Total restoration
| 1965
E Type roadster (Brad)
Total restoration |
|
|
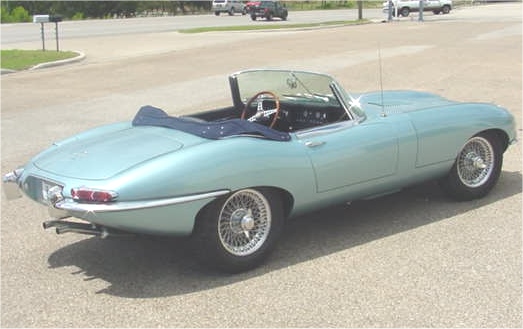
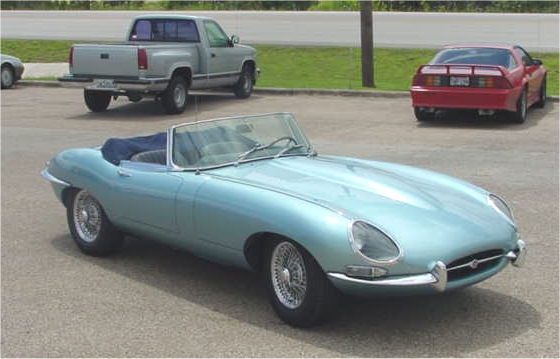
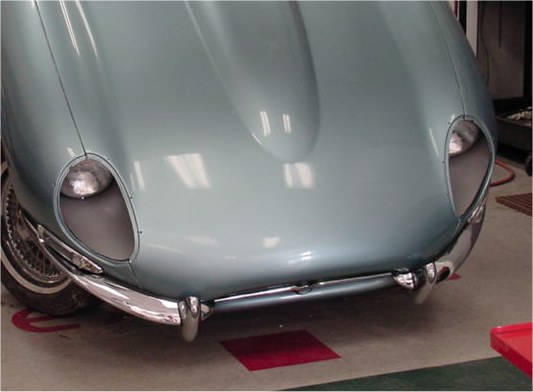
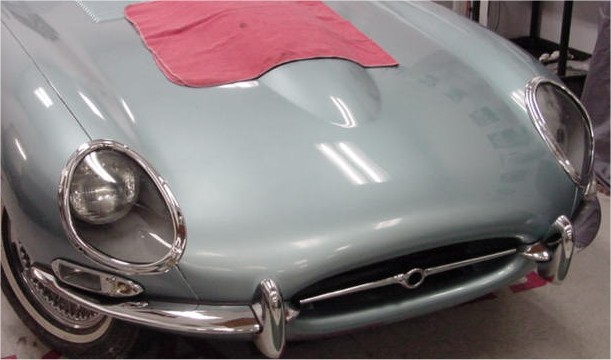
Another E Type back on the road!
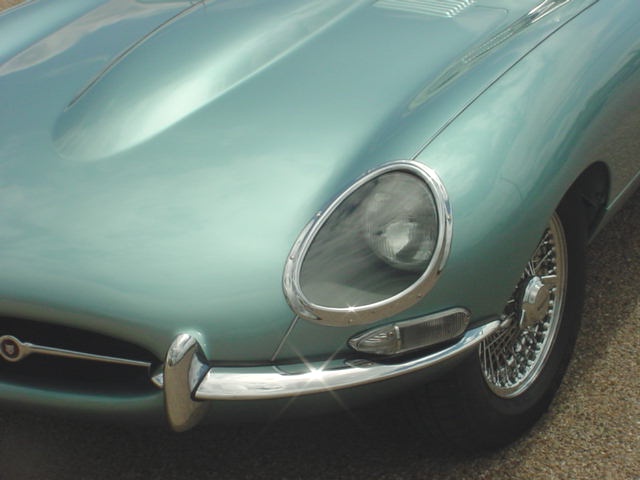
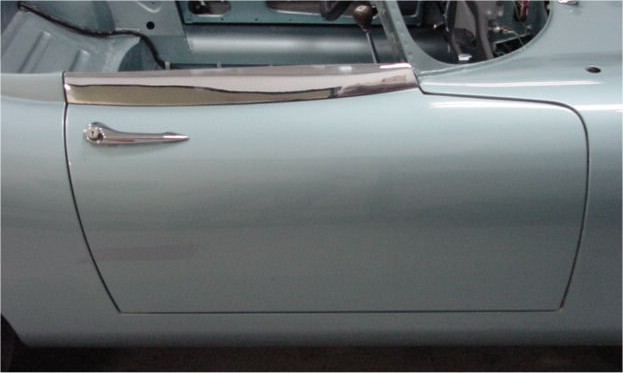
Opalescent Silver Blue might just be my all time favourite E Type colour.Final road testing is now complete and we will be contacting you in the next week or so to arrange delivery of your beautiful 'new' E Type.
 |
 |
 |
 |
 |
 |
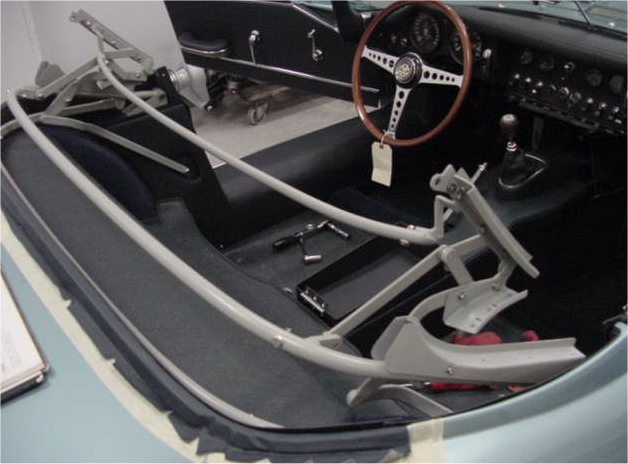
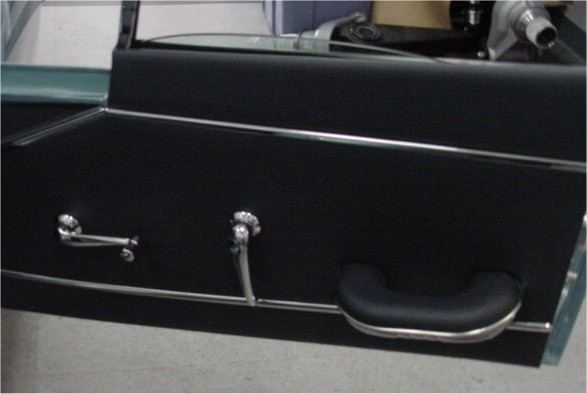
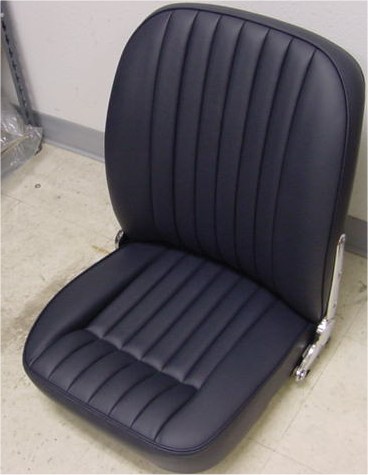
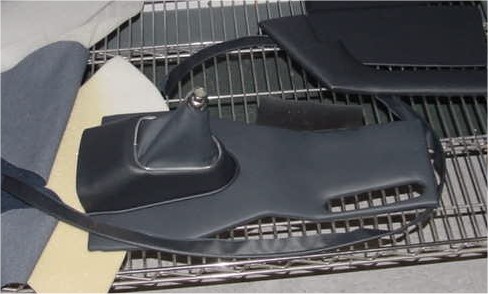
Really not much left to do but install the convertible top and seats!
 |
|
|
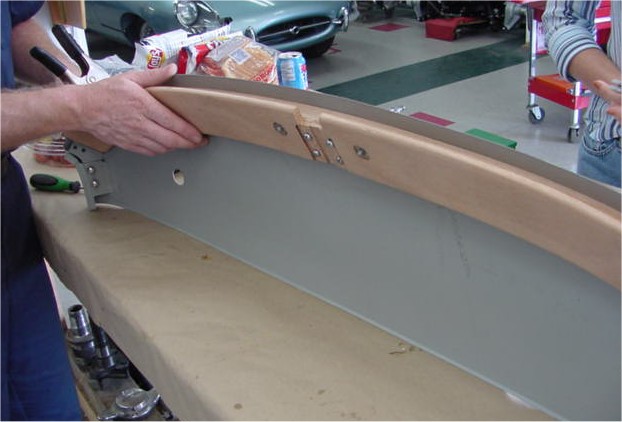
Interior trimwork now almost completed. It is just about time to install your restored convertible top frame.
 |
 |
 |
|
|
|
|
 |
 |
 |
|
|
|
|
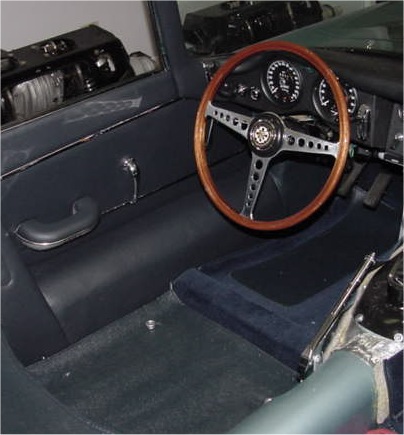
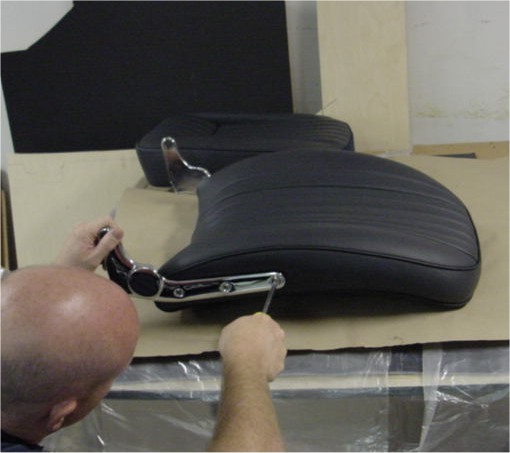
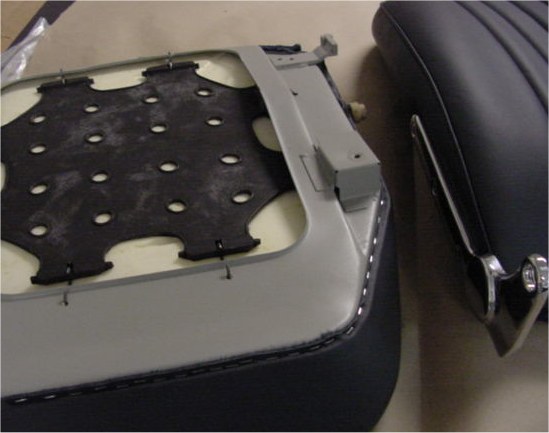
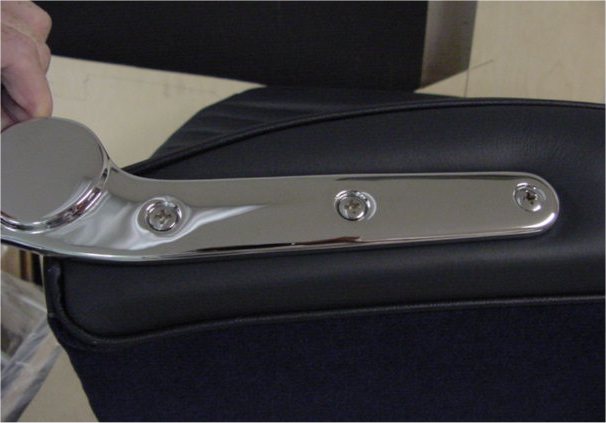
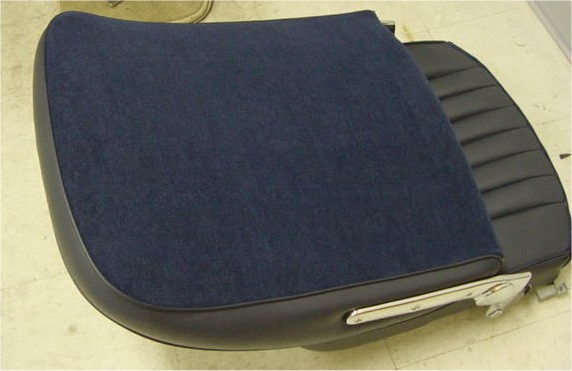
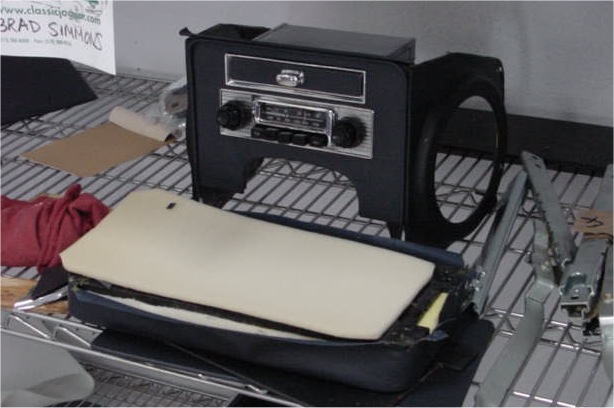
More completed trimwork....
 |
 |
 |
 |
 |
 |
 |
 |
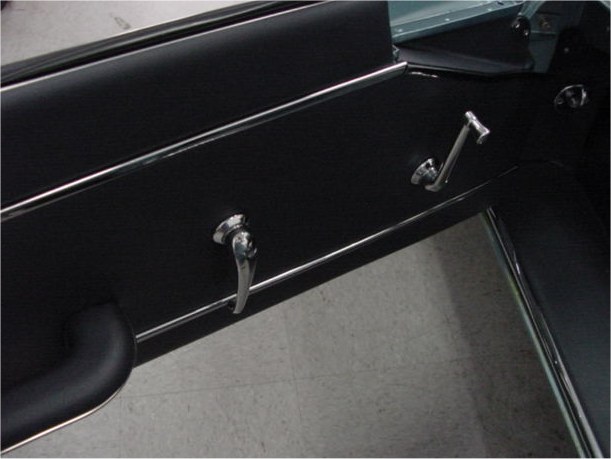
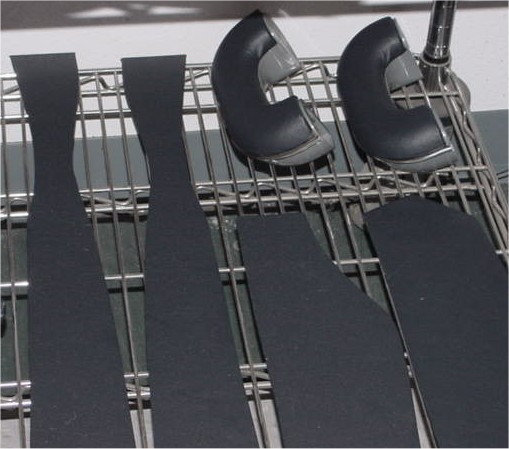
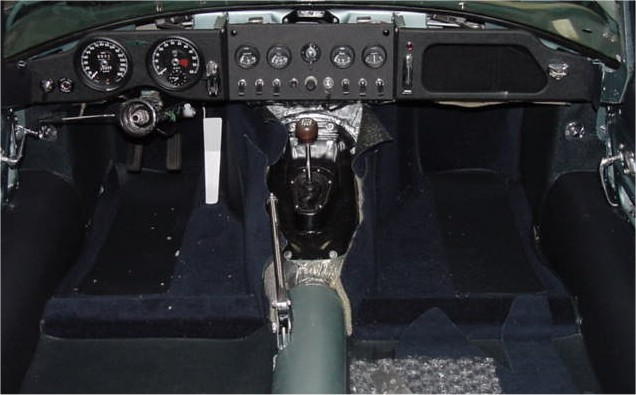
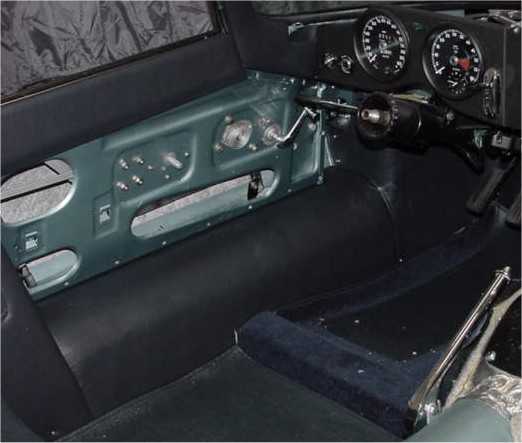
Interior retrim now well underway.....
 |
 |
 |
|
trans tunnel |
inside doors |
very nicely |
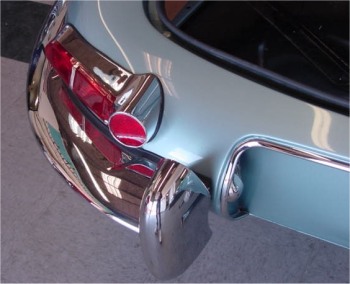
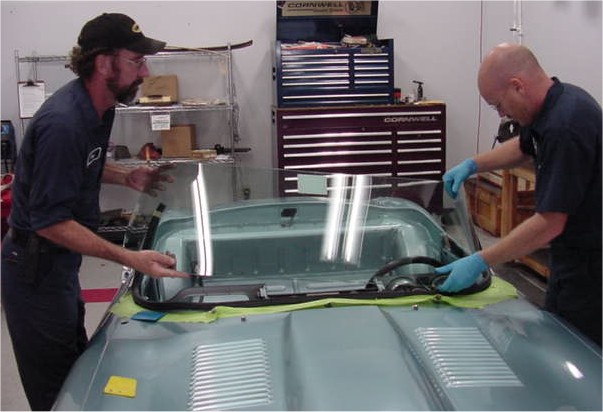
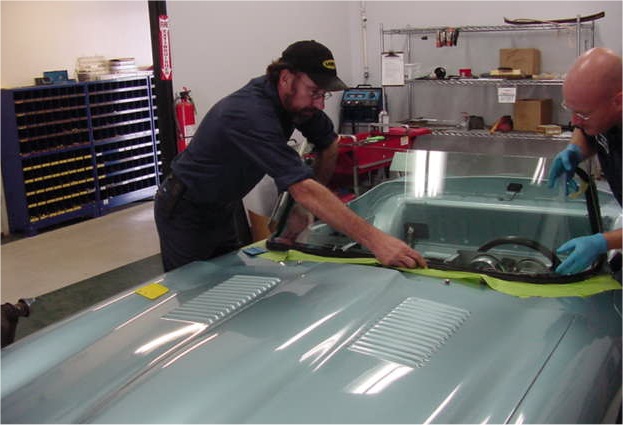
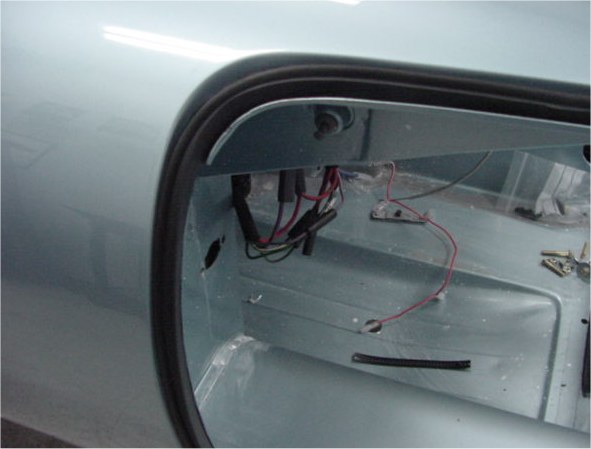
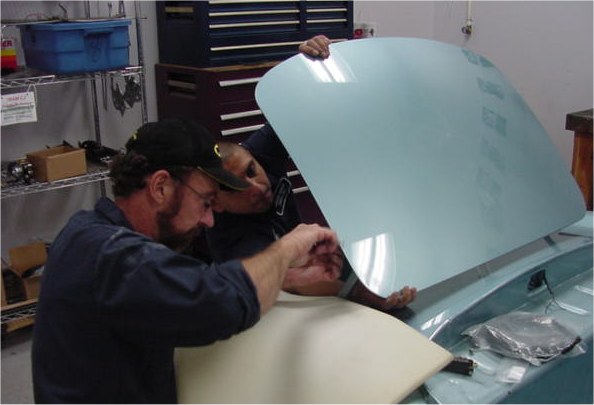
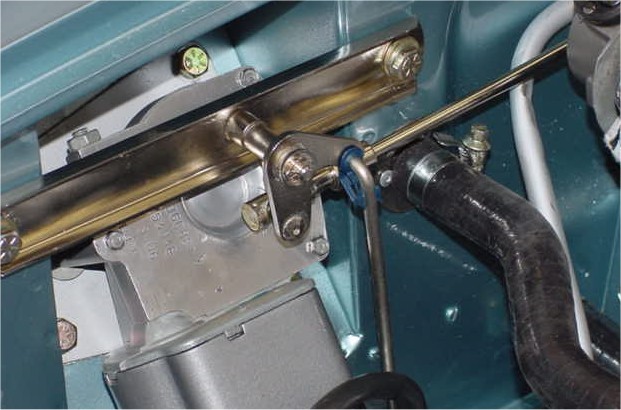
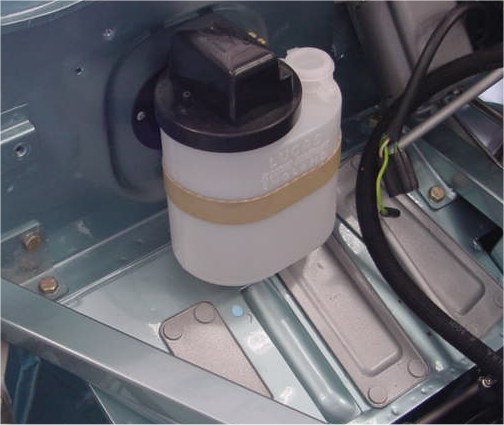
Now that we have the car back on the road, it seems only right that we should install a new Triplex windscreen.
 |
 |
 |
It's maiden voyage time - after 20 odd years off the road! Click on the photograph below to see Sam test driving your car for the first time.

Lots of progress since our last update report! Look for a maiden voyage during the coming week.
 |
 |
 |
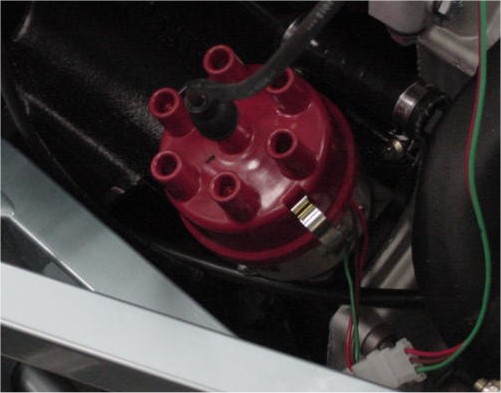
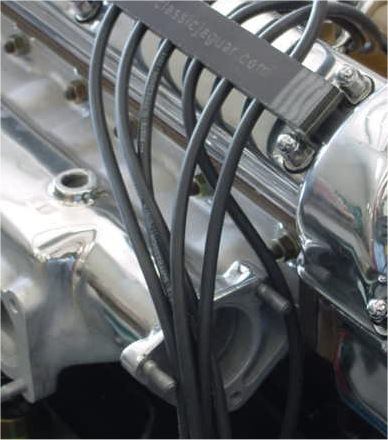
Click on the photograph below to see a video clip of the initial engine firing earlier this morning! I am delighted to report that everything is working perfectly.

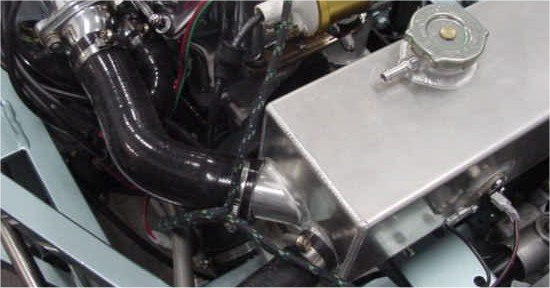
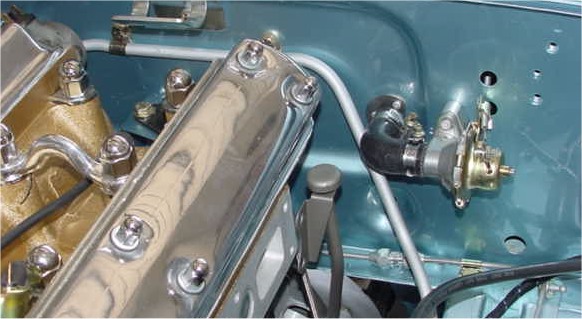
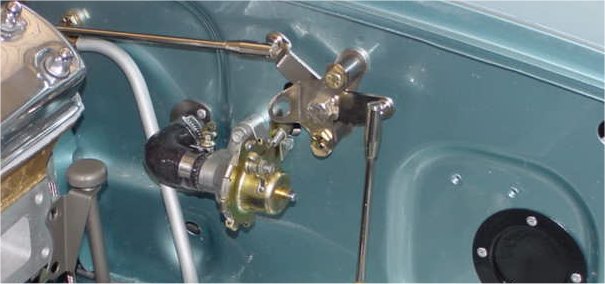
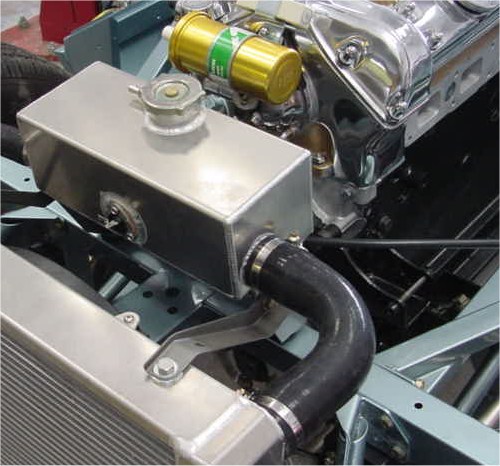
We continue to make great progress with your car and actually hope to fire it up for the first time later this week or early next week. In lieu of the new Team CJ stainless headers (which we will have in the next few weeks) we have temporarily installed some mild steel headers for the test run.
 |
 |
 |
|
|
|
|
|
|
|
|
 |
 |
 |
|
goes into the top frame |
running the engine |
|
 |
 |
 |
|
|
|
|
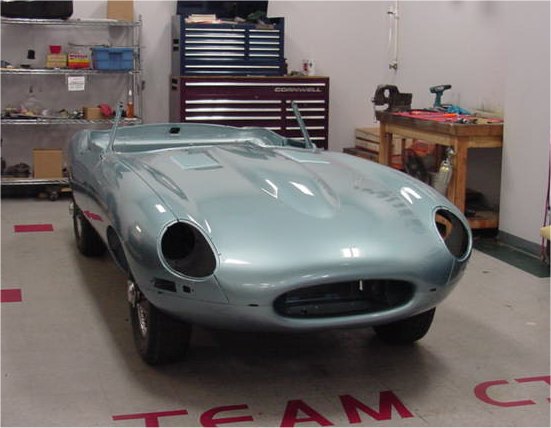
I thought you might like to see a photo of the bonnet going on the car! If you go back to the March 28 update, it is amazing how far the car has come in less than 4 weeks.
 |
 |
 |
|
|
|
|
Time to go on with the doors and bootlid...
 |
 |
 |
|
|
|
|
 |
 |
 |
|
installation |
|
|
 |
||
|
|
 |
 |
|
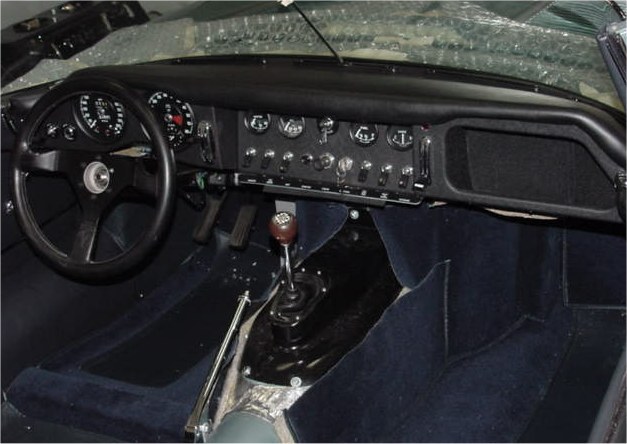
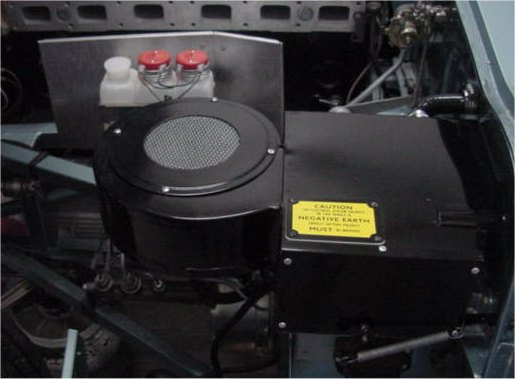
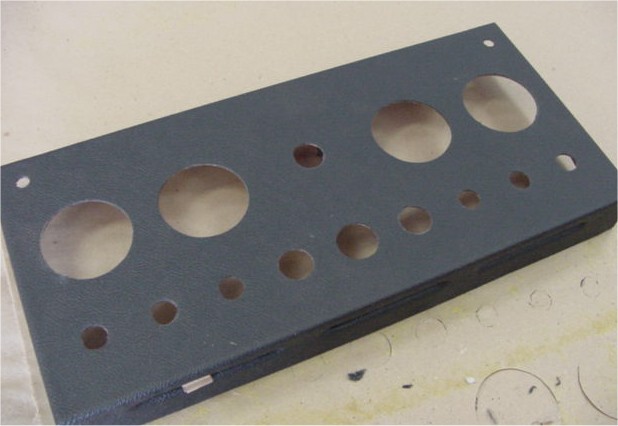
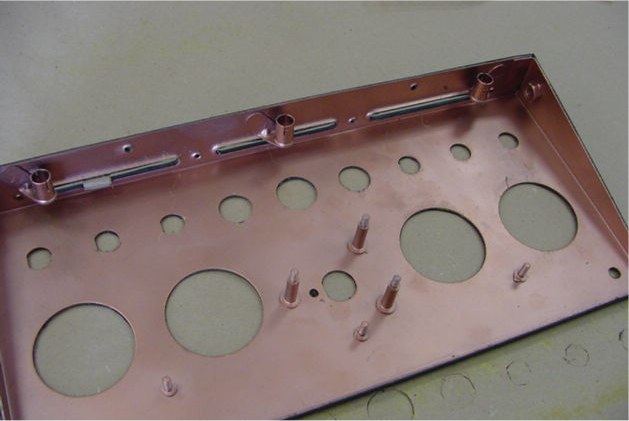
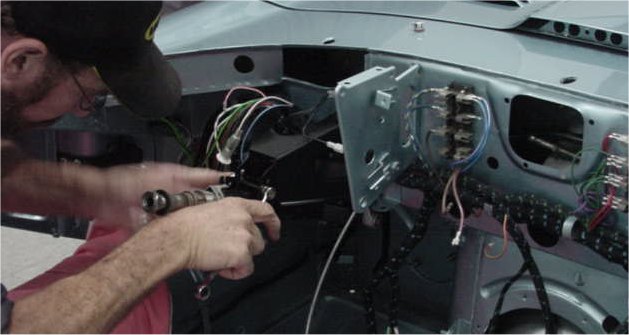
More great progress...
 |
 |
 |
|
|
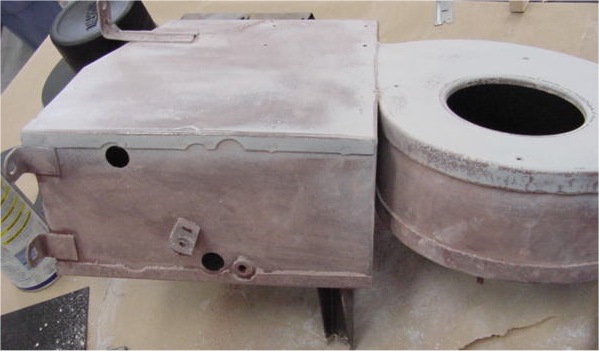
heater box..... |
|
 |
 |
 |
|
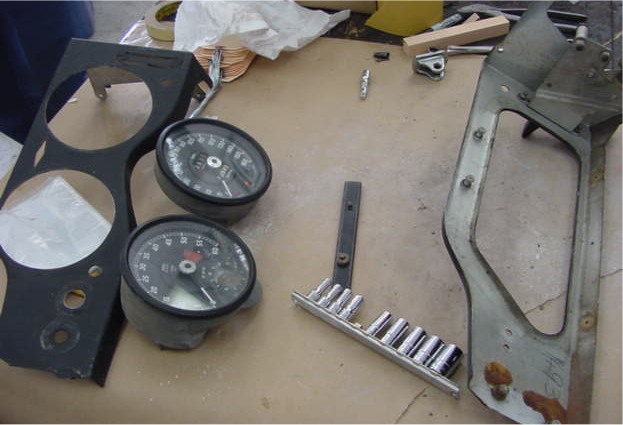
dash panels |
|
|
 |
 |
 |
|
|
|
|
 |
 |
 |
|
|
|
|
 |
 |
 |
|
|
|
|
 |
 |
 |
|
|
|
|
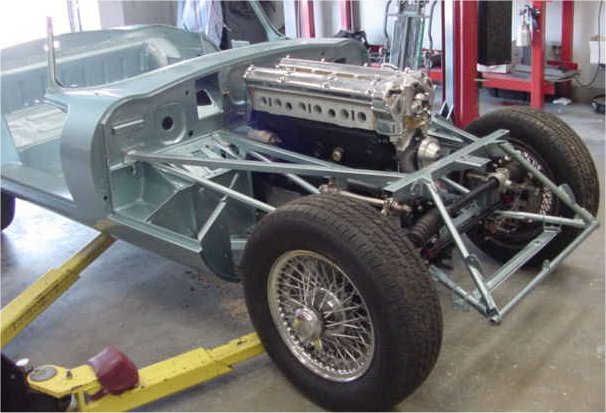
Update report - April 3, 2003
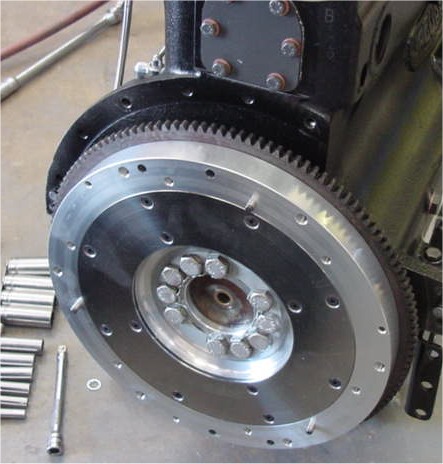
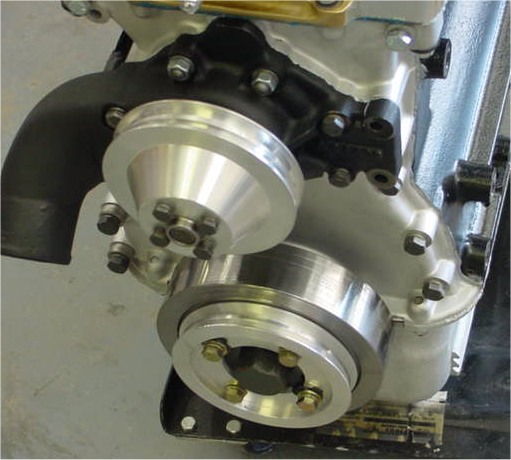
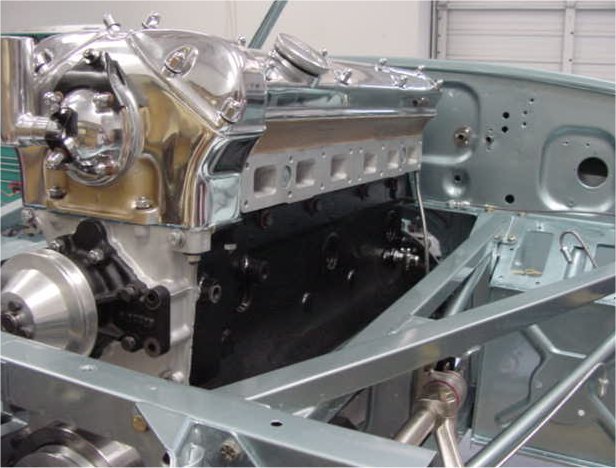
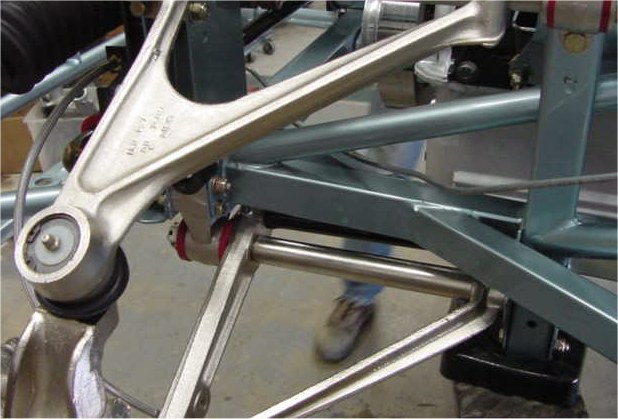
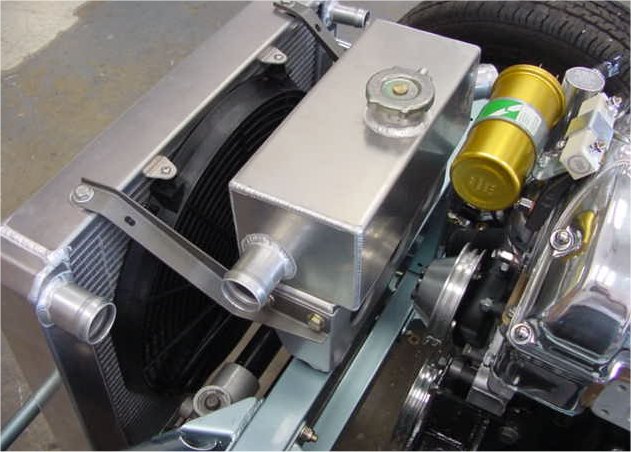
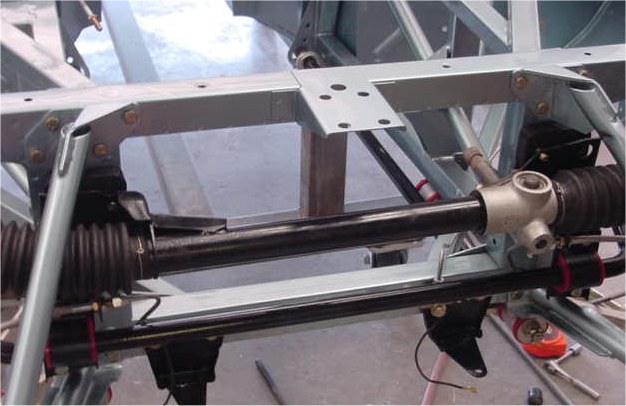
Fairly astounding progress, I think you will agree!
 |
 |
 |
|
|
new clutch |
Team CJ pulleys |
|
|
|
|
 |
 |
 |
|
|
|
|
|
|
|
|
|
|
|
|
 |
 |
 |
|
|
|
|
 |
 |
 |
|
|
|
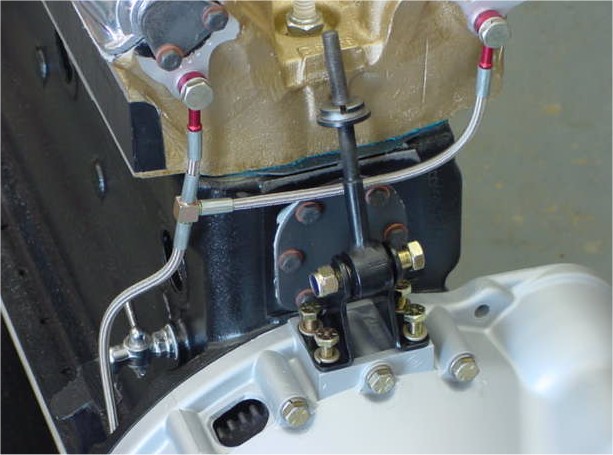
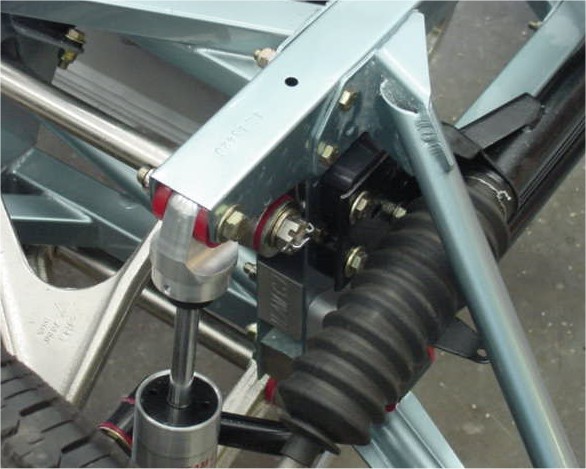
Team CJ shocks |
 |
 |
 |
|
|
|
|
 |
 |
 |
|
|
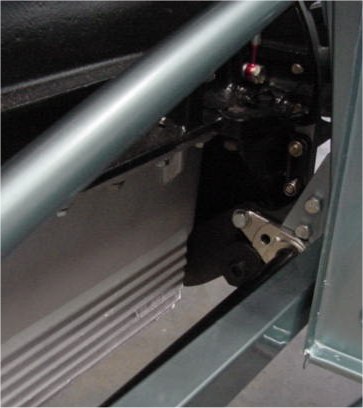
pointer |
|
 |
 |
 |
|
|
|
in the automotive world..... |
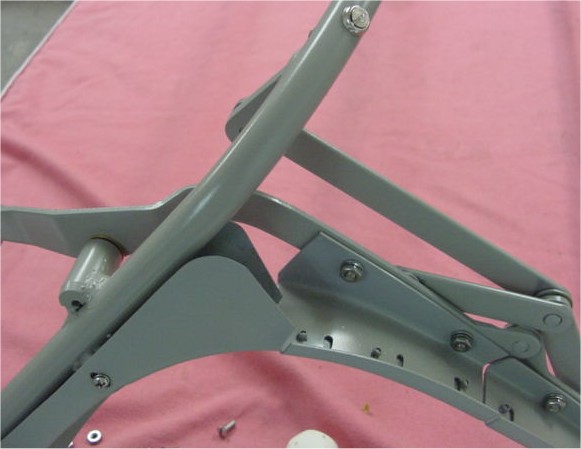
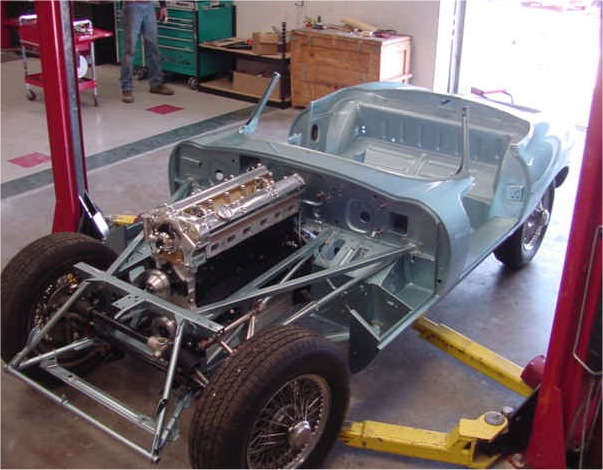
Update report - March 31, 2003
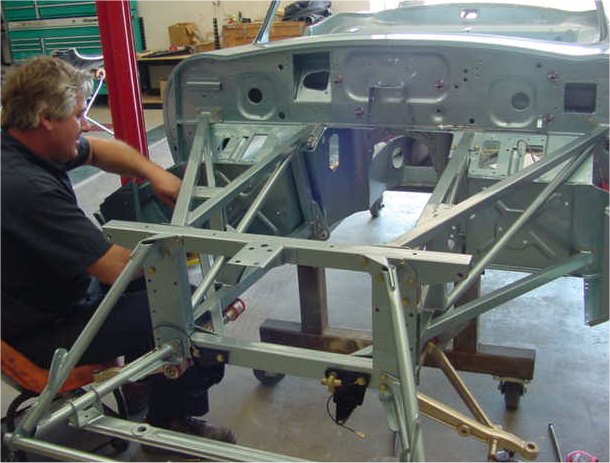
Starting to go back together!
 |
 |
 |
|
|
|
|
 |
 |
 |
|
|
|
|
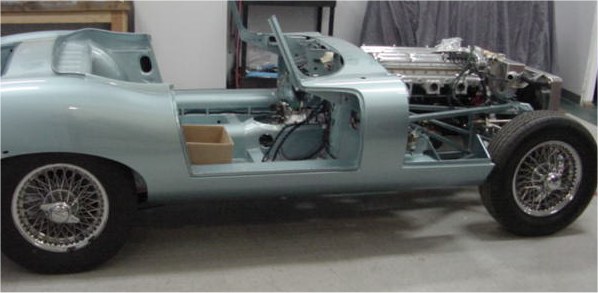
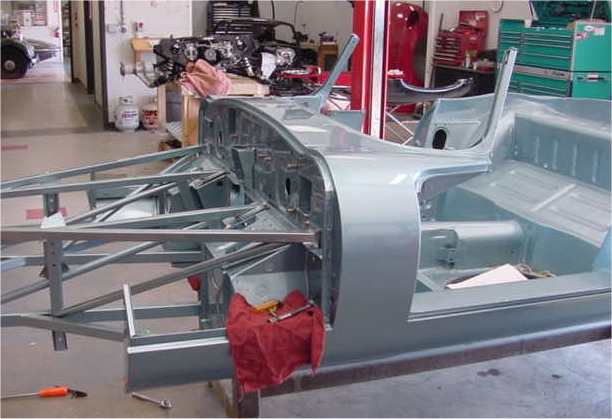
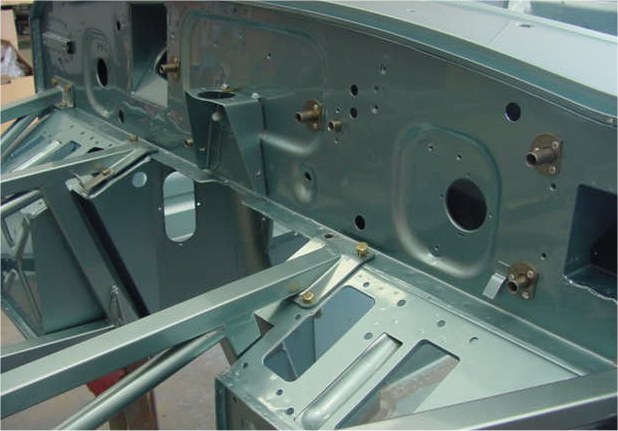
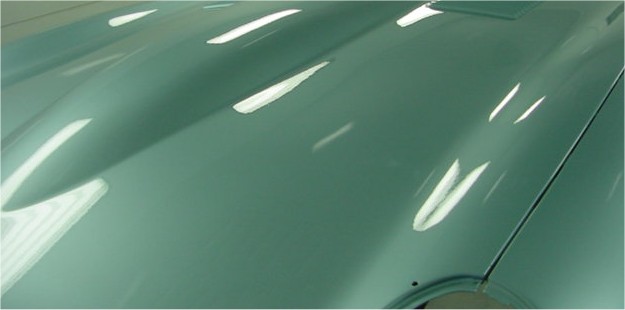
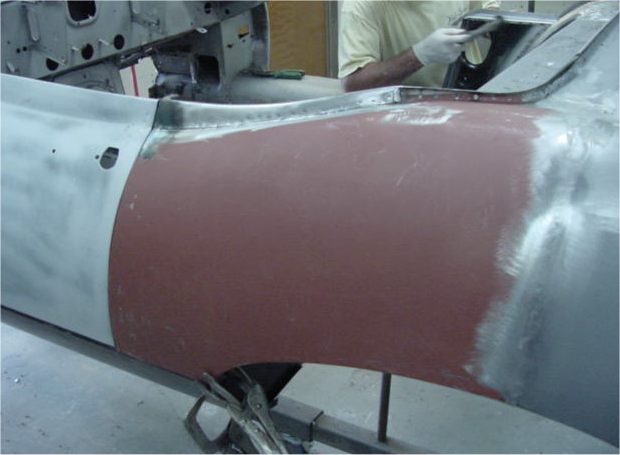
The following pictures are just a teaser while you are enjoying your vacation! Kevin and Charlie have now sanded and buffed the entire body and next week we will be installing the frames/suspension and getting your car back on four wheels for the first time in decades.We are actually using a new 3M sanding system (3M 3000) on your car which incorporates an incredibly smooth paper and produces an especially smooth, high gloss finish. Although the photographs don't do justice to Kevin and Charlie's efforts, I can promise you the car looks spectacular.
 |
 |
 |
|
slotted CJ rotors |
|
main monocoque |
 |
||
|
|
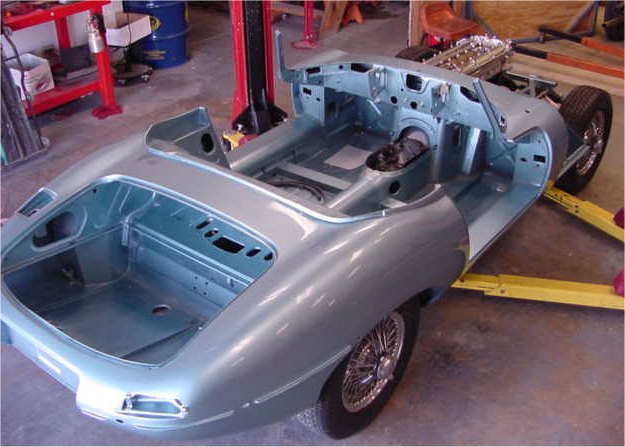
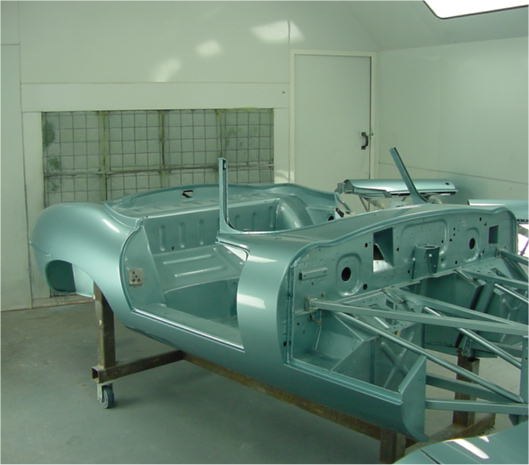
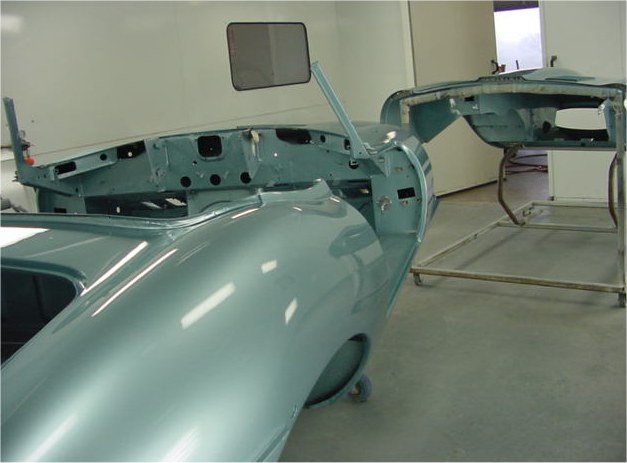
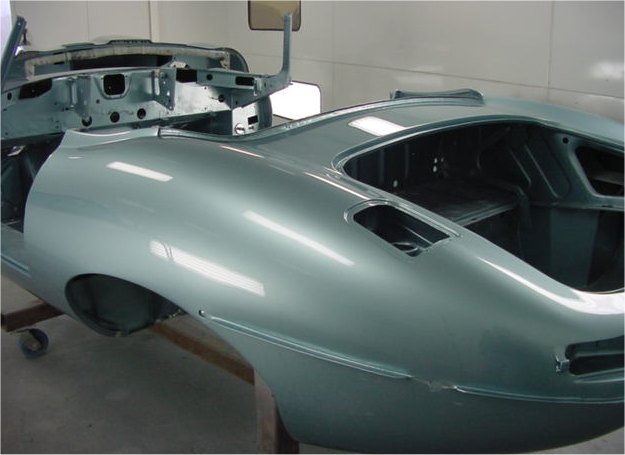
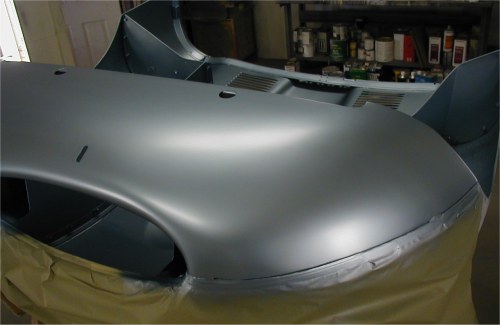
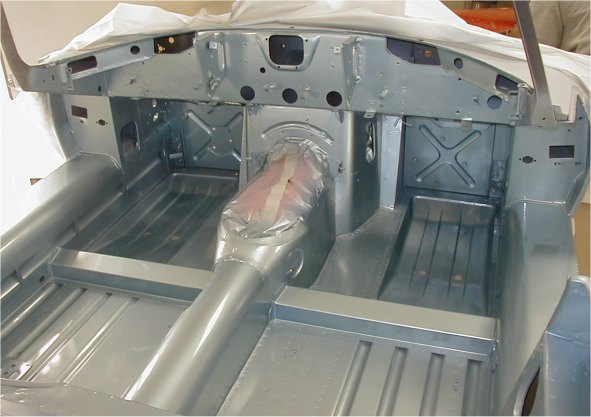
I am delighted to report that we have now finished painting your E Type. I am thrilled with the result which looks absolutely beautiful. It is difficult to give you a true idea of the colour under the special booth lighting, but I can assure you that it is a true Opalescent Silver Blue and the car is about as straight an E Type as I have ever seen.After the sanding and buffing process (probably Friday), the car will be moved through to the workshop for reassembly.
 |
 |
 |
 |
 |
 |
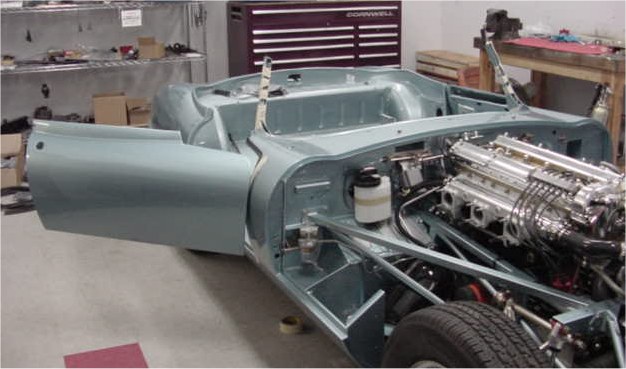
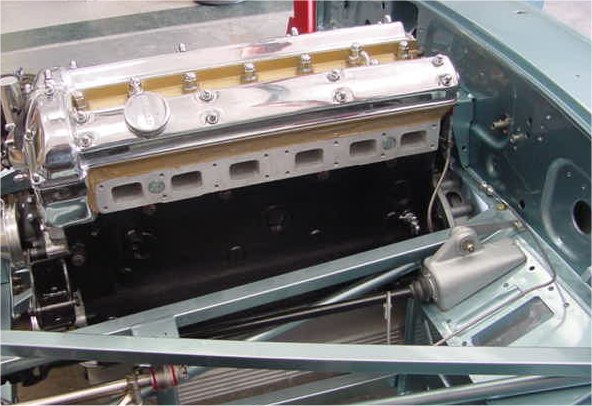
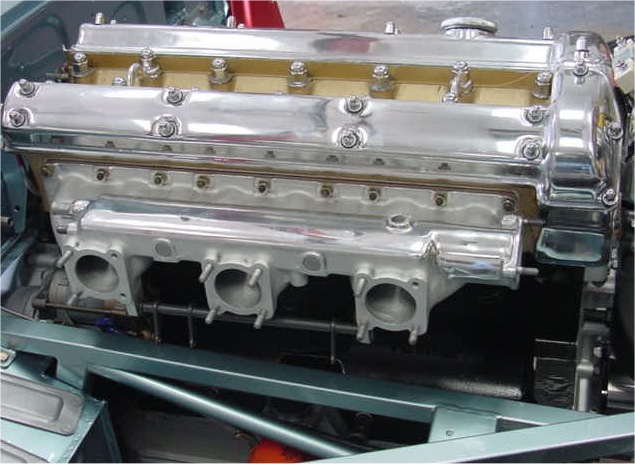
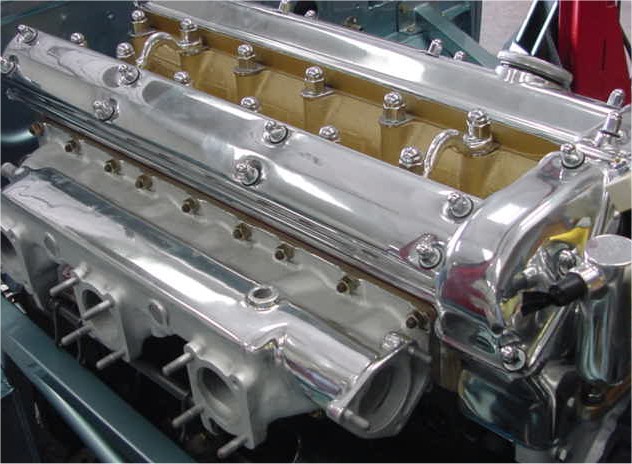
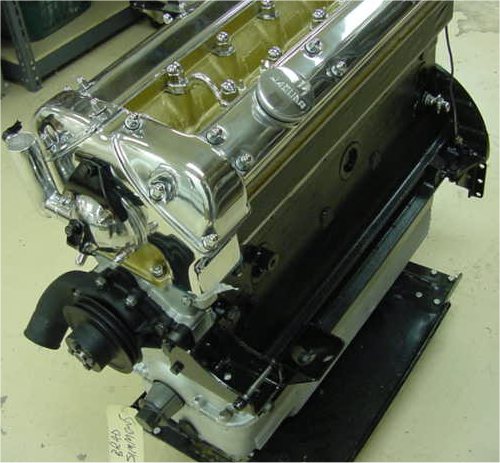
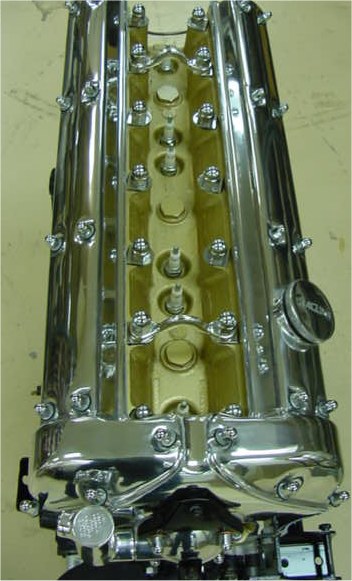
As you wait to see pictures of your car painted (this week) I thought you might like to see the finished engine rebuild!
 |
 |
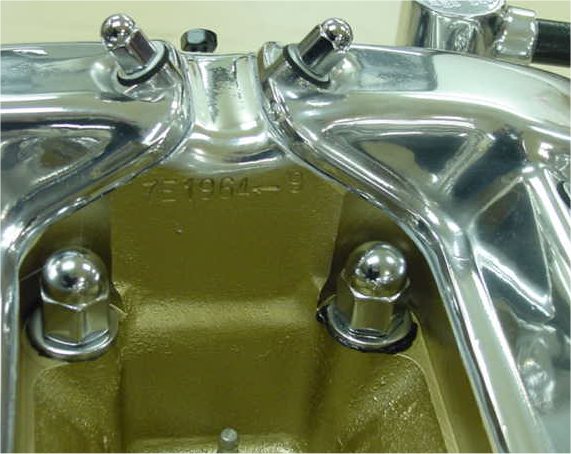 |
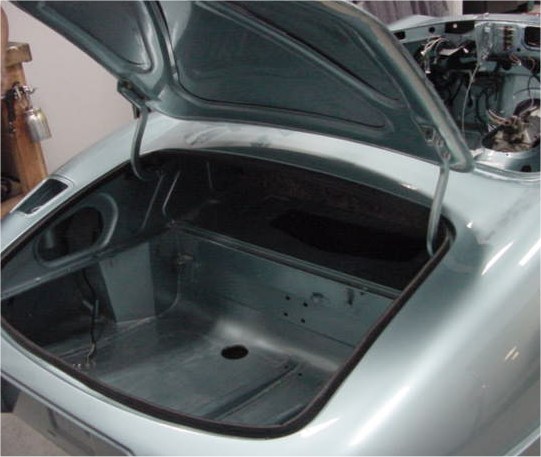
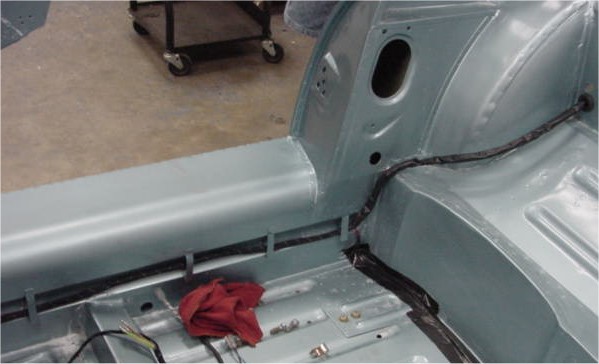
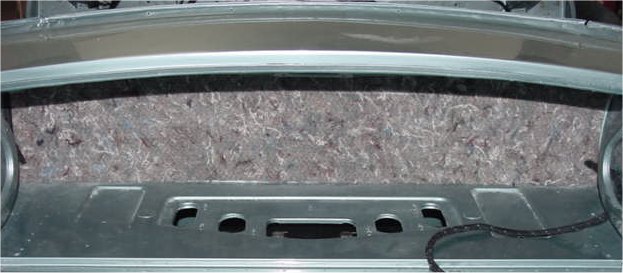
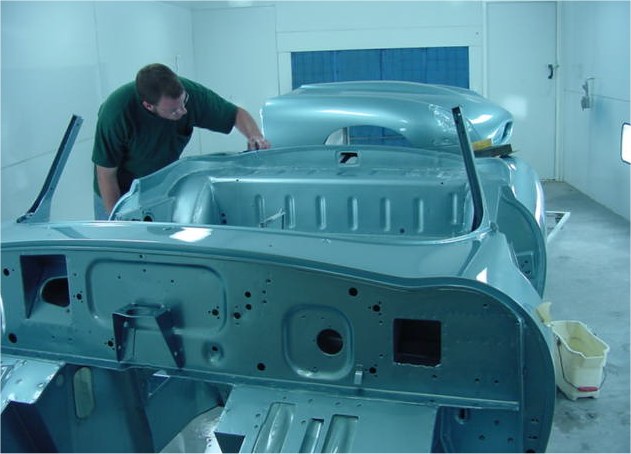
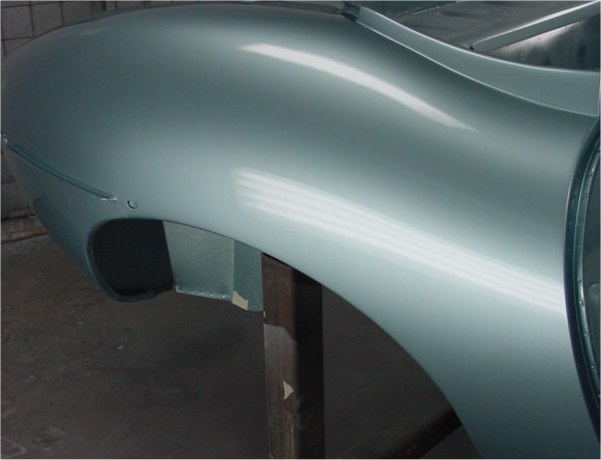
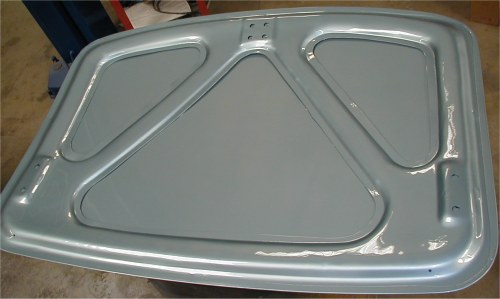
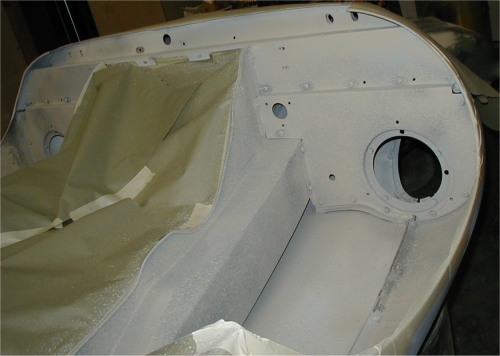
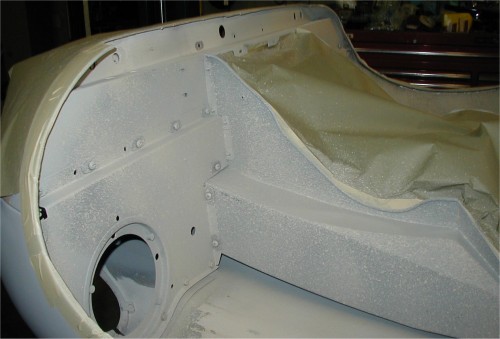
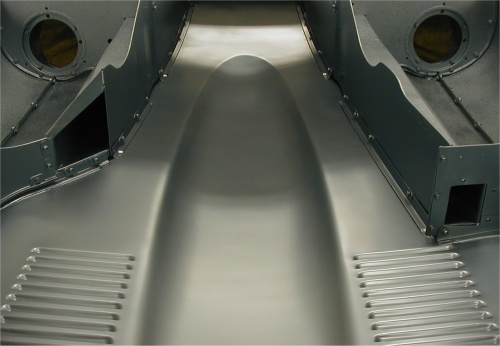
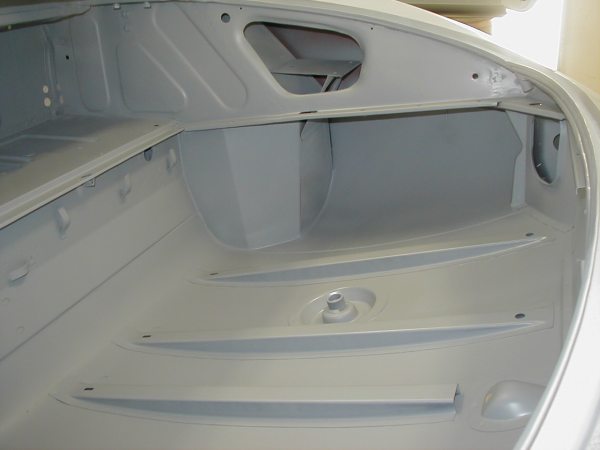
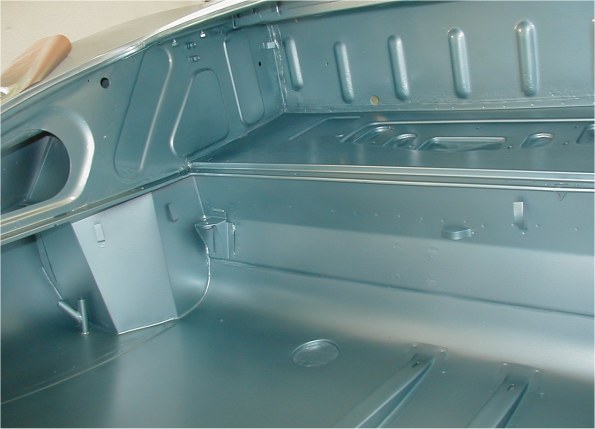
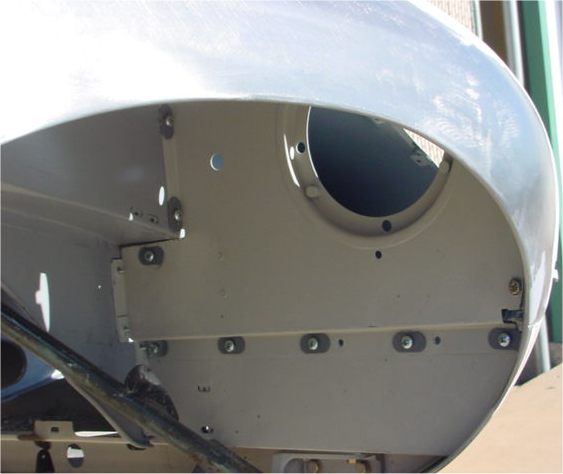
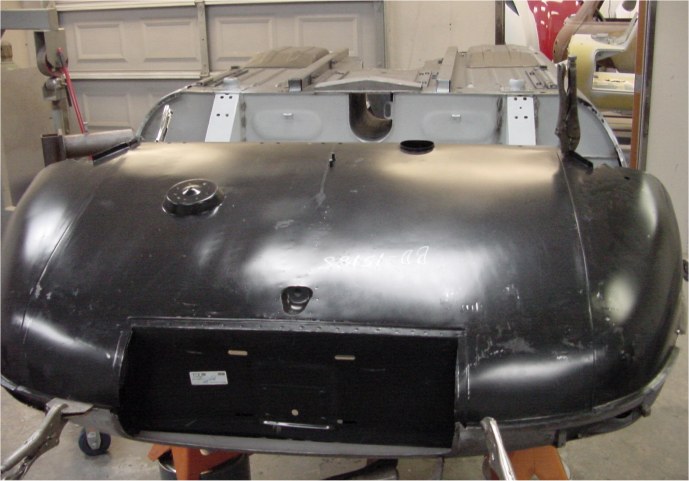
As you can see in the attached photographs, we are very close to shooting the car and actually hope to be doing that in the next few days. We are running a week or so behind schedule, largely thanks to additional work I had done to the bonnet in our attempts to achieve as close to perfection as possible.I have included photos of the boot area and the underside of the bonnet in the hope that you (and others) might see the incredible attention to detail that Kevin is maintaining throughout the painting process. I do not believe I have ever seen an E Type boot compartment looking better!
Incidentally, we really are getting to the point where we need the rest of the mechanical components you still have at home!
Click on the FAQ link below for an answer to the frequently asked question about when and where we apply 3M rock guard (also known as body schutz) during the course of a Classic Jaguar restoration.
 |
||
|
|
||
 |
 |
 |
|
door are painted in advance |
described as stunning? |
|
 |
 |
 |
|
|
|
|
|
|
|
|
 |
 |
 |
|
|
ready for some colour |
|
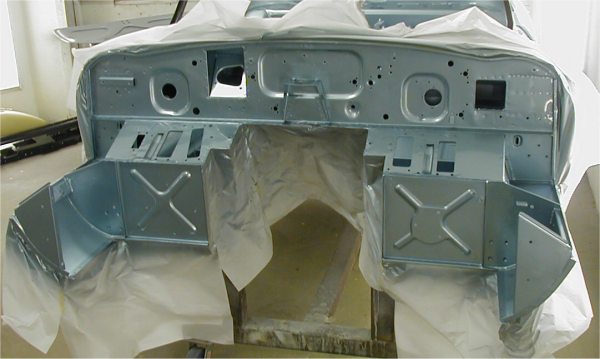
Although I have not updated this page for quite a while, I am happy to report that Kevin and Brian have been diligently priming and blocking your E Type almost without let up! They now have every panel beautifully straight and have already shot colour on the frames, interior, trunk area and inner sections of the doors. We will be shooting the final coats of colour during the first week in January.If you would like to be present during the painting process, you would be most welcome. The extra pressure is good for our painters.......
Have a wonderful Christmas from everyone at Team CJ!
 |
 |
 |
 |
 |
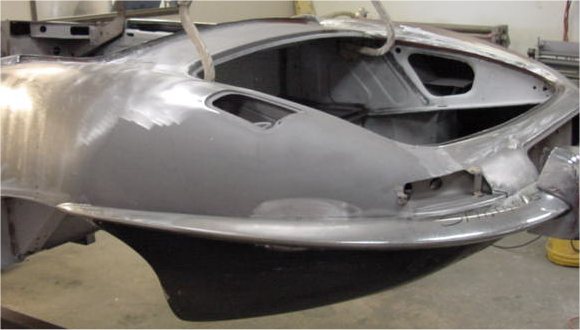
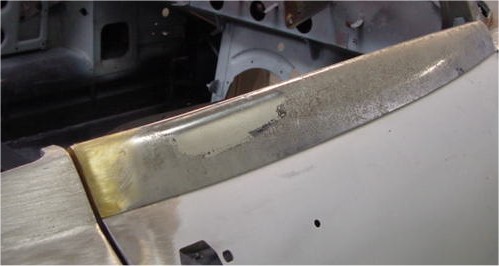
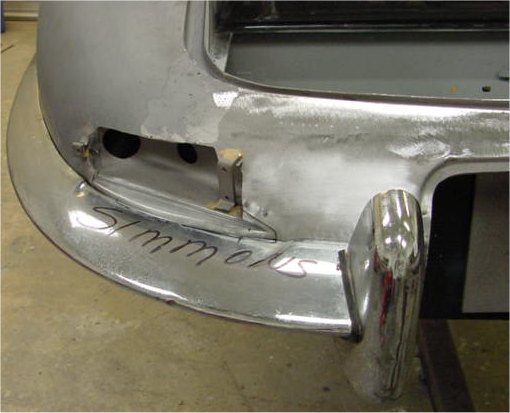
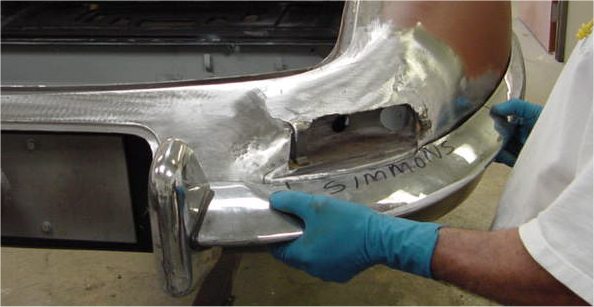
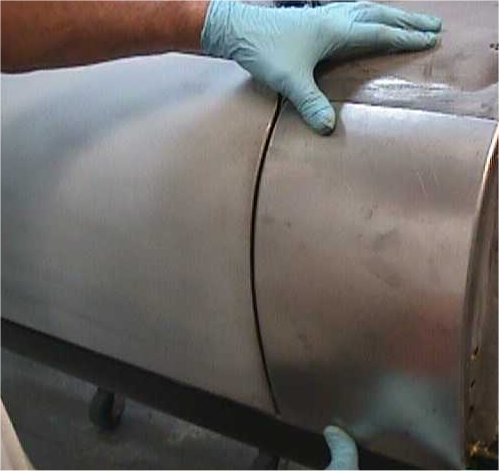
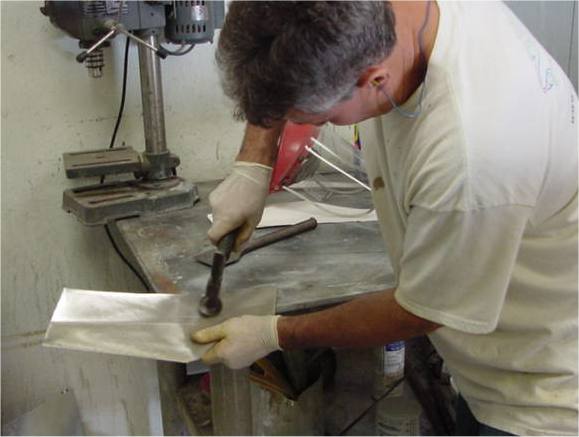
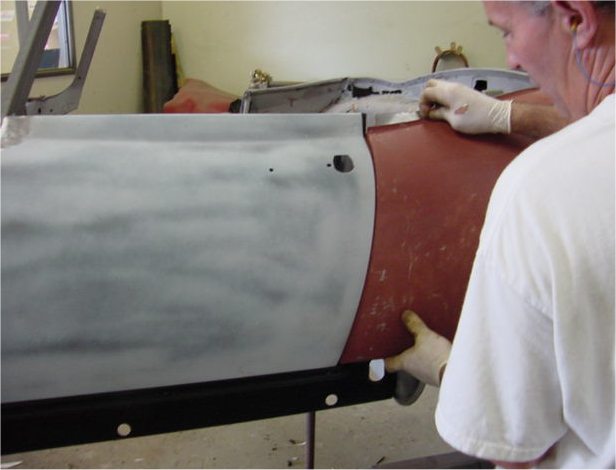
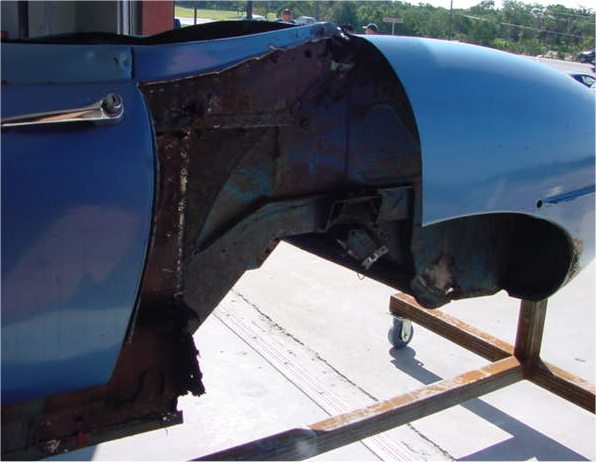
 |
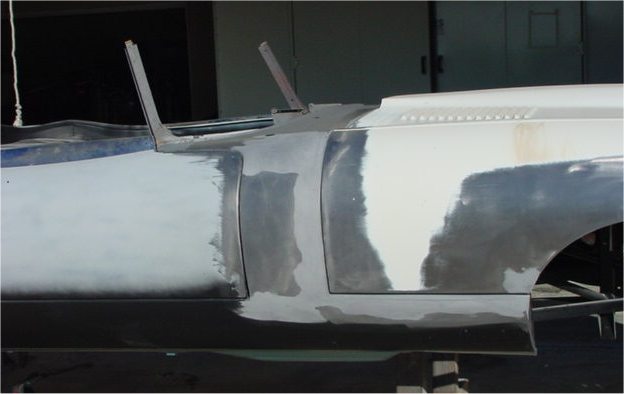
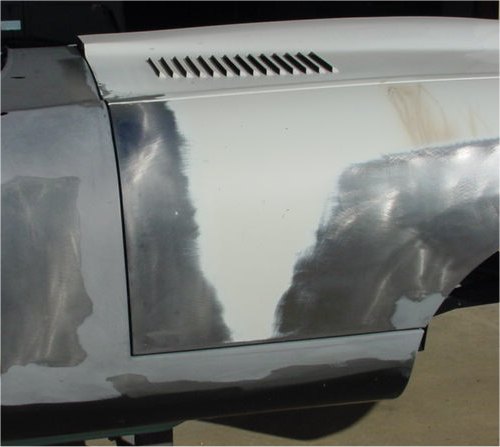
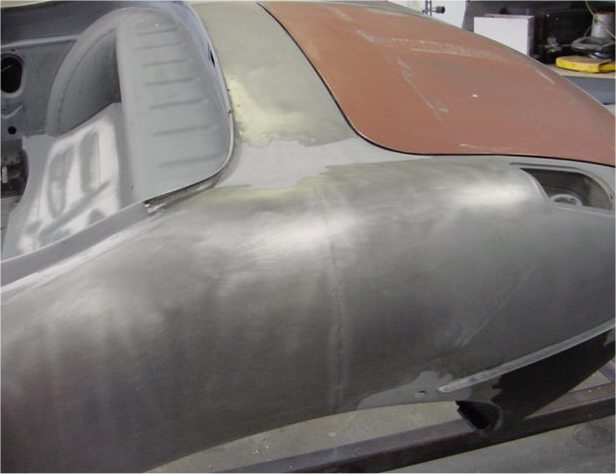
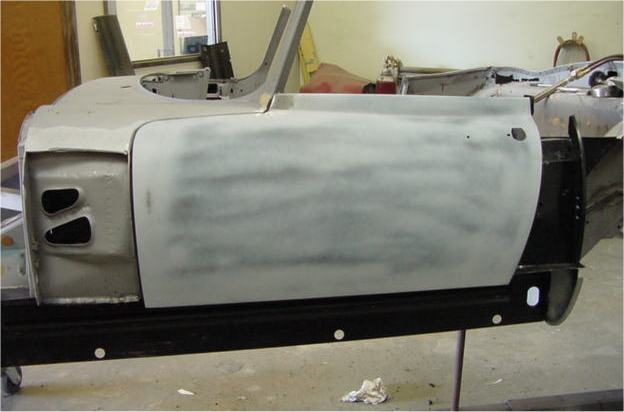
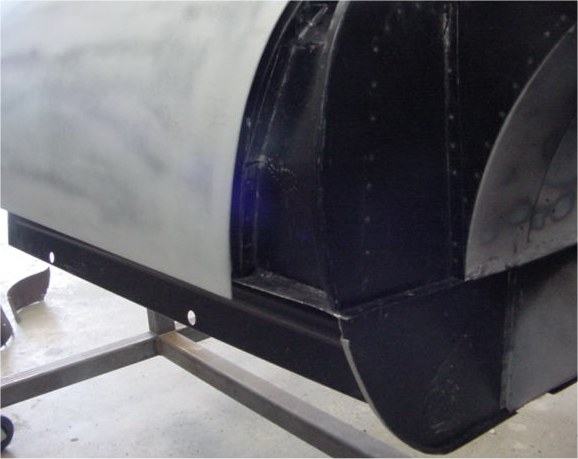
The following photographs show how a (used) bonnet can be reconstructed and made to fit beautifully using only shims, a hammer, lead....and about 40 hours of Lawrence Toneto's time. Not only is there zero bondo on your car, there isn't even any primer on it yet!Notice in picture # 2 how the curvature of the right hand wheel arch is continuous between the bonnet and the sill. See also the shape of the bonnet as it relates to the cowl in front of the windscreen (picture # 4).
Enlarge picture # 4 to view the best bare metal E Type bonnet fit you will ever see.
 |
 |
 |
 |
|
|
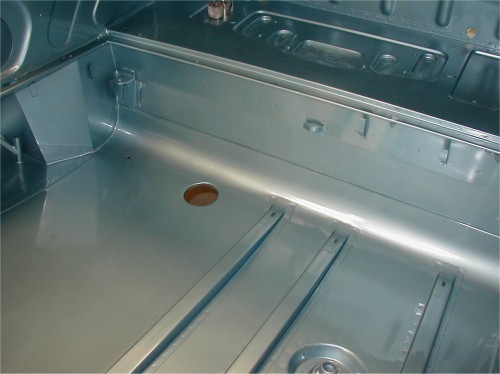
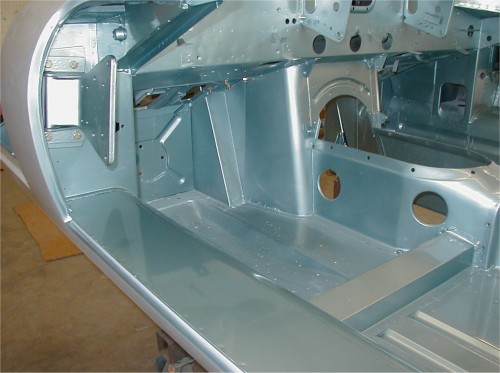
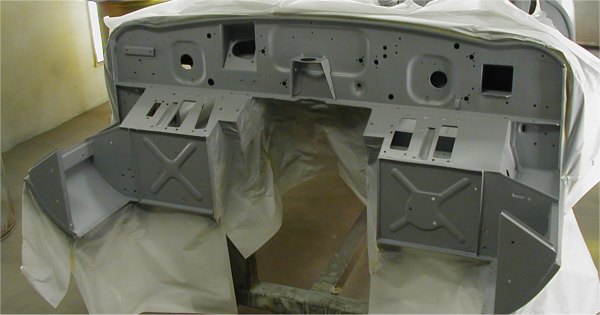
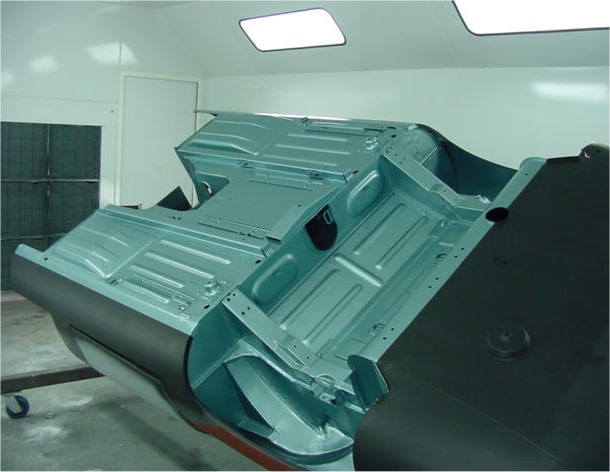
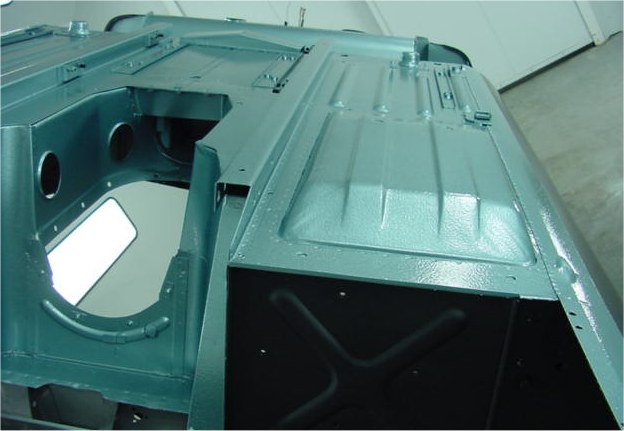
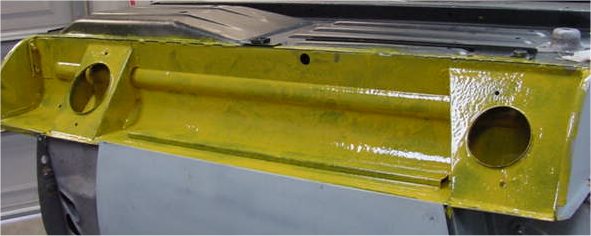
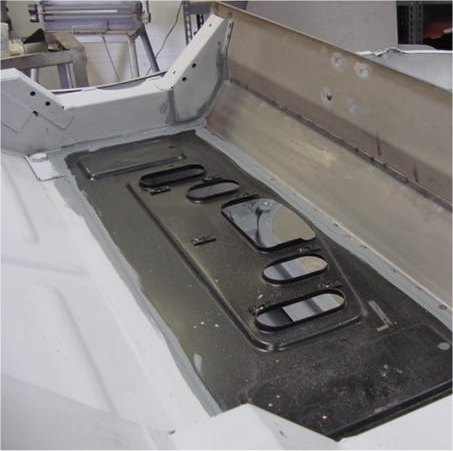
As you can see, the 3M rocker guard and Opalescent Silver Blue colour have now been applied to the underside of the floor. The car has been transferred to the frame jig and Lawrence is in the process of repairing and installing your bonnet.
 |
 |
|
|
overlooked part of the bodywork process |
|
|
|
 |
 |
|
load the body for a perfect fit |
|
|
|
|
 |
 |
|
|
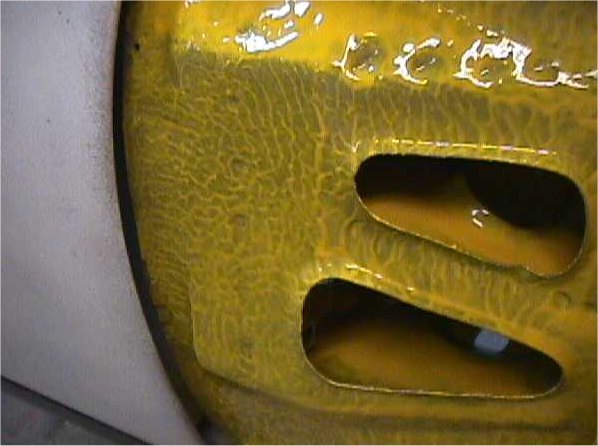
rocker guard beneath the paint |
|
|
|
 |
 |
|
|
bonnet installed |
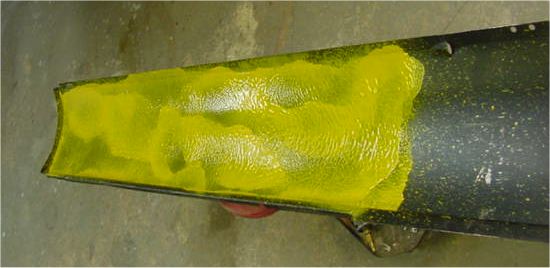
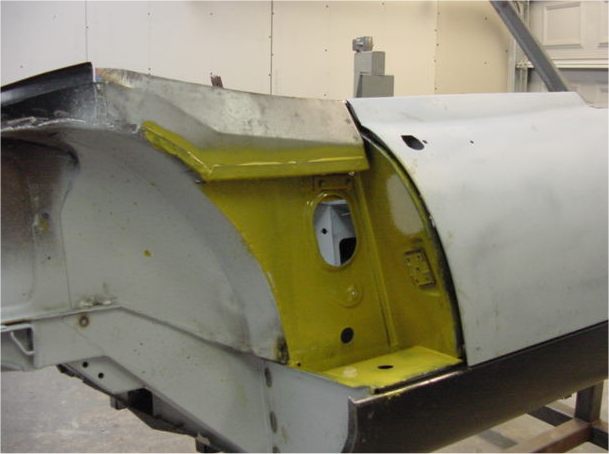
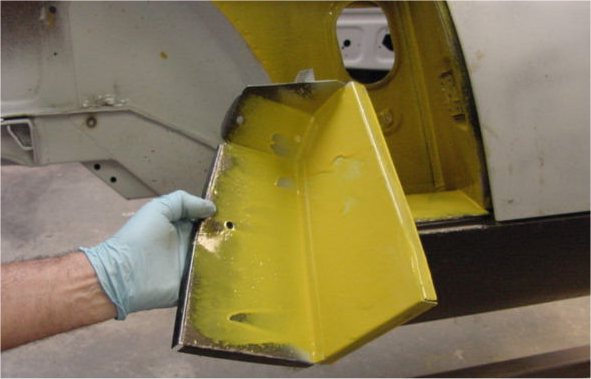
Lawrence has now finished his work with the main monocoque. The following pictures show the underside of the tub being put in epoxy primer - which will be followed by 3M rocker guard and a generous helping of Opalescent Silver Blue. Once the underside has been painted, we will transfer the shell to one of our frame jigs so that we can install the new frames and start fitting the bonnet.Do you recall only a month ago asking whether your bodyshell was beyond repair? Well I am delighted to tell you that, as of today, nobody in the world has a better Series One roadster bodyshell than you do.
 |
 |
|
|
during the lead loading process |
 |
 |
|
lead loaded |
|
 |
|
workmanship beneath the floor boards.......... |
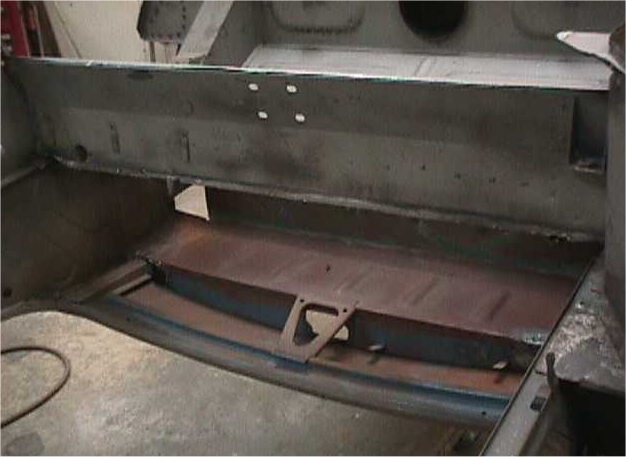
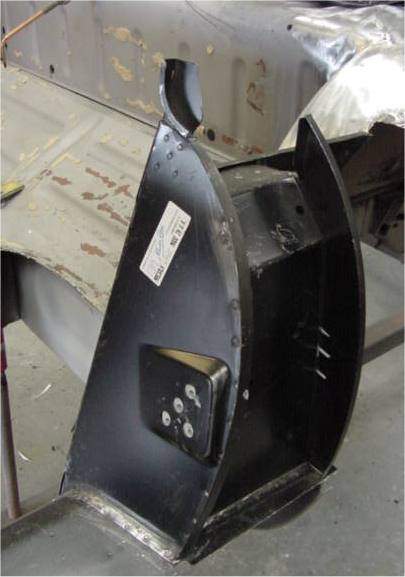
Here you can see the new rear boot assembly being offered into place. There has been something of a lull in proceedings because Lawrence broke his spot welder. Happily a new replacement arrived this morning so we should get the last bit of welding finished before the end of this week.
 |
 |
Update report - September 21, 2002
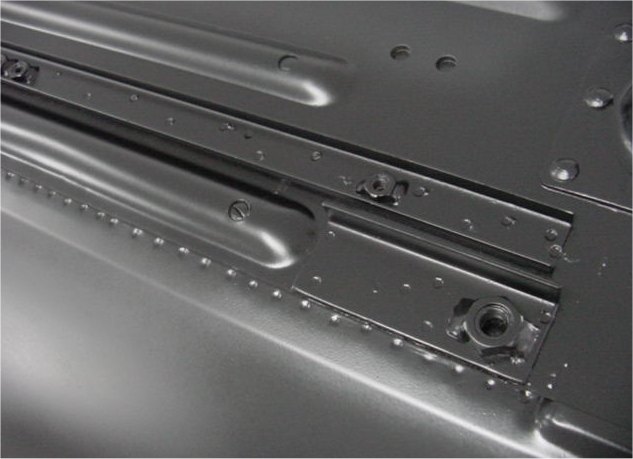
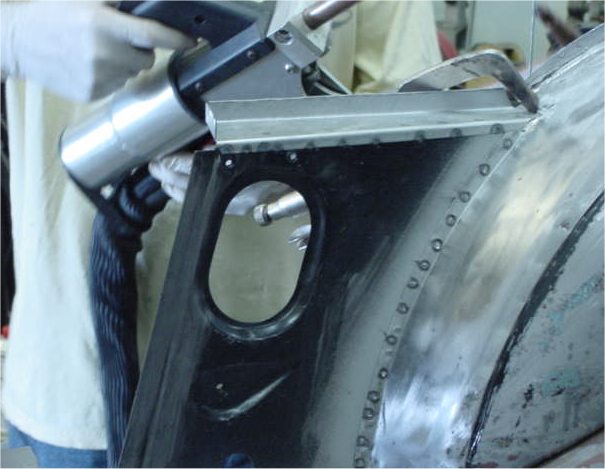
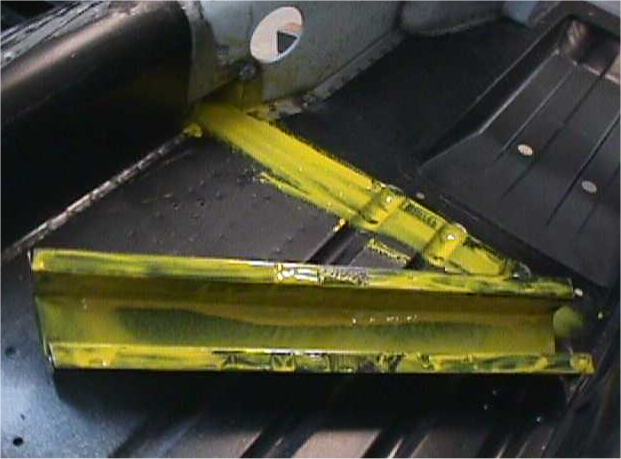
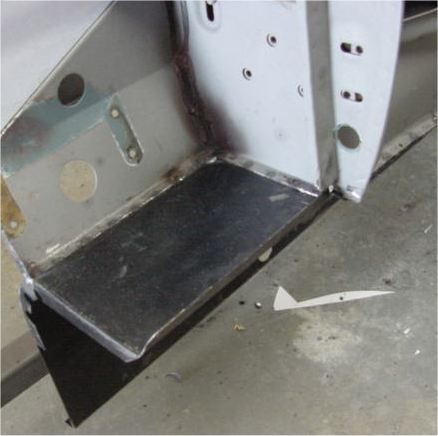
This week my photographs are not particularly glamerous, but they do show in graphic detail why an E Type restored by Classic Jaguar will never rust again!
 |
 |
|
of the outer sill that will be enclosed |
|
 |
 |
|
|
IRS mounting panels |
 |
 |
|
coated with body wax |
and rust proofed - if they had done this at the factory Lawrence would be out of work |
 |
 |
|
cowl (A Post) |
|
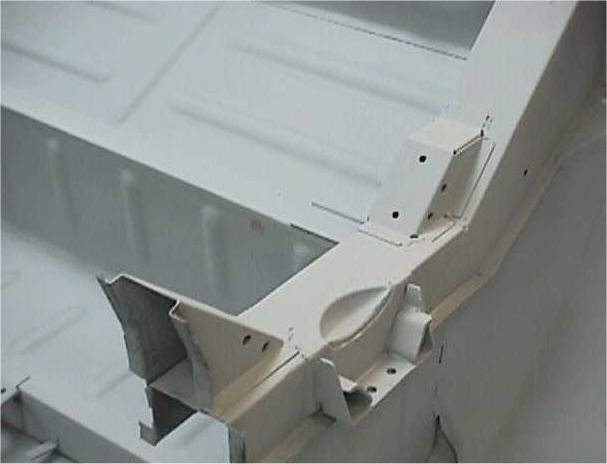
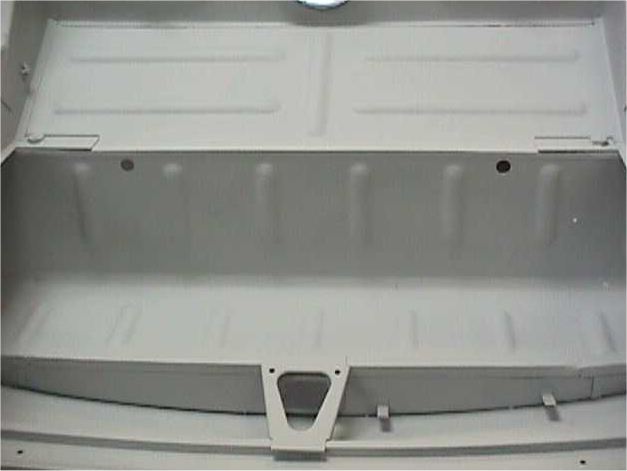
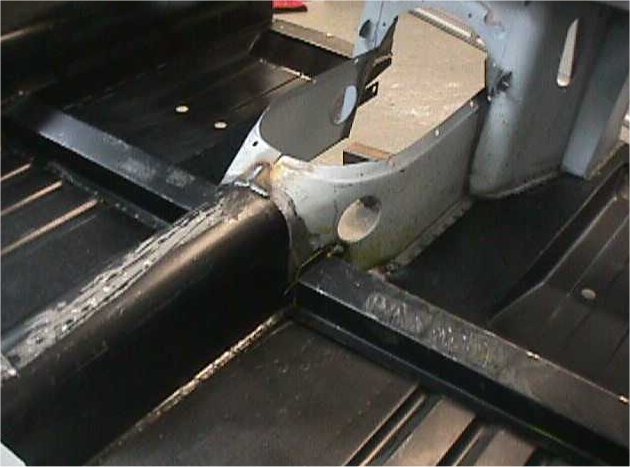
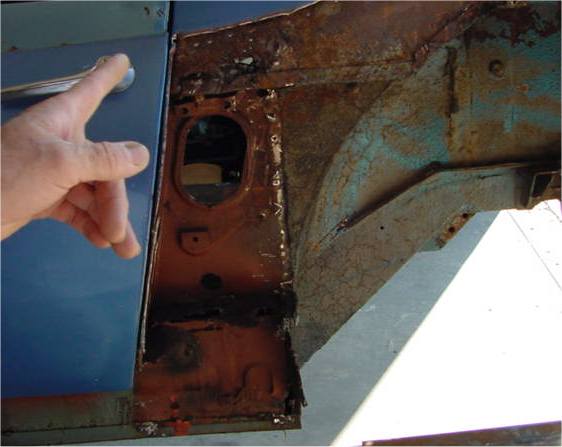
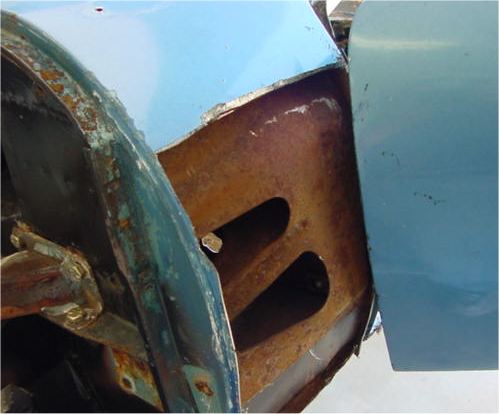
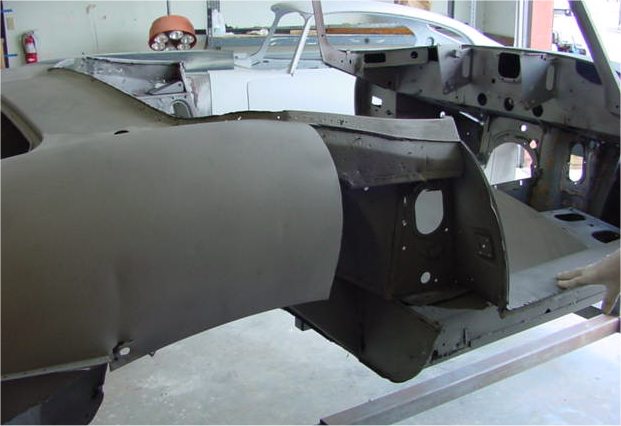
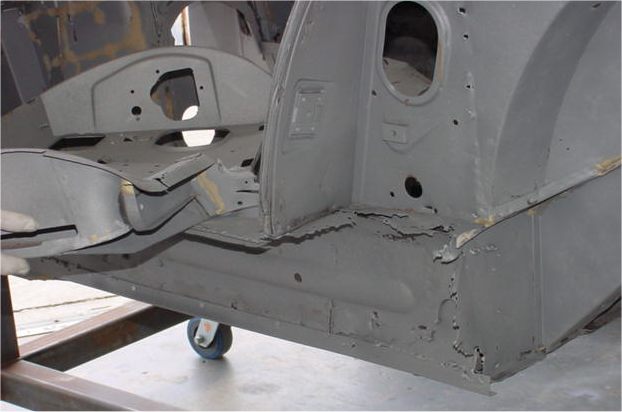
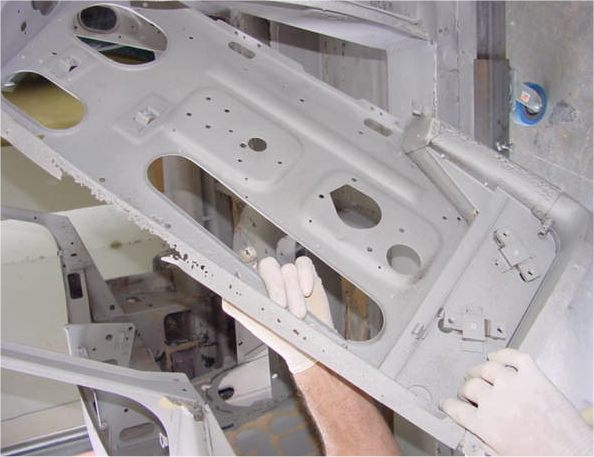
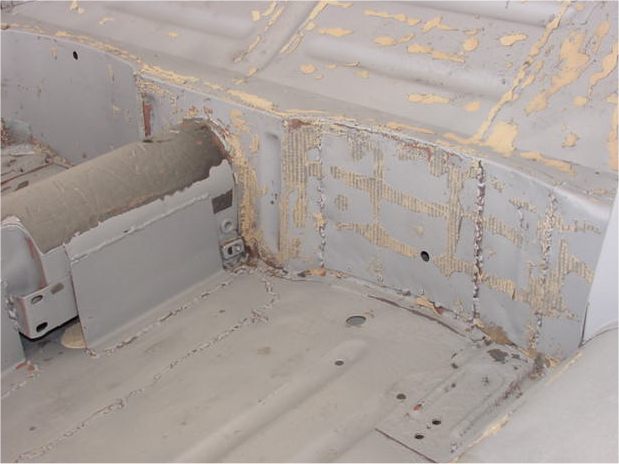
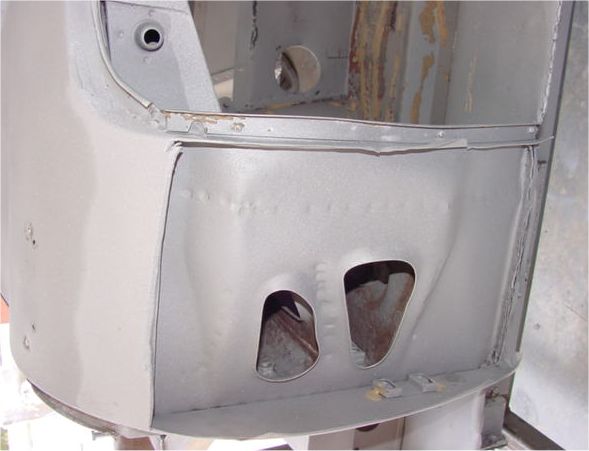
What a difference a day makes!I think you will particularly enjoy the latest pictures as they show Lawrence dealing with an area that I know caused you a great deal of concern when you first brought the car to us - the chassis legs and rear bulkhead where the IRS is attached.
 |
 |
|
IRS supports |
compartment and bulkhead |
 |
 |
|
access to rear brakes |
|
 |
 |
|
|
|
 |
 |
|
chassis leg inner box sections |
can see Lawrence fabricating a new bulkhead |
 |
|
|
|
Lots of progress since our last update just over a week ago. We are getting very close to having to make a decision on the colour because we would like to apply the stone guard and paint the underside of the tub while it is on the jig.
 |
 |
|
|
until the last minute..... |
|
|
|
 |
 |
|
|
|
|
|
|
 |
 |
|
|
|
|
|
|
 |
 |
|
|
|
|
|
|
 |
 |
|
the box section |
support brackets |
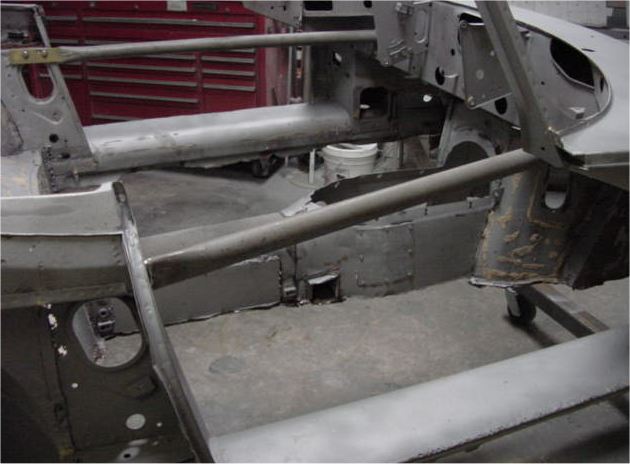
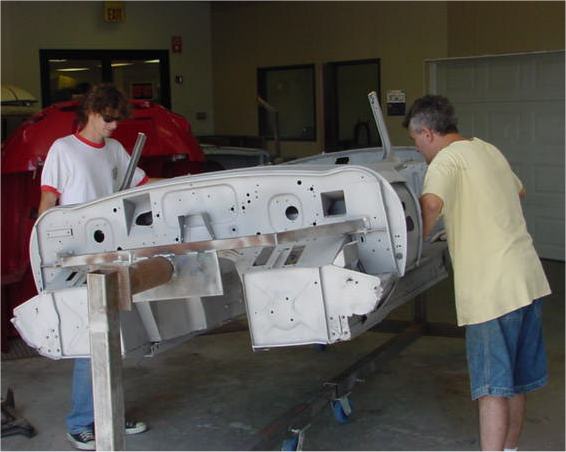
Update report - August 23, 2002
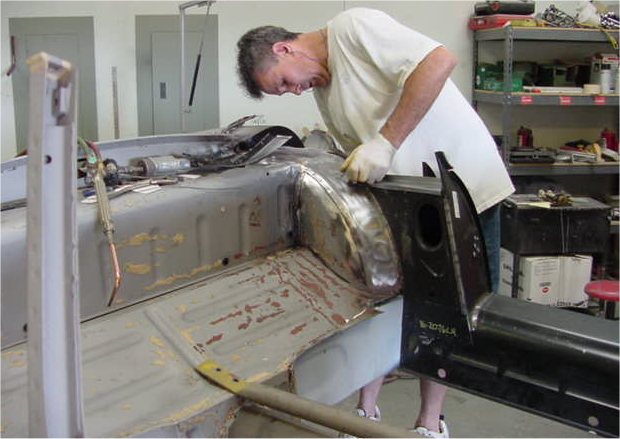
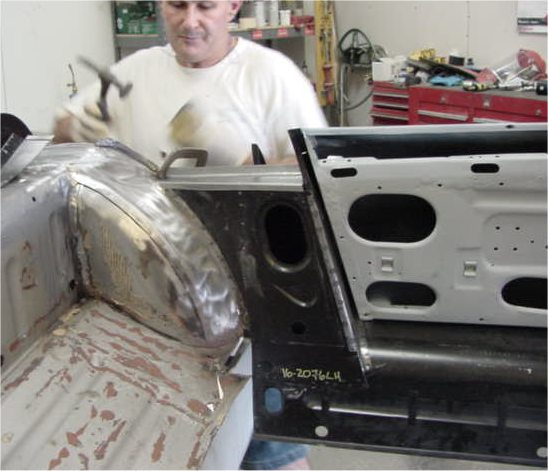
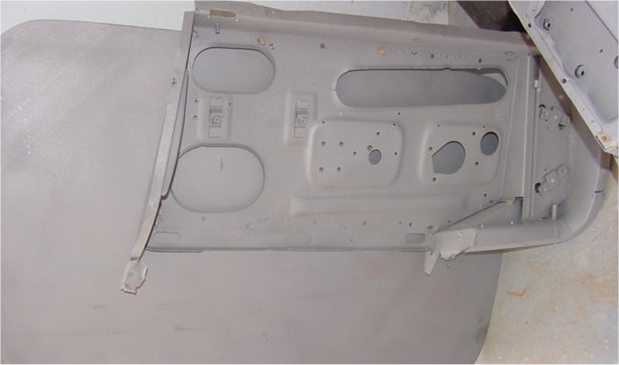
Well, I gather my August 20th update gave you a bit of a shock! Sorry about that, Brad! We do so many of these E Type monocoque restorations that sometimes I forget that some of the photographs must look pretty frightening to the owner of the car. The good news is that your car could not be in a better place. Fear not!I hope the following photographs give you a little encouragement. Notice how we rebuilt the doors first so that we can build the rest of the body (or at least the sills and the A and B pillars) around the door frames.
 |
 |
|
firewall and he'll build you an E Type |
|
 |
 |
|
B pillars are welded in place |
you that the car is in good hands.... |
 |
 |
|
|
|
 |
 |
|
|
|
 |
 |
|
|
|
|
|
|
|
|
|
 |
 |
|
|
|
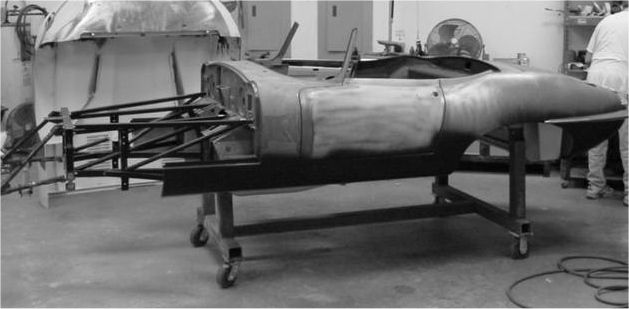
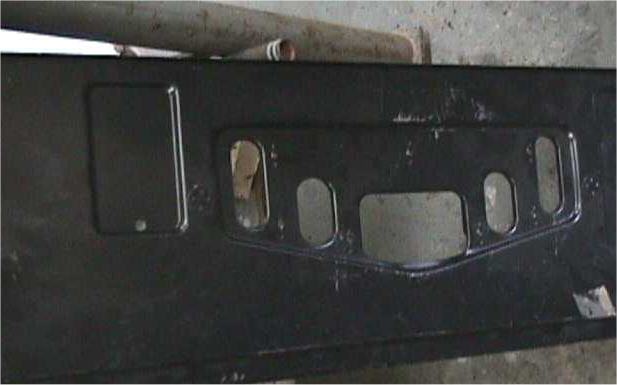
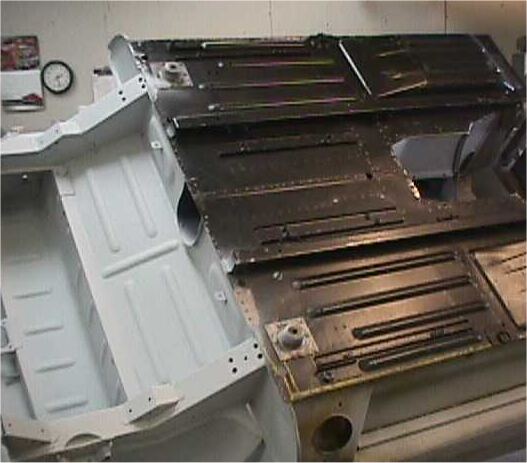
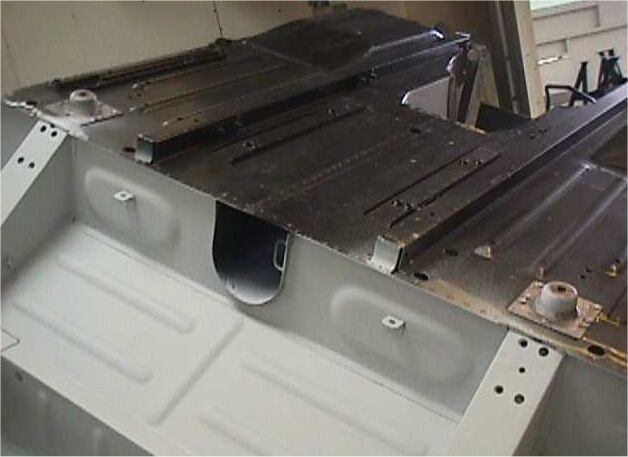
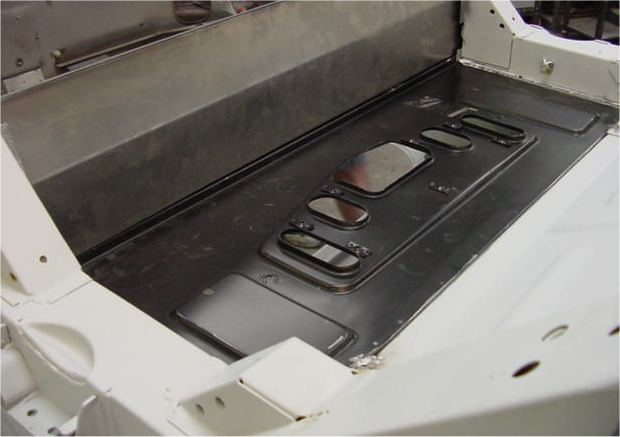
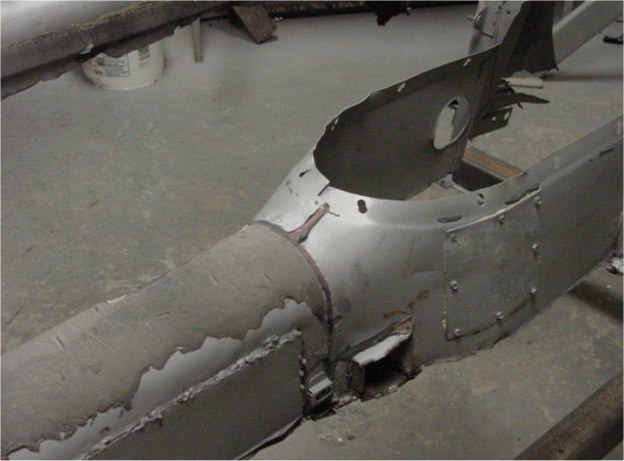
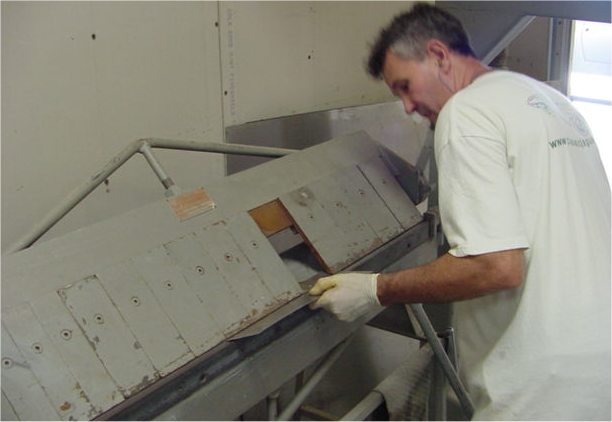
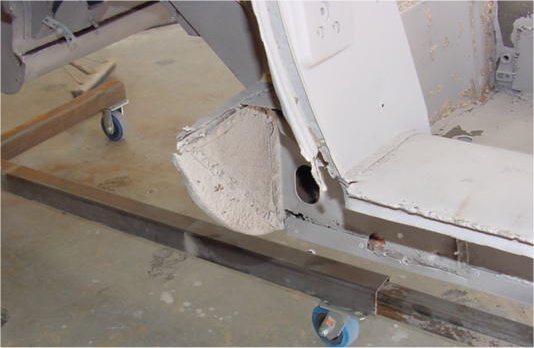
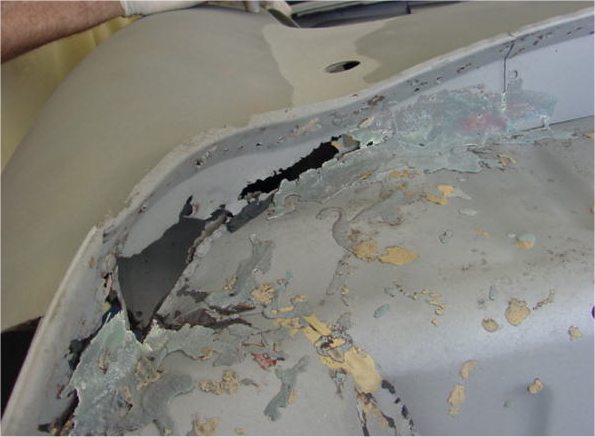
This roadster body is about as bad as you will ever see. Most, if not all, of the internal box sections are badly corroded and hardly an exterior panel will remain once our work is complete.Notice in the photographs below how Lawrence cut away a significant portion of the outer bodywork prior to sending the car off to be bead blasted. This is something we do commonly when we know that extensive sheet metal replacement is inevitable.
Follow this restoration through with us and you should get a very clear picture of how we tackle a roadster body reconstruction in the Team CJ Coachworks.
 |
 |
|
blaster access to inner box sections |
|
|
|
|
 |
 |
|
|
|
|
|
|
 |
 |
|
|
|
|
|
|
 |
 |
|
|
work before being reskinned |
|
|
|
 |
 |
|
|
|
|
|
|
 |
 |
|
|
|
|
|
|
 |
 |
|
|
|
|
|
|
 |
 |
|
|
I had for this one???!!!! |
