Update
report - November 1, 2017
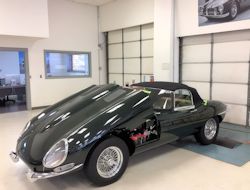
One
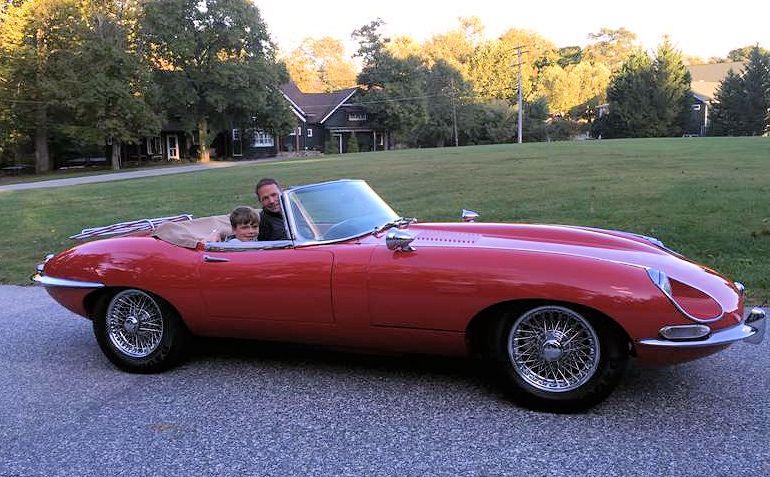
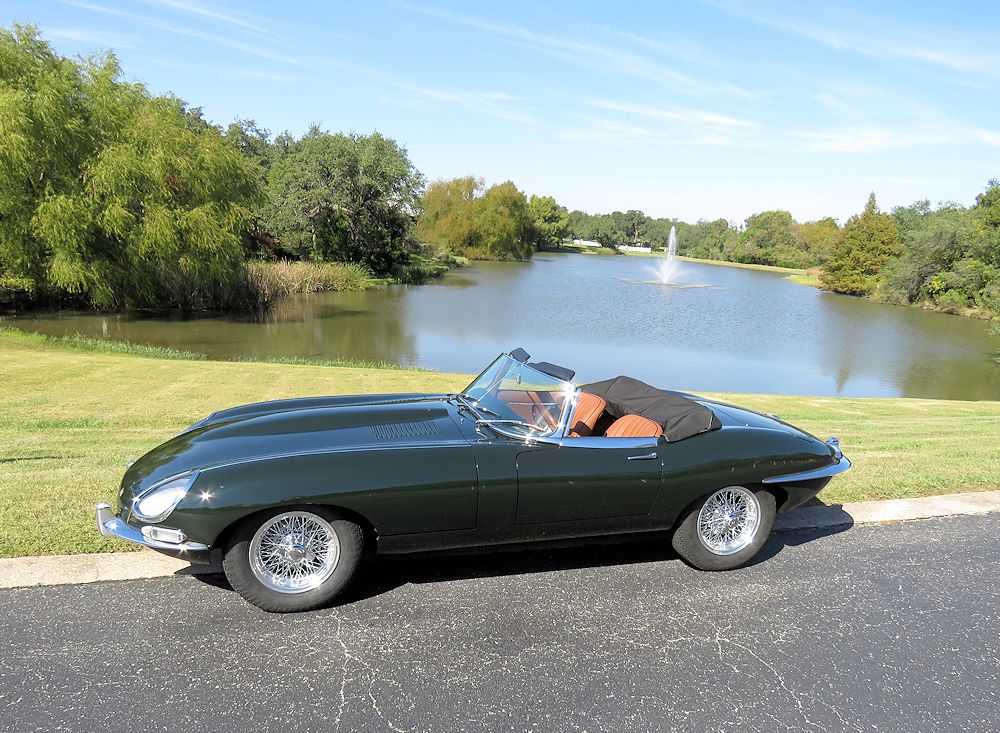
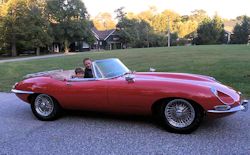
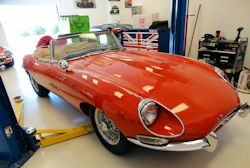
final test drive, one last photo opportunity!
|
|
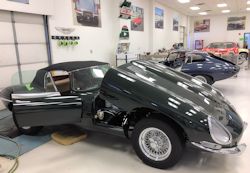
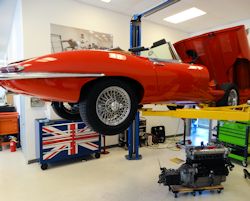
Car now just days away from completion
|
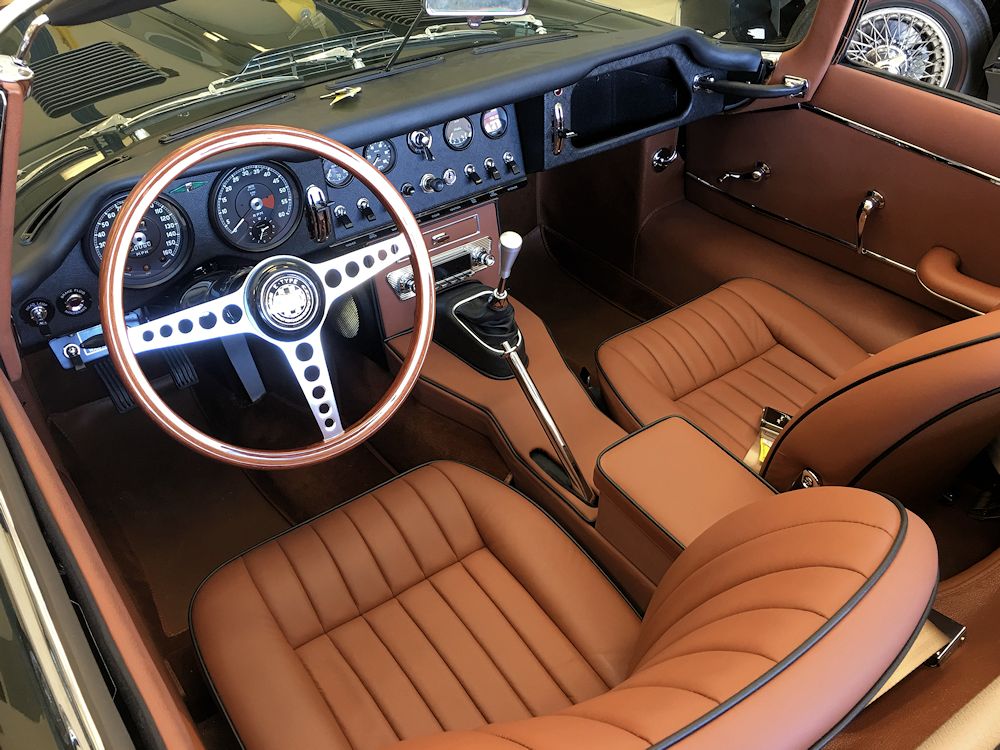
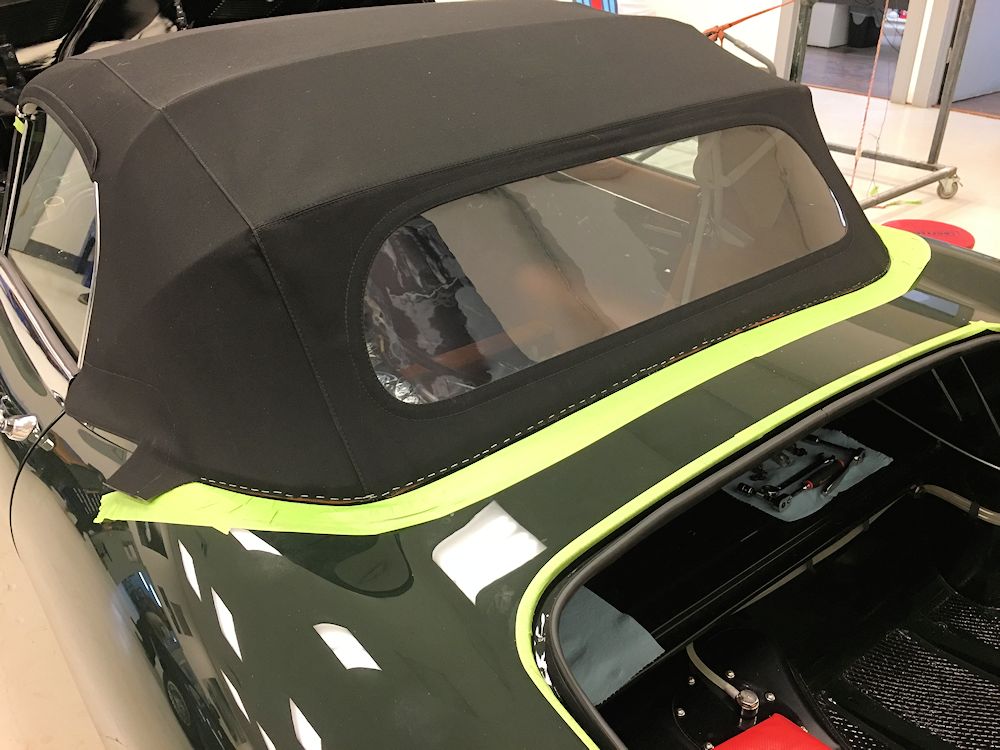
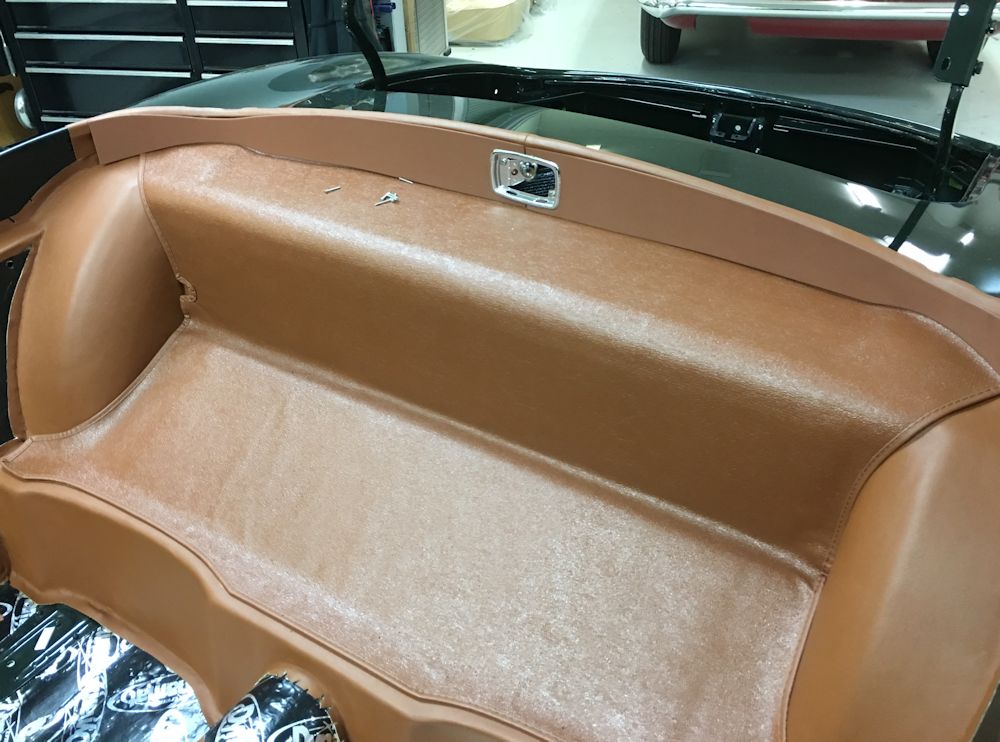
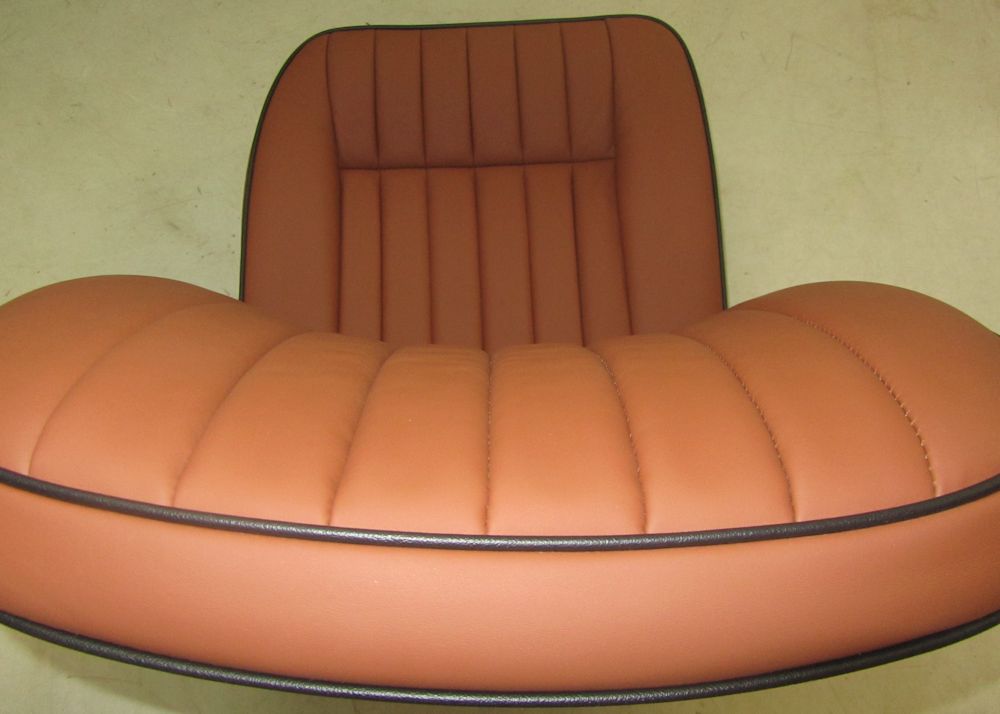
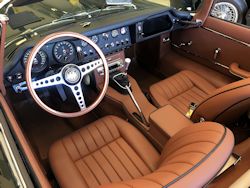
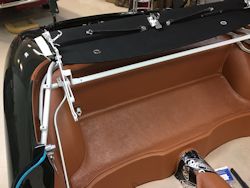
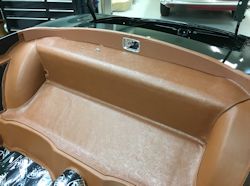
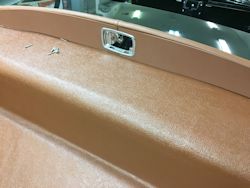
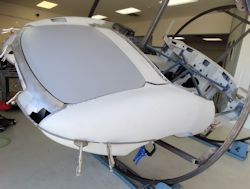
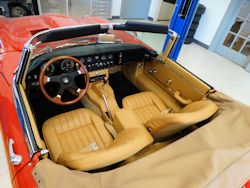
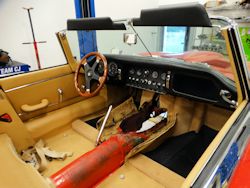
Suffolk & Turley interior looks
spectacular
|
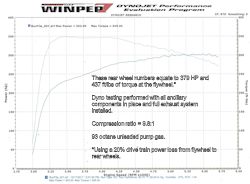
Your car has spent the last few days
being tuned on the Dyno and I am pleased to report
that it has been putting down some very impressive
numbers! Using a 20% power loss correction factor
(from flywheel to rear wheels), your Stage Two CJ engine is producing
379 HP and 437 ft/lbs of torque. These numbers are all the
more remarkable given they were achieved with all ancillary
components in place, including the complete exhaust system.
The compression ratio is a conservative 9.8:1 and all
testing was performed using 93 octane pump gas.
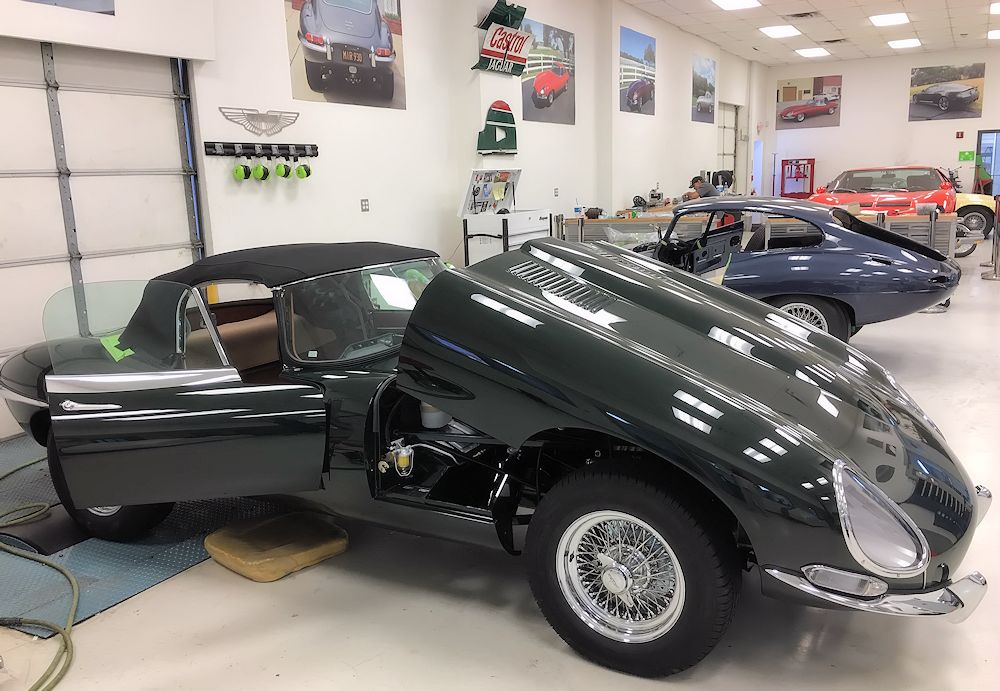
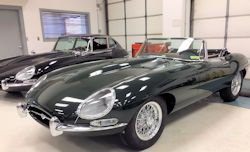
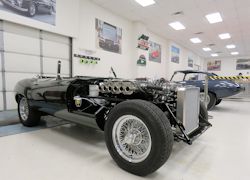
Your E Type is a flying machine,
and certainly one of the fastest road legal 6 cylinder E
Types on the road.
|
|
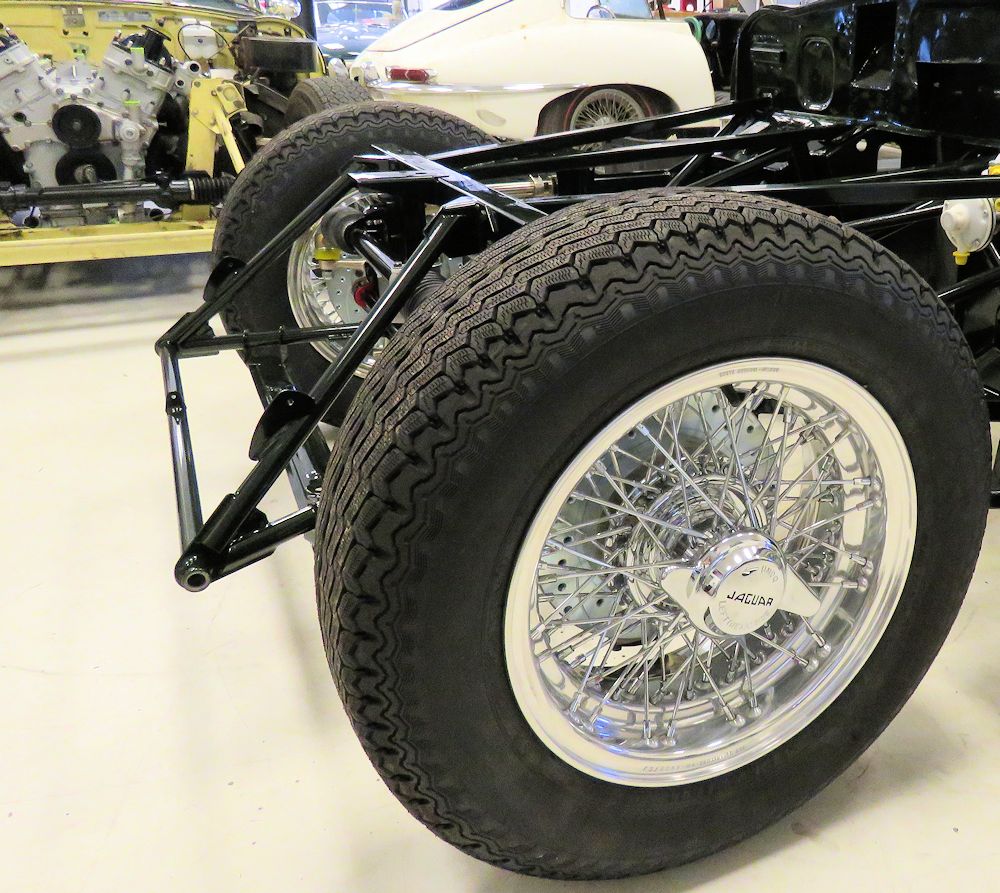
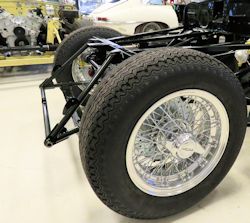
CJ/Borrani wheels now installed
|
Dyno sheet showing some remarkable
HP and torque numbers
|
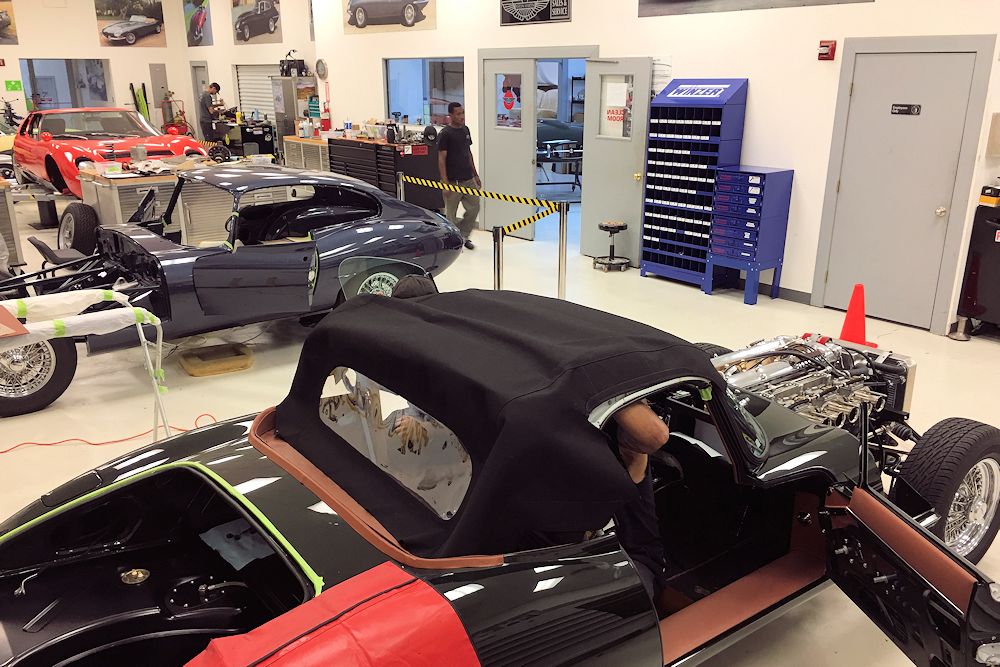
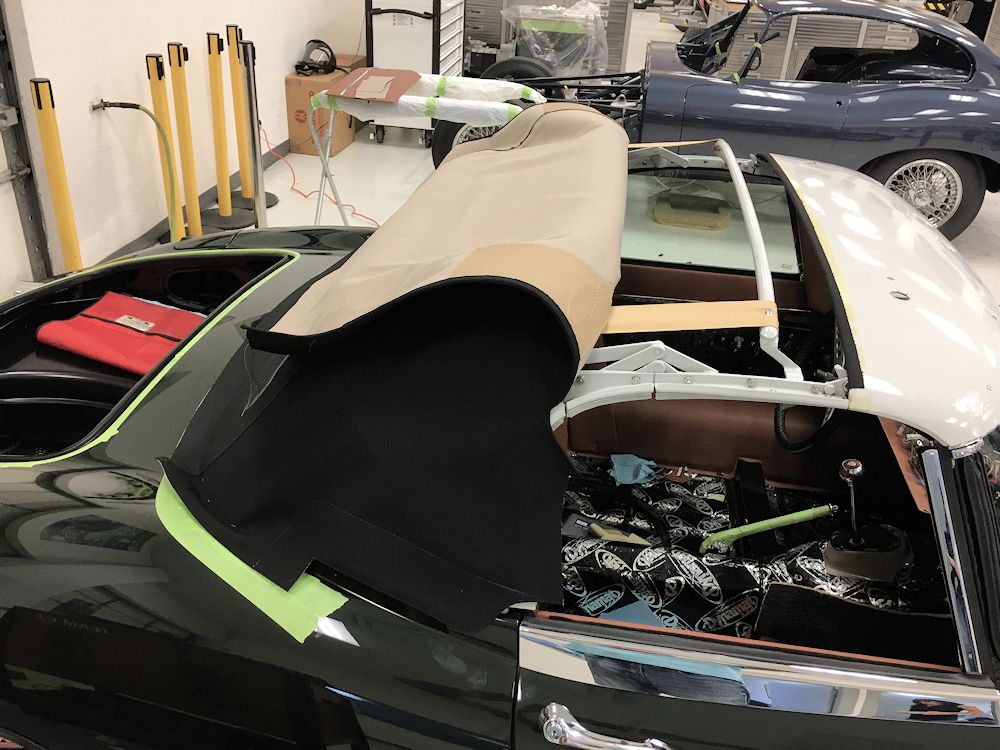
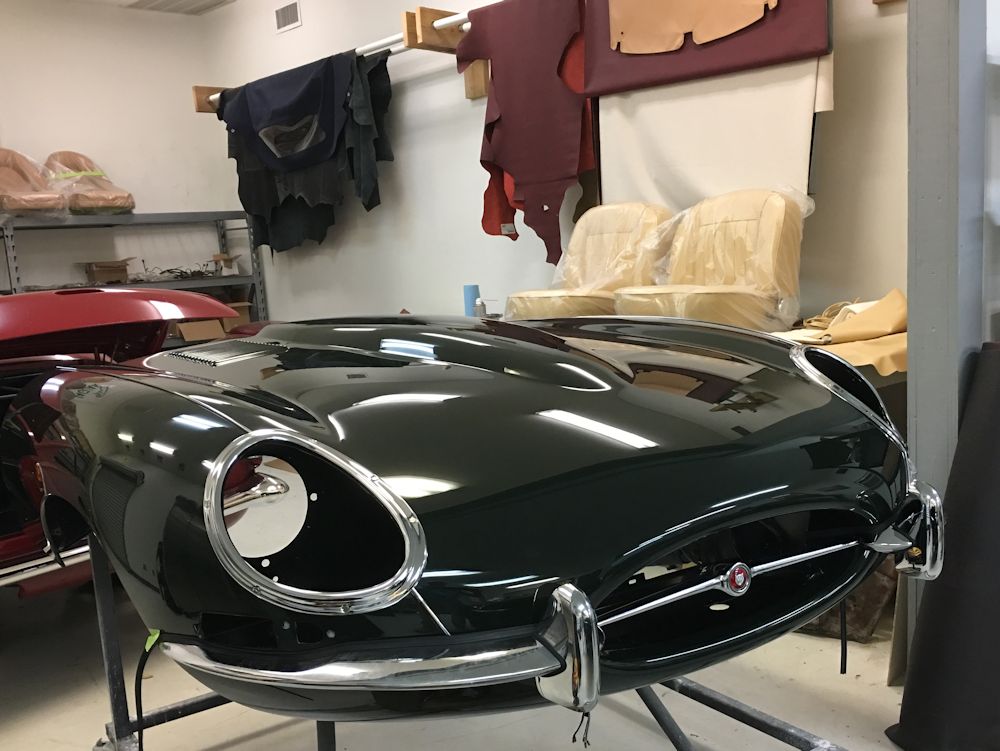
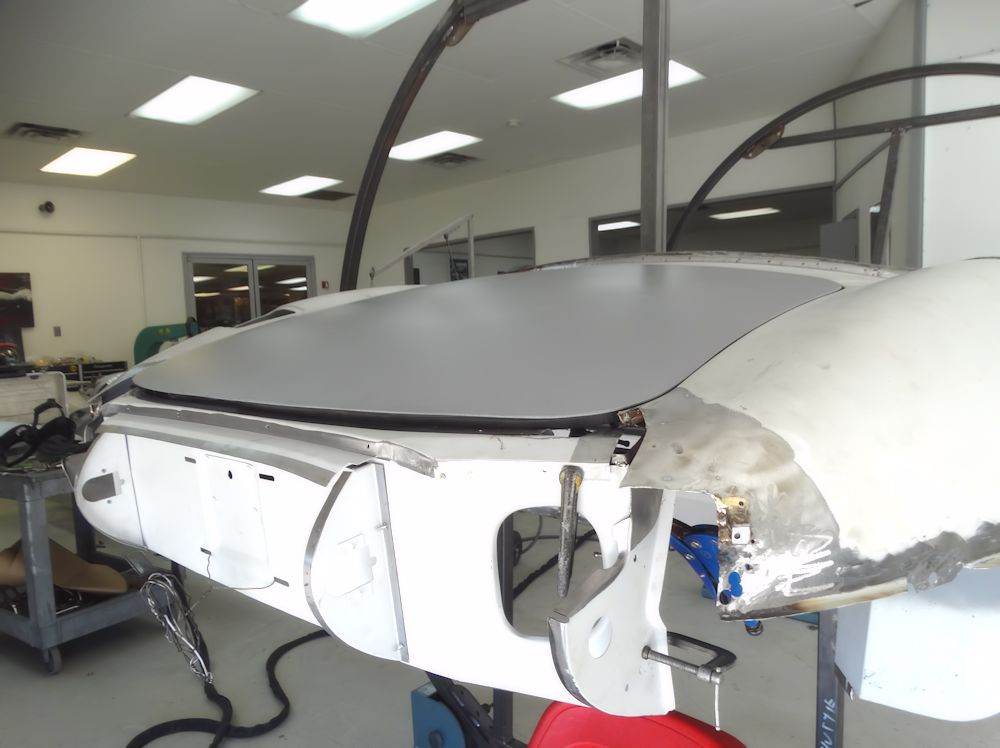
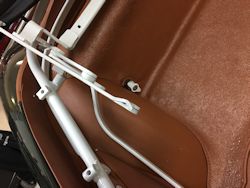
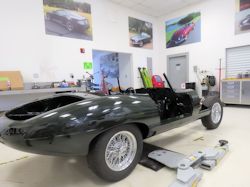
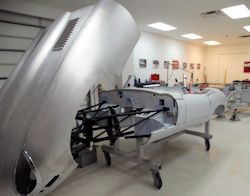
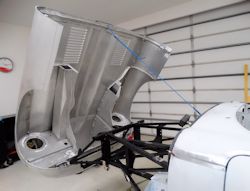
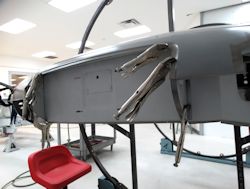
Installing
the convertible top and bonnet.
|
|
Time to install the bonnet!
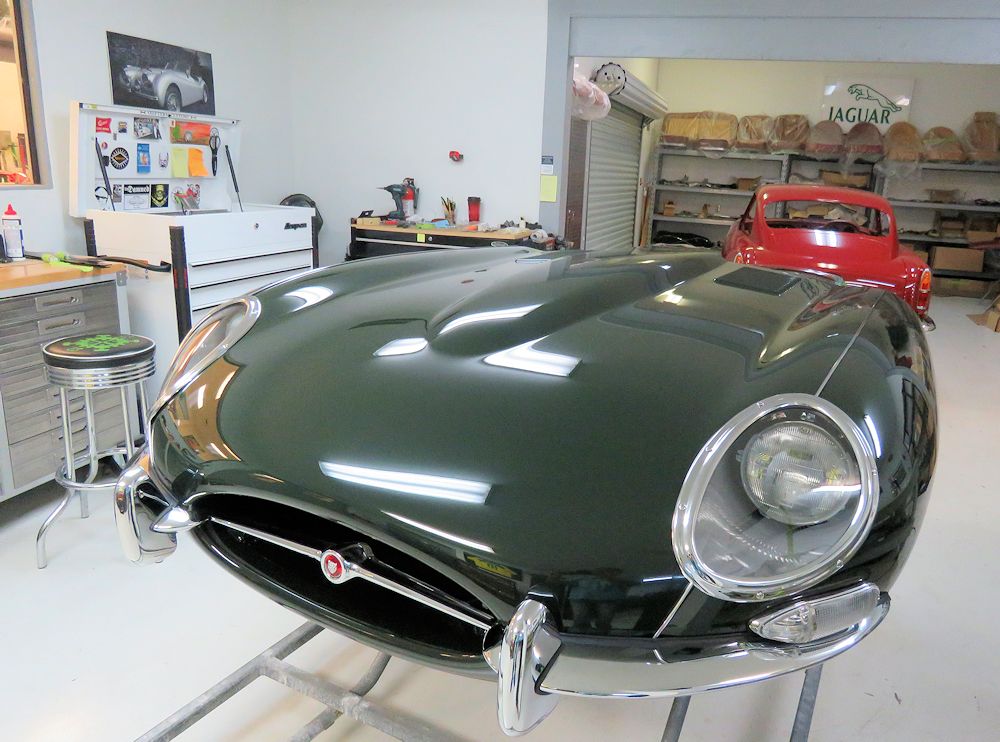
|
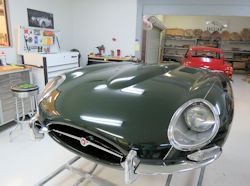
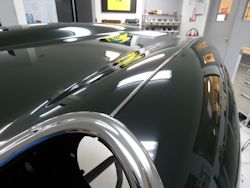
Looking more like a finished car every day
|
|
|

|
|
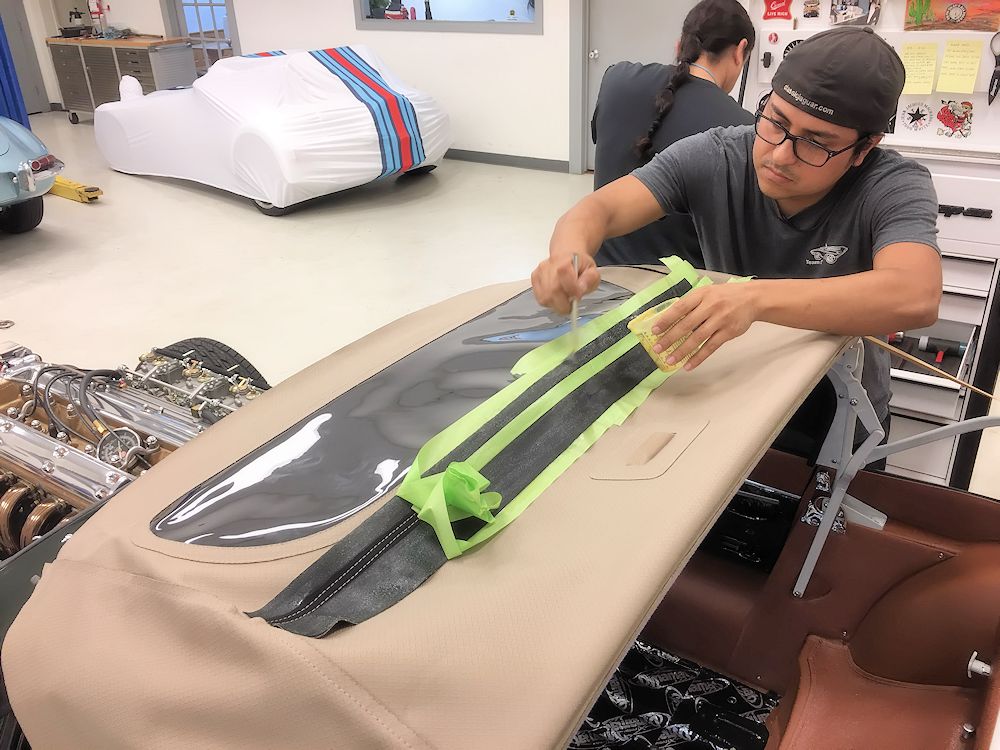
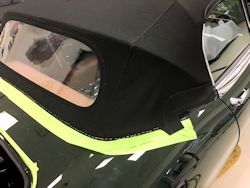
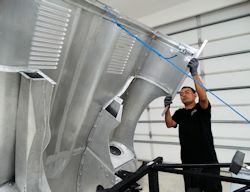
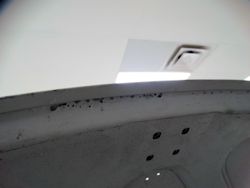
Stapling the rear edge of the mohair top
|
|
Hector and Carlos
installing your new mohair
Suffolk & Turley convertible top (in progress).
Click
on the image below for a short video of the car being run
through the gears on the Dyno!
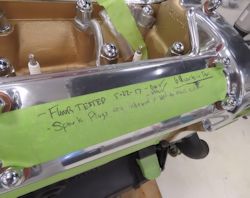
After
an uneventful initial firing, we have already run the
engine through several heat cycles and it is now time to spend a few
hours on the Dyno. I will post a video of the car running
through the gears tomorrow afternoon.
On a different note, happy 14th
birthday to Race! Your dad tells me he is going to allow you
to do your driver's ed in the E Type in a couple of years.

|
|
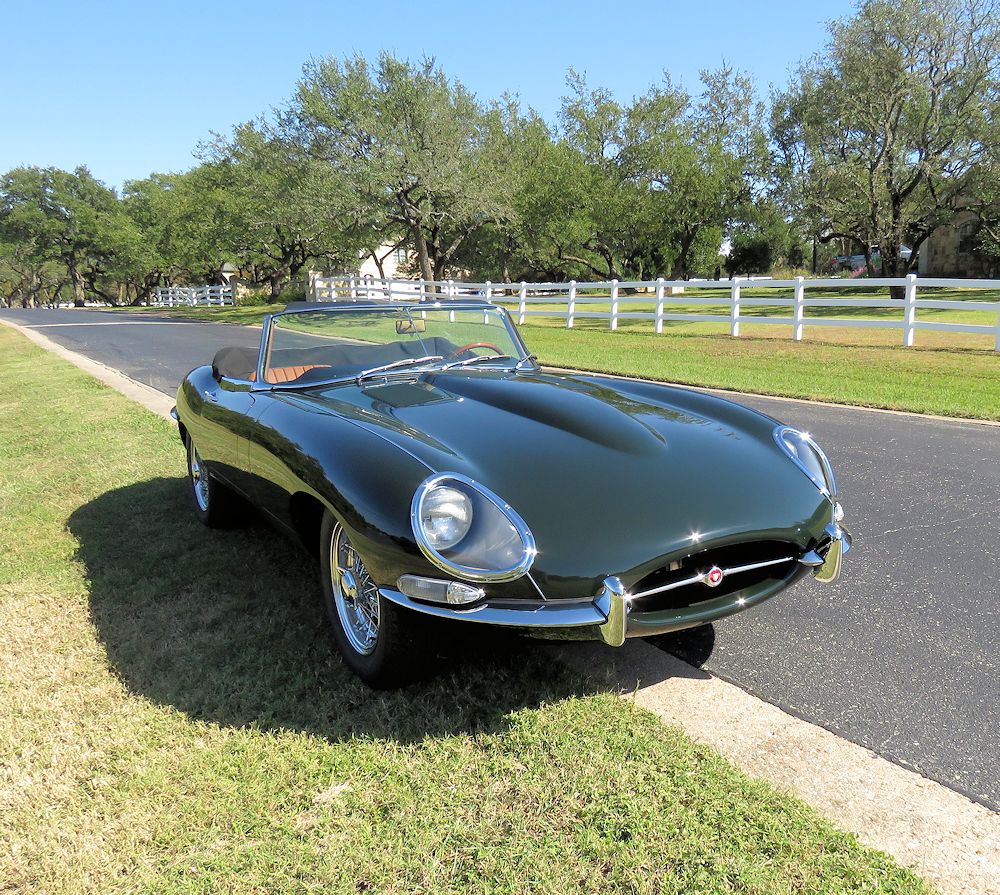
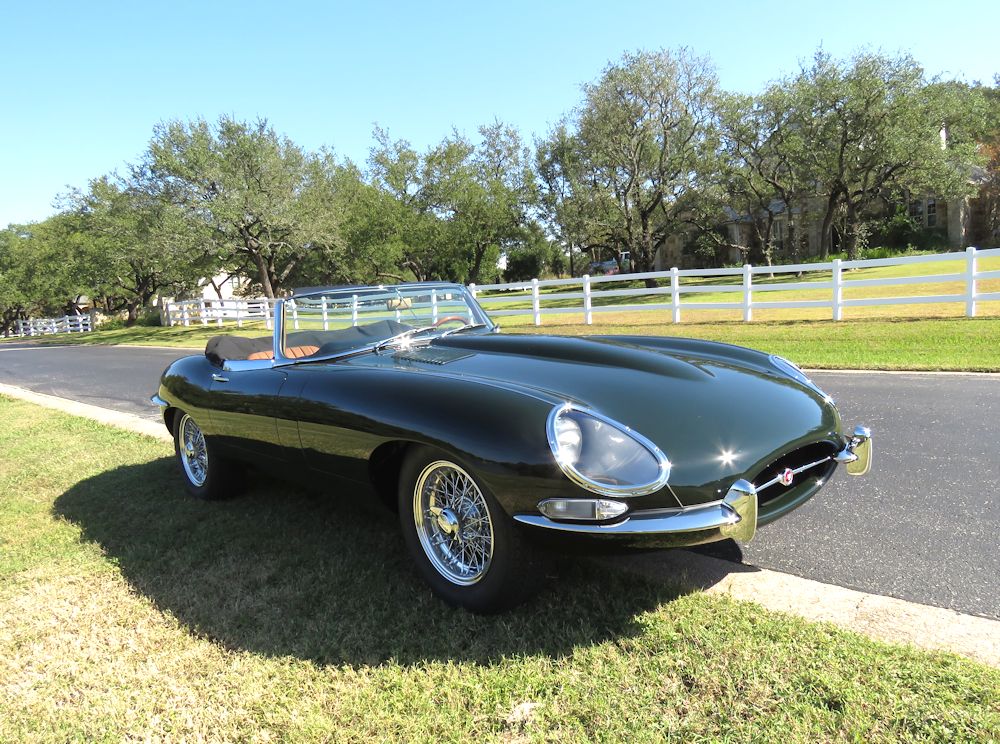
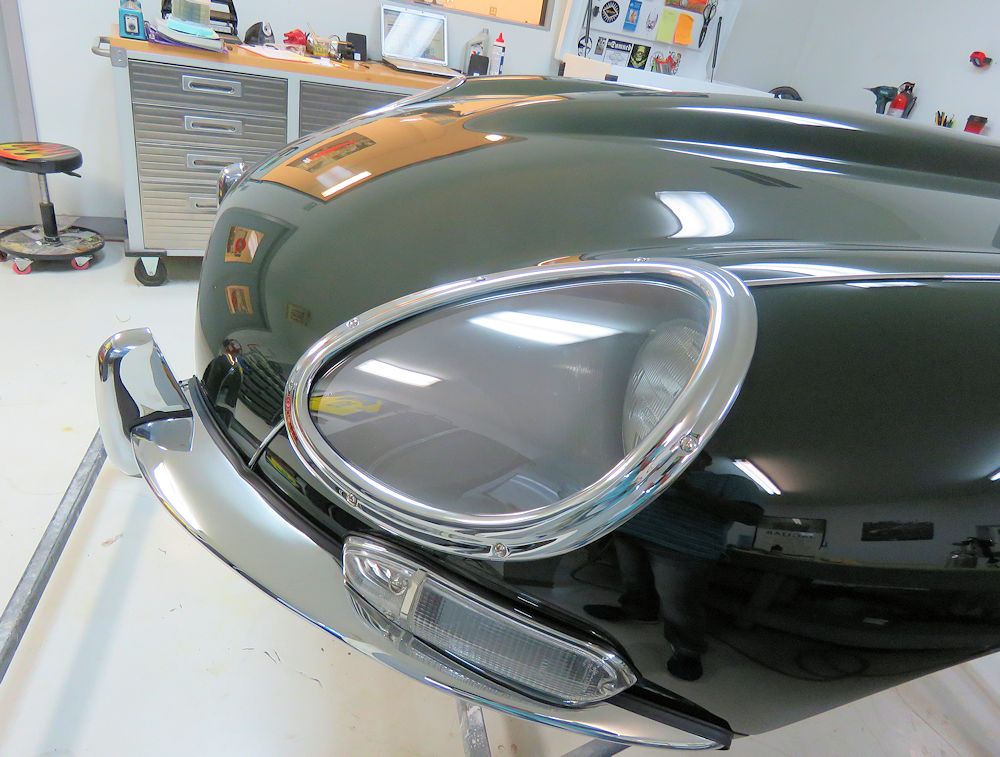
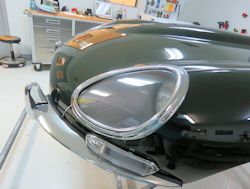
Front lights and brightwork have now been
installed
|
|
|
|
|
|
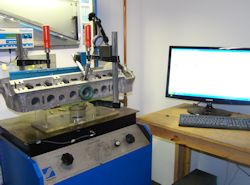
After successful initial firing and several
heat cycles,
the car has now been moved to the Dyno
|
|
|
|

|

|
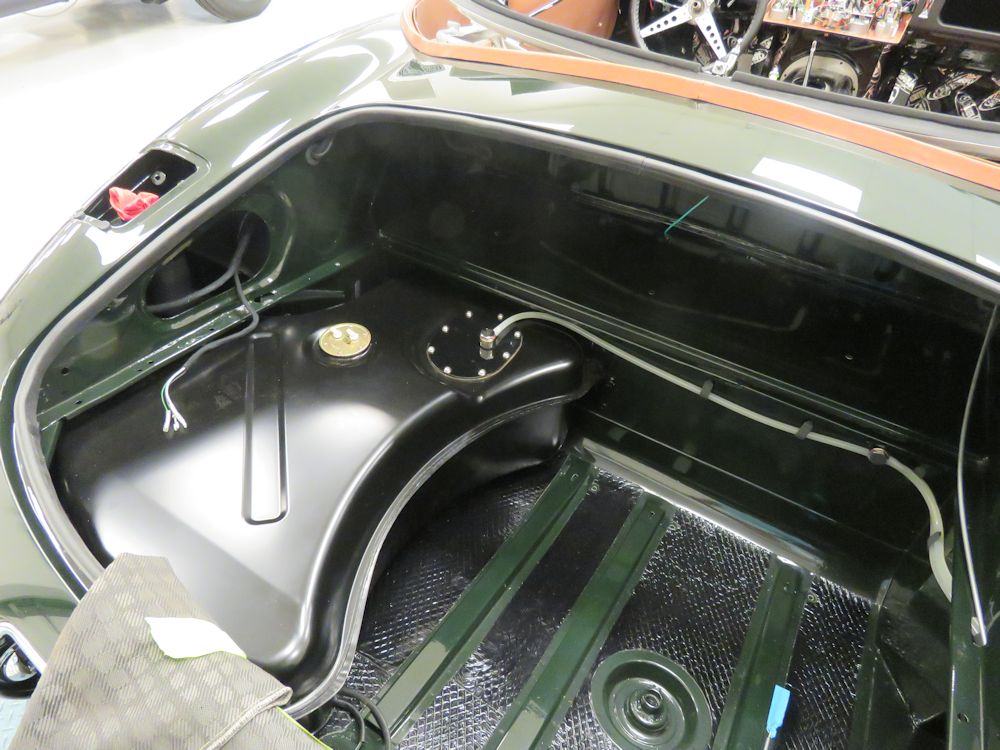
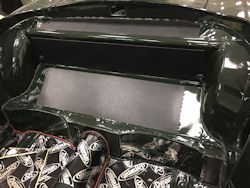
New fuel tank has now been installed
|
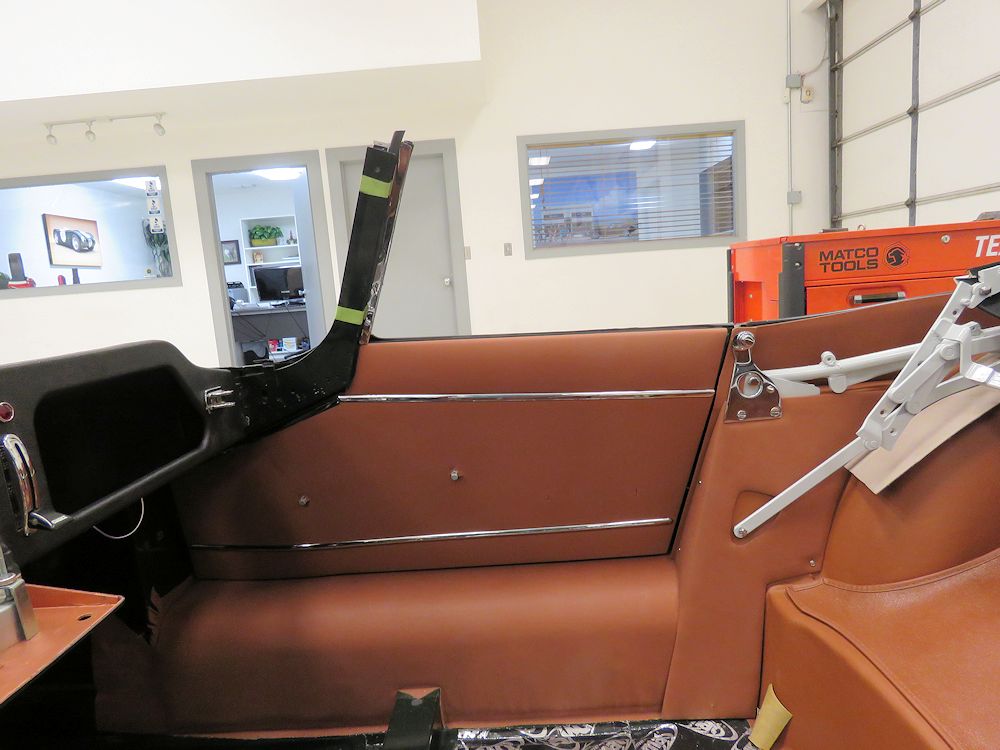
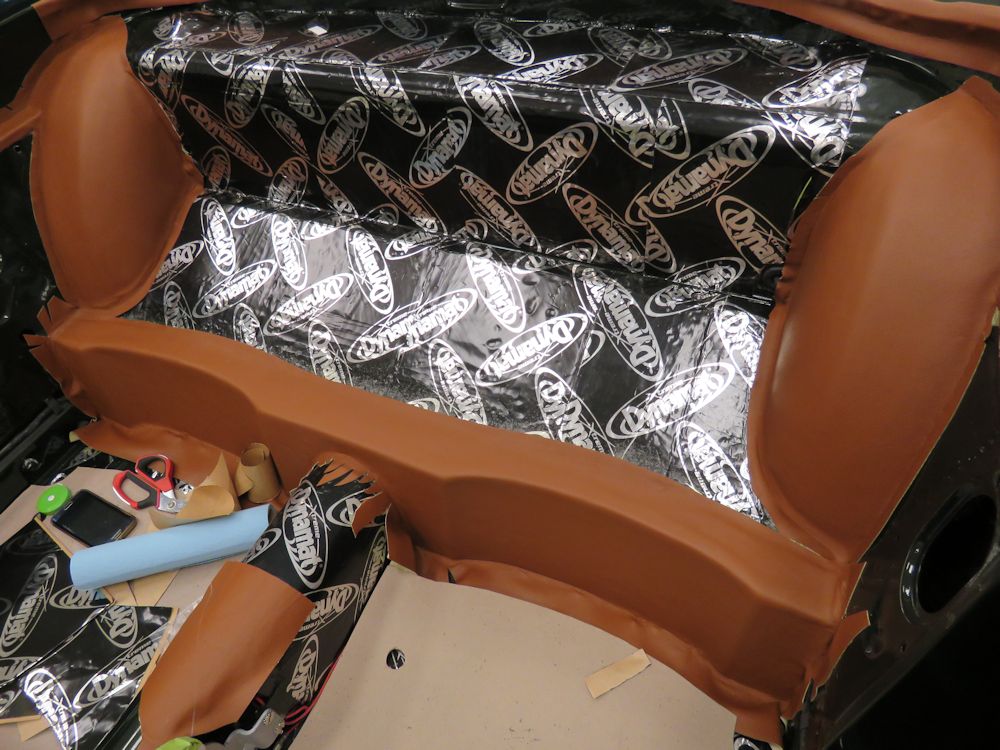
Hector installed the interior door panels
over
the weekend
|
|
|
|
|
The car is scheduled for several hours on
the Dyno
tomorrow (8/8)
|
Look for a video of the car being put
through its
paces tomorrow!
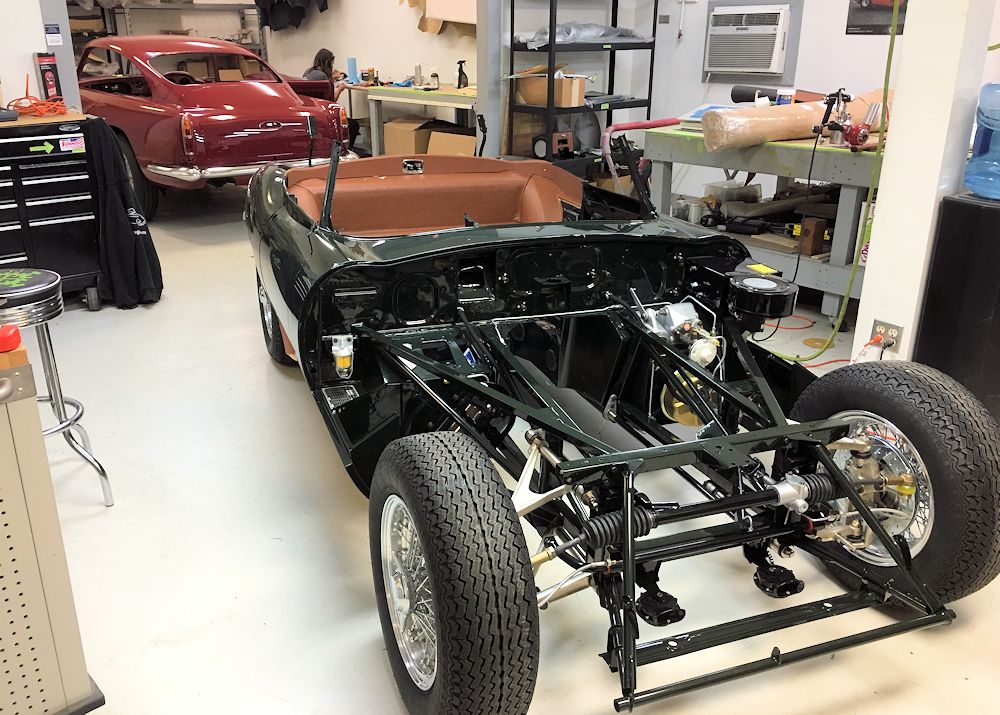
|
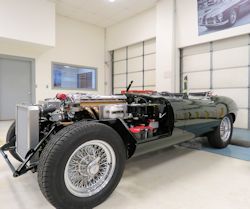
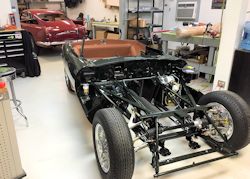
The mechanical assembly is progressing
very well!
|
|
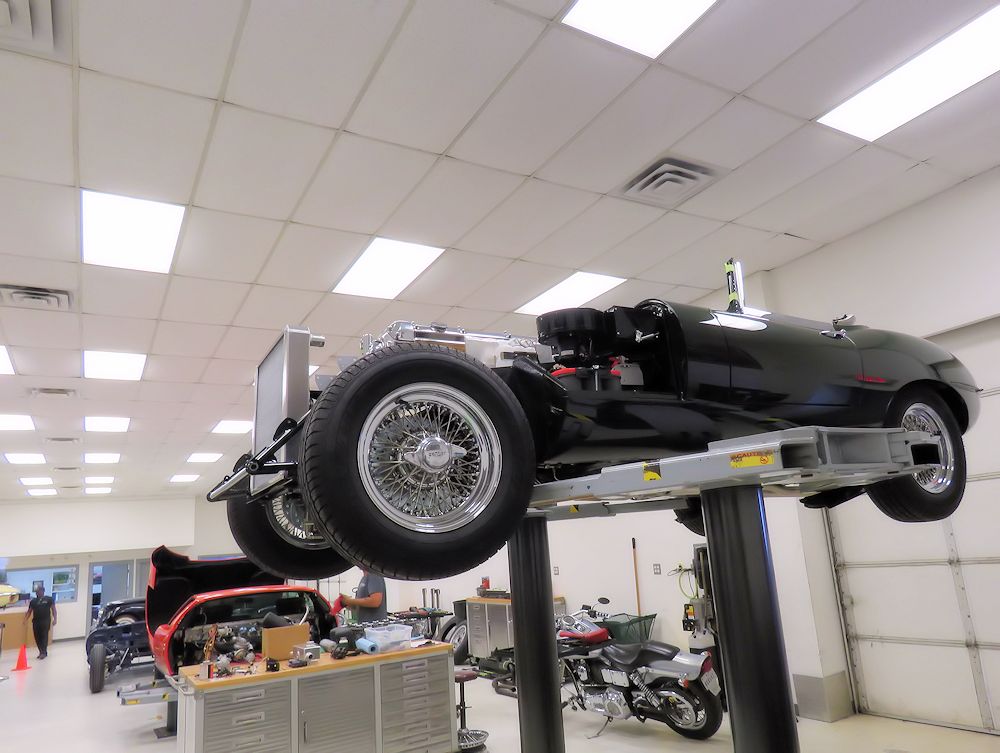
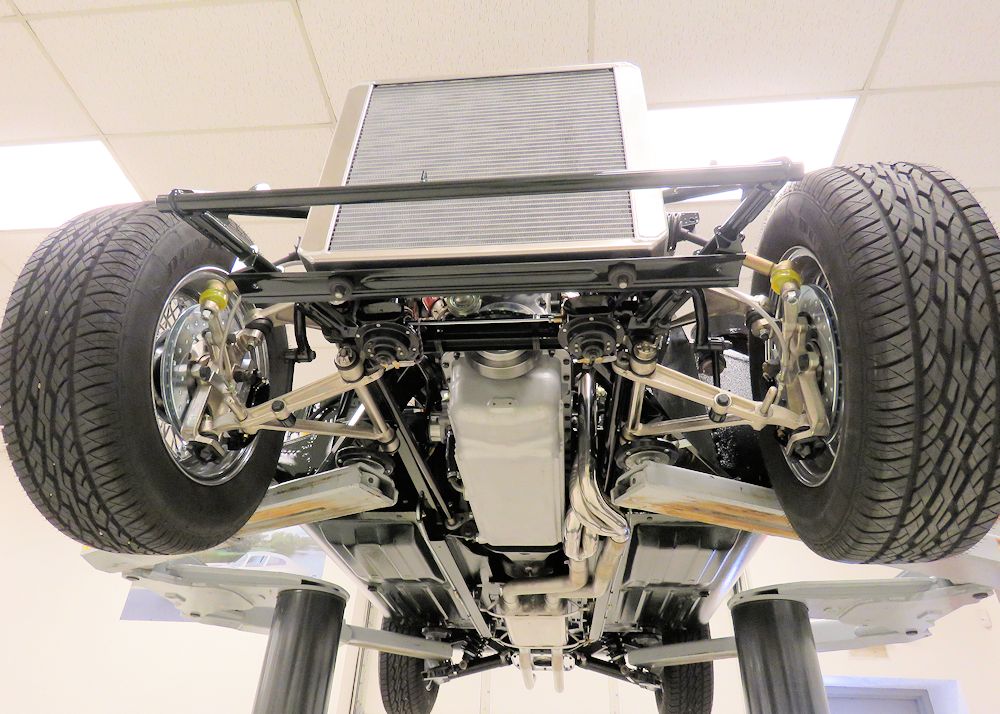
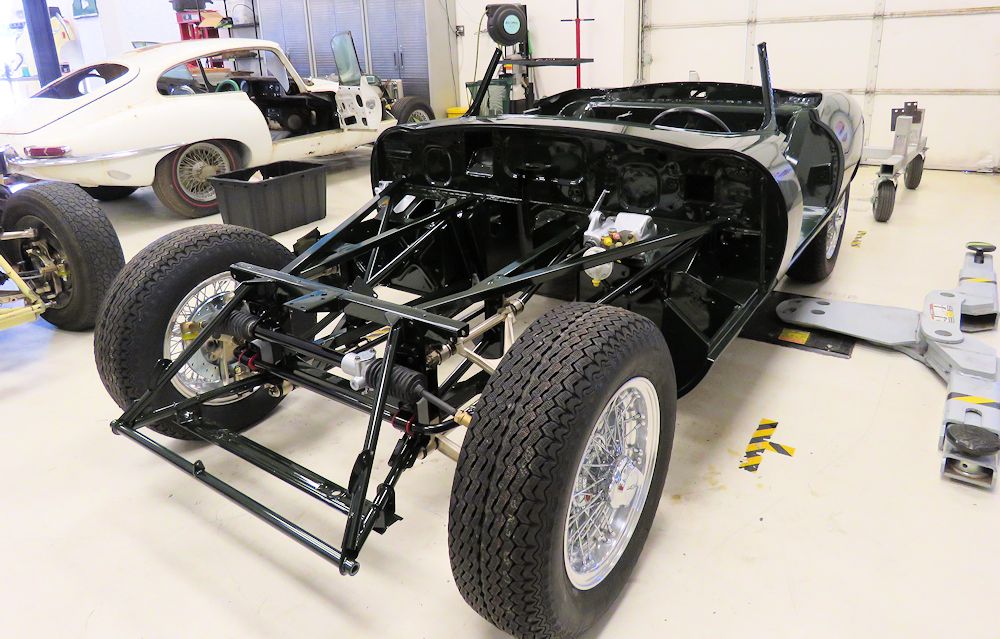
Slave wheels and tires will be used for
beak-in
sessions on the chassis dyno
|
|
|
|
|
|
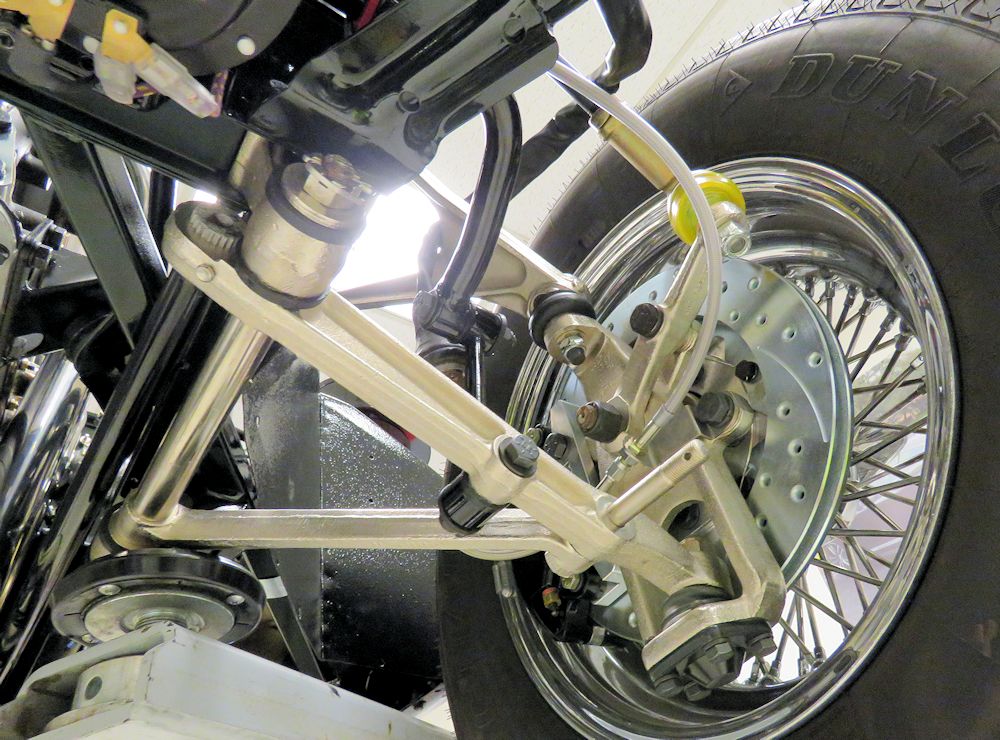
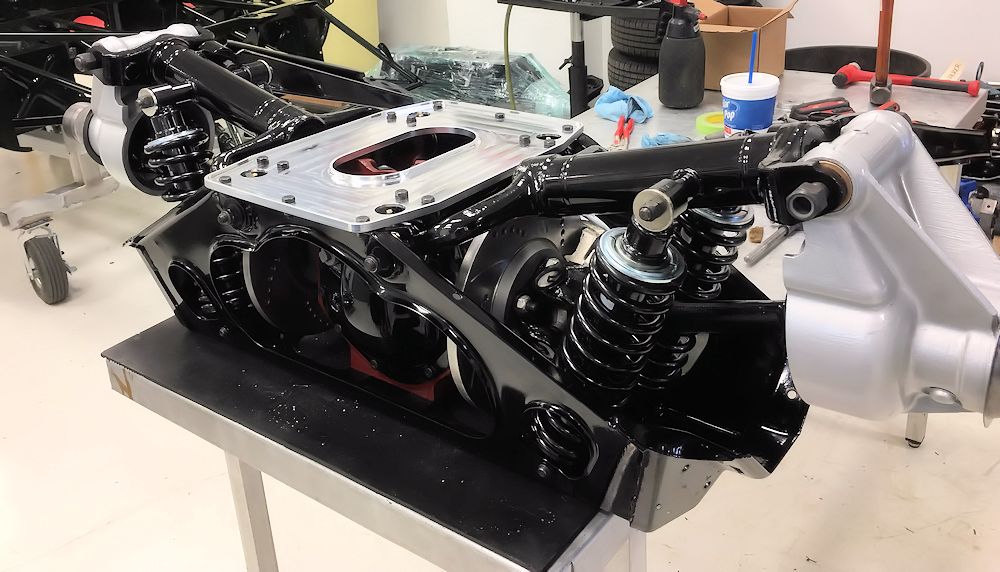
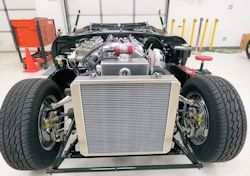
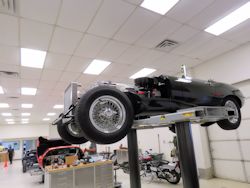
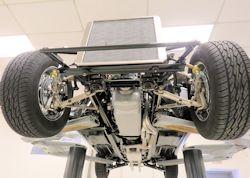
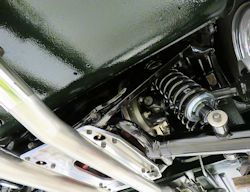
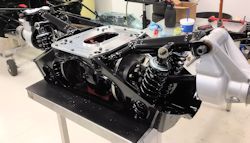
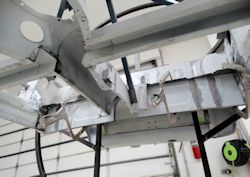
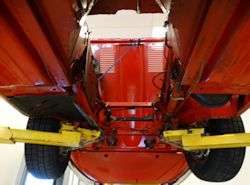
Uprated suspension and brakes on display
with the
car raised on one of the lifts
|
|
|
|
|
|
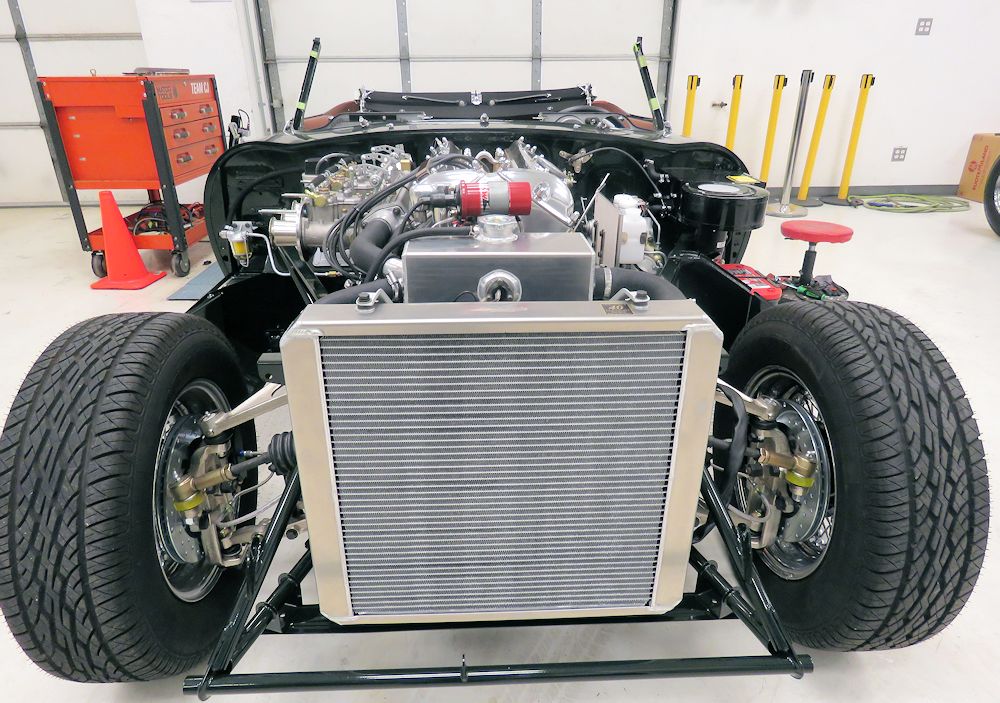
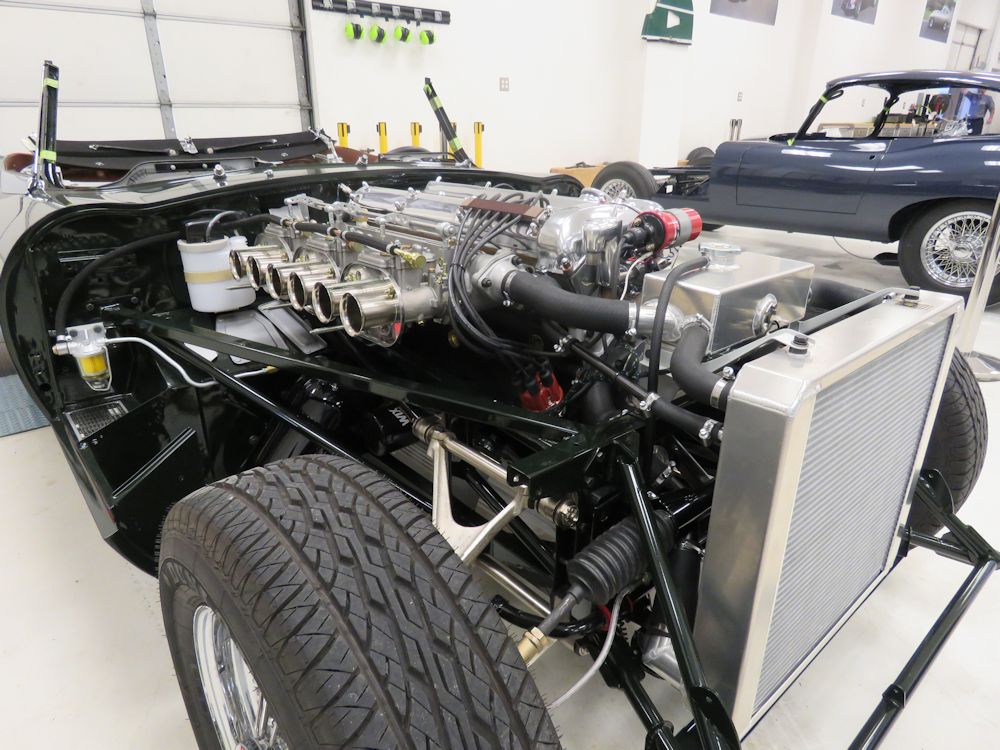
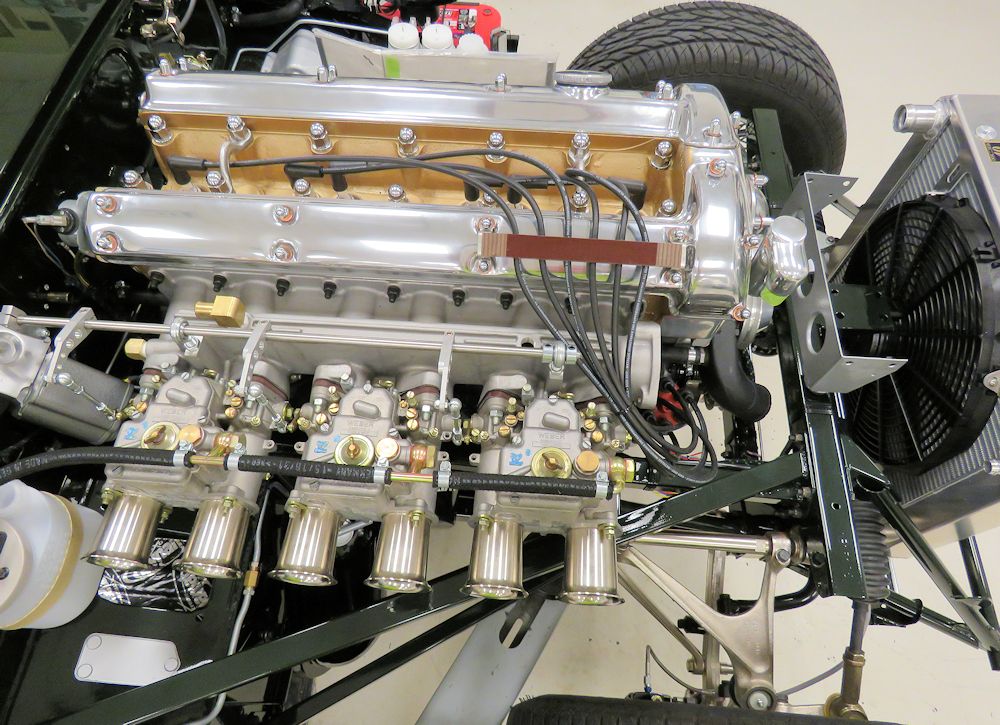
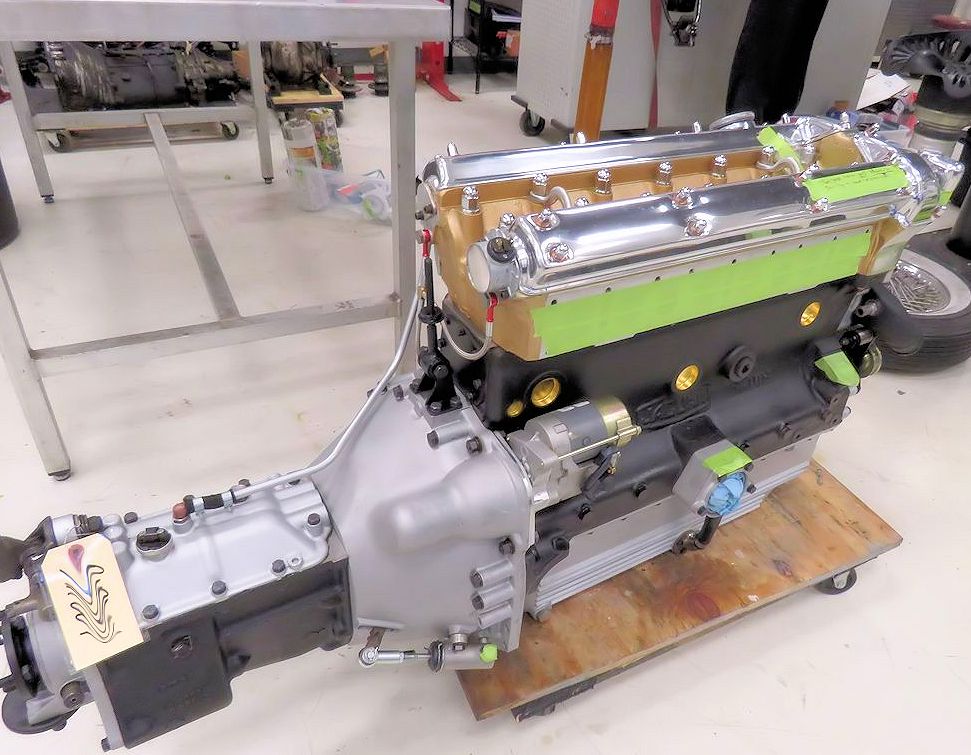
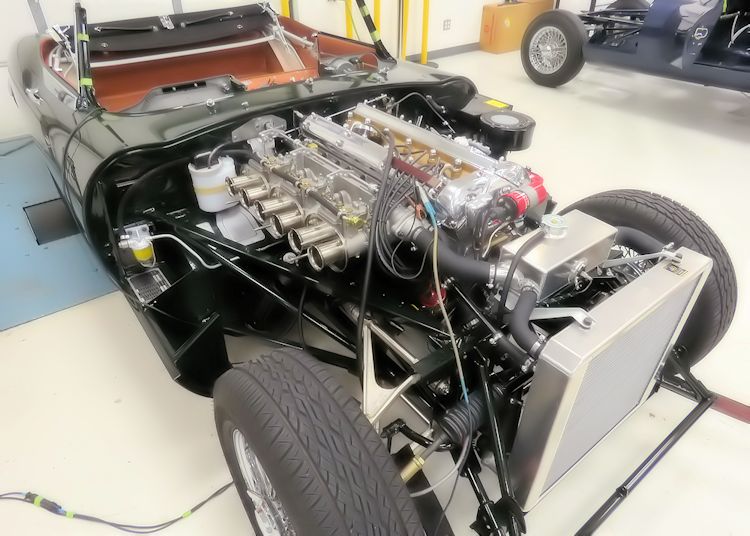
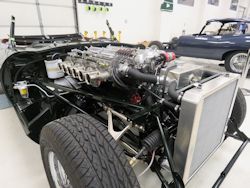
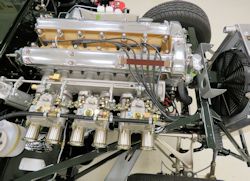
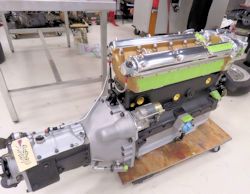
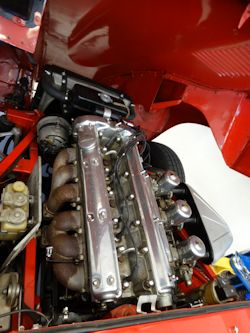
Stage Two 4.7L engine will be fired up in
the
next few days
|
Engine bay filling up rapidly!
|
|

|
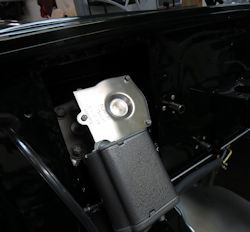
Wiper motor rebuilt, restored and installed
|
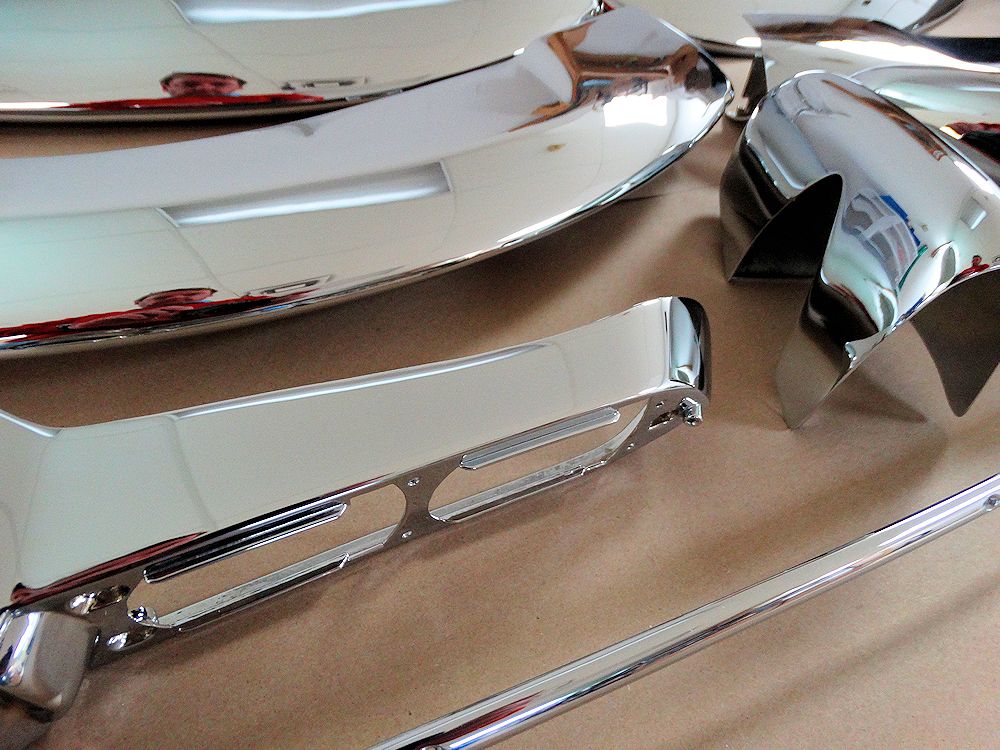
Bumpers and overriders installed
|
Gerardo
has now almost finished sanding and buffing the new
paintwork and Carlos has begun installing the first of the
restored chrome and brightwork.
|
|
Installing the restored convertible top
frame
|
Car will receive a black mohair Suffolk
& Turley
convertible top
|
|
|
|

|
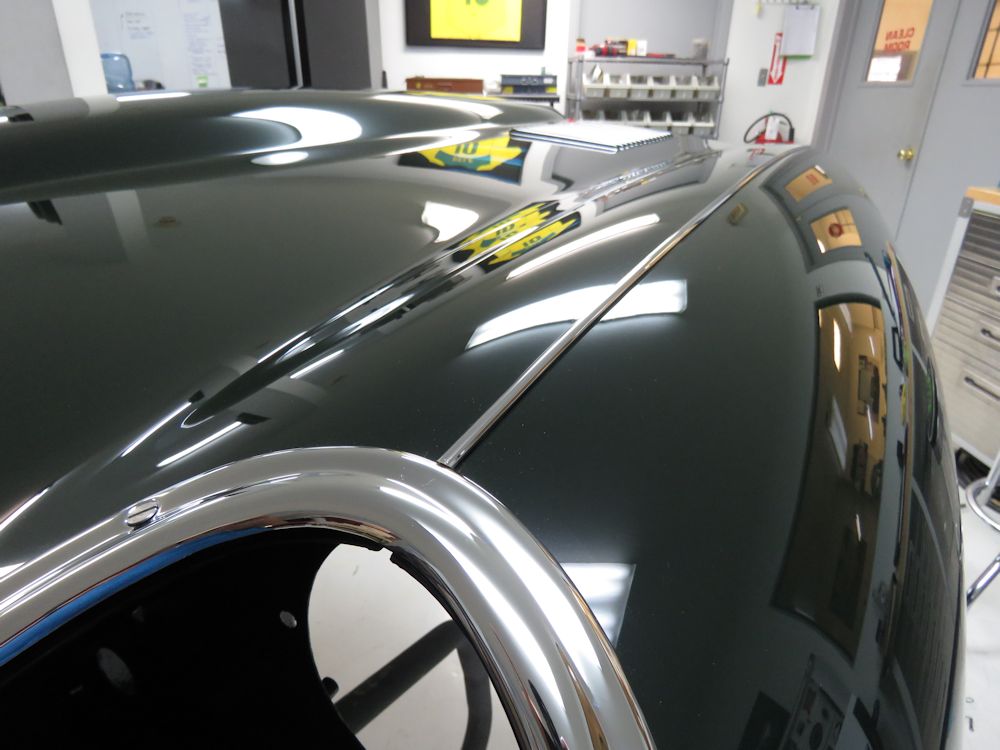
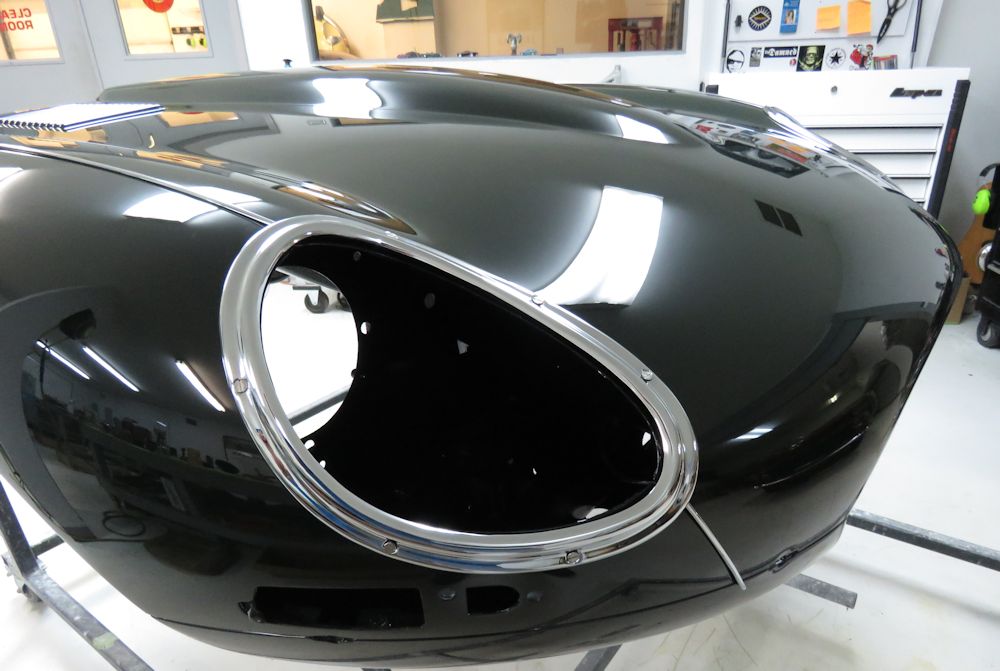
Carlos has now trimmed and installed the
bonnet chrome beading
|
|
|
|
|
|
Bonnet is now ready for lights and bumpers
|
Gerardo has now sanded and buffed the doors
|
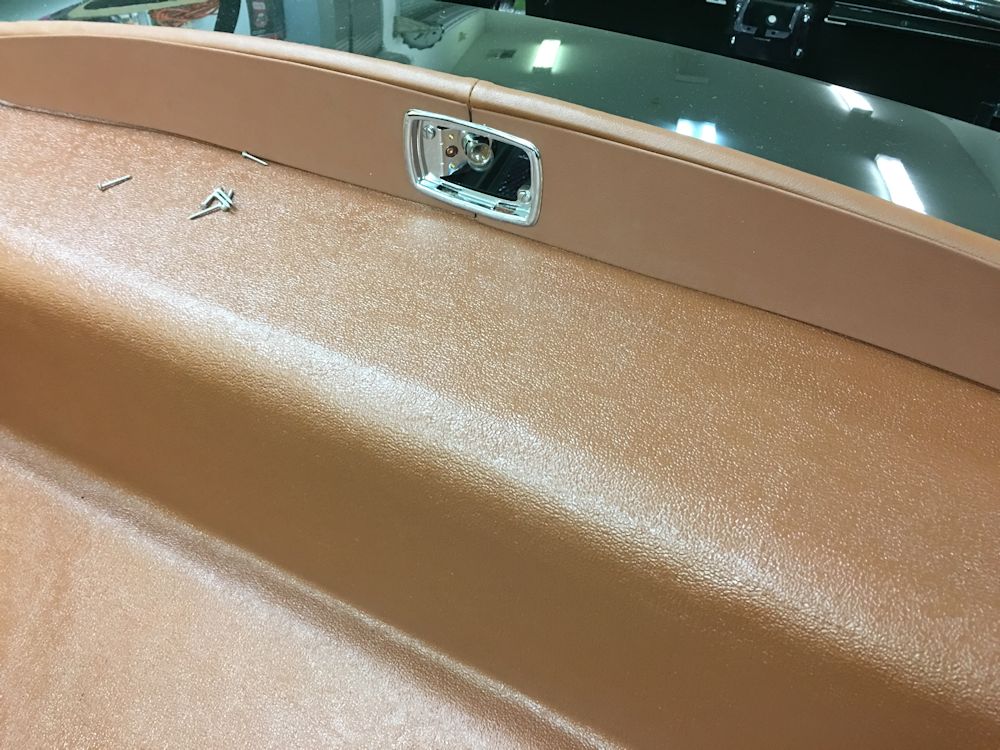
Interior
re-trim, continued..
|
|
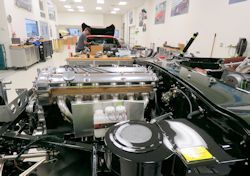
Your car is now keeping some good company
in the CJ trim room!
|
|
|
|
|

|
|
|
|
|
|
|
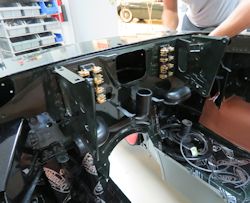
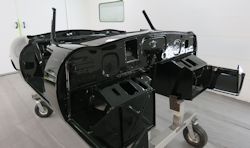
Installing fuse boards and heater elbows
behind
the dash
|
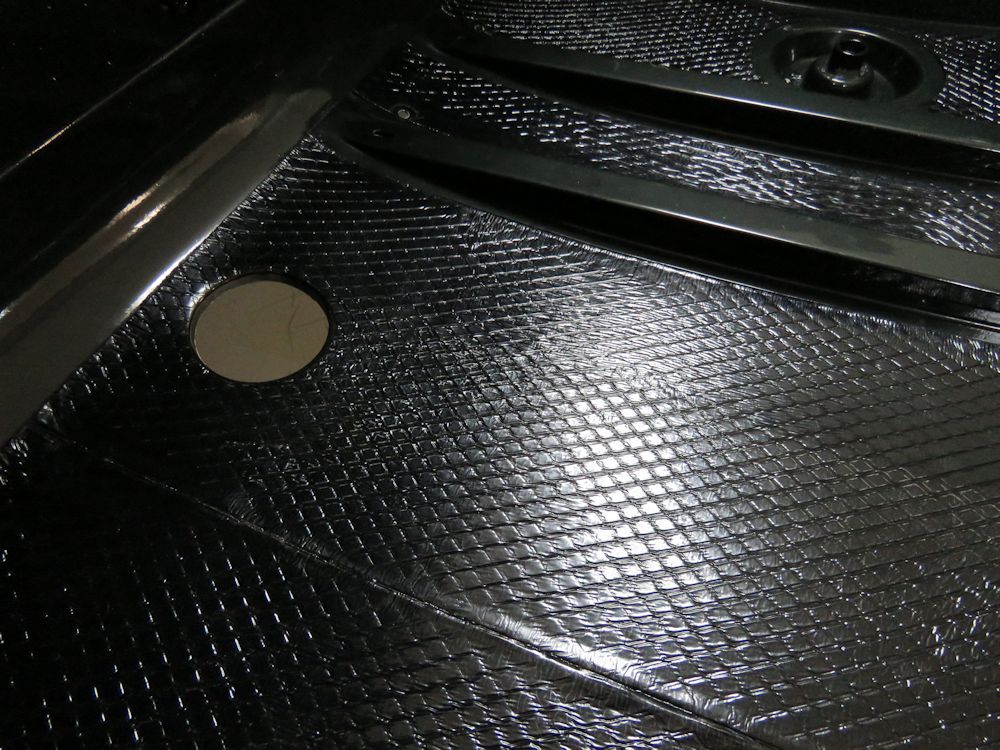
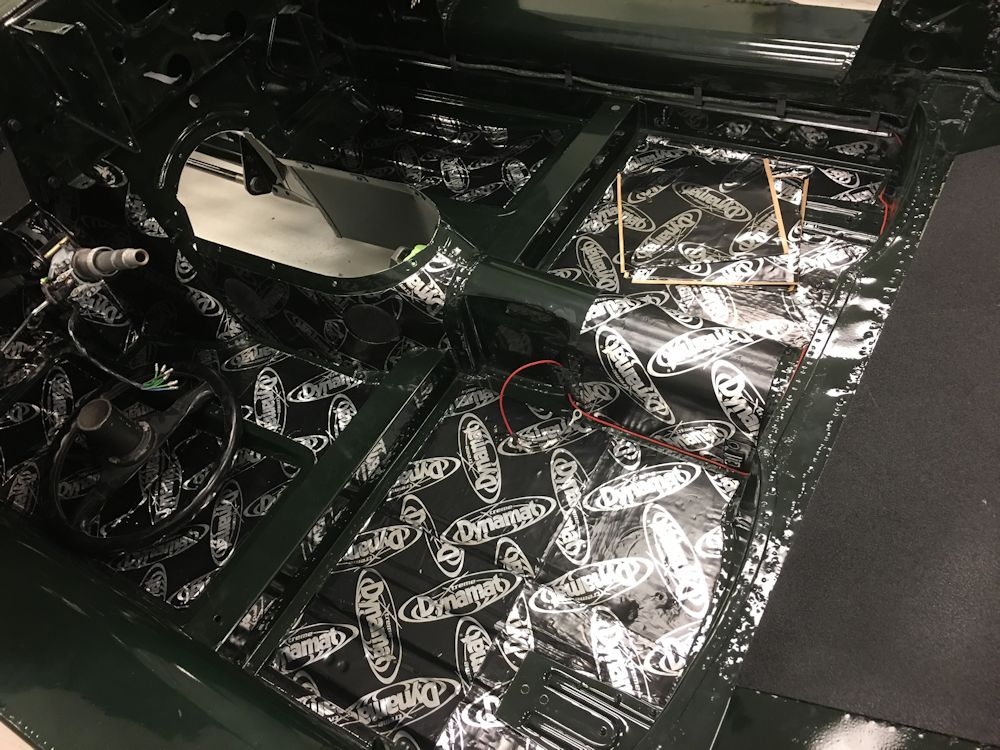
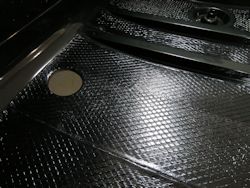
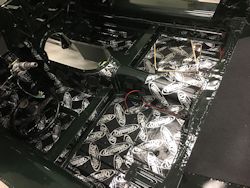
Installing 3M 8840 sound deadening material
prior
to installing the gas tank
|
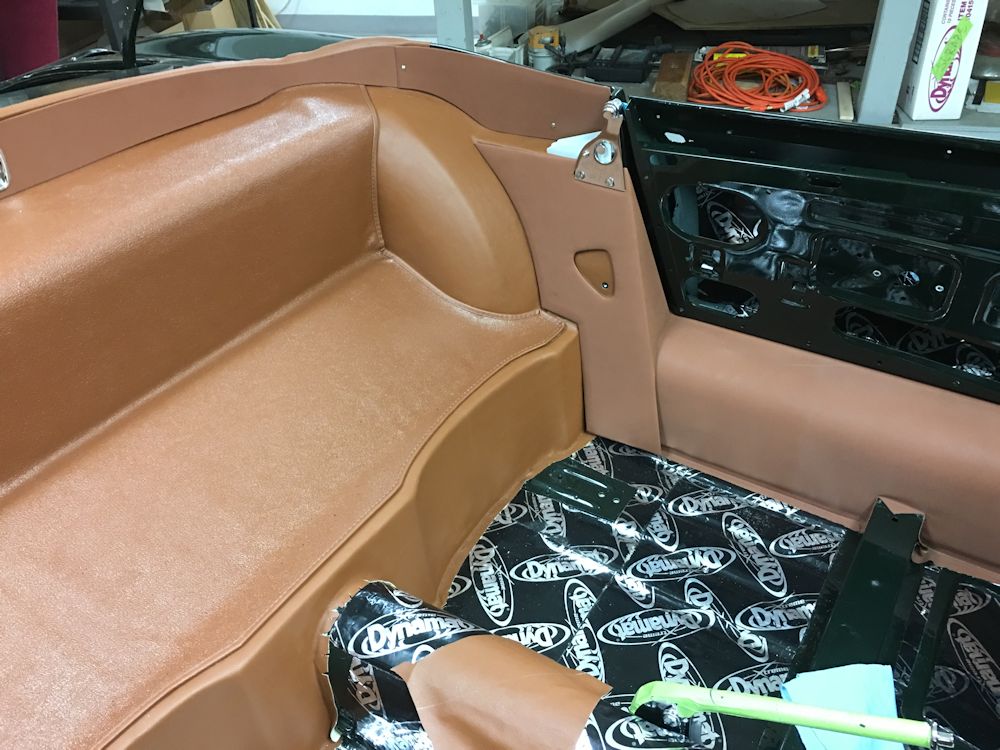
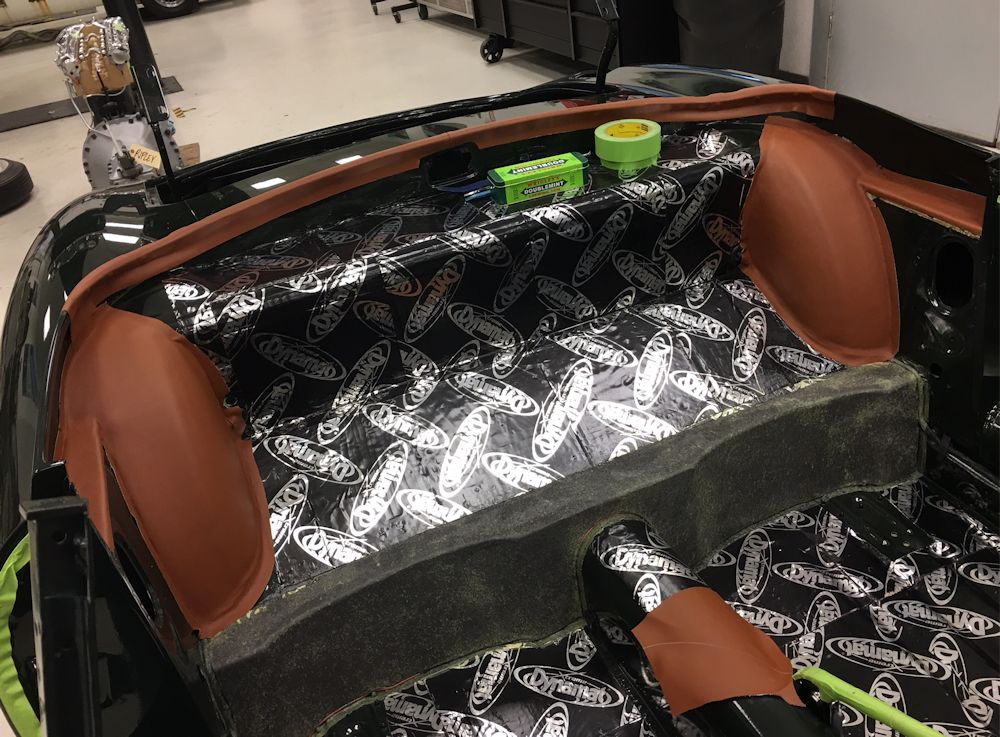
Carlos
starting to install the first pieces of the tan interior...
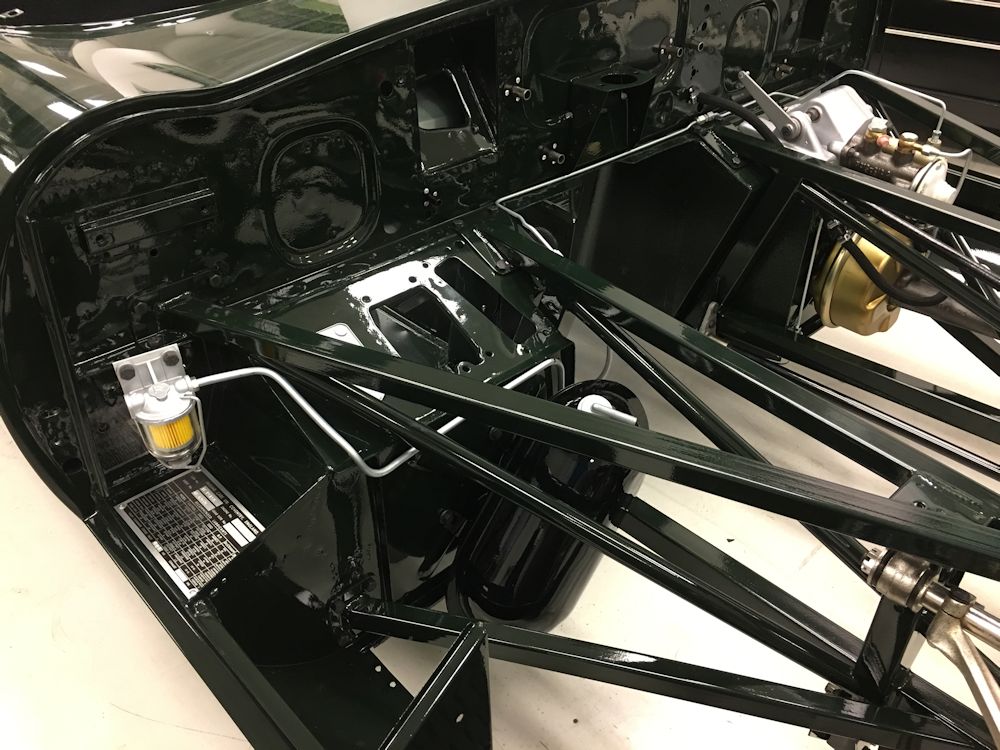
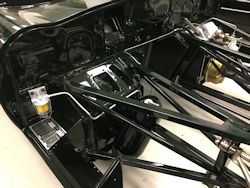
Installing Dynamat, hydraulic and fuel
lines, engine and transmission ready to install.
|
|
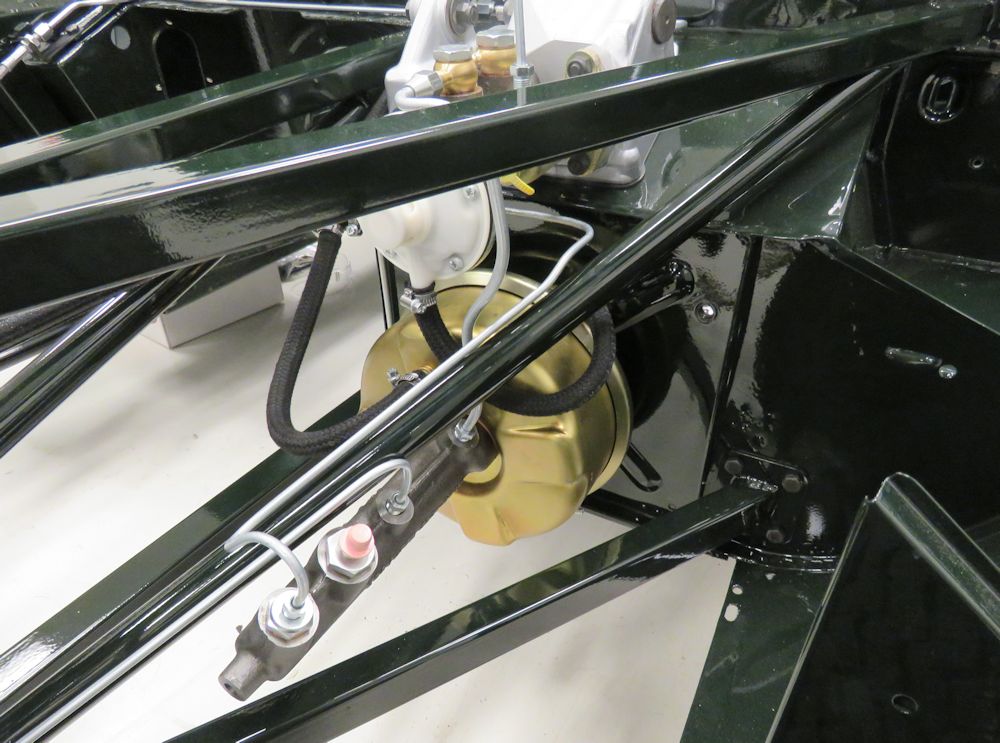
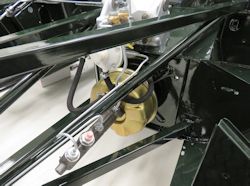
Fabricating and installing hydraulic and
fuel lines
|
New brake booster and master cylinder
installed
|
|
|
|
|
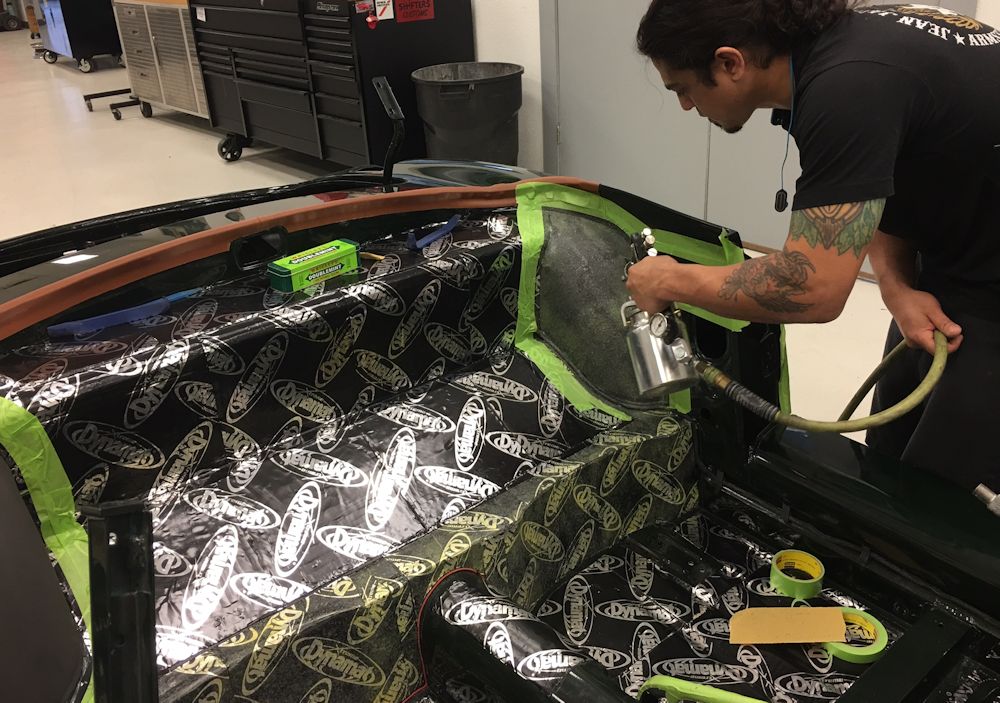
Dynamat installed throughout the cabin
|
|
|
|
|
|
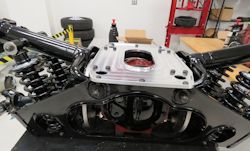
Engine and transmission ready to install
|
|
Your car
has now been moved to the main workshop where the
mechanical reassembly is already underway.
|
|
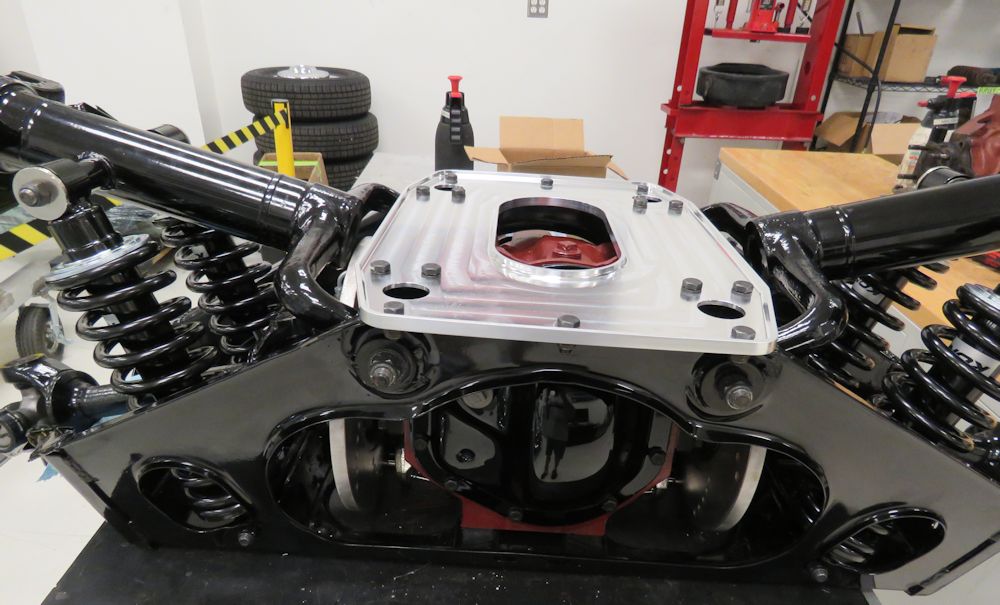
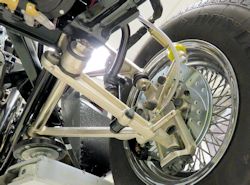
Putting finishing touches to the IRS
rebuild
|
IRS now almost ready to install
|
|
|

|
|
Installing engine frames
|
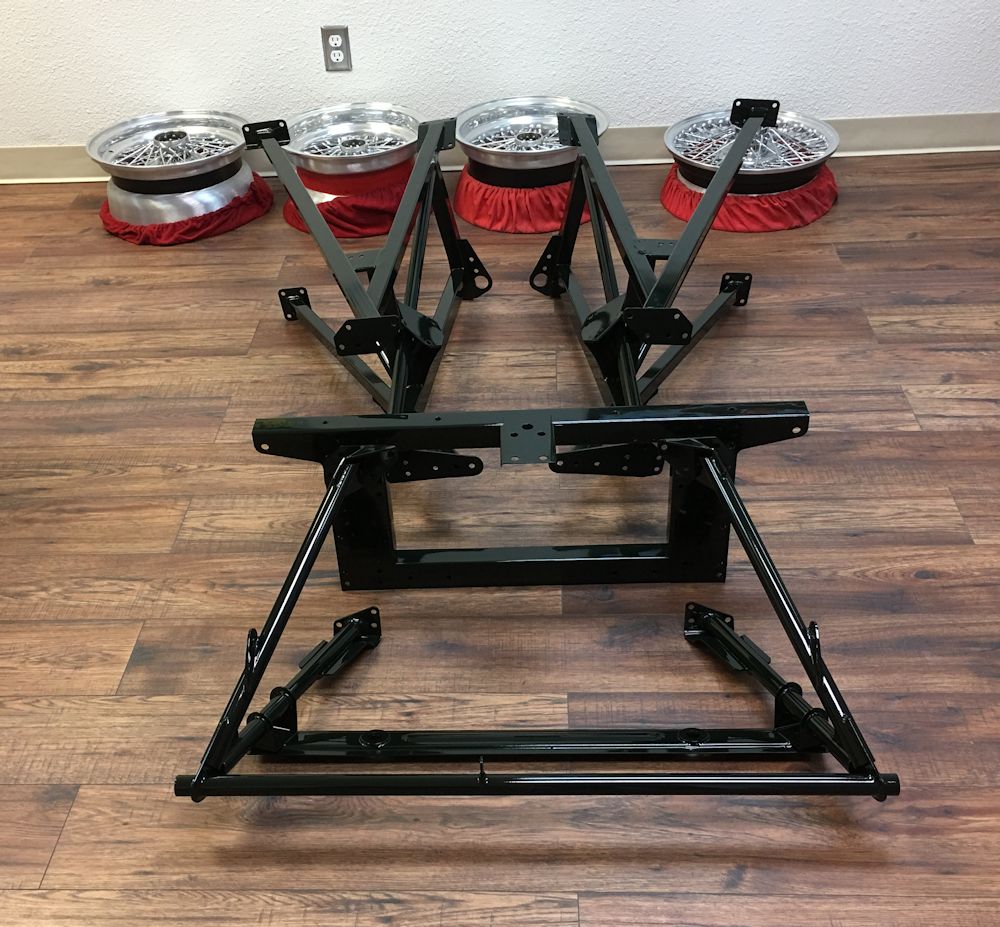
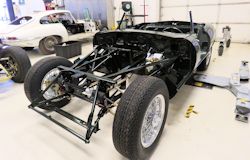
Front and rear suspension installed, your
car is now
sitting on its wheels
|
|
|
|
|
Wiring, dash, engine and transmission
next..
|
CJ/Borrani wheels
|
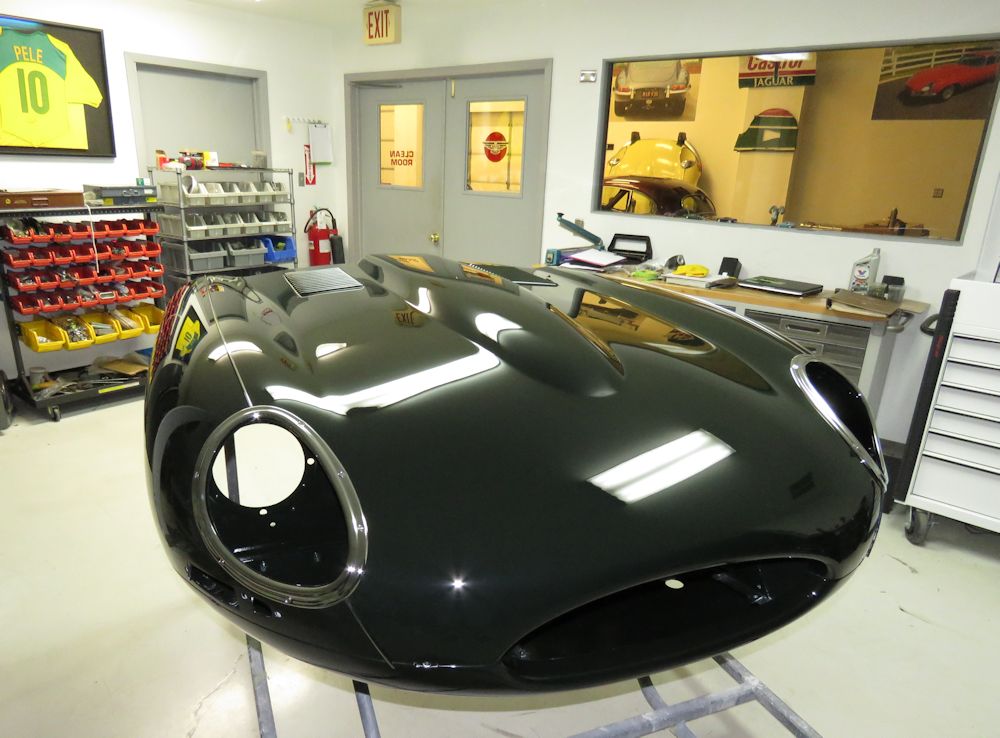
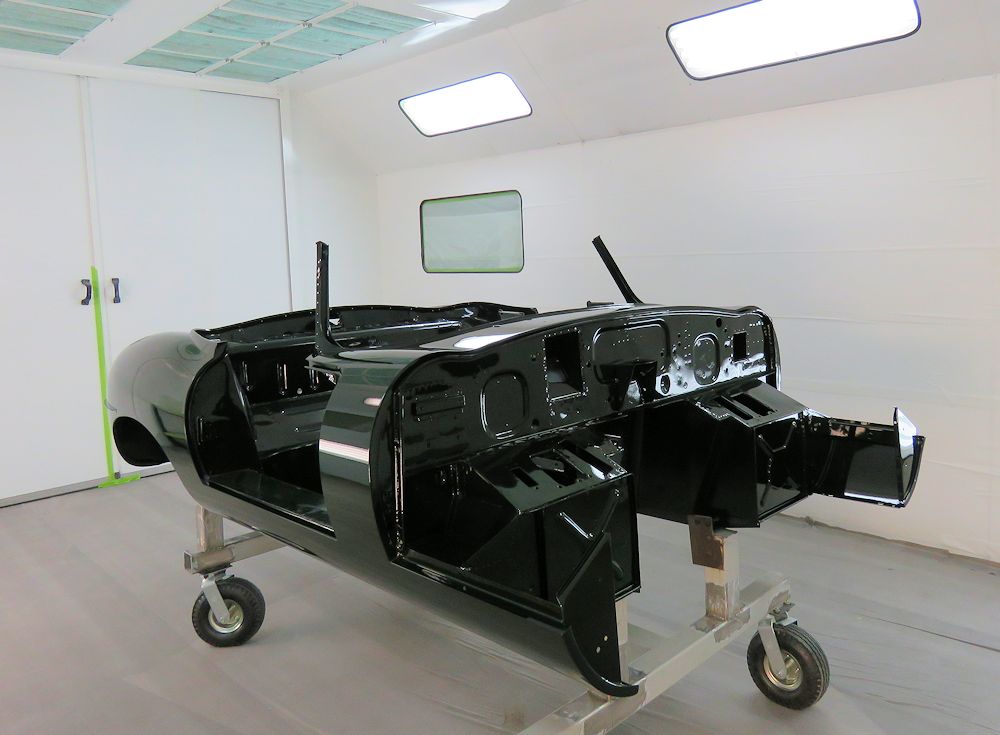
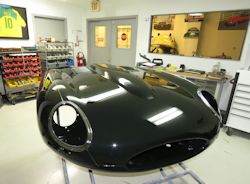
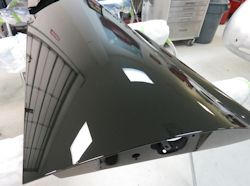
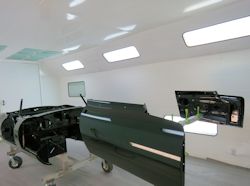
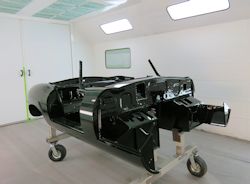
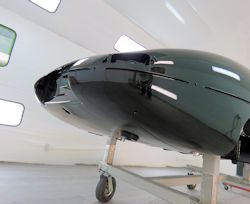
The
bonnet and engine frames have now been painted British
Racing Green.
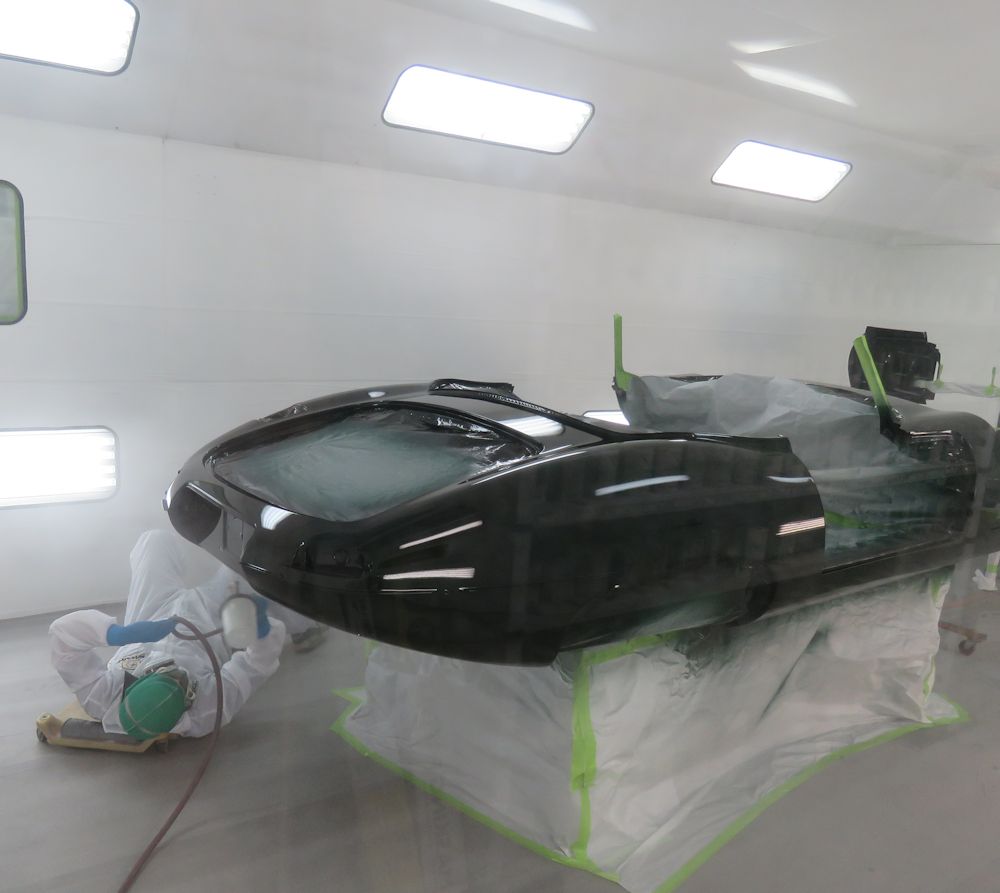
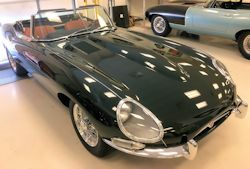
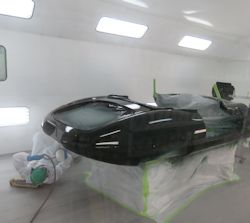
Late yesterday afternoon Gerardo
painted the main body and the doors.
|
|
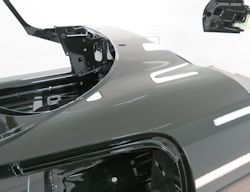
View through the booth window at around
4pm yesterday
|
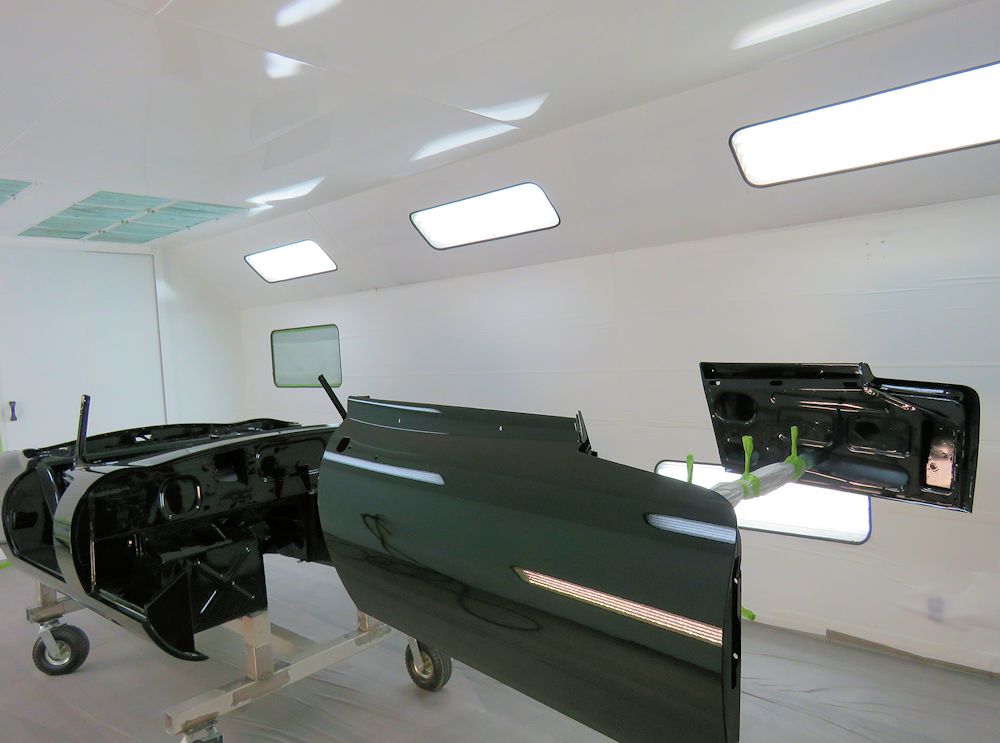
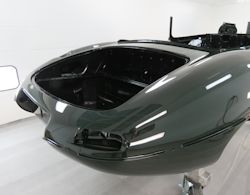
After unmasking, first thing this morning
|
|
|
|
|
|
|
|
|
|
|
|
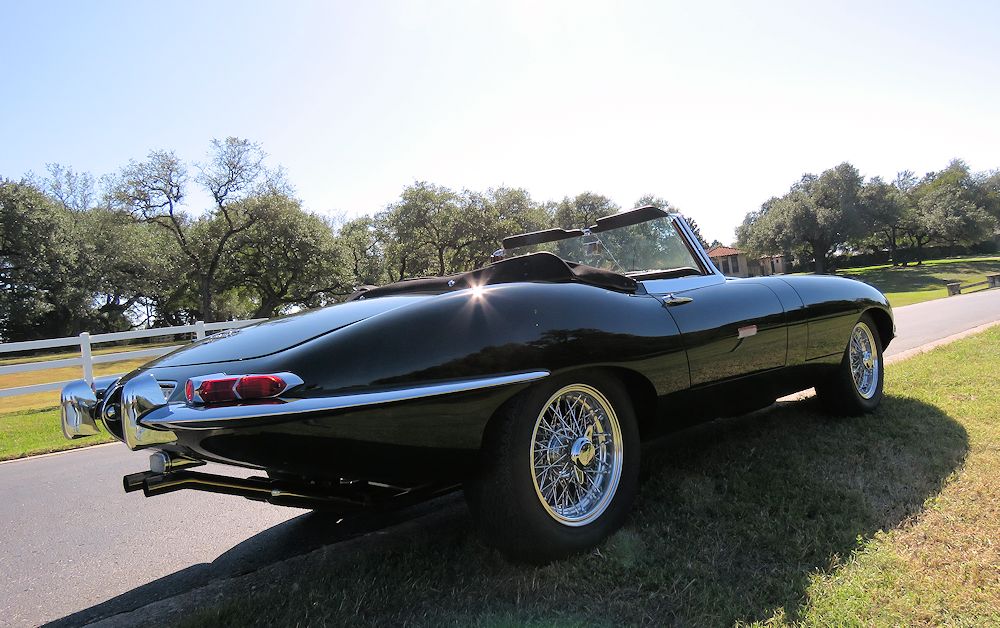
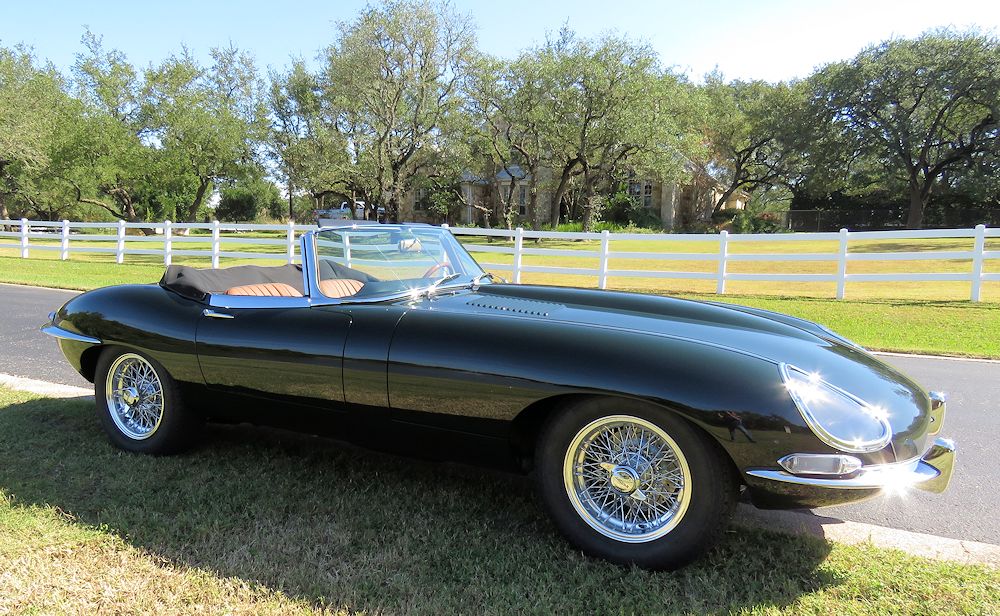
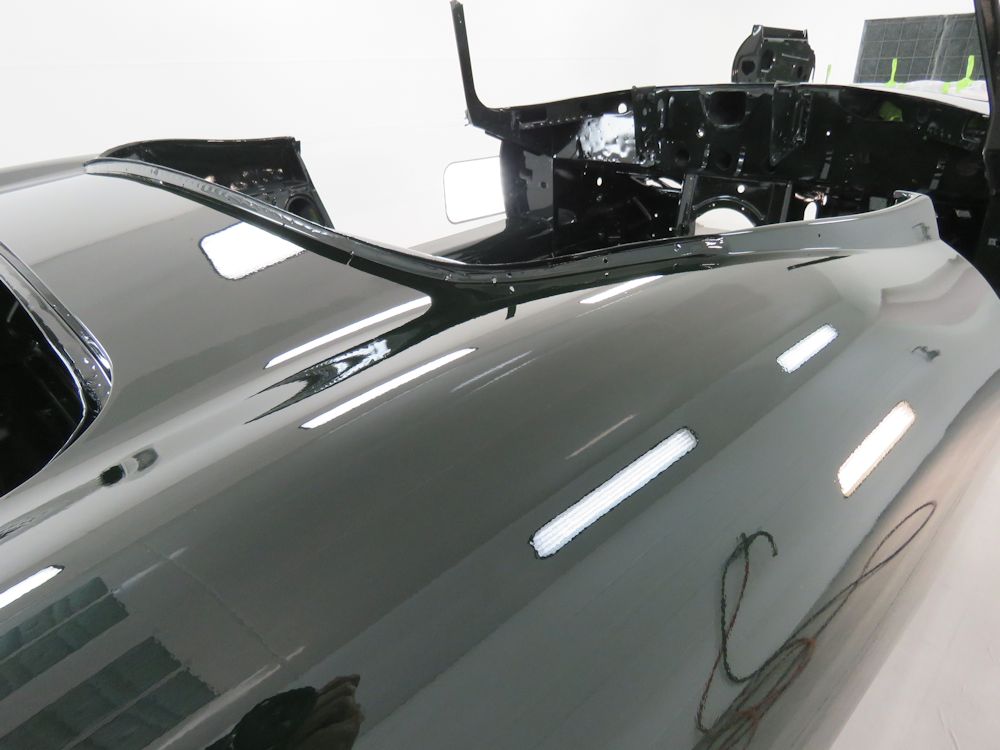
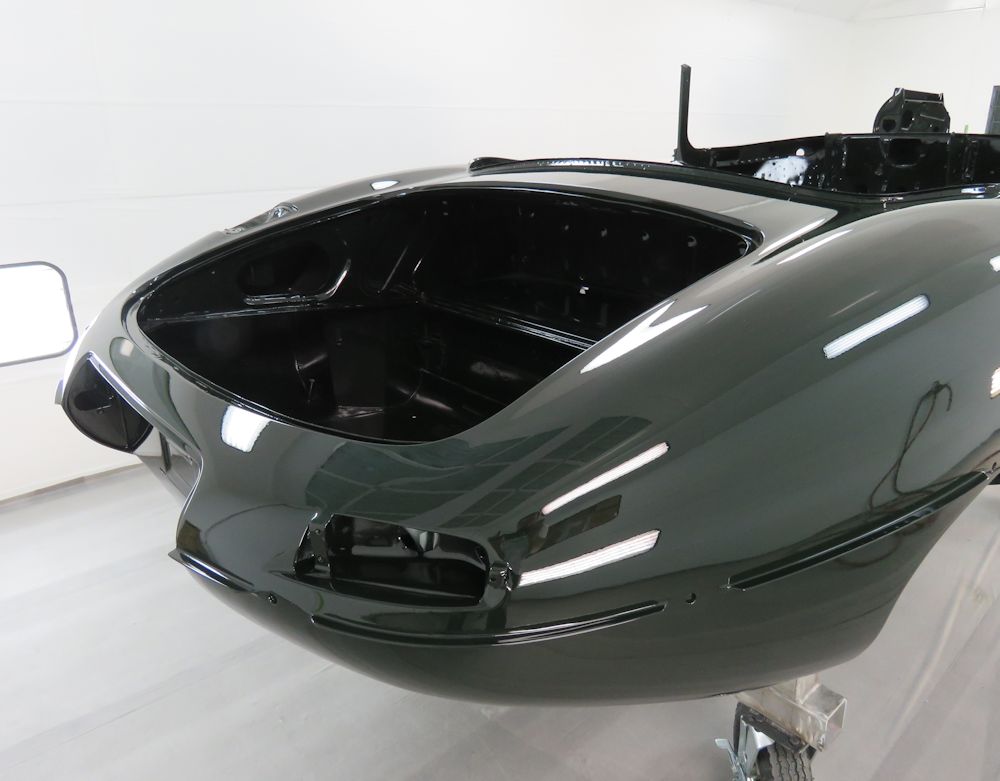
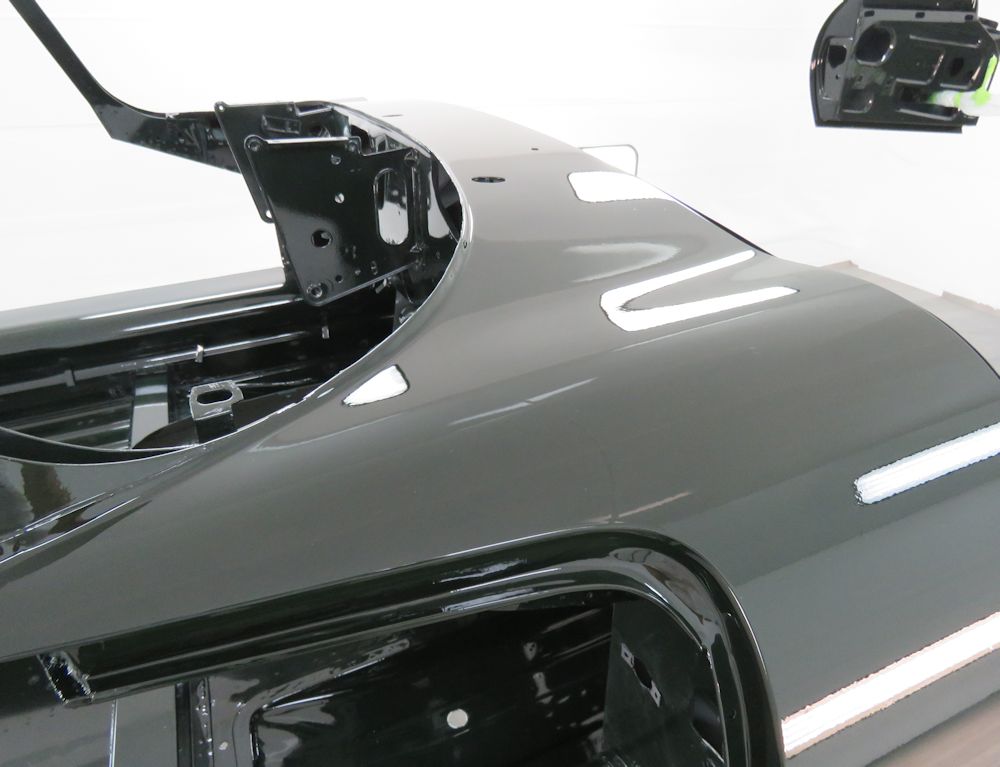
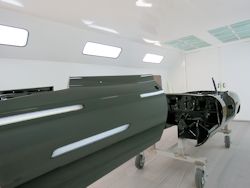
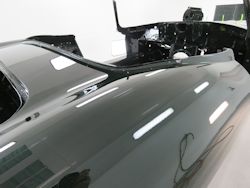
BRG shows off the E Types curves
beautifully
|
|
|
|
|
|
|
|
|

|
|
|
|
|
|
|
|
|
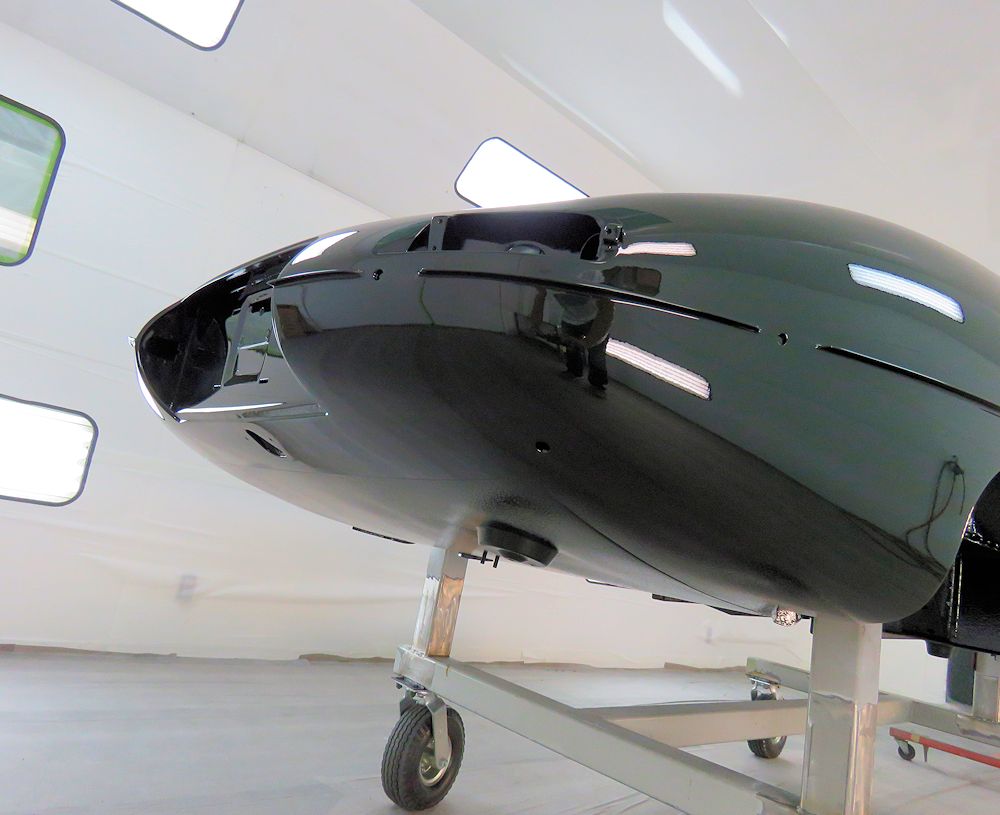
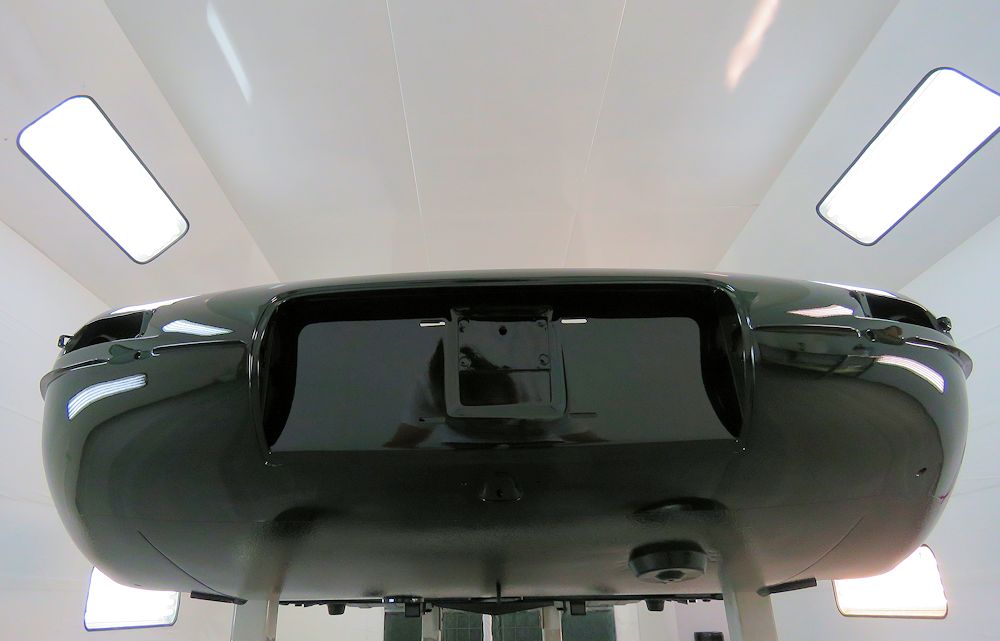
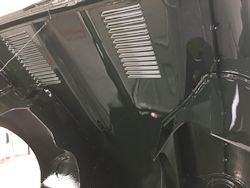
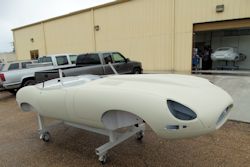
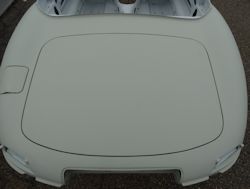
|
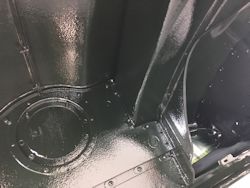
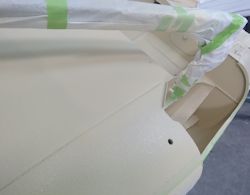
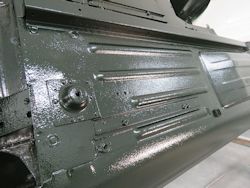
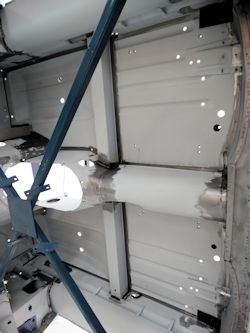
Yesterday
afternoon we painted the underside of your bonnet. Later
today we will be painting the underside of the main body,
then on Monday we will start painting all of the outer
panels.
|
|
|
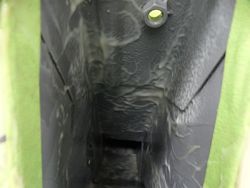
Rocker guard being applied to the front
wheel wells
|
|
|
|
|
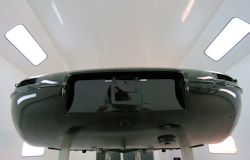
Underside of bonnet now BRG
|
|
|
|
|
|
|
|
|
|
|
|
|
|
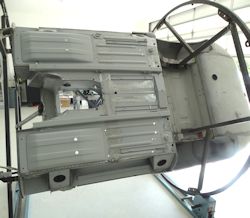
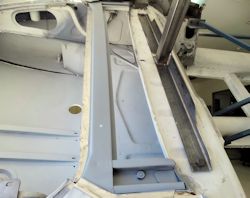
Applying rocker guard to the underside of
floors
|
|
|
|
|
|
|
|
|
|

|
|
|
|
|
|

|

|
|
|
|
|
|
|
|
|
|
|
|
|
|
|
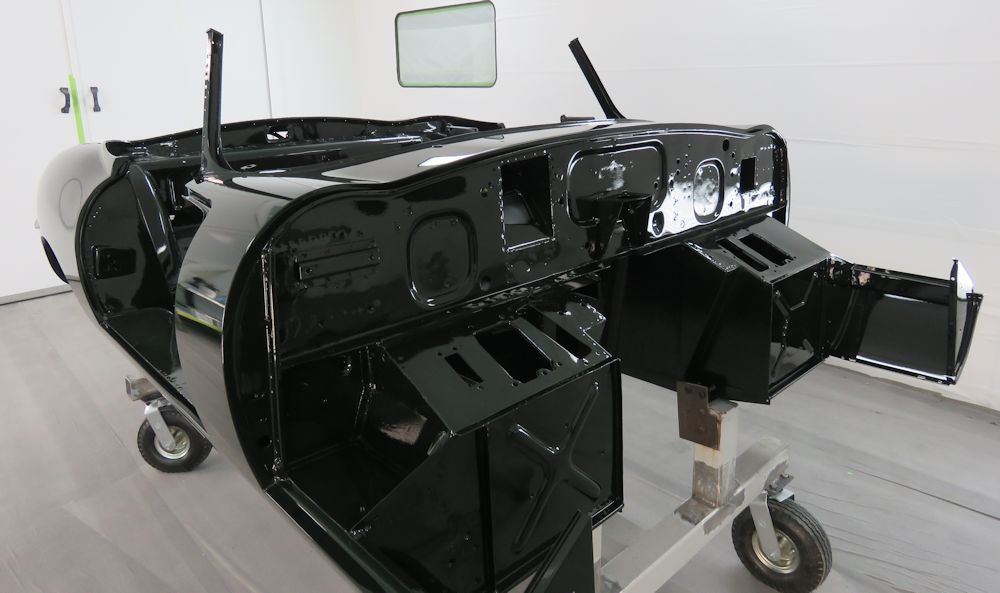
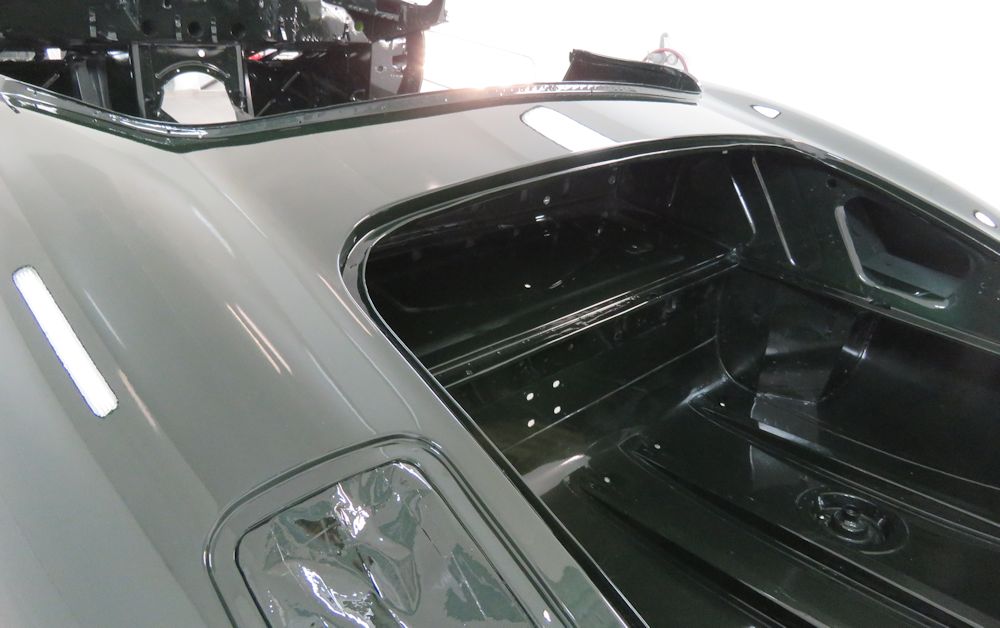
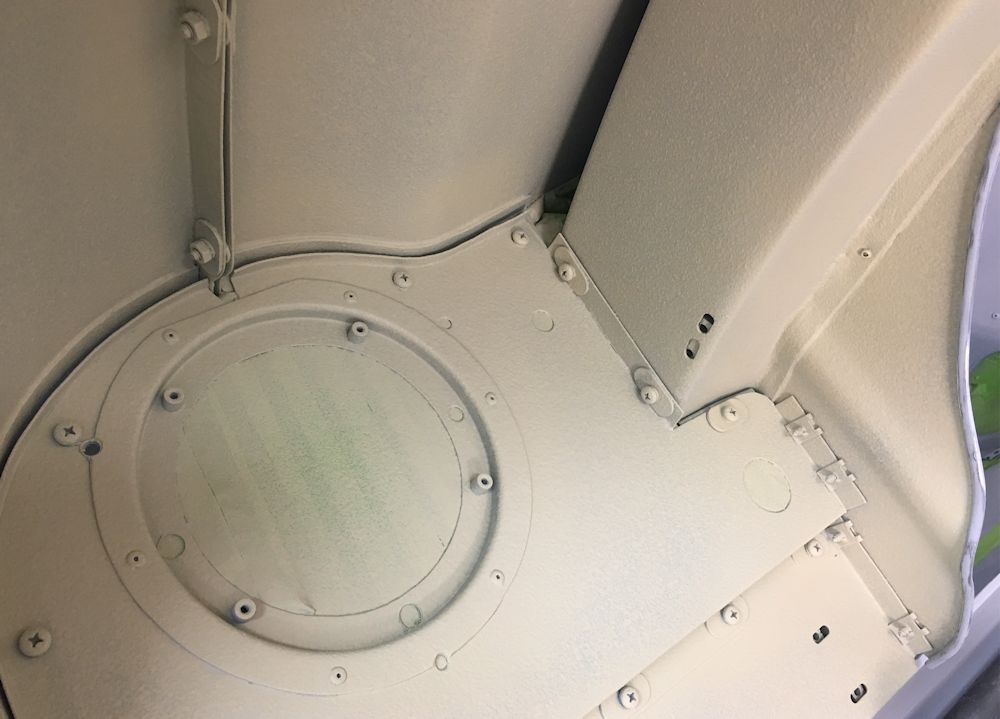
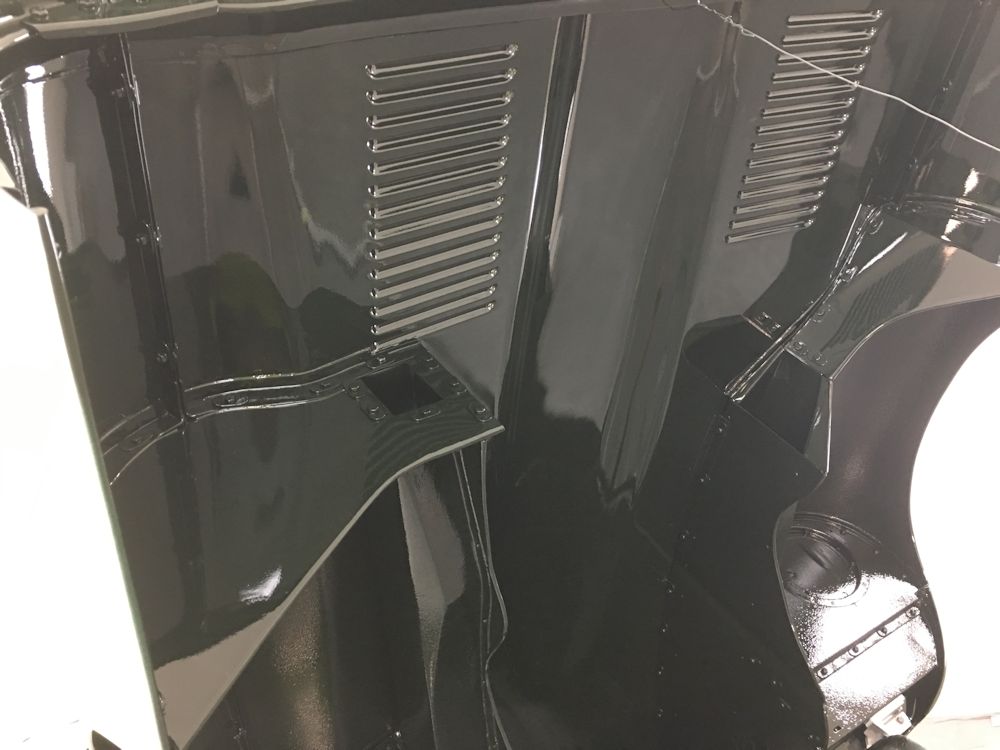
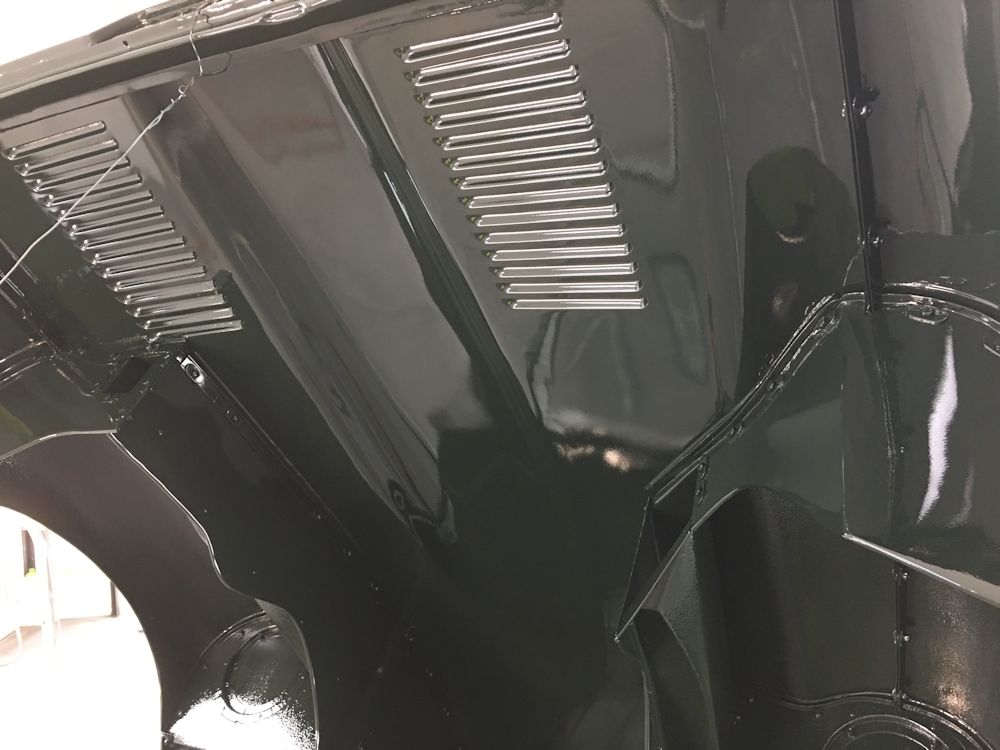
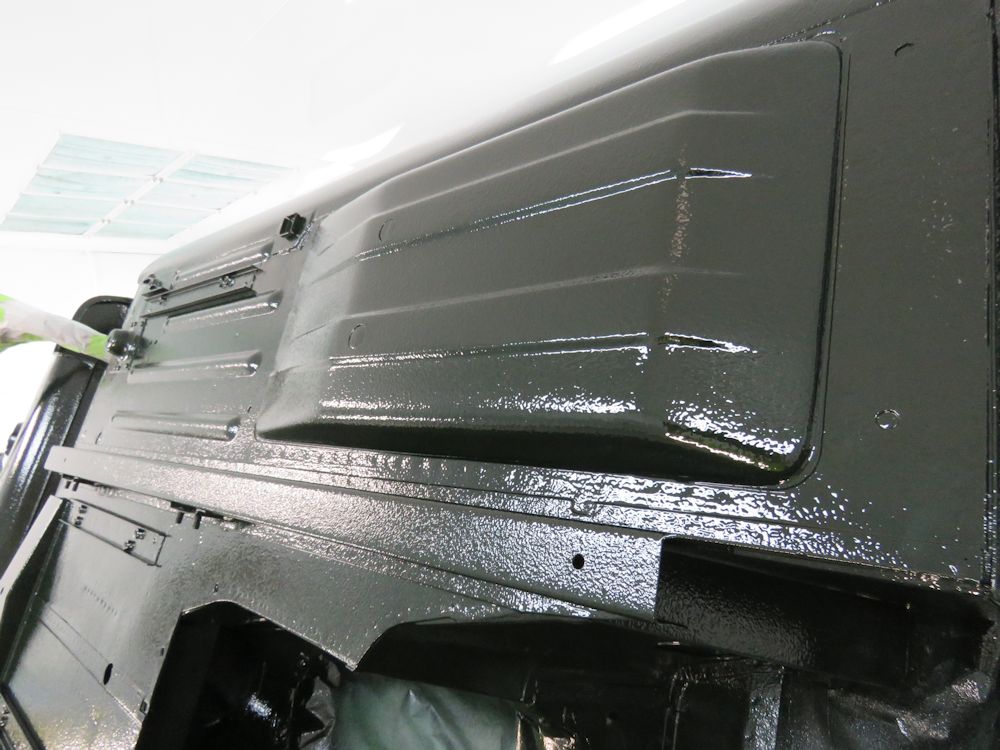
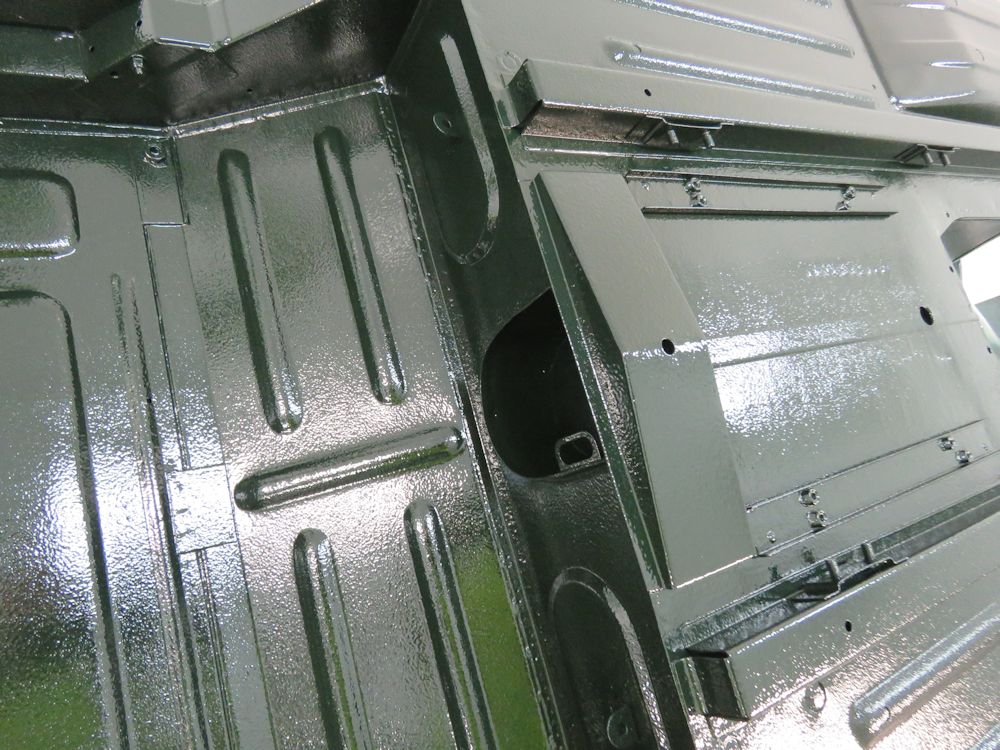
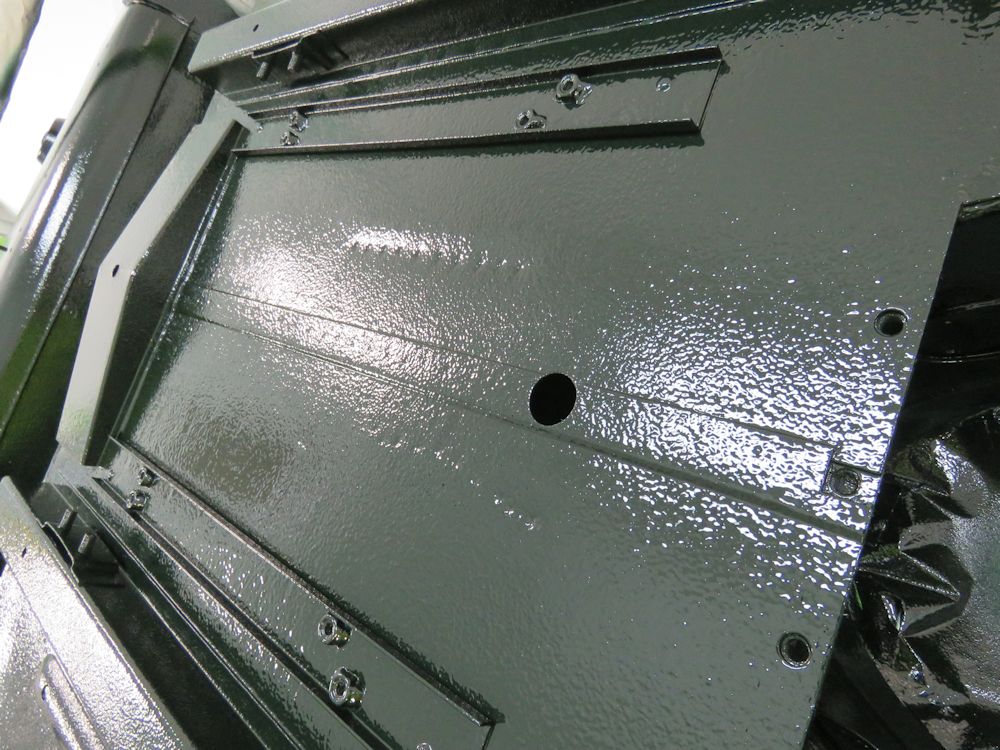
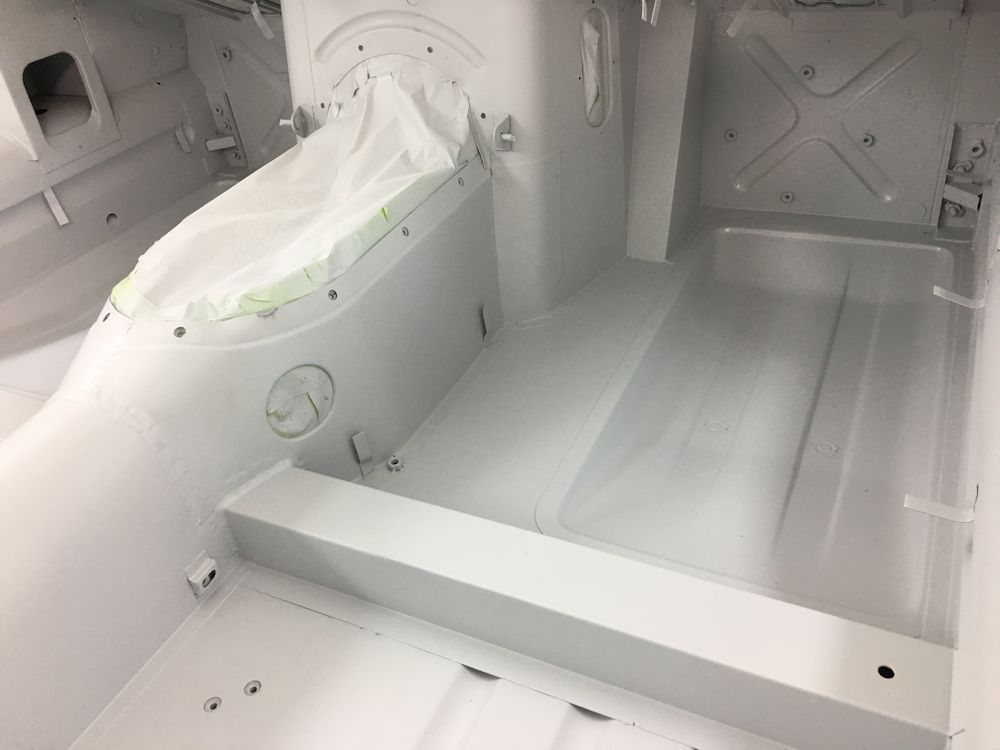
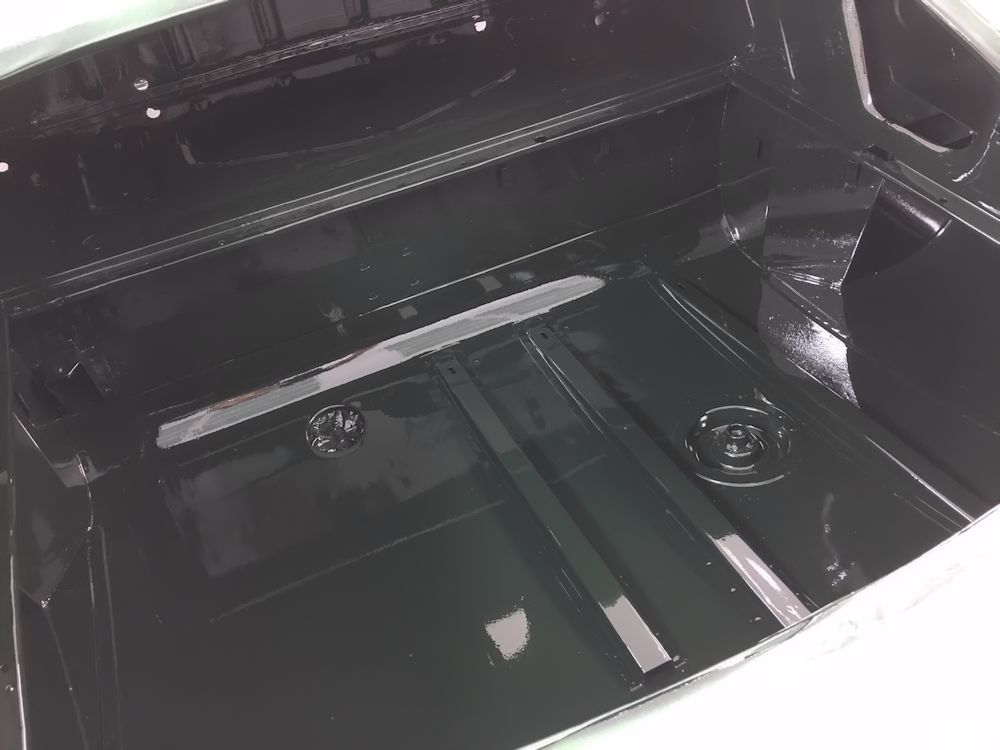
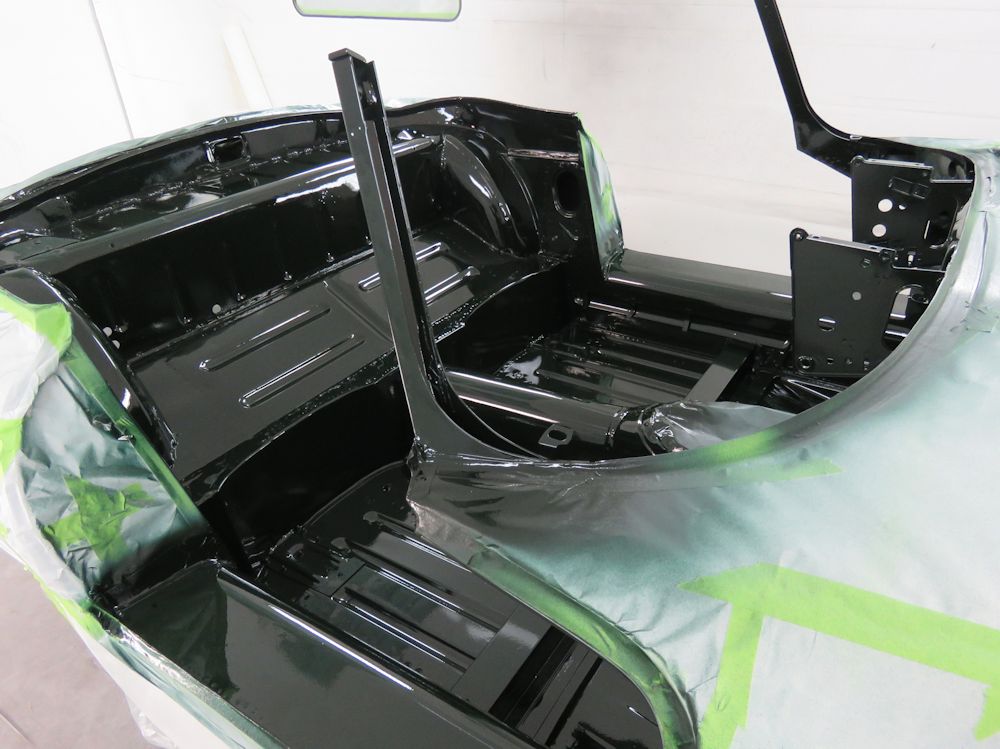
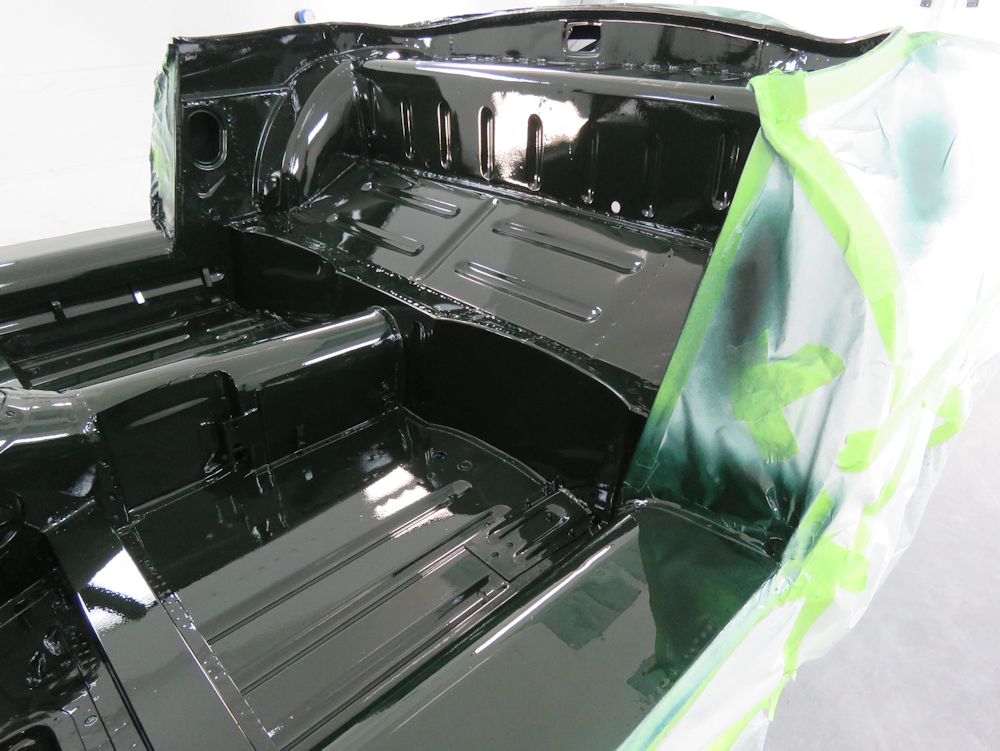
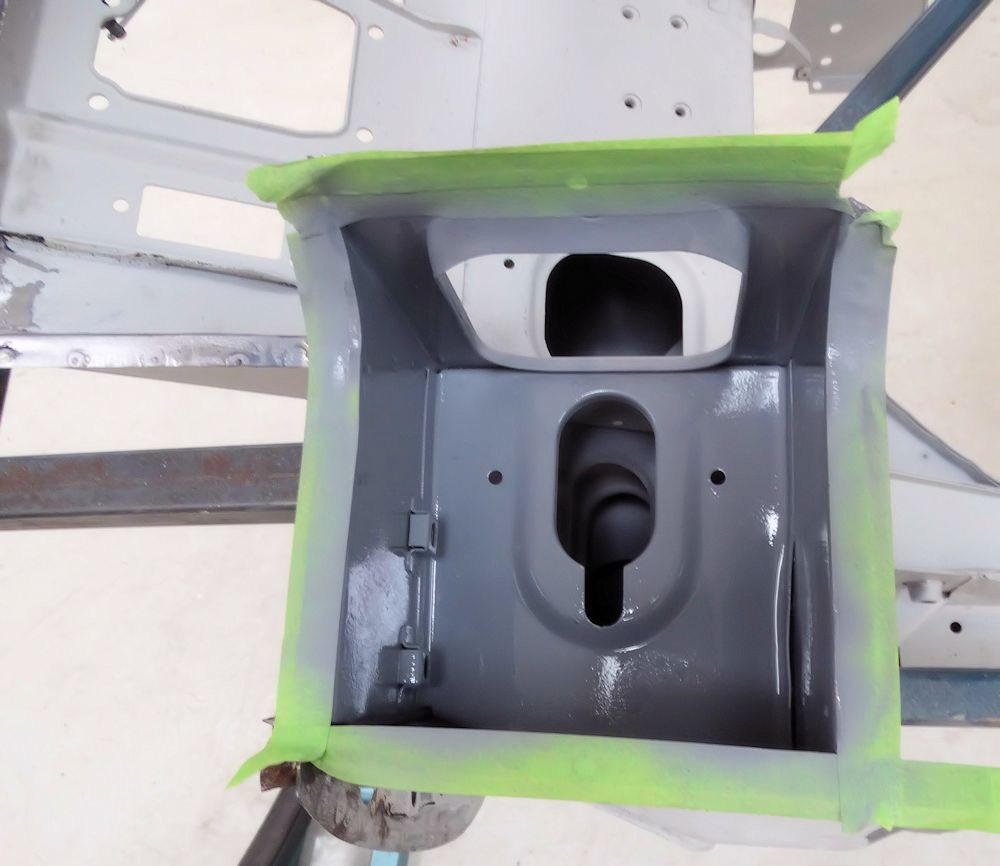
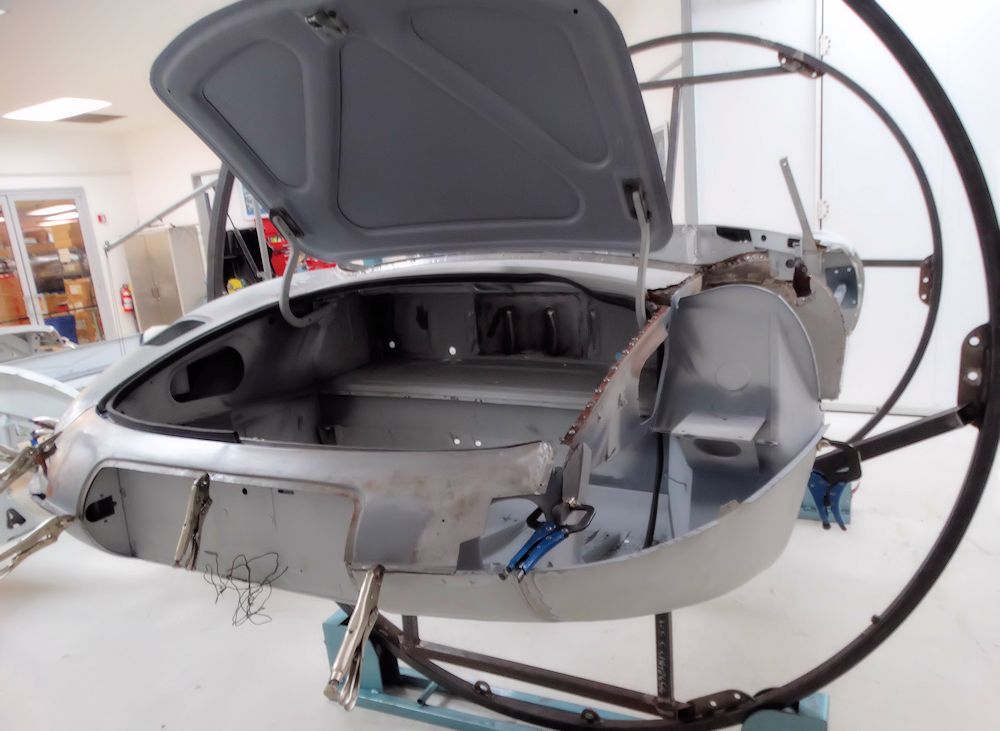
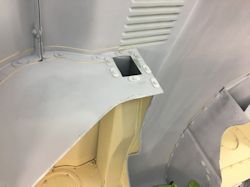
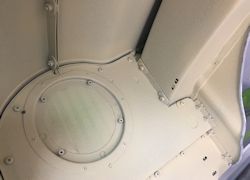
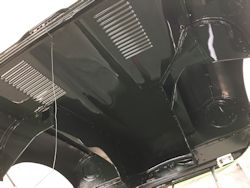
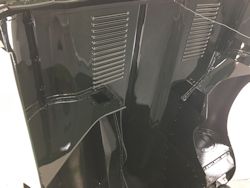
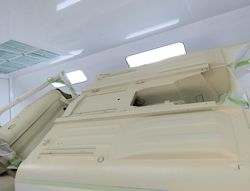
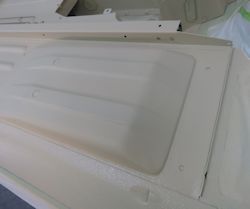
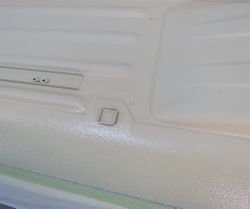
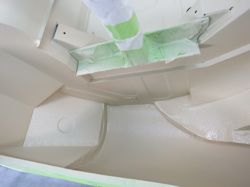
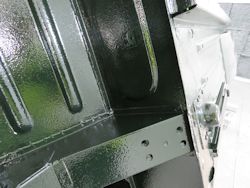
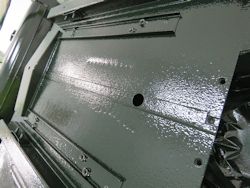
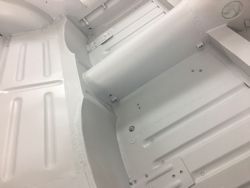
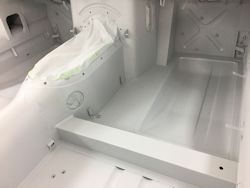
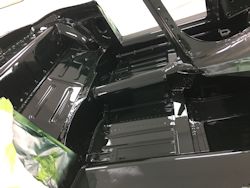
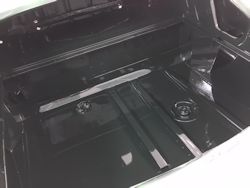
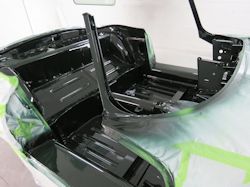
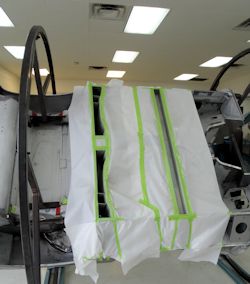
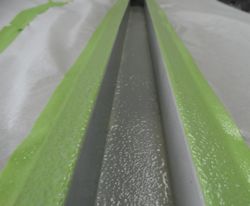
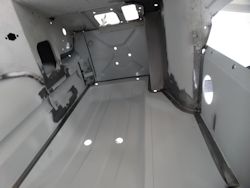
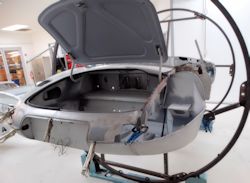
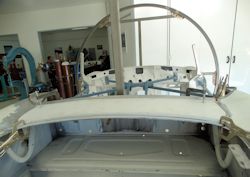
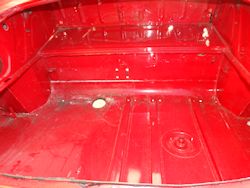
Applying
the first of the British Racing Green paint! First up is
the cabin area and the boot compartment.

|

|
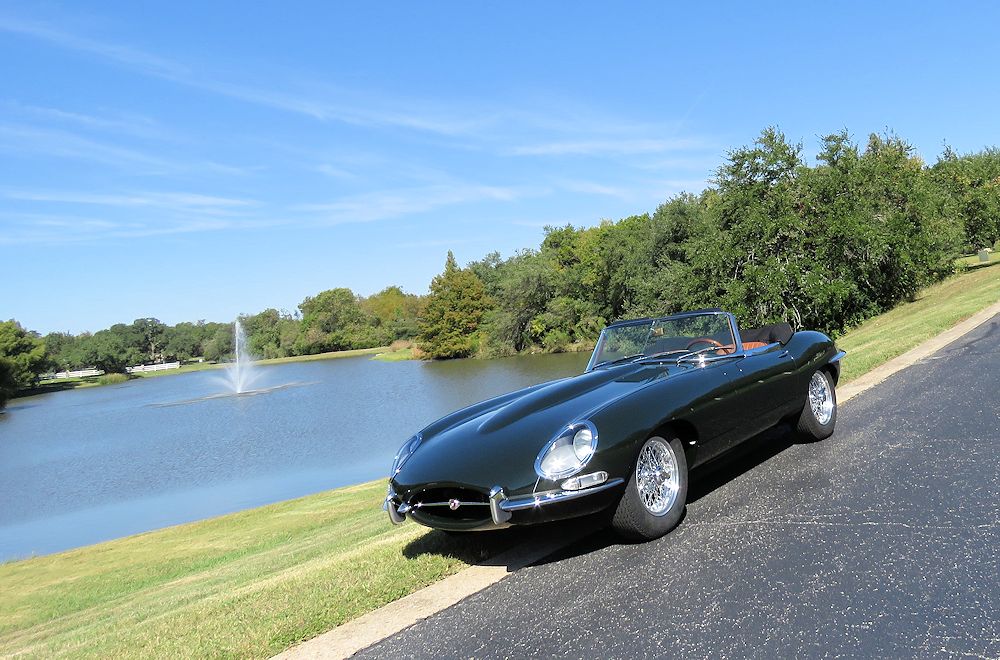
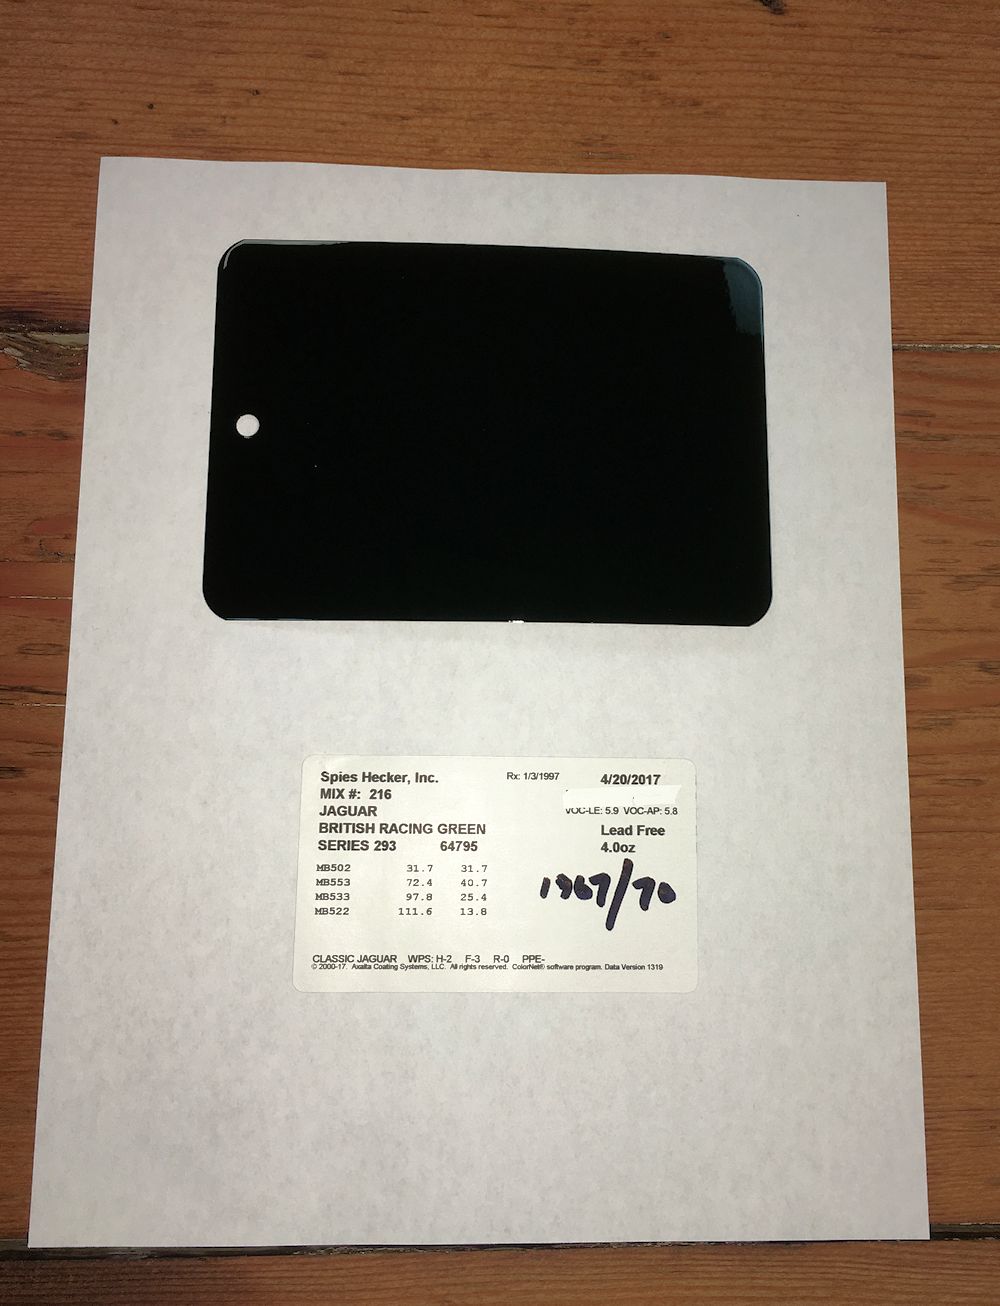
For this car we have chosen our darkest
British racing Green option
|
For anyone interested in the color for
their
own restoration
|
|
|
|
|
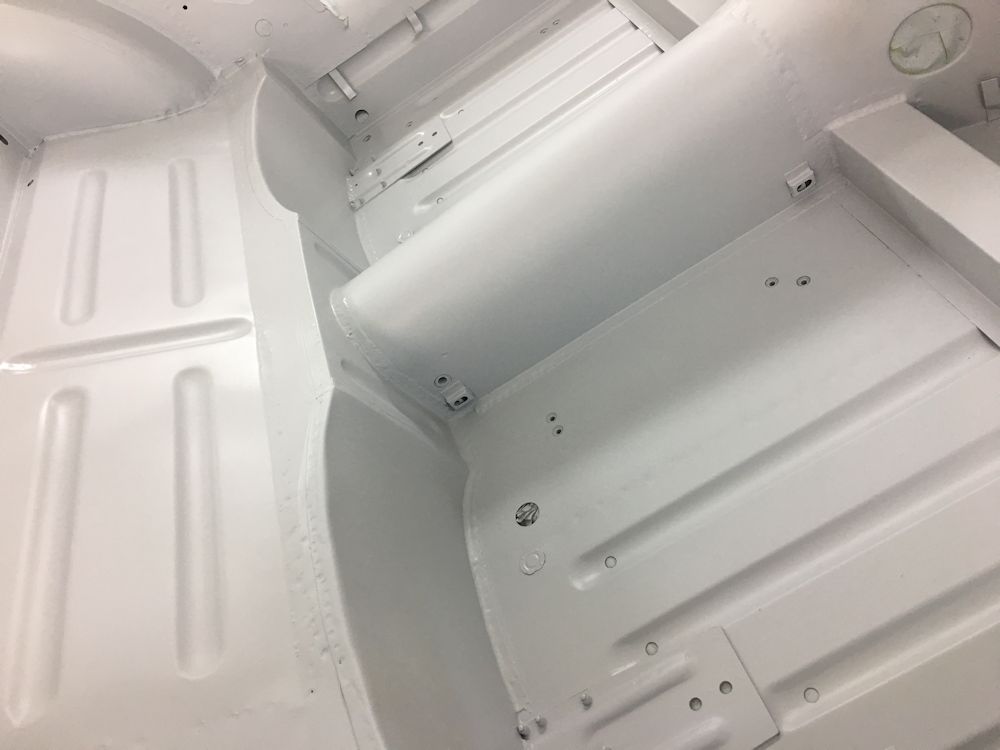
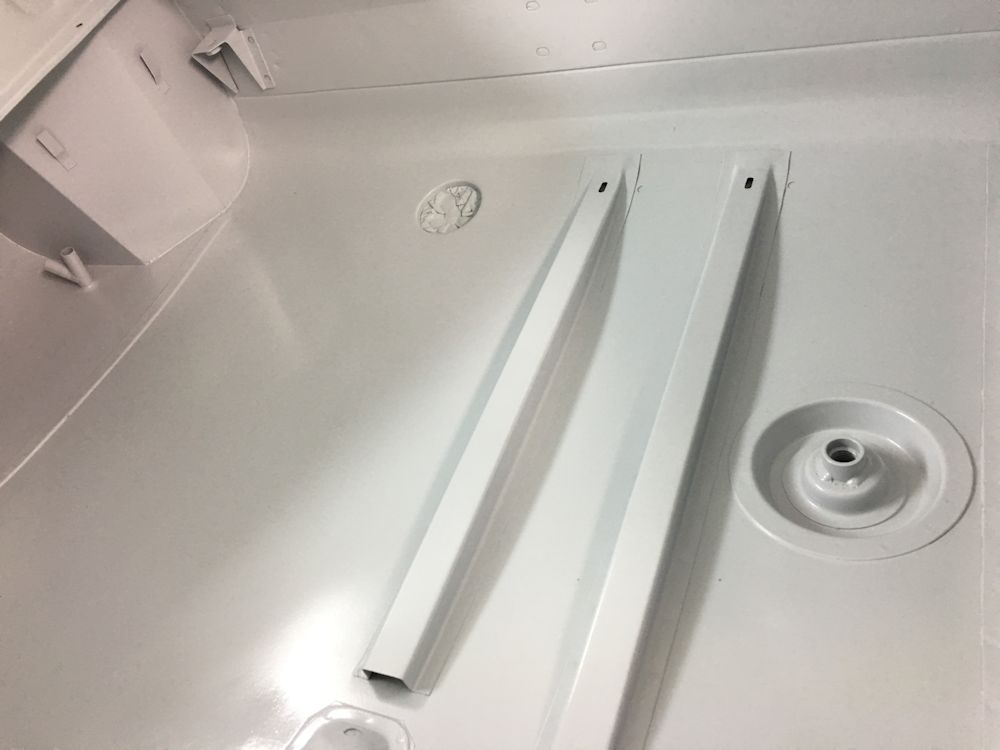
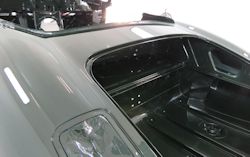
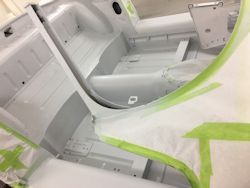
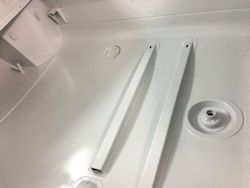
Cabin and boot compartment sealed in epoxy
primer all joints seam sealed
|
|
|
|
|
|
|
|
|
|
|
|
The first of the British Racing Green!
|
|
|
|
|

|
|
|
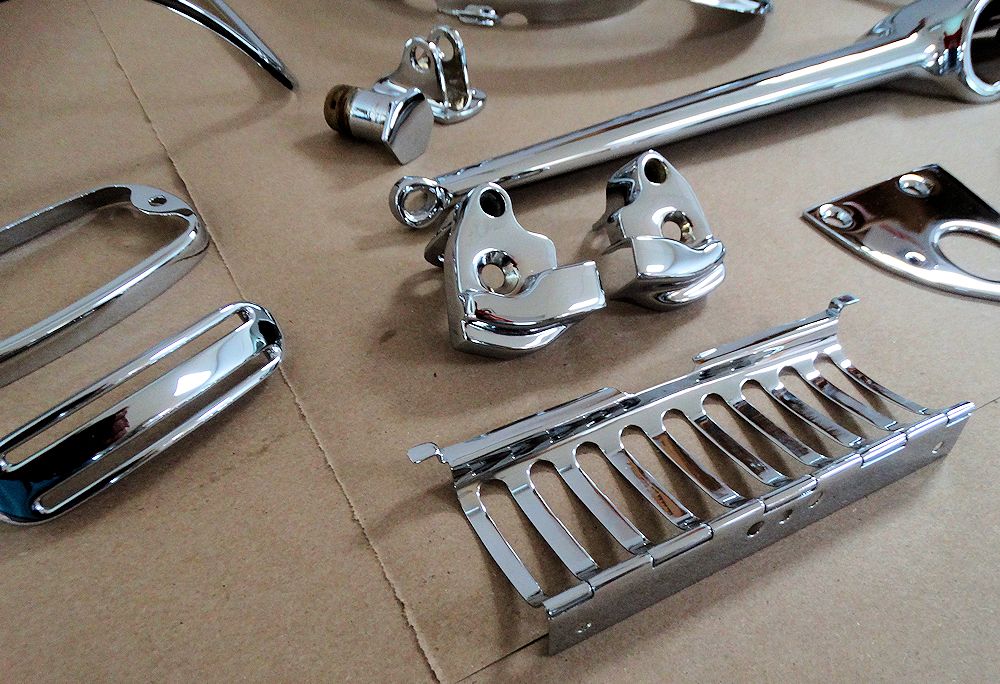
Unpacking
your beautifully re-plated chrome...
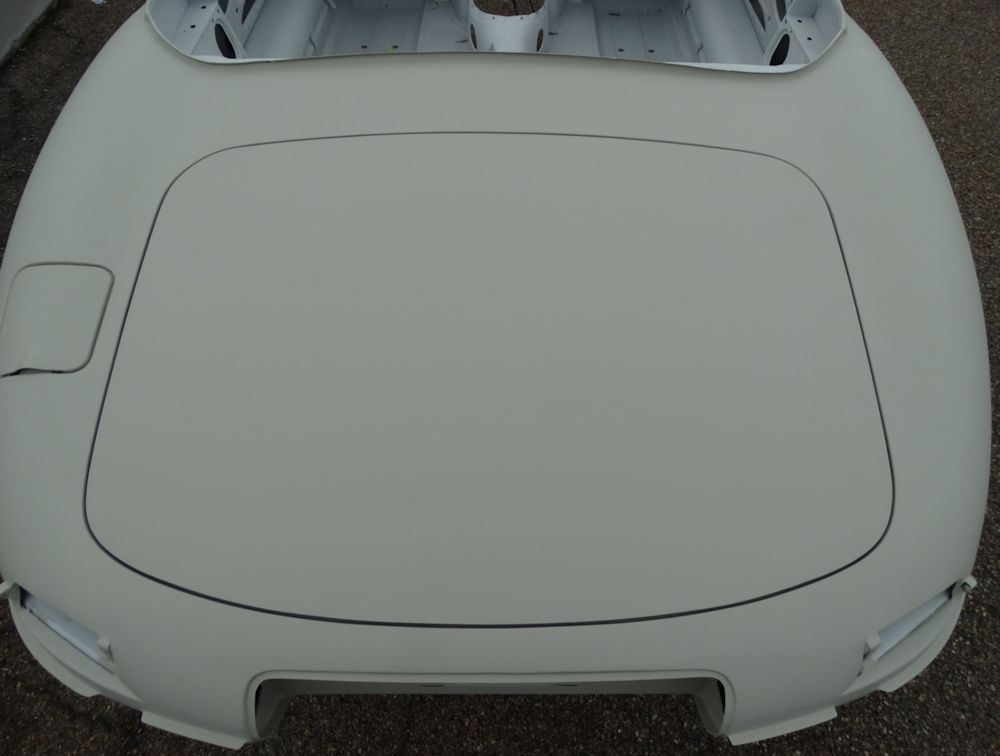
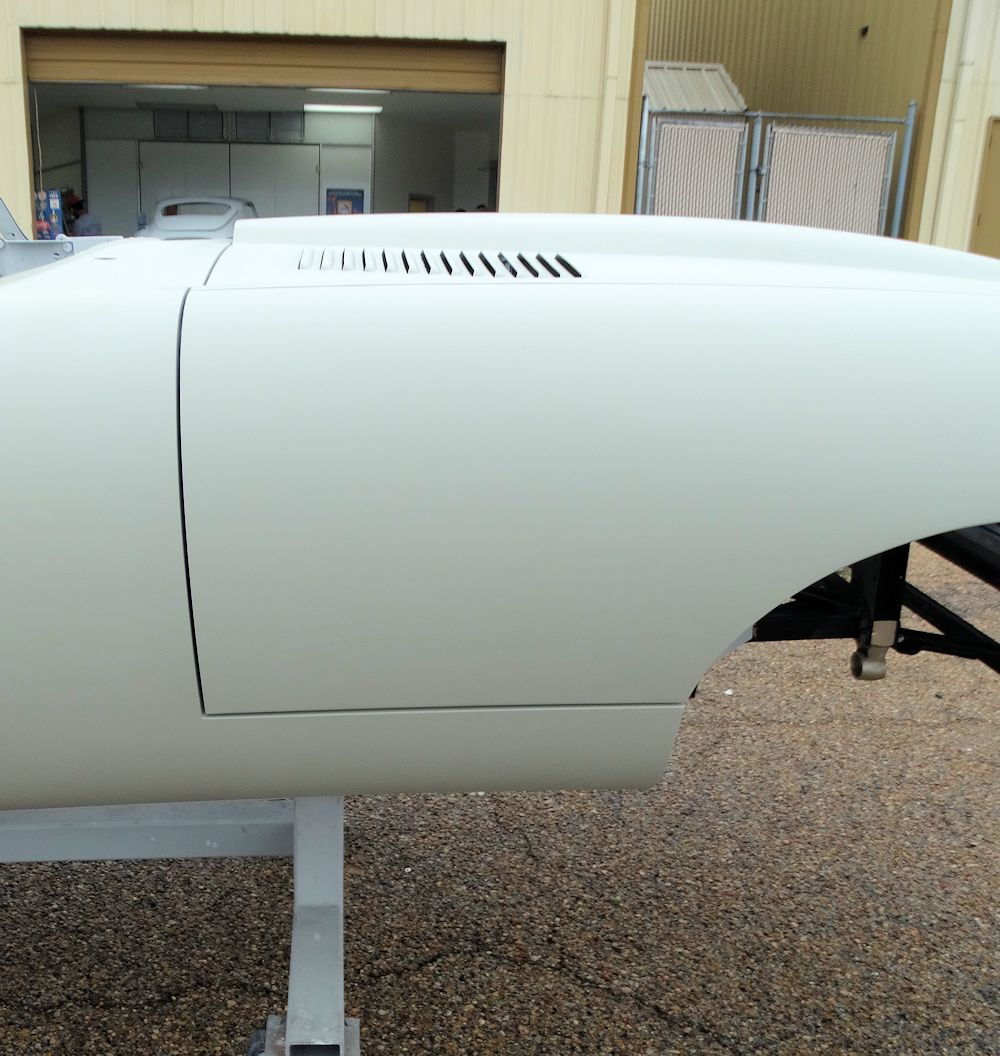
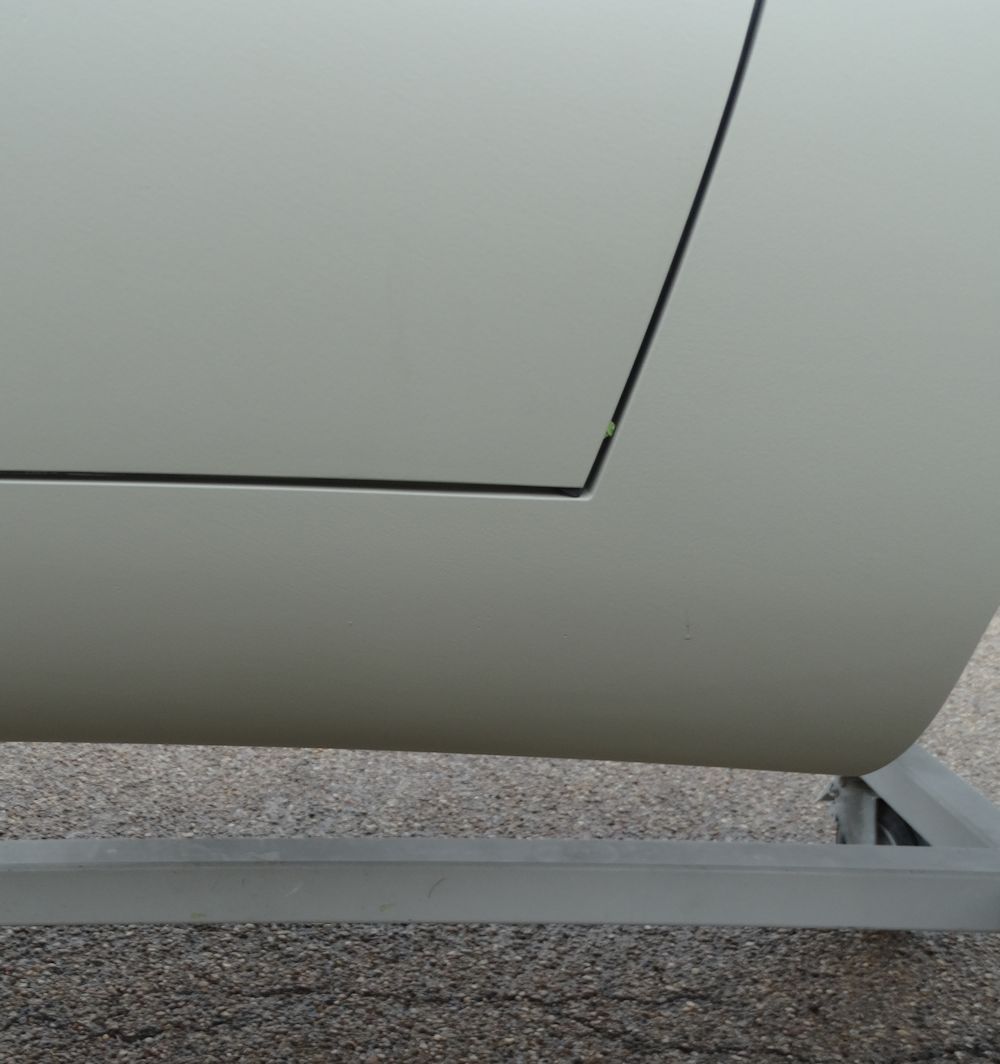
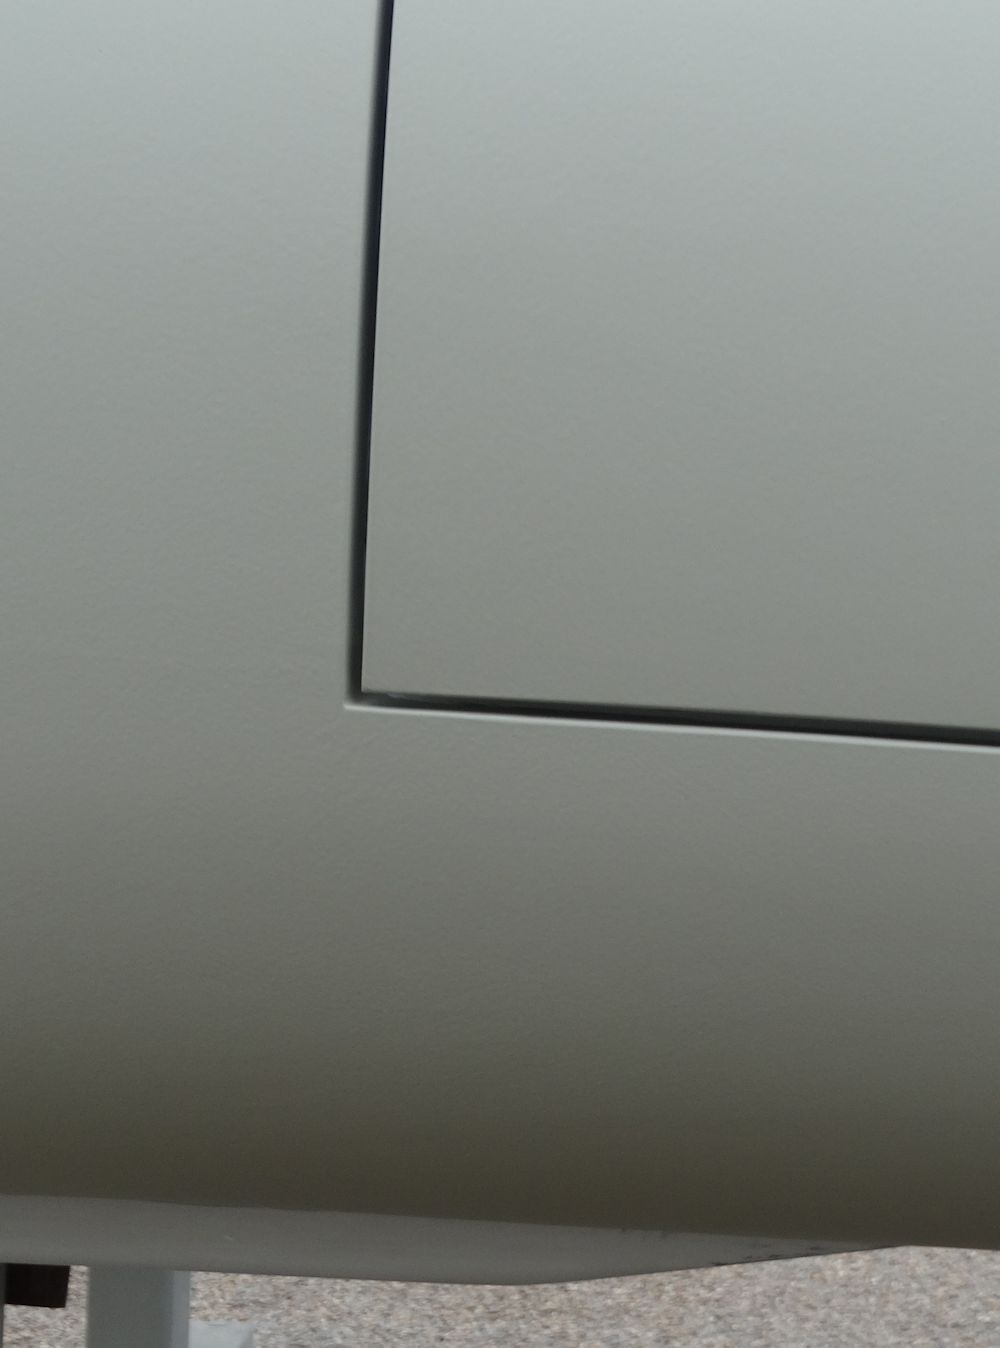
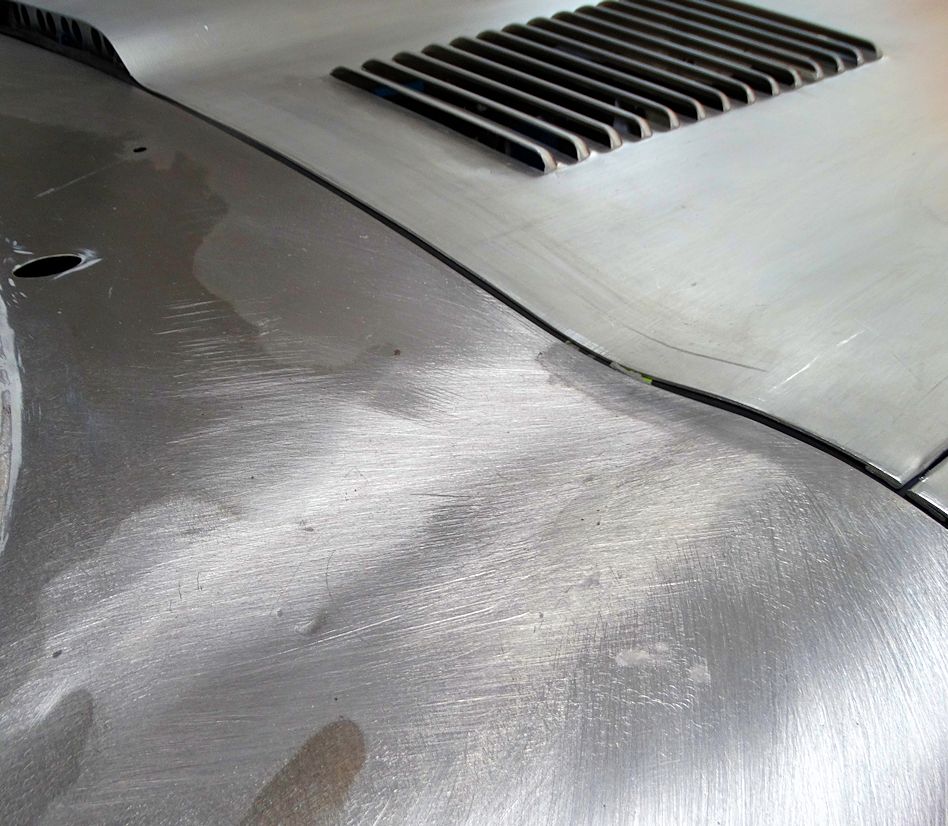
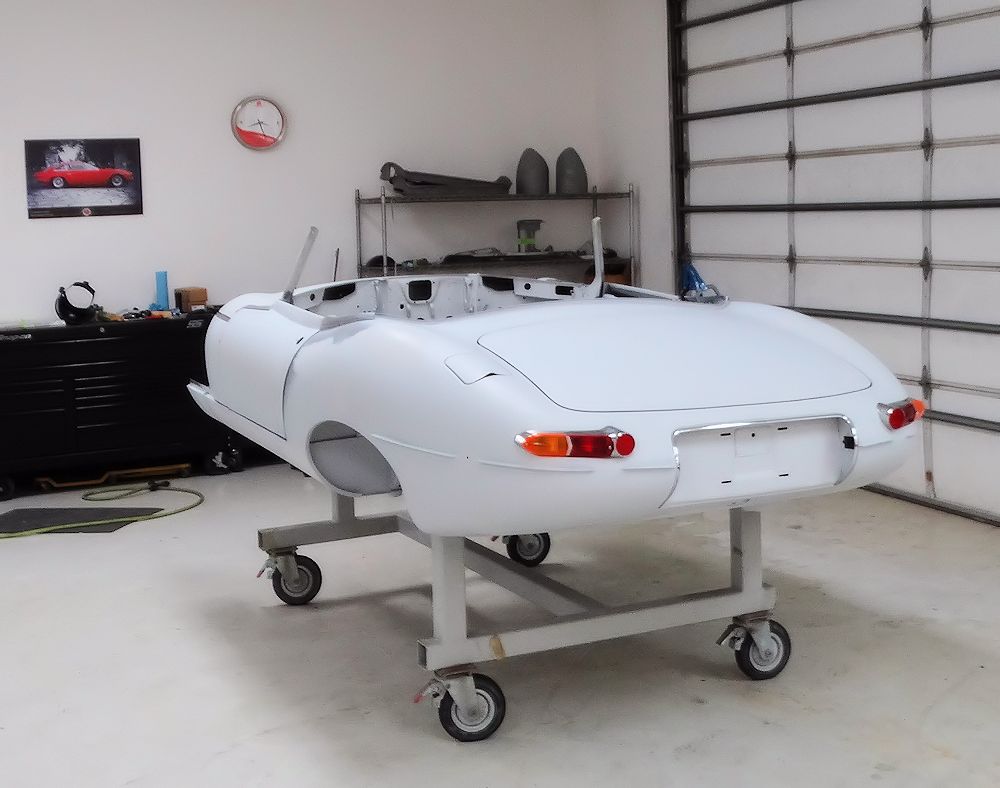
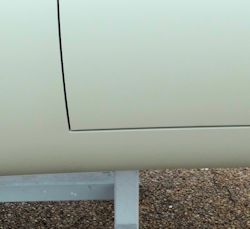
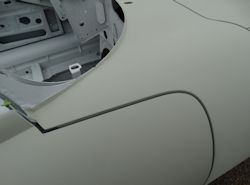
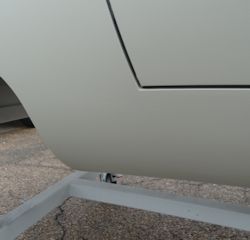
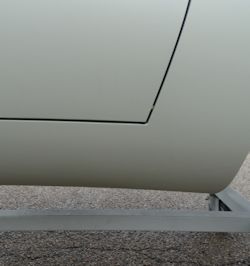
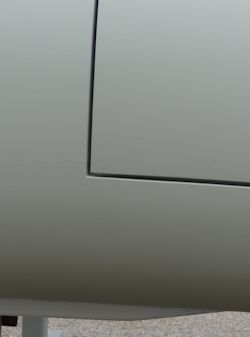
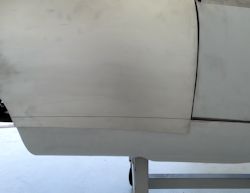
The
doors and boot lid have been reinstalled and adjusted
following application of the sprayable polyester. At this
stage the panel fit has been finalized and you can see how
all the gaps will look on the finished car.
|
|
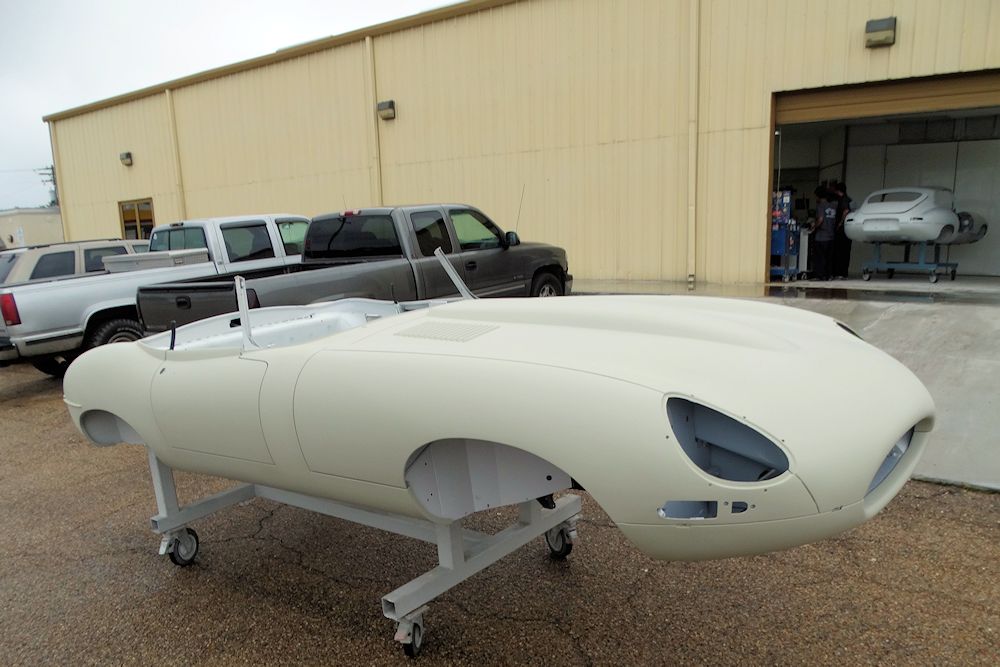
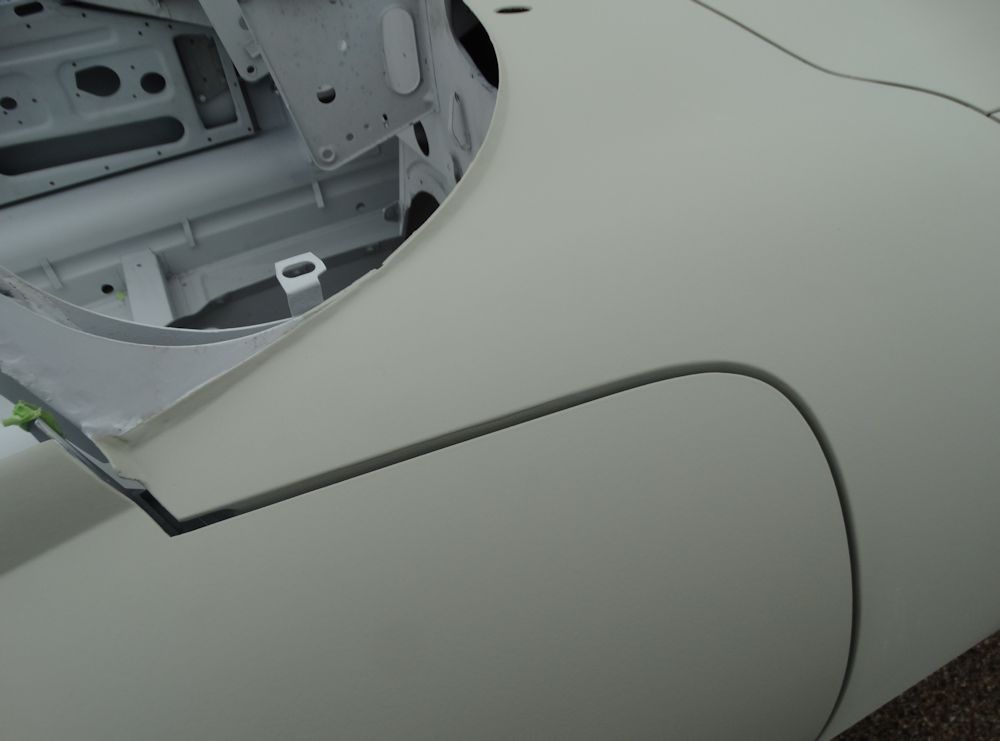
Panel fit is spectacular throughout the
car
|
|
|
|

|
|
|
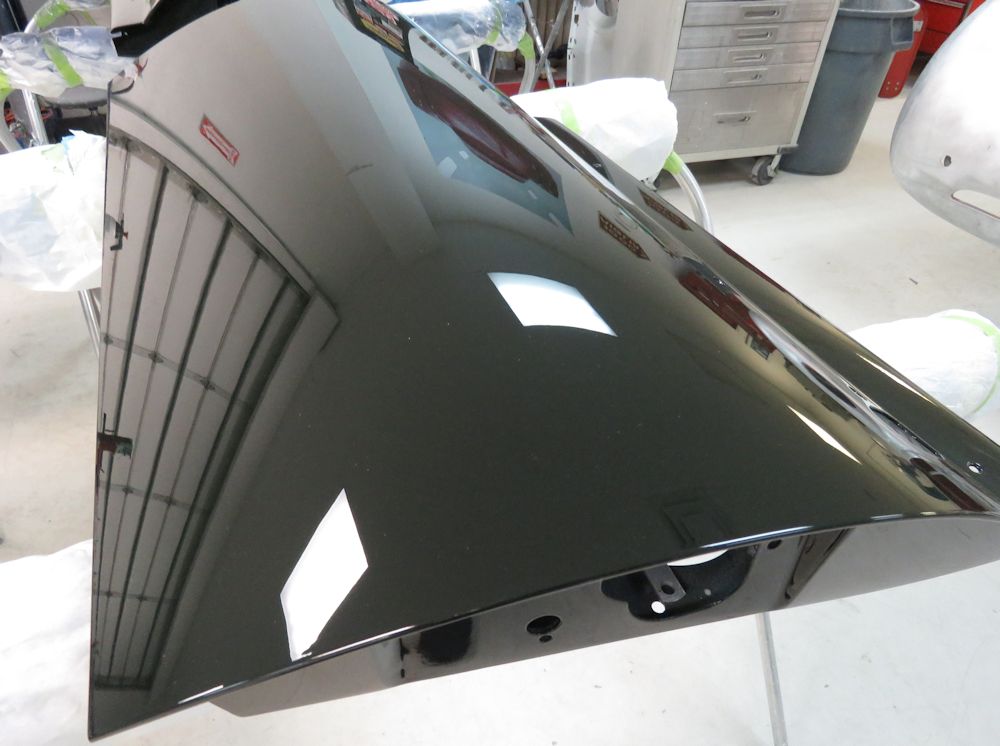
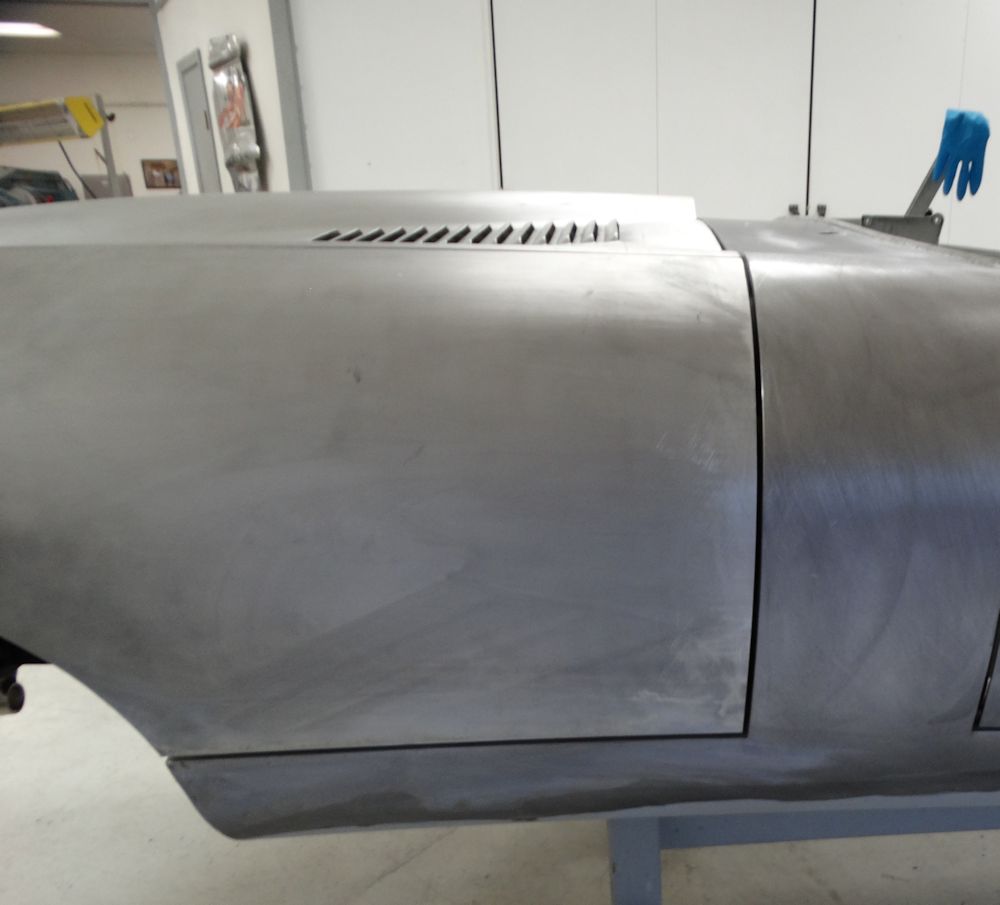
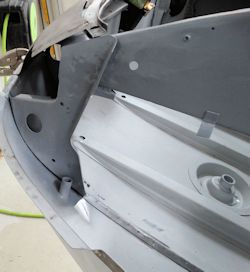
Rear bottom corner of right side of
bonnet
|
|
|
|
|
Right hand upper door panel gaps
|
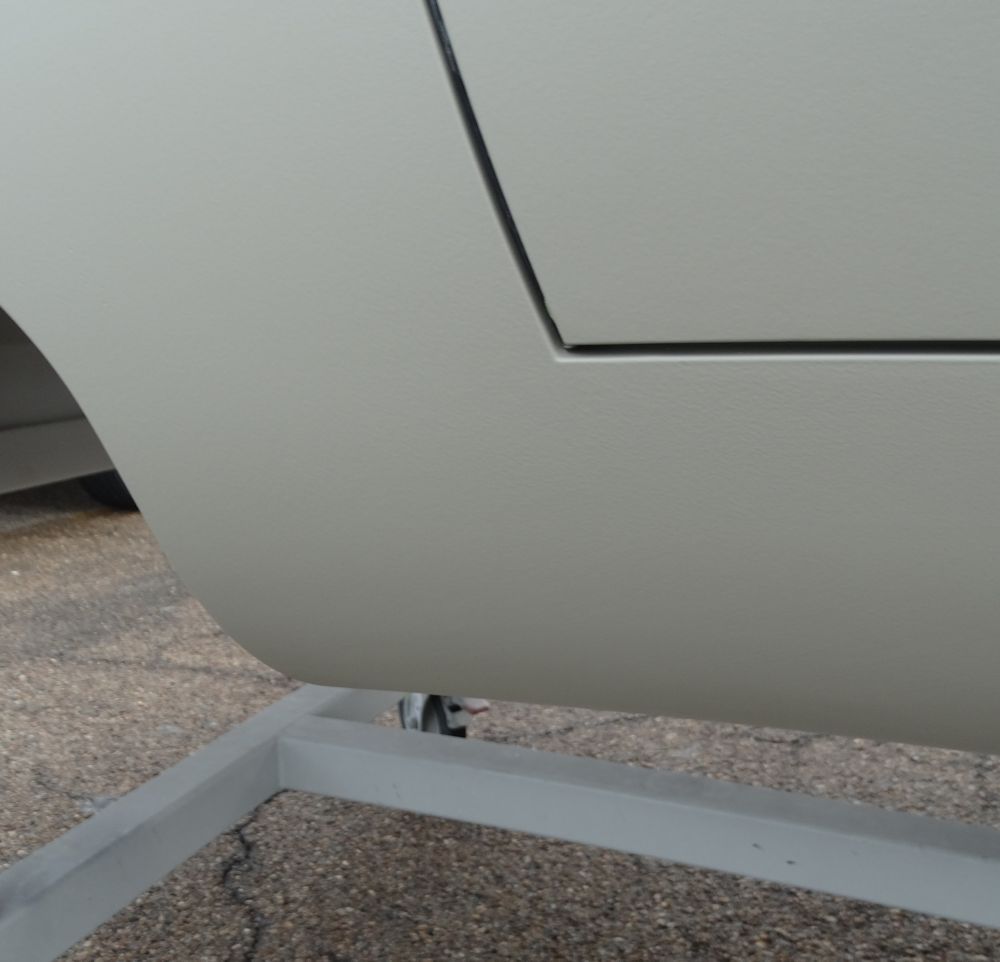
Lower rear corner of passenger door
|
|
|
|
|
Lower rear corner of driver's door
|
Lower front corner of driver's door
|
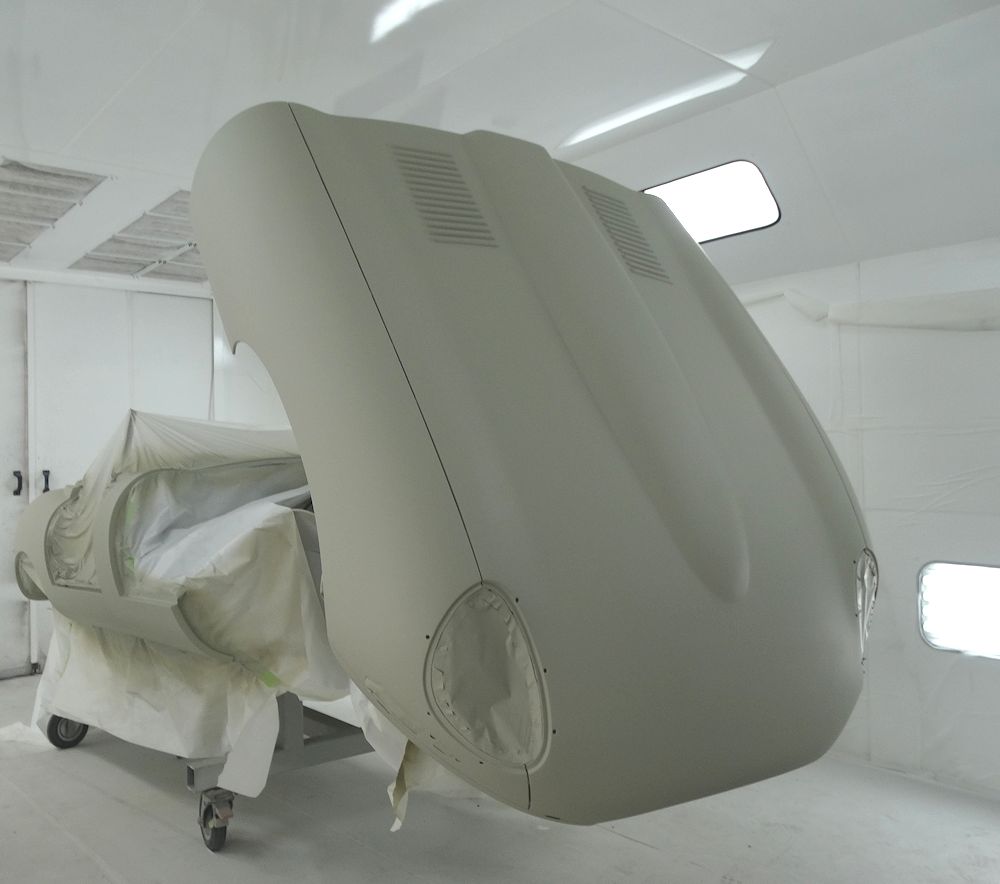
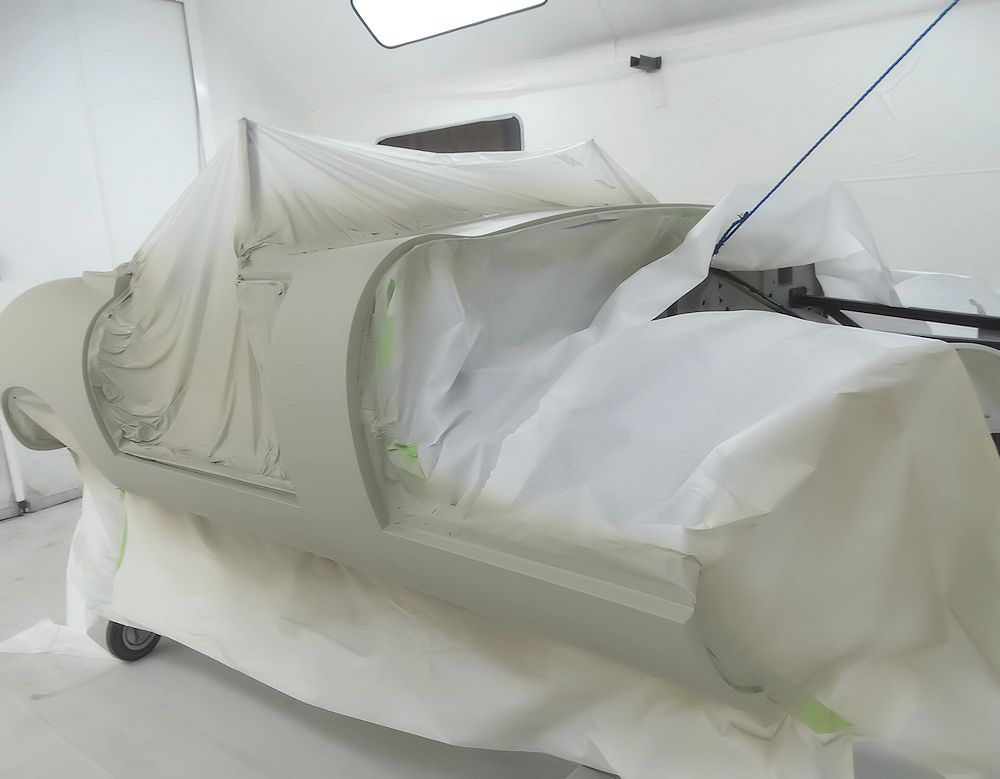
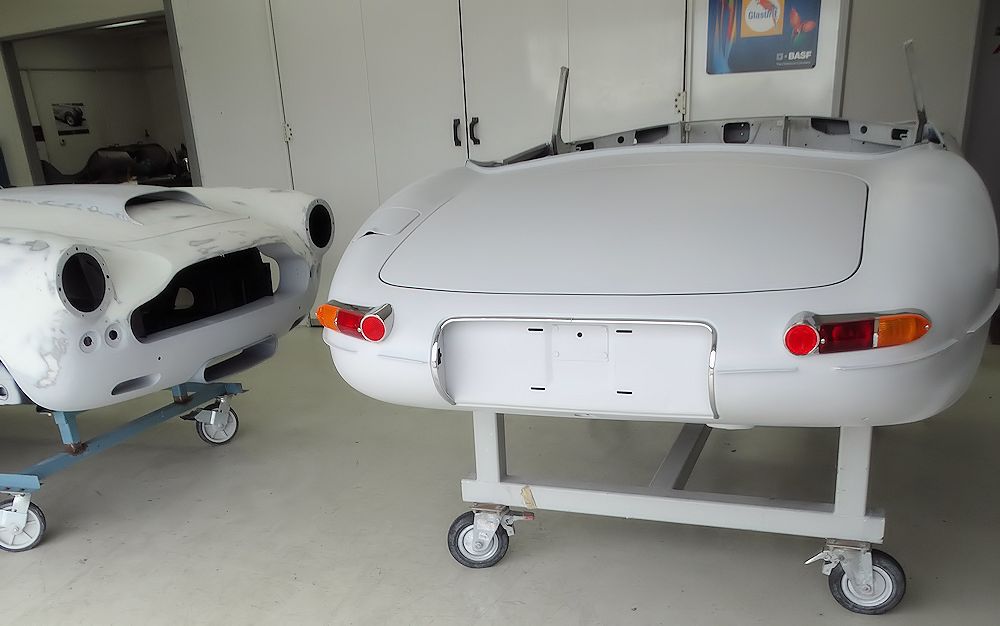
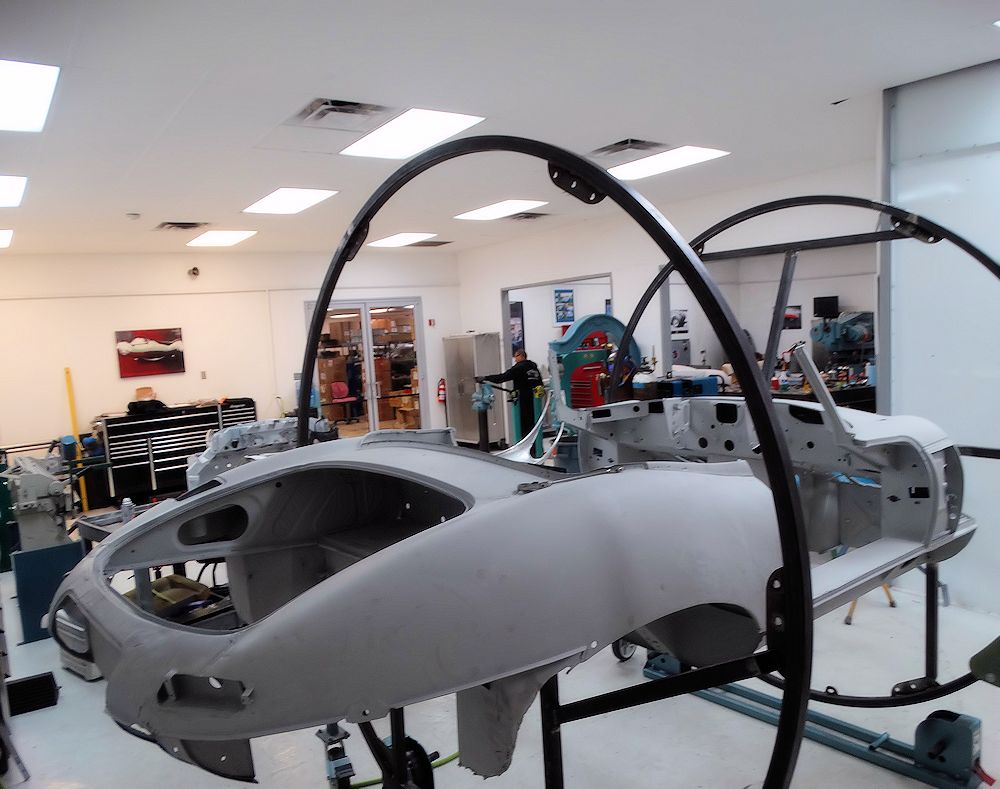
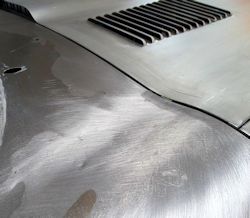
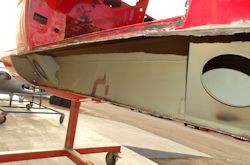
With the bodywork (filler and block)
stage completed, your car has now been primed with
Spies Hecker 3508 Raderal sprayable polyester.
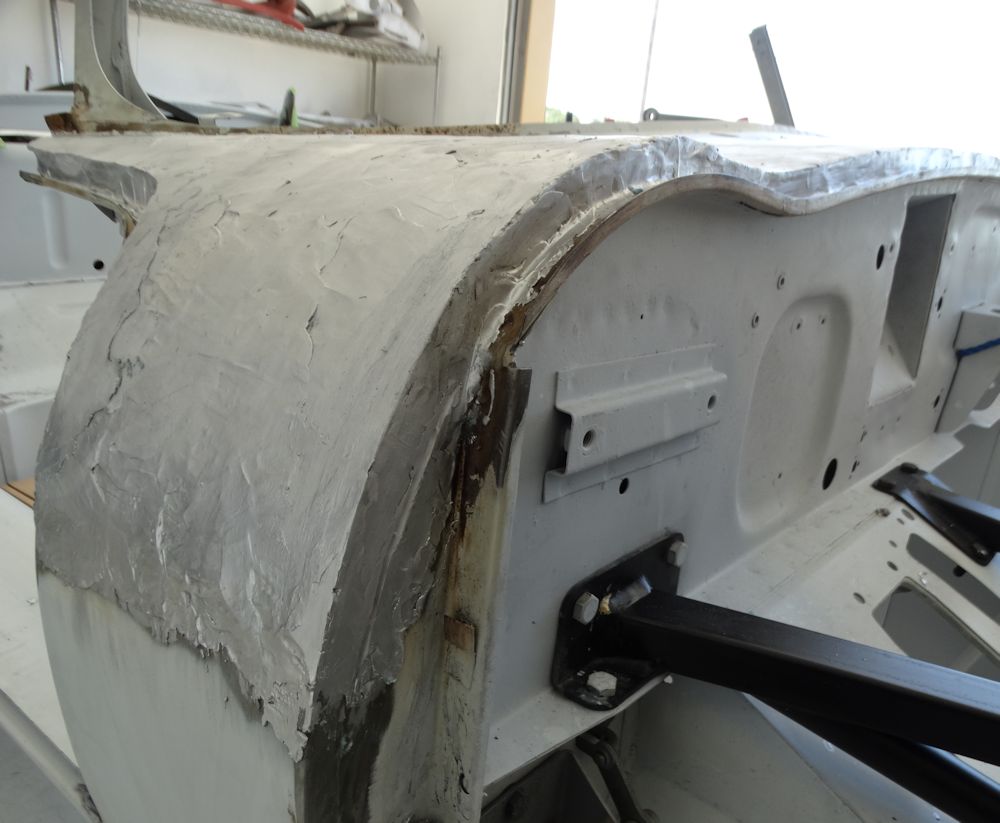
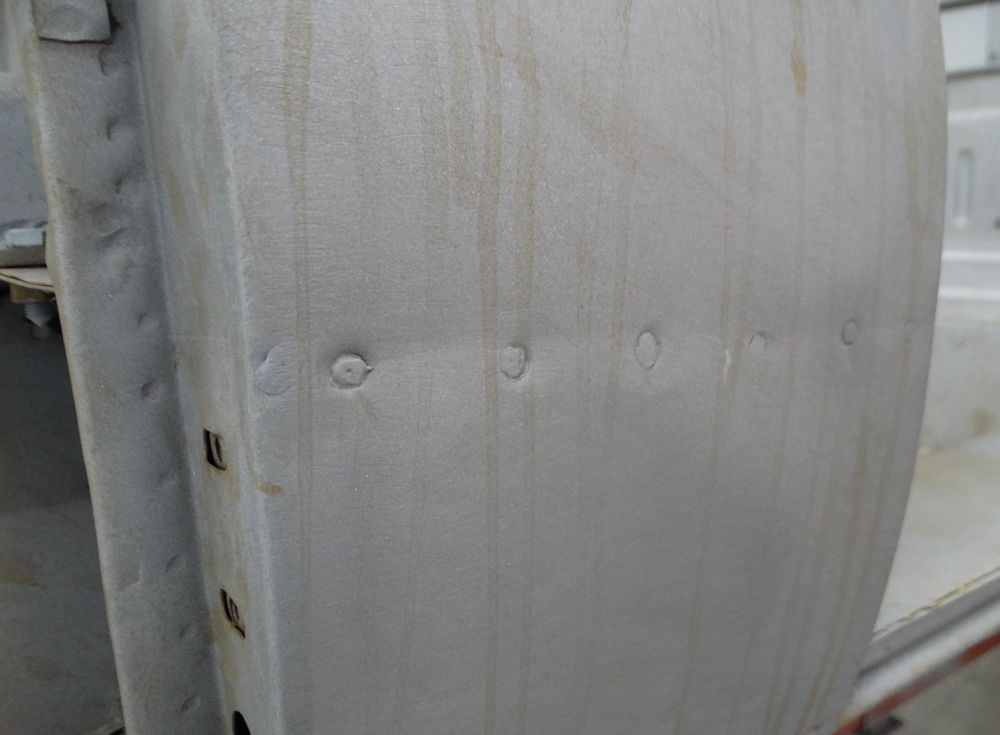
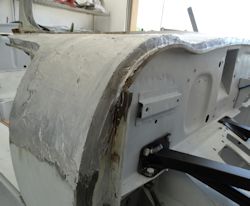
Lead
loading the rear quarters and front cowl..

|

|
Note heater box is trial fitted as part
of the
bonnet installation
|
Filing lead on the front cowl
|
|
|
|
|
Right hand cowl now has lead applied
|
Starting to take shape after filing
|
|
|
|

|
|
All the panel gaps are looking good
|
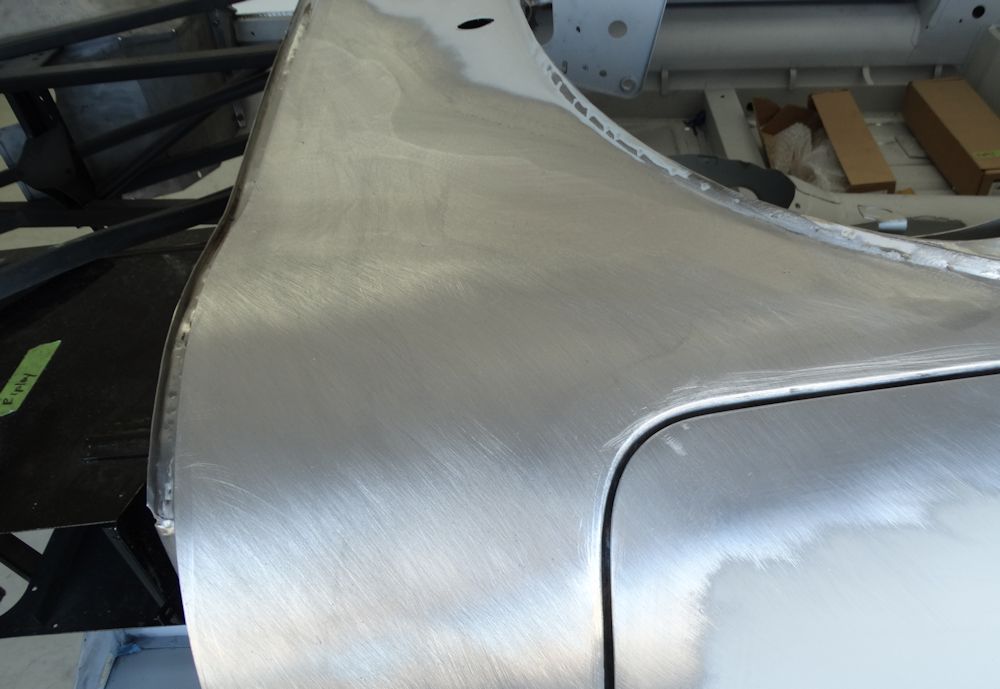
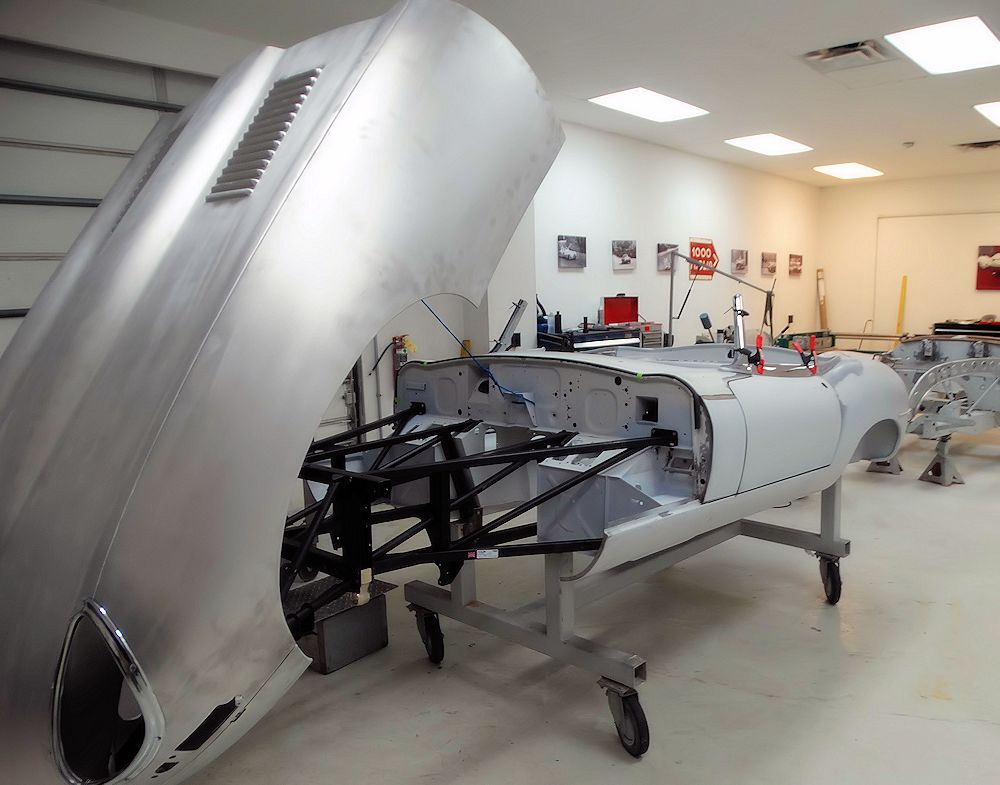
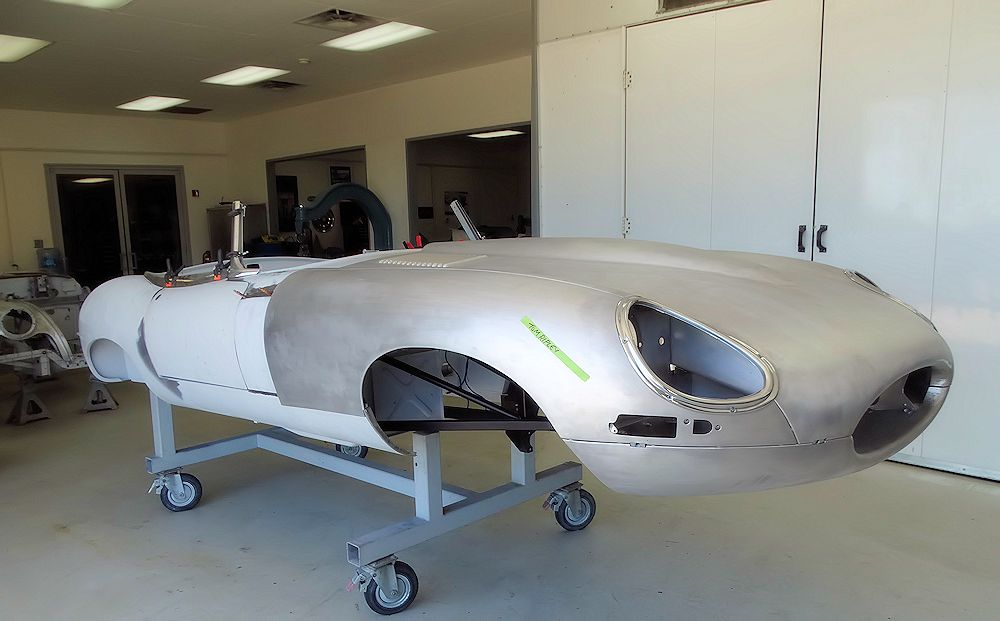
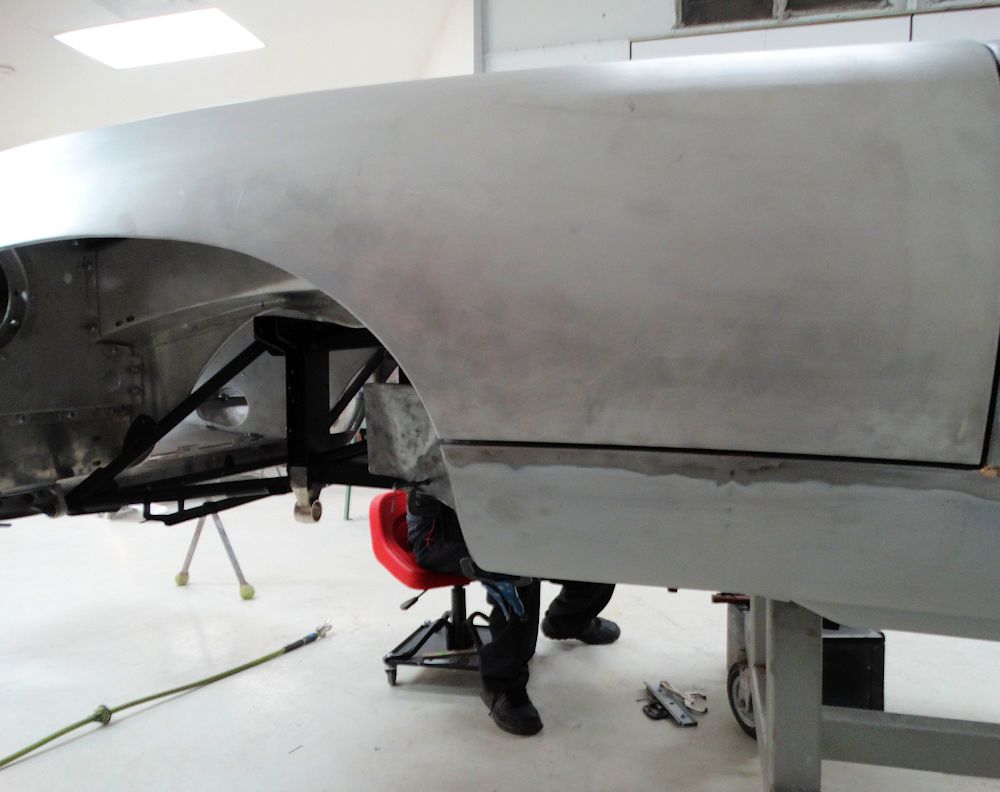
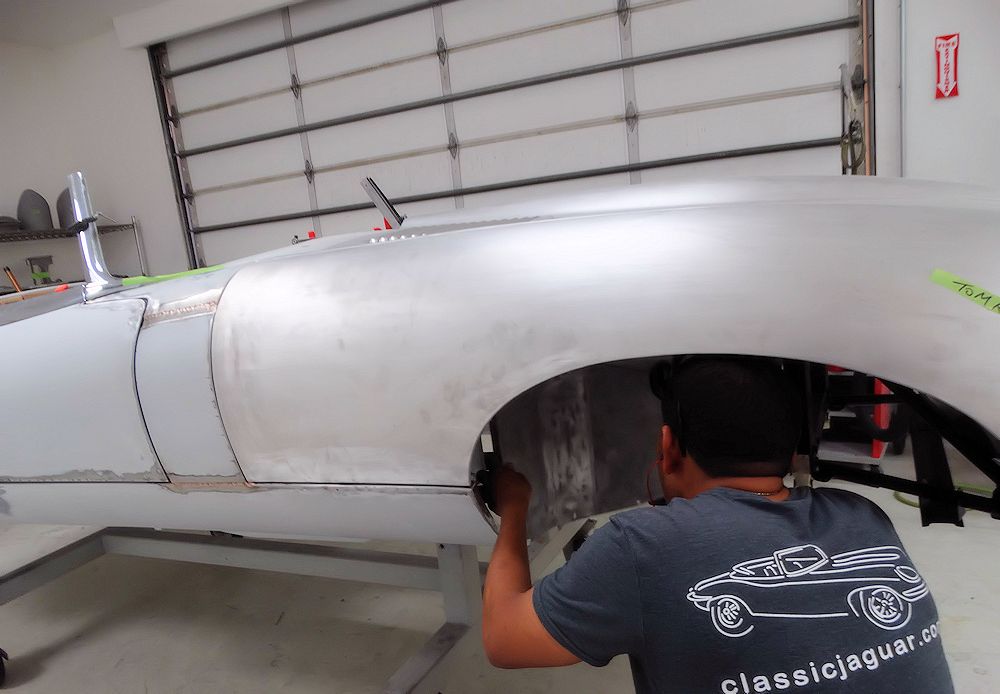
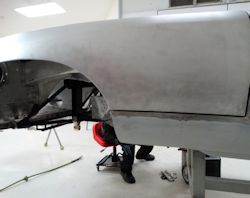
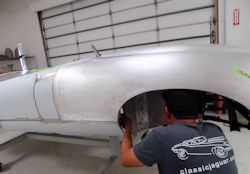
Oscar
has been busy trimming and fitting your alloy bonnet....

|
|
New engine frames installed
|
|
|
|

|
|
|
Both wings will be trimmed to fit
|
|
|
|
|
Oscar checking straightness after hammering
over
edge beading
|
|
|
|
|
|
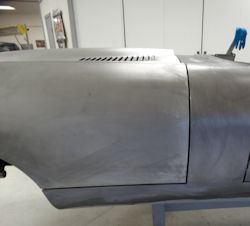
Bonnet fit now starting to take shape
|
Trial fitting mudguards
|
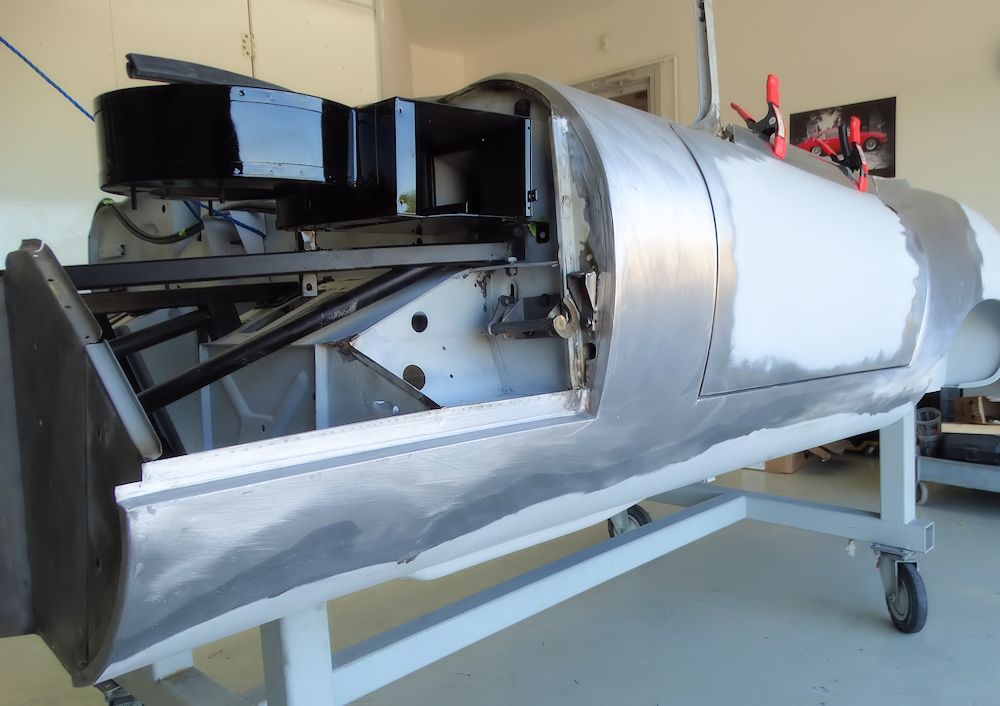
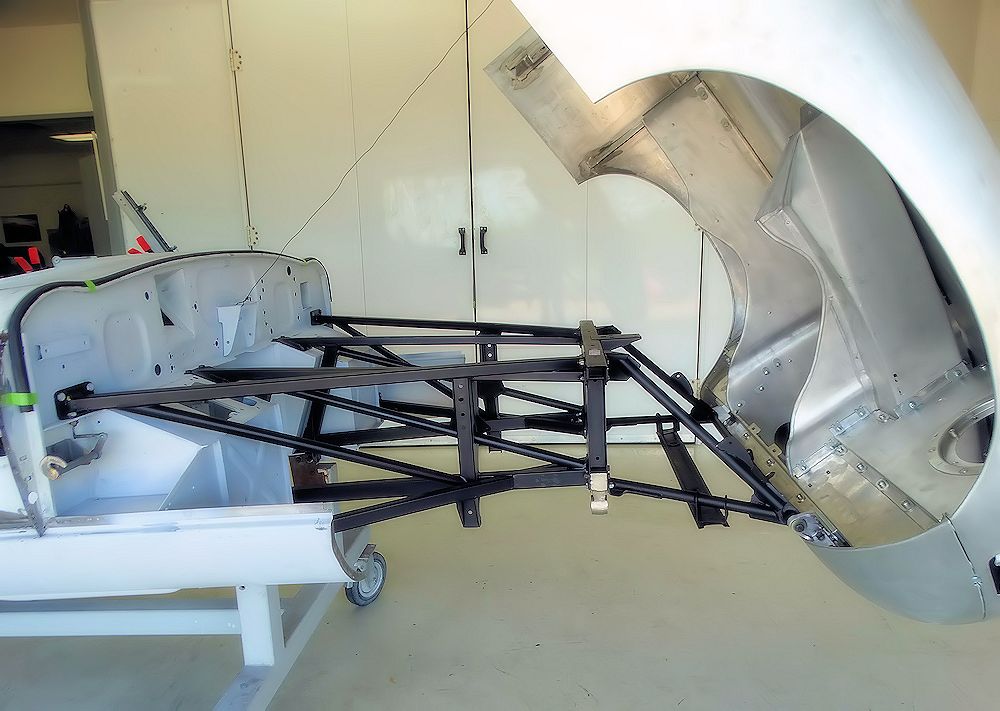
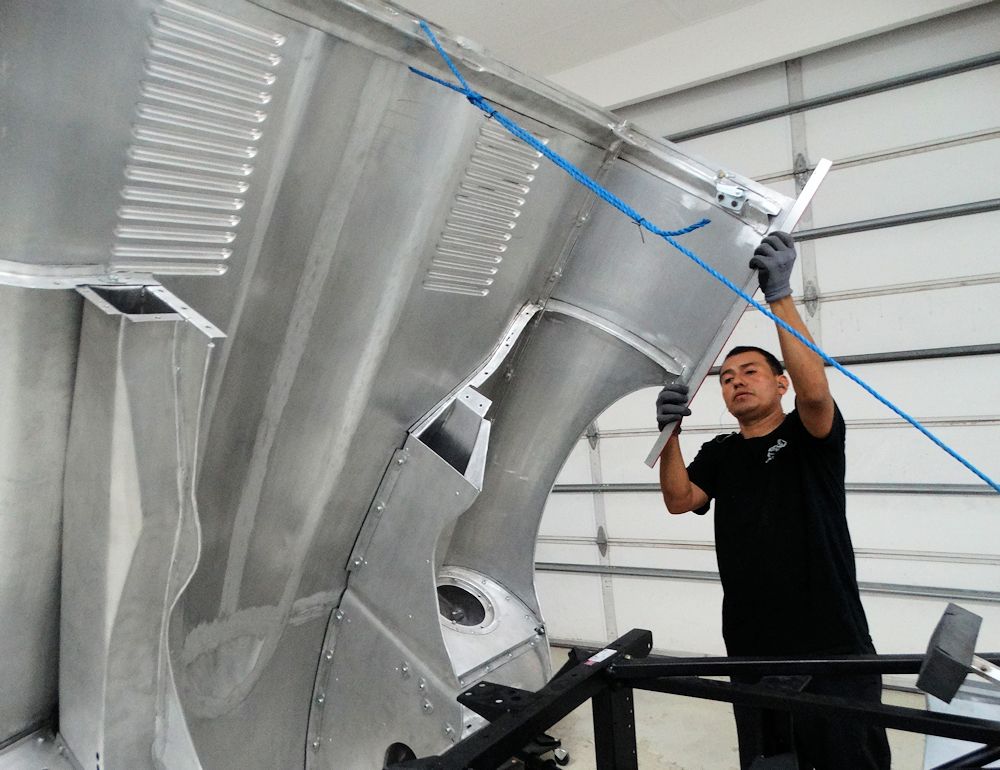
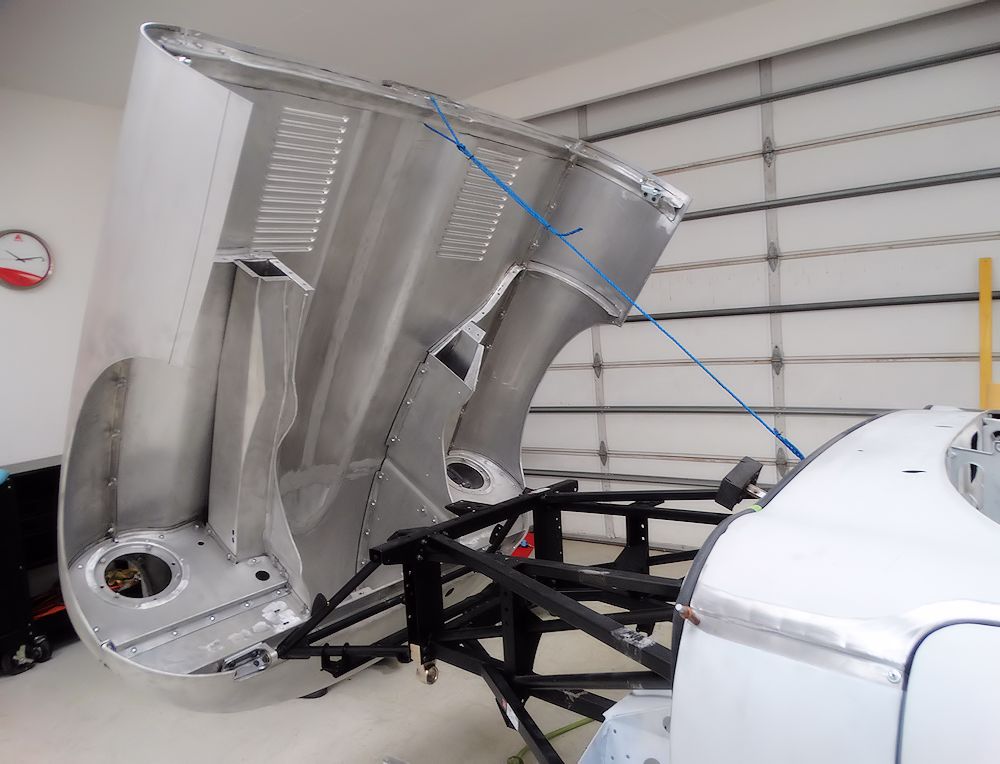
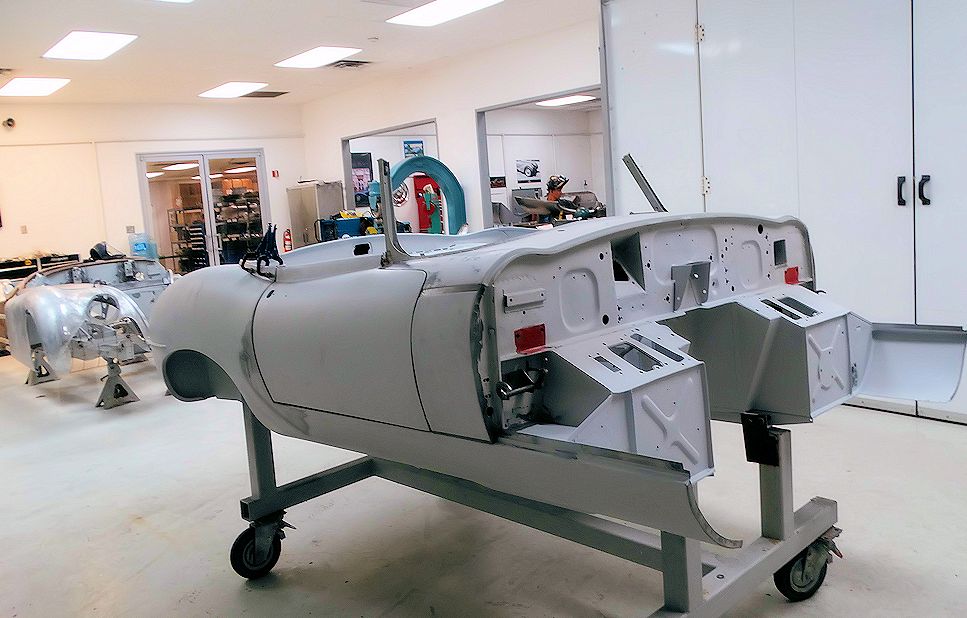
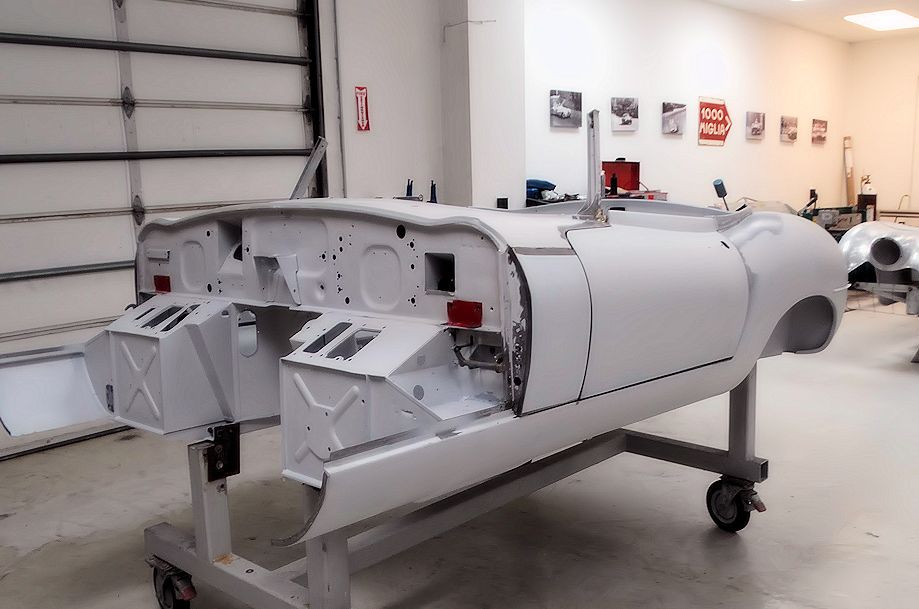
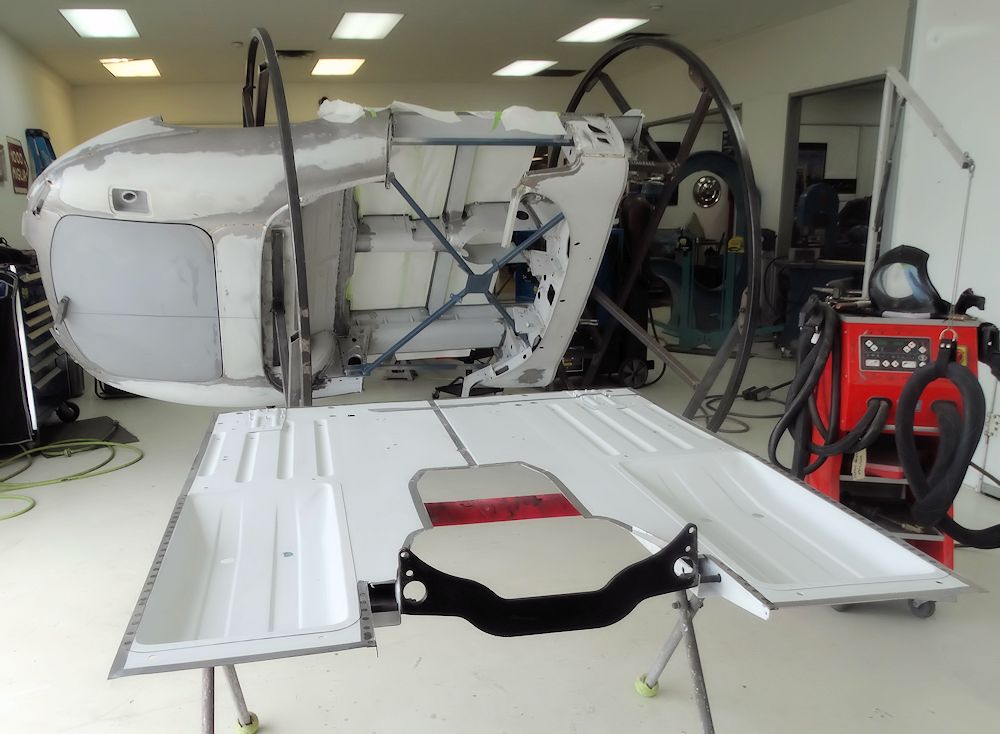
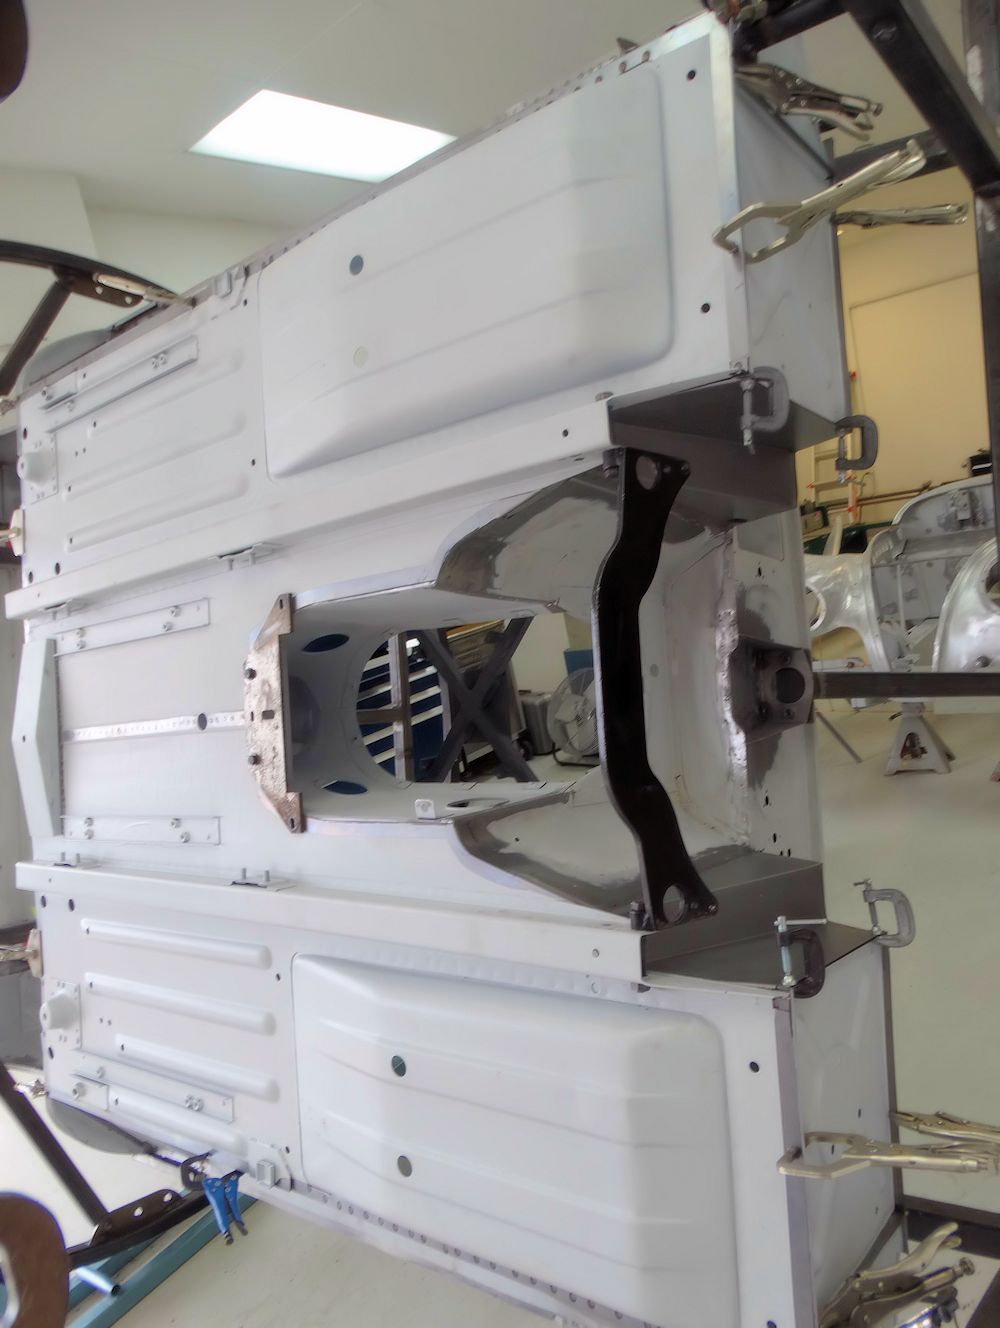
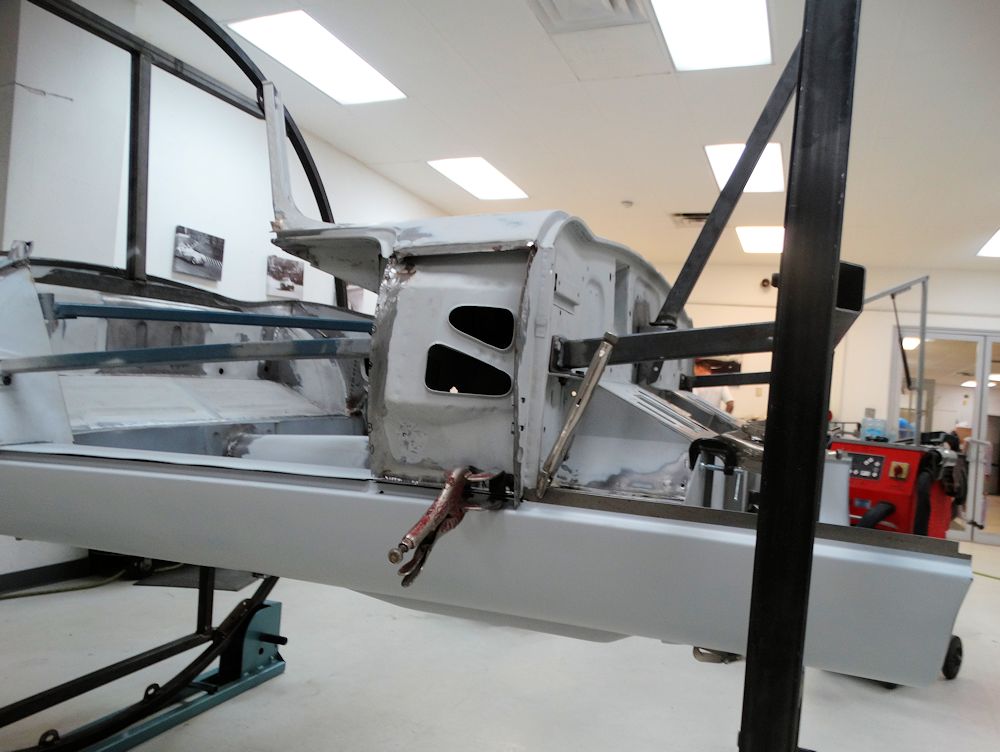
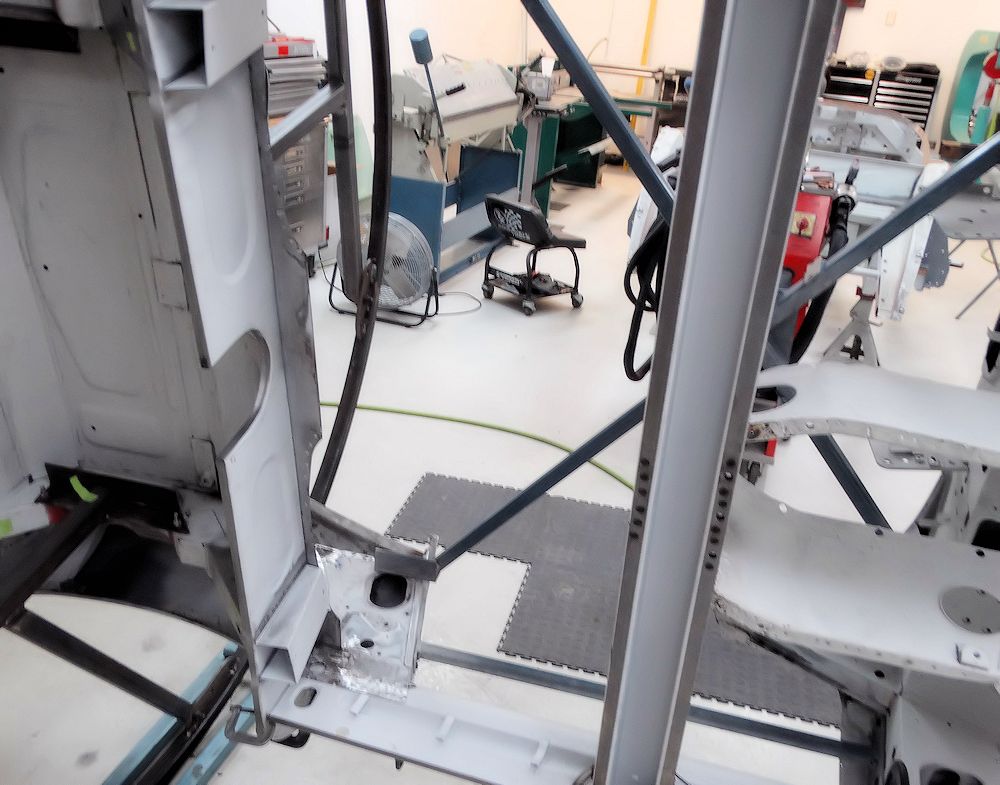
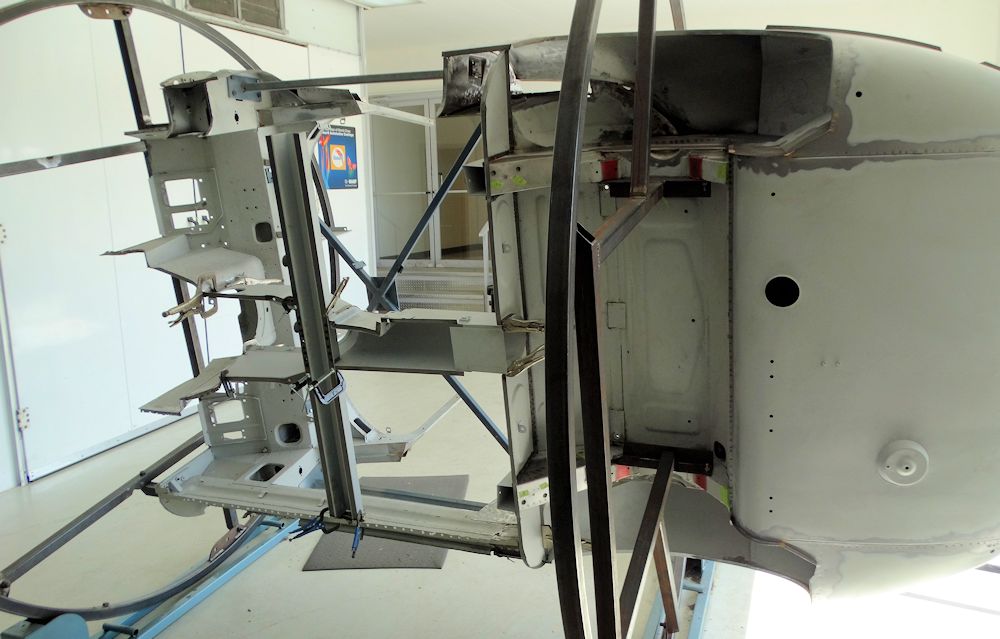
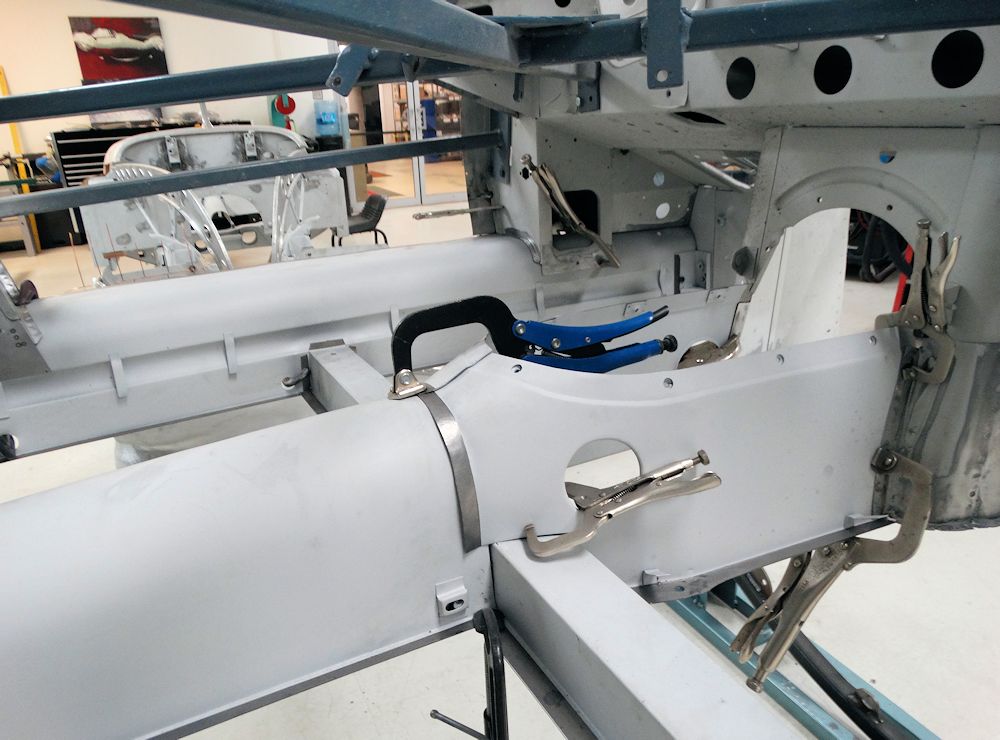
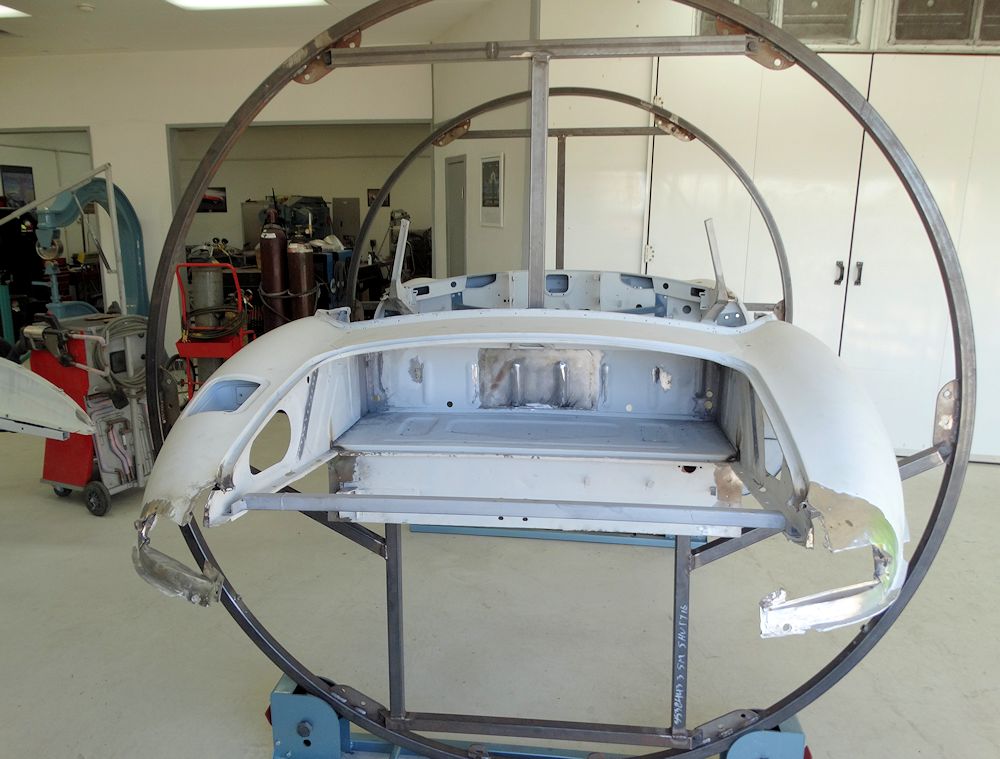
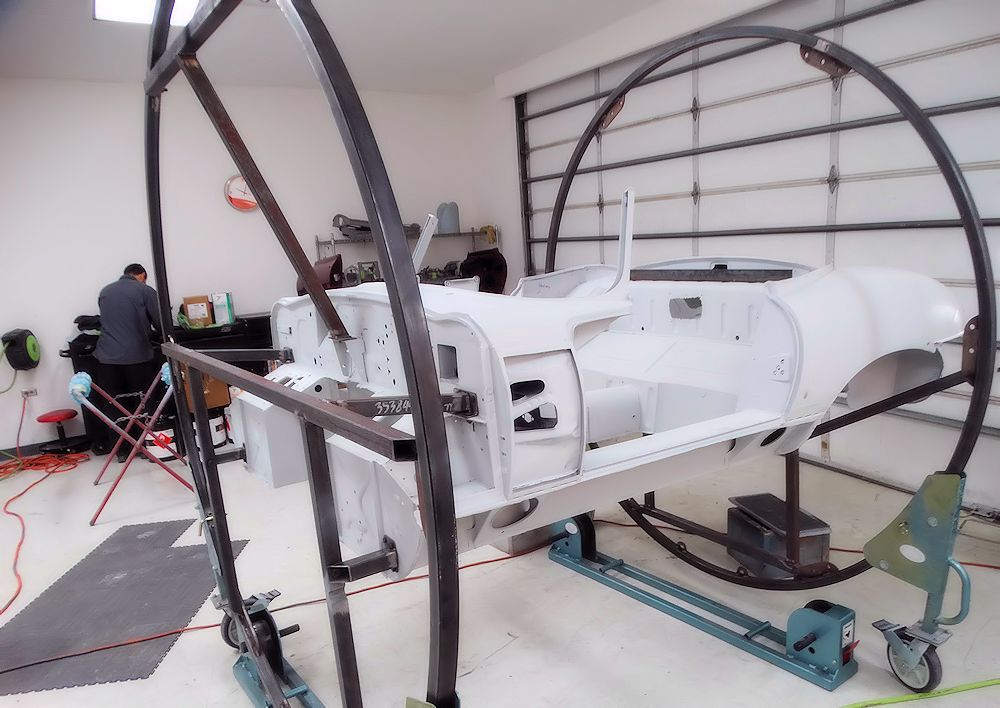
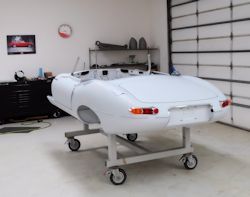
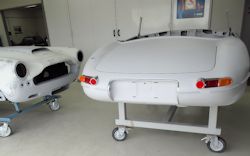
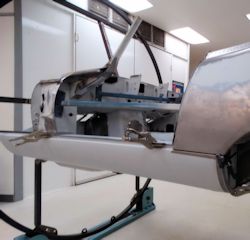
We
have now removed the monocoque from the rotisserie and
placed it on a roll-around frame jig. The next task will
be to install the new engine frames and fit the new CJ
aluminum bonnet.

|

|
|
Preparing to install the engine side frames
|
|
|
|
|
Trial fitting rear lights and license plate
chrome
|
Keeping good company in the CJ Coachworks
|
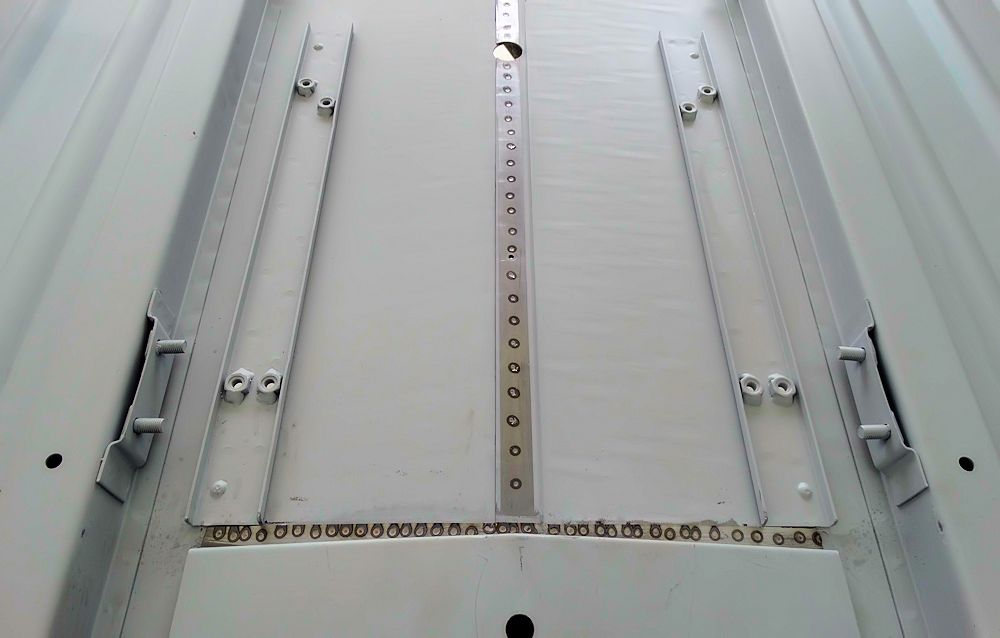
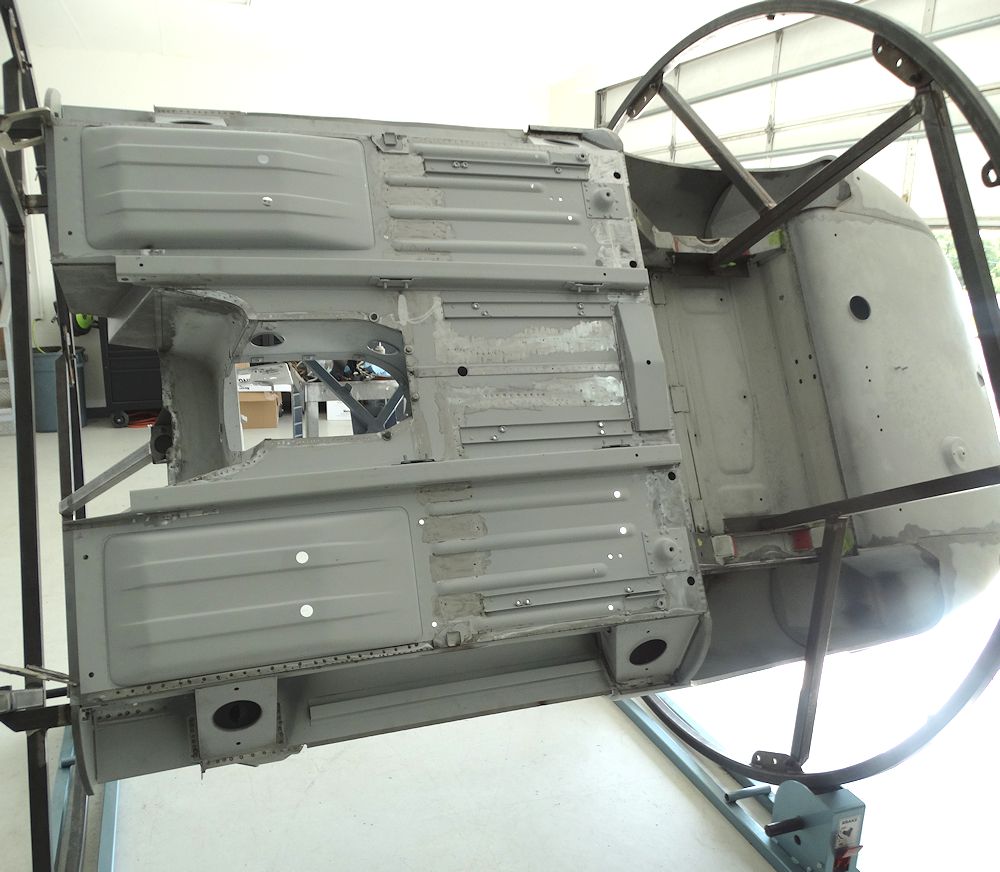
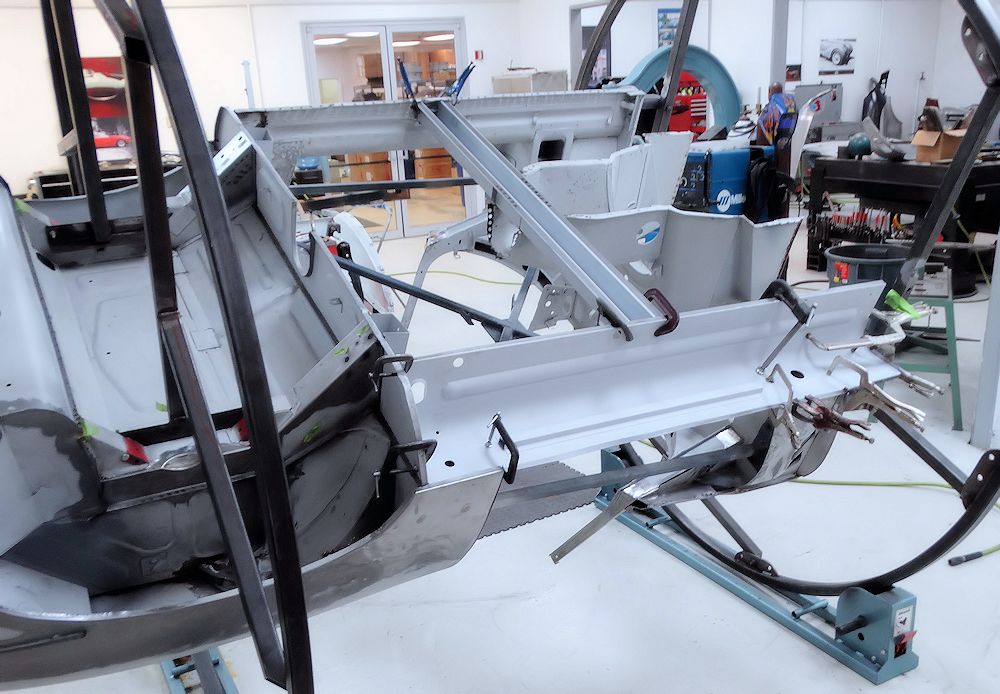
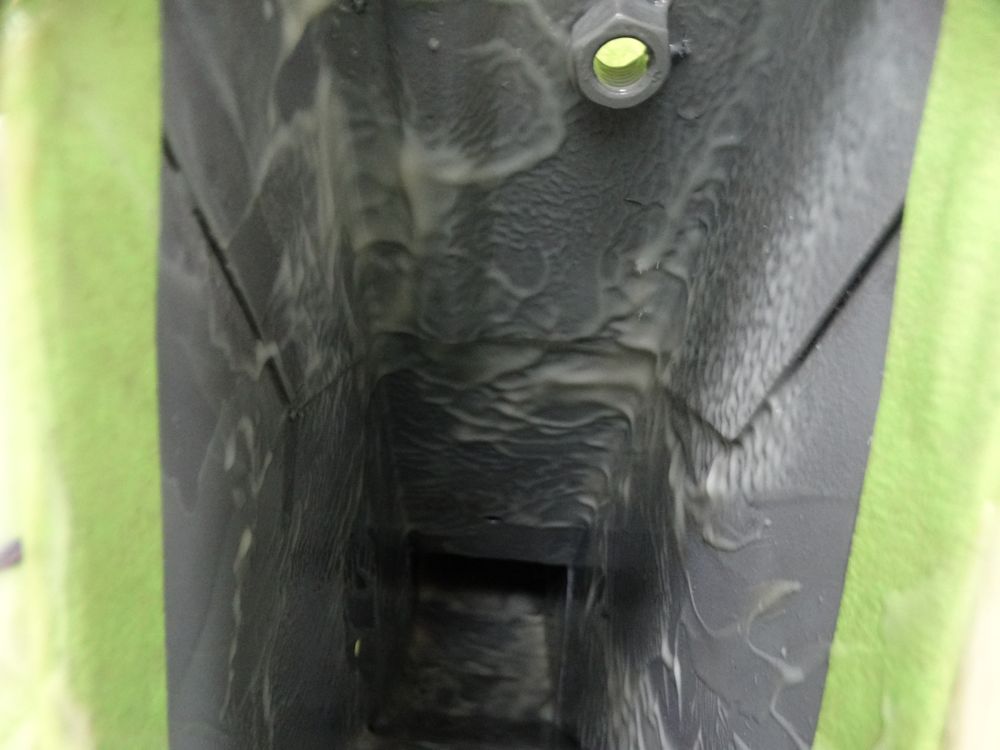
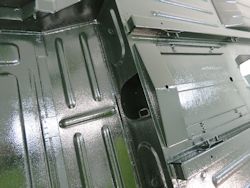
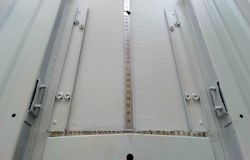
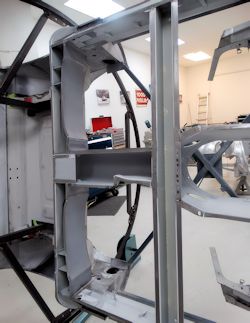
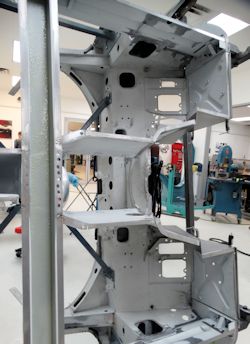
Oscar has been busy installing your
new floors, after carefully rust proofing all the
enclosed box sections with Wurth Body Wax prior to
spot welding the floors into place.
|
|
|
Wurth Body Wax is sprayed in all box
sections
that will be enclosed by the floors
|
|
|
|

|
The body wax will help prevent for decades
to come
|
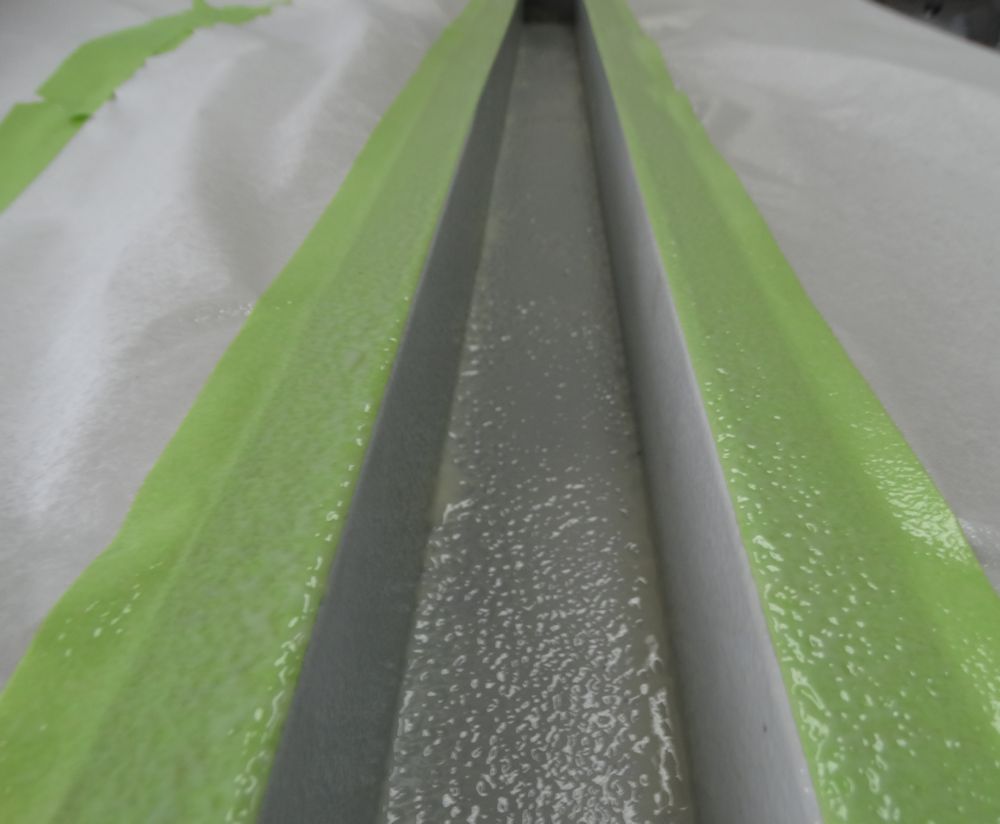
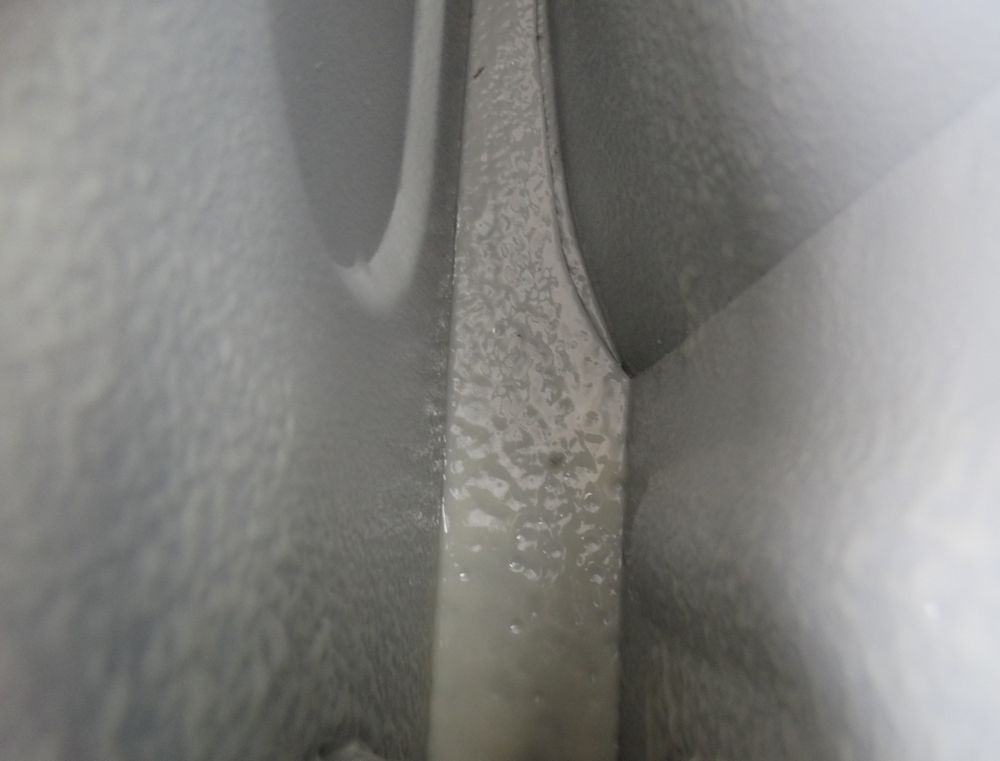
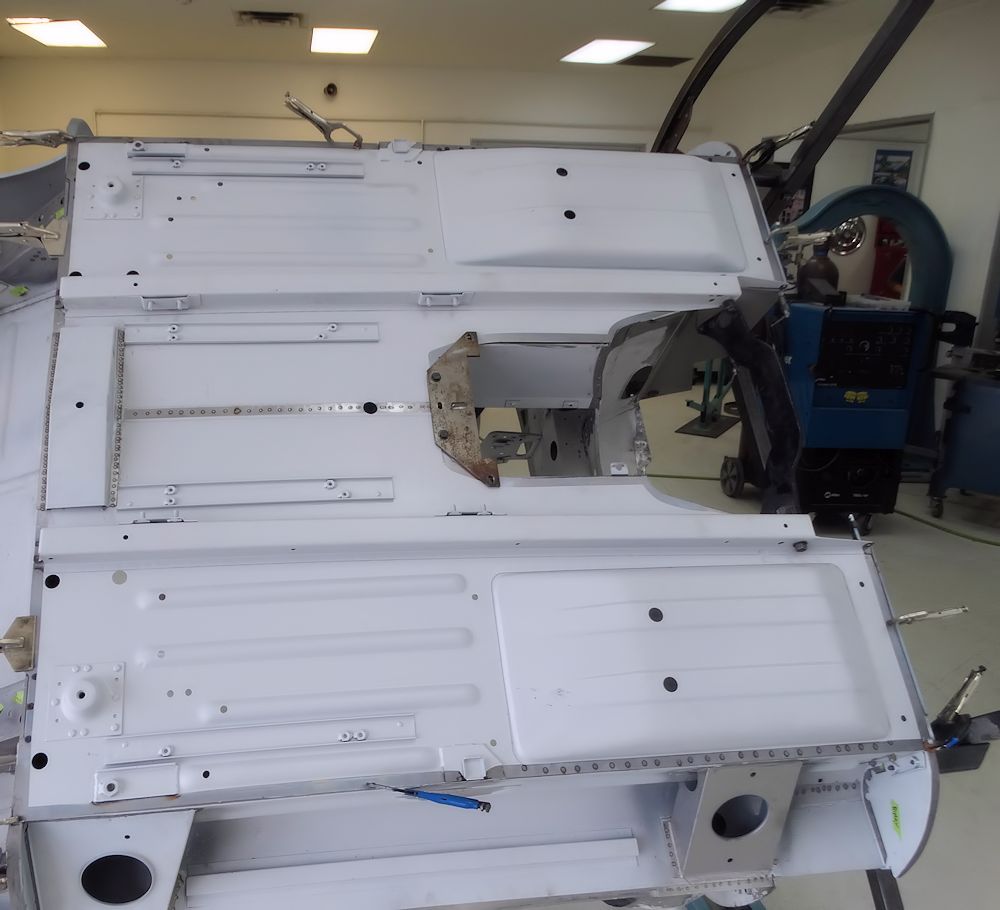
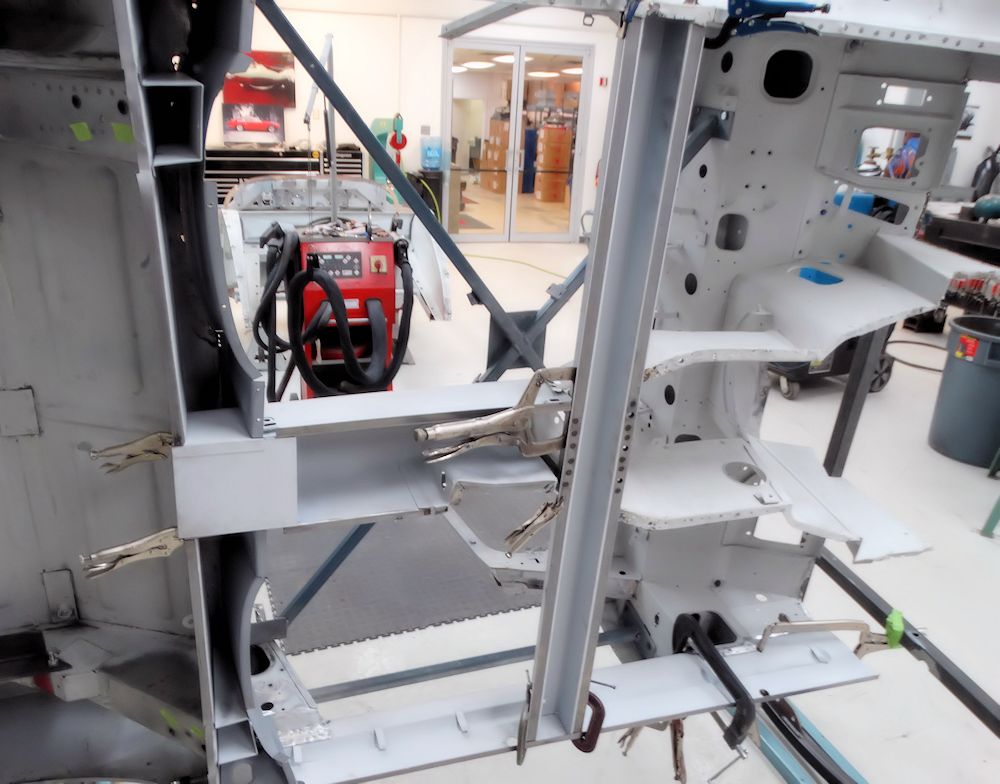
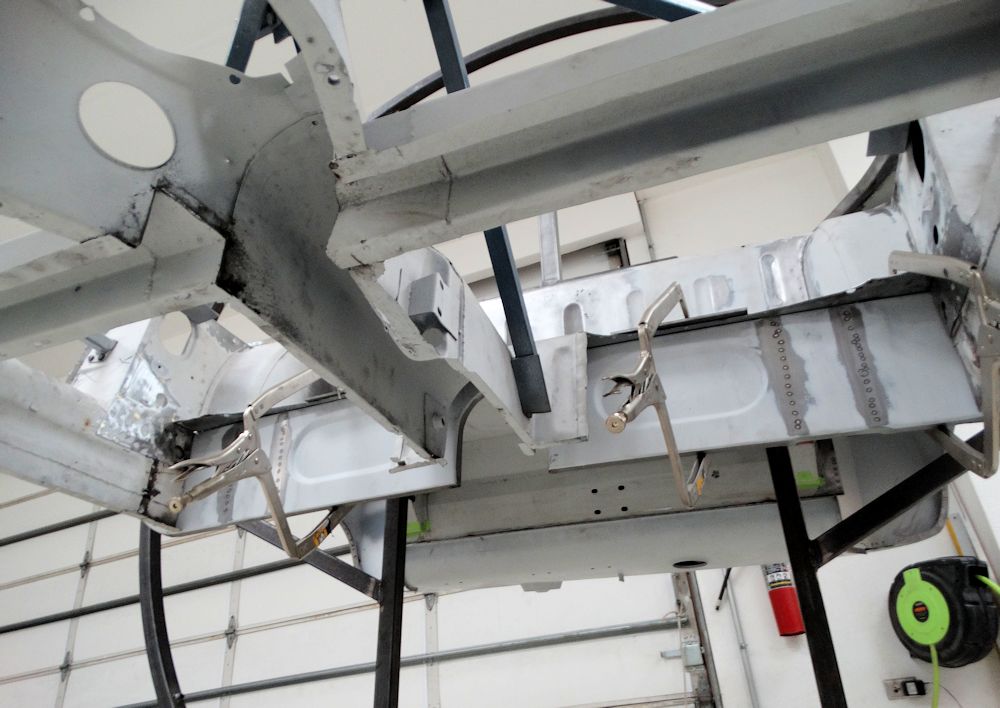
Left and right hand floors are spot welded
along
the center line
|
|
|

|
|
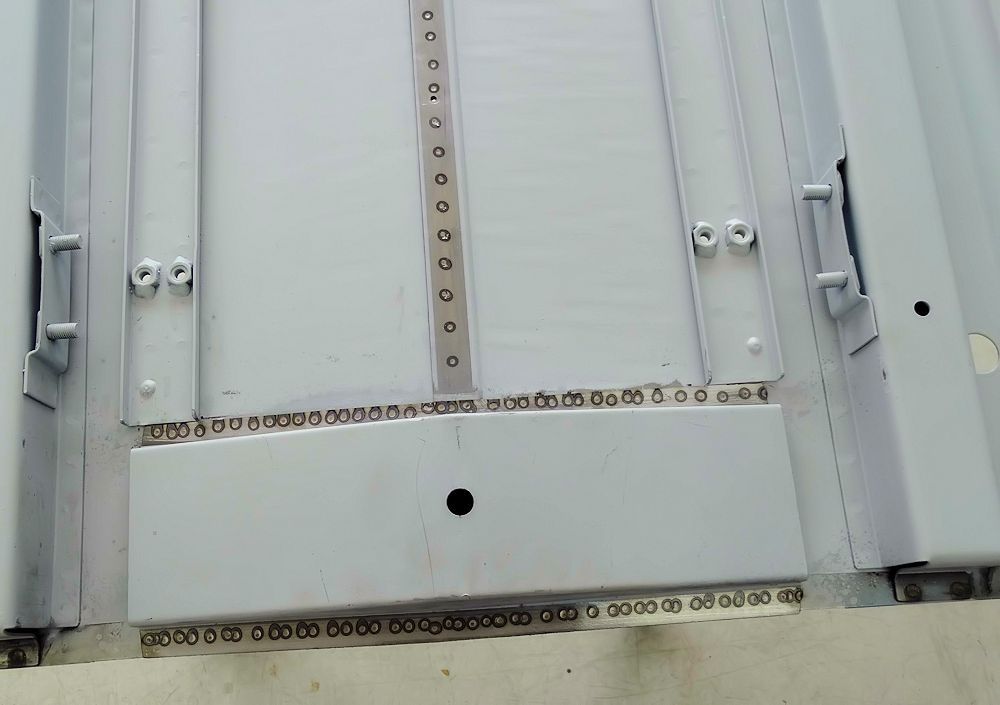
Spot welding the rear floor brace in
position
|
|
|
|

|
|
|
|
|
|
|

|
|
|
|
|
|
|
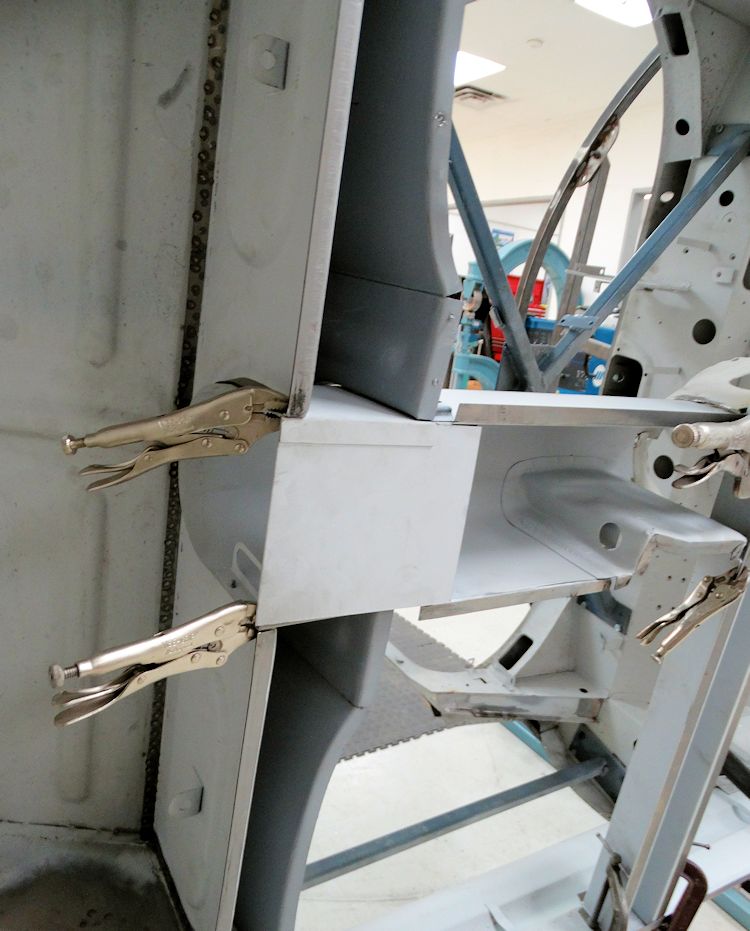
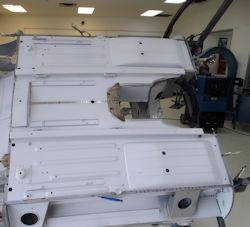
Floors are clamped in place for welding
|
|
|
|
|
|
|
|
|
|
|
|
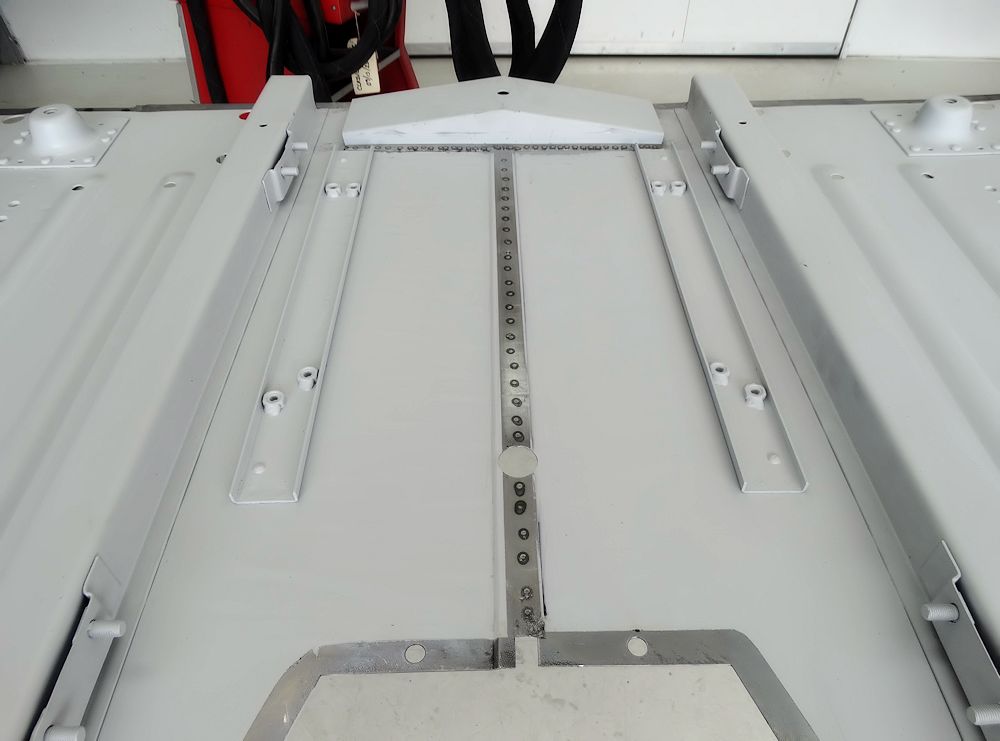
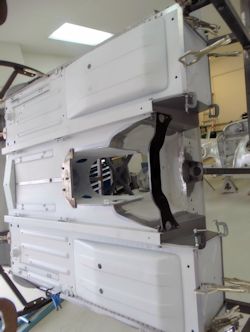
Literally hundreds of spot welds secure the
new floors
to the main monocoque
|
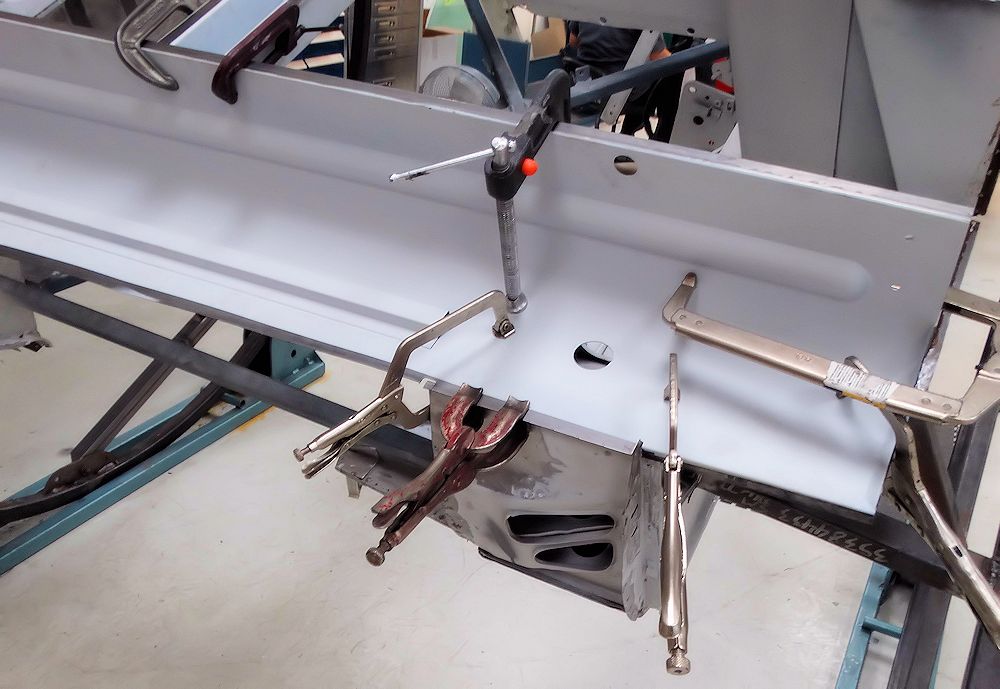
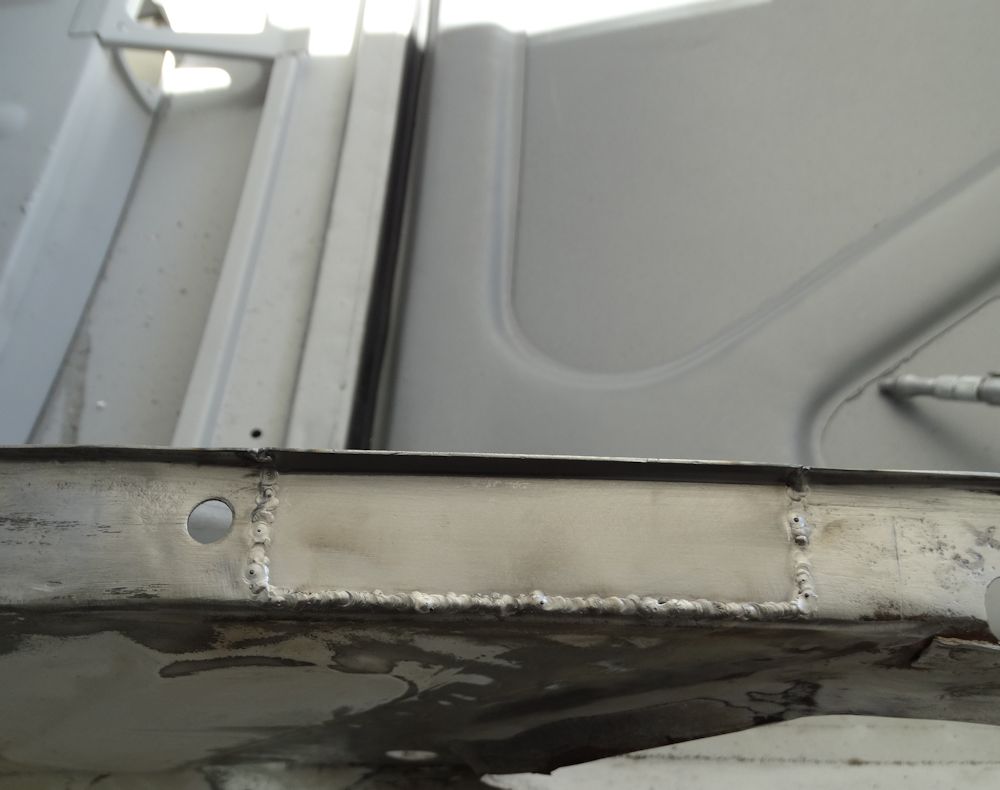
Trial fitting the outer sills
|
|
|

|
|
|
About to spot weld the outer sills in place
|
Lots
of progress in the Coachworks...

|
|
Cutting out rusted section of inner cowl
|
Trial fitting replacement repair panel
|
|
|
|

|
|
|
|
|
|
|
|
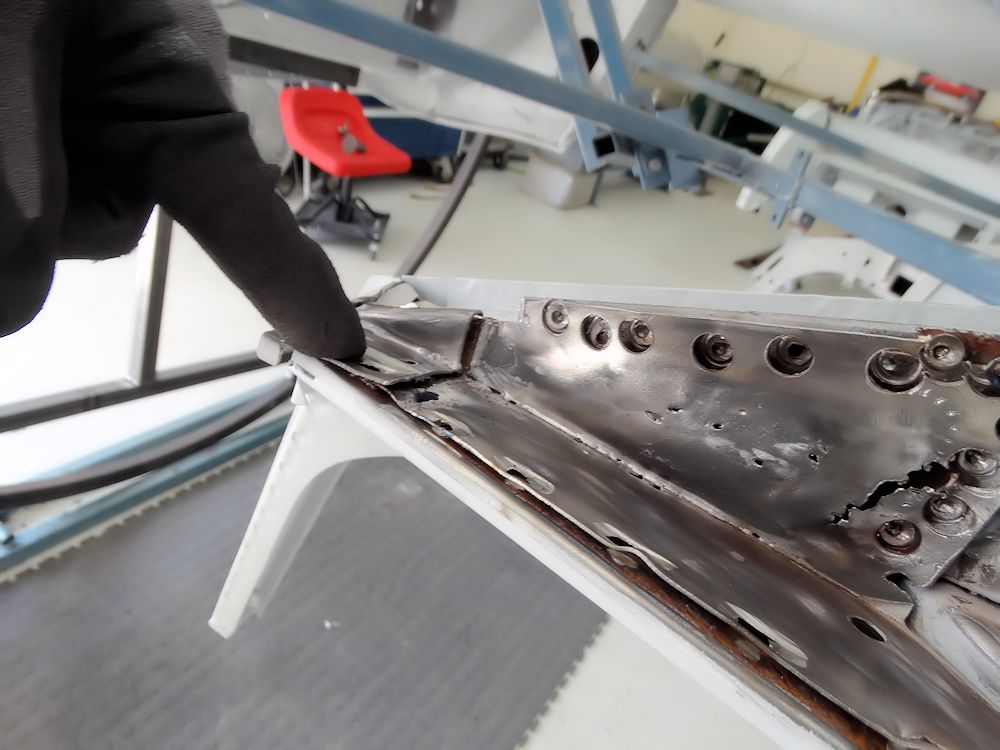
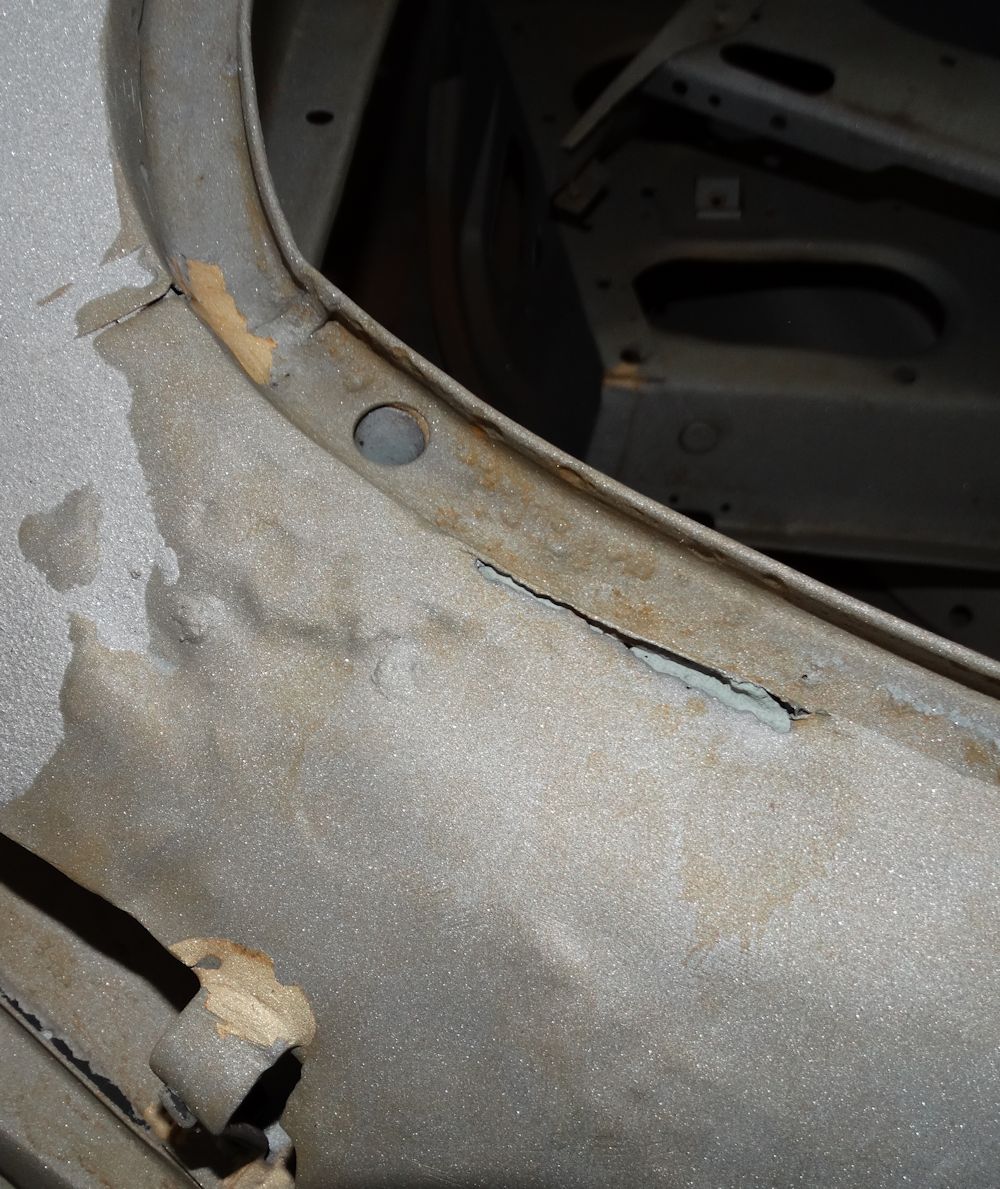
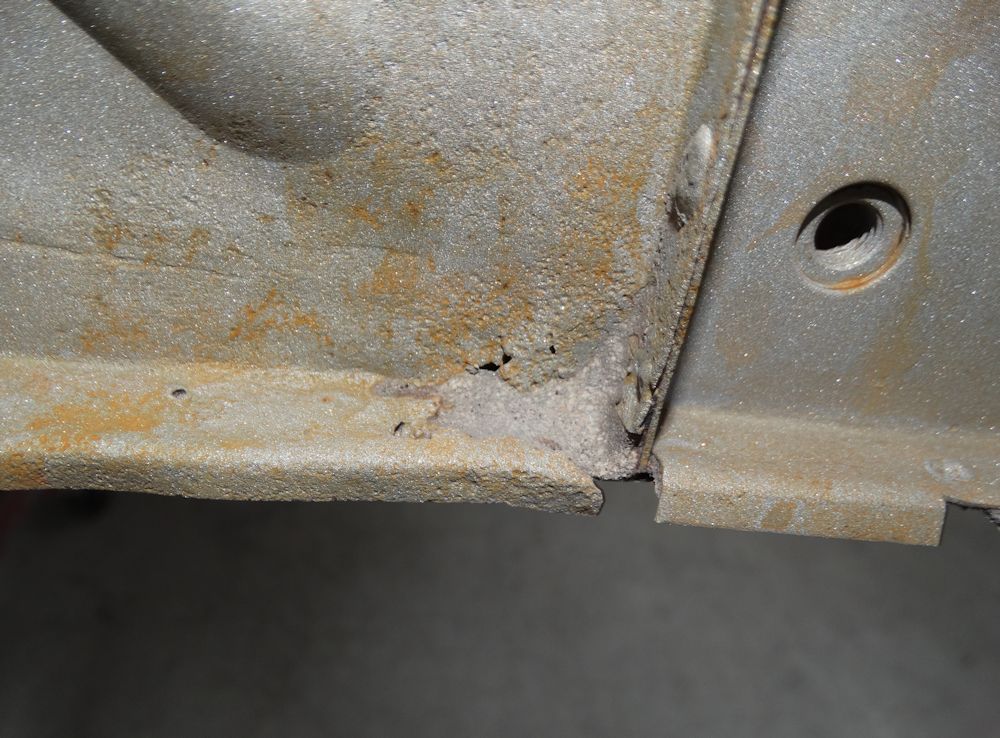
Rust holes up beneath LH A pillar
|
|
|

|
|
|
|
|
|
|
|
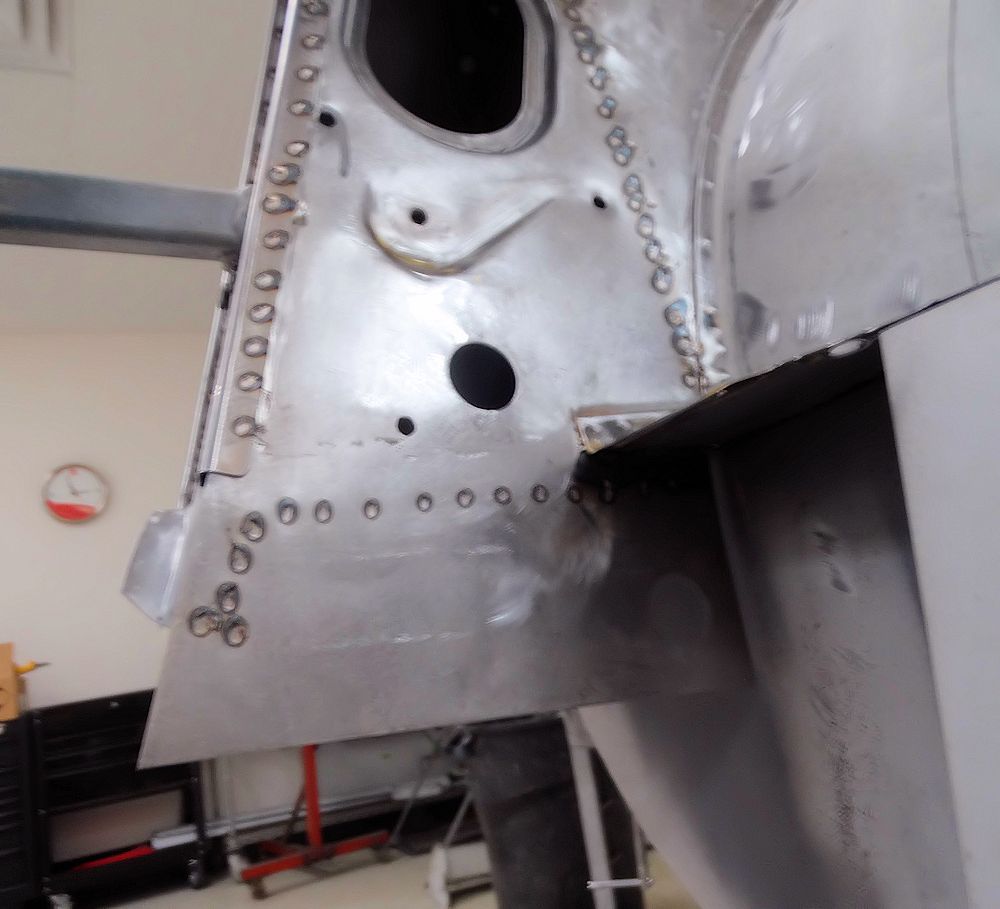
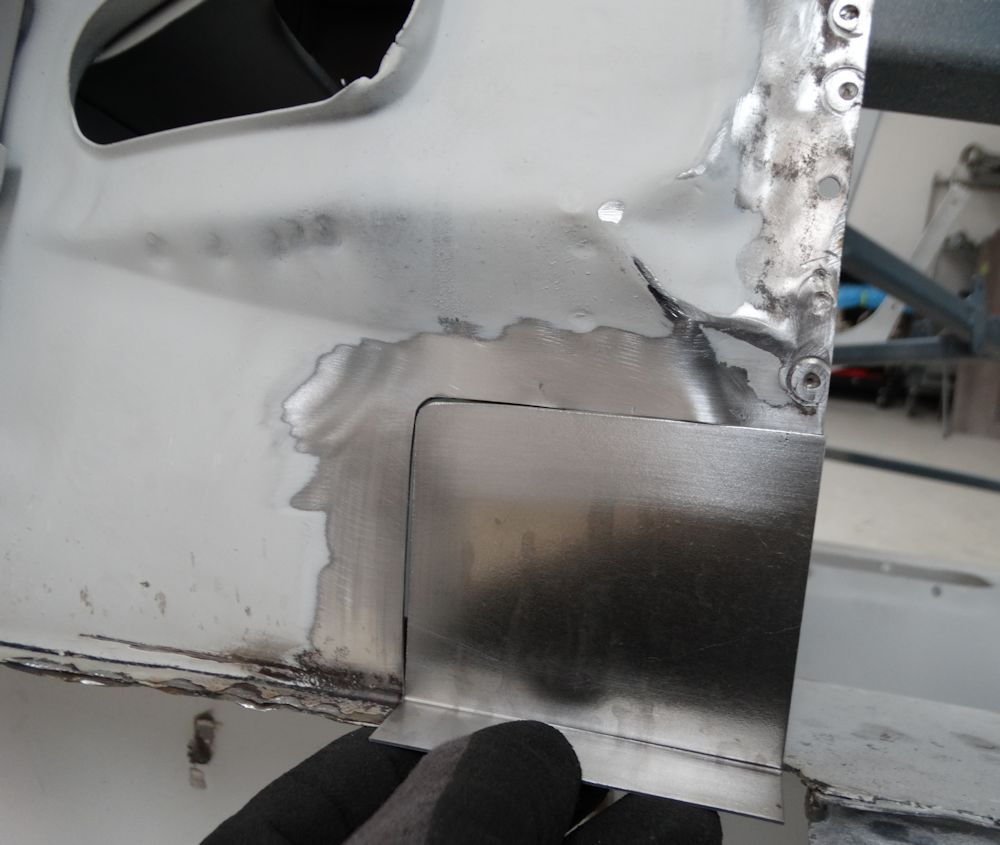
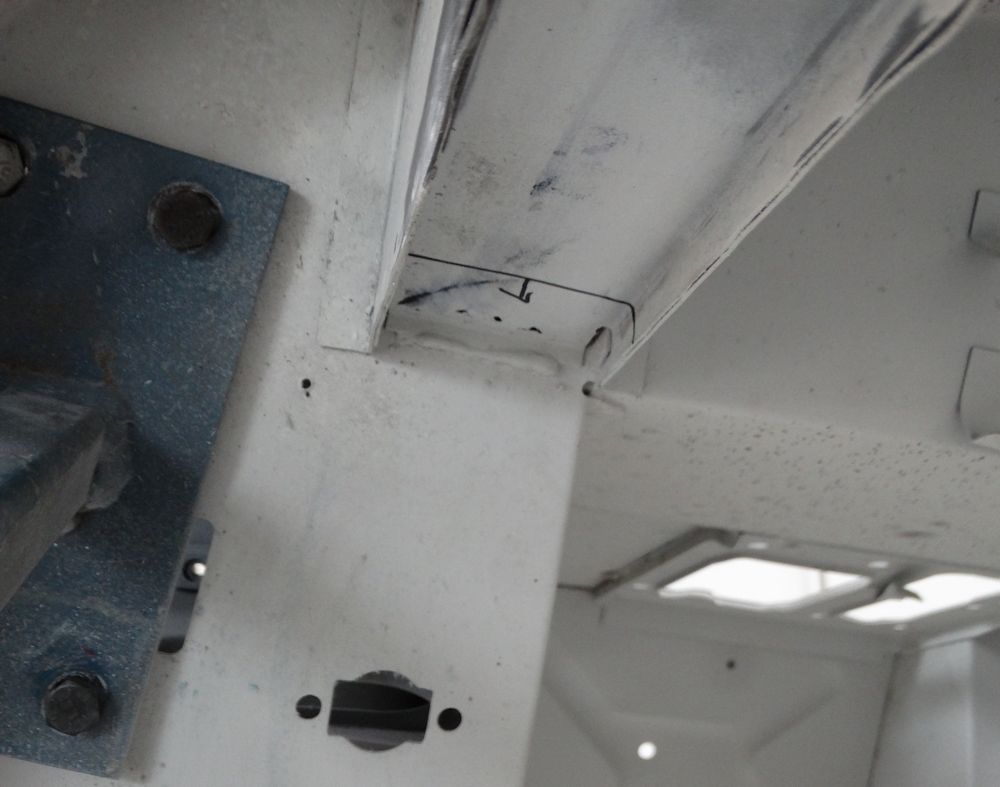
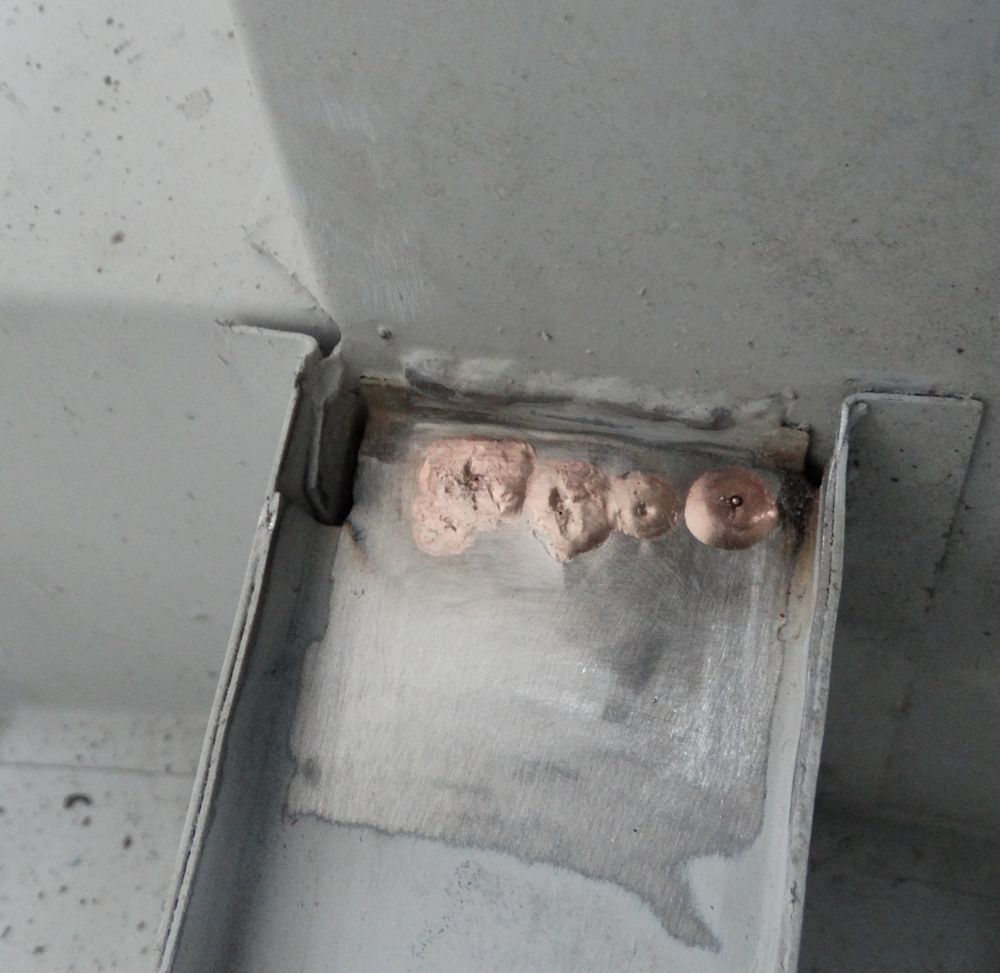
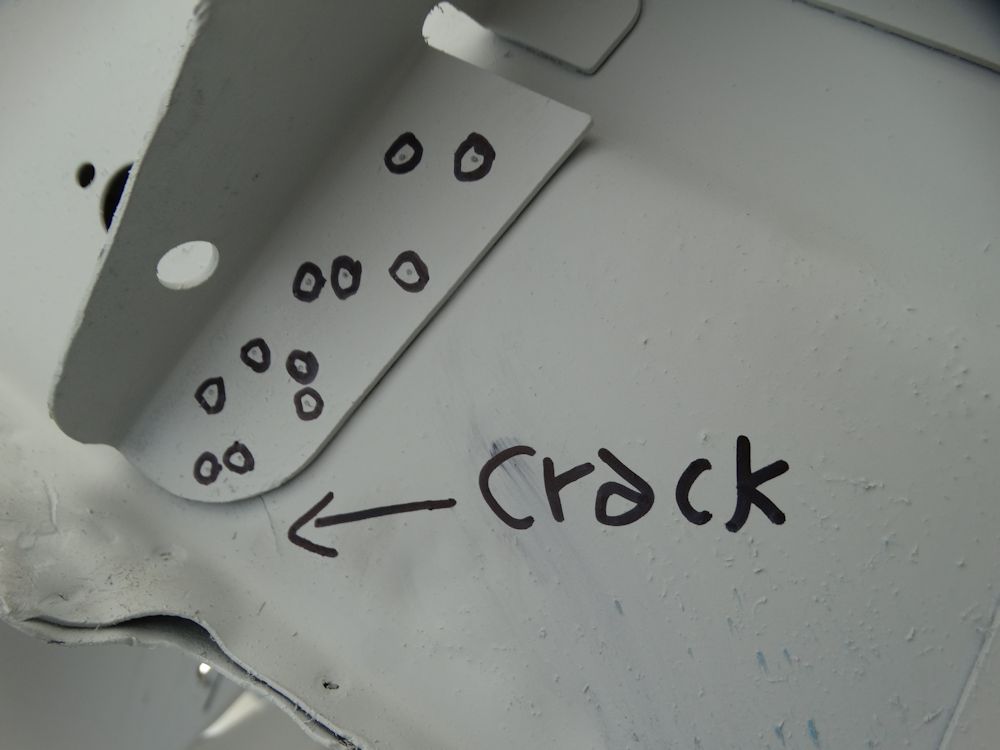
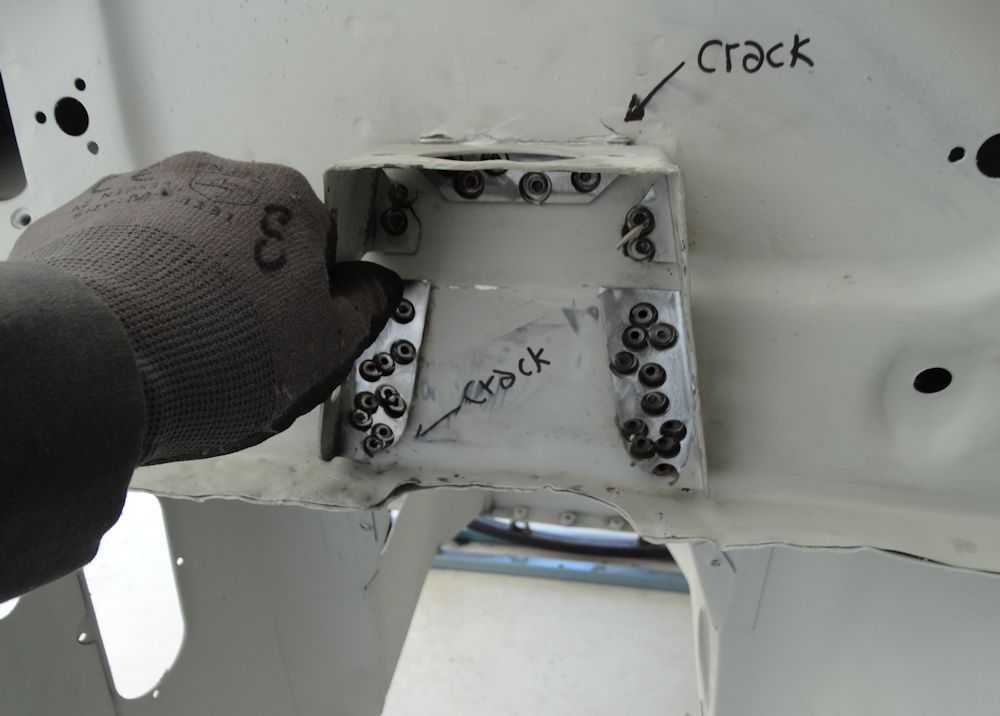
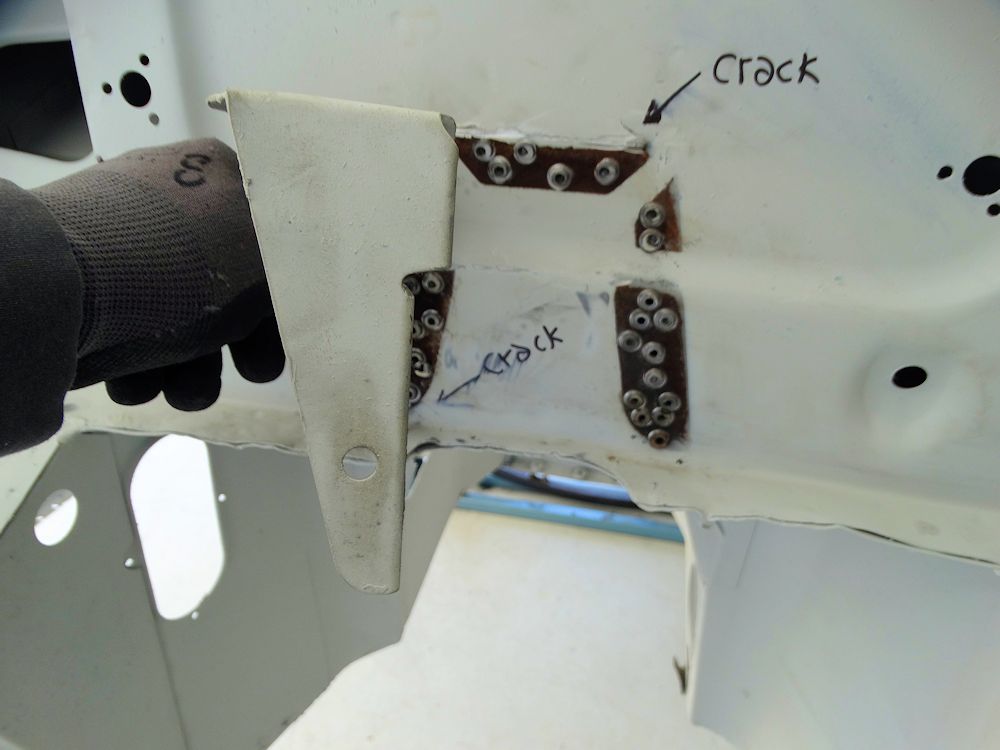
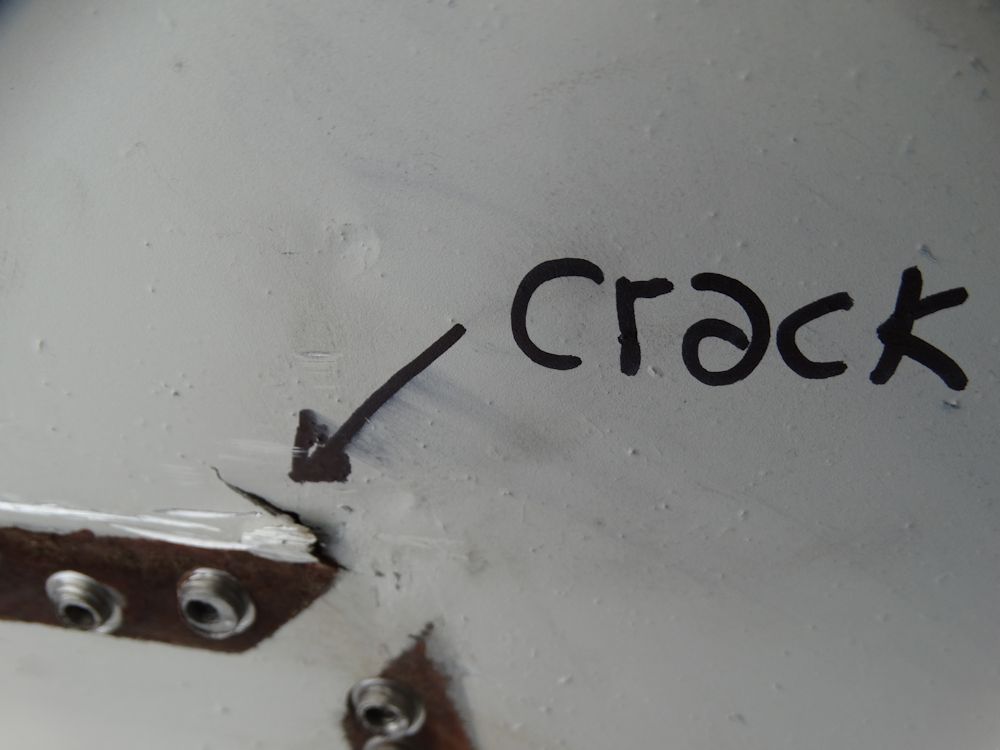
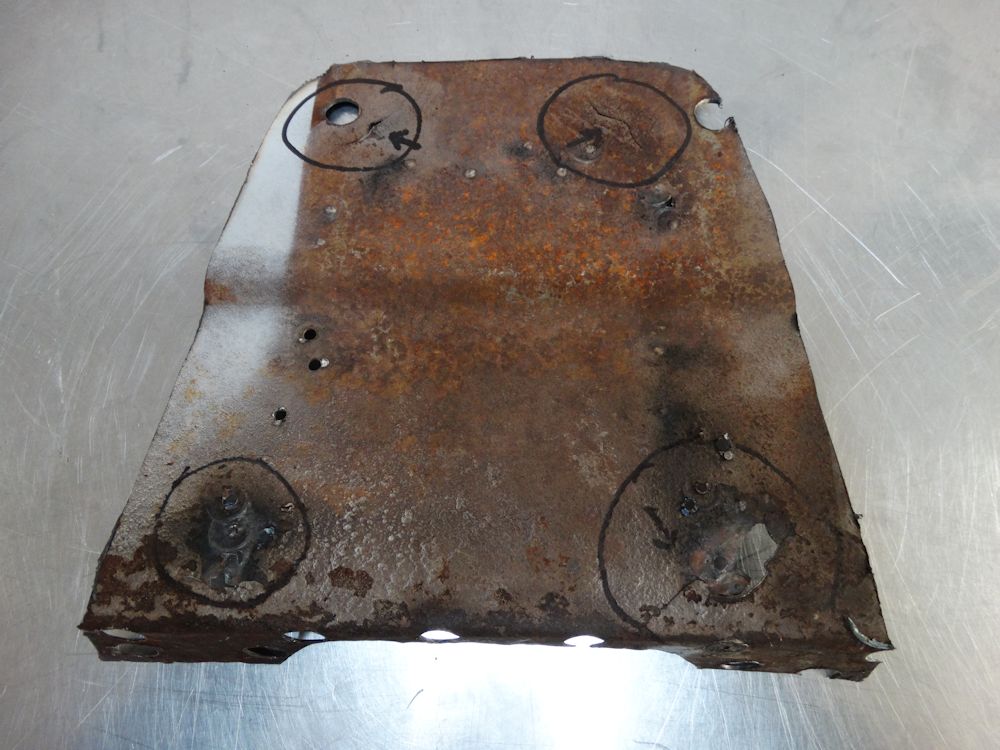
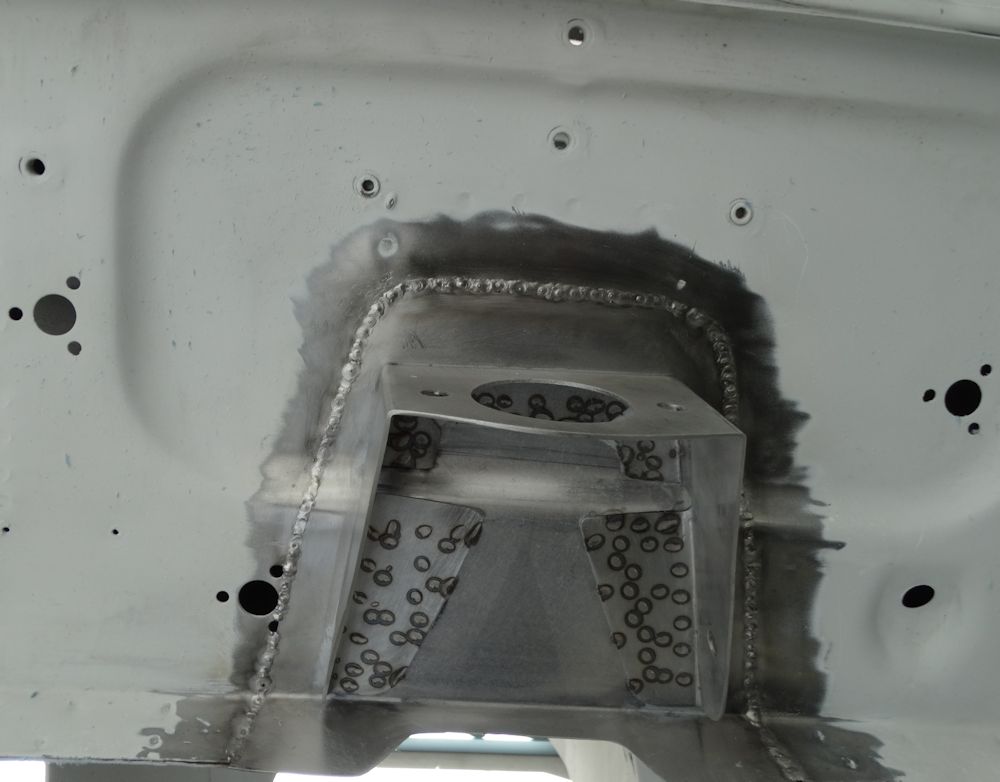
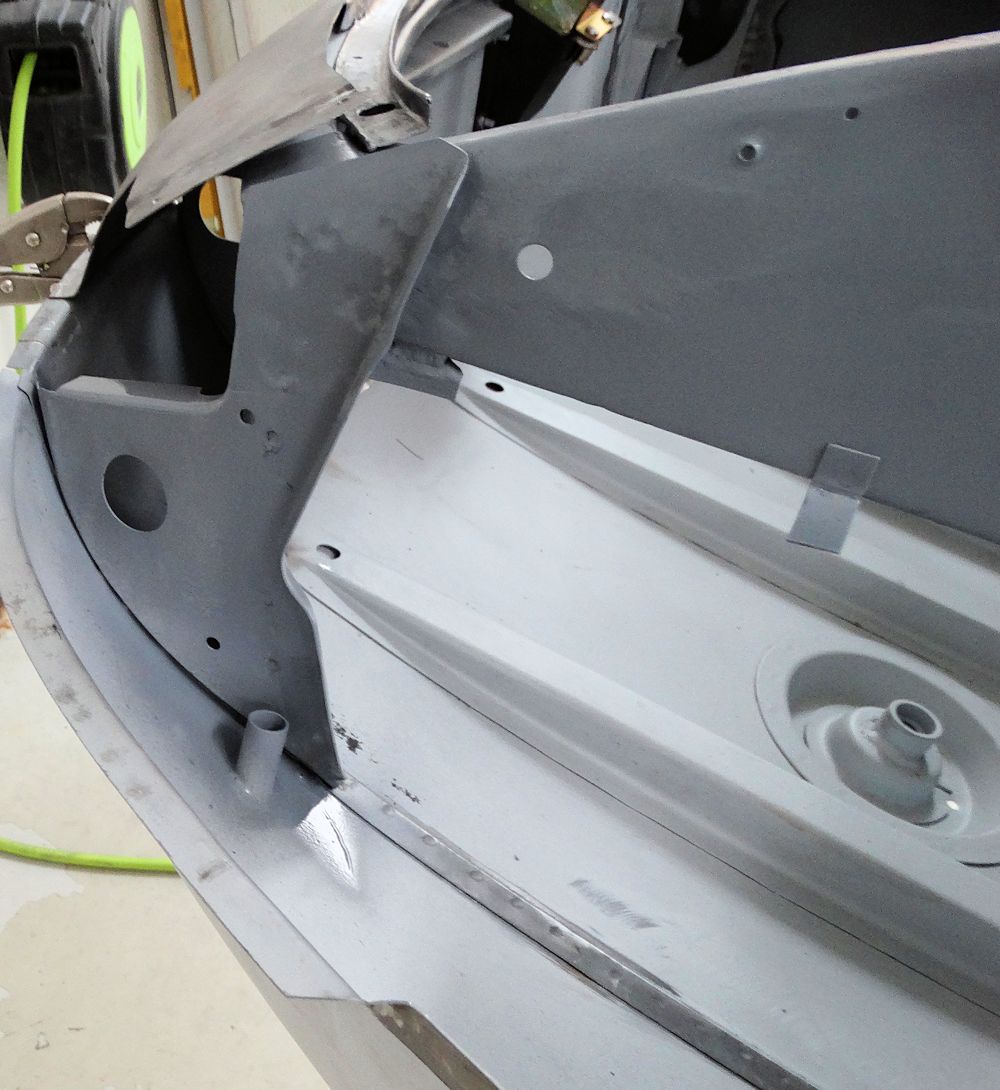
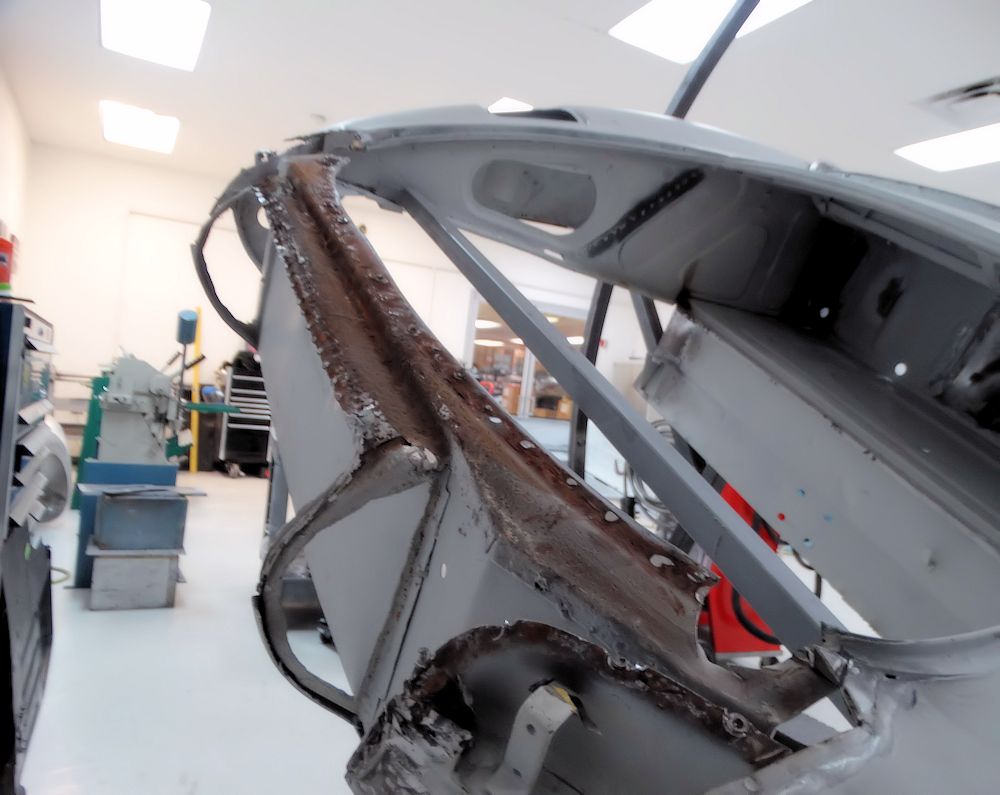
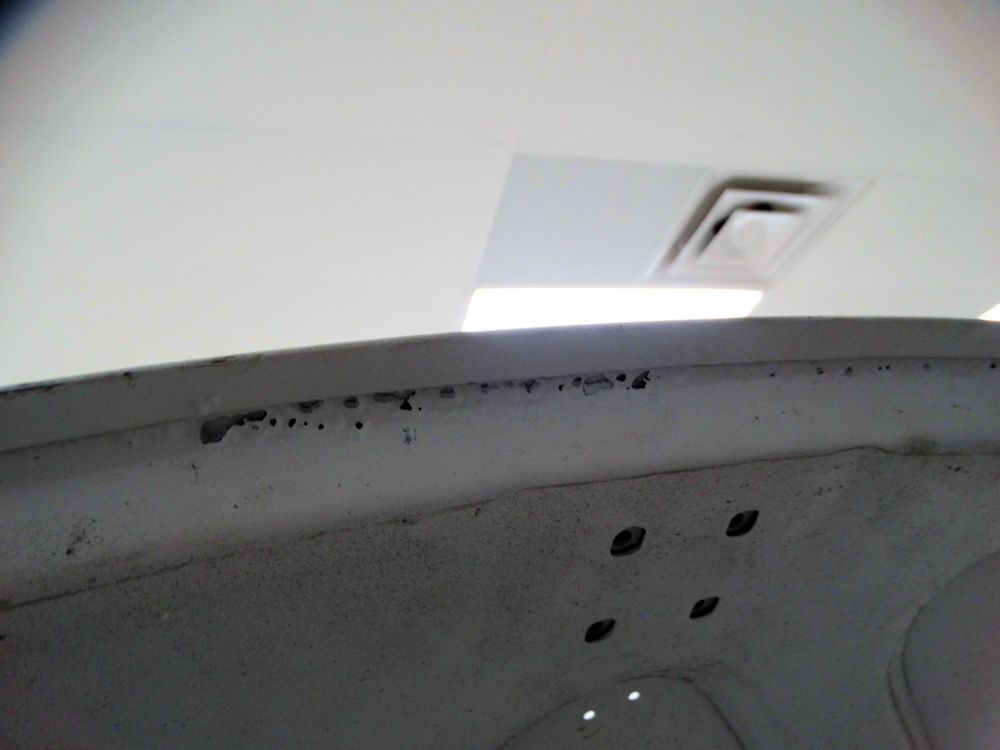
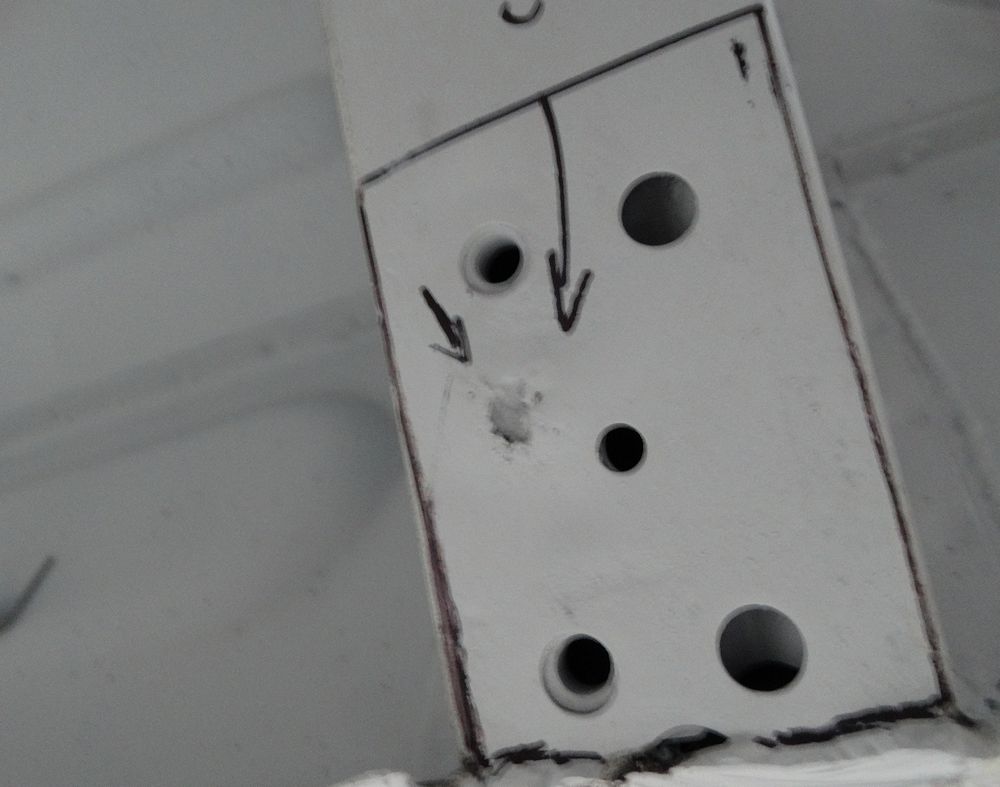
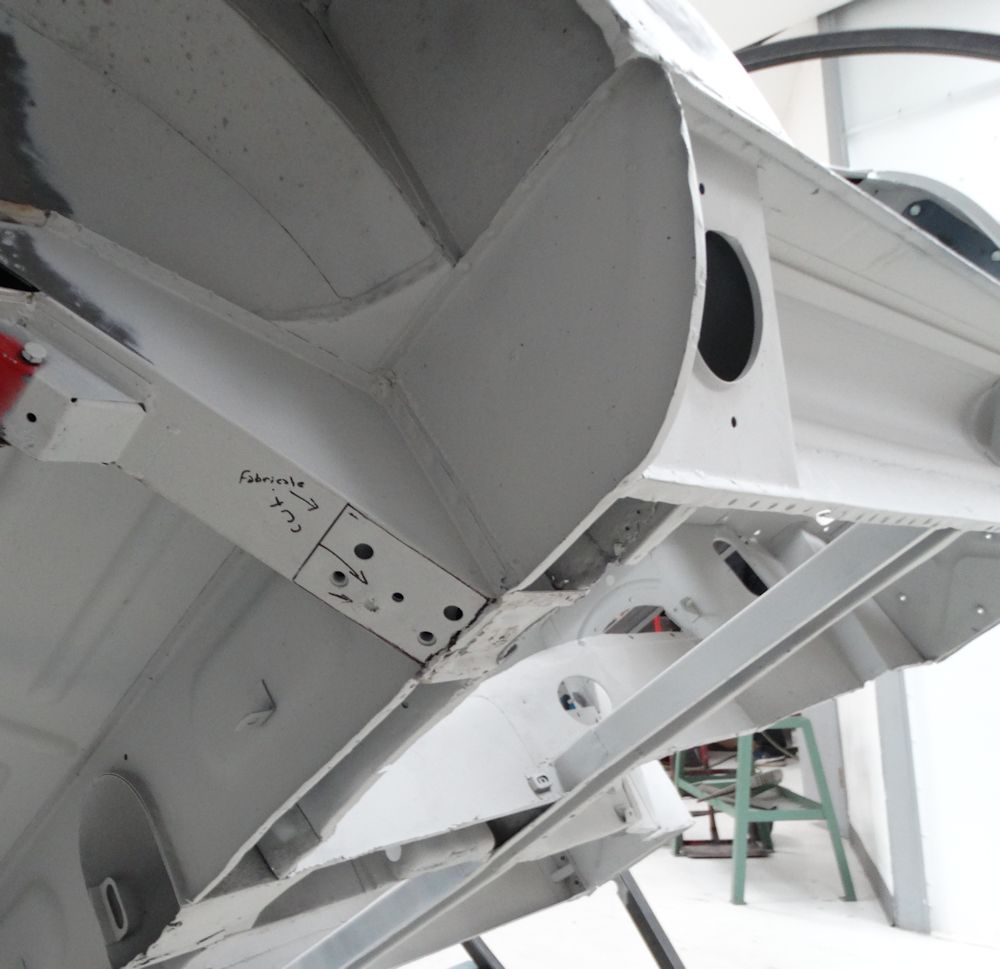
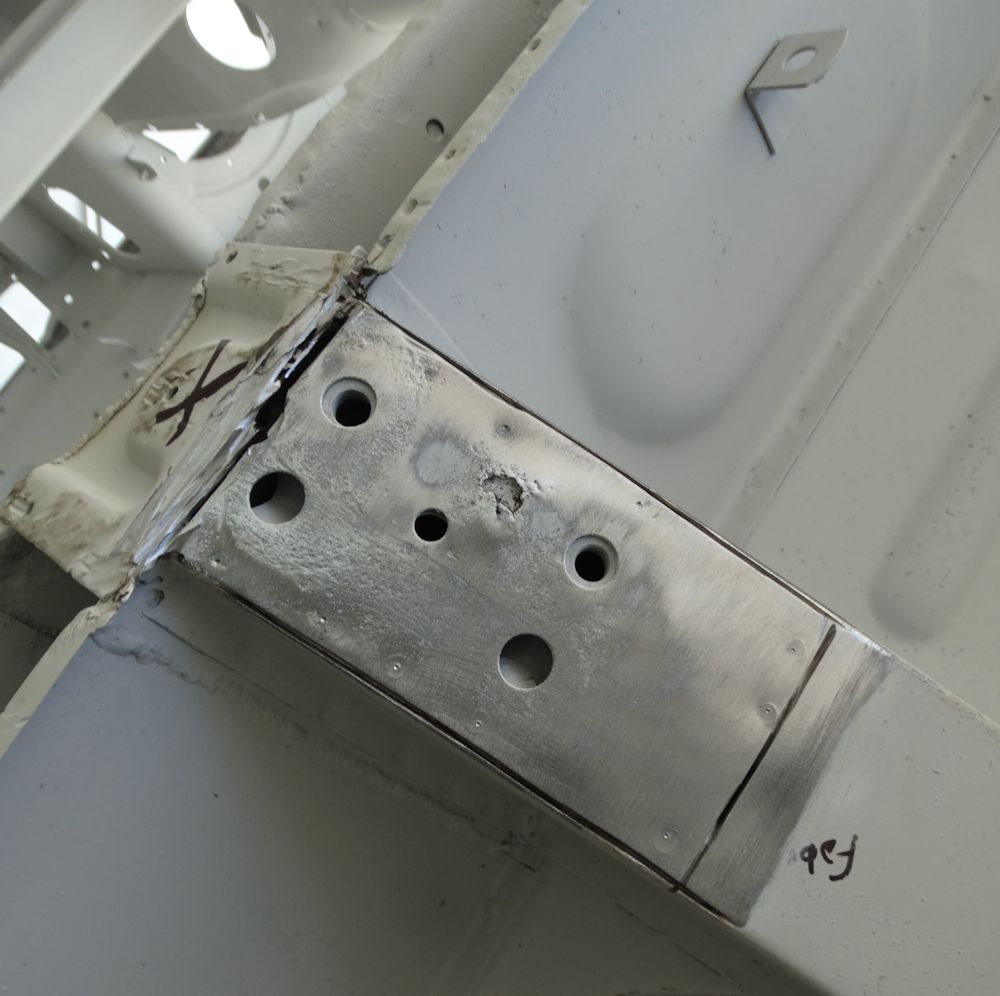
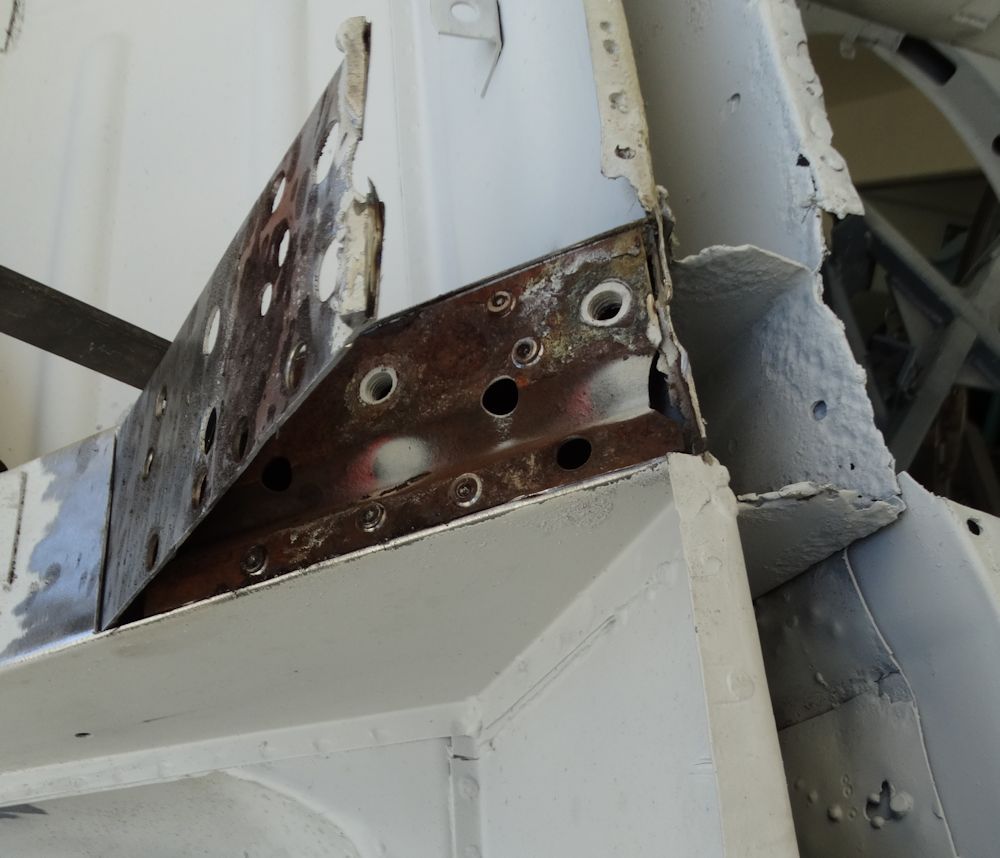
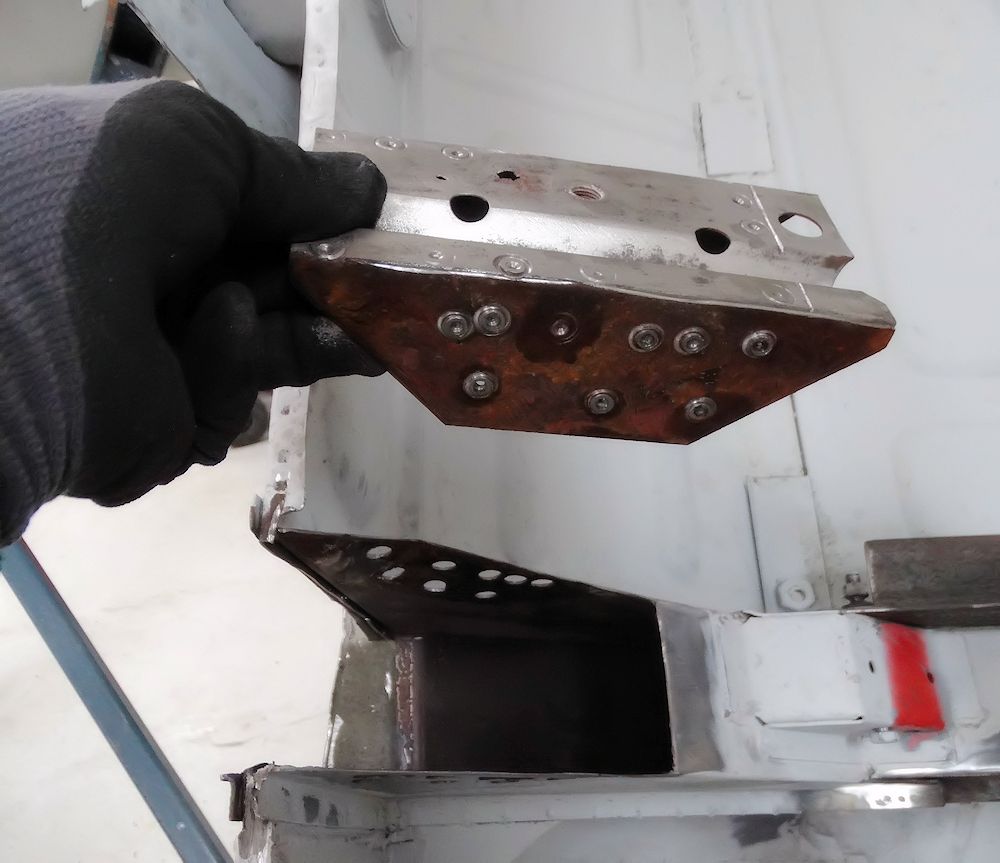
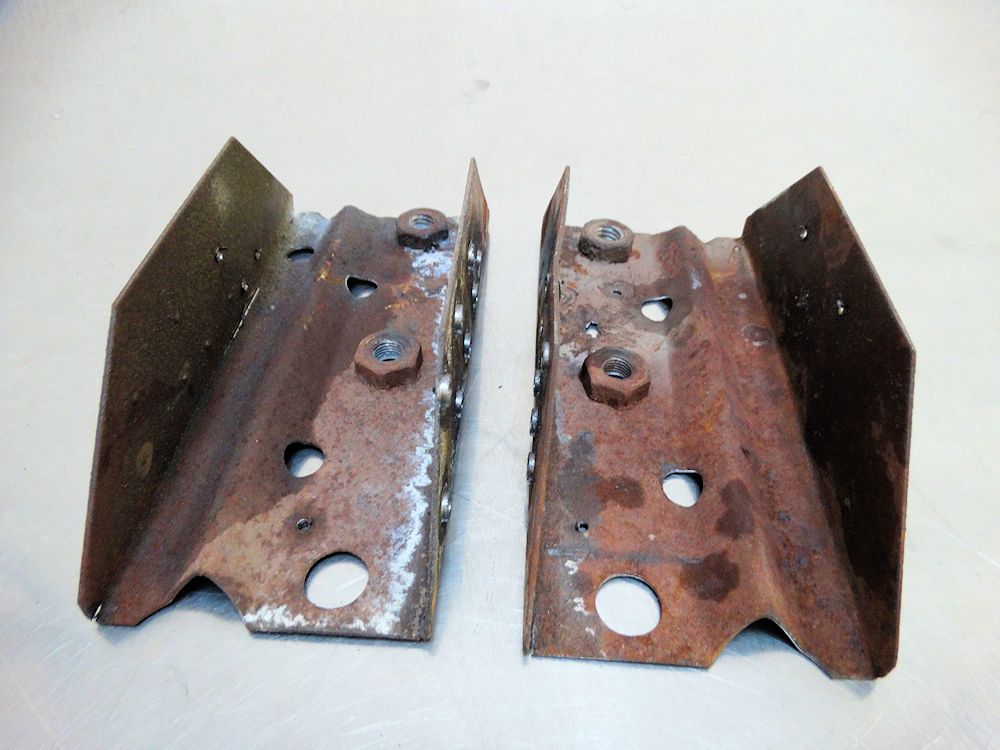
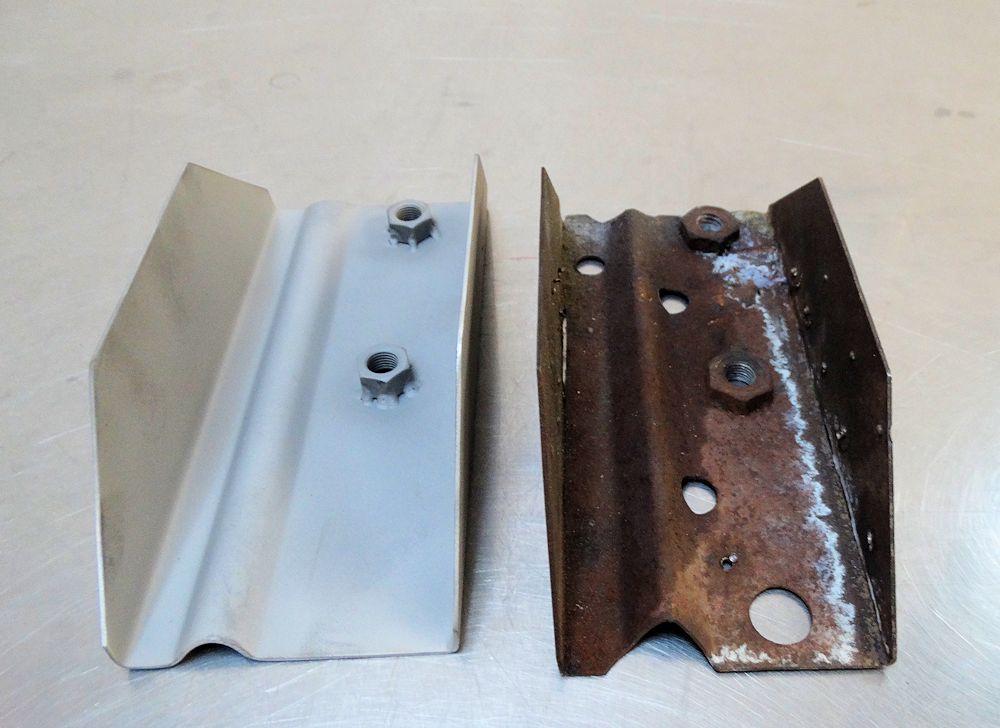
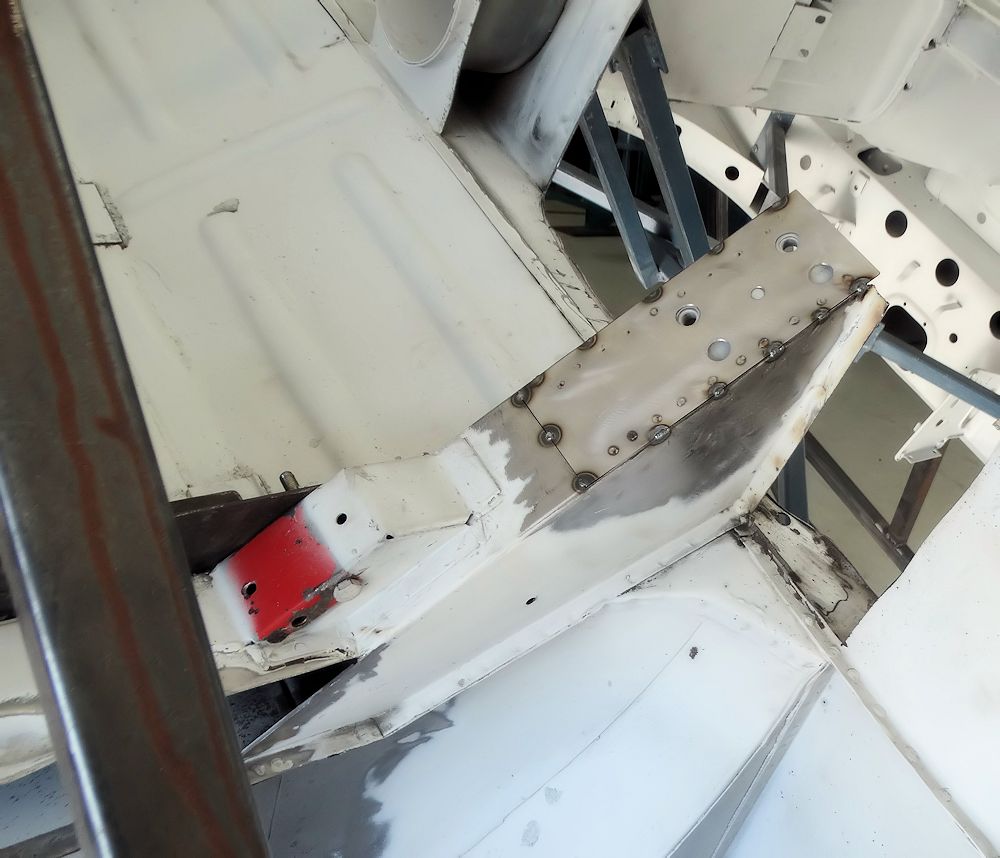
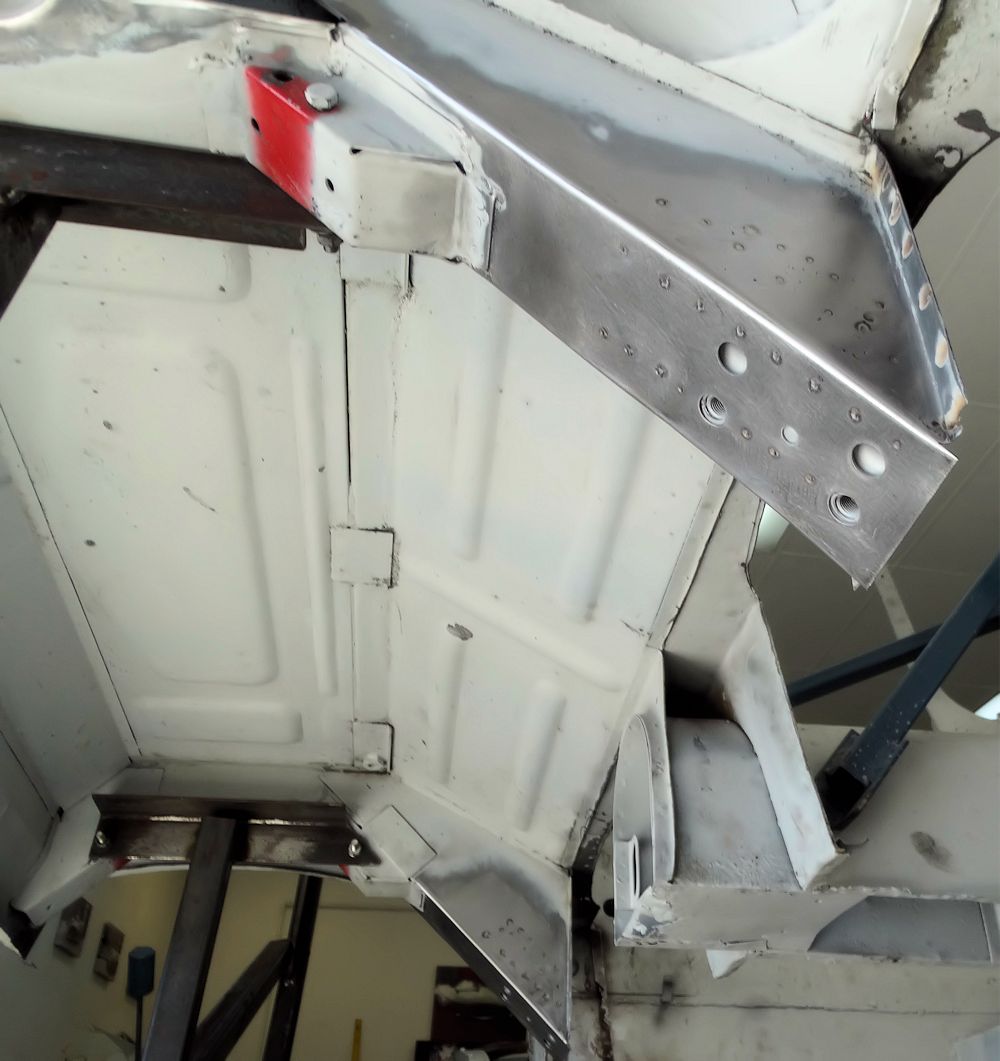
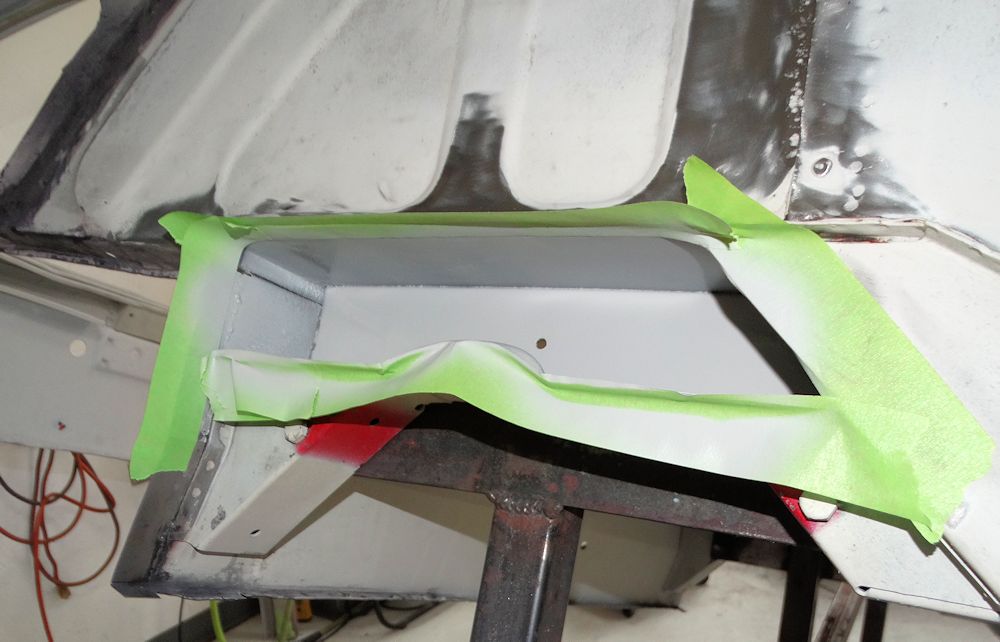
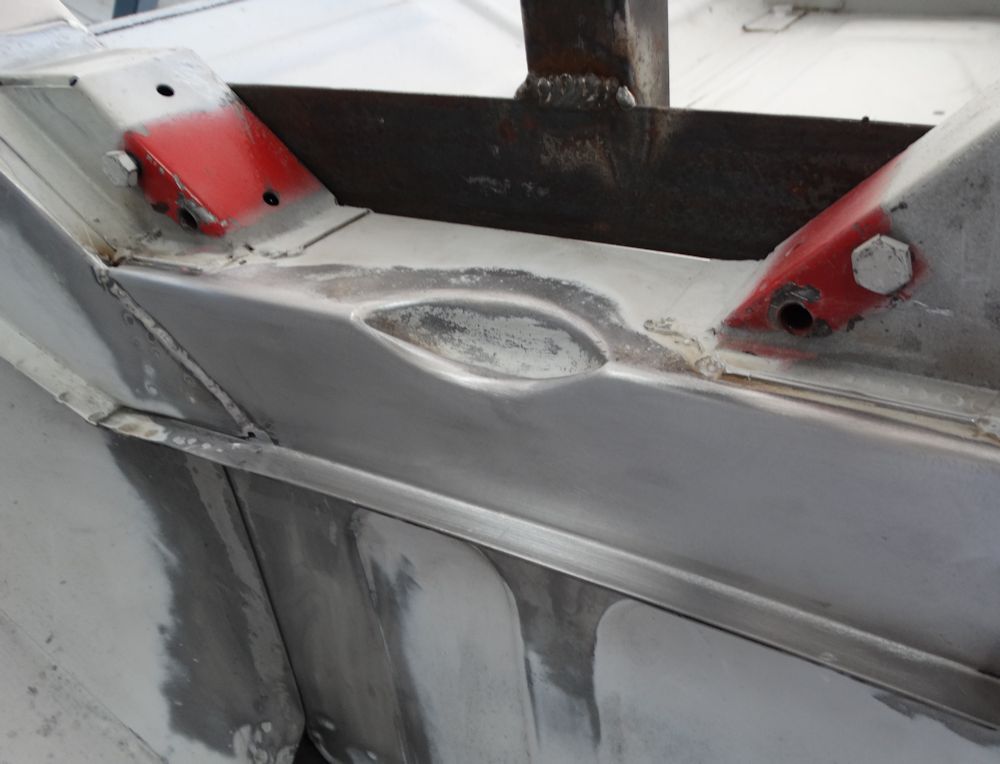
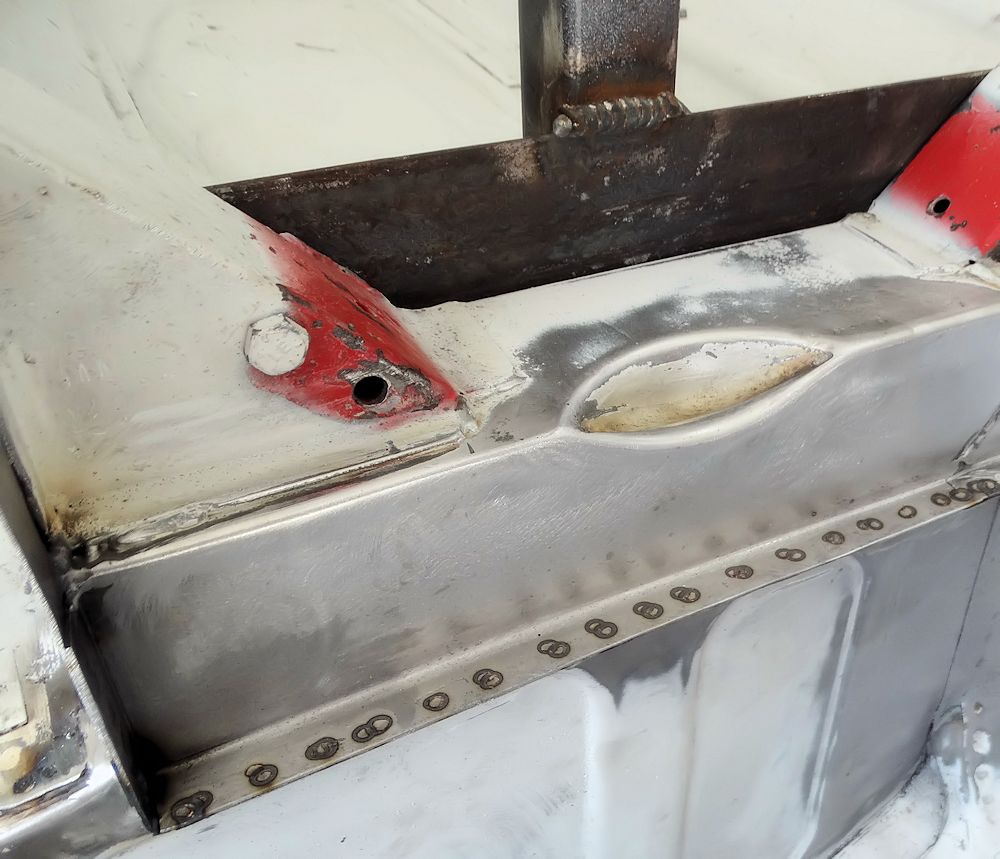
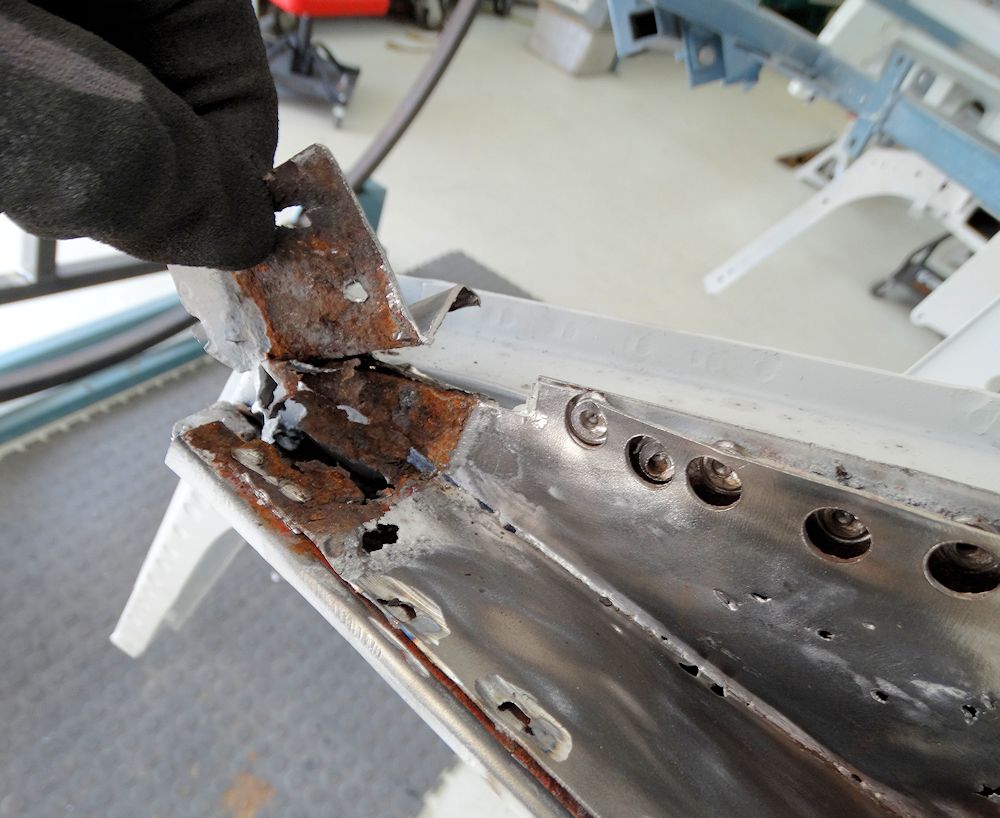
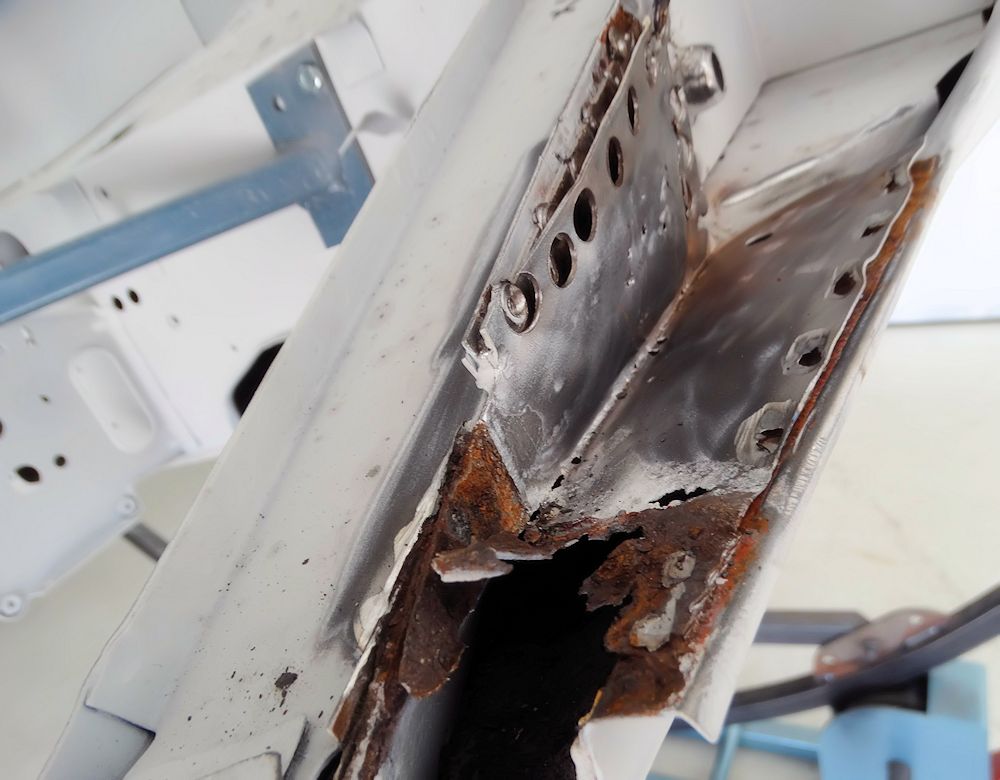
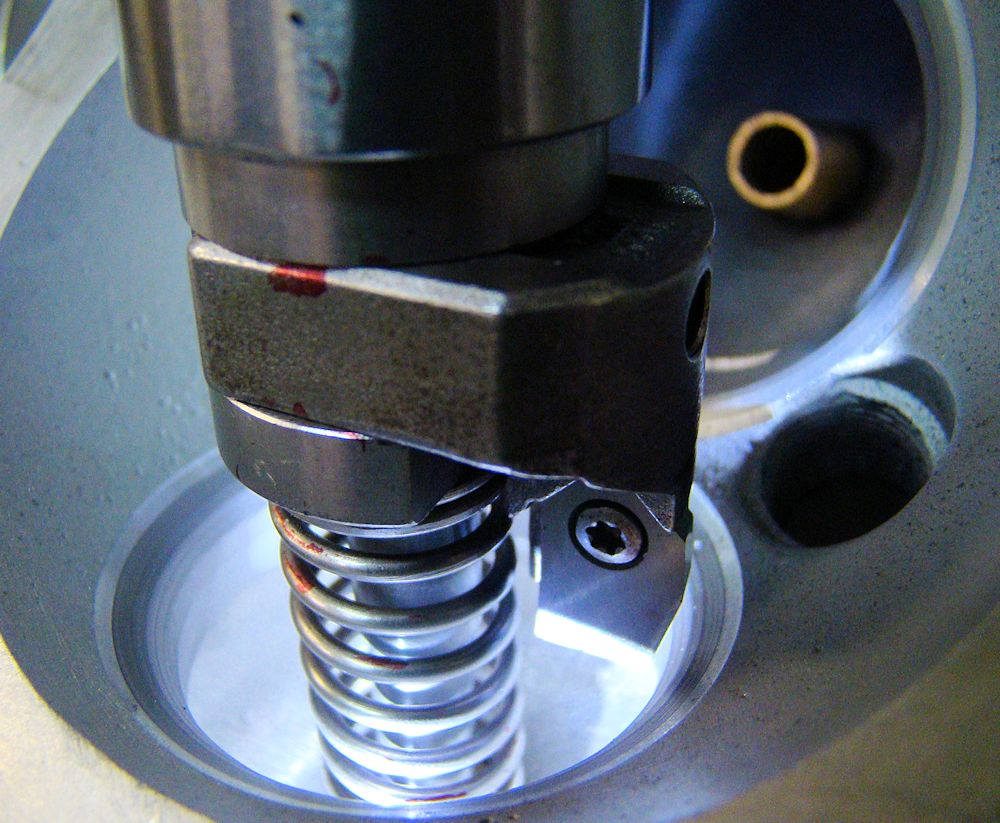
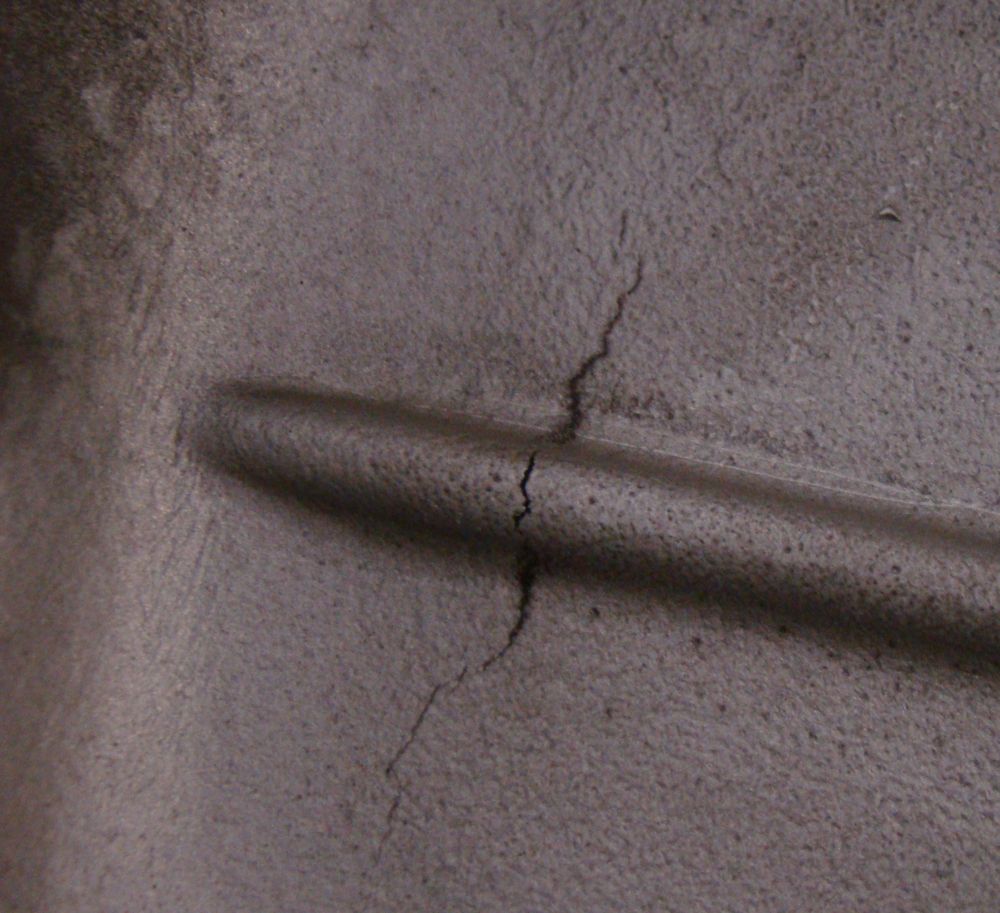
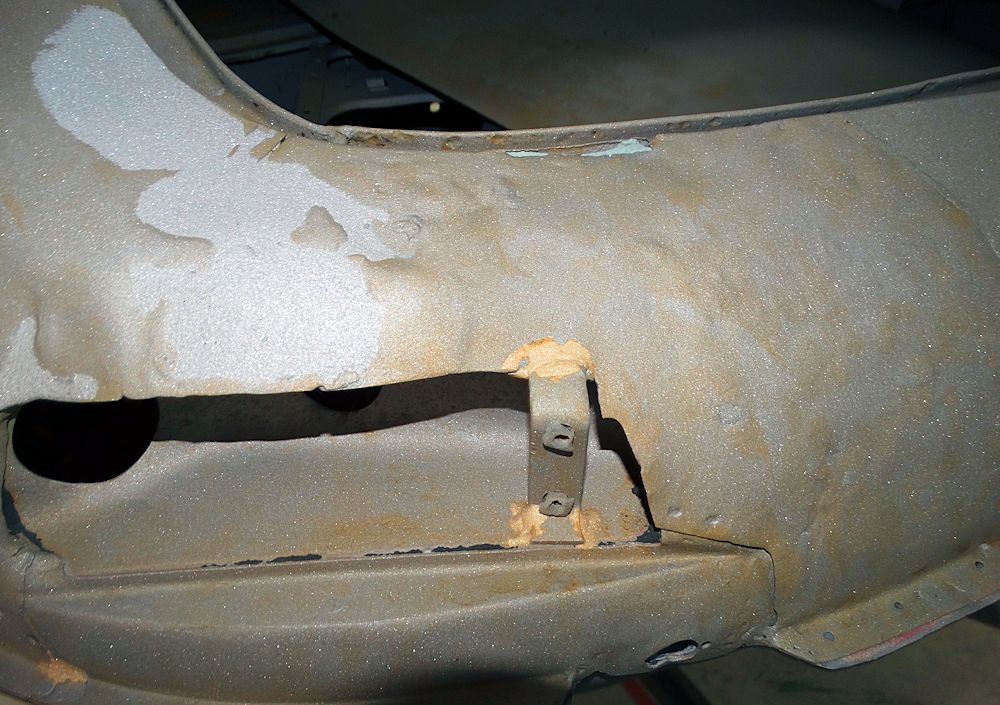
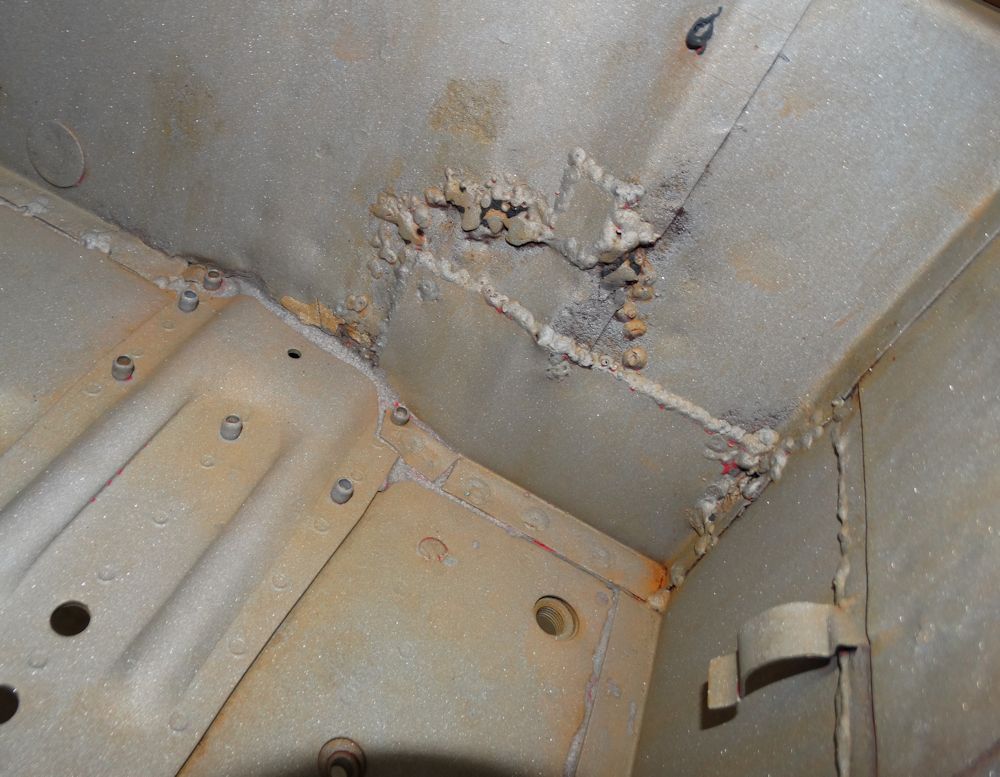
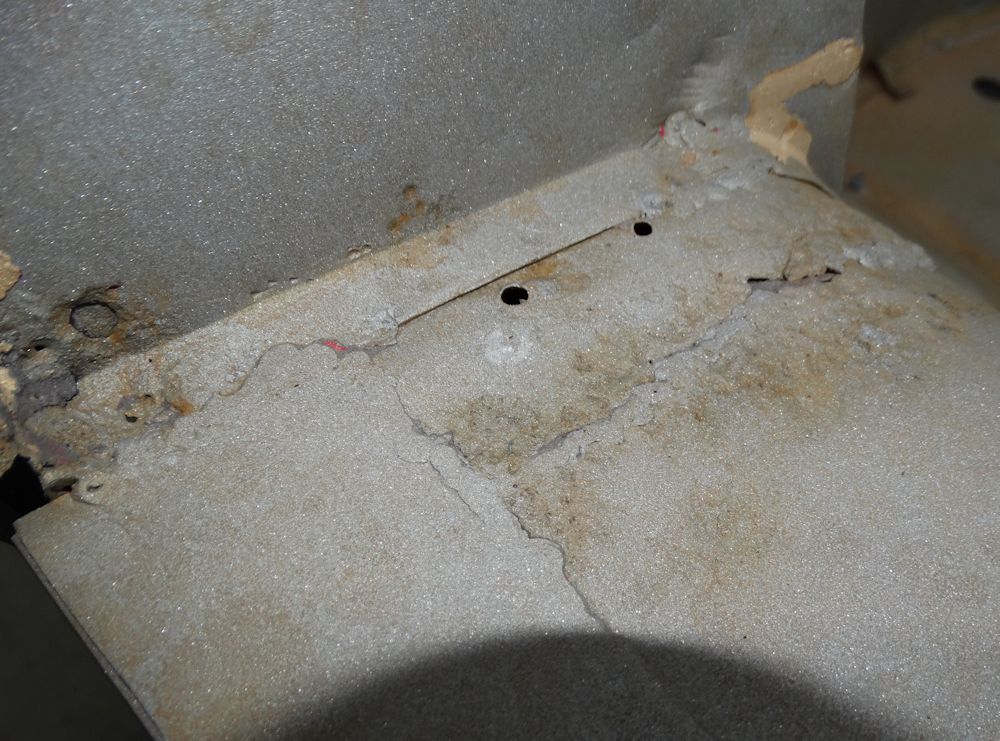
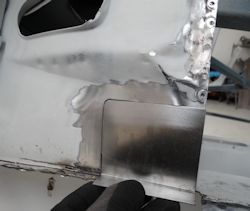
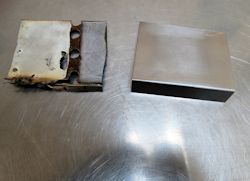
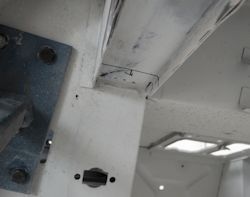
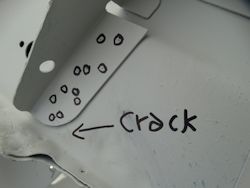
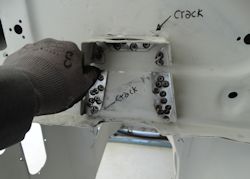
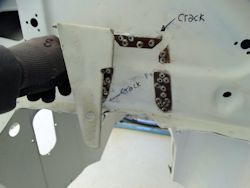
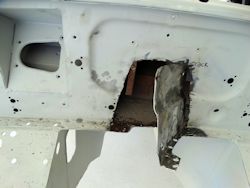
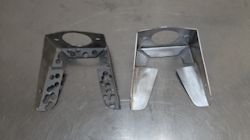
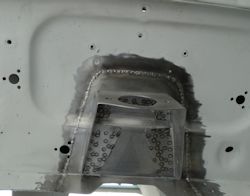
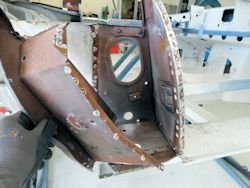
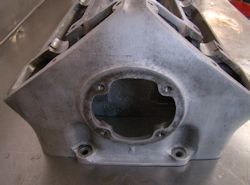
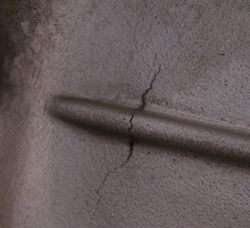
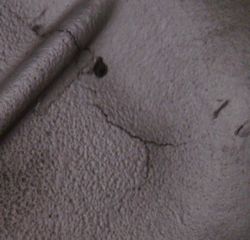
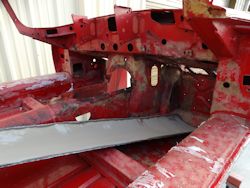
Cracks found around engine stabilizer
bracket
|
|
|
|
|
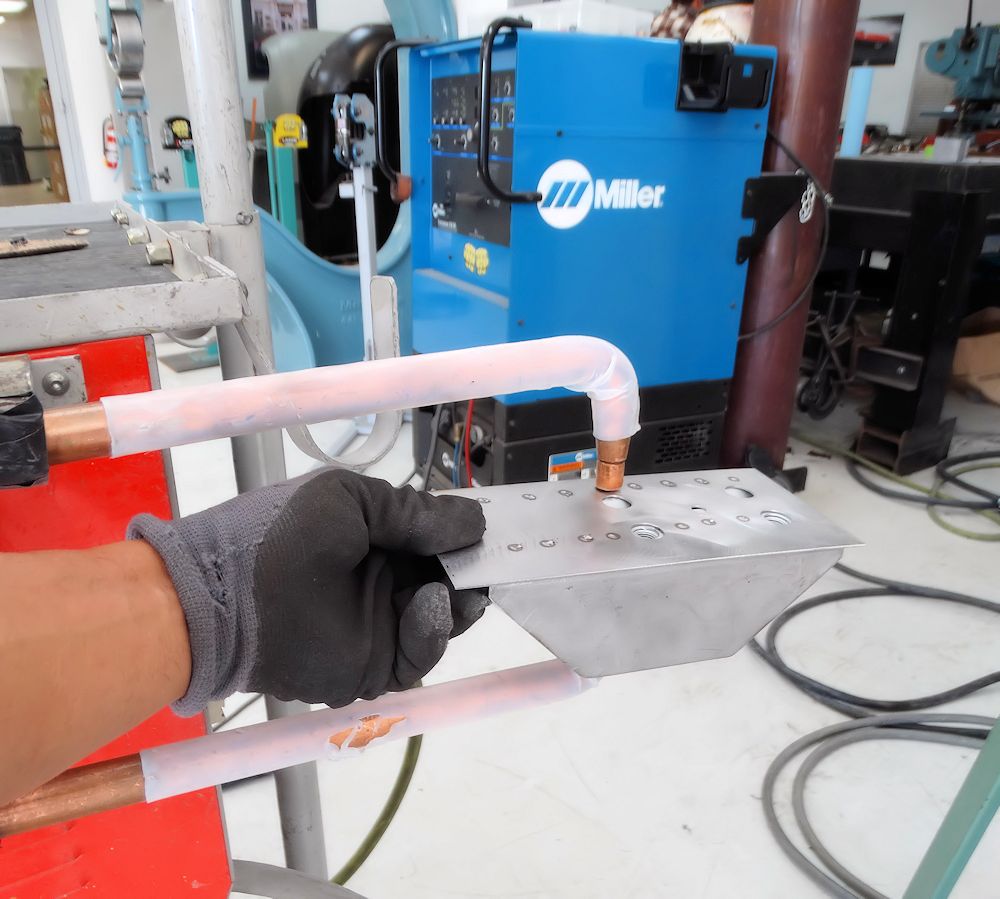
|
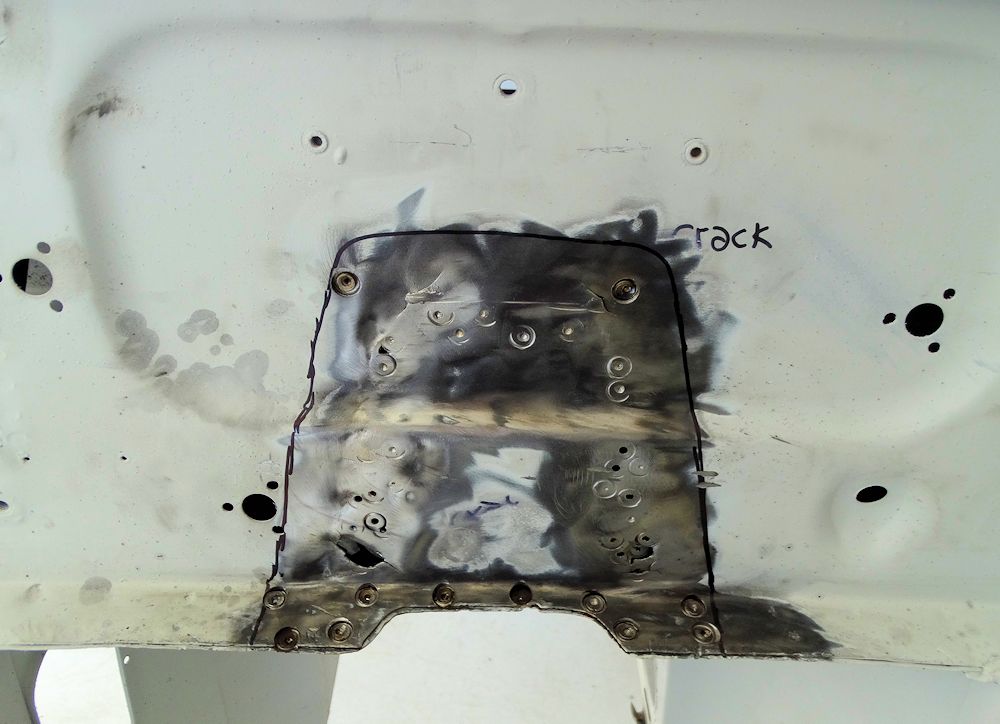
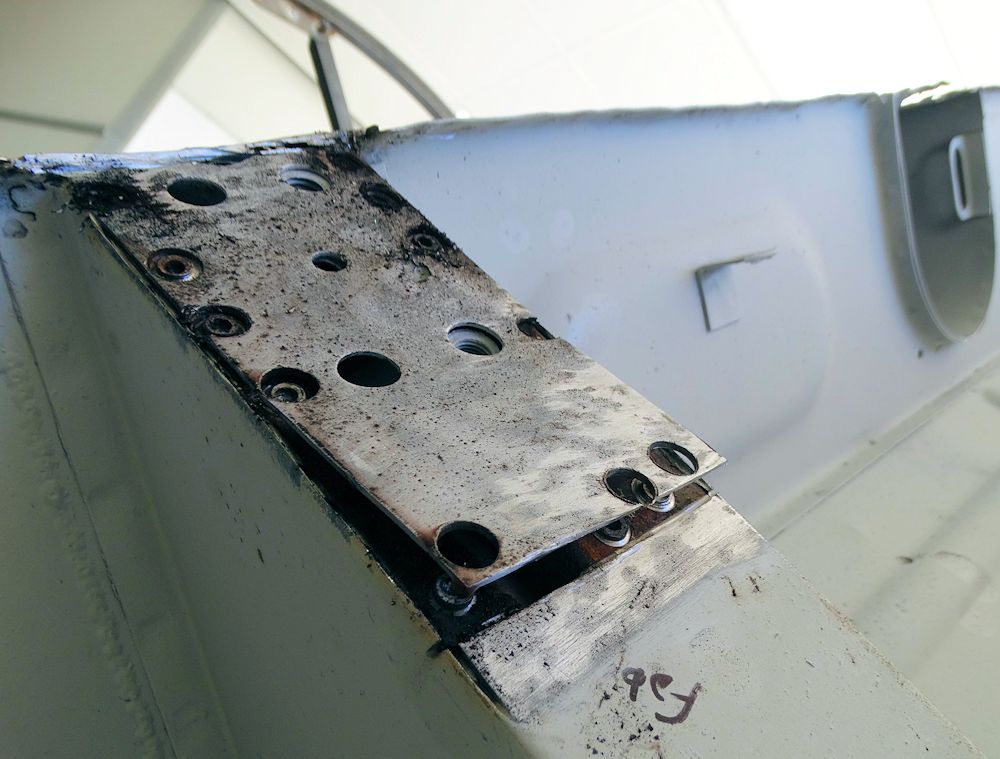
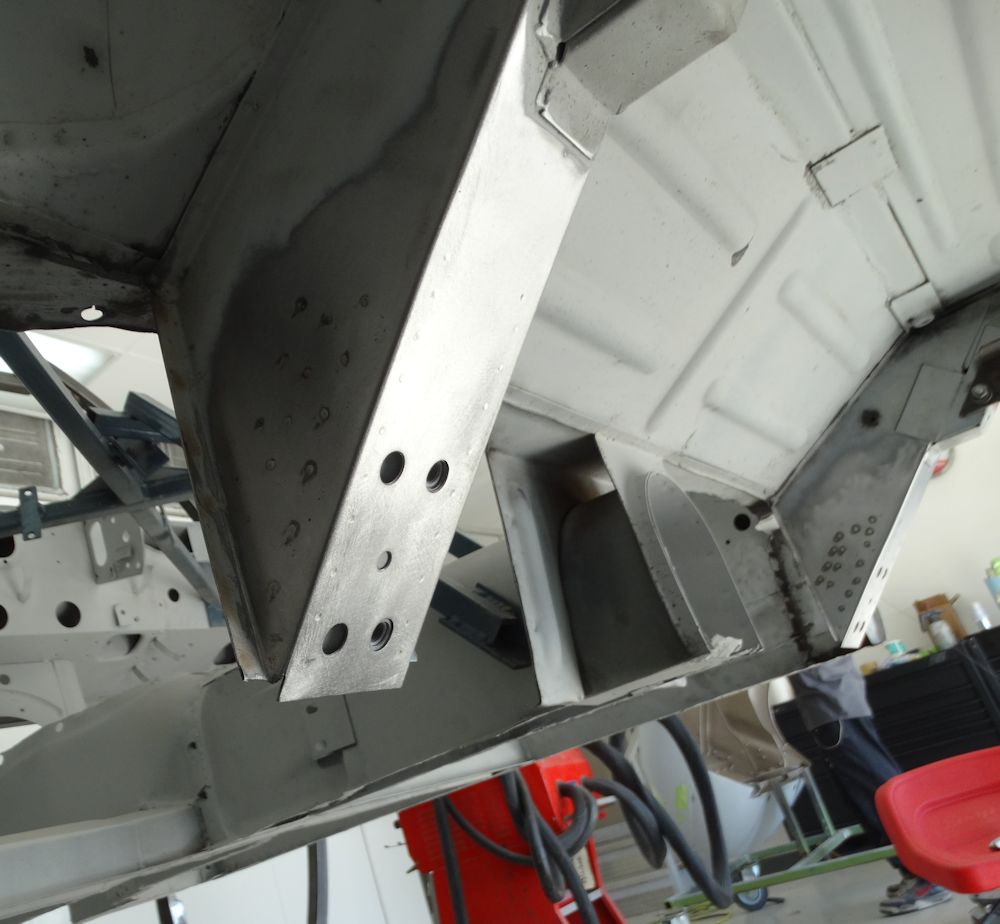
Drilling out spot welds holding bracket
to firewall
|
|
|
|
|
|
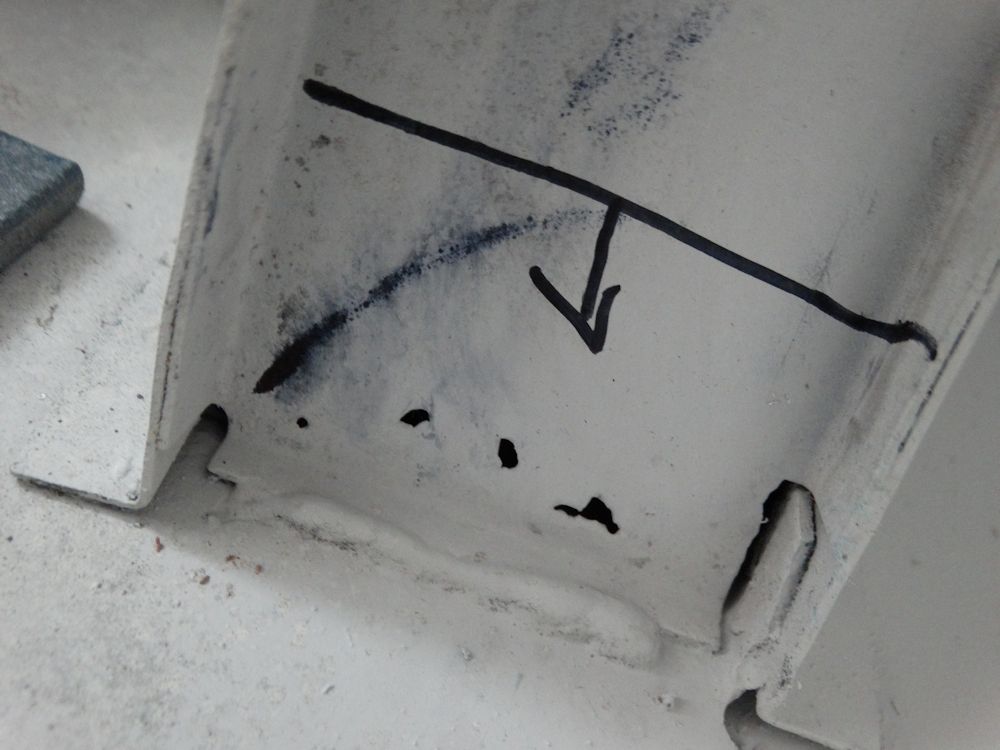
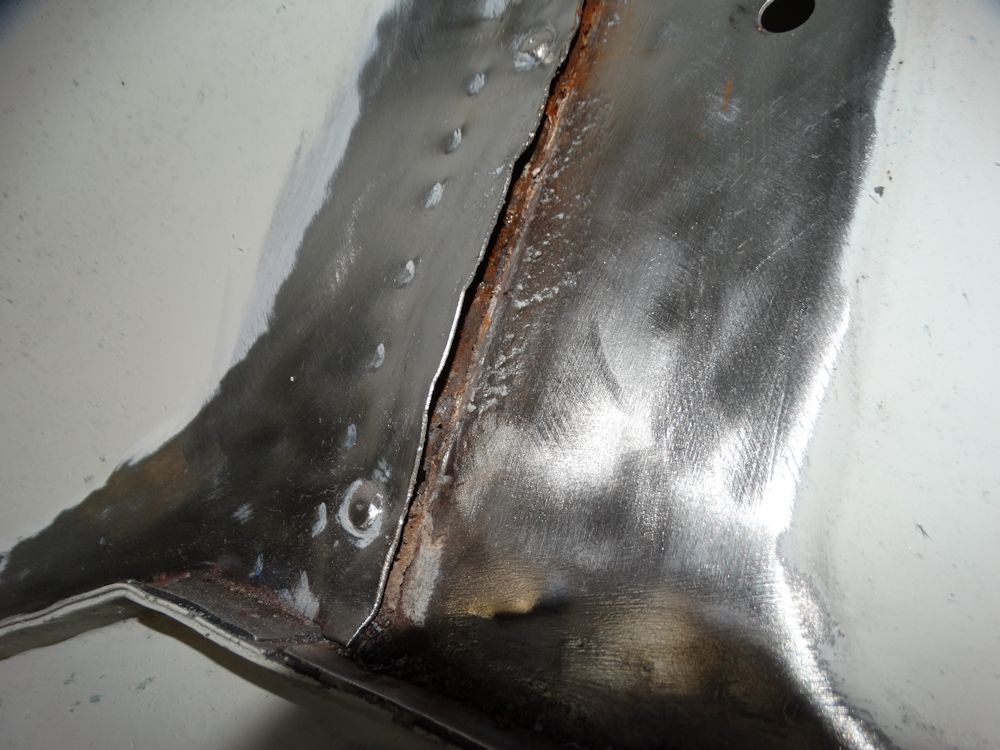
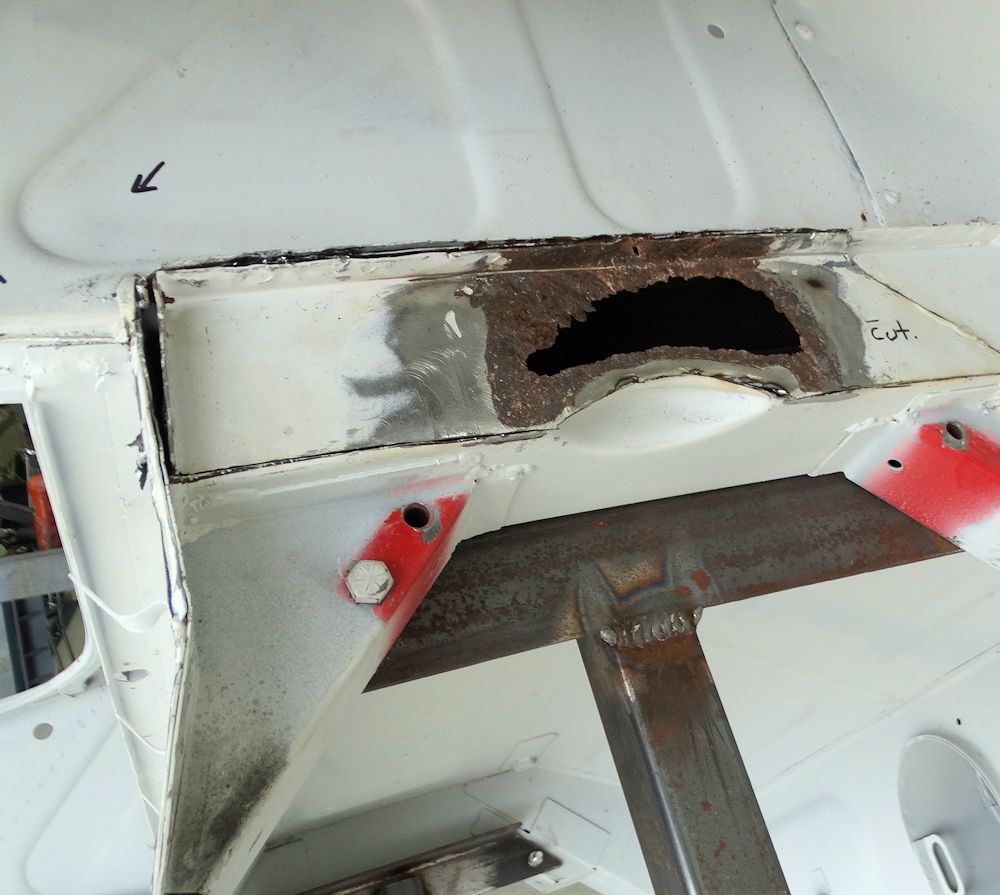
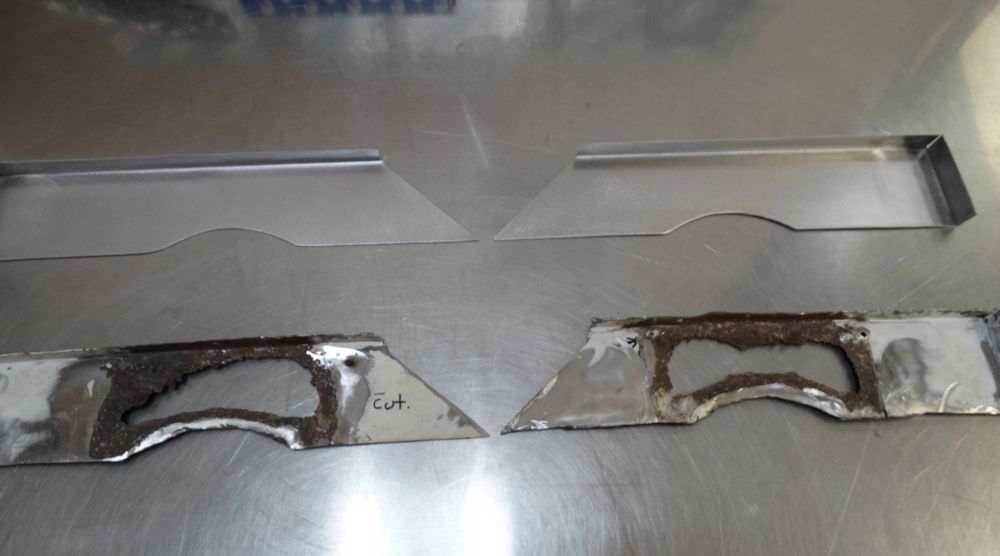
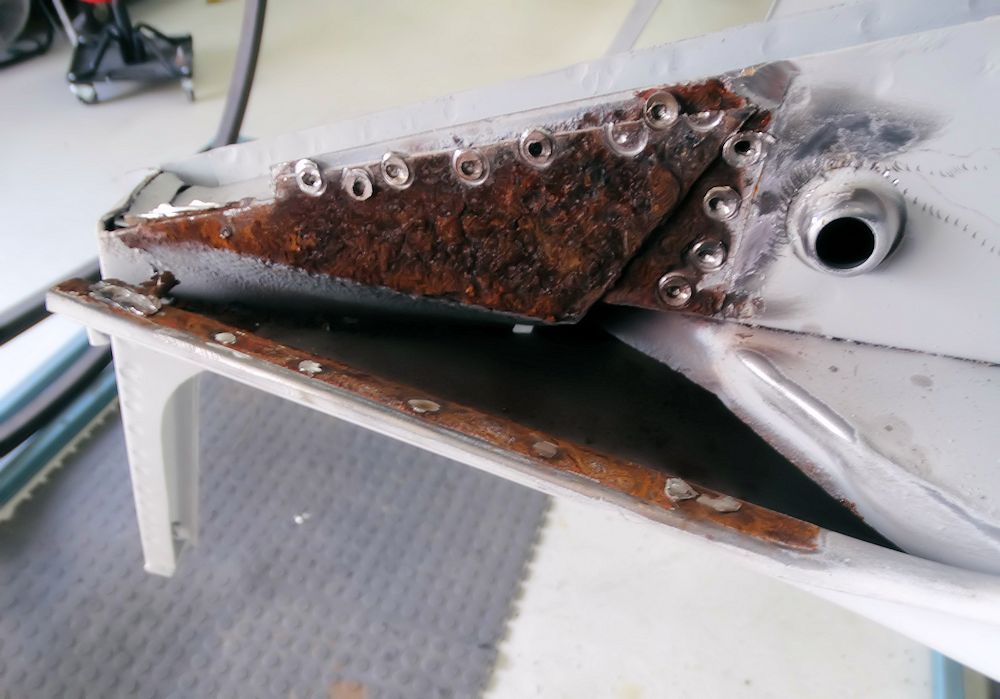
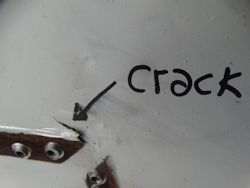
Crack cannot be ignored at such an
important
structural part of the firewall
|
|
|
|
|

|
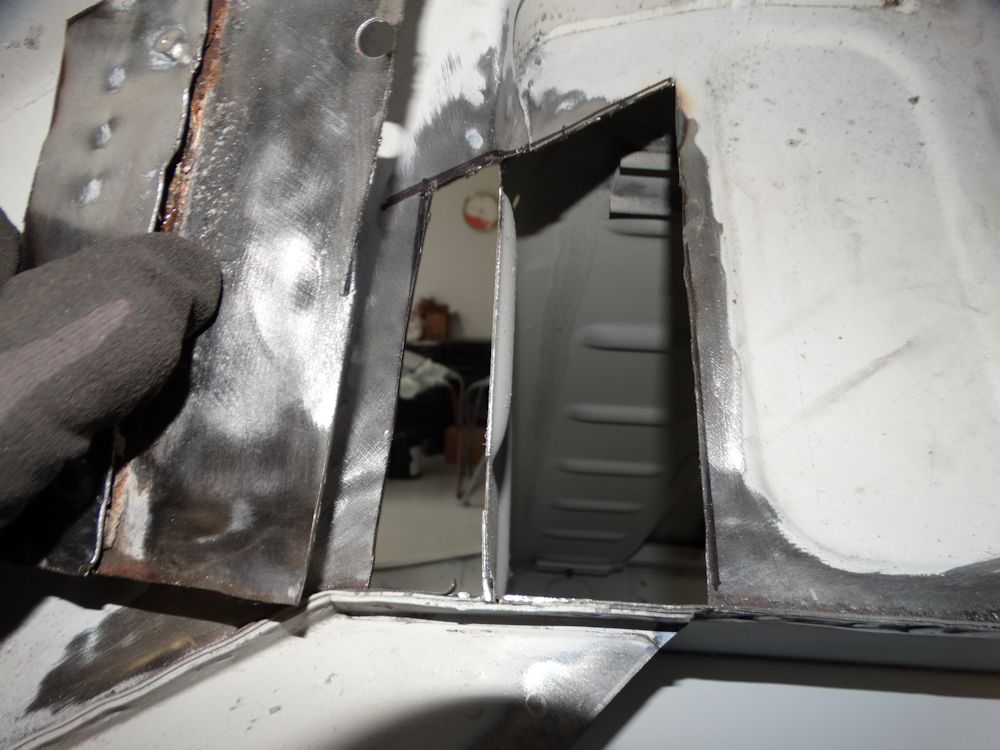
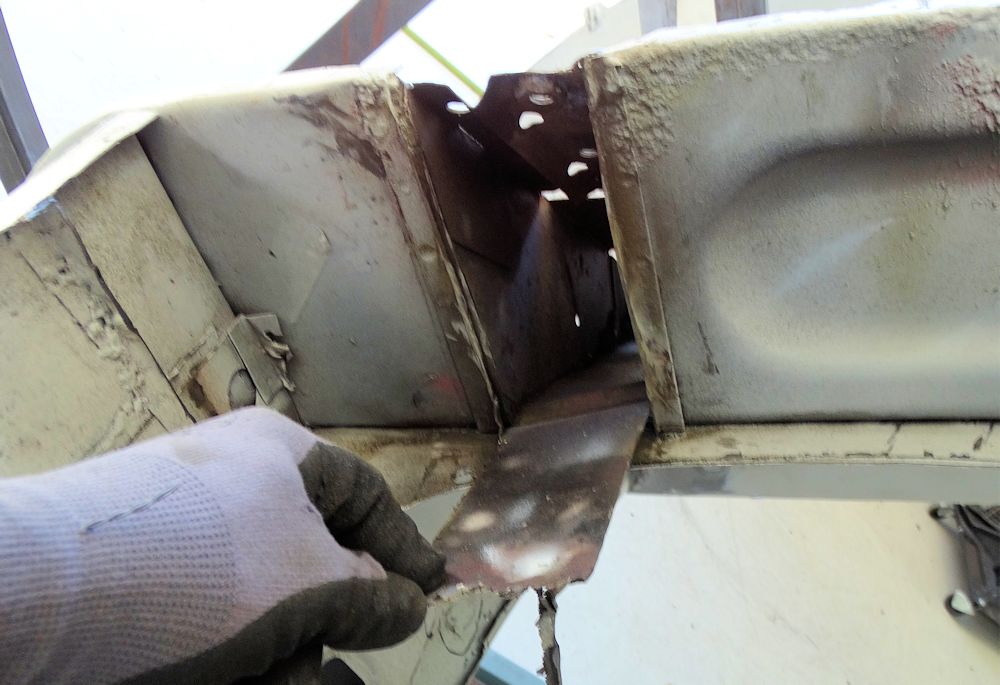
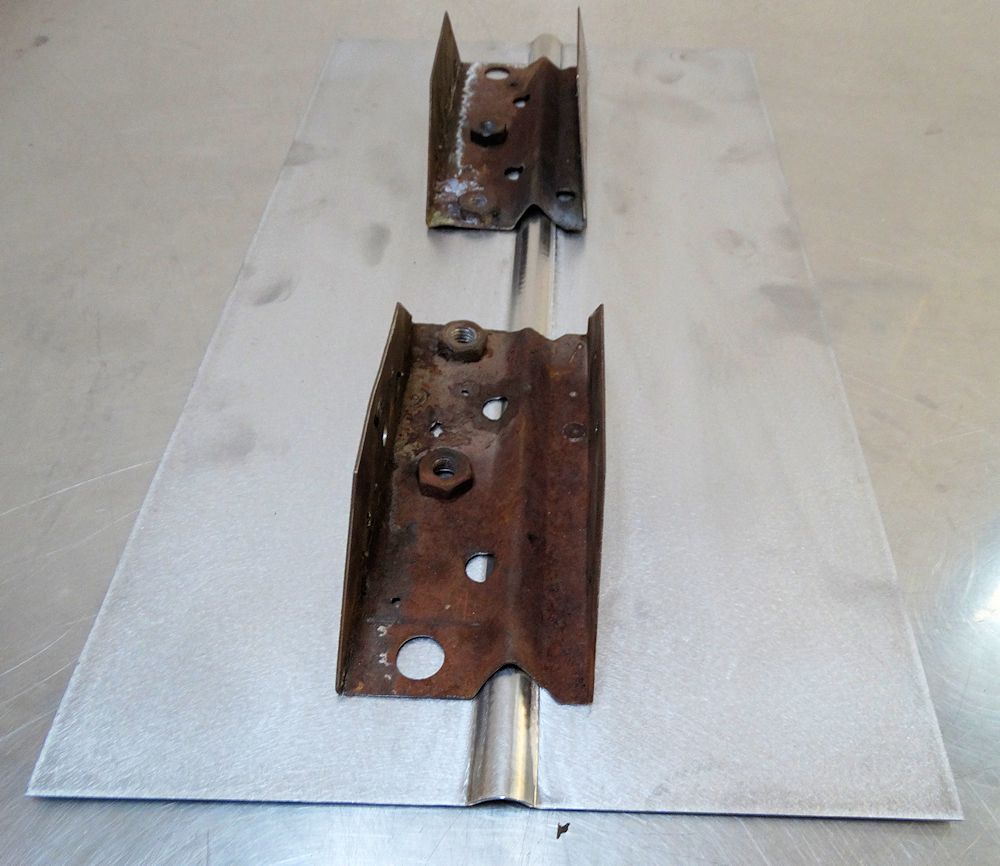
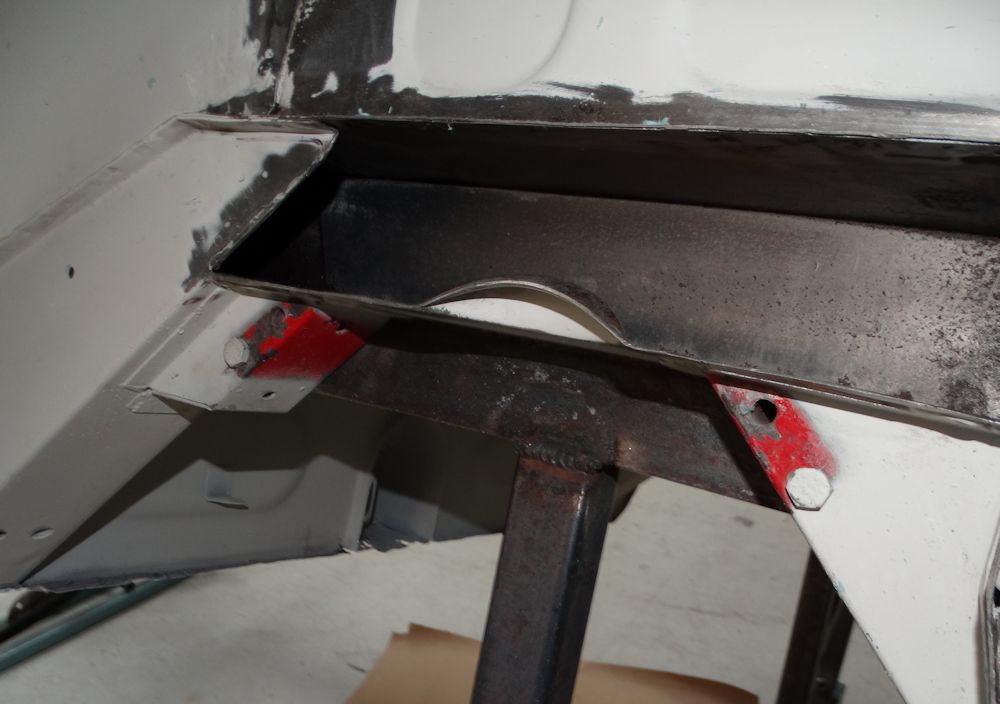
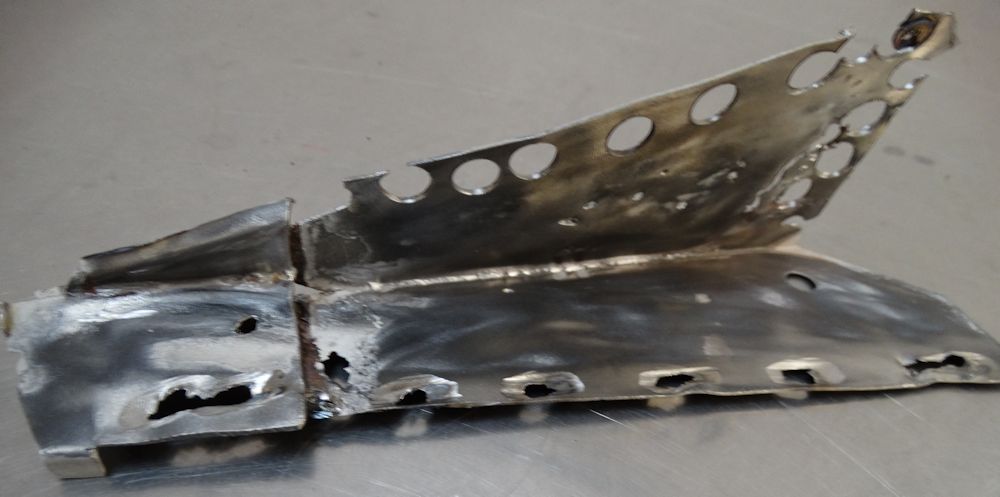
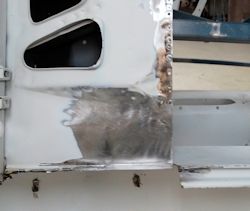
Cutting out the corroded section
|
|
|
|
|
|
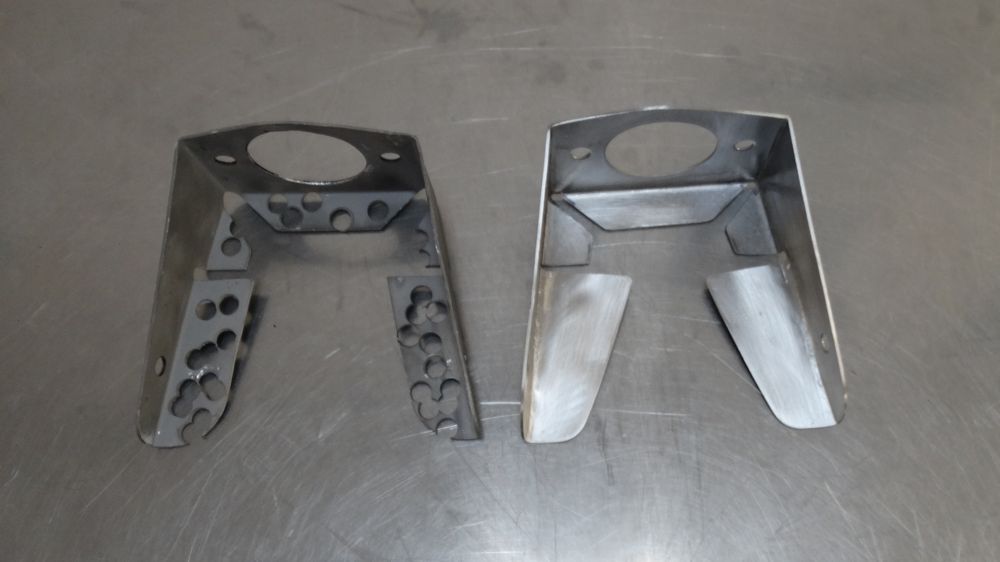
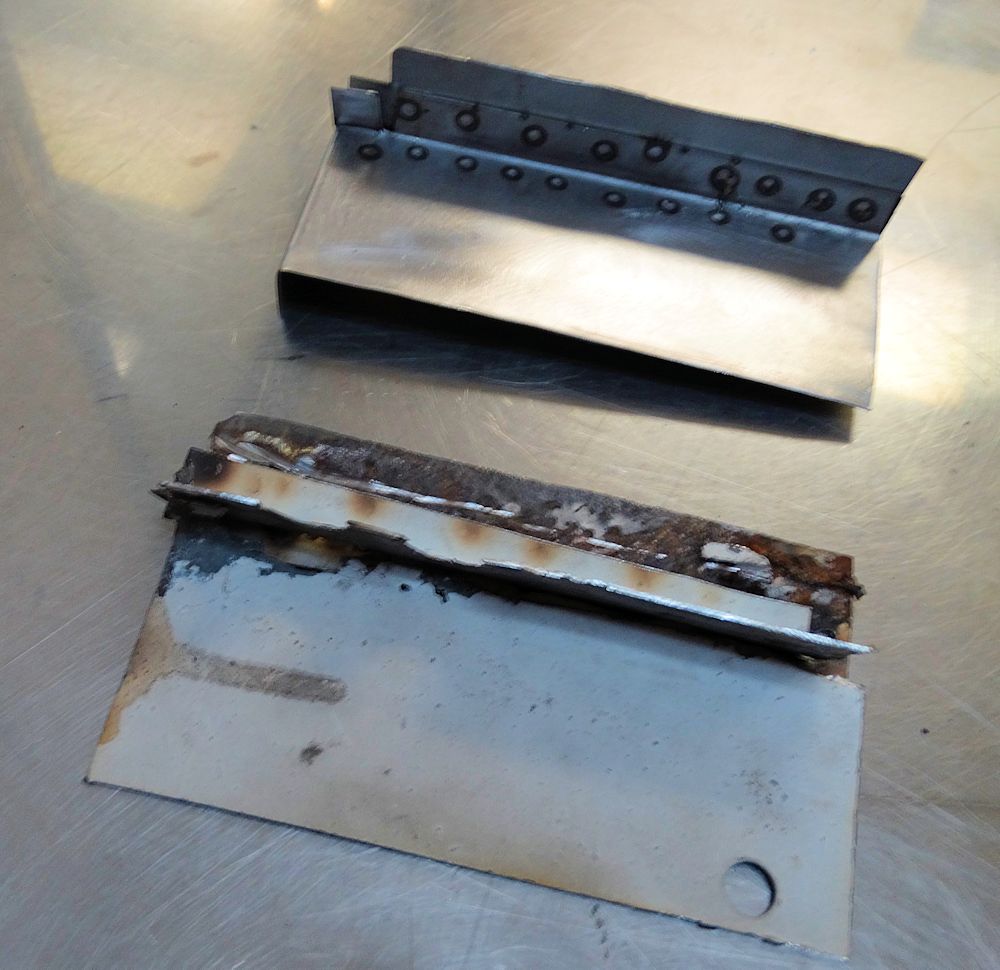
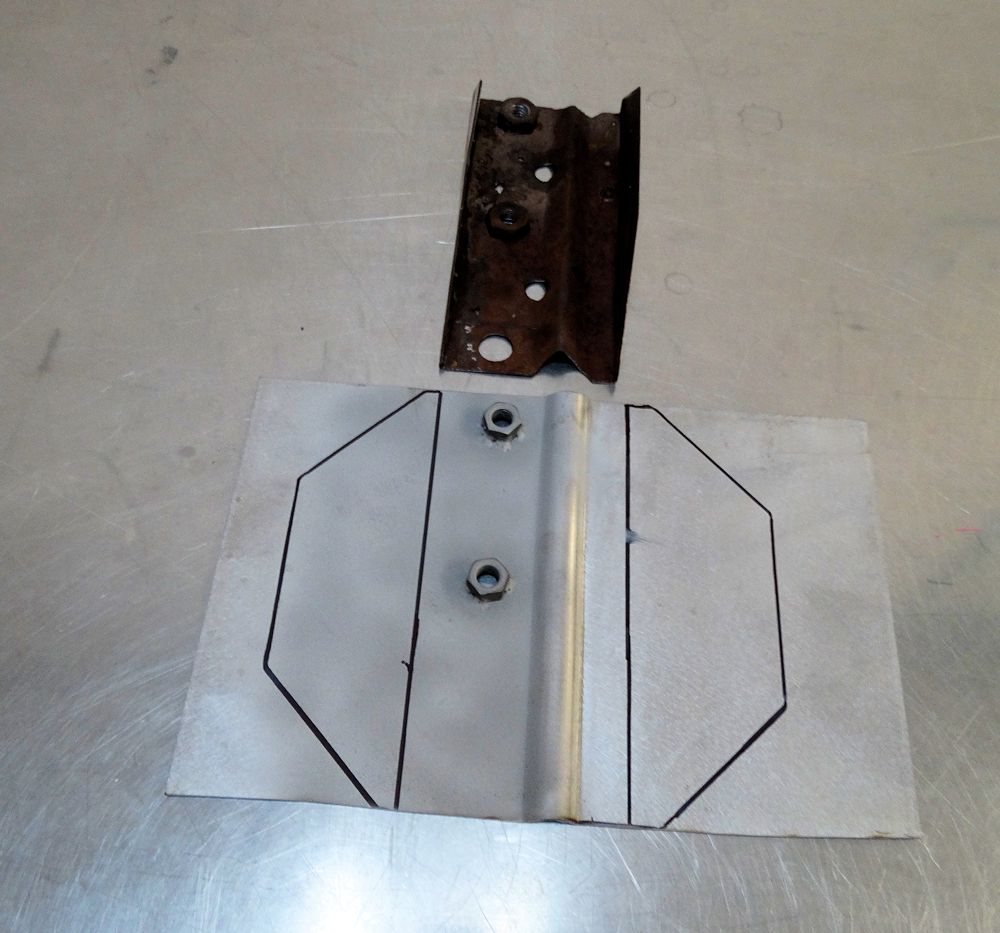
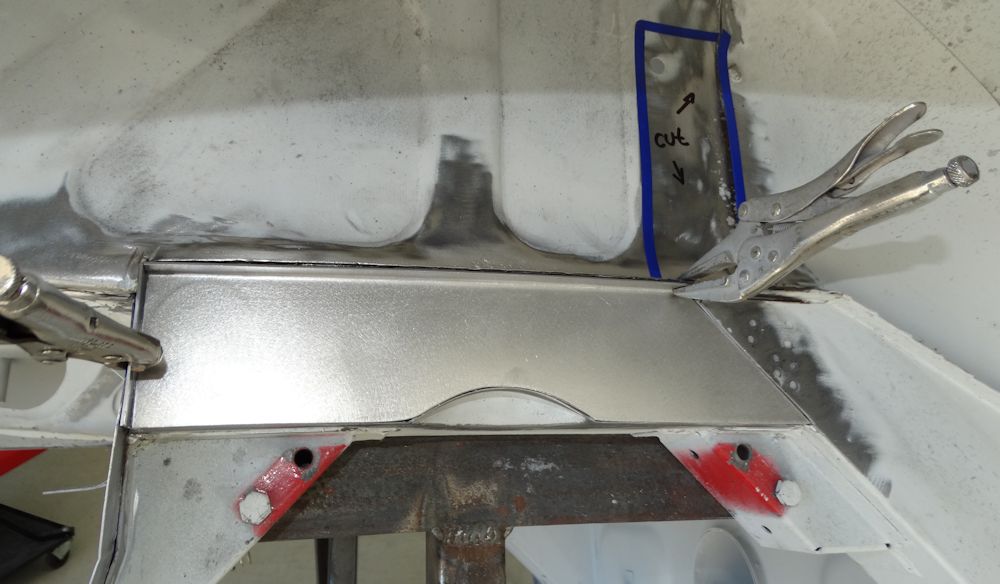
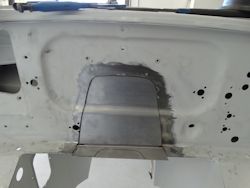
Trial fitting replacement repair panel
|
New stabilizer bracket fabricated
|
|
|

|
|
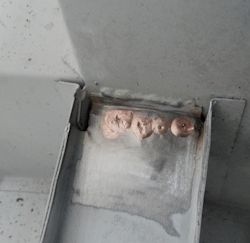
Acid washing inner/enclosed surfaces
|
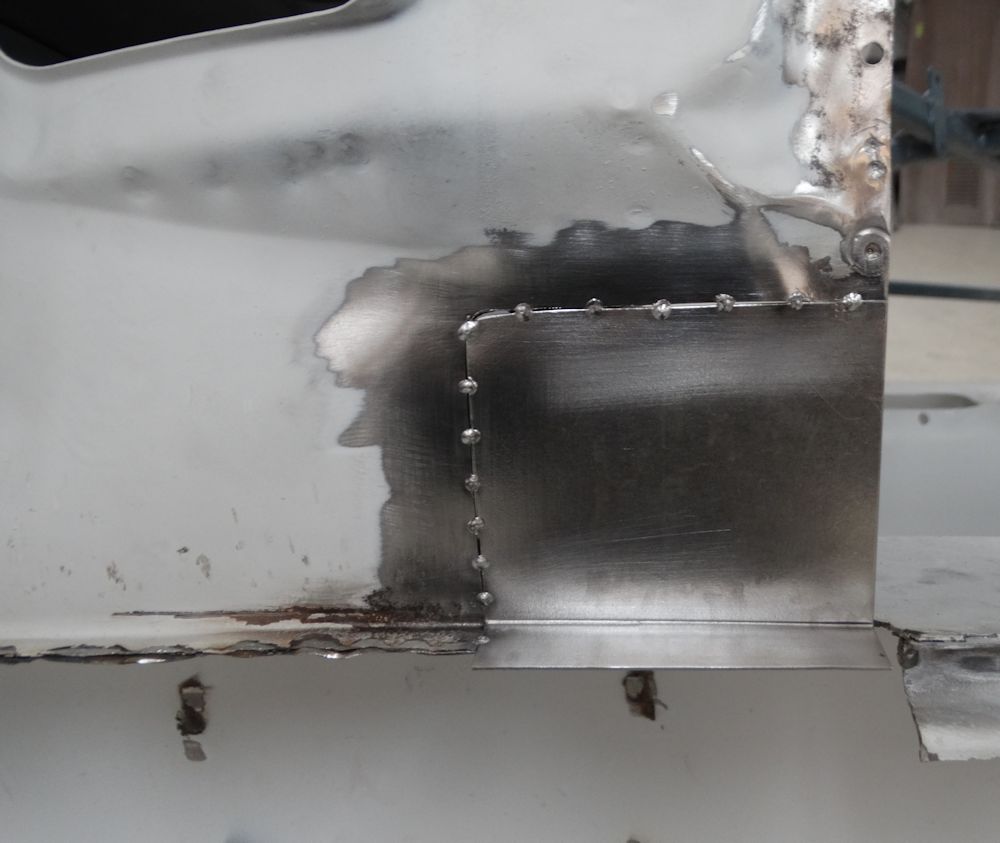
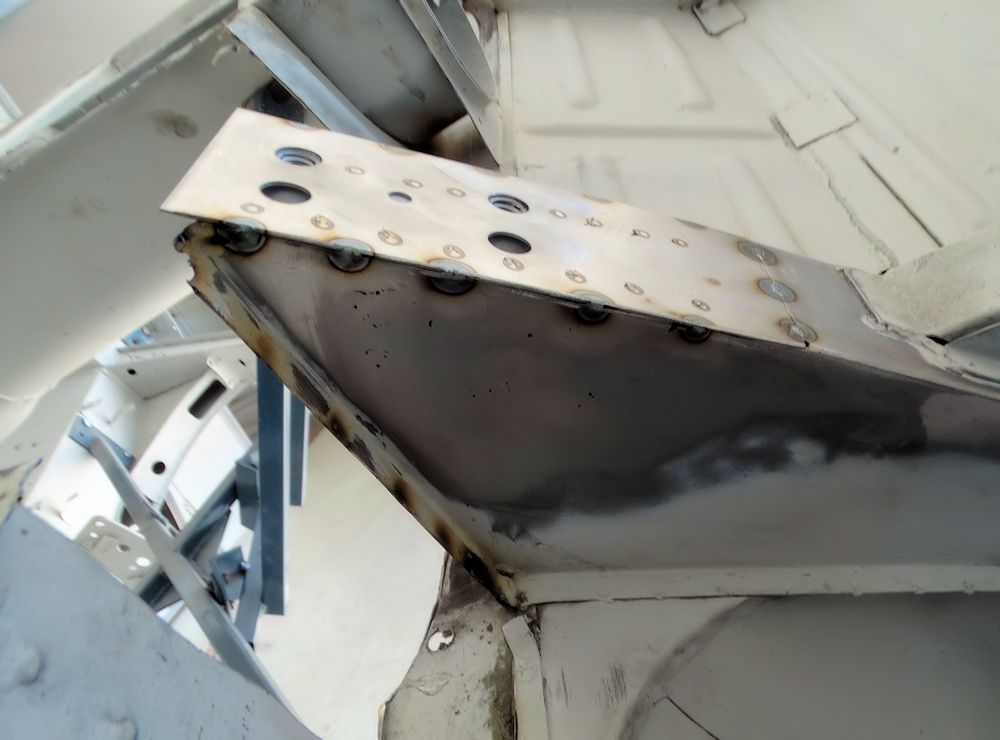
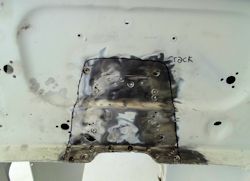
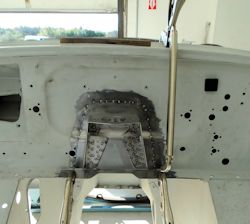
Tack welding replacement panel in position
|
|
|
|

|
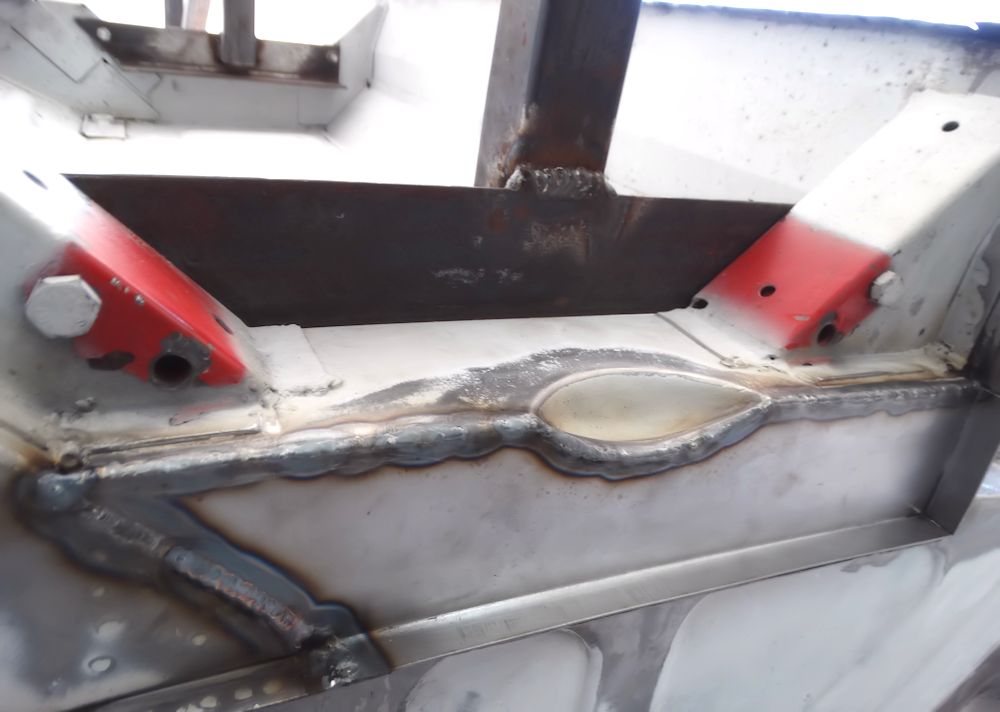
TIG weld next
|
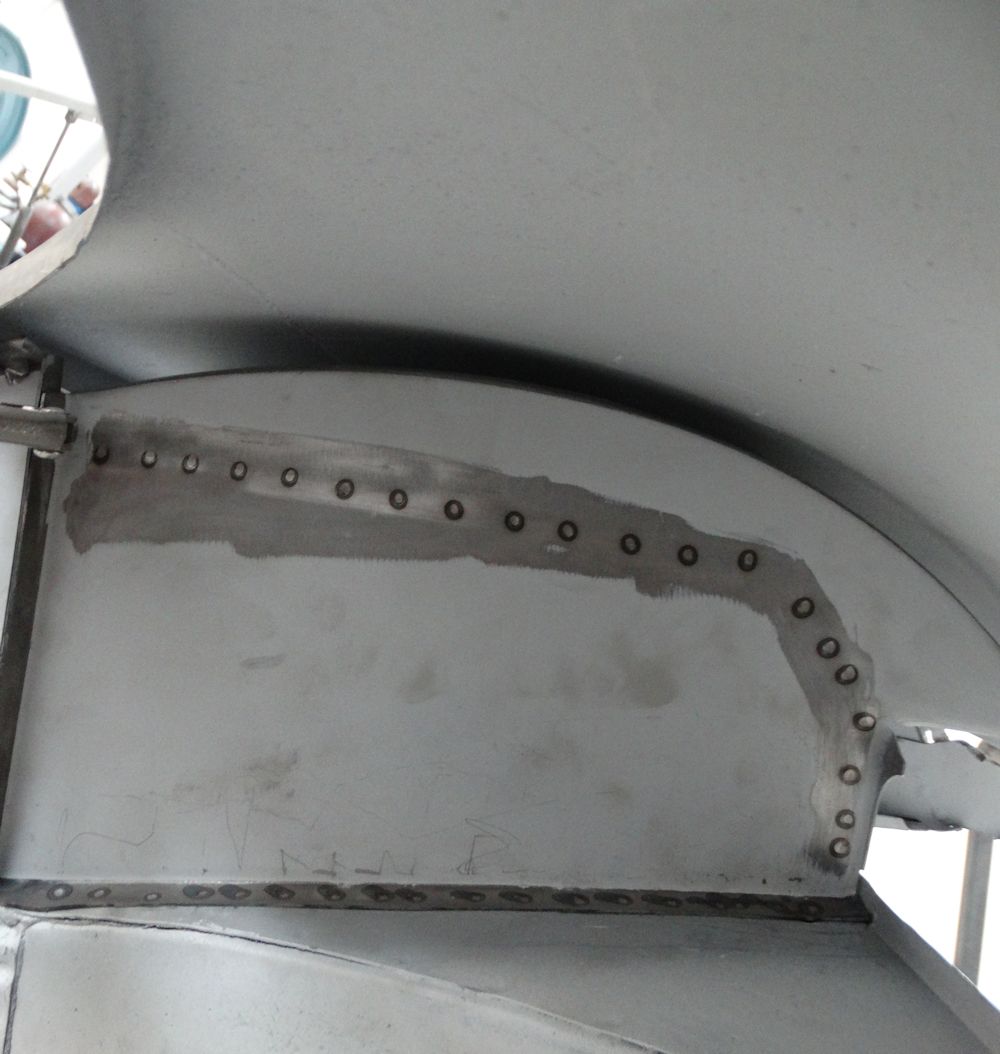
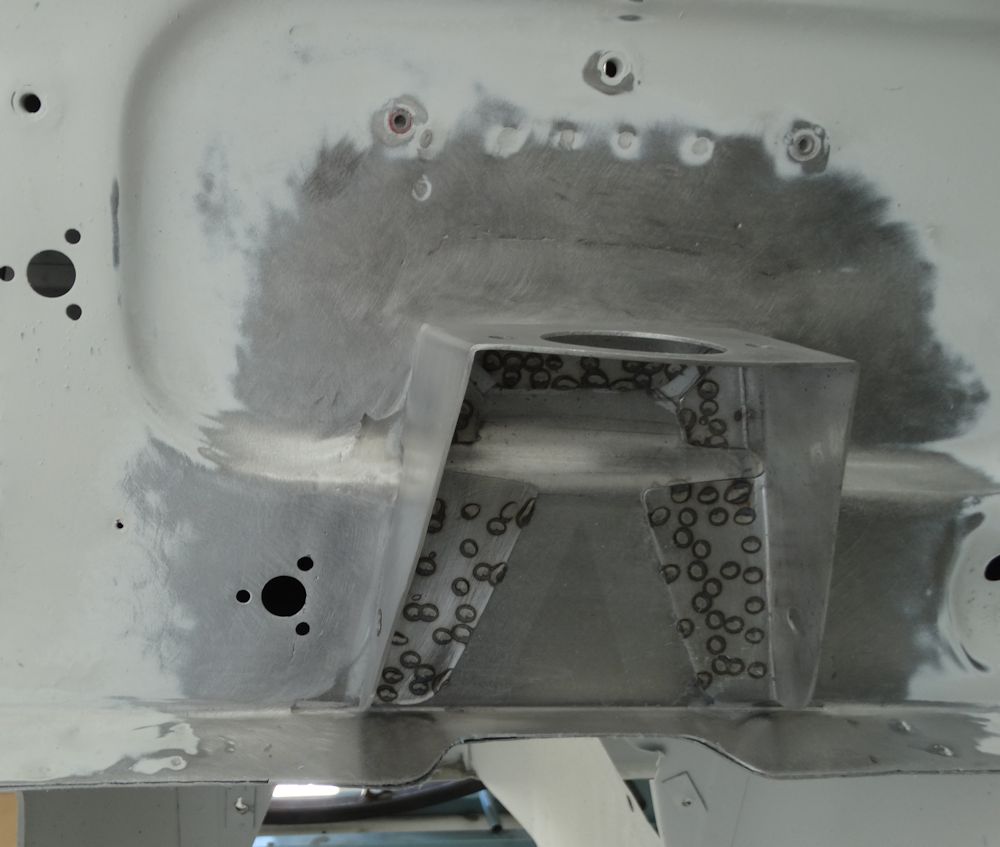
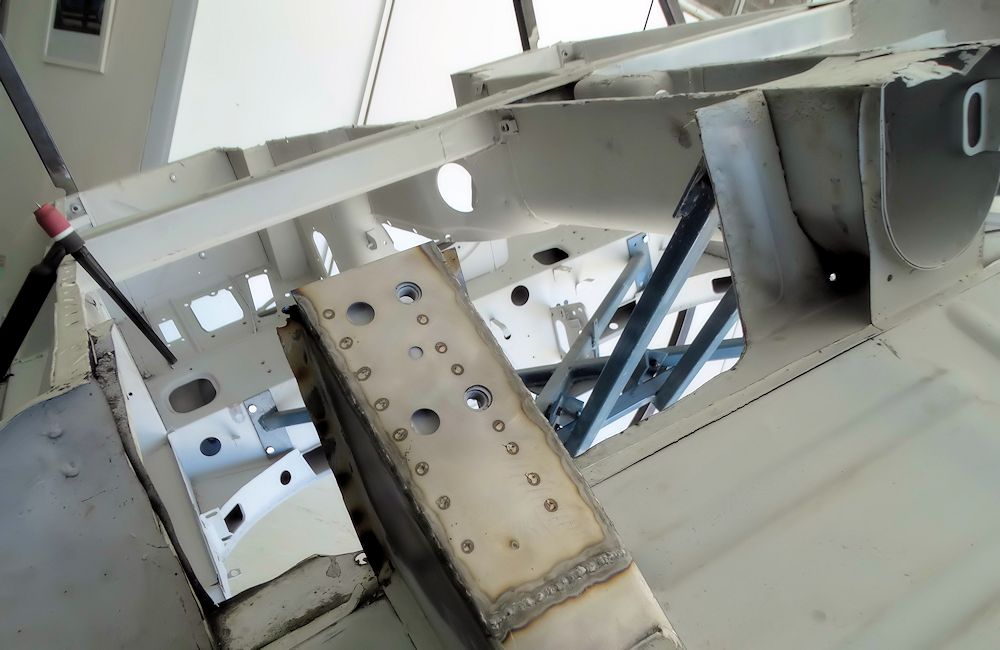
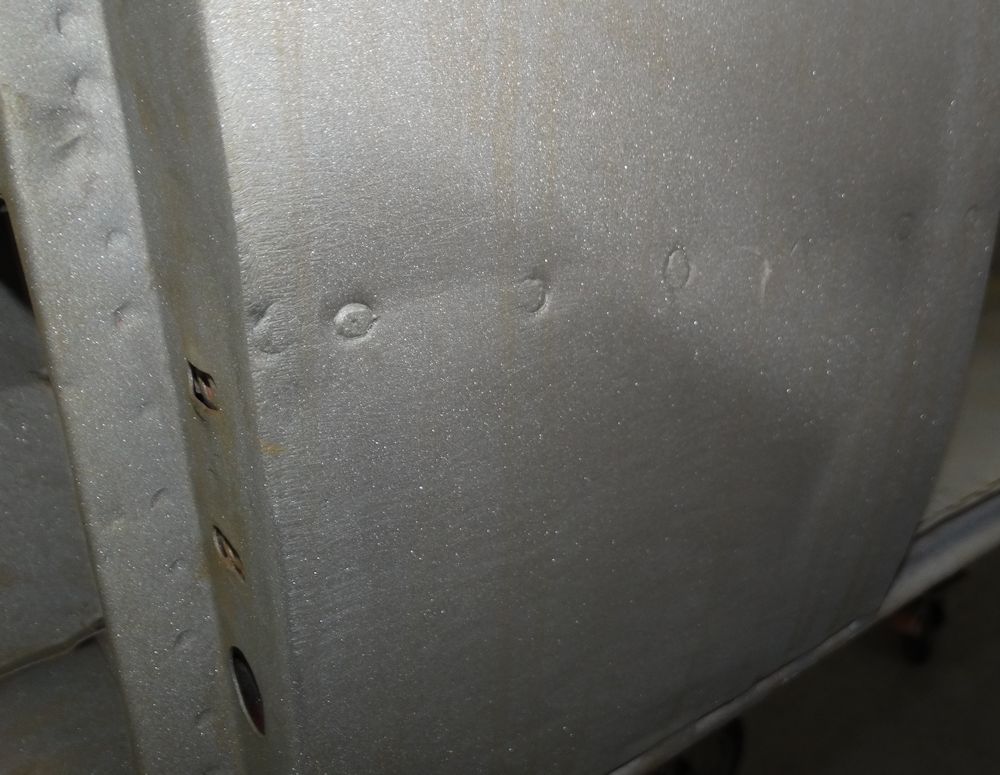
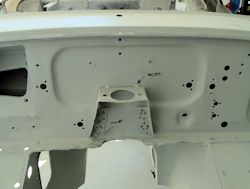
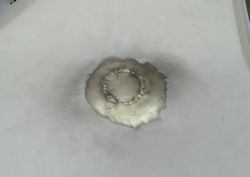
Repair now invisible after metal finishing
|
|
|

|
|
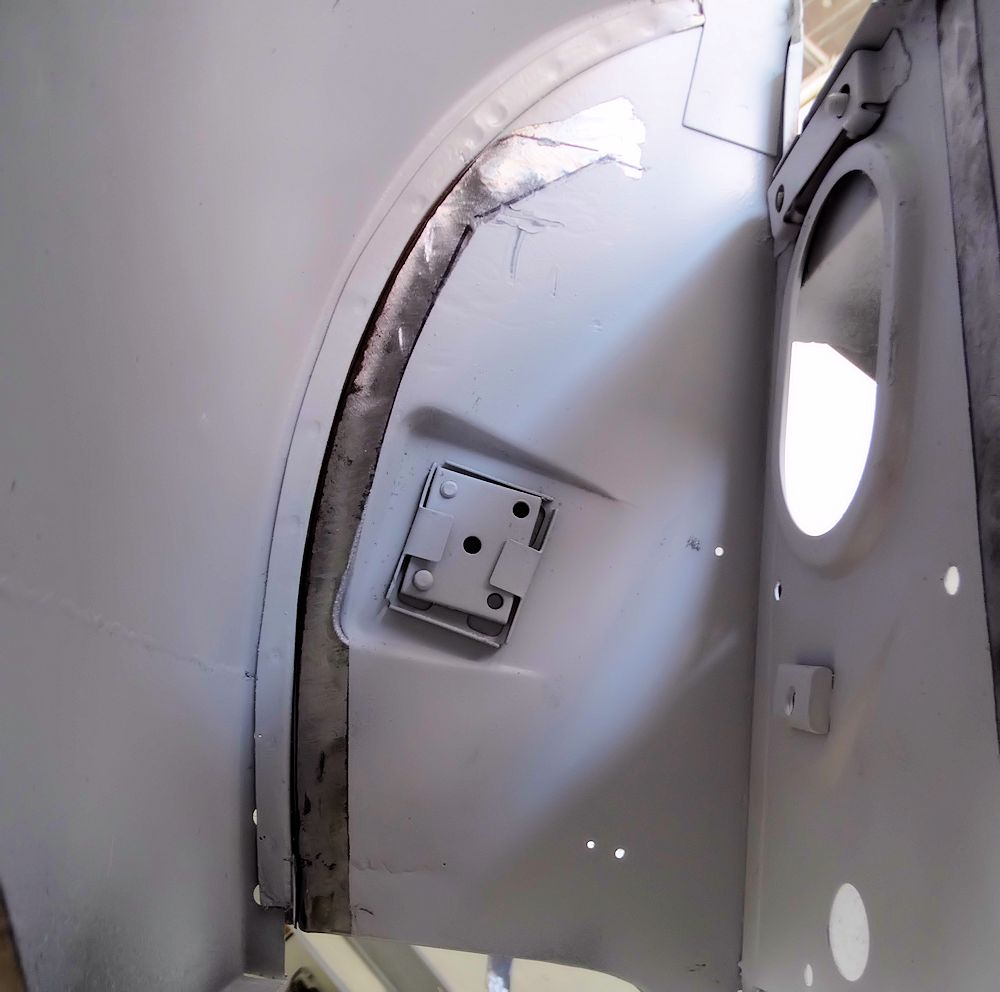
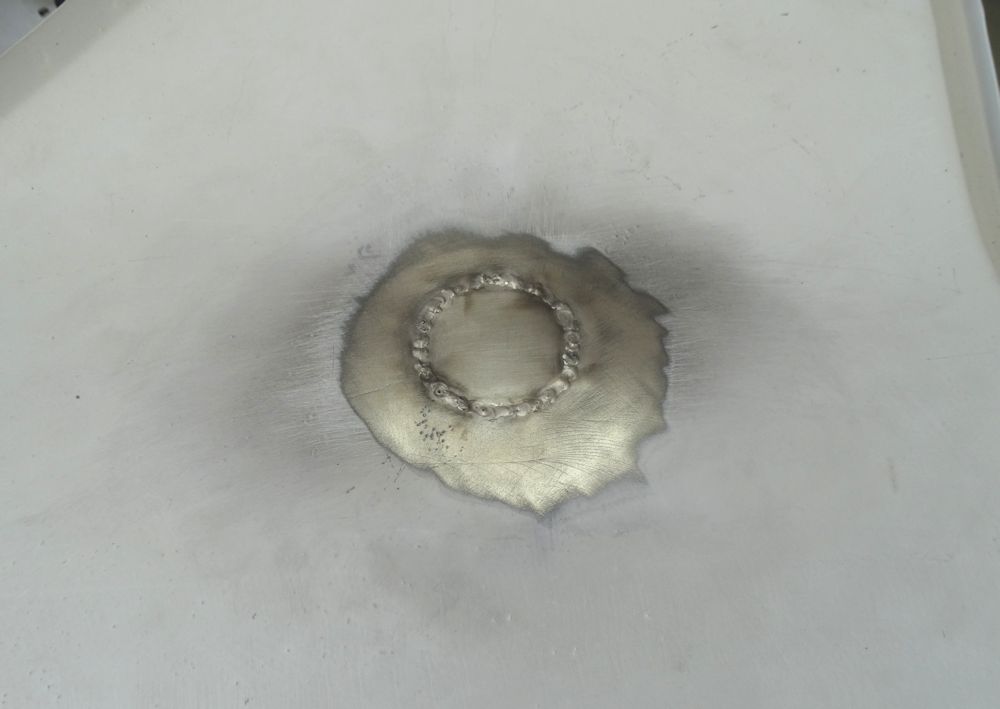
Antenna hole will be filled
|
|
|
|

|

|
|
|
|
|
|
|
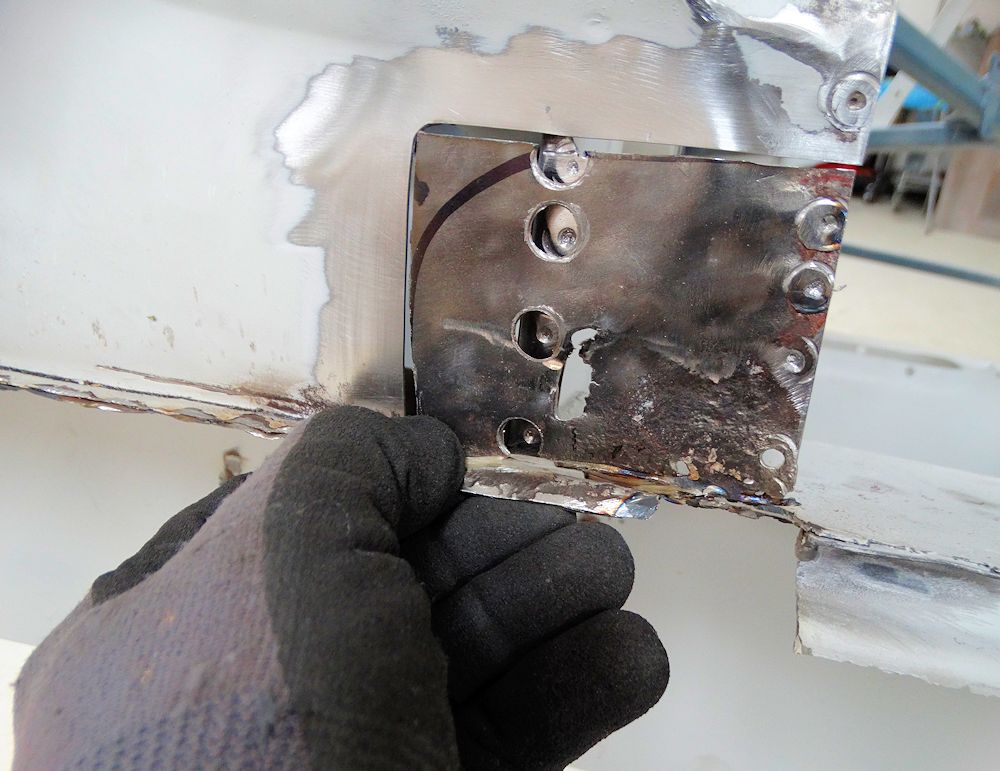
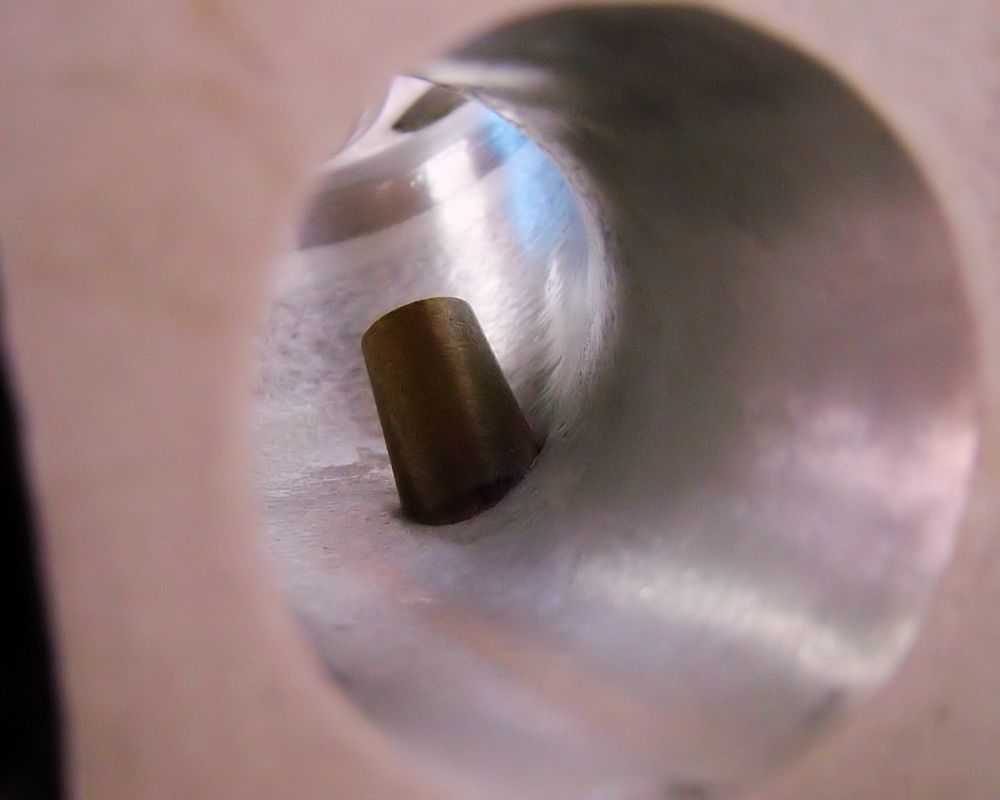
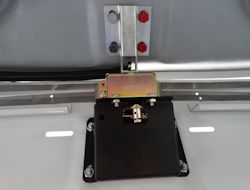
Unusual view of new boot latch being
trial fitted
|
|
|
|
|

|
|
|
|
|
|
|
All inner box sections are thoroughly rust
proofed
|
|
|
|
|
|
|
Trial fitting new boot lid
|
|
|
|
|
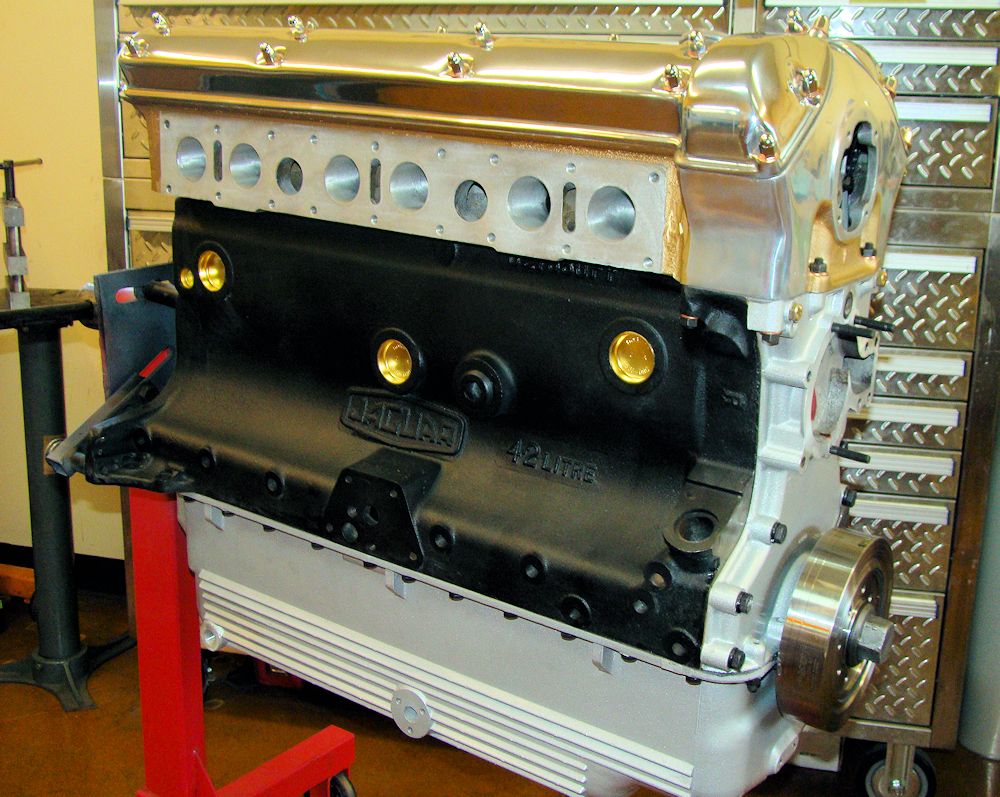
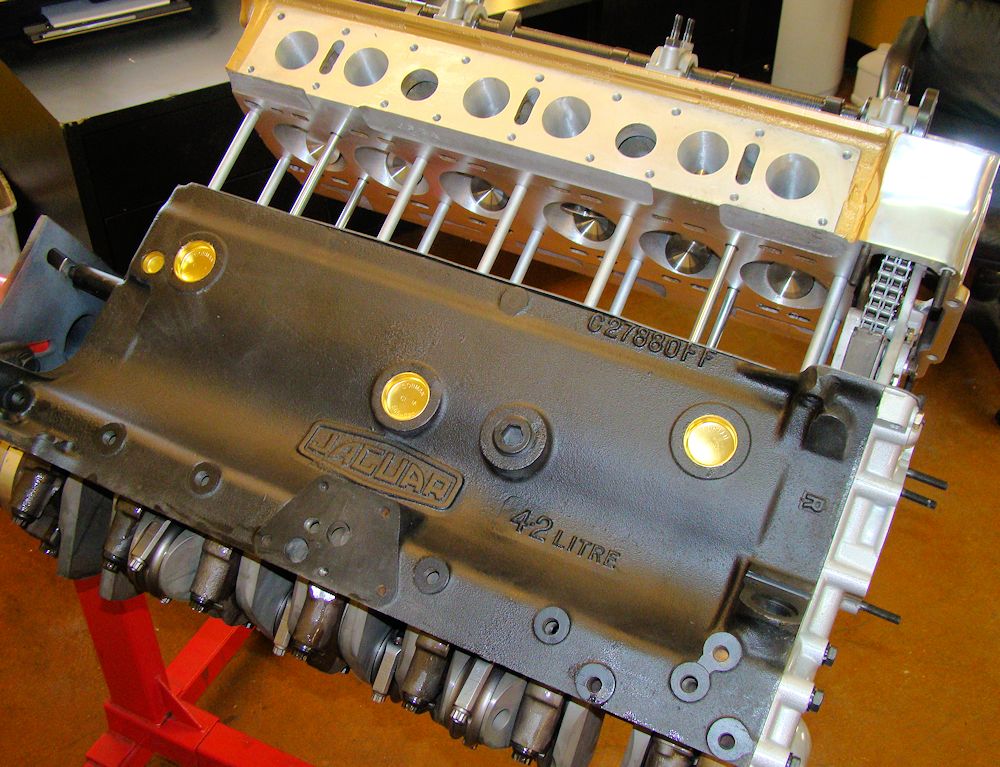
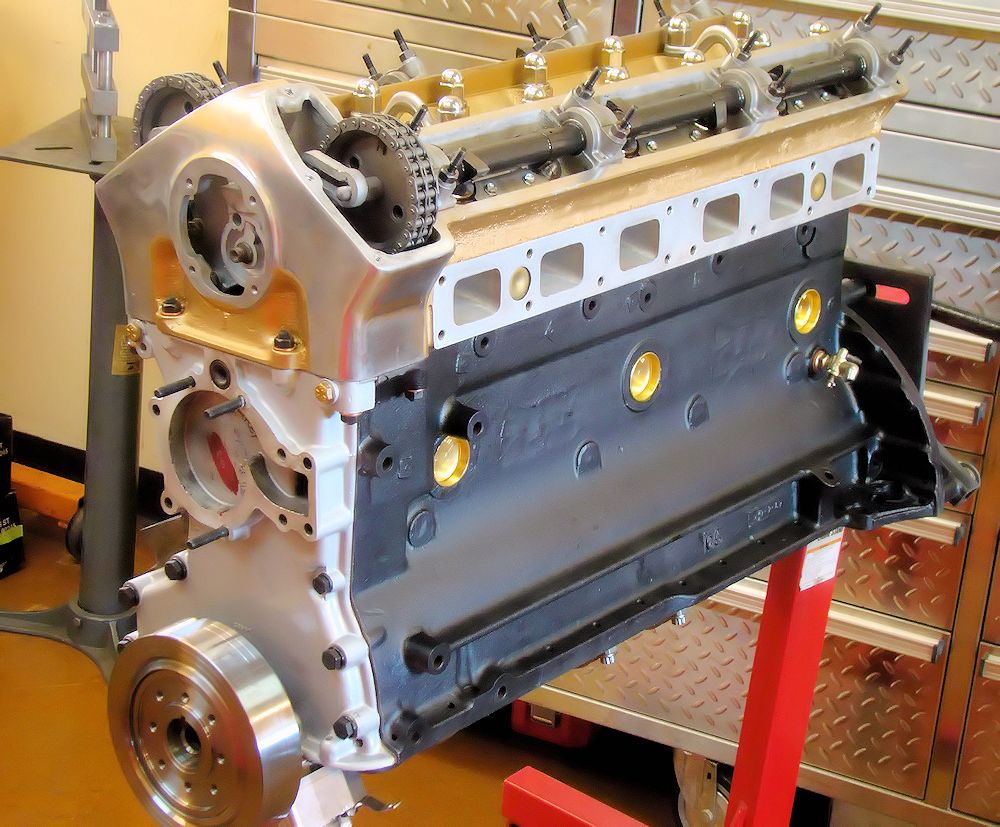
We
have now wrapped this Stage Two engine rebuild and look
forward to seeing how it performs on the chassis dyno in a
few months time. We typically see about 380 HP and 430
ft/lbs of torque with our 4.7L CJ Stage Two rebuilds.
That's more torque than a Ferrari 458 Italia - in a car
weighing less than 2,500 lb!
|

|
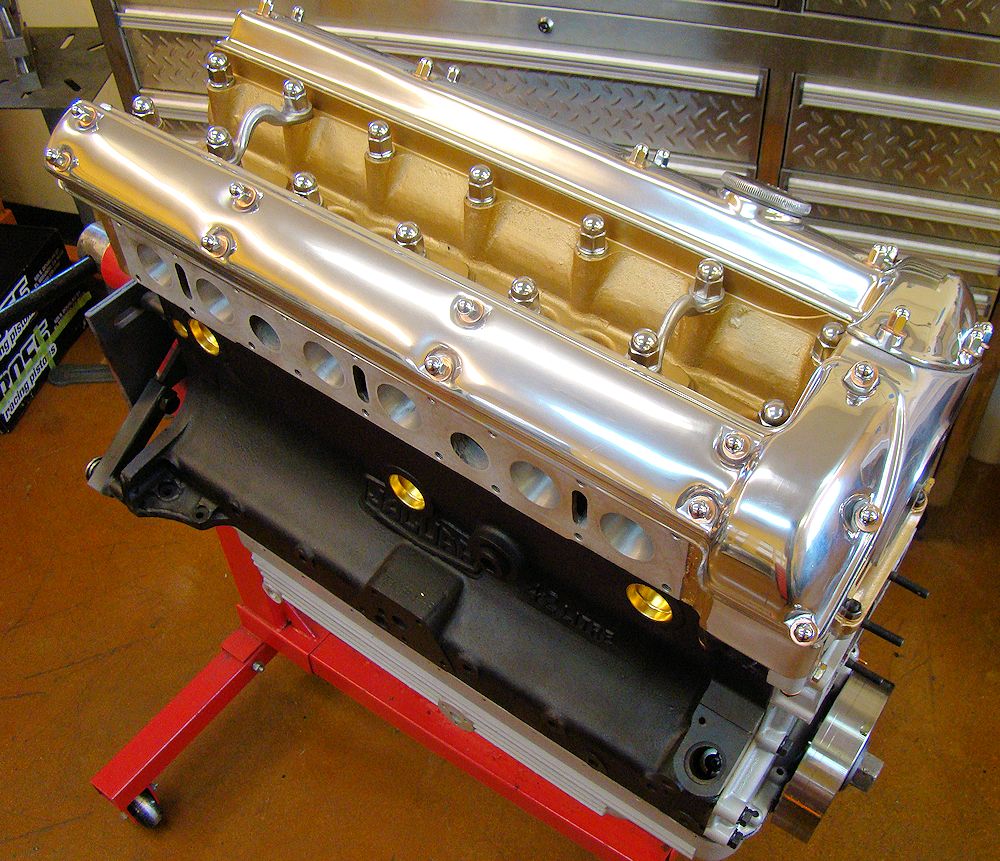
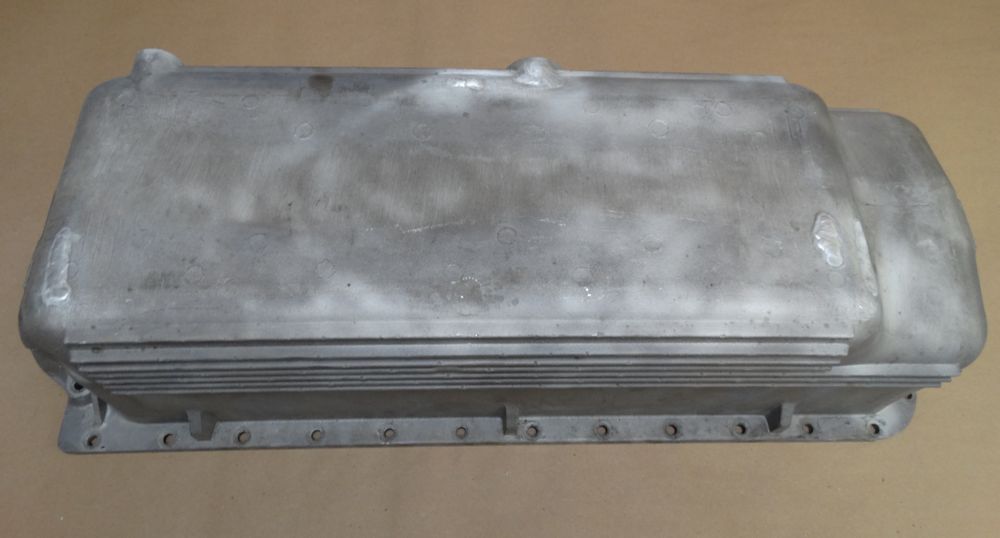
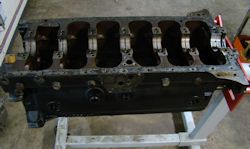
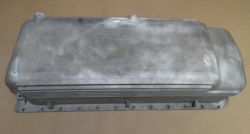
Preparing to install the oil pan
|
|
|
|

|
|
Not just a pretty face, this engine will
put out around
380HP and 430 ft/lbs of torque!
|
|
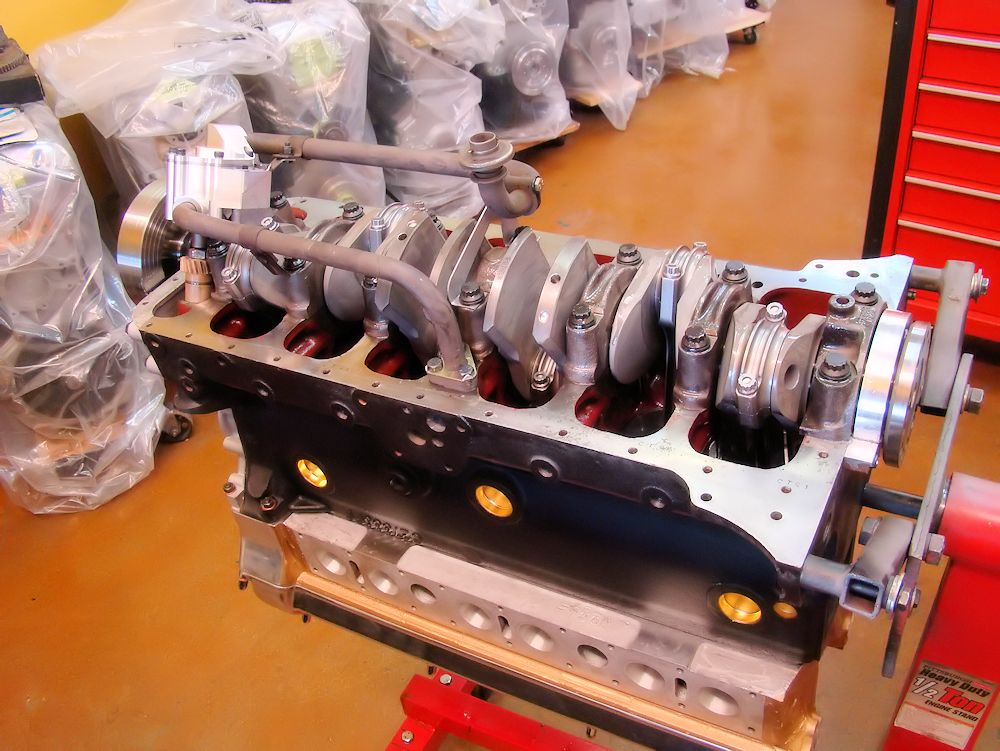
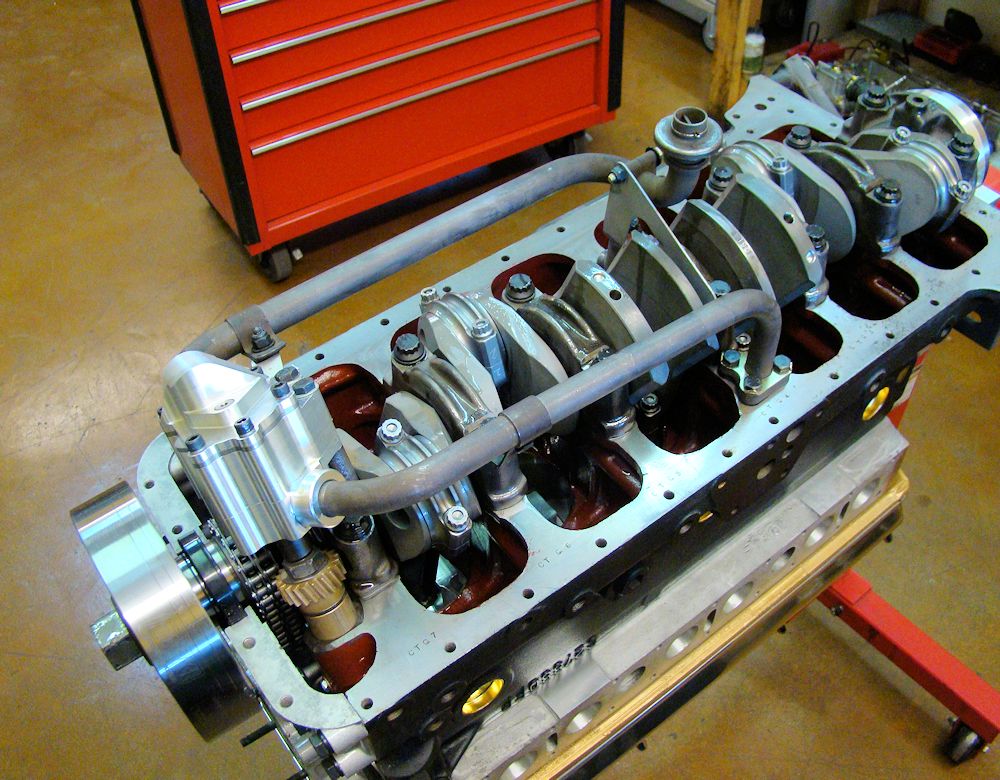
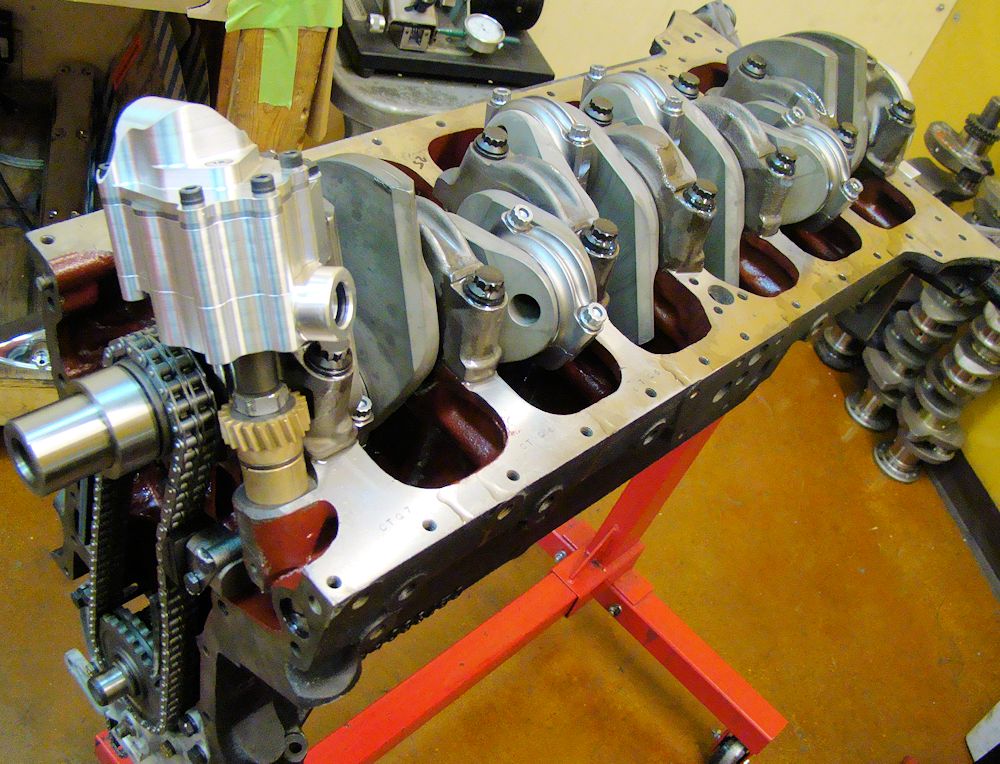
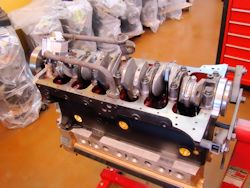
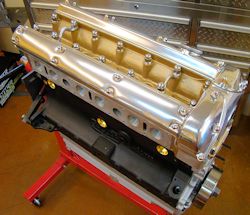
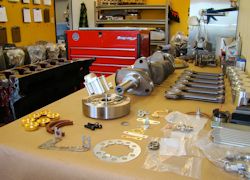
Putting
the finishing touches to another 4.7L CJ Stage Two engine
rebuild.
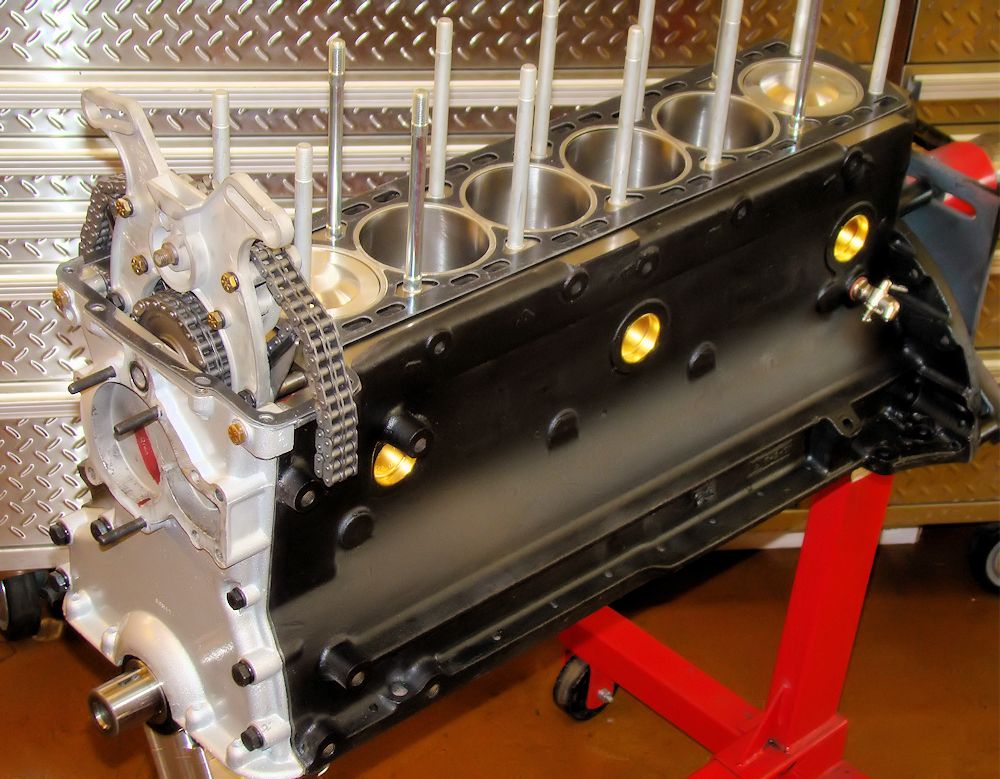
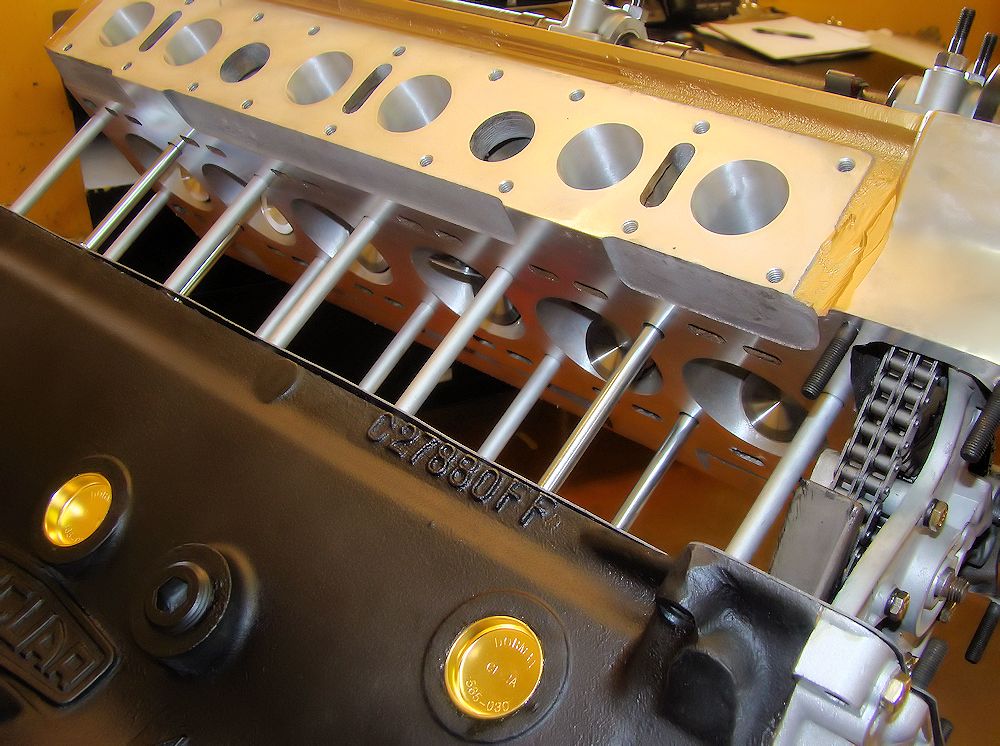
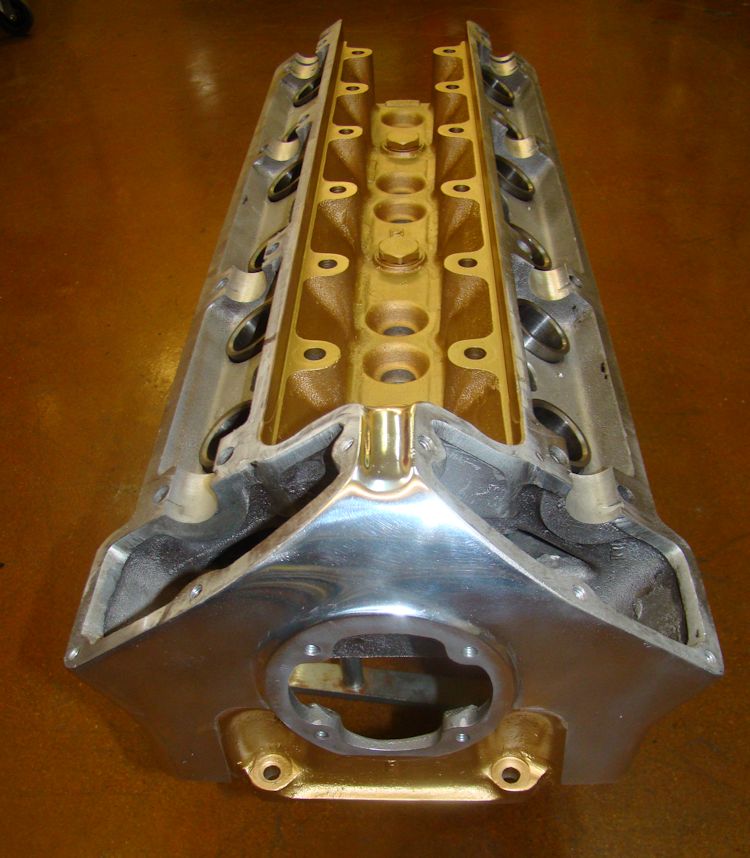
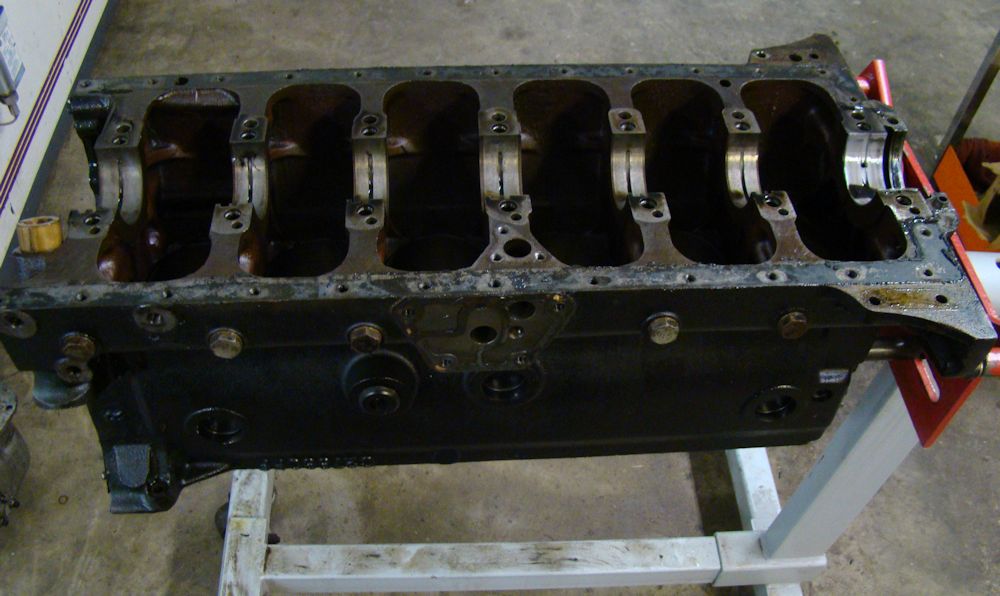
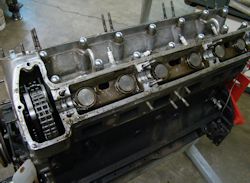
We
have now finished the block machine work and we are about
to begin the final assembly.
|

|
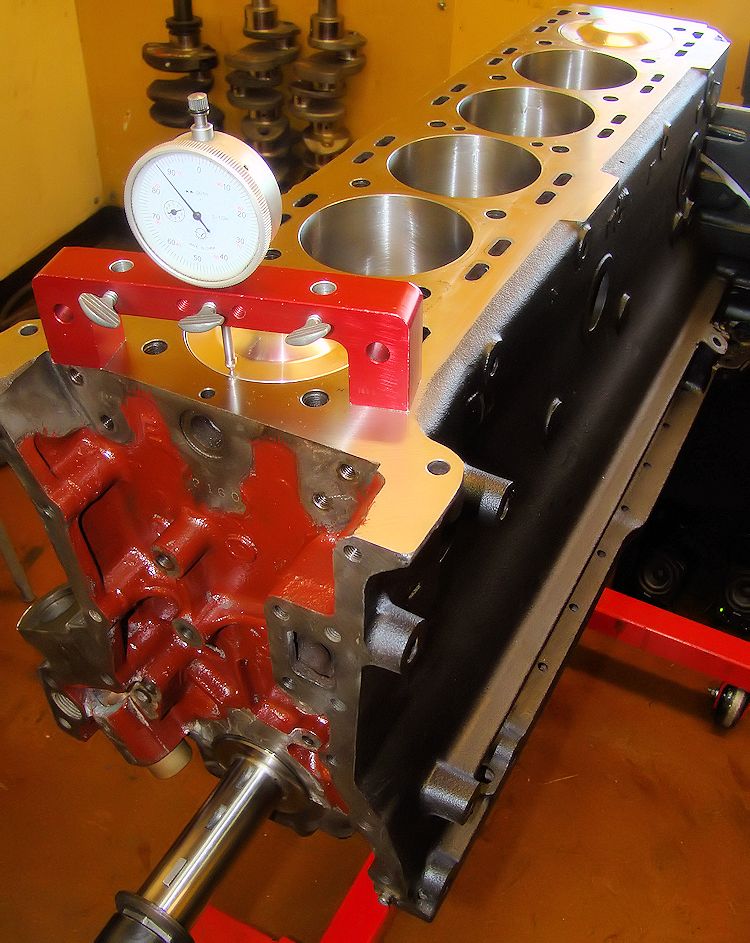
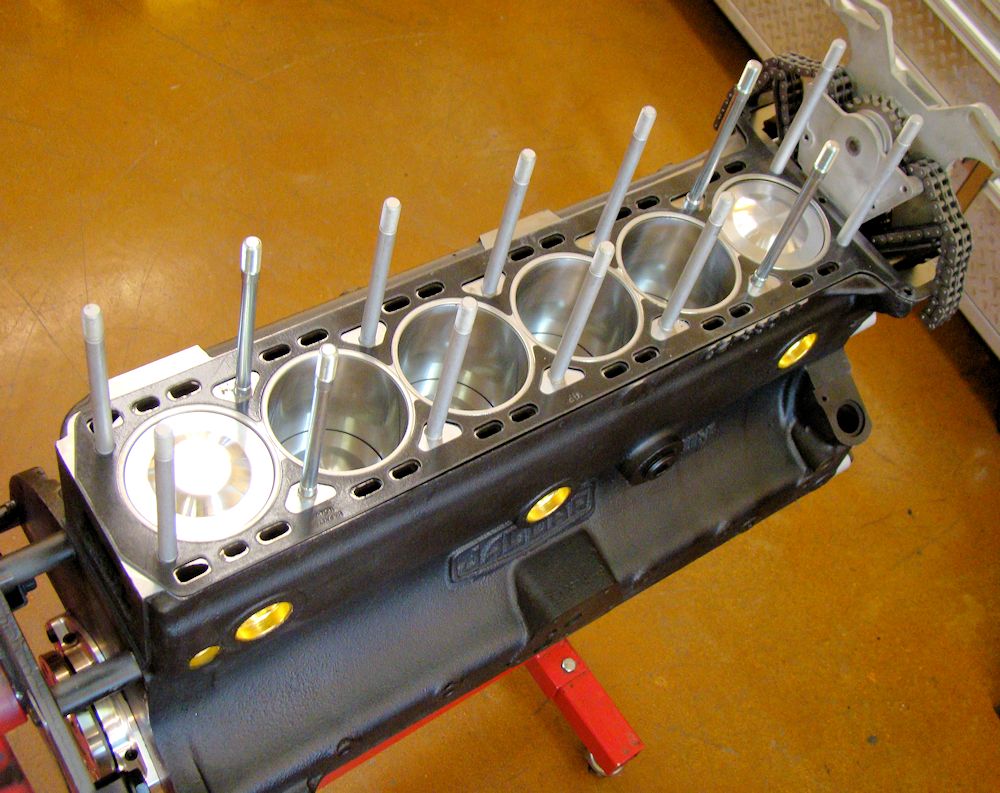
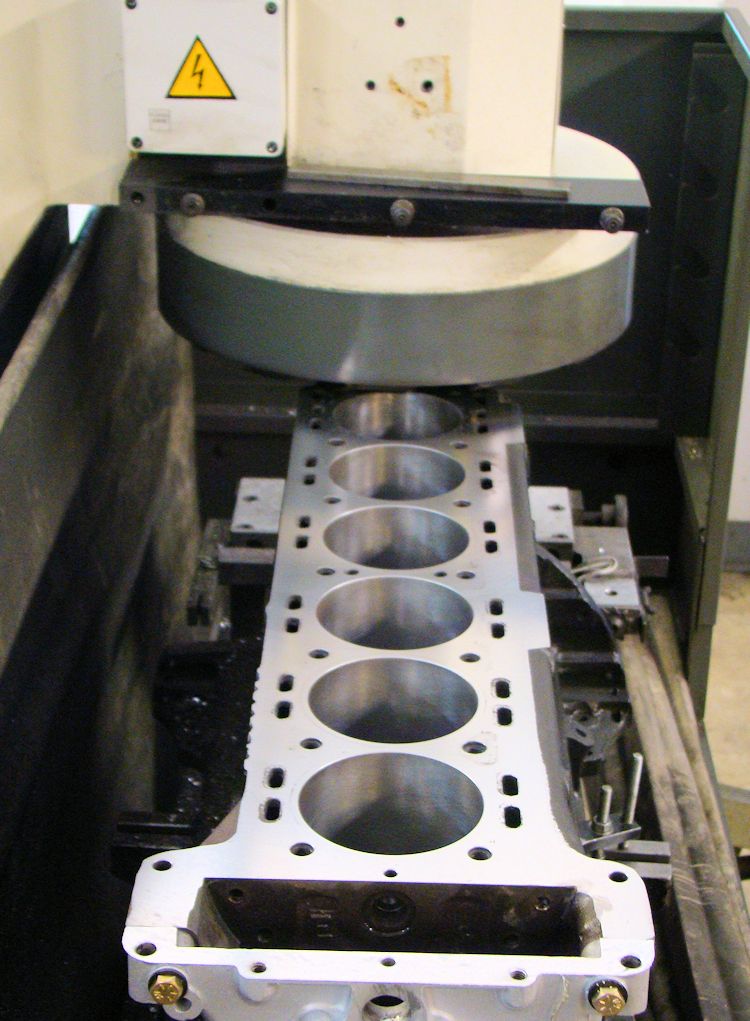
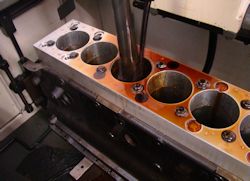
Torque plate cylinder honing in progress
|
Surfacing the block with front timing chain
installed
|
|
|
|
|
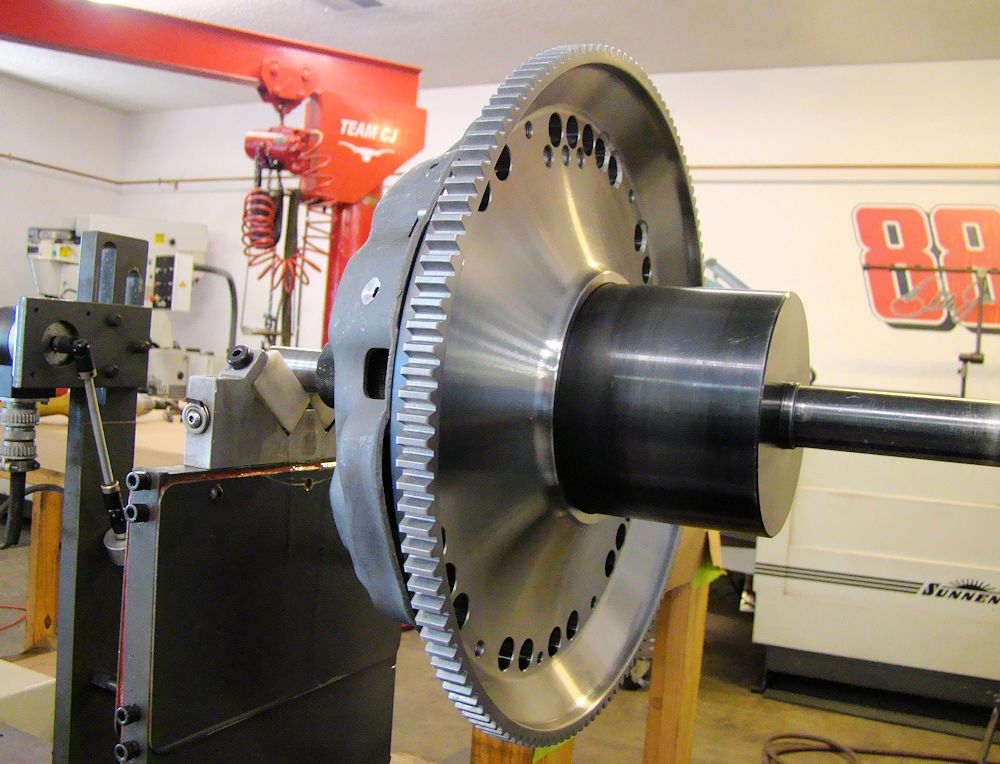
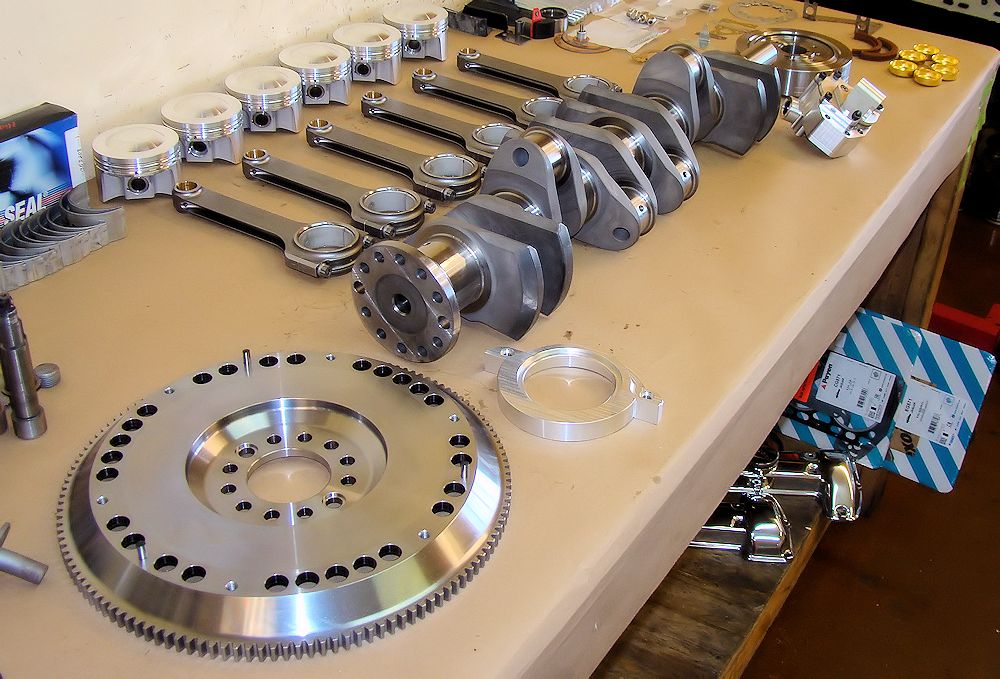
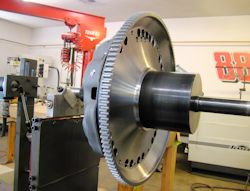
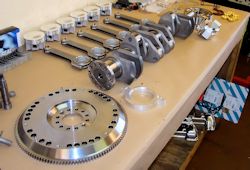
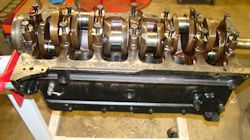
Balancing flywheel and pressure plate
|
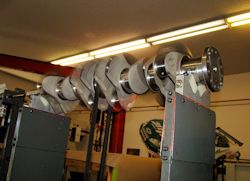
Balancing your billet stroker crankshaft
|
|
|
|
|
|
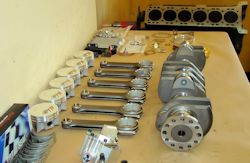
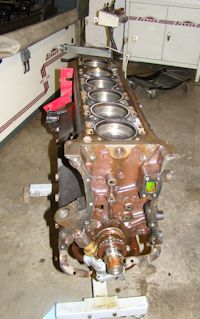
Laying out forged Carrillo connecting rods
and
custom forged CJ pistons, etc
|
|
|
|
|
|
Final assembly underway!
|
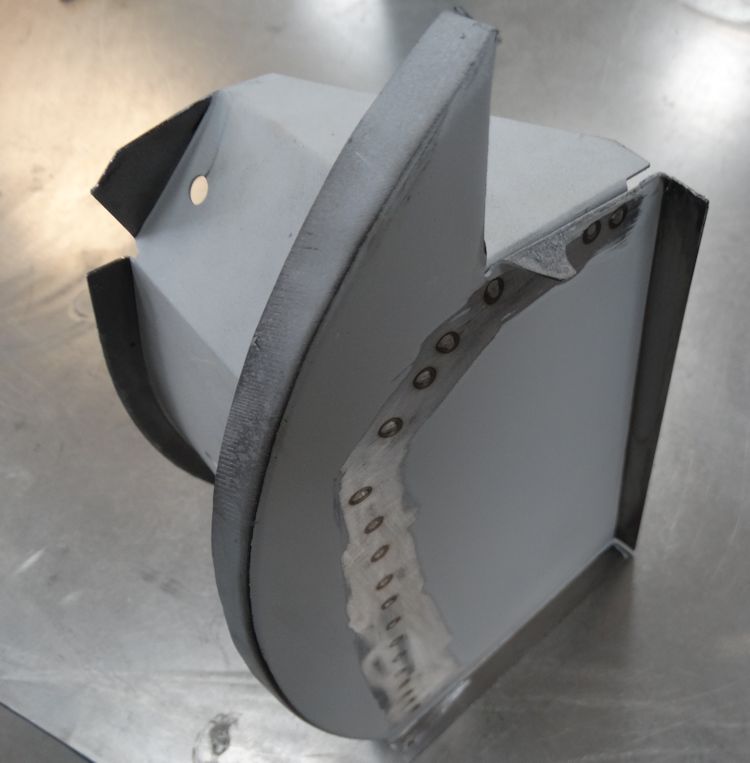
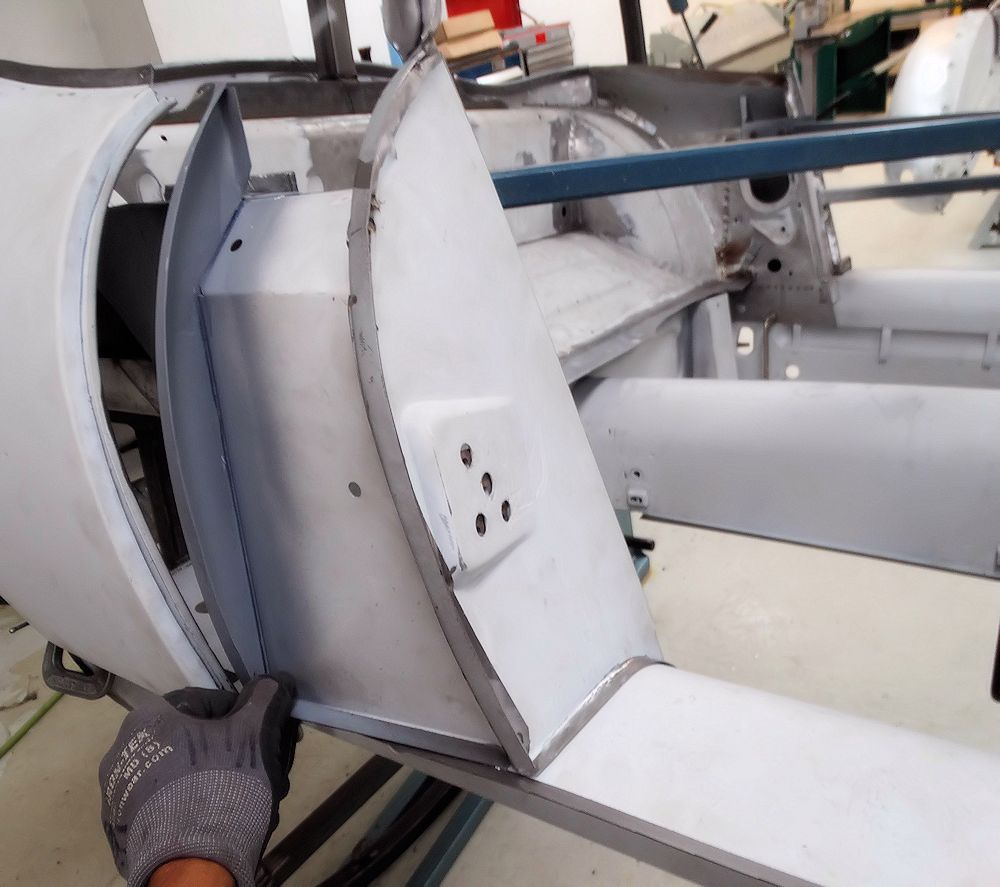
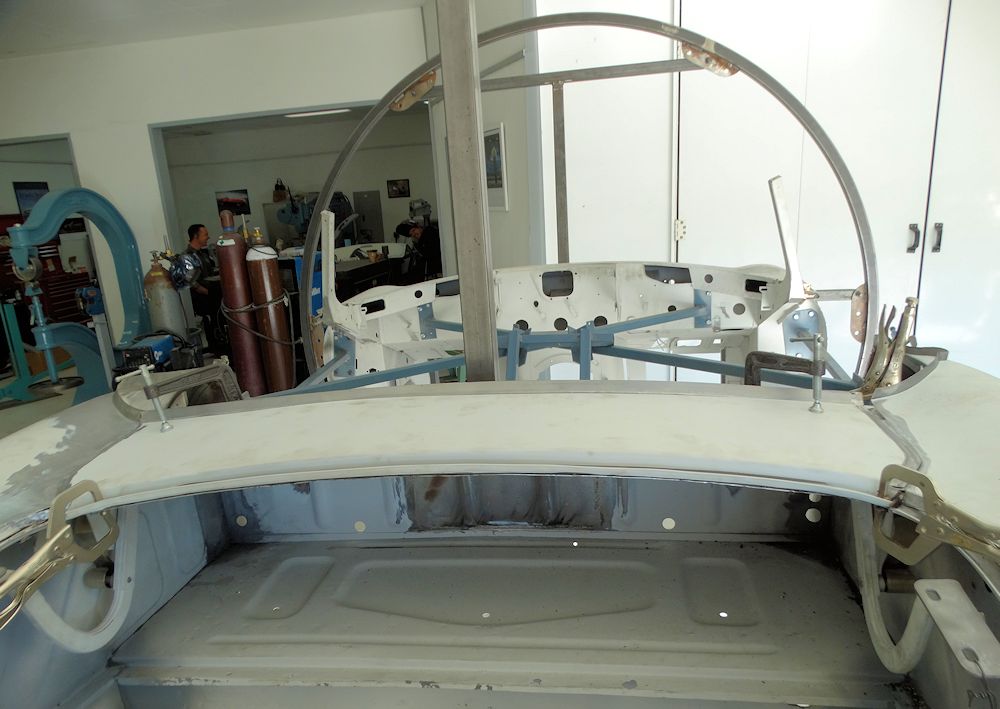
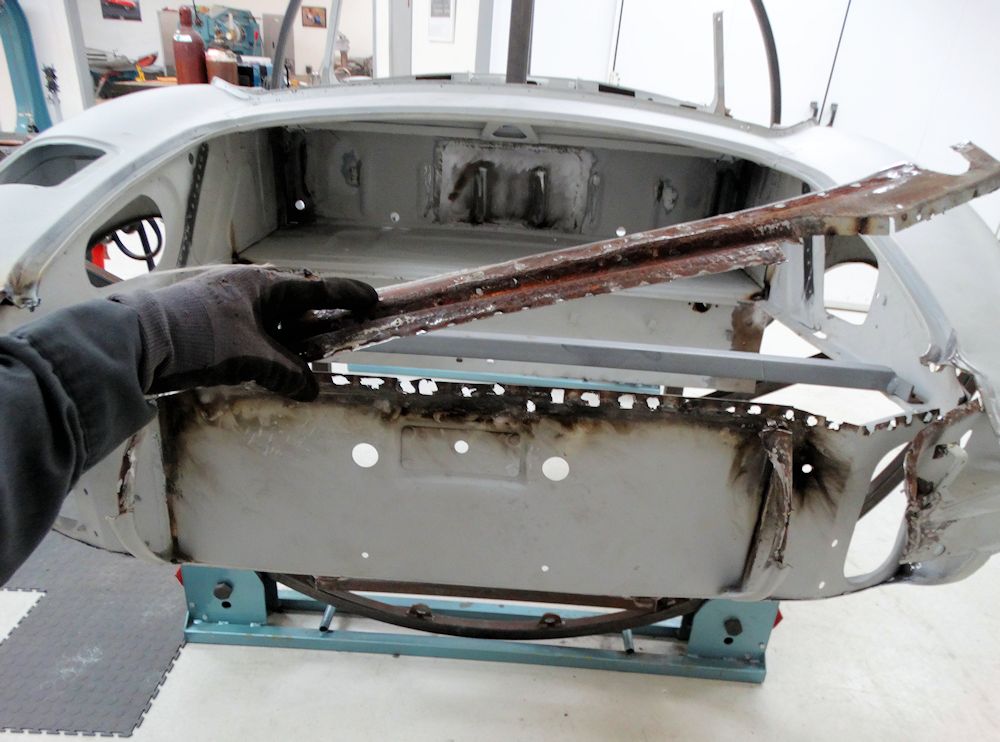
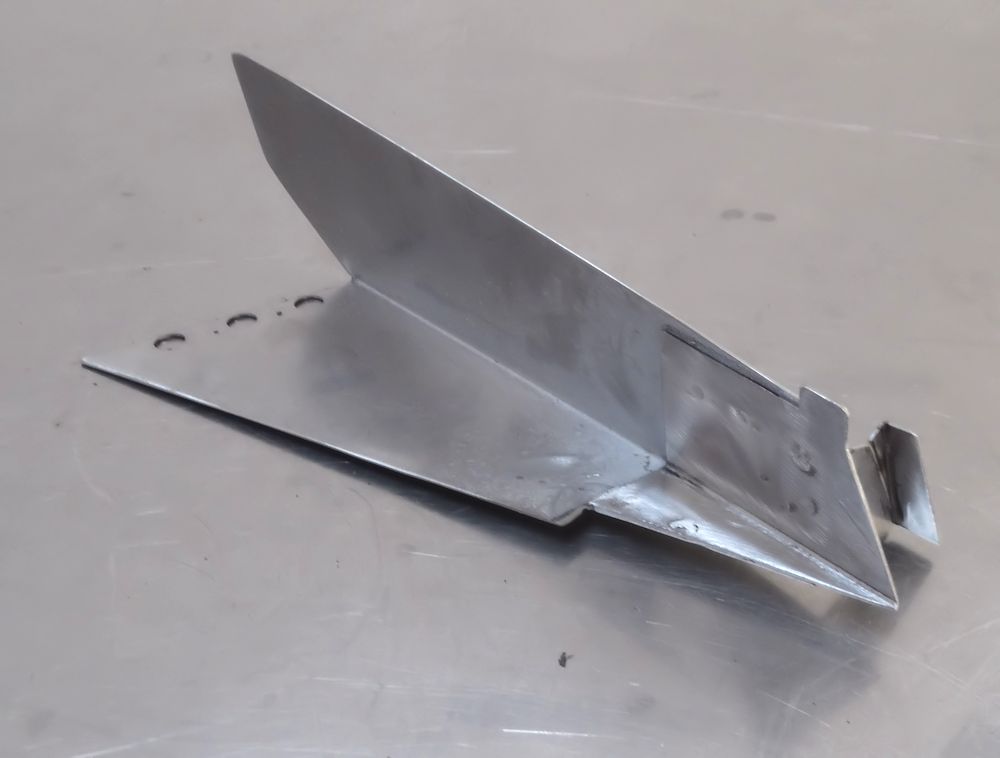
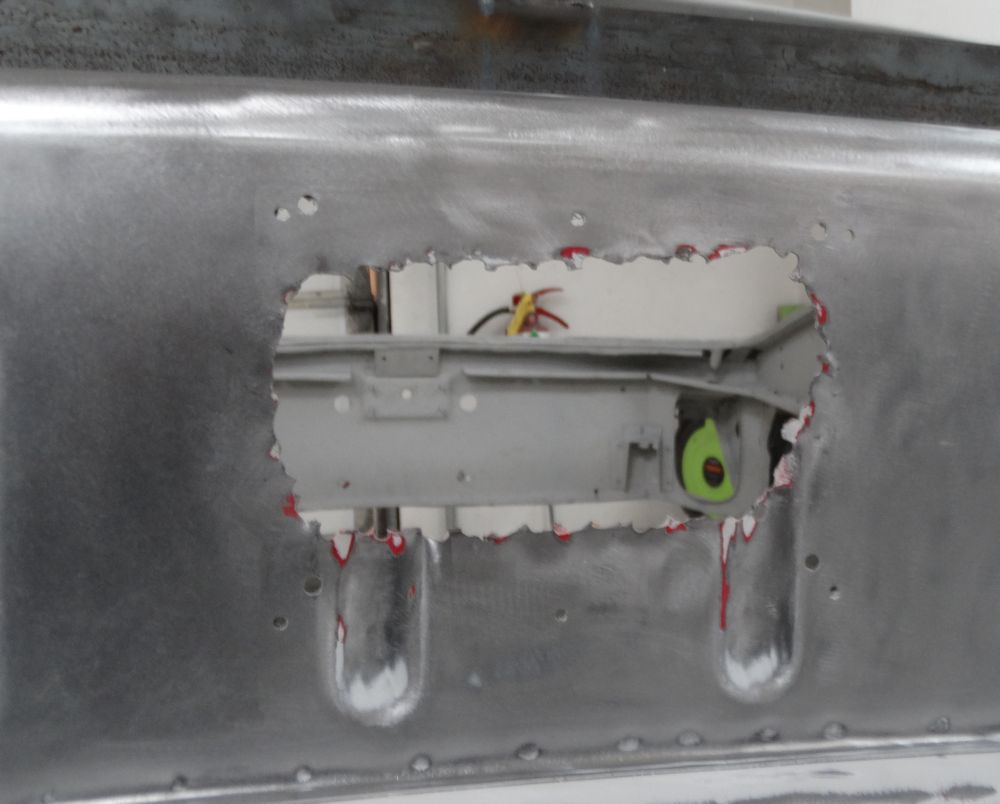
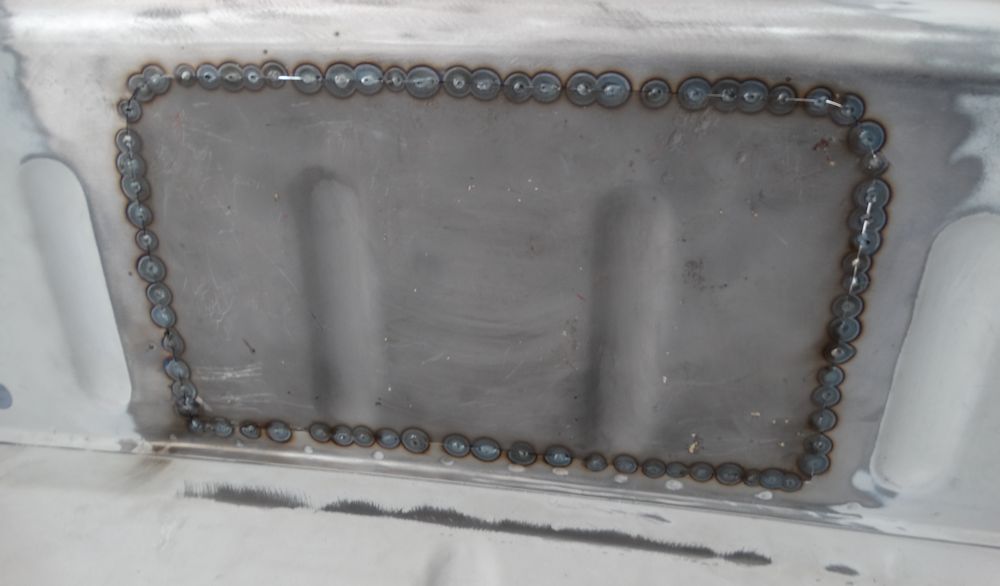
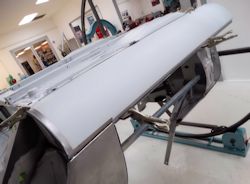
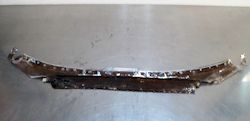
The
following sequence of photographs show Oscar fabricating a
new inner support panel for the upper license plate panel.
Unfortunately the original panel was completely rotten and
new panels are not available, hence the need to fabricate
one from scratch.

|

|
|
Removing the rear license plate support
panel
|
|
|
|
|
|
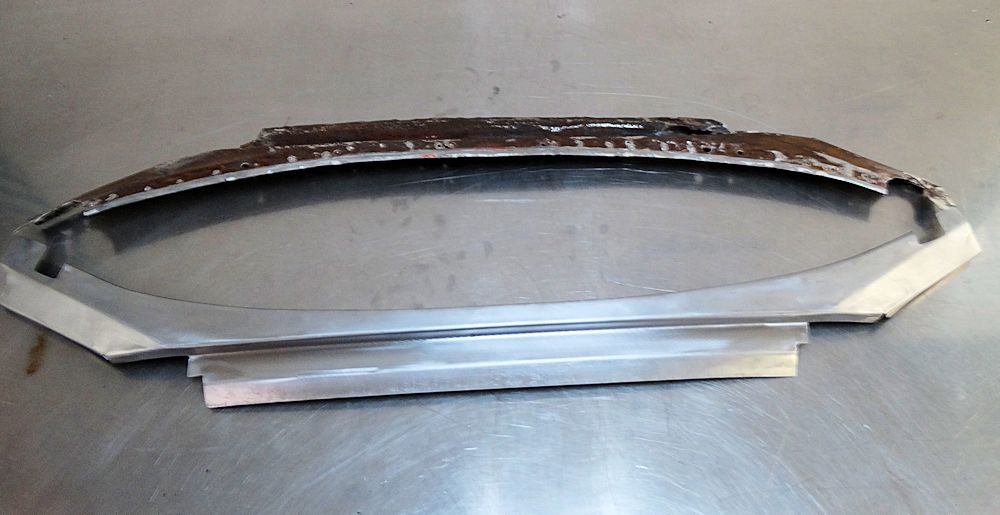
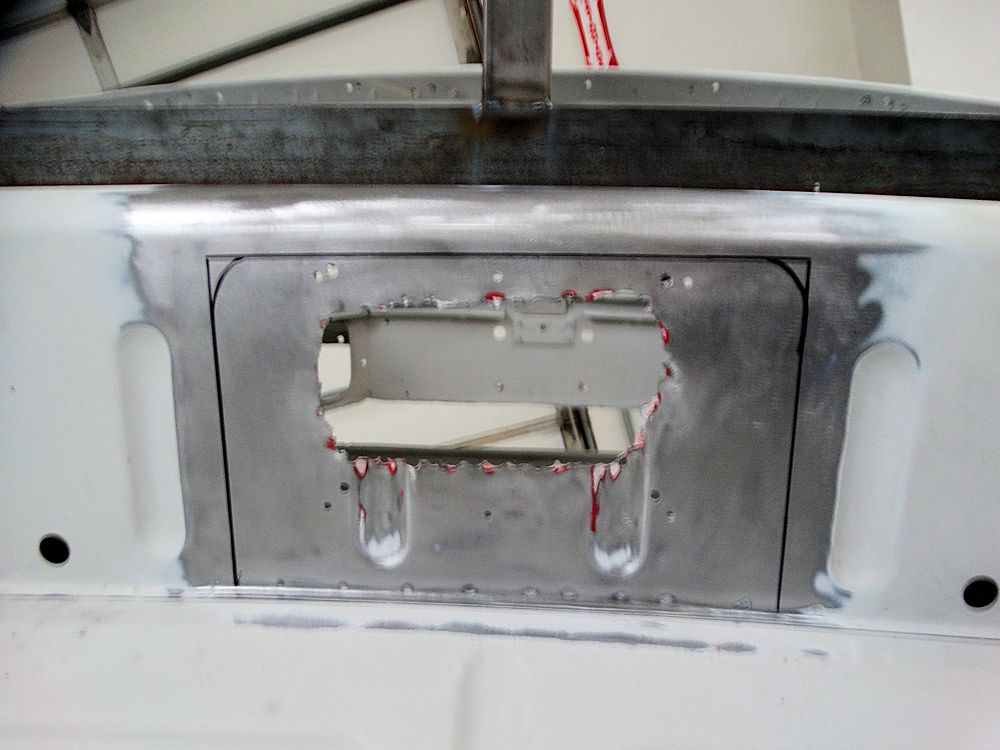
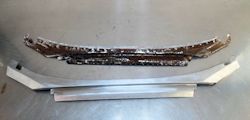
A new panel had to be fabricated from
scratch
|
|
|
|

|
|
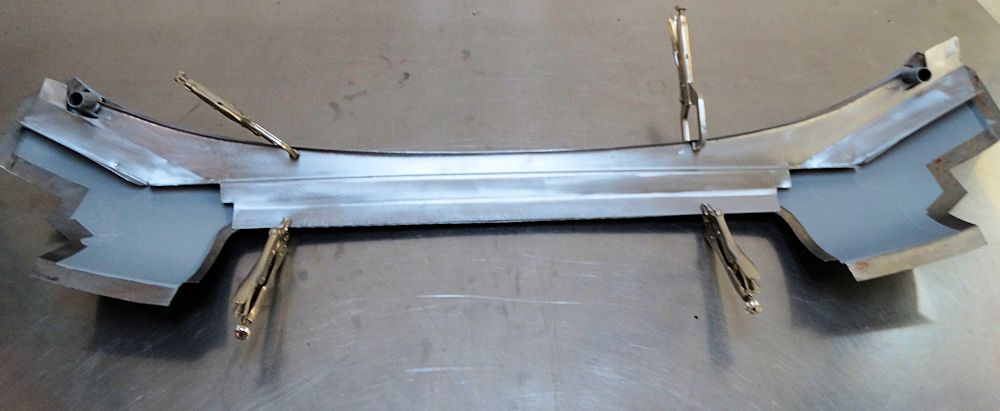
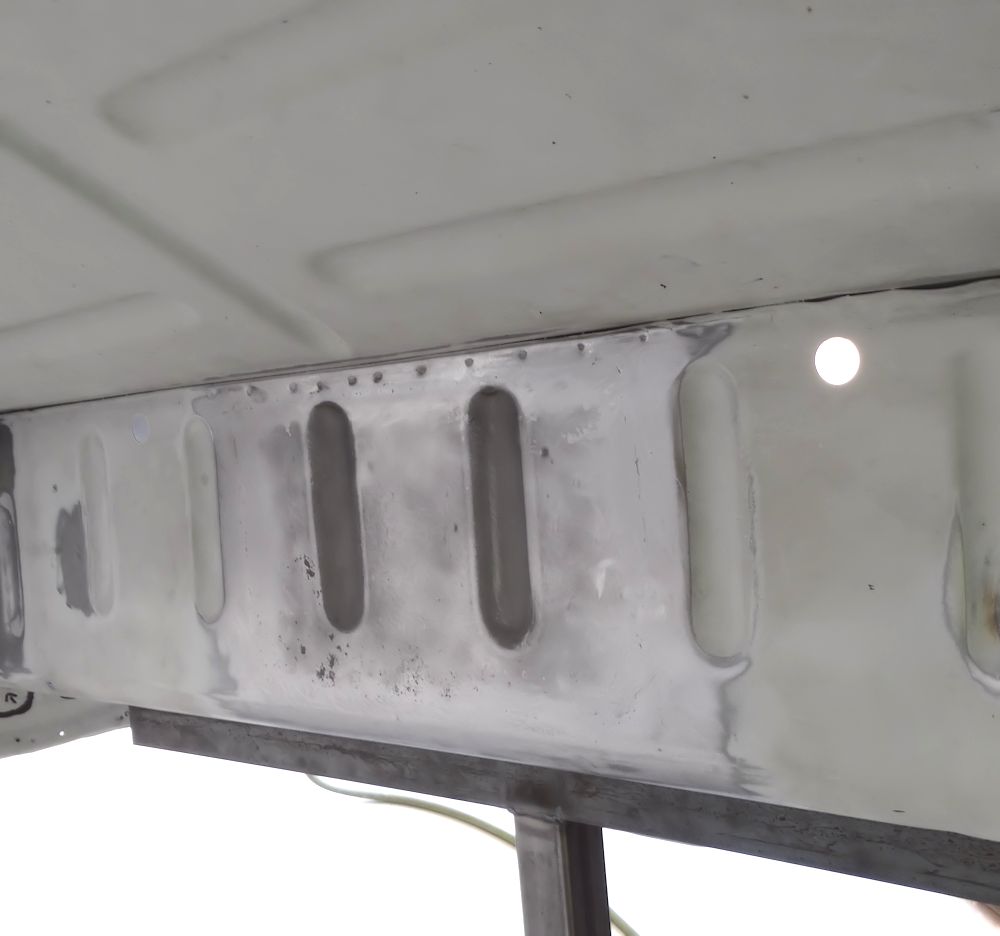
Trial fitting the new panel
|
|
|
|

|
|
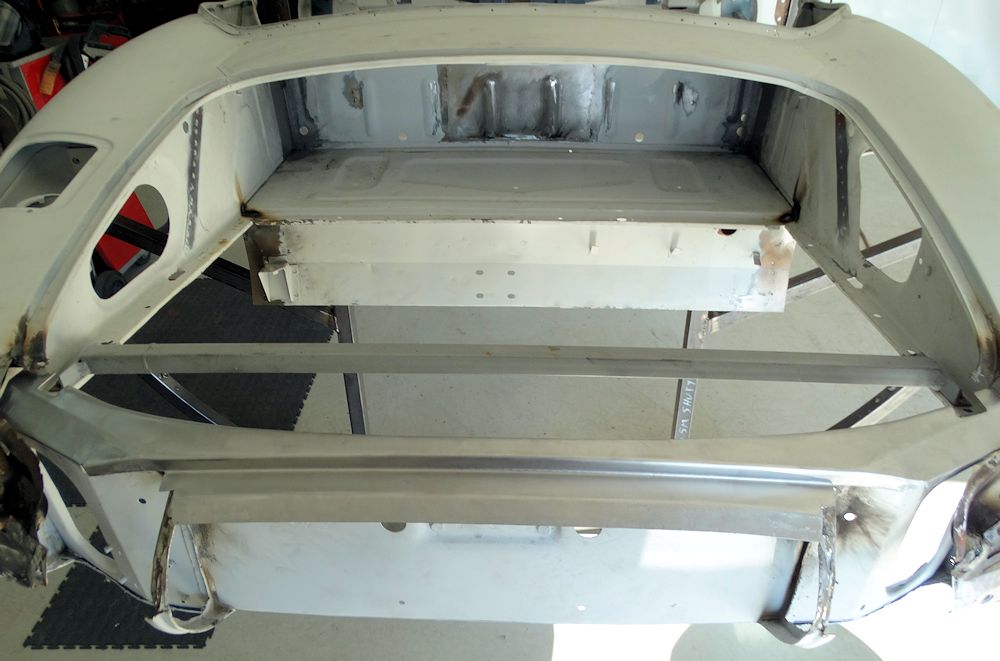
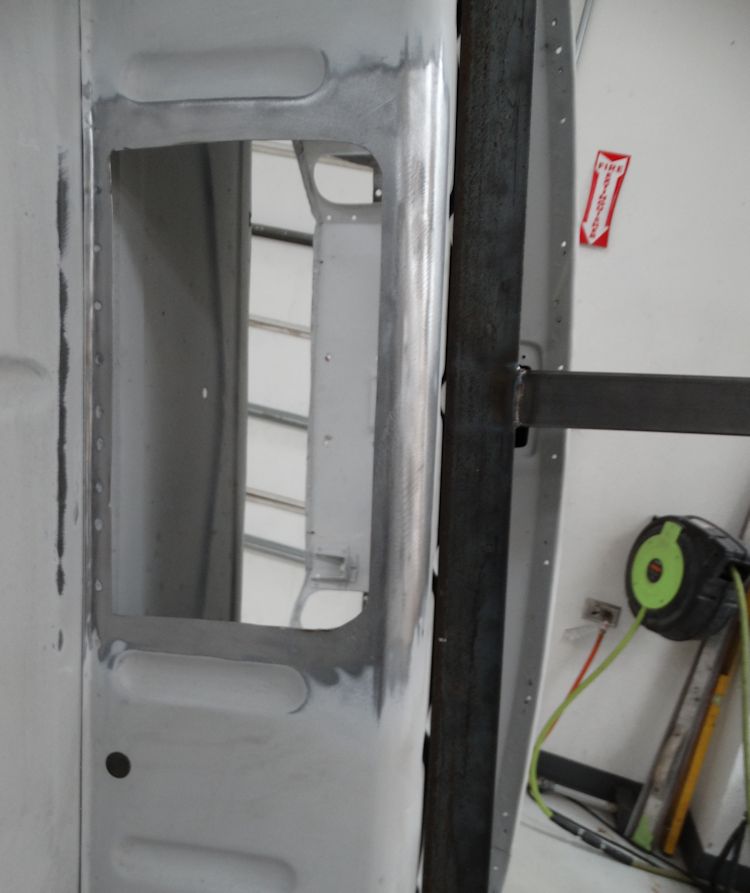
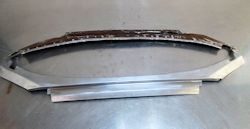
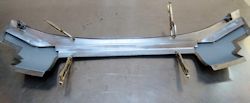
Not much left at the back of the car at
this point!
|
|
|
|
|
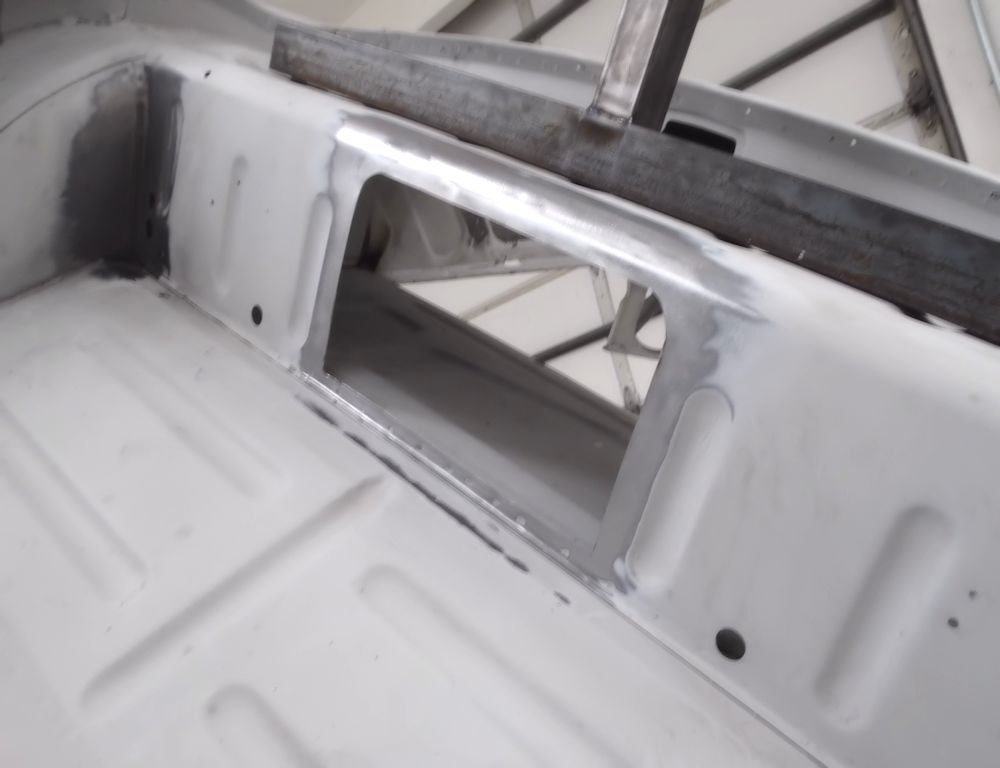
Trial fitting license plate panel
|
Unfortunately your boot lid is also rusty
and will be replaced
|
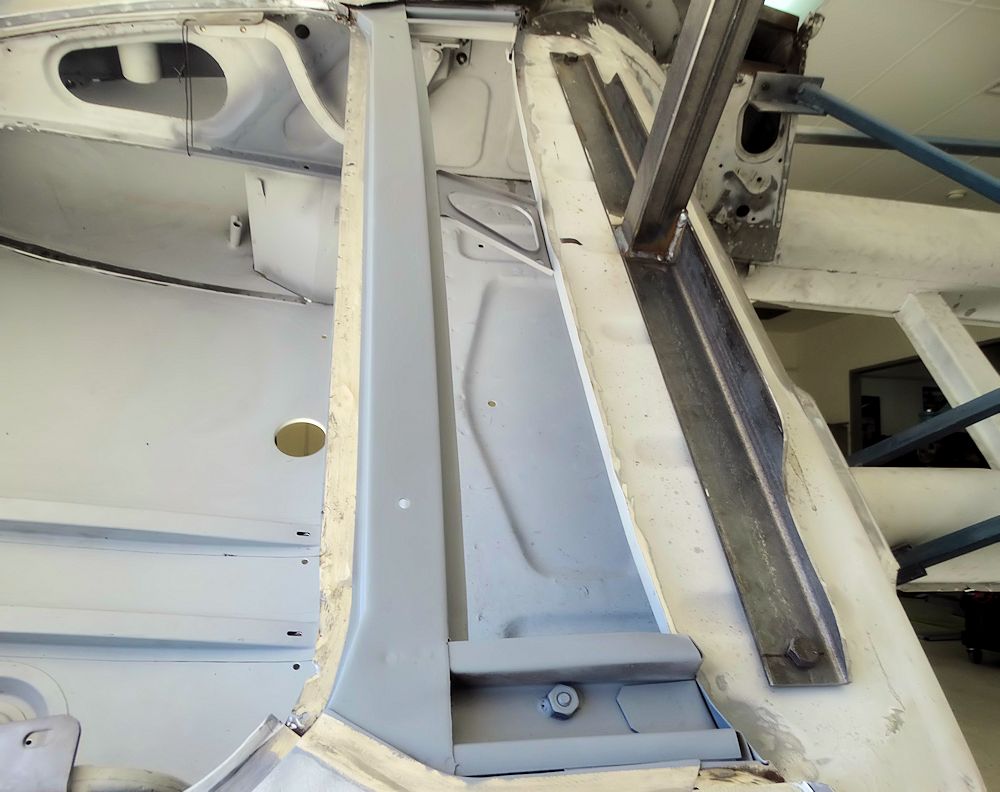
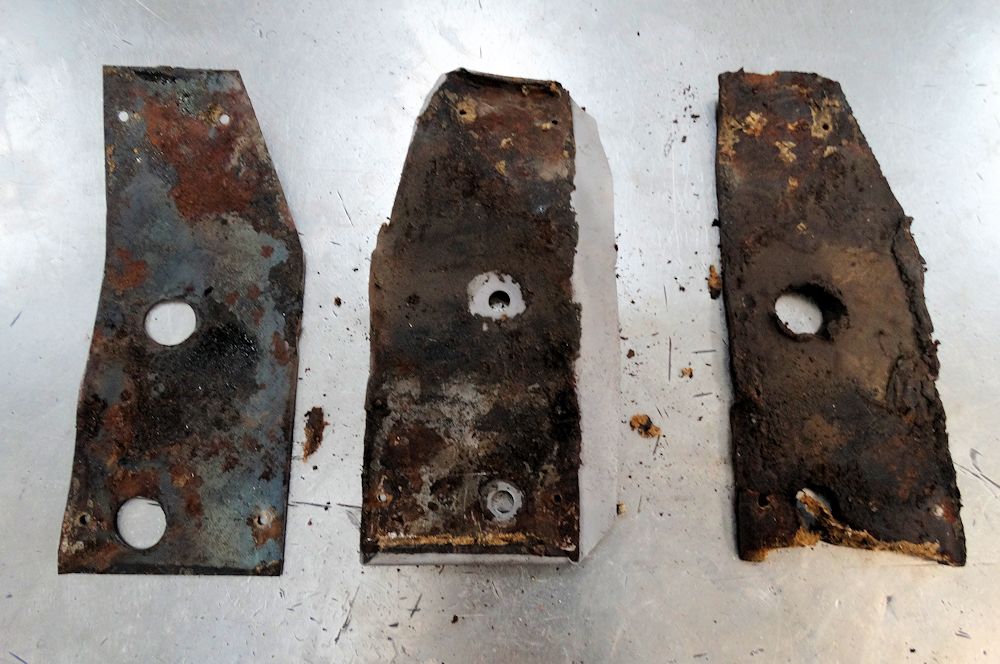
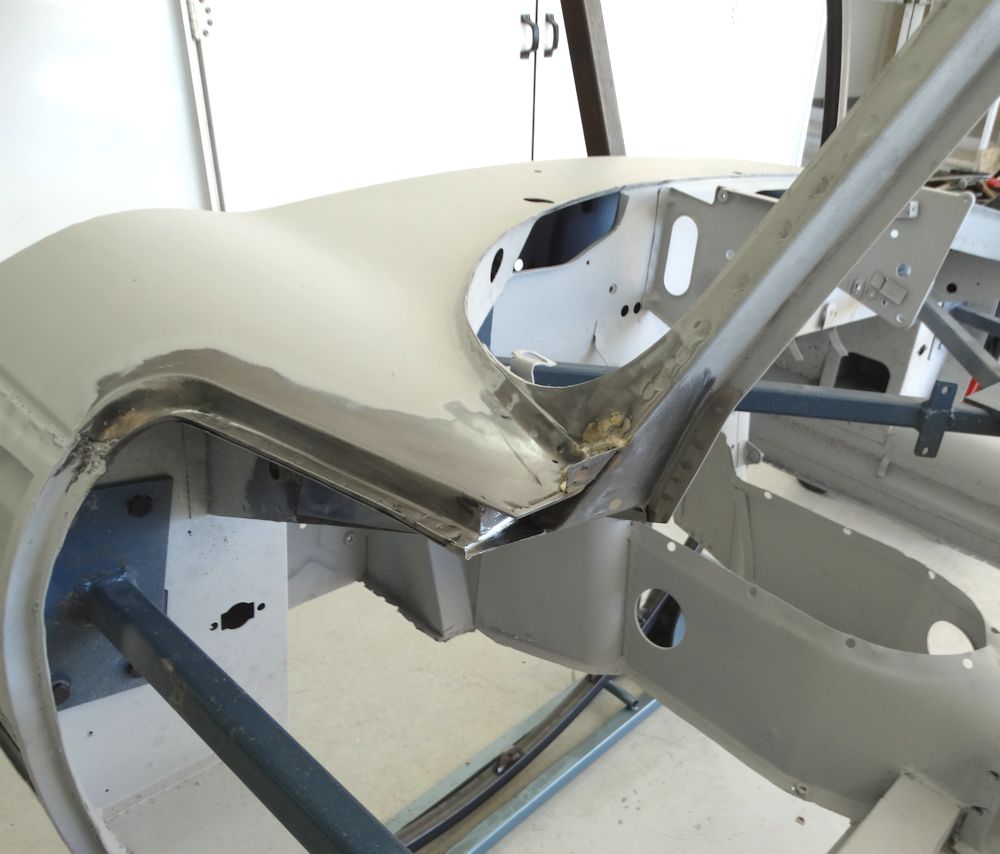
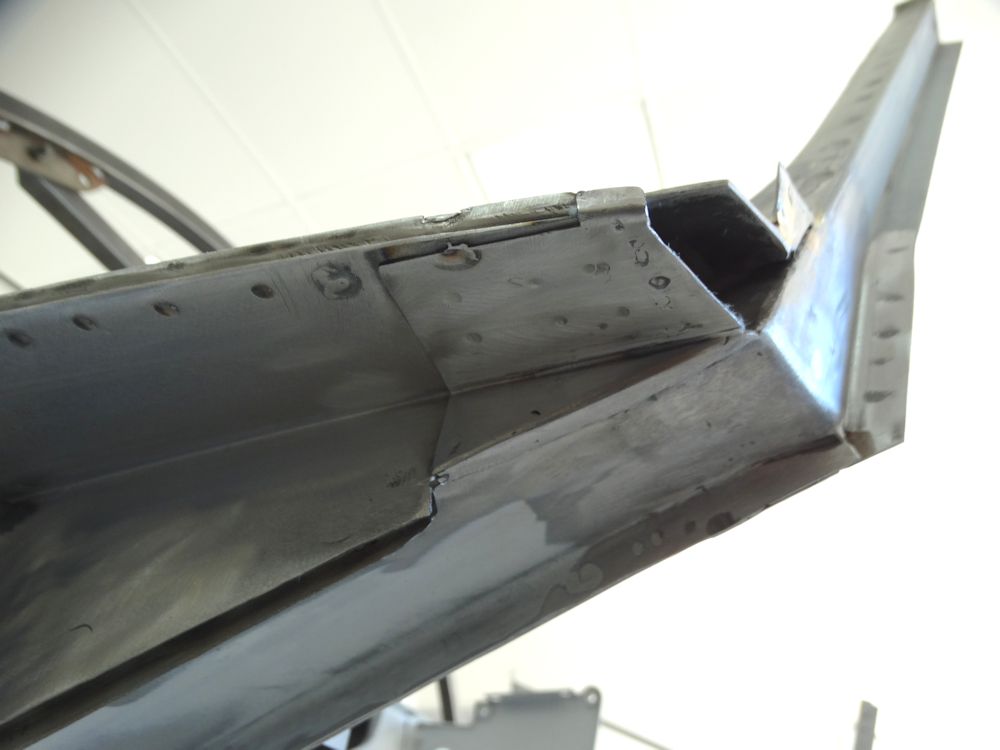
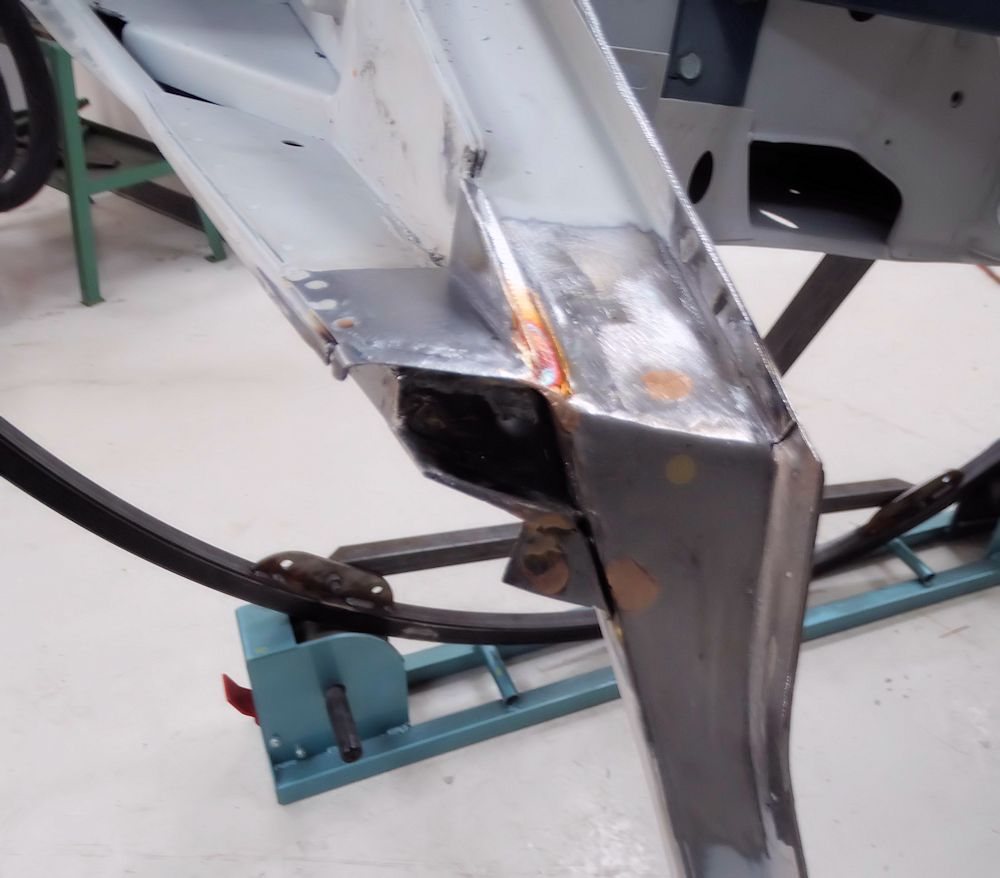
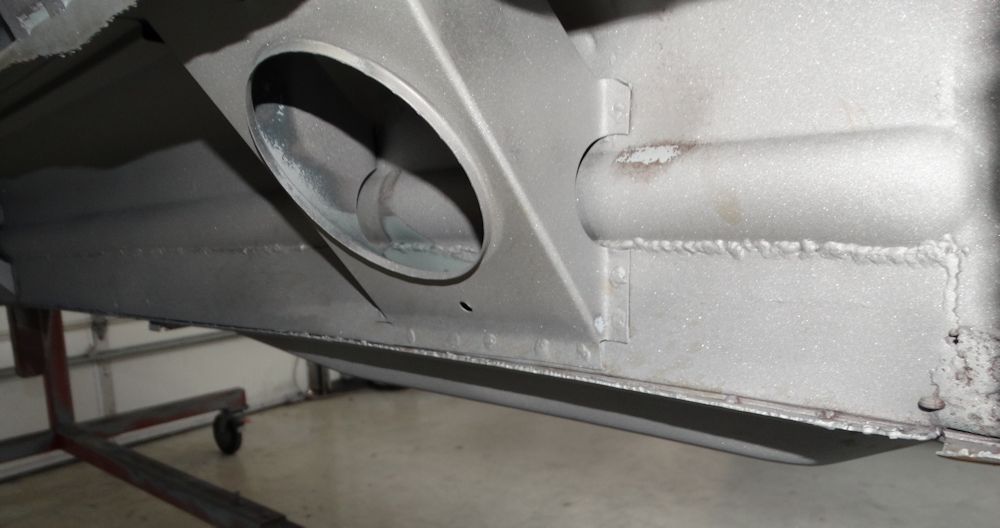
Oscar
has been busy cutting out corroded metal and fabricating
replacement panels for the IRS chassis legs and beneath
the windscreen pillars. He has made excellent progress in
the last few weeks!
Body
restoration underway today!
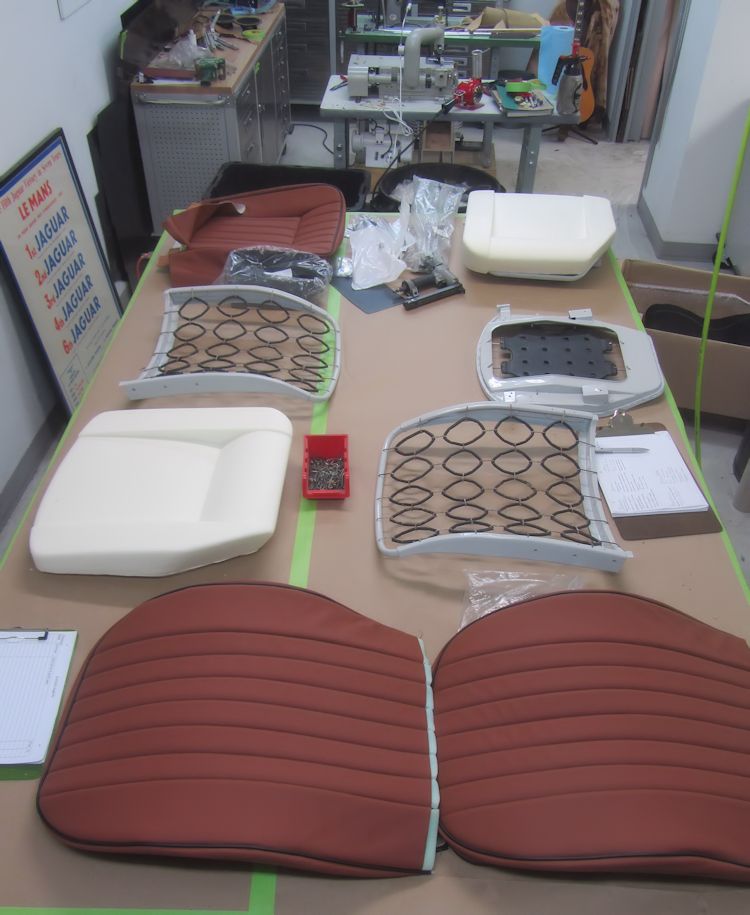
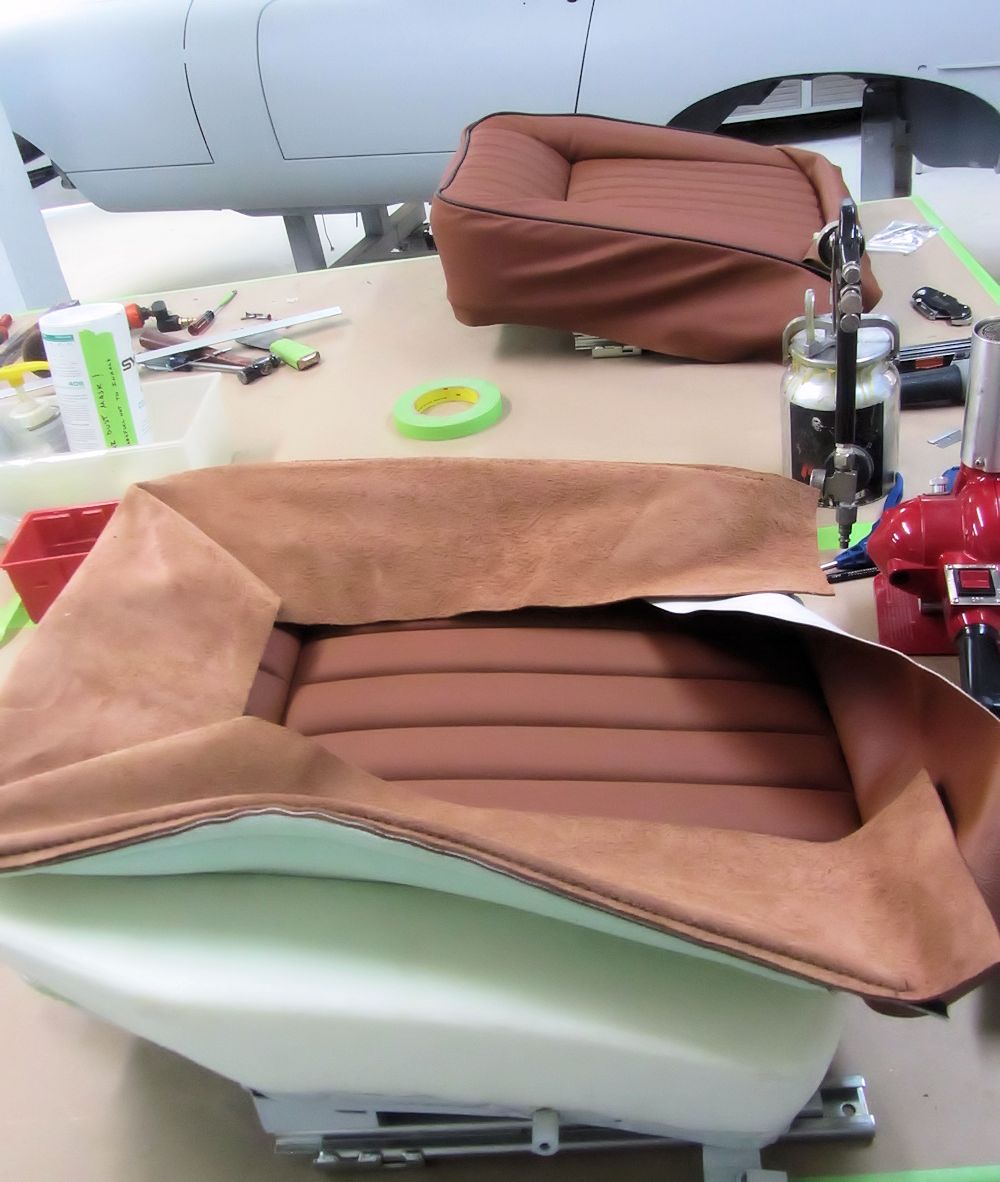
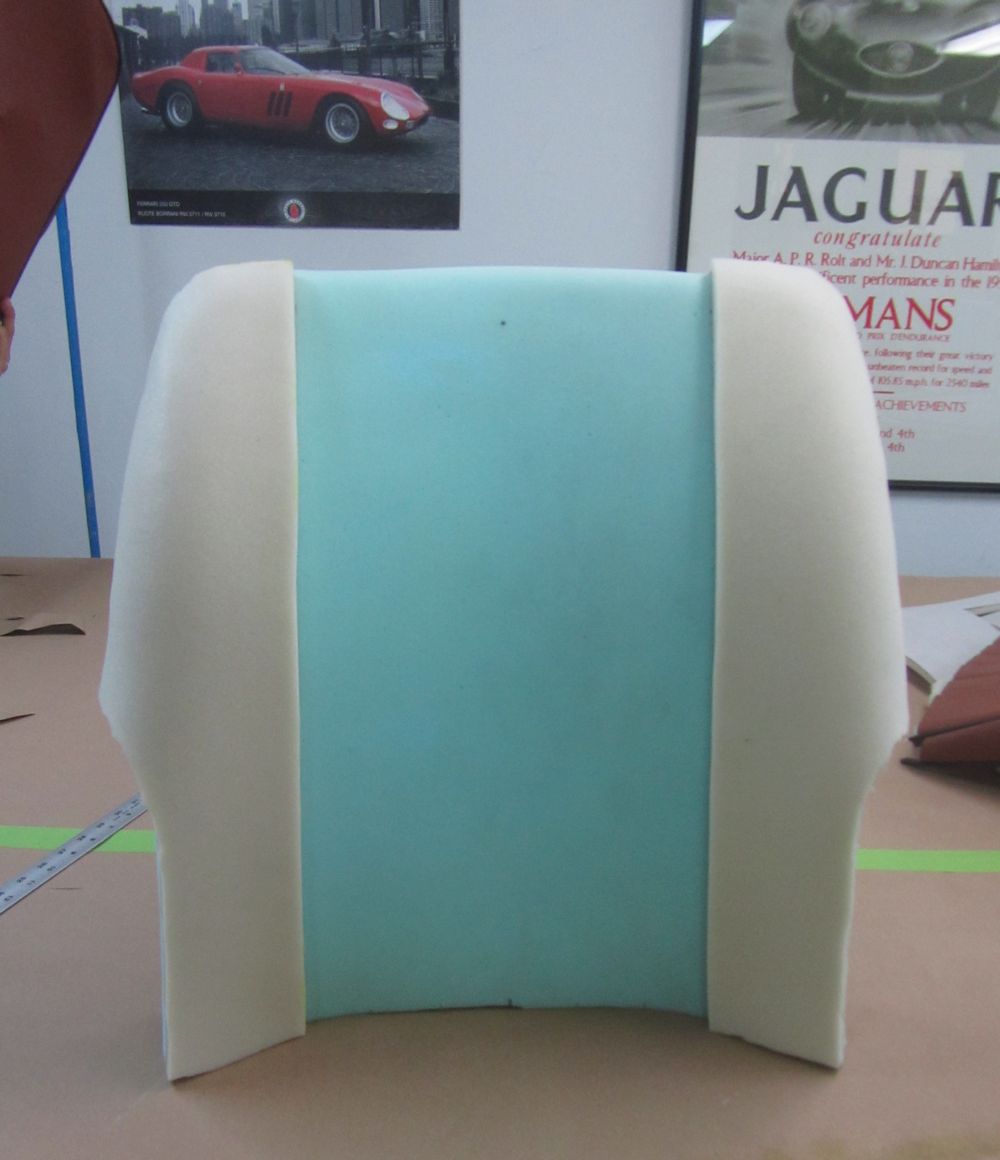
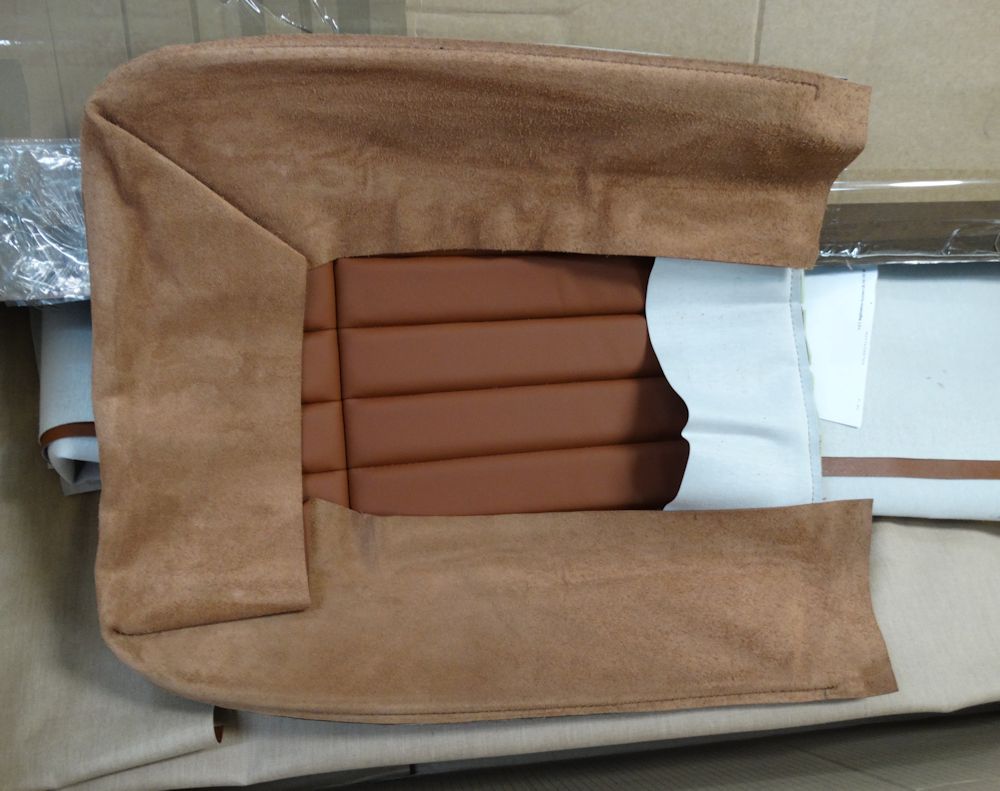
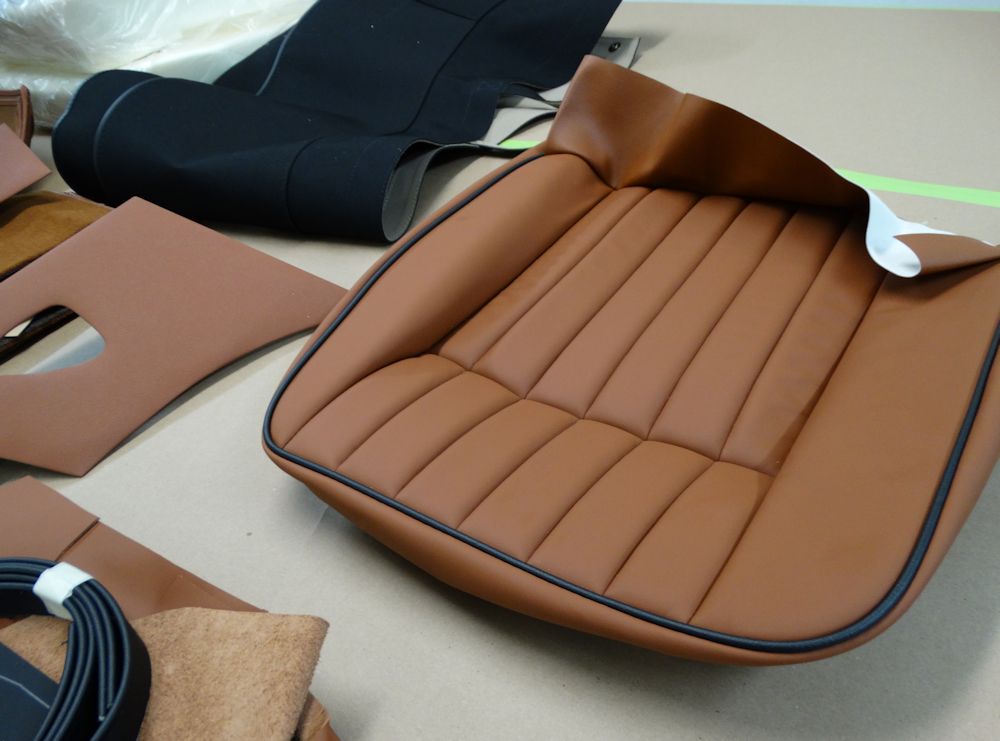
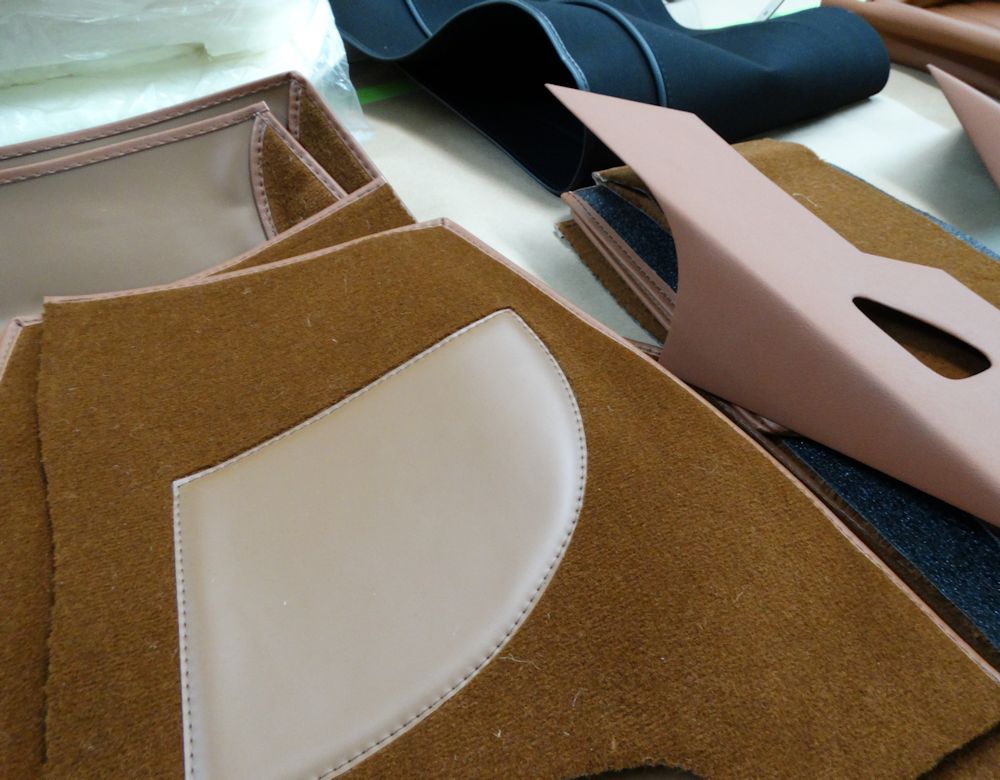
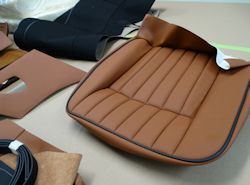
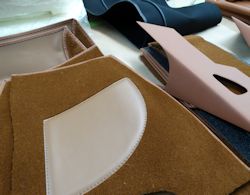
Restoration
of your seats now virtually complete.
Lots
of progress in the machine shop, interior trim restoration
about to get underway.
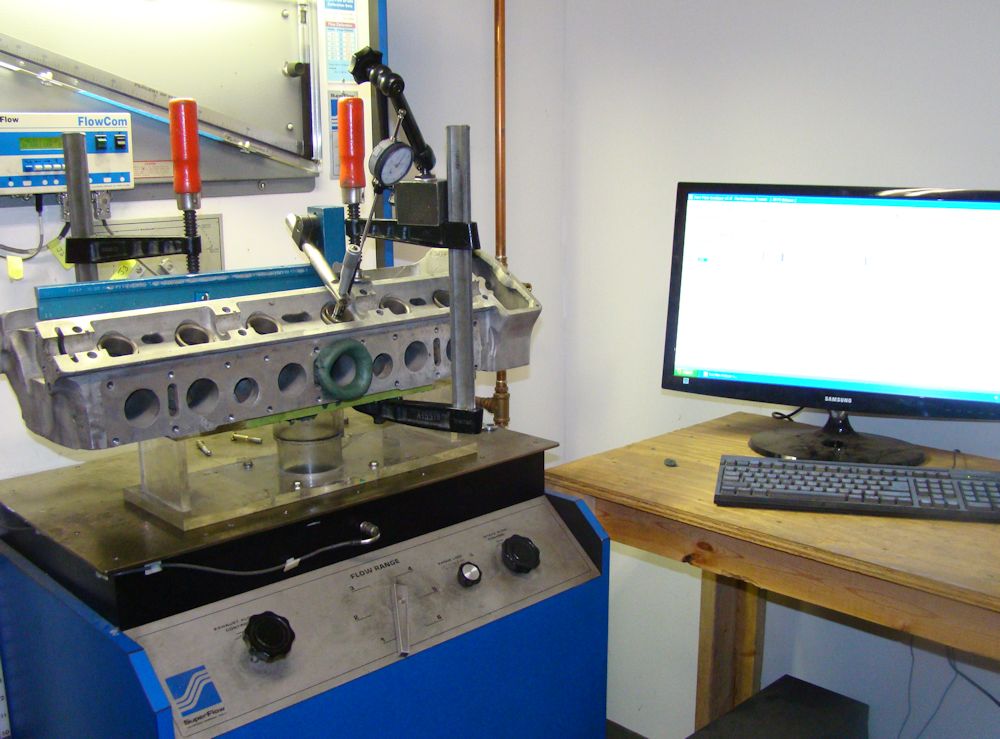
|
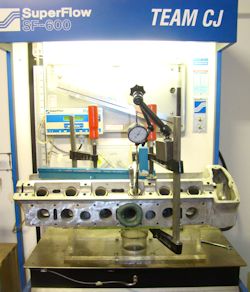
|
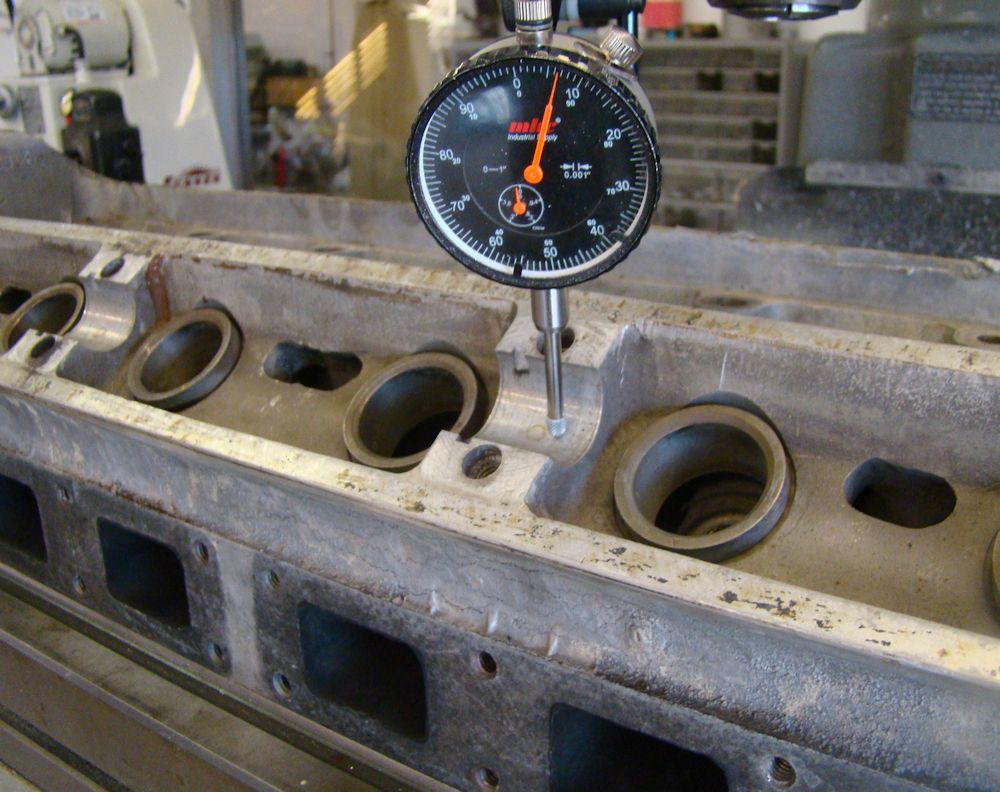
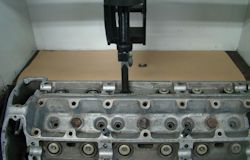
Base-line flow testing the head
|
Machining out old seats
|
|
|
|
|
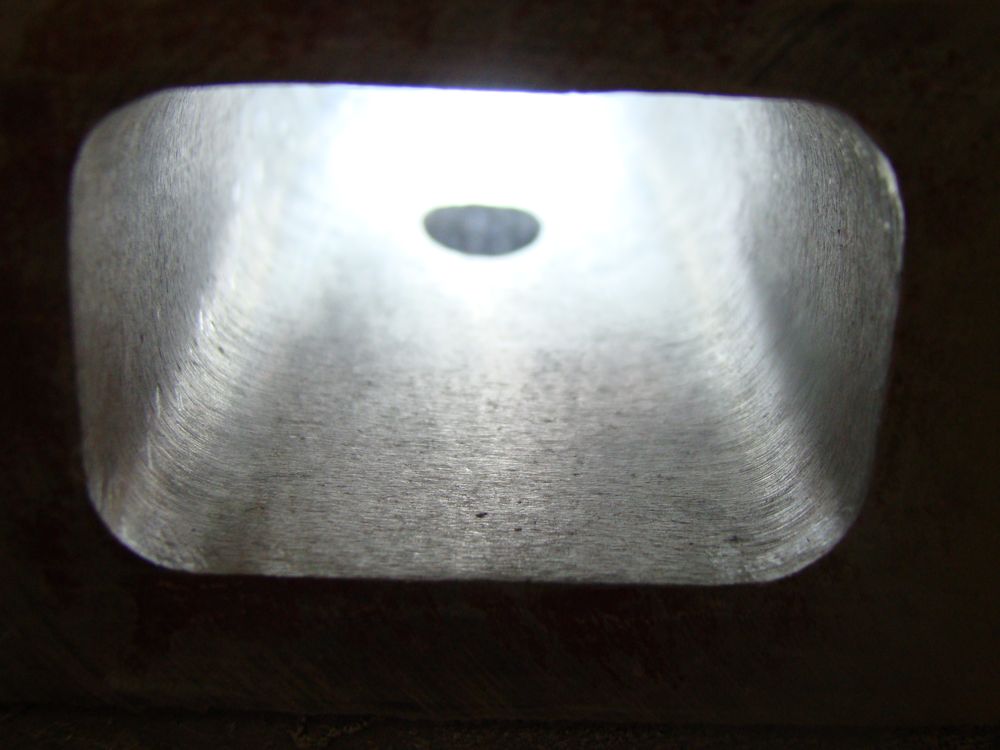
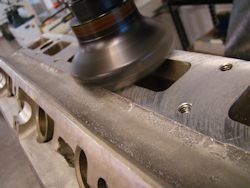
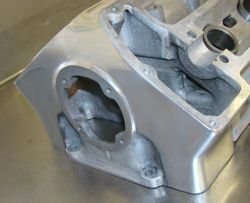
Surfacing gasket areas
|
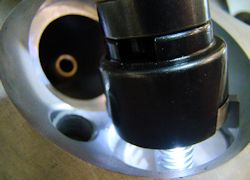
Porting in progress (exhaust port)
|
|
|

|
|
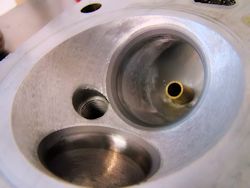
Machining 5 angled valve job
|
|
|
|

|
|
|
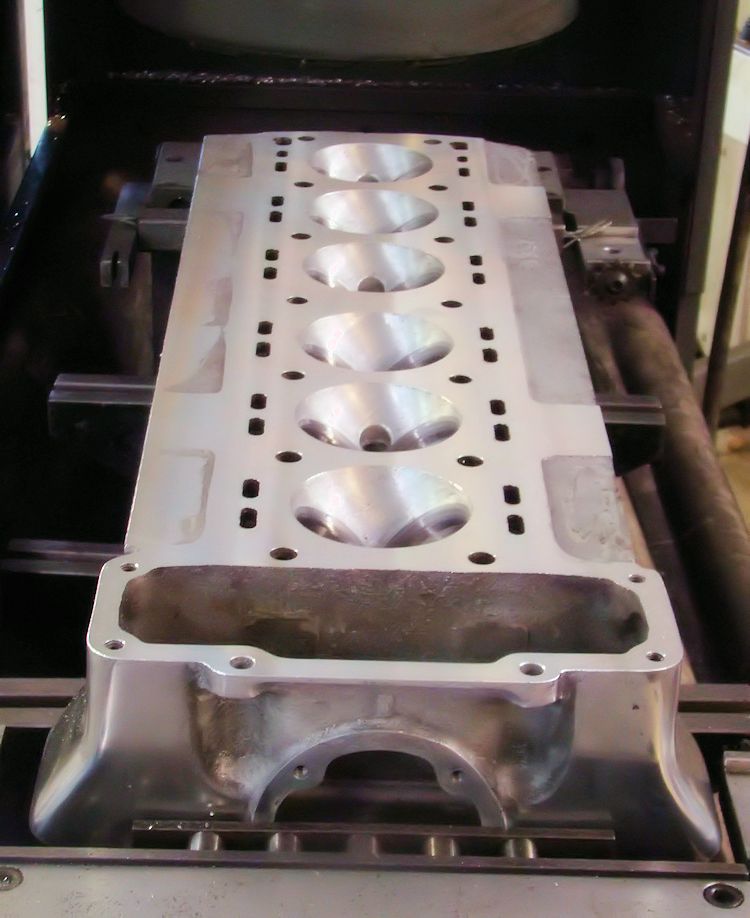
Front of head prior to sanding and
polishing
|
|
|
|
|
|
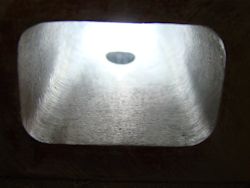
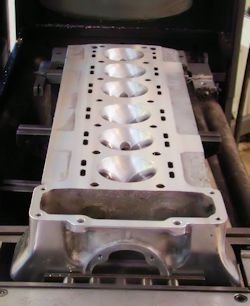
Surfacing the deck
|
|
|

|

|
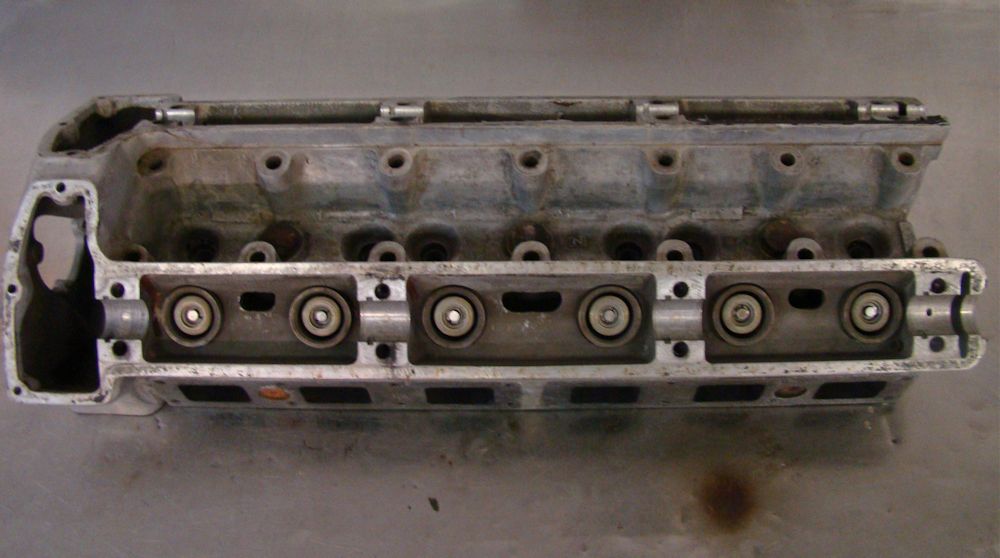
Rebuilt head now ready for assembly
|
|
|
|
|
|
Beautiful tan Suffolk & Turley hides
|
|
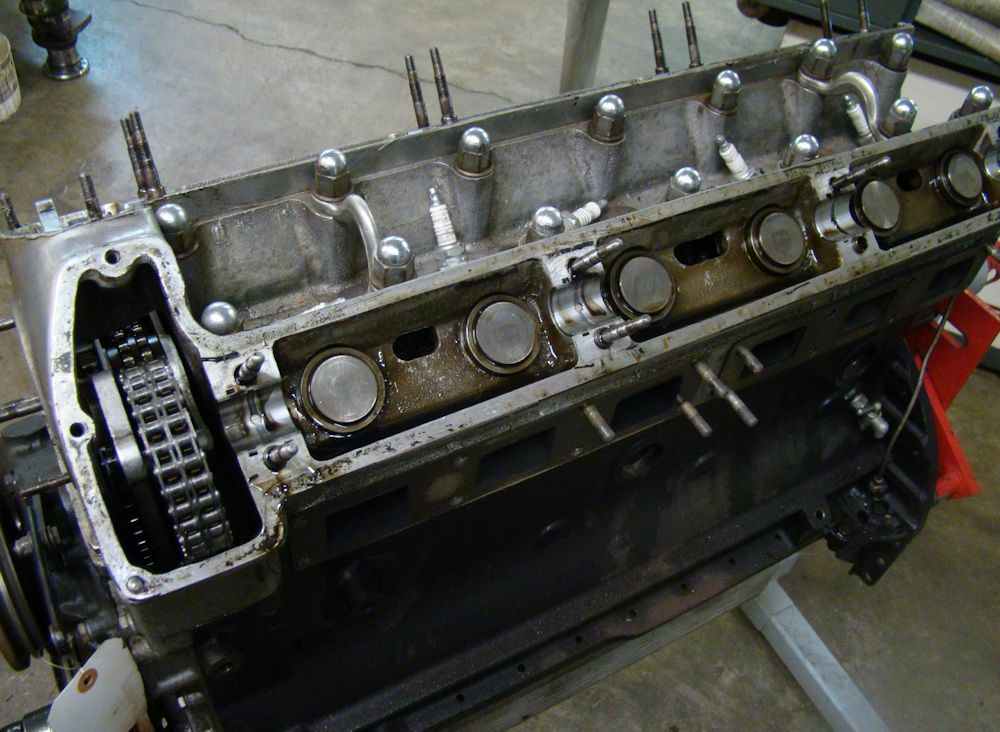
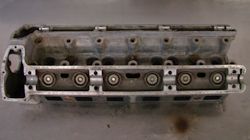
I am pleased to
report that we now have your Stage 2 (4.7L) engine rebuild
underway.
|

|
|
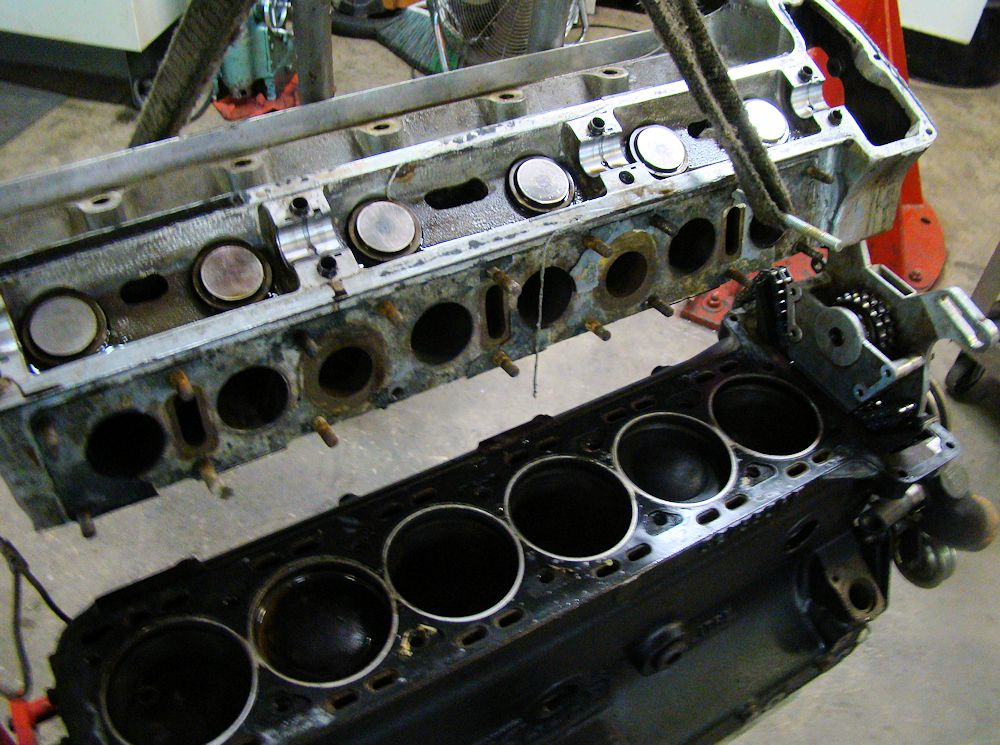
Removing the cylinder head
|
|
|
|
|
|
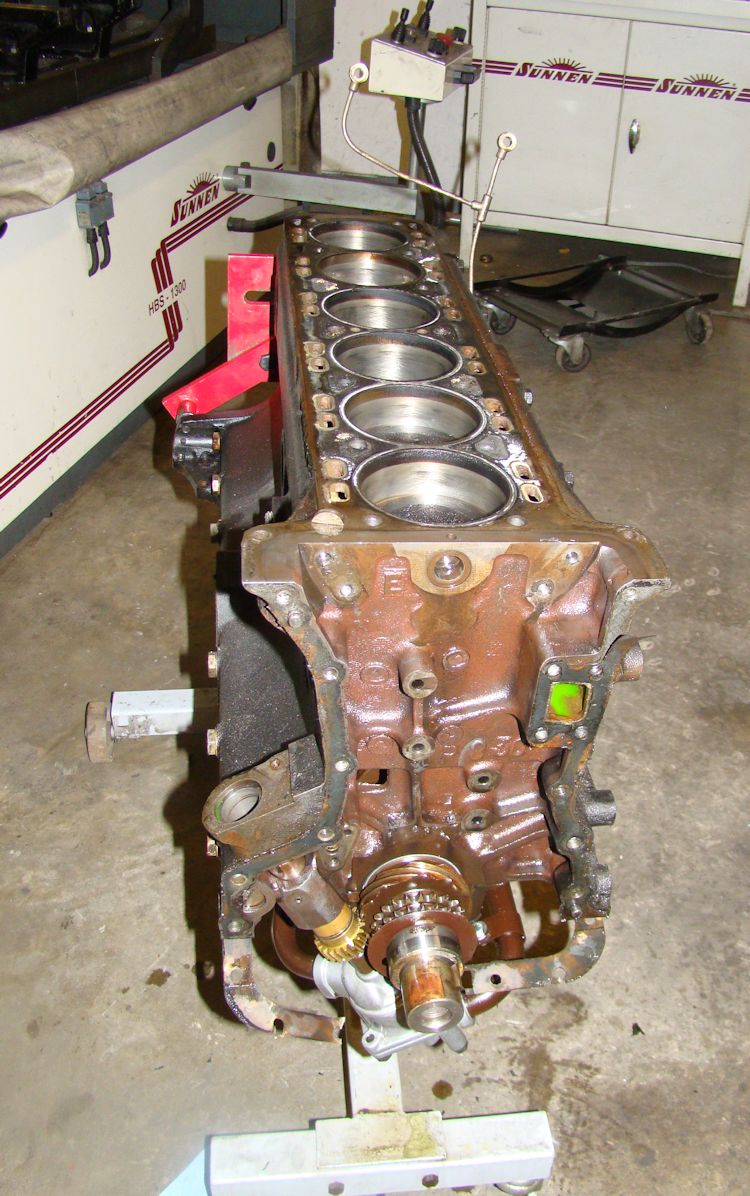
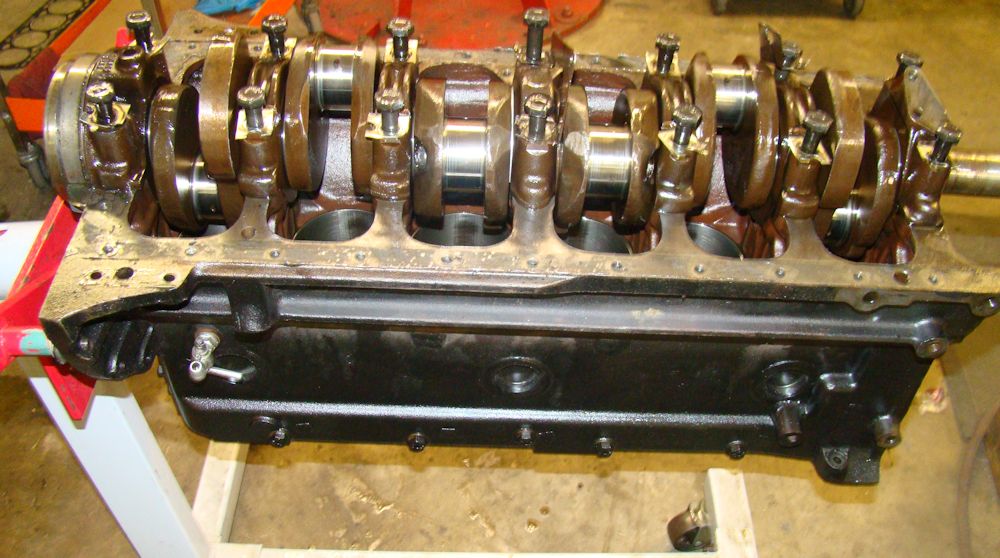
Crank will be replaced with a billet
stroked unit
|
|
|
|
|
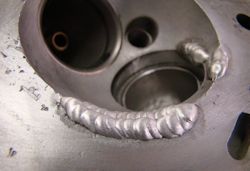
|
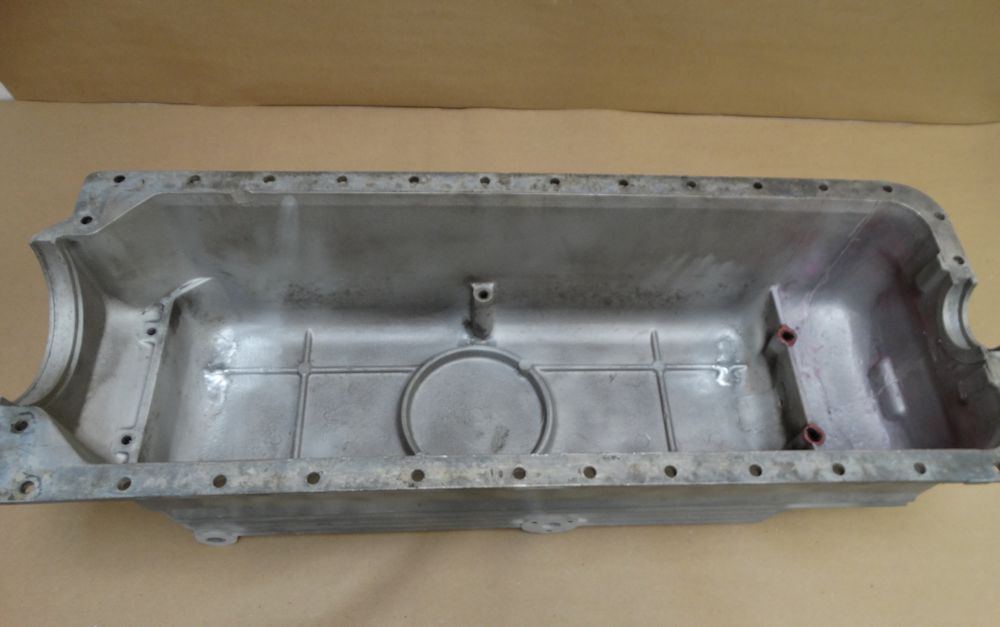
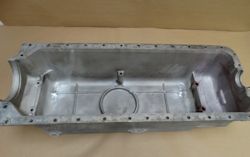
Oil pan had several cracks that will
require welding
|
|
|
|
|
|
|
|
|
 |
|
|
|
|
|
|

|
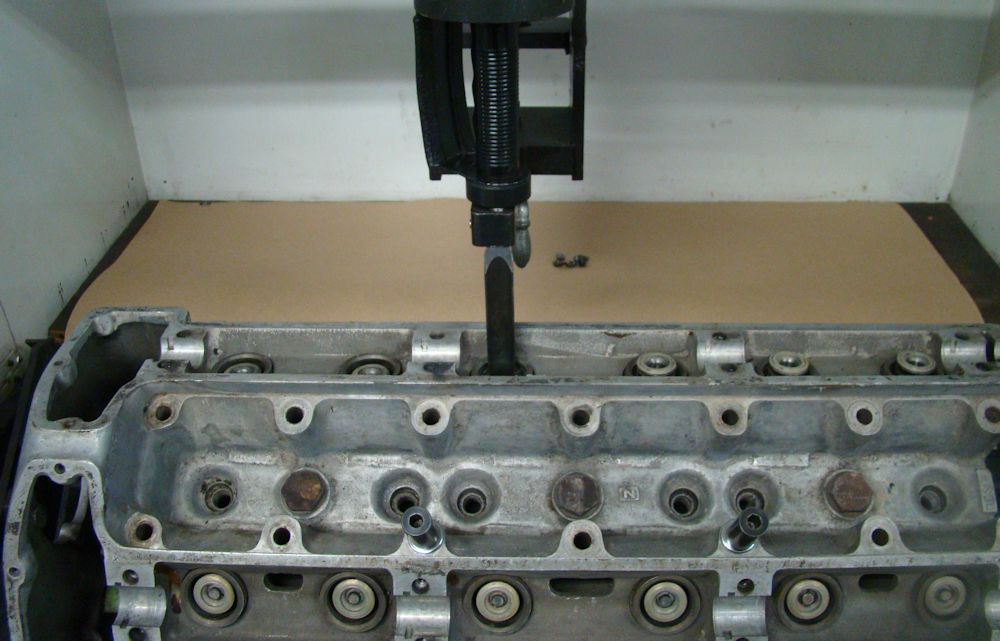
Disassembling the head
|
|
|
|
|
|
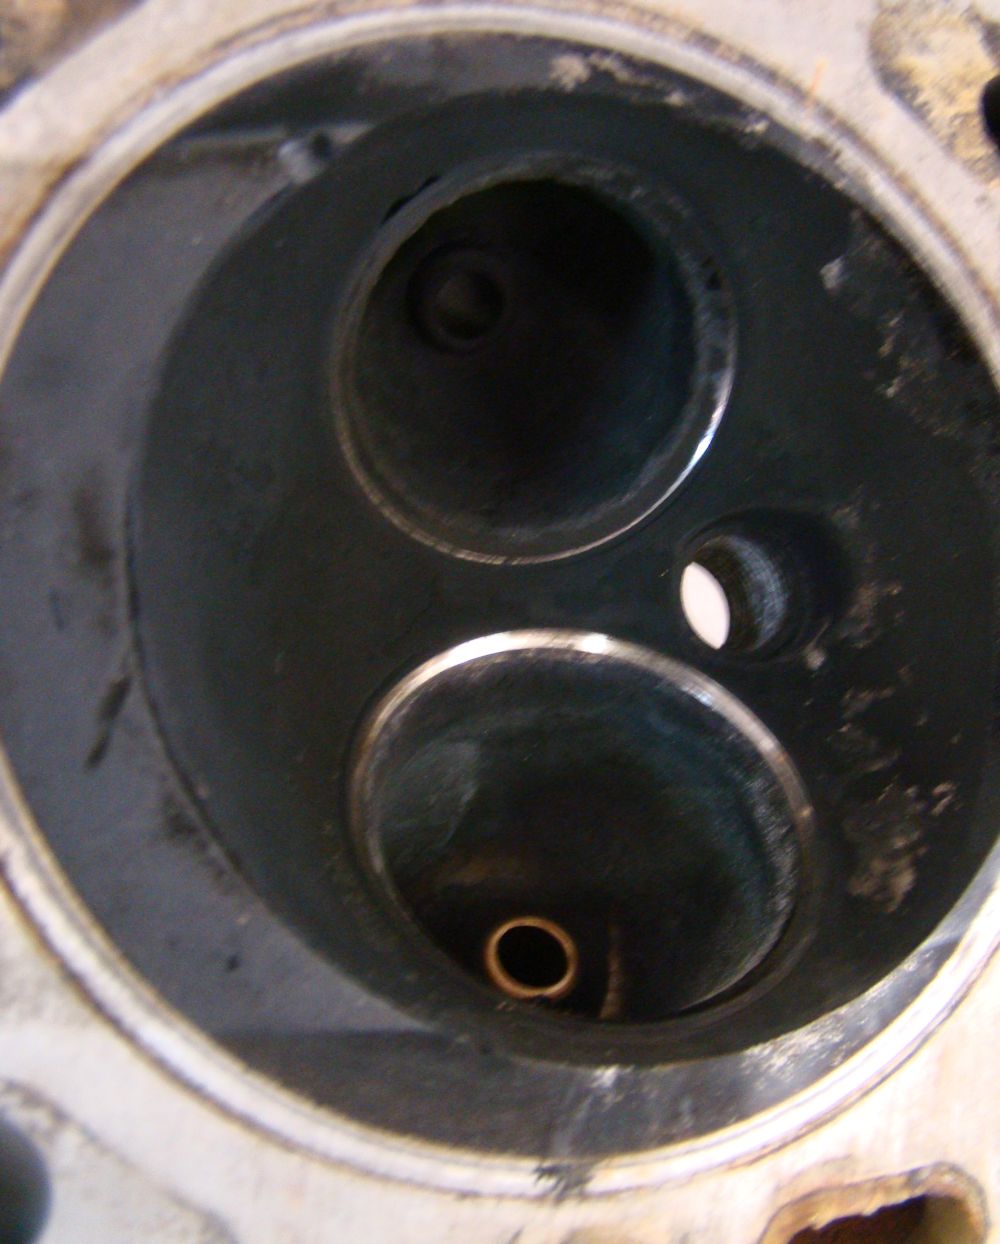
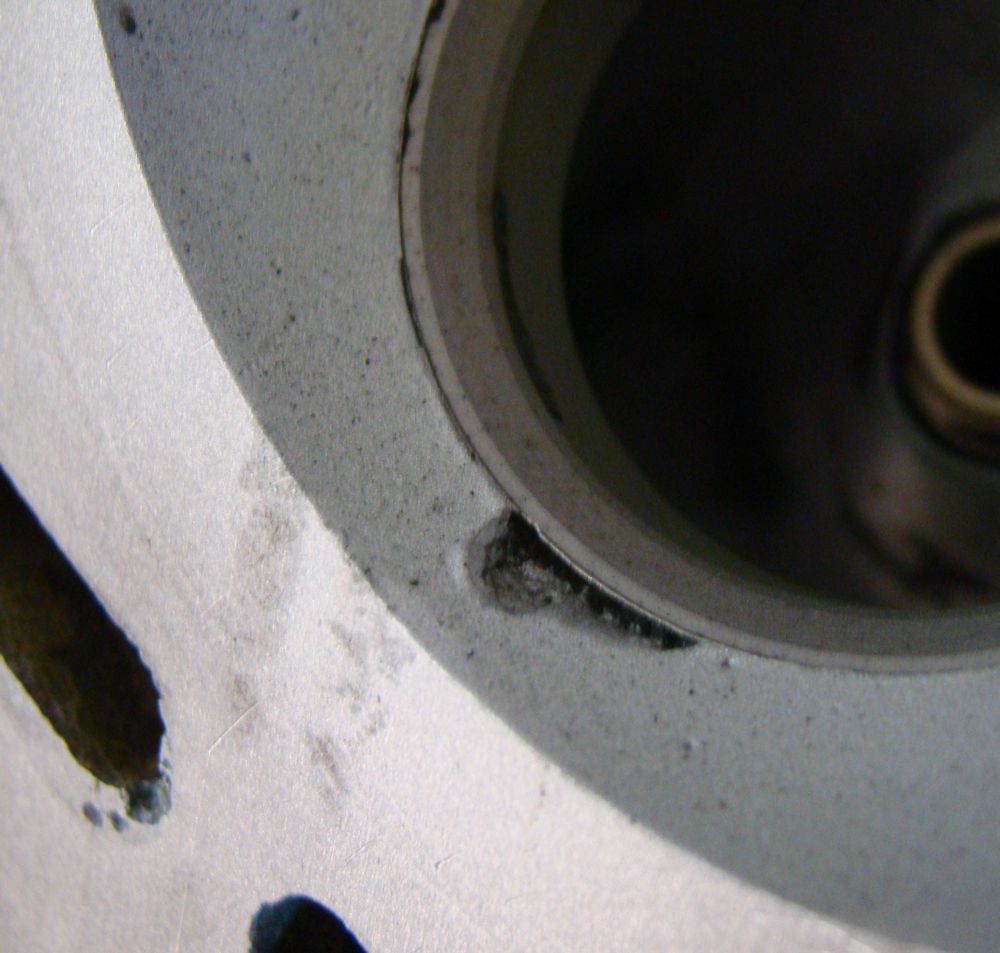
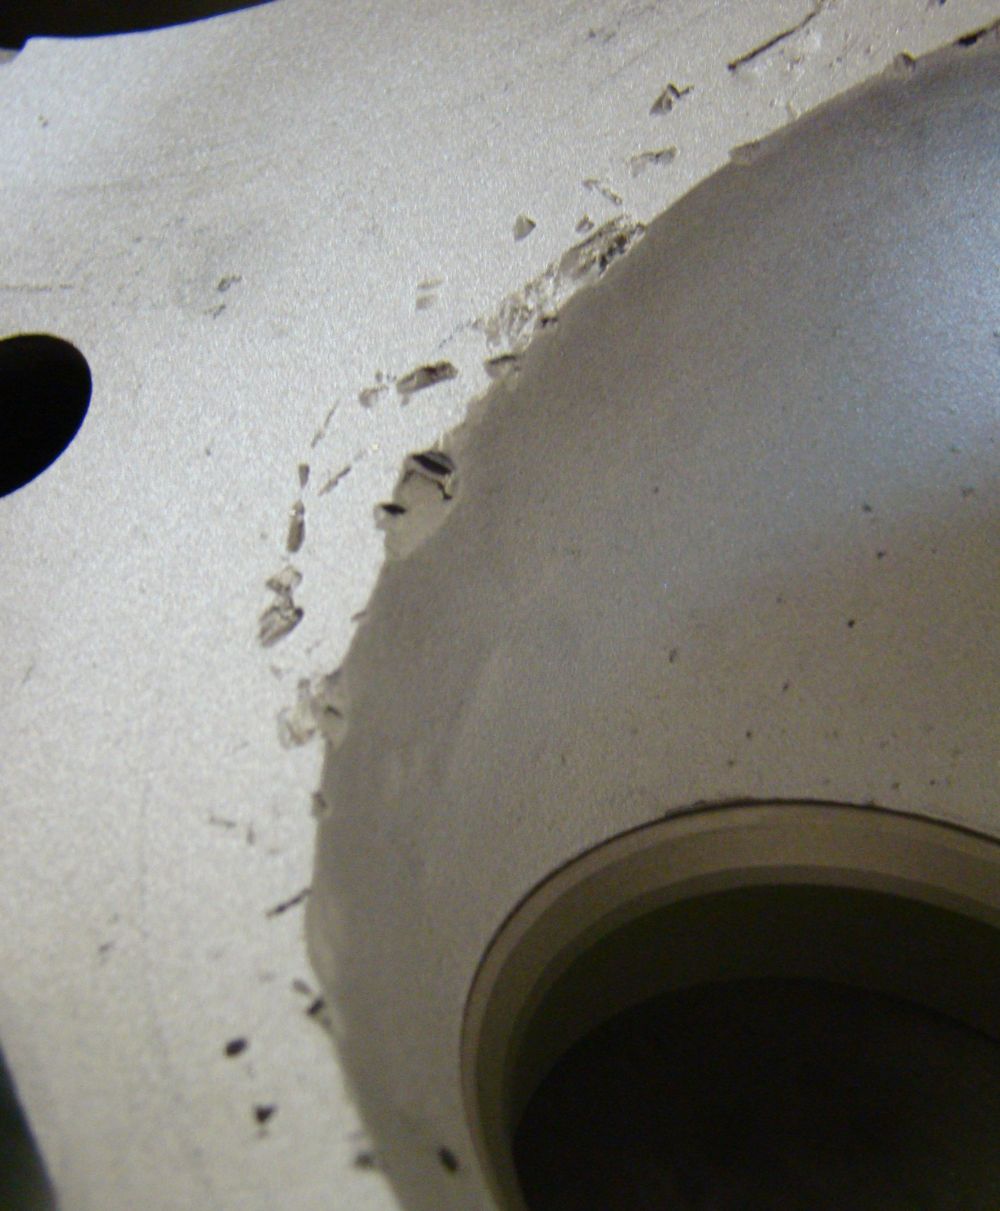
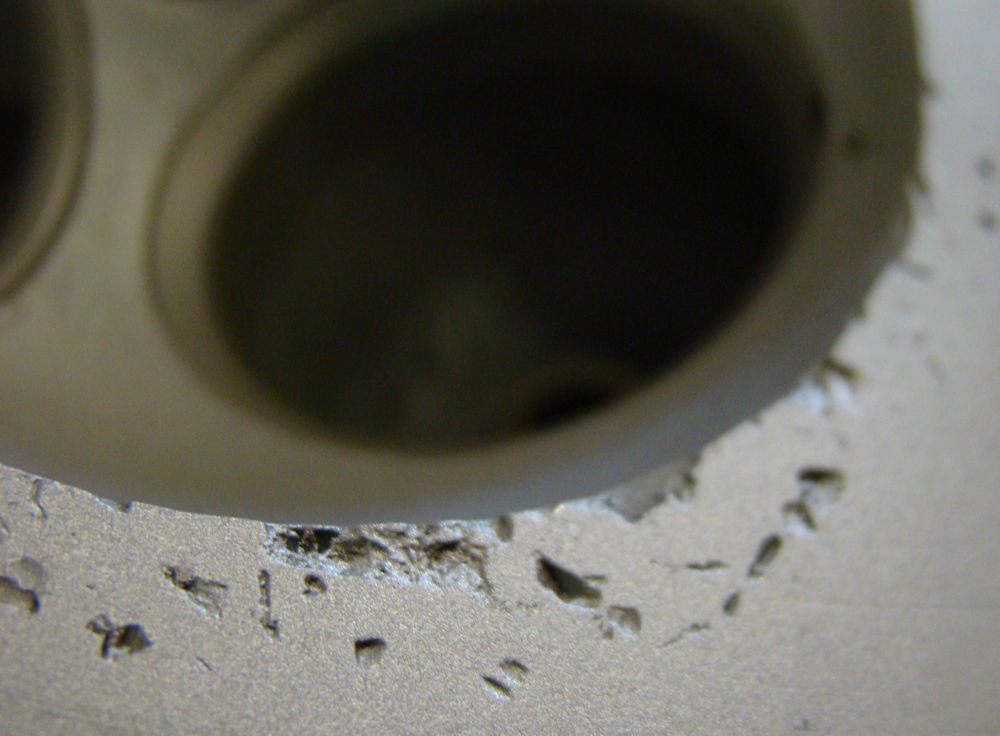
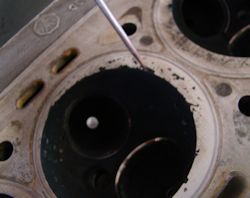
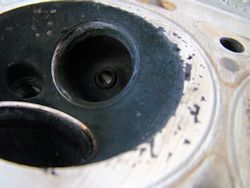
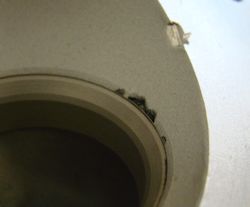
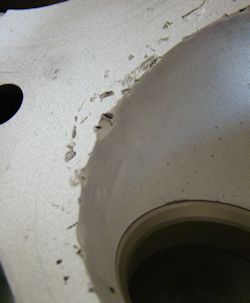
Head has extensive shrapnel damage
|
|
|
|
|

|
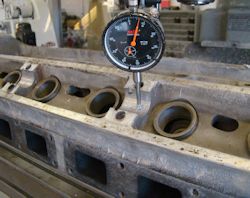
Measuring head warpage - will require a cam
saddle align hone
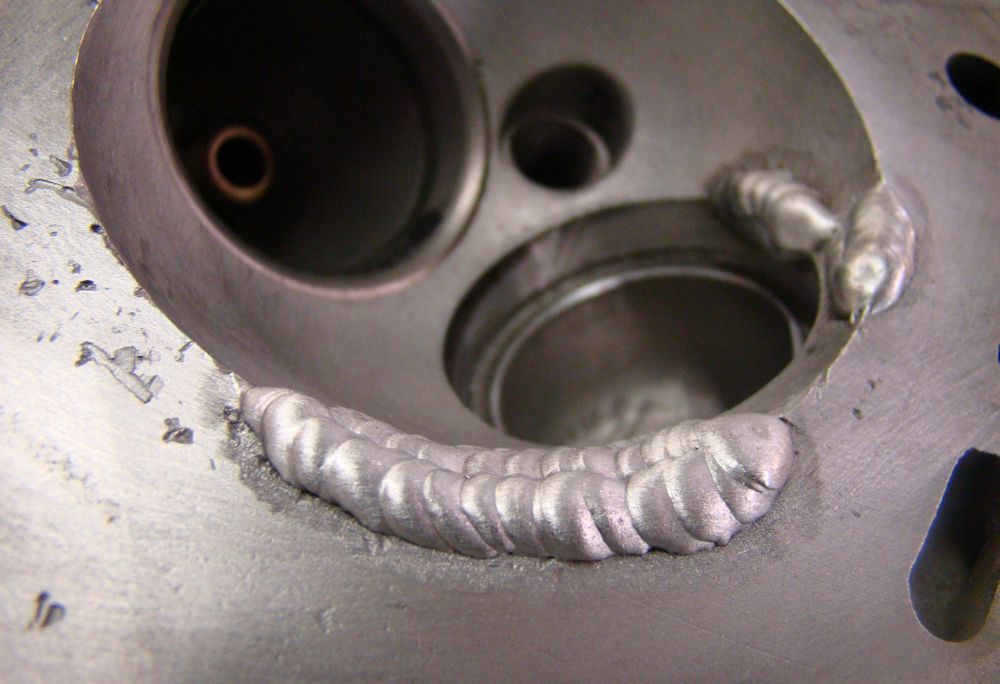
|
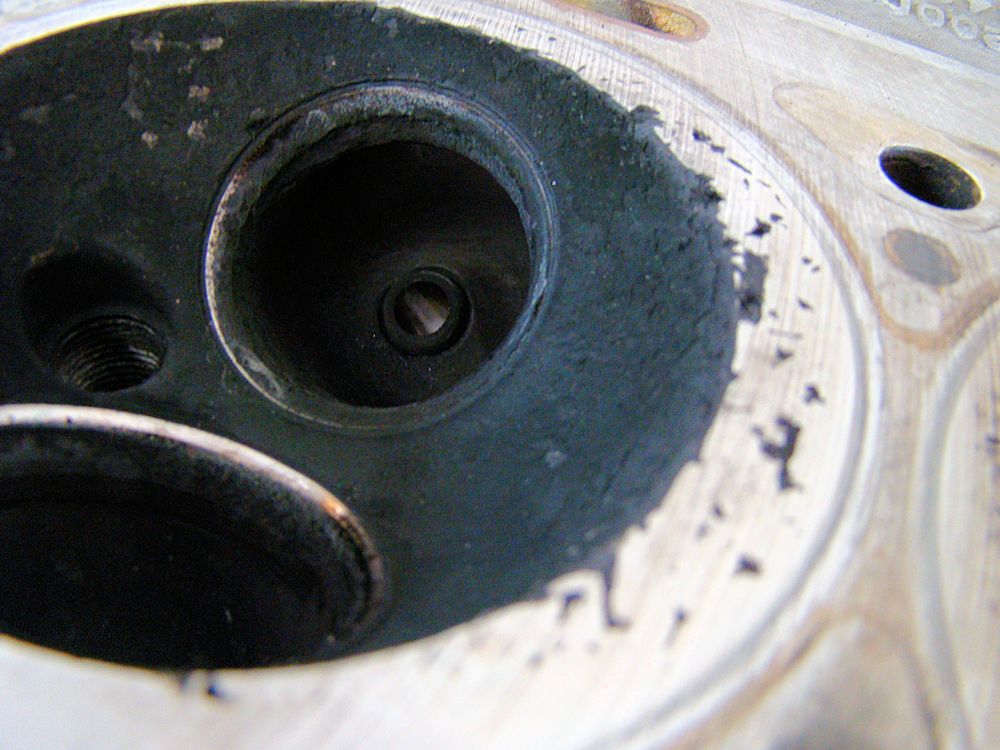
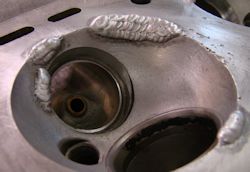
Several chambers will require significant
repair
|
|
|
|
|
|
|
|
|

|
|
|
Baseline flow testing prior to port work
|
|
|
|
|
Cylinder head weld repairs underway
|
|
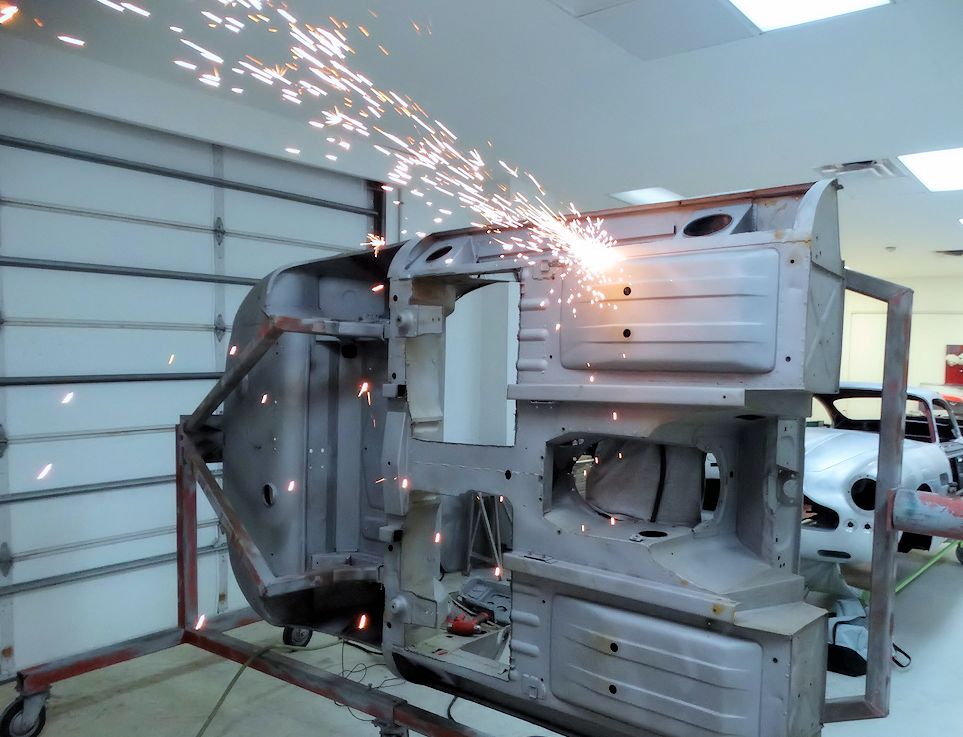
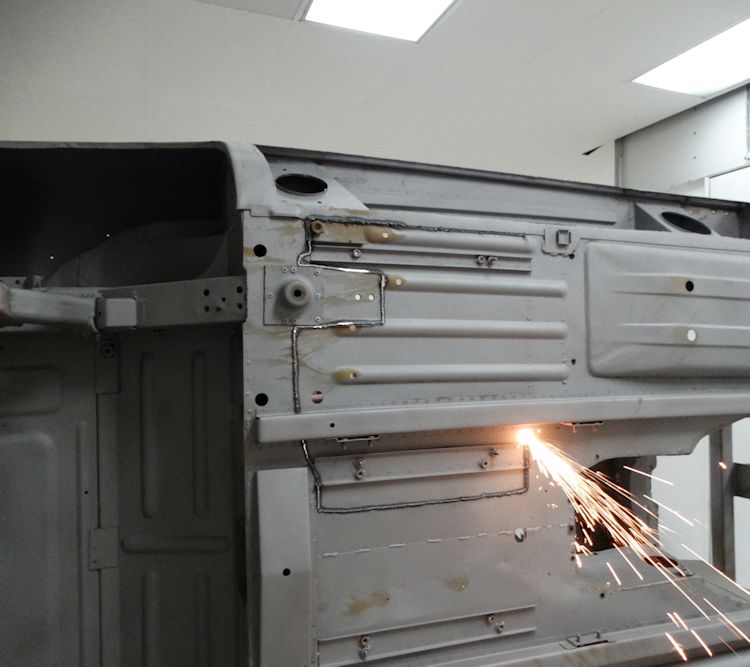
Cutting out
floors with the plasma cutter. Click on the large image
below for a short video clip.
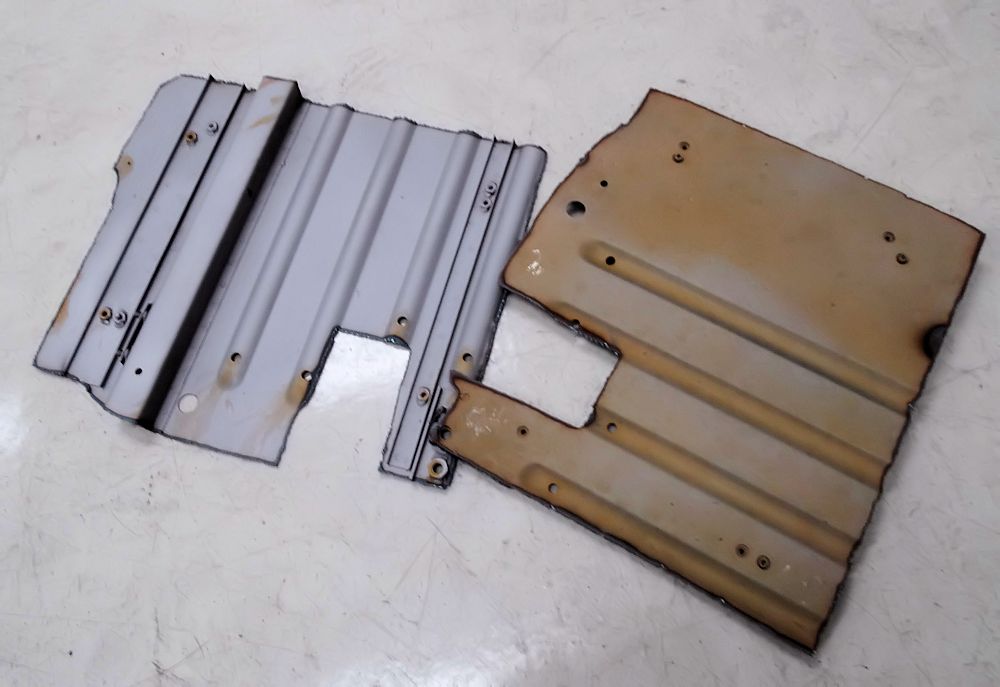
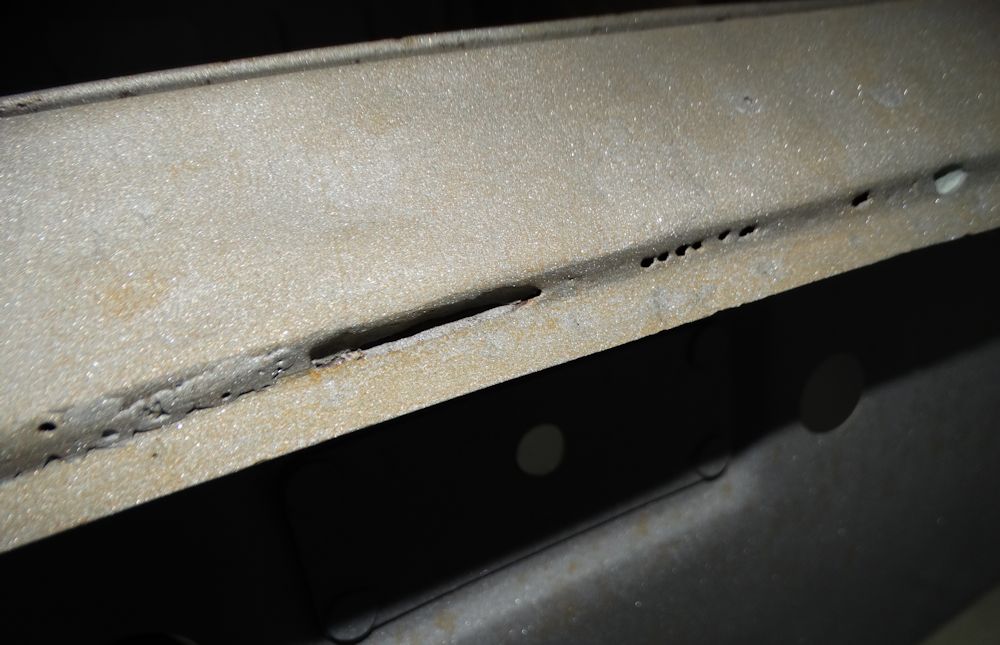
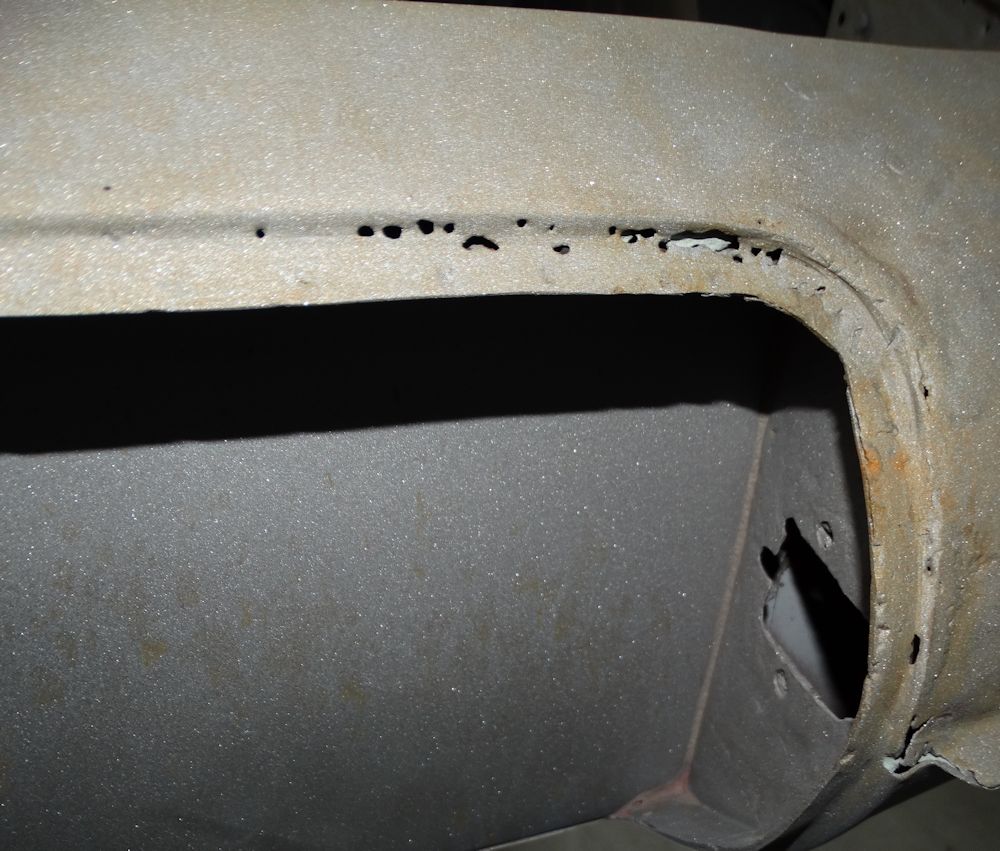
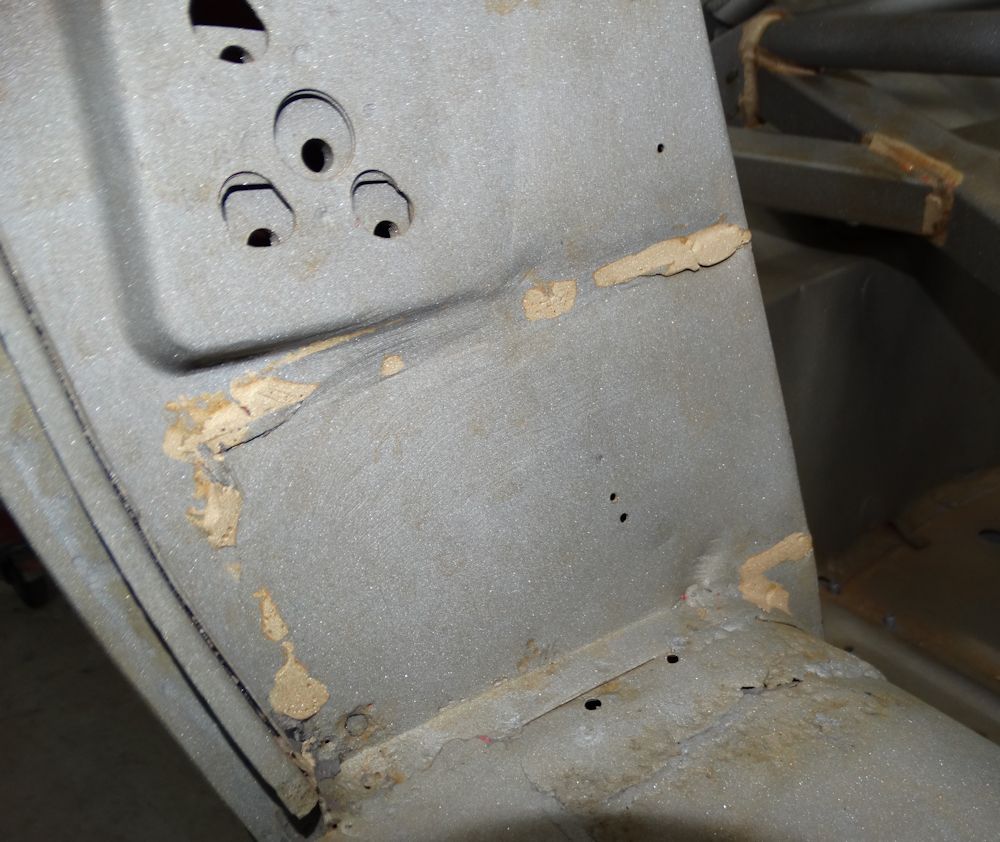
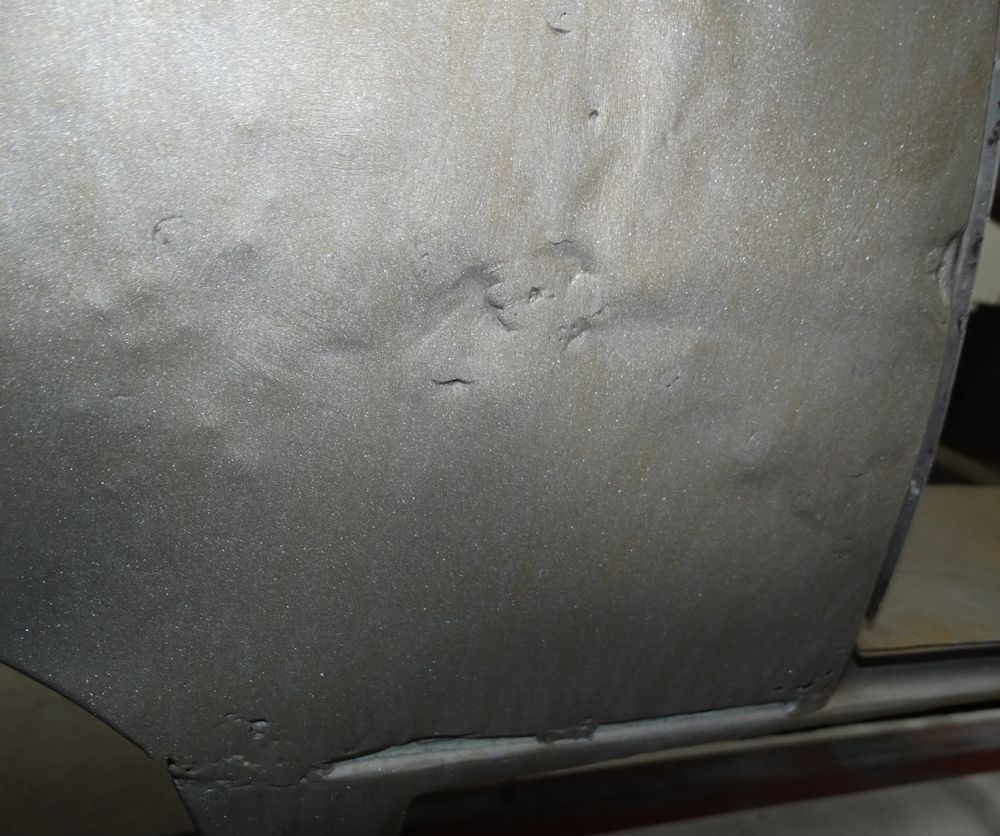
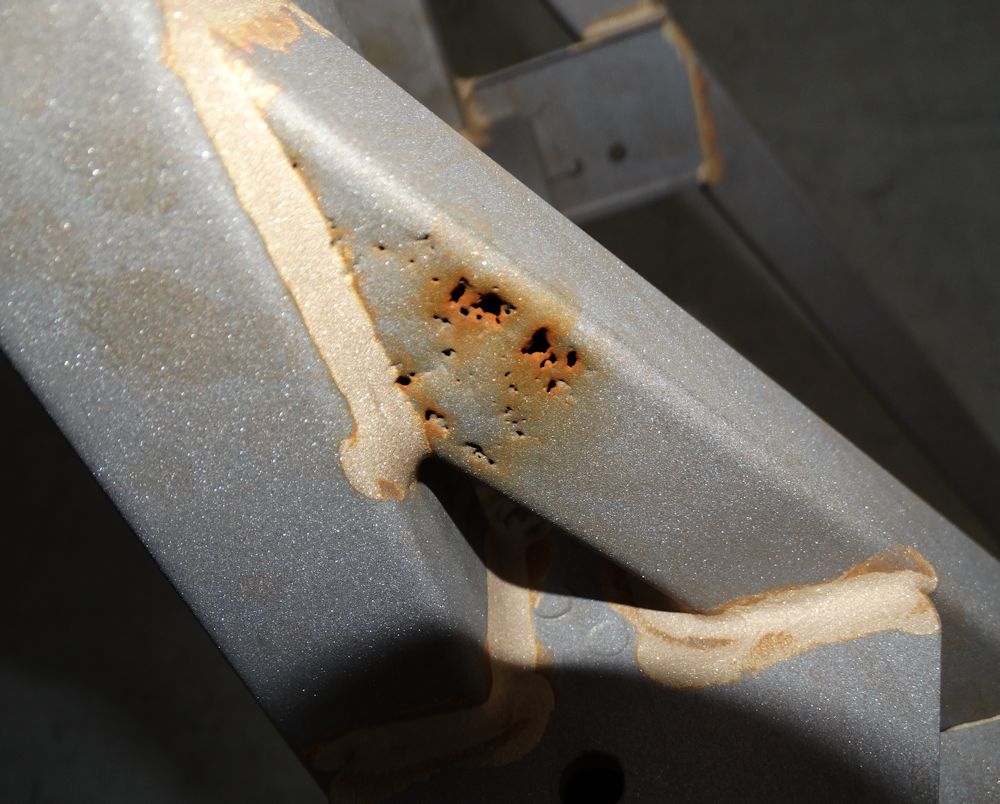
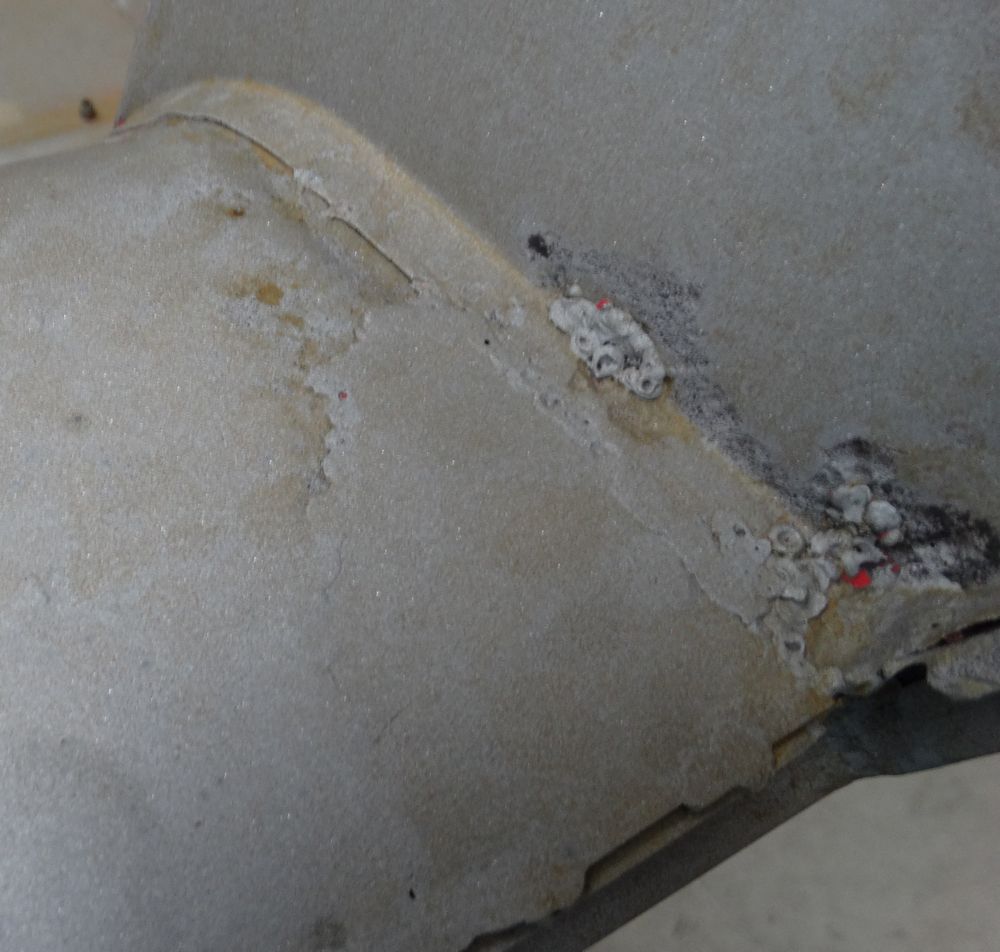
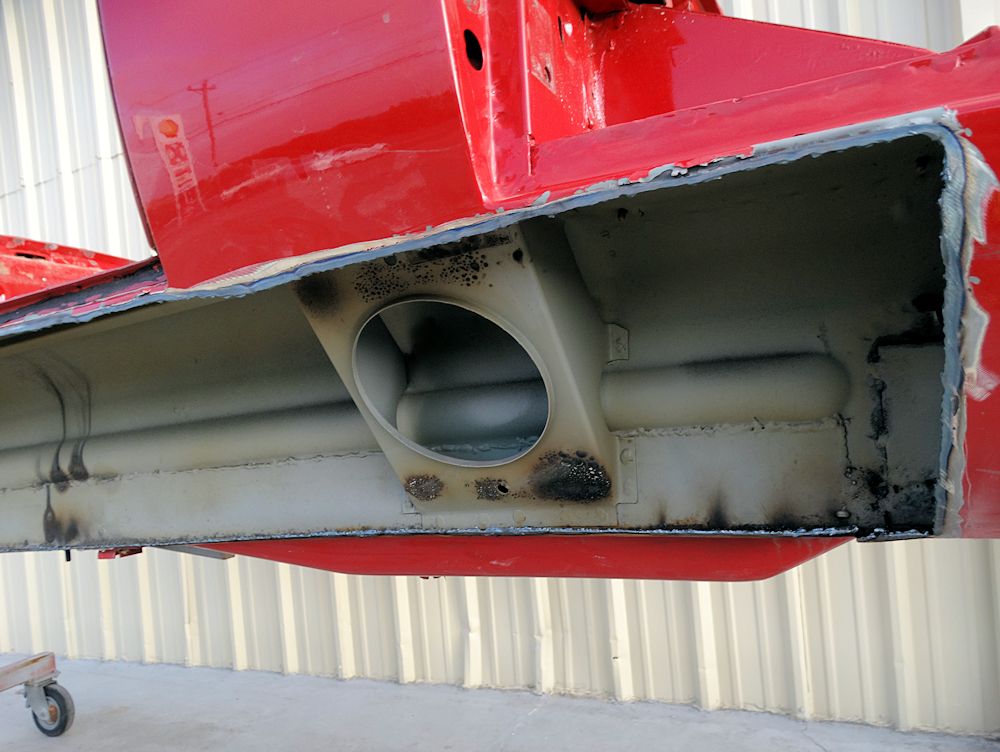
Blasting the car
back to bare metal has unfortunately exposed some fairly
extensive damage, as well as some pretty shoddy sheet metal
repairs. The car was obviously quite rusty prior to being
painted, with several corroded areas being covered up with
bondo or crudely patched. There is also some old accident damage evident
around the rear lamp panels.
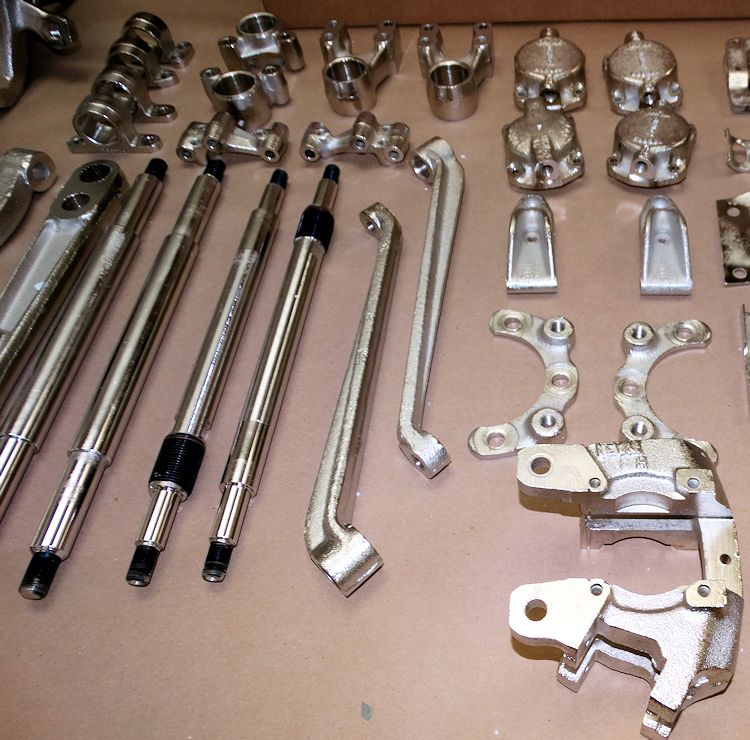
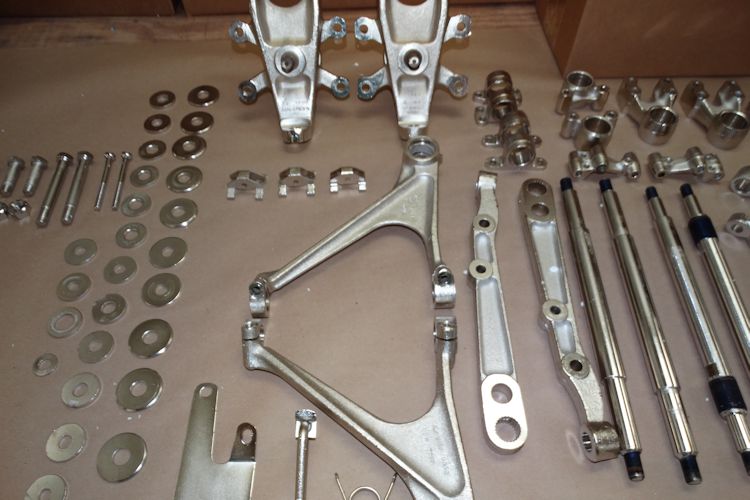
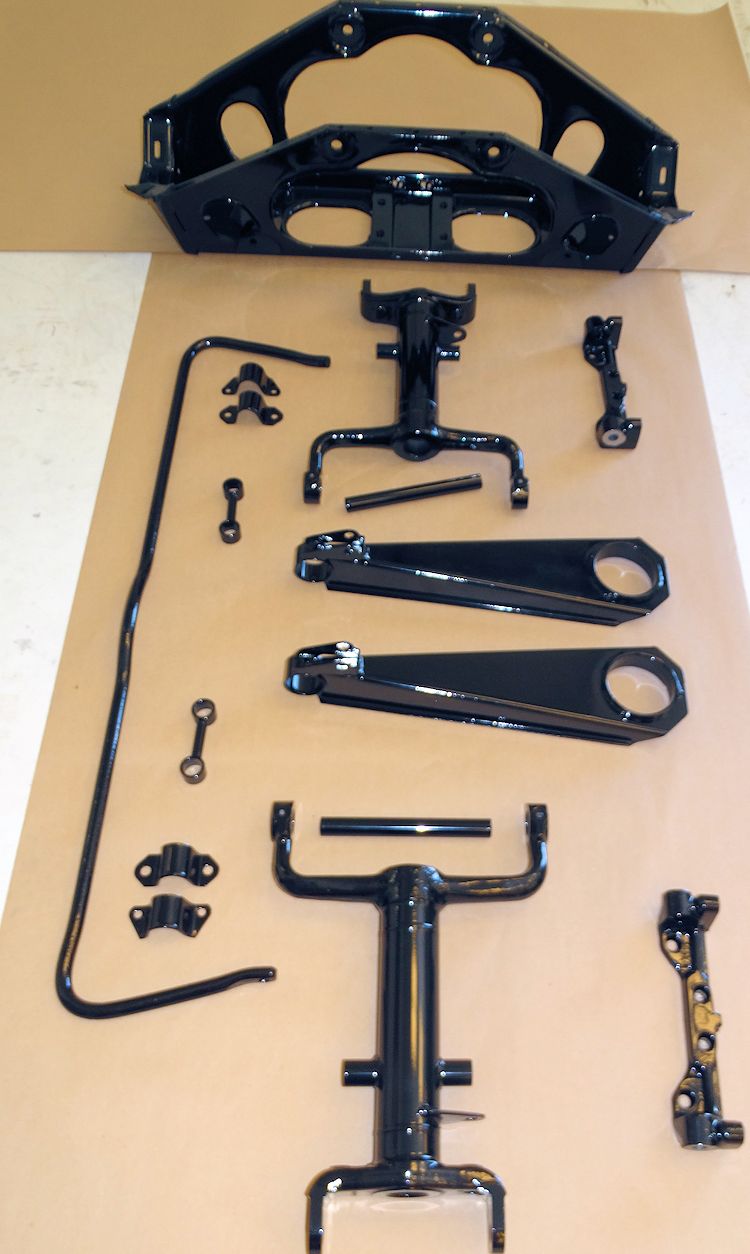
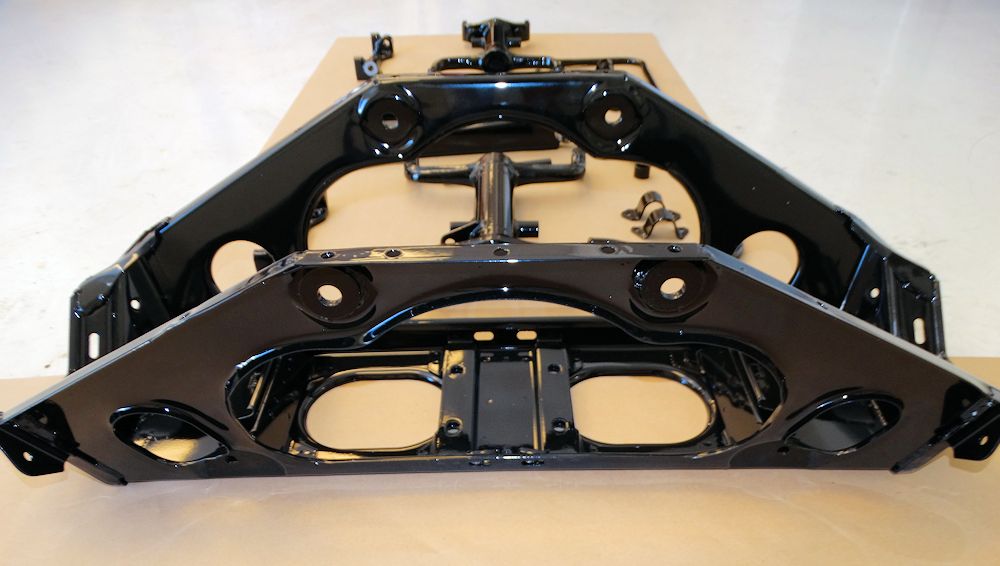
A sample of your
Nickel plating and powder coating...
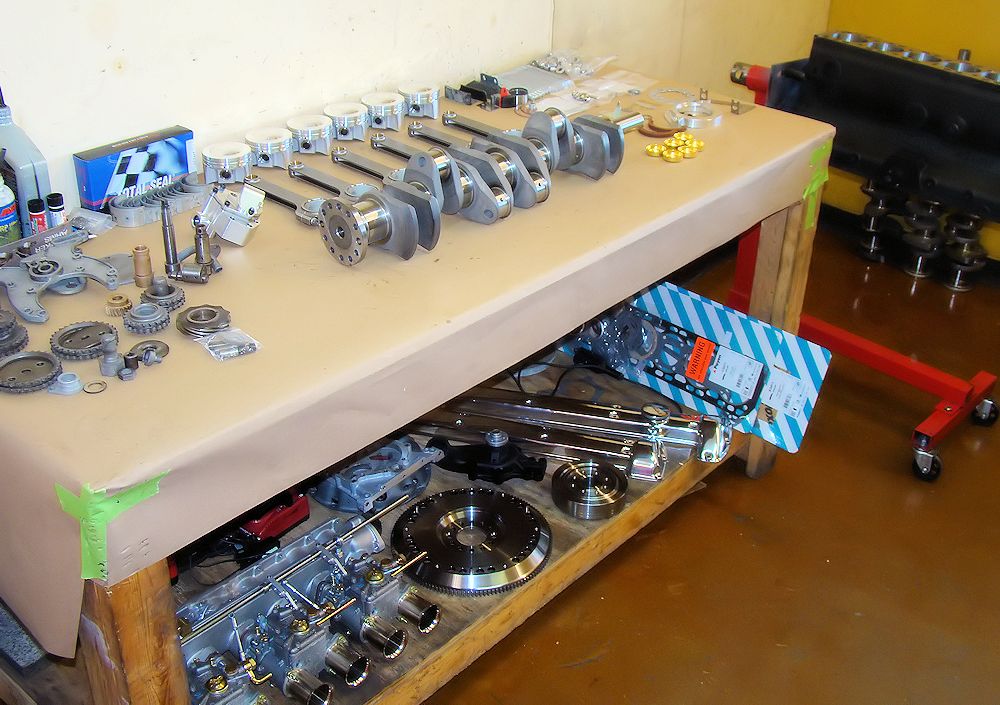
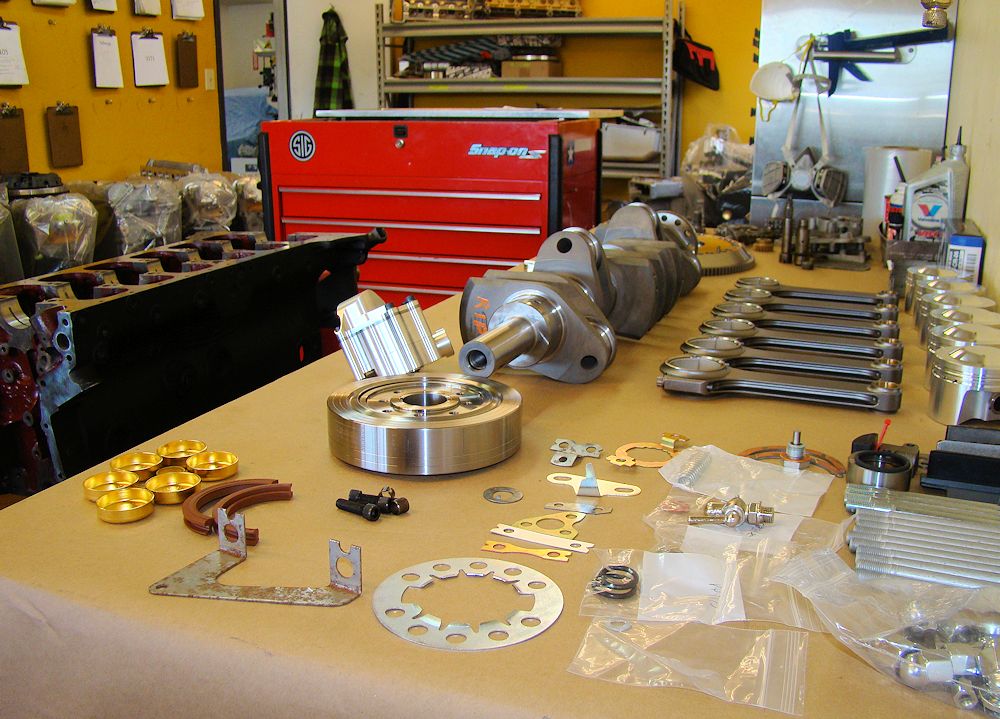
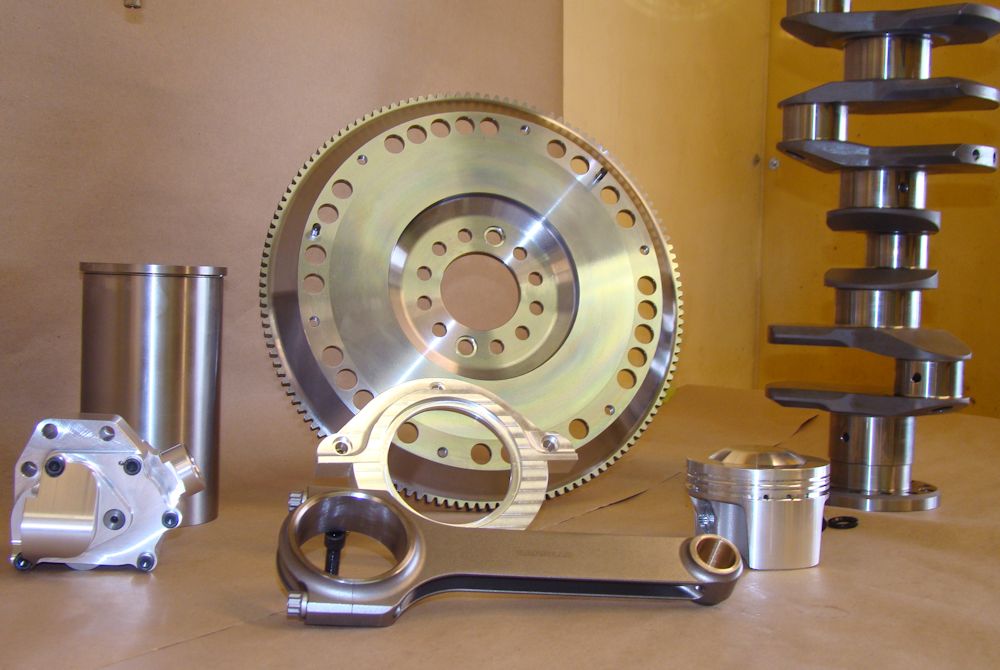
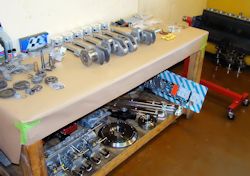
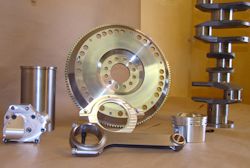
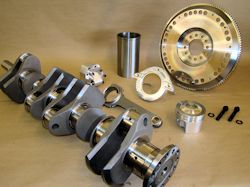
Just some of the
goodies that go into a Team CJ Stage Two rebuild...
|
|
Some of the component parts of a Team CJ
Stage Two engine rebuild
|
Billet stroker crank in foreground
|
We now have
your E Type completely disassembled and will have the
sheet metal blasted back to bare metal in the next few
days.
|
|
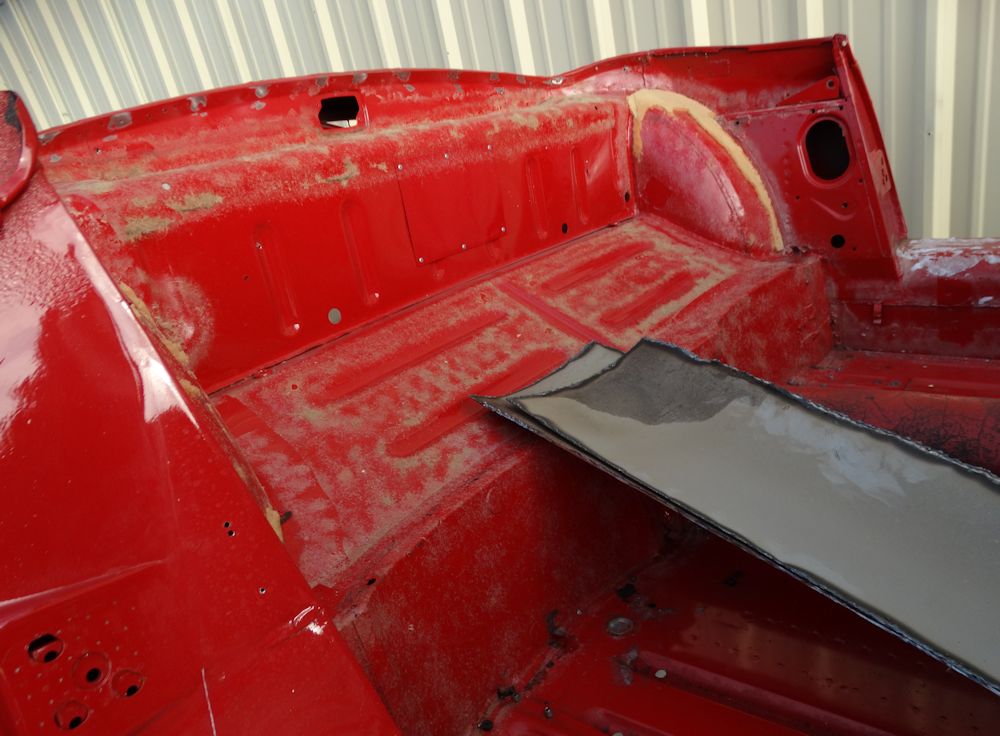
Time to tear the car down and see what
lurks
beneath the shiny paint
|
|
|
|

|
|
Panel gaps are poor, and the car clearly
has a great
deal of bondo throughout the body
|
|
|
|
|
|
Engine and transmission removed
|
|
|
|
|

|
Time to remove the interior
|
Cutting away outer sills reveals patched
inner sills
|
|
|
|
|
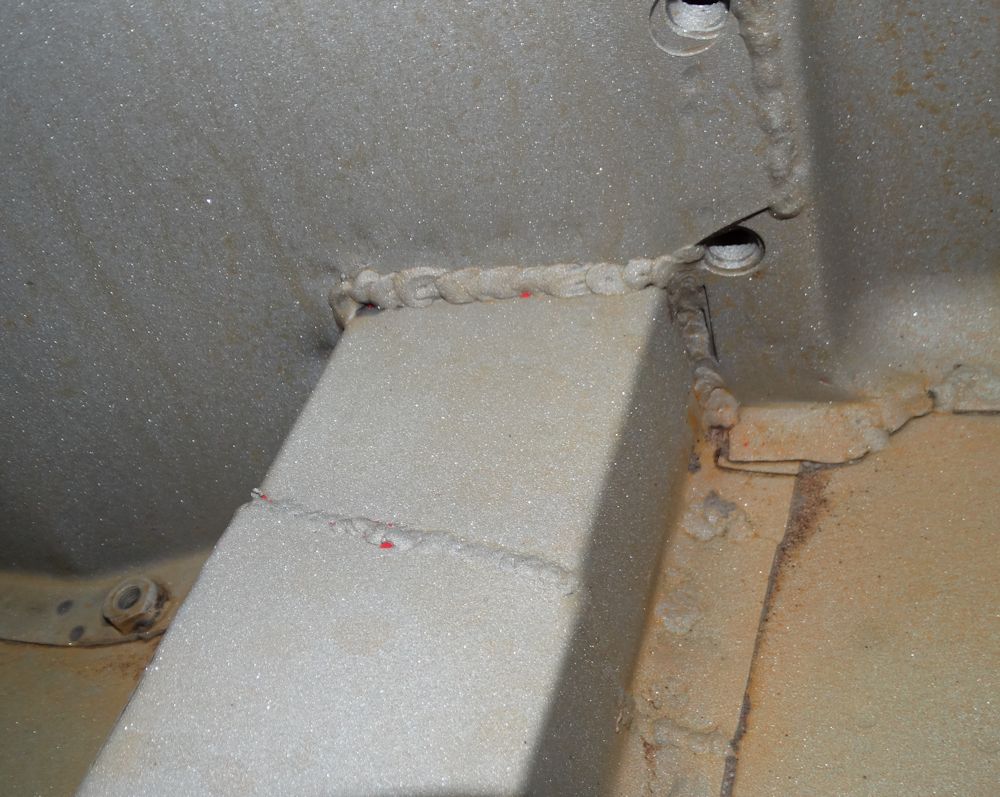
LH inner sill has been crudely patched with
a flat
piece of sheet metal
|
|
|
|
|

|
Car now on a rotisserie blasting jig
|
|
We will
have this exciting project underway in the next few weeks!