Job # 1319 (TP)
| Team
CJ engine rebuild (stock)
Job # 1319 (TP) |
|
3.8 E Type
Block # R 43761 - 9
Head # RA 3087 - 9
Warranty InformationEffective date for warranty, June 17, 2007. If you contact me on or about the date when you first fire your engine up, your warranty period will be shown as two years from that date.
Report date - June 17, 2005As you can see from the latest photographs, it is now time to ship your engine back home to California. If you have any questions above and beyond the Blue Print specs listed below, don't hesitate to contact me.
Thanks and best regards,
Dan Mooney
Team CJ
 |
 |
Technical Specs
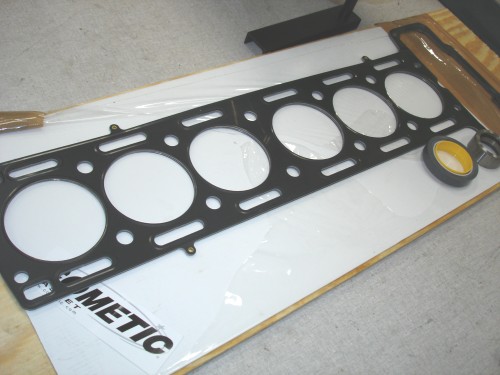
Compression:9.07:1 with custom (Cometic) 0.051" cylinder head gasket

Pistons:
A&E spin cast, 0.020" oversized
Piston dome volume:
26 cc piston dome
Finish bore size:
3.444"
Actual cubic capacity:
3,823.75 cc
Skirt clearance:
1 = 0.004"
2 = 0.004"
3 = 0.004"
4 = 0.004"
5 = 0.004"
6 = 0.004"Main housing size:
2.9165"
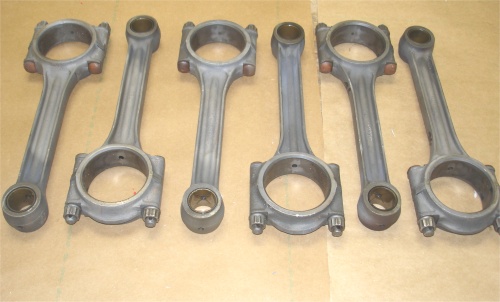
Rods:
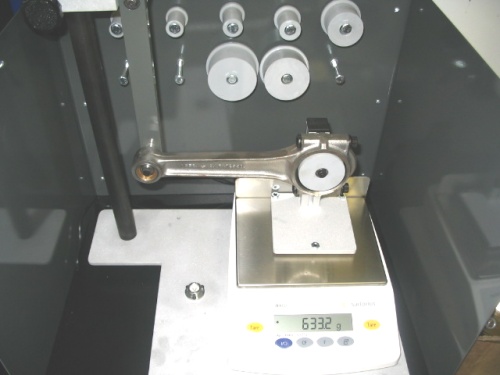
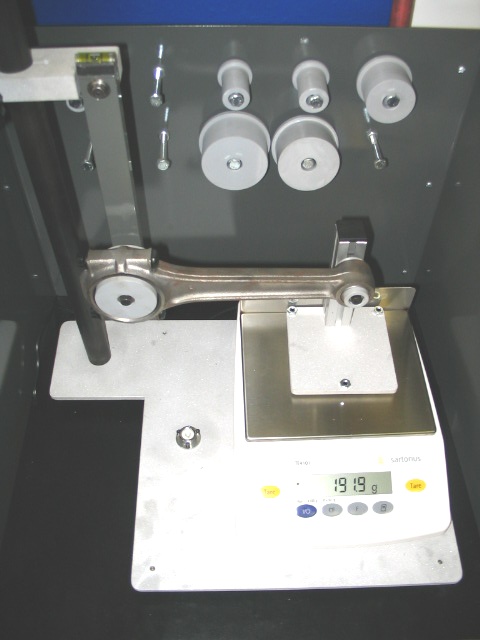
Fully reconditioned, re-bushed, balanced, ARP rod bolts and nuts torqued to 55 ft/lbs with 30 weight oil on threads.
Sleeves:
New stepped sleeves throughout
Crankshaft/block:
Main bearings @ 0.010" oversized
Rod bearings @ 0.010" oversized
Front main seal - upgraded to Teflon
Main bearing lock washers upgraded to ARP
New A&E 4.2 oil pump with 4.2 (larger bore) pick up pipeCylinder head:
All new intake and exhaust seats installed (0.005" interference fit)
All new guides
Stem to guide clearance = (intake) .0014" - .0015" (exhaust) .0015" - .0016"
Cyl head cc = 97 cc
All new valves - 1.750" intake, 1.620" exhaust
Intake valves have seals retro fitted
New valve spings, nominally 45 lb
Valve spring pressure: Closed 85 lbs, open (0.400 lift) 145 lbs
All new (later style) keepers, split collets and spring retainers on intake side
Valve lash (0.004" intake, 0.006" exhaust)
Tappets are new throught
NGK BPRE5 spark plugs set at 0.025"Shim allocation as follows:
(Intake) #1 .105" #2 .107" #3 .106" #4 .108" #5 .106" #6 .105"
(Exhaust) #1 .105" #2 .105" #3 .109" #4 .116" #5 .114" #6 .116"Head studs:
New, torqued to 60 ft/lbs with 30 weight oil on threads. Hylomar on lower threads where studs installed in block at 27 ft/lbs, small amount of Permatex RTV silicone beneath each D washer. After initial running, allow to fully cool overnight, then re-torque head nuts to 60 ft/lbs. After 500 to 1,000 miles, re-torque head to 60 ft/lbs.
Note: Lifting hooks retro-fitted for convenience
Any questions, please contact Classic Jaguar on 1 877 PART JAG or (512) 288 8800.
Email: [email protected]
CJ recommends Castrol GTX 20 w 50 engine oil!
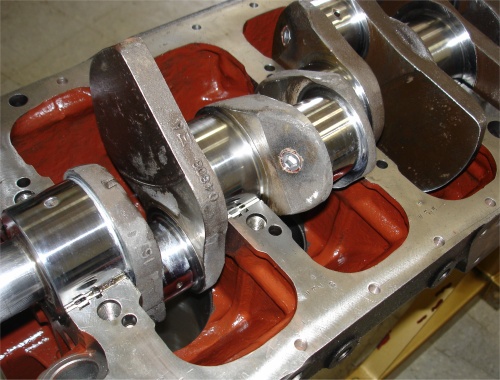
More engine assembly progress...
 |
 |
 |
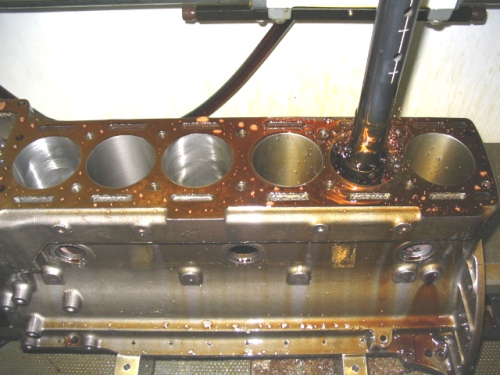
It is now time to start putting everything back together. The second photograph shows us measuring the deck height in order to calculate your compression ratio. We are going with a custom (0.051") Cometic head gasket that will result in a compression ratio of 9.07:1.
 |
 |
 |
|
|
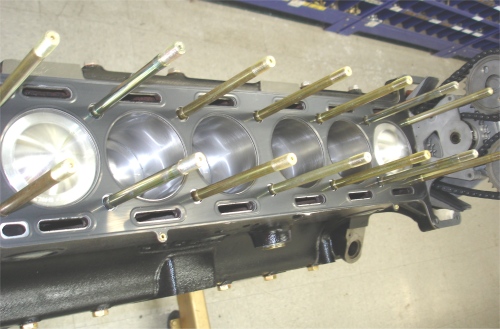
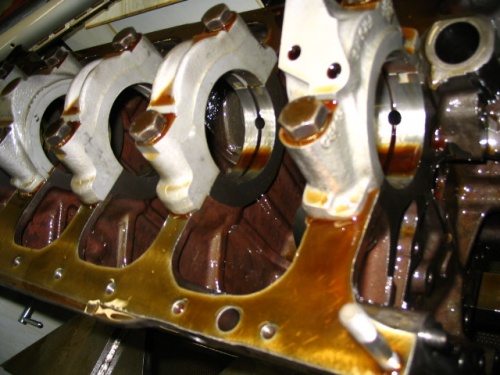
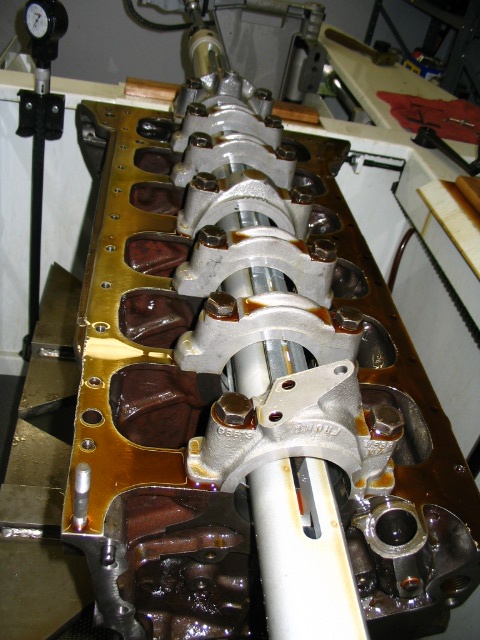
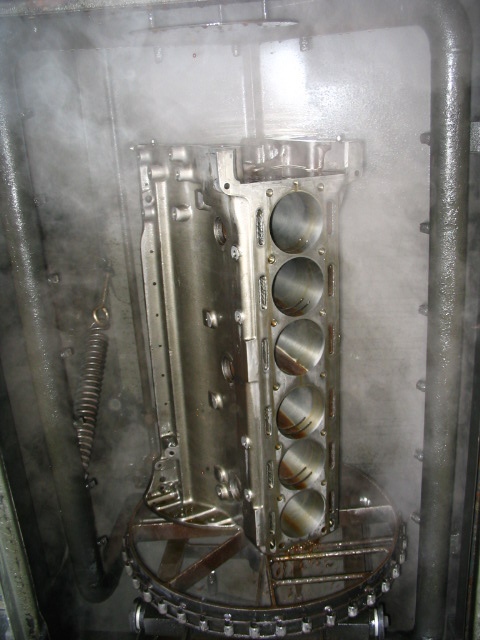
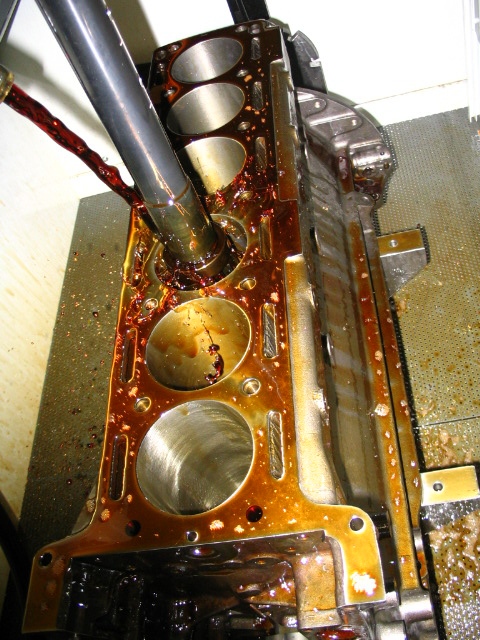
The following photographs show Harold completing the align hone, machining out the old sleeves, then honing the new cylinders and decking the block. We plan on reassembling your engine over the next few days.Let me know if you have any questions!
 |
 |
 |
|
|
||
 |
 |
 |
|
|
lurk behind sleeves and are always gummed up - which is why we always re-sleeve the block in CJ engine rebuilds |
|
 |
 |
 |
|
|
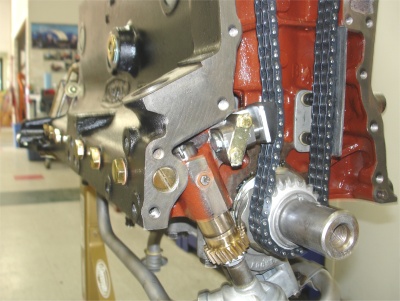
chain cover in place |
|
 |
 |
 |
|
|
|
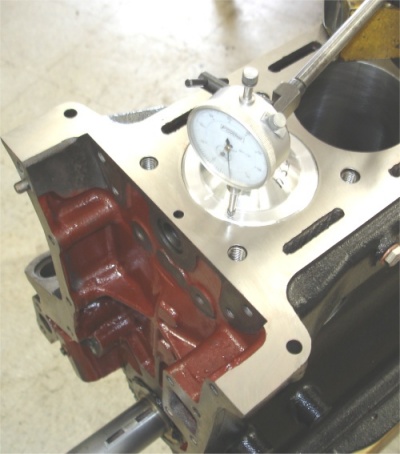
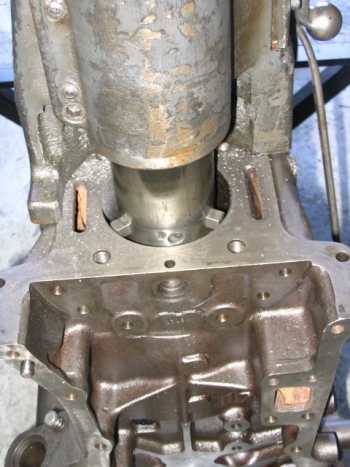
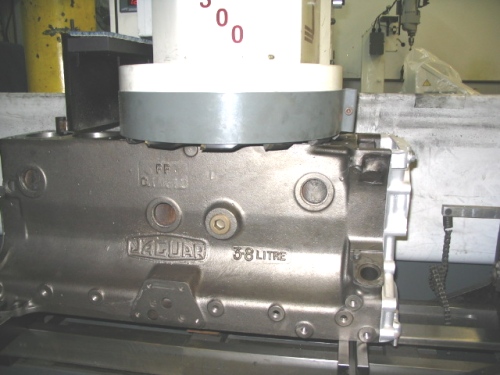
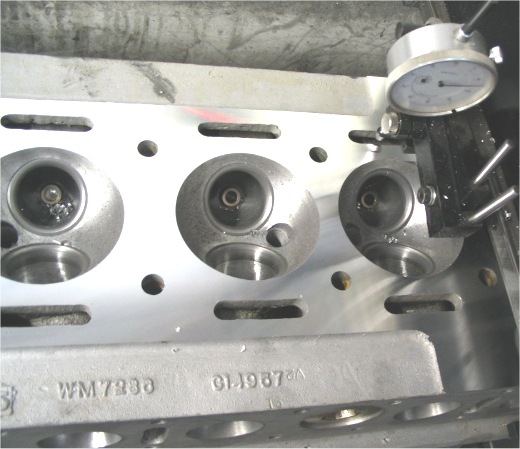
As you can see, we have now turned our attention to your engine block. The following photographs show the main caps being machined down as part of the align boring process. The purpose of this is to ensure proper and consistent load on the bearing and proper main bearing clearances.The cap you see on the fixture with the dial indicator shows Harold measuring how much he needs to machine off each cap in order for them all to be precisely the same. We will be align boring your block later today, so more pictures to follow!
 |
 |
 |
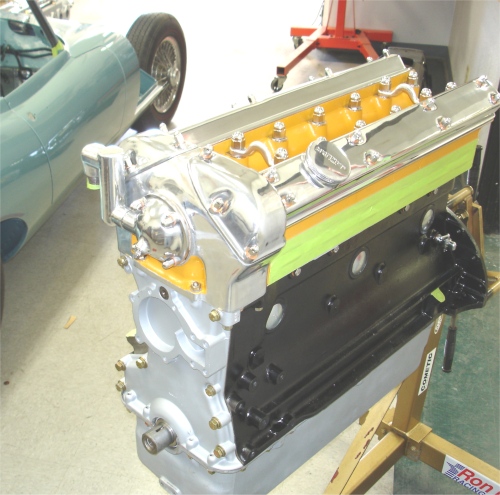
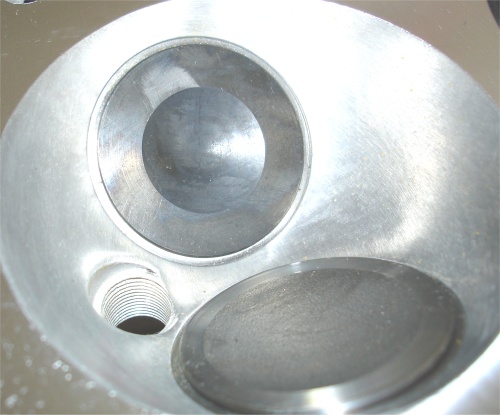
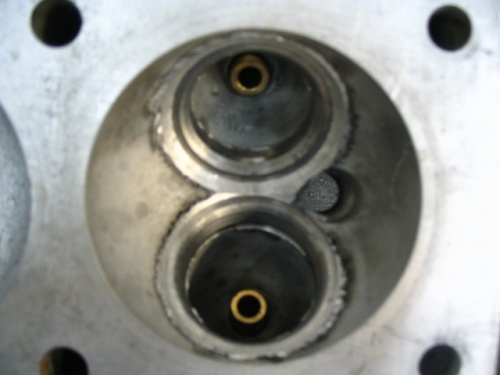
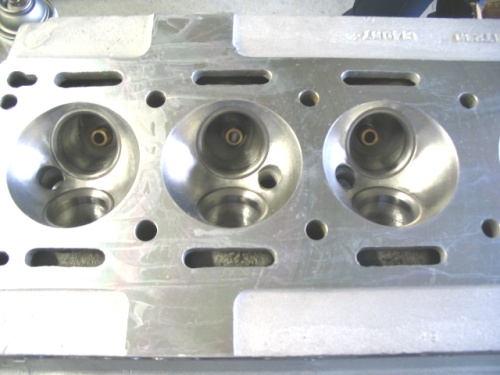
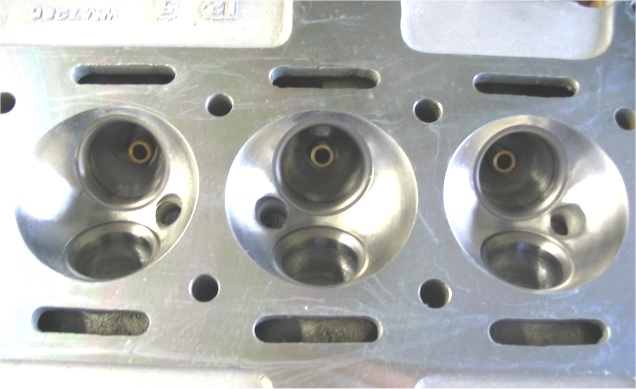
Putting the finishing touches to your cylinder head, including a couple of coats of Pumpkin Gold paint! Notice the re-shaped chamber in the first photograph.
 |
 |
 |
 |
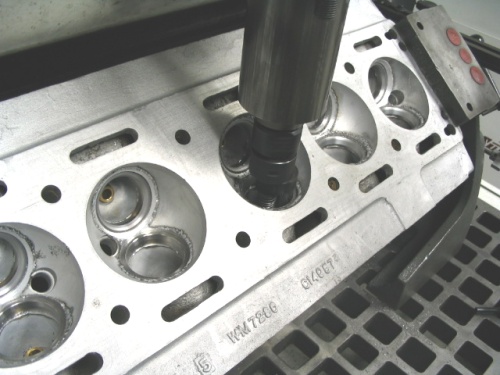
The cylinder head machine work is now just about complete and the new valve seats installed into the re-shaped domes. The photographs show the process of machining away the old seats followed by welding up the seat bores, then cutting back the weld and re-shaping the domes - then finally the installation of the valve seats.
 |
 |
 |
 |
 |
 |
 |
 |
 |
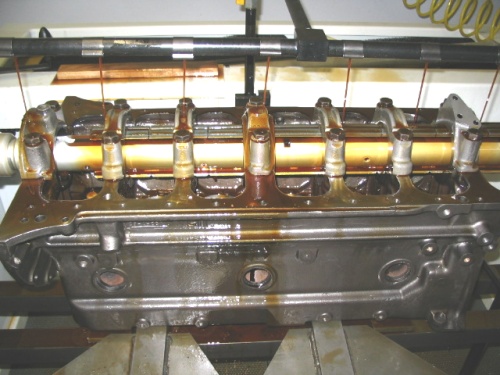
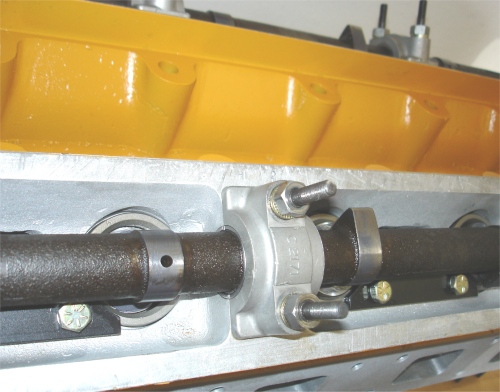
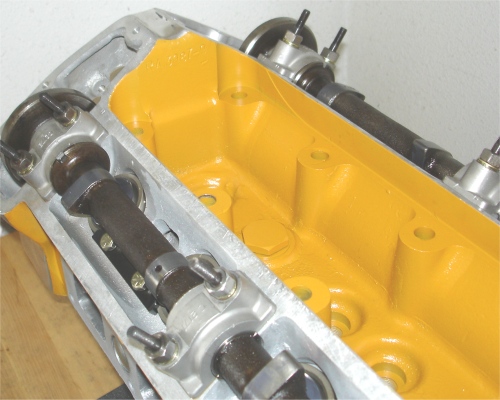
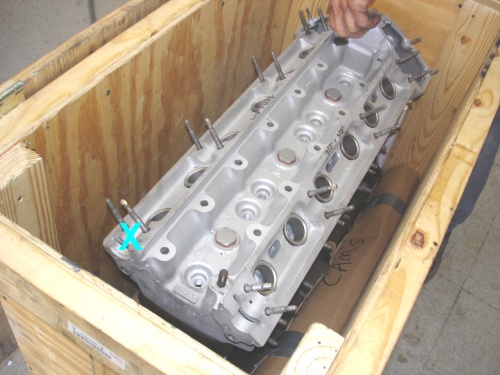
As you know, the transport company kindly dropped the engine crate on its head, although thankfully the only damage was a couple of bent cam studs (see first photograph below).
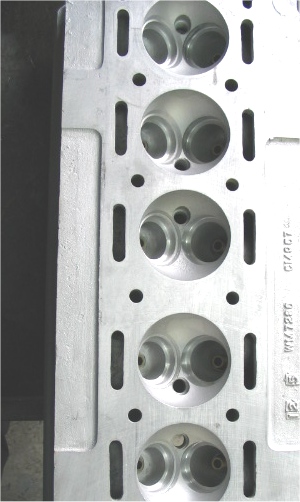
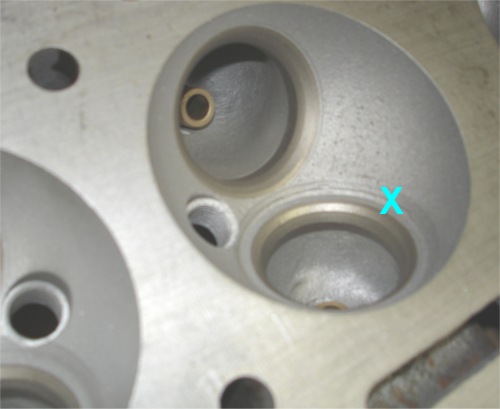
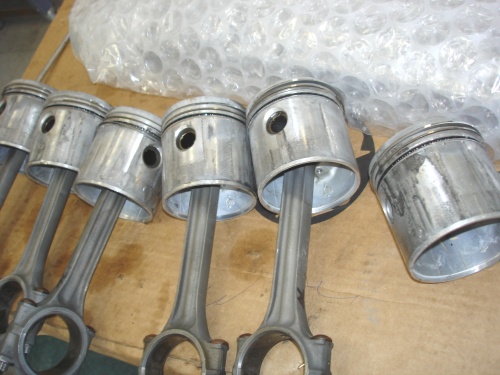
I must say, I have never seen such badly damaged pistons in an engine that was still running! I can only assume that they were set up with inadequate skirt clearance. Still, as we re-sleeve the engine anyway in the course of a CJ engine rebuild, it really isn't a big deal. I don't anticipate any problem saving the head, although obviously somebody has made some strange cuts around the valve seats on the exhaust side....I have provided a replacement crankshaft and I am pleased to report that we already have the machine work is underway. Watch this space, Tom!
 |
 |
 |
|
the crate was dropped |
the exhaust valve seats |
|
 |
 |
|
|
|
(marked X) |