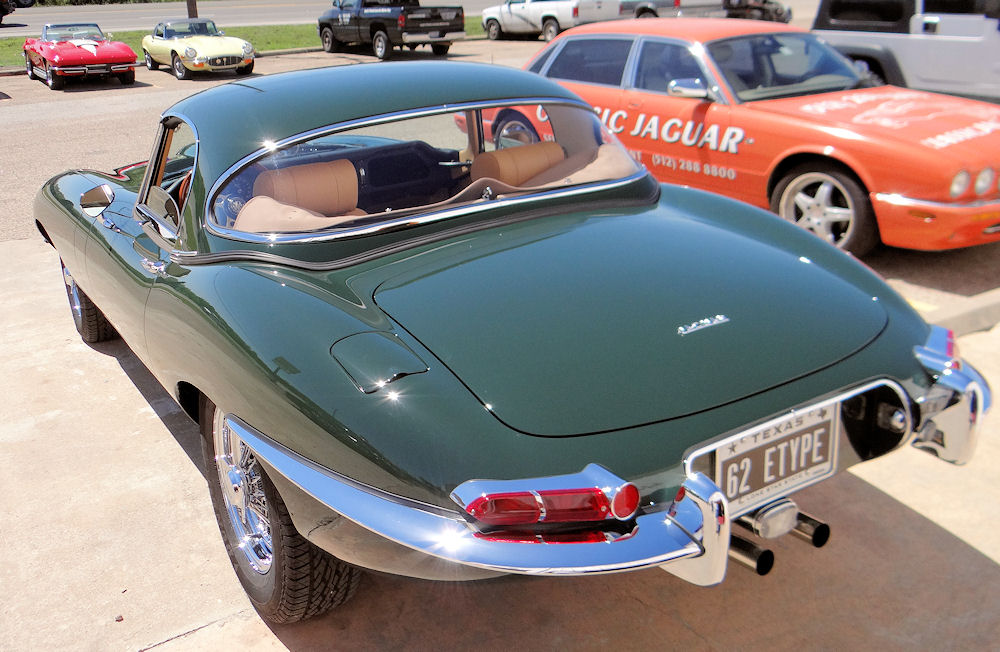
| 1962 Jaguar E Type roadster - 876567 |
|
| 1962 Jaguar E Type roadster - 876567 |
|
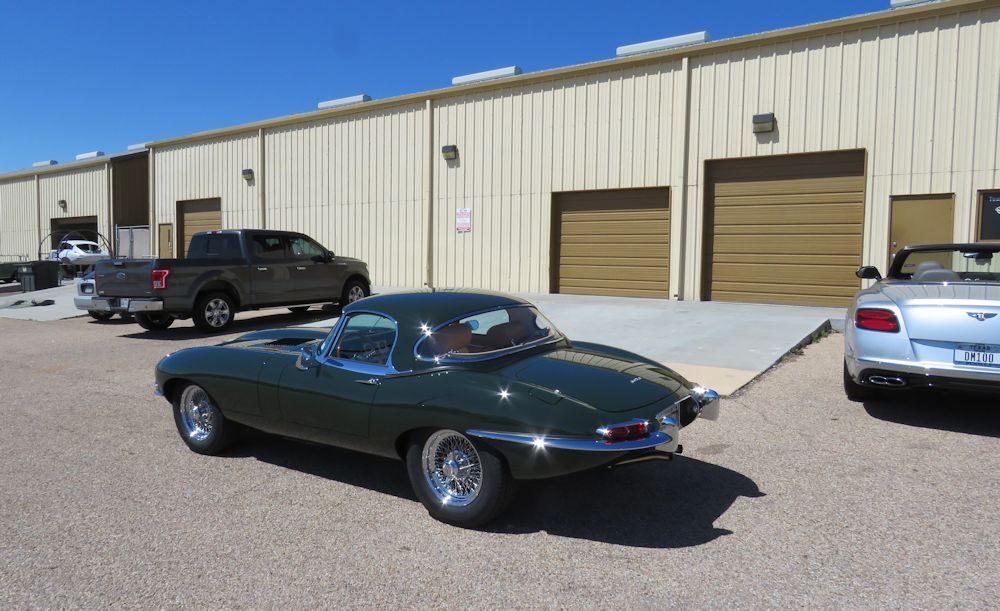
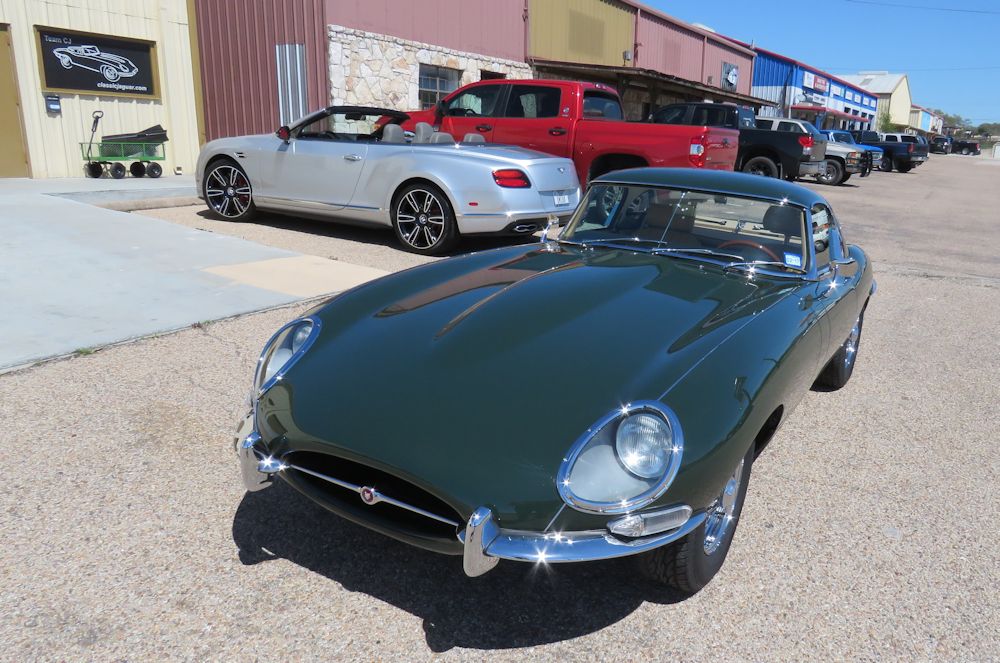
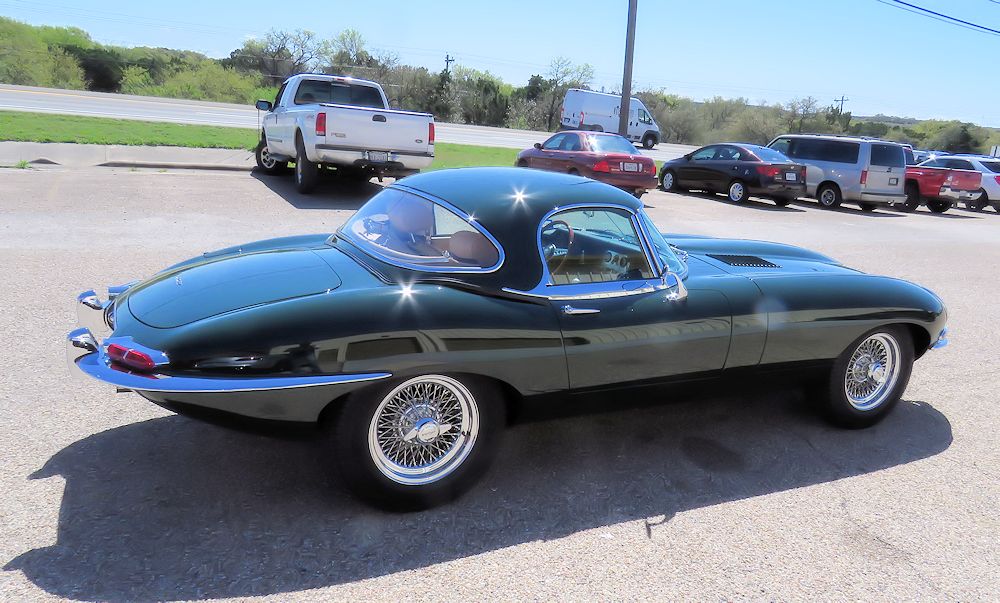
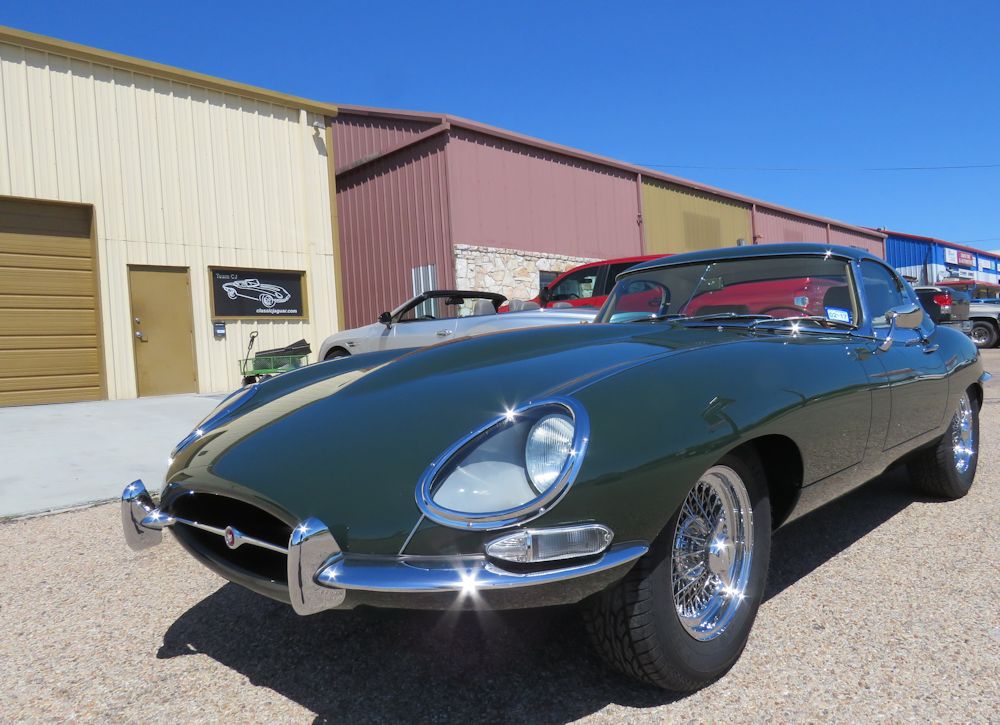
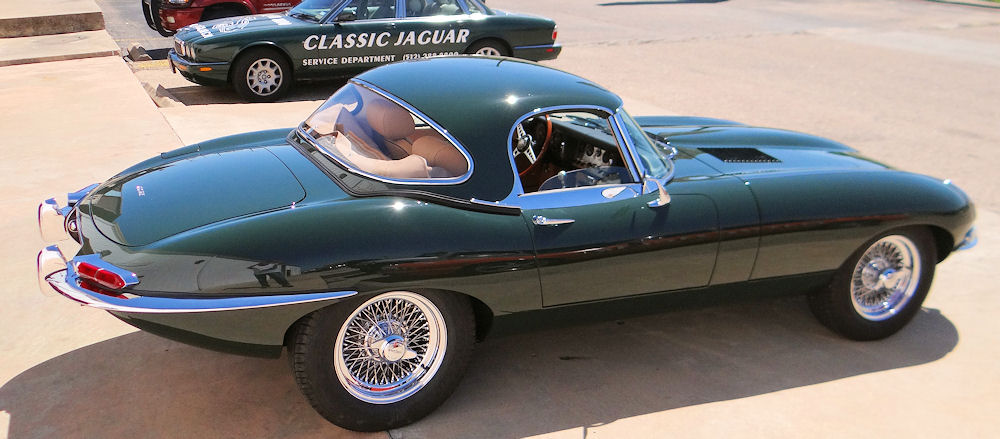
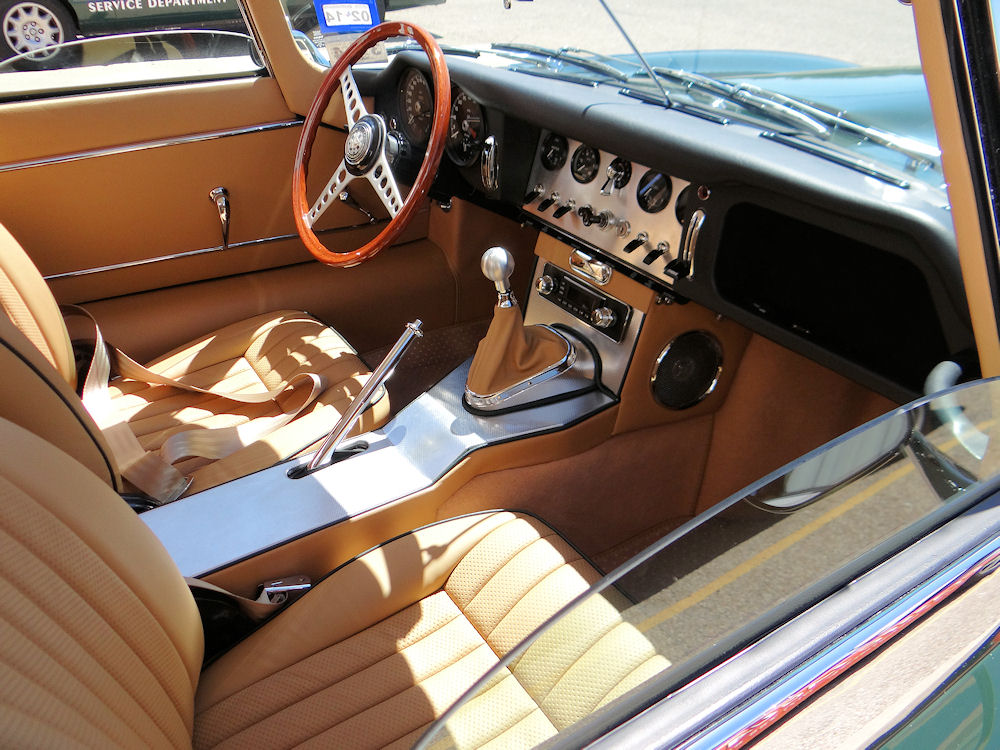
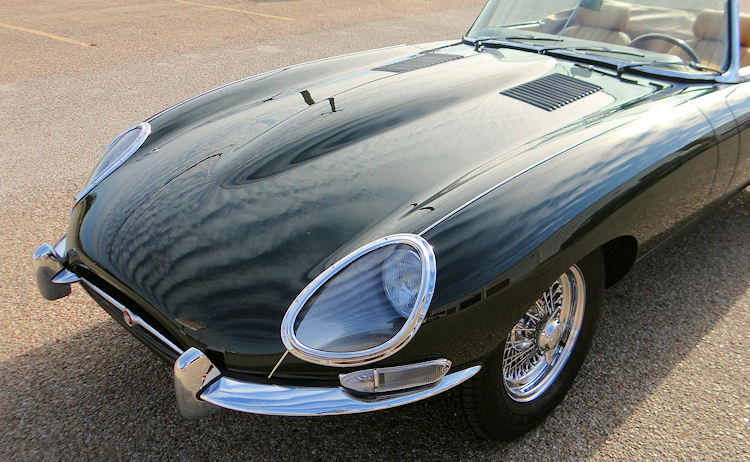
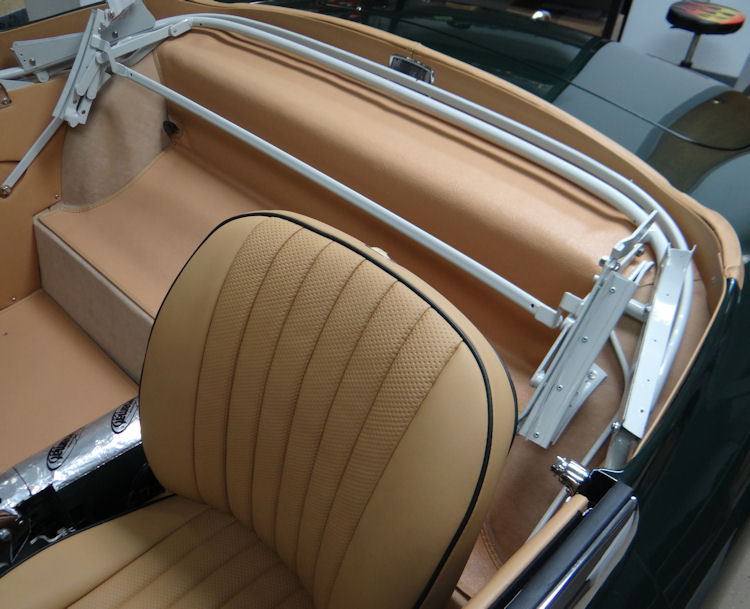
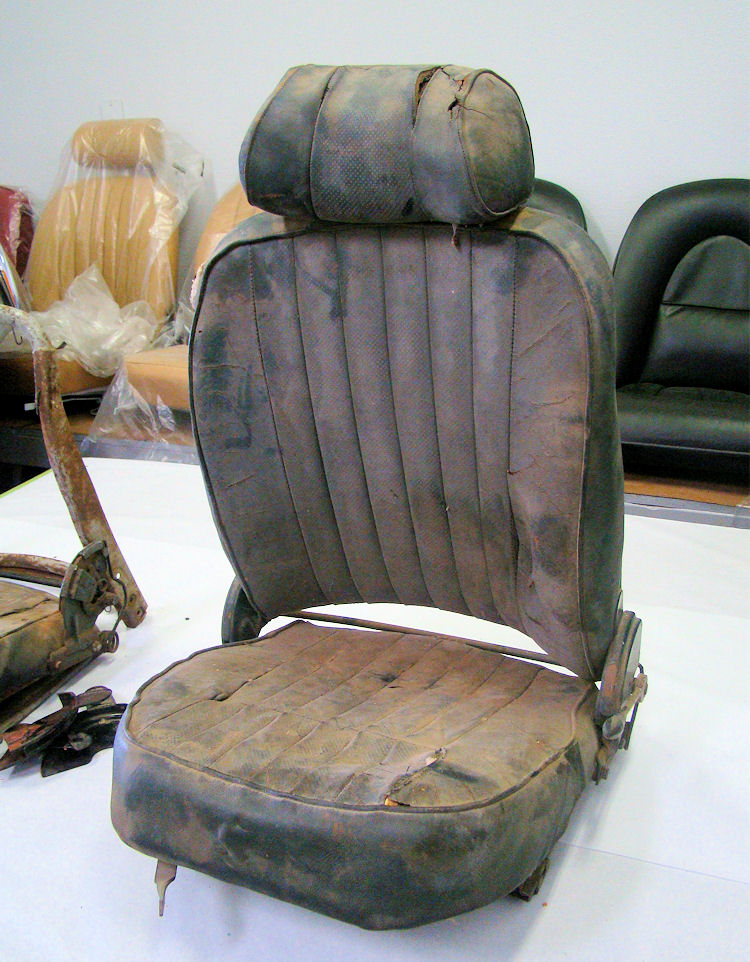
This beautiful 1962 flat floor E Type roadster was totally restored in the CJ Workshops over a 19 month period between July 2011 and February 2013. The starting point was a fully matching numbers car that was equipped with a welded louver bonnet and flat floors when new. During the course of the restoration the owner specified several modifications in the name of increased comfort and performance. These modifications included the installation of a footwell on the driver's side floor, as well as reclining seats from a V12 E Type.
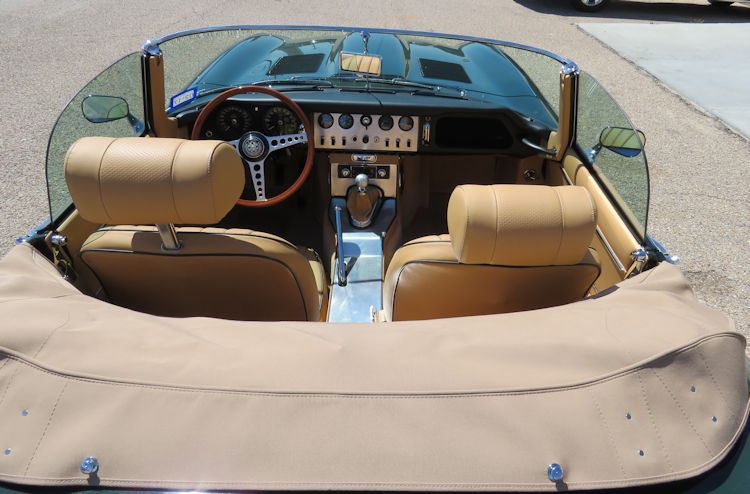
We were careful to install the driver's footwell in such a way that it would be relatively straightforward to remove it and return the car to flat floor configuration should a subsequent owner choose to do so. Going back with the correct 3.8 style bucket seats would of course be a simple matter of unbolting the V12 seats and replacing them with a pair of 3.8 seats.
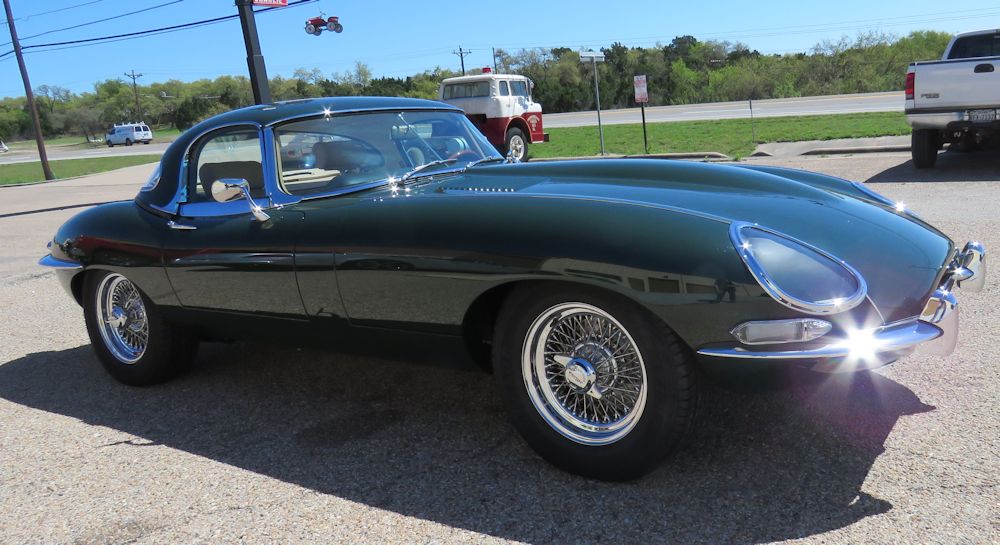
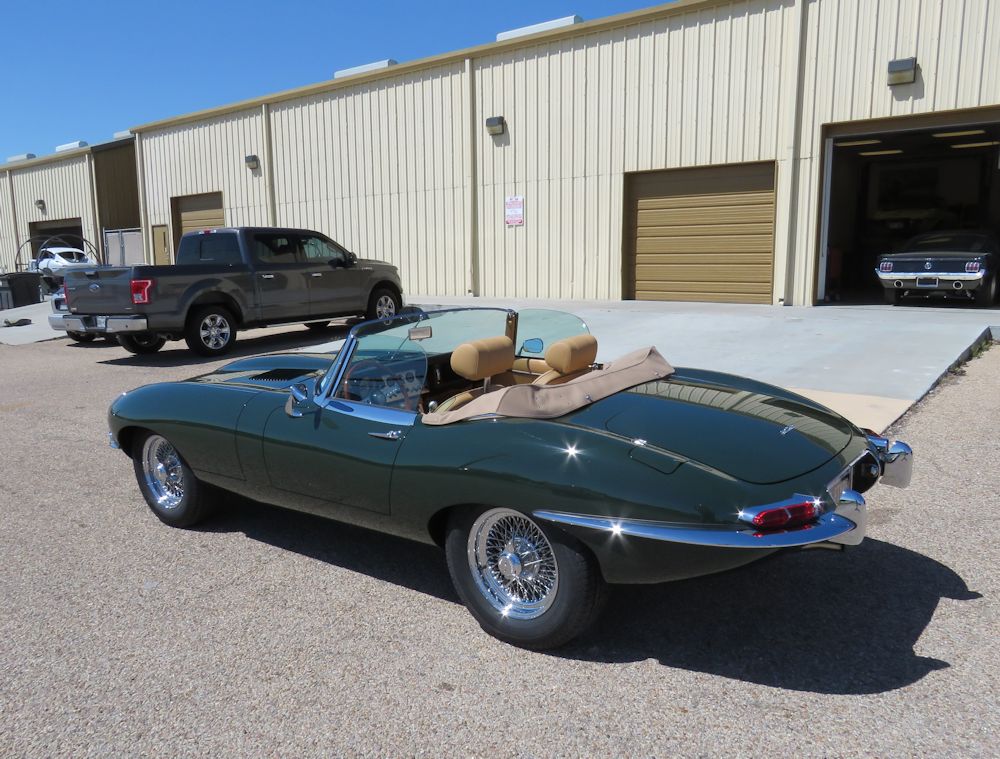
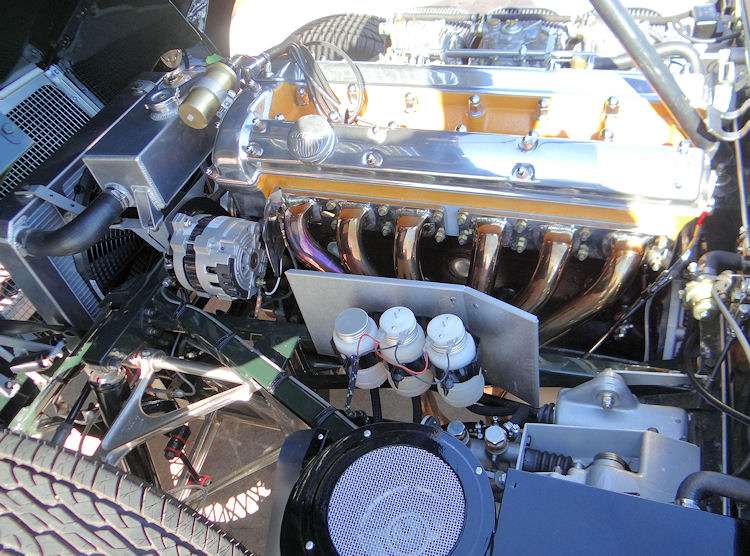
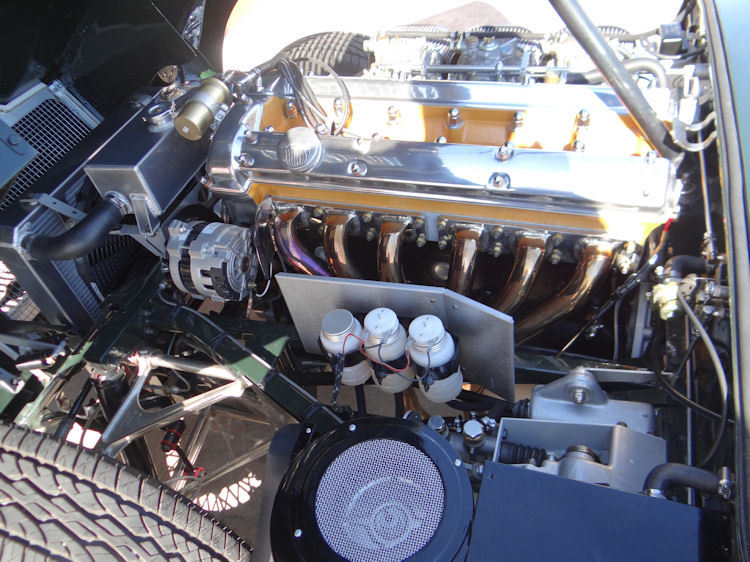
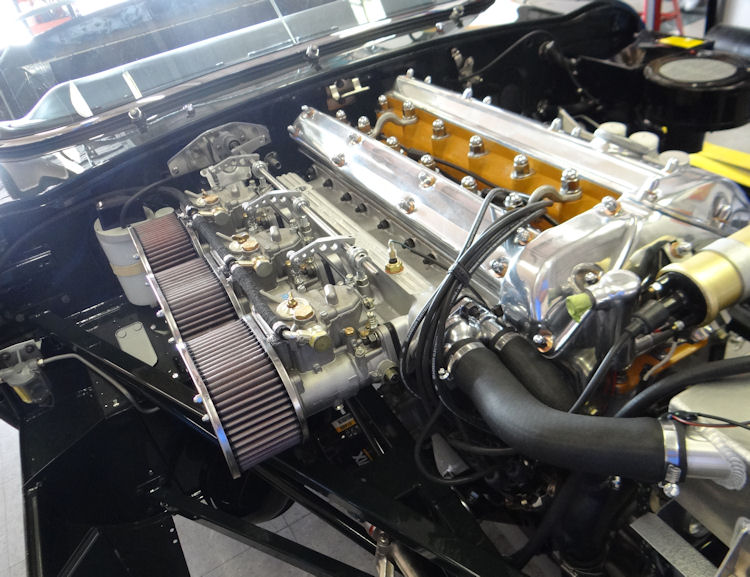
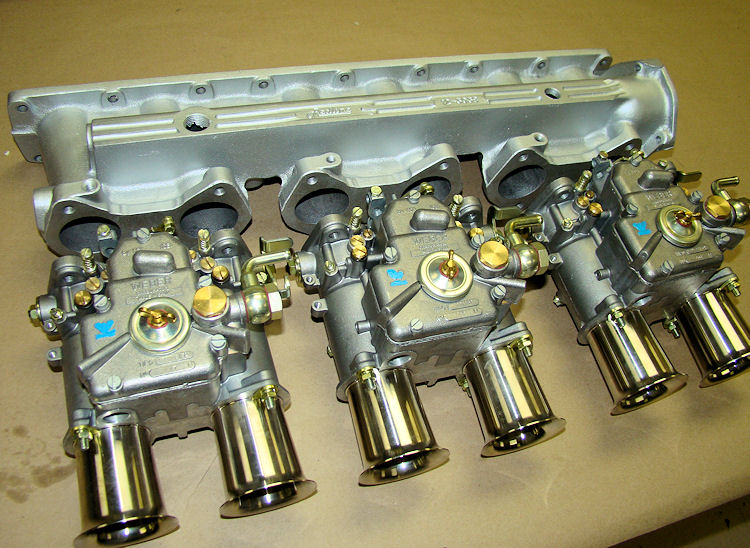
The car features numerous performance and reliability upgrades, including a Stage One engine rebuild, CJ 5 speed transmission, CJ headers and triple 45 DCOE Weber carbs, as well as uprated cooling, ignition, suspension and brakes. The original matching numbers gearbox is included in the sale. This E Type is very fast, fully sorted, and runs and drives impeccably!
This E Type is fantastic value and a blue chip investment at the asking price, which is significantly less than the cost of the restoration.
This vehicle is now sold, thank you
Inspections and test drives are welcome and actively encouraged. Call (512) 288 8800 or email with any questions or to make an appointment to view.
This vehicle is being sold as is, where is, with no warranty of any kind being offered. Clear, unencumbered title conveys to the new owner.
 |
|
 |
 |
 |
 |
 |
 |
 |
 |
 |
 |
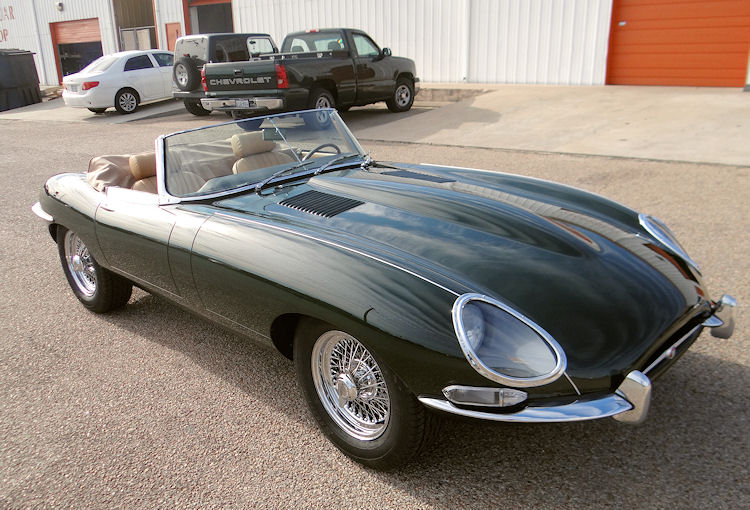
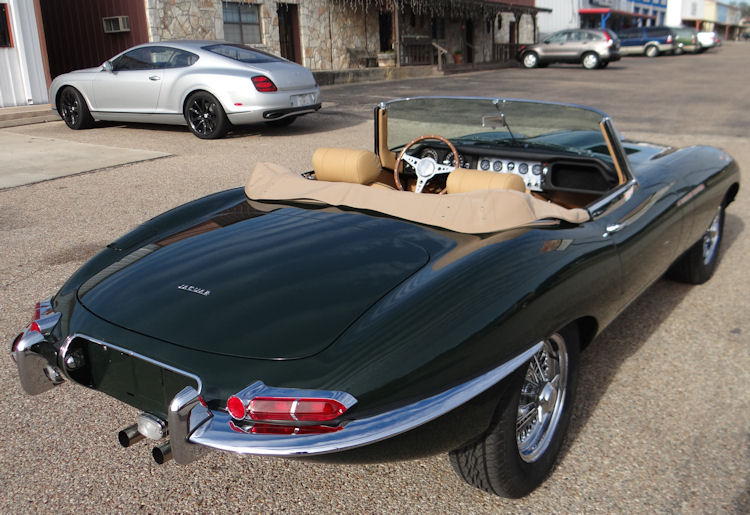
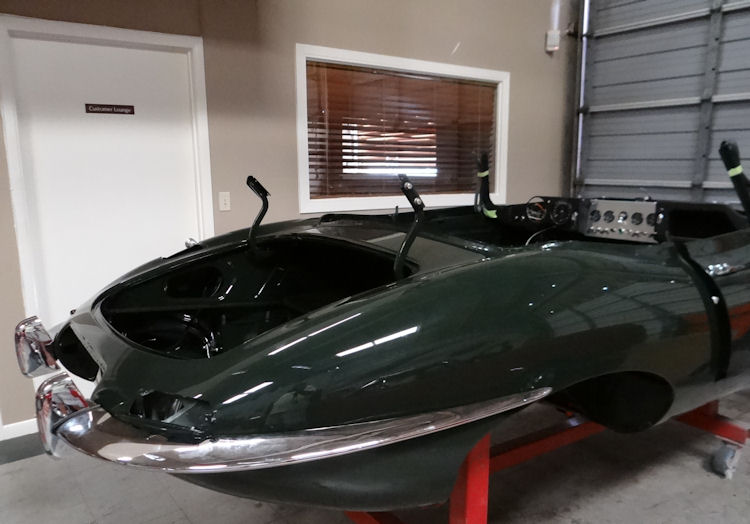
February 2013 - another beautiful E Type ready for delivery!
 |
 |
| |
|
 |
 |
Click on the photo below to see this E Type being put through its paces on the dyno.
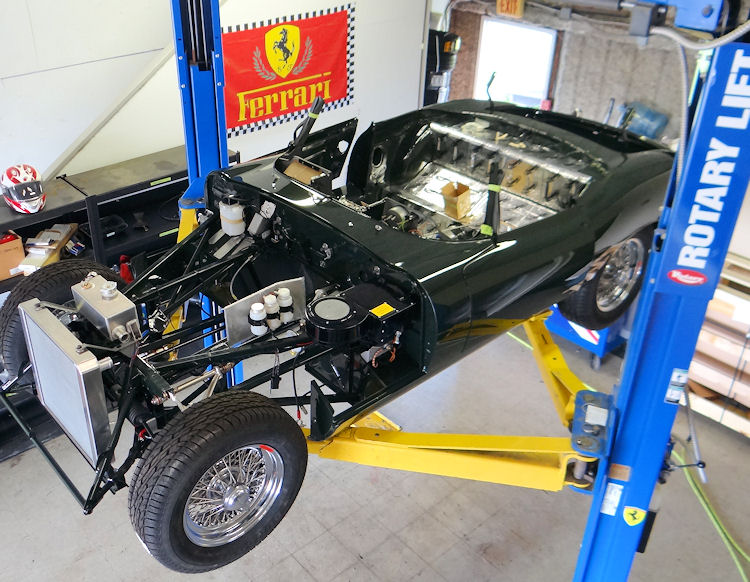
This project is now complete, final road testing underway...
 |
 |
|
|
|
 |
 |
|
|
|
 |
 |
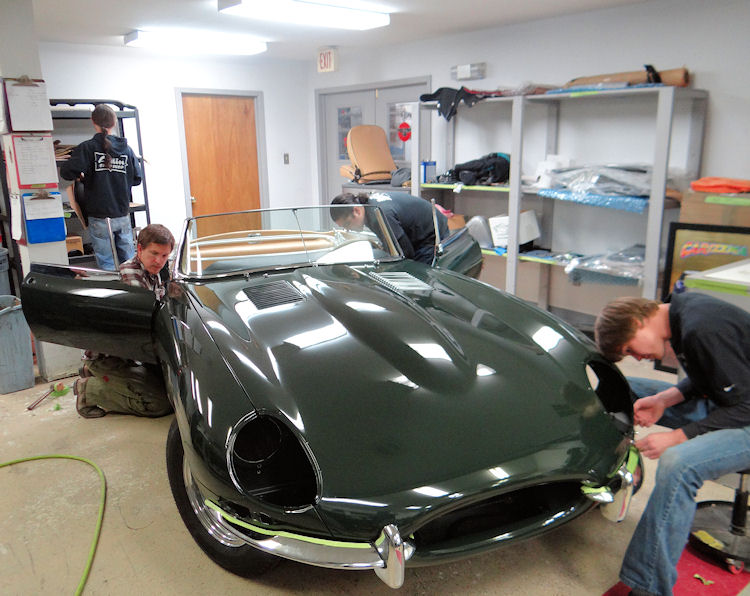
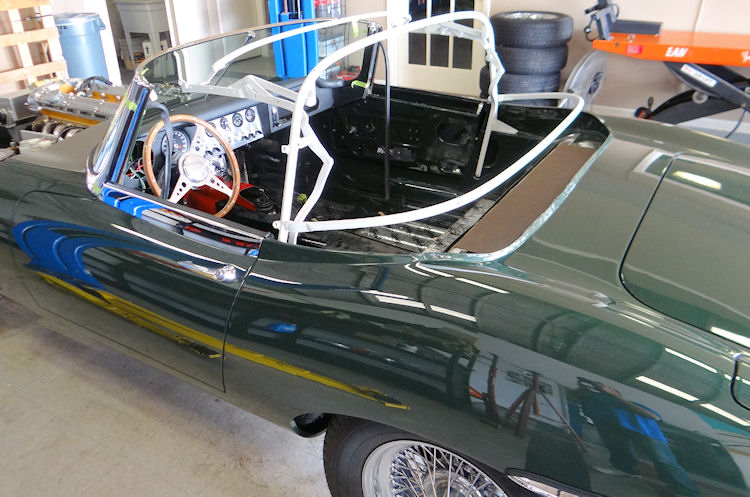
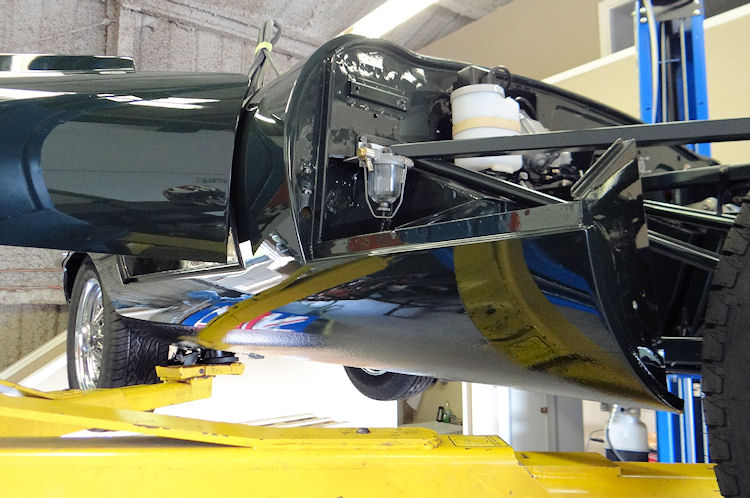
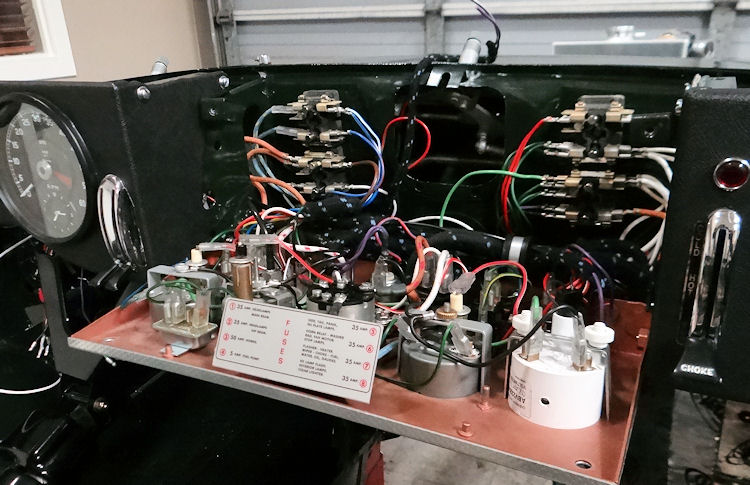
In the finishing straight on this project...
 |
 |
|
|
|
 |
 |
|
|
|
|
|
|
 |
 |
|
|
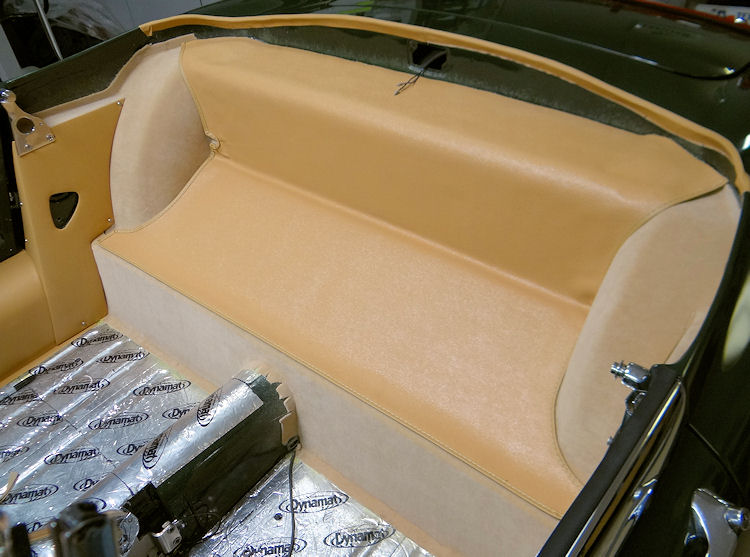
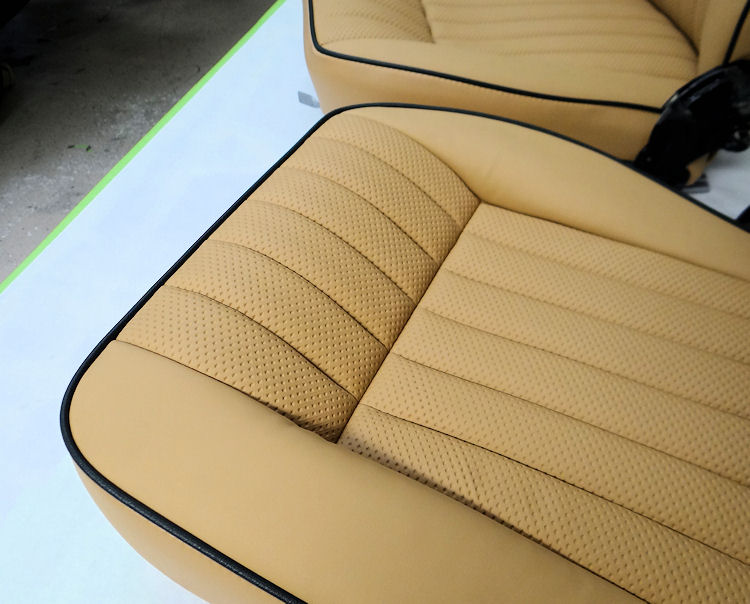
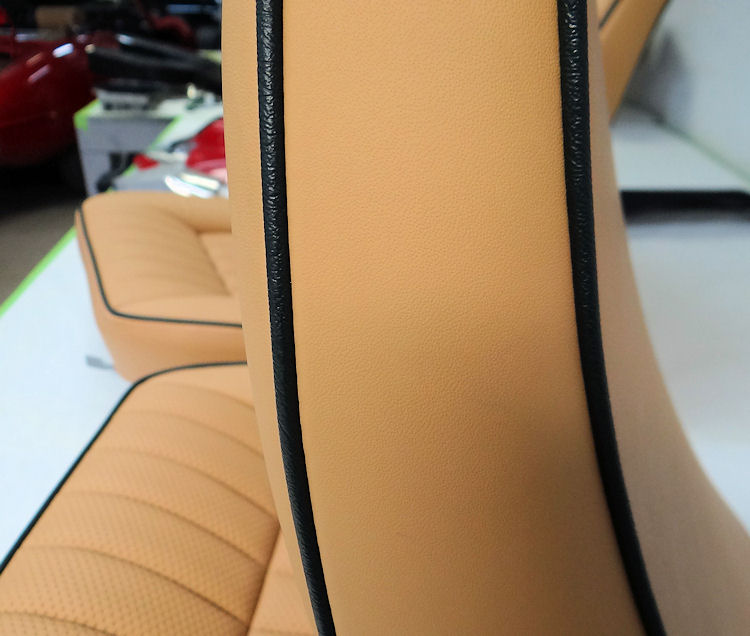
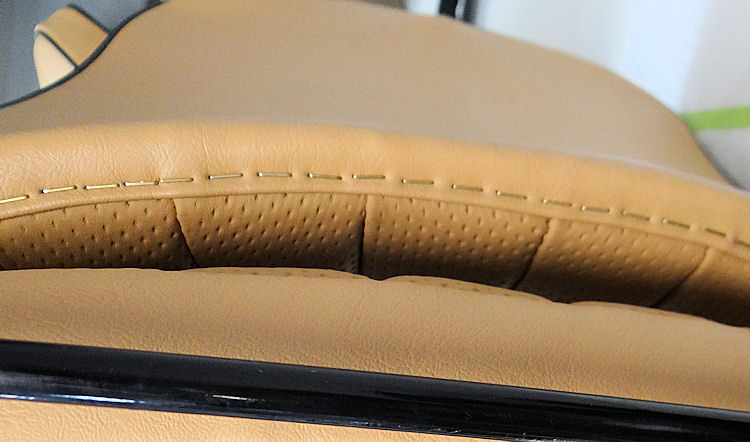
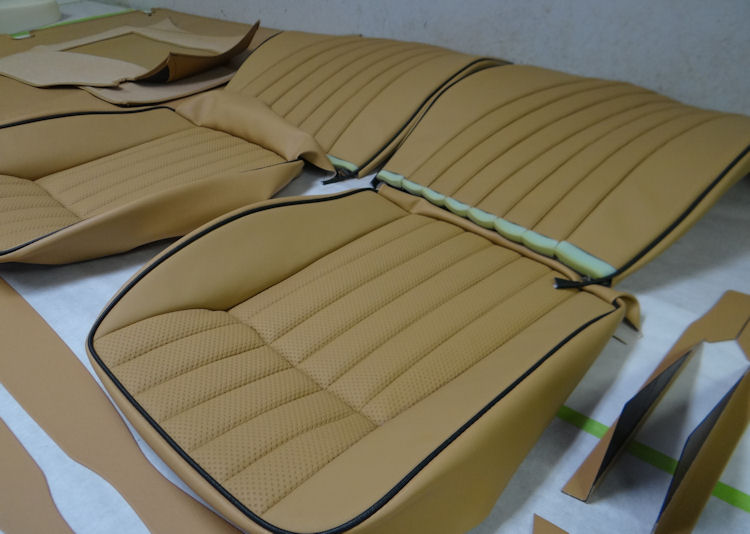
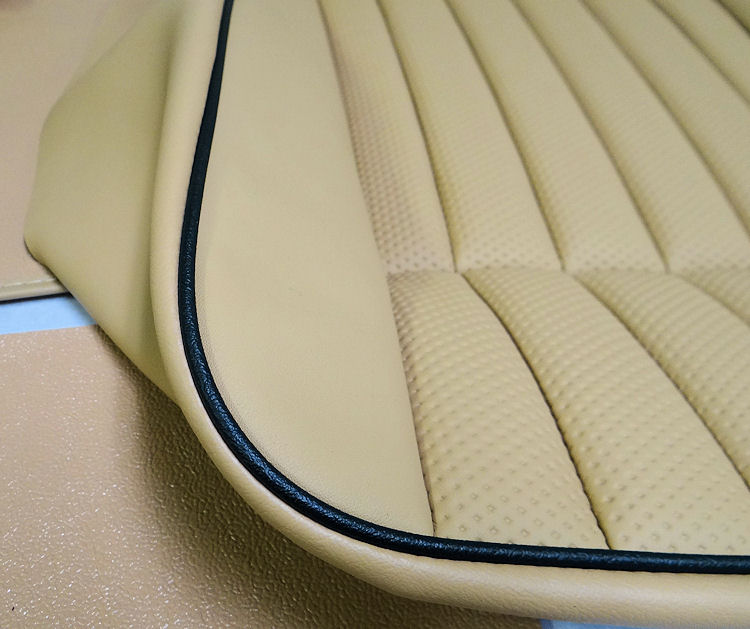
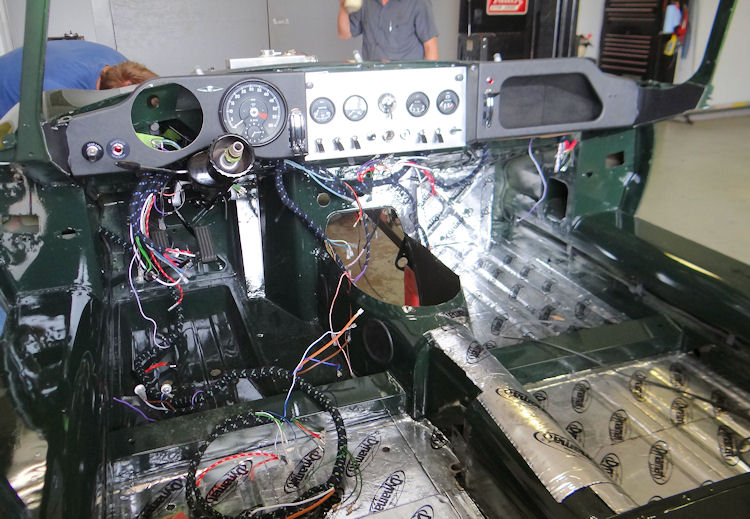
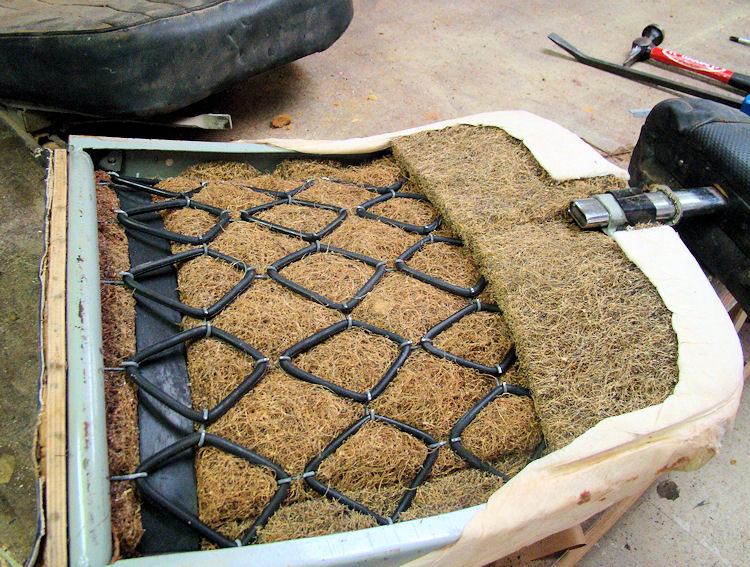
We now have the interior retrim well underway....
 |
 |
|
in this shot |
|
|
|
|
 |
 |
|
|
|
|
|
|
 |
 |
|
the level of workmanship and attention to detail |
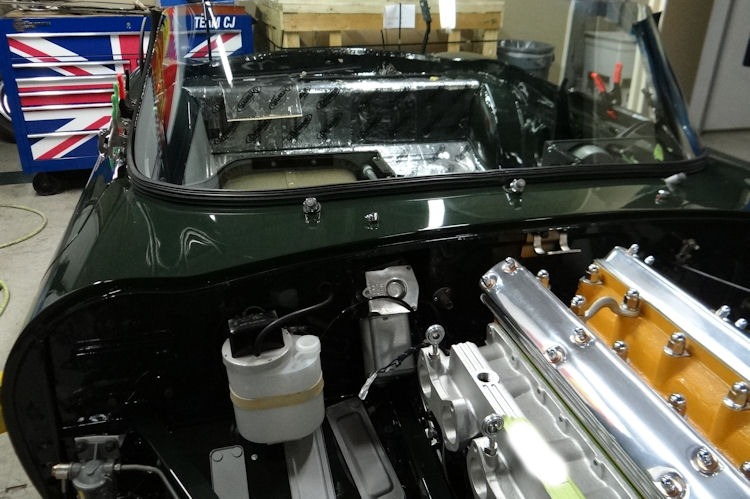
We will be firing the engine in the next few days, then it will be time to install the new interior...
 |
 |
|
|
|
 |
 |
|
|
|
|
|
|
 |
 |
|
|
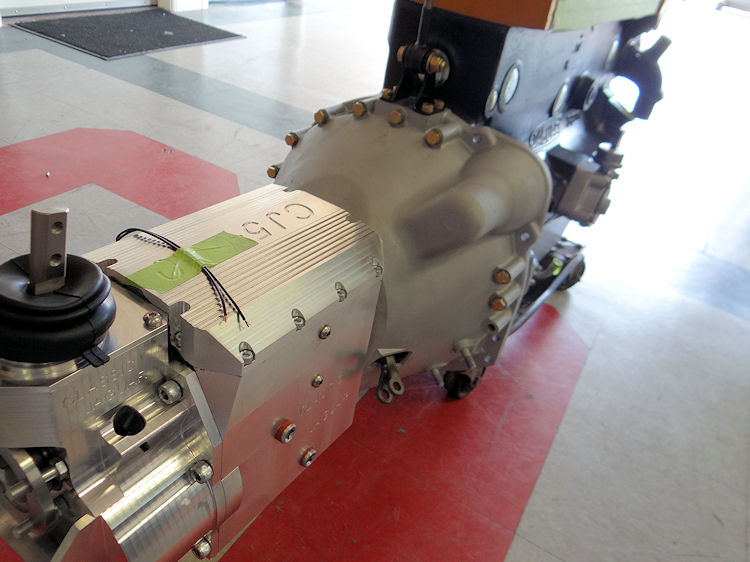
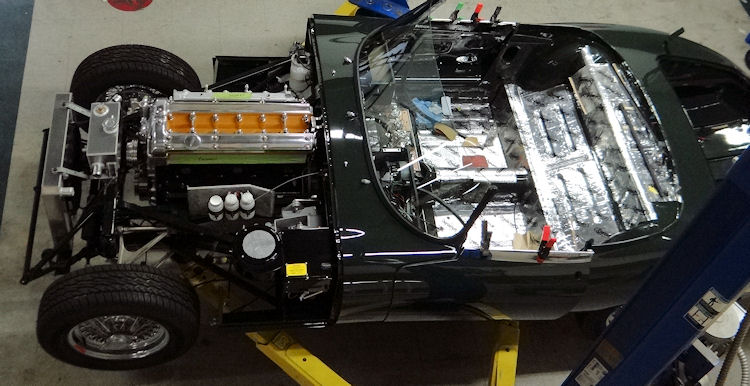
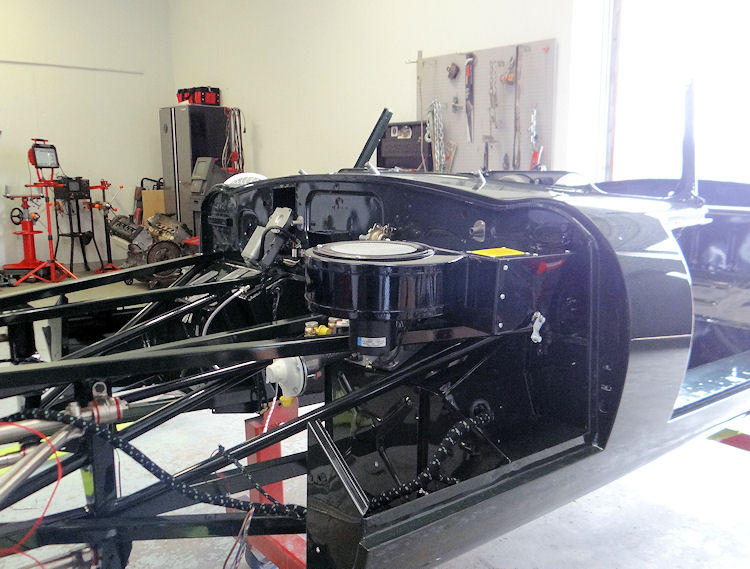
Installing the engine and transmission....
 |
 |
|
|
|
|
|
|
 |
 |
|
|
|
|
|
|
 |
 |
|
|
|
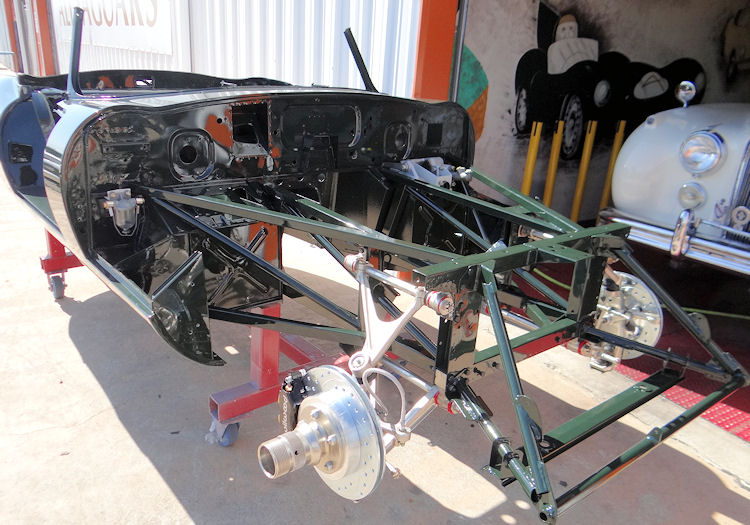
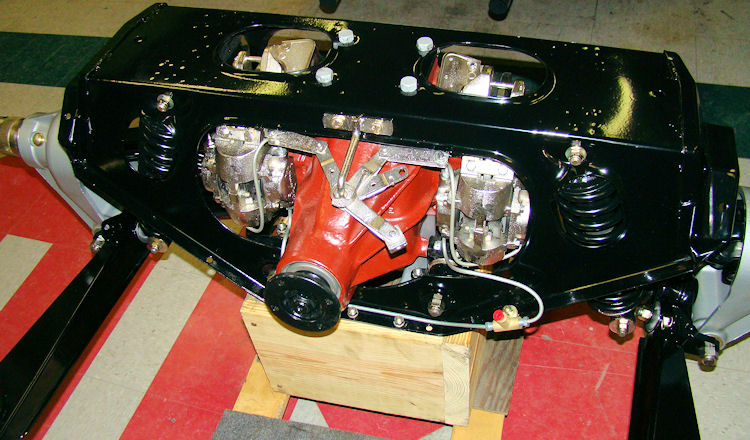
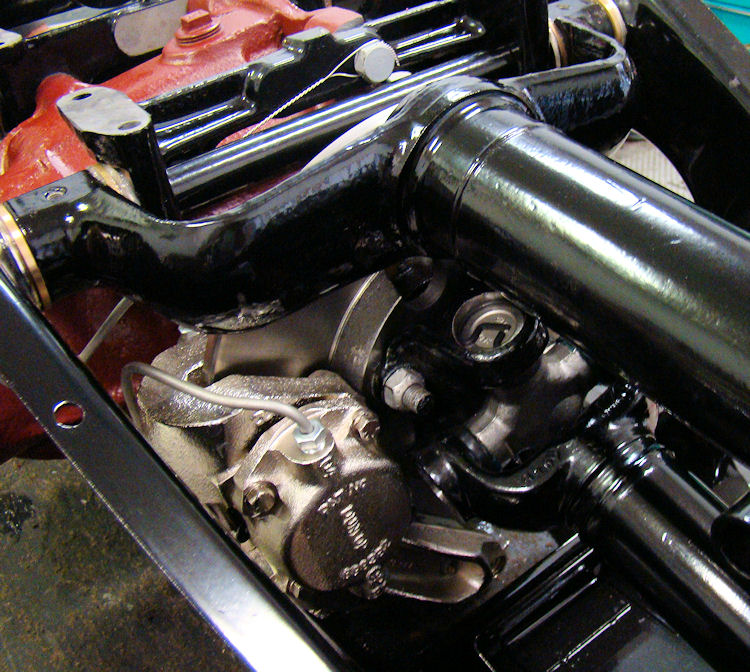
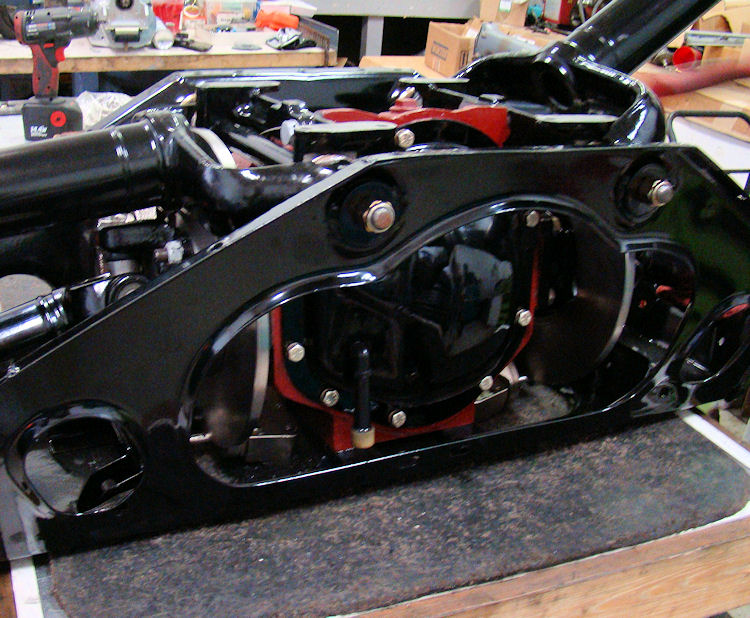
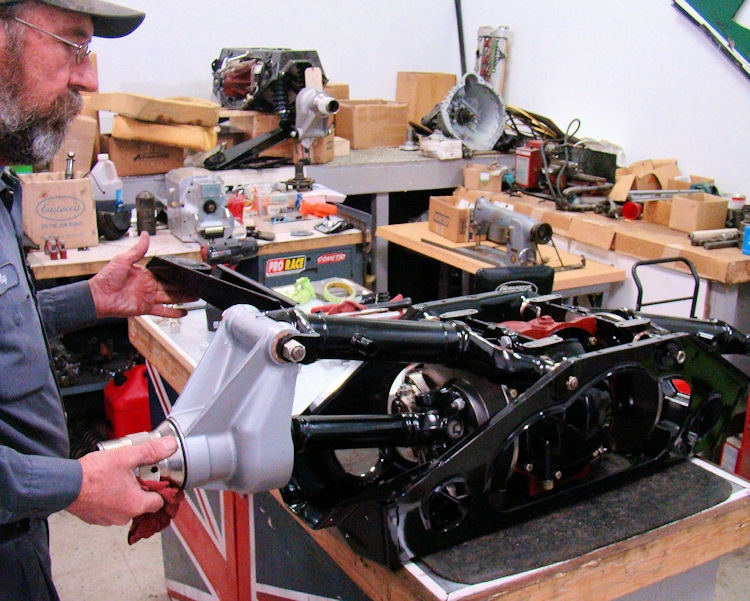
Installing the IRS...
 |
 |
|
|
|
 |
 |
|
|
|
 |
 |
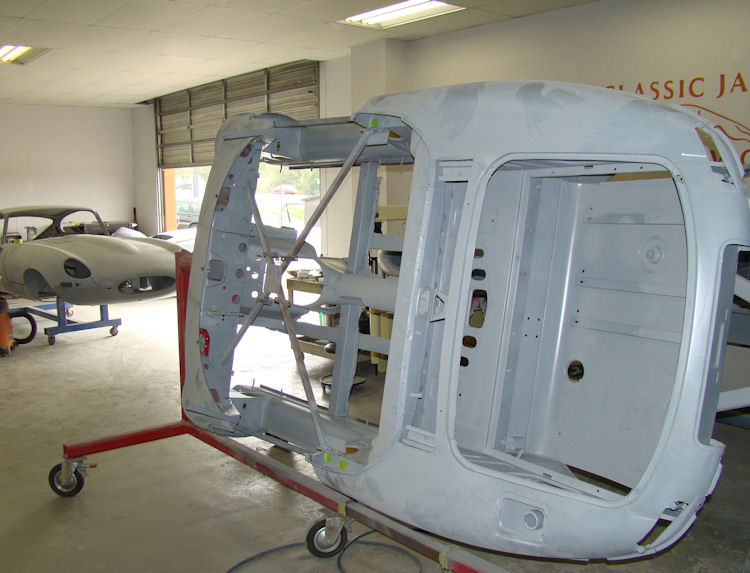
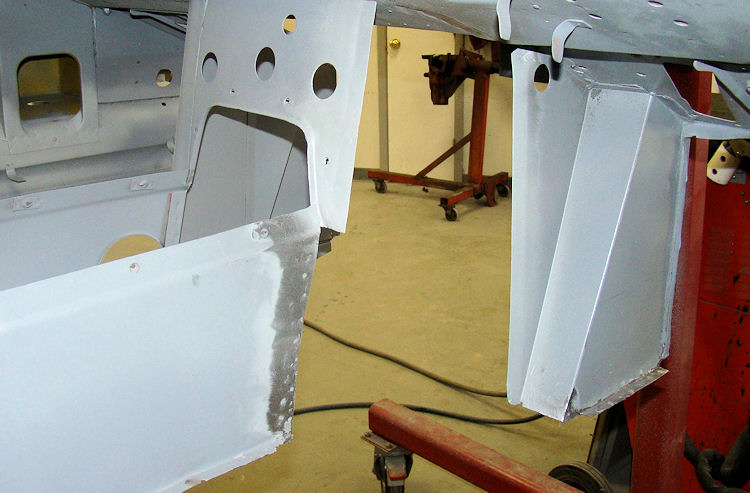
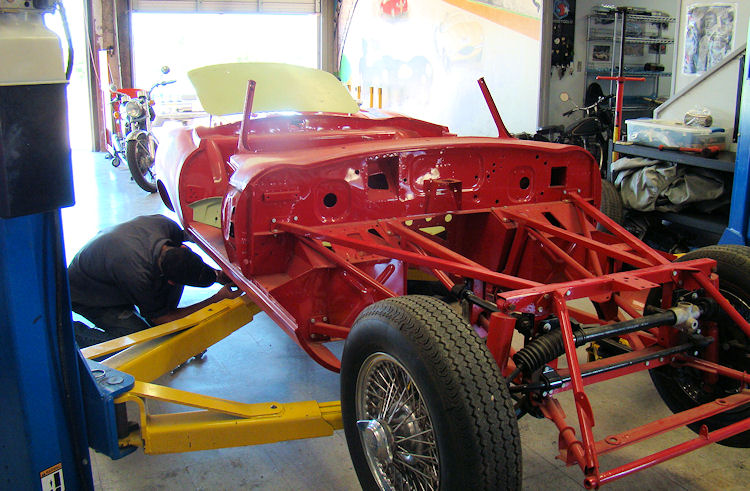
Your car is progressing rapidly, just three weeks after painting...
 |
 |
|
|
|
|
|
|
 |
 |
|
|
|
|
|
|
 |
 |
|
|
|
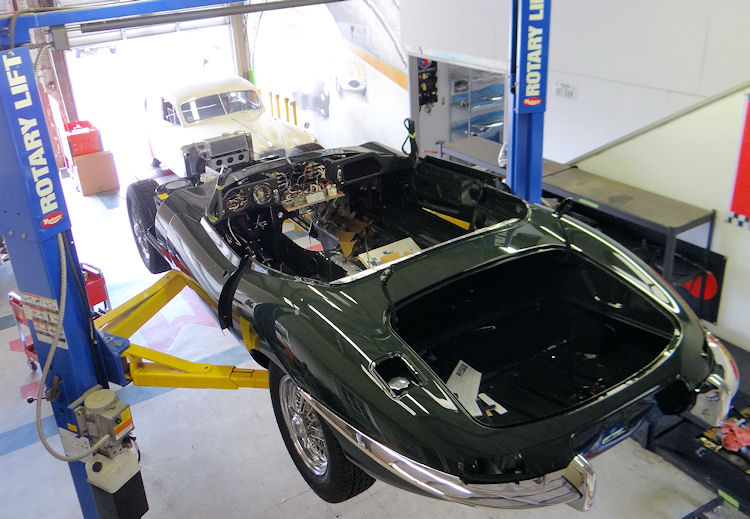
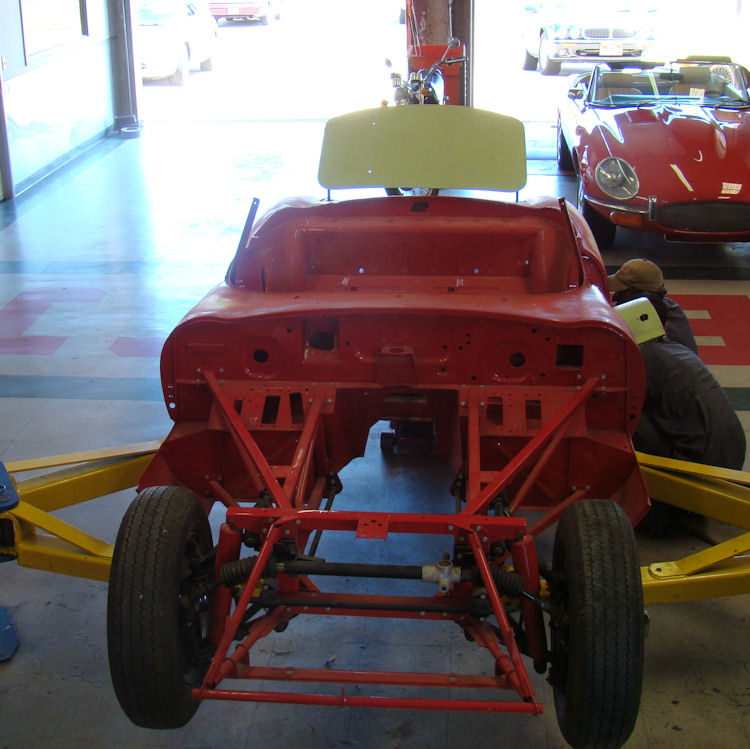
Your car is going together very nicely in the main CJ workshop....
 |
 |
|
|
|
 |
 |
|
|
|
 |
 |
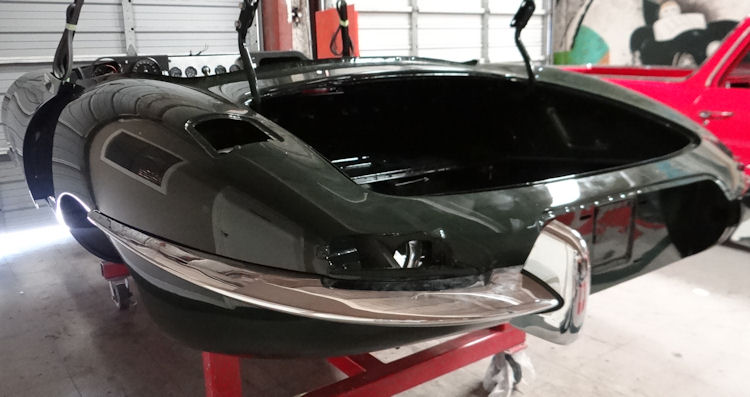
Hardtop painted, reassembly underway...
 |
 |
|
|
|
 |
 |
Color sanding and buffing has now been completed. Next up, painting the hardtop...
 |
 |
|
|
|
|
|
|
 |
 |
|
|
|
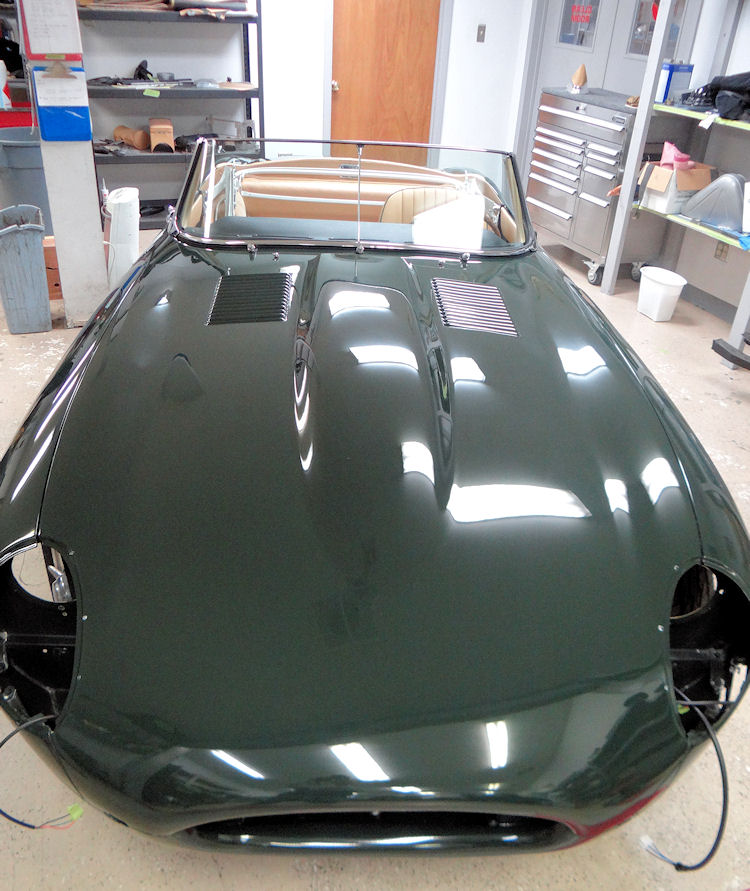
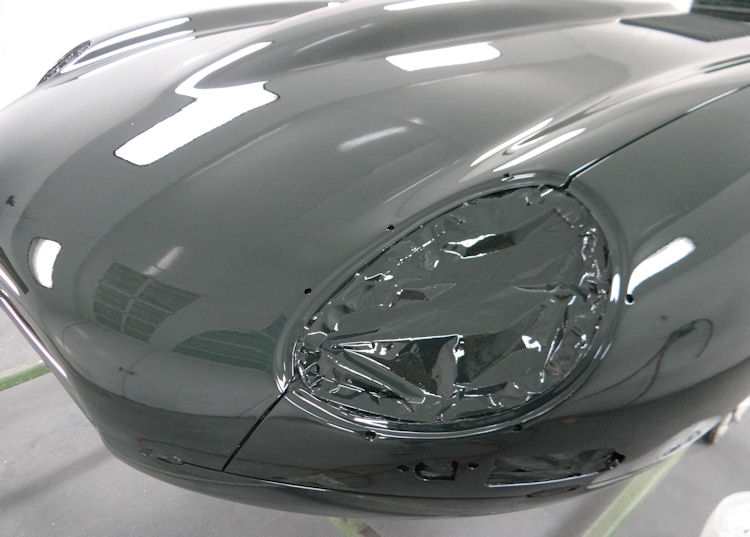
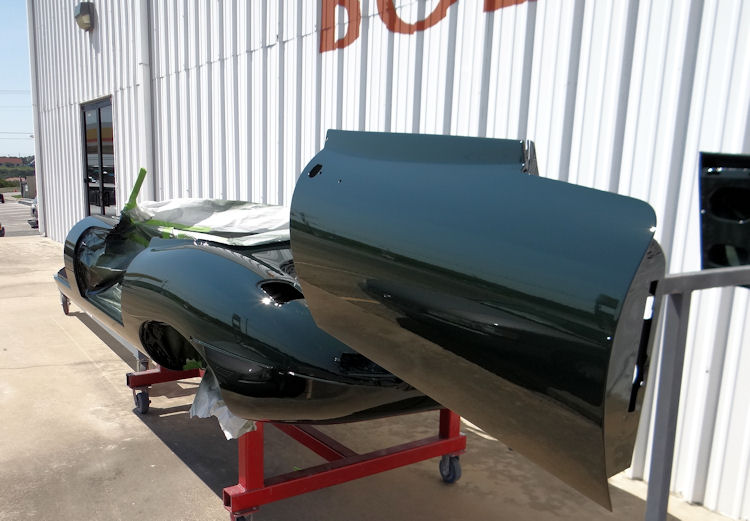
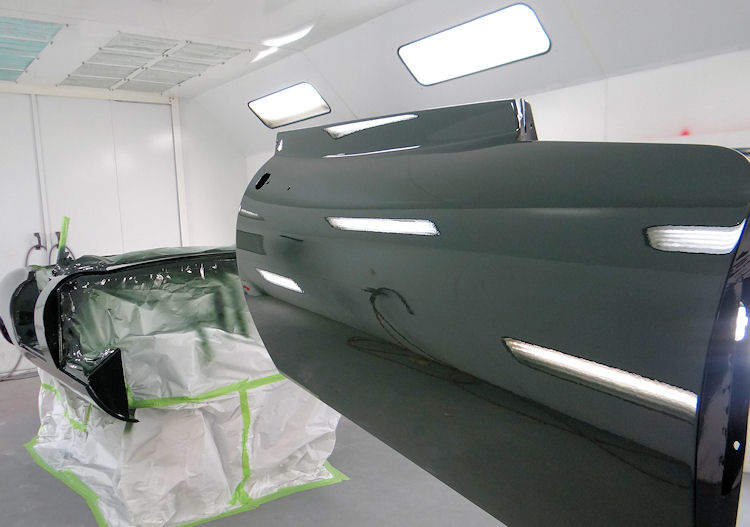
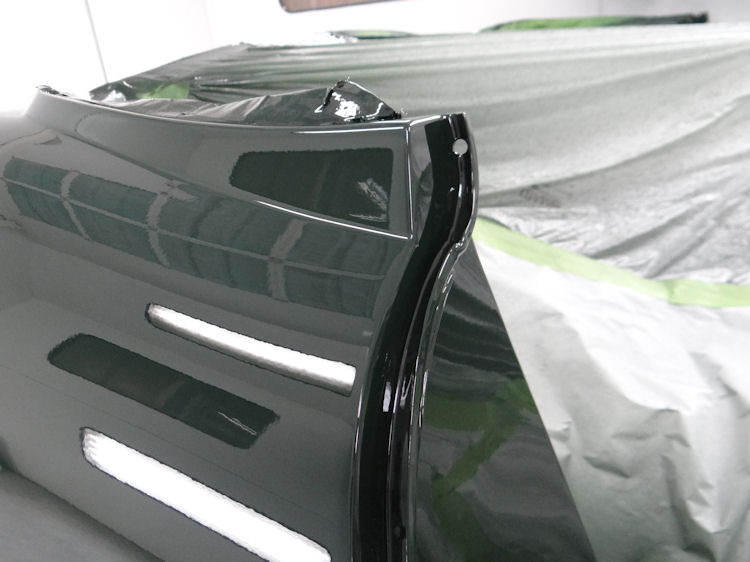
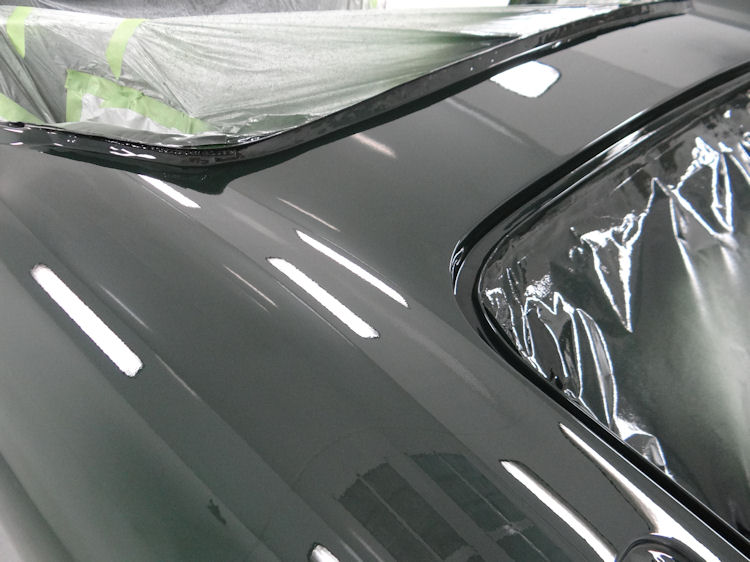
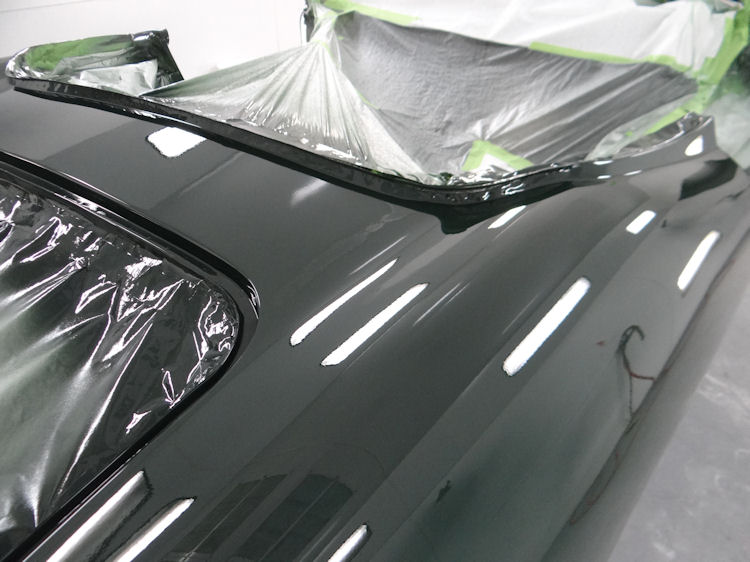
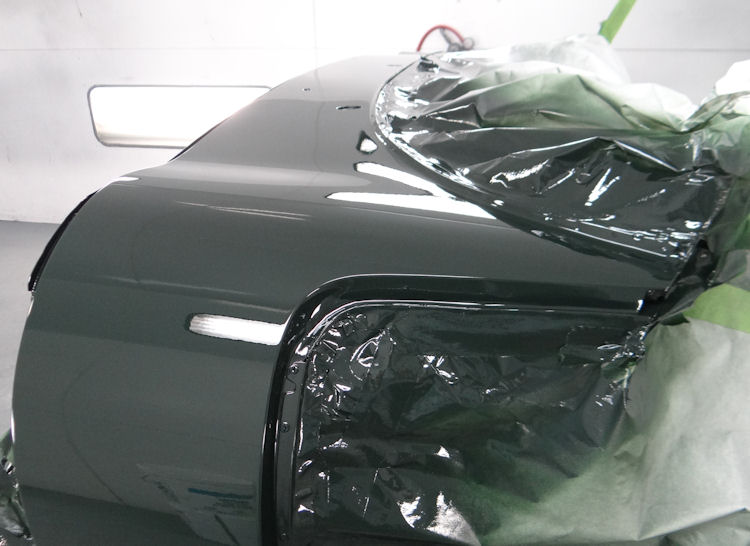
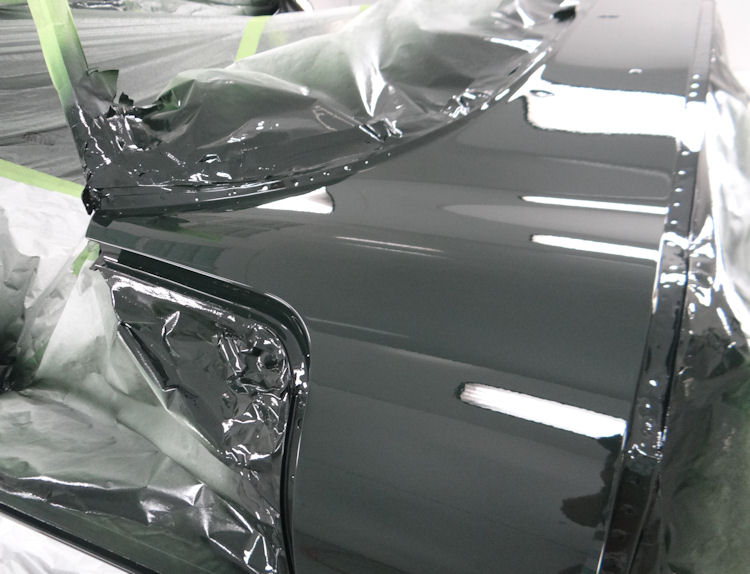
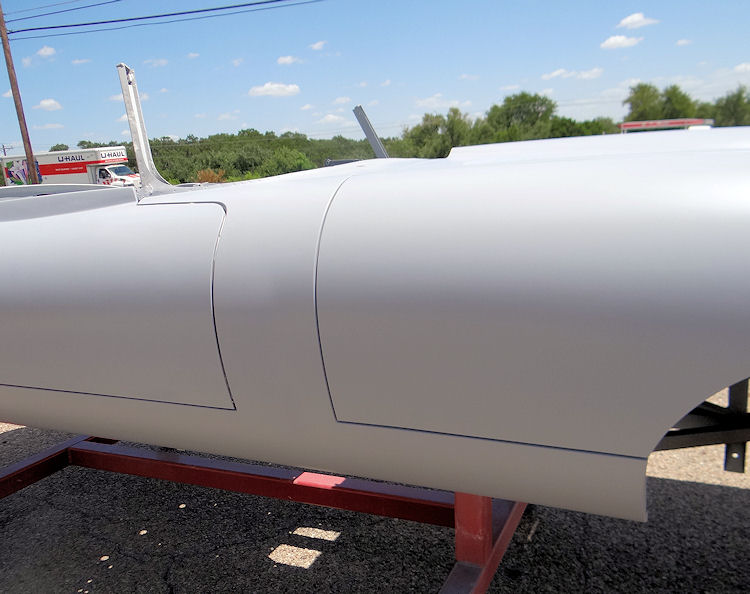
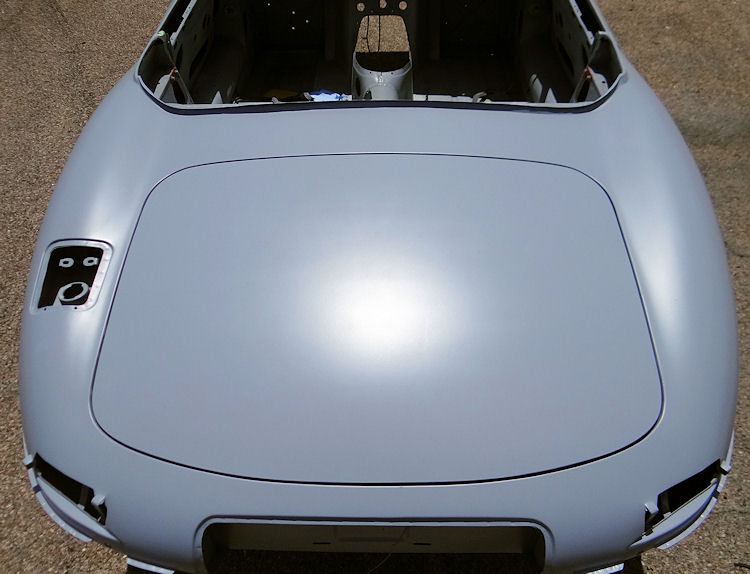
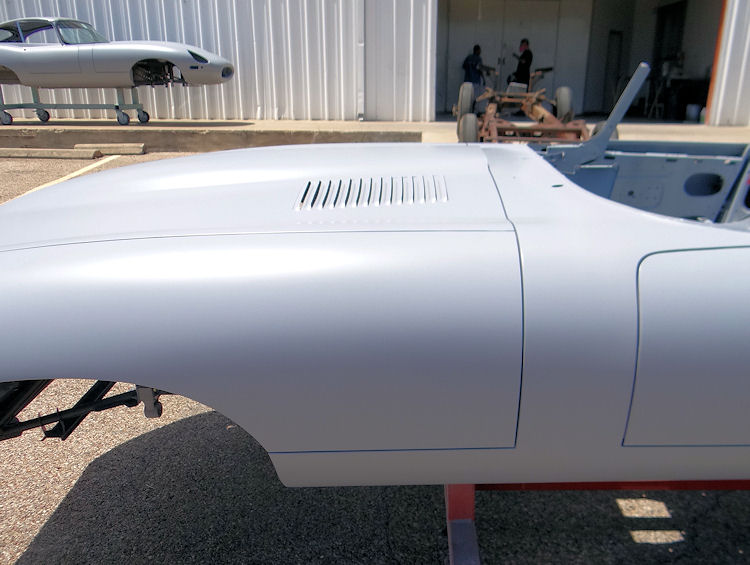
All of the outer panels, including the bonnet, have now been painted.
 |
 |
|
|
|
 |
 |
|
|
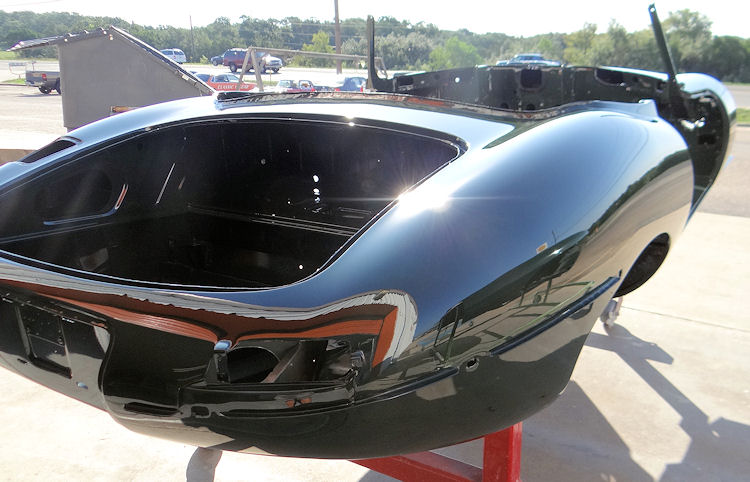
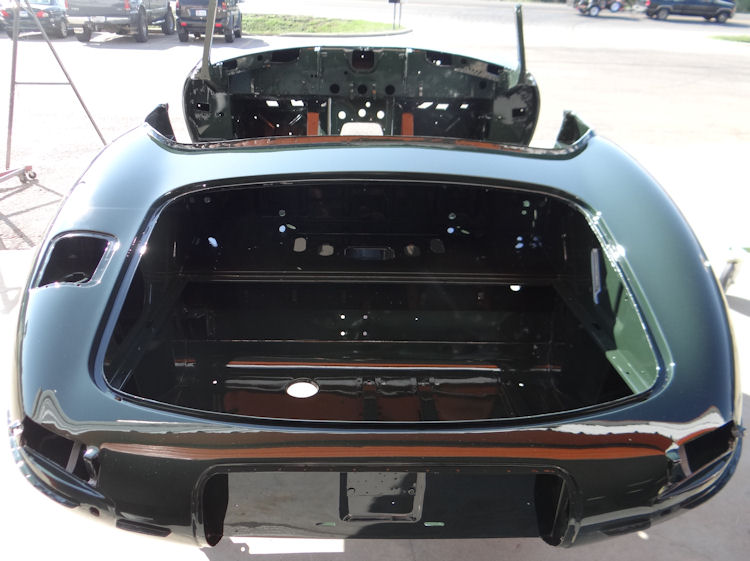
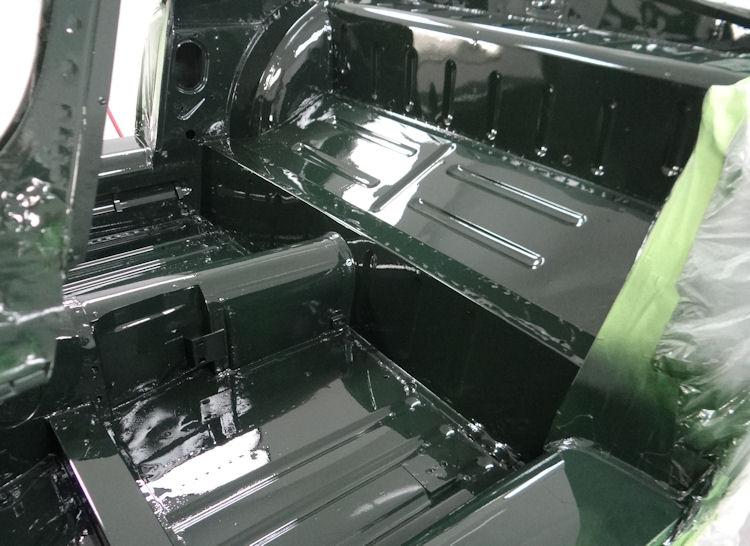
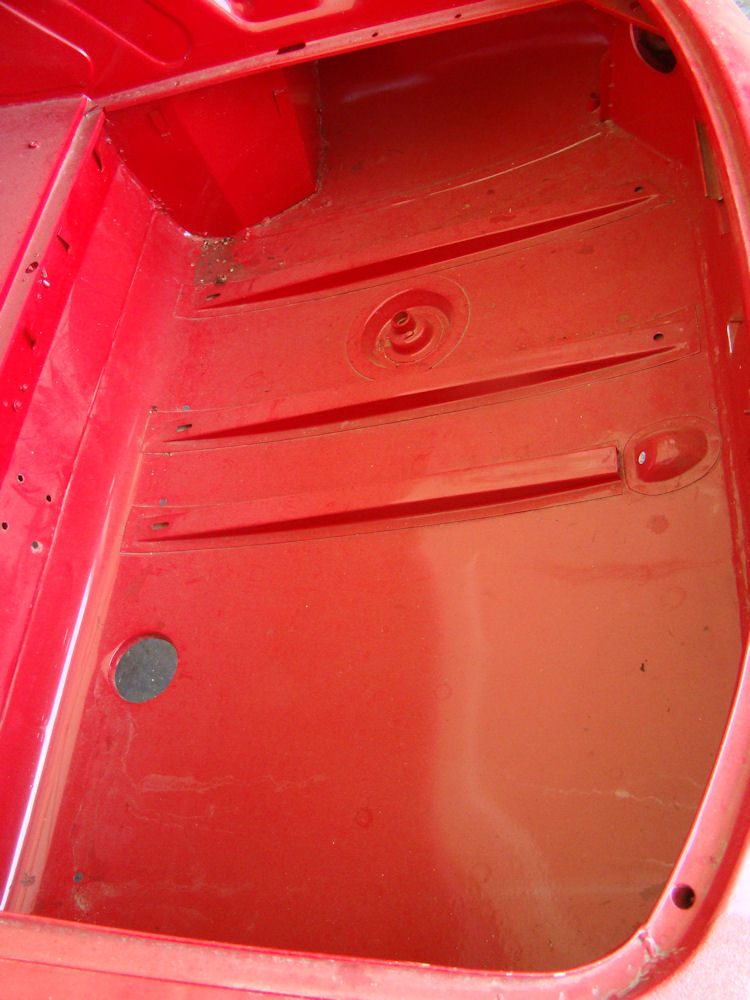
We painted the main bodyshell on Friday evening and I am pleased to report that the finished result is spectacular.
 |
 |
 |
 |
 |
 |
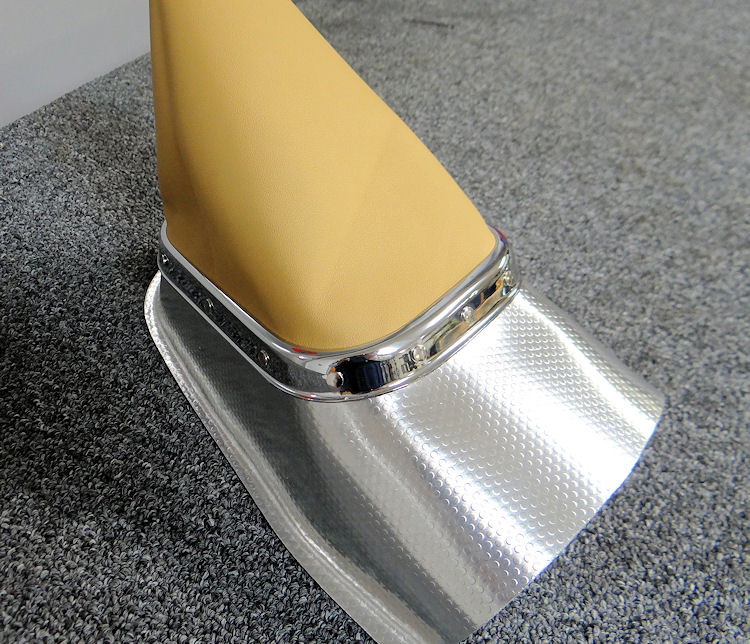
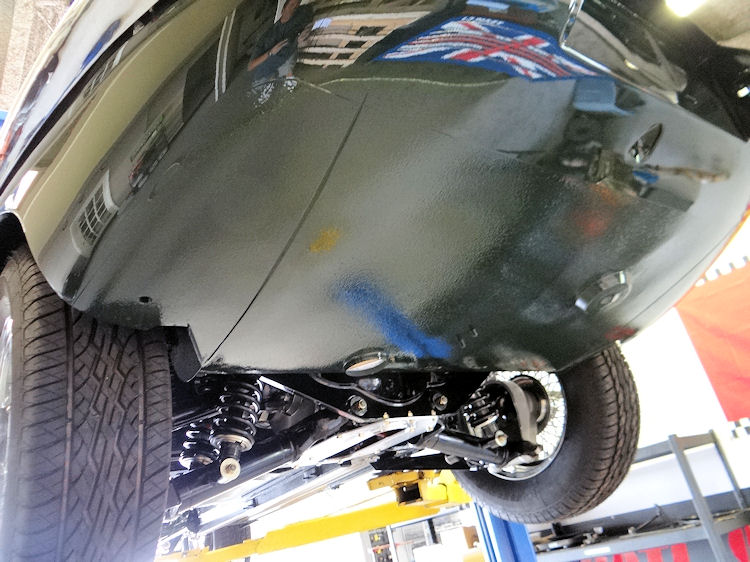
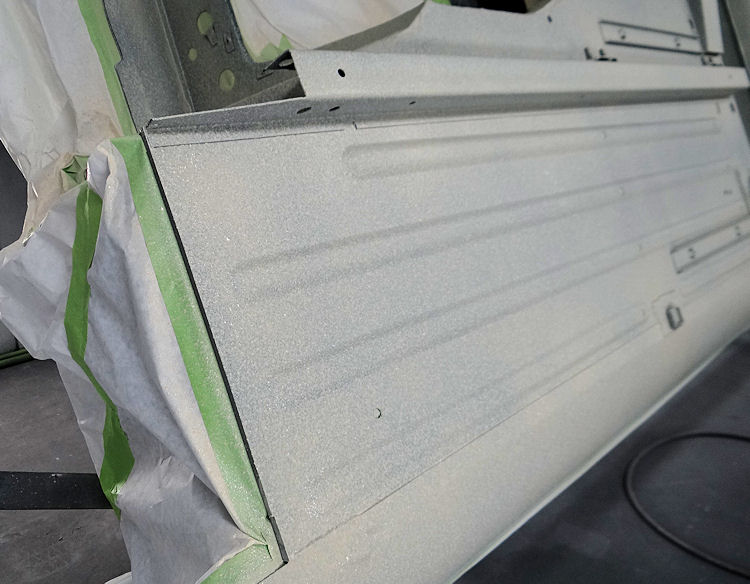
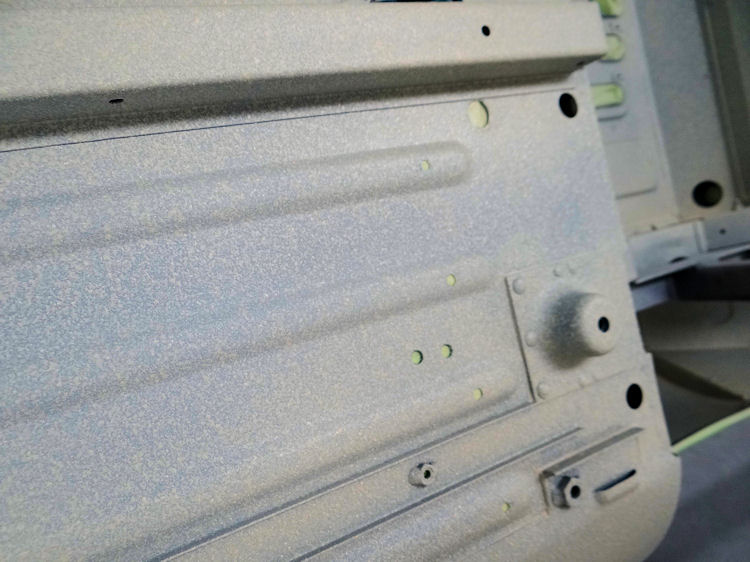
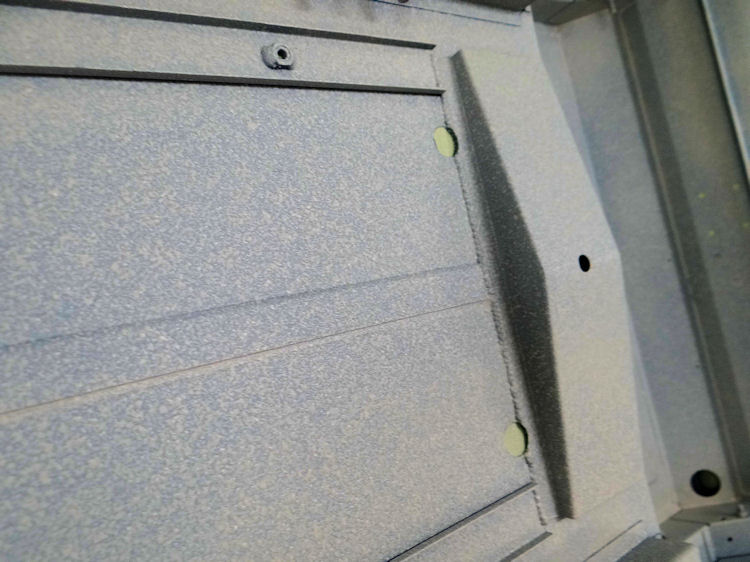
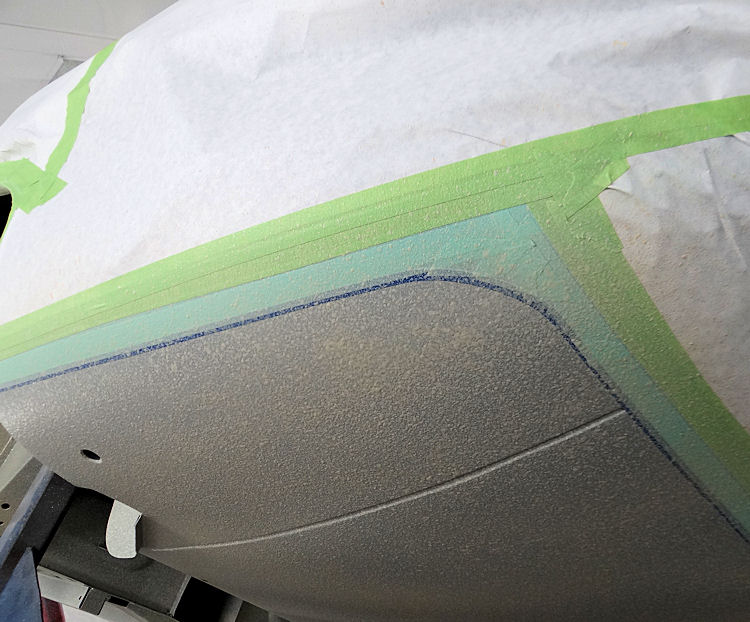
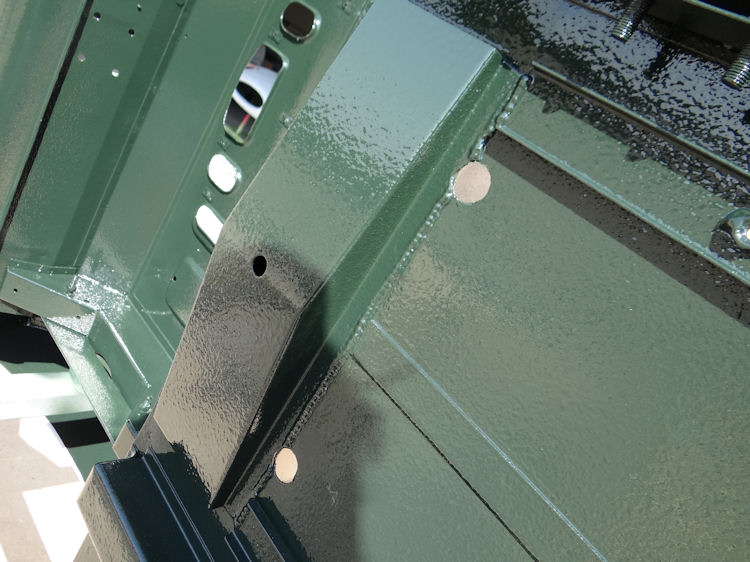
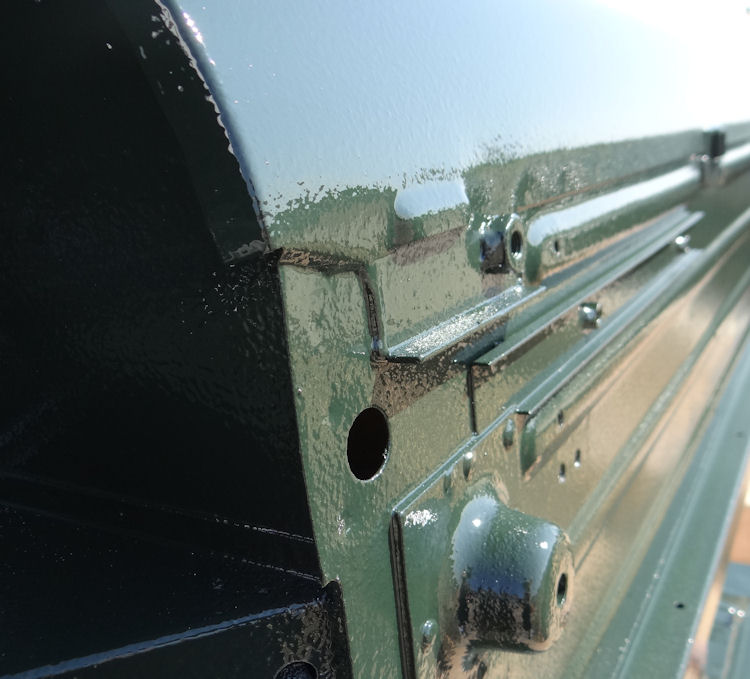
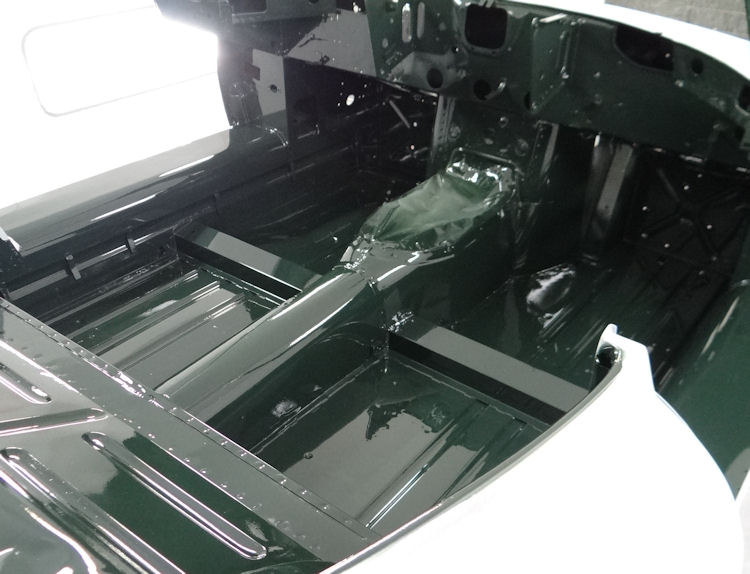
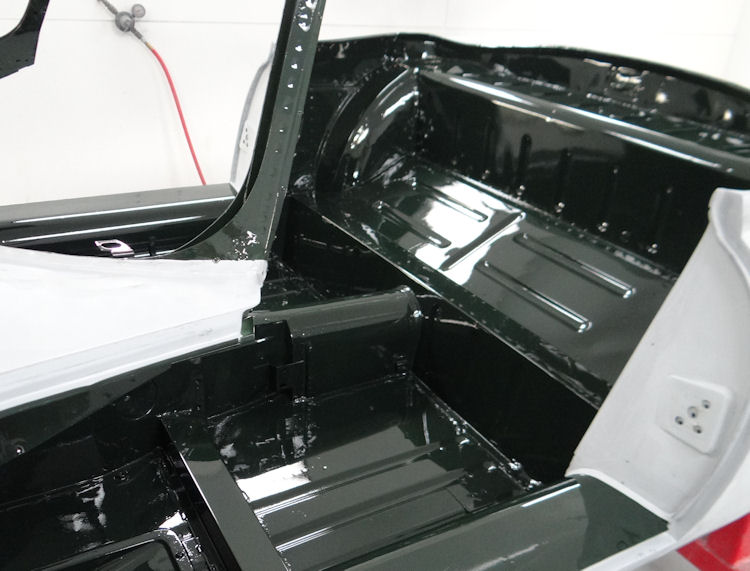
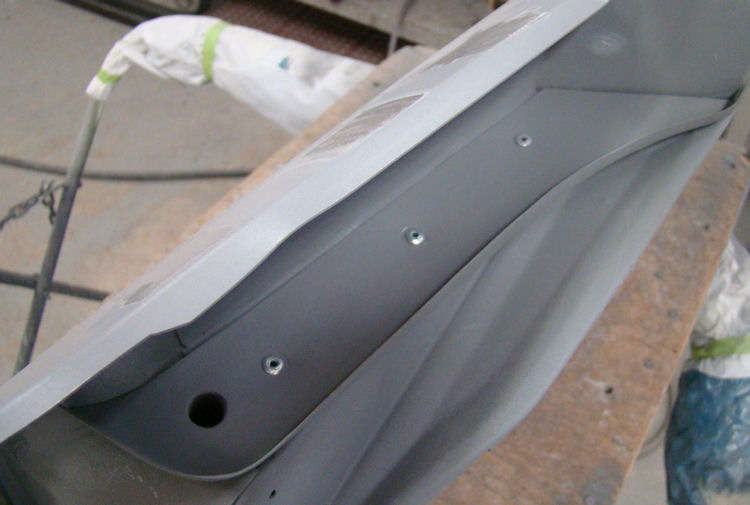
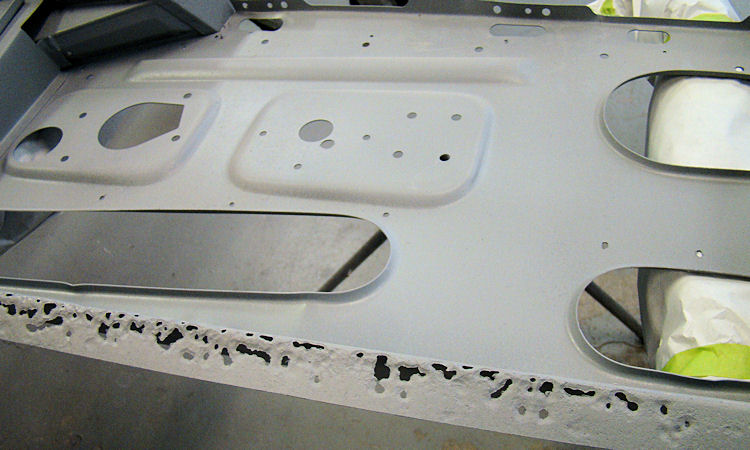
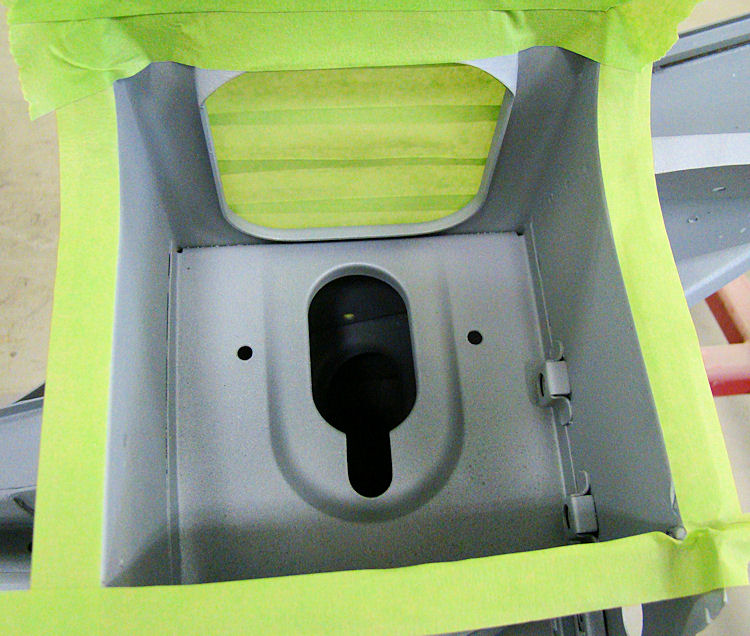
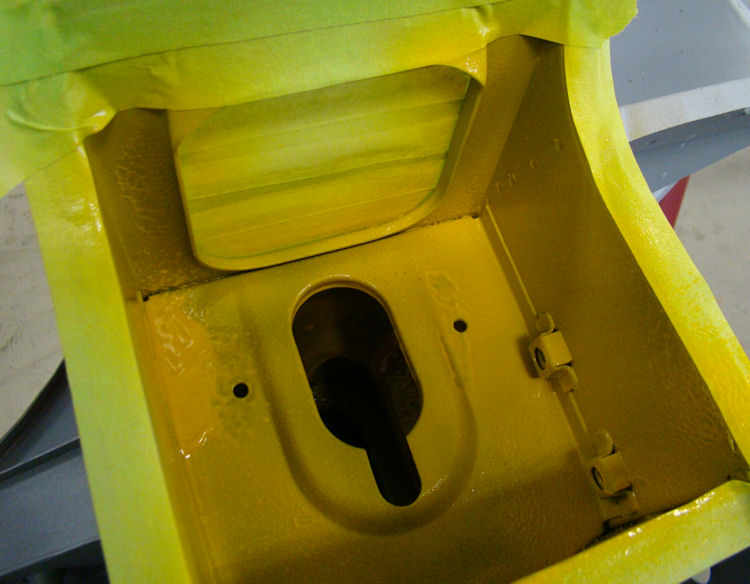
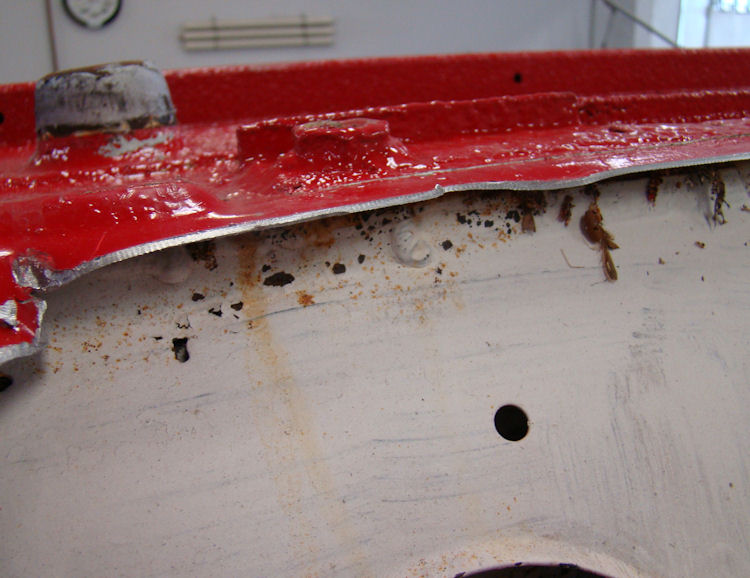
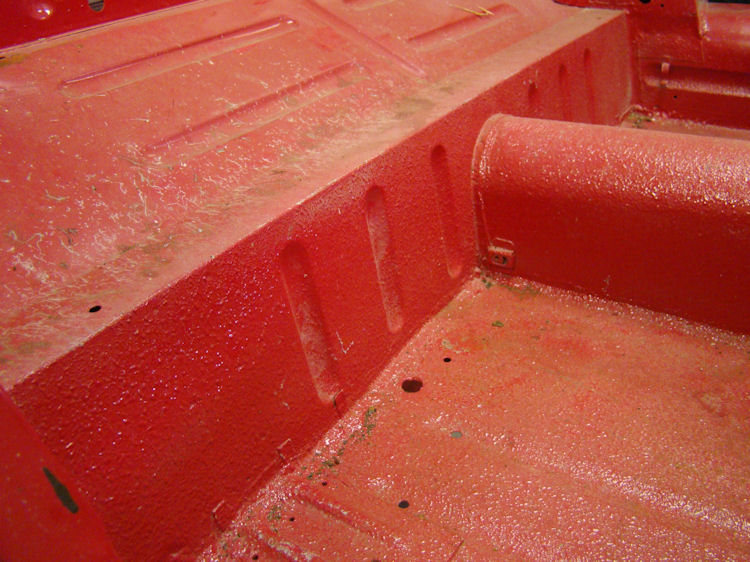
We have now painted the underside of the car and will be painting the outer panels of the body this afternoon. The first few photos below show the textured rocker guard that we apply prior to painting the underside of the floors.
 |
 |
|
|
|
|
|
|
 |
 |
|
|
|
|
|
|
 |
 |
|
|
|
|
|
|
 |
 |
|
|
|
|
|
|
 |
 |
|
|
|
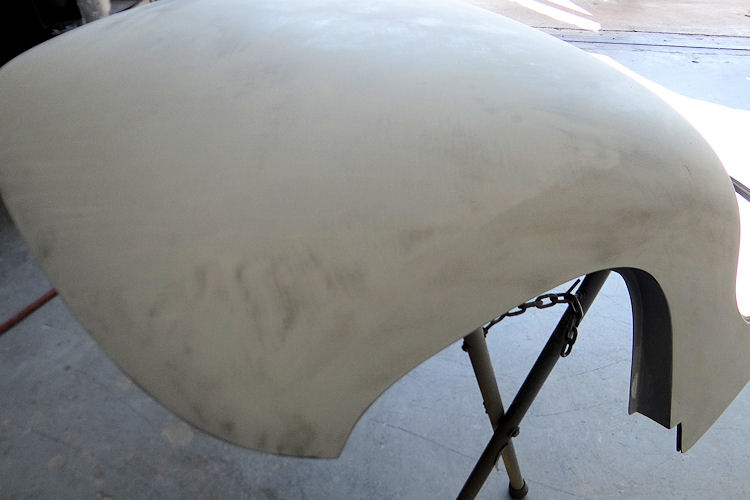
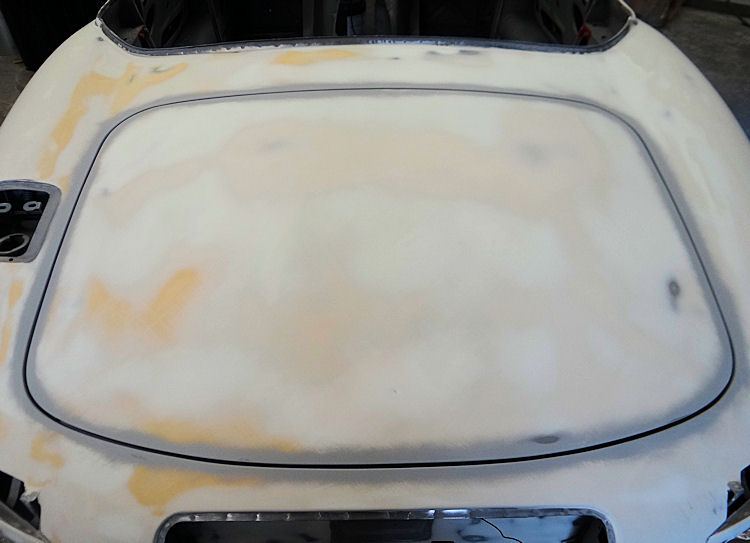
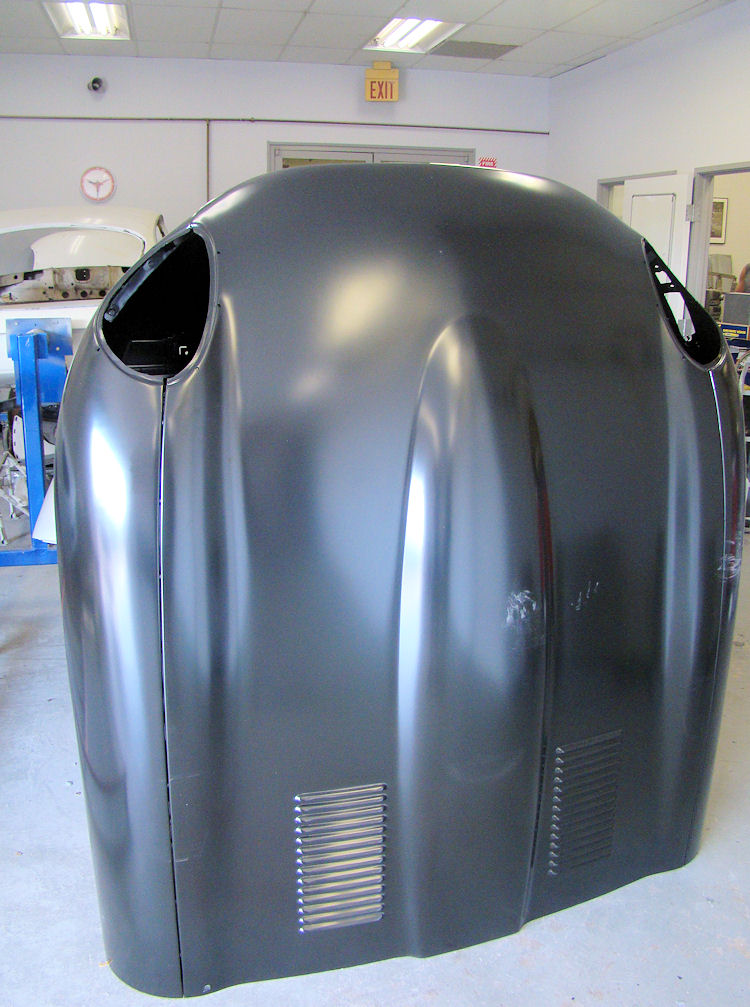
Painting the underside of the bonnet...

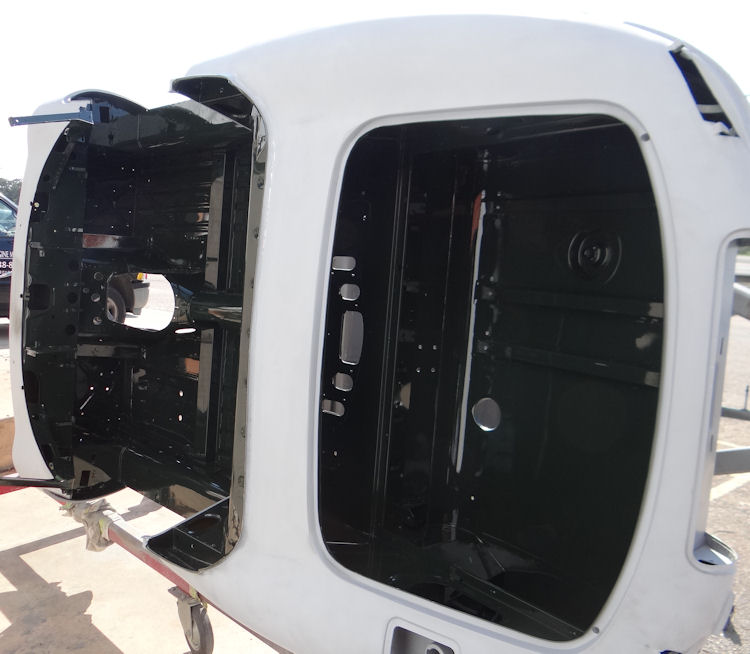
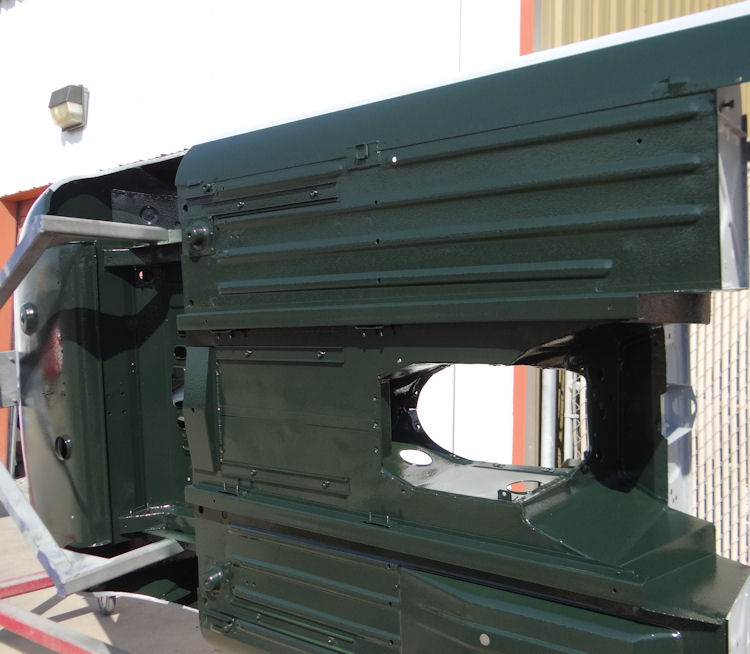
Applying the first of the new British Racing Green paint...
 |
 |
 |
 |
All important chrome trial fit in progress. We typically spend around 40 hours modifying and trial fitting the chrome. We also trial fit the windscreen and associated trim items.
 |
 |
 |
 |
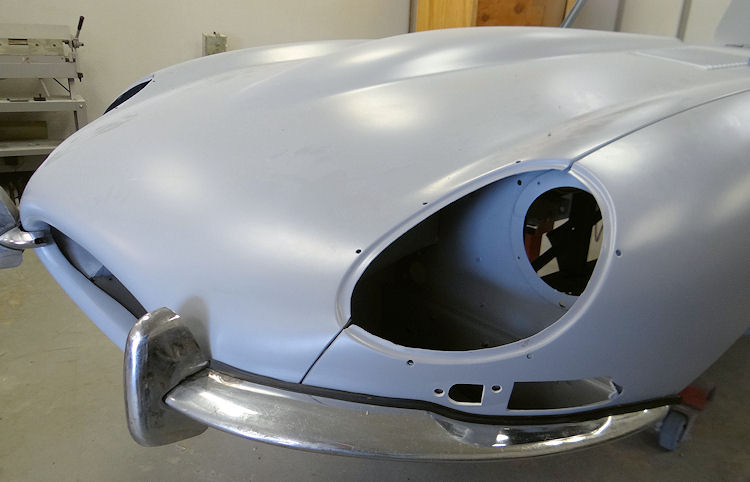
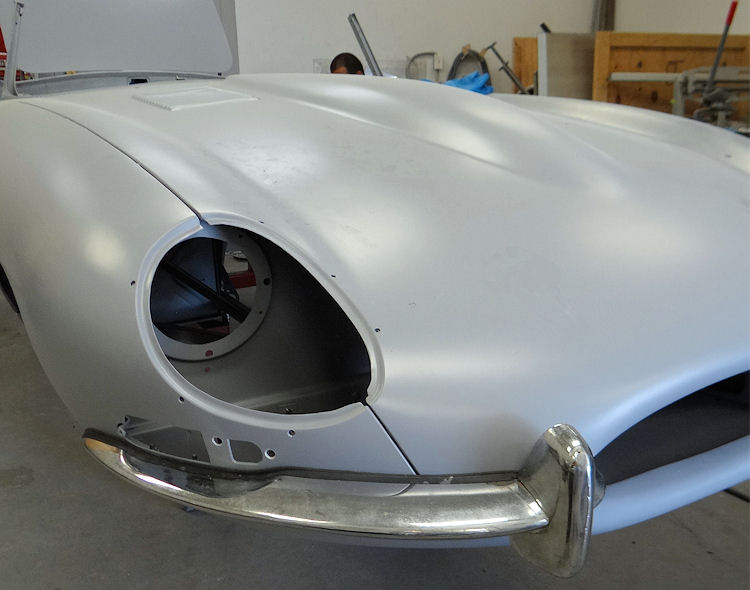
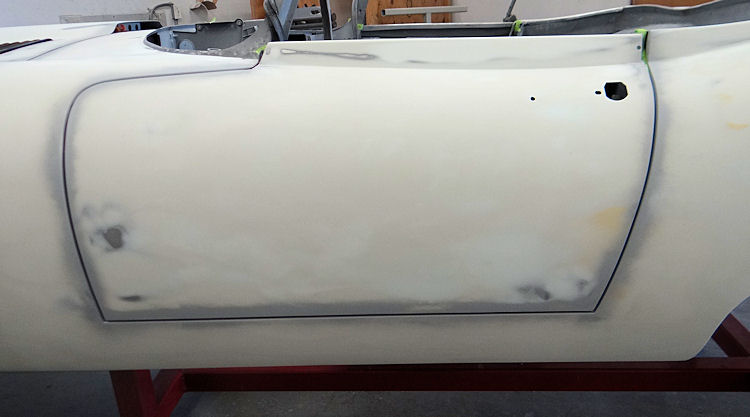
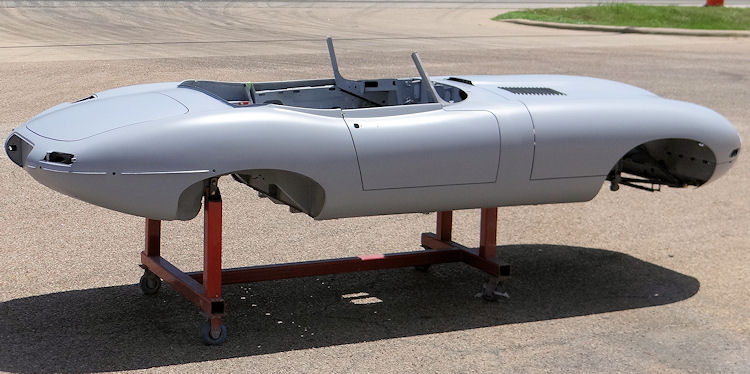
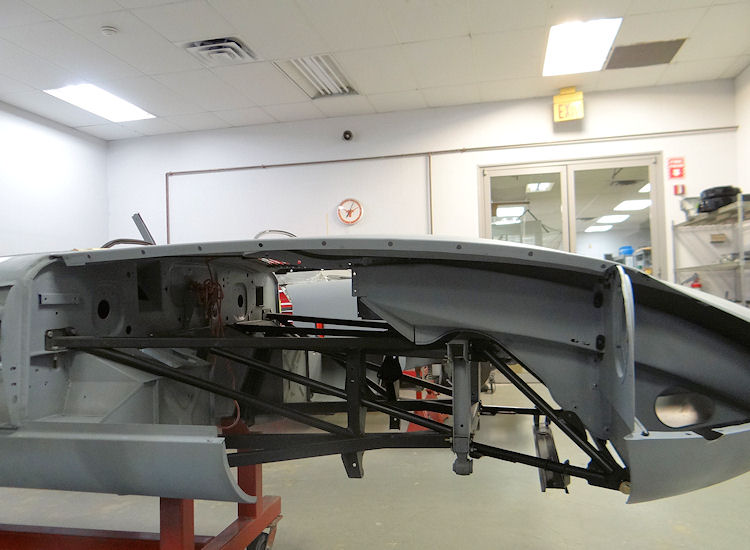
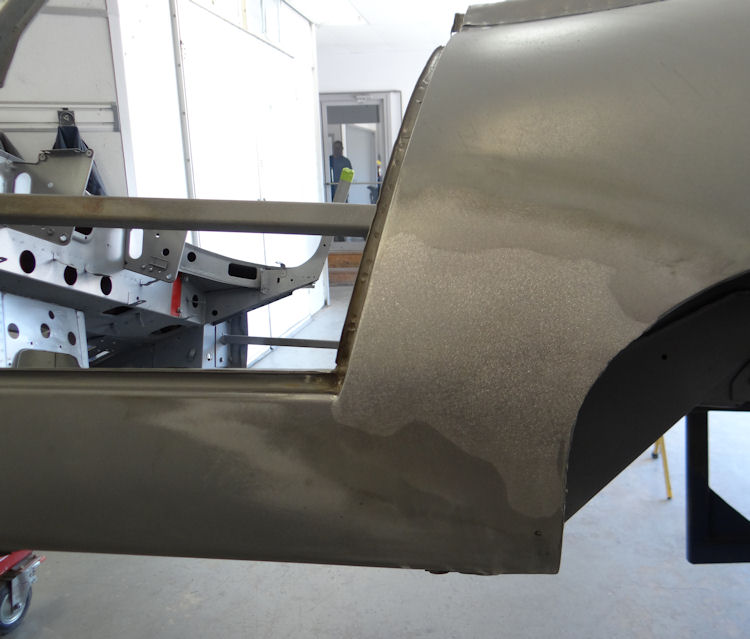
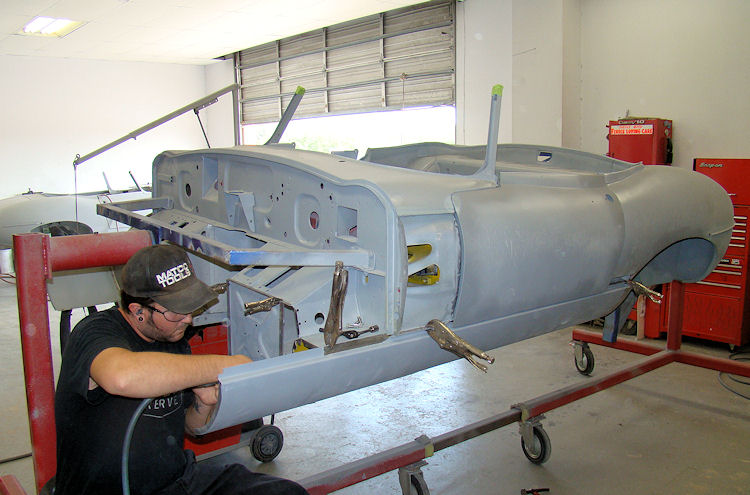
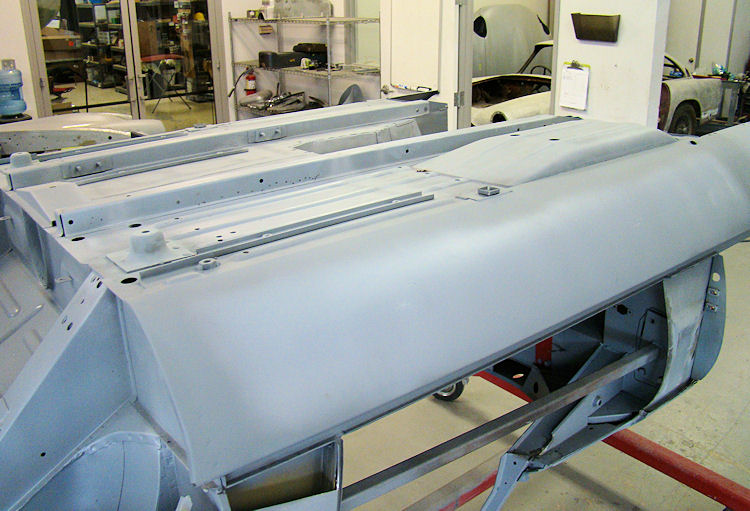
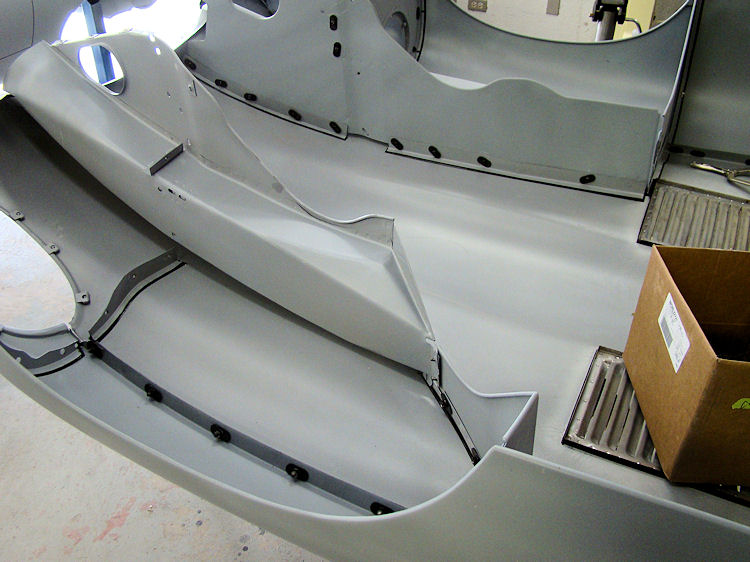
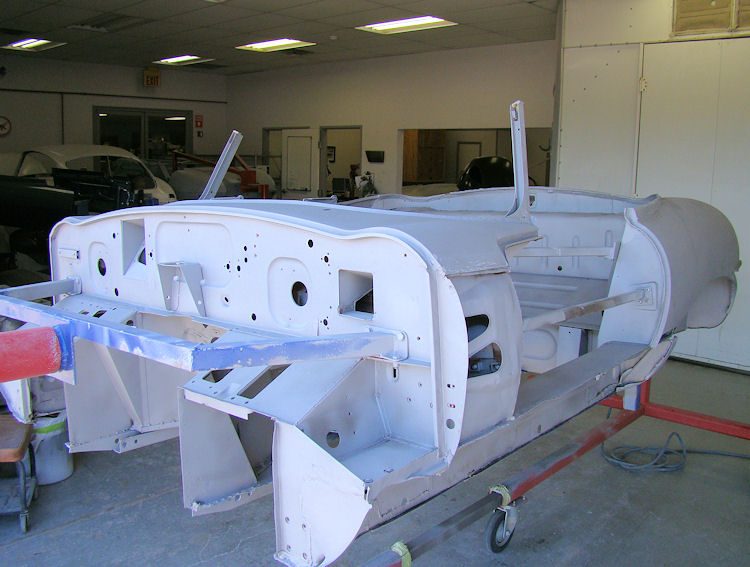
The bodywork has now been completed and the car is in primer, almost ready for some British Racing Green!
 |
 |
|
|
|
 |
 |
|
|
|
 |
 |
|
|
|
 |
 |
|
|
|
 |
 |
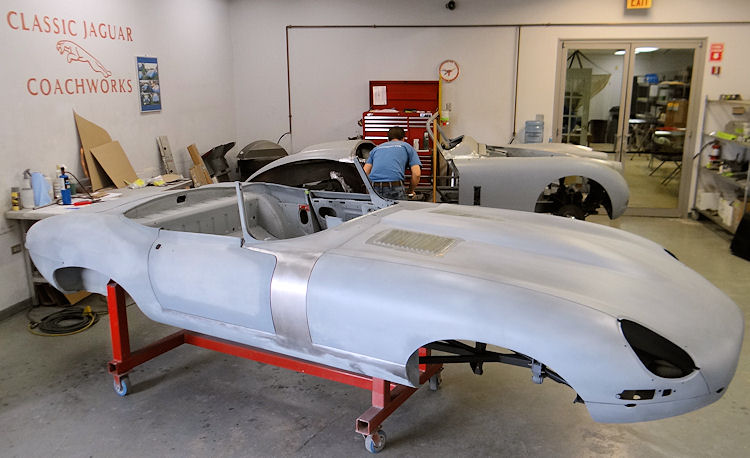
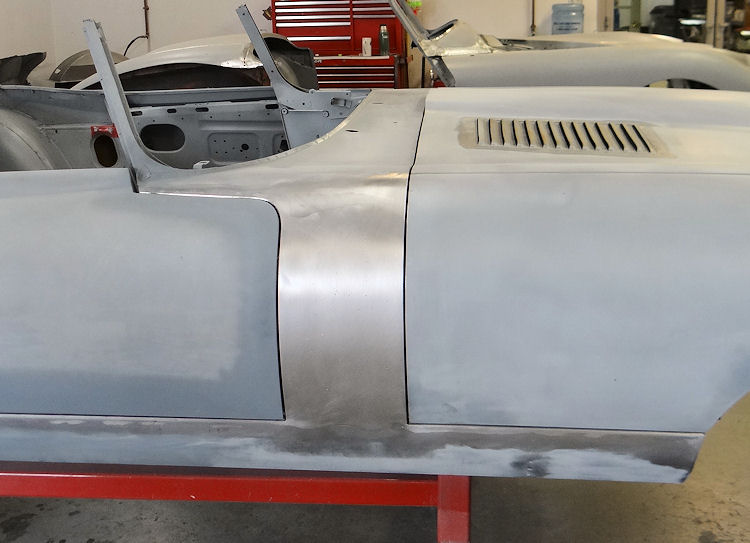
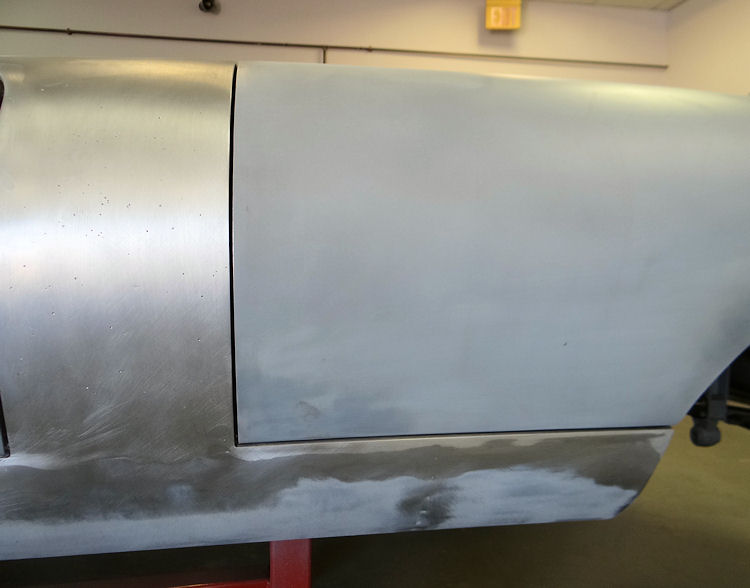
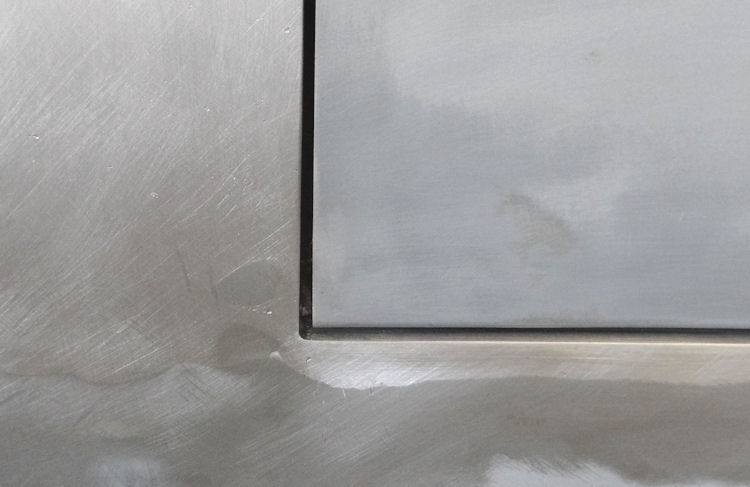
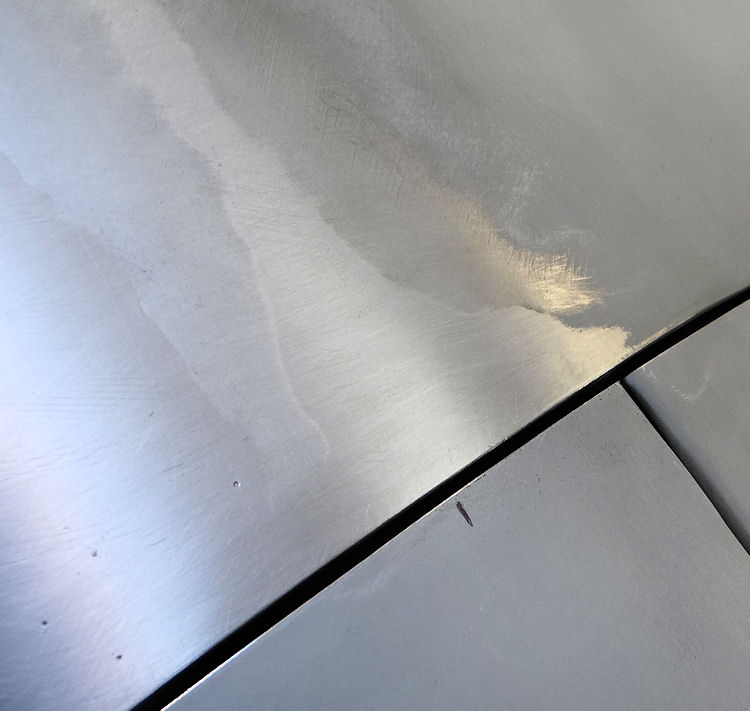
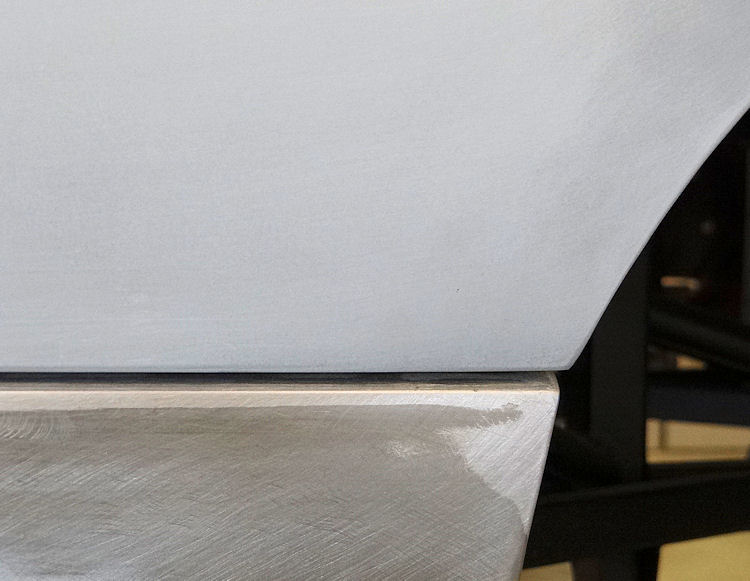
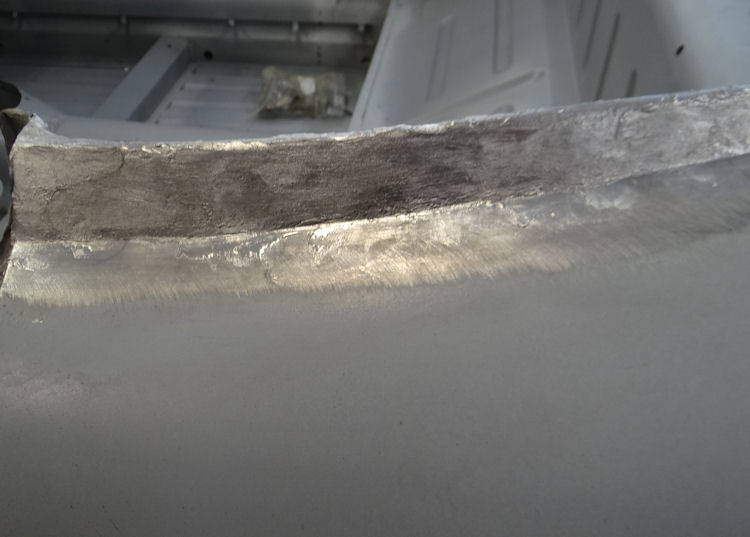
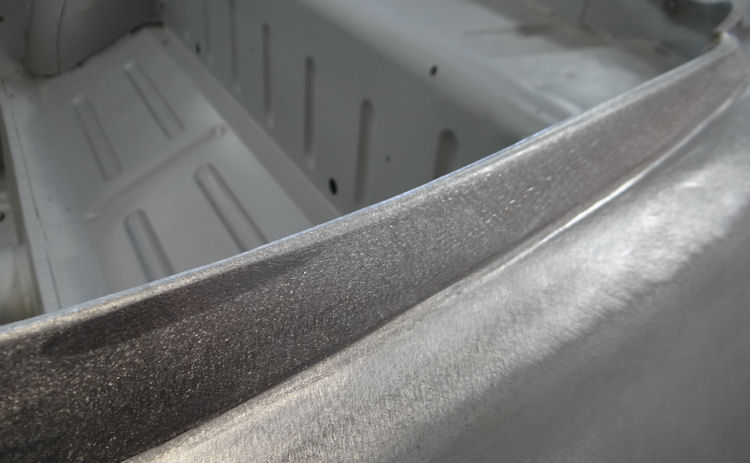
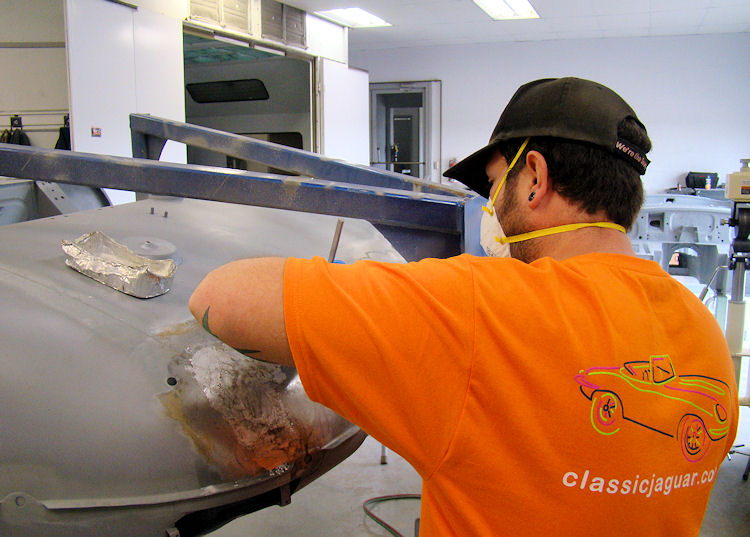
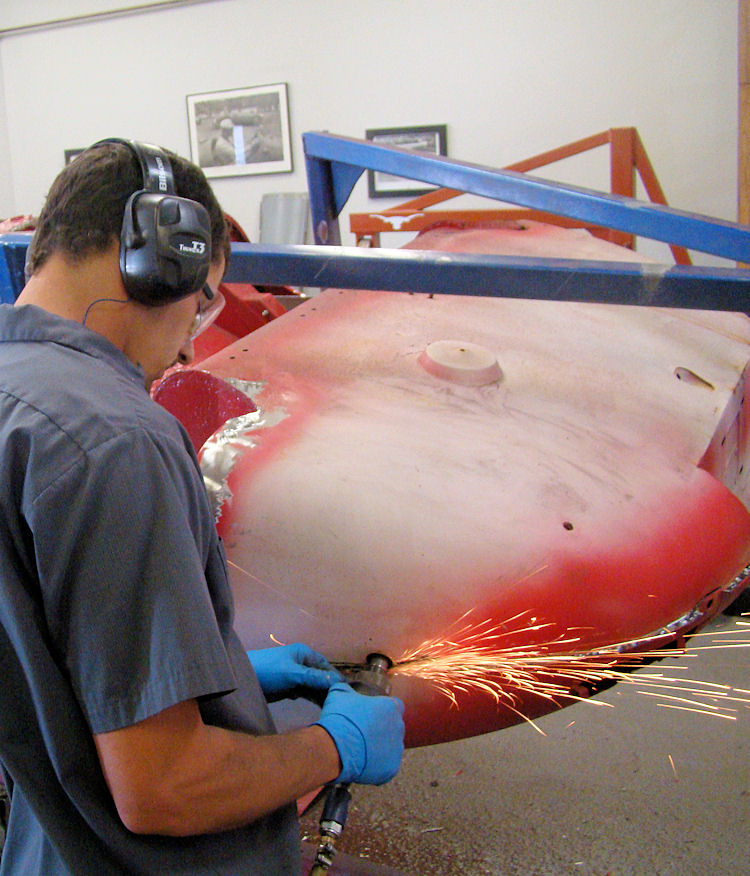
Sheet metal and lead work has now been completed...
 |
 |
|
|
|
 |
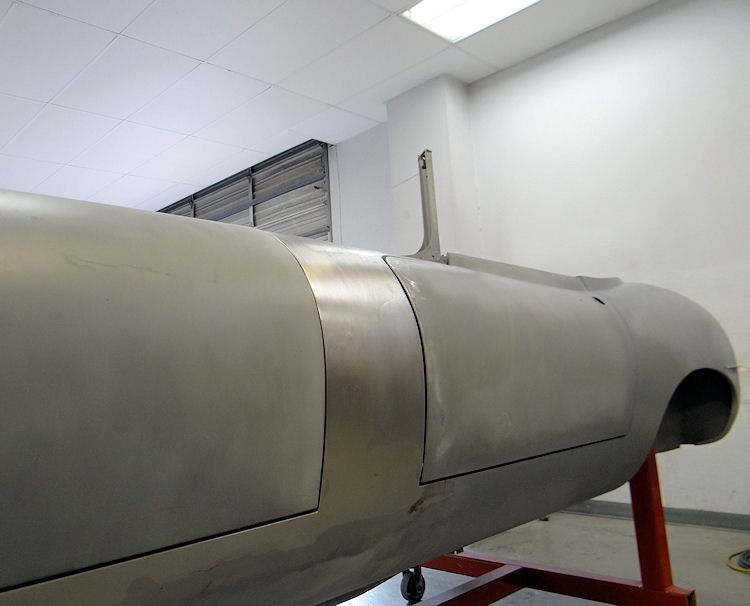 |
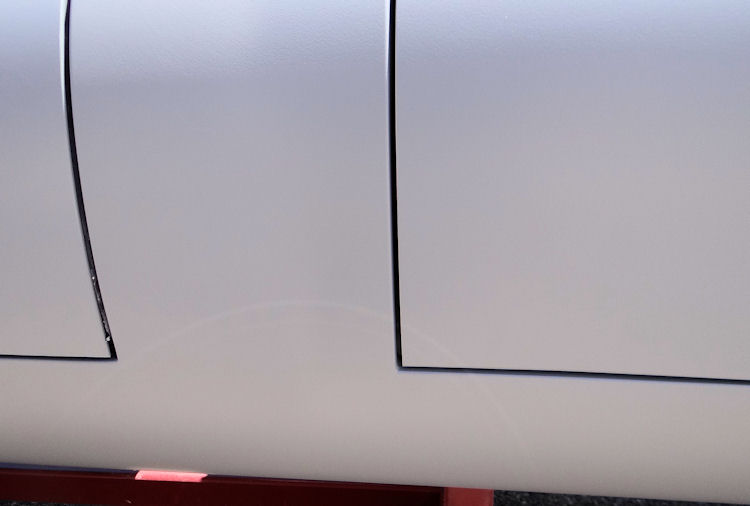
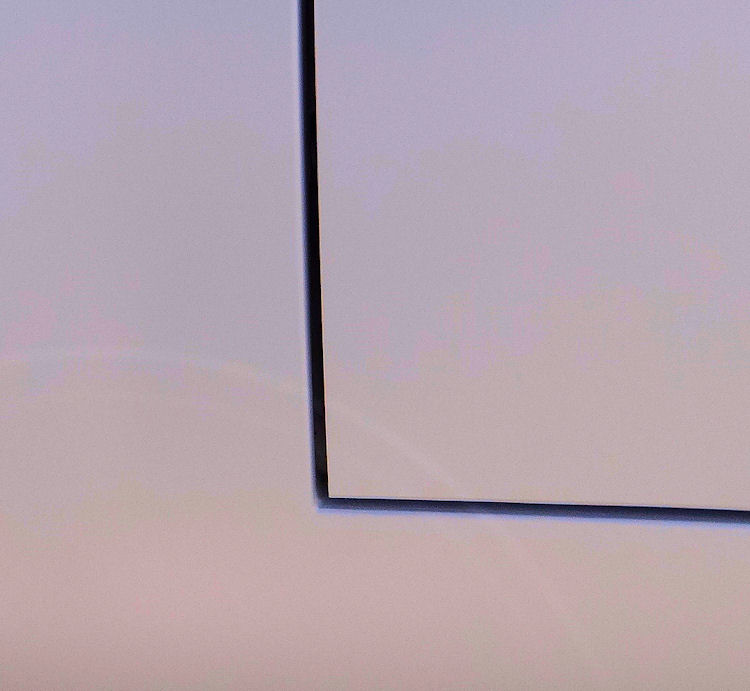
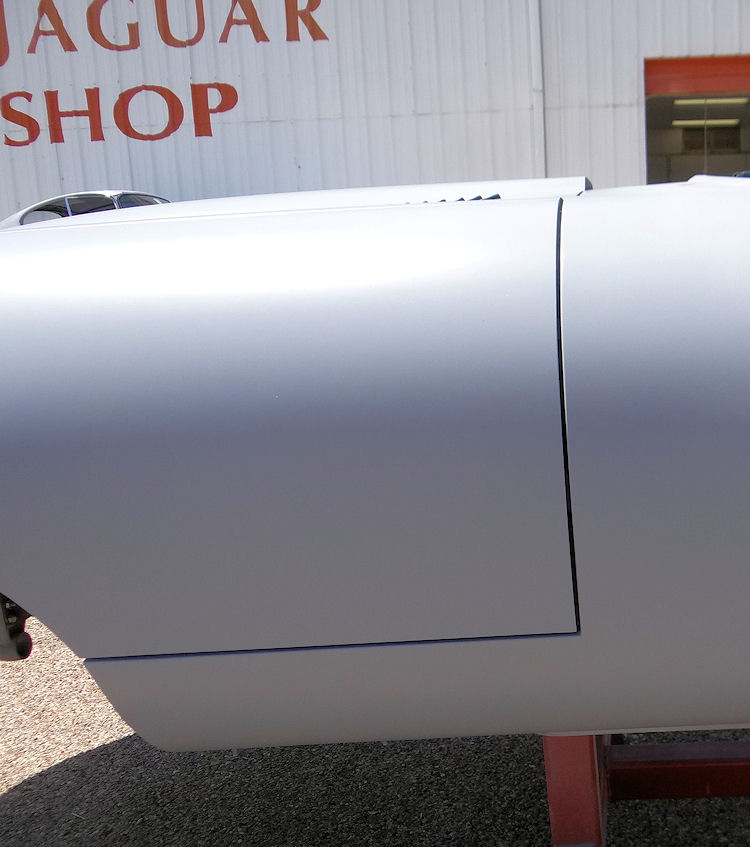
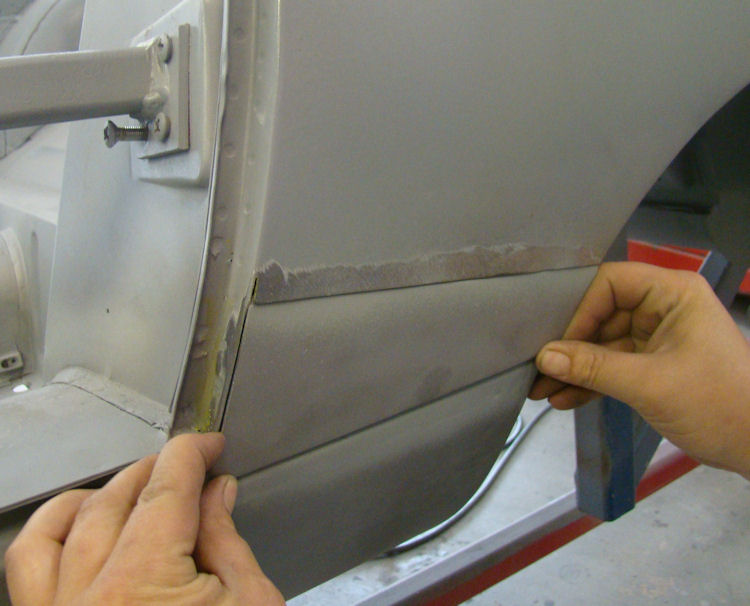
Check out your bonnet gap in sheet metal and lead...
 |
 |
|
|
|
|
|
|
 |
 |
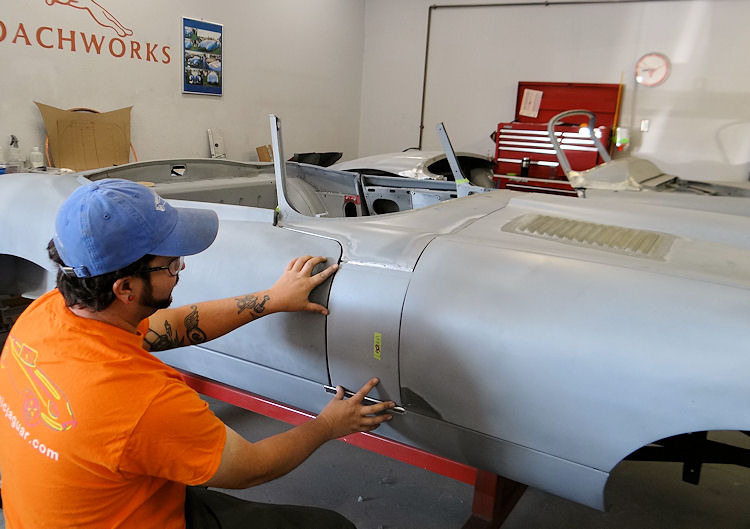
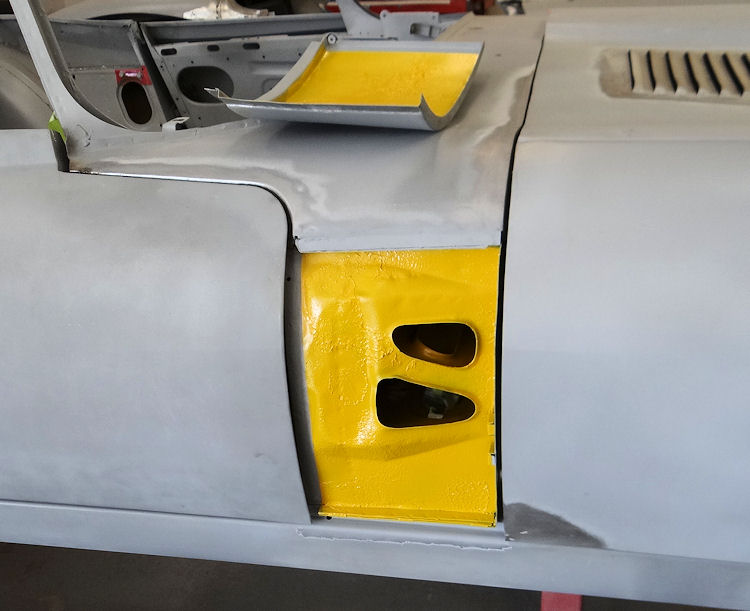
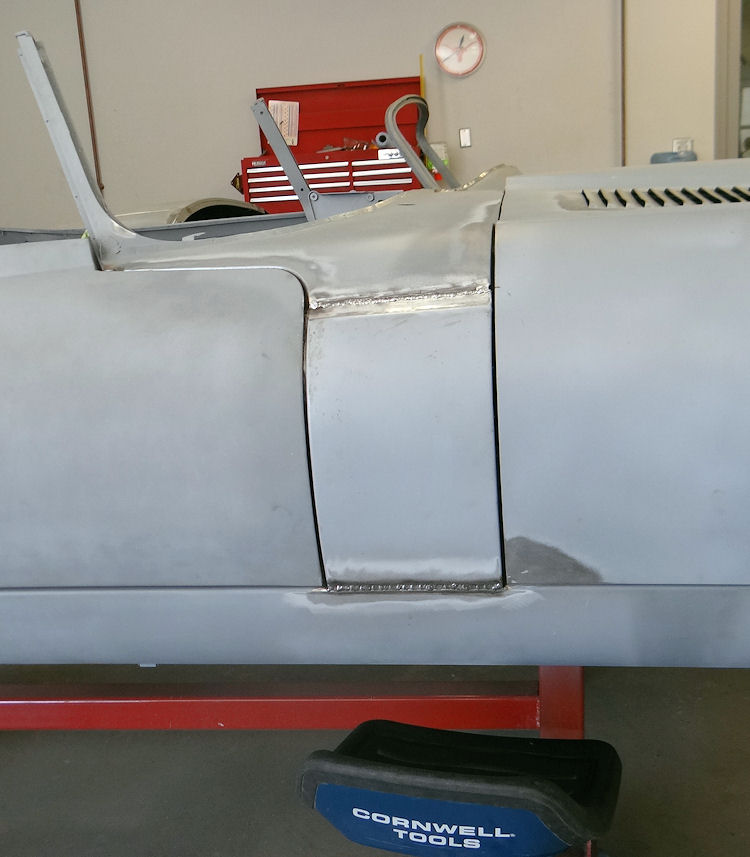
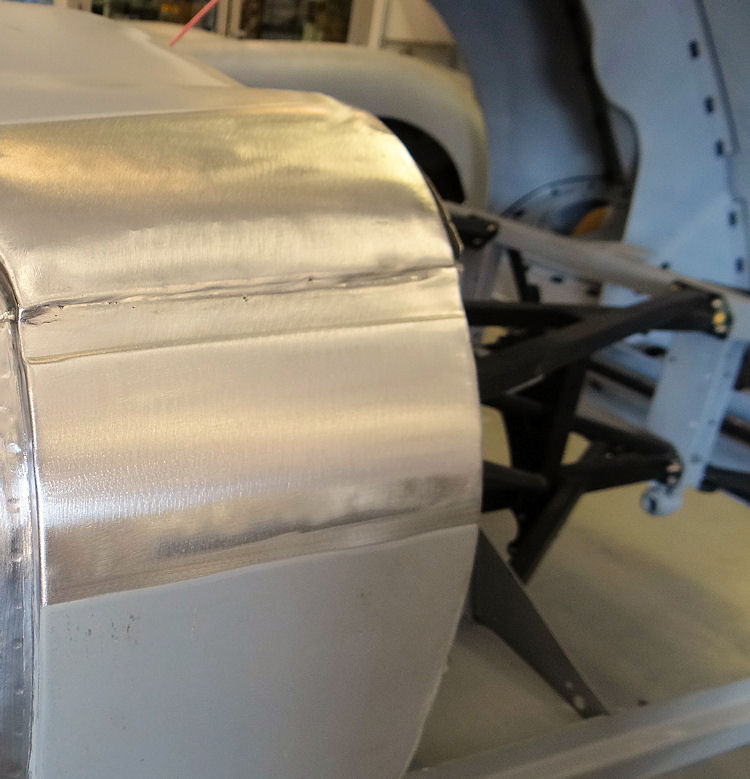
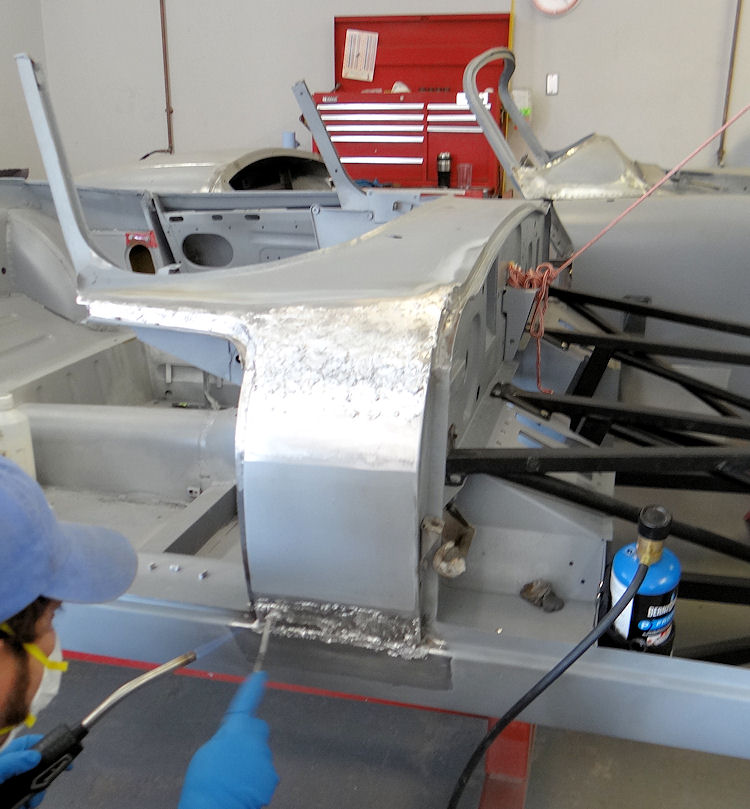
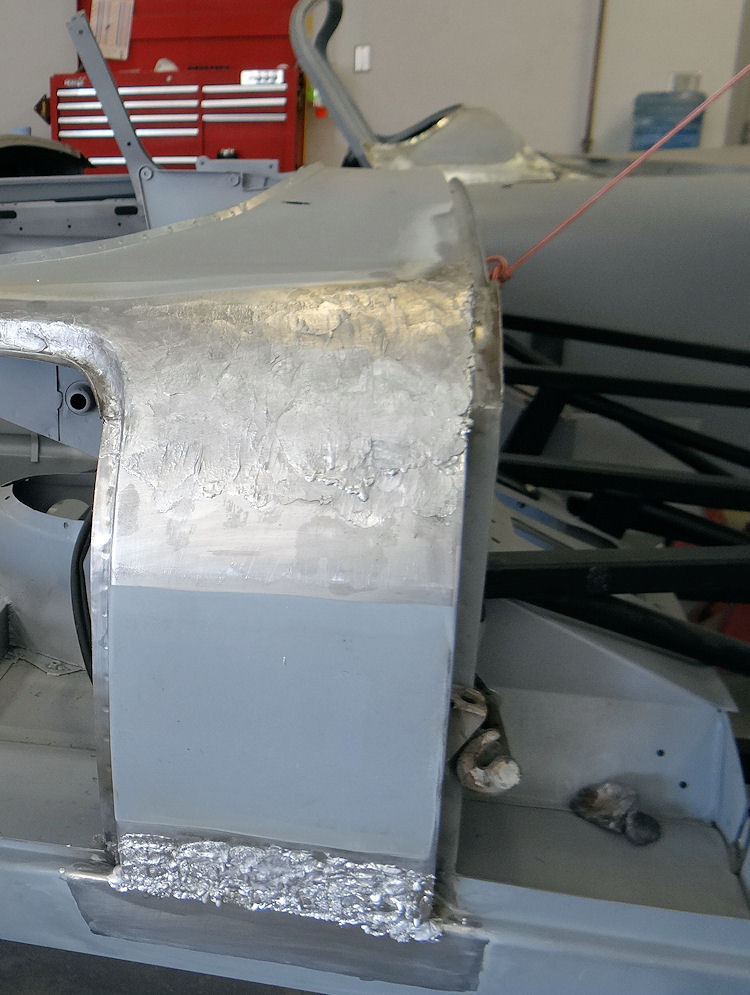
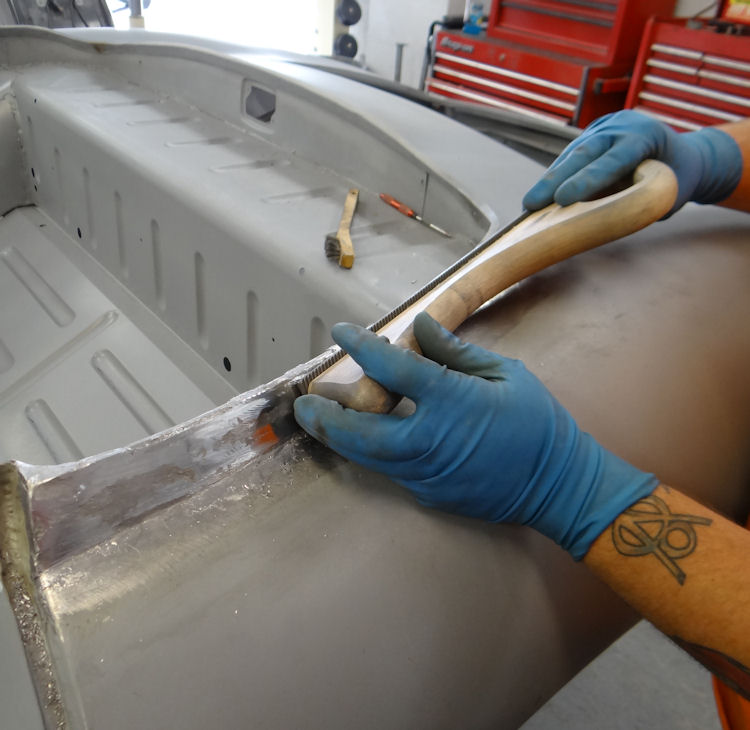
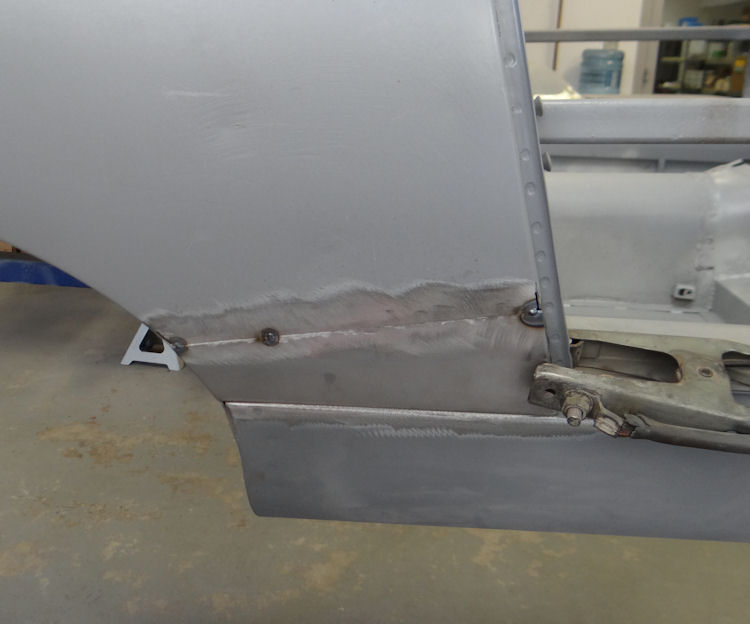
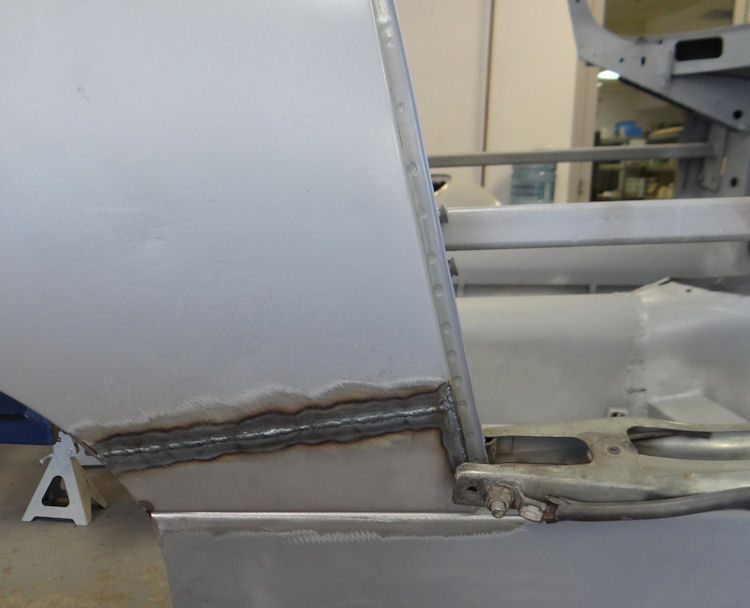
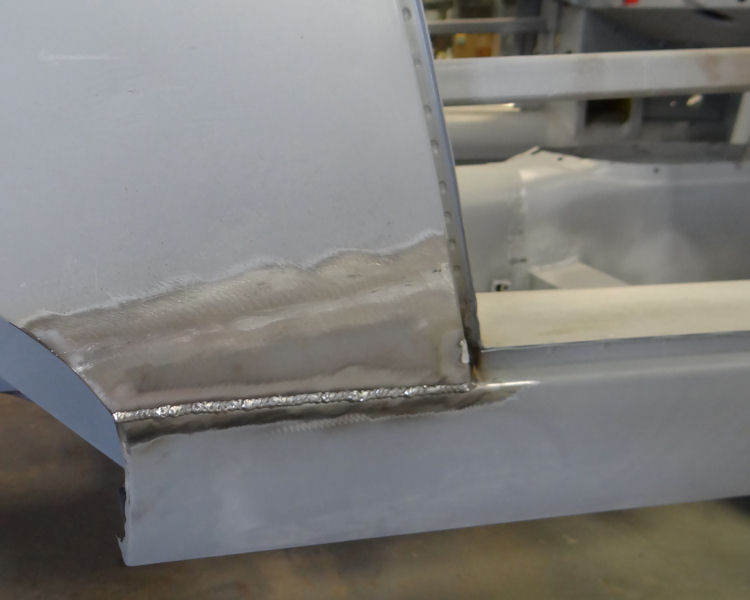
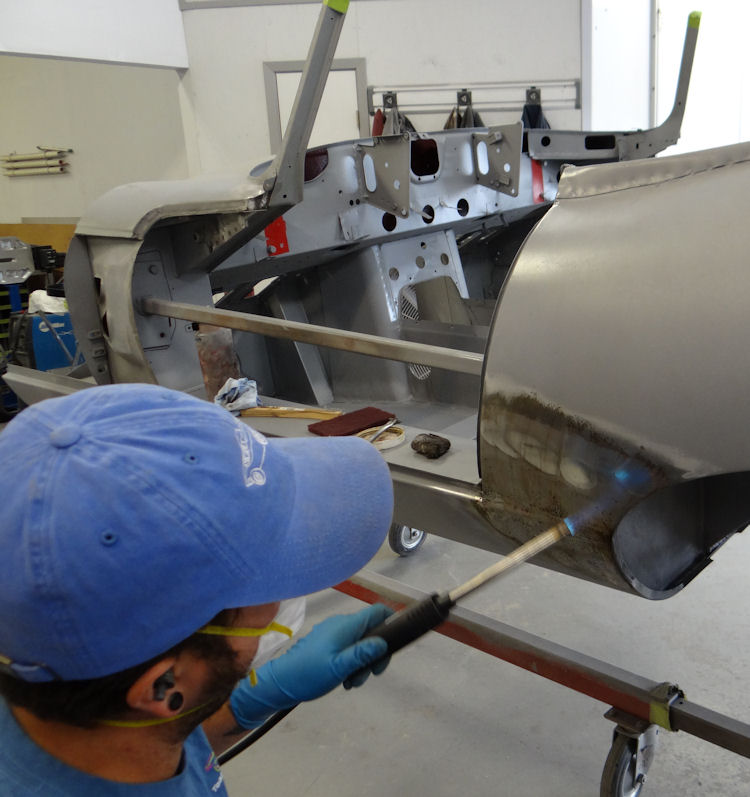
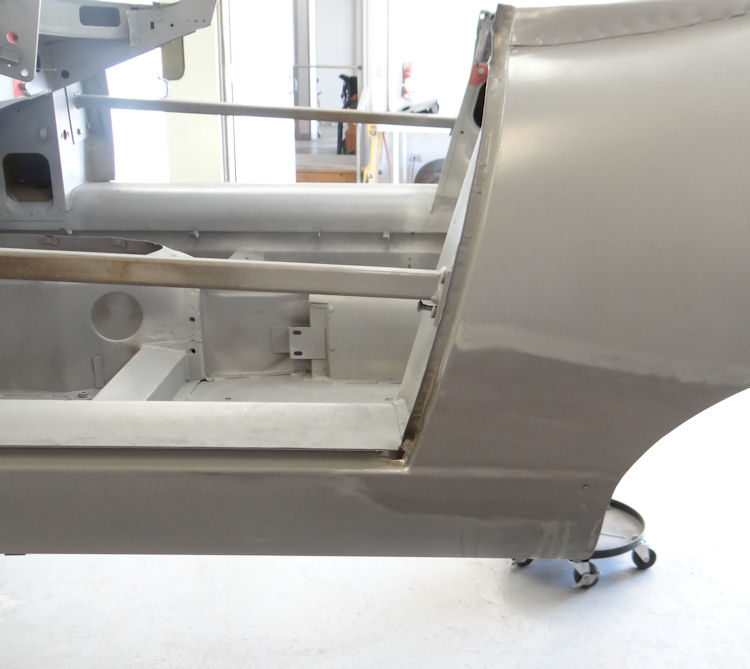
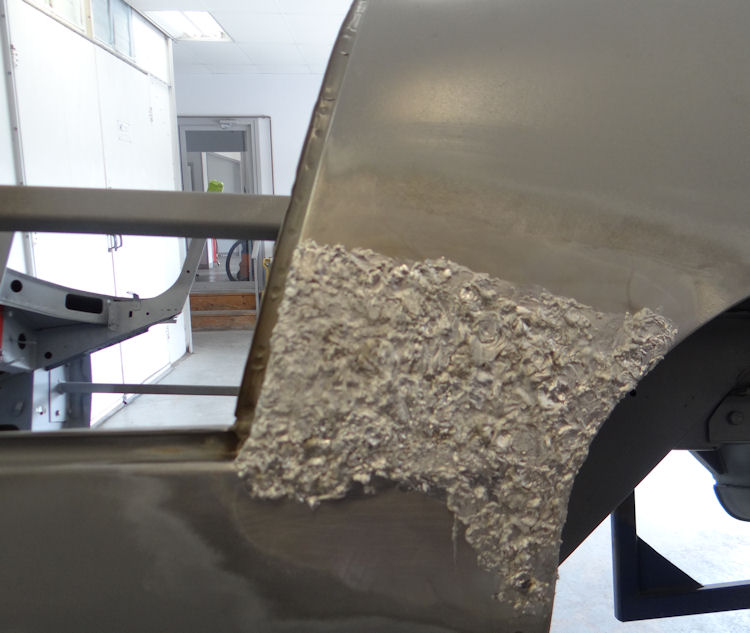
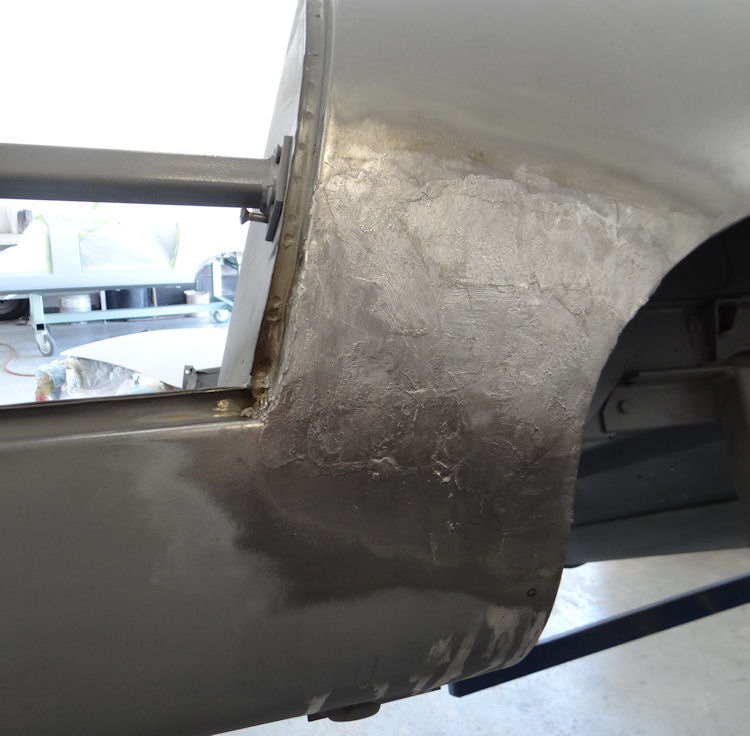
Installing cowl side panel, lead loading...
 |
 |
|
|
|
|
|
|
 |
 |
|
|
|
|
|
|
 |
 |
|
|
|
|
|
|
 |
 |
|
|
|
|
|
|
 |
 |
|
|
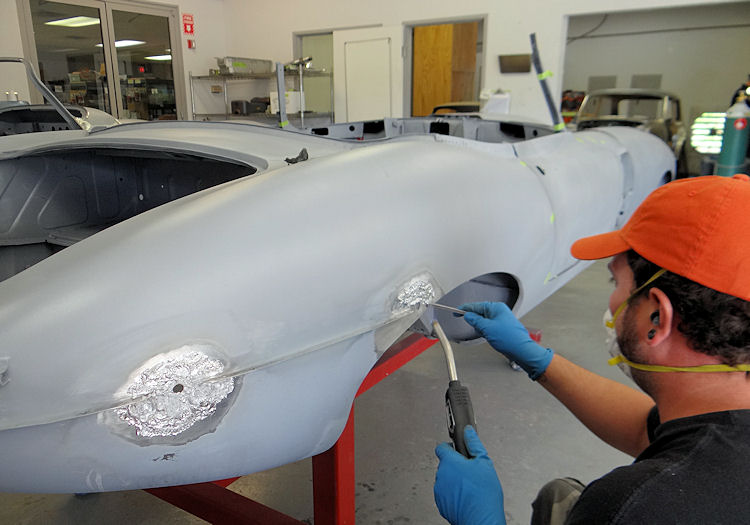
Lead loading in progress...
 |
 |
|
|
|
 |
 |
|
|
|
 |
 |
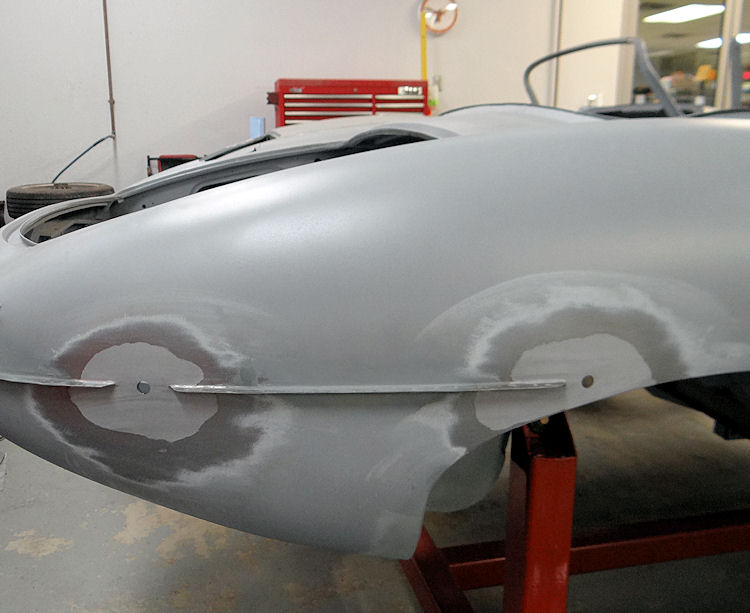
Fabricating and installing repair panels, lead loading in progress...
 |
 |
|
|
|
|
|
|
 |
 |
|
|
|
|
|
|
 |
 |
|
|
|
|
|
|
 |
 |
|
|
|
|
|
|
 |
 |
|
|
|
|
|
|
 |
 |
|
|
|
More progress in the CJ Coachworks...
 |
 |
|
|
|
|
|
|
 |
 |
|
|
|
Installing outer sills and bulkhead closing panels....
 |
 |
|
|
|
|
|
|
 |
 |
|
|
|
|
|
|
 |
 |
|
|
|
Both doors have now been restored/reconstructed...
 |
 |
|
|
|
|
|
|
 |
 |
|
|
|
|
|
|
 |
 |
|
|
|
|
|
|
 |
 |
|
|
|
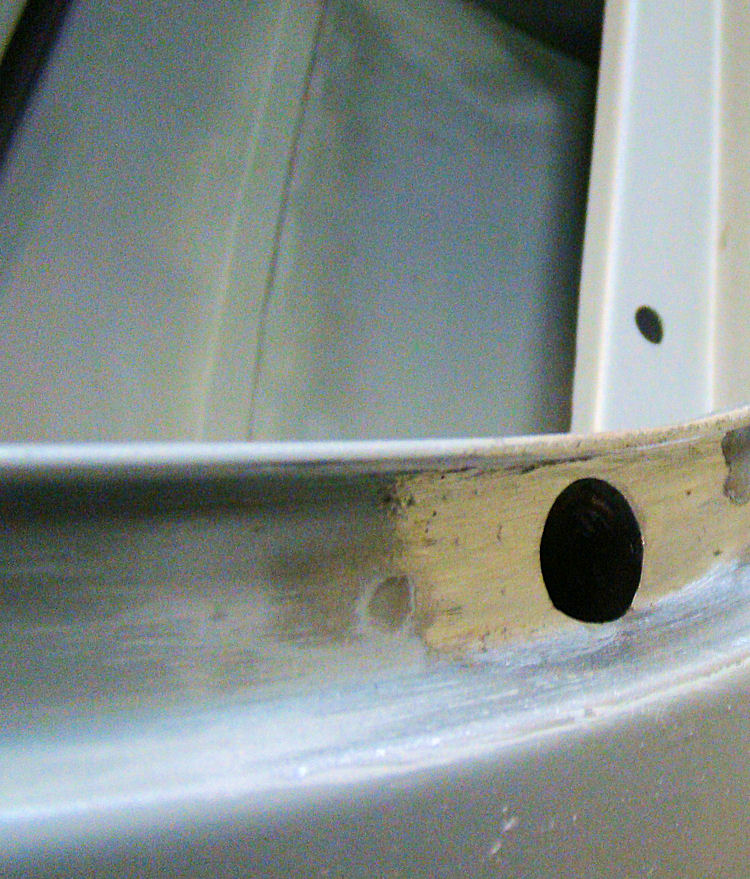
The following sequence of photos show how Riley reconstructed your right hand door frame...
 |
 |
|
|
|
 |
 |
Restoring rusty door frames...
 |
 |
|
channel has rotted away |
|
|
|
|
 |
 |
|
|
|
|
|
|
 |
 |
|
door frames |
|
|
|
|
 |
 |
|
|
|
|
|
|
 |
 |
|
|
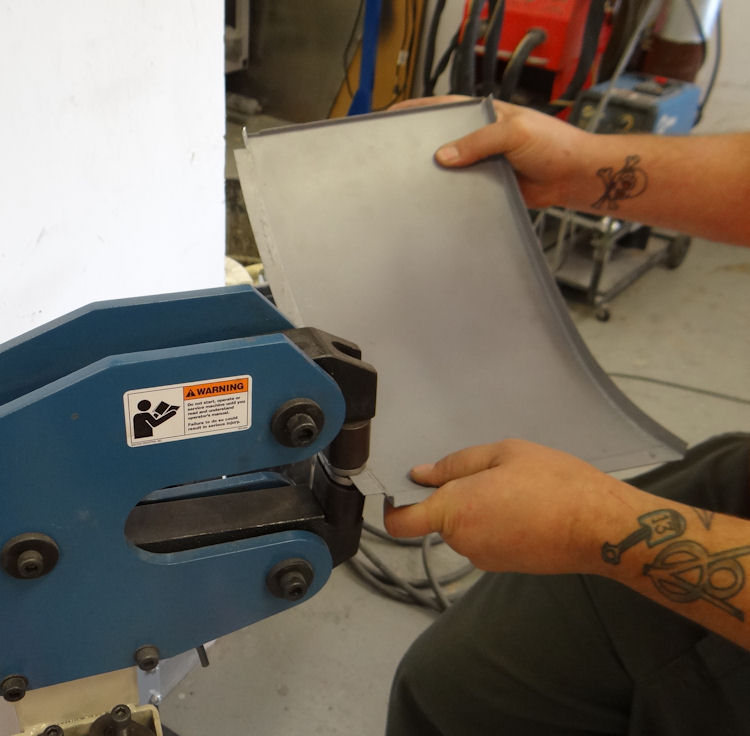
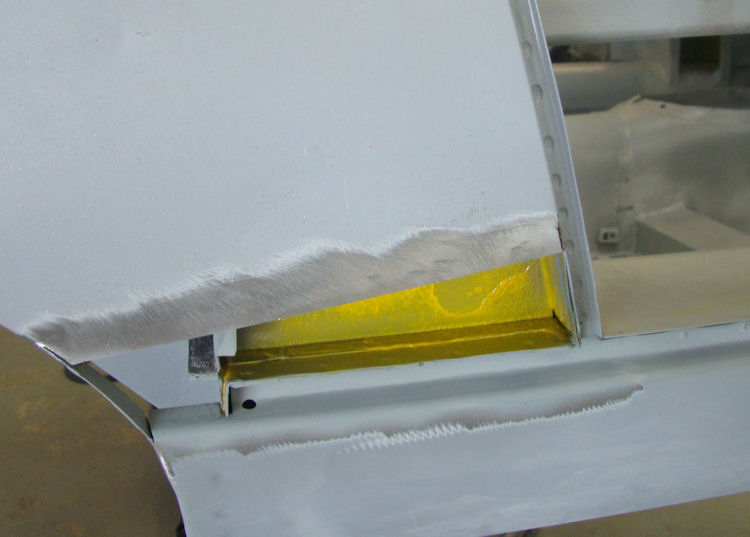
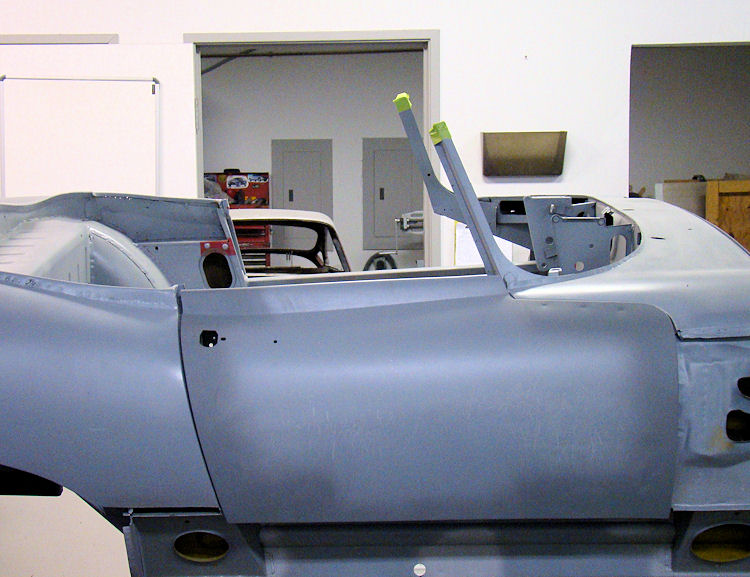
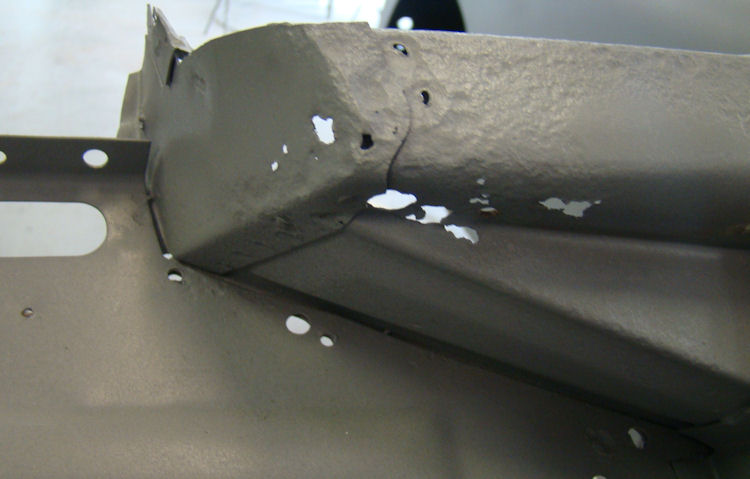
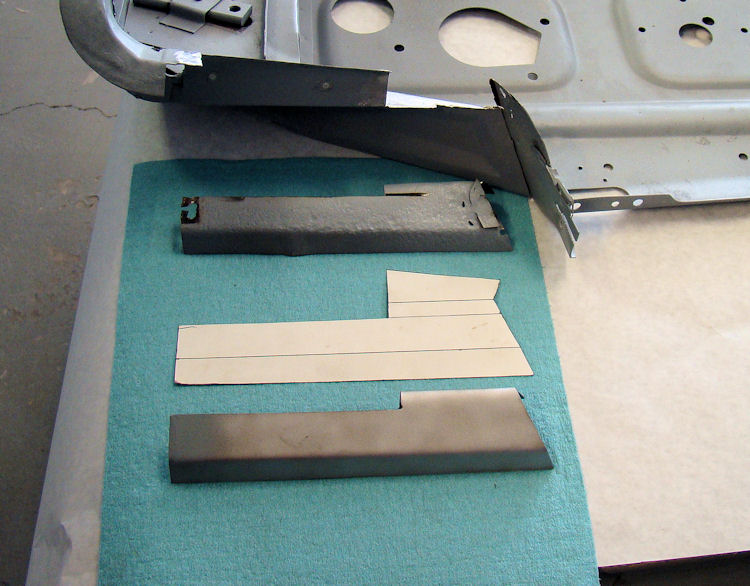
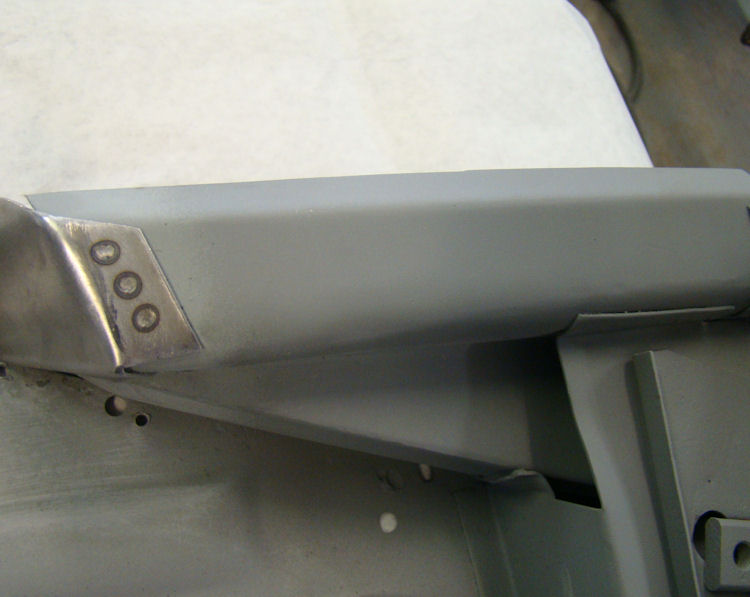
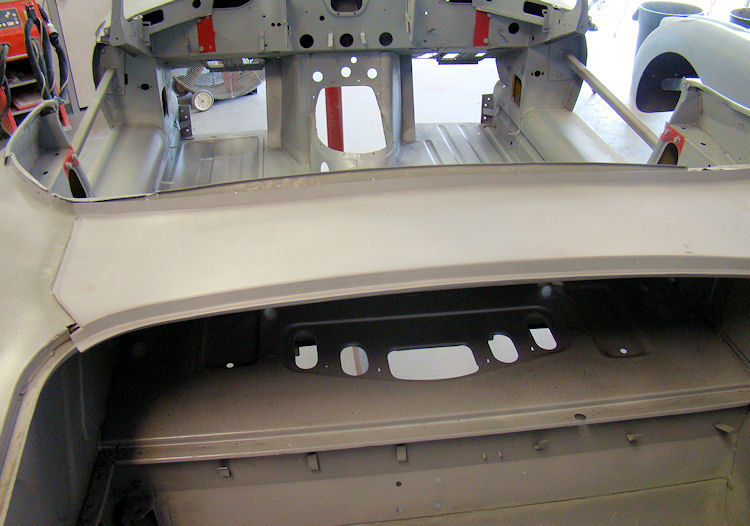
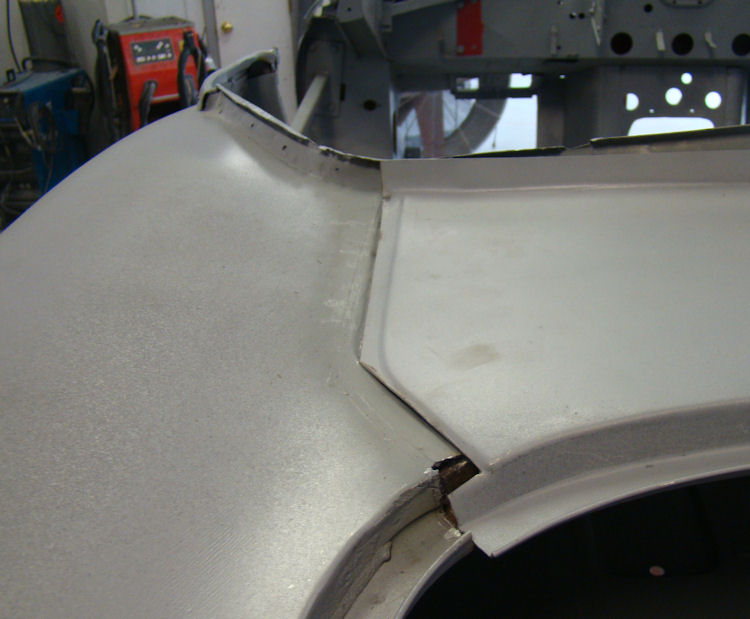
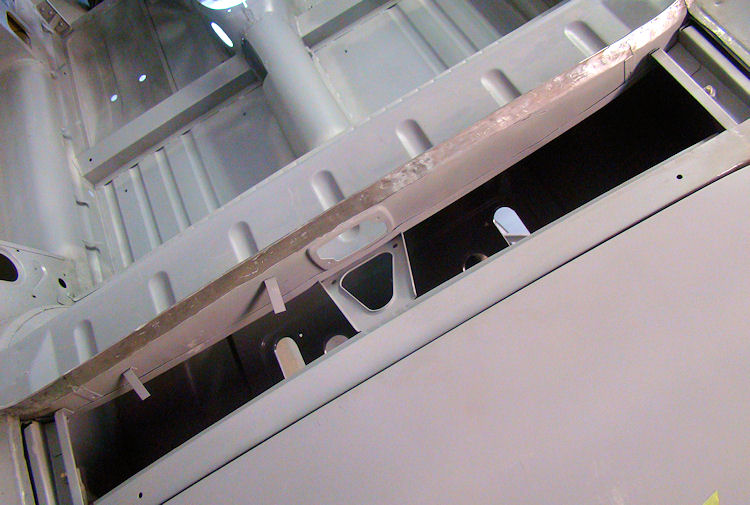
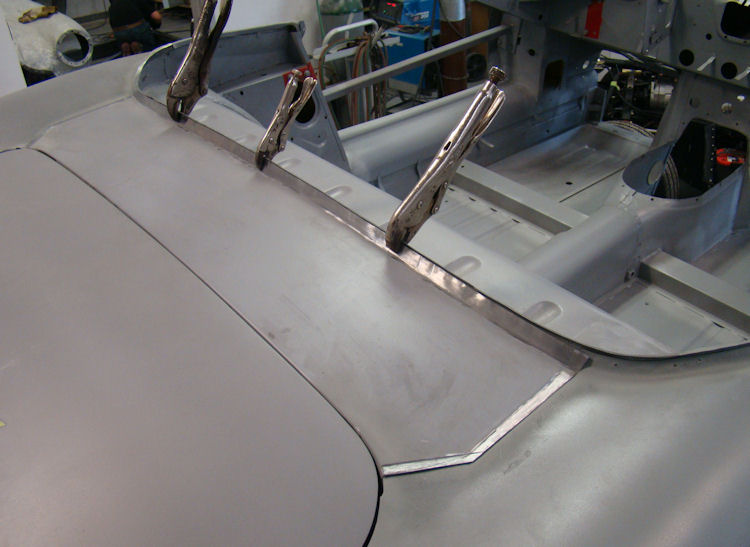
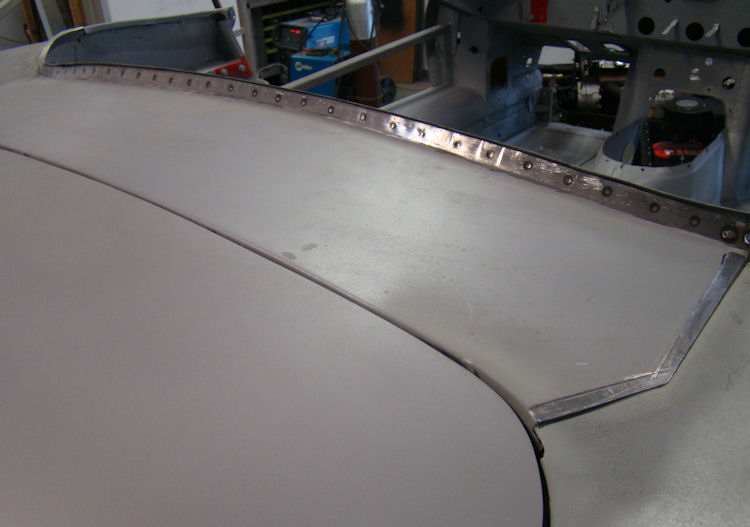
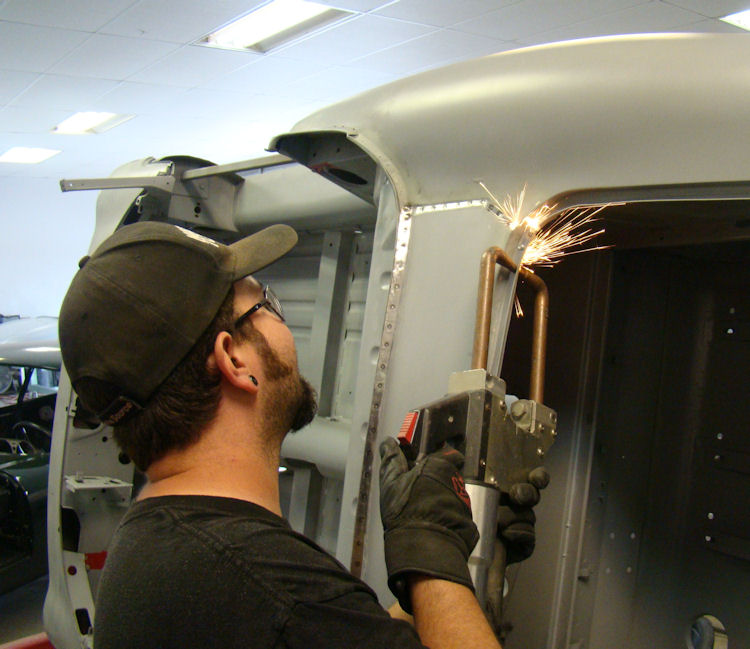
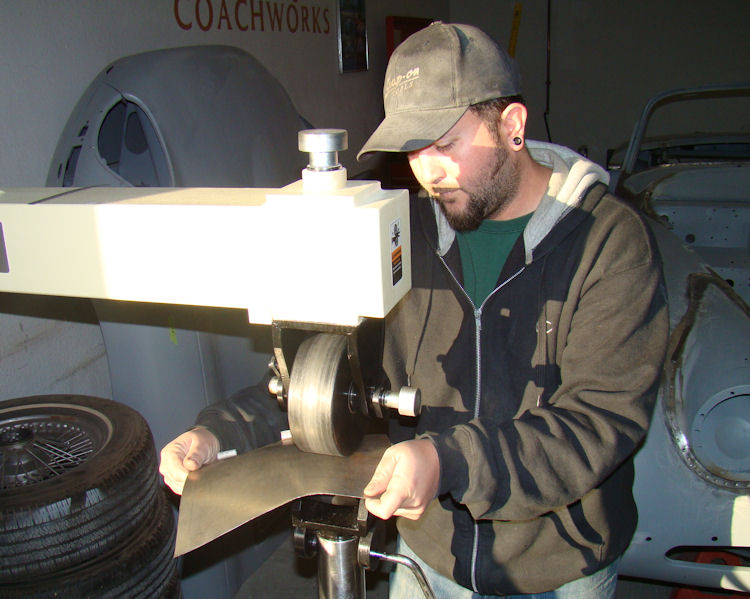
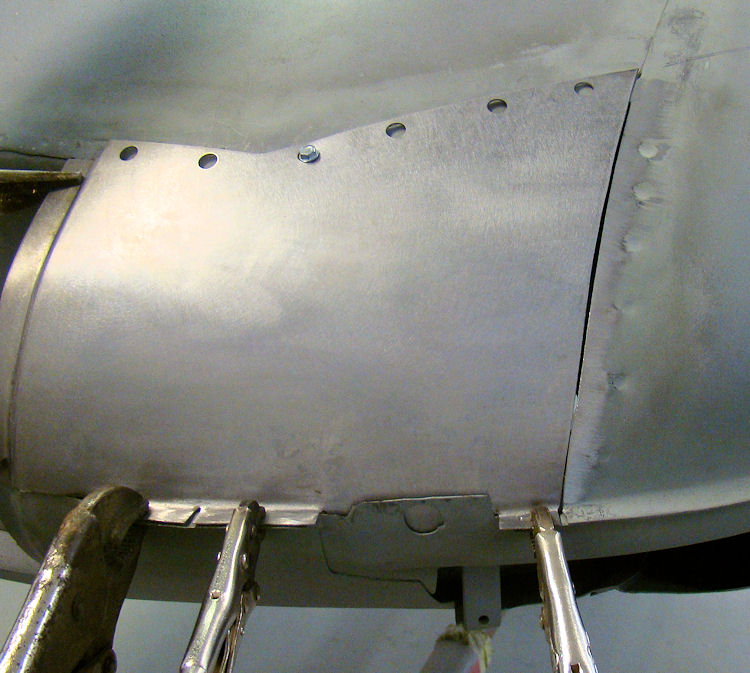
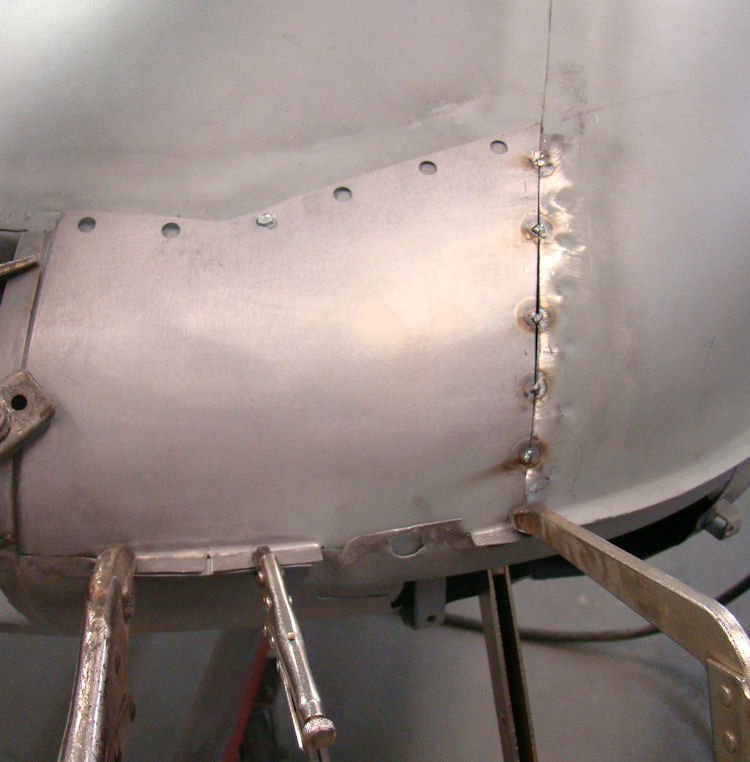
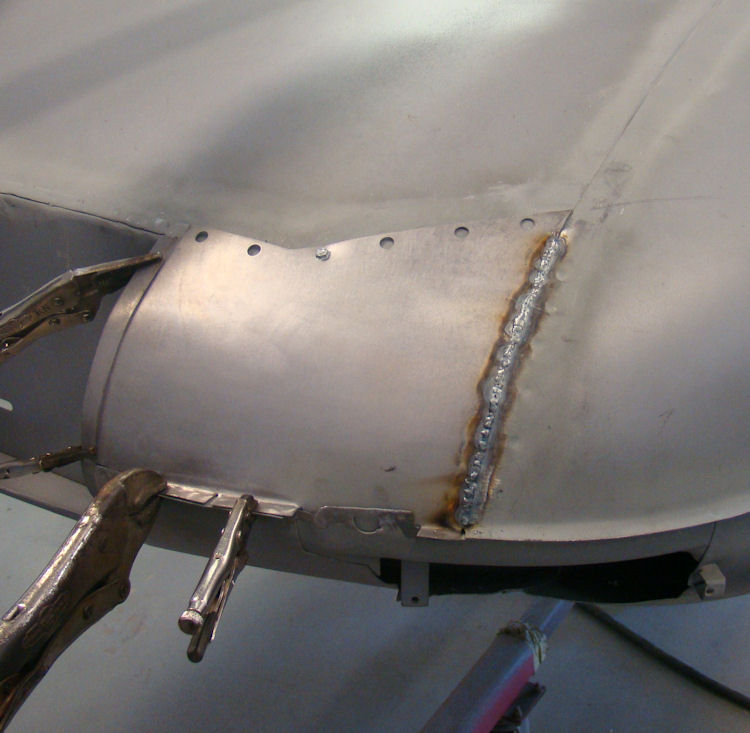
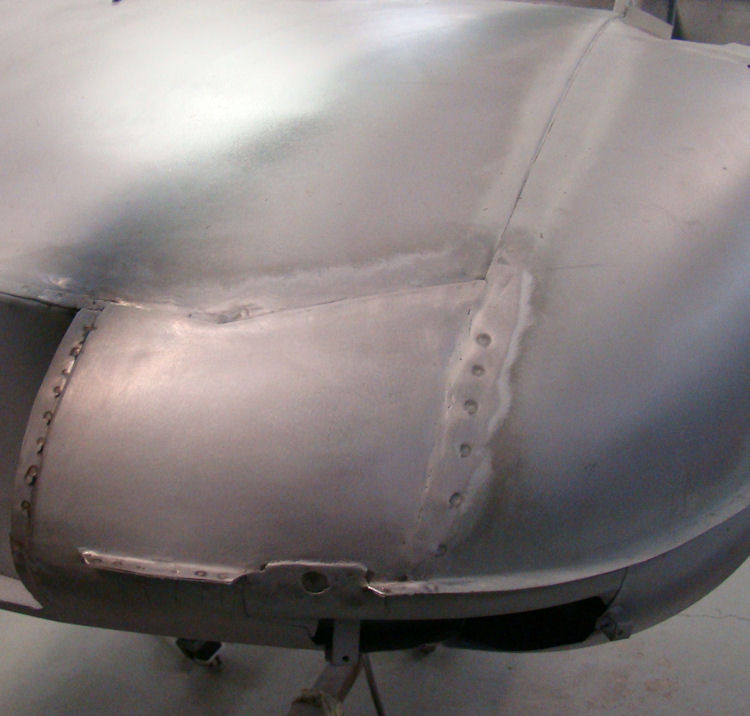
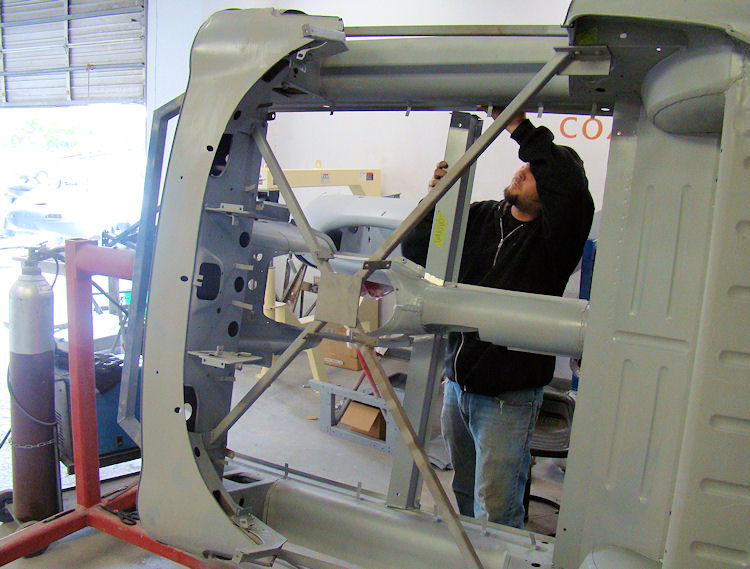
The following sequence of photographs show Riley modifying and installing the new rear cowl panel...
 |
 |
|
|
|
|
|
|
 |
 |
|
|
|
|
|
|
 |
 |
|
tack strip channel |
|
|
|
|
 |
 |
|
|
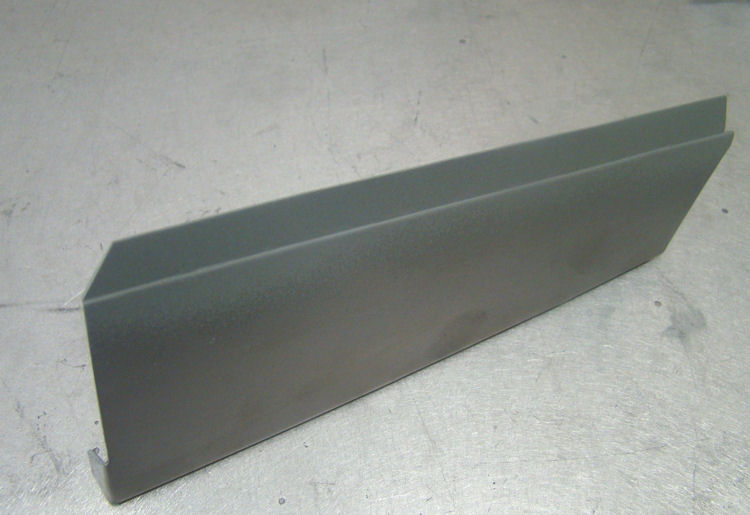
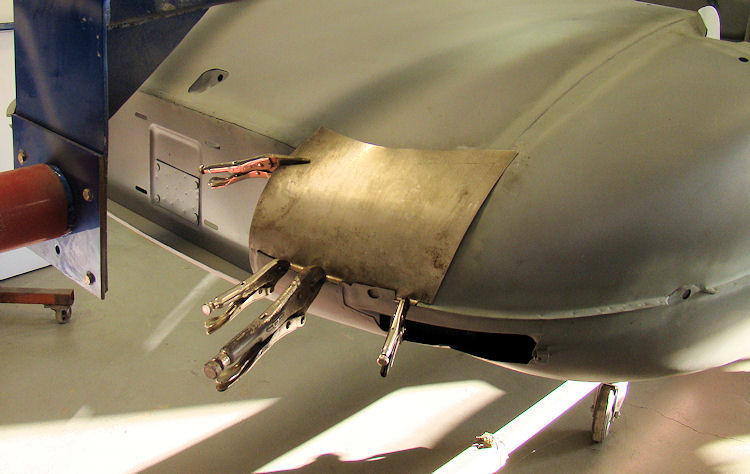
Fabricating and installing repair panels at either side of the rear license plate opening....
 |
 |
|
|
|
|
|
|
 |
 |
|
|
|
|
|
|
 |
 |
|
|
|
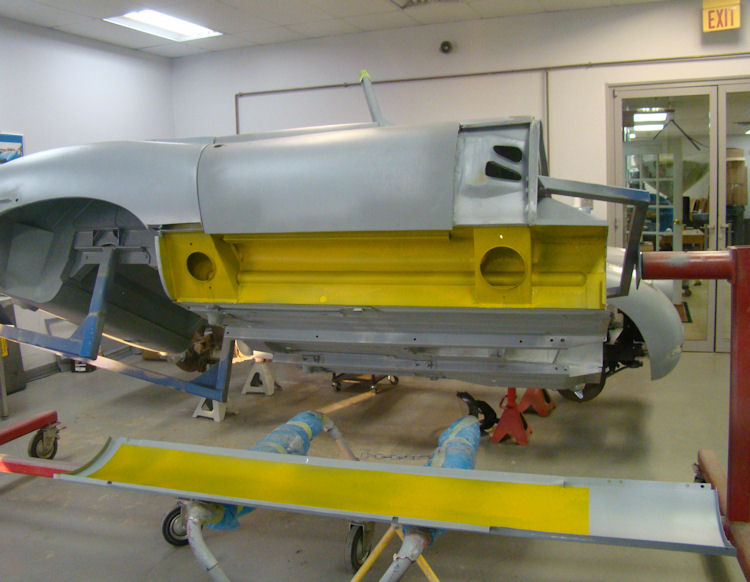
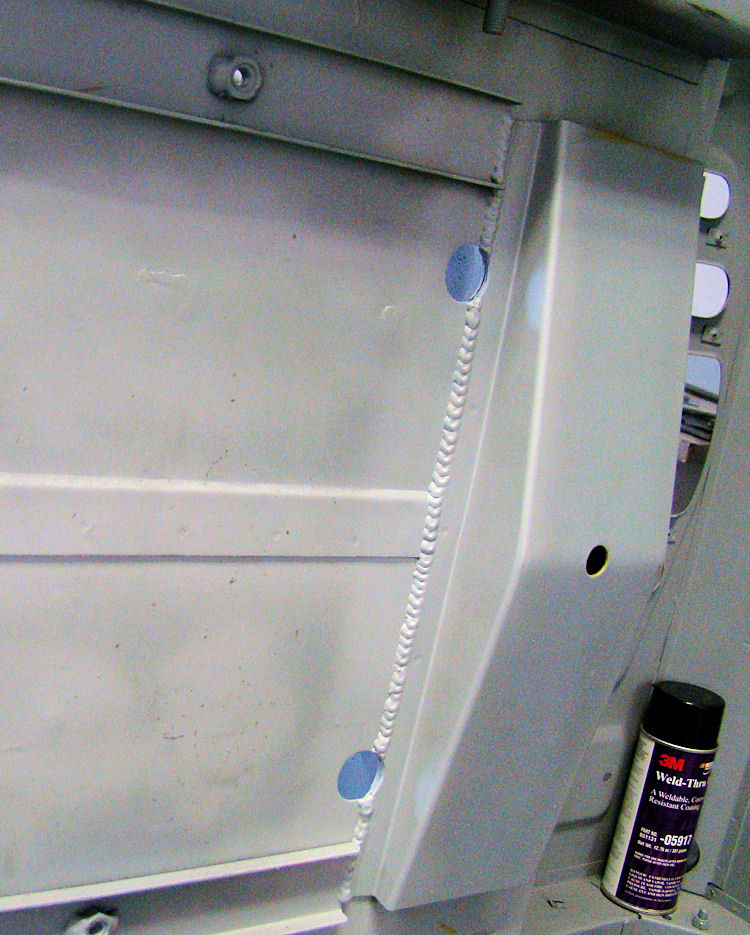
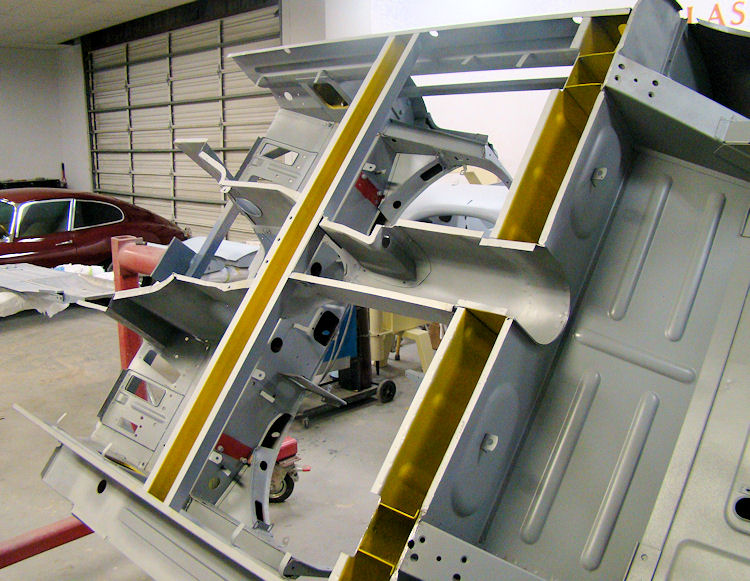
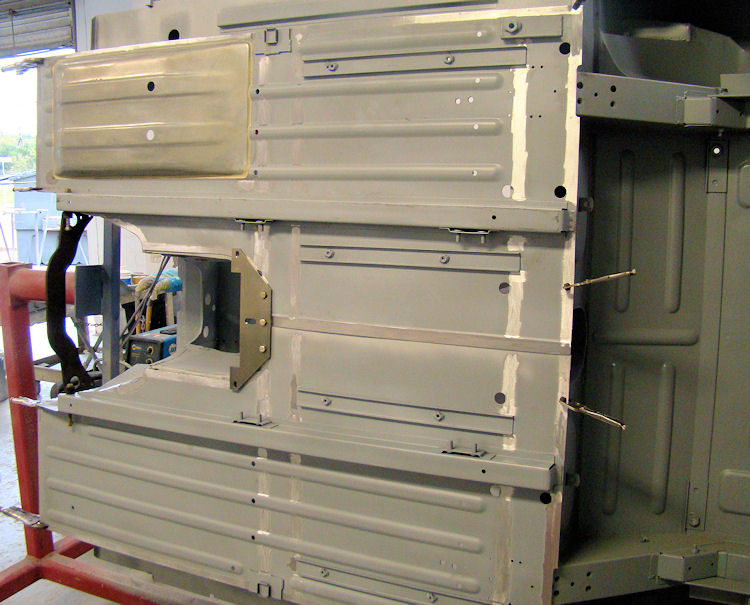
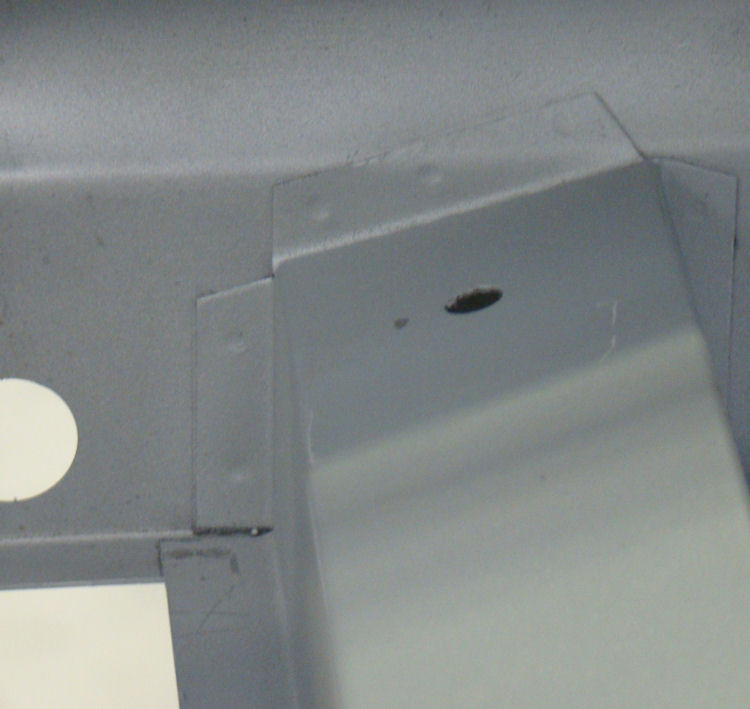
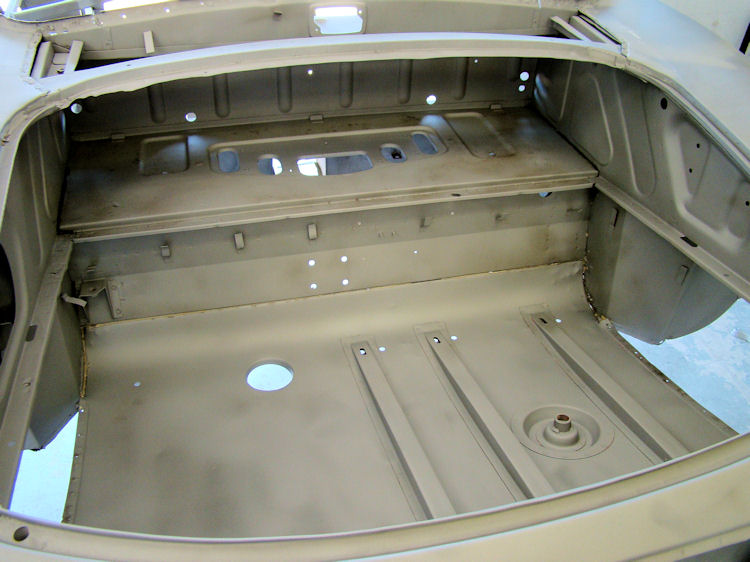
Installing floors, inner sill braces, engine frame anchoring brackets, etc...
 |
 |
|
|
|
|
|
|
 |
 |
|
|
|
|
|
|
 |
 |
|
|
|
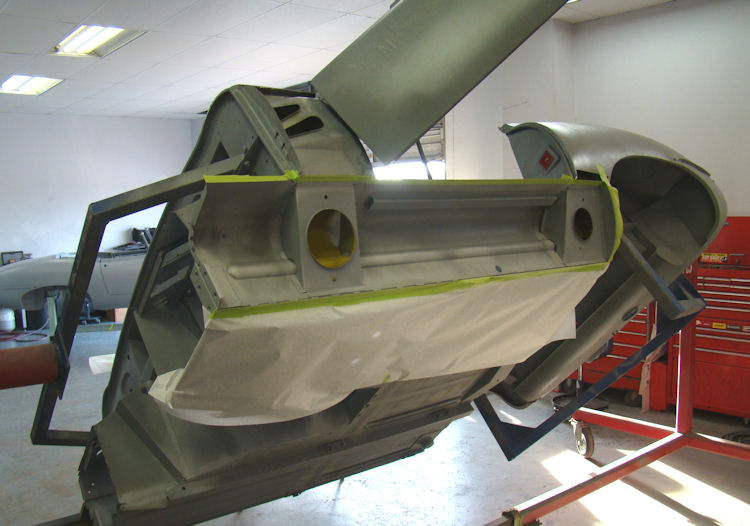
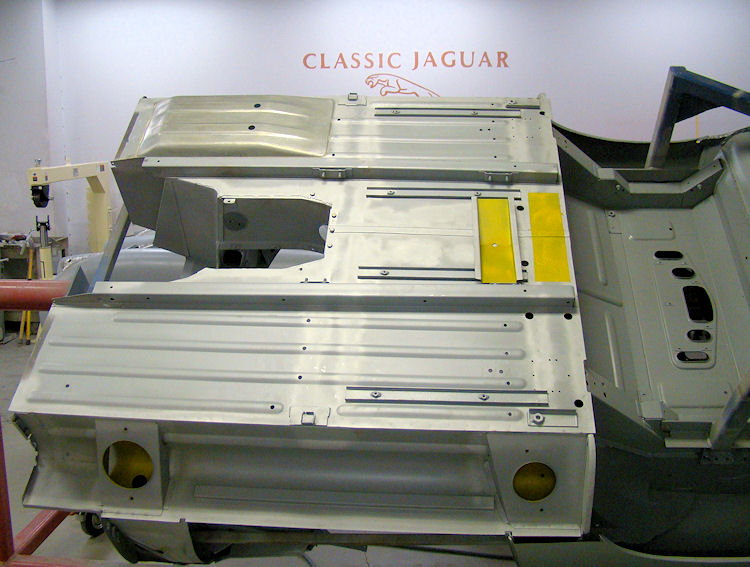
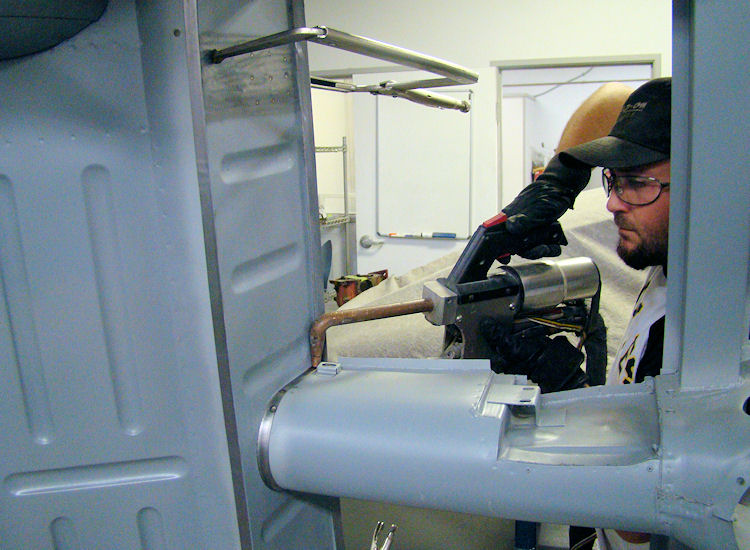
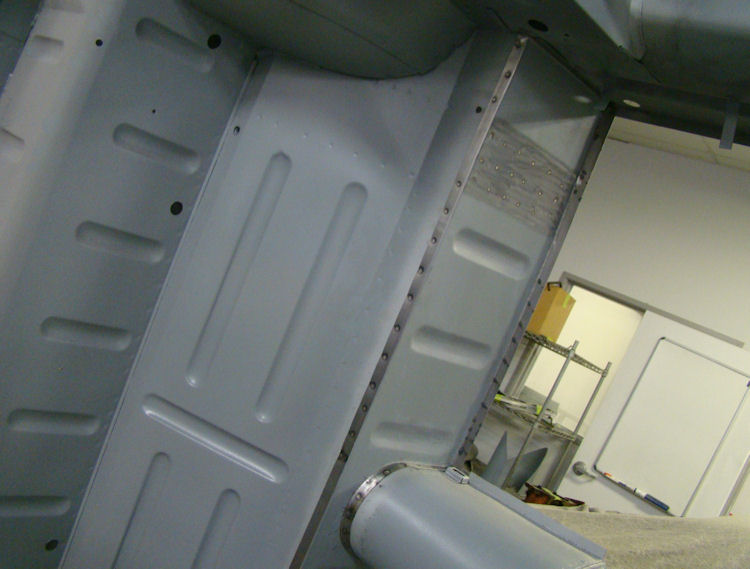
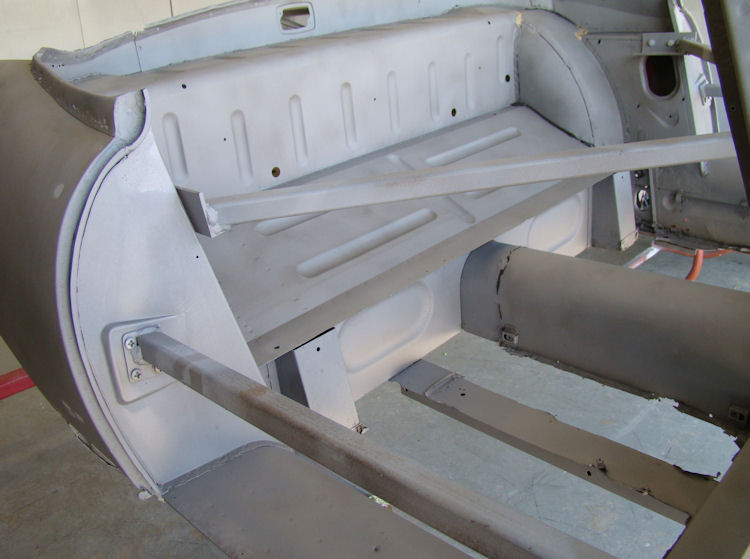
Installing the new rear bulkhead and main floors...
 |
 |
|
|
|
|
|
|
 |
 |
|
be enclosed once floors are installed |
|
|
|
|
 |
 |
|
|
|
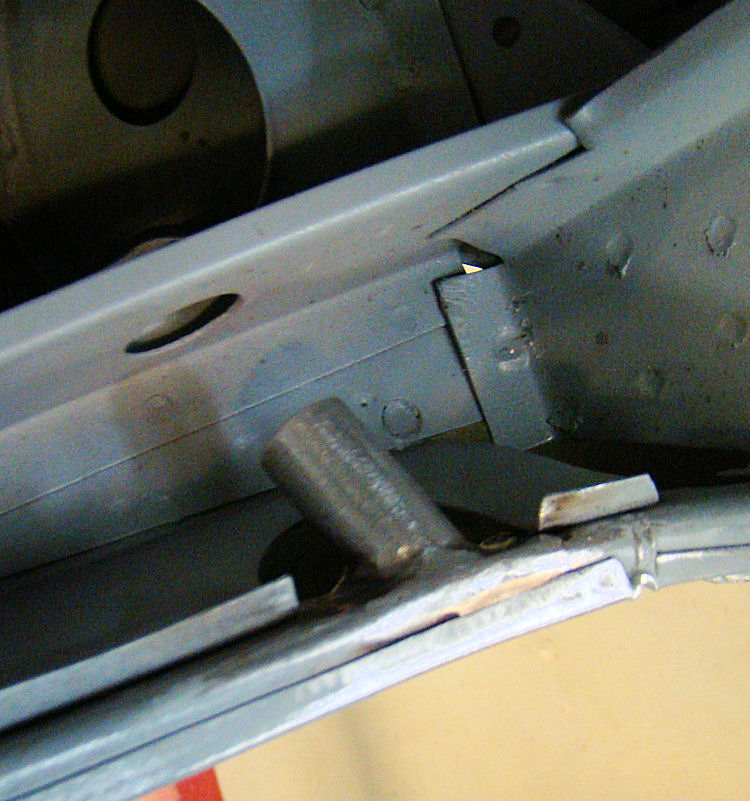
The following sequence of photos show Riley installing your new floor cross-member...
 |
 |
|
|
|
|
|
|
 |
 |
|
welded to the inner sills |
we are almost ready to install the new floors |
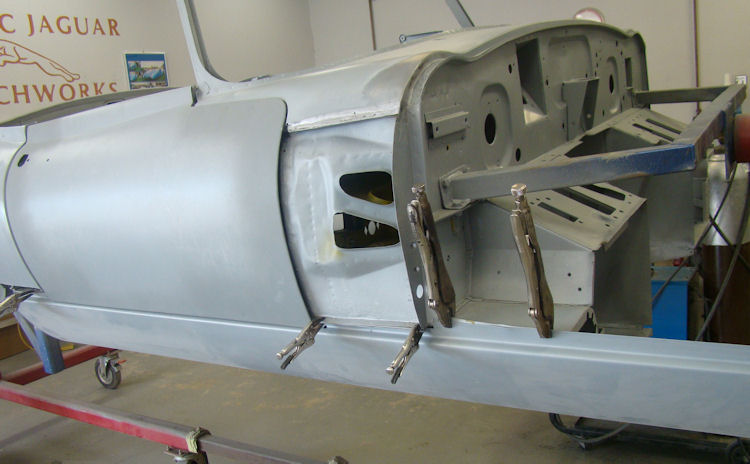
Second inner sill installed, replacing corroded right hand trans tunnel side panel...
 |
 |
|
|
|
|
|
|
 |
 |
|
|
|
|
|
|
 |
 |
|
|
Installing new inner sills...
 |
 |
|
|
|
|
|
|
 |
 |
|
|
|
|
|
|
 |
 |
|
|
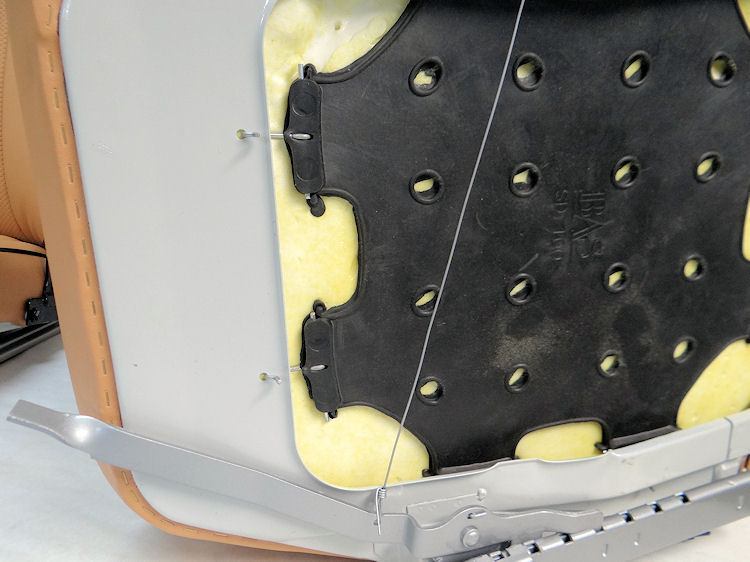
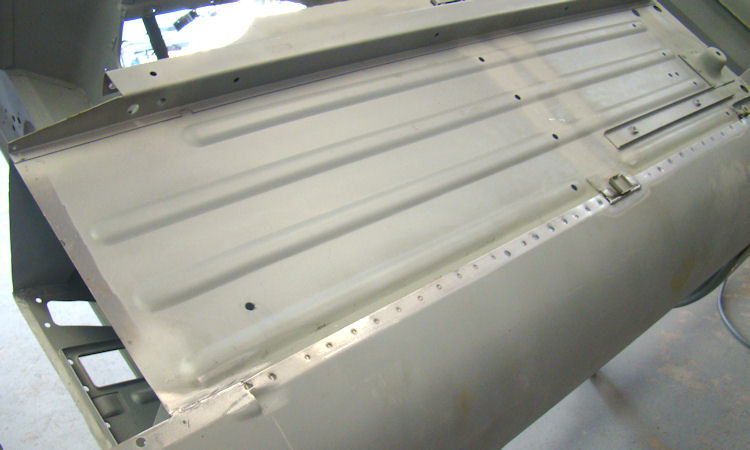
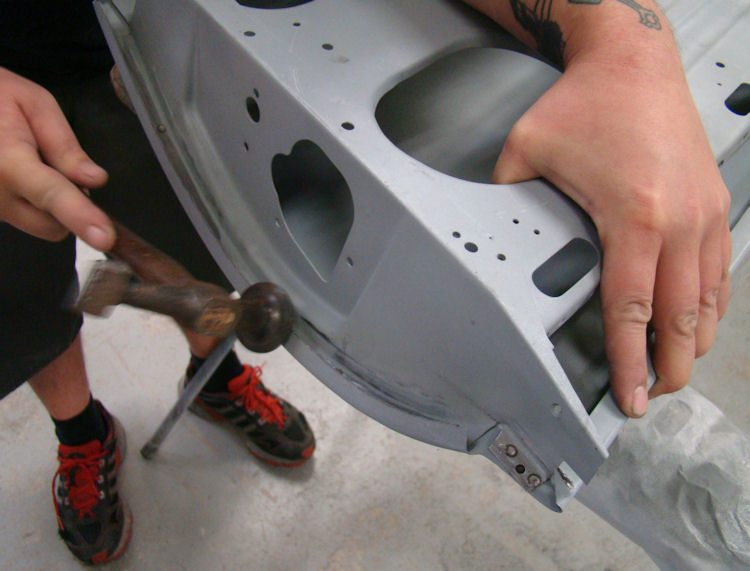
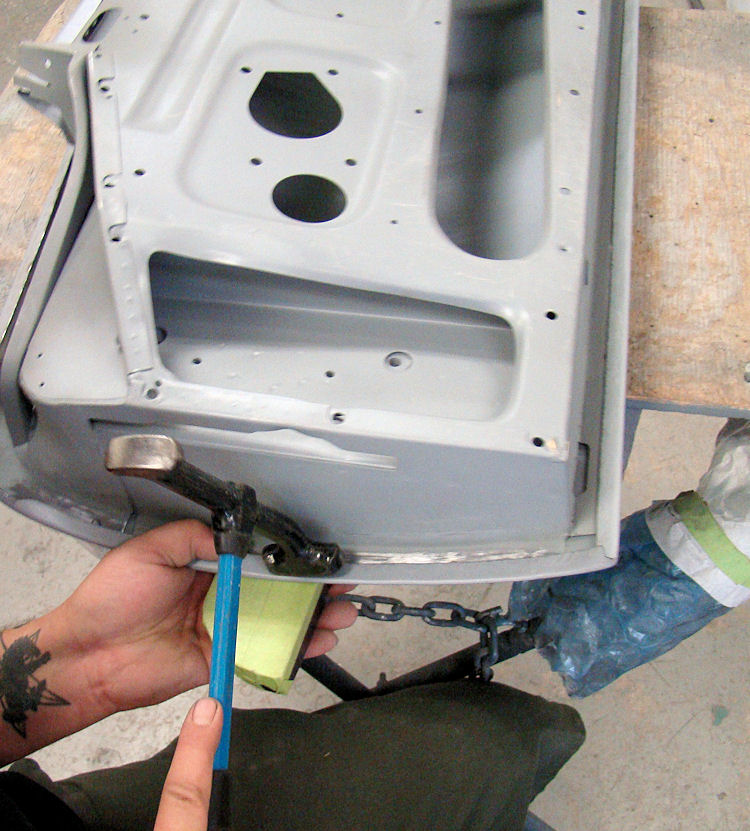
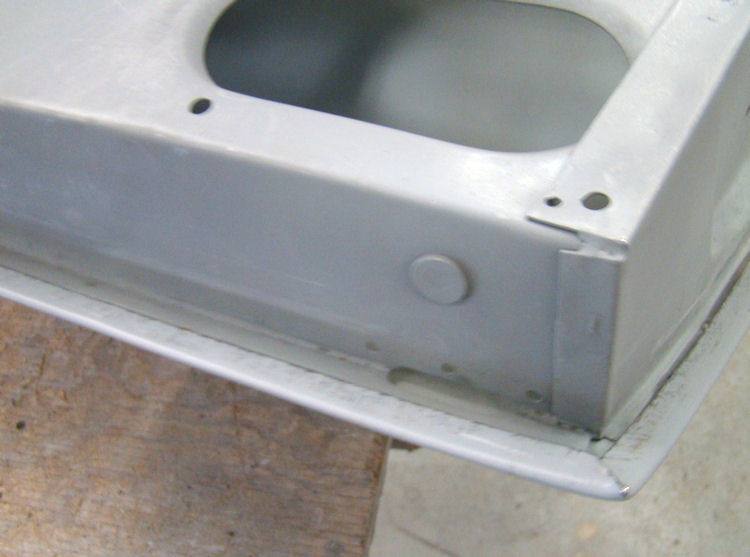
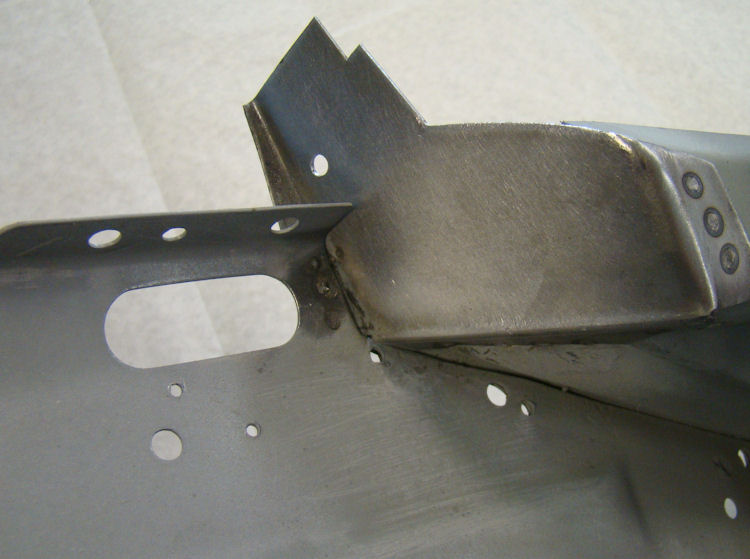
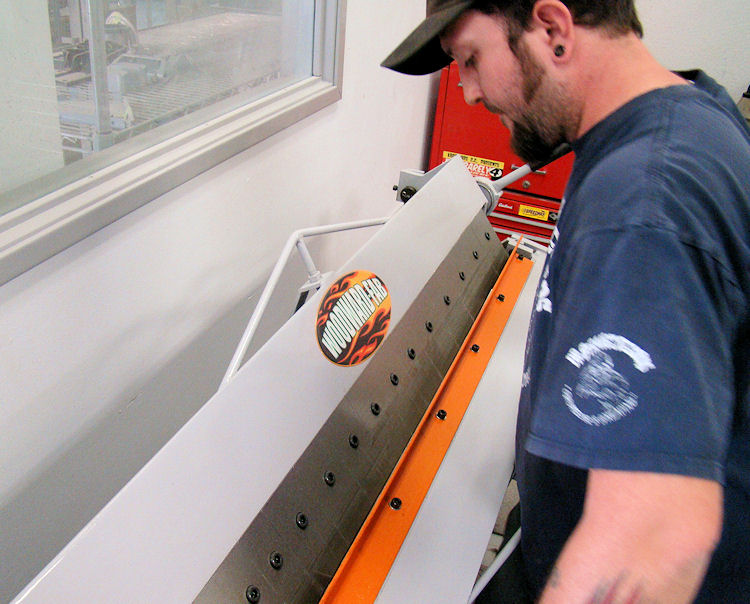
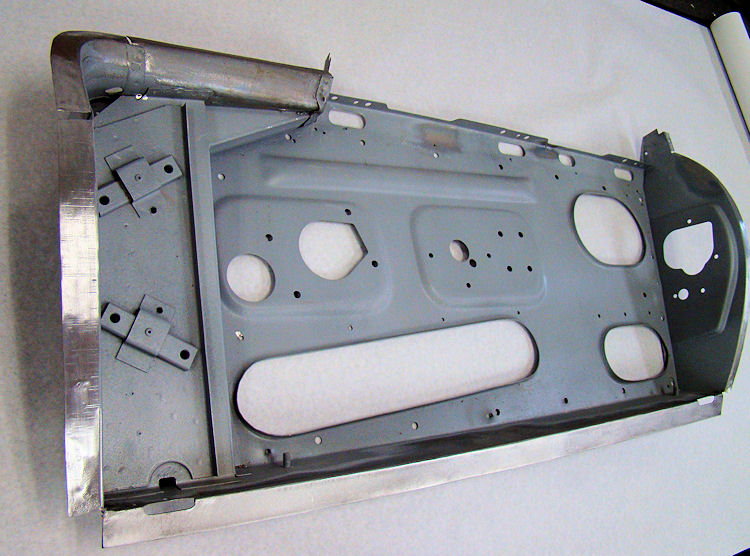
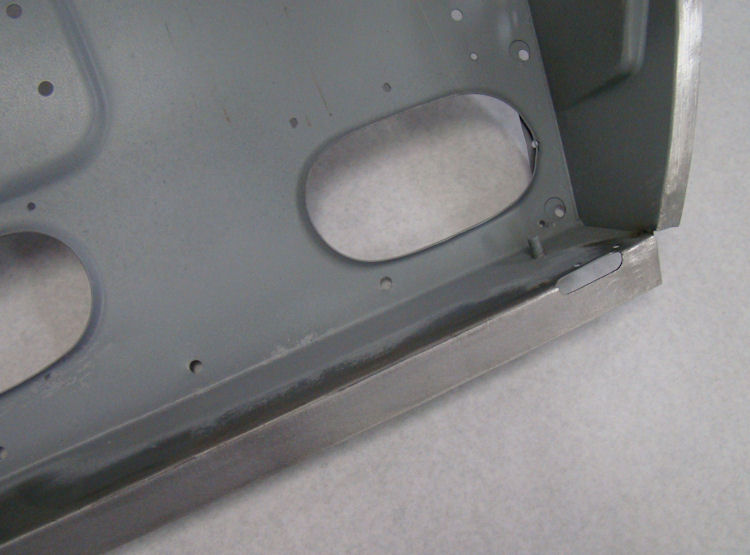
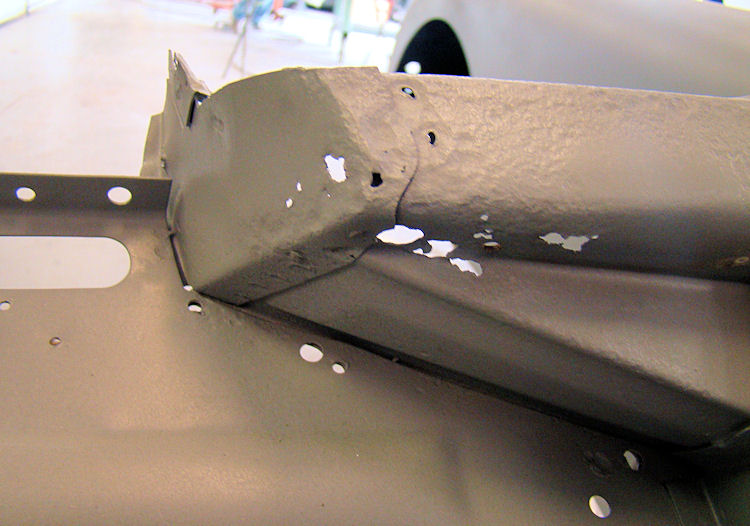
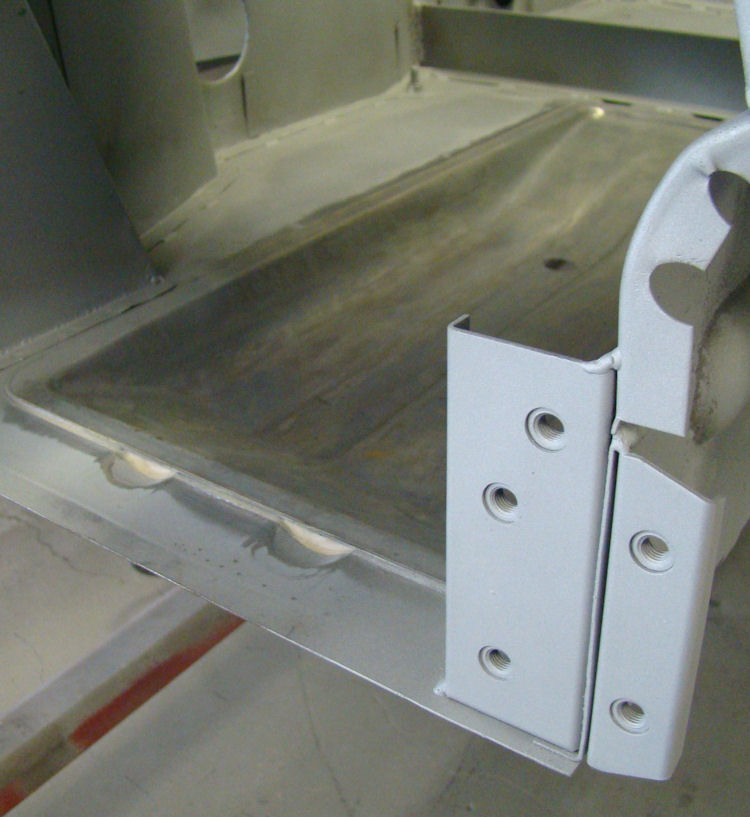
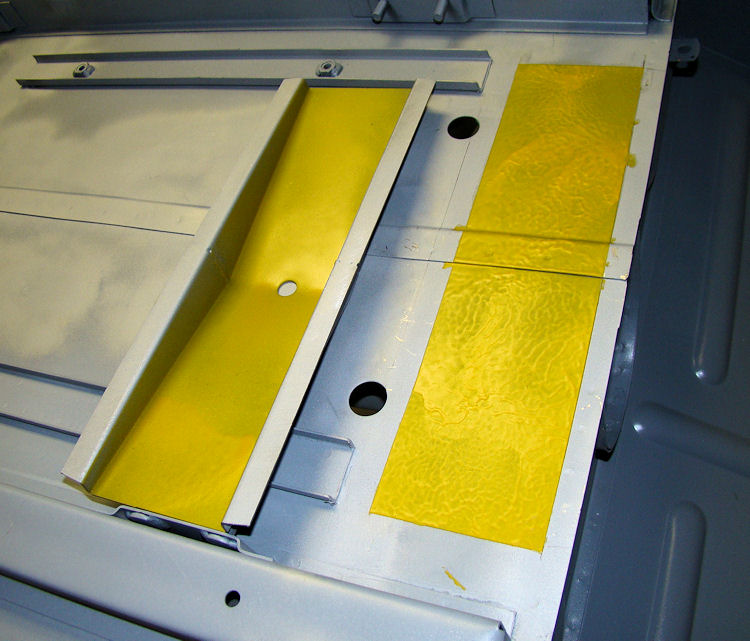
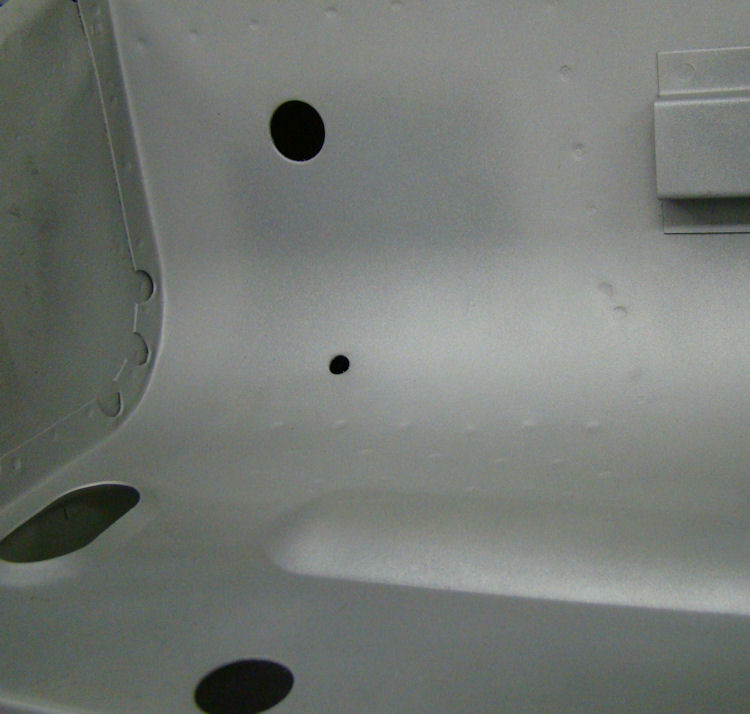
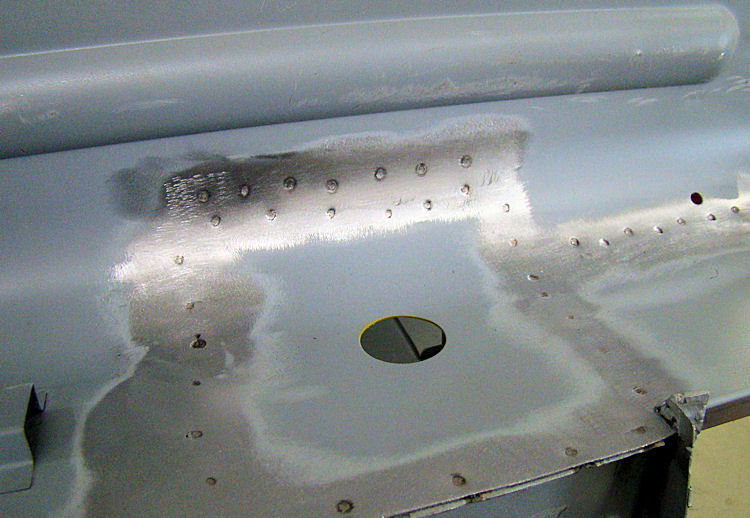
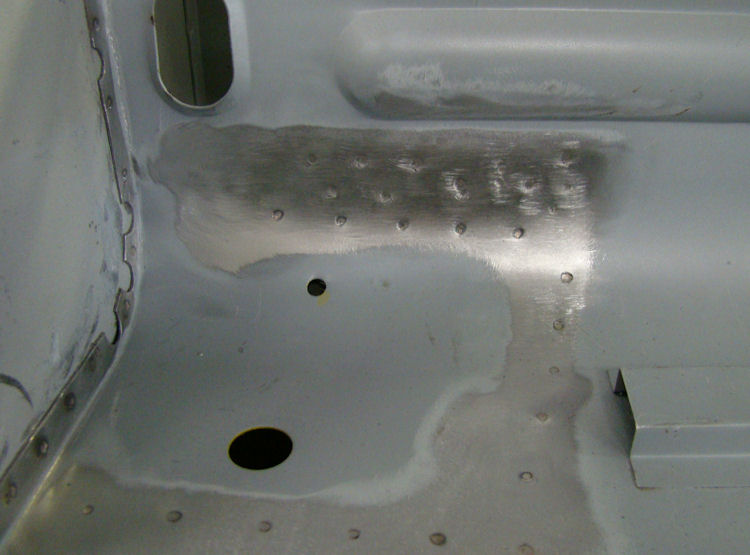
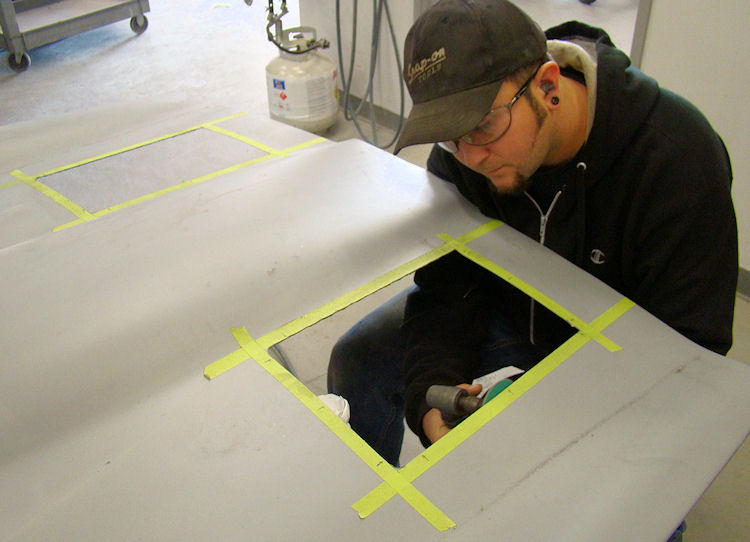
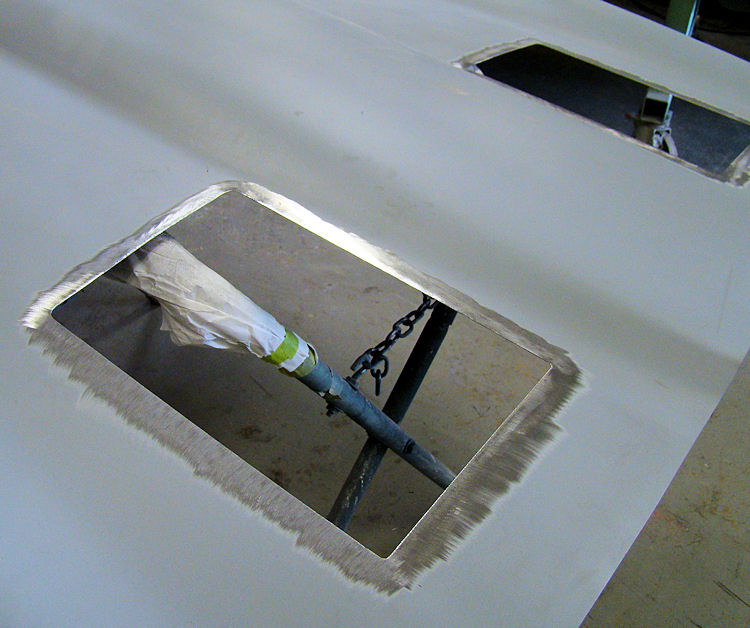
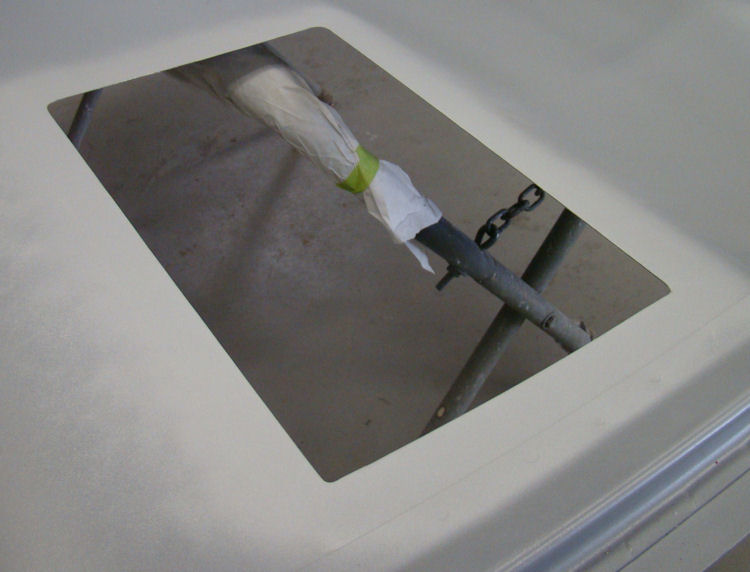
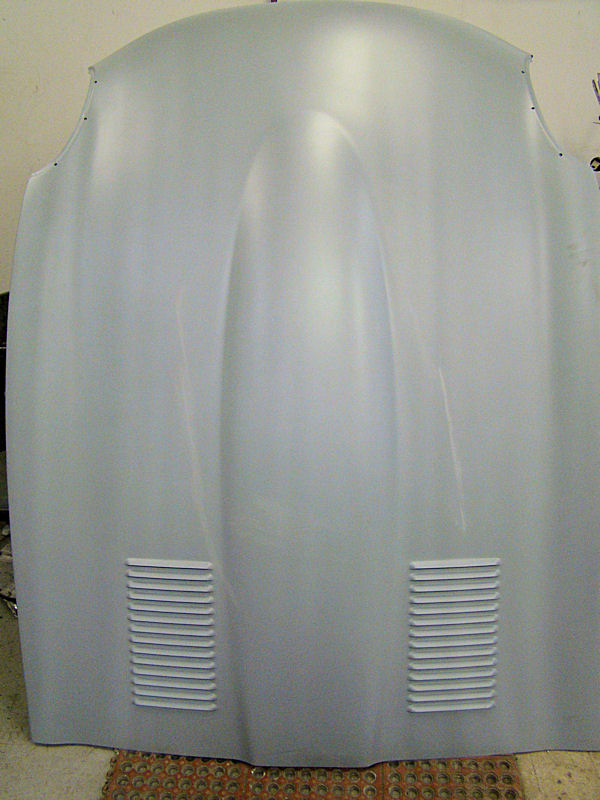
Assembling the new bonnet, modifying floors to accept a footwell in such a way that the car can easily be returned to "flat floor" configuration at a later date, if desired....
 |
 |
|
|
|
|
|
|
 |
 |
|
|
|
|
|
|
 |
 |
|
easily be returned to 'flat floor' status at a later date |
|
|
|
|
 |
 |
|
|
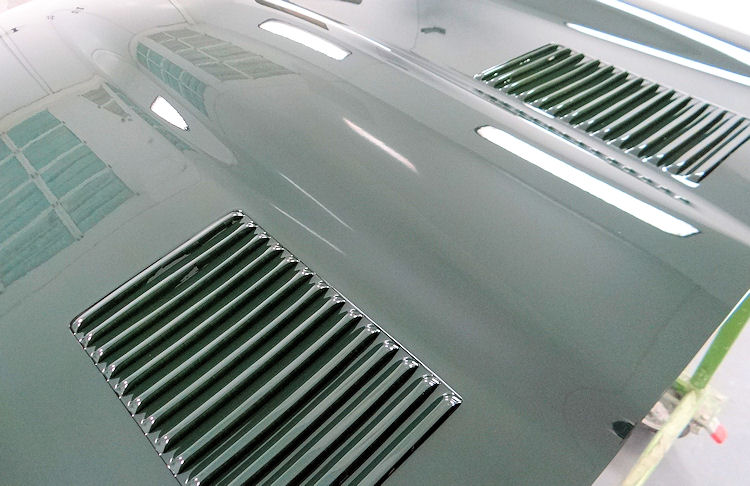
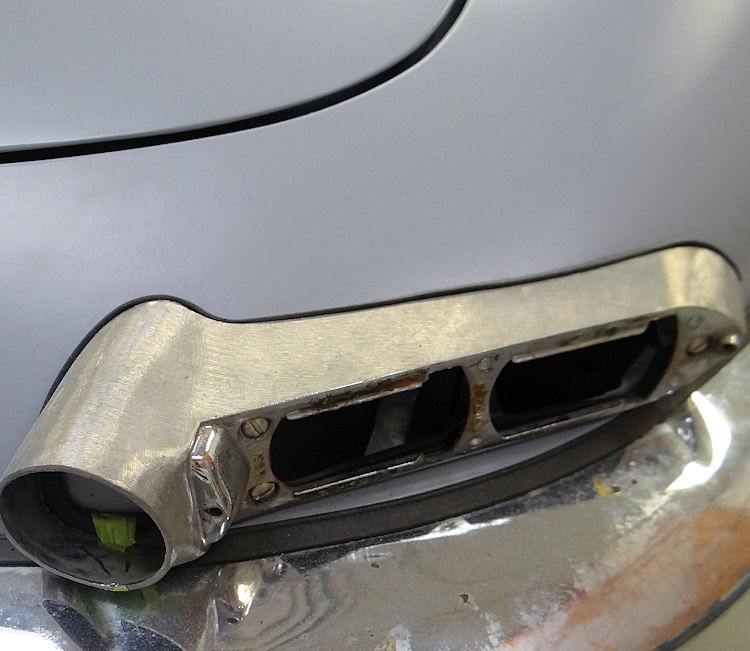
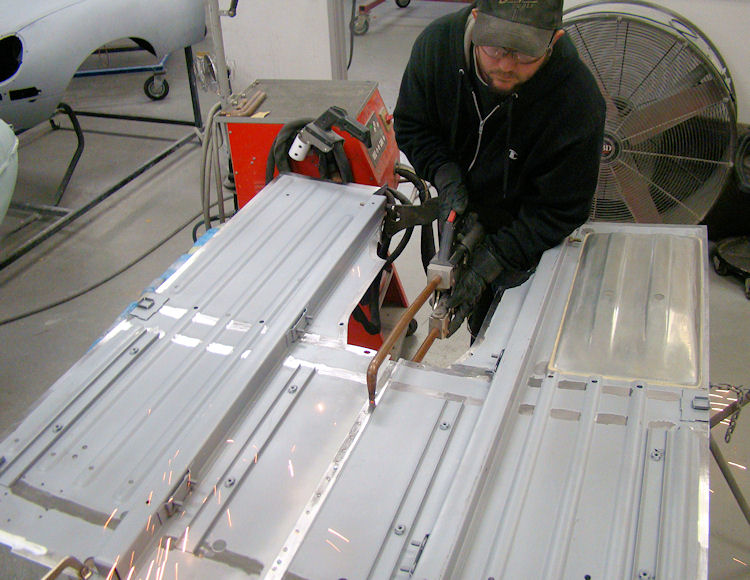
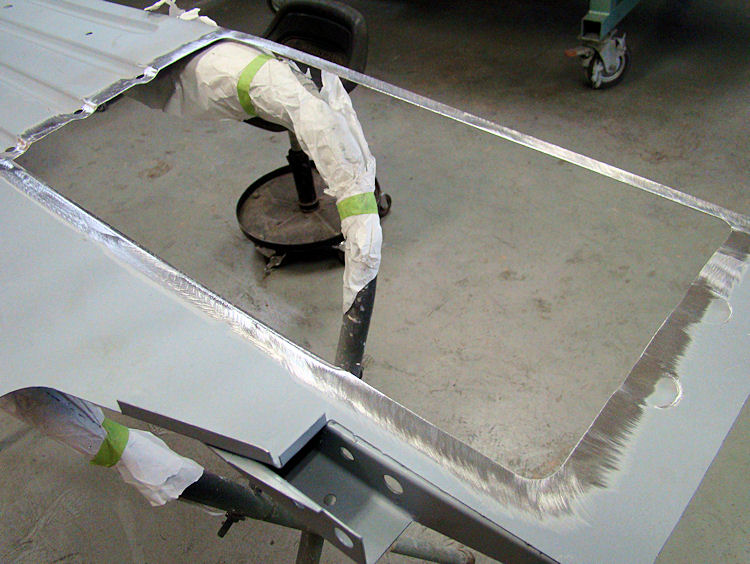
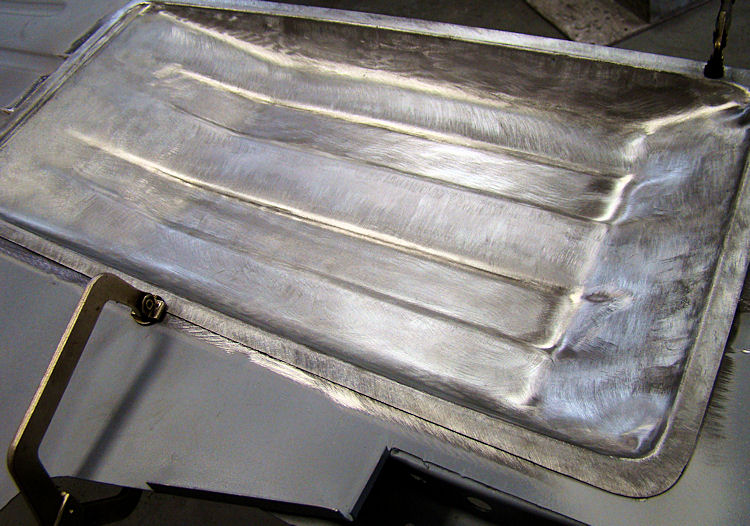
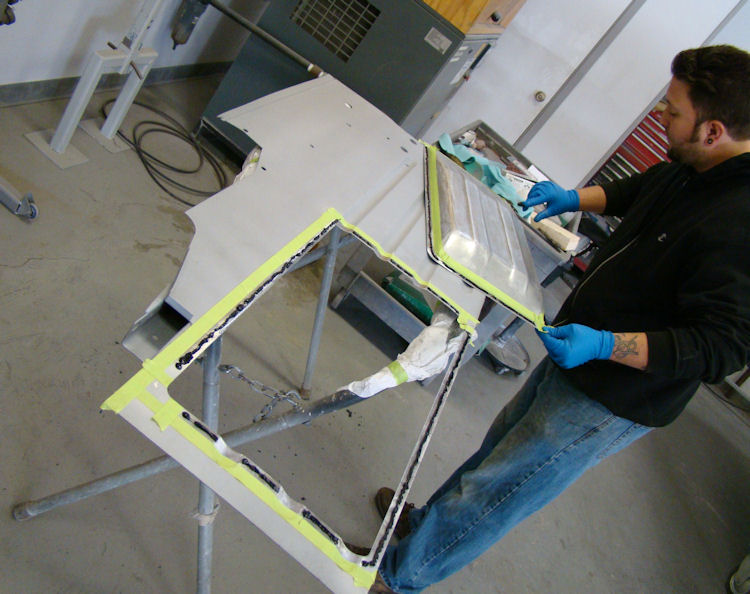
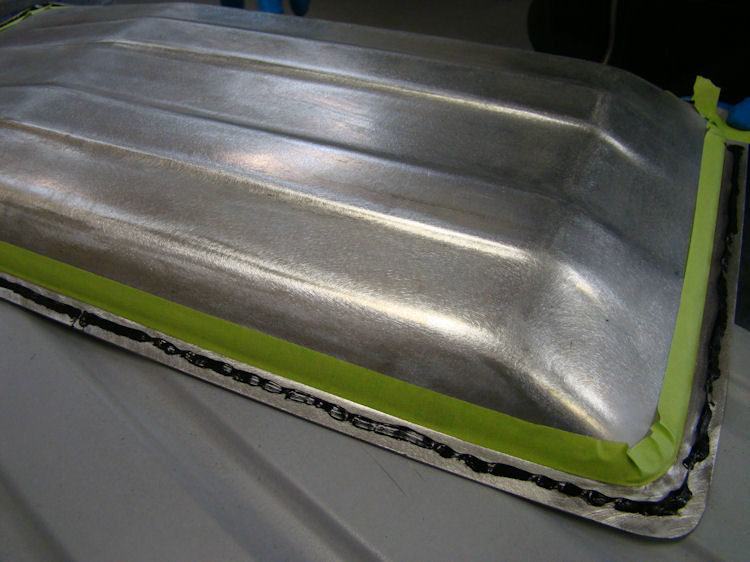
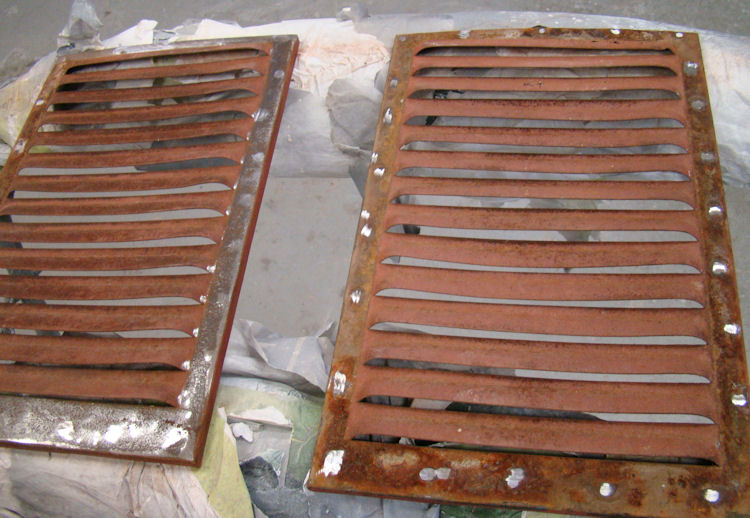
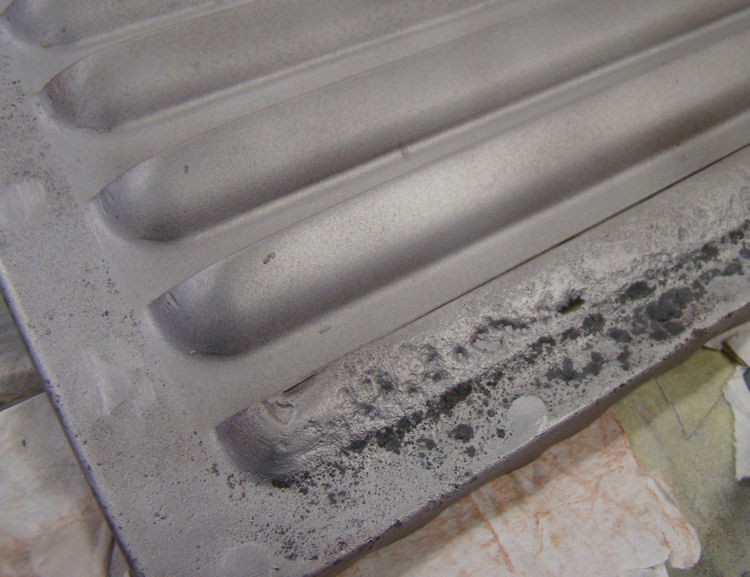
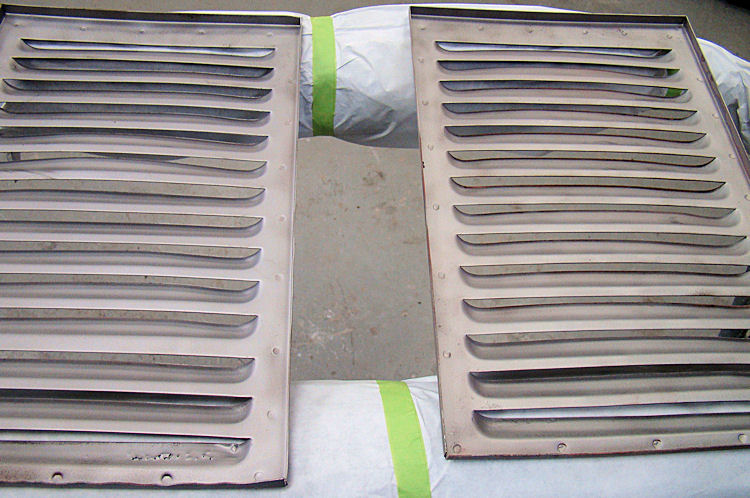
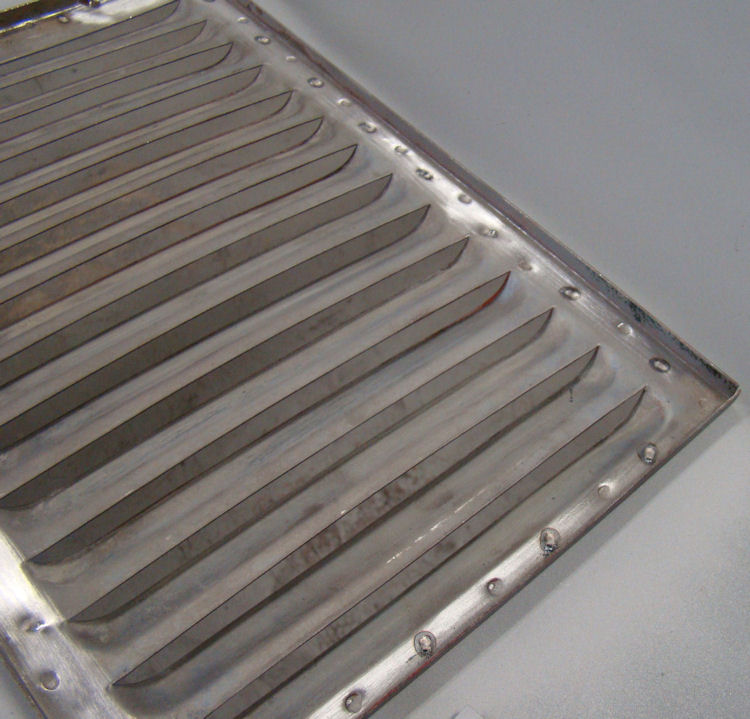
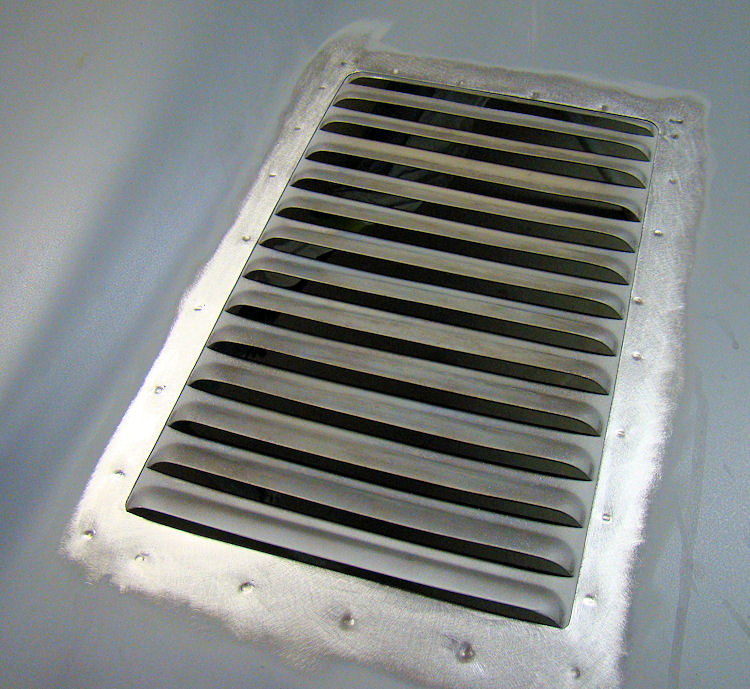
Transplanting a pair of original welded bonnet louvers into a new bonnet center section.
 |
 |
|
|
|
|
|
|
 |
 |
|
|
|
|
|
|
 |
 |
|
|
|
|
|
|
 |
 |
|
|
|
|
|
|
 |
 |
|
|
|
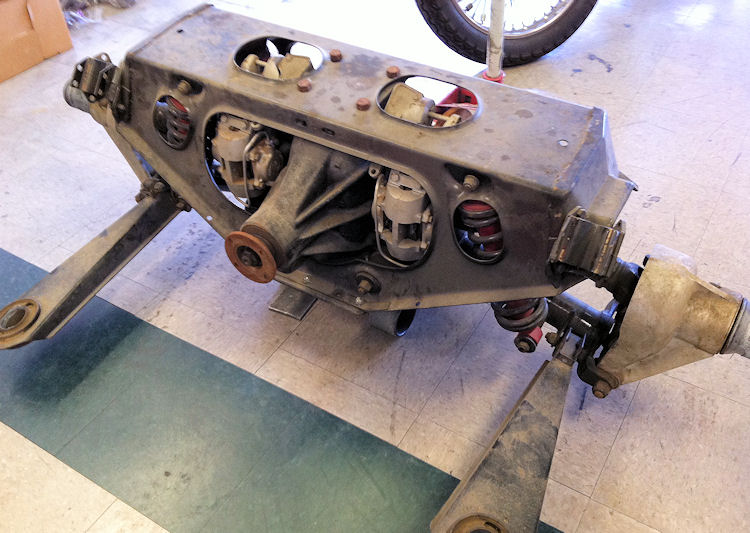
IRS rebuild has now been completed...
 |
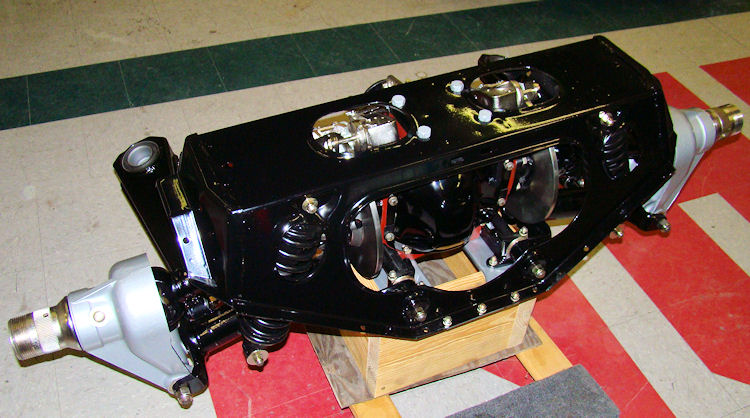 |
Earlier today Ray began assembling your IRS...
 |
 |
 |
 |
As we prepare to get this particular body restoration underway, one of the first things we will be doing is transplanting a pair of original "welded louvers" into the new bonnet center section.
 |
 |
|
|
|
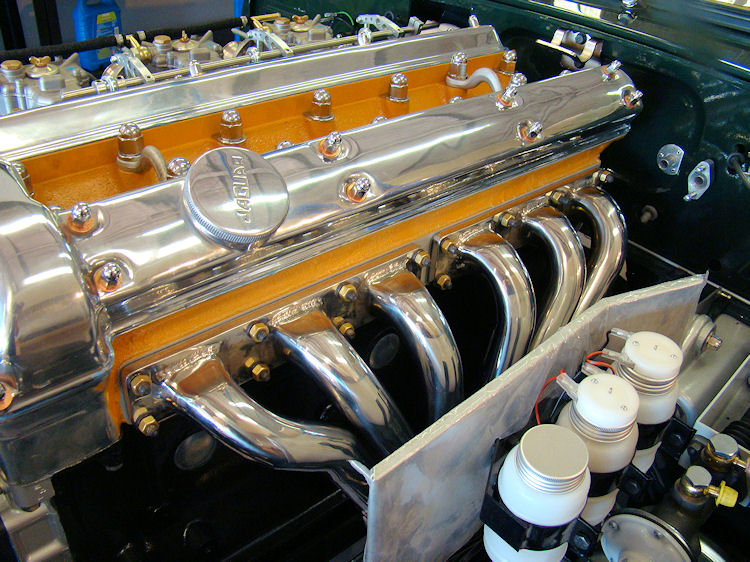
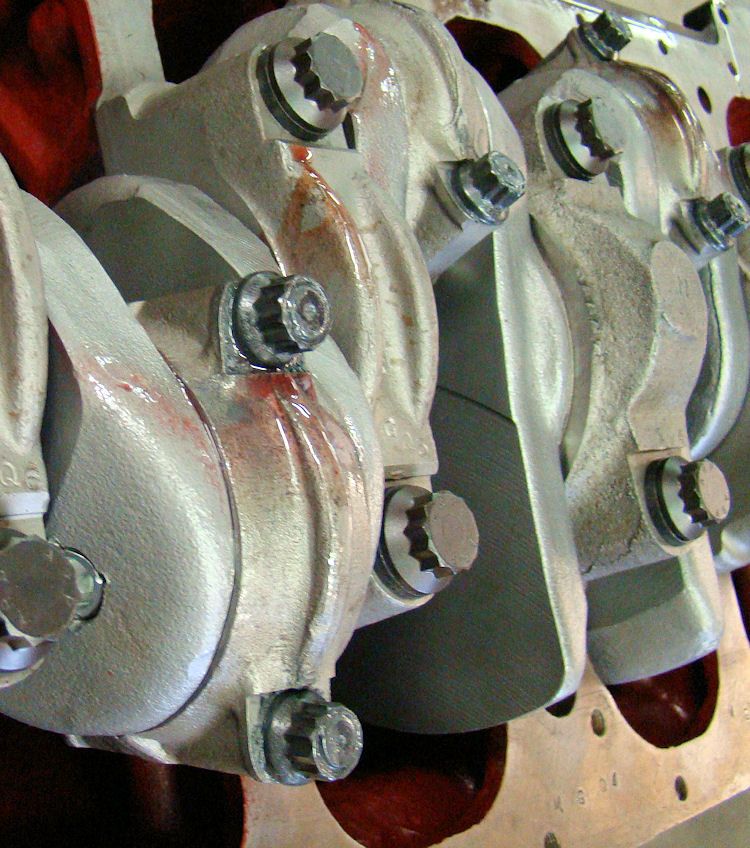
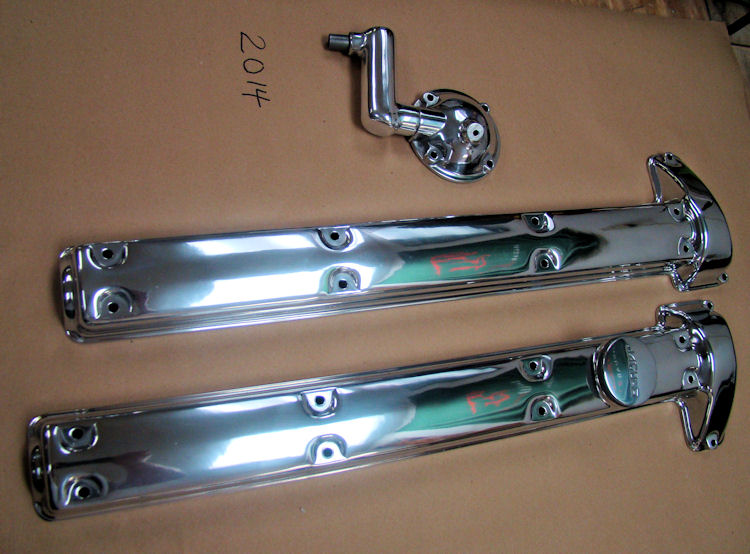
Your Stage One engine rebuild has now been completed and the finished result is a thing of beauty...
 |
 |
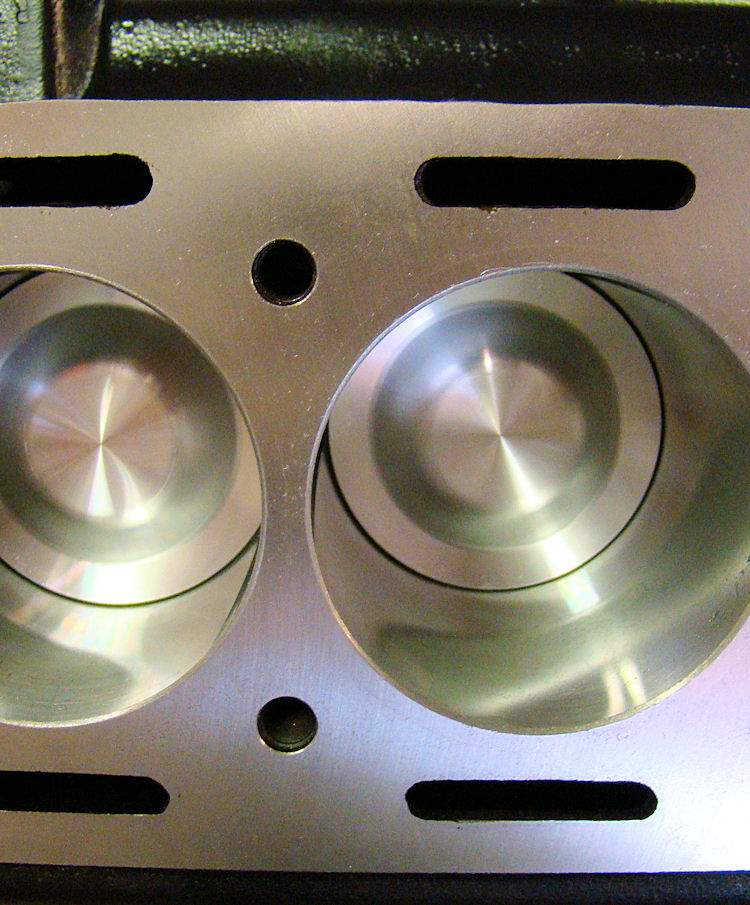
I am pleased to report that your cylinder head and short block have noiw been fully rebuilt and assembled.
 |
 |
|
|
|
|
|
|
 |
 |
|
|
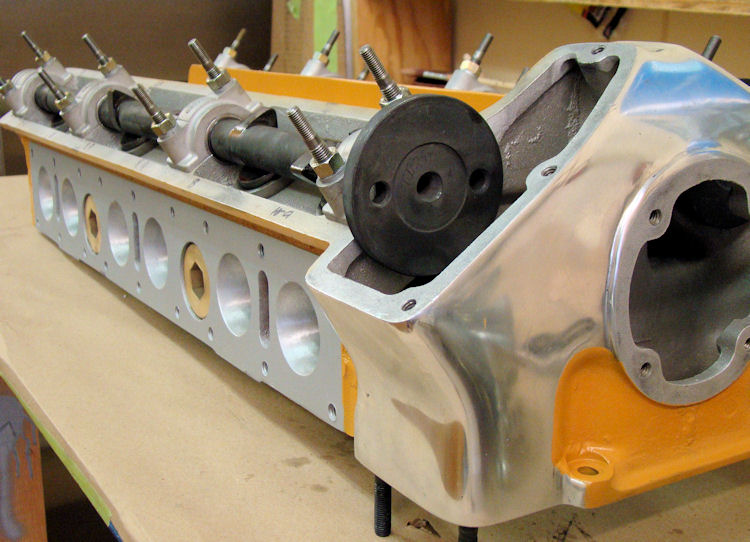
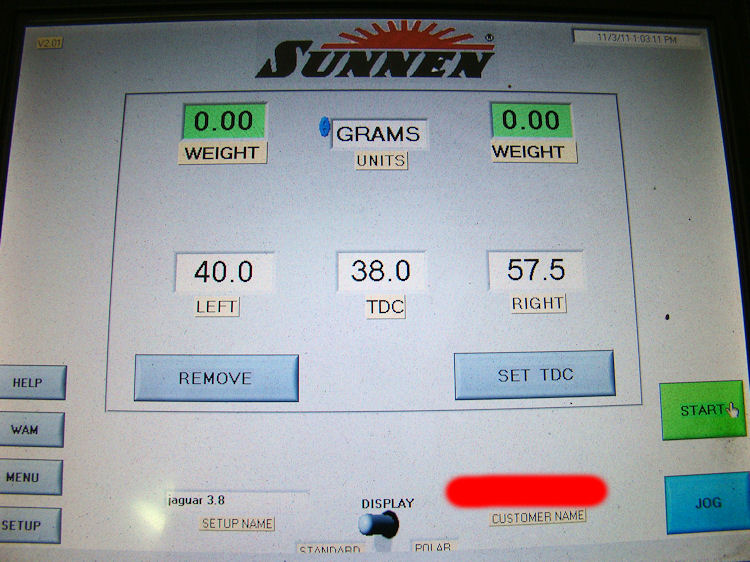
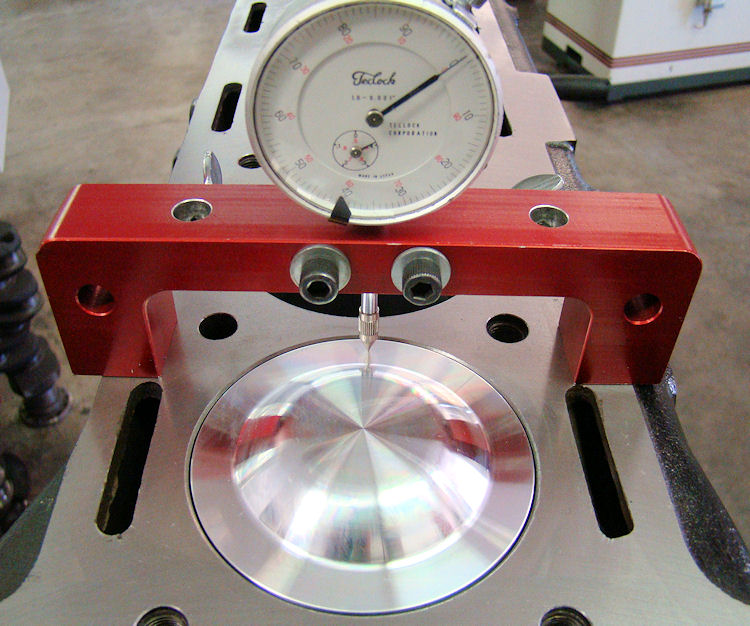
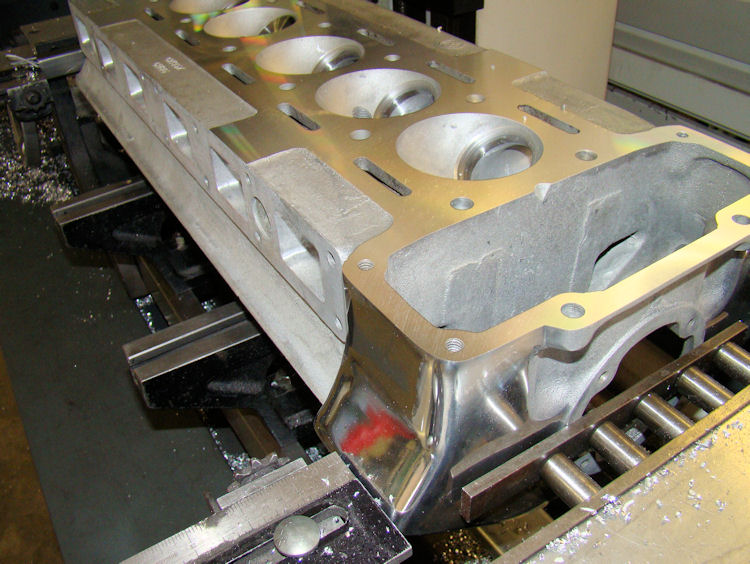
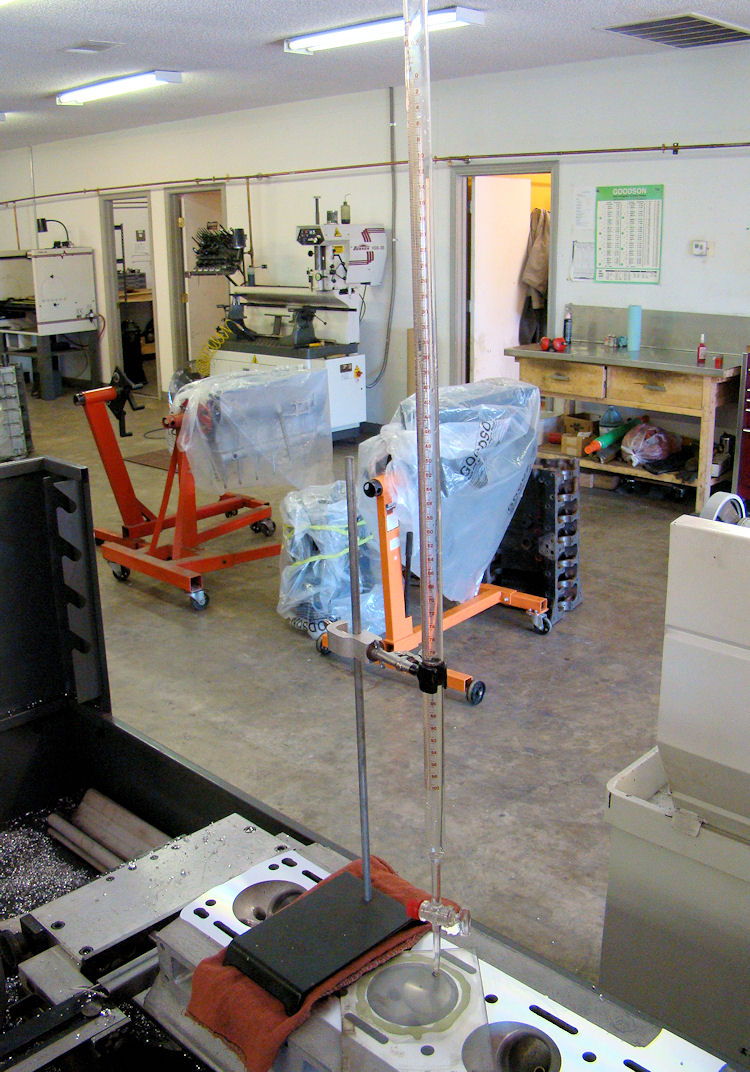
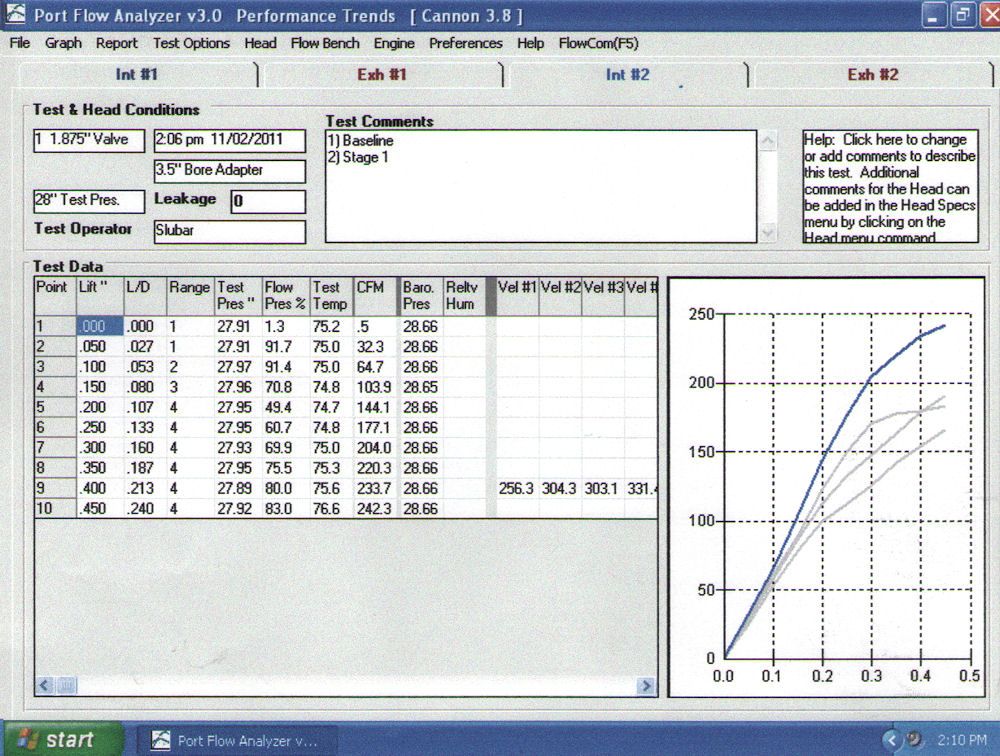
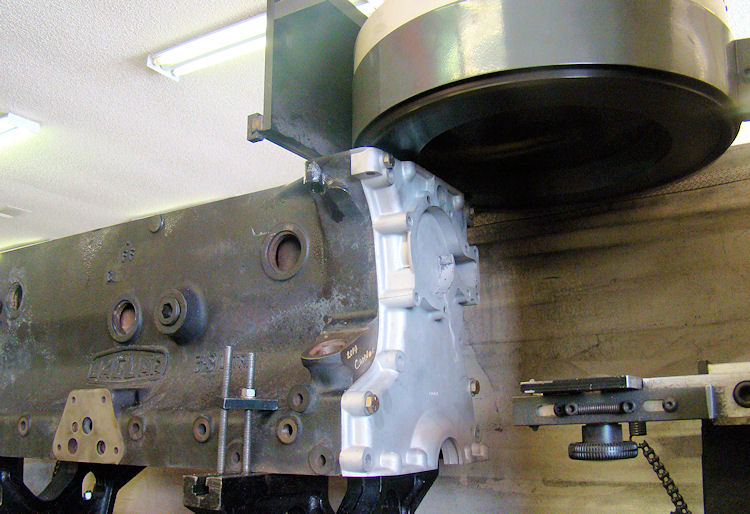
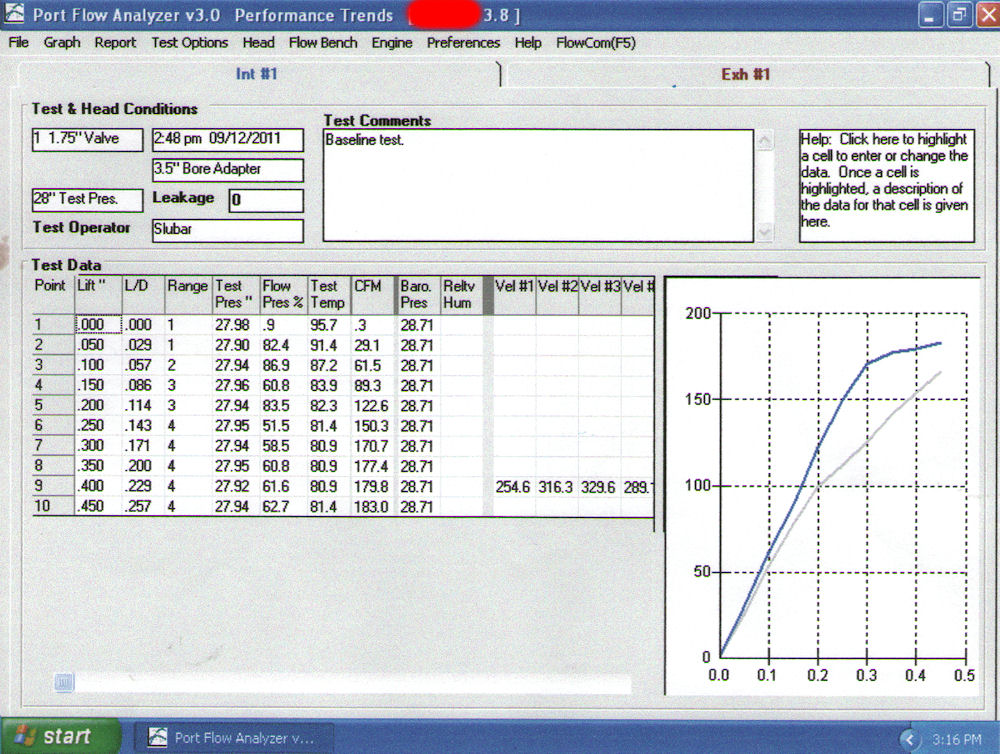
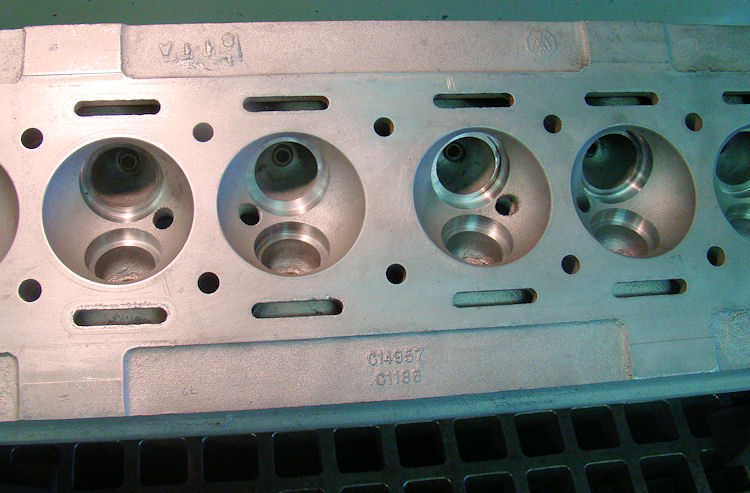
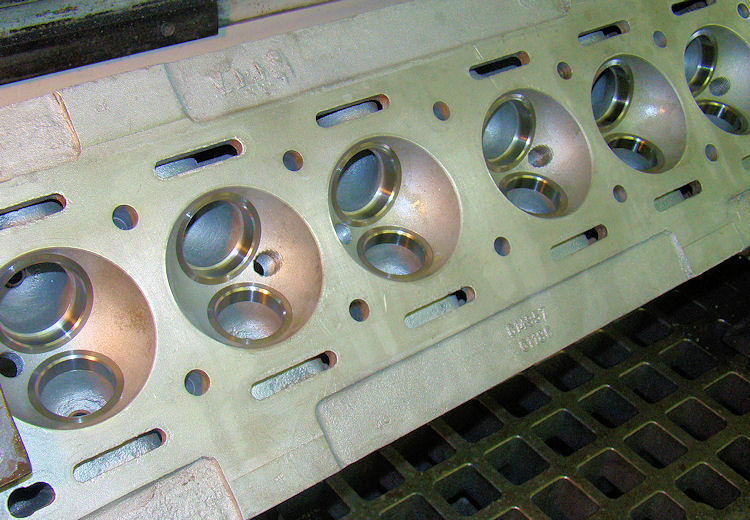
Lots of progress in the CJ machine shop, including some huge gains on the flow bench following Chris Slubar's portwork.
 |
 |
|
|
|
|
|
|
 |
 |
|
ratio calculation |
|
|
|
|
 |
 |
|
|
|
|
|
|
 |
 |
|
|
|
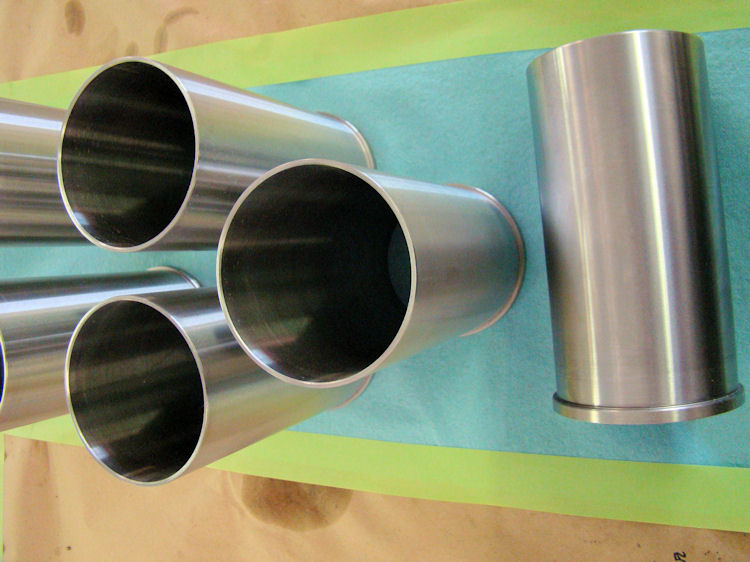
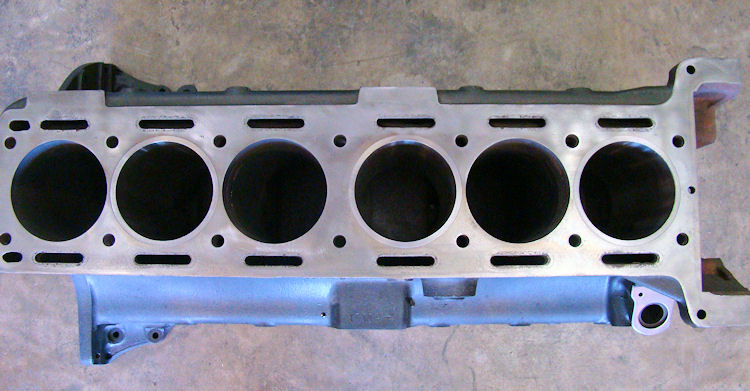
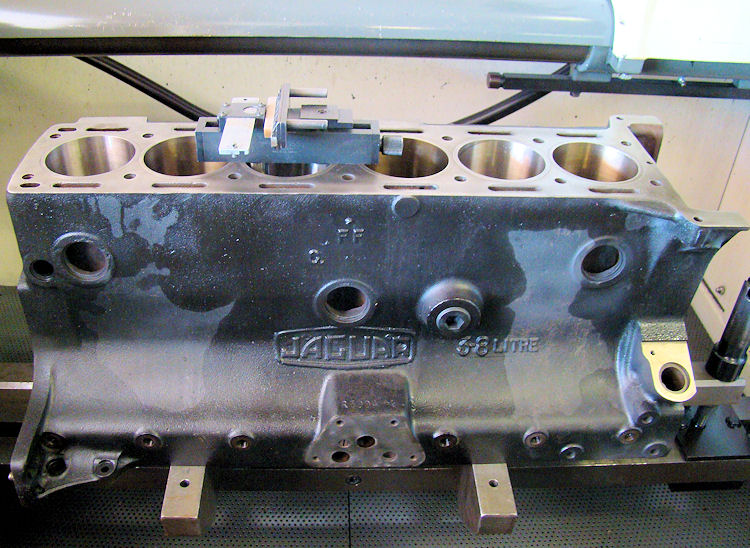
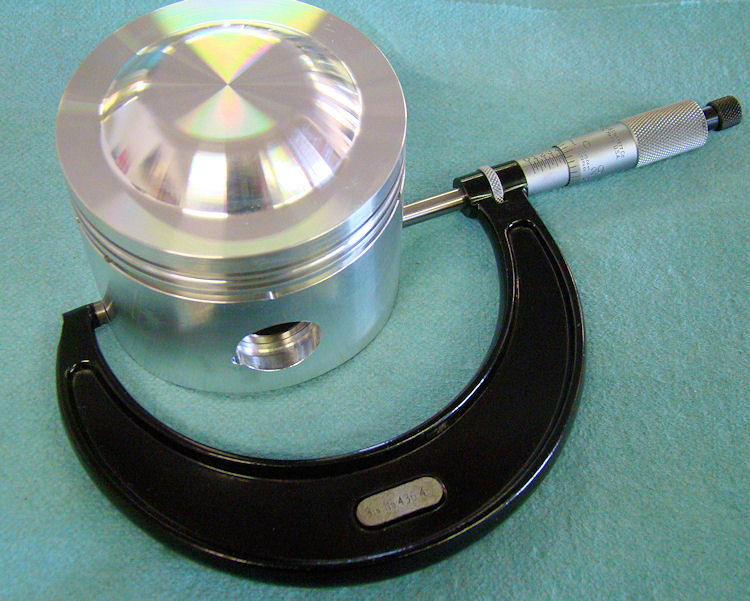
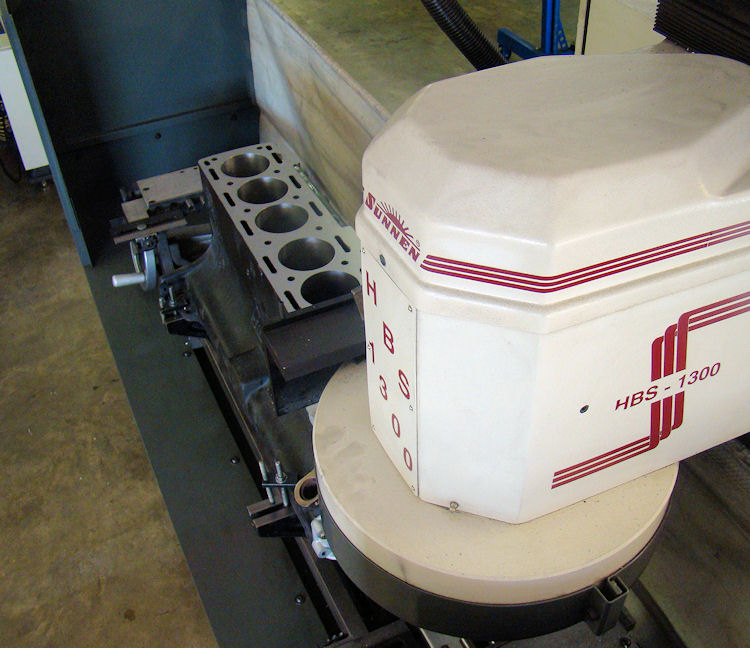
Engine blockwork completed...
 |
 |
|
|
|
|
|
|
 |
 |
|
|
|
|
|
|
 |
 |
|
|
|
|
|
|
 |
 |
|
|
|
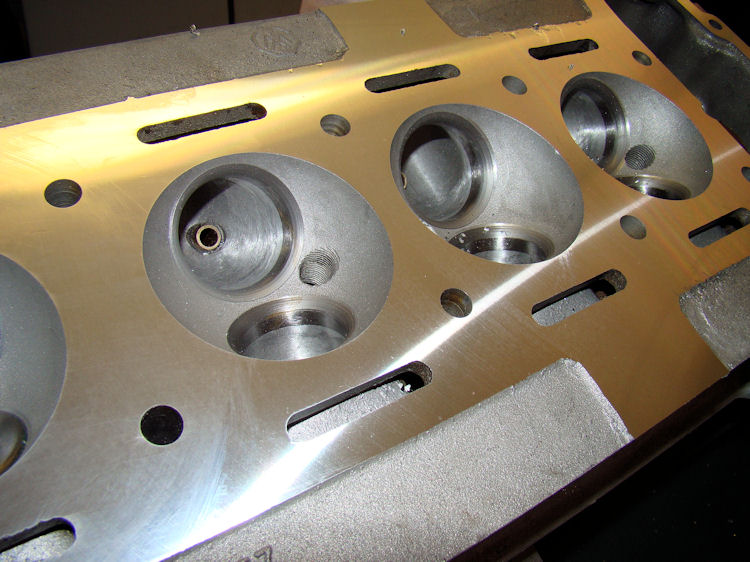
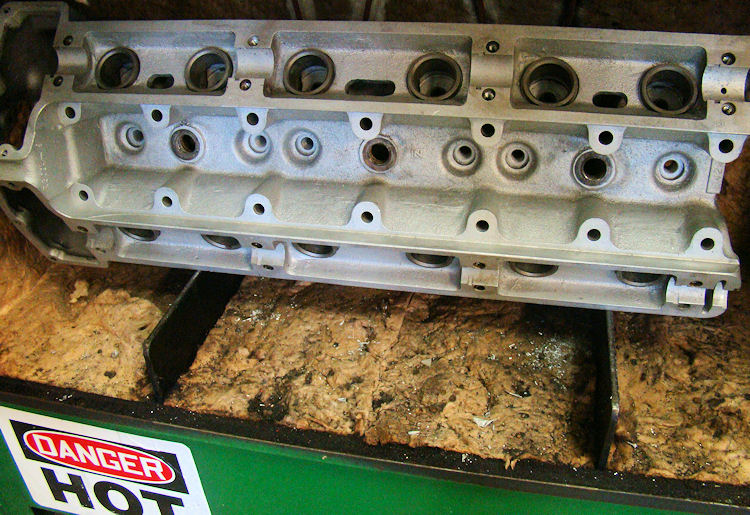
Stage One cylinder head rebuild in progress...
 |
 |
|
|
oversized CJ valve seats |
|
|
|
 |
 |
|
|
|
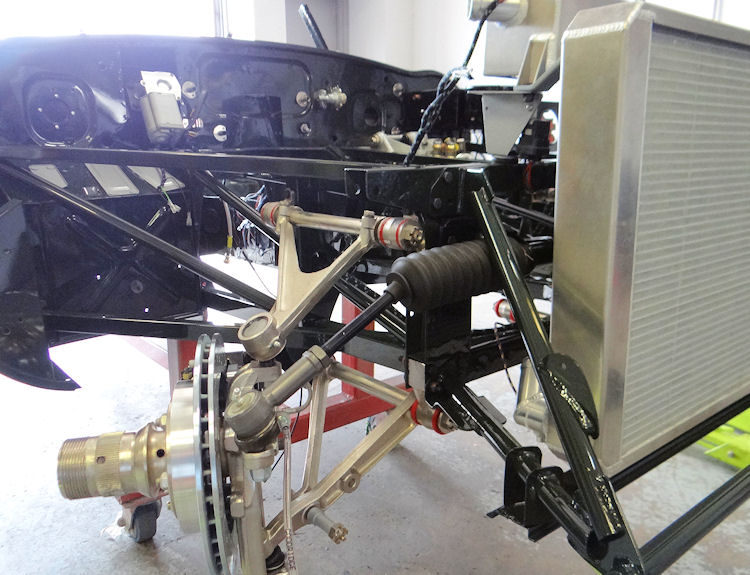
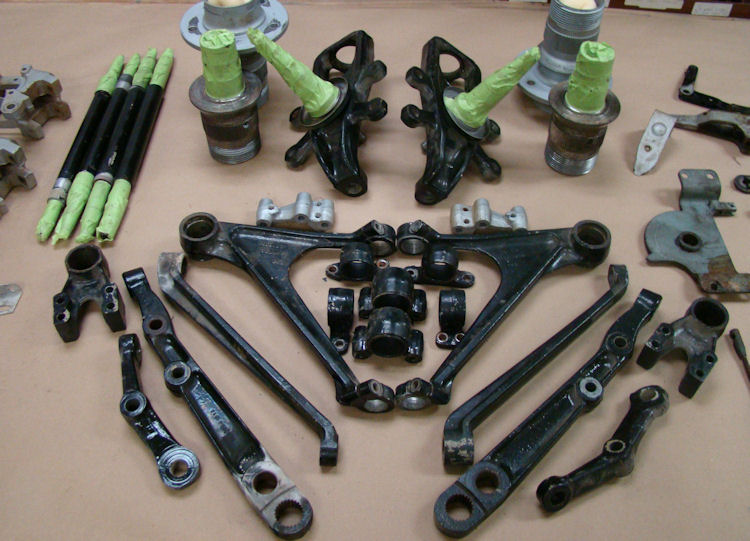
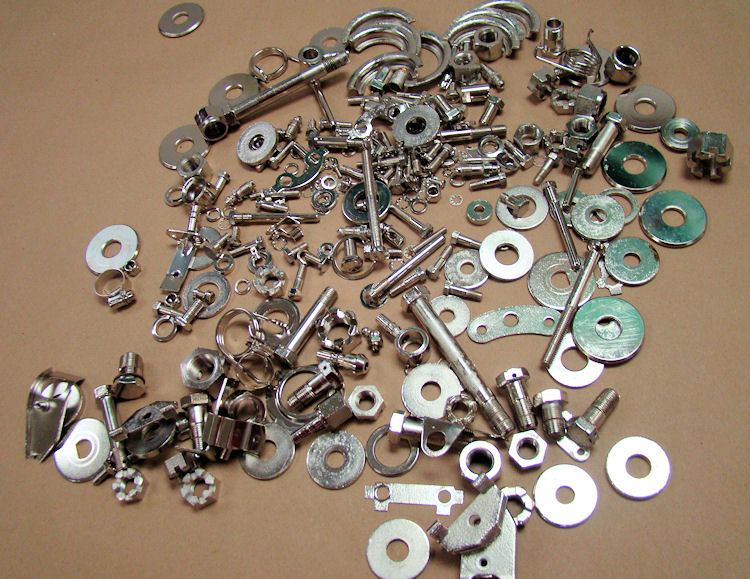
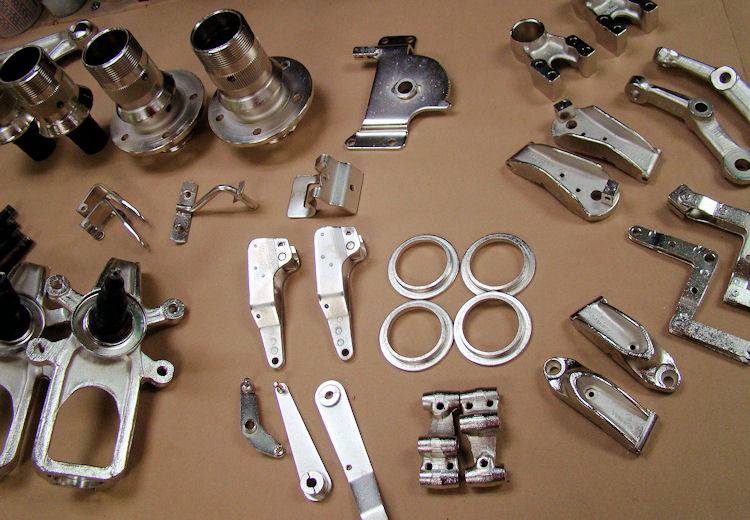
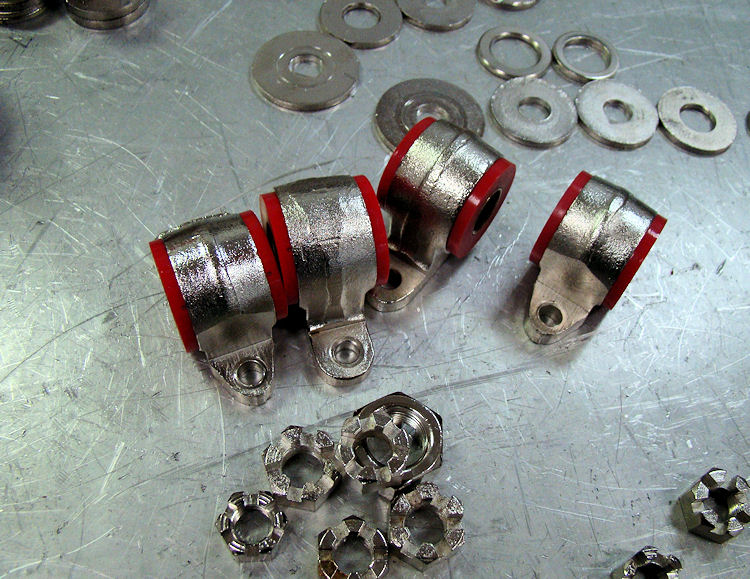
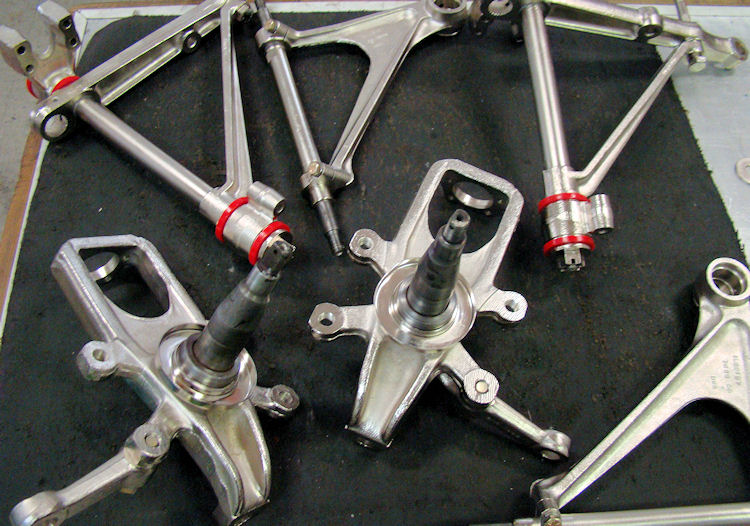
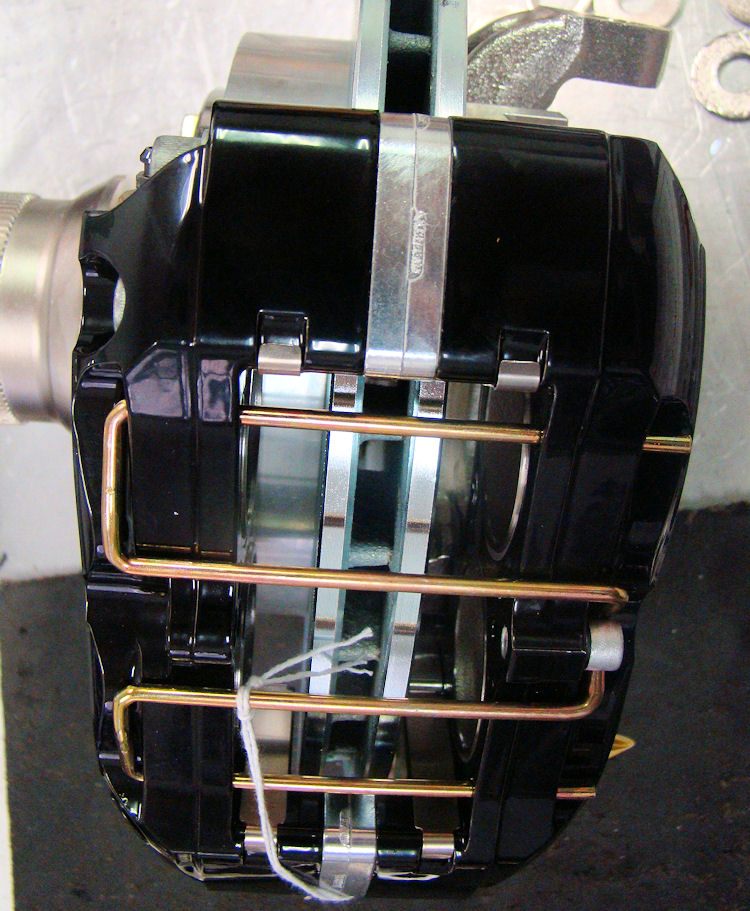
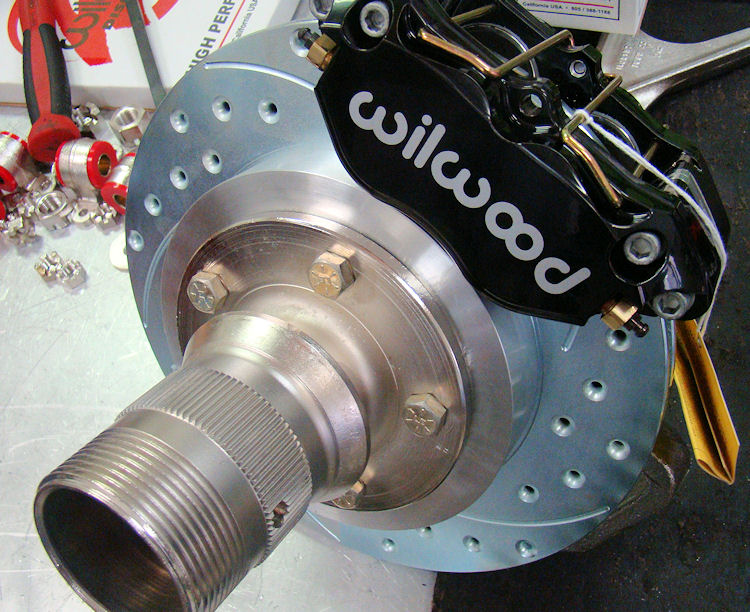
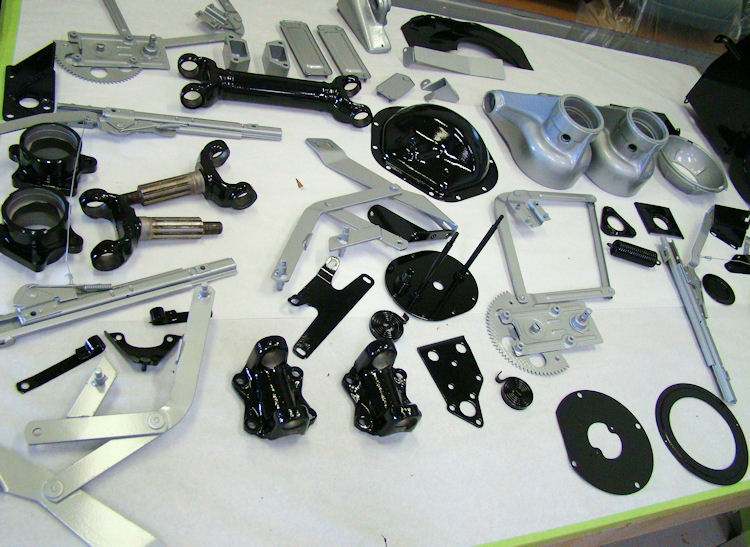
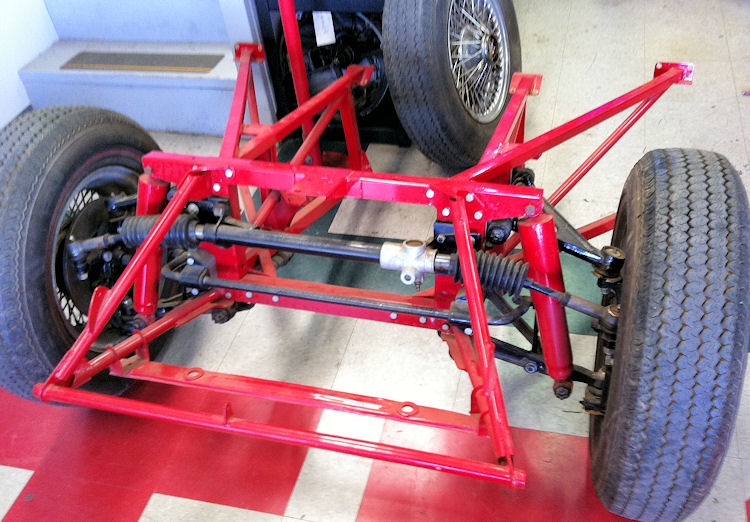
350 Nickel plated items, assembling front suspension, vented brakes etc...
 |
 |
|
|
|
|
|
|
 |
 |
|
|
|
|
|
|
 |
 |
|
|
|
|
|
|
 |
 |
|
|
|
Back from the blasters, no nasty surprises...
 |
 |
|
|
|
|
|
|
 |
 |
|
will be saved |
|
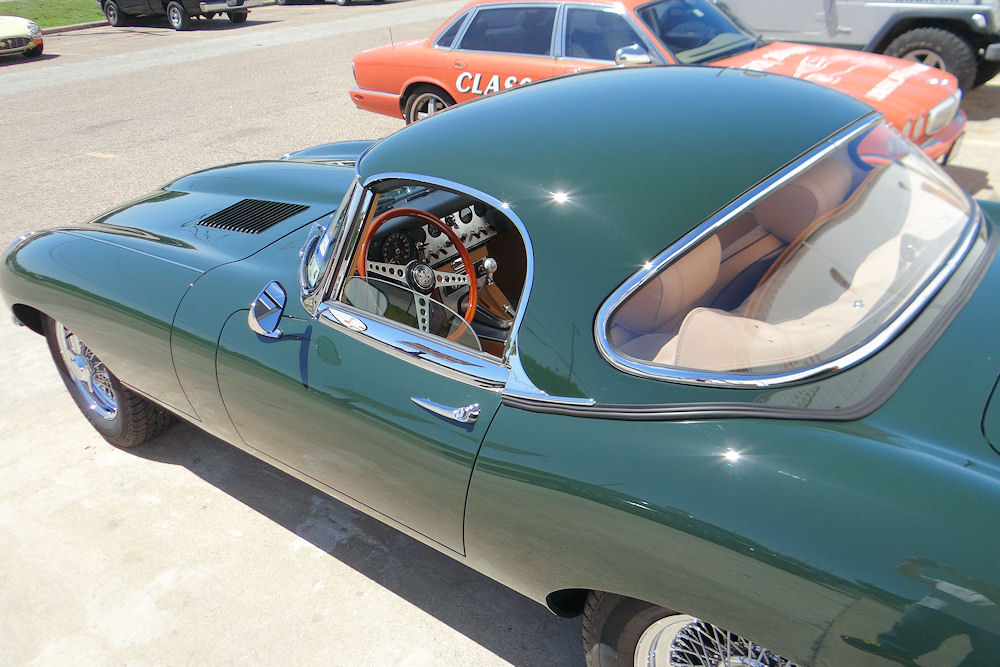
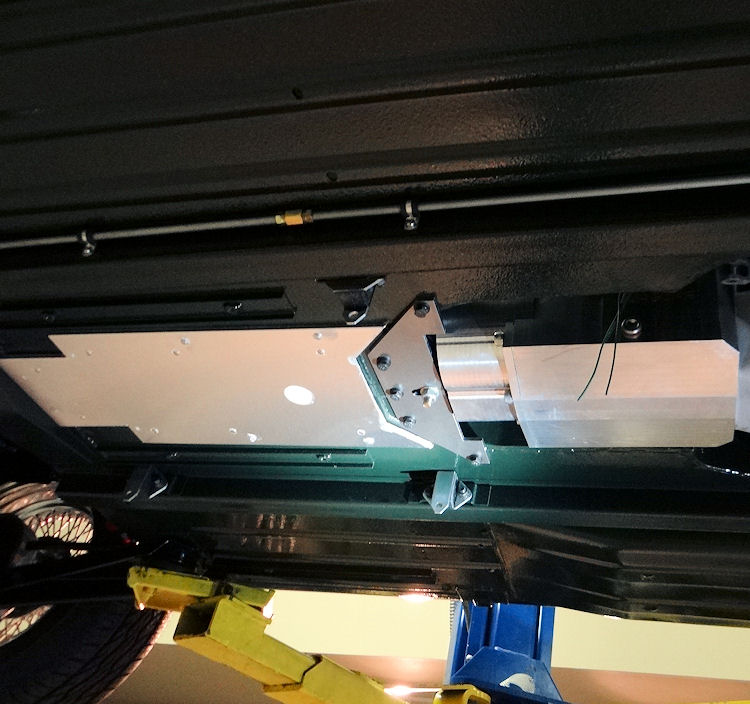
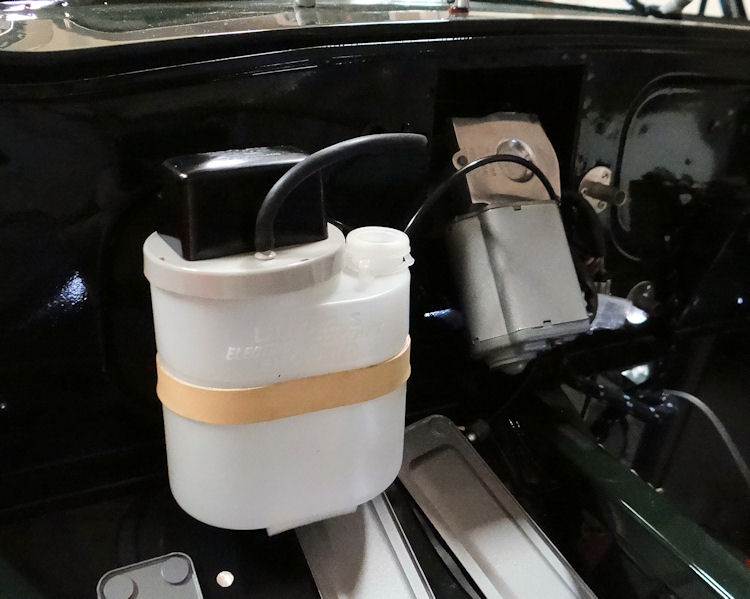
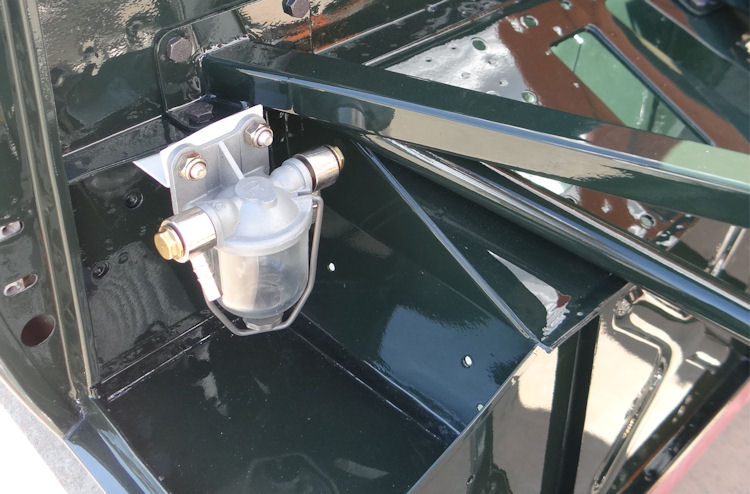
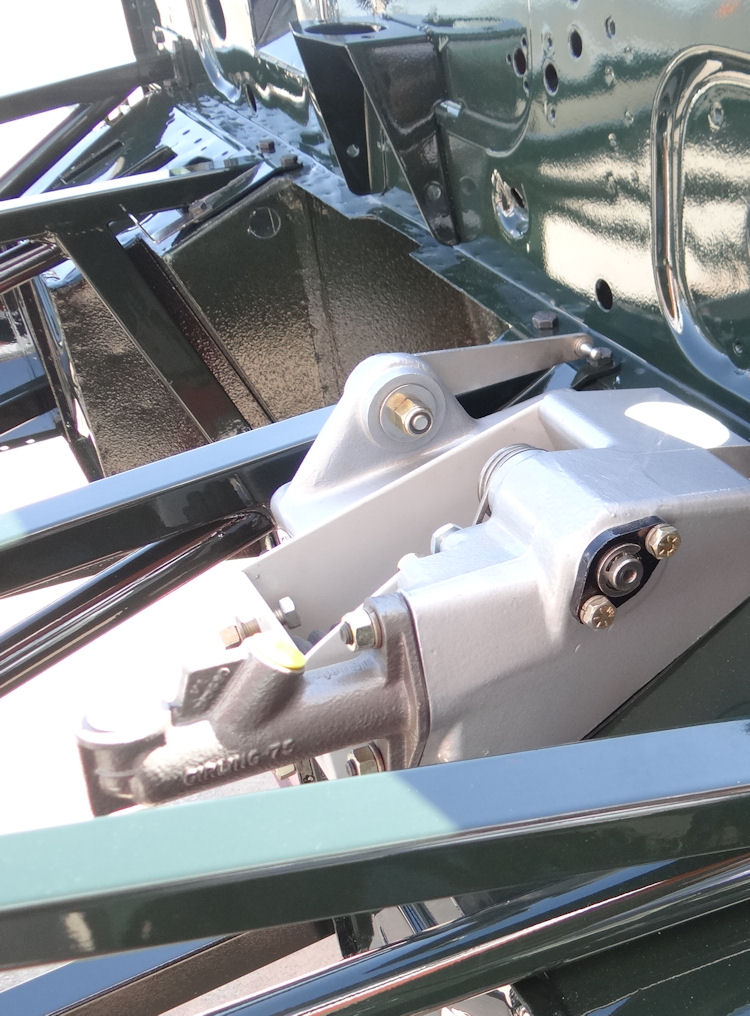
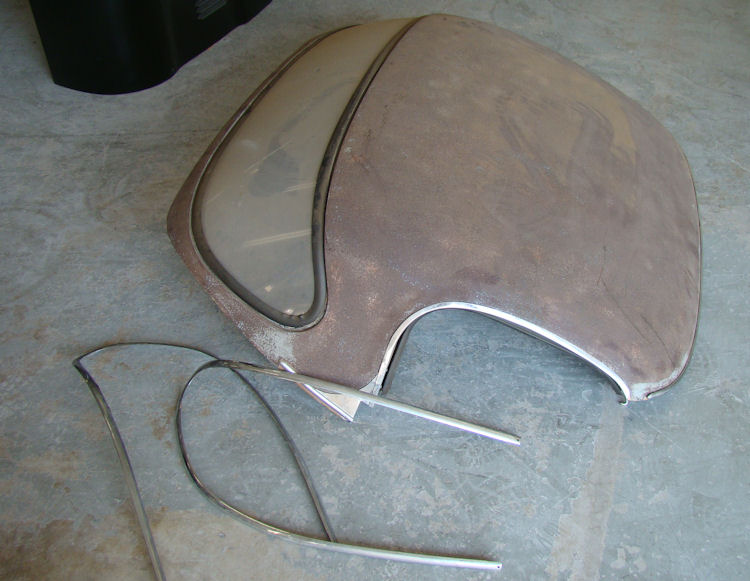
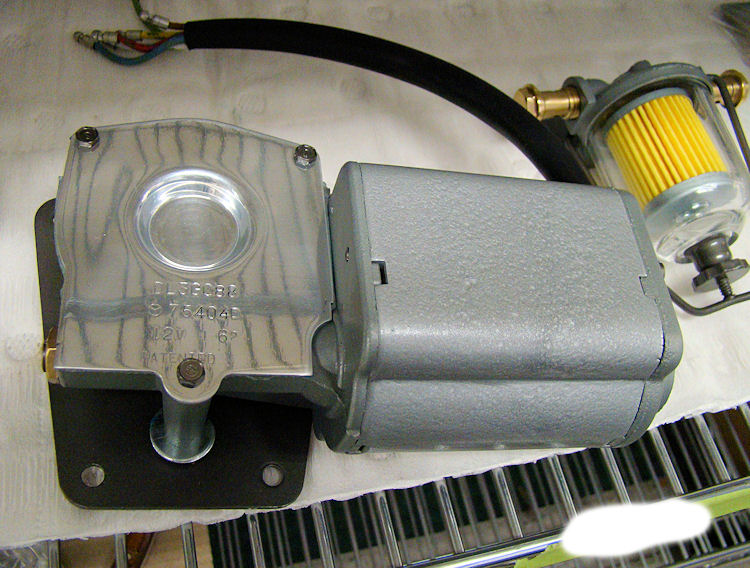
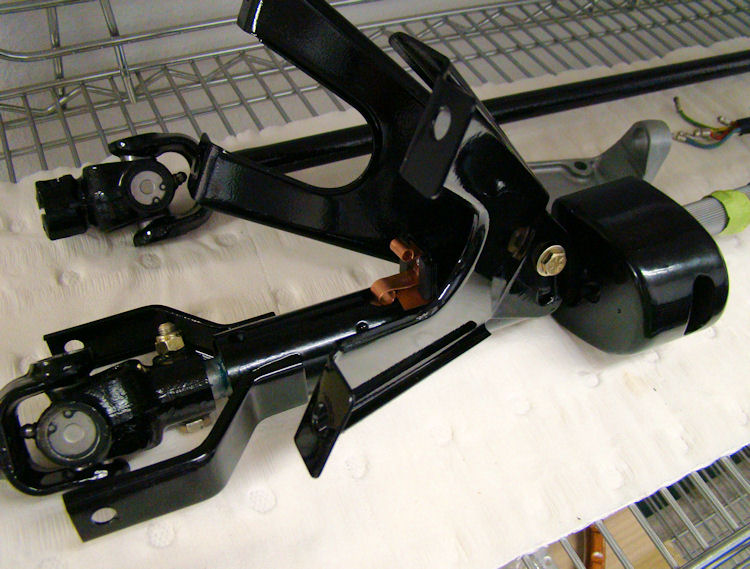
We have now sourced you an original factory hardtop, complete with ultra-rare rear window chrome trim. We have also been busy restoring and rebuilding various mechanical components, as well as converting your pedal box to work with our exclusive upgraded brake master cylinder and servo system.
 |
 |
|
with extremely rare rear window chrome trim |
|
|
|
|
 |
 |
|
|
|
|
|
|
 |
 |
|
master cylinder and servo application |
|
Your bodyshell has now been sent off to be blasted back to bare metal. In the mean time, the new parts continue to stack up...
 |
 |
|
|
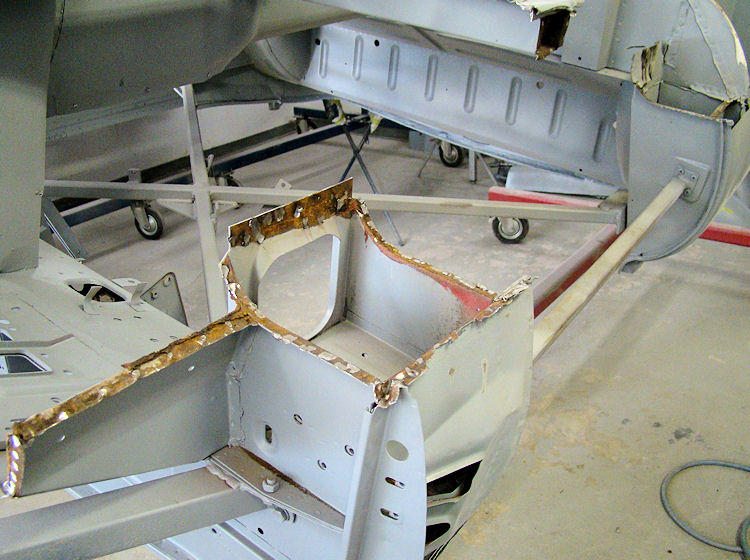
|
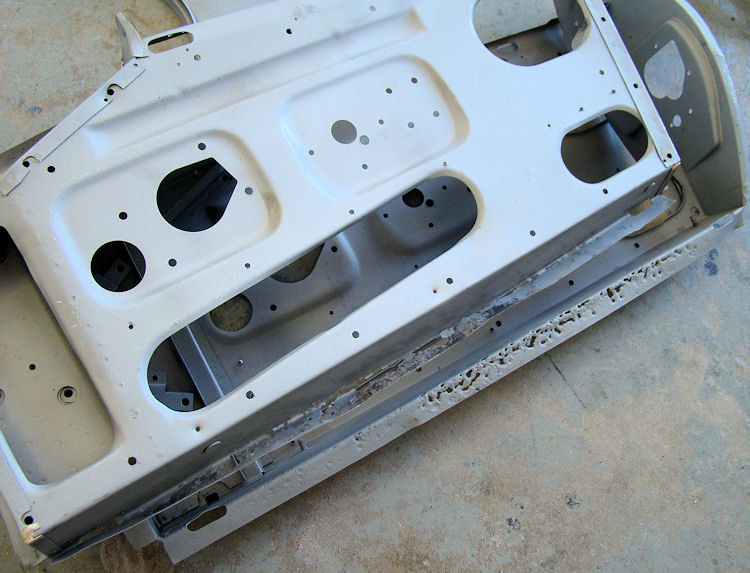
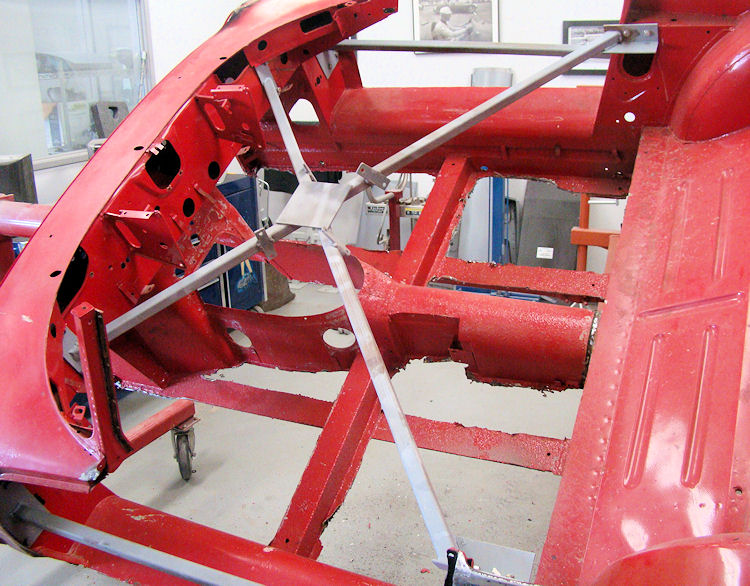
Darrell has now begun cutting away the corroded and/or unwanted sheet metal, in preparation for the blasting process. Although this car is early enough that it would have originally been a flat floor and straight rear bulkhead car, we will be installing a dished rear bulkhead and slightly deeper than standard footwells, as well as a pair of reclining V12 seats, in order to provide more room and comfort for taller drivers.
 |
 |
|
|
|
|
|
|
 |
 |
|
|
travel/leg room |
|
|
|
 |
 |
|
|
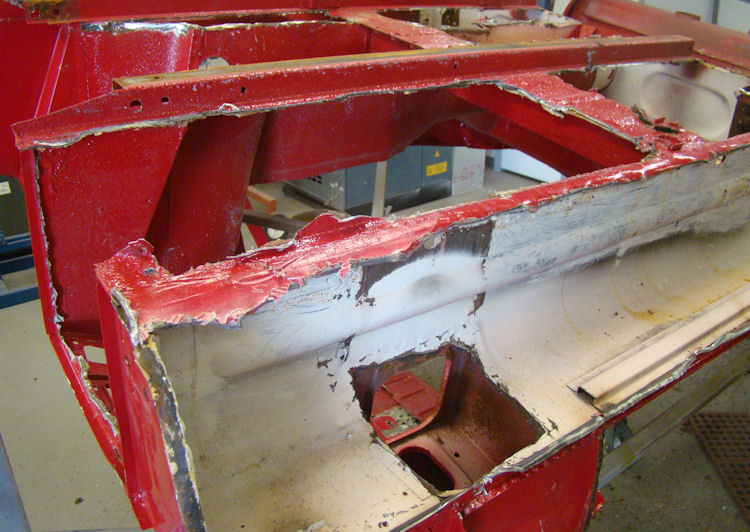
more and more sheet metal is removed |
|
|
|
 |
 |
|
|
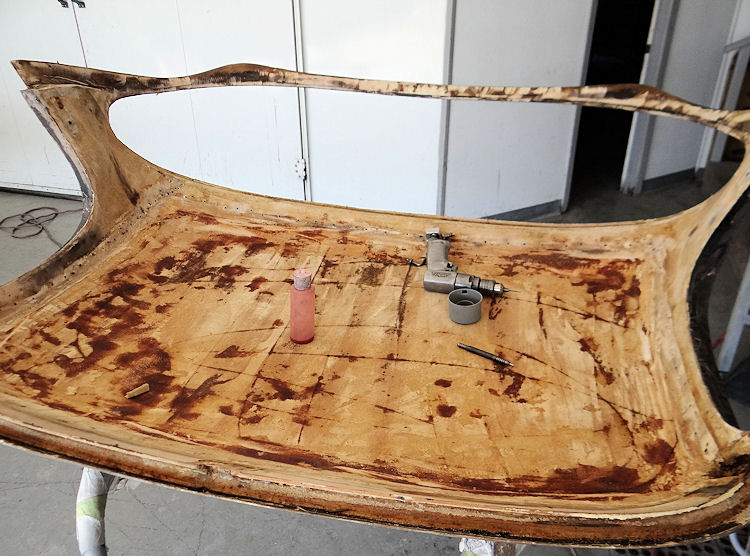
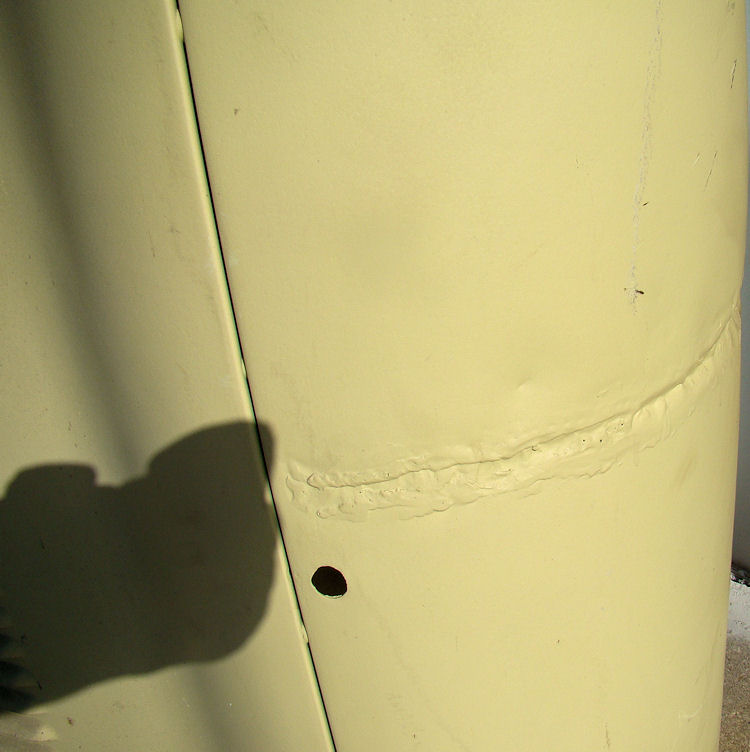
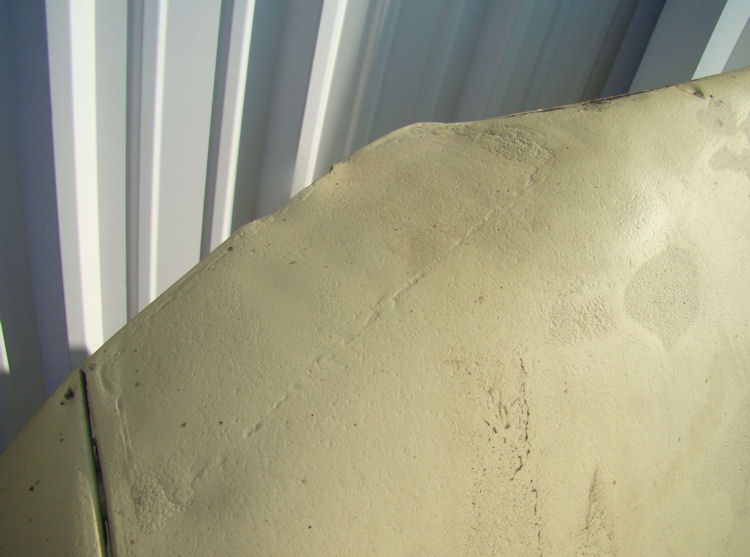
We already have your car on one of the rotisseries and will be having it blasted back to bare metal in the next few days. The body is actually better than expected, although unfortunately the bonnet is in poor enough condition that it makes more sense just to replace it with a brand new unit. As expensive as new bonnets are, we could easily sink 100 plus hours into repairing this bonnet.As well as the body restoration, we also have the engine and suspension rebuilds underway.
 |
 |
|
|
|
|
|
|
 |
 |
|
|
|
 |
 |
|
|
|
|
|
|
 |
 |
|
|
|
I am pleased to report that we now have the restoration of your E Type underway in the CJ workshops. I hope you enjoy following the progress in these pages!
 |
 |
|
|
|
|
|
|
 ' ' |
 |
|
|
|