| 1967
Lamborghini Miura P400 (RG) |
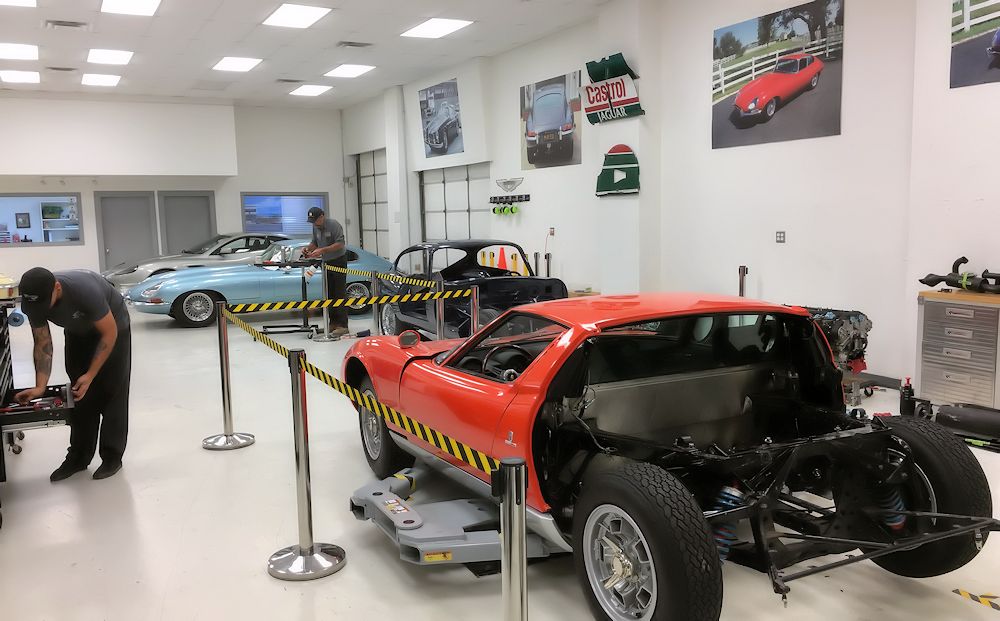
Restoration Log by Dan Mooney |
|
|
 |
 |
 |
 |
 |
 |
 |
 |
 |
 |
 |
 |
 |
 |
 |
 |
 |
 |
 |
 |
 |
 |
 |
 |
 |
 |
 |
 |
 |
 |
 |
 |
 |
 |
 |
 |
 |
 |
 |
 |
 |
 |
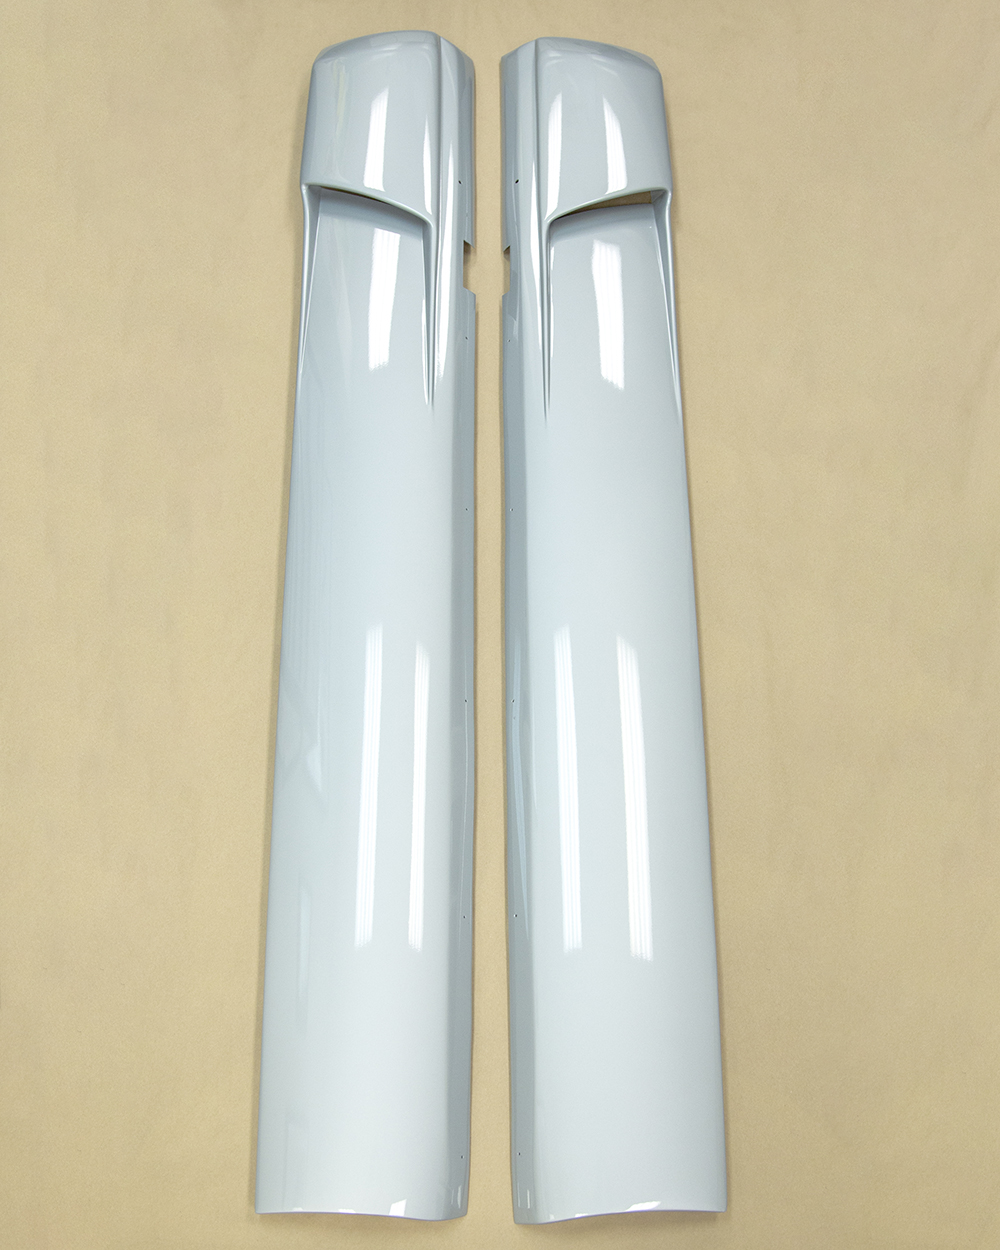
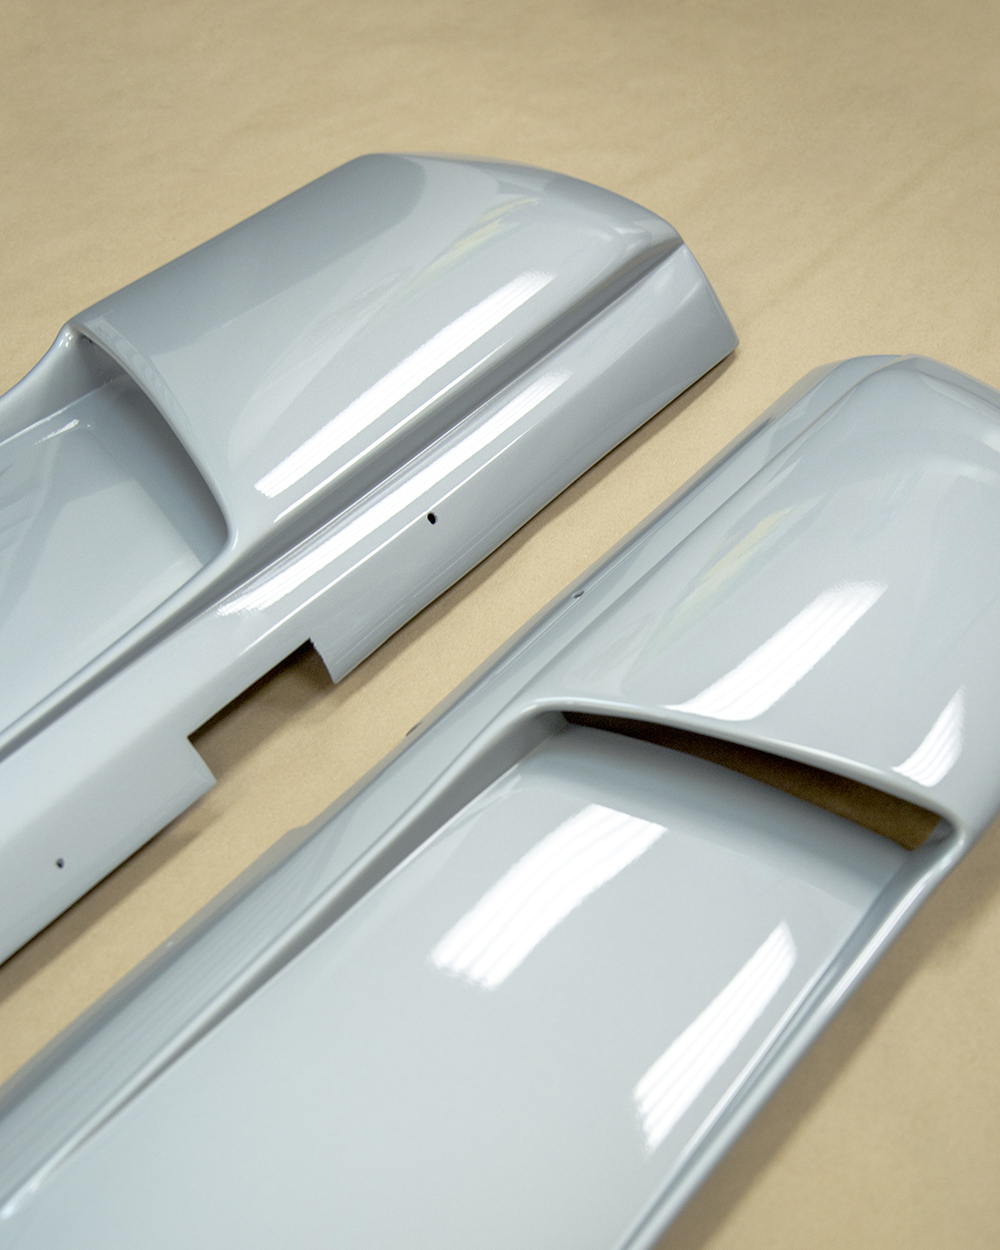
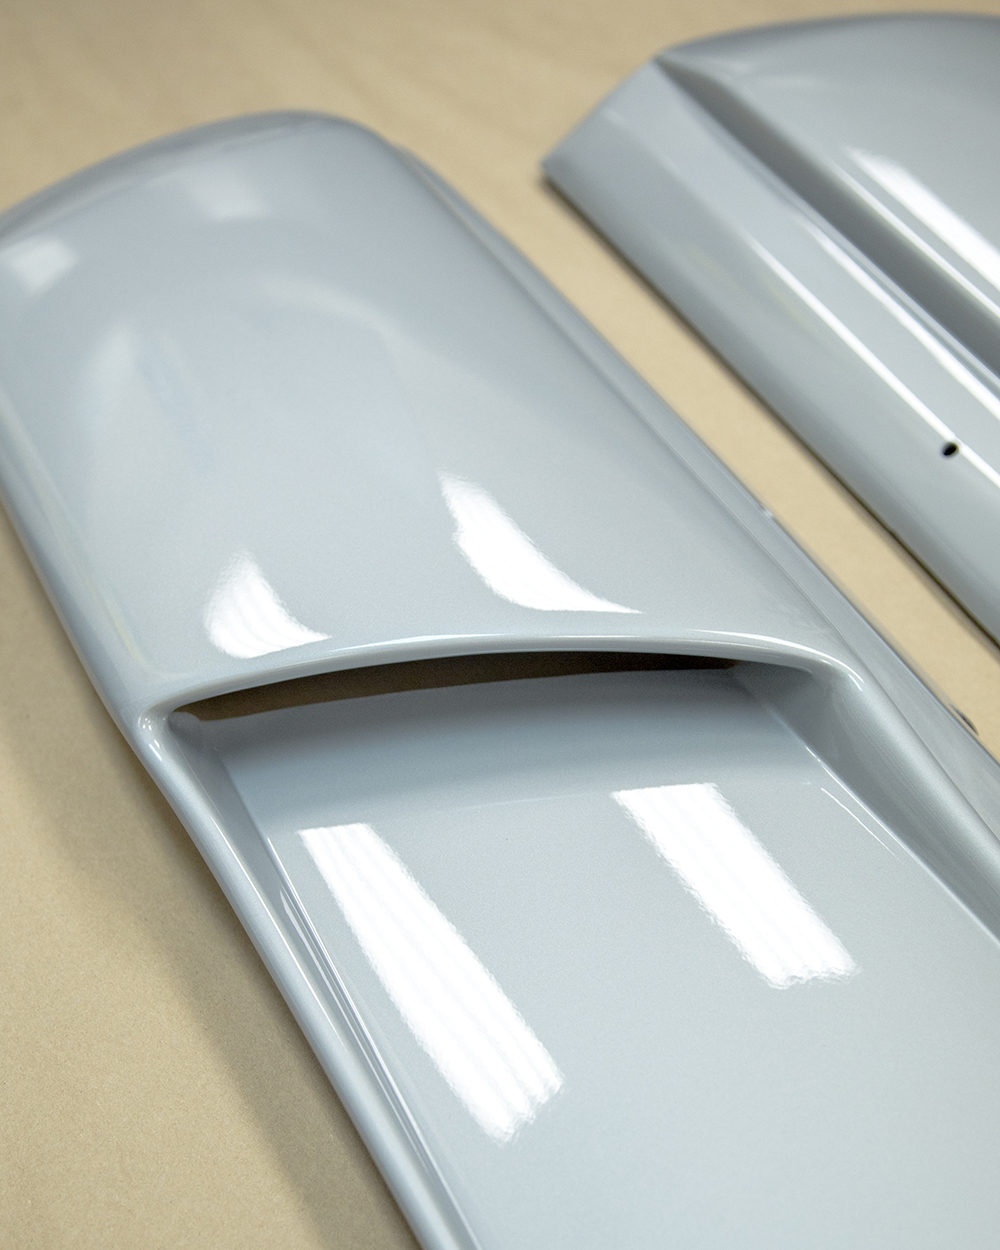
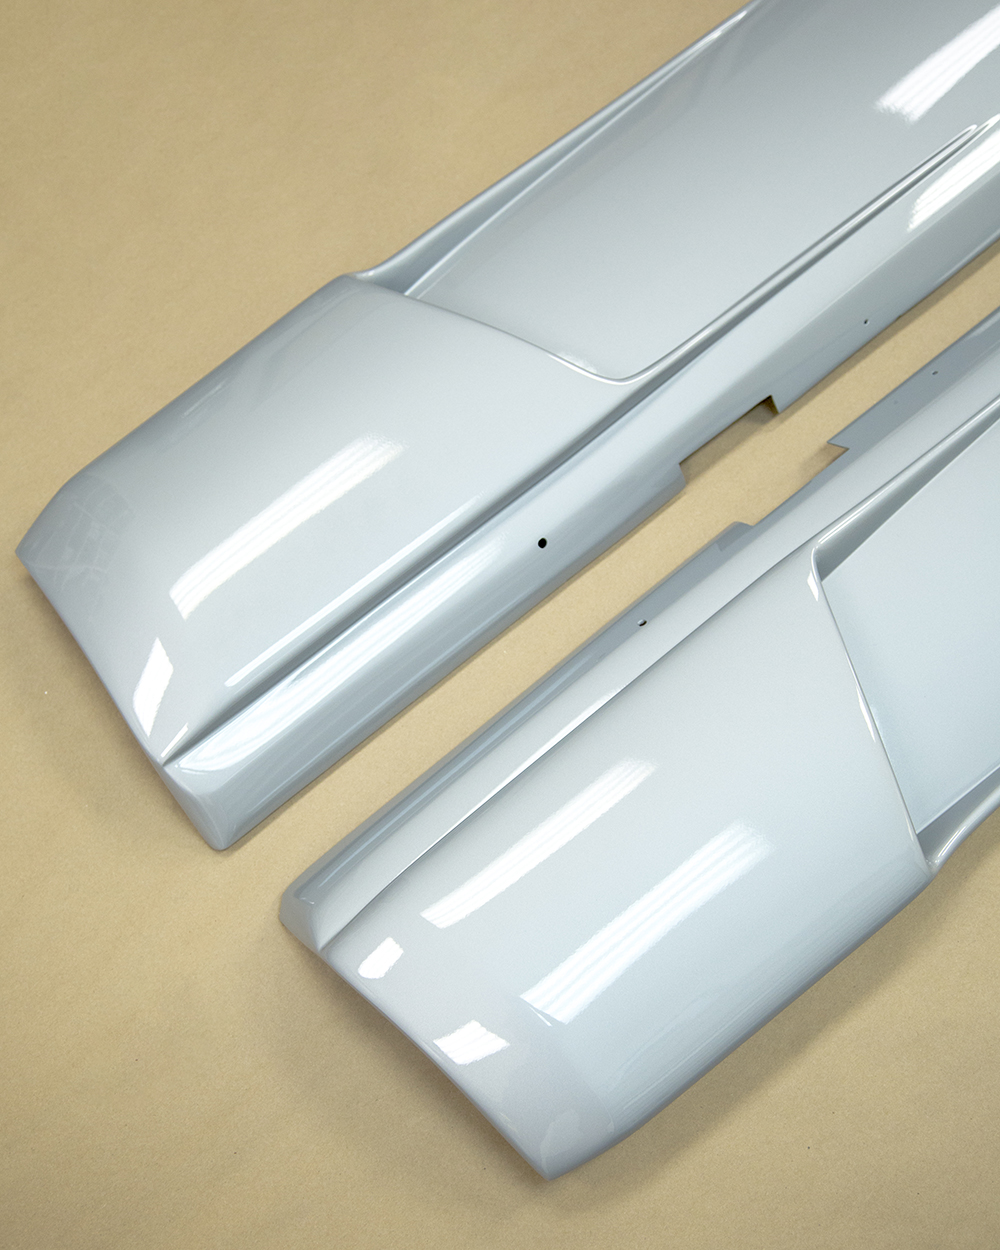
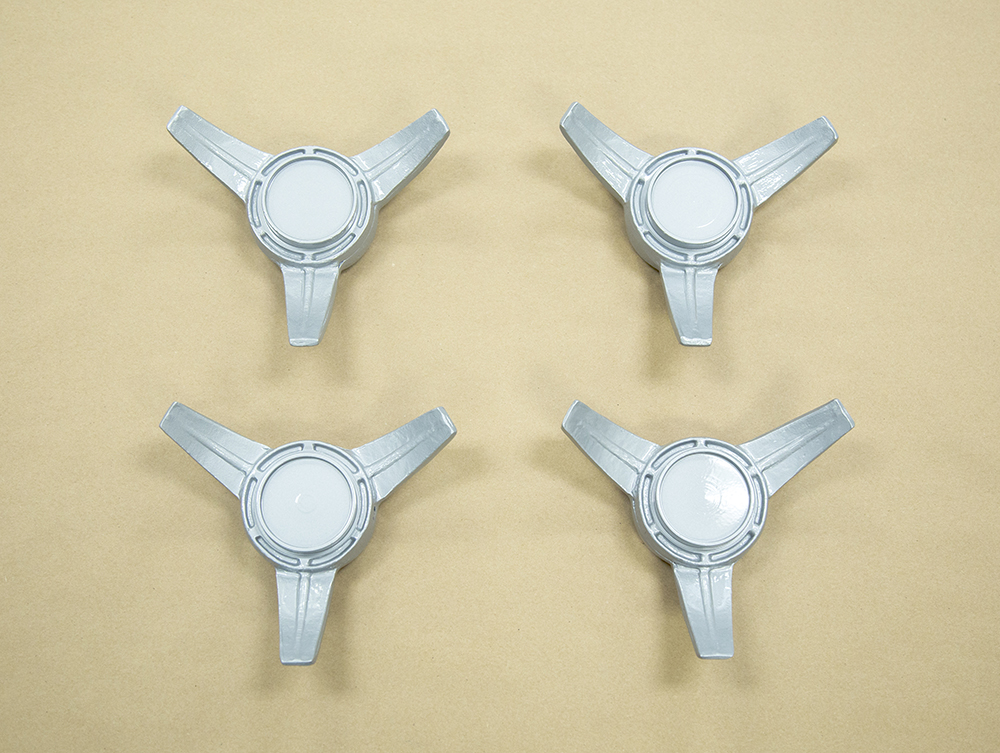
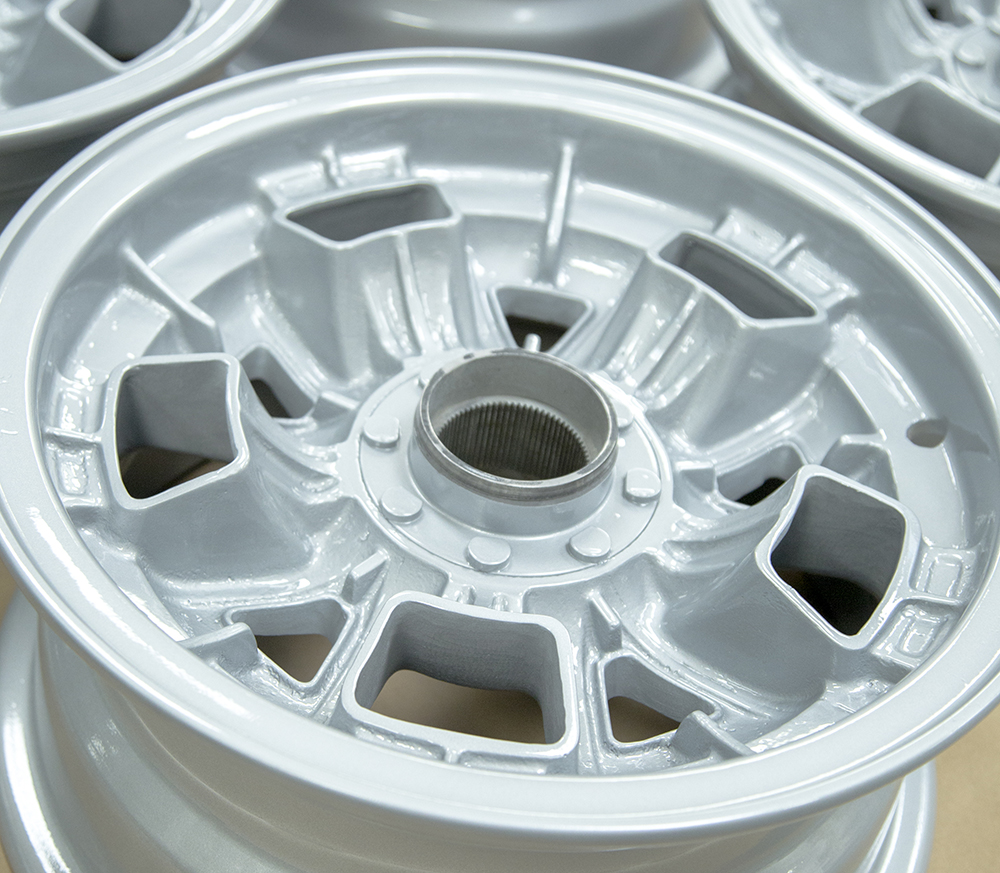
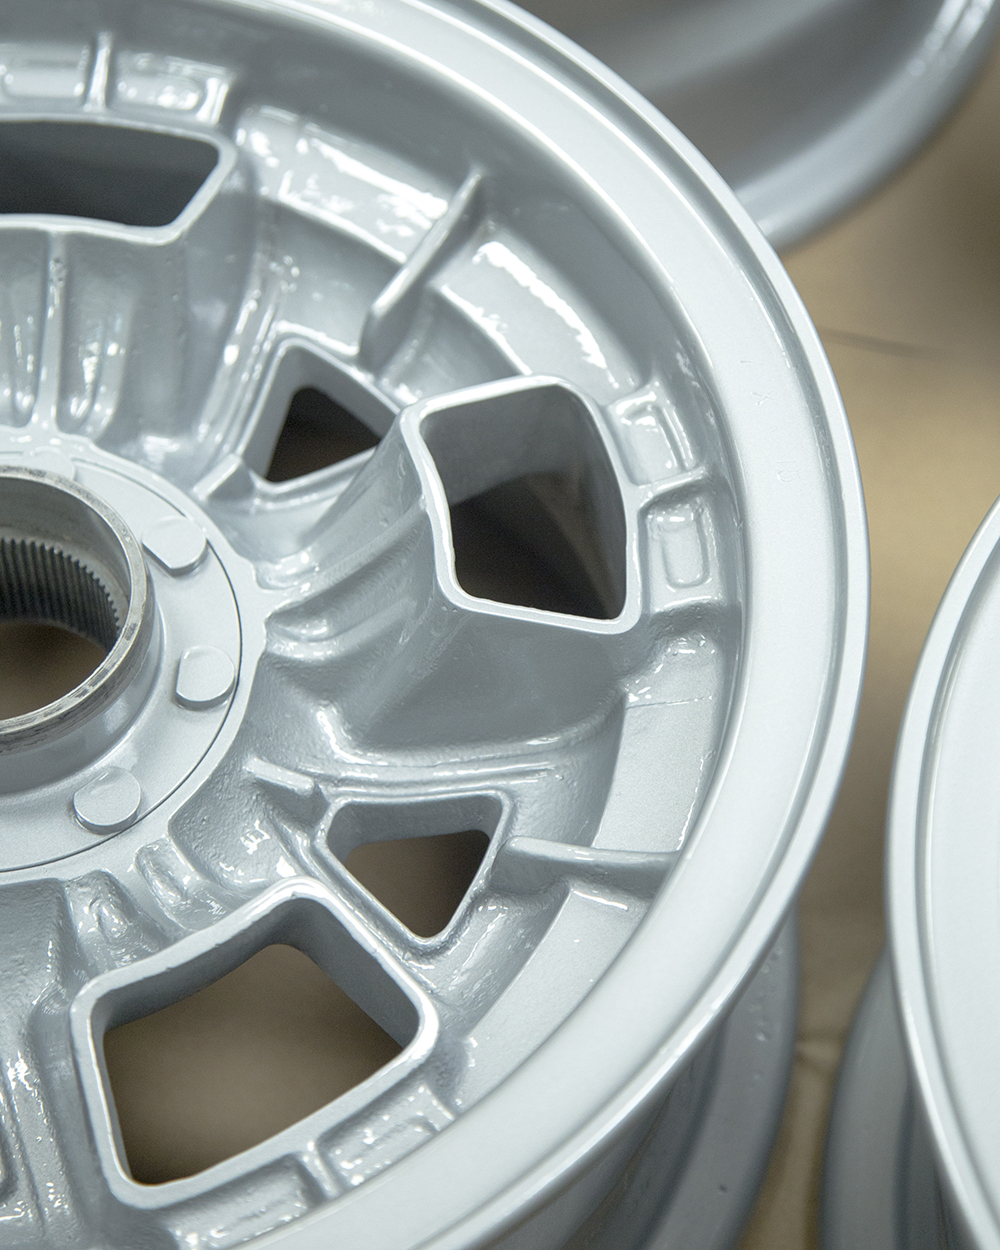
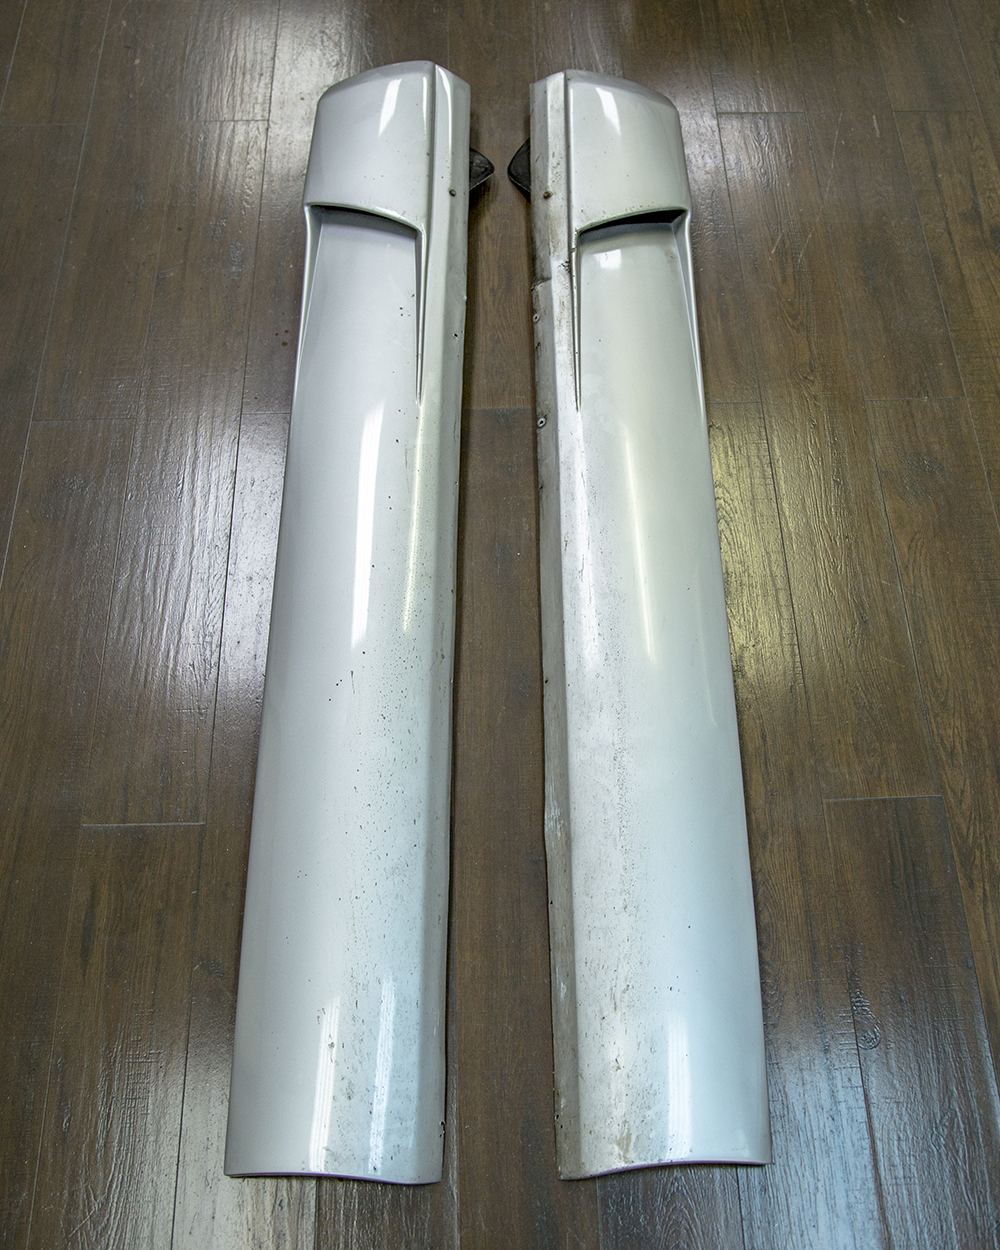
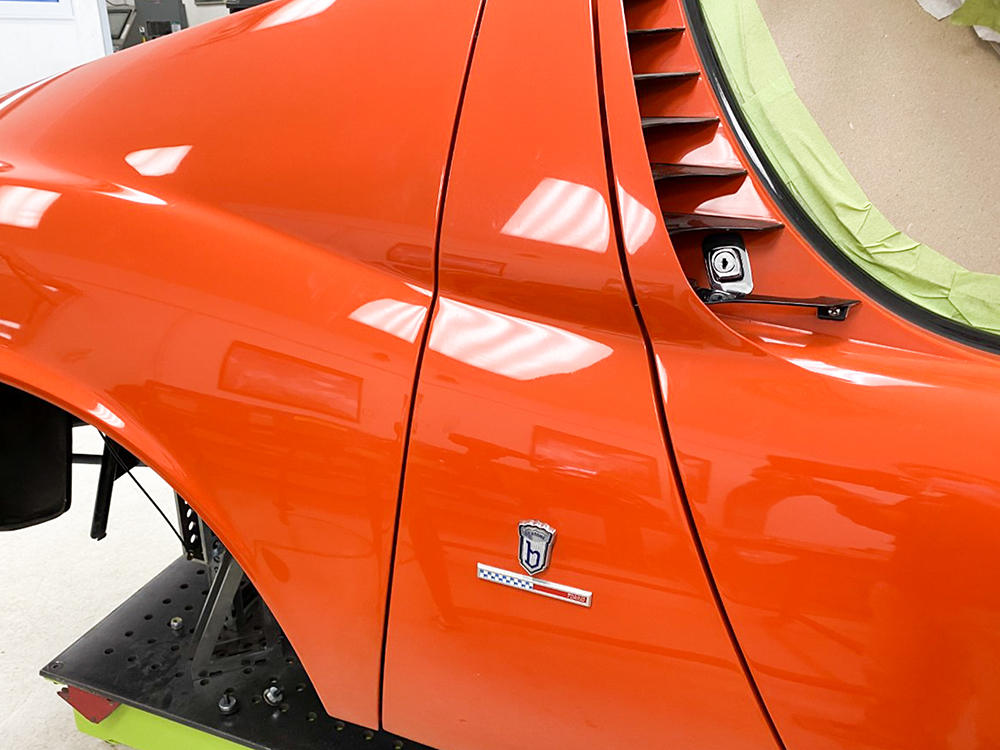
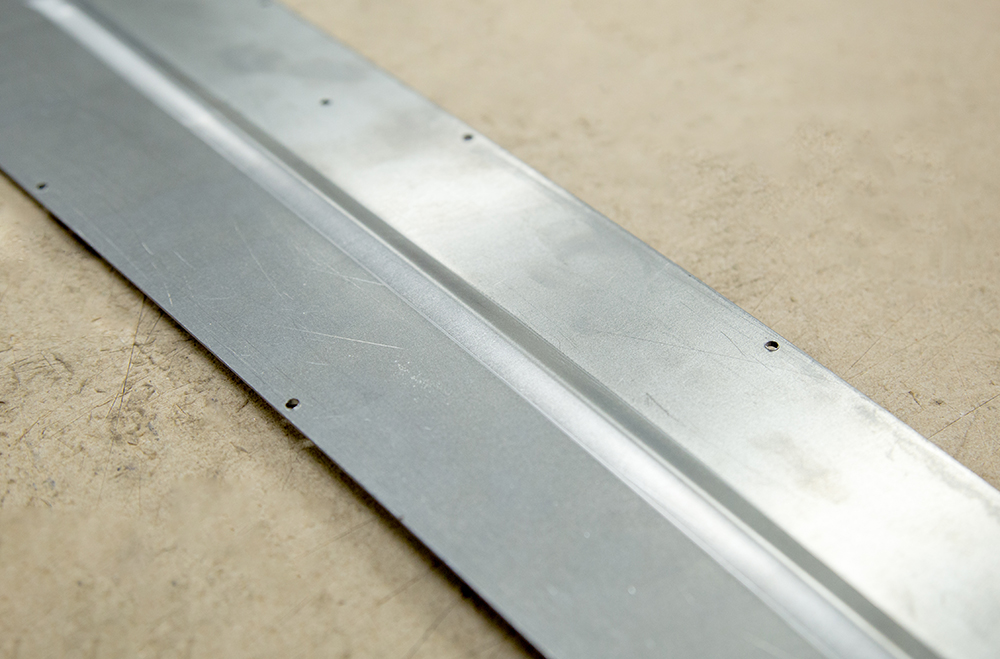
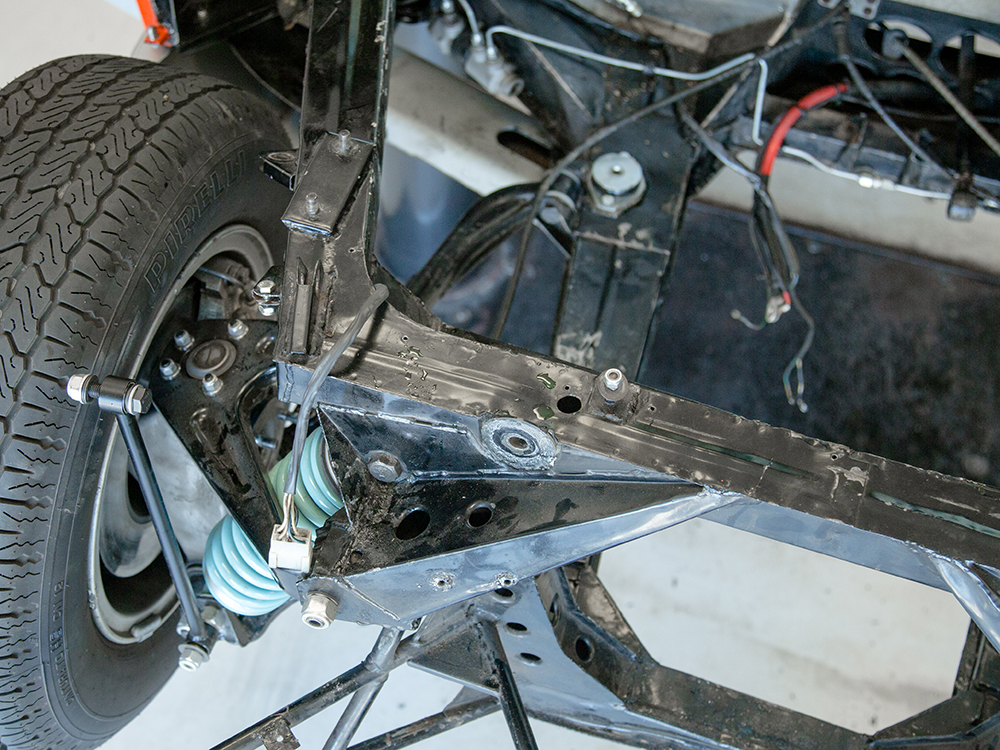
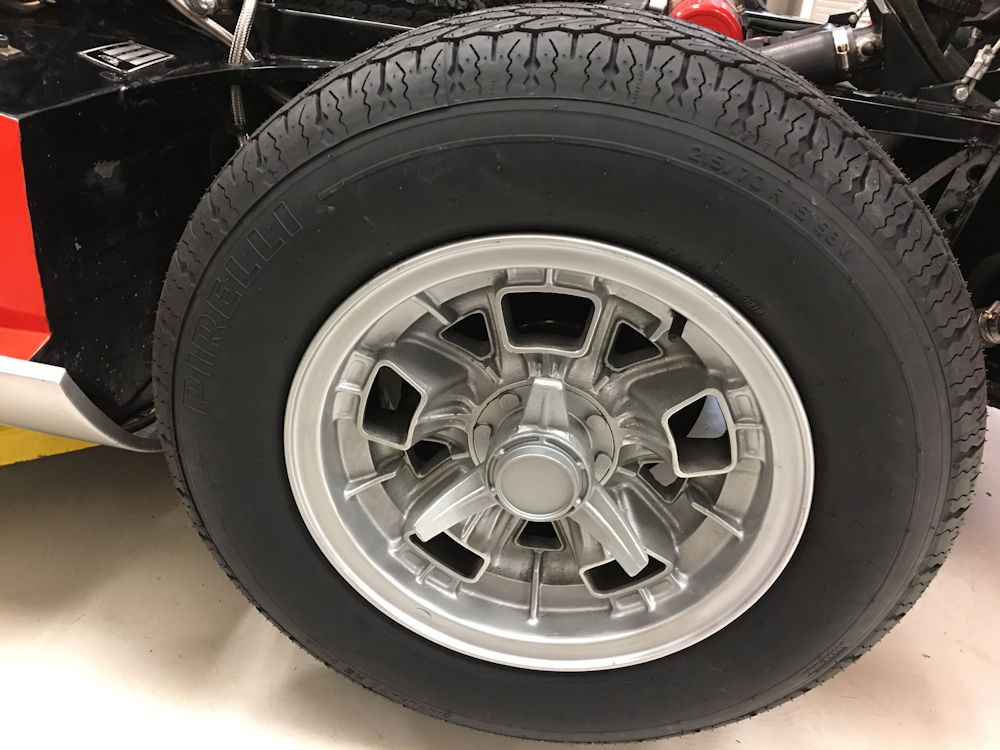
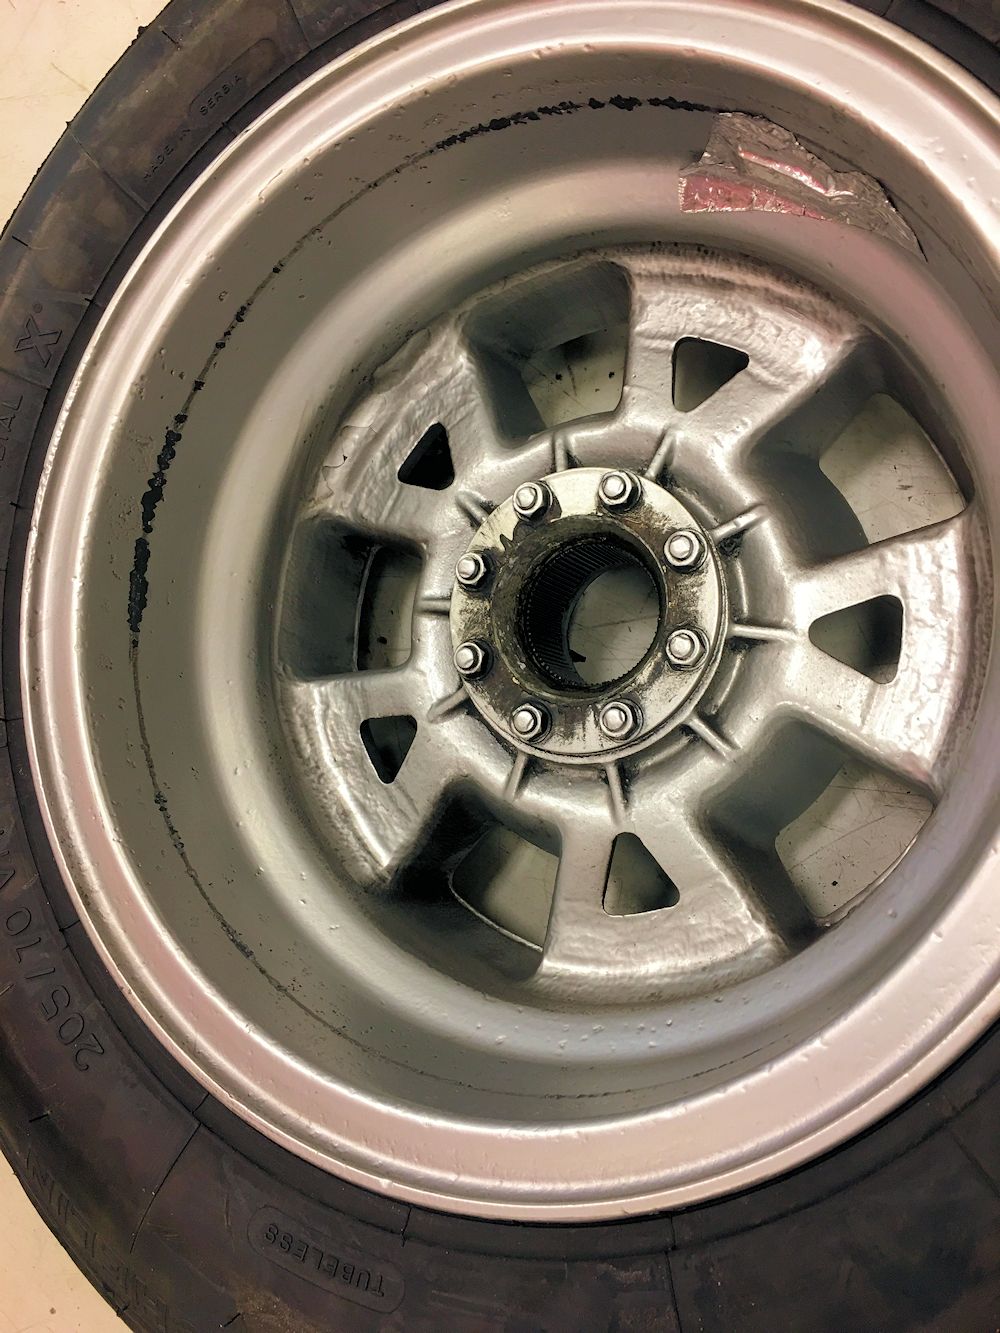
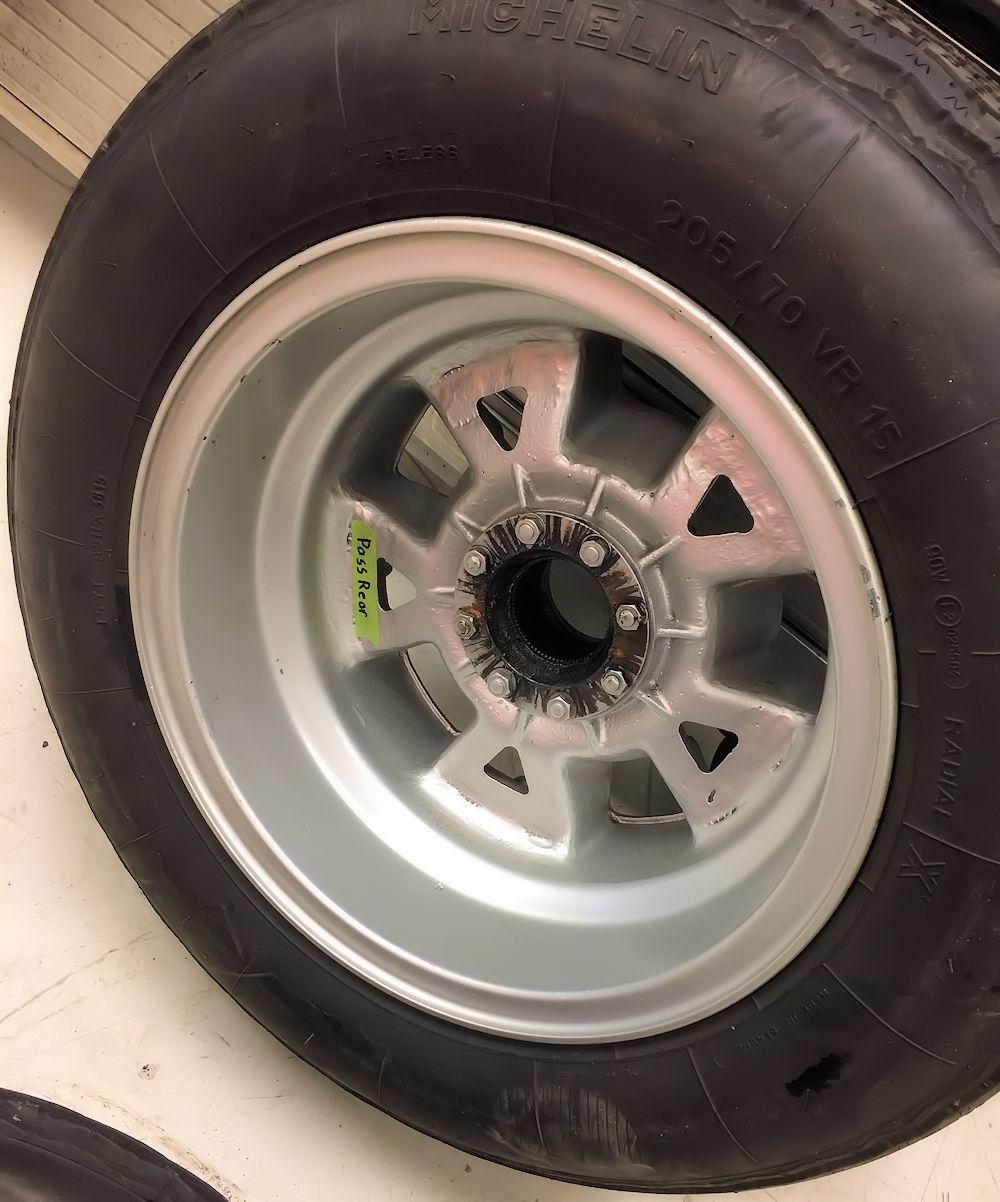
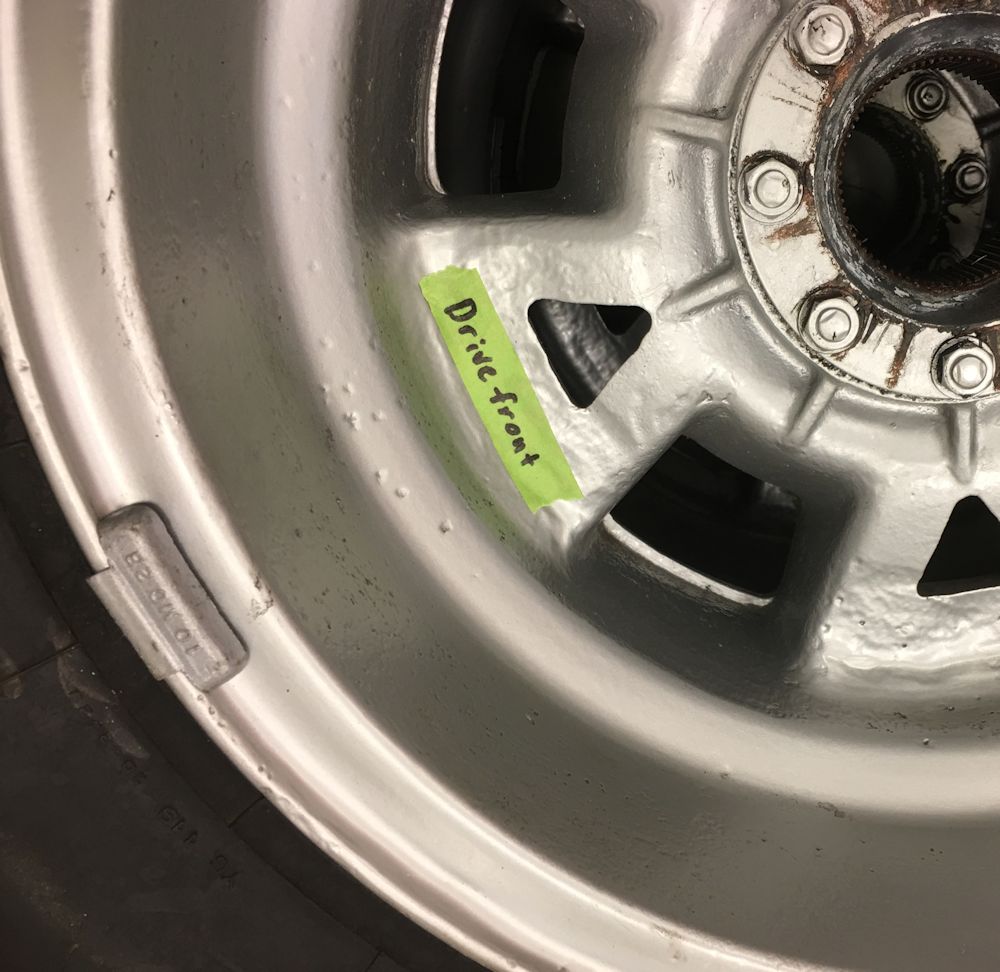
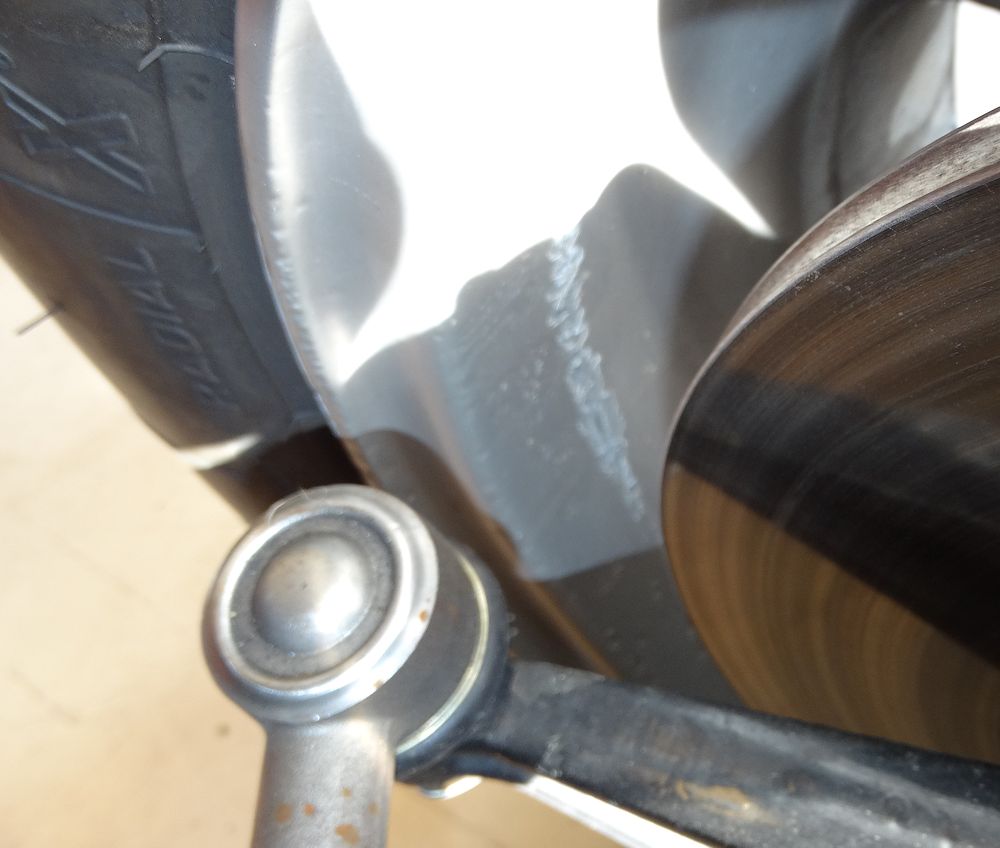
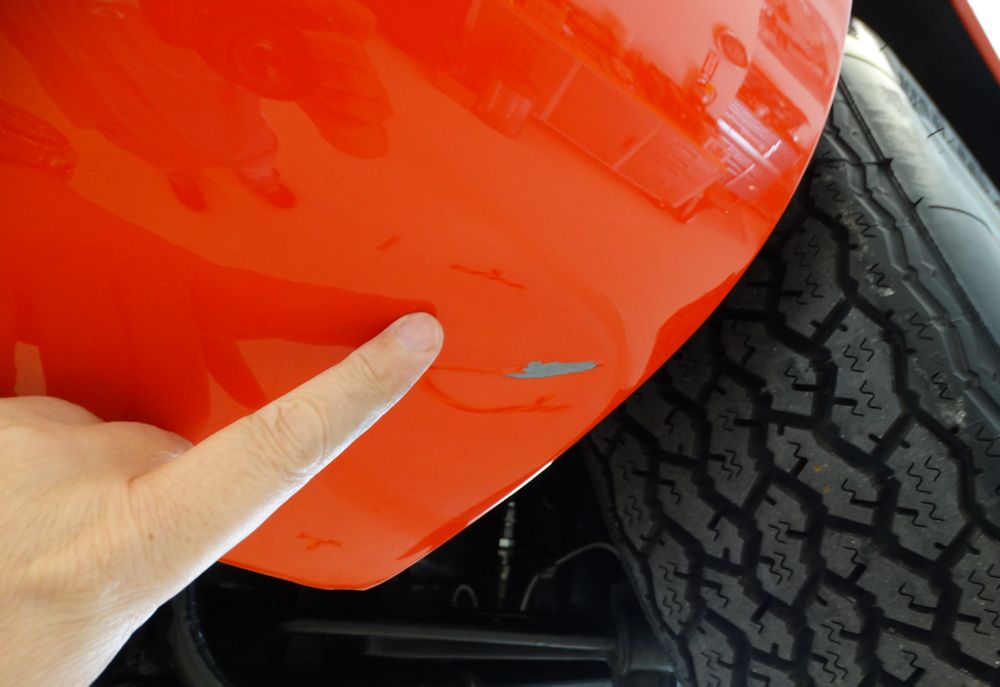
The outer sills and wheels have now been repaired and refinished.
 |
 |
 |
 |
 |
 |
 |
 |
 |
 |
 |
 |
 |
 |
 |
 |
 |
 |
 |
 |
 |
 |
 |
 |
 |
 |
 |
 |
 |
 |
 |
 |
 |
 |
 |
 |
 |
 |
 |
 |
 |
 |
 |
 |
 |
 |
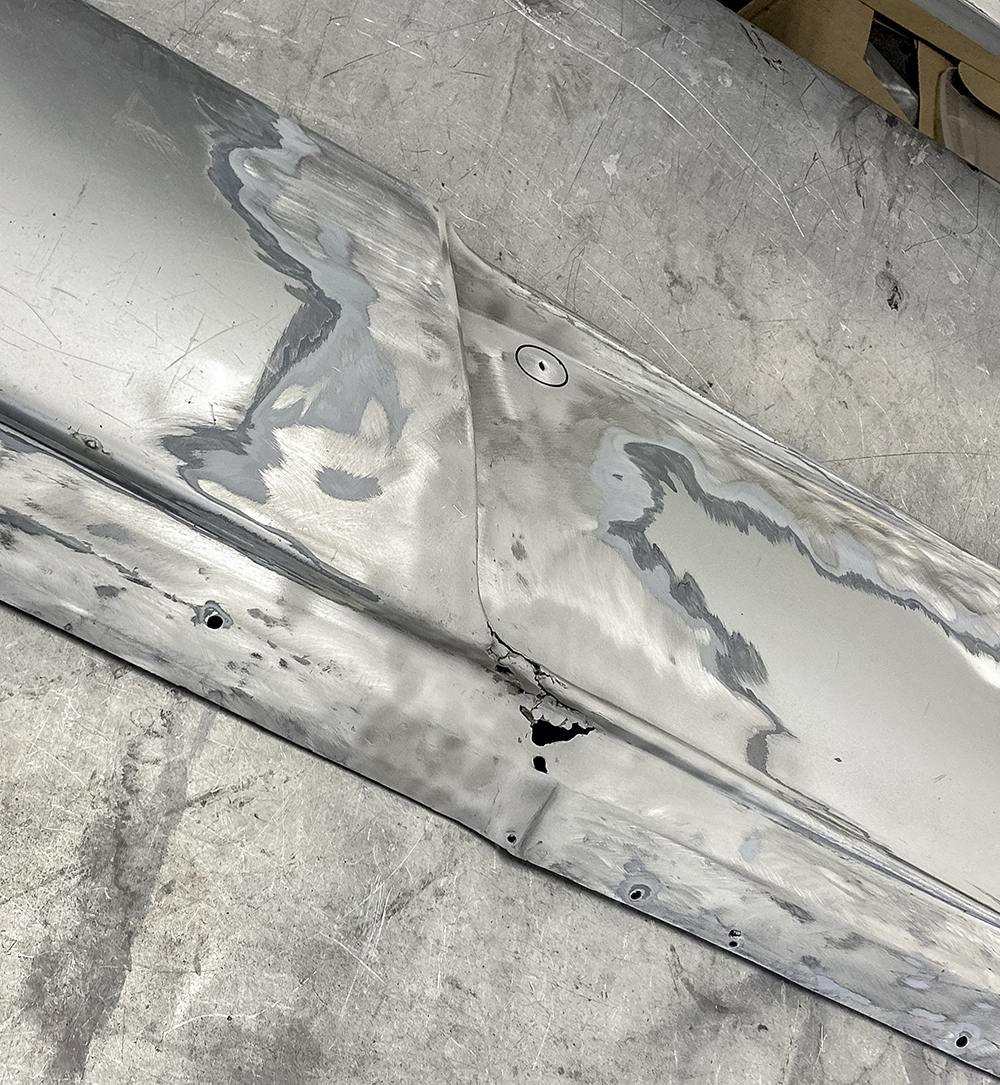
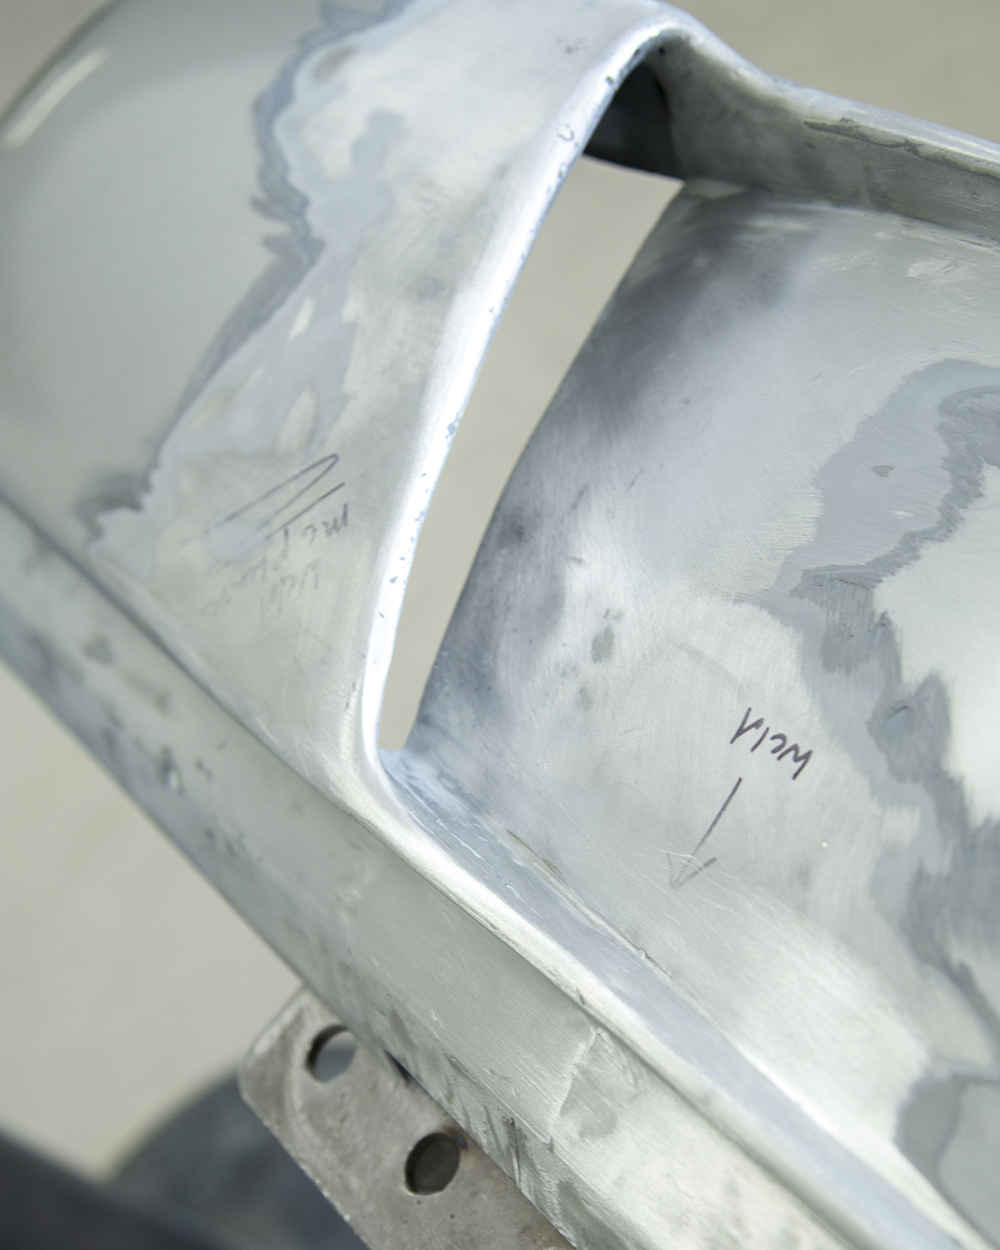
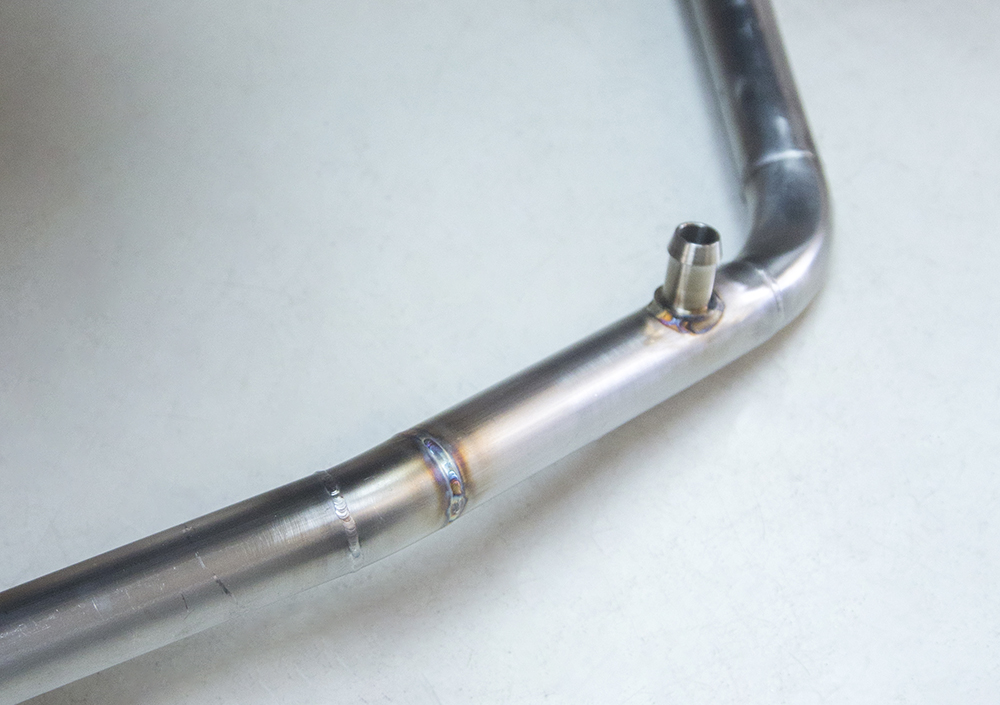
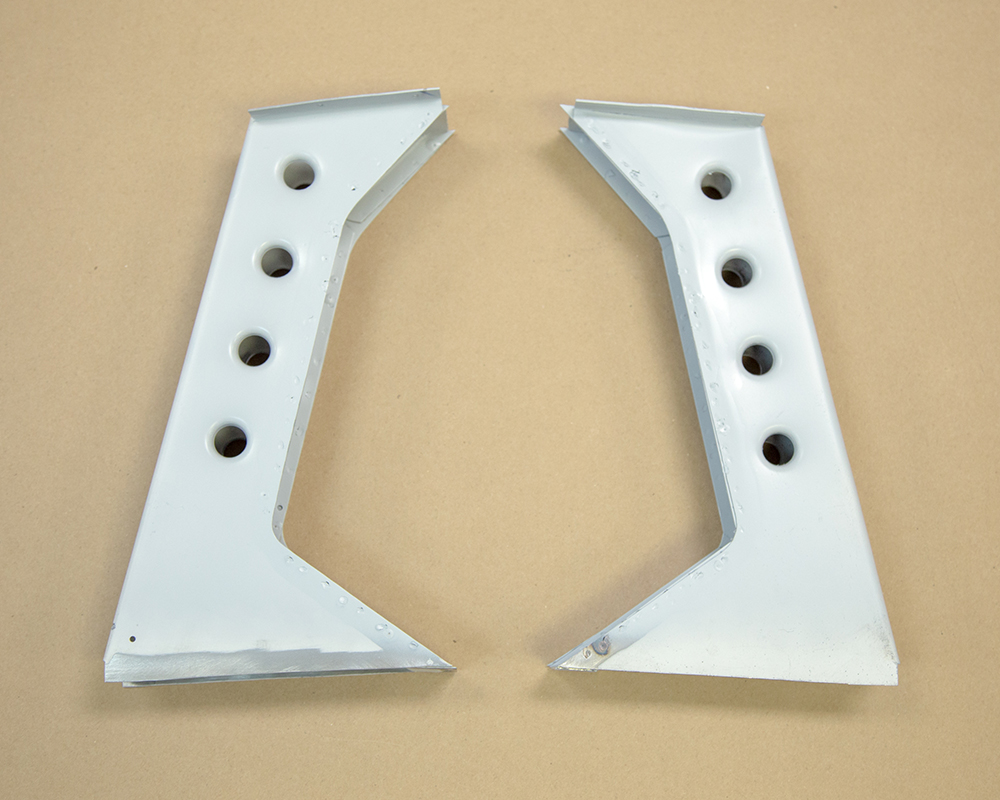
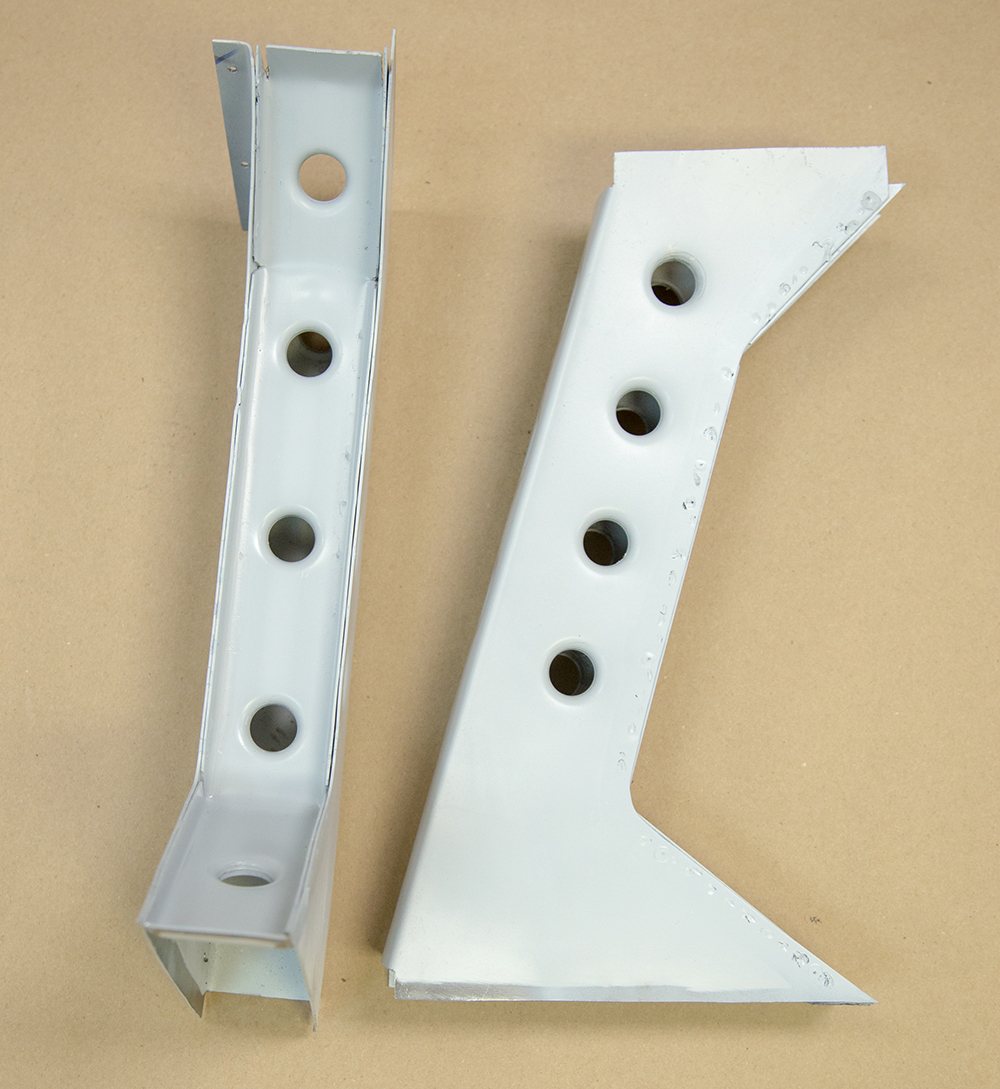
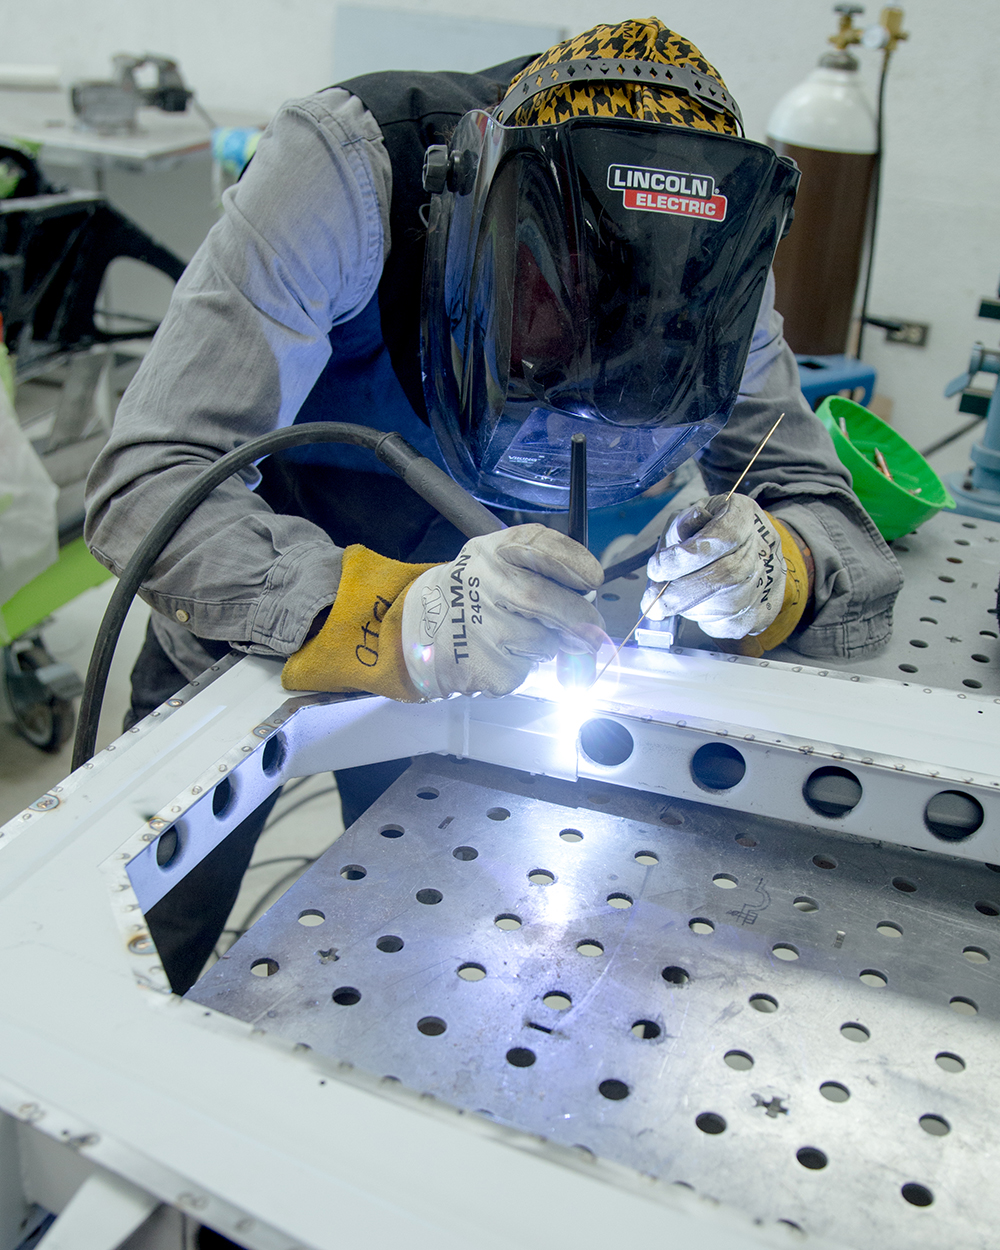
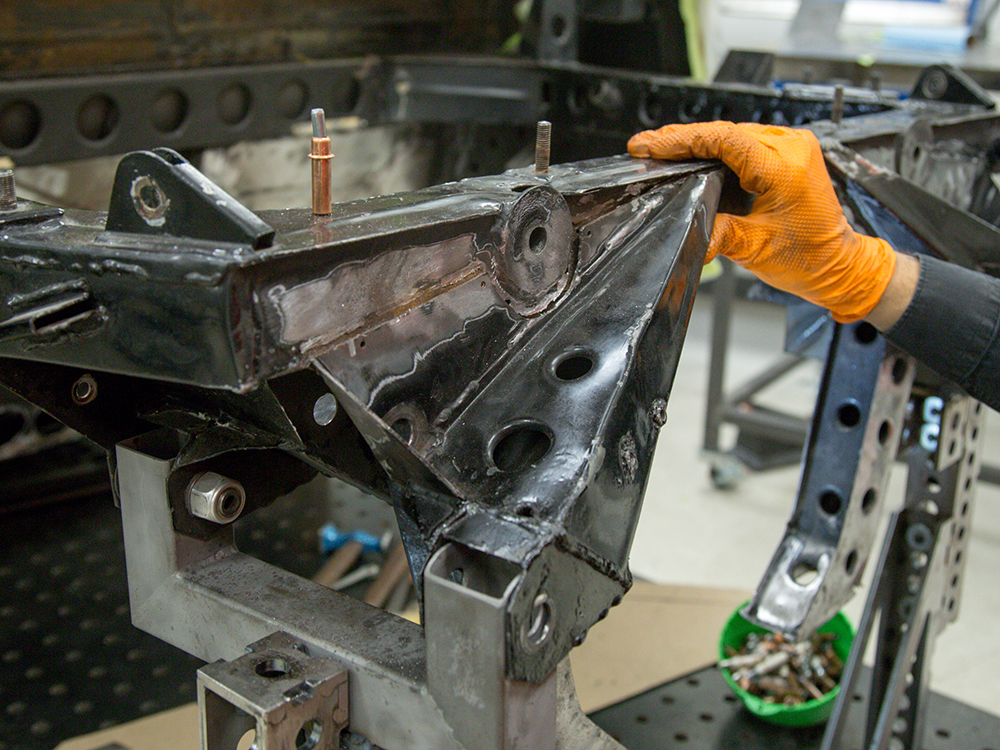
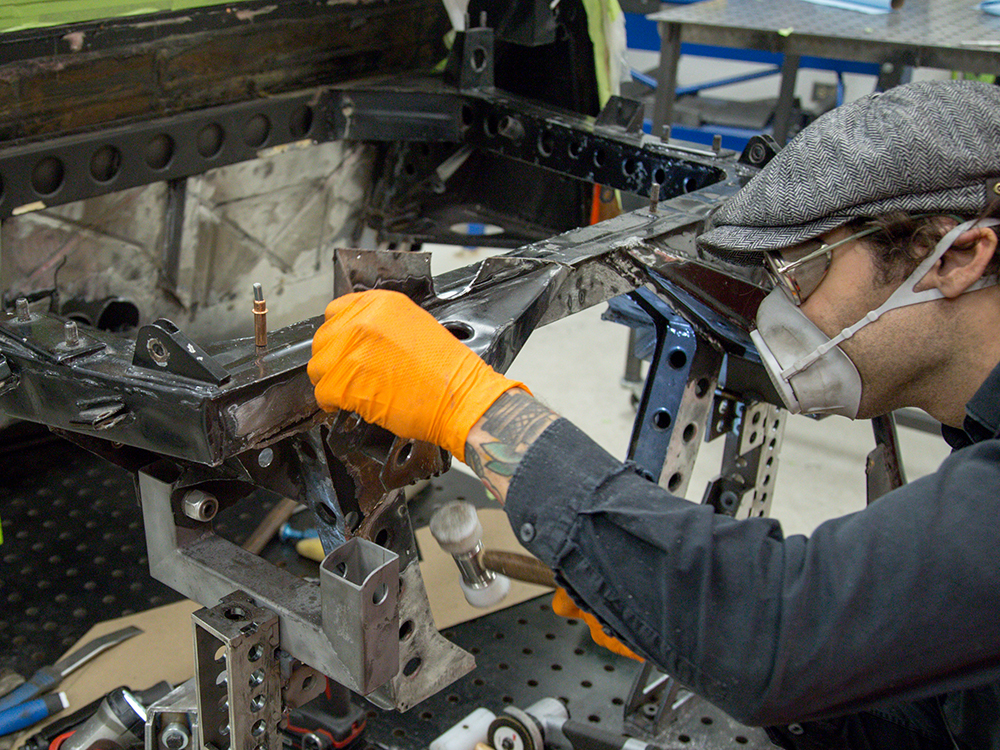
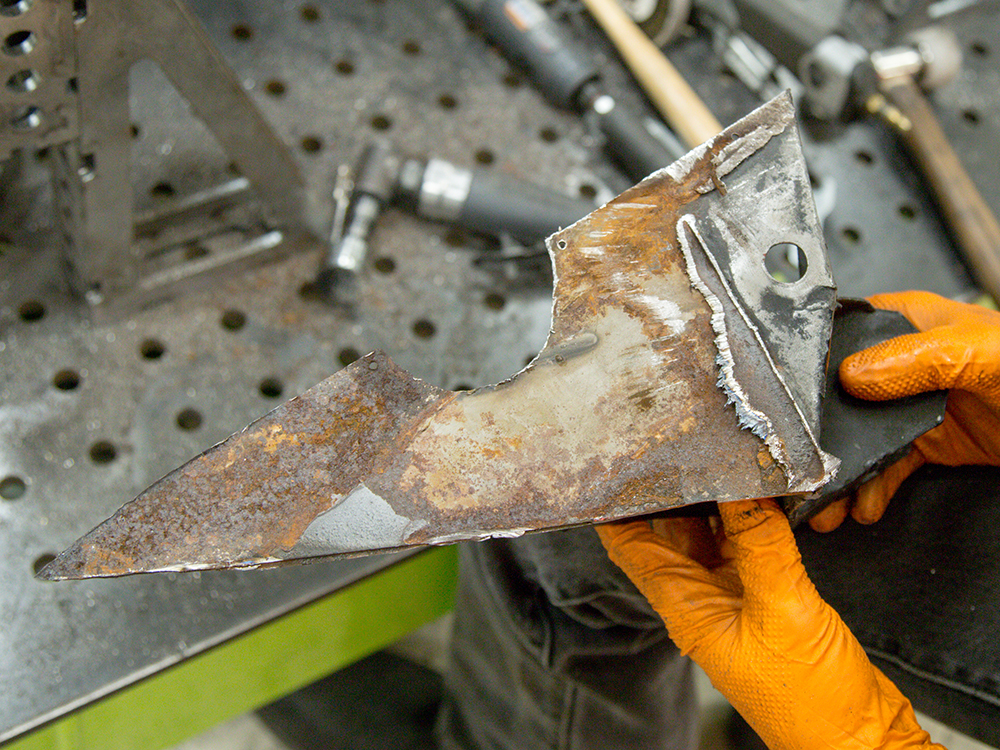
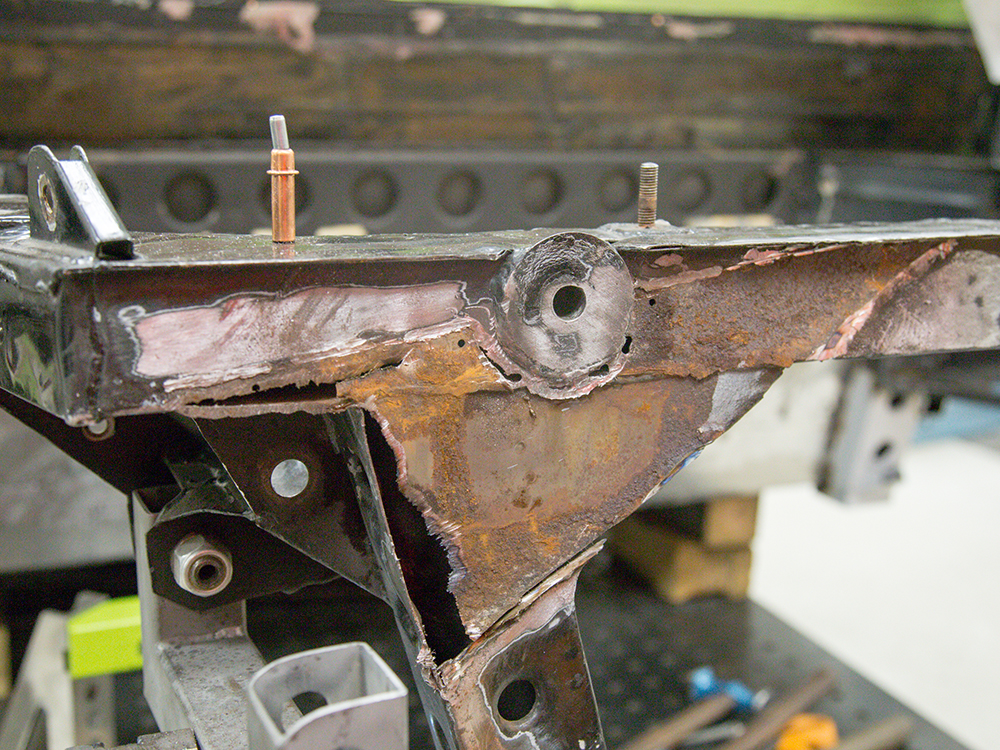
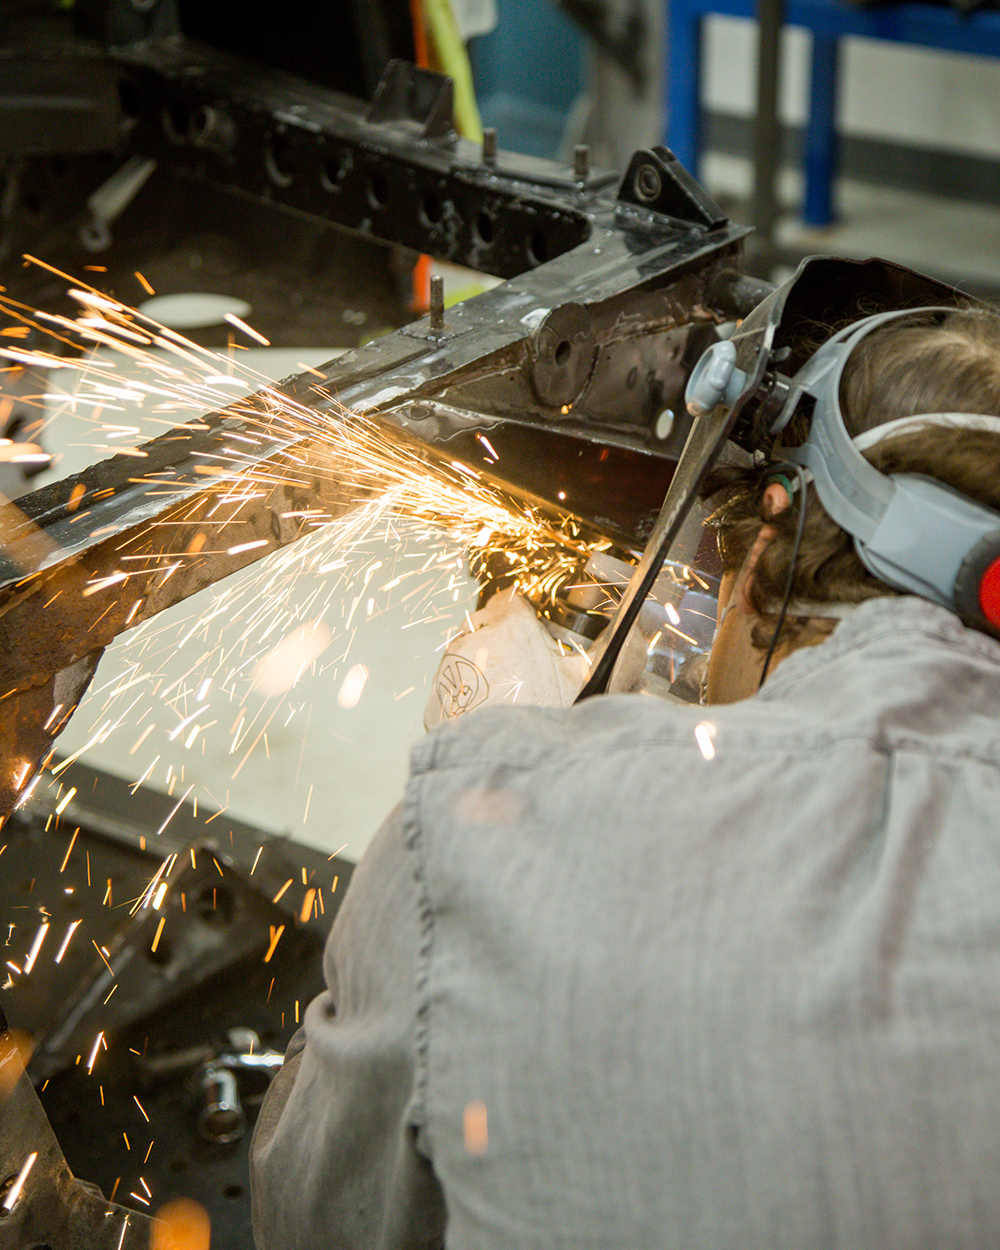
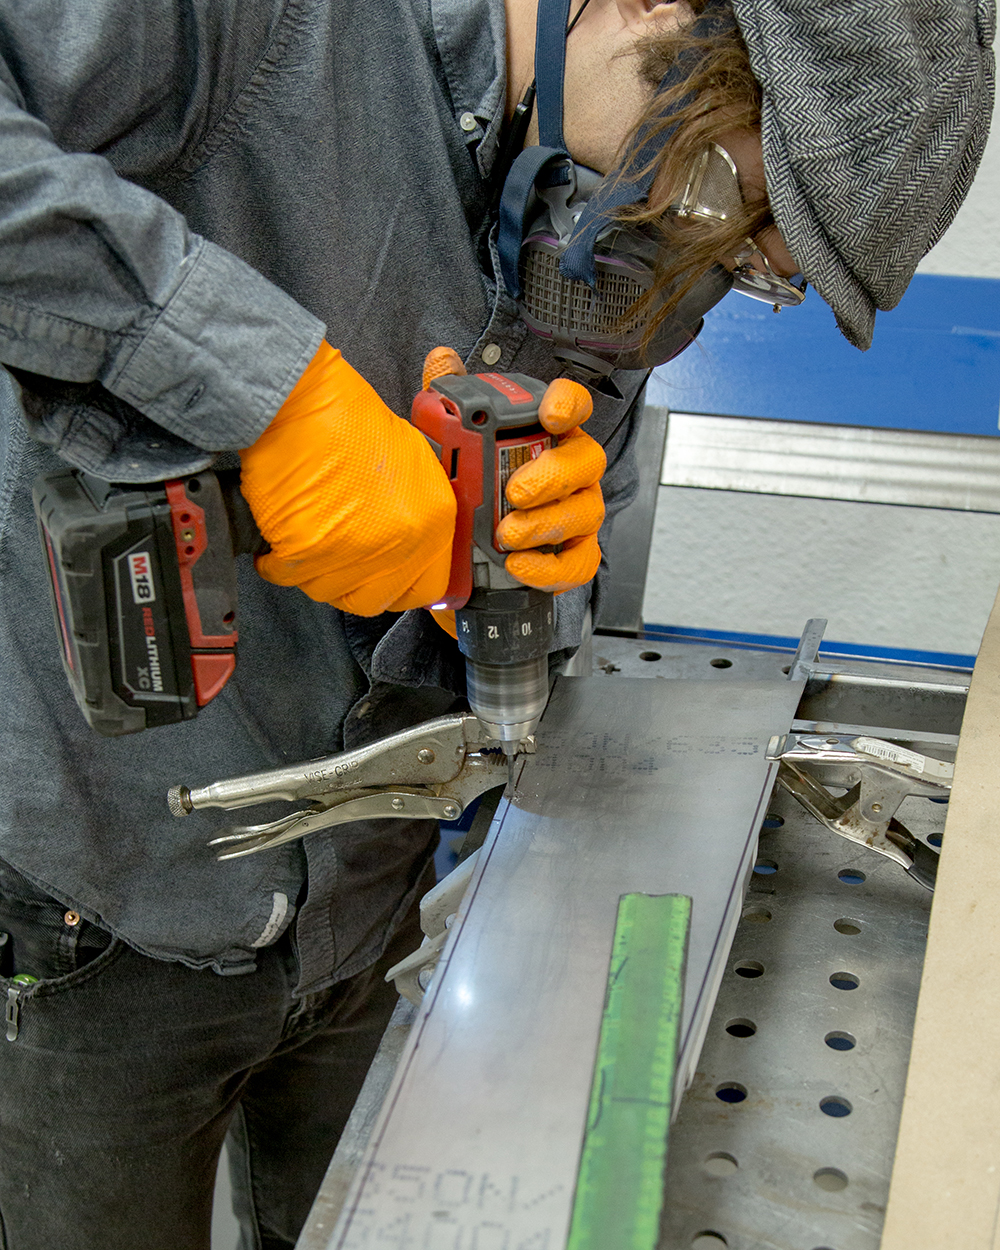
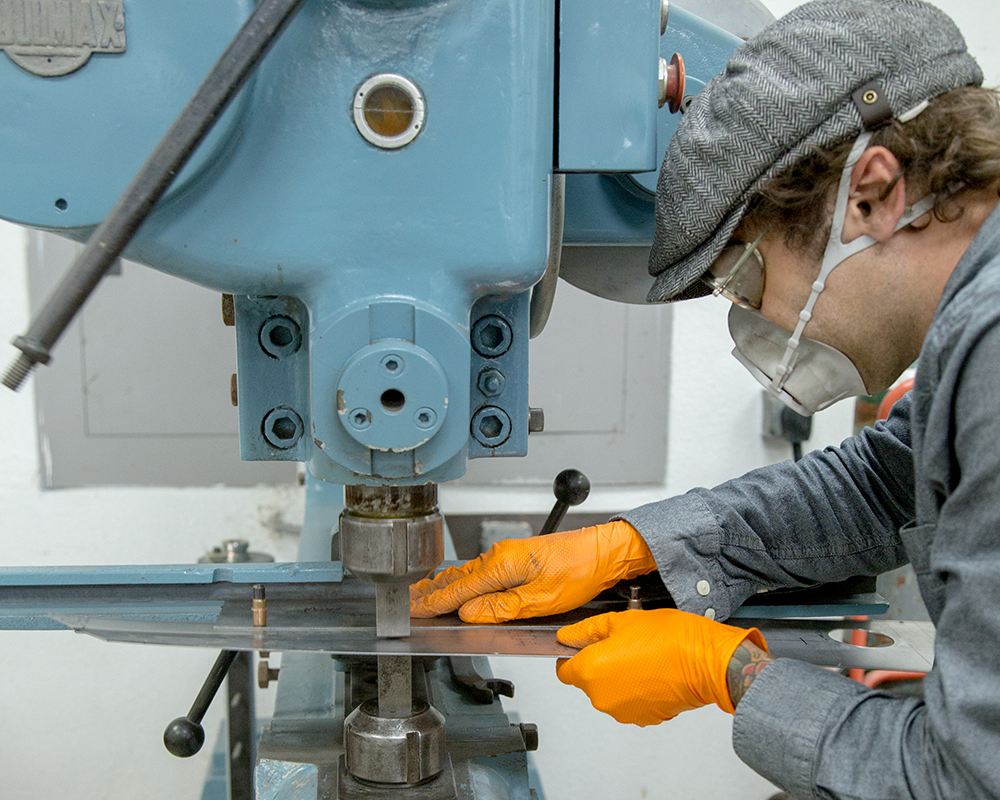
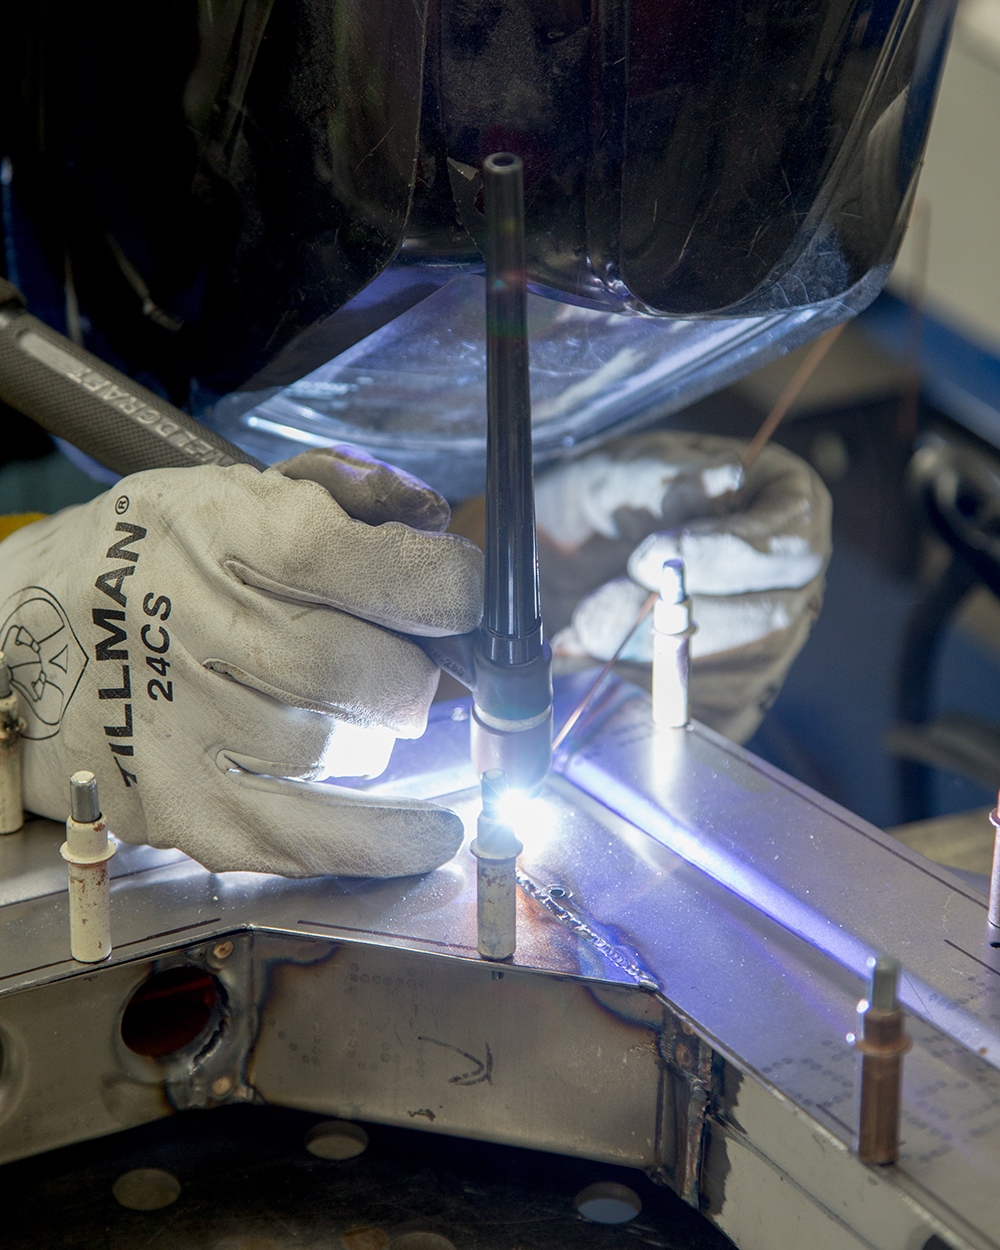
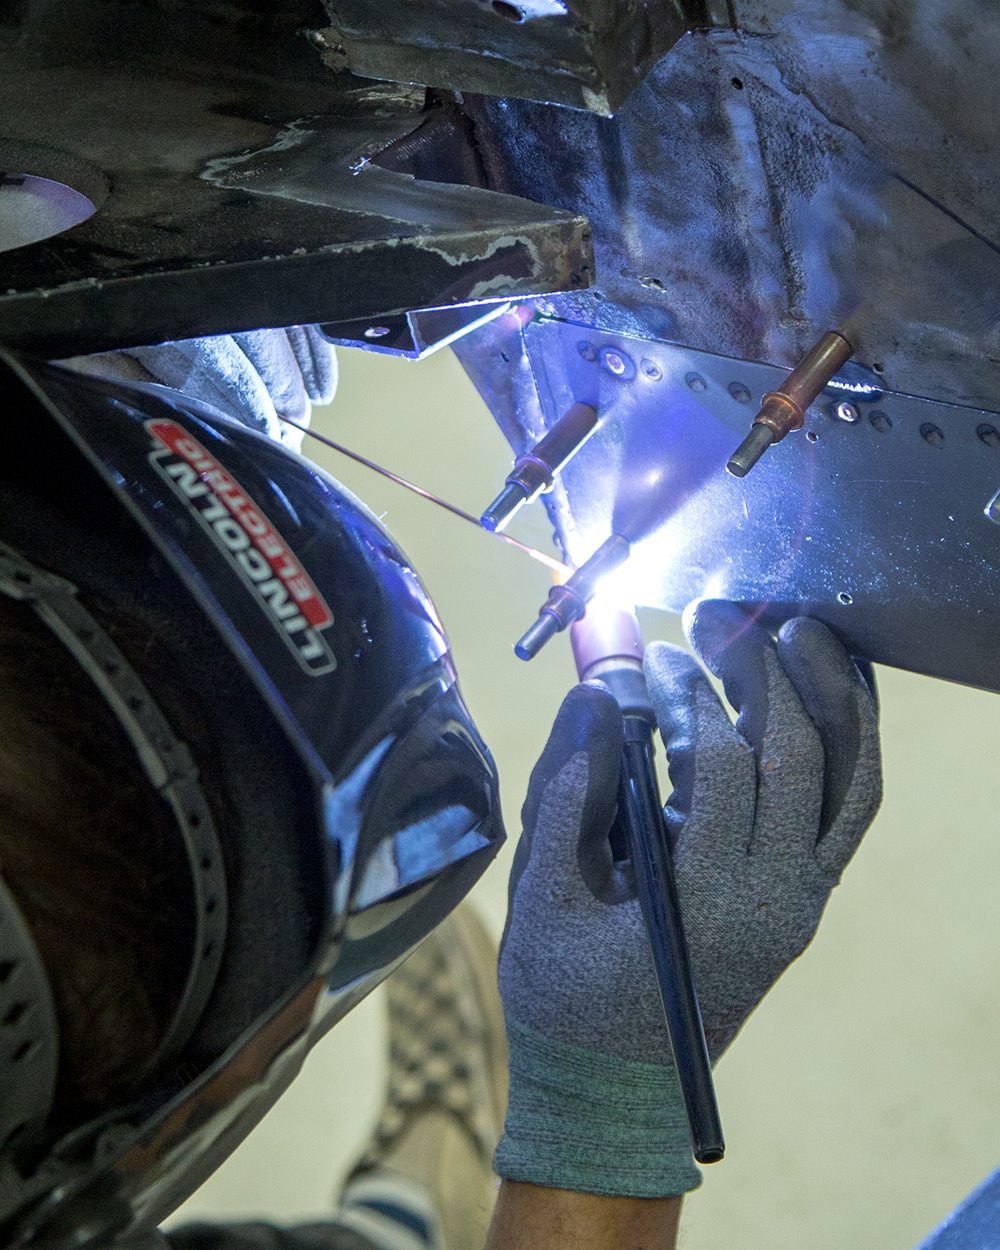
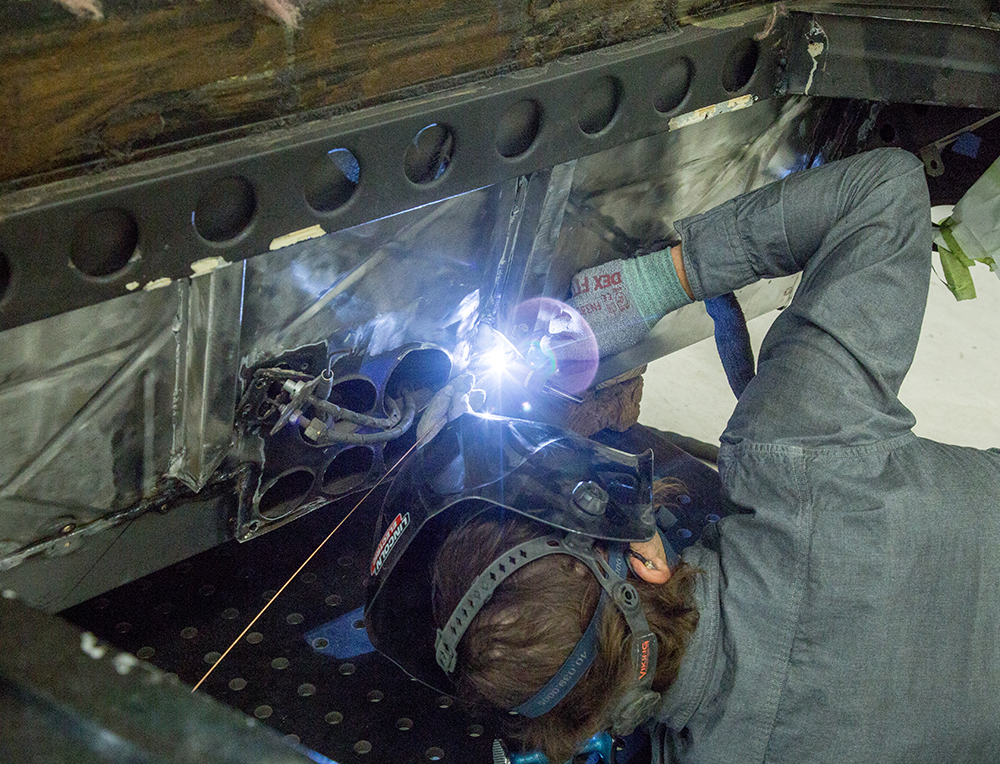
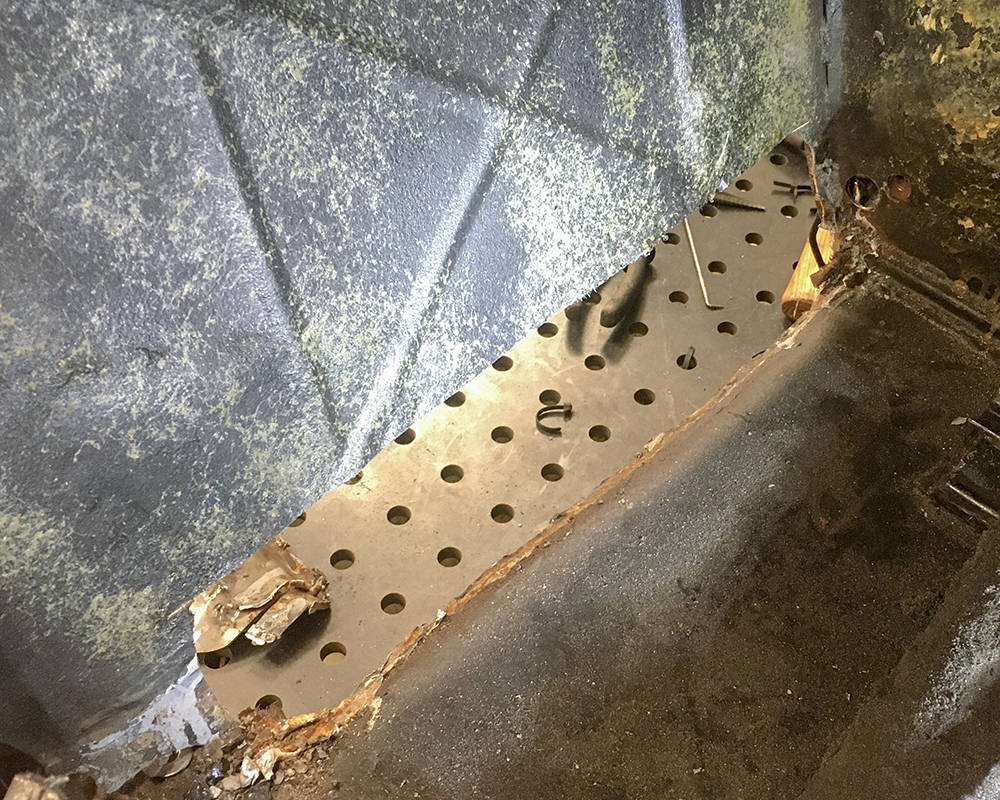
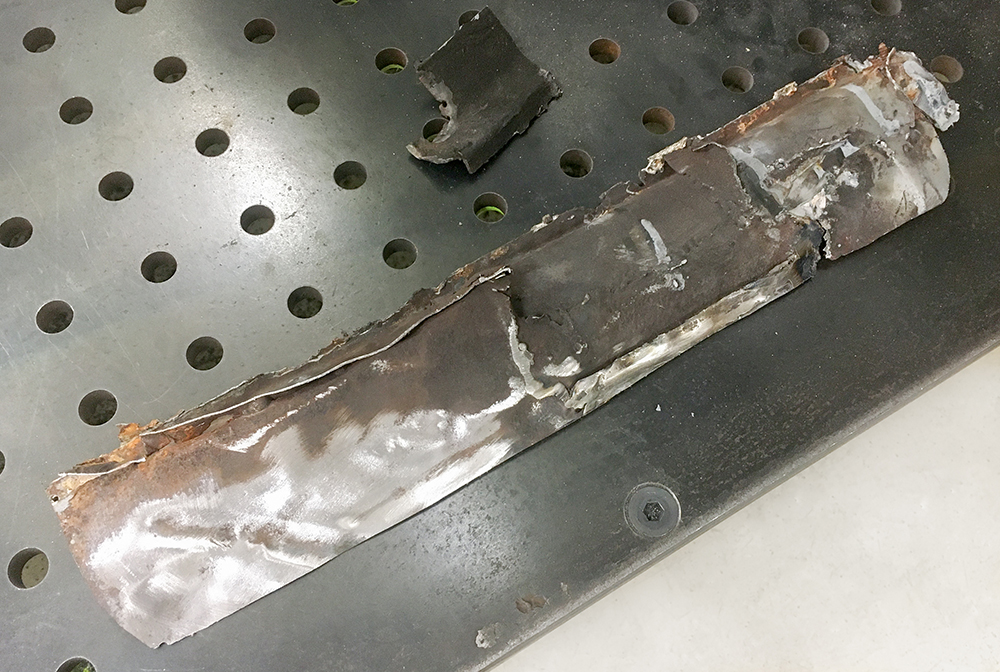
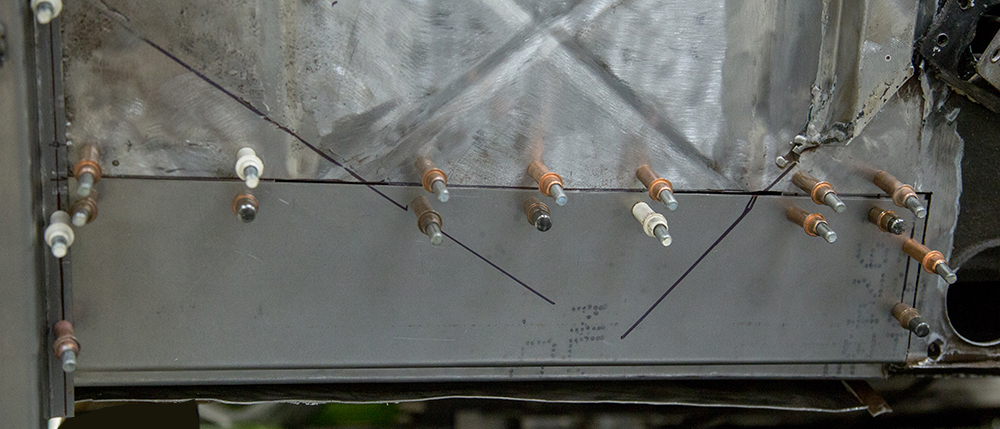
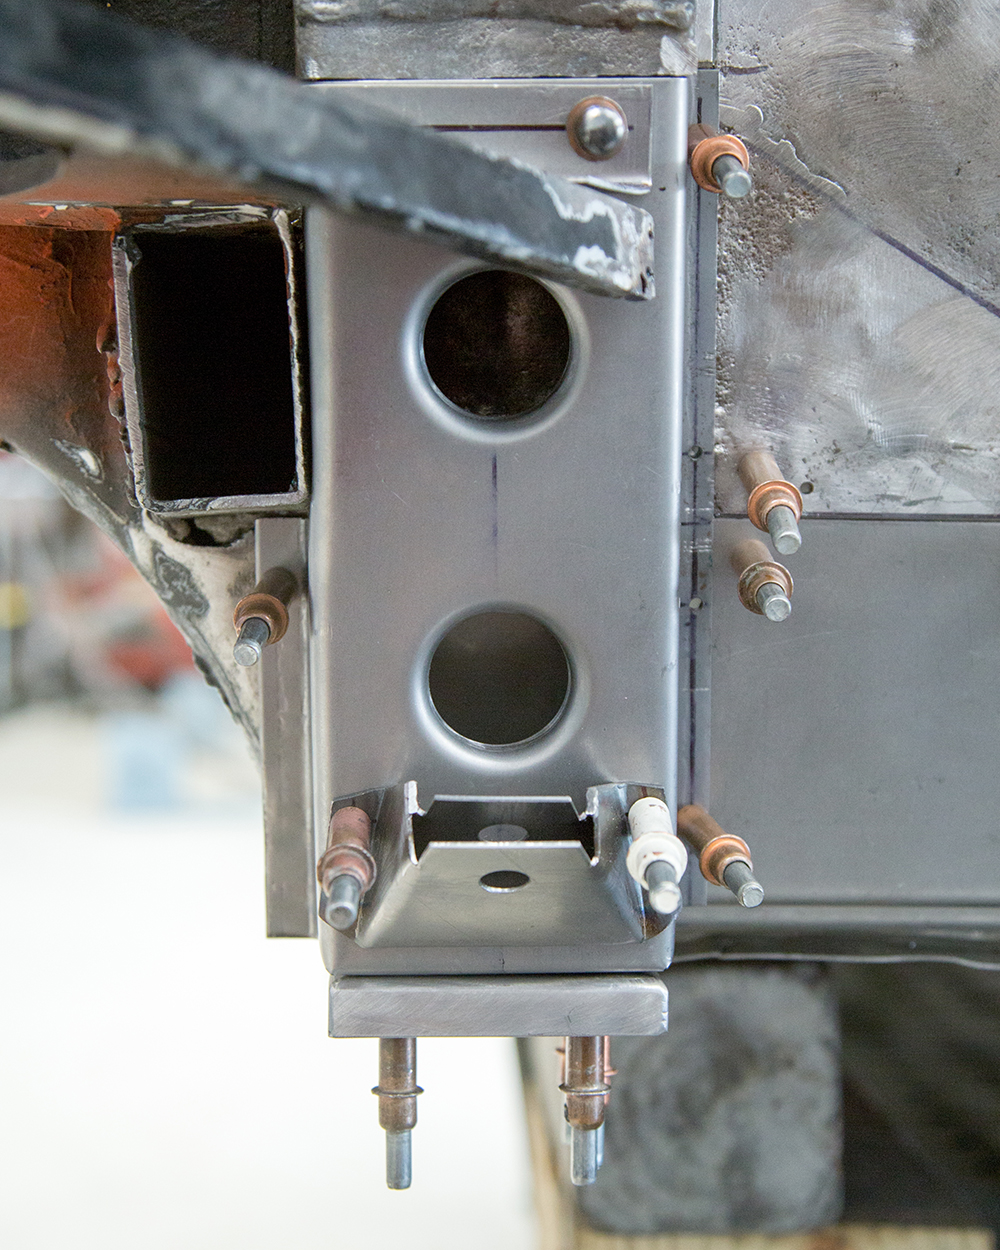
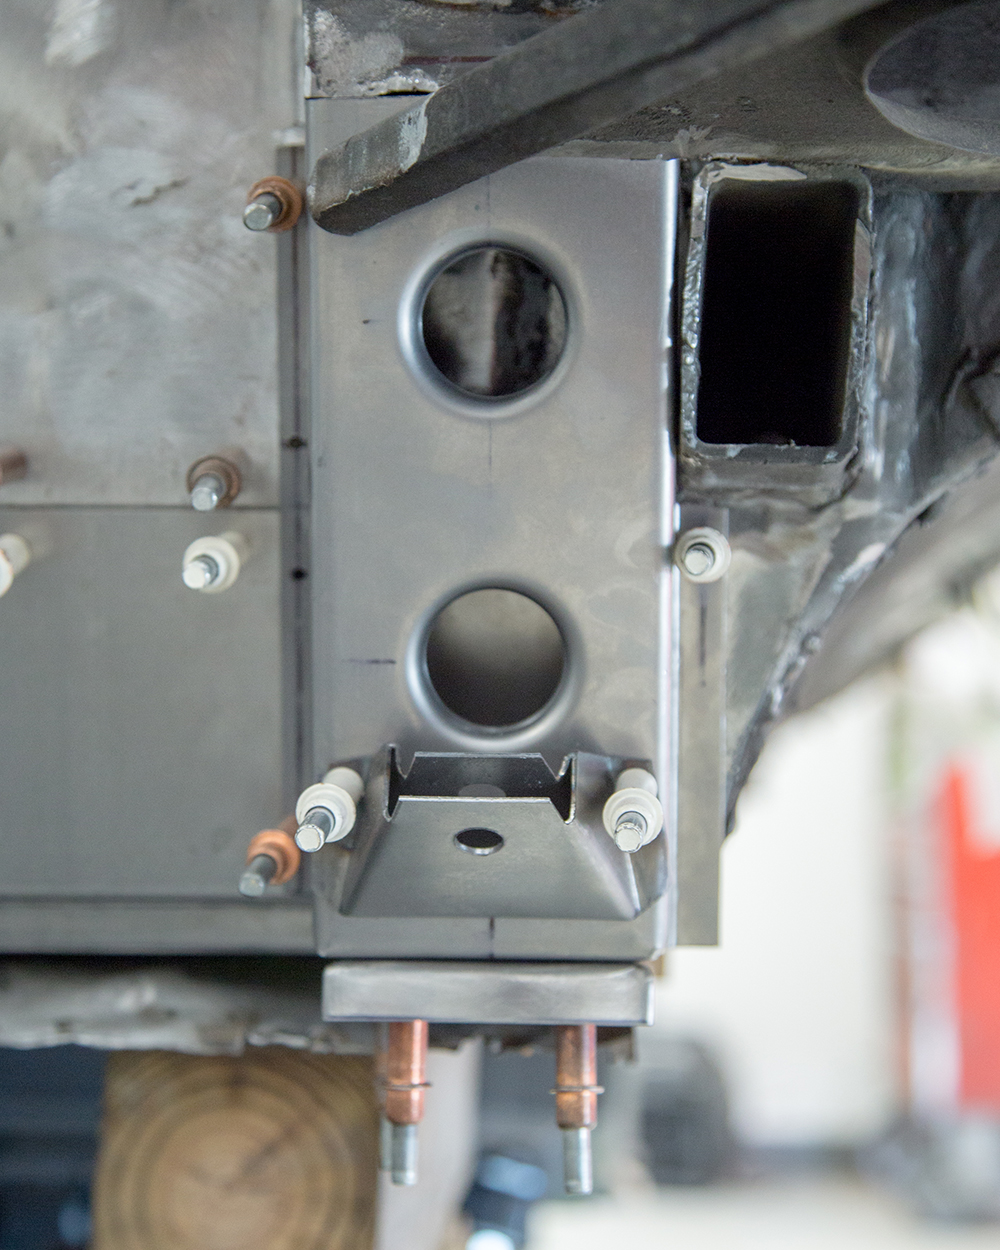
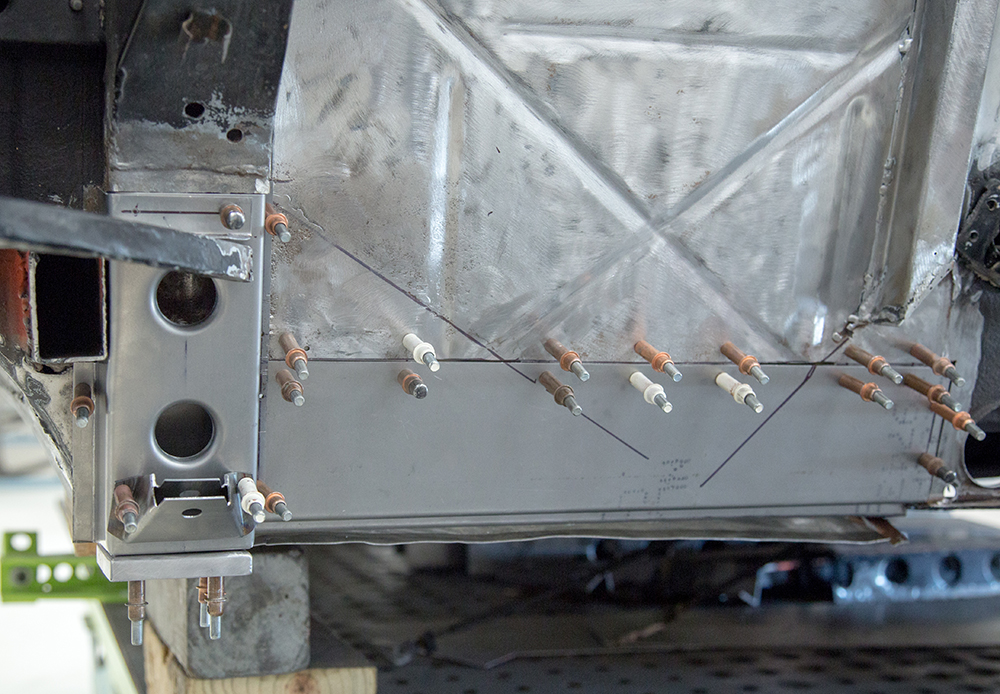
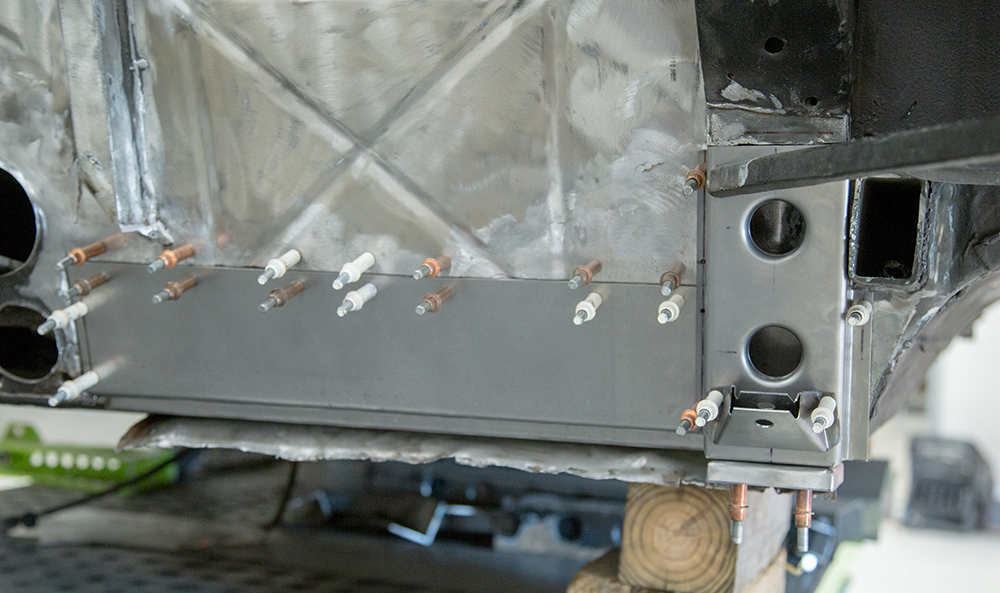
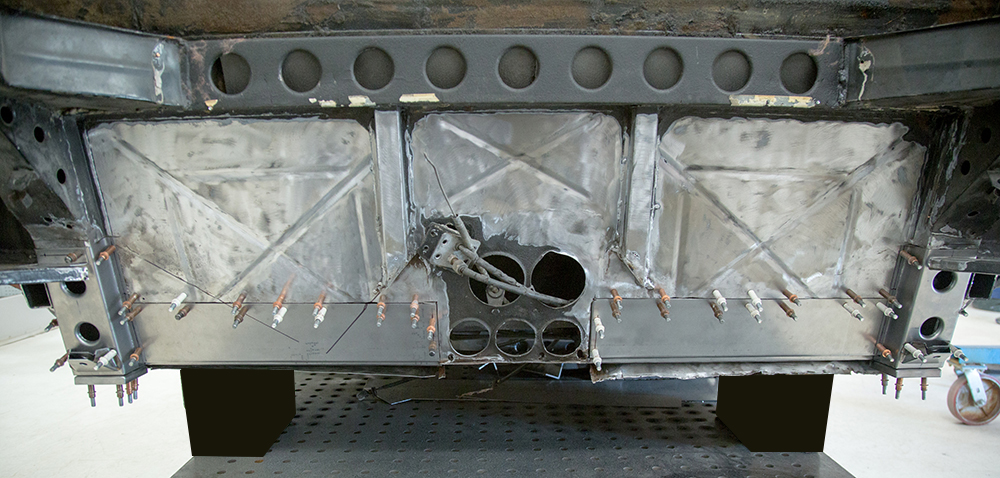
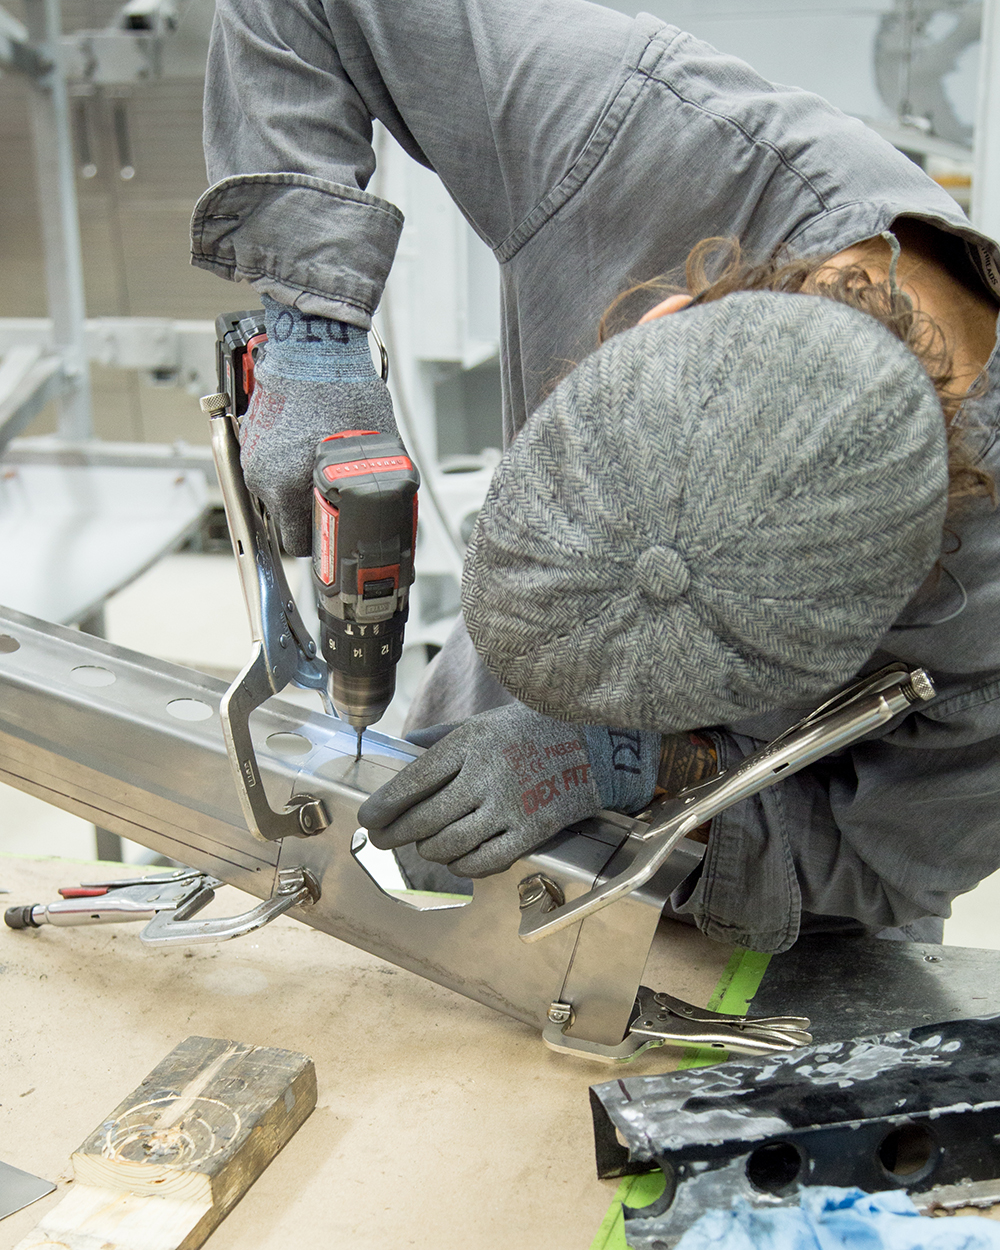
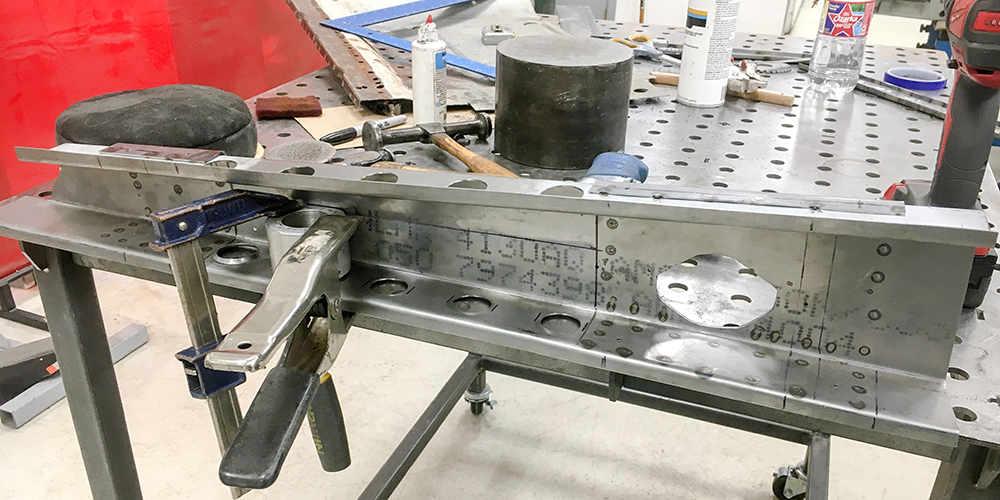
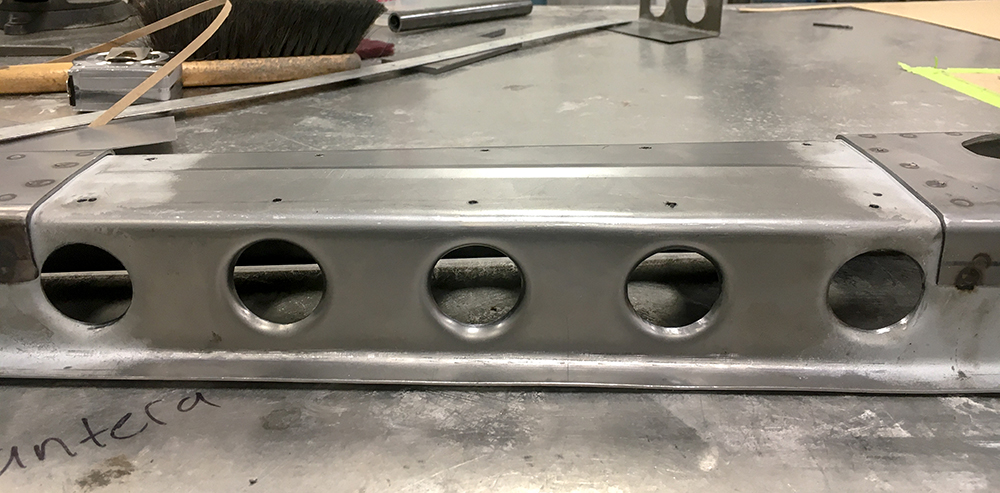
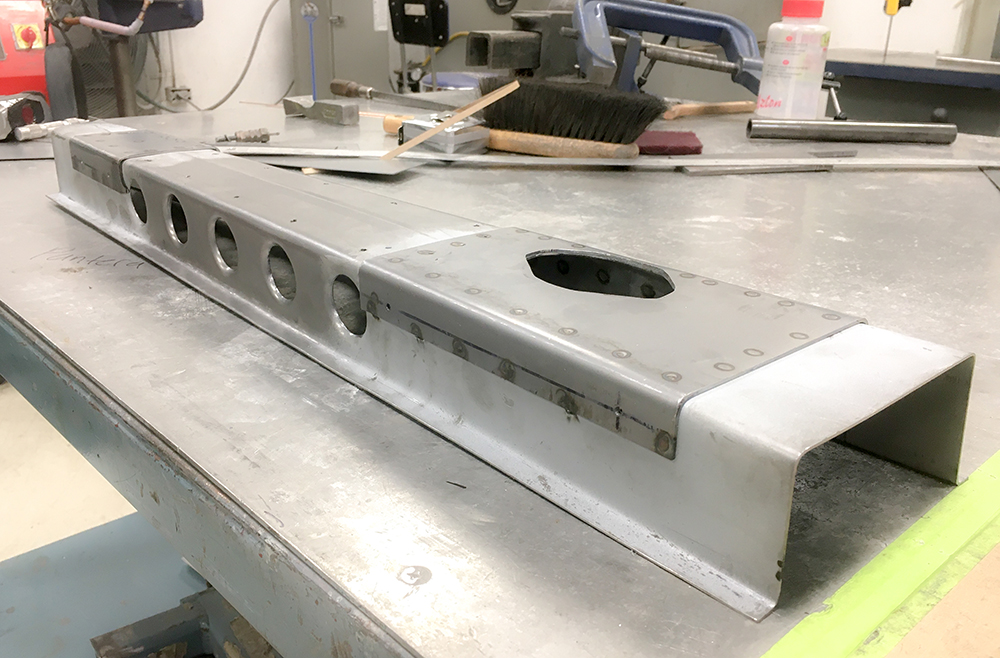
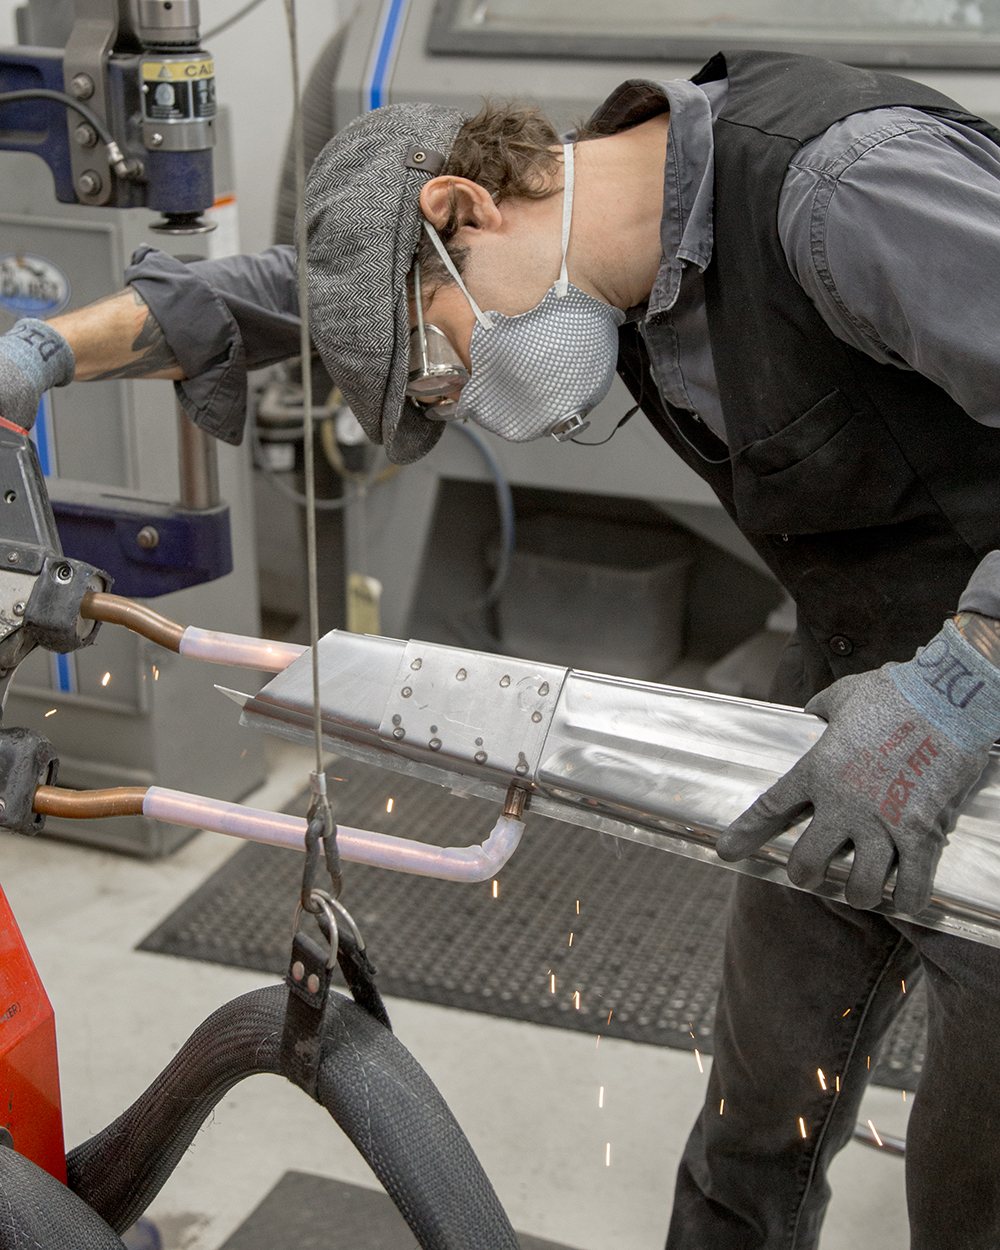
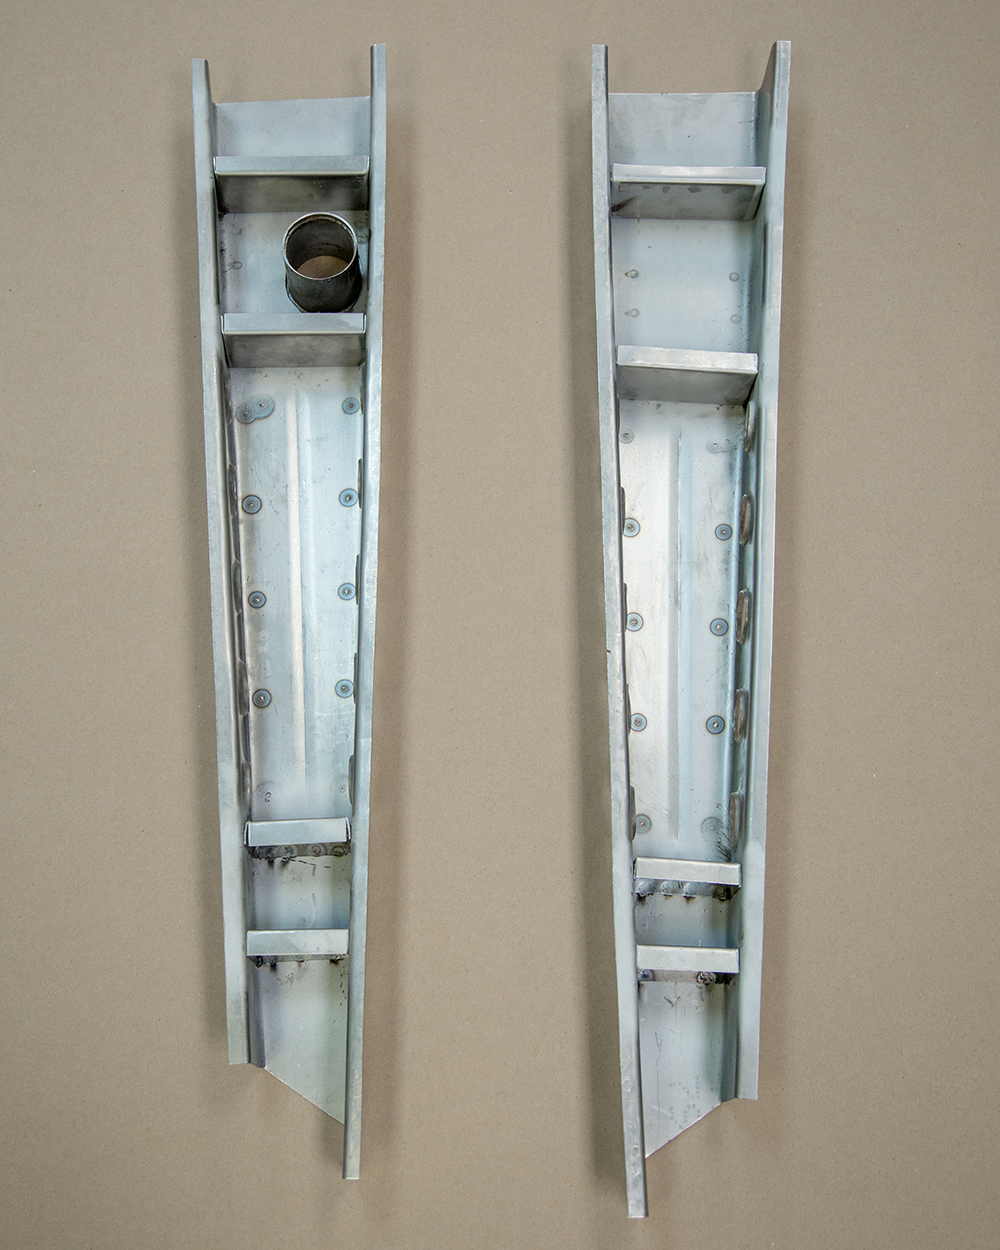
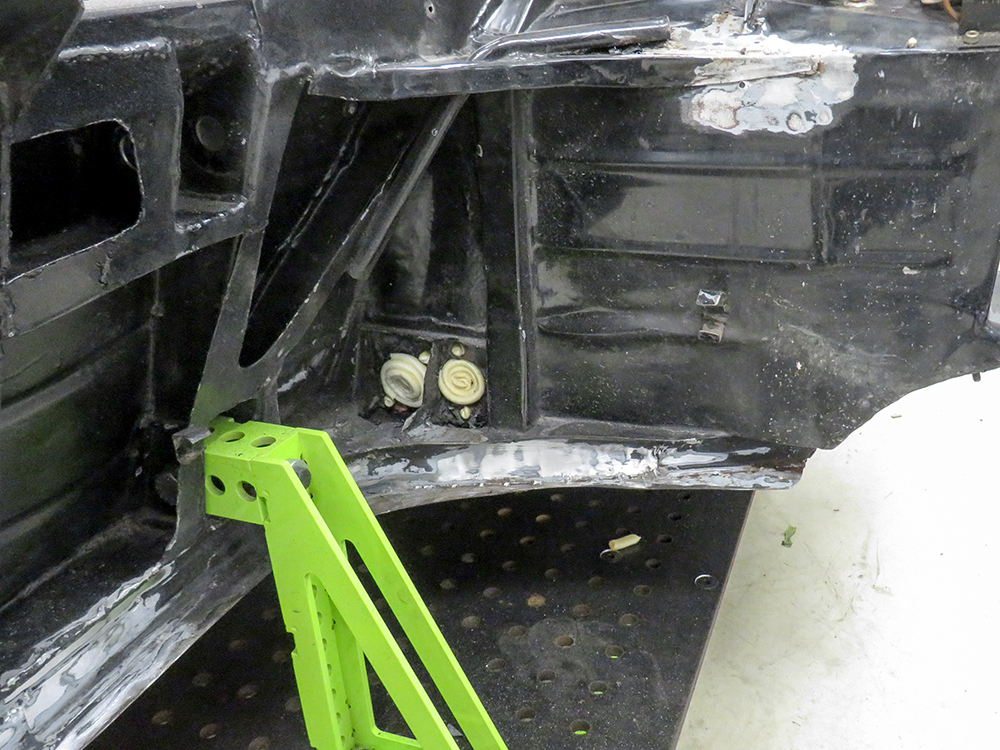
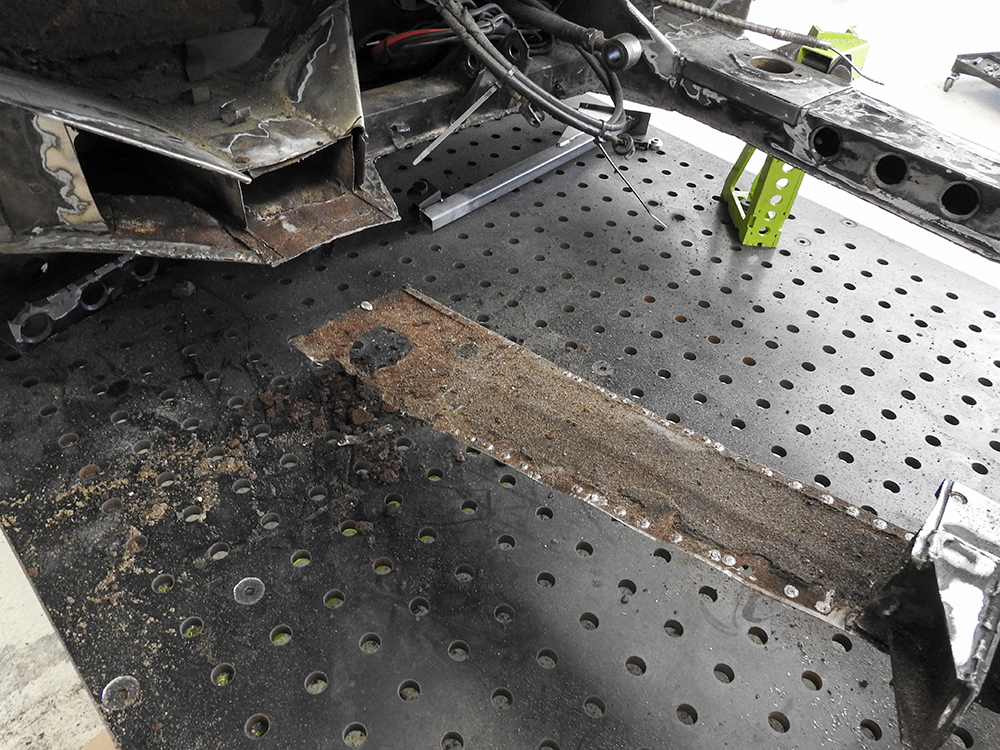
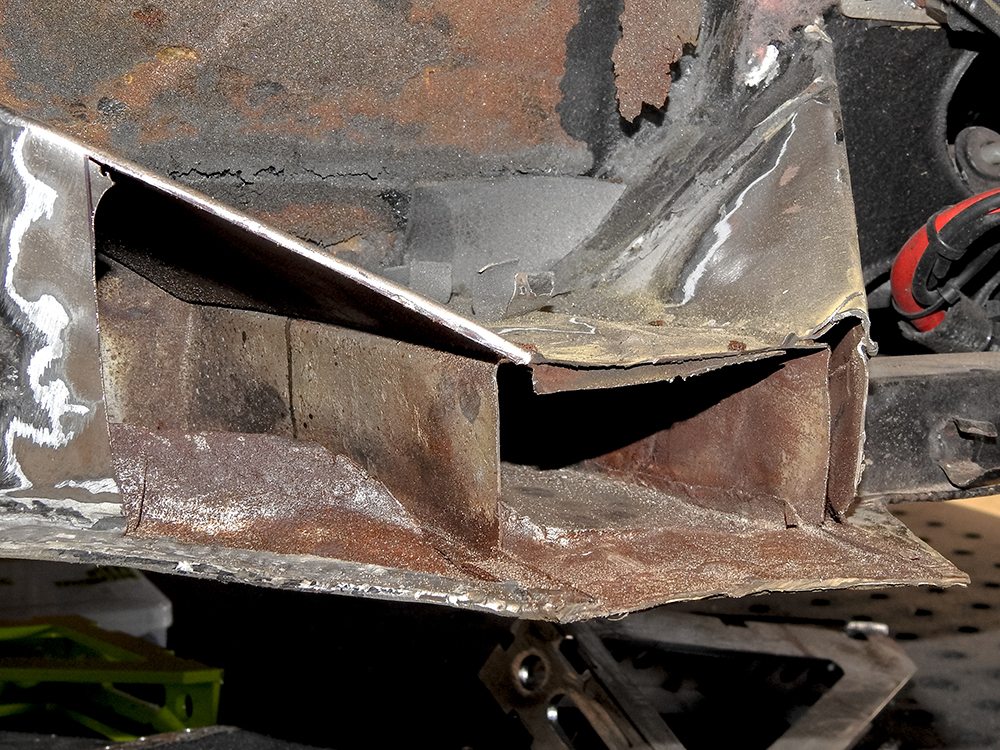
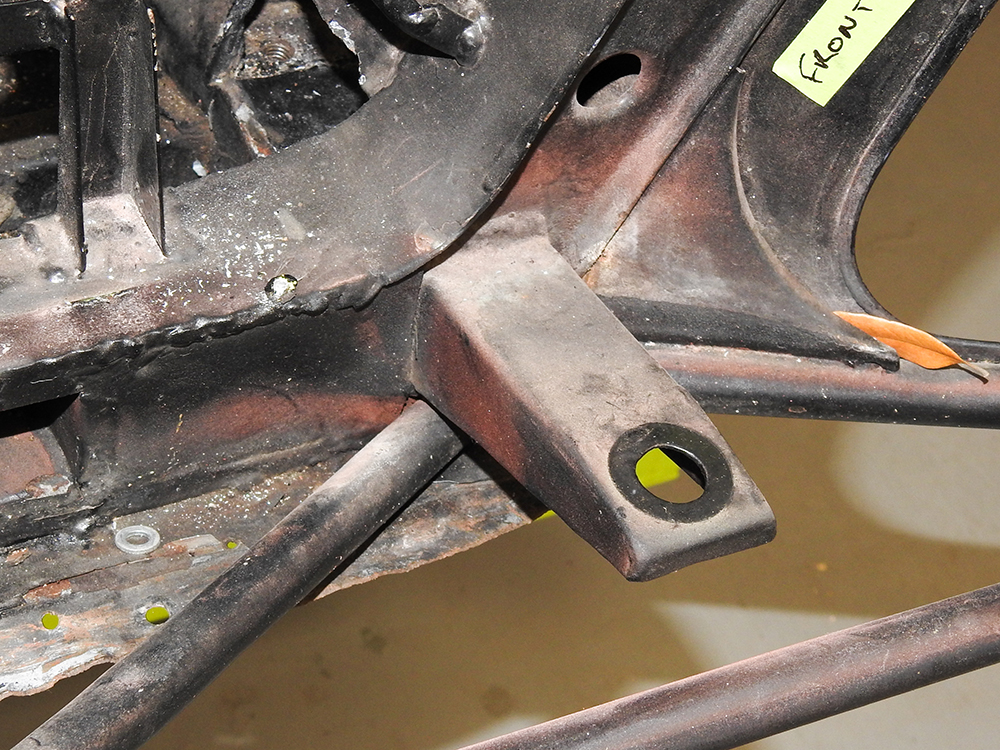
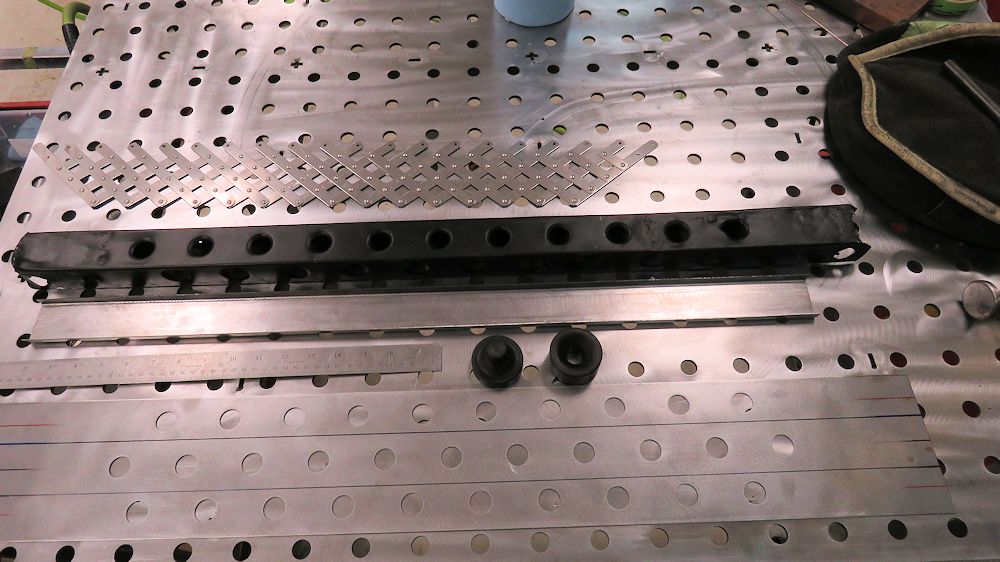
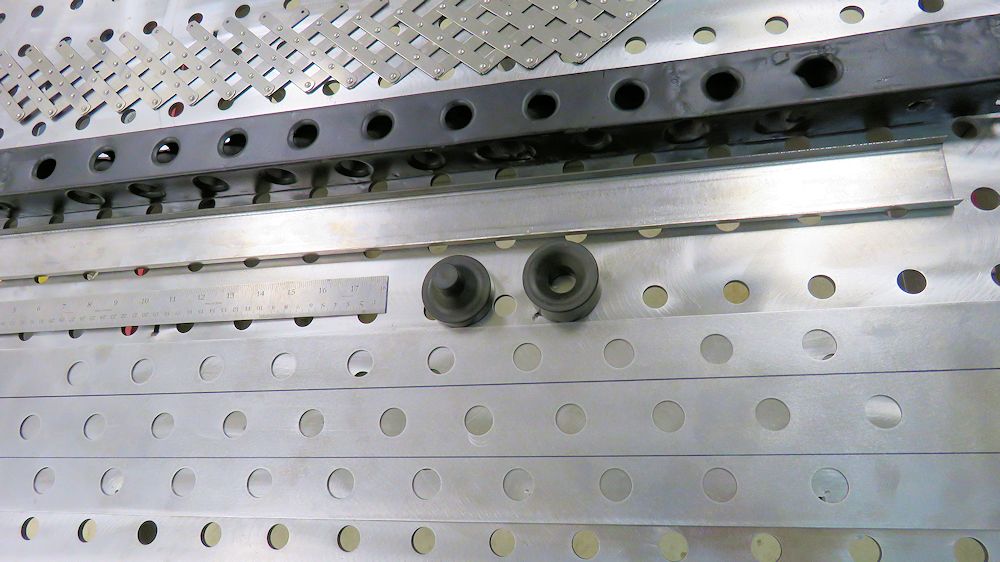
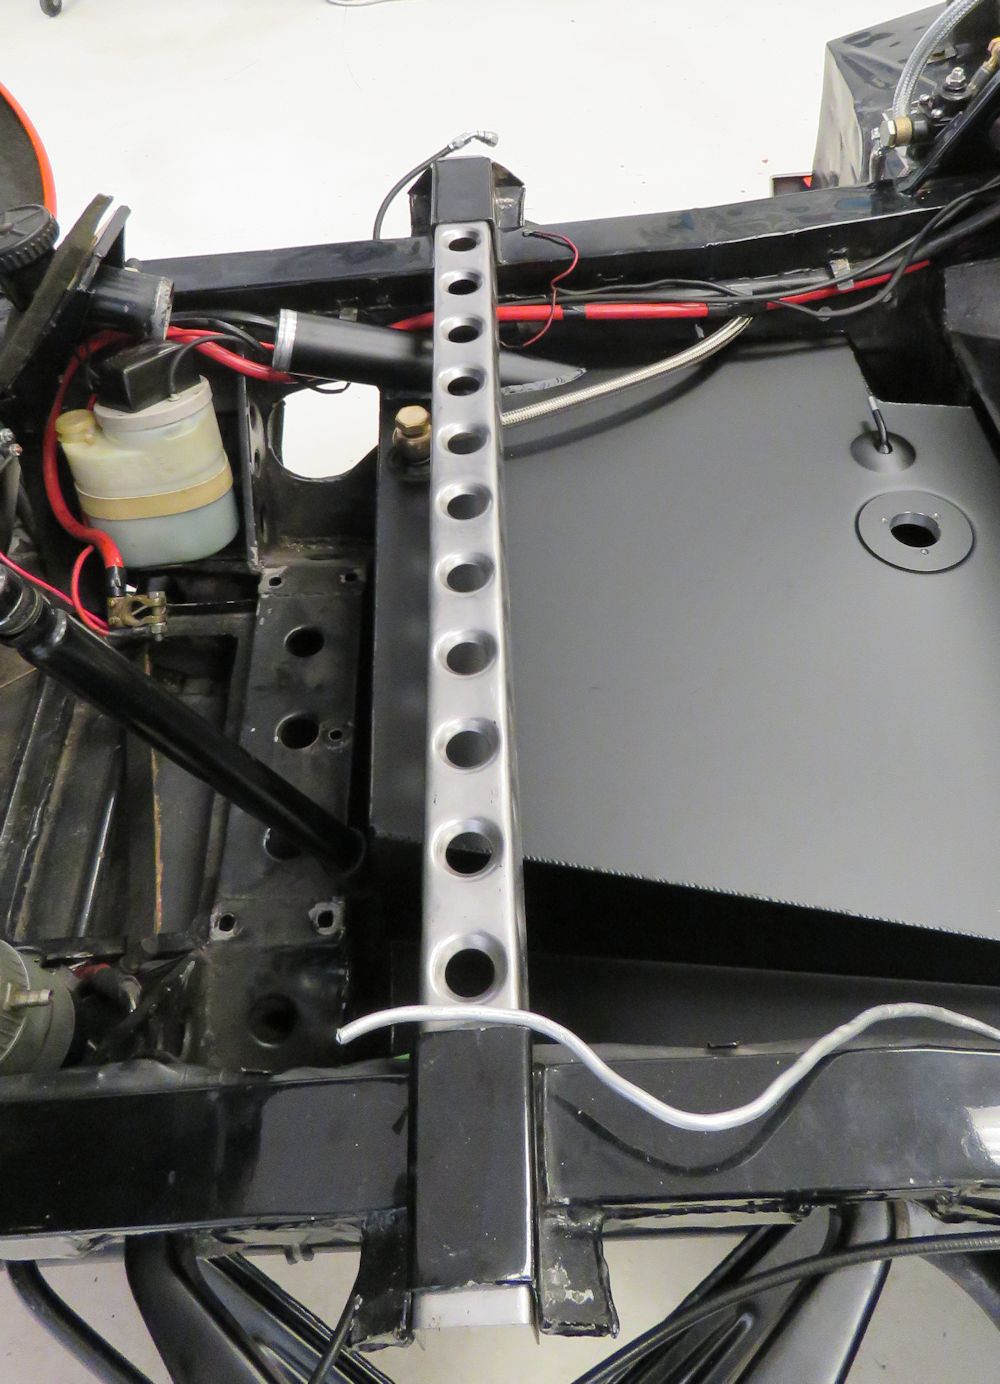
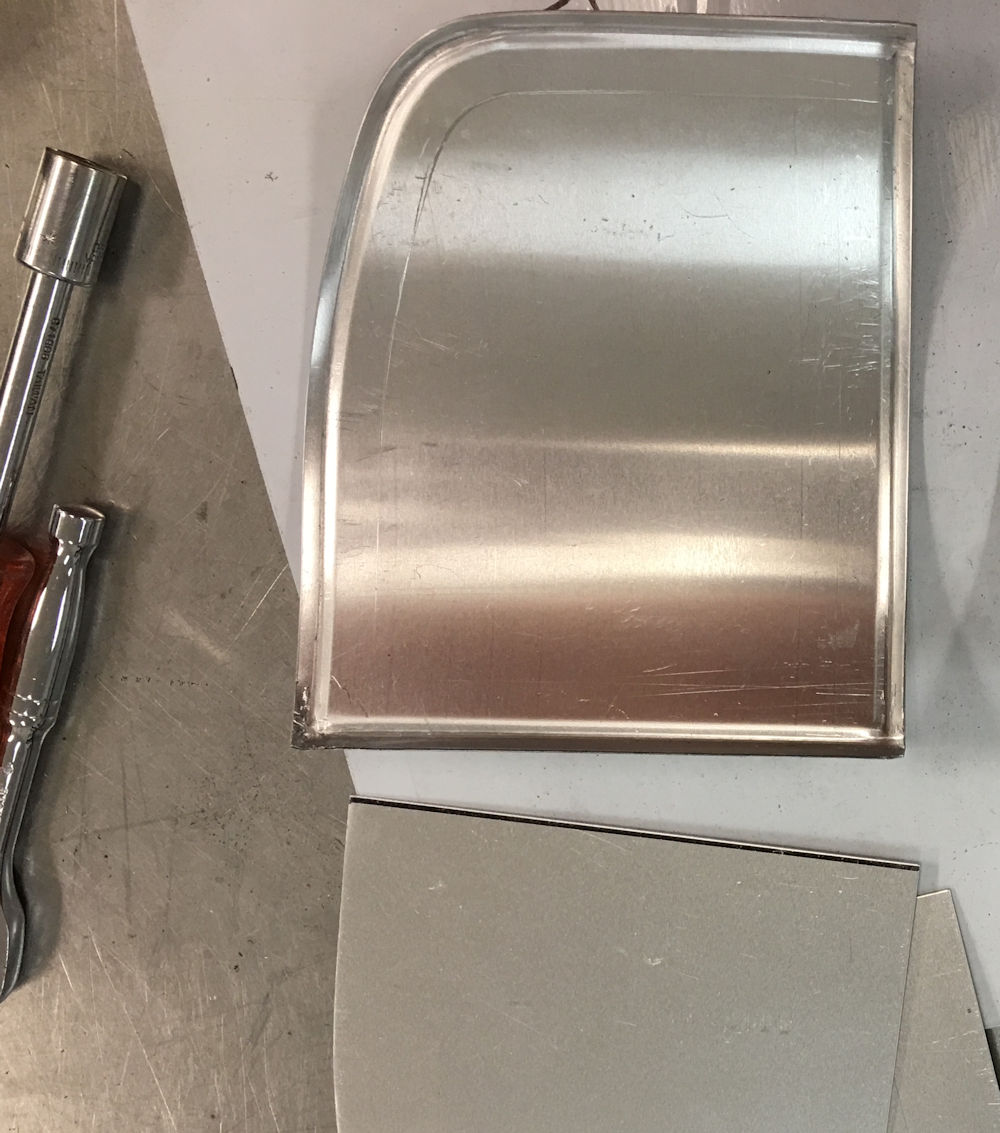
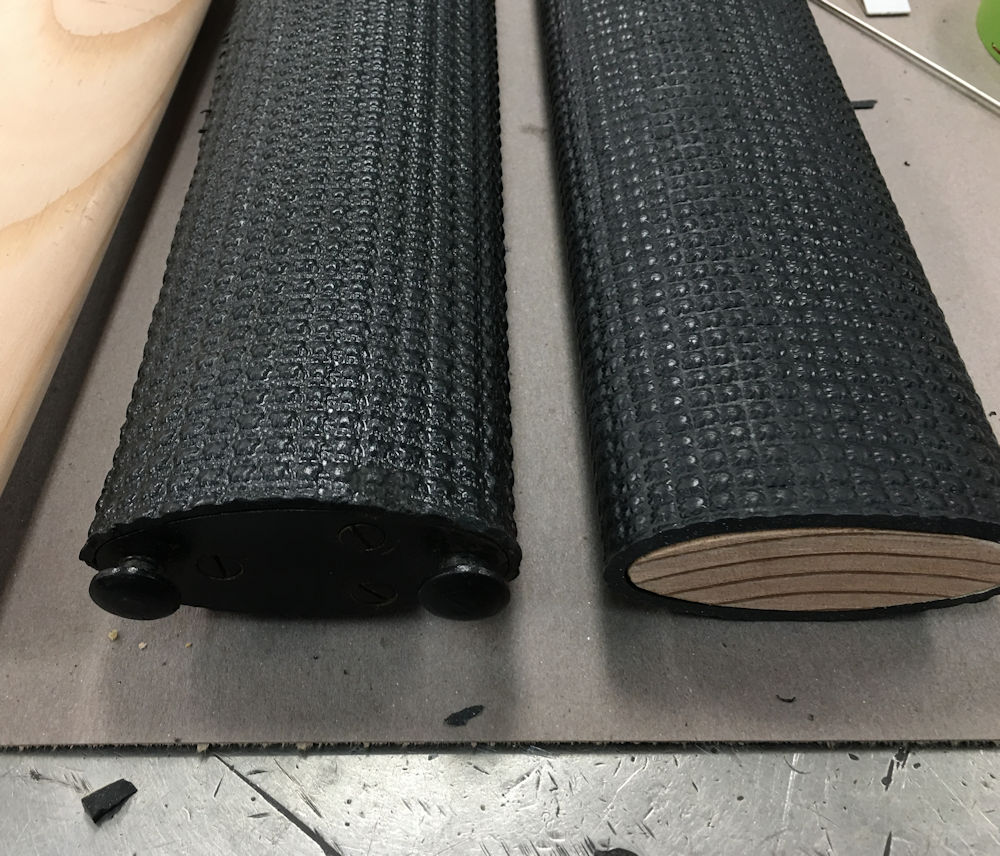
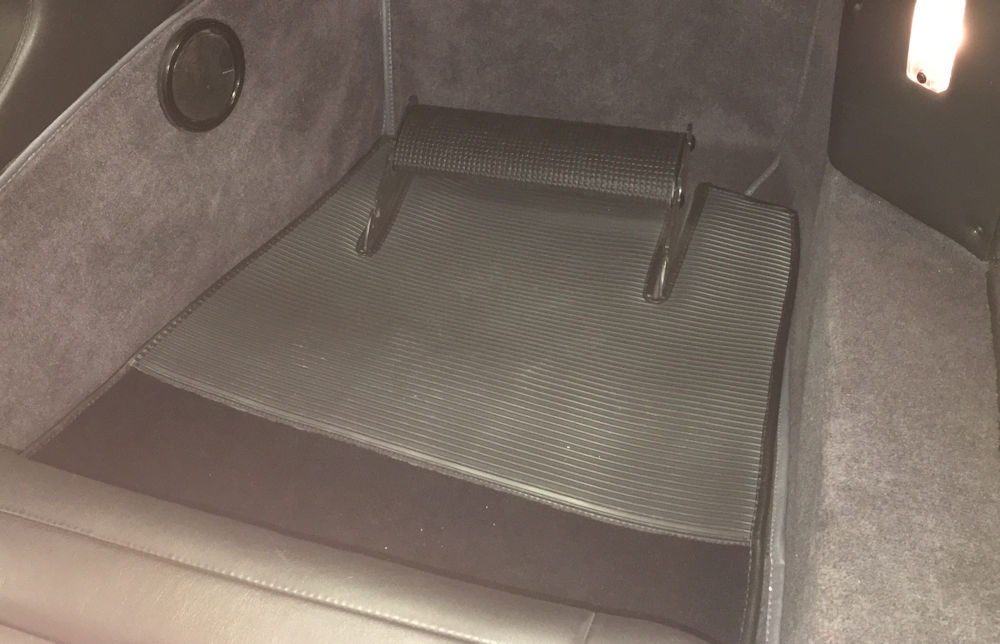
Repairing both outer sill panels and fabricating rear firewall cover panels.
 |
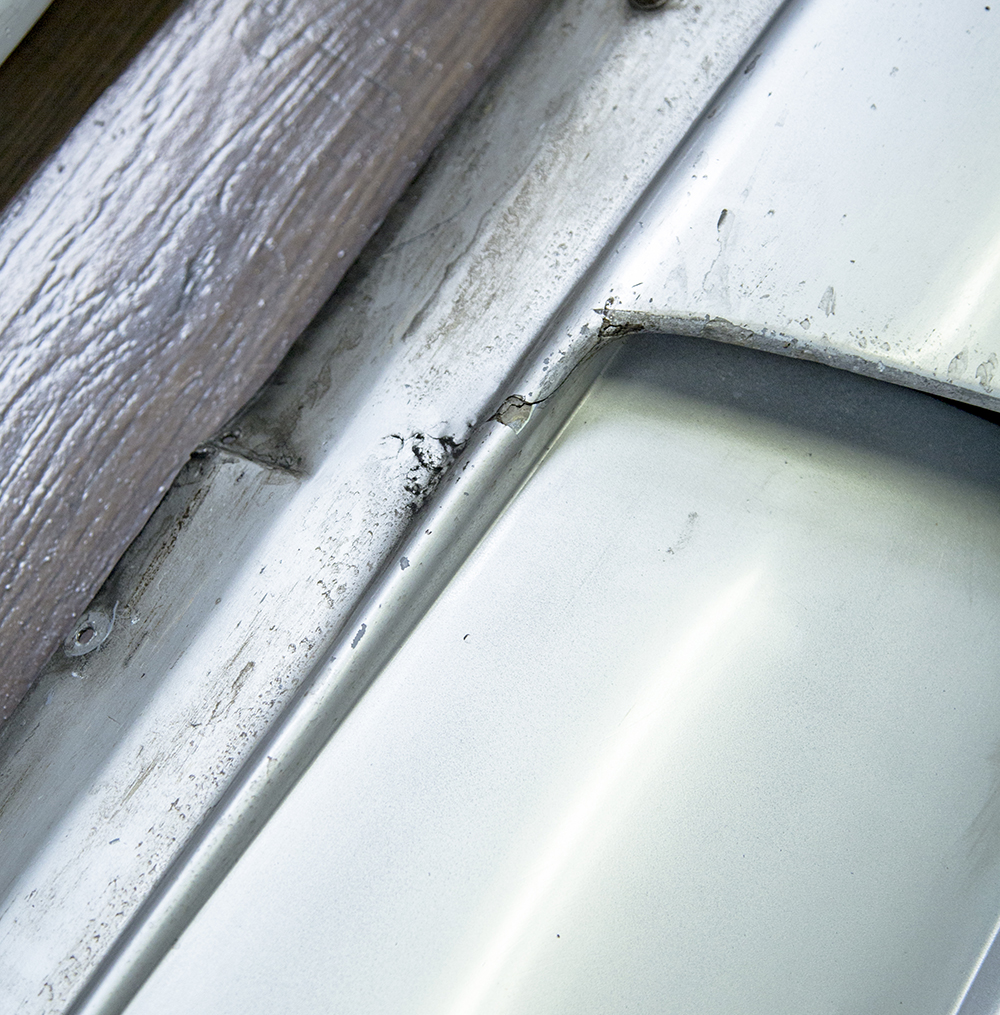 |
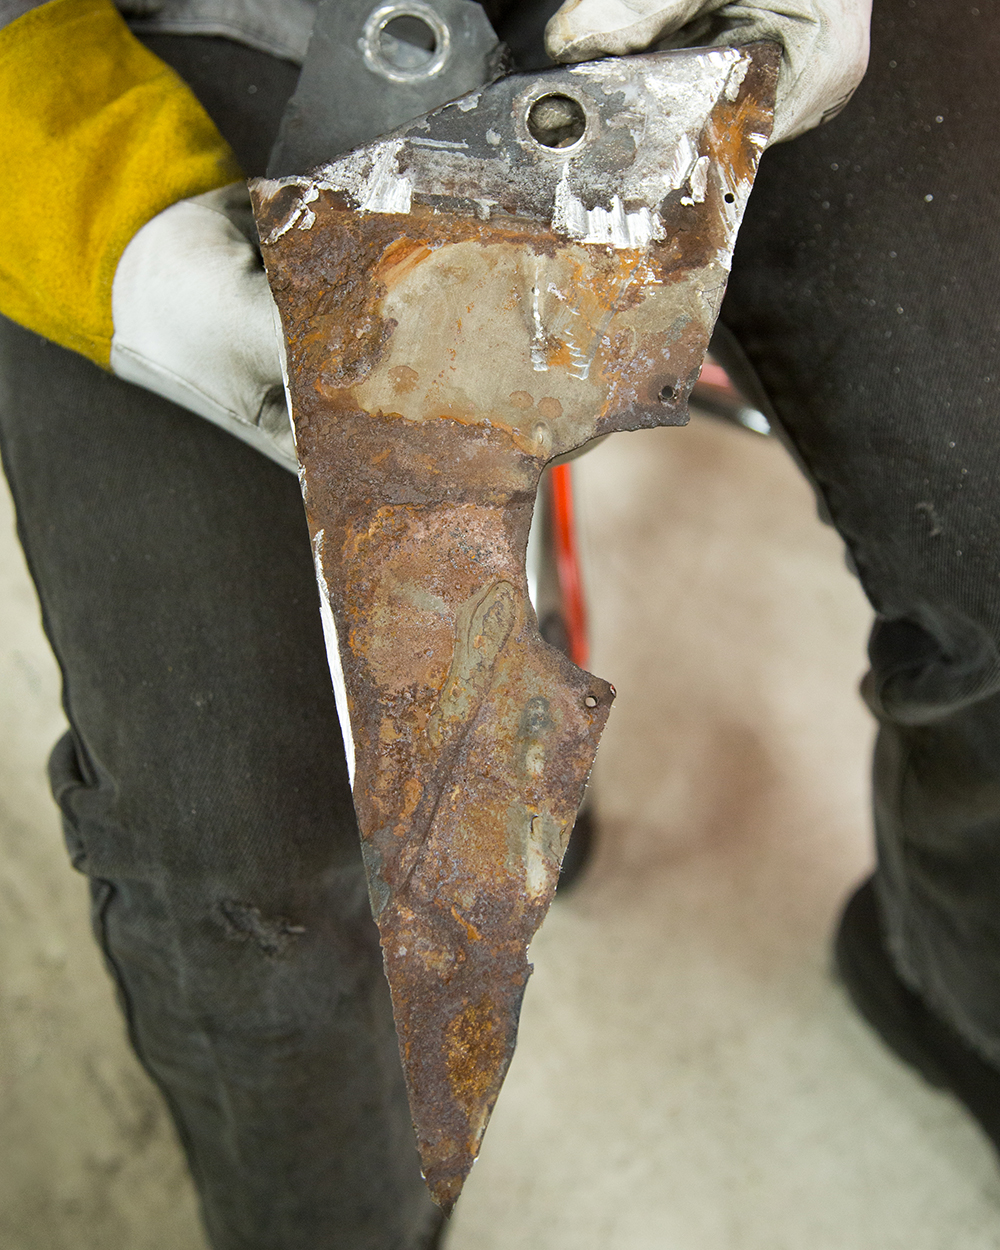
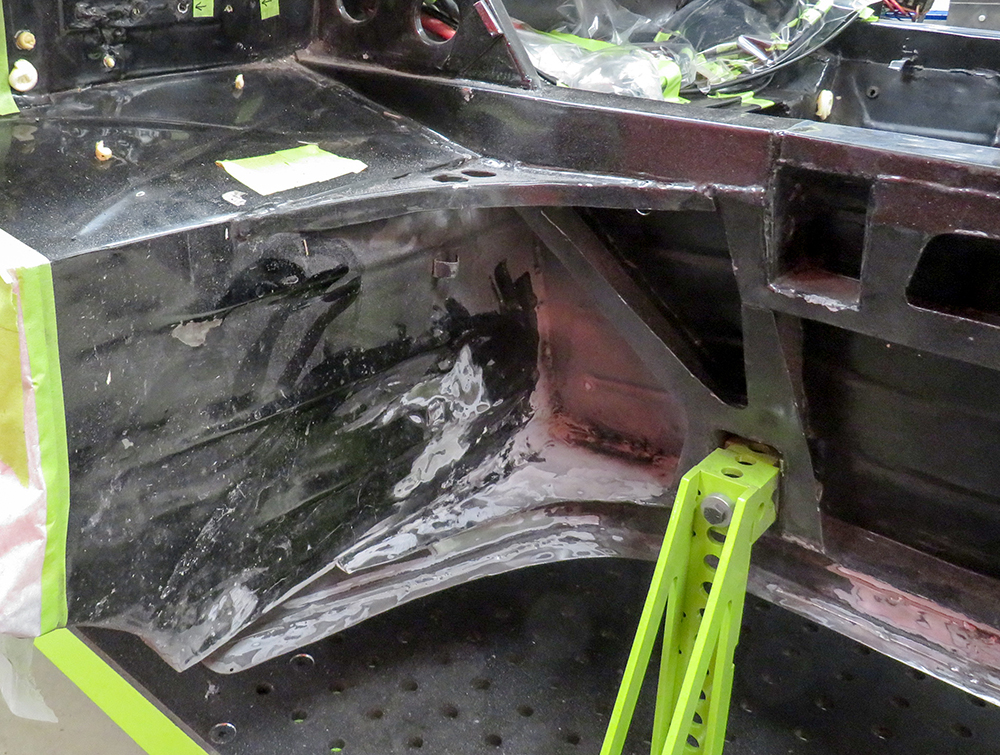
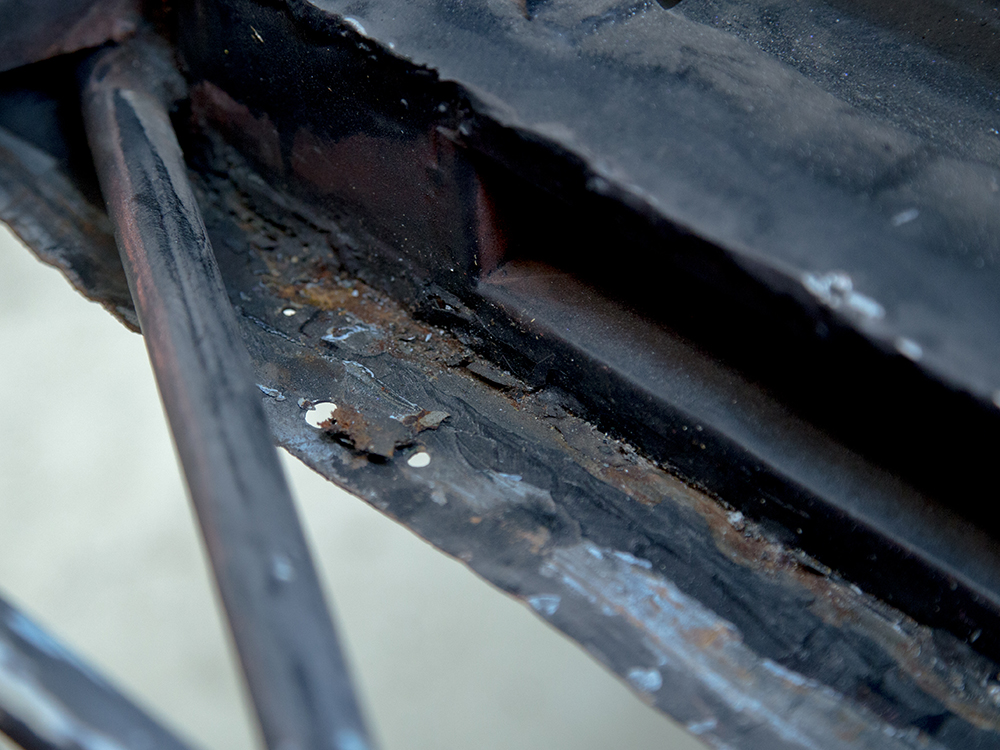
| Both outer sill panels have some corrosion
damage which needs attention |
Doesn't look too bad at first glance... |
|
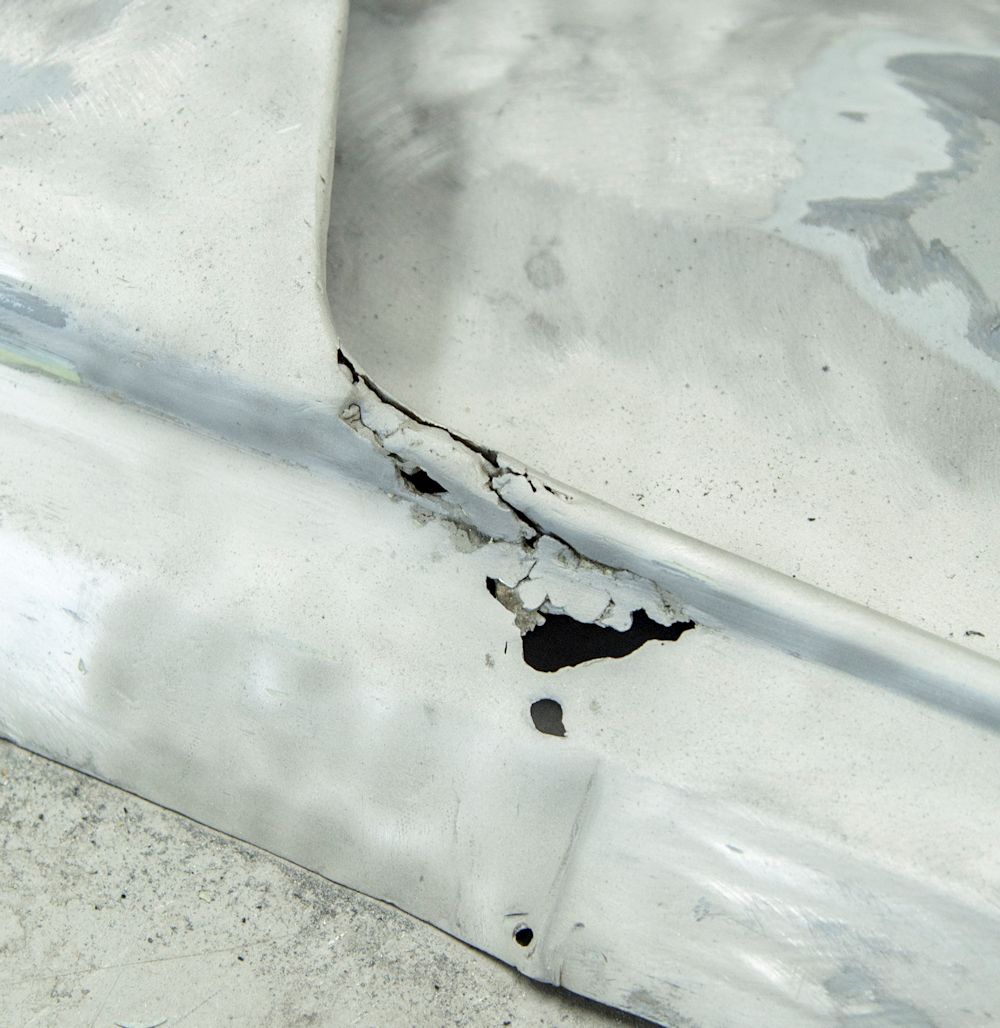 |
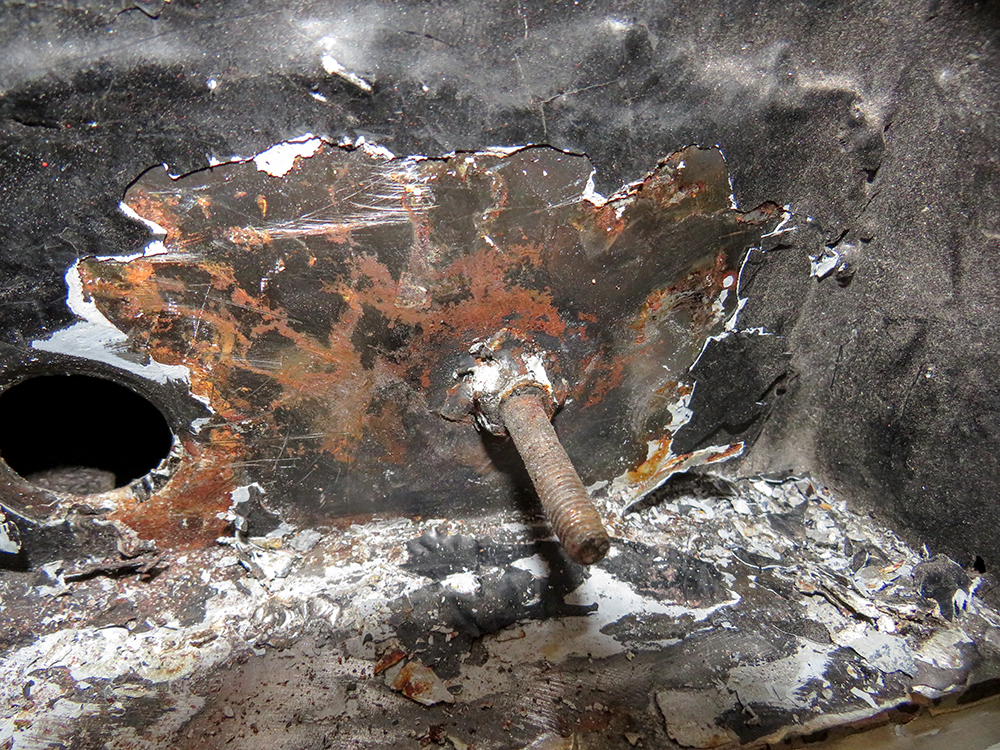
| But several holes were lurking beneath the
filler |
|
|
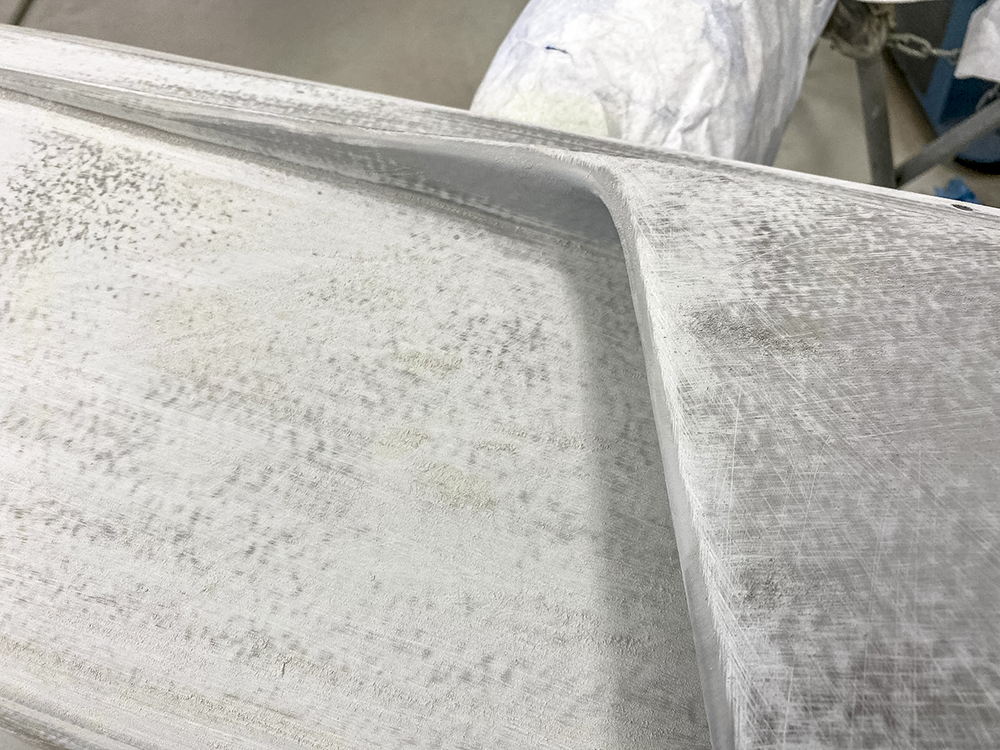 |
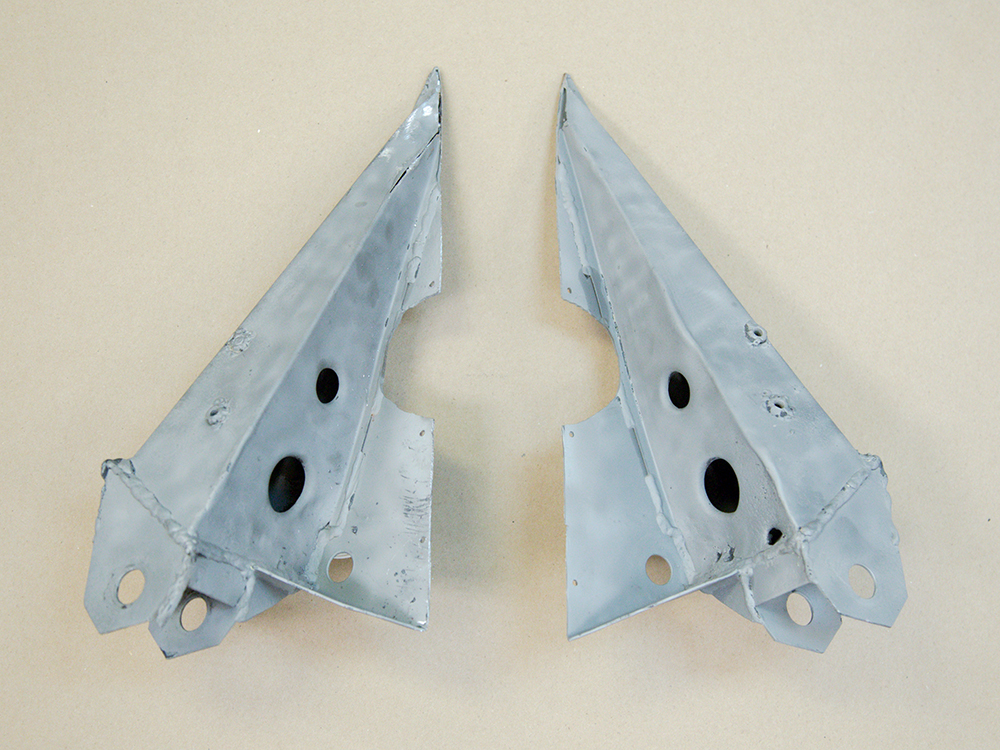
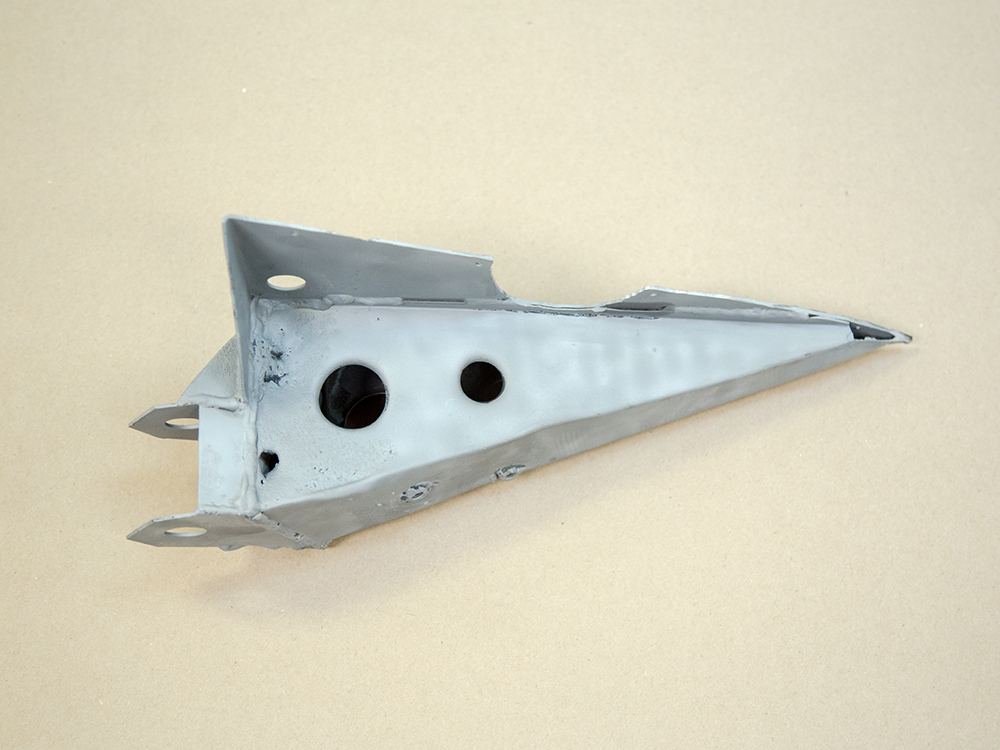
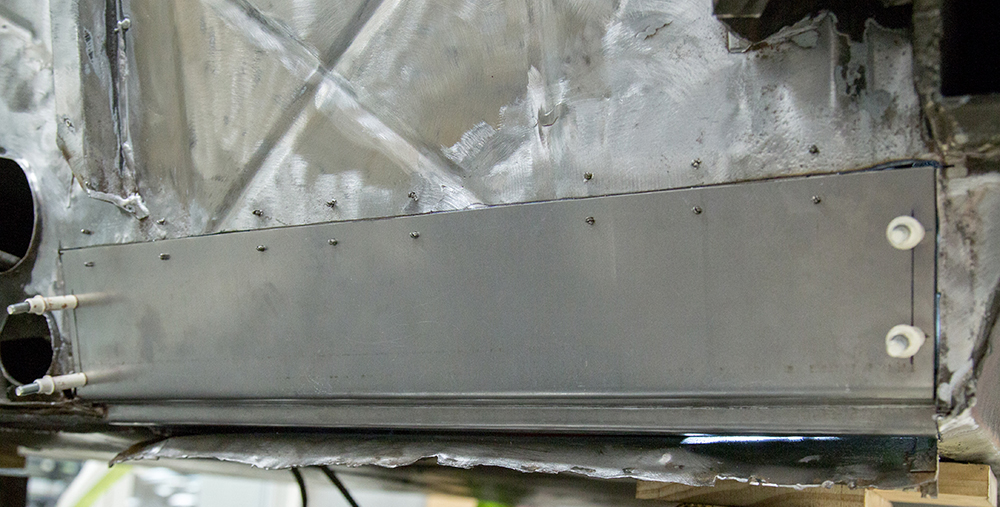
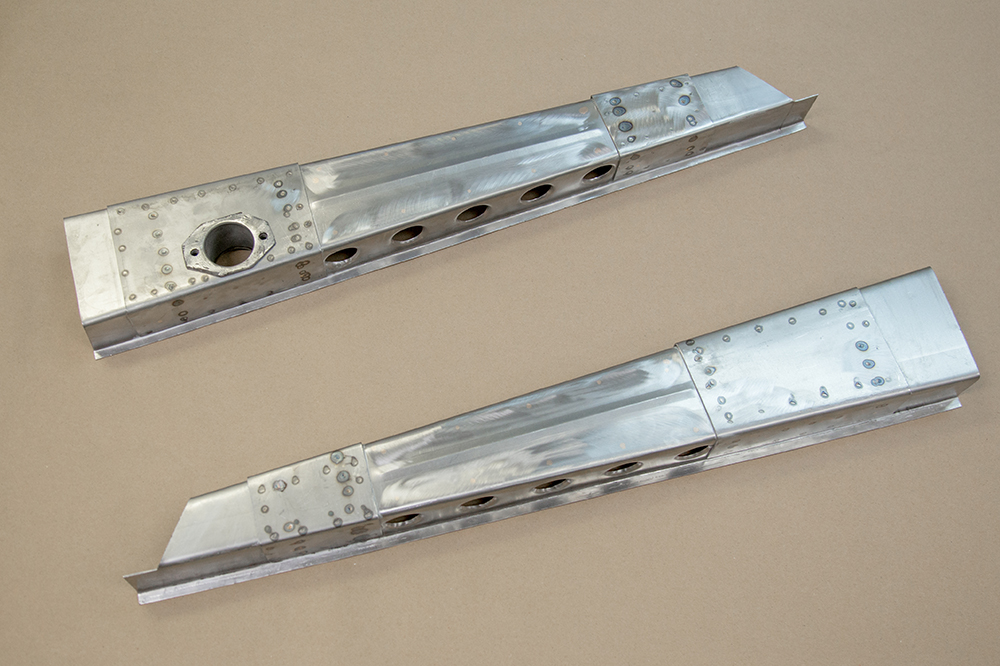
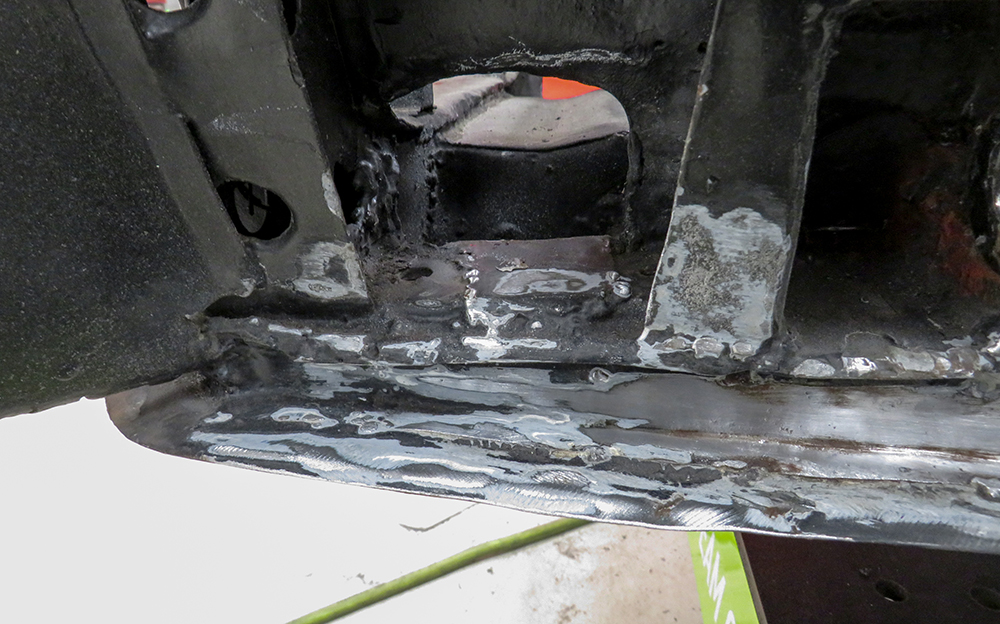
| The worst damage has now been cut out and
a repair panel welded in place |
In primer, almost ready for repainting |
 |
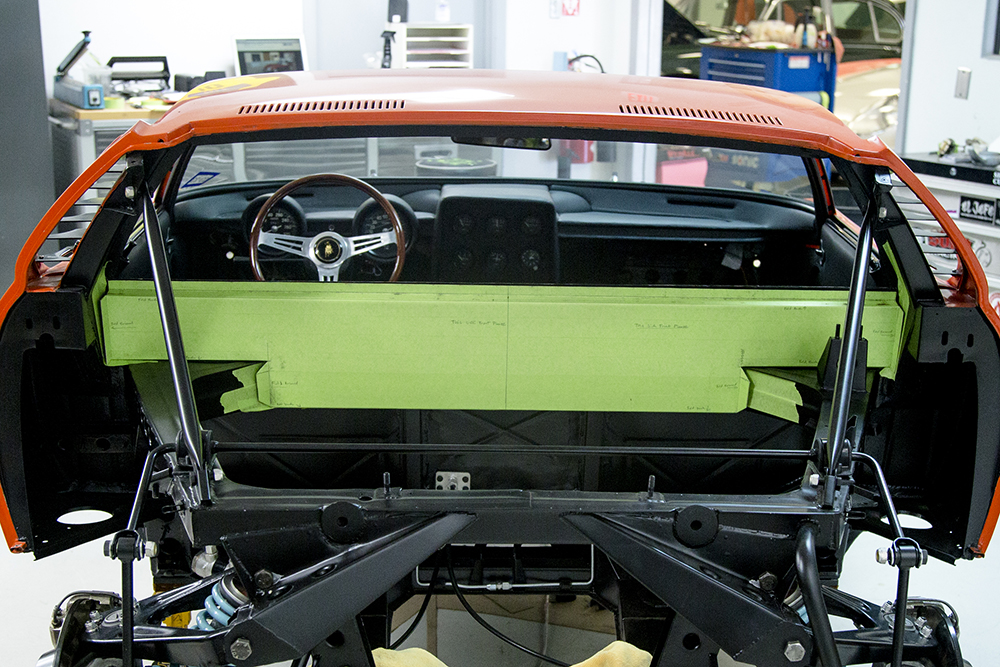 |
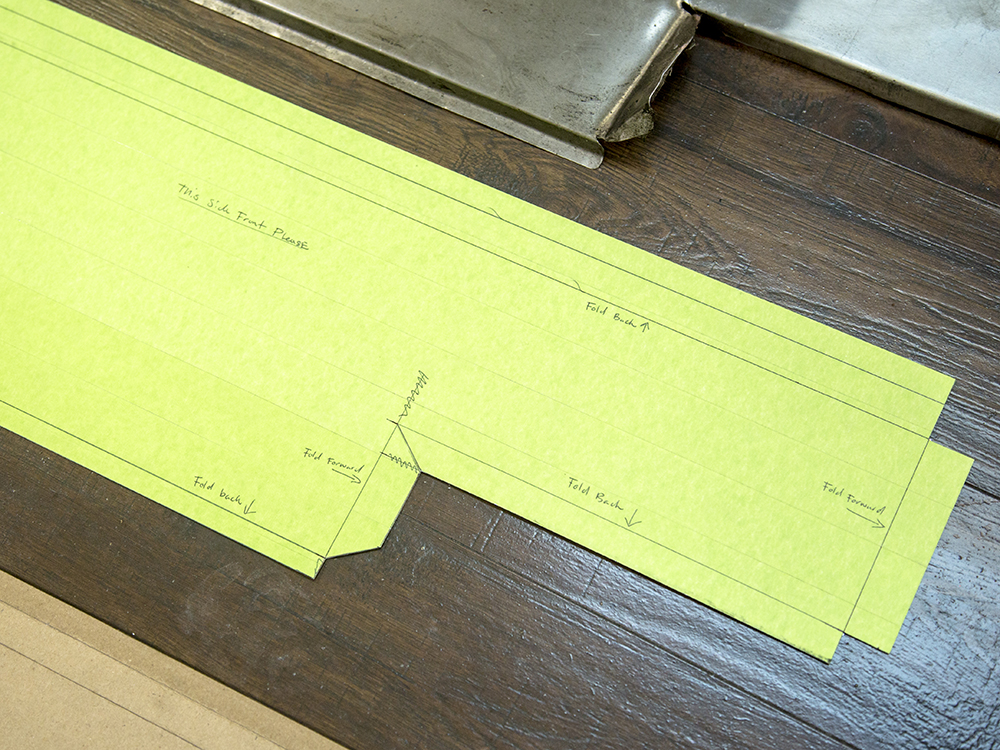
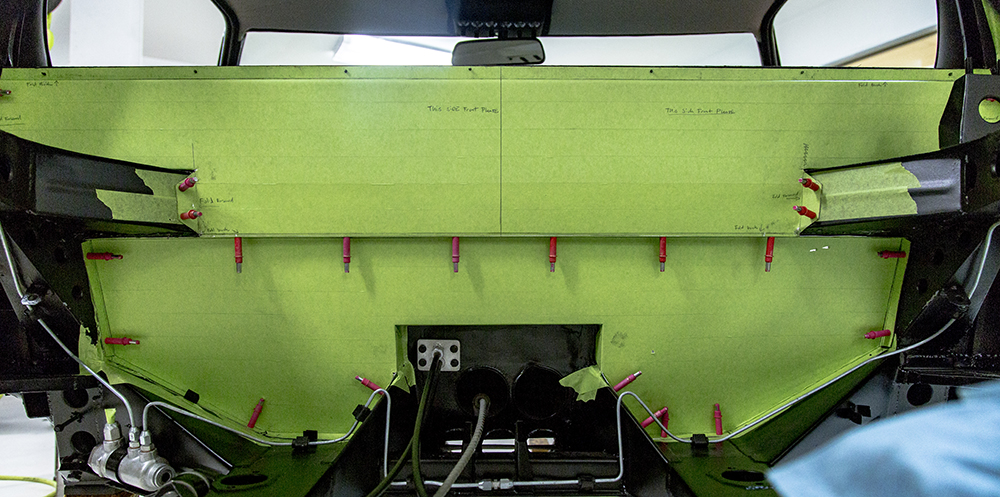
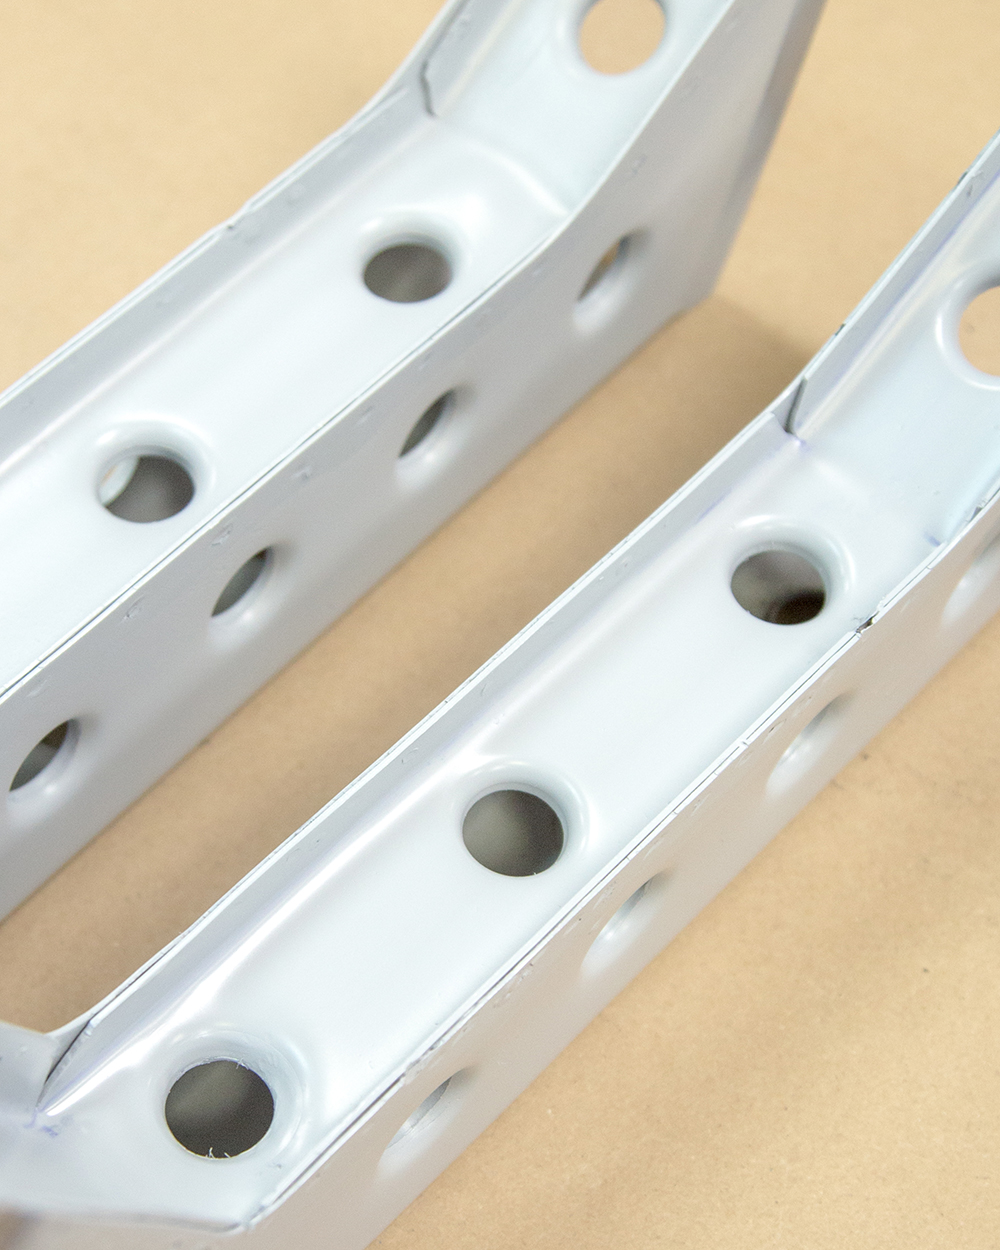
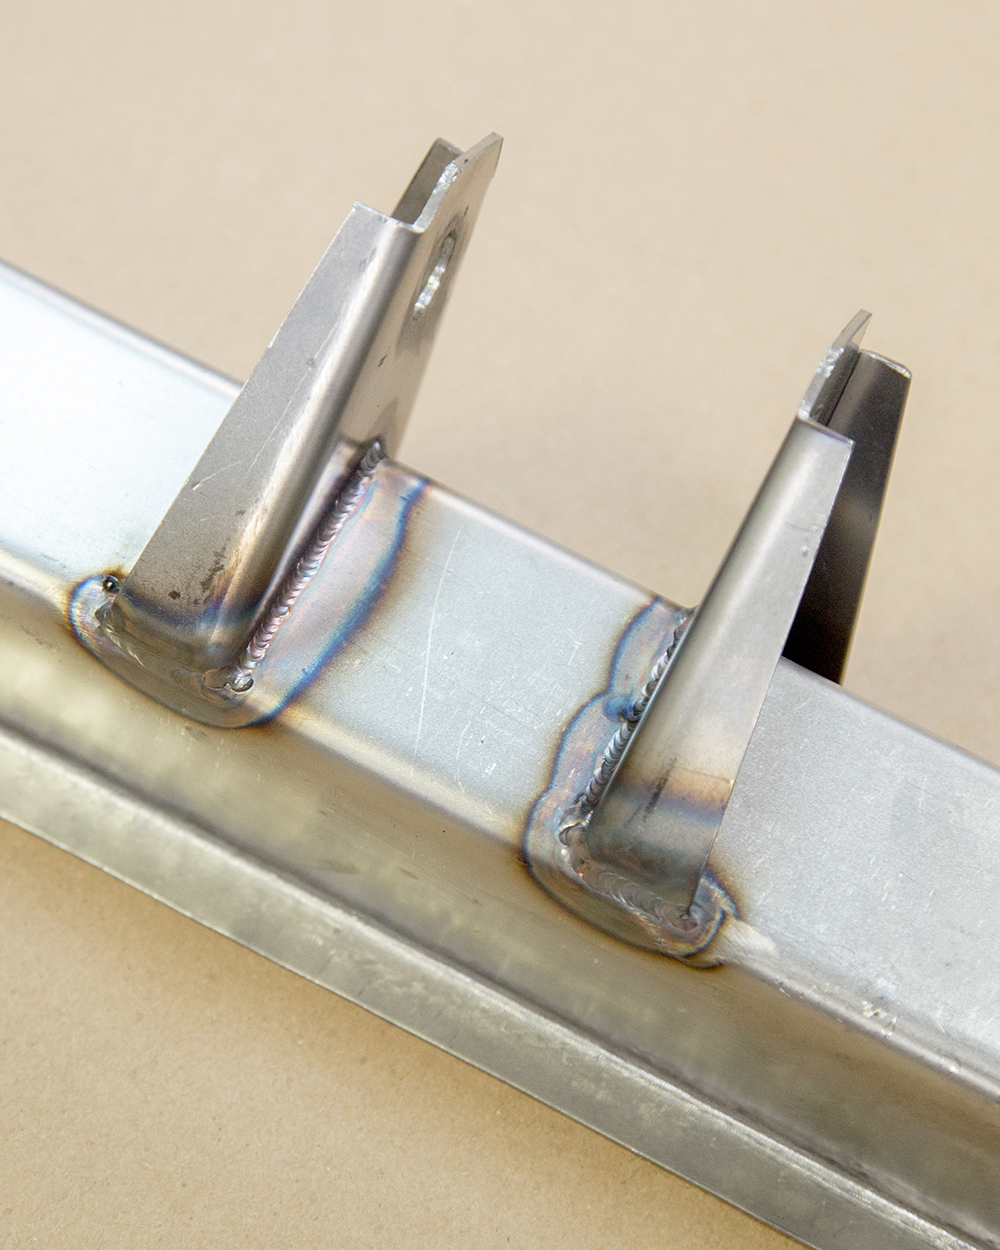
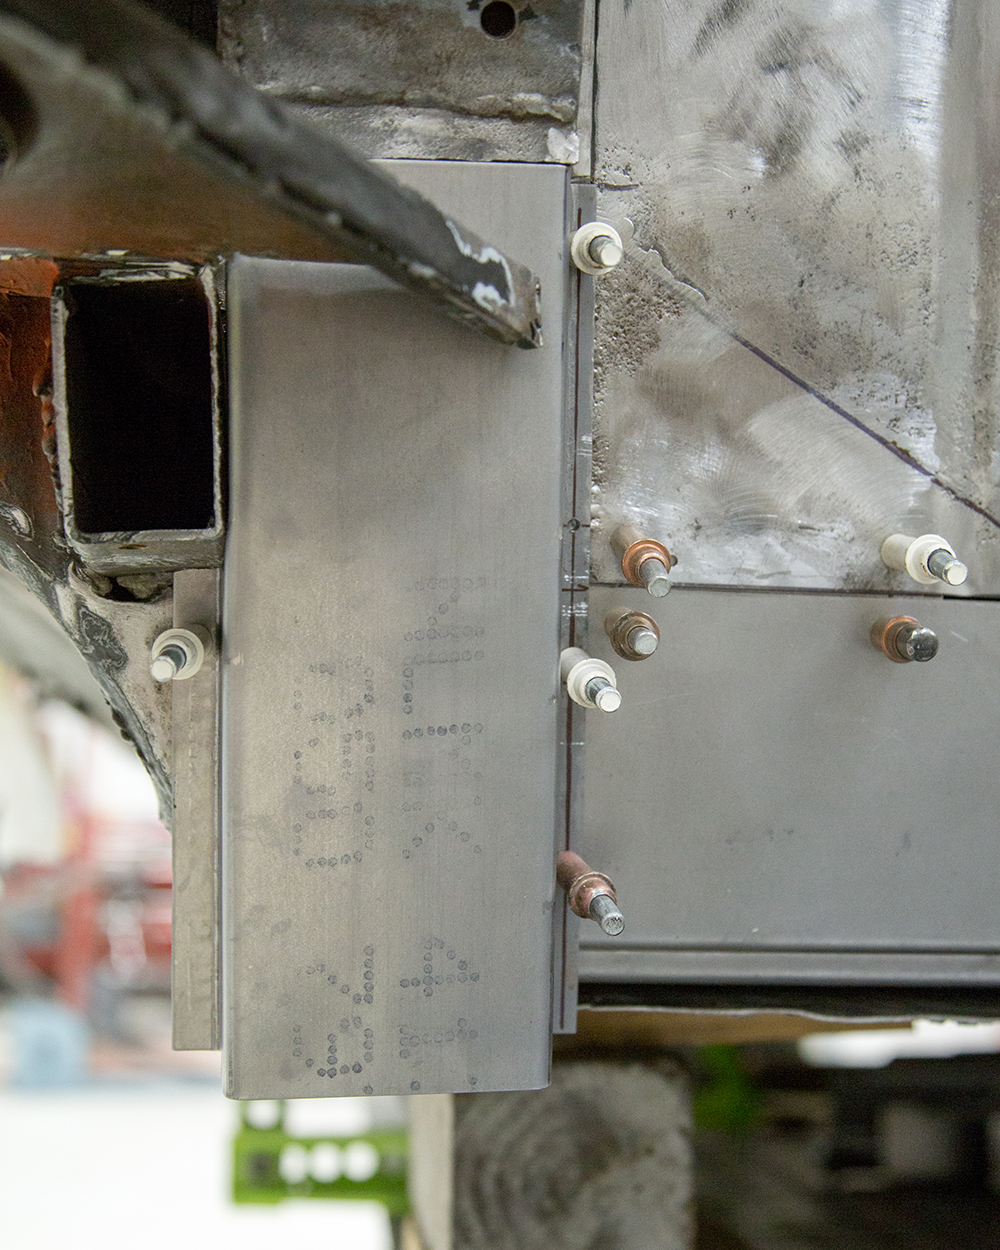
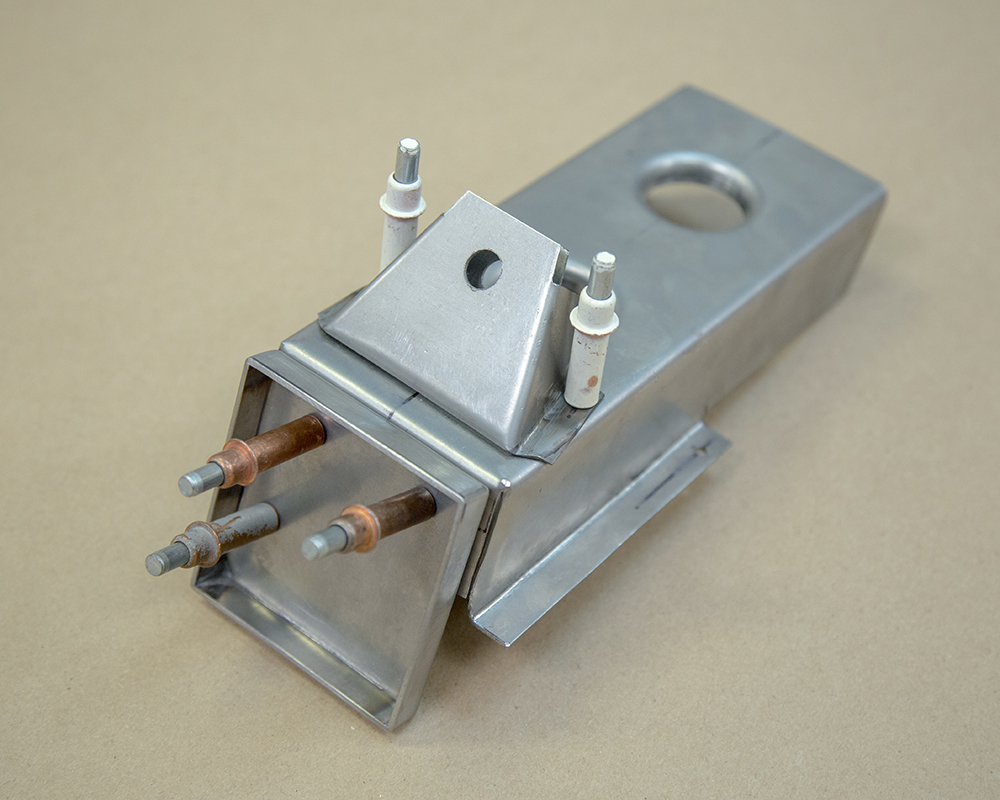
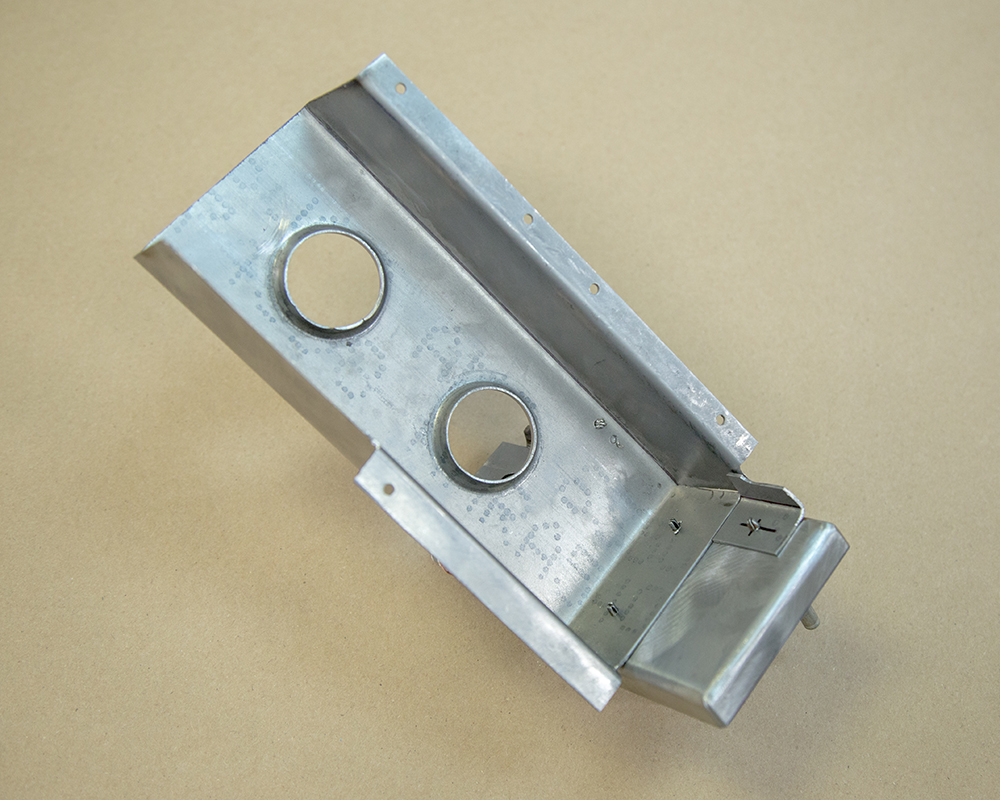
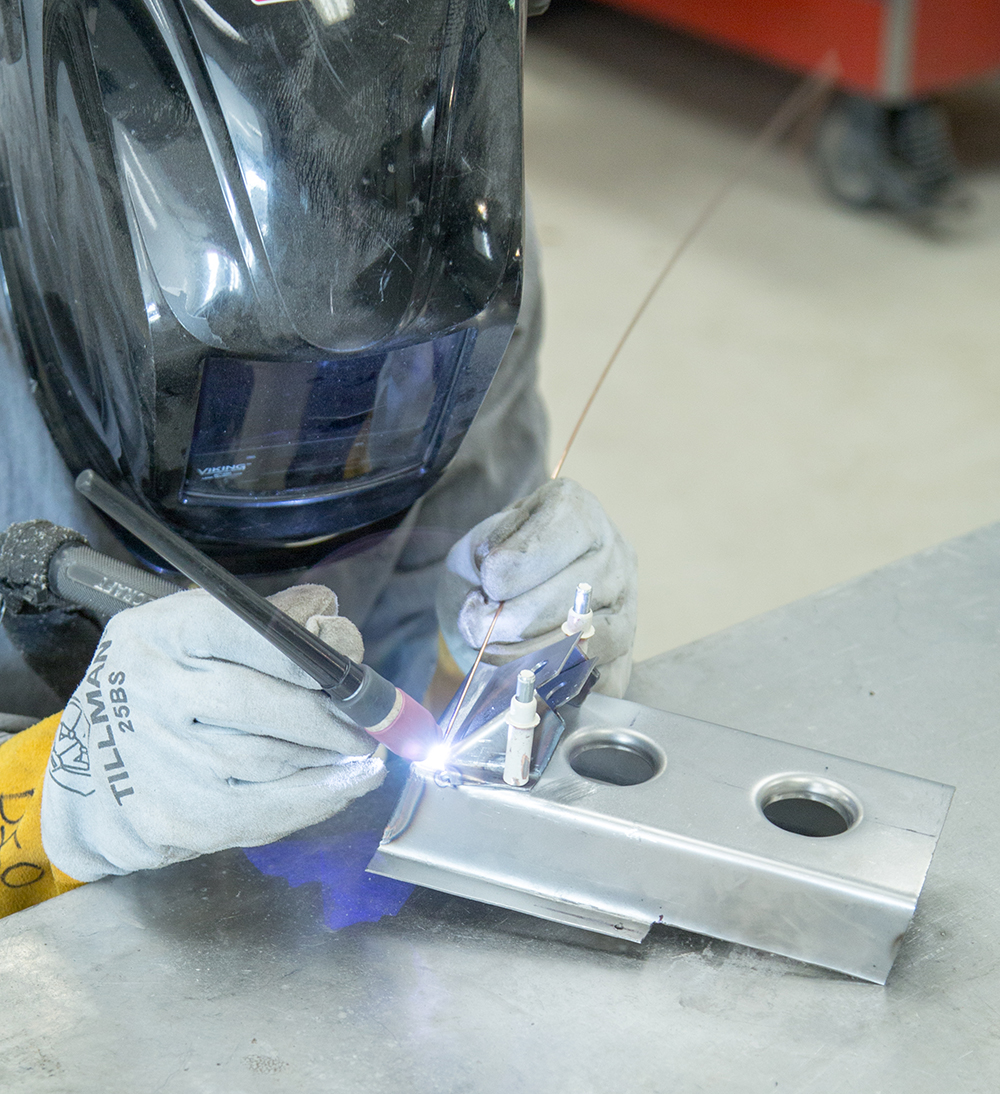
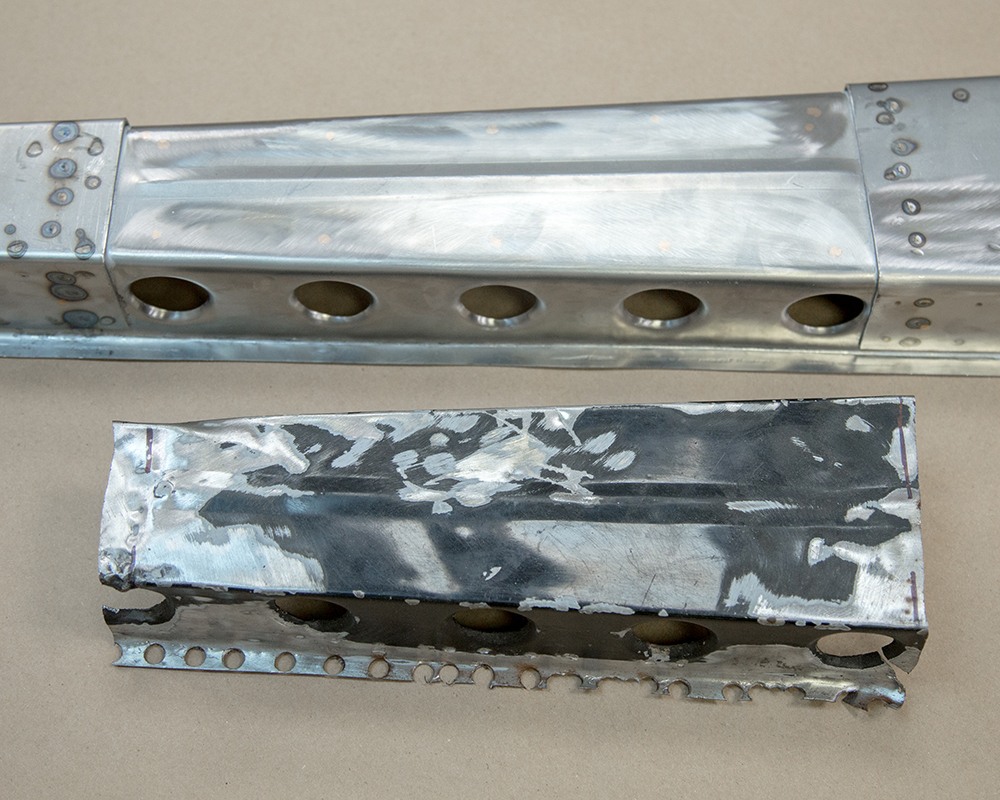
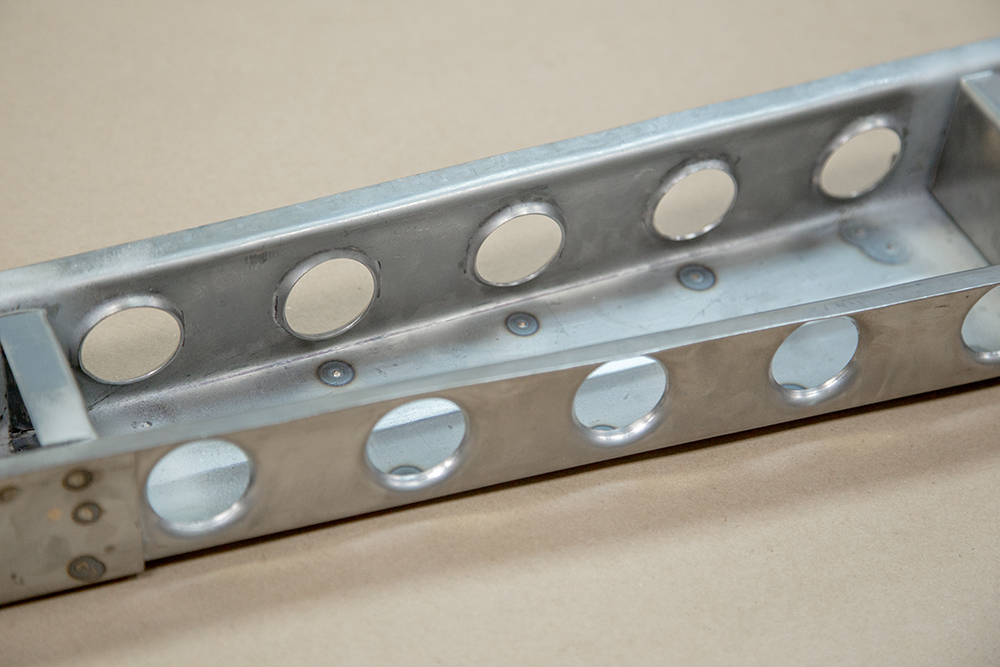
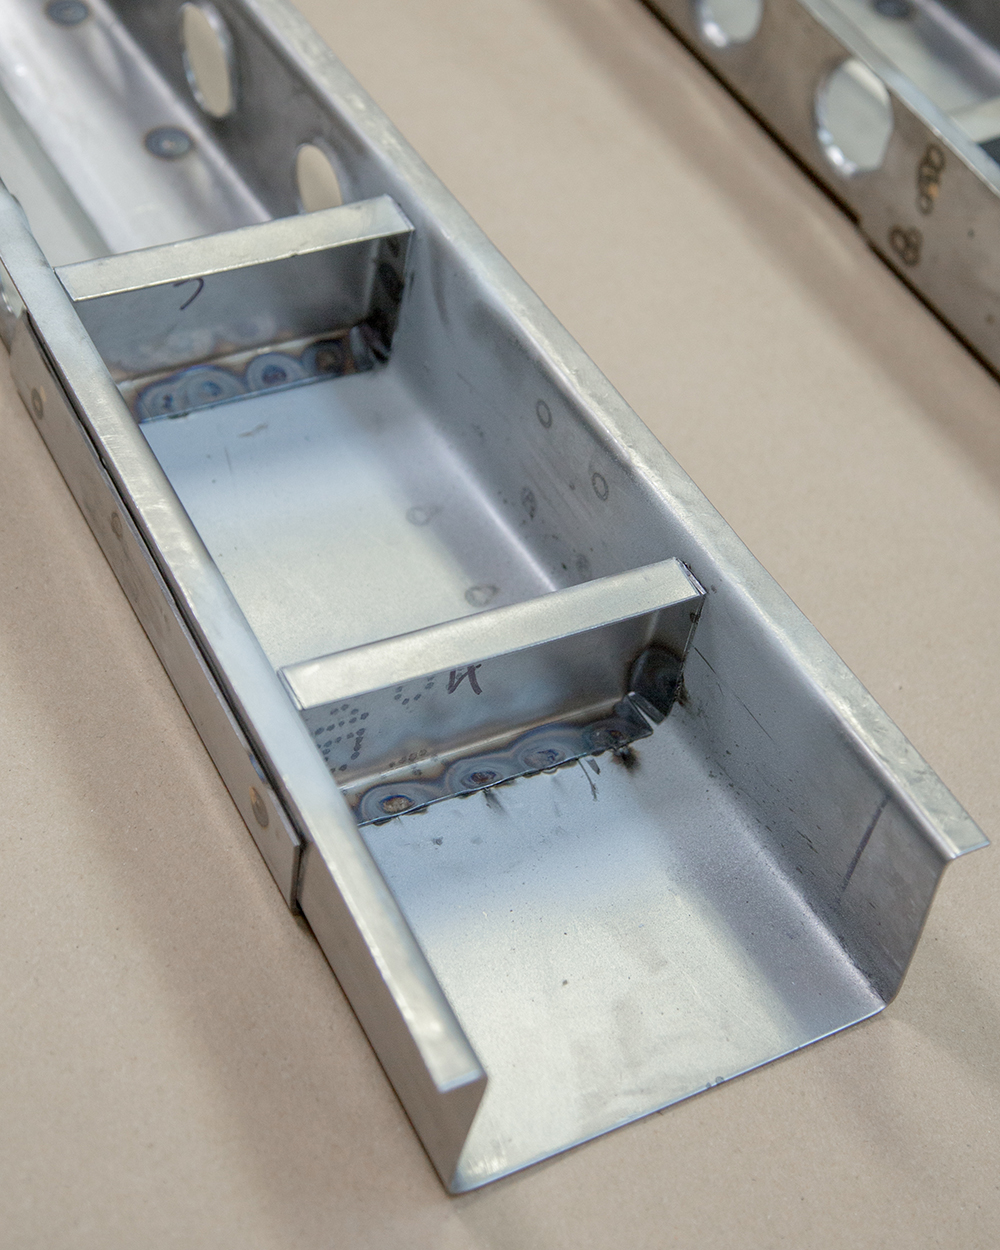
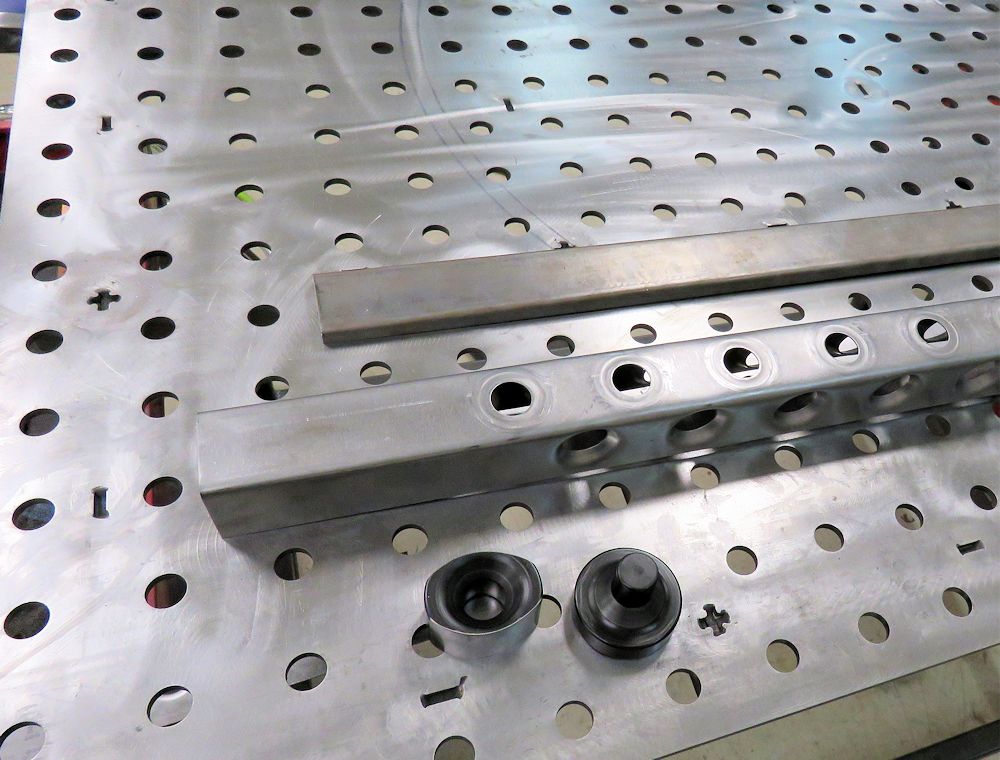
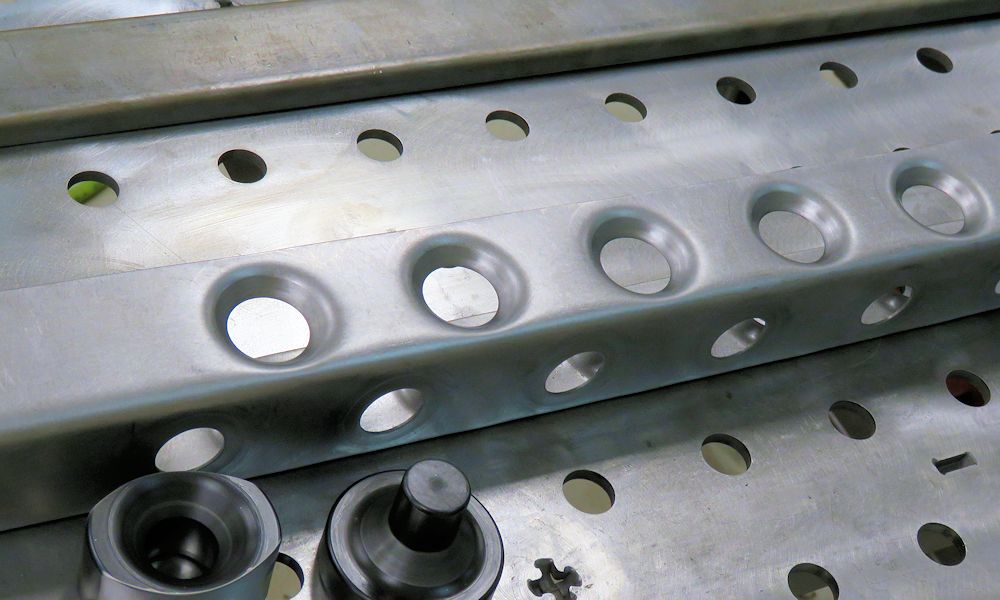
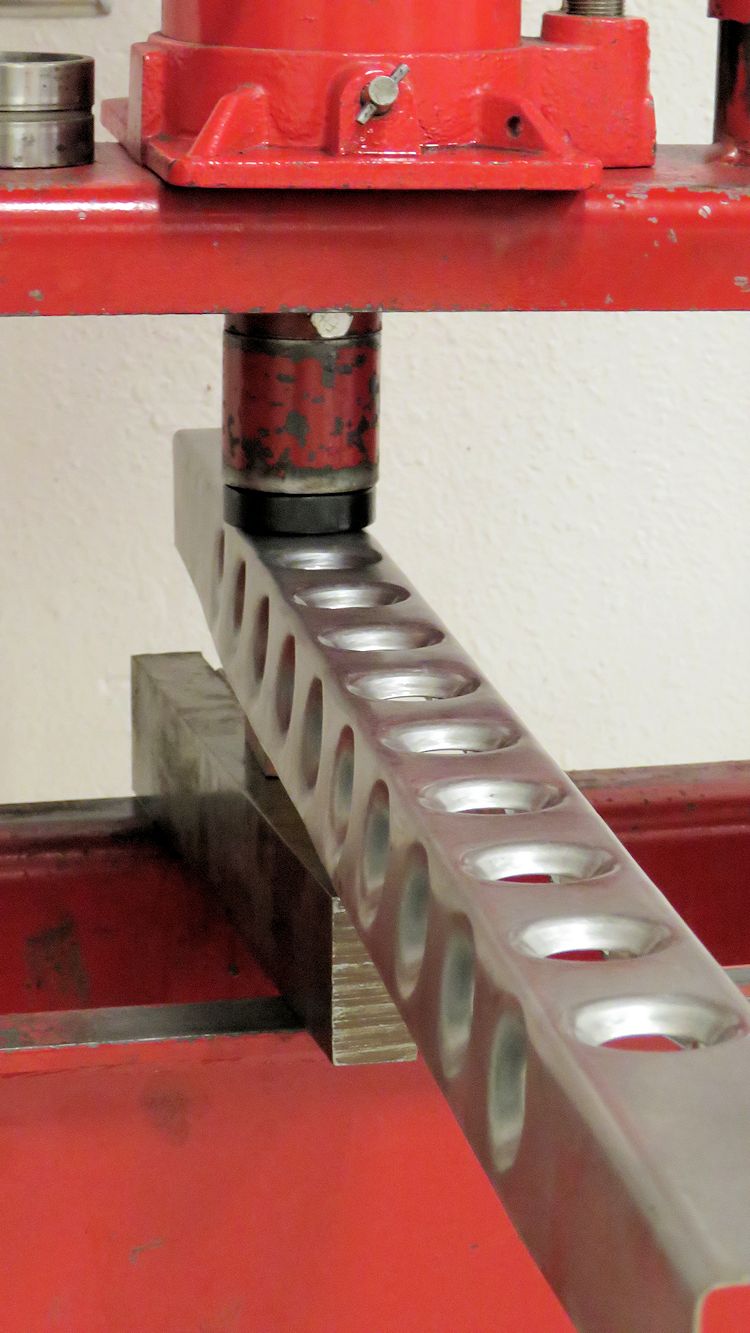
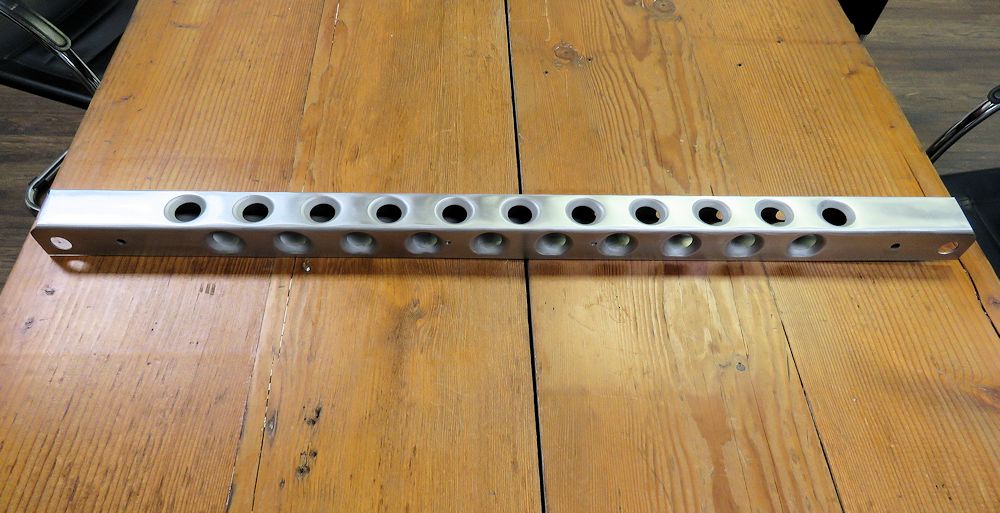
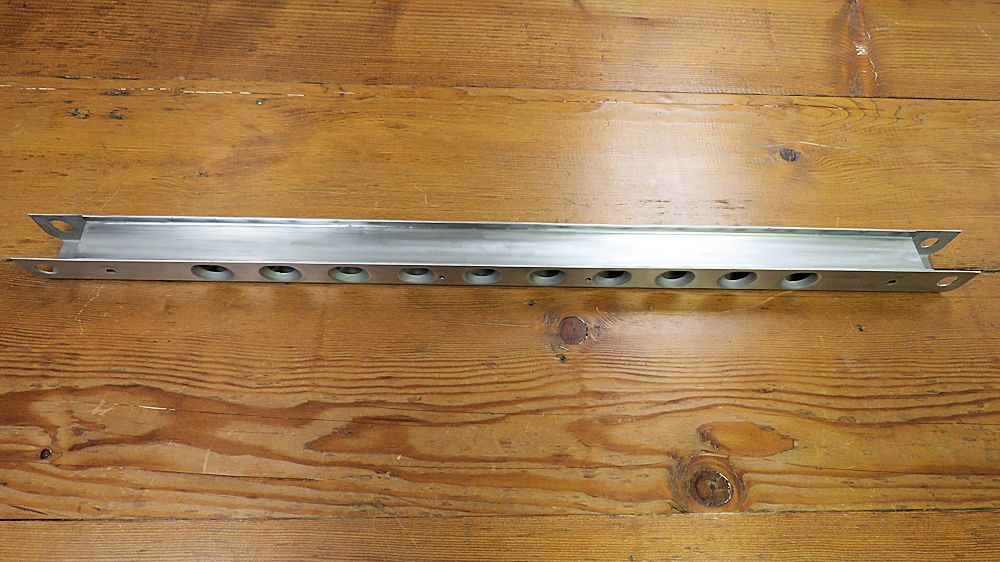
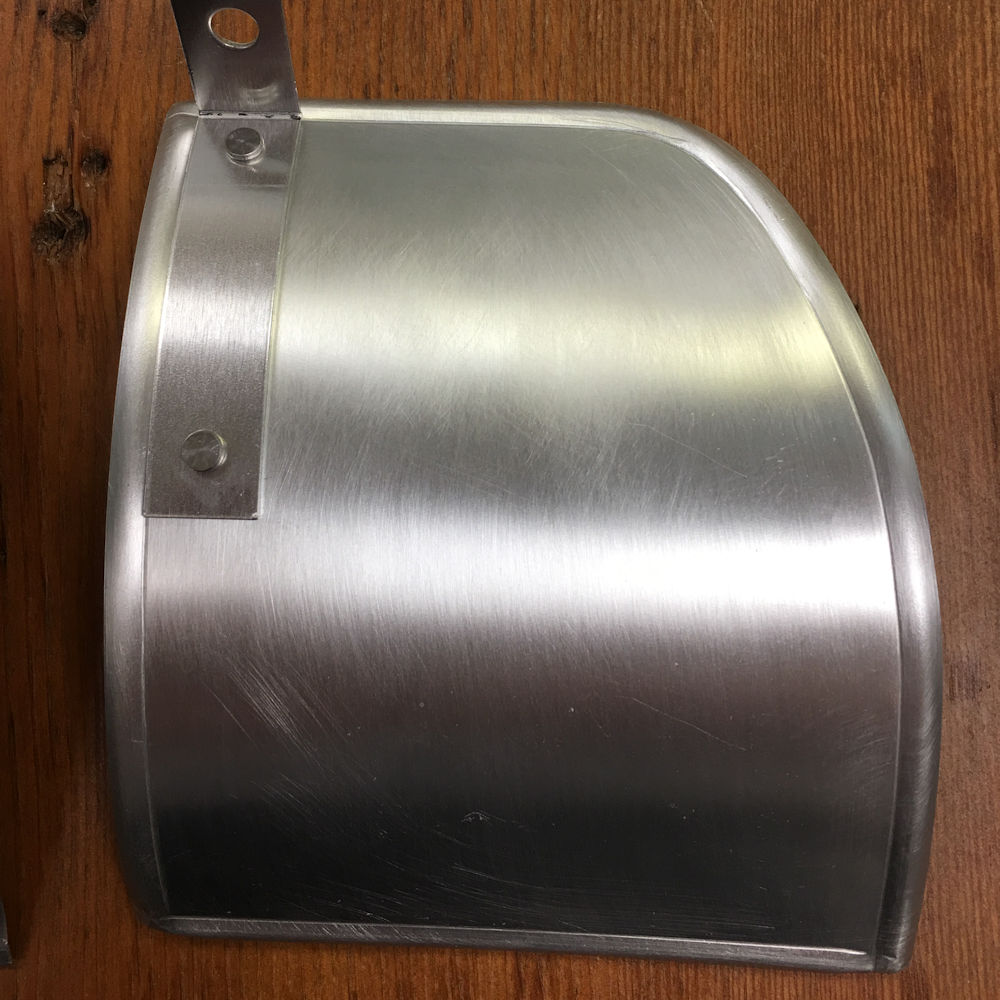
| Fabricating the new rear bulkhead cover
panels |
|
 |
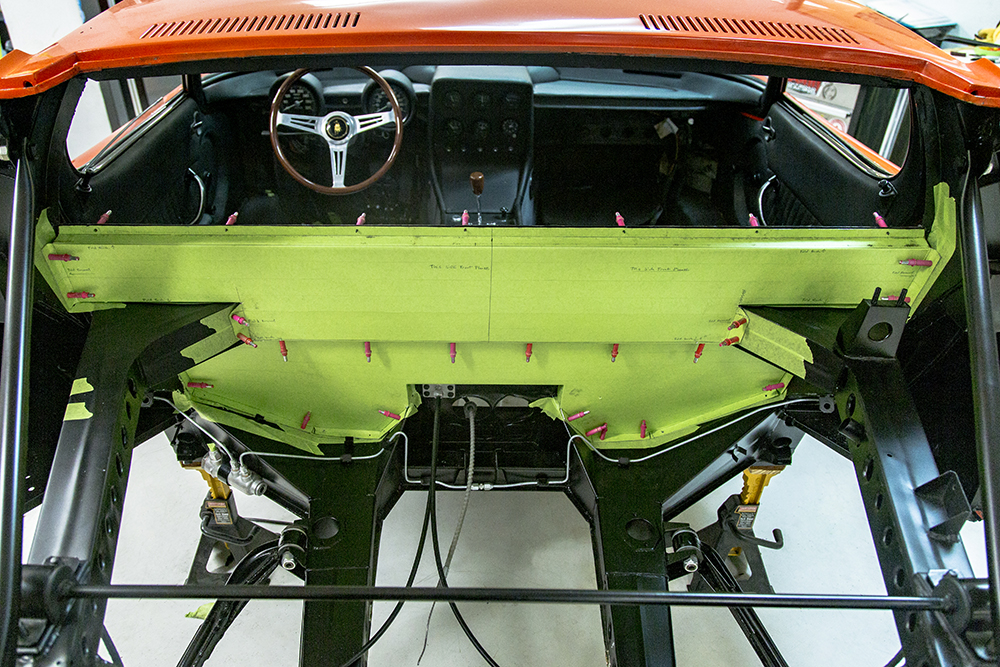 |
| New panels being trial fitted with clekos |
 |
 |
 |
 |
 |
 |
 |
 |
 |
 |
 |
 |
 |
 |
 |
 |
 |
 |
 |
 |
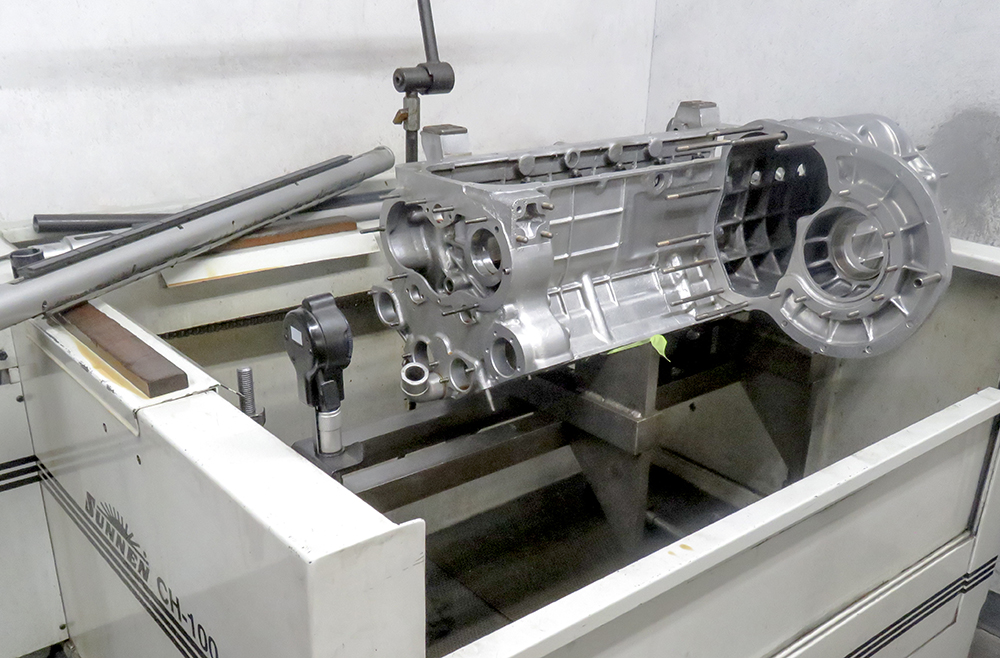
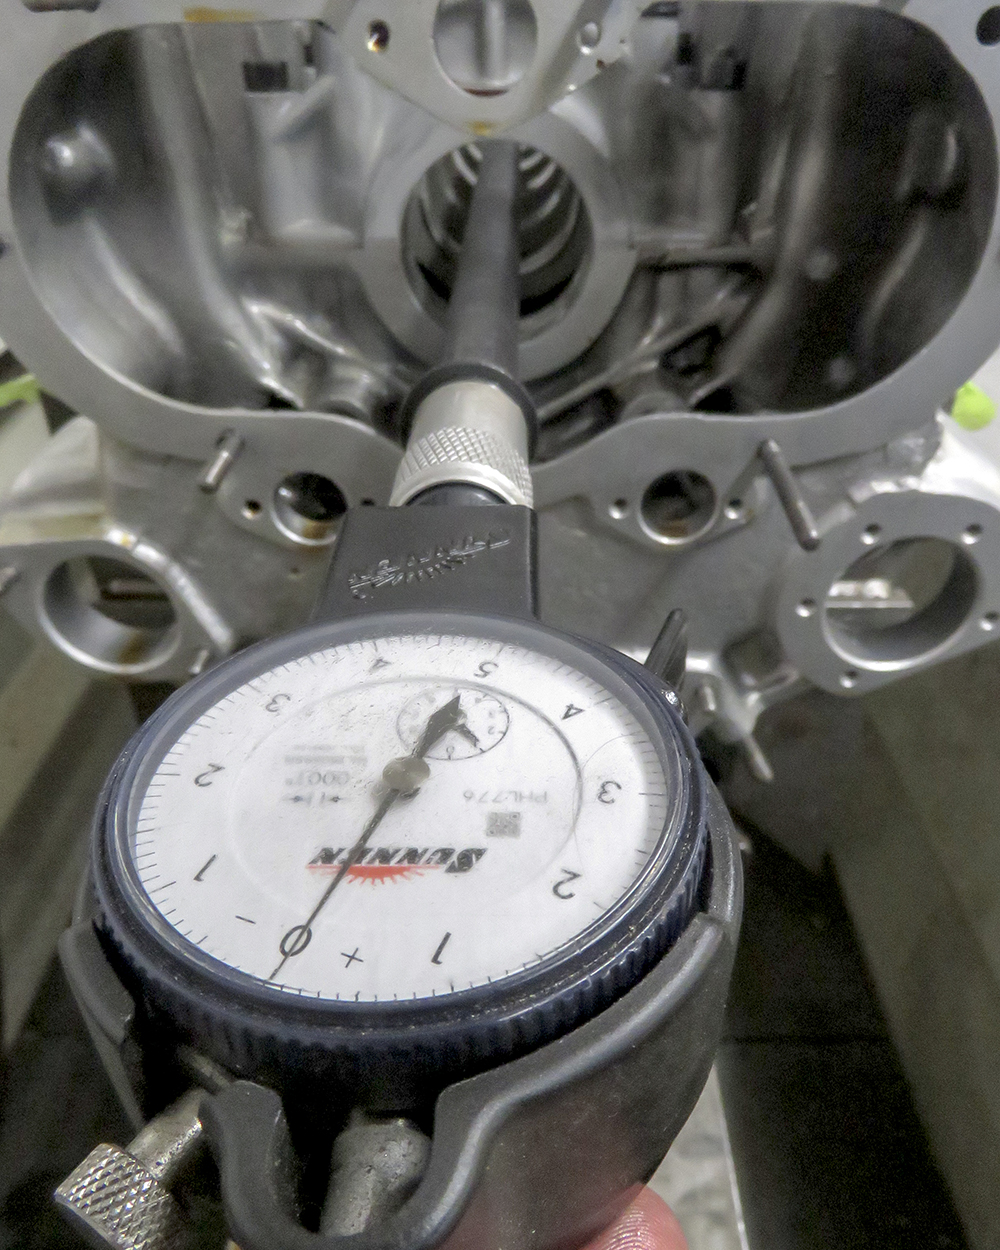
Update report - January 25, 2021
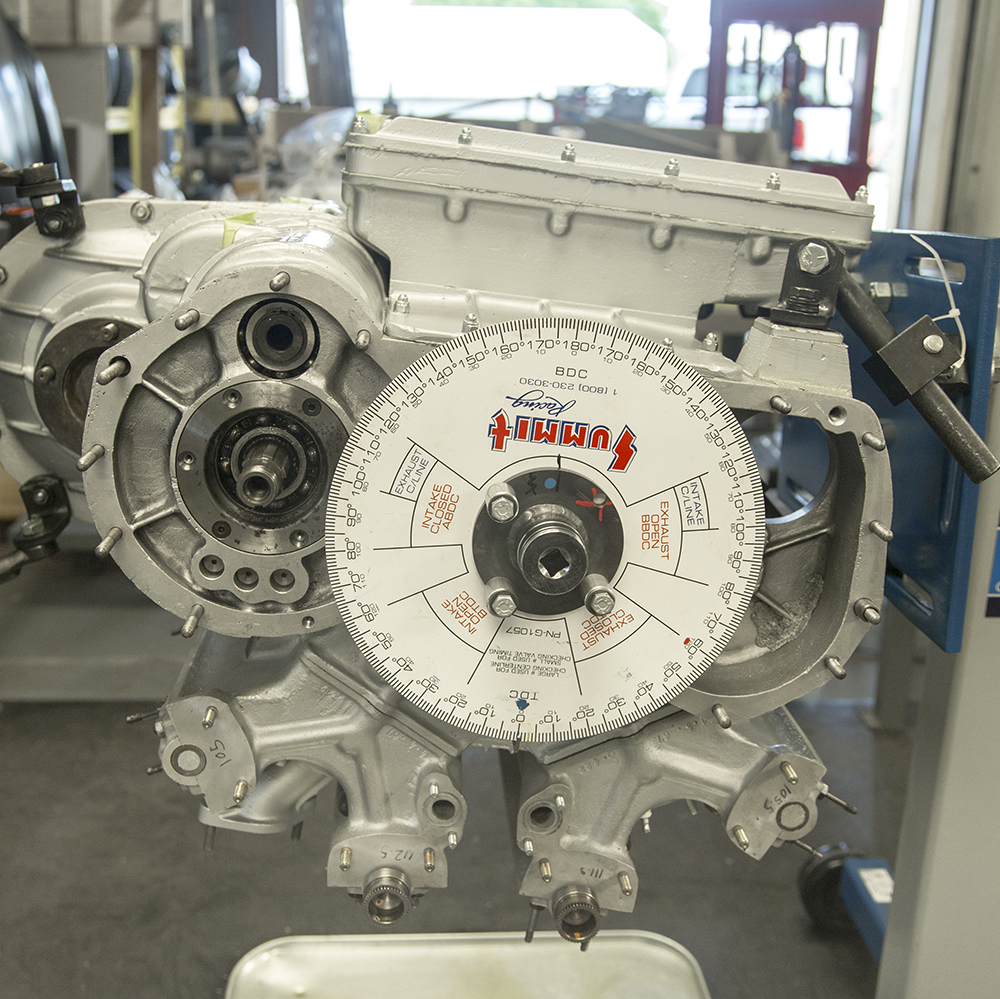
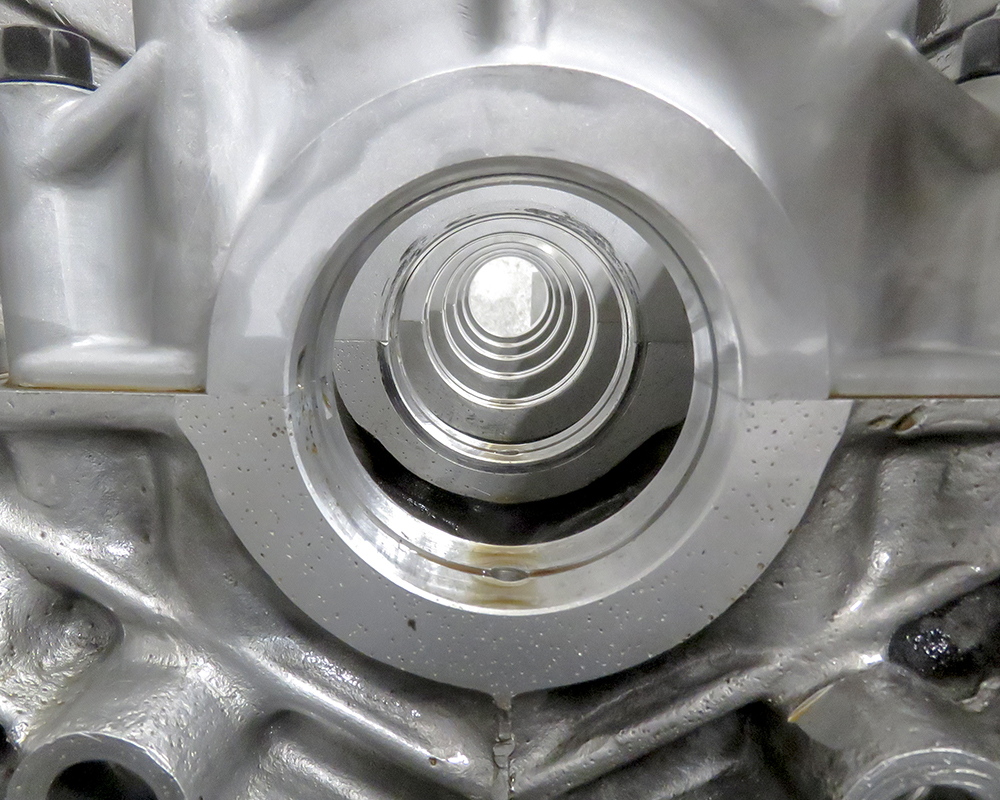
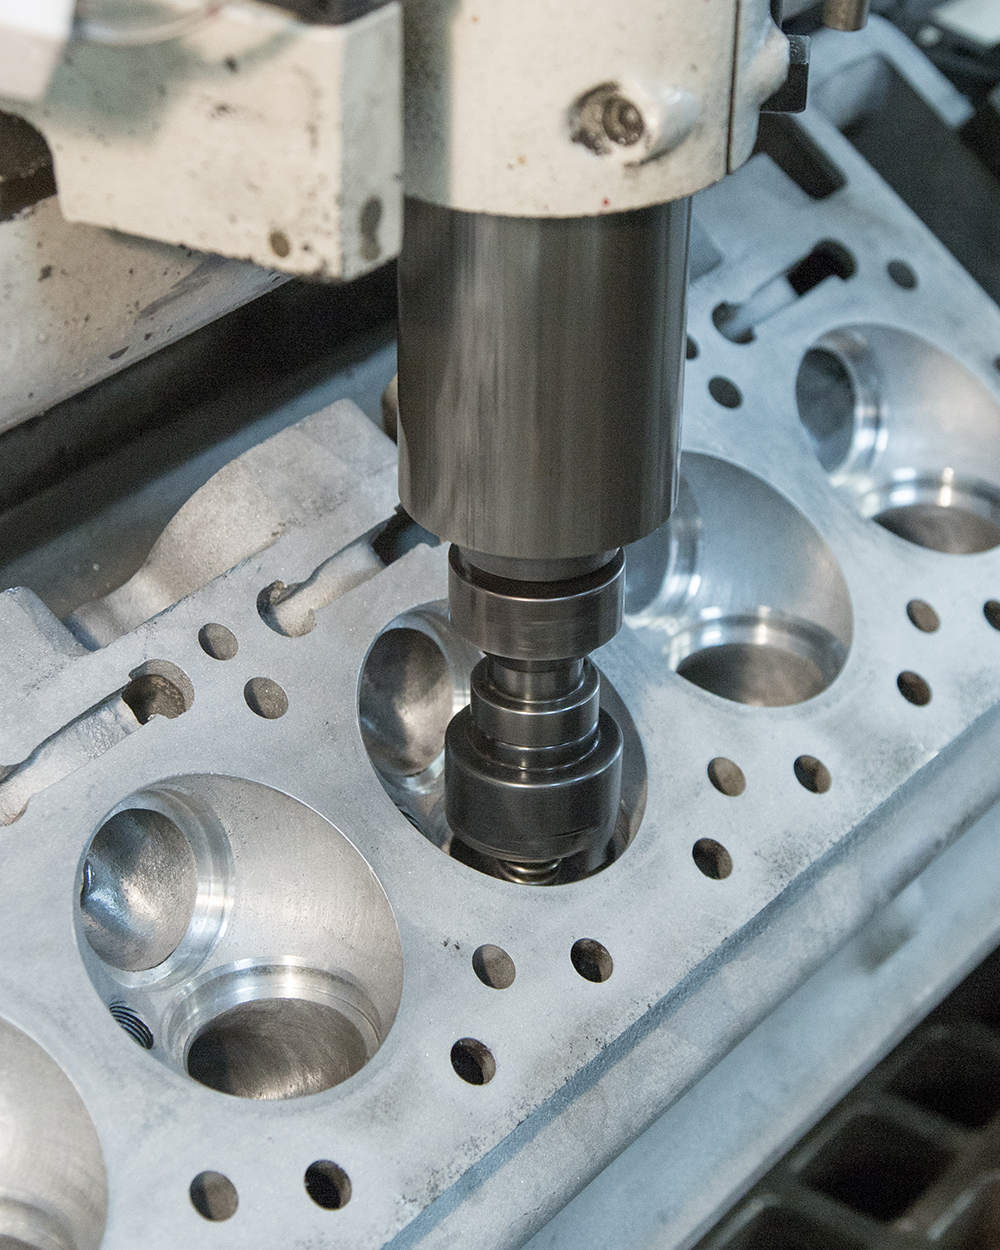
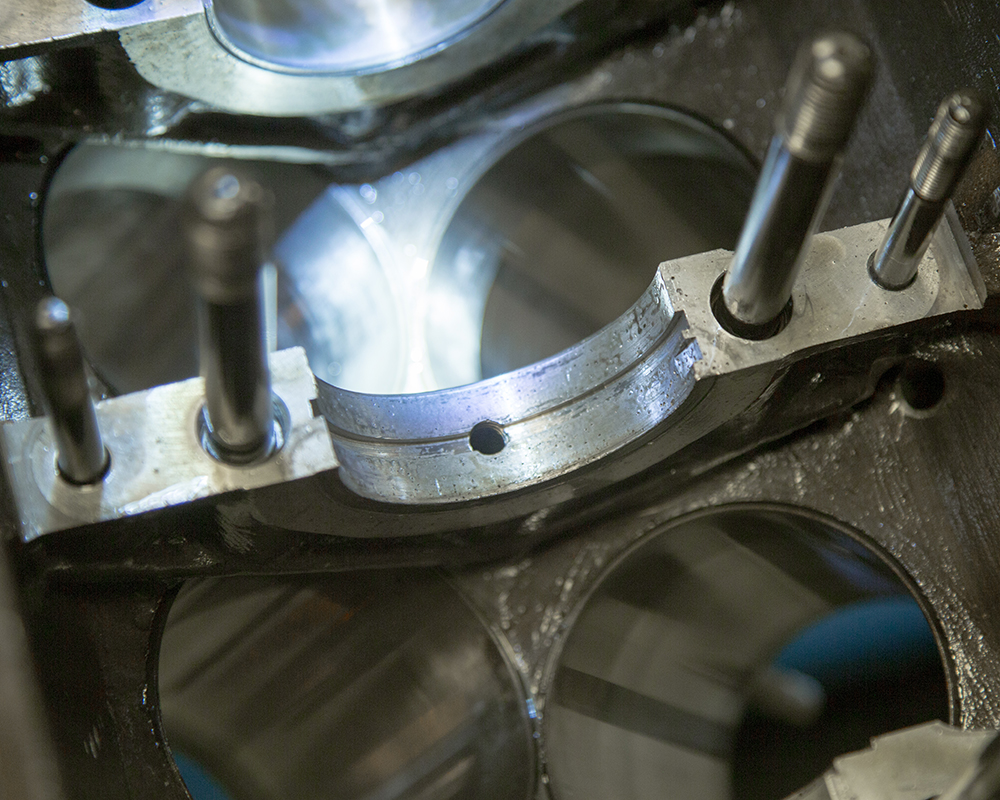
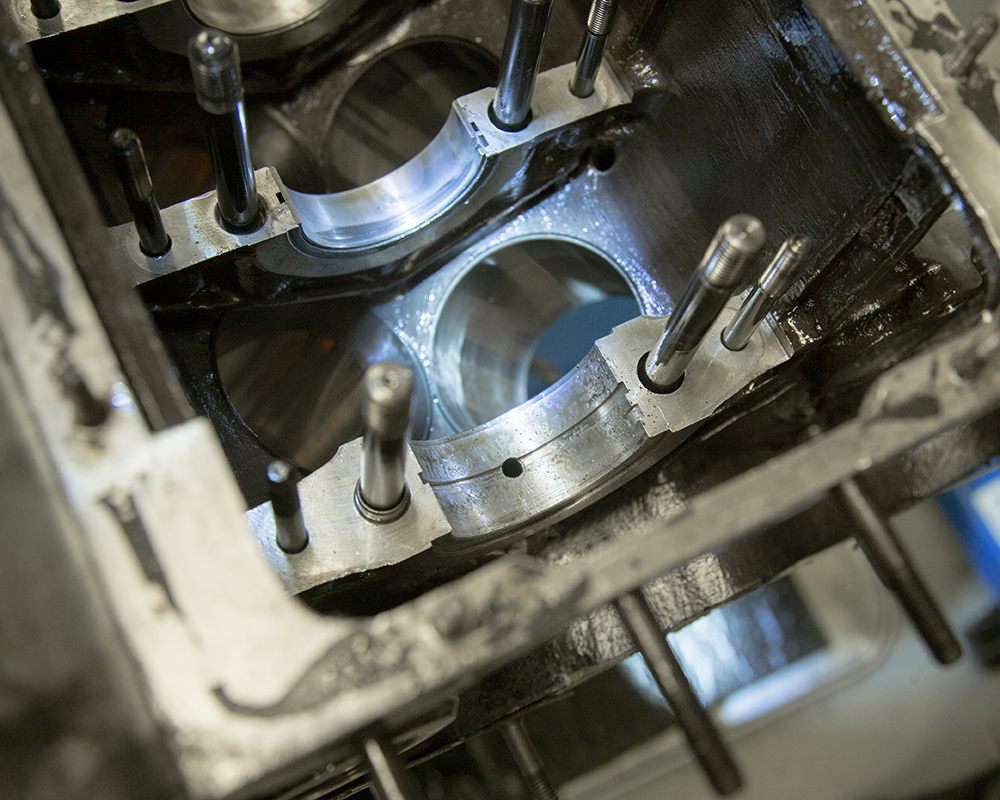
Align honing in progress.
 |
 |
 |
 |
Update report - January 15, 2021
 |
 |
 |
 |
 |
 |
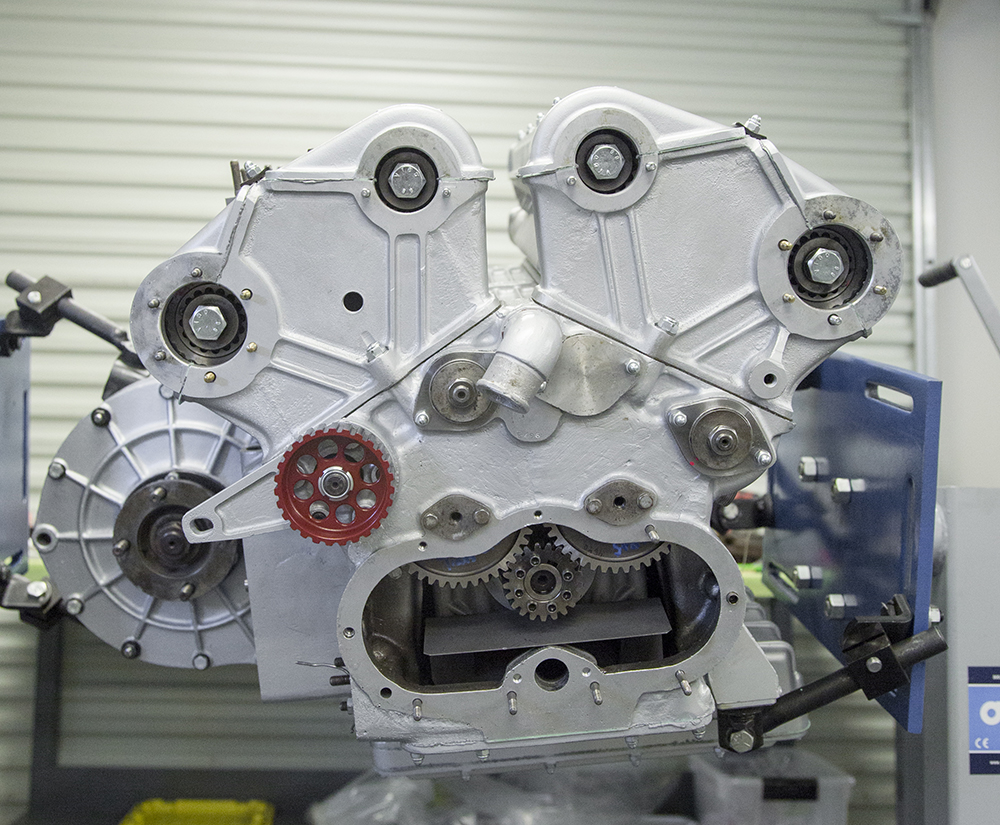
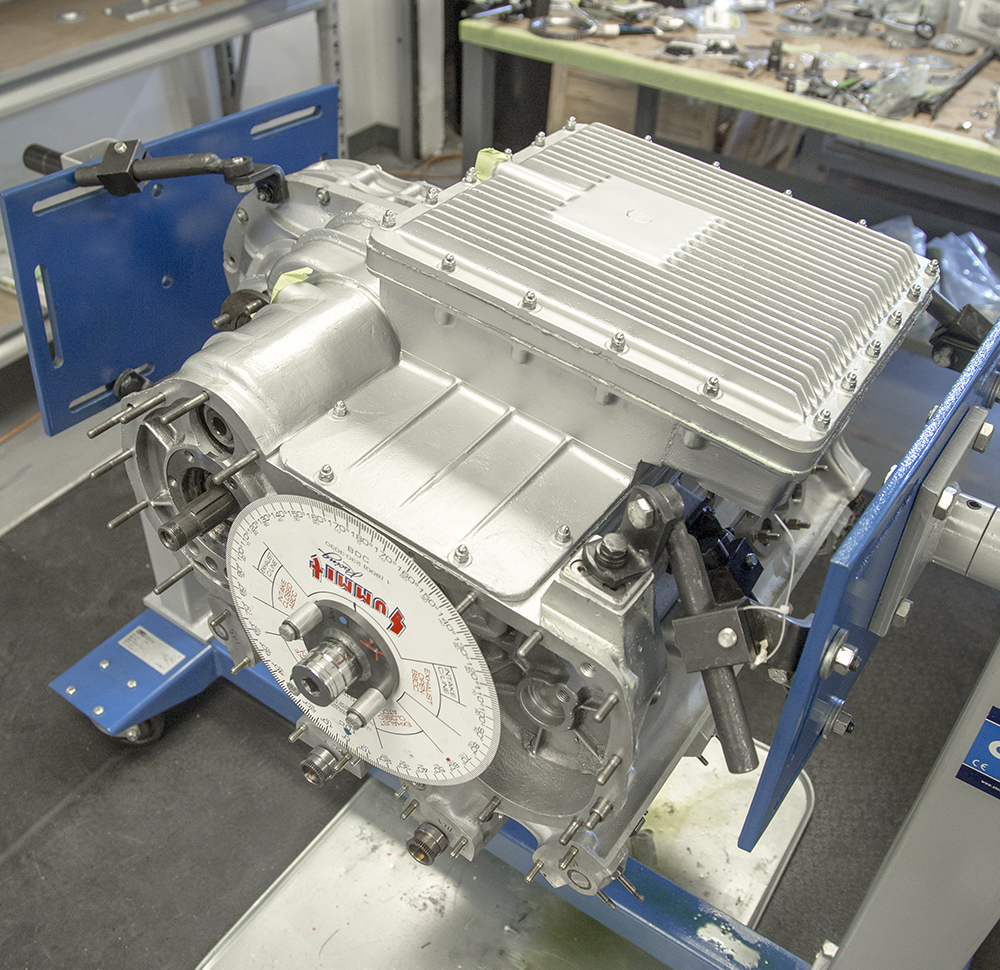
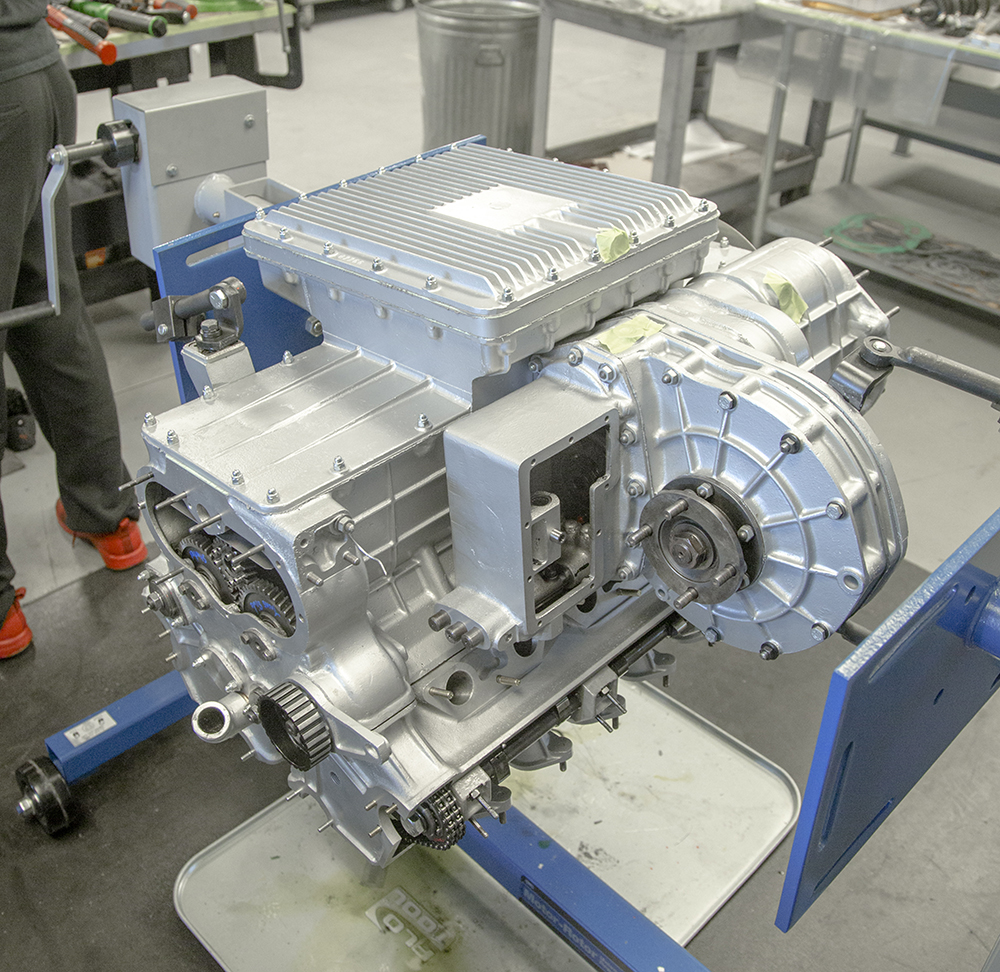
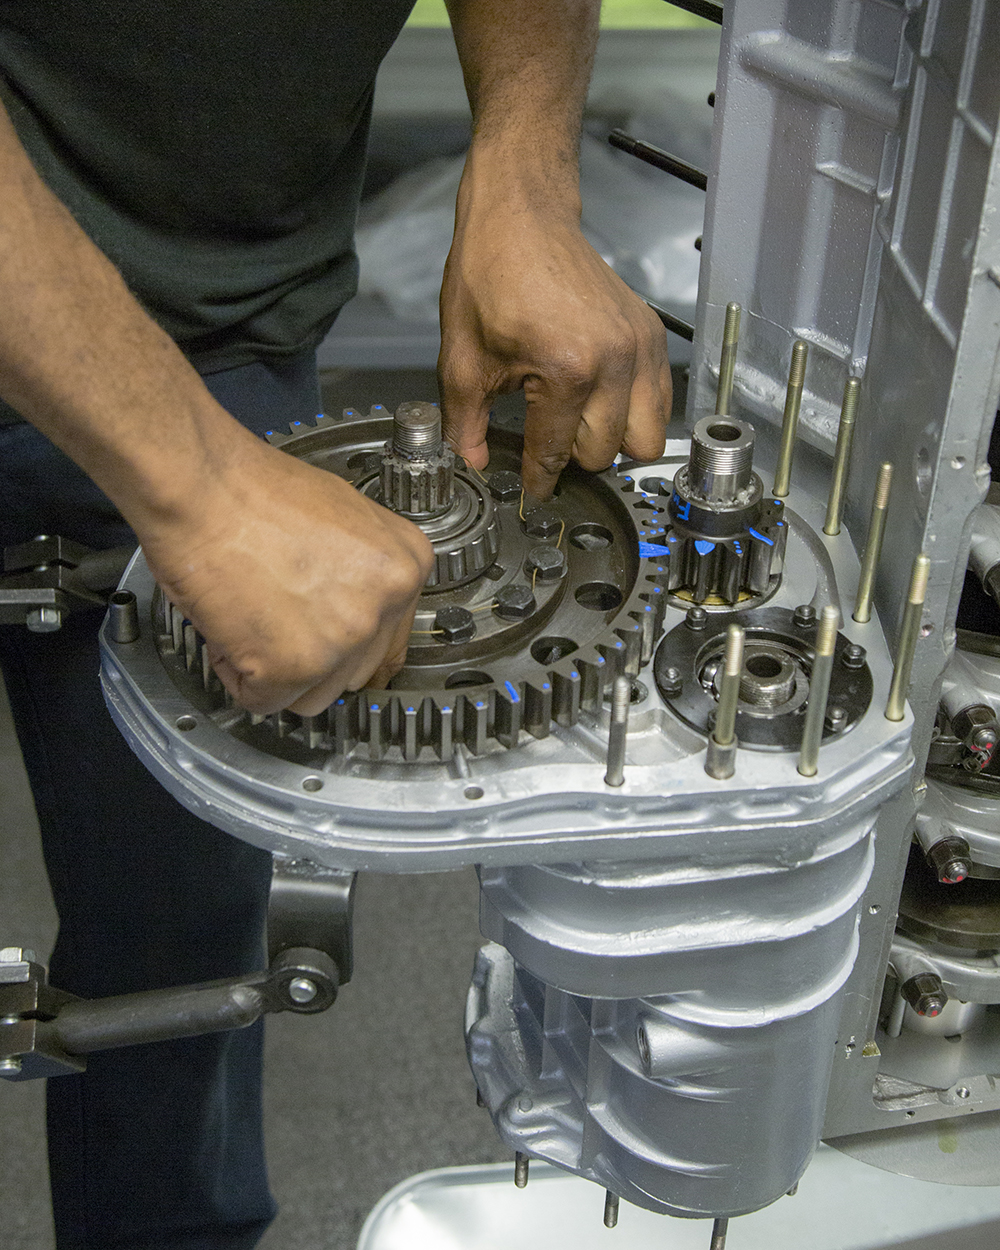
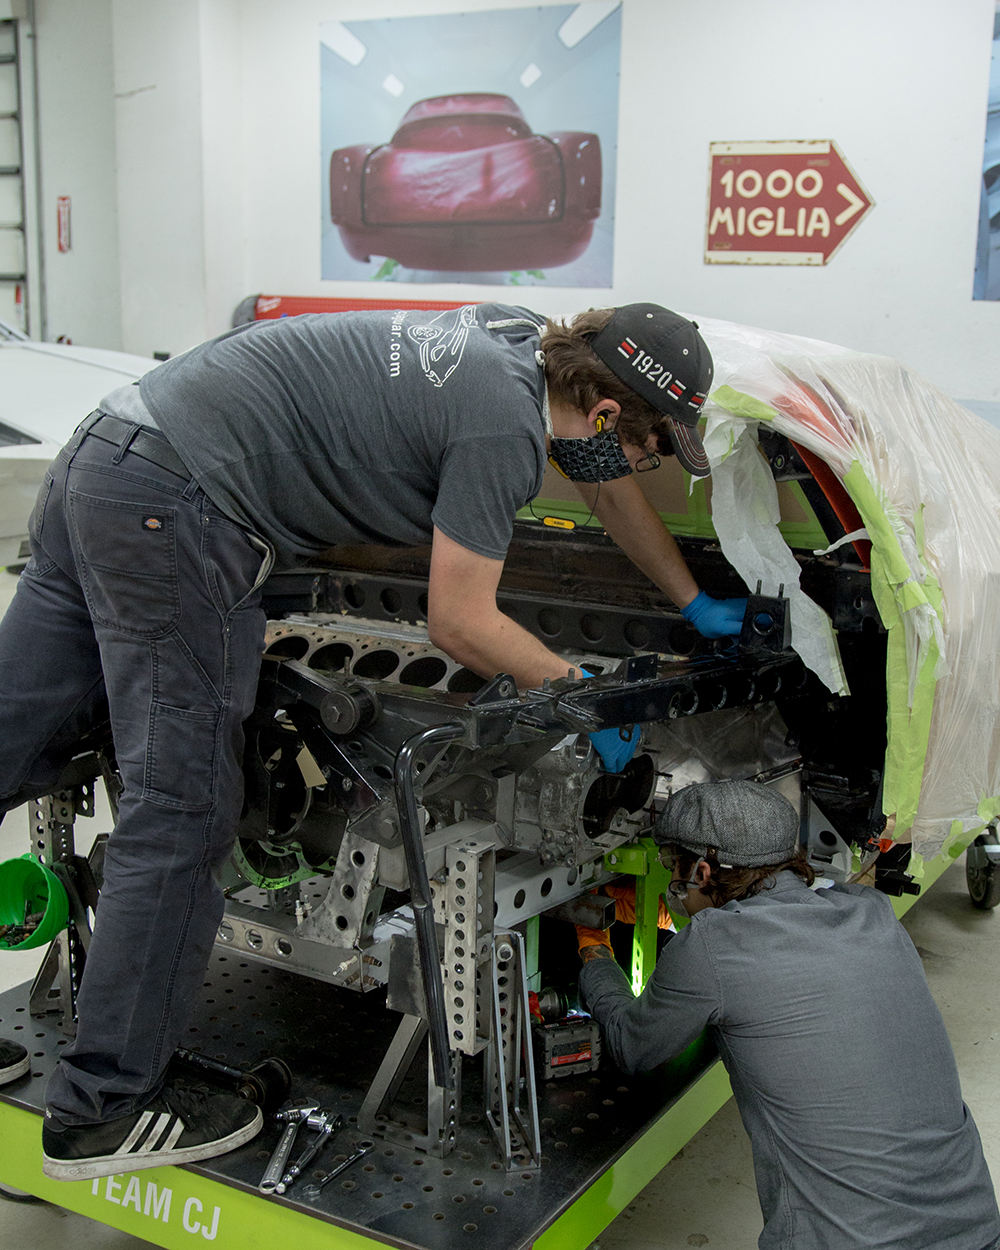
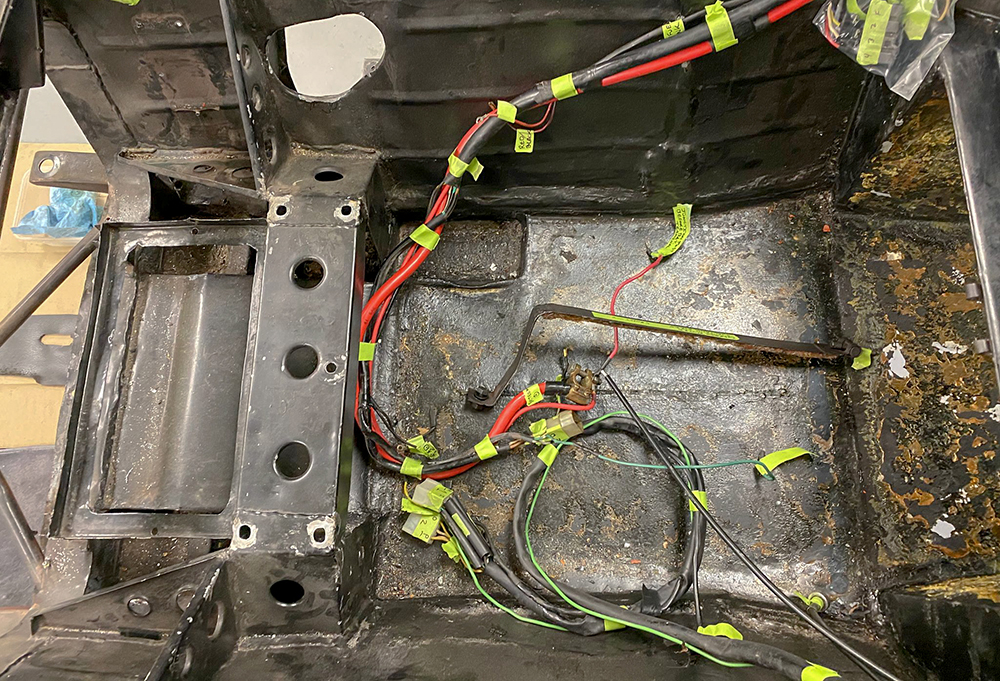
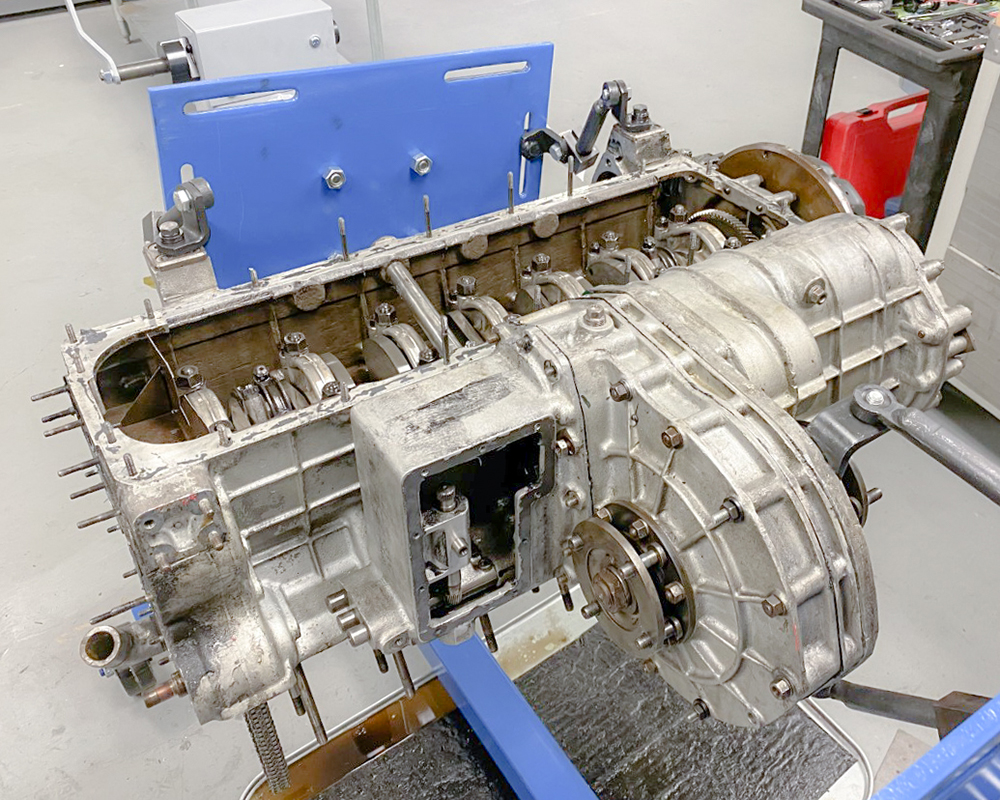
It is now time to start going back together with the Miura.
 |
 |
 |
 |
 |
 |
 |
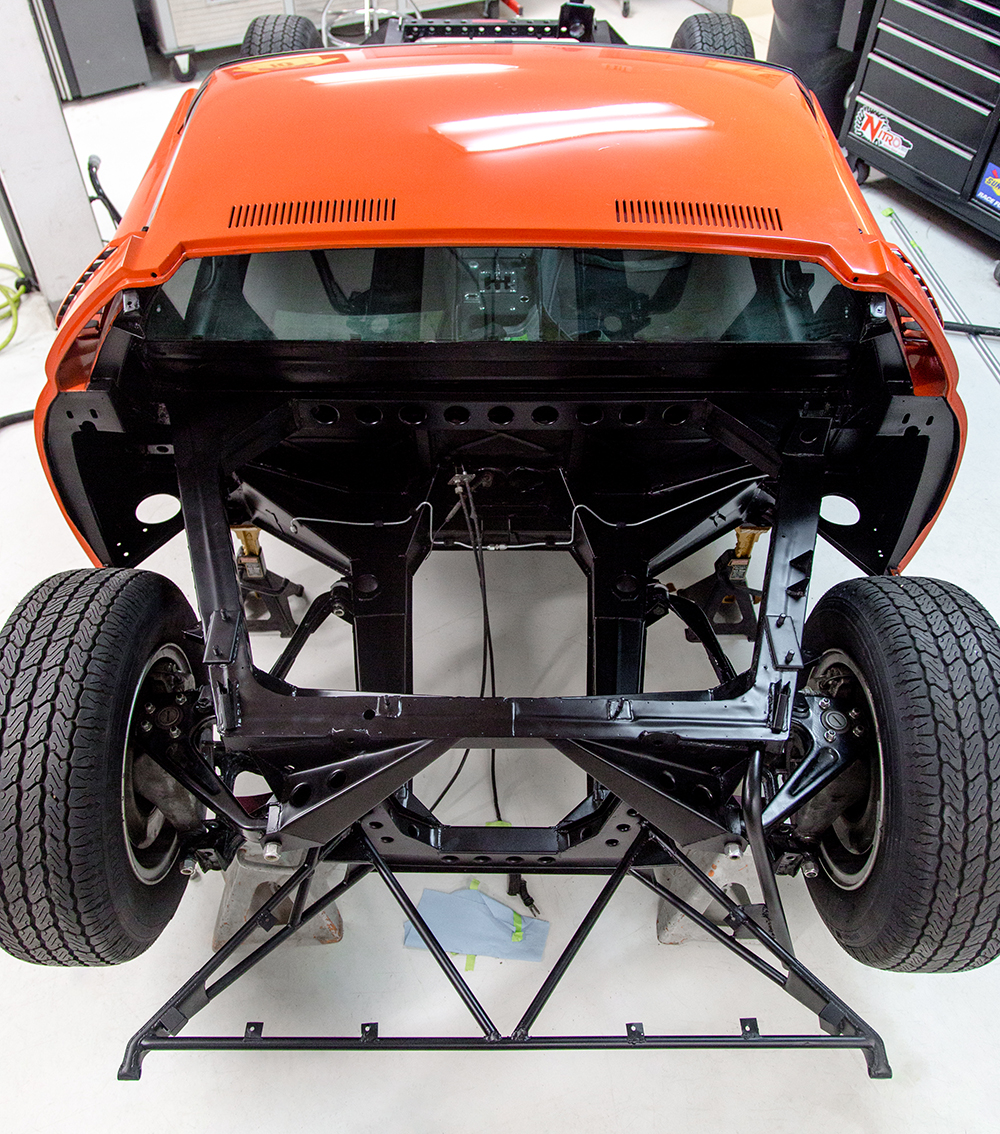 |
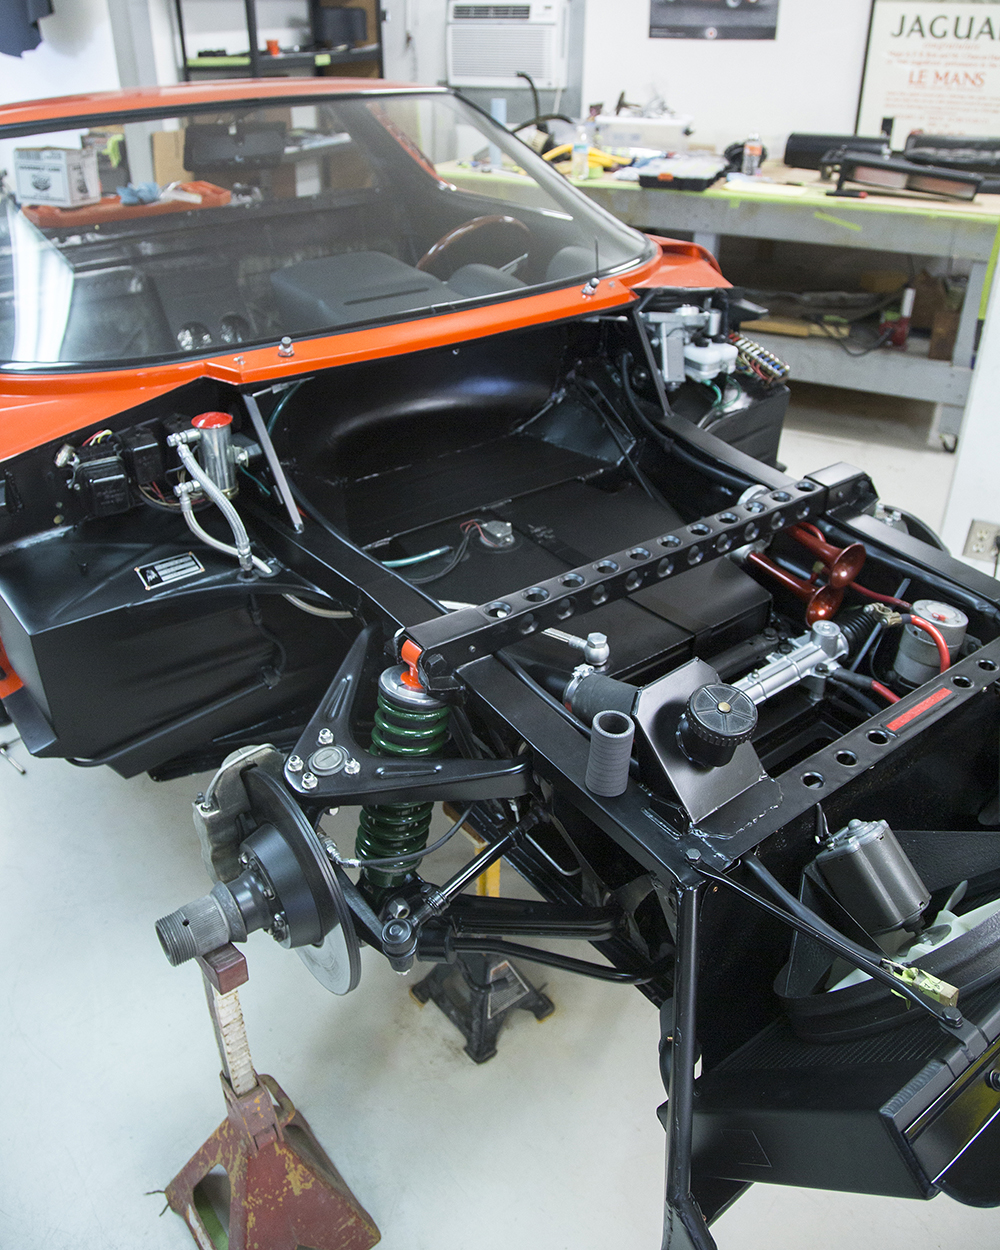
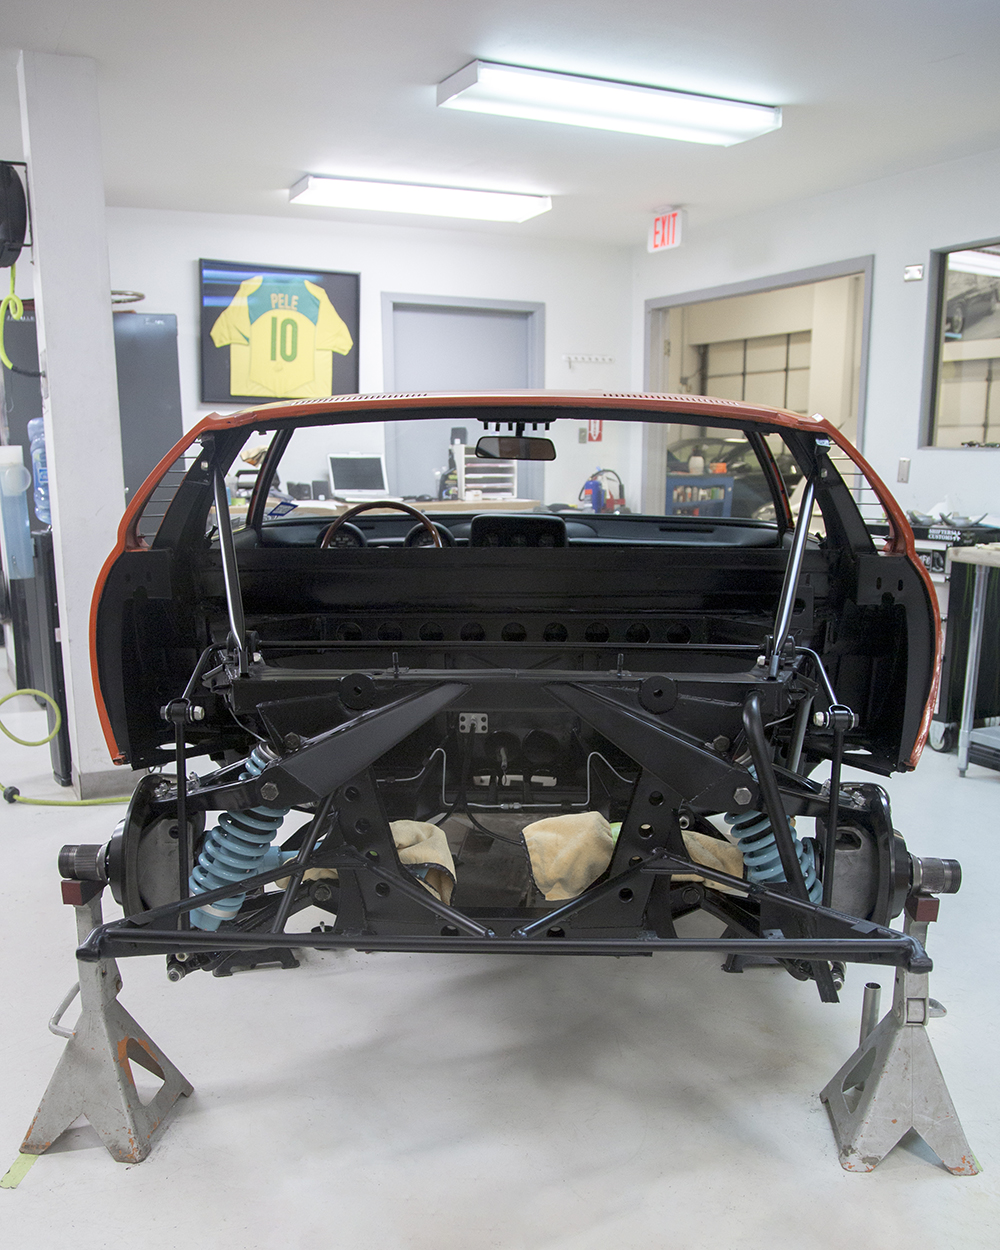
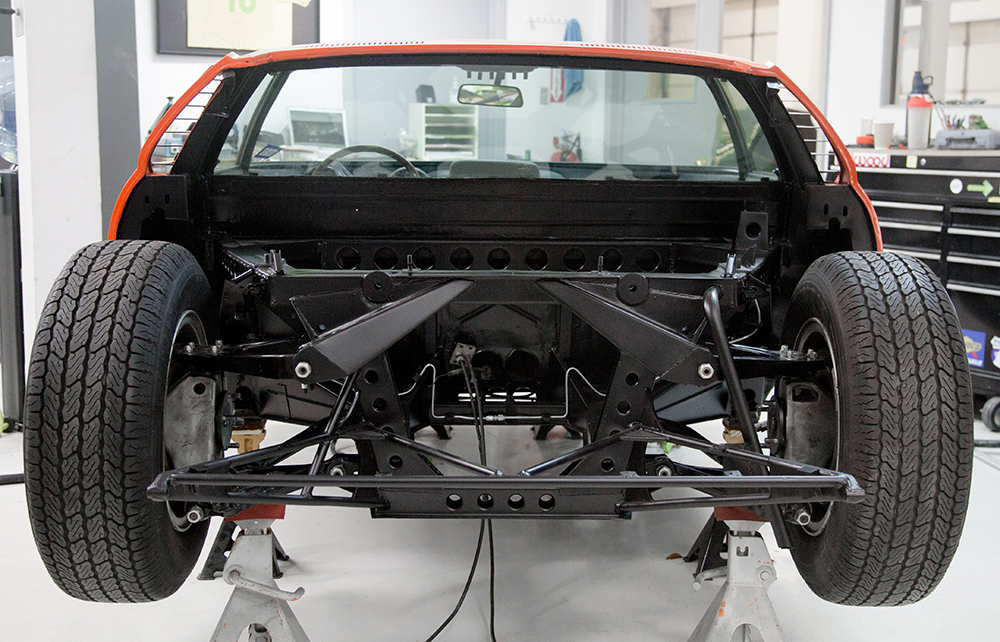
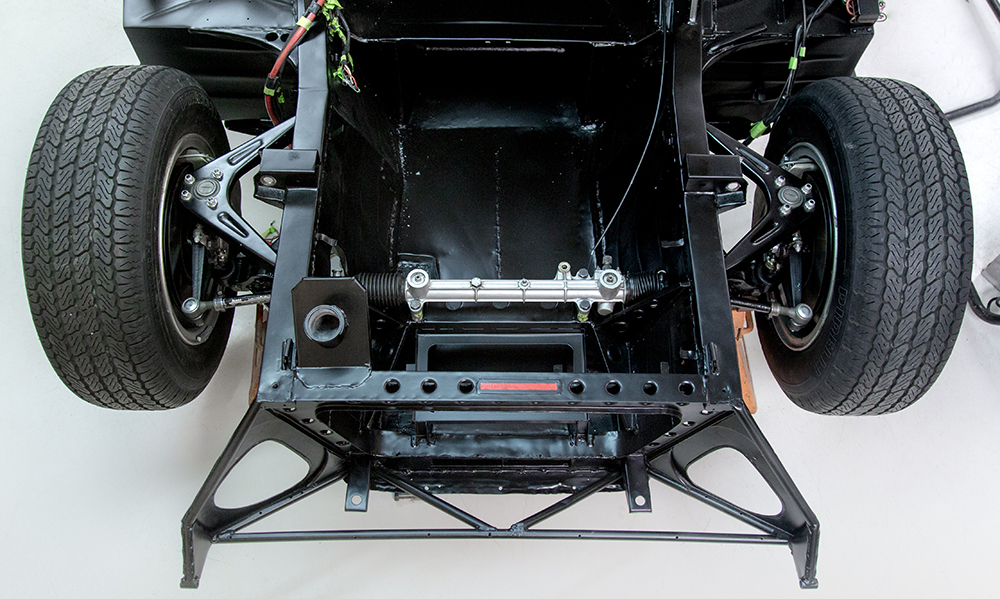
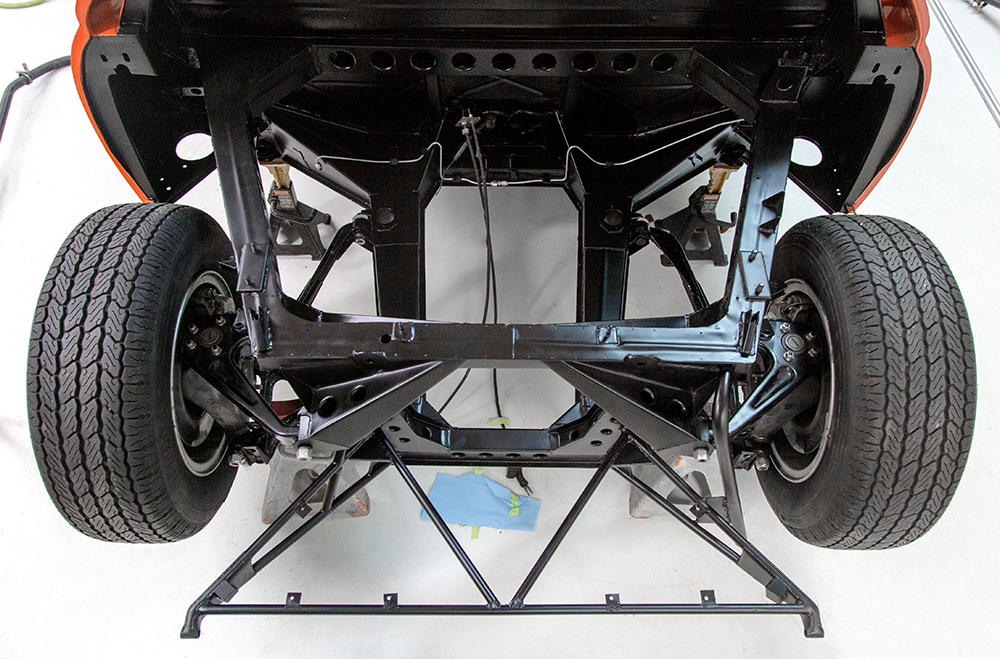
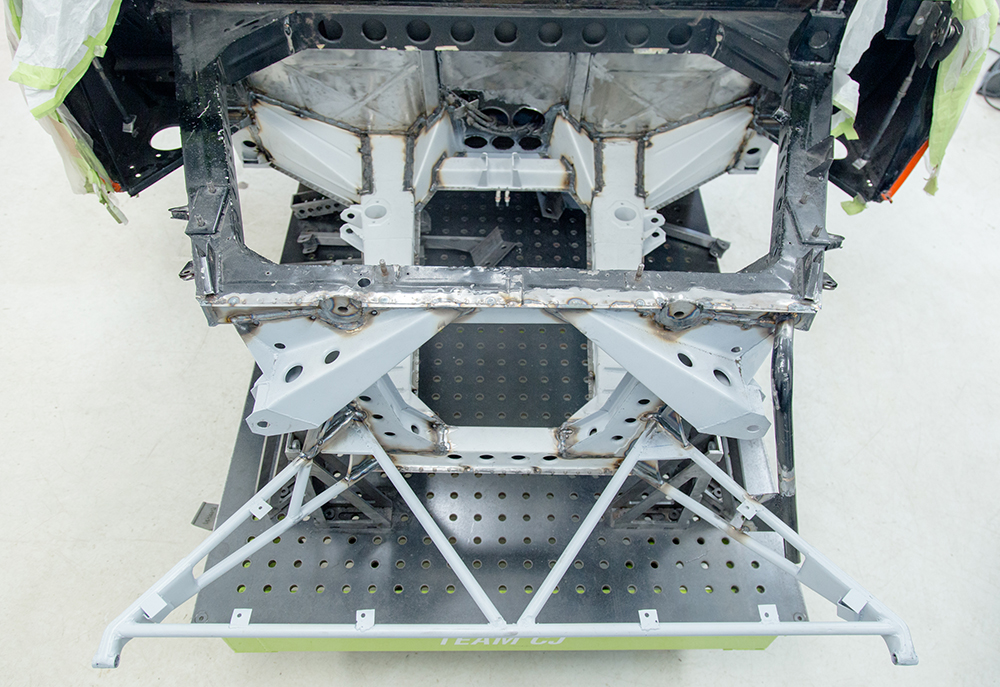
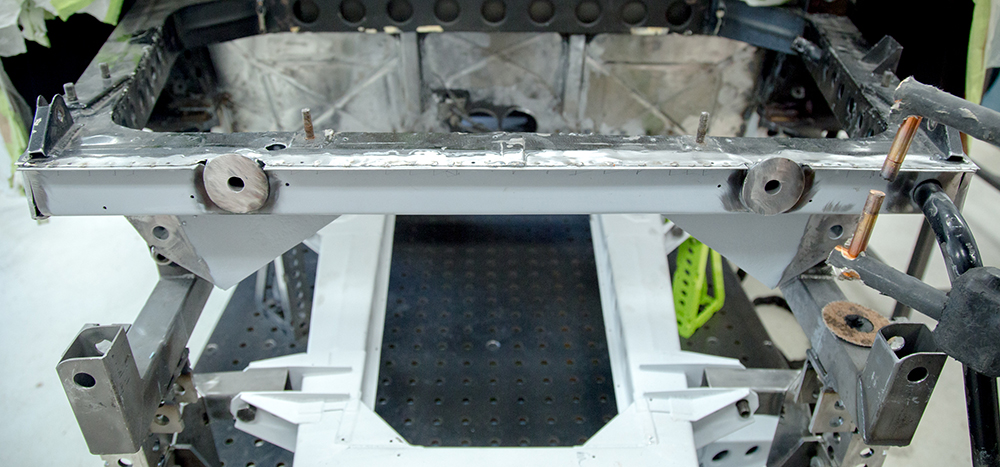
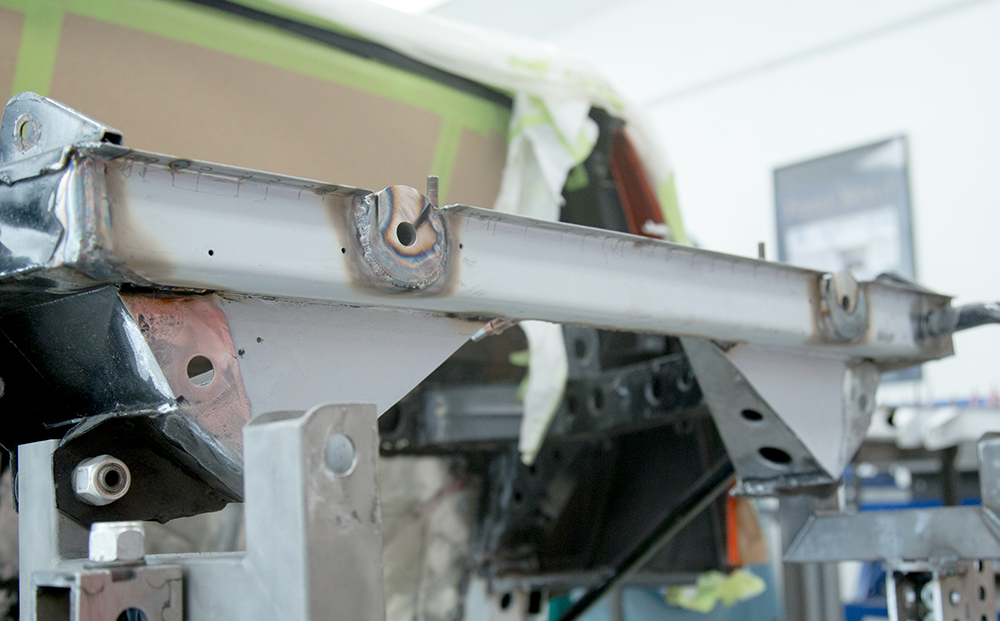
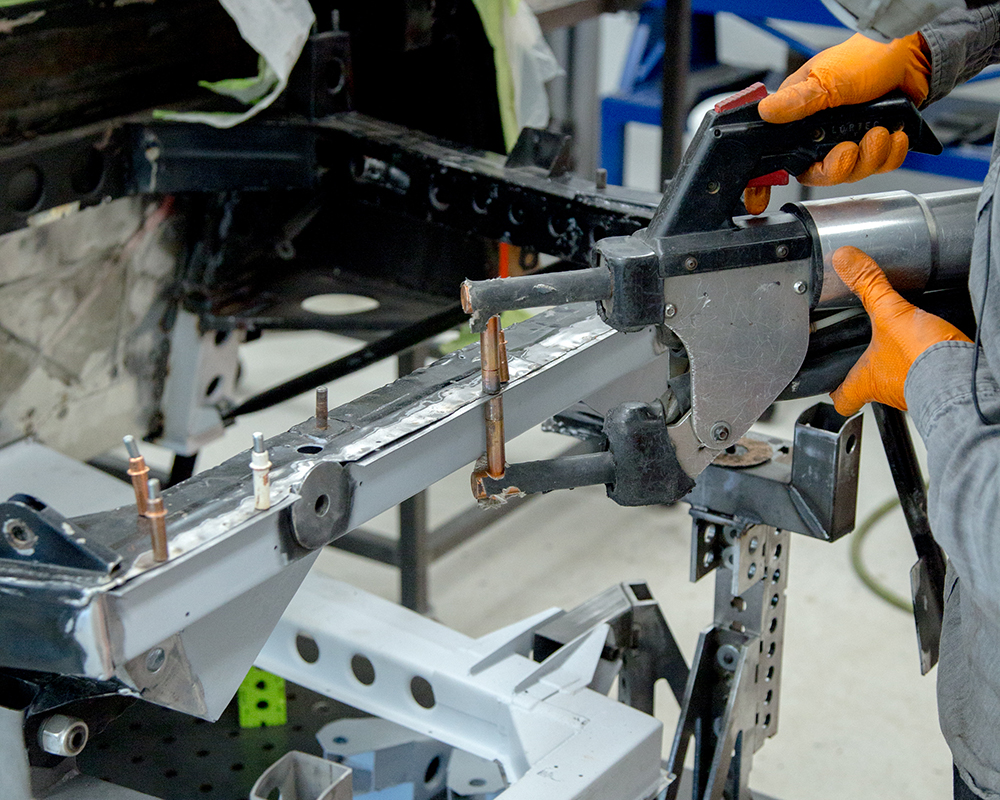
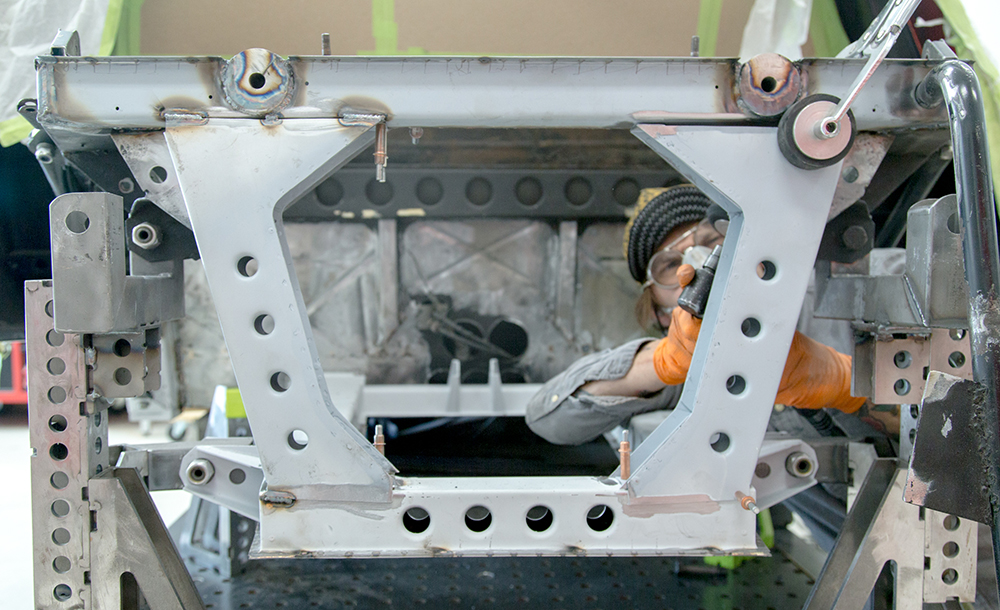
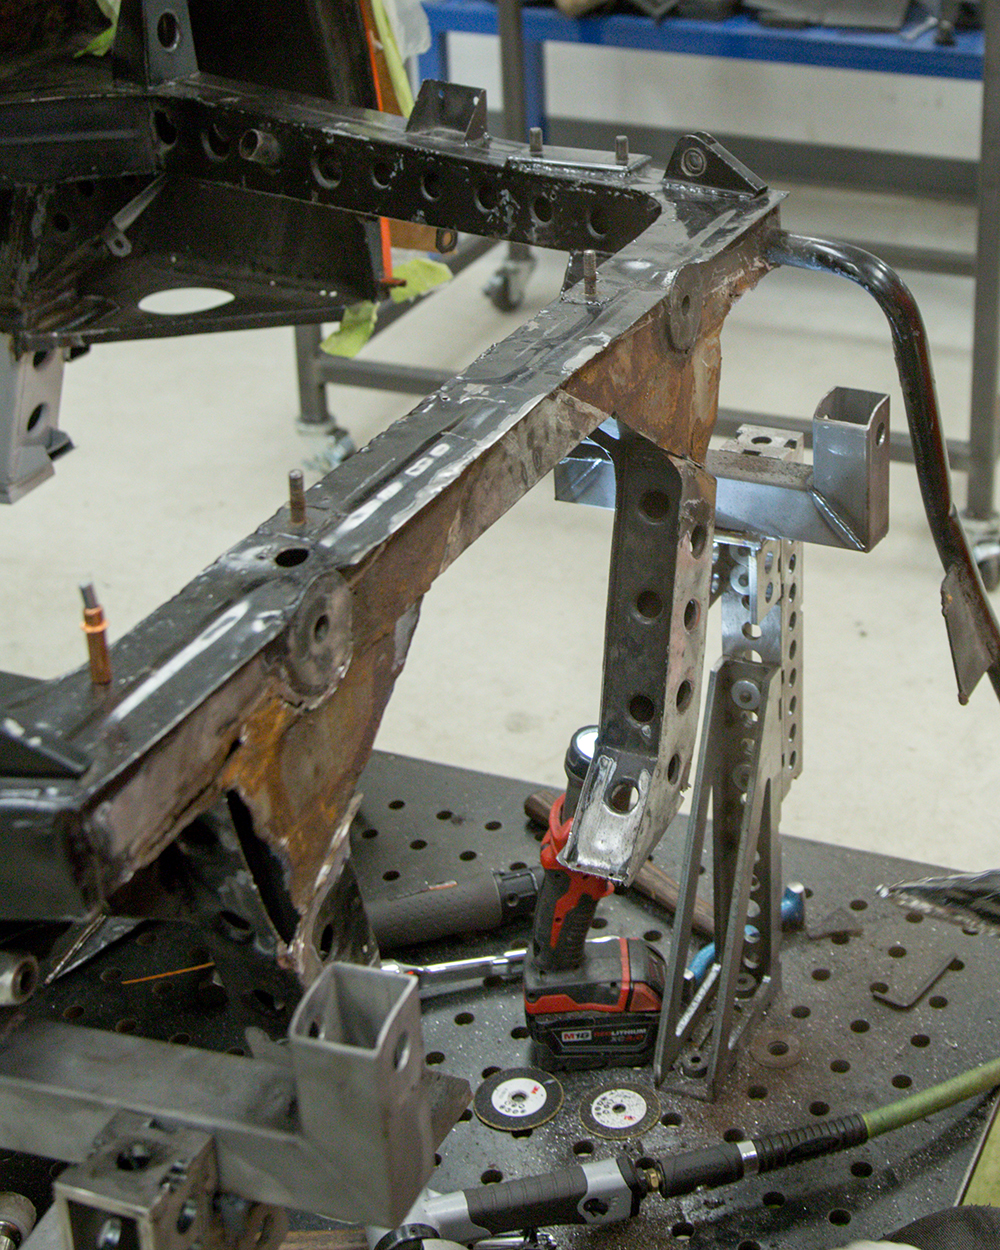
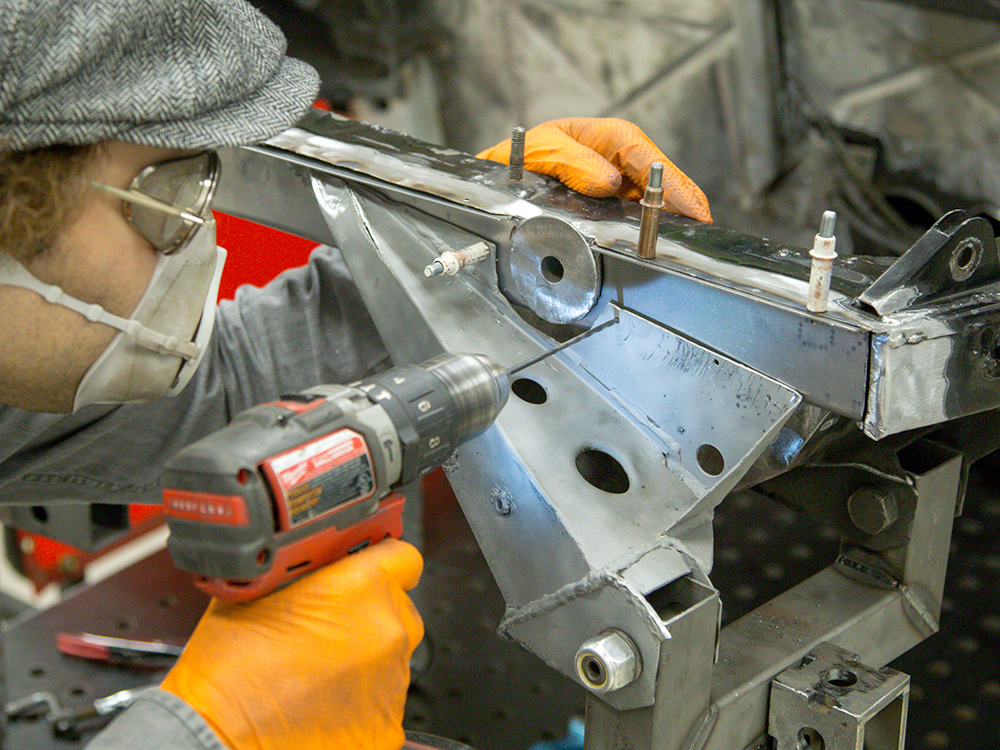
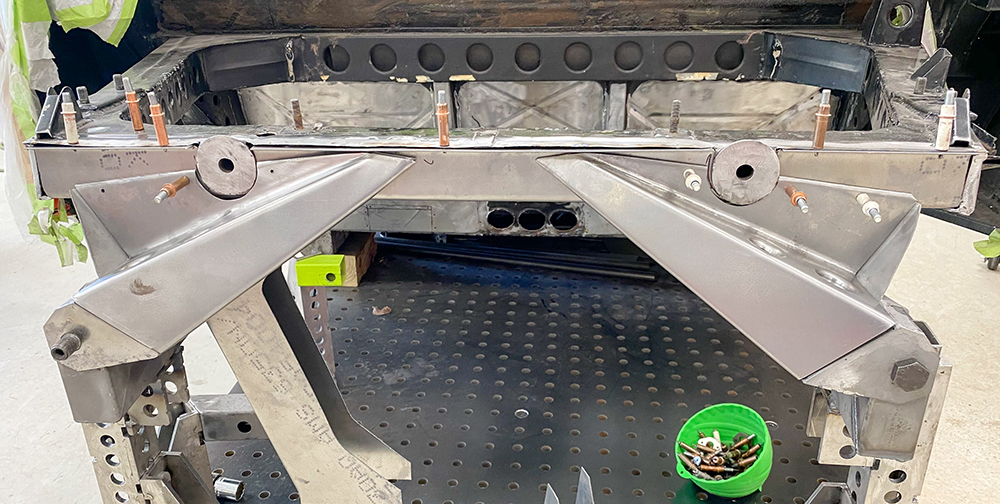
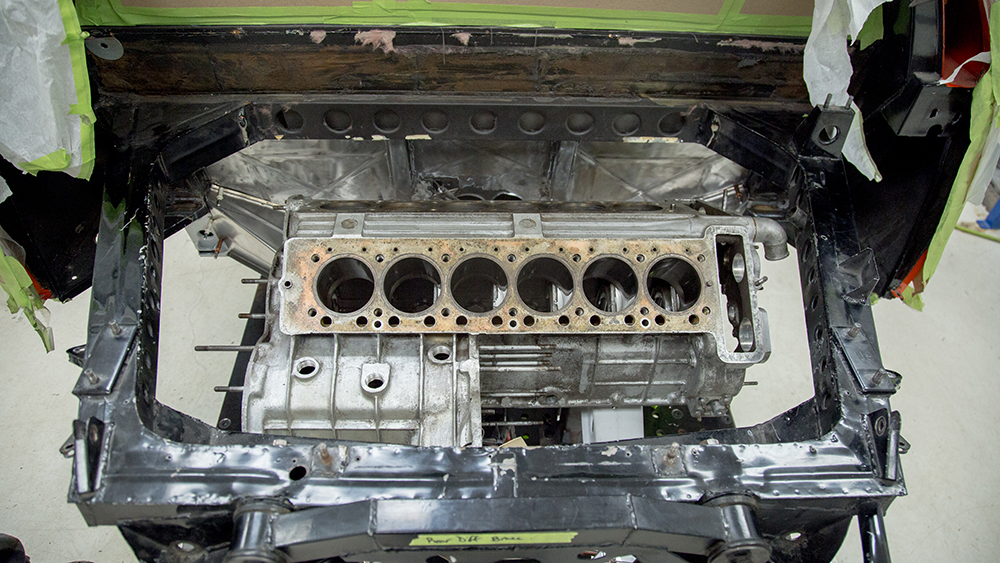
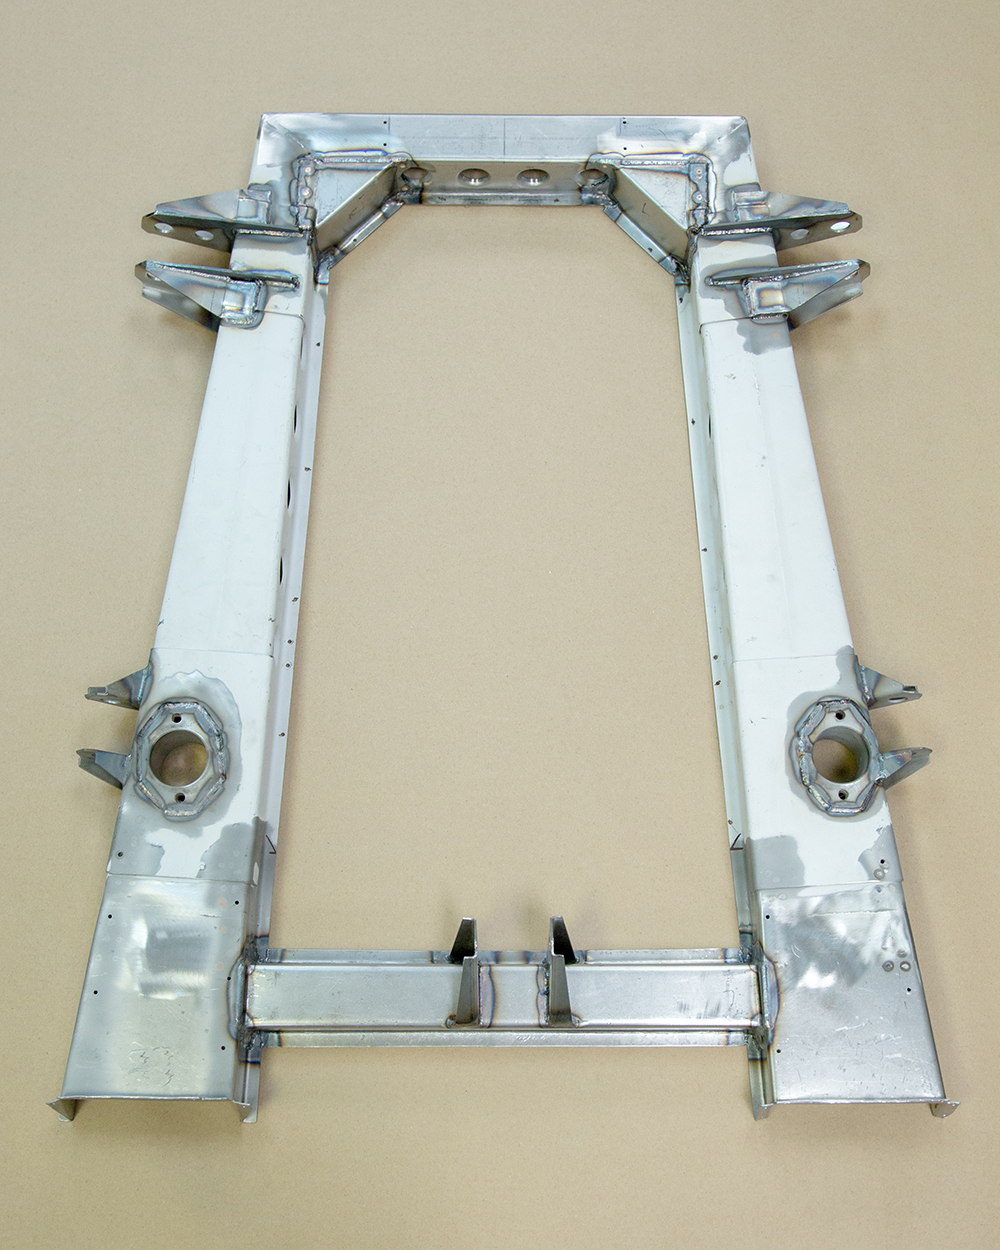
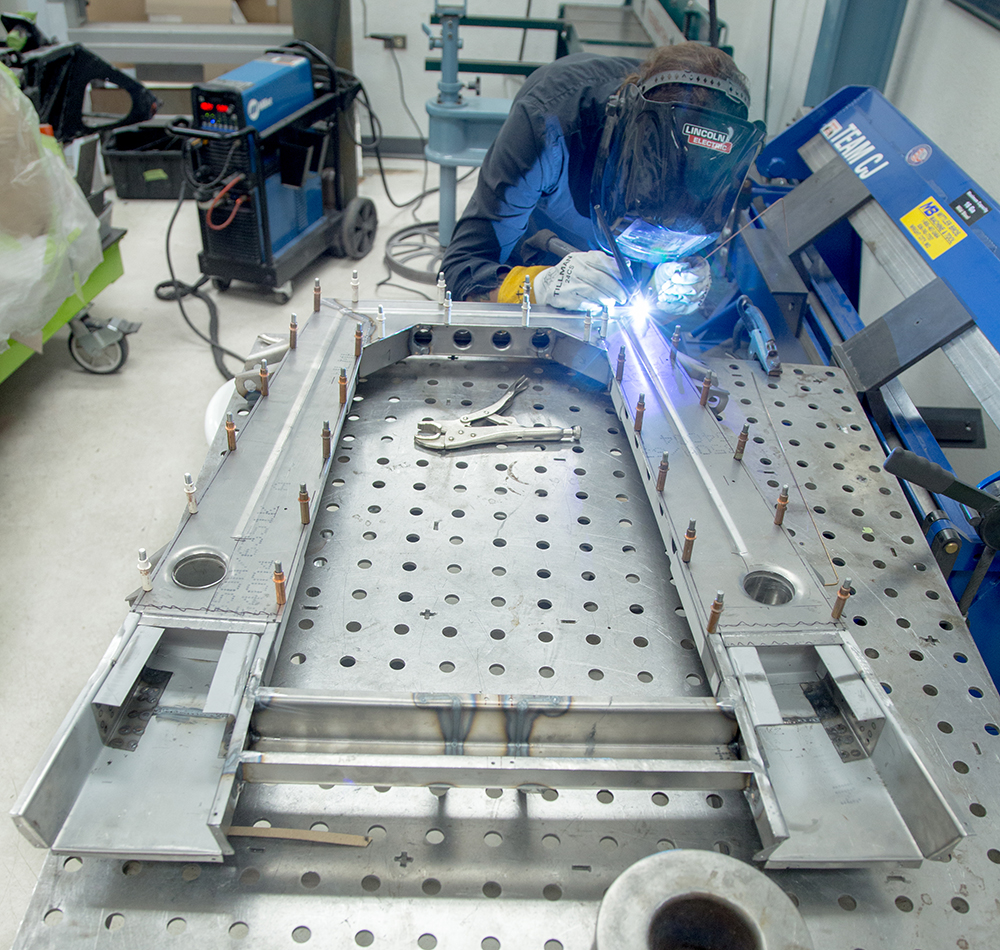
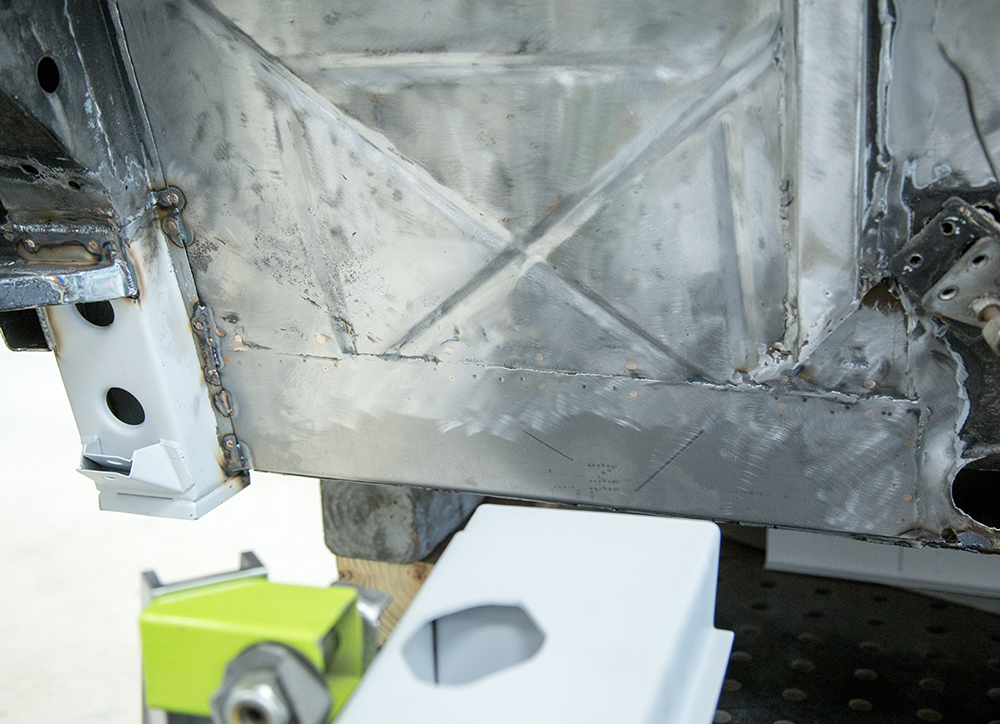
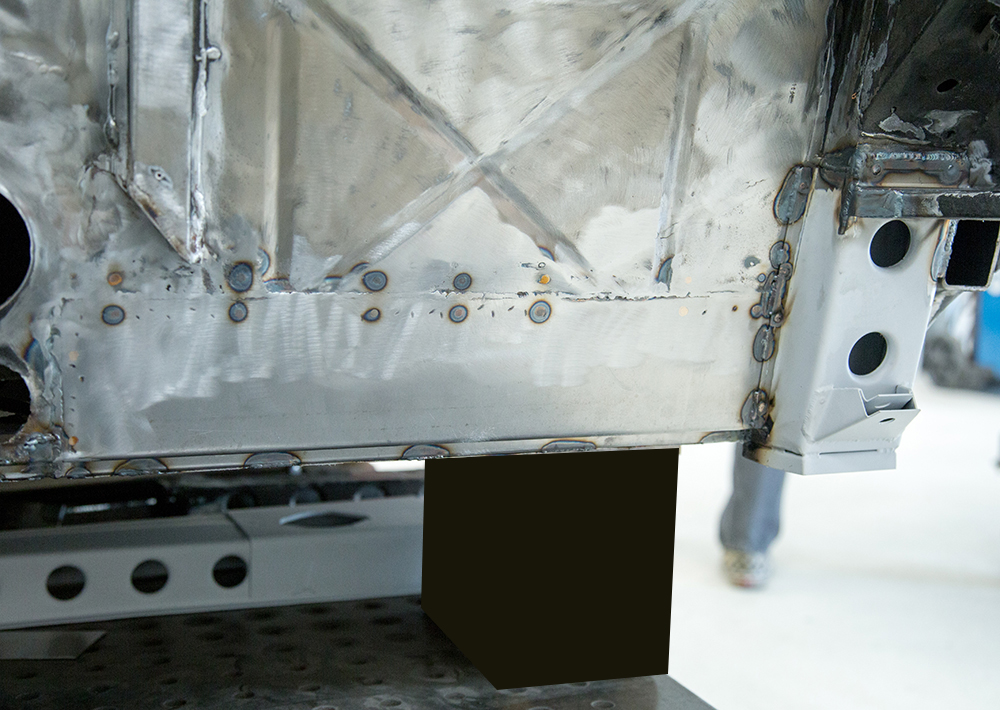
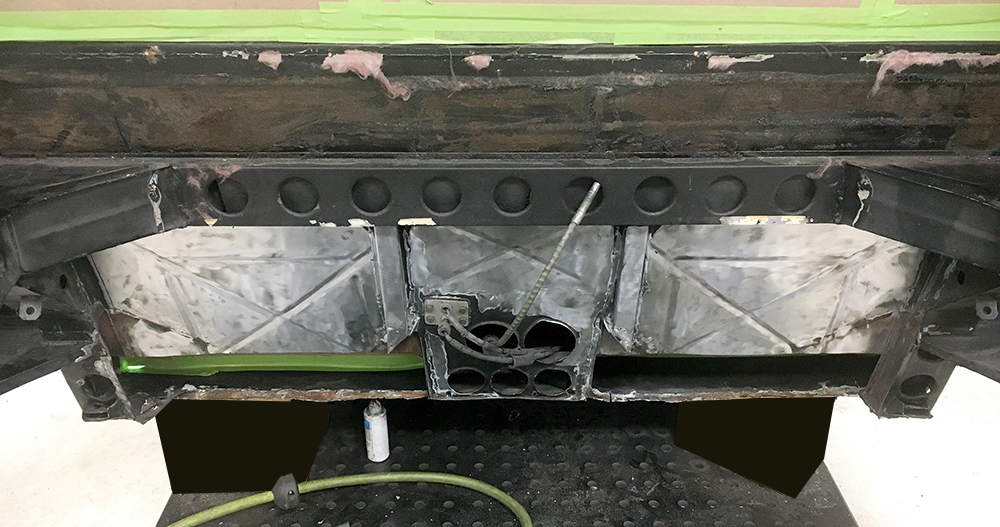
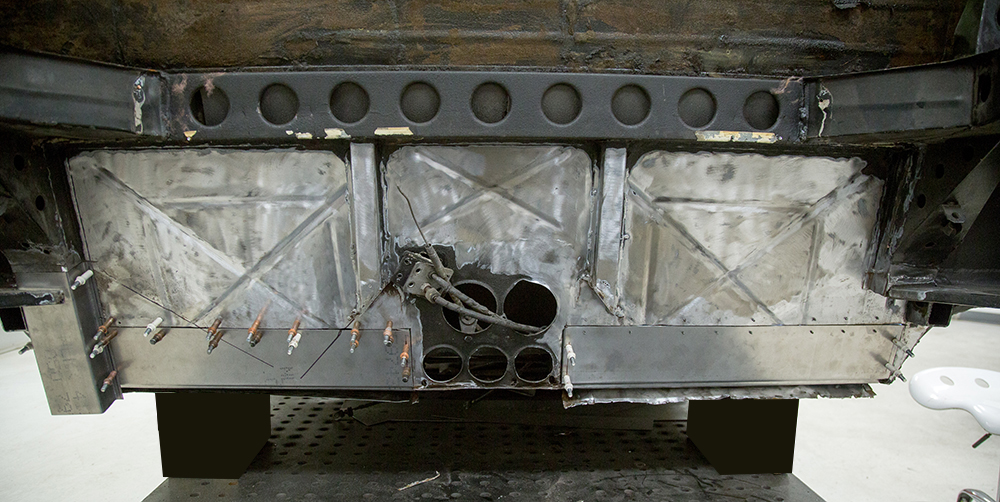
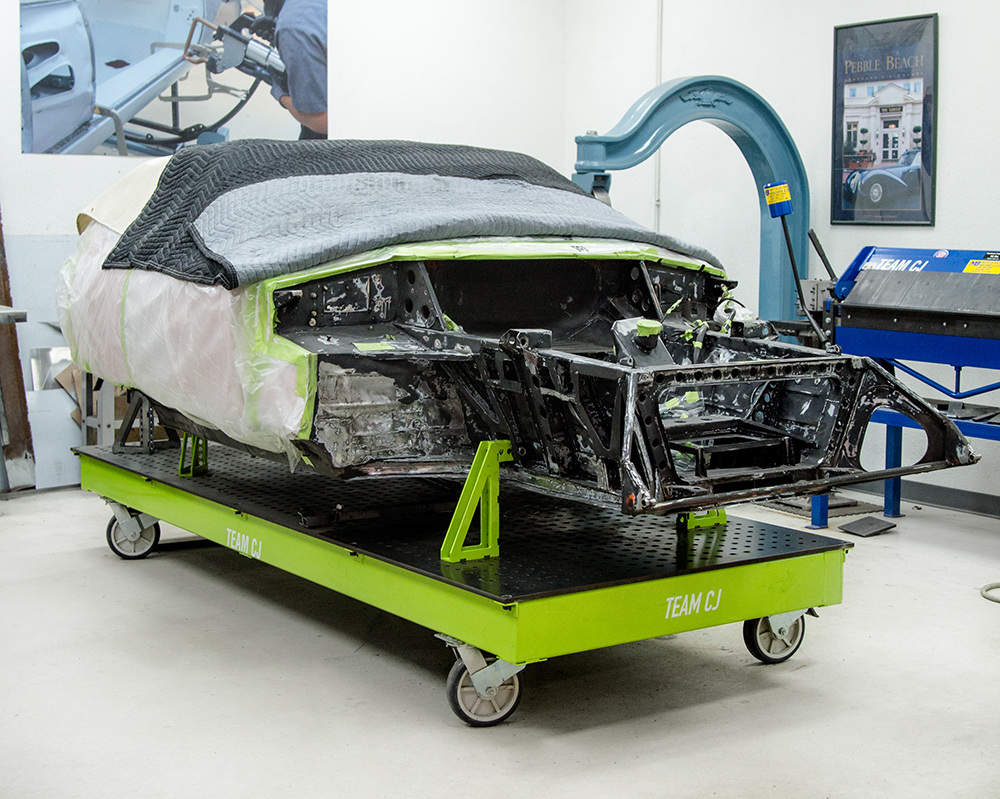
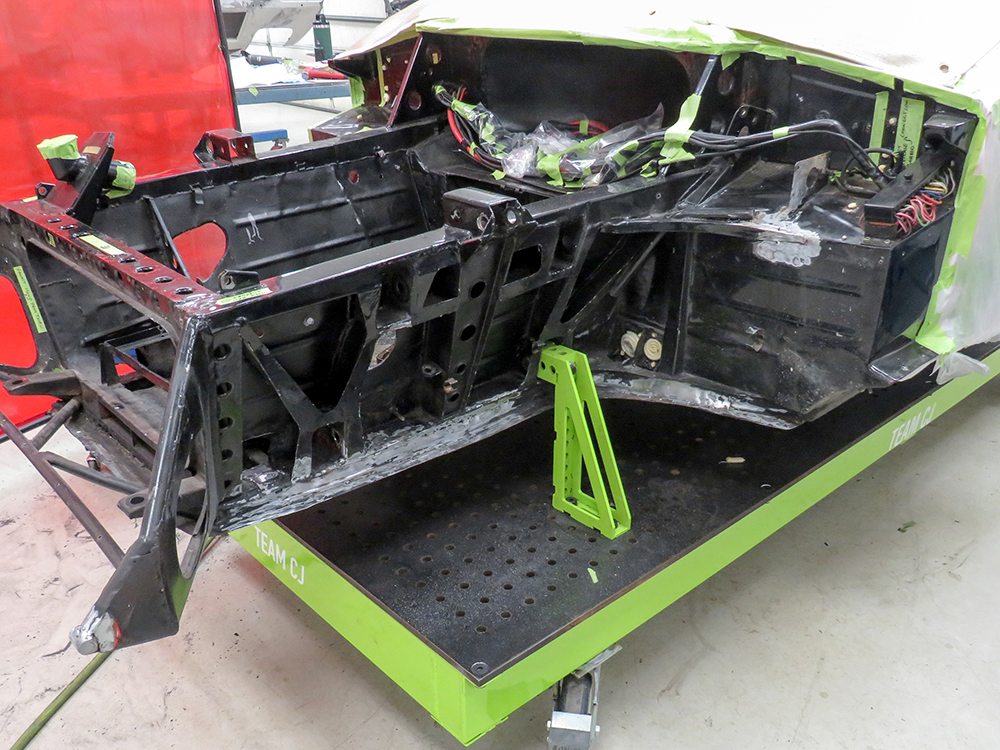
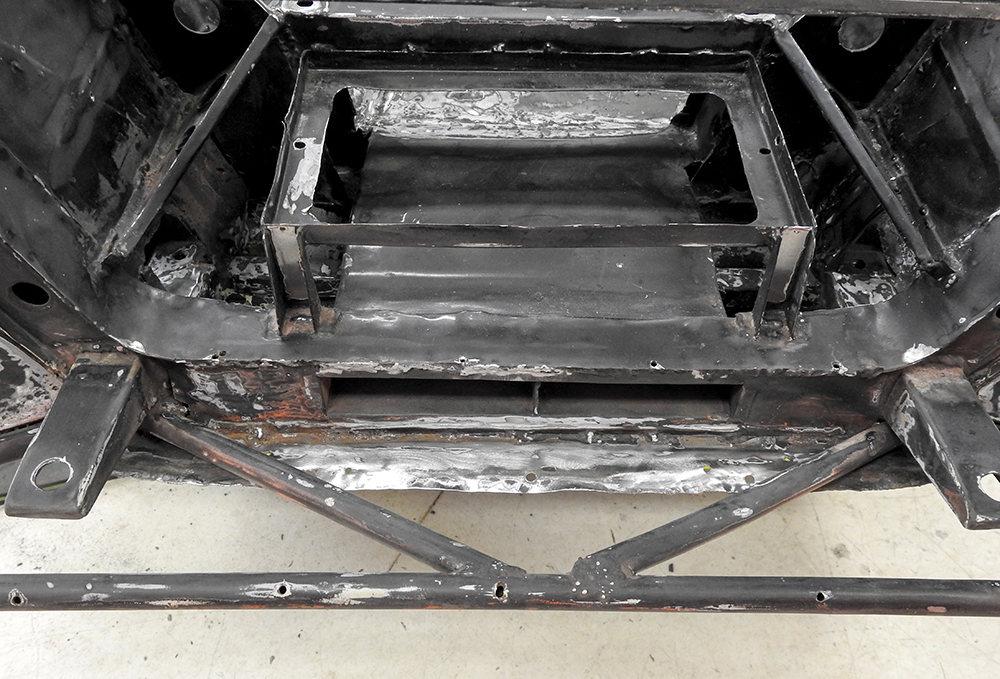
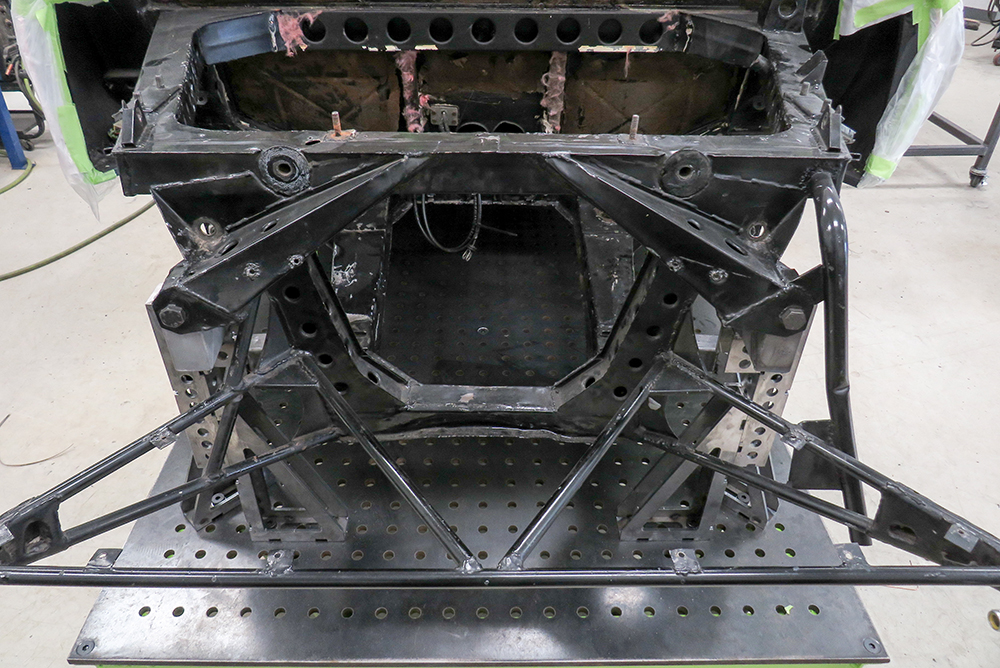
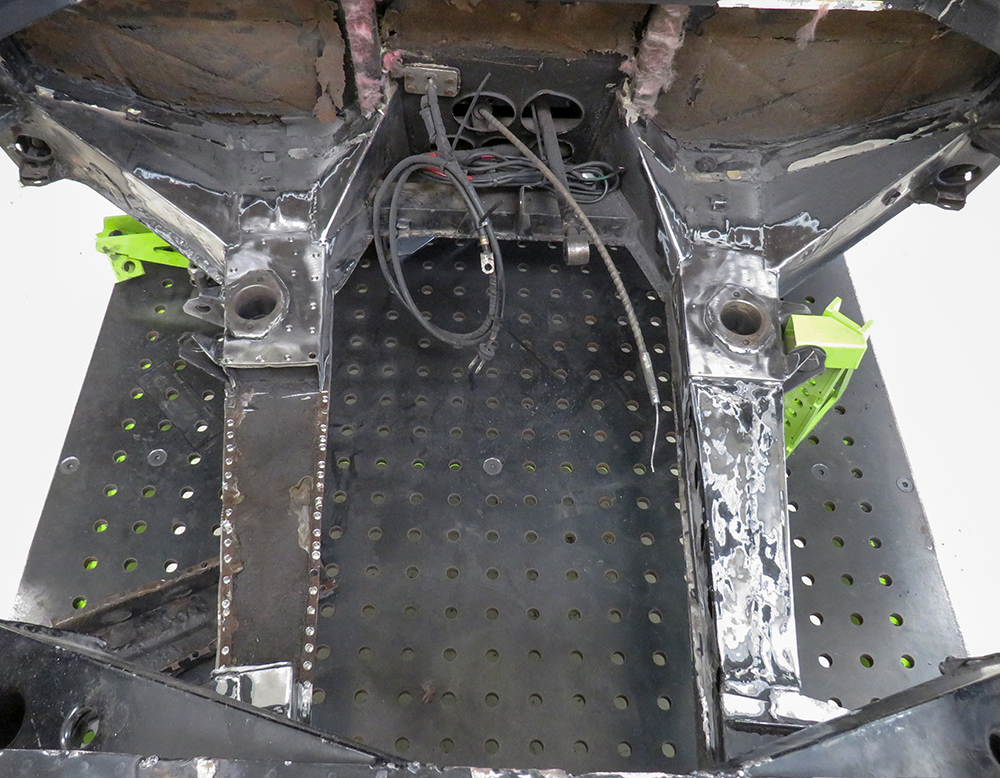
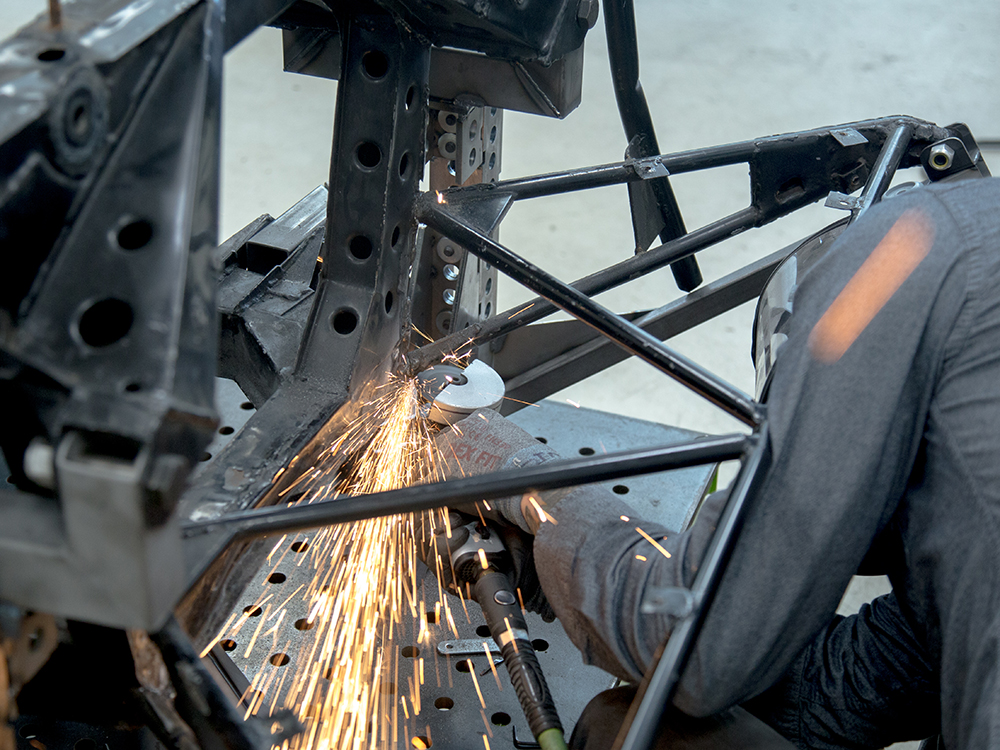
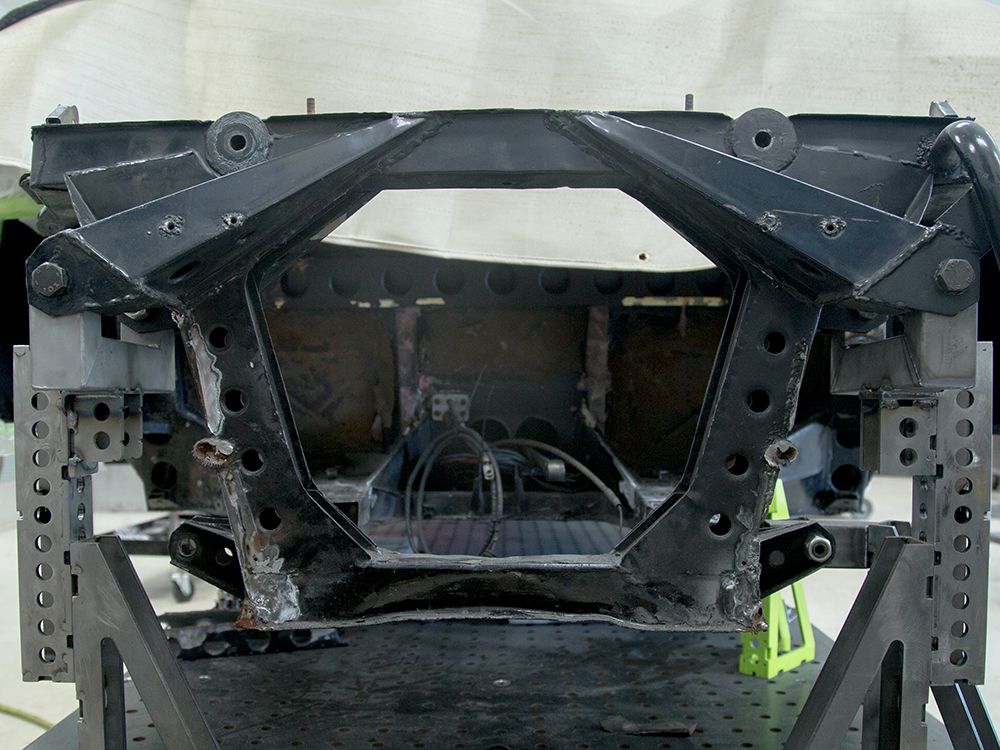
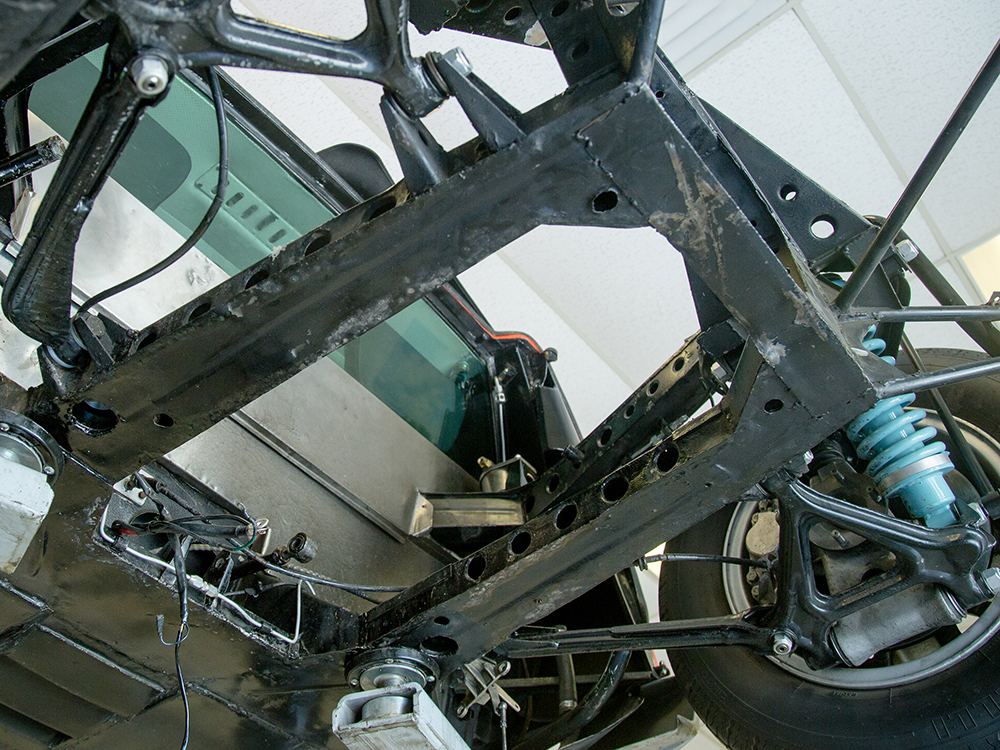
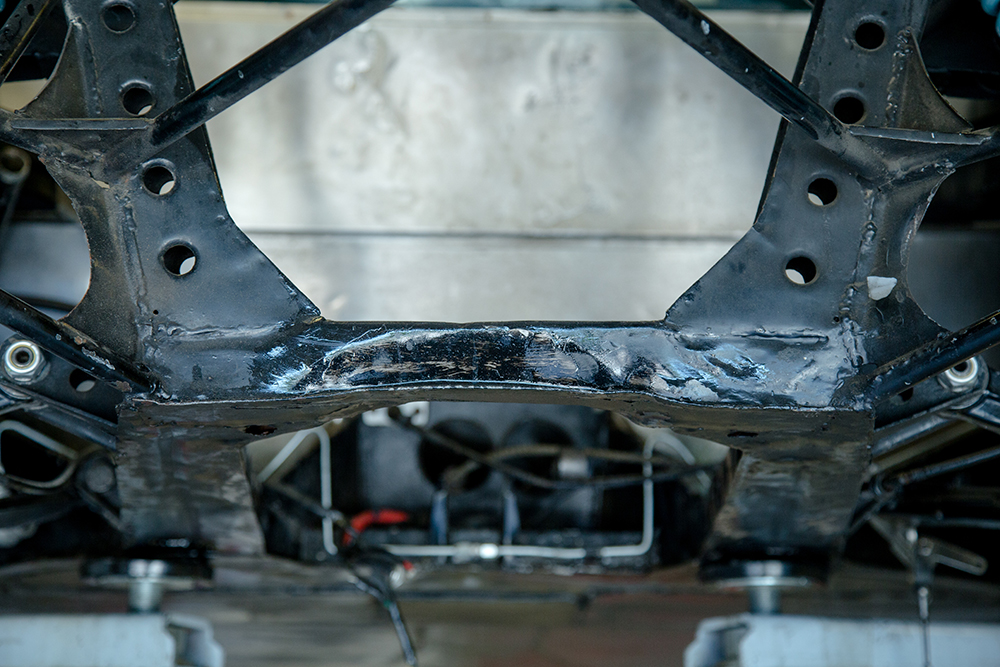
We have now wrapped up the sheet metal repairs to the engine cradle, rear main frame and the bonnet hinge frame. The body will be removed from the chassis table later today.
 |
 |
 |
 |
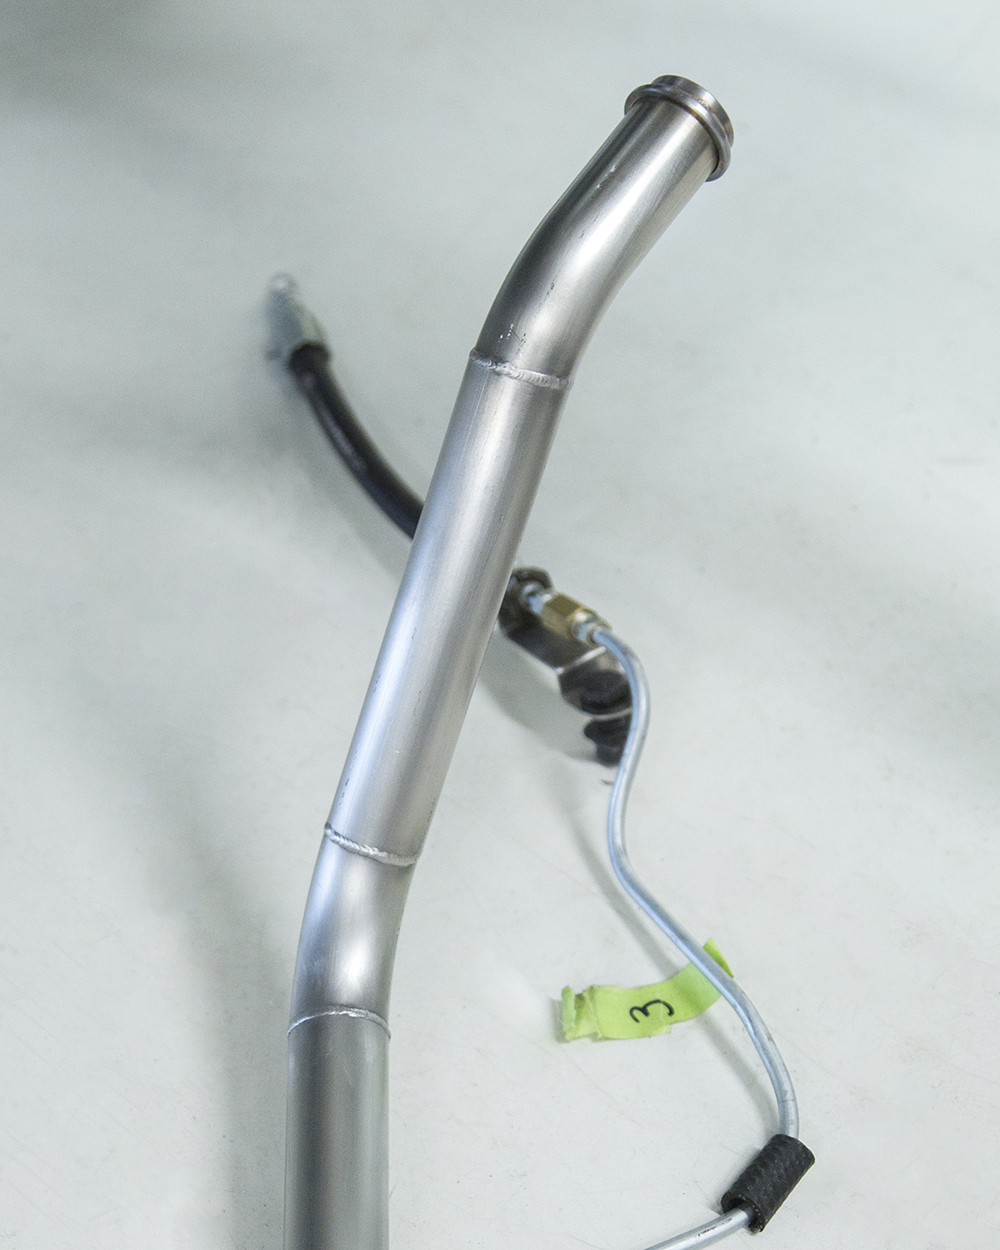
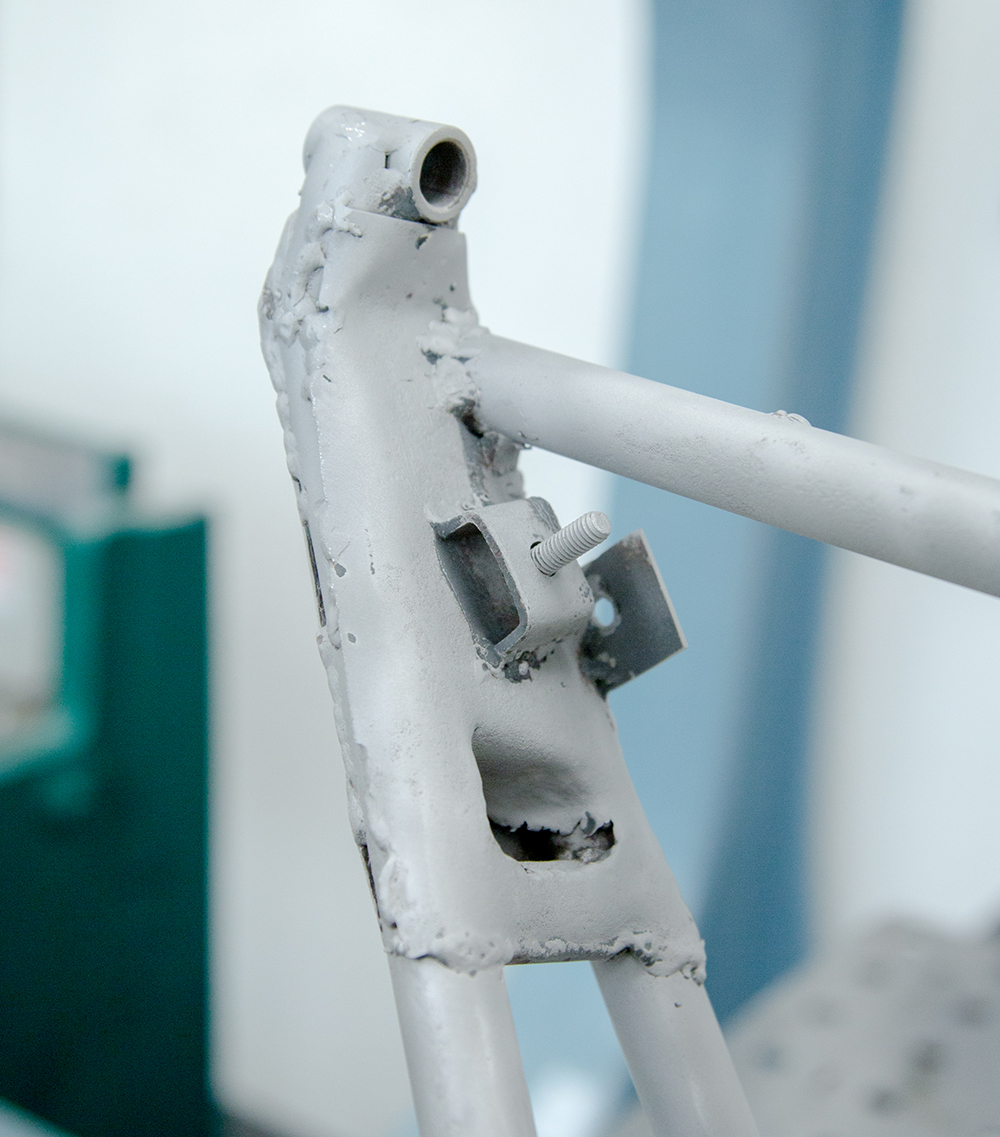
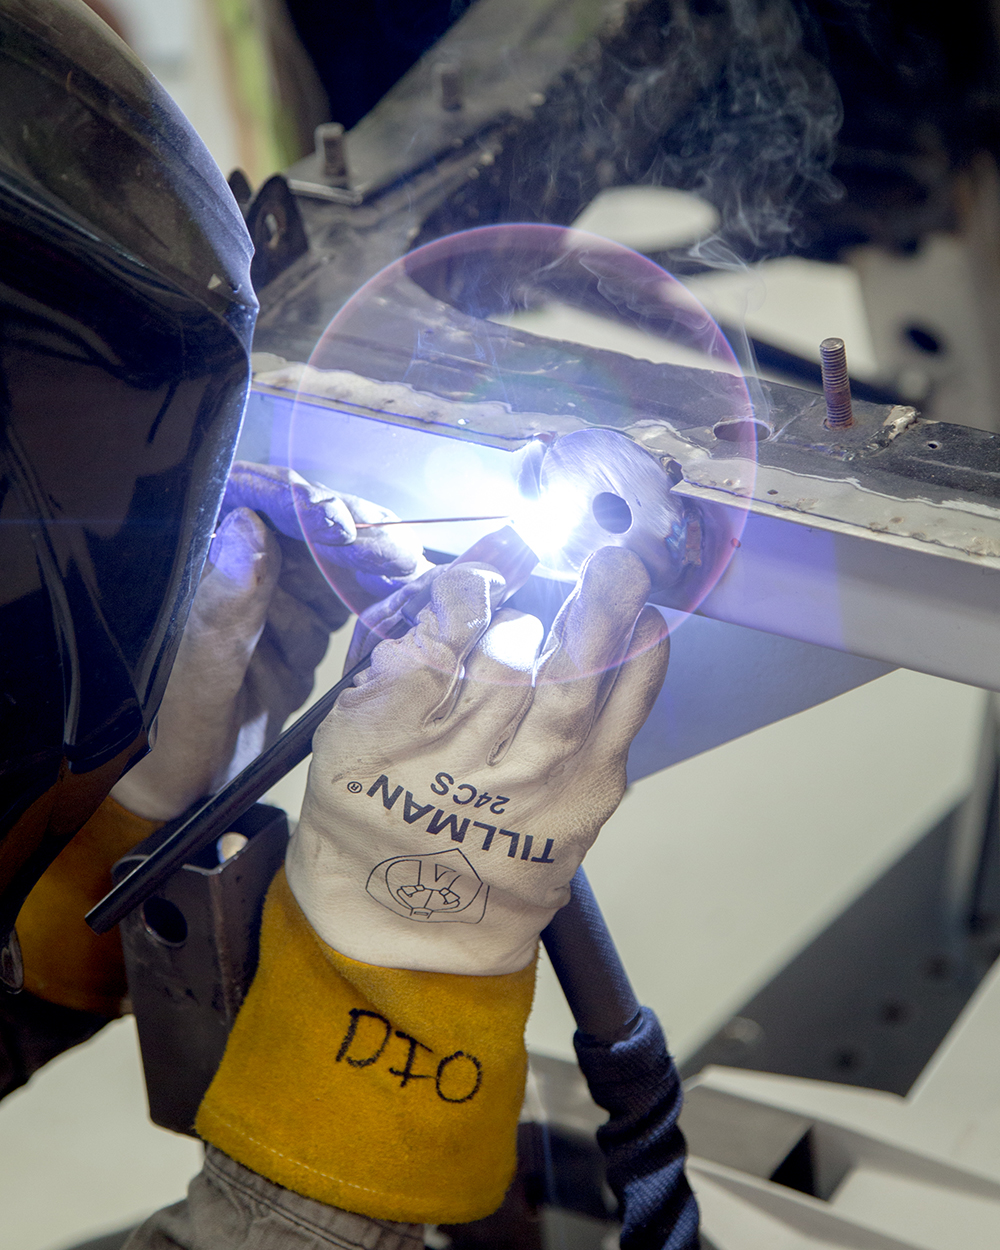
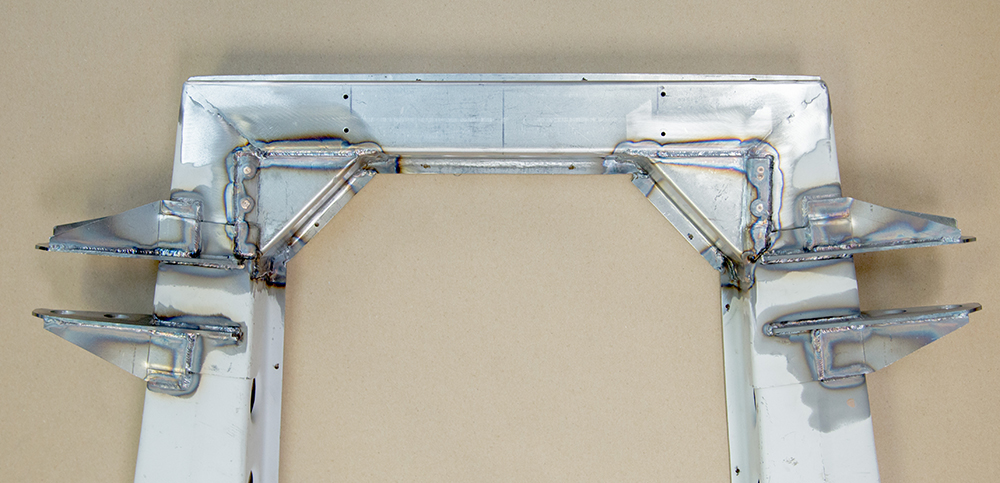
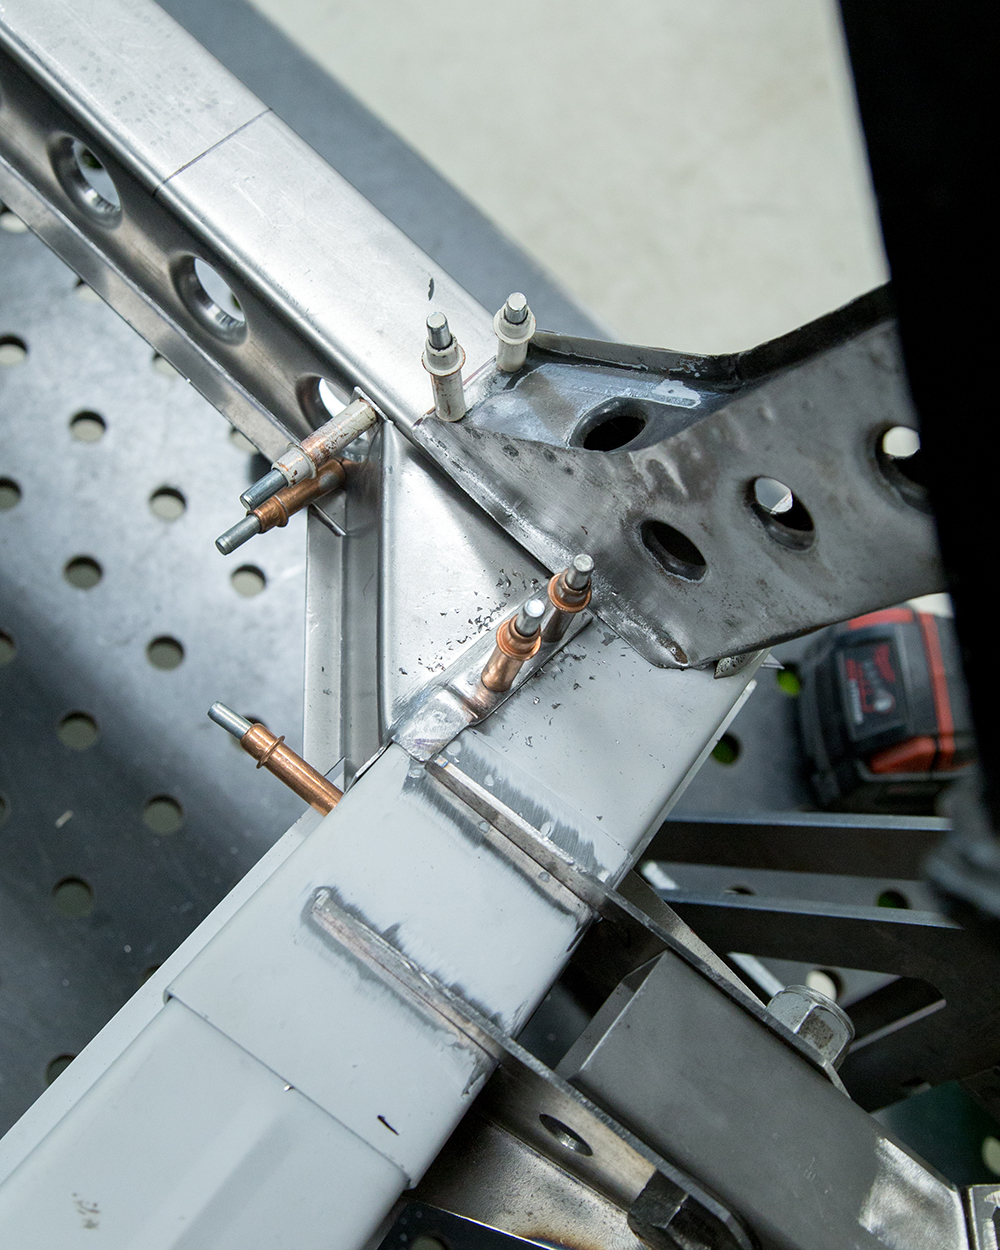
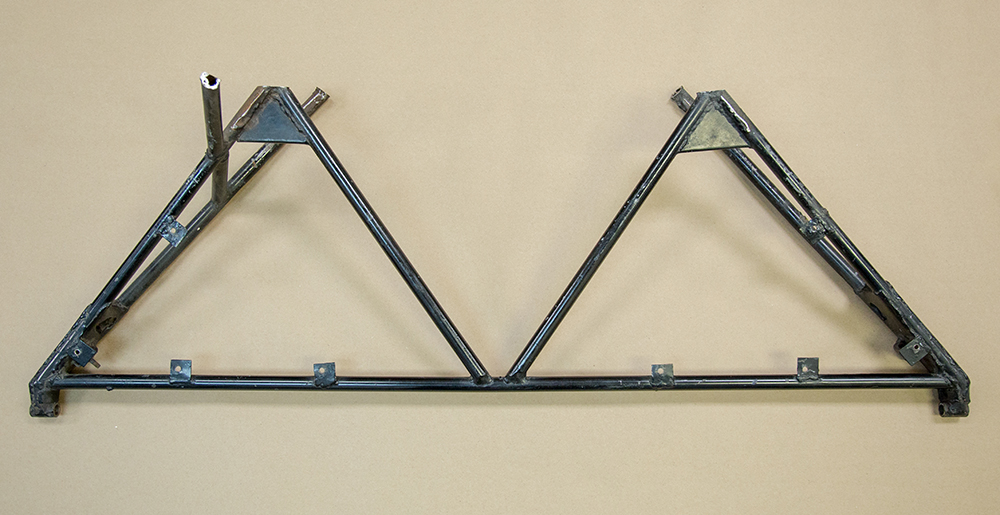
| Repaired bonnet hinge frame tack welded in
place |
|
 |
 |
 |
 |
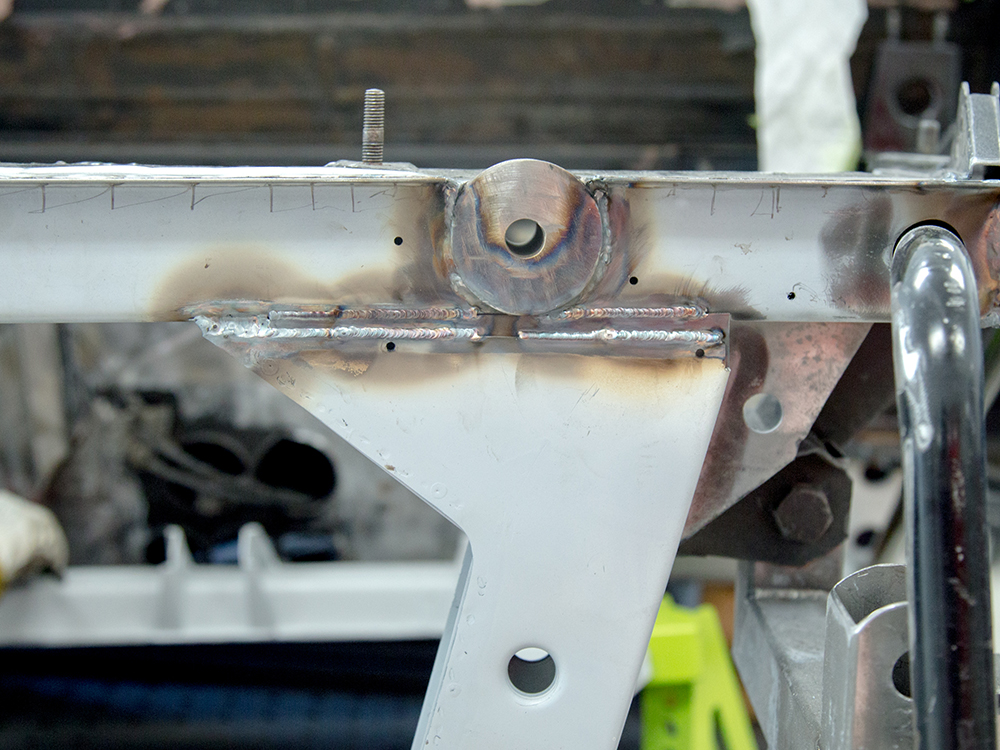
| After confirming bonnet fit, the hinge
frame is now TIG welded in place |
New bonnet frame braces welded in place |
 |
 |
| Trial fitting the bonnet |
|
 |
 |
 |
 |
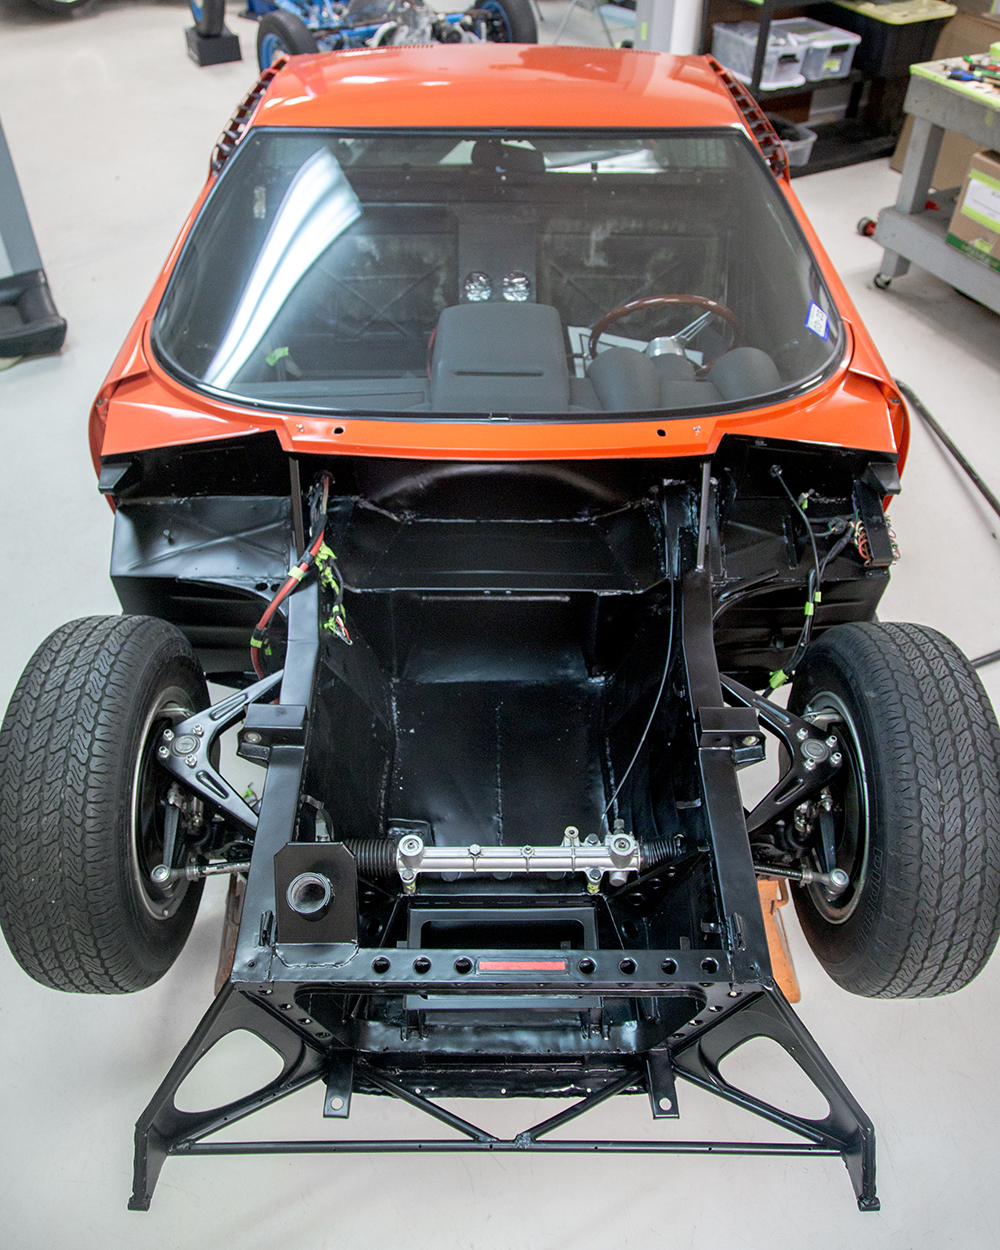
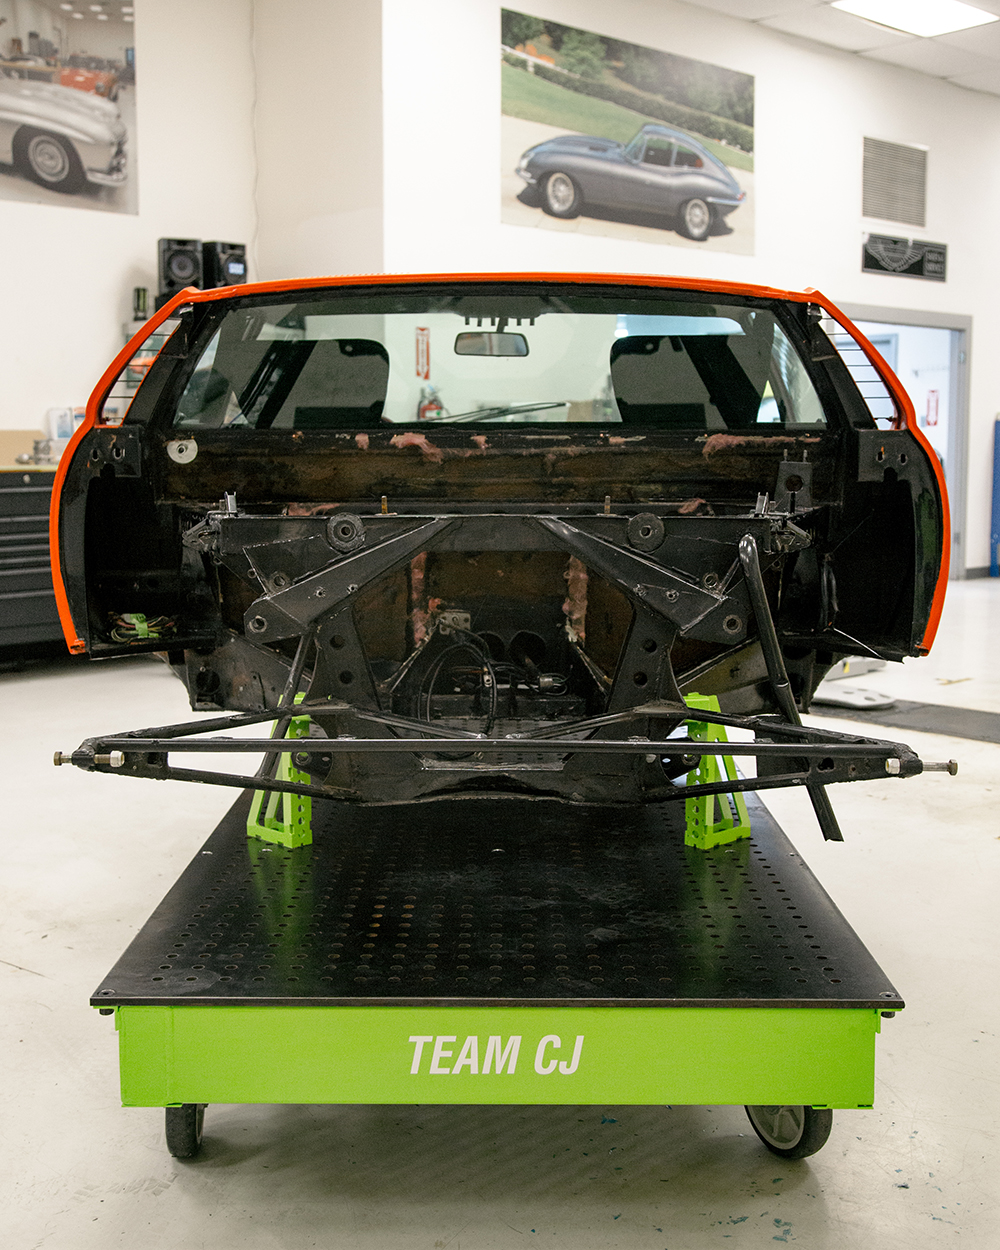
| Time to remove the body from the chassis
table |
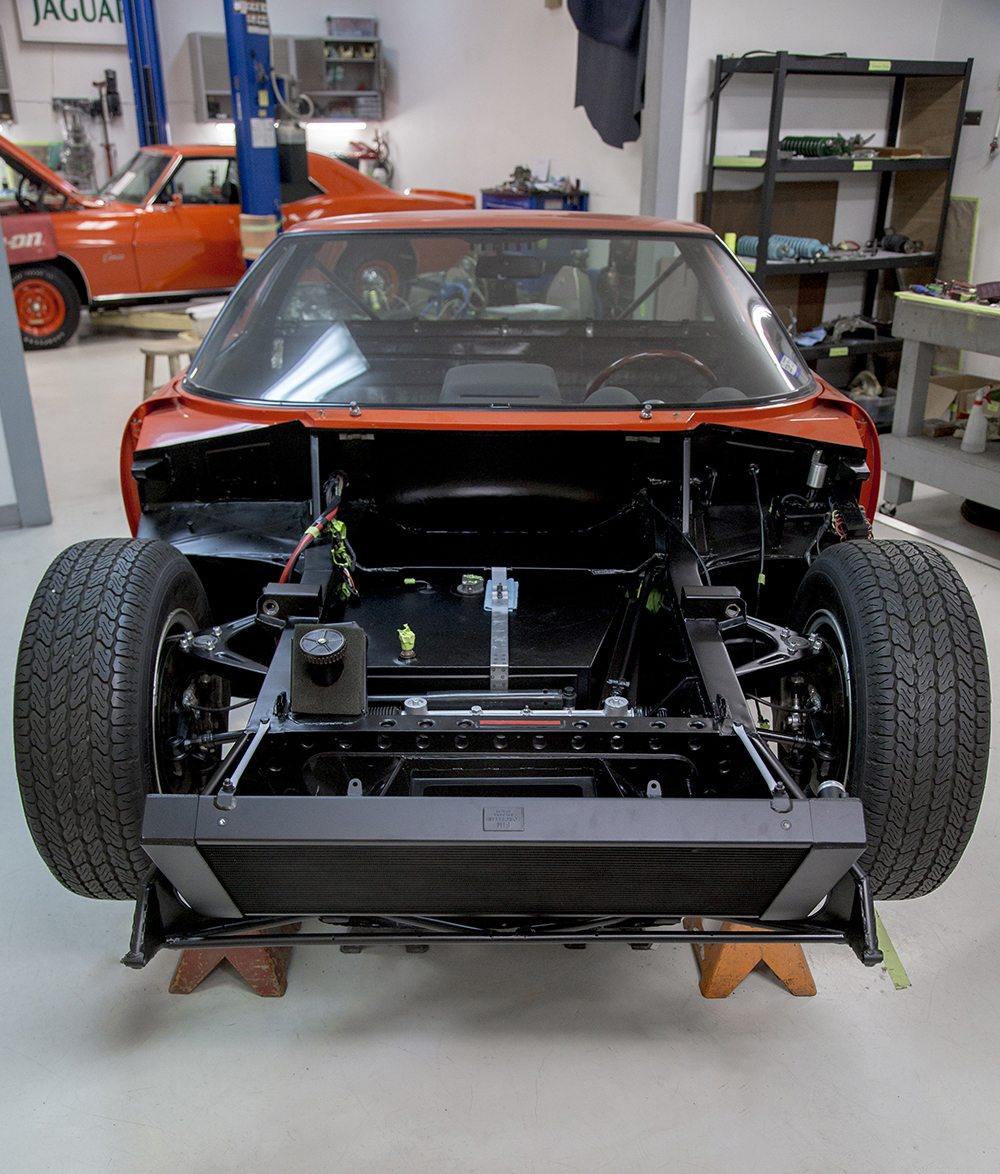
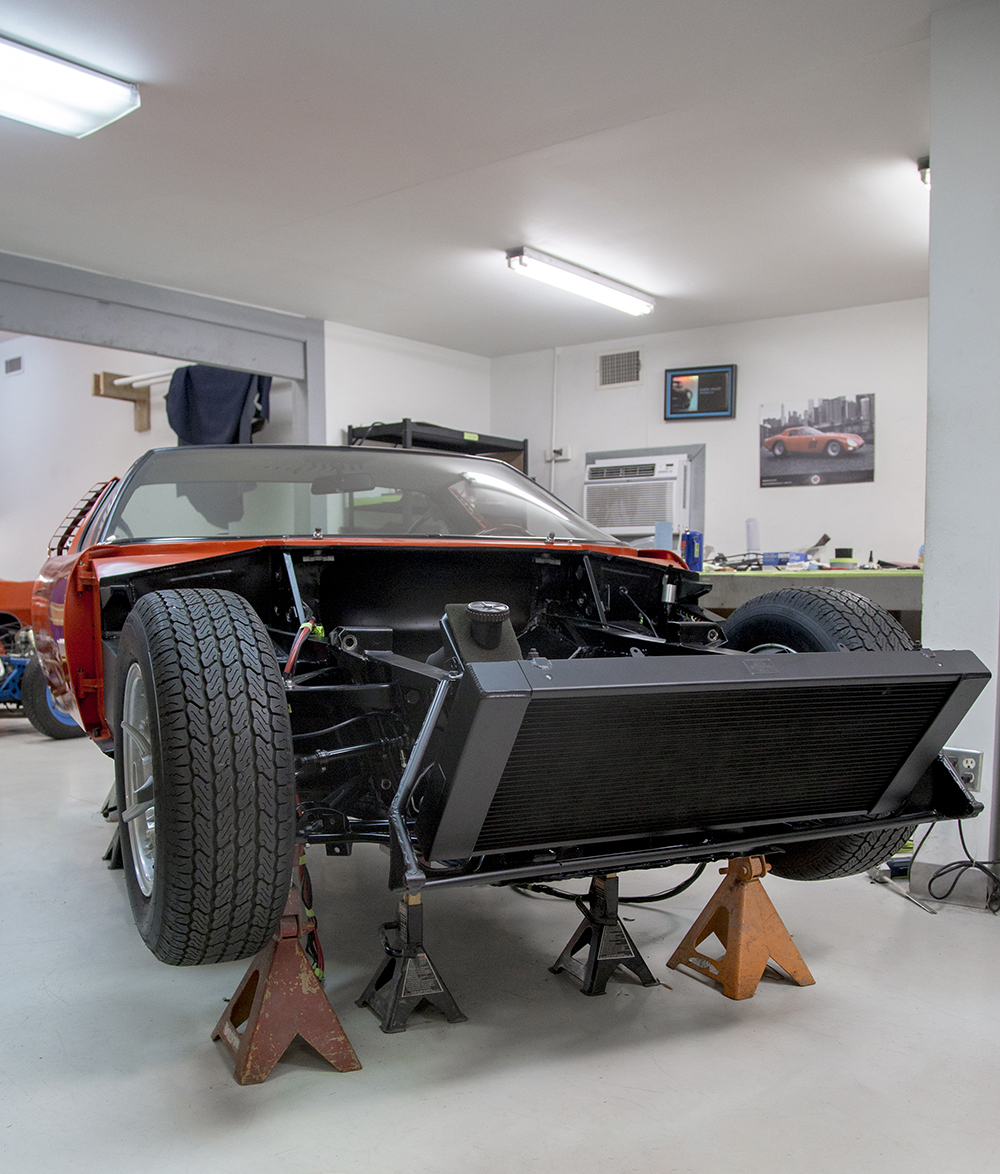
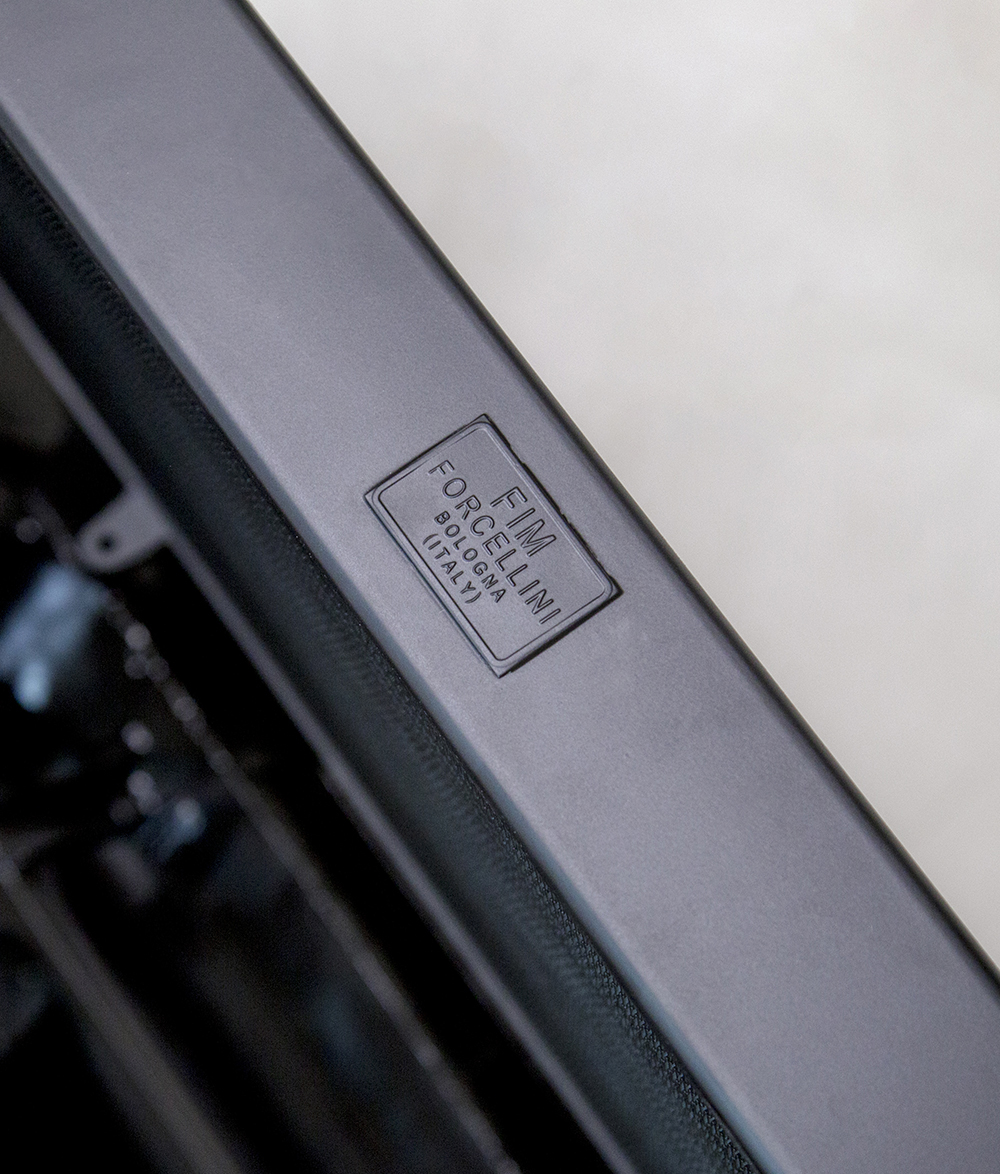
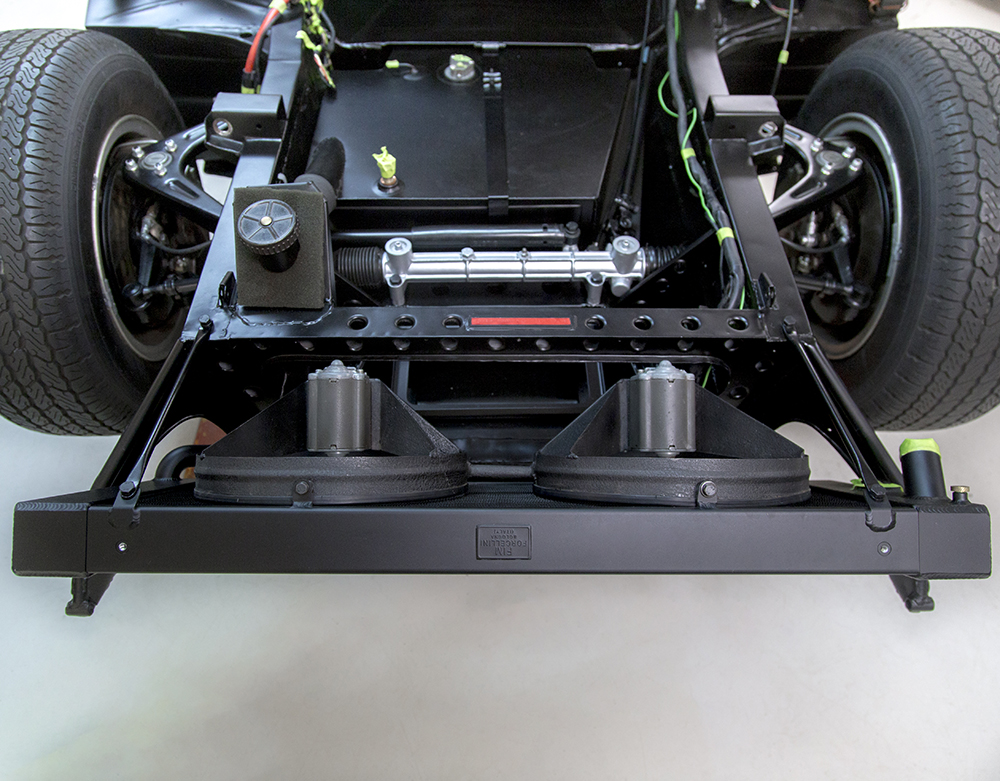
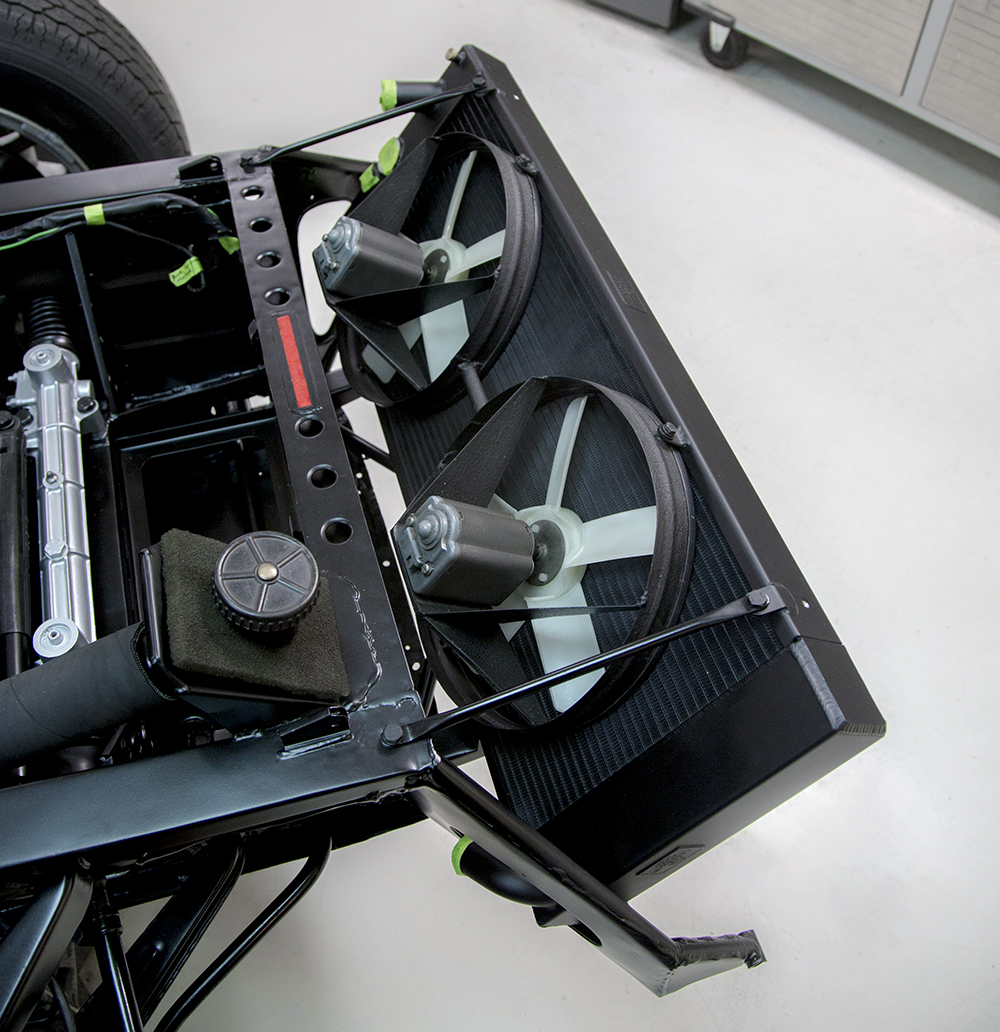
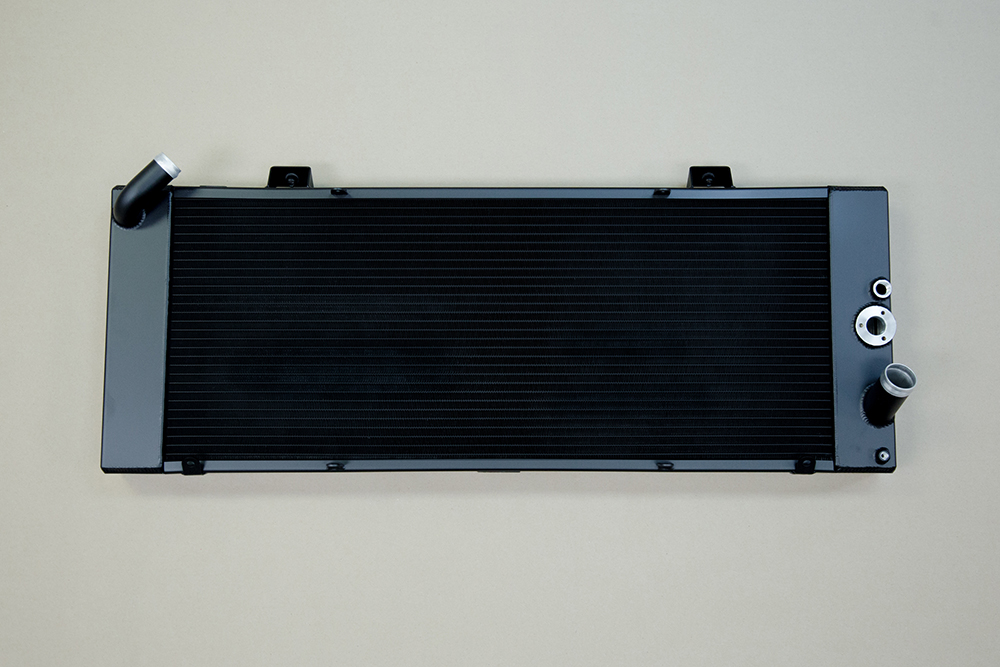
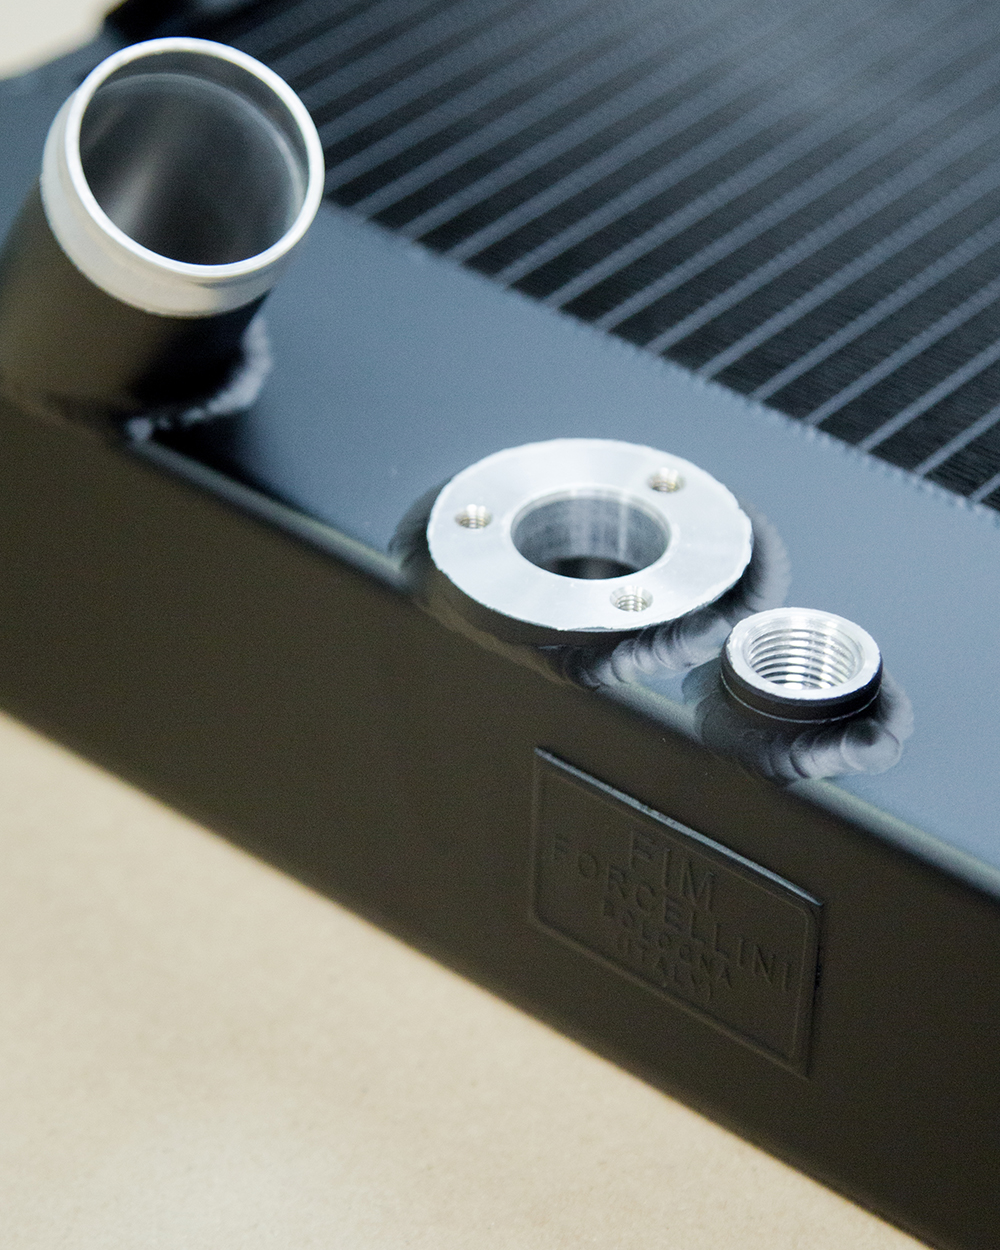
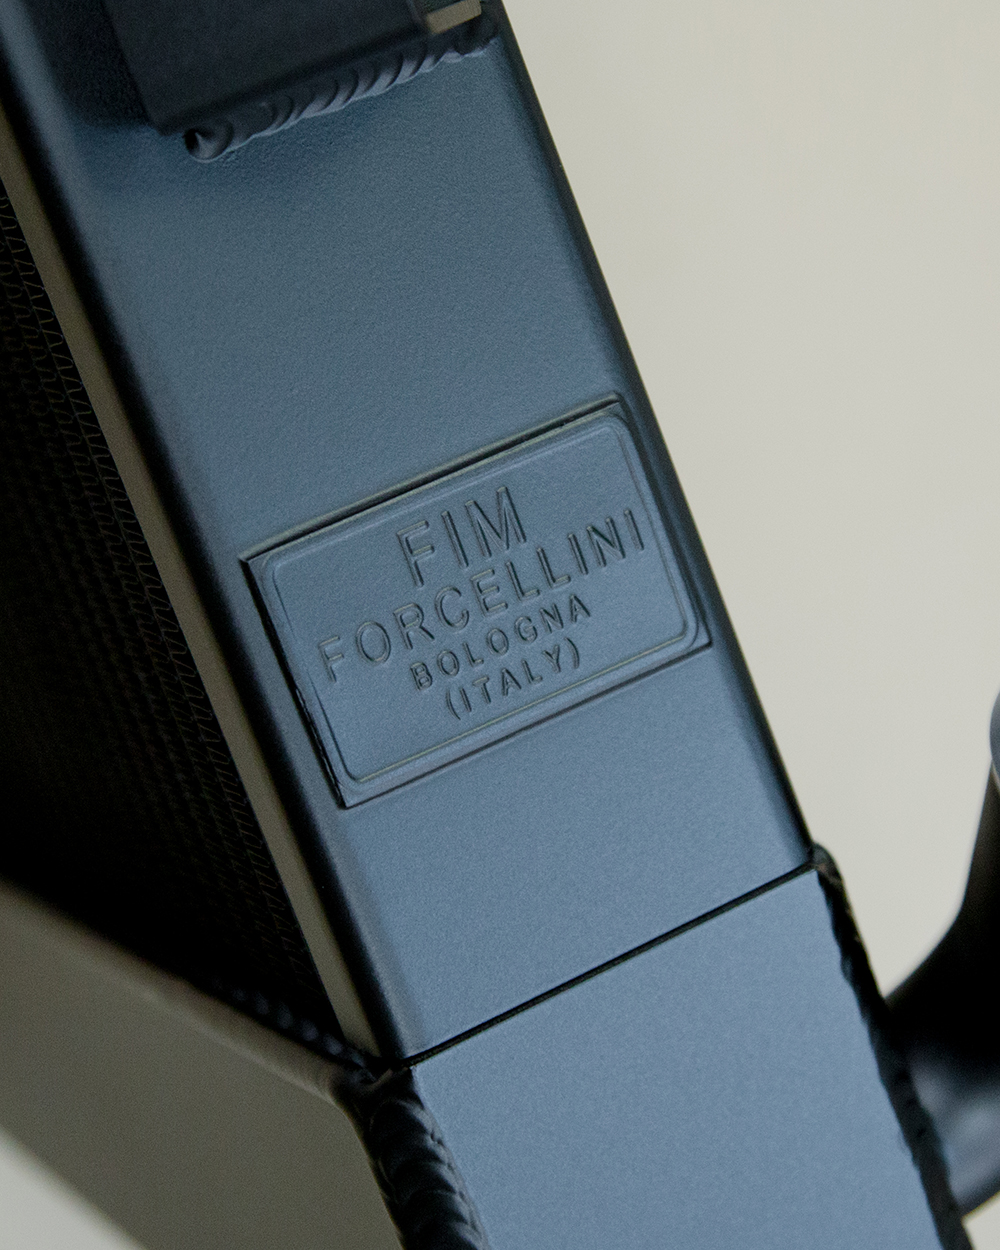
A beautiful new high performance radiator, complete with replica FIM tags, and continuing repairs to the engine cradle and rear bonnet hinge frame.
 |
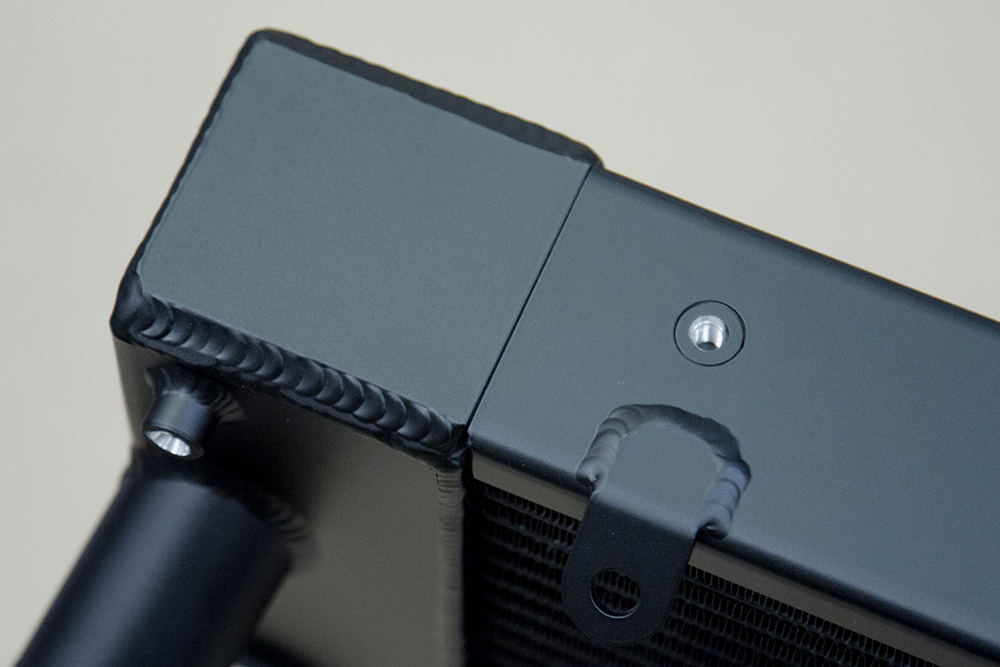 |
| Stunning quality replacement radiator |
|
 |
 |
 |
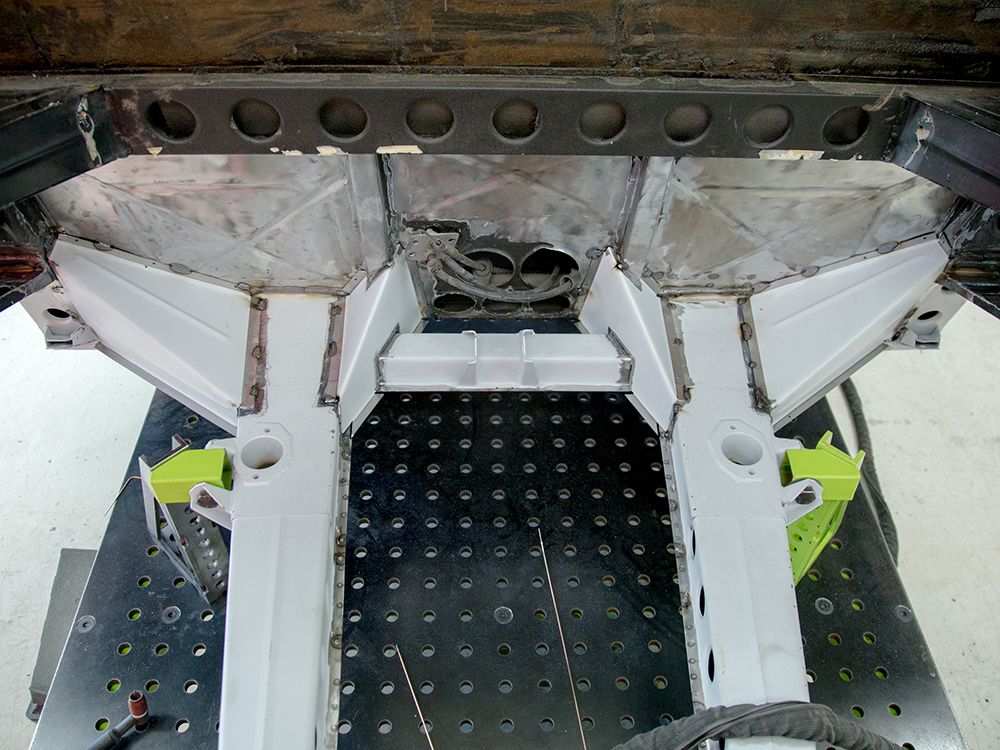 |
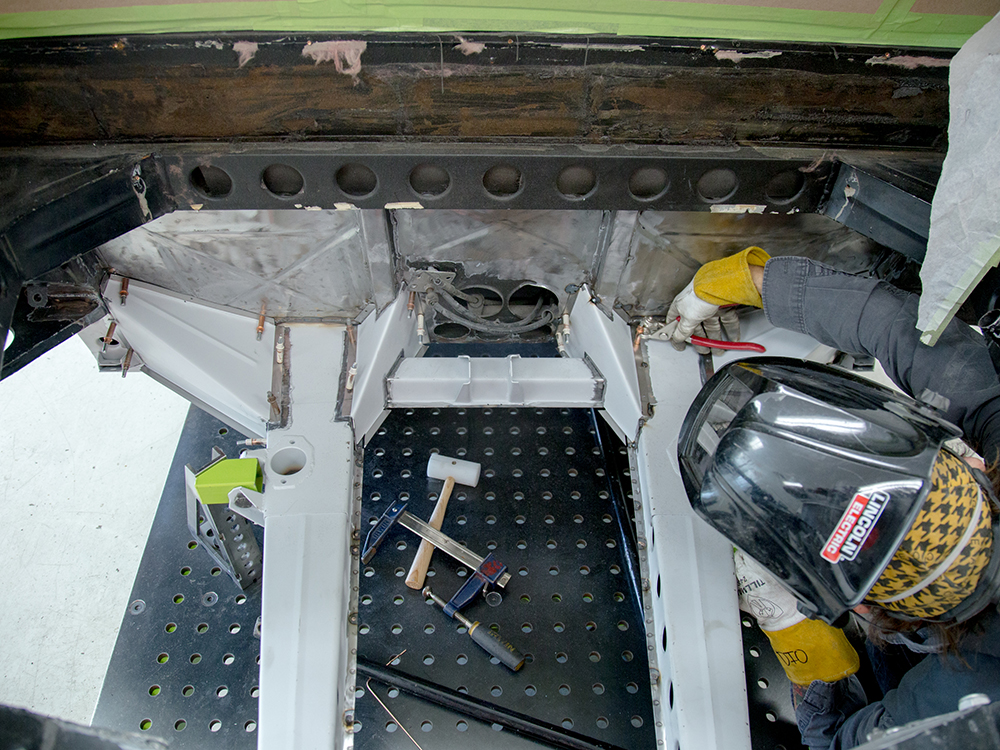
| Starting to tack weld the new lower frame
rails to the rear bulkhead and floor |
|
 |
 |
 |
 |
 |
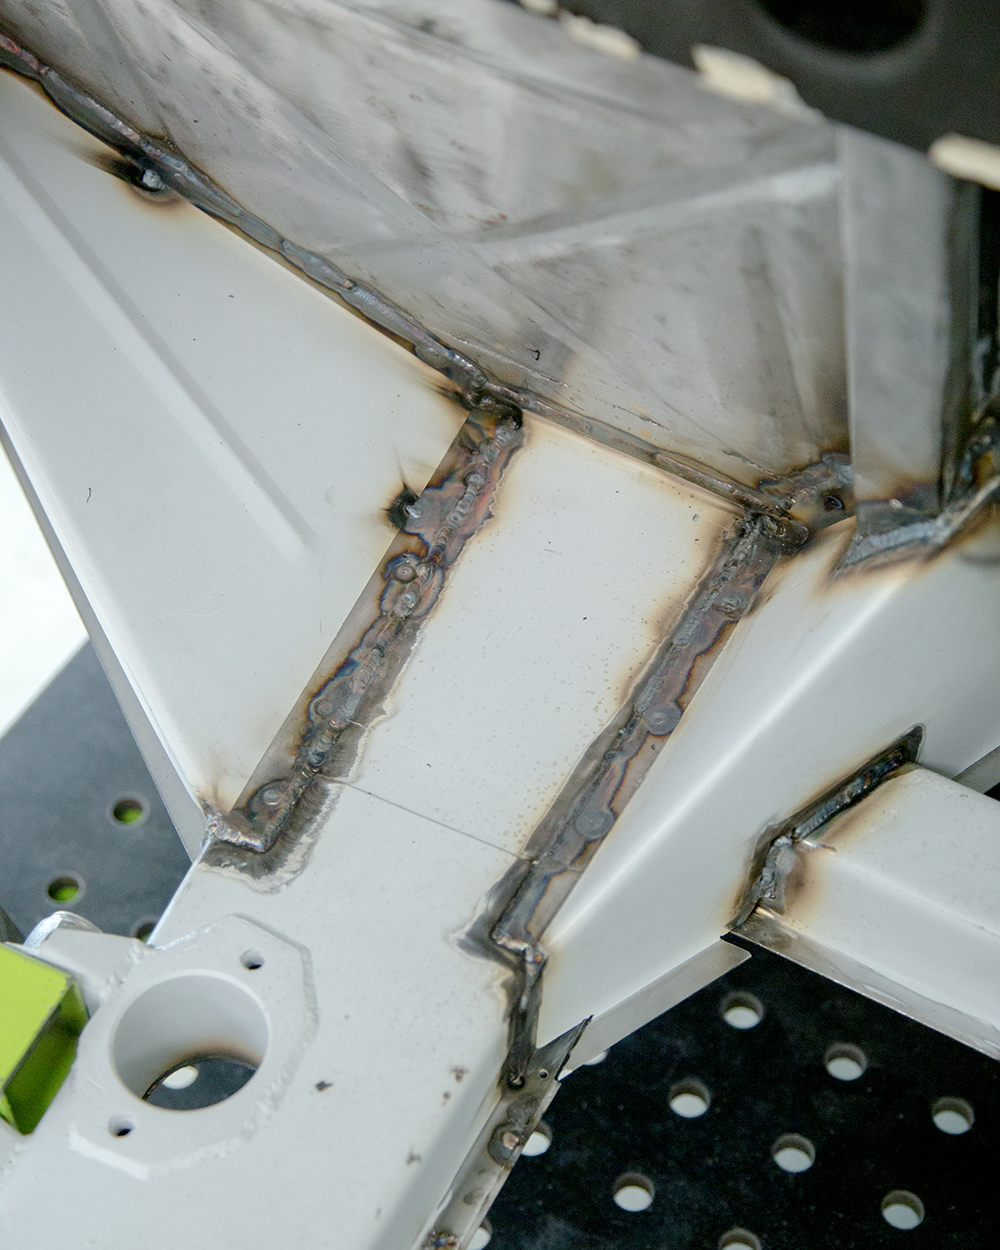 |
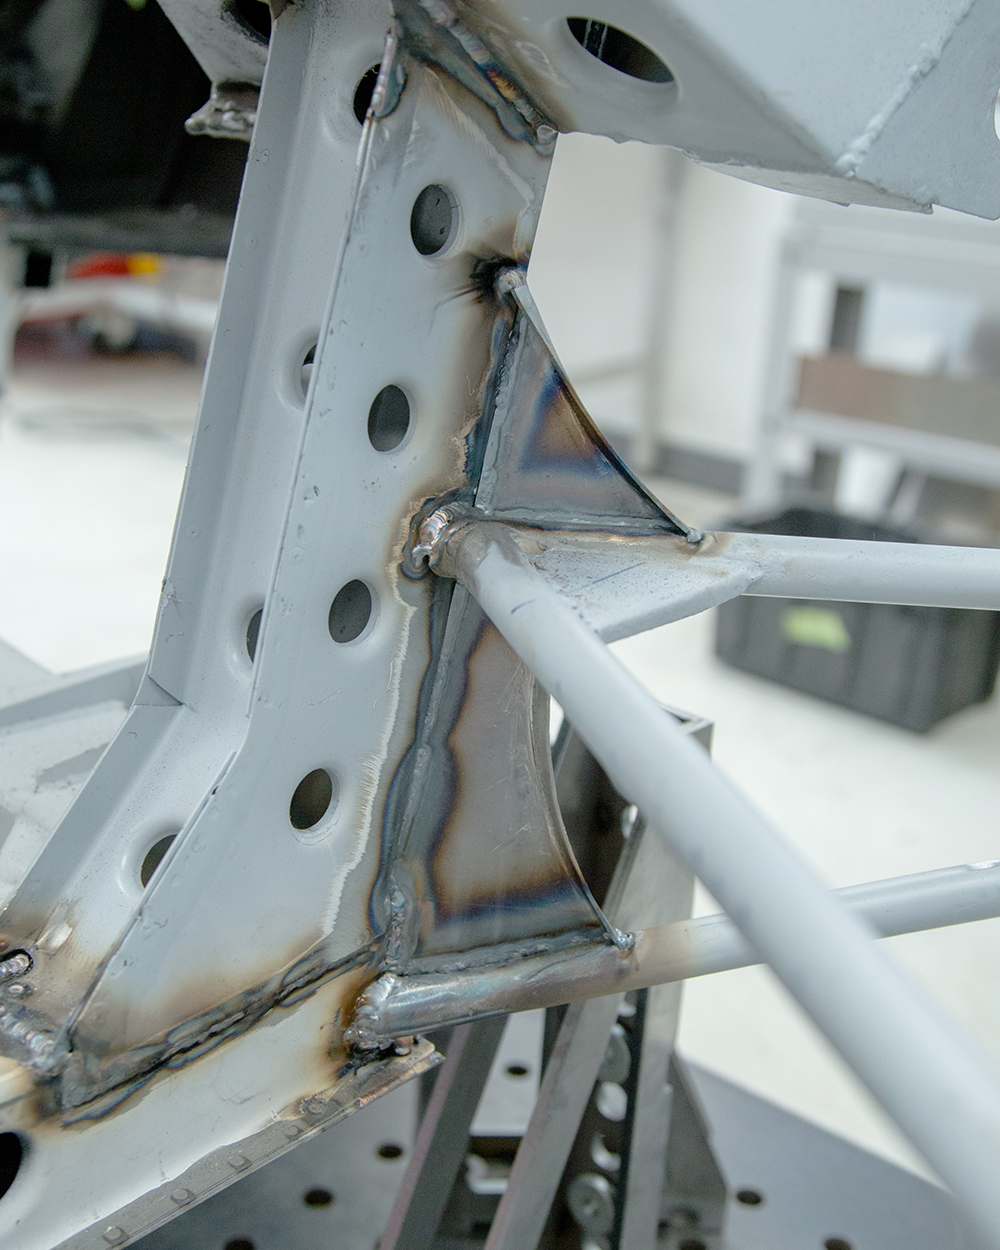
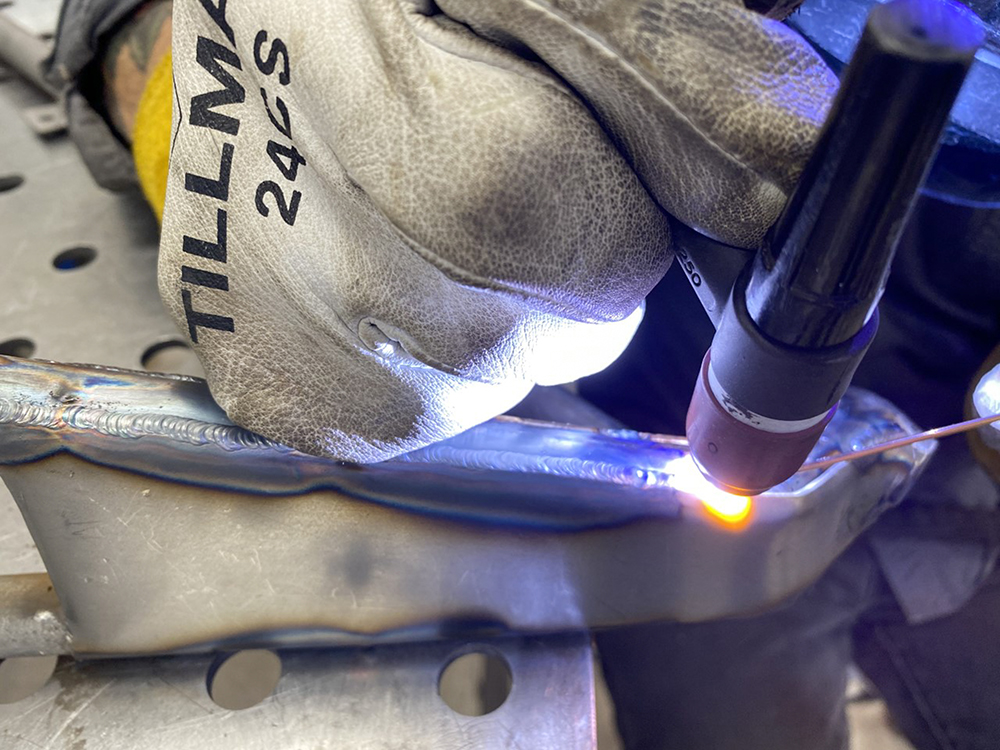
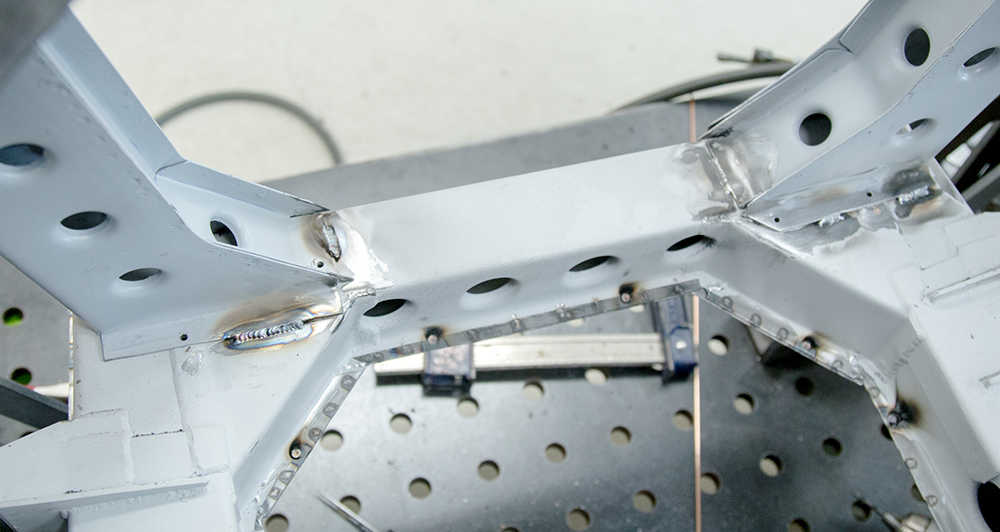
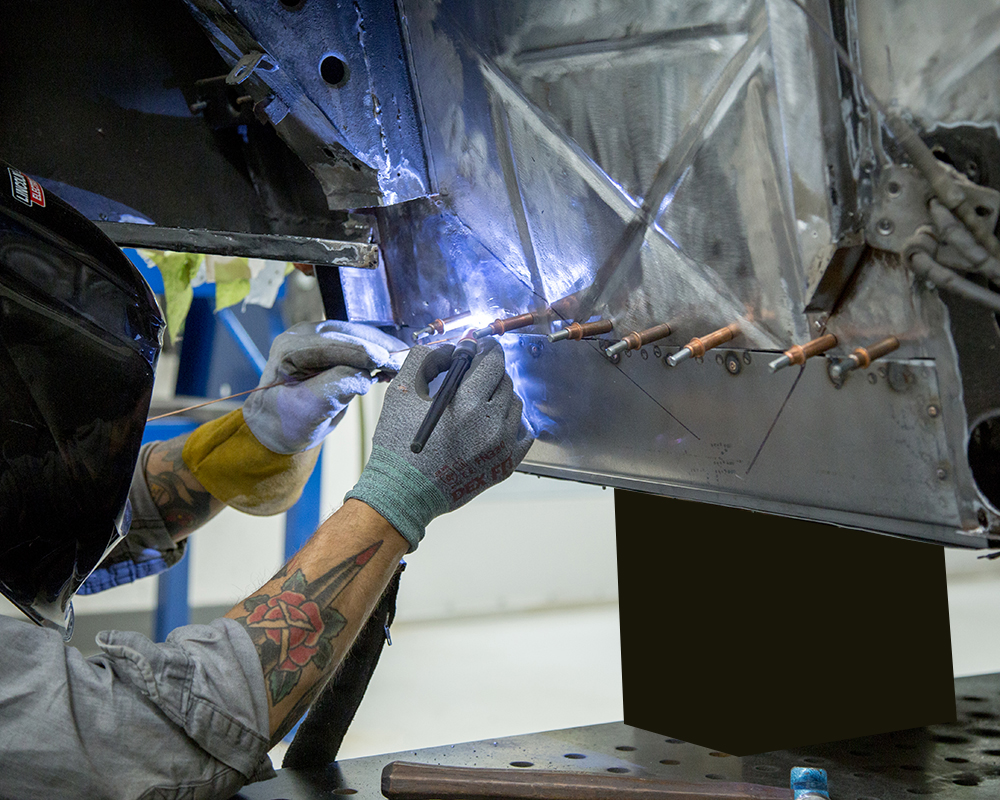
| Seams and joints are now all TIG welded |
|
 |
 |
 |
 |
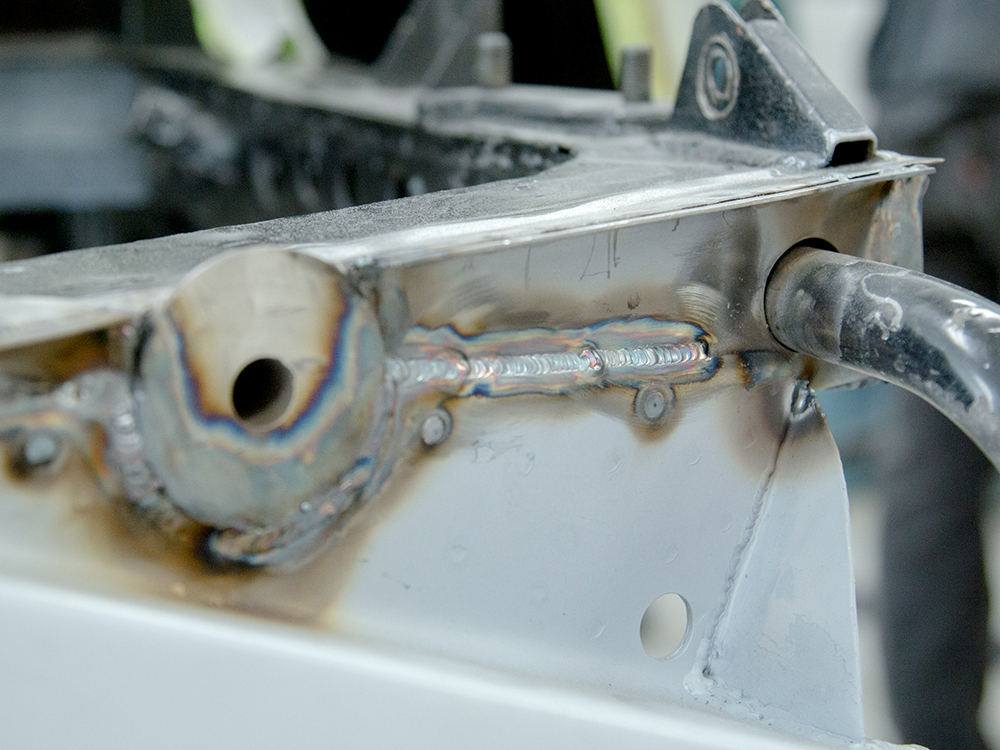
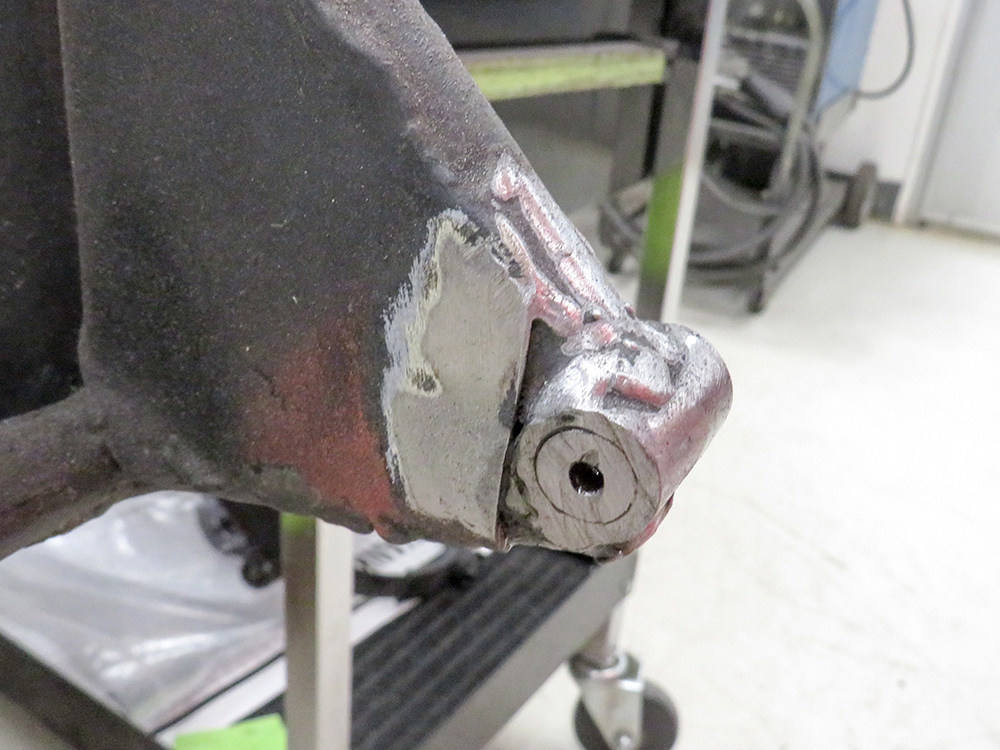
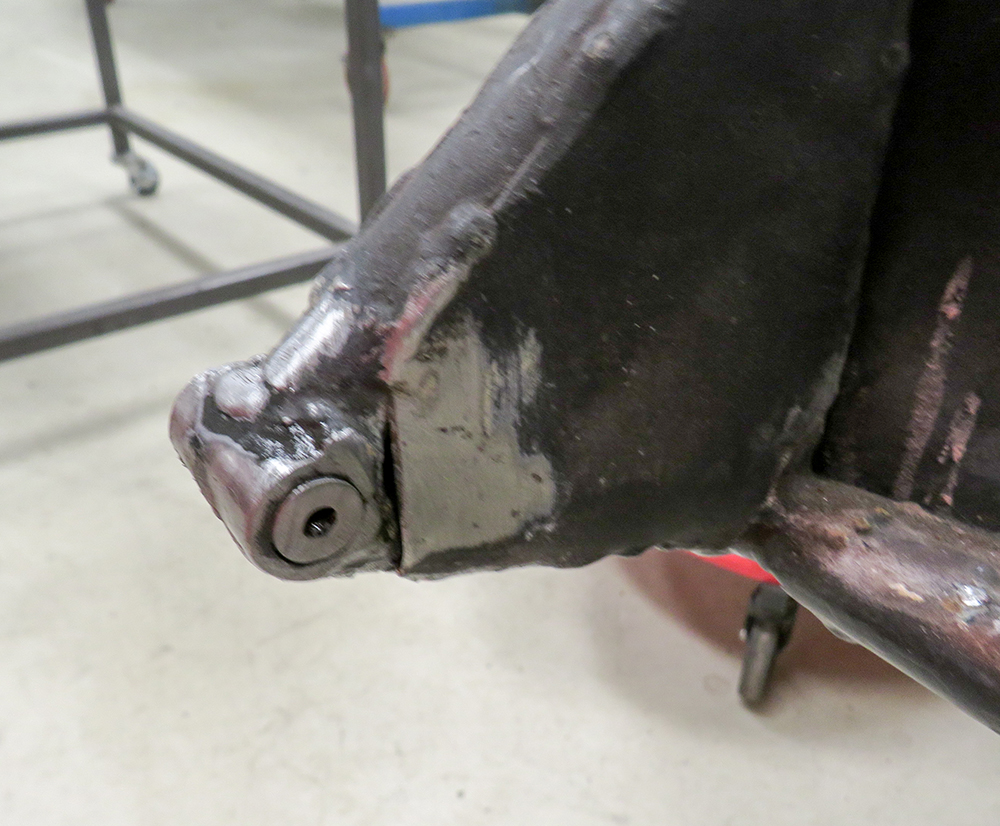
| Rear bonnet hinge frame had corrosion issues
and had been poorly repaired in the past |
|
 |
 |
 |
 |
 |
 |
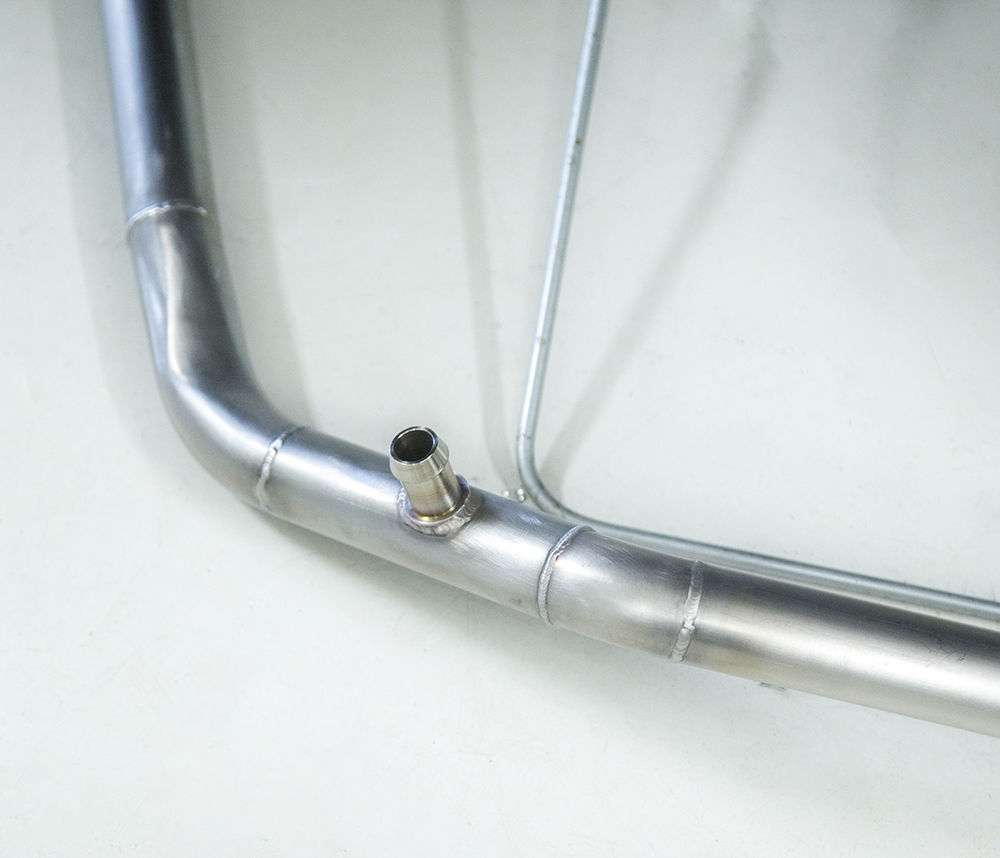
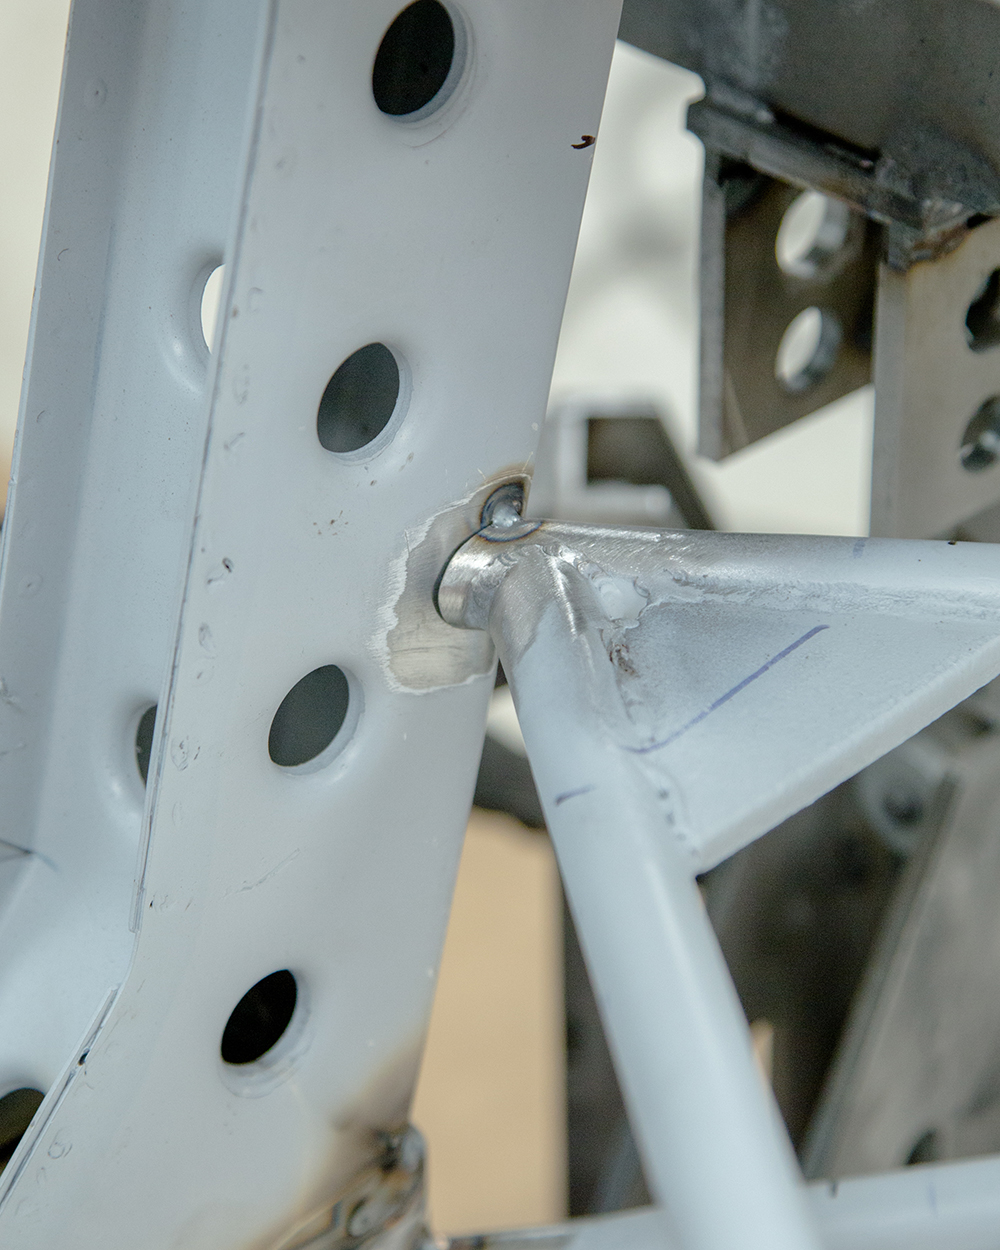
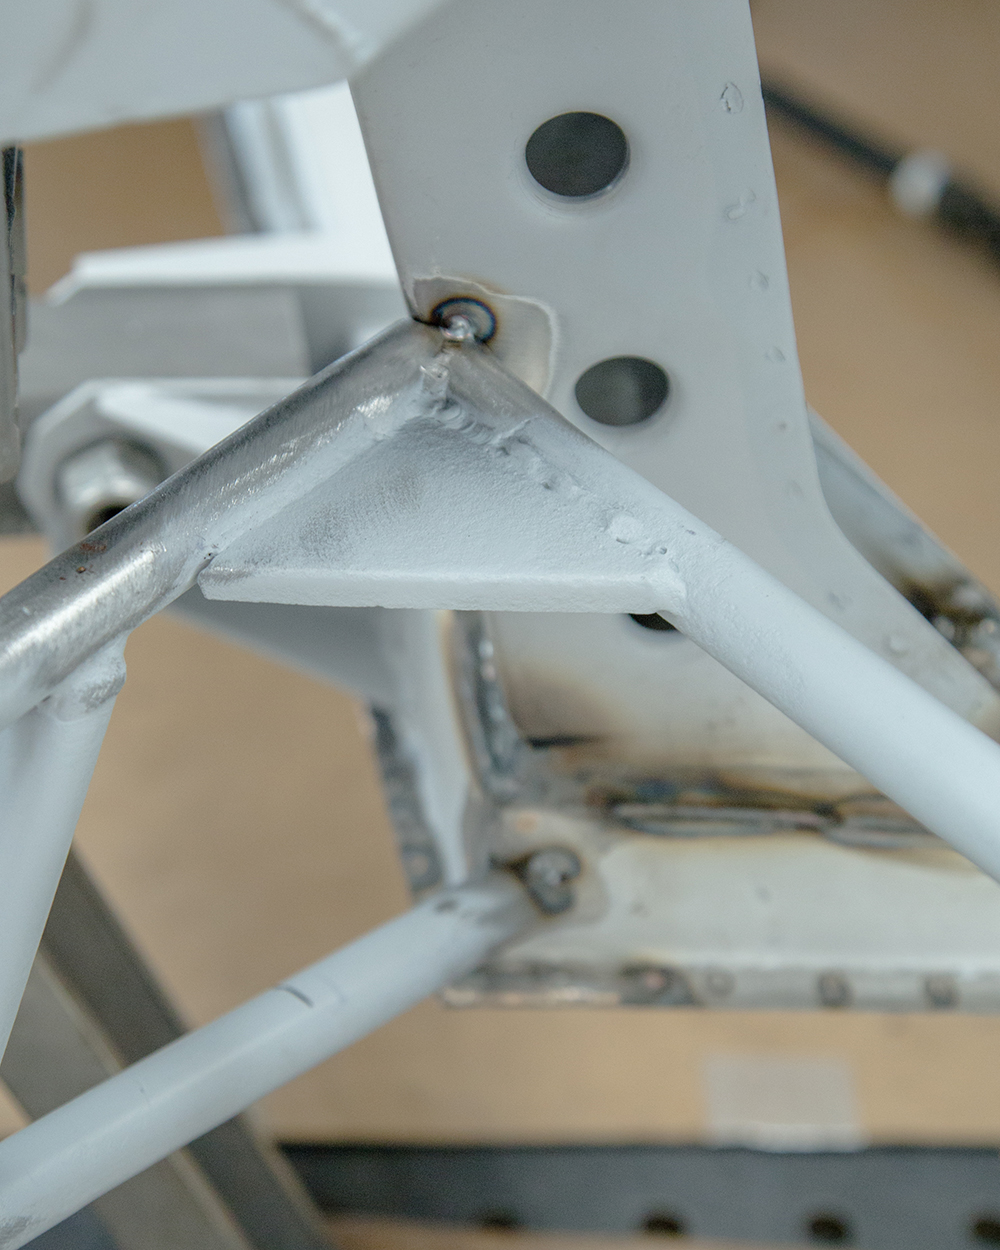
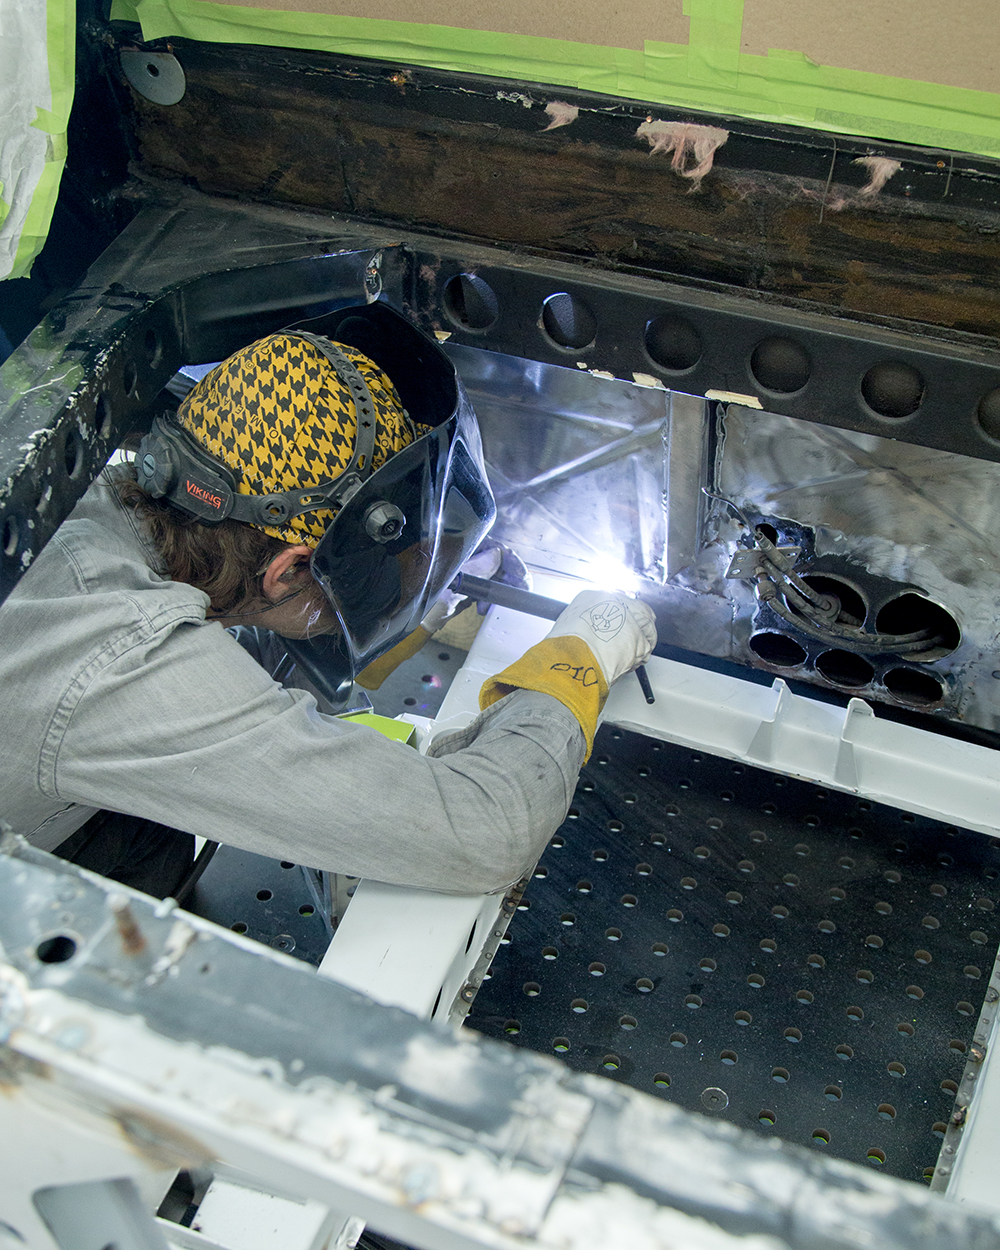
| TIG welding repair panels and new tubing at
the hinge points |
|
 |
 |
| The first brace panel now welded in place |
|
 |
 |
 |
 |
 |
 |
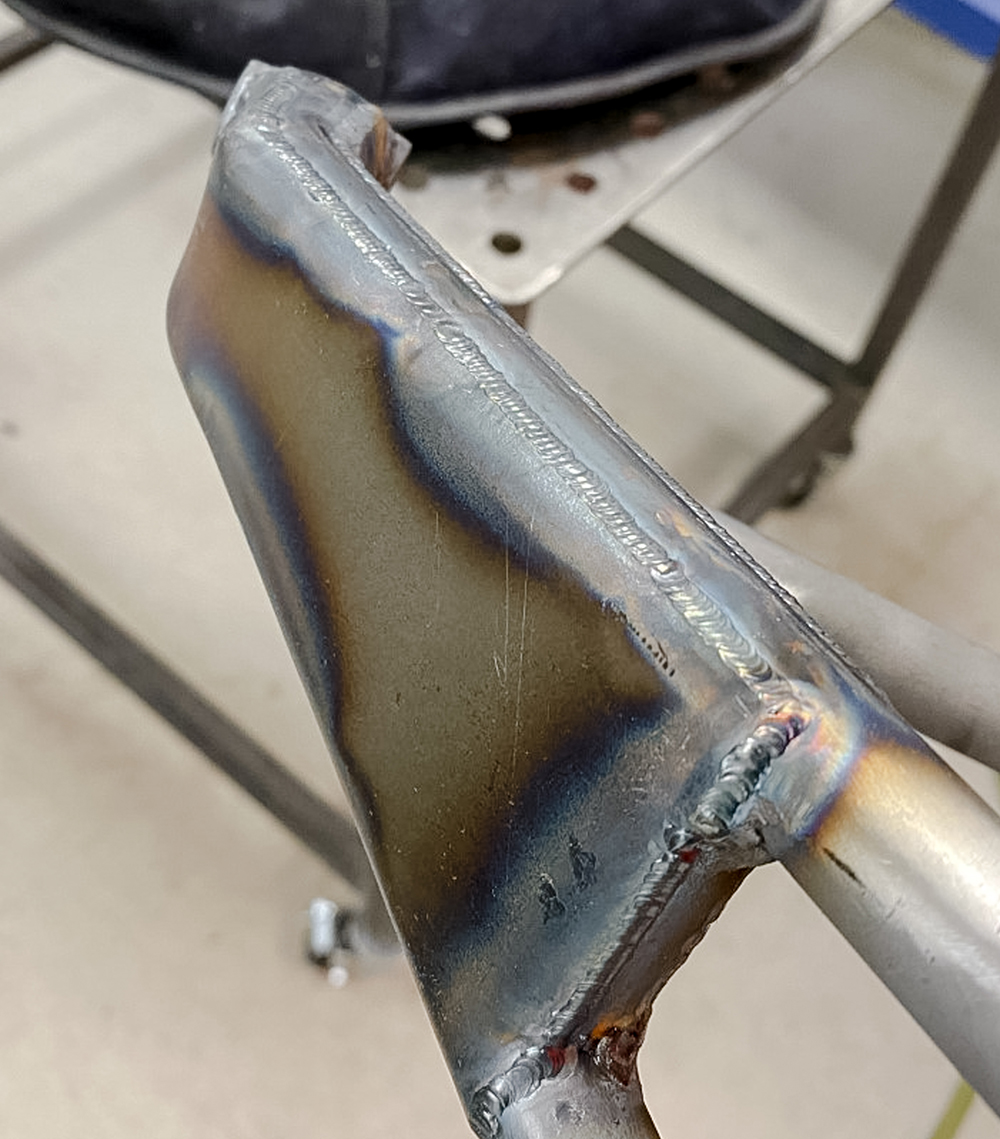
| Ready for primer and paint! |
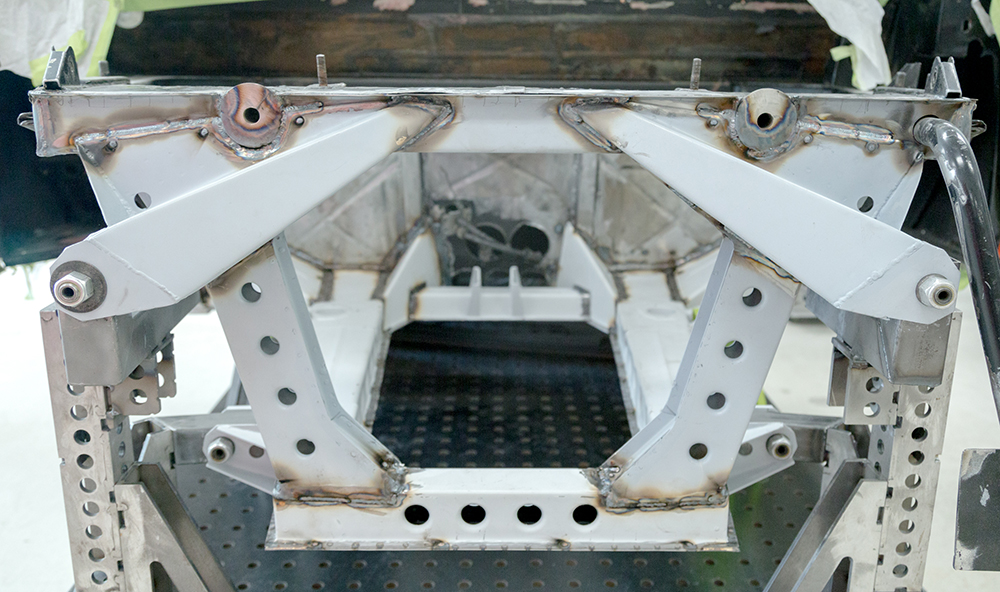
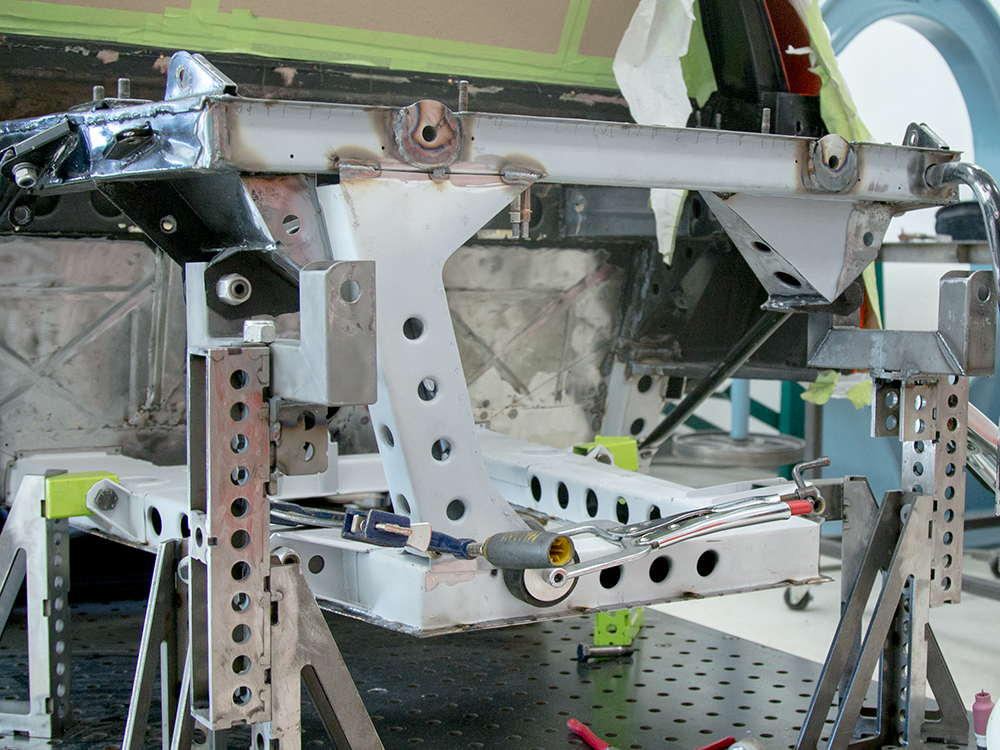
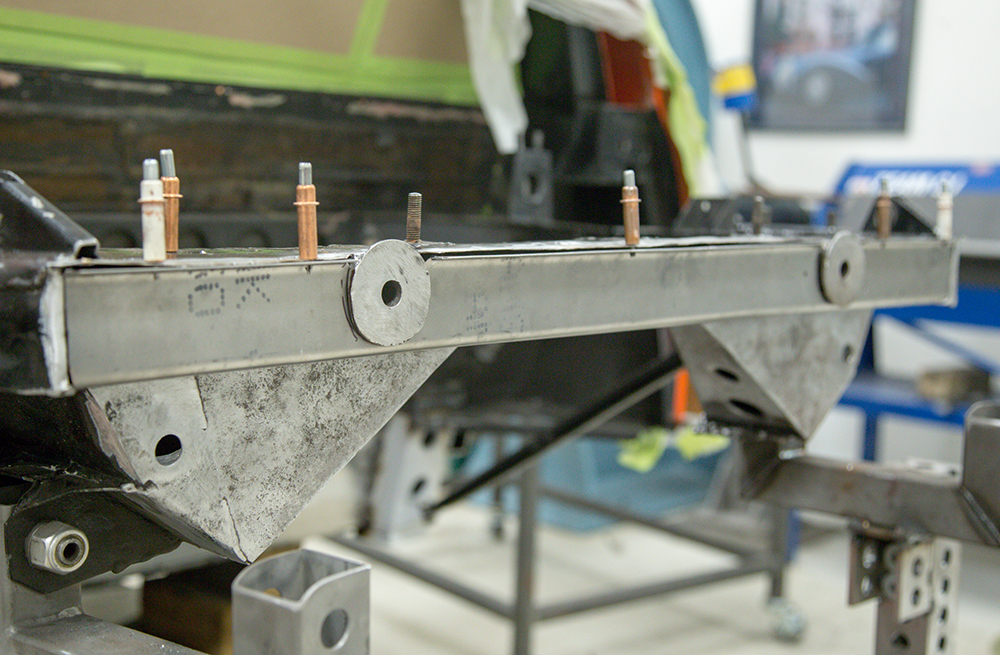
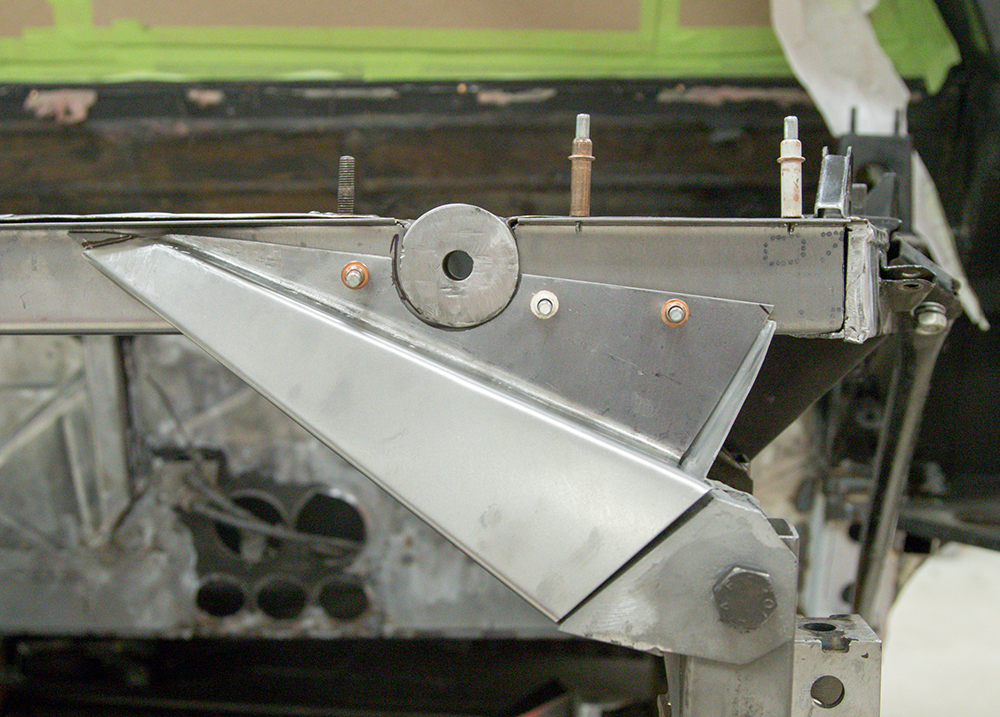
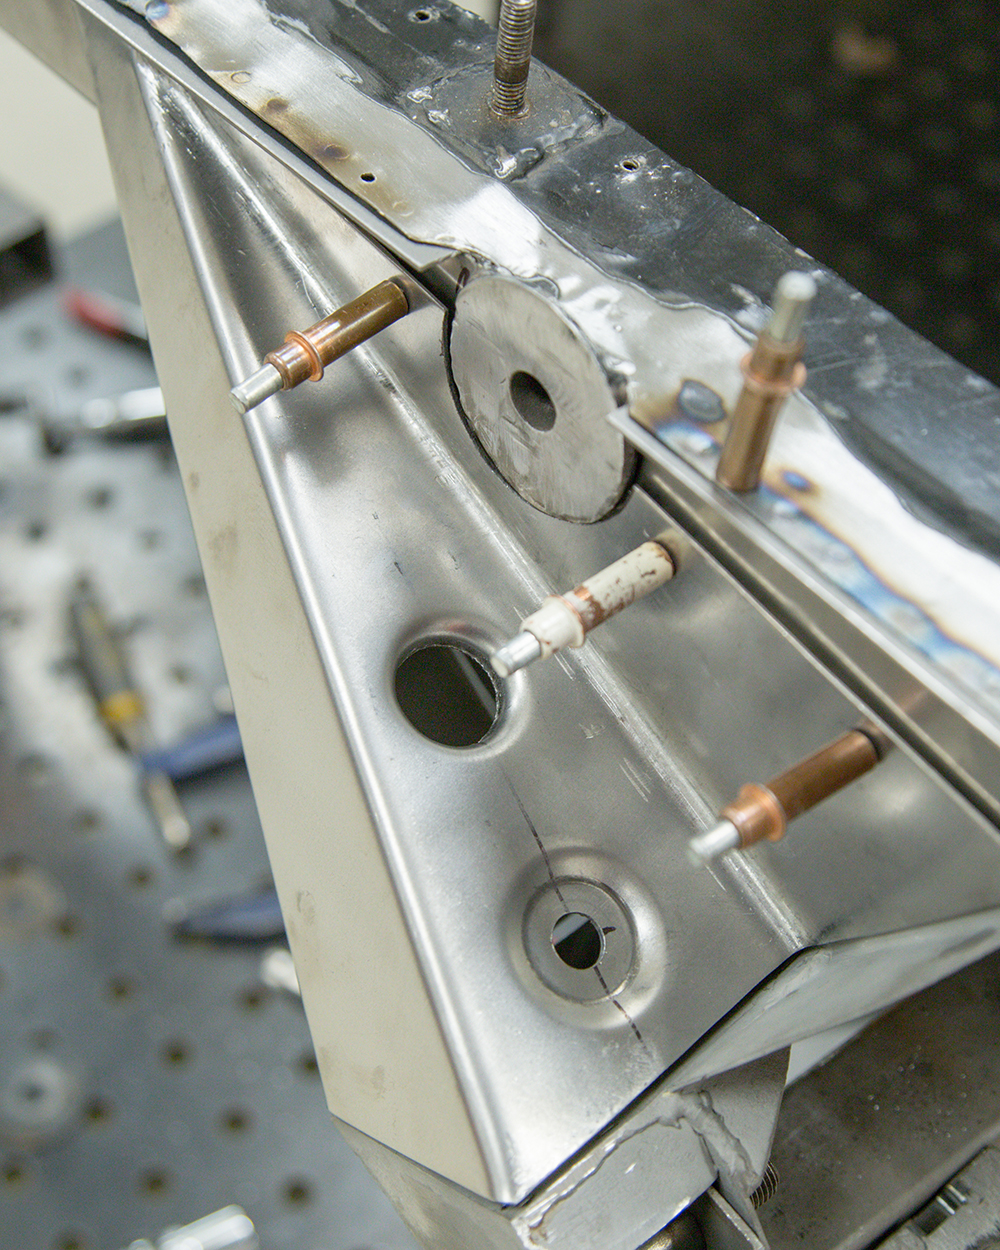
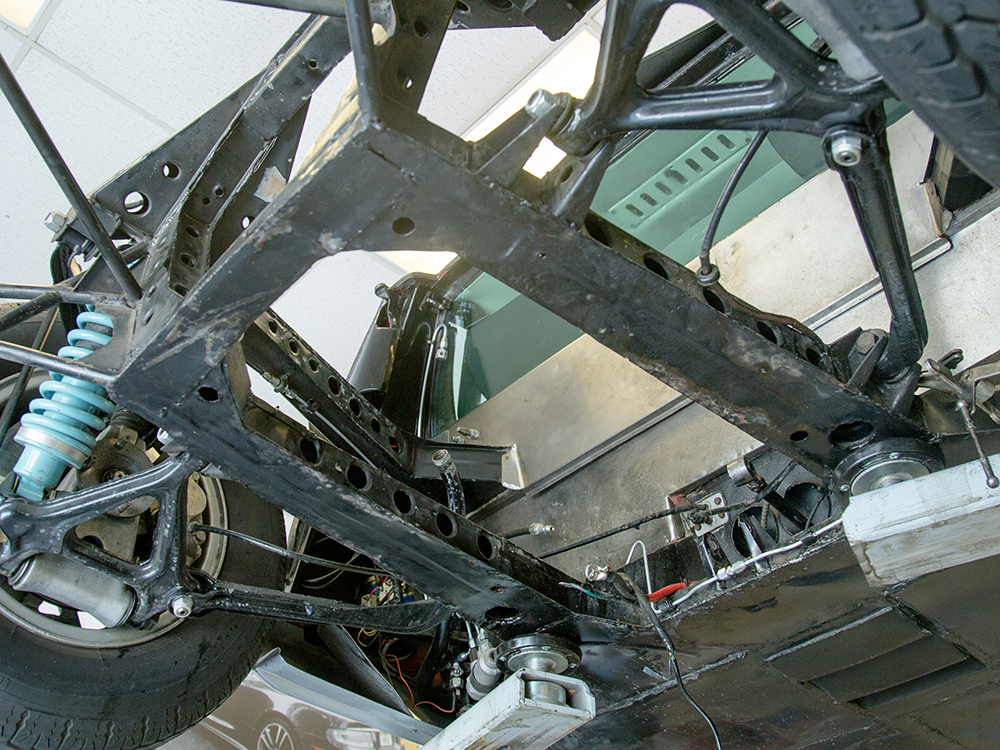
Rear frame and engine cradle construction progressing well!
 |
 |
 |
 |
 |
 |
 |
 |
 |
 |
 |
 |
 |
 |
 |
 |
 |
 |
 |
 |
 |
 |
 |
 |
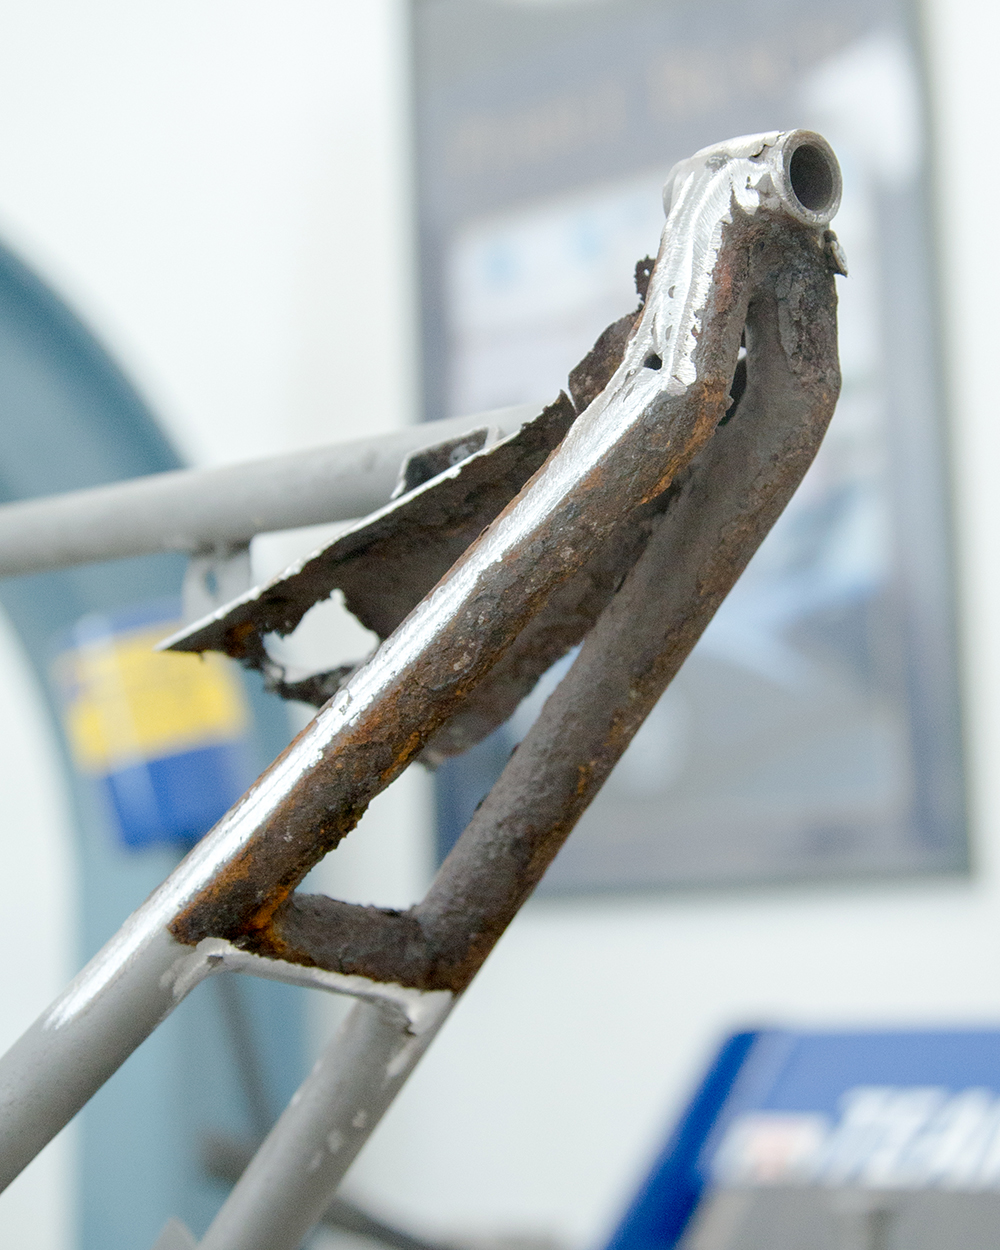
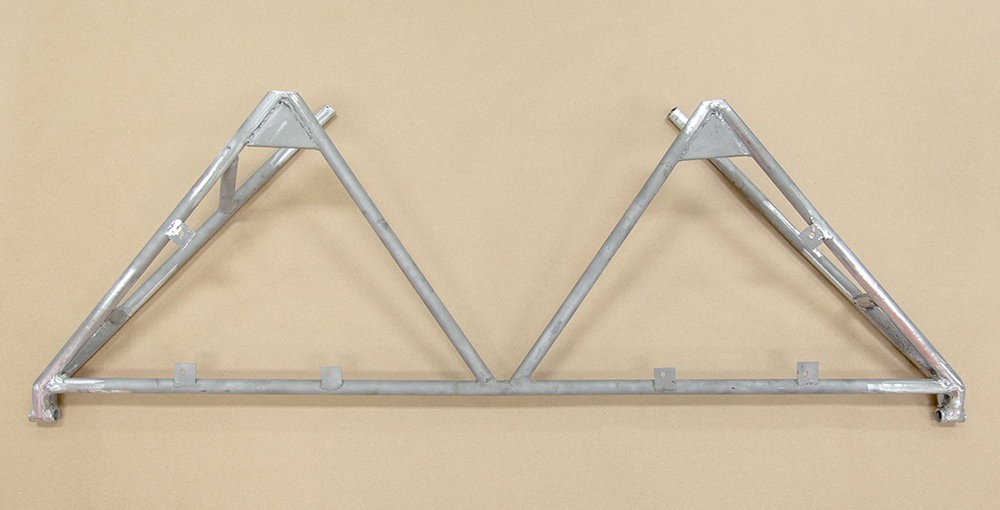
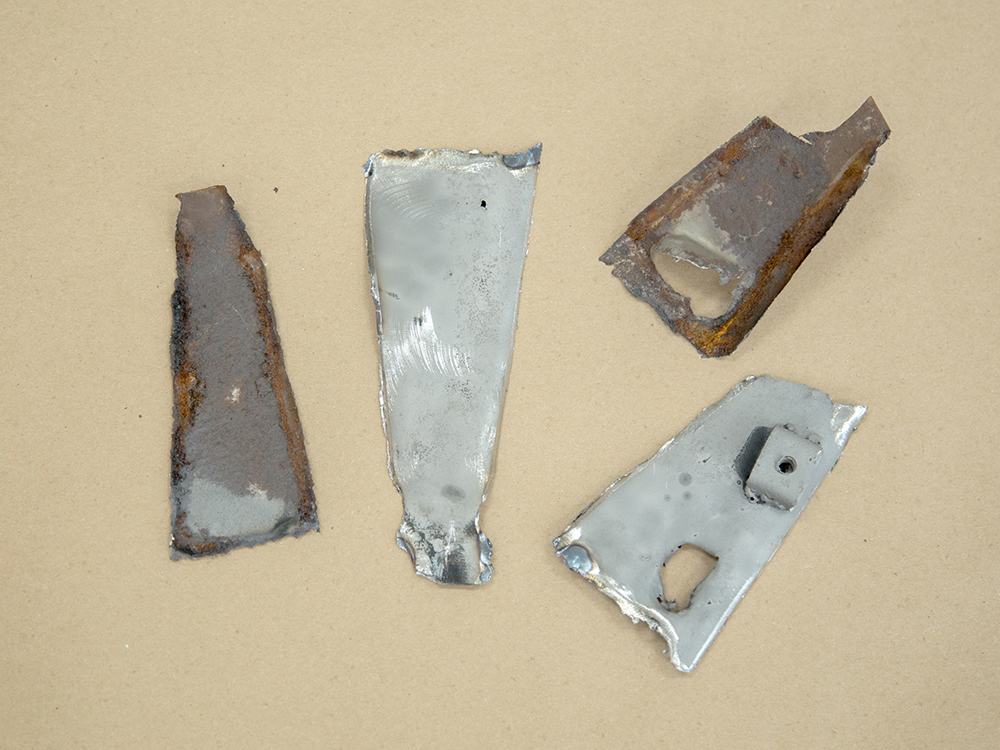
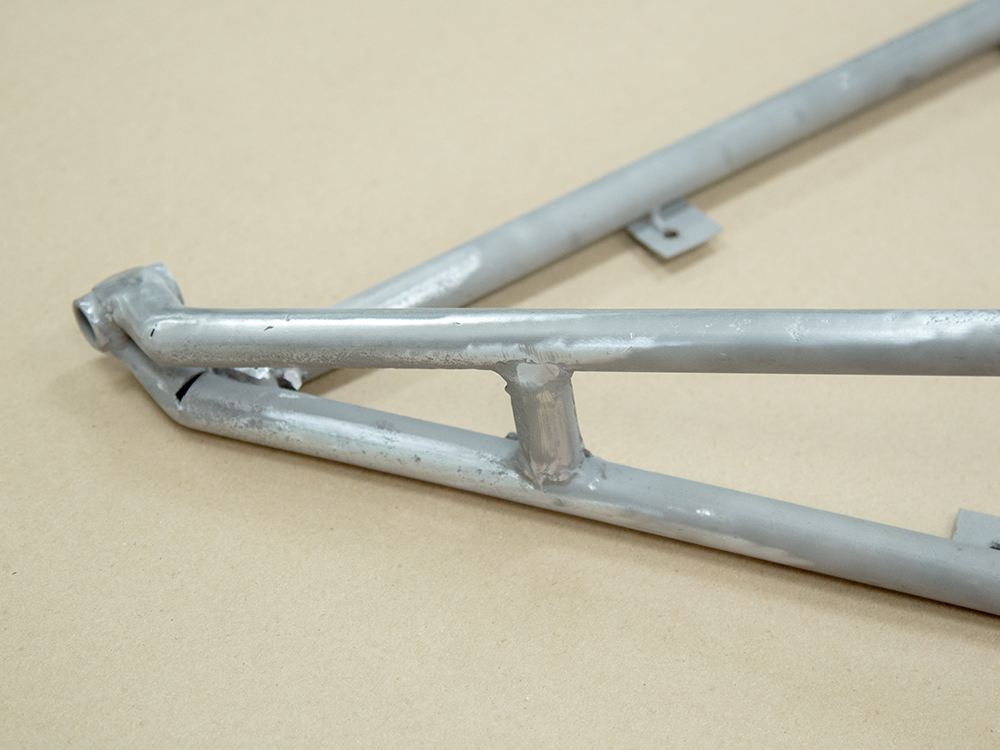
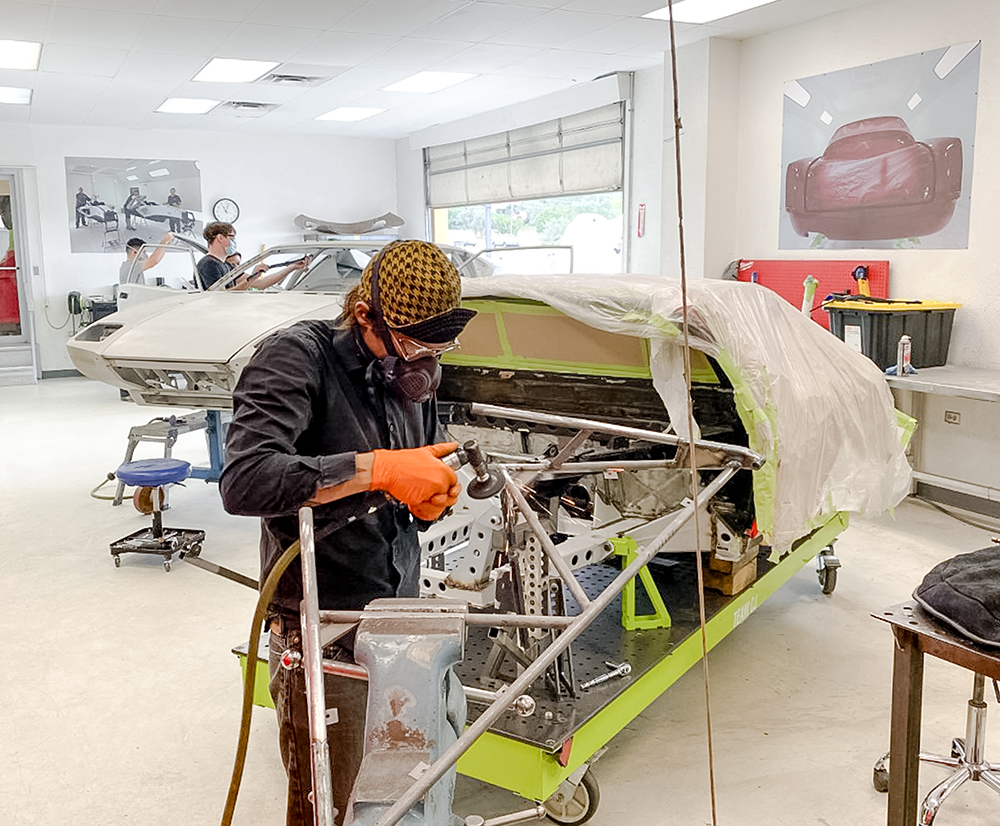
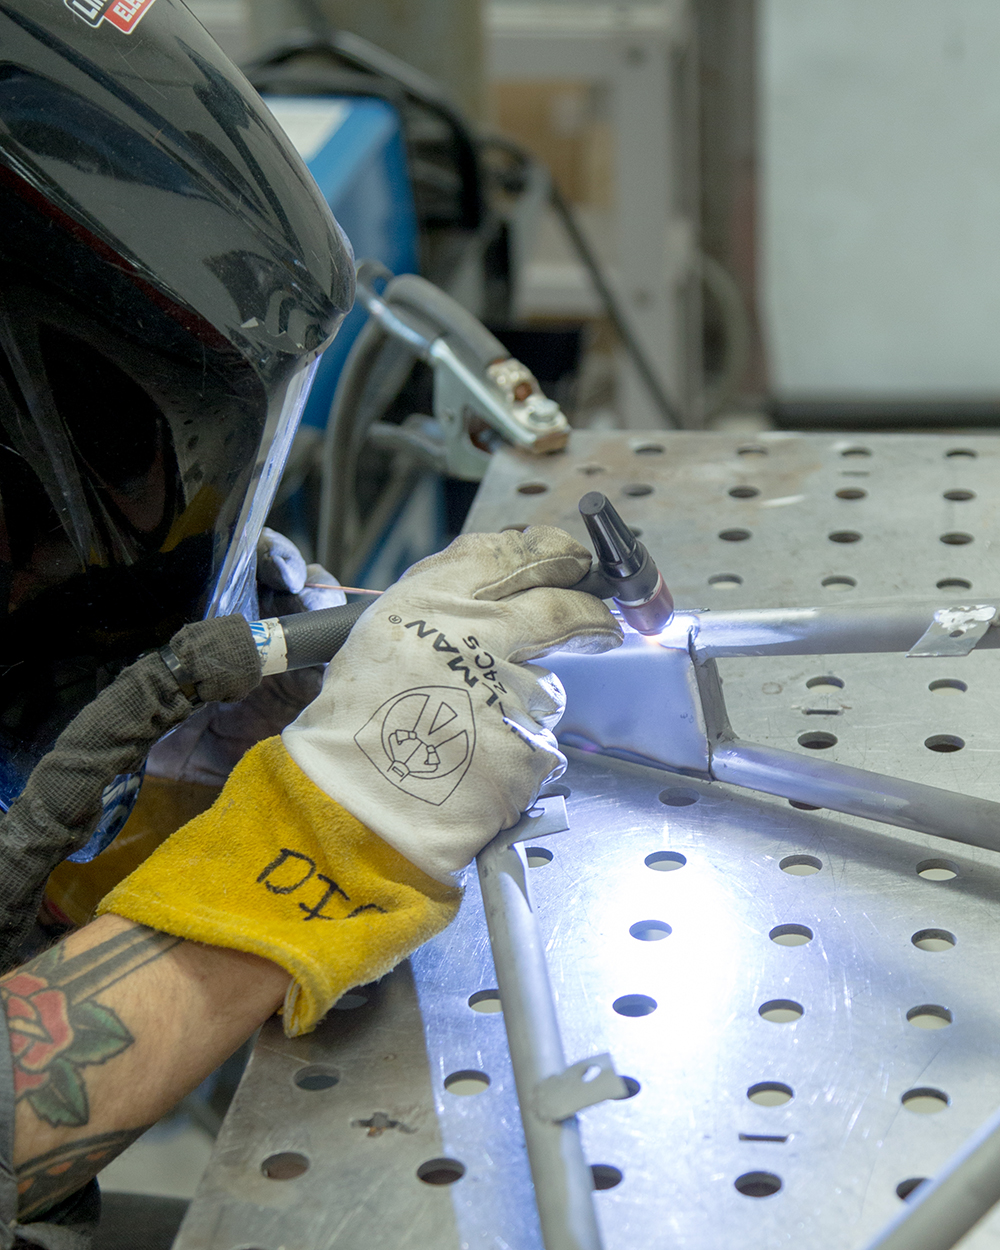
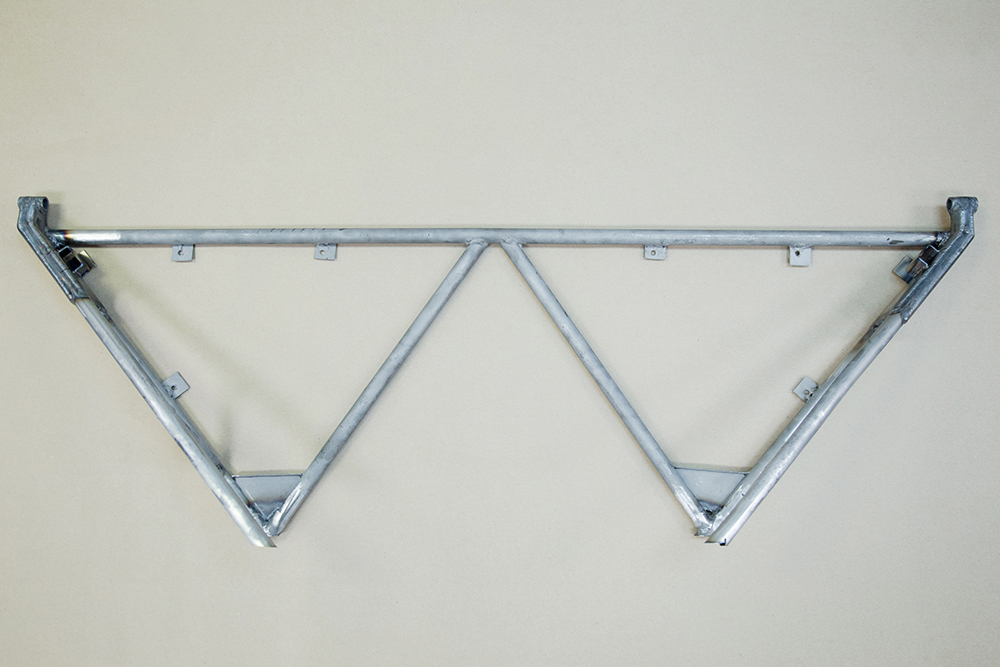
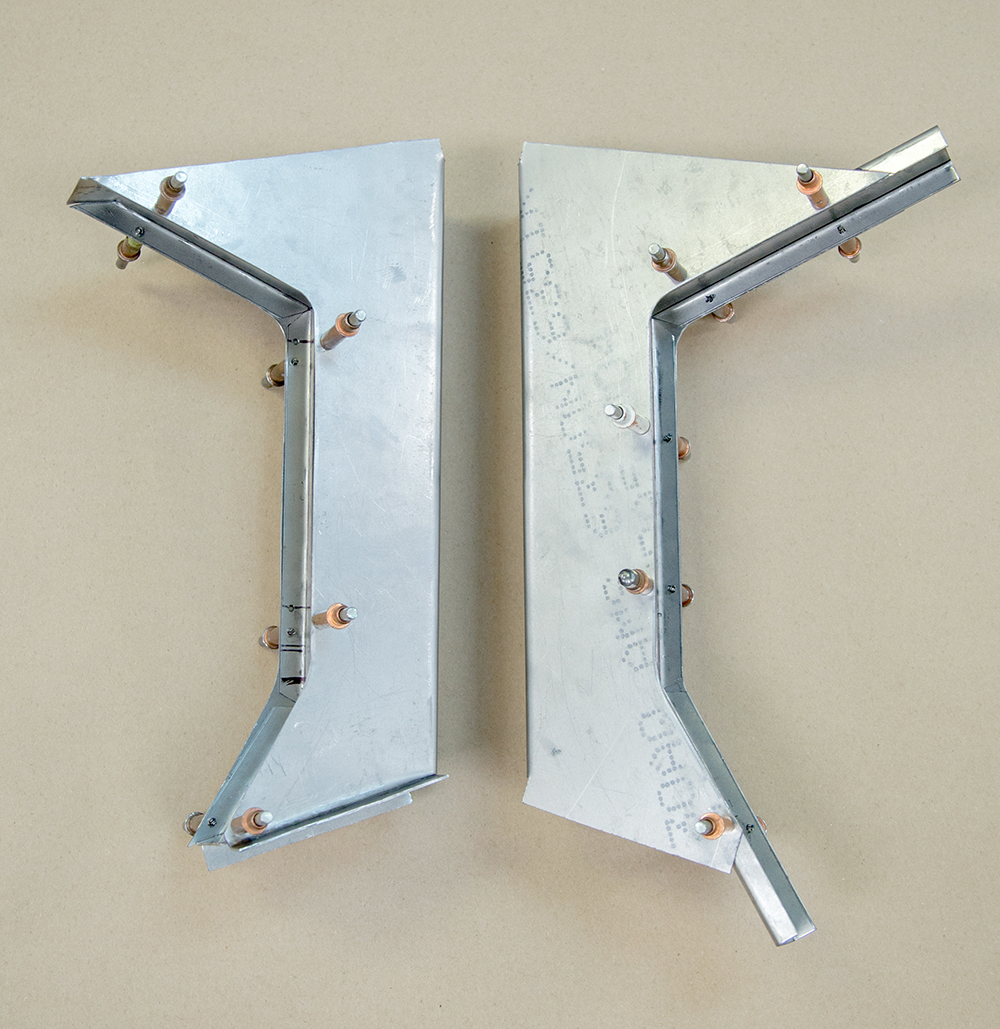
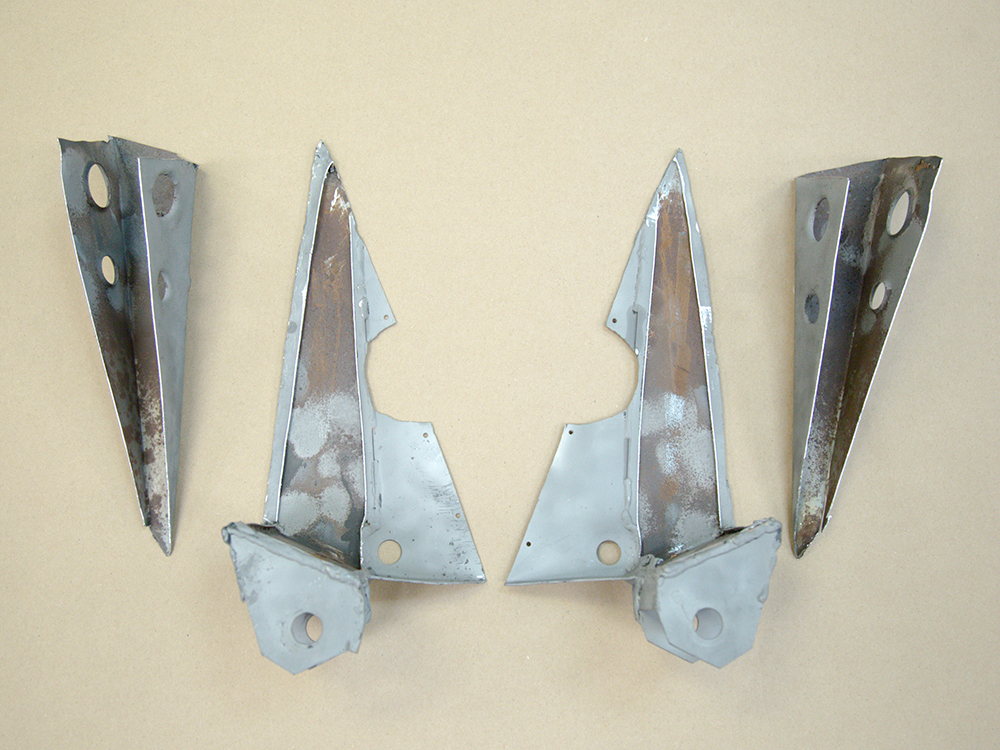
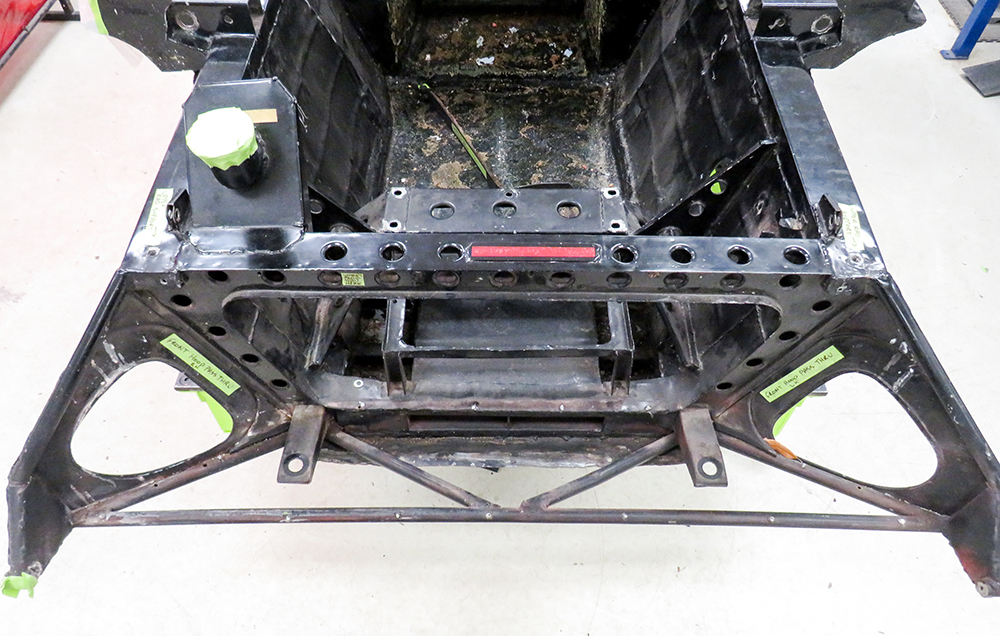
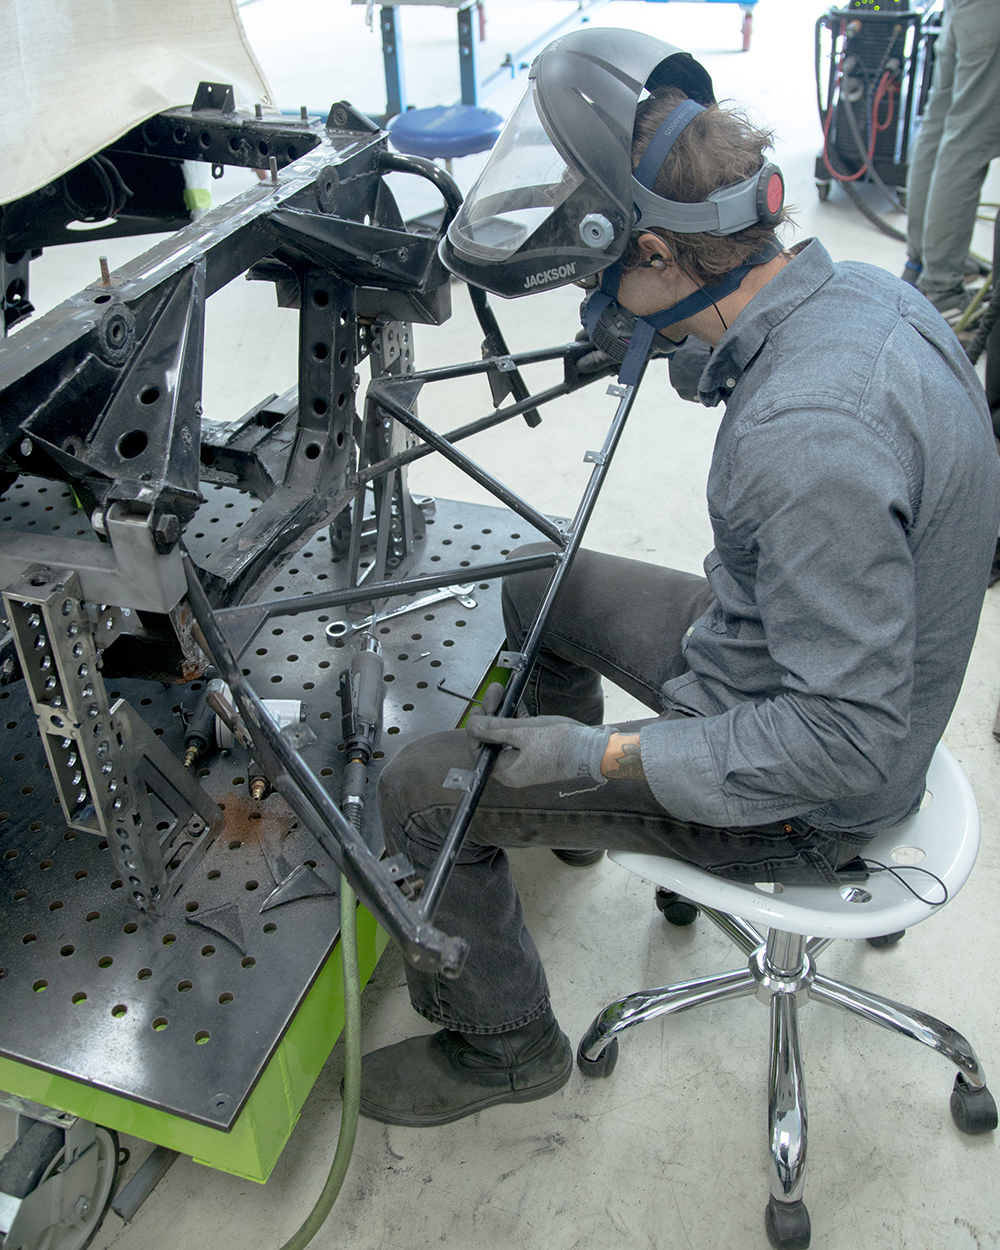
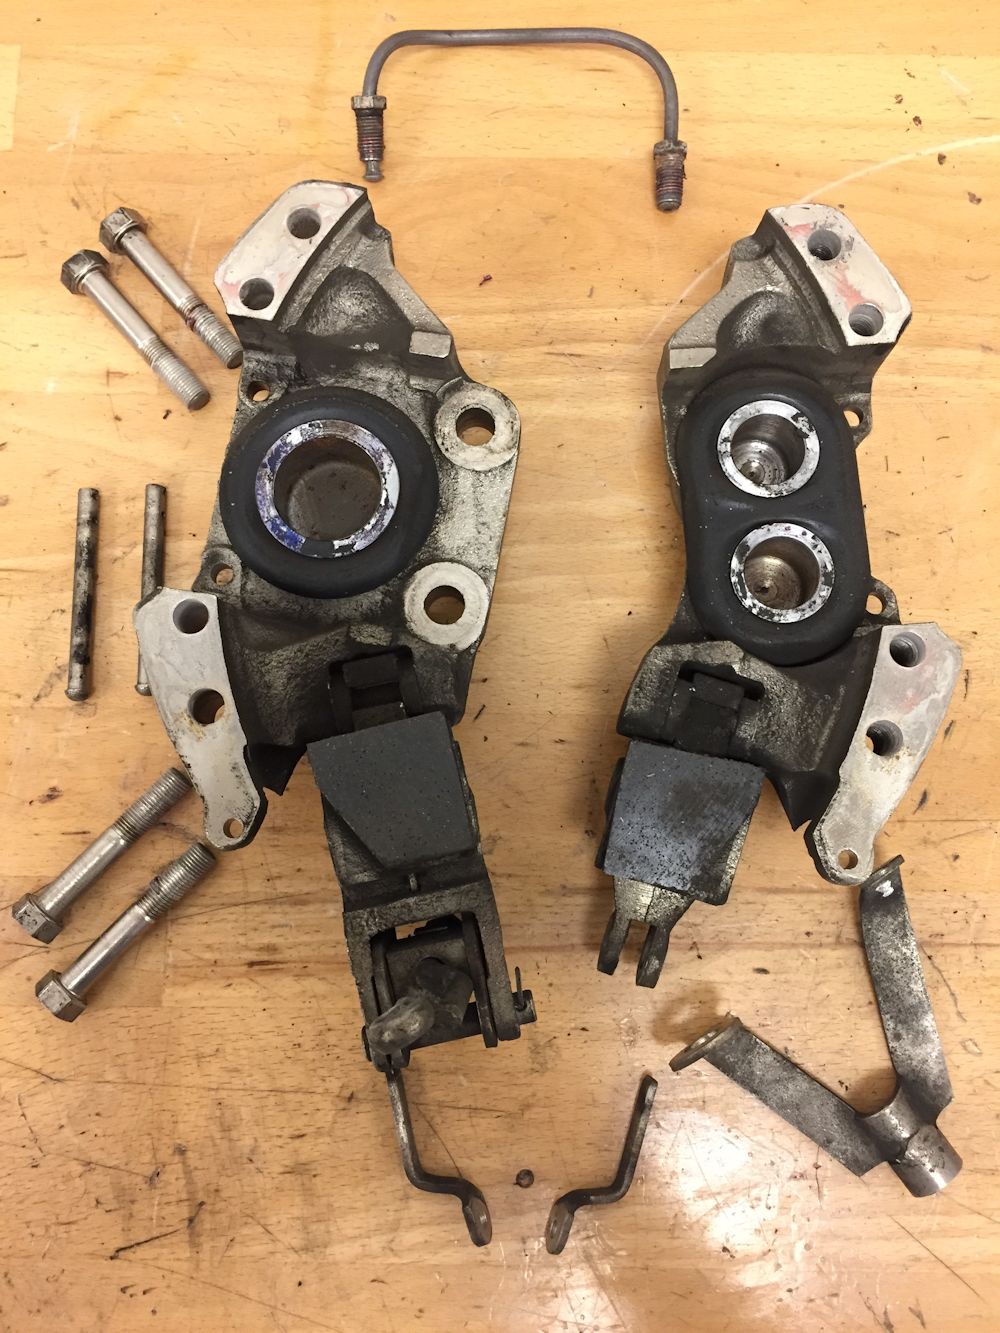
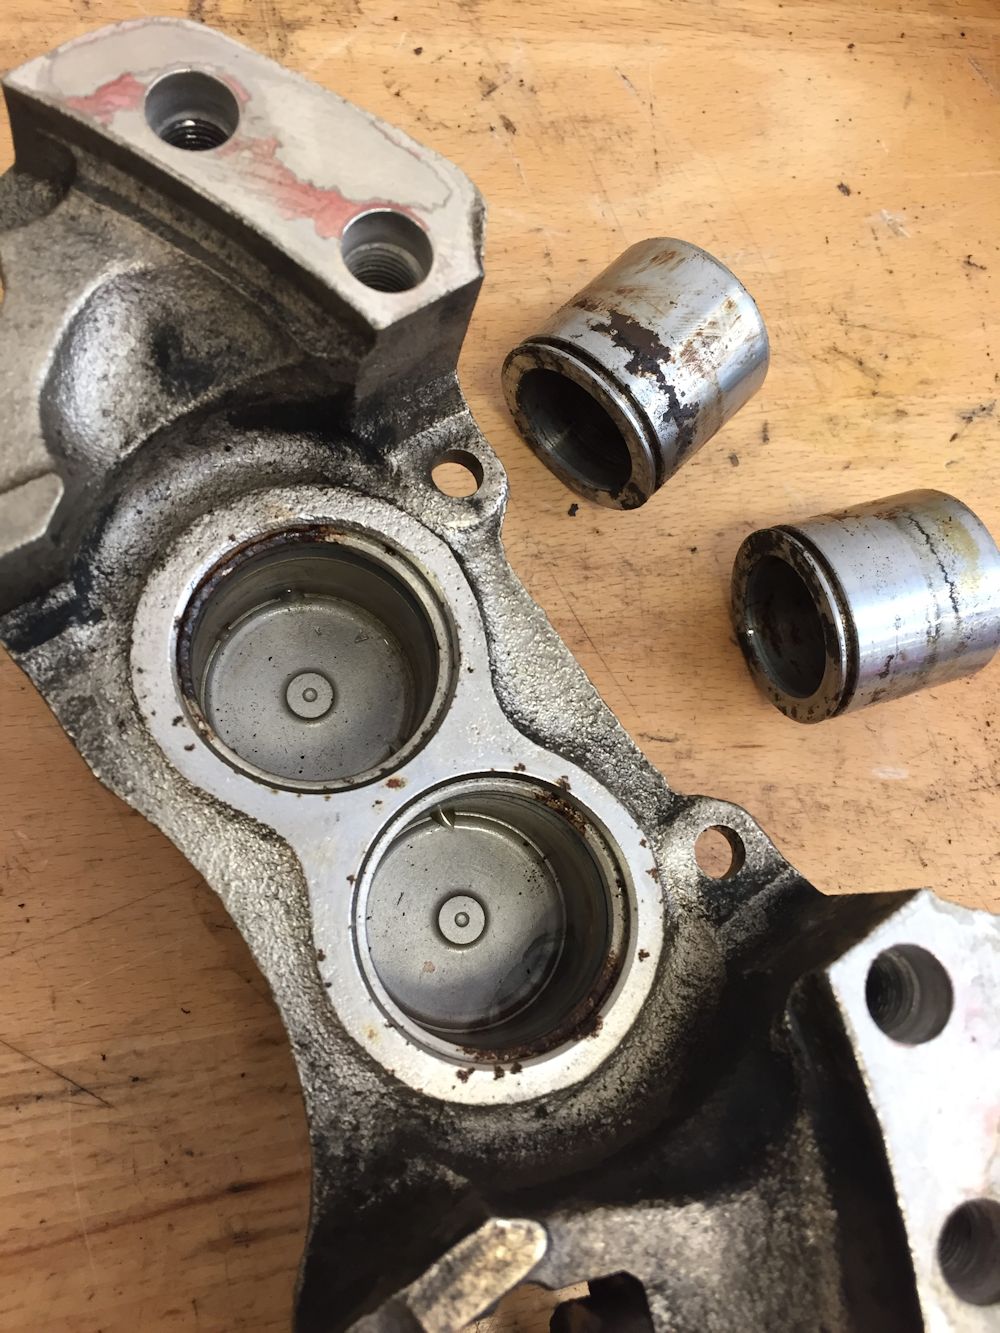
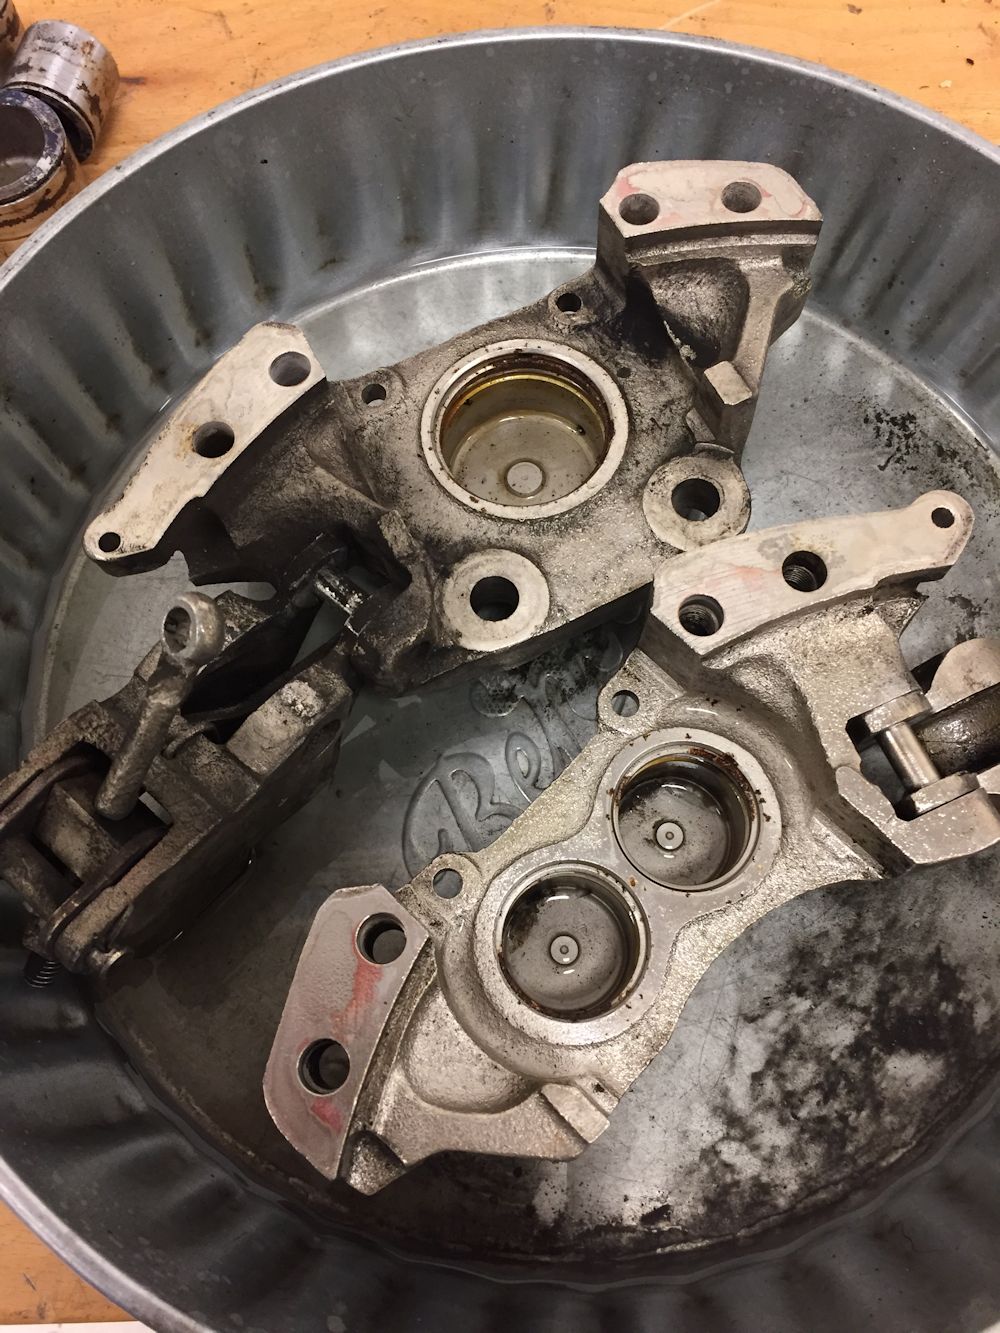
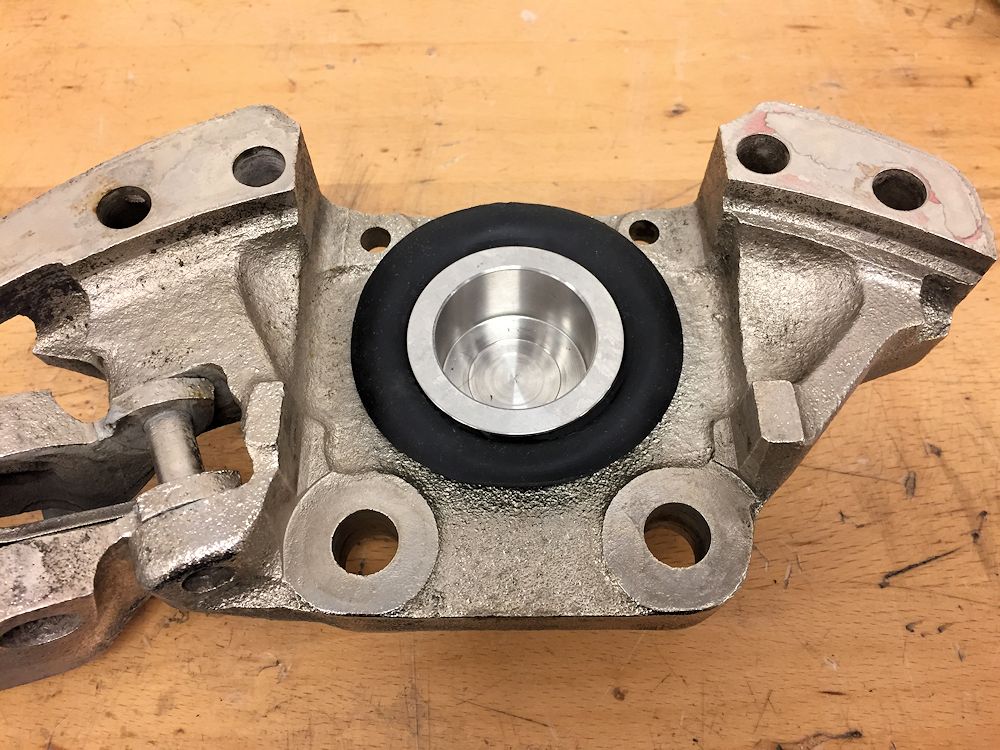
Andy has been making excellent progress with the frame repairs and fabrication.
 |
 |
 |
 |
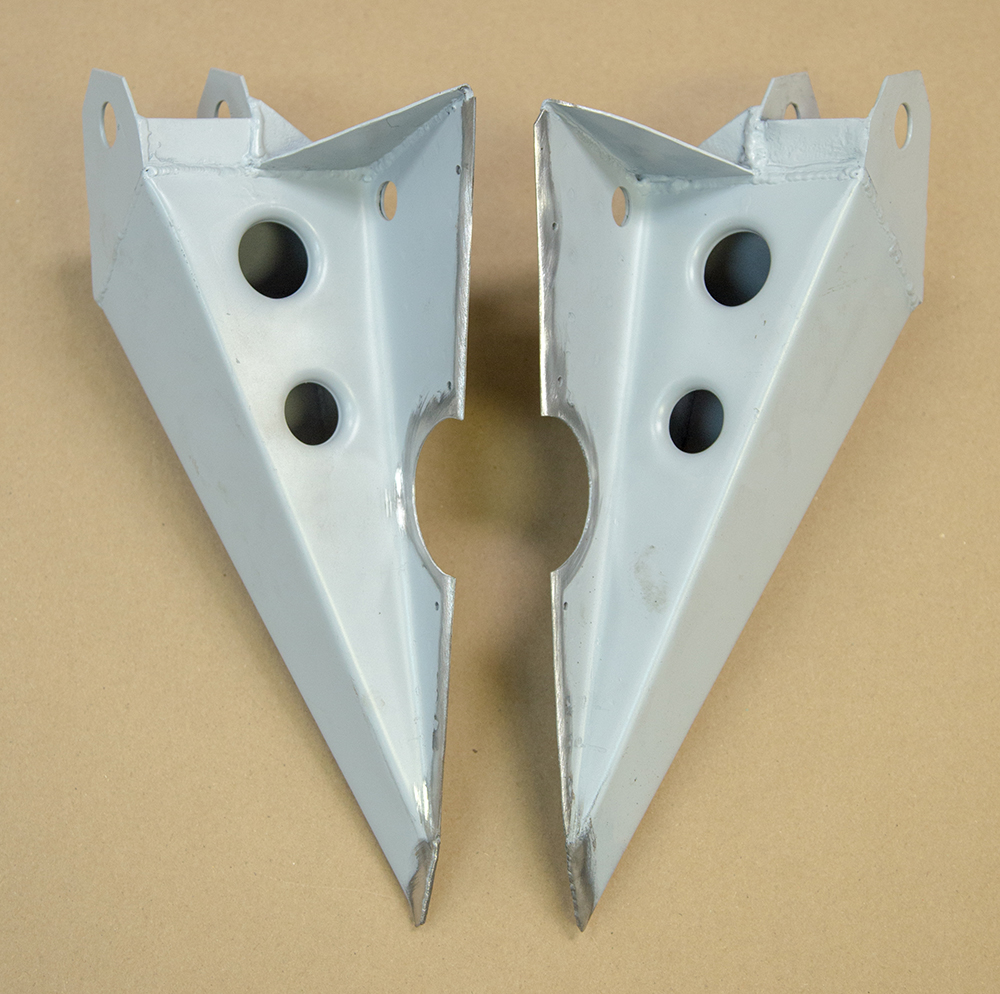
| Quite a lot of corrosion behind the corner
sections |
|
 |
 |
 |
 |
 |
 |
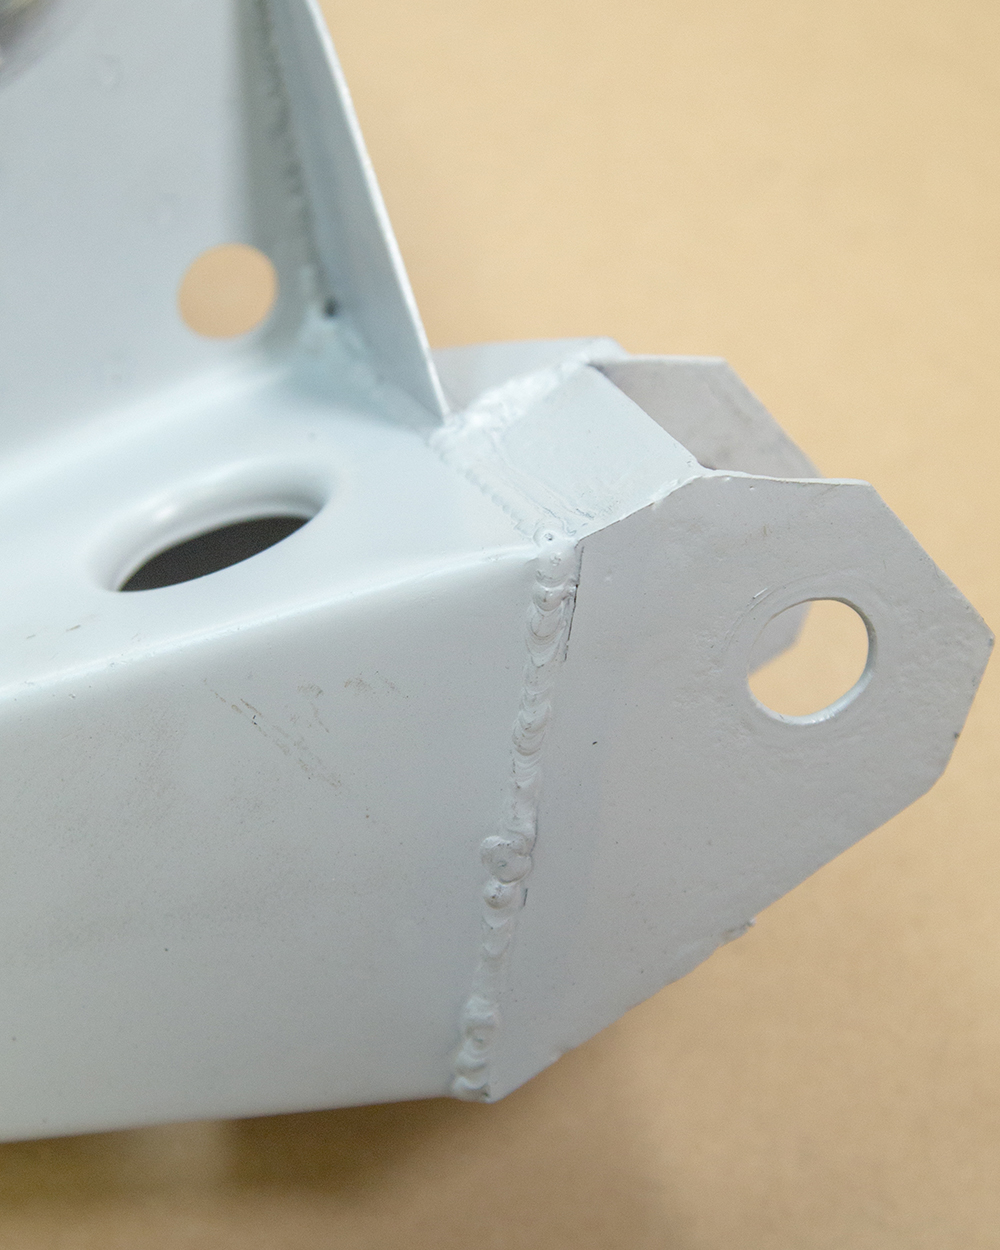
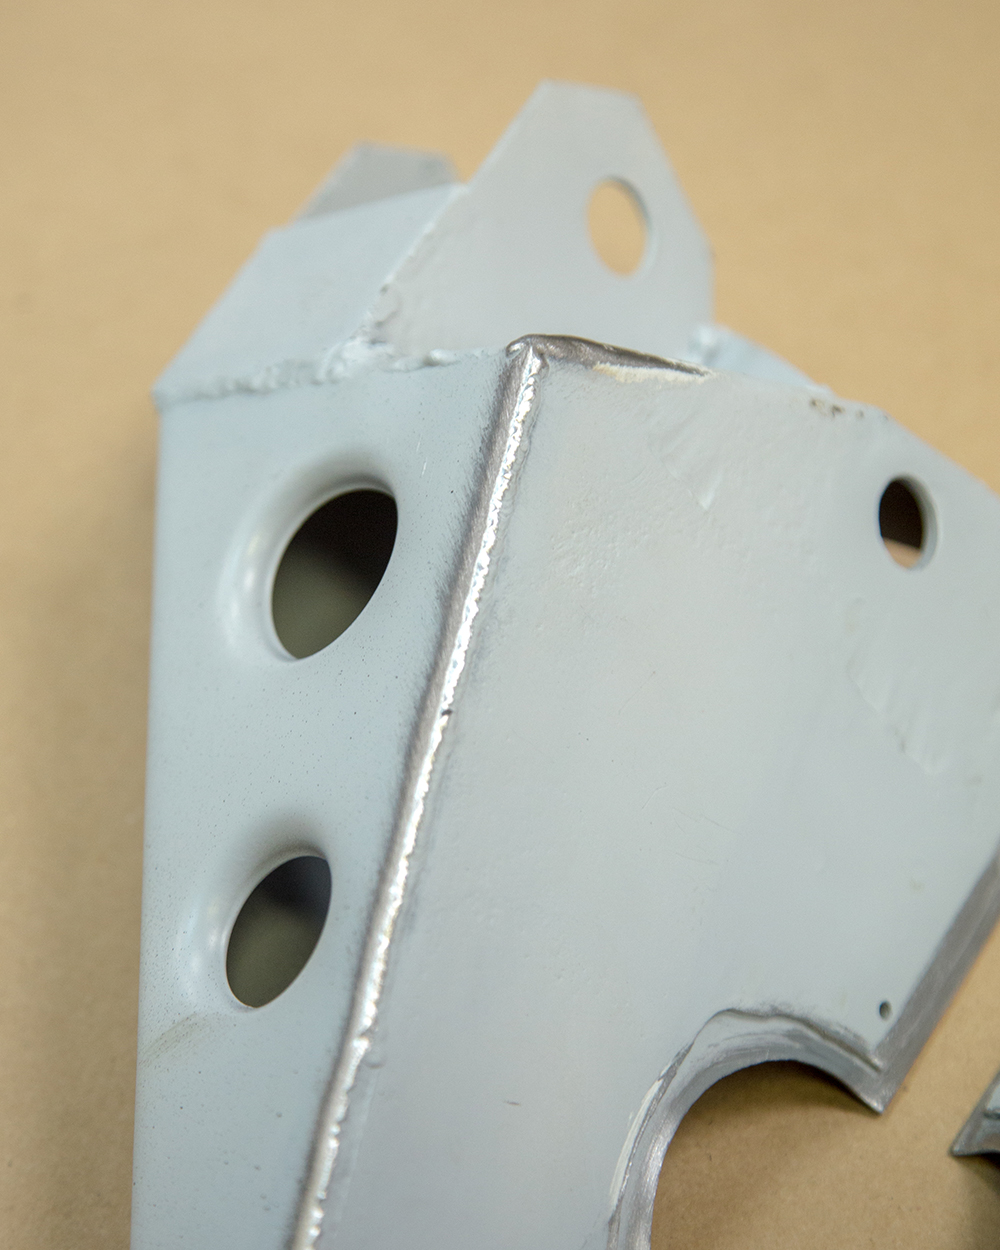
| Original corner sections will be remade |
|
 |
 |
 |
 |
 |
 |
| Fabricating the upper cross bar |
|
 |
 |
 |
 |
| Starting to come together! |
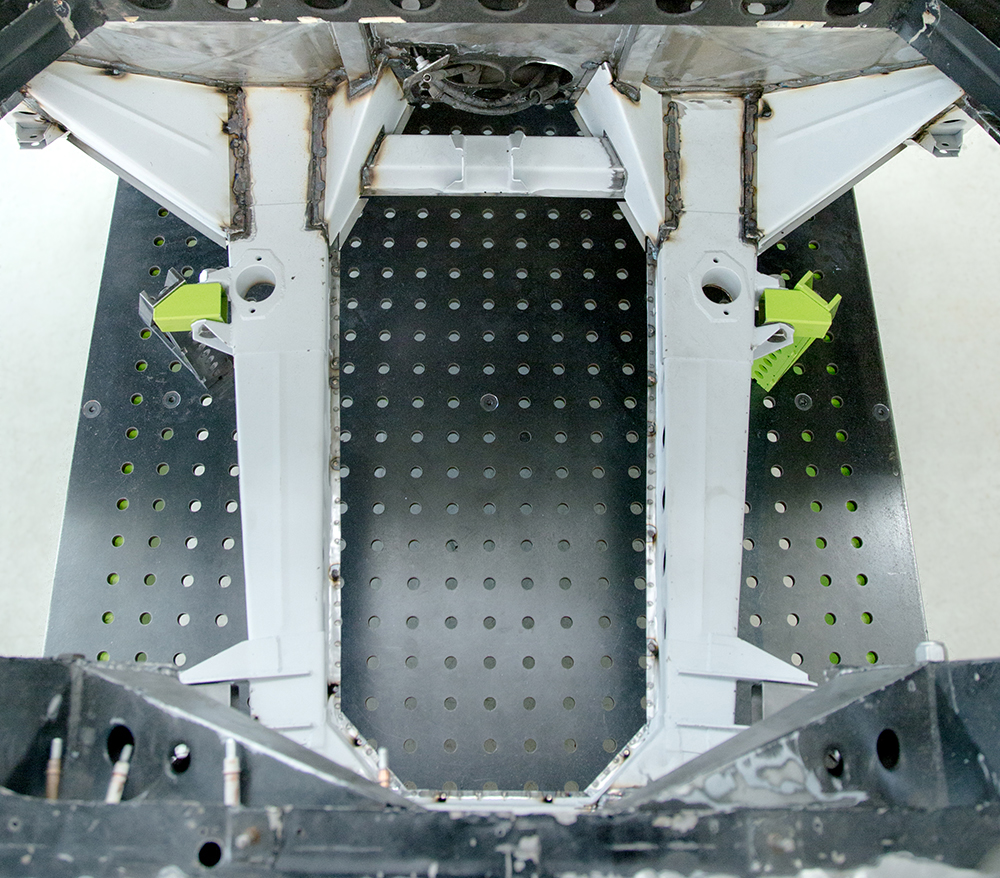
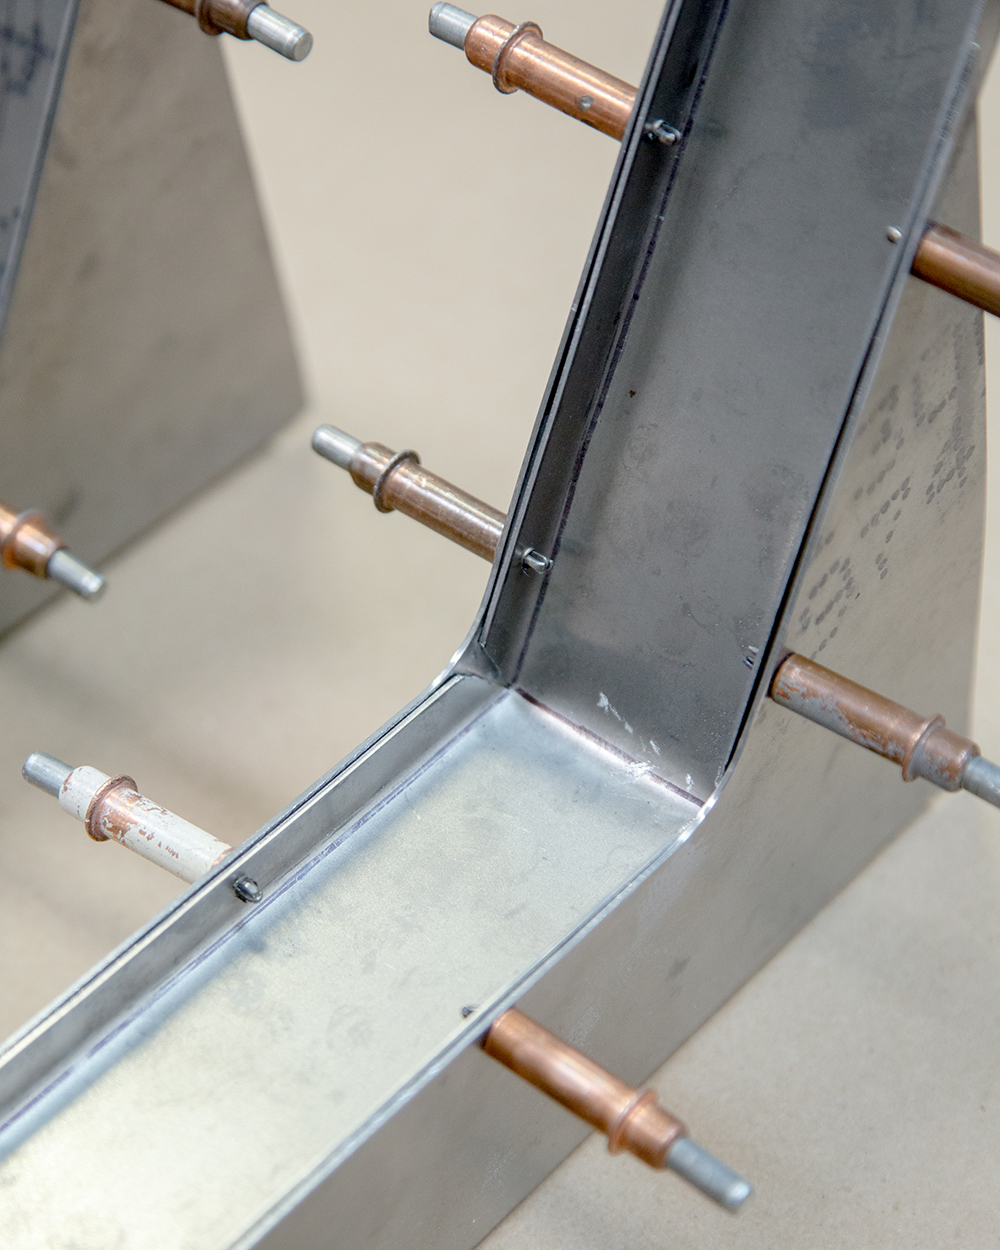
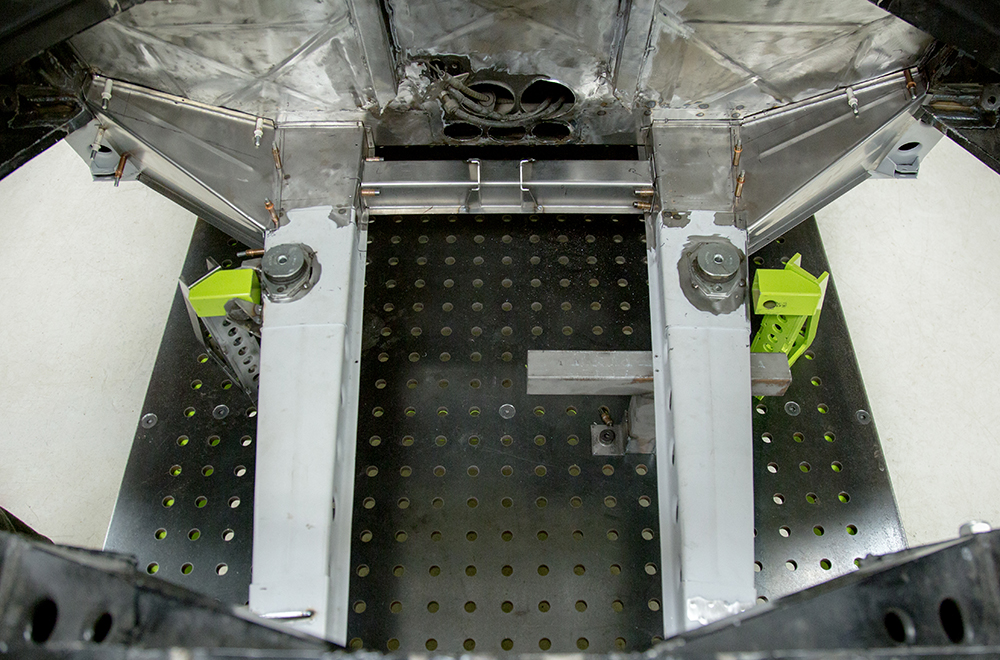
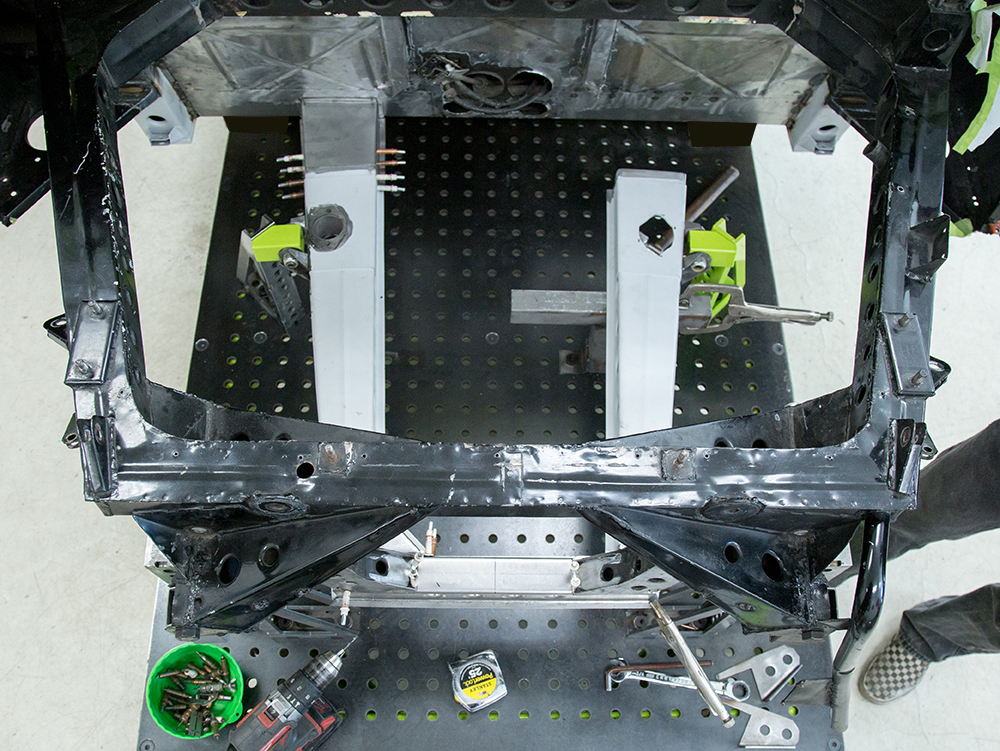
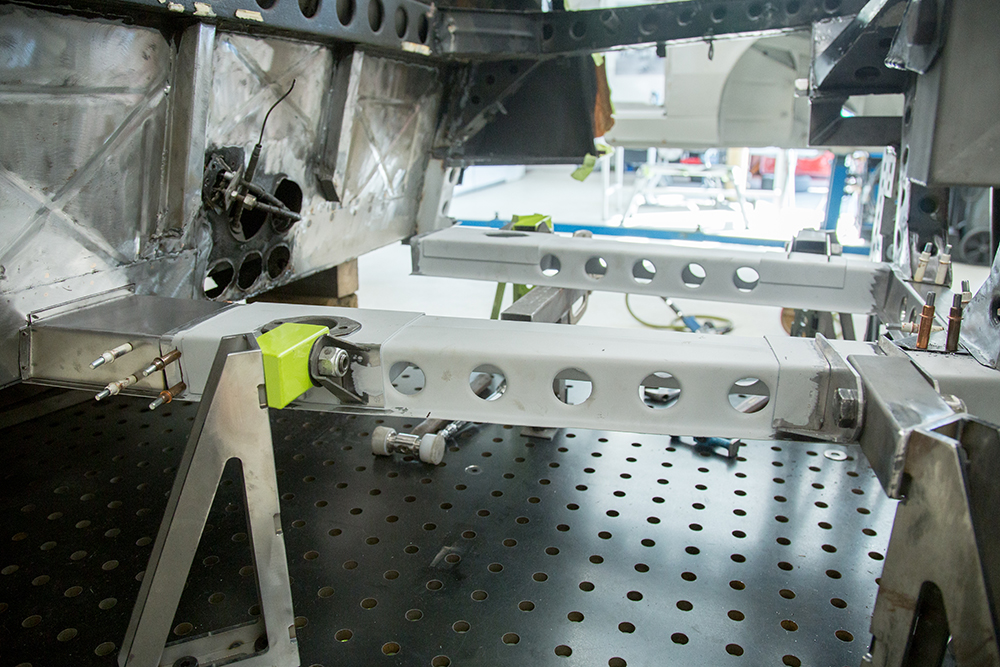
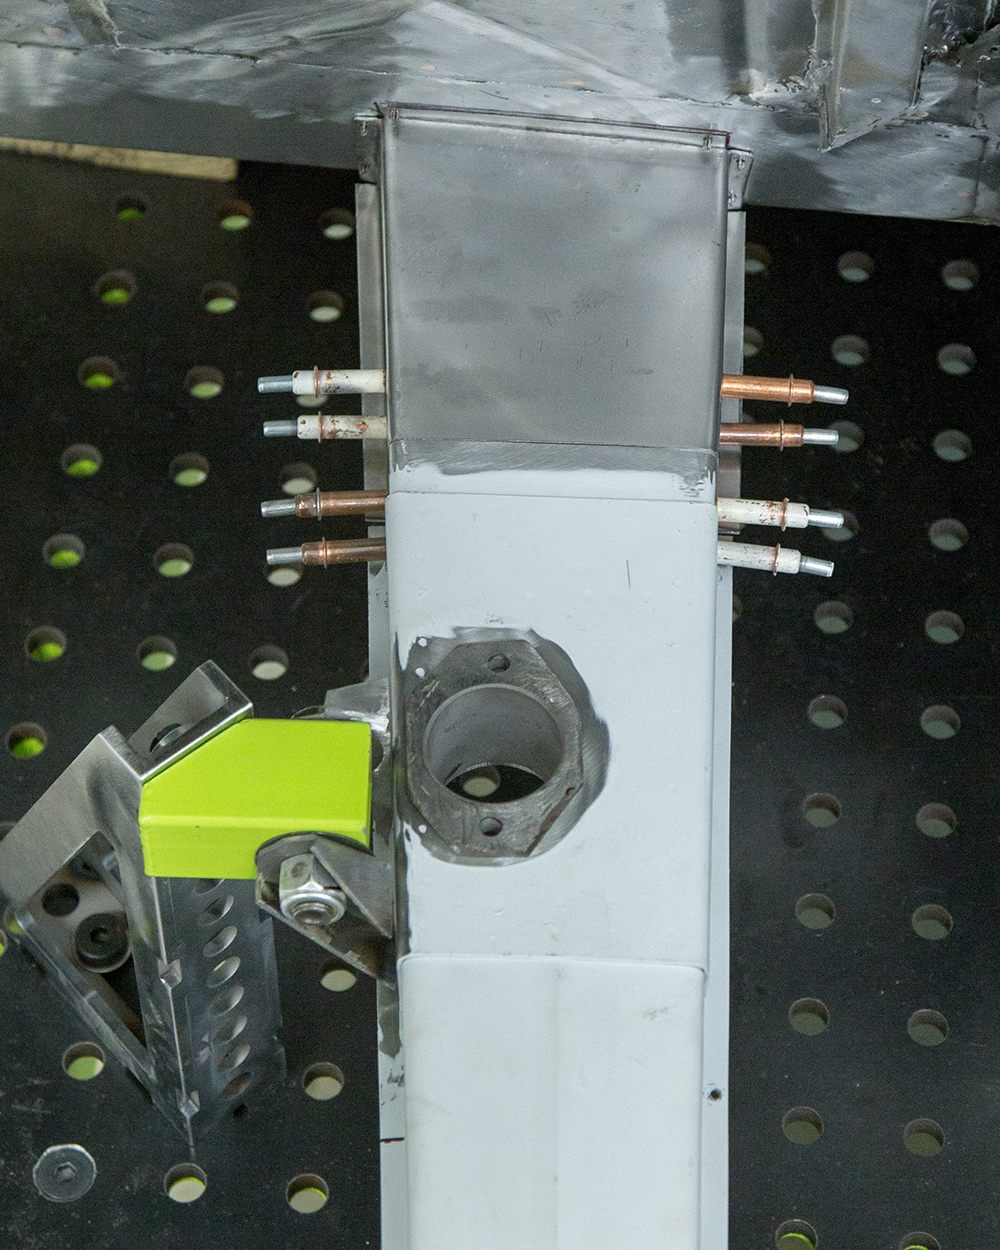
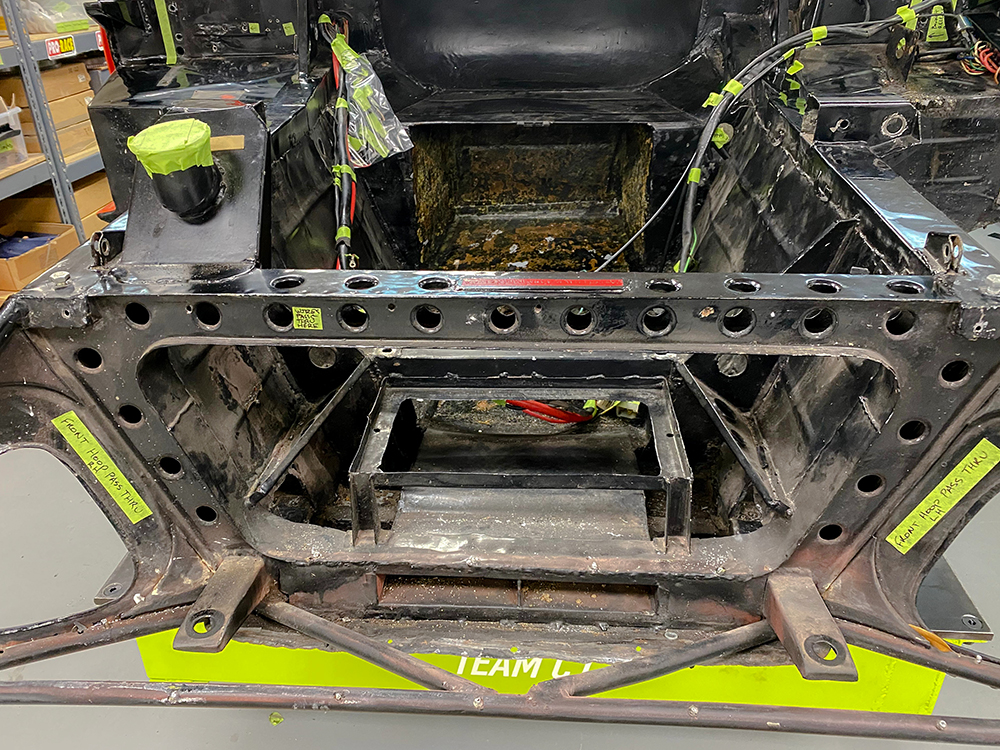
Lots of progress fabricating and welding the lower/rear chassis rails and engine cradle.
 |
 |
| Trial fitting the engine mounts on the new
lower frame rails |
|
 |
 |
| Trial fitting the bare block to finalize
engine mount positioning |
|
 |
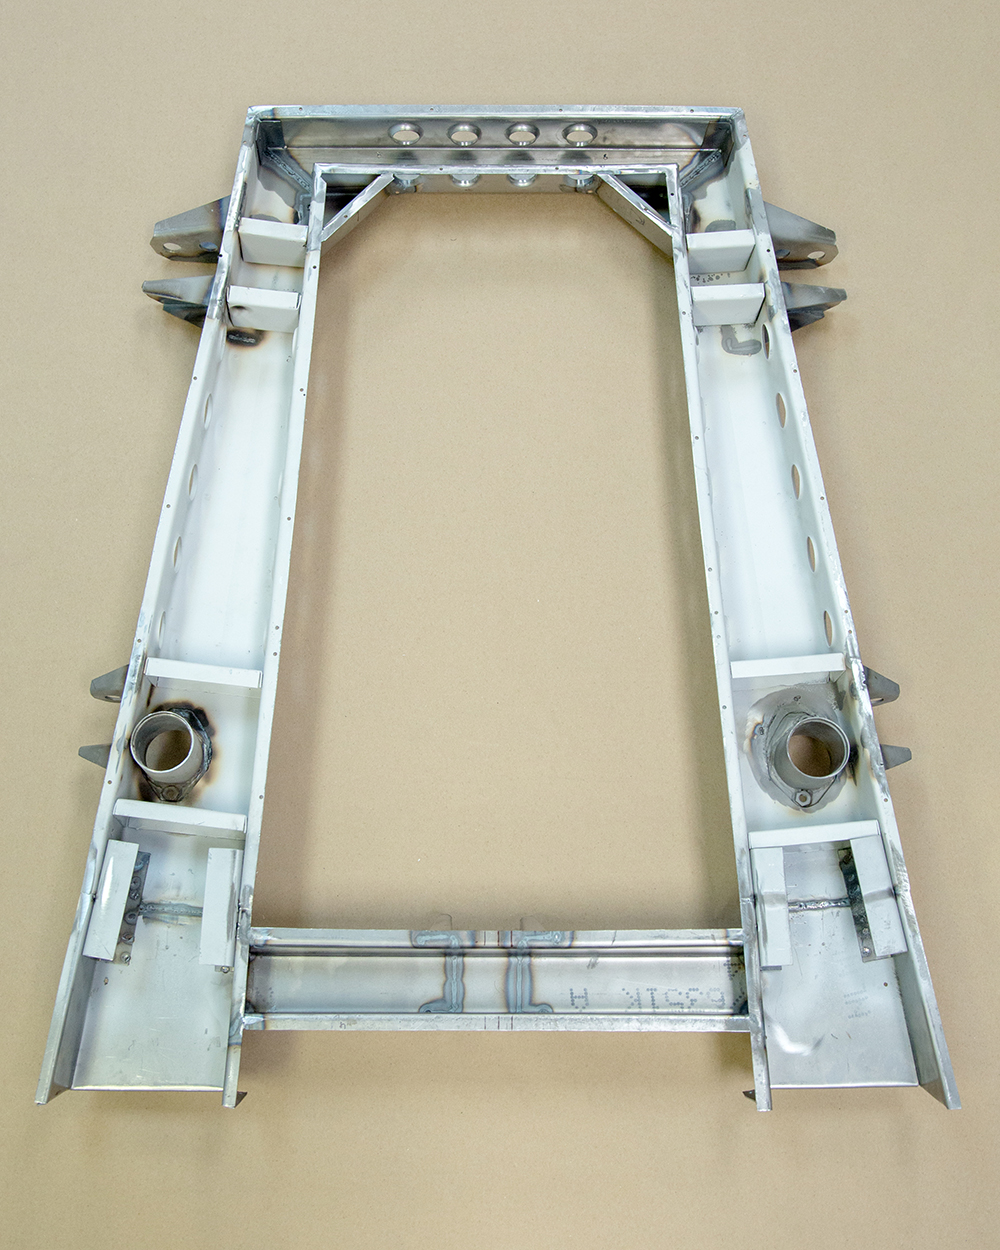 |
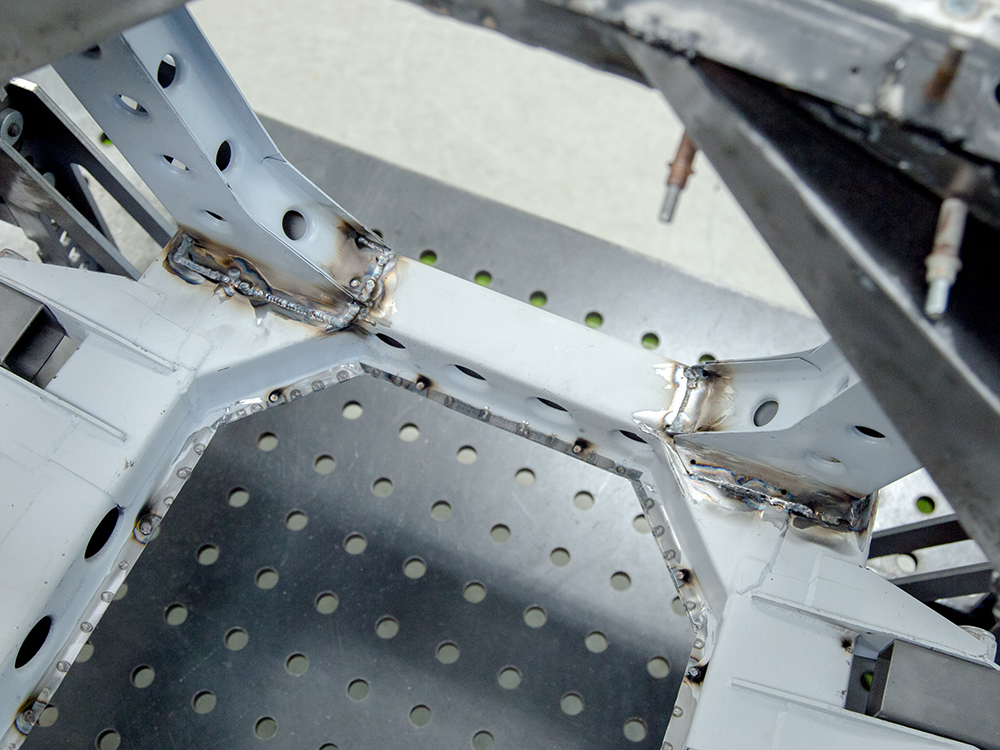
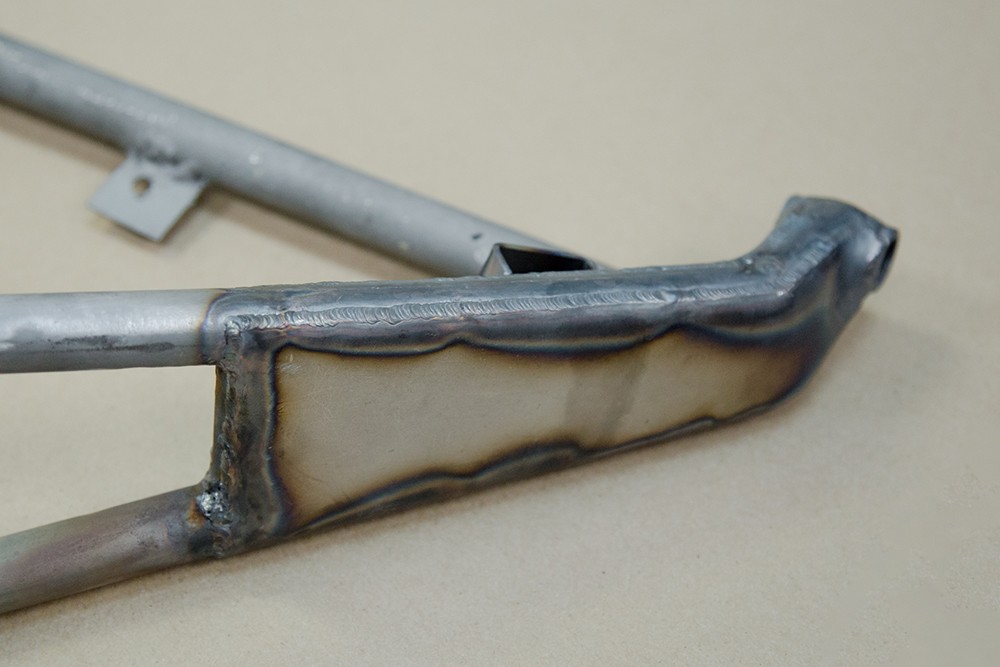
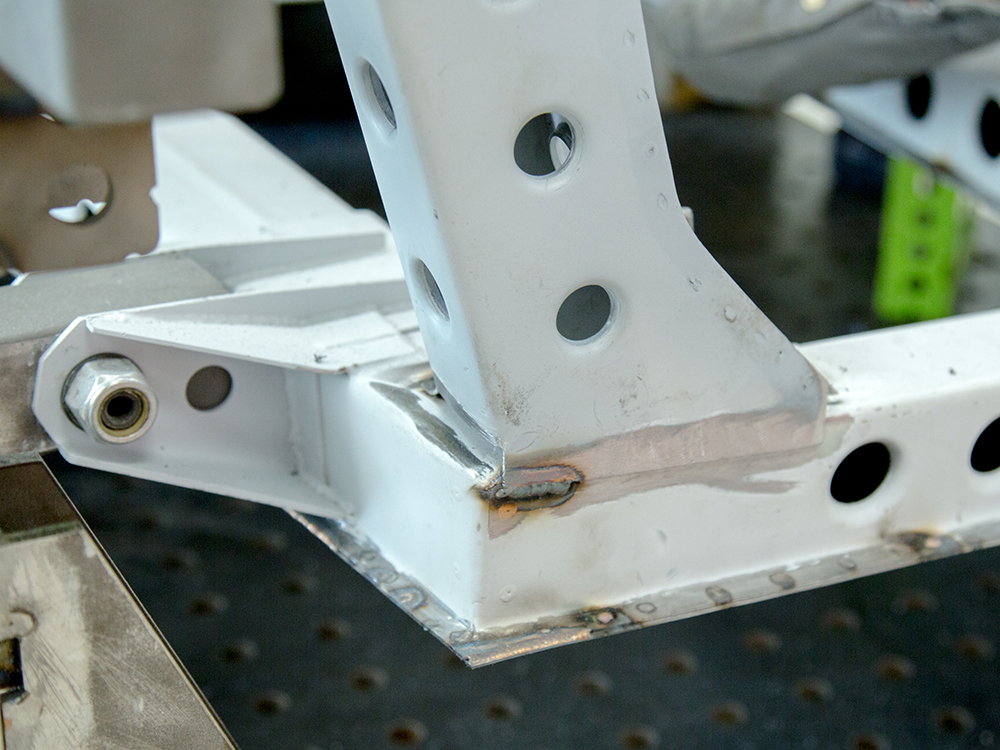
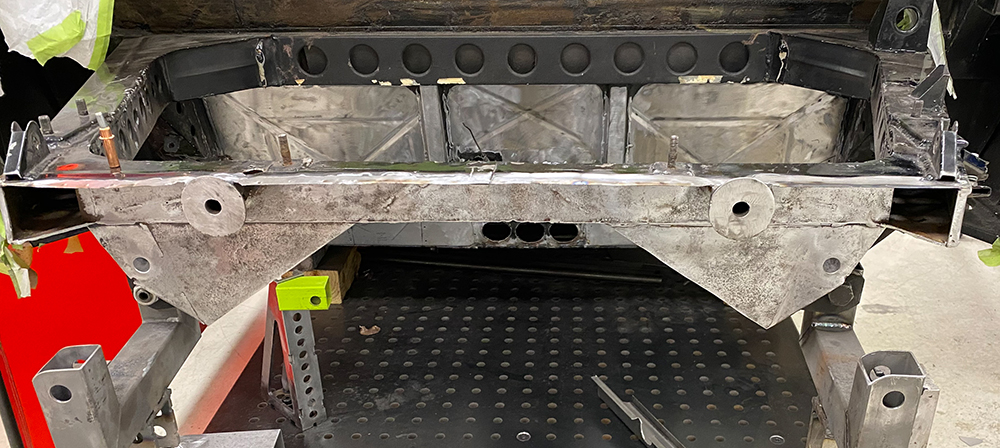
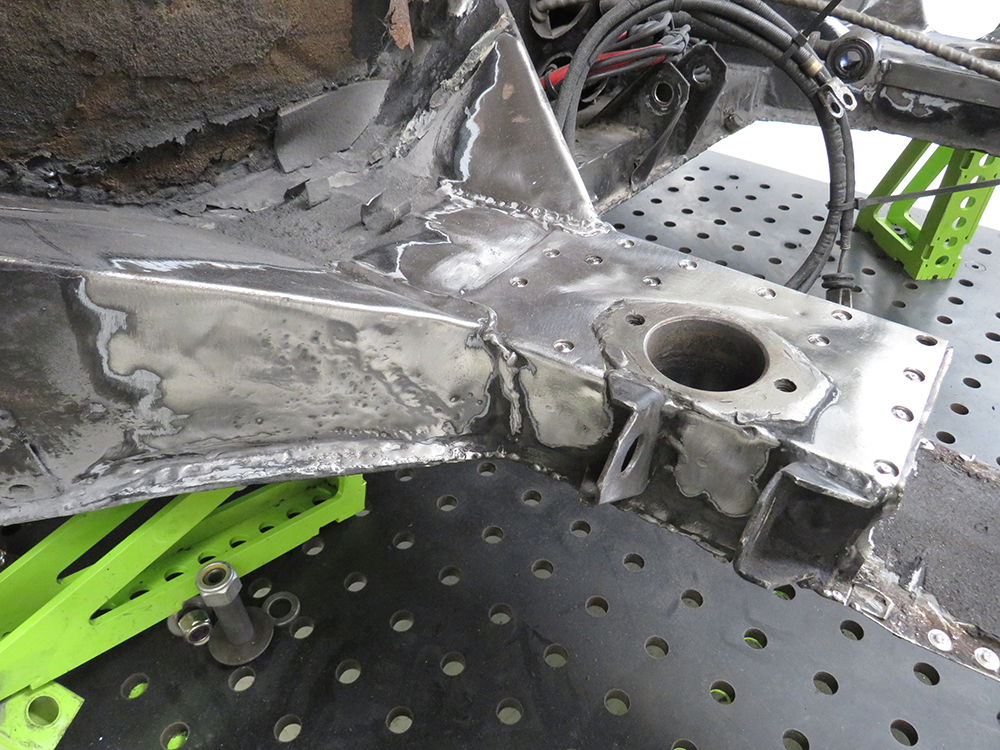
| Main lower structure now mostly welded
together |
|
 |
 |
 |
 |
 |
 |
 |
 |
| Fabricating the close out panels for the
bottom side of the lower chassis rails |
Machining strengthening gusset beading on
the new lower panels |
 |
 |
| Beading replicates factory panel |
TIG welding the lower closing panels
together while attached to frame rails with clekos |
 |
 |
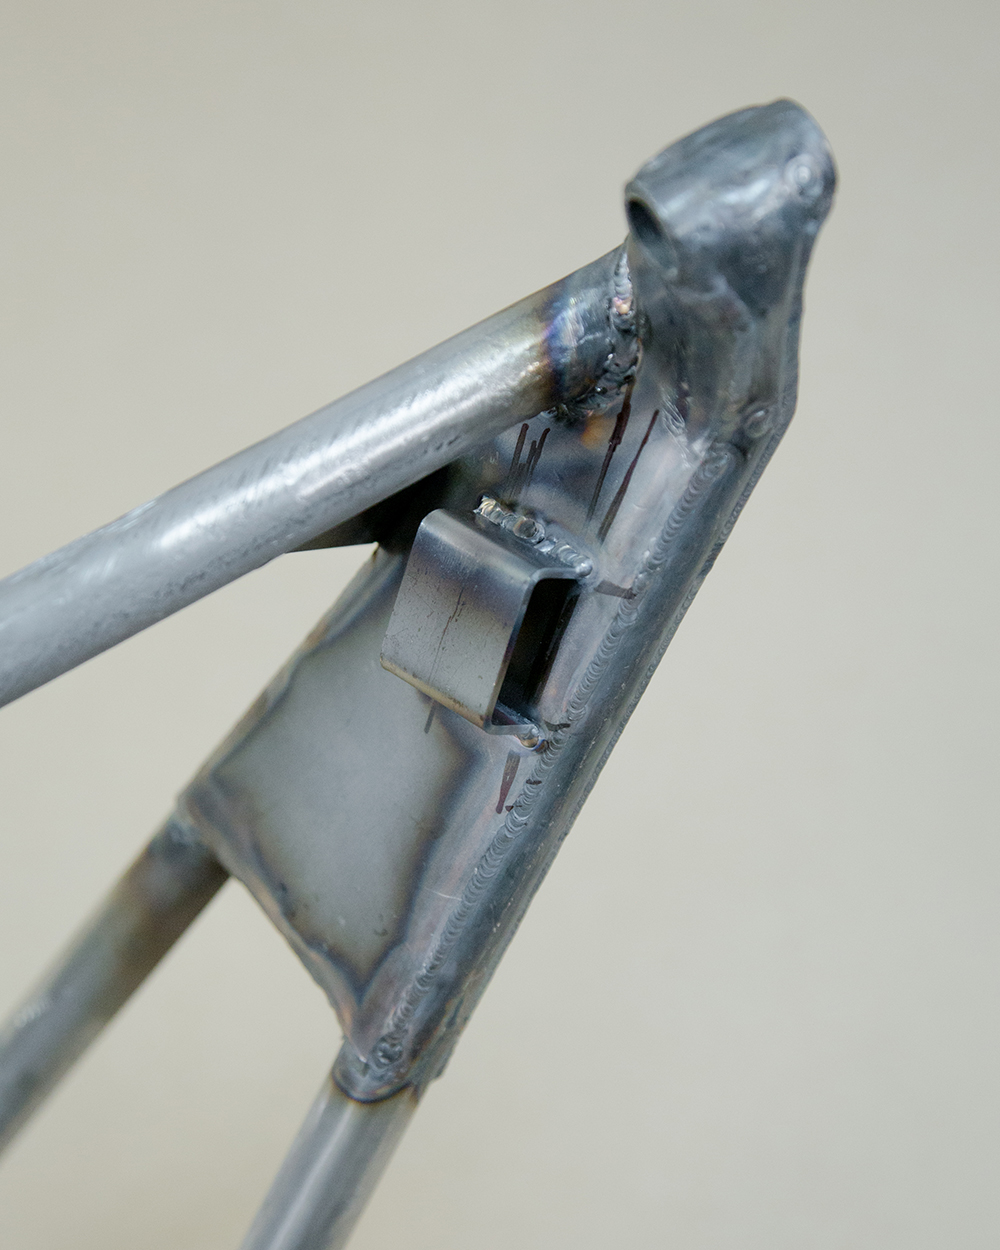
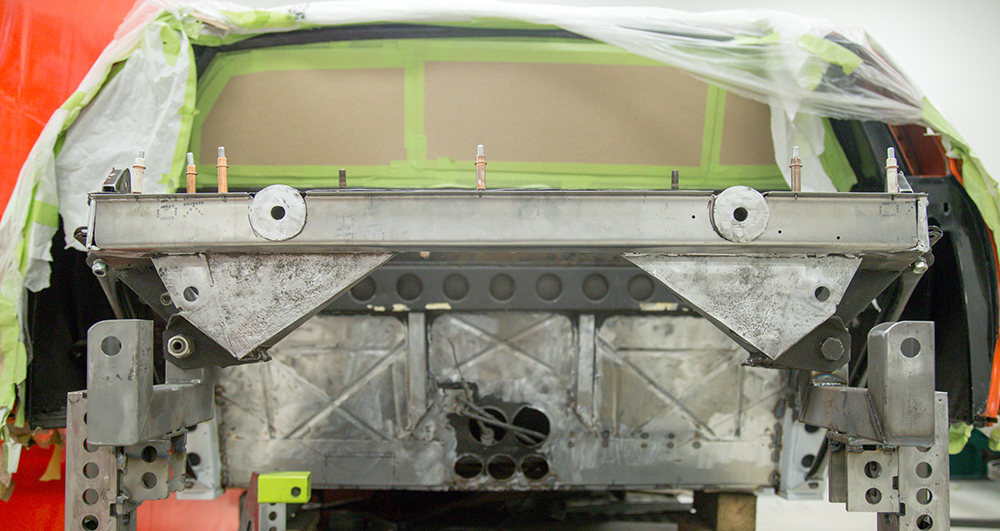
| Almost ready to weld up to the rear
bulkhead |
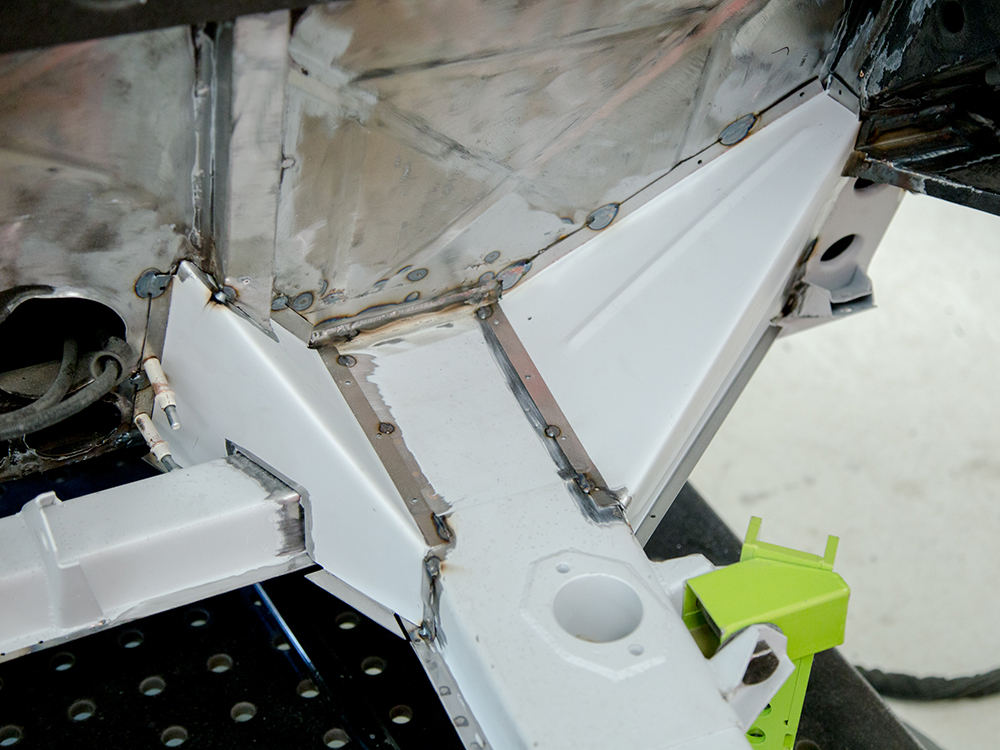
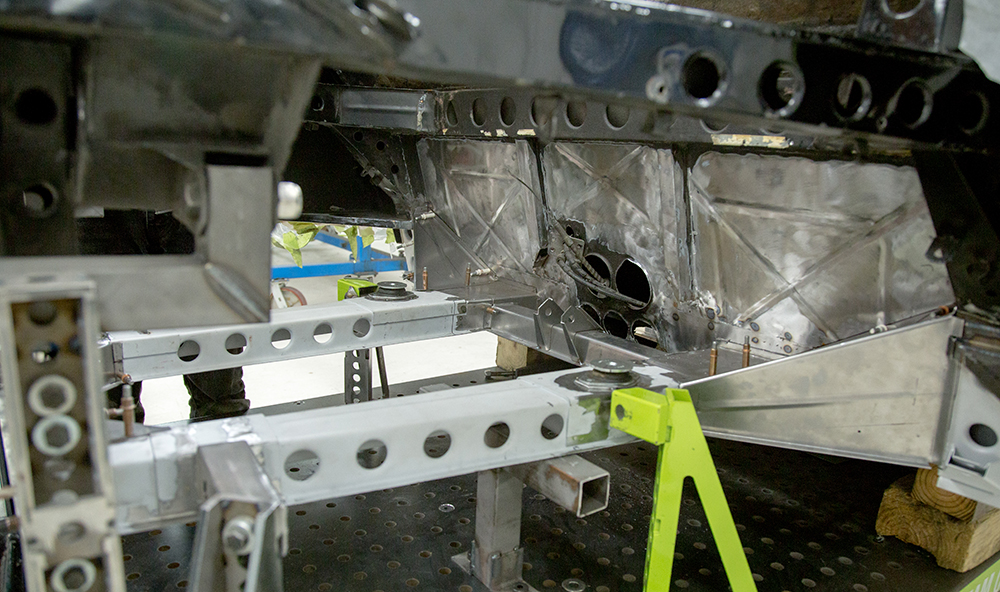
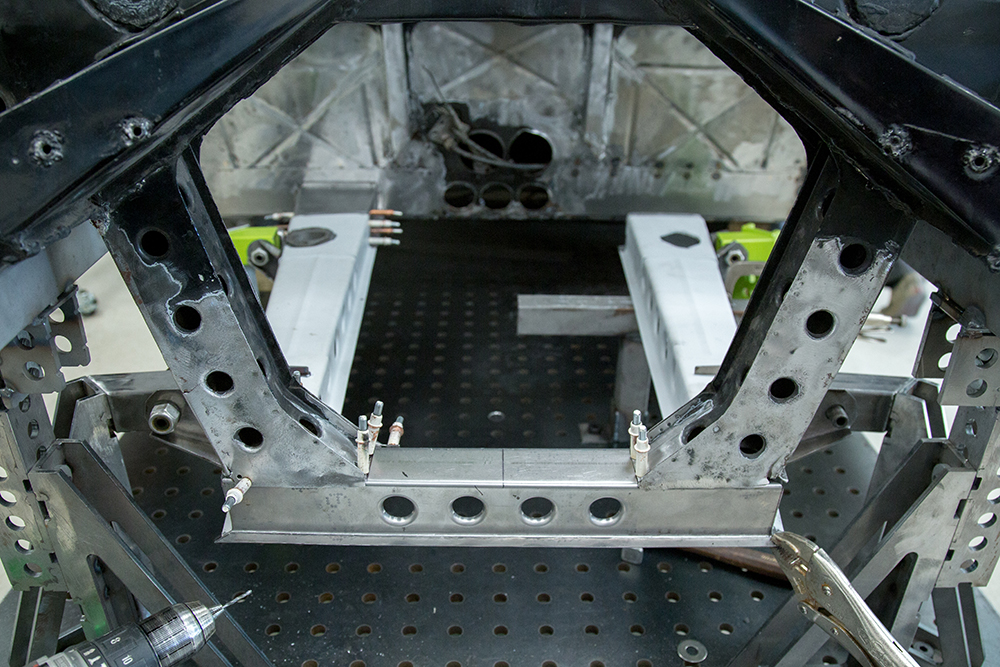
Andy has begun trial fitting the newly fabricated rear frame rails having welded the new vertical frame struts in place on the bulkhead.
 |
 |
 |
 |
 |
 |
 |
 |
 |
 |
 |
 |
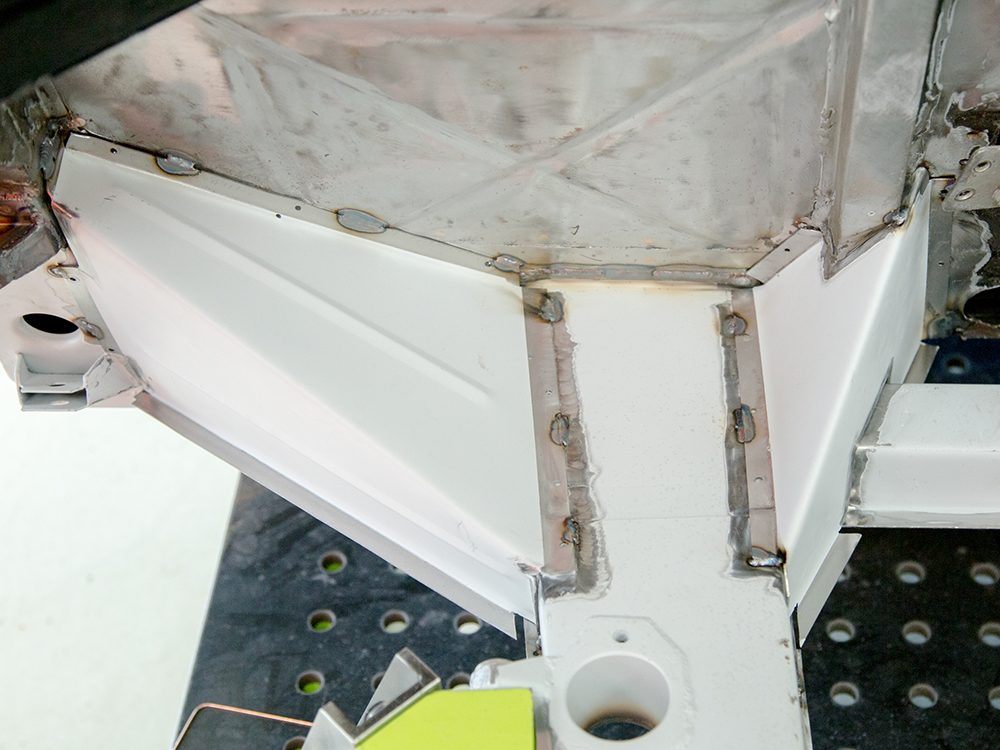
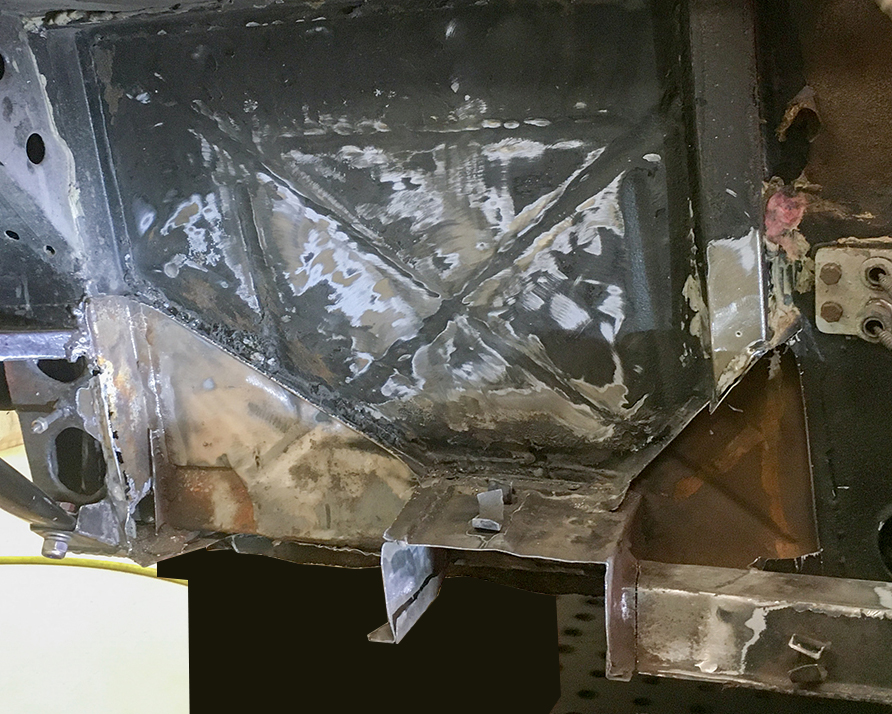
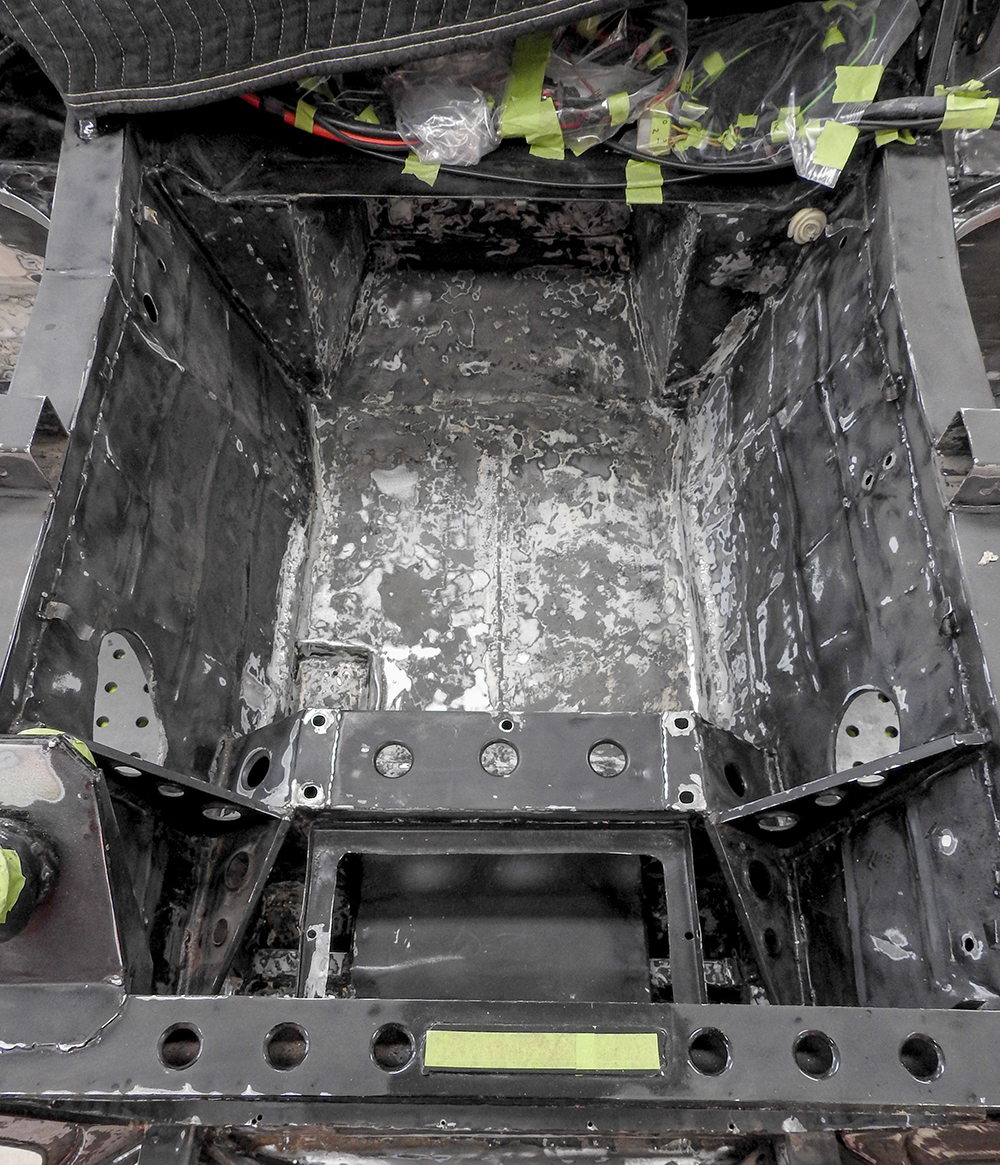
Andy has been making great progress with the rear bulkhead repairs/reconstruction.
 |
 |
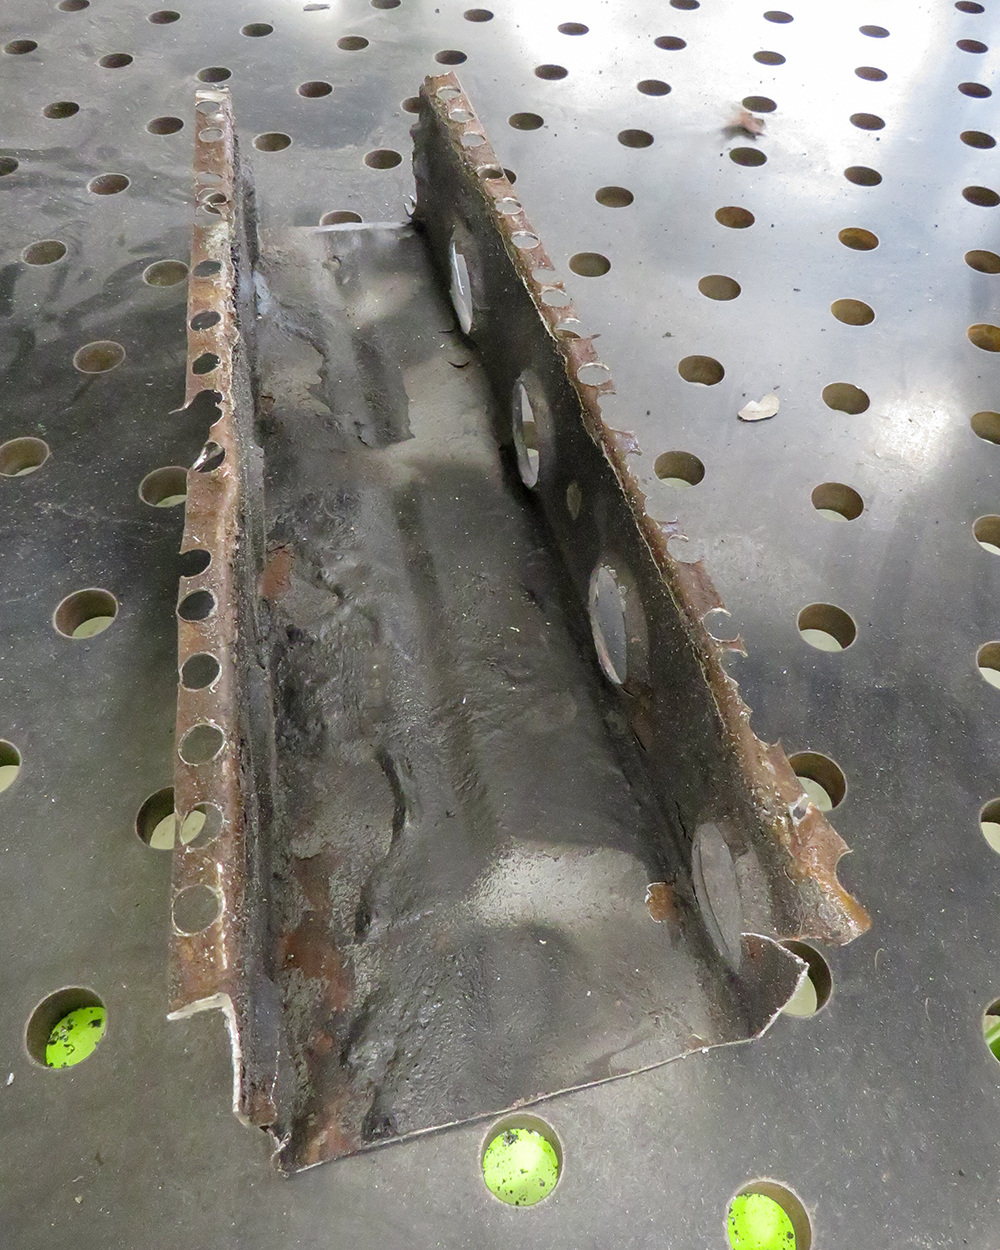
| Lower portion of the rear bulkhead is
rusty and will be replaced |
|
 |
 |
| The box section where chassis side rails
mount will also be reconstructed |
|
 |
 |
 |
 |
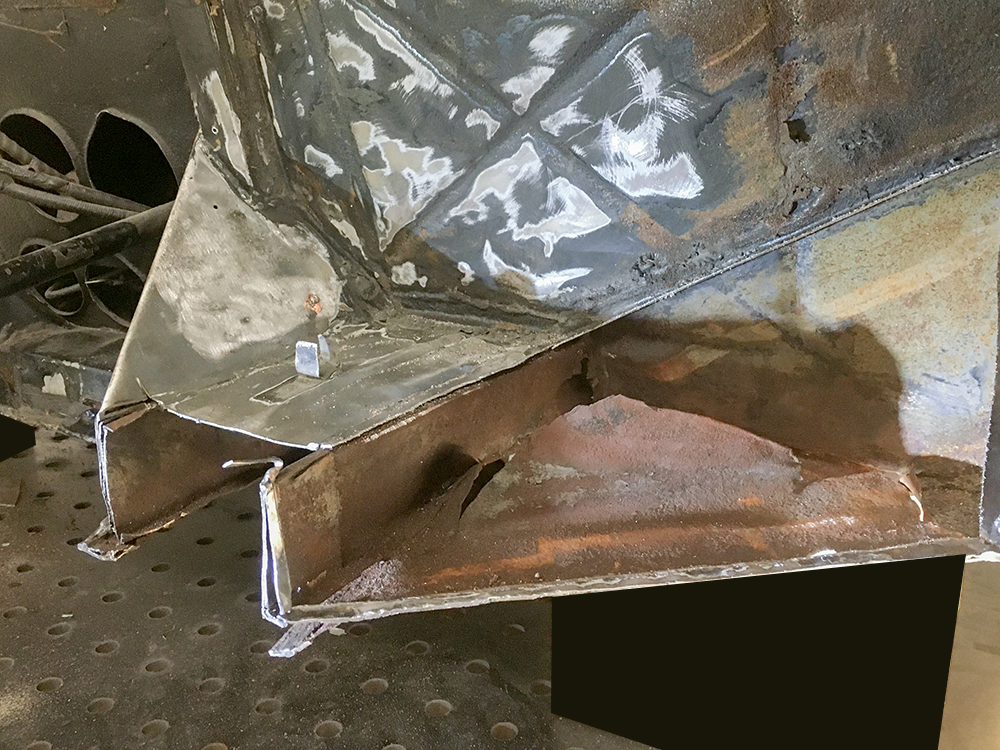
| Corroded metal cut away |
Trial fitting replacement panel |
 |
 |
 |
 |
 |
 |
| Fabricating the vertical side frame struts | |
 |
 |
 |
 |
| Trial fitting the vertical side frame
struts |
|
 |
 |
 |
 |
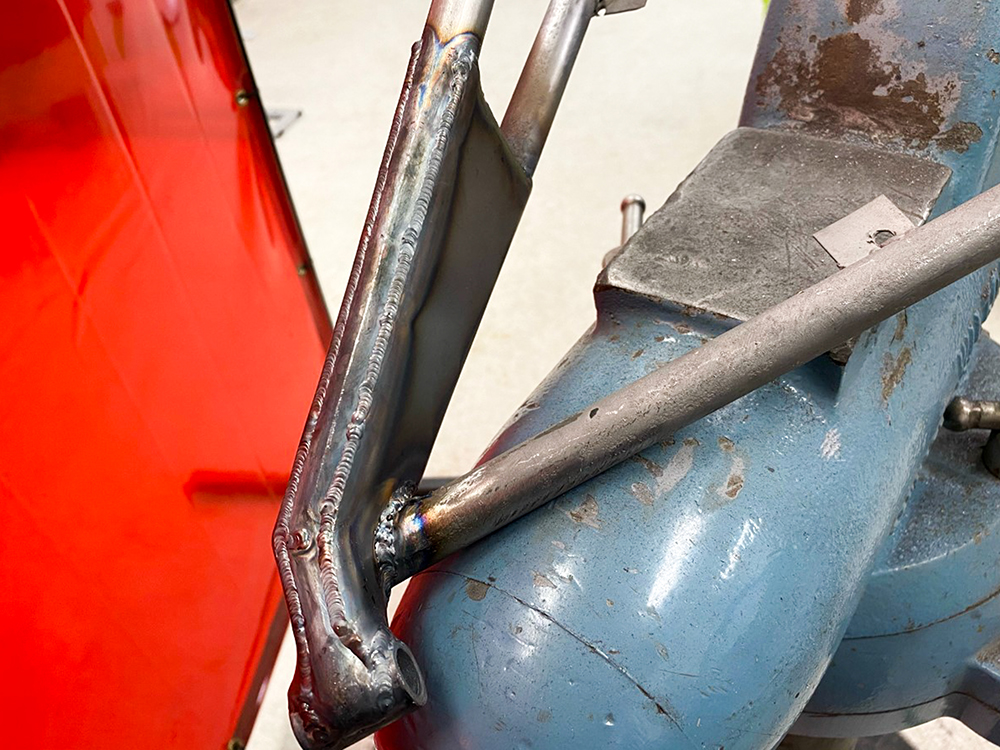
| Welding the vertical frame struts together |
|
 |
 |
| Ready to install |
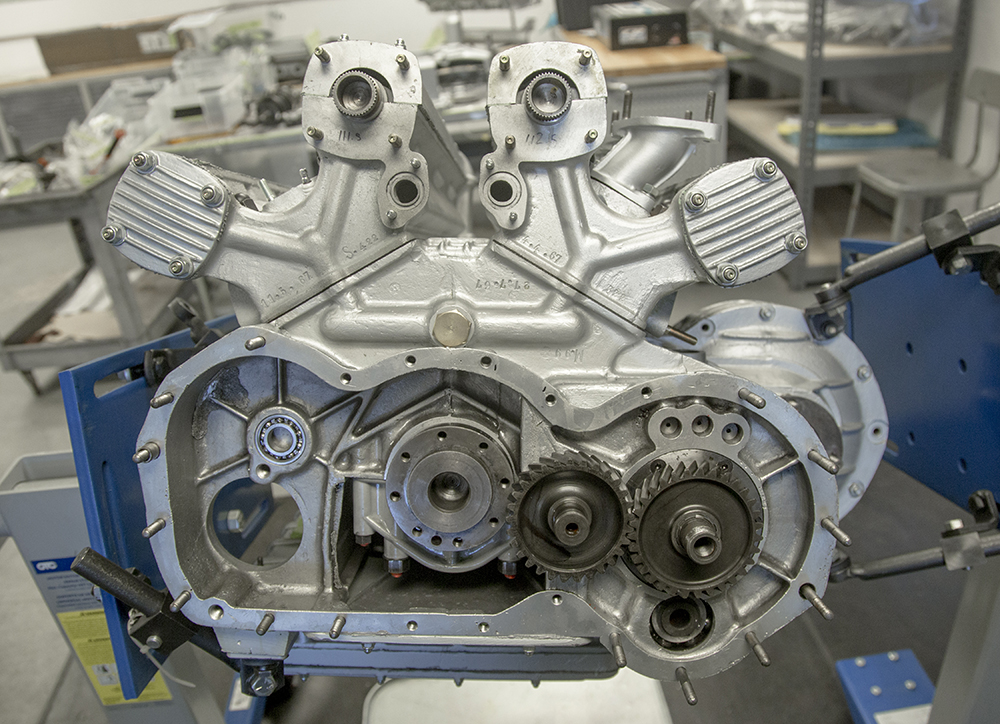
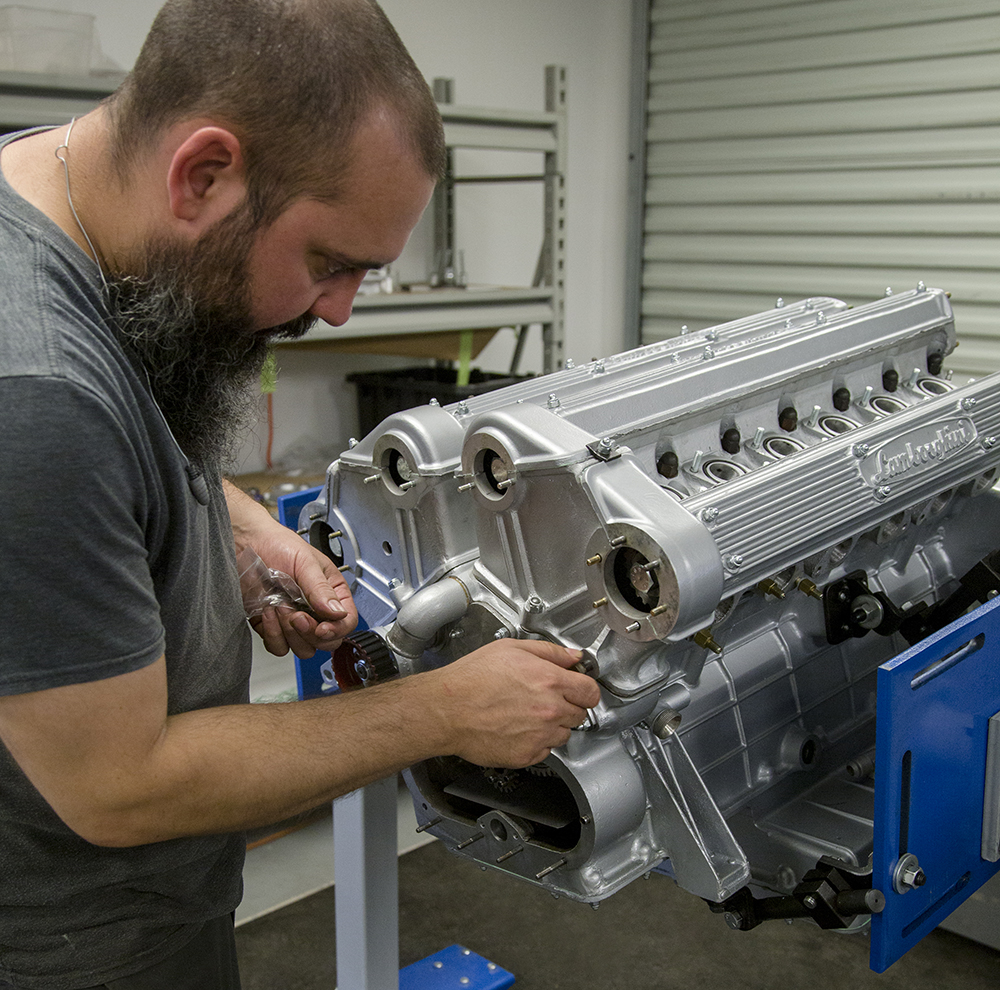
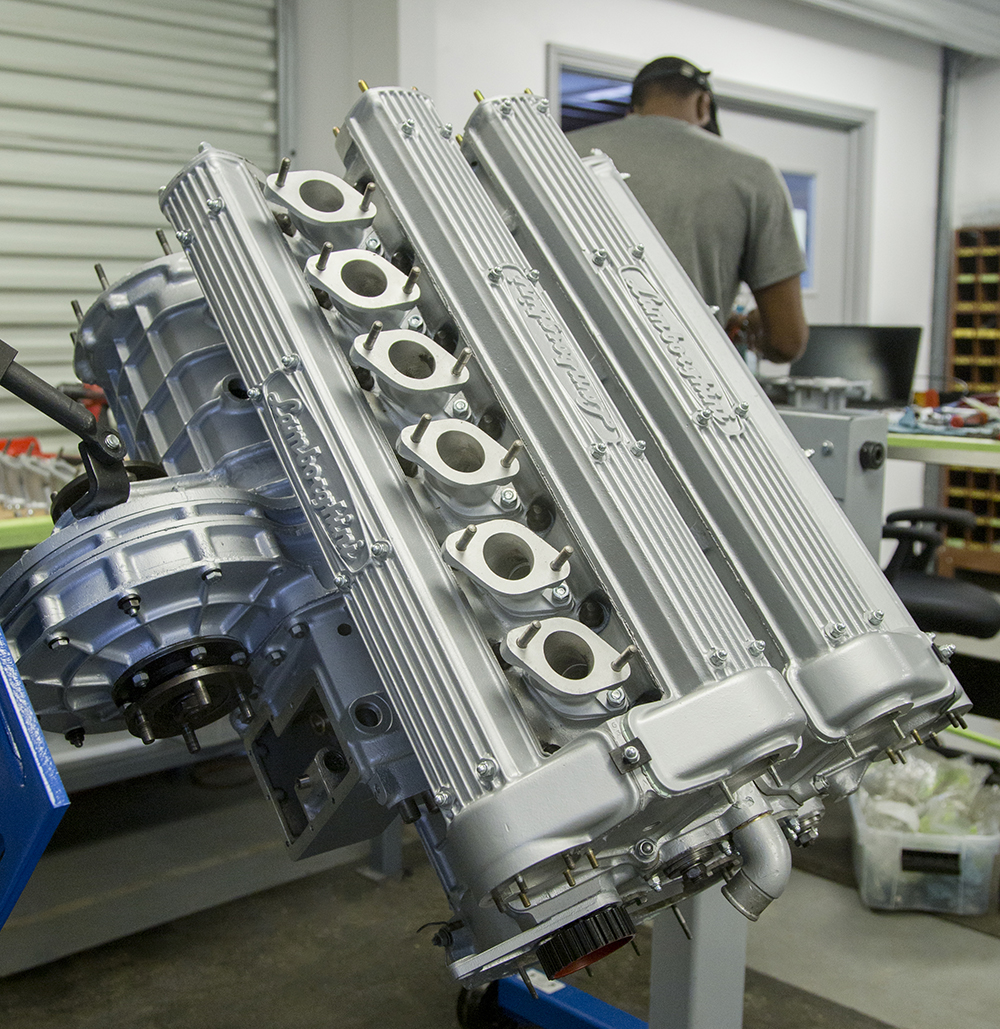
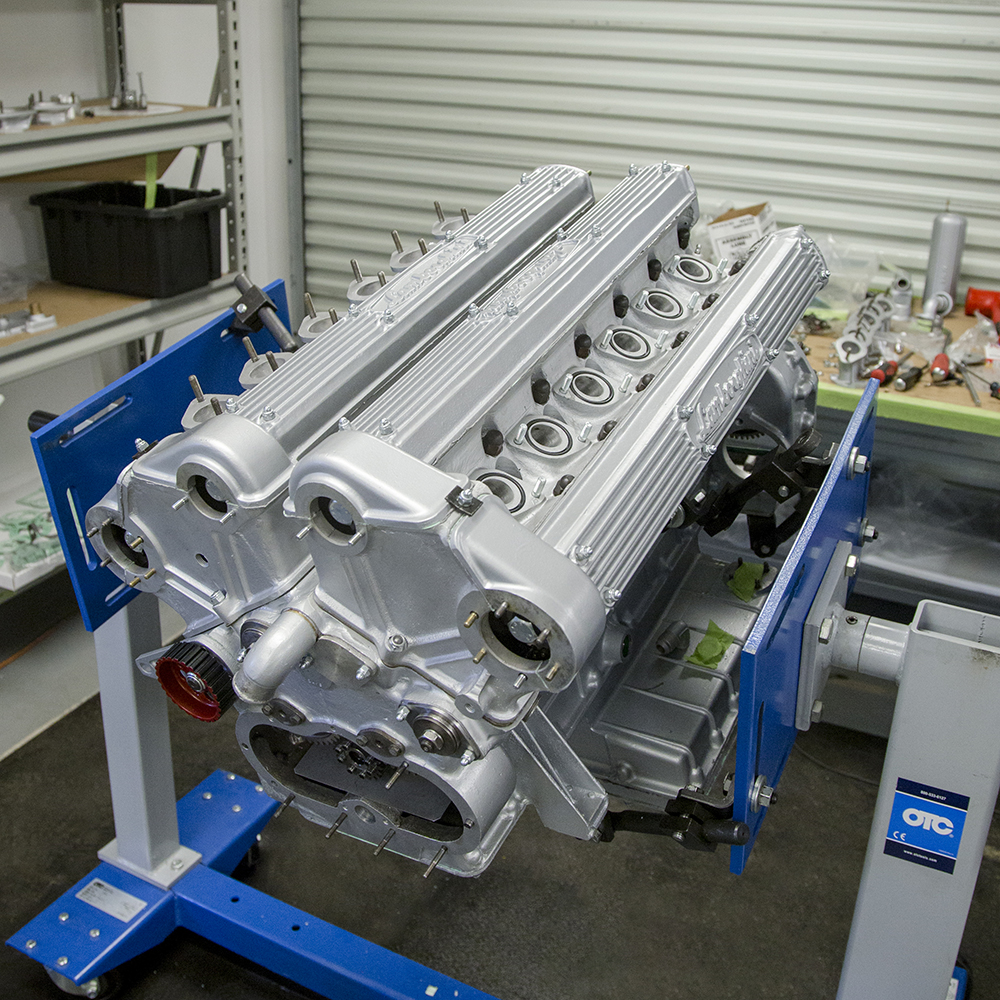
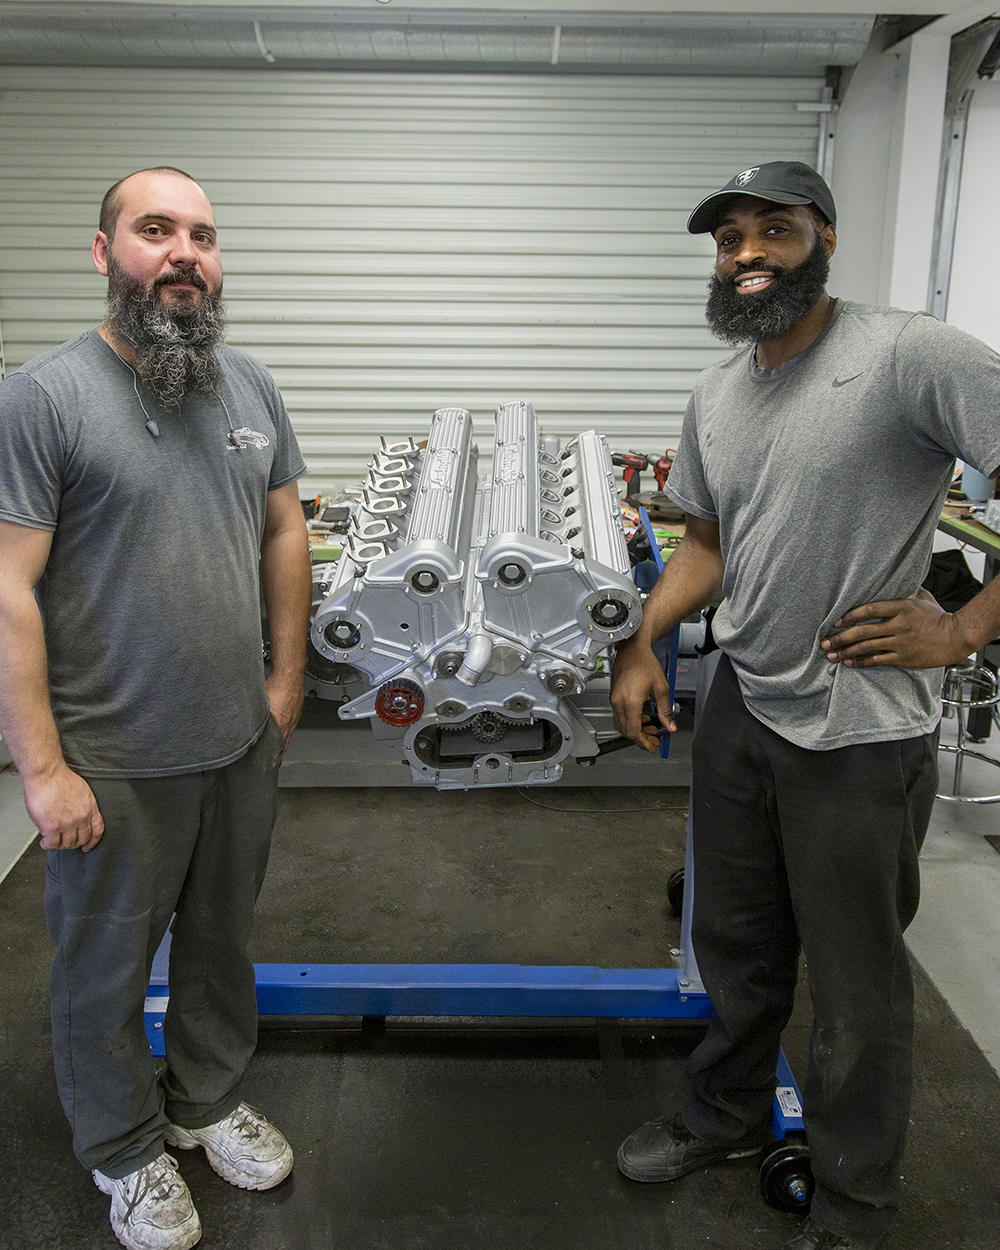
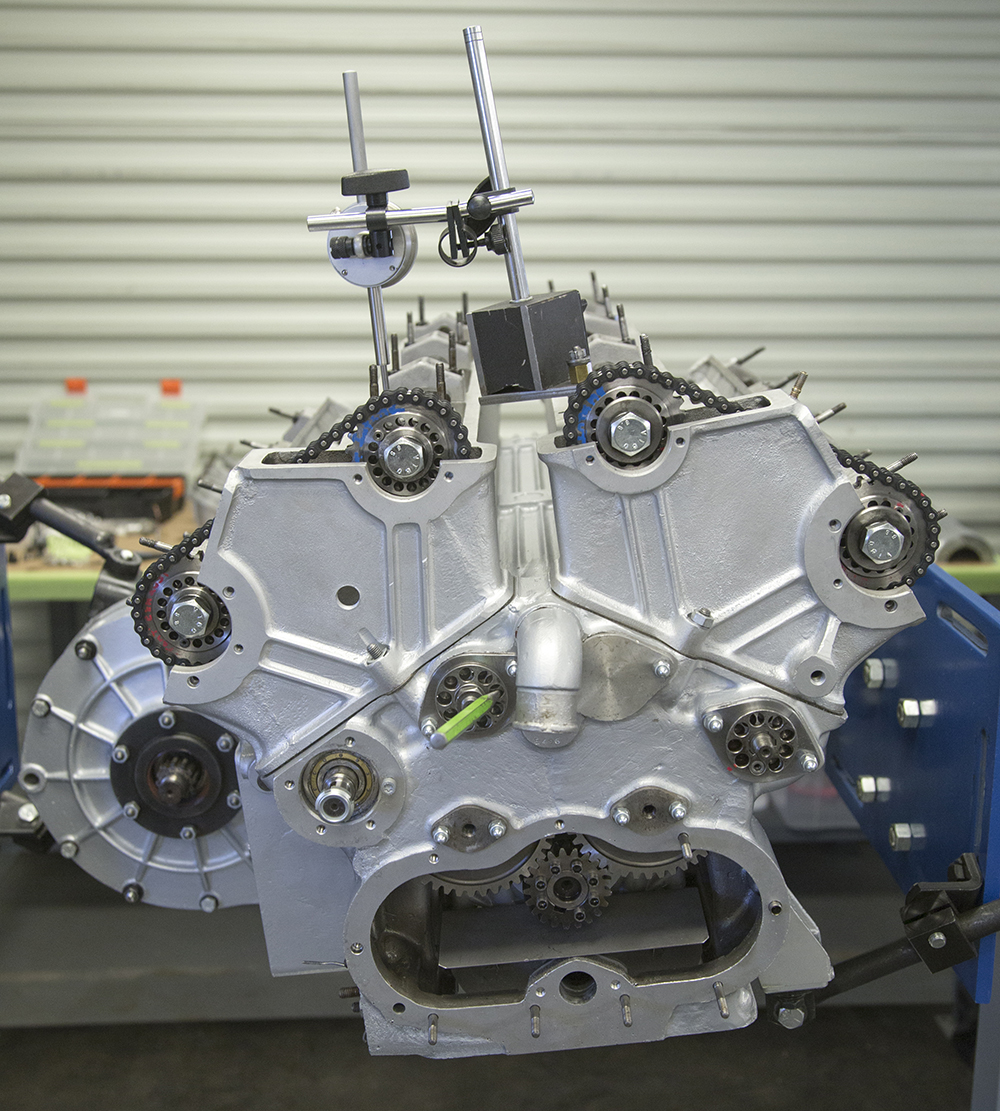
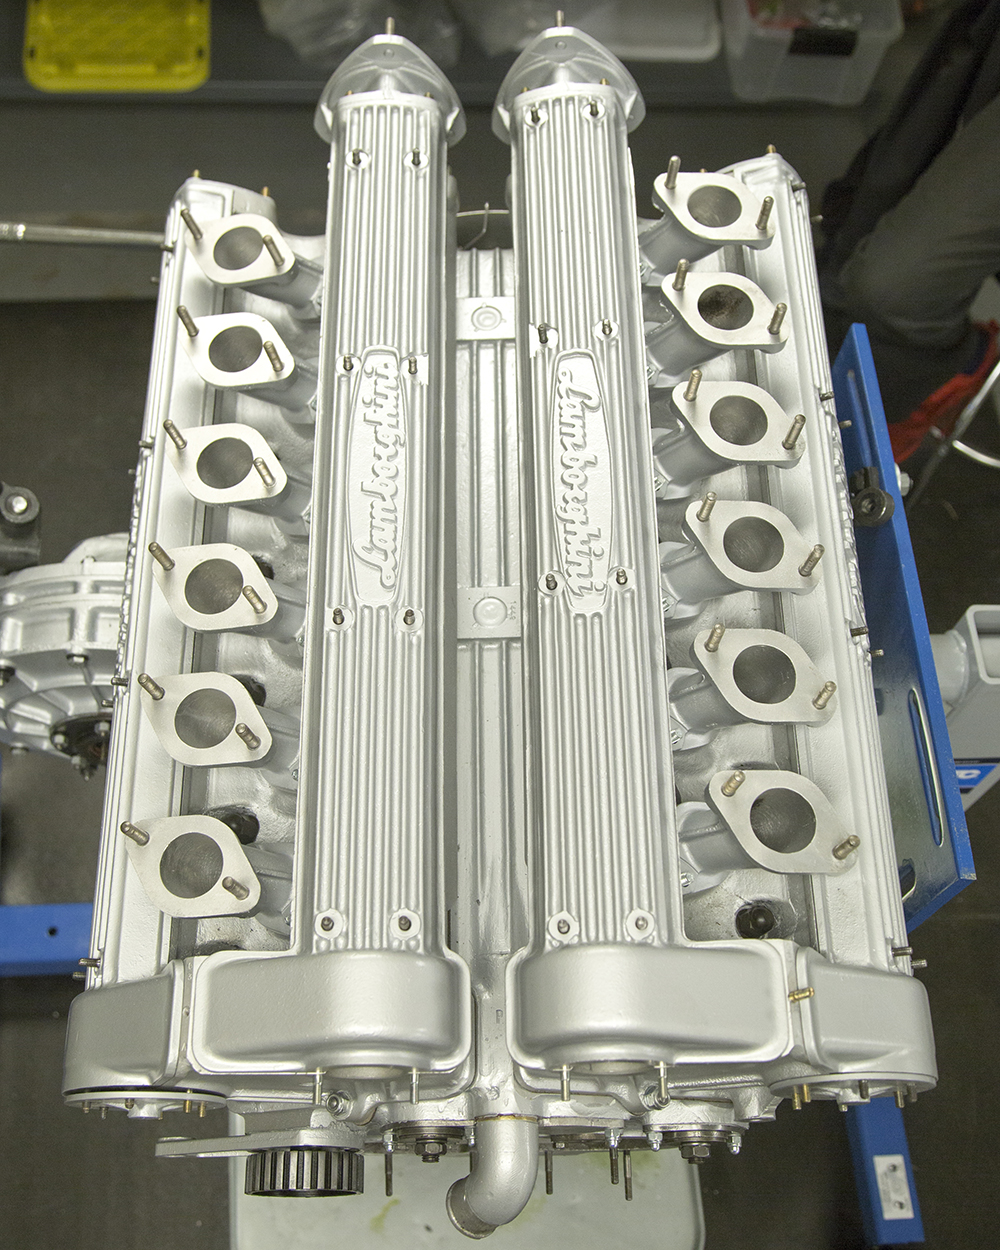
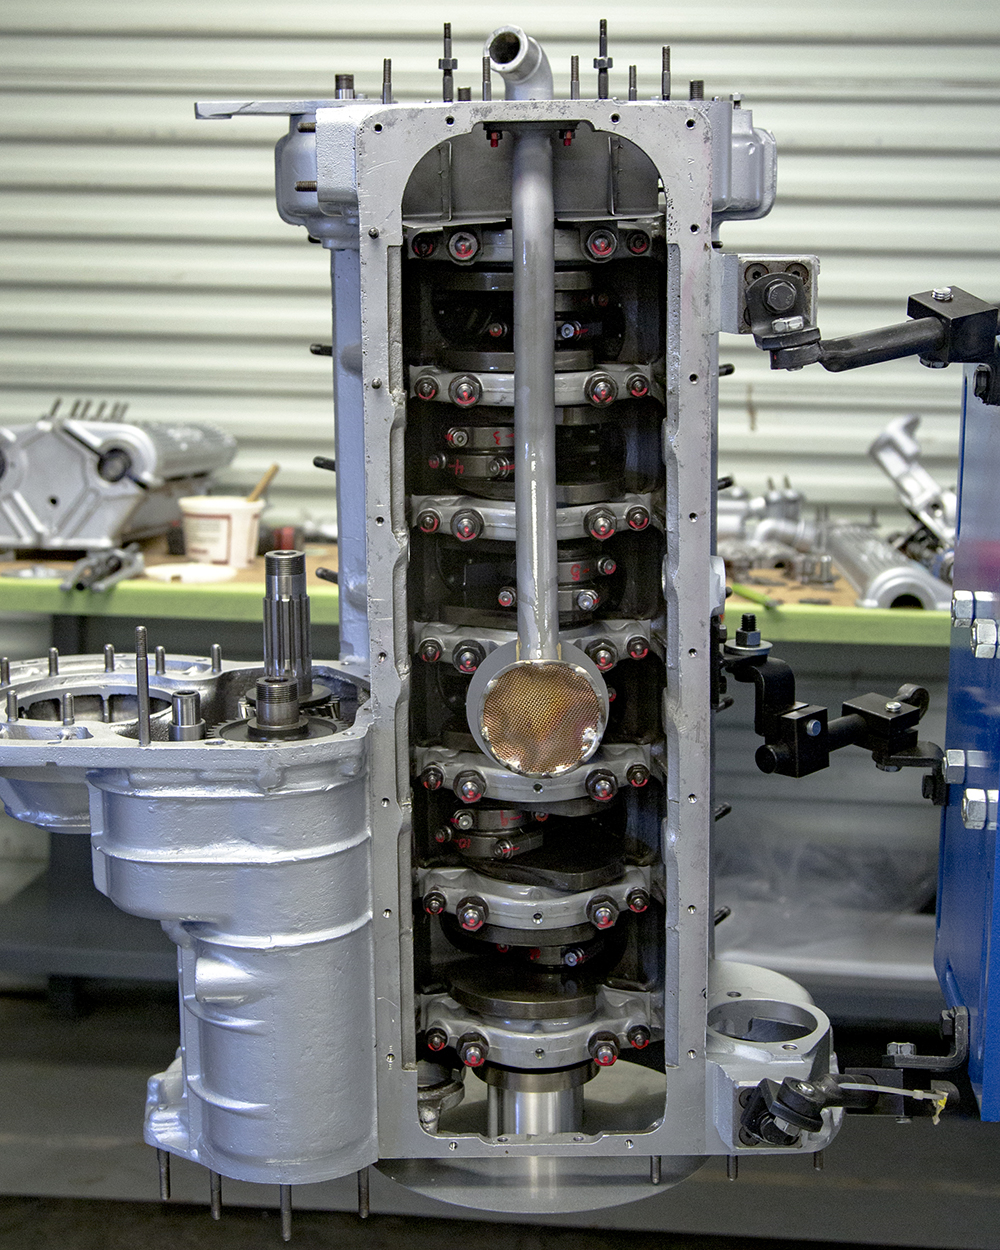
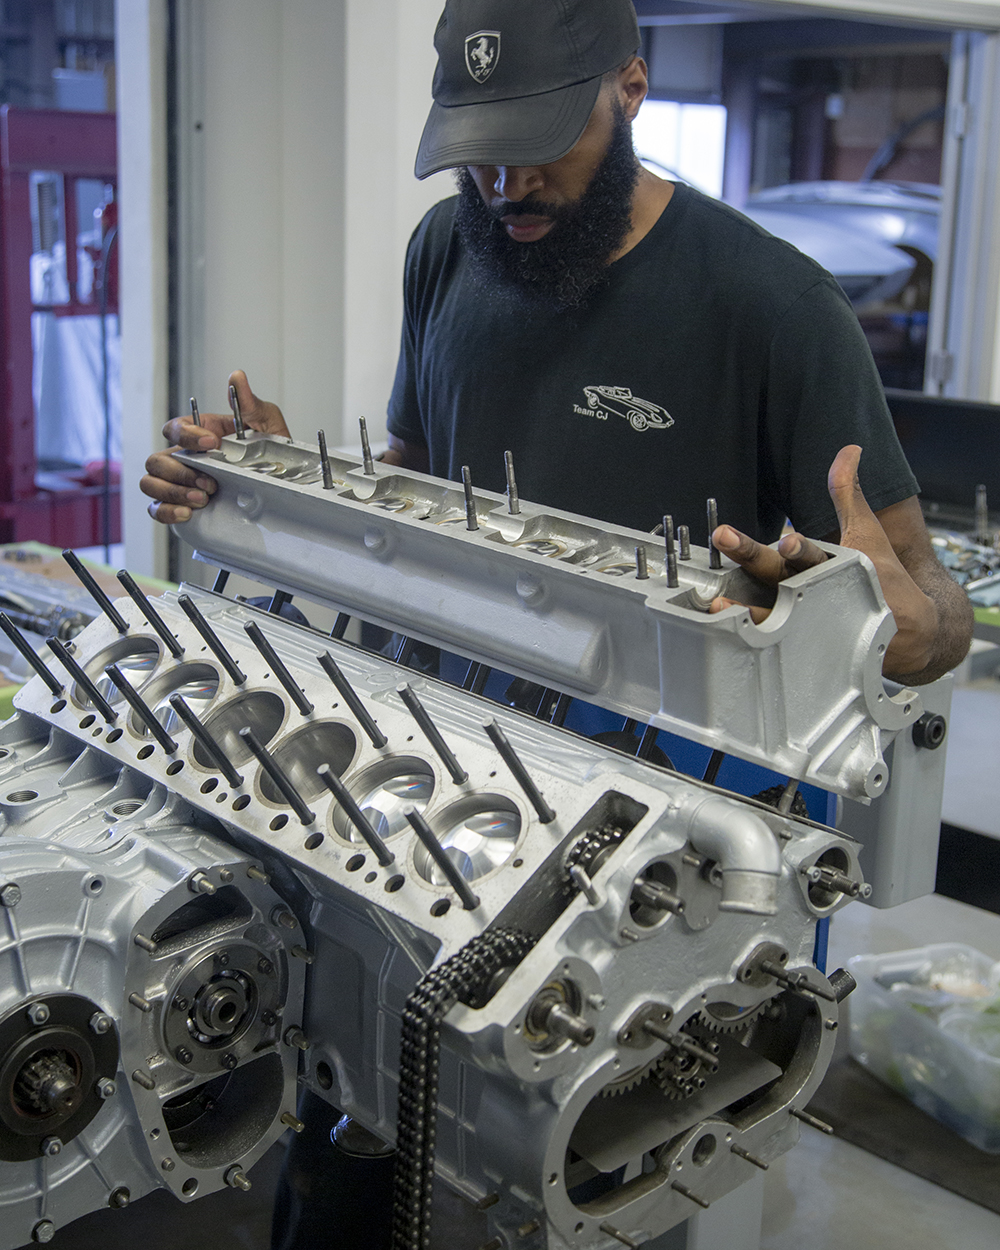
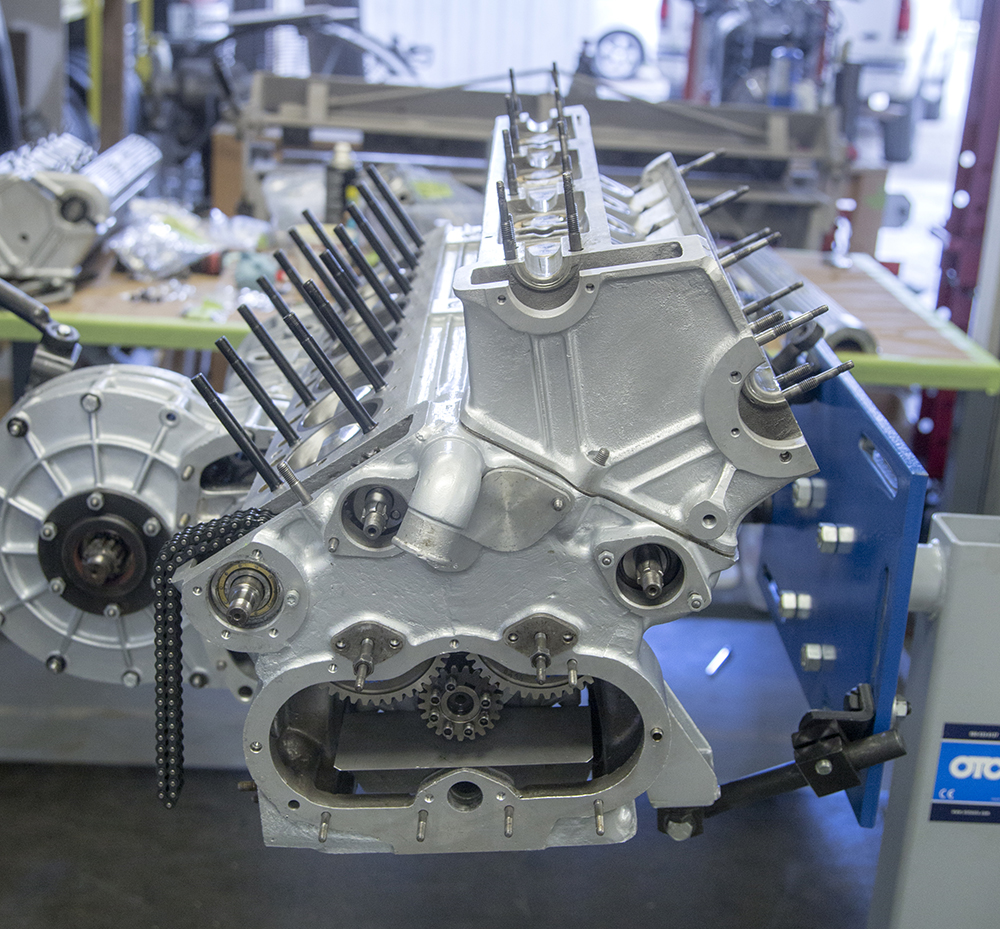
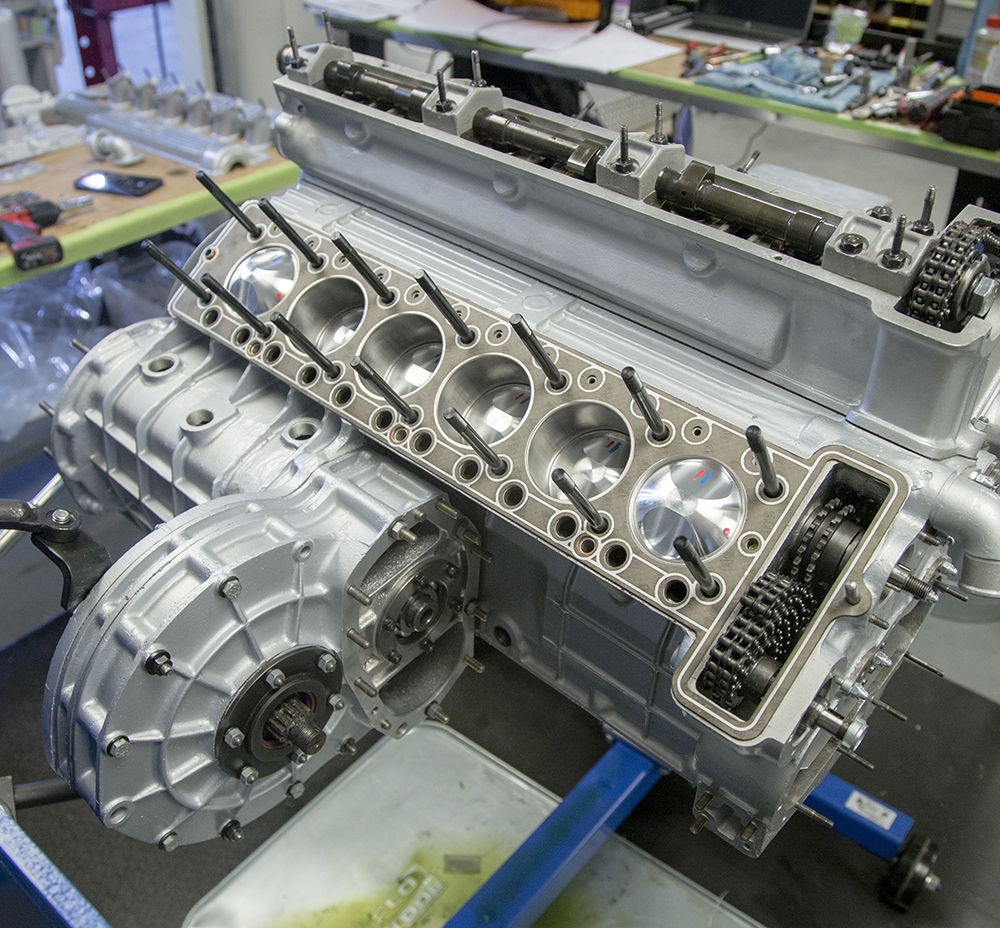
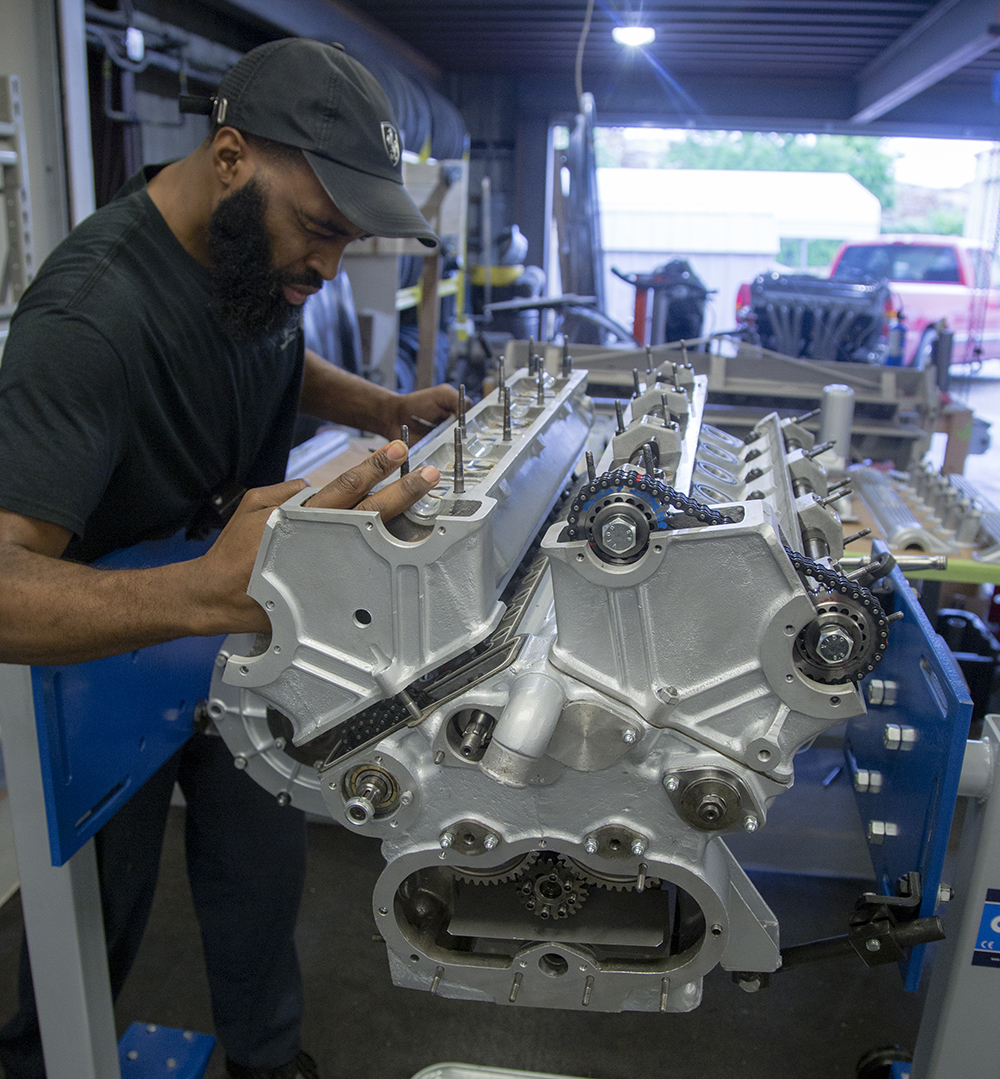
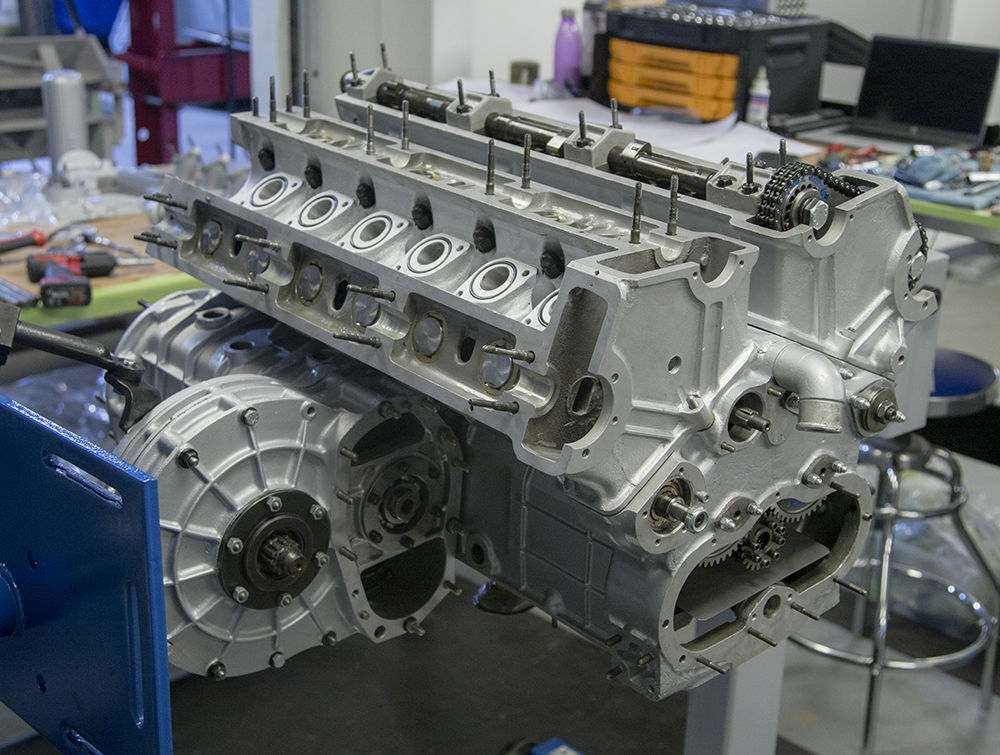
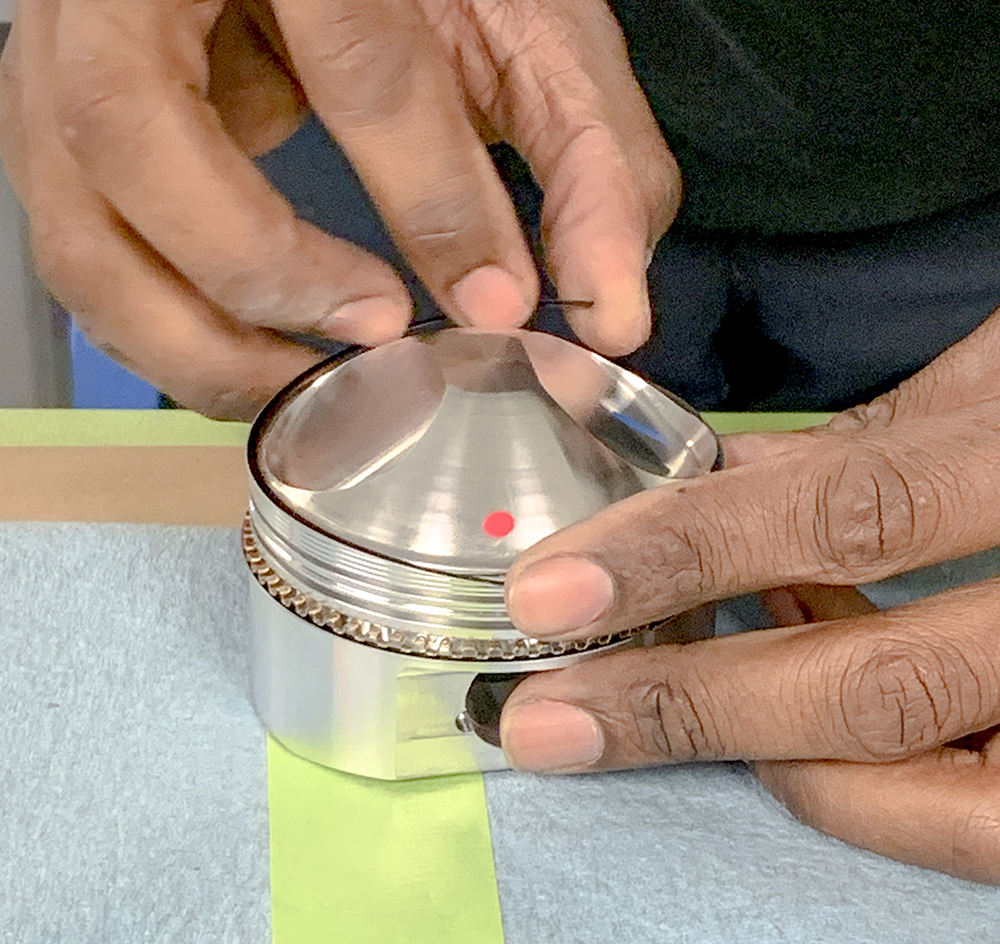
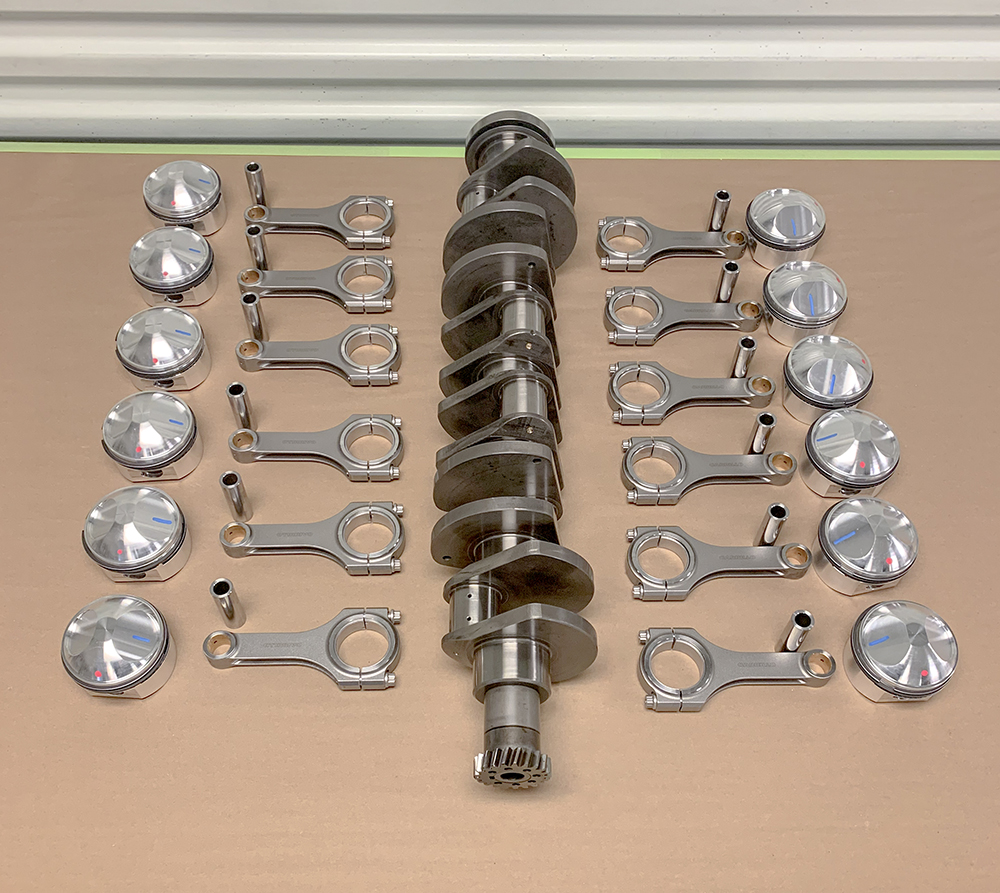
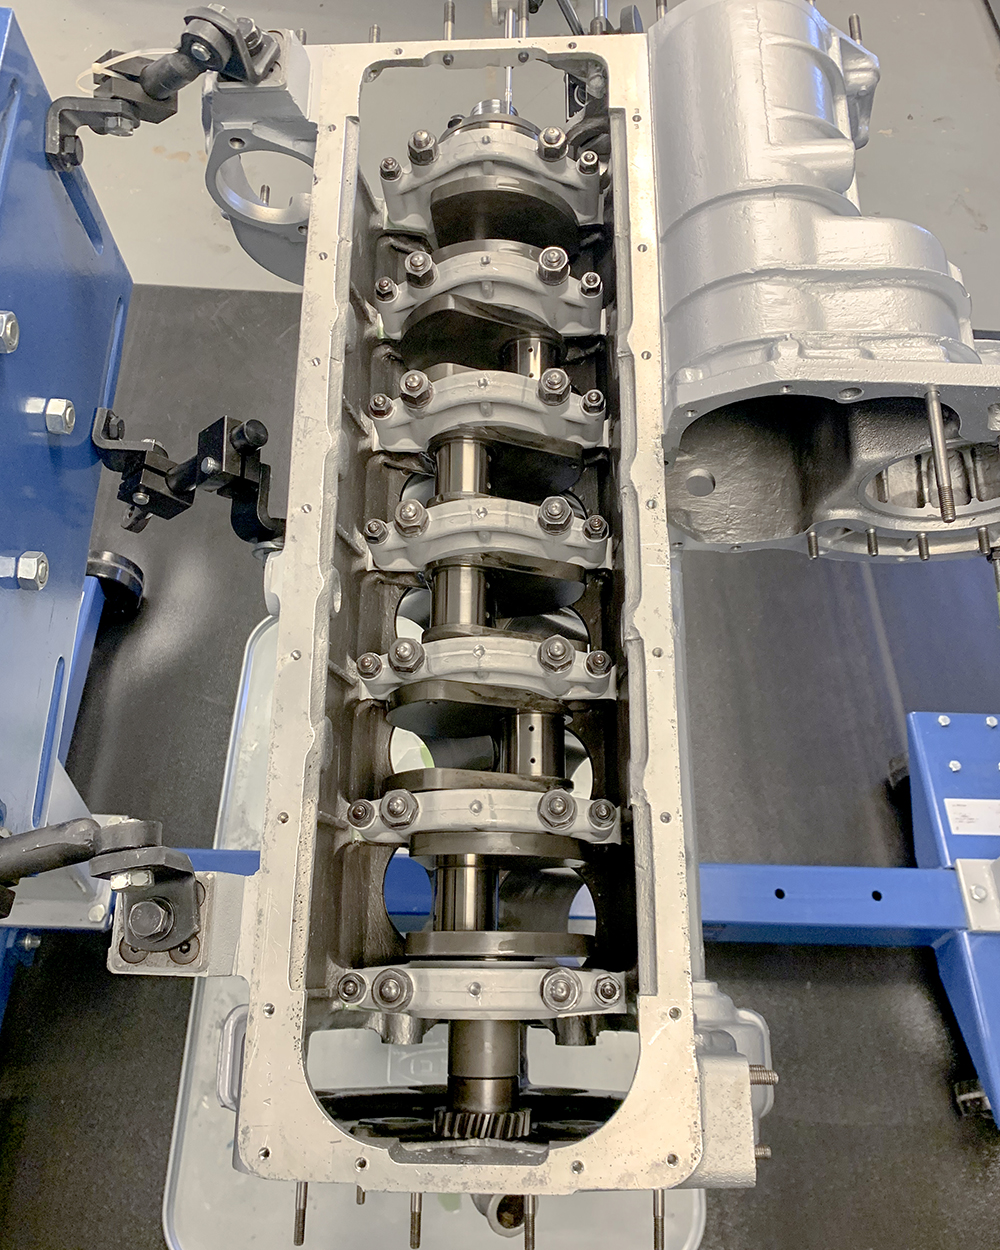
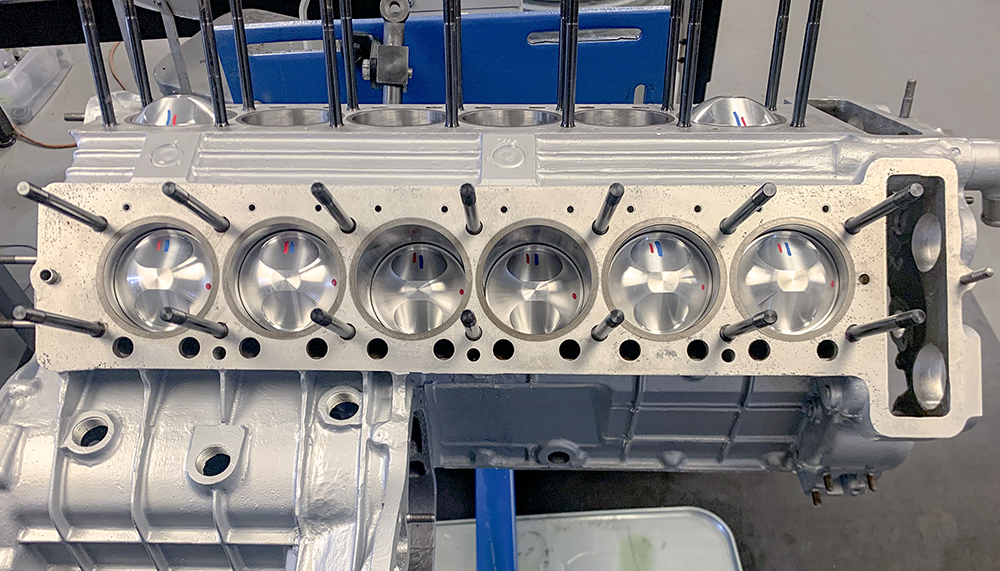
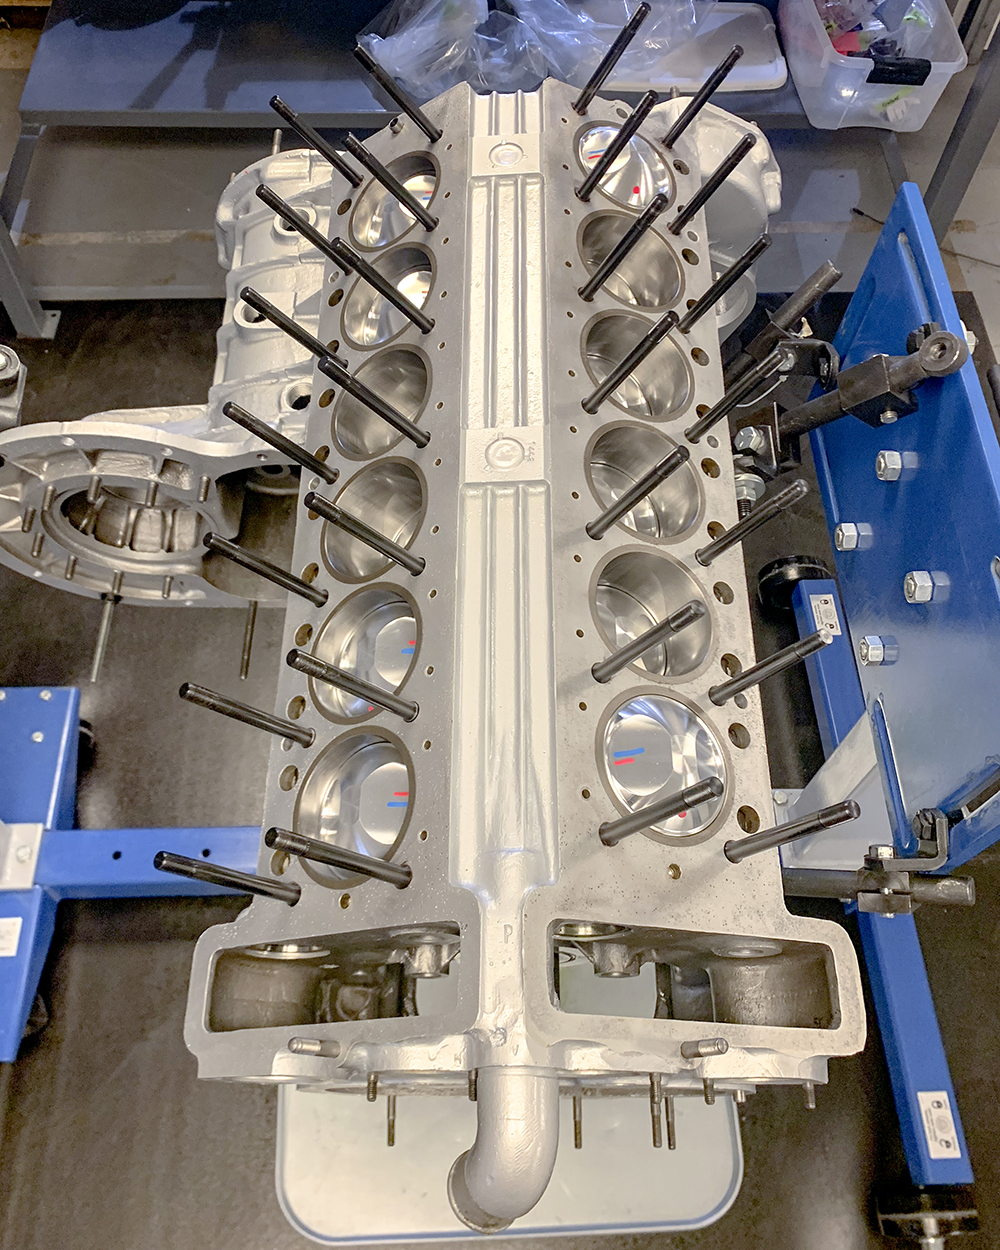
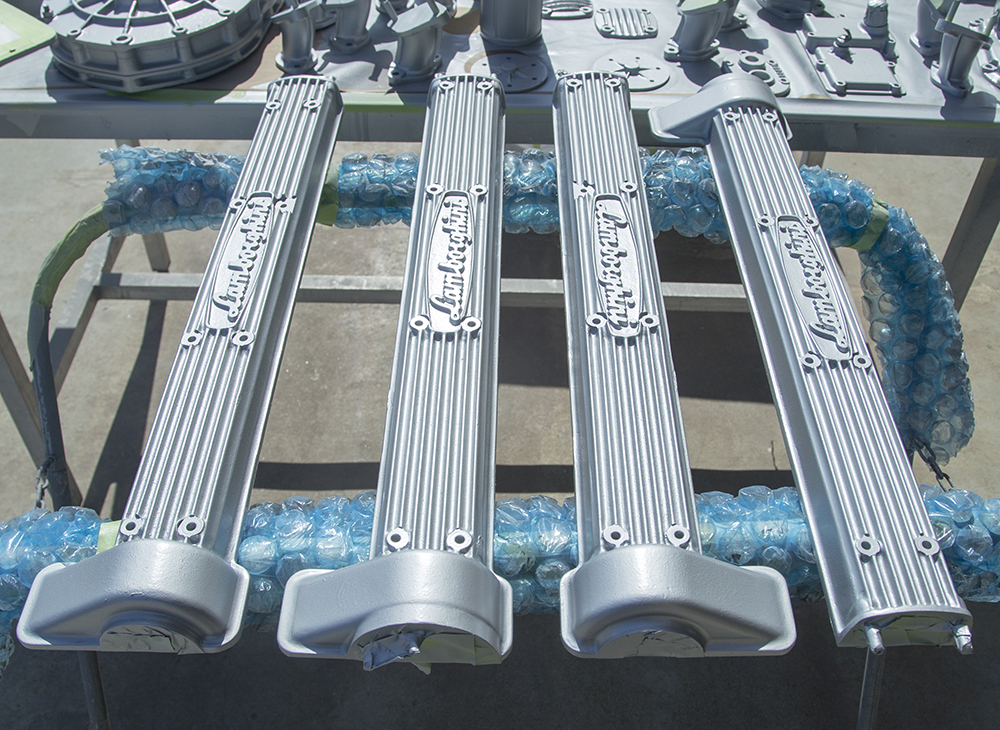
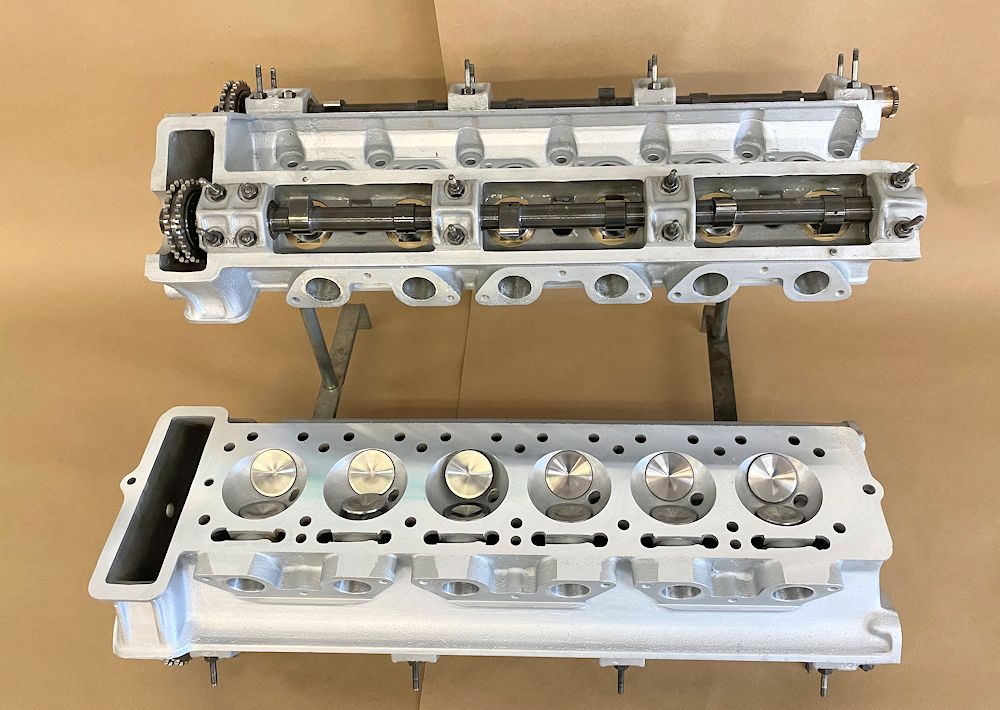
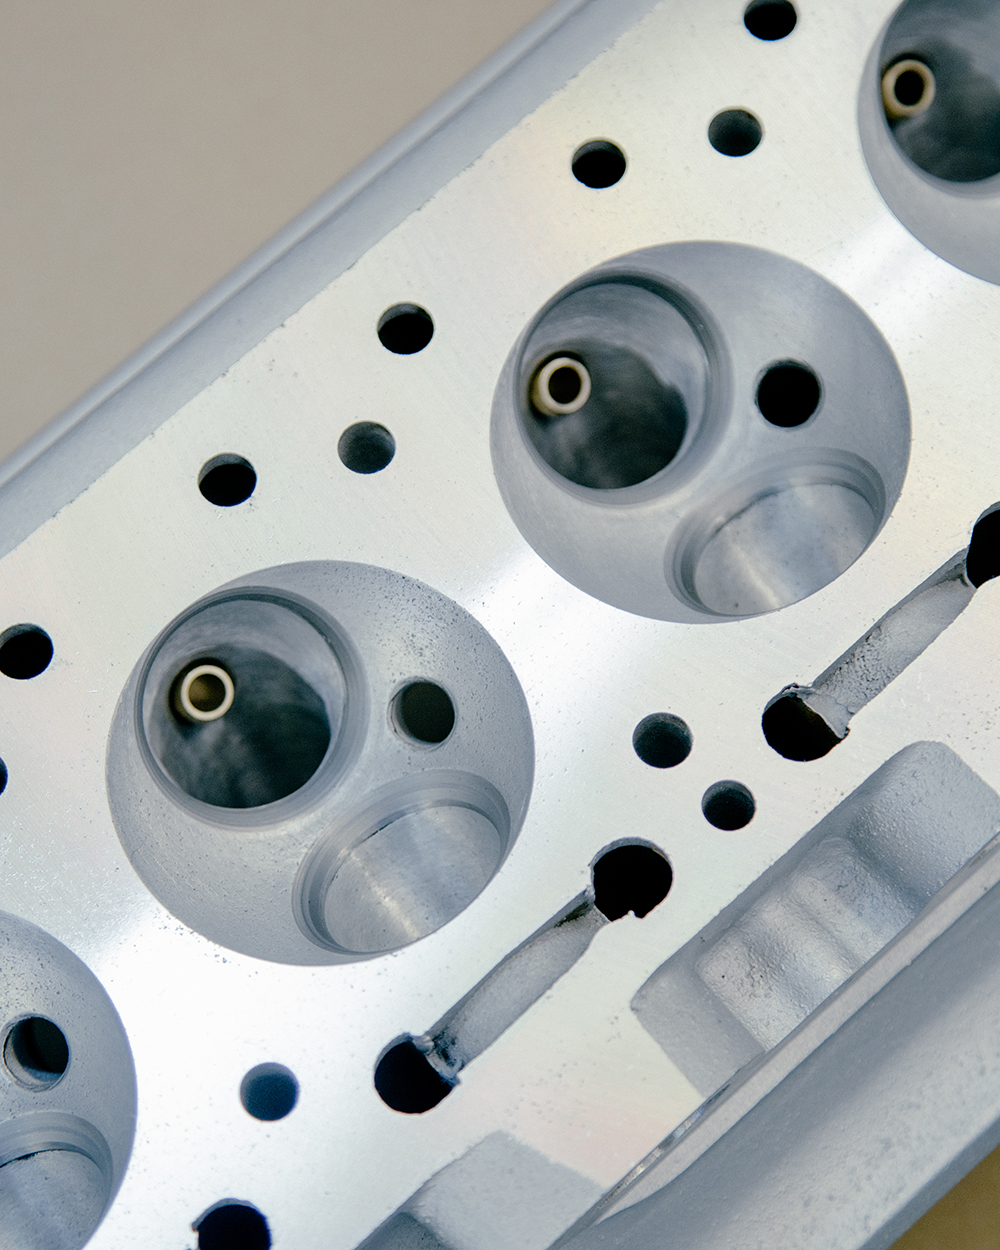
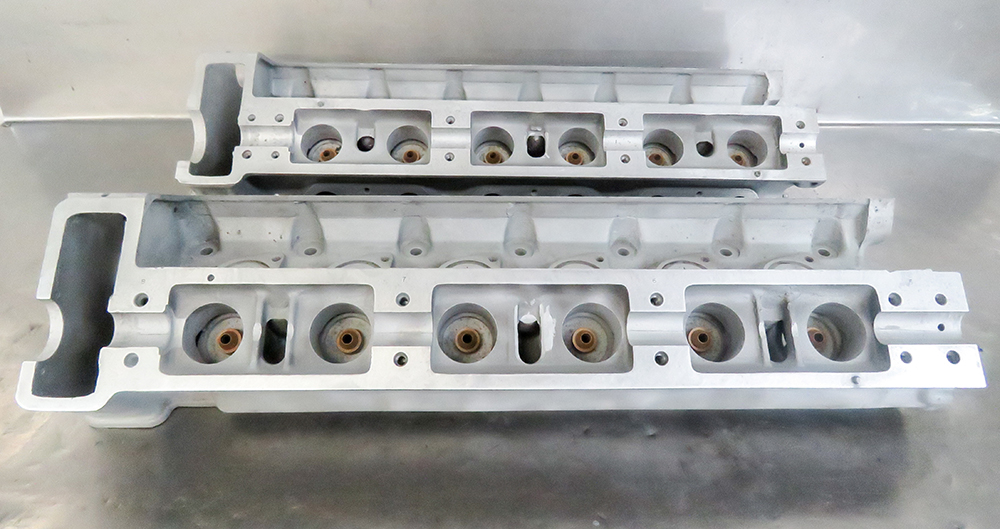
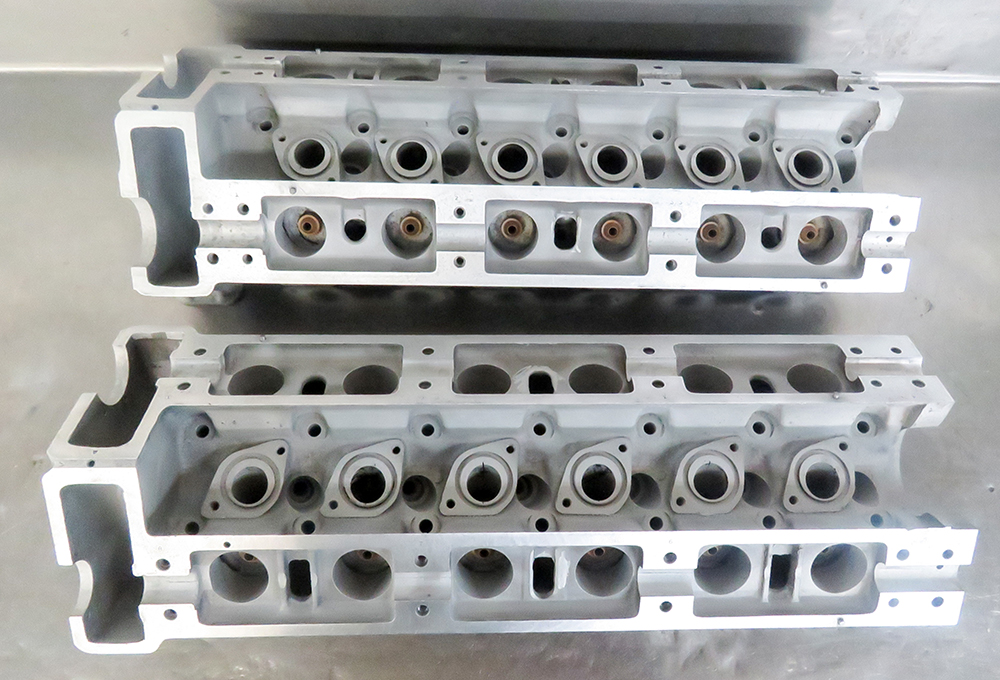
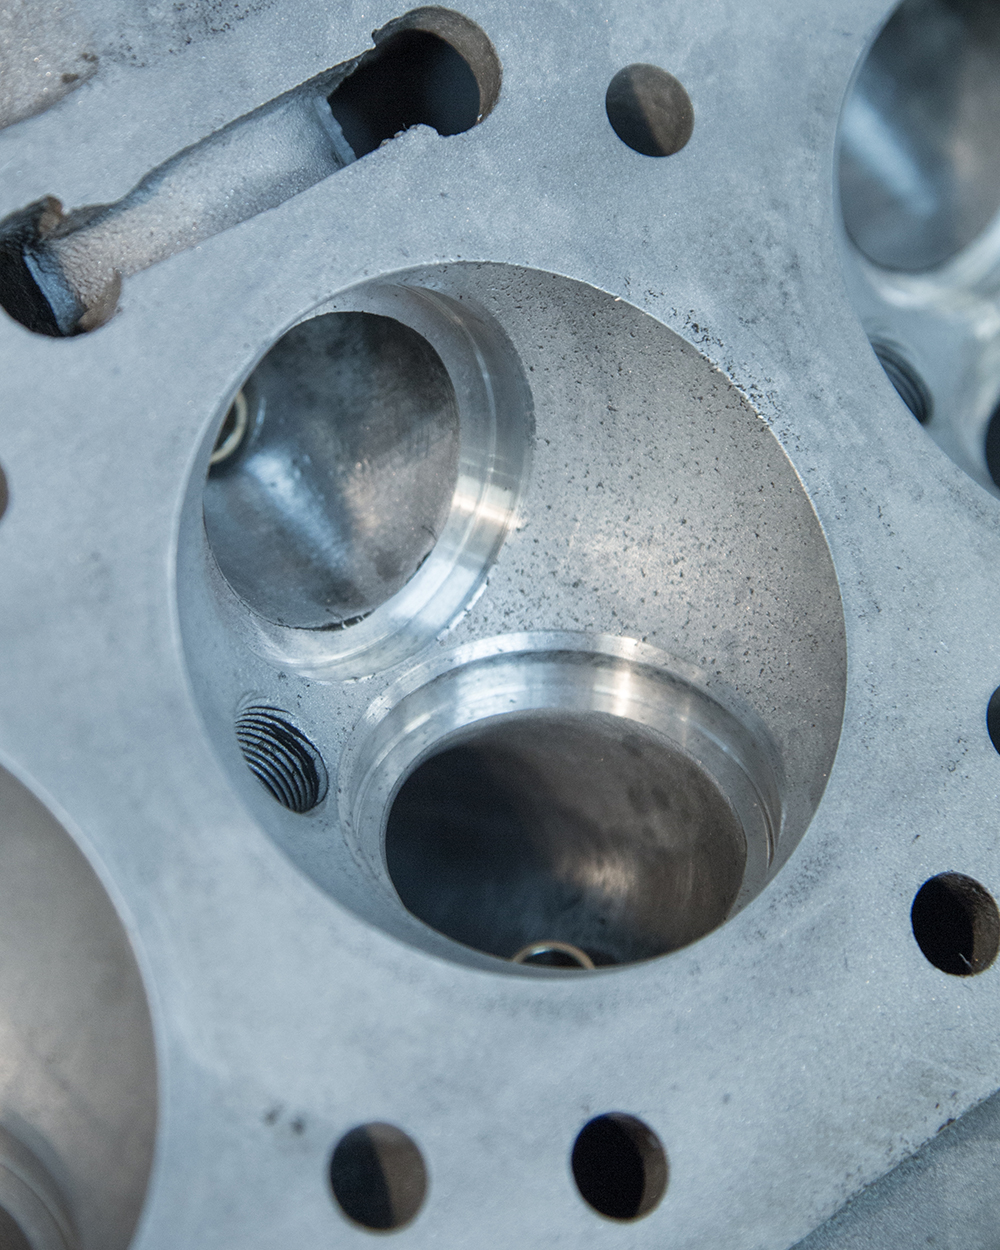
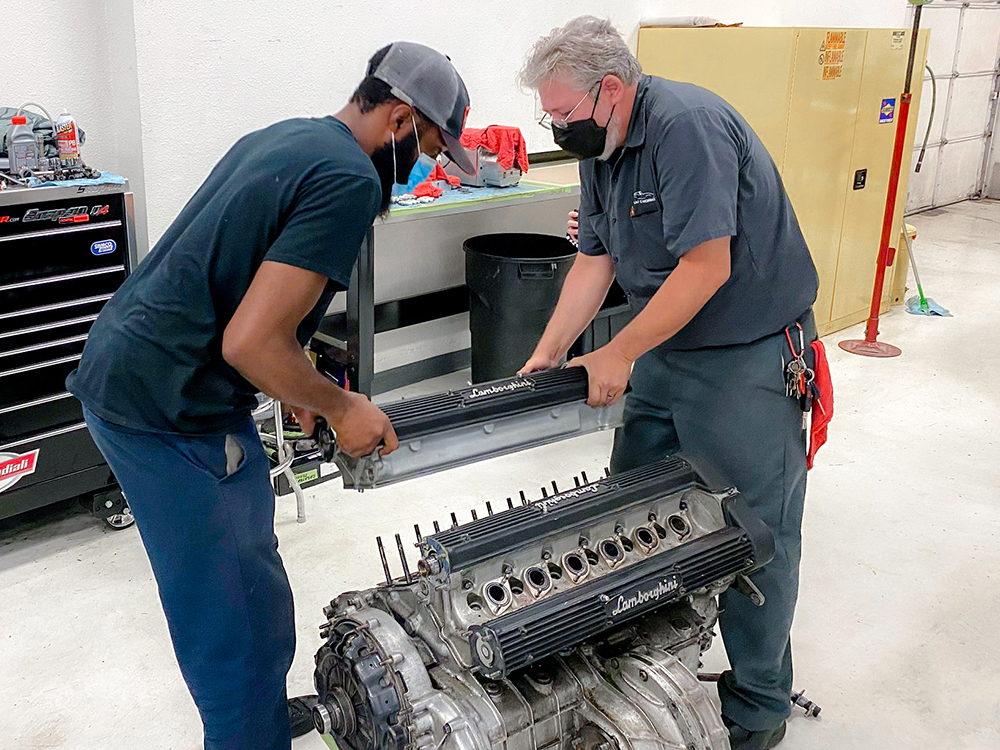
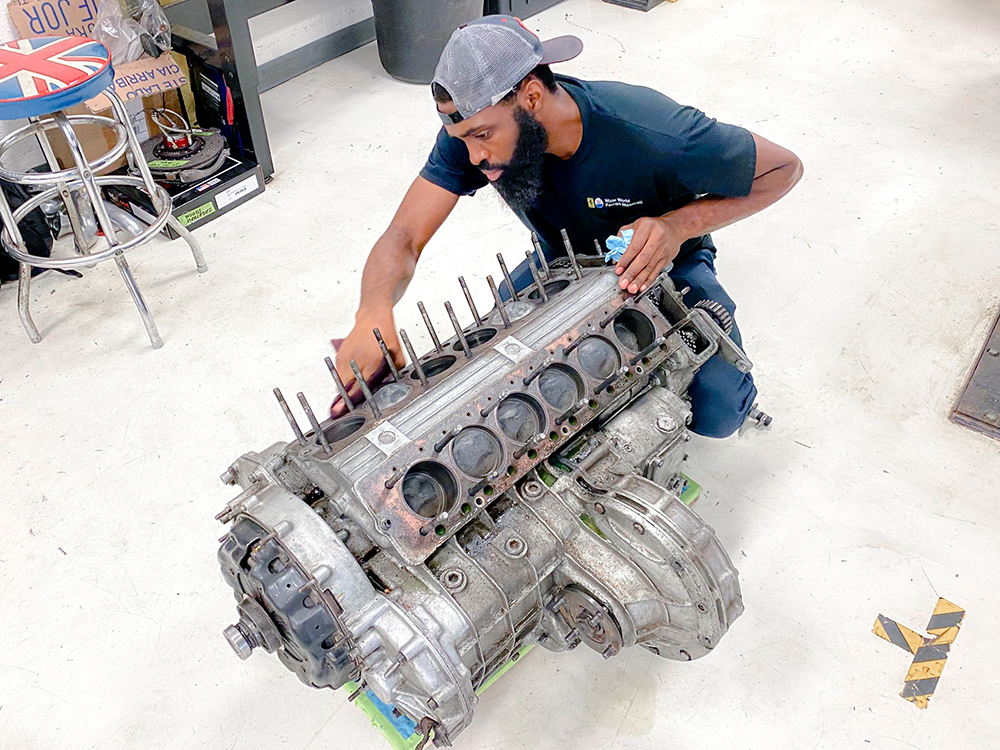
Both cylinder heads now fully assembled.
 |
 |
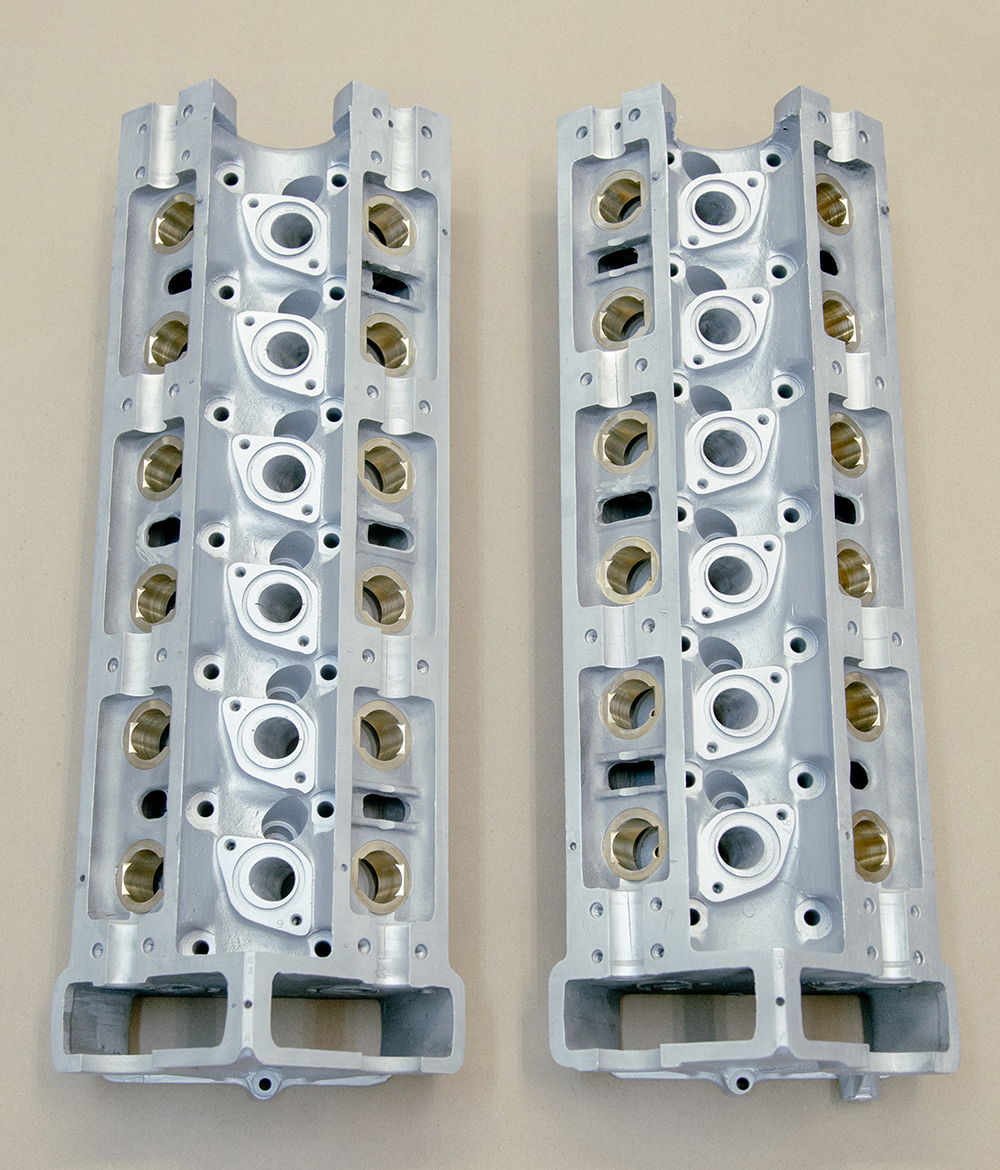
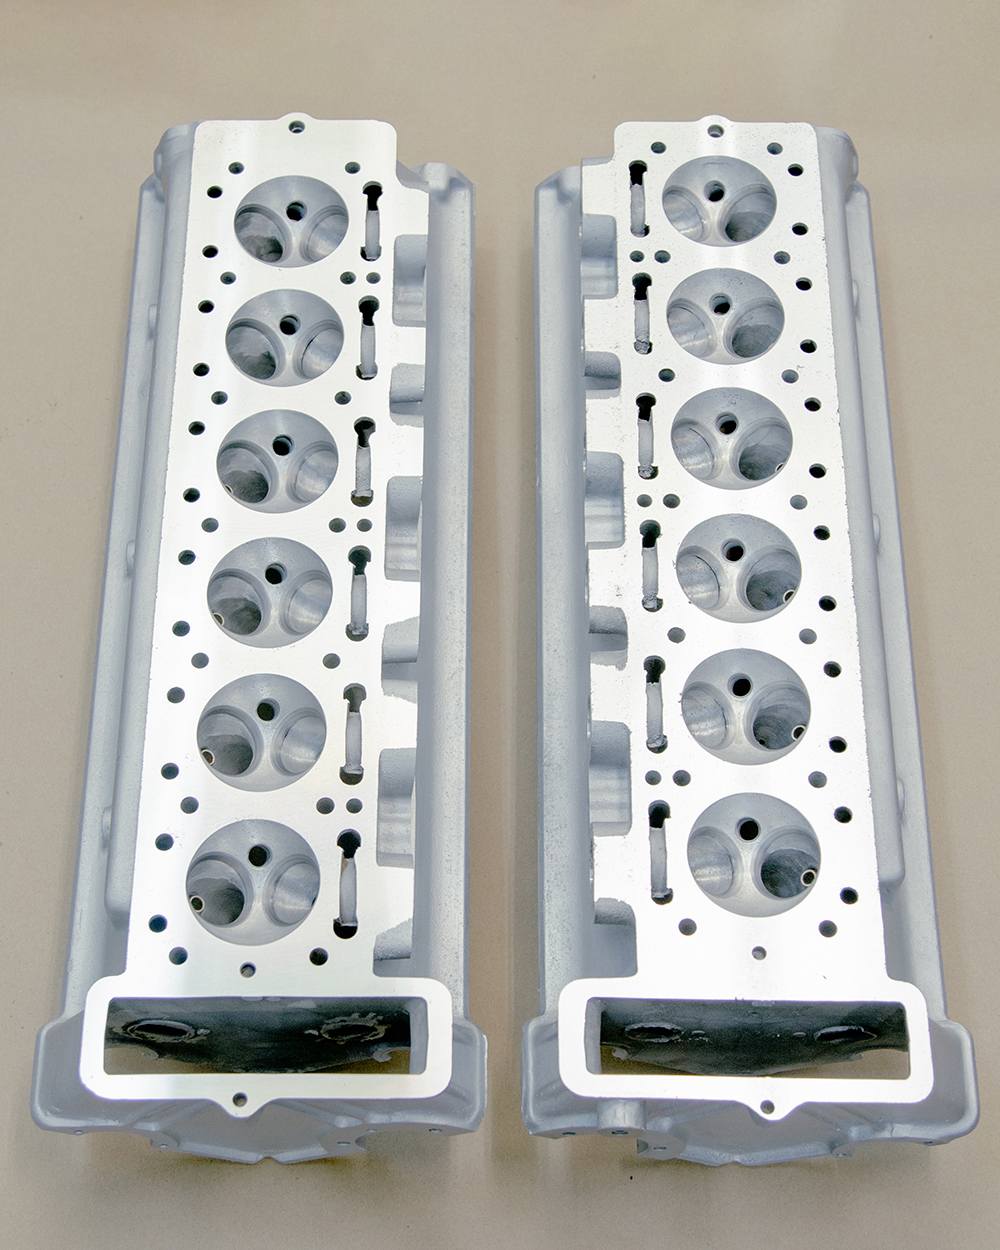
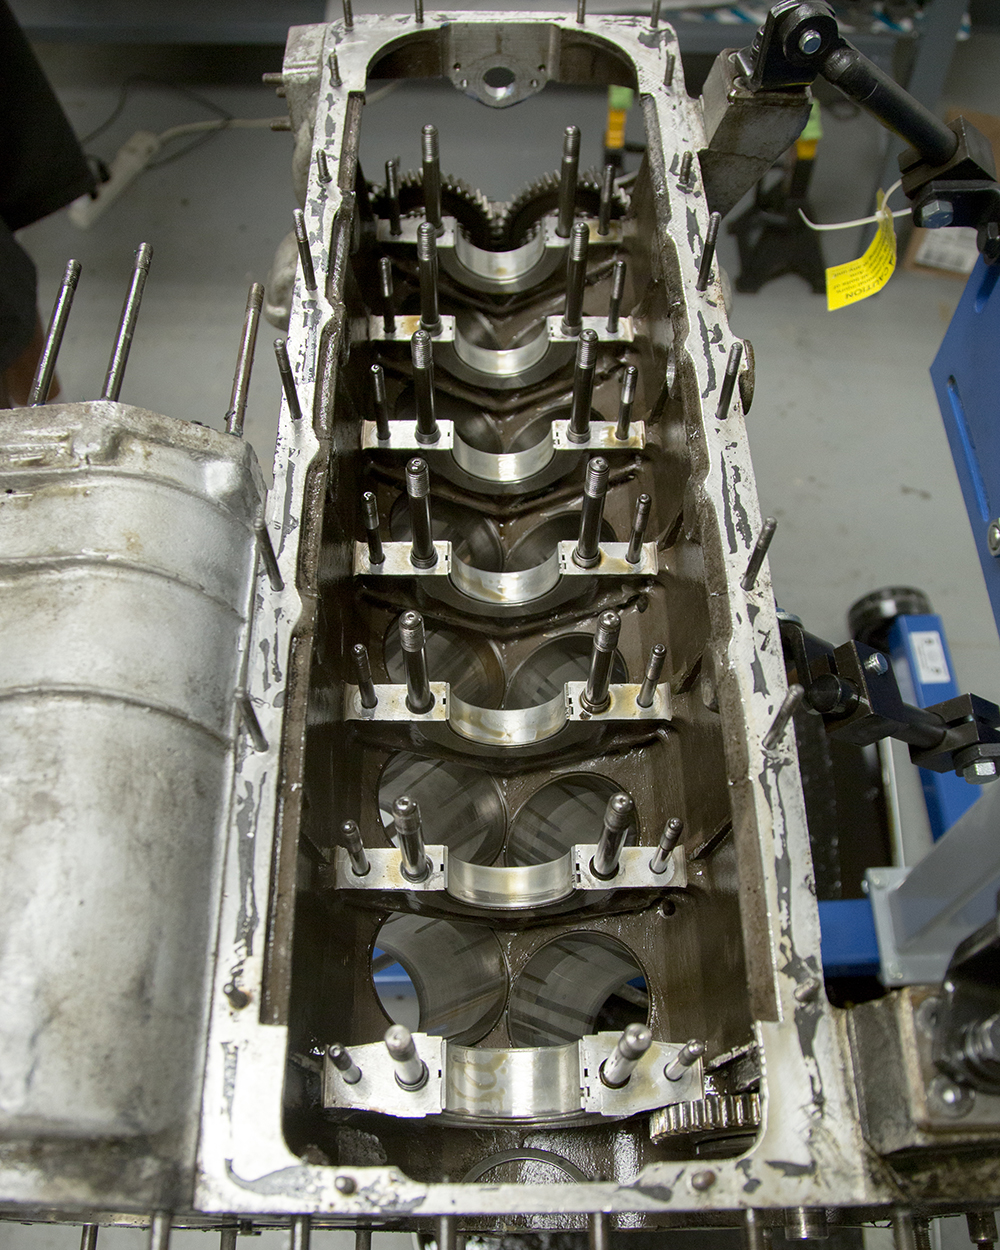
Corey has now completed the machine work to both cylinder heads.
 |
 |
 |
 |
 |
 |
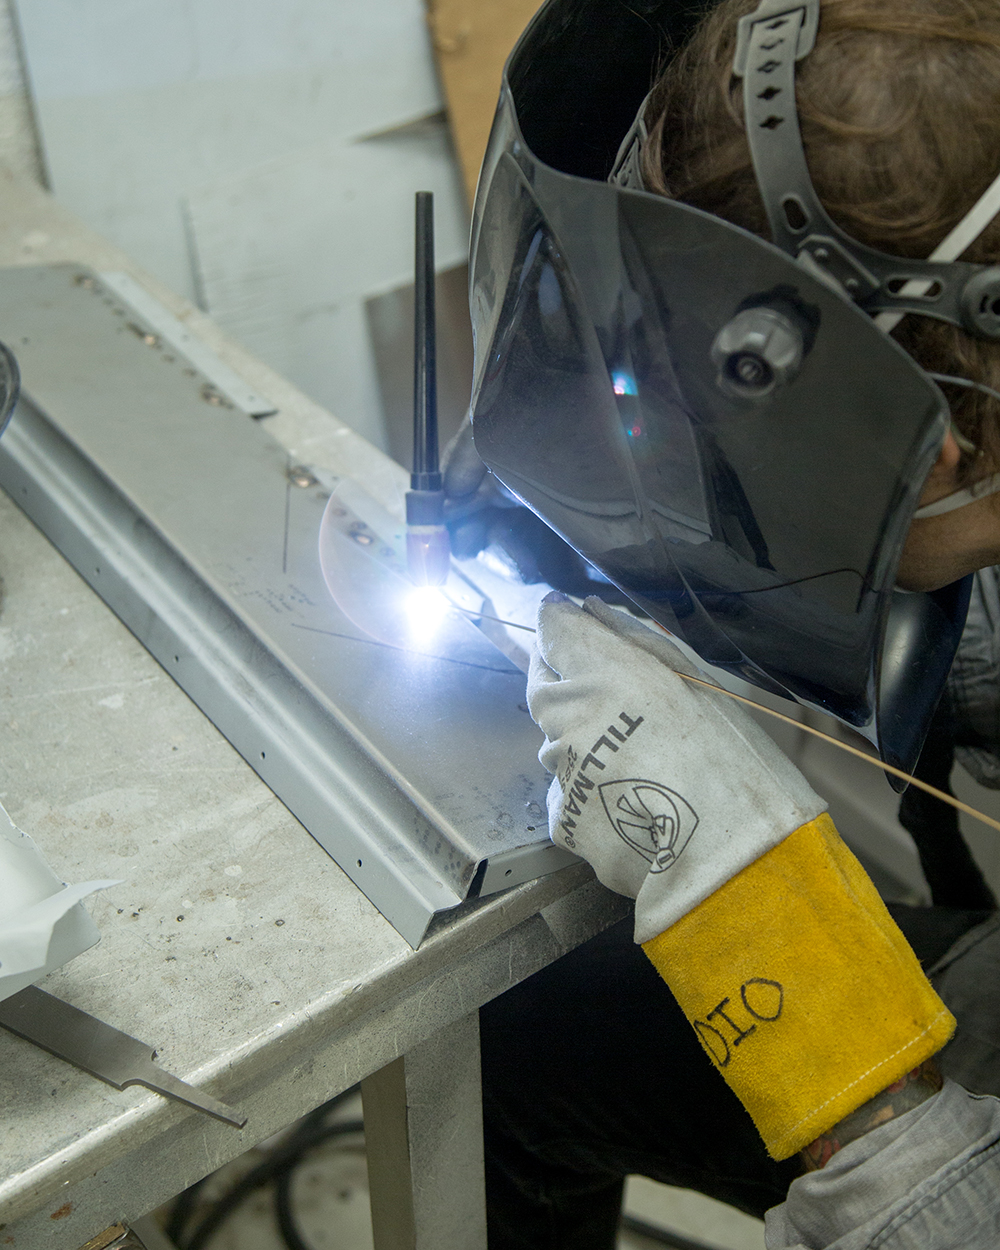
The follow sequence of photographs show Andy fabricating your new rear chassis rails.
 |
 |
 |
 |
| Holes have now been dimpled, as original |
Area around the engine mount is reinforced |
 |
 |
| Spot welding the support braces in place |
|
 |
 |
| Comparing the old and new chassis rail
sections |
|
 |
 |
 |
 |
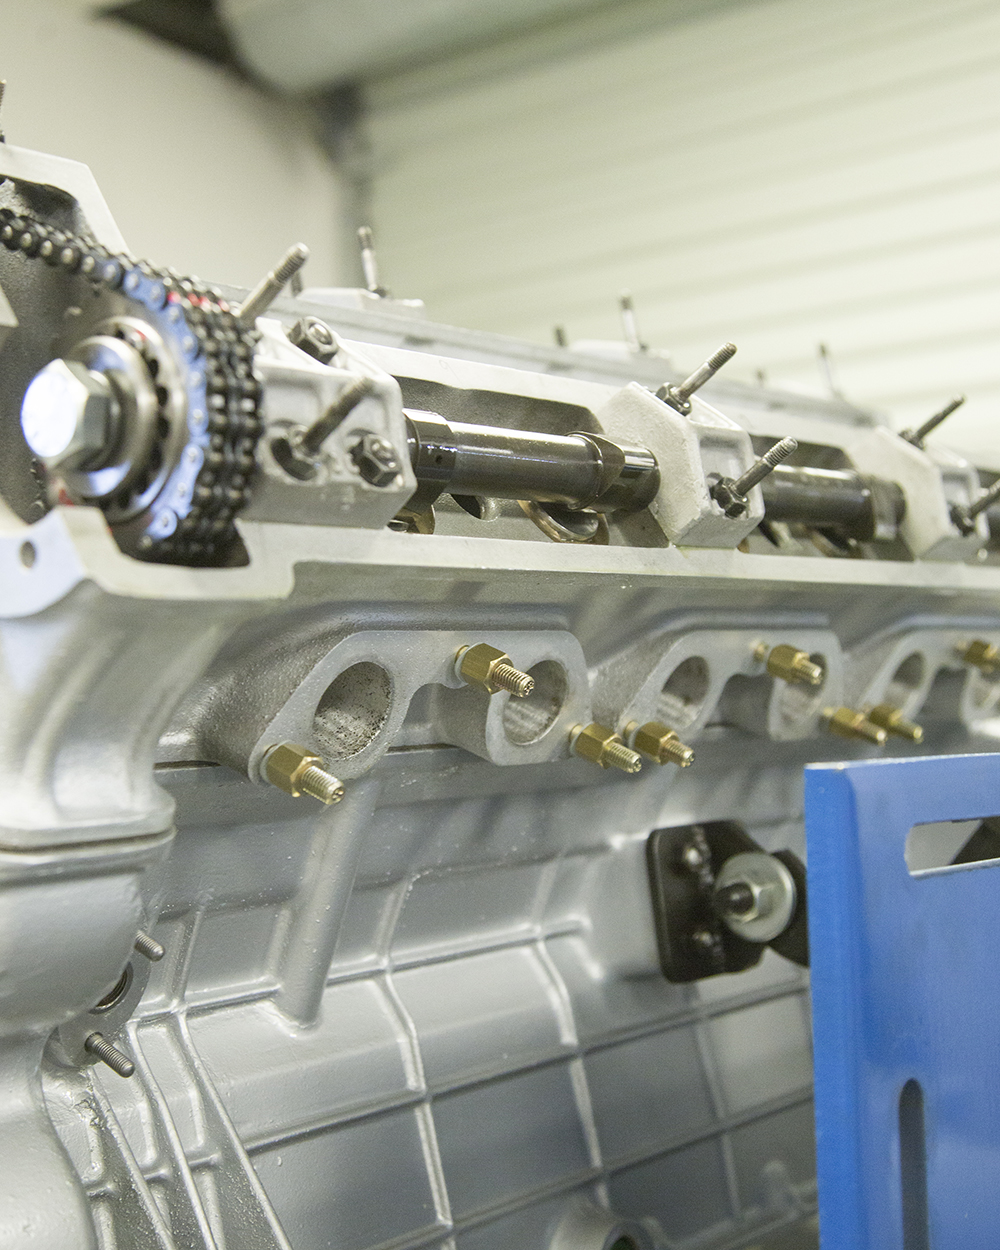
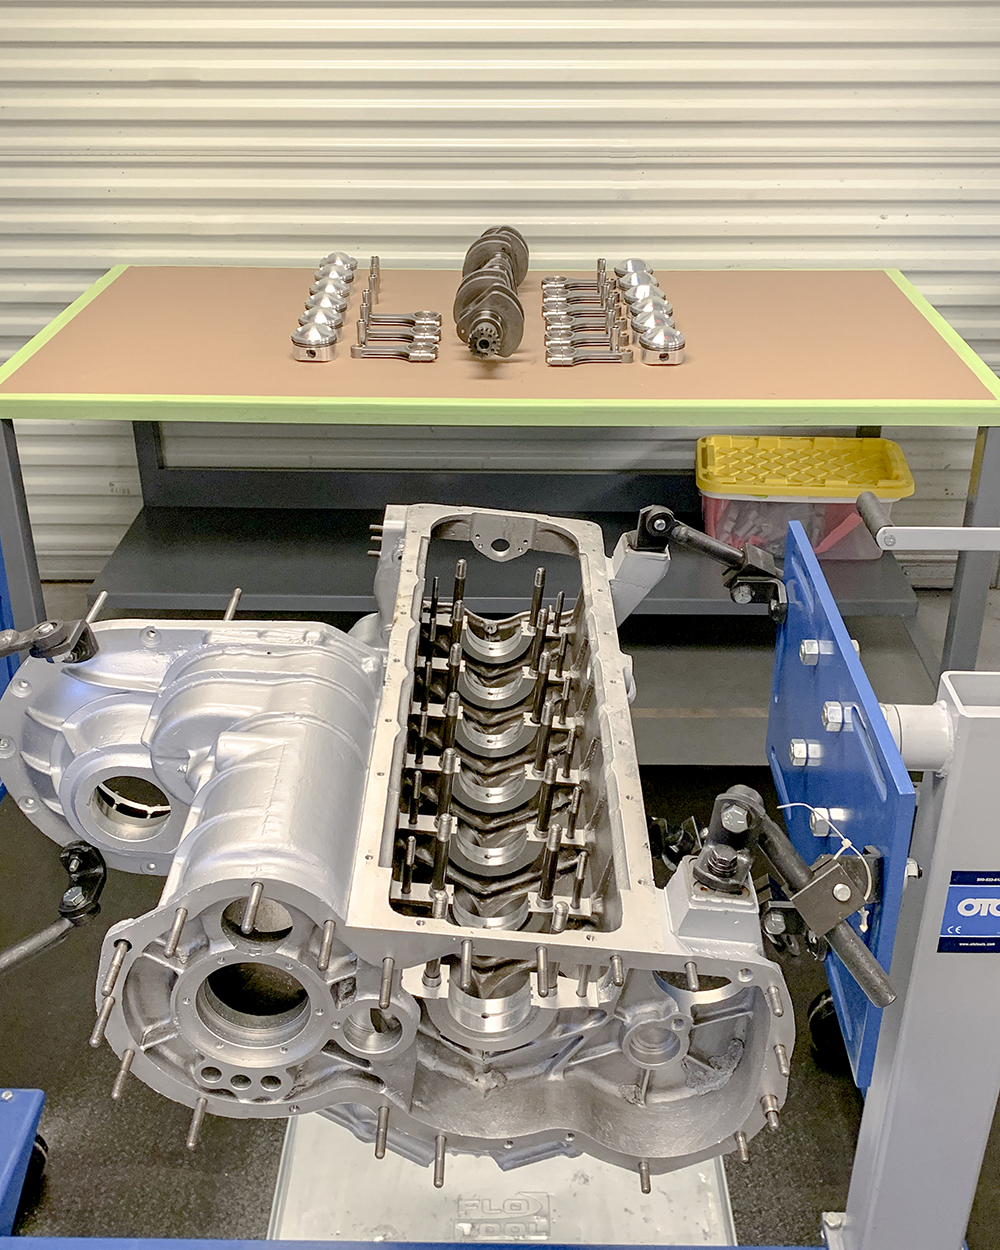
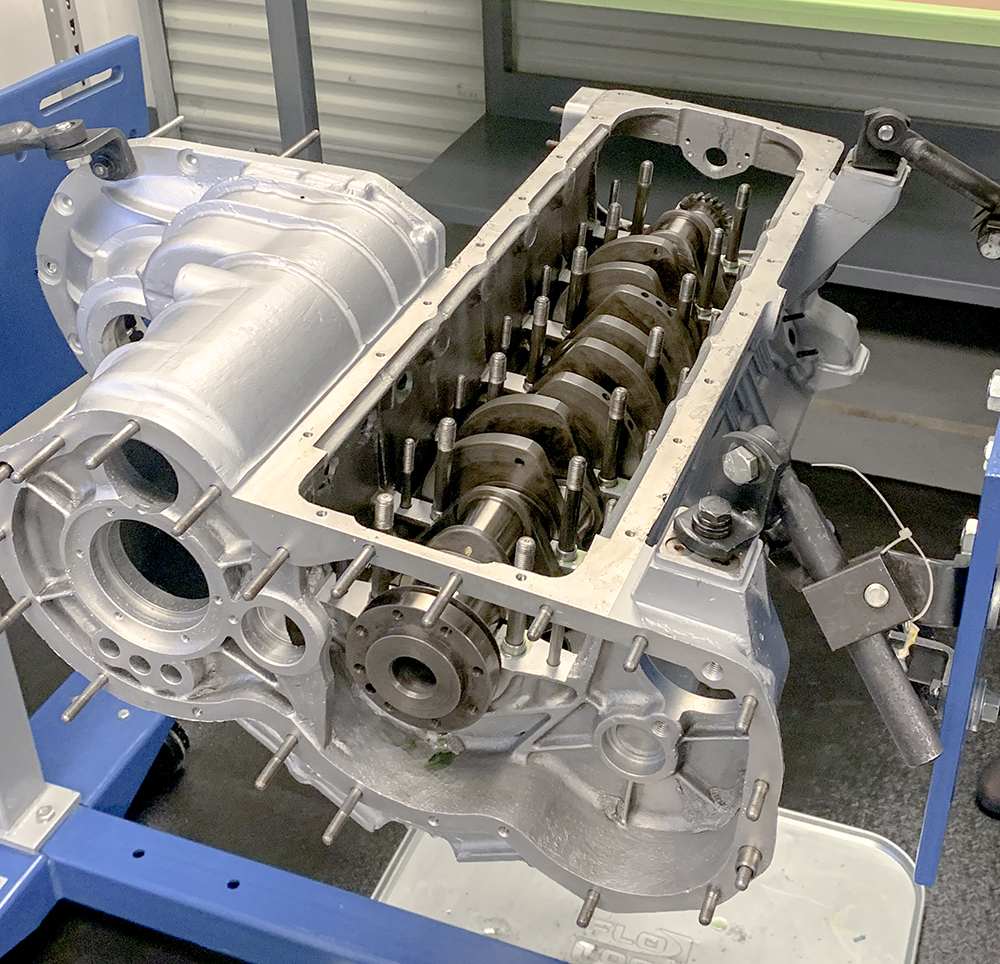
Cylinder head rebuilds underway in the engine shop as the front frames are being prepared for refinishing in the Coachworks.
 |
 |
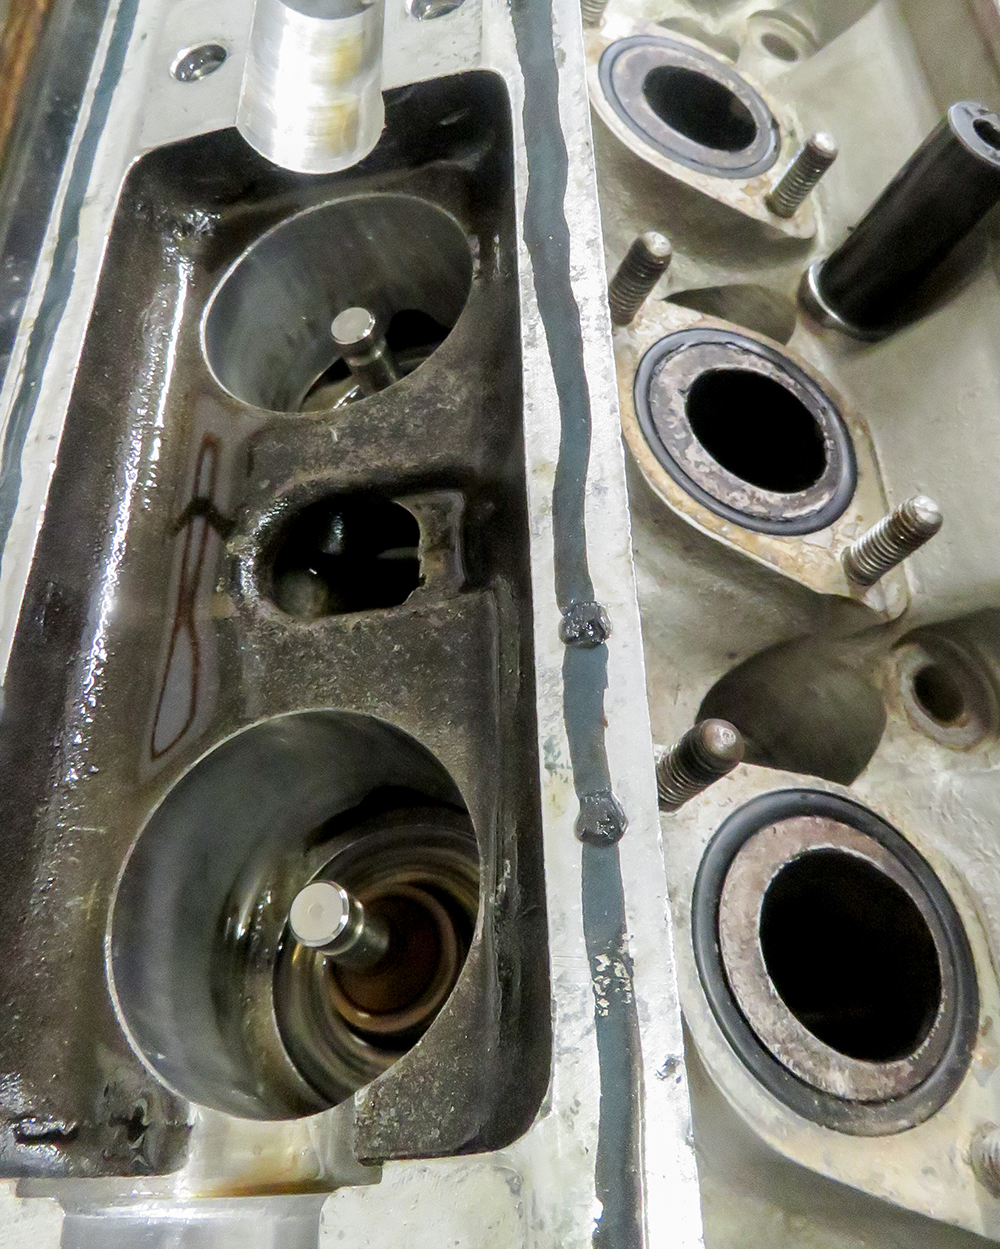
| Overall the heads are in very good condition | |
 |
 |
| Several of the original valve stems were scored | |
 |
 |
 |
 |
| Pressure testing heads - both OK | |
 |
 |
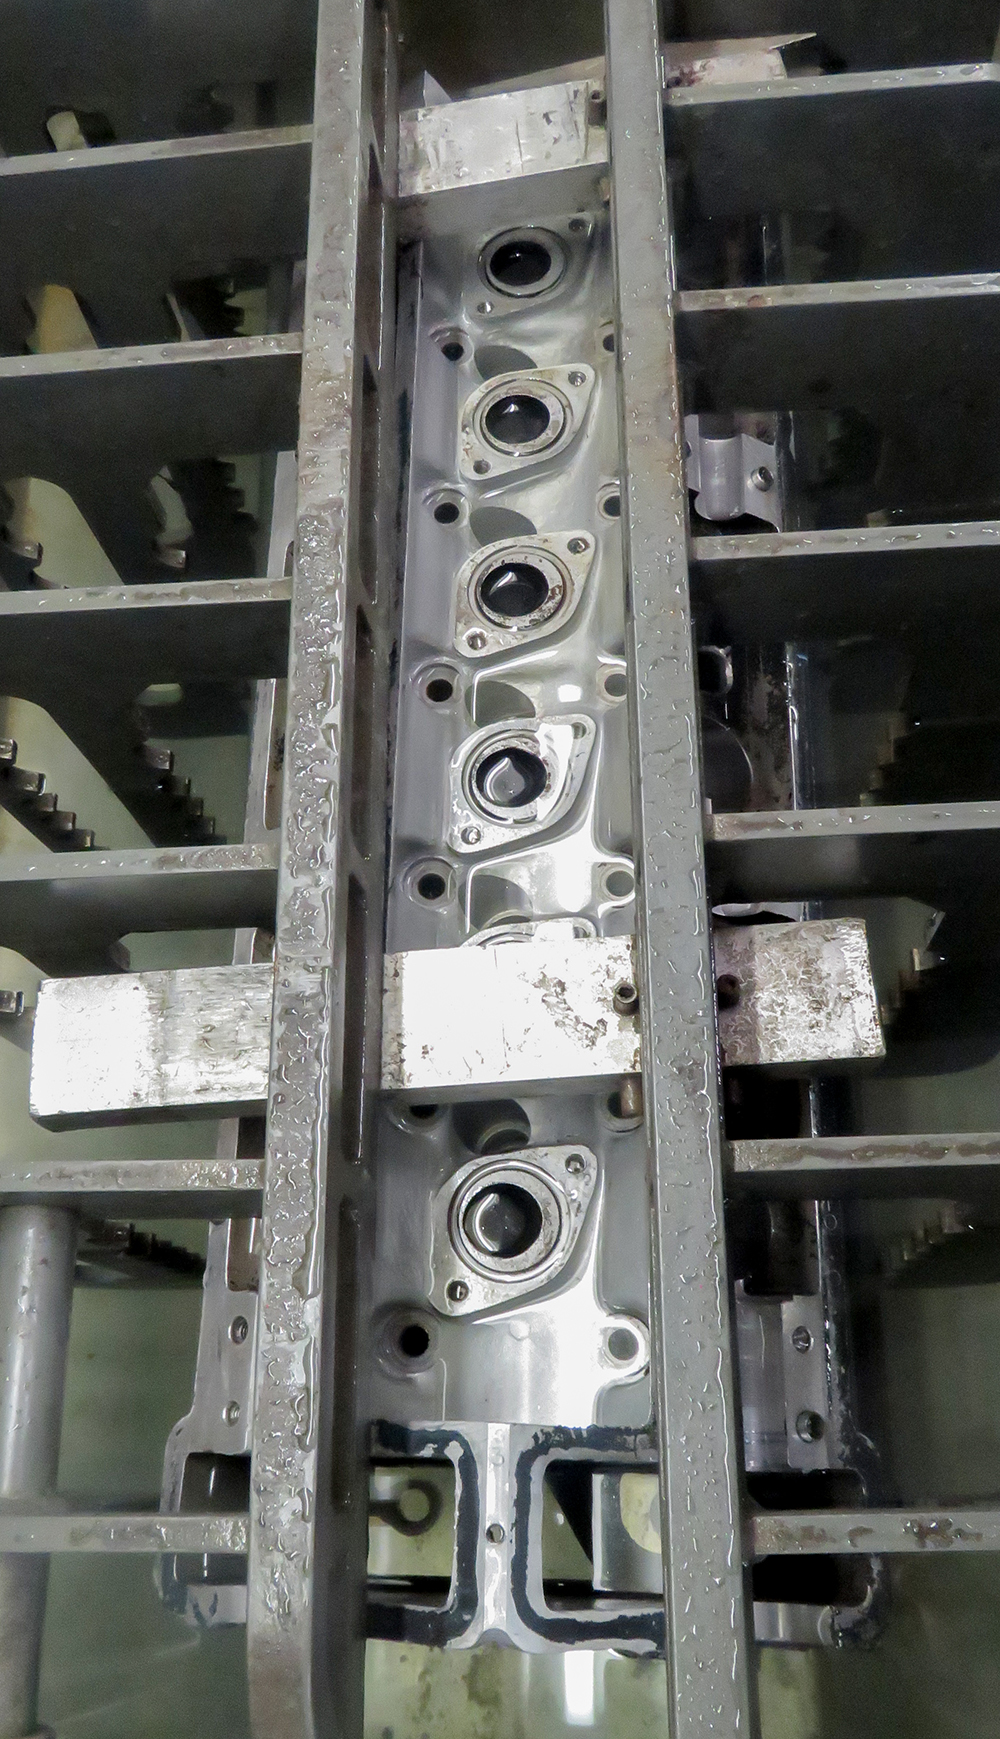
| Heads now cleaned and media blasted | |
 |
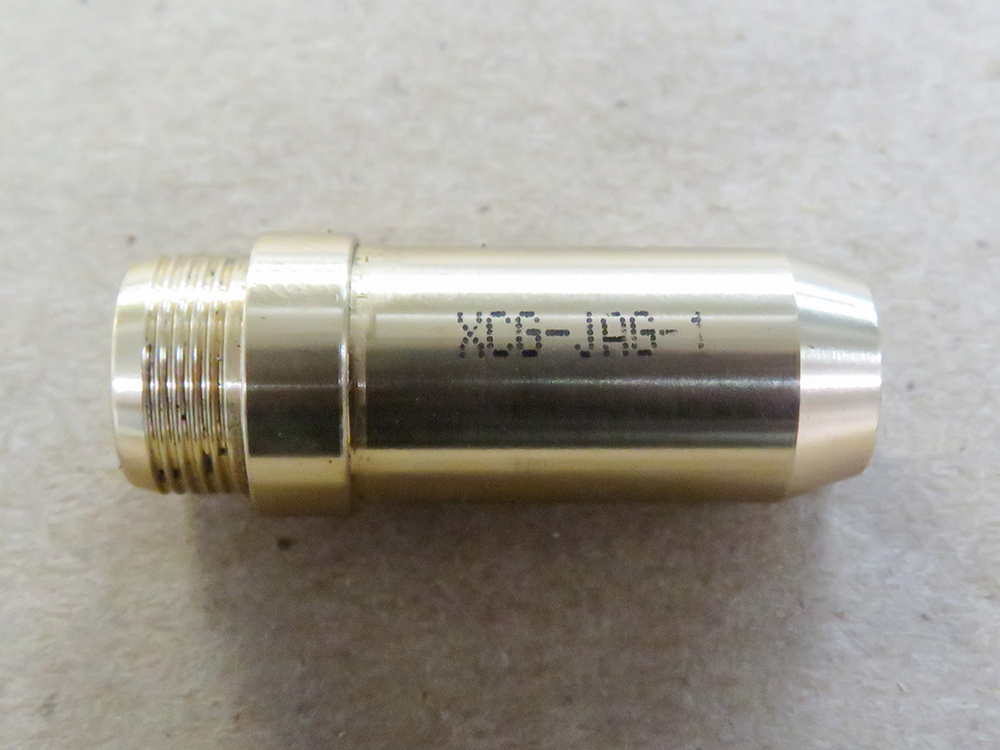 |
| Exclusive Team CJ valve guides | |
 |
 |
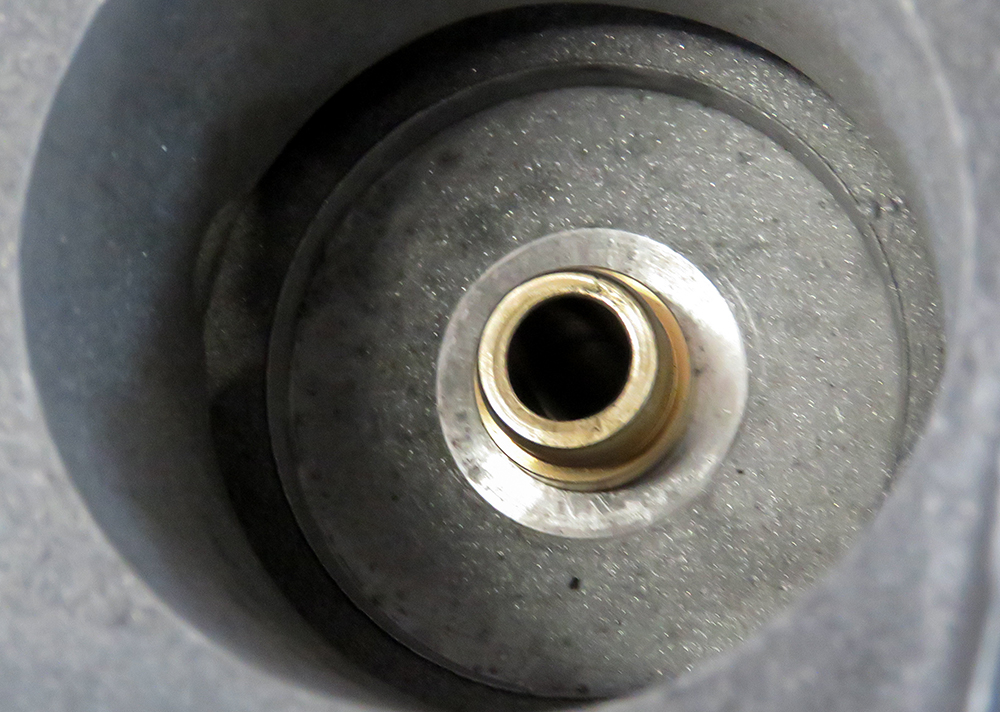
| Original bronze seats
will be replaced with hardened steel |
|
 |
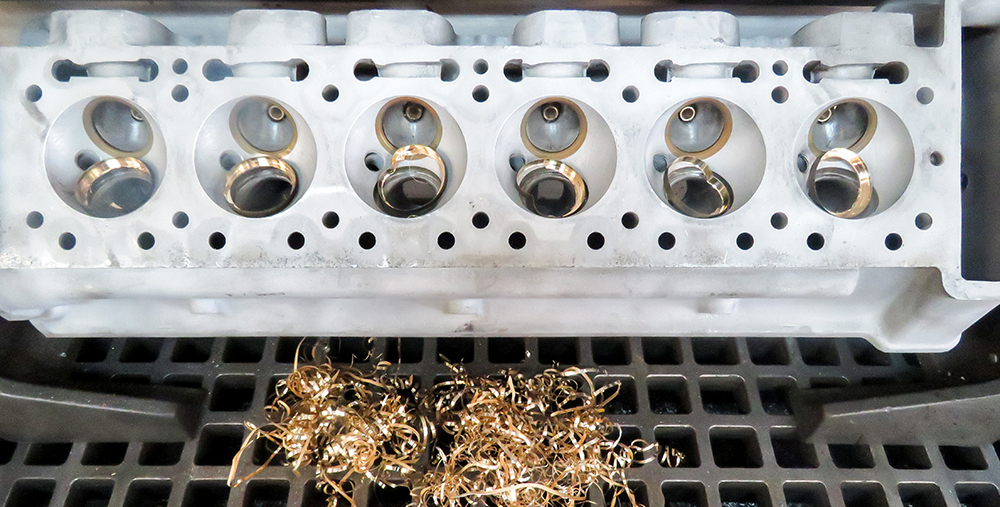 |
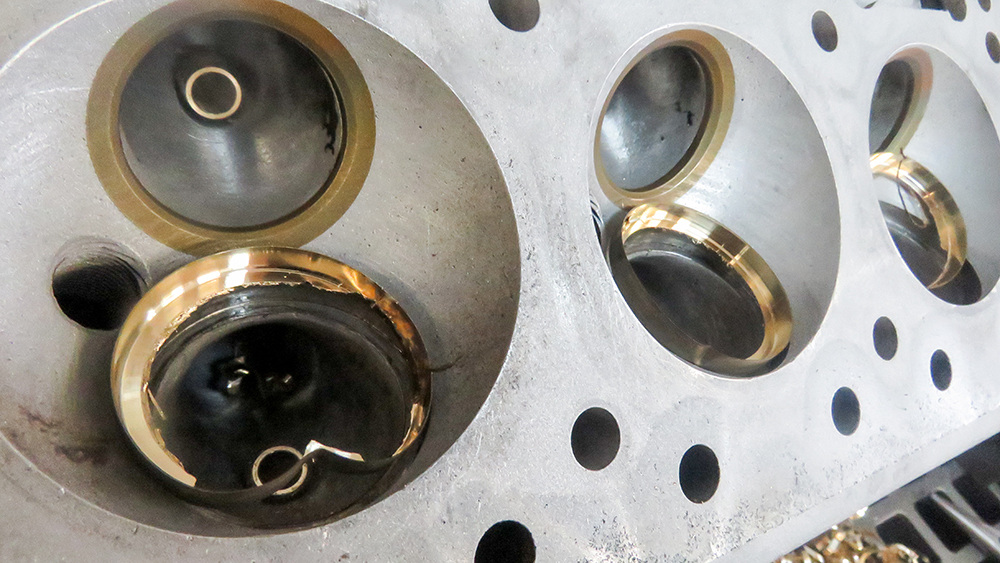
| Machining out the old bronze seats | |
 |
 |
| Sizing seat pocket counter bores for new seats | |
 |
 |
| No major repairs required at the front end of the car |
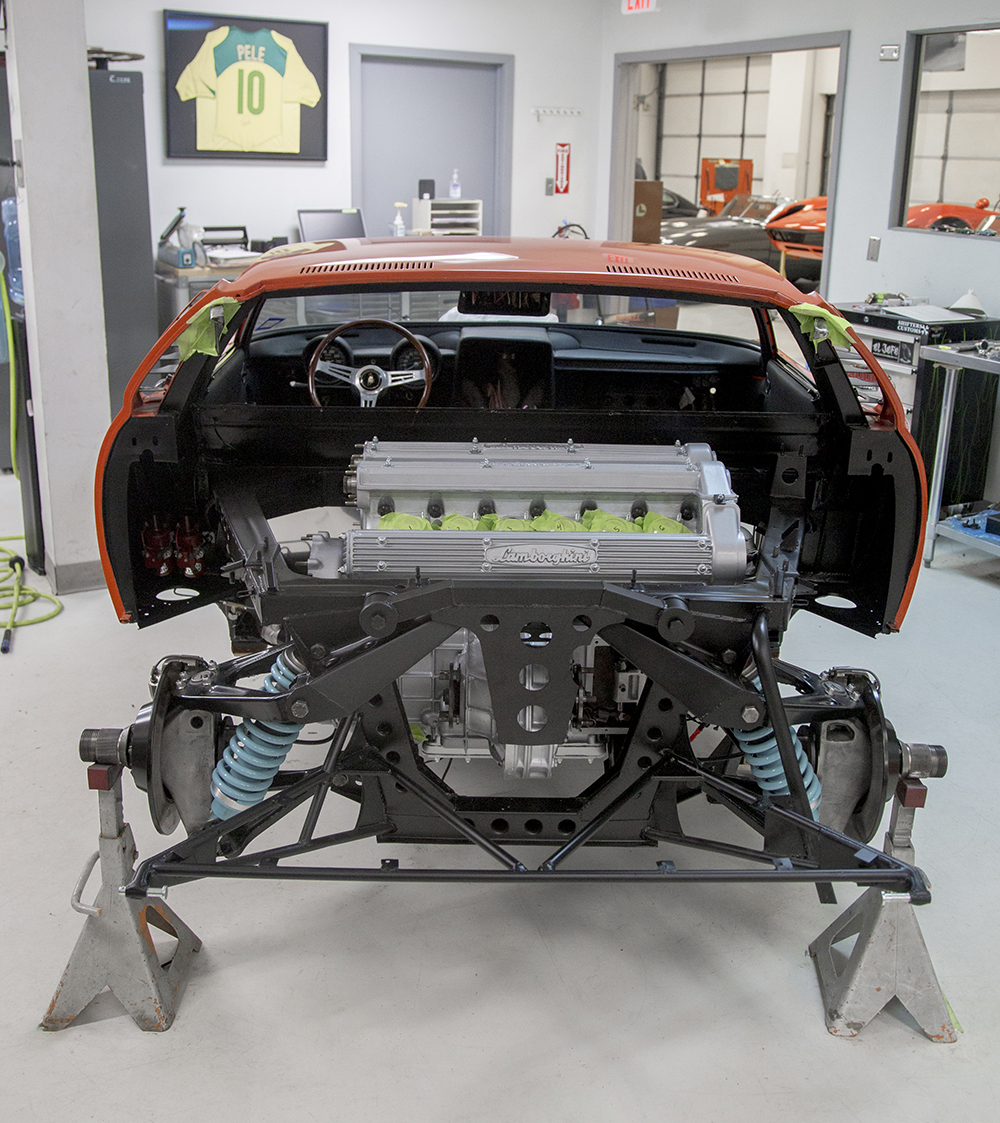
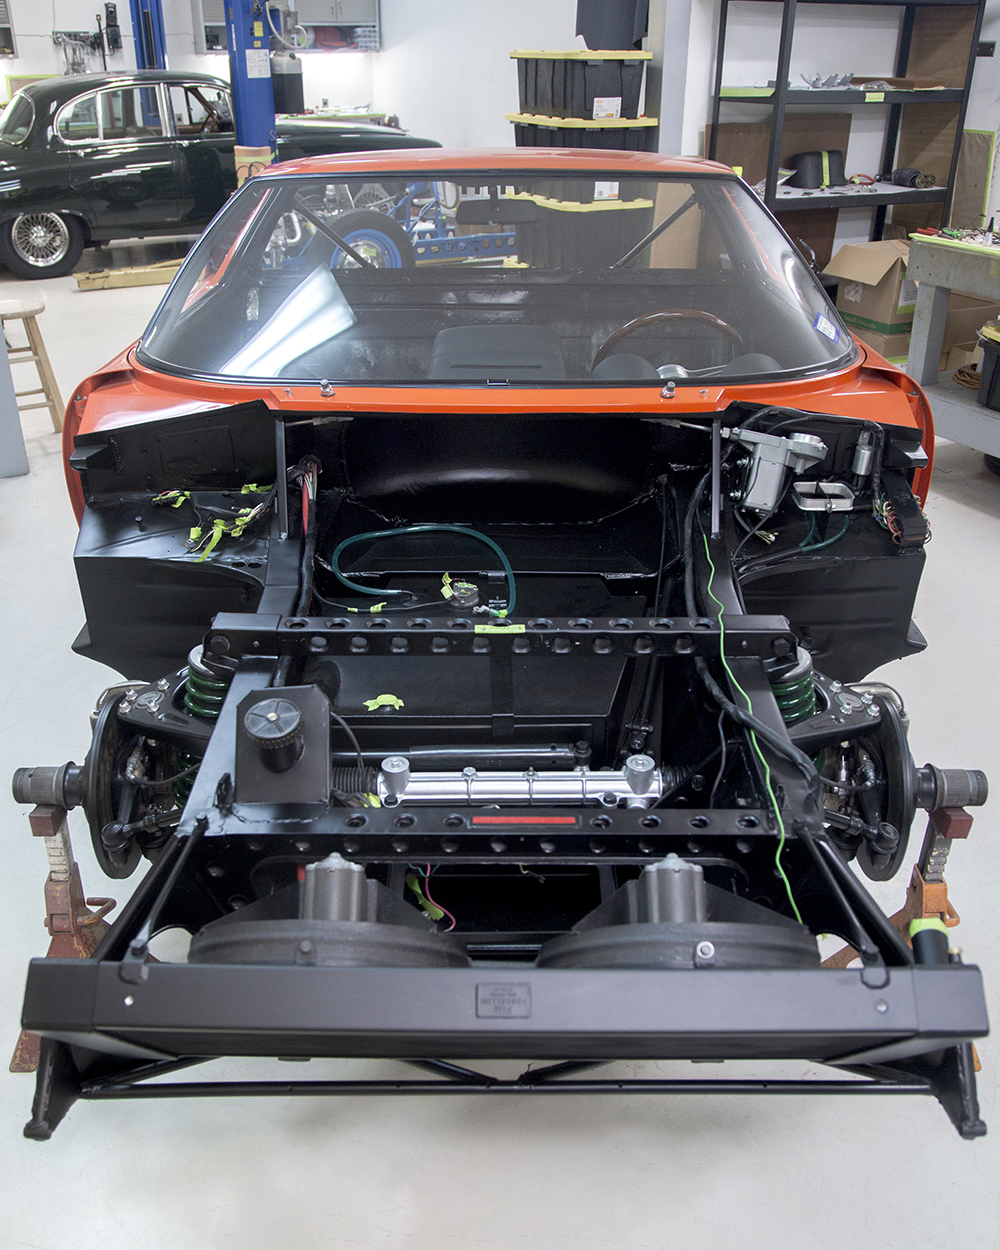
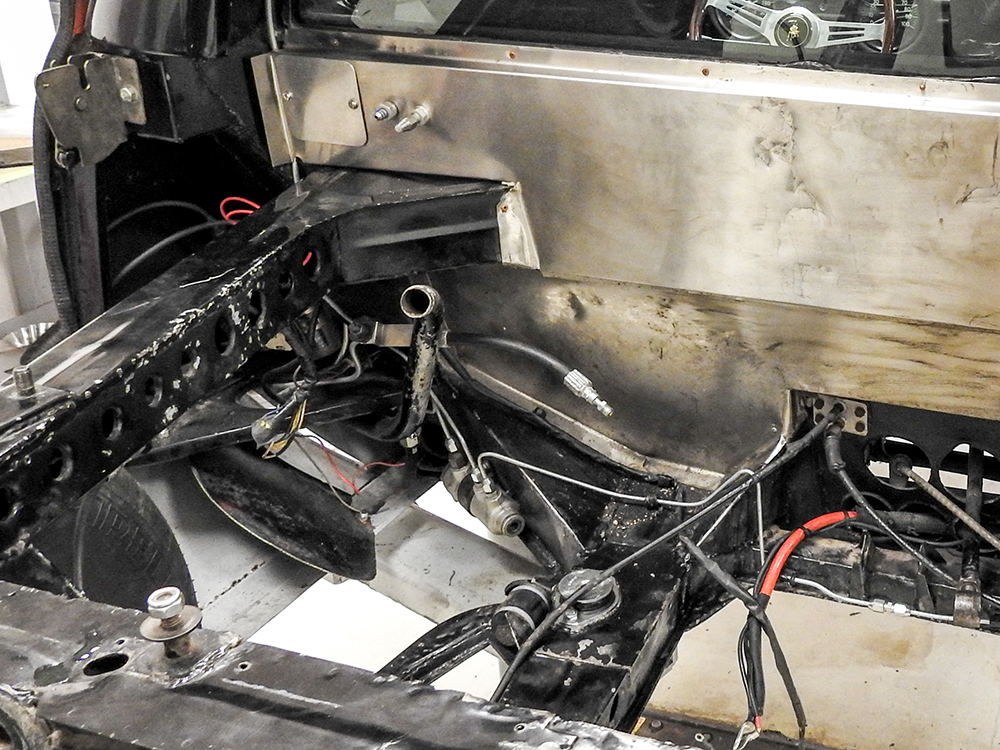
Lots of progress at both ends of the Miura on the chassis table.
 |
 |
 |
 |
 |
 |
 |
 |
 |
 |
 |
 |
 |
 |
 |
 |
 |
 |
 |
 |
 |
 |
 |
 |
 |
 |
 |
 |
 |
 |
 |
 |
 |
 |
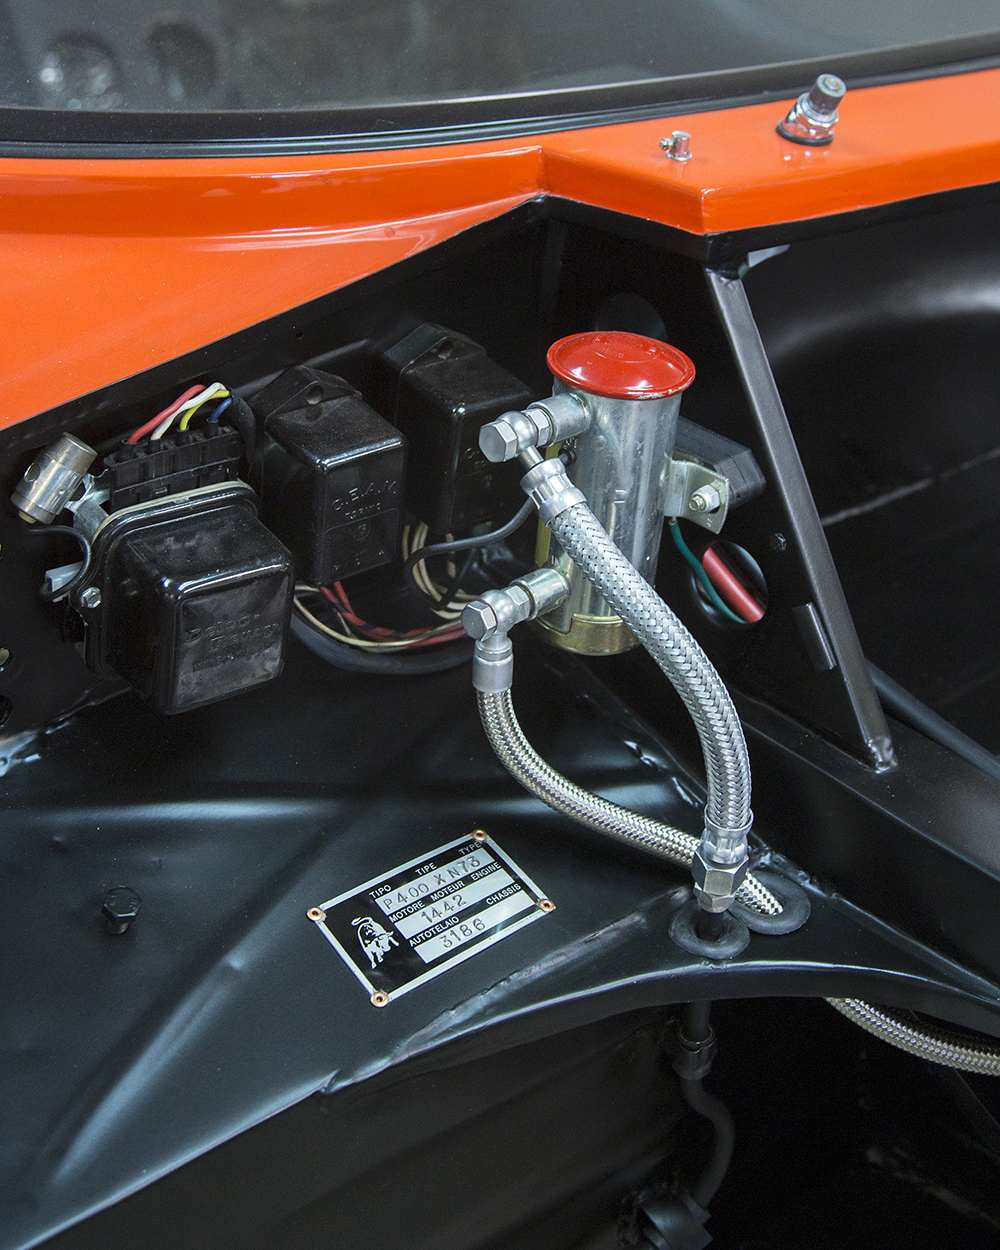
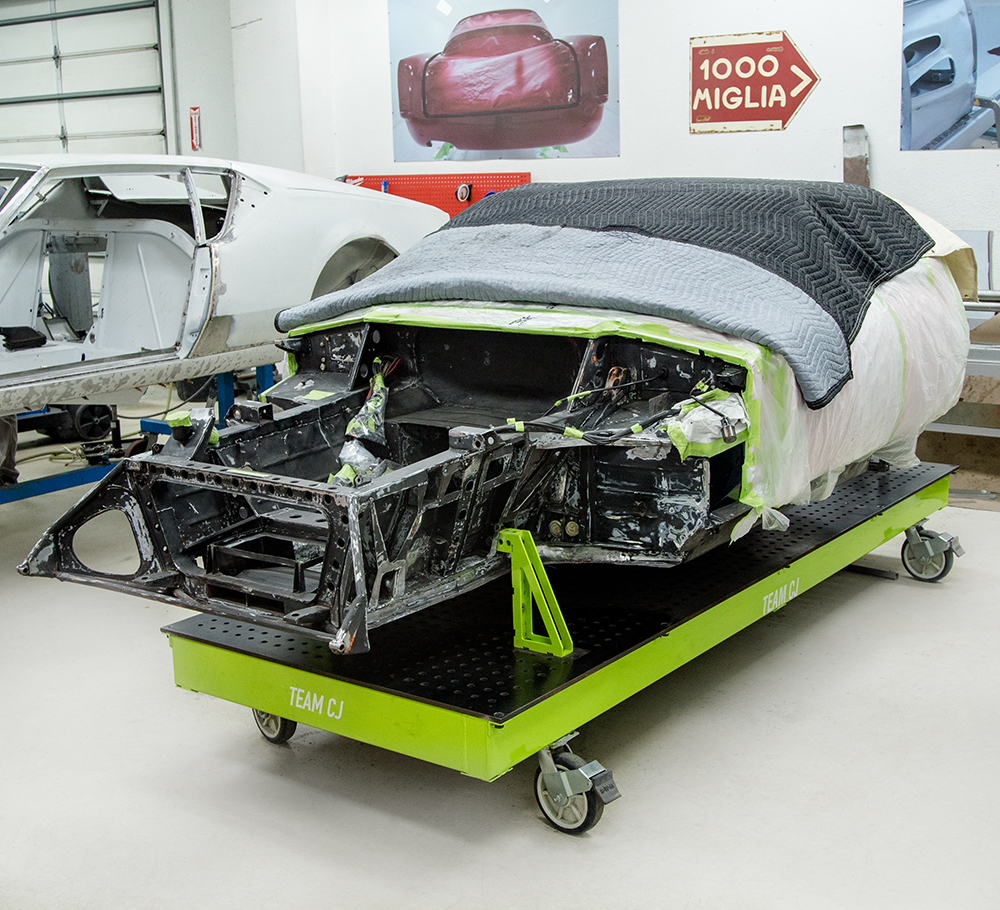
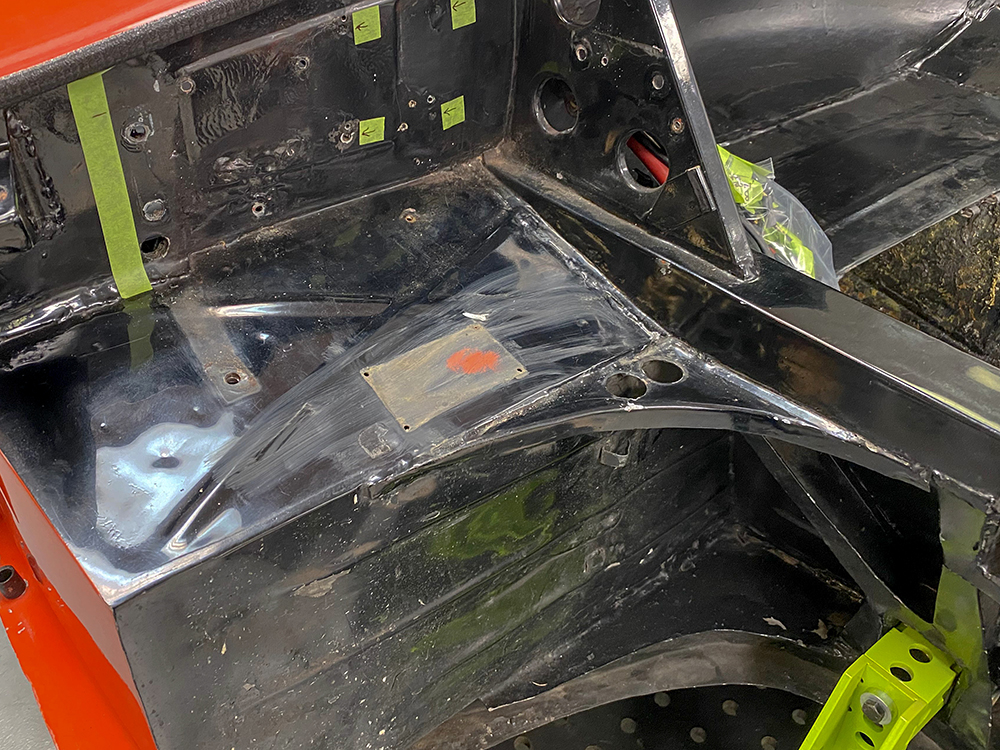
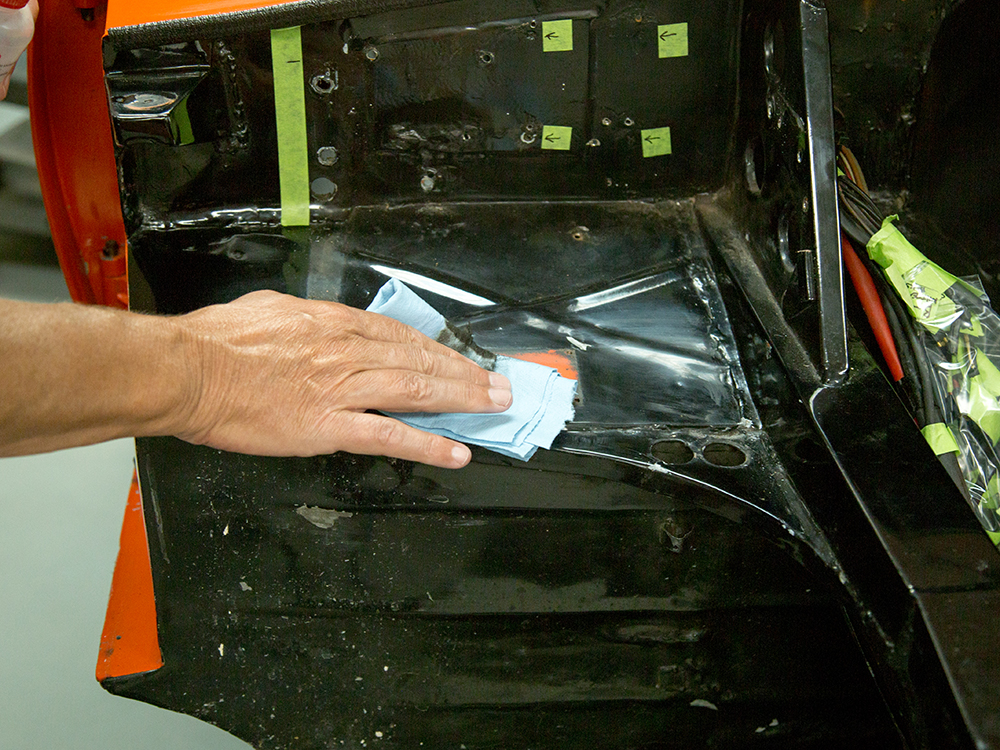
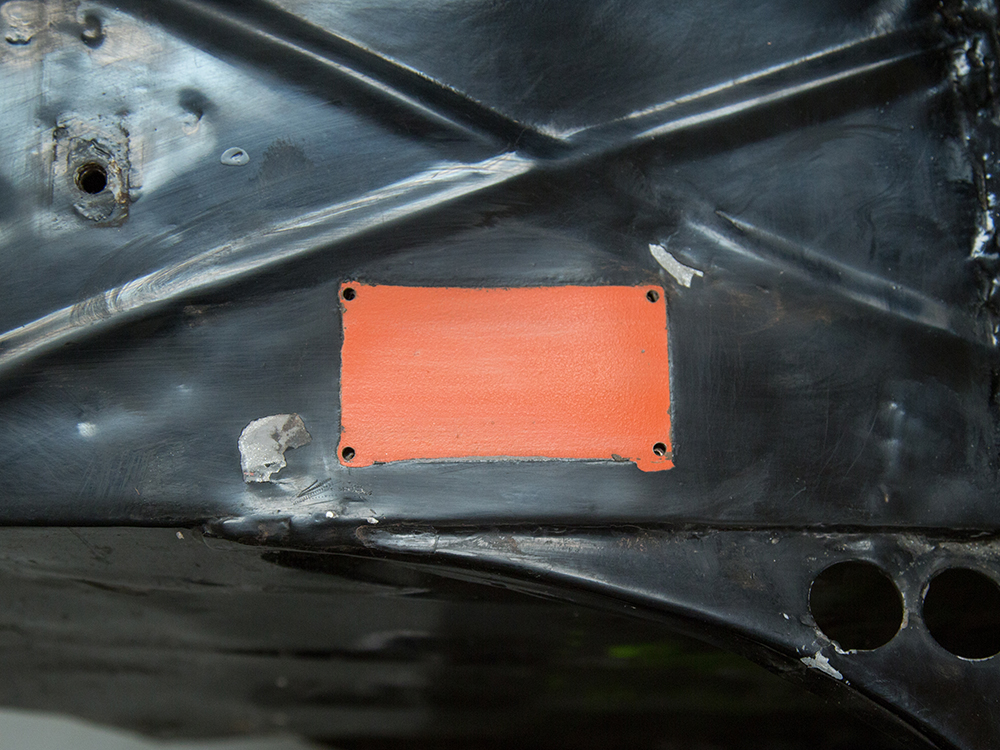
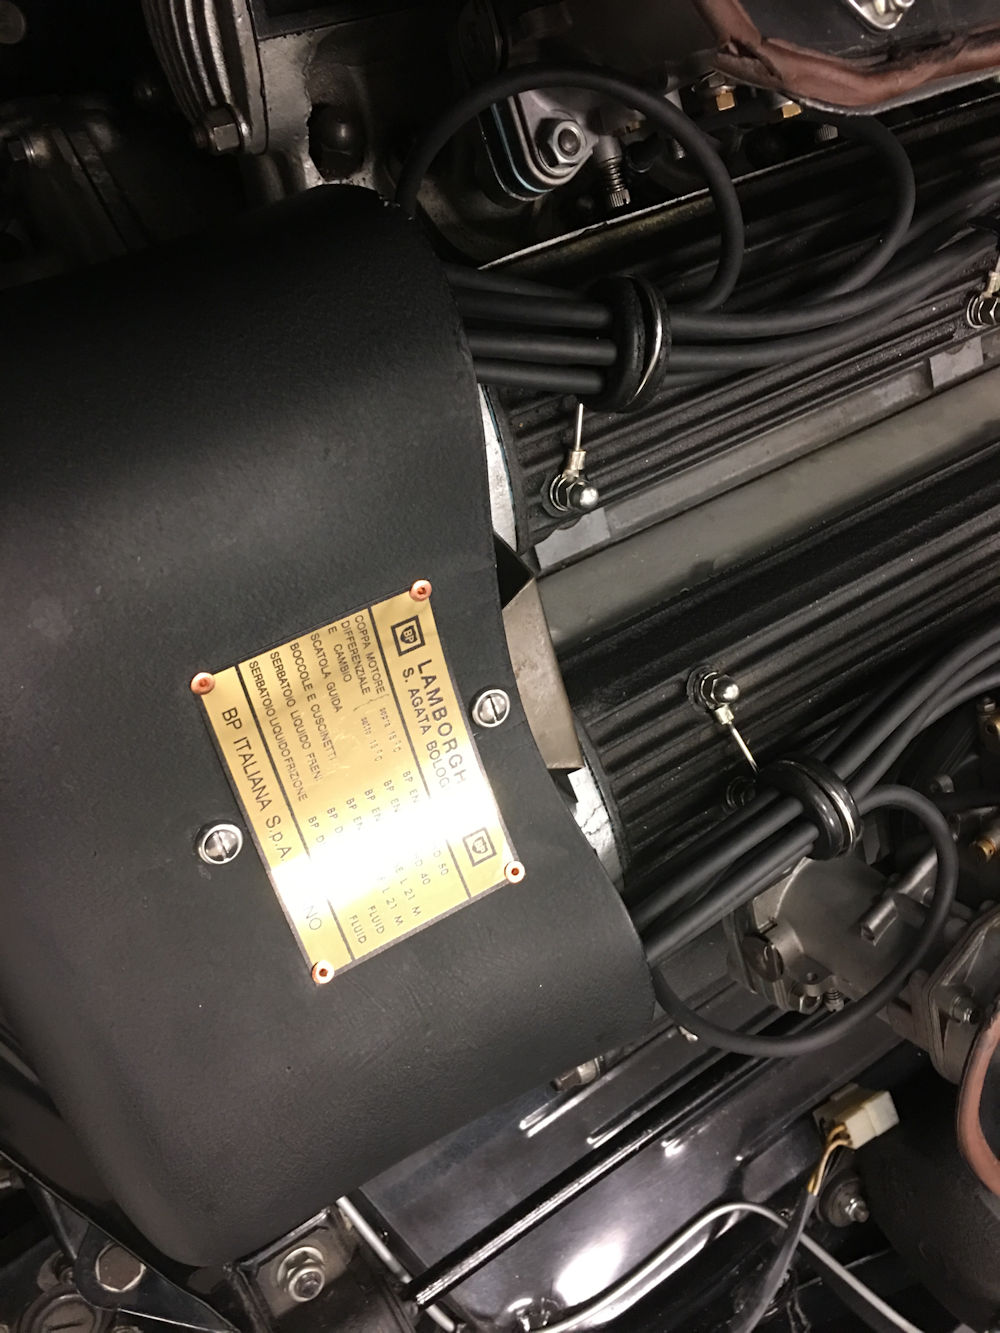
We have now disassembled the front end as we prepare to refinish all the black areas. At some point in the past the front end was painted gloss black, although the Miura frames and bulkheads were painted more of a satin black when they were new. Interestingly, when we removed the data plate from the right bulkhead area, the original satin black finish was clearly visible beneath the plate. Gently rubbing the satin black paint with lacquer thinner revealed what is presumably some of the original orange paint that would have been applied by Bertone.
We understand that the frames came from Marchesi finished in satin black. The frames were then united with the body by Bertone, who also painted the cars for the Lamborghini factory. Once the cars were assembled, the factory sometimes touched up certain areas with more satin black. The last three photos in the sequence below show the area beneath the data plate.
 |
 |
| Front end has now been stripped |
|
 |
 |
 |
 |
 |
 |
 |
 |
 |
 |
| A little lacquer thinner aided detective work! |
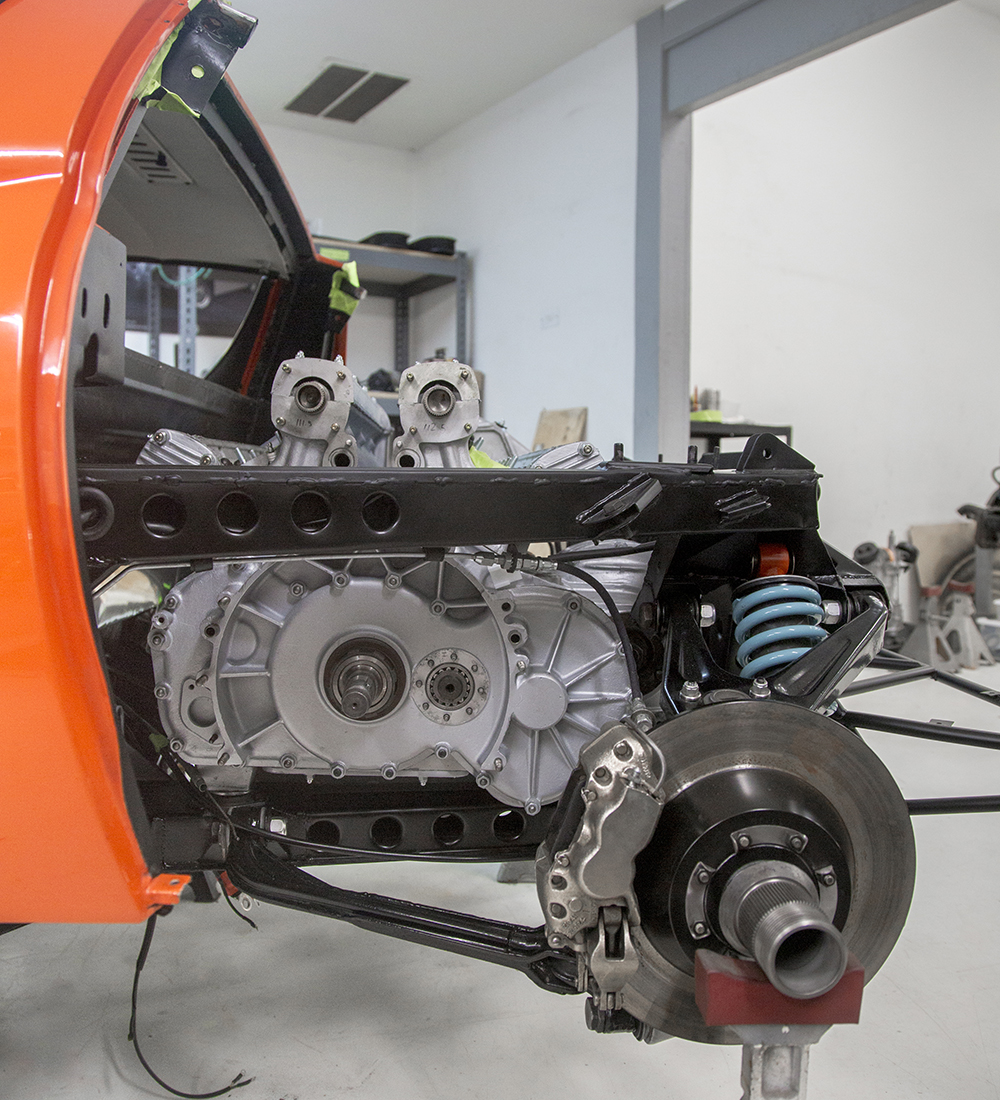
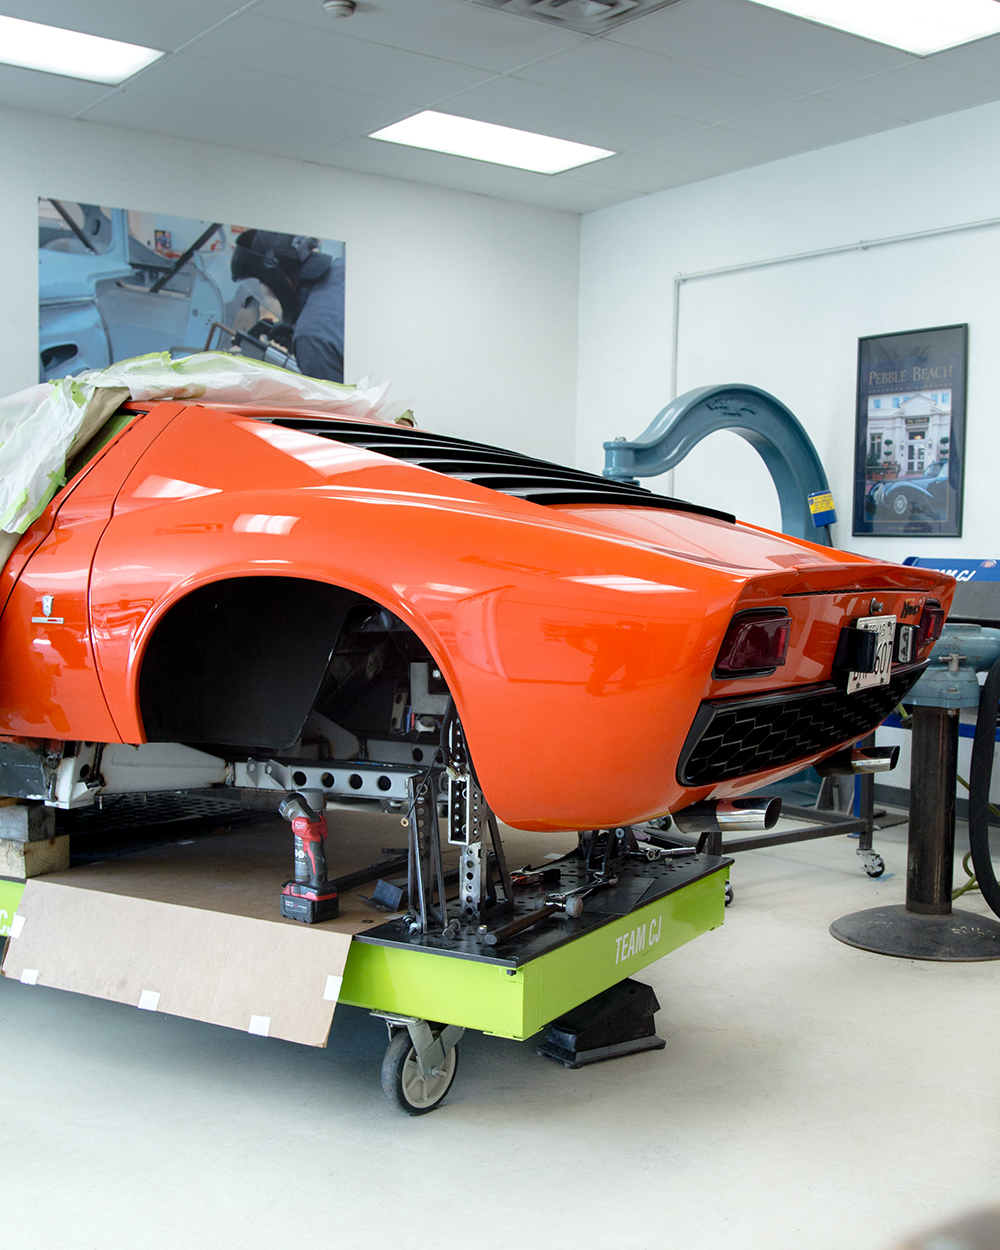
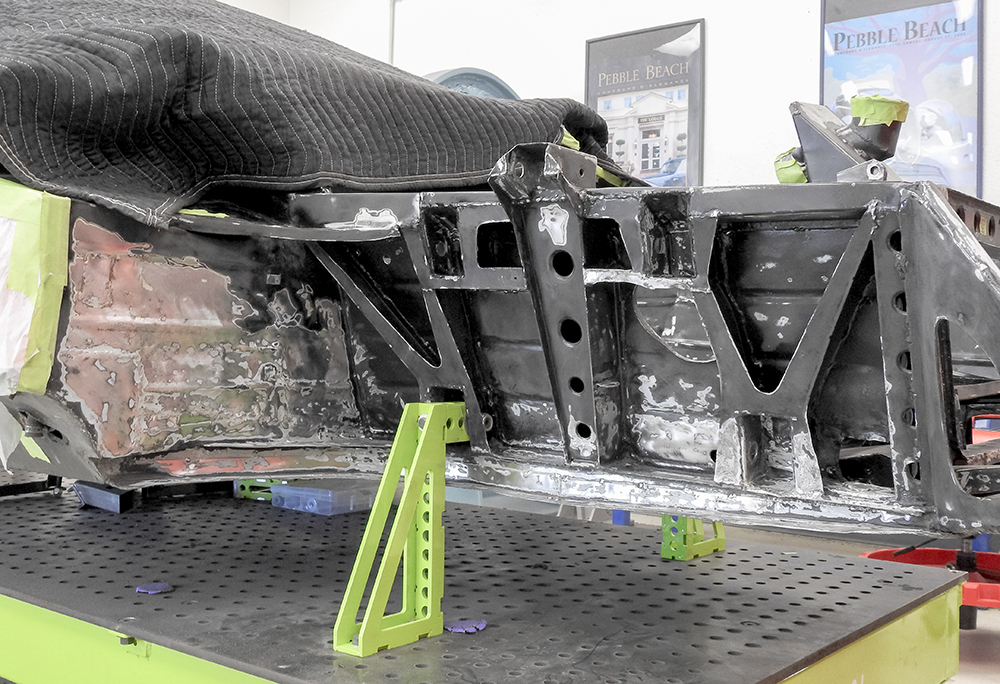
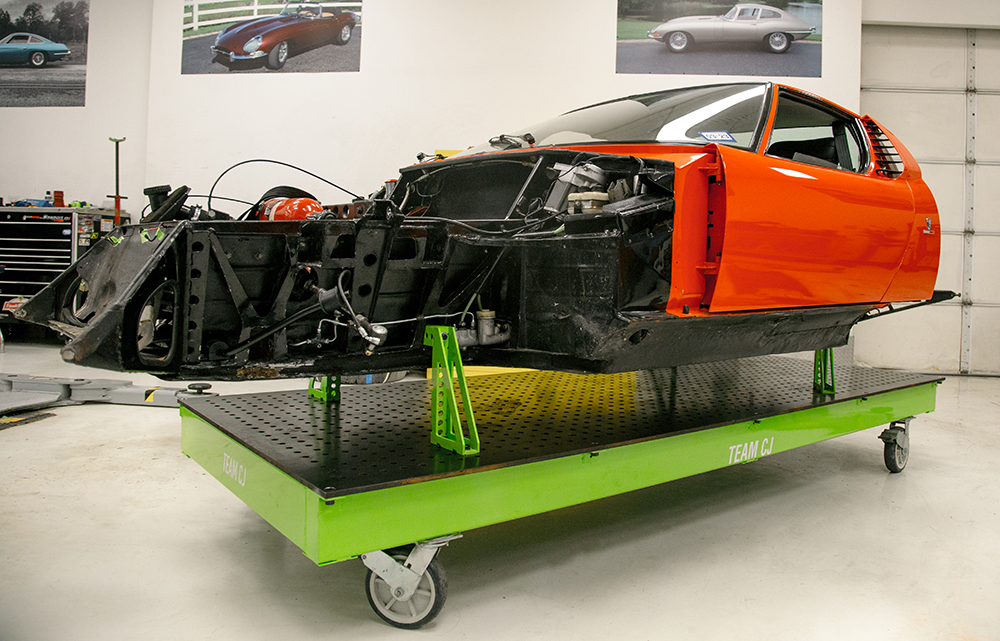
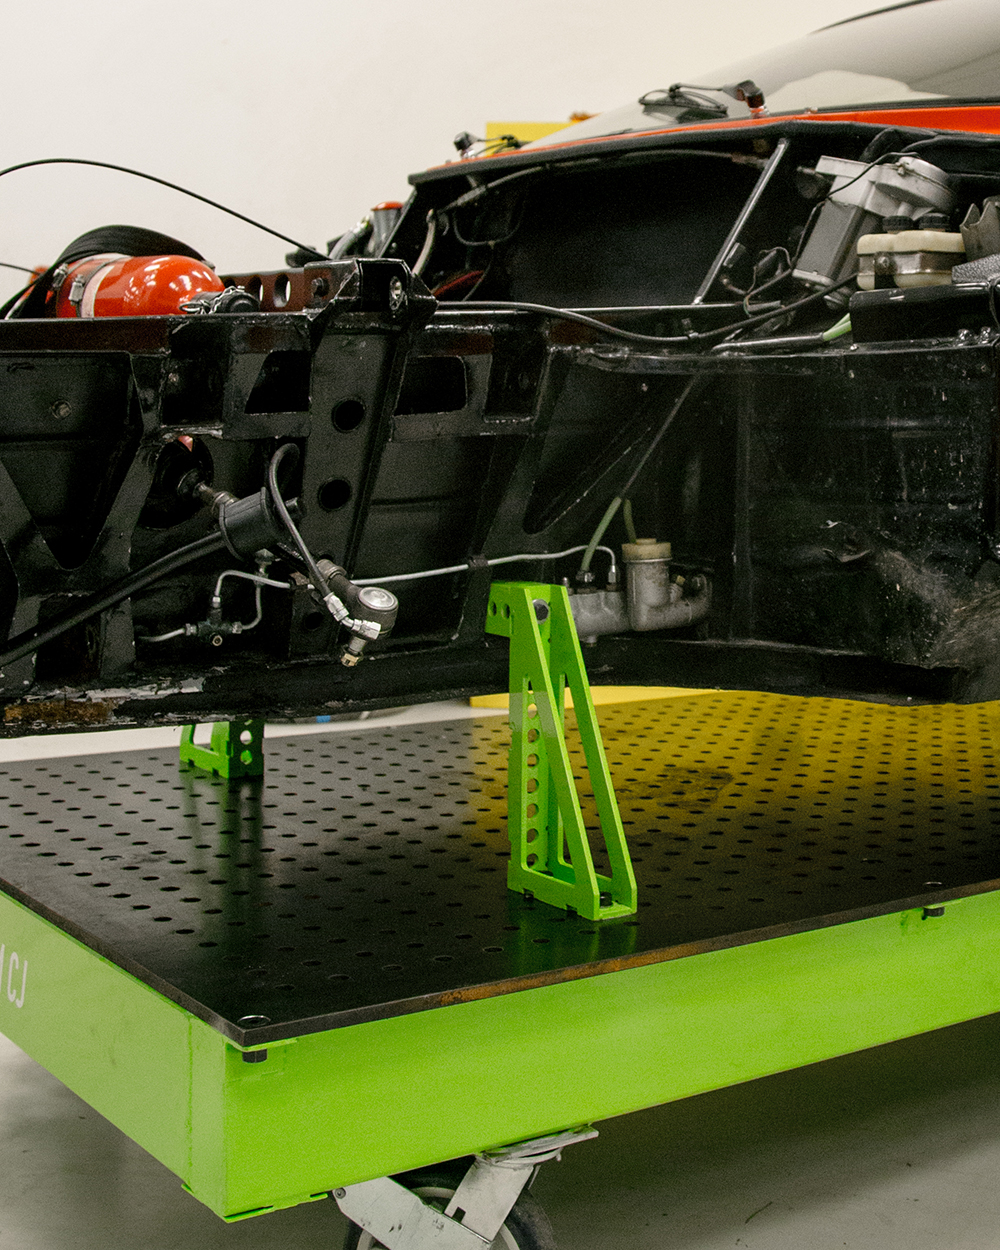
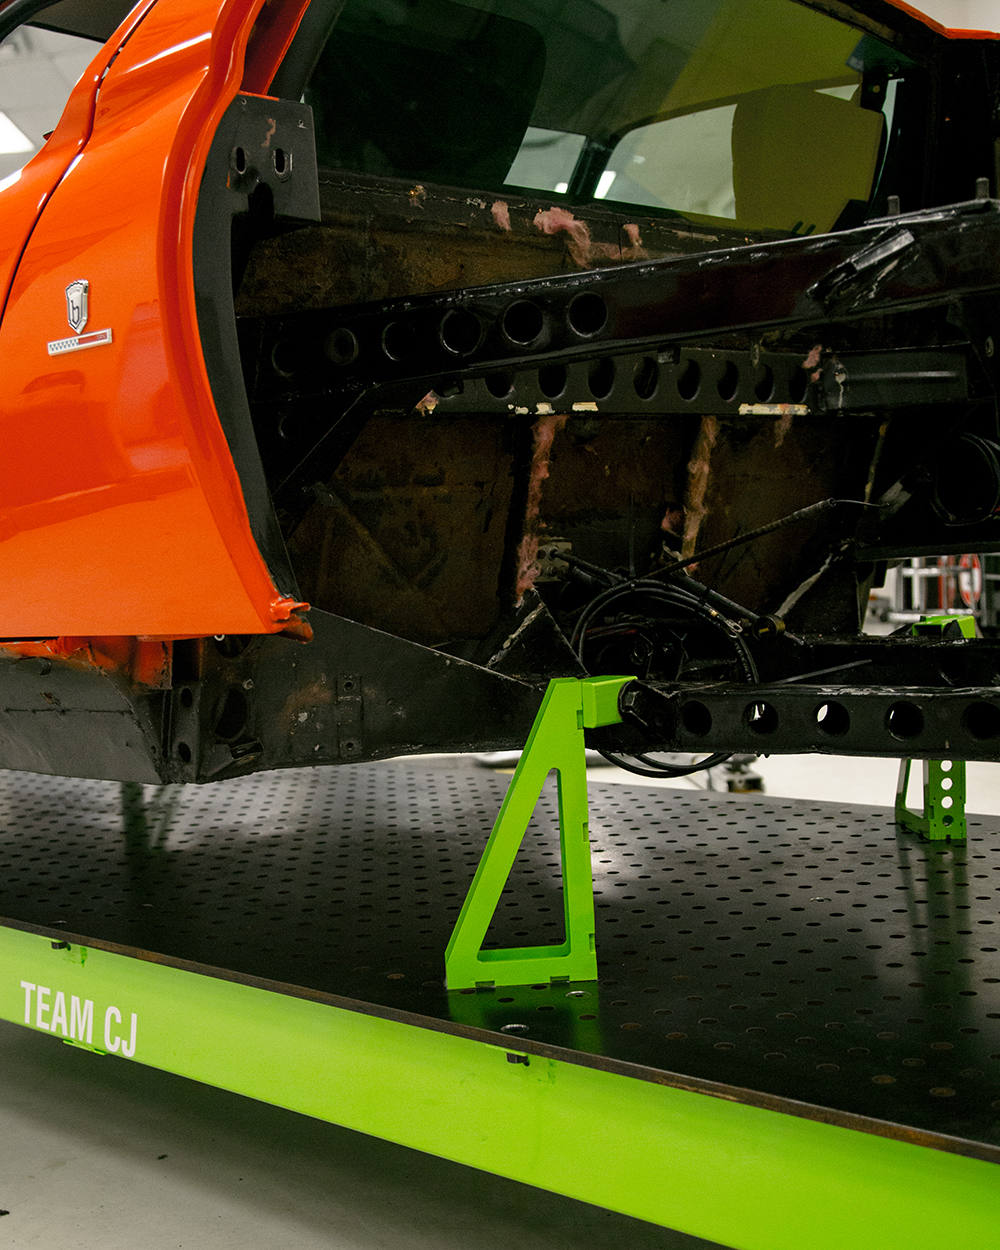
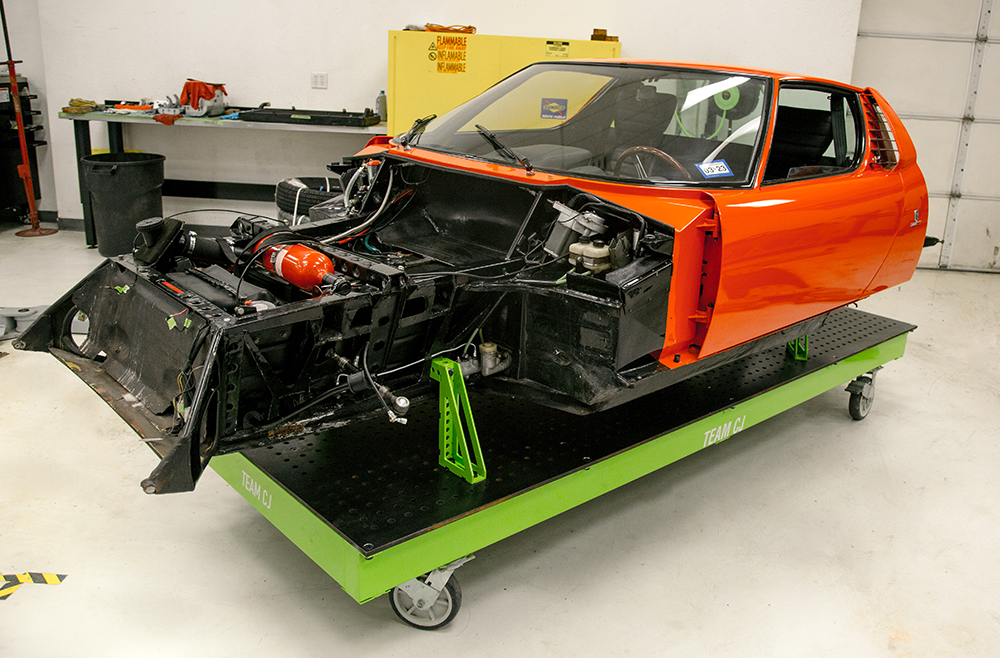
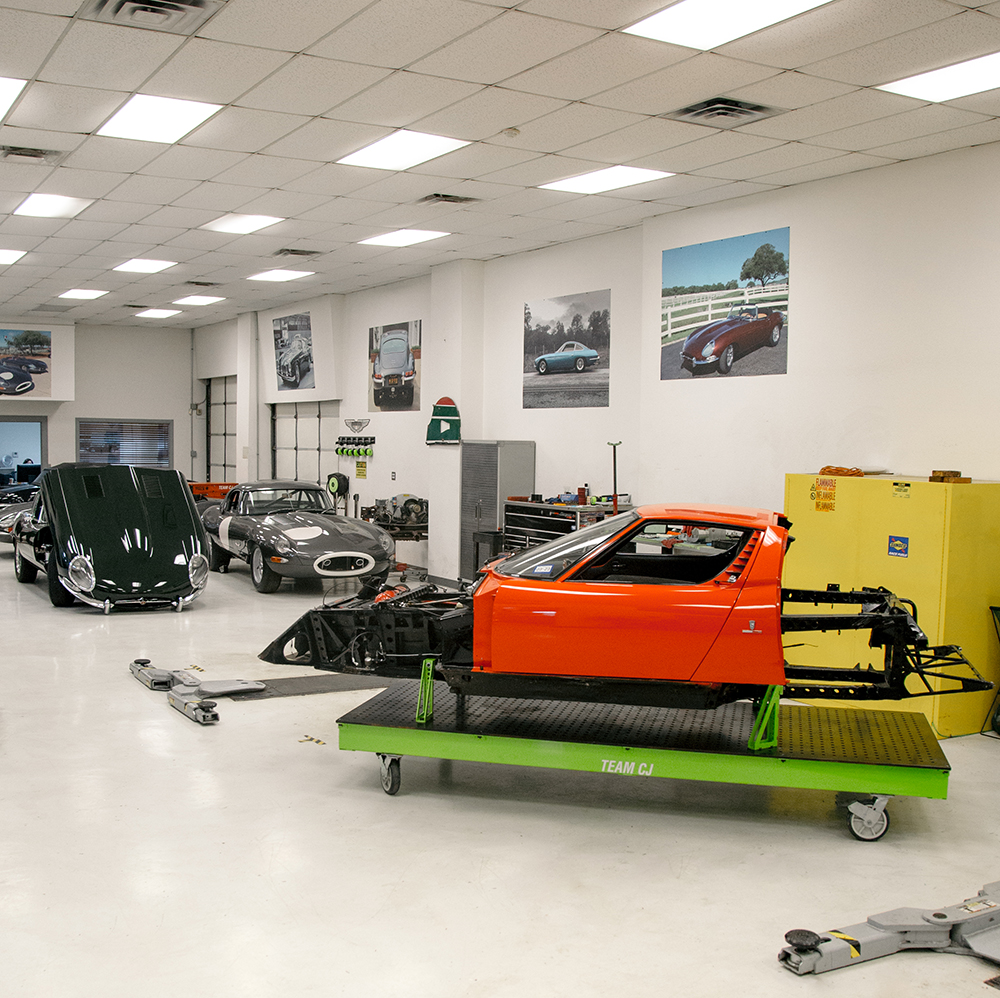
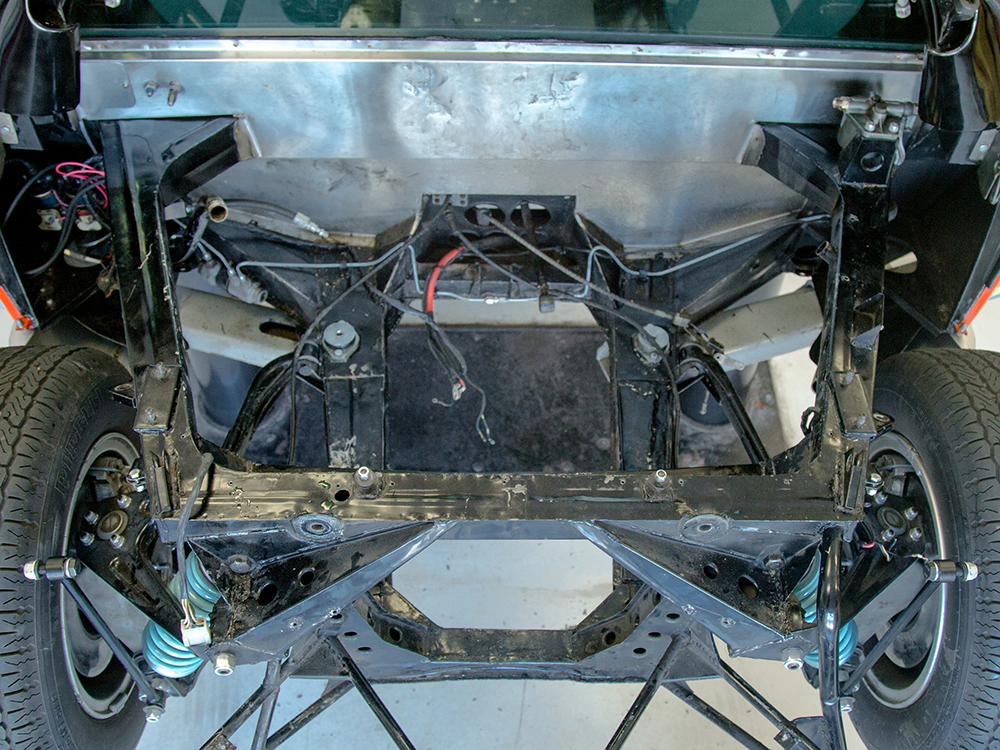
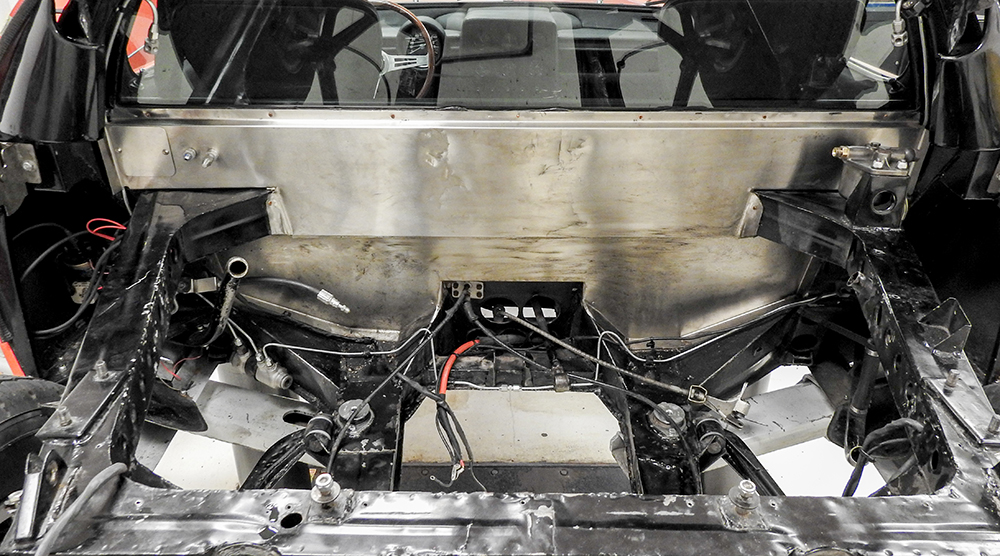
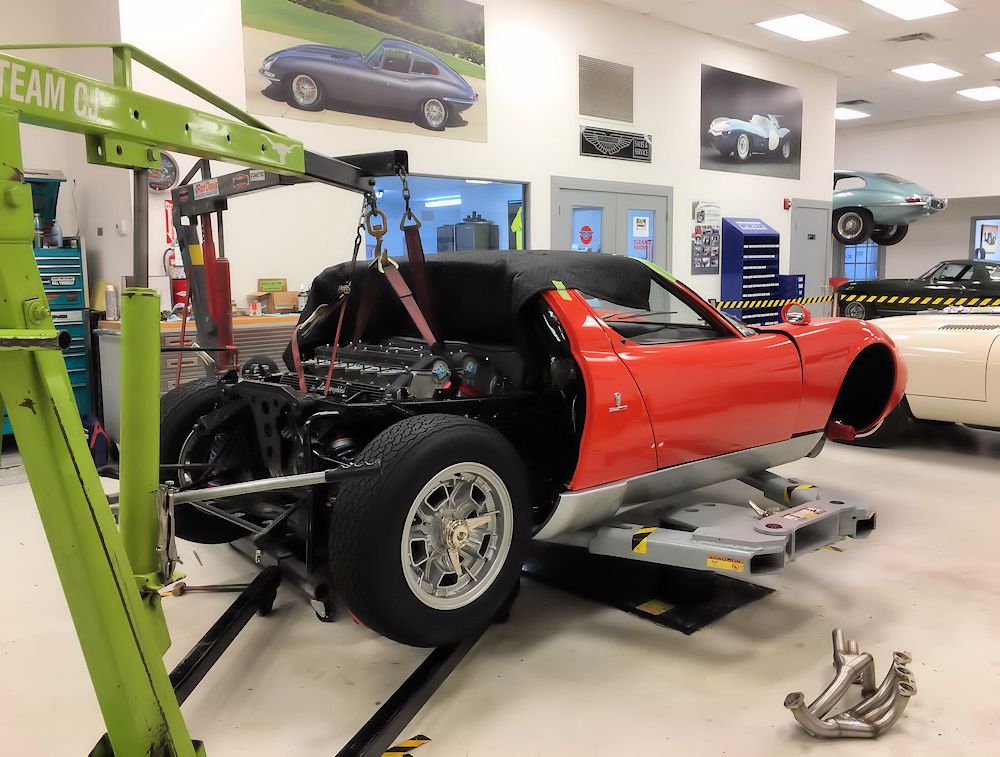
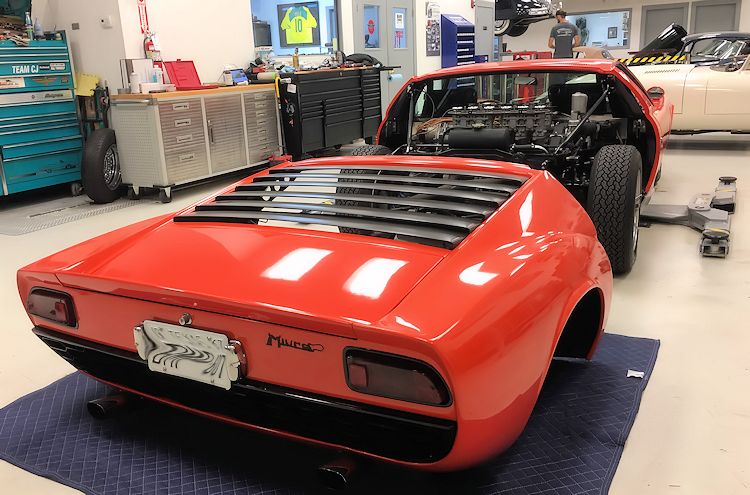
The Miura body has now been secured to the chassis table in preparation for repairs to the rear engine cradle and chassis rails.
 |
 |
 |
 |
 |
 |
 |
 |
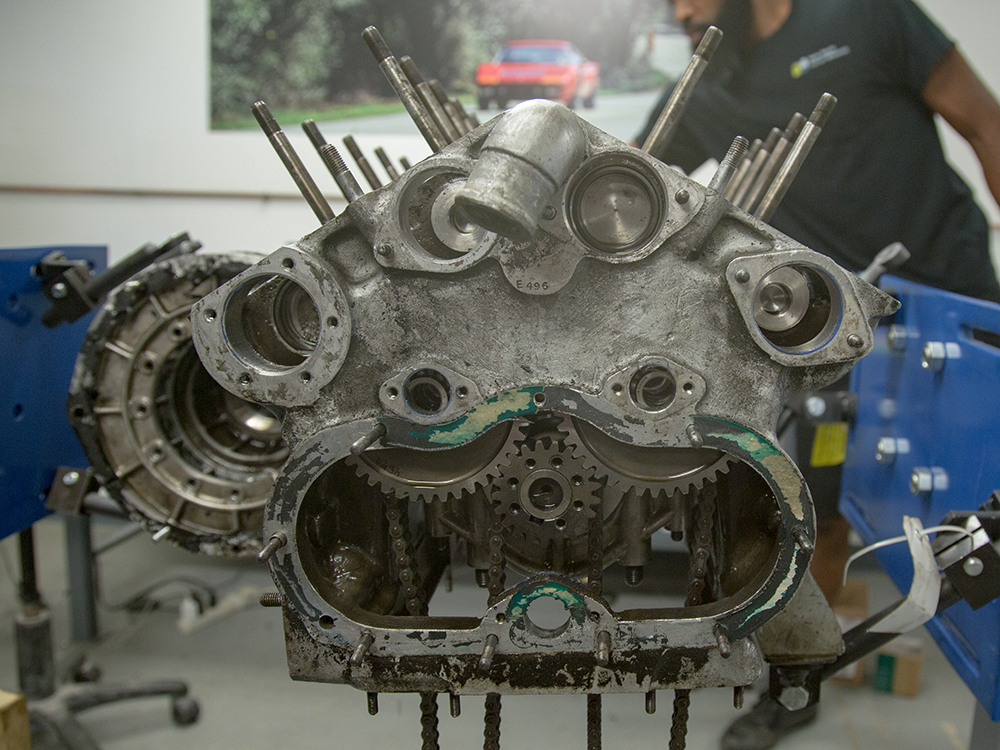
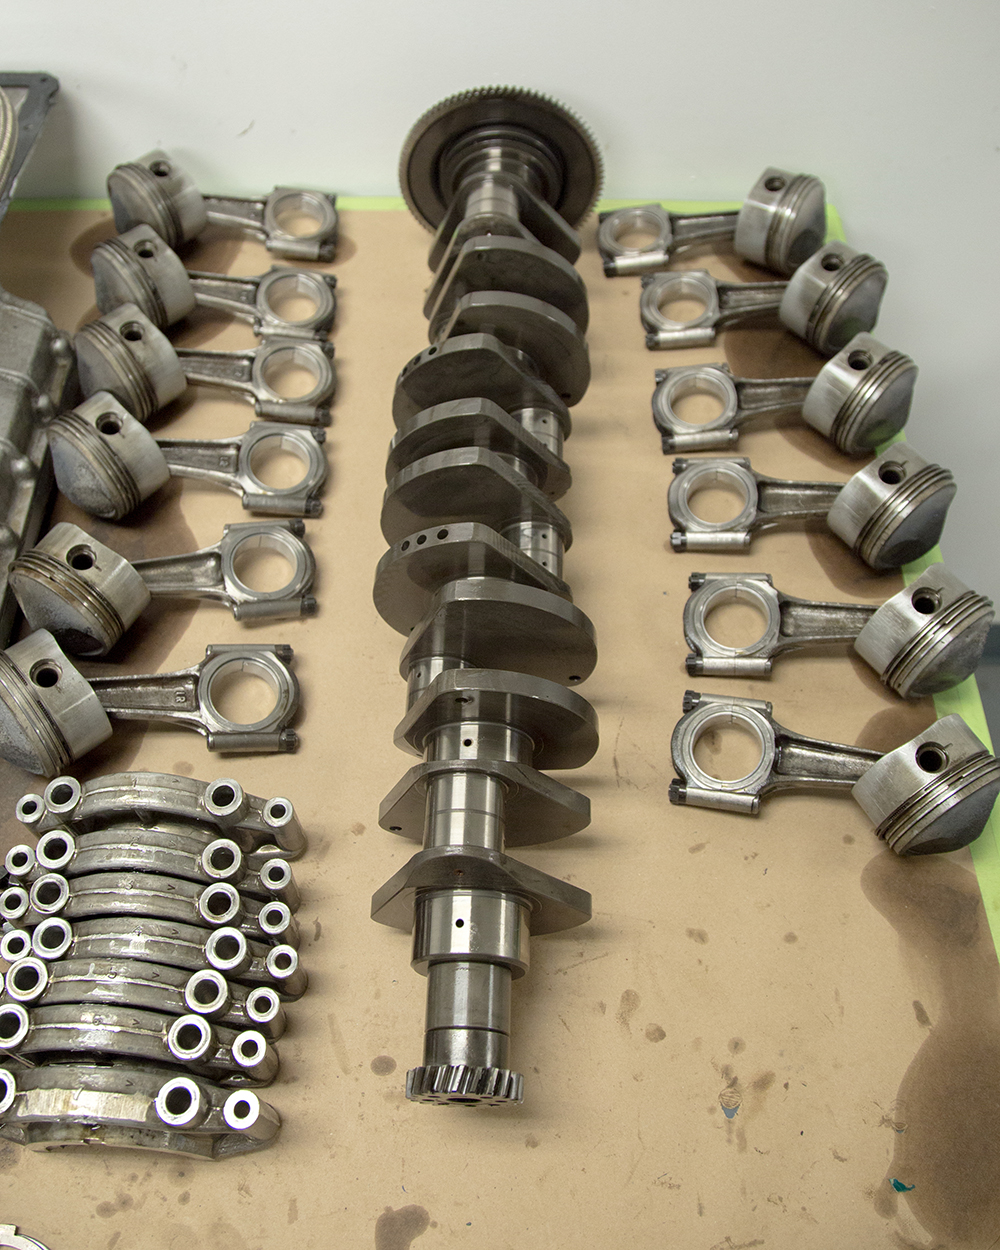
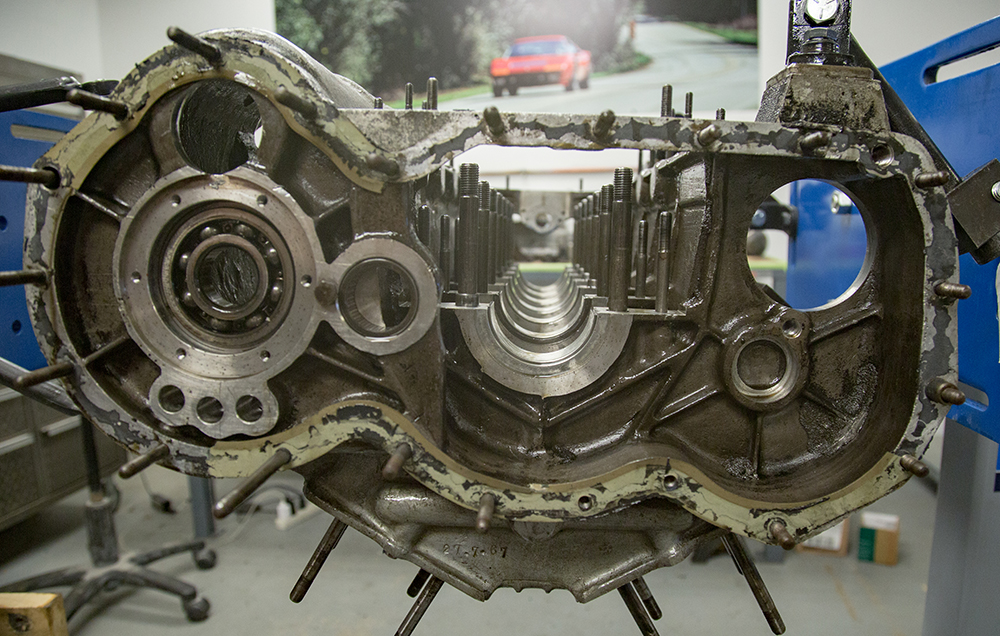
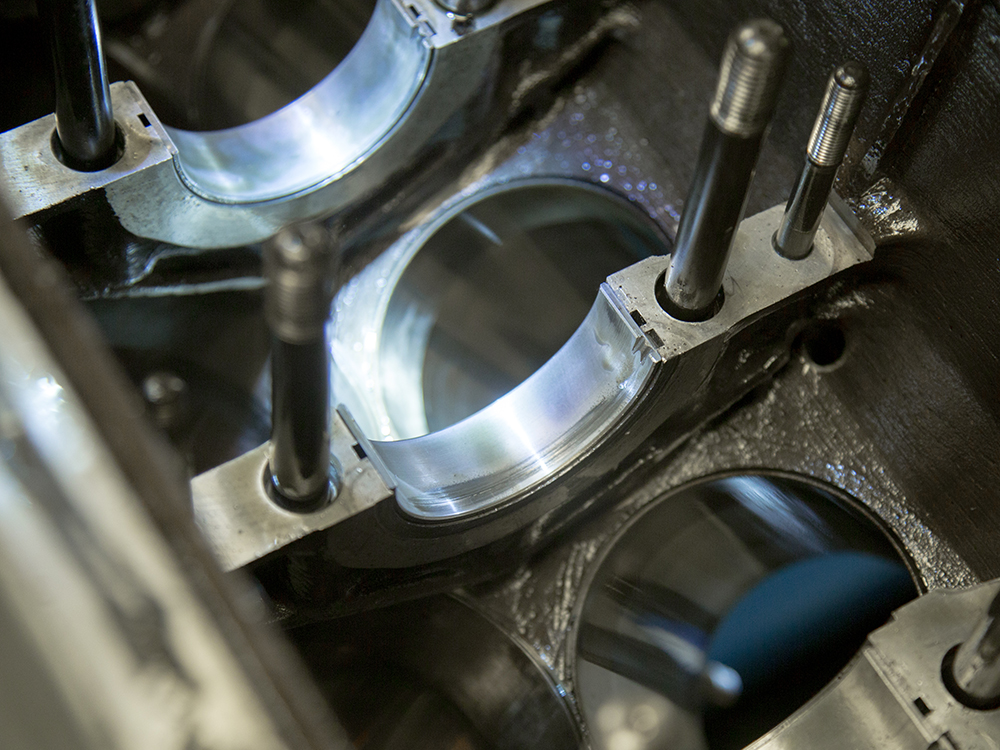
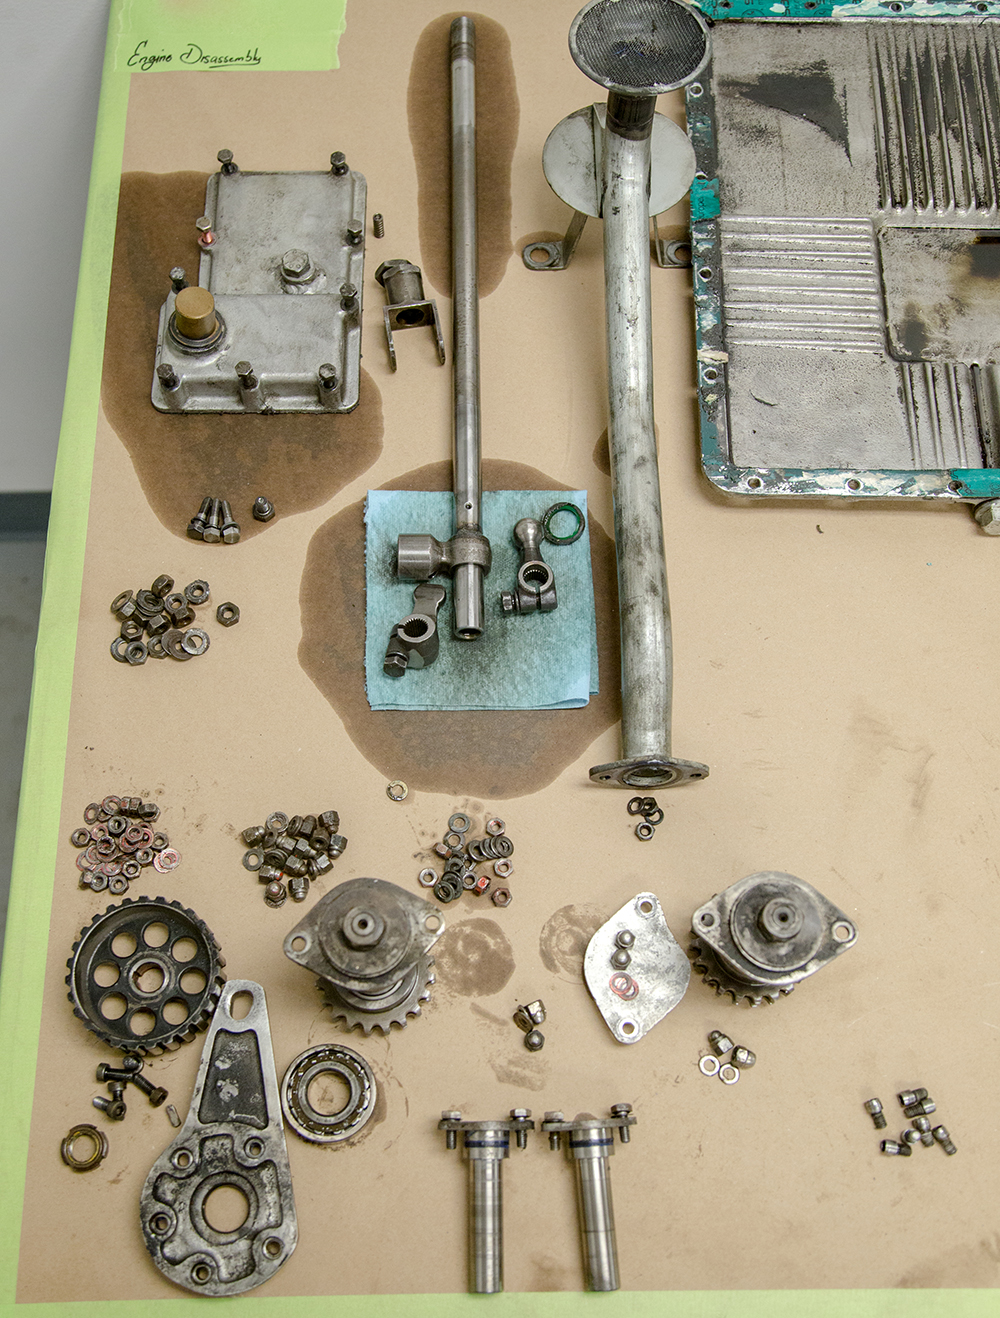
Darien has now completed the tear down of this Miura engine.
 |
 |
 |
 |
 |
 |
 |
 |
 |
 |
 |
 |
 |
 |
 |
 |
Engine tear down underway..
 |
 |
 |
 |
 |
 |
 |
 |
 |
 |
 |
 |
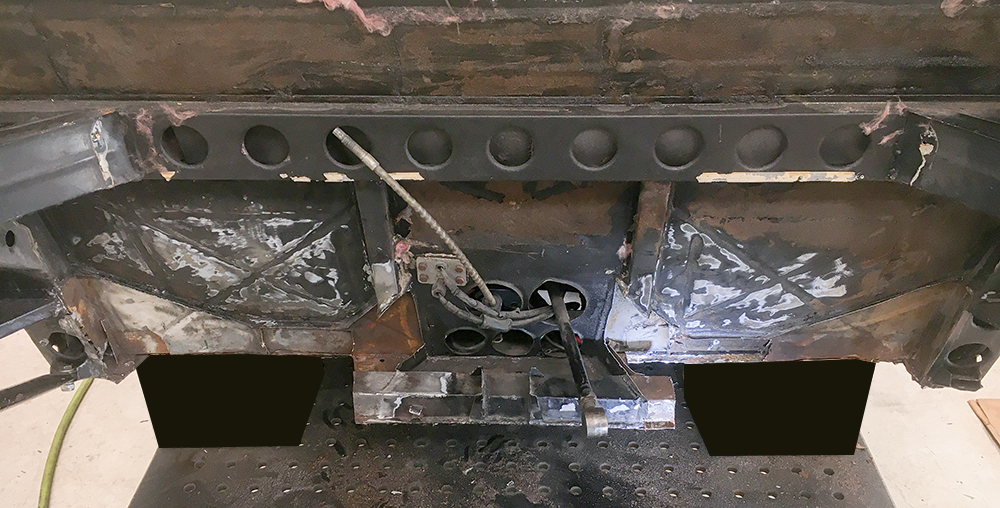
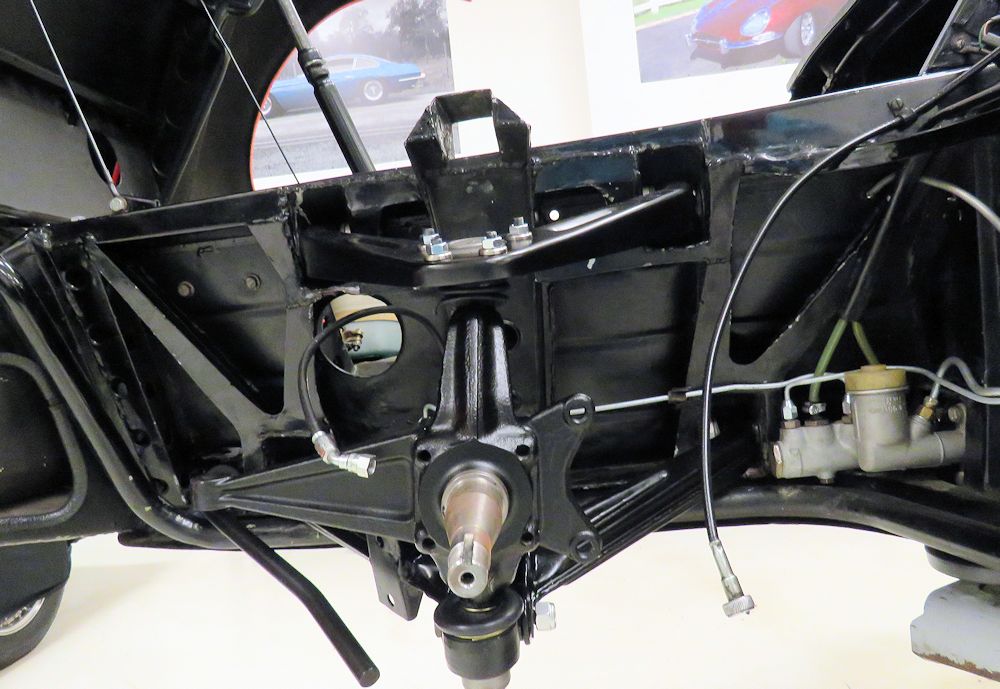
Removing the engine for rebuild and inspecting the rear frame and bulkhead, both of which will be repaired and refinished before the engine is reinstalled.
 |
 |
 |
 |
 |
 |
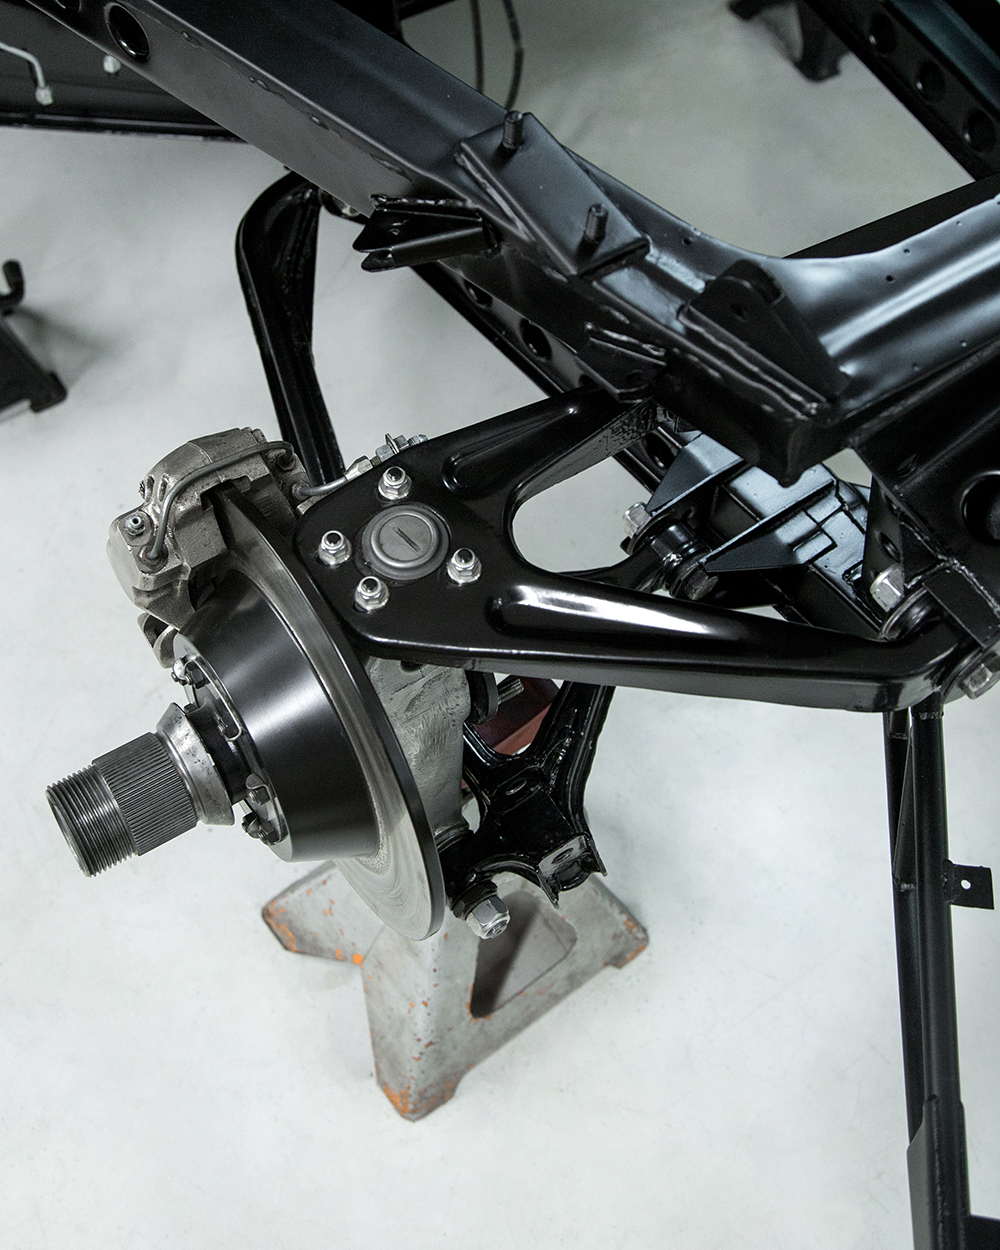
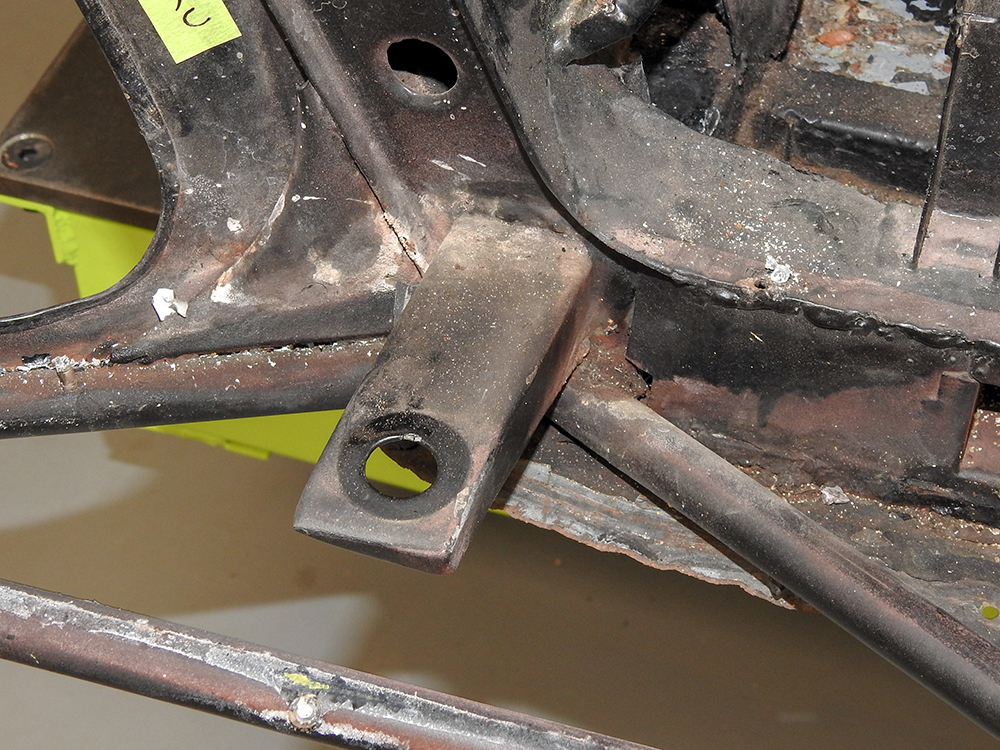
| Rear subframes appear to be generally sound |
|
 |
 |
 |
 |
 |
 |
| |
|
 |
 |
 |
 |
Our next task will be to rebuild the engine and restore the engine bay to concours appearance.
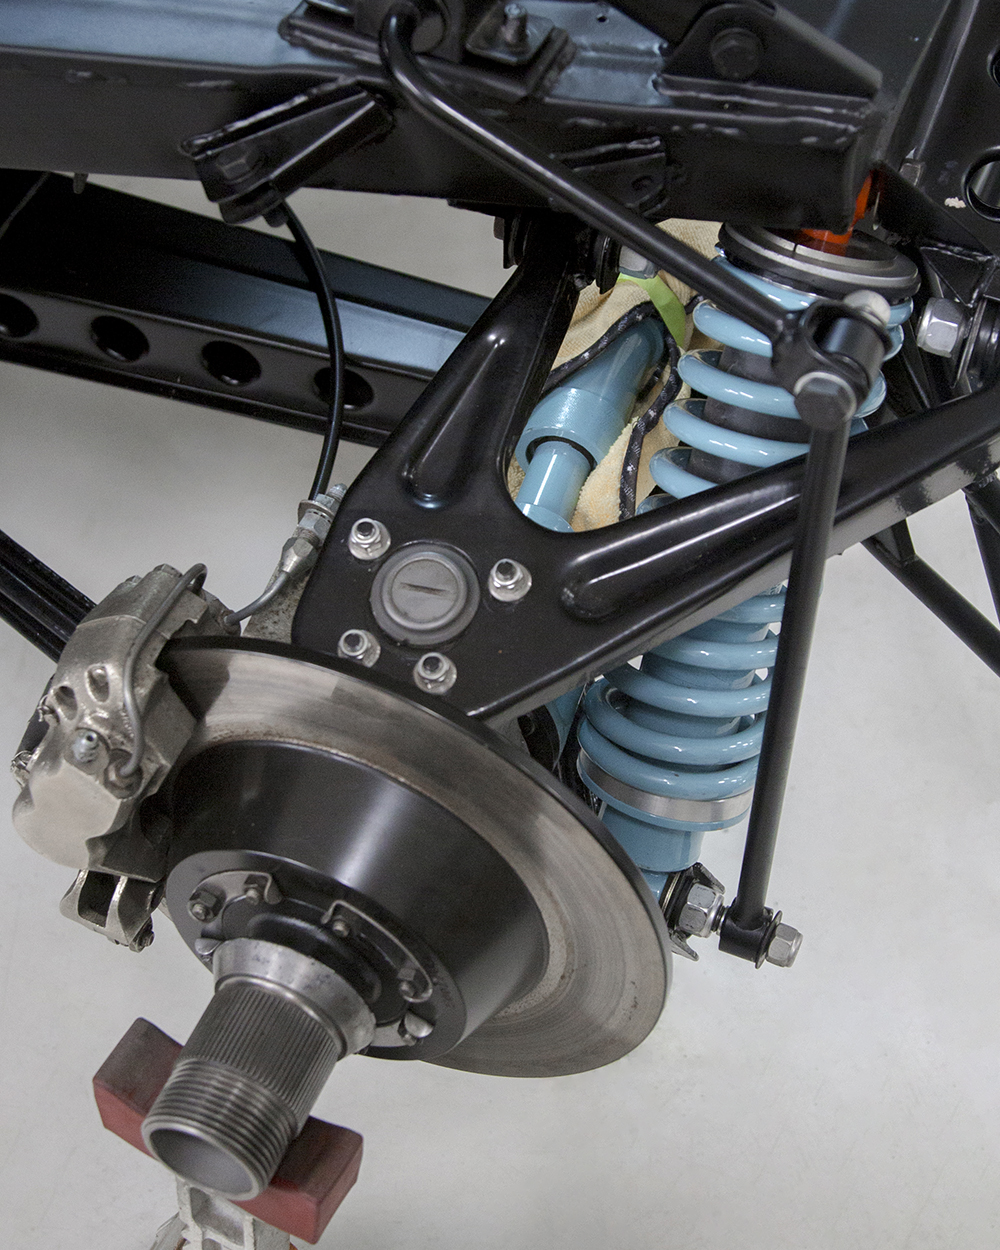
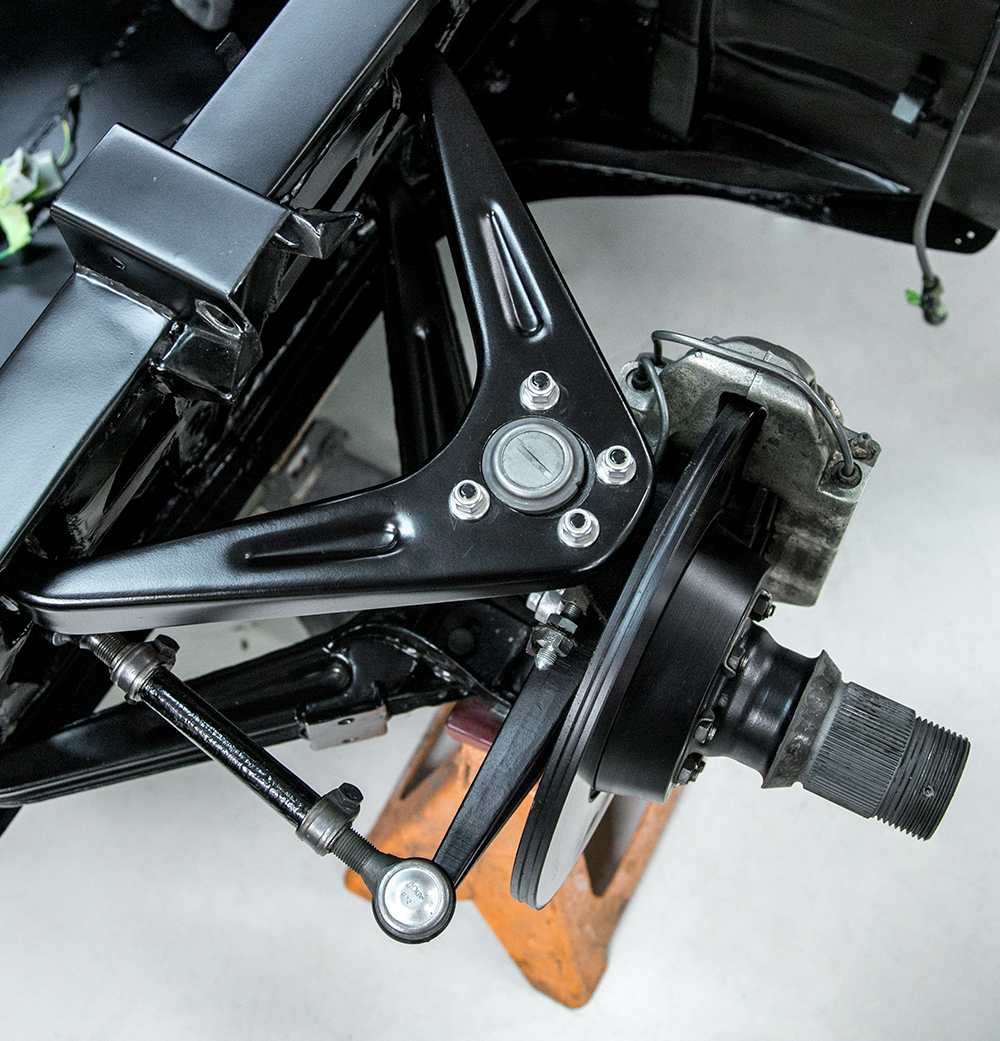
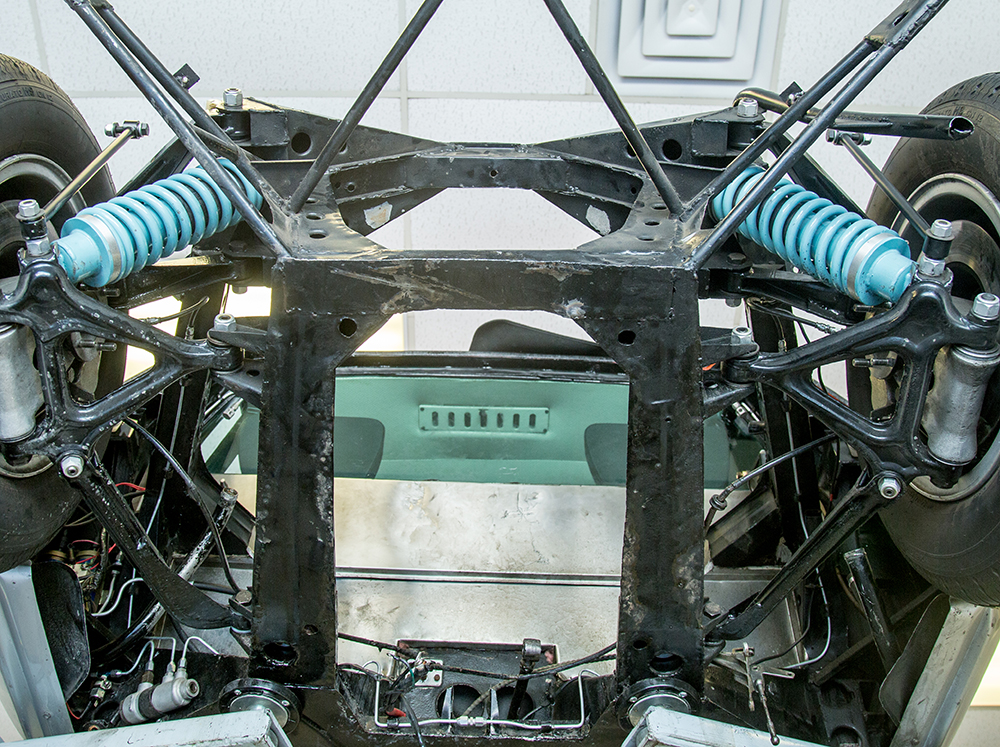
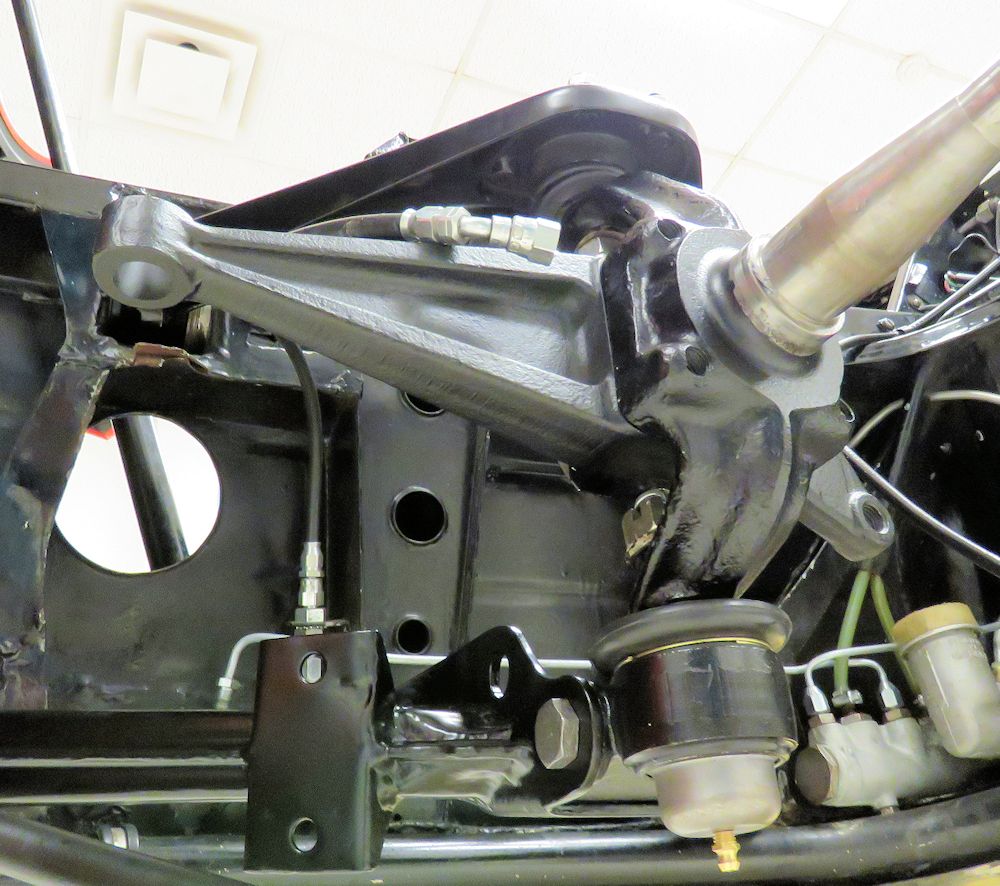
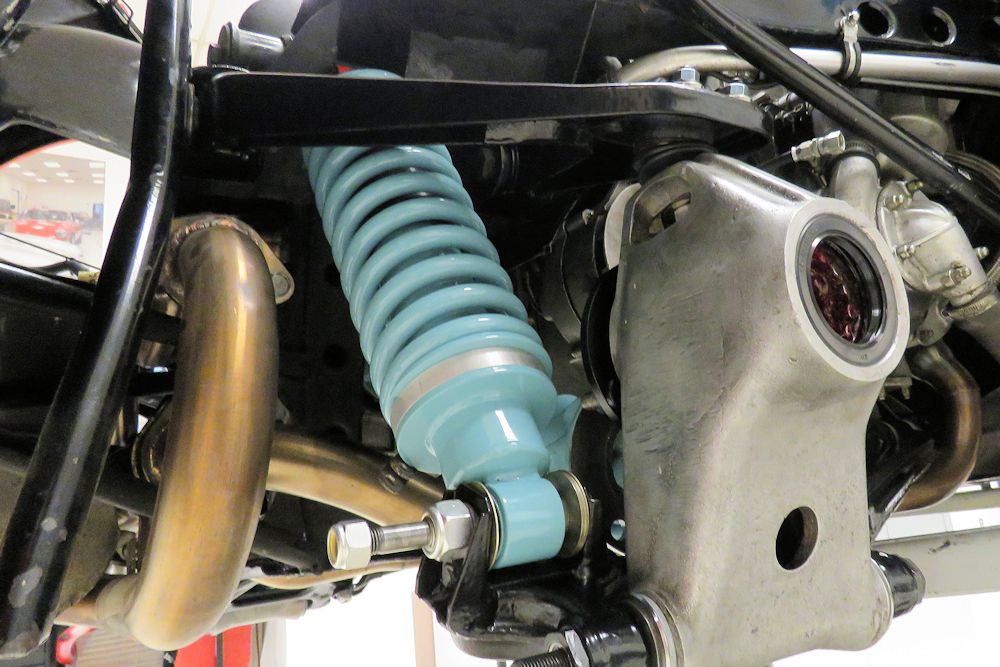
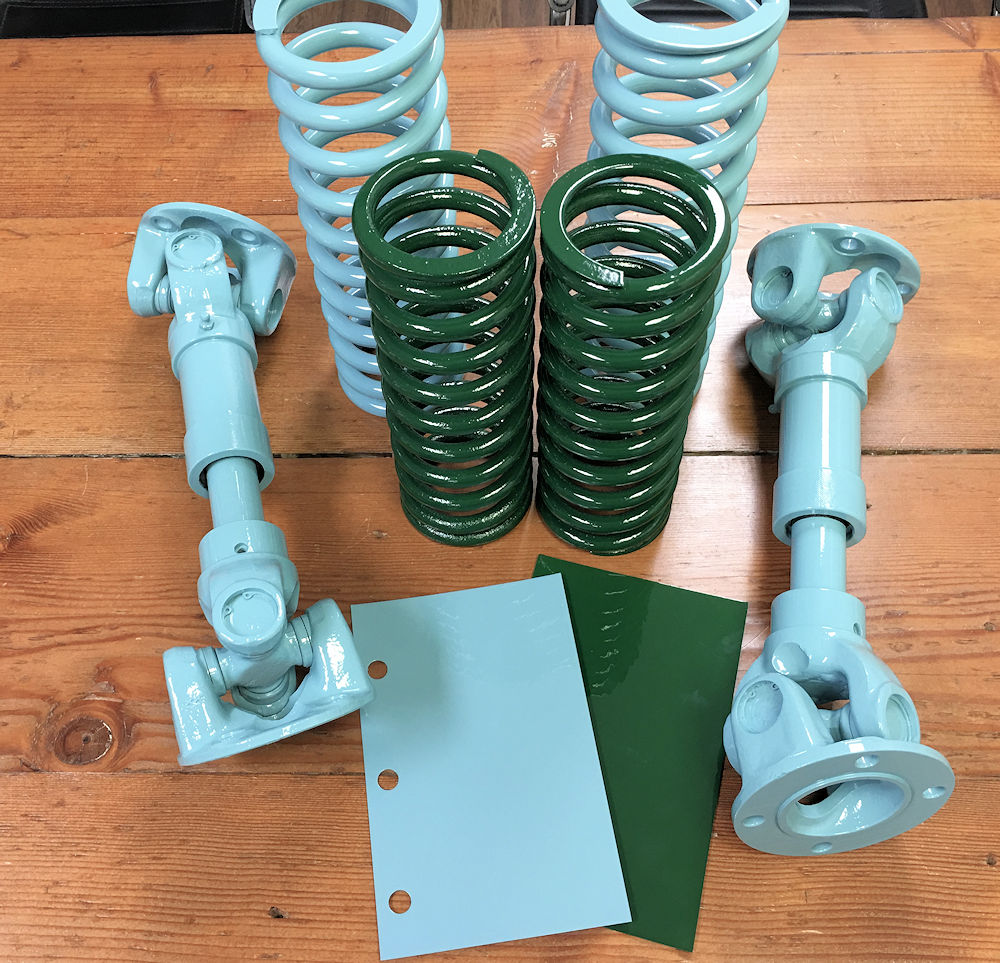
Last week we started going back together with the restored and rebuilt suspension. We also refinished the air cleaner boxes and painted the newly fabricated front suspension cross-member.
 |
 |
| Starting to reassemble the front suspension |
|
 |
 |
| Nuts are temporary and will be replaced with
yellow Nyloks once suspension geometry has been set up |
|
 |
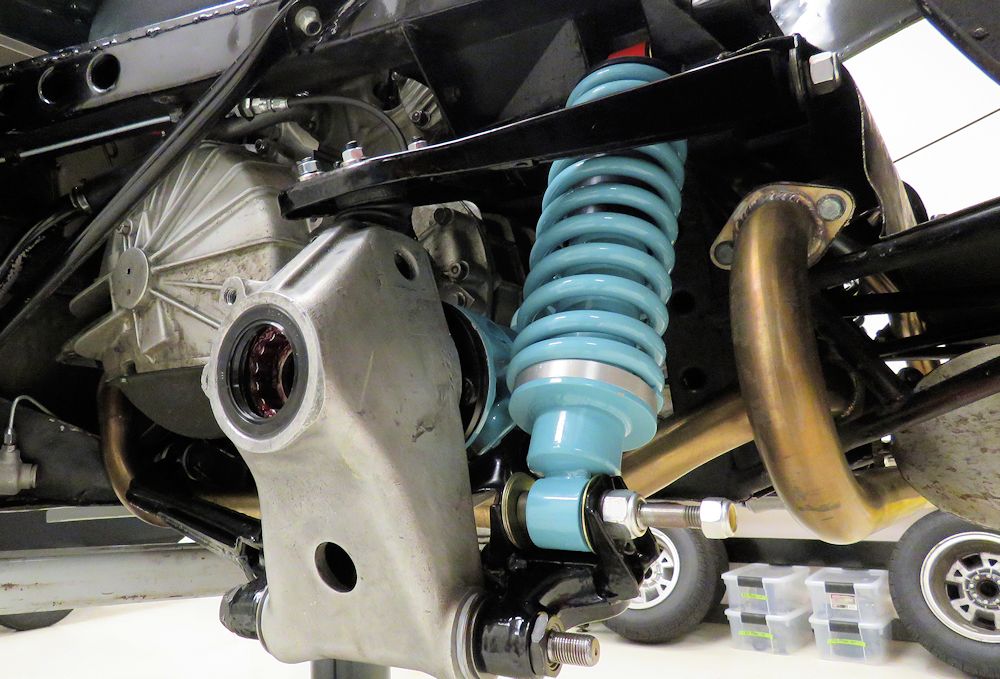 |
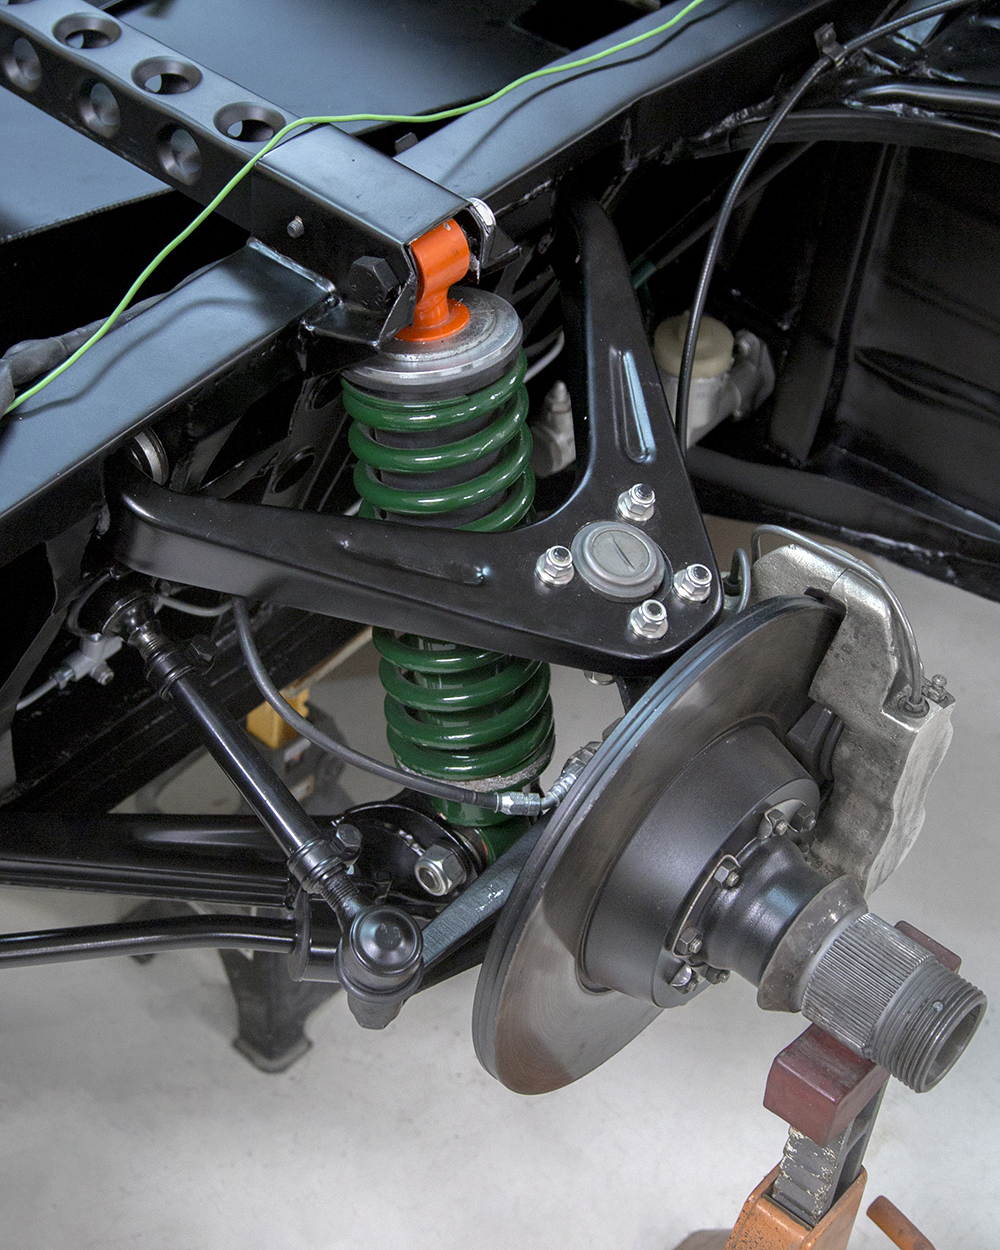
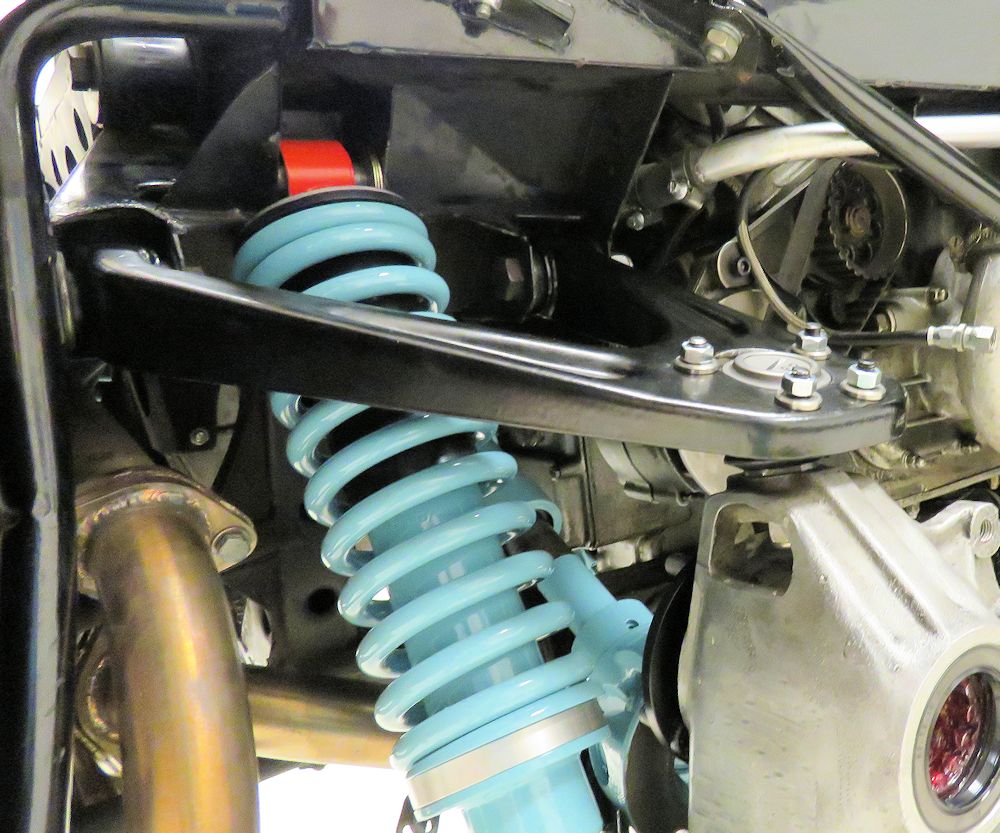
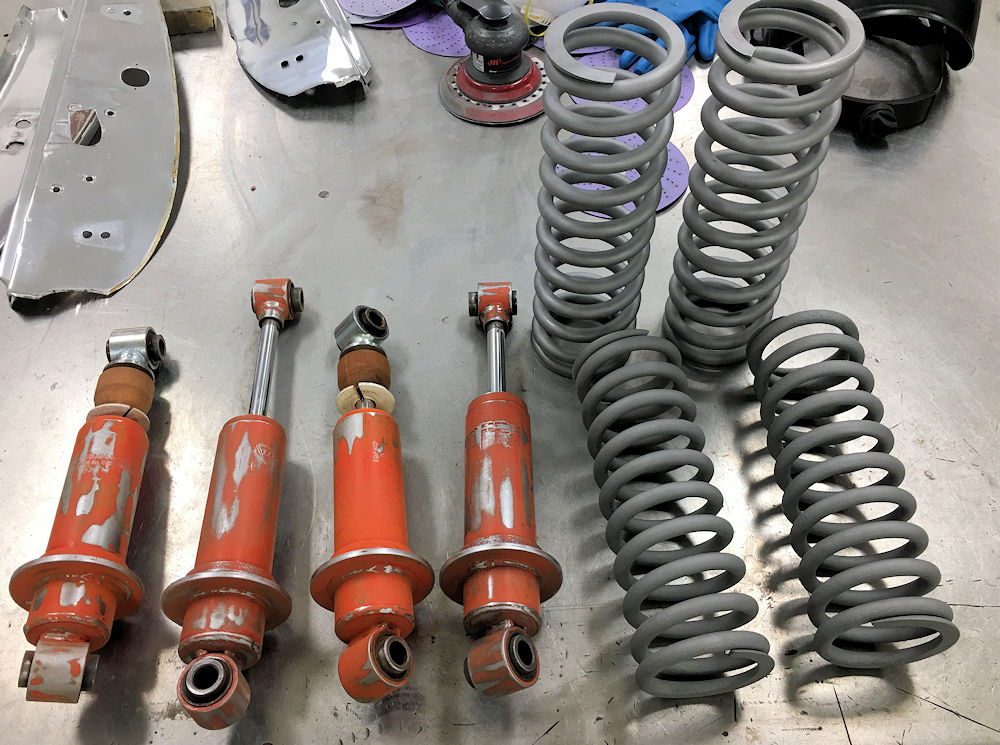
| Rear shocks and springs have been restored and
repainted to original specs |
|
 |
 |
| New cross-member has been painted along with
the new sway bar links |
|
 |
 |
| |
Gratuitous photo bomb by the Bull Award from
last weekend's Concorso Italiano |
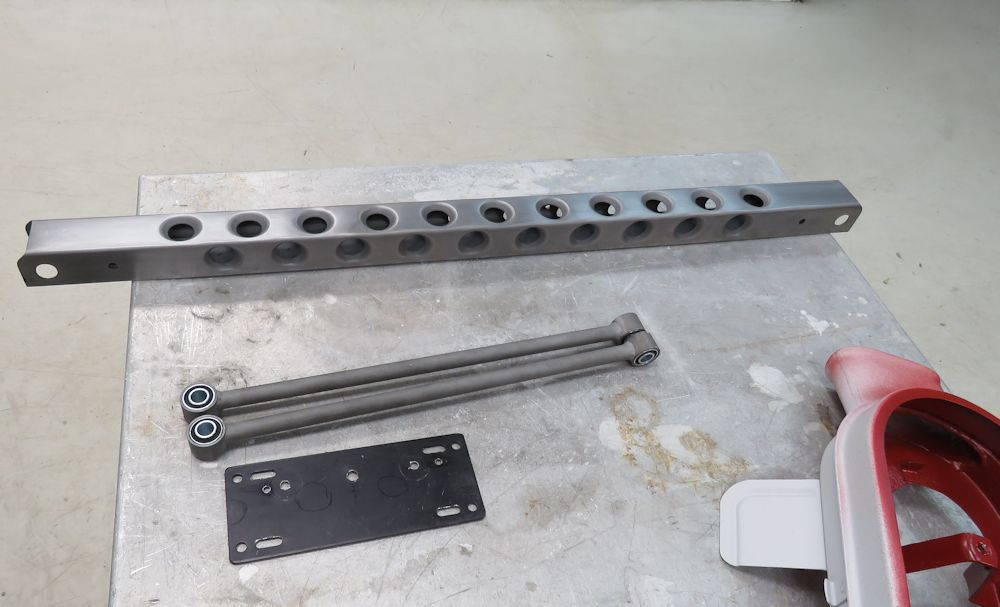
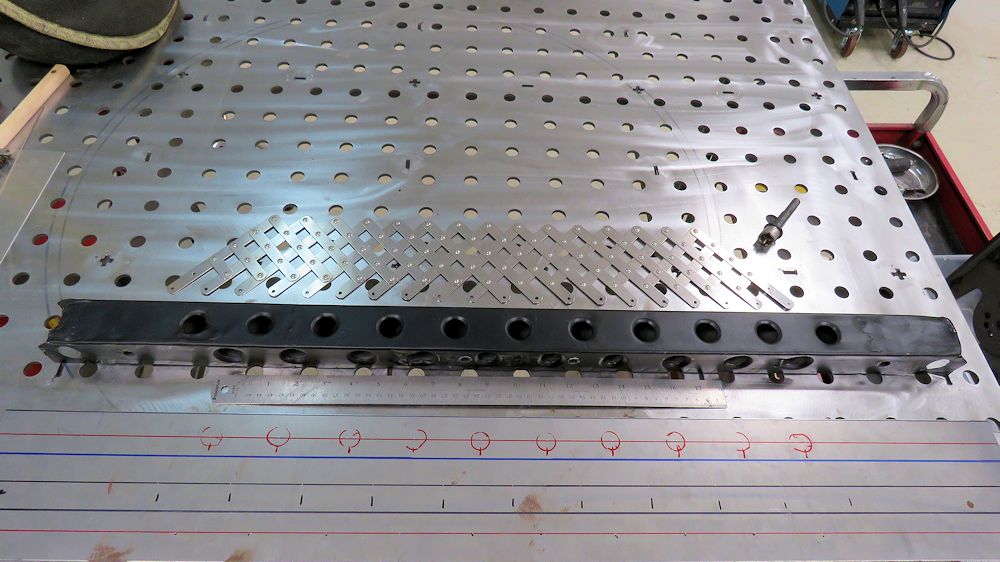
Jake has fabricated a new front suspension cross-member to replace the damaged original.
 |
 |
 |
 |
 |
 |
 |
 |
 |
 |
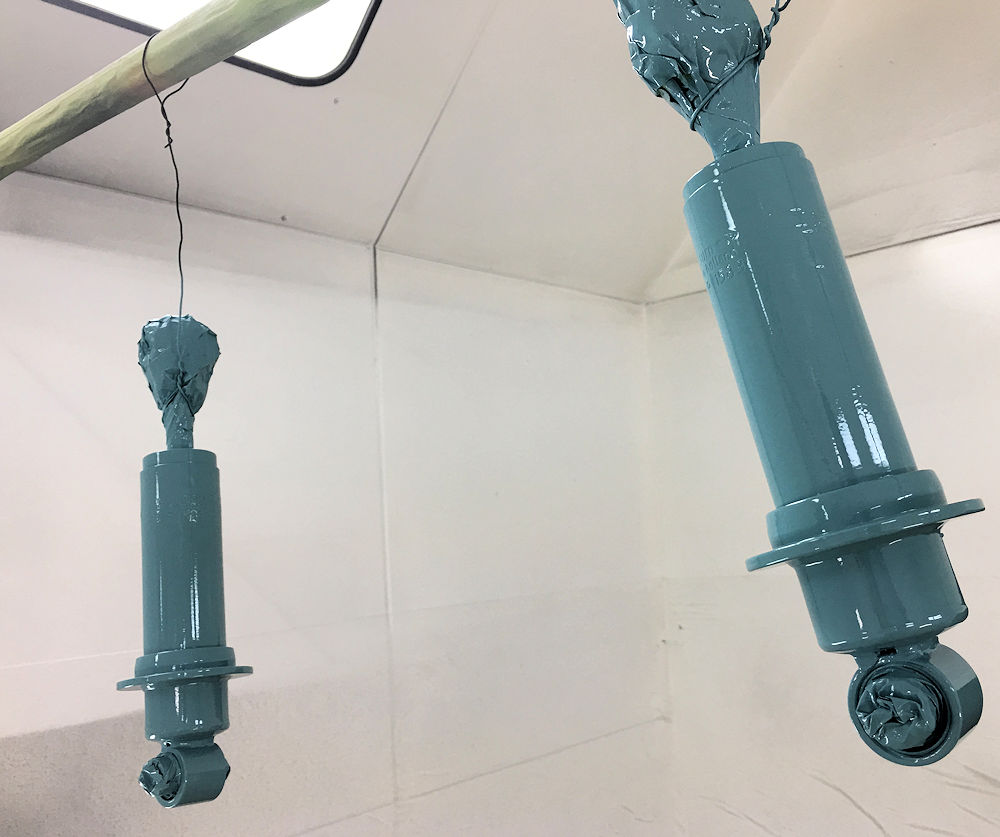
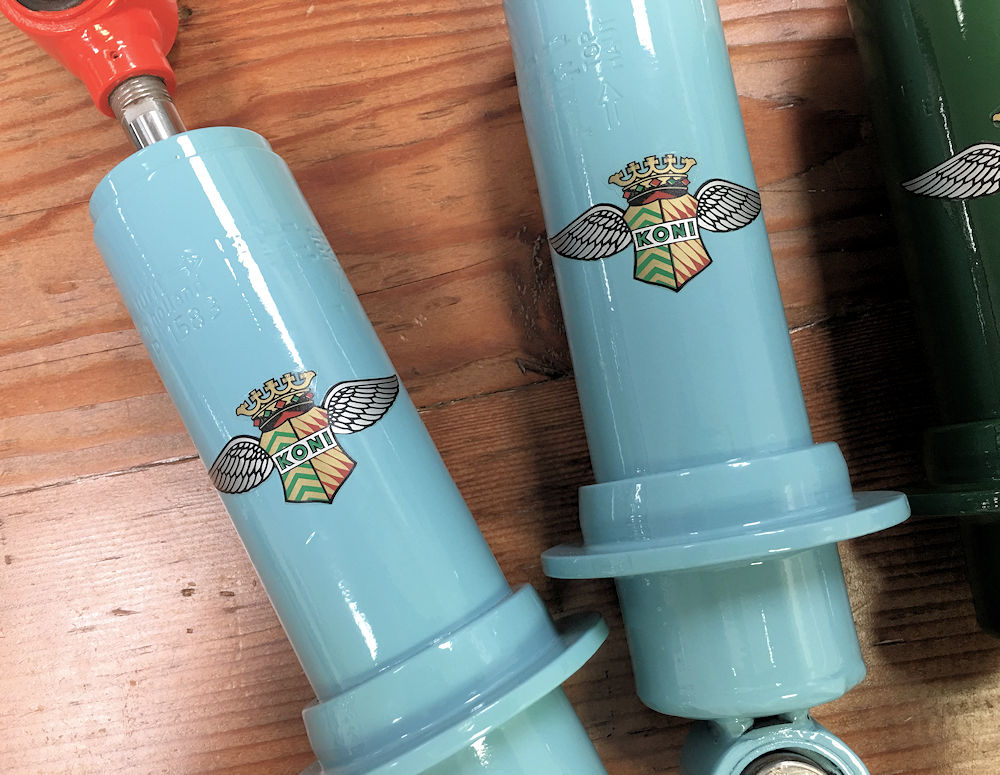
Repainting the Koni shocks, springs and rear half shafts.
 |
 |
| Springs were media blasted back to bare metal,
Konis sanded down |
Half shafts and springs repainted in correct
'Miura' colors |
 |
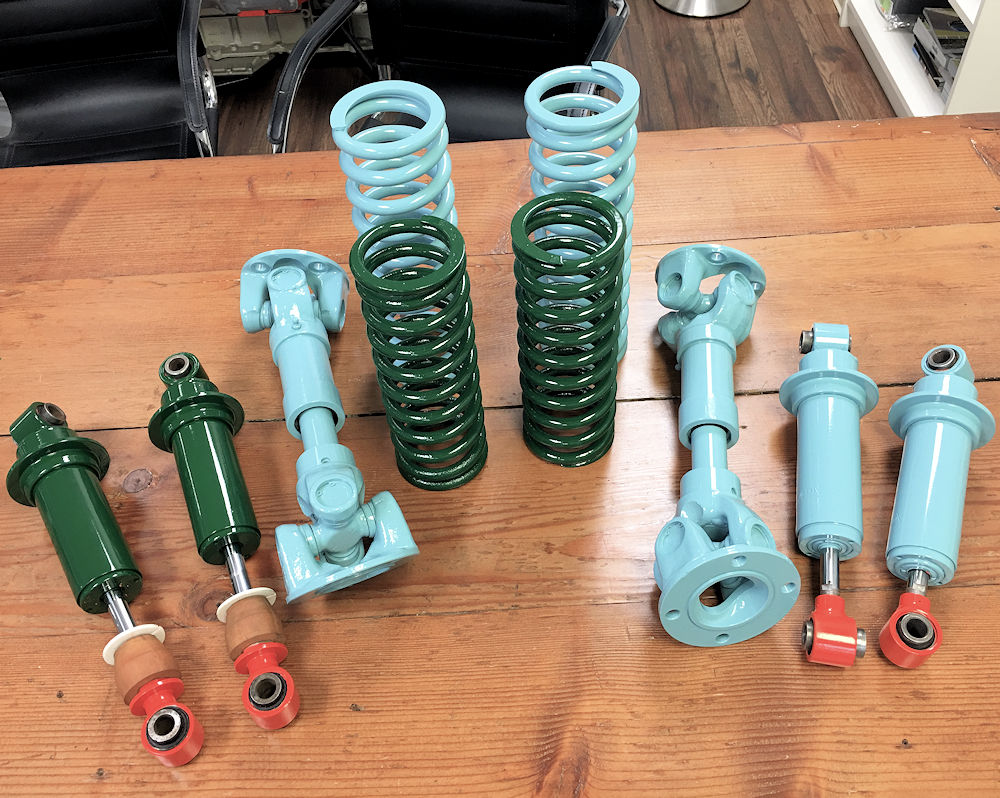 |
| Shocks are painted to match springs, except
for upper mounts which are left Koni orange |
|
 |
 |
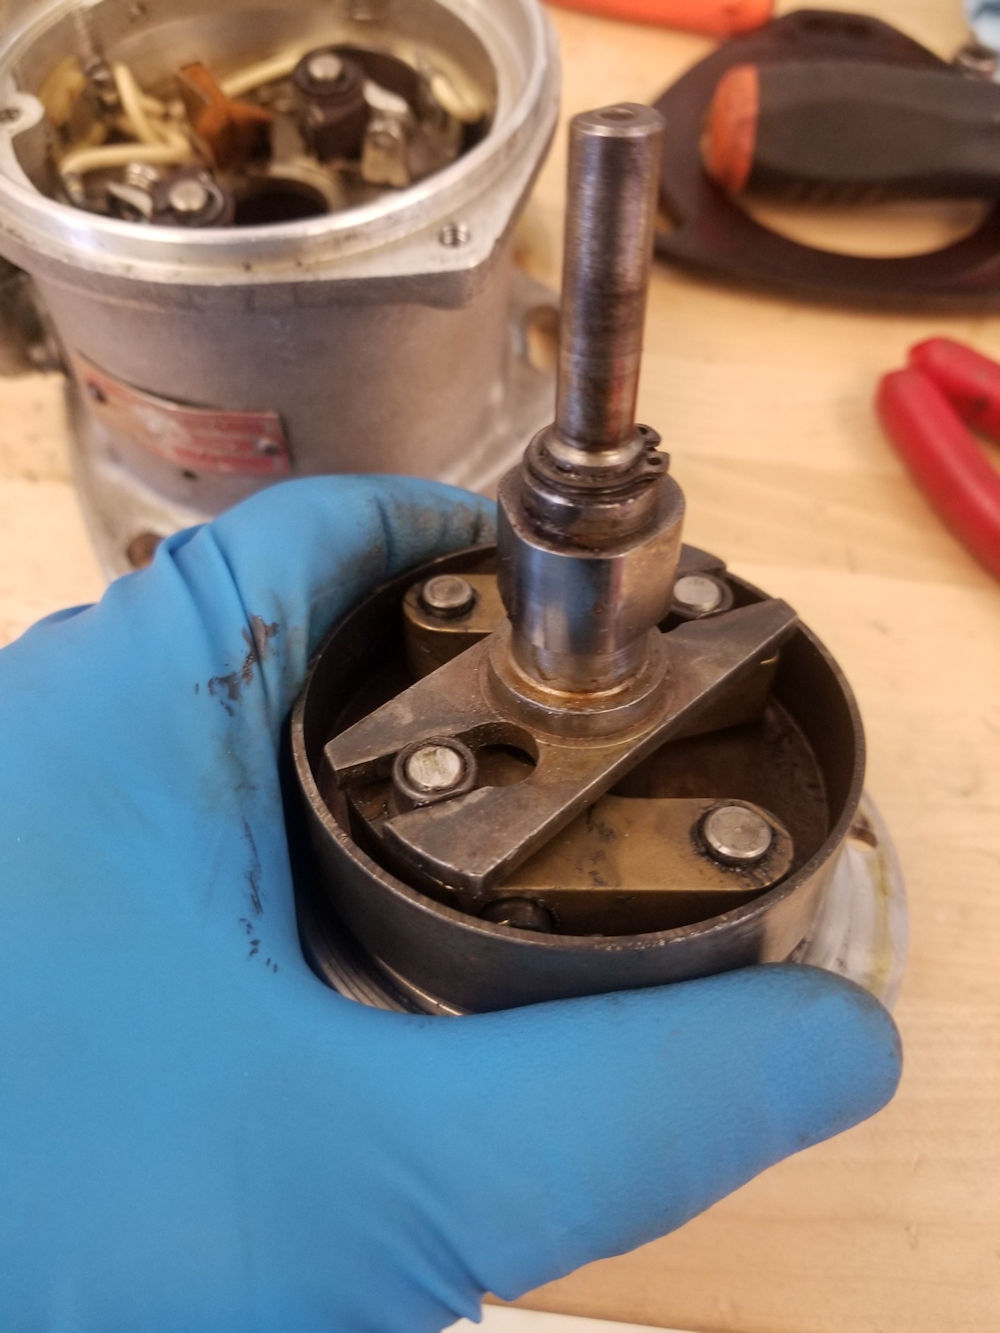
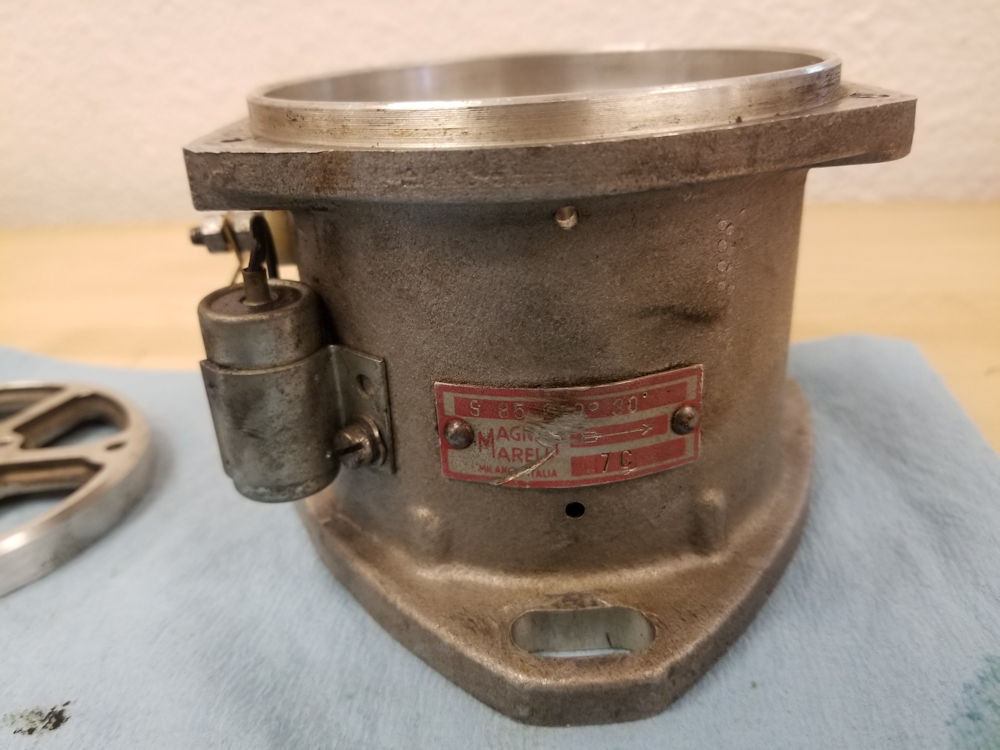
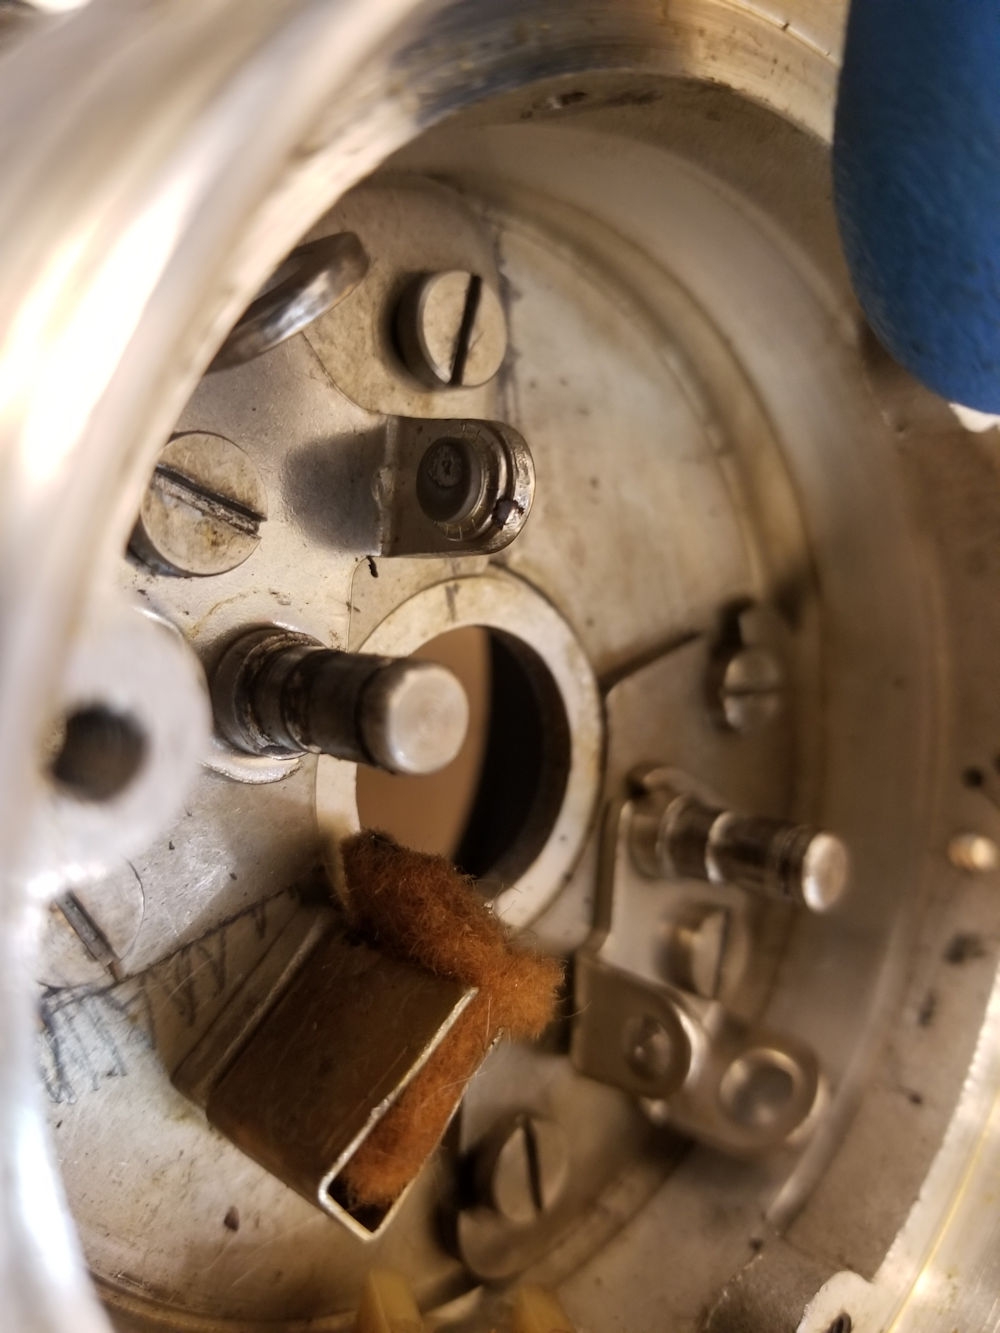
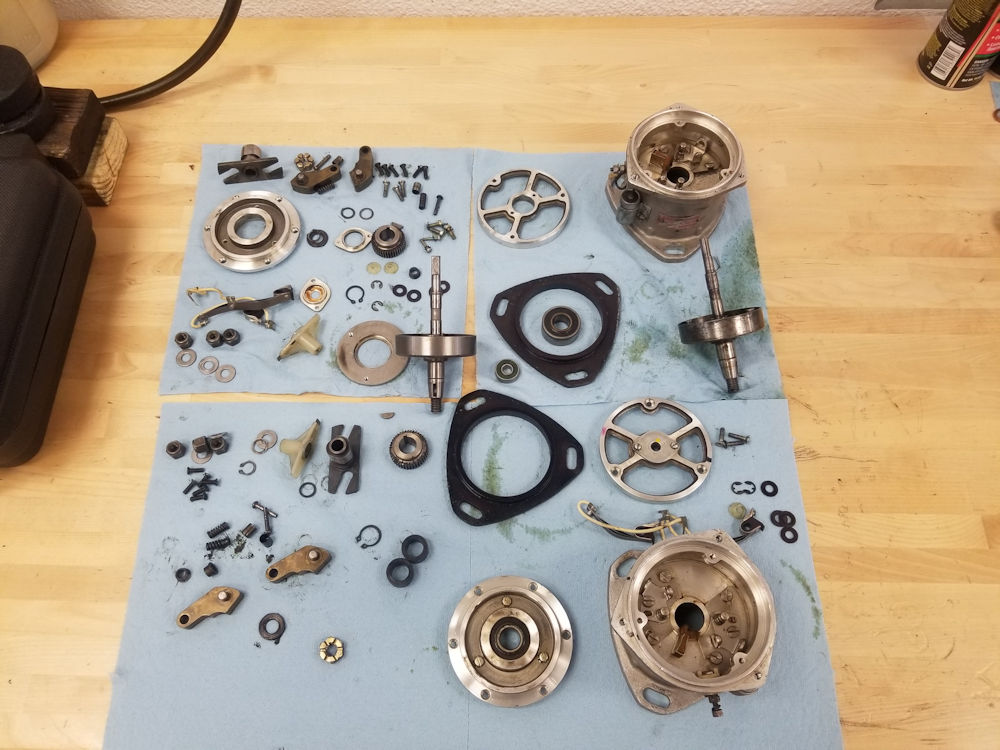
Josh has now removed and disassembled the Miura's distributors. Both units show significant wear and it is obviously a long time since they were serviced.
 |
 |
 |
 |
 |
 |
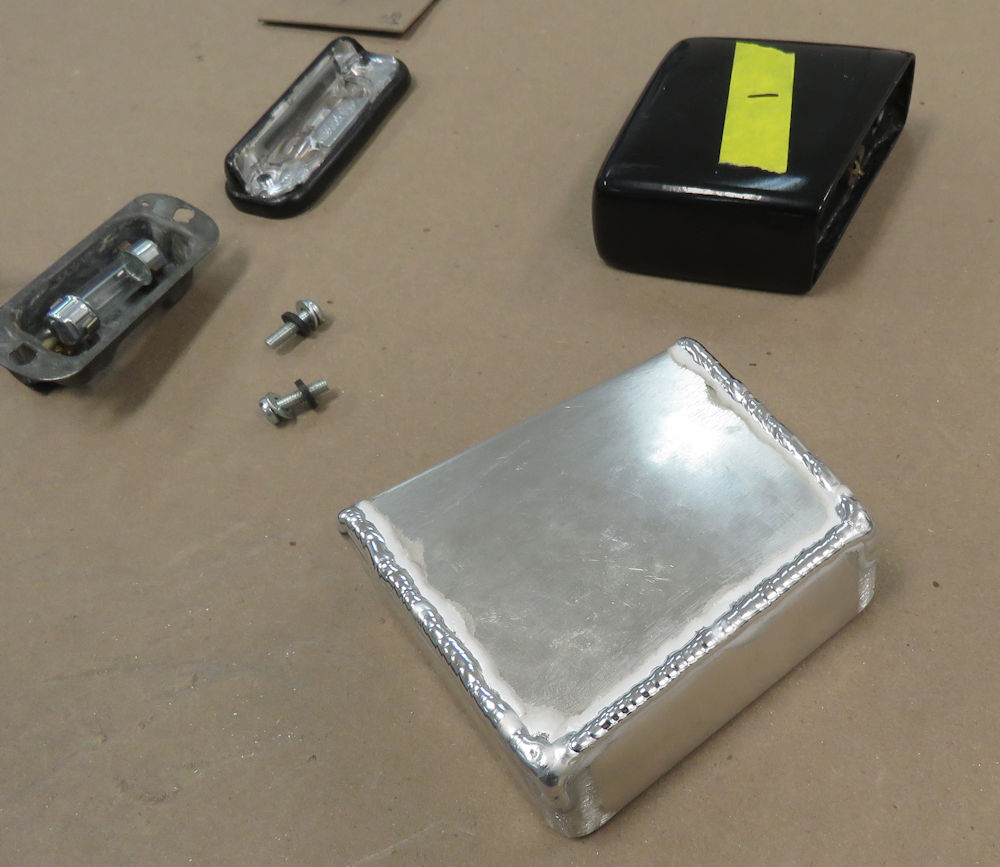
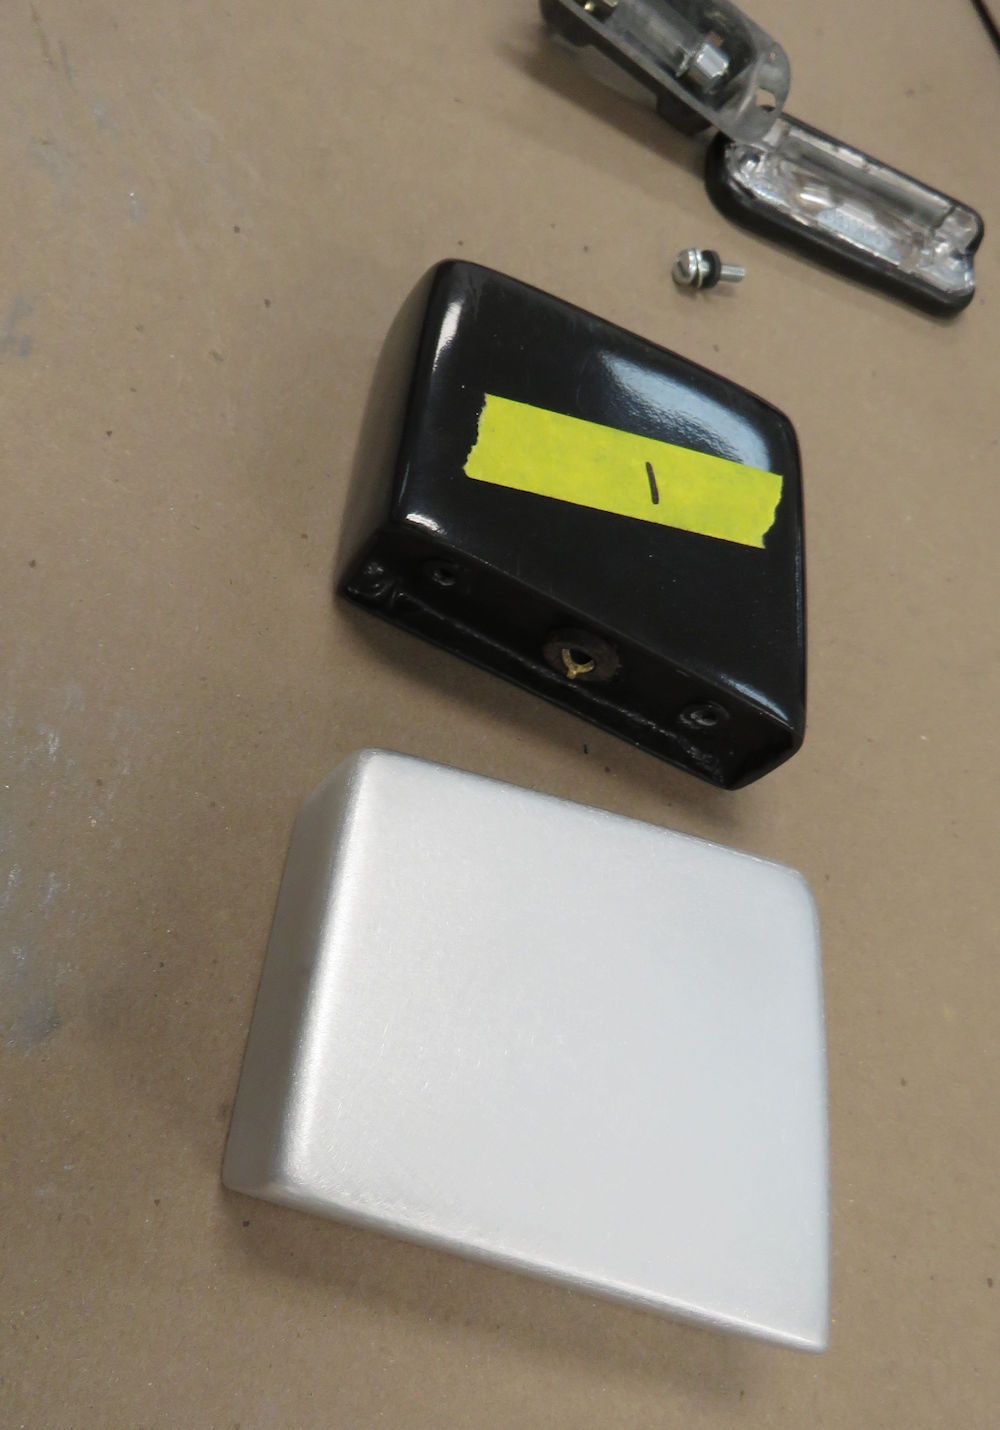
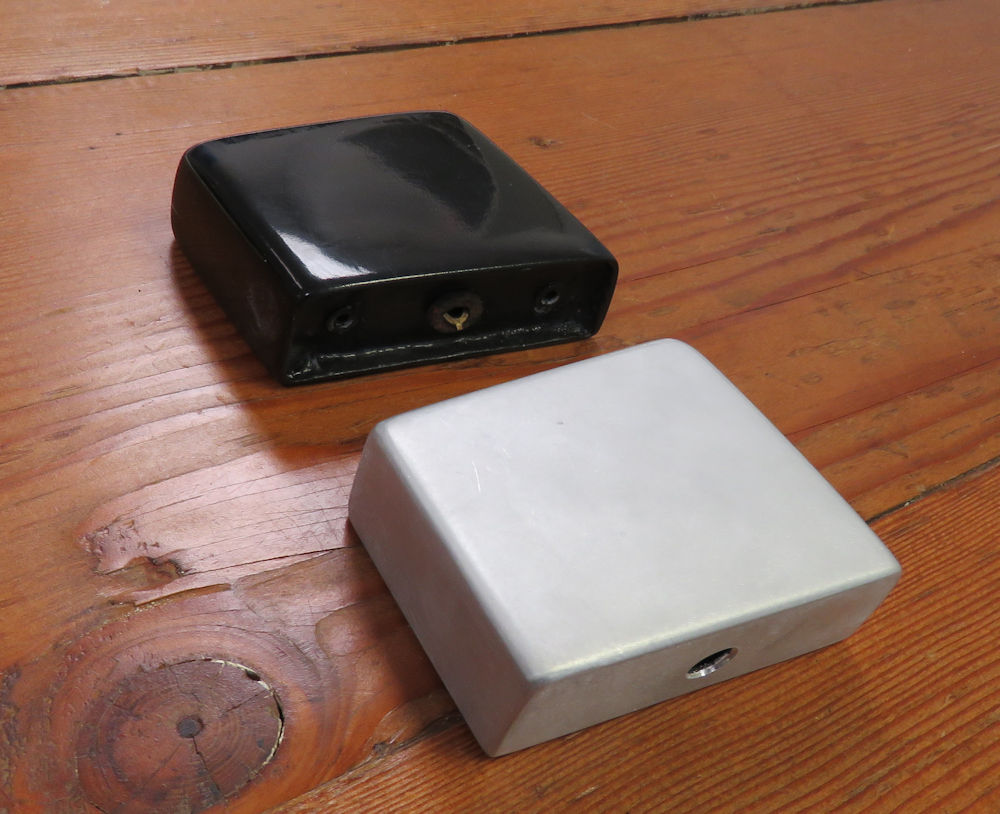
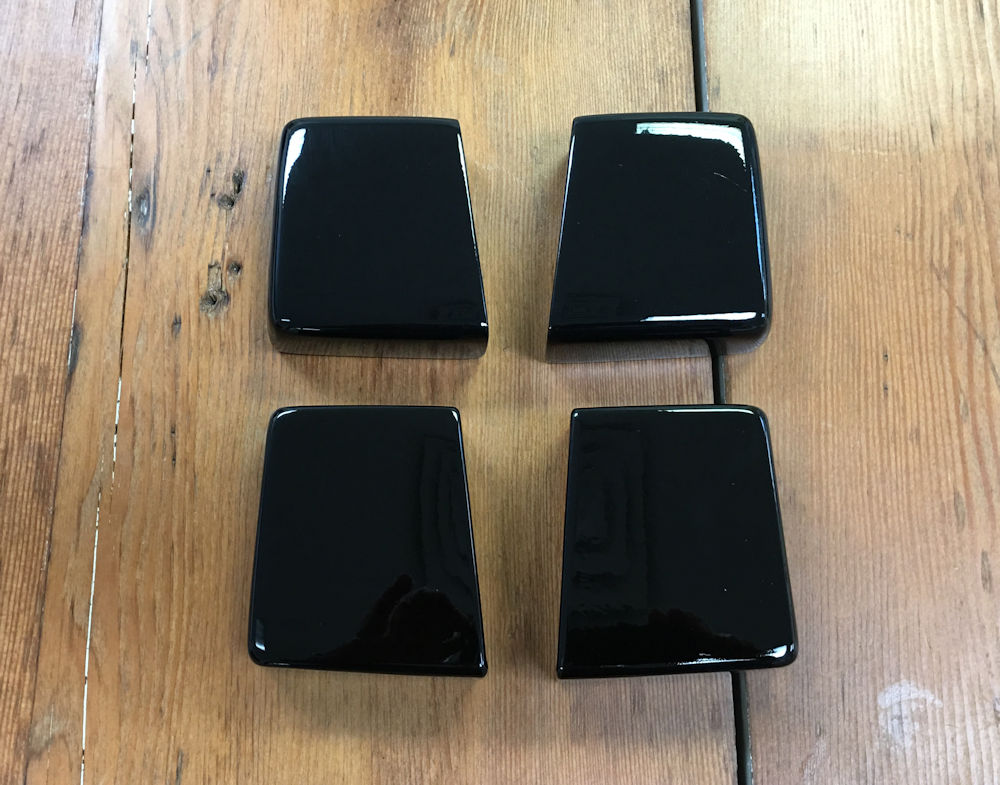
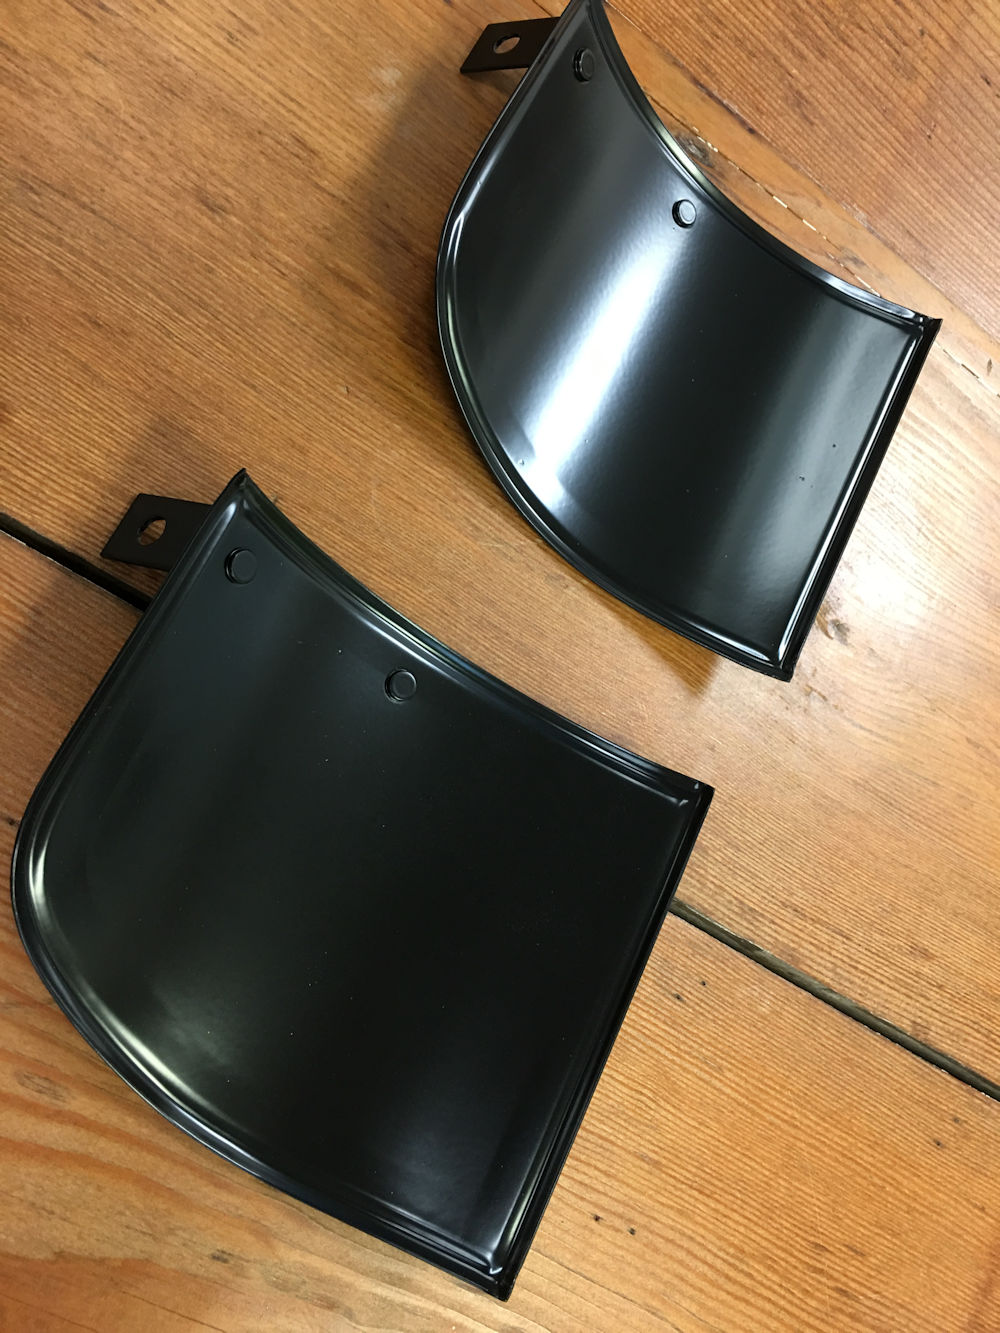
Jake has been busy fabricating a pair of rear license plate lights for the Miura. Thanks to Andrew Romanowski of Lamborghini Club America for the loan of a pair of original lamp housings for us to replicate.
 |
 |
 |
 |
 |
 |
 |
 |
 |
 |
| Once painted, the new lamp housings are
virtually indistinguishable from the originals |
New housing on left, original on right |
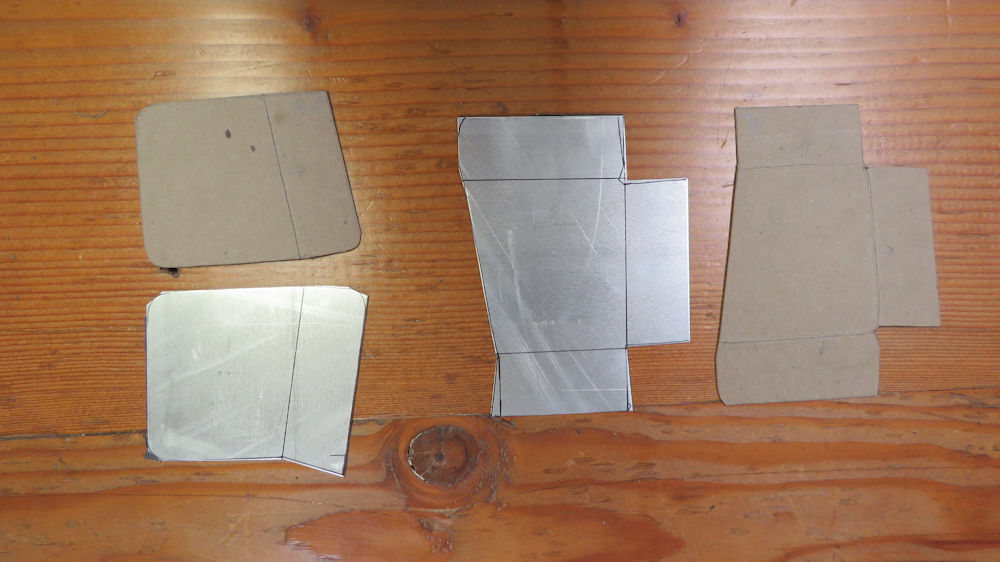
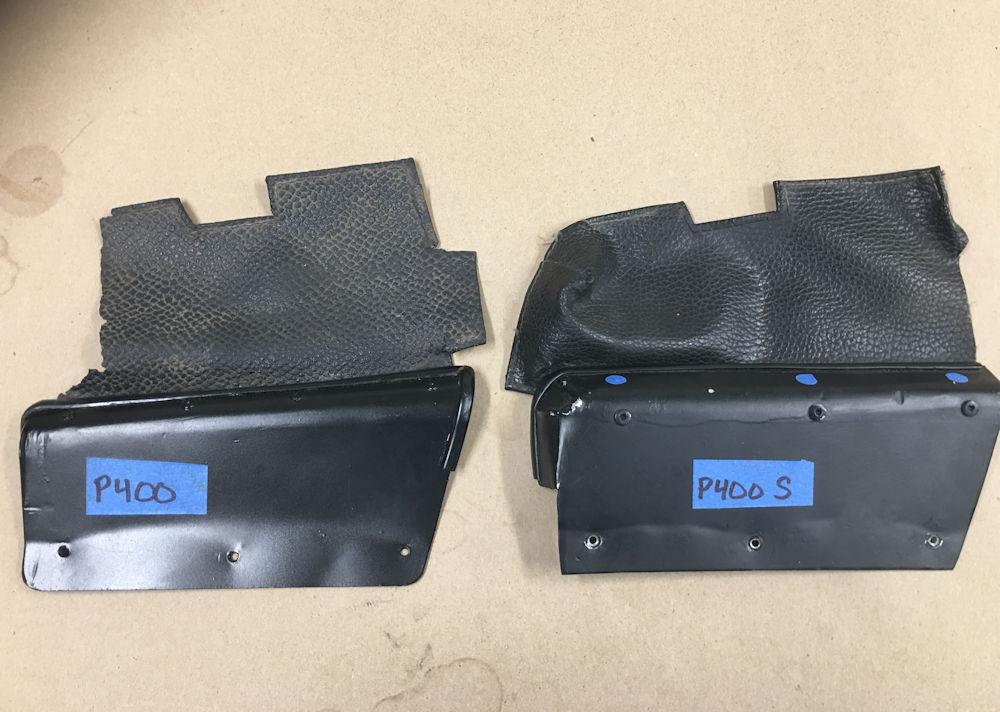
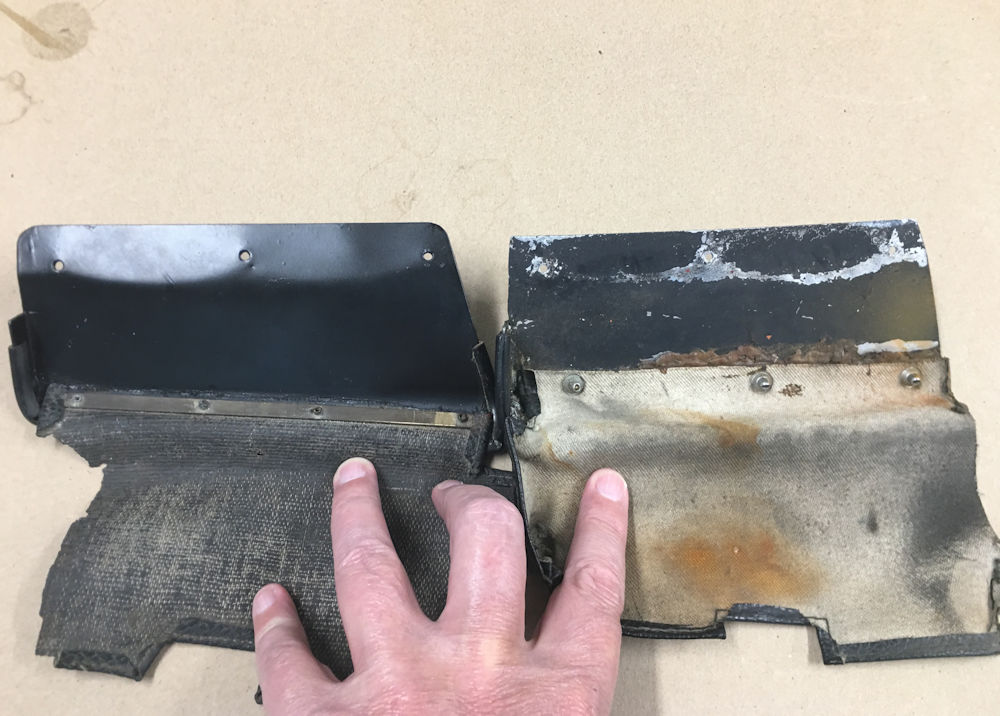
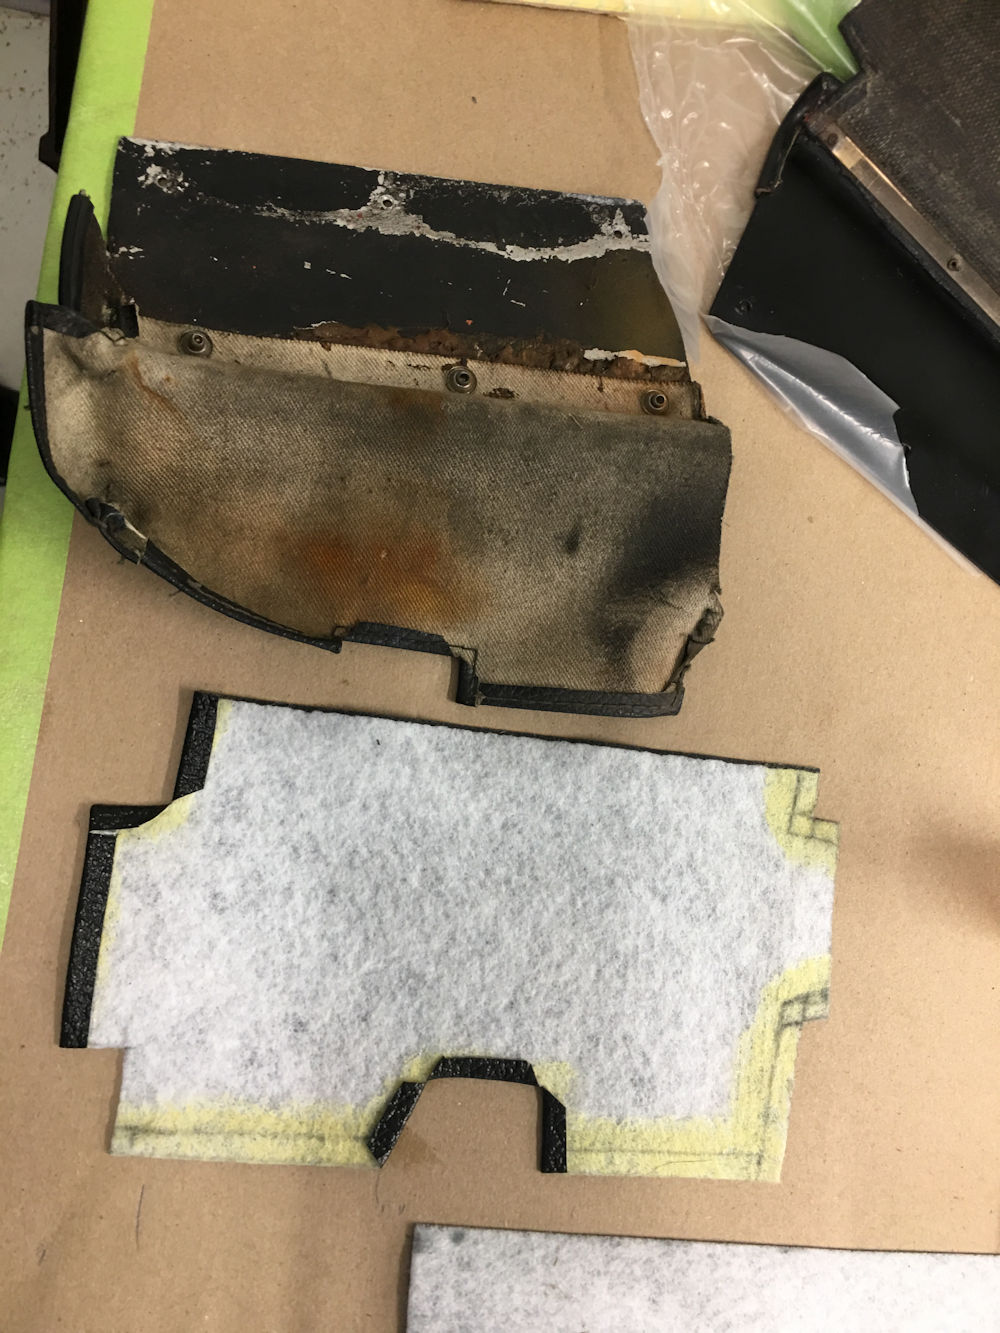
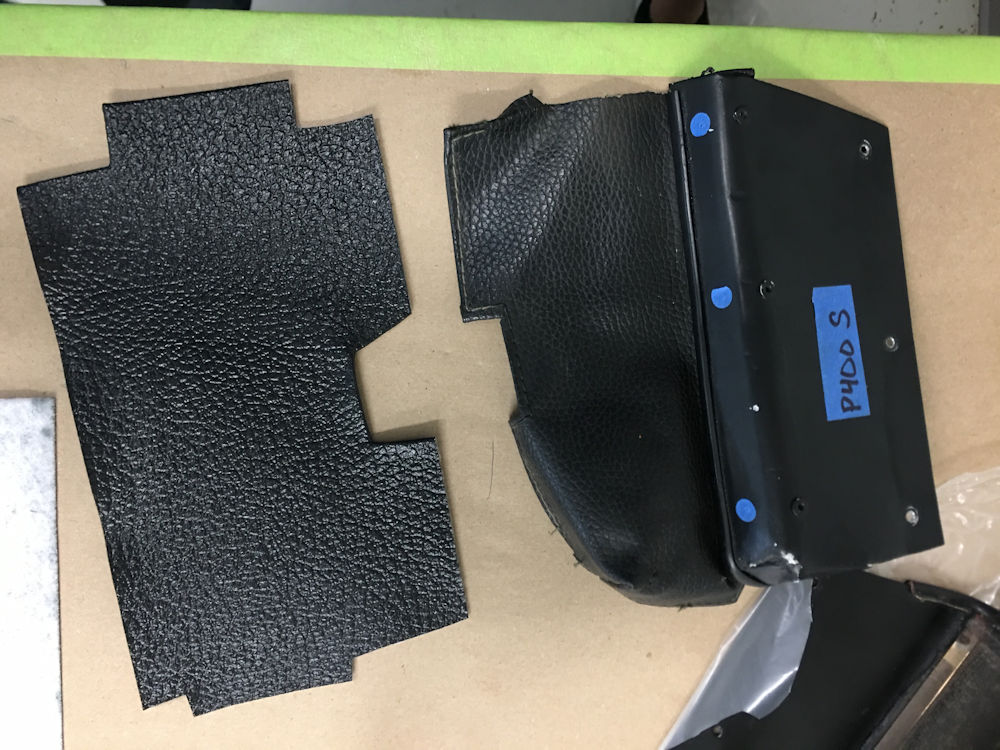
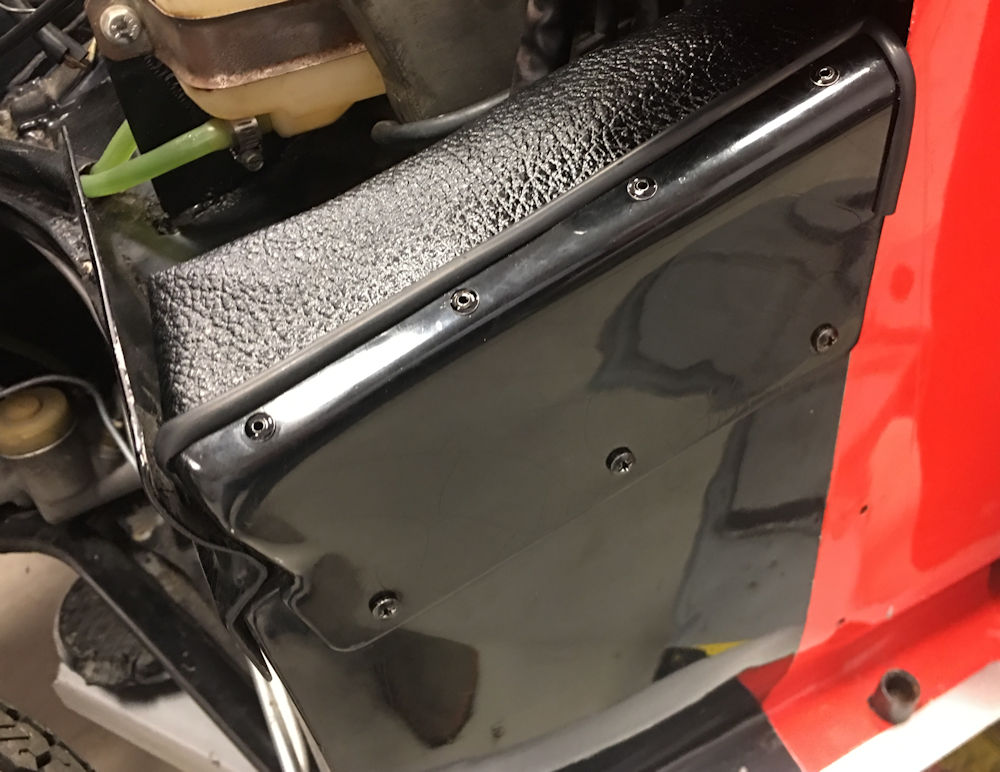
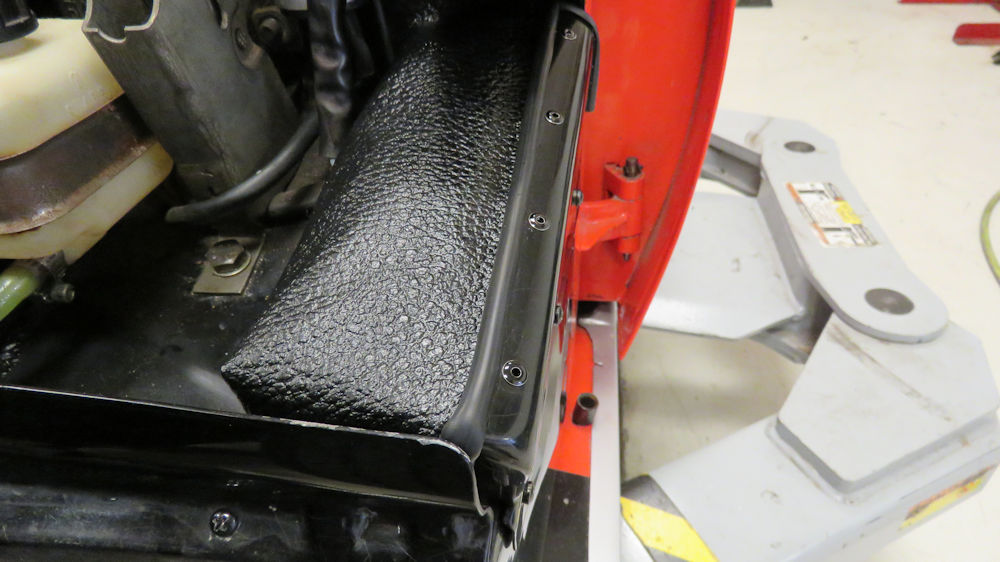
Thanks to Andrew Romanowski of Lamborghini Club America who loaned us a pair of fuse box covers to copy, as our Miura was missing its 'leather' cover. Although often referred to as 'leather' fuse covers, they are actually made of heavy grained black vinyl. The P400 and P400S covers are very slightly different so we created templates for both, for future reference.
We also machined new Delrin escutcheons that sit behind the window cranks as we were missing the one for the driver's door.
 |
 |
| Noting slight differences between 400 and 400S covers |
|
 |
 |
 |
 |
| New cover sewn and ready to rivet to the
side panel |
Installed on car |
 |
 |
| Plug wire conduits have been moved beneath the rain shields |
|
 |
 |
| Corey machined new Delrin escutcheons for the window cranks |
New escutcheon sits beneath the window crank |
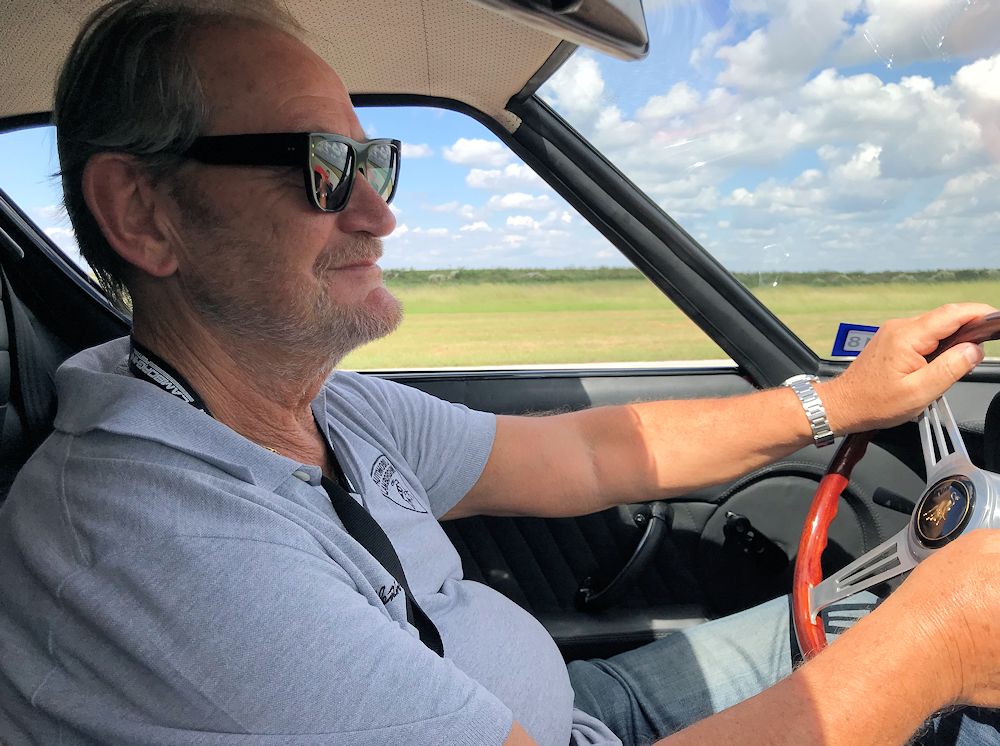
We were honored to receive a visit from the maestro himself, Valentino Balboni, earlier this week. He was kind enough to spend some time going over the Miura and making some suggestions and recommendations to the Team CJ crew. Needless to say, he also test drove the car and gave it his official seal of approval!
Today the Miura was one of three cars in our care that we took to COTA to support the Drive and Give charity event. I am happy to report that the car drove and performed flawlessly, even in Austin's infamous traffic!
 |
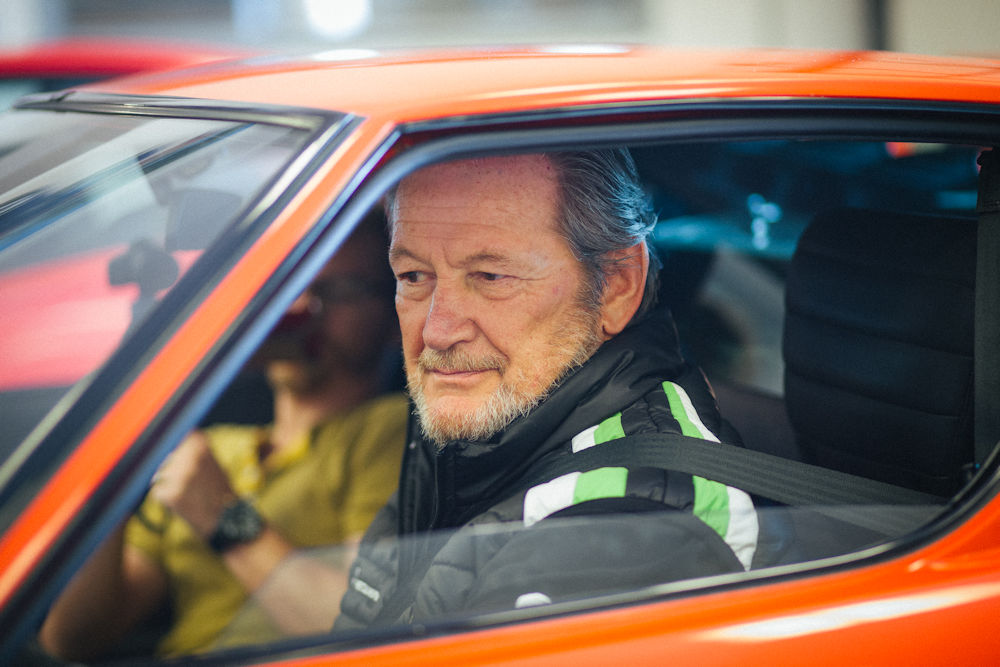 |
| Valentino Balboni inspecting the Miura |
Time for a test drive! |
 |
 |
| Headed out to COTA just after dawn today |
Keeping good company in the pit lane at COTA |
Attending to a few more items on the Miura ahead of our visit from Lamborghini legend Valentino Balboni next week.
 |
 |
| New Miura badge installed, minus the screws
which held the old one in place |
Fuel pump cap painted 'Flash Red' per
original, new braided fuel line installed |
 |
 |
| Tires changed from Michelin XWX to original
spec Pirelli Cinturato CN12 215/70 R15 |
Chassis stamping painted 'Flame Red' |
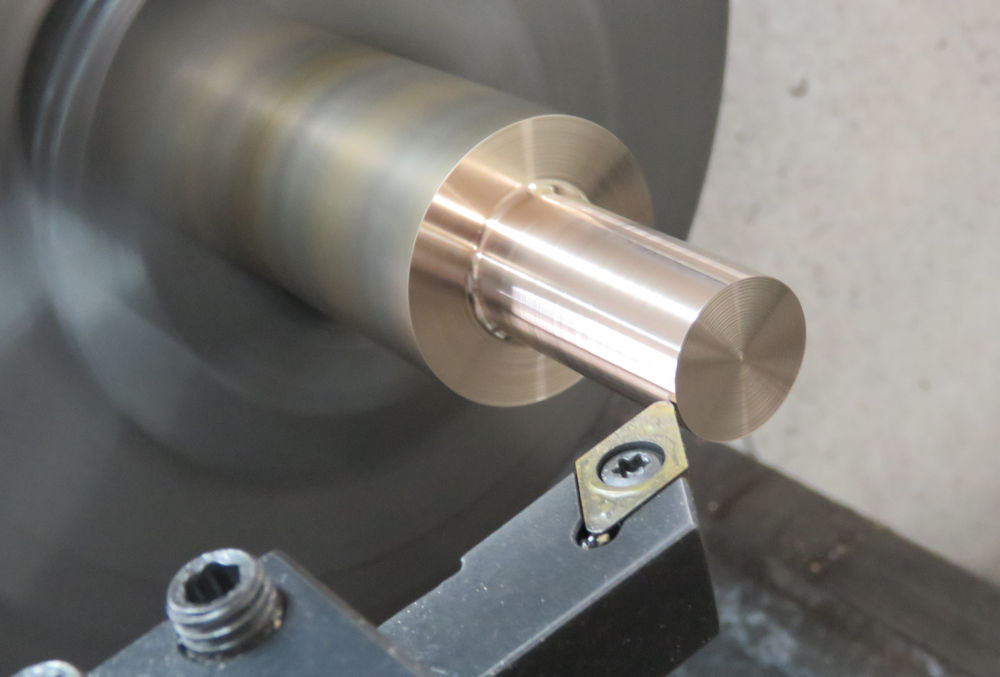
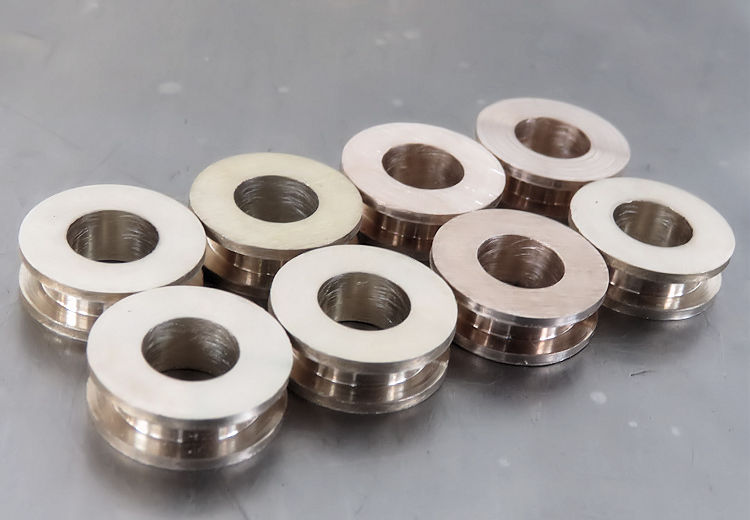
We have been spending some quality time with the Miura correcting a few originality issues and fabricating some previously missing components.
 |
 |
| Corey machining new bronze bushings for the cable stays for the bonnet and engine cover |
|
 |
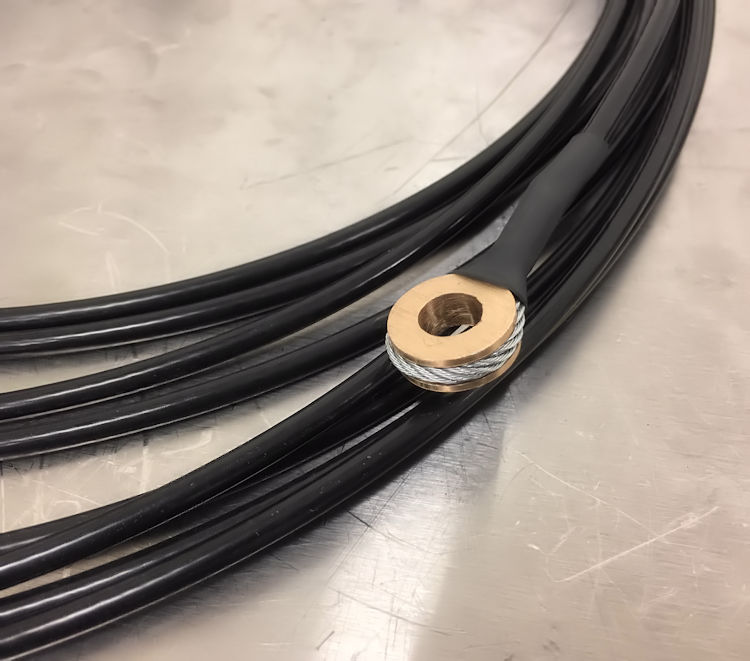 |
| The first of the bushings attached to the new
cable |
|
 |
 |
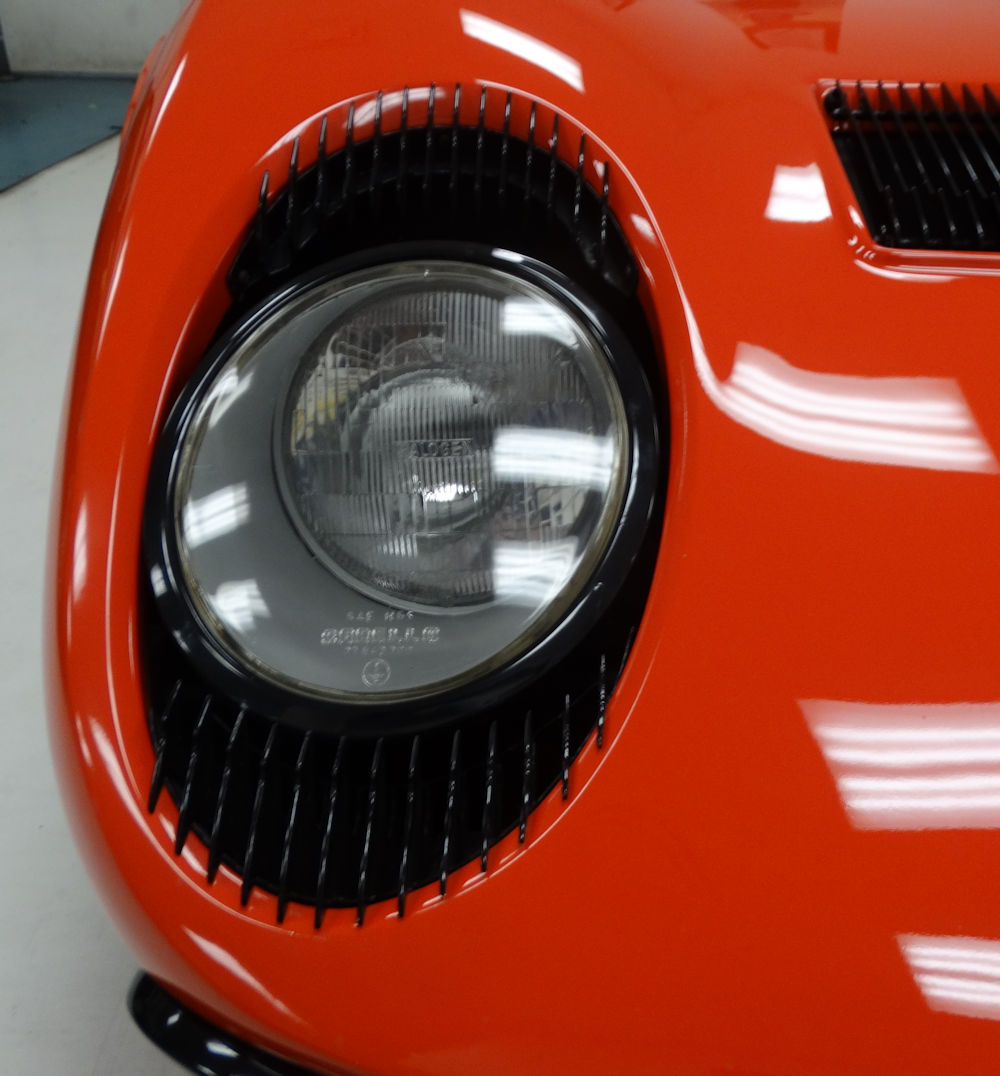
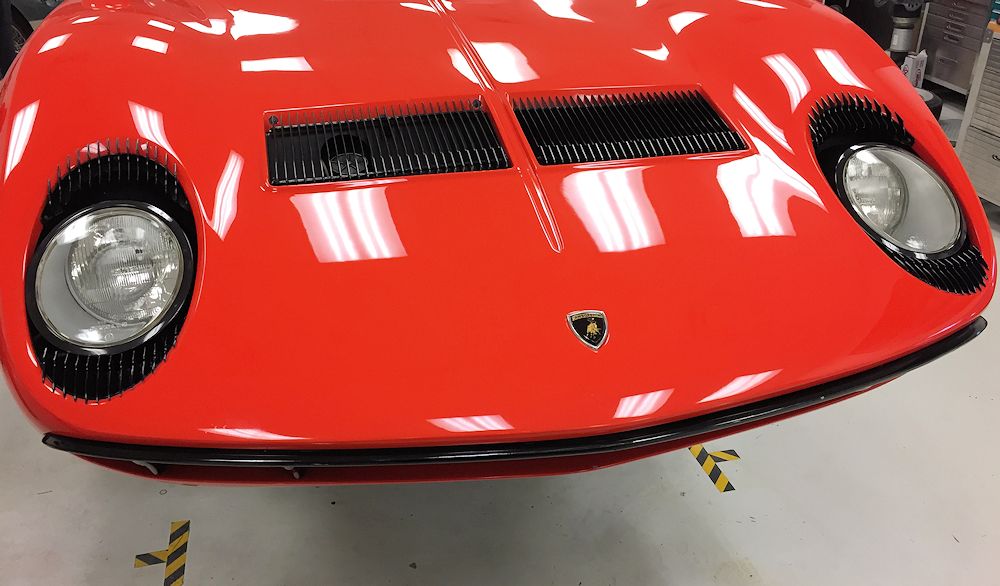
| Incorrect headlamp lenses | |
 |
 |
| Correct lenses now installed | Previously missing BP plate |
 |
 |
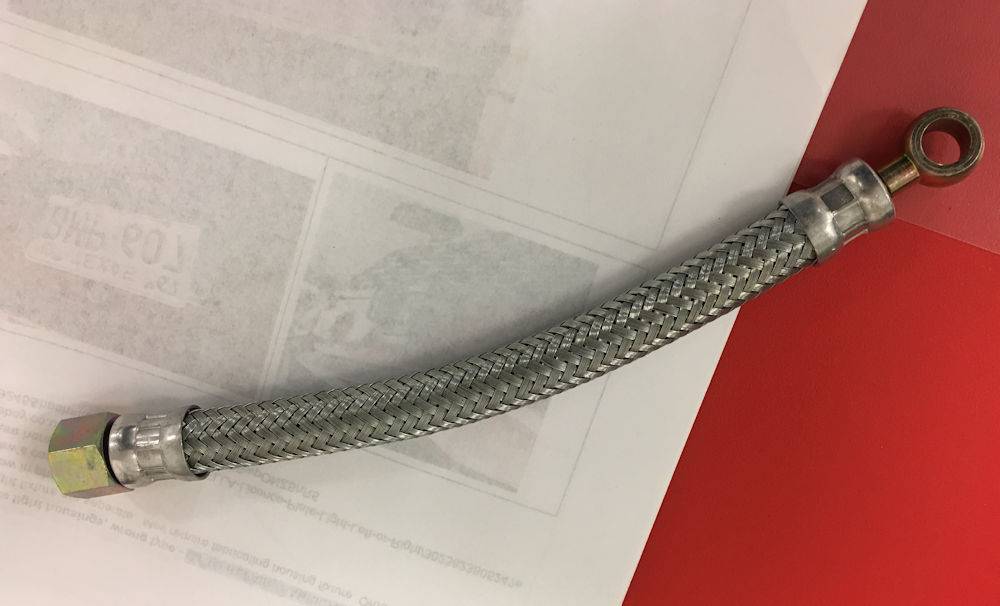
| Braided fuel line for fuel pump |
Installing correct style Kangol seat belts |
 |
 |
| Incorrect 'square' indicator switch previously installed |
Correct 'round' Lucas indicator switch now
installed |
 |
 |
| Fabricating a heat shield for the oil sending
unit |
|
 |
 |
| Powder coated semi-gloss black (second shield is for another Miura owing friend) |
Fabricating the previously missing passenger
footrest |
 |
 |
| An original footrest kindly loaned by Andrew Romanowski of Lamborghini Club America |
New foot rest now installed |
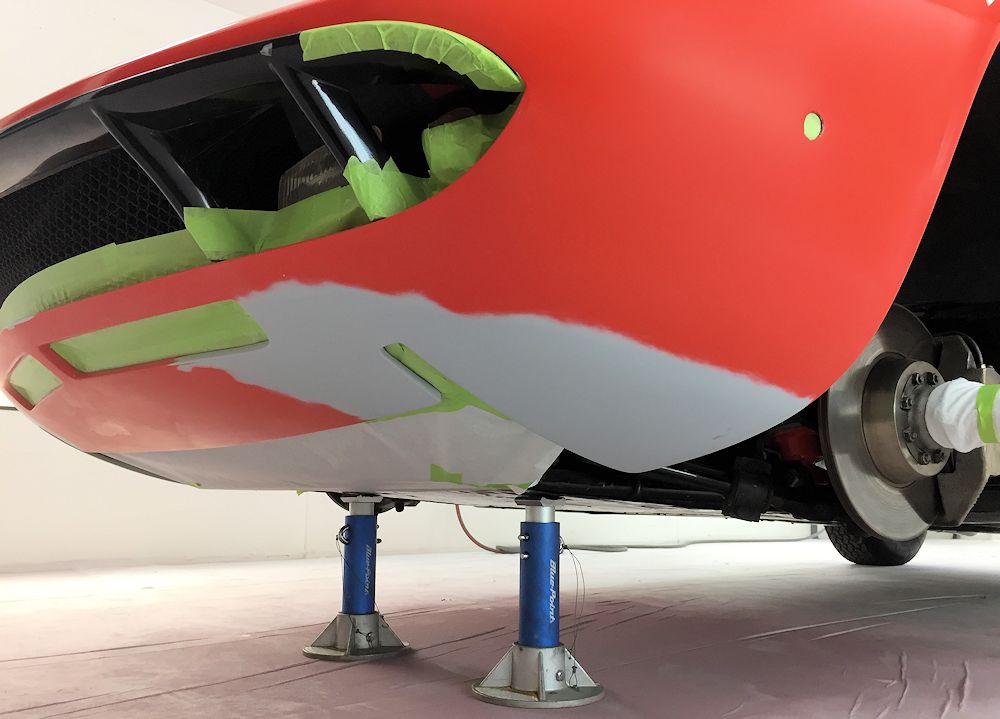
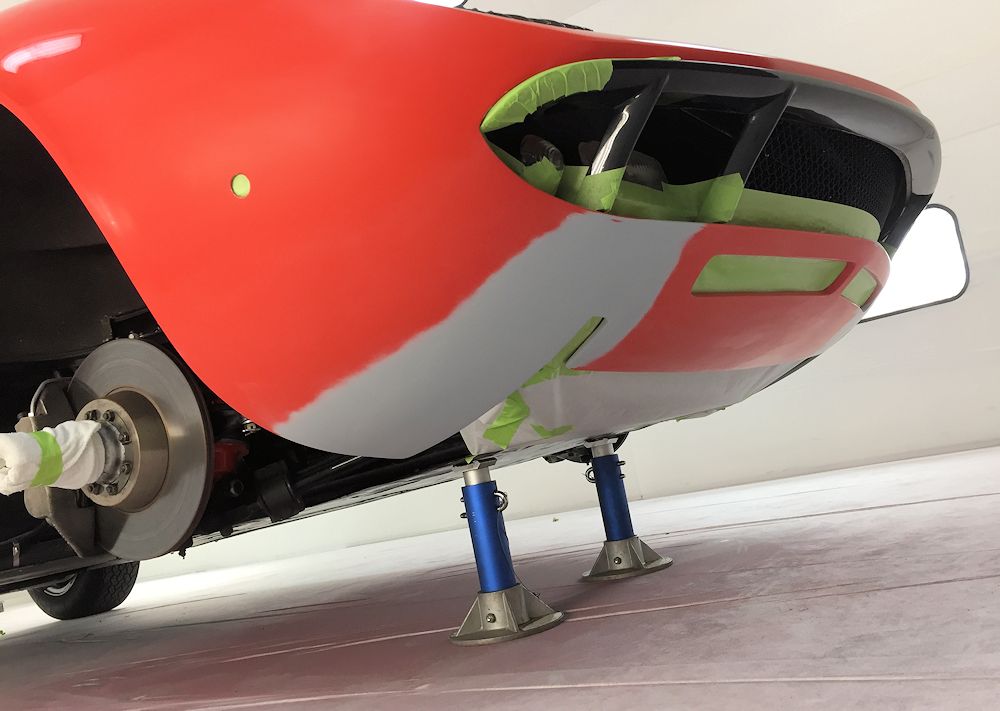
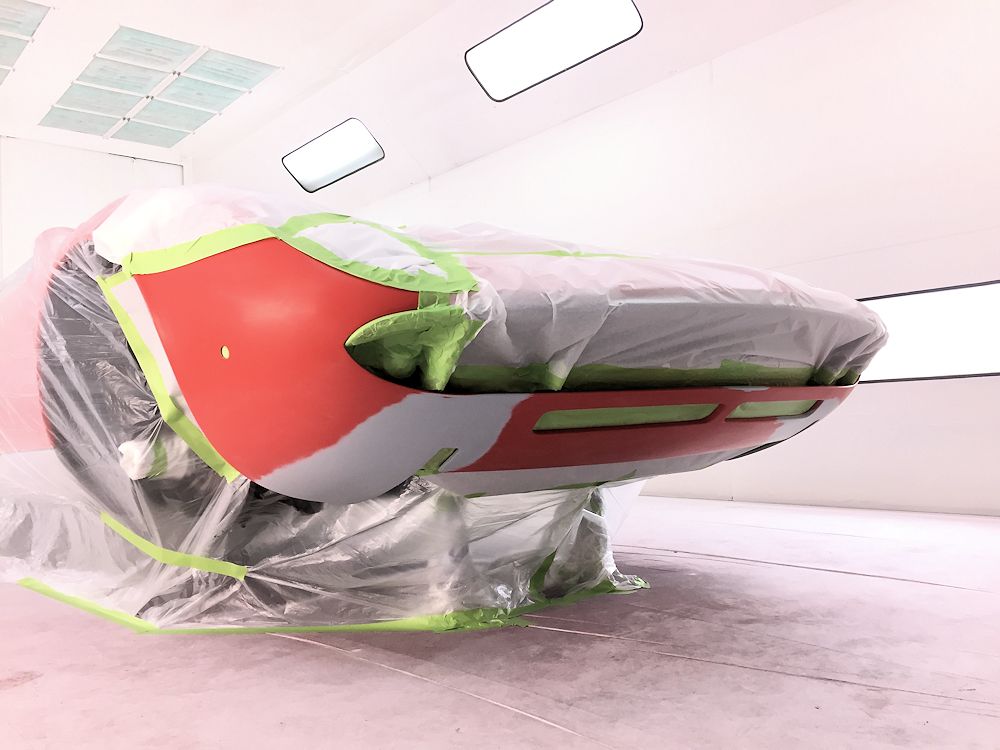
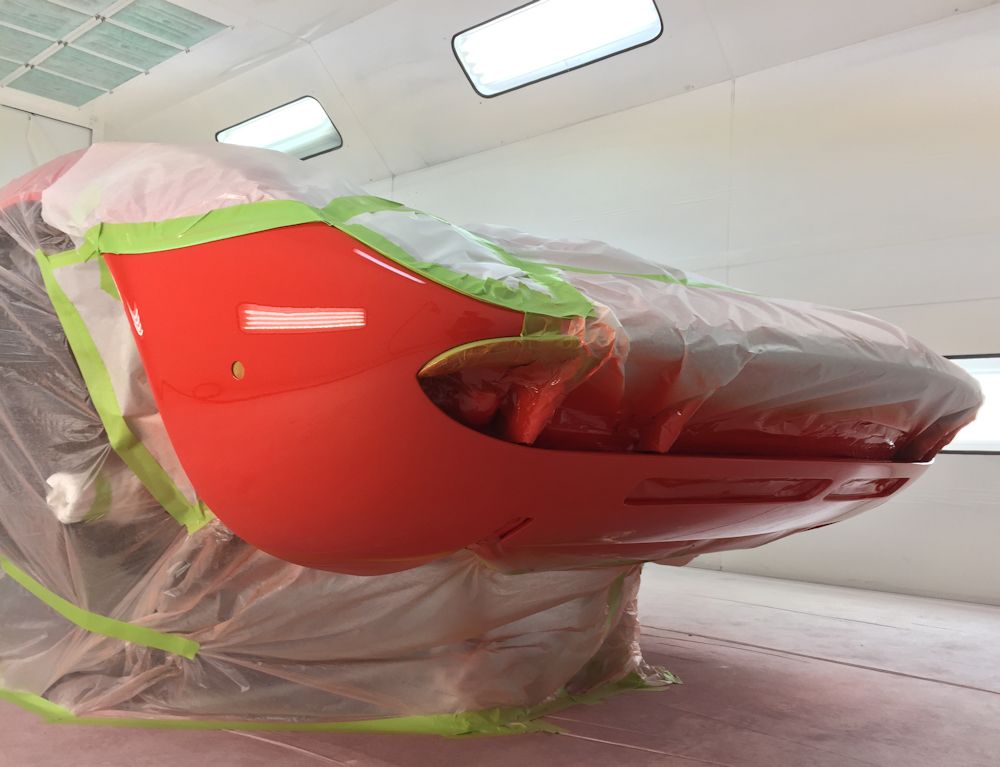
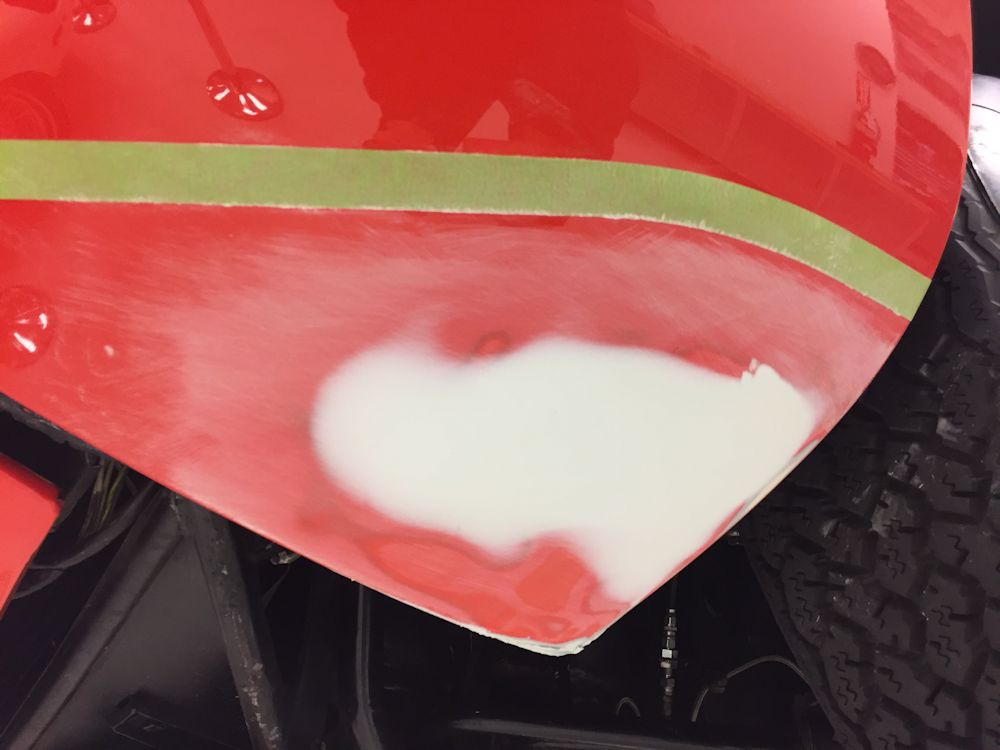
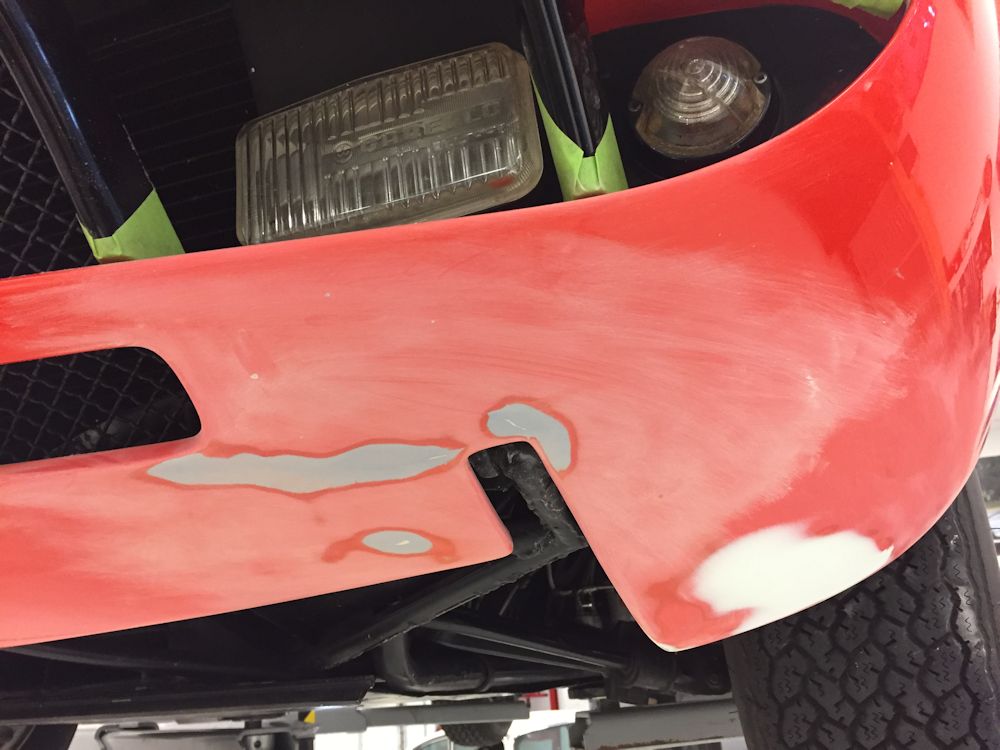
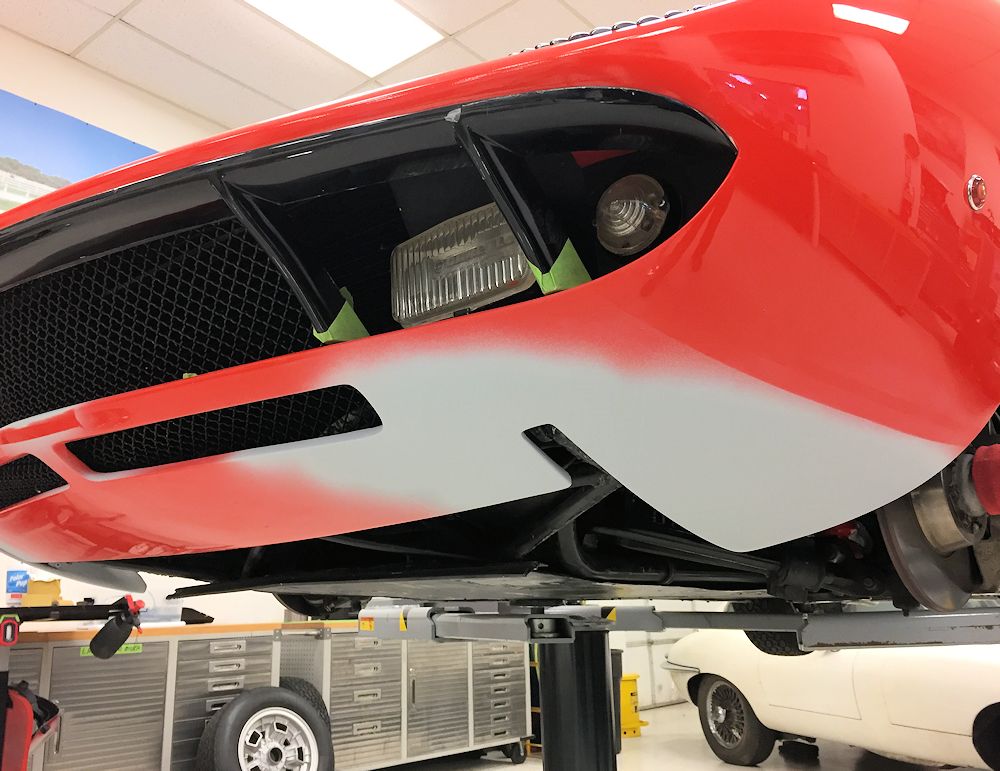
The paintwork repairs to the lower valance have now been completed.
 |
 |
 |
 |
 |
 |
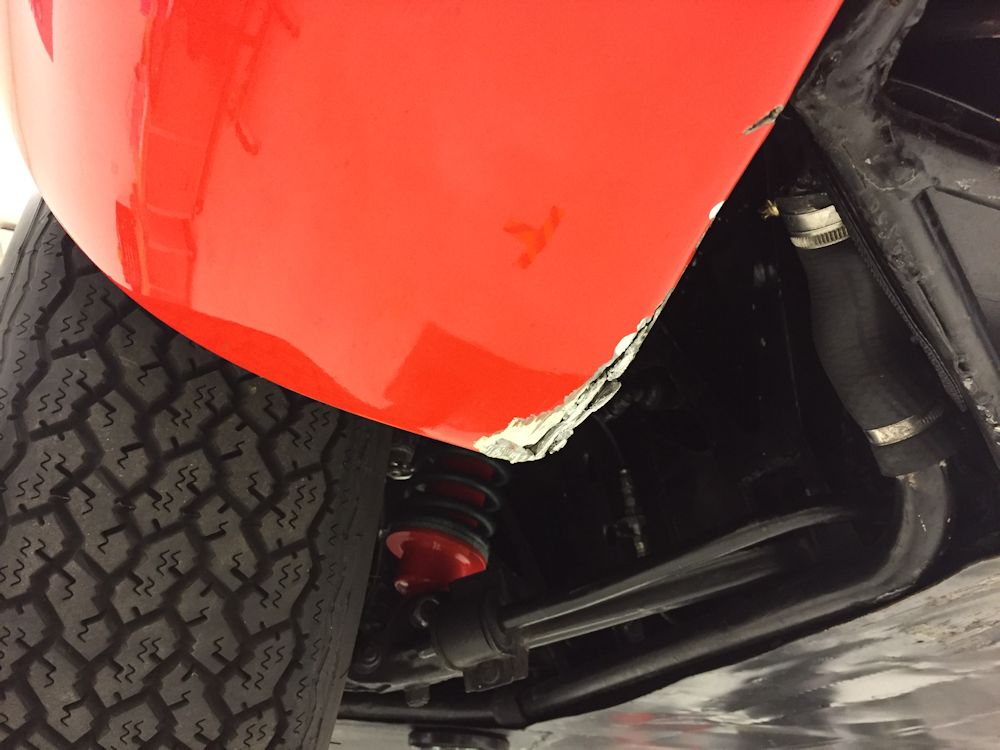
Performing some minor body repairs beneath the nose of the car. Prior to replacing the old shock absorbers, the front end had been bottoming out and causing damage to the lower valance. Our repairs are now virtually complete and we expect to be painting the valance early next week.
 |
 |
 |
 |
| Prior to replacing the front Koni shocks the
car had been bottoming out, damaging the lower valance |
This was the worst of the damaged areas |
 |
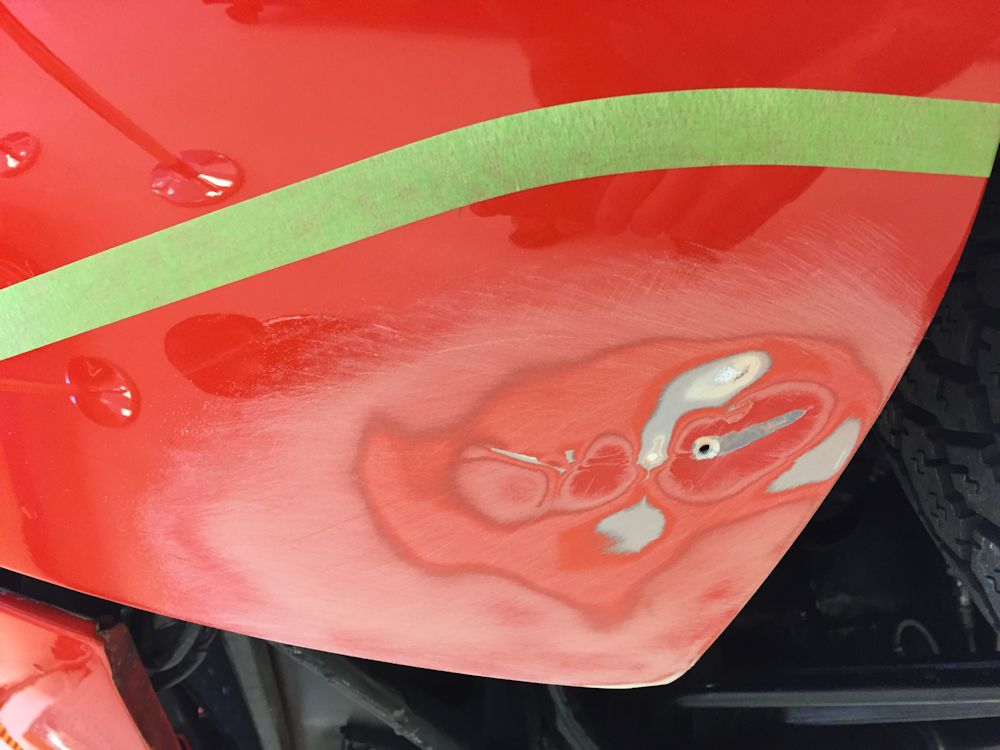 |
| Panel is cracked around the hinge |
|
 |
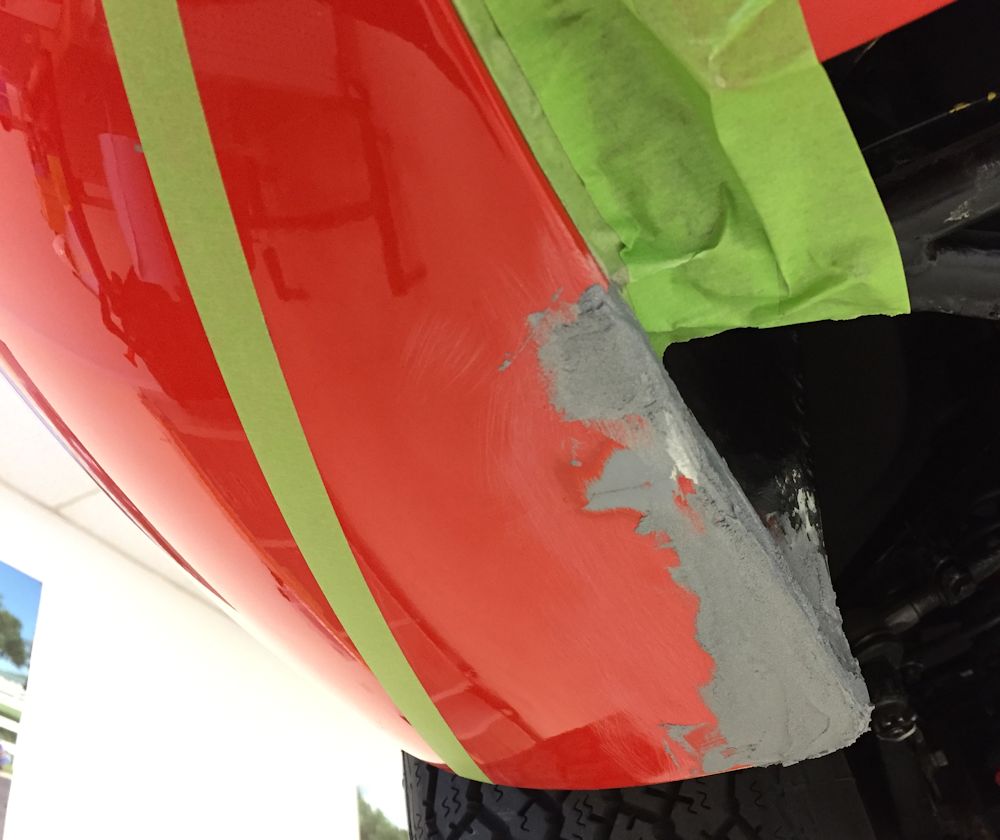 |
| A small hole was lurking beneath this
previously repaired area |
Metal to Metal aluminum based filler |
 |
 |
 |
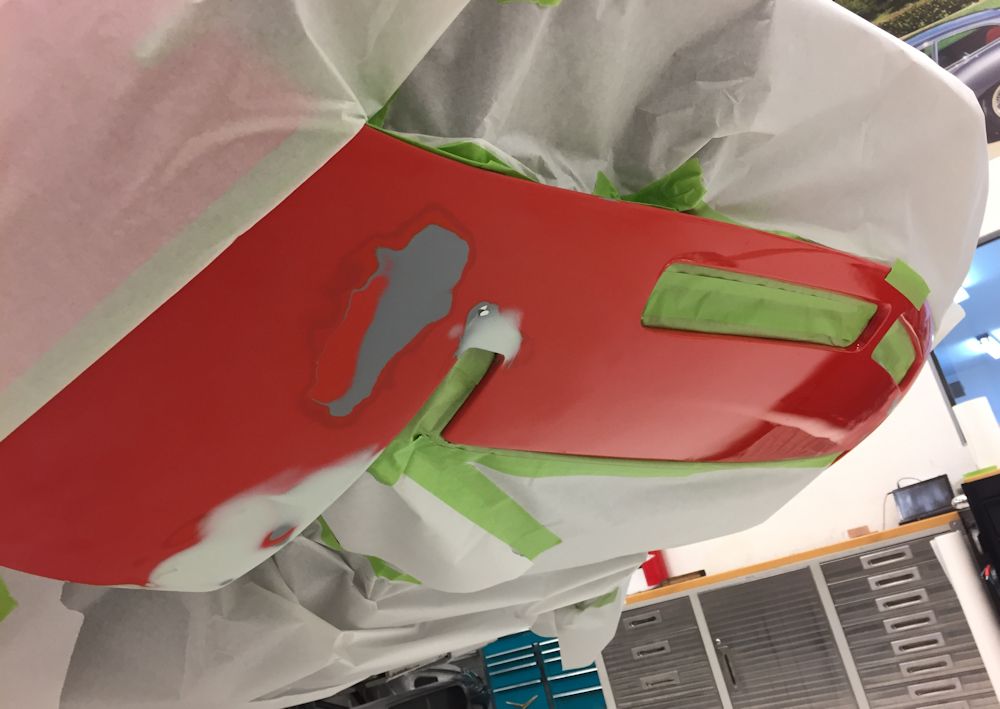 |
| Repaired panels now ready for priming |
|
 |
 |
 |
 |
| Damaged areas now primed |
Repaired areas will be painted early next week |
 |
 |
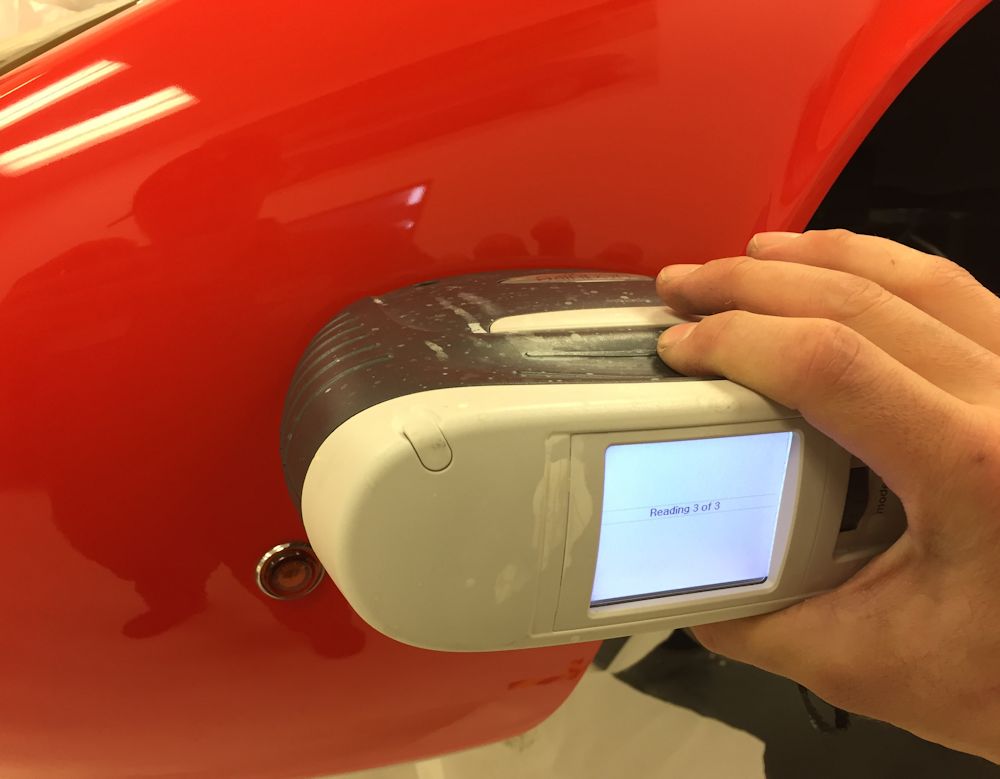
| Using the Spies Hecker color match camera |
Glad to see I am not the only person working at the weekend (Valentino Balboni video) |
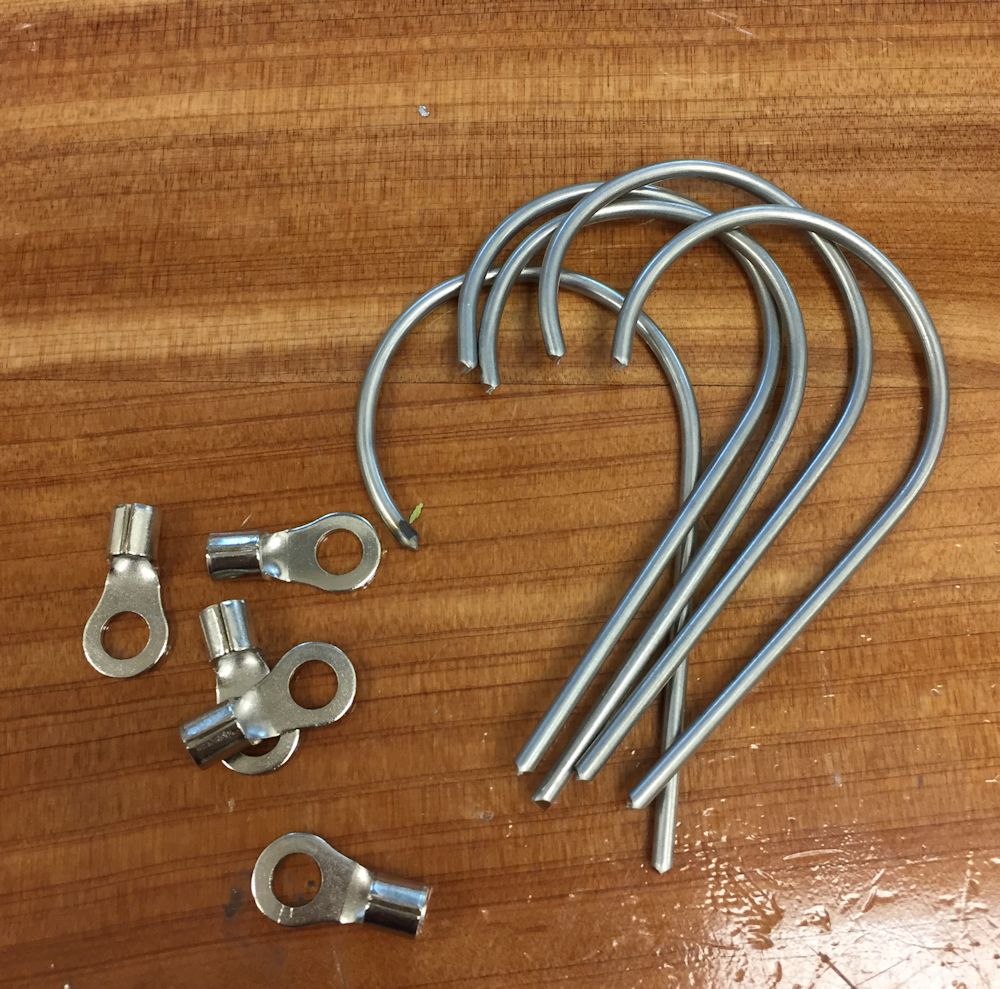
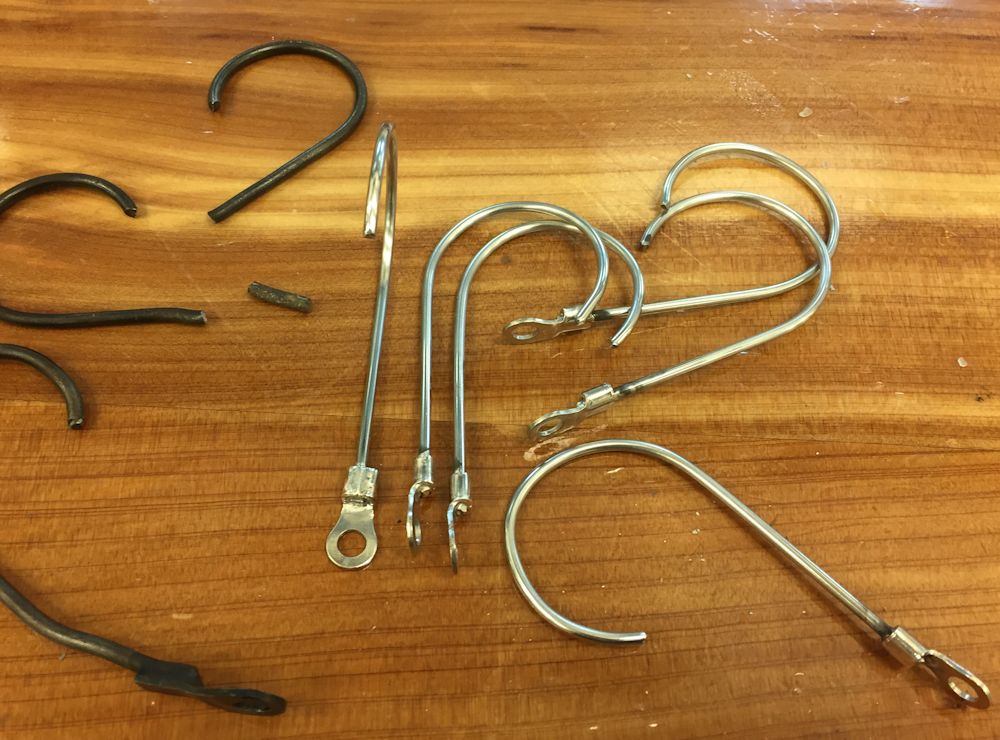
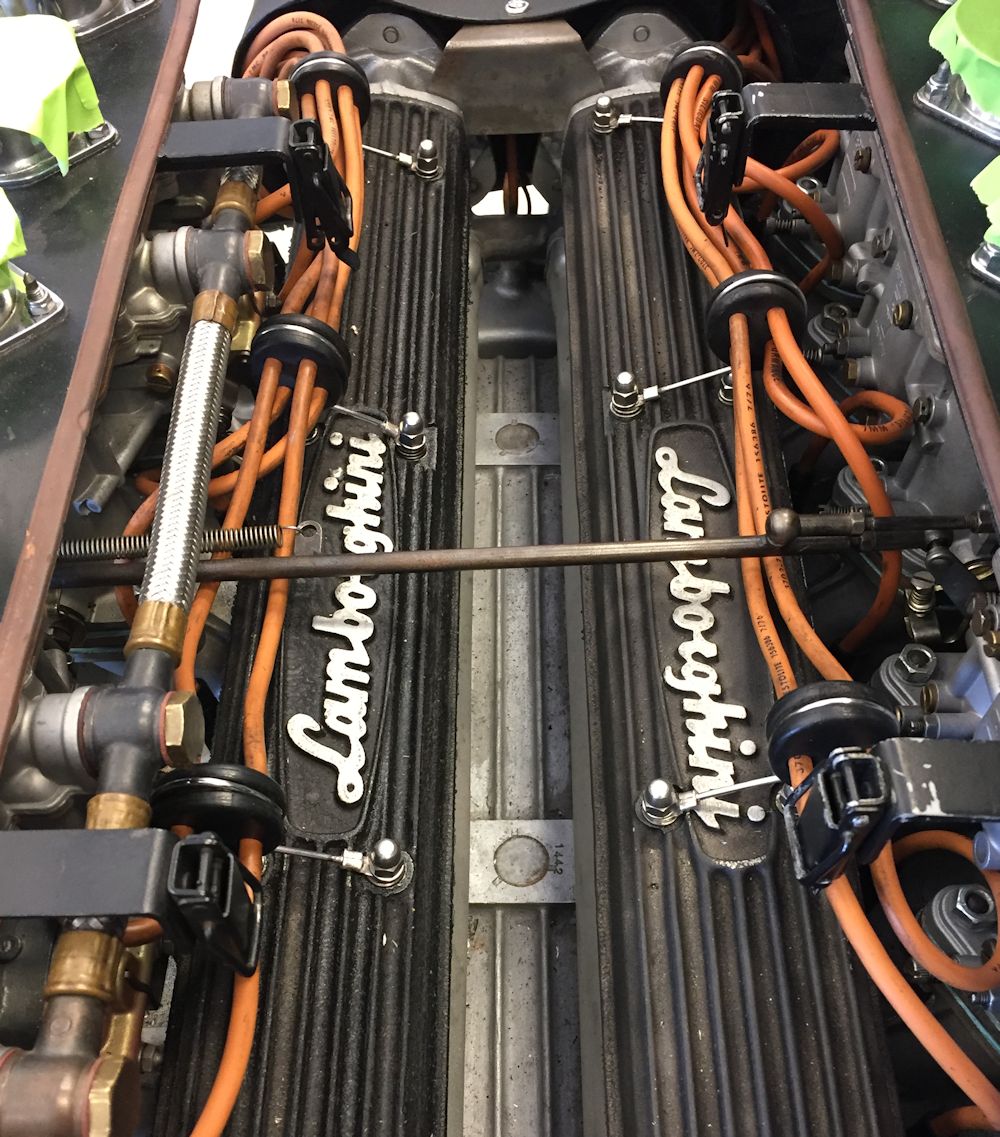
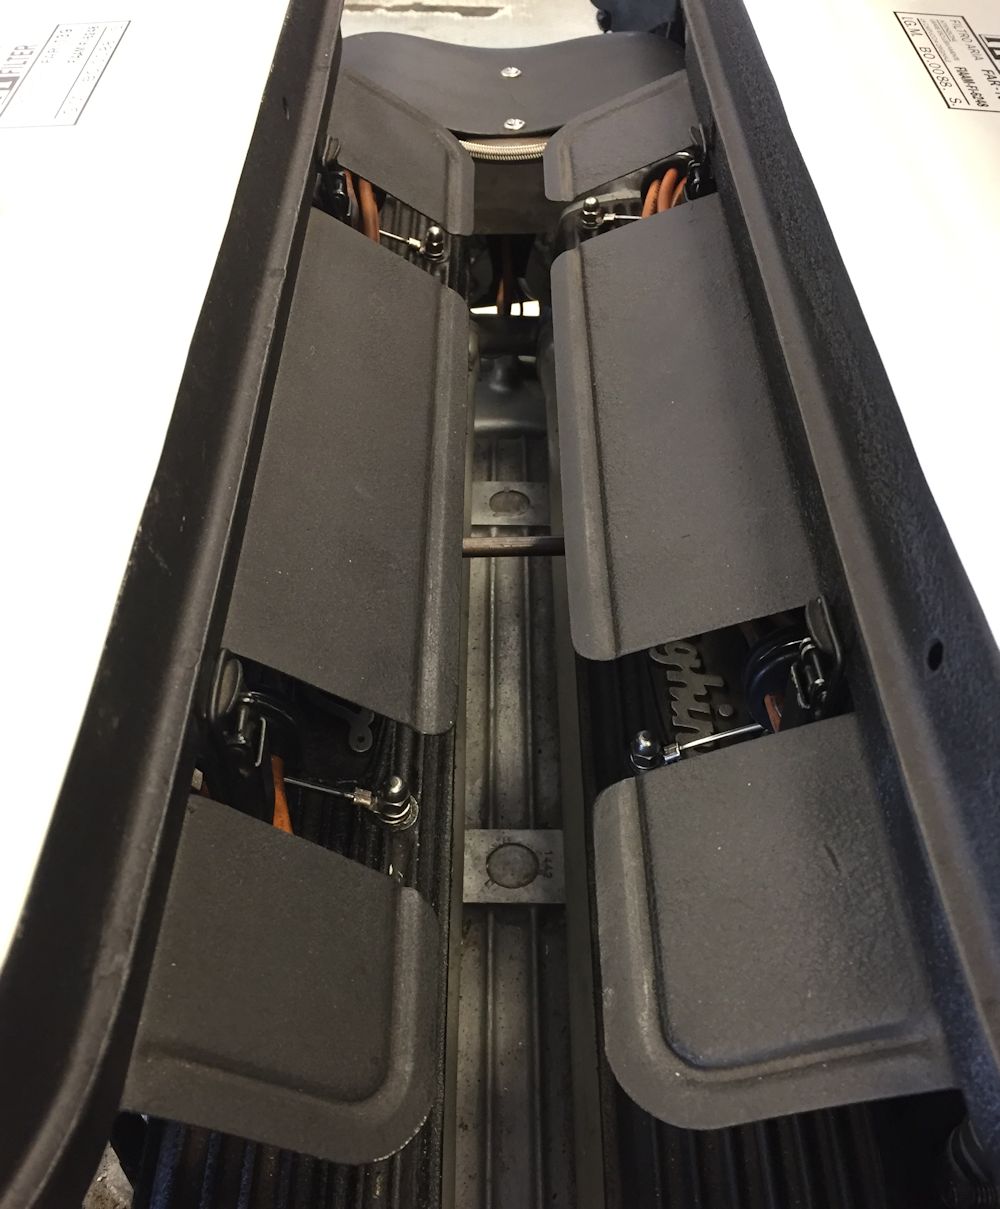
Today's update outlines the correction of a couple of issues related to the Miura plug wires. The first problem was that the conduit brackets were held to the cam covers by extremely flimsy little wire clips, all of which had been repaired (soldered) several times in the past. The next issue was that the conduit clips were installed 180 degrees out, meaning the plug wires ran down the center line of the engine, rather than sitting beneath the shields.
Chris fabricated new conduit clips from stainless steel stock. They look almost identical to the originals, but a far sturdier. He then installed the new clips so that the plug wires are now protected and hidden by the shields.
Next task (already underway) is the repair and paintwork of the damaged bodywork beneath the nose of the car.
 |
 |
| The plug wires had been sitting along the center line of the engine |
Original clips were extremely flimsy and were constantly breaking |
 |
 |
| Chris decided to fabricate new clips |
|
 |
 |
| Installing the new clips |
|
 |
 |
| Plug wires and clips now hidden beneath
shields |
Job done! |
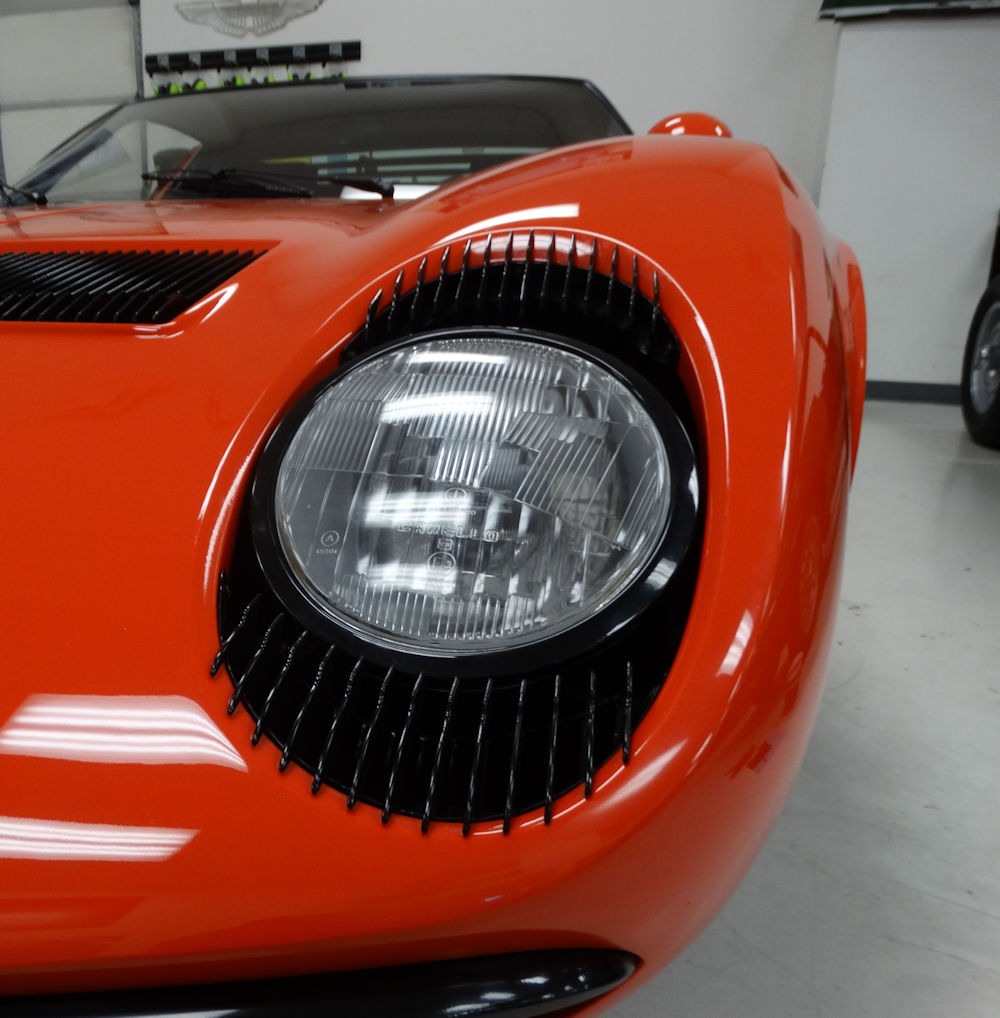
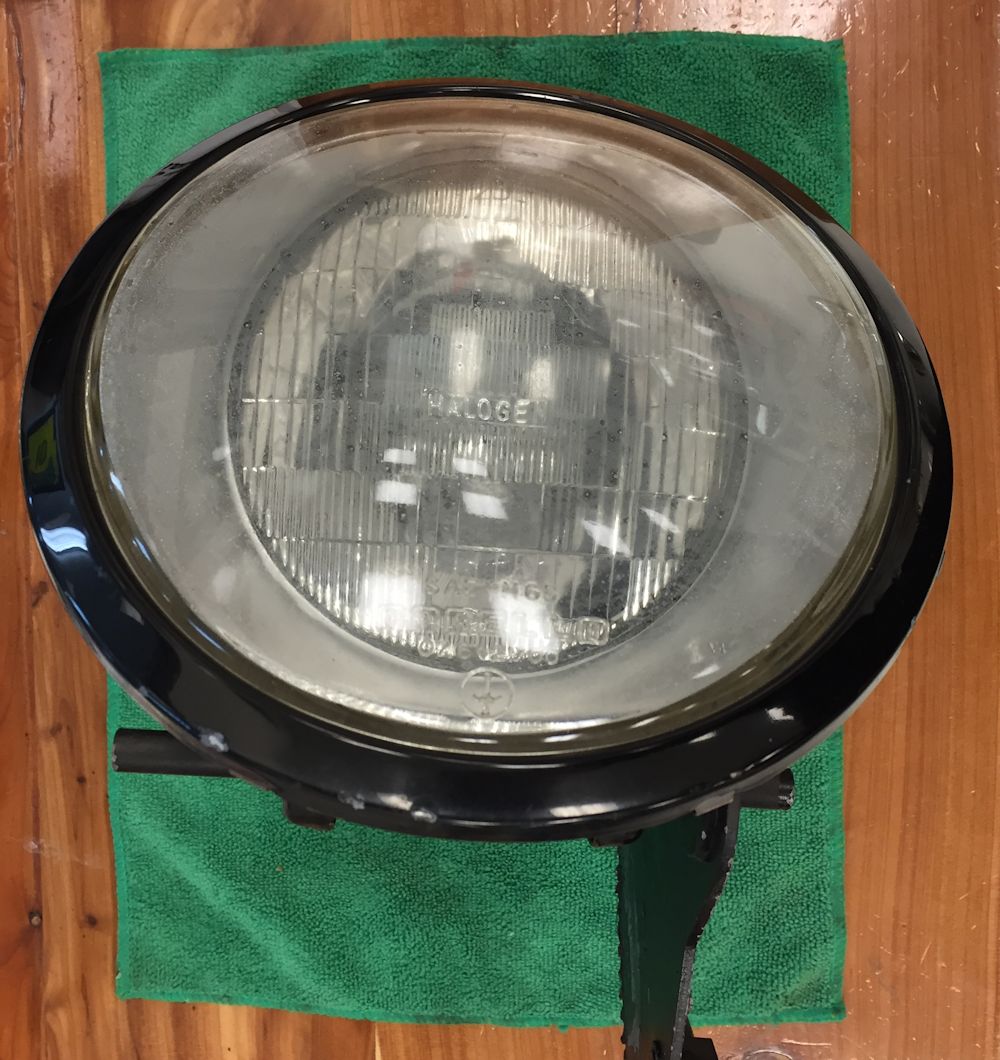
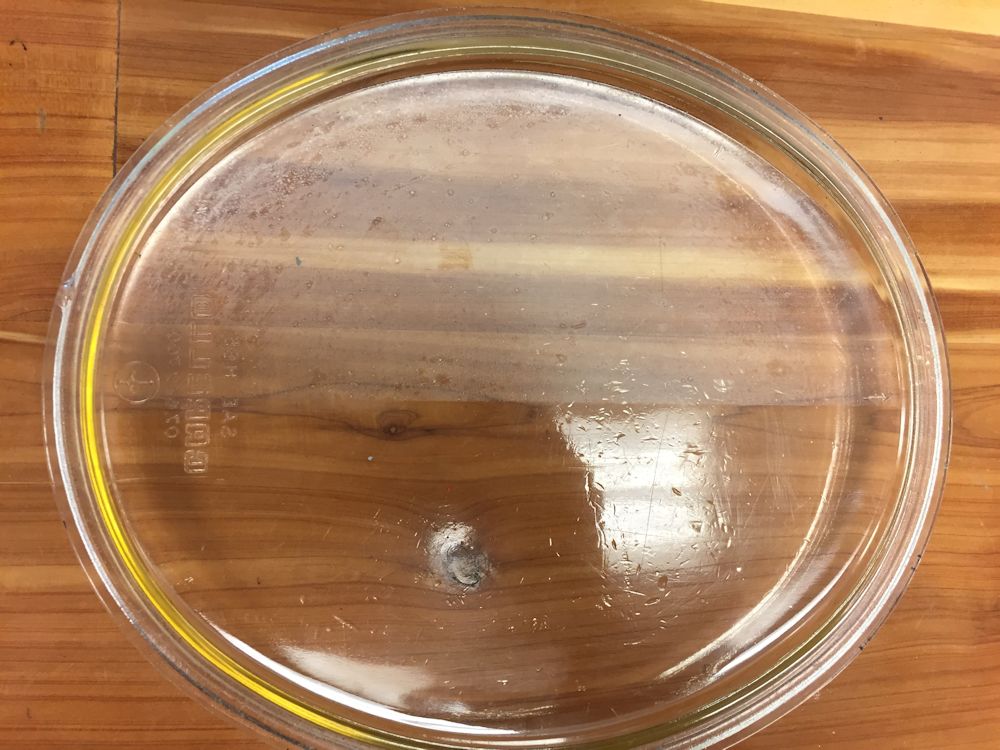
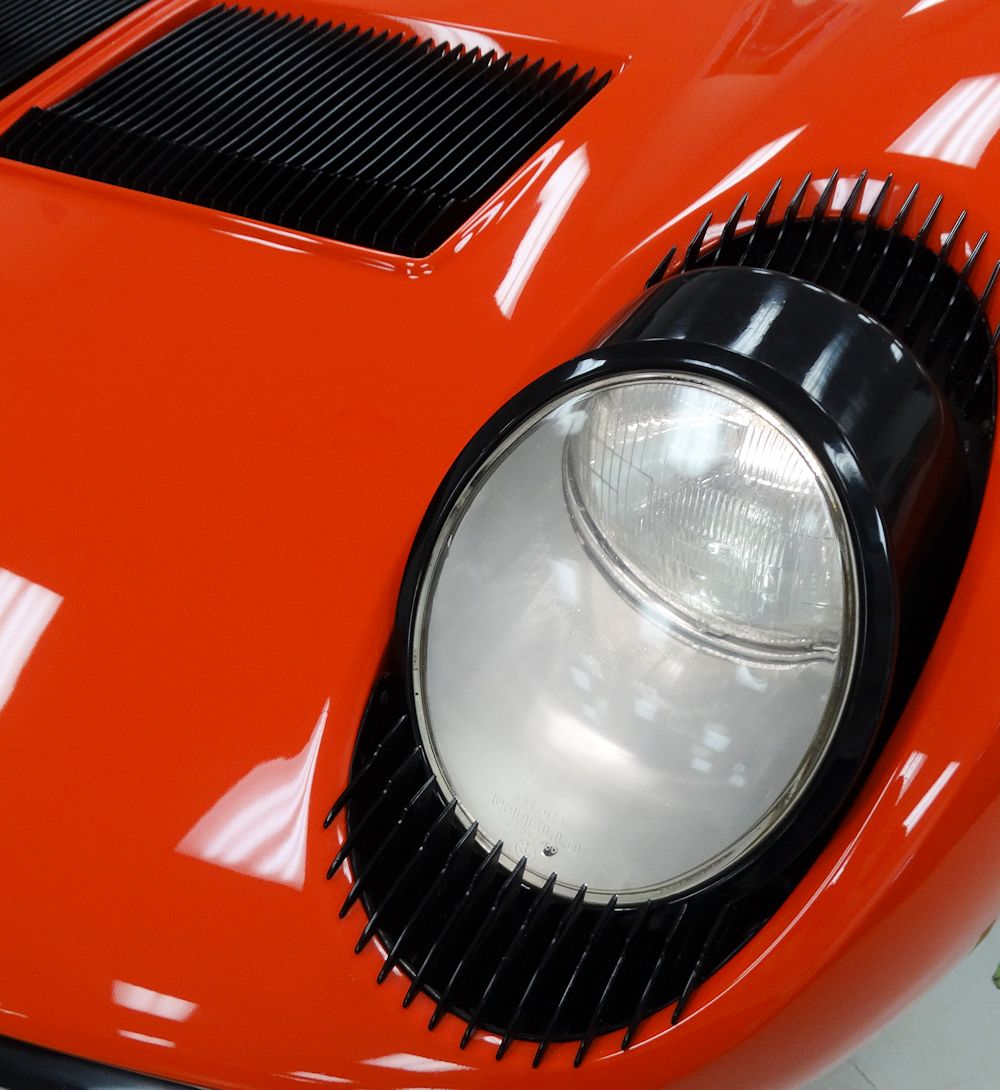
The headlamps on the Miura had recently stopped working and they were also suffering from decades of grime and condensation stains behind the lenses. Chris has now removed and disassembled both headlamp assemblies, cleaned all the internals and corrected the electrical issues.
 |
 |
| Both headlamps were a little grimy behind the glass lenses |
Disassembling the lamps for a thorough
cleaning |
 |
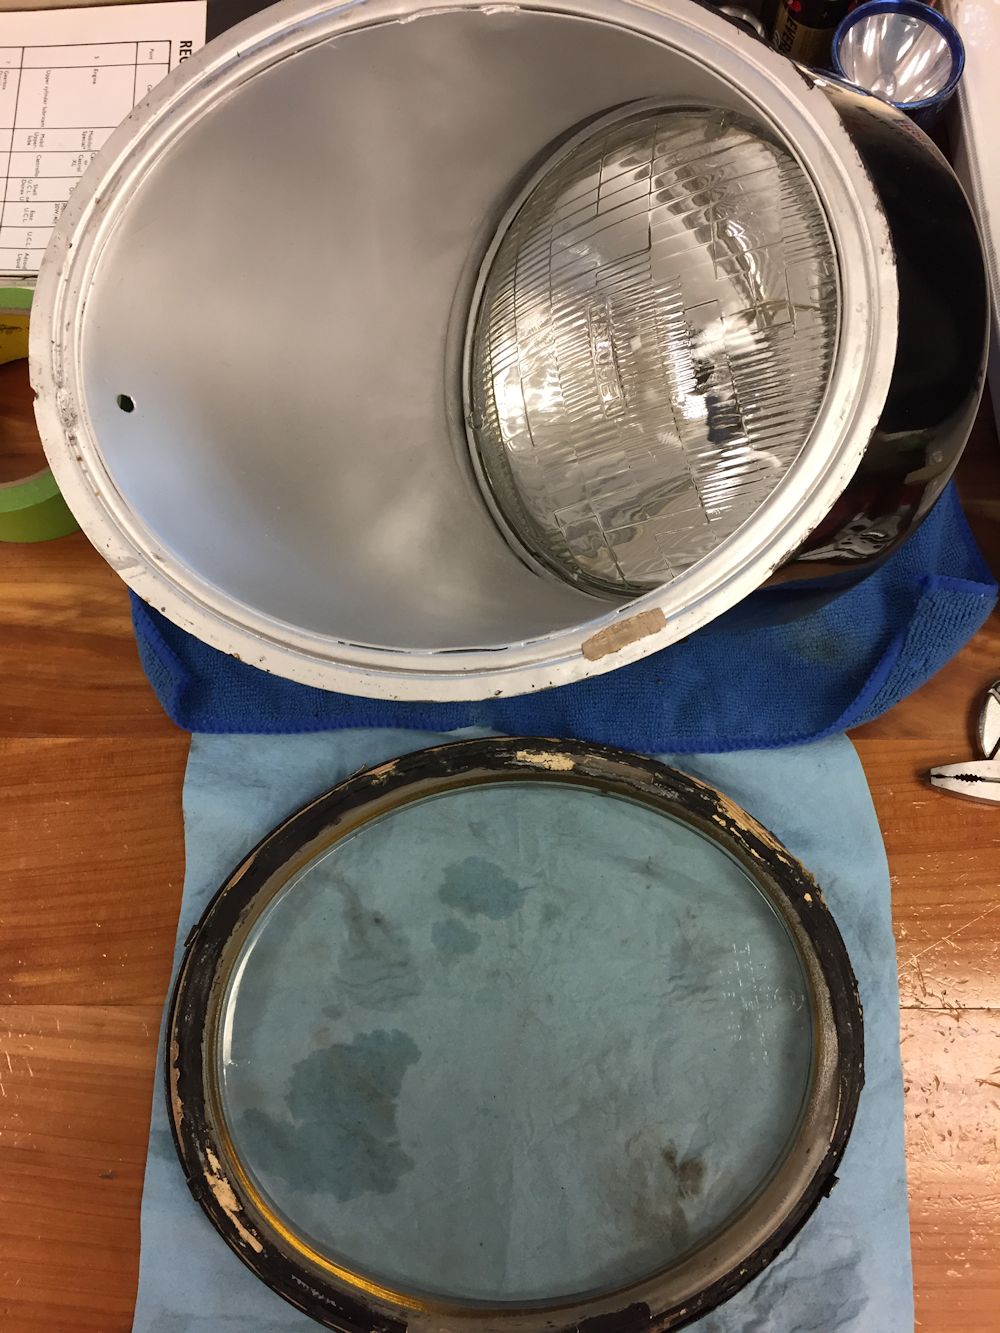 |
| Inner edge of glass lenses were stained
following many years of condensation |
|
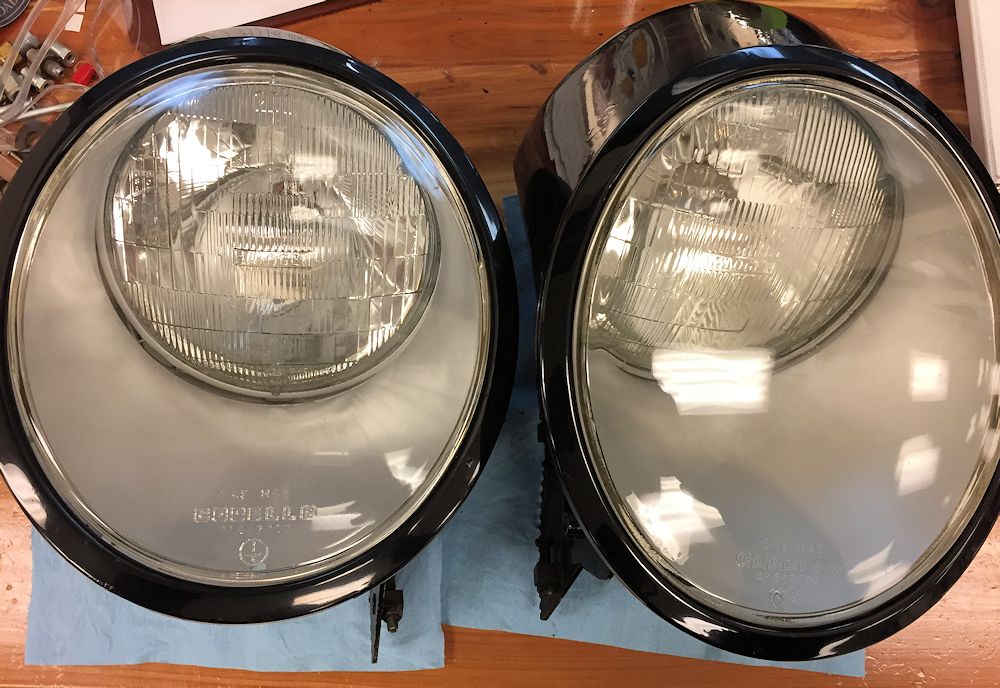 |
 |
| Reassembling headlamps after cleaning |
Looking a lot better! |
 |
 |
| Electrical issues resolved, headlamps fully functional once more |
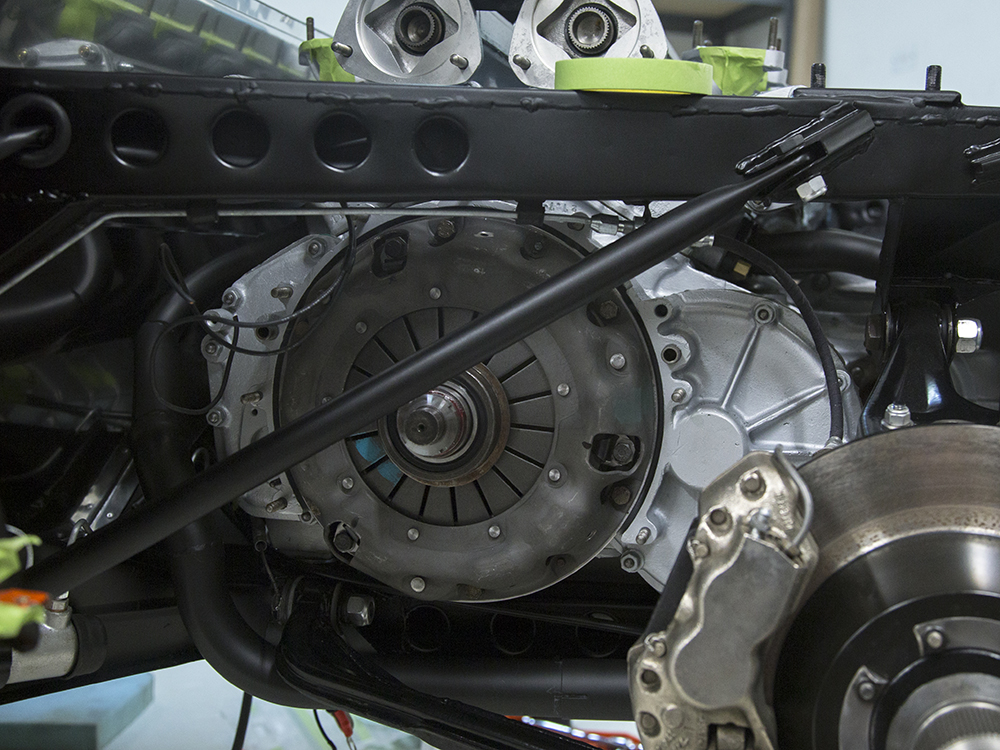
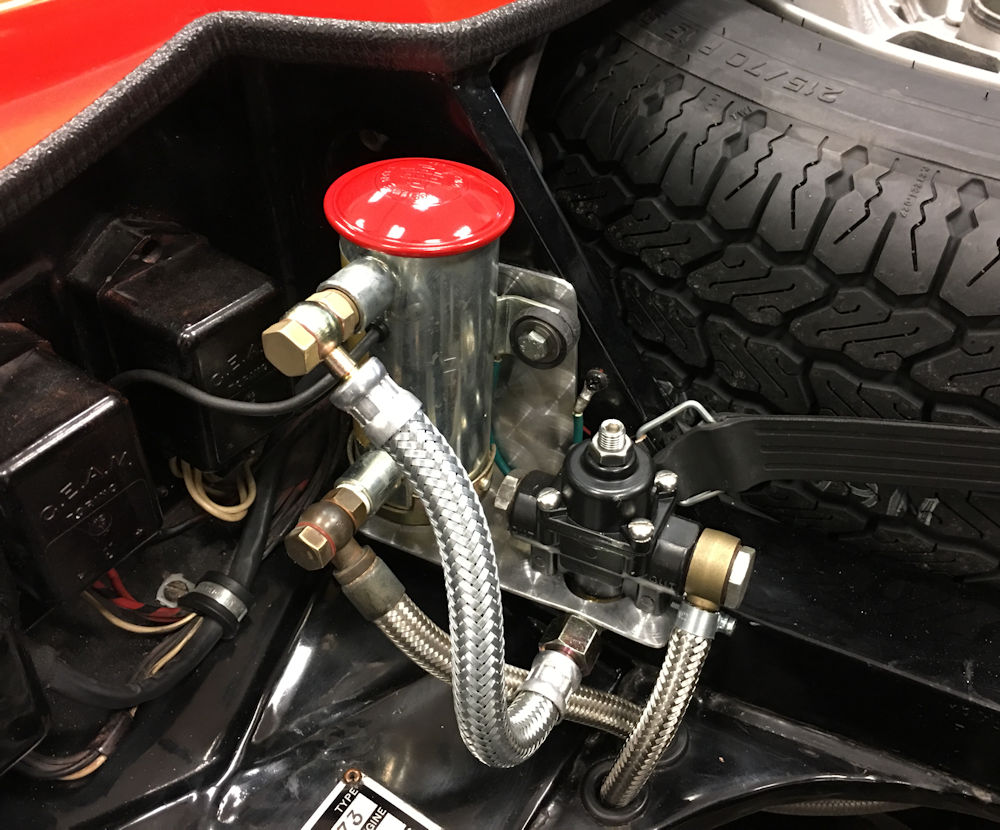
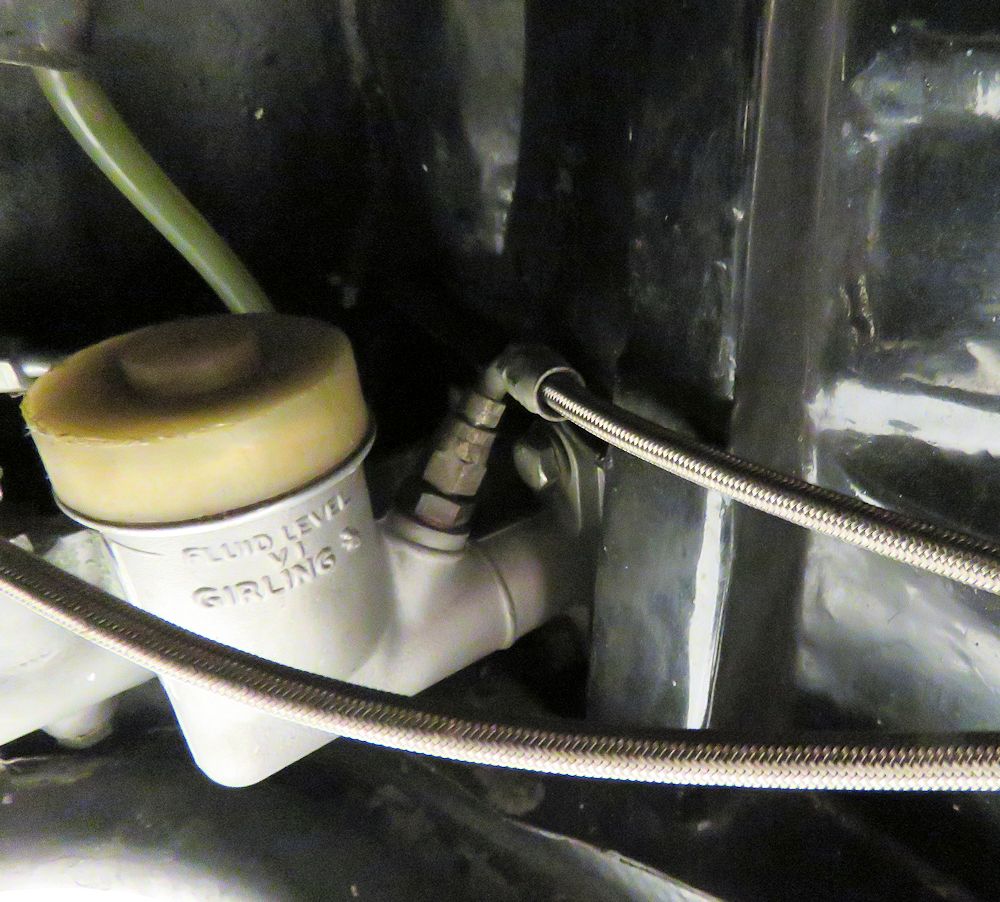
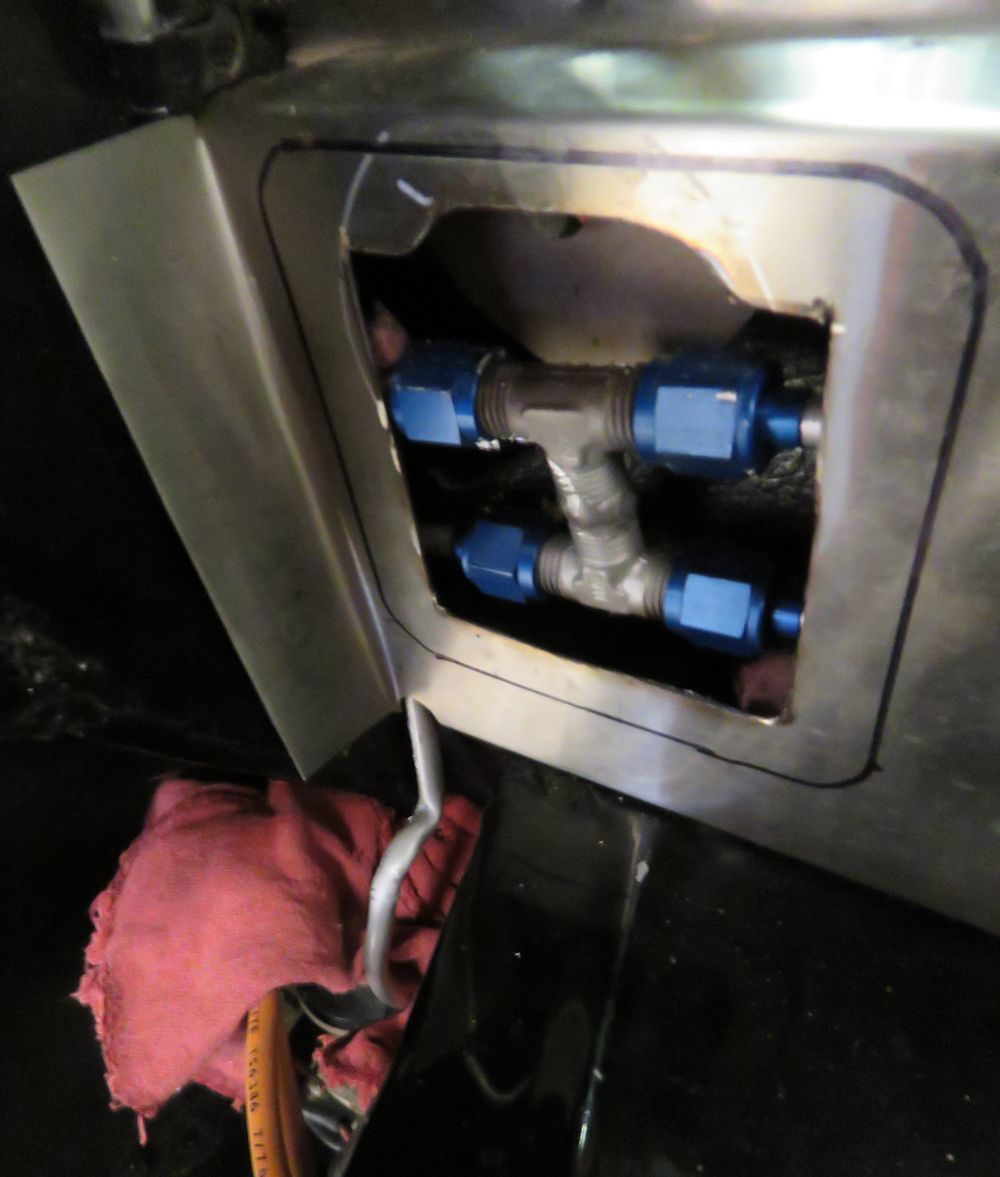
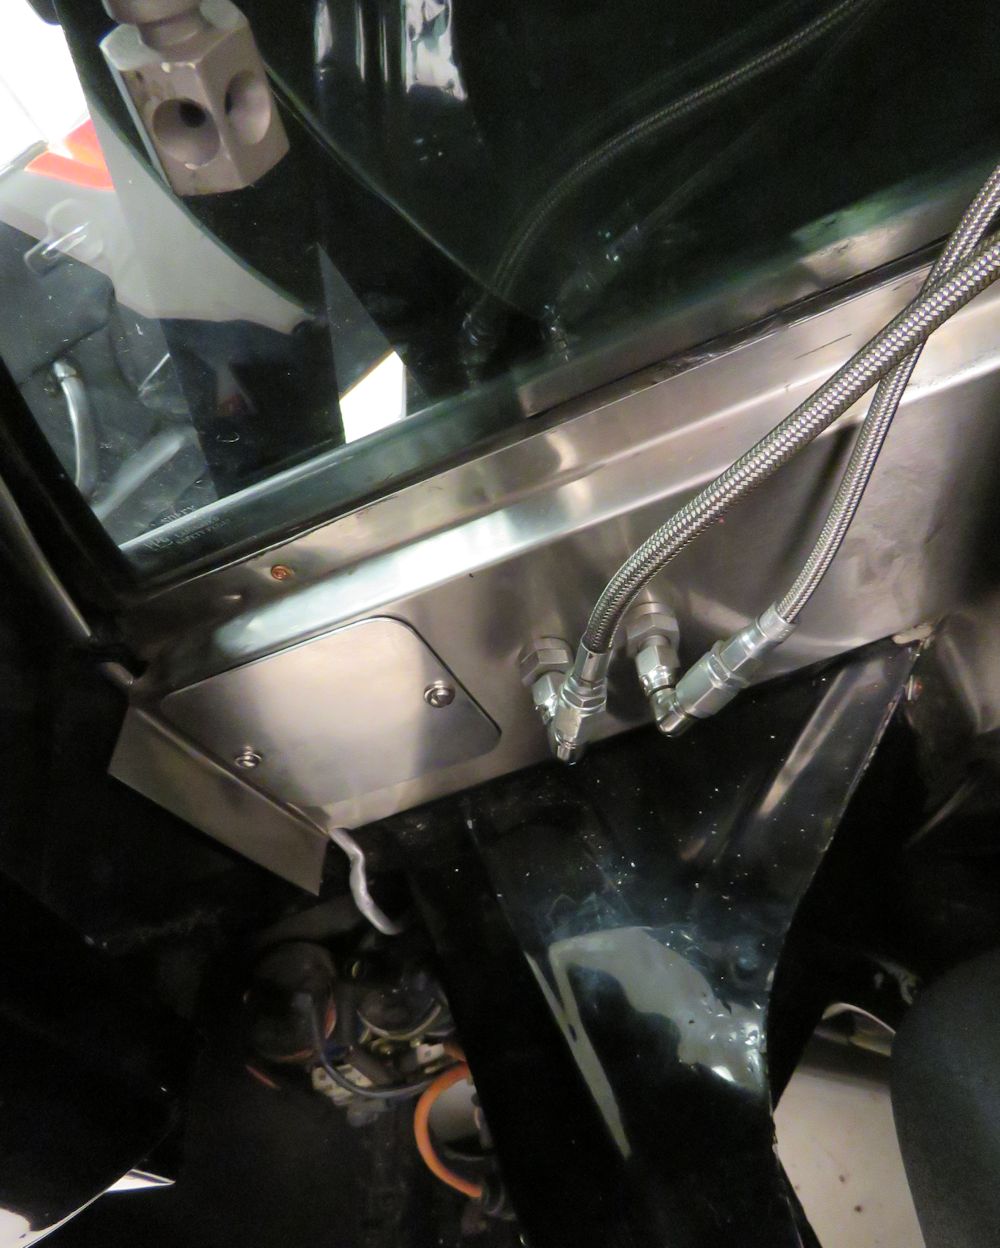
I am pleased to report that we have completed our upgrade of the clutch hydraulic system and the clutch is working perfectly, with a noticeable improvement in pedal feel. Thanks to Valentino Balboni for the recommendation and advice!
 |
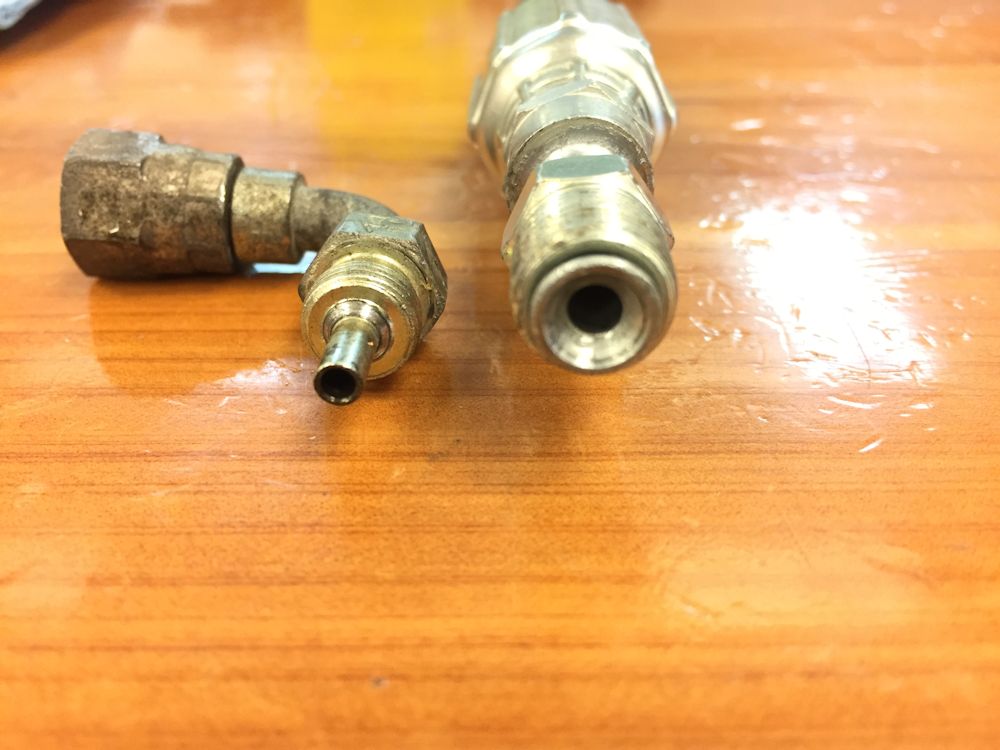 |
| Rocker panel removed, exposing the fire extinguisher line |
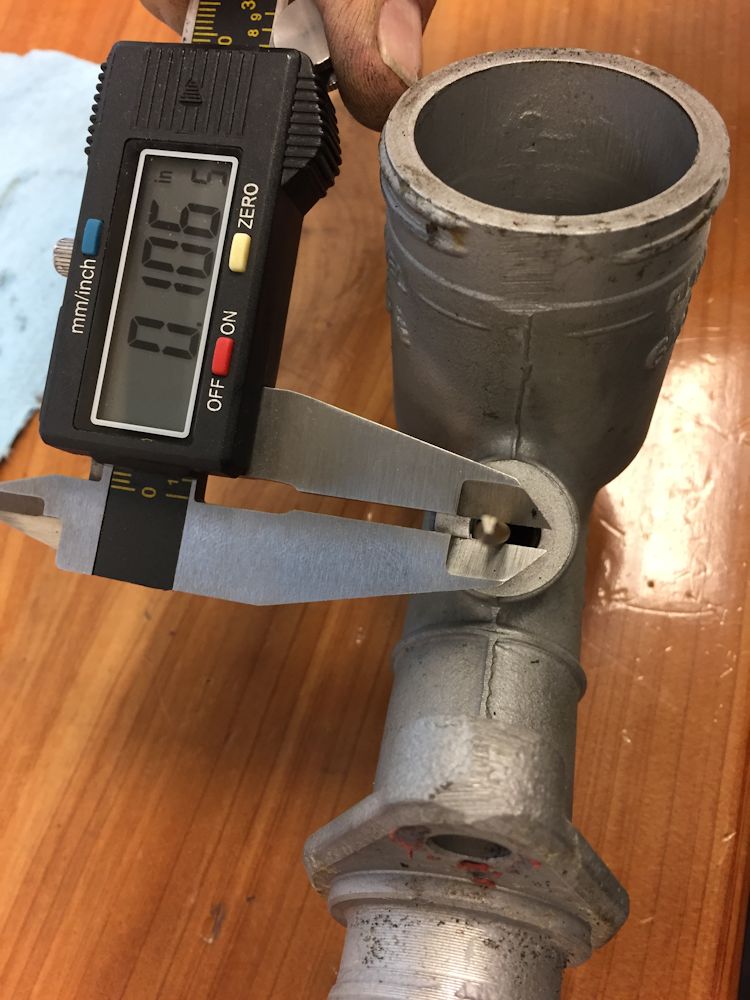
Comparing old (L) and new fitting bore ID |
 |
 |
| Old fitting |
New fitting approximately .035" larger |
 |
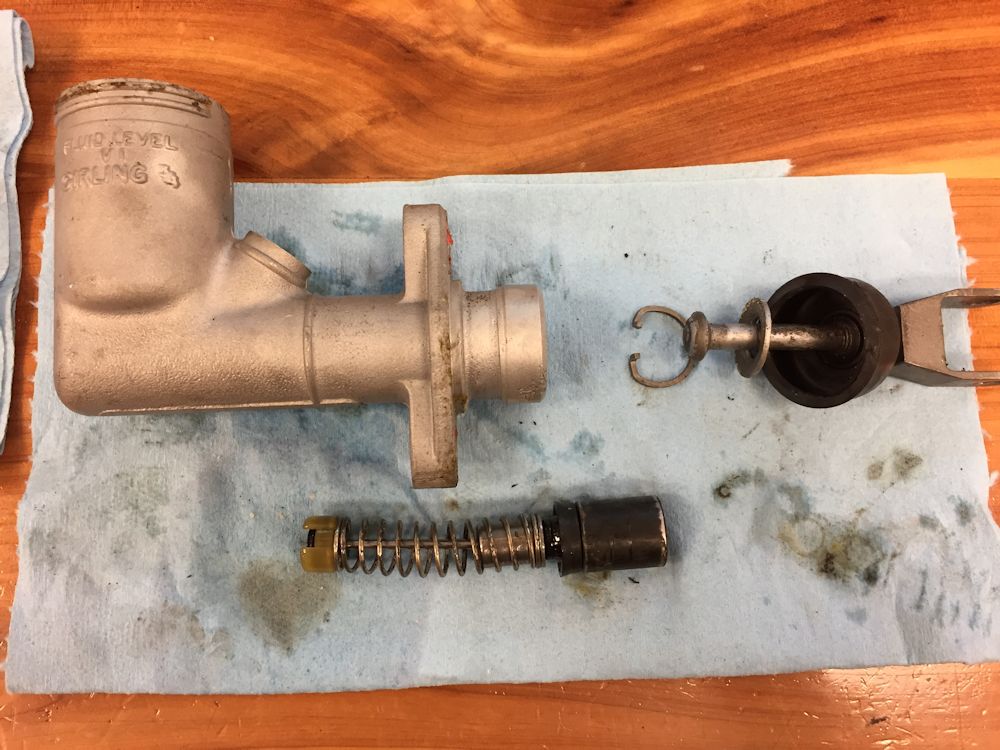 |
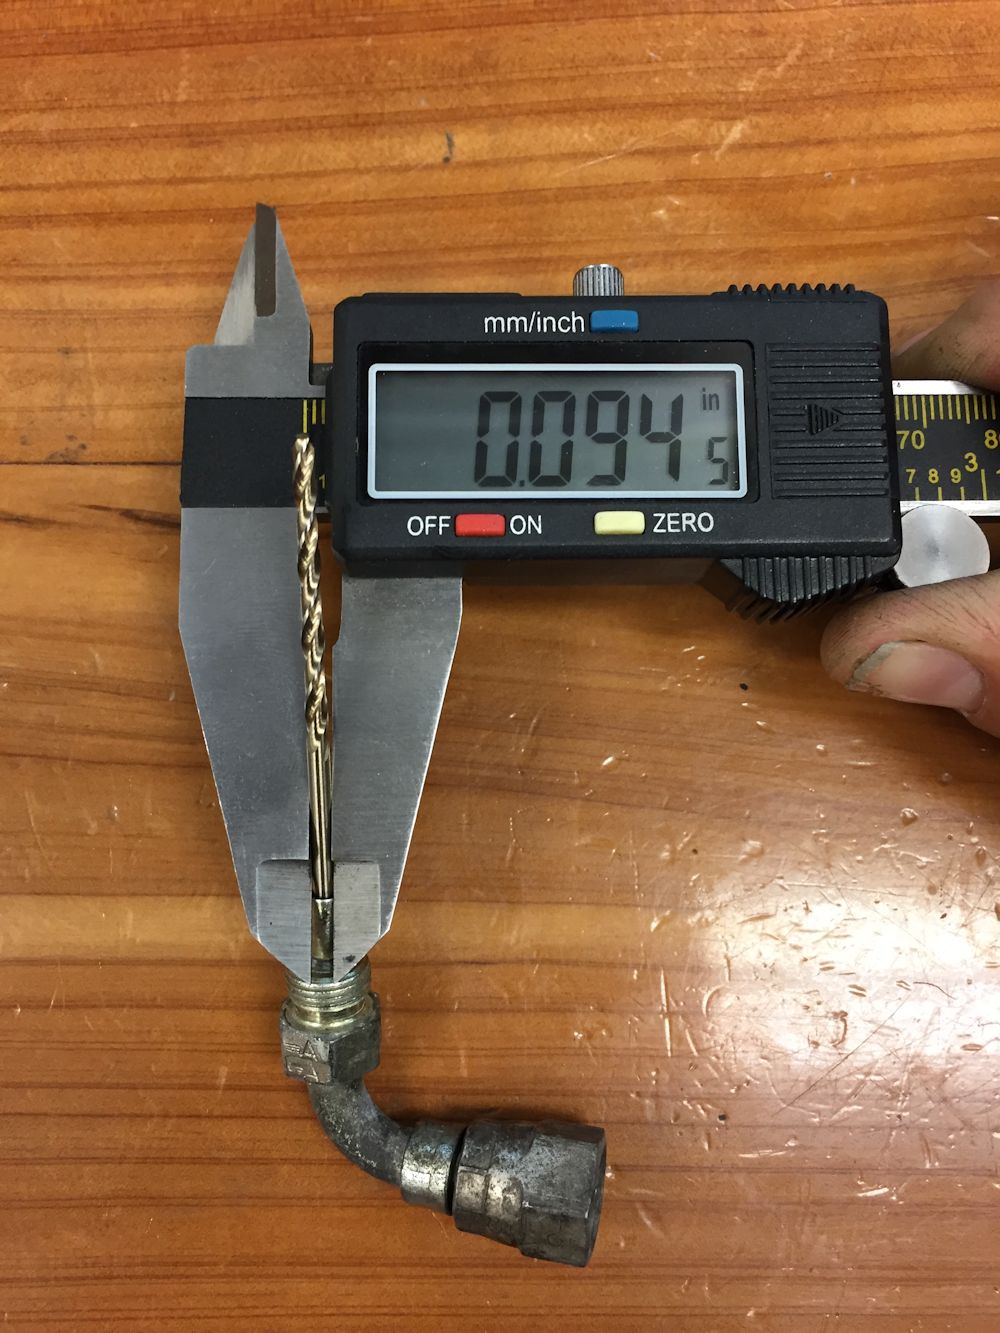
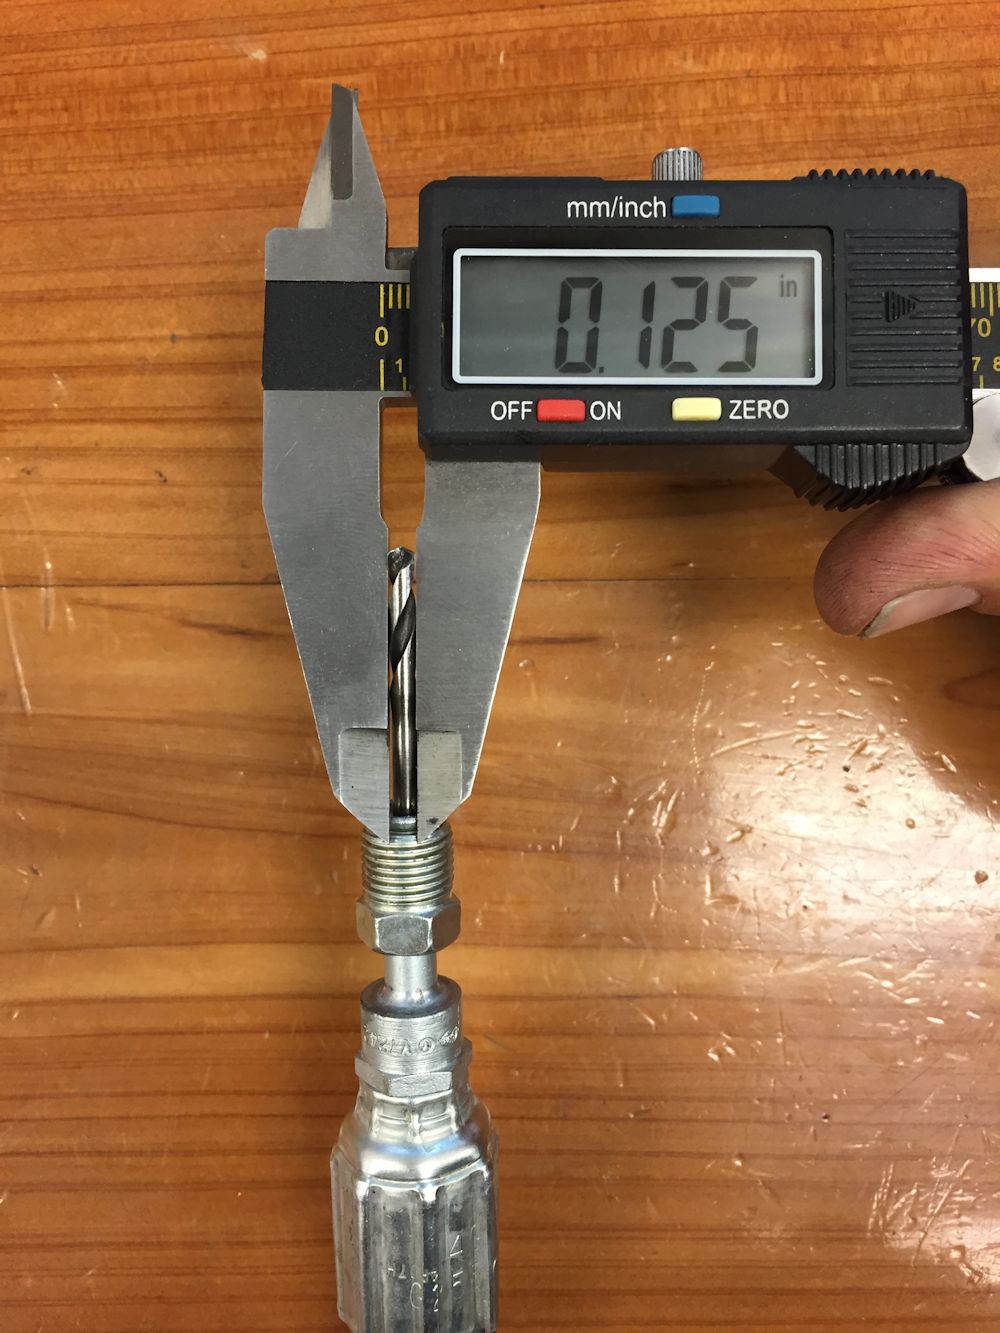
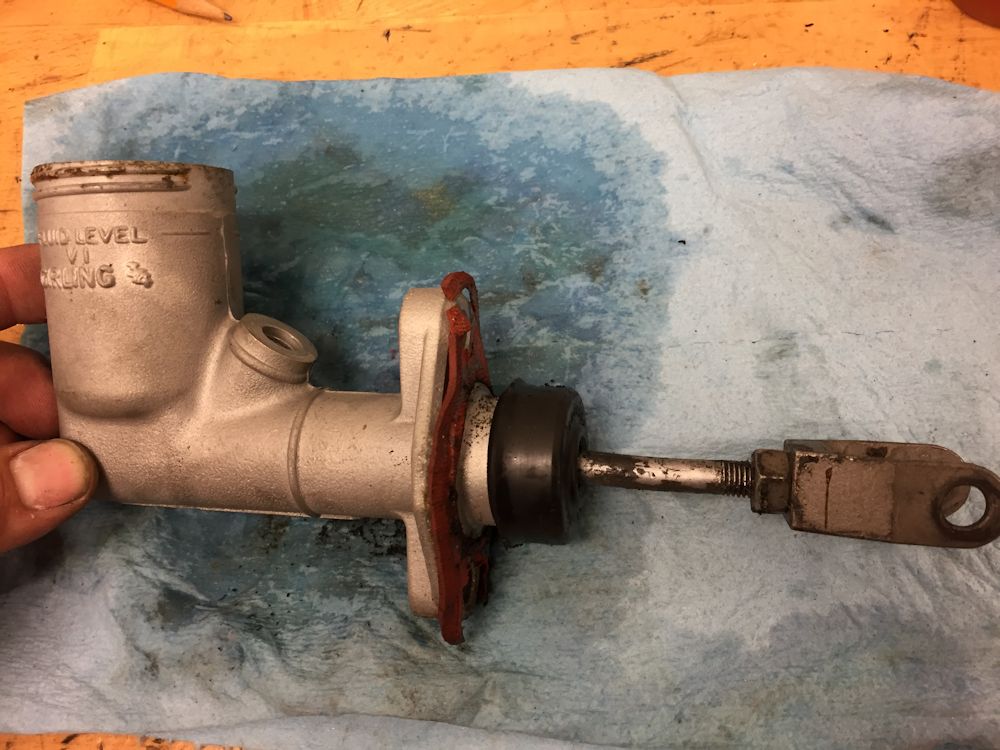
| Time to address the clutch master cylinder |
|
 |
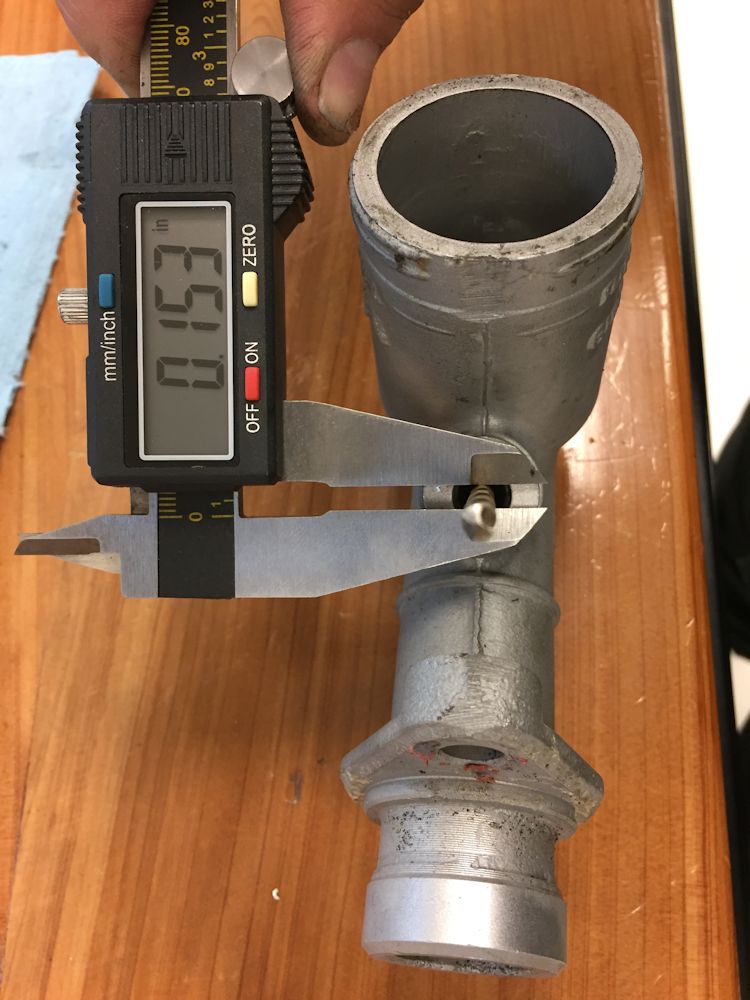 |
| Before modification |
Almost .050" greater ID after modification |
 |
 |
| Fabricating and installing the new hydraulic hard line |
Our new hydraulic line is the straight line in this picture! |
 |
 |
| Showing where the new hard line meets up with
the new flex line (using original mounting holes) |
Showing the new flex line terminating at the
slave cylinder |
 |
 |
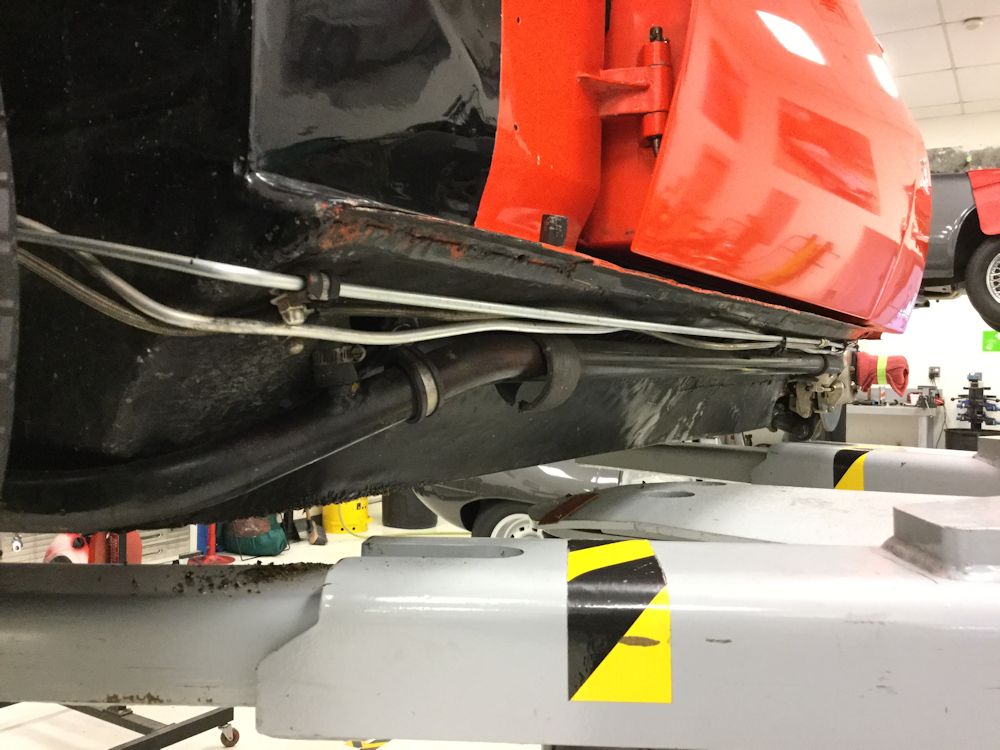
| We took the opportunity to tidy up the routing
of the fire extinguisher and brake lines |
Rocker cover replaced, clutch upgrade now completed |
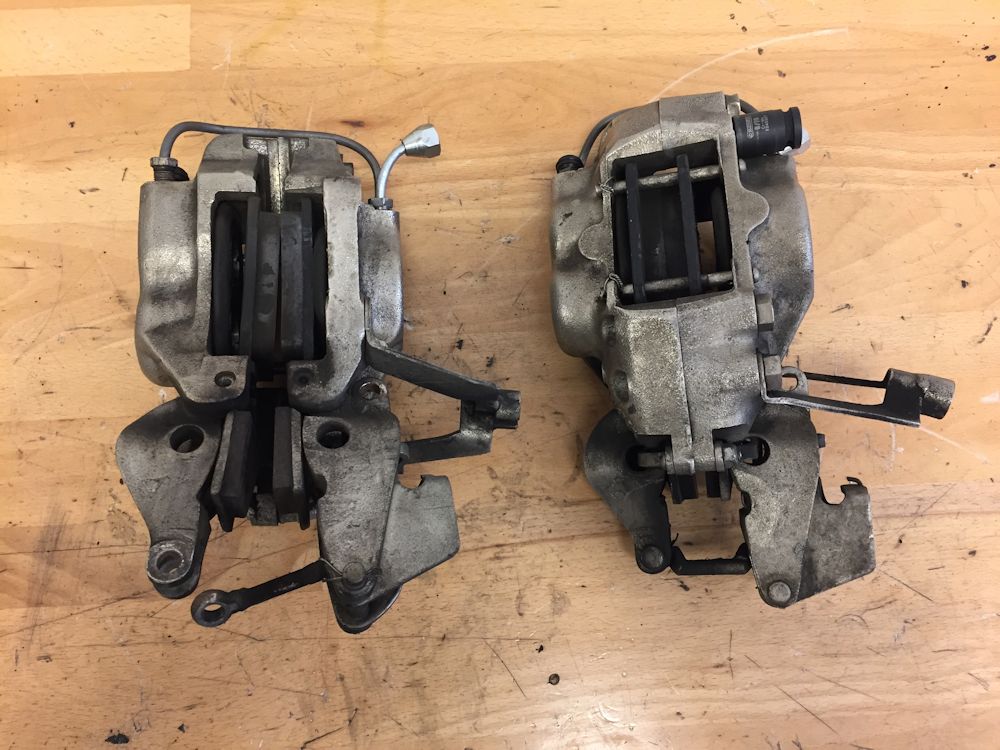
We have already rebuilt the rear brake calipers and installed the new Quick Silver headers and exhaust. Having investigated the clutch hydraulics, we believe the biggest restriction is in the aftermarket braided clutch line, not the ports of the master and slave cylinders. That being the case, we are going to replace the small bore braided line with larger steel line to see if that provides a lighter clutch pedal feel.
 |
 |
 |
 |
| Caliper pistons are rusty and will be
upgraded to new stainless pistons |
|
 |
 |
| New seals and pistons installed |
|
 |
 |
| Rebuilt calipers now reinstalled |
Investigating the bore size of the clutch
slave |
 |
 |
| Hydraulic line makes a 90 degree turn
immediately after leaving the clutch master cylinder |
|
 |
 |
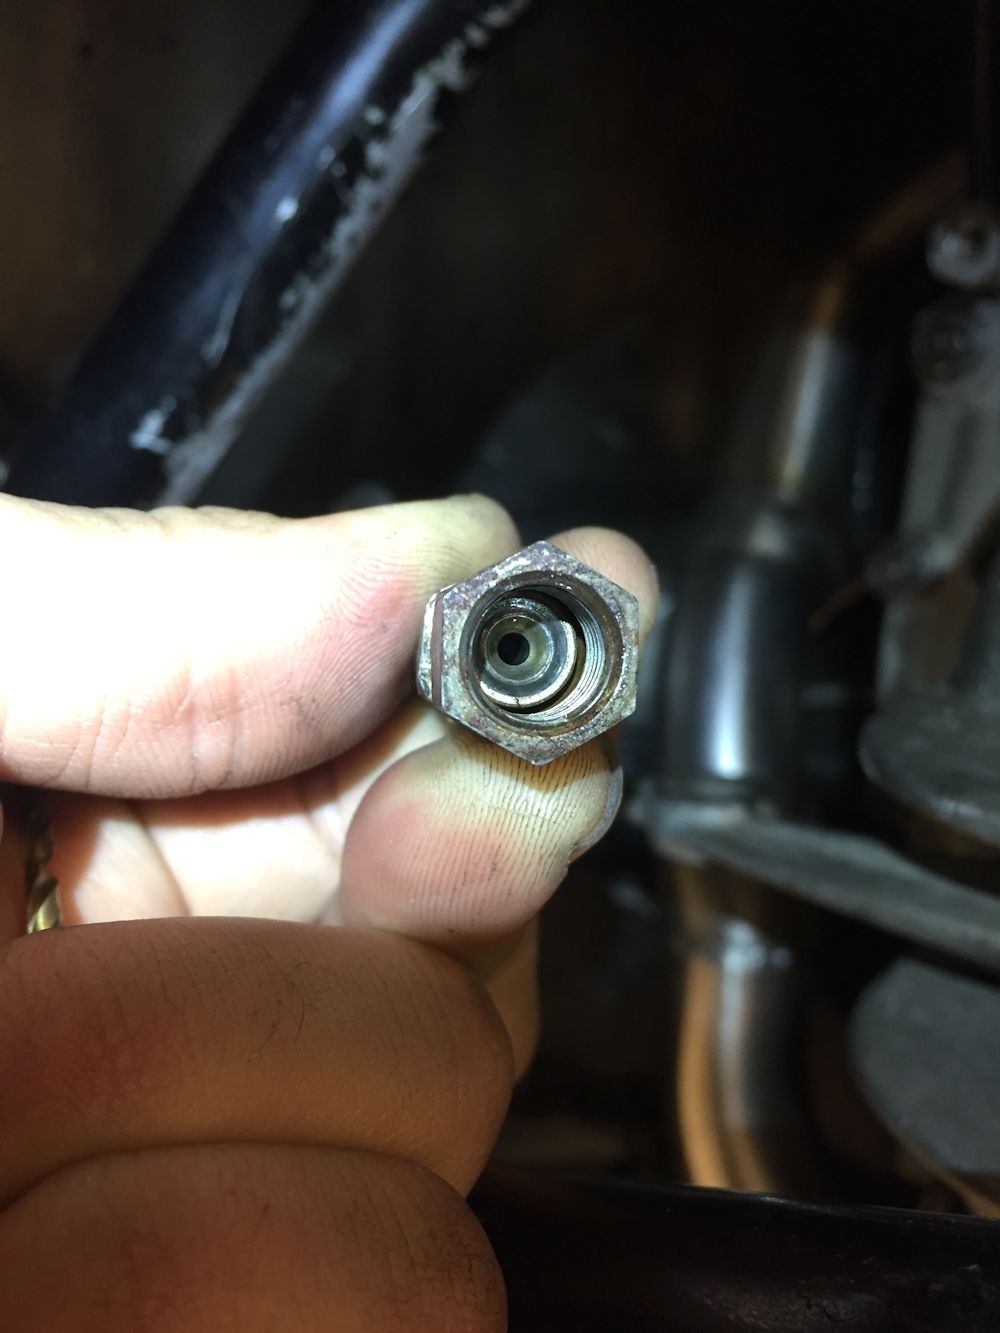
| Braided clutch line has very restrictive
bore |
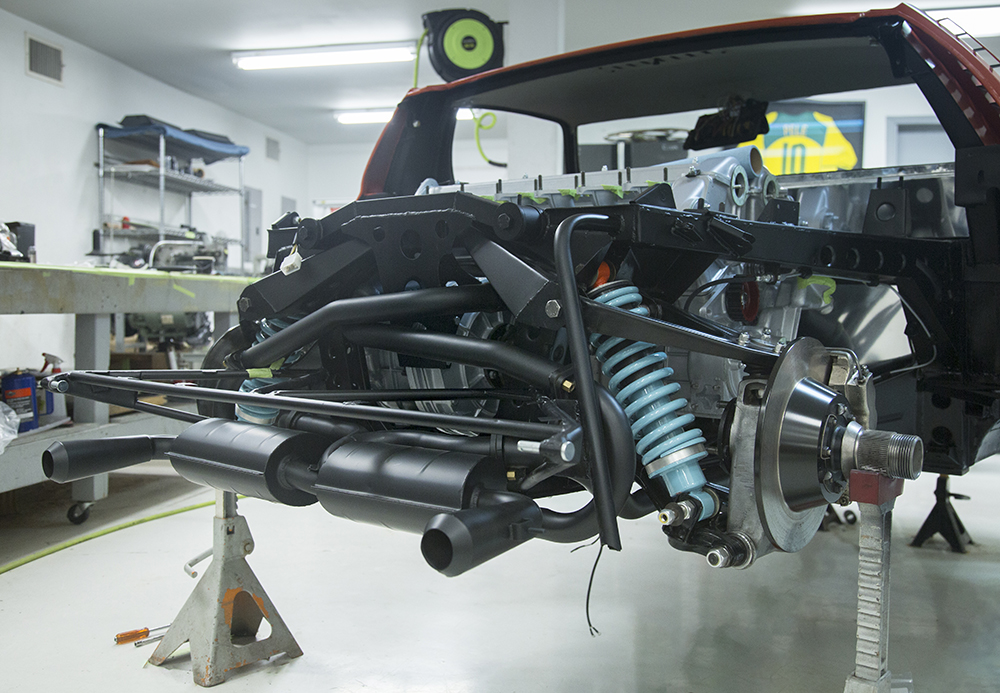
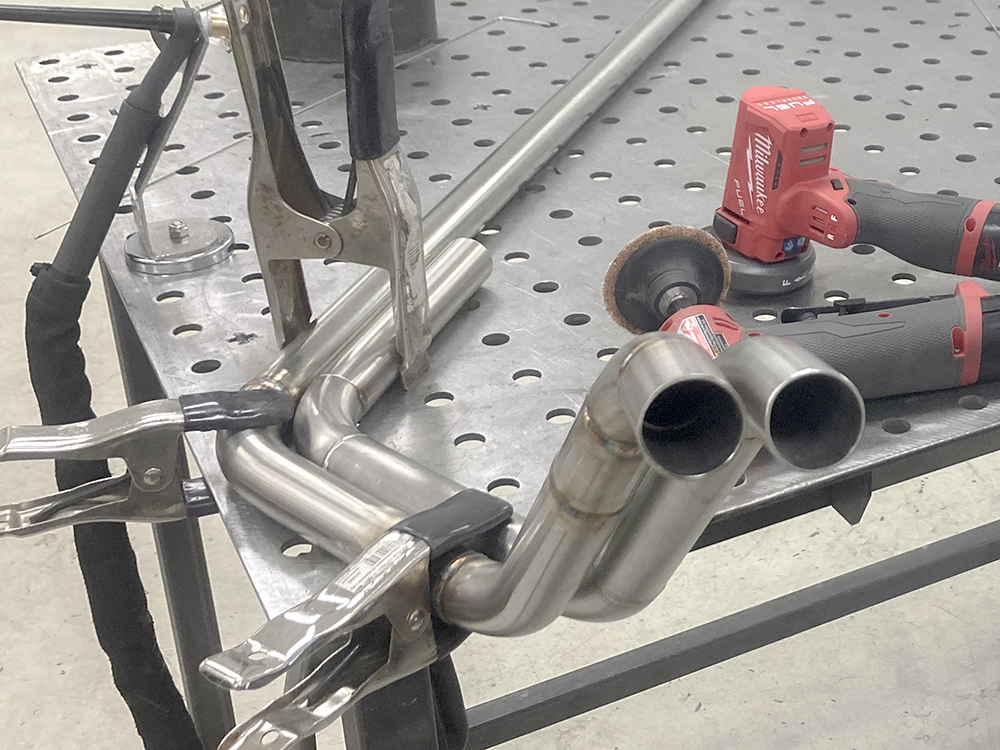
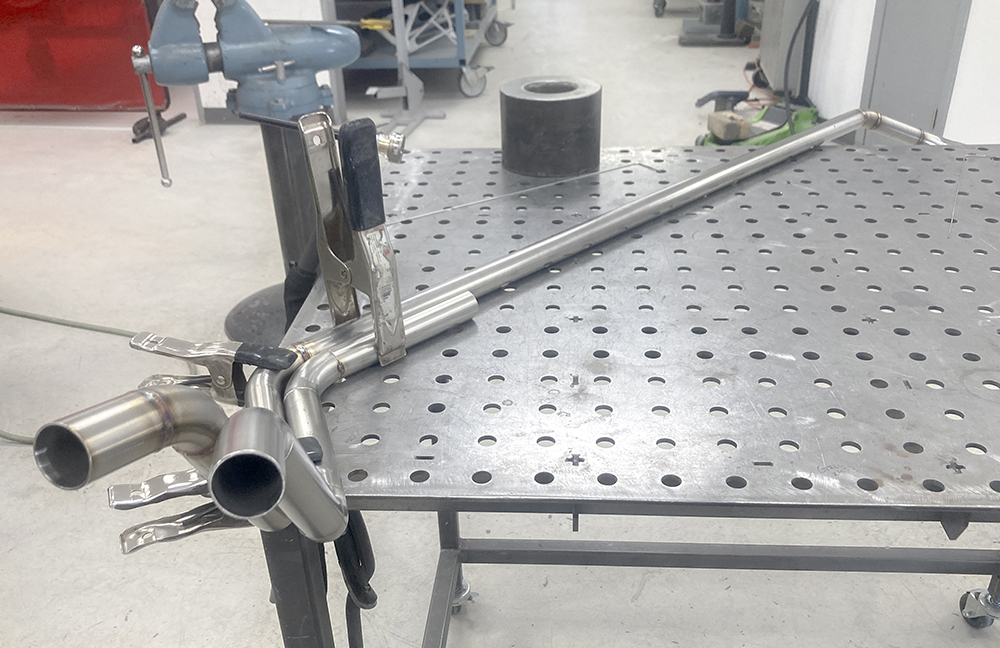
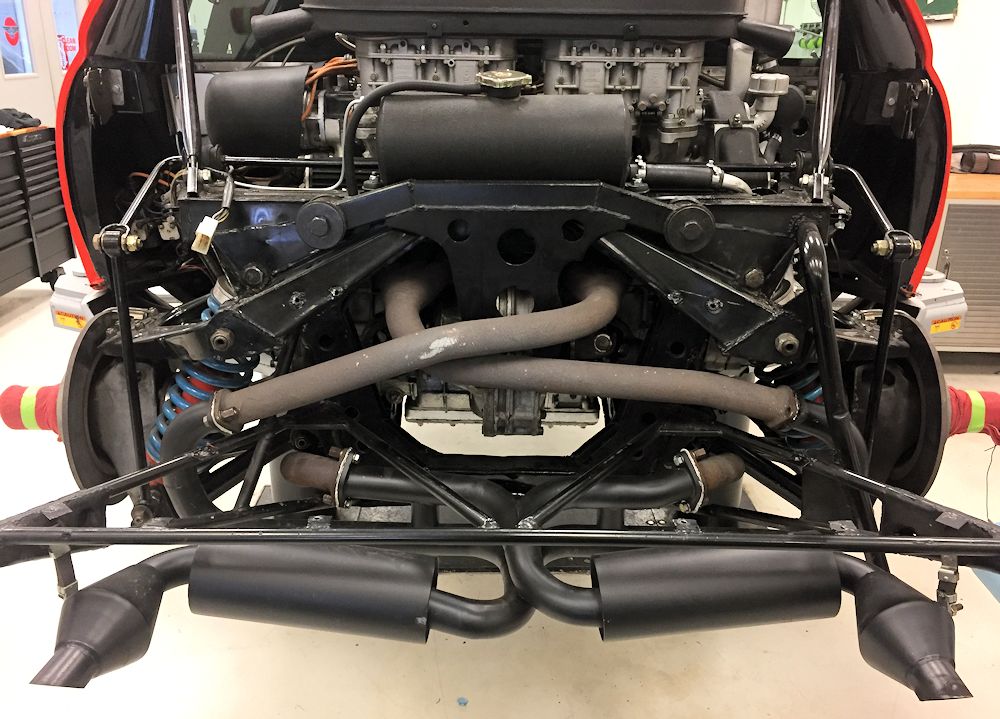
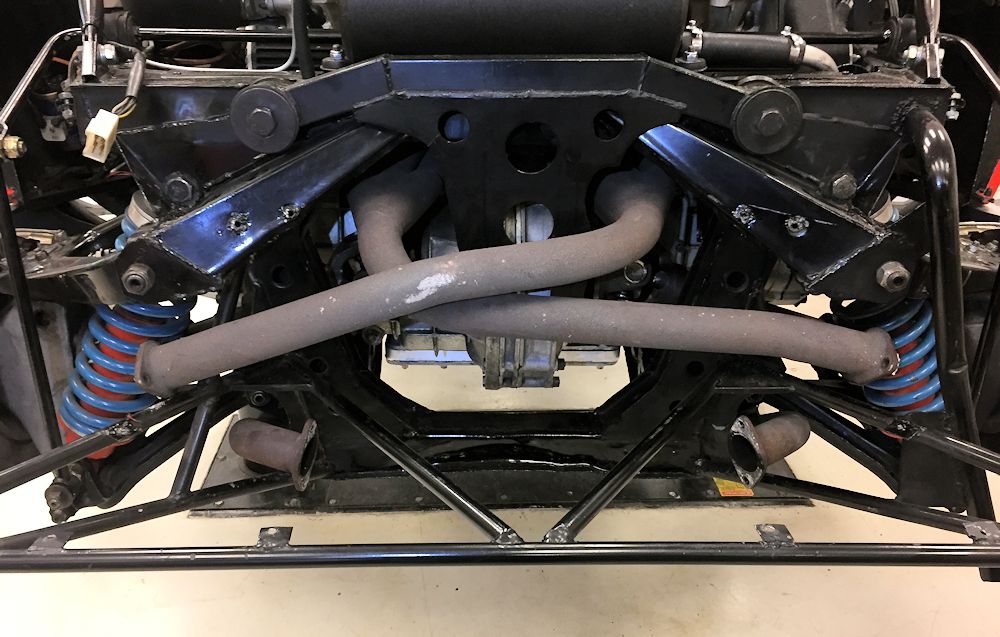
Time to remove and replace the old headers and exhaust |
 |
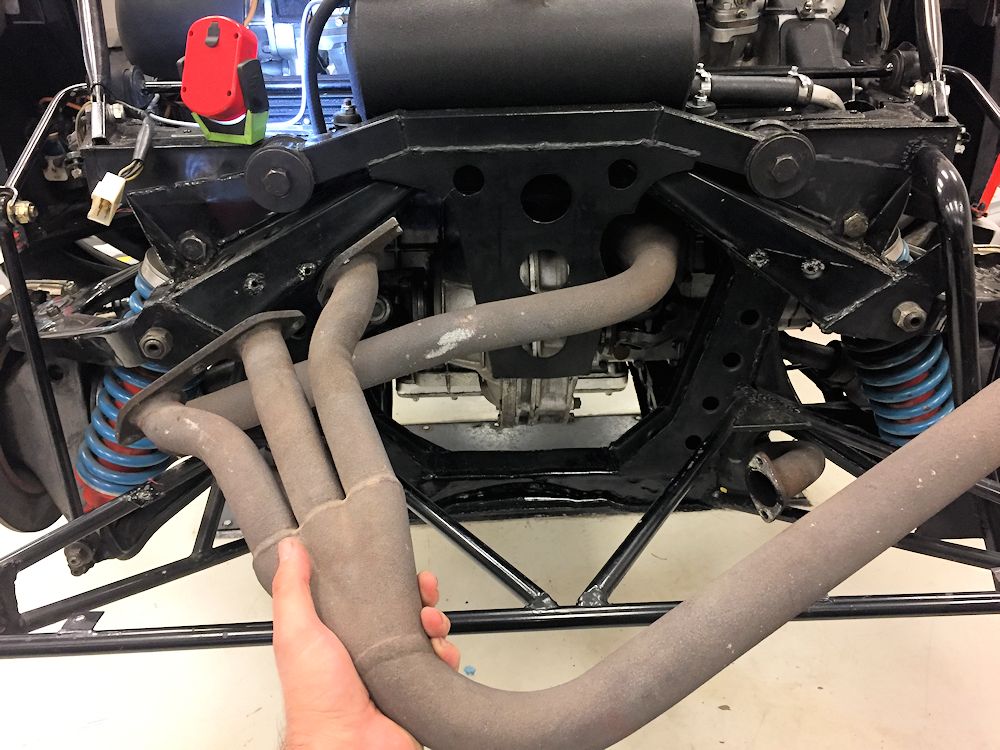 |
| Removing the left hand header |
|
 |
 |
| New Quick Silver system fits beautifully |
Earlier today legendary Lamborghini factory test driver Valentino Balboni piloted this beautiful Miura for three "aggressive laps" around MSR in Houston. Mr. Balboni had driven the car previously and I am proud to report that he declared our recently completed mechanical work a complete success. He told the owner of the car, who was a passenger for the laps around MSR, "It is like a different car...better than expected."
Click on the photo below for a short video clip of the legend behind the wheel.
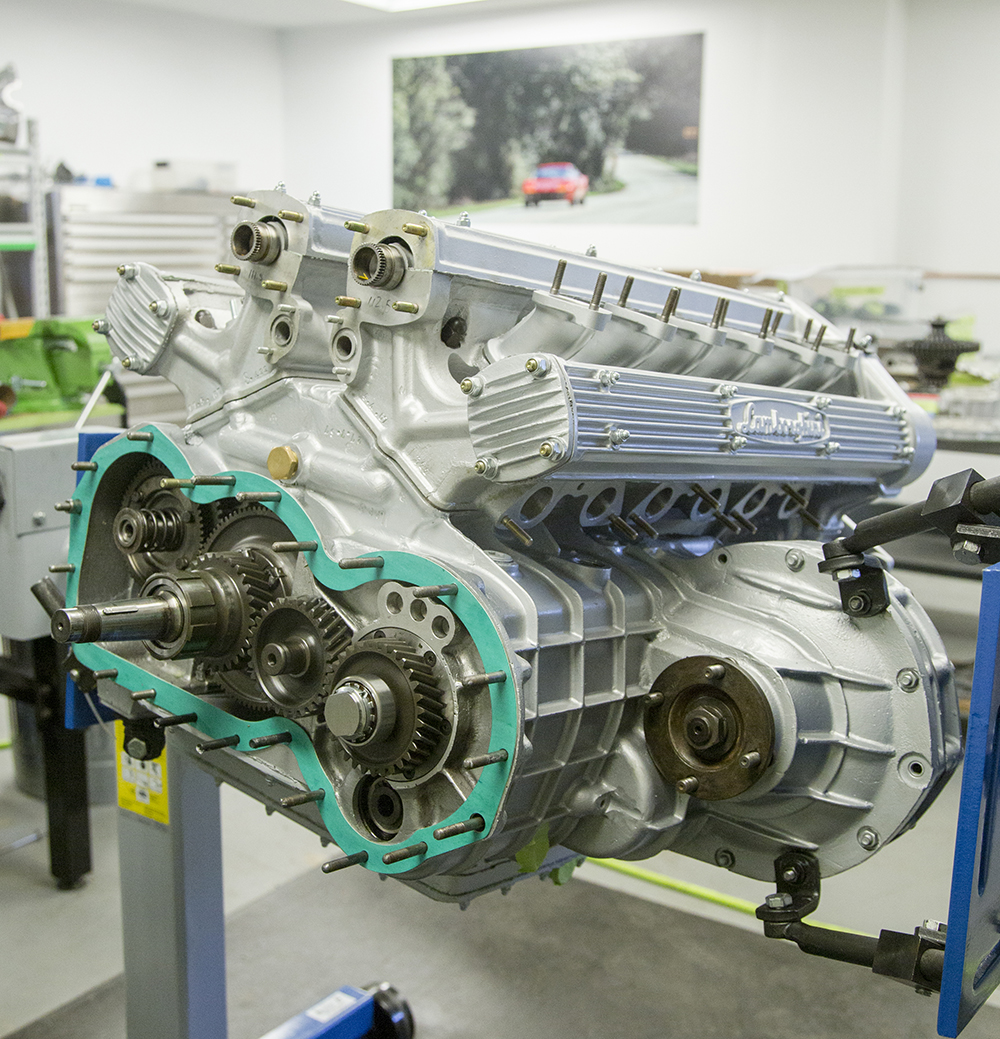
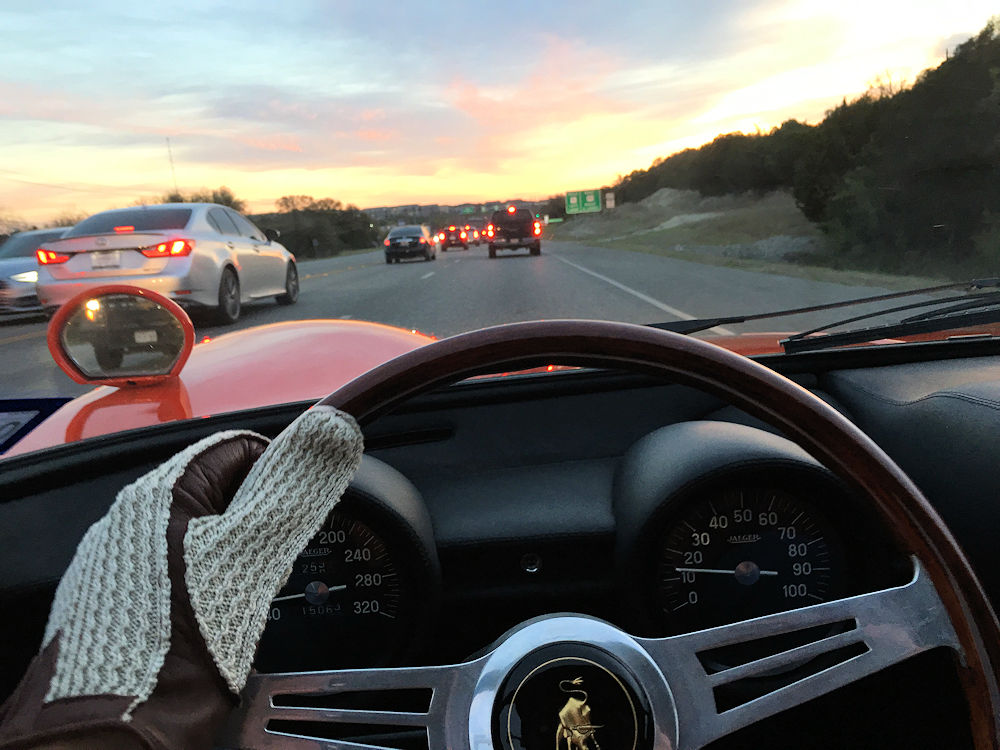
I am pleased to report that we have now completed the transmission rebuild and been busy tuning the rebuilt Webers on the Dyno. Earlier today I took the car out for some initial road testing, which went very well.

 |
 |
| Road test video # 1 |
Road test video # 2 |
 |
 |
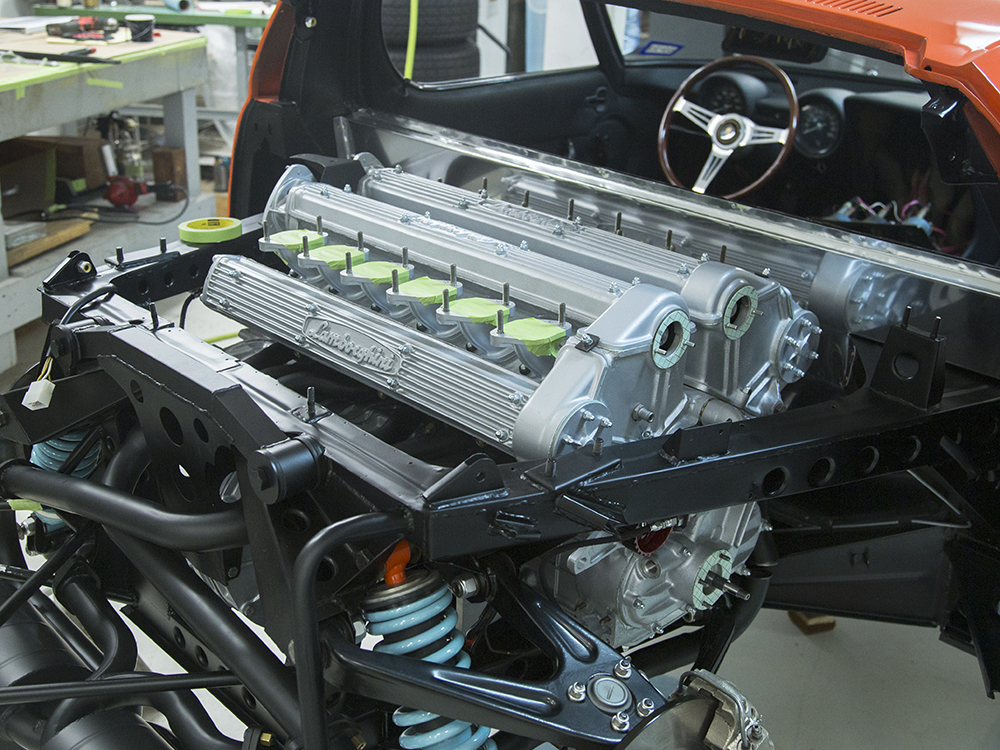
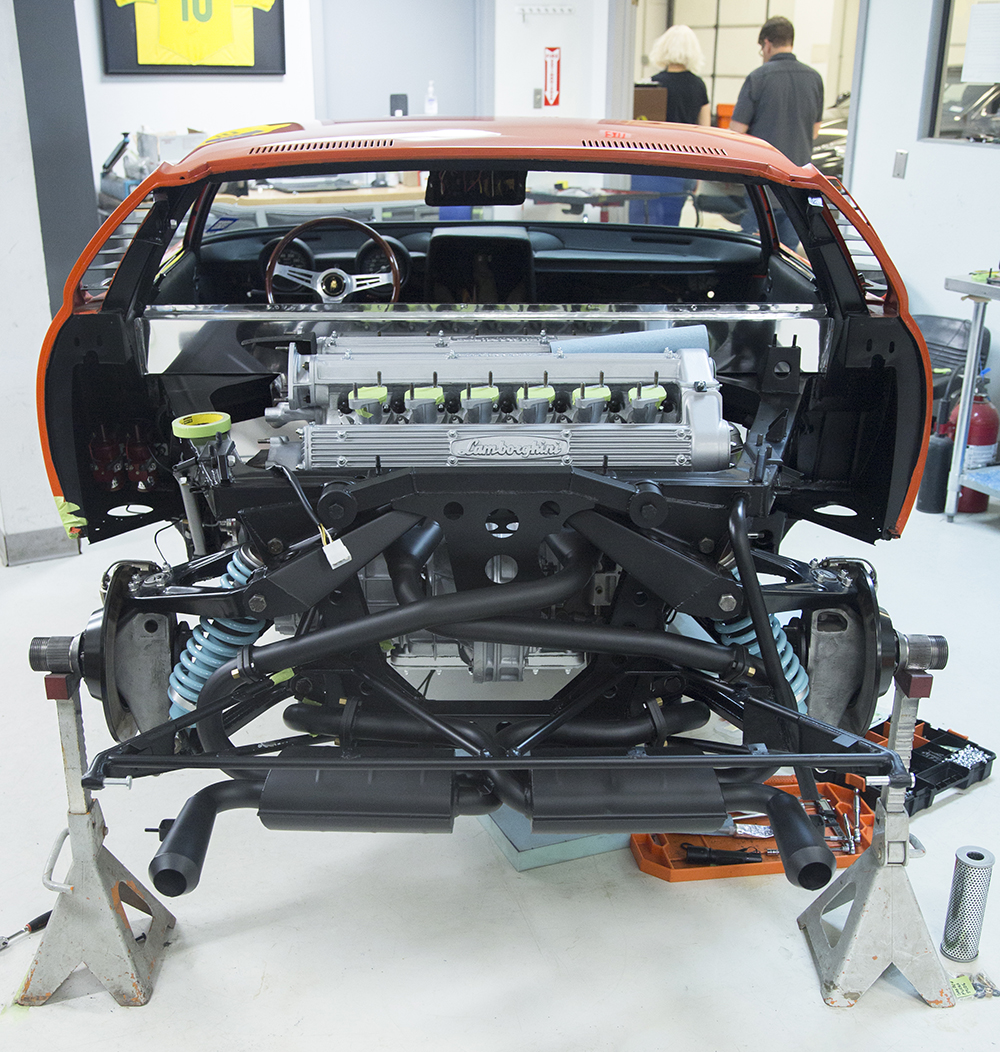
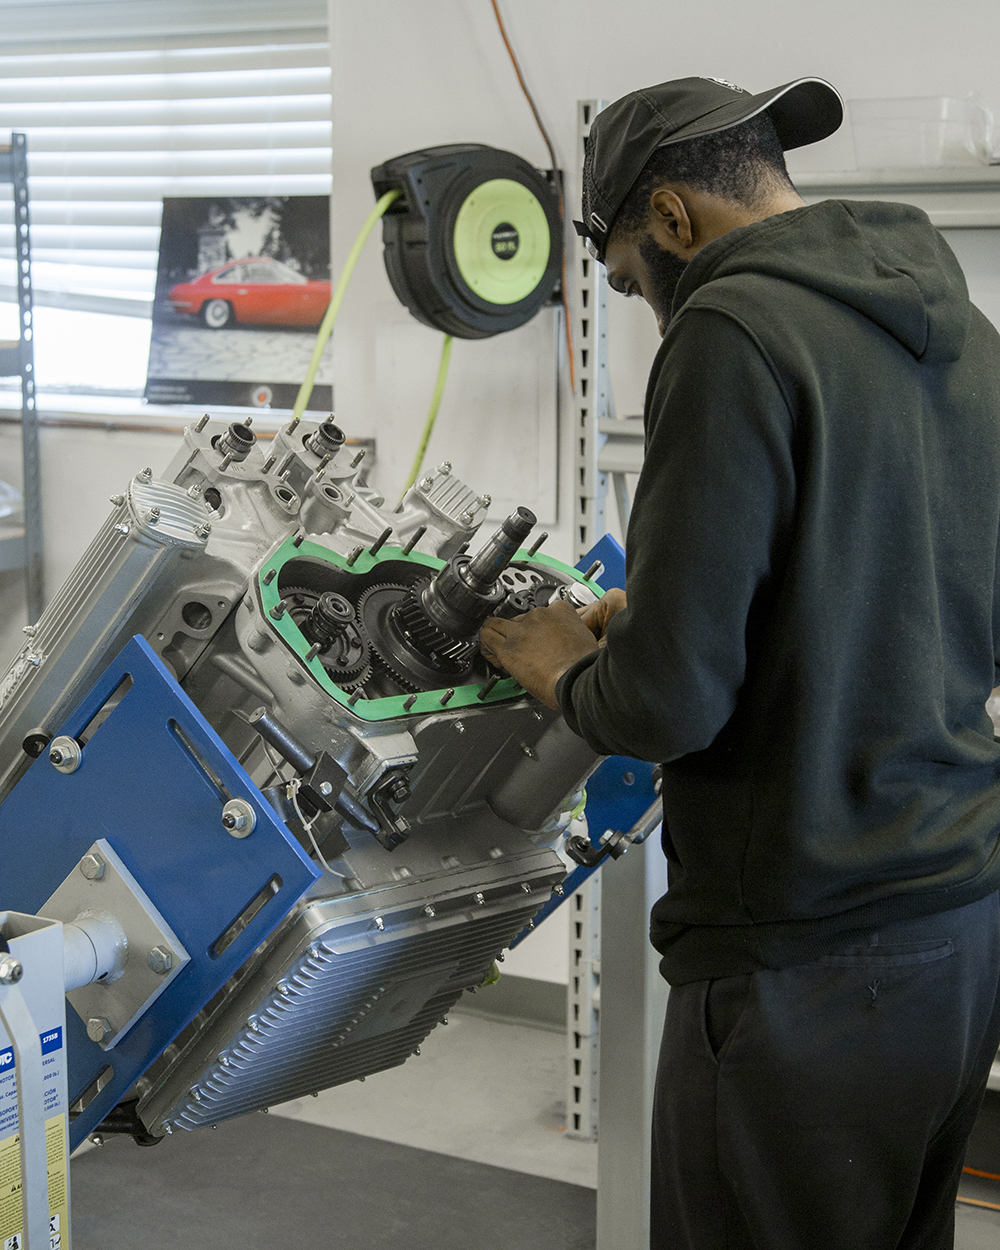
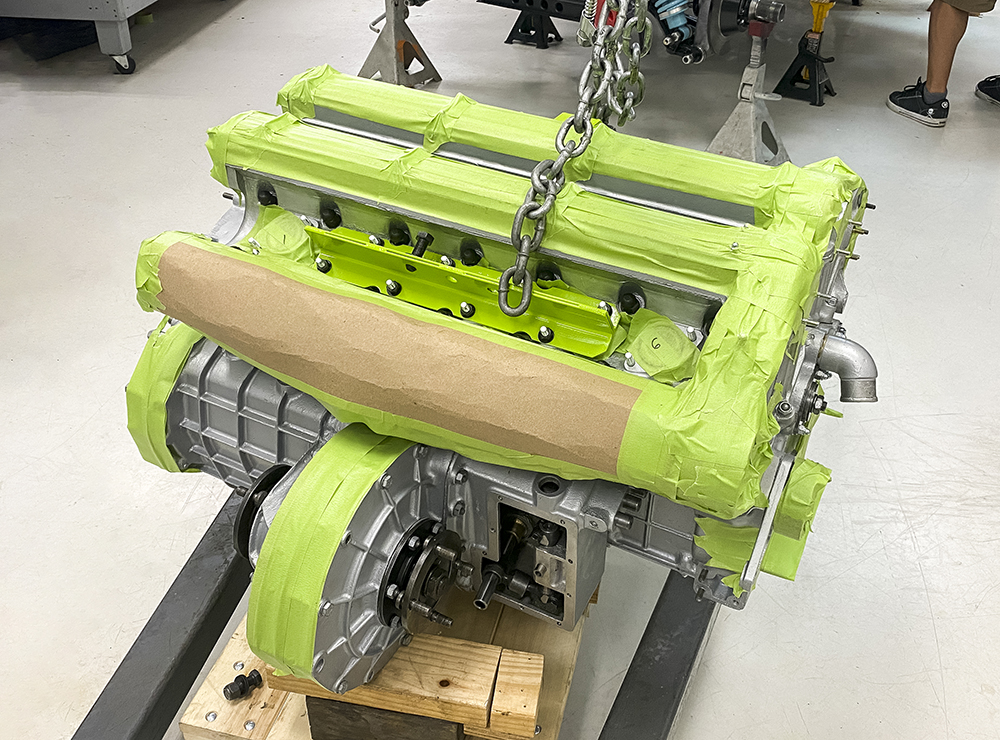
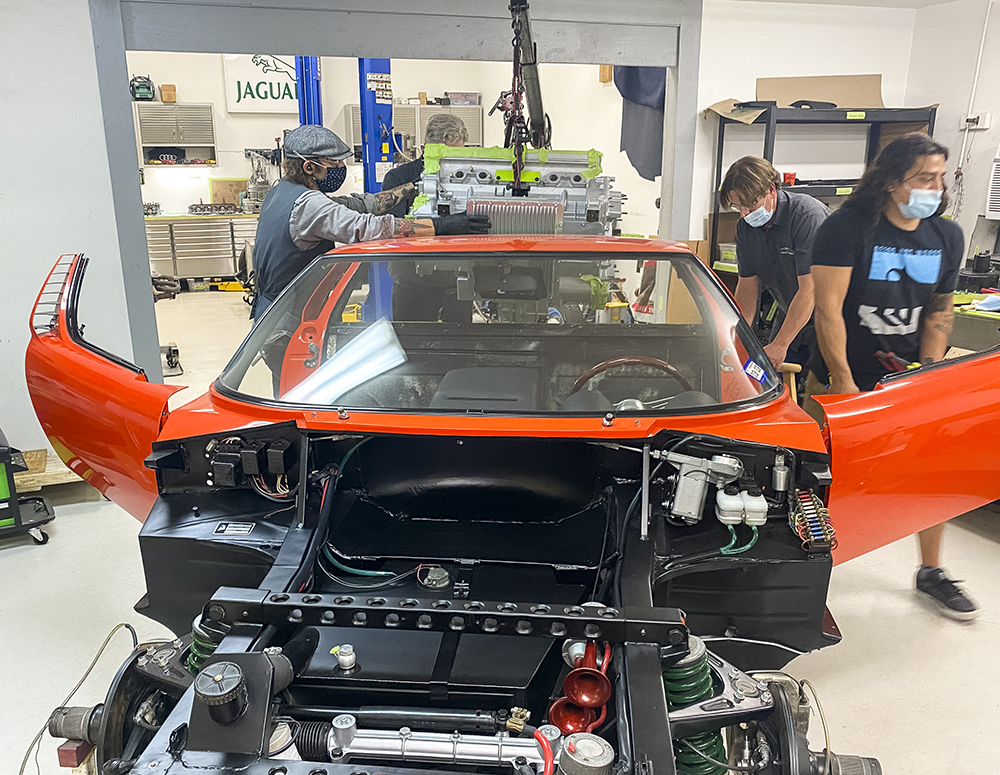
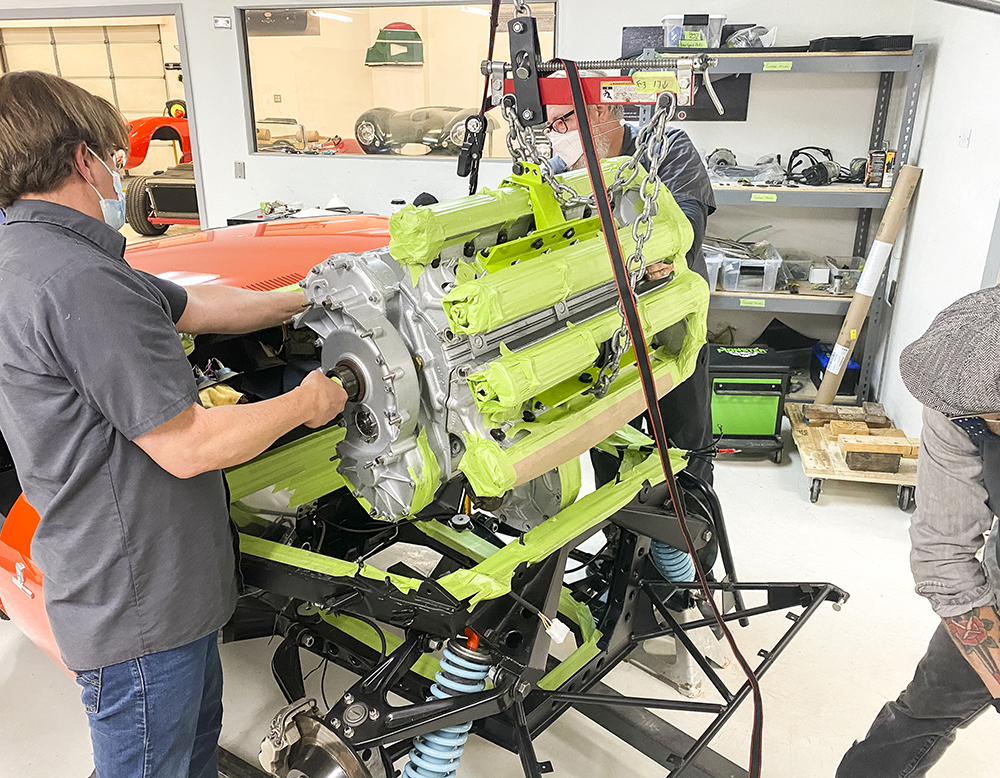
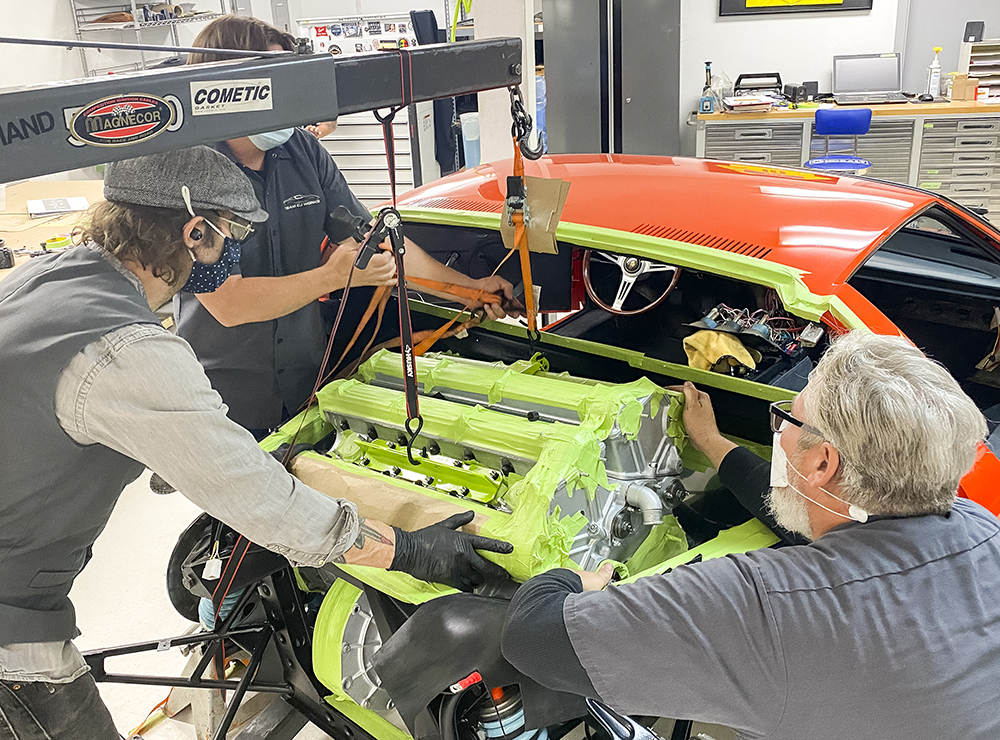
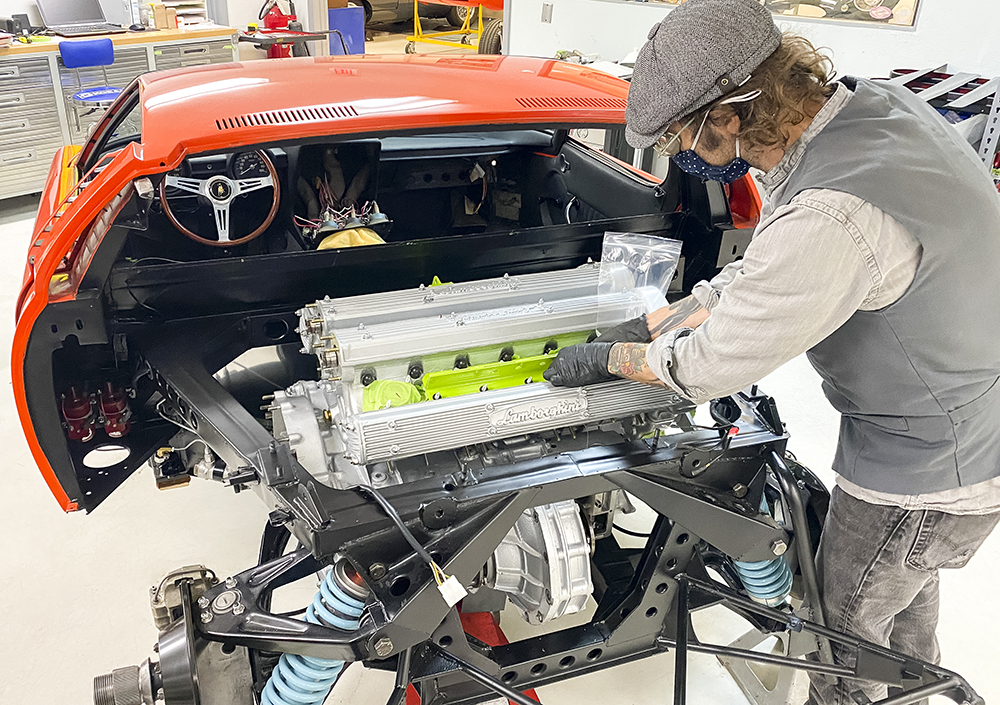
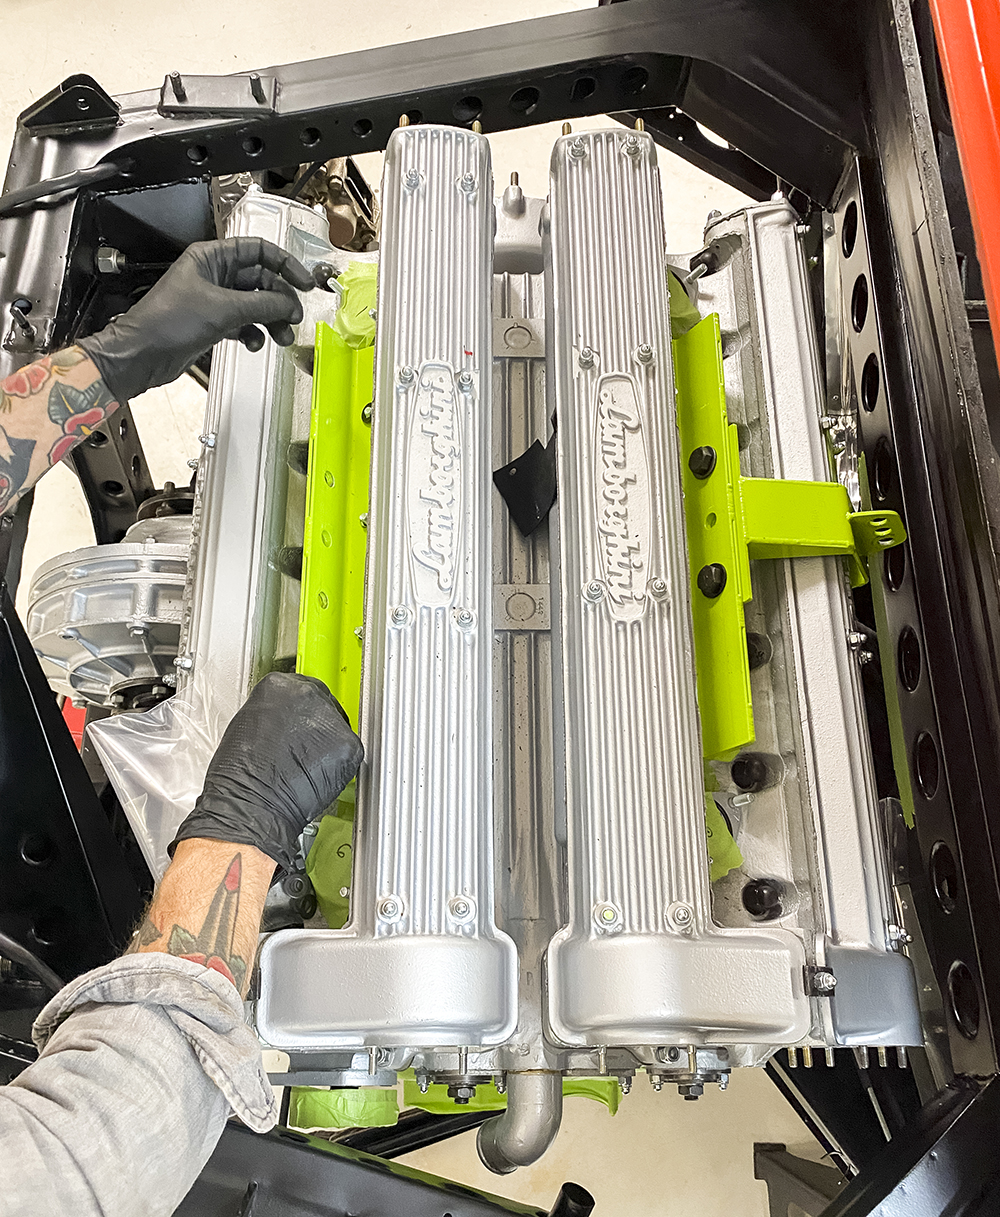
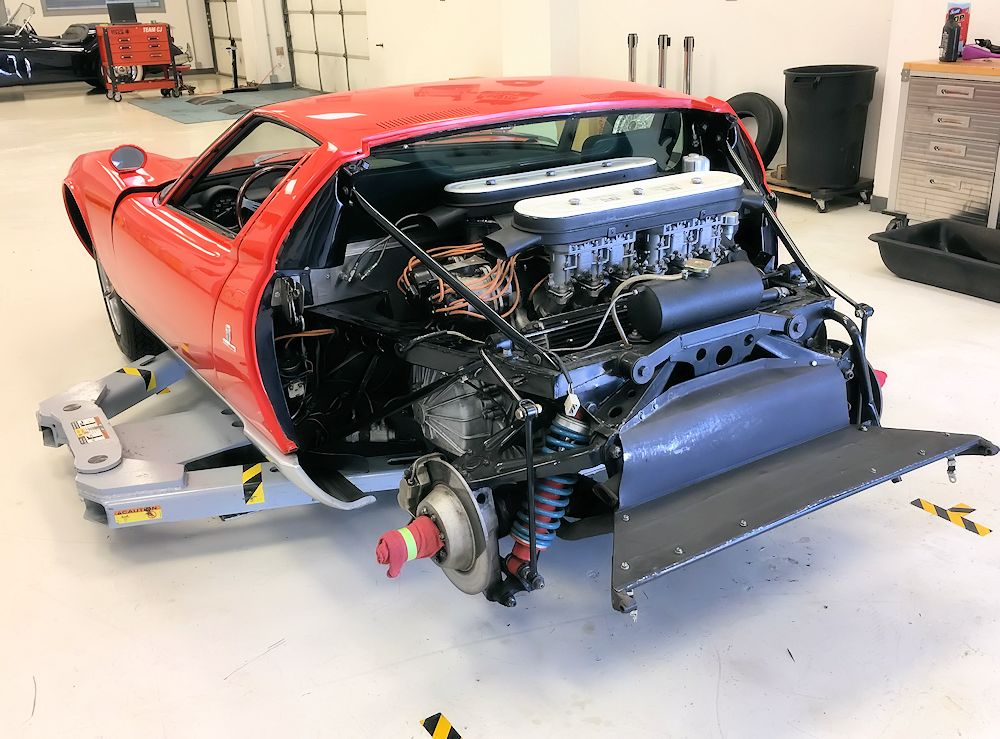
| Installing the engine and transmission after the rebuild |
Preparing to reinstall rear clip/engine cover |
|
 |
| Time to run the car through its paces on the
Dyno |
Tuning the rebuilt Webers on the Dyno |
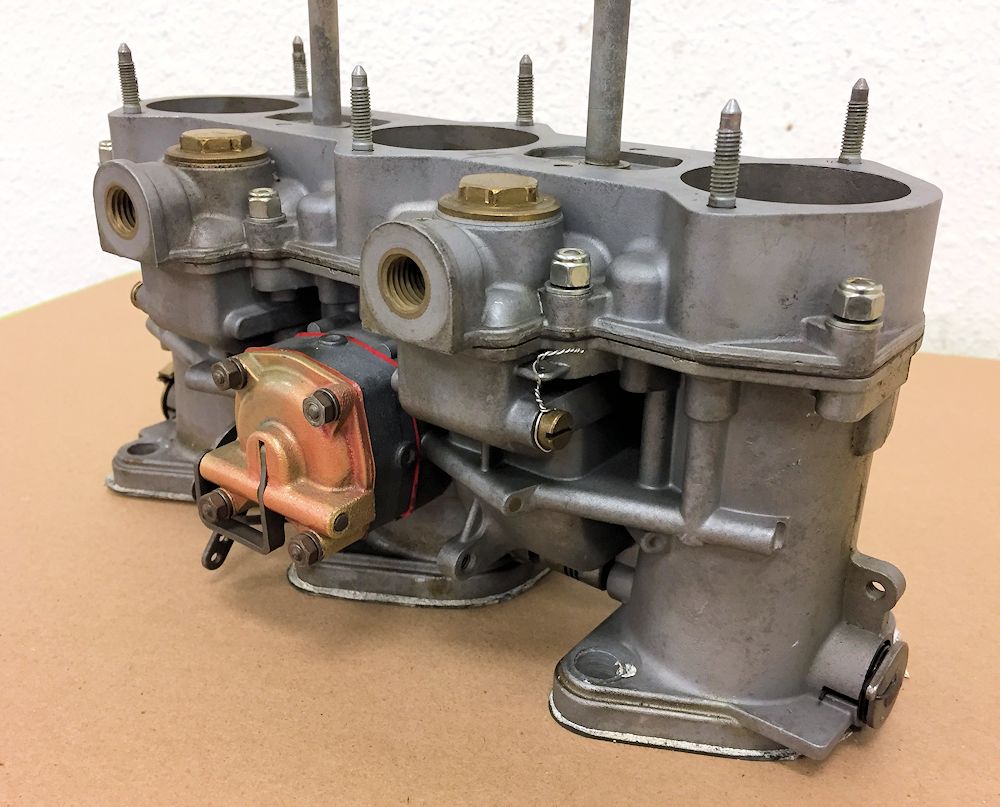
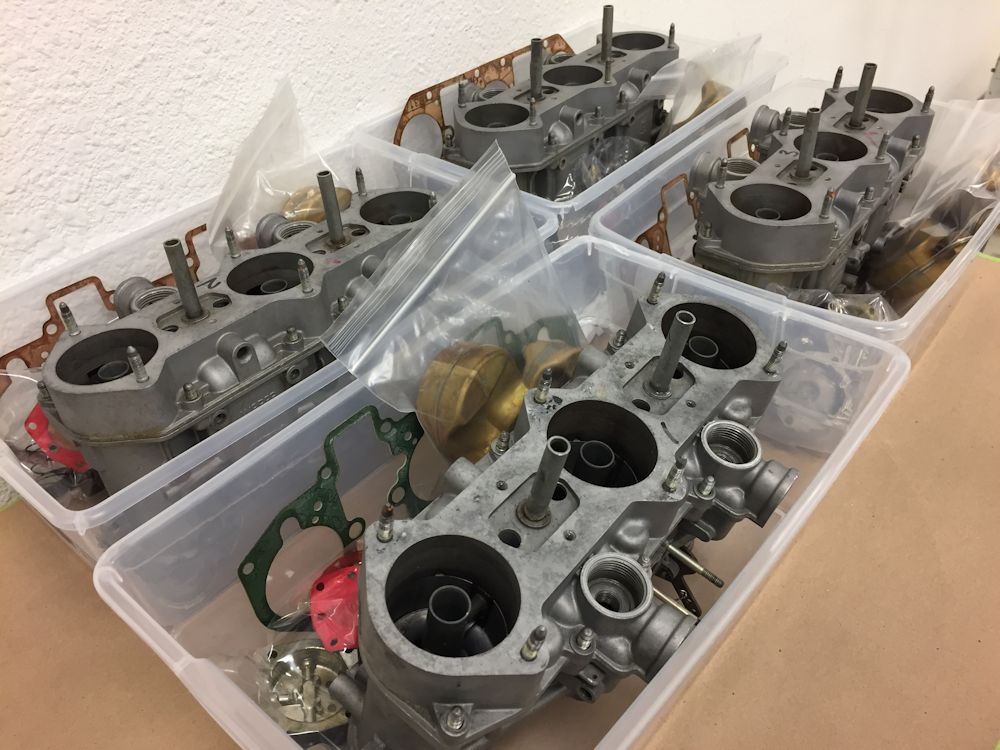
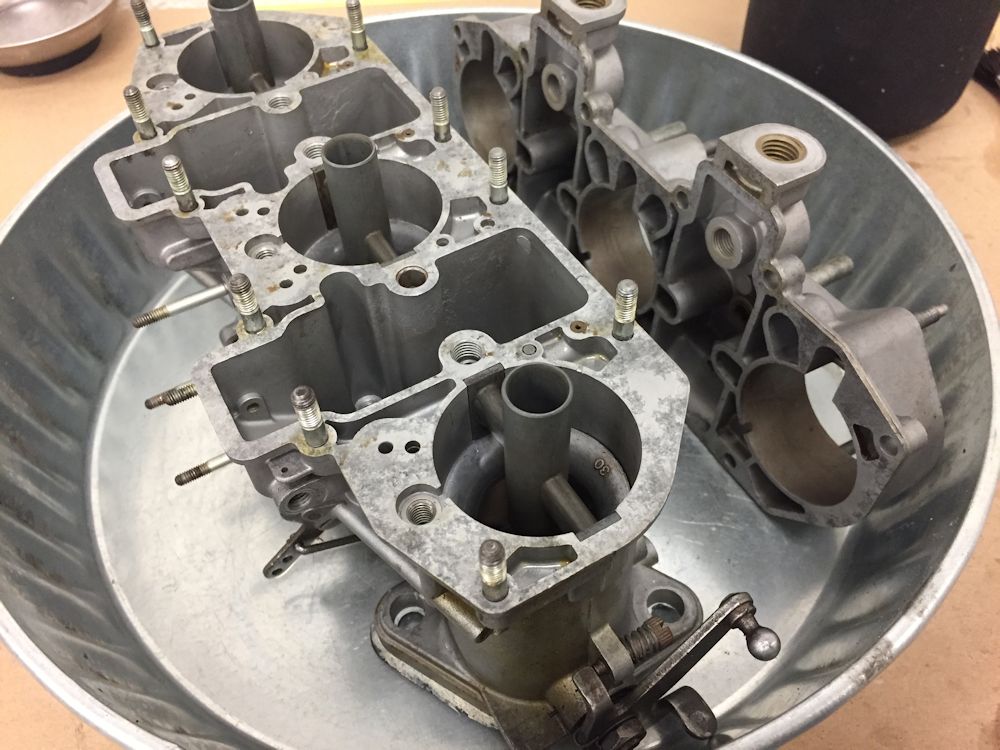
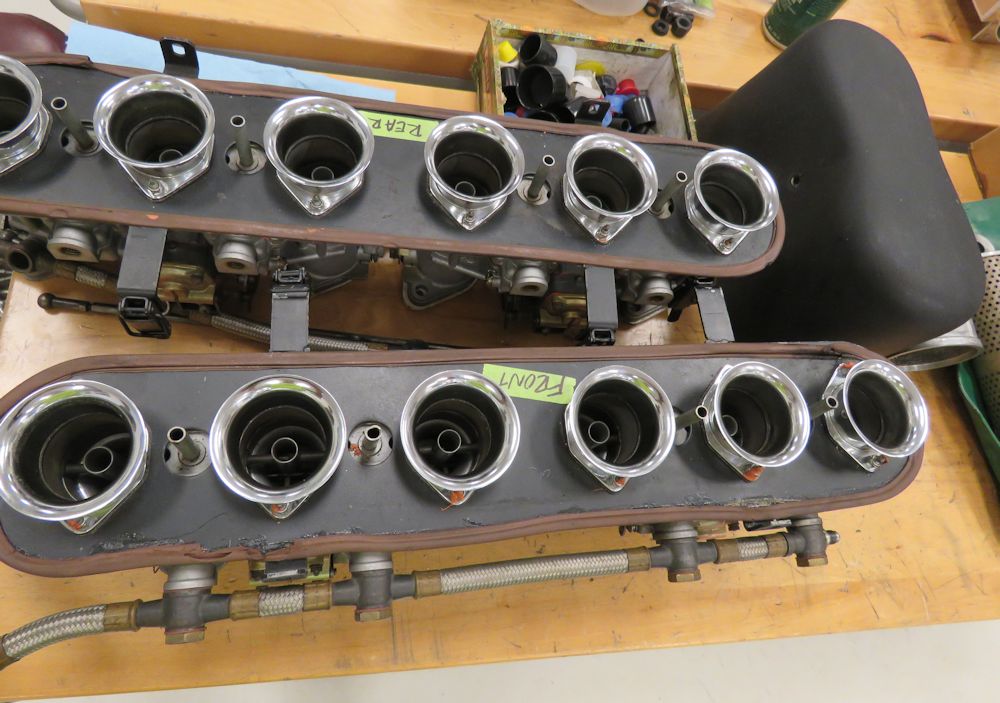
We have now completely rebuilt the Weber carbs and will be wrapping up the transmission rebuild in the next couple of days. We are on schedule to reinstall the engine and transmission on Wednesday of next week.
 |
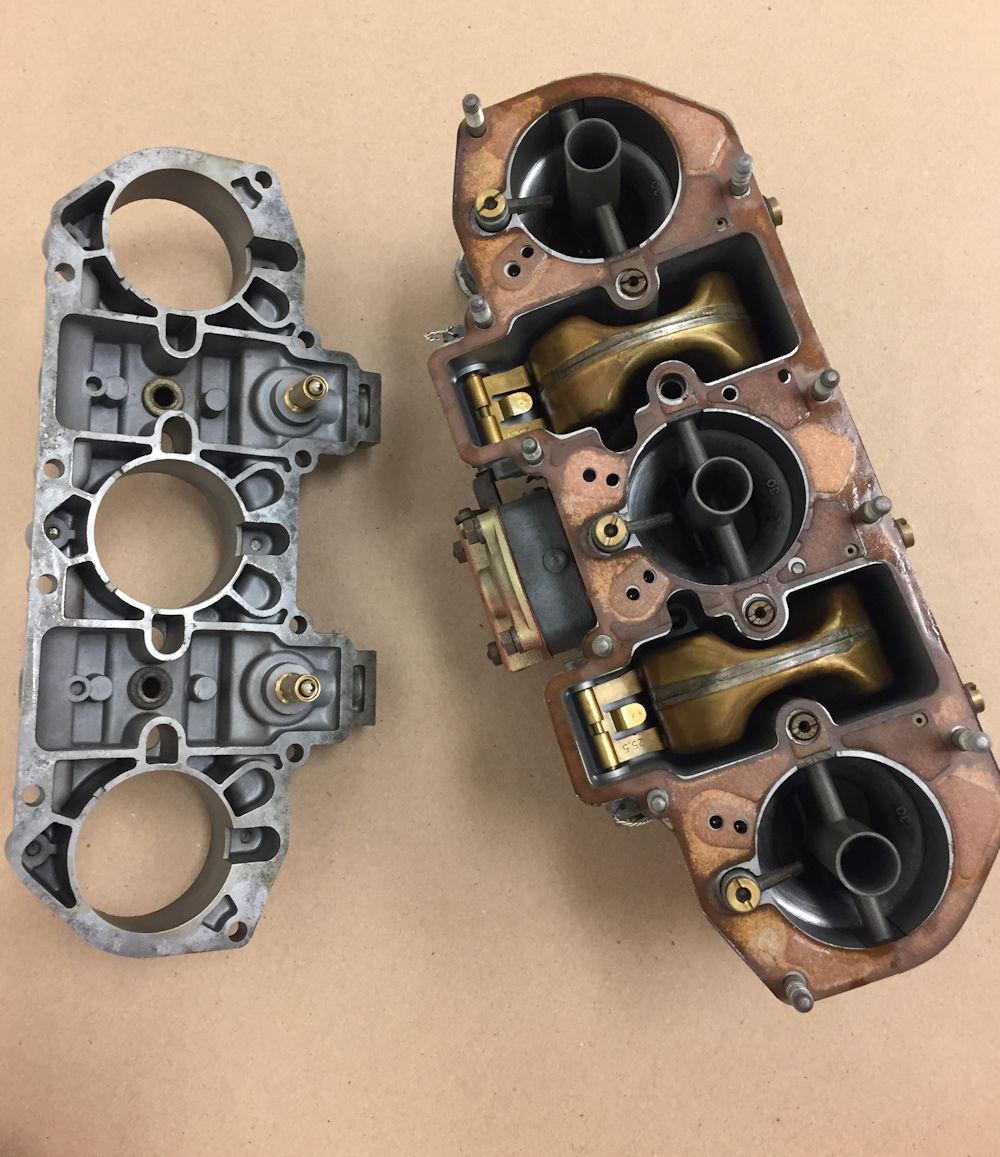 |
| Carb prior to disassembly |
|
 |
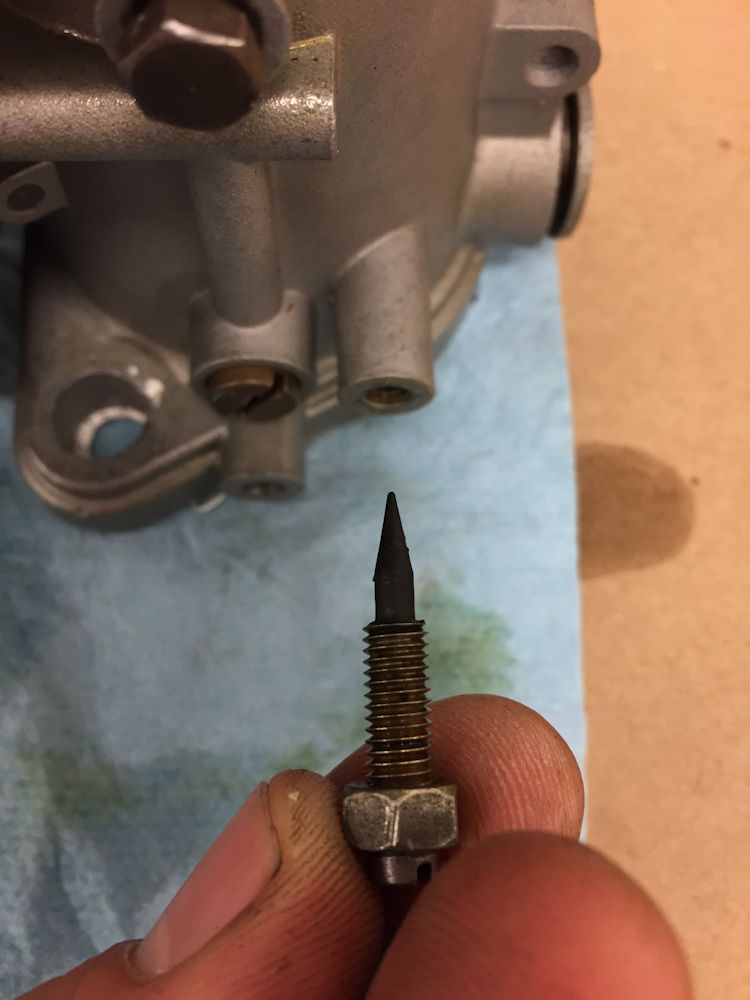 |
| Air corrector jets were very sooty |
|
 |
 |
| Measuring float height |
|
 |
 |
| Cleaning carb bodies |
|
 |
 |
| Carbs now fully rebuilt |
|
 |
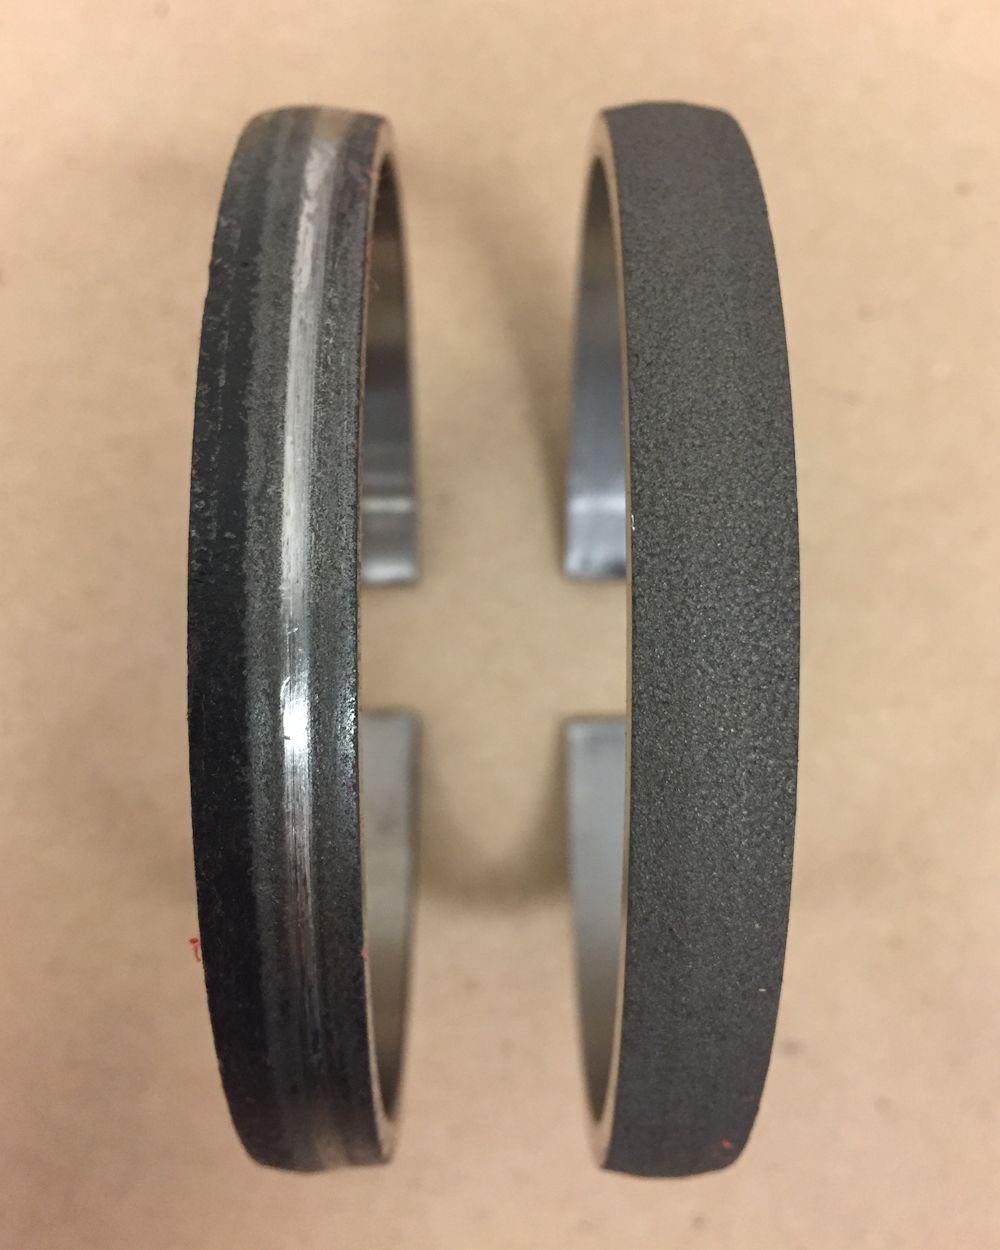 |
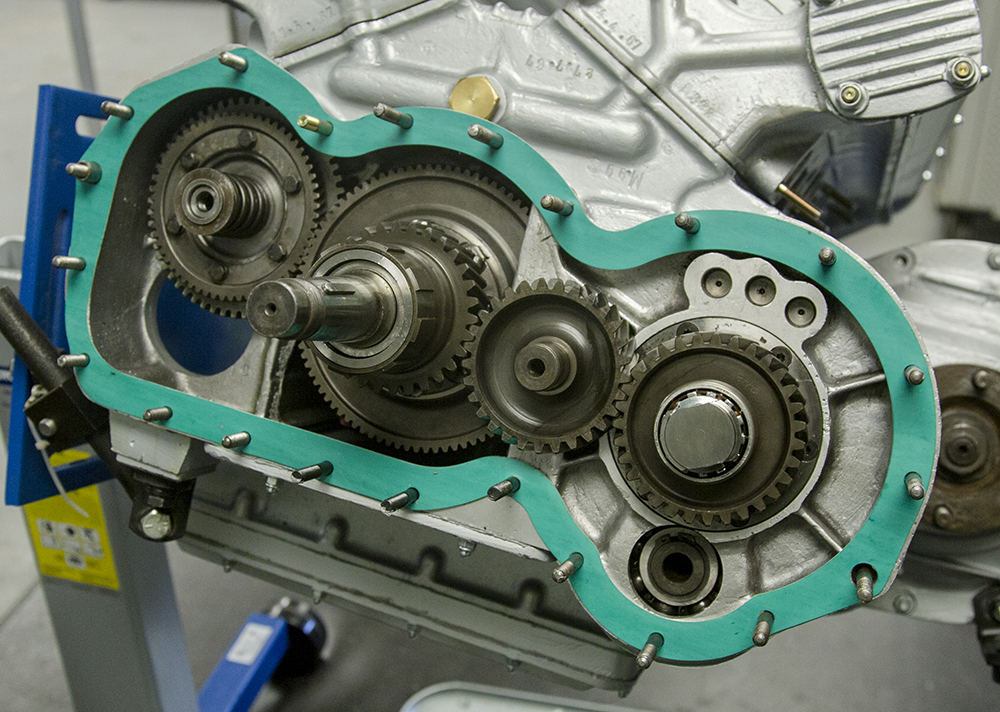
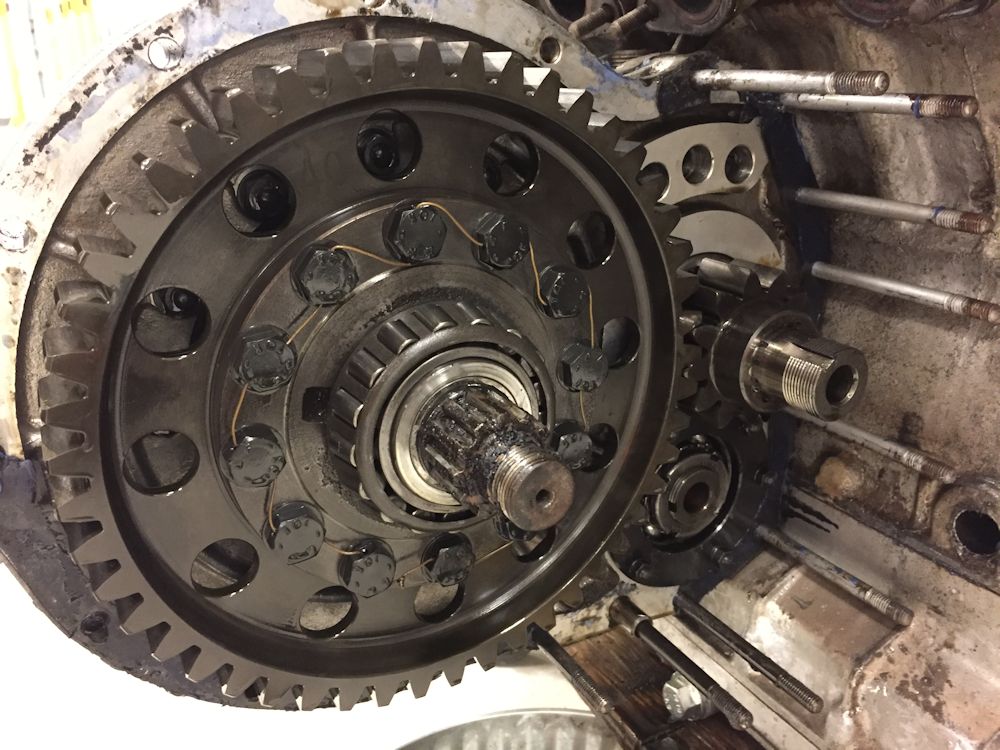
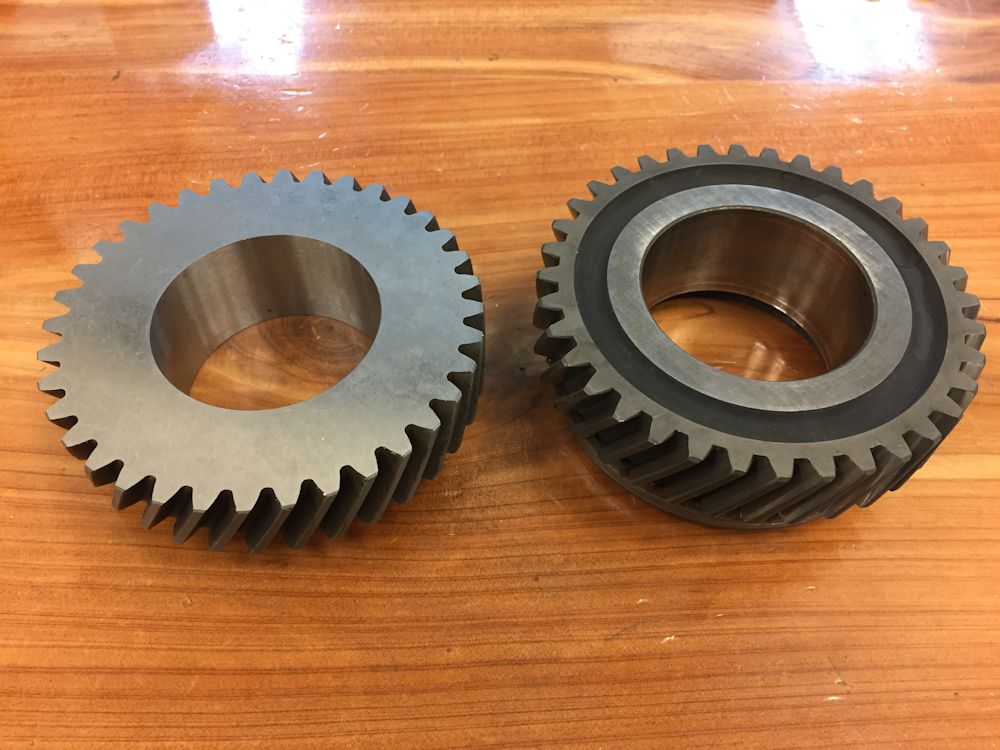
| Comparing old (L) and new (R) synchros |
|
 |
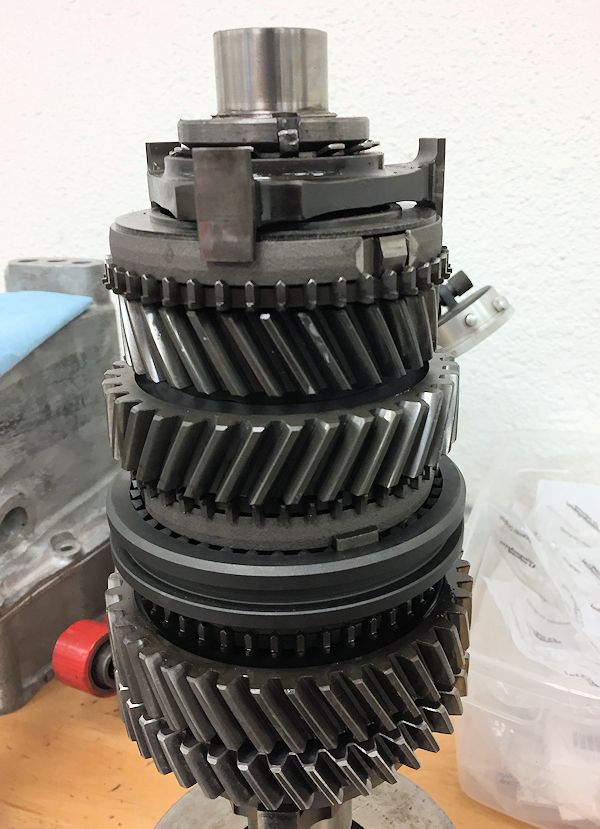 |
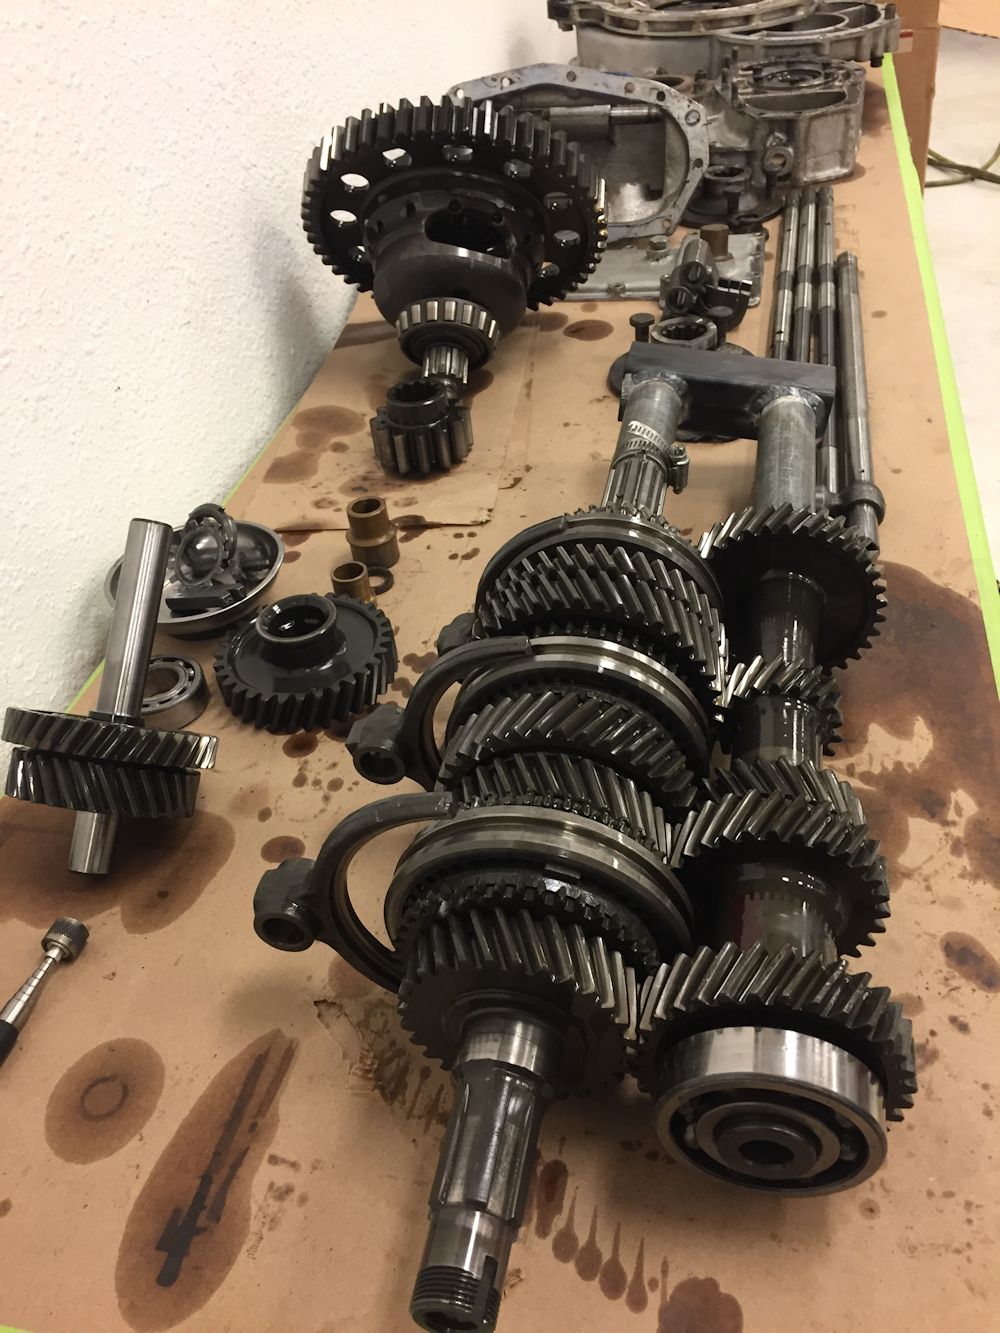
| Assembling the main shaft with new synchros |
|
 |
 |
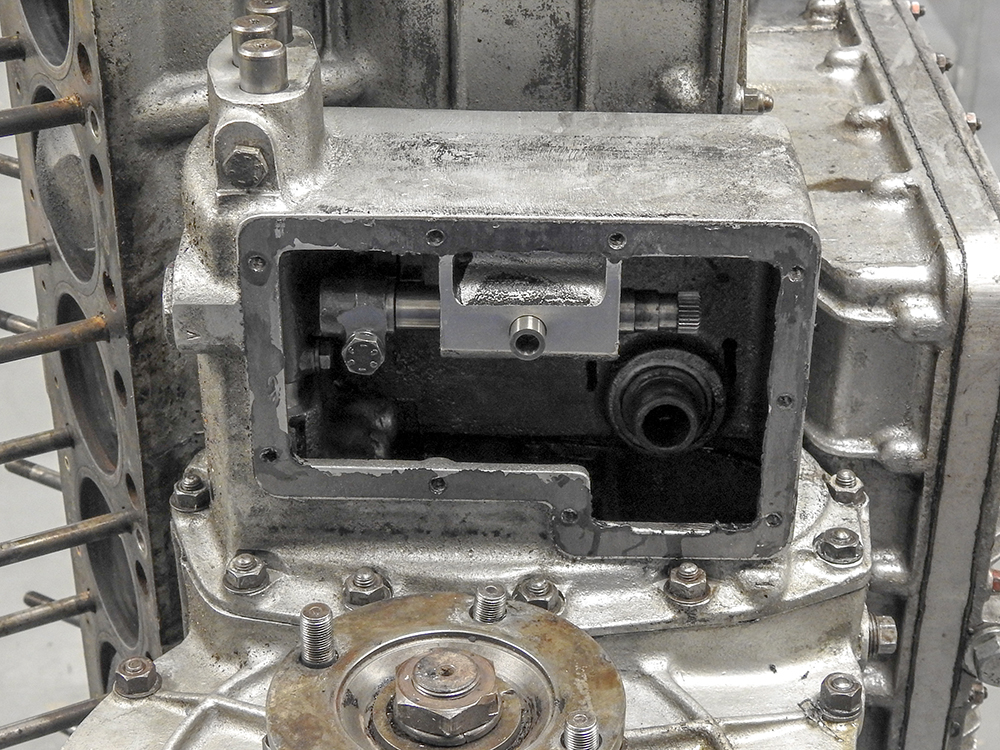
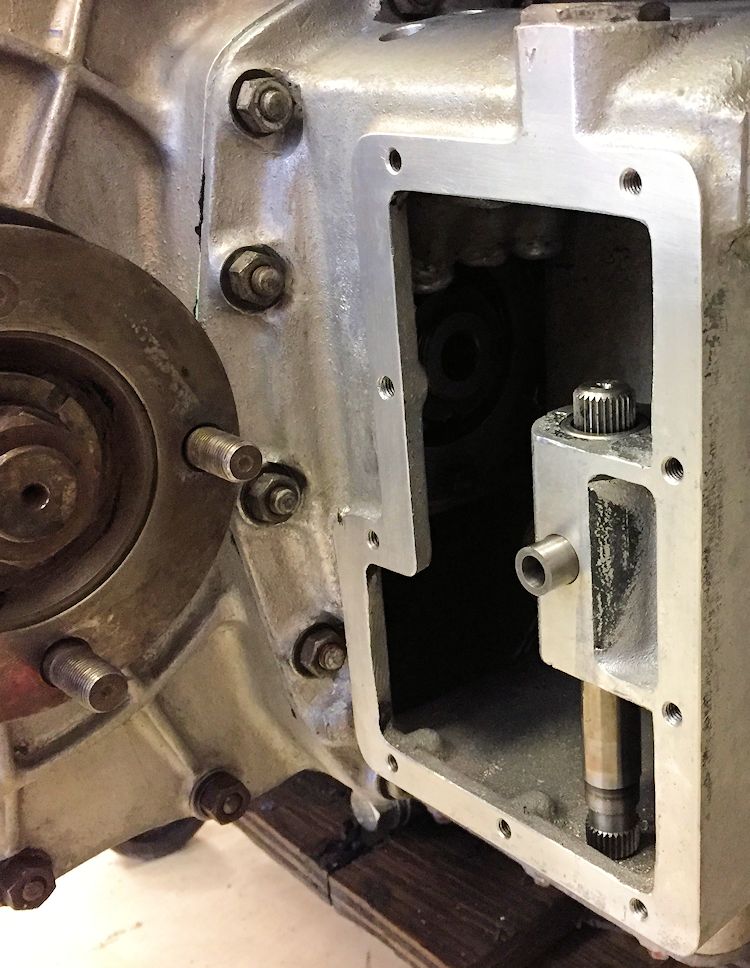
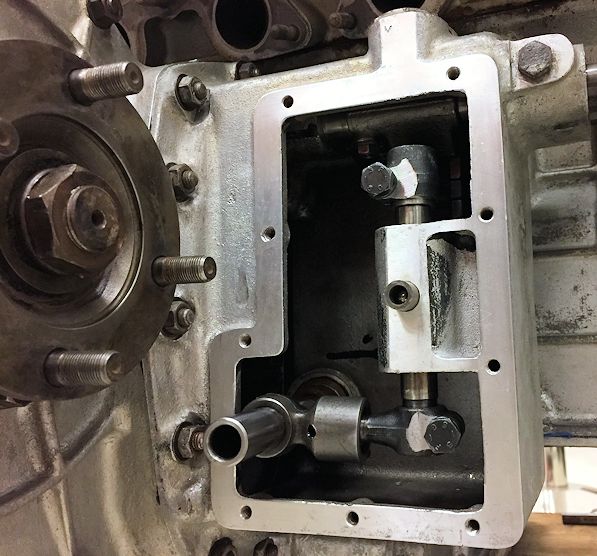
| This is the shifter box |
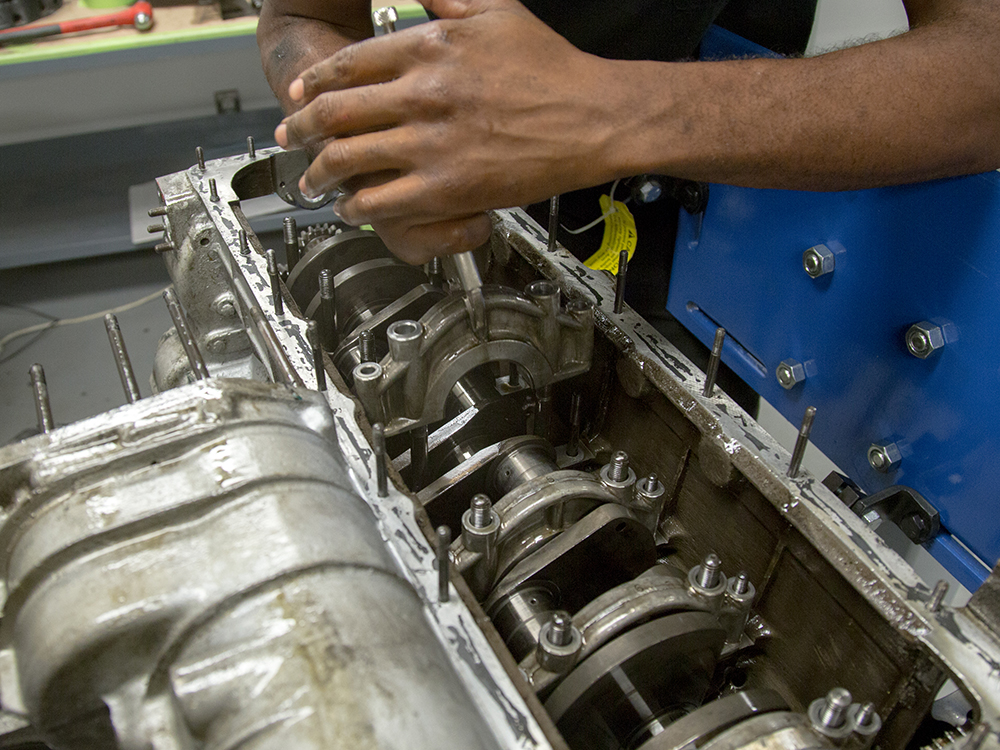
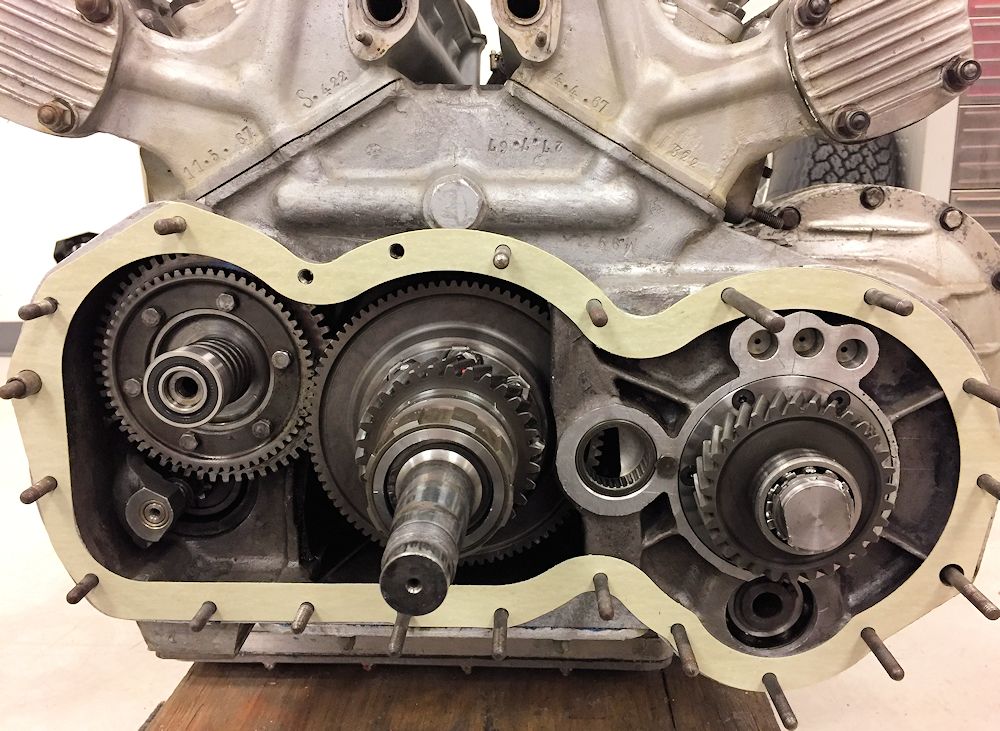
New gaskets used as we go back together with the transmission |
 |
 |
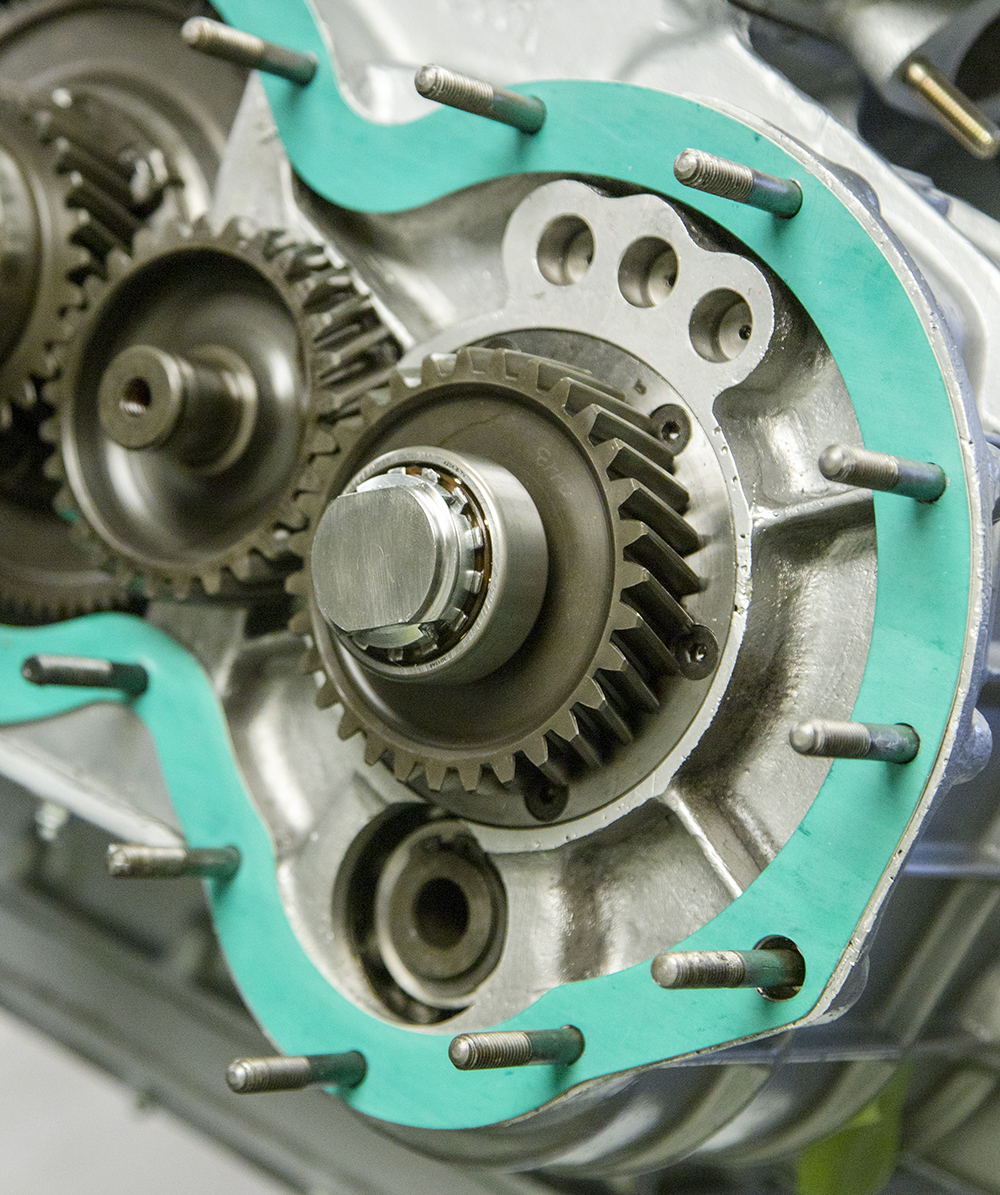
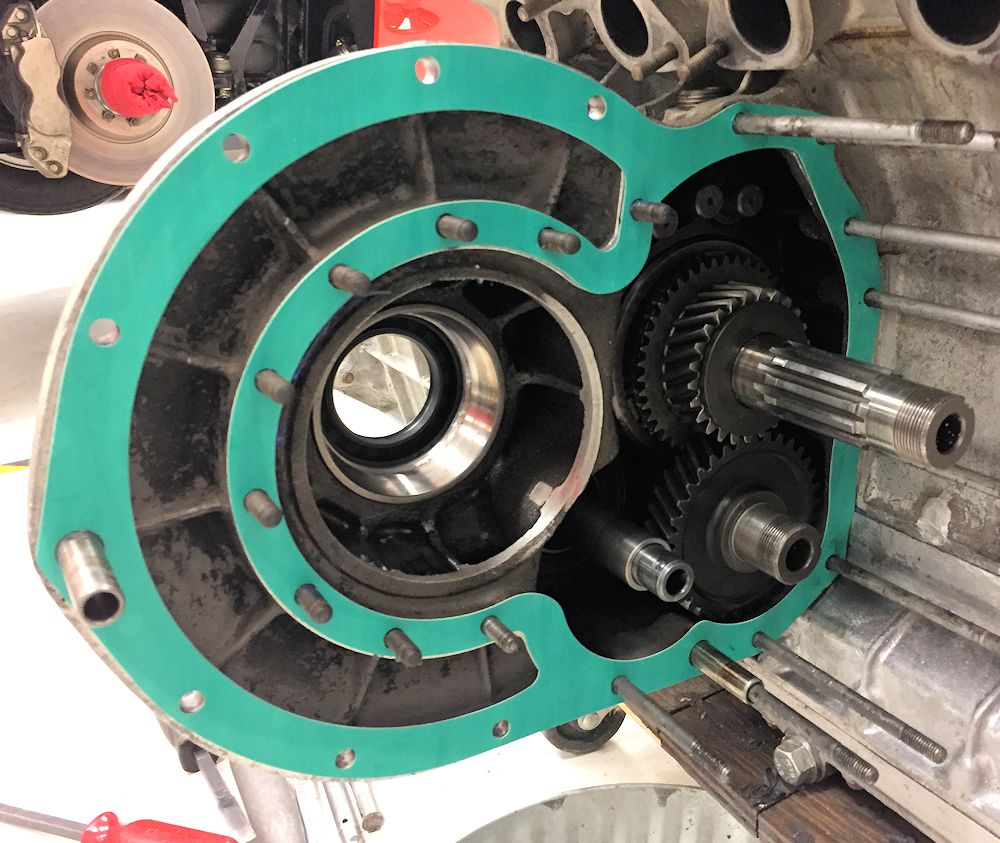
| Installing the diff spacer (bearing retainer) |
|
 |
 |
| Assembling the shifter box |
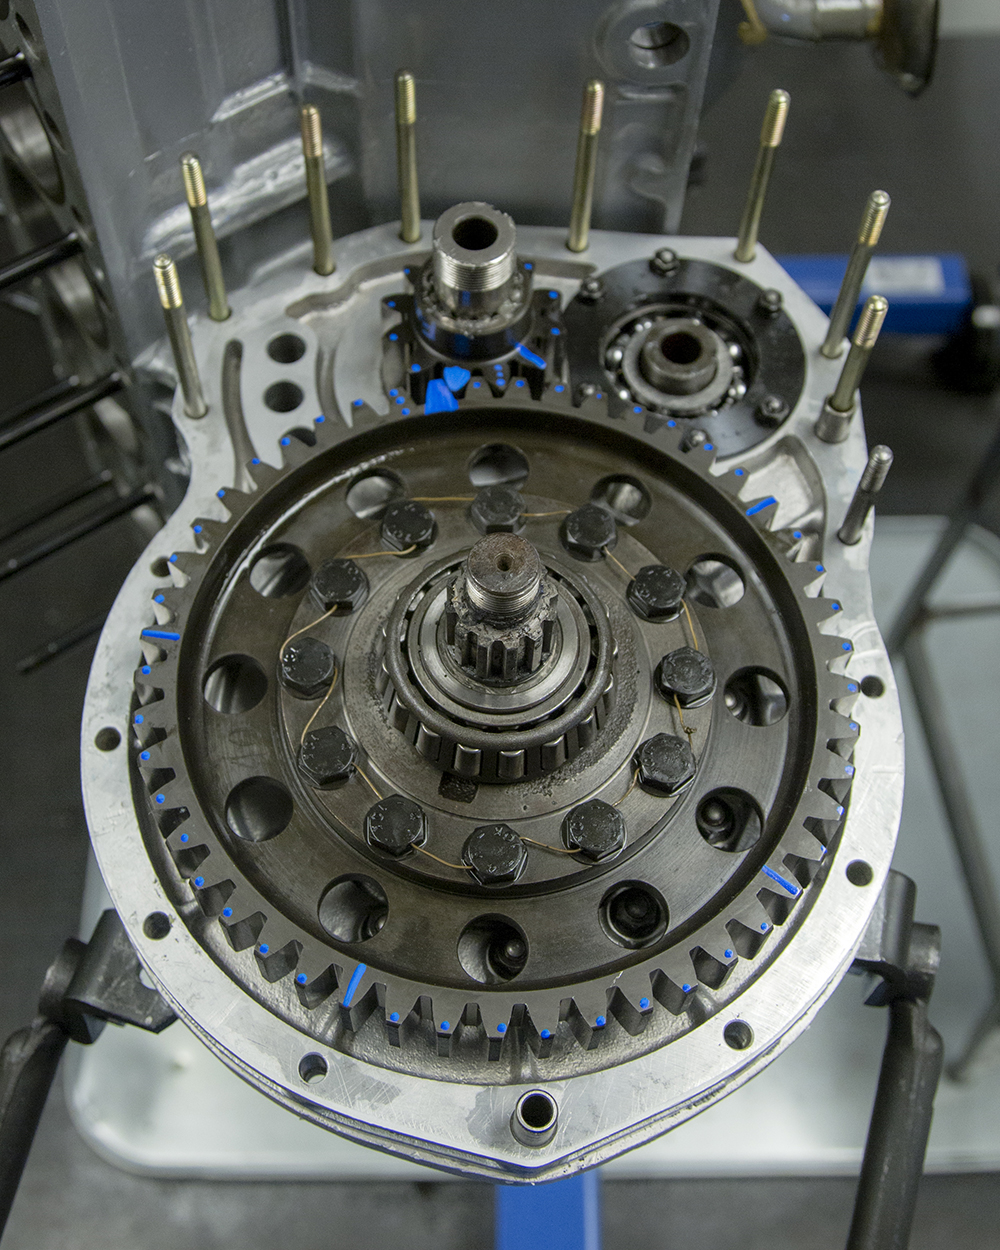
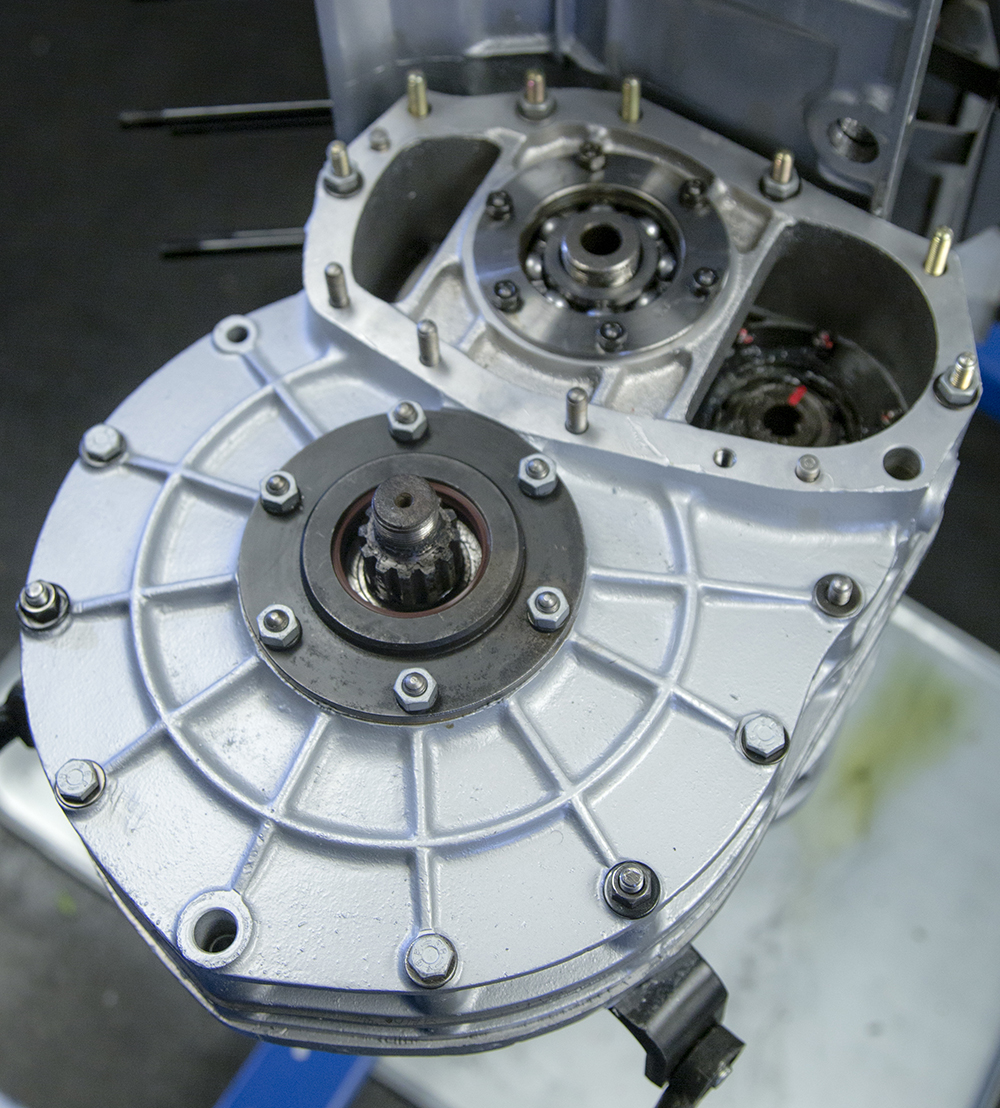
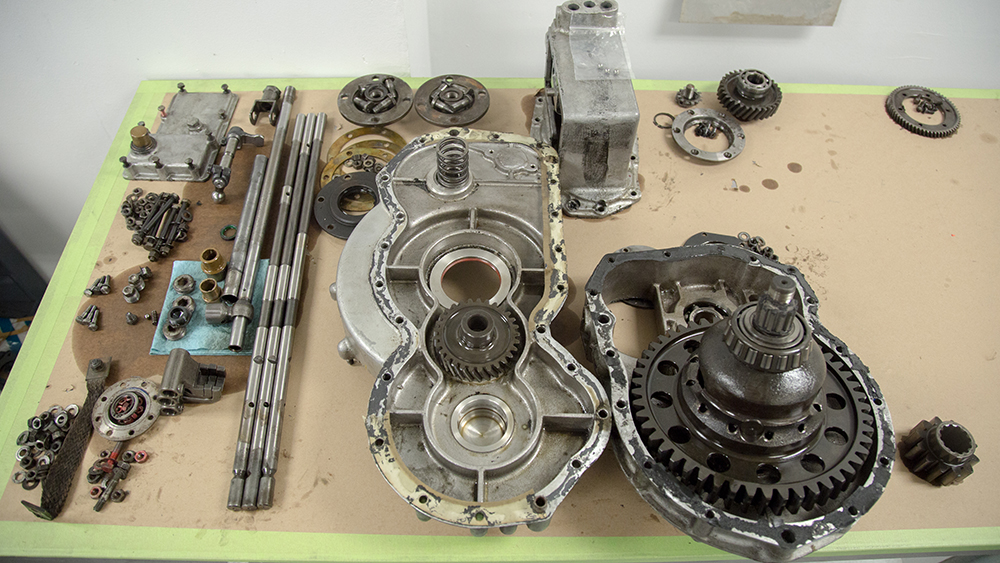
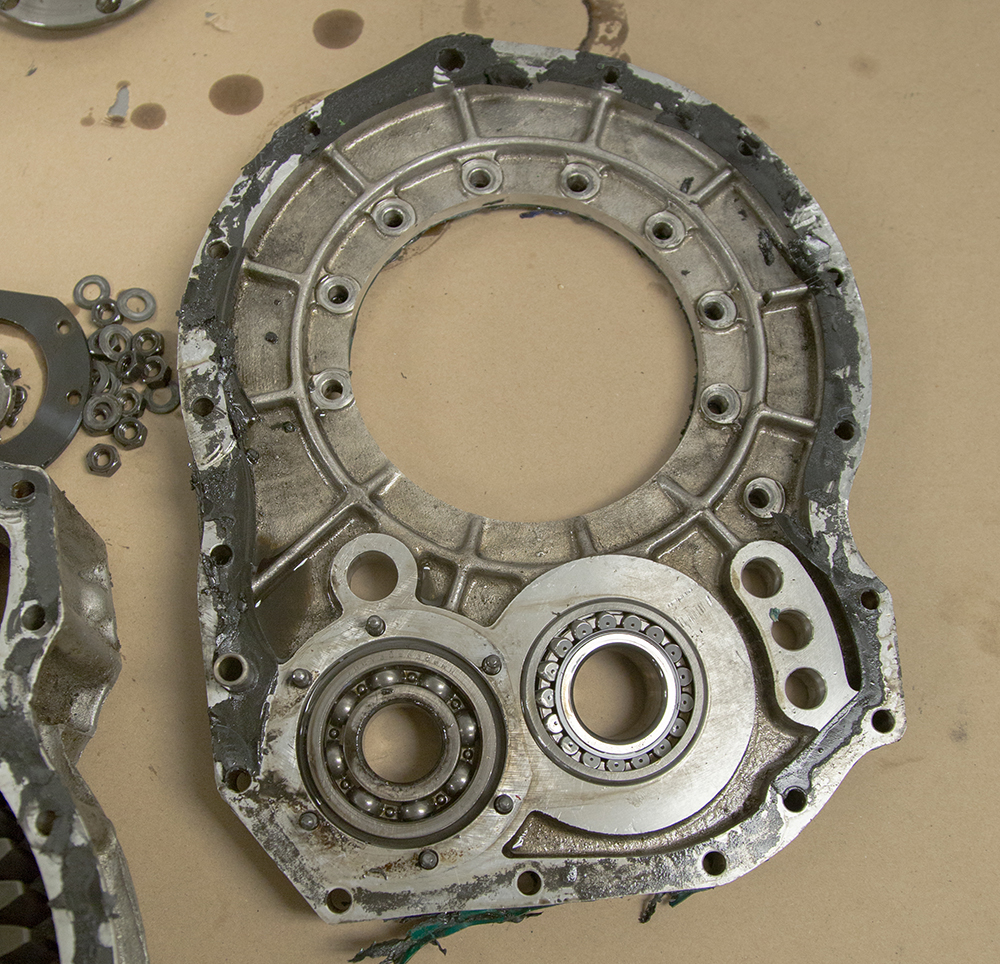
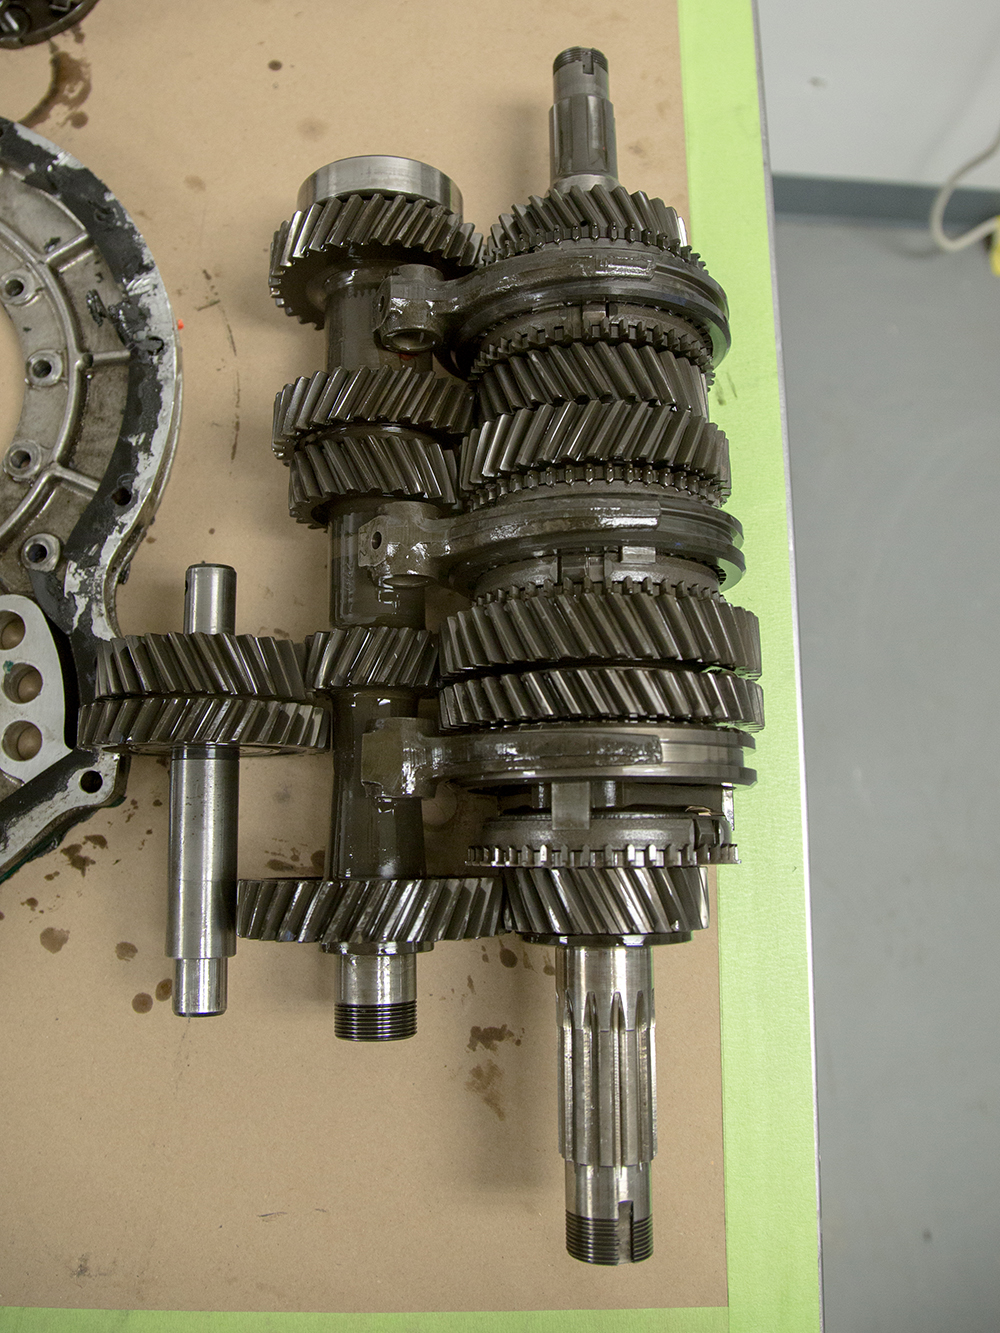
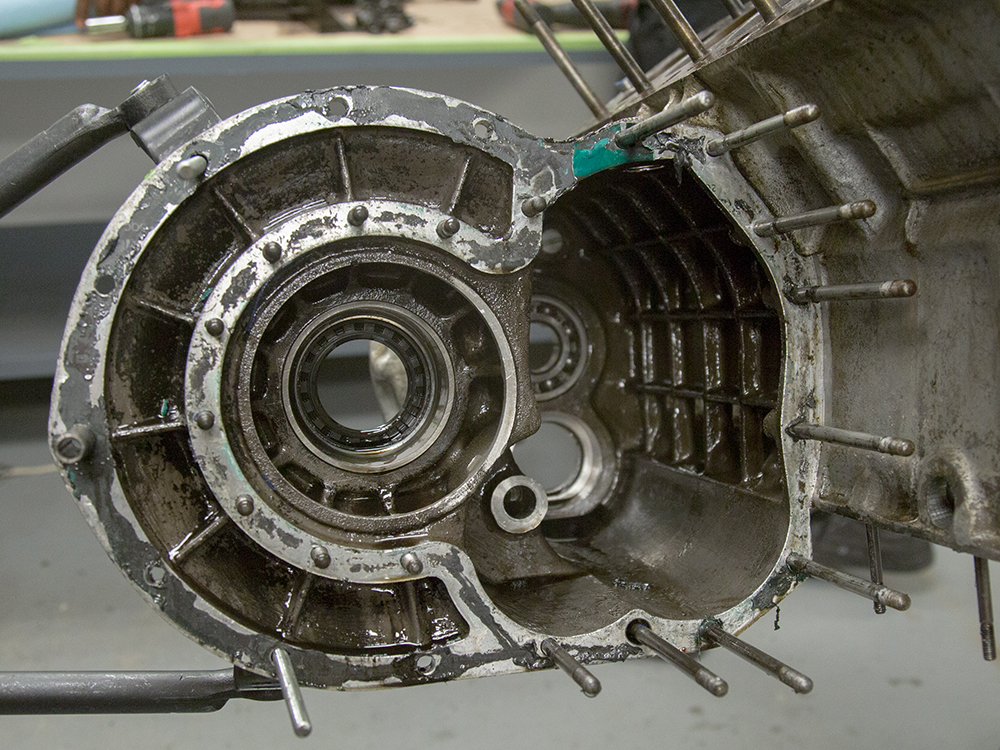
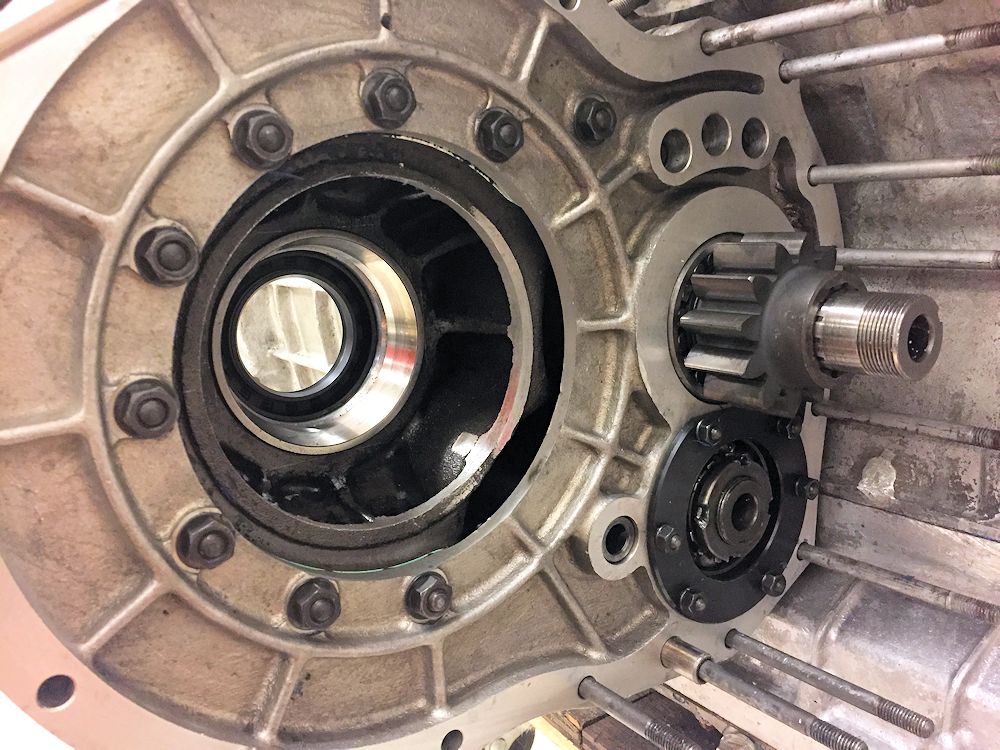
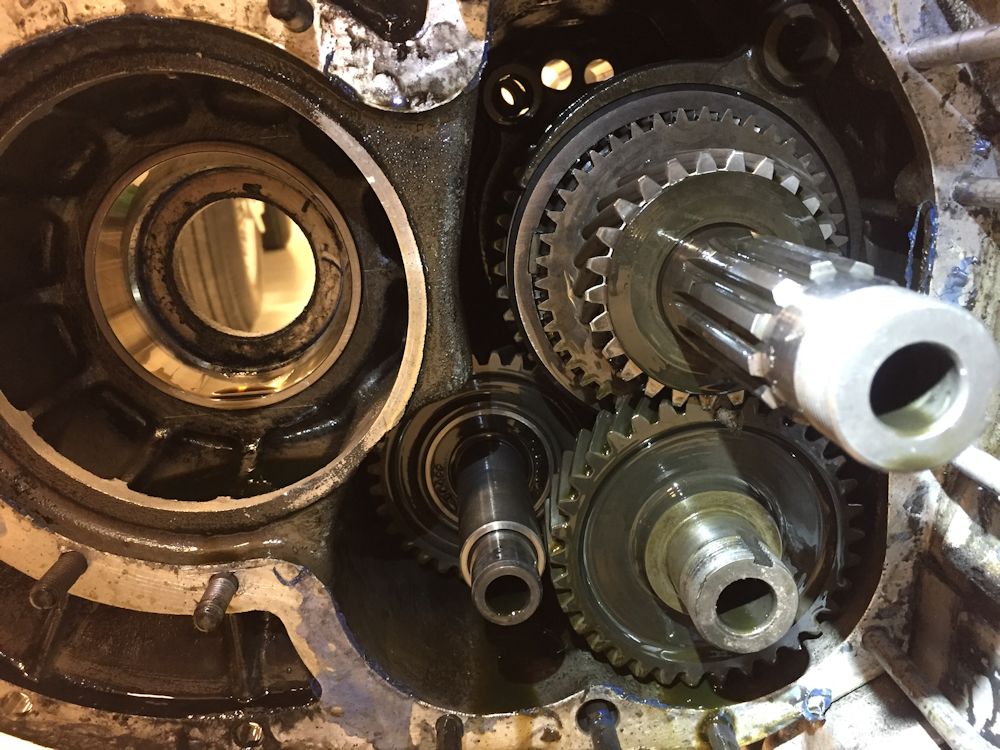
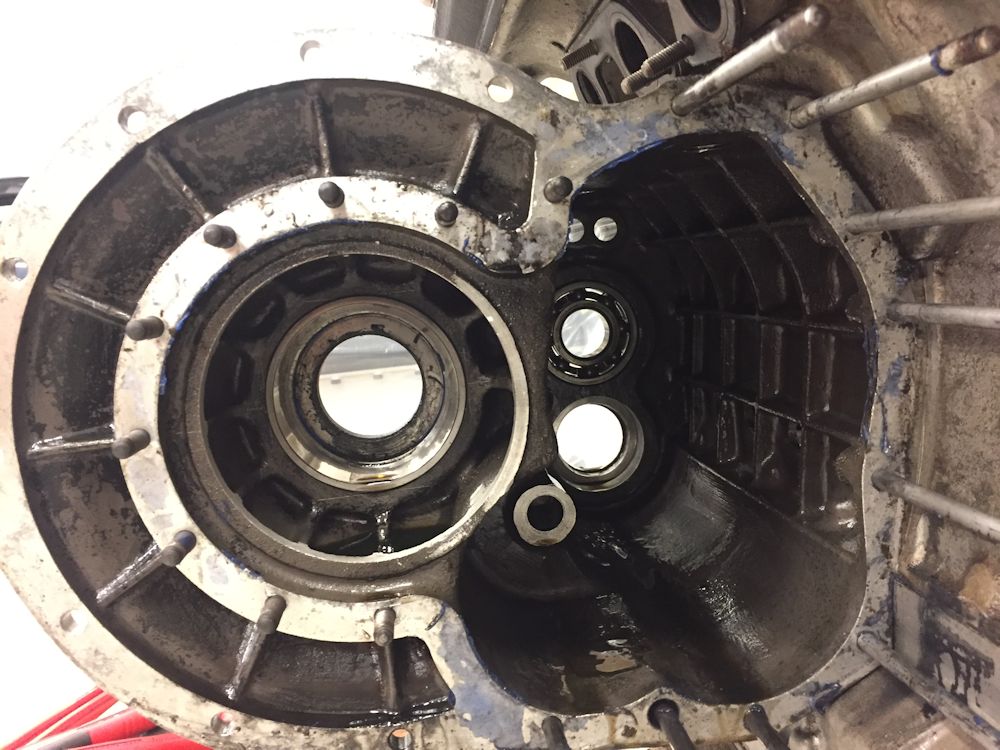
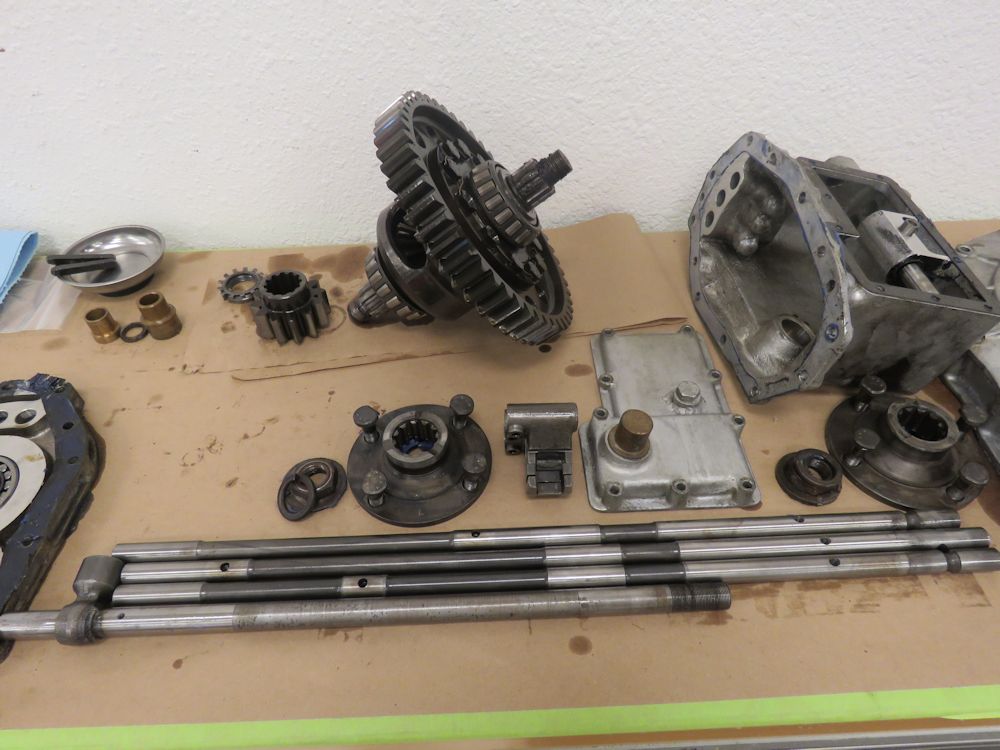
Removing and disassembling the transmission for rebuild.
 |
 |
| 8mm wrench has apparently been wedged in place for many years... |
Removing the clutch cover |
 |
 |
| Differential is in good condition |
|
 |
 |
 |
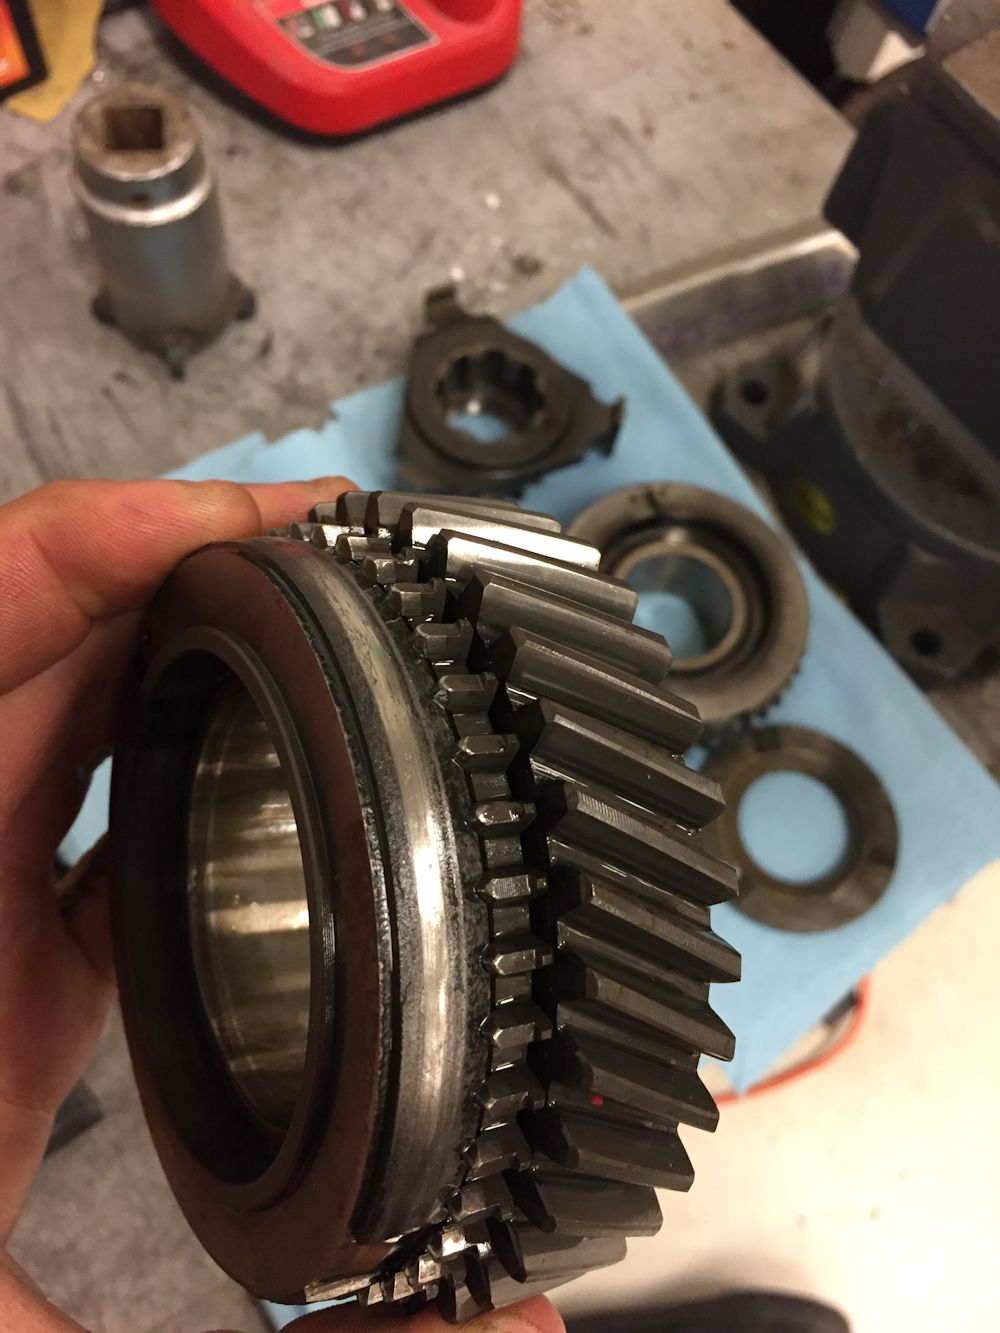 |
| 2nd gear synchro is in very bad shape |
|
 |
 |
| Comparing new 2nd gear with original (on
right) |
Comparing old and new synchros |
 |
 |
| Plenty of evidence this is not the first time
the transmission has been apart |
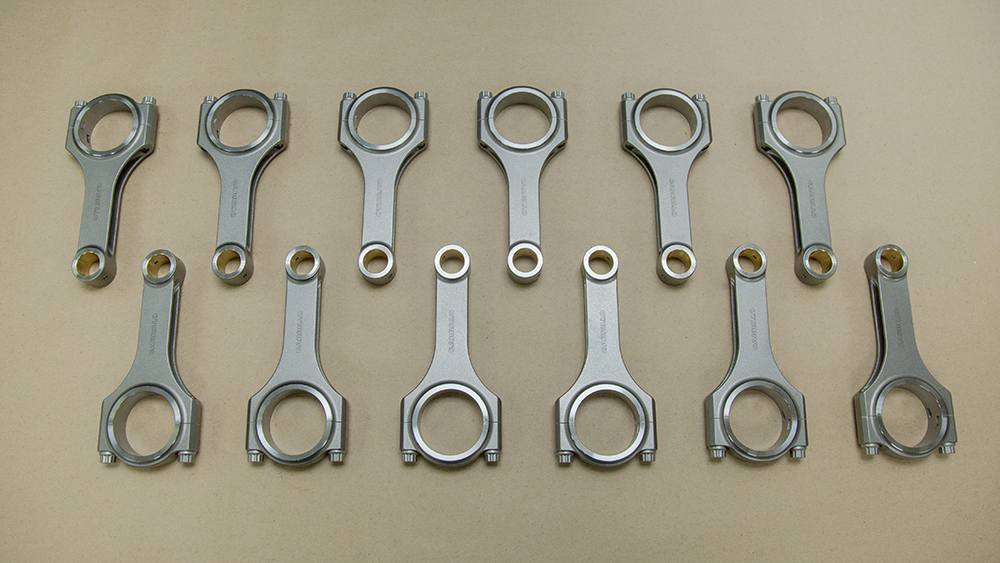
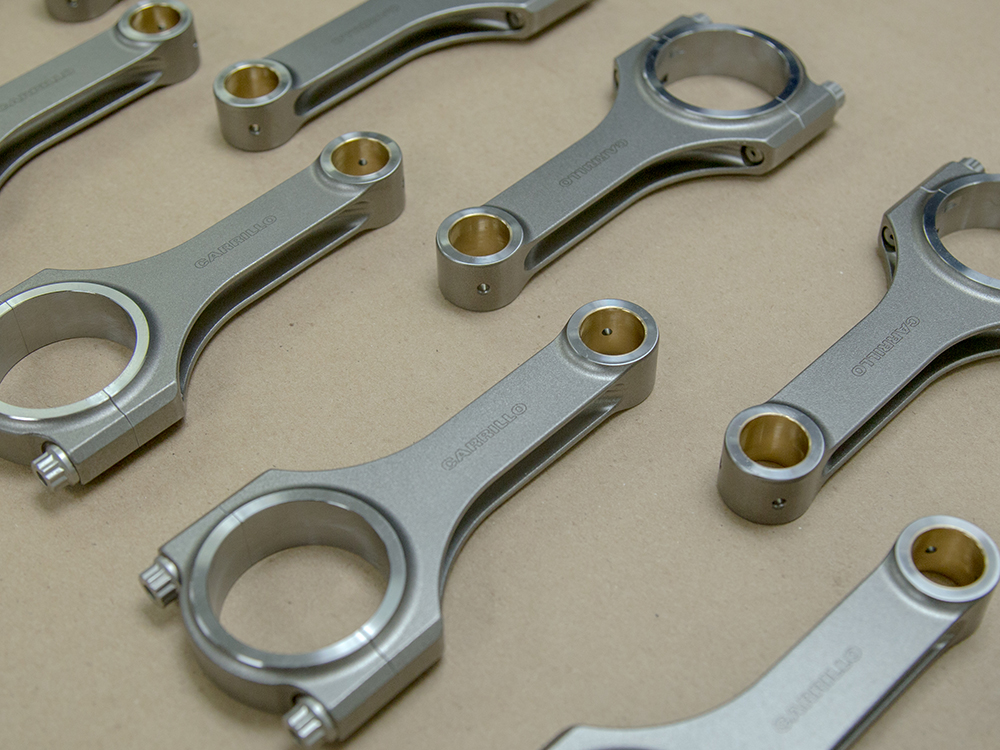
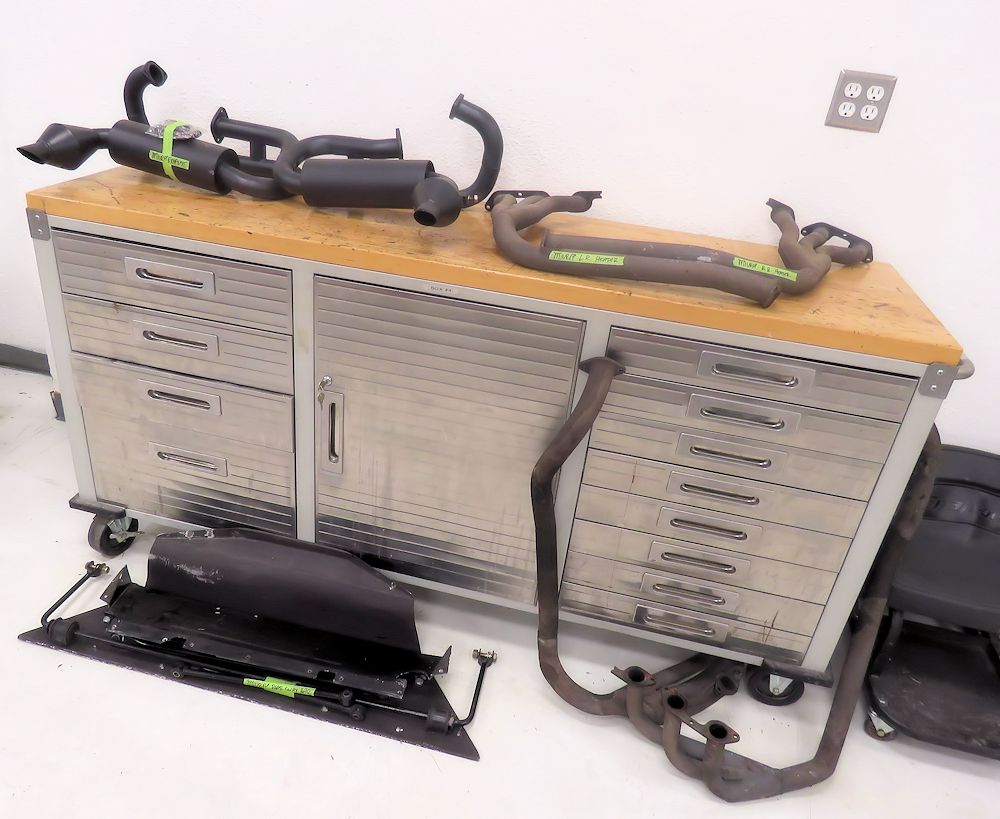
When the time comes to go back together with this project, we will upgrade the headers and exhaust with a superb quality replacement system from Quick Silver in England.
 |
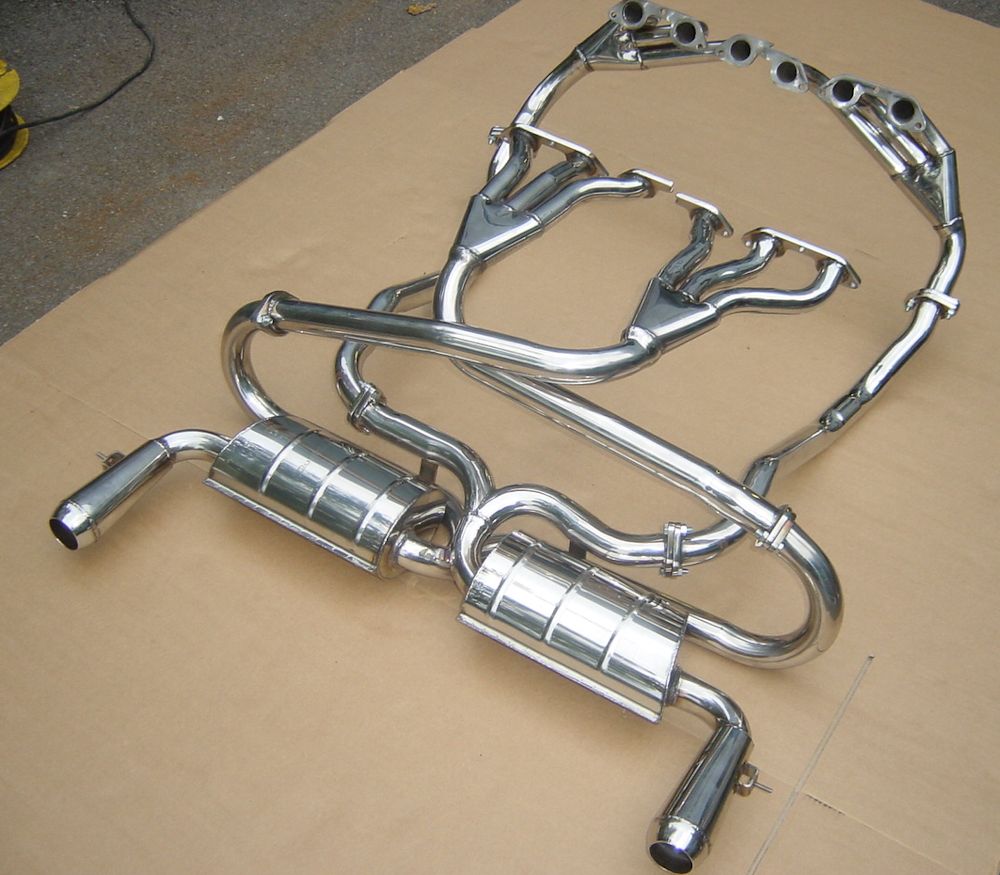 |
| Headers are no longer serviceable |
New 304 stainless steel Quick Silver system |
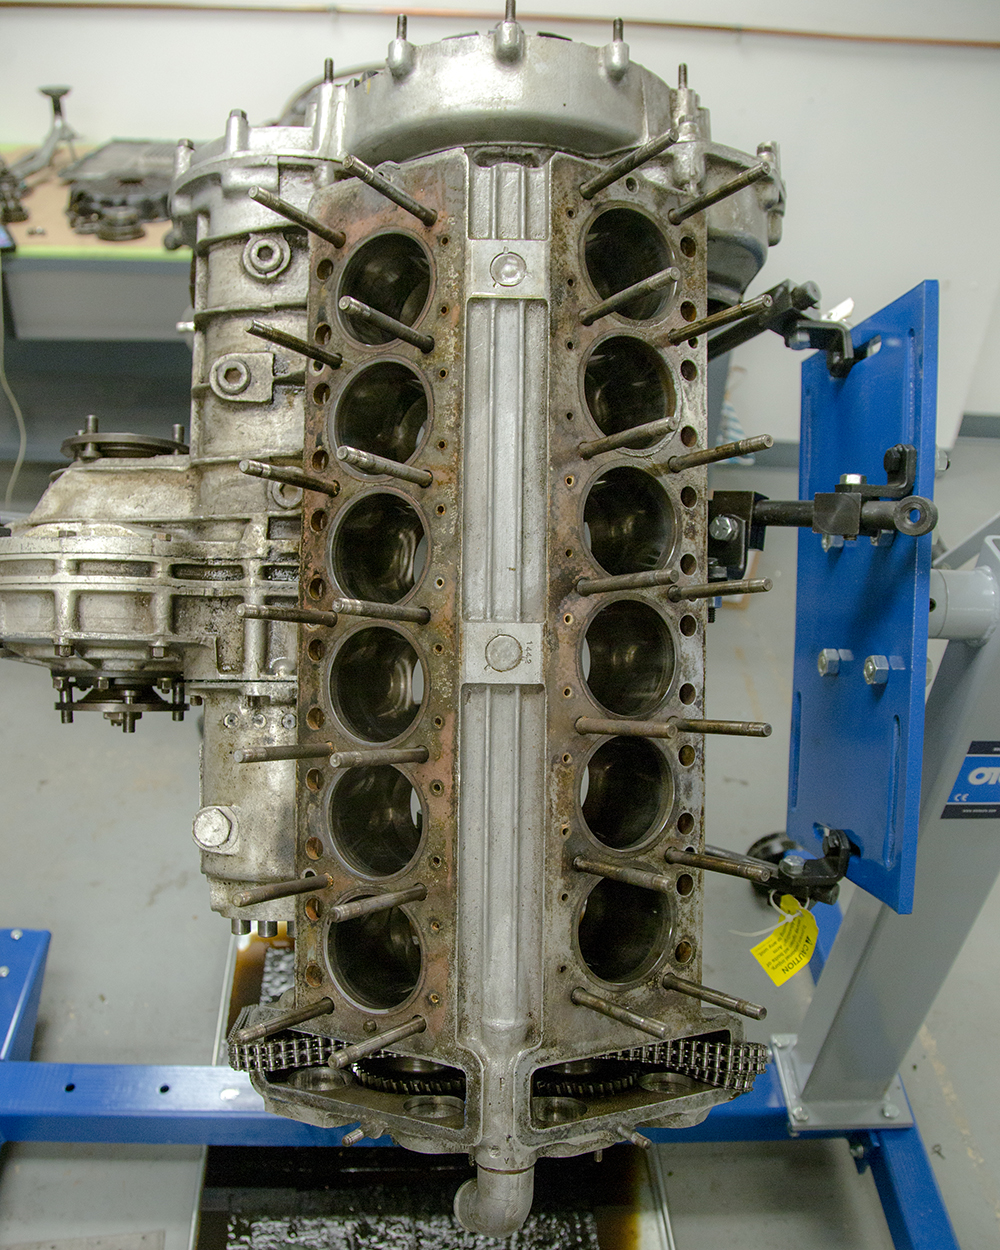
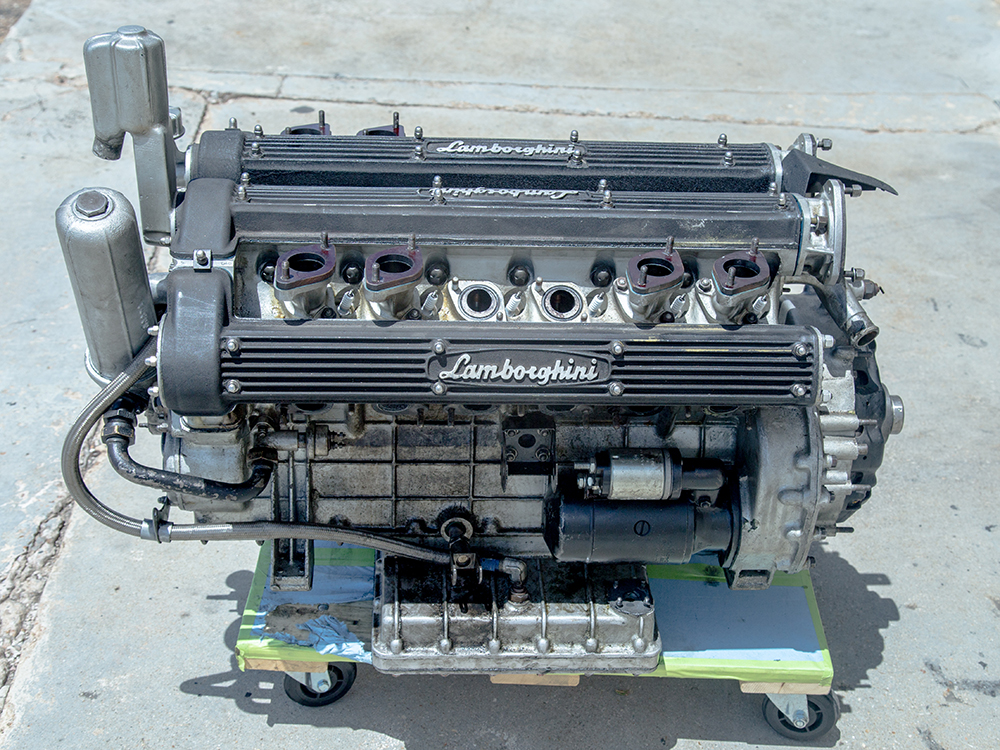
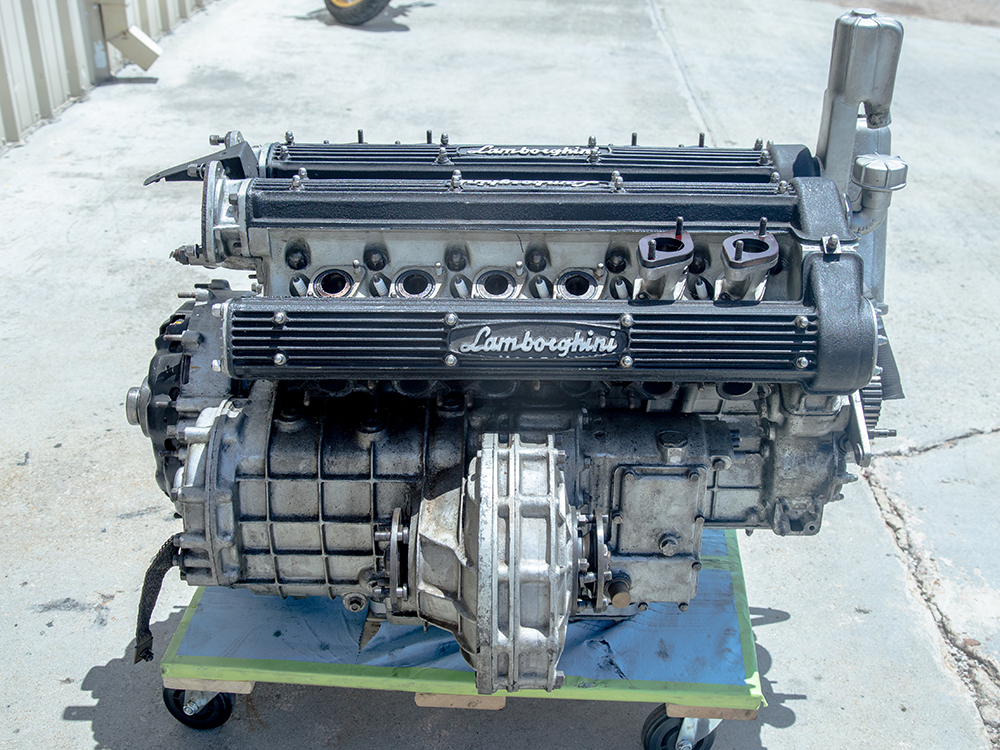
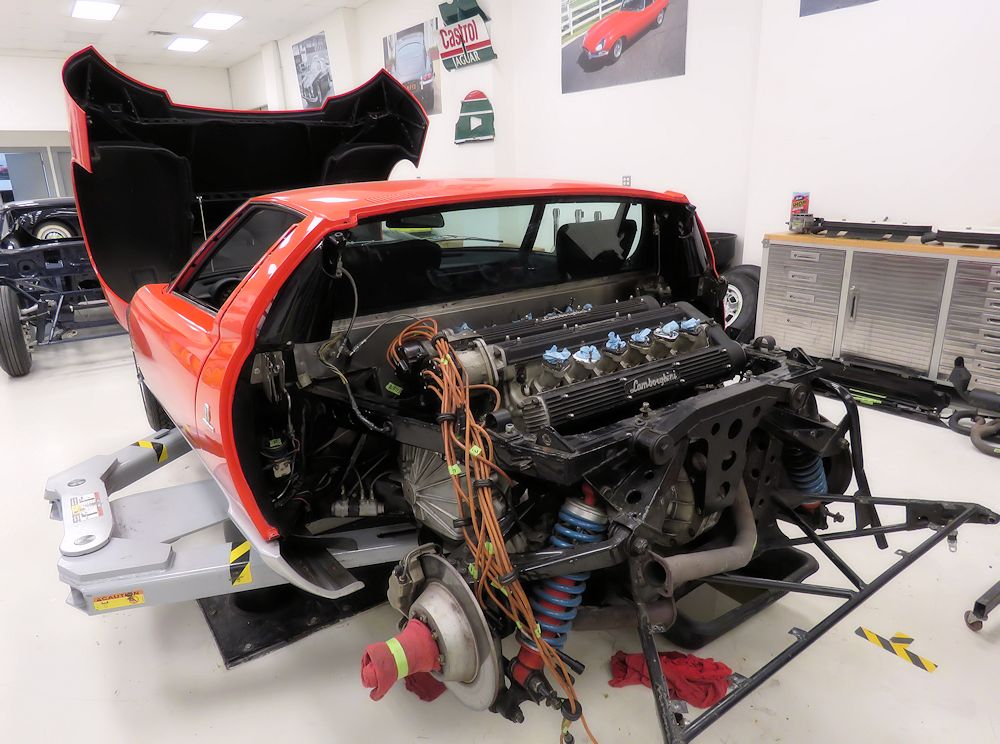
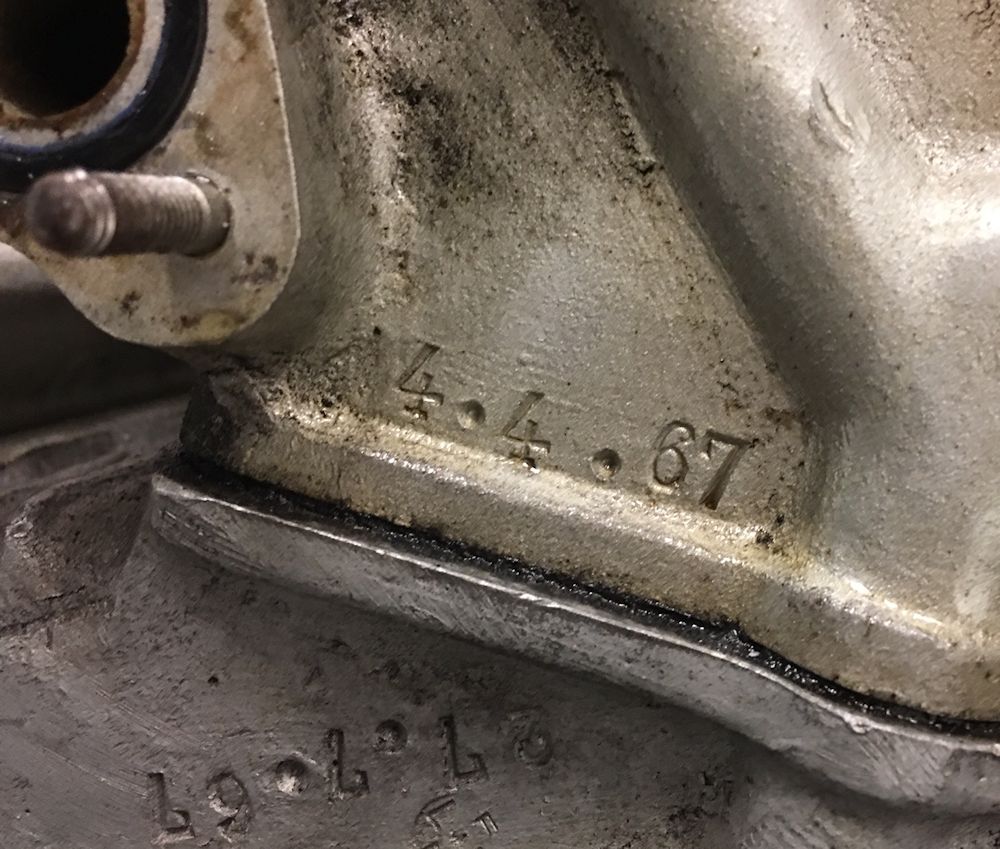
I am pleased to report that we now have this project underway. Interesting to note that the engine is date stamped July 27, 1967, meaning we removed it on its 50th birthday!
 |
 |
| Work underway |
Rear clip will add a little Italian flair to
my office for a few weeks |
 |
 |
 |
 |
| Webers will be rebuilt |
|
 |
 |
| Engine and transmission removed |
Interesting that the engine was removed on its 50th birthday! |
 |
 |
| Cylinder heads are also date stamped |
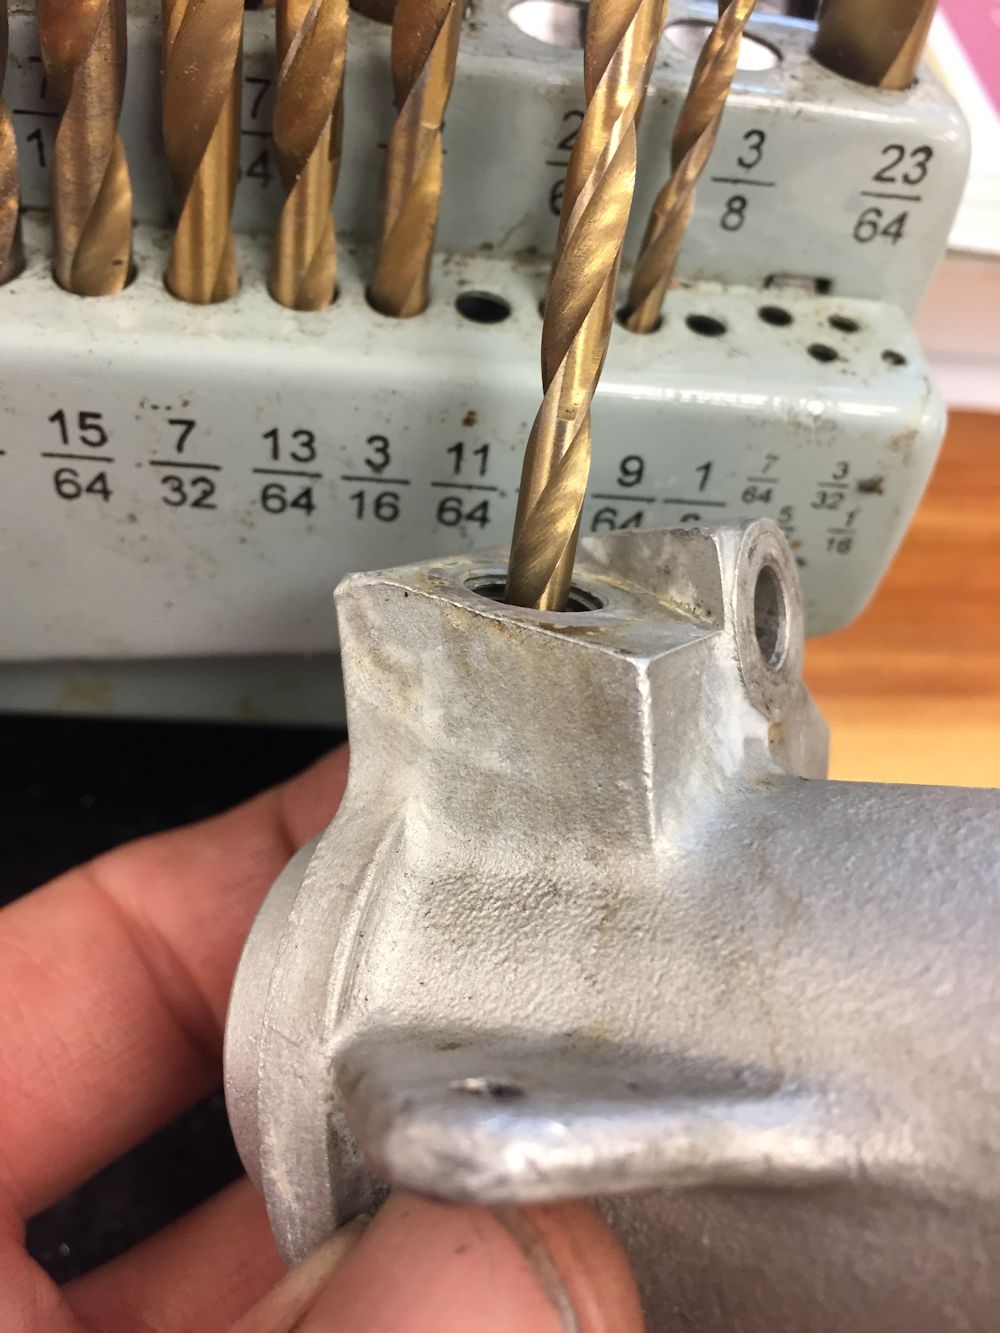
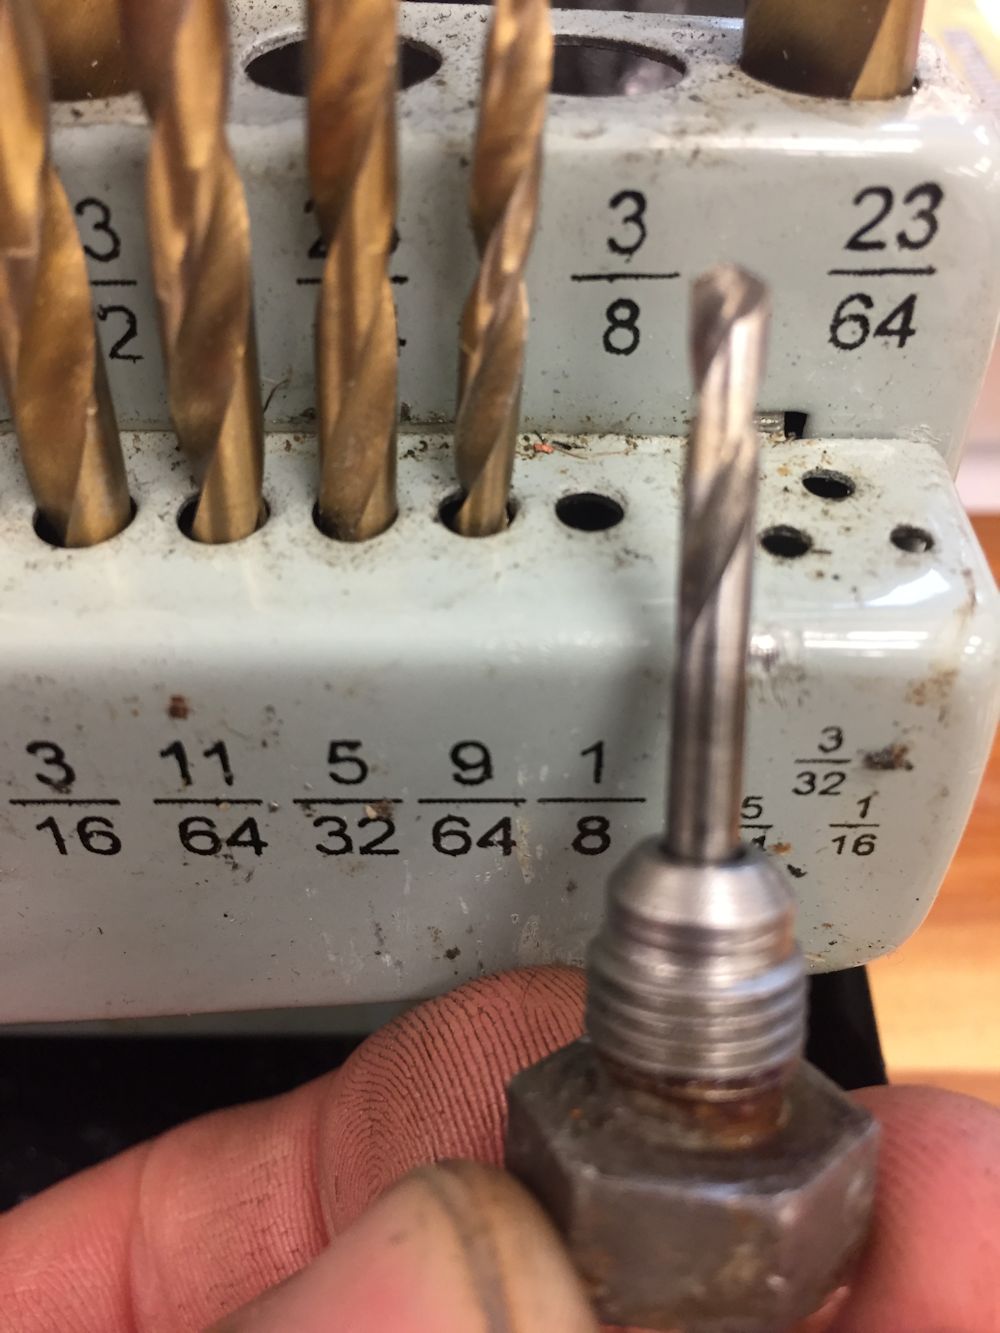
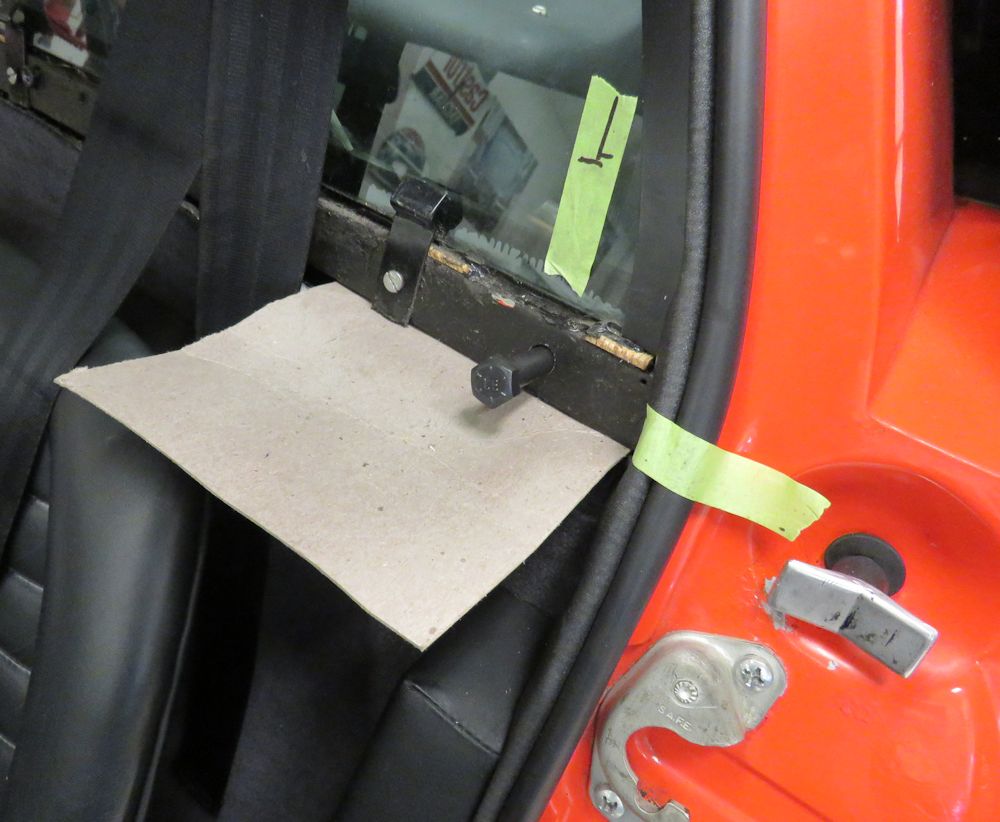
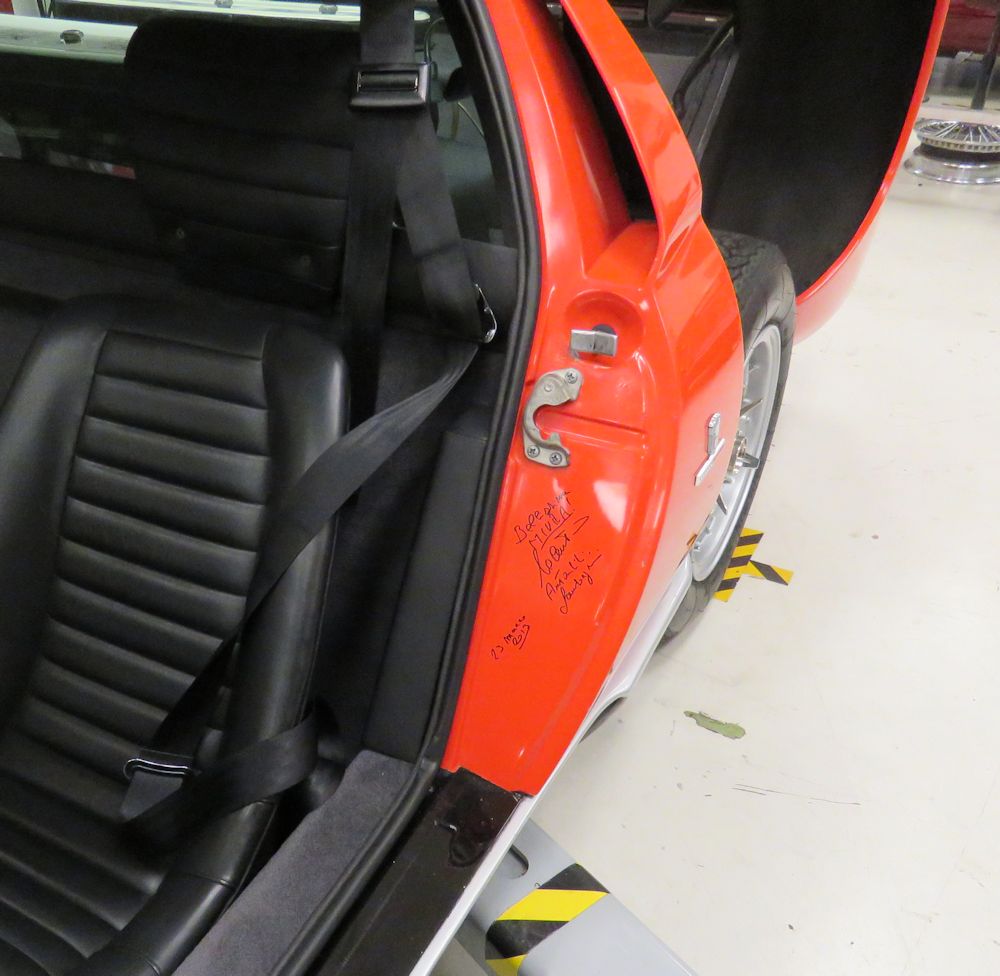
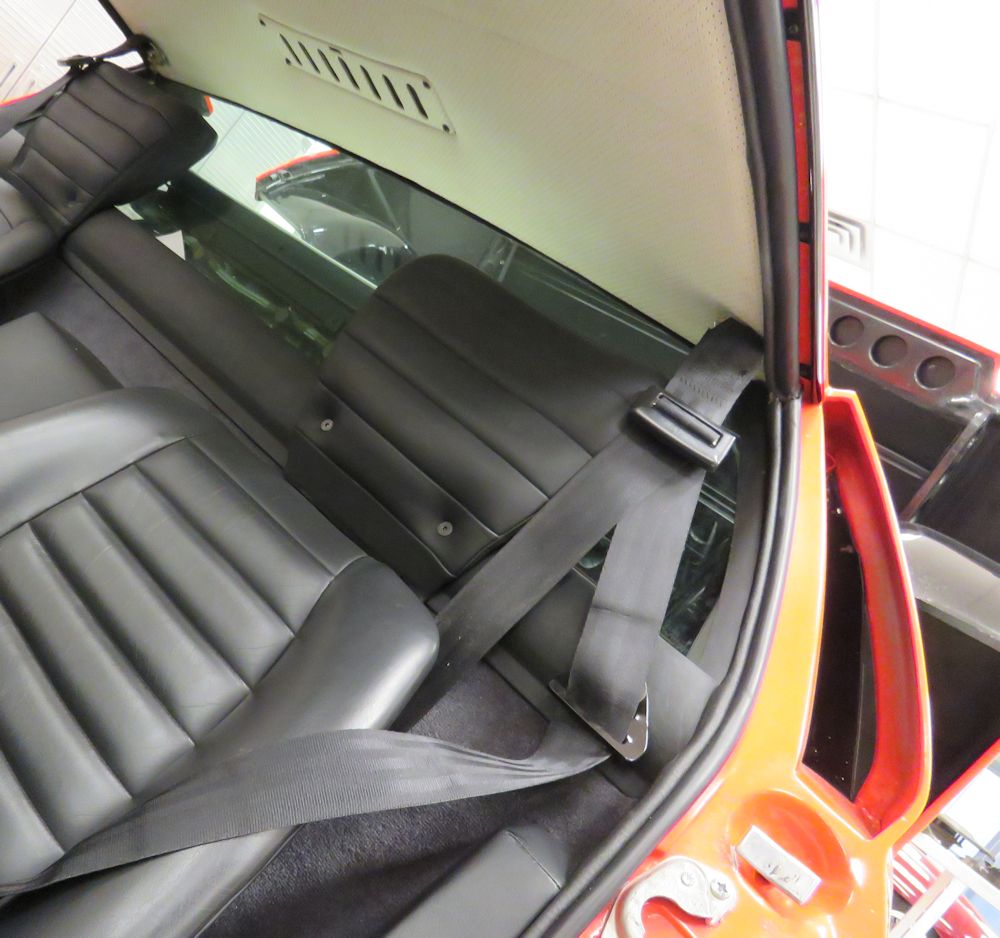
The following photographs cover the relocation of the driver's seat belt shoulder anchor, and the installation of new front brake rotors.
 |
 |
| Installing a seat belt anchor point over the driver's left shoulder |
Cutting an access panel behind the seat belt mounting point |
 |
 |
| Fabricating and installing a panel so back
side of seat belt anchor can be accessed |
Belt now positioned over driver's shoulder,
rather than across his neck |
 |
 |
| Horns replace, now working |
|
 |
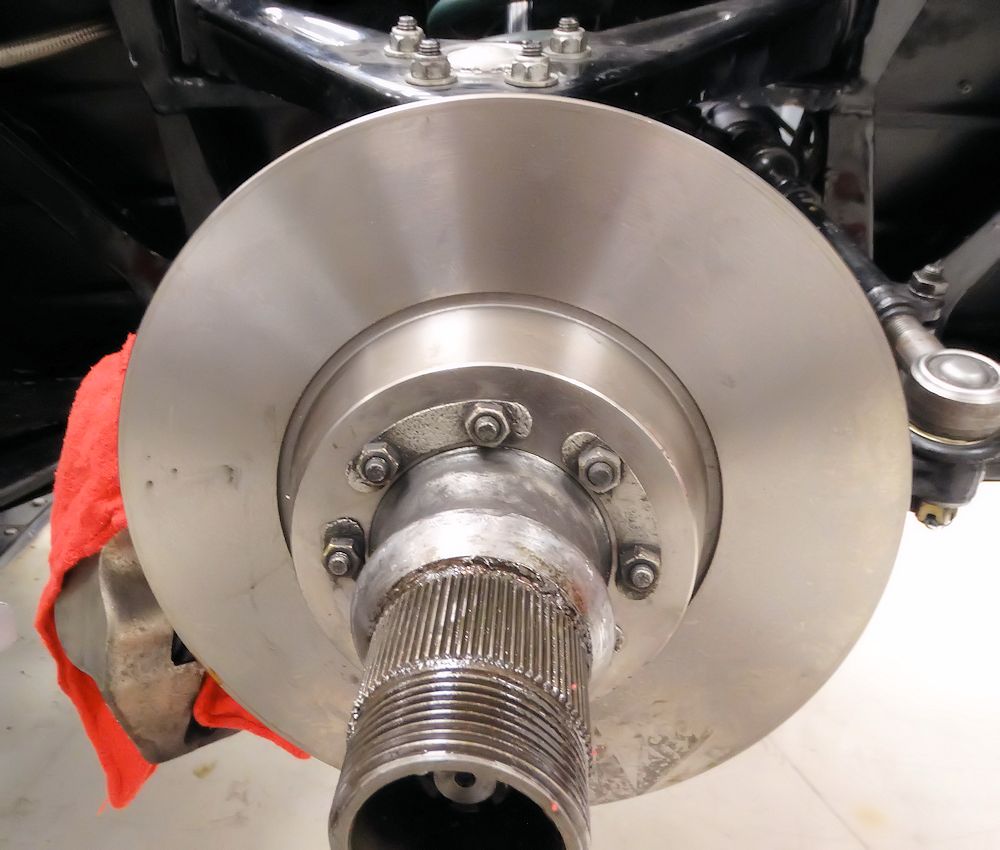 |
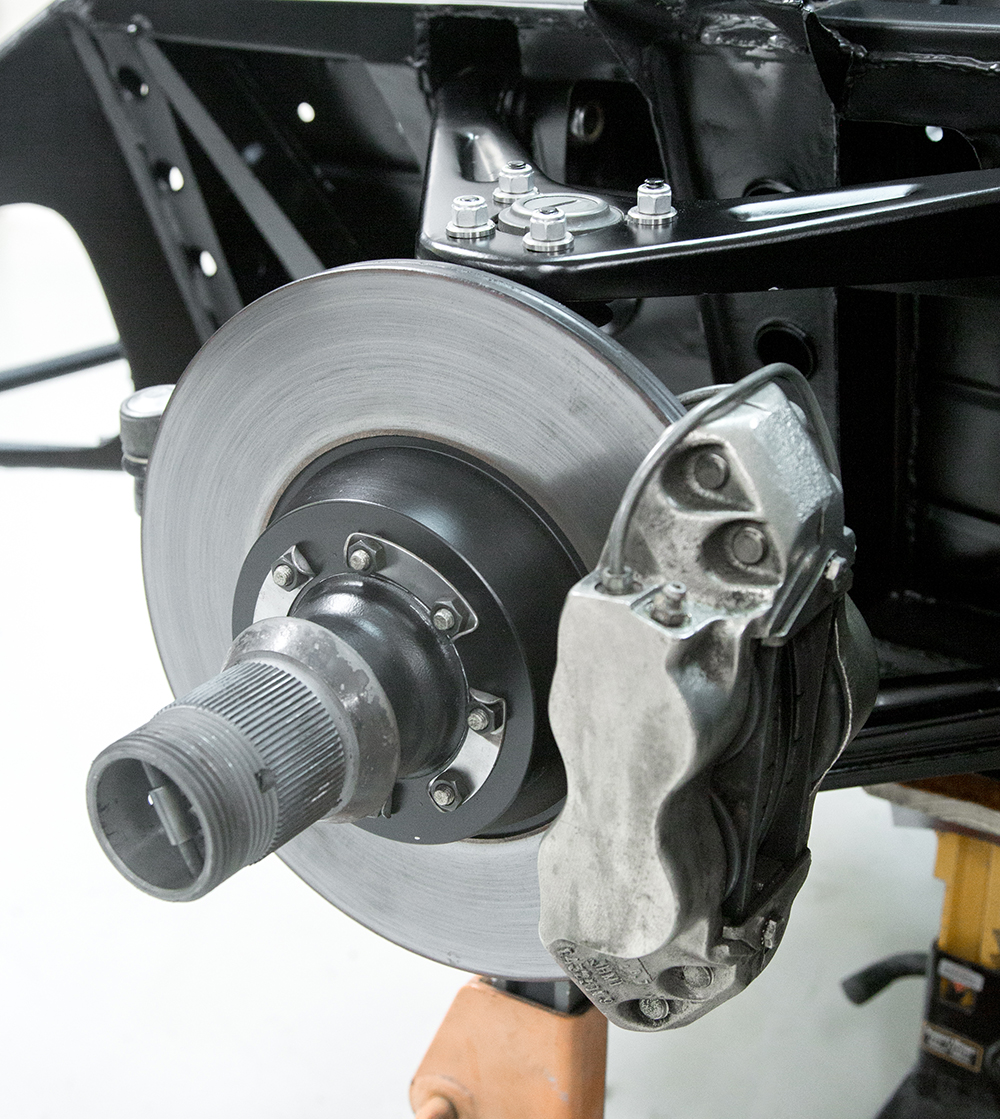
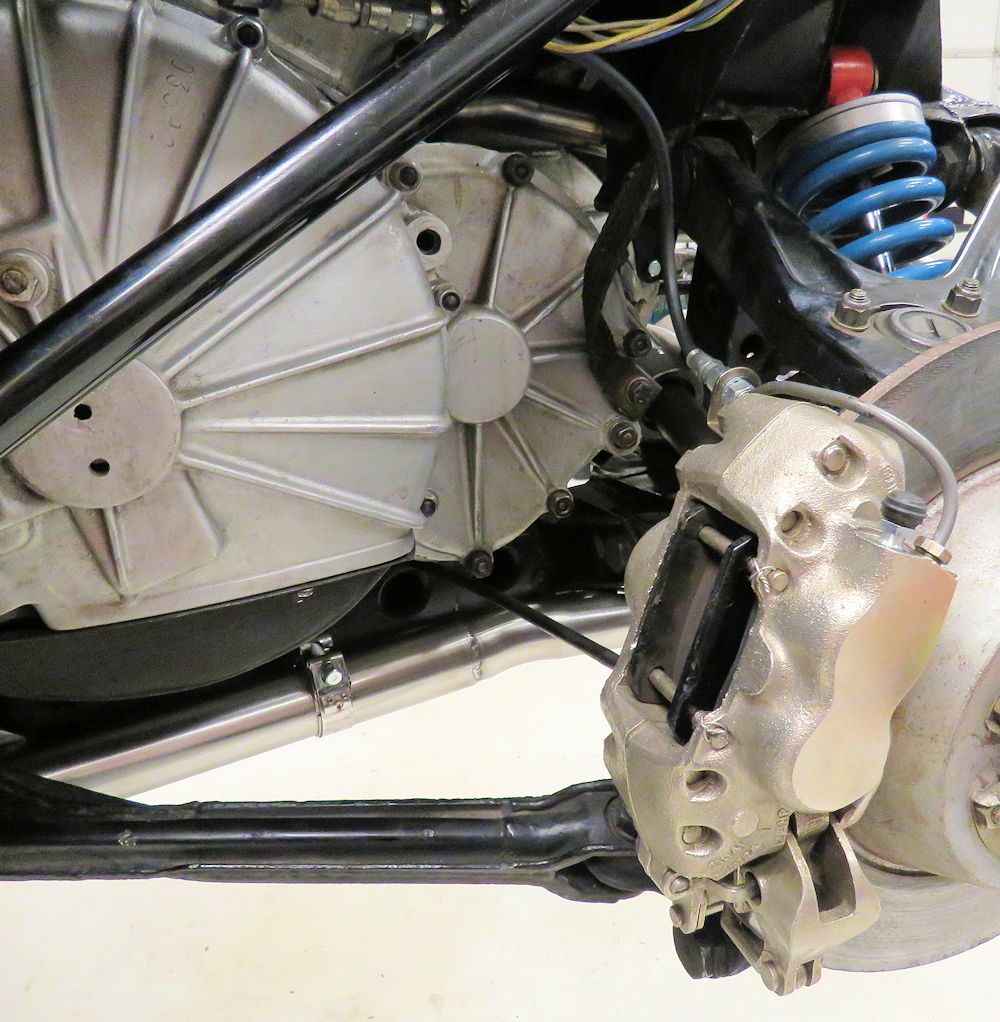
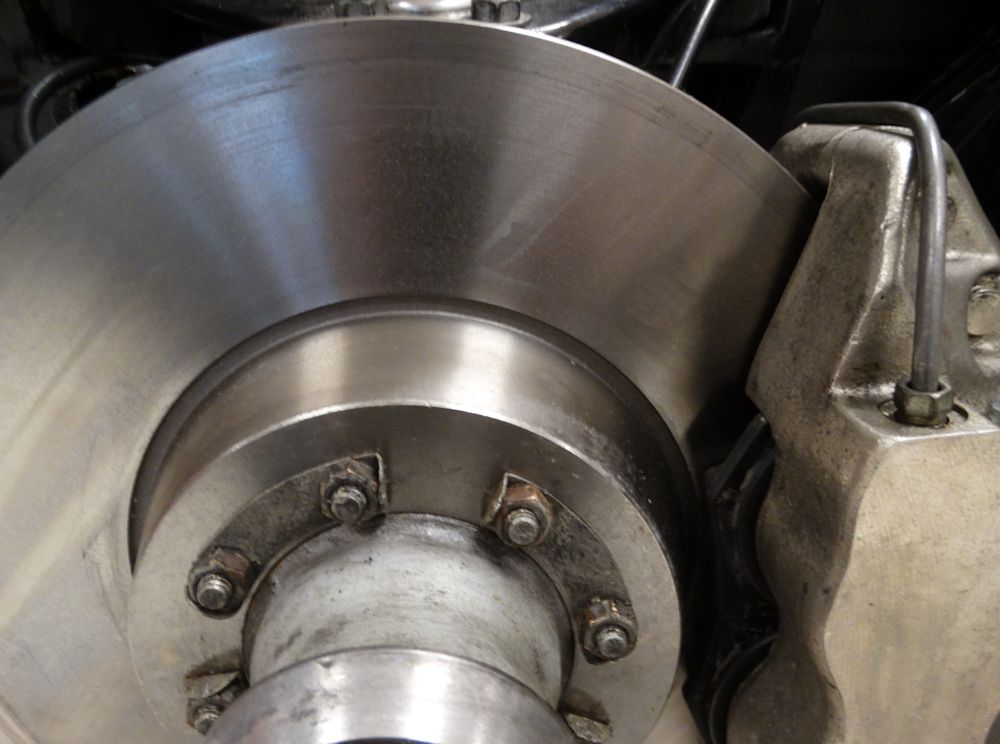
| Installing new front brake rotors |
|
 |
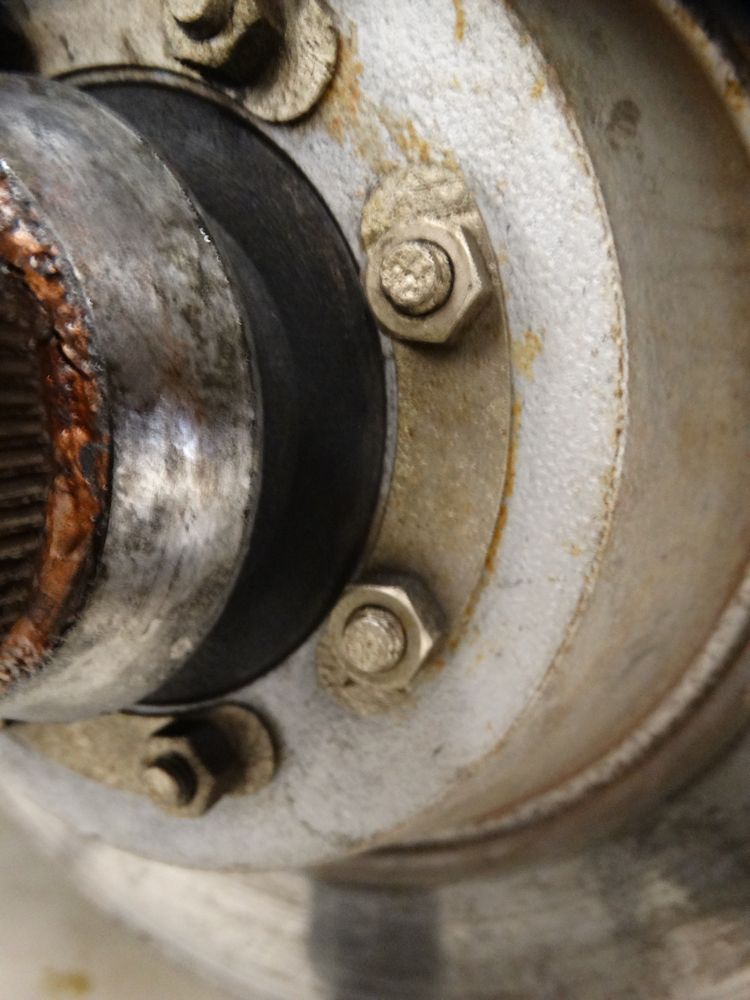 |
| Lock tabs folded over |
Rear tabs had not been previously folded,
which has now been corrected |
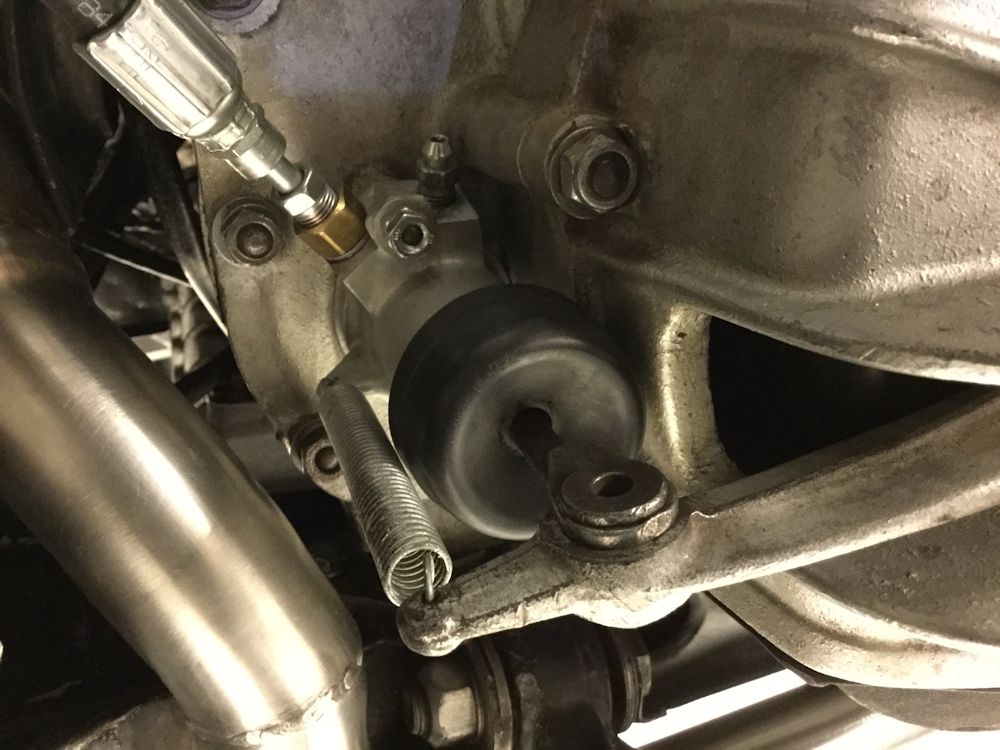
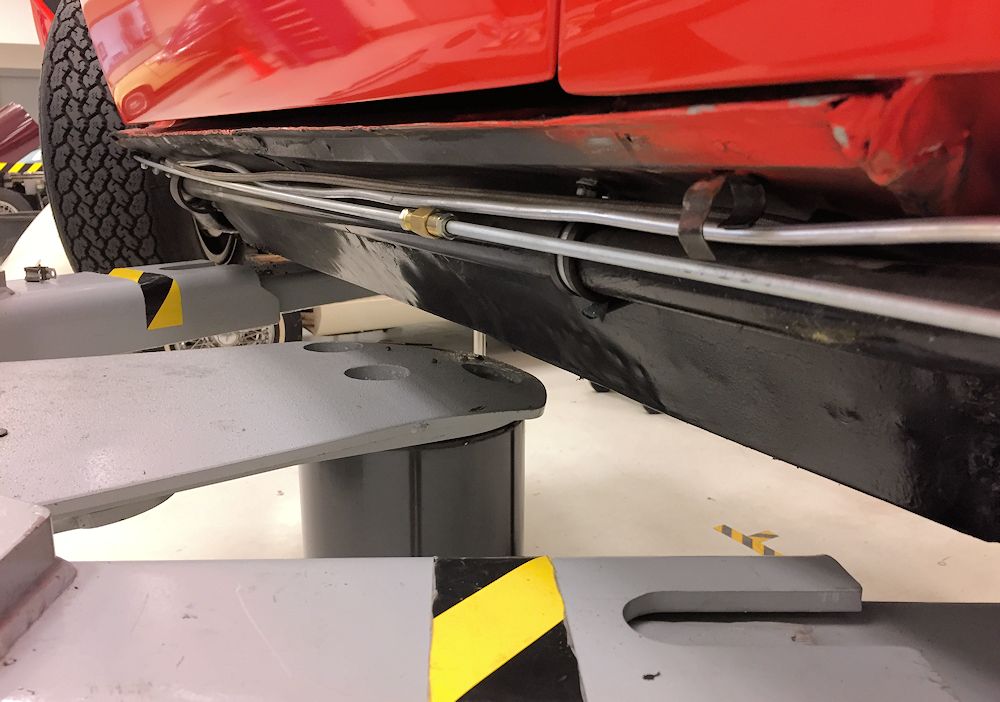
Today we have been fabricating and installing new brake lines and balancing the road wheels. Previous balance weights had been glued in position where they contacted the calipers when the wheels rotated. There is so little clearance between the top of the calipers and the inner surface of the wheel rim, that you really have to use clip on weights attached to the inner bead. Several of the old balance weights were missing altogether and others were barely attached.
 |
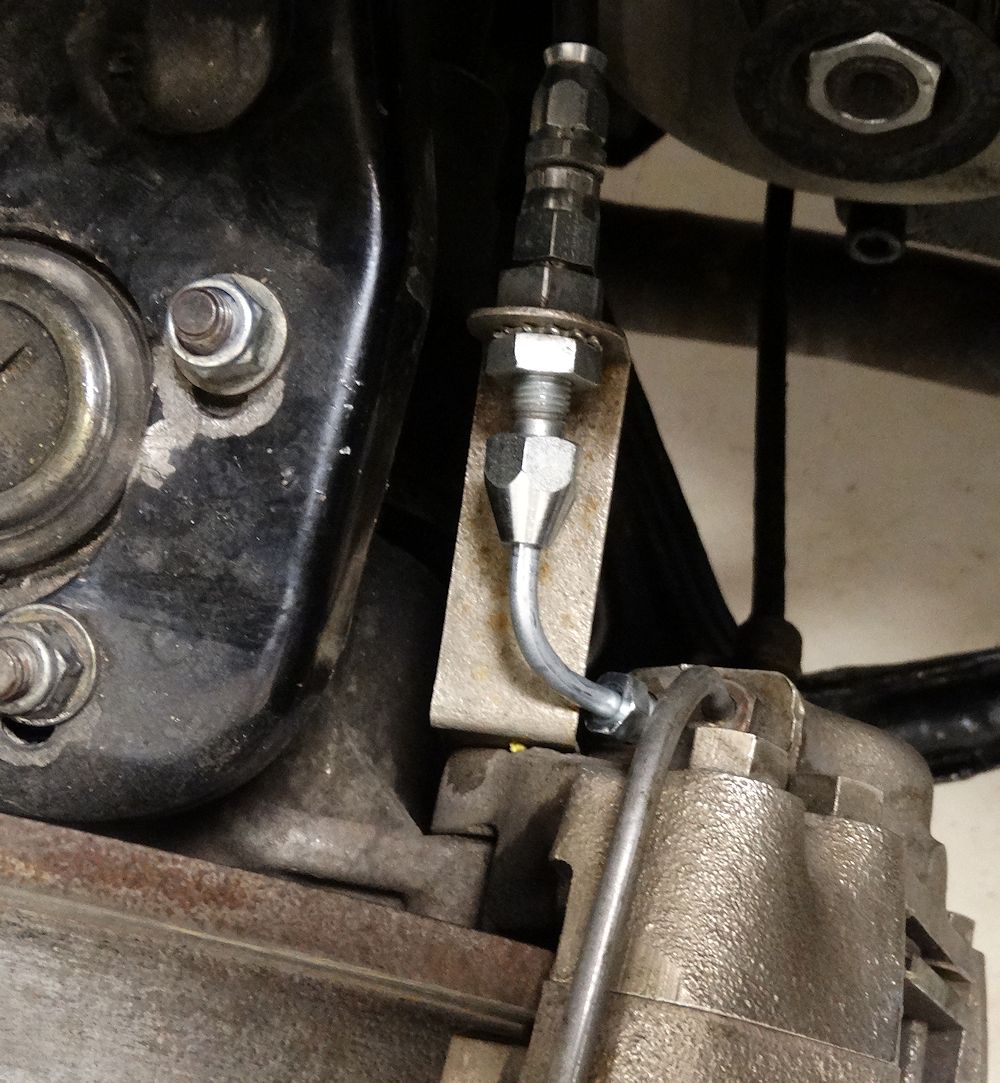 |
| Hard lines to rear calipers were strained and actually cracked open when removed |
New lines were fabricated and installed |
 |
 |
| New line fabricated and installed much tighter around top of front right caliper |
After cleaning FR inner rim, damage caused by
old brake line contacting inner rim clearly visible |
 |
 |
| Balance weights had been glued where there was insufficient clearance for calipers |
Cleaning inner rims prior to re-balancing
wheels |
 |
 |
| Bead clip balance weights are a simple fix to caliper clearance problems |
All 4 door hinge pins are now secured with cotter pins and E clips |
 |
 |
Another productive day working our way through several issues. Unfortunately we discovered a few new issues, such as brake lines rubbing inside wheels, and defective air horns, etc, but we were still able to check off several items today.
 |
 |
| Brake line rubbing against inner rim of front right wheel |
Witness marks show where brake line has been contacting inner rim |
 |
 |
| Engine cover release handles were missing grommets on both sides |
Missing rubber grommets caused handles to
rattle and clunk around |
 |
 |
| A little shrink wrap and a custom elliptical
rubber washer was a cheap and cheerful fix |
Lock nut was missing from the back of the
driver's side handle - now installed |
 |
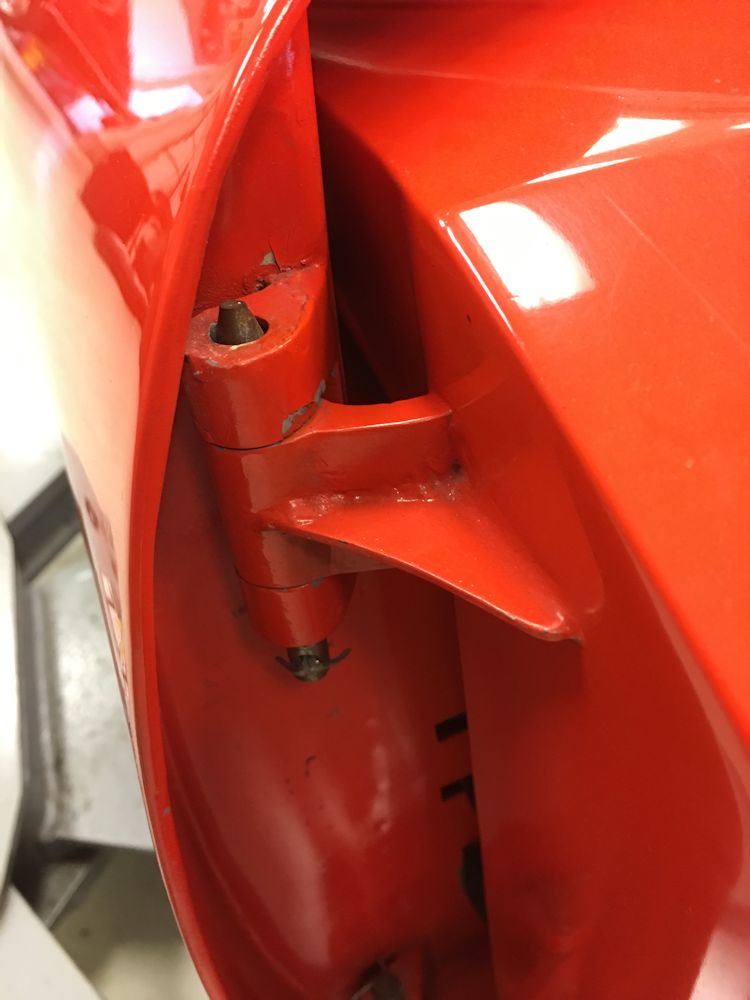 |
| Door hinge pins need securing |
Upper passenger side pin literally about to
fall out |
 |
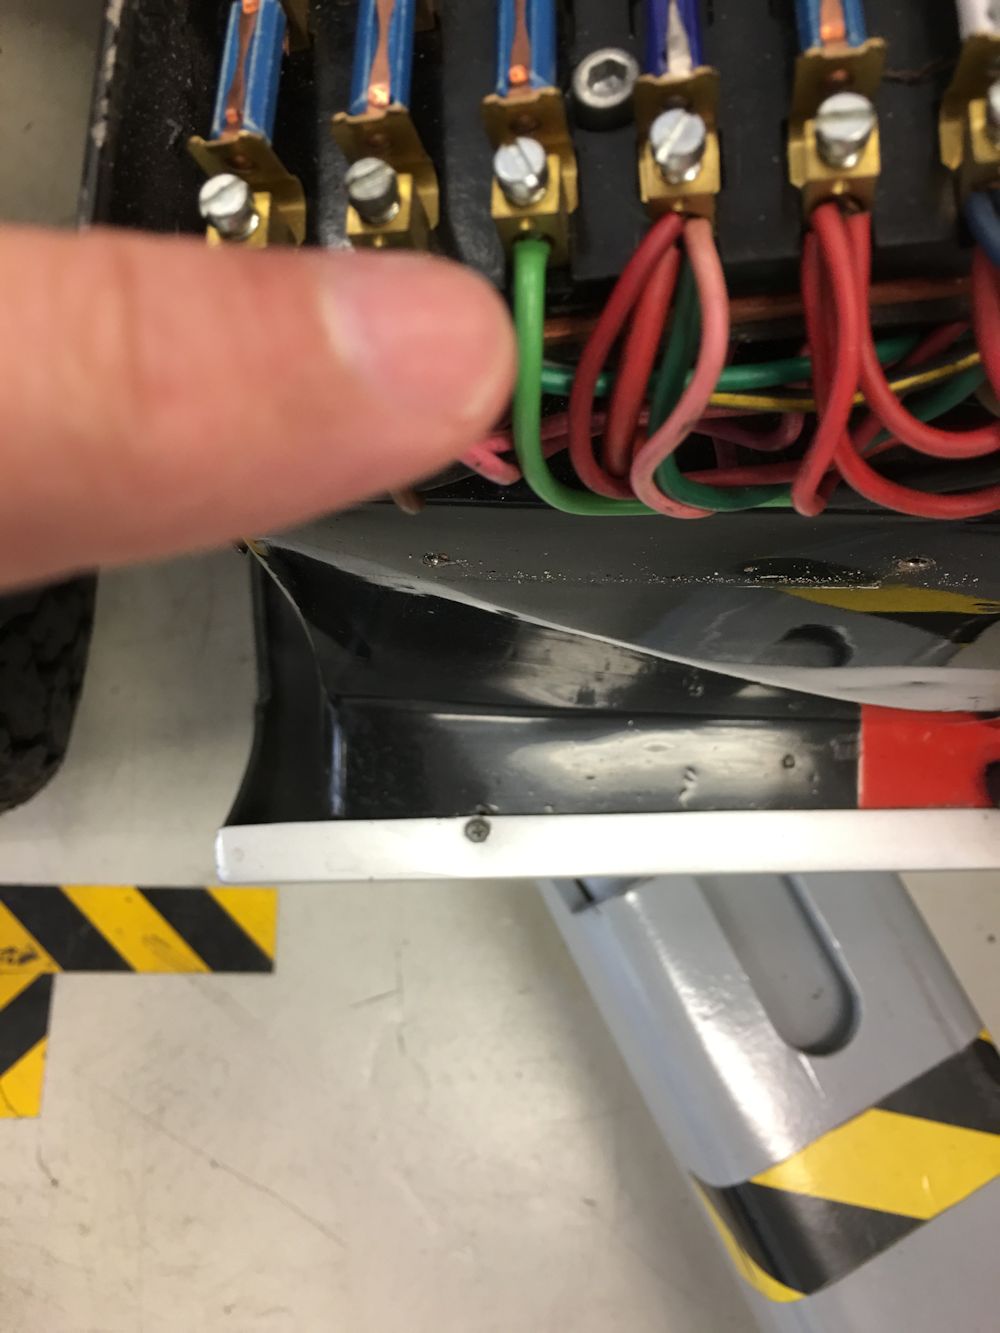 |
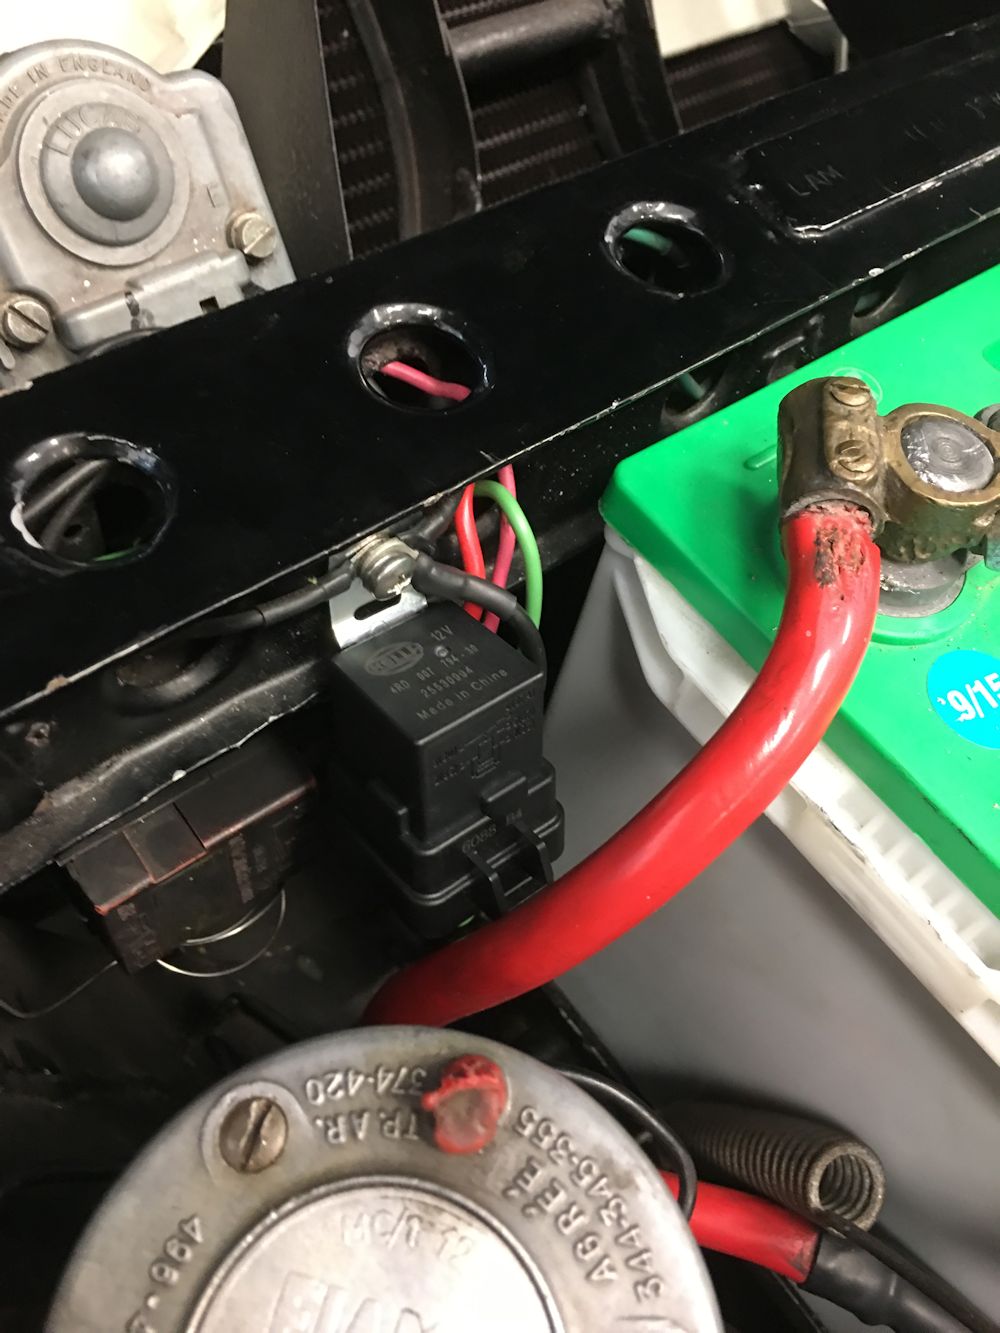
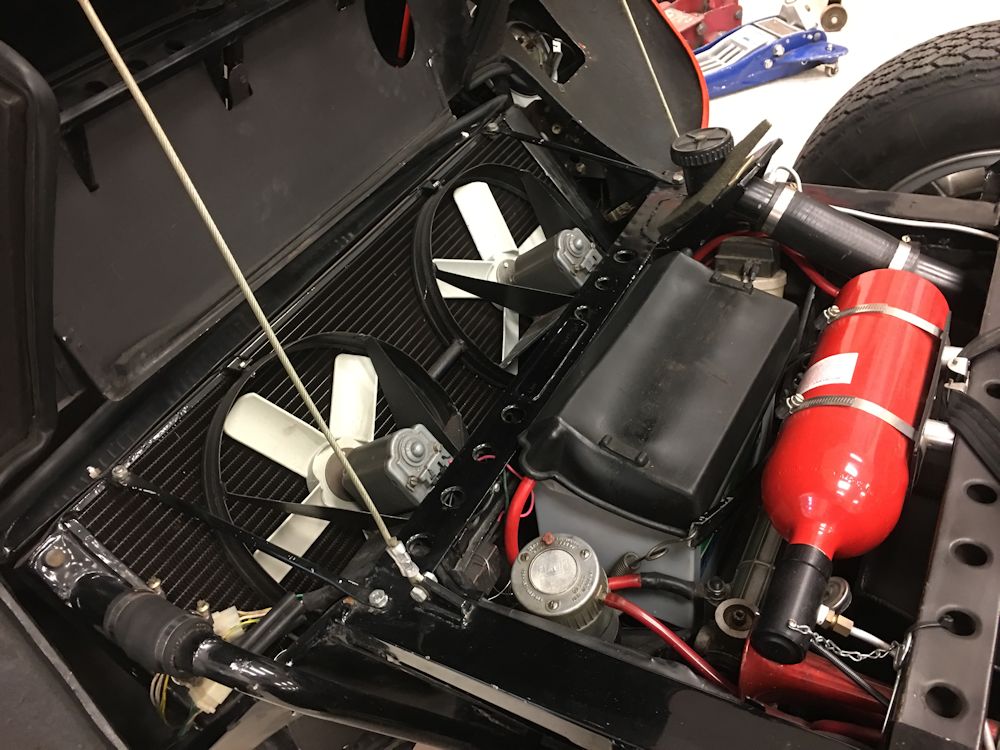
| #3 fuse was vacant and keyed, so we decided to use it for the new fan relay |
Fan relay now wired in |
 |
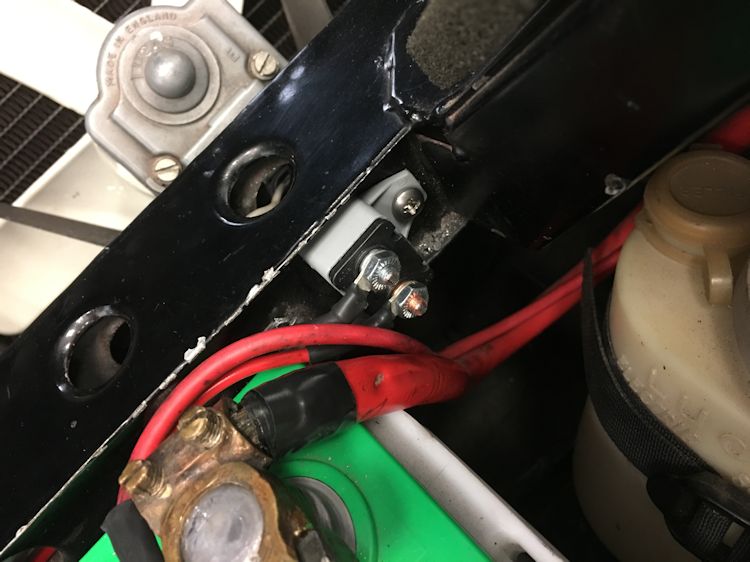 |
| Fan relay positioned by battery |
New circuit breaker |
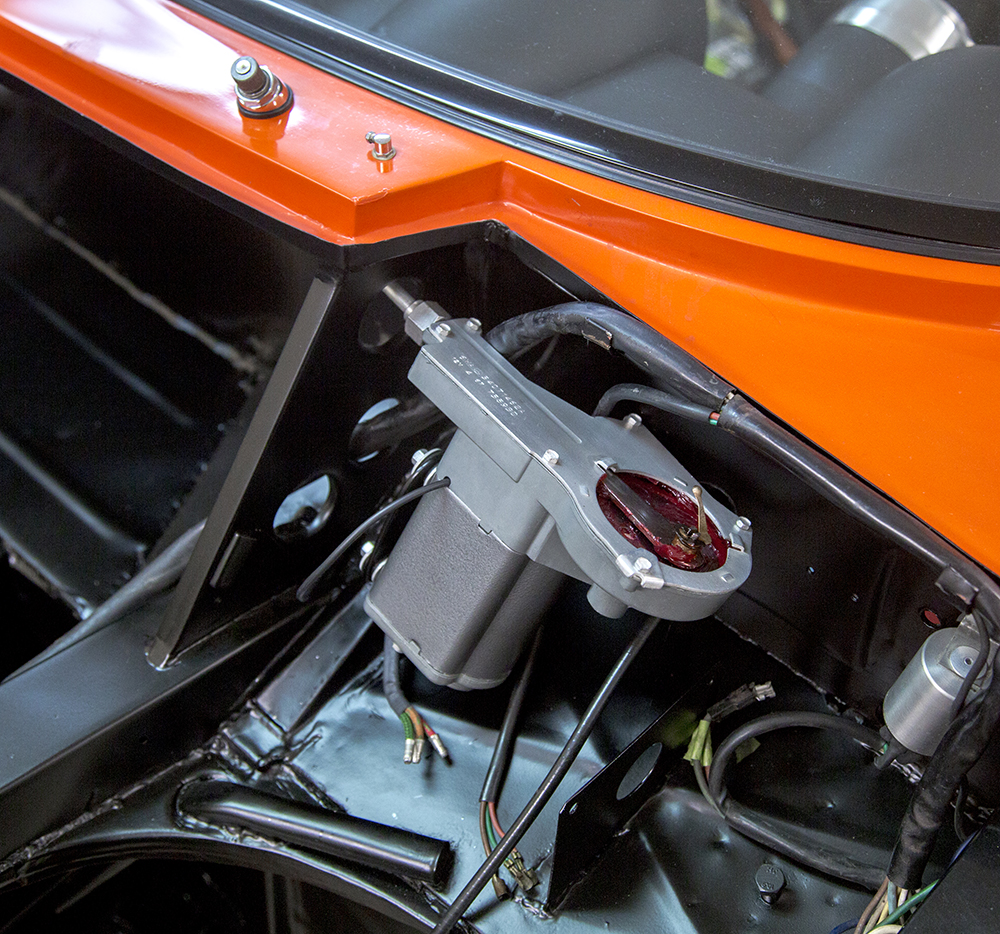
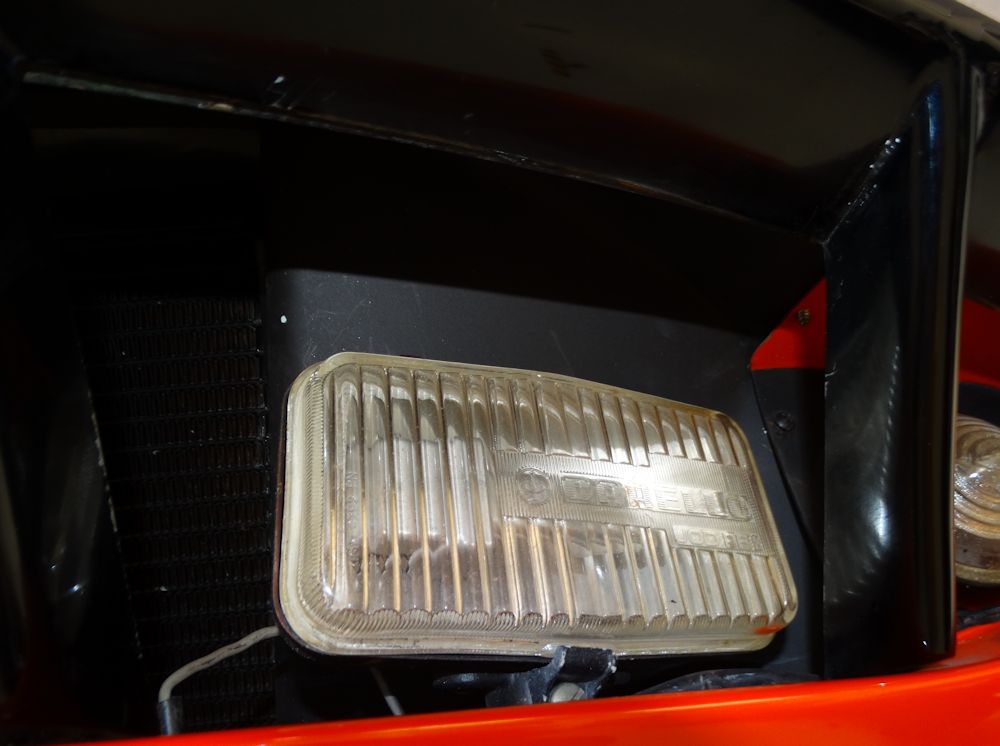
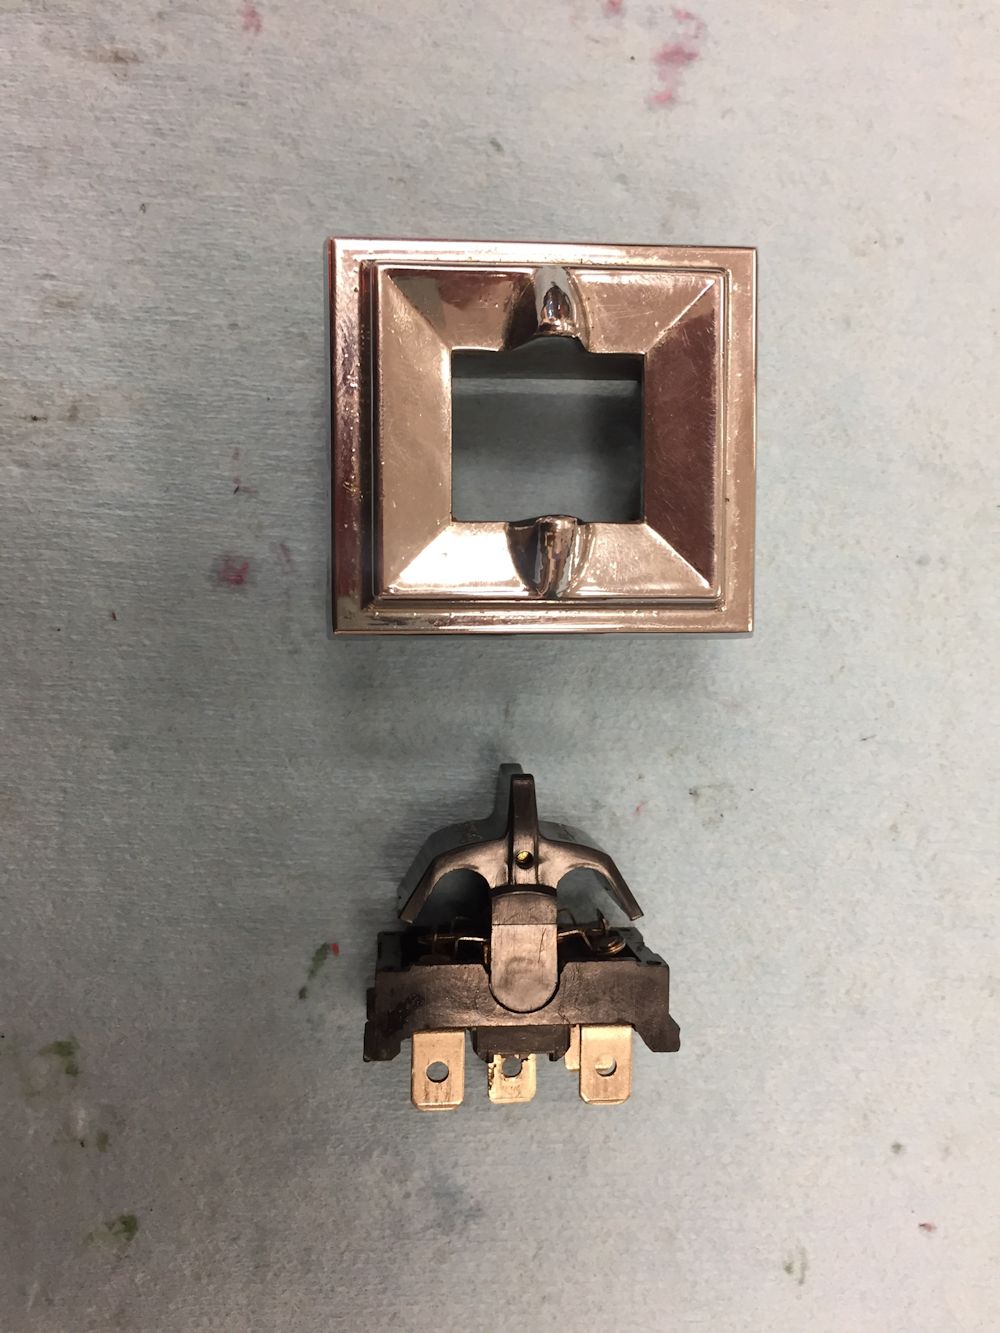
We are happy to get this new project underway. Our first task will be to address several electrical issues. We have already rebuilt the right hand headlamp mechanism, installing a new bronze crank gear, rewired the headlamp motor and rebuilt and rewired the fog lamp switch. You now have fully operational headlamps and fog lamps.
 |
 |
 |
 |
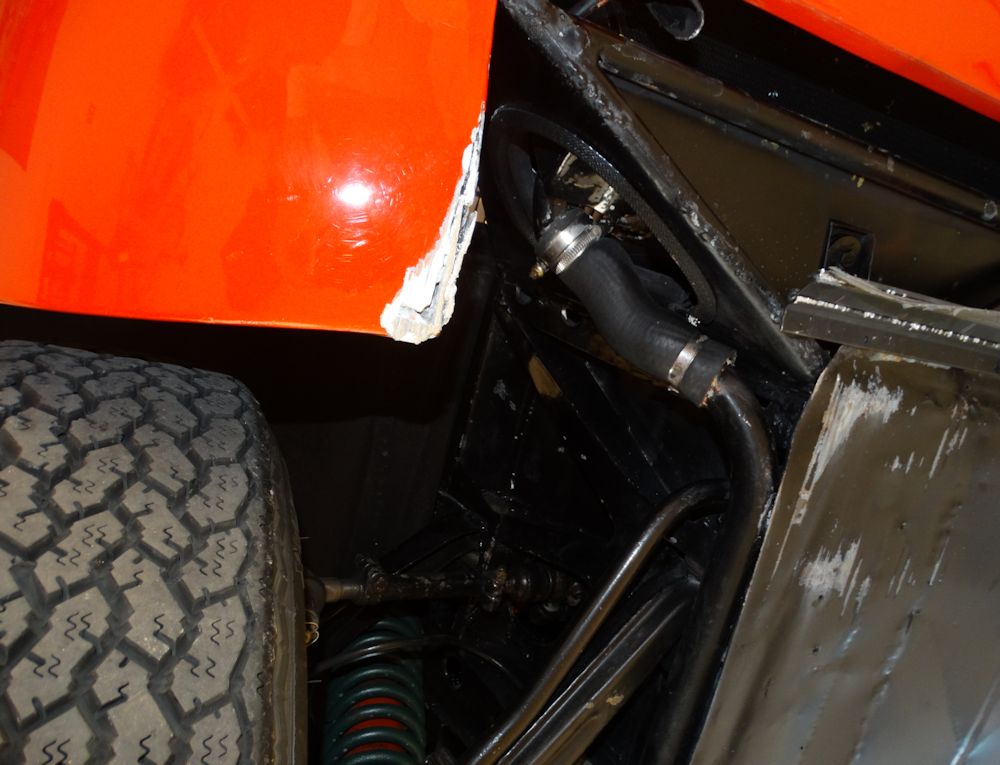
| RH exhaust tip has been pushed up into the
rear valance, causing slight damage to the valance |
|
 |
 |
| Slightly damaged chassis tube extension |
Brake rotors will be replaced |
 |
 |
| Damage under front right corner |
|
 |
 |
| Small dent at front left corner |
Inoperative fog lamps are loose on their
mounts |
 |
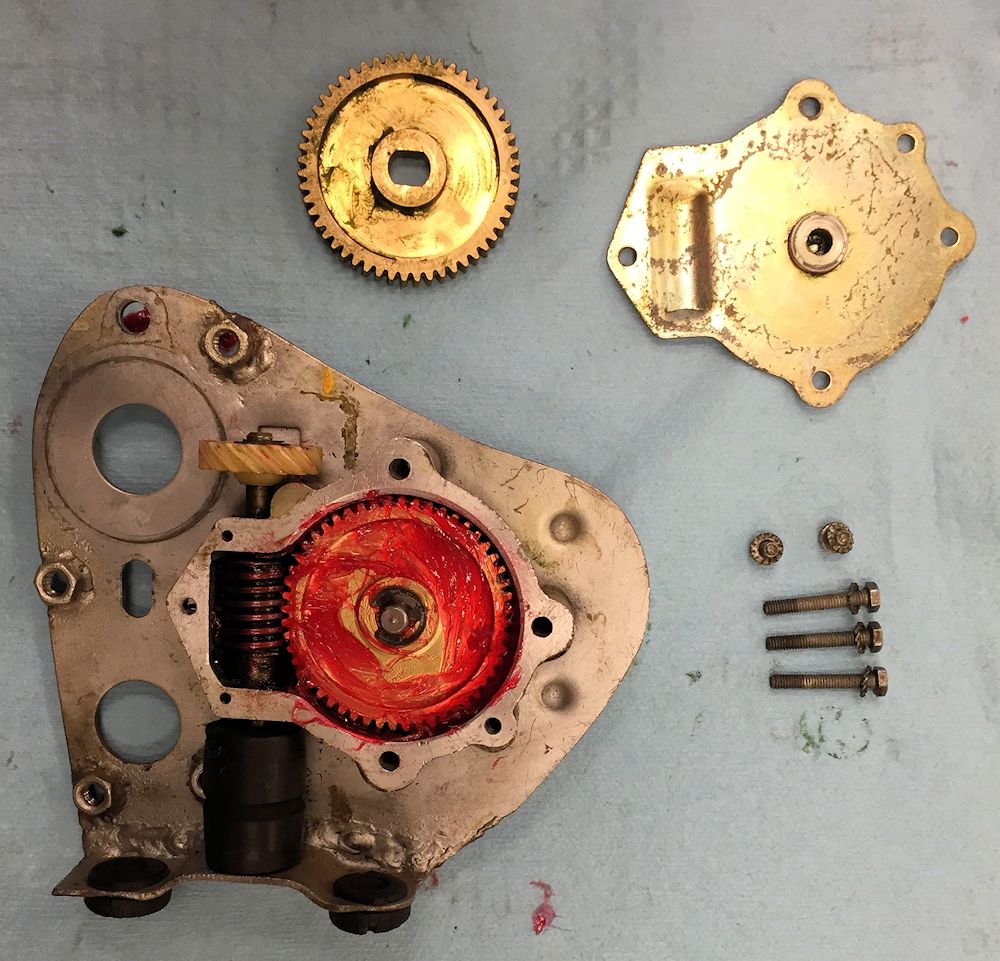 |
| New bronze gear will be installed in RH headlamp mechanism |
|
 |
 |
 |
 |
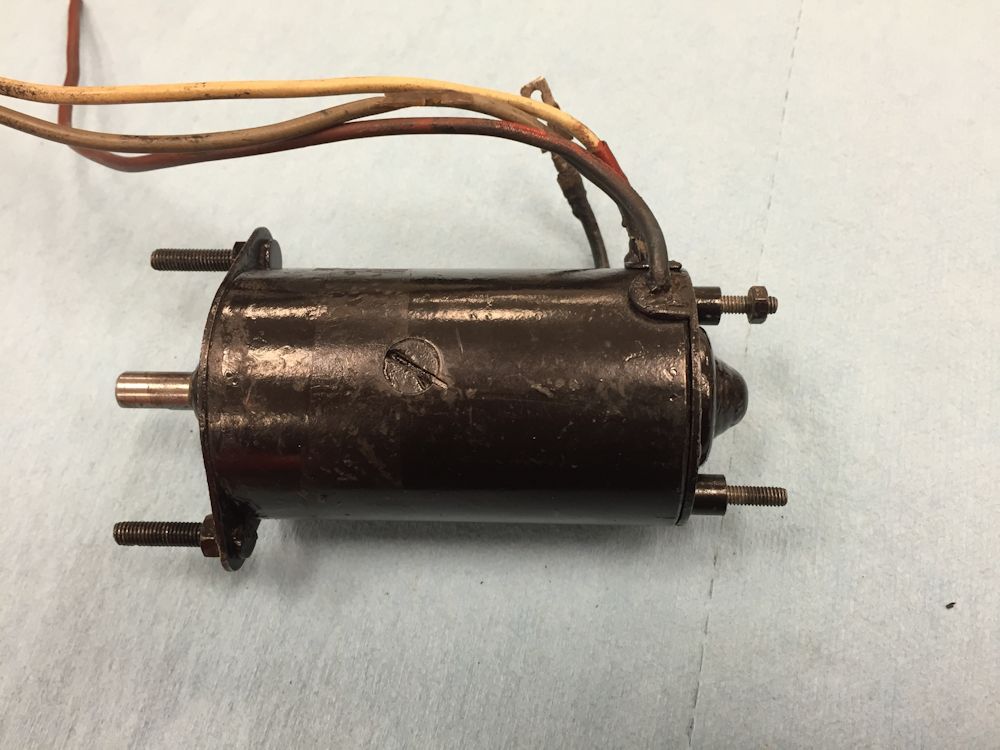
| Headlamp motor was wired incorrectly |
|
 |
 |
| Auxiliary (switch operated) fan was
inoperative |
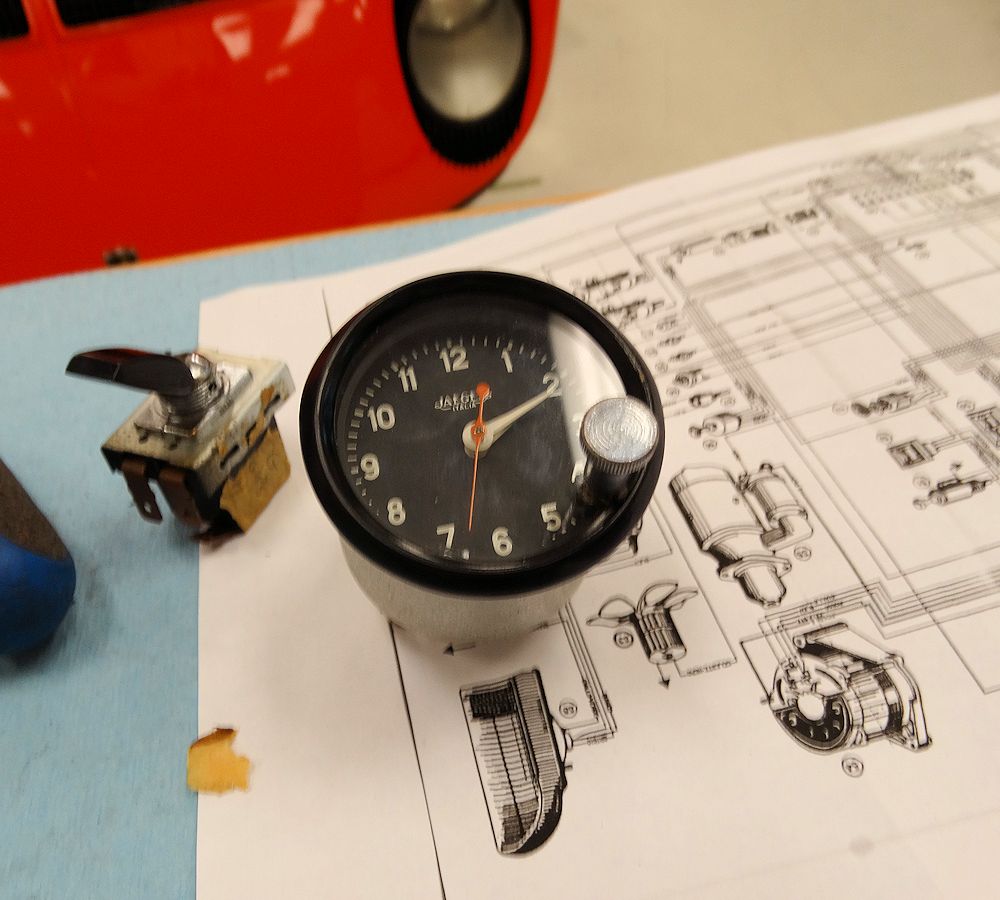
Clock is inoperative. Good power and ground,
so almost certainly internals bad. |
 |
 |
| Both headlamps now operational |
