Total Restoration
| Mercedes
300 SL Gullwing (JM)
Total Restoration |
|
|
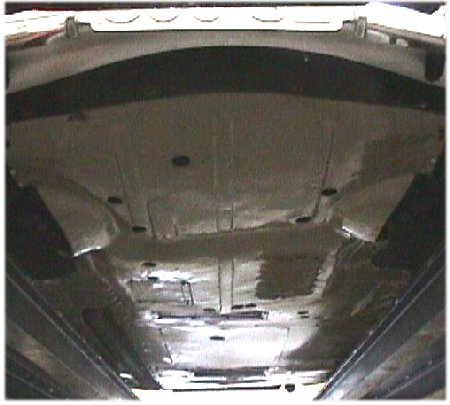
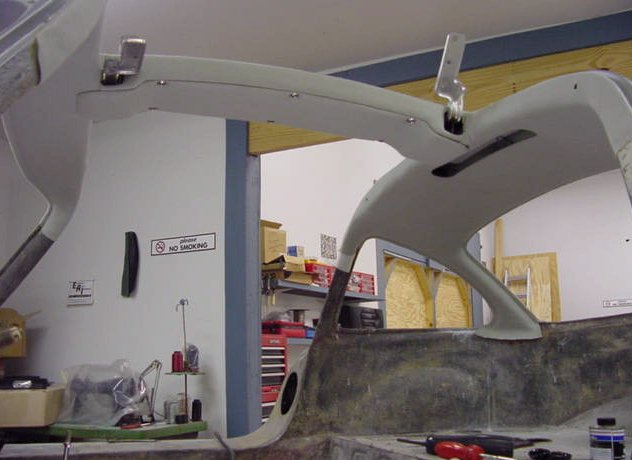
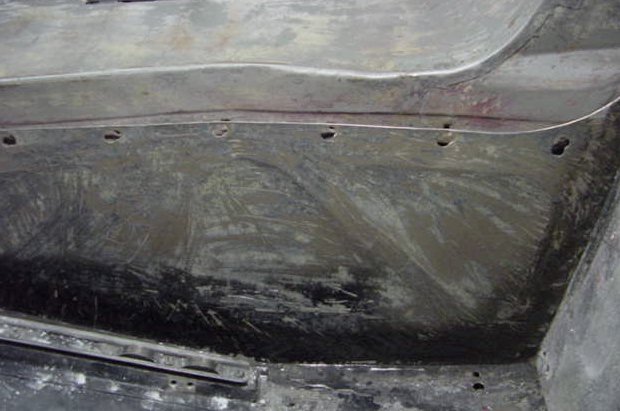
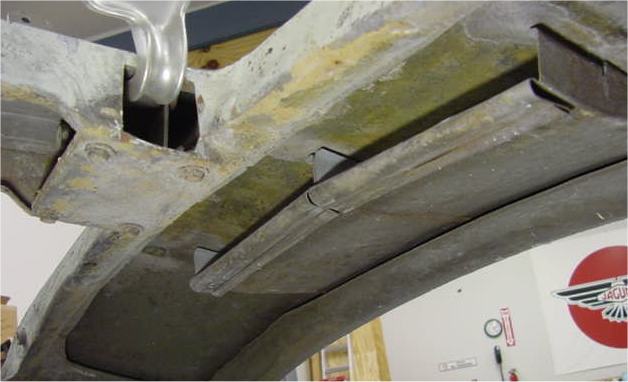
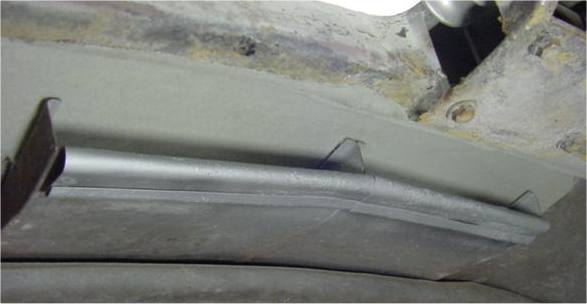
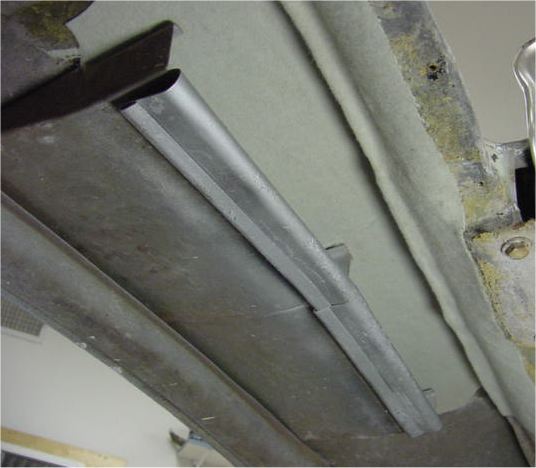
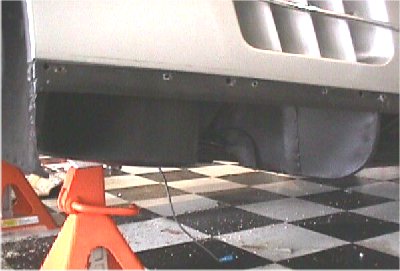
Last week was spent tying up a few mechanical loose ends, including installing the new exhaust system and tracking down a few fluid leaks. Sam identified a fairly major transmission seal leak which we will be dealing with early this week, as well as a nasty differential output seal leak. While under the car dealing with these issues, we have been detailing the under carriage and wheel arches, etc, prior to going back with the Rudge belly pans.On the subject of the Rudge belly pans, and further to our telephone conversation last week:
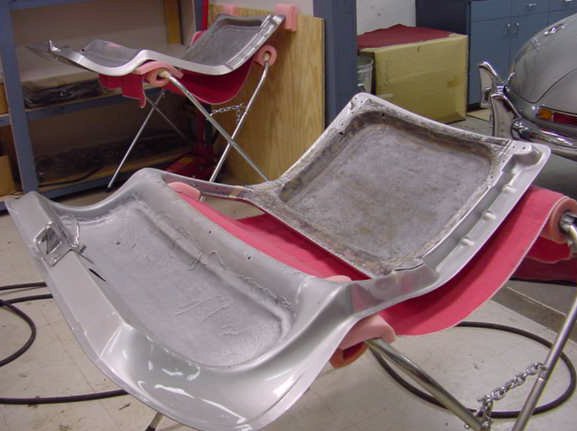
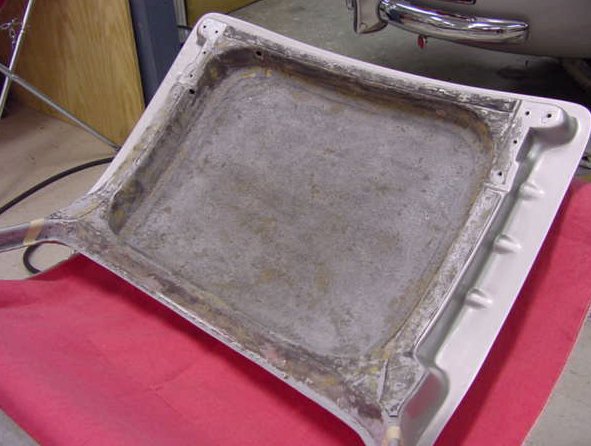
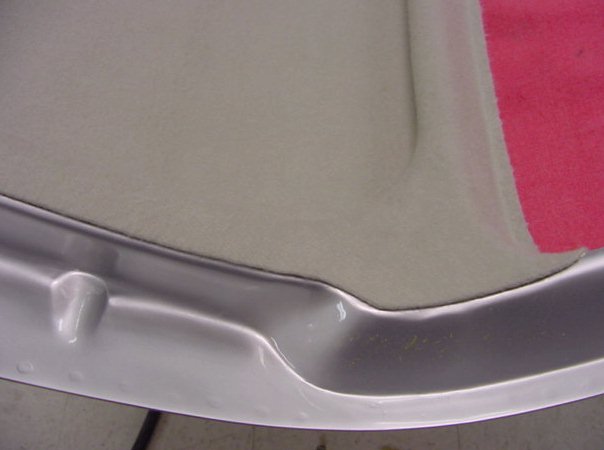
Cosme has now cleaned the pans up and I have decided to leave them in their original paint, complete with 46 year old patina, rather than strip them down and paint them. They really are in fantastic, original shape.
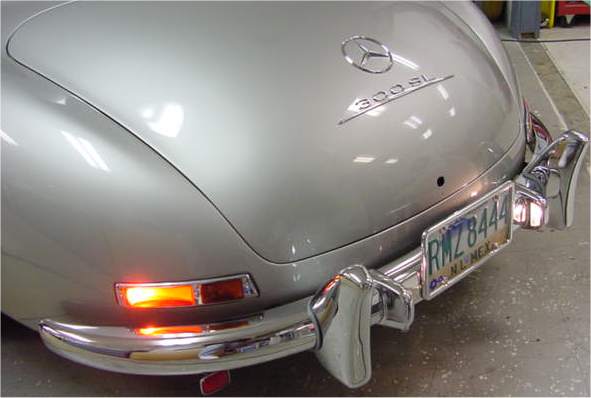
That's about it for now - difficult to photograph mechanical progress! The pictures below show the front arches and wheel drums after they had been detailed.
 |
 |
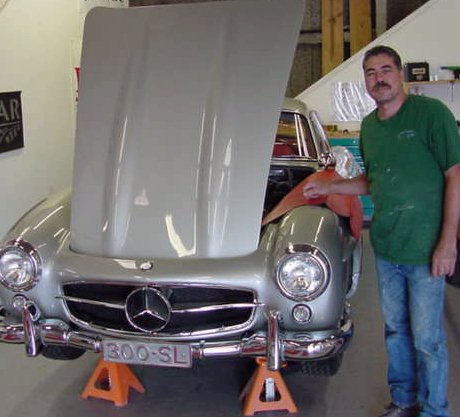
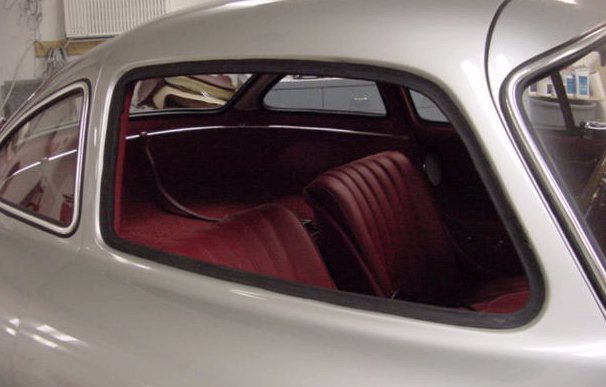
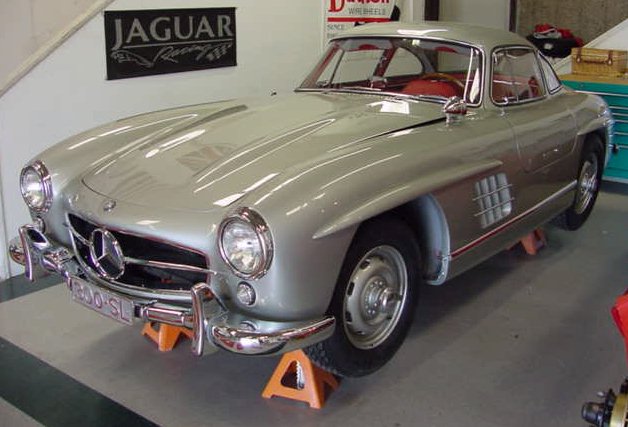
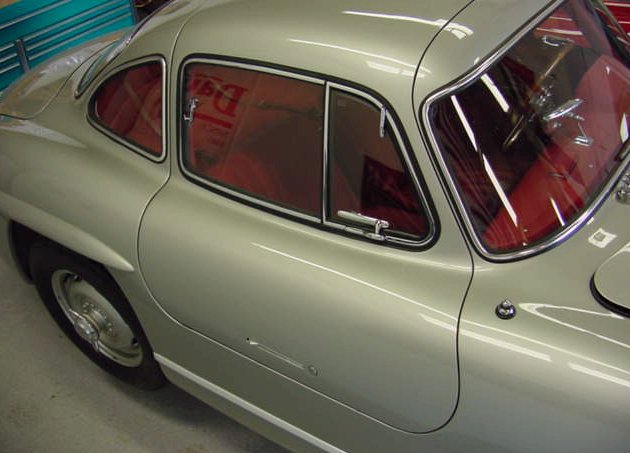
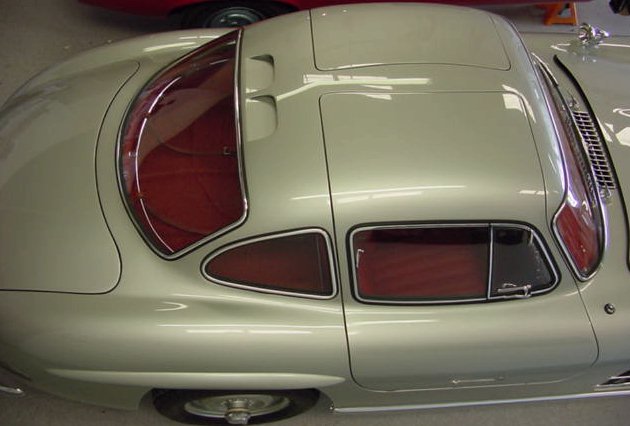
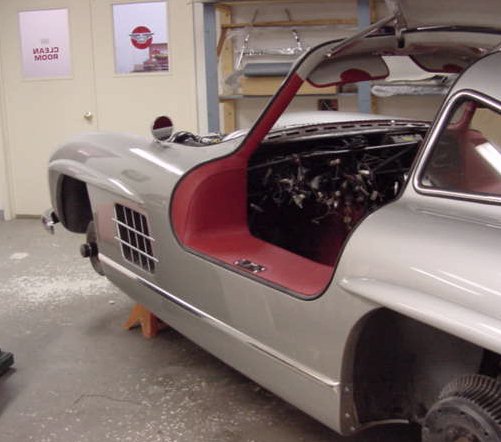
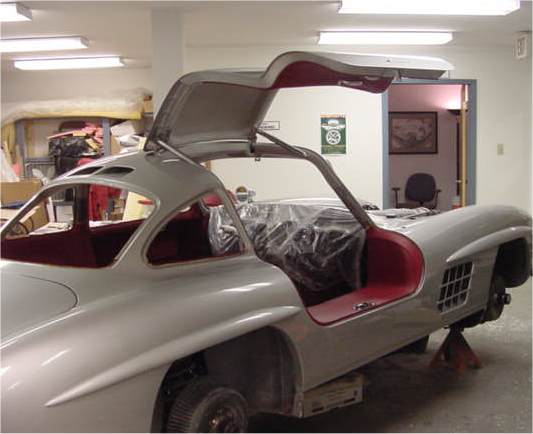
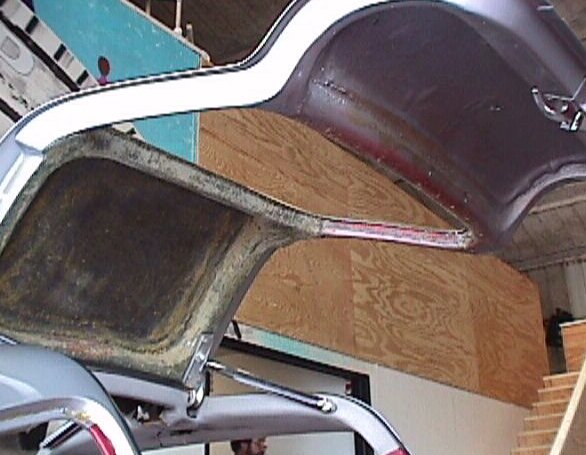
David has now pretty much finished his work with the car and it has moved out into the CJ workshop for its final mechanical shakedown. The following photographs show the side windows going into place, as well as Cosme refitting the bonnet. Cosme particularly asked to have a photograph taken of him standing next to the car as he is very proud of his paintwork - and rightly so.
 |
 |
 |
 |
 |
 |
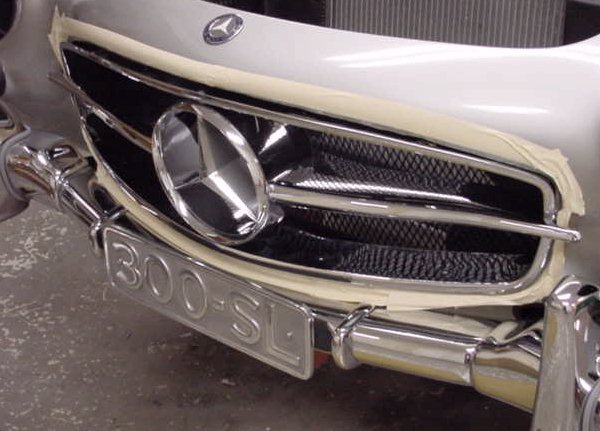
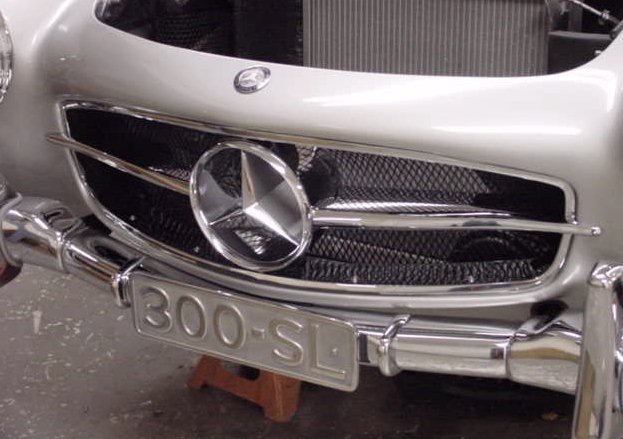
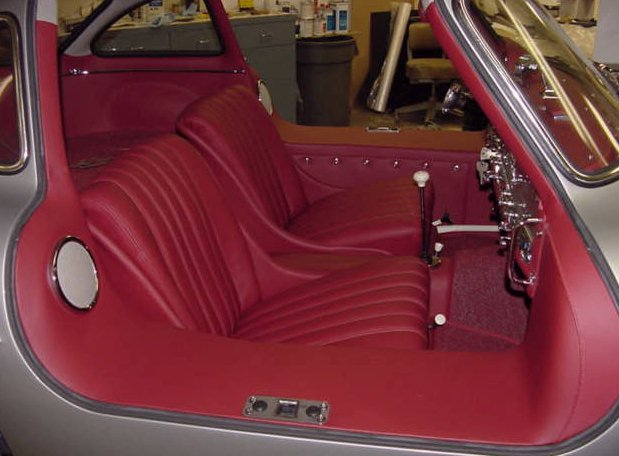
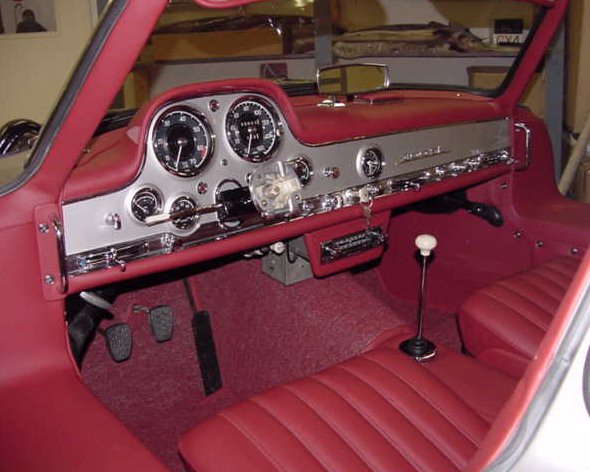
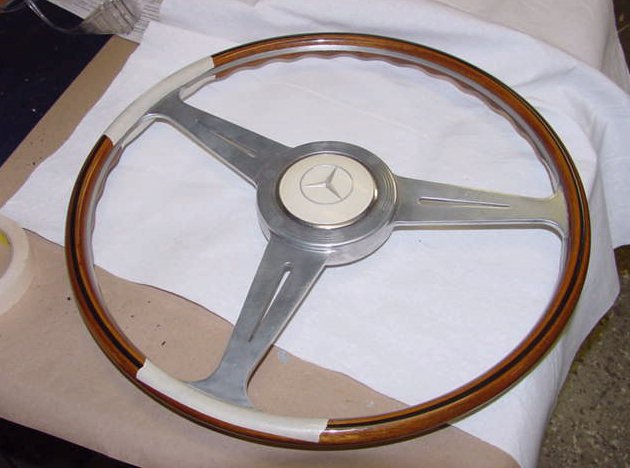
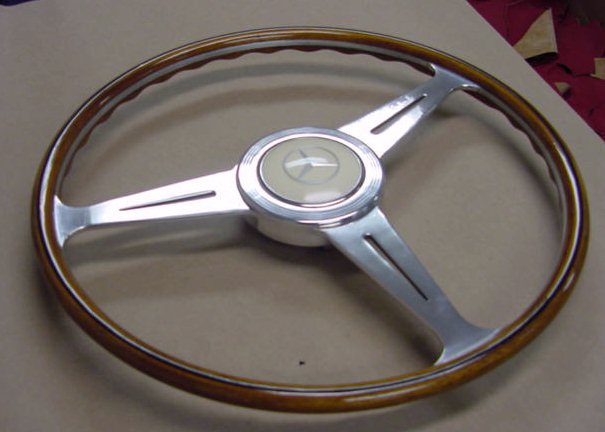
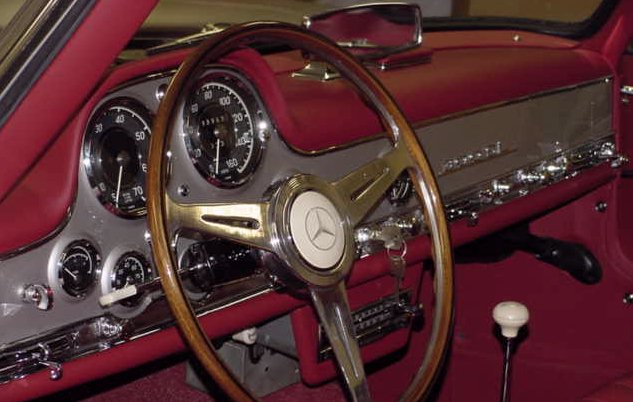
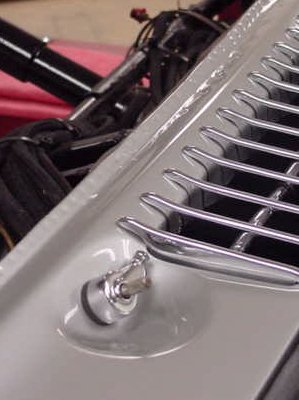
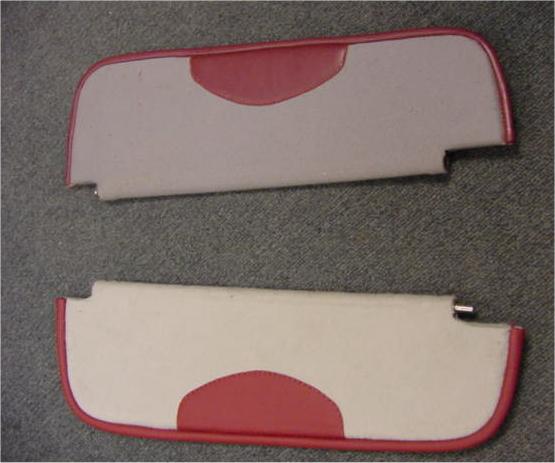
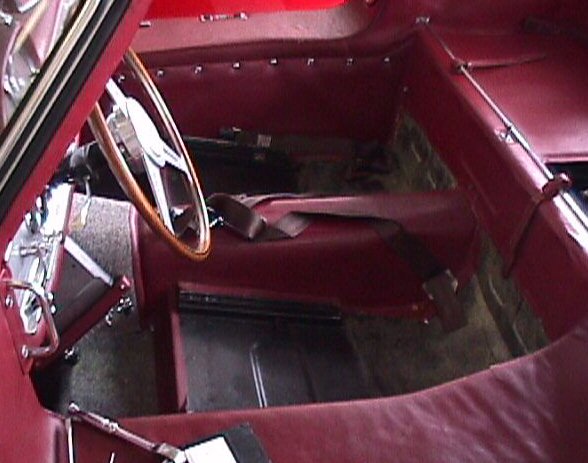
Two high profile items were restored and installed during the past week - the famous grill and the steering wheel. We also finally got around to putting the retrimmed seats back in the cabin where they belong! I hope you are pleased with our progress.
 |
 |
|
an astounding job repairing and replating it |
|
 |
 |
|
|
|
 |
 |
|
upper steering column |
|
 |
 |
|
|
|
 |
 |
|
a turn on the buffing wheel |
|
 |
 |
|
|
|
The following pictures speak for themselves. Automotive art.
 |
 |
 |
 |
Some serious progress for you this week. The car is looking absolutely fantastic.
 |
 |
|
restoring the dash grills |
|
 |
 |
|
|
|
 |
 |
|
|
|
 |
 |
|
|
|
 |
 |
|
|
|
 |
 |
|
|
|
 |
 |
|
|
mechanisms |
 |
 |
|
|
|
 |
 |
|
(boy was that a challenge!) |
|
 |
 |
|
|
|
 |
|
Four steps forward and one step back.....Just as we were feeling rather pleased with ourselves, we found out that Mercedes Benz had mistakenly shipped us a 300SL roadster screen instead of the Gullwing screen that we obviously needed. This knocked David out of his stride somewhat, as he was about to install the windscreen, followed by the dashboard.
In any event, as you can see from the following photographs, he is still managing to make great progress.
 |
 |
 |
 |
 |
 |
|
|
|
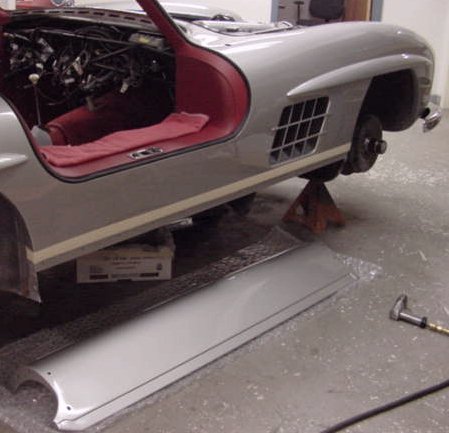
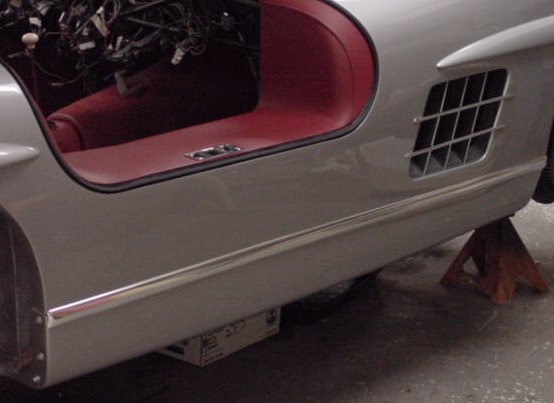
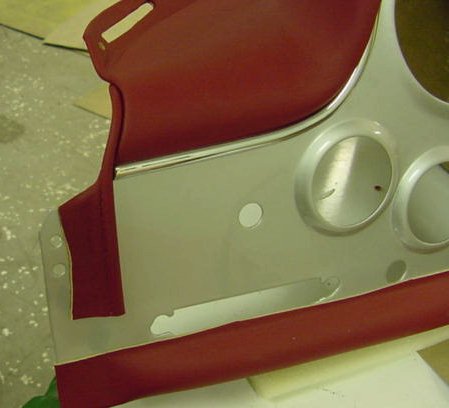
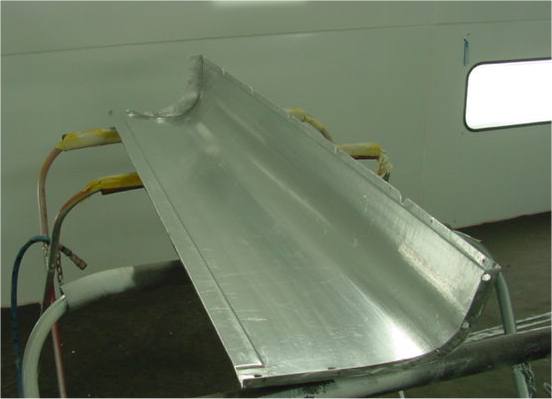
I am pleased to report that the doors are now installed and the glass is starting to go back into place. Lawrence has fitted and reworked the new aluminium rocker panels which are now in Cosme's hands and well into the painting process.Per your discussion with Justine, we have now ordered a period Becker radio for the car.
 |
 |
|
|
|
 |
 |
|
|
join - very clever stuff! |
 |
 |
|
|
|
 |
 |
|
screen using a new rubber seal |
modified and now in the paint booth |
 |
 |
|
high build (sandable) primer |
|
 |
 |
|
(sorry, couldn't find any McLaren Formula 1 pit crew shirts) |
|
David continues to make excellent progress with the Gullwing project. The following photographs show him trimming out the doors.
 |
 |
 |
 |
 |
 |
 |
 |
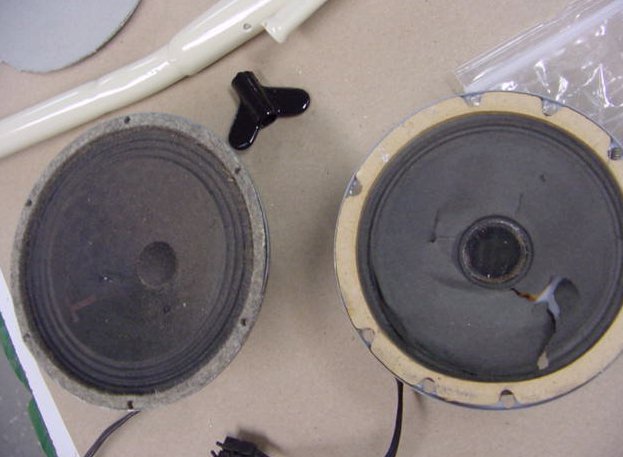
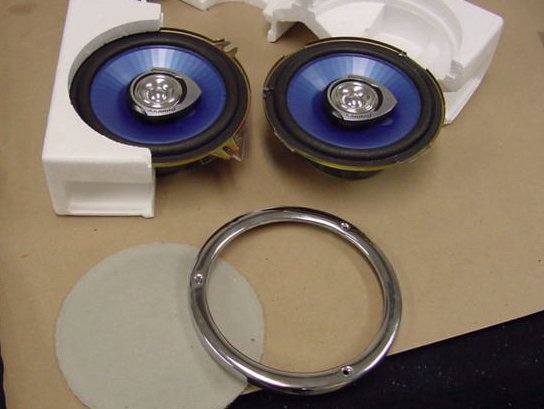
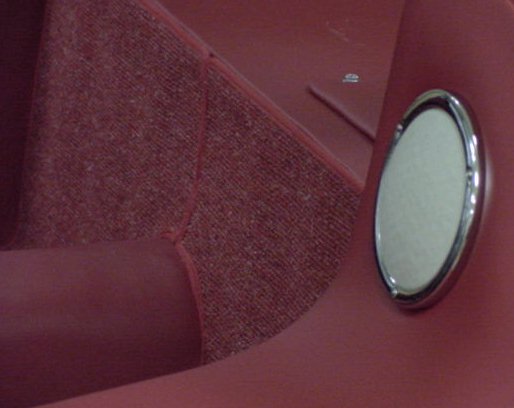
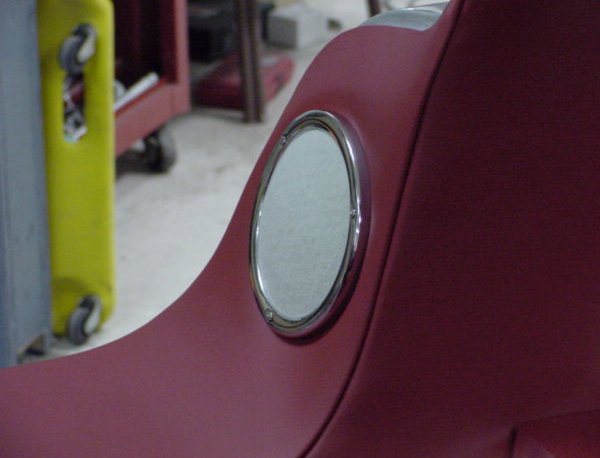
The speakers installed in your car were damaged and mis-matched. David managed to source a new pair that could be made to work given the limitations of the circular holes already cut into each of the B pillars. We also had to find something that would work with the original chrome trim rings. I think the following photographs show that David has done a splendid job providing you with mdern performance speakers with an entirely original look.
 |
 |
|
from the car, way back when |
|
 |
 |
|
map pockets |
from the chrome platers |
 |
 |
|
|
the entire automotive world |
 |
 |
|
|
|
 |
|
|
beautiful trimwork where the two hide panels meet |
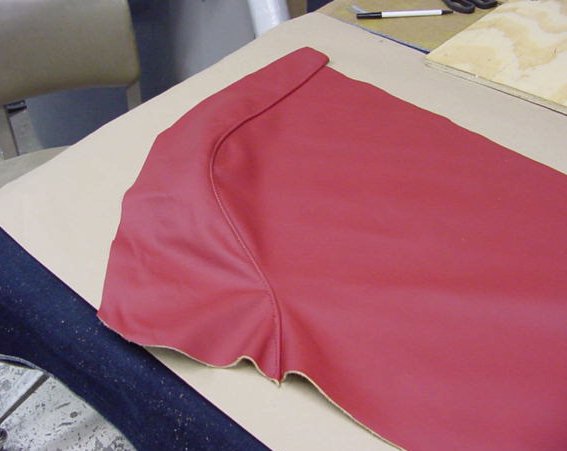
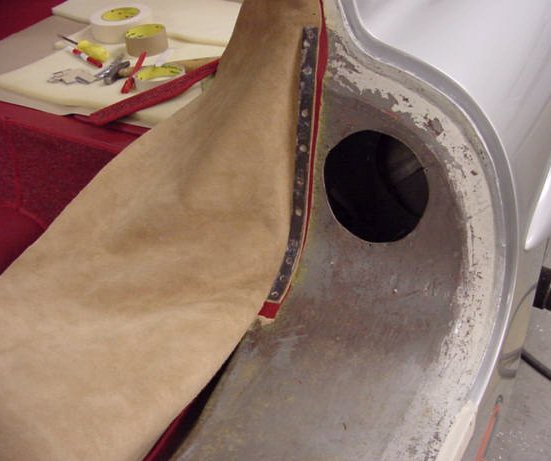
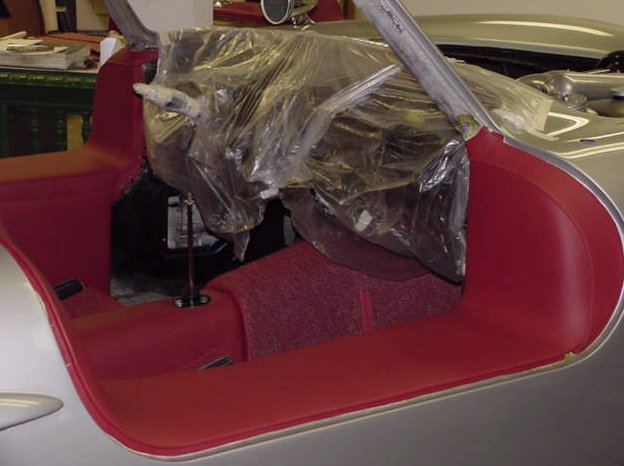
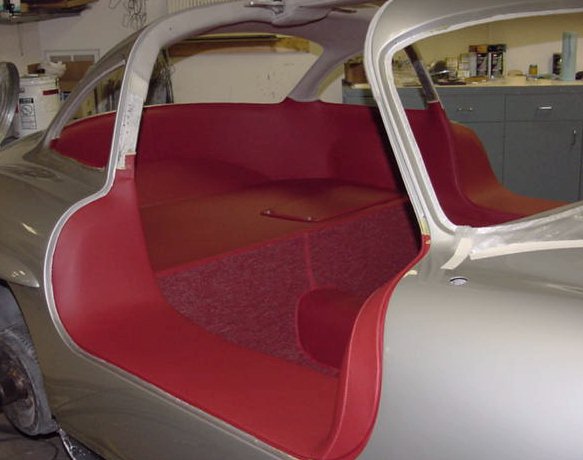
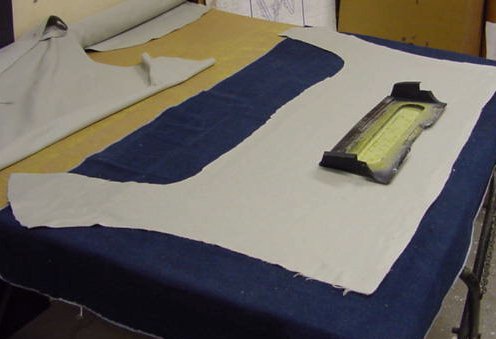
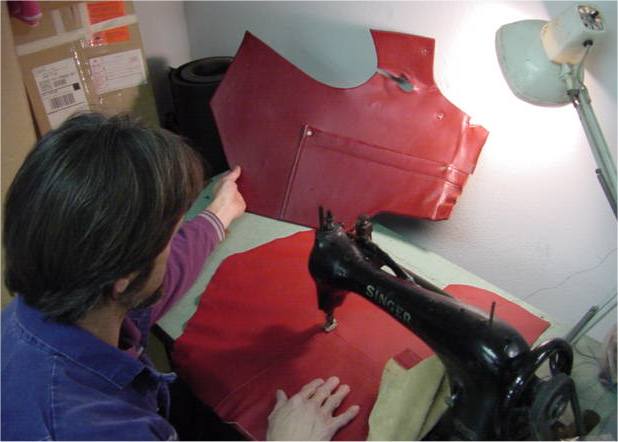
The following photographs show how David fabricated and installed the hides which trim out the side panels and the door openings, including the rather complex A and B posts.
 |
 |
|
|
scrupulously cleaned |
 |
 |
|
|
|
 |
 |
|
door openings and the A & B pillars |
get exactly right |
 |
 |
|
|
|
 |
 |
|
stitching in the earlier photograph |
|
 |
 |
|
David's craftsmanship |
|
 |
 |
|
|
|
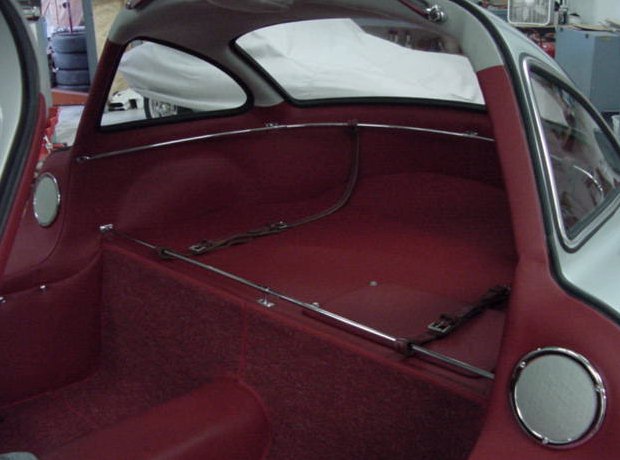
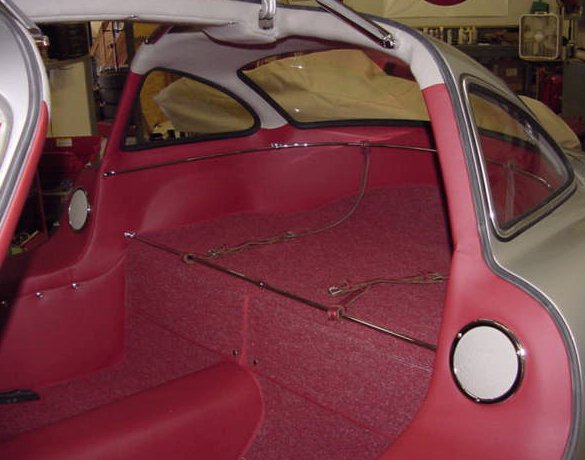
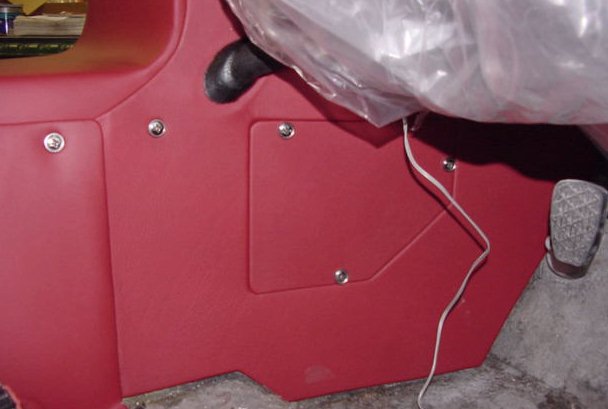
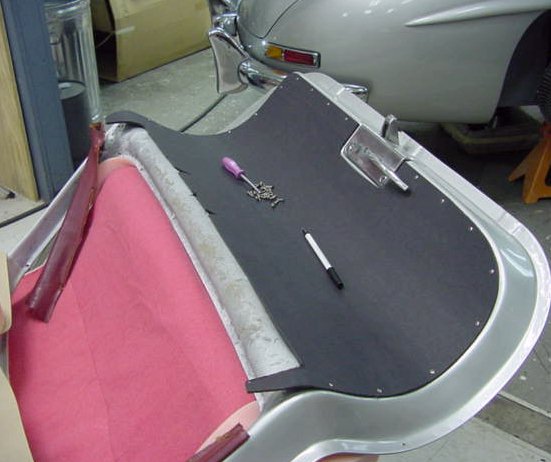
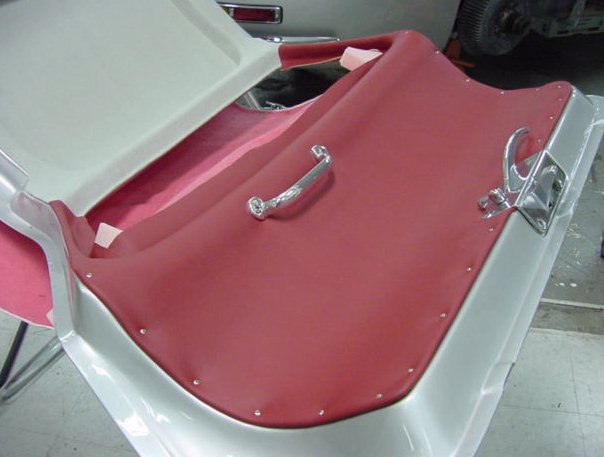
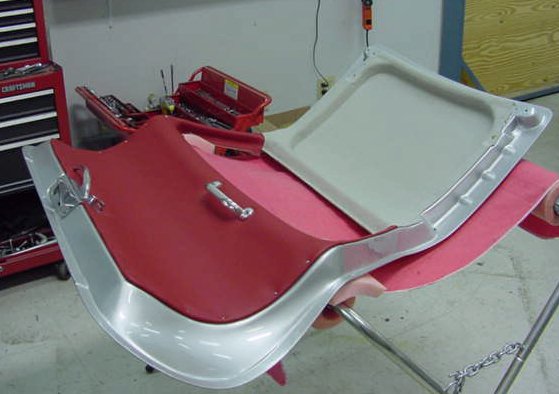
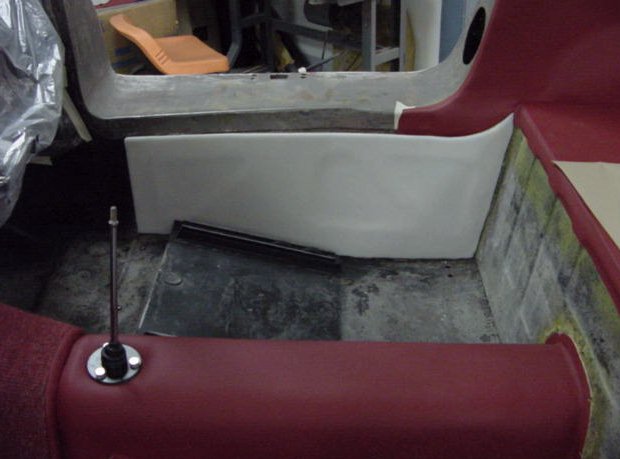
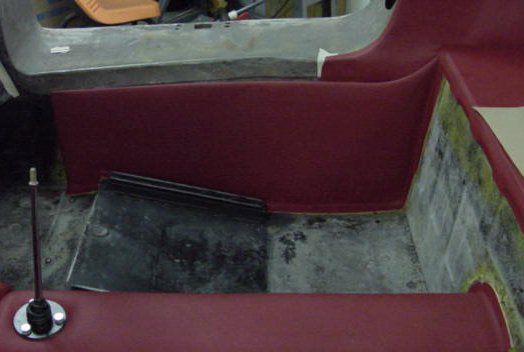
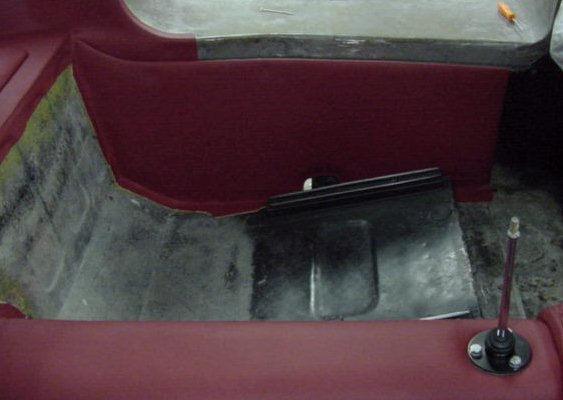
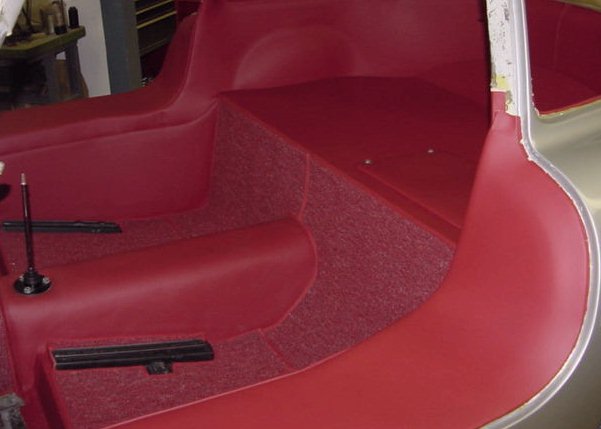
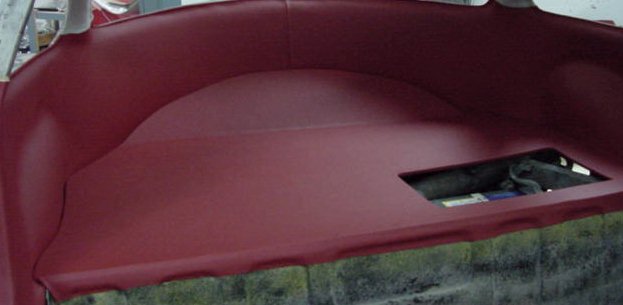
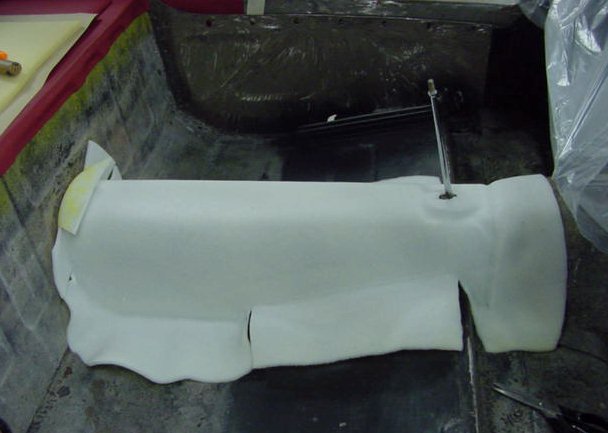
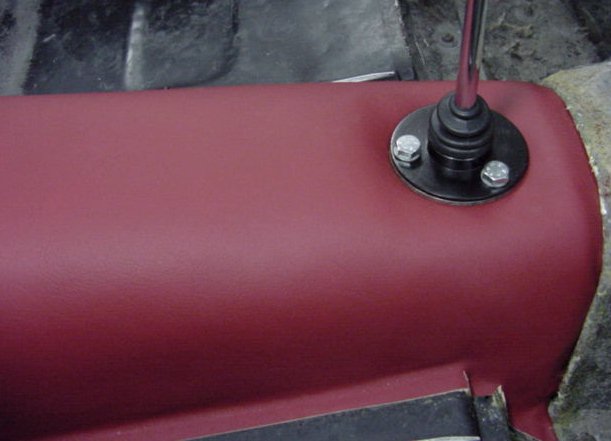
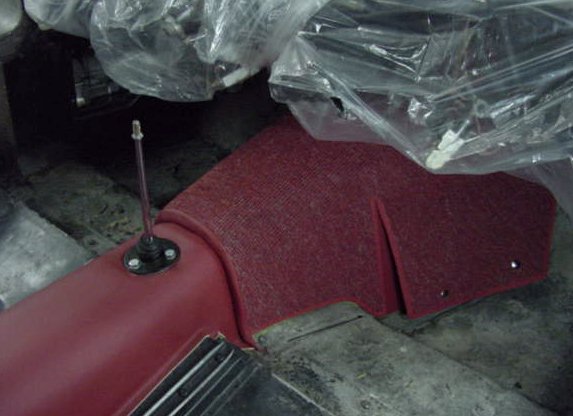
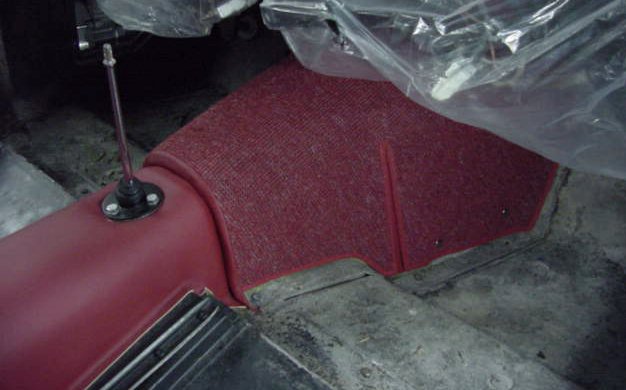
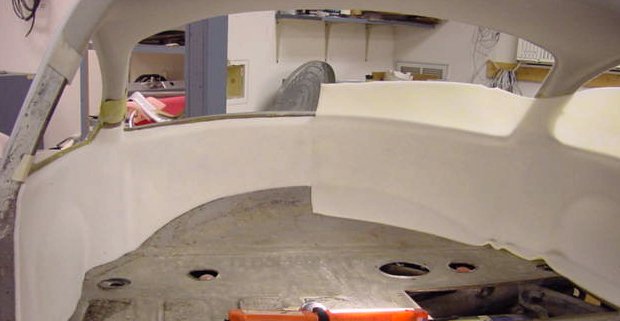
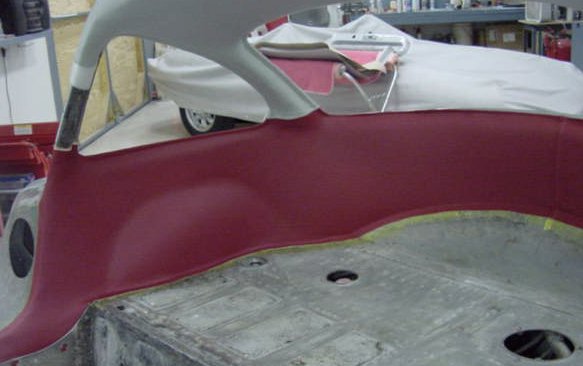
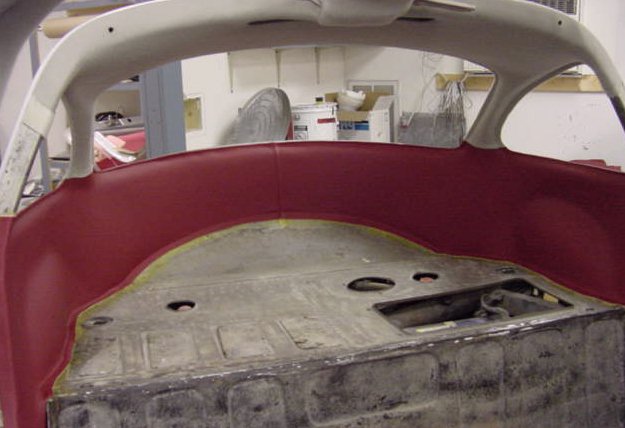
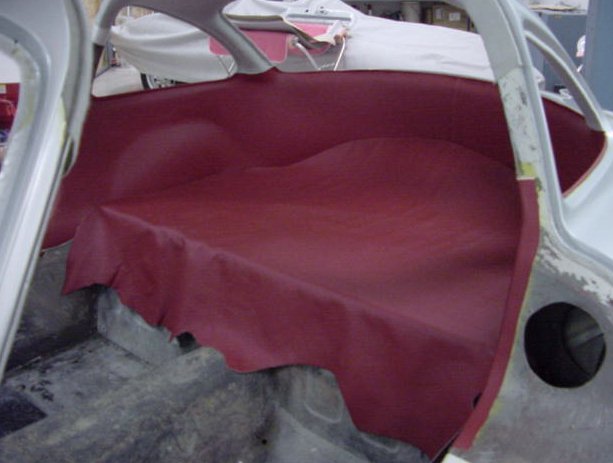
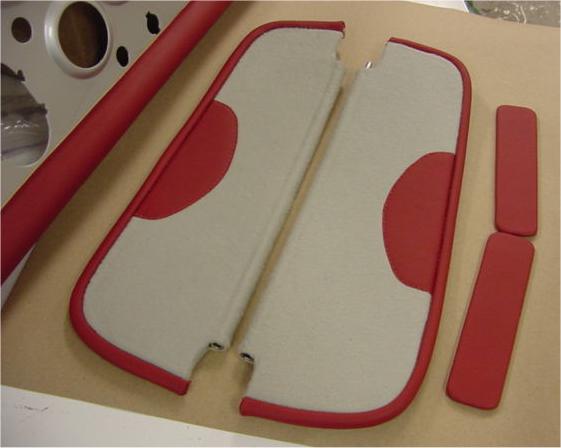
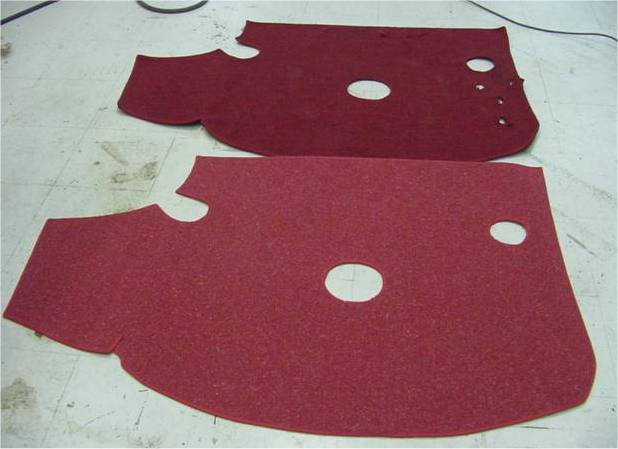
The removable hide panel on the rear deck now complete, David has turned his attention to the transmission tunnel. This area is trimmed with a combination of hide and square weave/leather bound carpet.
 |
 |
|
hole in rear deck |
with a tailored carpet |
 |
 |
|
with open cell foam |
|
 |
 |
|
|
covered |
 |
 |
|
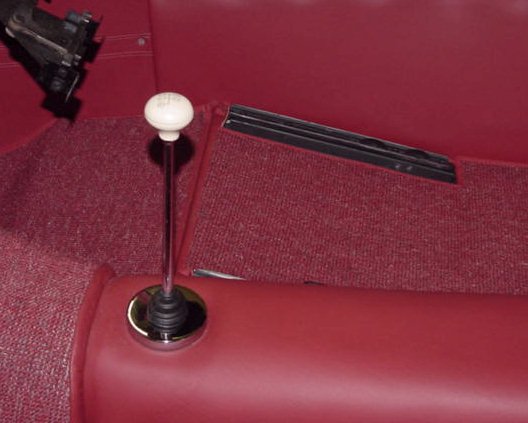
forward of the trans shifter |
|
 |
 |
|
panel sewn into the carpet |
the access to the transmission |
 |
|
|
|
More fabulous workmanship from Dave Doonan. I truly believe that this is 'as good as it gets'.
 |
 |
|
|
on the interior section - this can be very difficult to trim satisfactorily |
|
|
|
 |
 |
|
|
|
|
|
|
 |
 |
|
|
|
|
|
|
 |
 |
|
|
will not do |
|
|
|
 |
 |
|
come to that |
|
|
|
|
 |
 |
|
|
aluminium tub that is literally screwed to the steel side panels and the rear bulkhead |
|
|
|
 |
 |
|
of the aluminium tub |
|
|
|
|
 |
 |
|
|
aluminium floor pan sits in the well of the car - fascinating design |
|
|
|
 |
 |
|
the steel sheel |
restoration |
|
|
|
 |
 |
|
|
|
|
|
|
 |
 |
|
all the glue we were able to scrape from the side panel |
rear screen bulkhead where new hides are about to be installed |
|
|
|
 |
 |
|
(very forgiving) open cell foam to smooth things out |
he has managed to get the hide to follow the contour of the rear arch intrusions |
|
|
|
 |
 |
|
|
|
|
|
|
 |
 |
|
mat he is making for the rear deck |
|
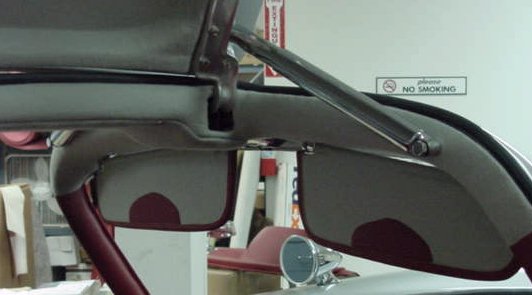
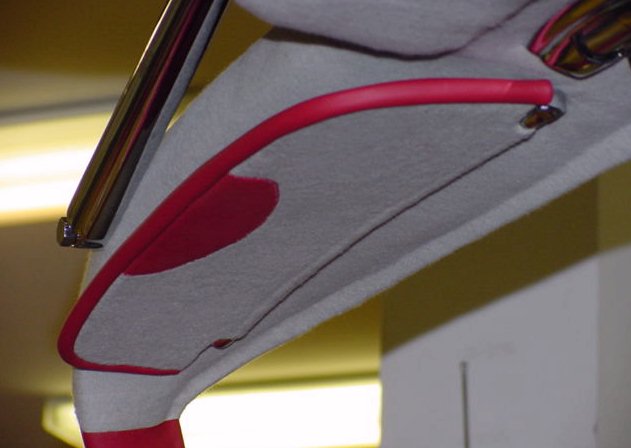
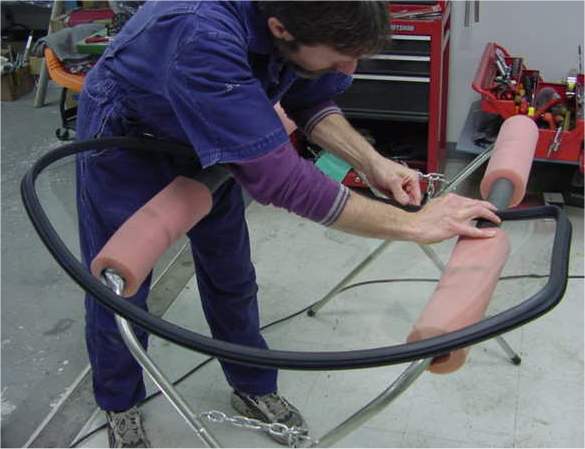
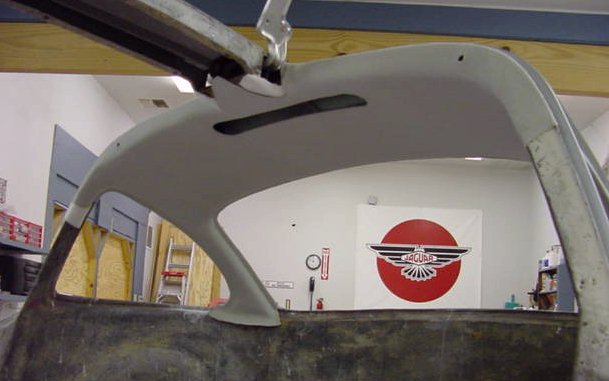
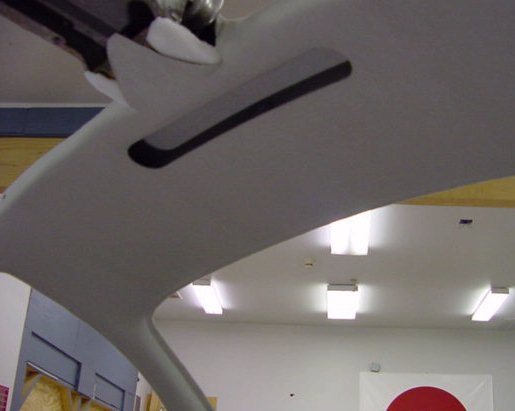
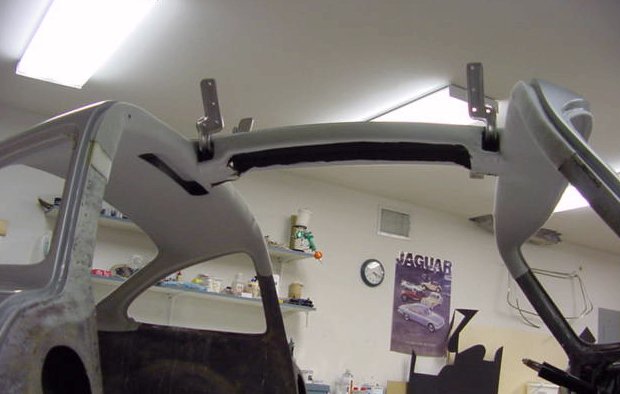
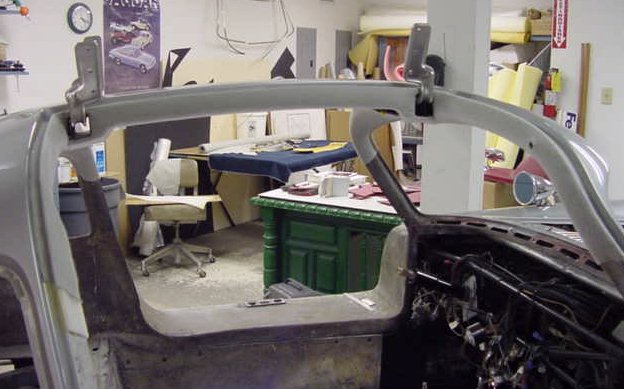
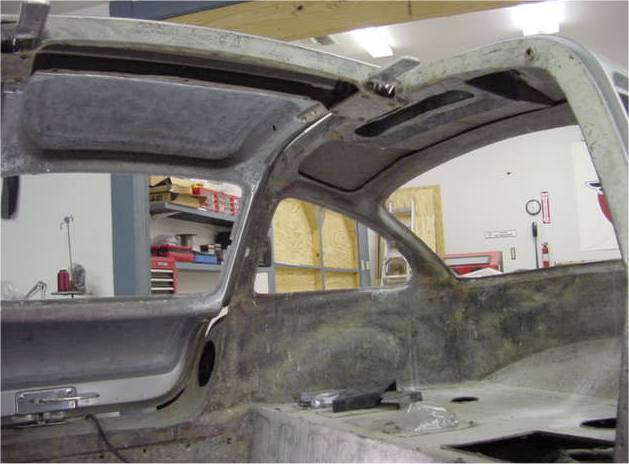
The following photographs show the installation of the new headliner. The area around the vents at the rear edge of the roof panel is particularly tricky.
 |
 |
|
and installed |
|
 |
 |
|
|
panel is extremely tricky to trim out |
 |
 |
|
separately |
|
 |
 |
 |
 |
|
prior to installation |
an E Type Jaguar! |
 |
 |
|
a superb job |
before being reinstalled |
 |
|
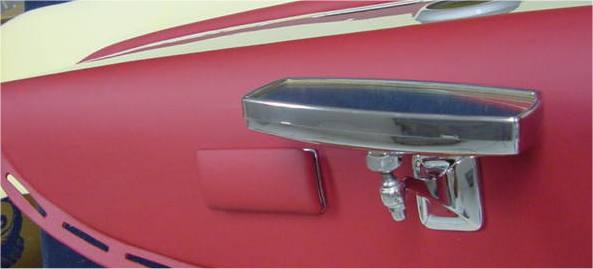
With the chrome starting to go into place, the car really is beginning to look awesome.
 |
 |
|
|
|
 |
 |
|
|
|
 |
 |
|
the job off |
|
 |
 |
|
|
|
 |
 |
|
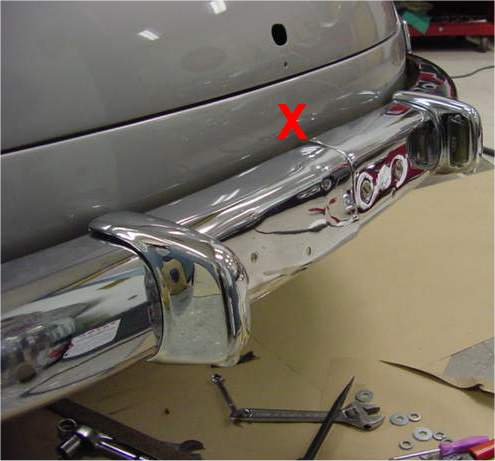
could be saved - there was extensive damage at the joint (marked X above) |
|
 |
 |
|
|
|
 |
 |
|
|
|
 |
 |
|
|
to form the grill immediately infront of the screen |
 |
 |
|
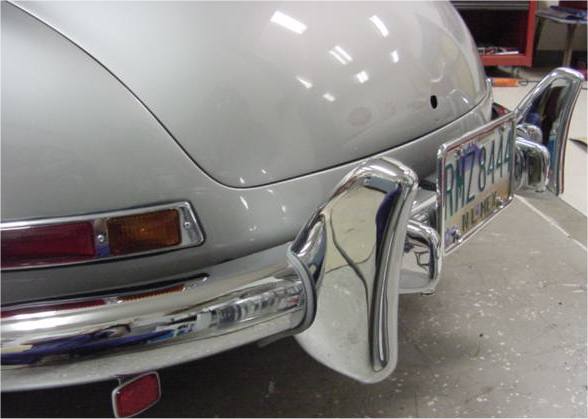
is installed at the point marked X |
gullwing doors |
 |
 |
|
|
|
 |
 |
|
|
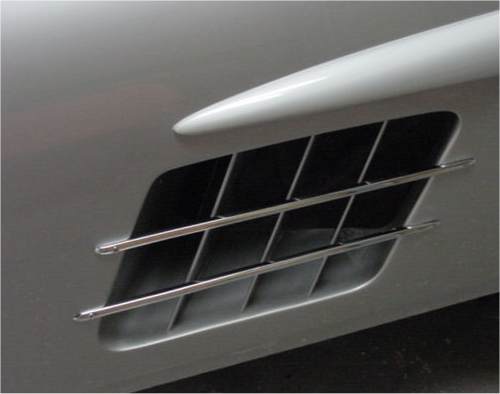
the cowl grill |
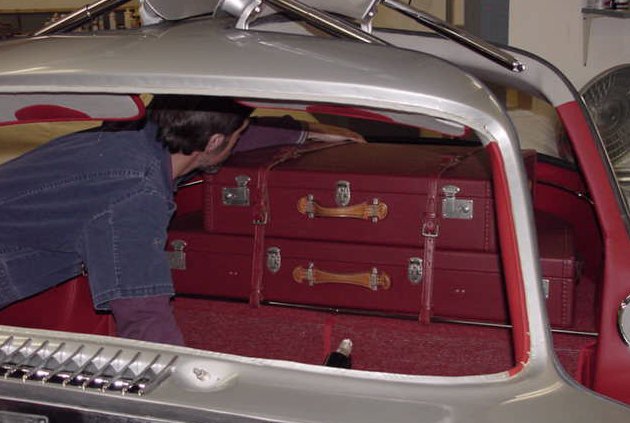
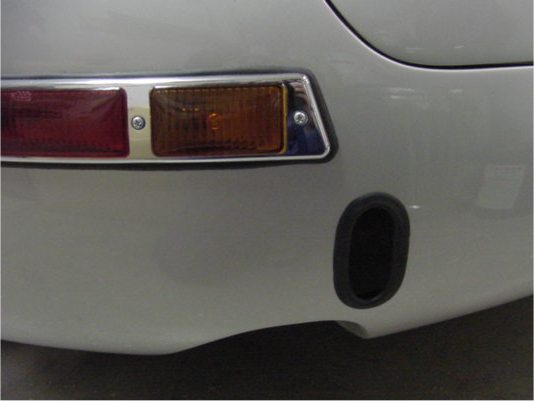
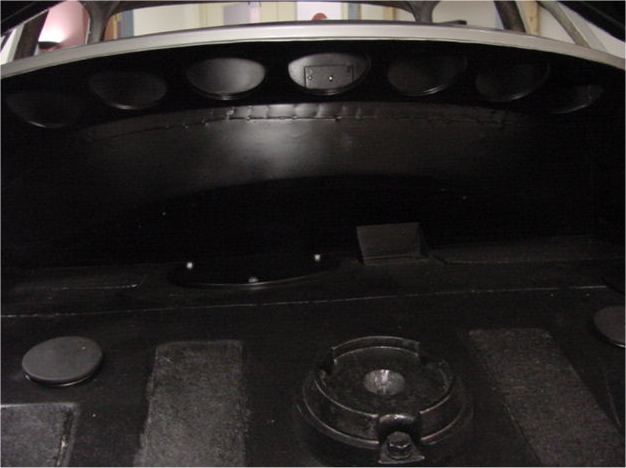
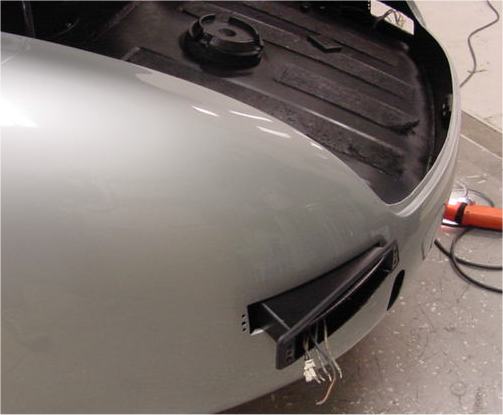
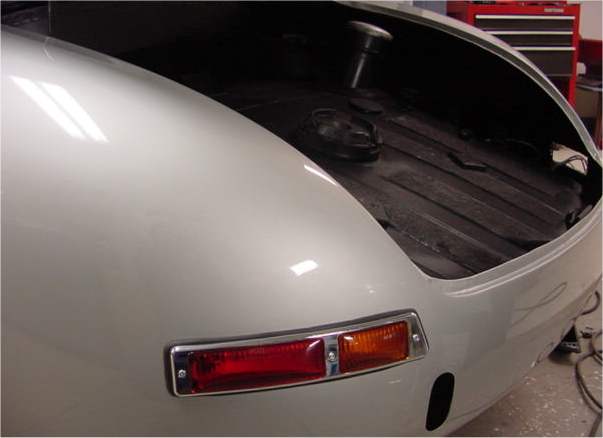
The following photographs show David cleaning up the boot compartment, making and installing the new boot carpets, installing the new lights and badges, etc. He is making excellent progress.
 |
 |
|
|
|
|
|
|
 |
 |
|
|
|
|
|
|
 |
 |
|
back lights |
|
|
|
|
 |
 |
|
|
old mat as a template |
|
|
|
 |
 |
|
|
|
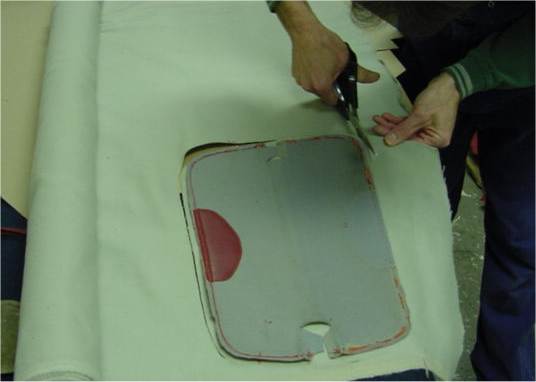
I thought you might enjoy seeing a few more examples of David's excellent trim work.
 |
 |
|
scratch exactly as per the originals |
|
 |
 |
|
|
|
 |
 |
|
except the original (top) is faded and dirty |
|
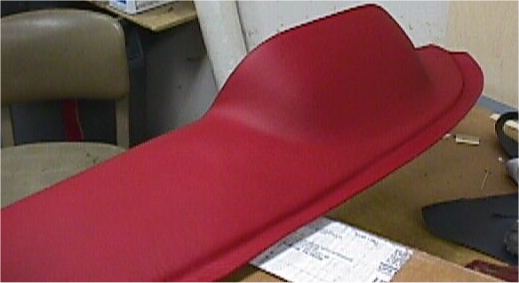
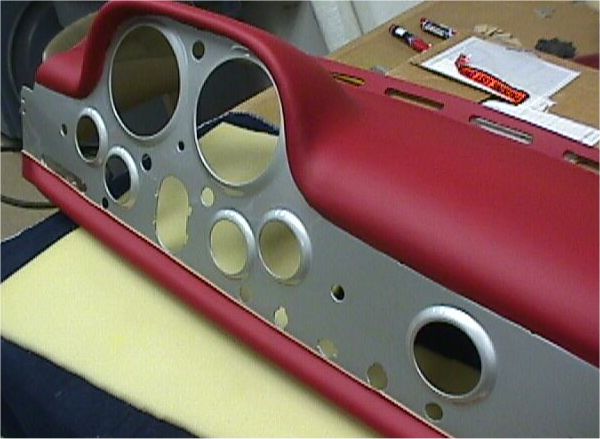
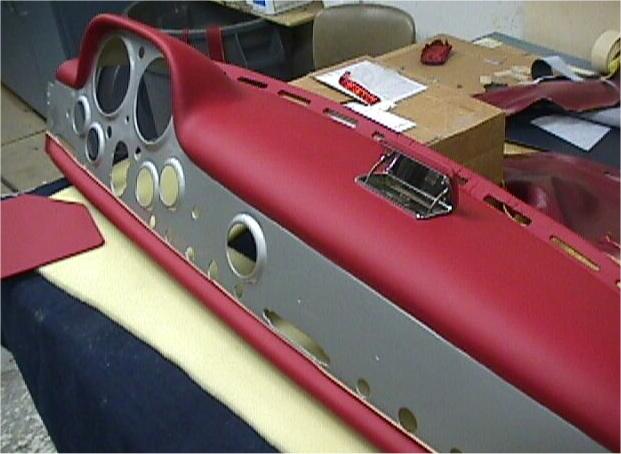
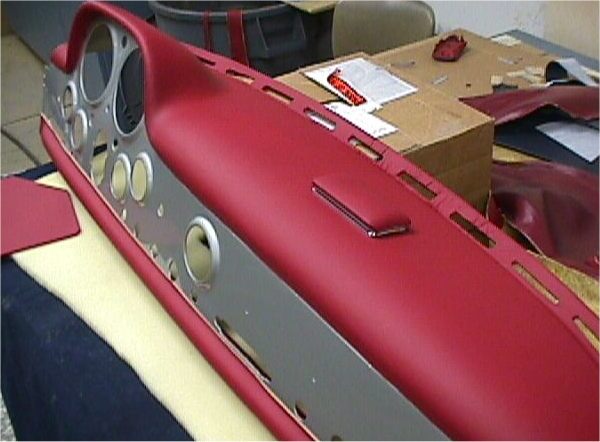
Right on schedule the Gullwing is now with David in the trim room. The following photographs show that he is already making some great progress. The dash was particularly tricky, given all the curves and contours, but hopefully you will be able to see from the photographs that David has done a truly superb job.
 |
|
with map pockets using the original as a template |
 |
 |
|
|
as templates) |
 |
 |
|
|
the outer edges of the hides thinner so they can be wrapped around panels without wrinkling - this is an extremely skilled (and risky) operation! |
 |
 |
|
cows can be seen in the background |
|
 |
 |
|
|
is very difficult to trim out - the leather has to be heated and stretched in order to follow the contours properly |
 |
 |
|
|
|
 |
 |
|
I am 18 days without a Marlboro, Juan? |
|
 |
 |
|
|
against the dash will be replaced - it is pretty beaten-up and is relatively cheap |
 |
|
shown at the bottom of the picture - believe it or not a new replacement is literally thousands of dollars |
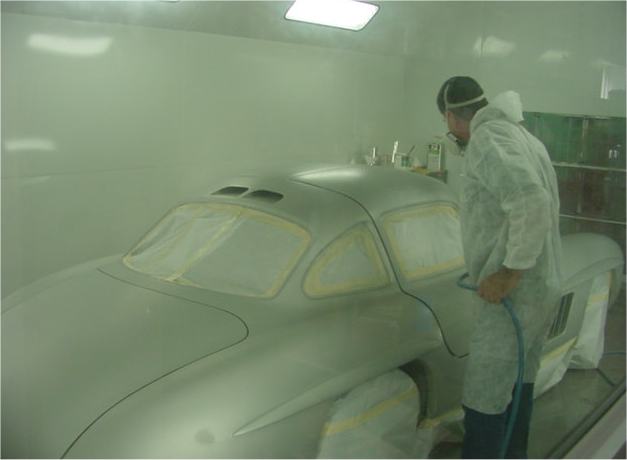
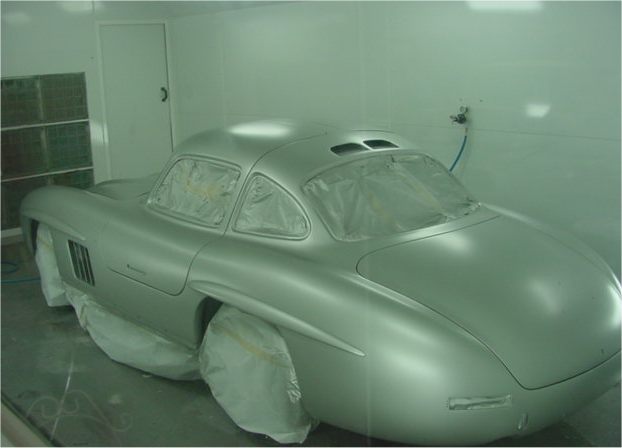
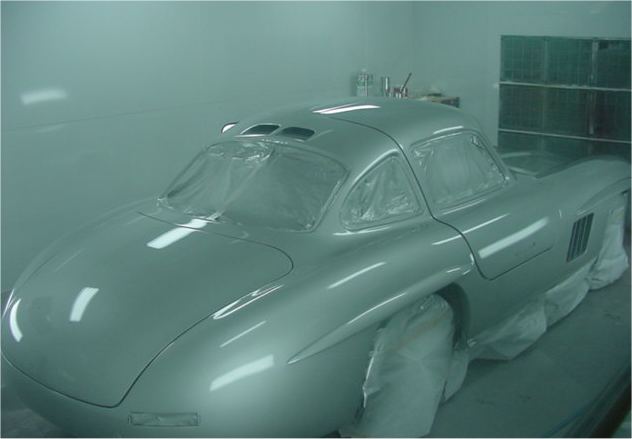
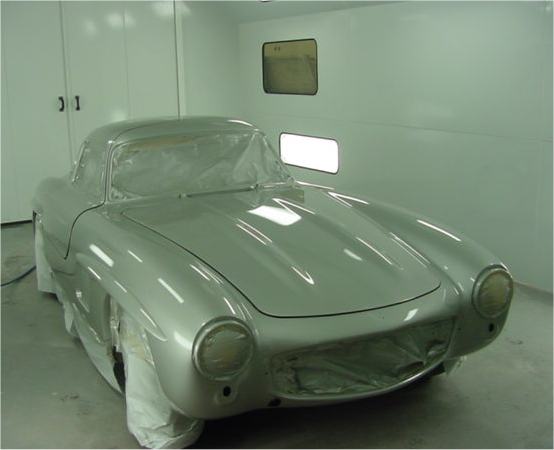
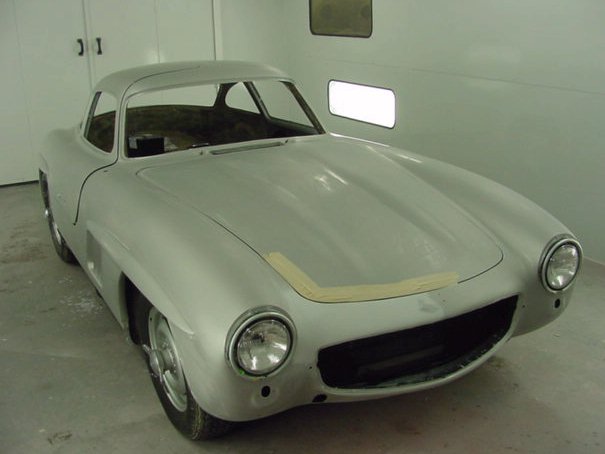
As you can see, the car has now been painted and I am pleased to report that the finish (and colour) are both absolutely perfect.
 |
 |
|
|
|
 |
 |
|
|
|
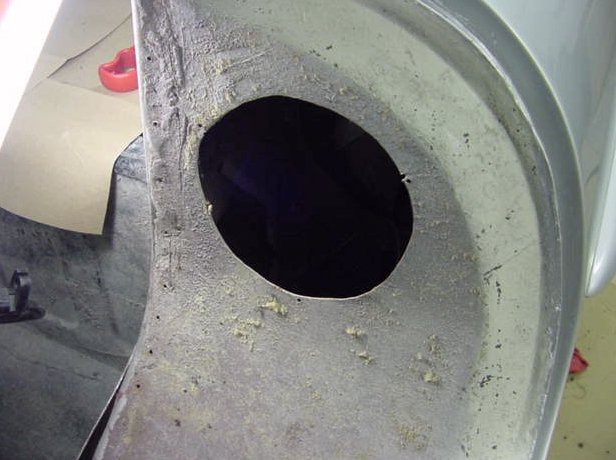
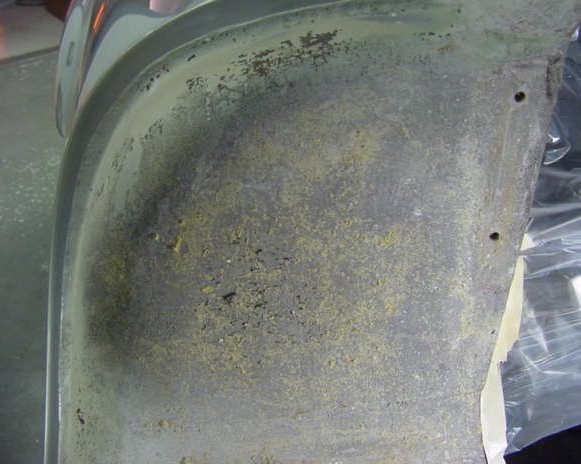
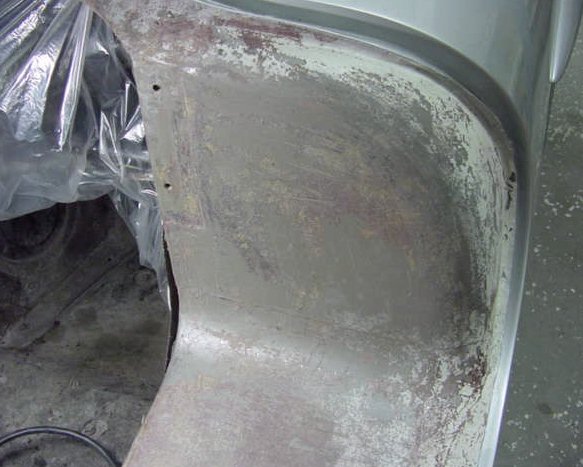
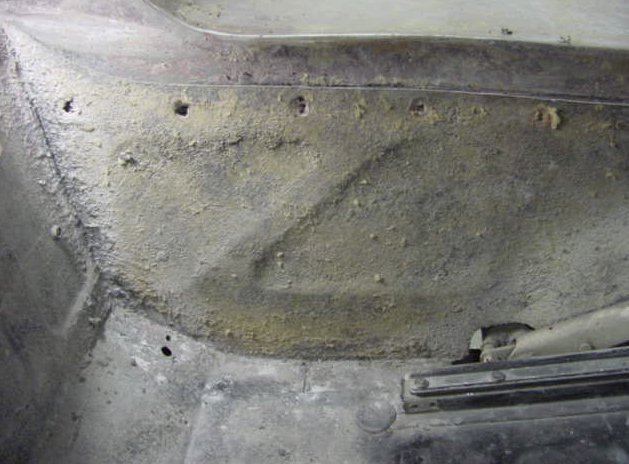
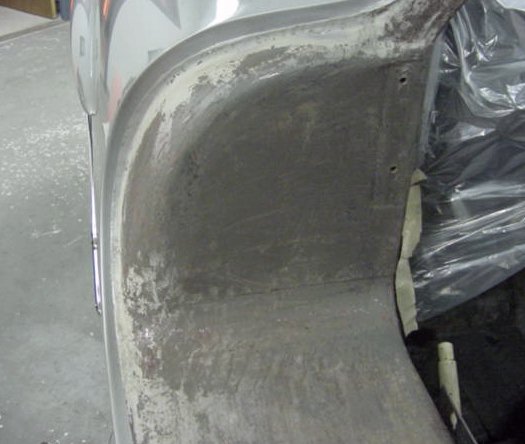
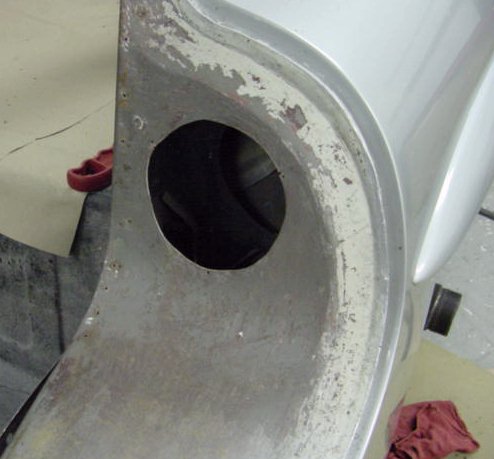
John having gone as far as he can on the mechanicals (without being able to drive the car), we now have the bodywork and paint well underway. Cosme has finished the painstaking process of sanding down the entire car and has already repaired the front valance, rear boot lid, the dent in the passenger door and the rough areas around the front wing vents.We have the correct Mercedes Silver (DB 180) in hand and we are scheduled to repaint the car later this week.
At this time we are still waiting for the new exhaust, new outer sill cover panels and a few other sundry items - although nothing which need delay Cosme's schedule.
 |
 |
 |
 |
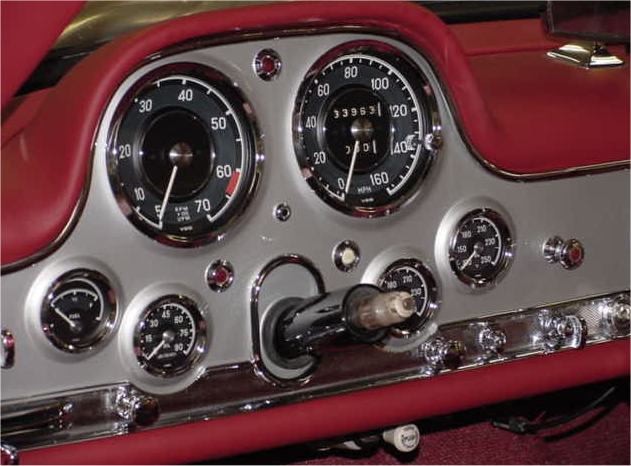
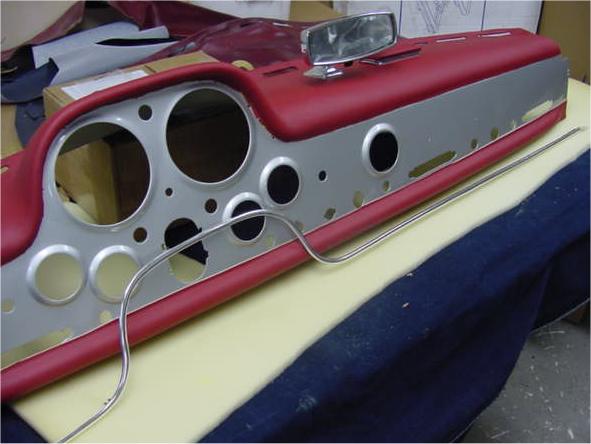
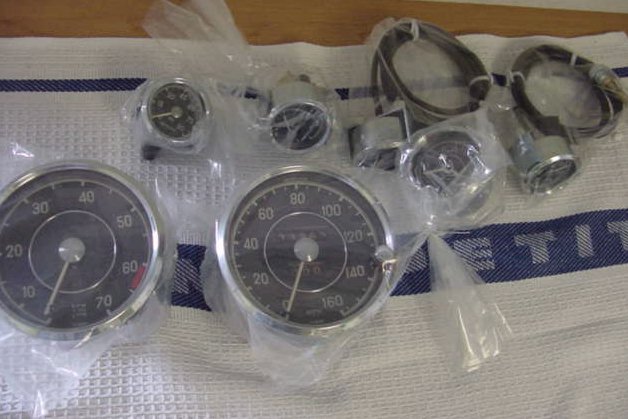
As you can see, we have now received all the Gullwing instruments back. If they work as well as they look, we will be in excellent shape.As the dash is such an intrinsic part of the interior, we have decided to temporarily install the minor gauges we need in order to complete and test run all the mechanical components of the car. Once I am satisfied that the car is completely finished mechanically, it will be time for David to trim out the interior and reinstall all the glass and chrome.
John will begin the mechanical work this week and we hope to hand the car over to David towards the end of next week.
Incidentally, we managed to obtain all the rubber seals for the car through the Mercedes Benz factory in Germany. They have been a pleasure to work with and provided us with a number of parts which we did not think would still be available.
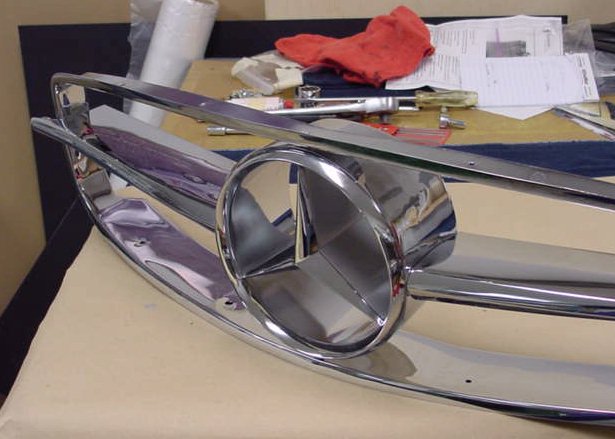
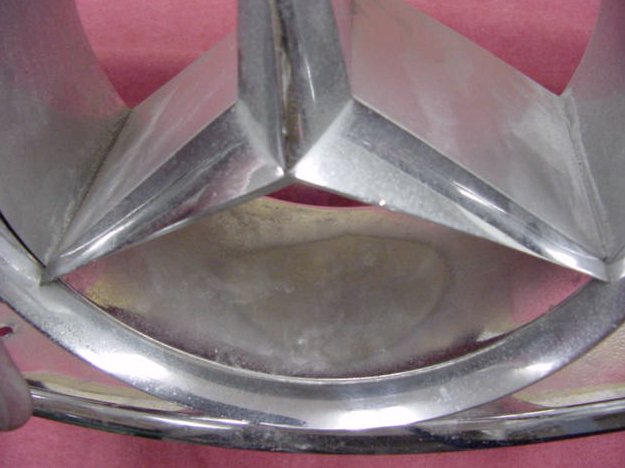
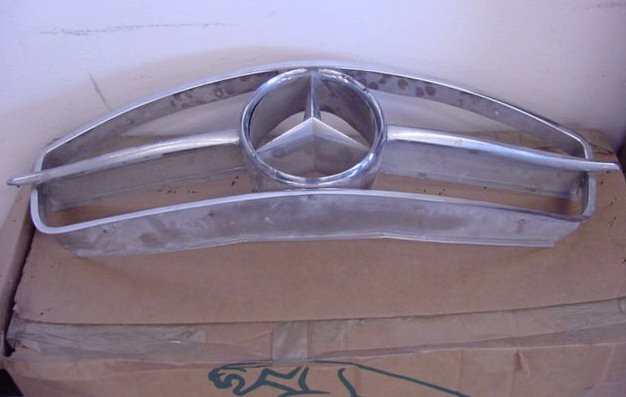
The grill during disassembly. It has now been submitted for replating.
 |
 |
 |
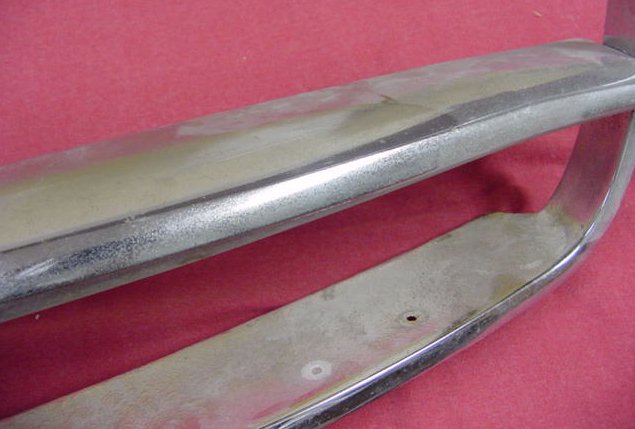 |
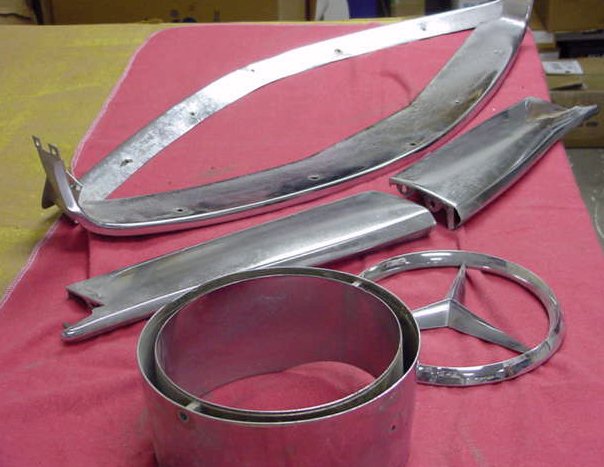
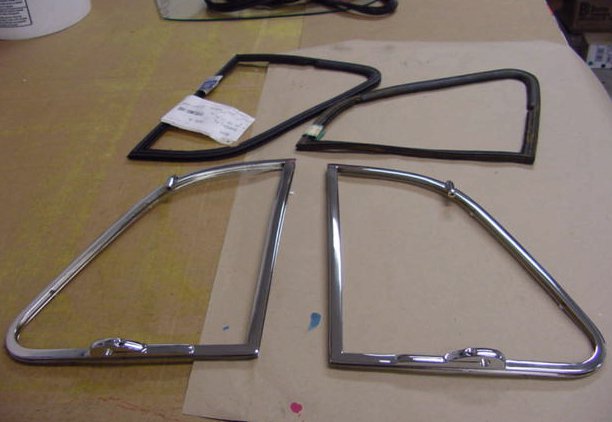
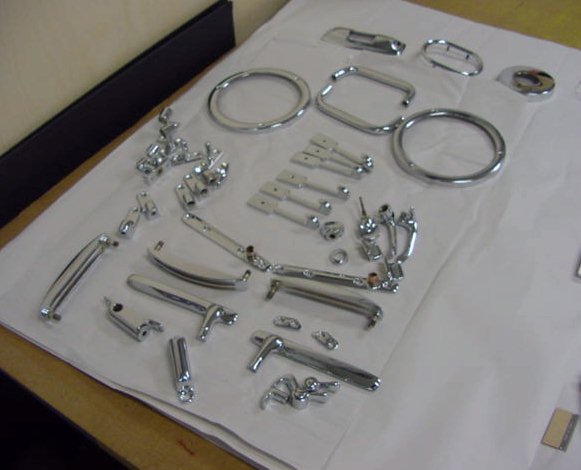
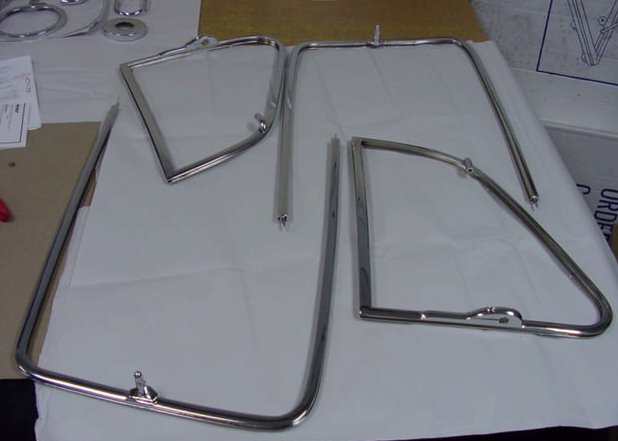
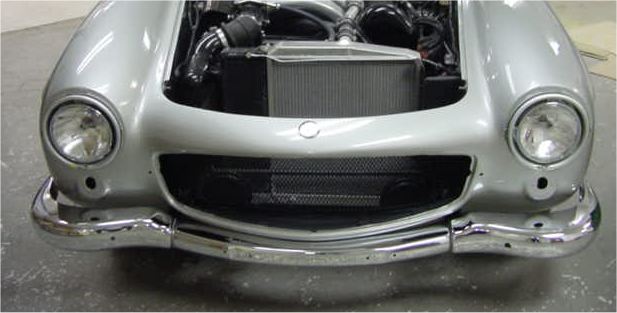
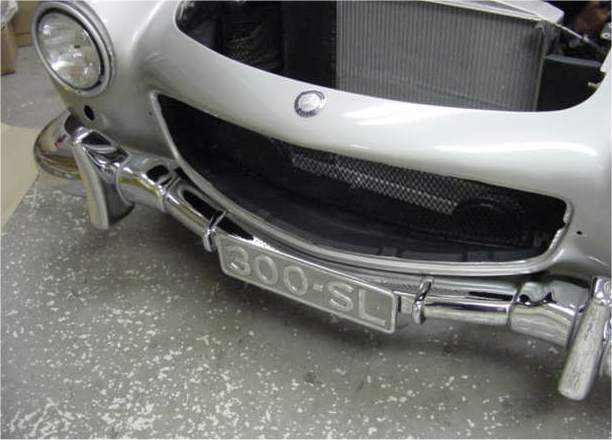
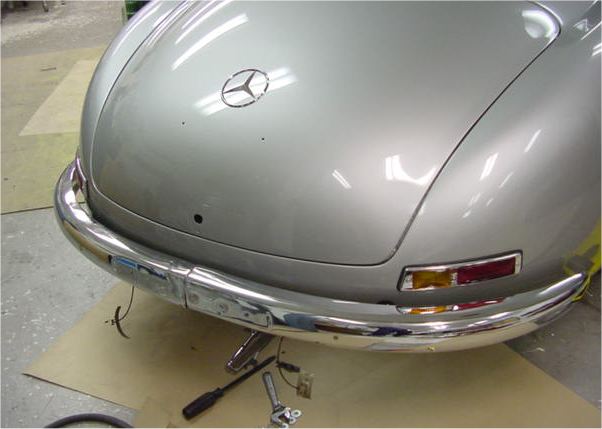
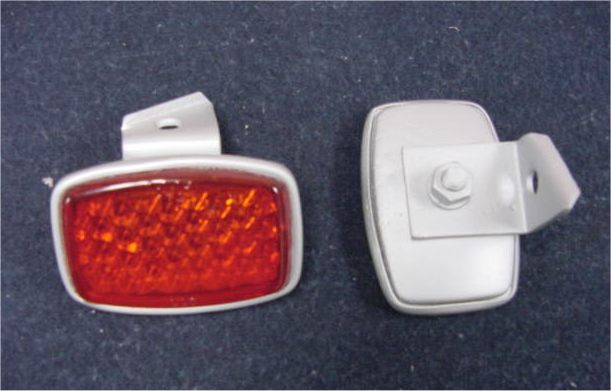
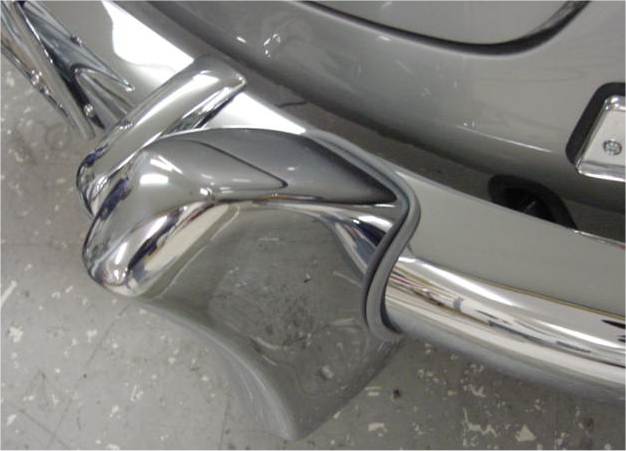
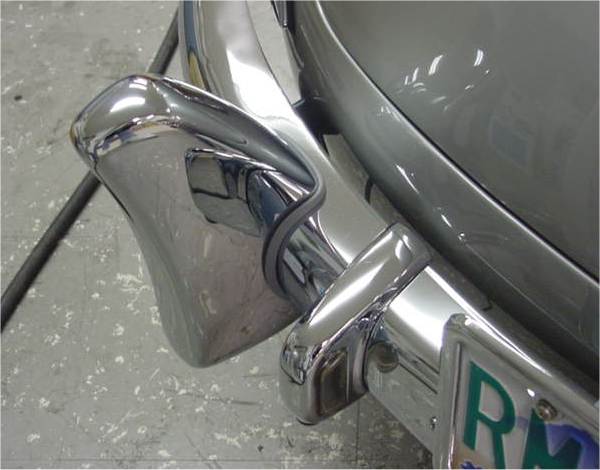
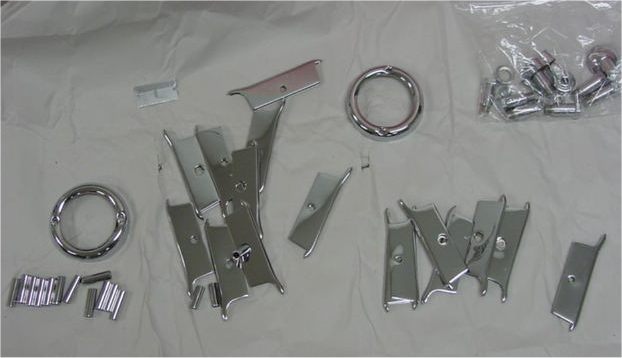
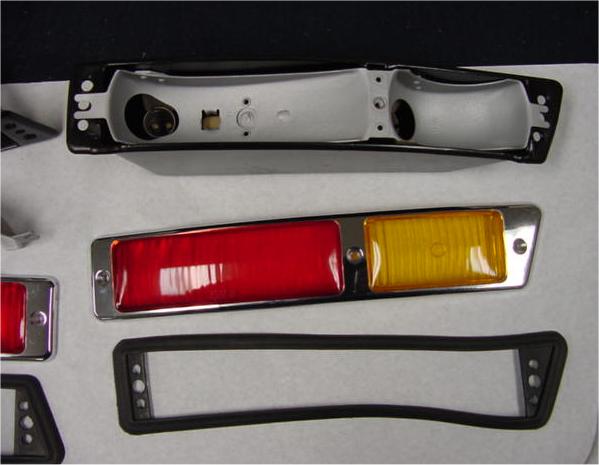
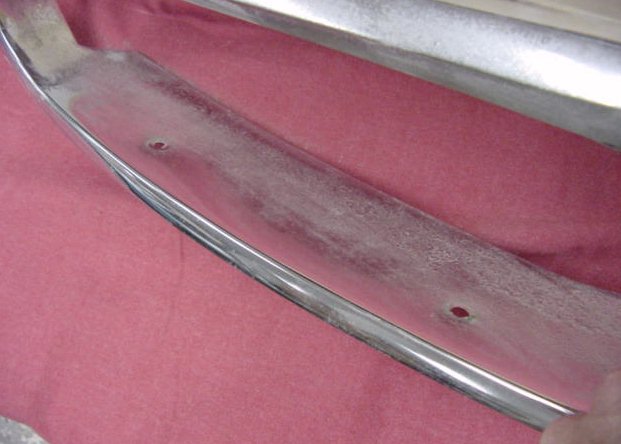
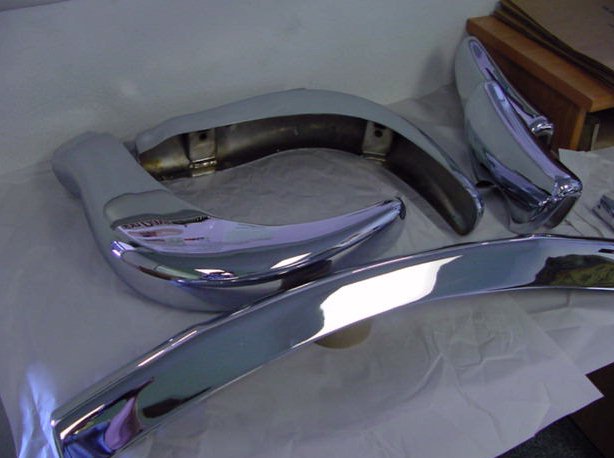
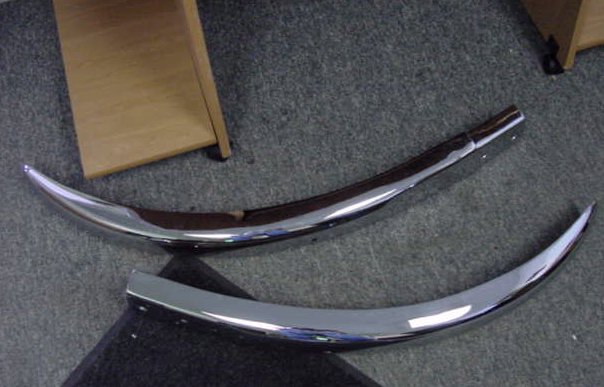
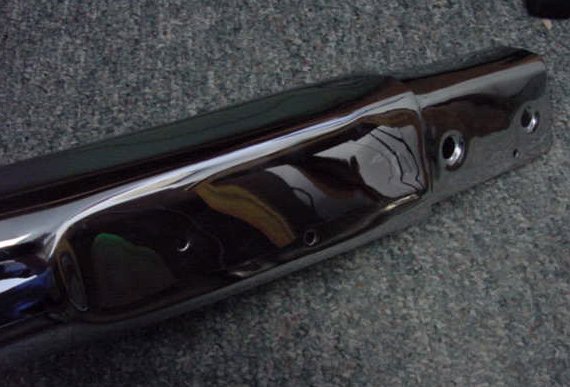
We now have the majority of the replated chrome back, excepting some of the window brightwork and the main front grill. I deliberately did not submit the grill with everything else as it has to be carefully disassembled first and I was concerned about getting all the various pieces back! I have included a photograph of the grill before disassembly as it is a good indication of what all the chromework was like before replating.I had been worried that we might not be able to save the main two piece bumper assembly but I am very pleased with the repair that was done. Needless to say, we went for the highest quality plating available.
 |
 |
 |
 |
 |
 |
I am delighted to report that as of yesterday evening, we finally have the Gullwing back home.I will update this page regularly for you as the car goes back together and I can confirm that the next stage of the restoration is already underway.
 |
 |
|
the dash goes back together (just kidding) |
|
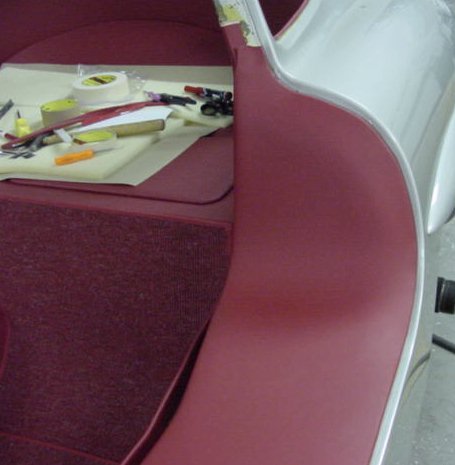
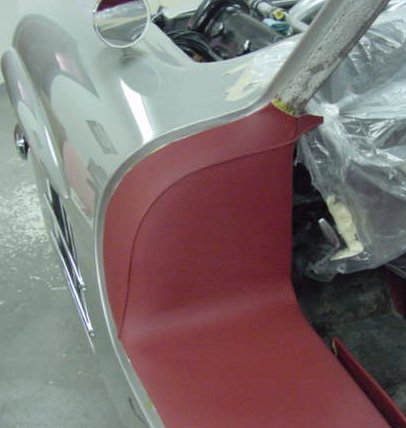
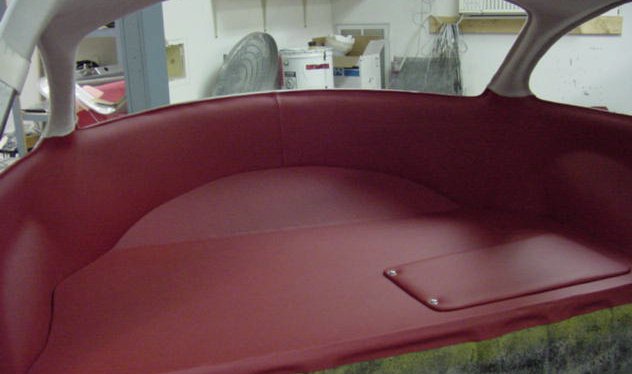
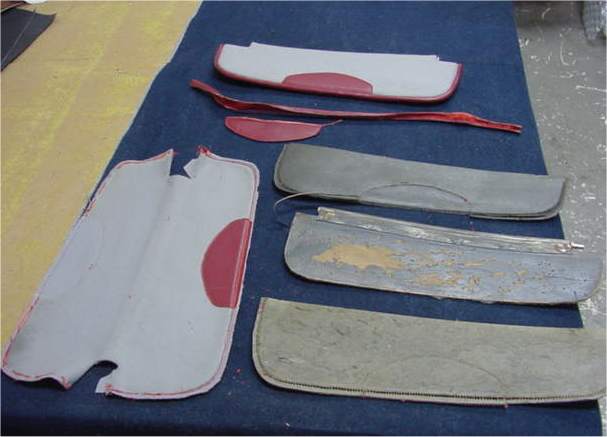
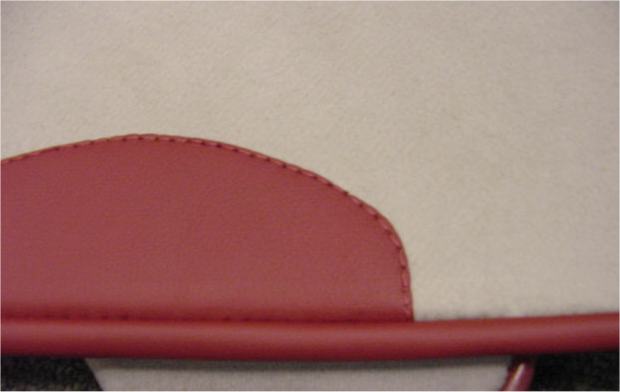
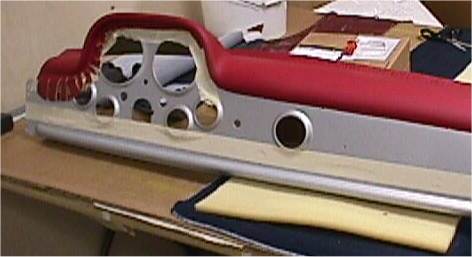
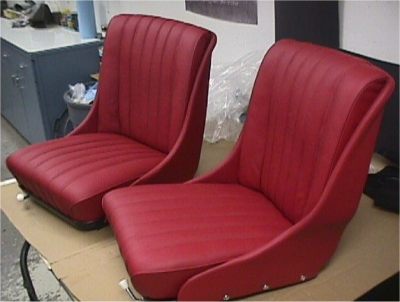
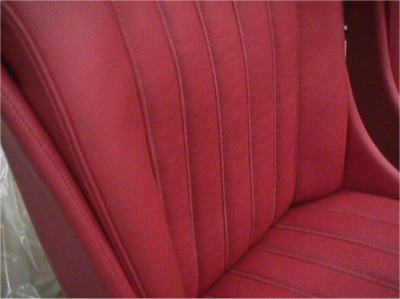
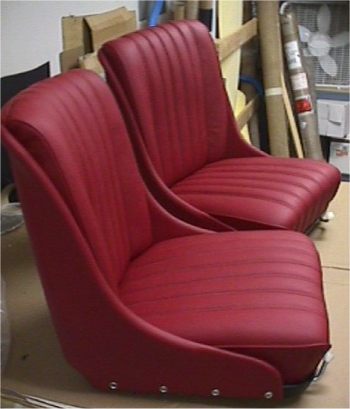
In the following photographs you can see the seats freshly trimmed in the new hides.
 |
 |
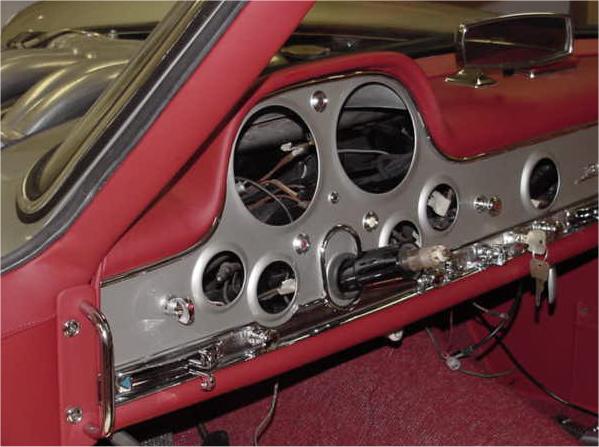
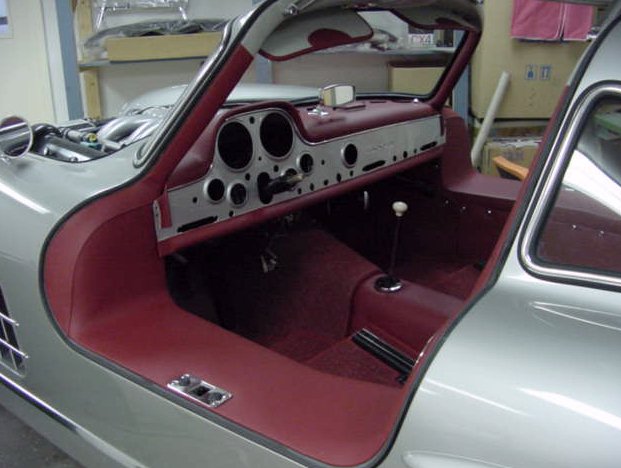
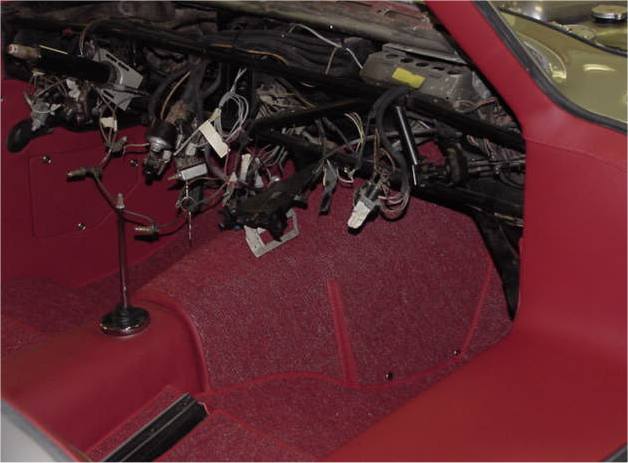
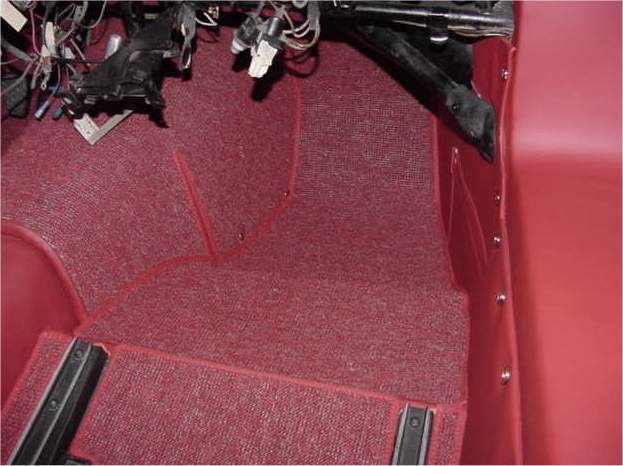
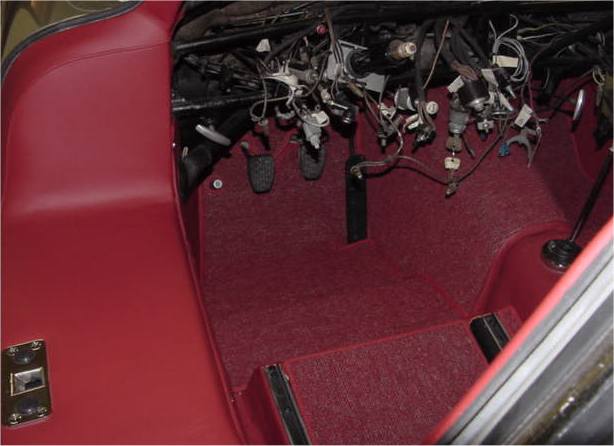
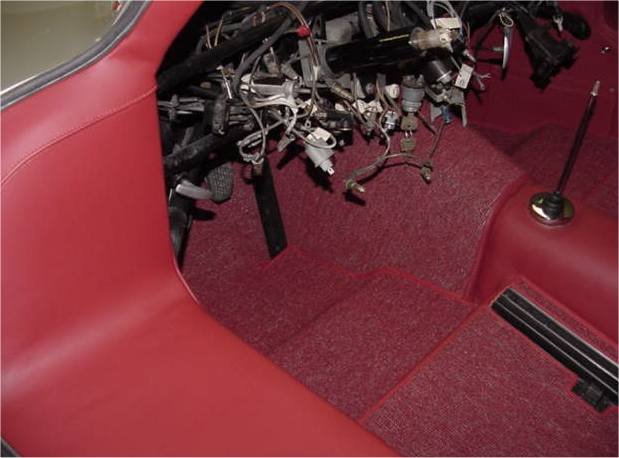
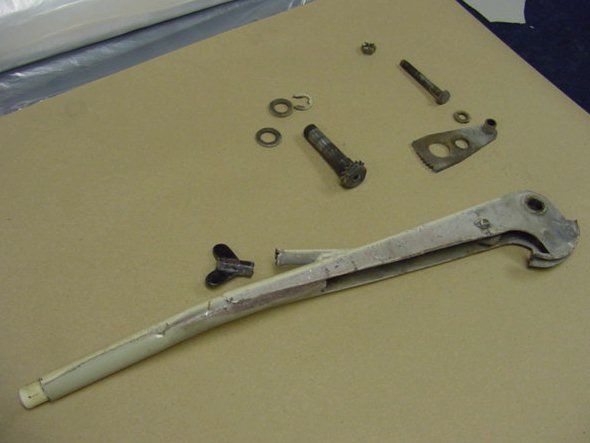
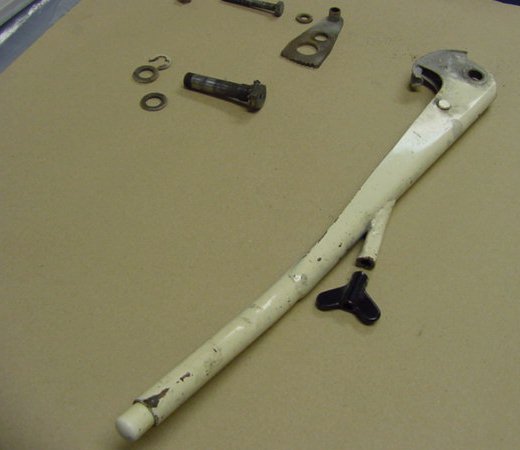
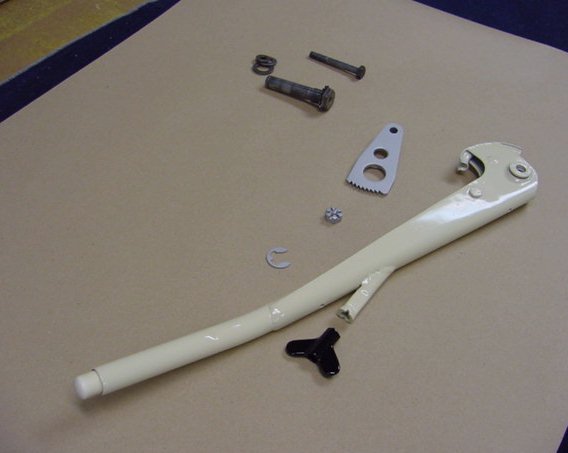
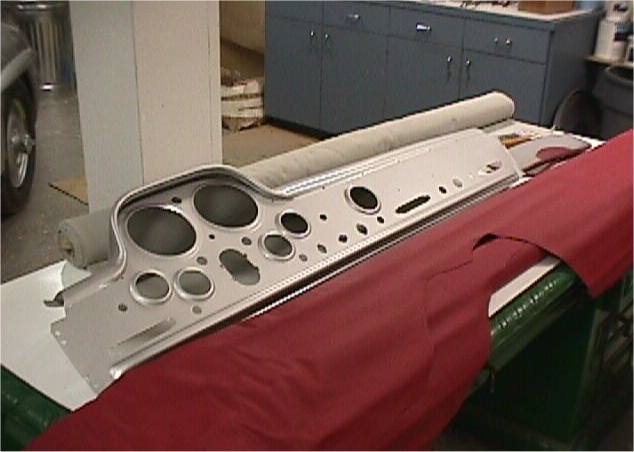
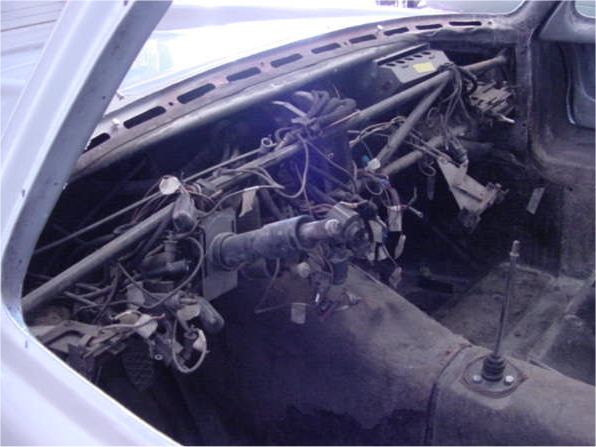
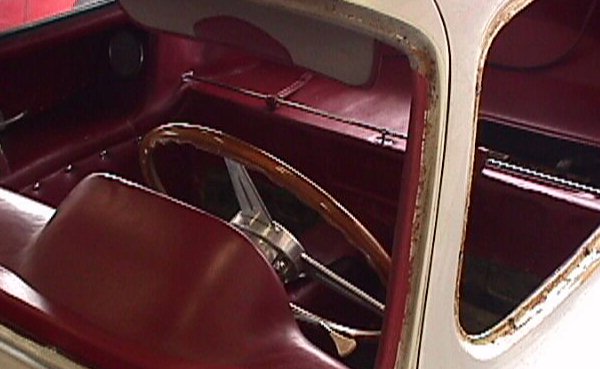
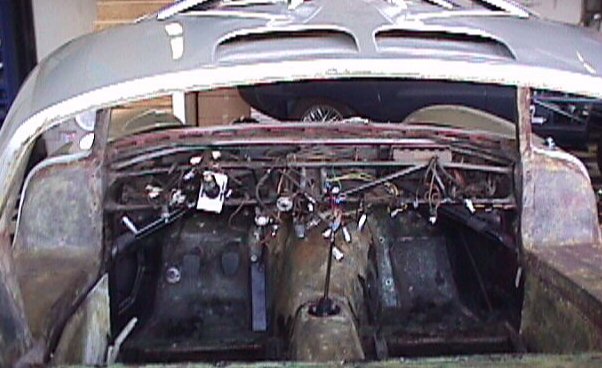
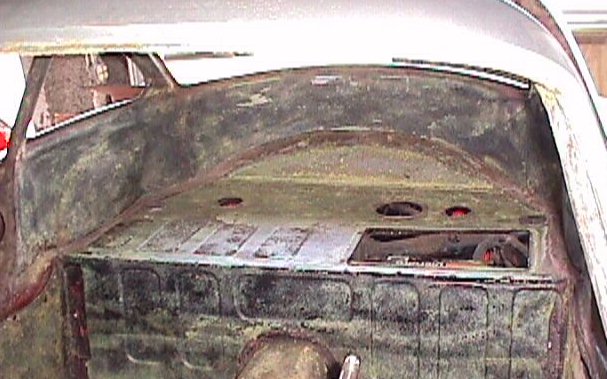
The following photographs show the complete removal of all the glass, chrome, interior trim and electrical components.Look closely at the photographs of the dash and you will see how the harness has been attached and secured using a series of leather belts and buckles - just too cool for words!
We hope you are enjoying watching the restoration unfold.
 |
 |
 |
 |
 |
 |
 |
 |
 |
 |
 |
 |
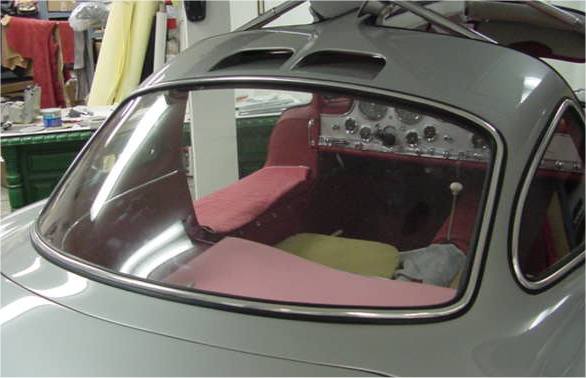
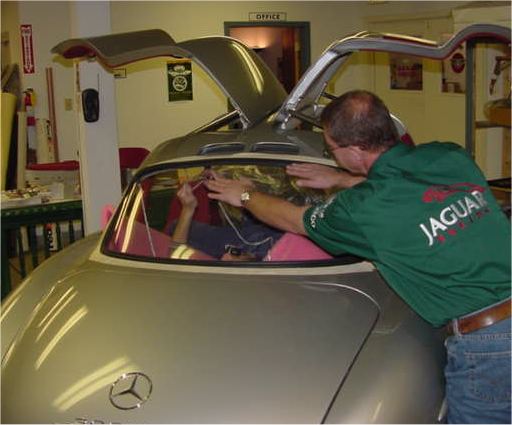
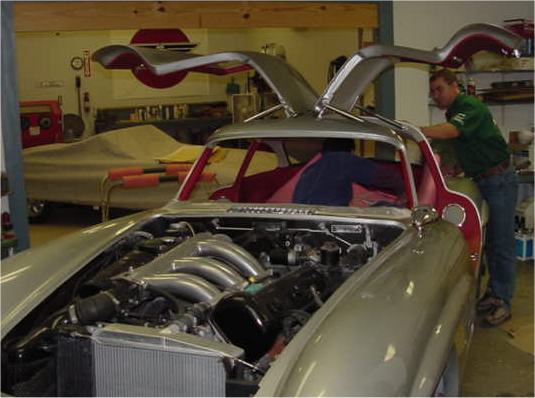
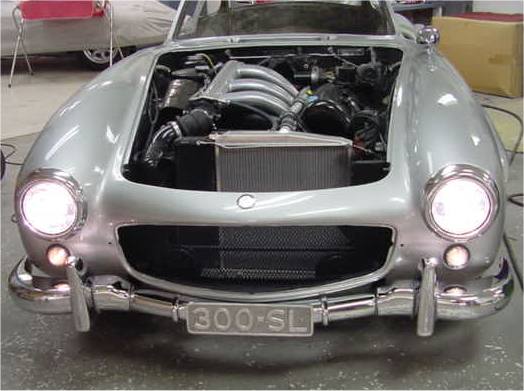
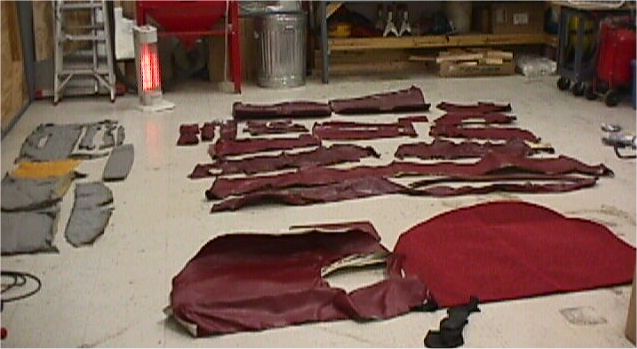
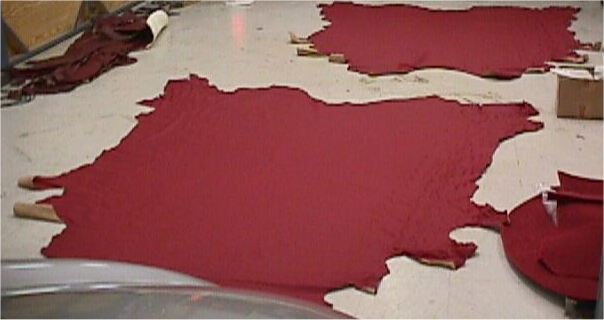
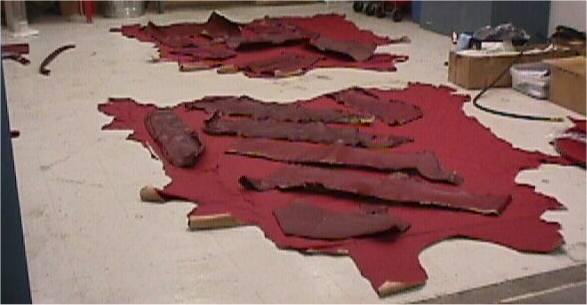
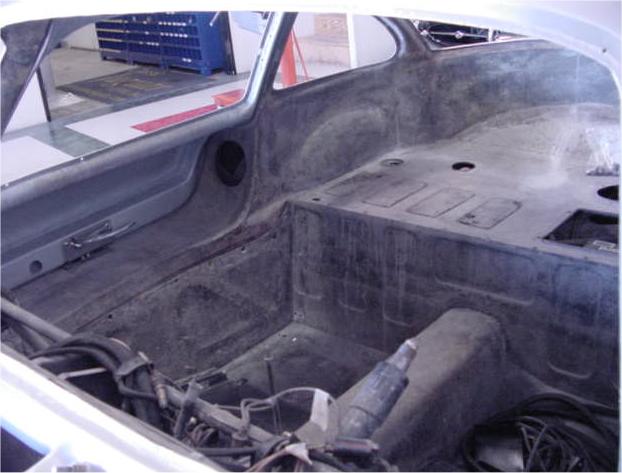
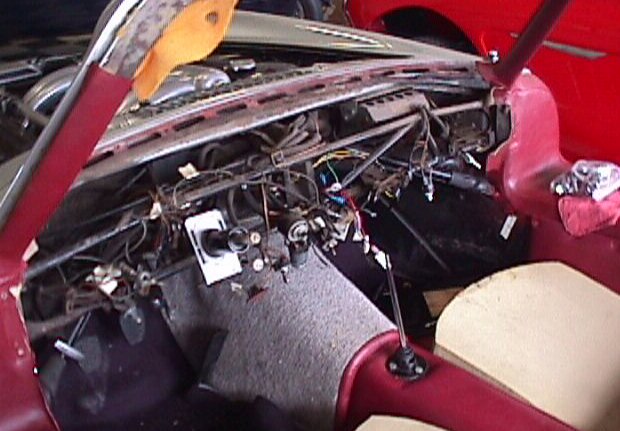
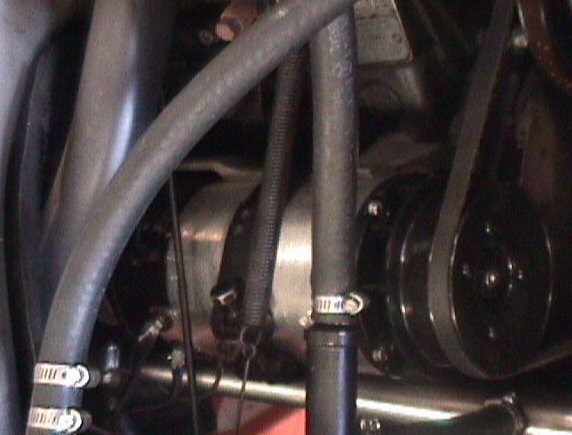
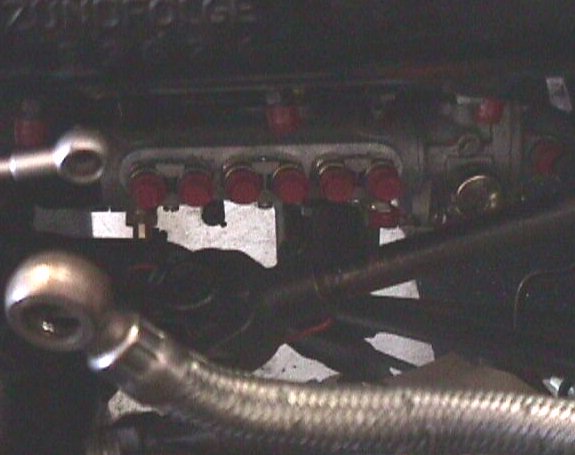
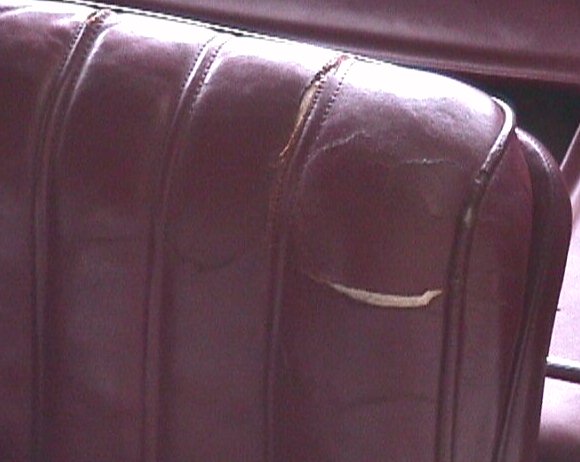
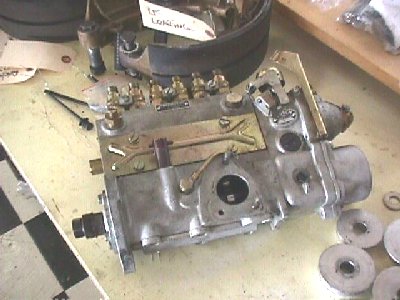
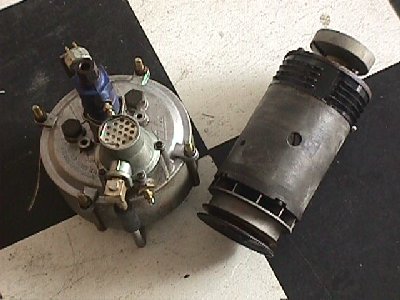
I am pleased to report that the mechanical rebuild is now 99% complete. I was able to take your car for a drive and test out the new steering, suspension, cooling and braking systems - and I am delighted to report that everything seems to be working extremely well. We still have to time the fuel injection pump and have various minor mechanical tasks to perform, but basically all the major mechanical work is now behind us.The next stage will be to disassemble the dash, interior, glass and chrome trim. We considered trying to save the original hides, but unfortunately the texture is so dry (almost powder) around the various tears that it would not be possible to make a worthwhile repair.
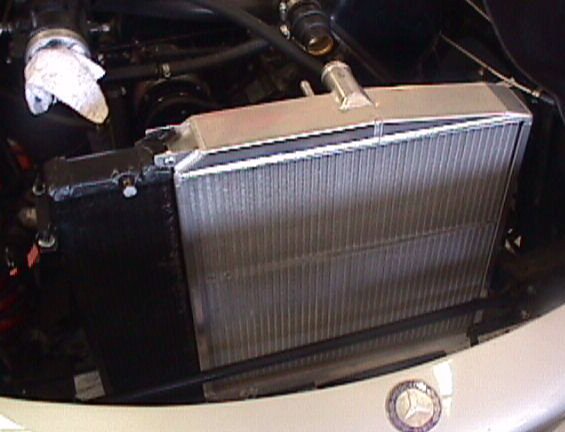
In the photographs below you will notice the custom built radiator that we had Ron Davis Racing make for your car. They did a beautiful job and it seems to work as well as it looks!
Click on thumbnails below to view larger images
 |
 |
 |
 |
 |
 |
 |
 |
Making rapid progress now, so please look for regular updates over the next few days/weeks.
 |
 |
 |
 |
 |
 |
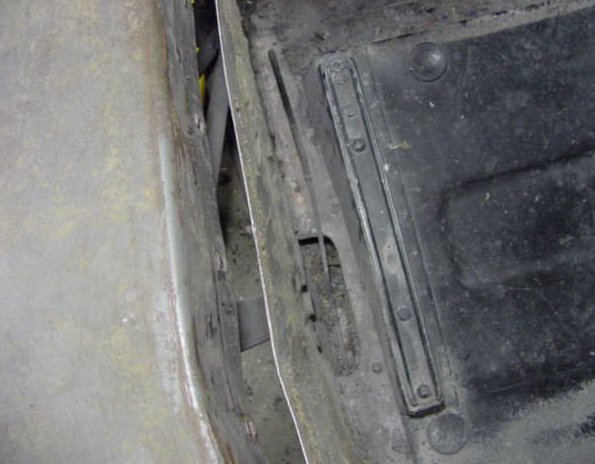
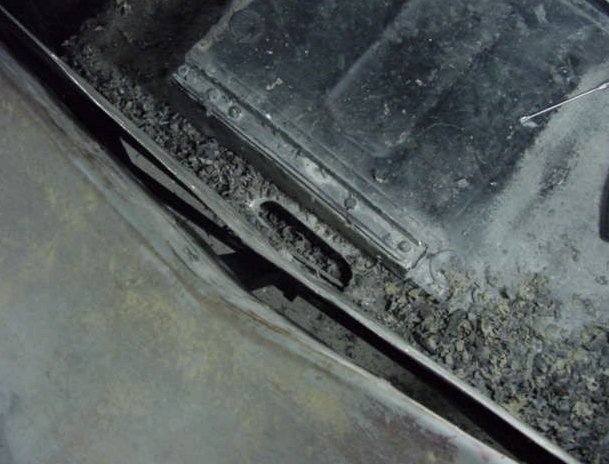
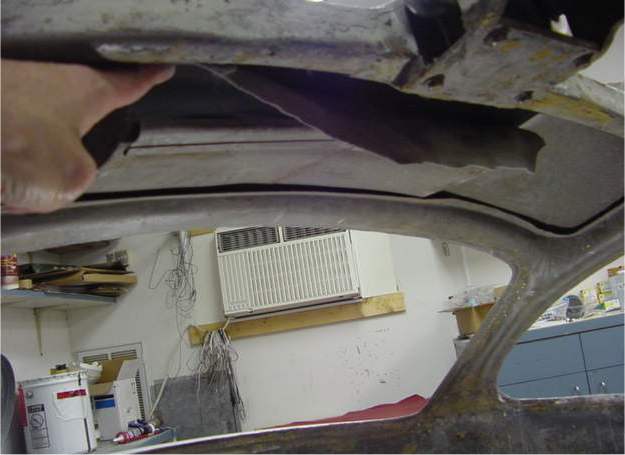
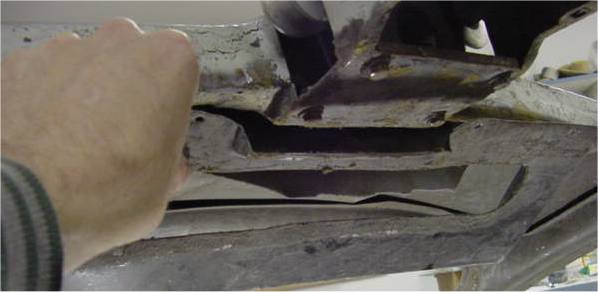
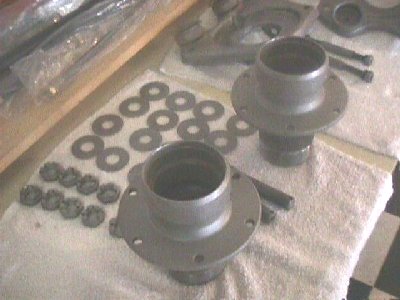
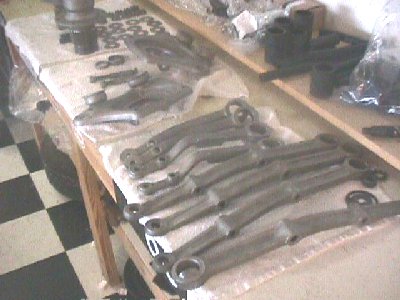
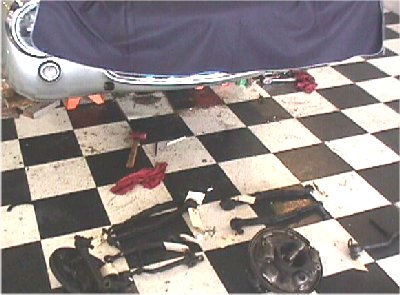
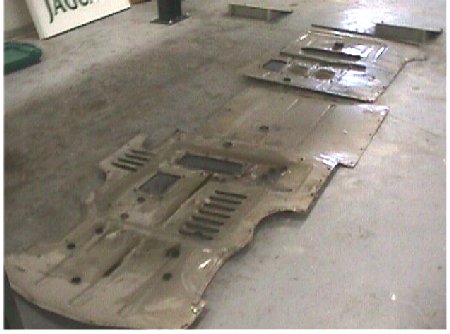
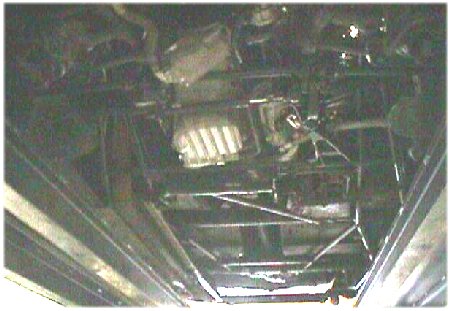
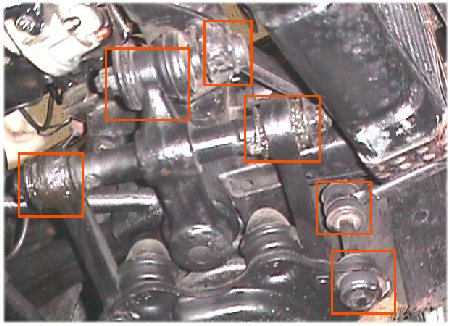
The following photographs show the work beginning in earnest. It was rather difficult to take clear pictures underneath the car, but the images are none the less fascinating in that they show this wonderful automobile with and without its Rudge bellypans. An incredible piece of engineering, given the vintage of the car.Once we had removed the bellypans, an inspection of the upper surface of same gave us a very clear picture of the areas and components that have been leaking fluids. Actually, just about everything that contains fluids is leaking to some degree!
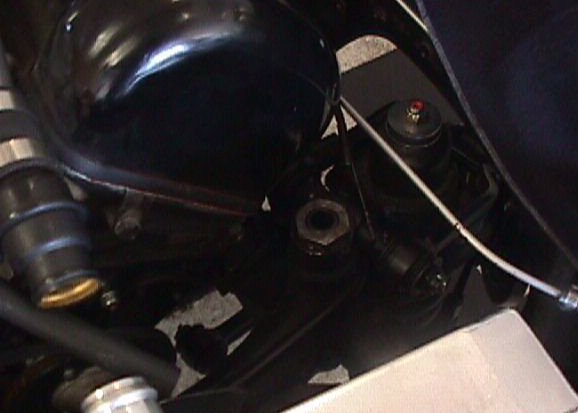
The other thing I have tried to show in these photographs is the extent to which the rubber suspension bushings and mountings are perished. All will need replacing, and in fact the rear axle stops are missing altogether.
As the work progresses, we will continue to update you through these pages.
Click on thumbnail pictures to view larger images
 |
 |
 |
 |