Specification (briefly) for this
project is as follows:
Of
the 120 Lamborghini 350GTs built at the
Sant'Agata factory between 1964 and 1967,
chassis # 0433 is an ultra-rare steel bodied
example. We understand there may only have
been two or three steel bodied 350s
produced, although the precise number was
never documented. Some put the number as
high as six, but whatever the actual number,
we do know that this particular 350GT is a
very rare car indeed.
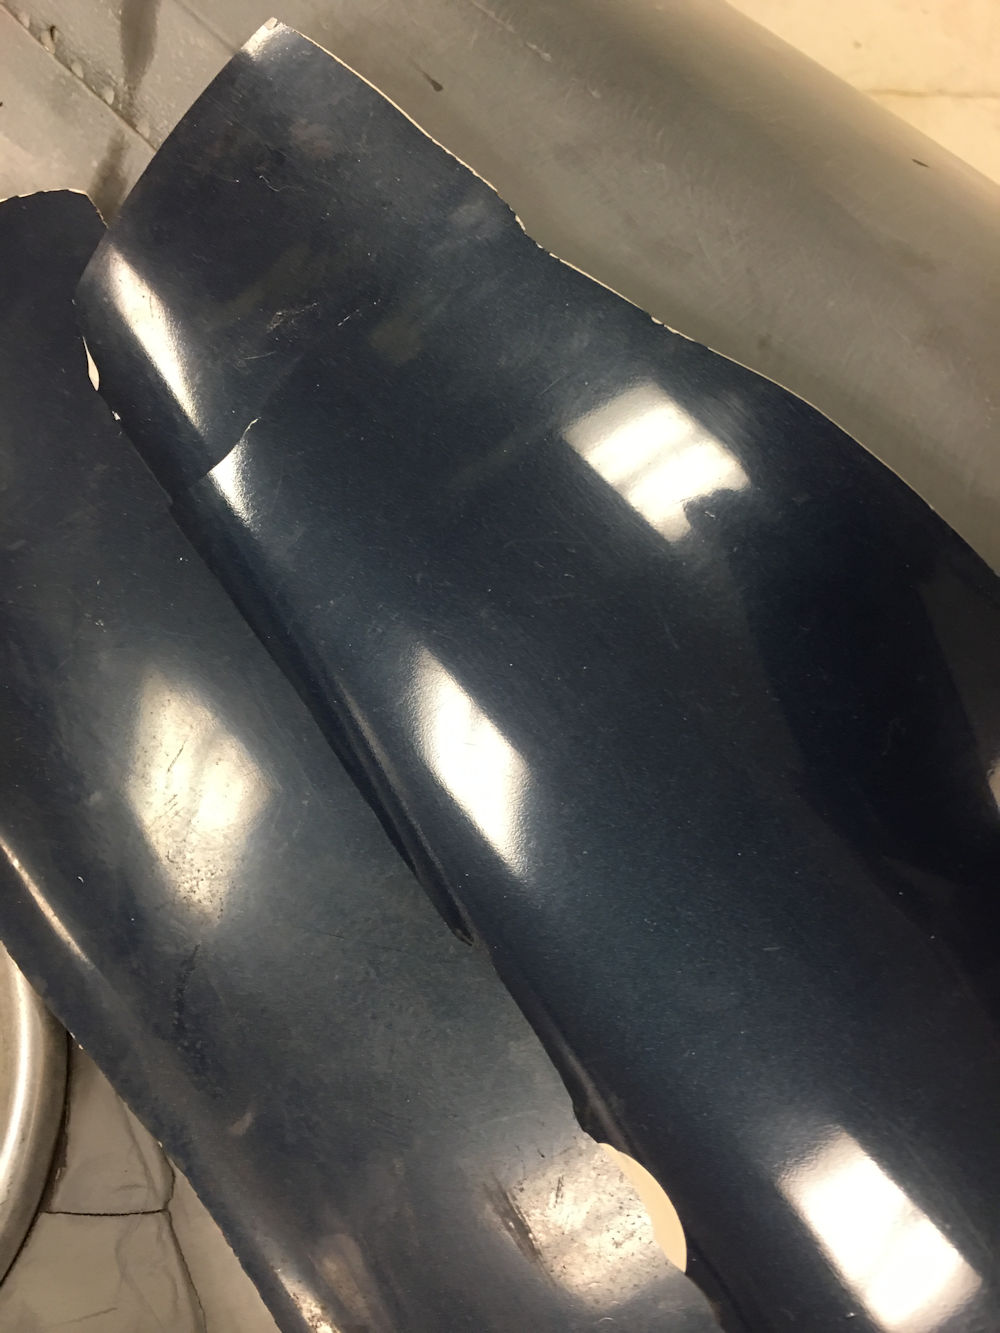
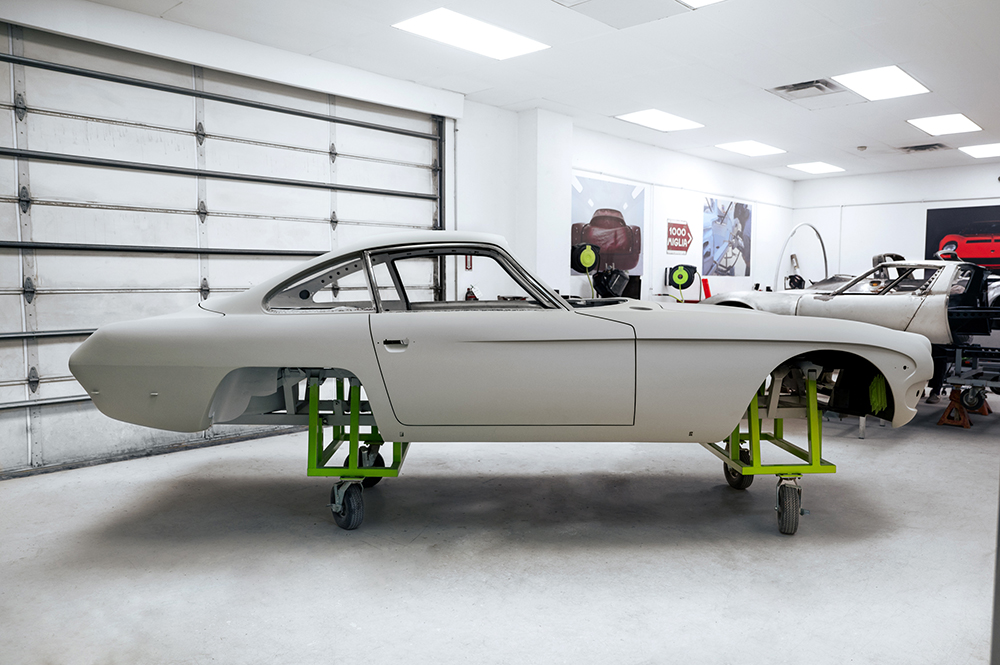
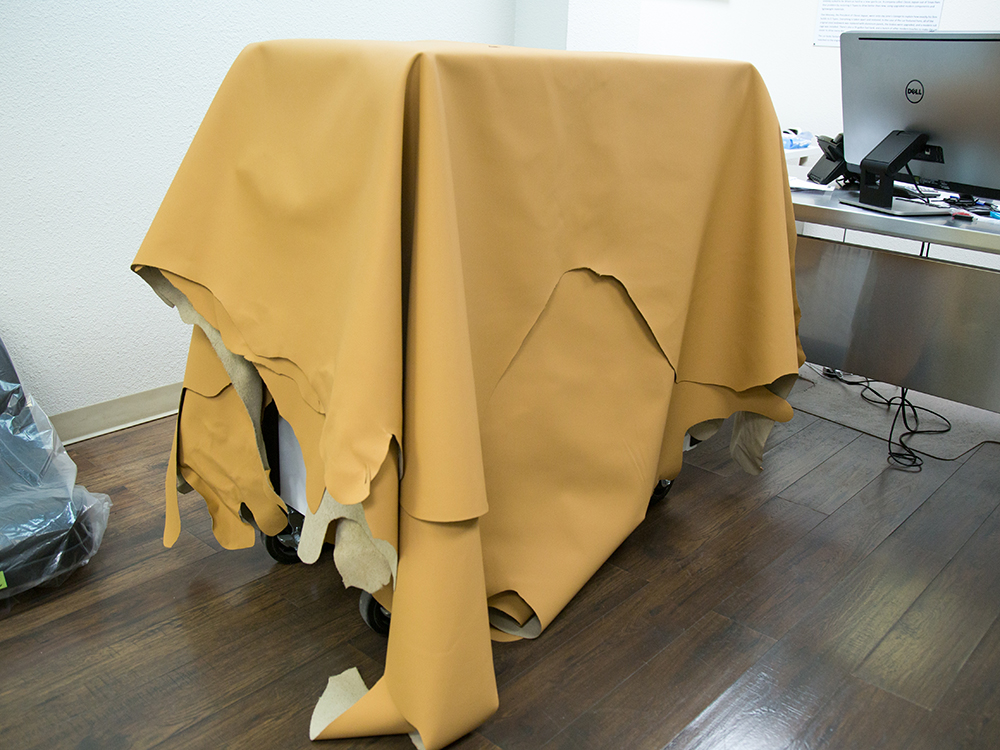
We will be carrying out a total restoration
of this very special car in the original
factory livery of Blu Notte Scuro (dark blue
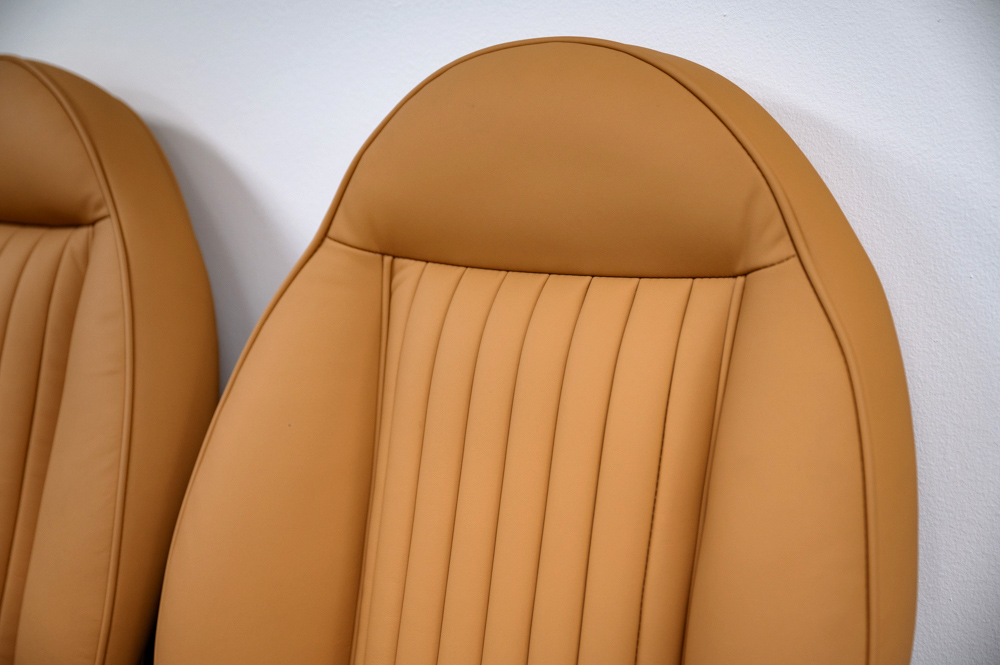
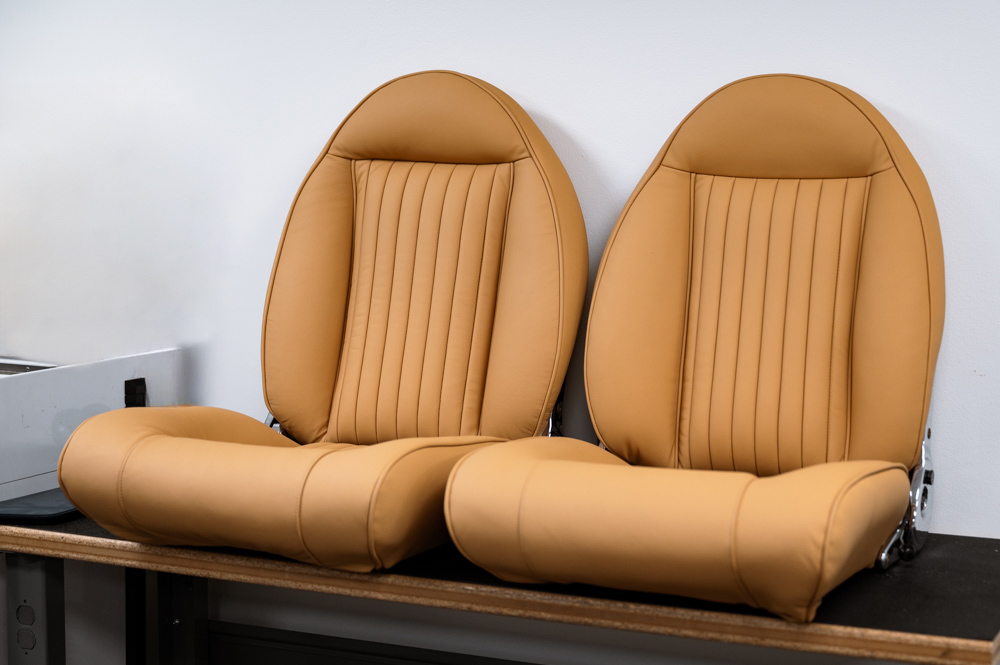
metallic, paint code A/20454) with Senape
(tan) hide trim.
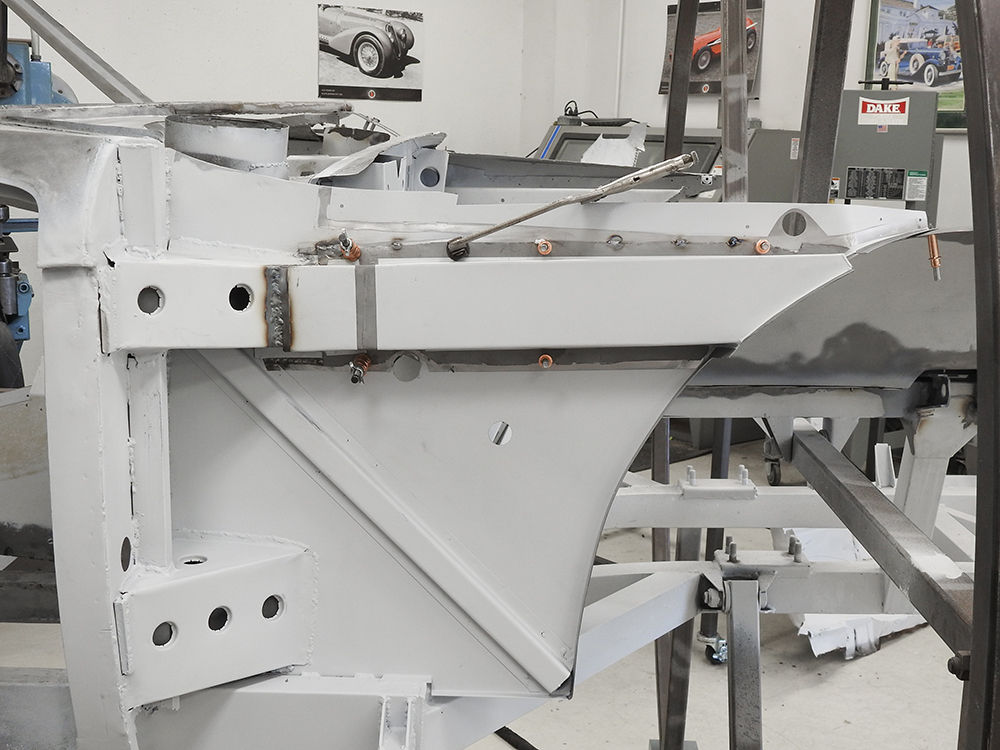
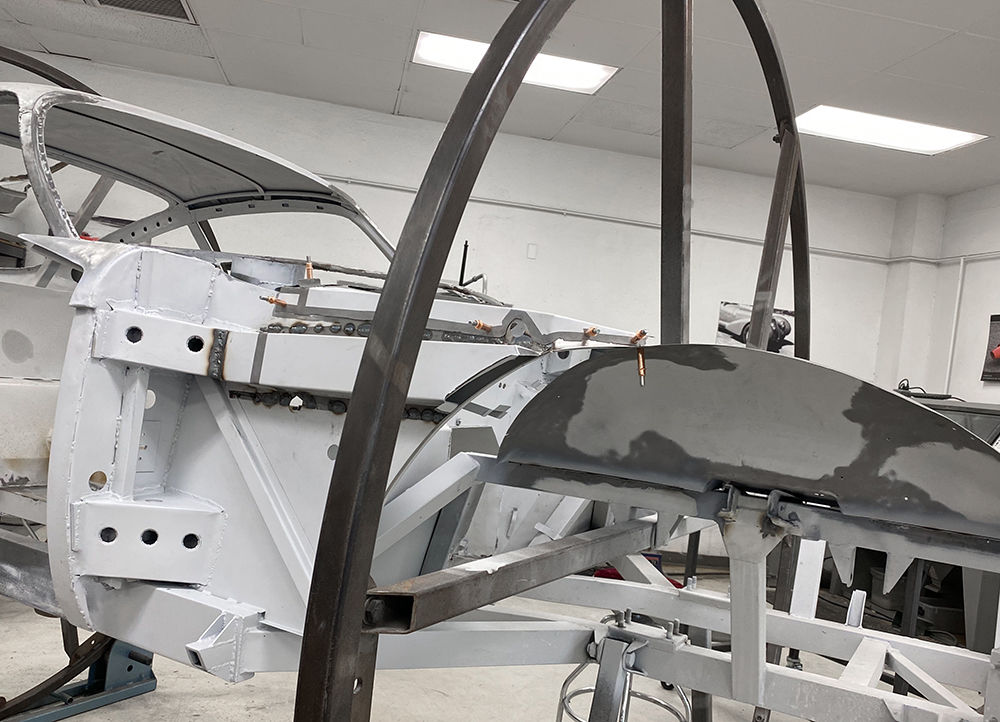
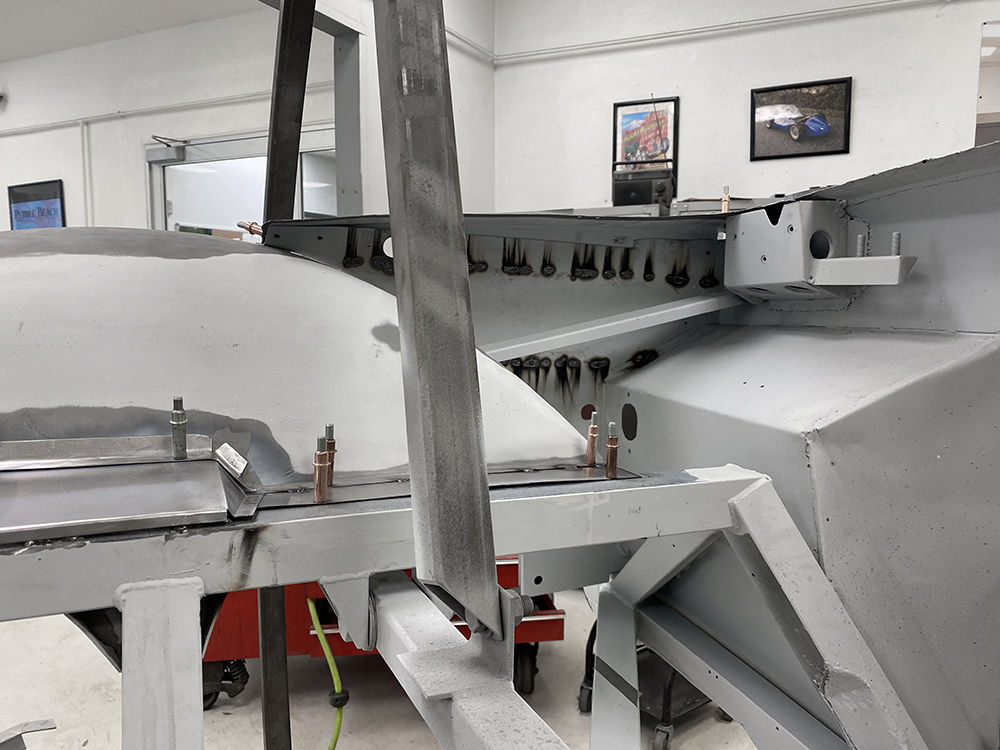
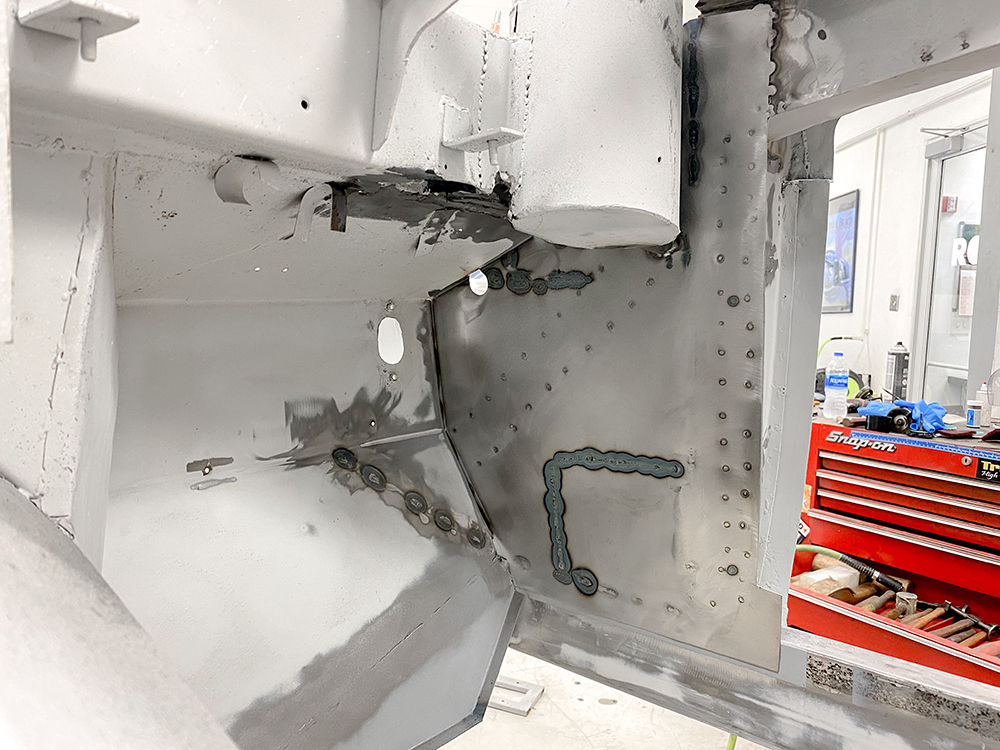
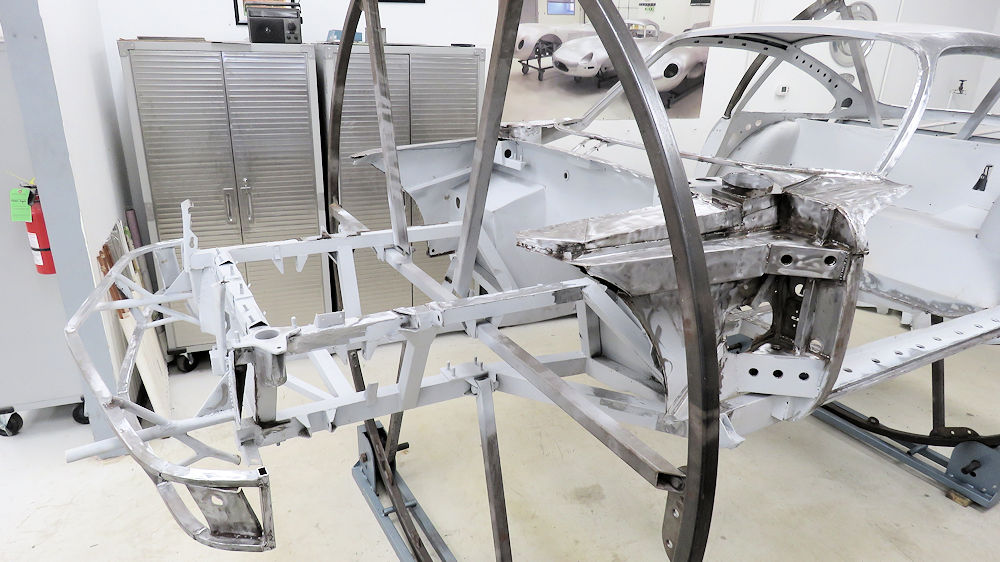
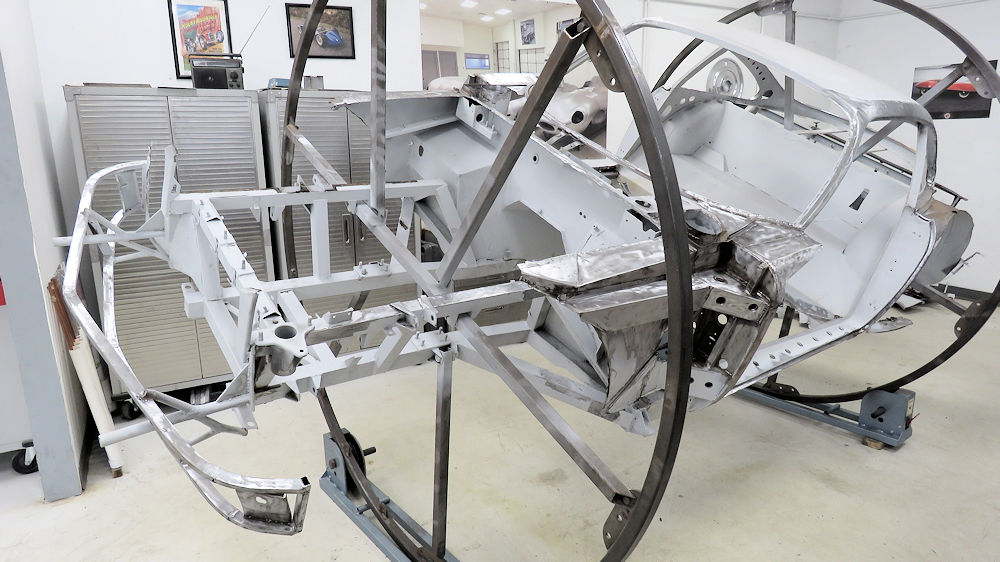
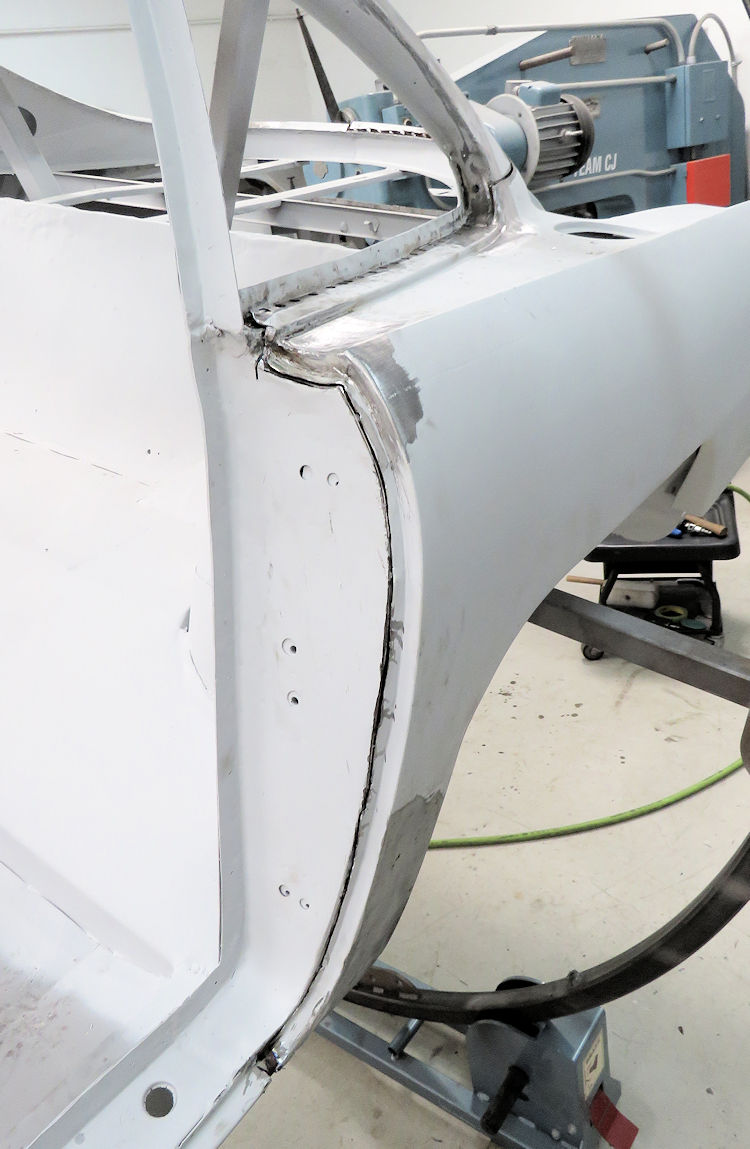
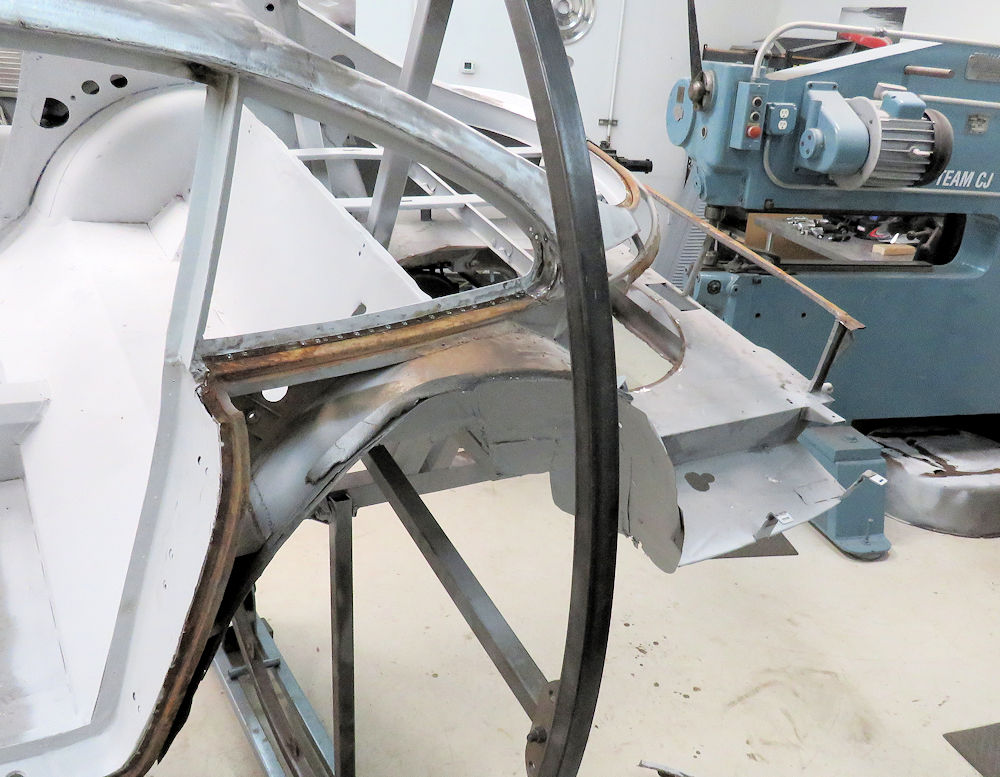
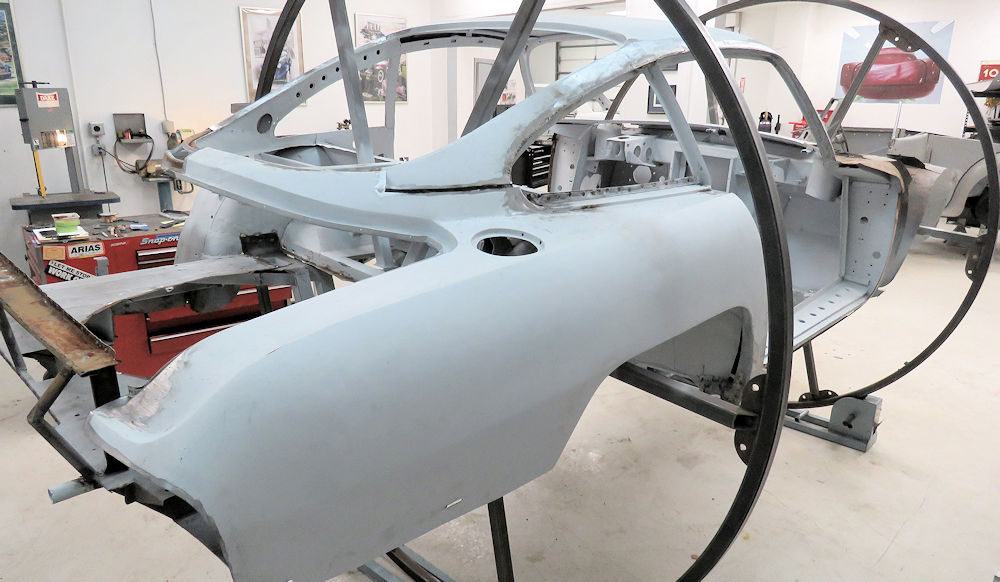
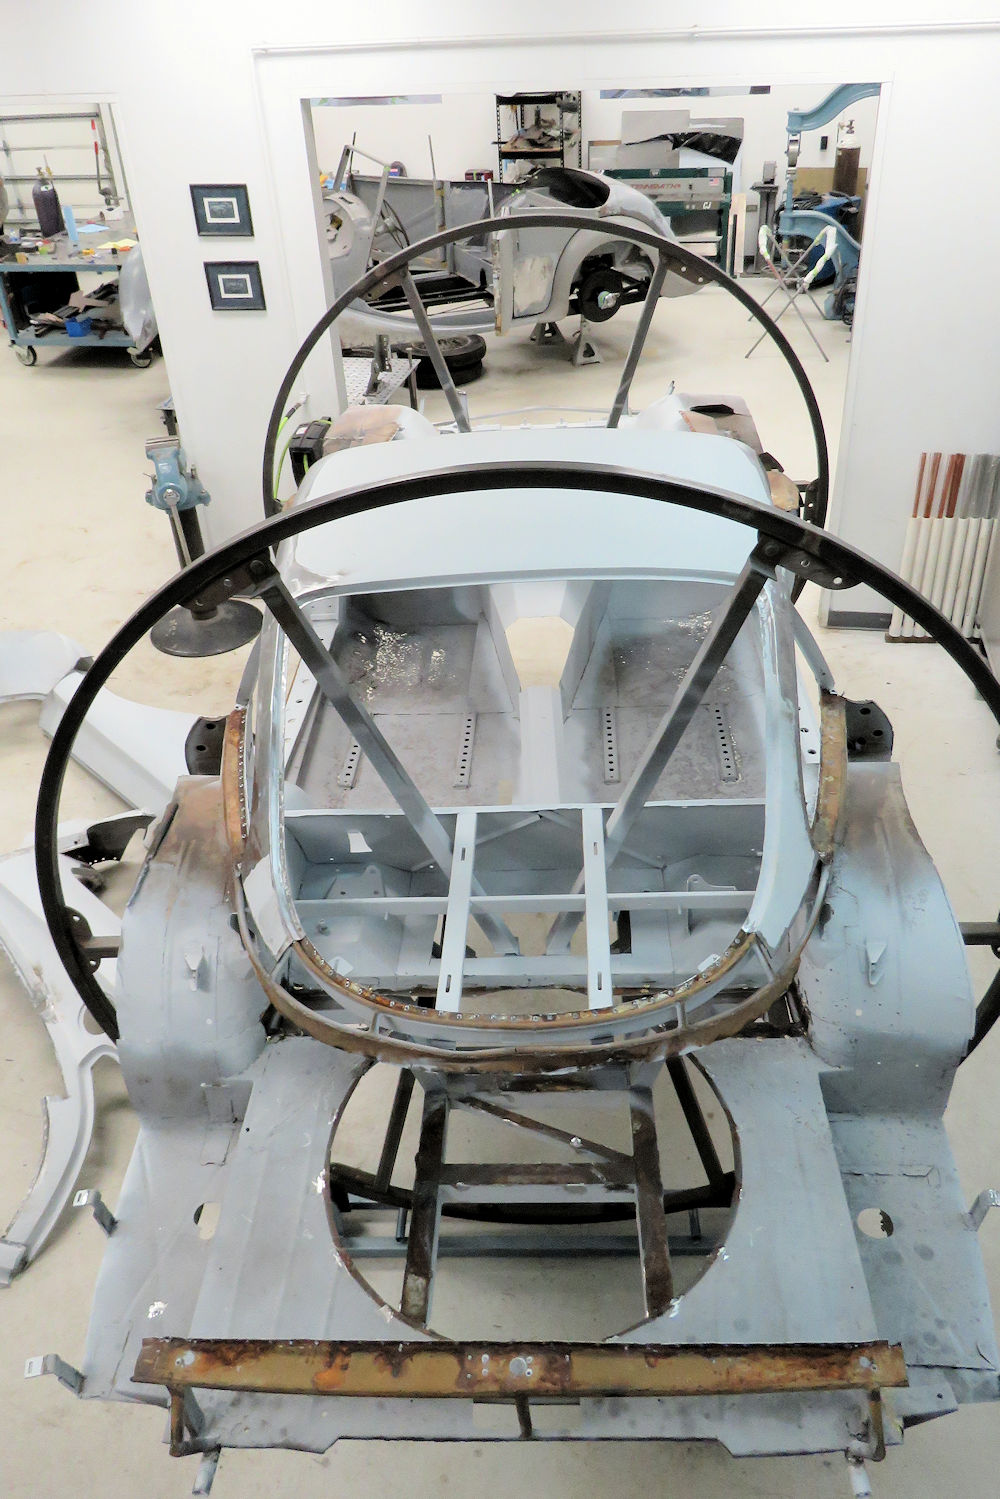
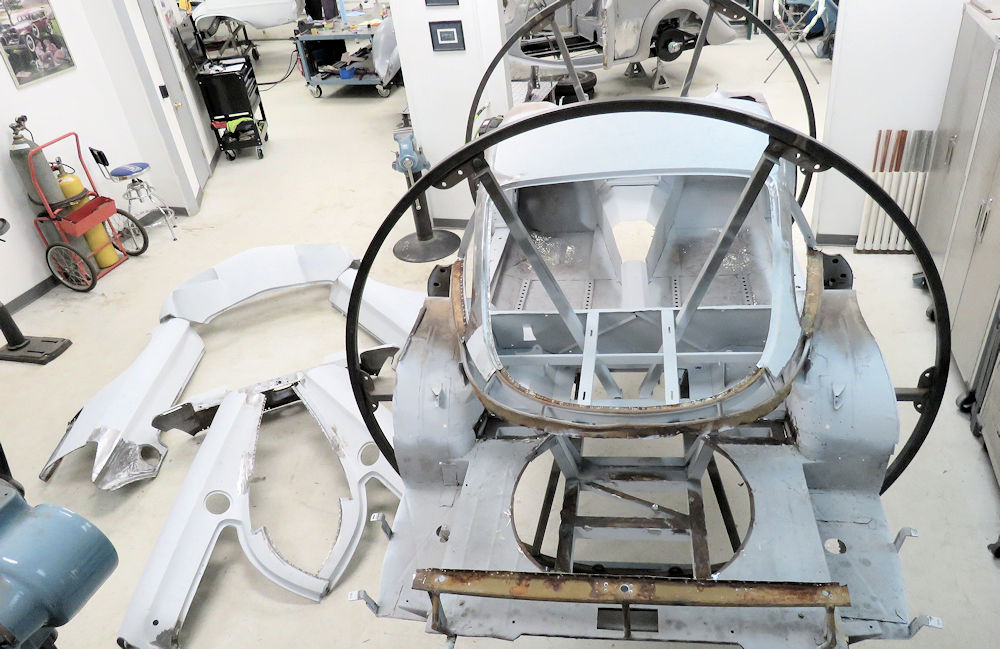
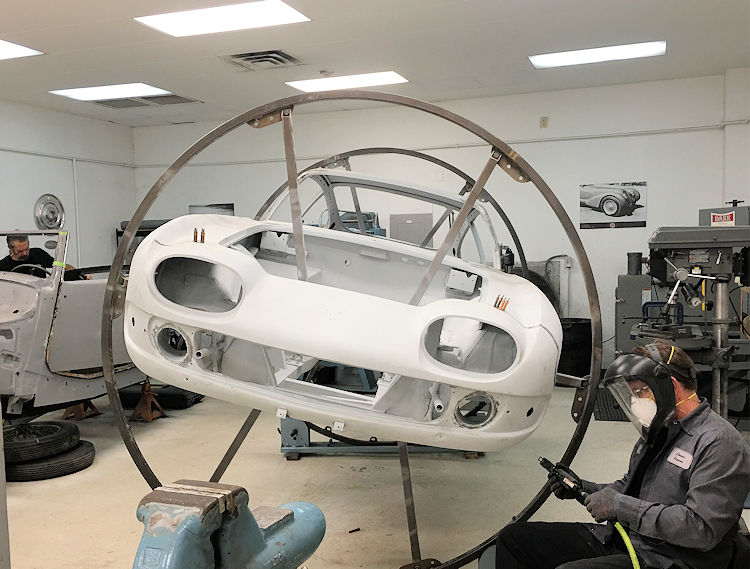
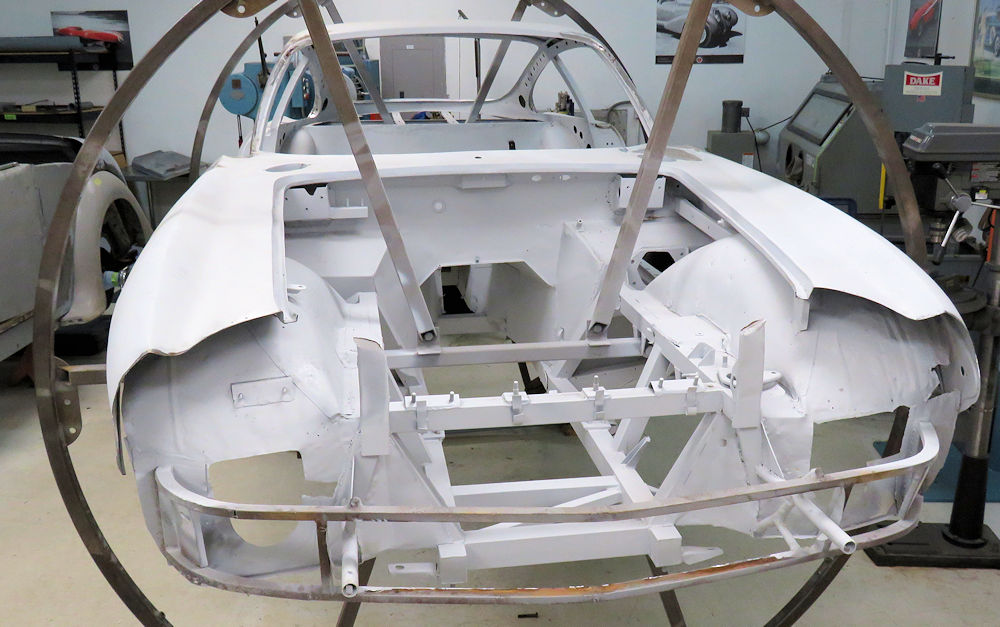
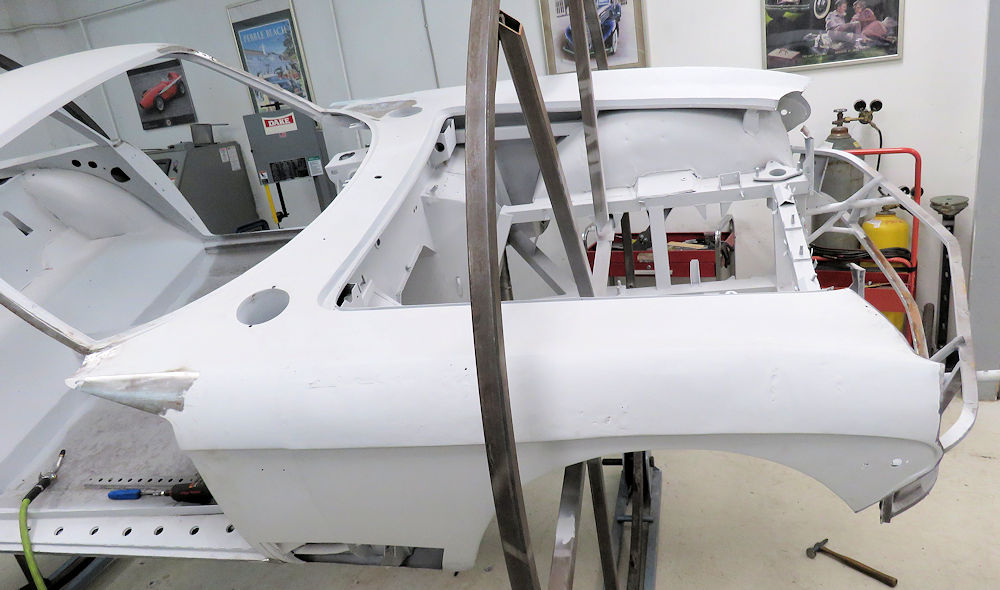
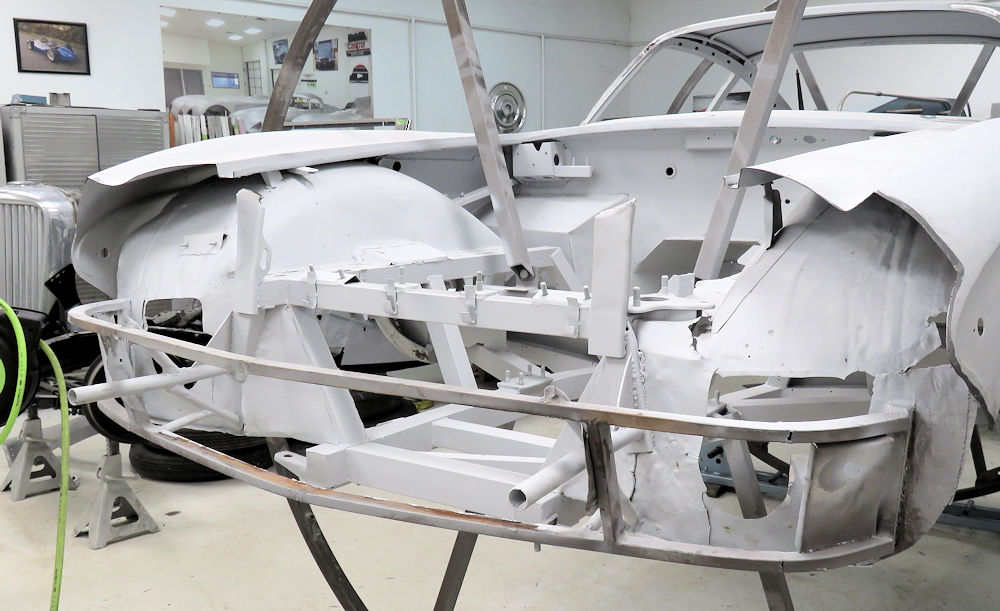
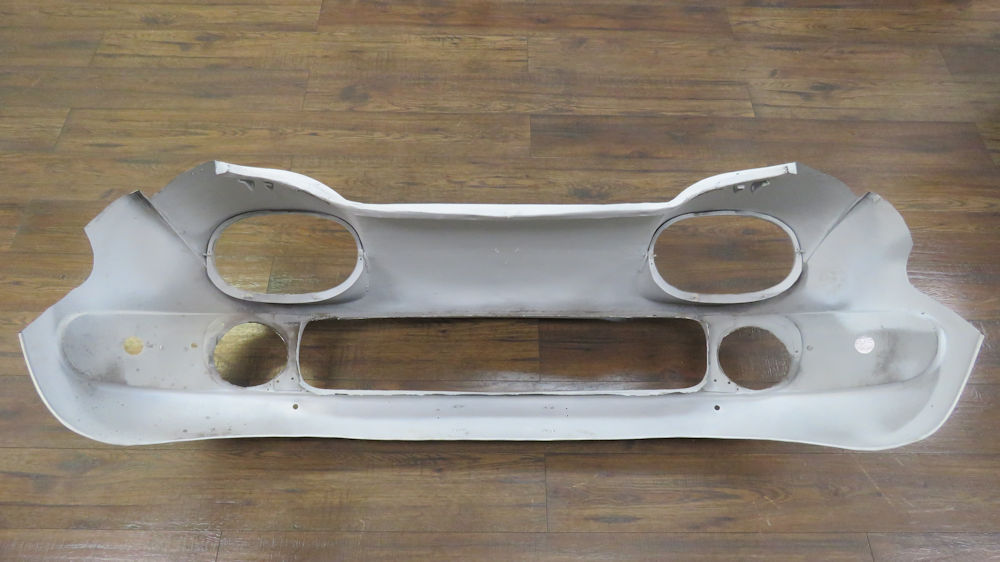
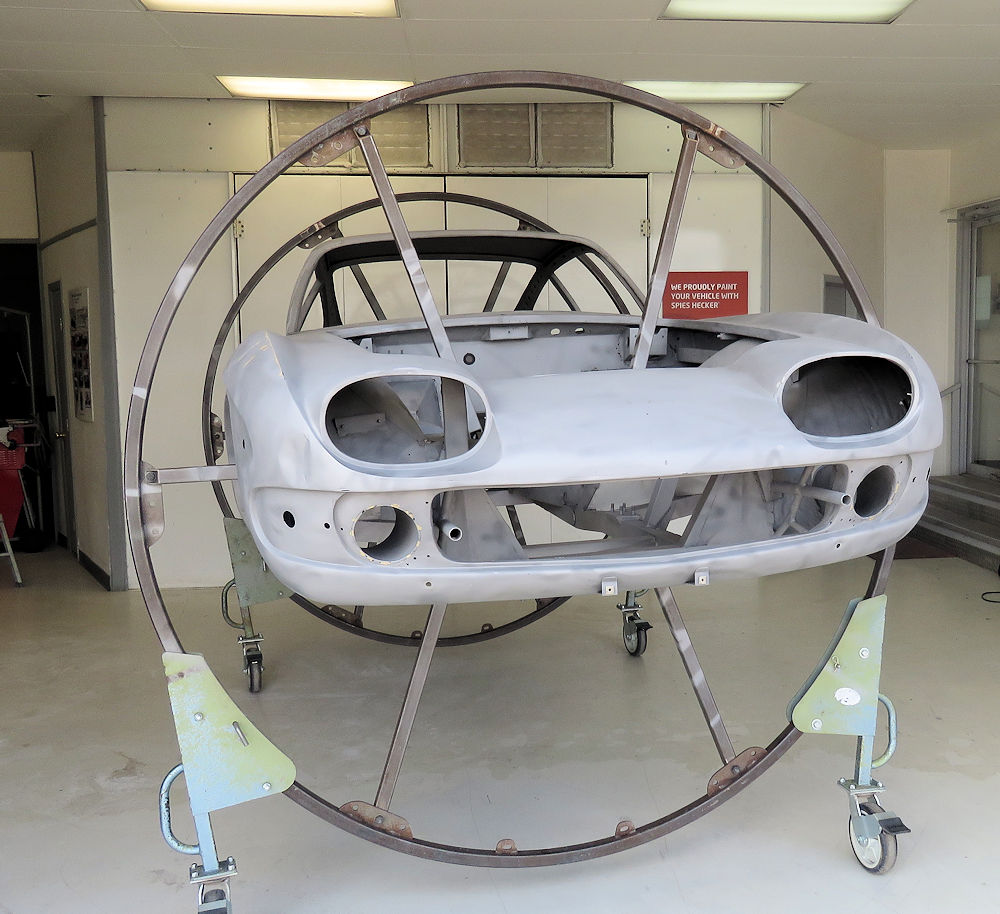
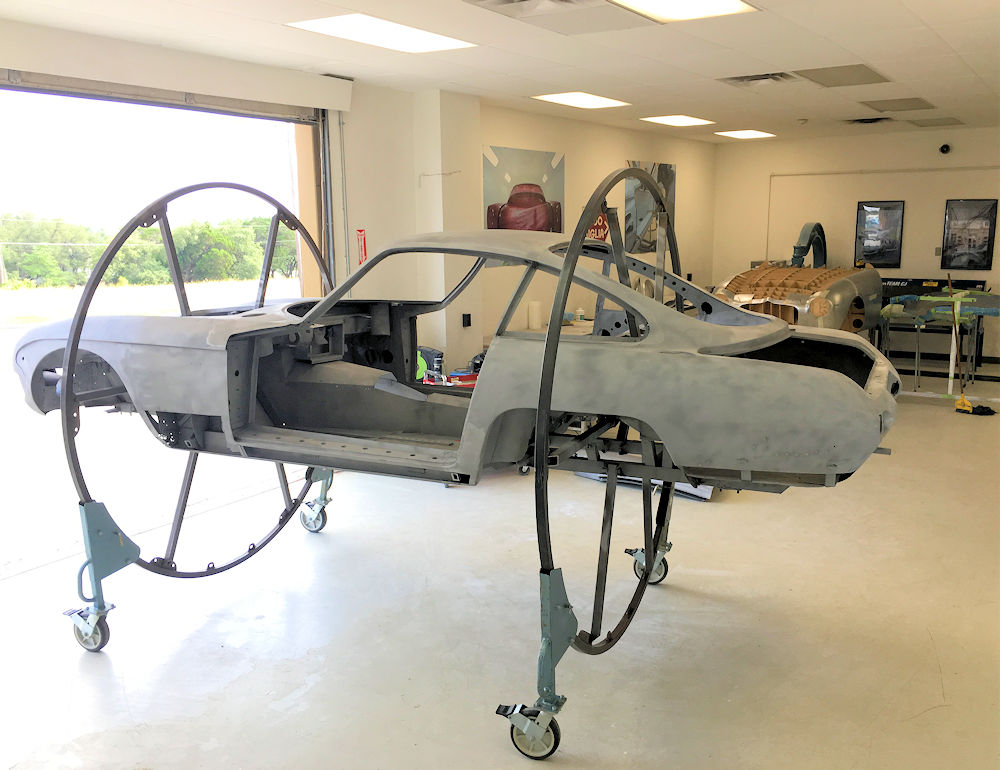
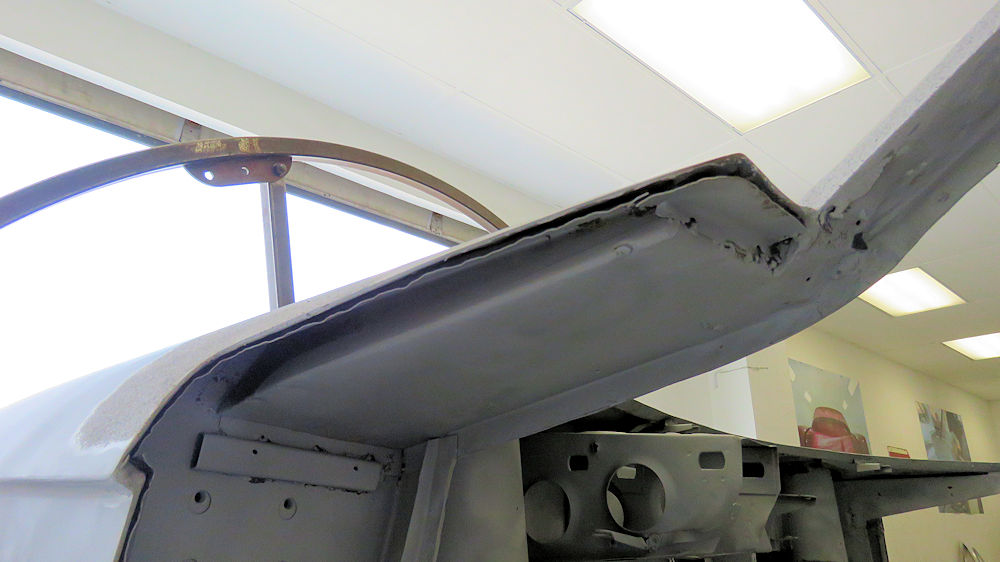
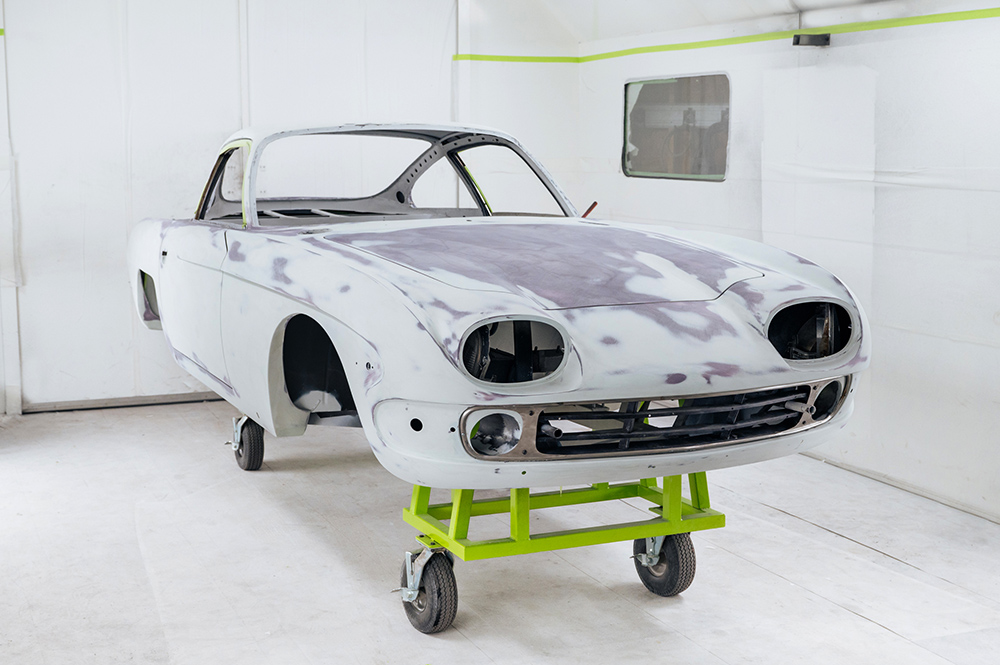
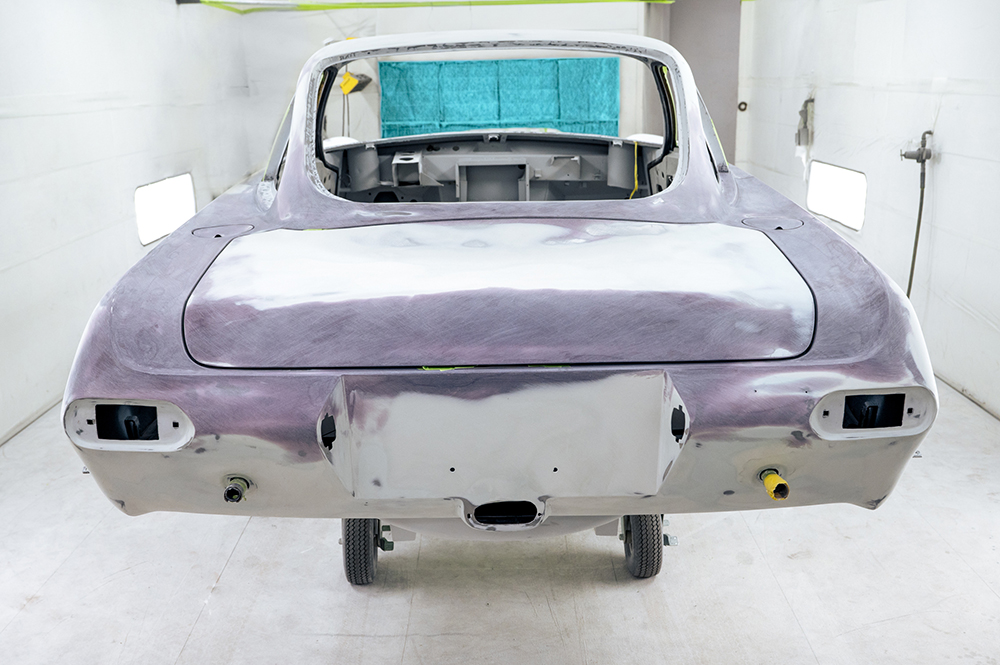
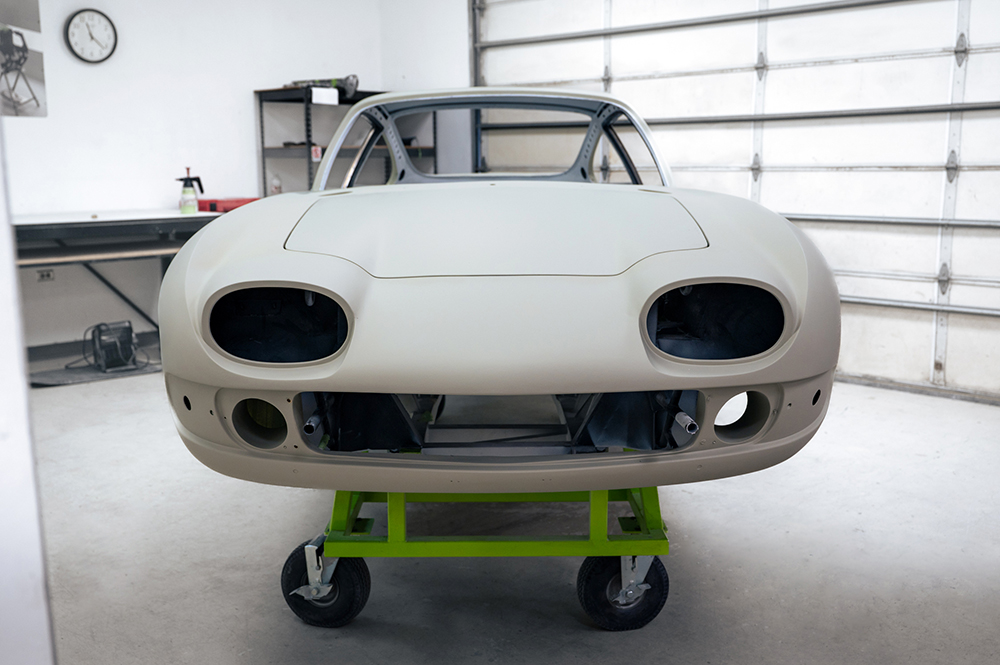
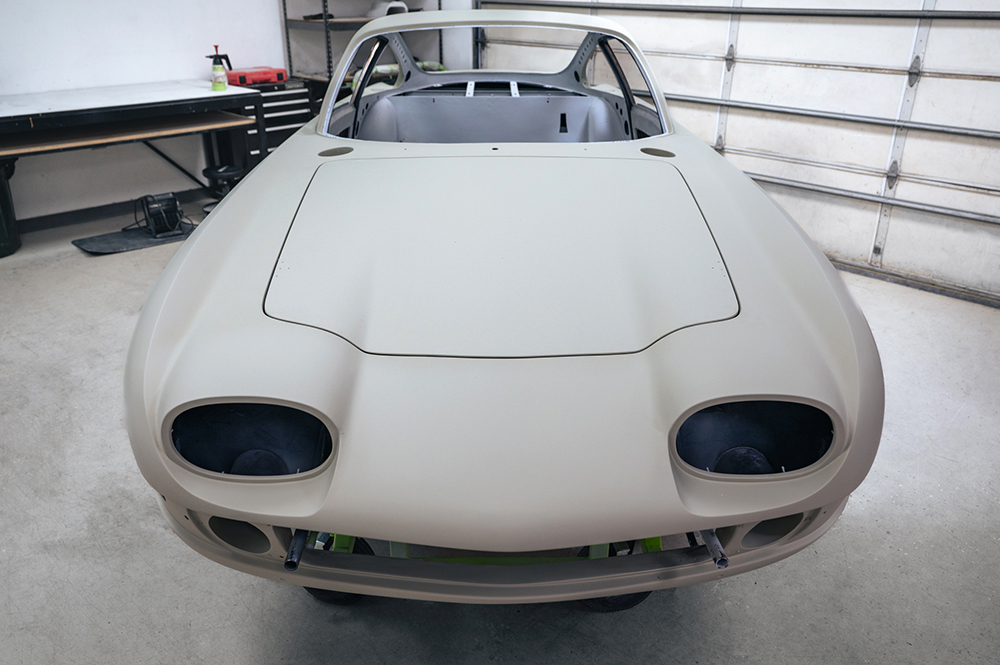
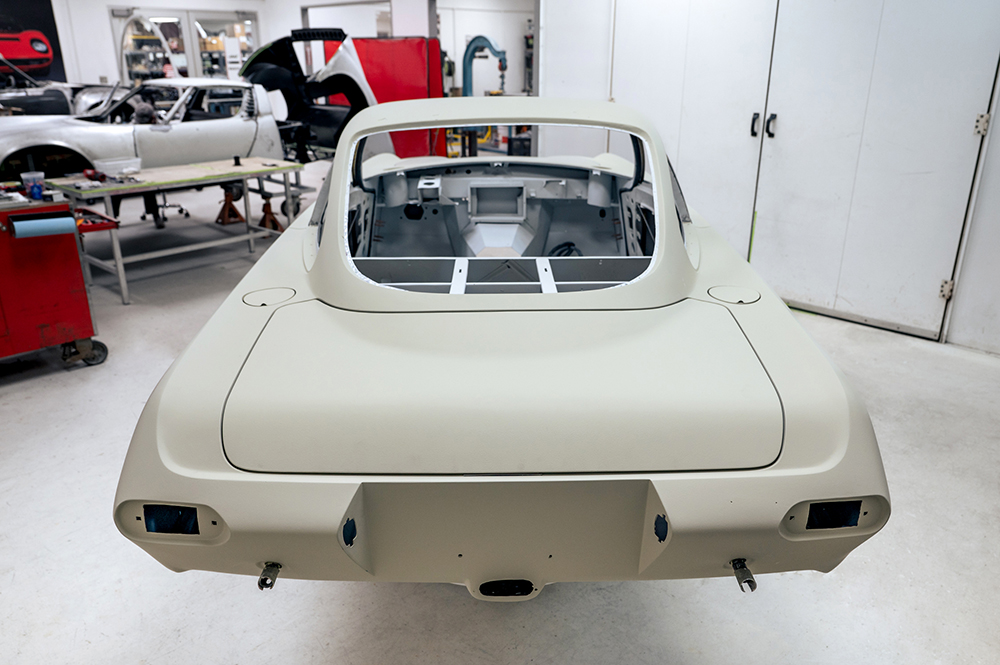
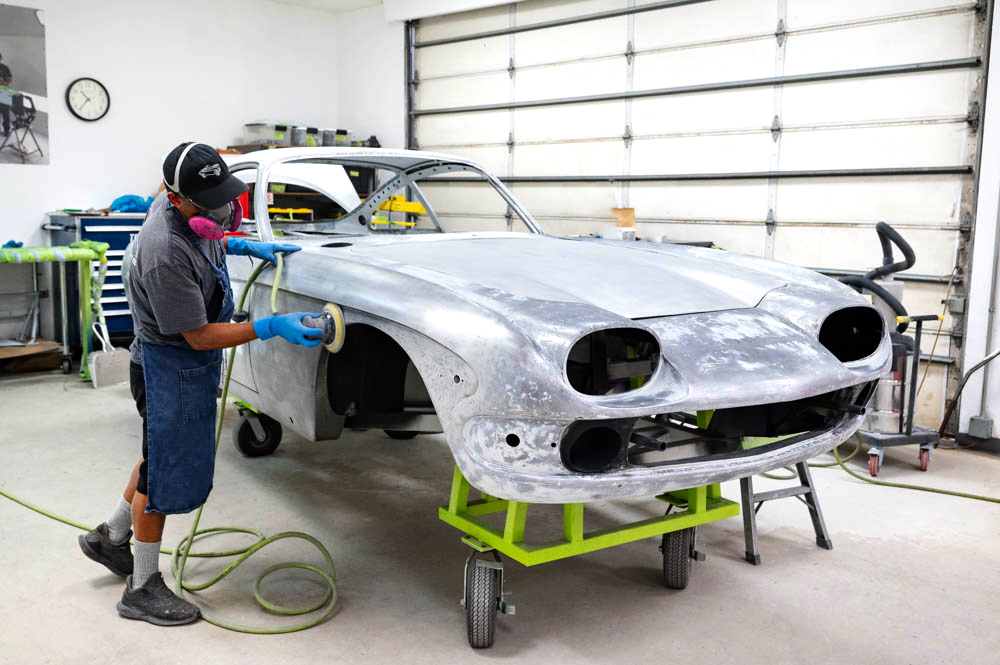
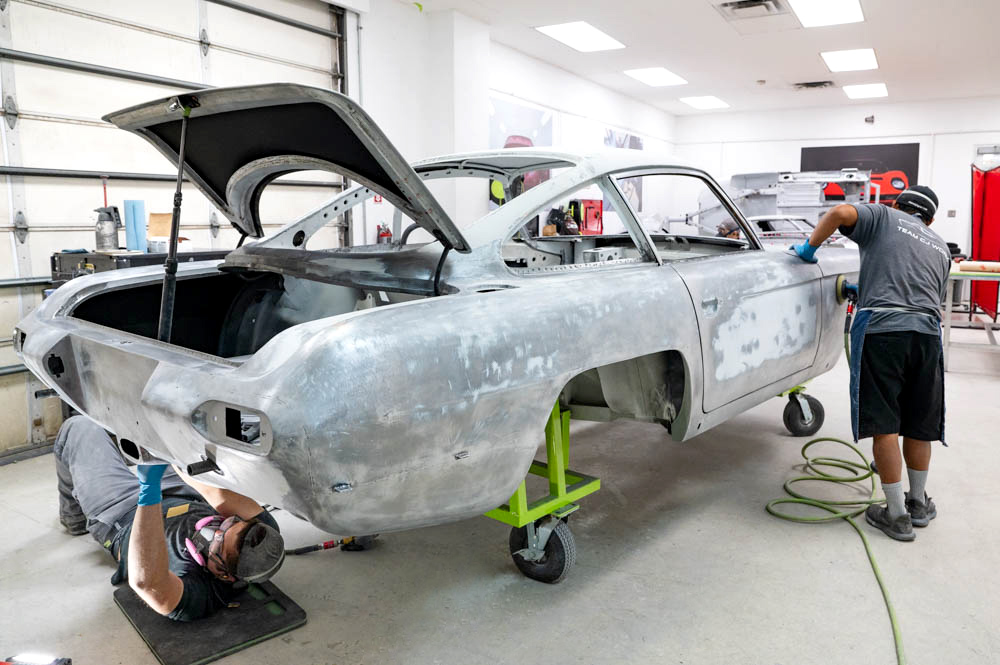
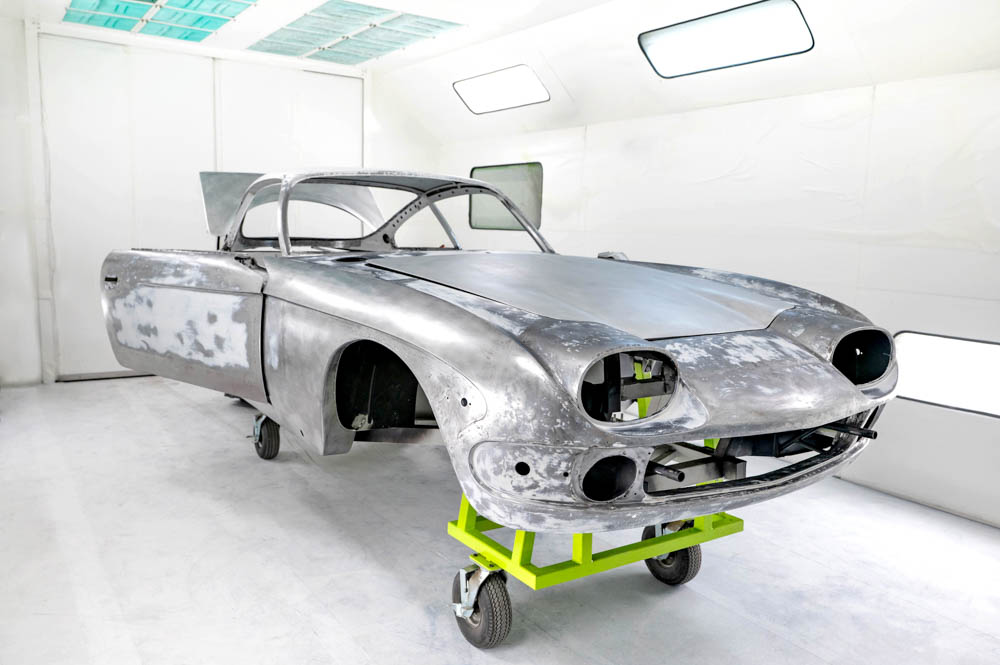
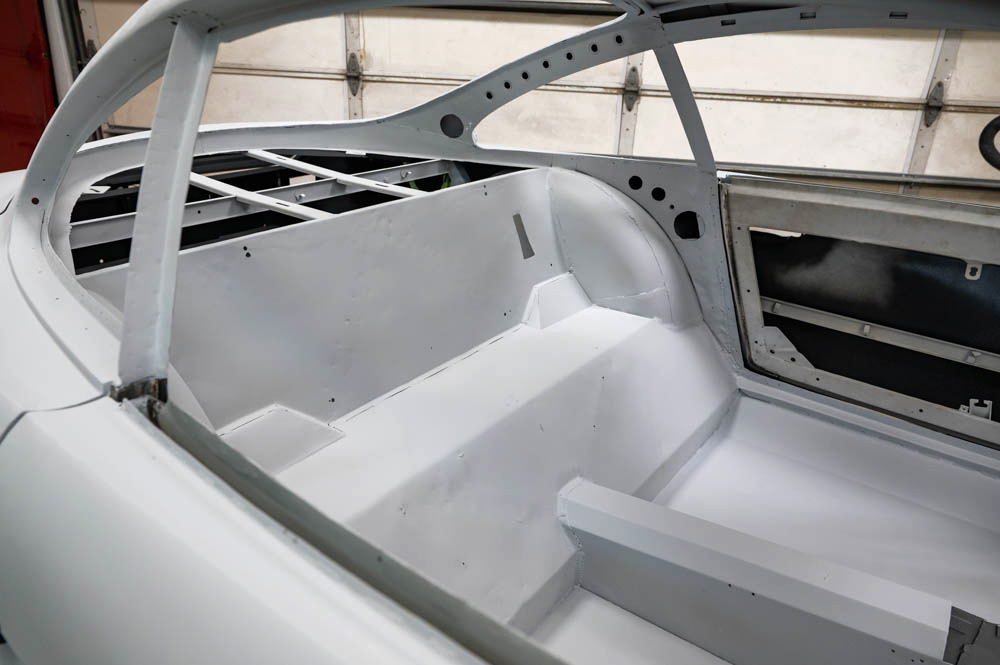
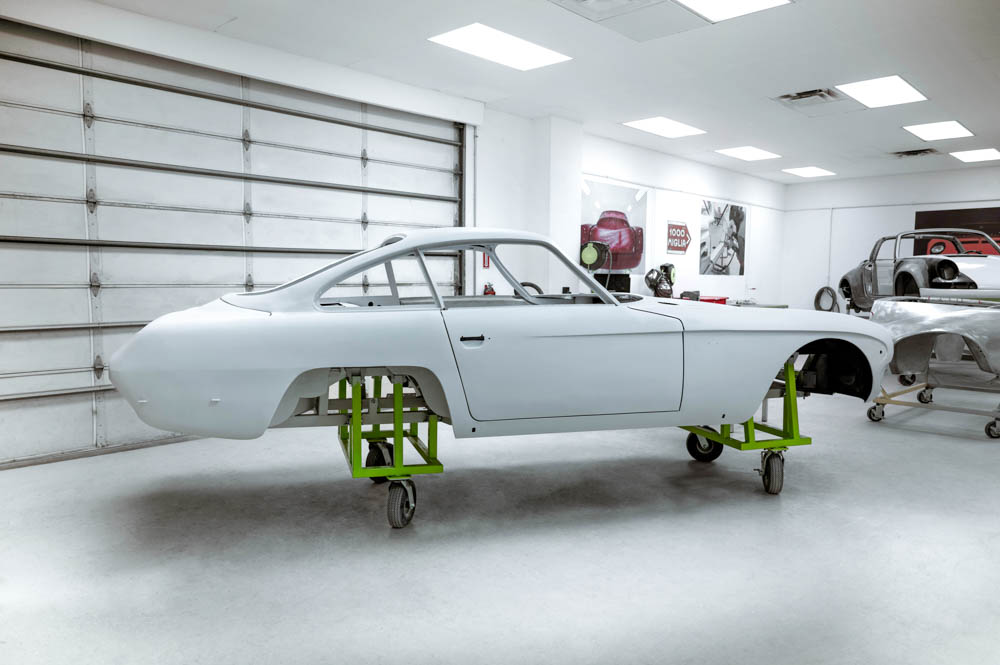
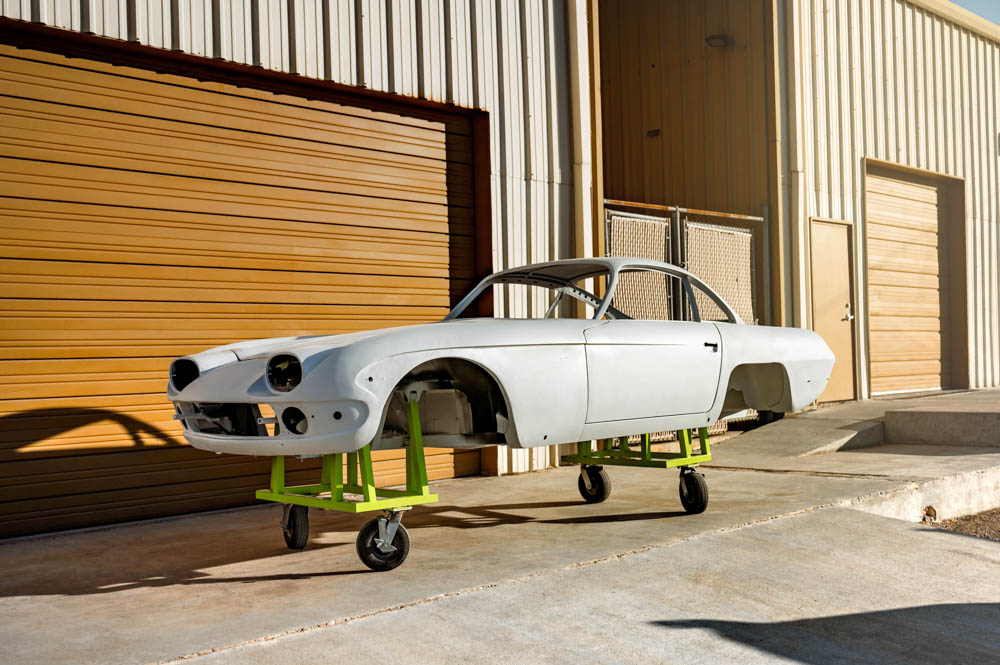
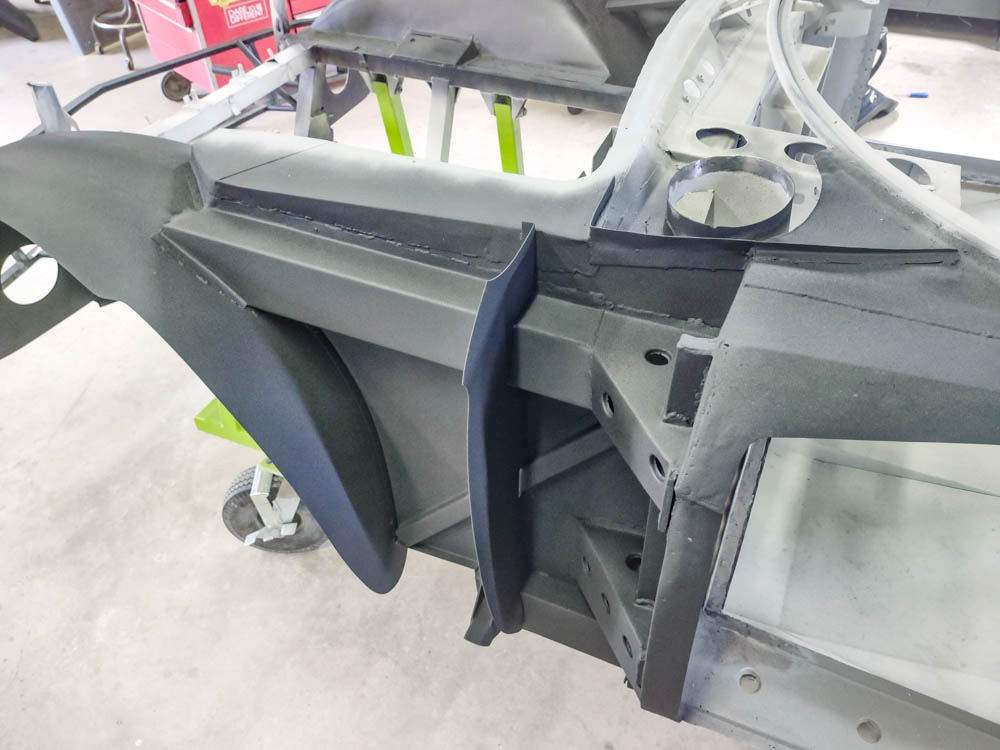
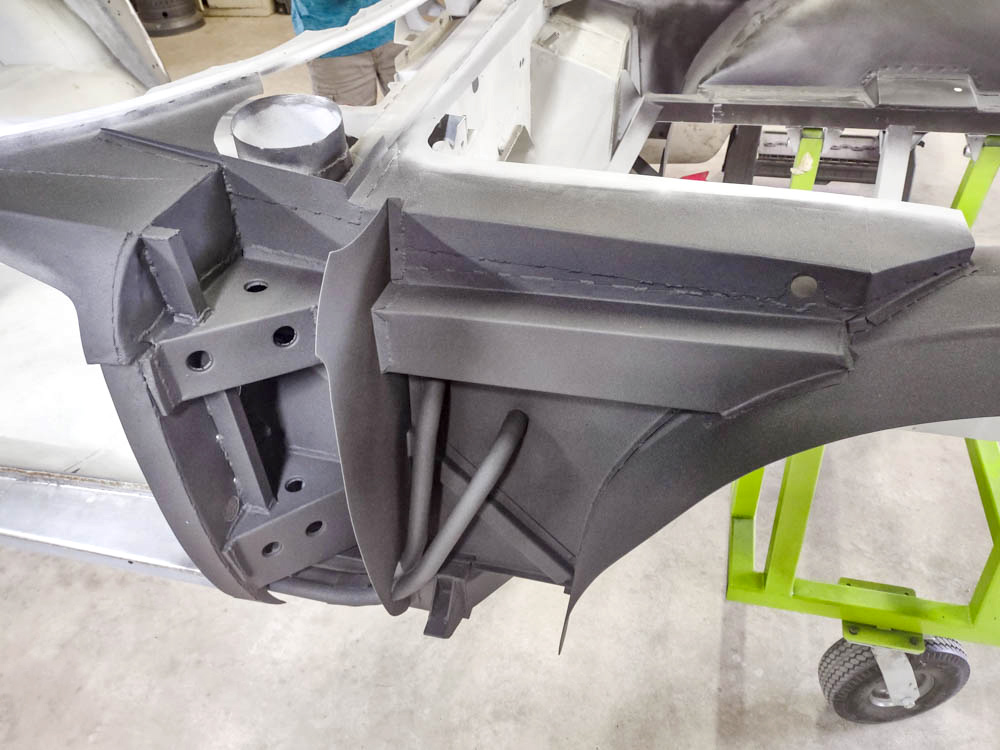
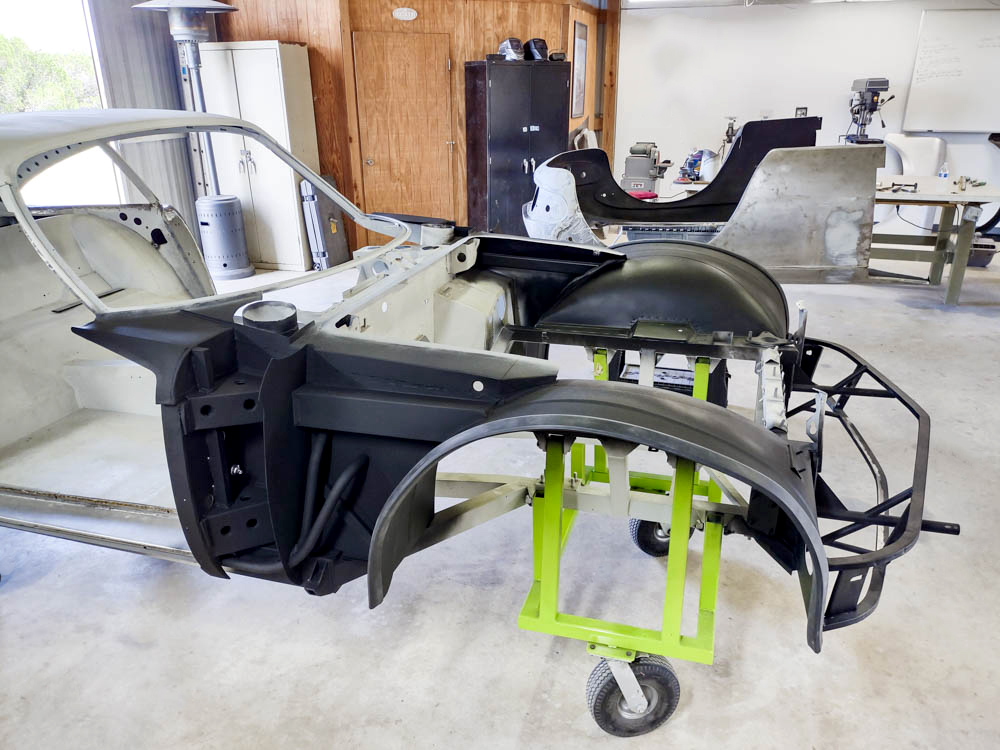
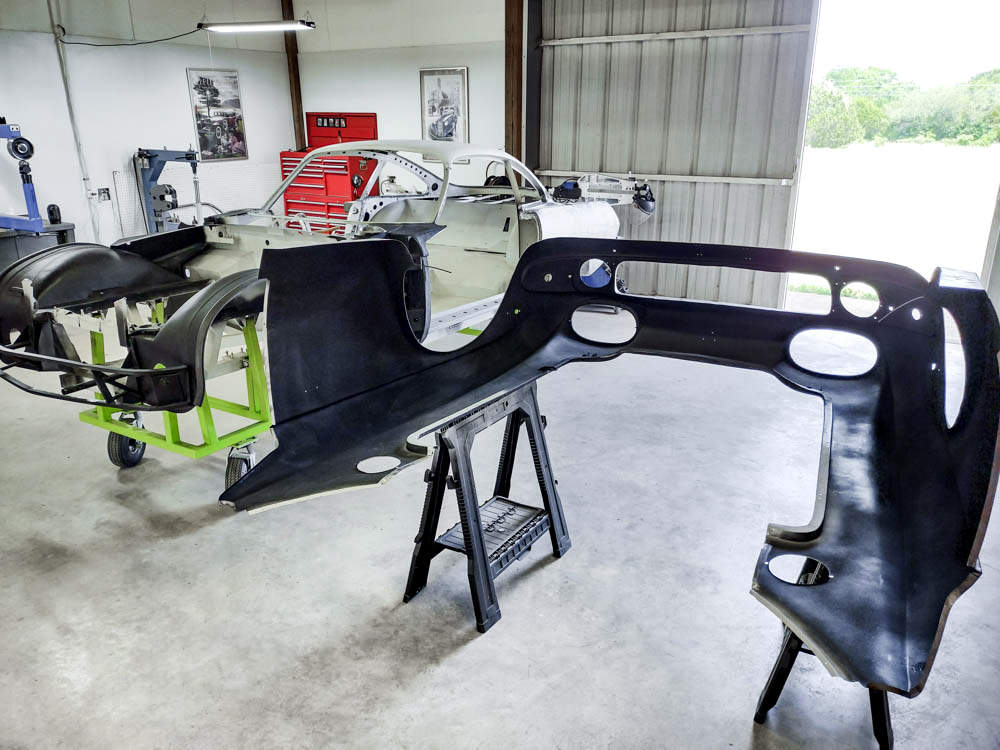
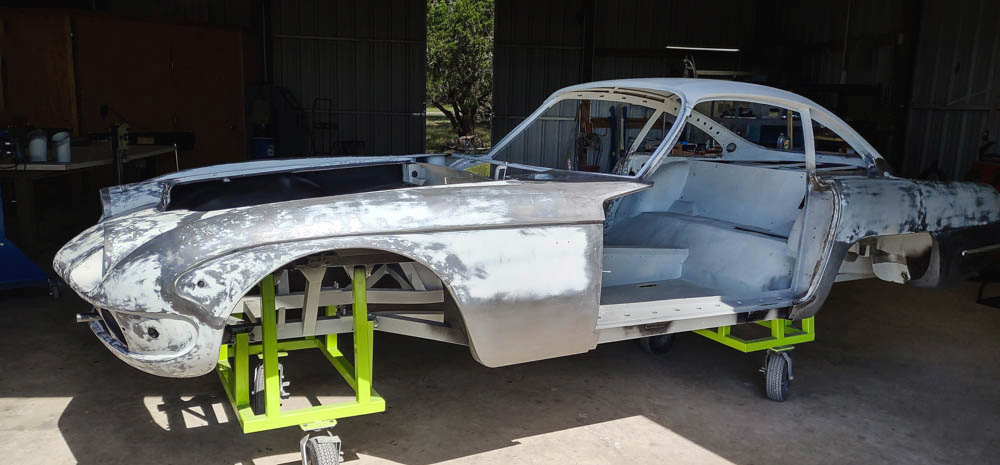
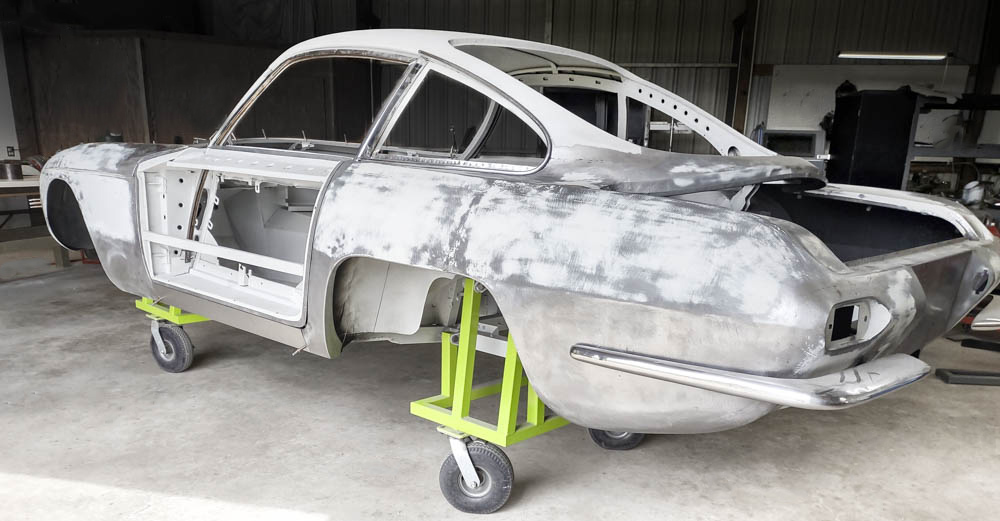
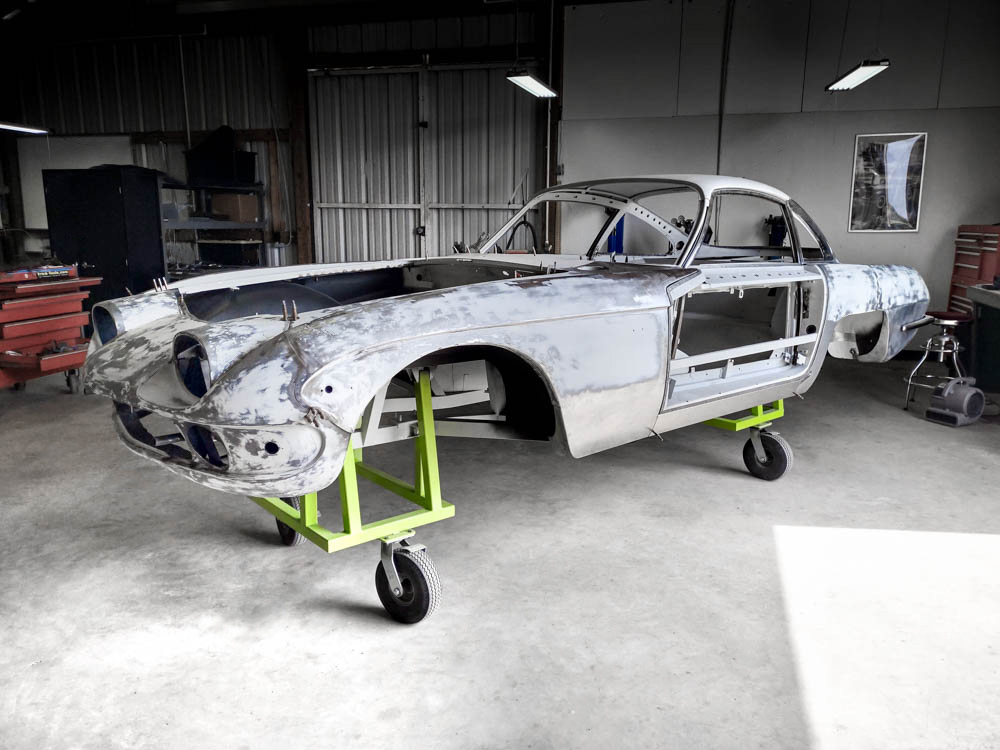
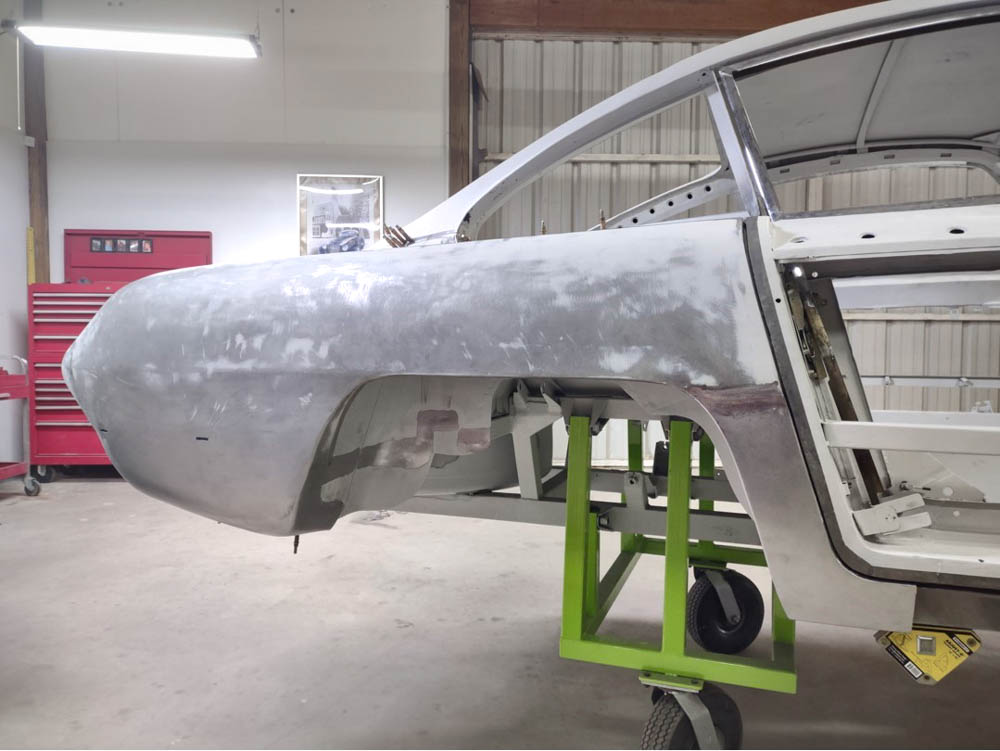
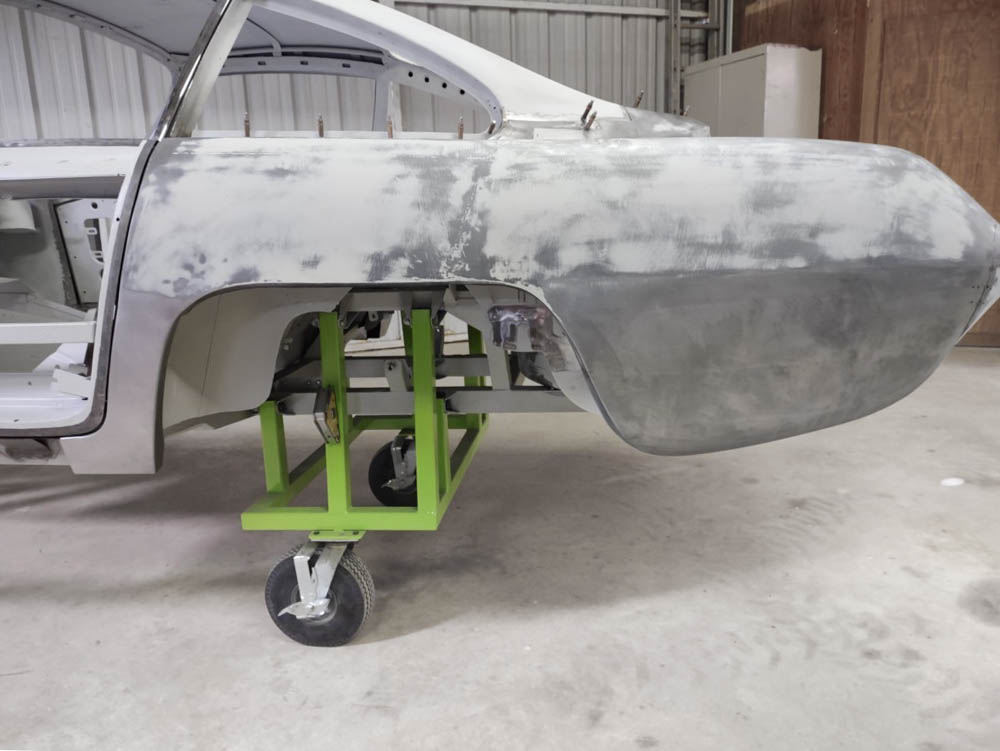
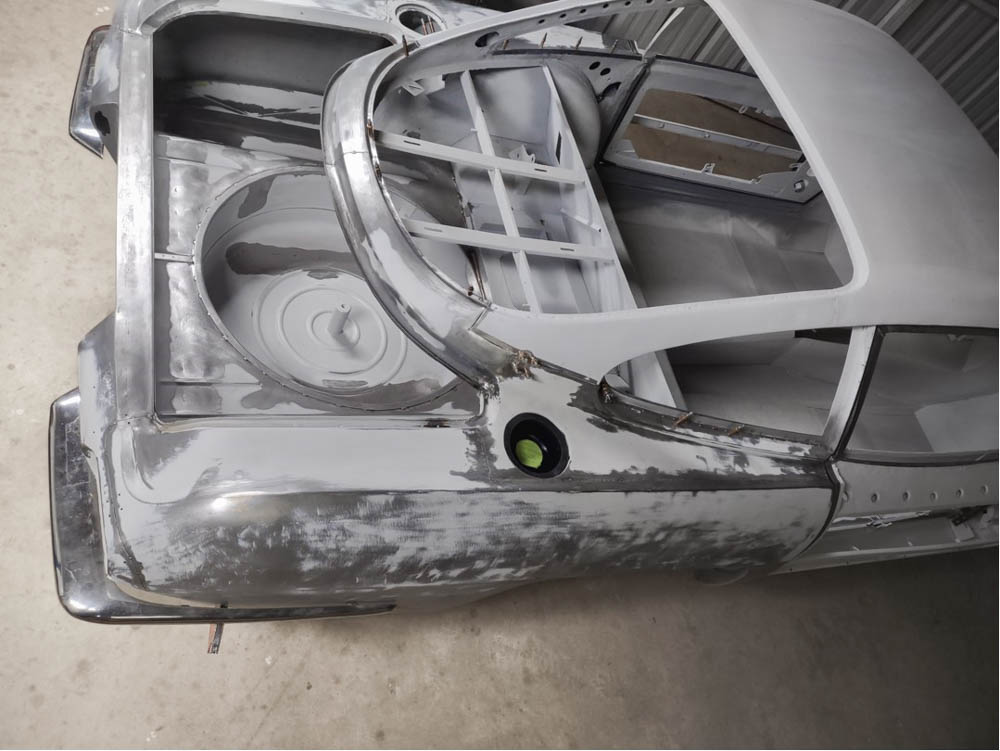
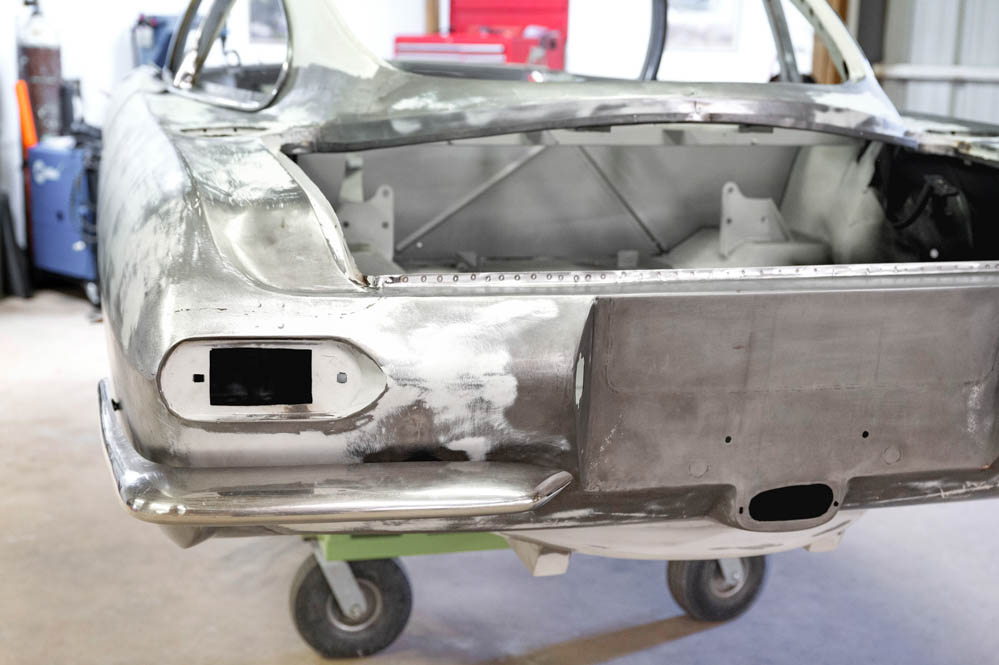
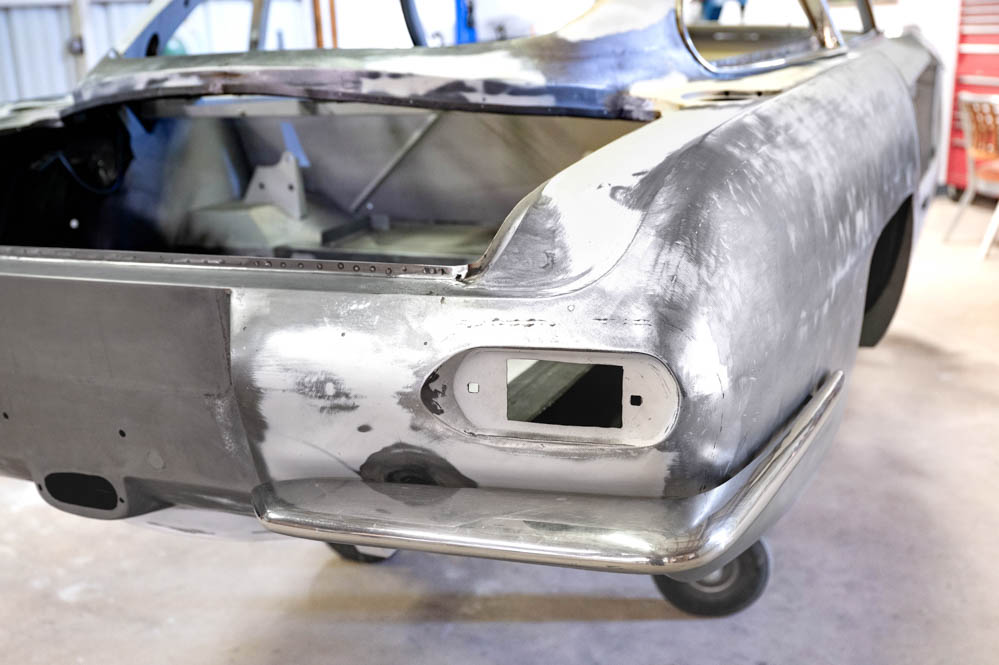
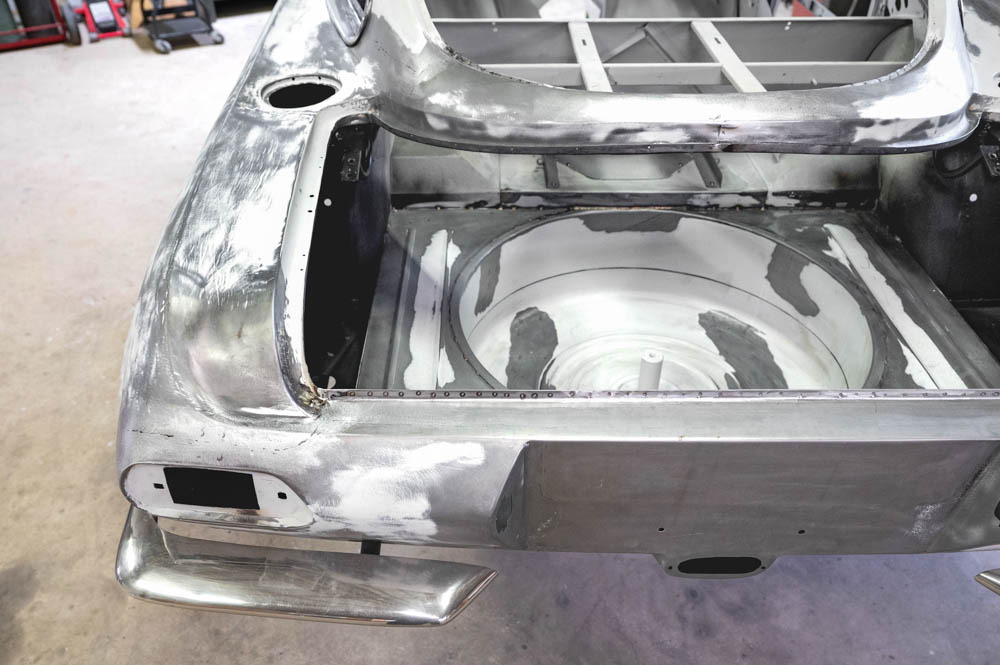
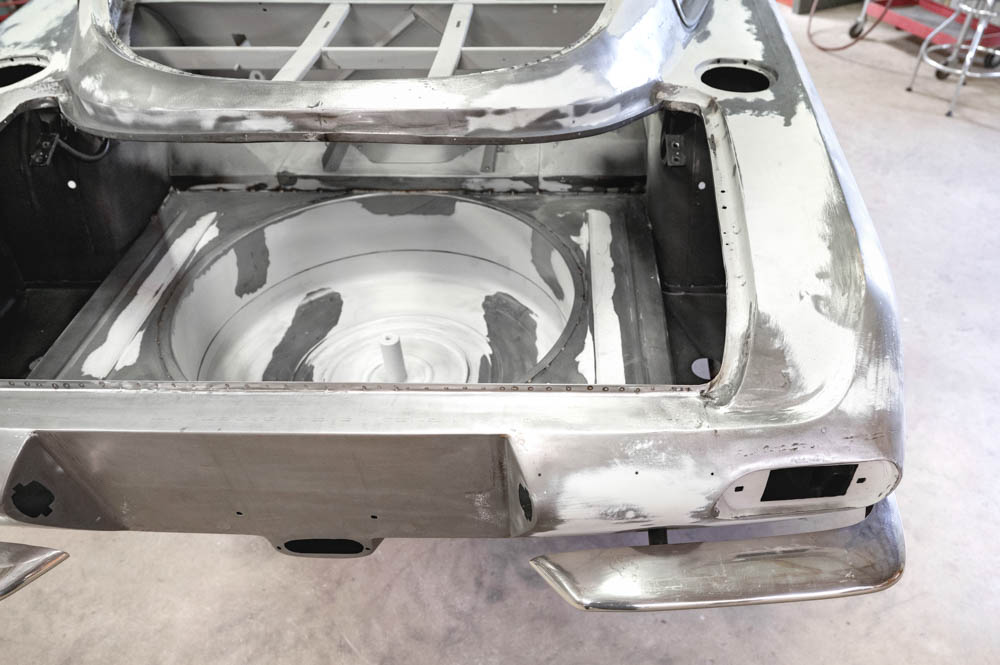
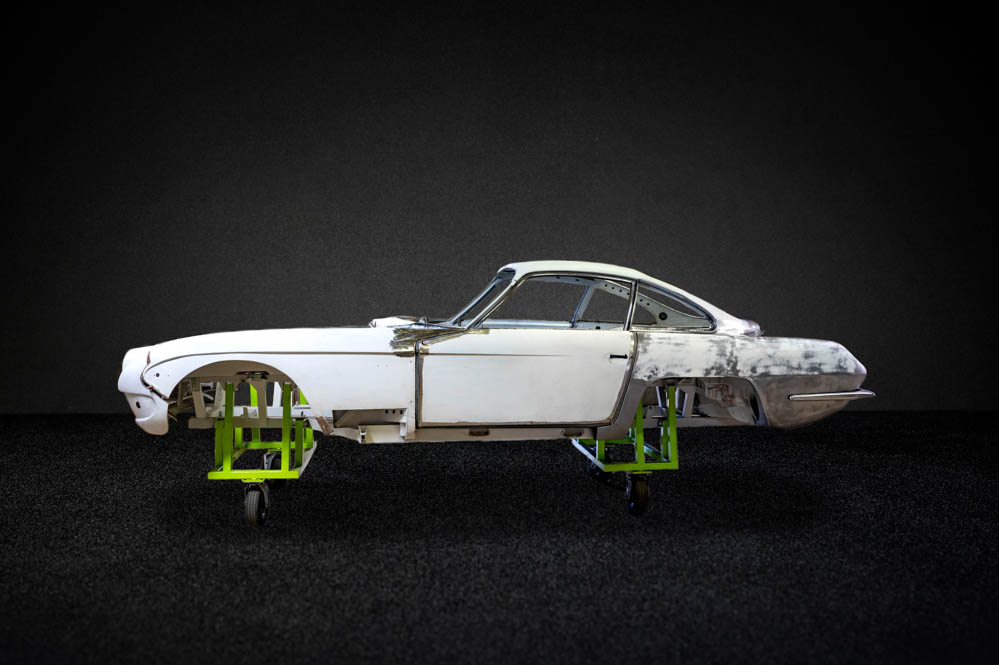
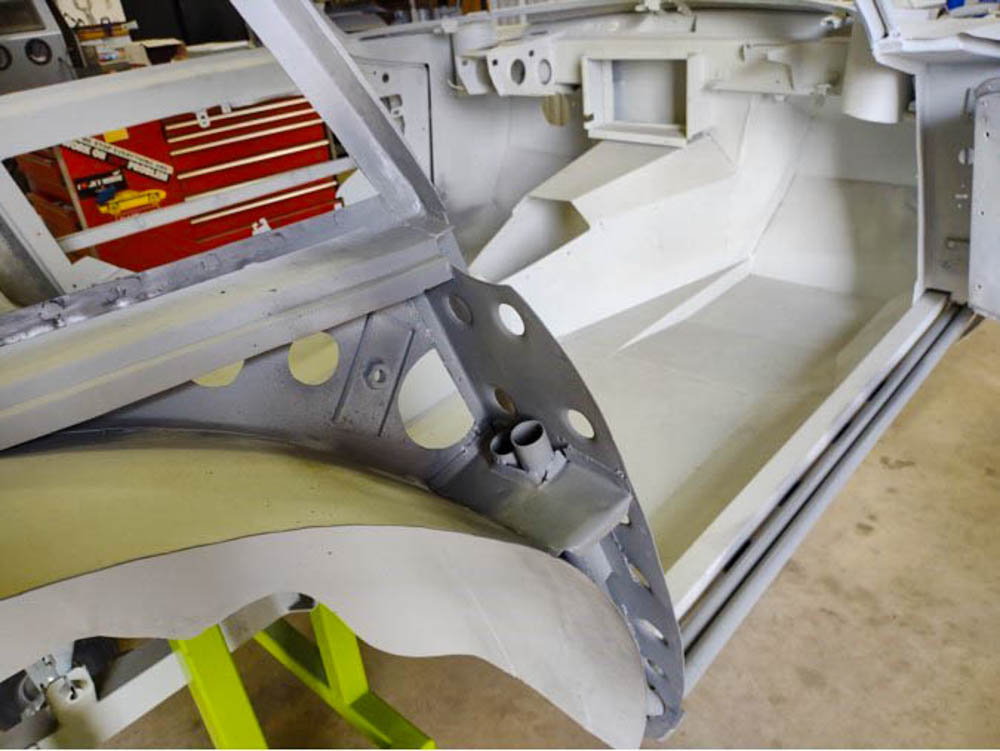
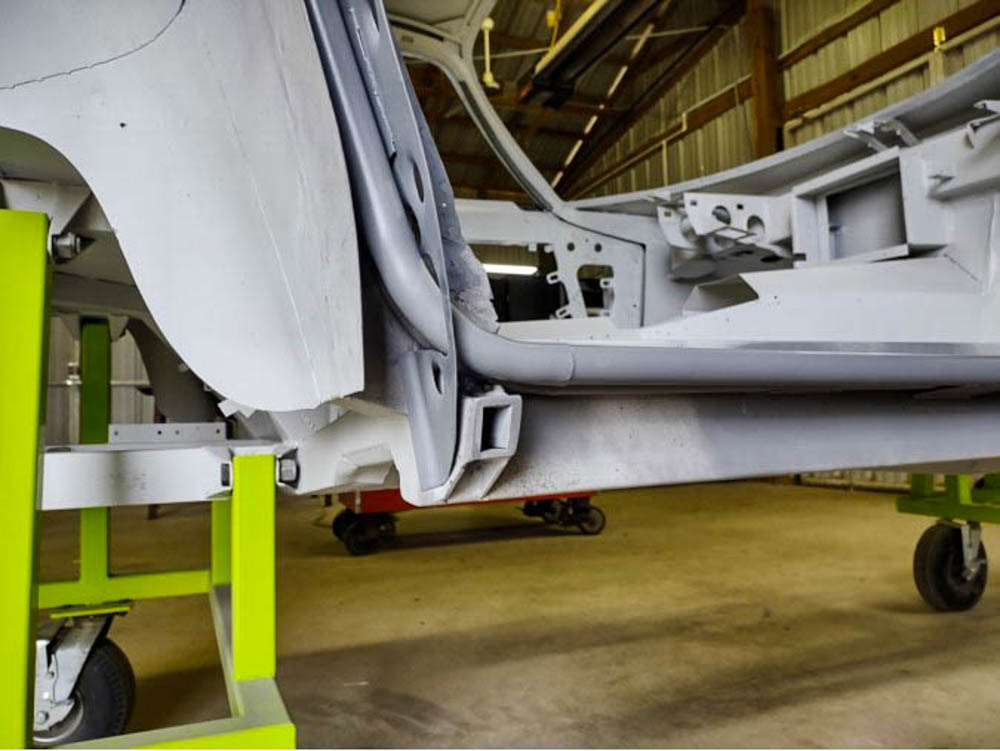
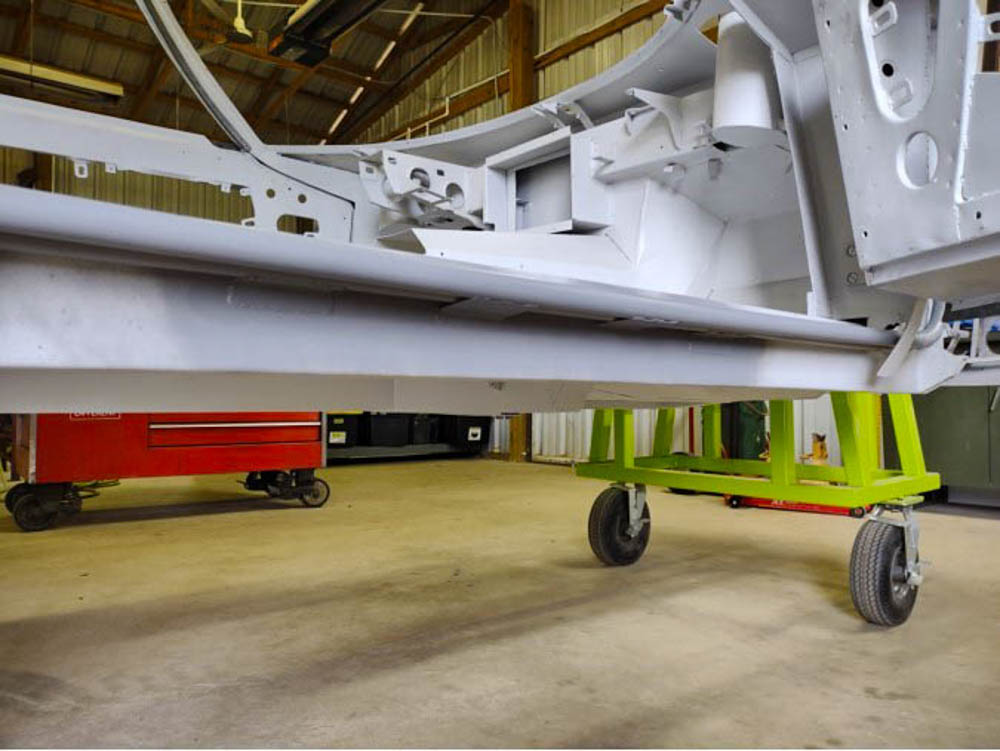
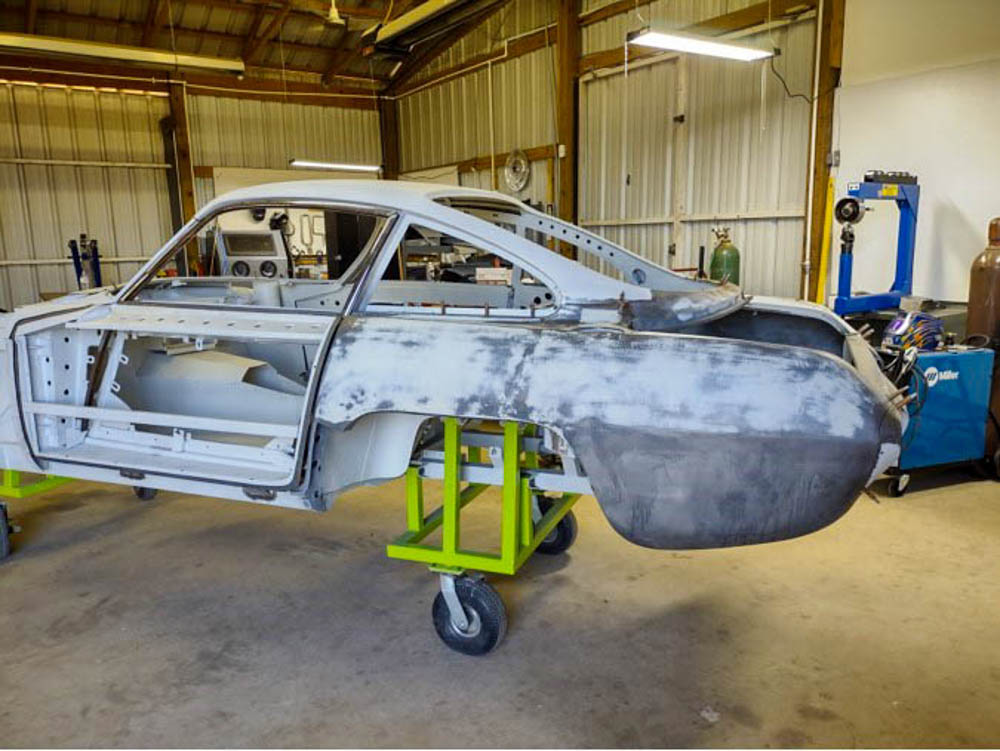
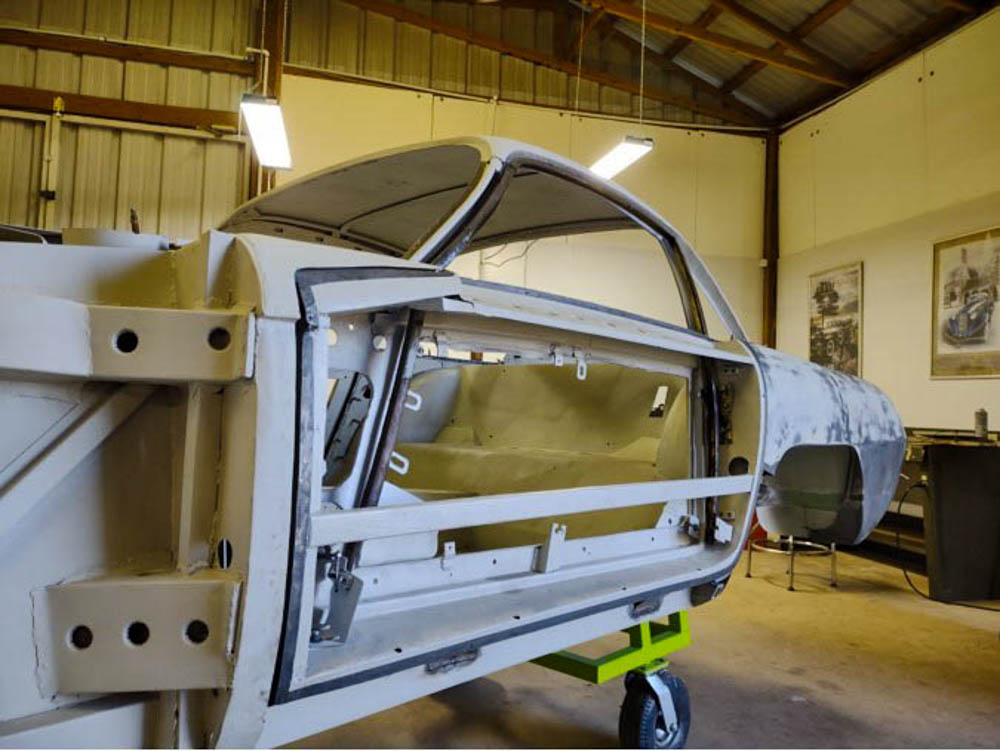
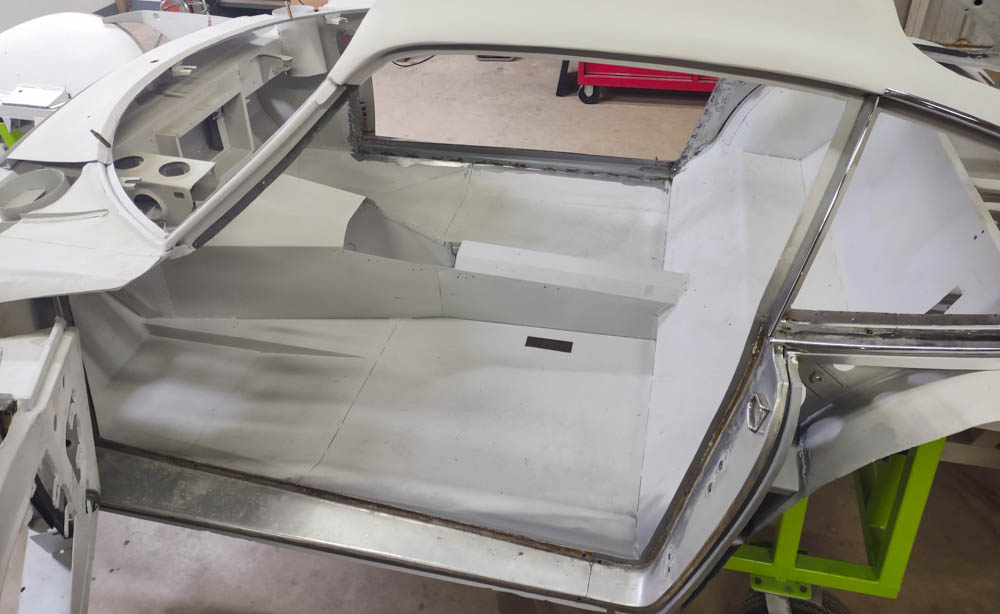
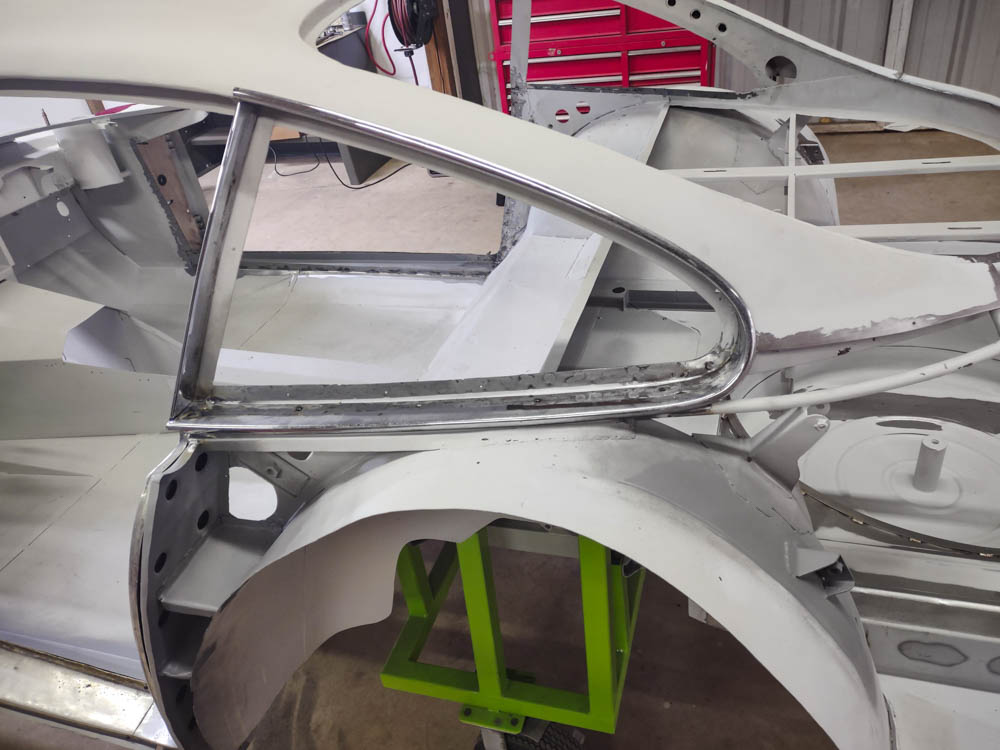
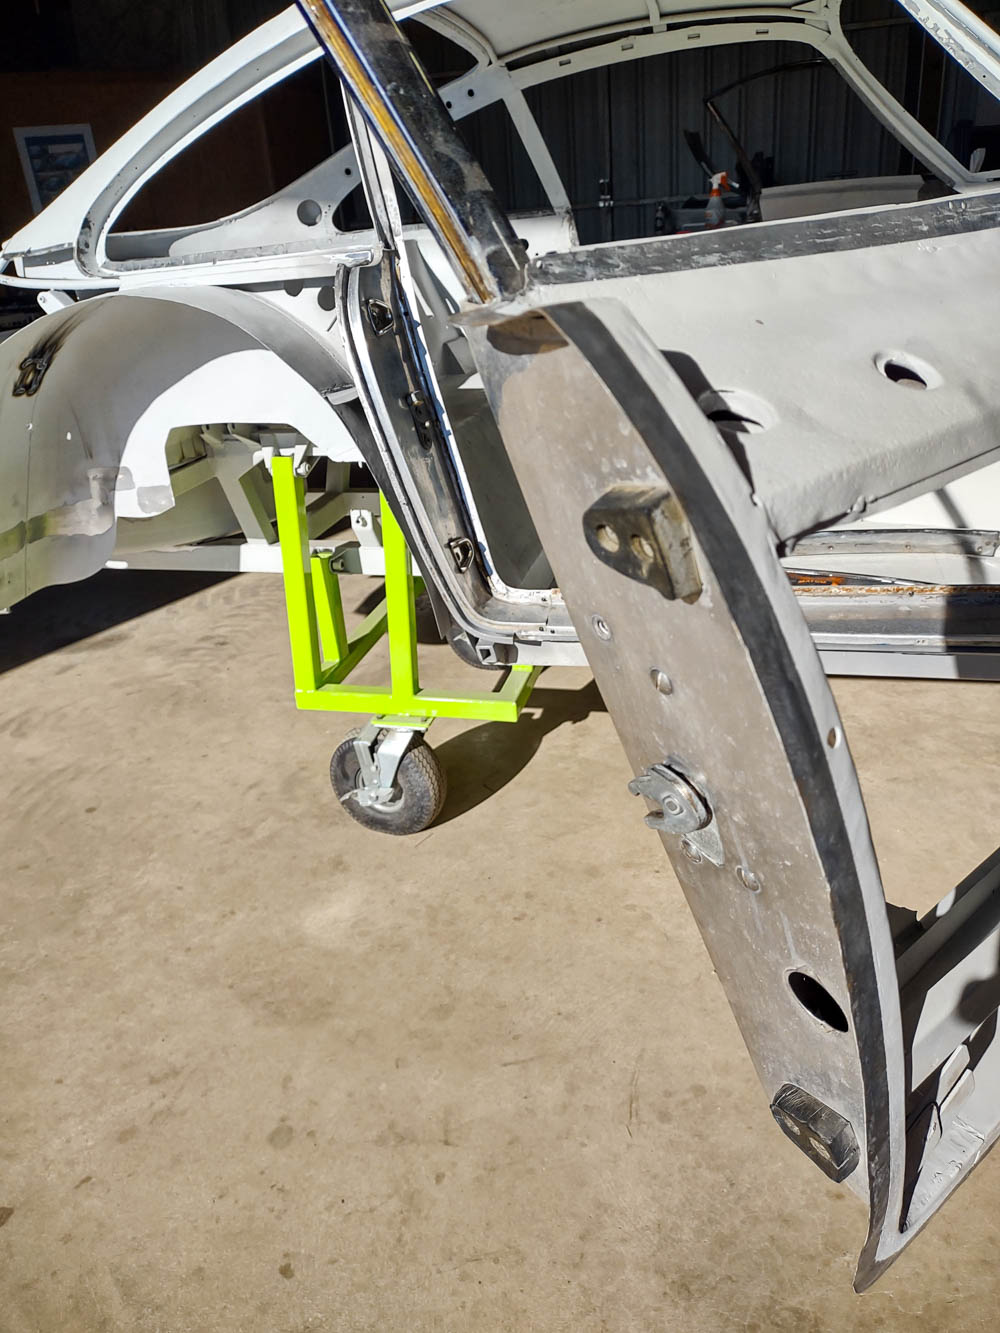
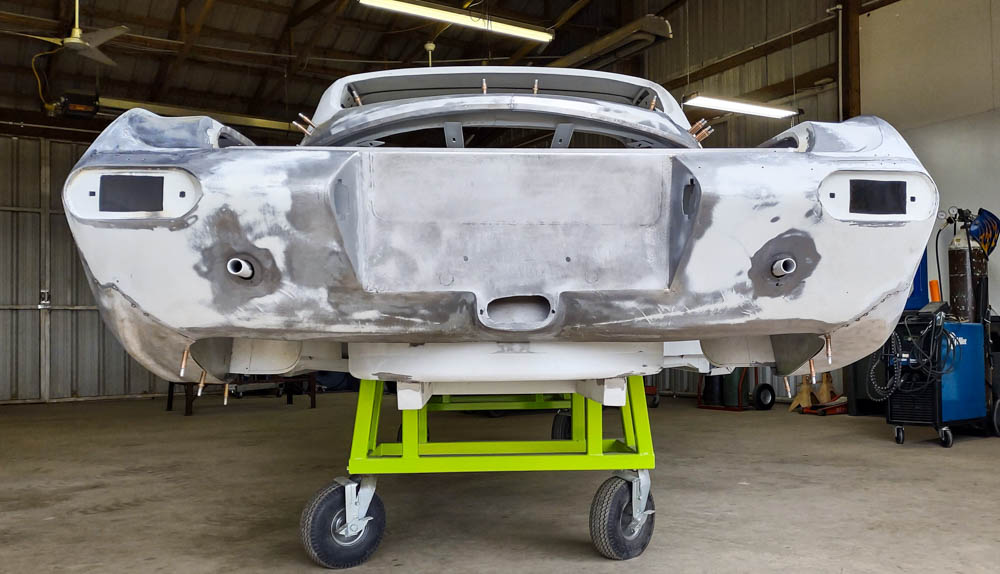
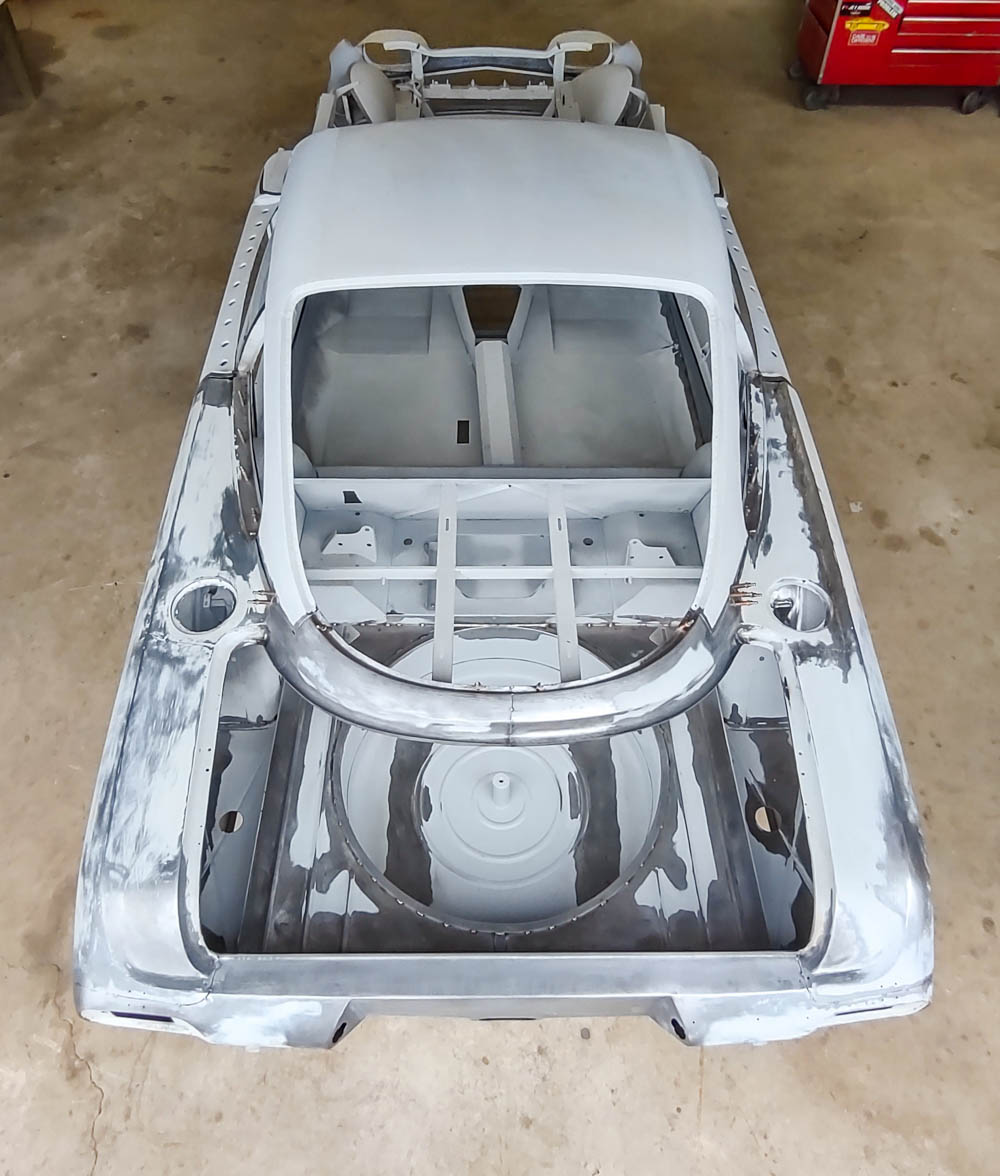
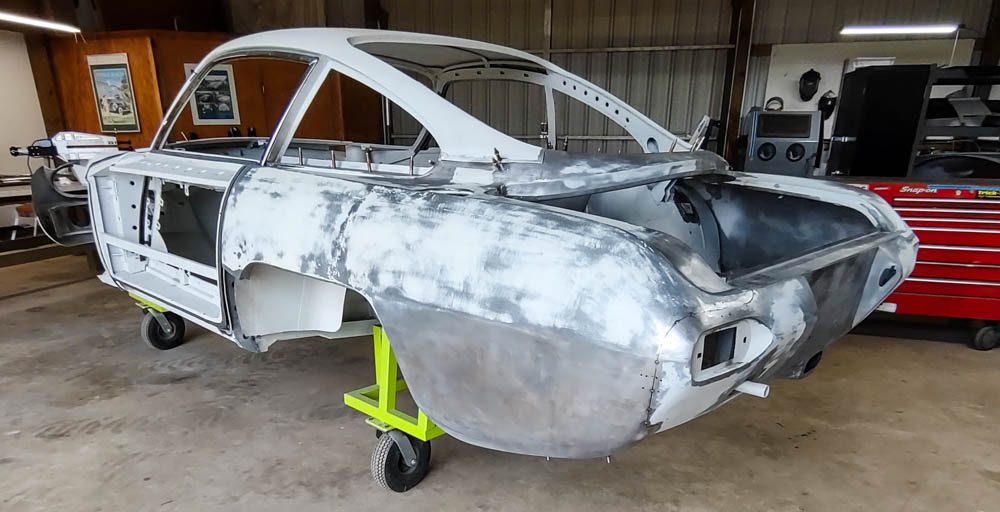
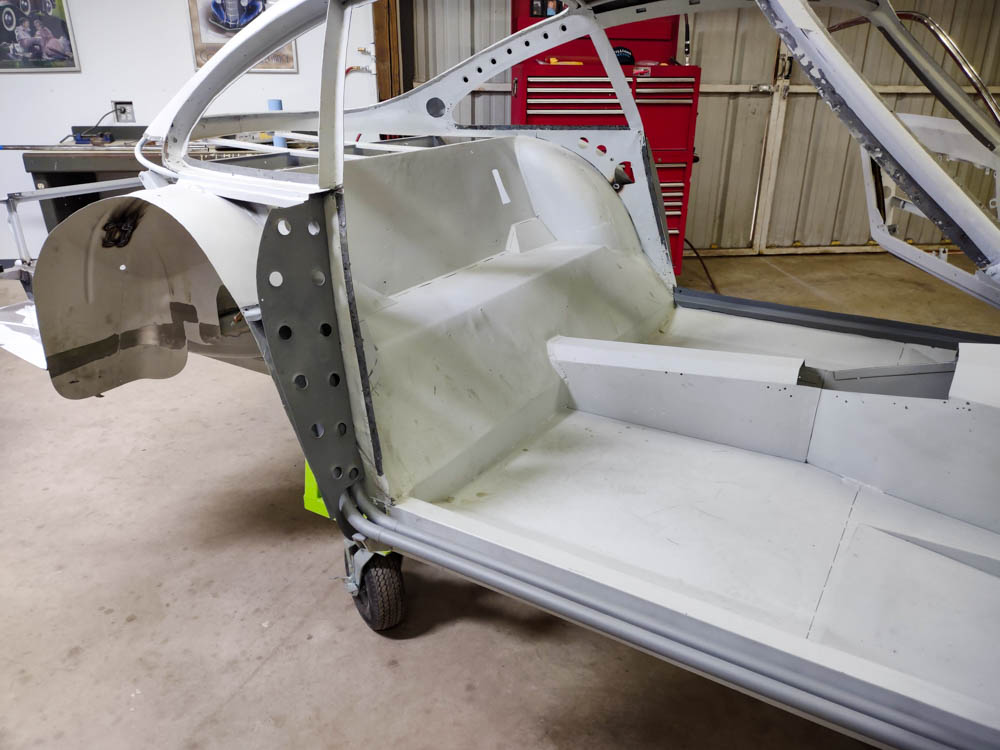
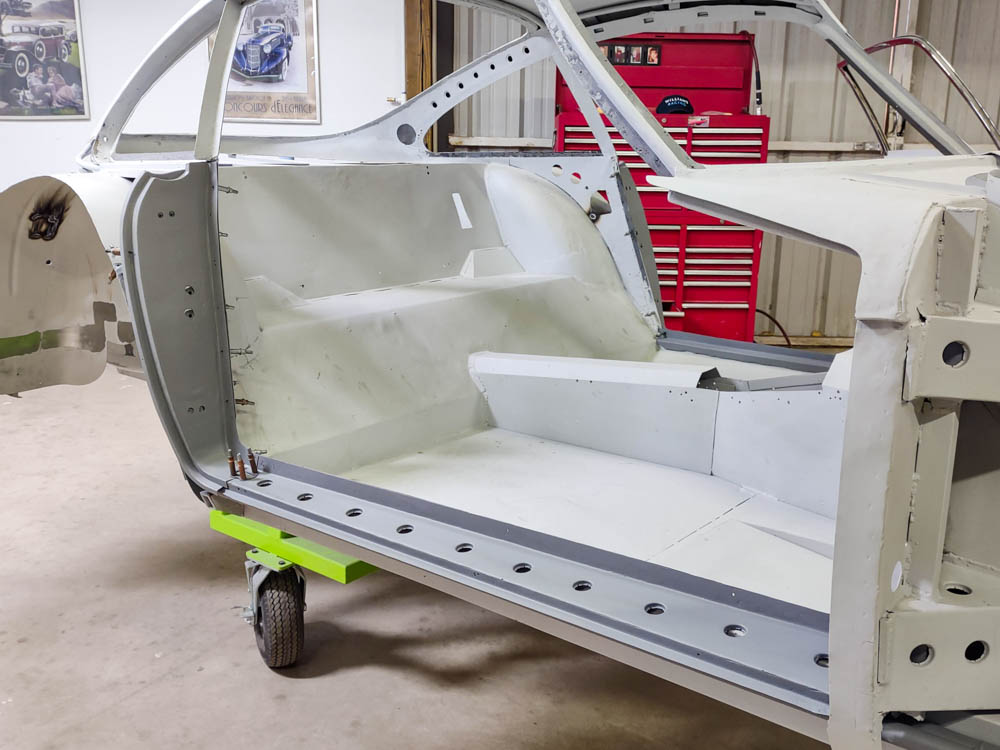
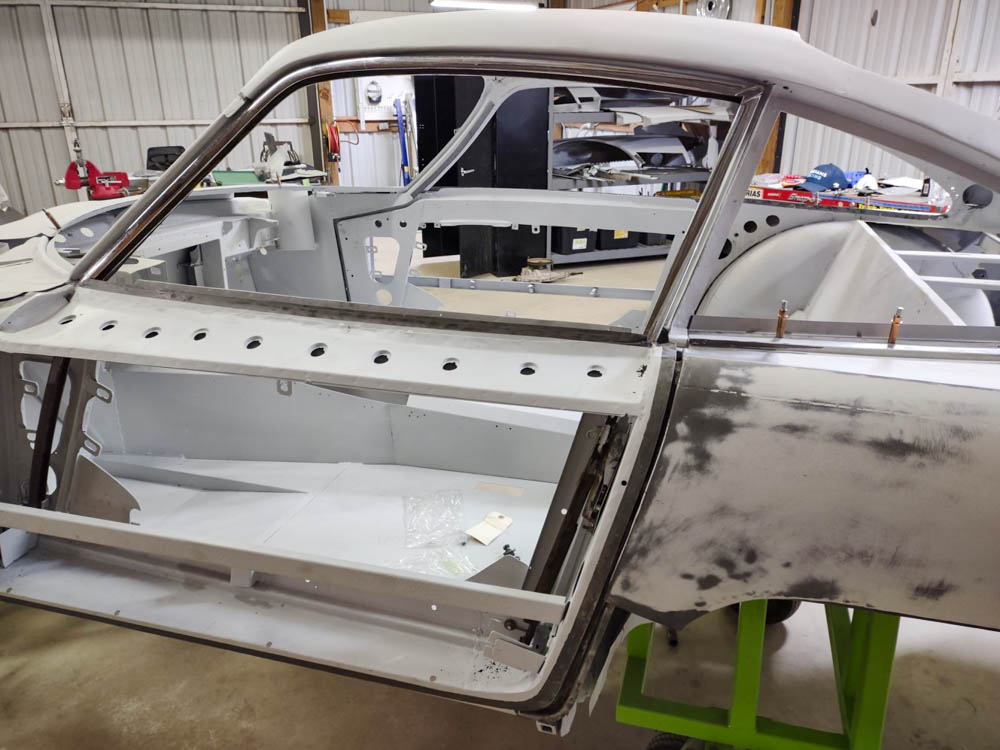
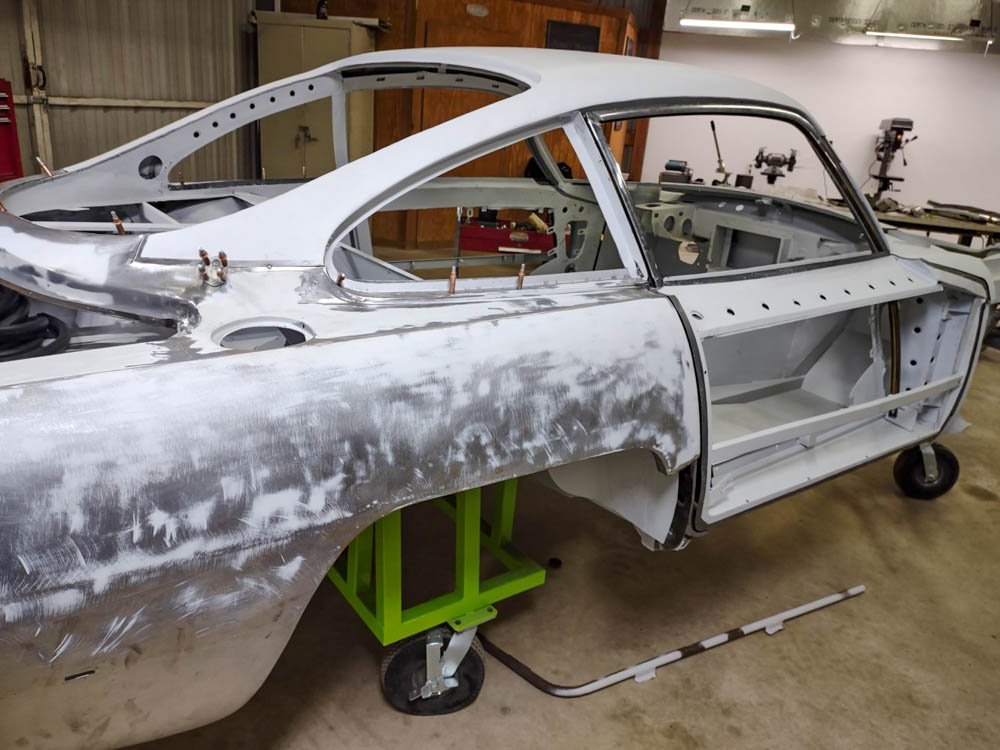
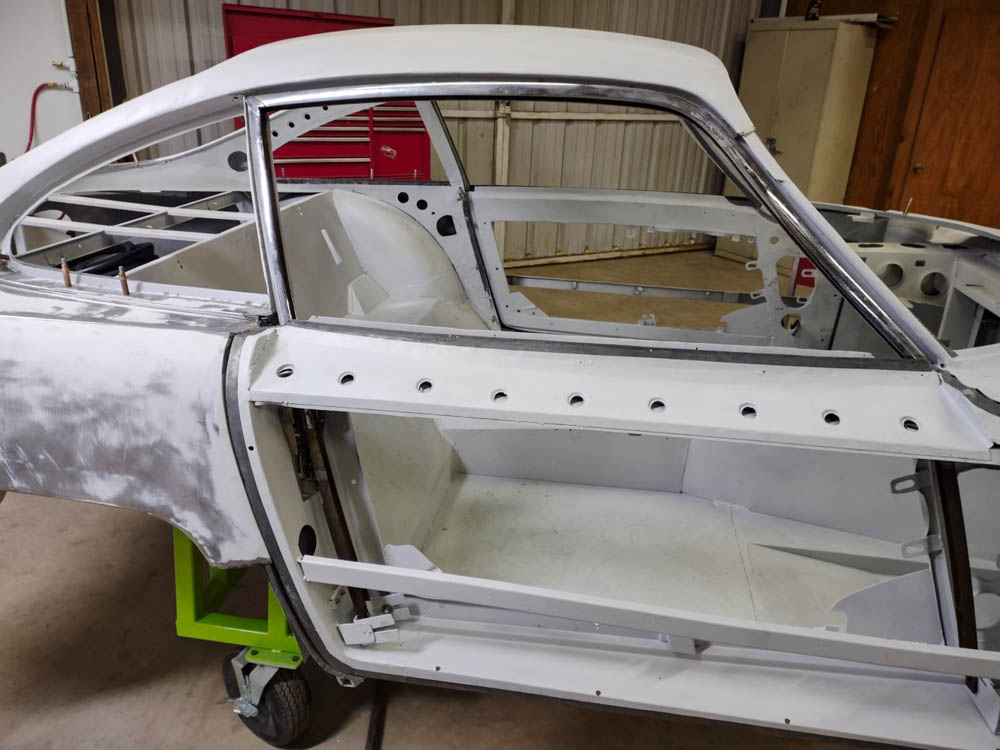
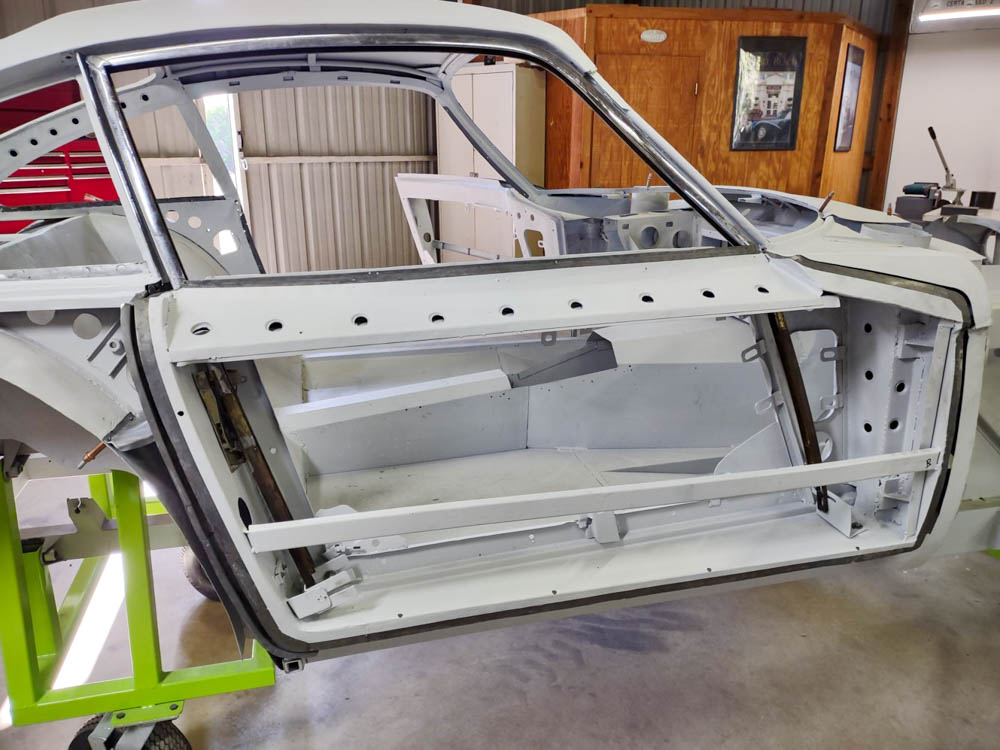
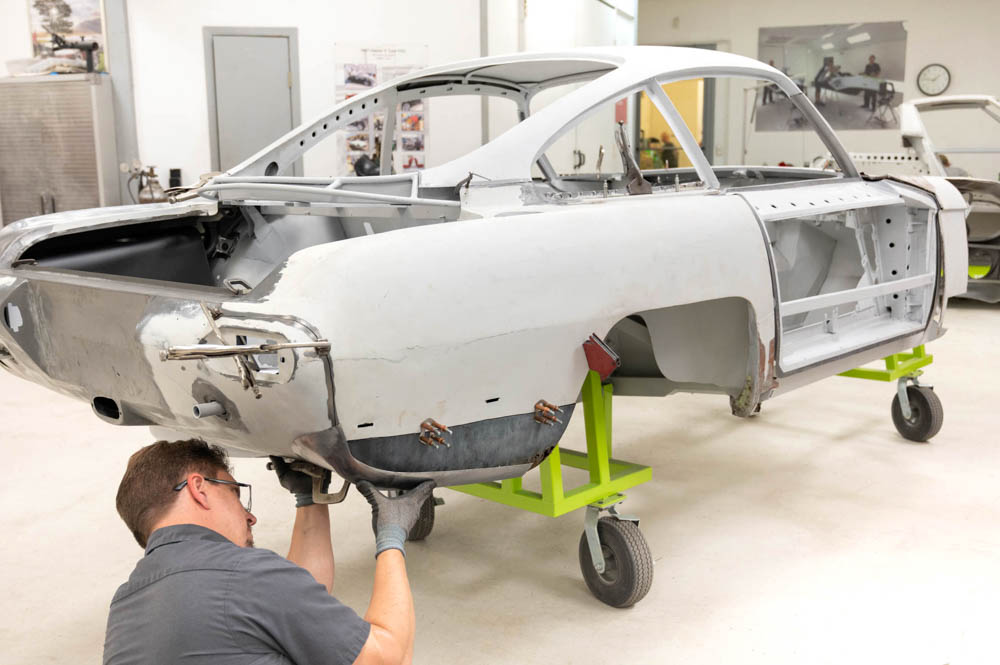
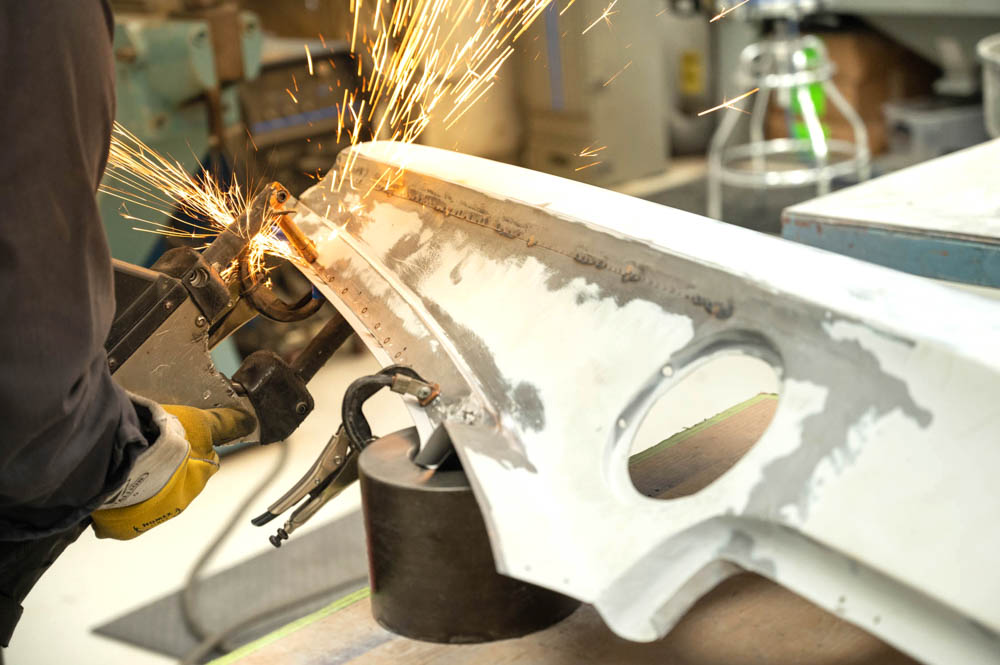
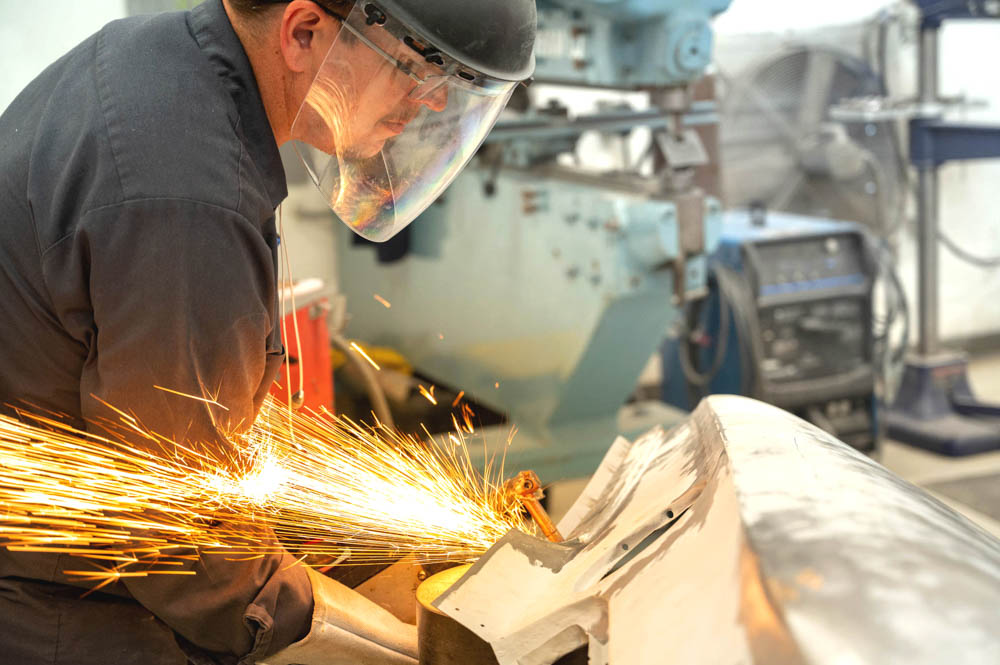
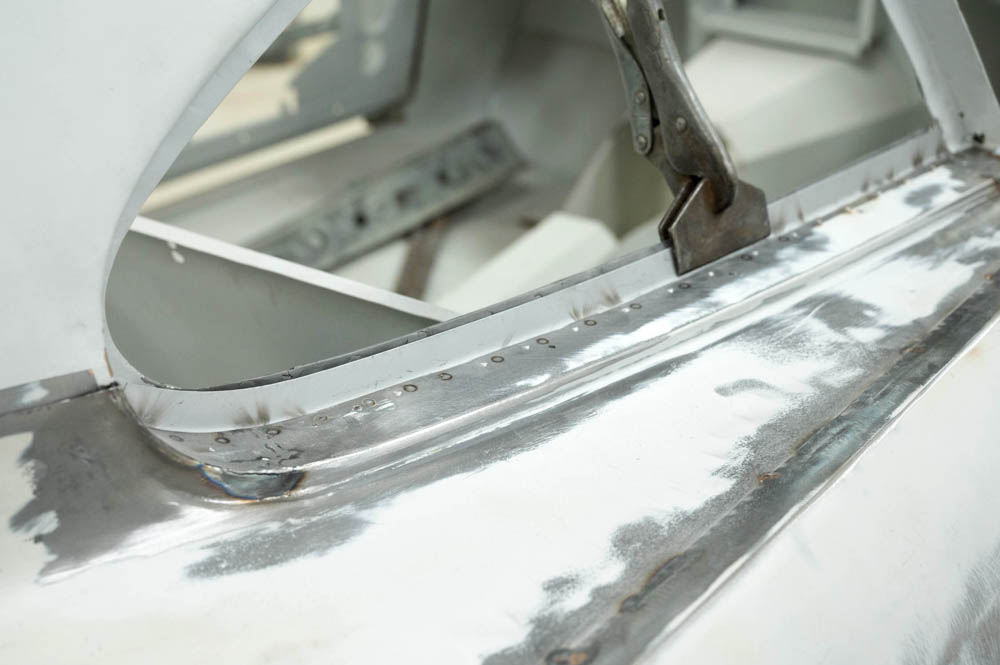
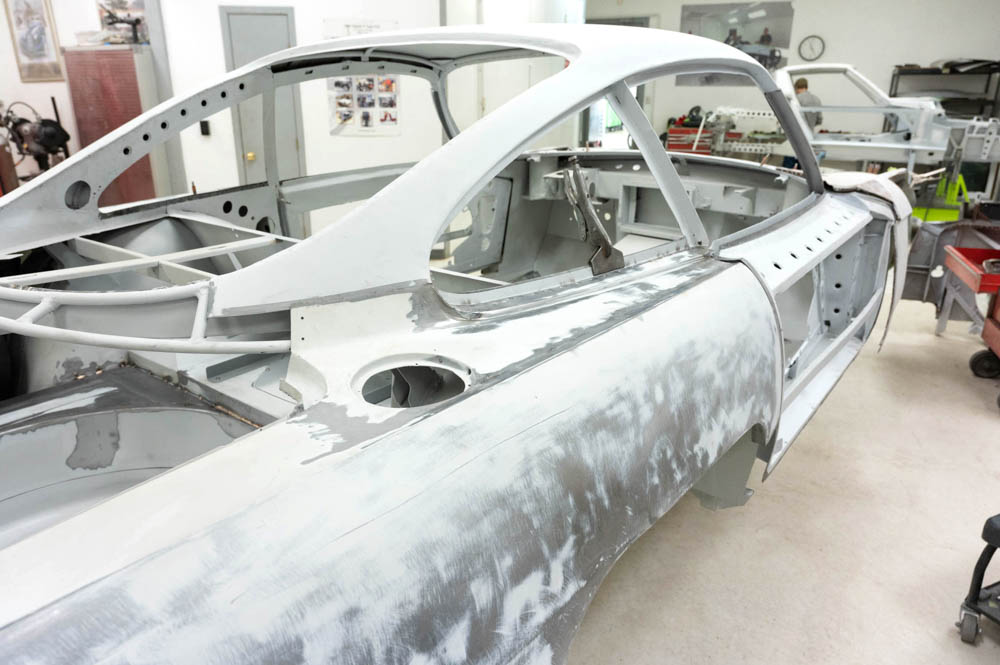
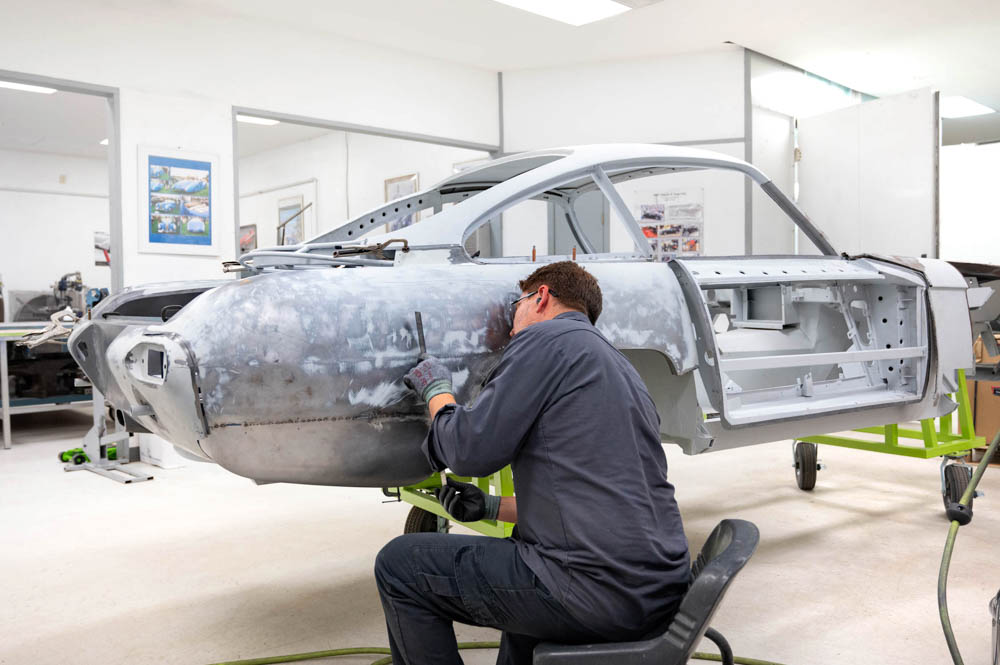
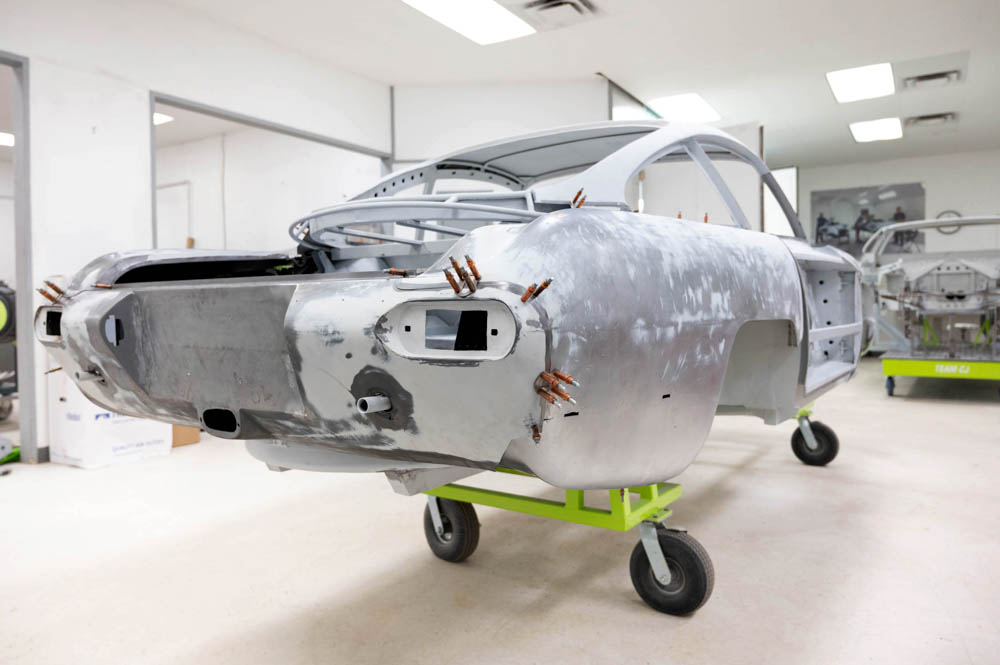
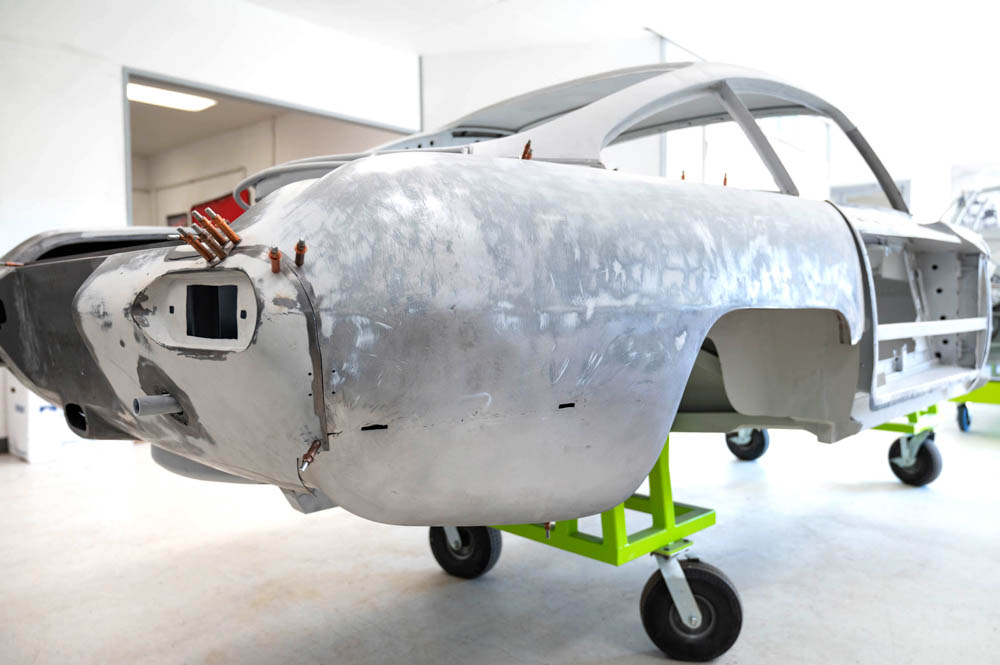
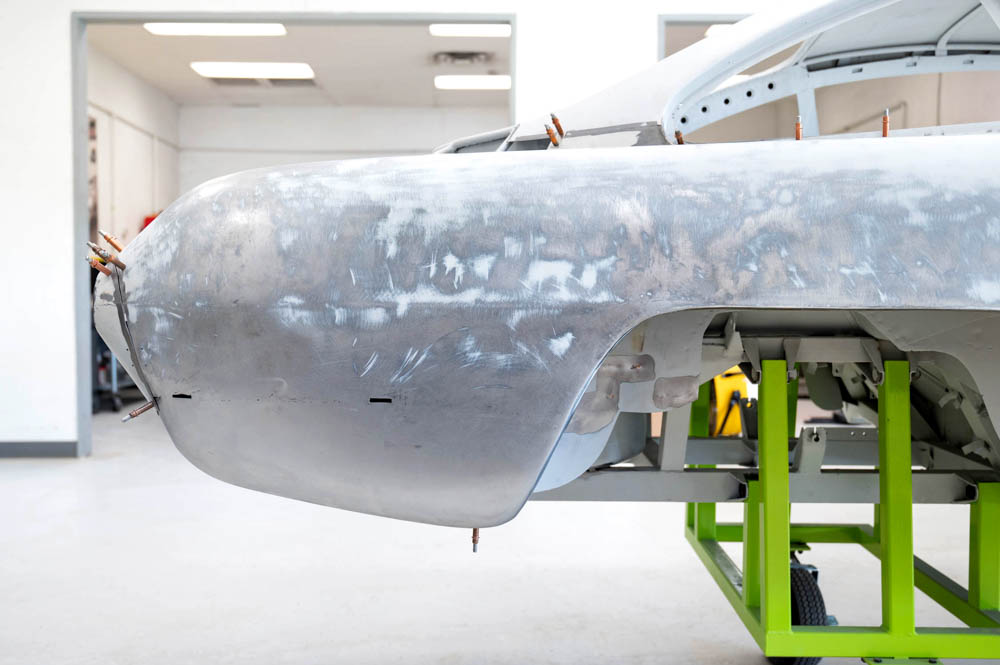
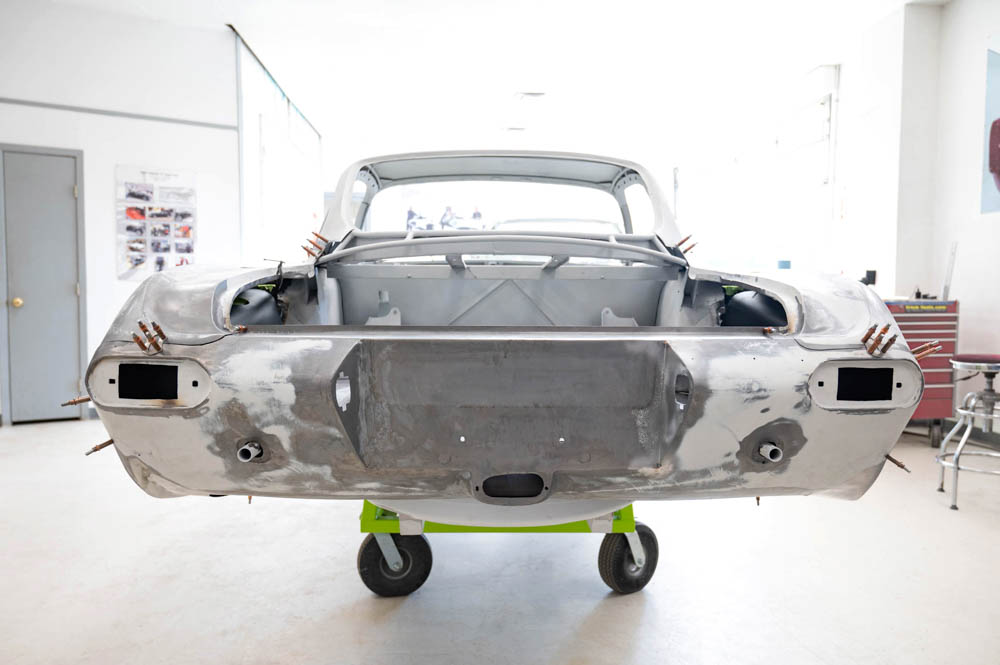
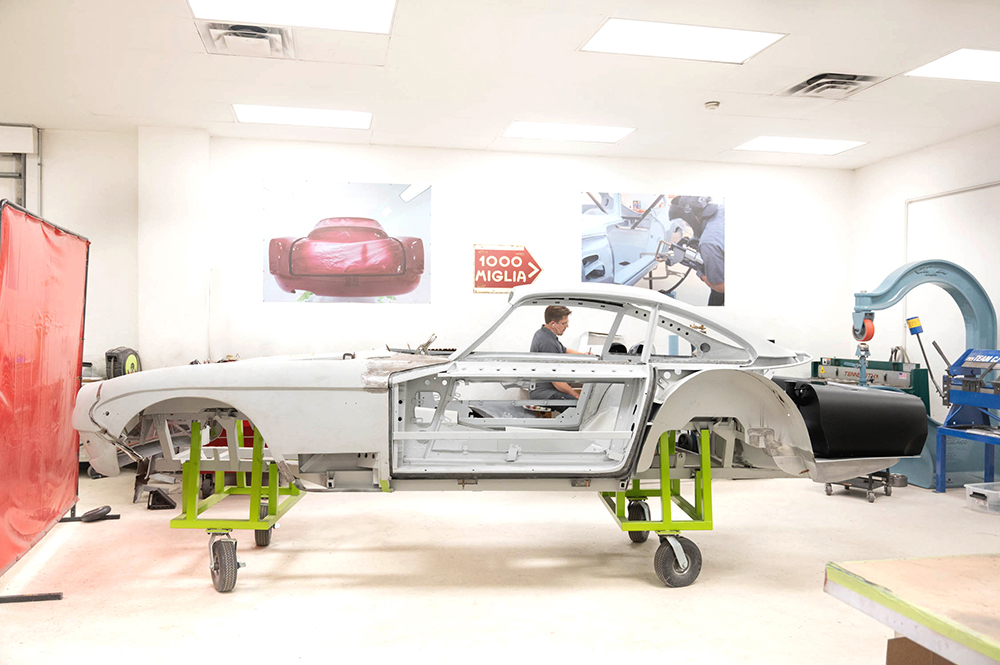
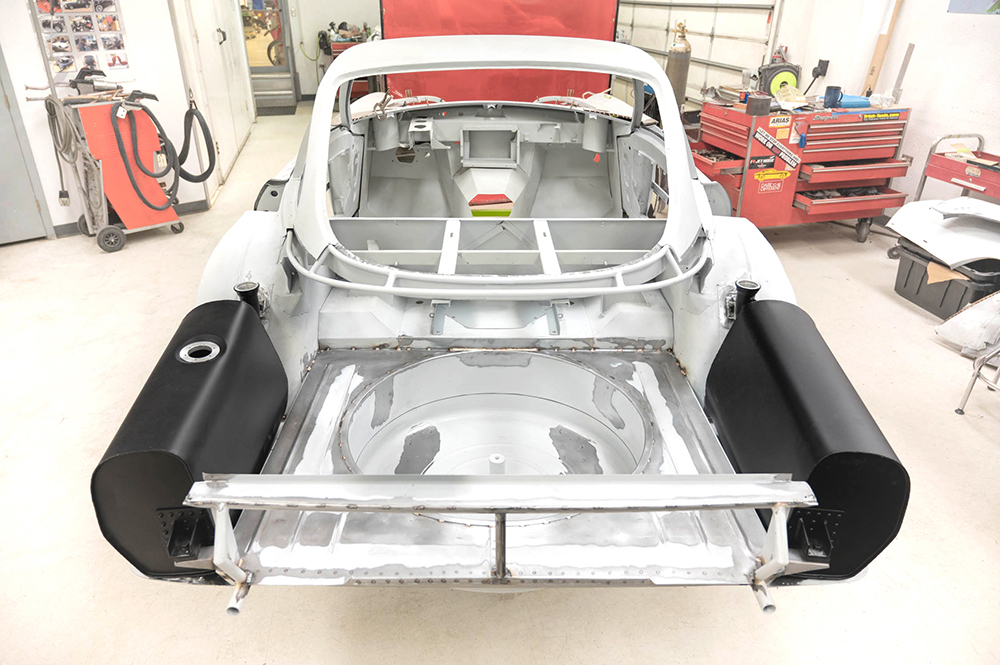
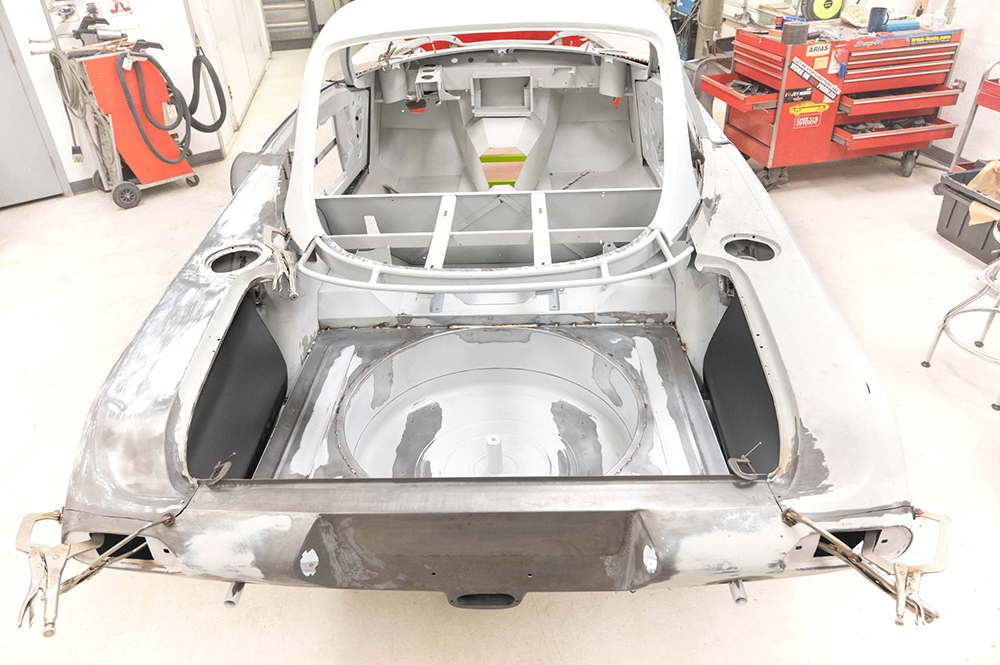
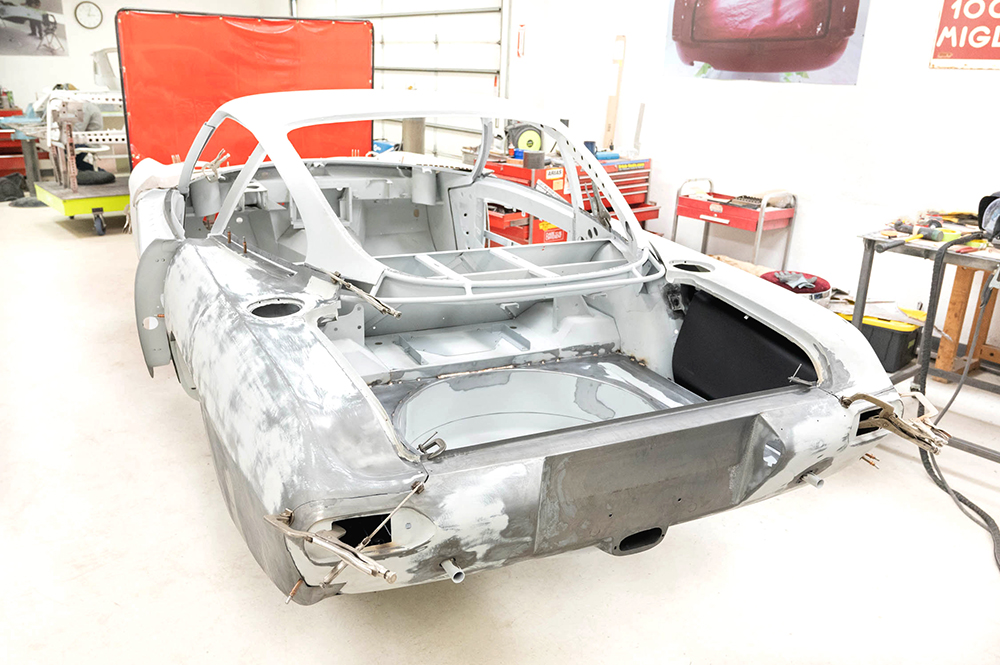
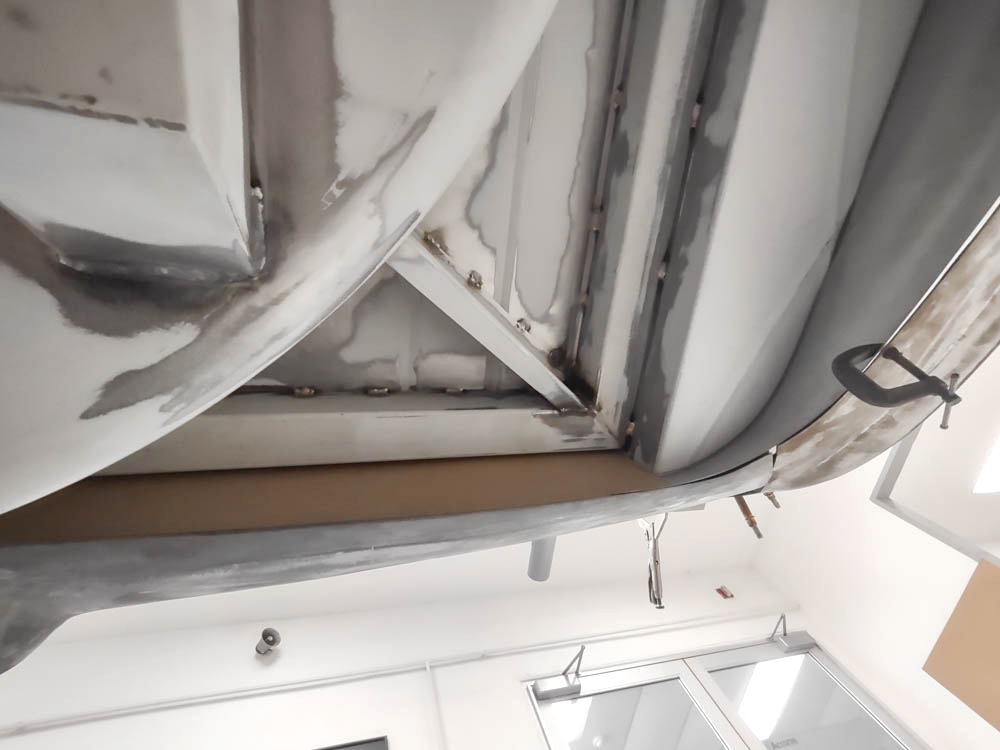
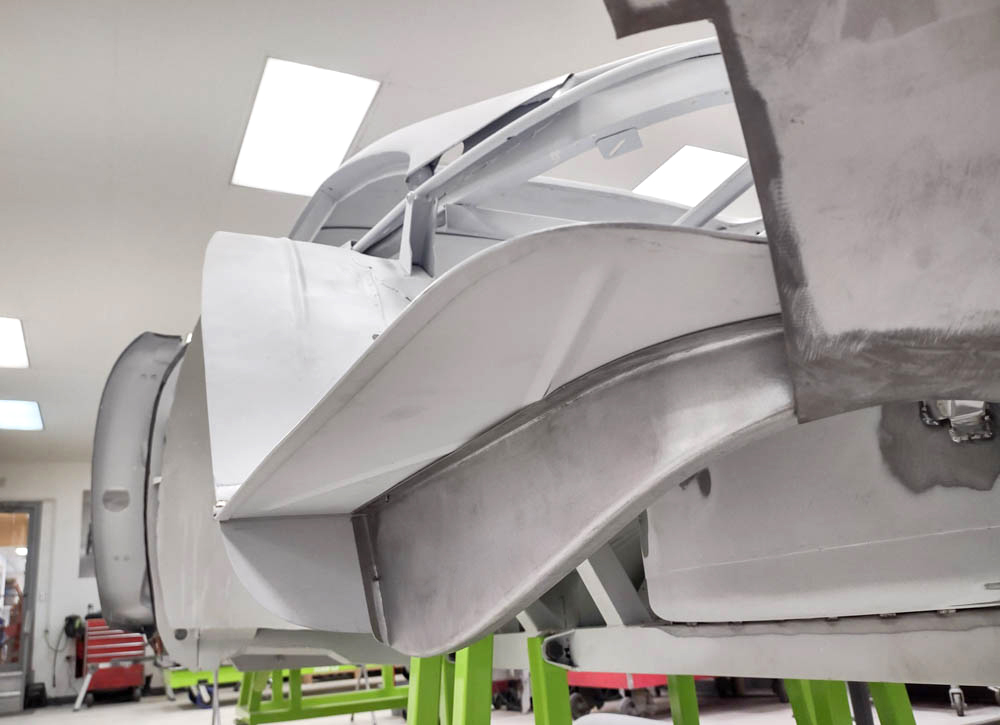
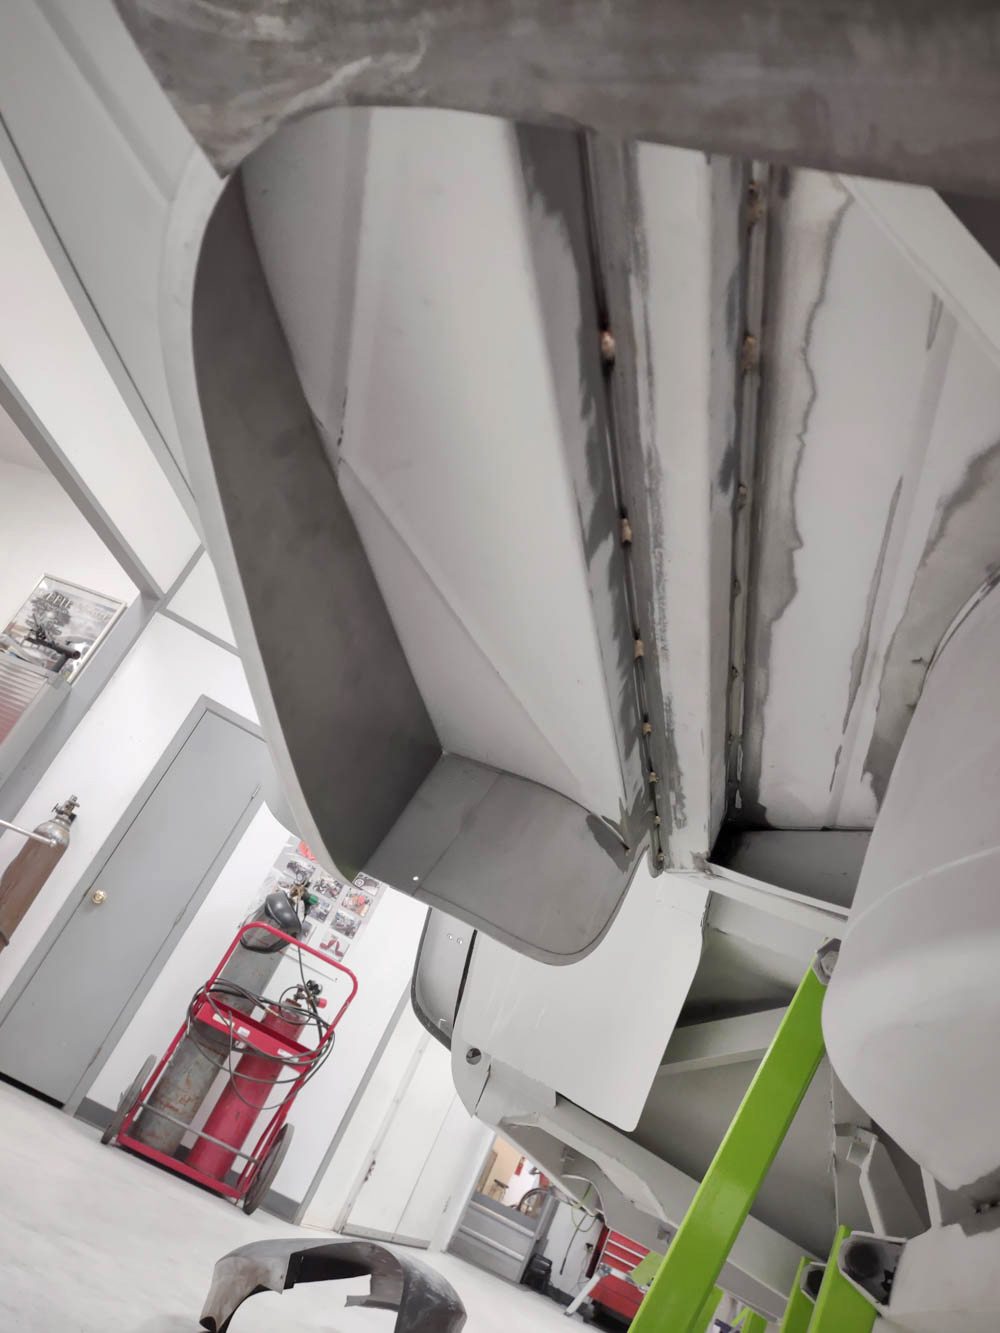
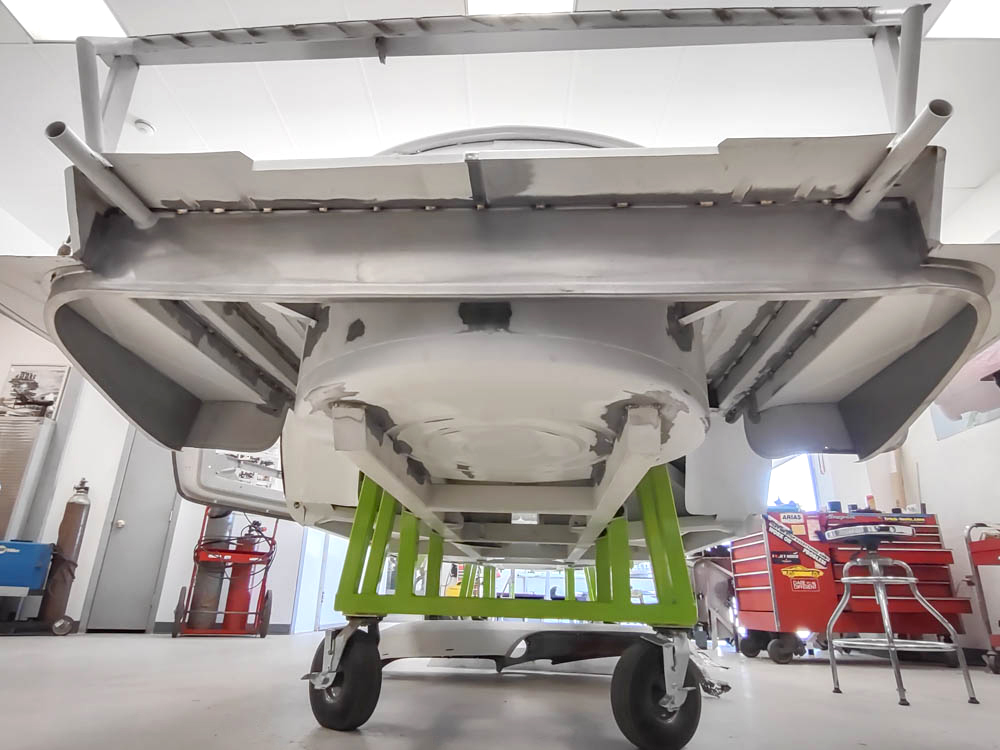
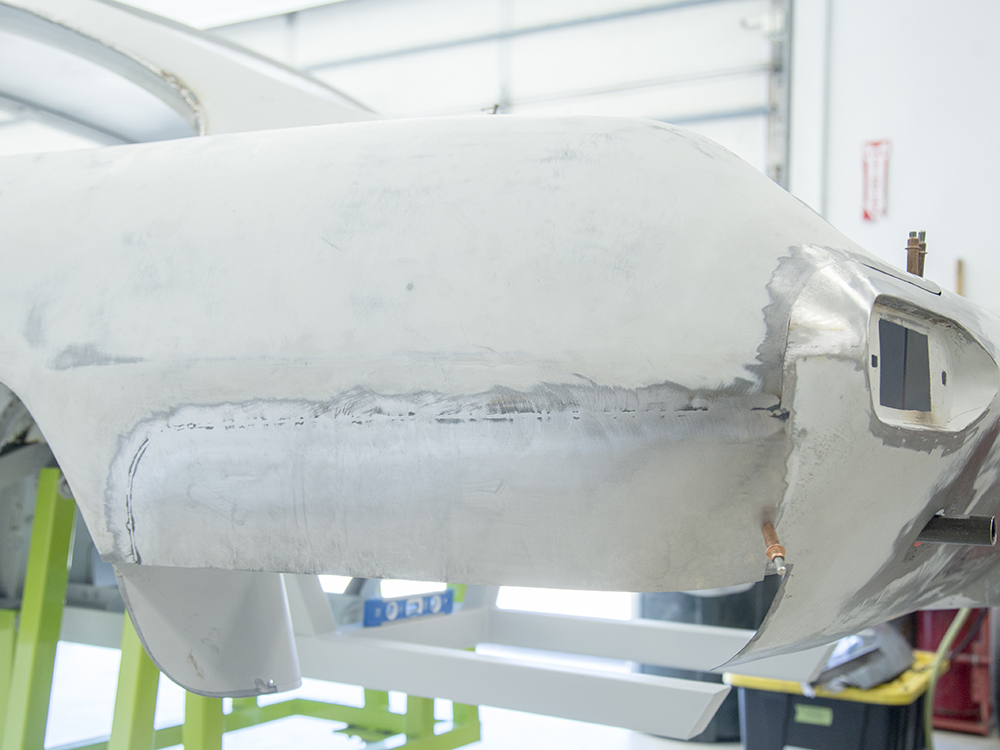
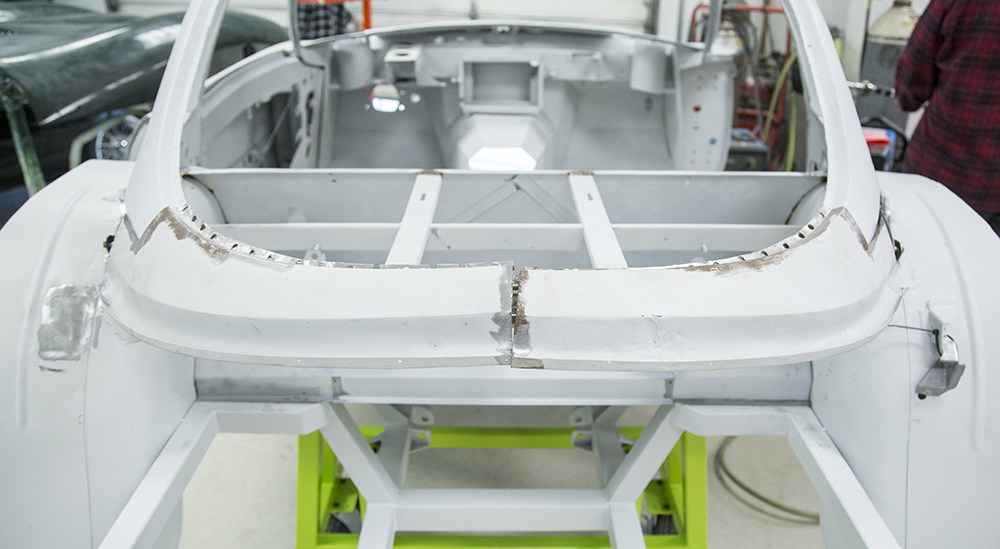
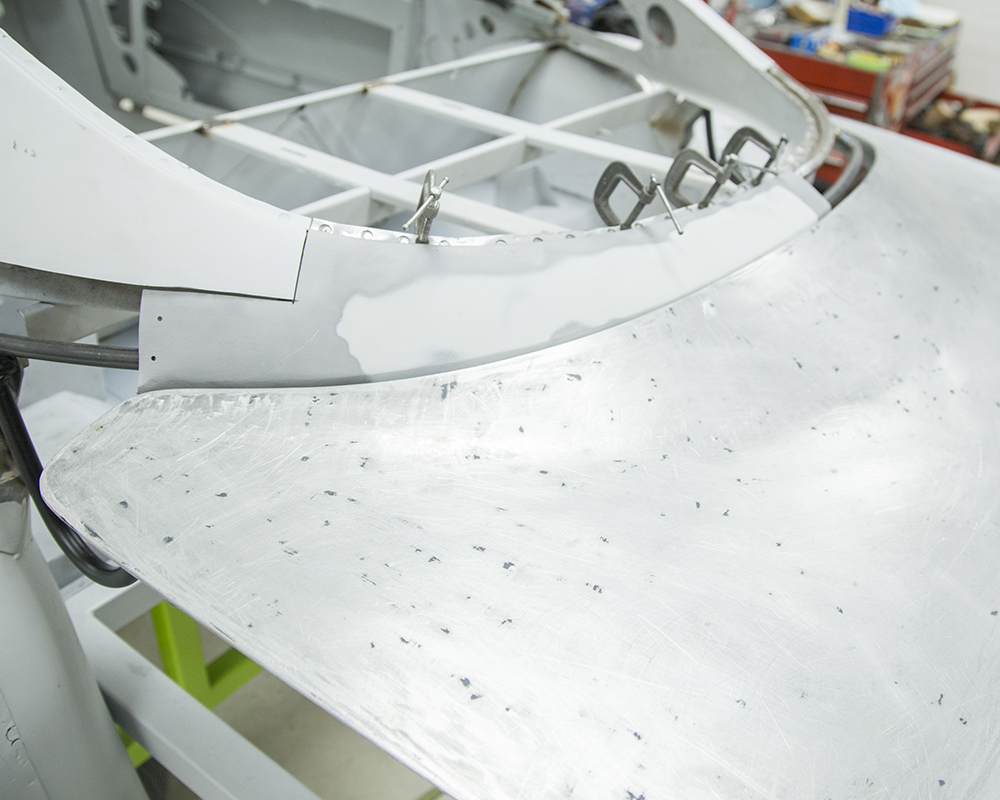
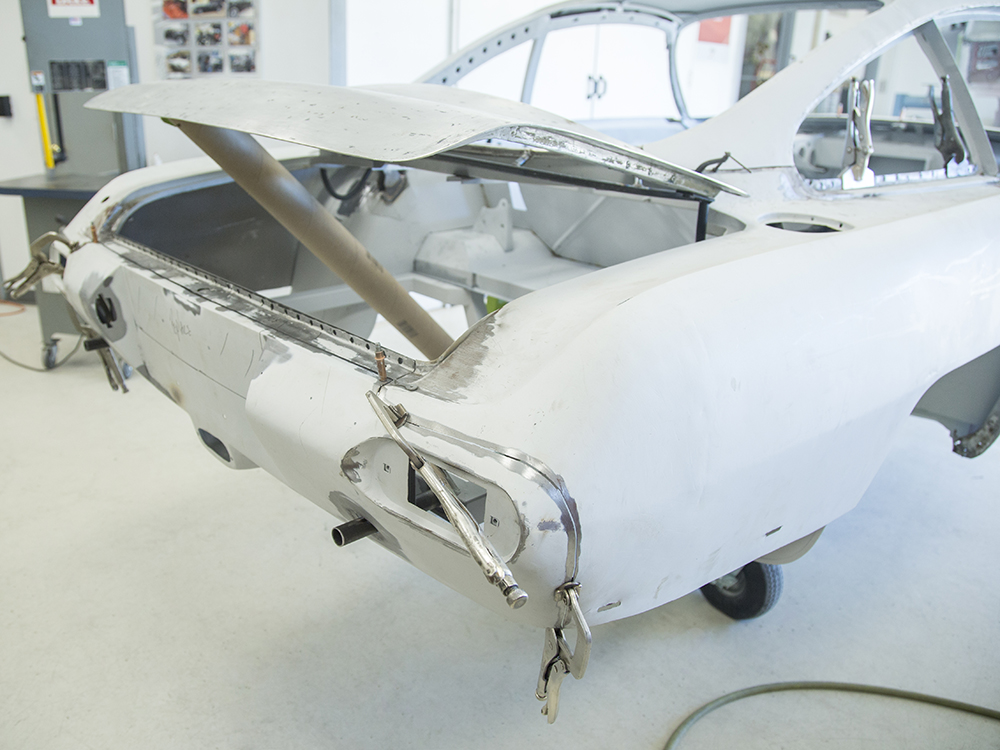
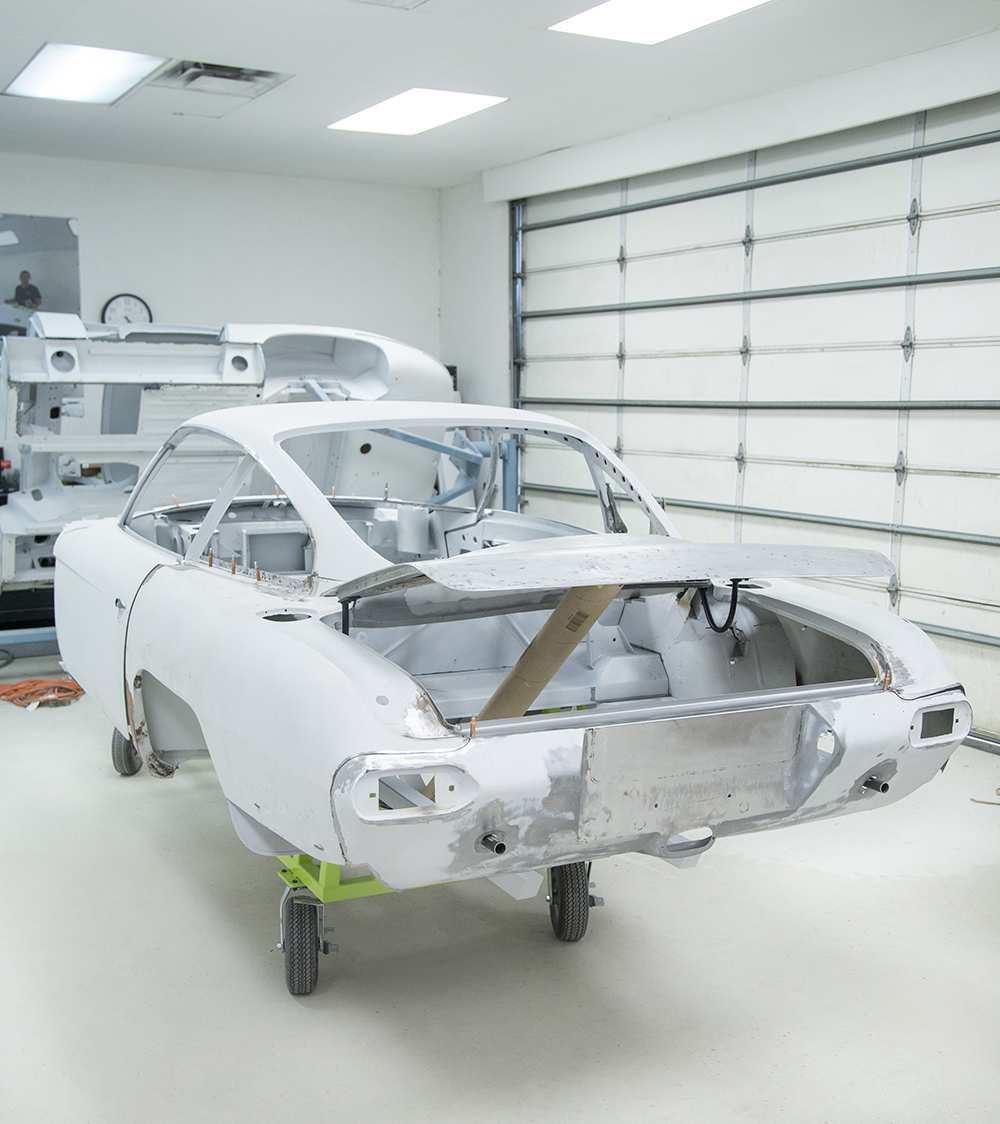
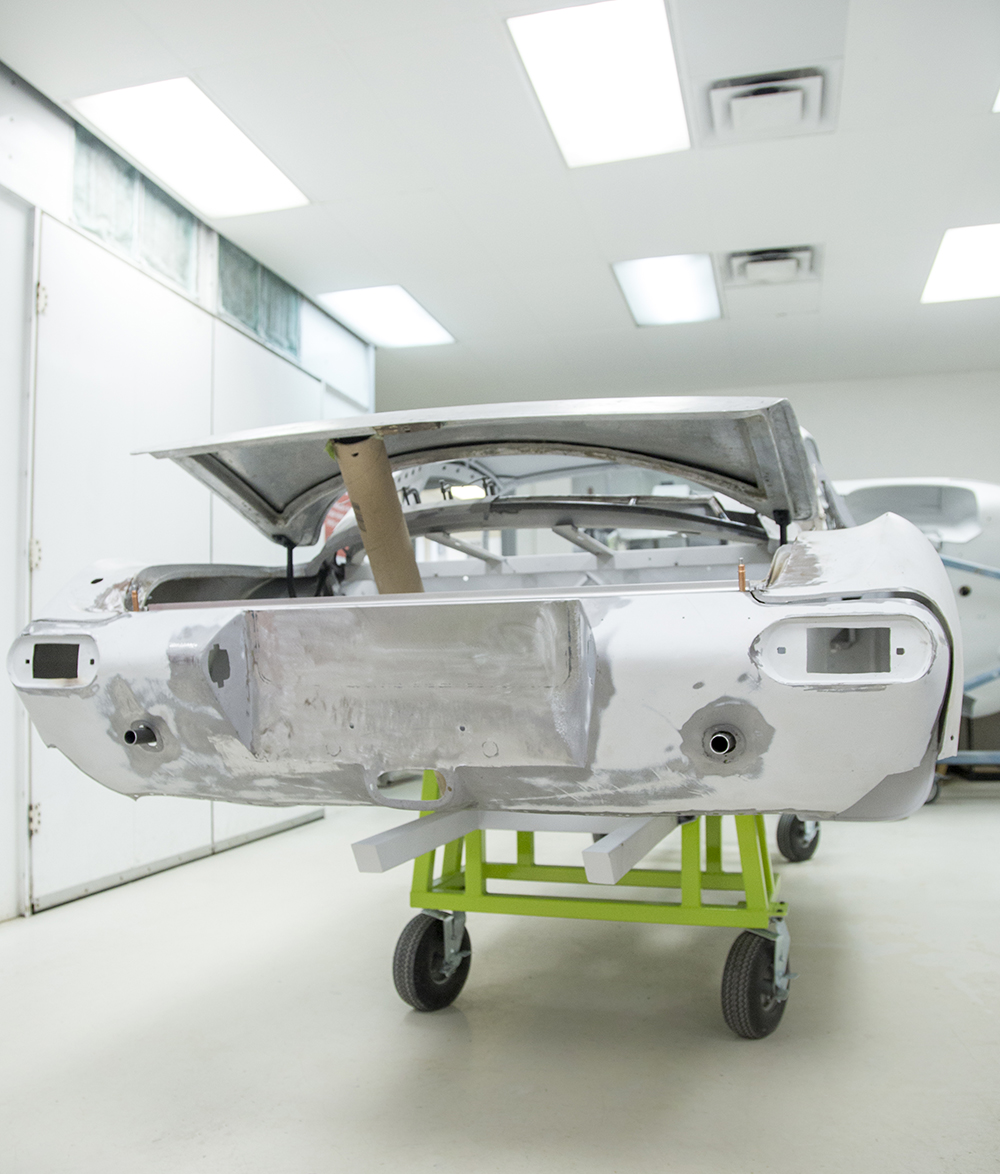
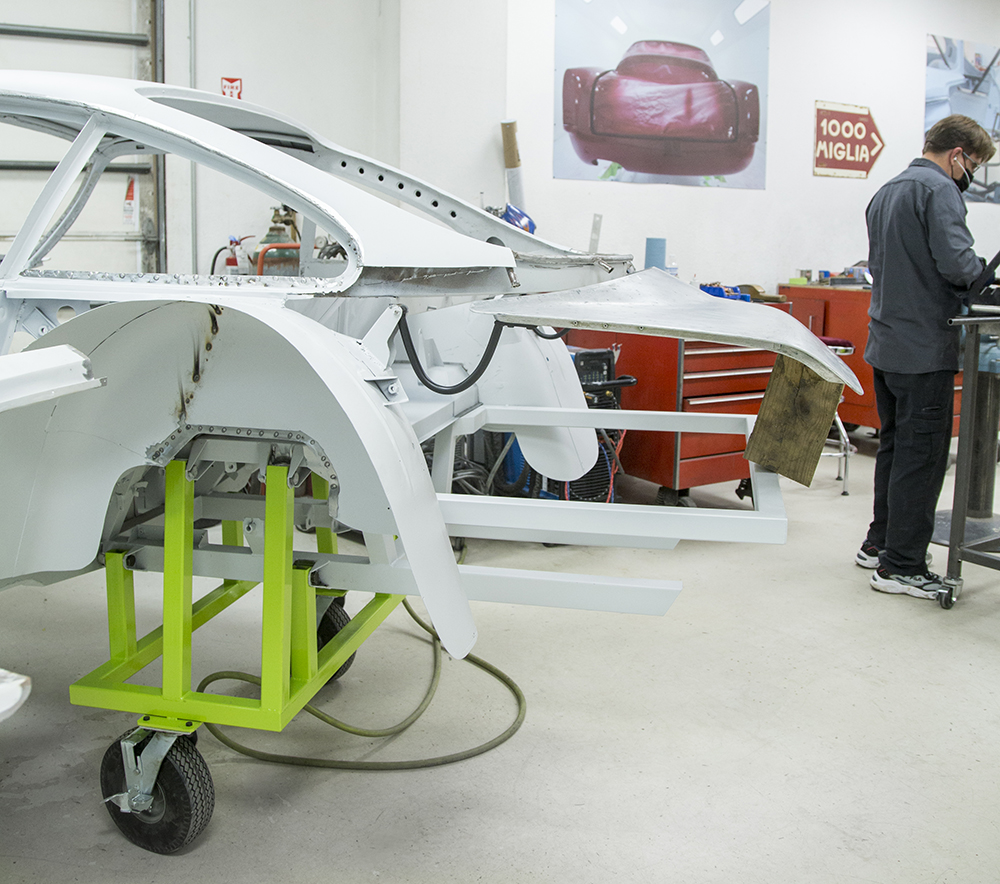
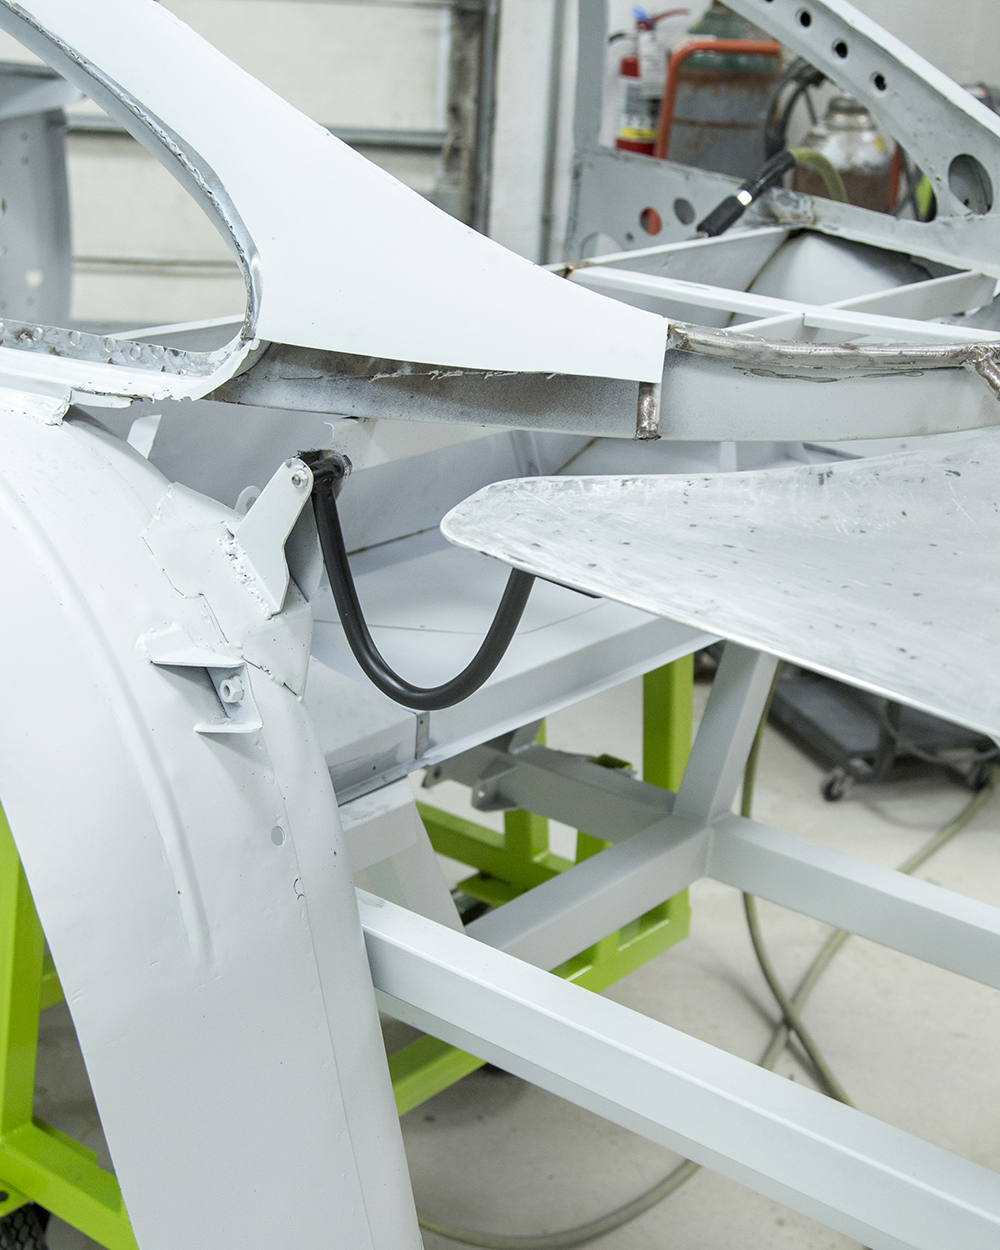
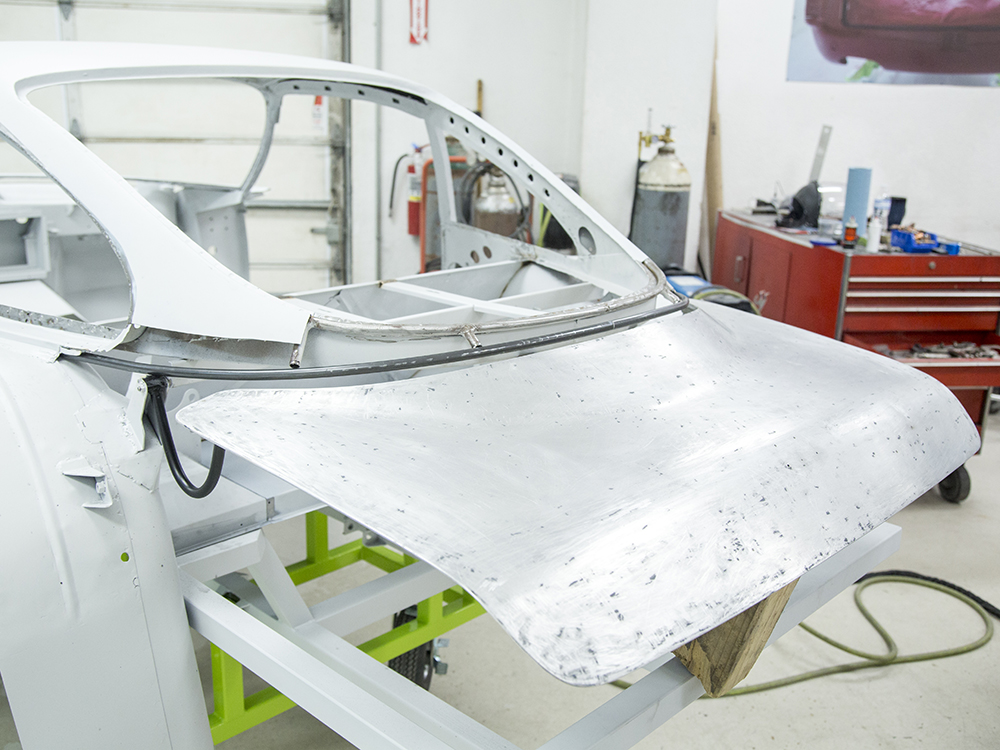
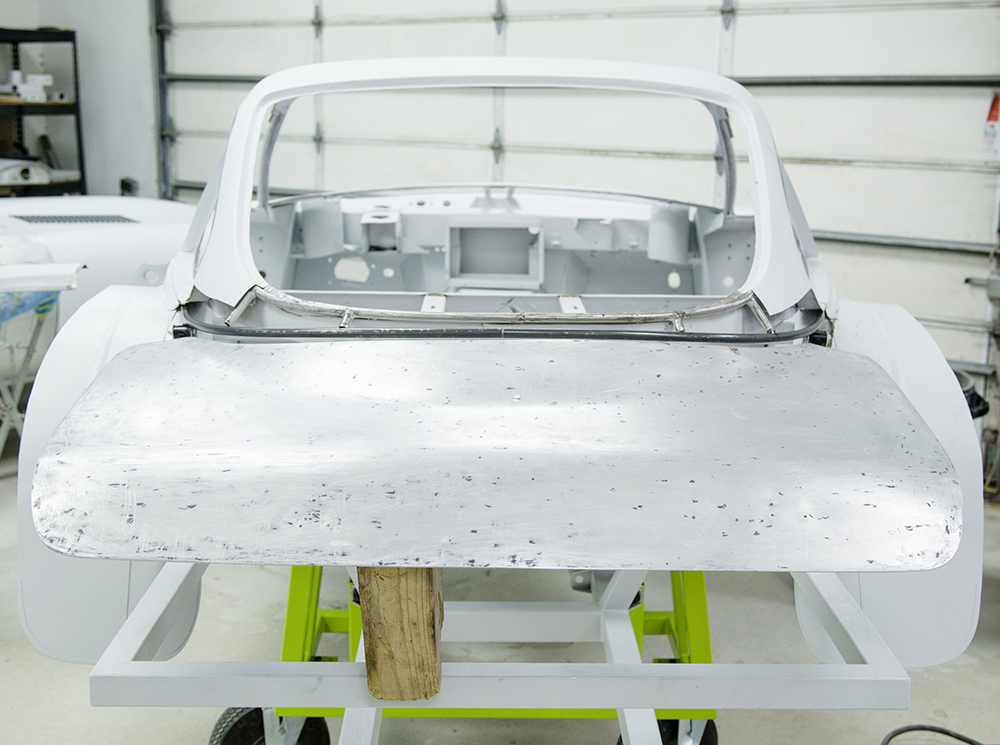
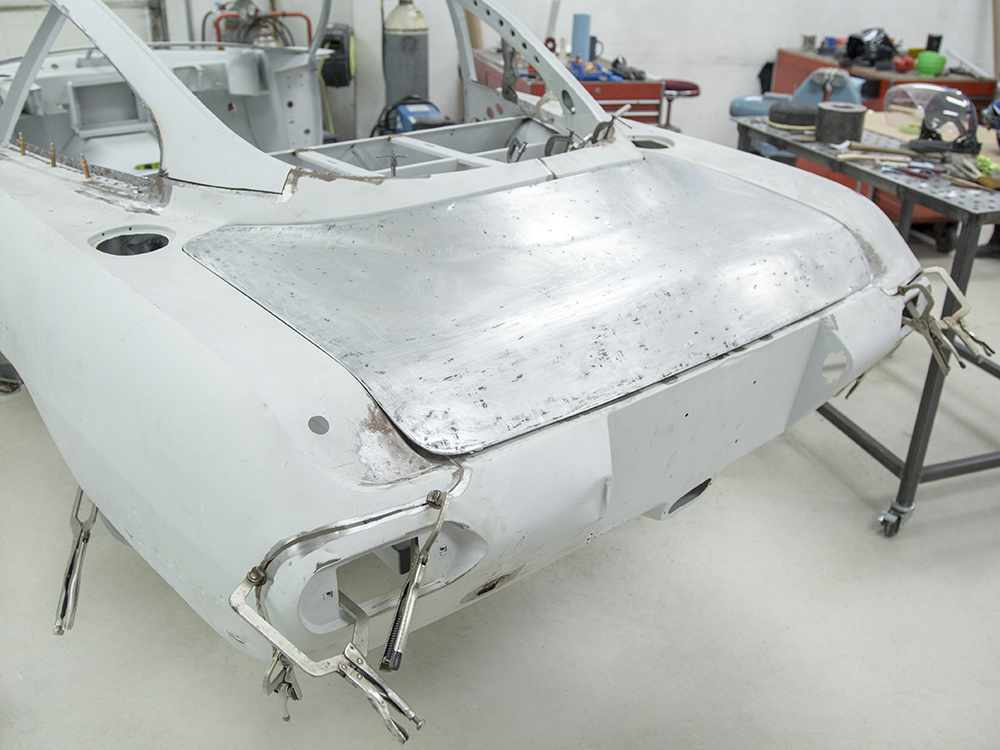
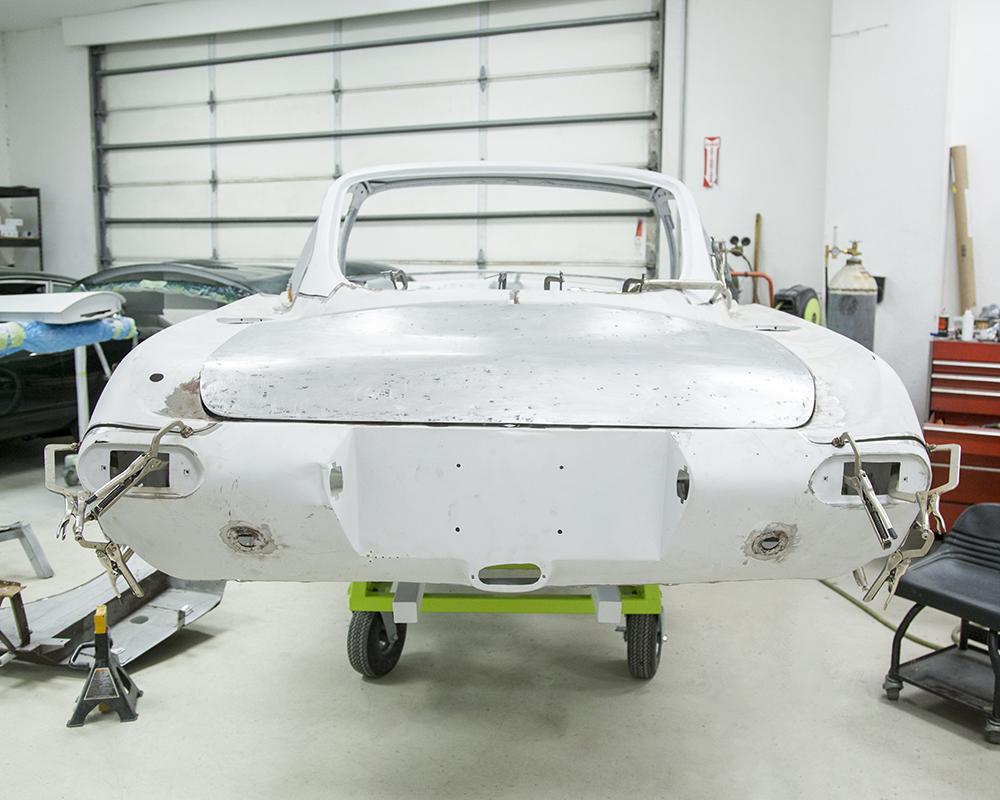
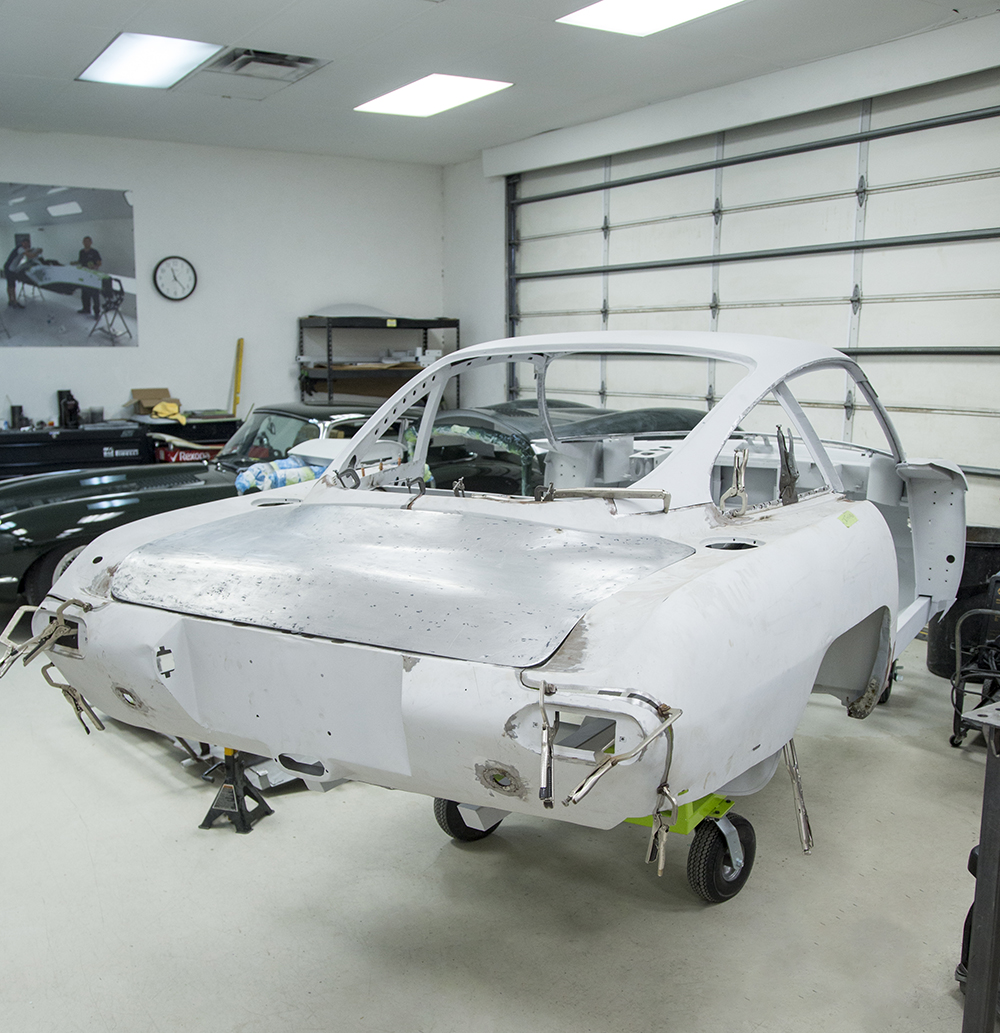
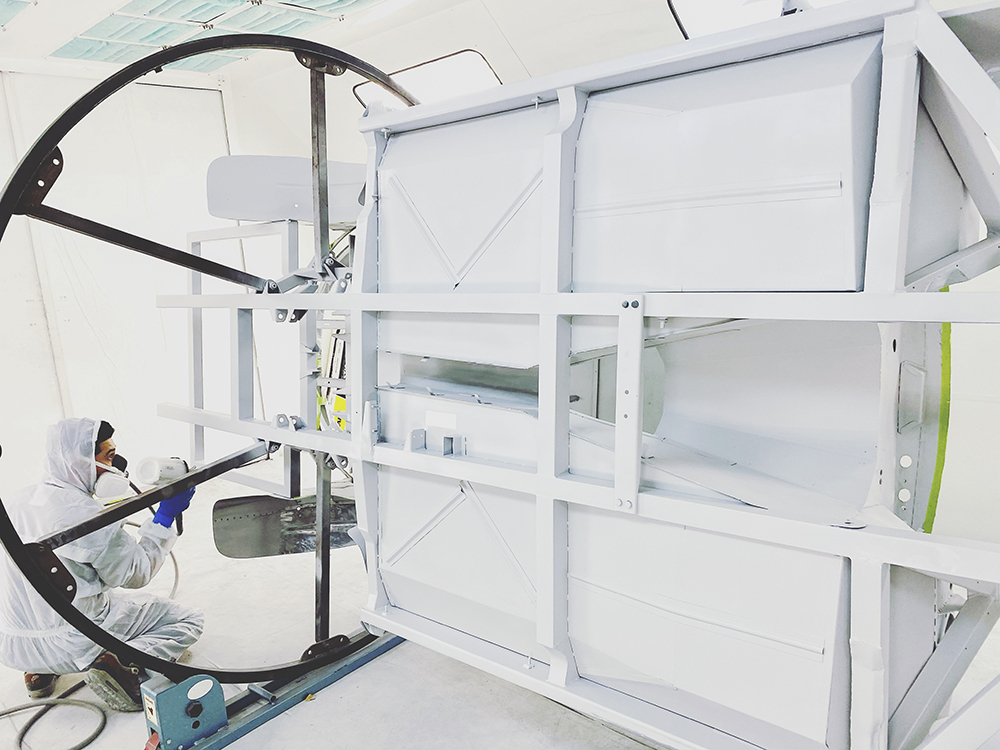
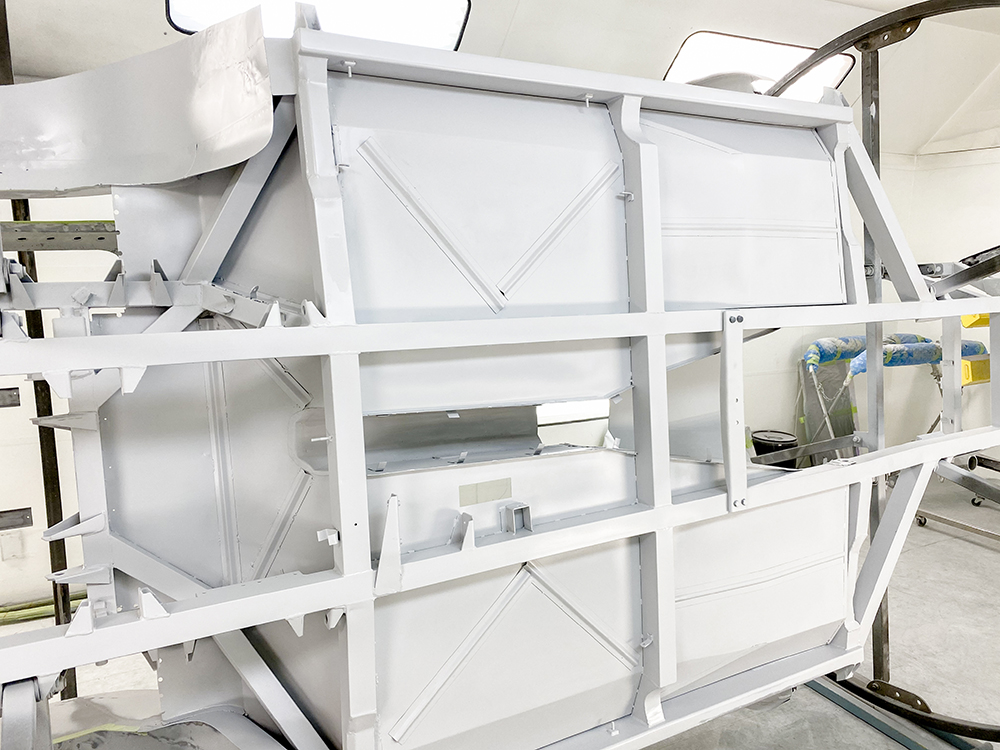
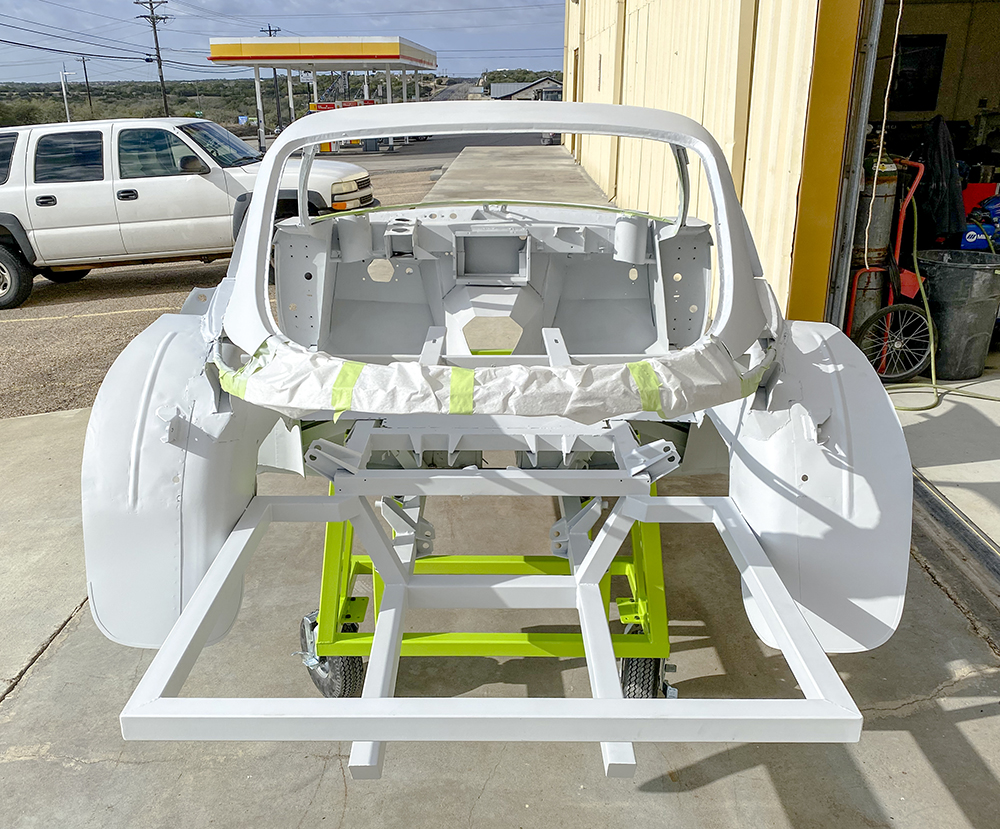
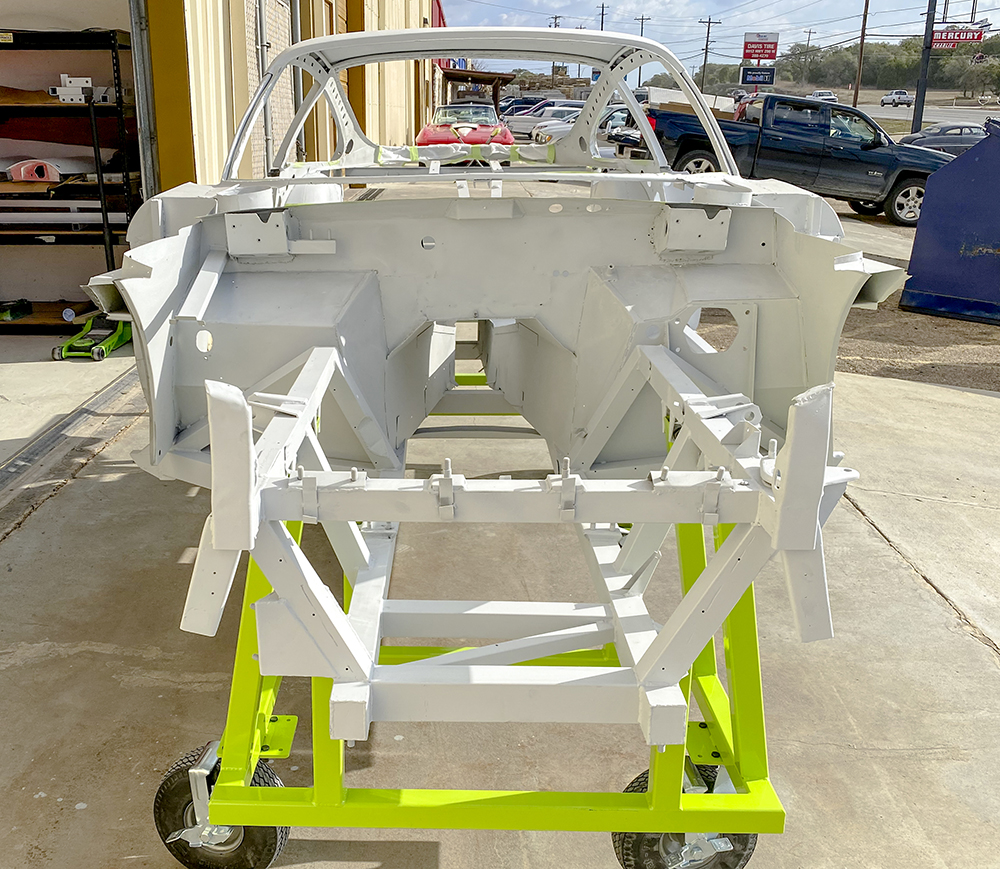
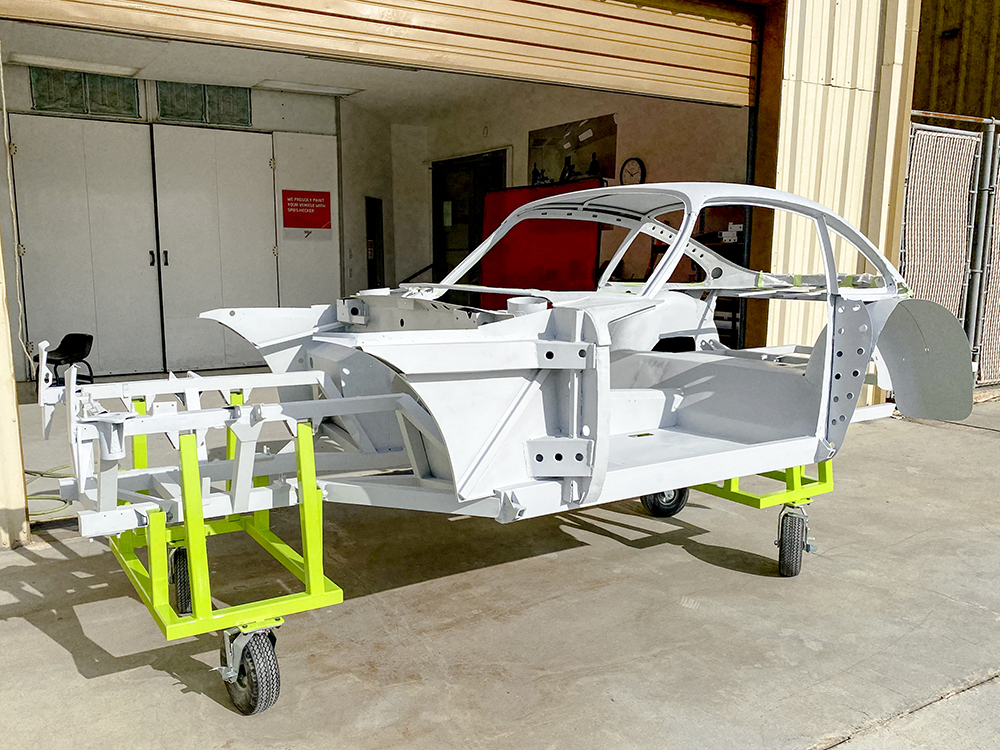
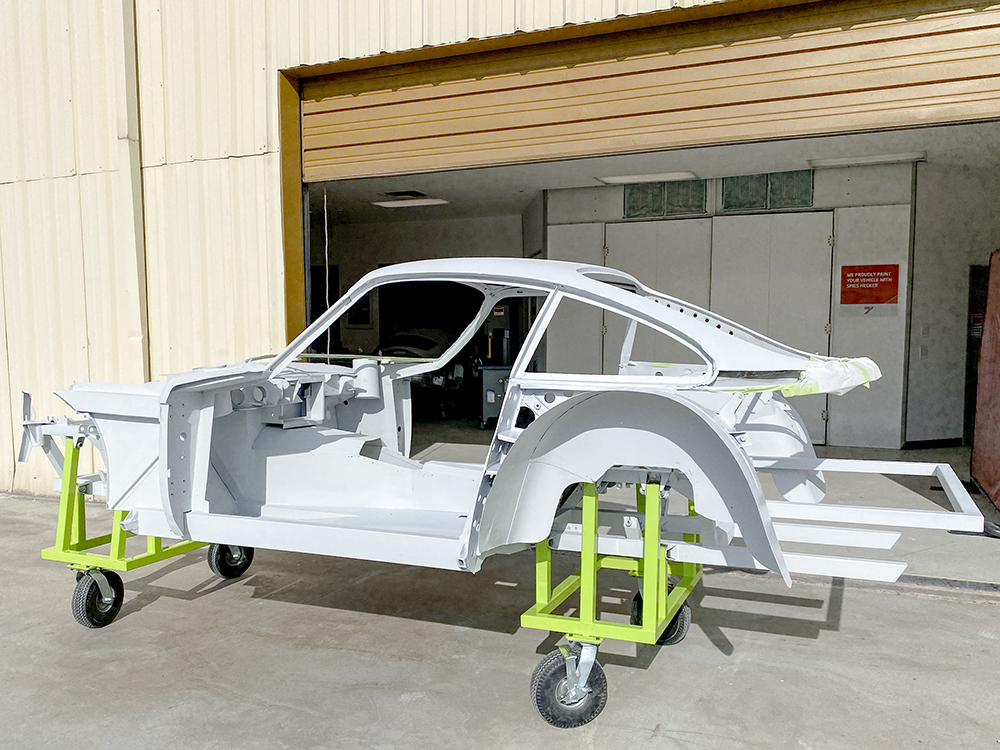
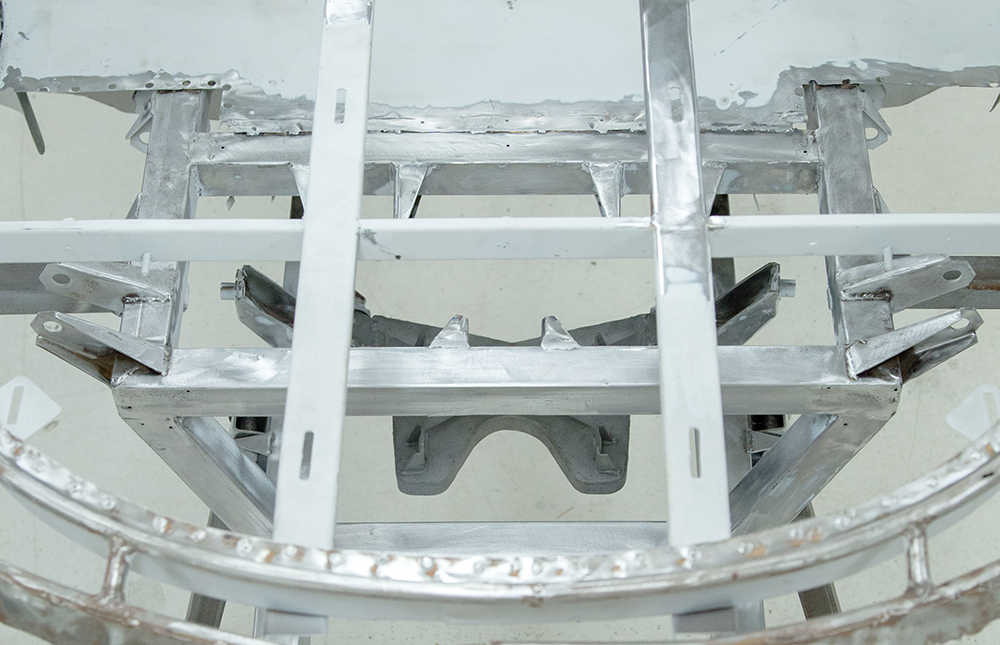
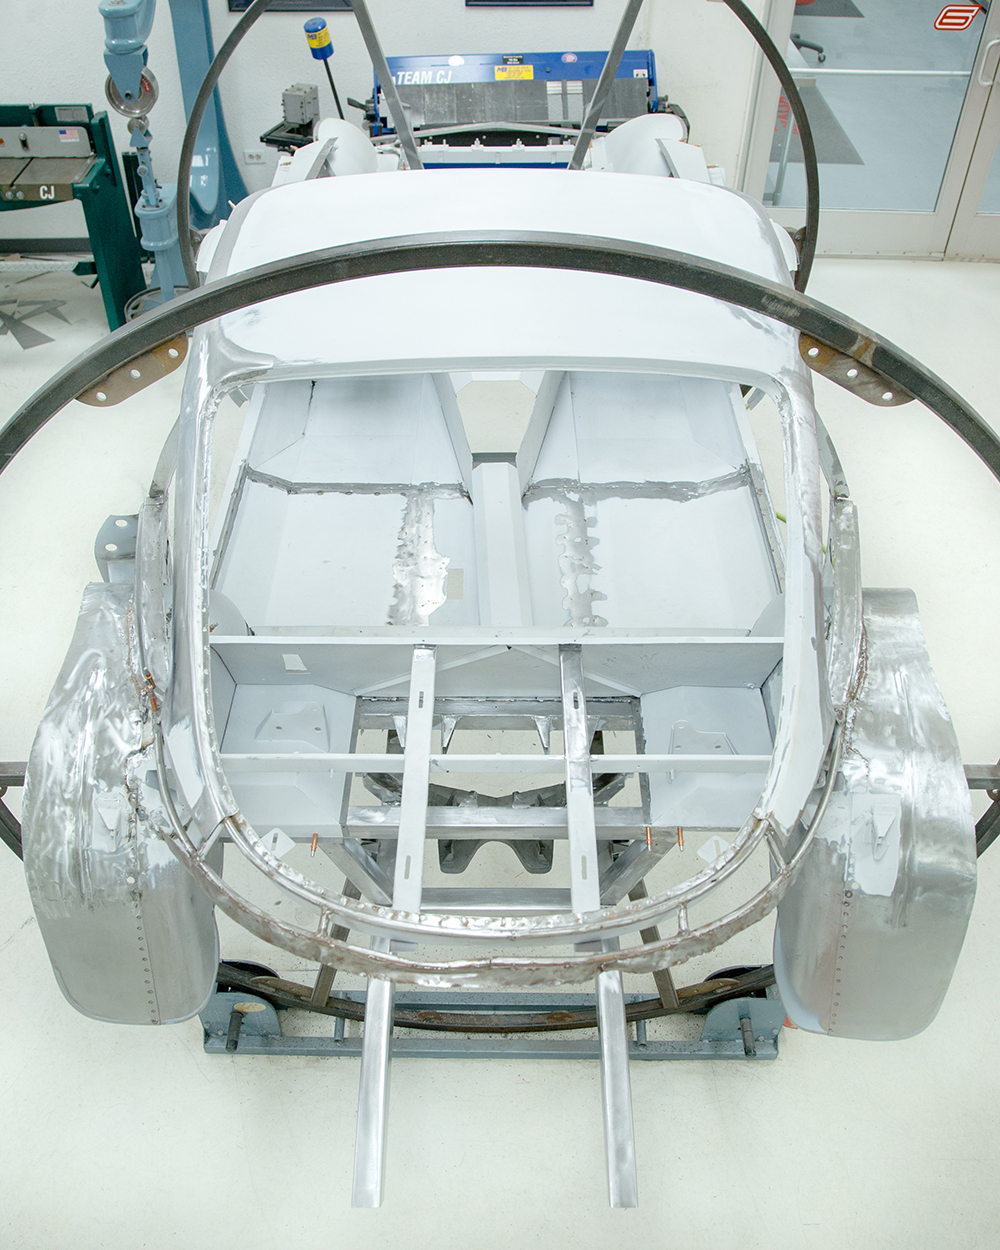
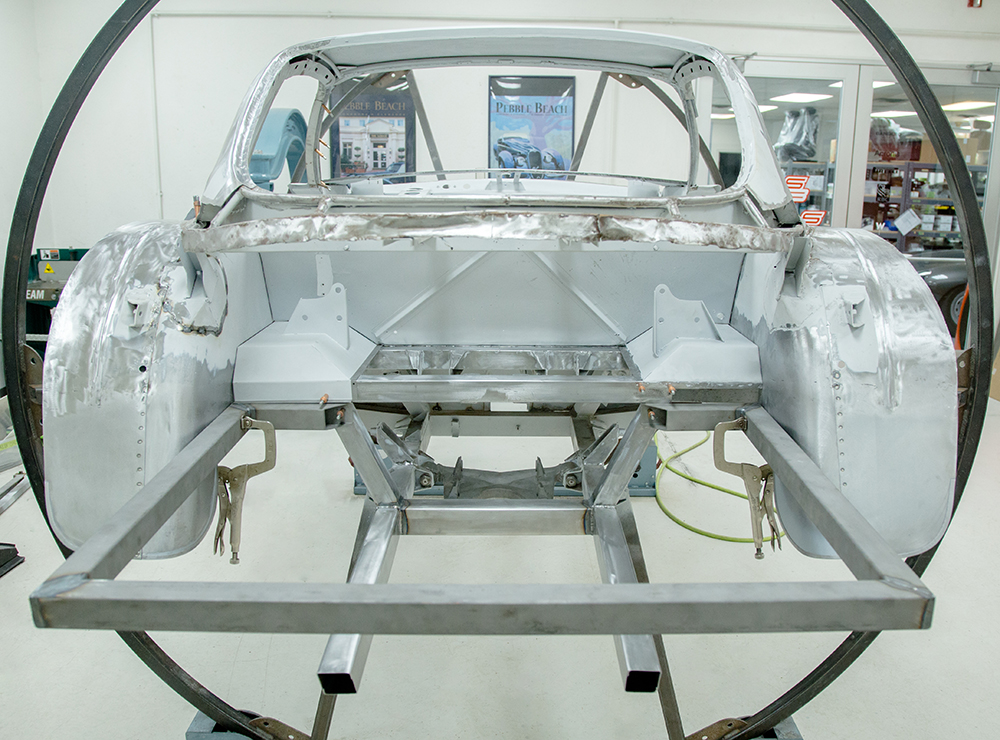
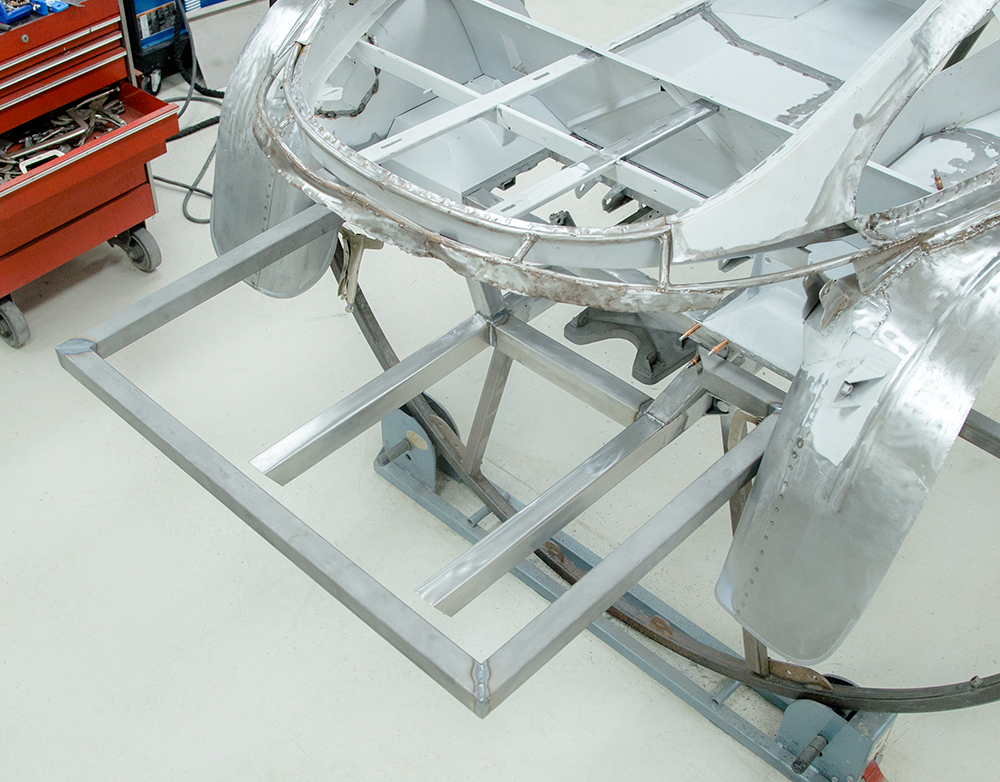
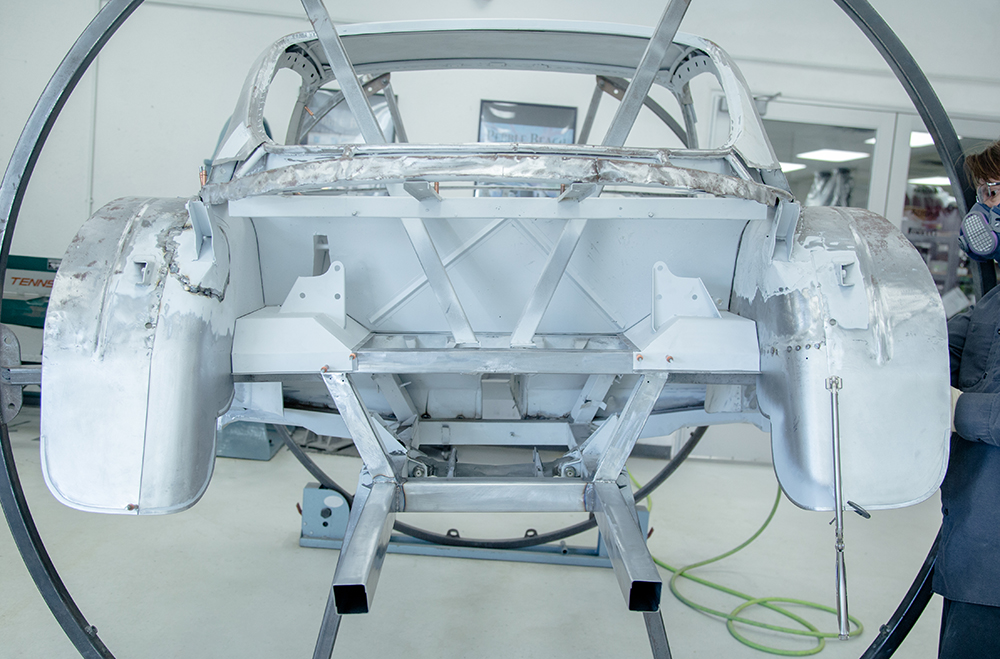
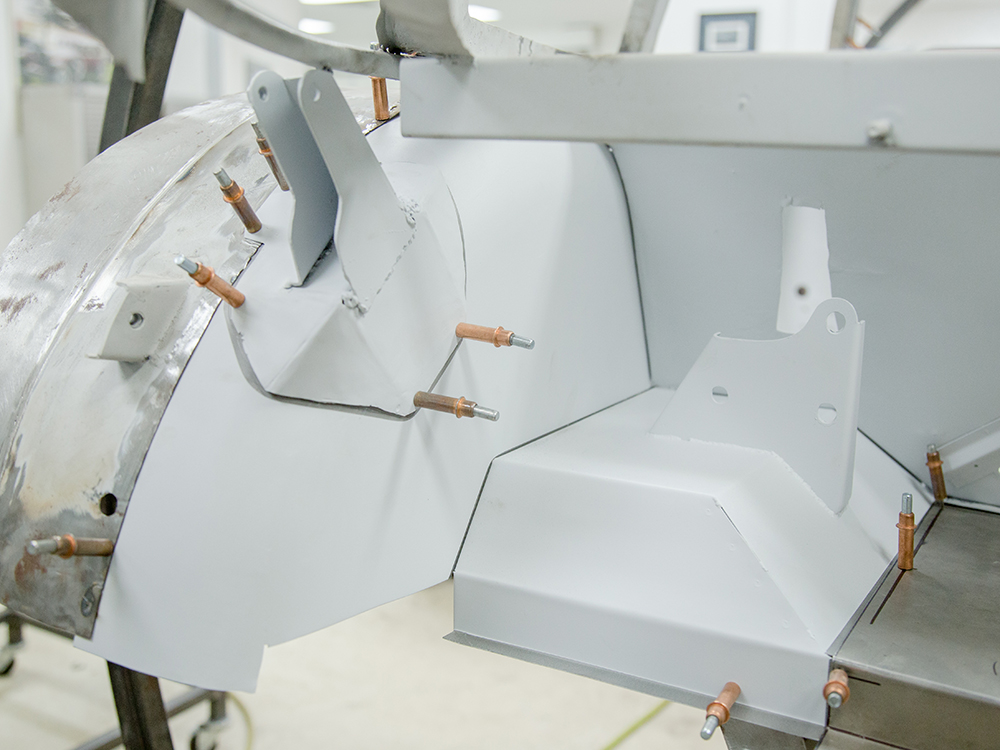
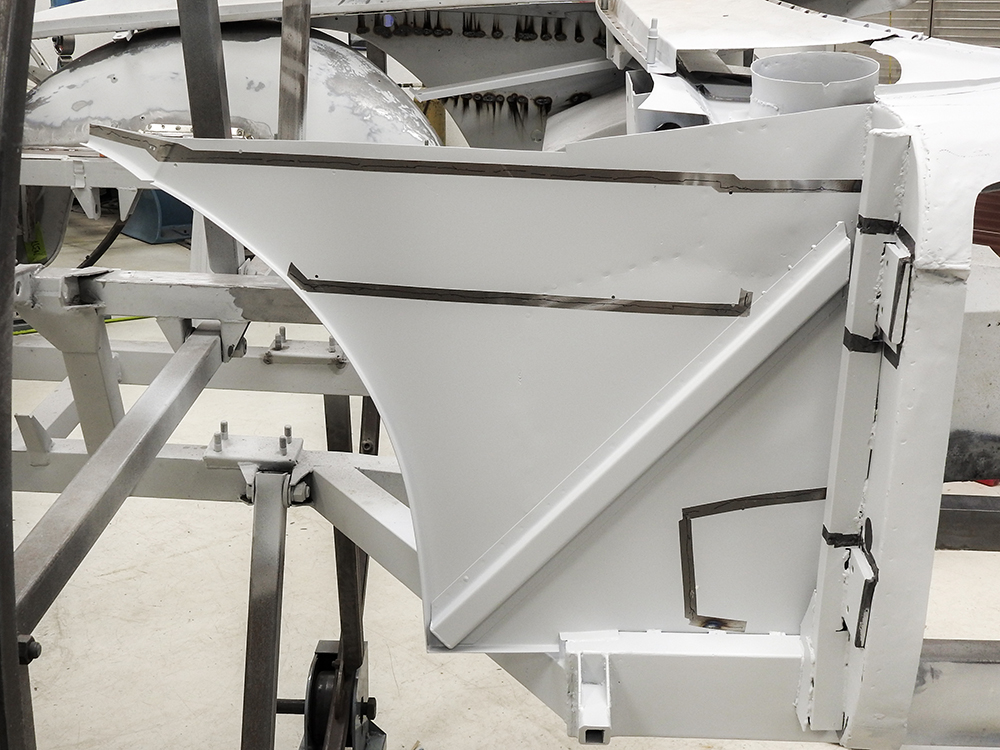
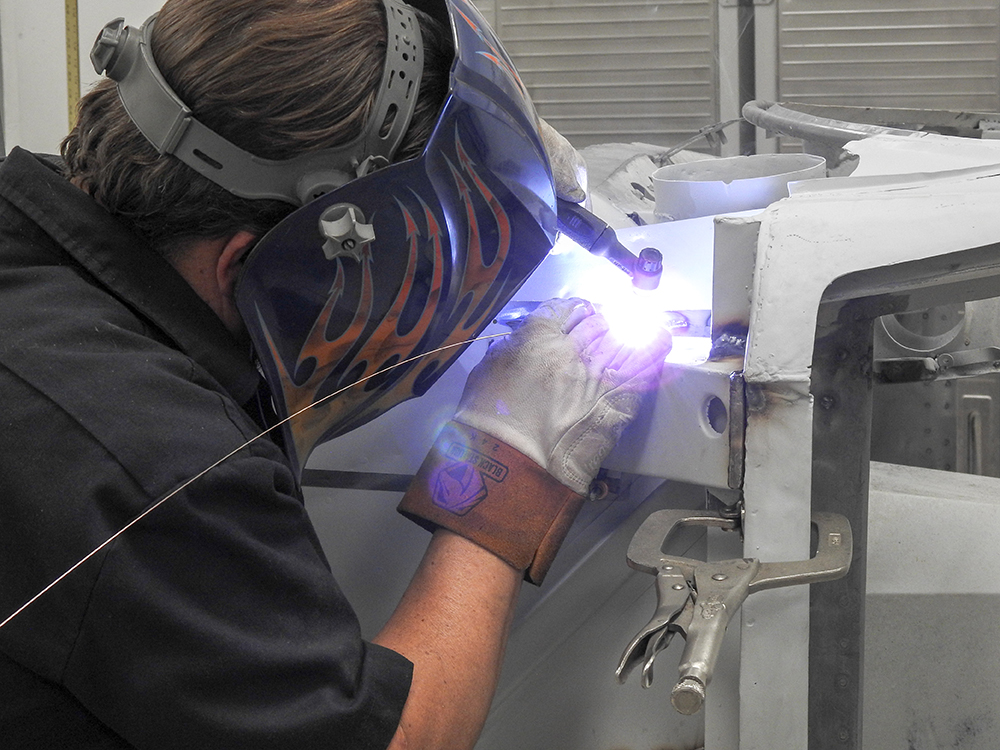
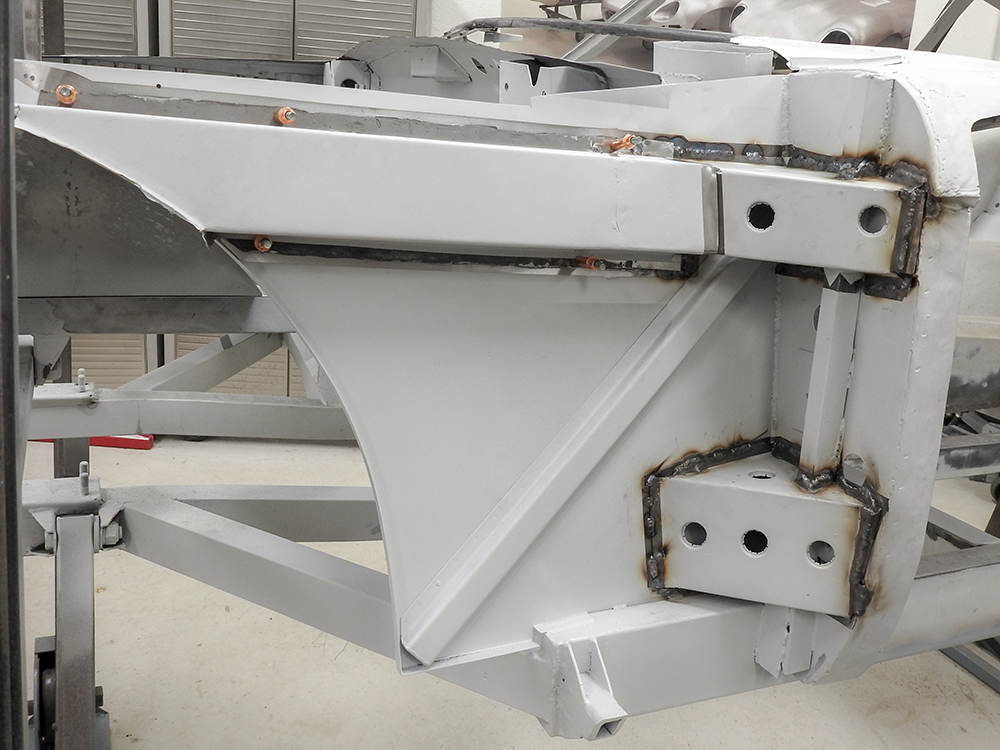
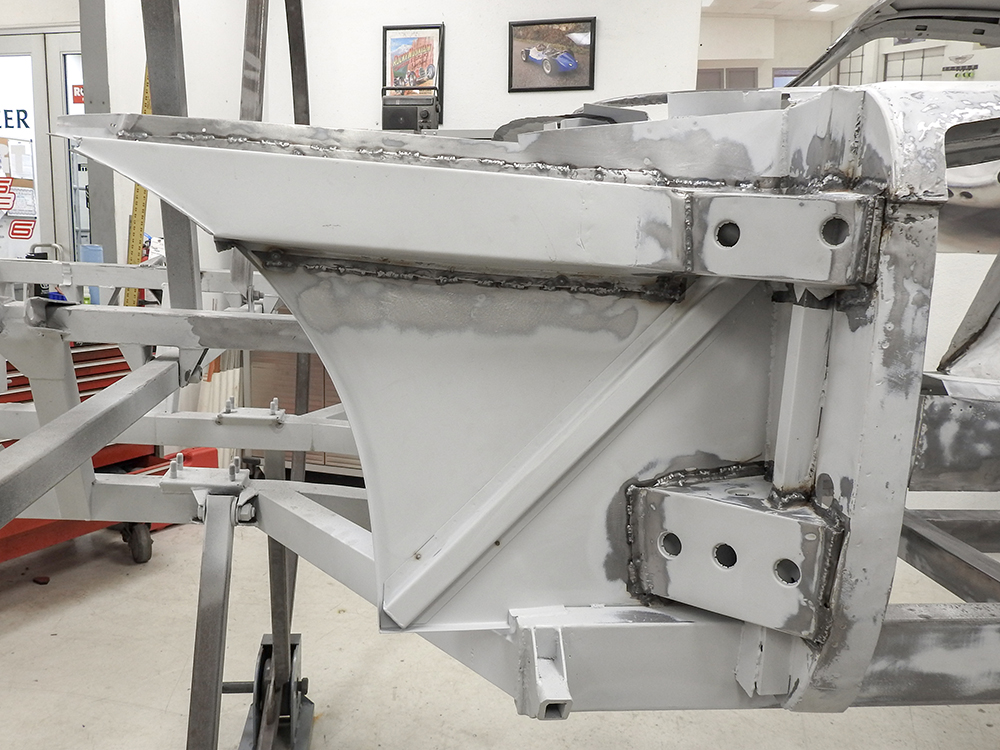
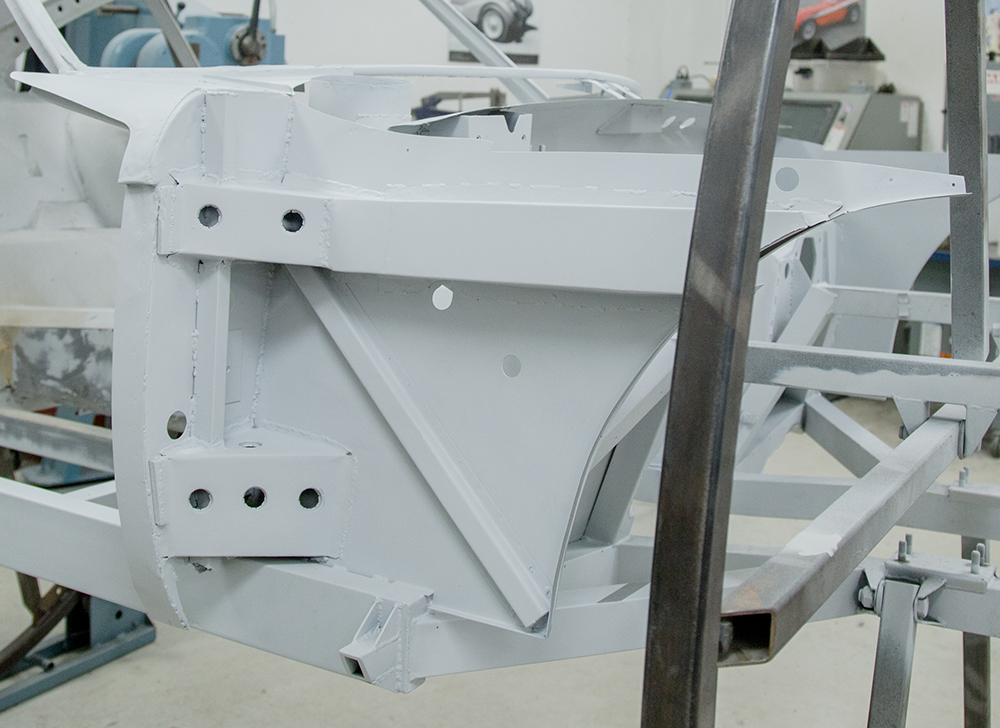
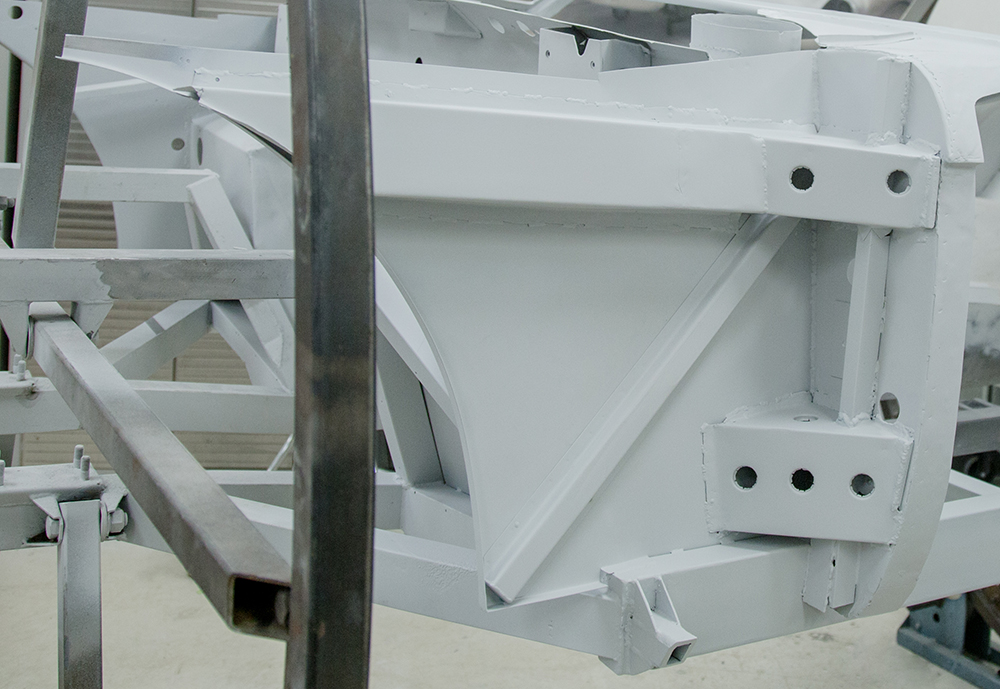
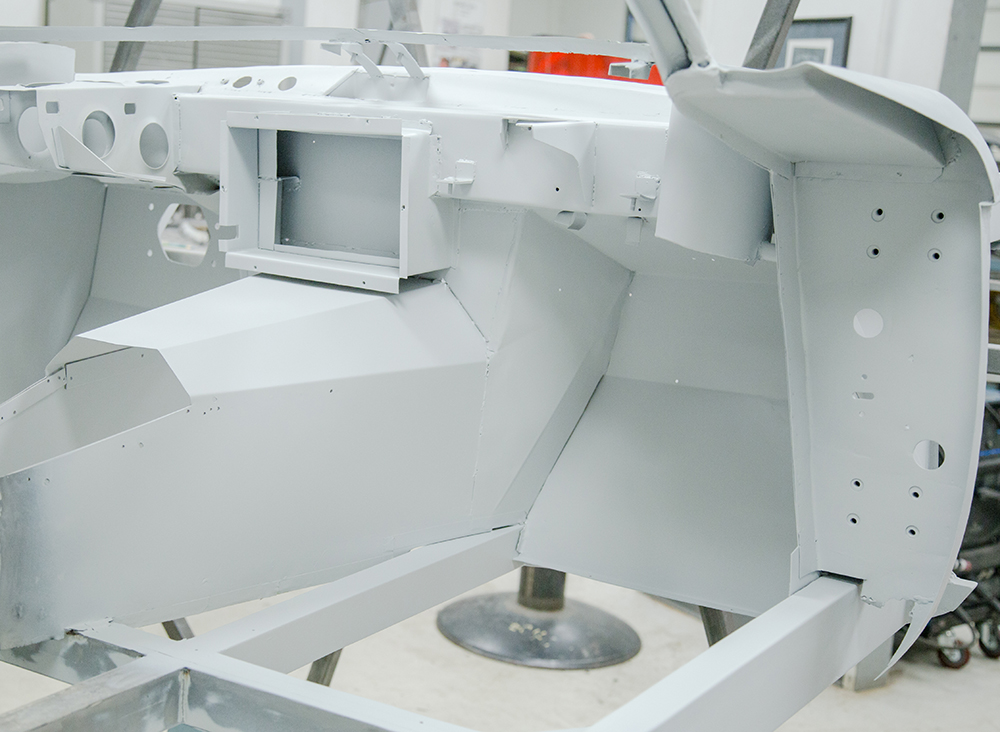
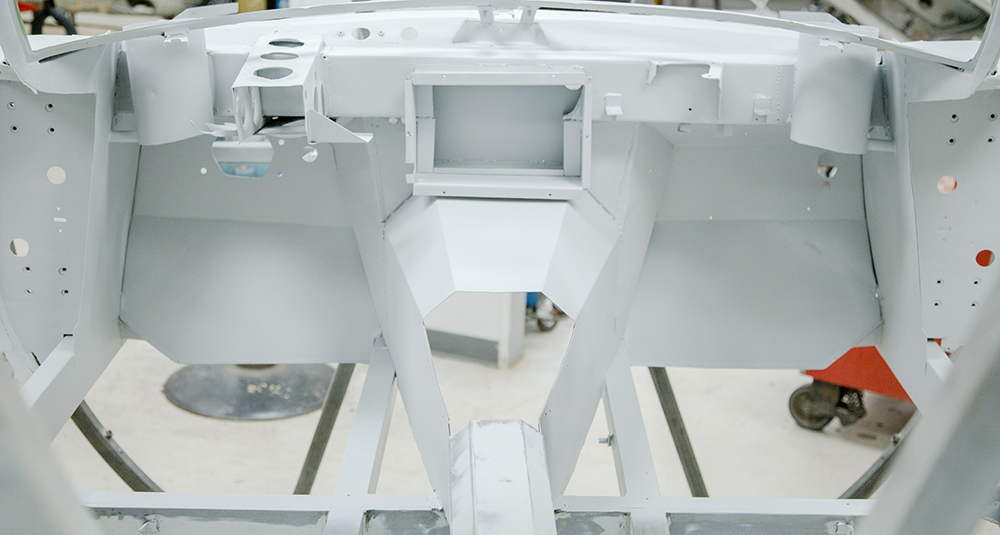
With all of the
bodywork complete, our 350 GT project has now been primed.
Update report - October 19, 2022
Update report - September 29, 2022
Update report - August 12, 2022
Update report - June 3, 2022
Update report - May 5, 2022
Update report - April 11, 2022
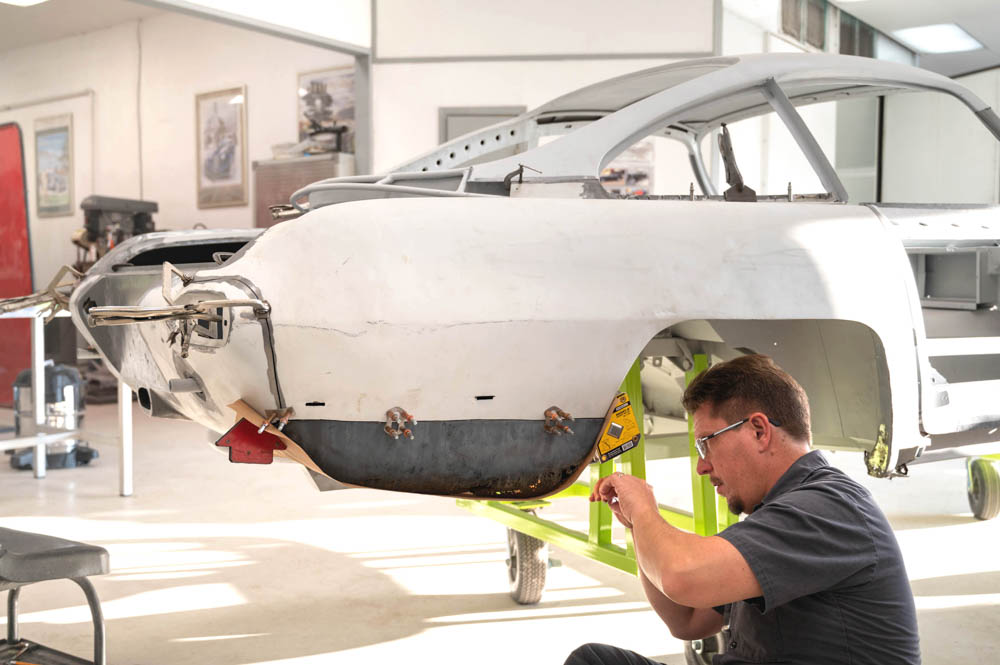
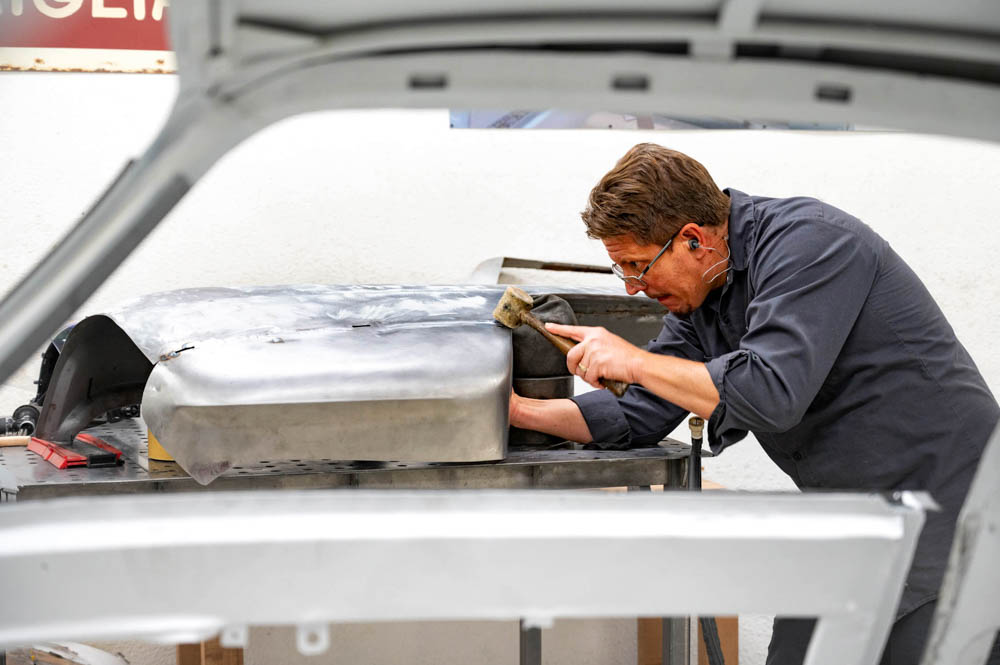
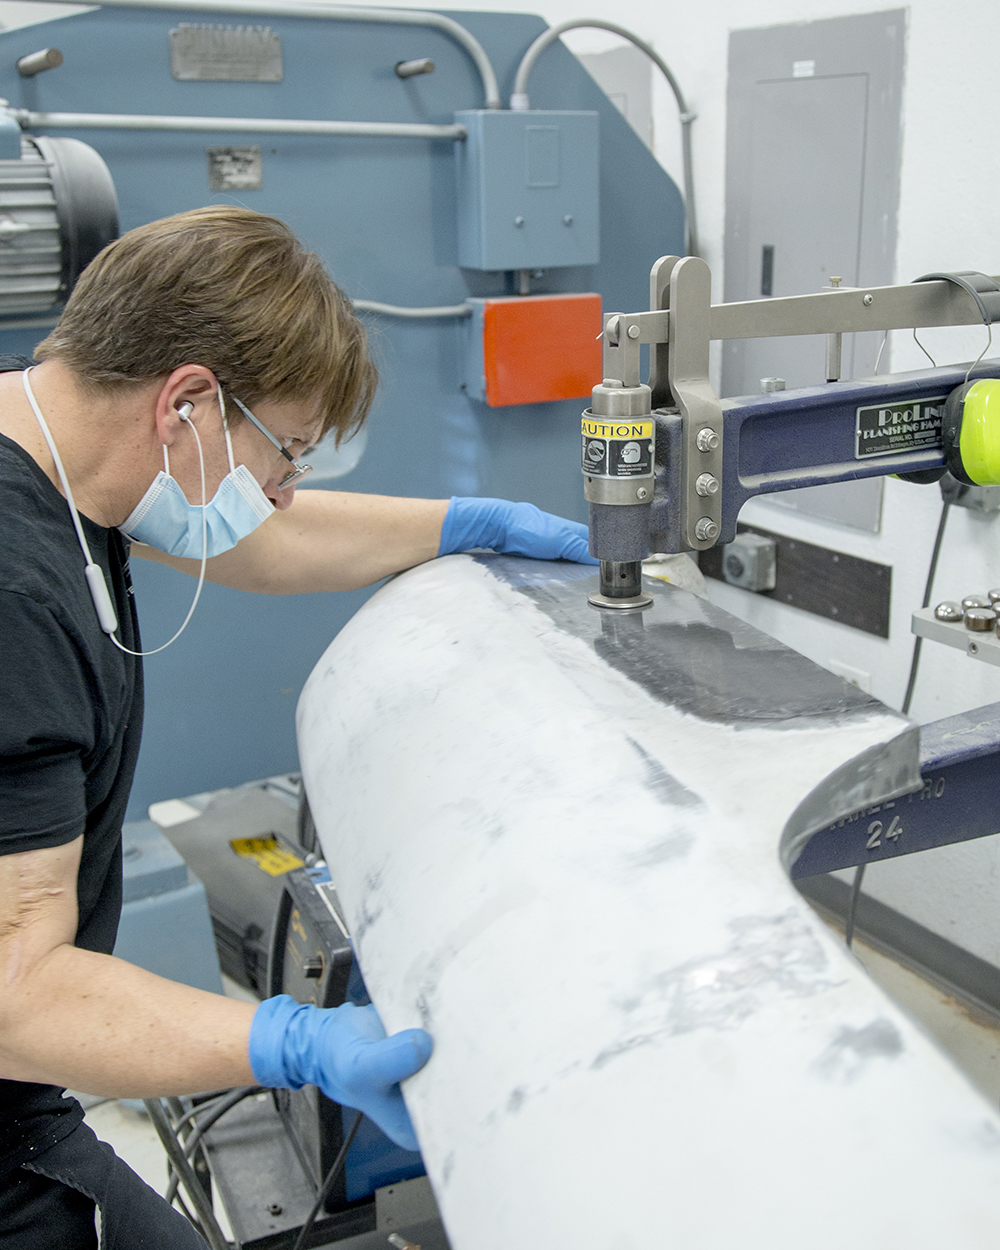
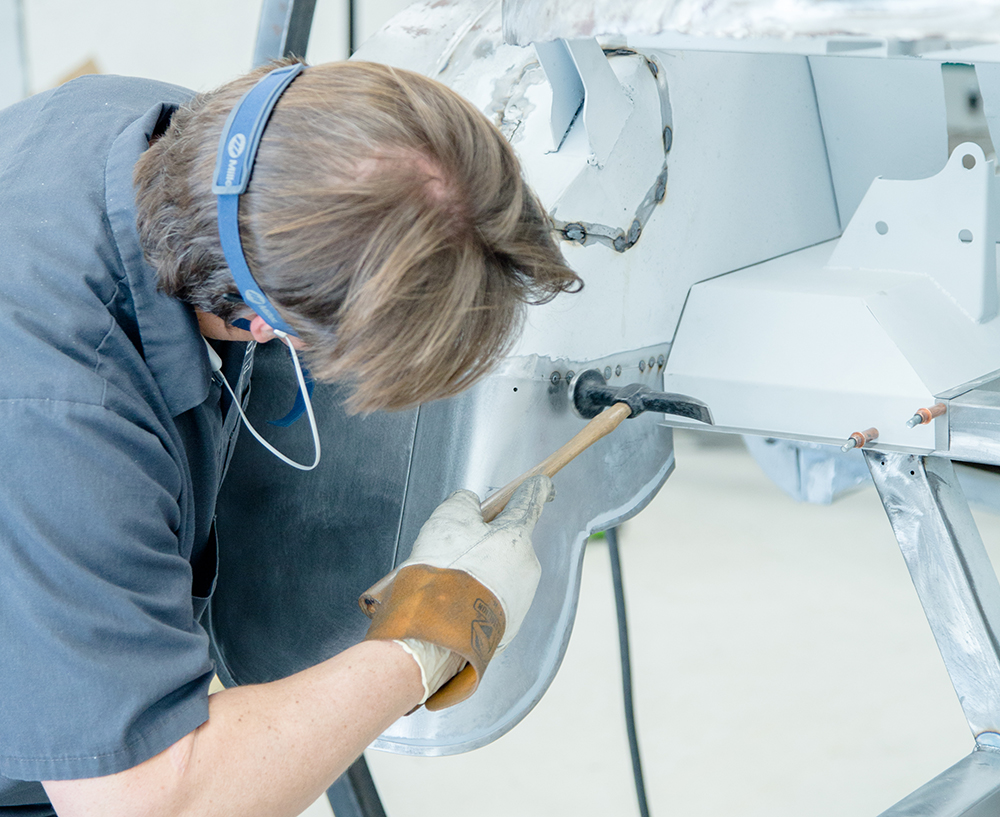
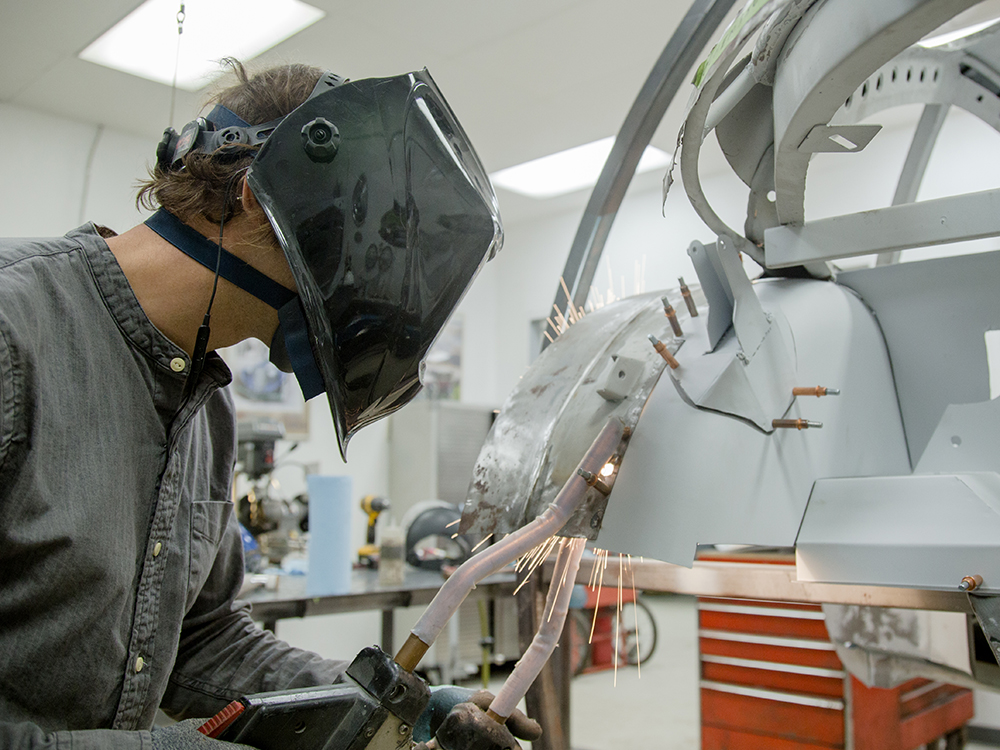
Jake continues to make
excellent progress with the body restoration.
Update
report - February
17, 2022
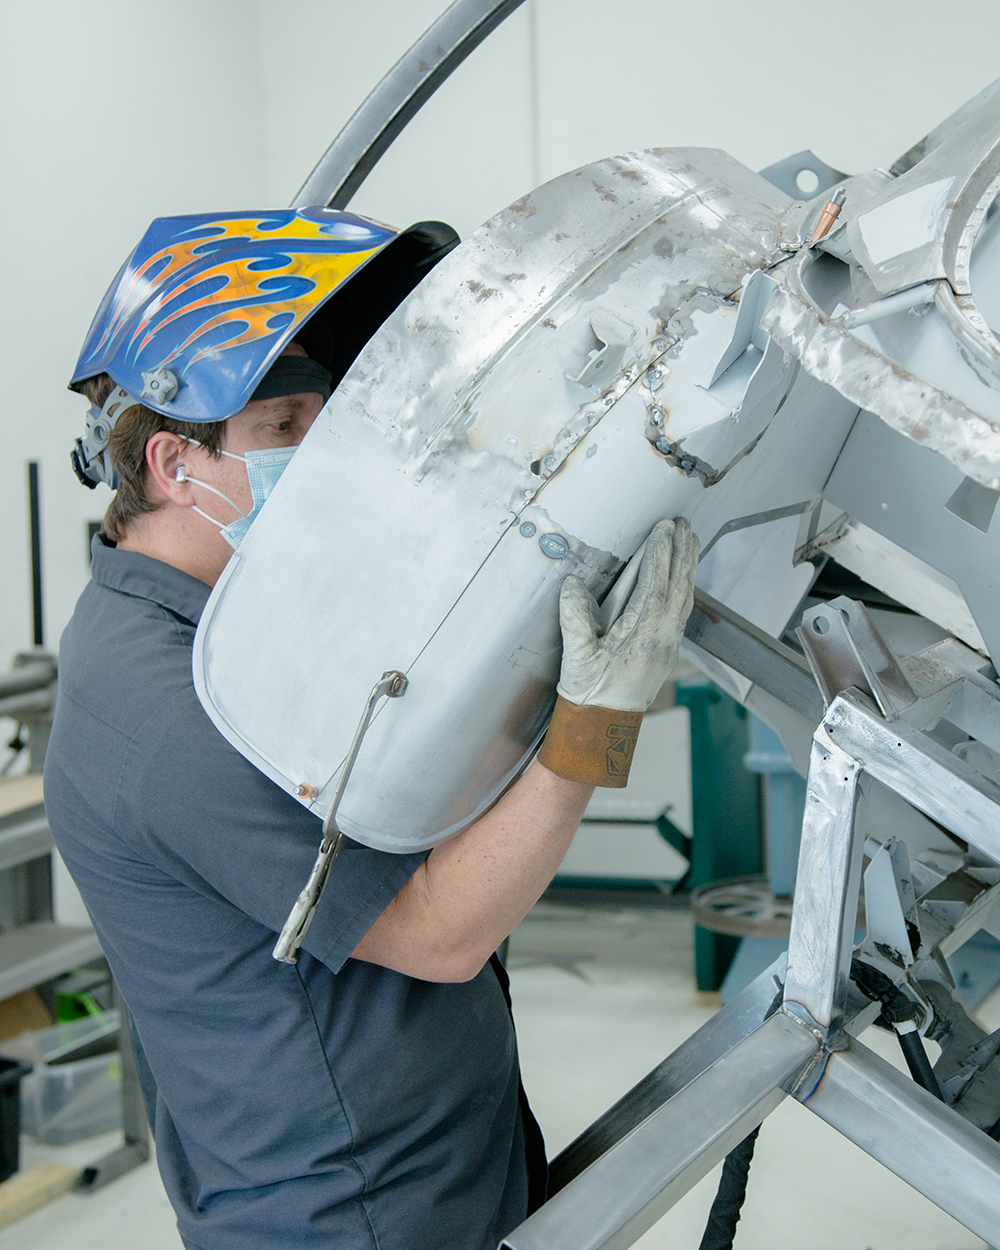
Jake has been making excellent
progress with the body restoration.
Update
report -
January 11, 2022
Update
report - December
15, 2021
Update report
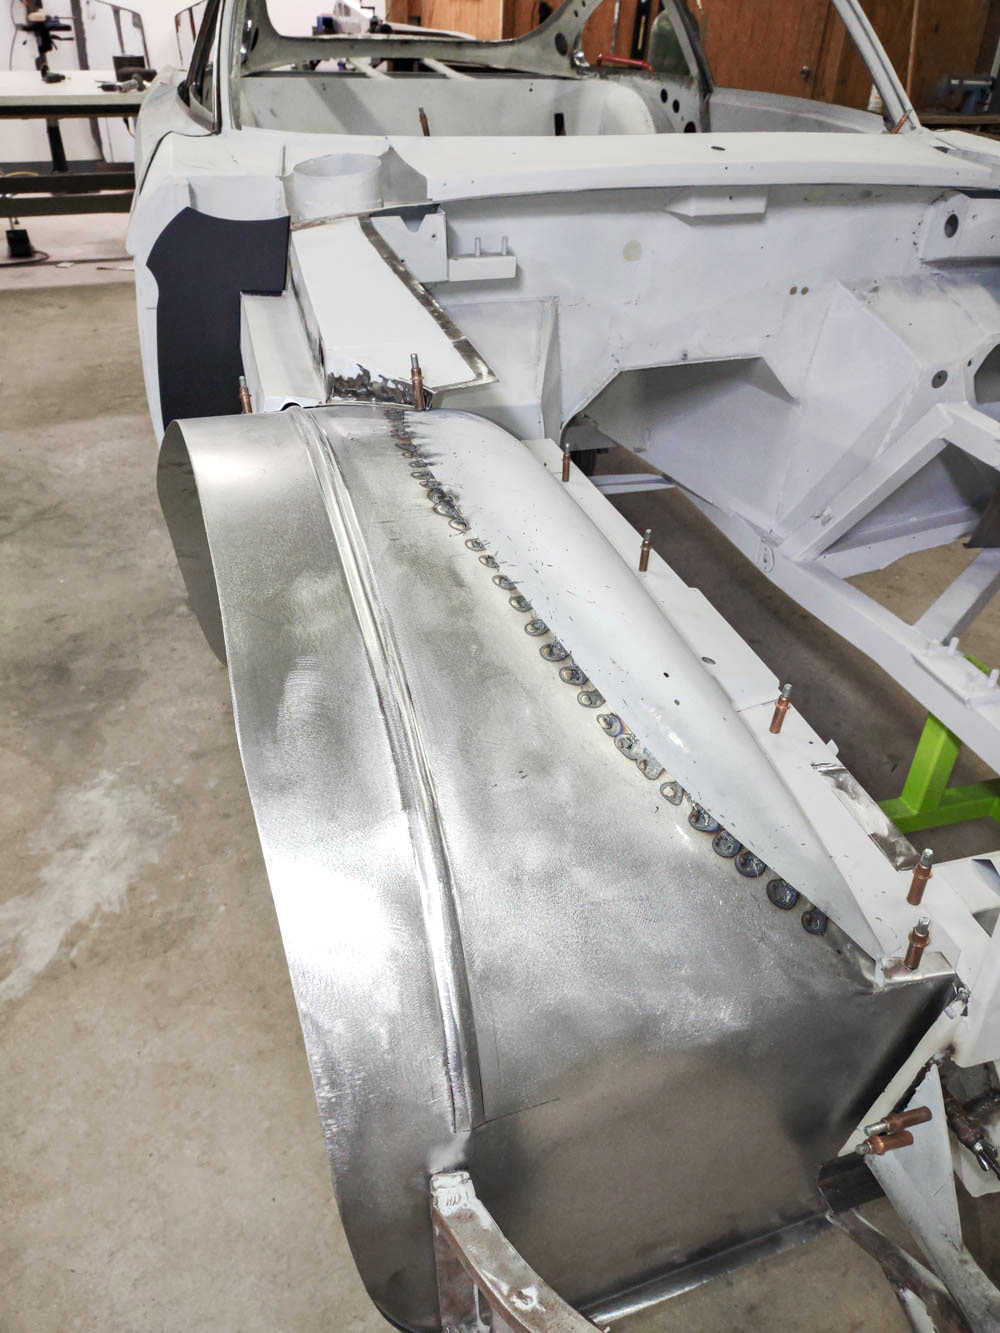
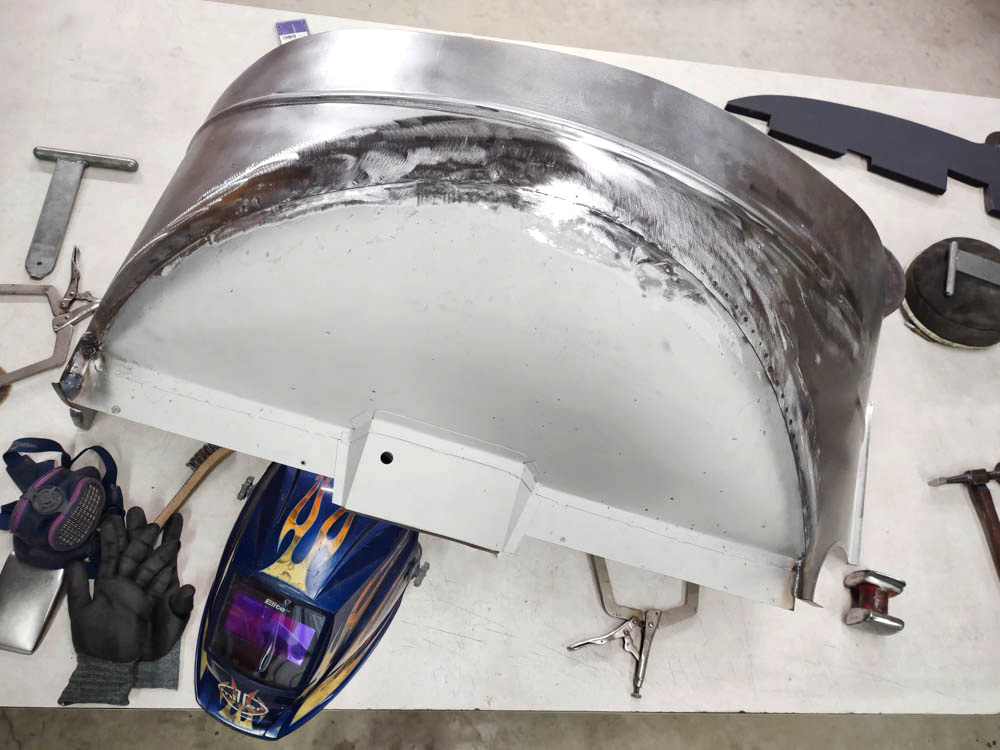
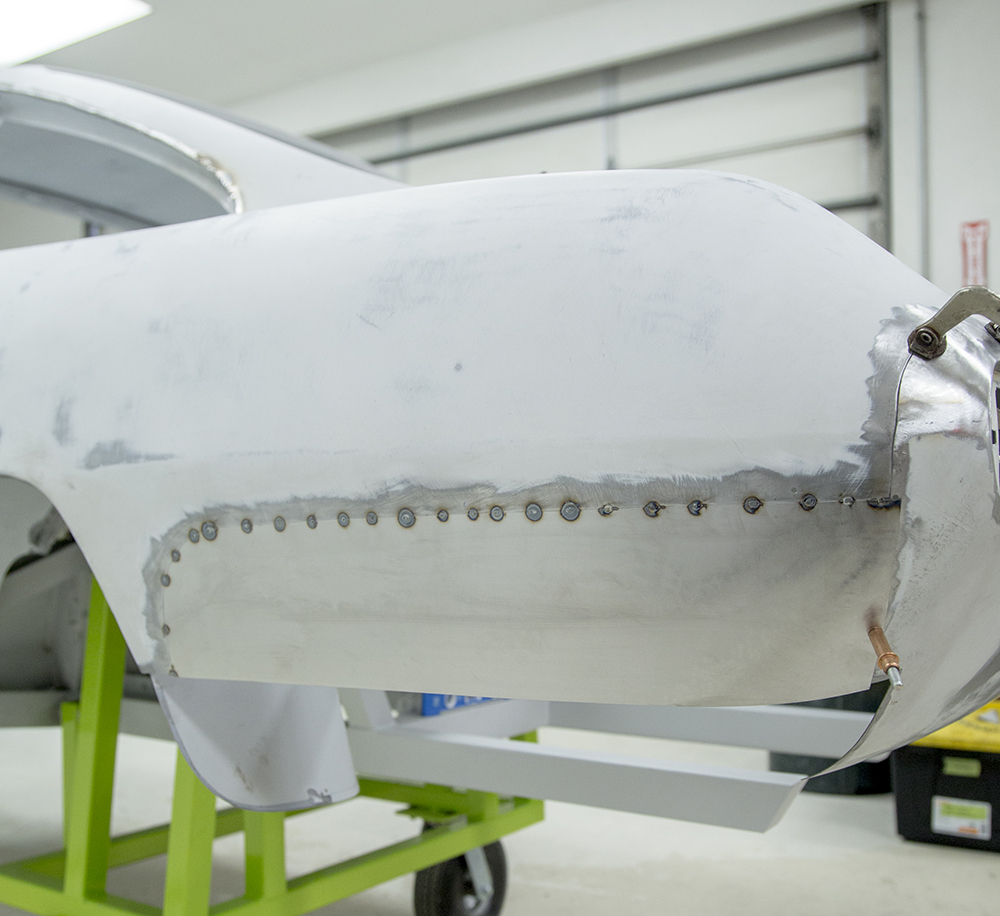
- October 29, 2021
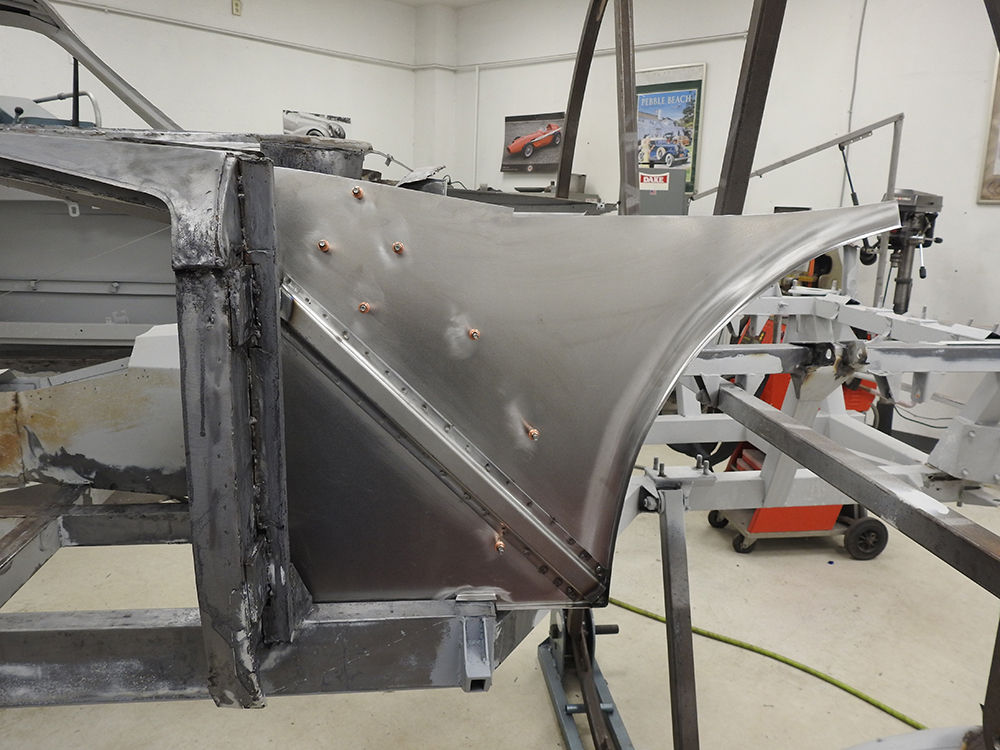
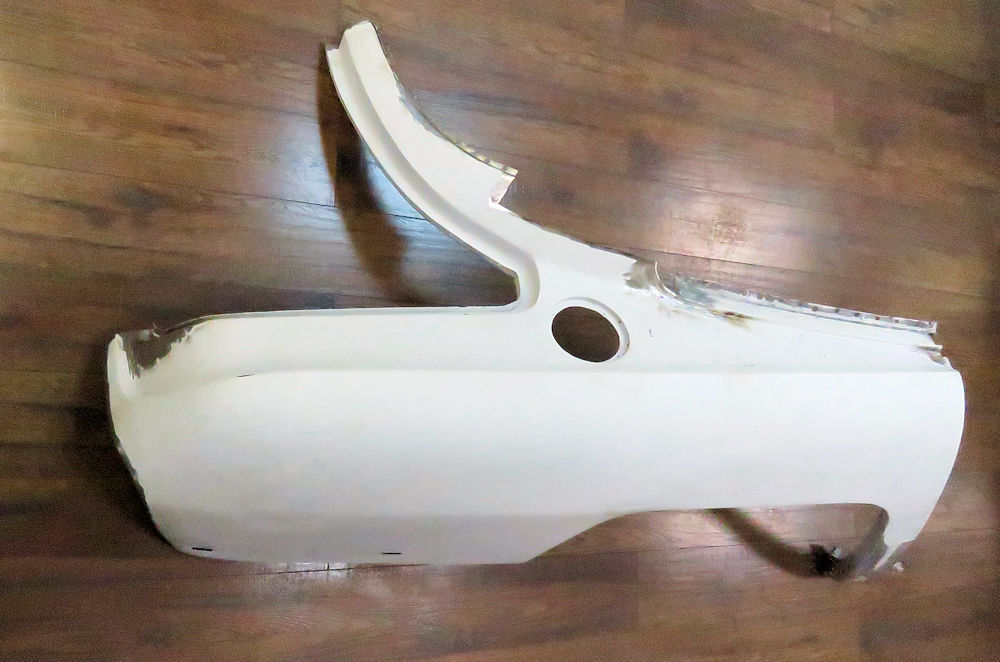
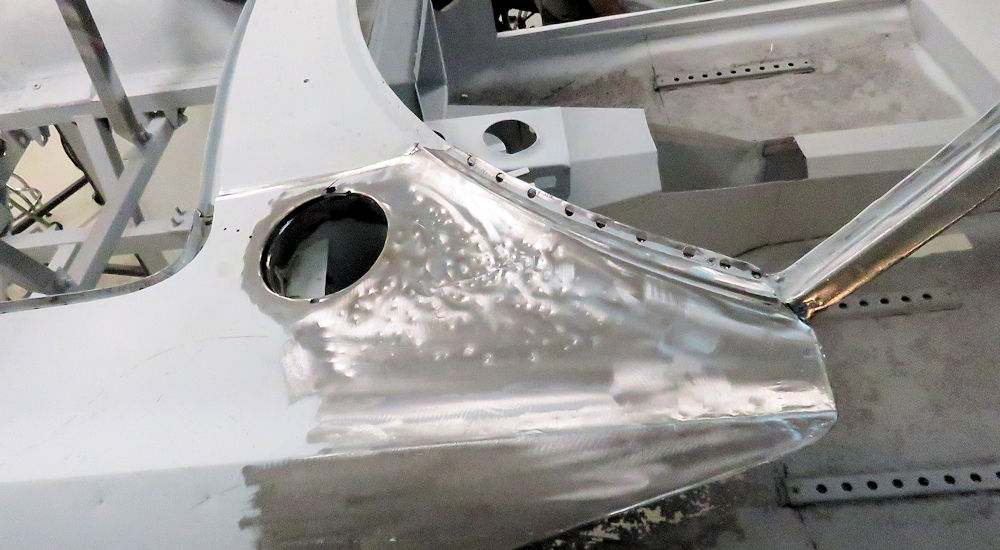
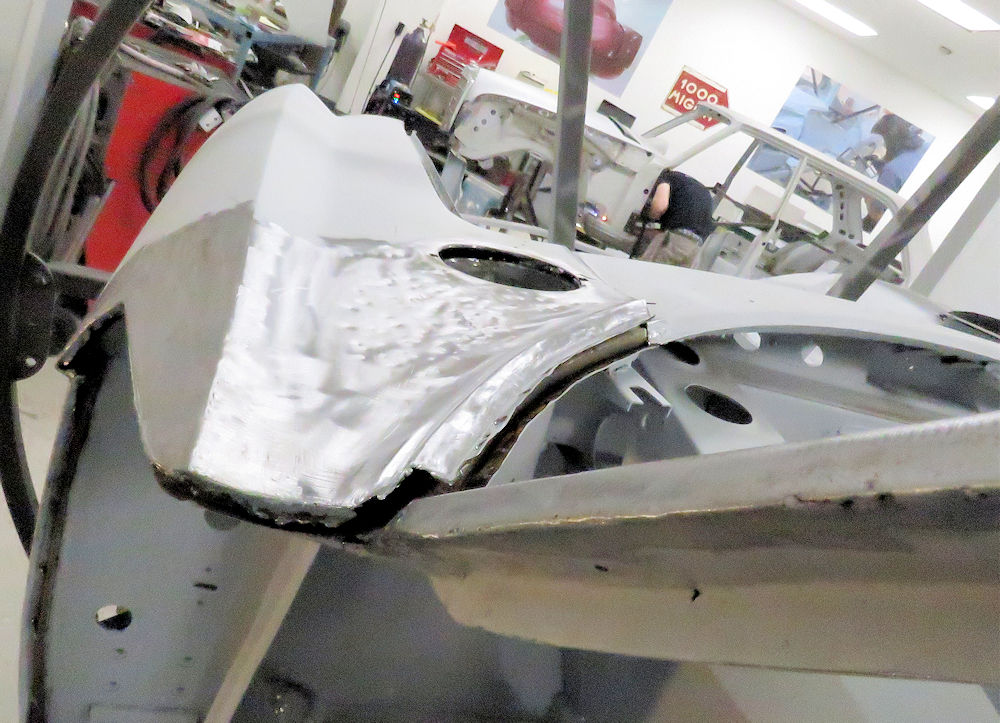
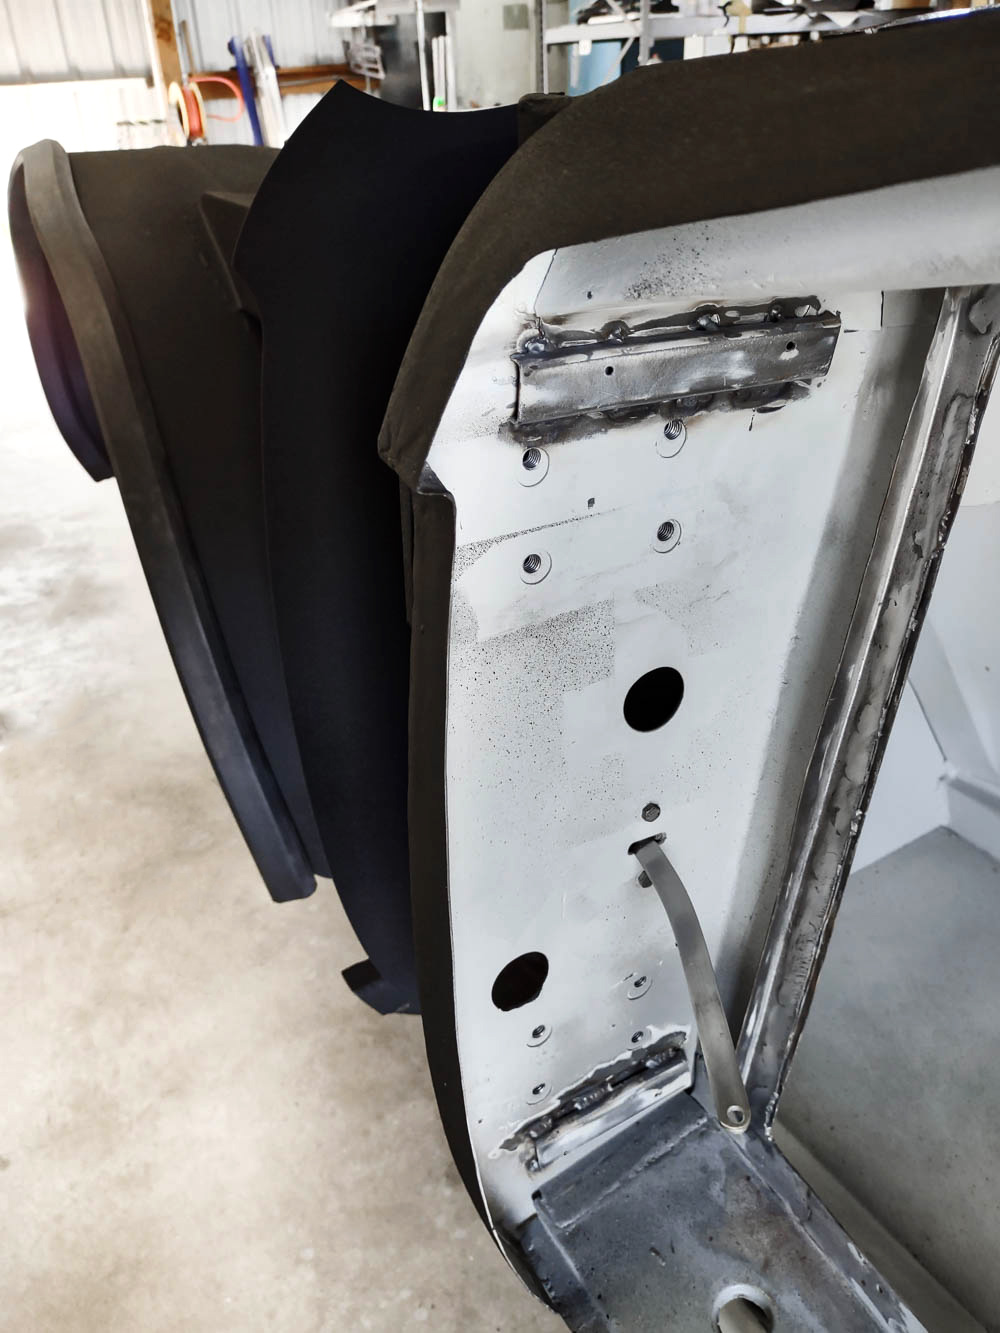
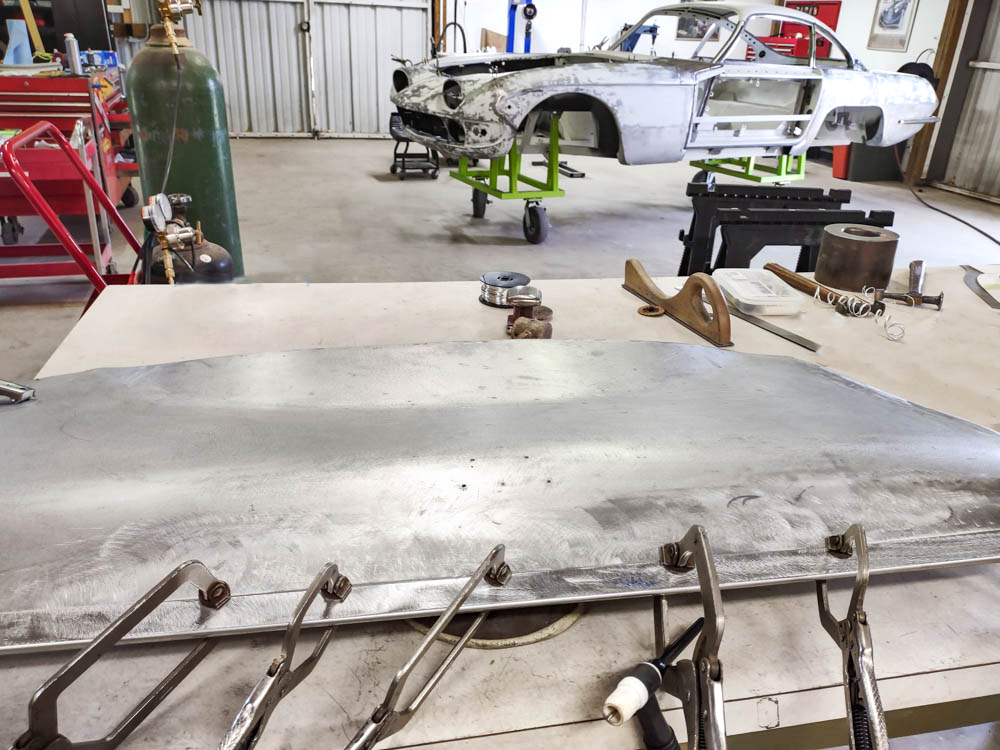
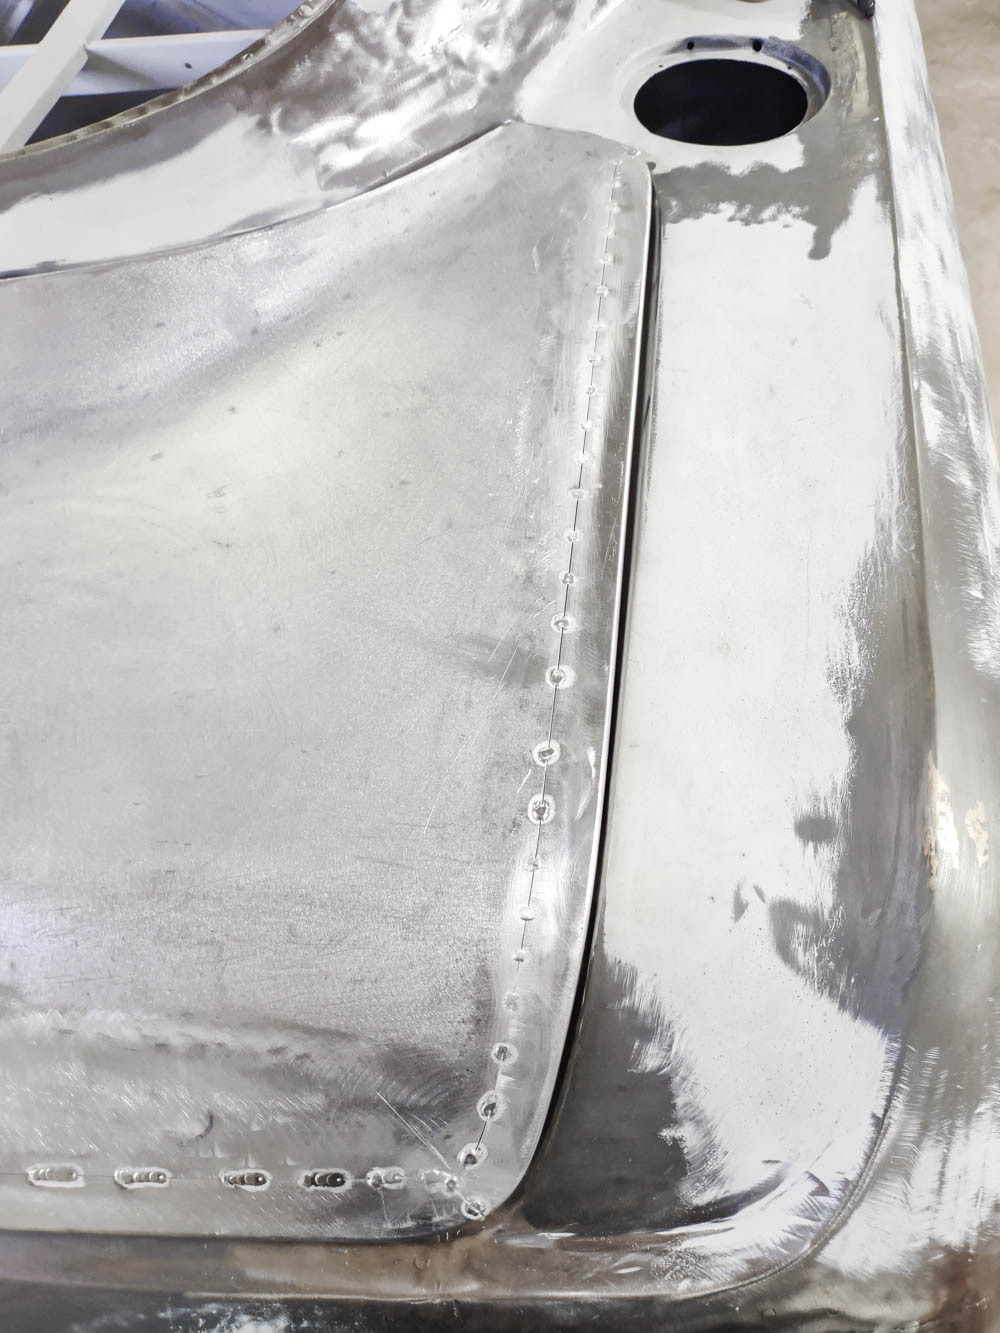
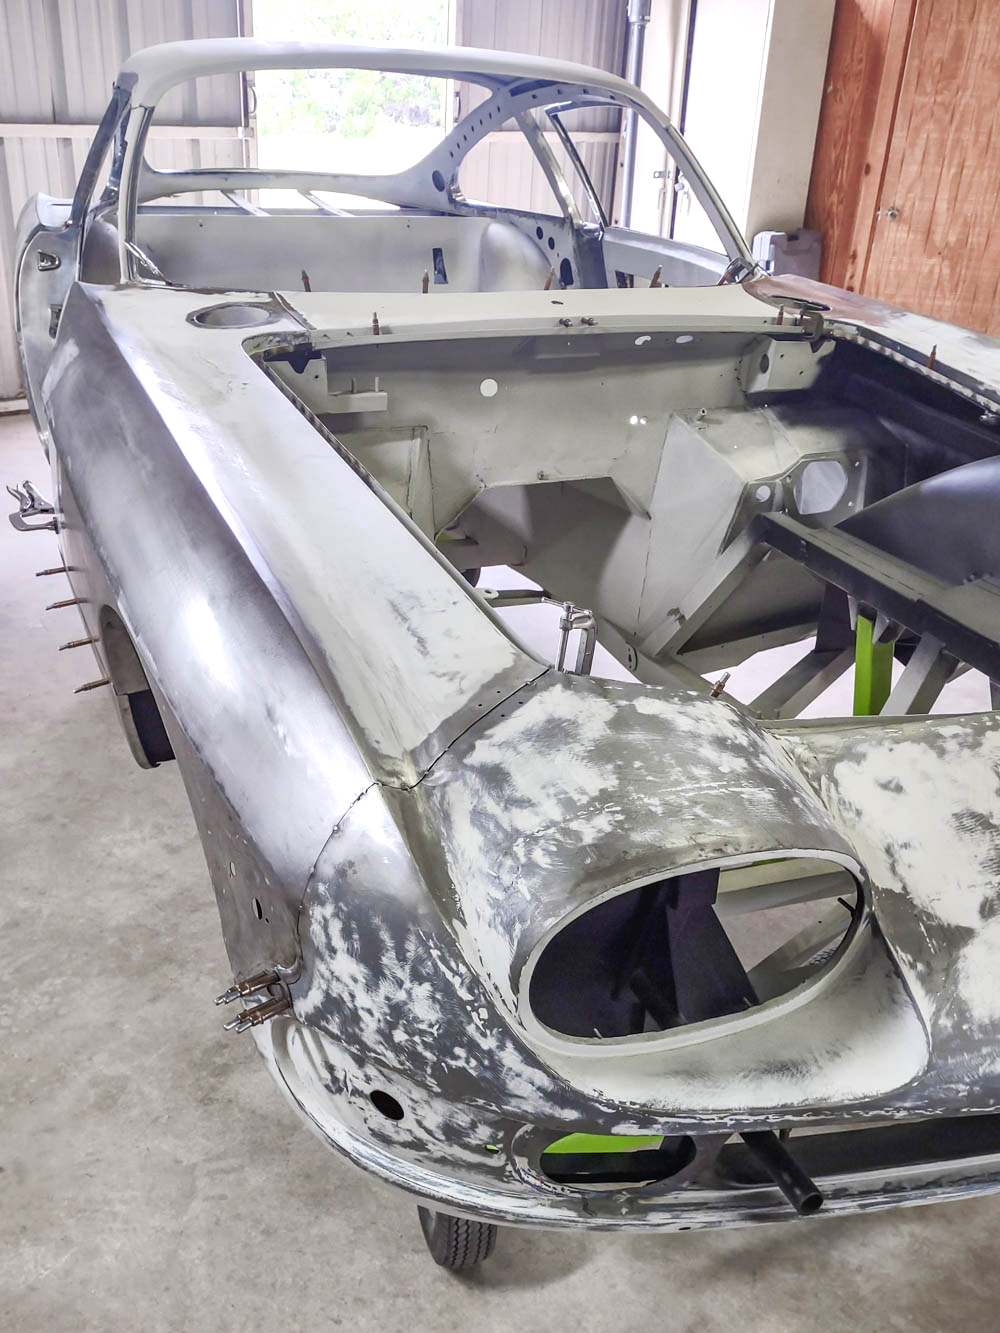
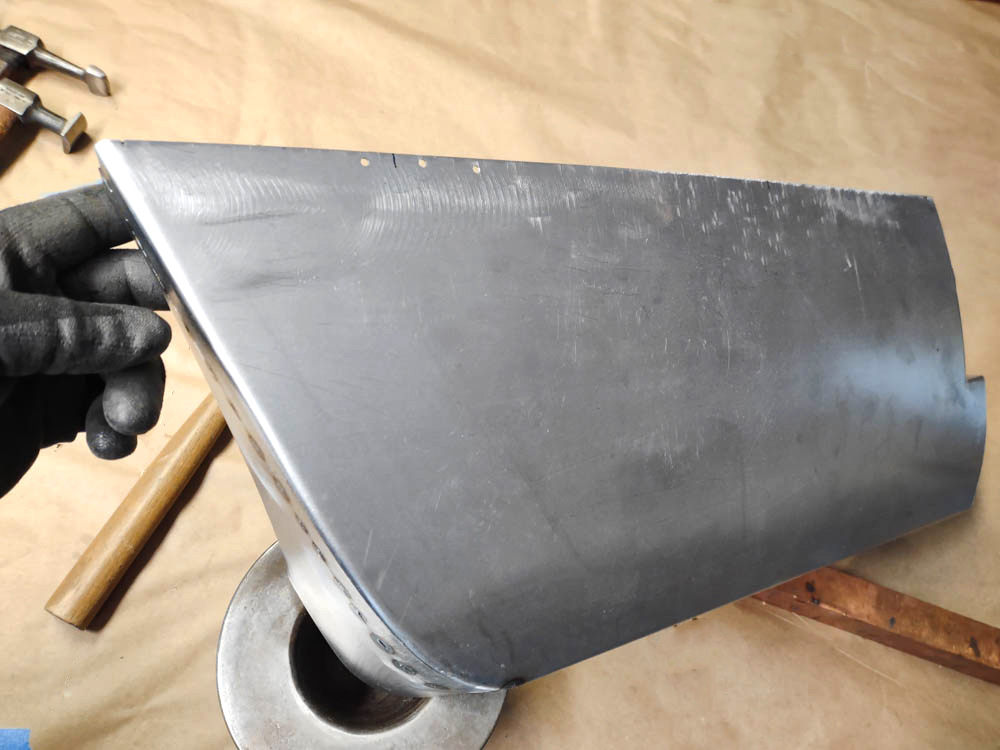
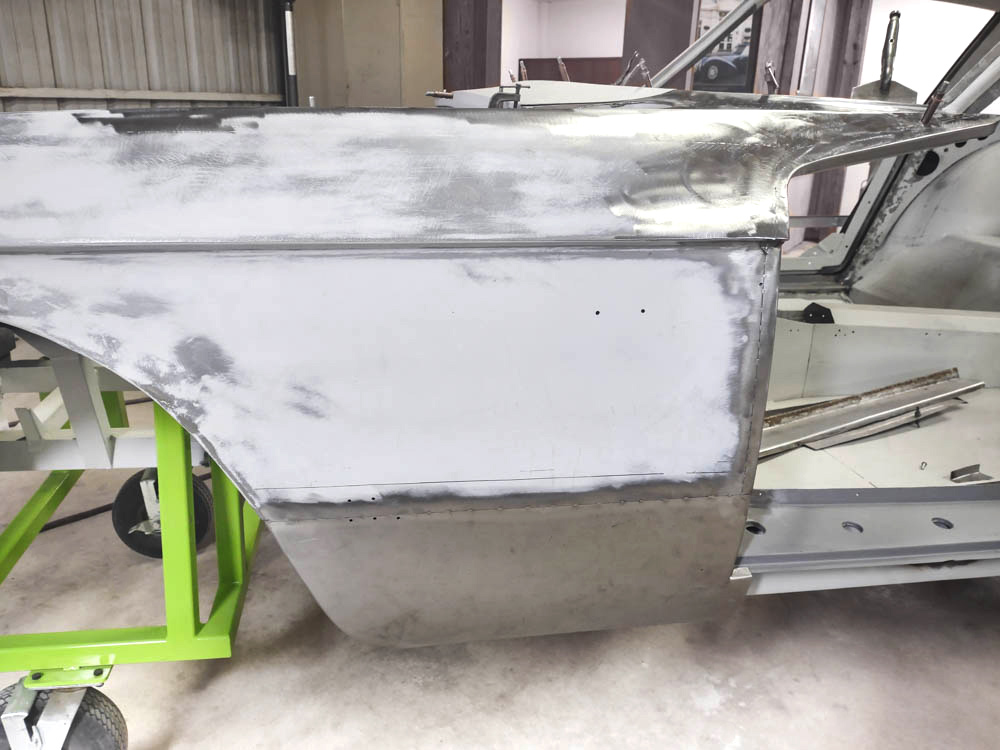
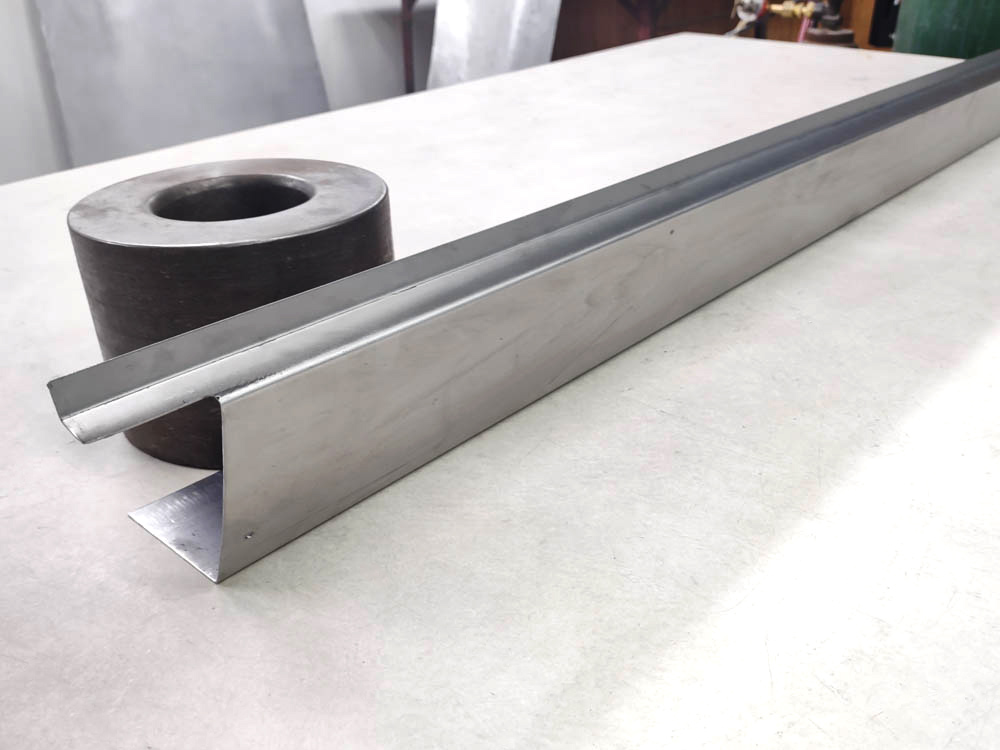
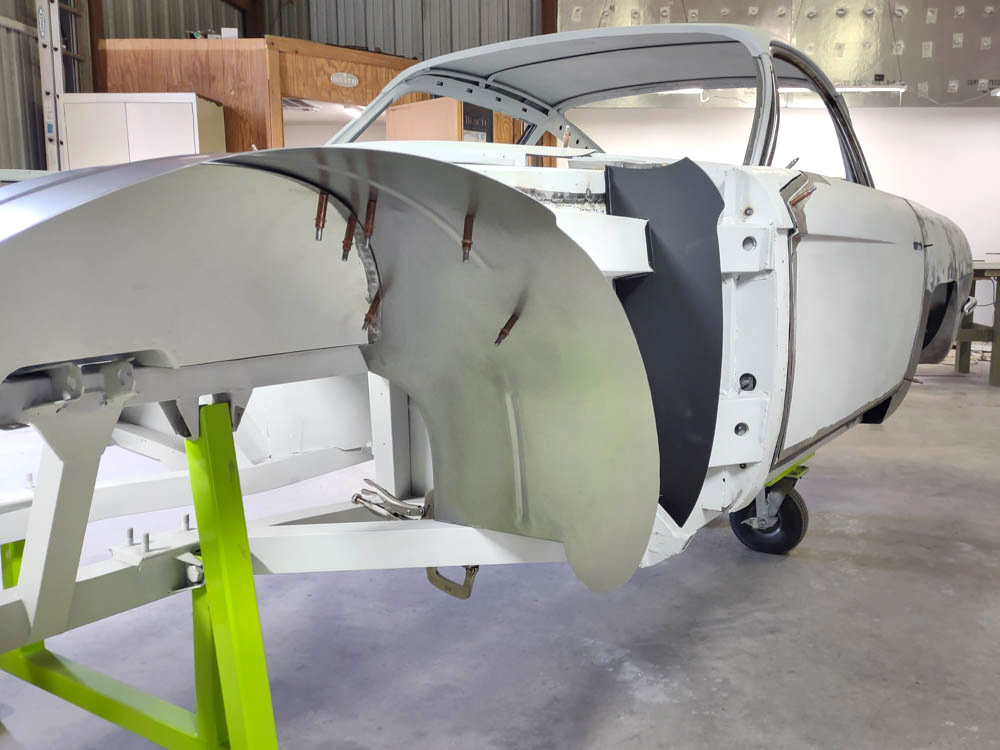
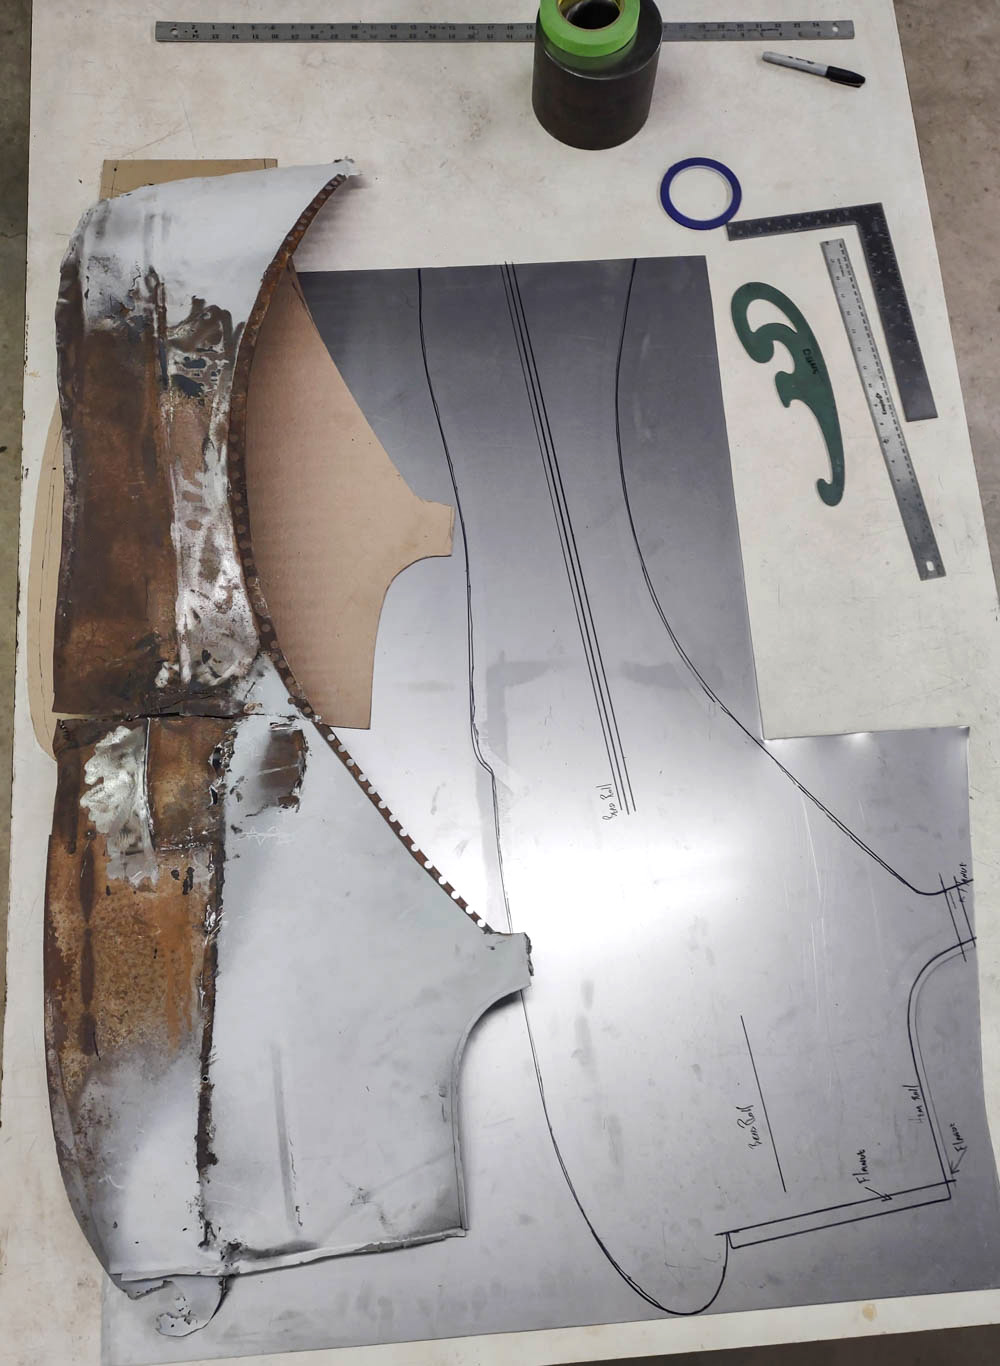
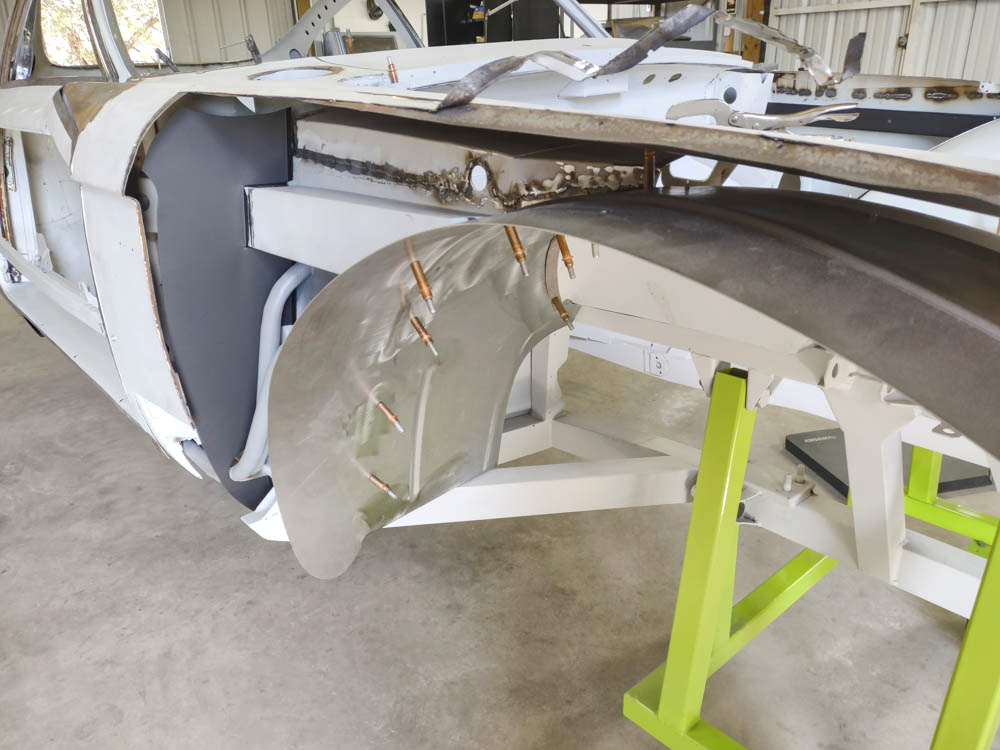
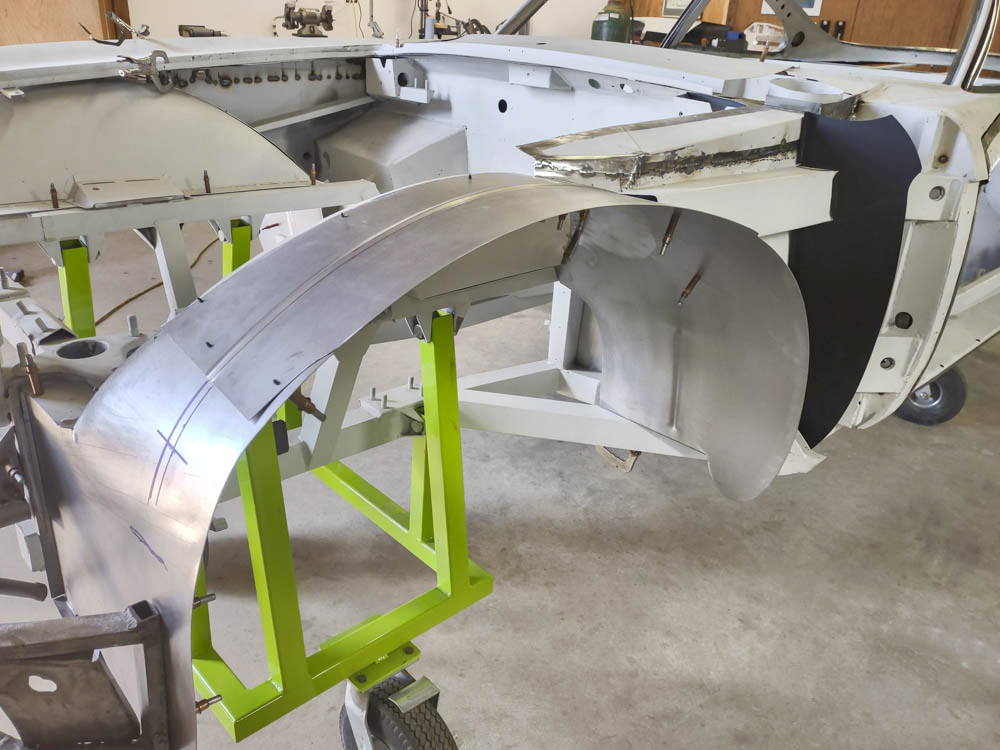
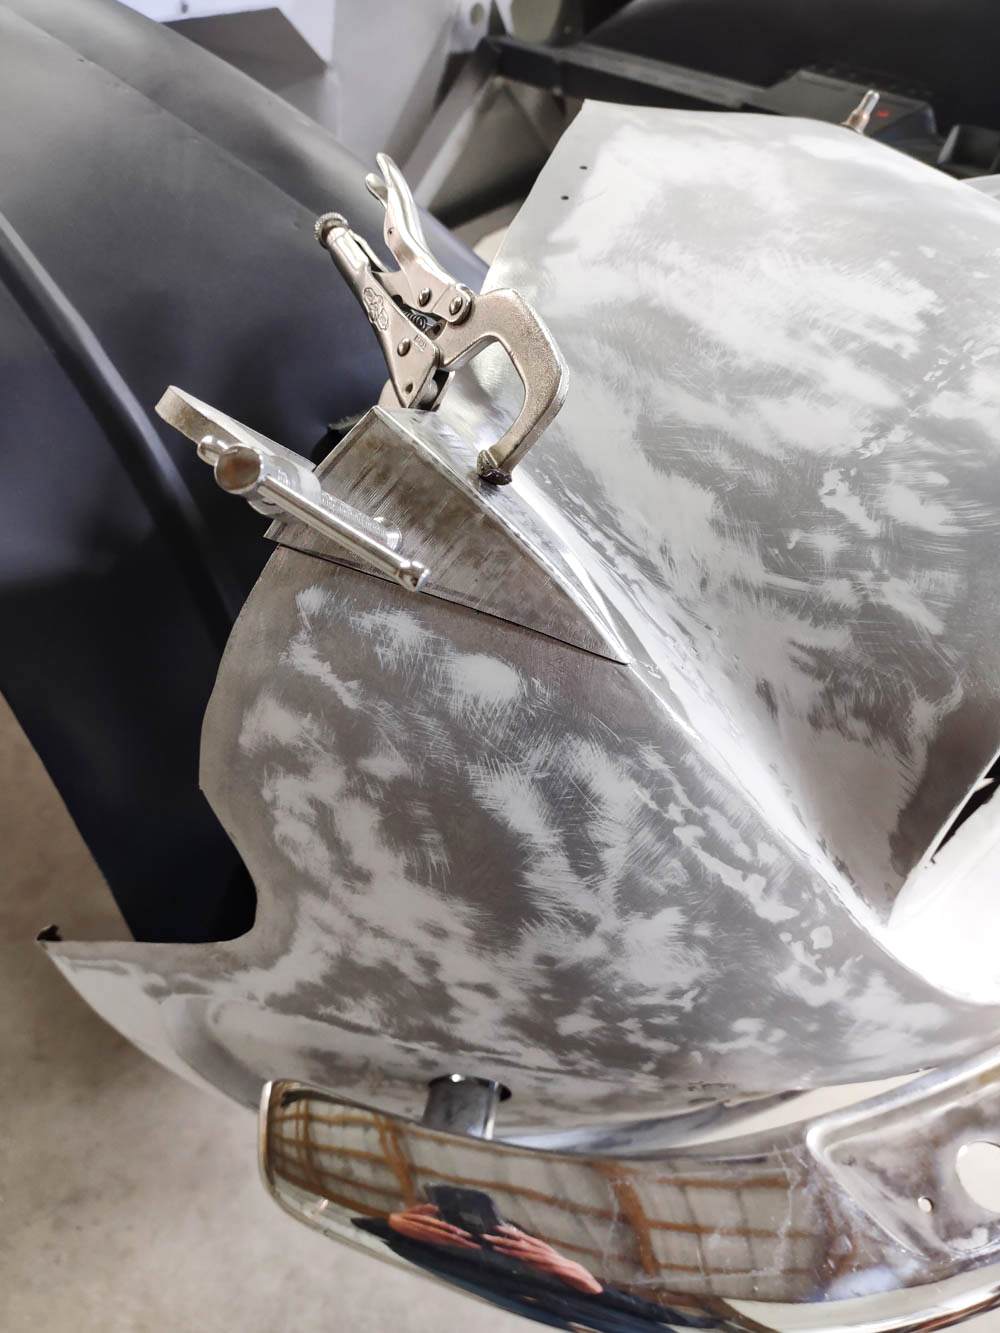
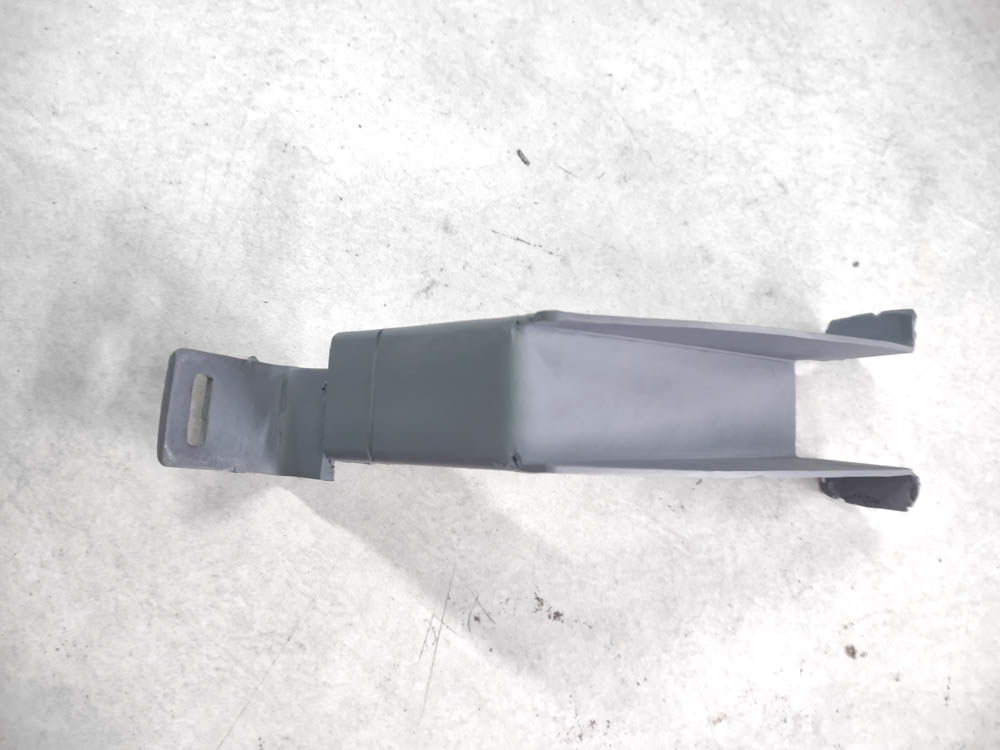
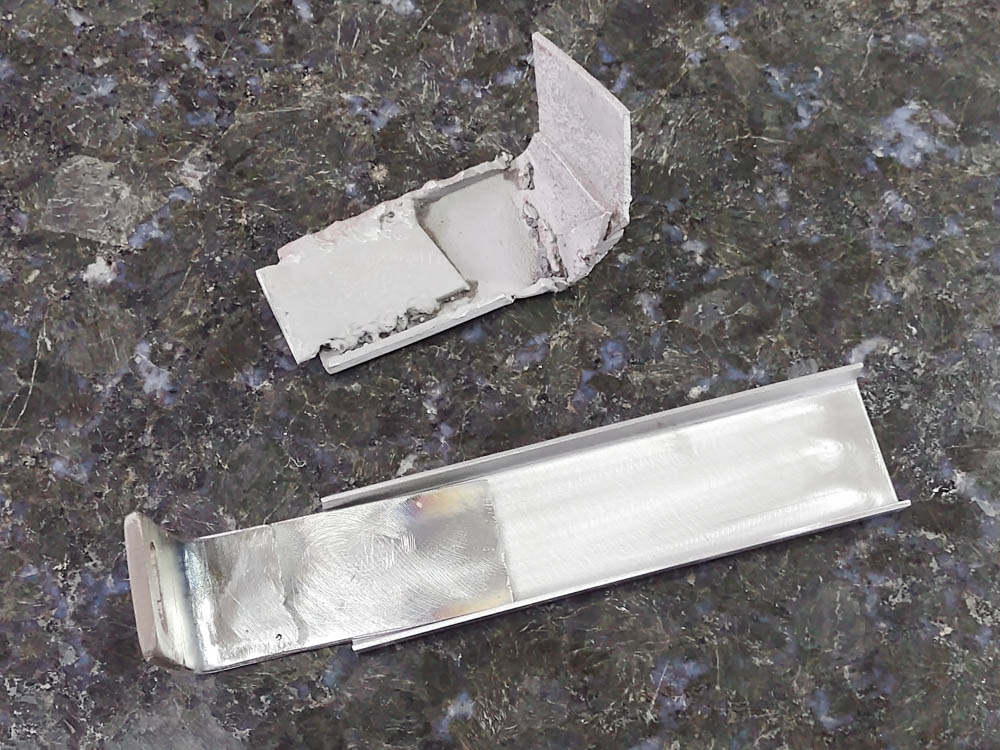
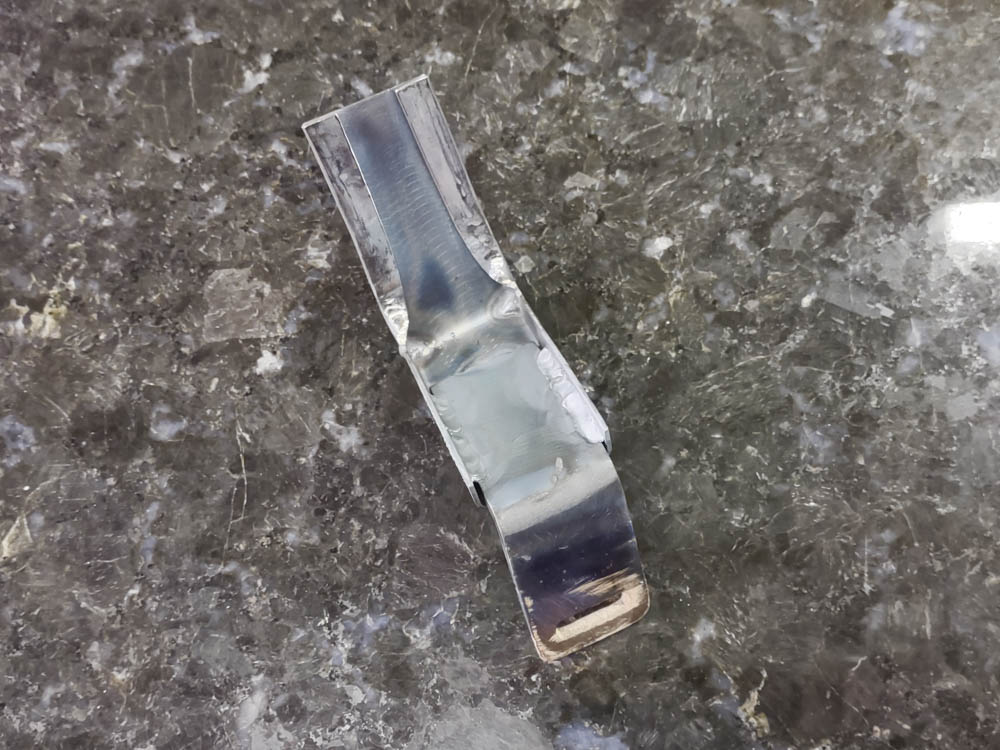
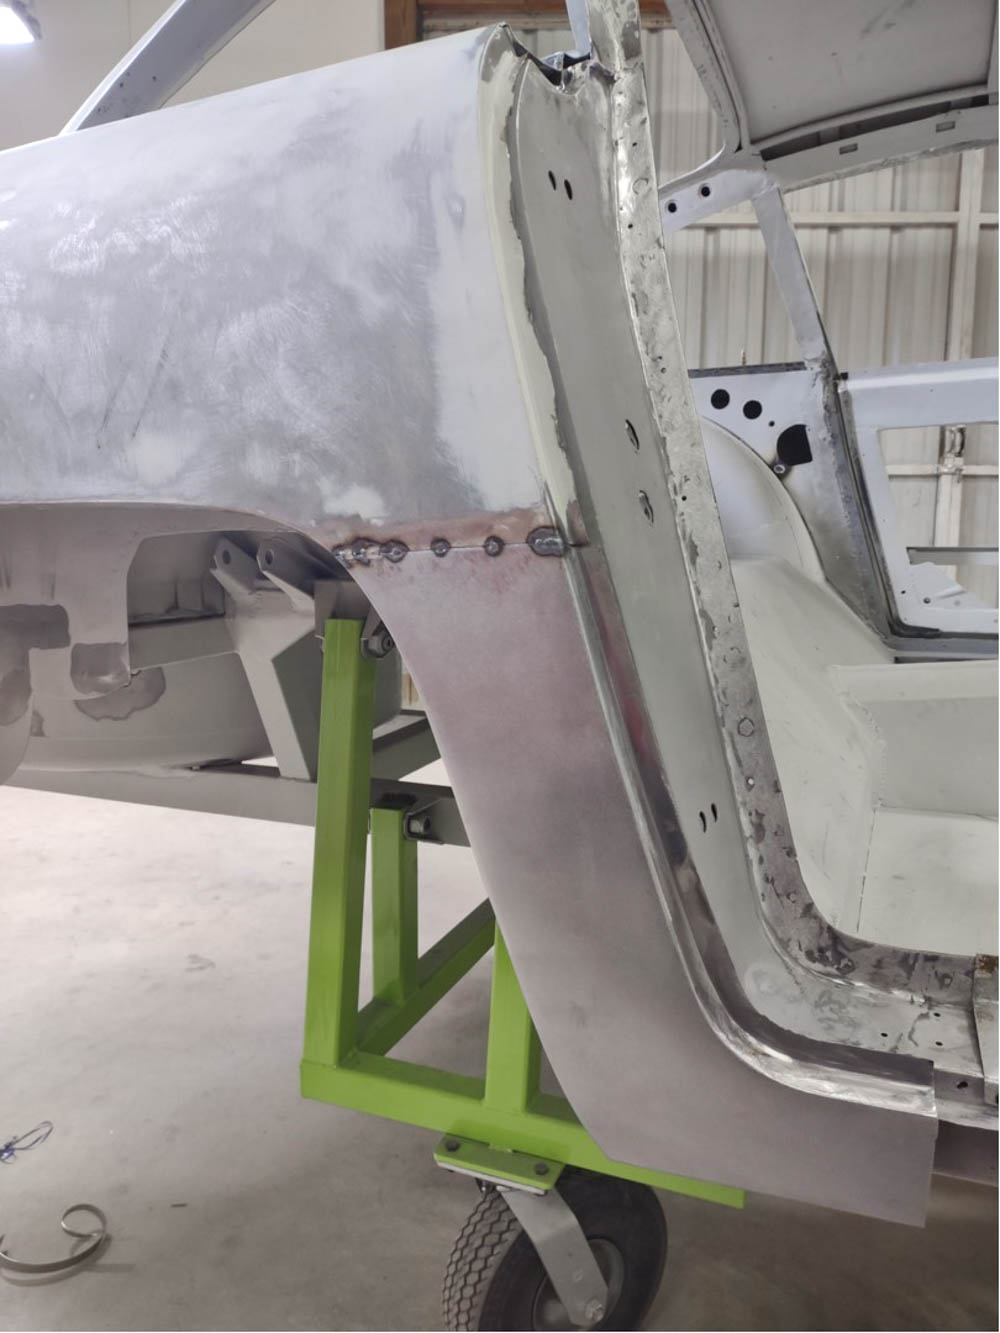
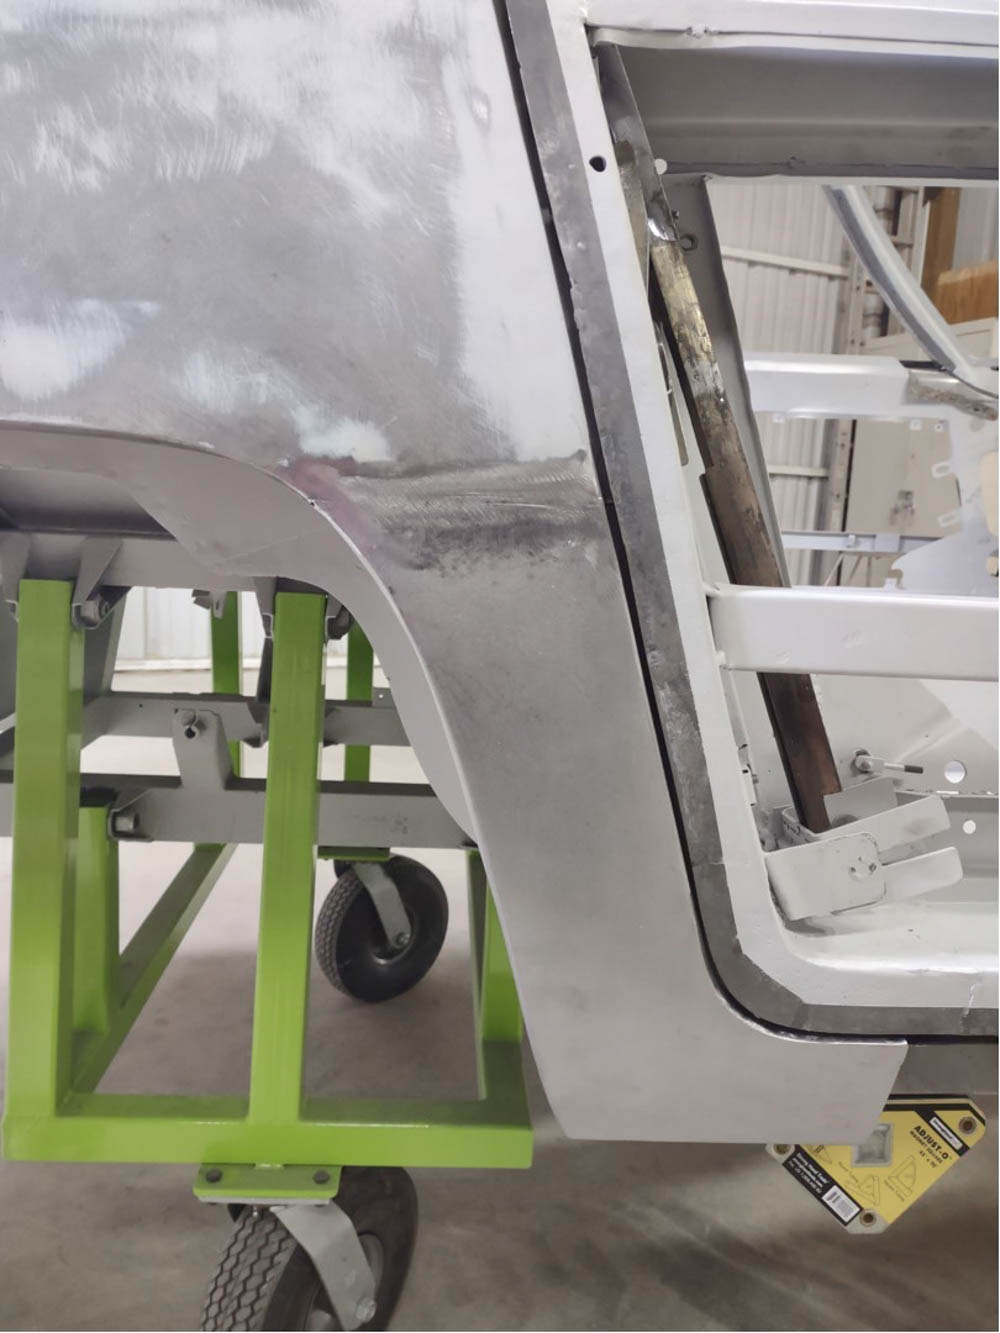
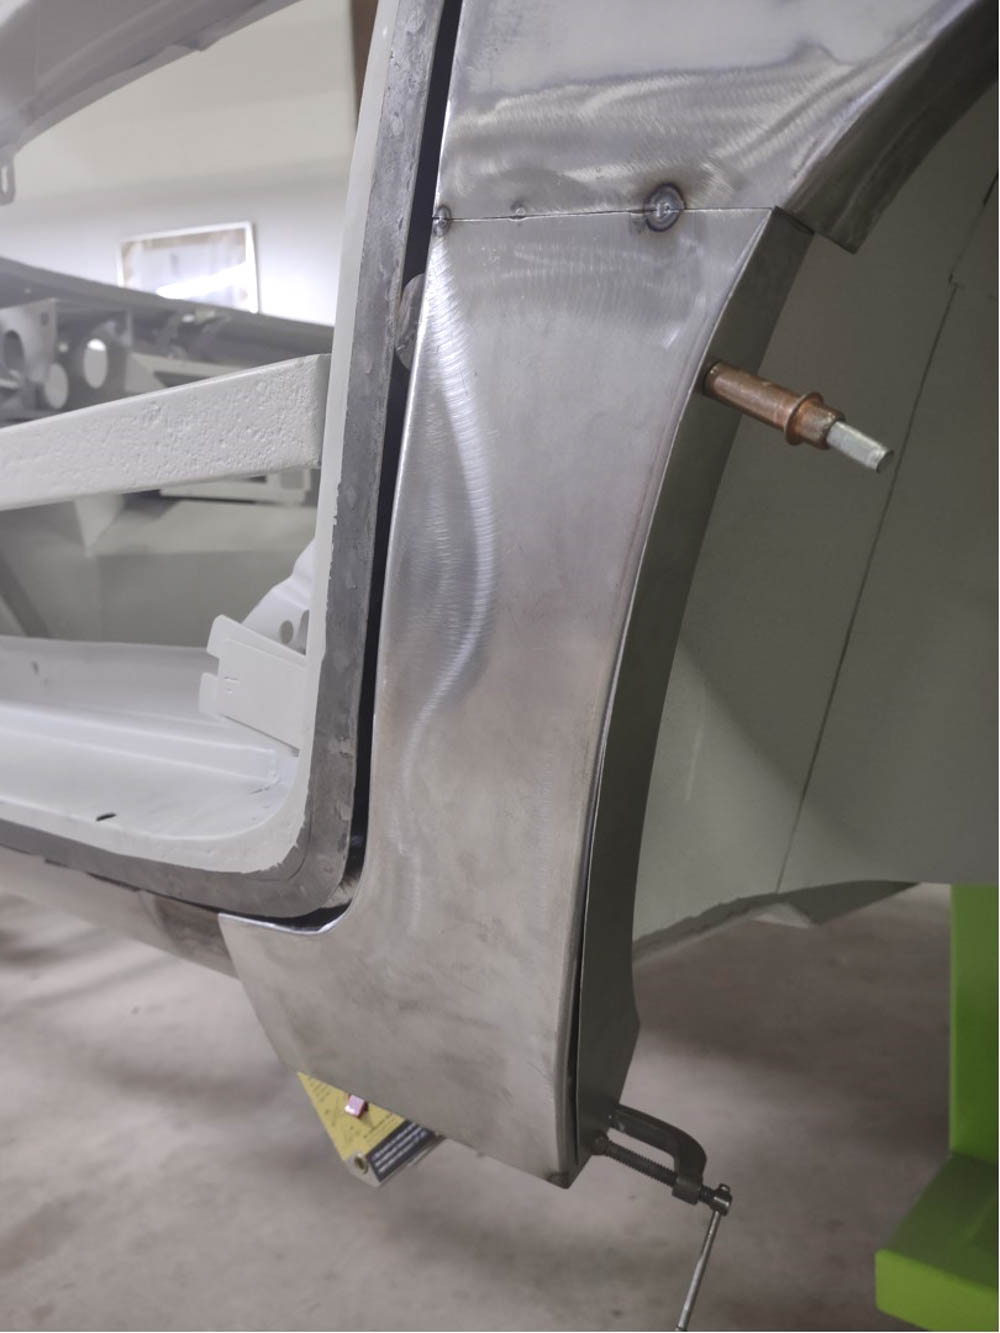
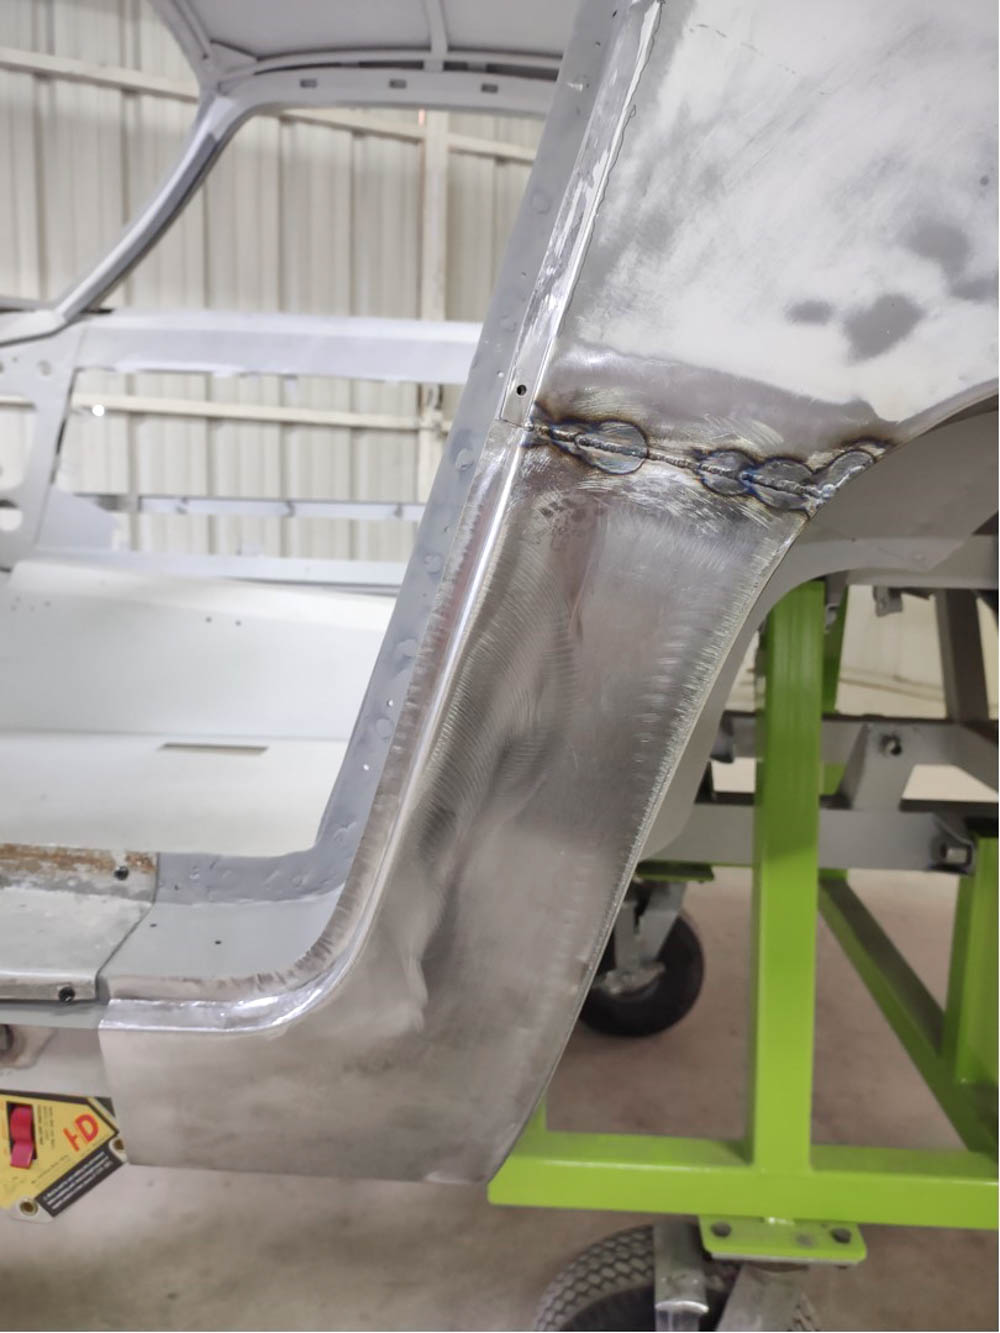
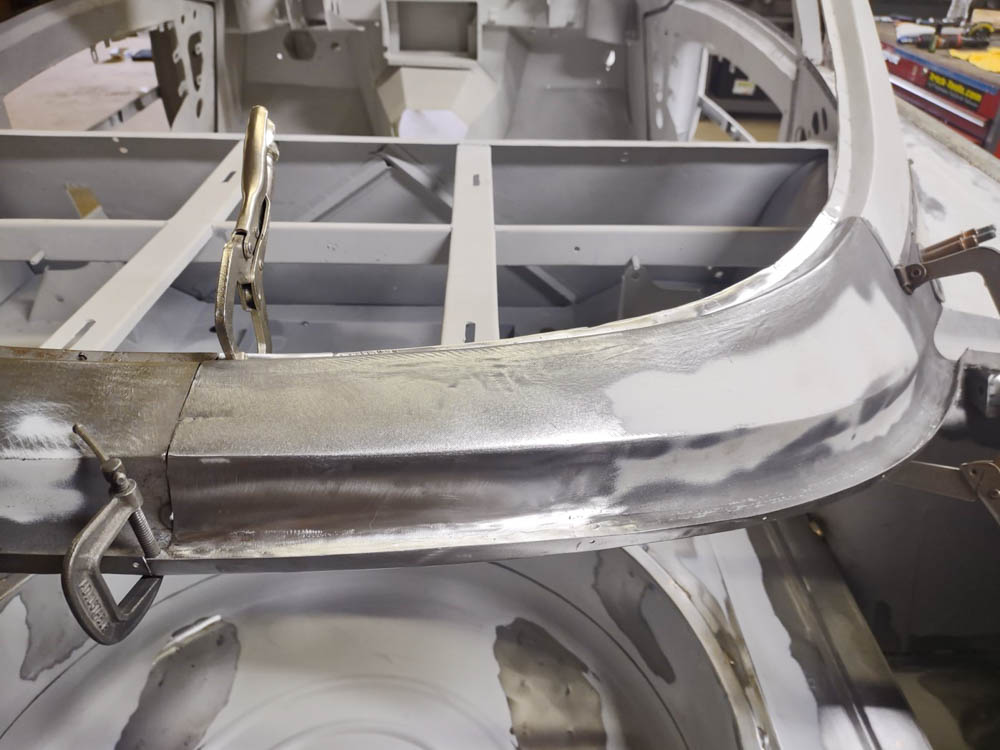
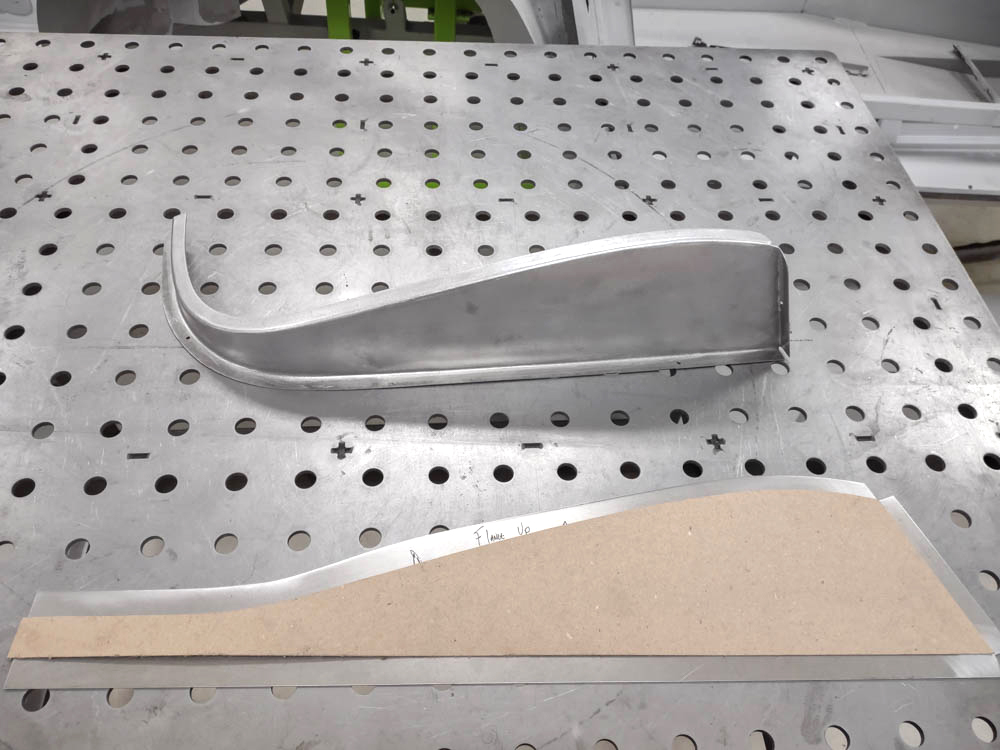
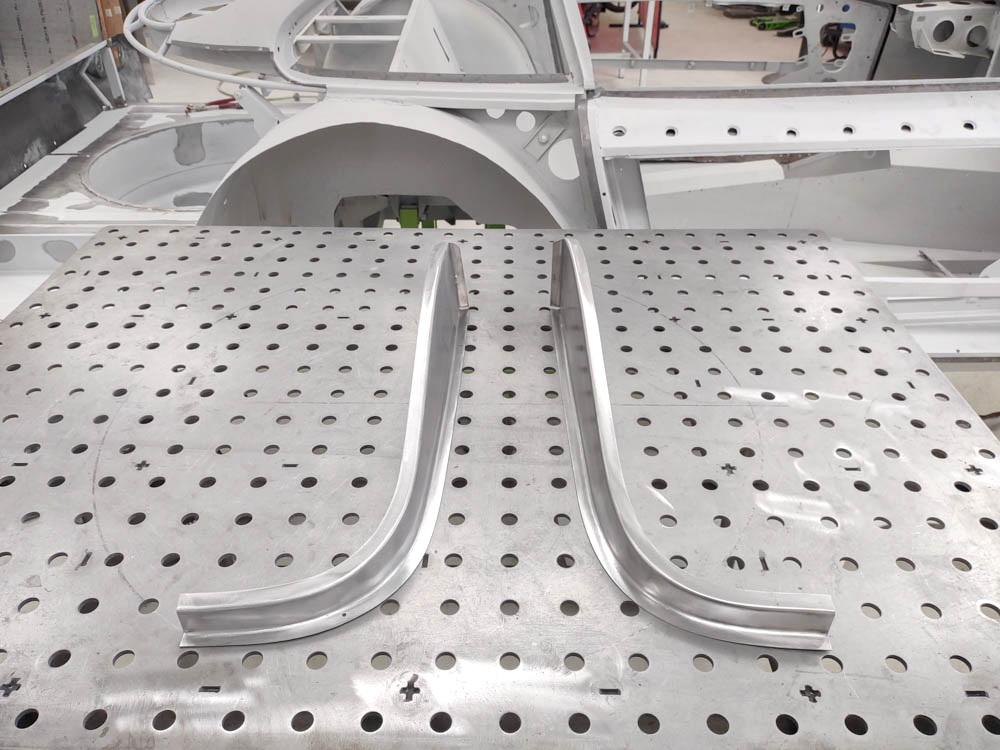
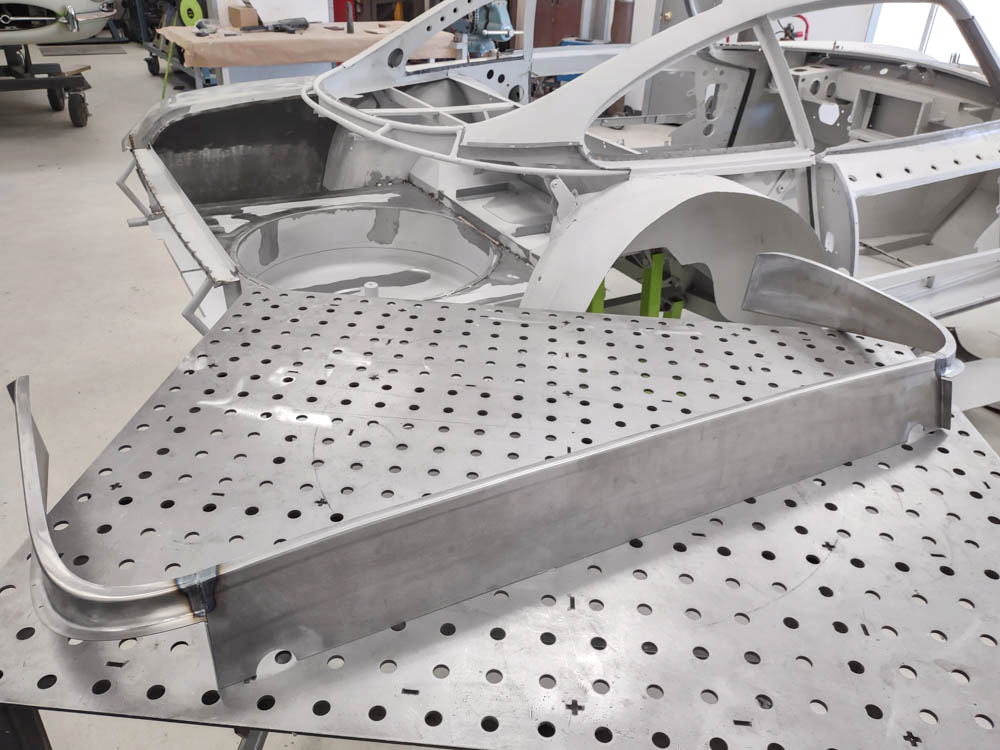
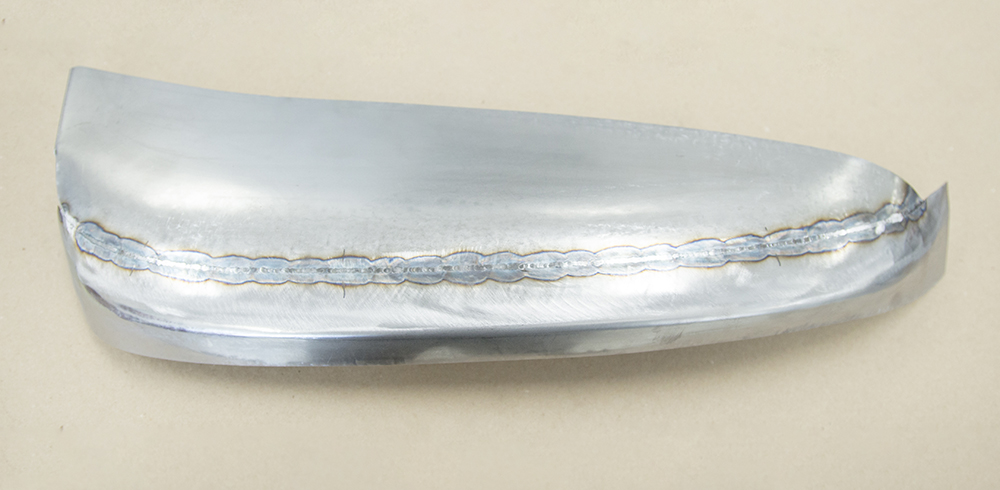
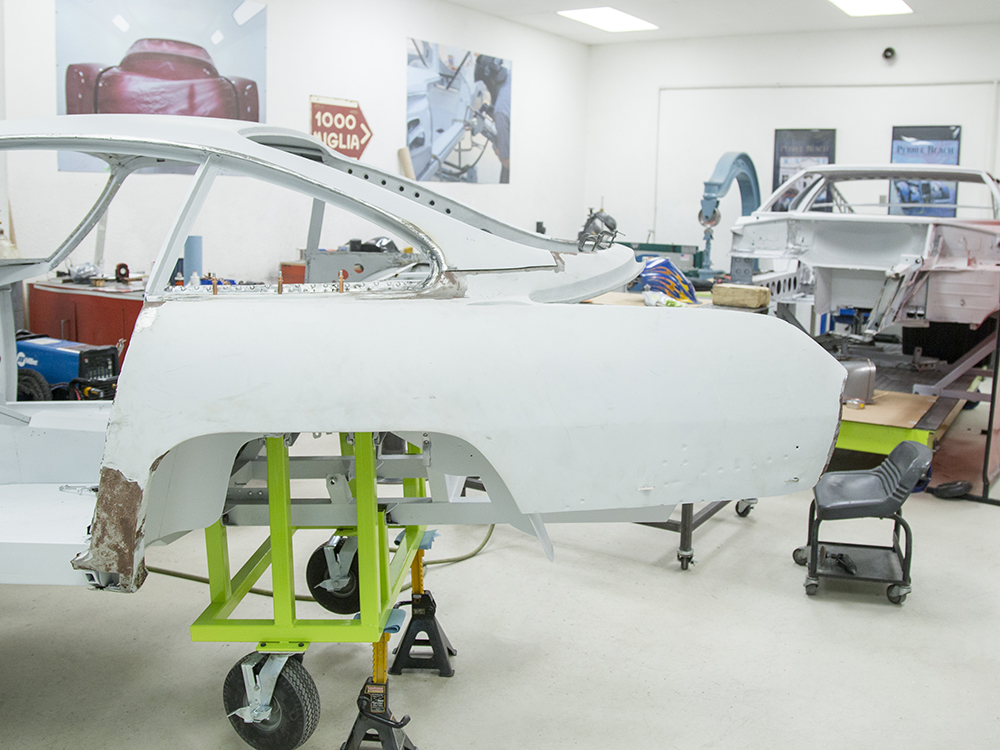
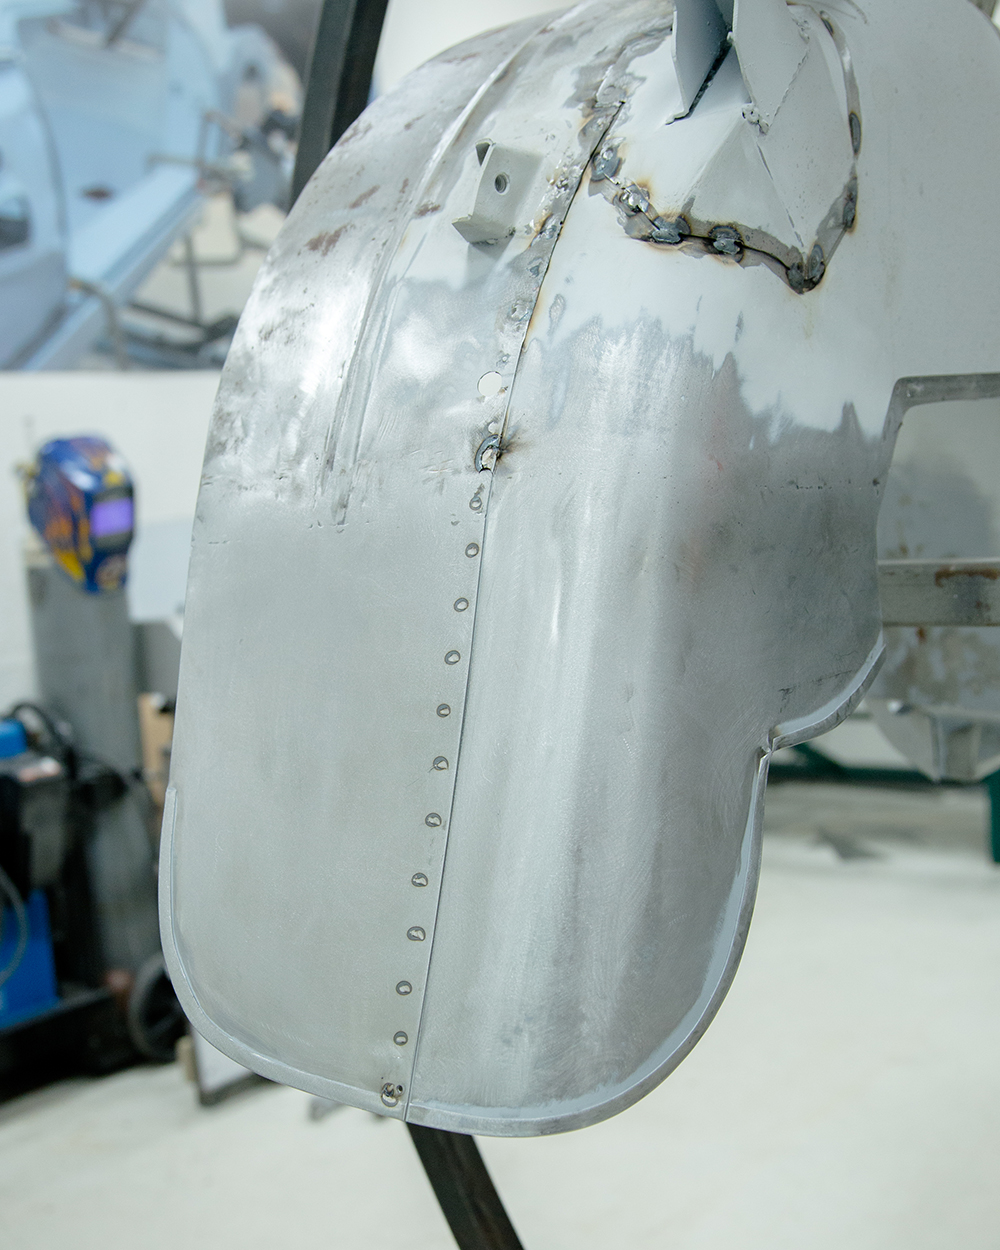
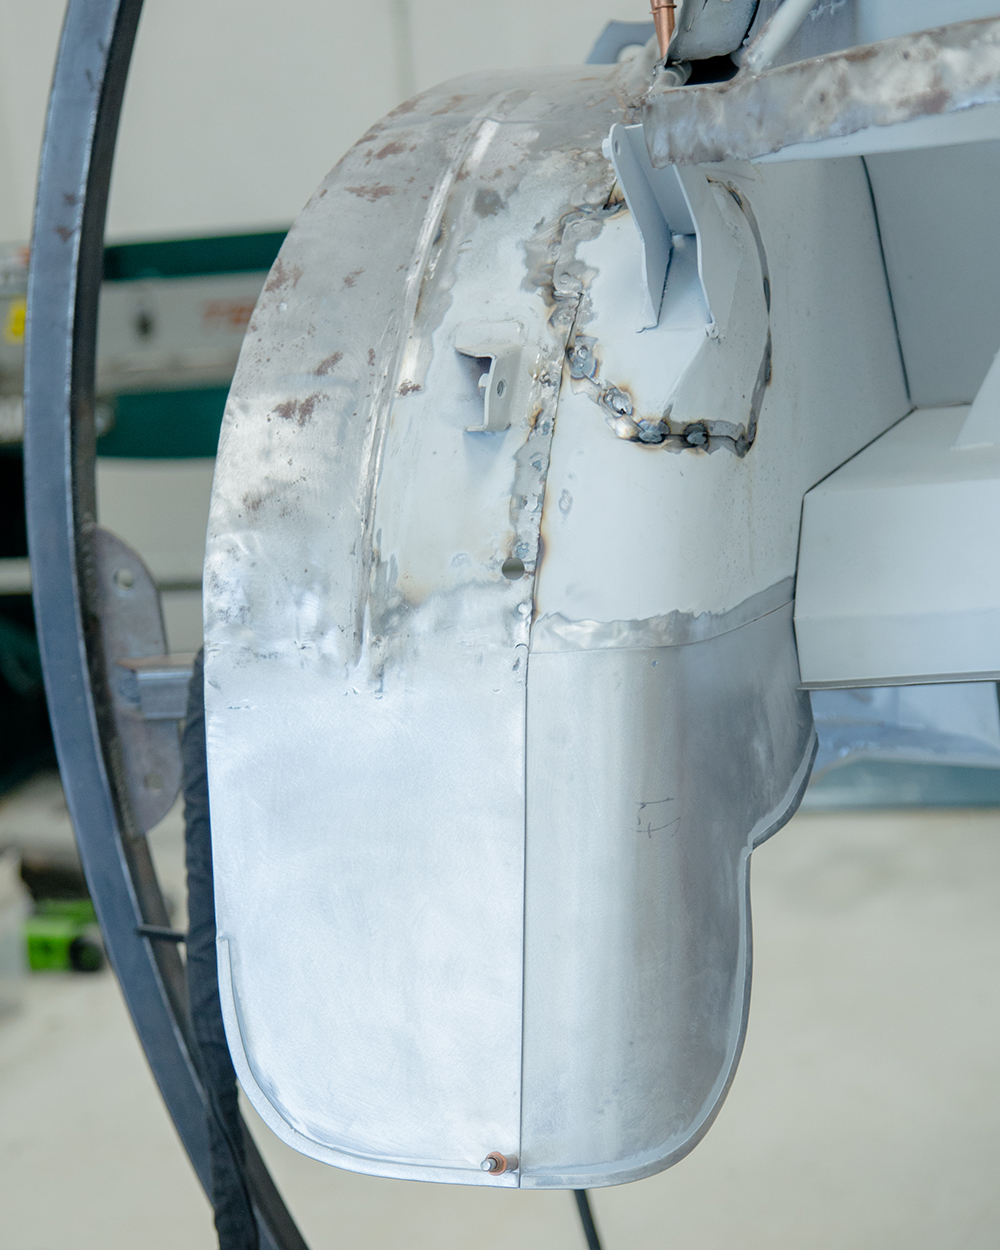
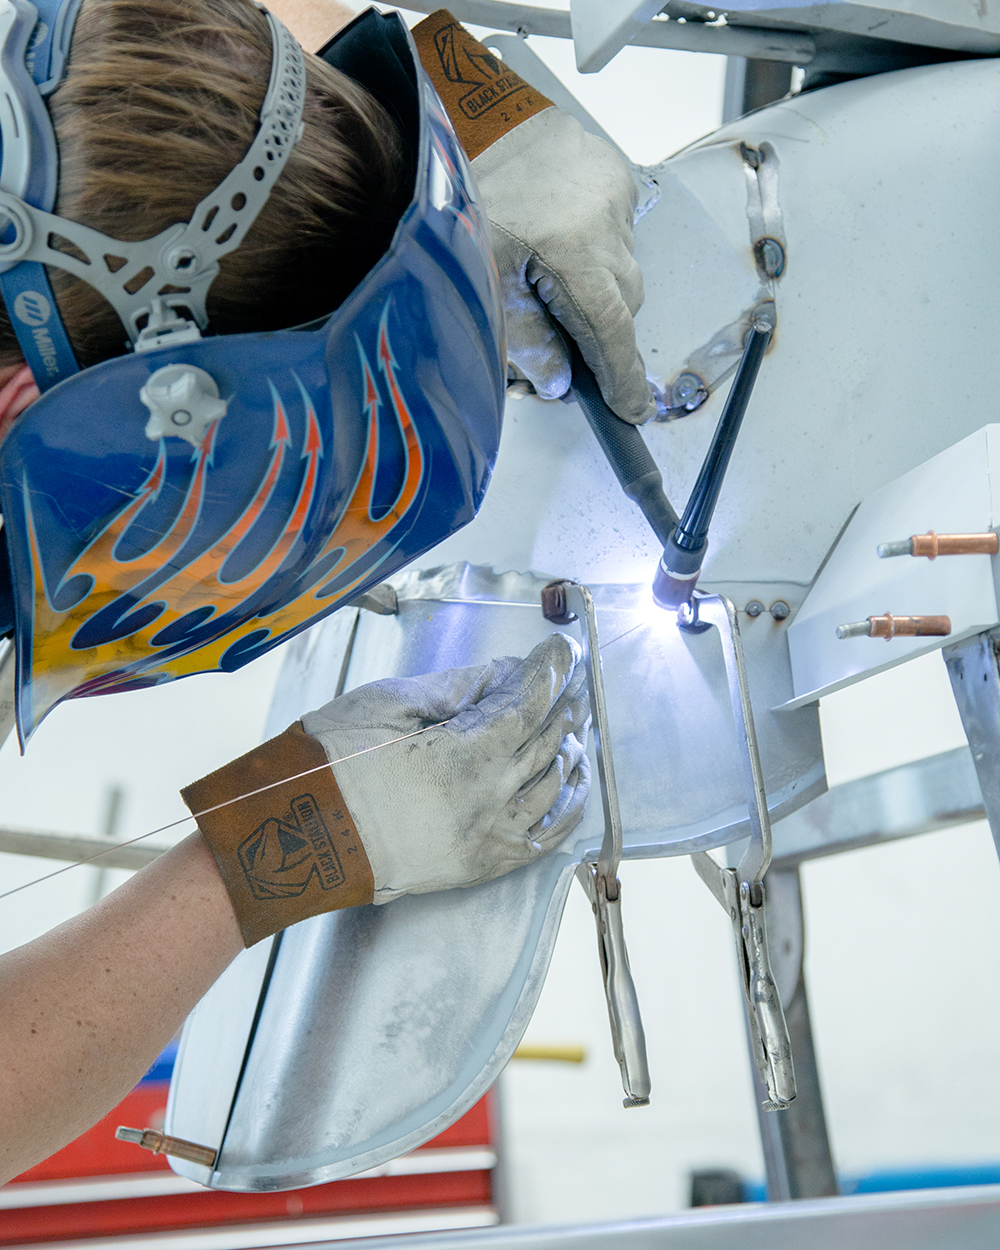
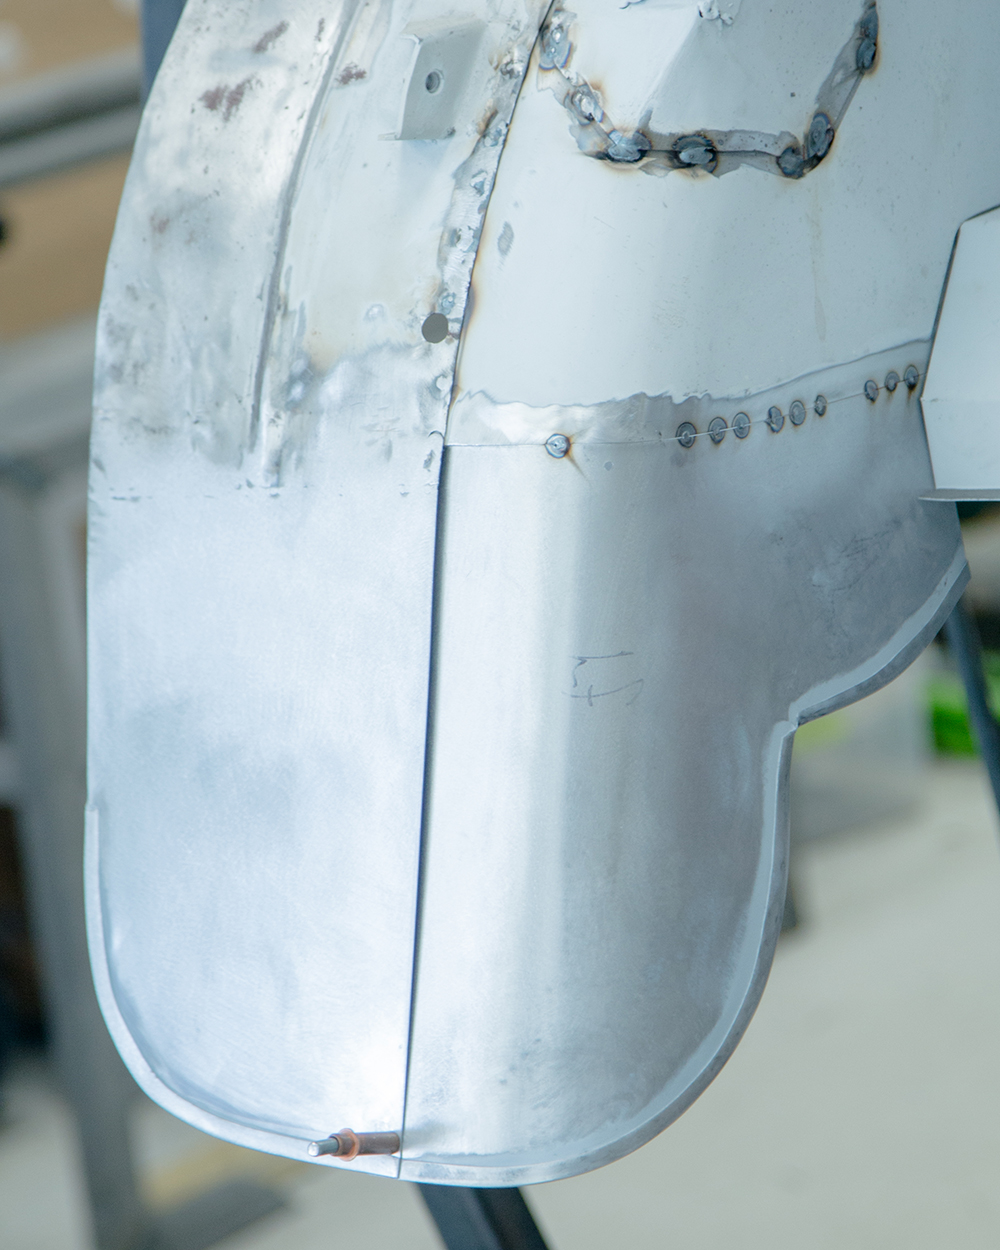
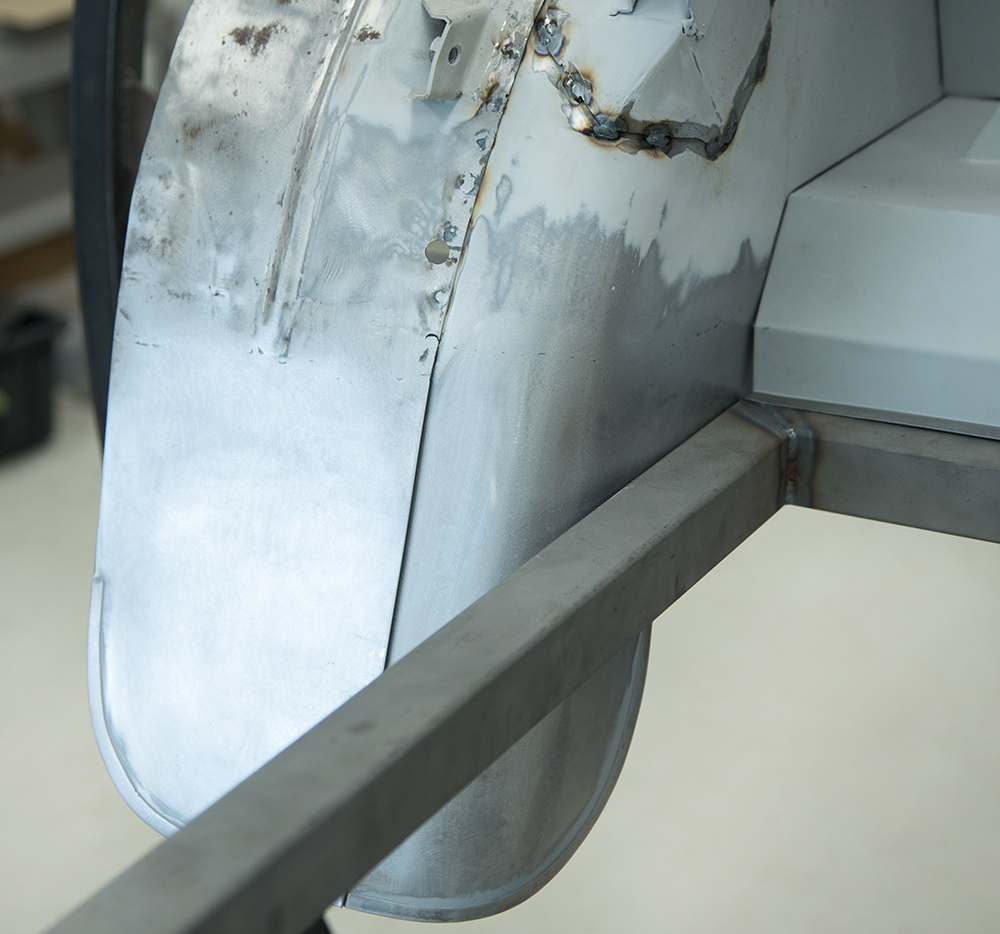
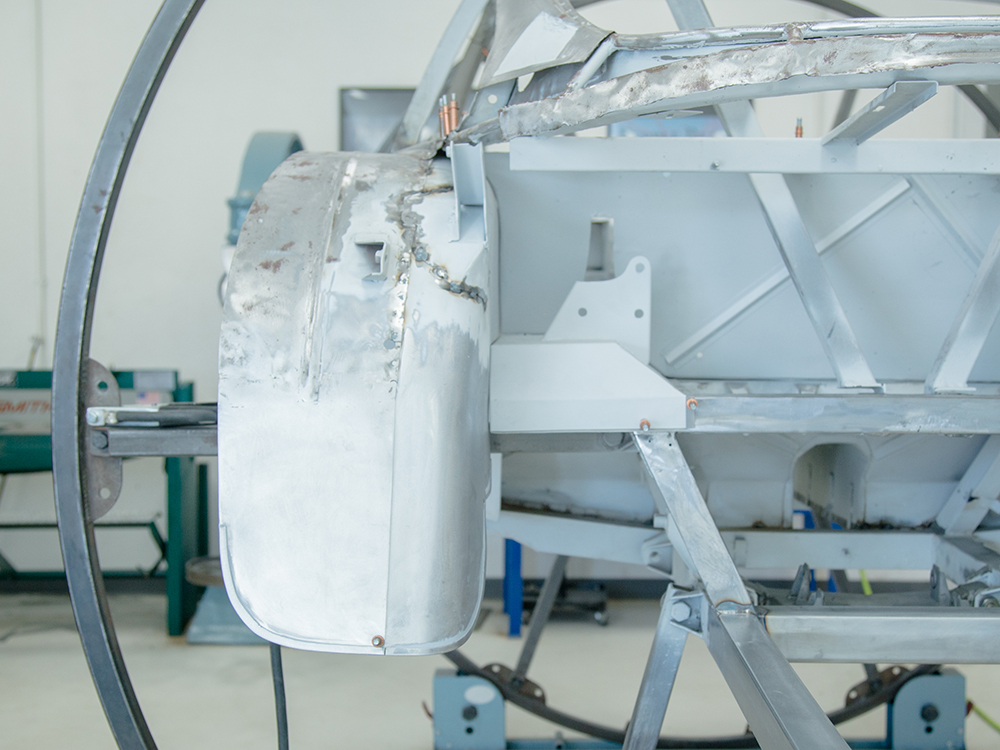
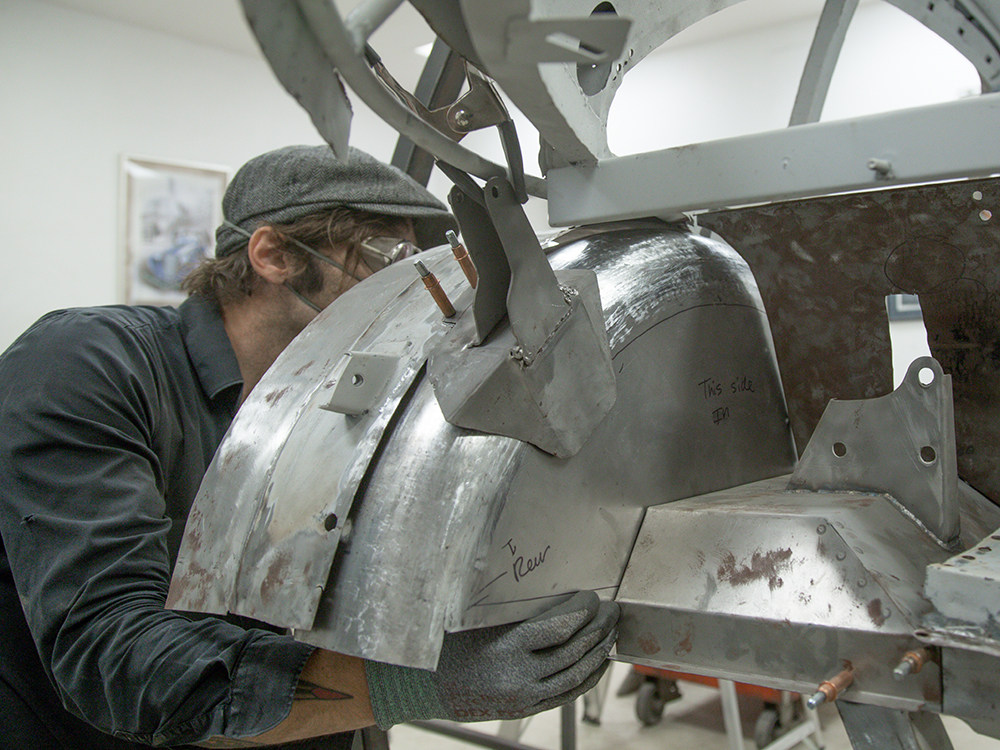
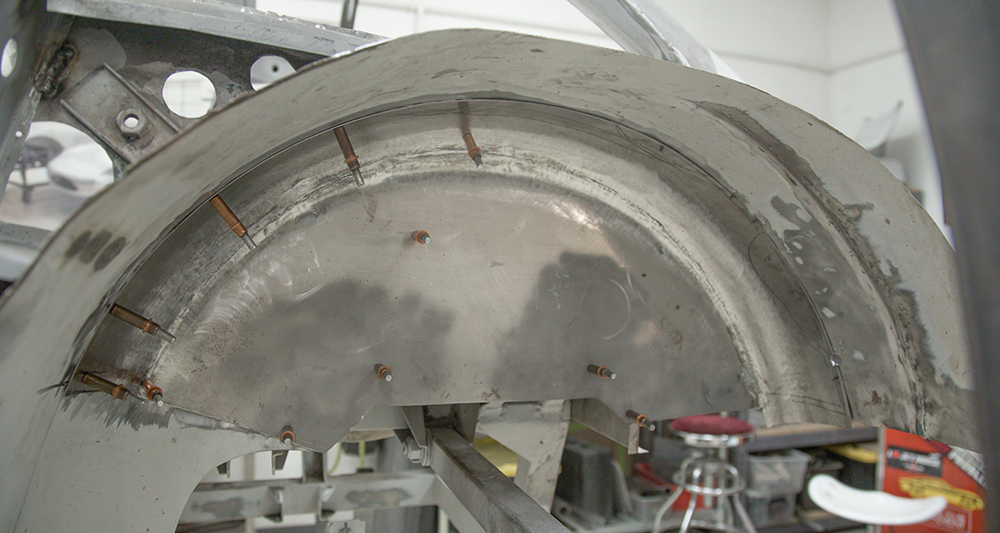
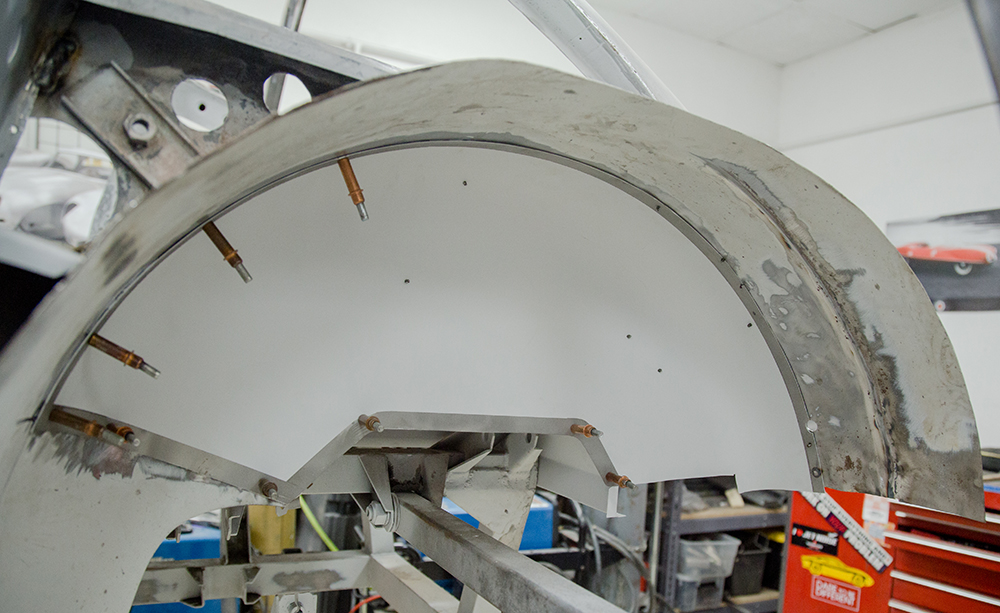
Jake fabricating replacement panels
for the right rear quarter.
Update report - October 4, 2021
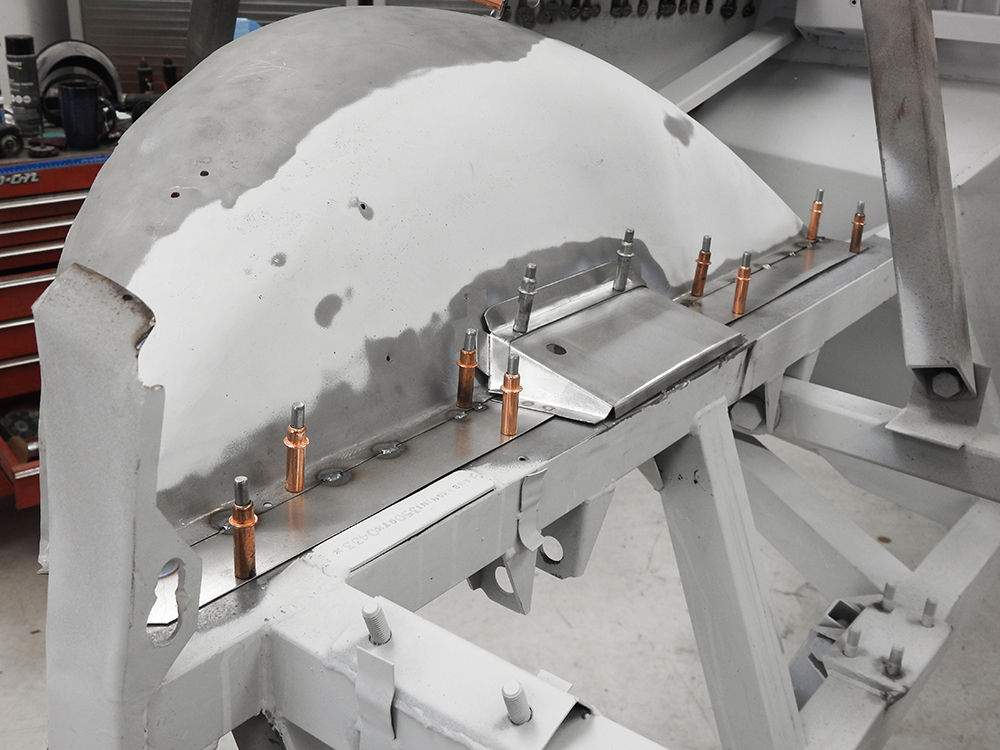
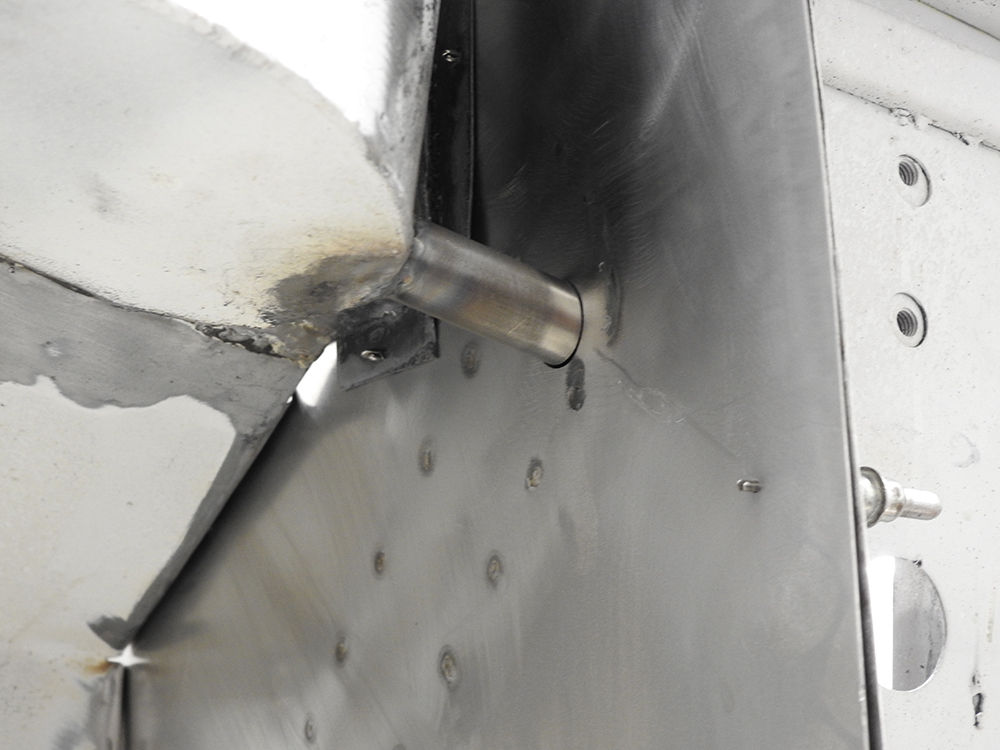
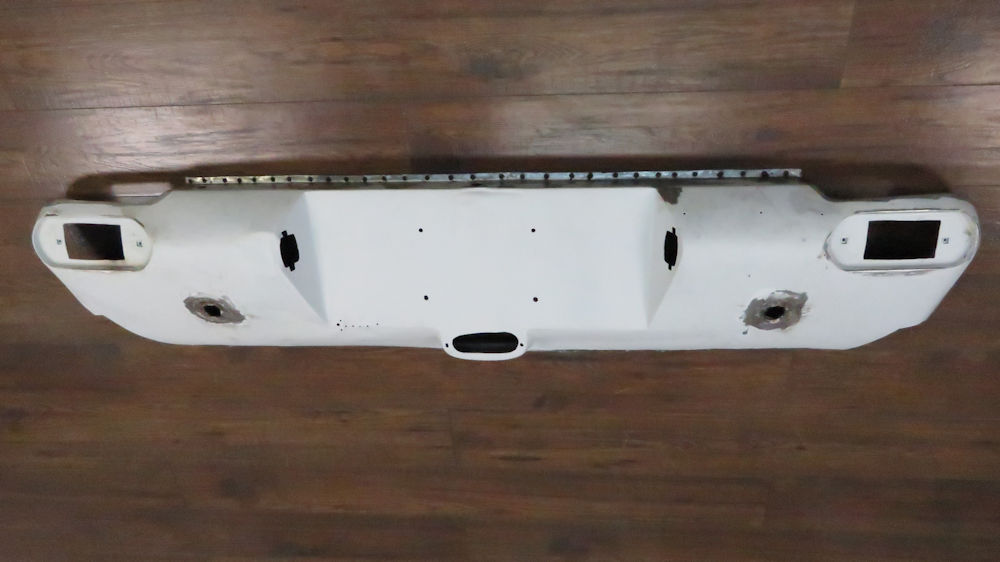
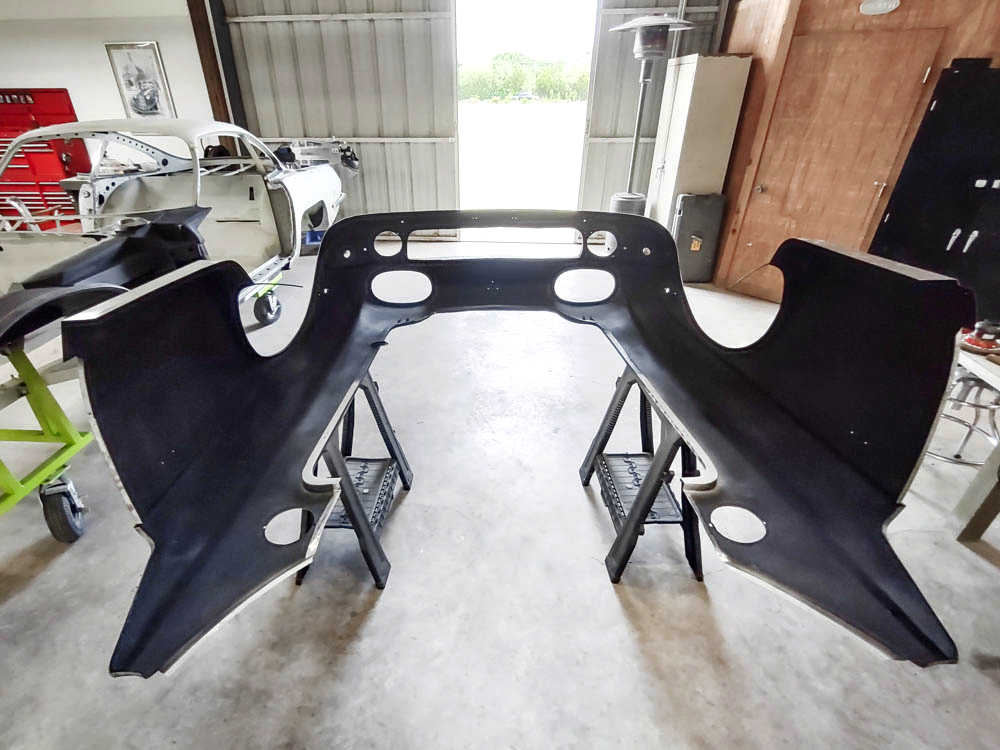
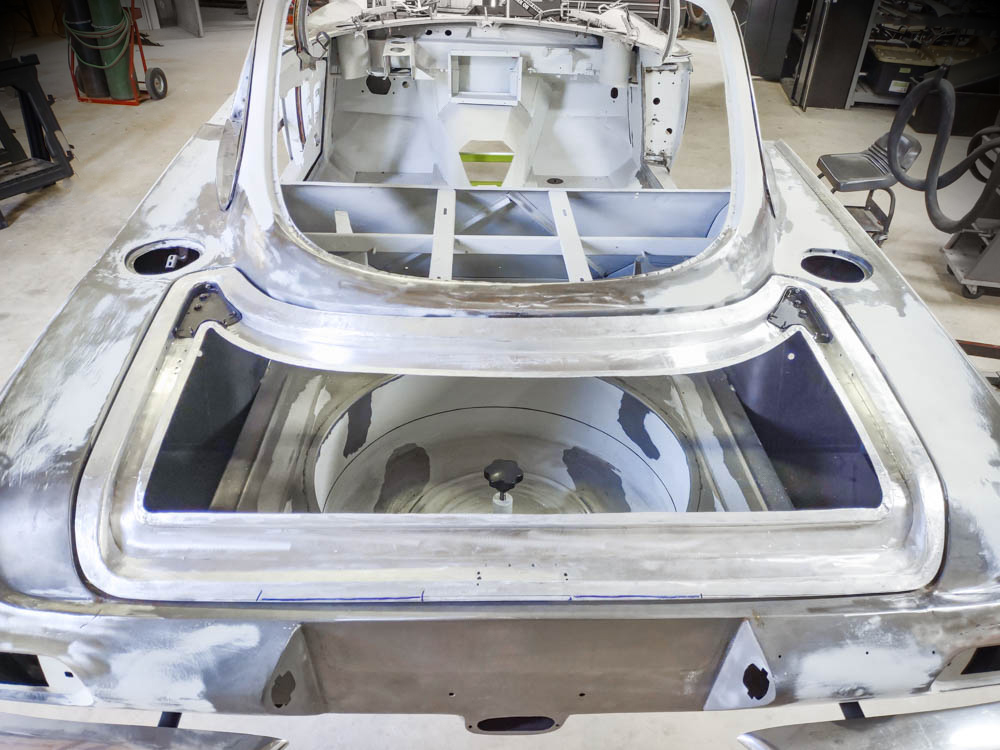
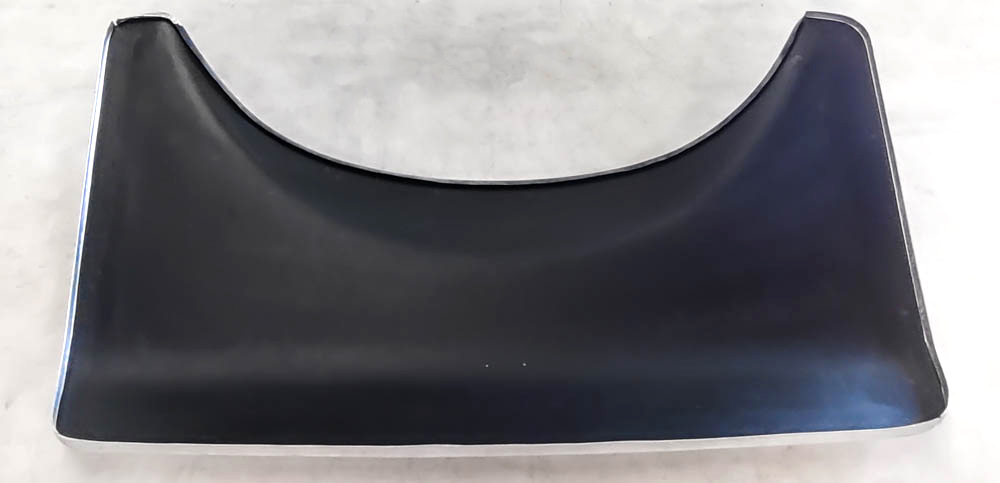
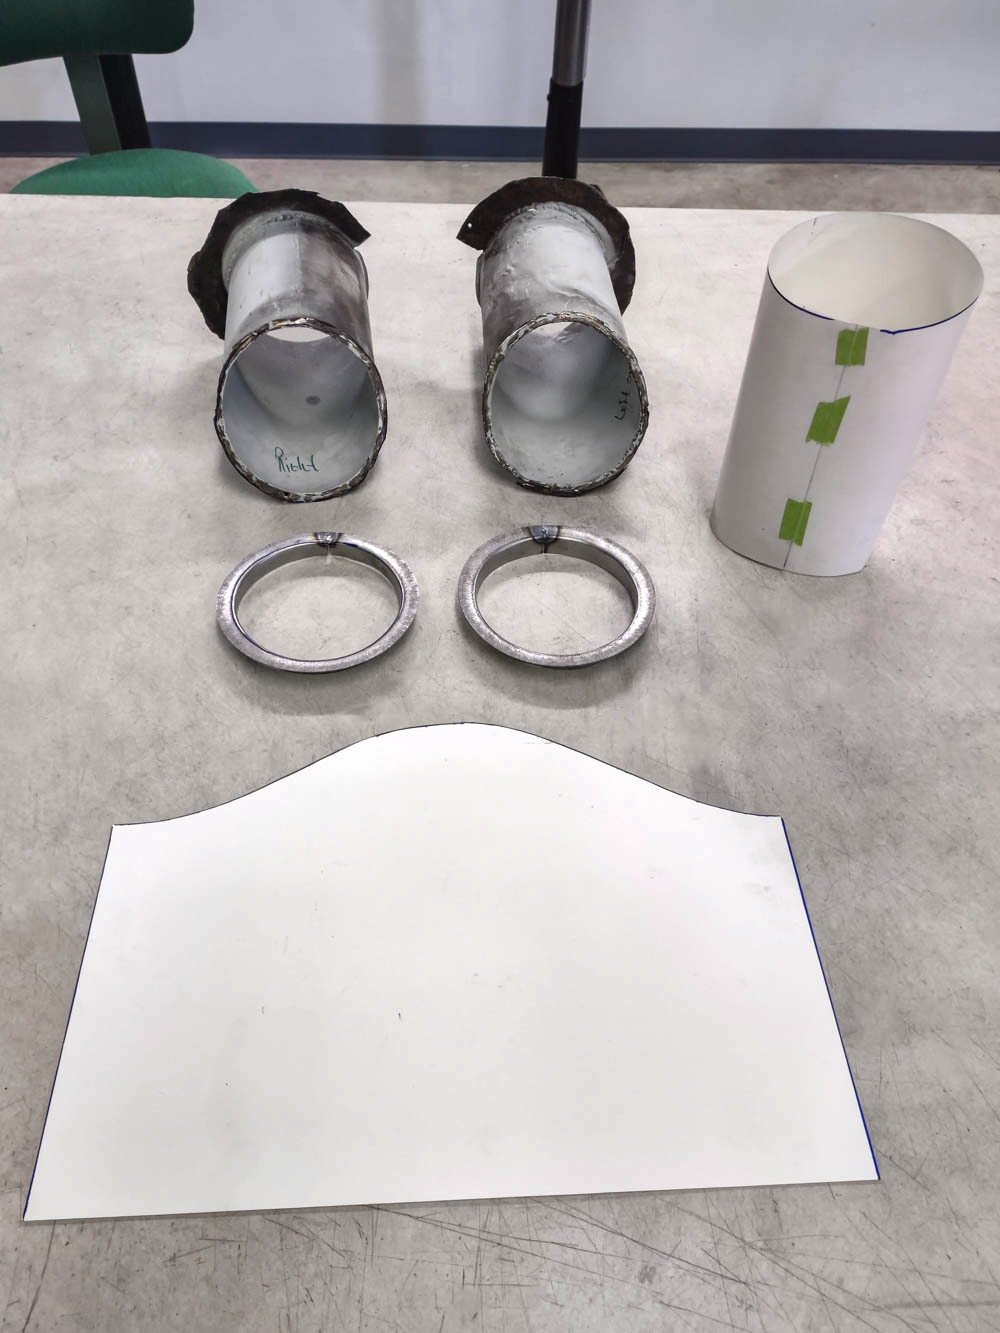
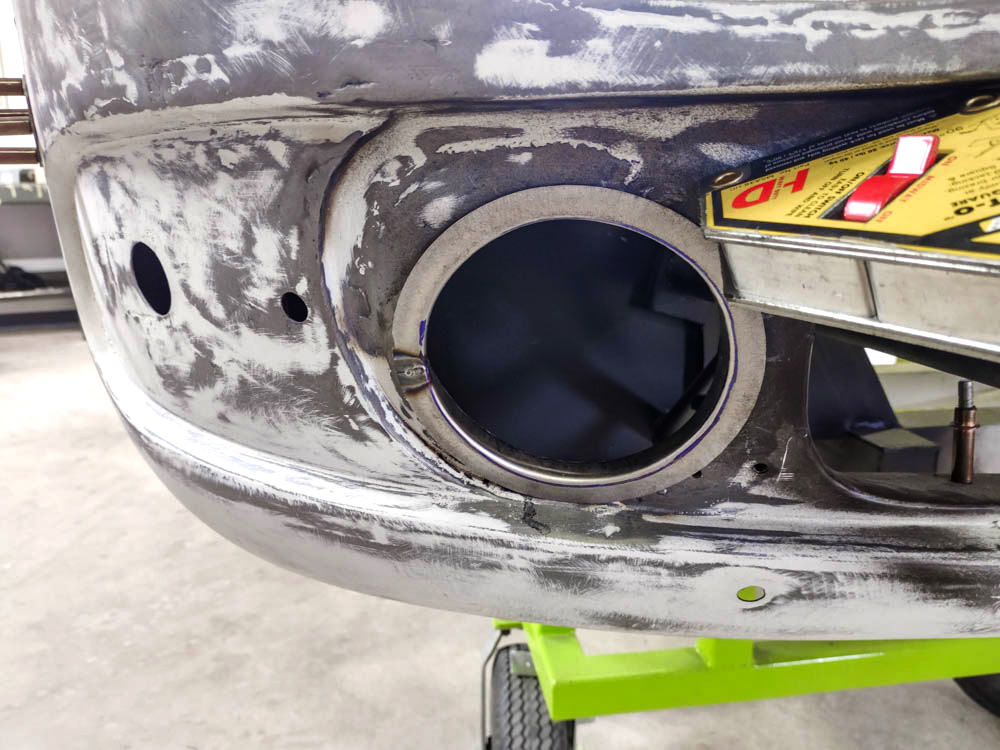
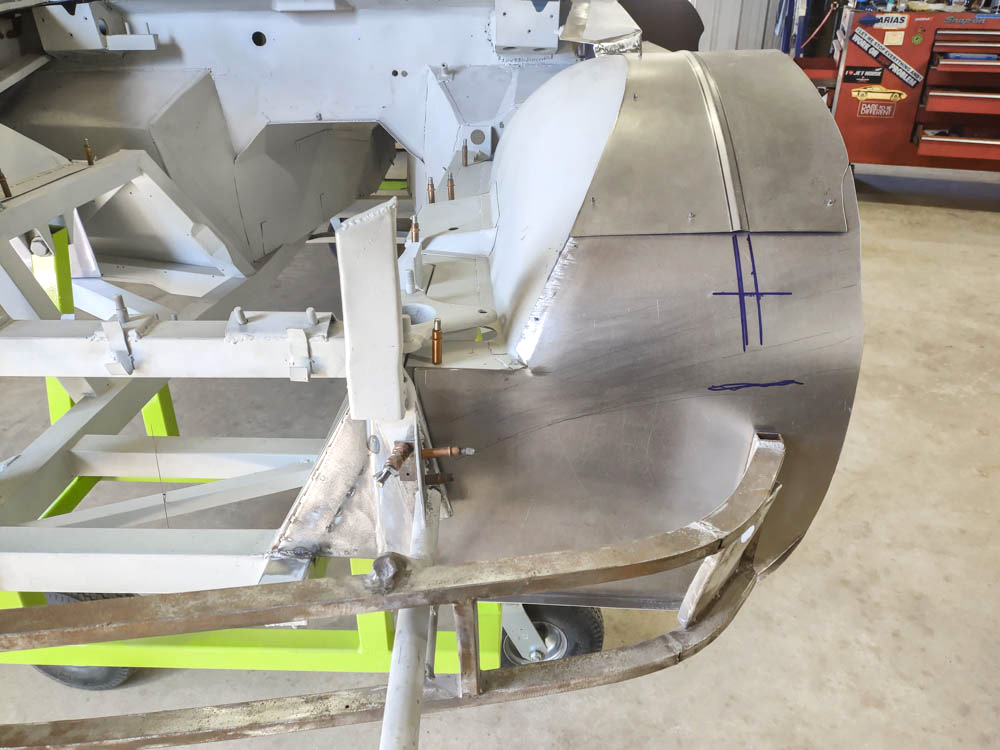
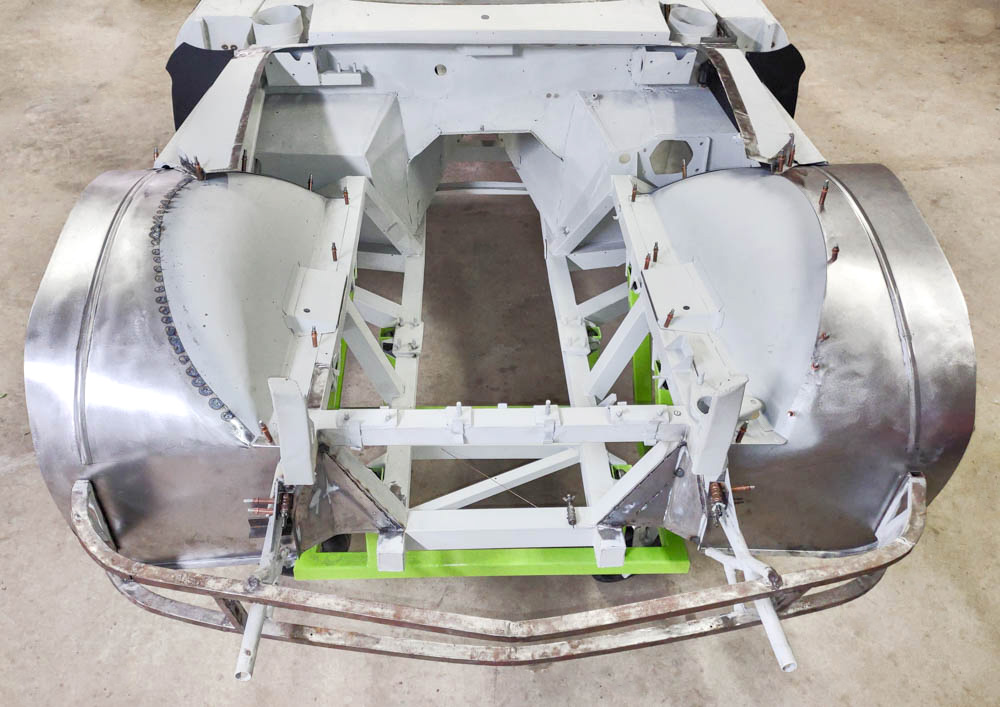
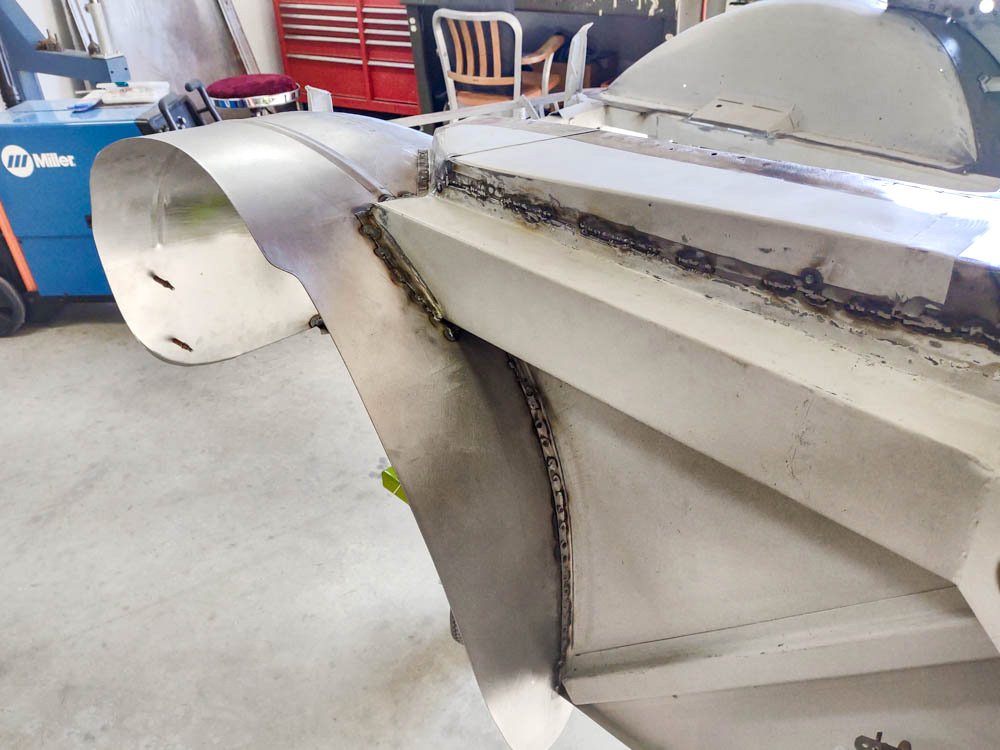
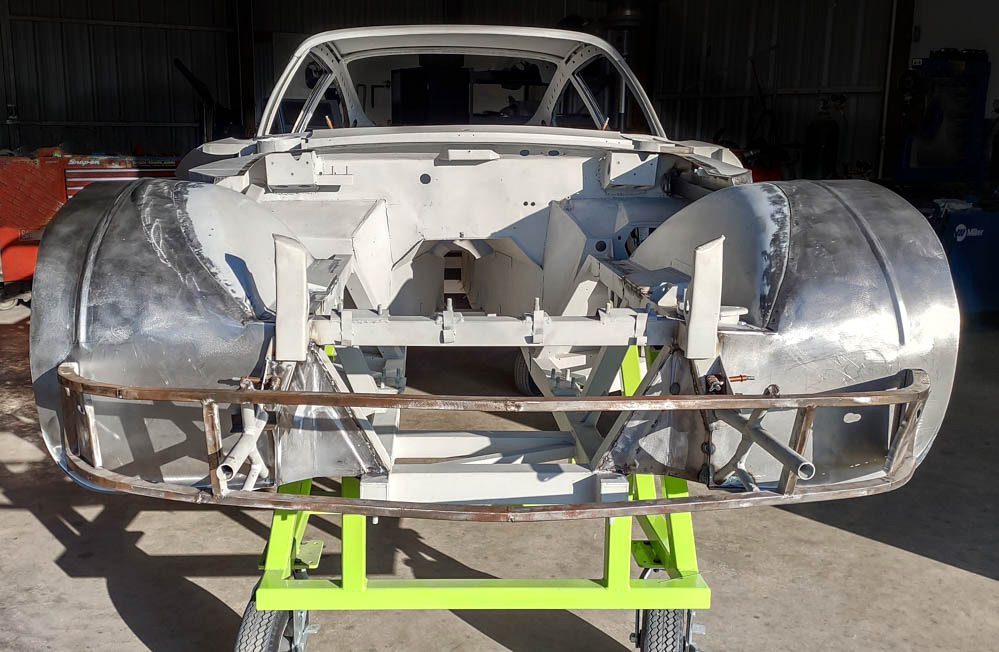
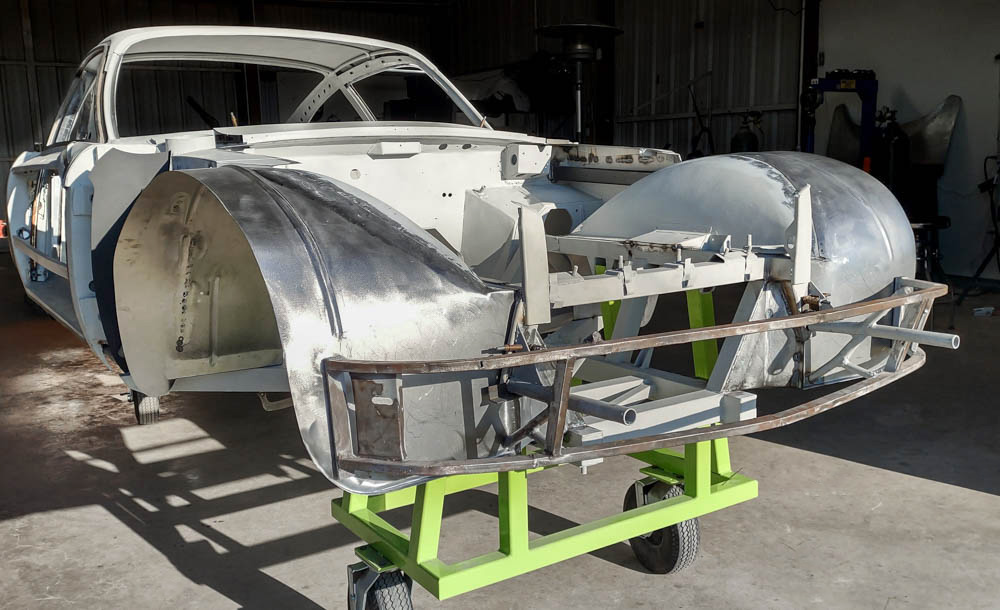
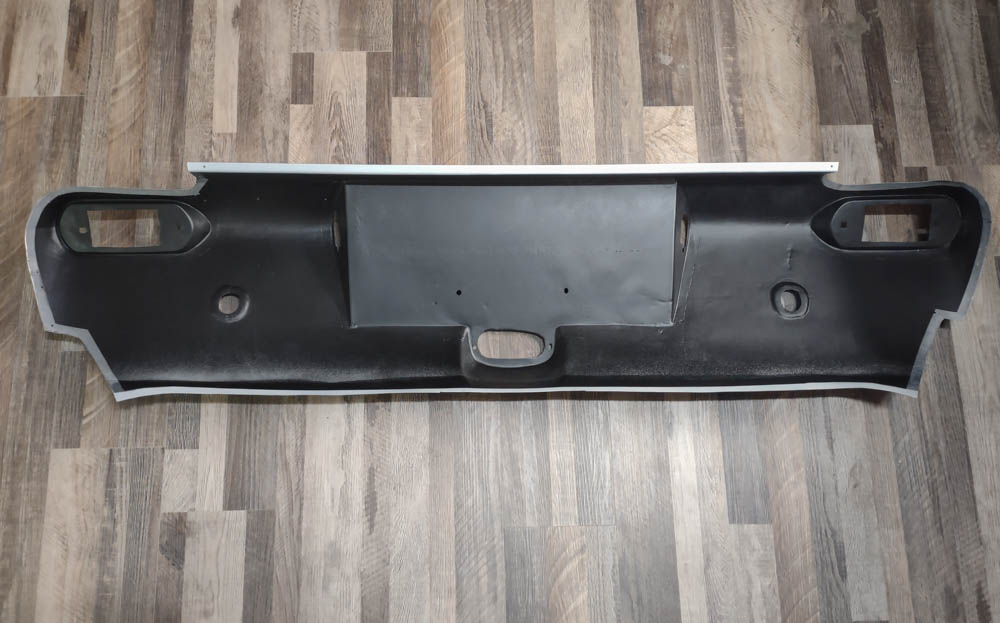
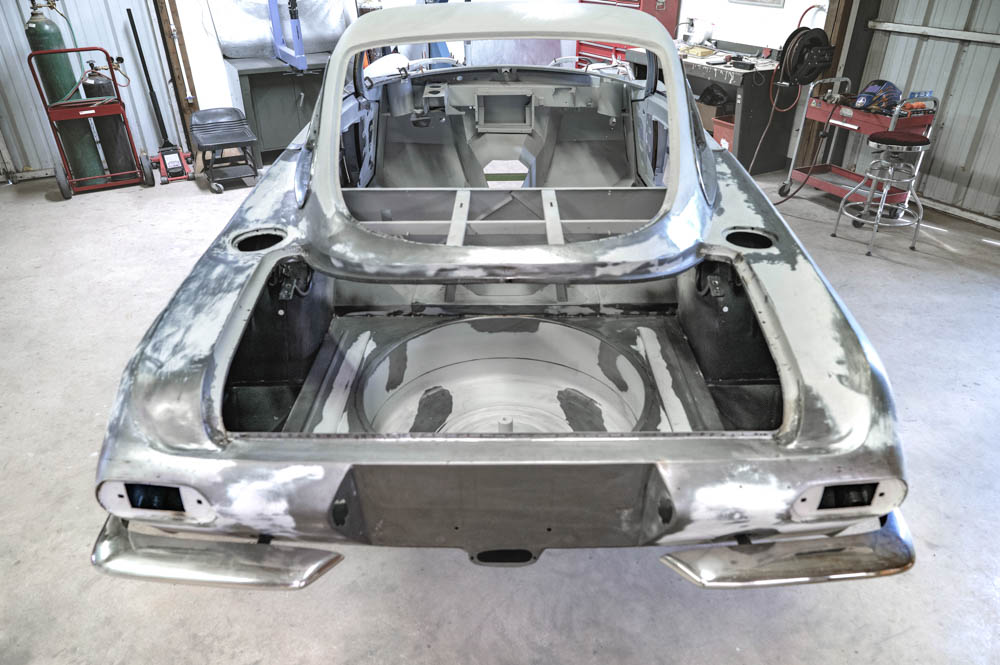
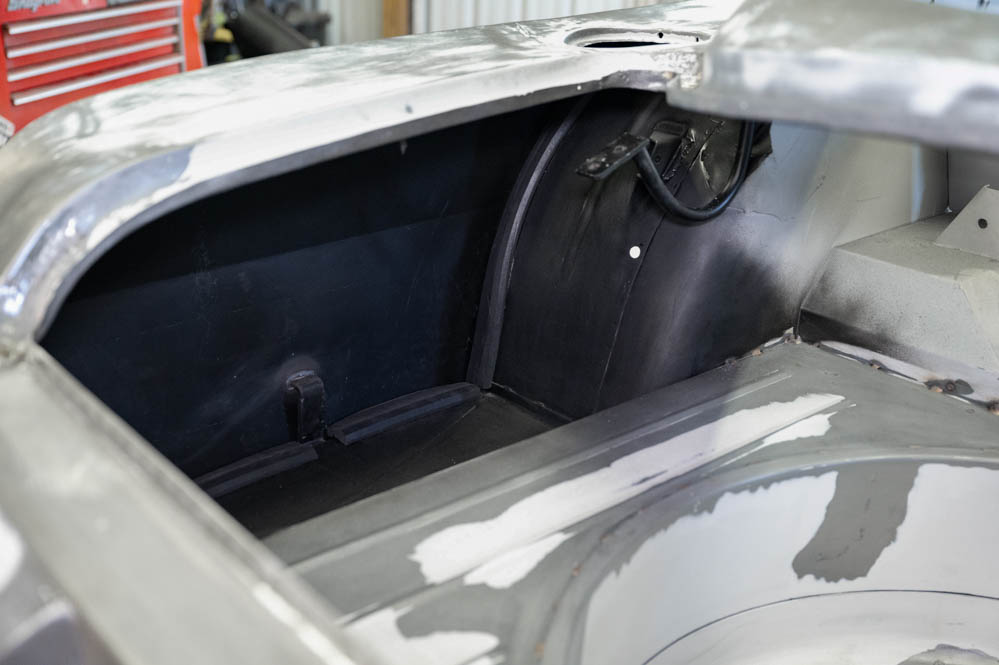
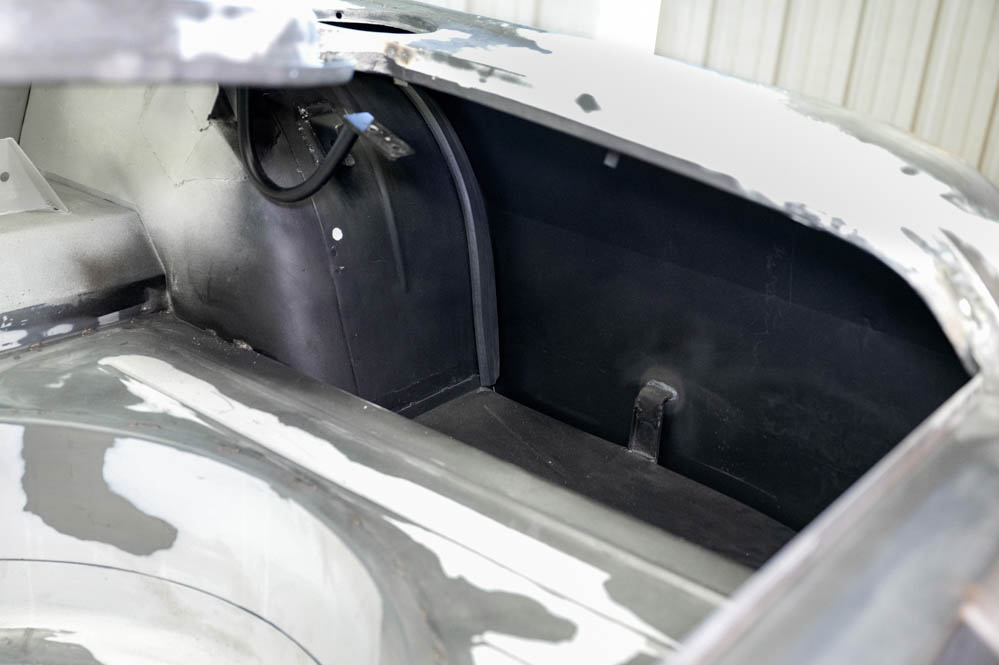
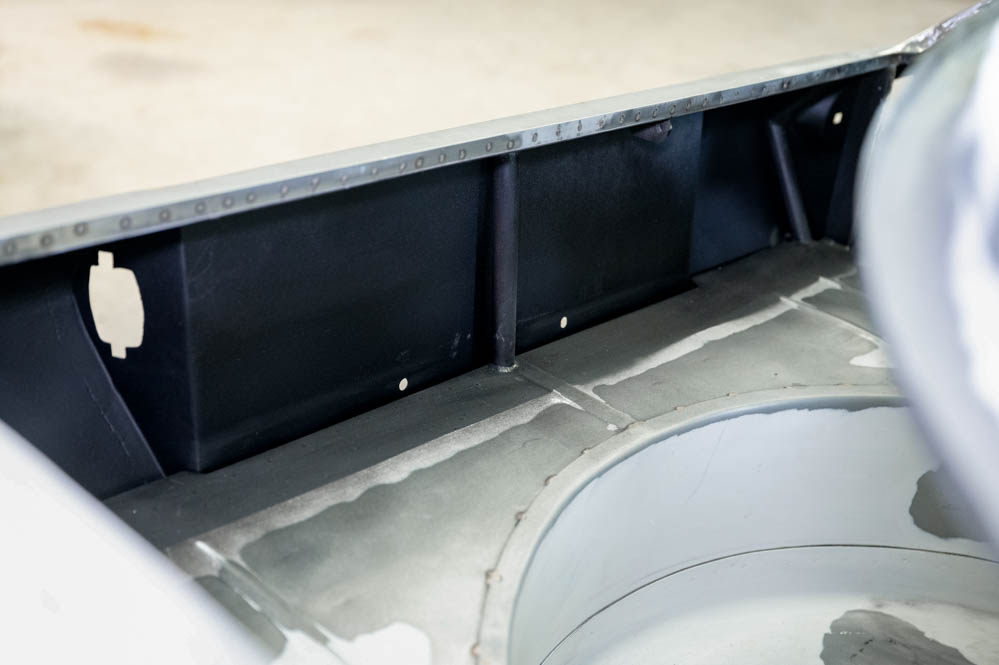
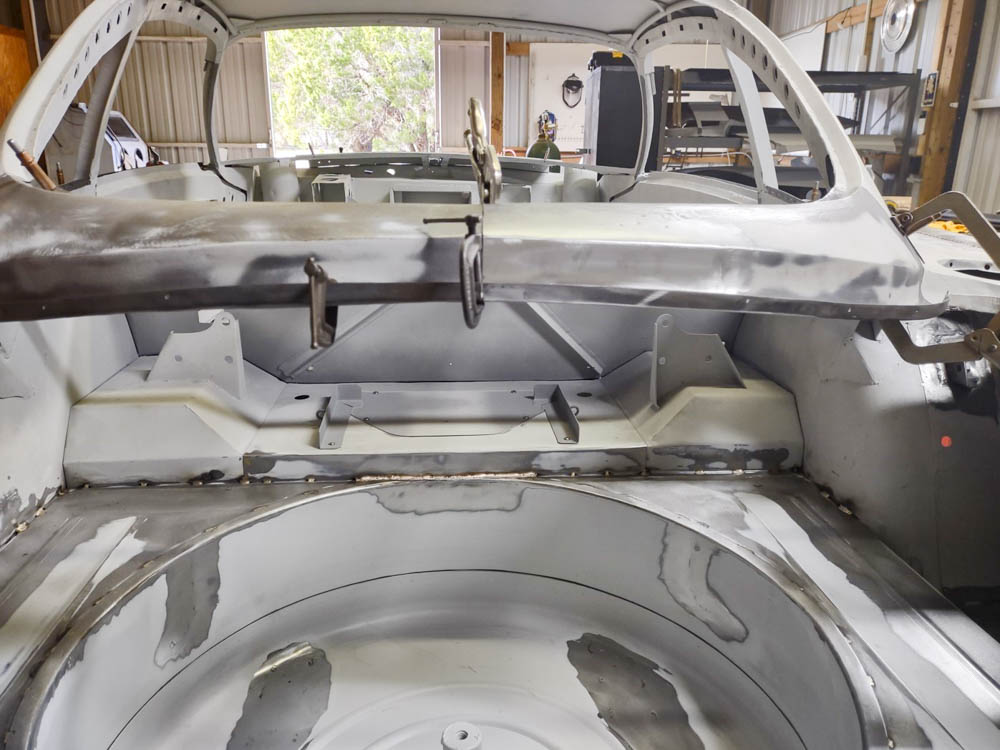
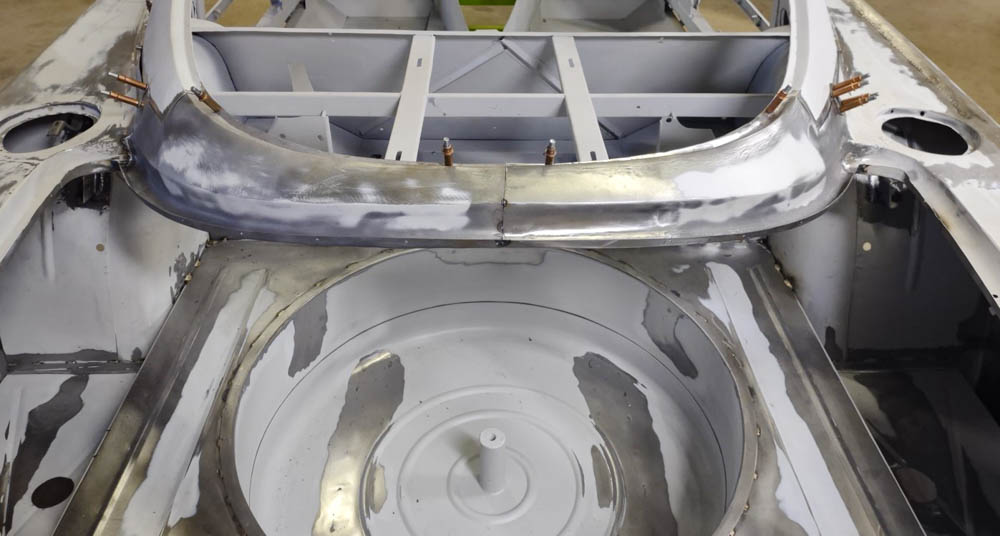
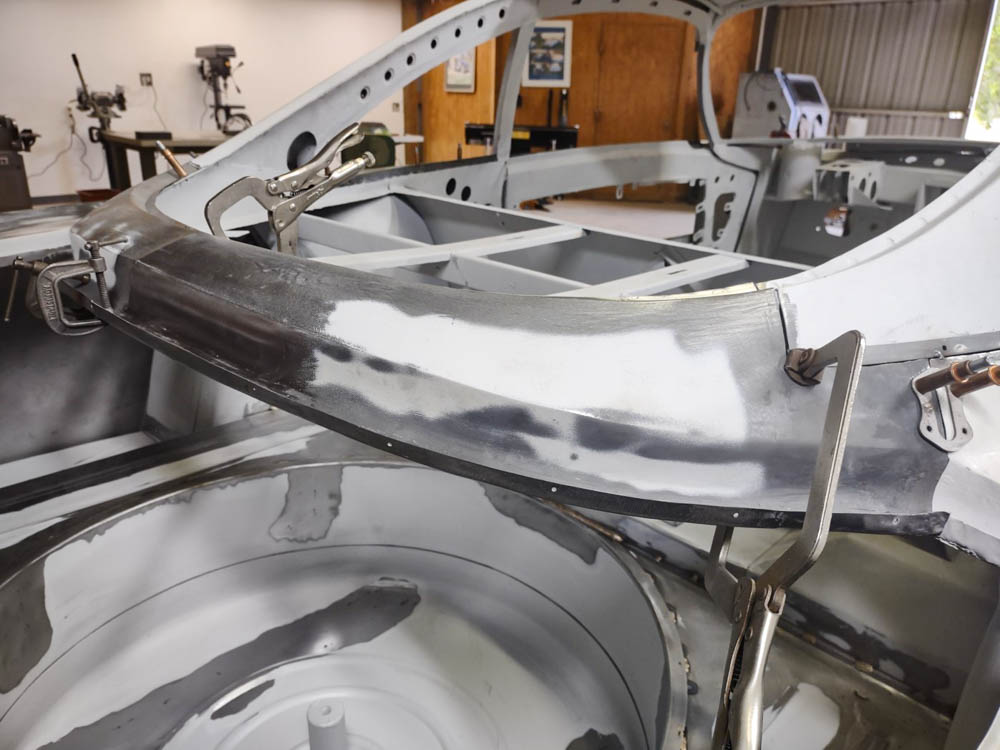
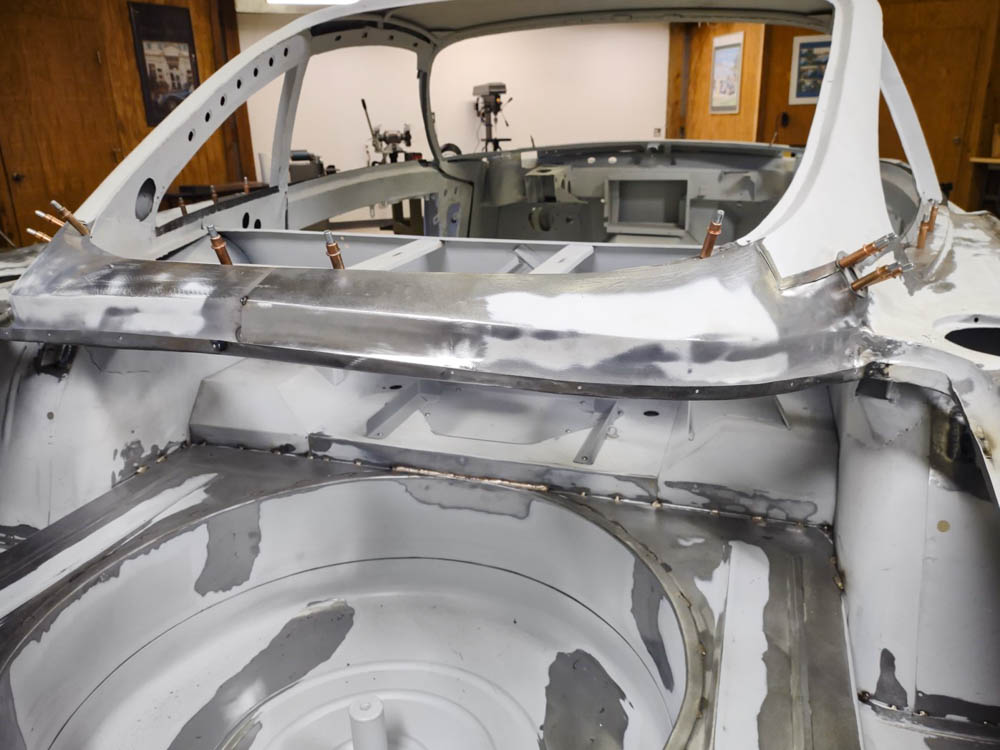
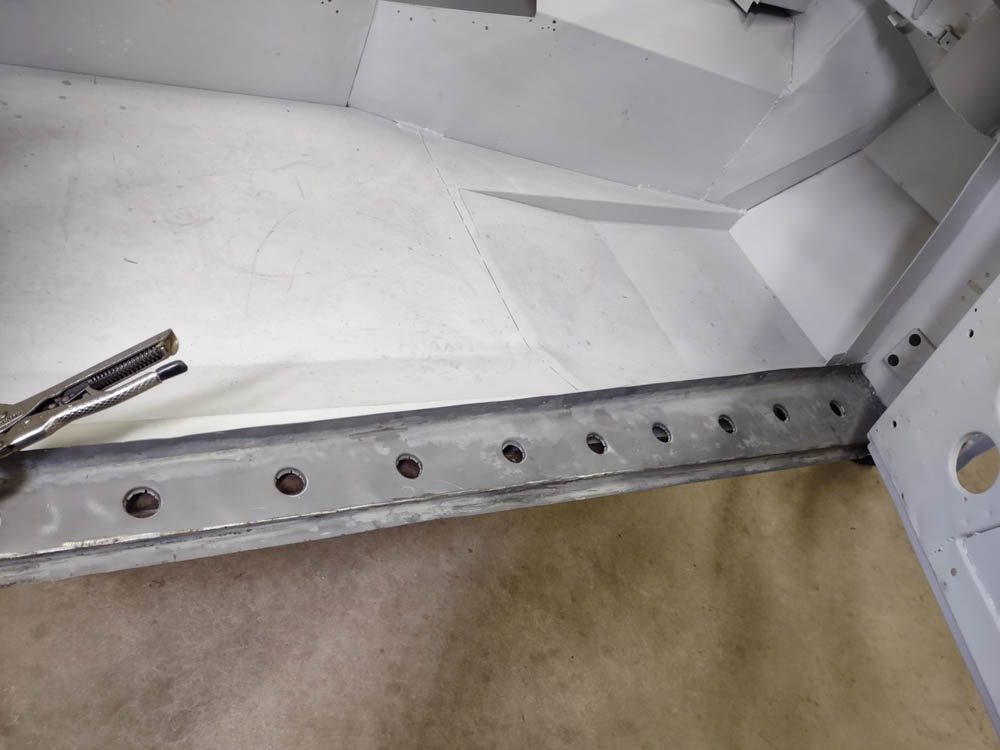
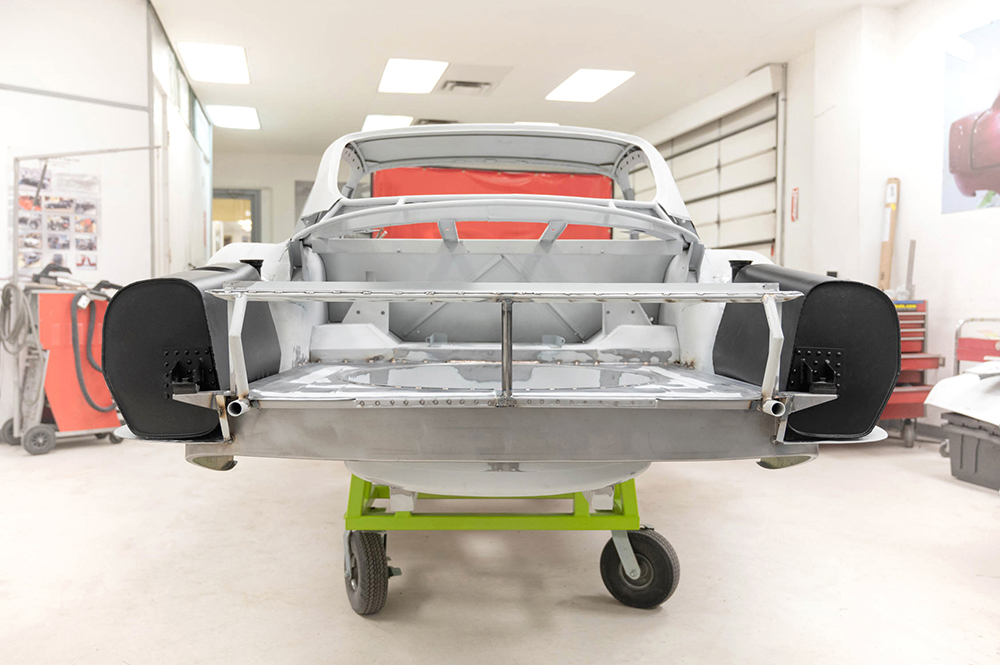
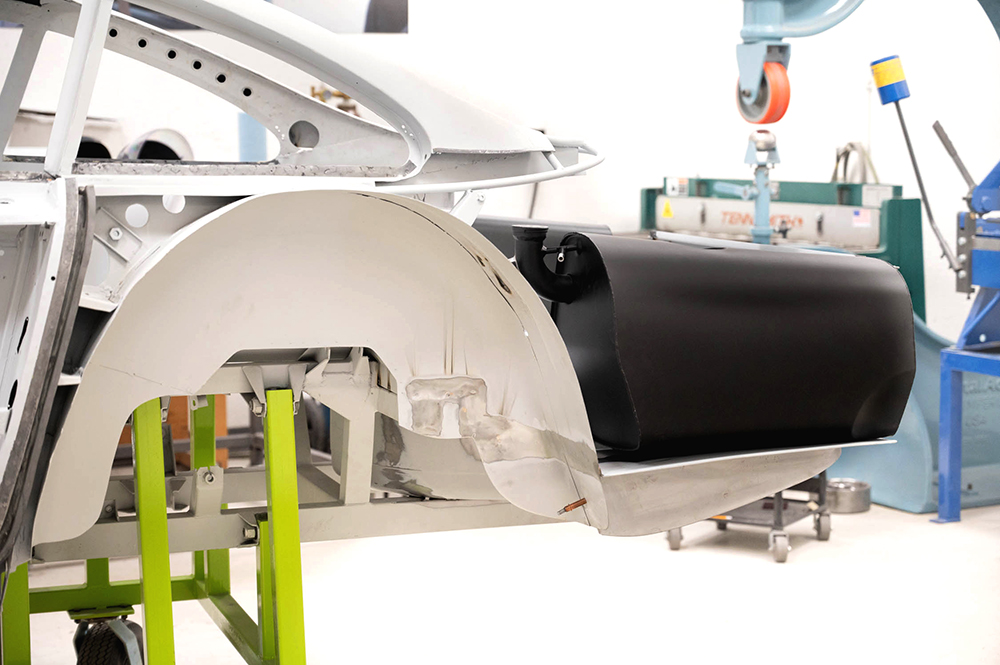
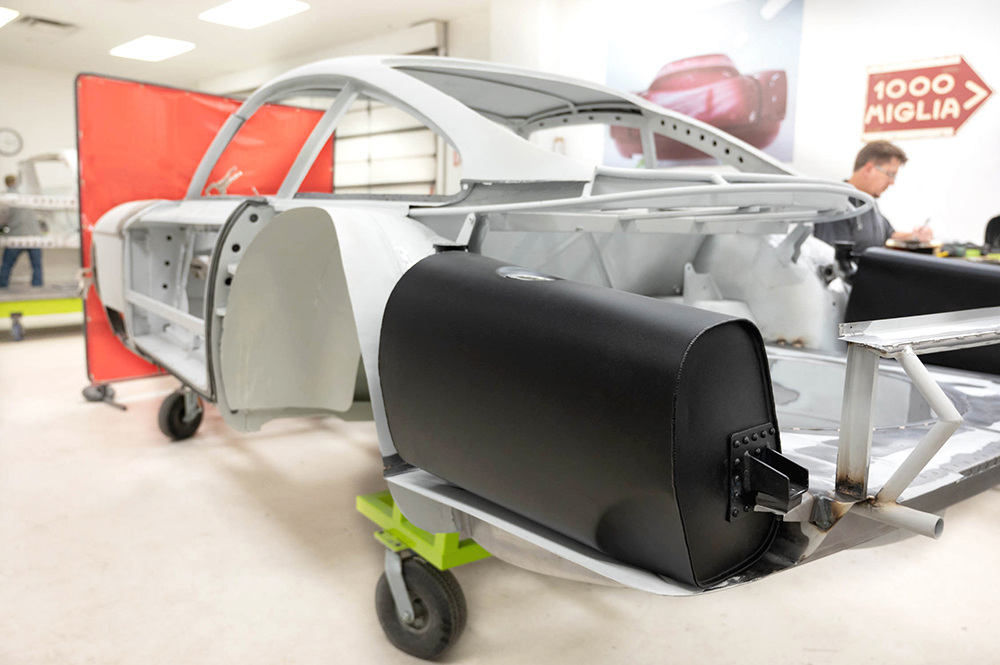
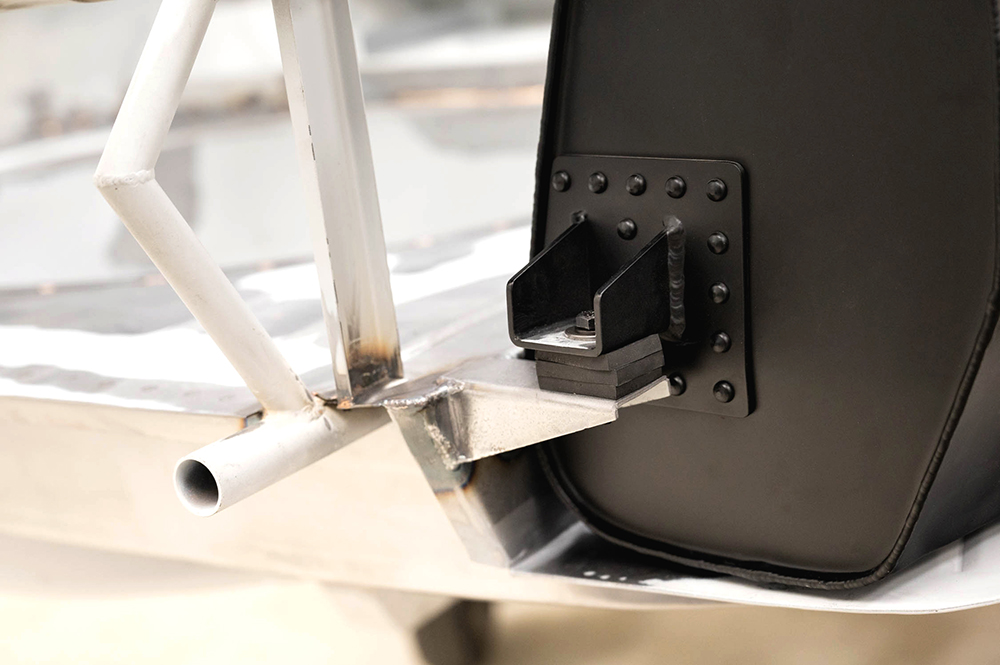
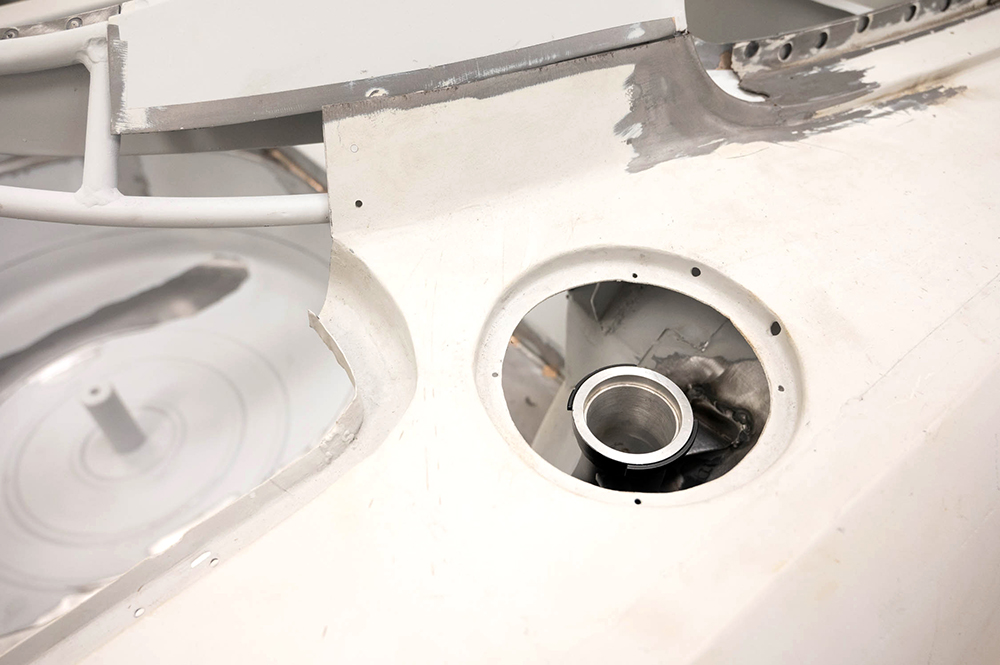
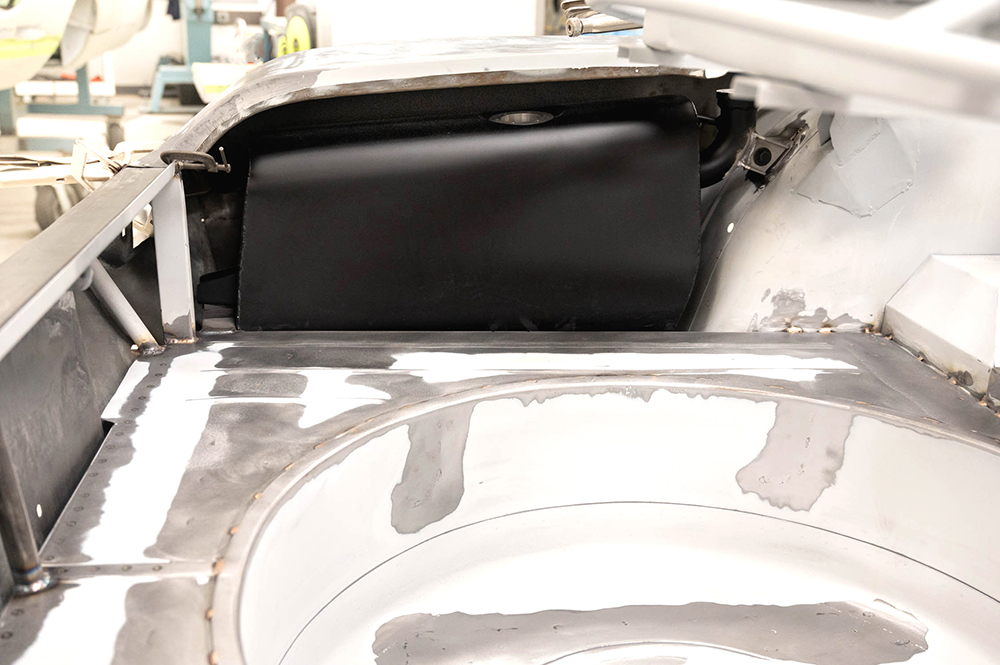
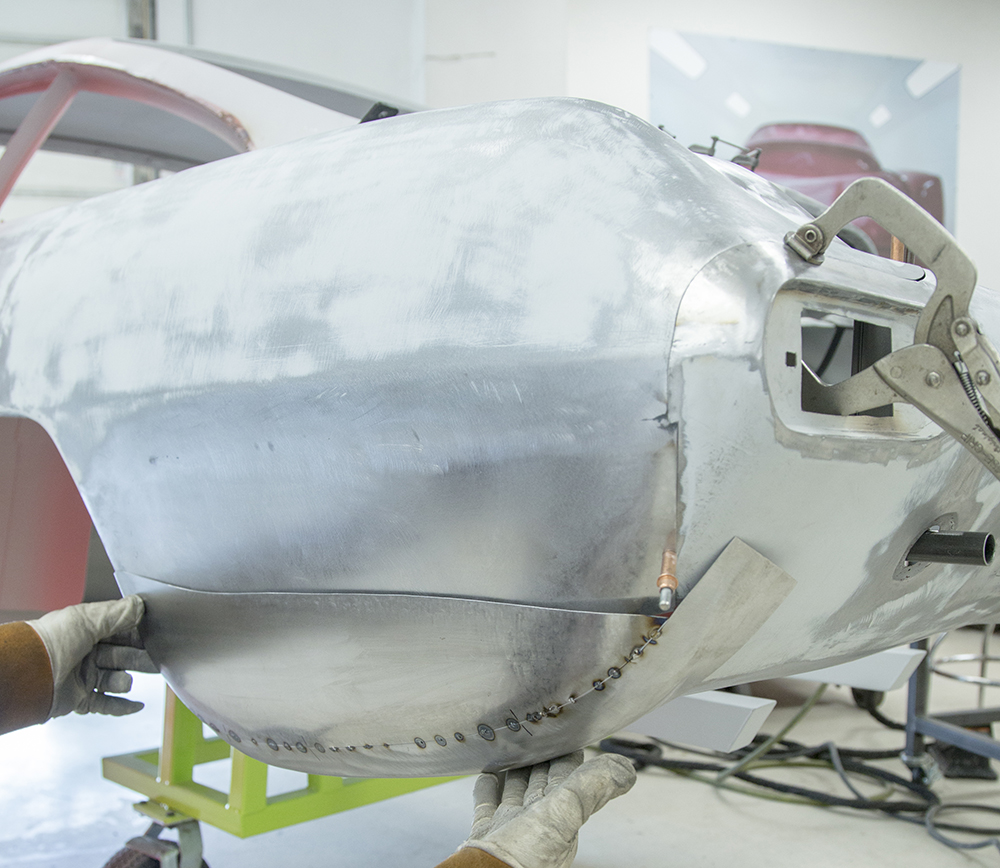
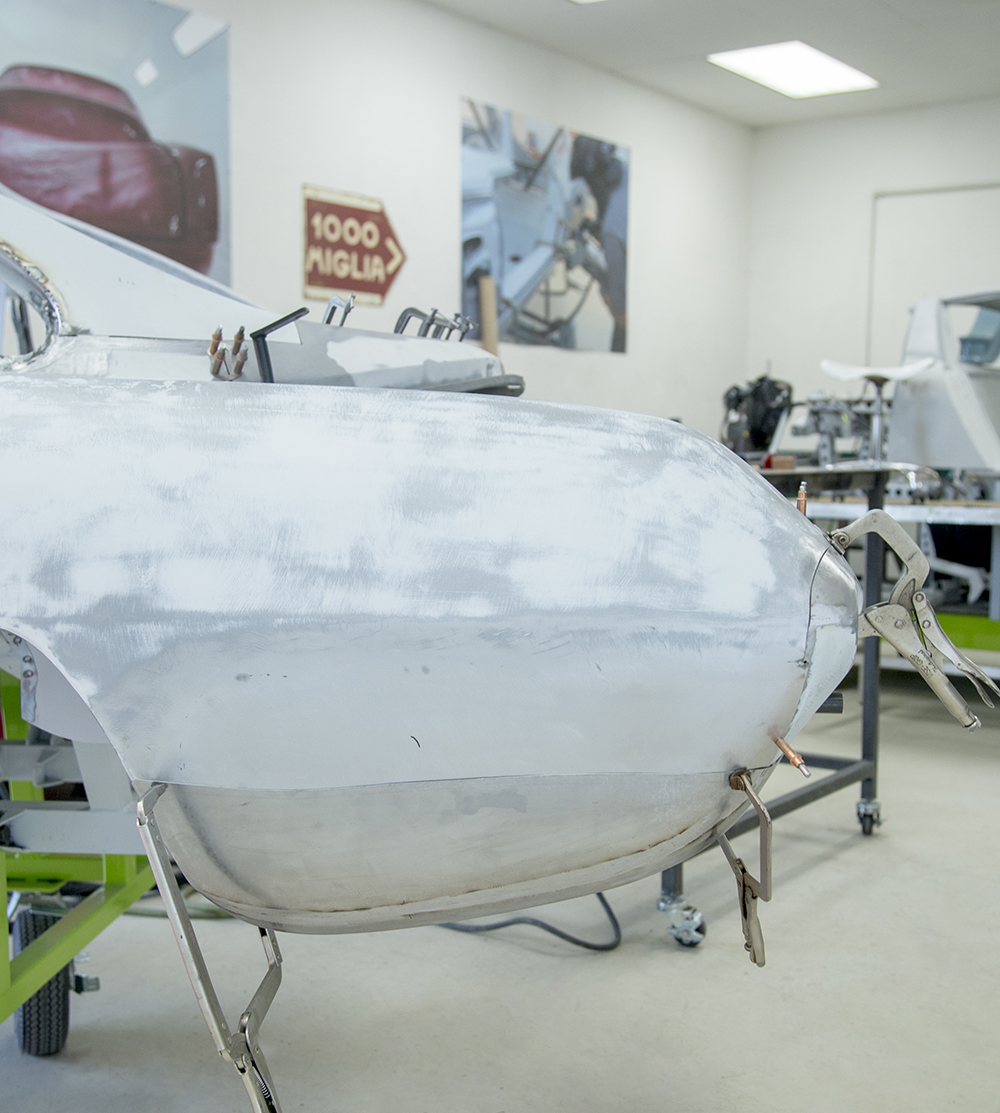
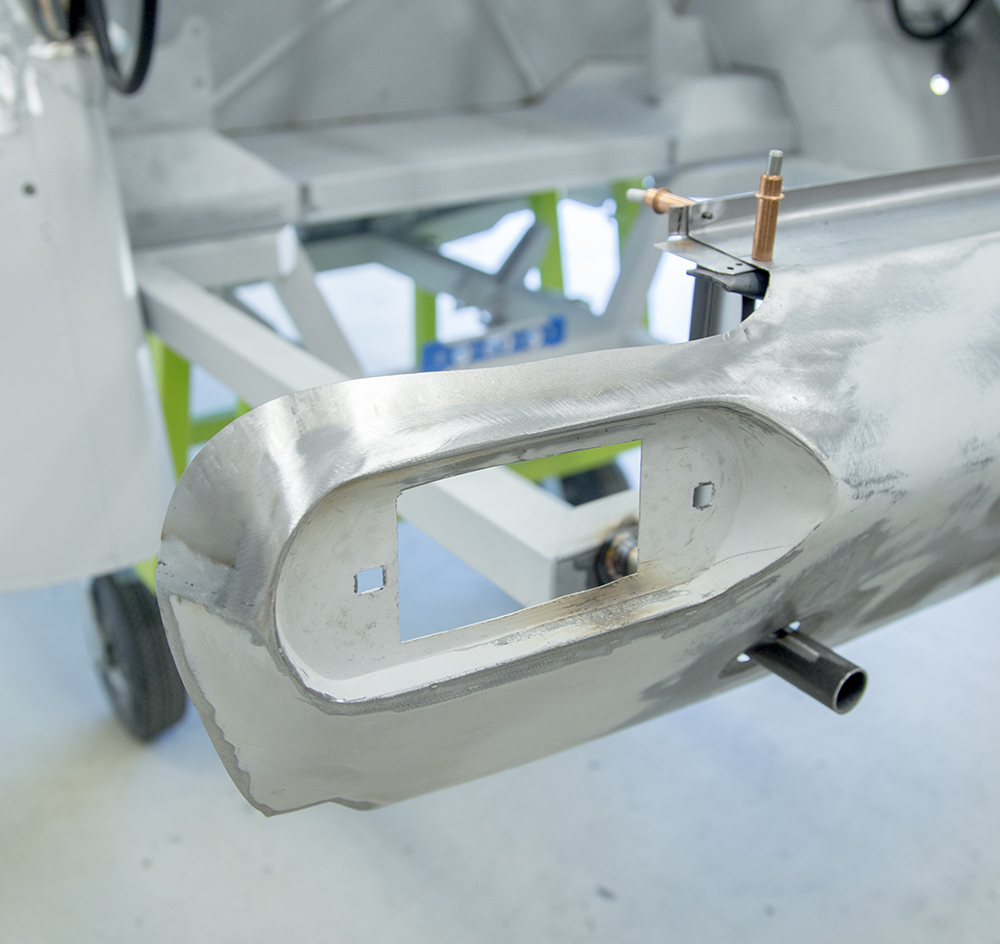
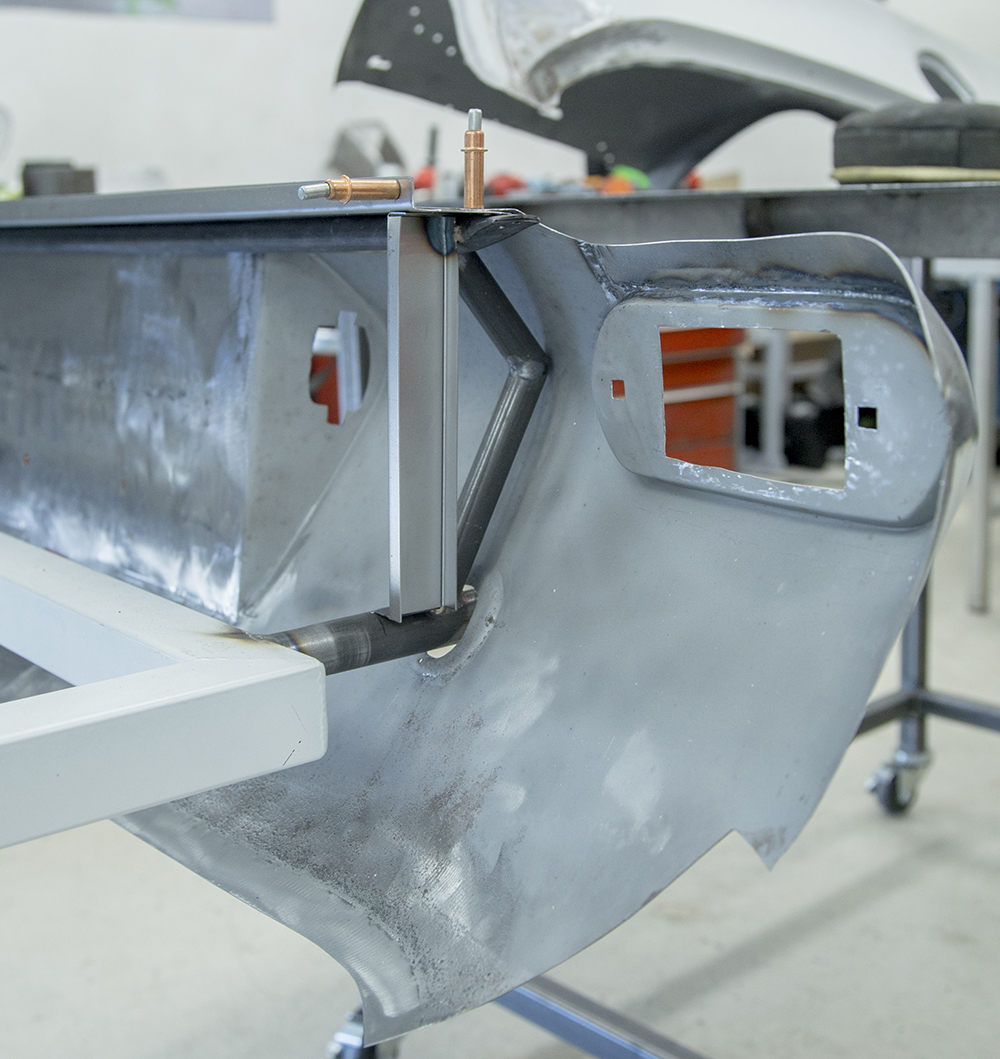
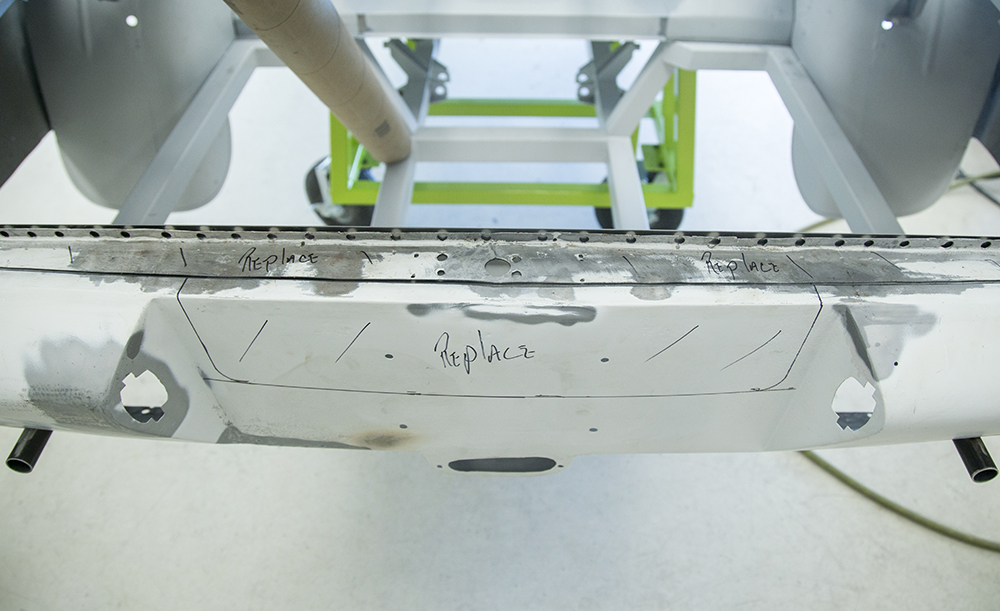
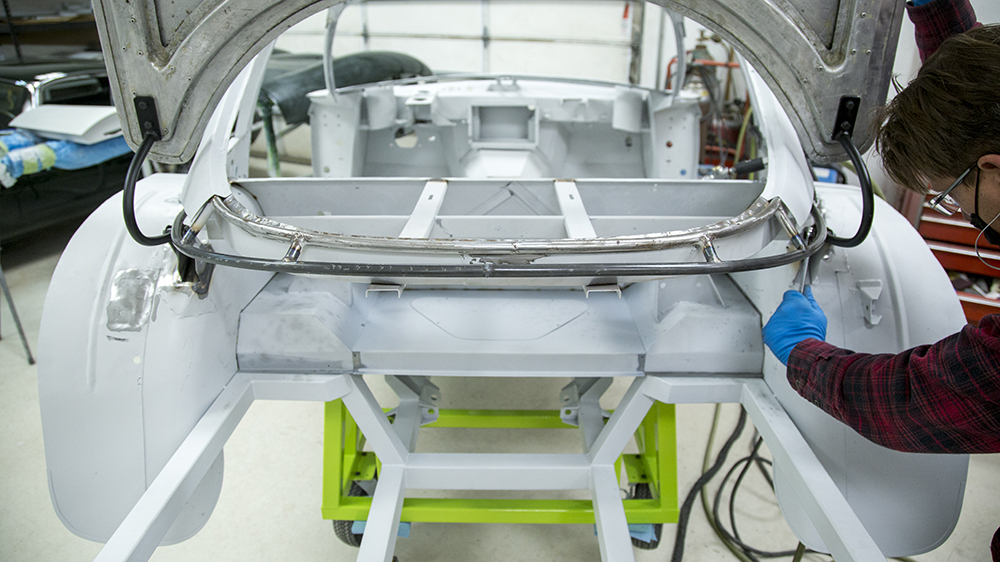
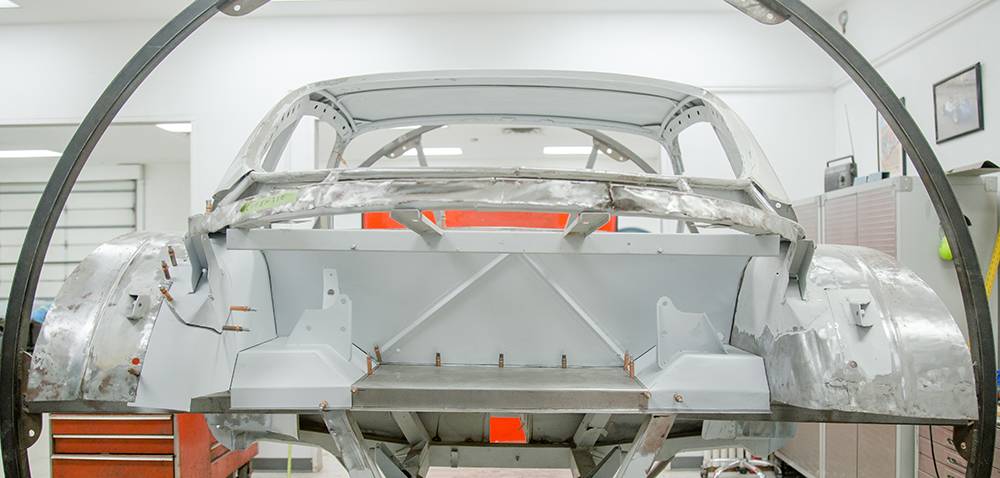
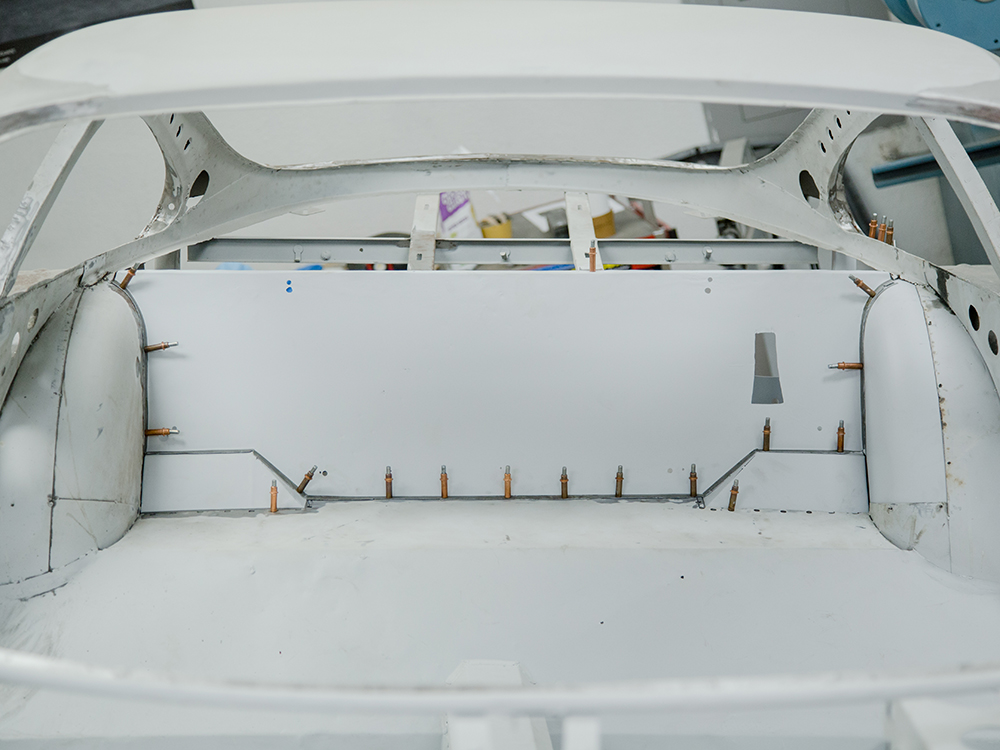
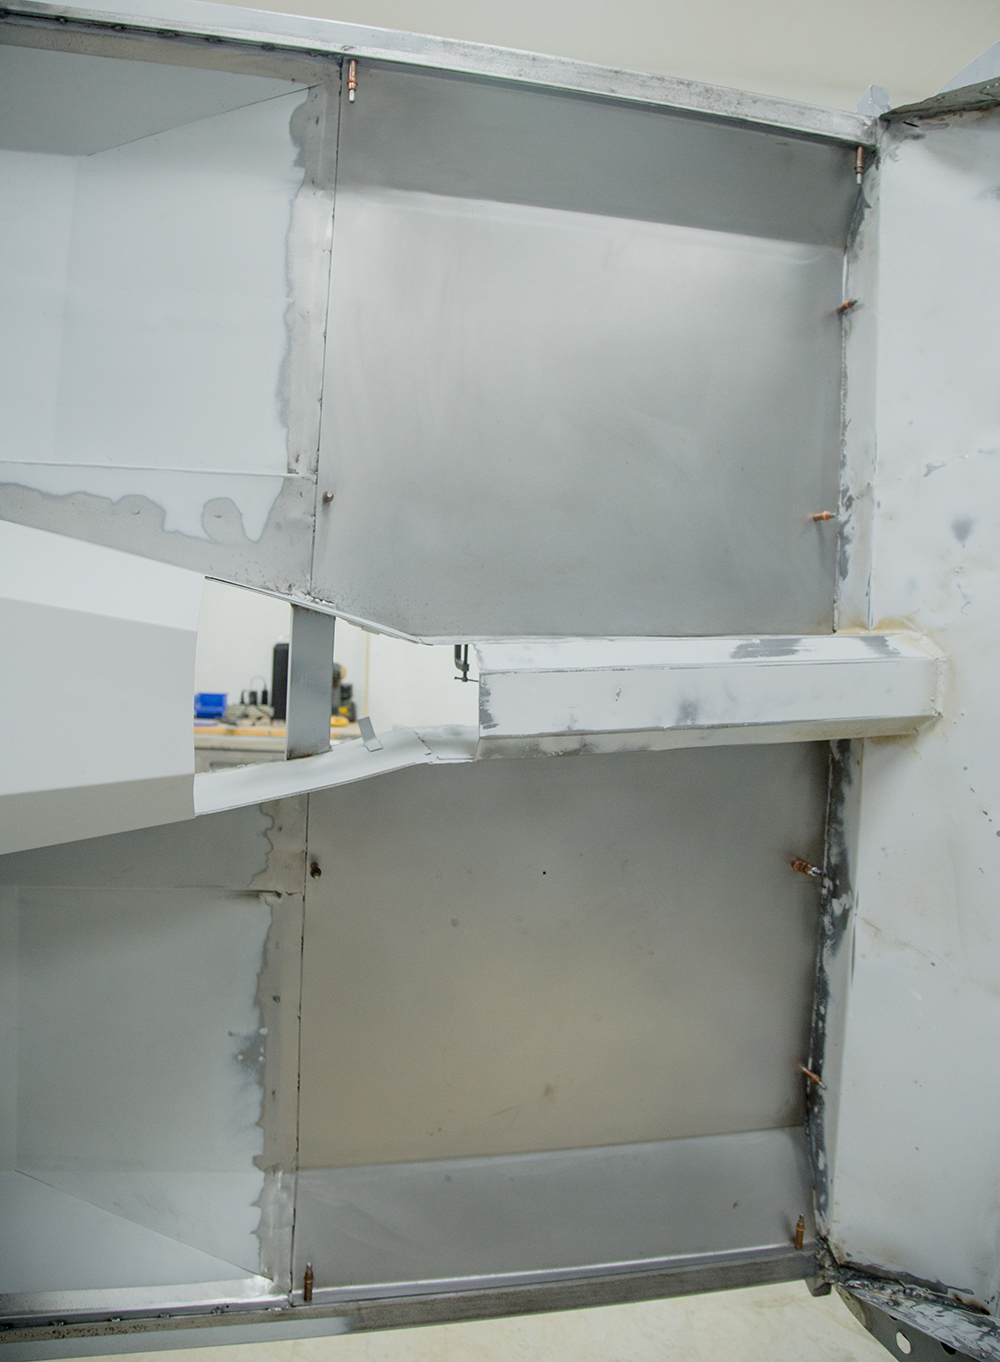
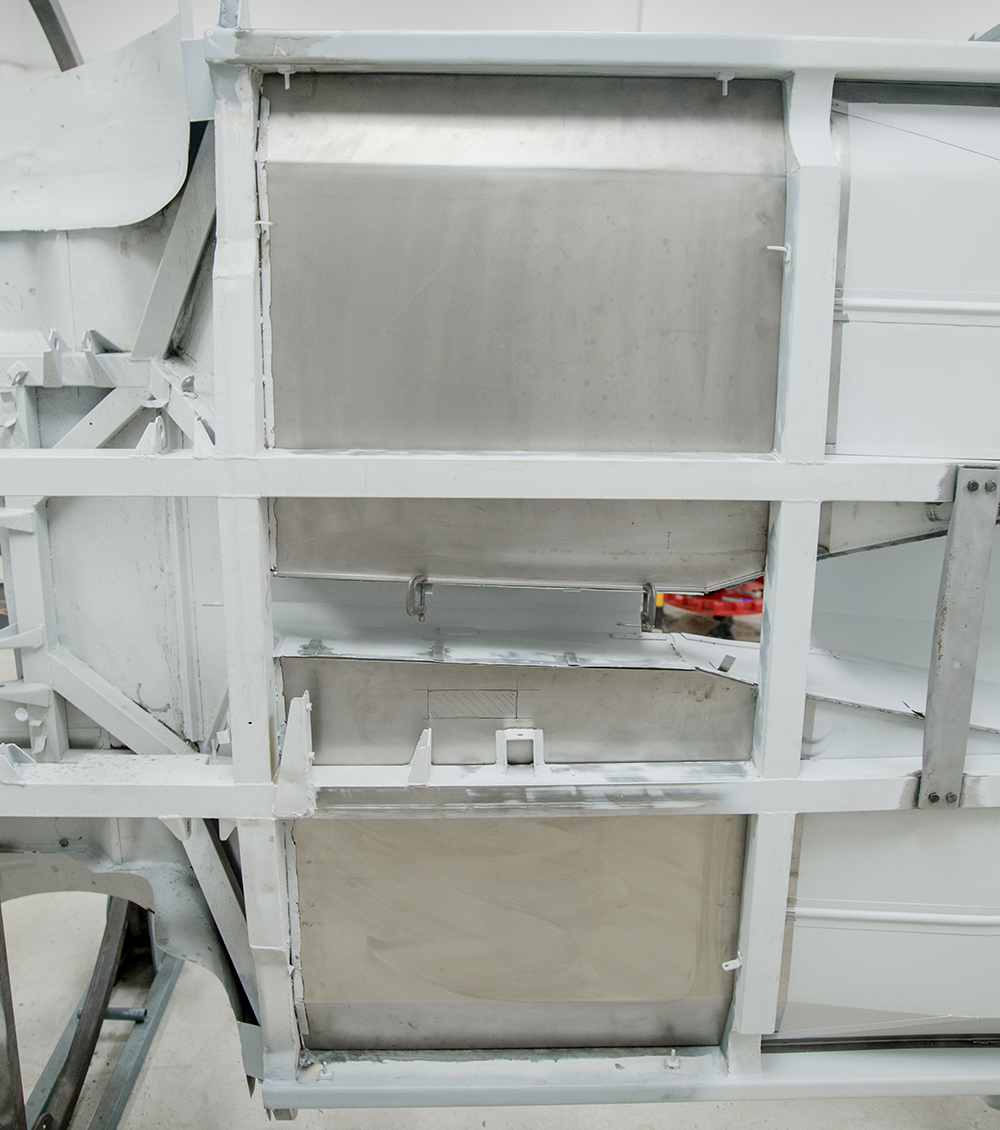
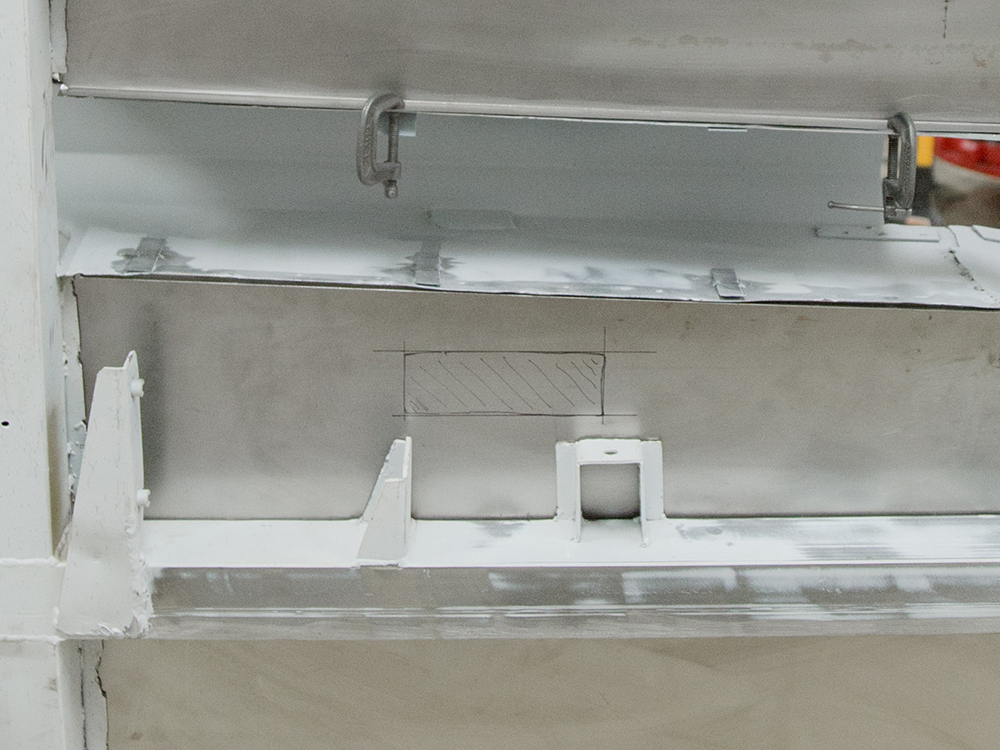
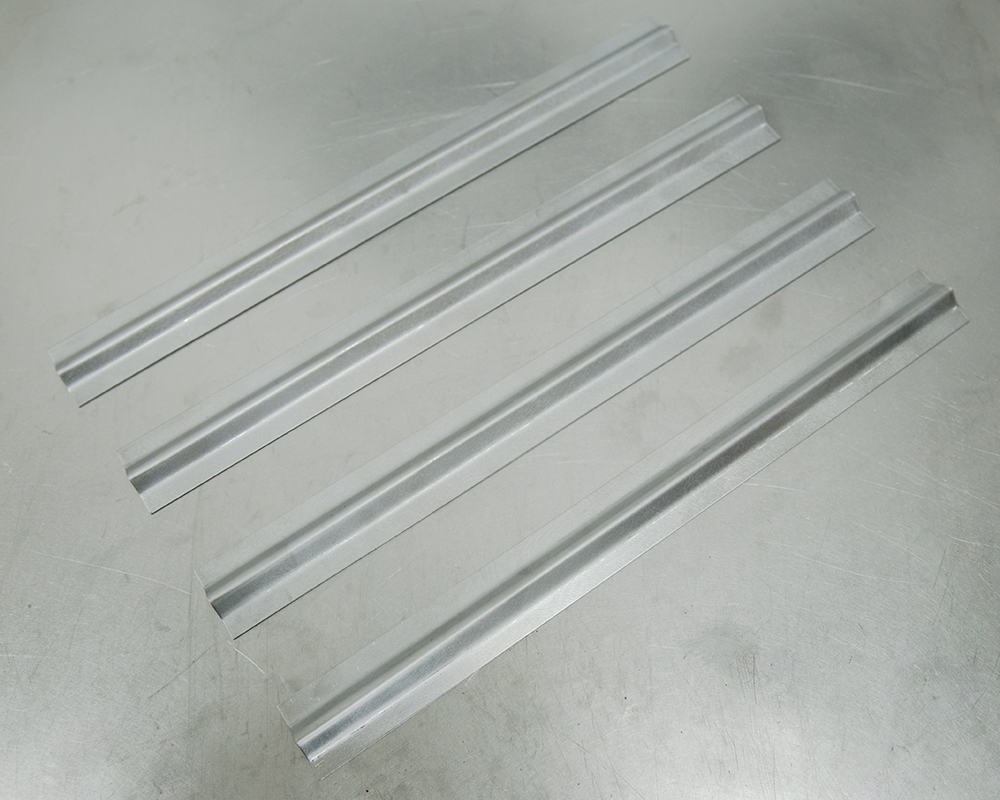
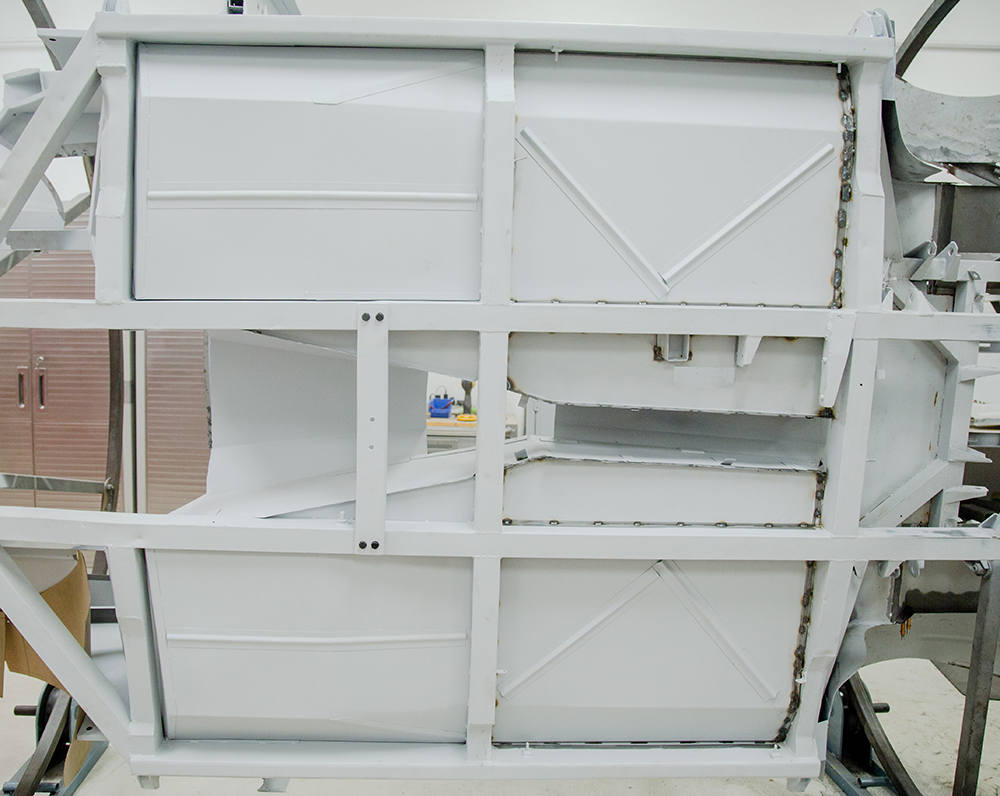
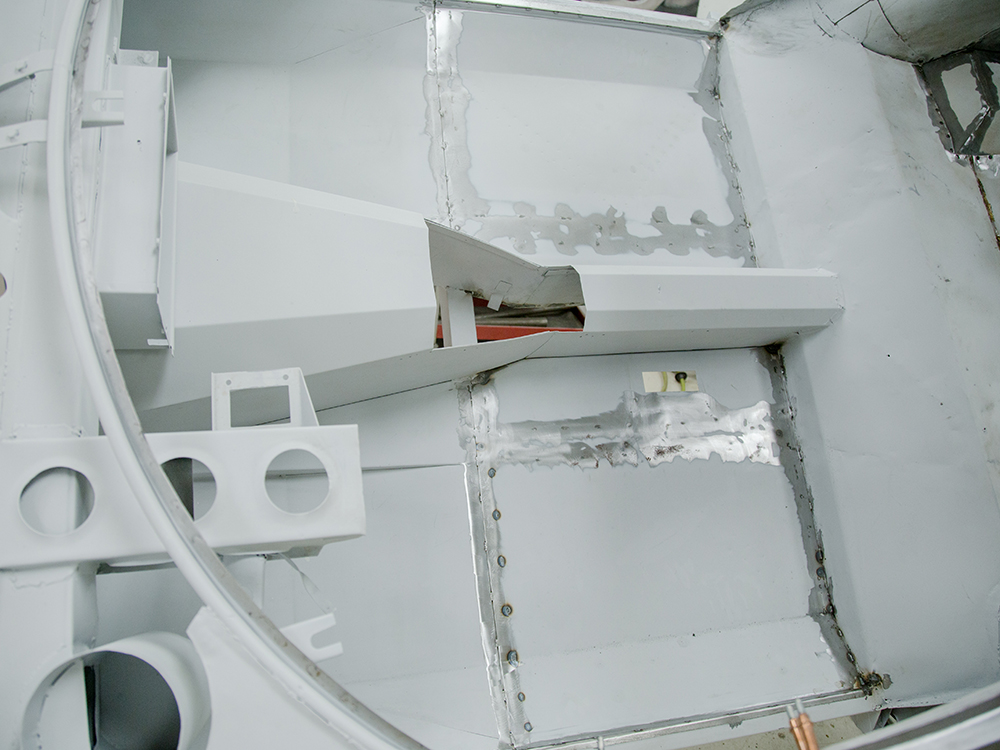
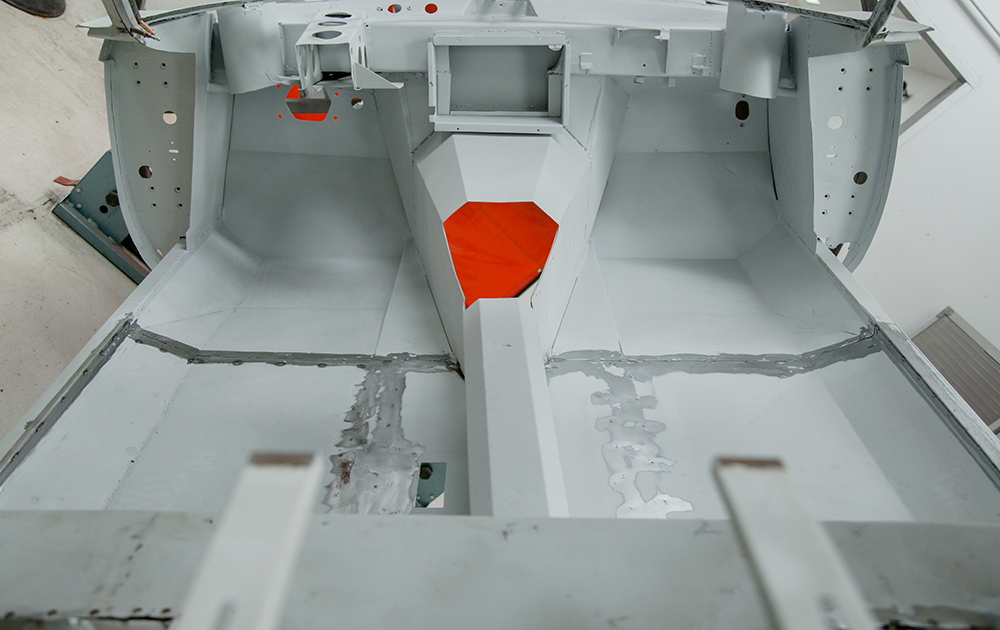
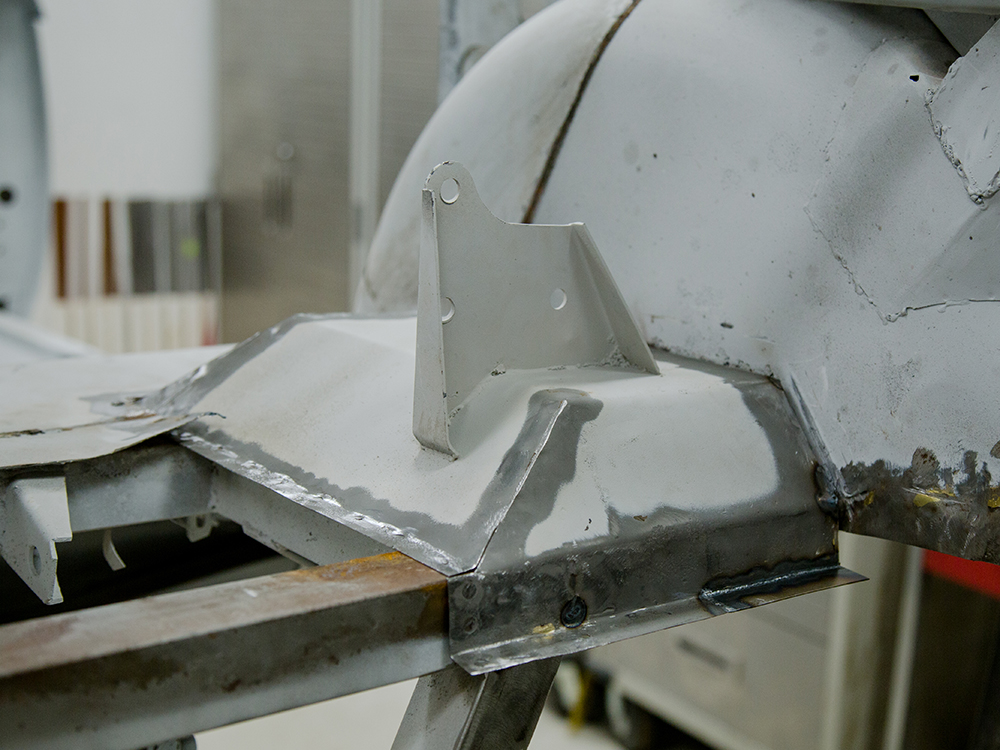
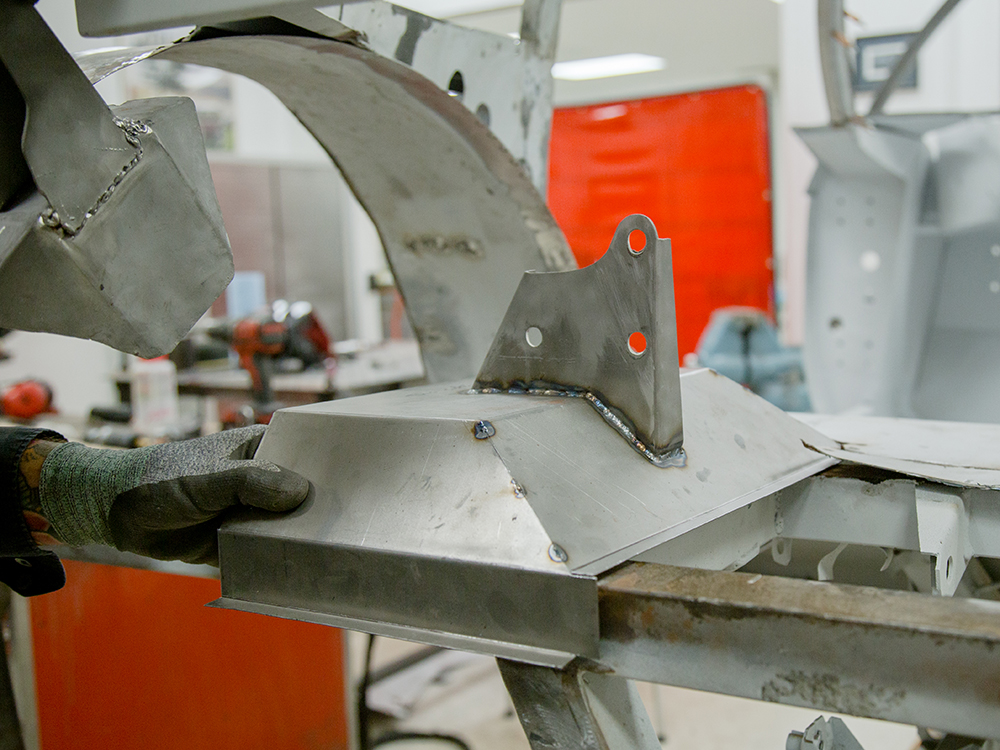
Gas tanks and rear panel fitting.
Update report - September 28, 2021
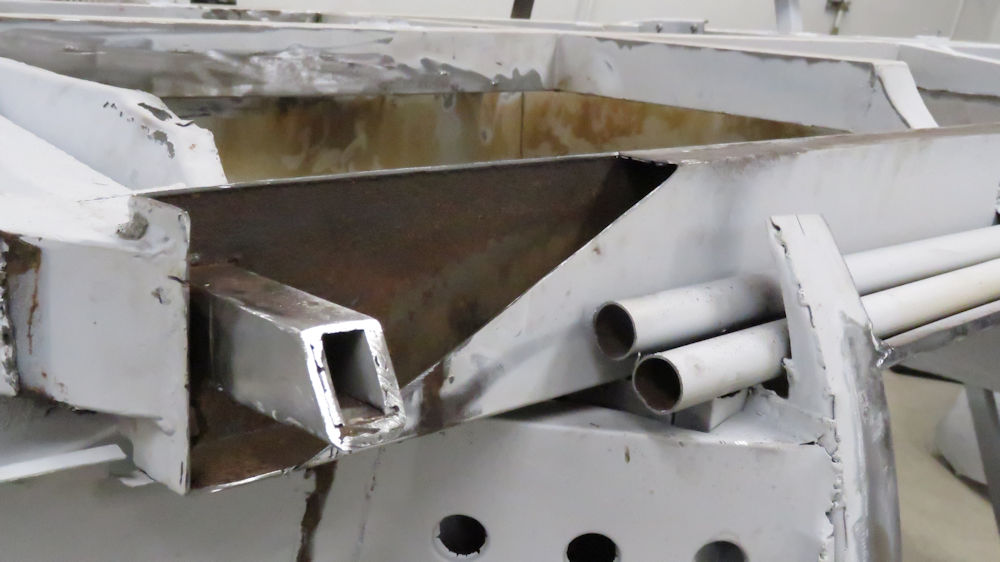
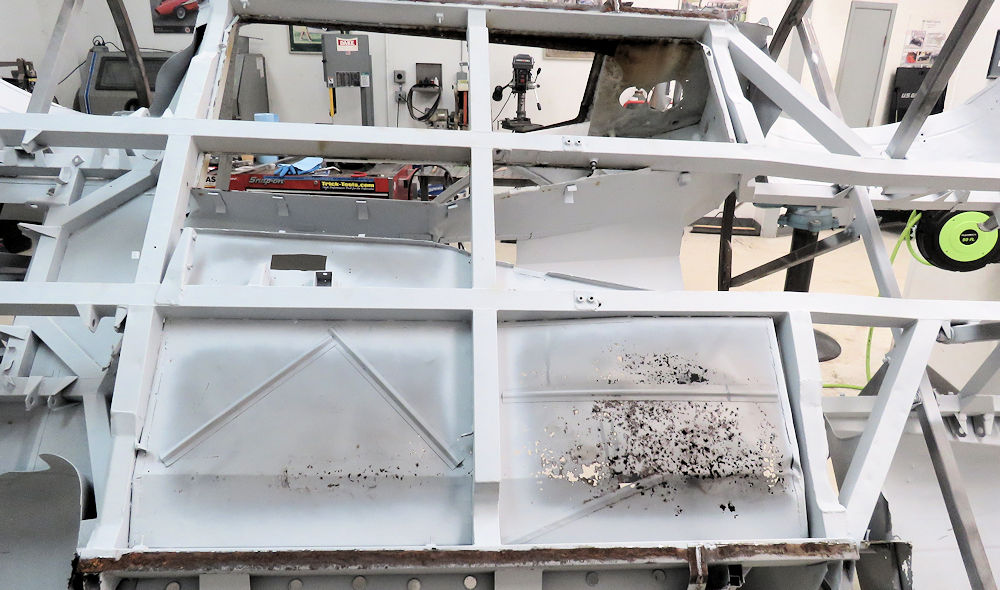
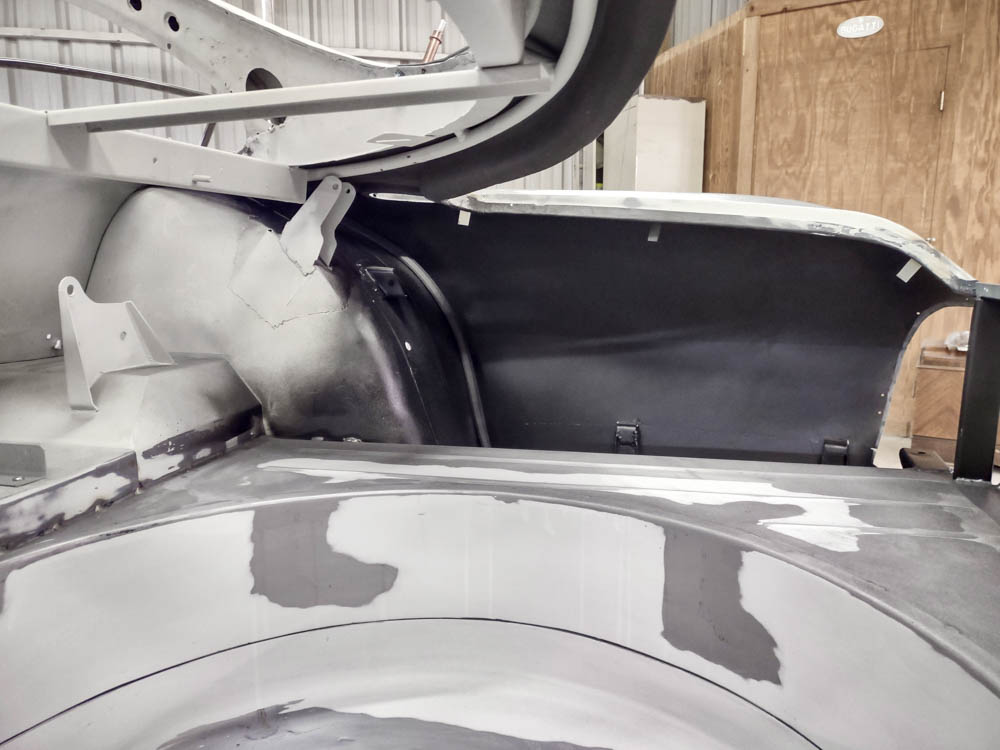
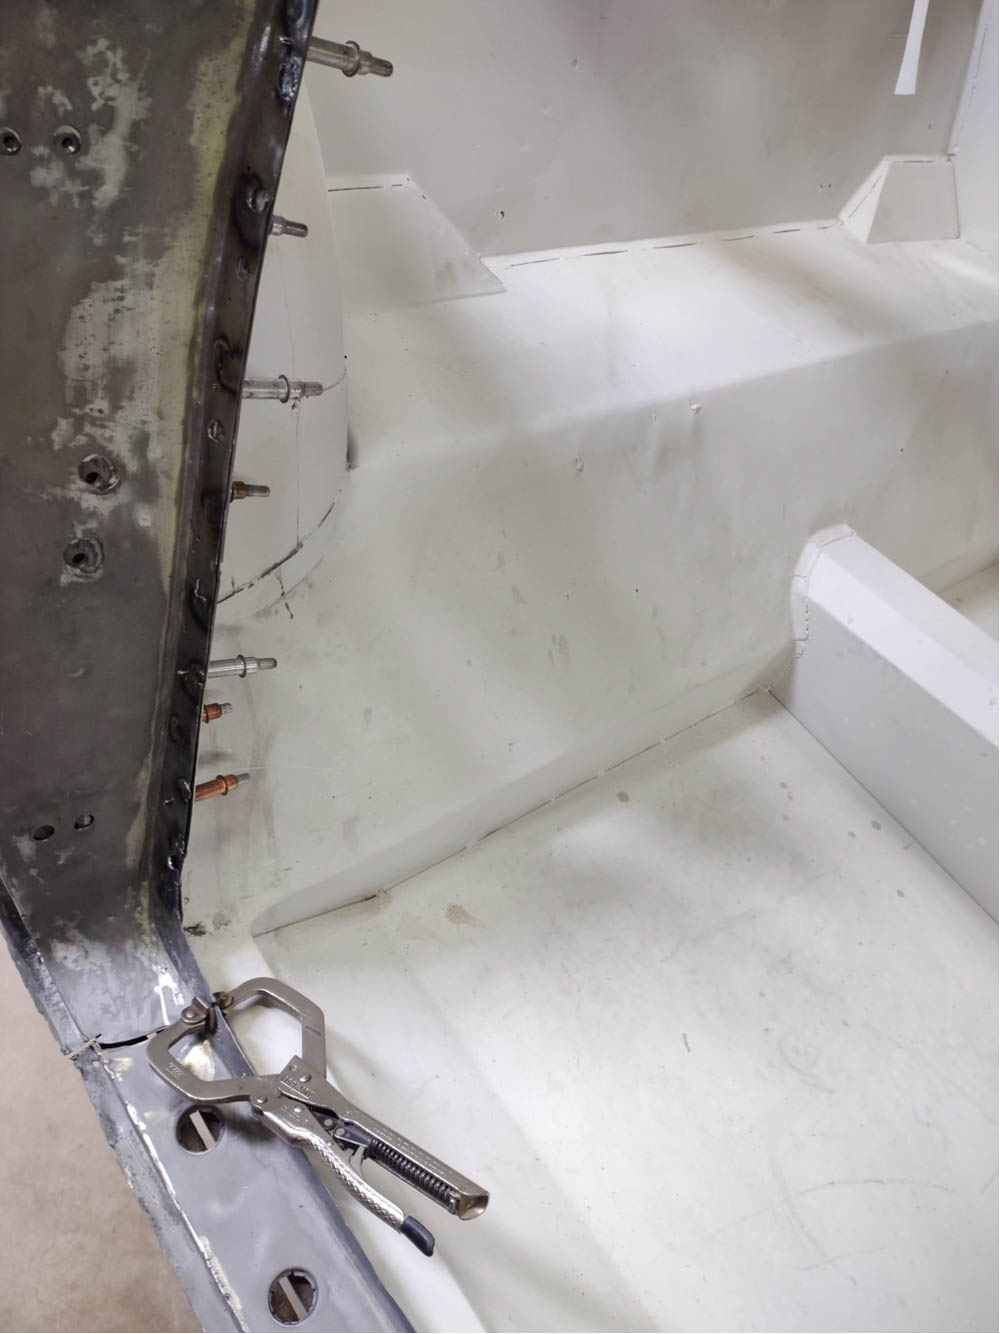
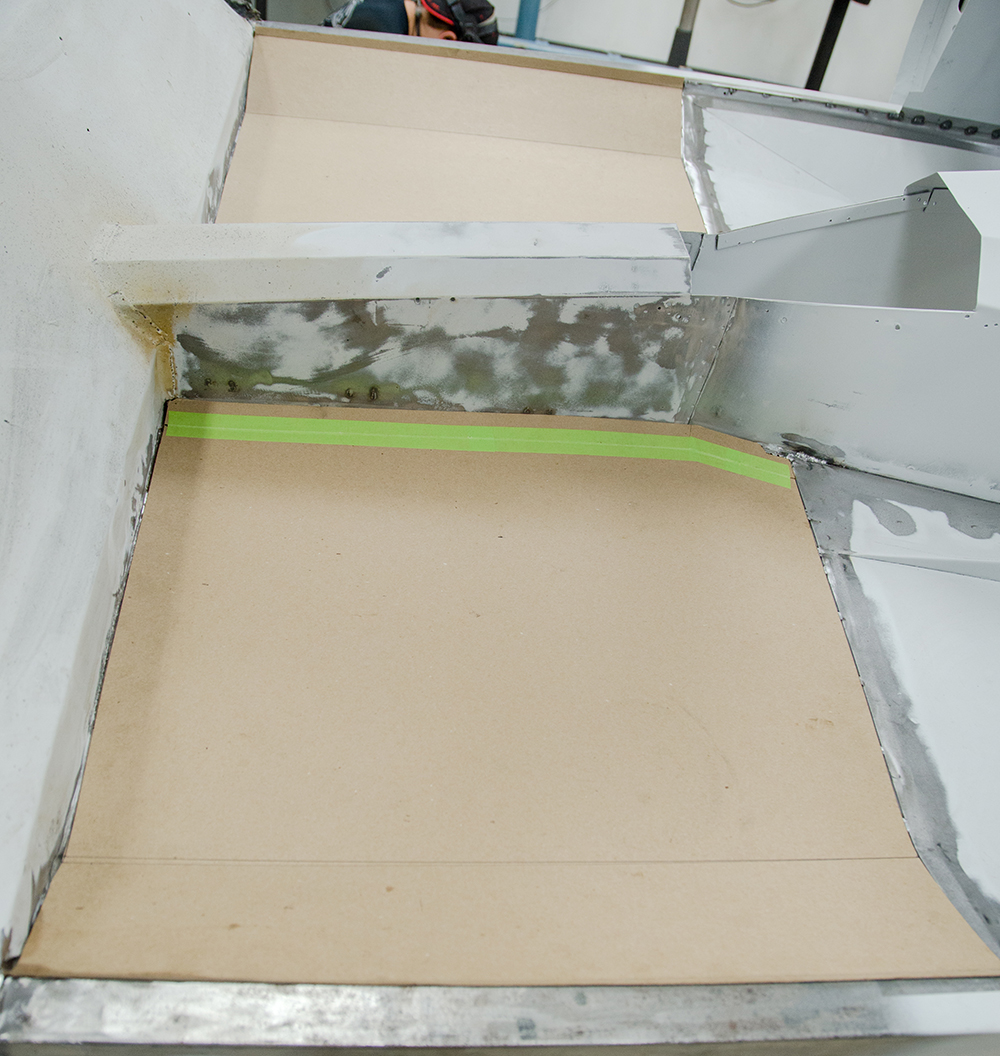
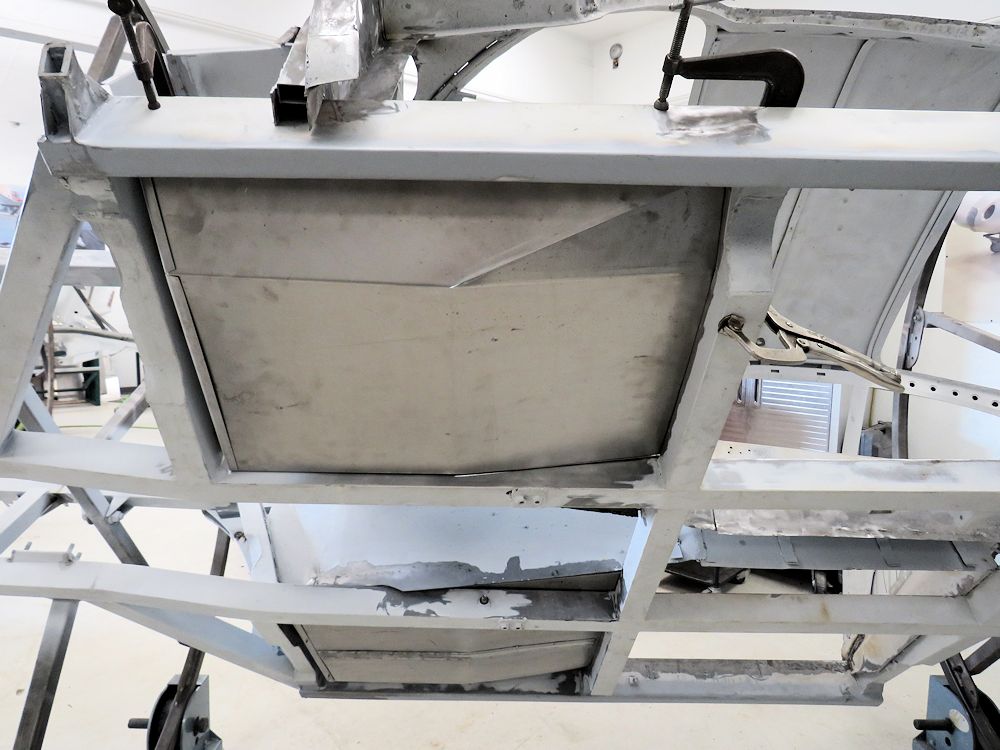
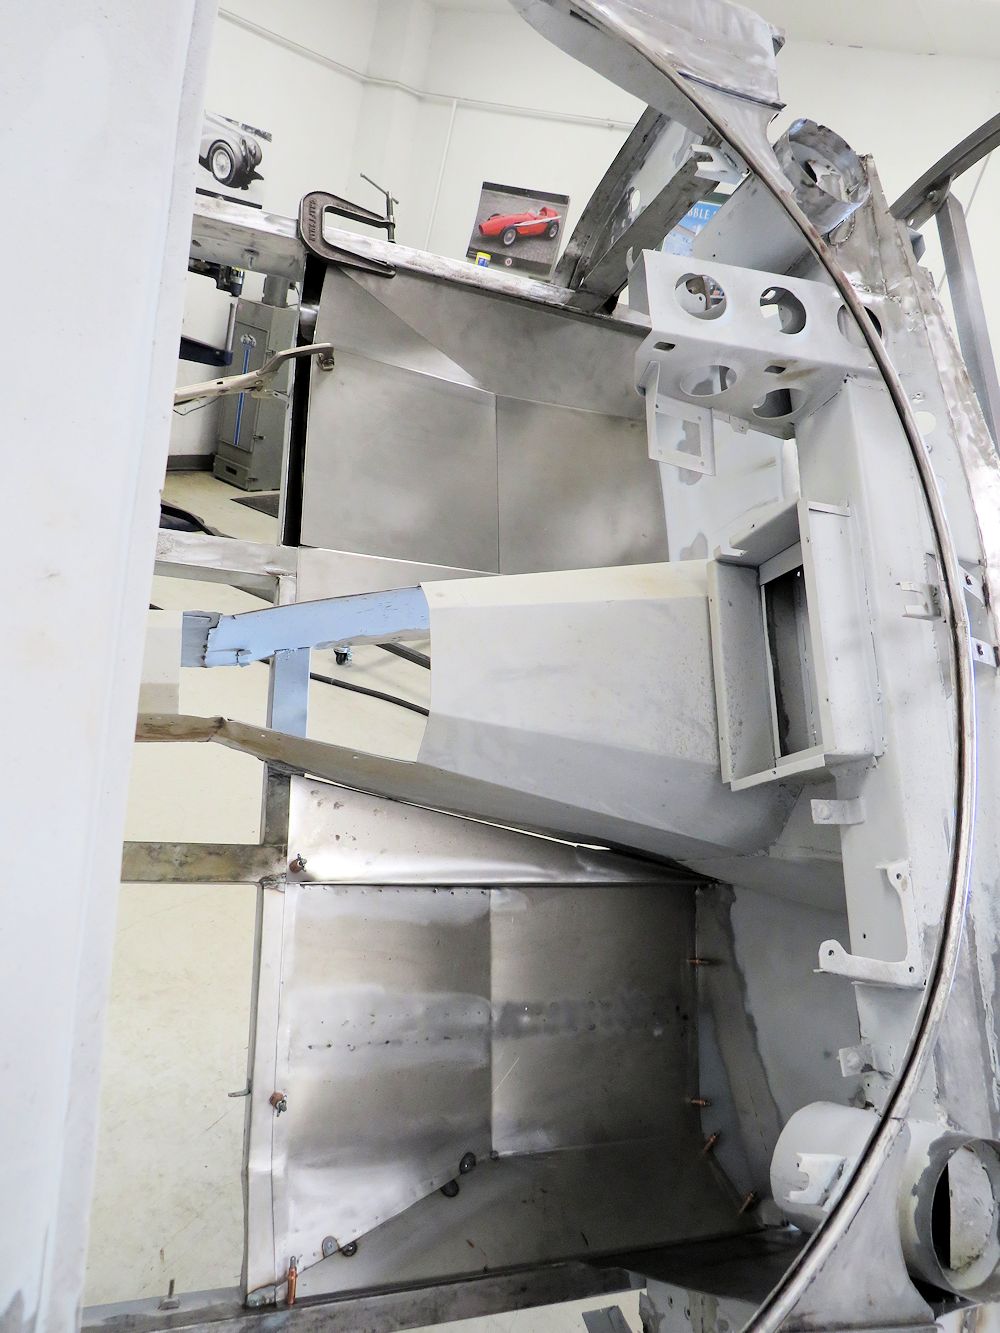
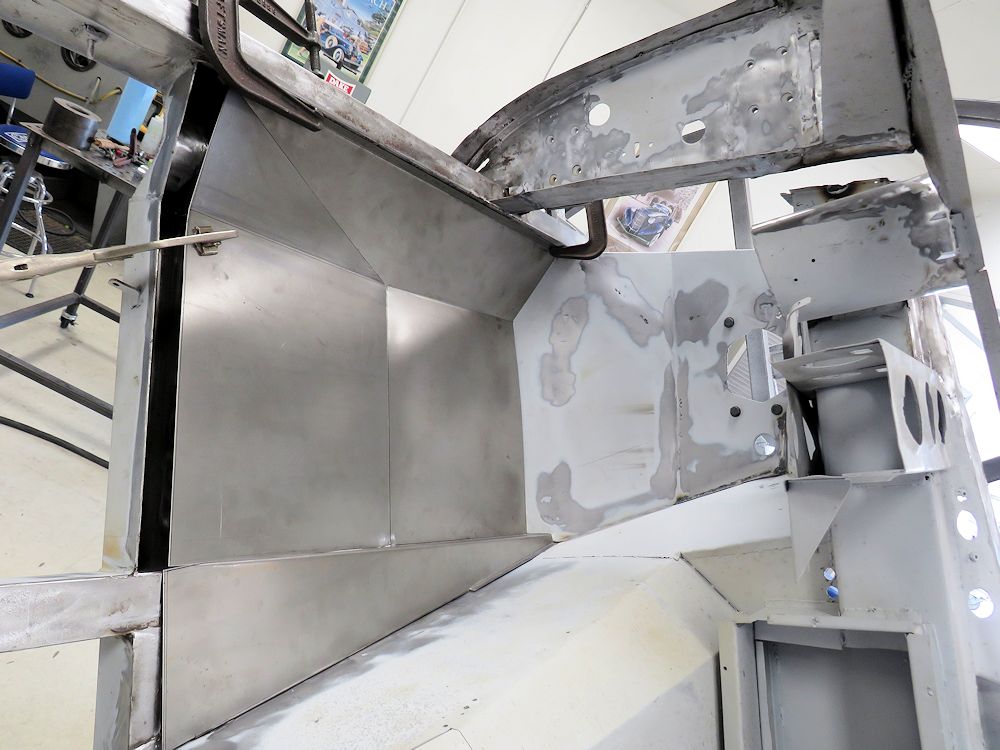
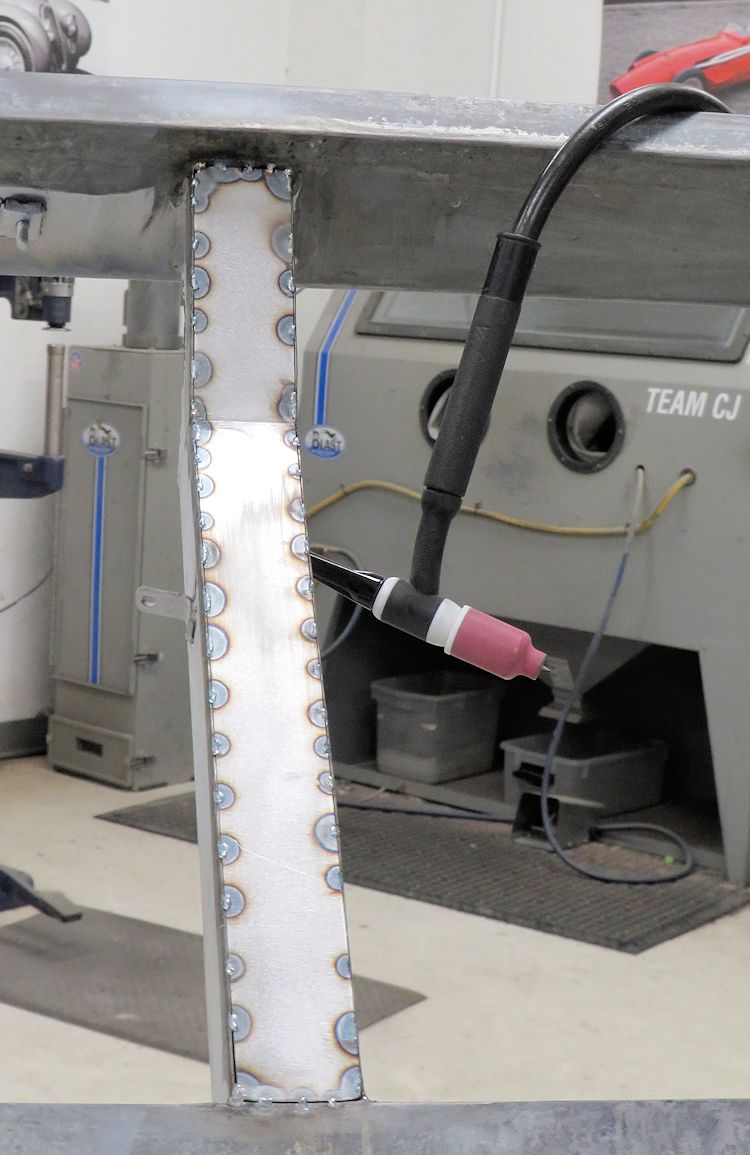
Jake has now fabricated and welded in
the new close out panels for the rear trunk floor.
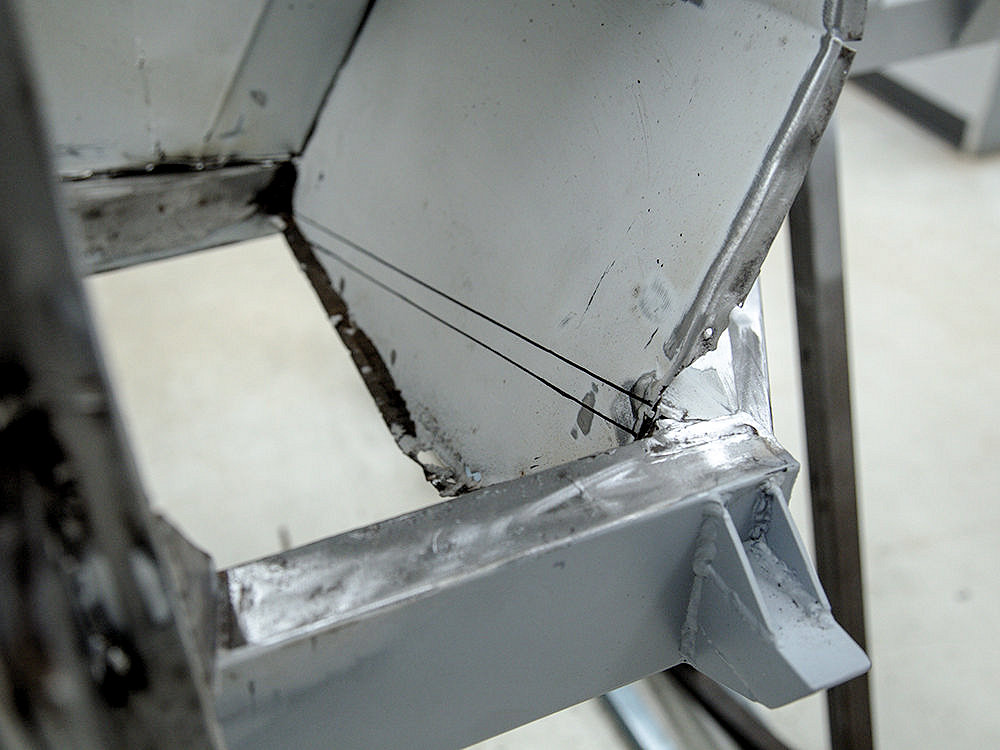
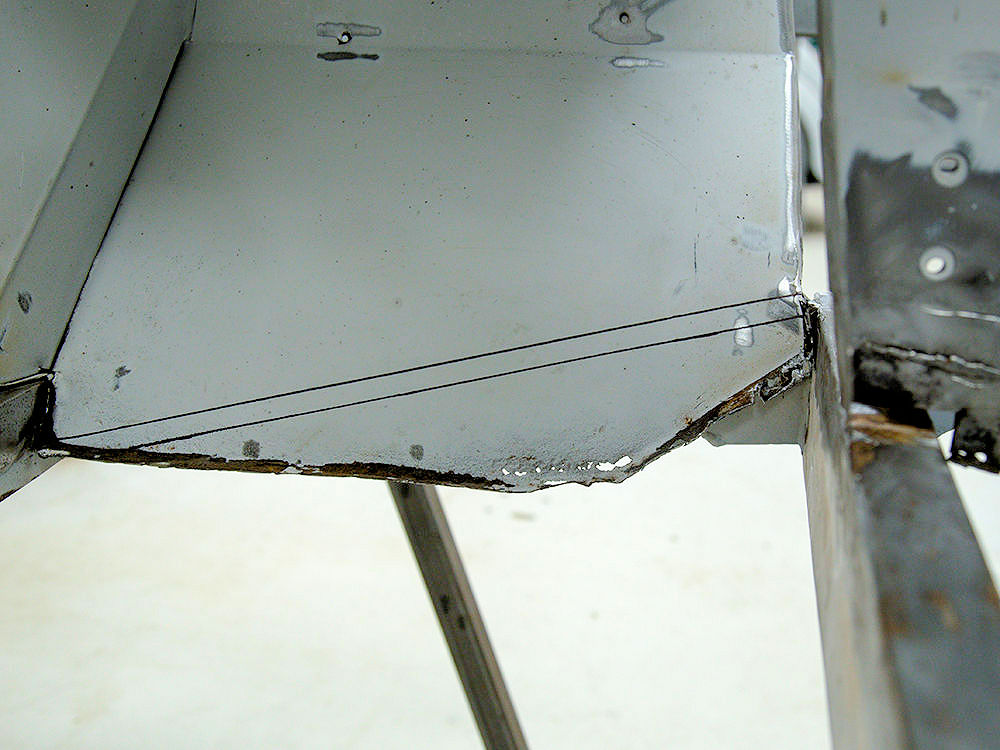
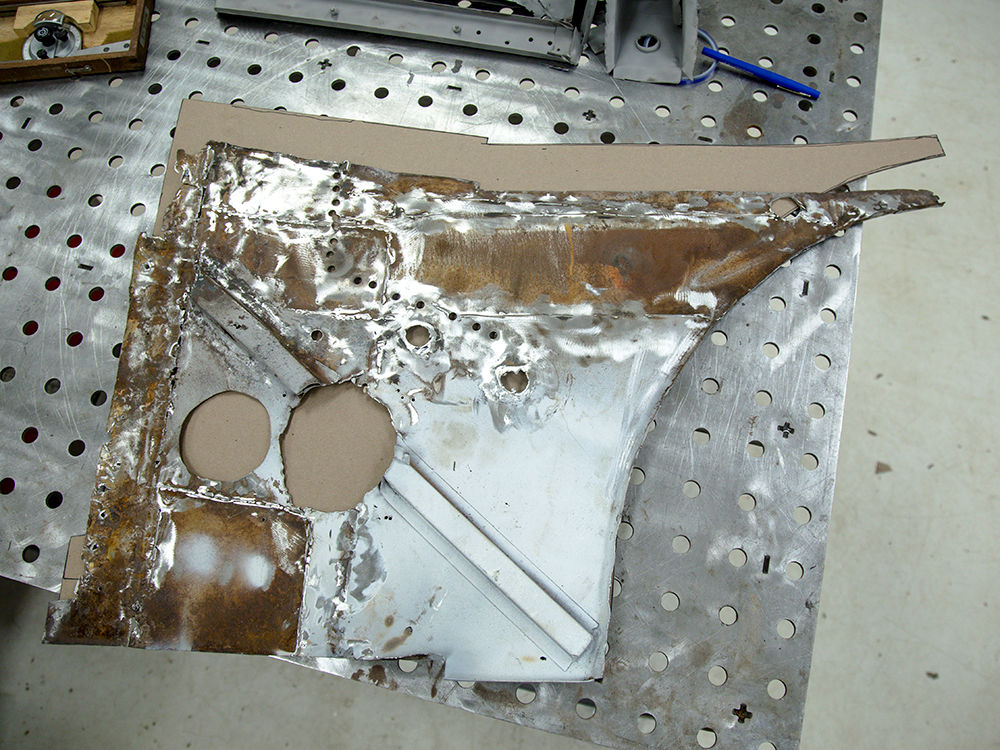
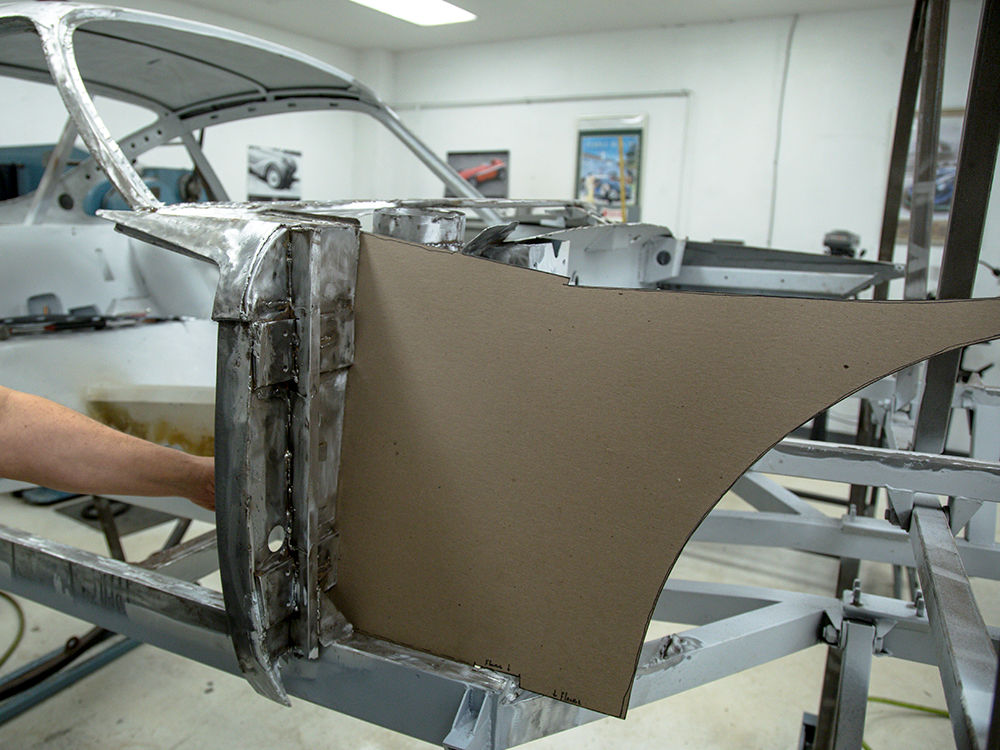
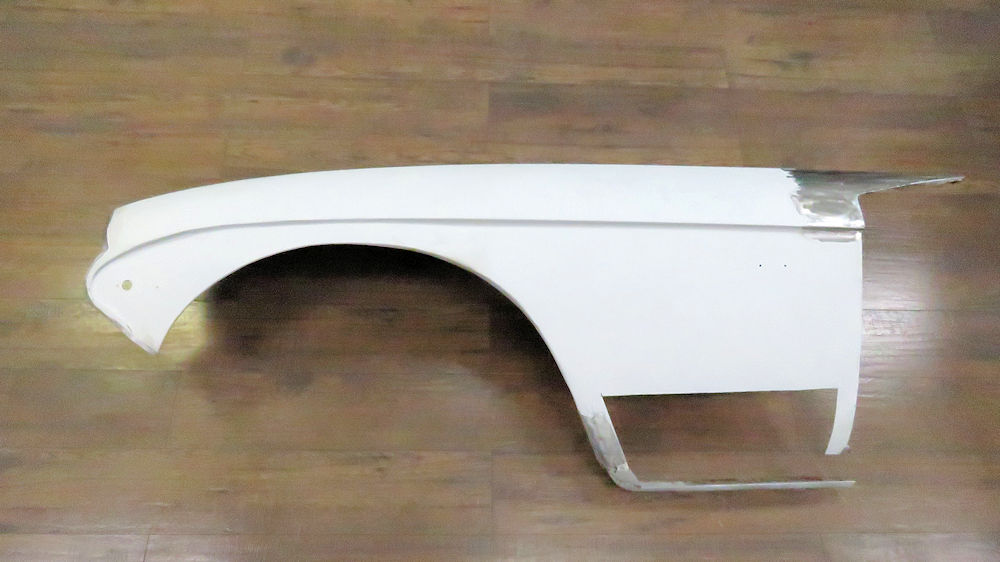
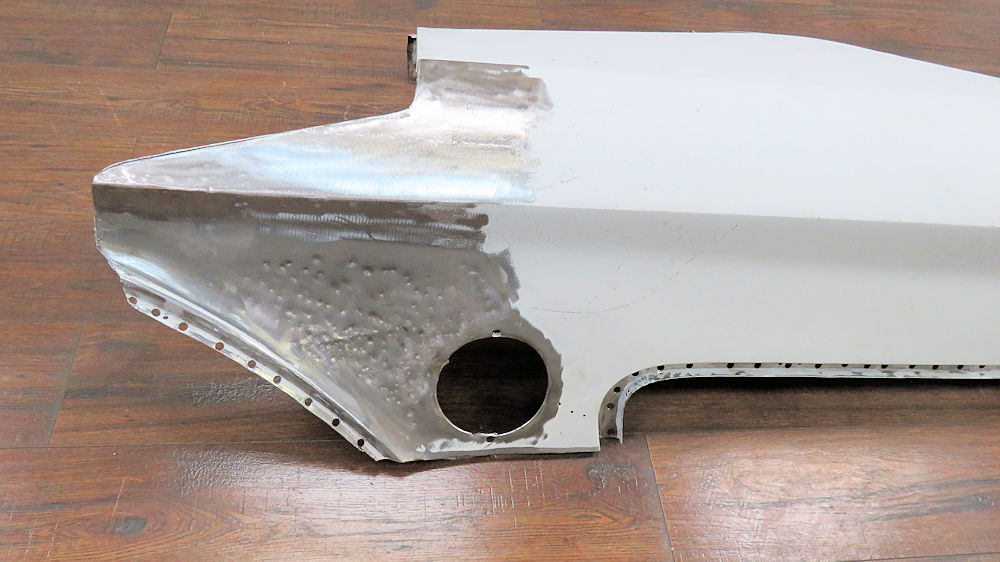
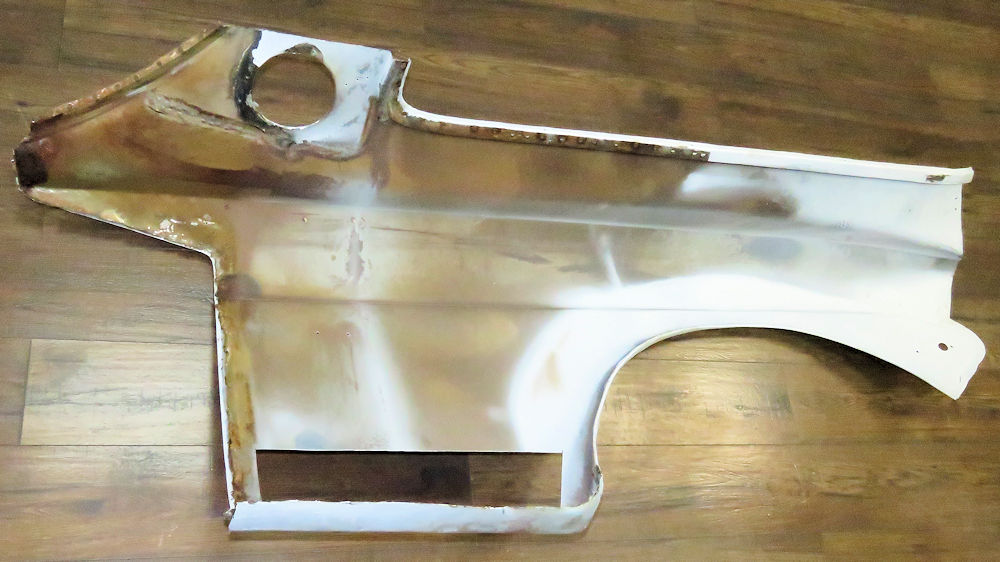
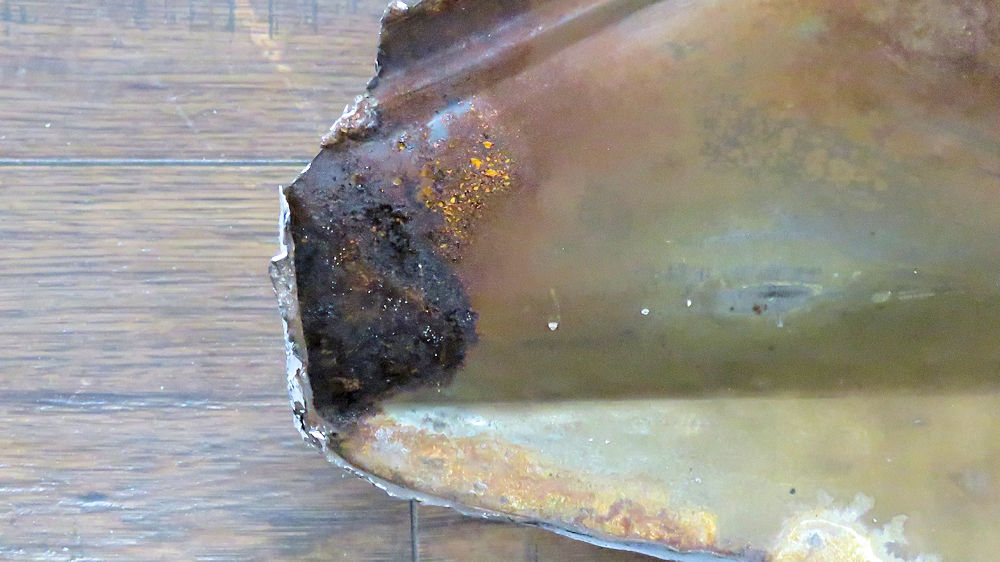
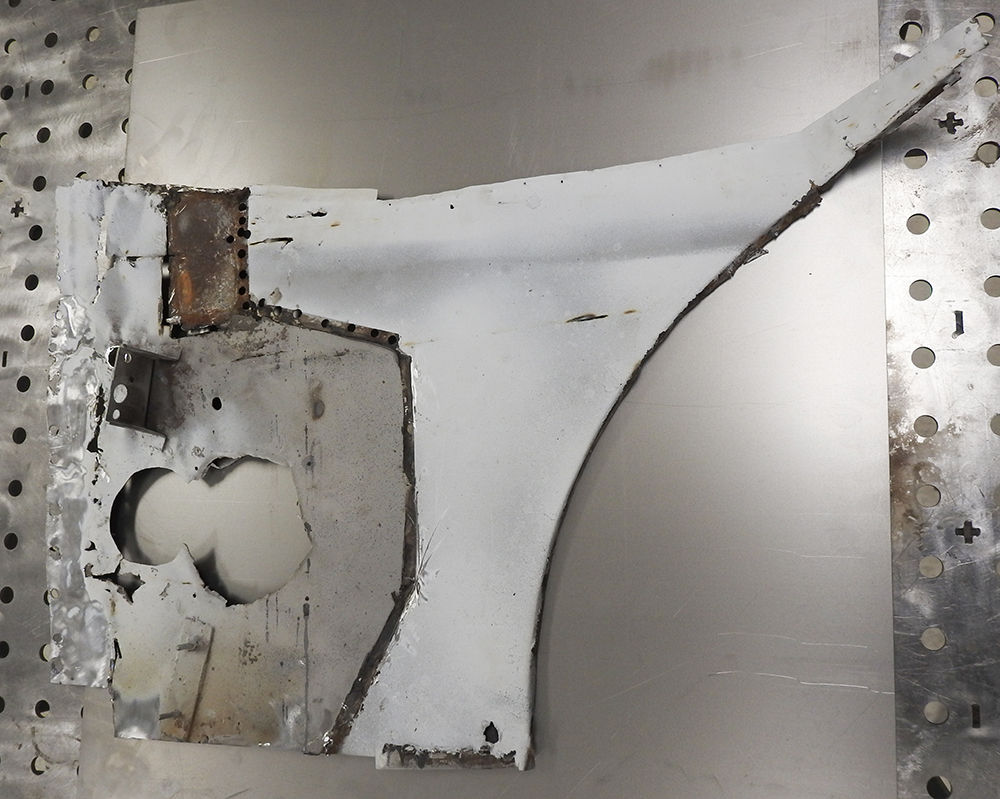
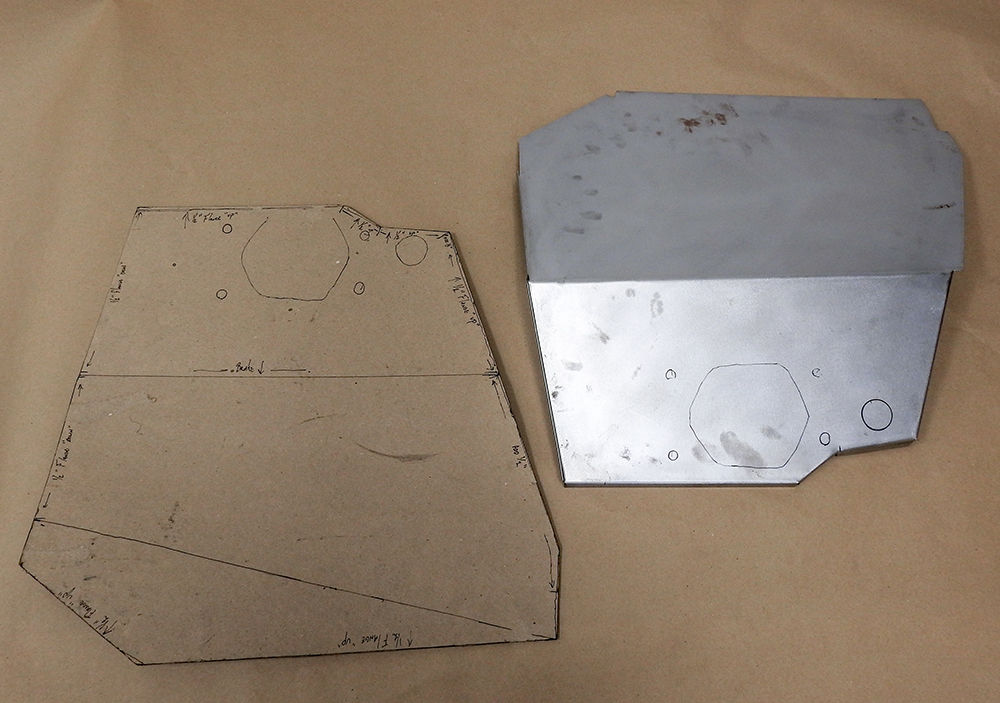
Update report - March 11, 2021
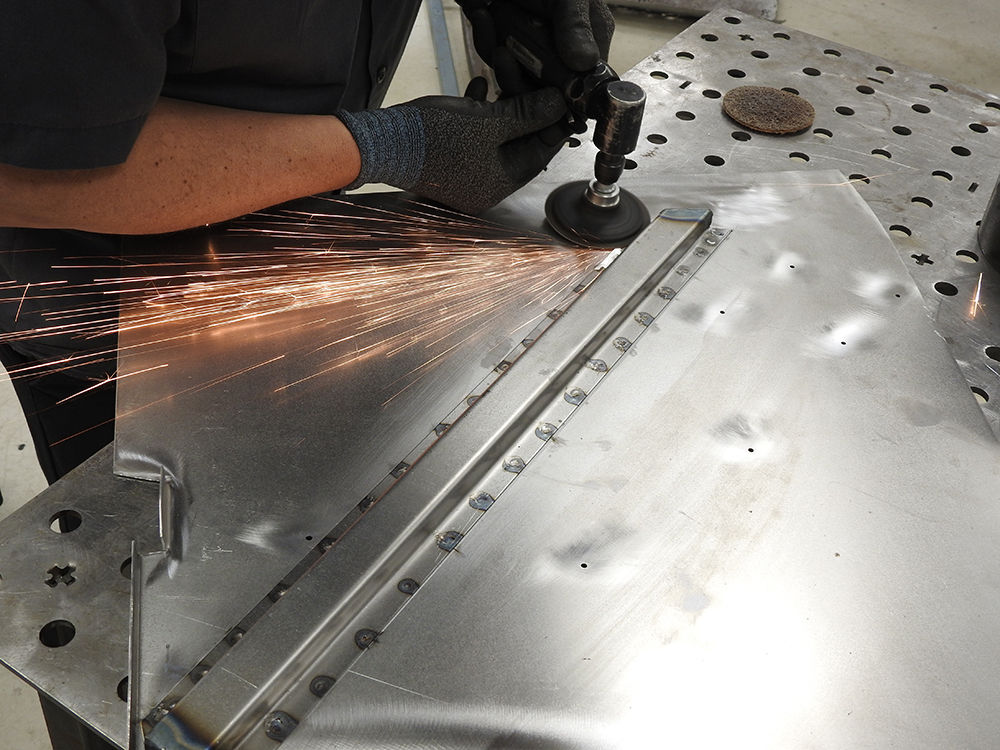
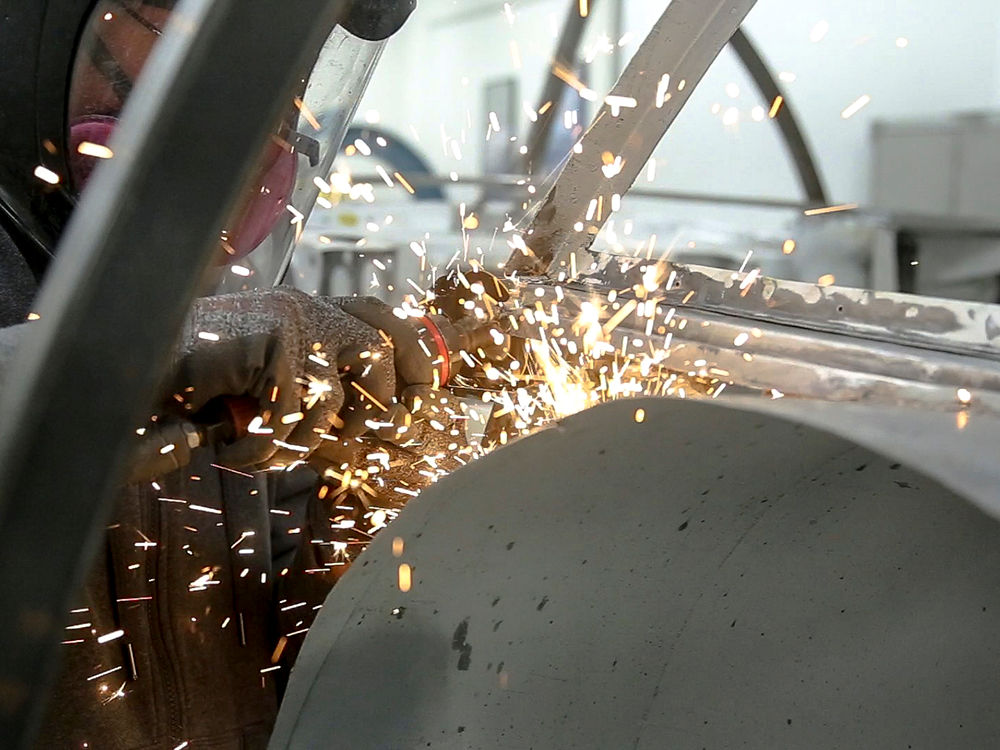
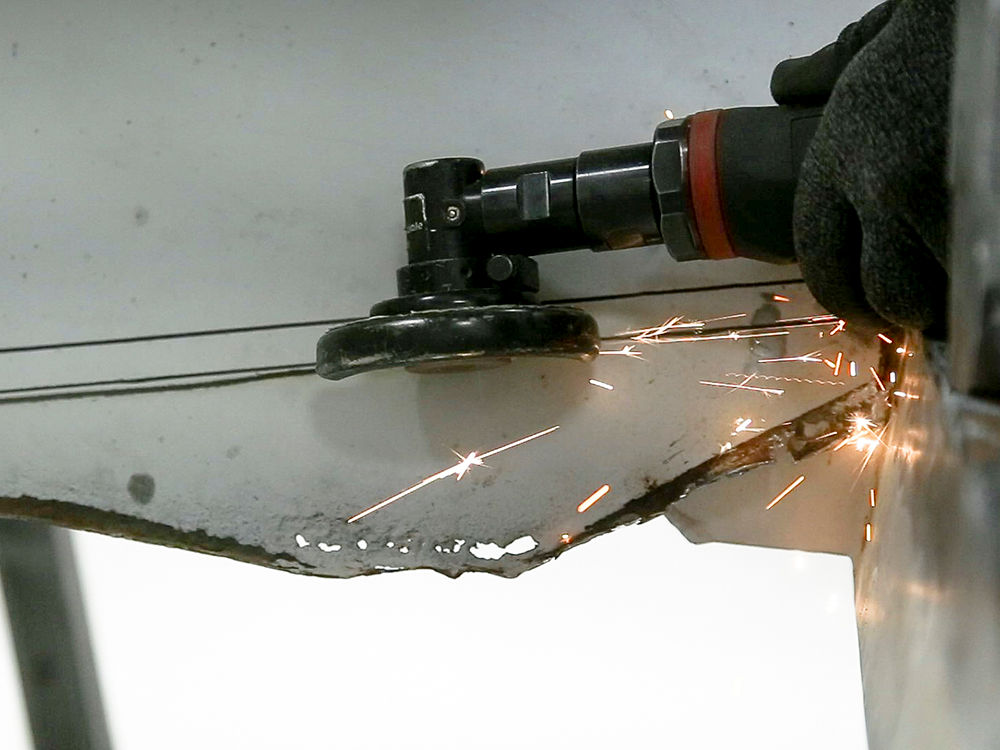
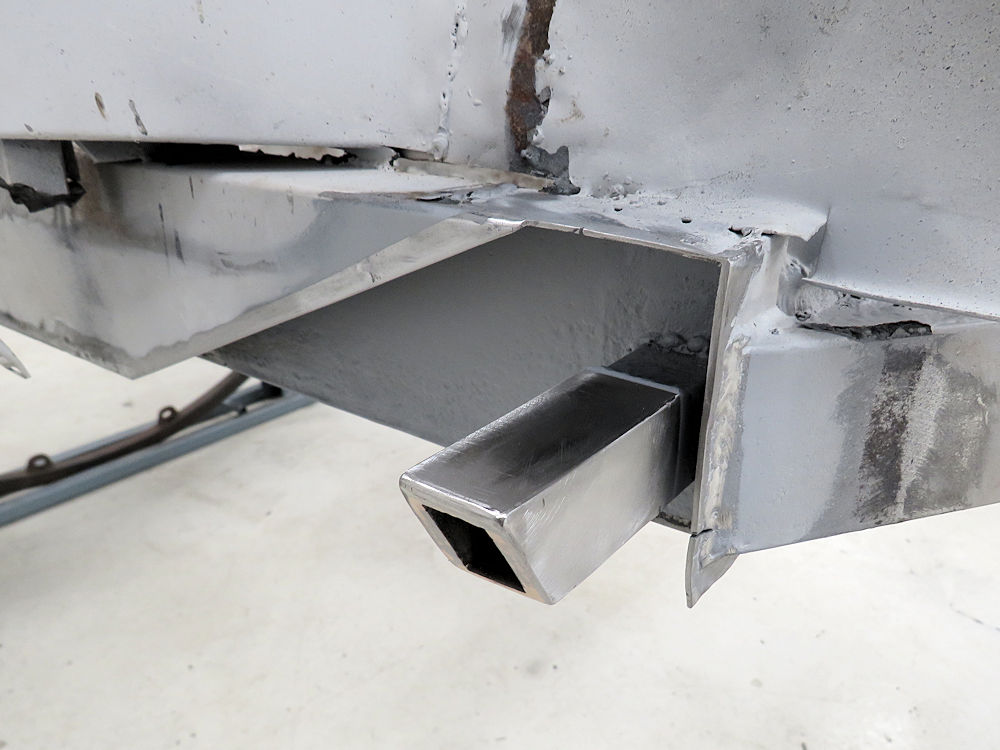
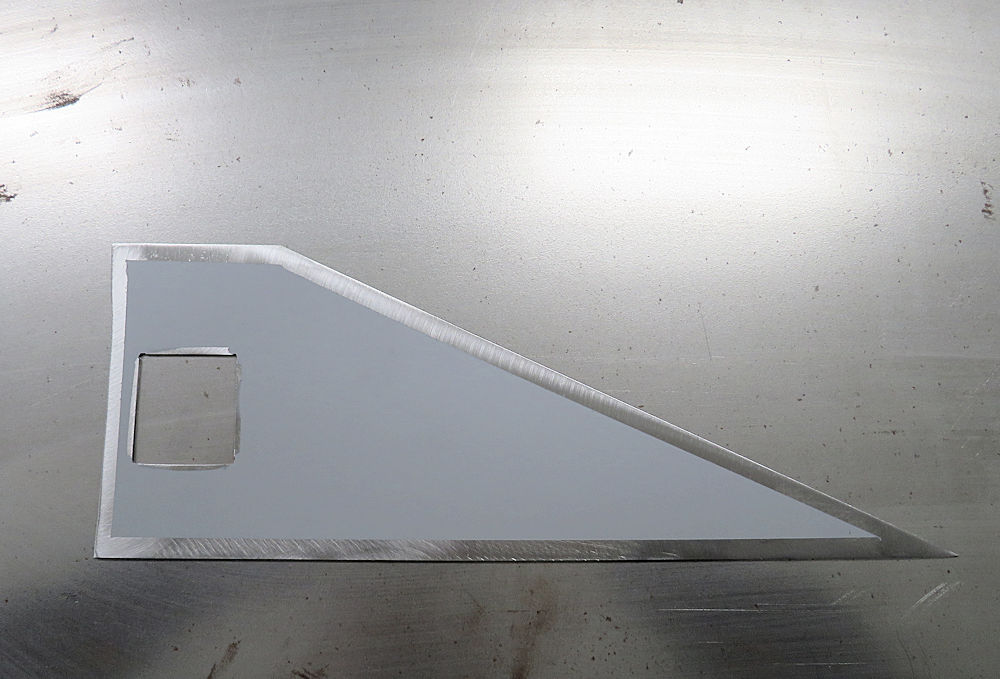
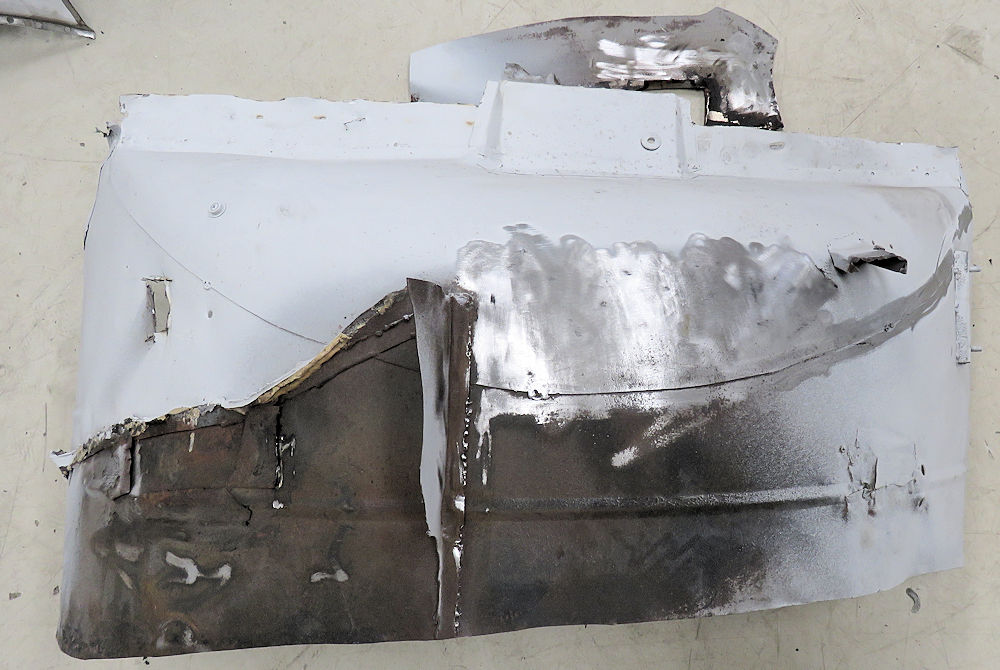
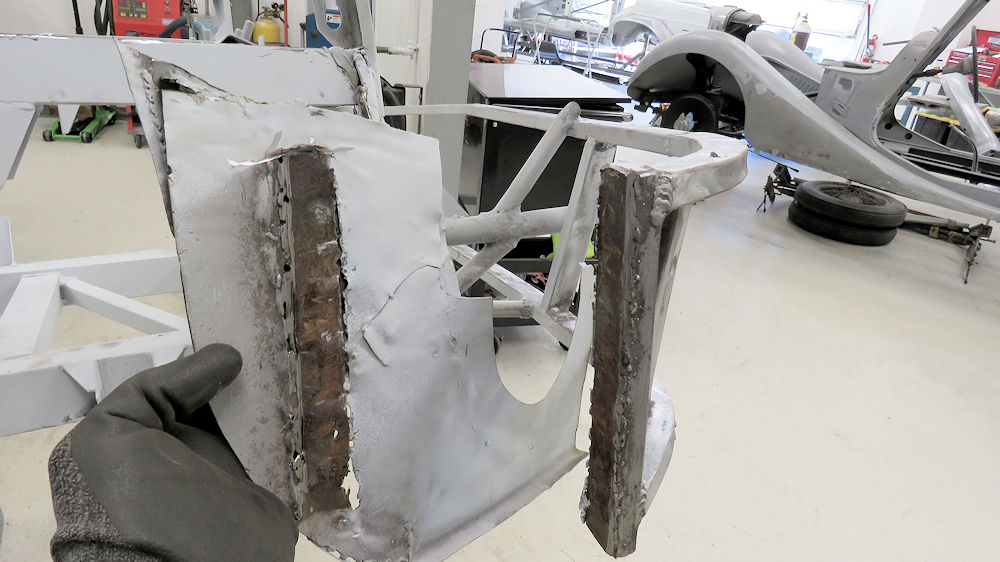
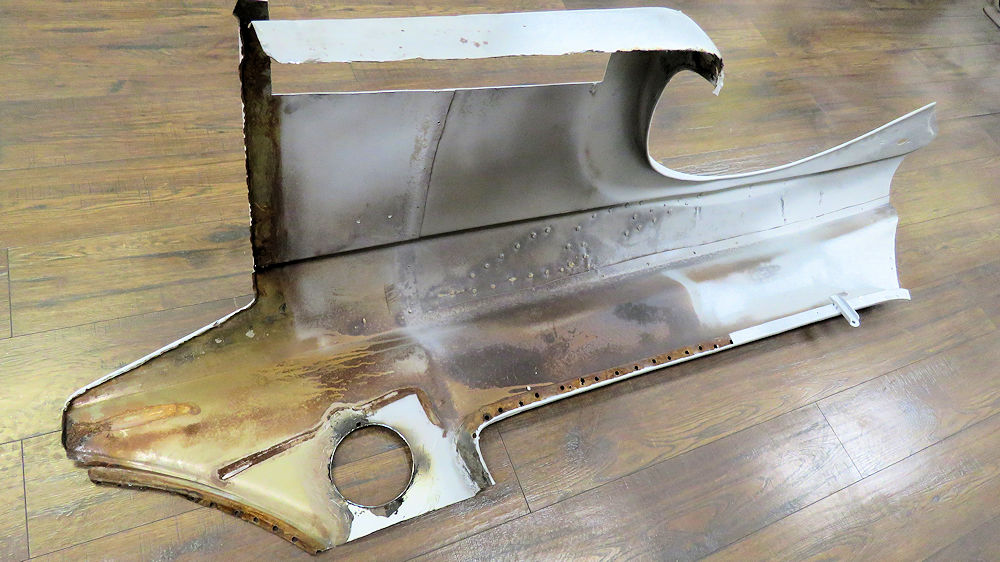
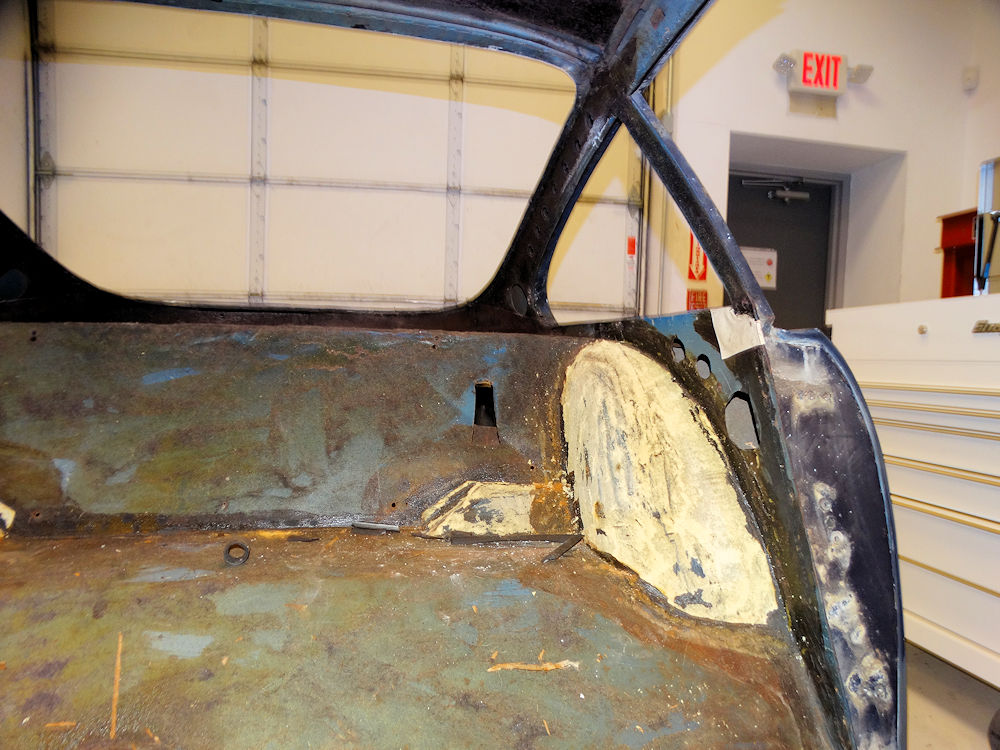
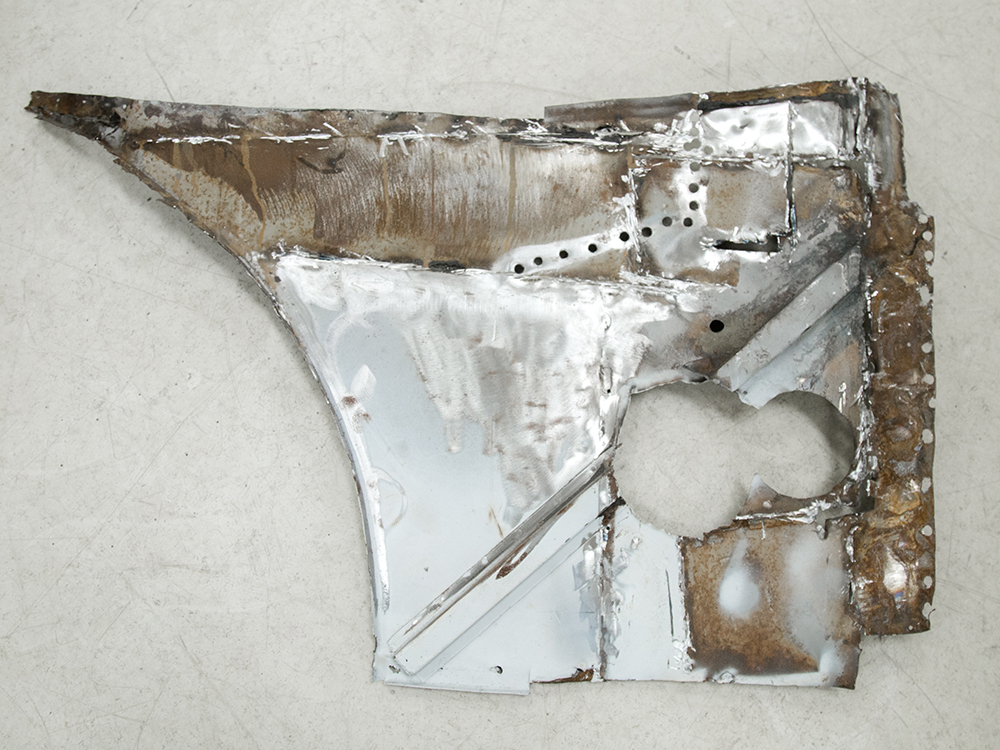
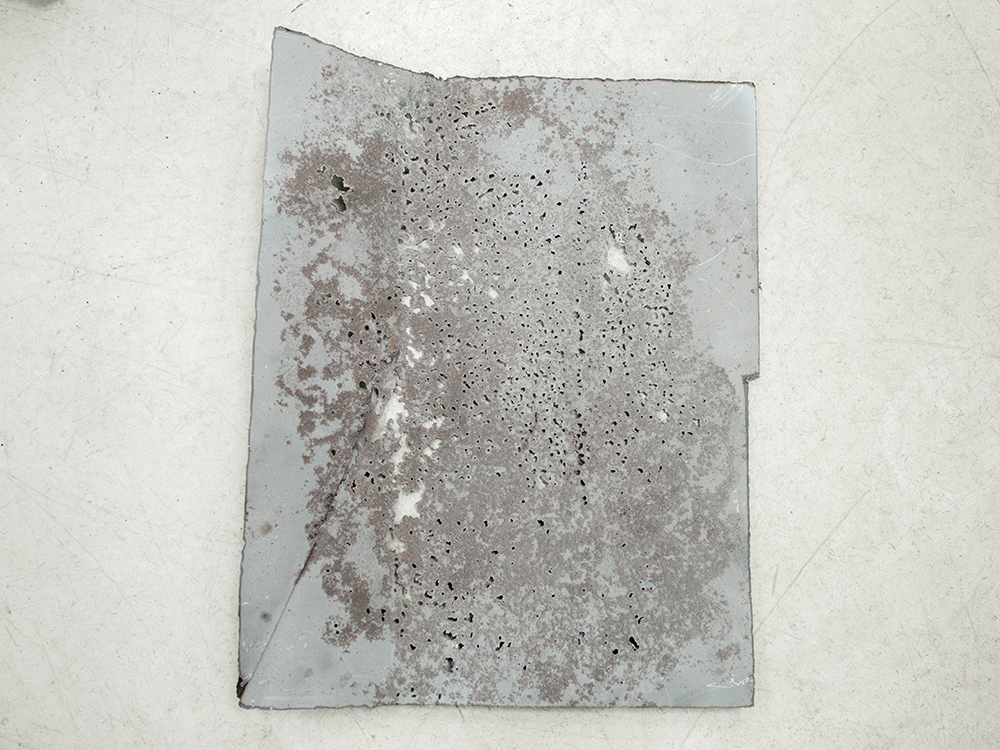
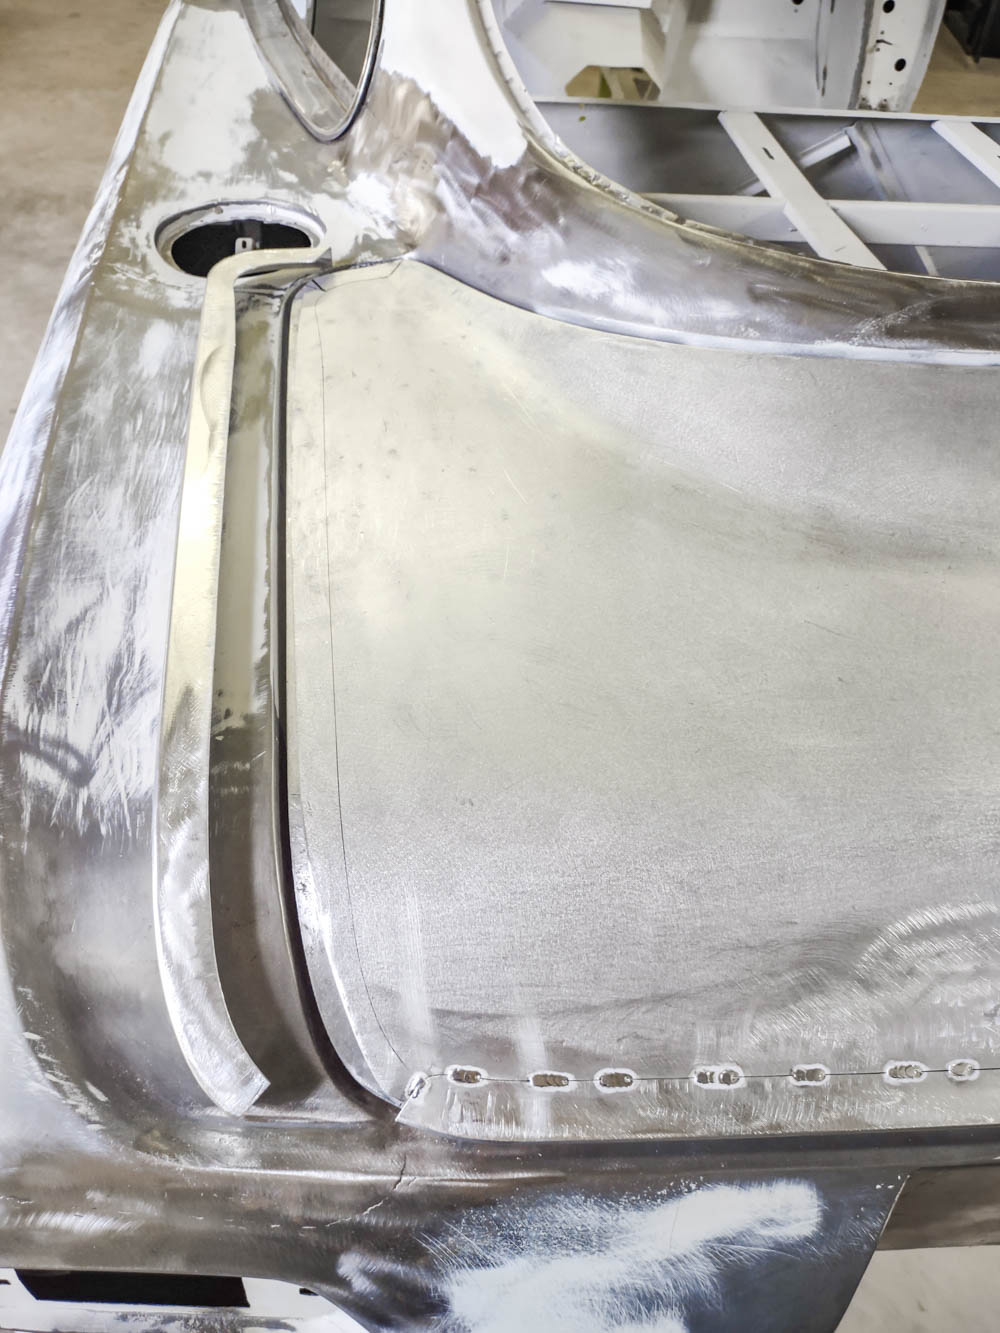
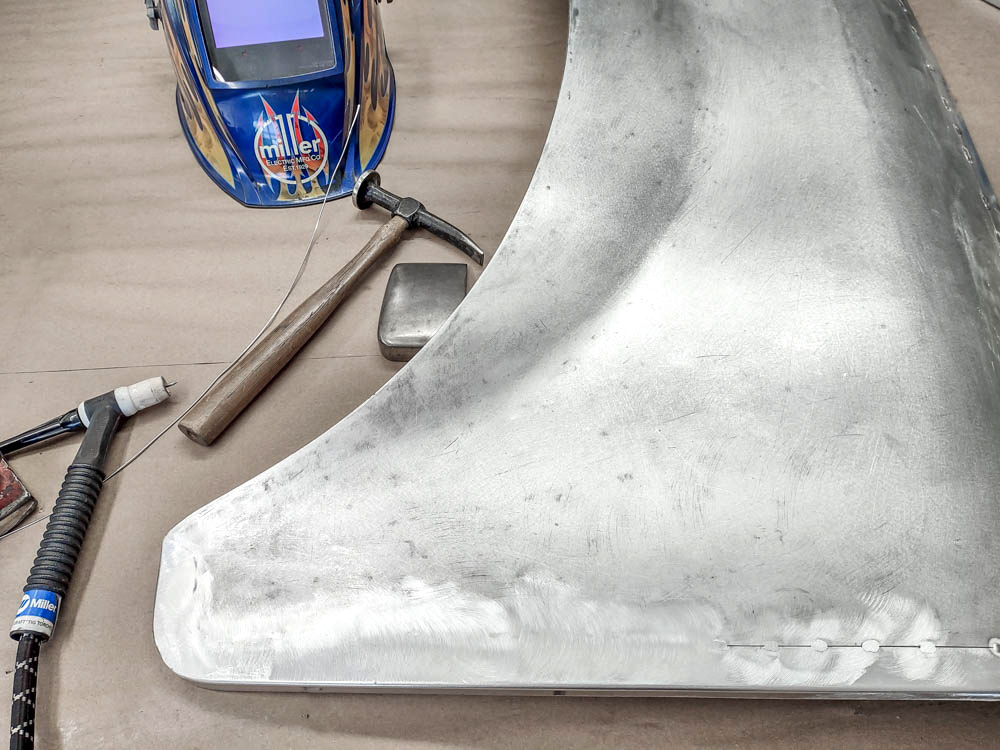
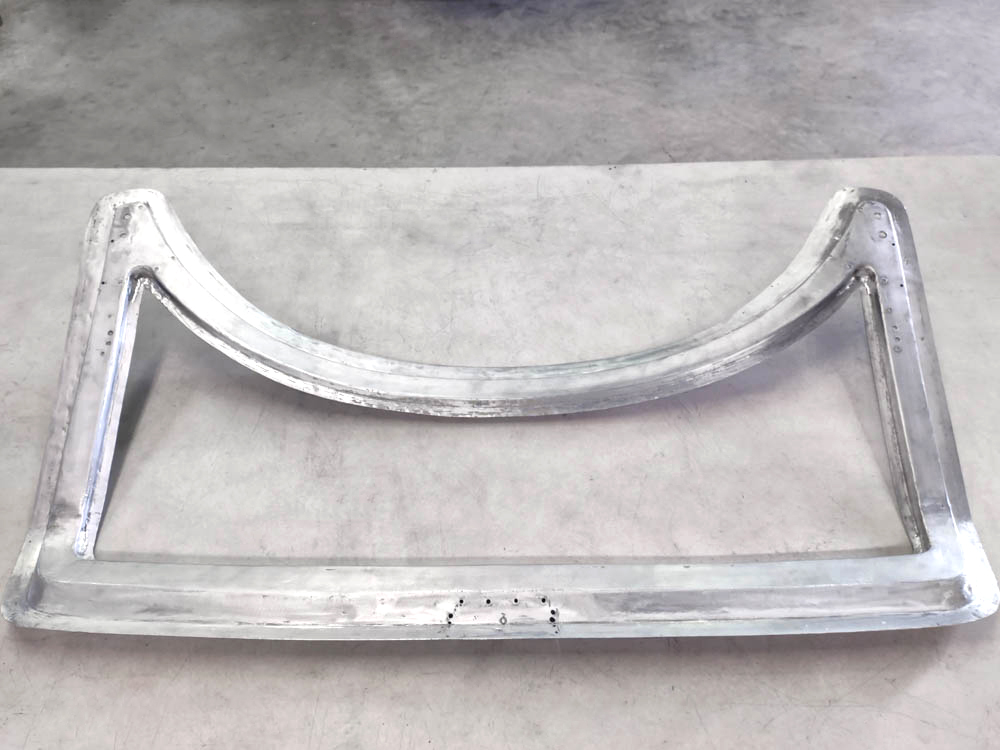
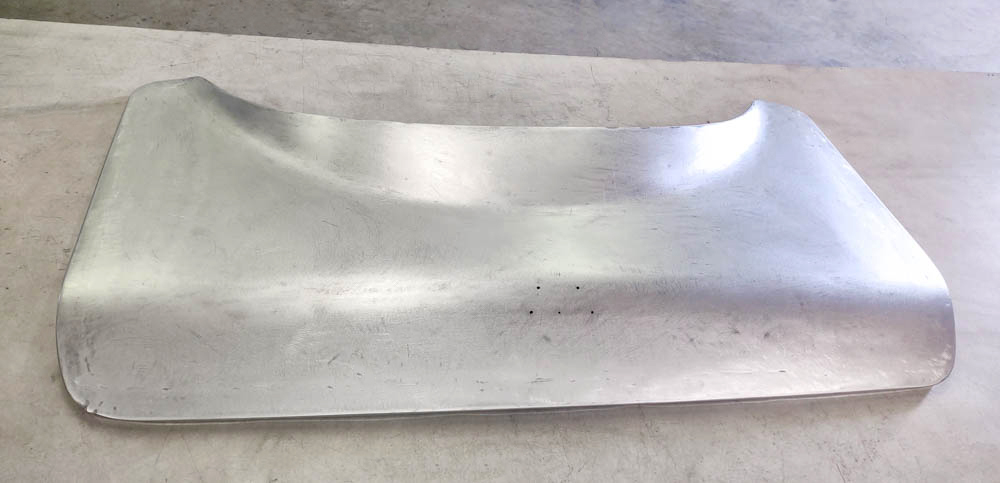
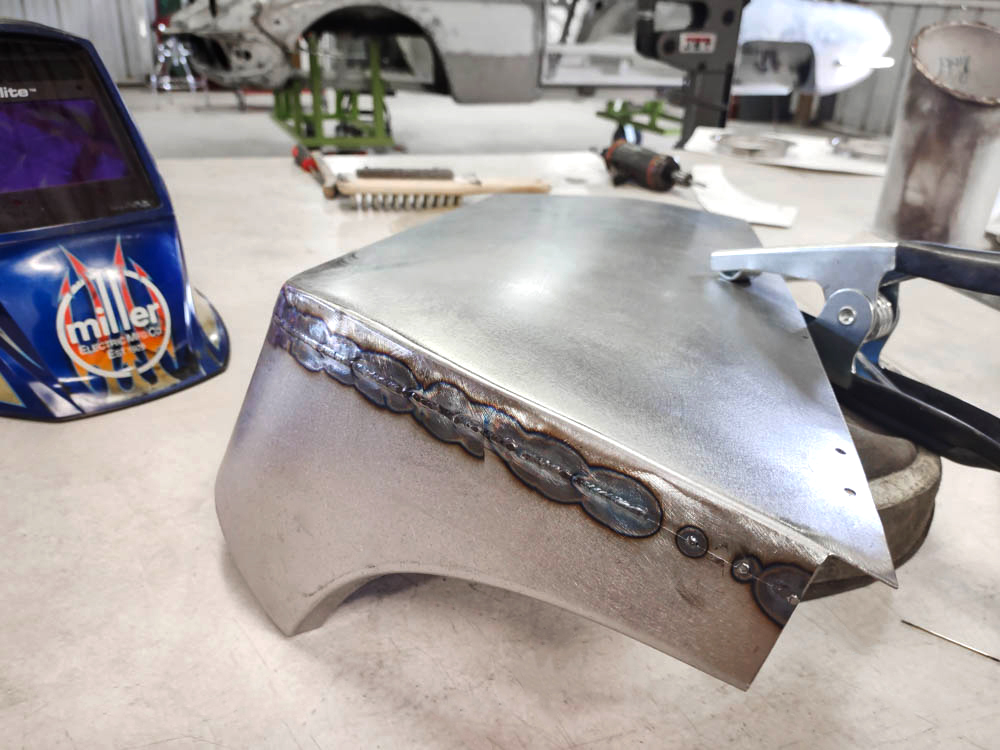
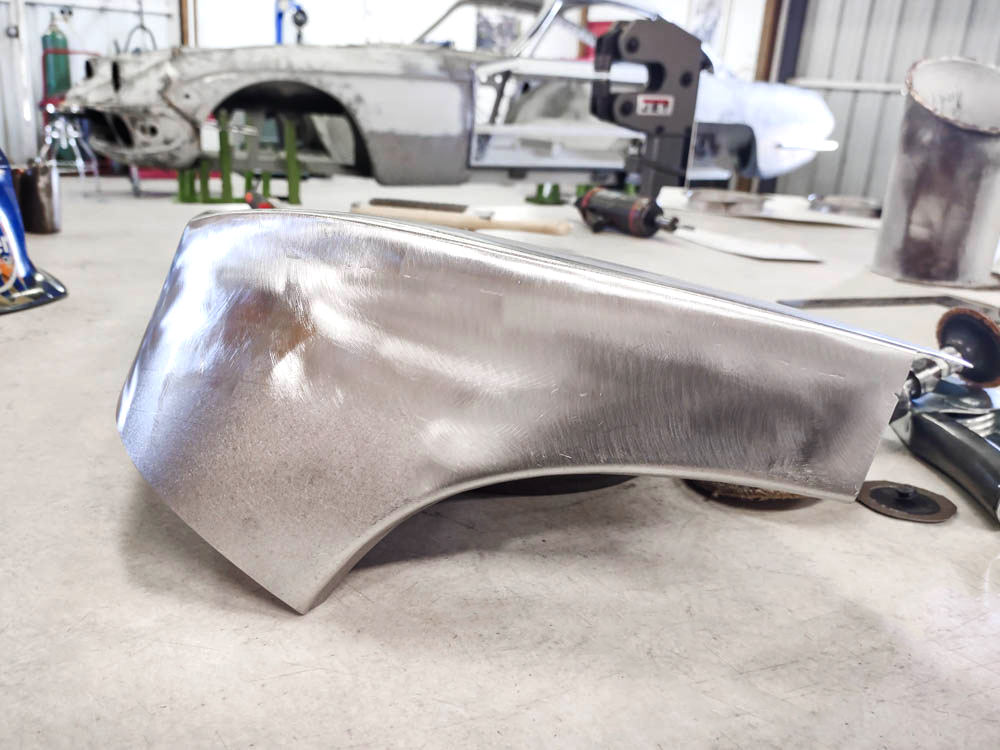
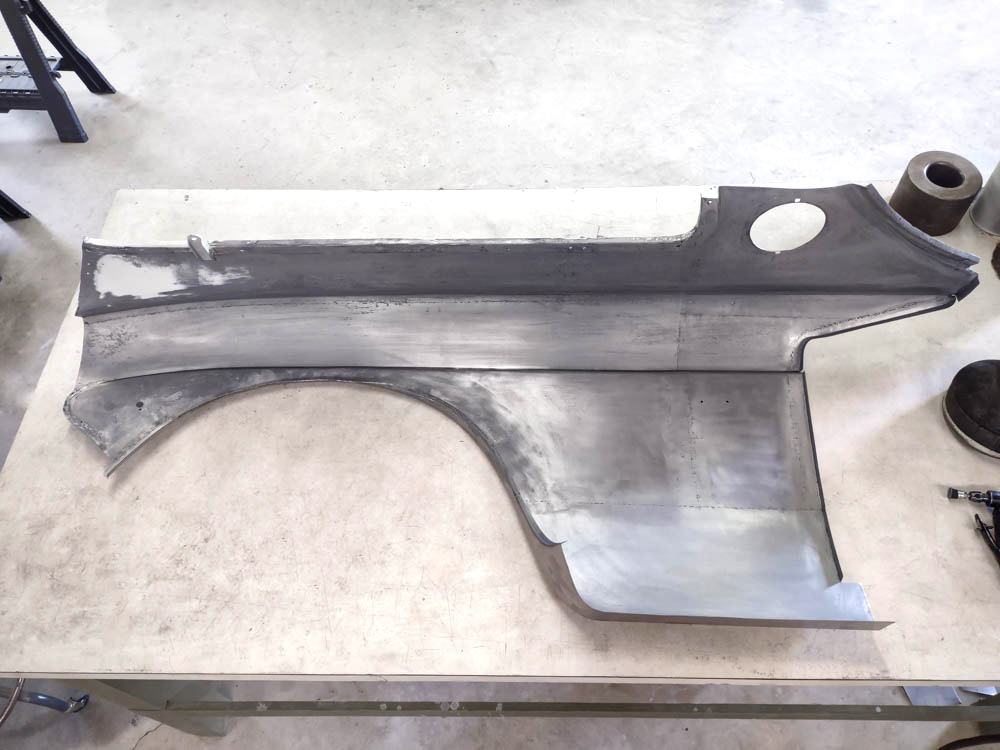
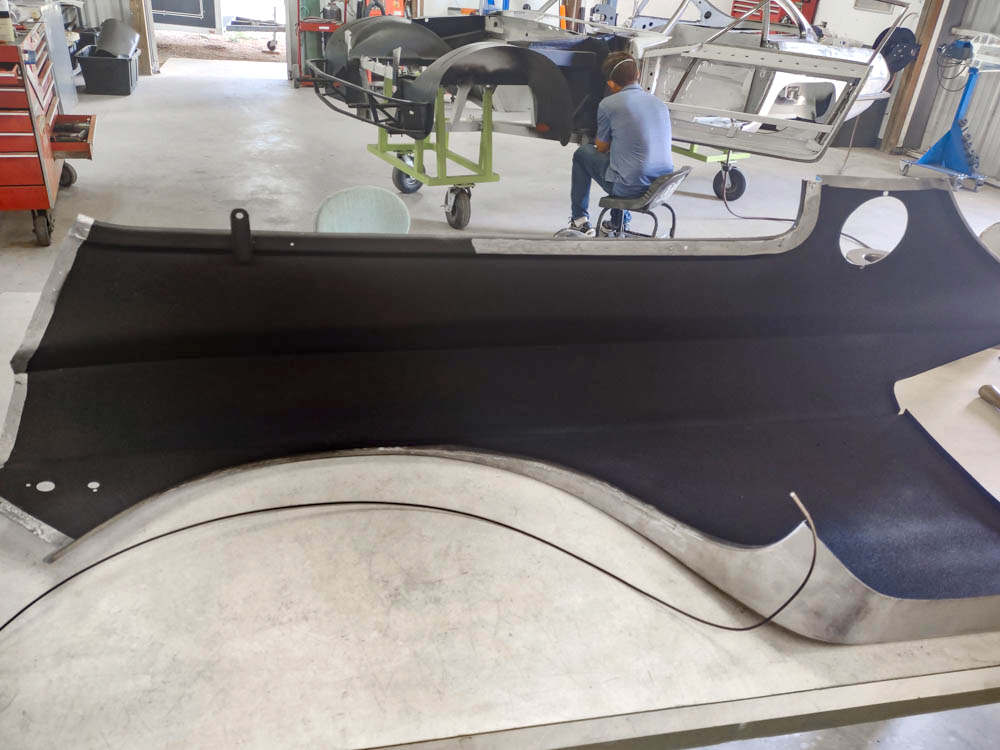
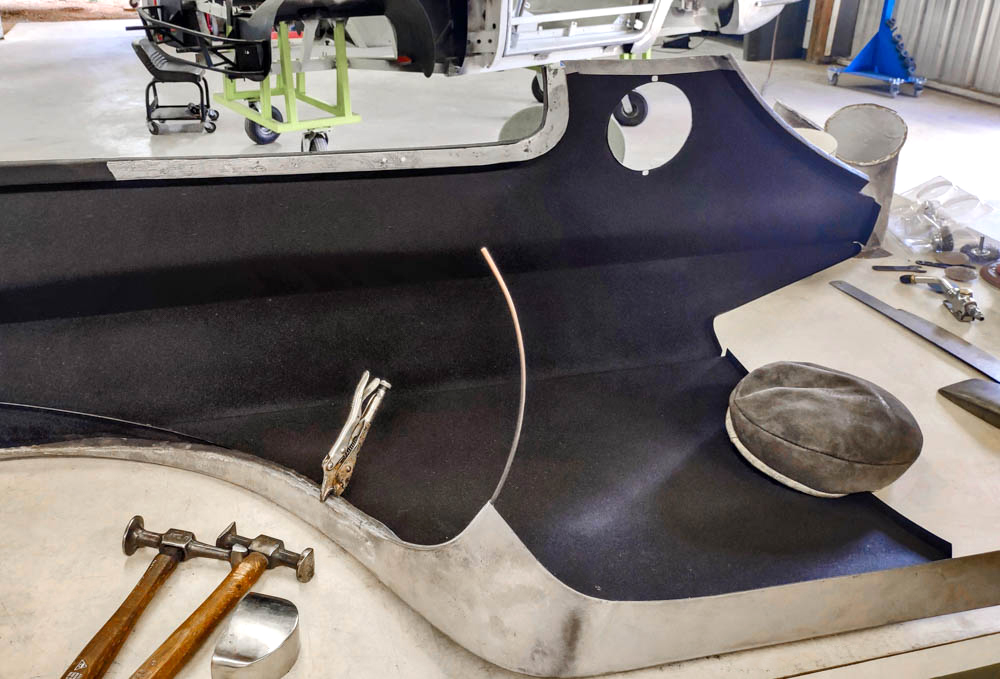
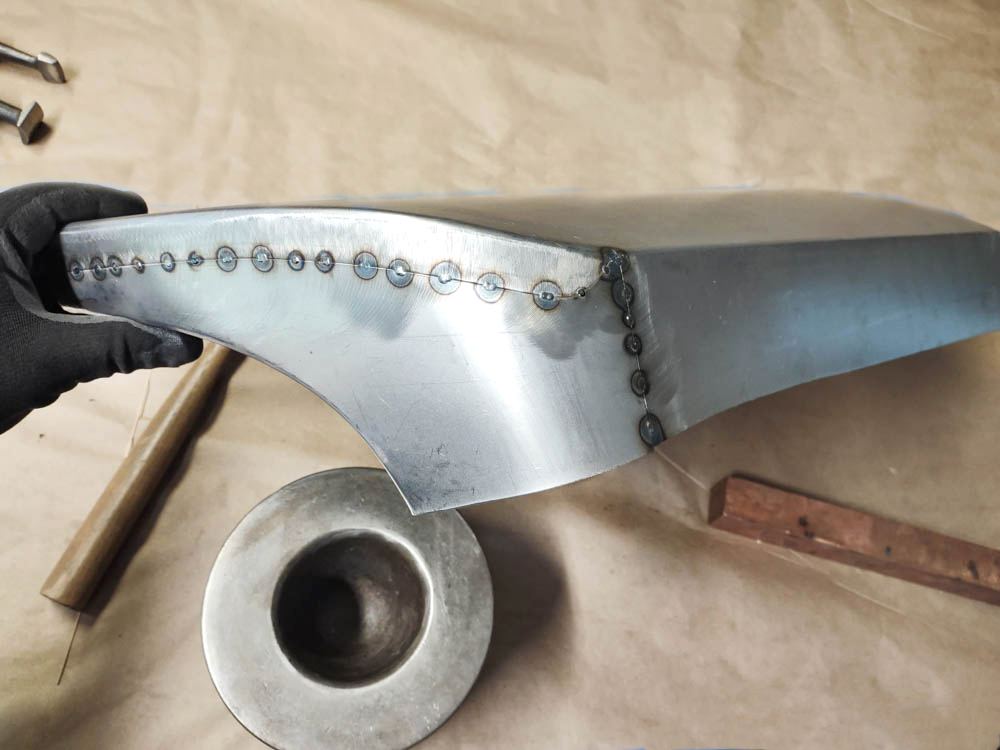
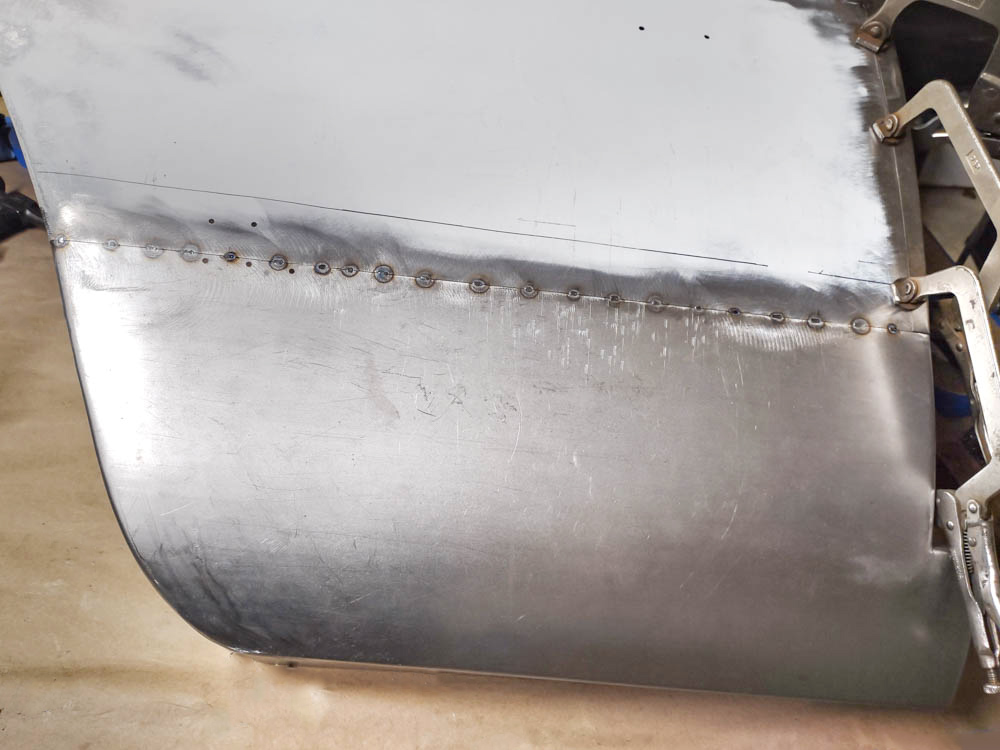
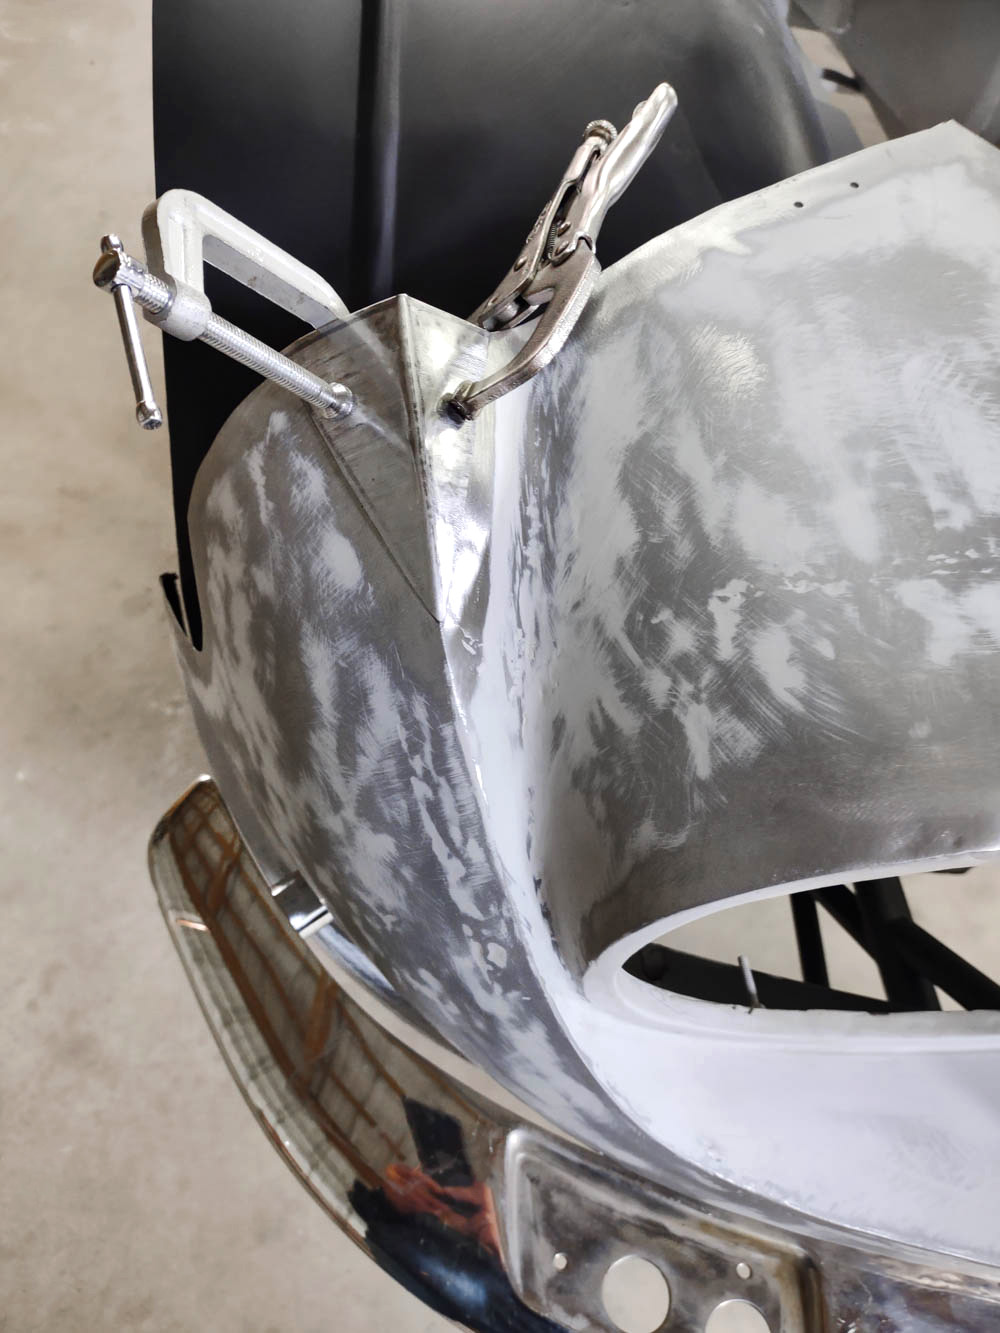
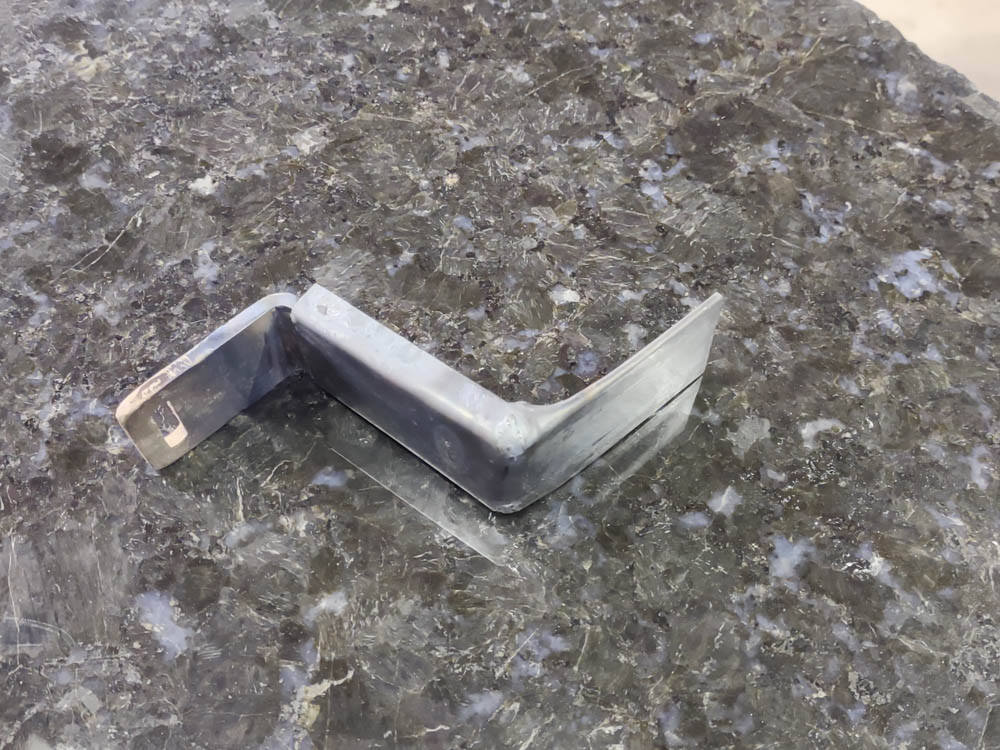
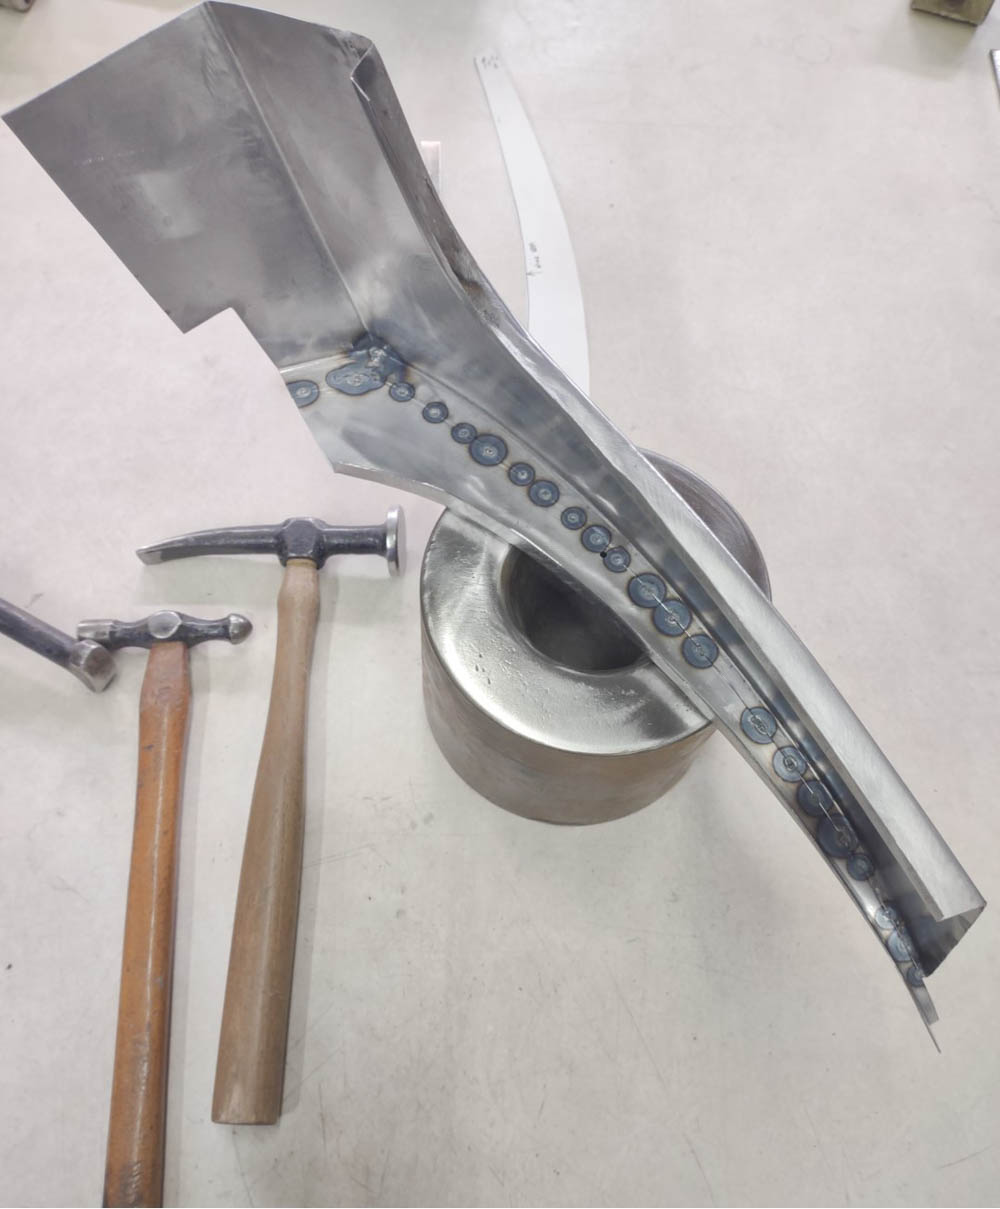
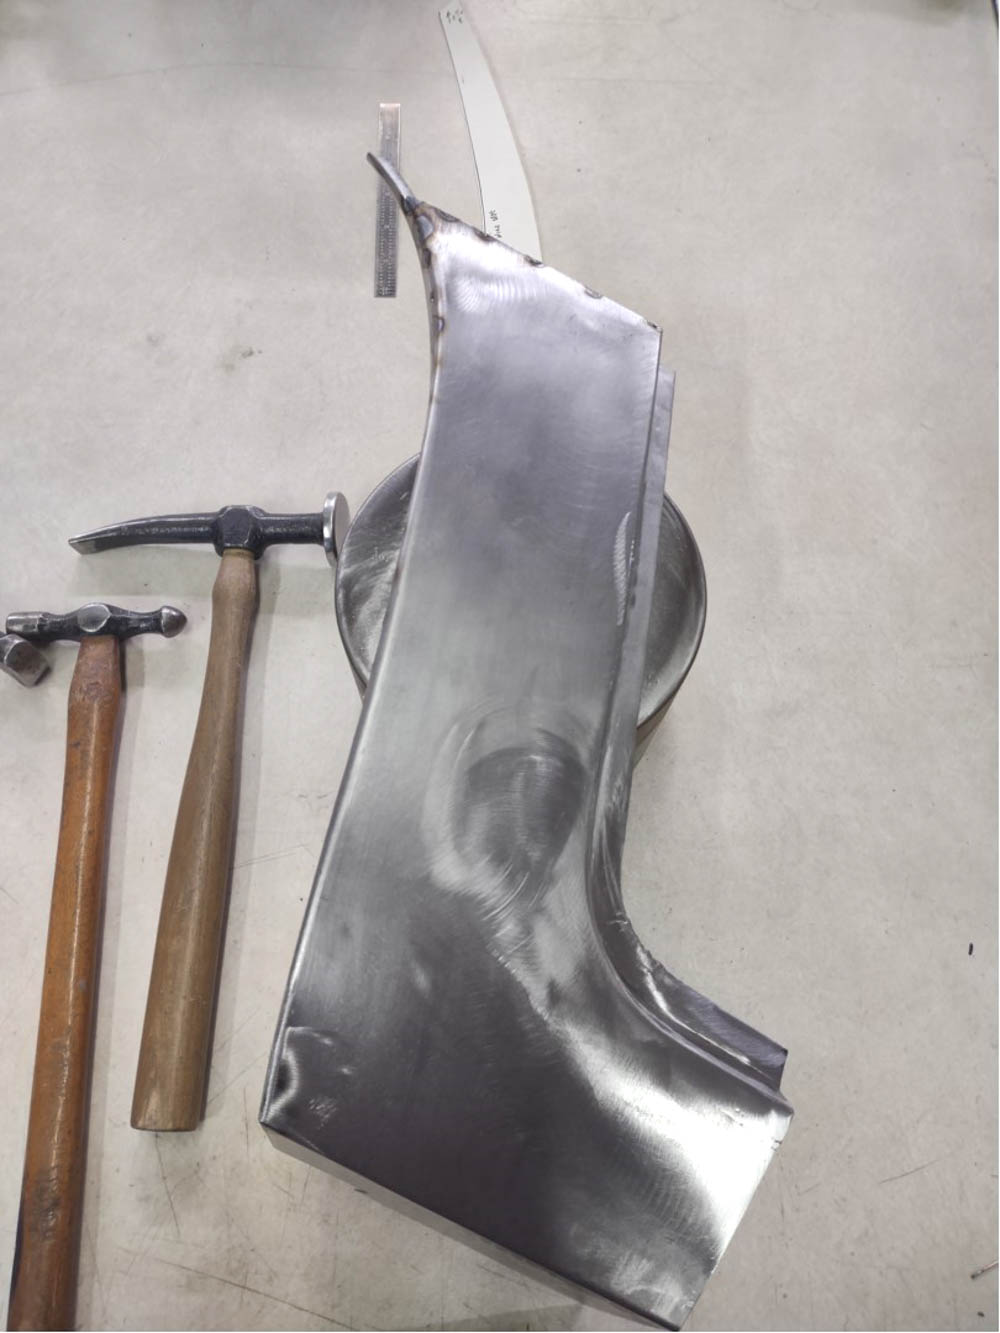
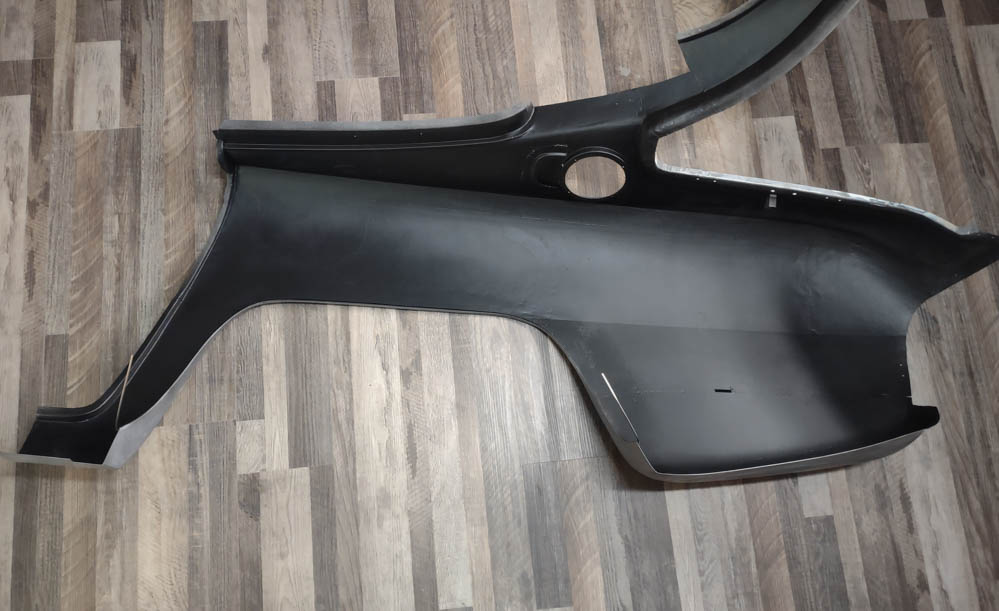
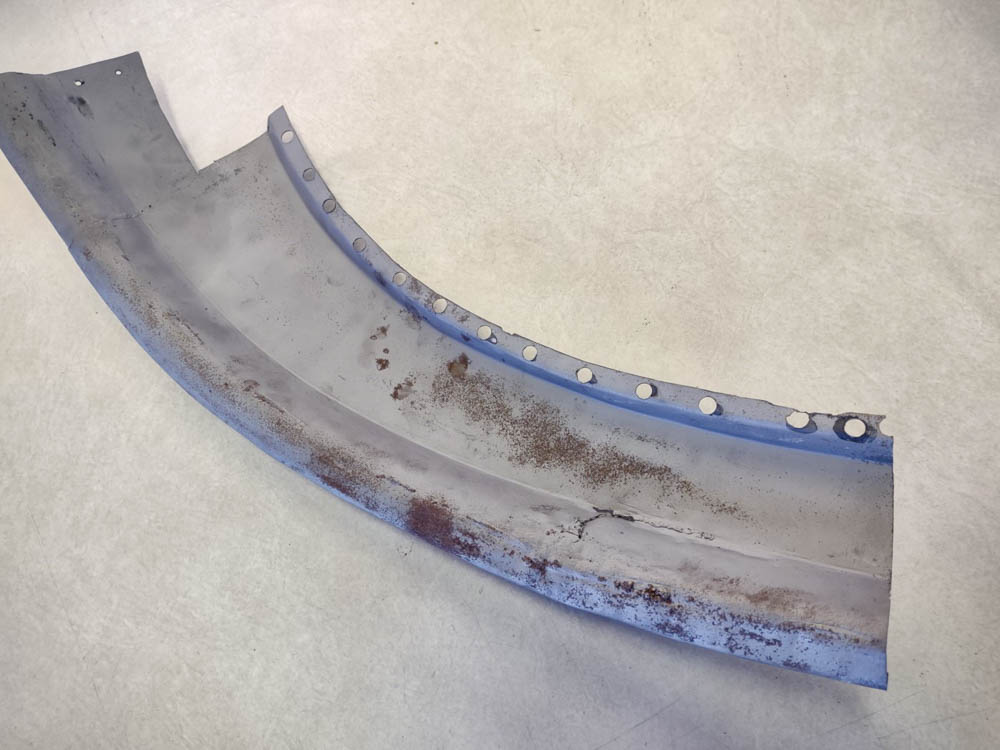
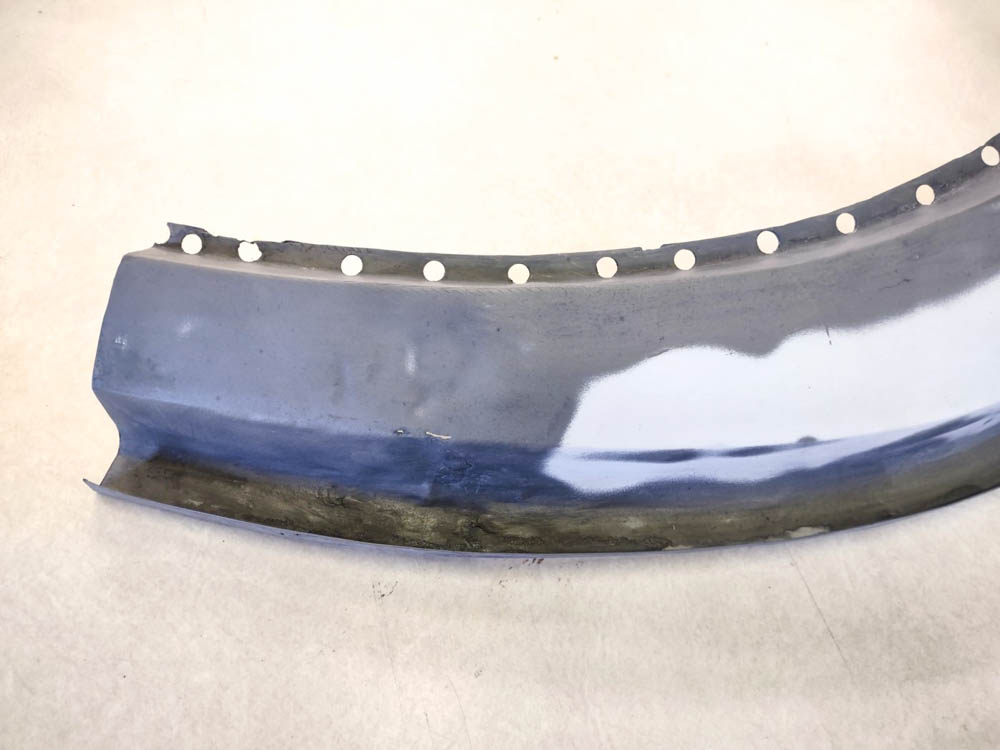
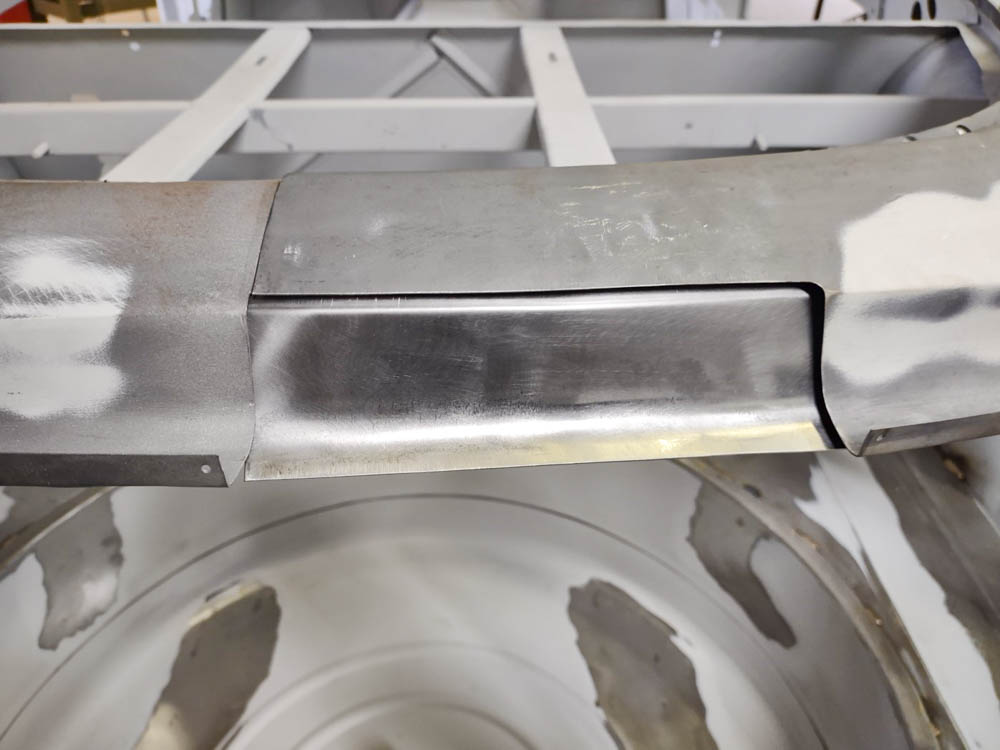
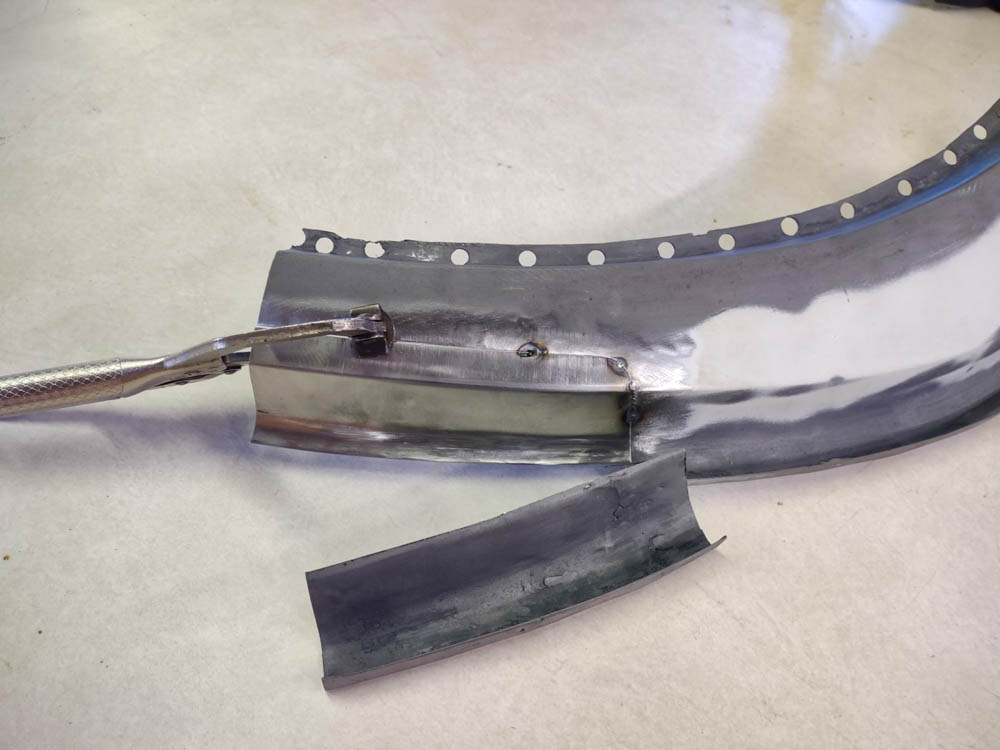
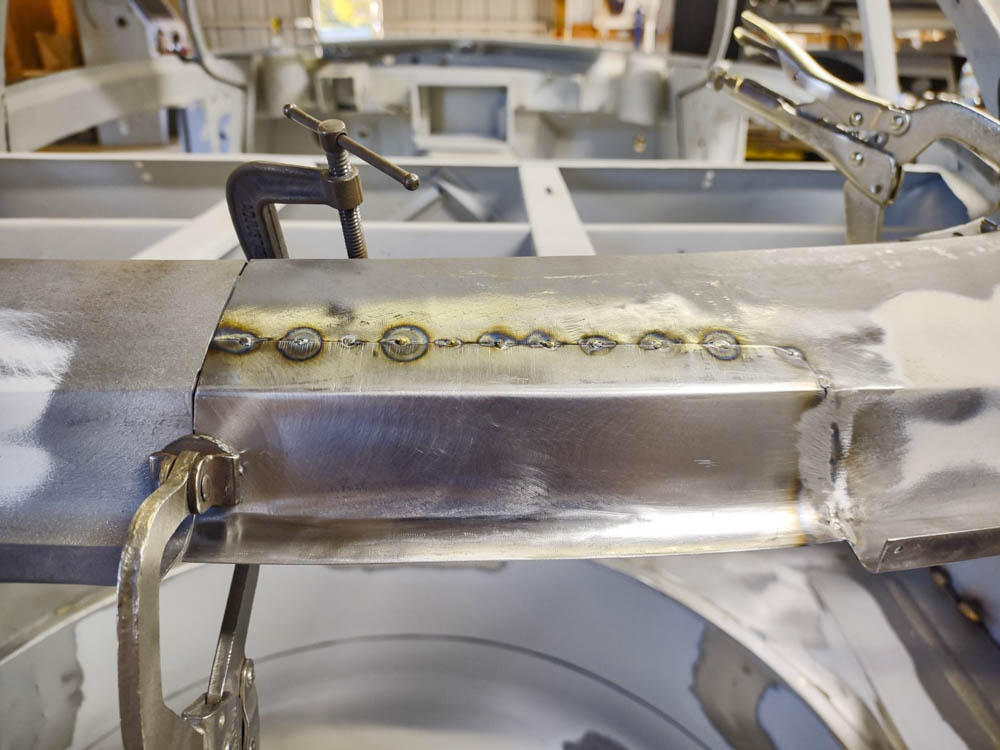
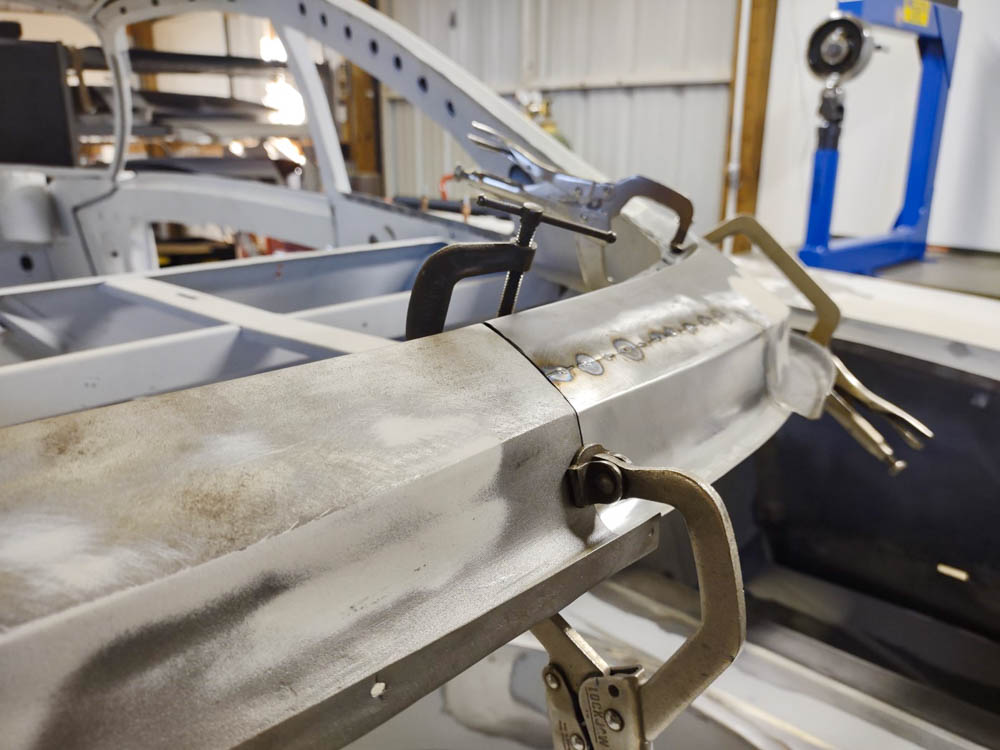
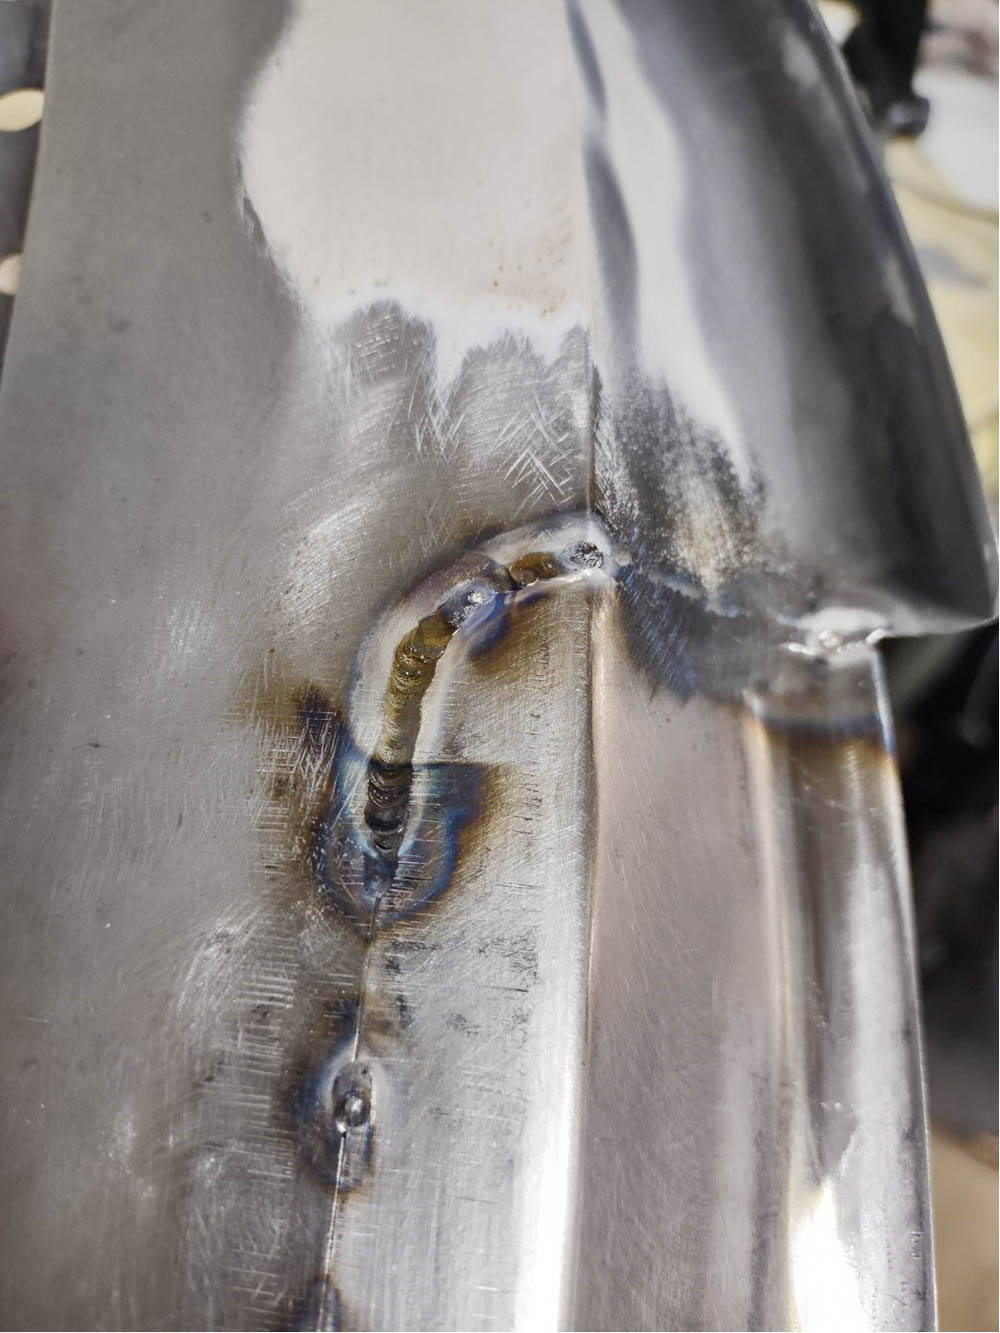
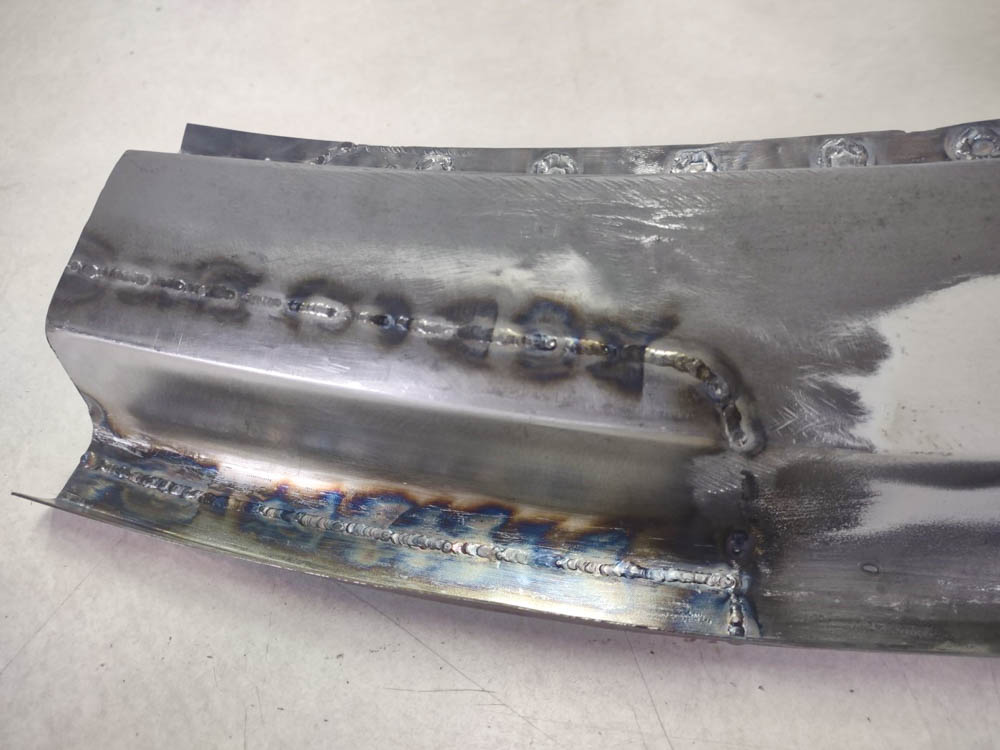
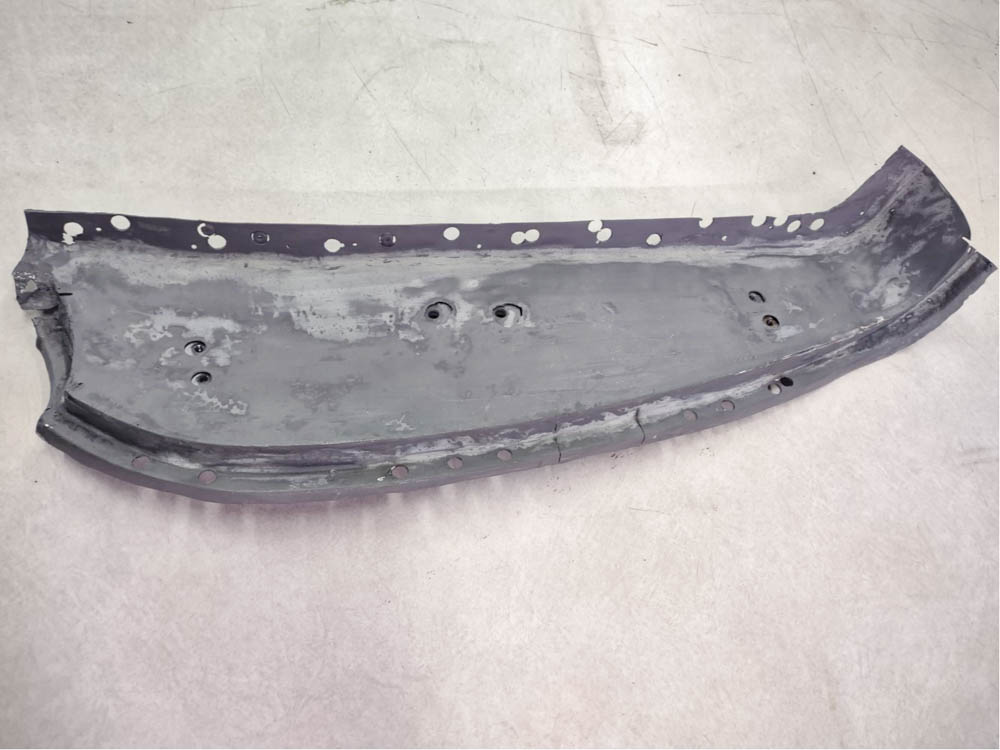
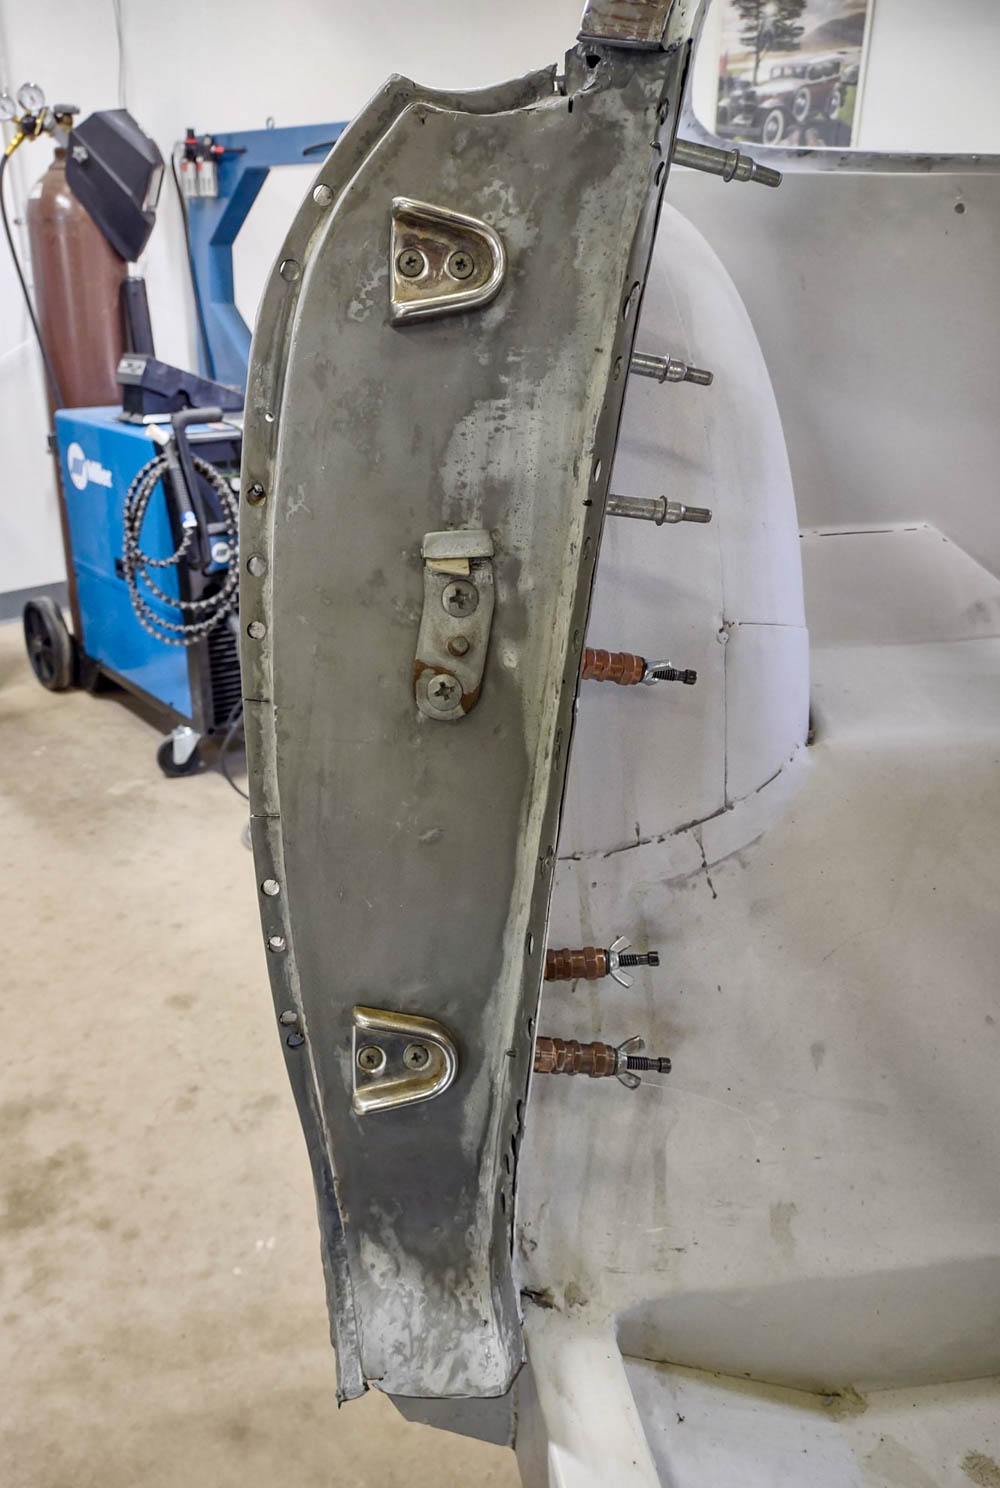
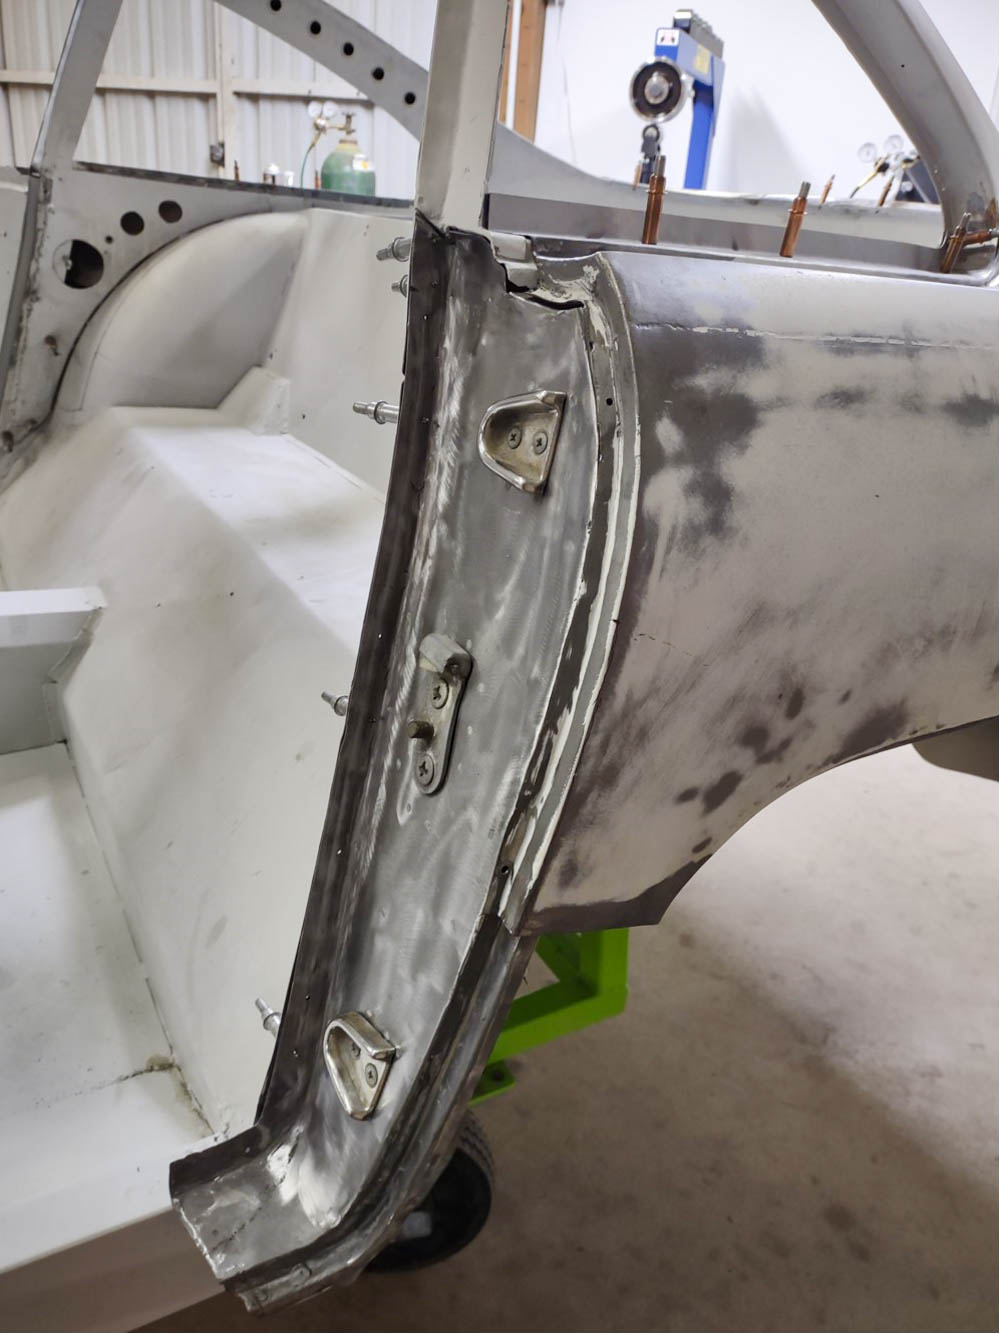
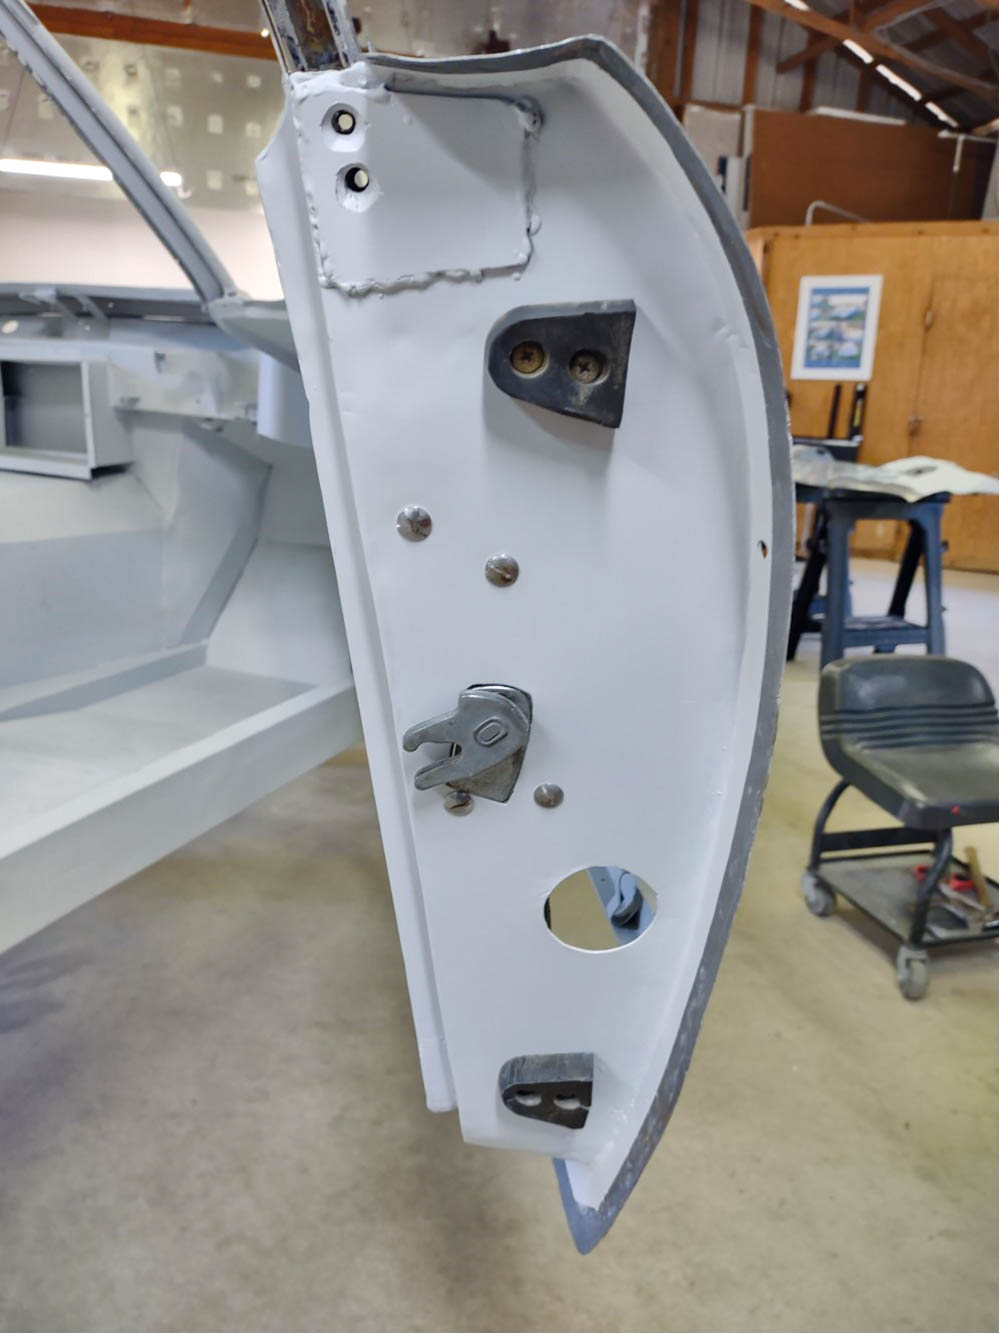
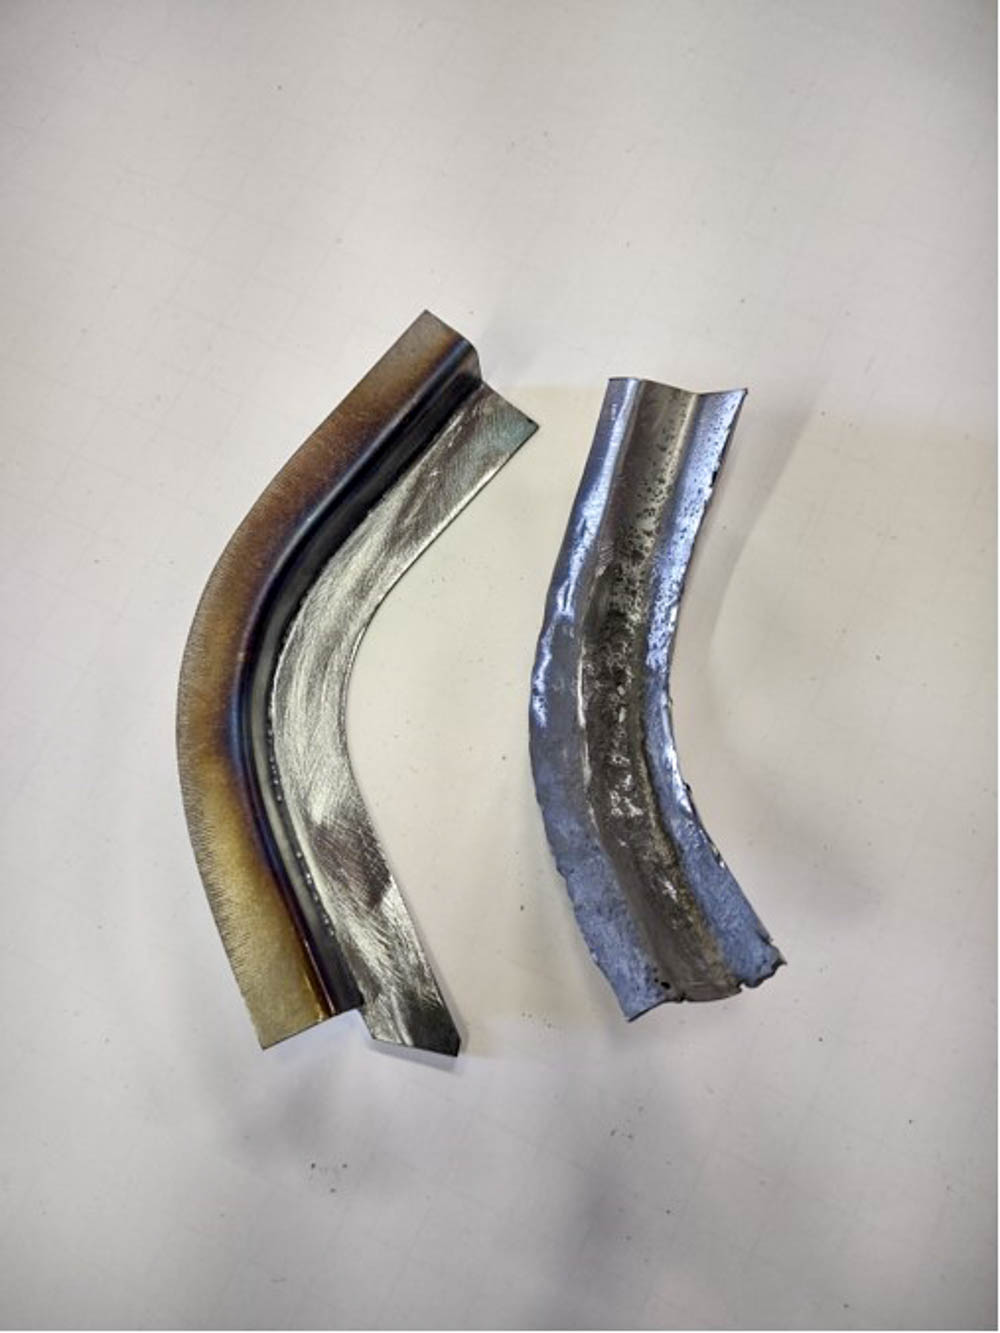
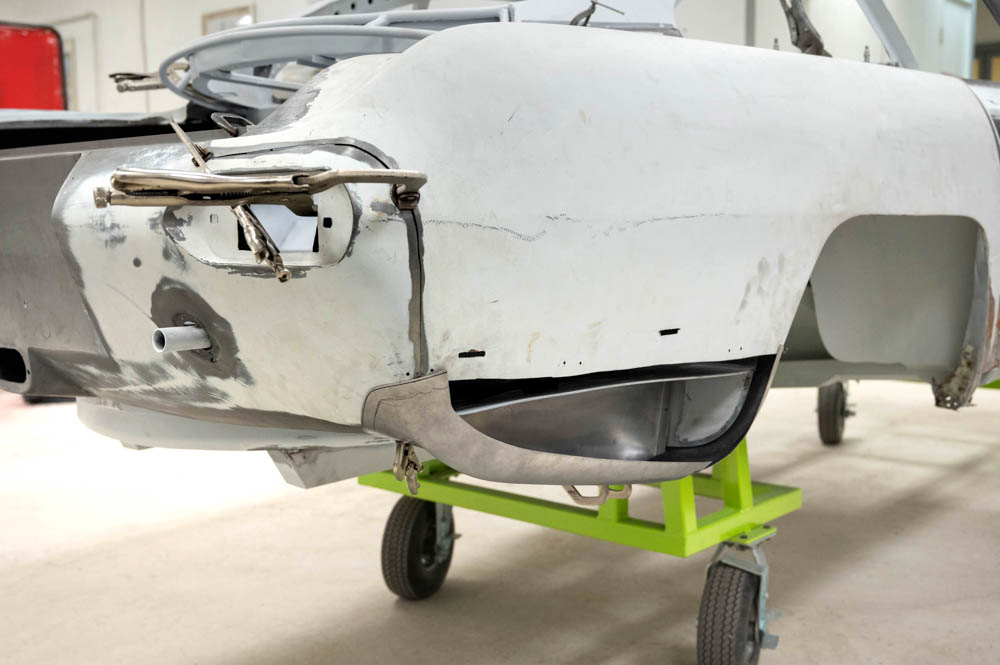
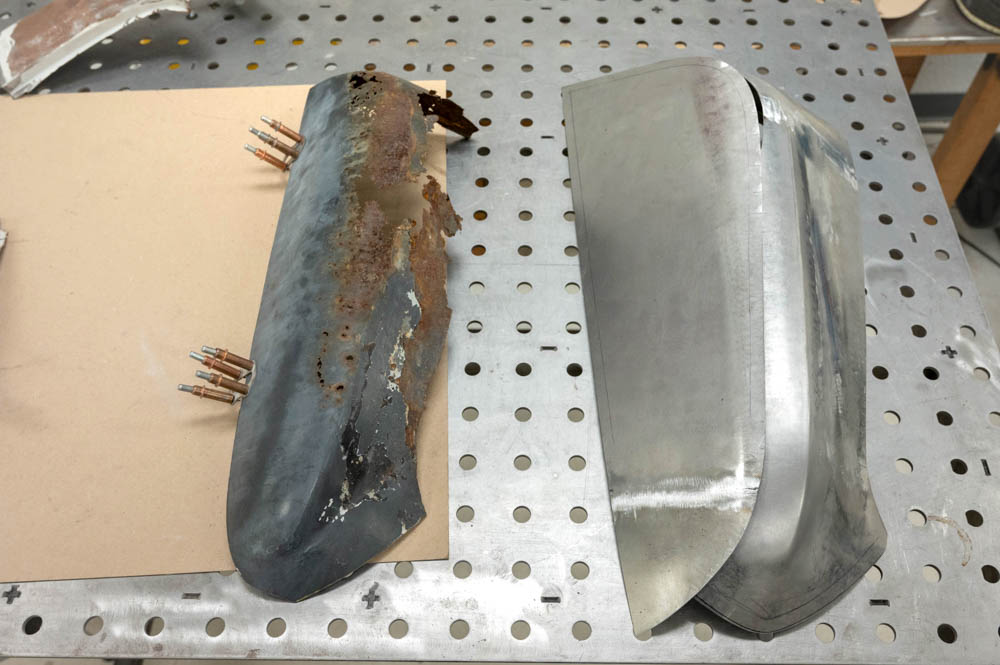
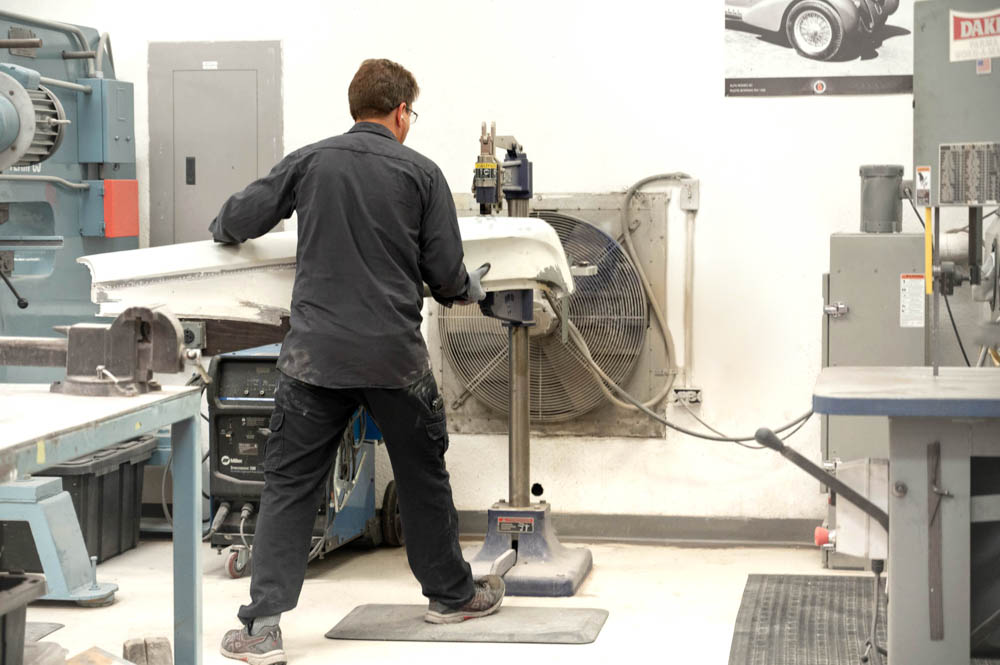
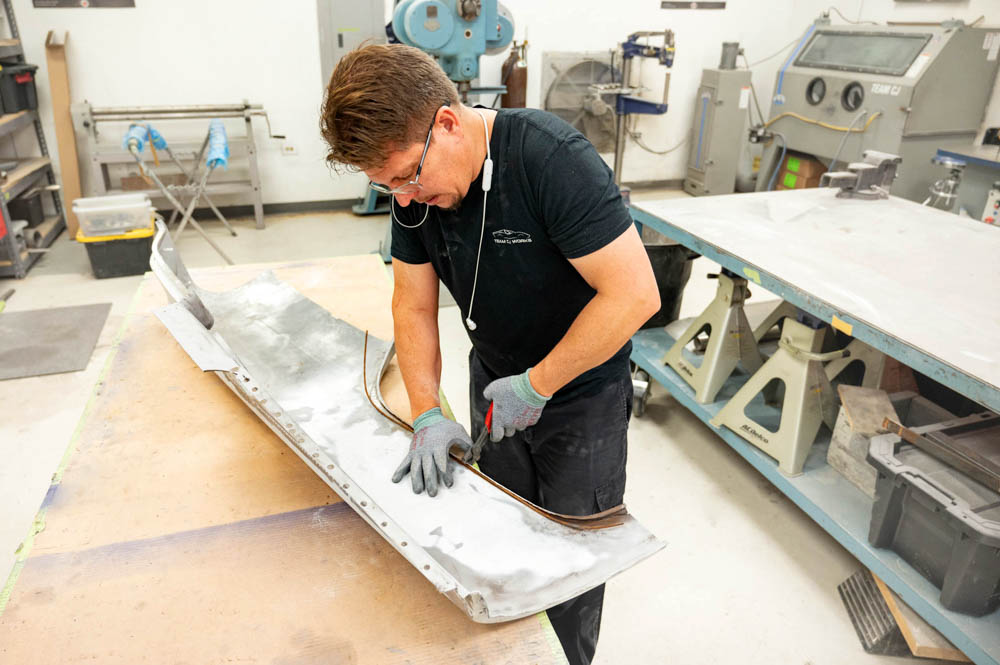
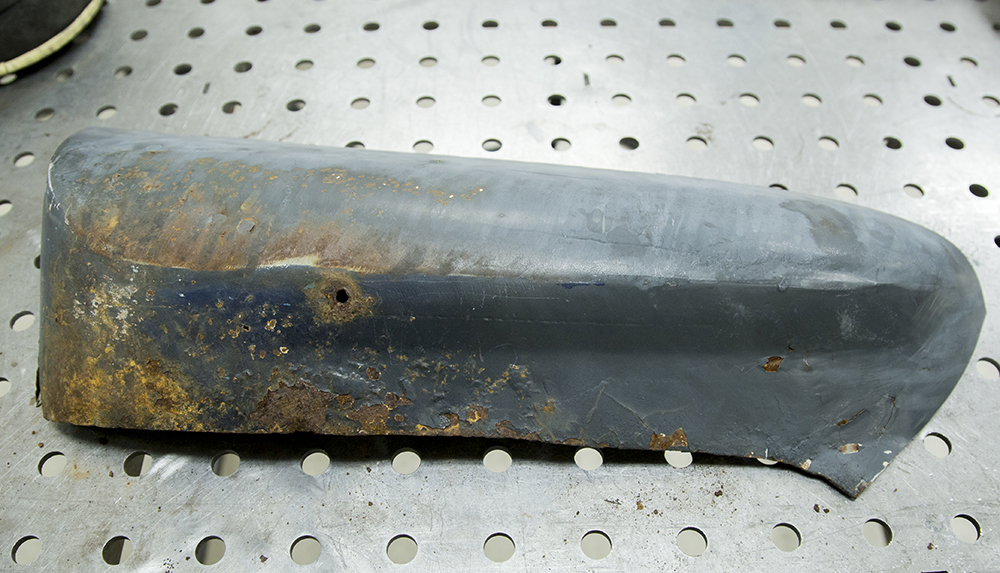
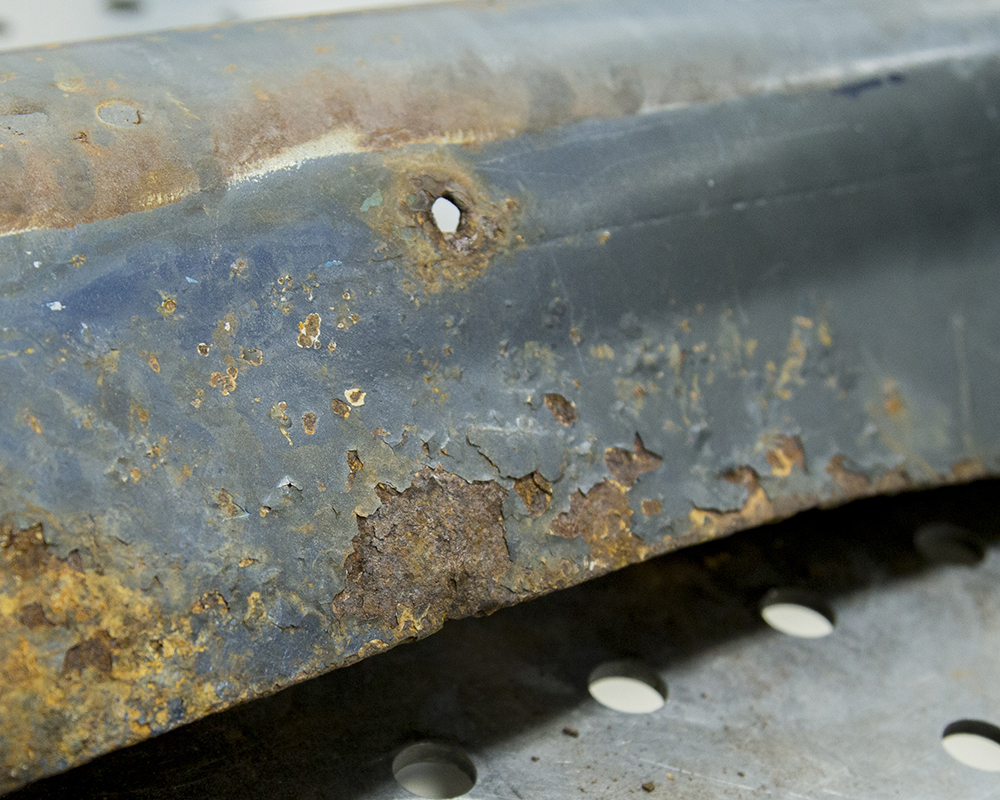
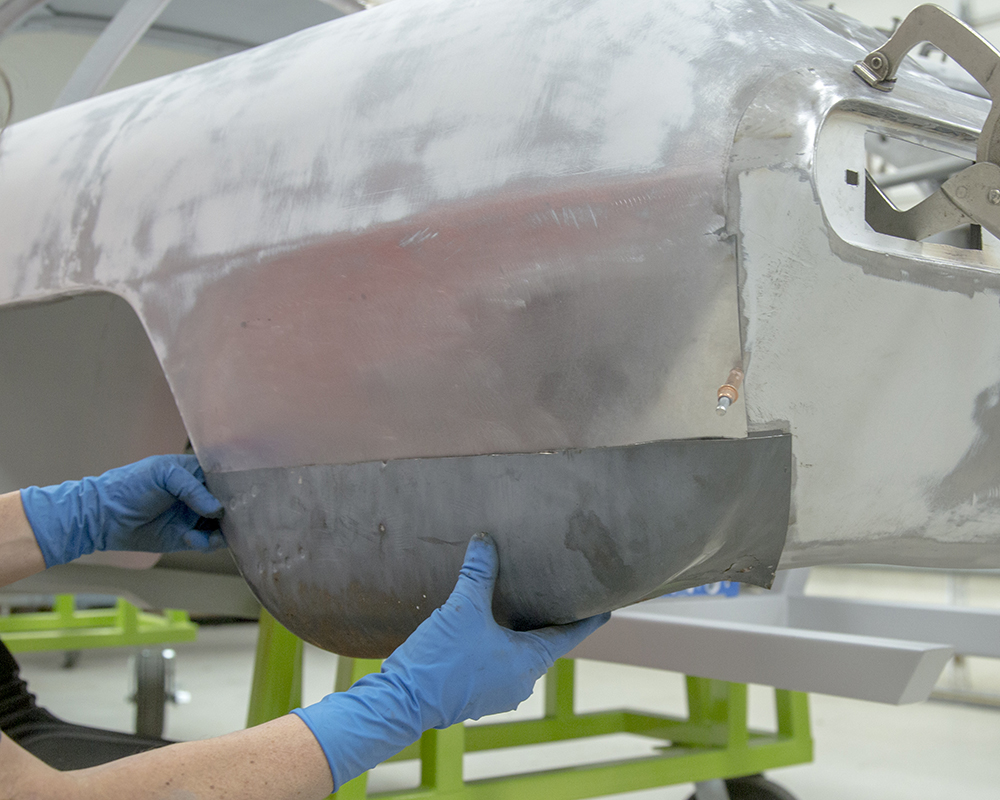
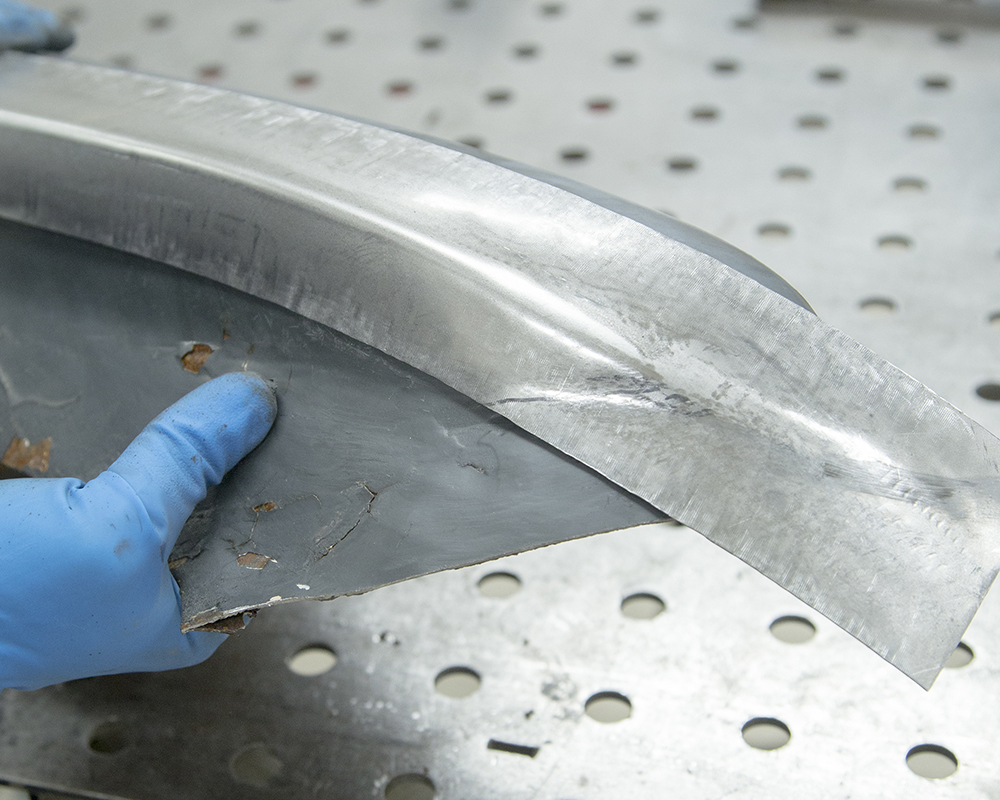
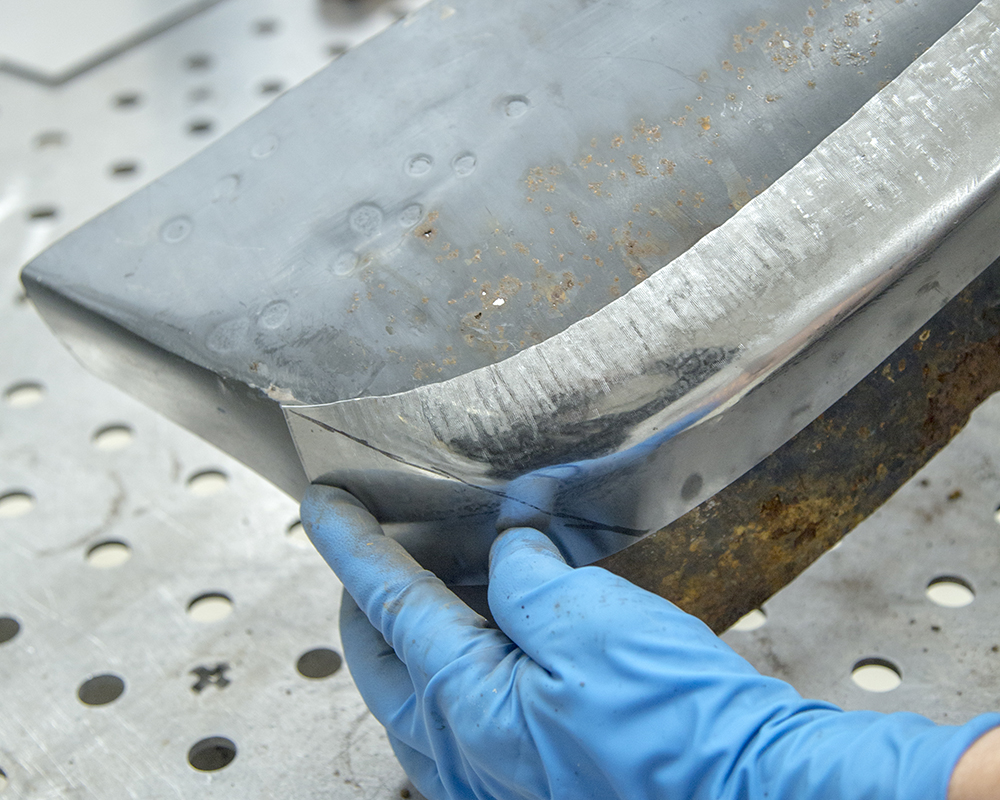
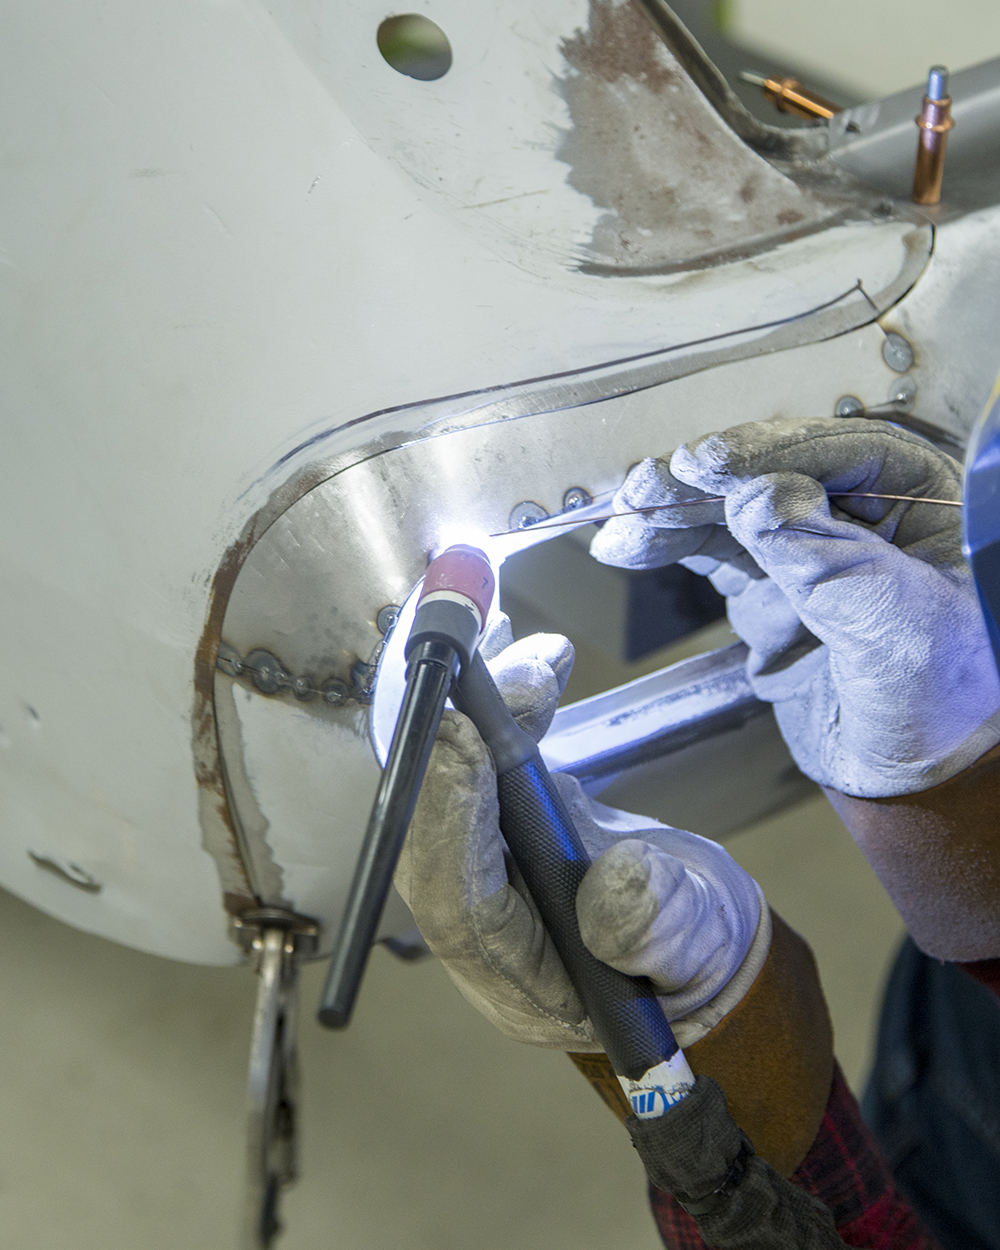
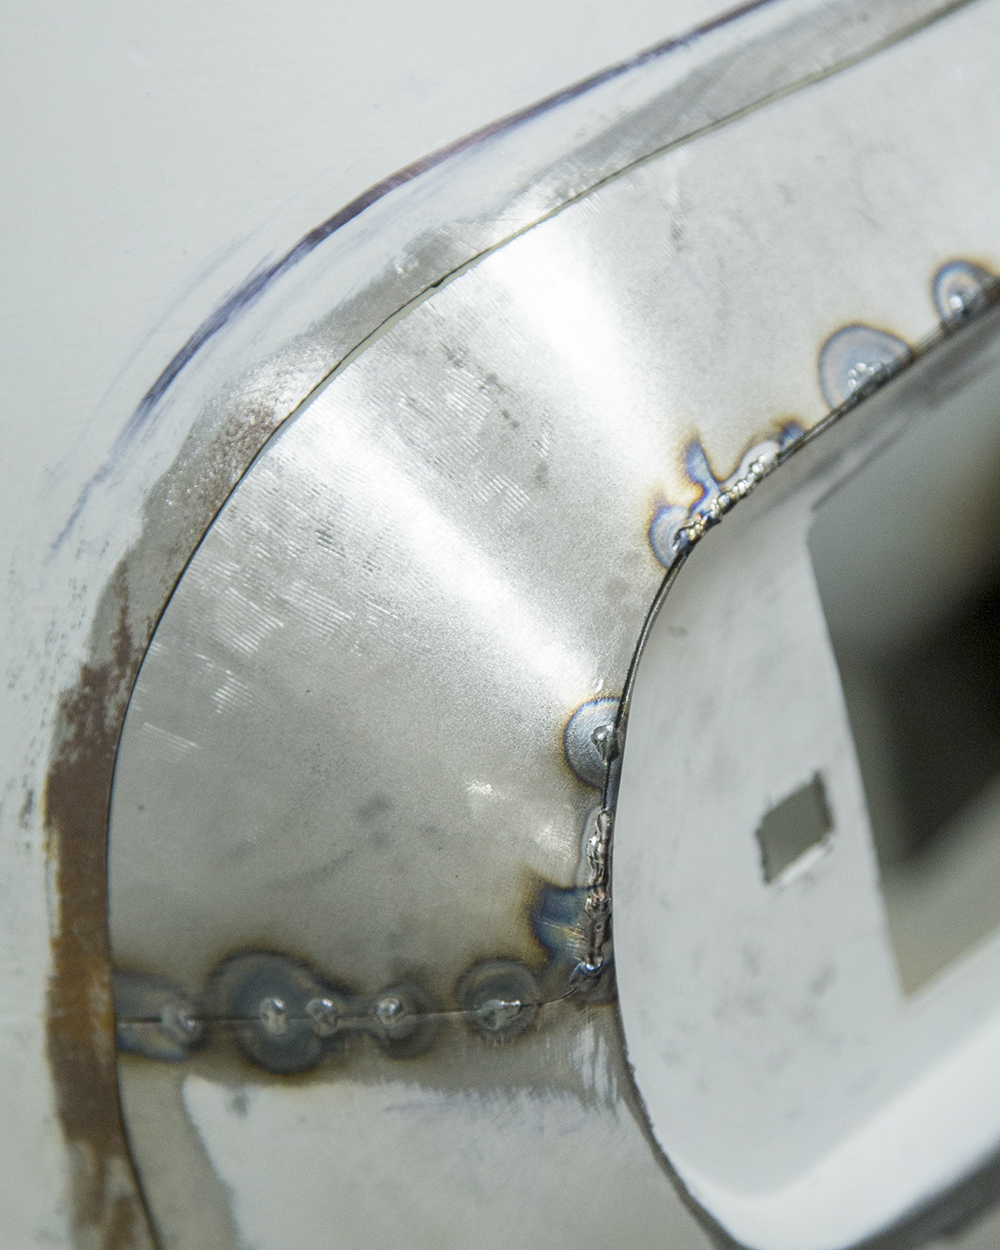
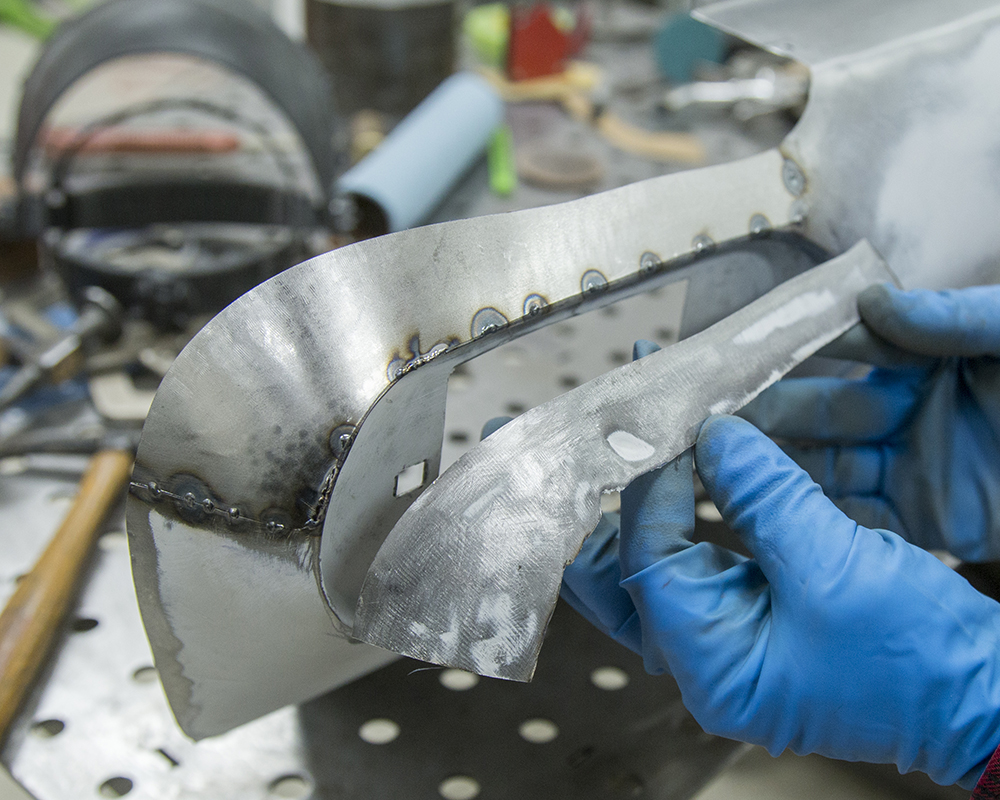
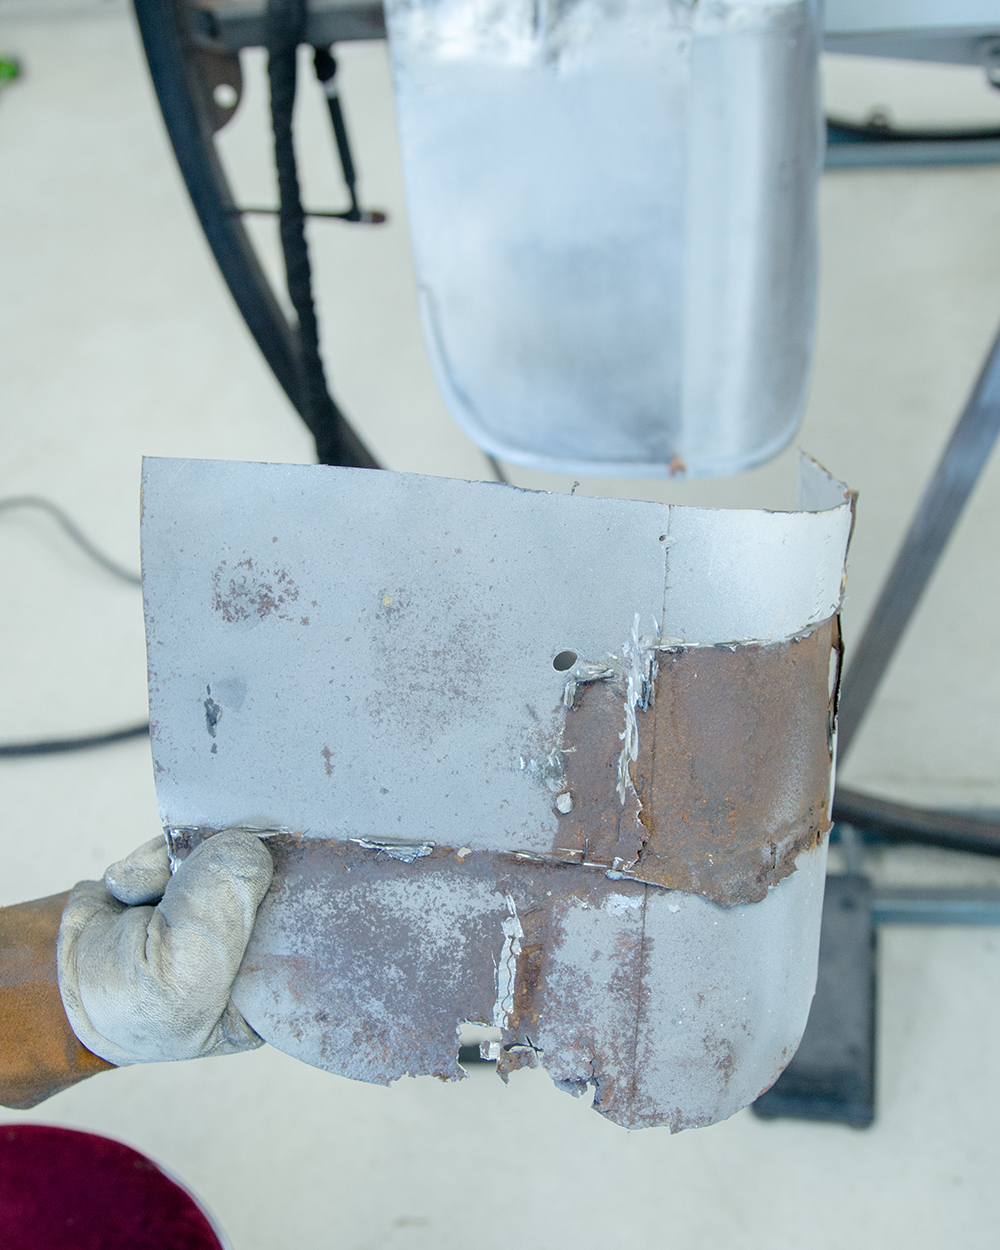
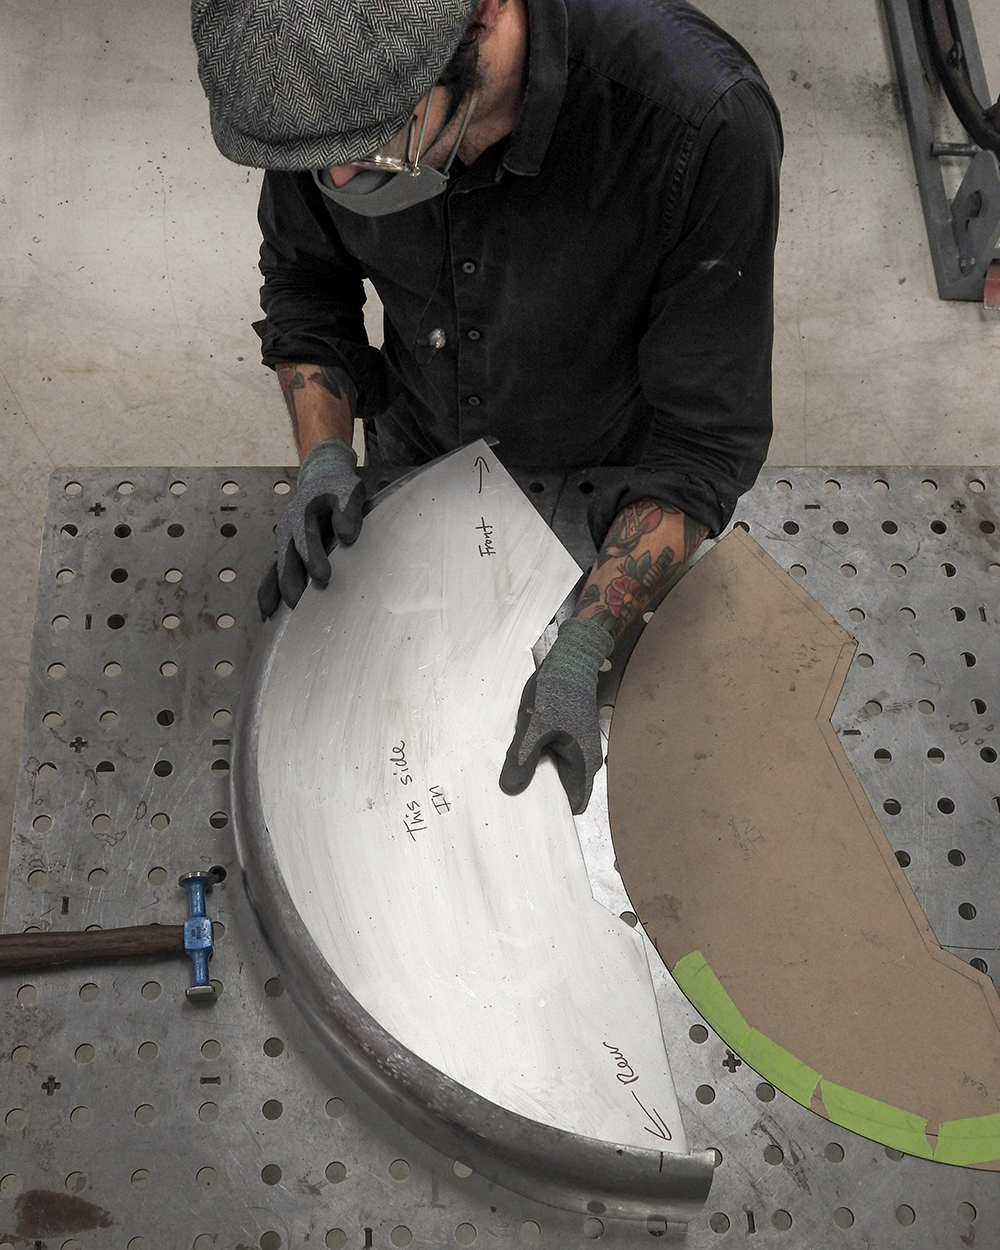
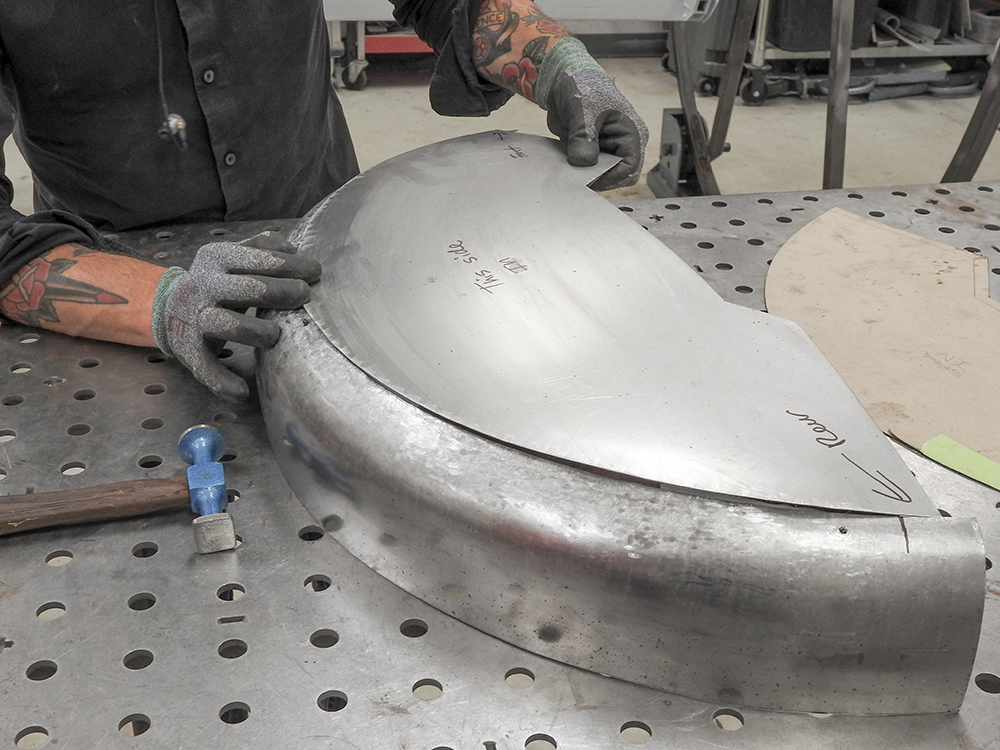
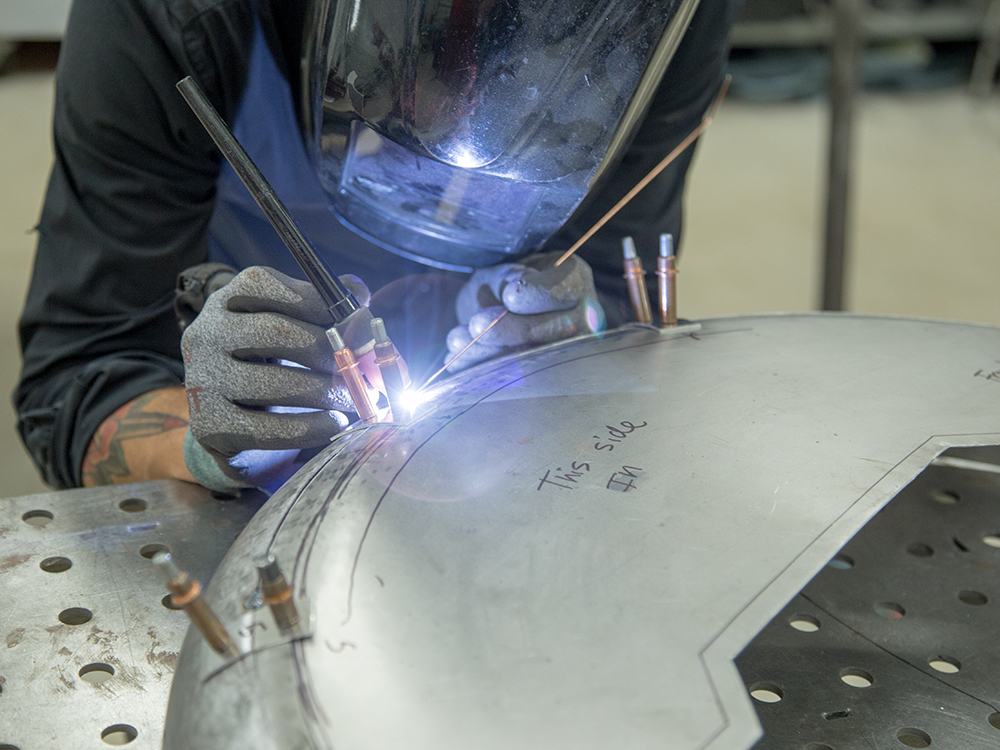
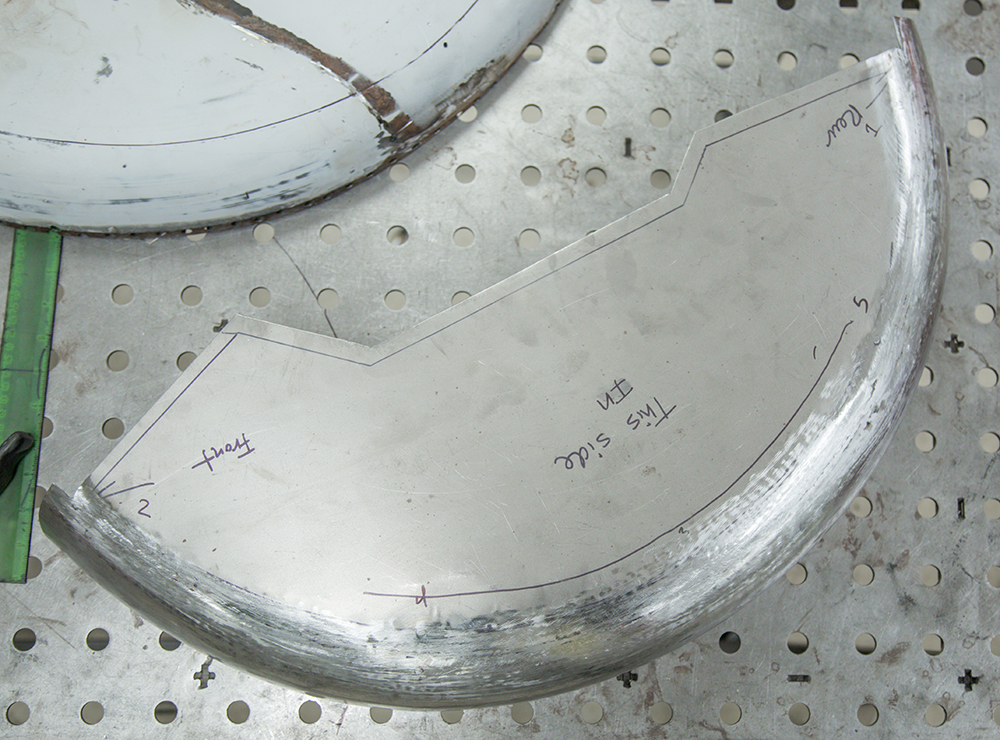
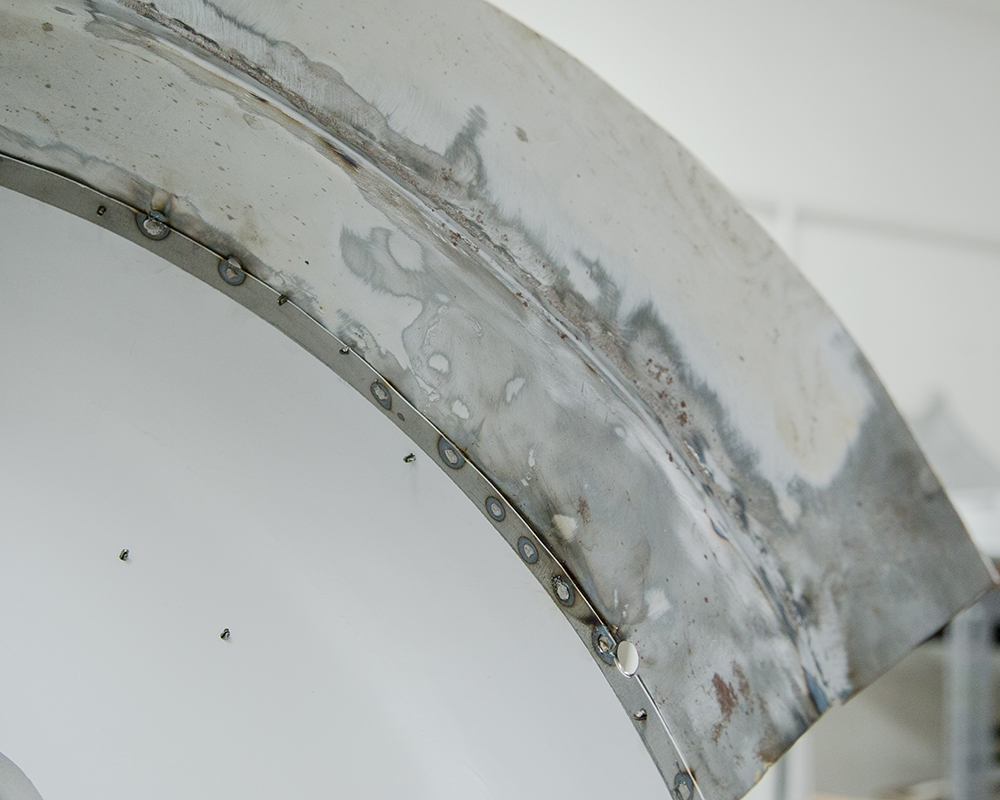
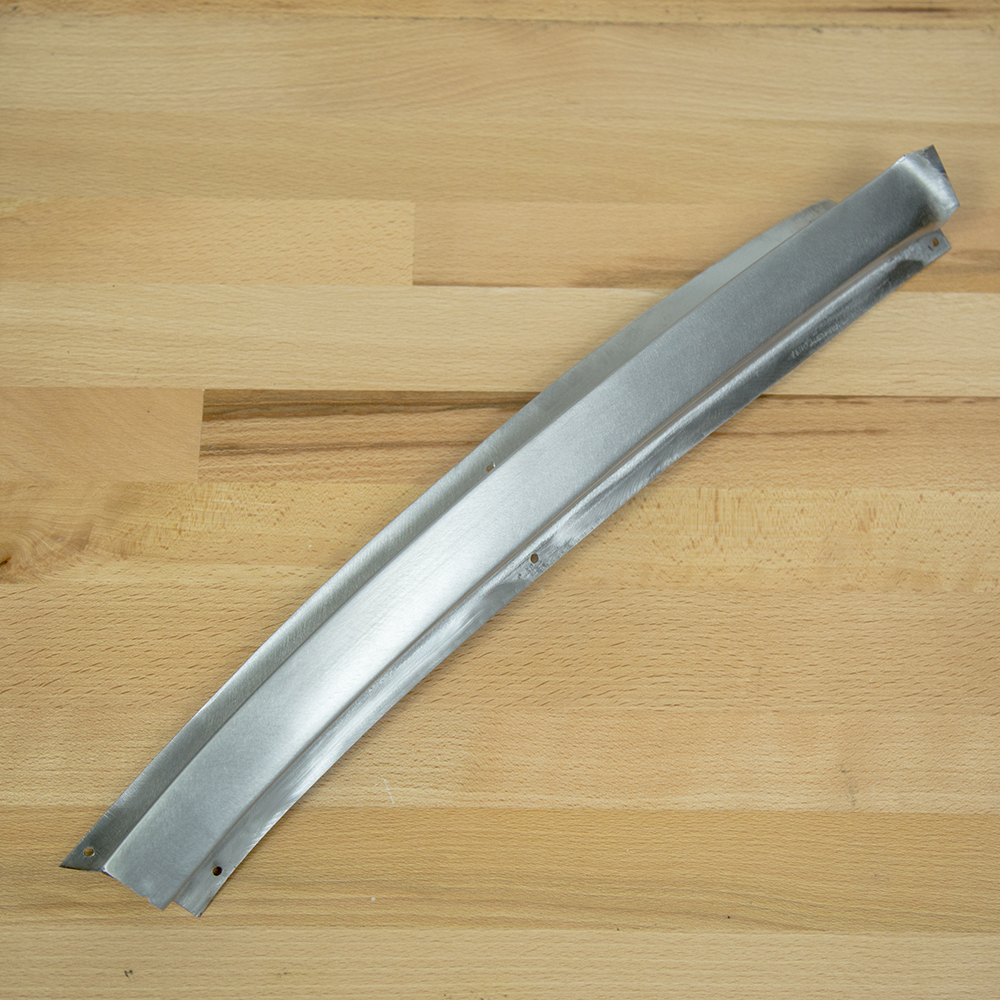
The following photographs show Jake
fabricating a repair panel of the left rear quarter using
the rusty original as the template.
Update report - March 5, 2021
Update report - February 26, 2021
Update report - February 10, 2021
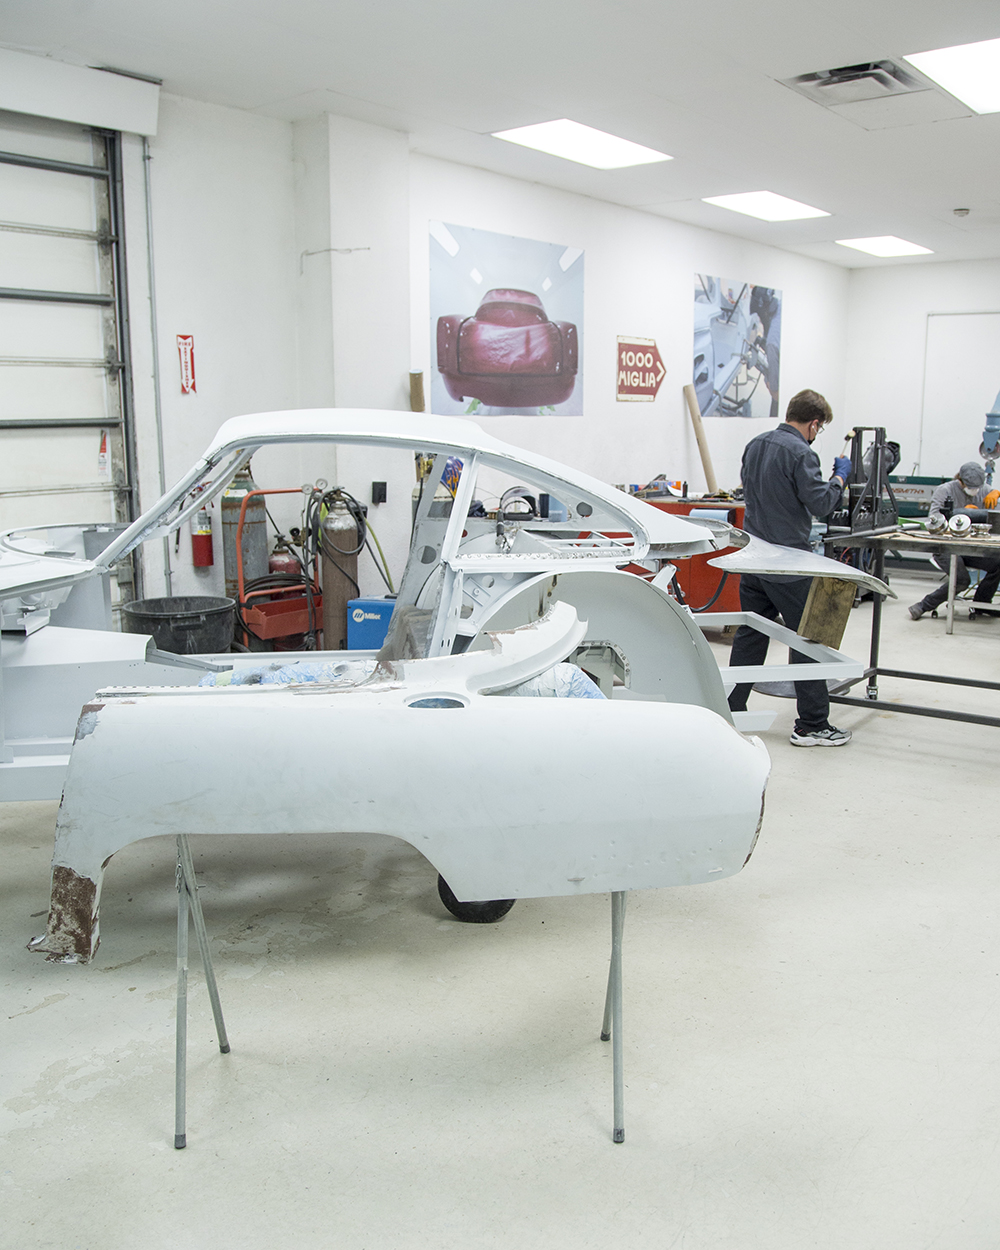
Jake is making excellent progress in
the Team CJ Coachworks.
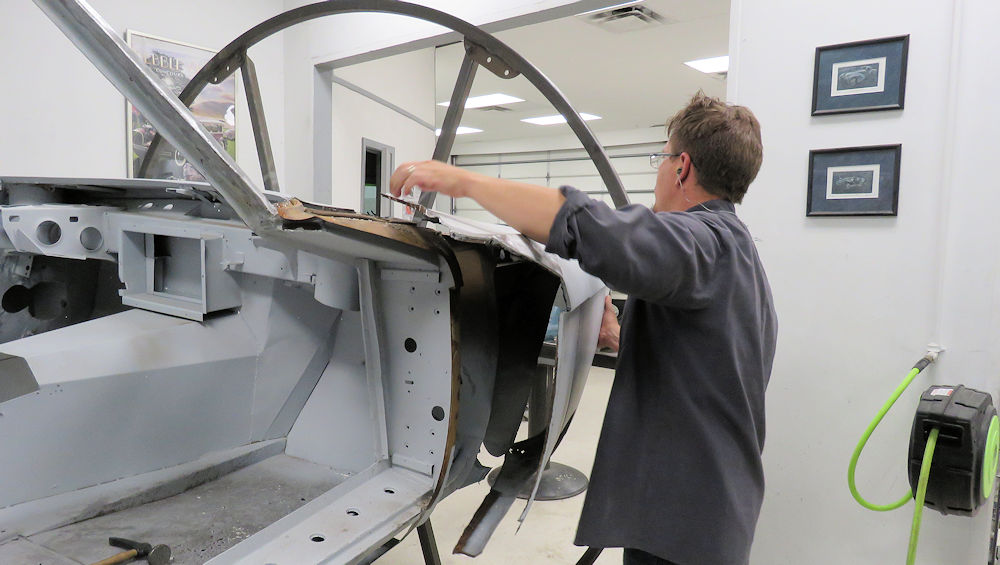
Update report - January 26, 2021
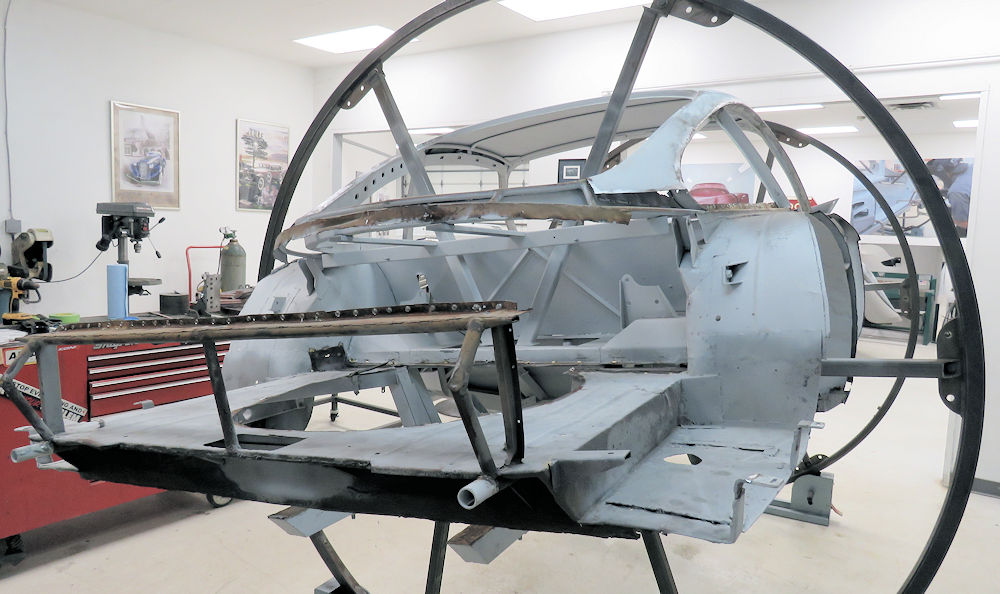
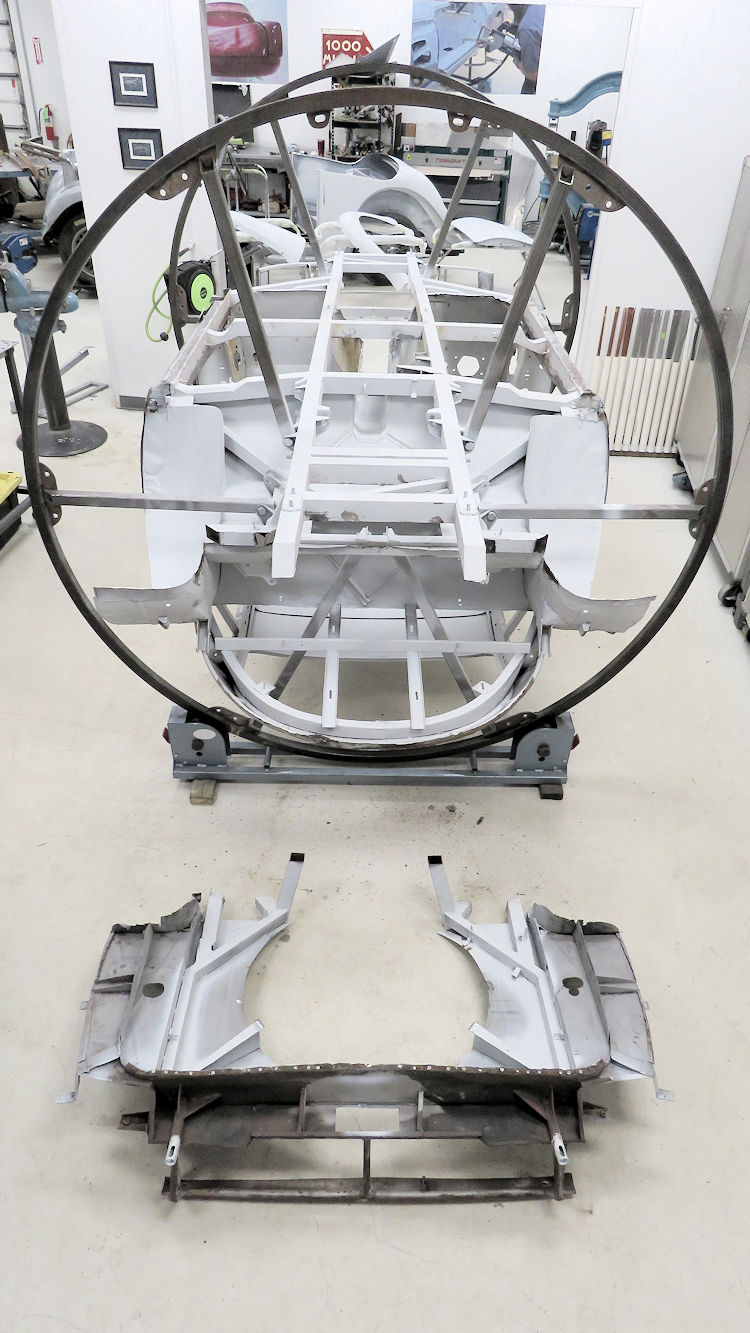
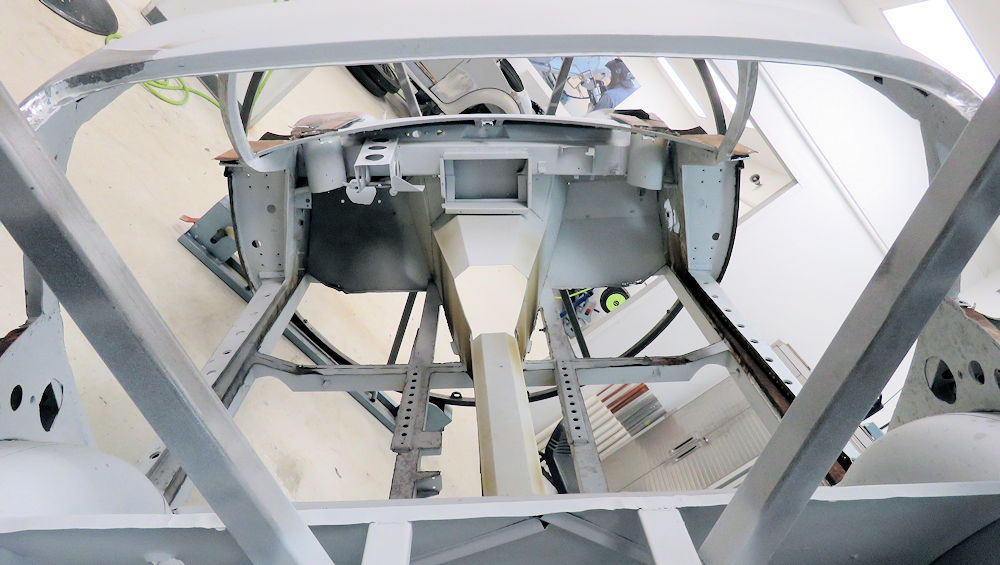
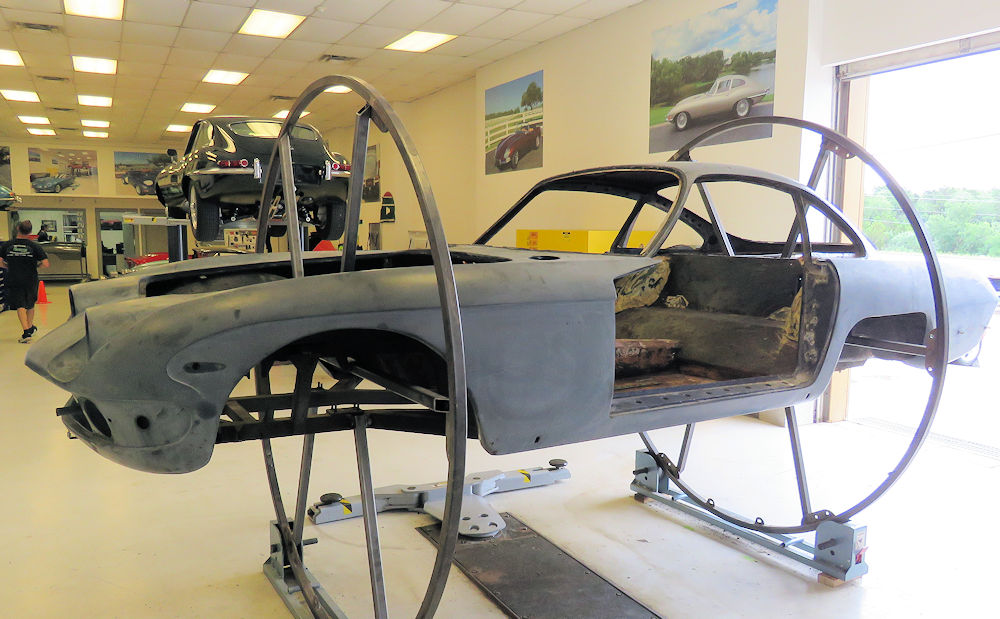
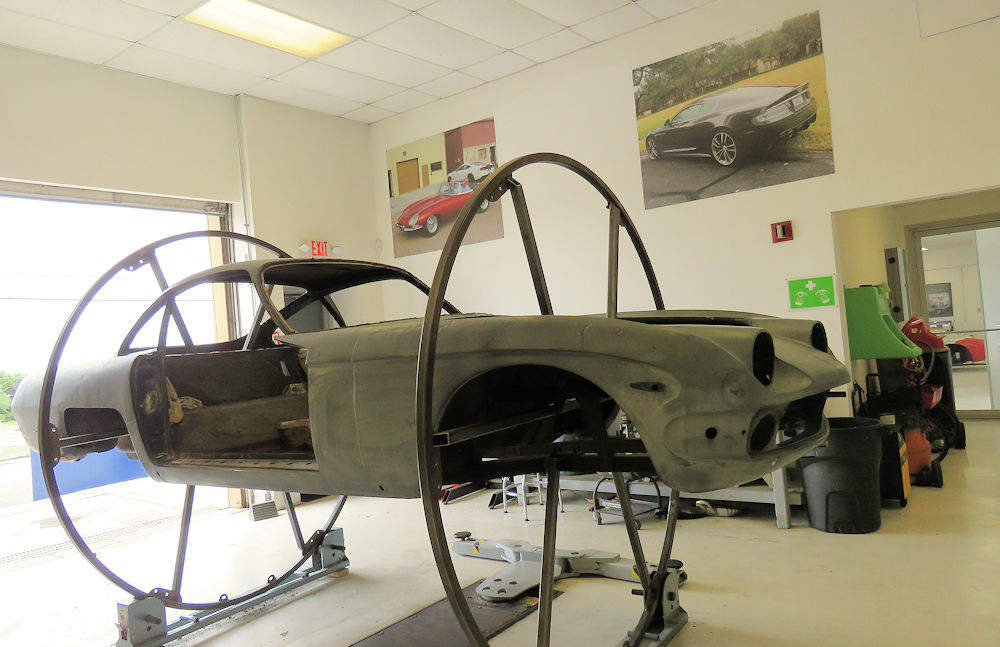
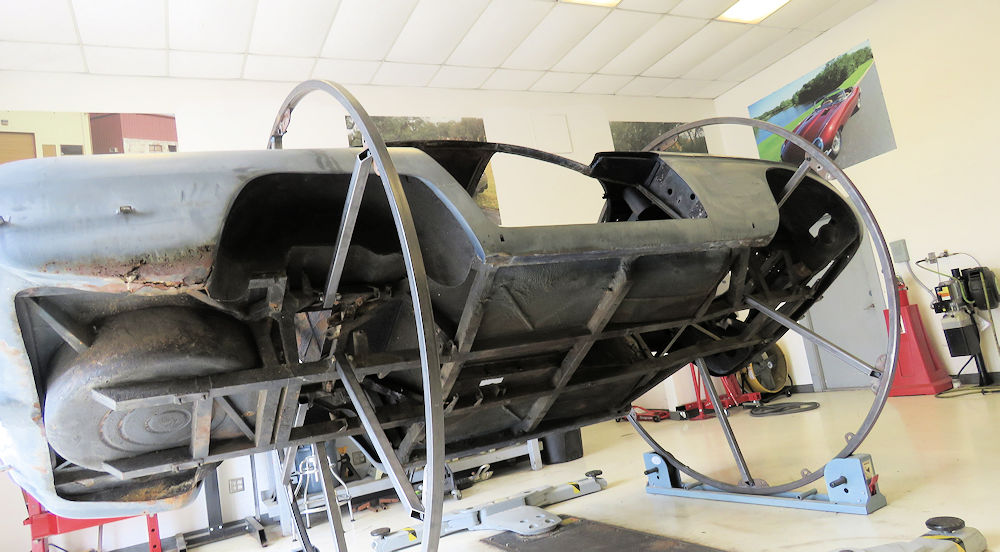
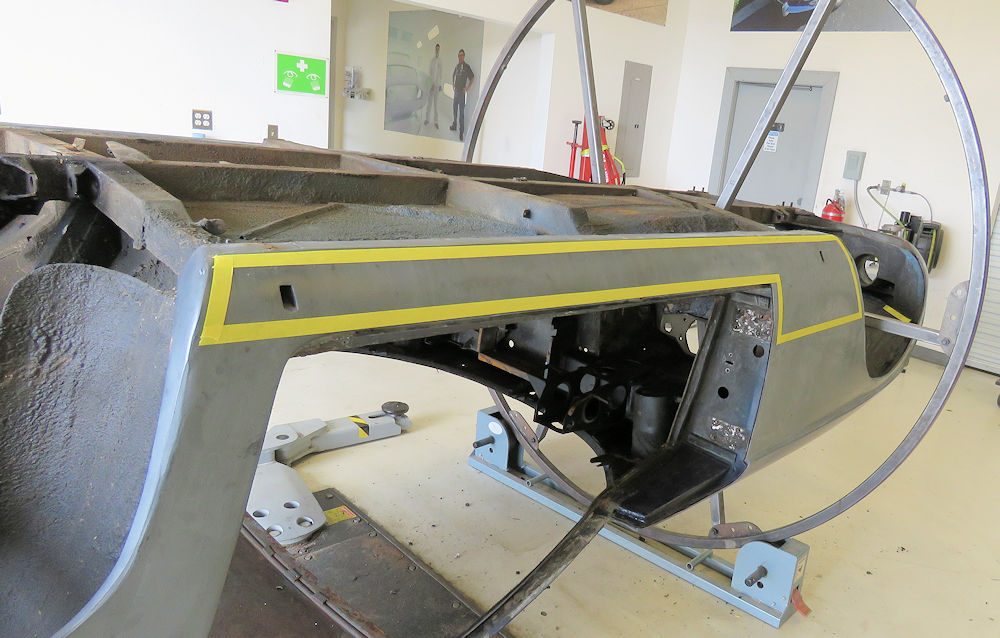
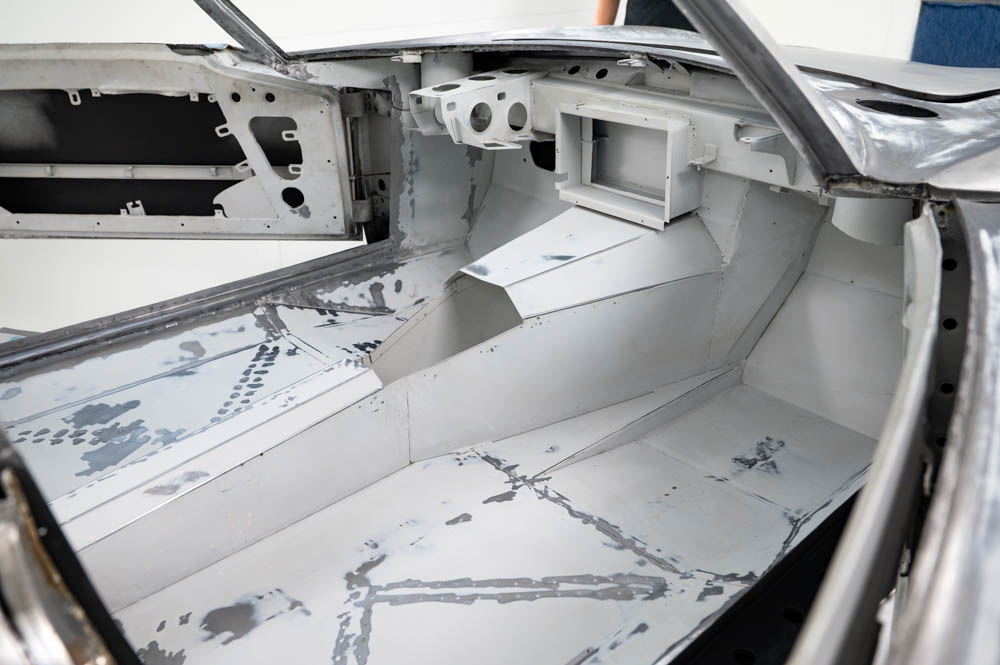
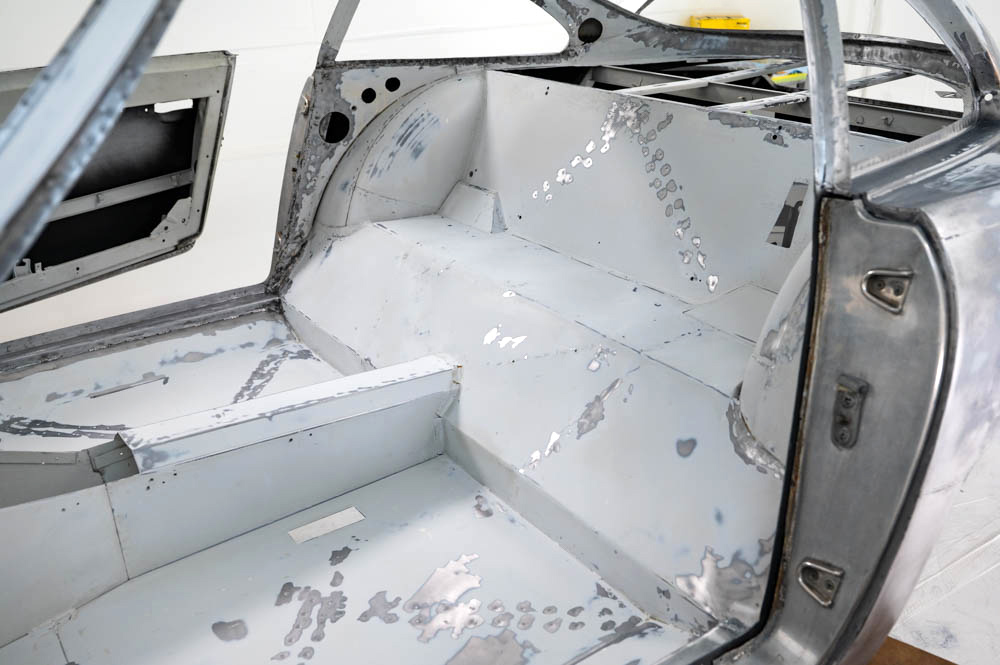
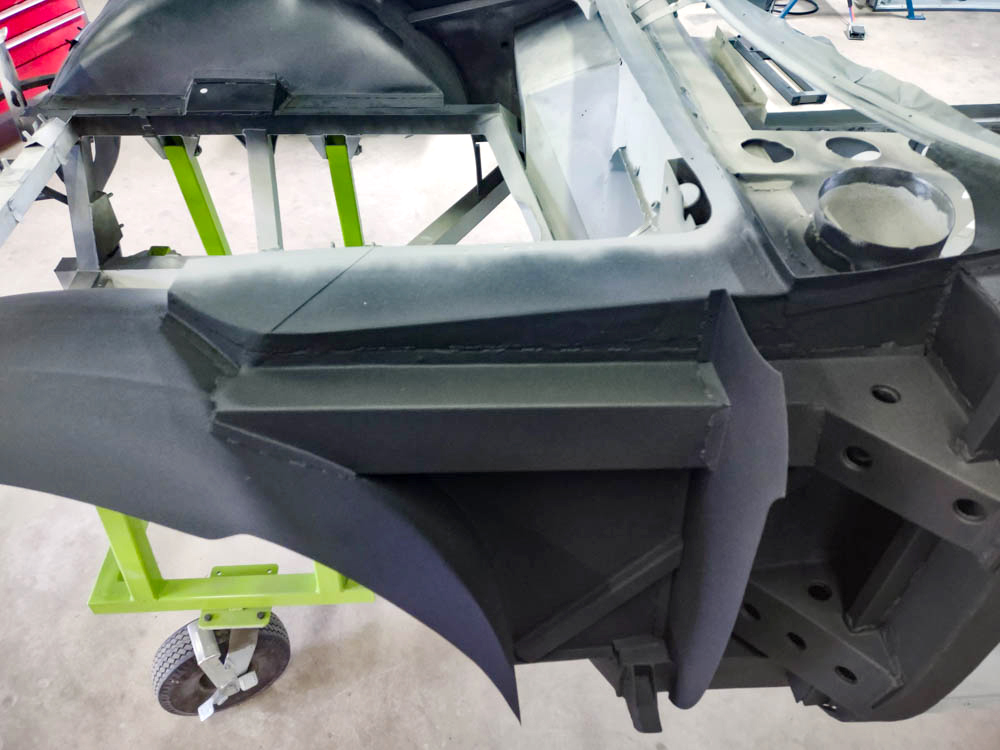
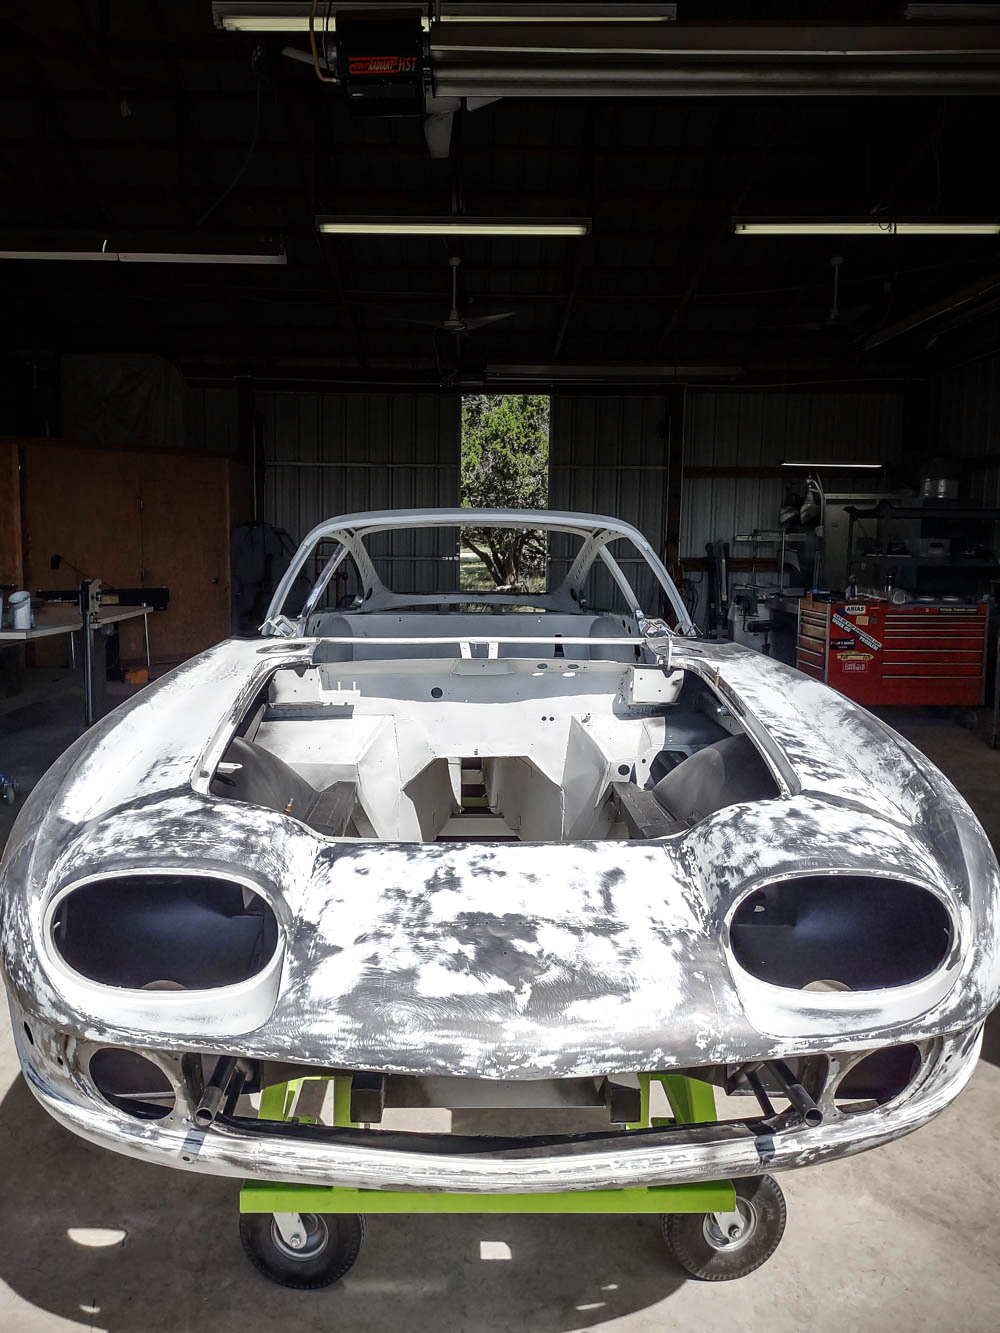
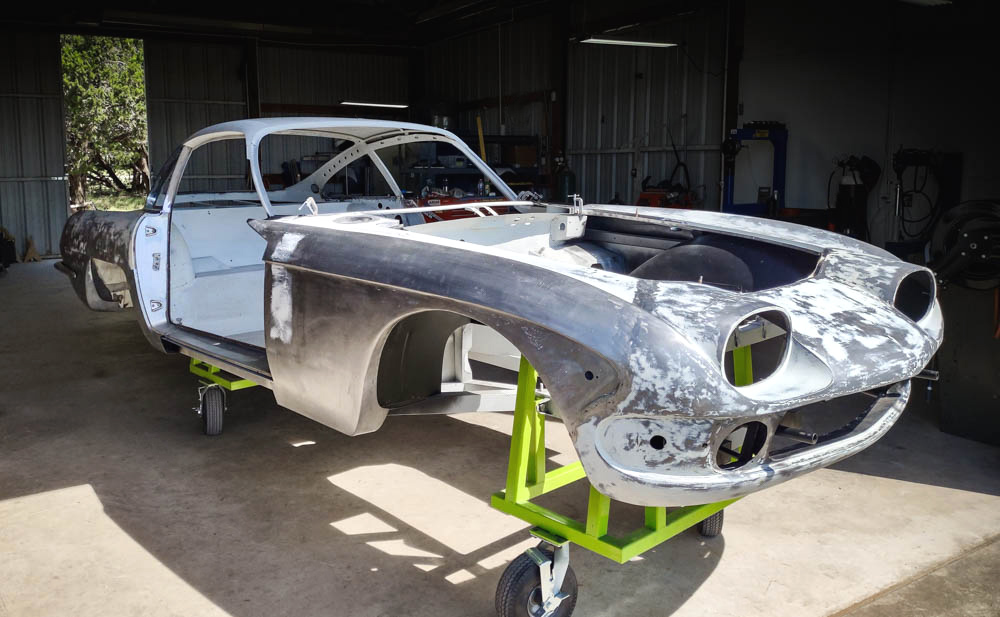
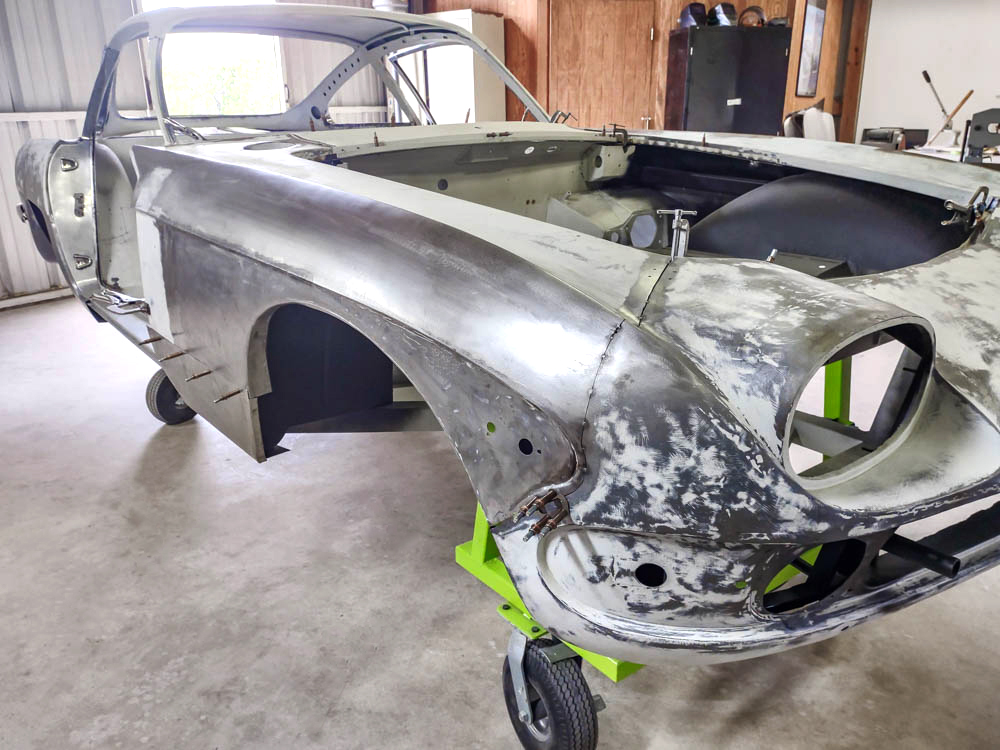
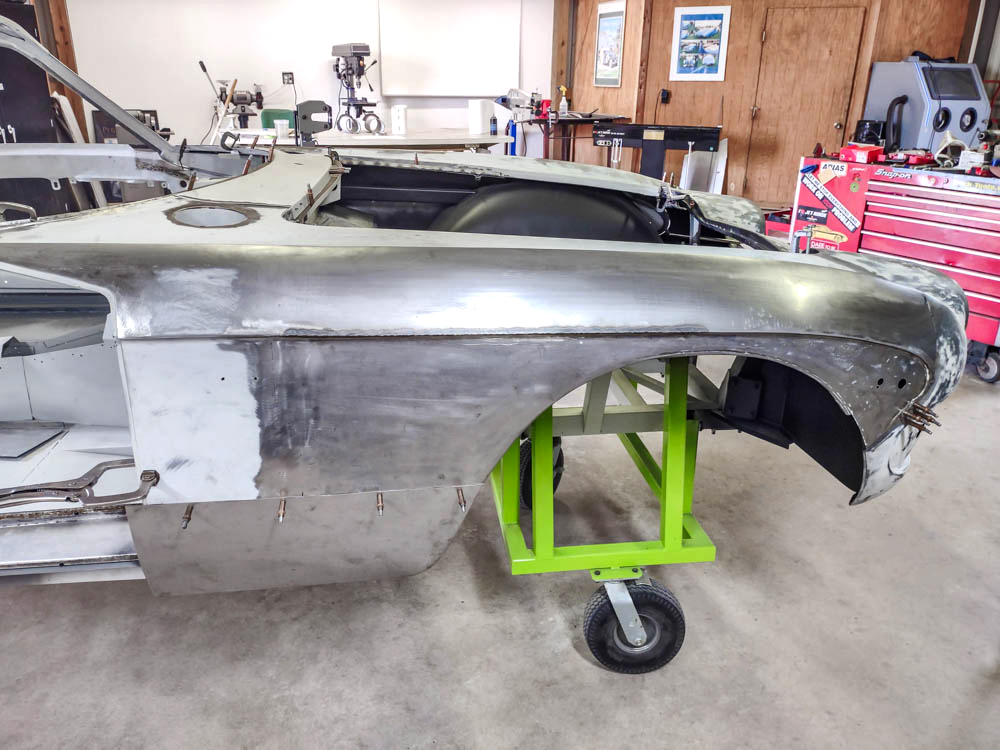
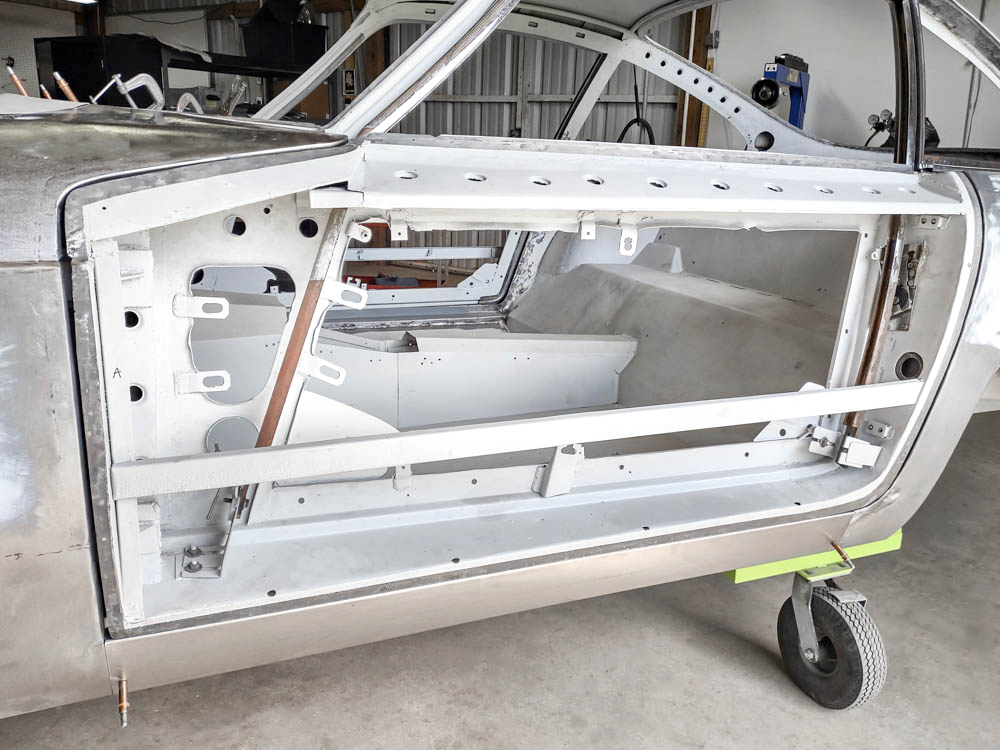
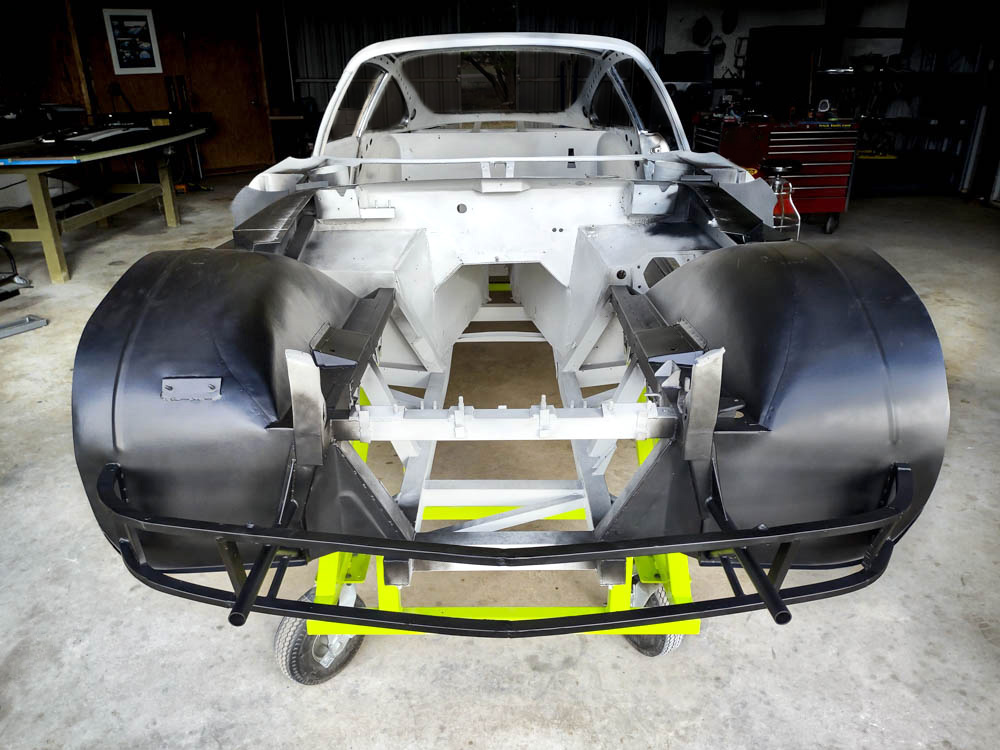
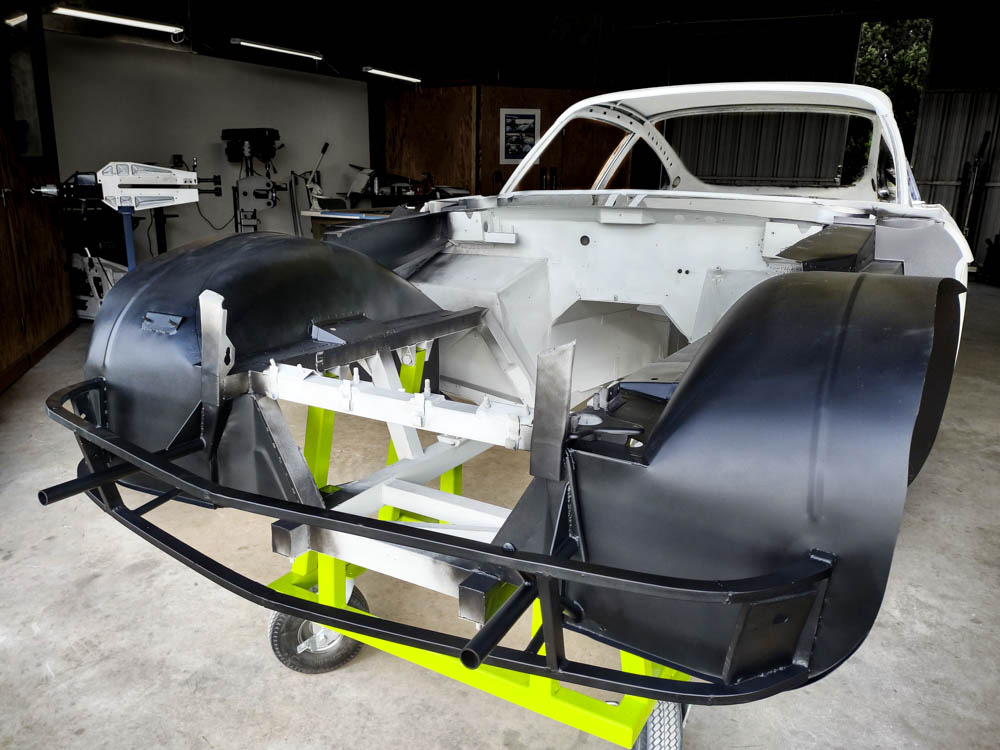
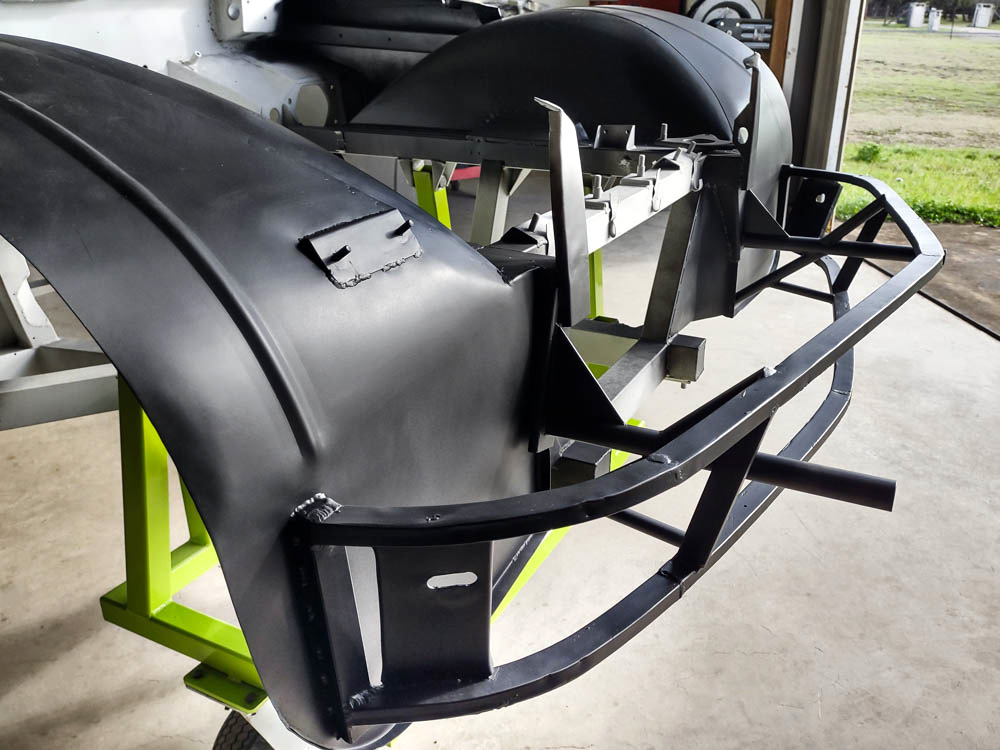
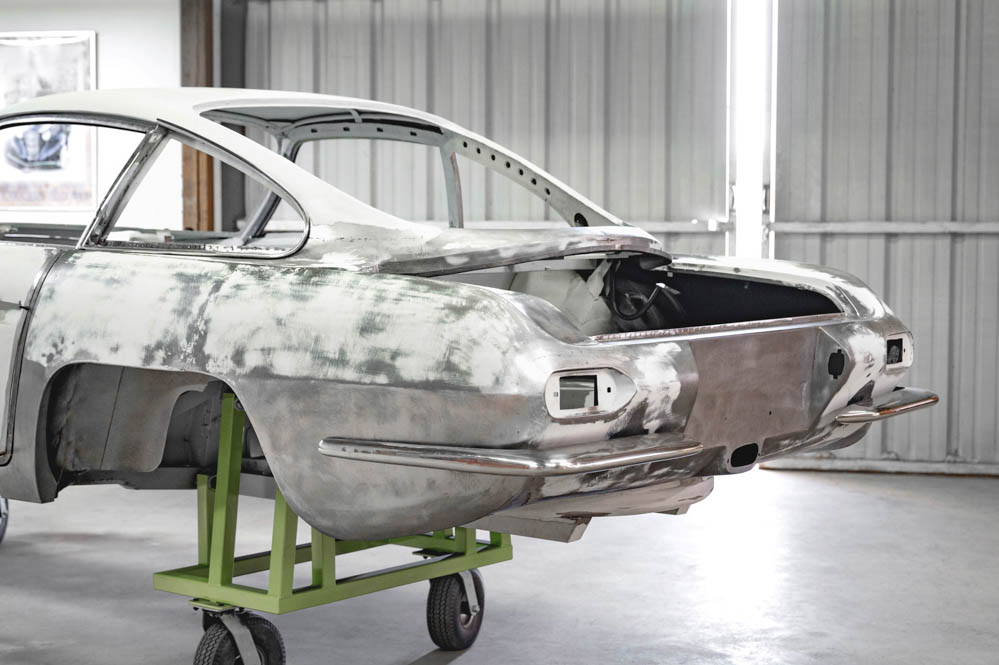
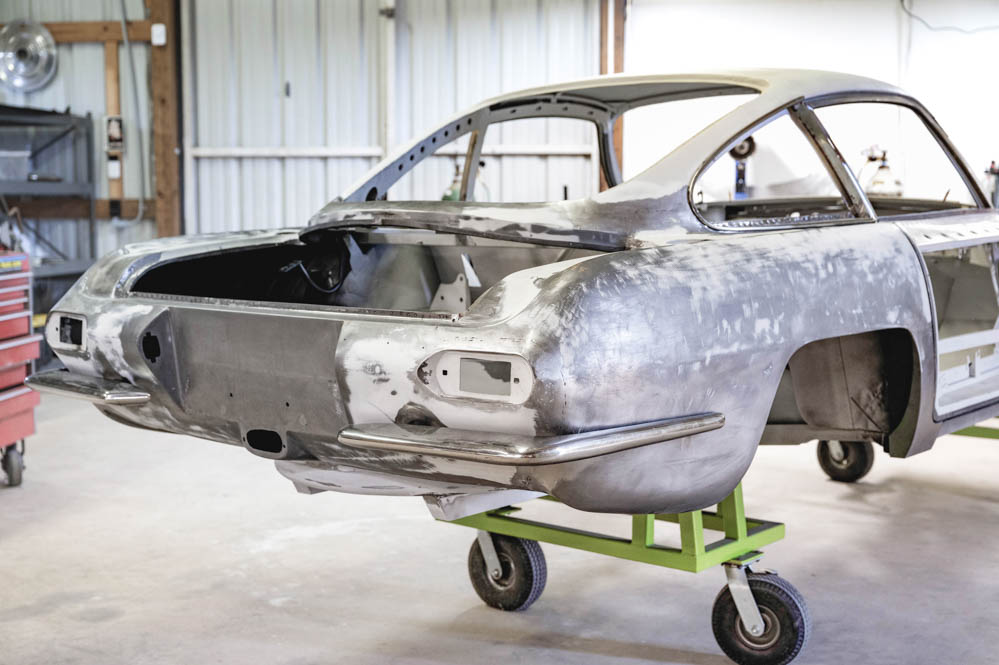
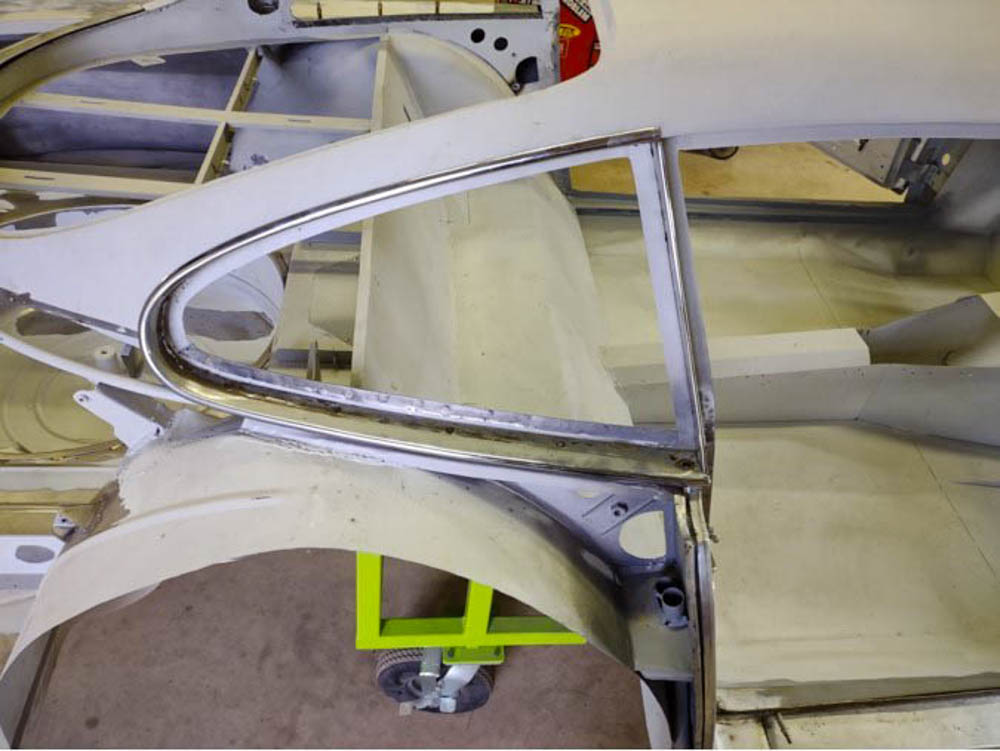
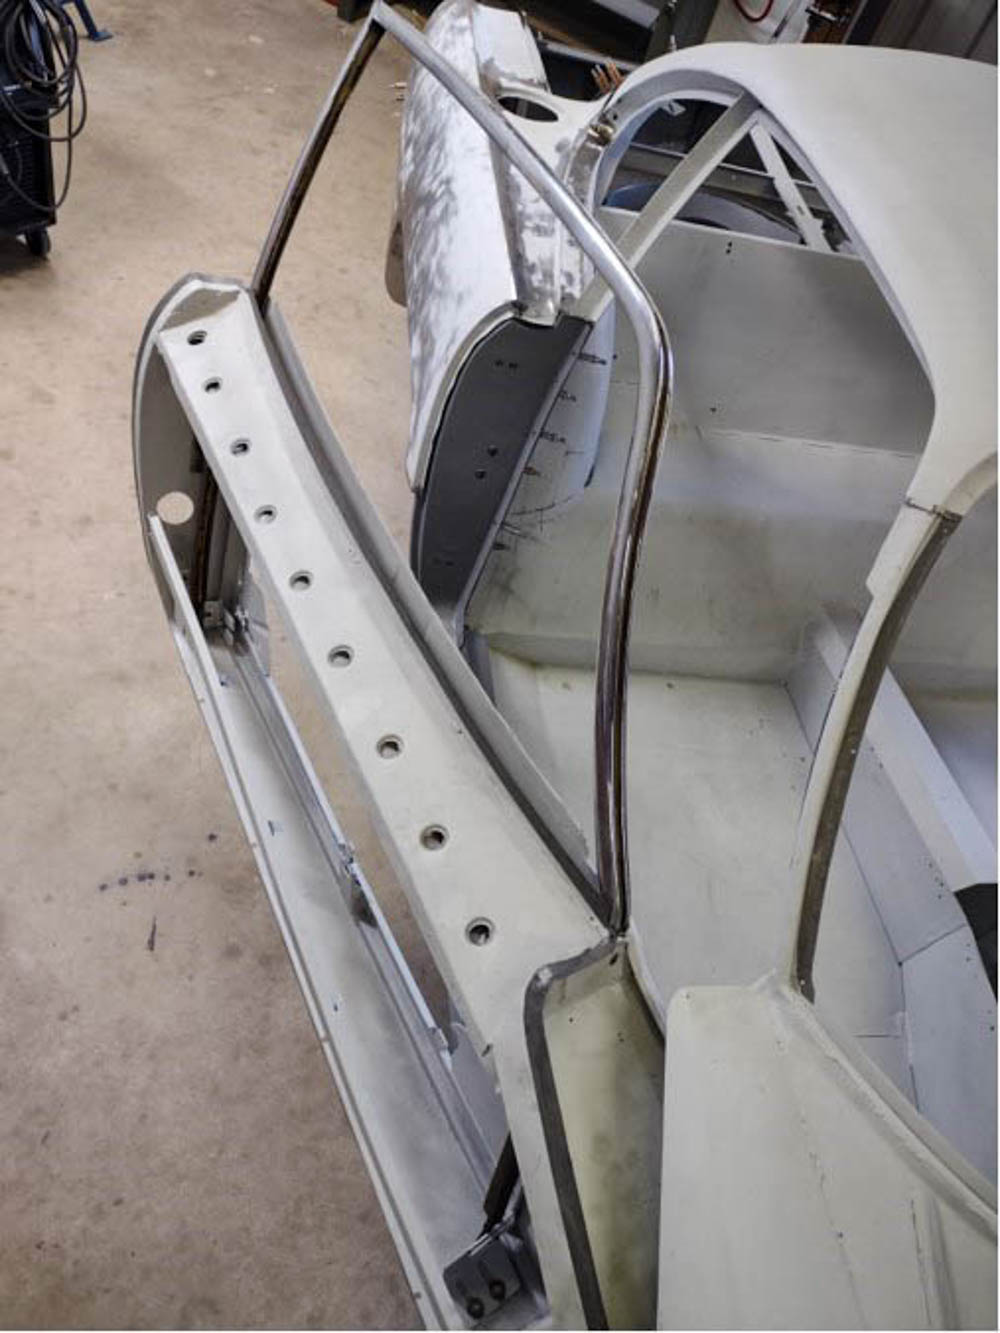
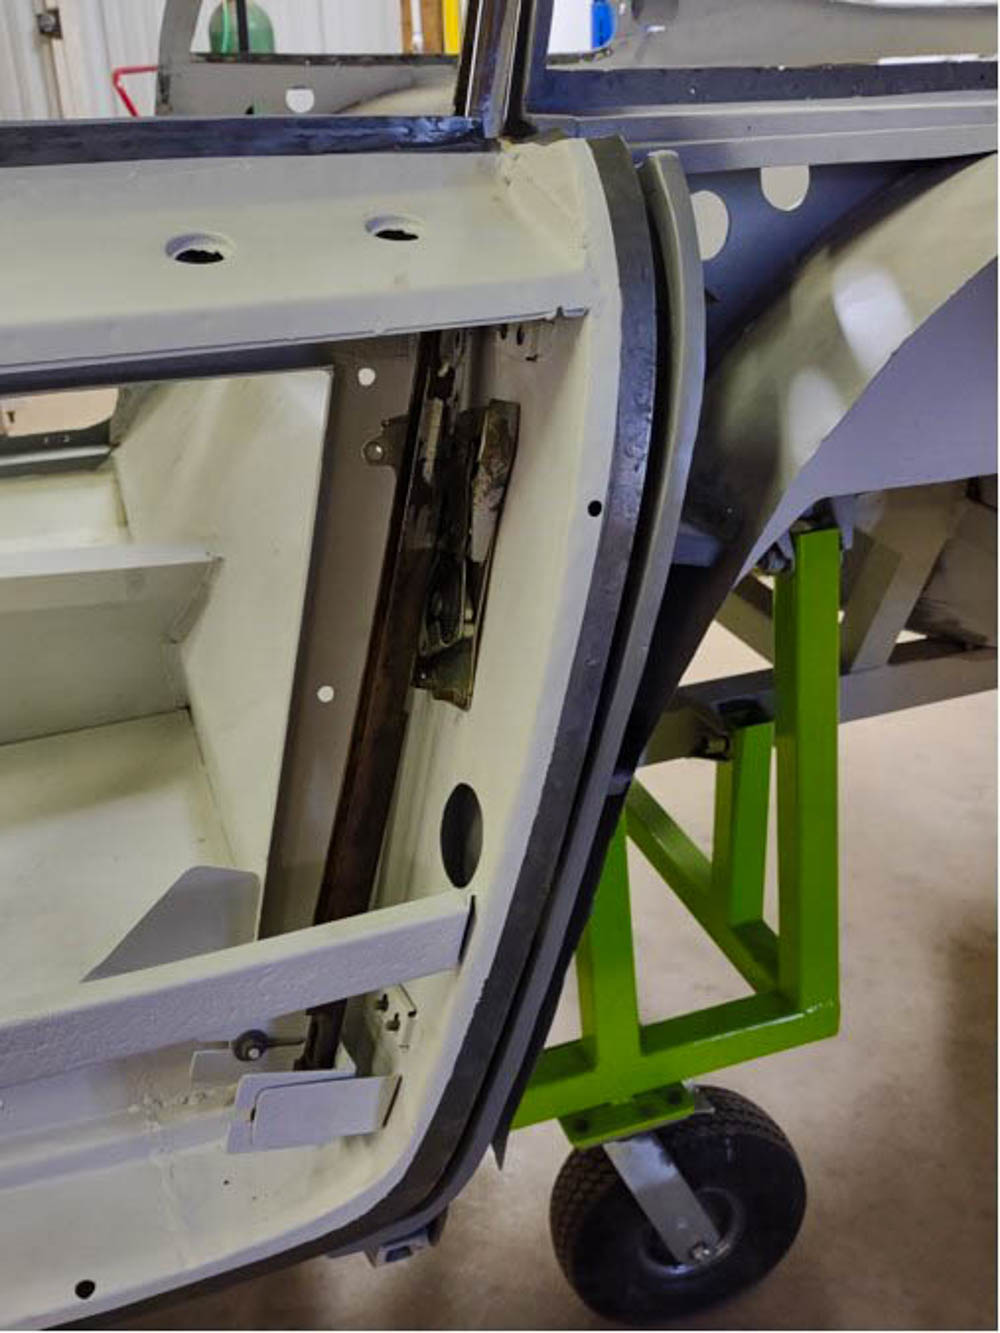
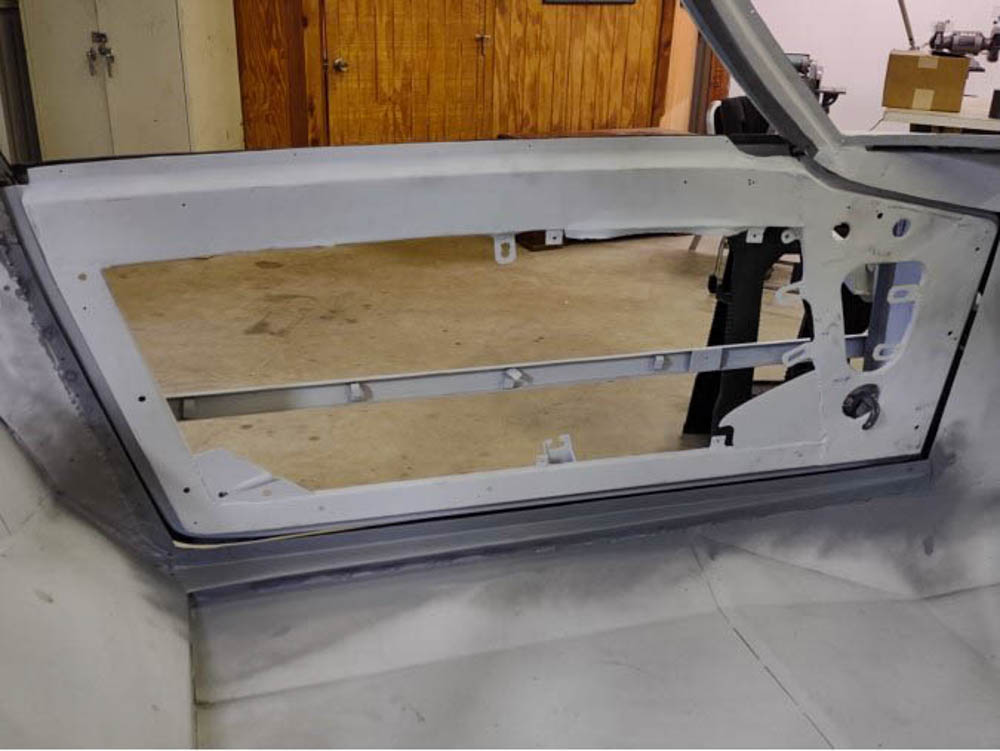
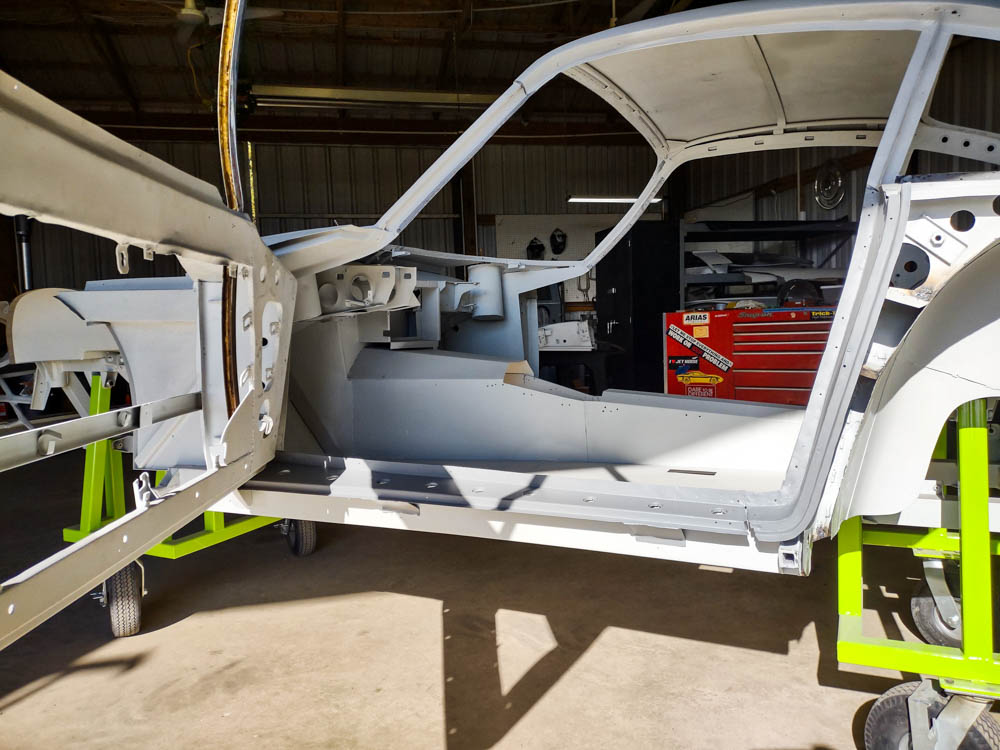
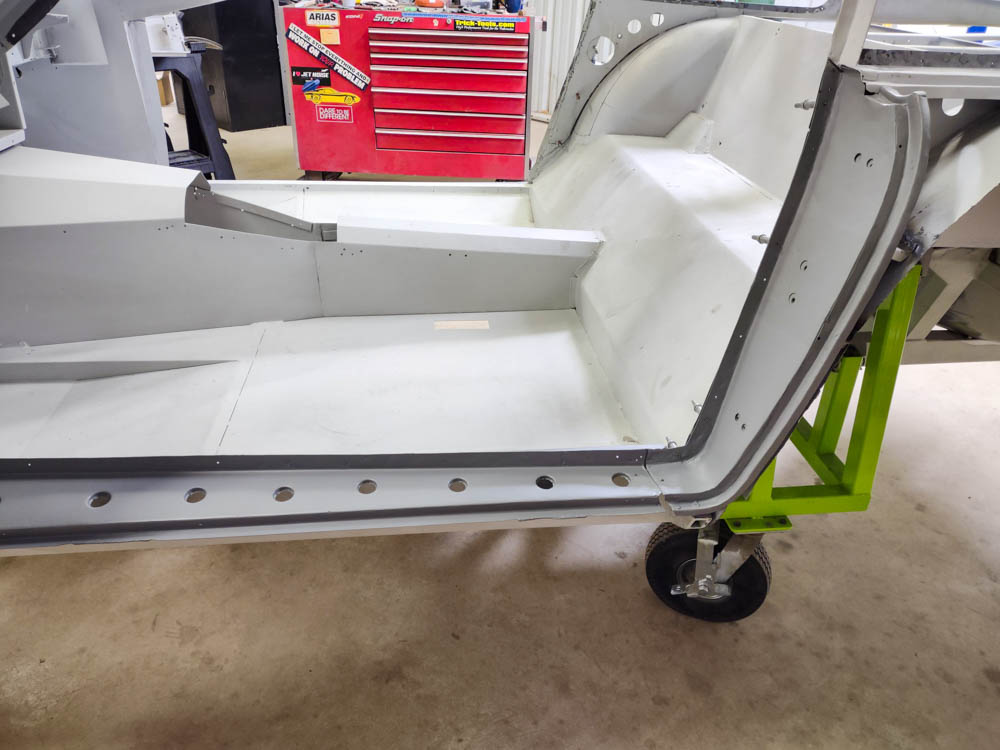
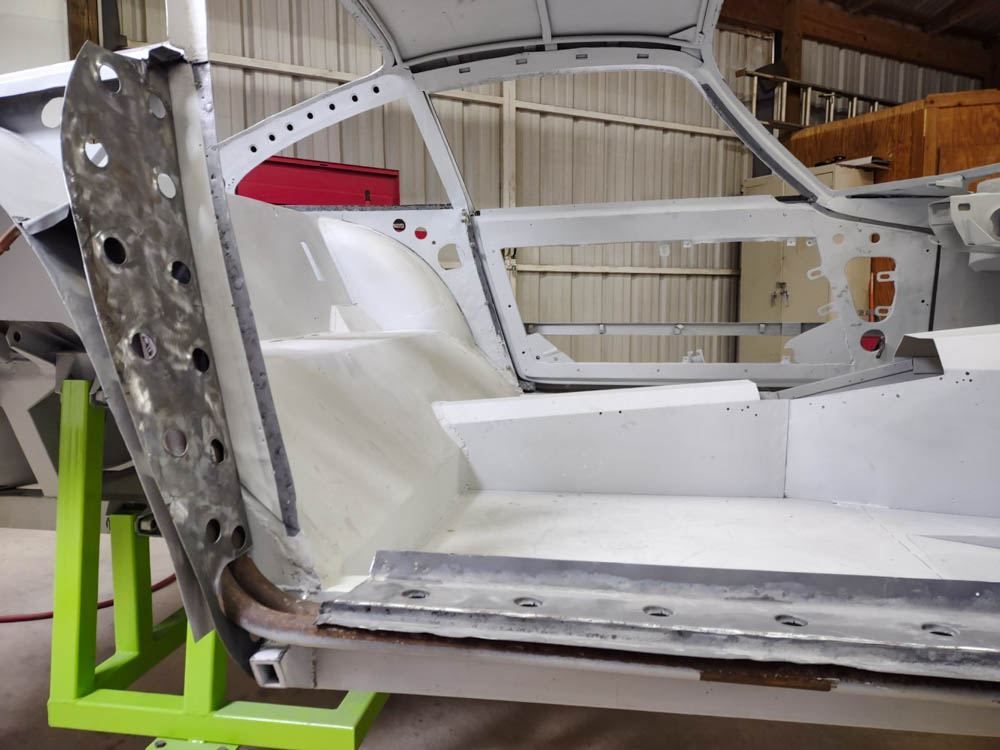
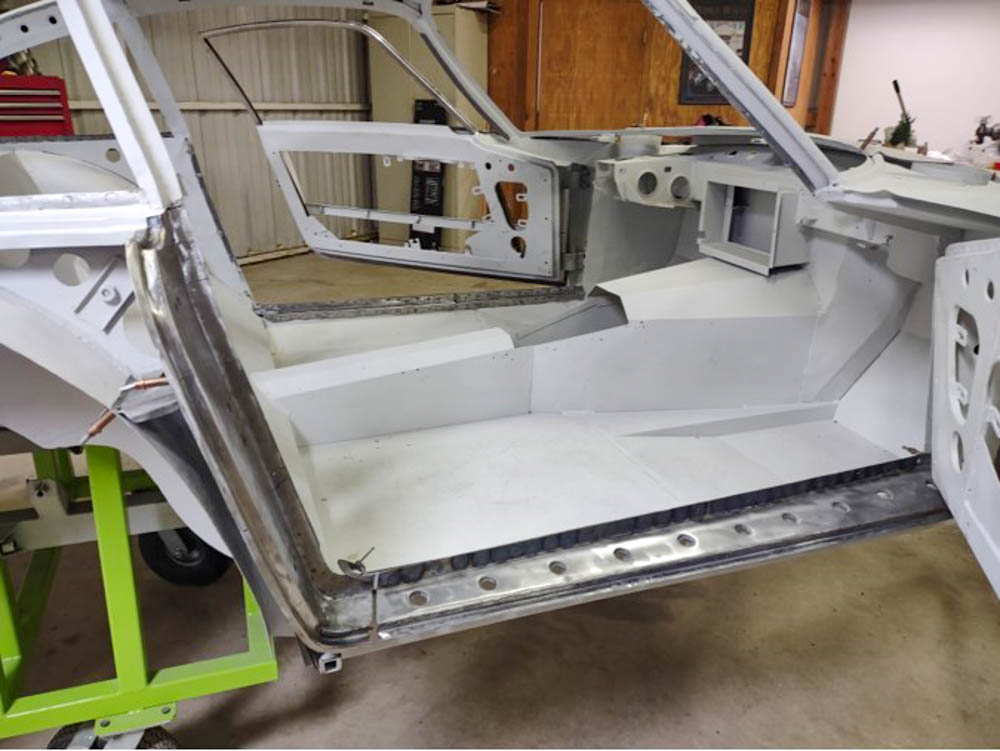
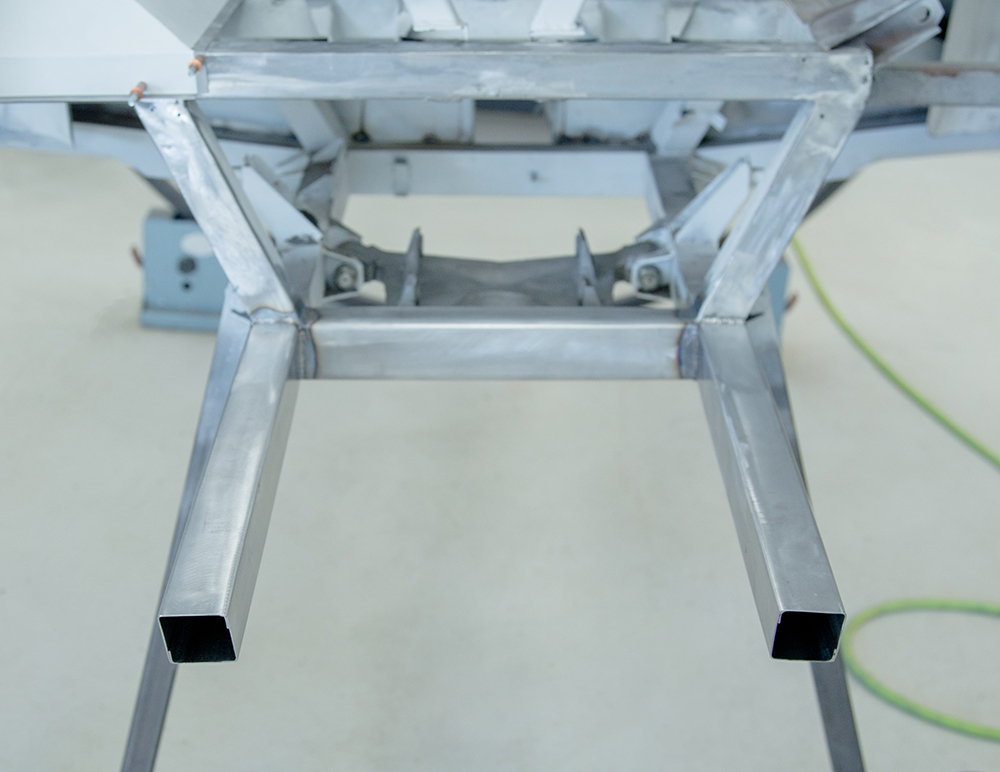
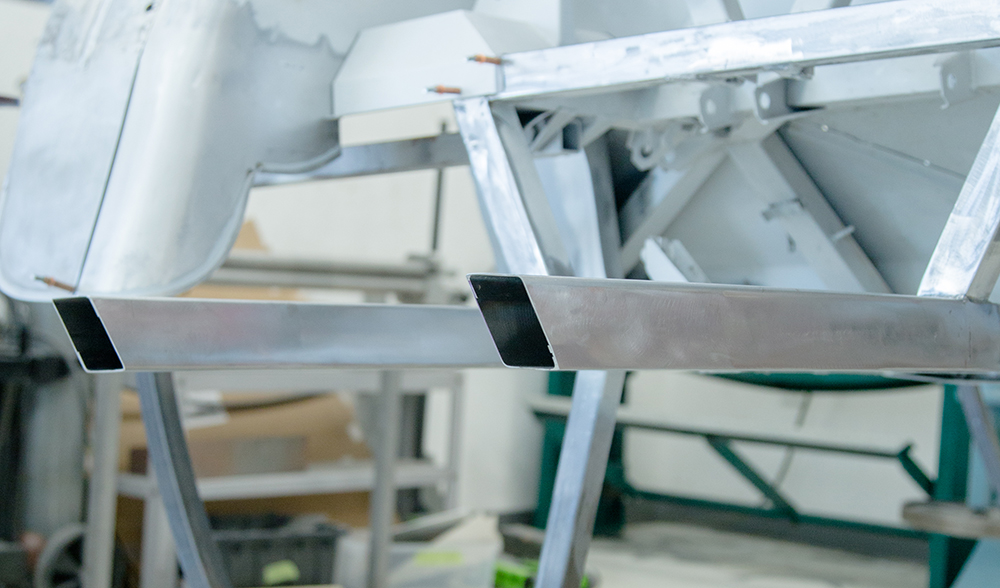
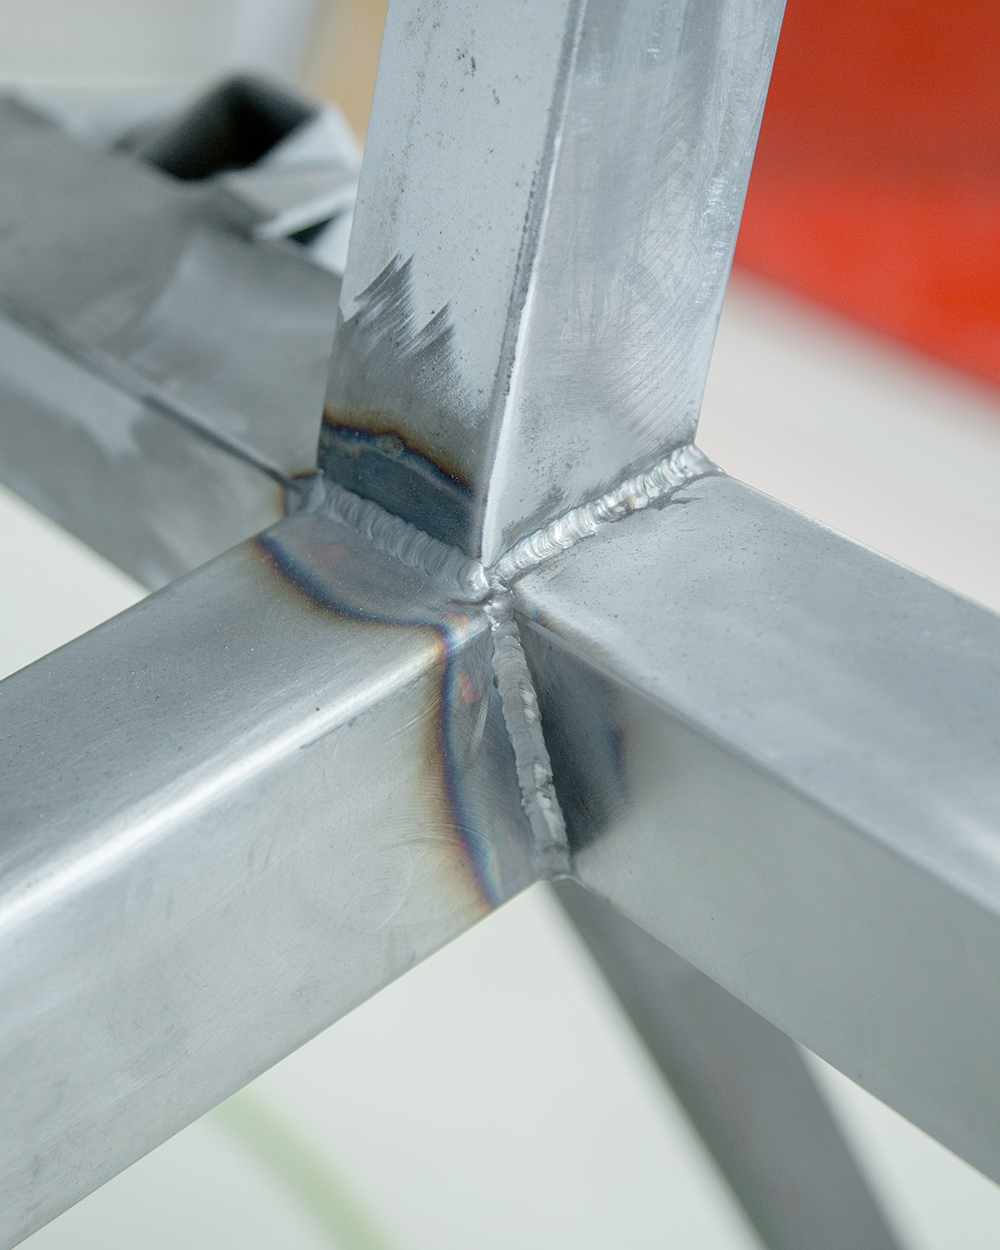
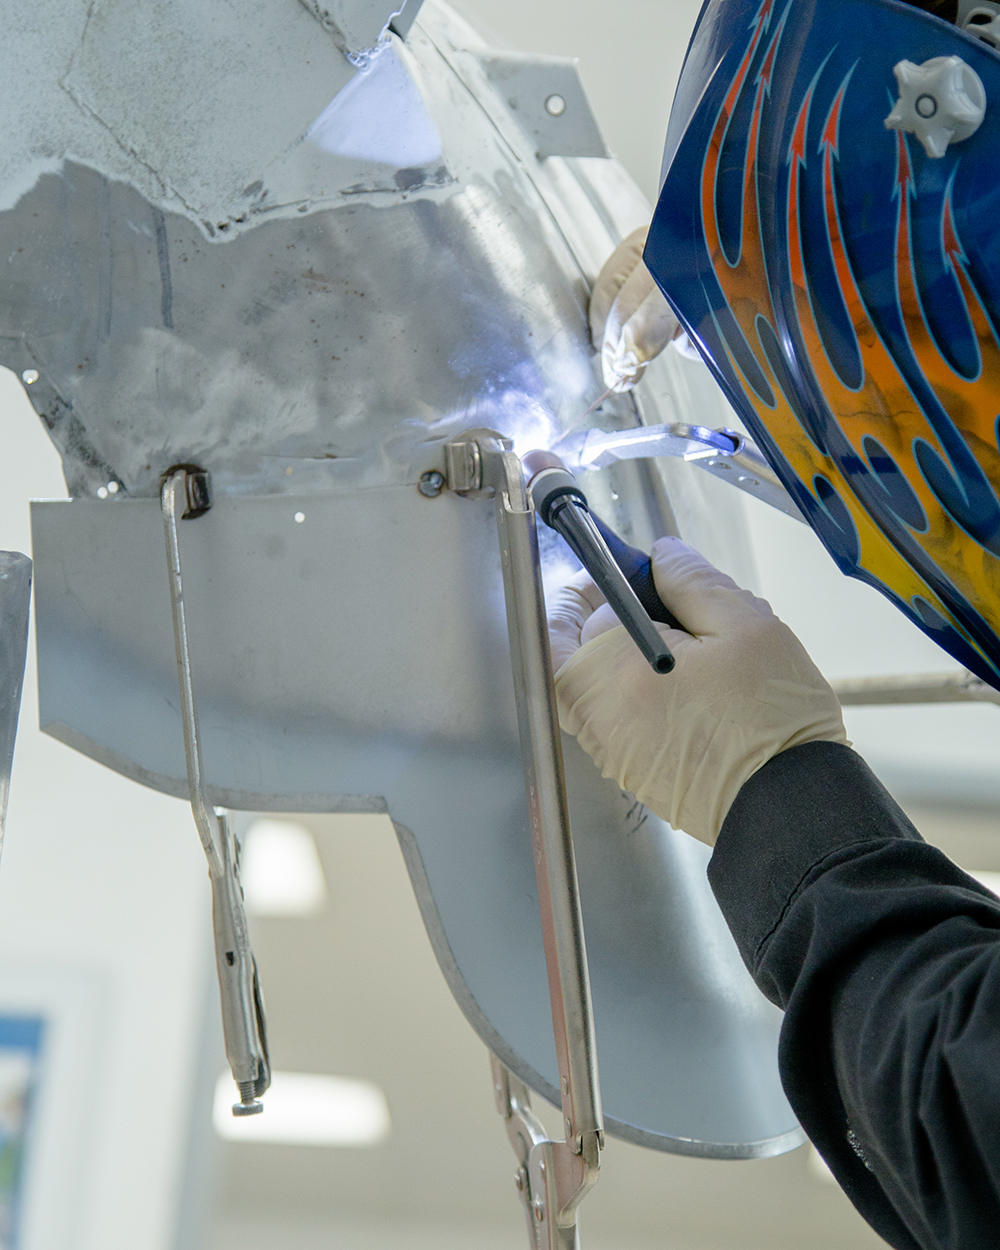
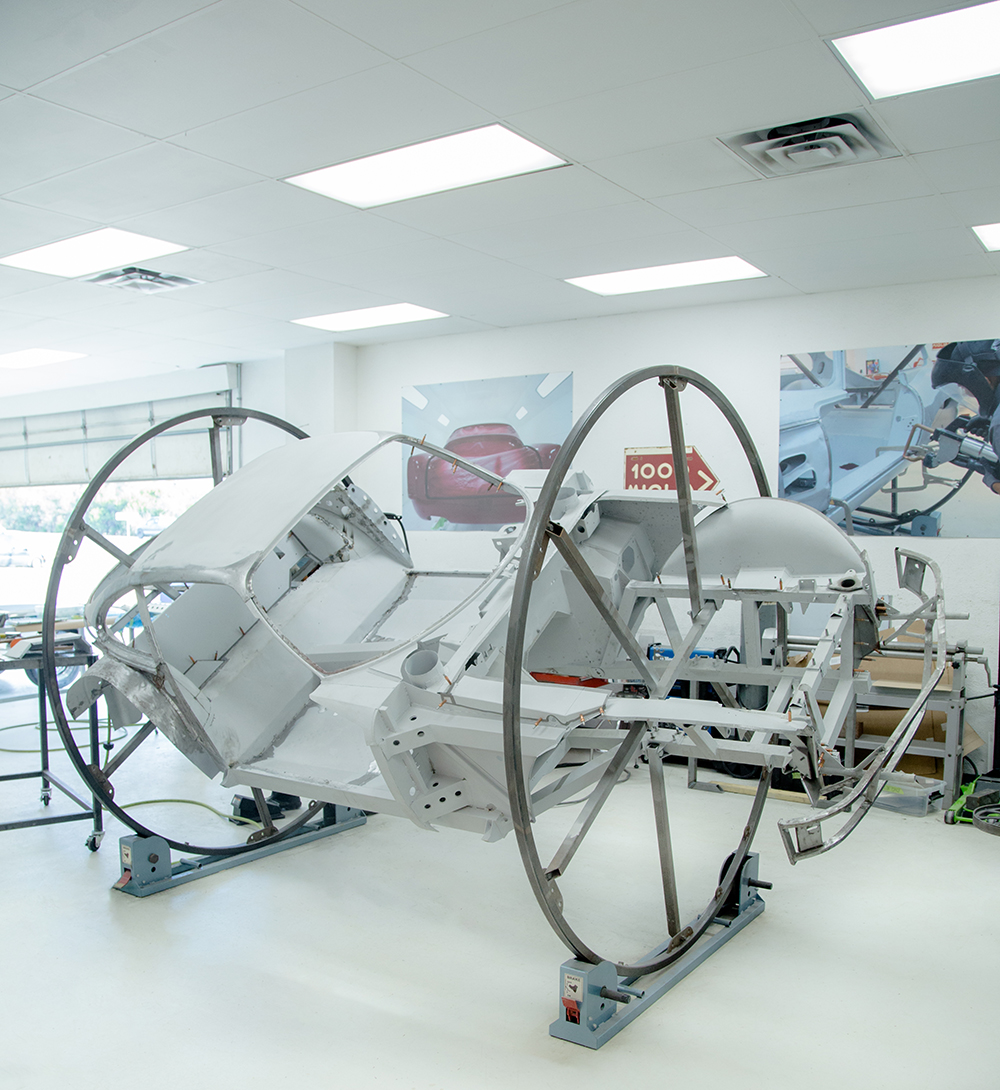
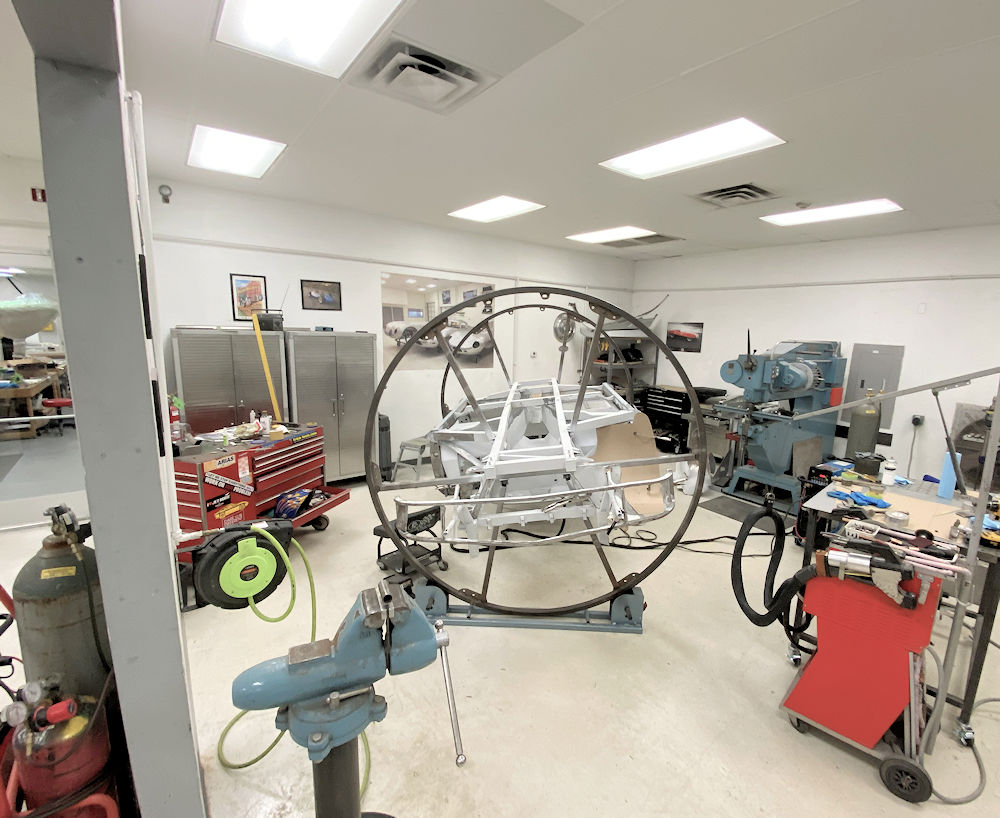
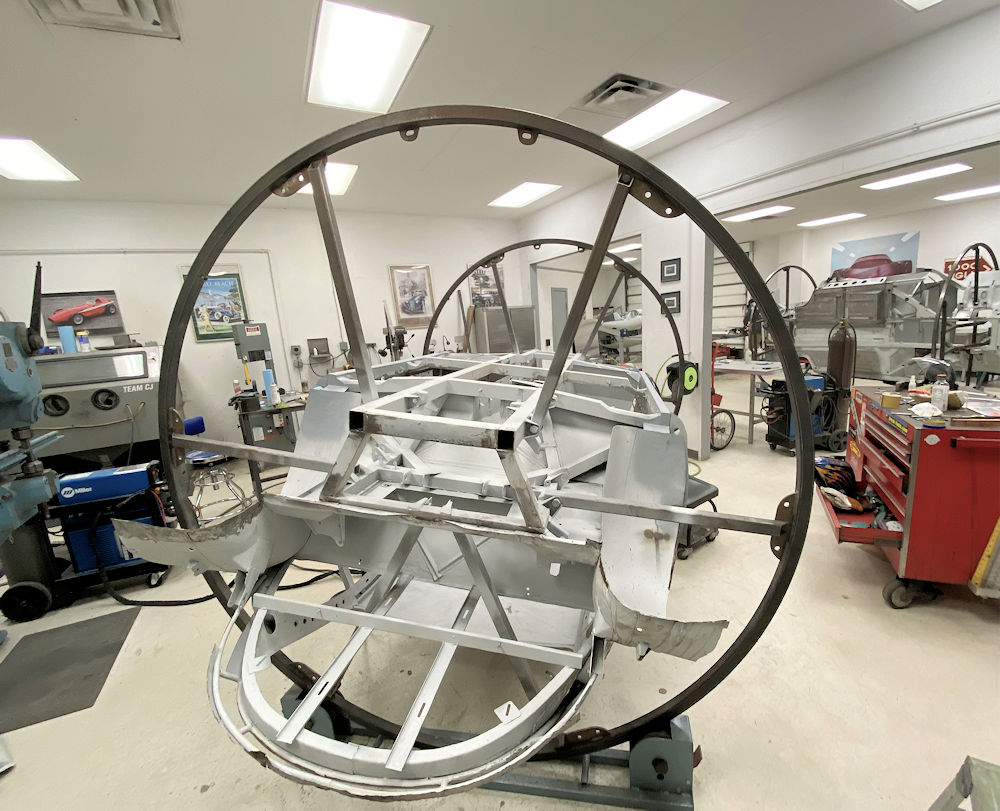
With the chassis repairs completed, Gerardo has now sealed
everything up in epoxy primer and the car has been placed on
our custom 350 roll-around jig. We will shortly start the
process of hanging the outer panels.
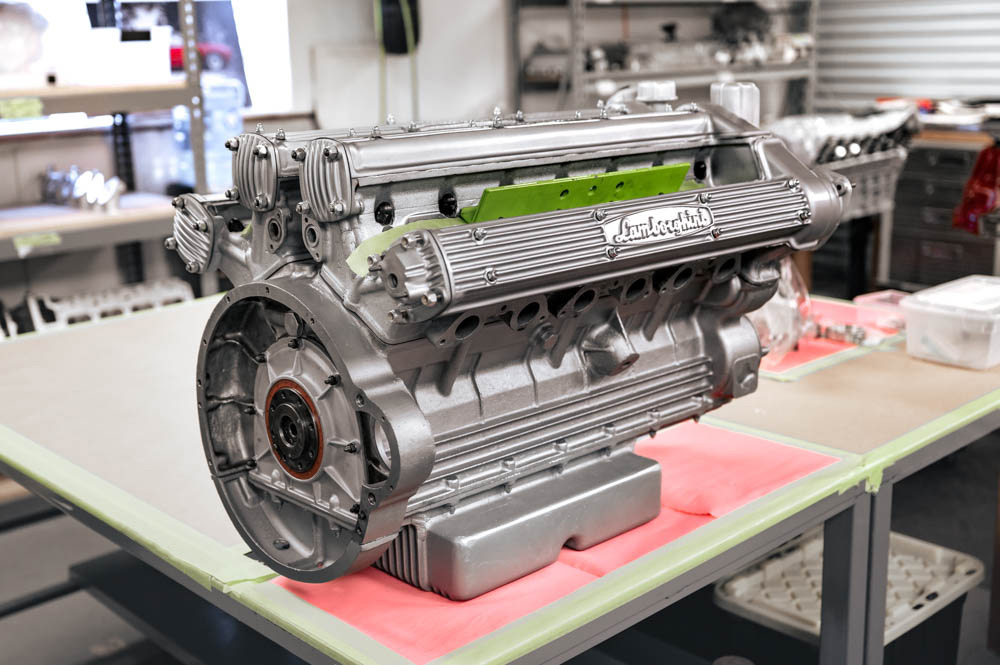
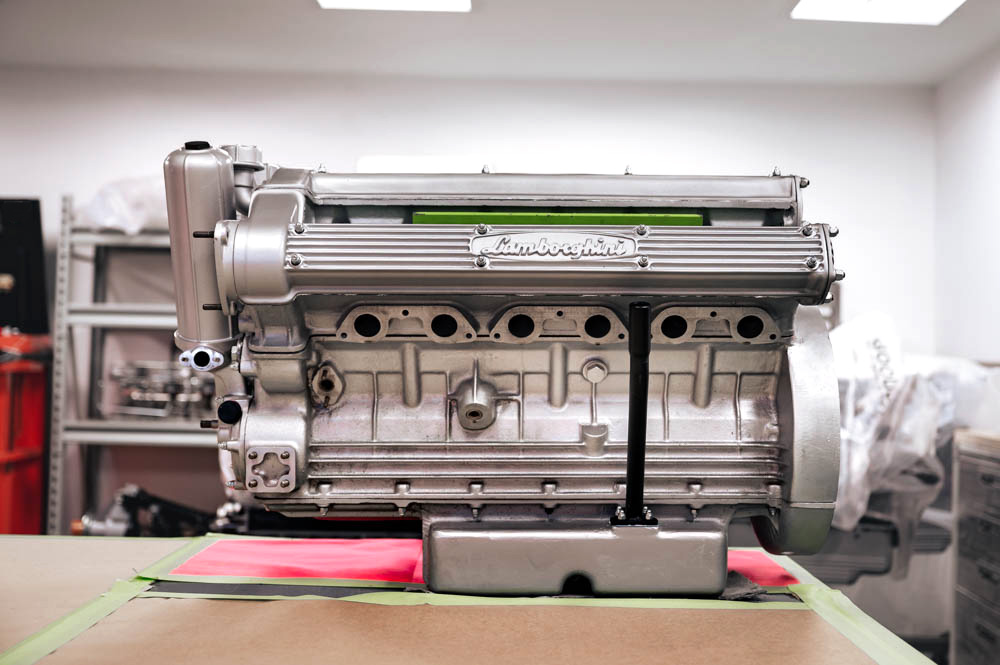
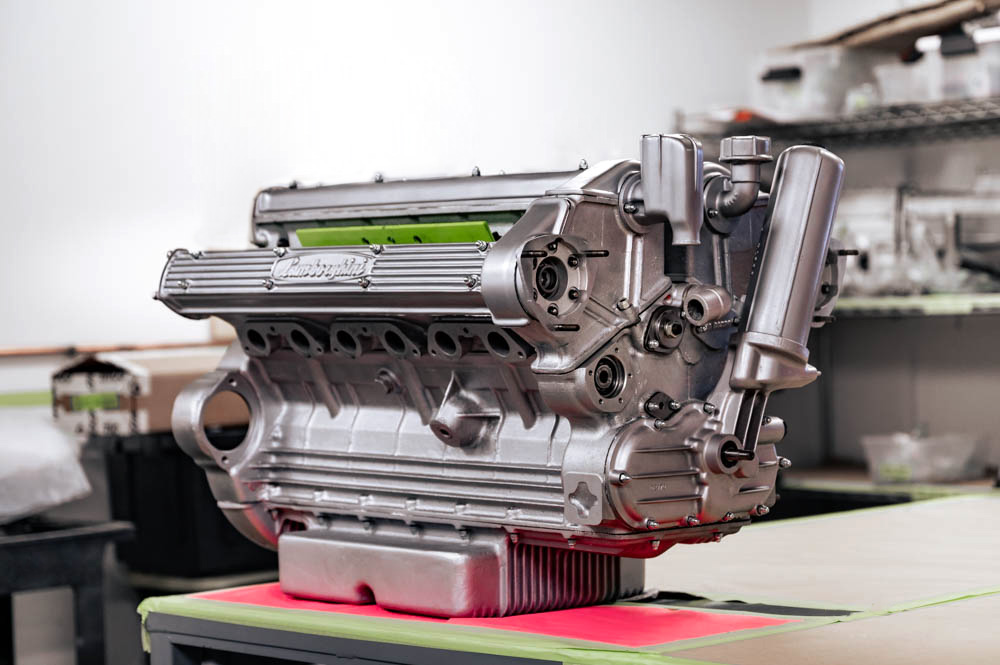
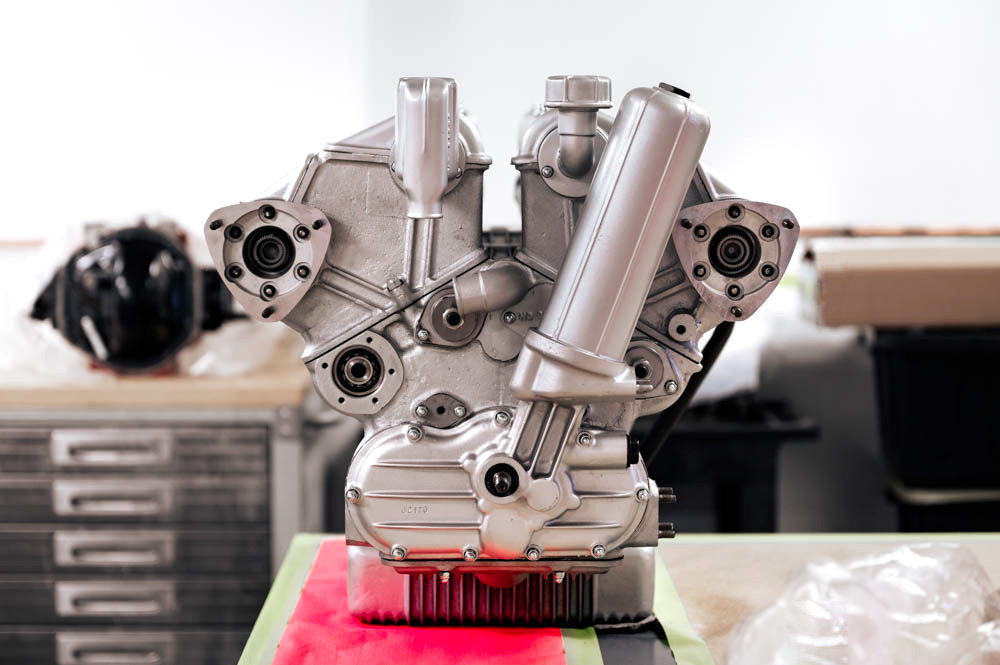
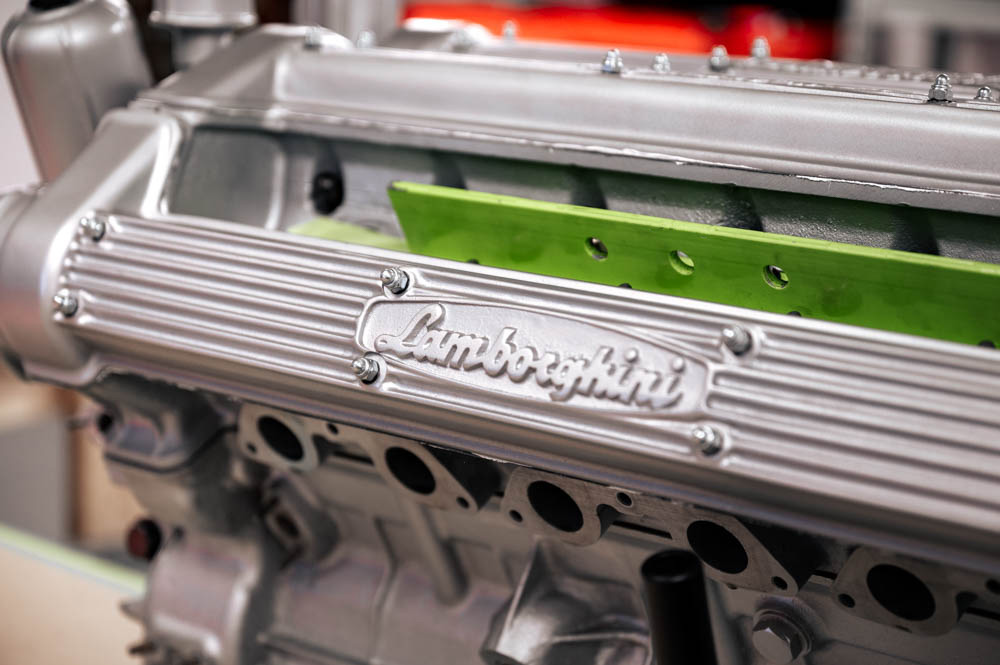
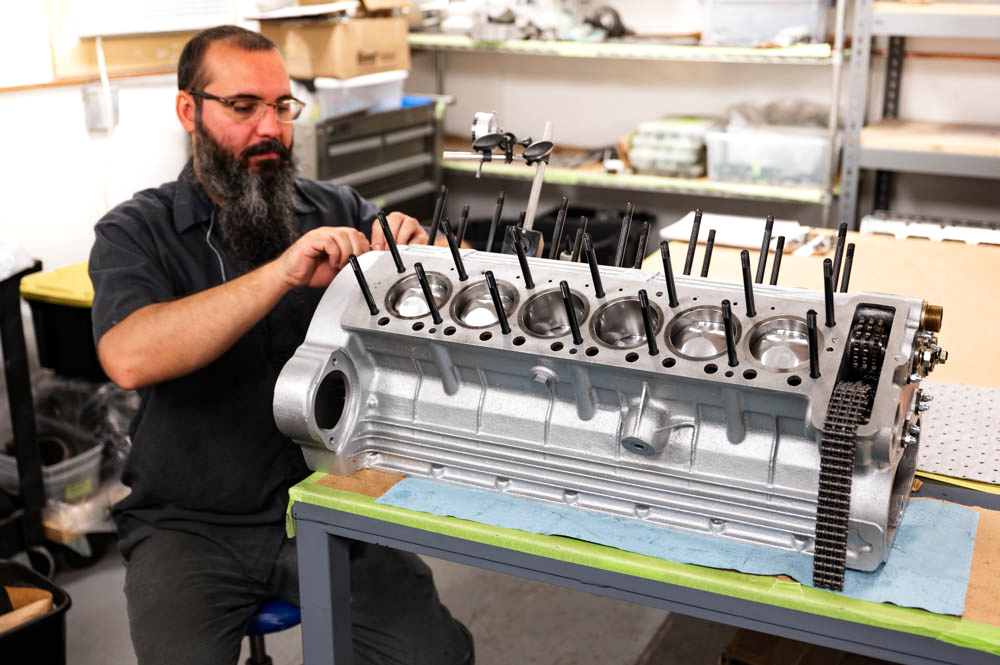
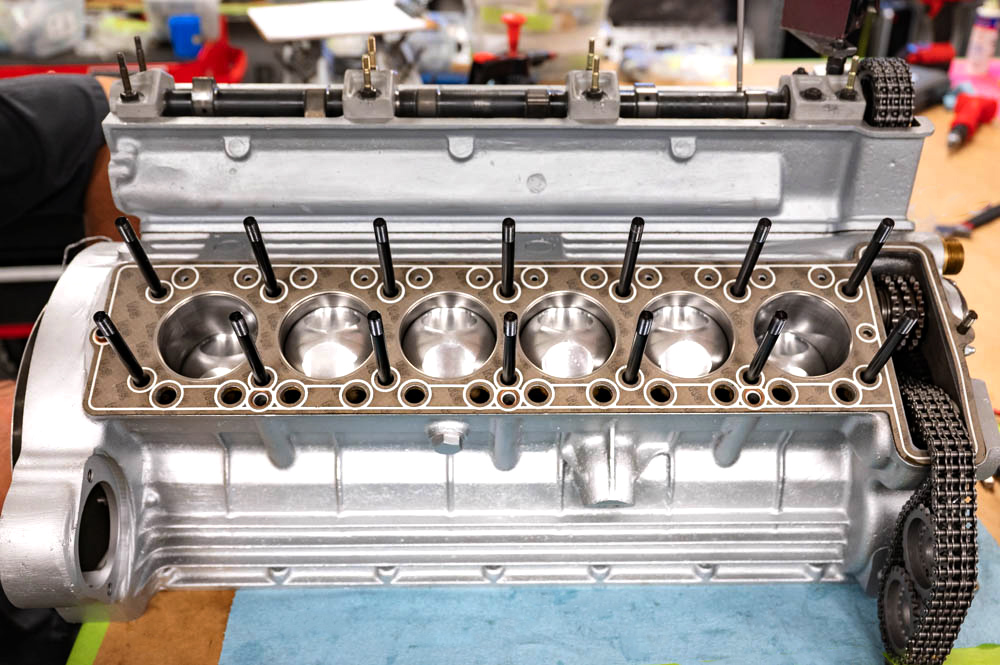
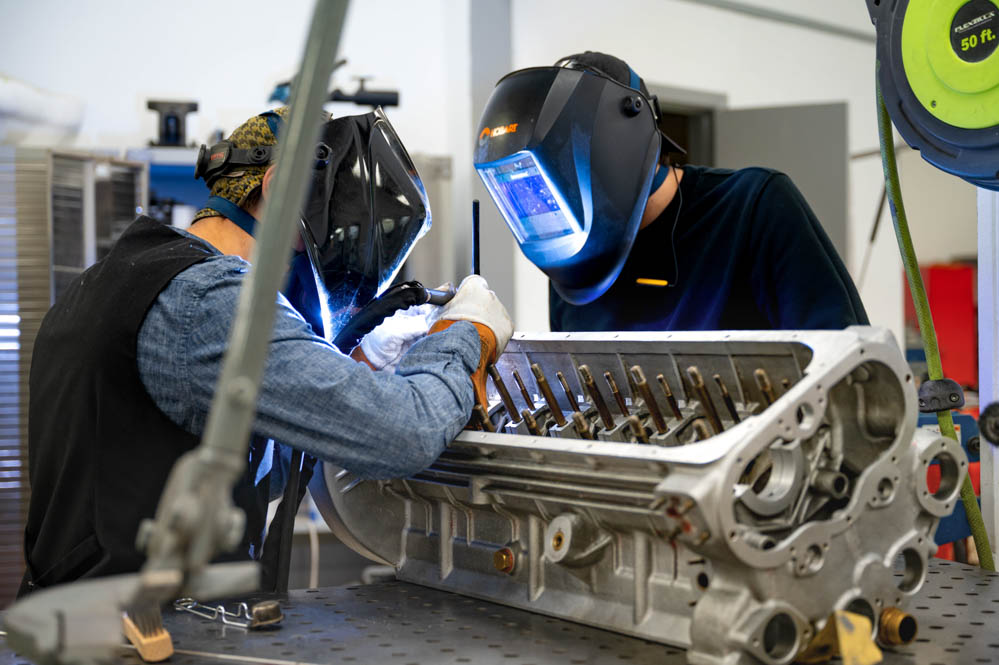
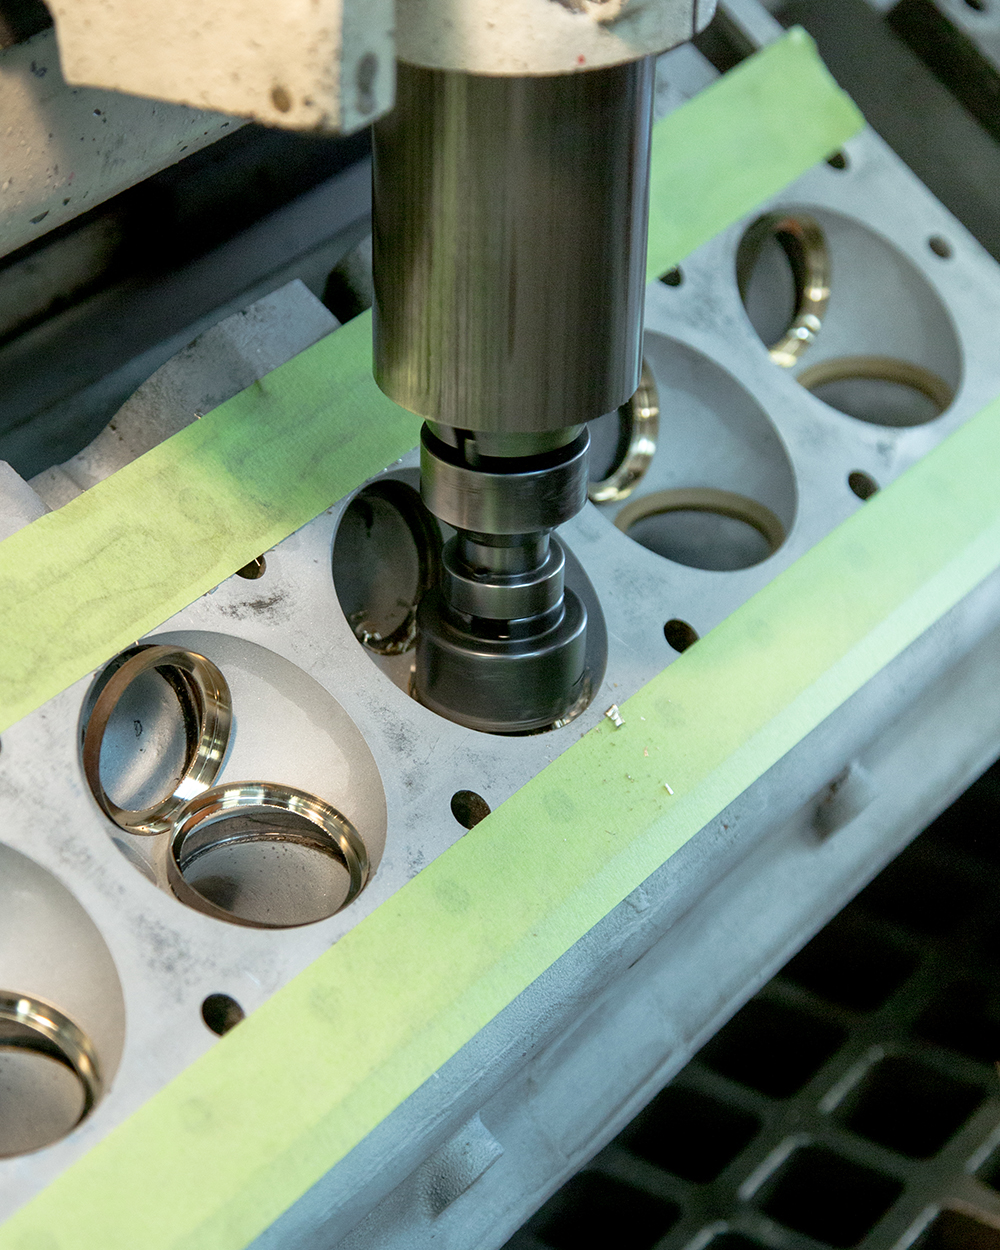
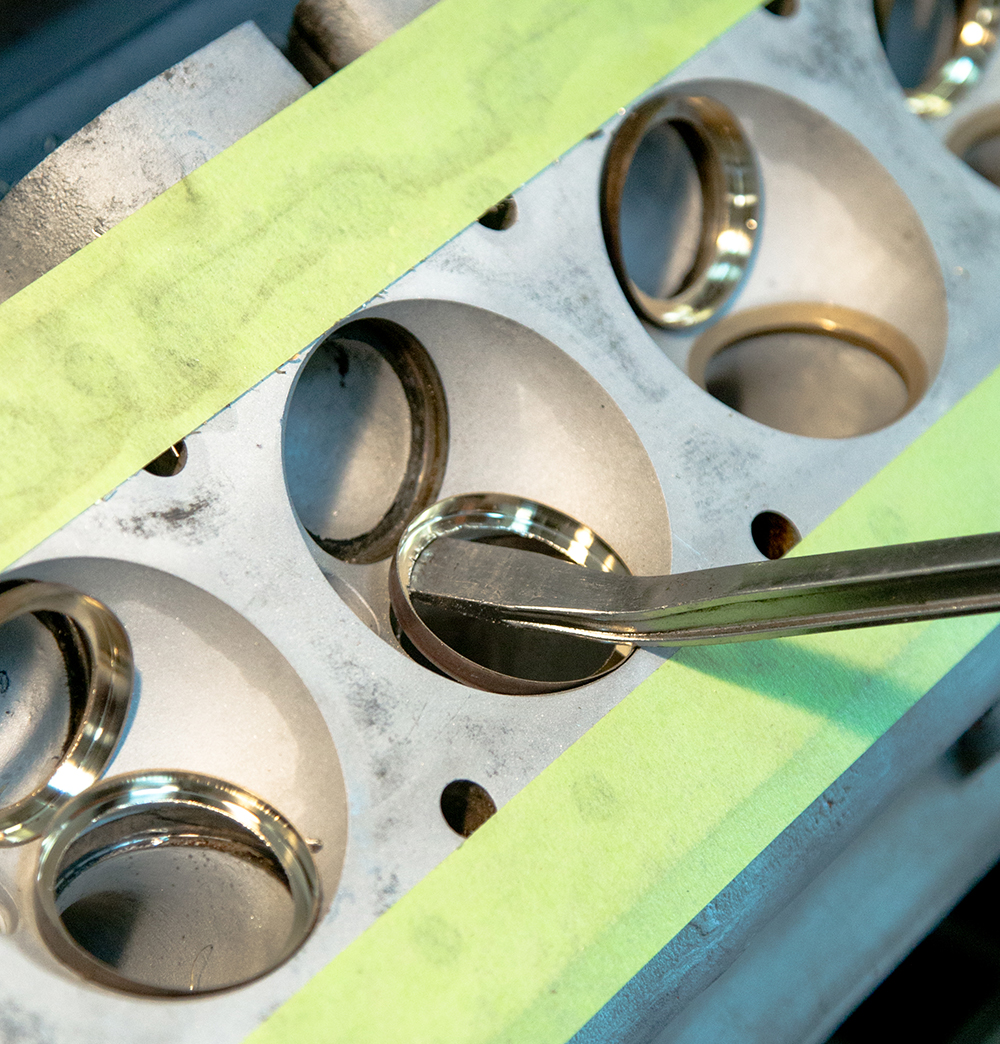
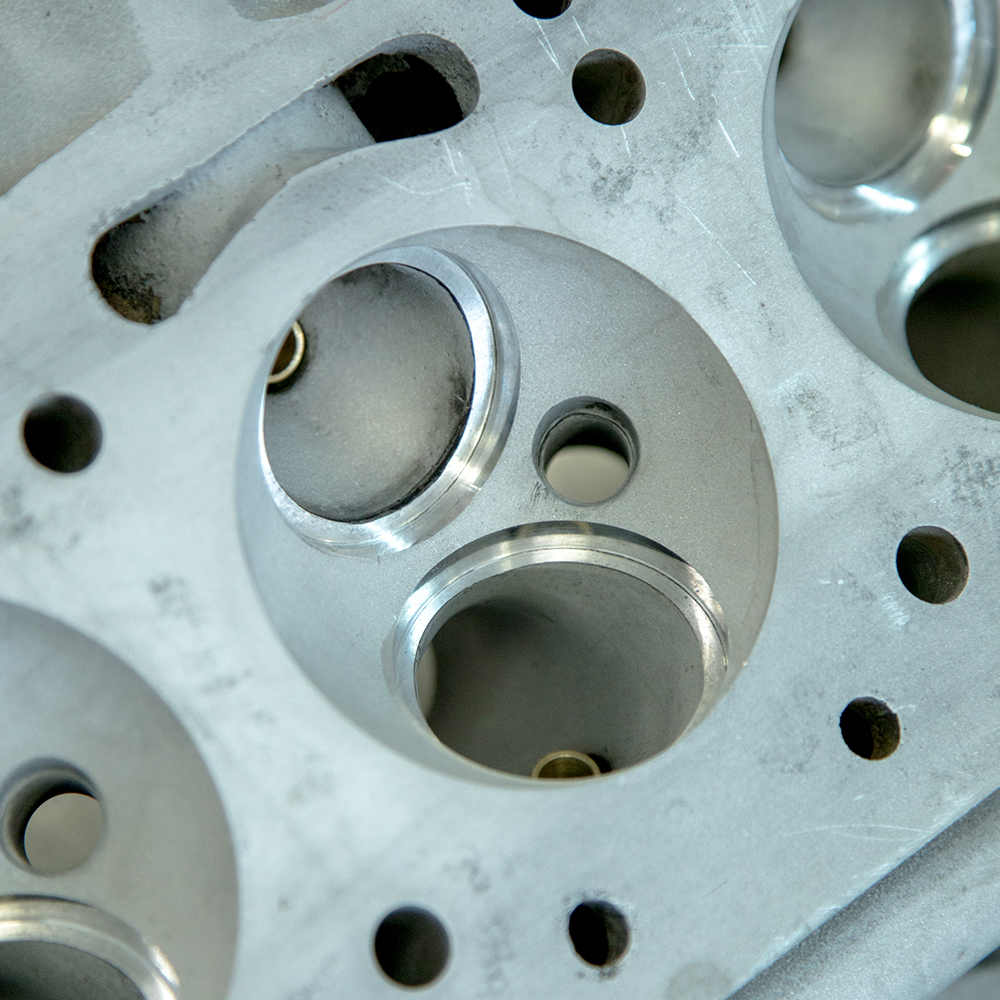
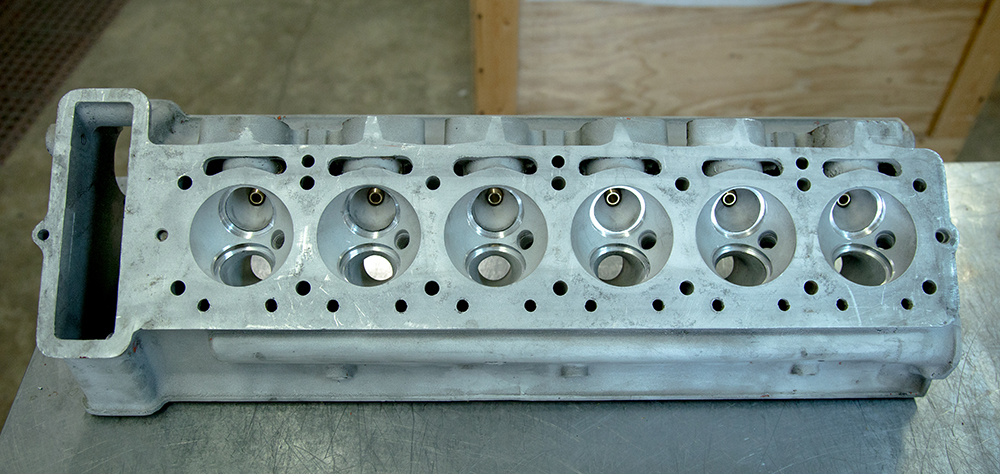
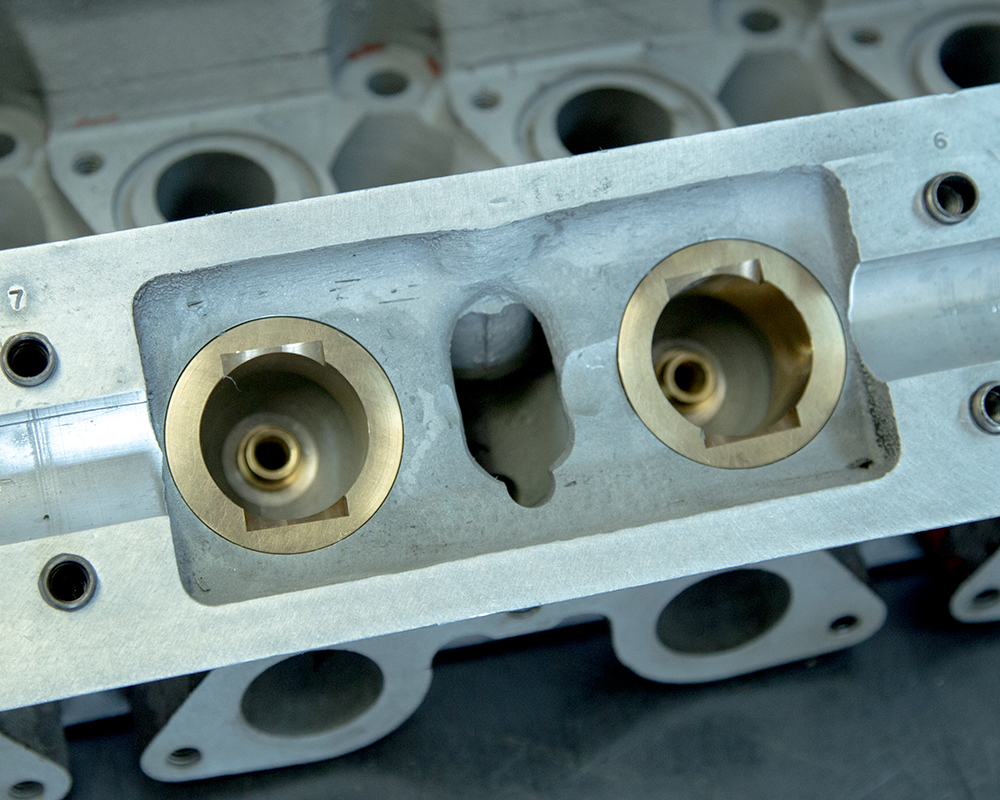
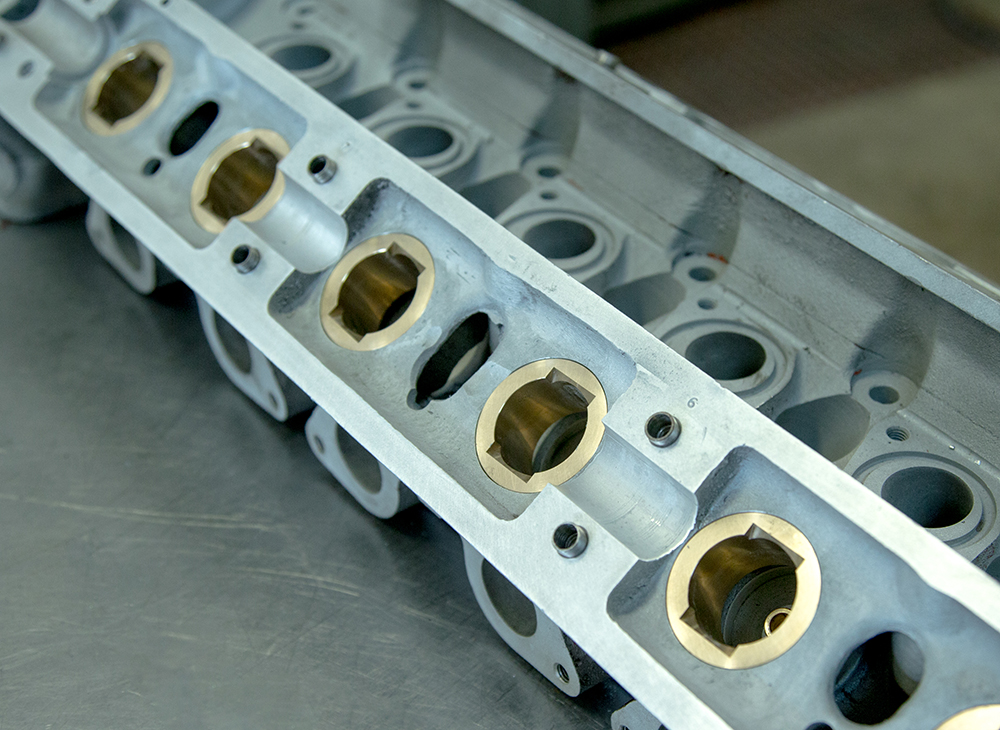
Update report - January 15, 2021
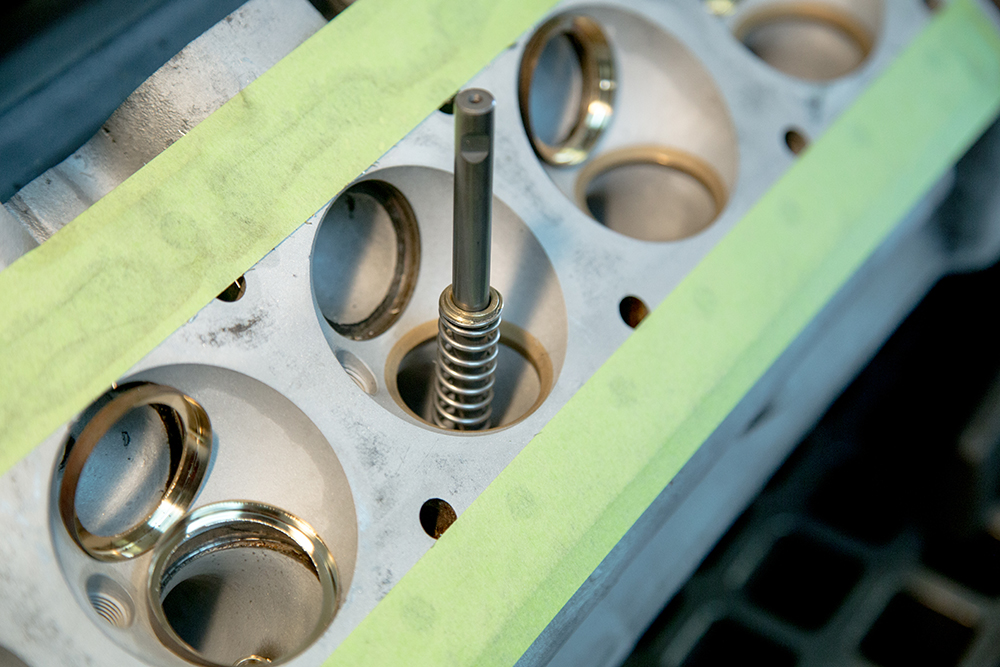
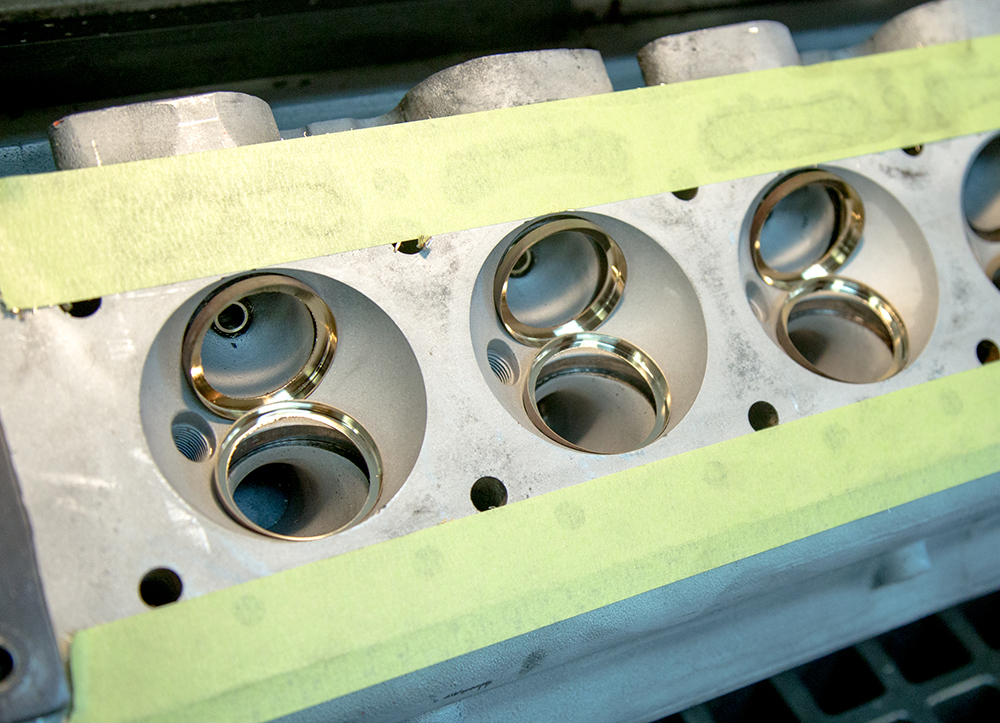
We now have your
cylinder head rebuilds underway. The following sequence of
photographs show Corey removing the old valve seats and
installing the new bronze tapped guides.
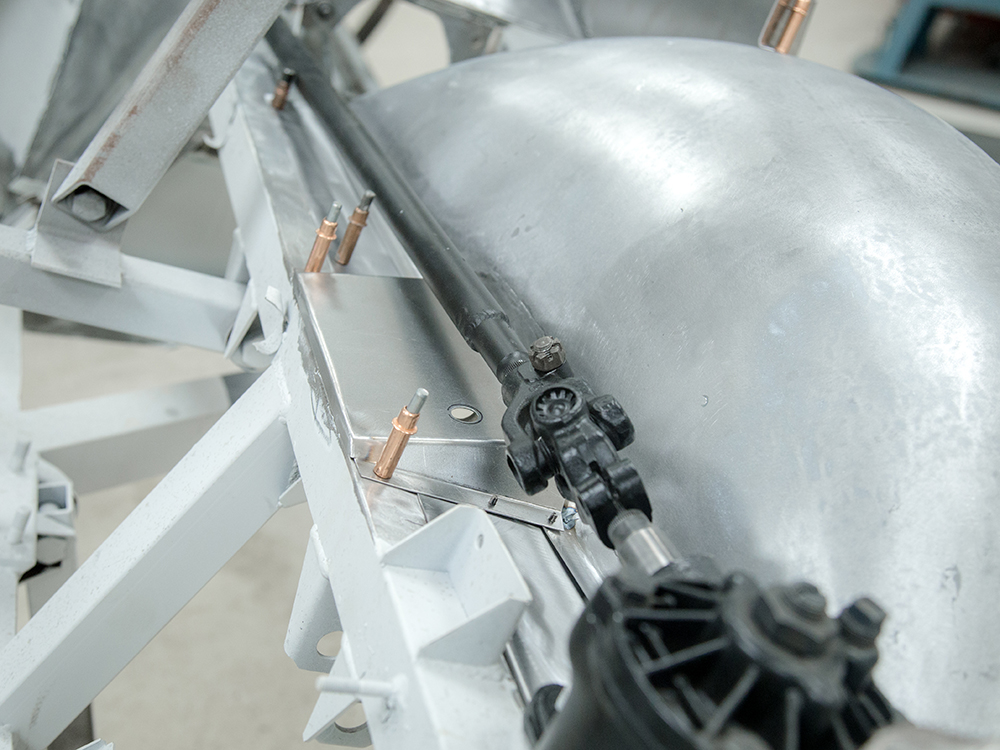
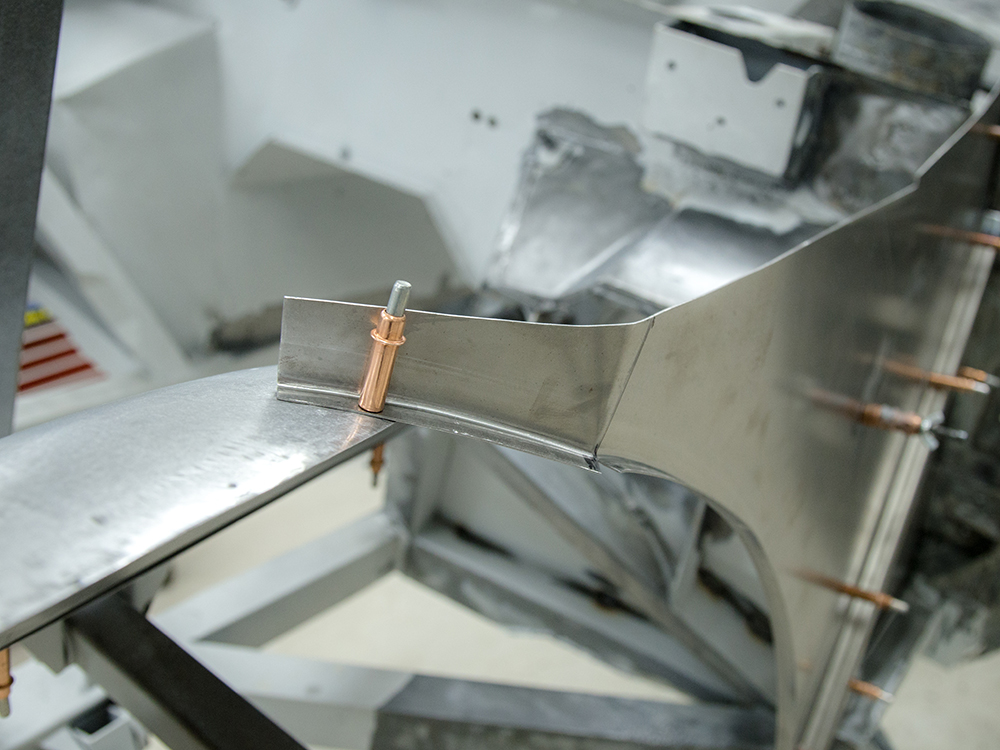
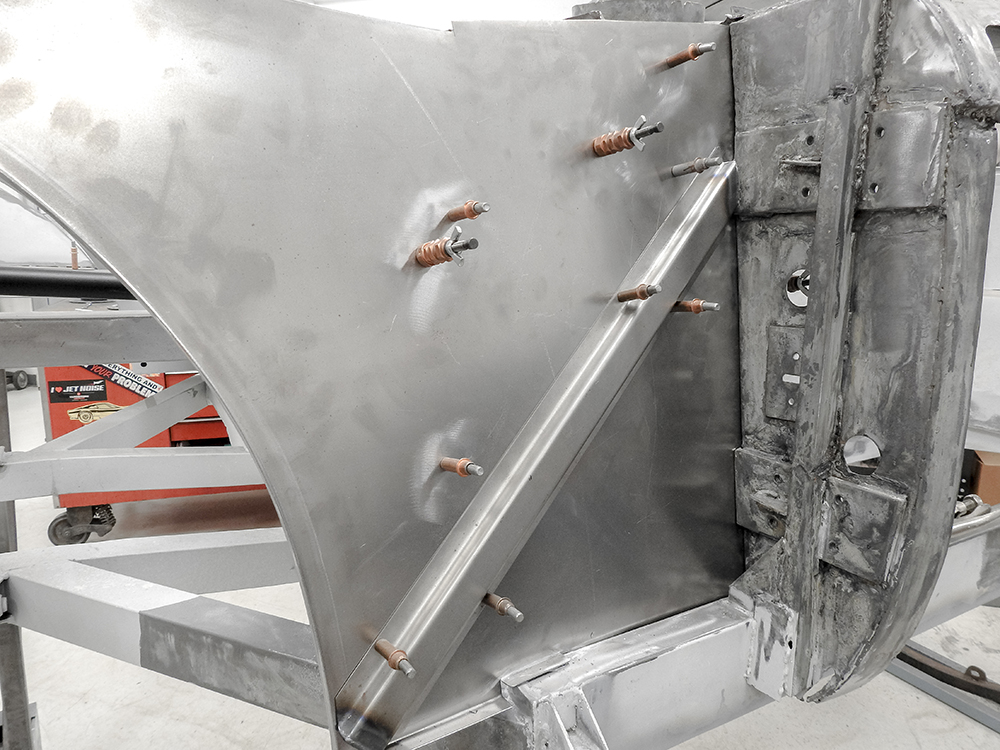
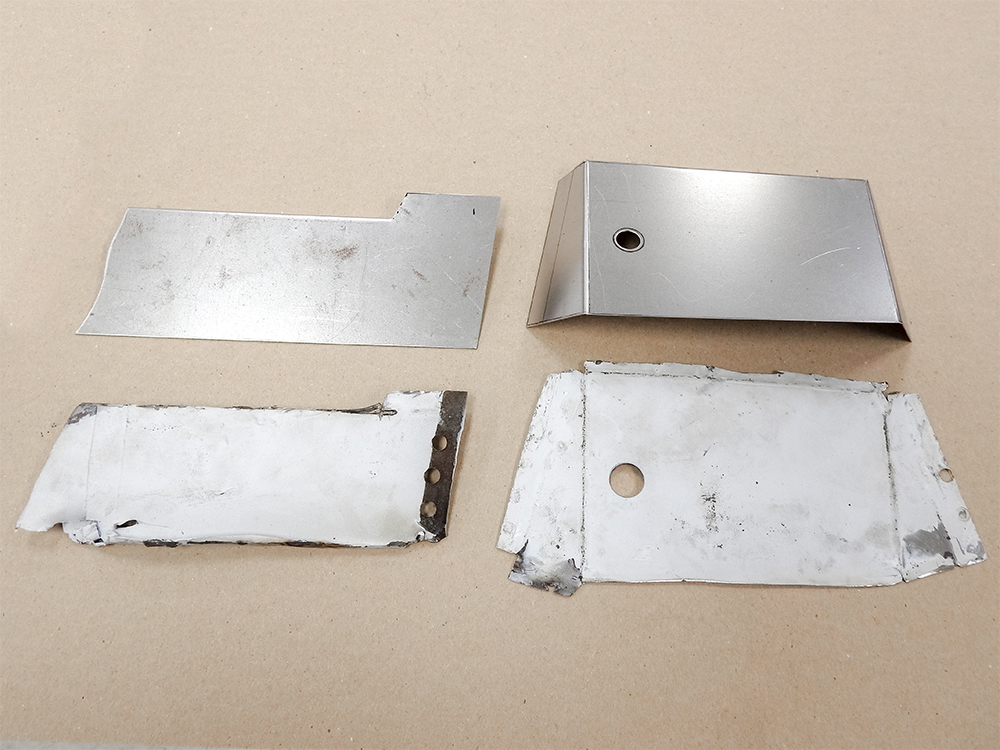
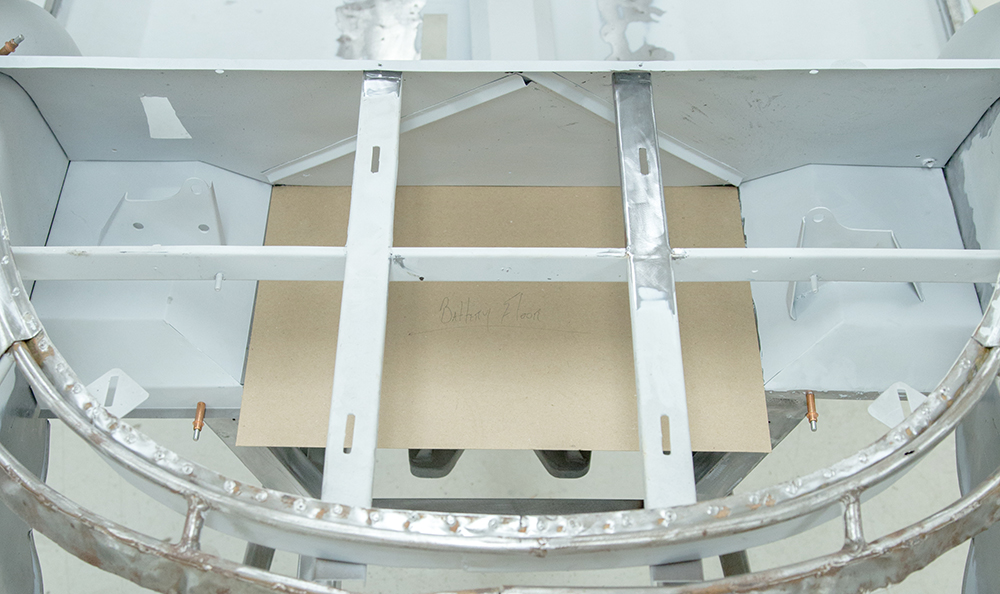
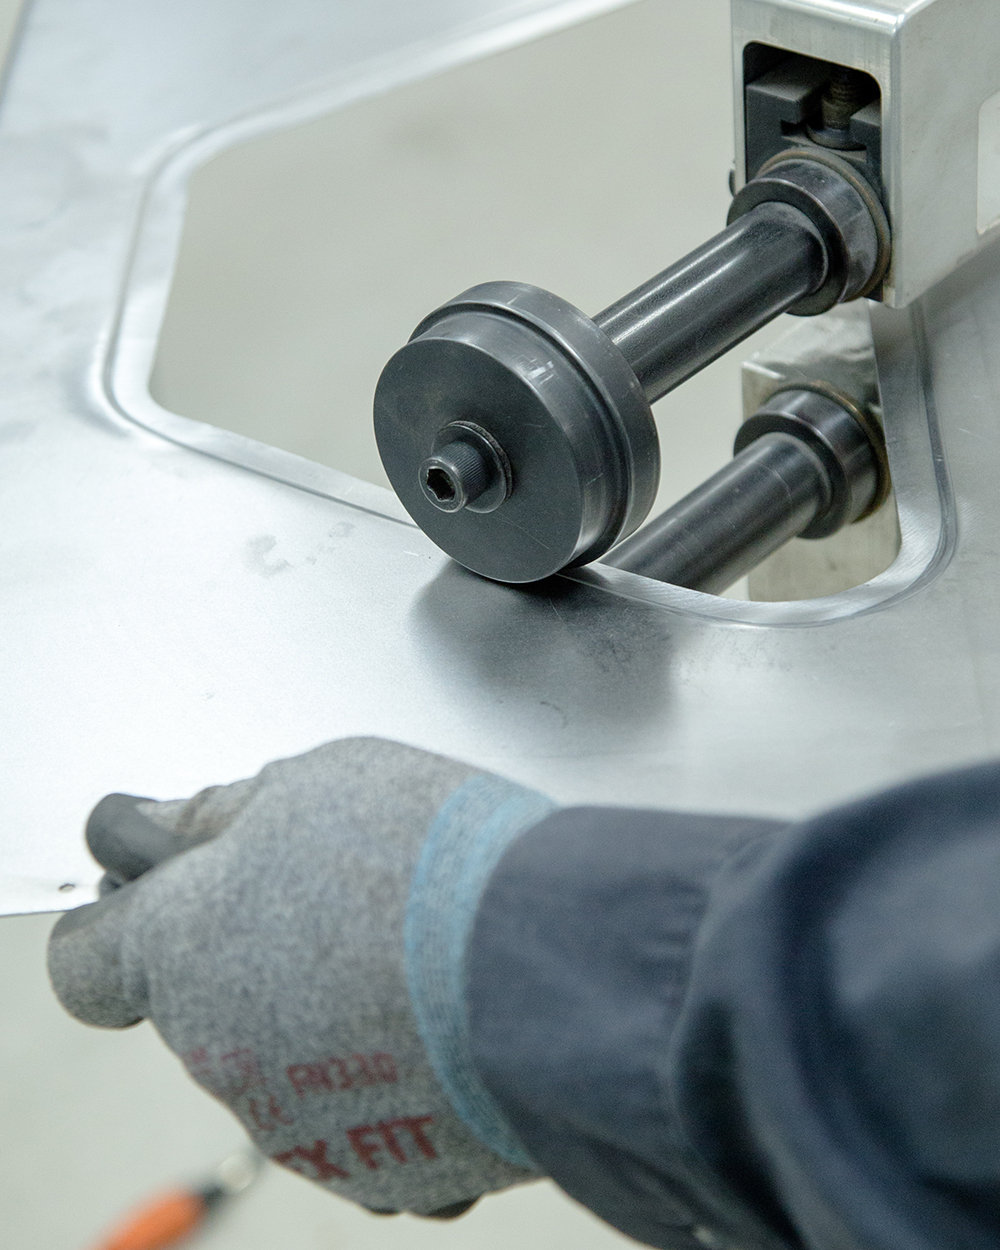
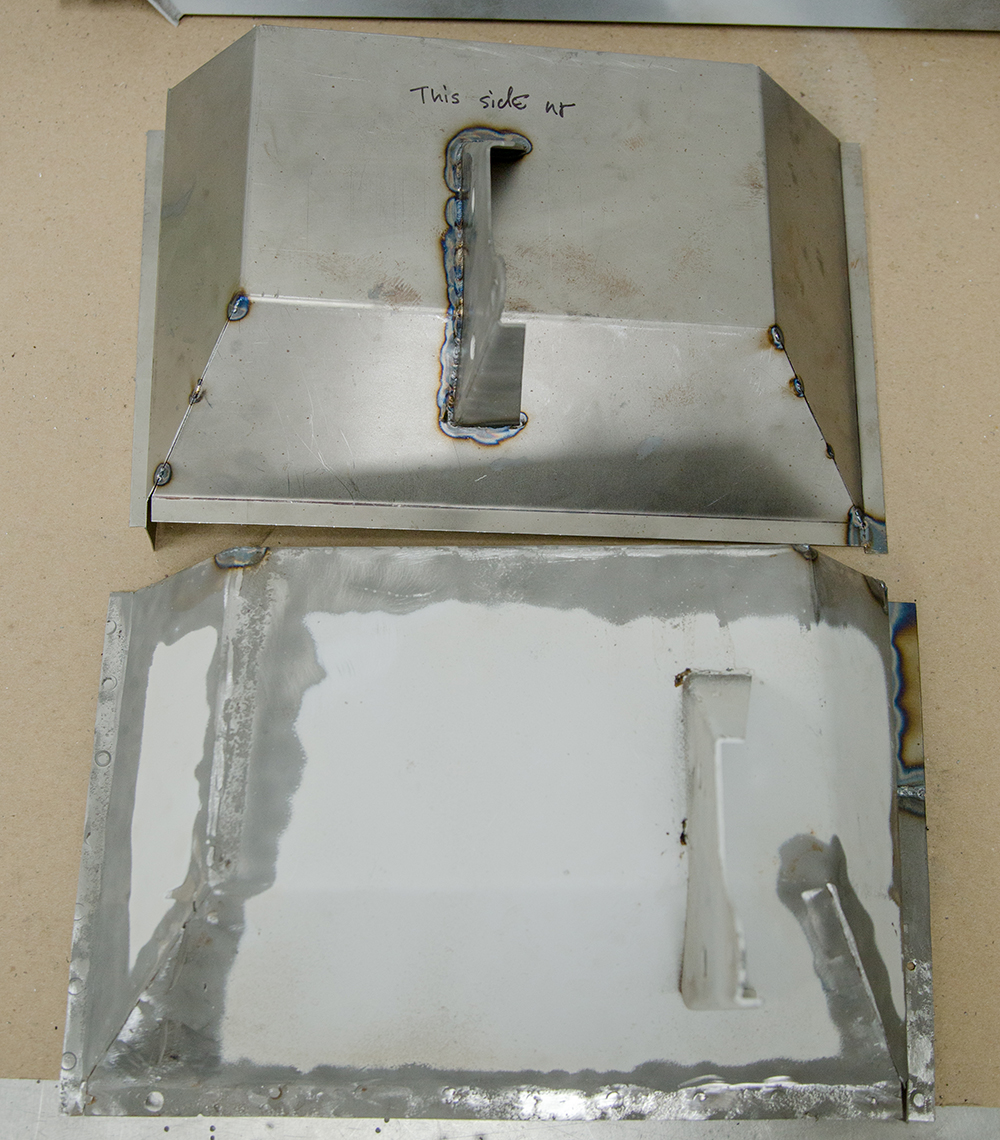
Update report - January 13, 2020
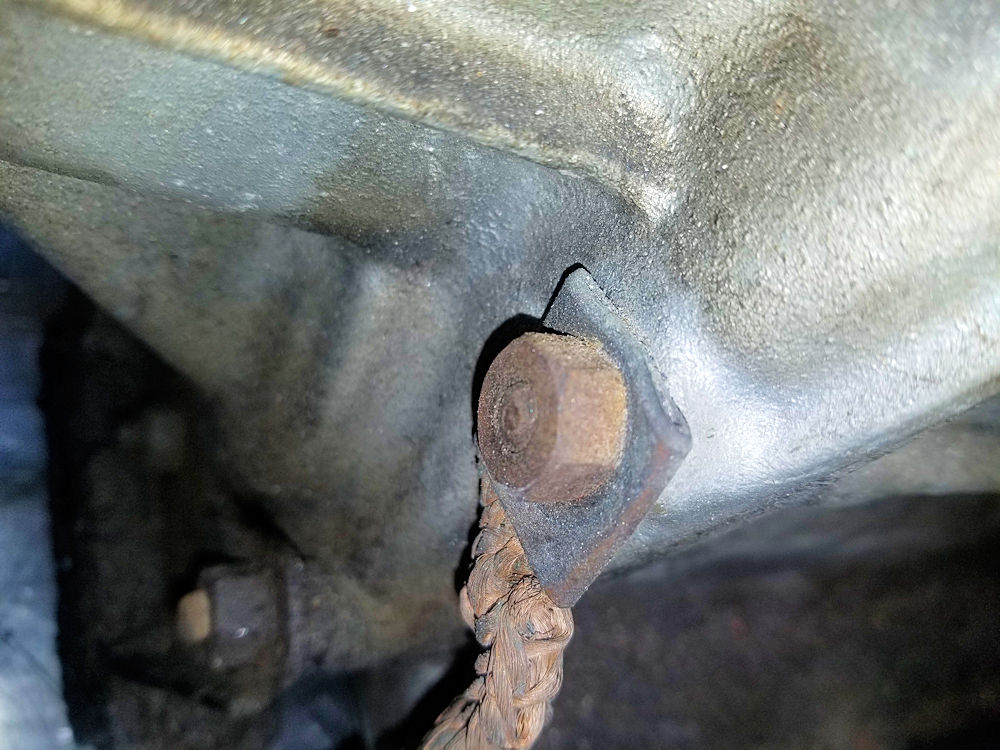
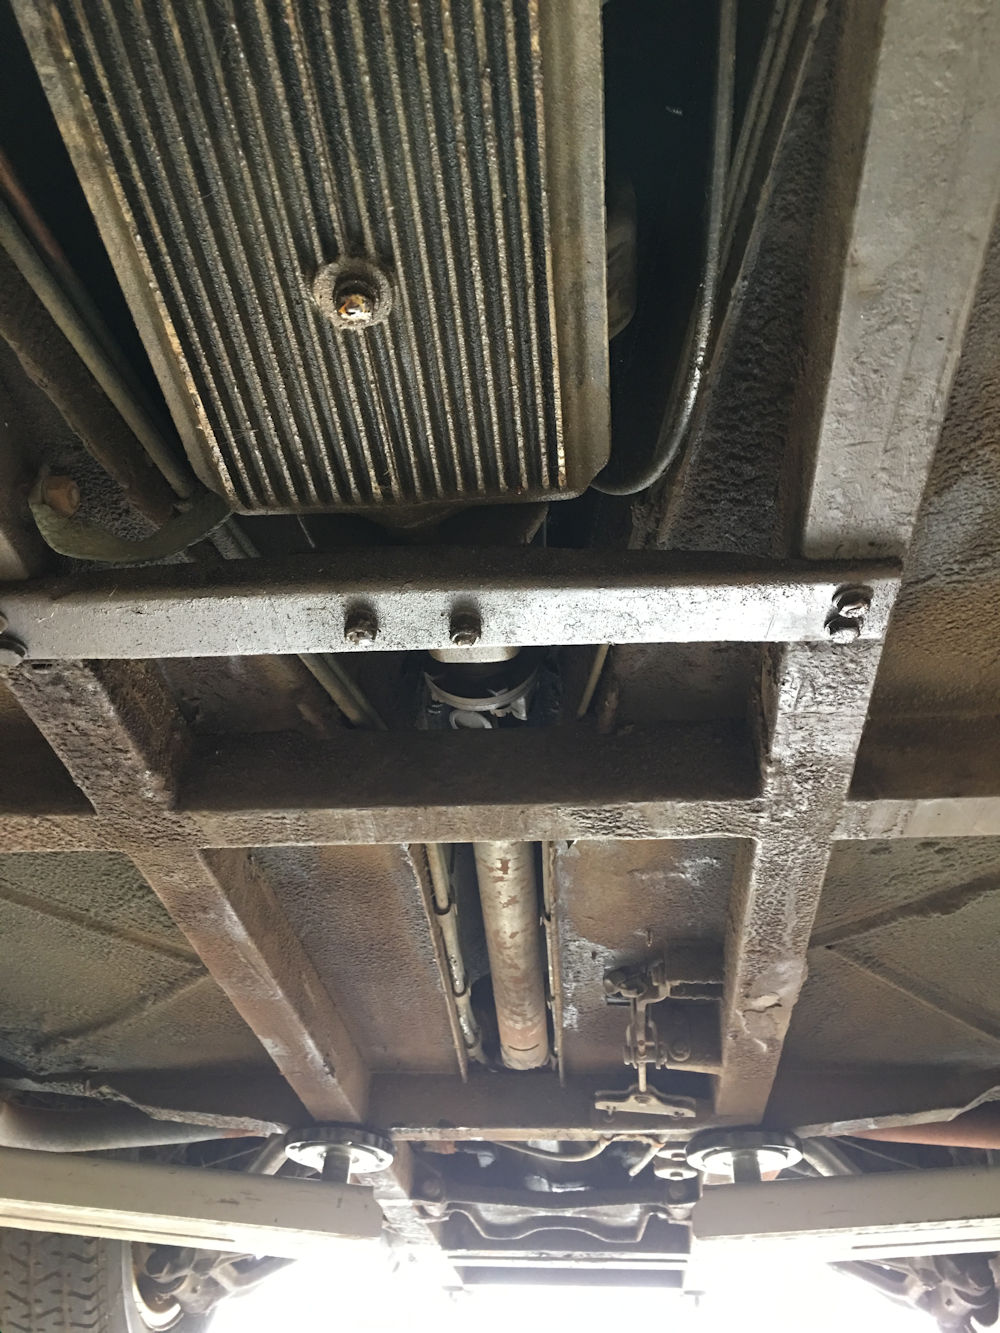
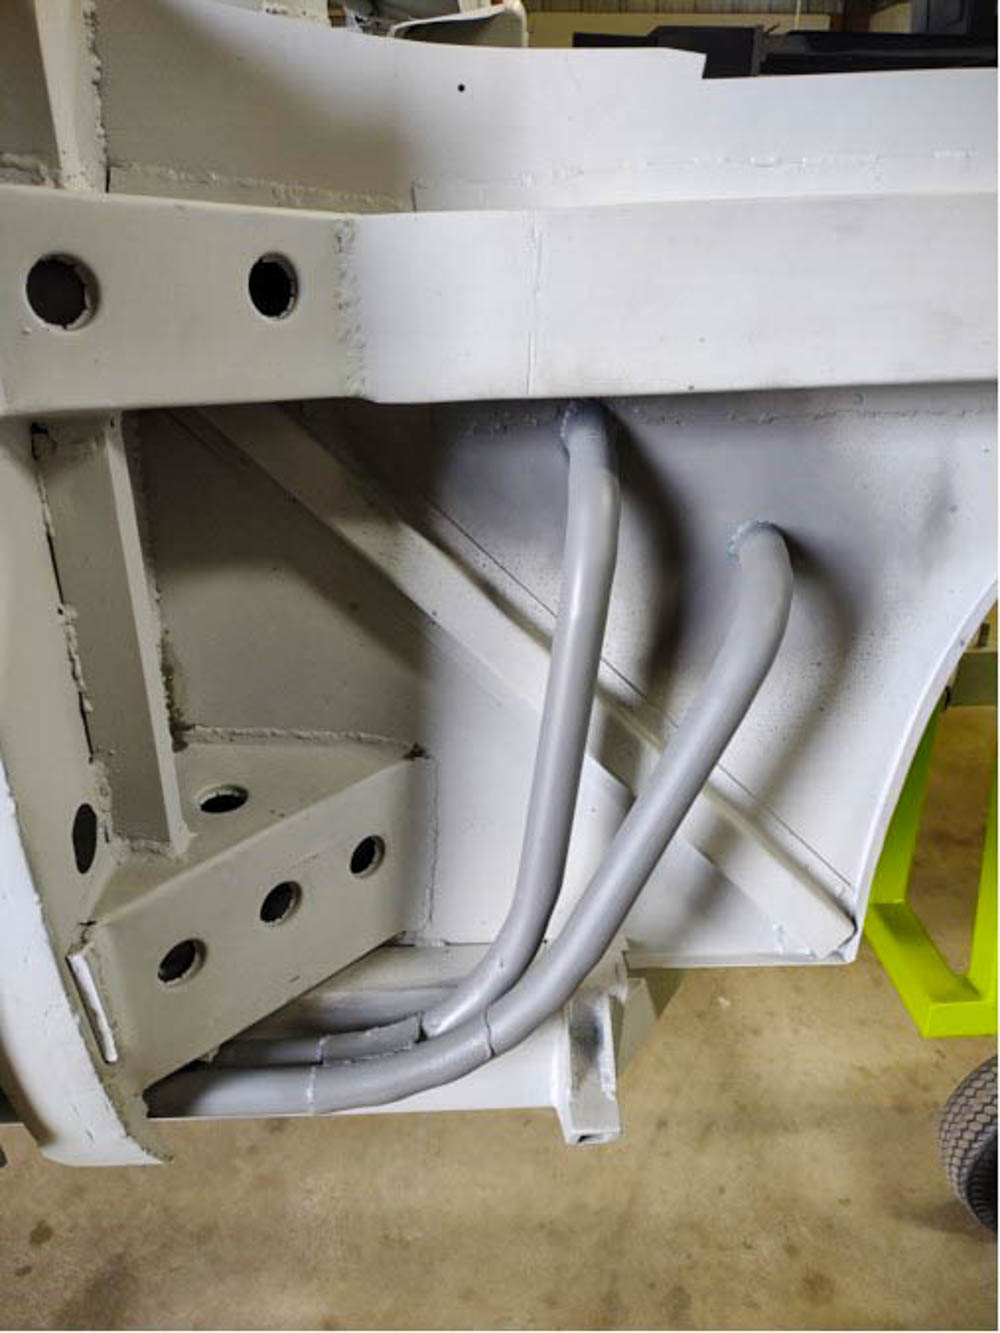
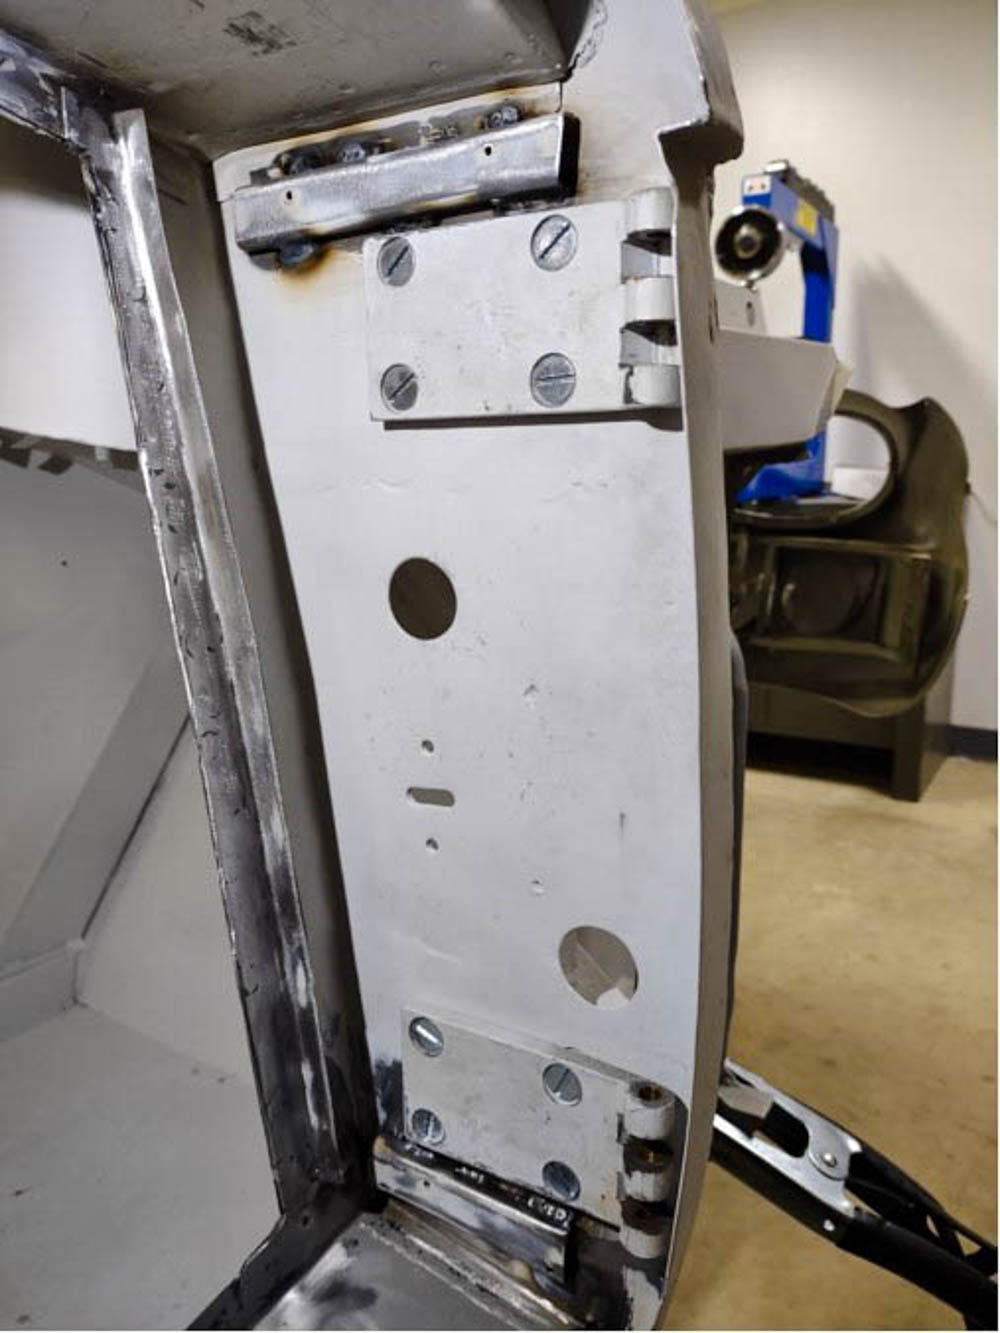
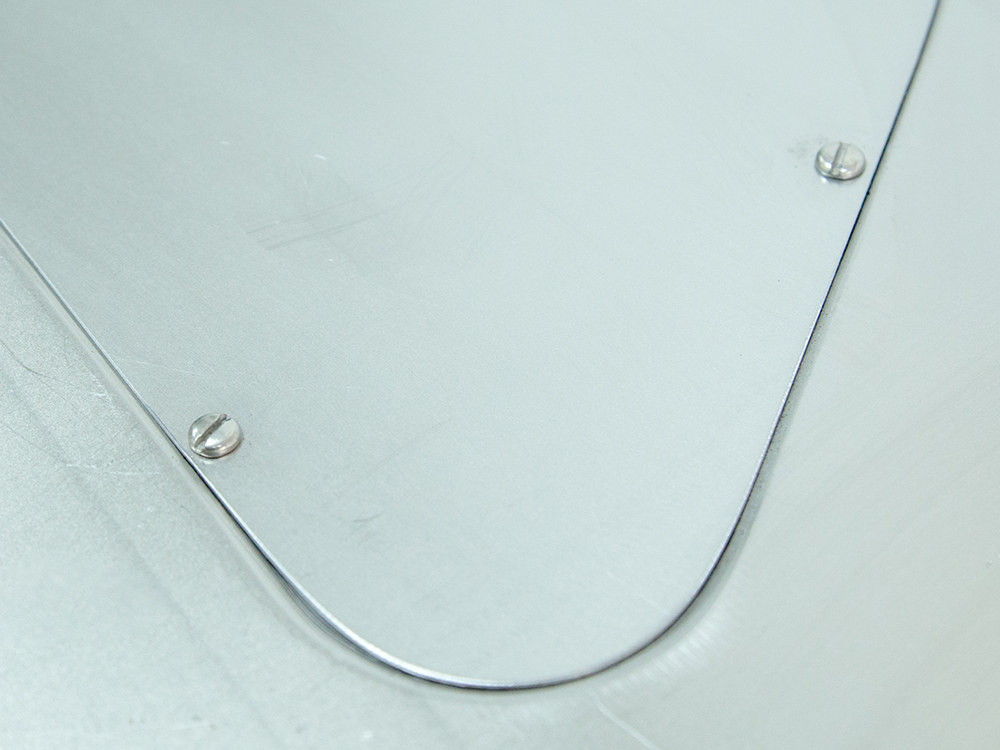
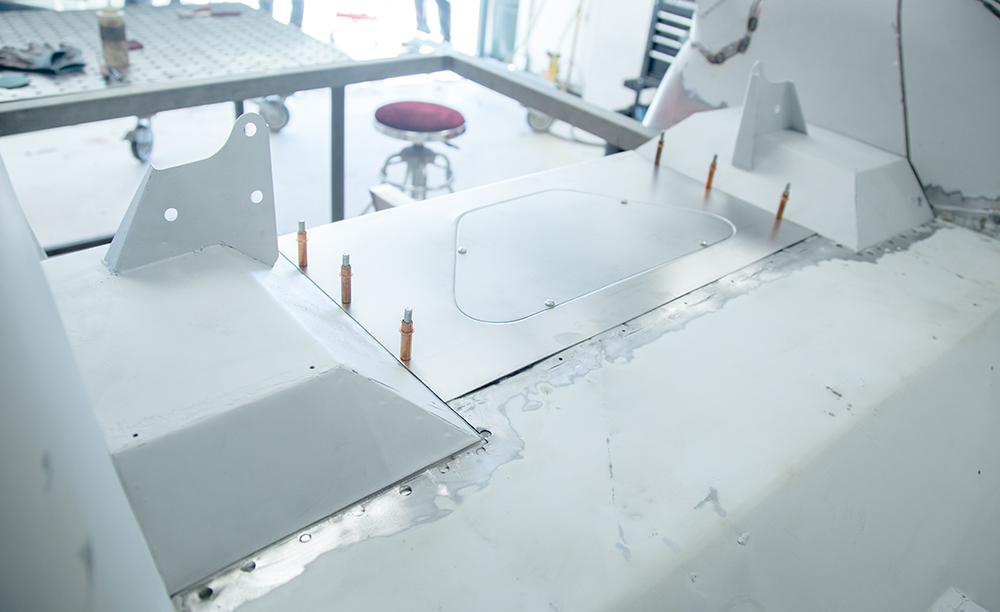
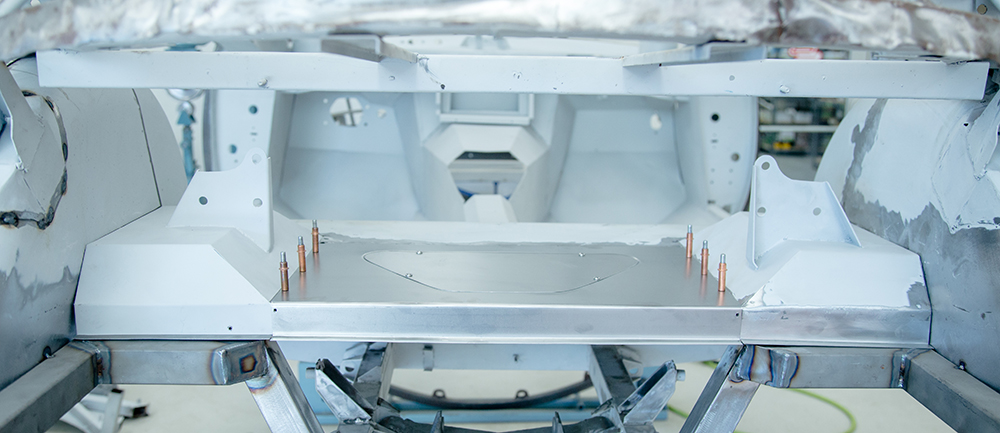
The following
sequence of photos show Jake making a new removable
battery floor panel. On the early 350 models accessibility
to the differential bracket bolts (beneath the battery floor
panel) was extremely difficult. Making the battery floor
panel removable will make servicing the differential much
easier in the future, and the modification will be all but
invisible.
Update report - January 8, 2020
Update report - January 6, 2020
Excellent progress
coming along in the Team CJ Coachworks.
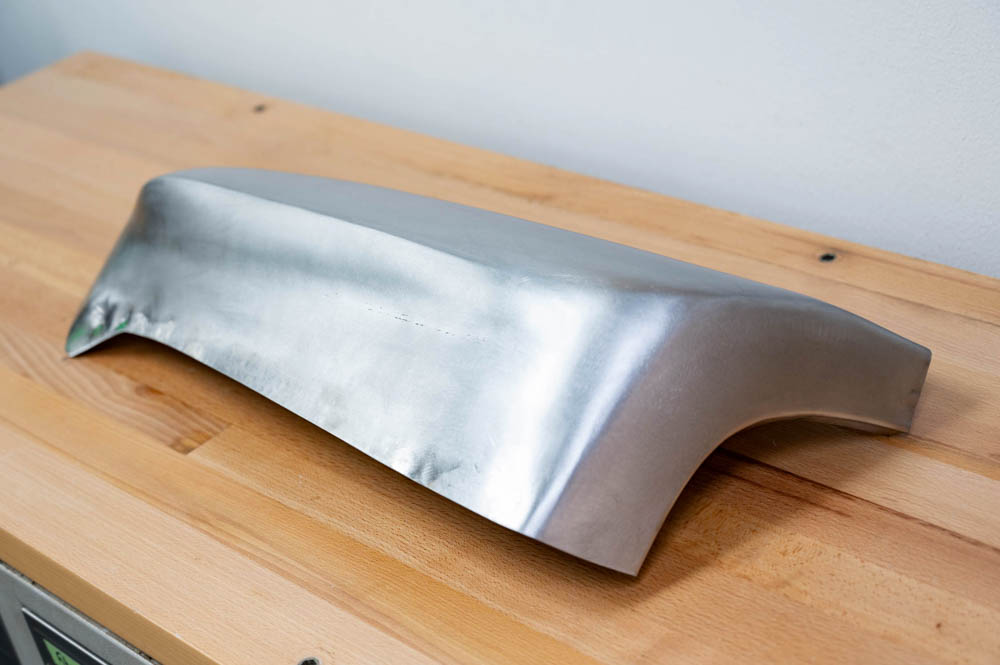
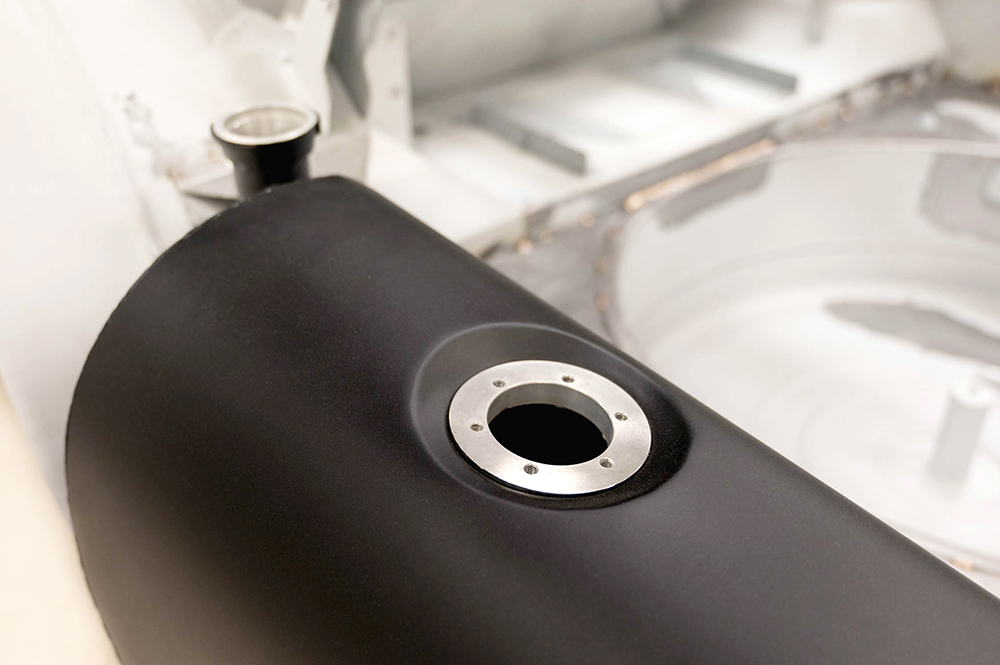
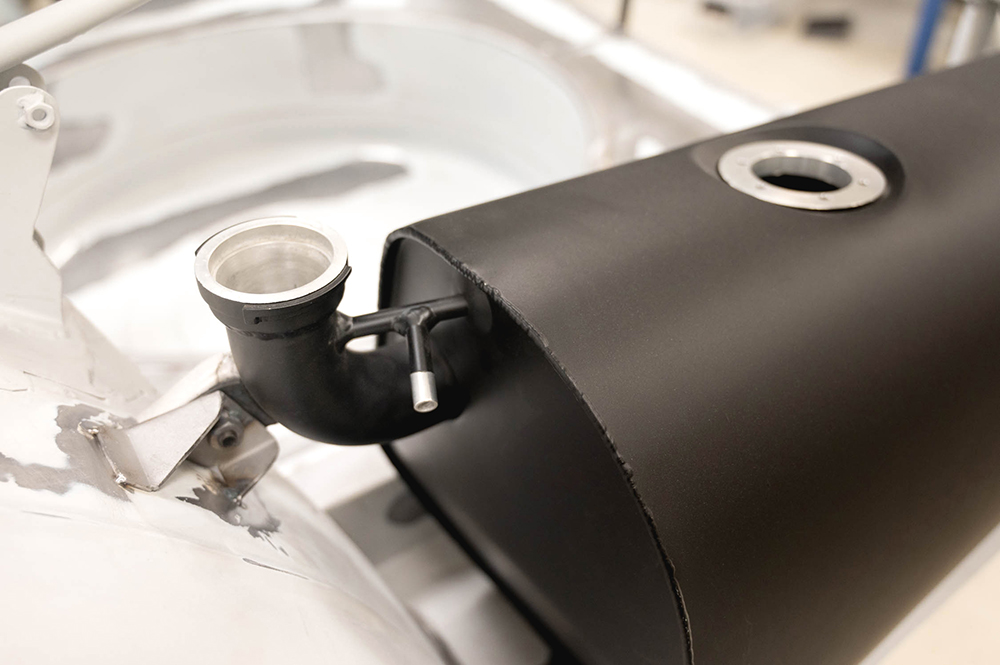
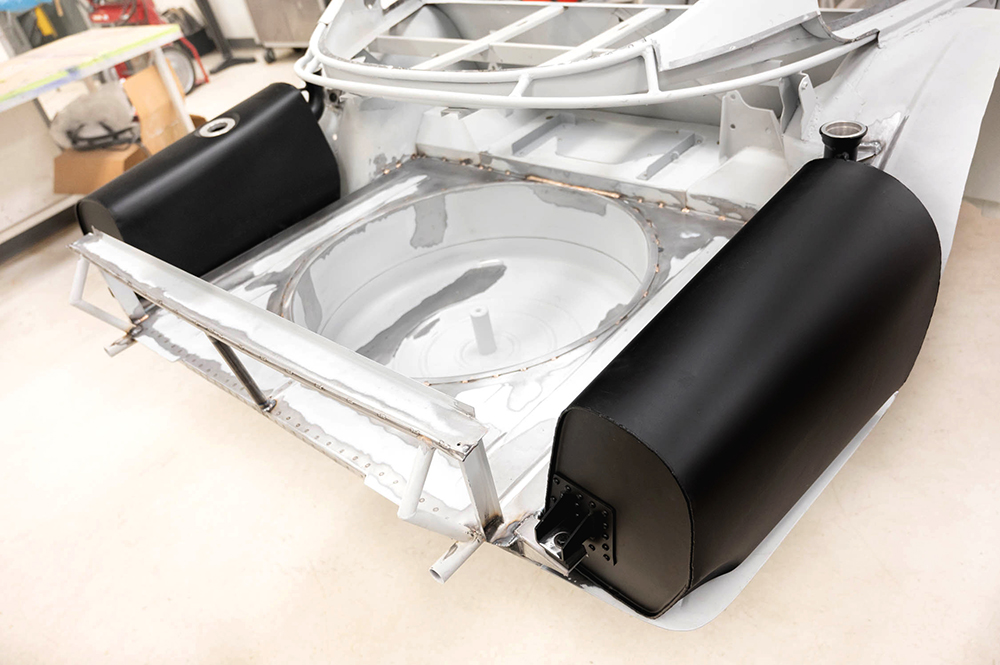
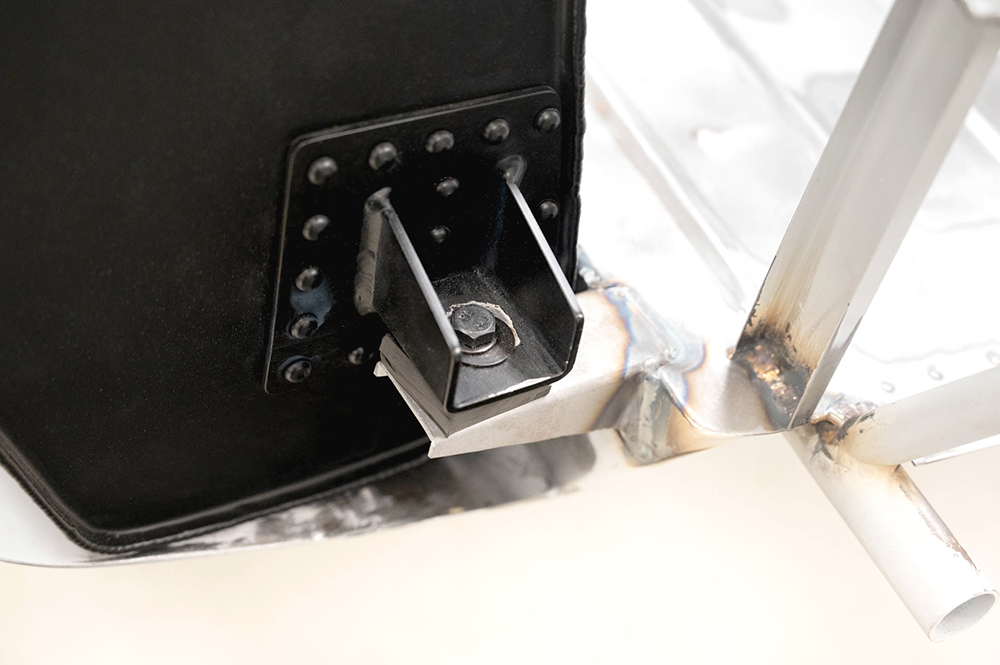
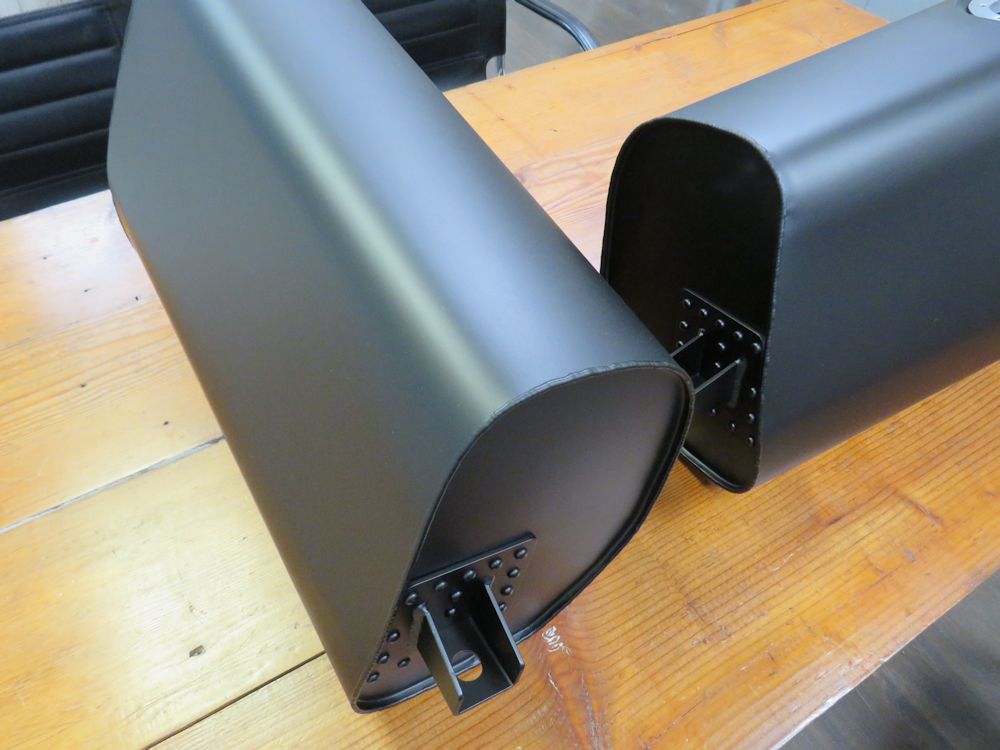
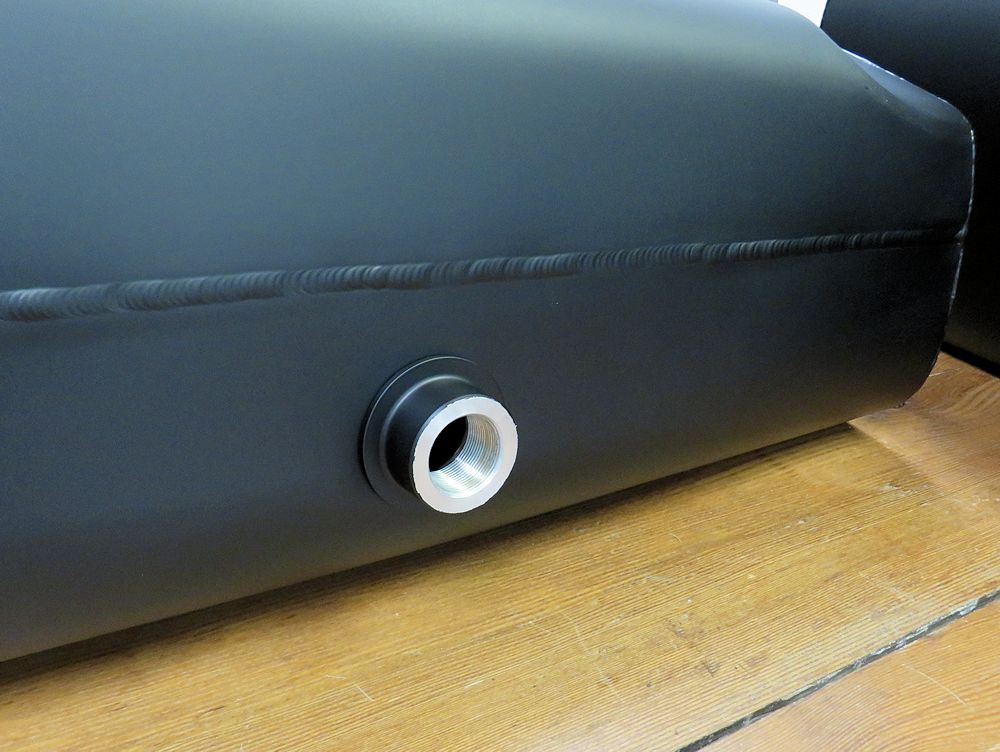
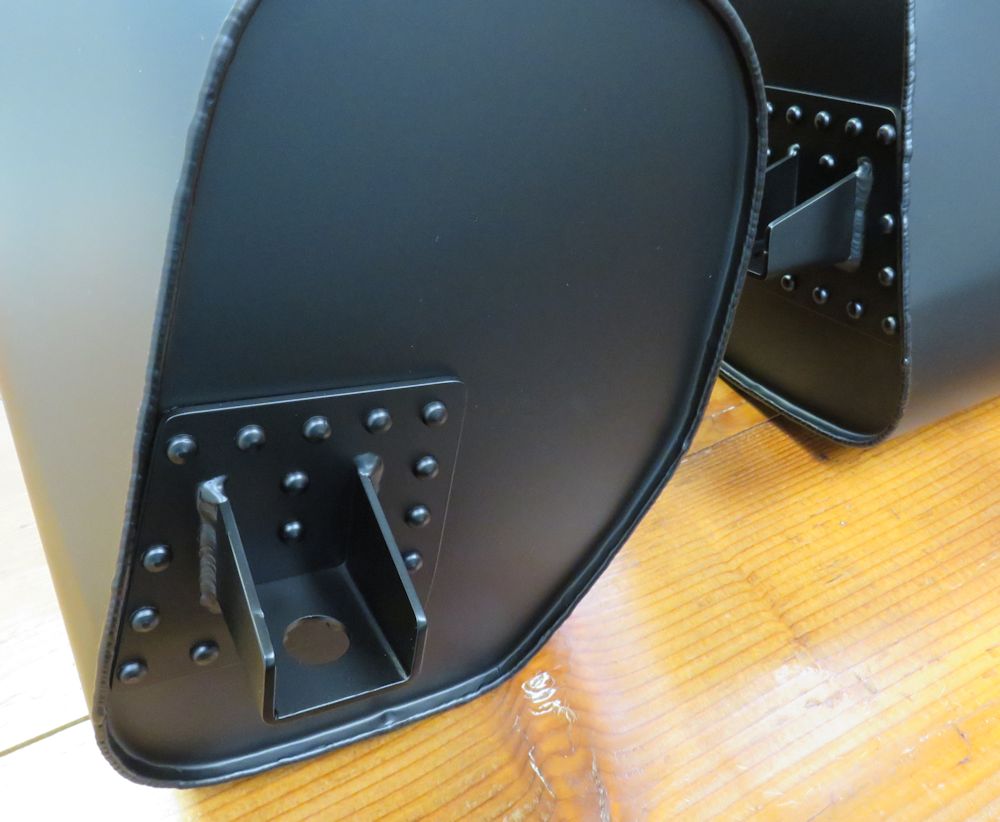
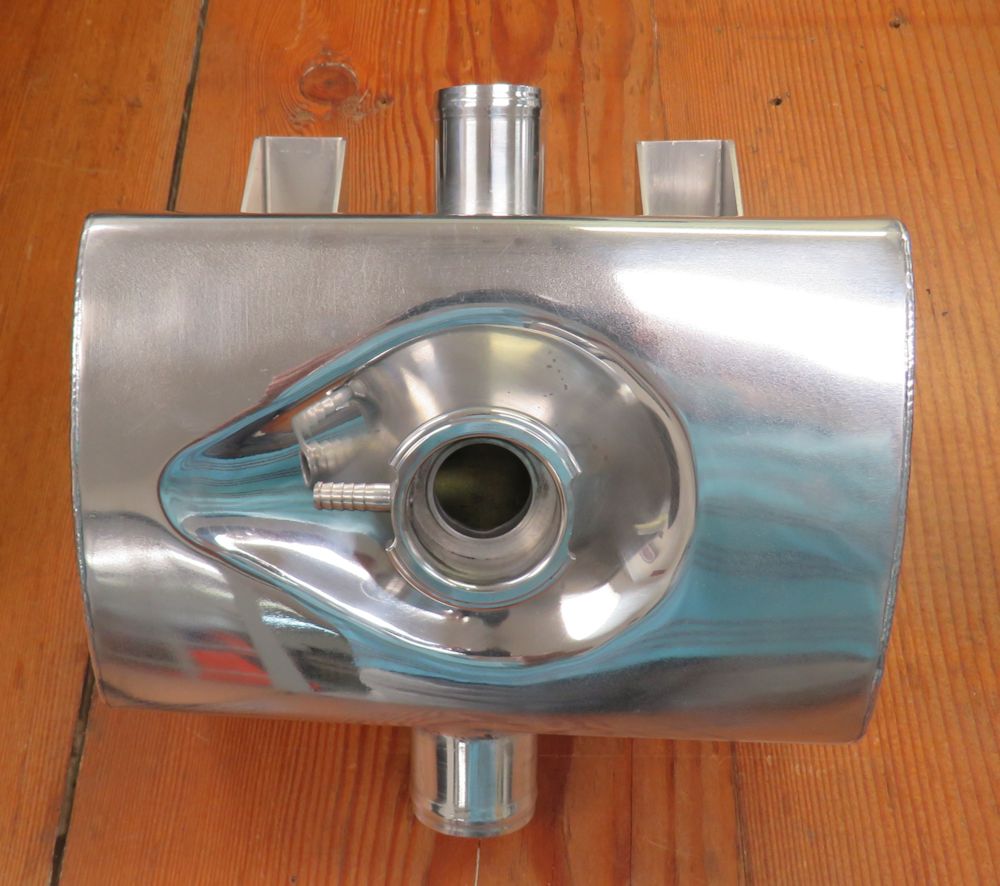
Update report - November 19, 2020
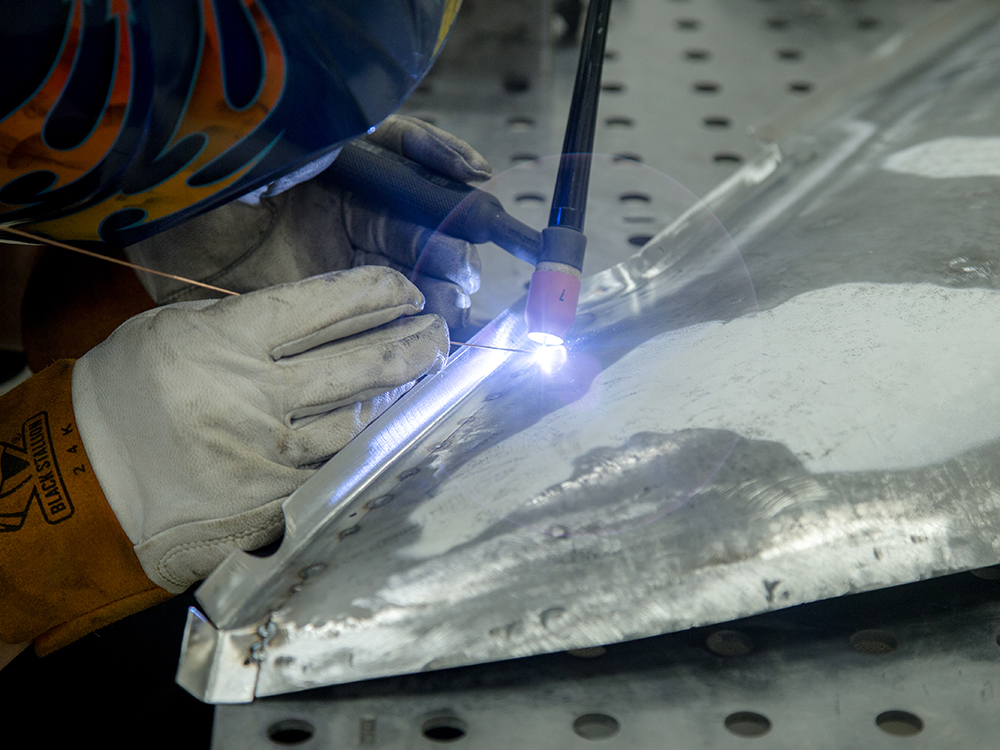
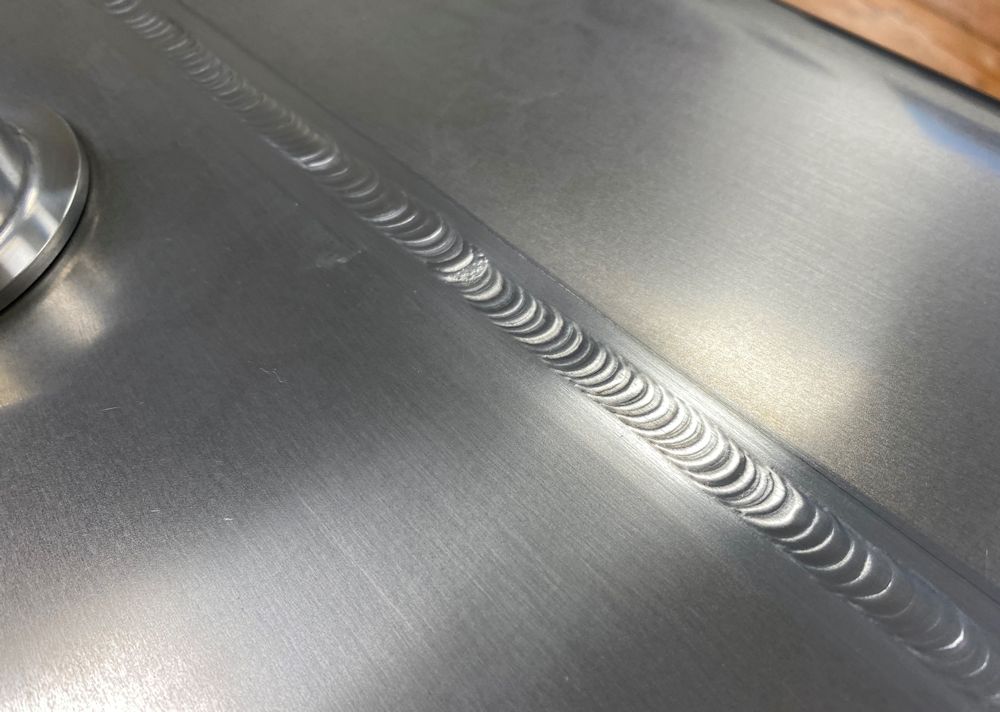
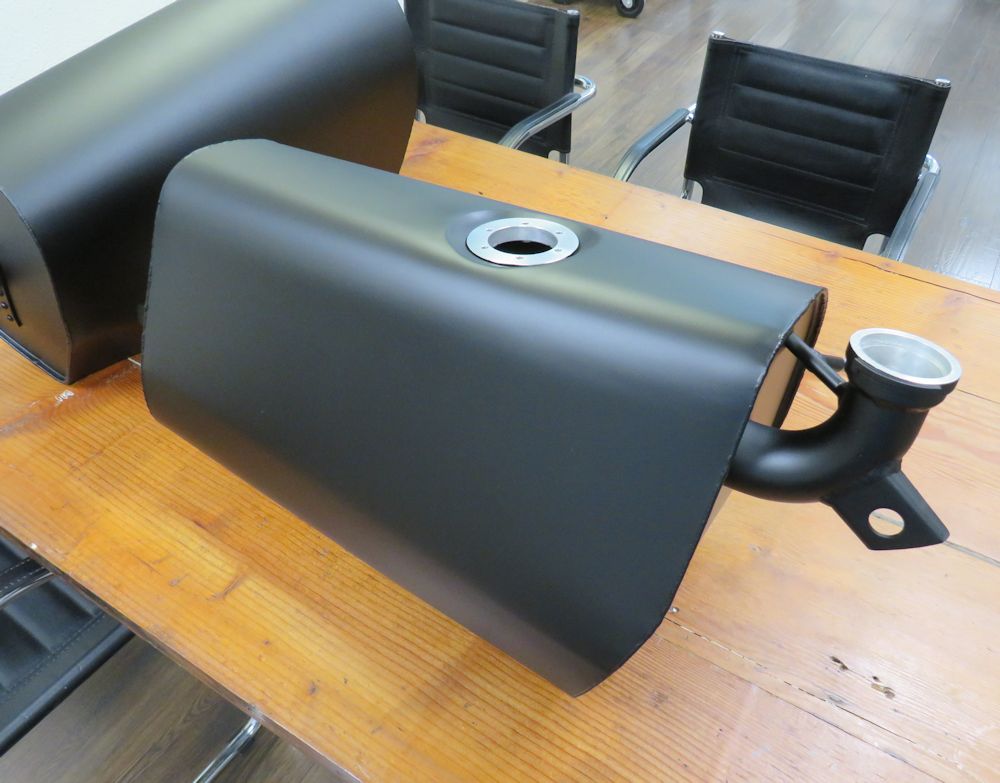
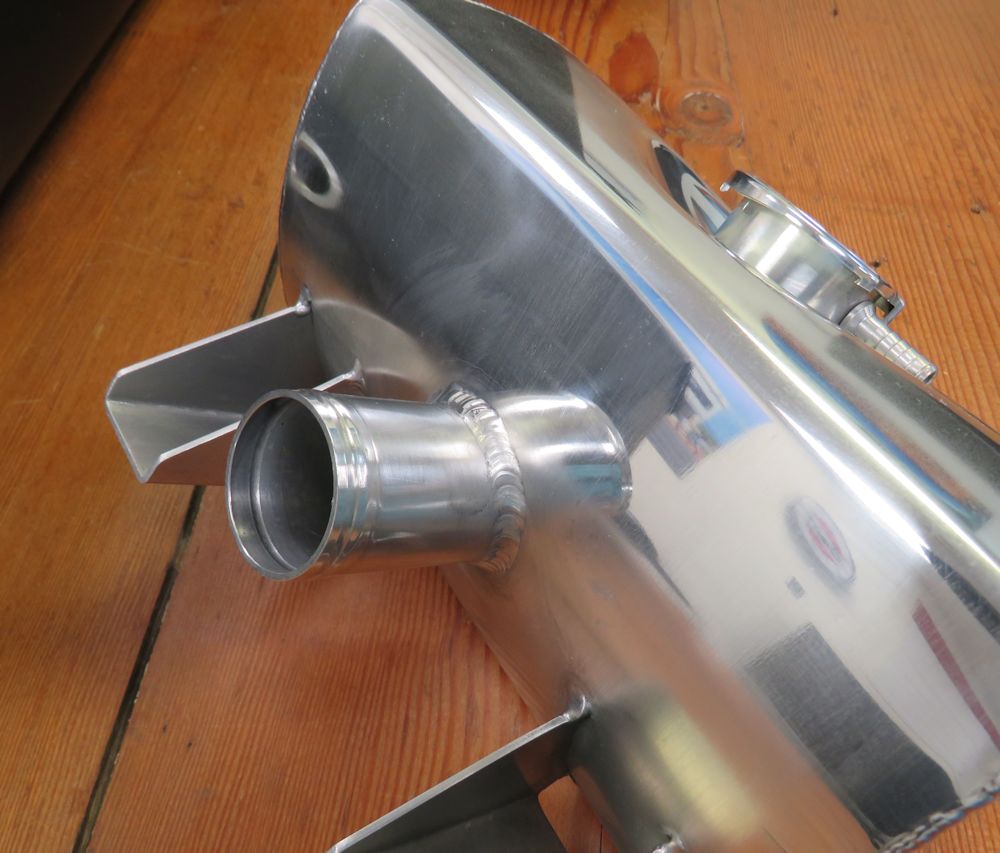
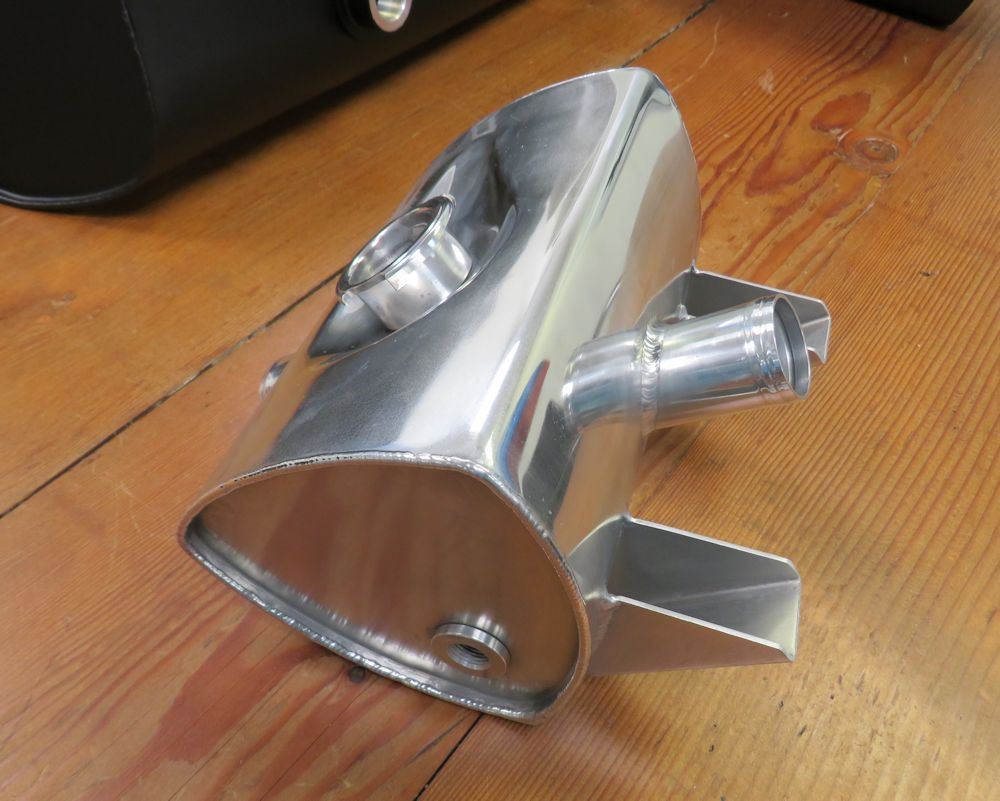
Beautifully
fabricated aluminum fuel tanks and a coolant expansion tank
for our 1967 350 GT project.
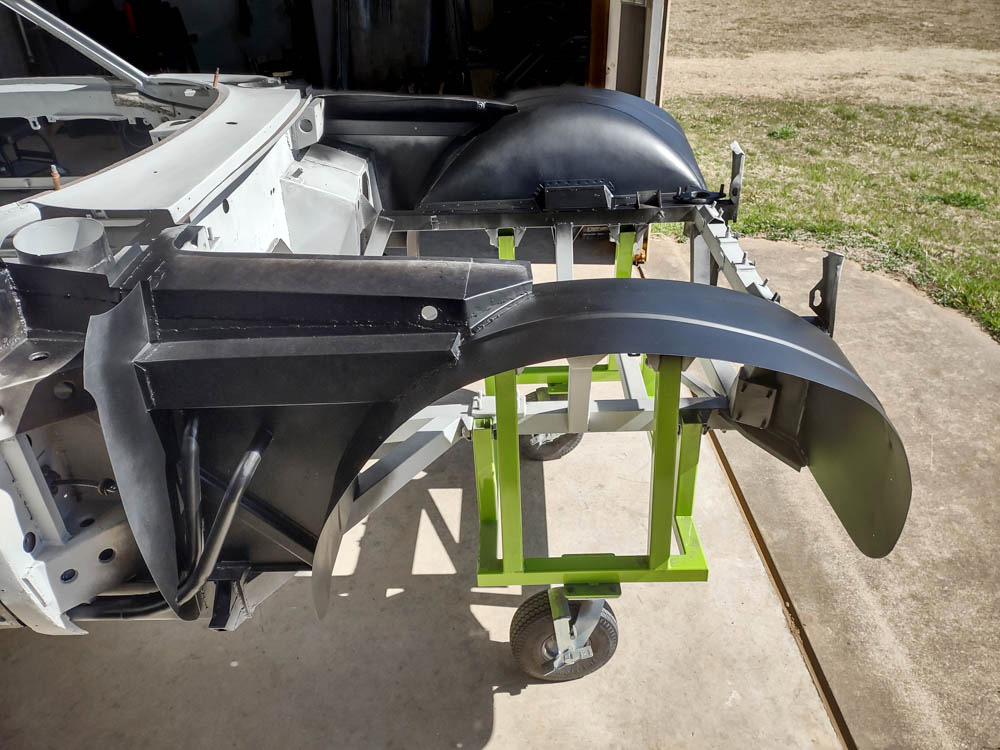
Stunning
workmanship
Fuel
tanks have been painted satin black, per the
originals
Coolant
expansion tank will also be painted satin
black
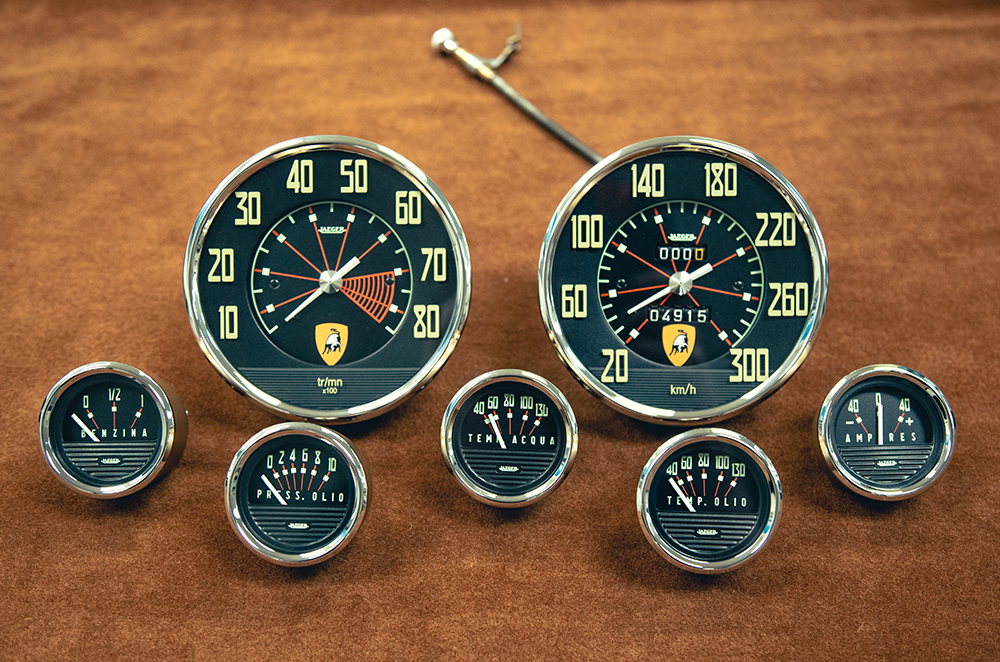
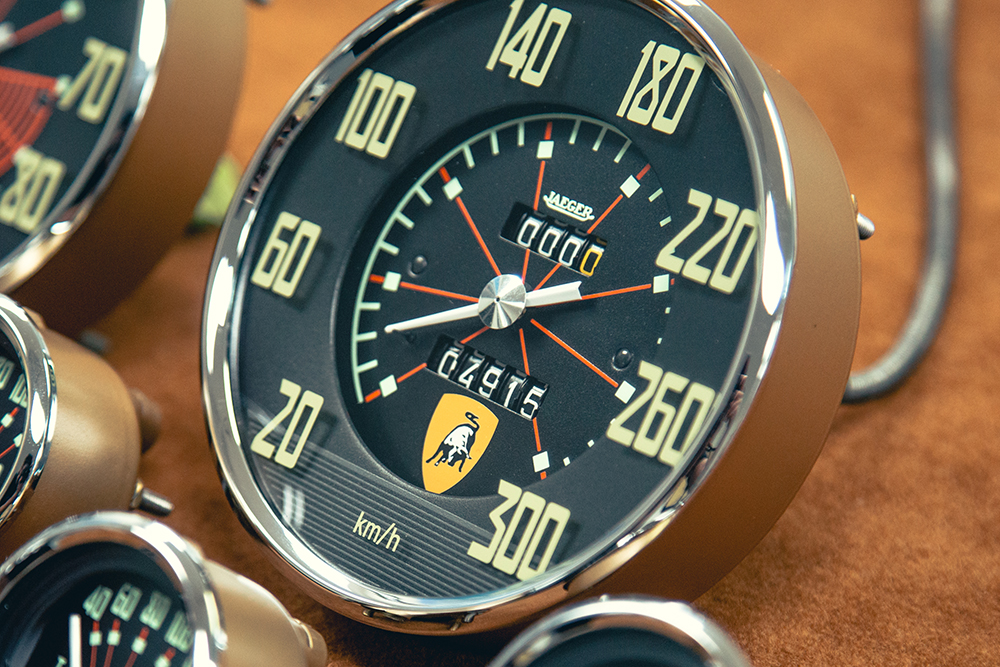
Update report - August 26, 2020
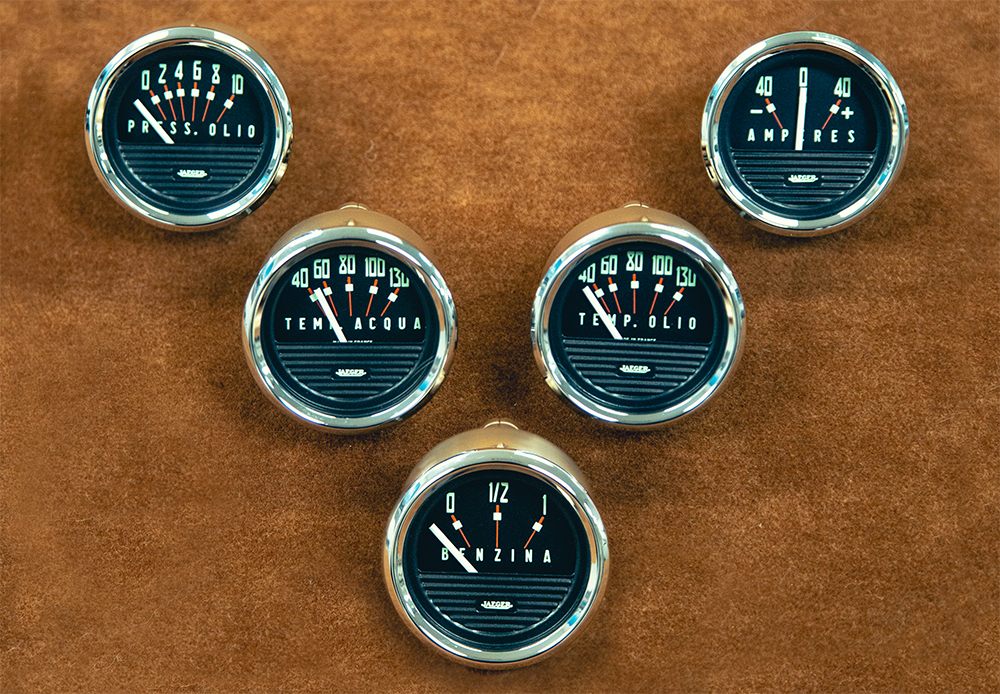
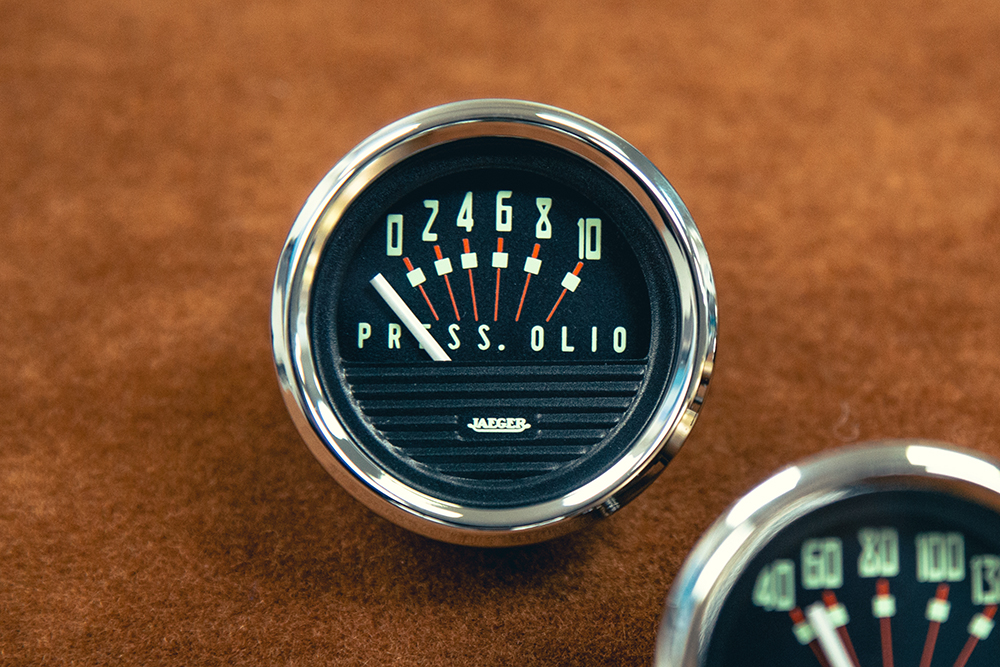
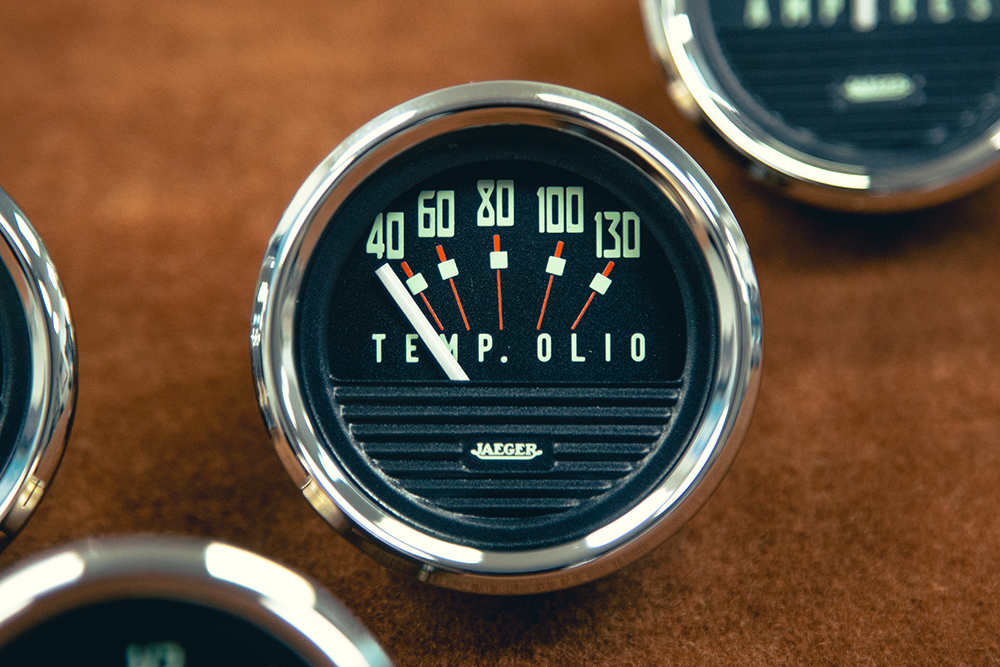
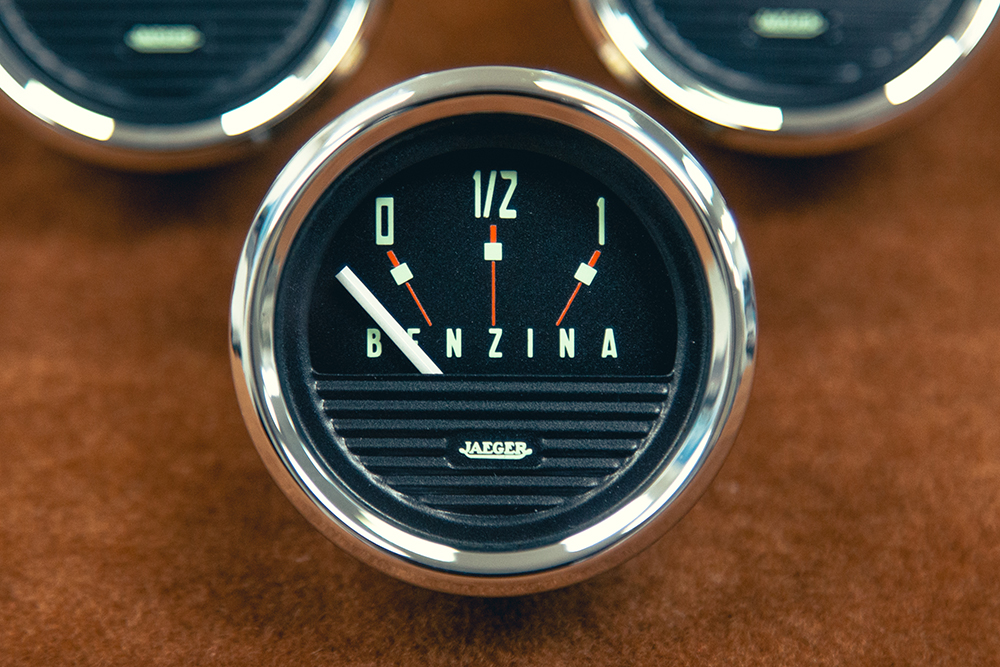
Your gauges have now been fully restored and
rebuilt.
Update report - August 7, 2020
Andy James has
been making fantastic progress in the Team CJ Coachworks.
Update report - July 29, 2020
Lots of progress
in the Team CJ Coachworks!
Update report - June 17, 2020
Lots of progress
in the Team CJ Coachworks!
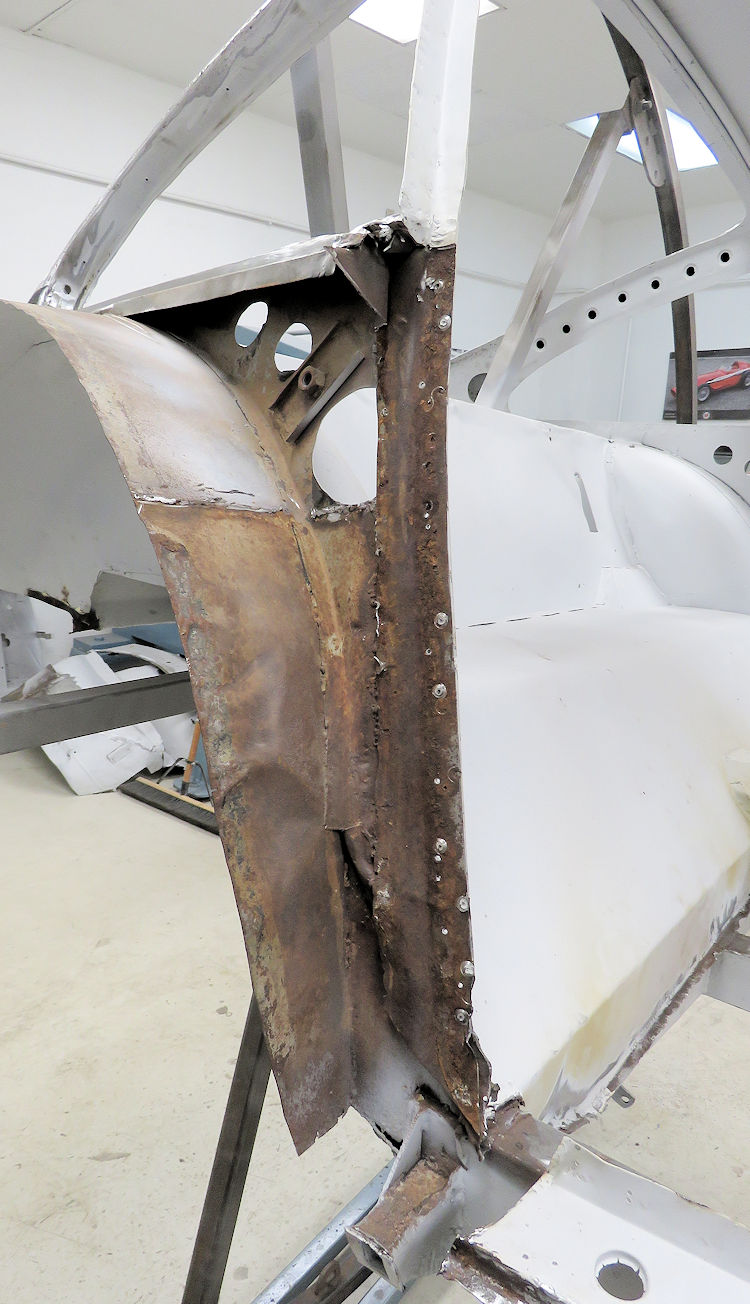
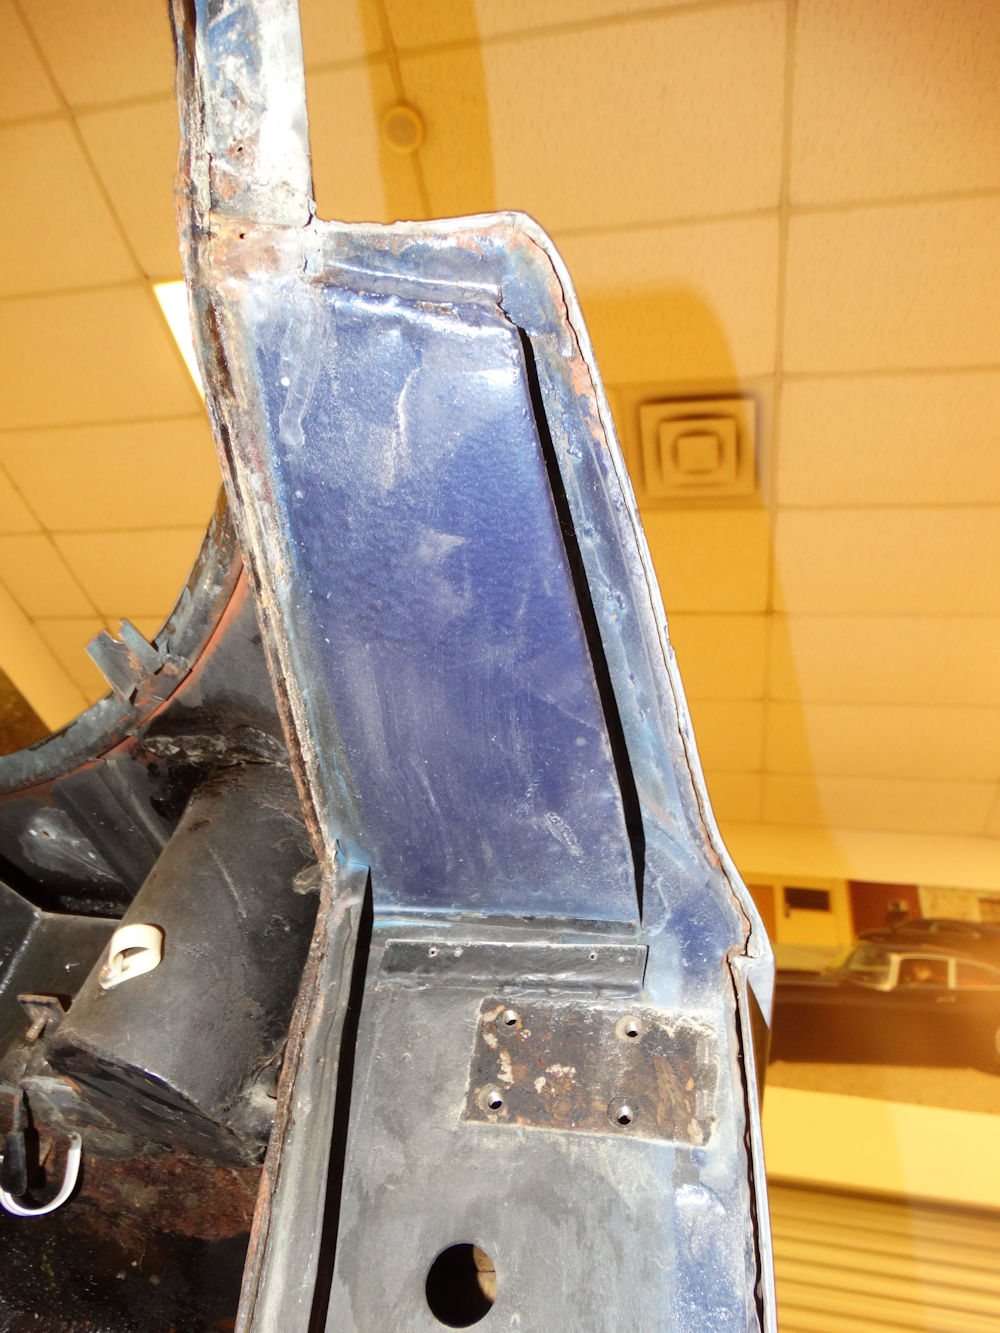
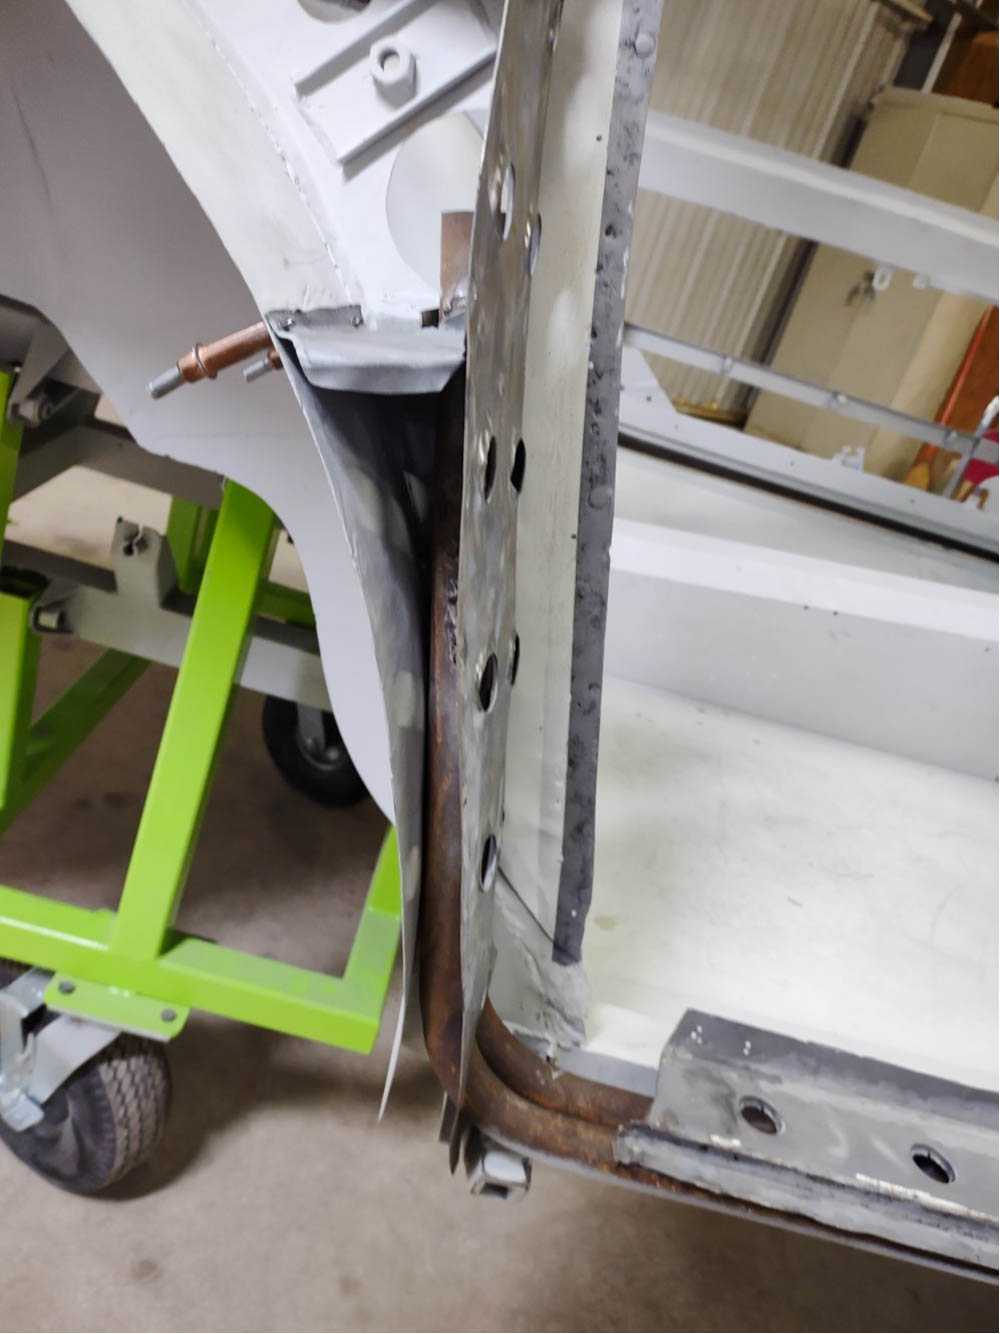
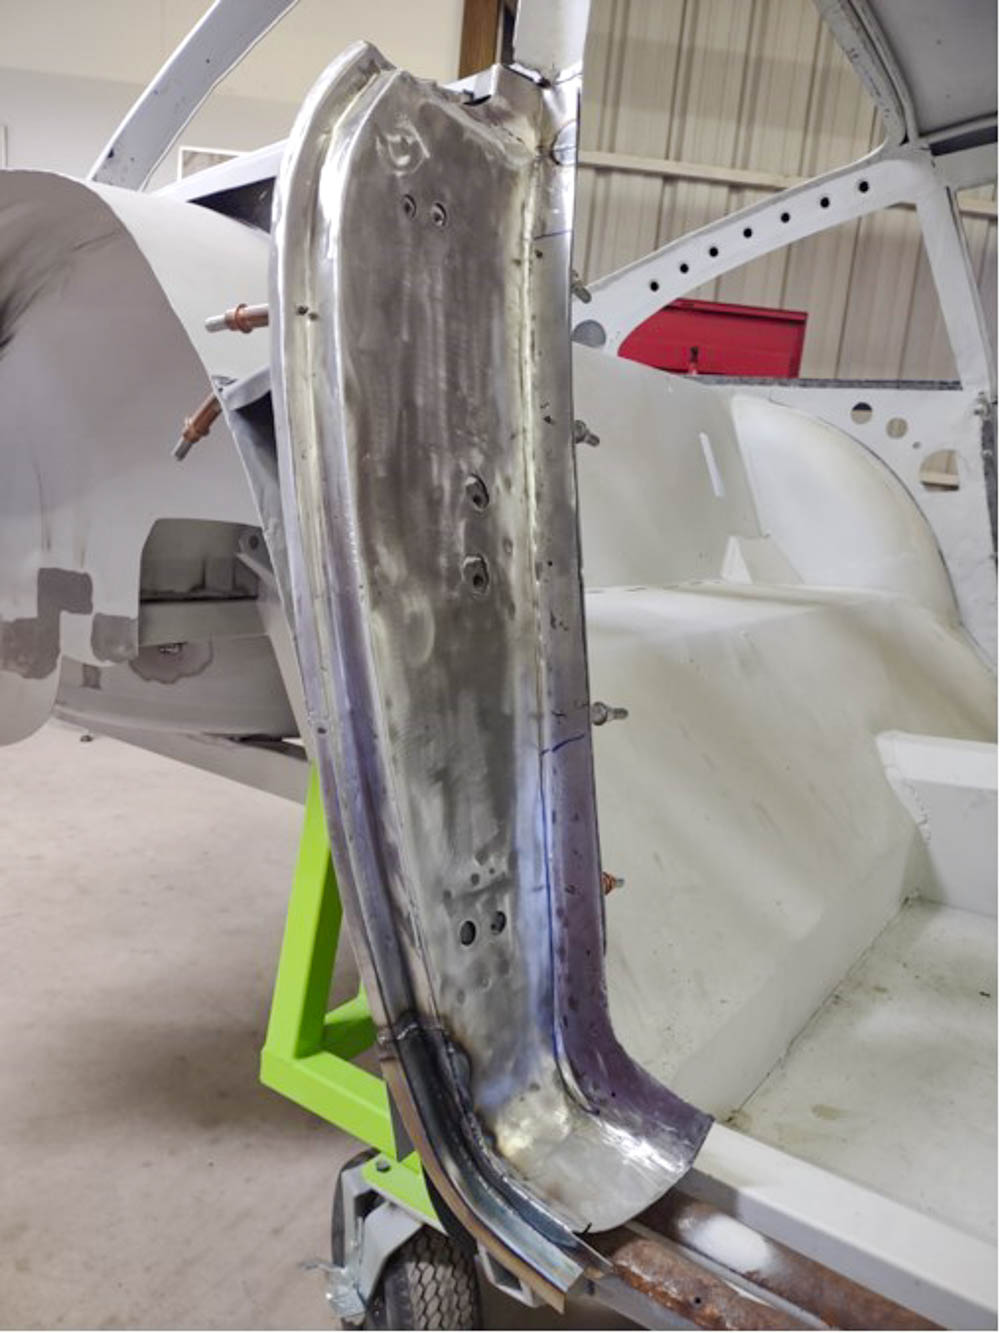
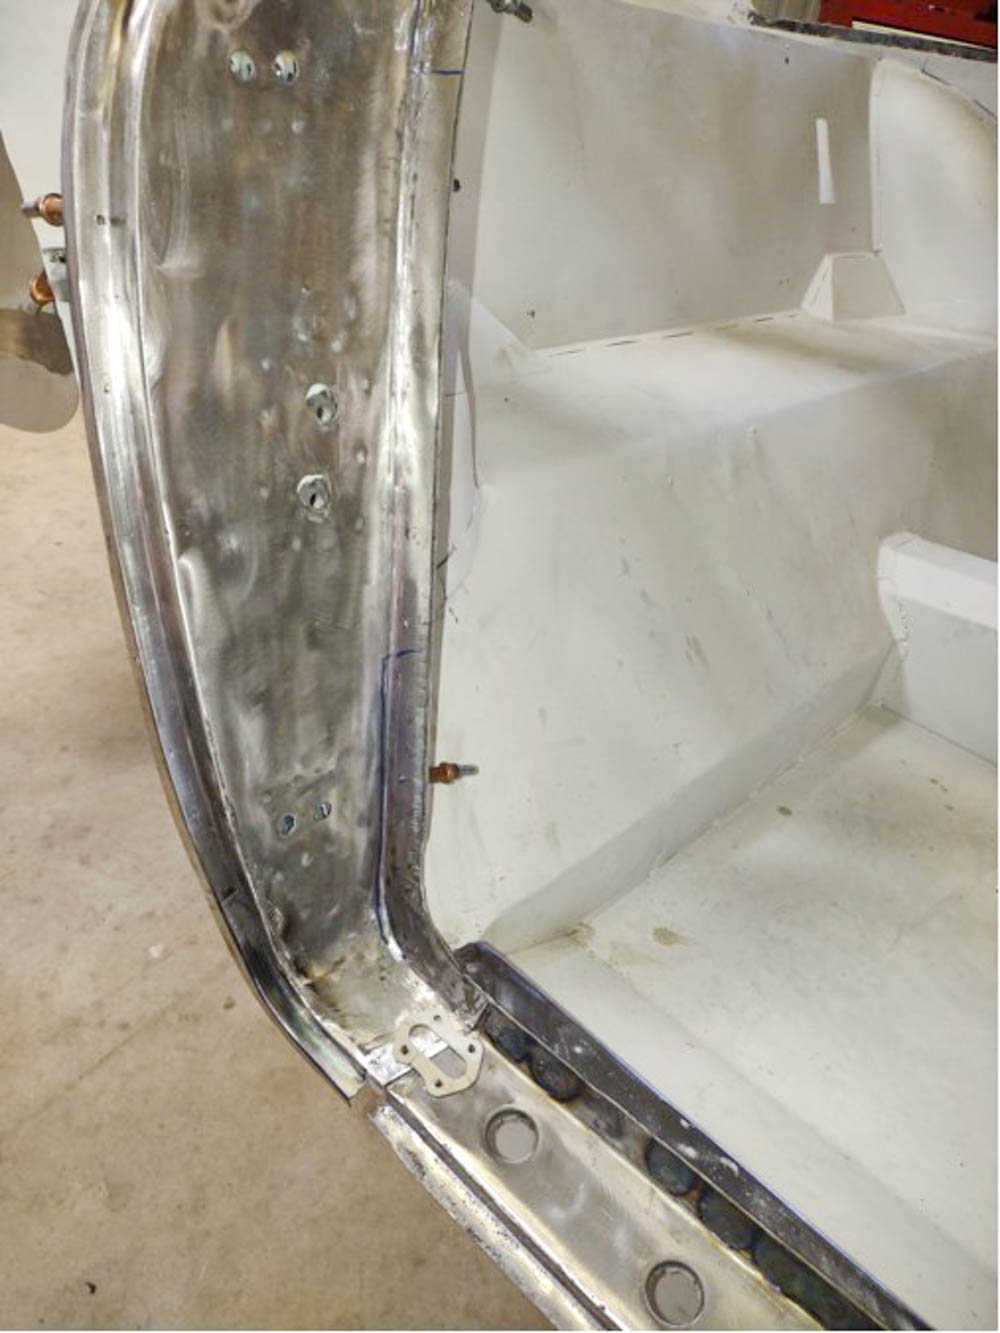
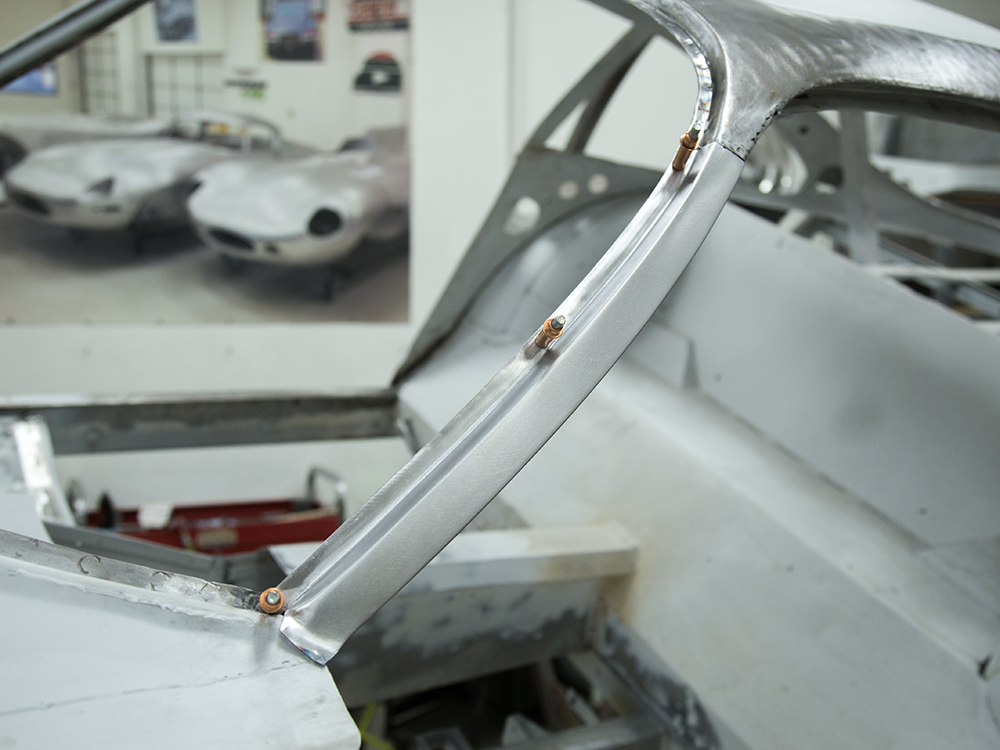
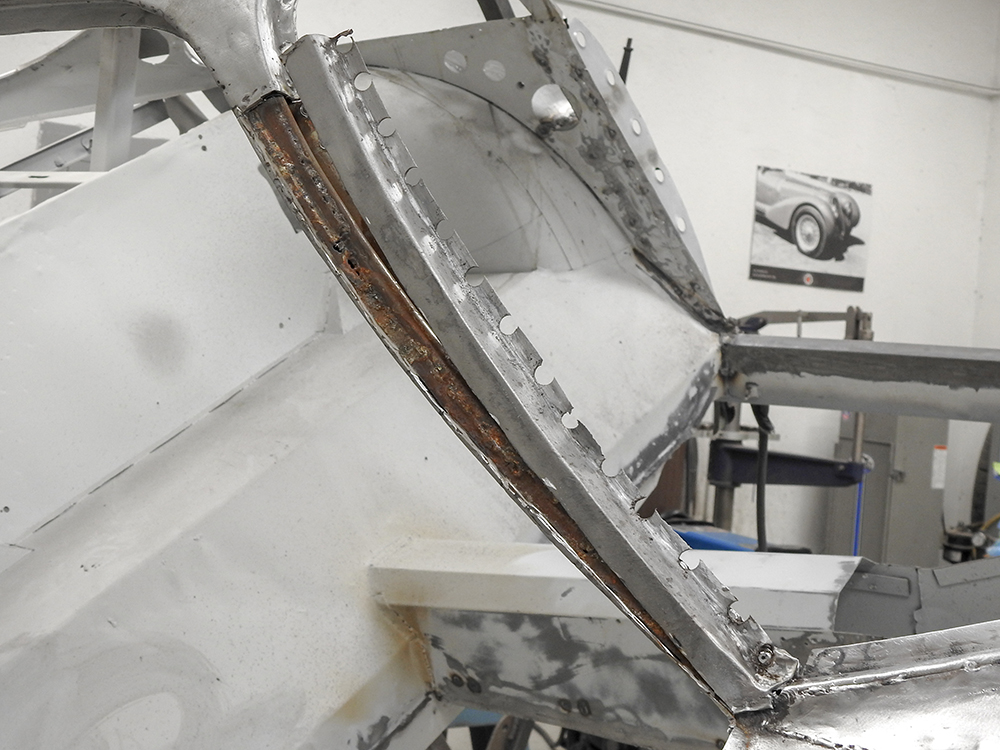
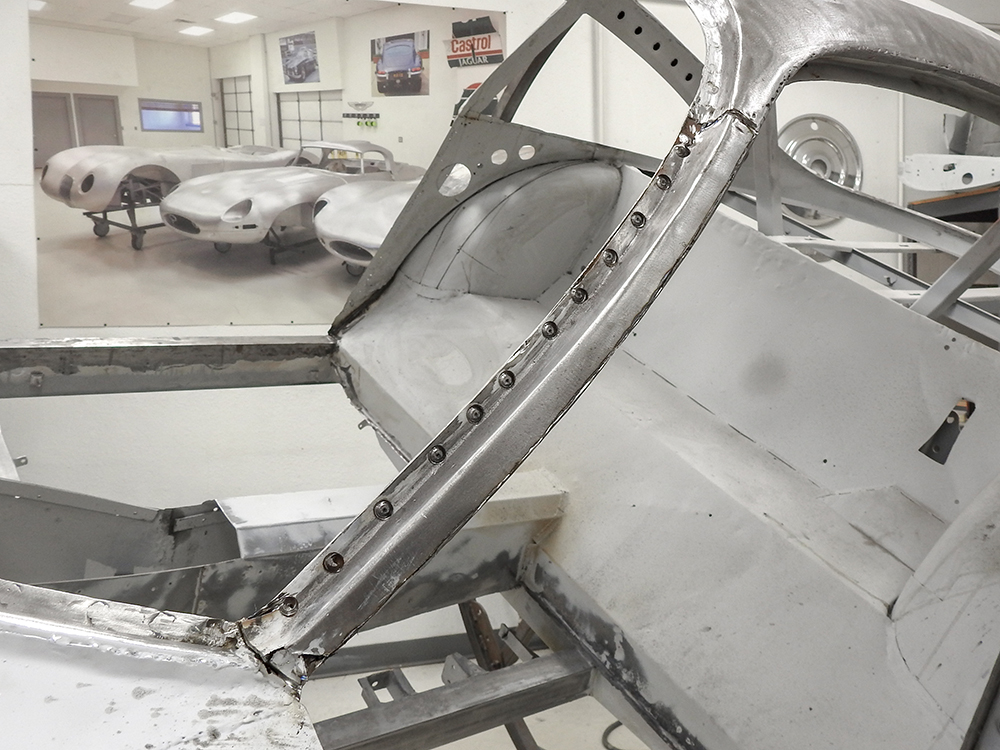
Removing out skins of A pillars to deal with
rust beneath
Drilling out A pillar spot welds
Zero primer or rust preventative used when the
cars were built
Main front inner substructure is now restored
and totally sound
Foot wells will be installed next week
Lots of progress!
Update report - April 24, 2020
Jake
describes the recent fabrication work that's been done to
the 350 GT.
Update report - March 26, 2020
Jake continues to make great progress
in the Team CJ Coachworks.
Trial fitting the new driver's floor pan
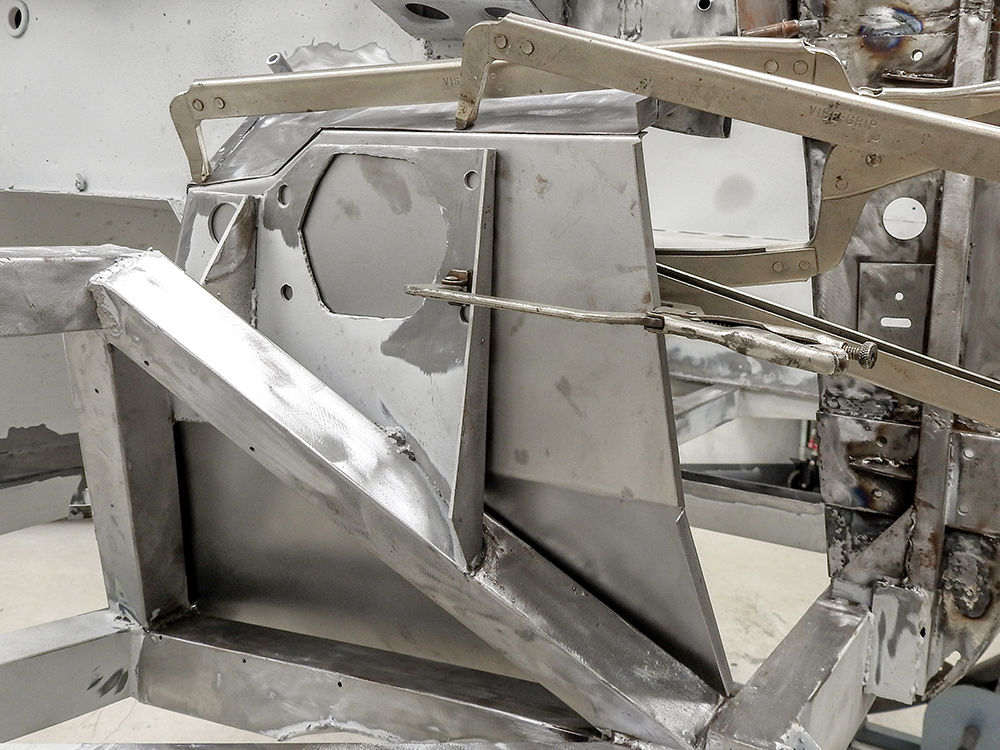
Work progressing well in the Team CJ
Coachworks and also in the machine shop, where Corey
machined new bronze bushings we needed to rebuild the pedal
box.
Jake has been making great progress this week
Welding the new pedal box and toe board
panels in place
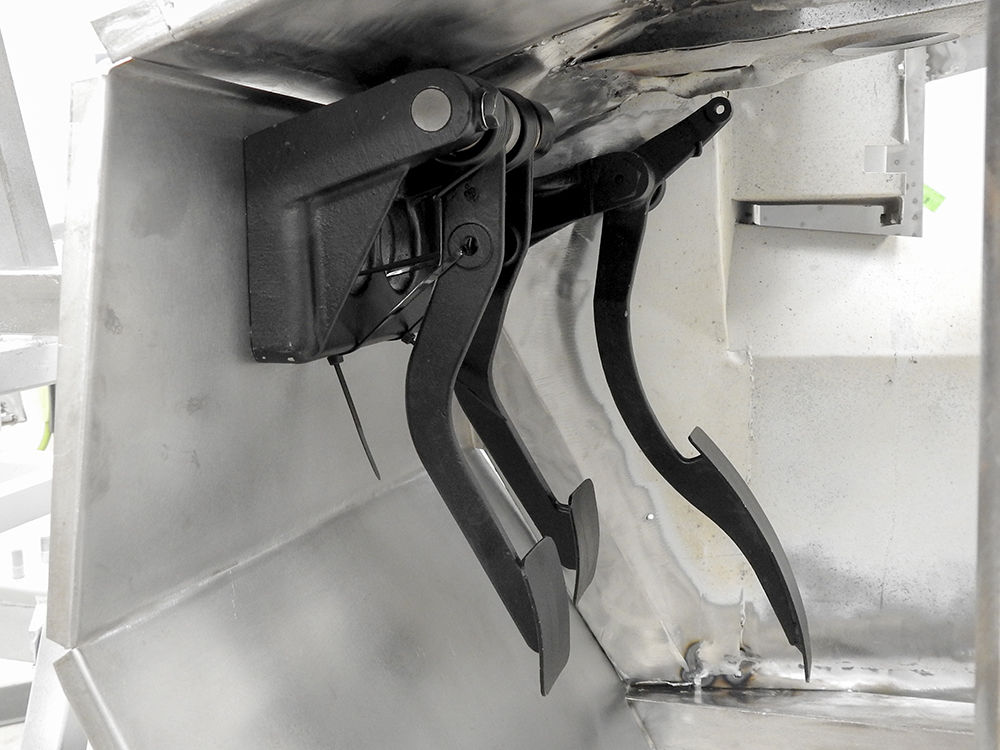
Corey machining new bronze bushings to rebuild
original pedal box in the Team CJ machine shop
Assembling pedals with new bronze bushings
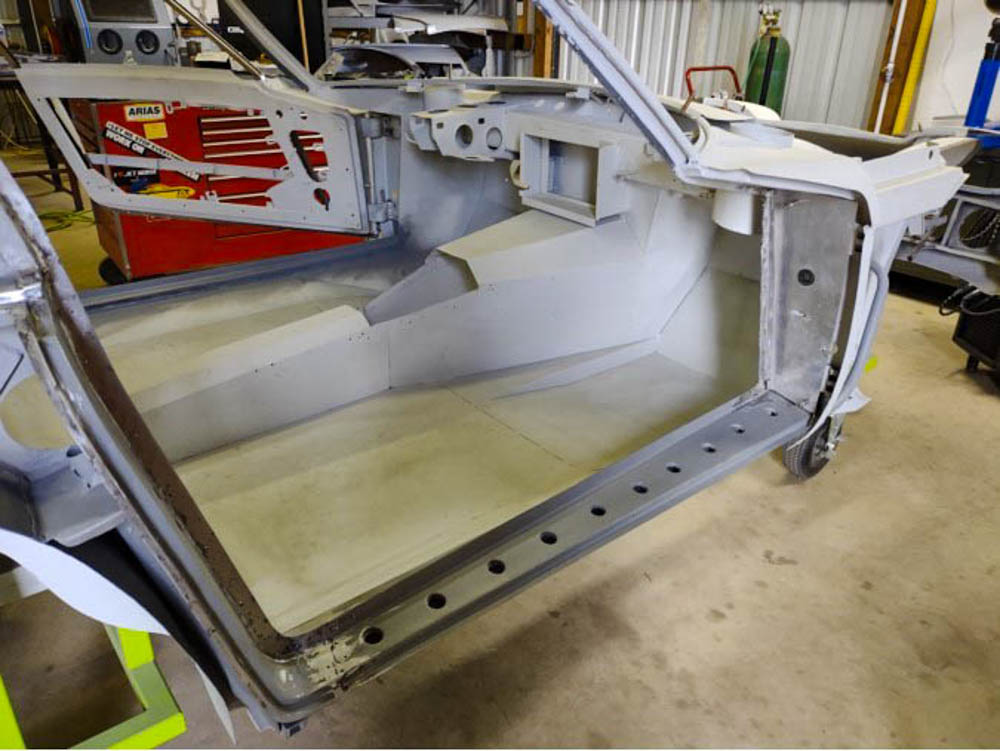
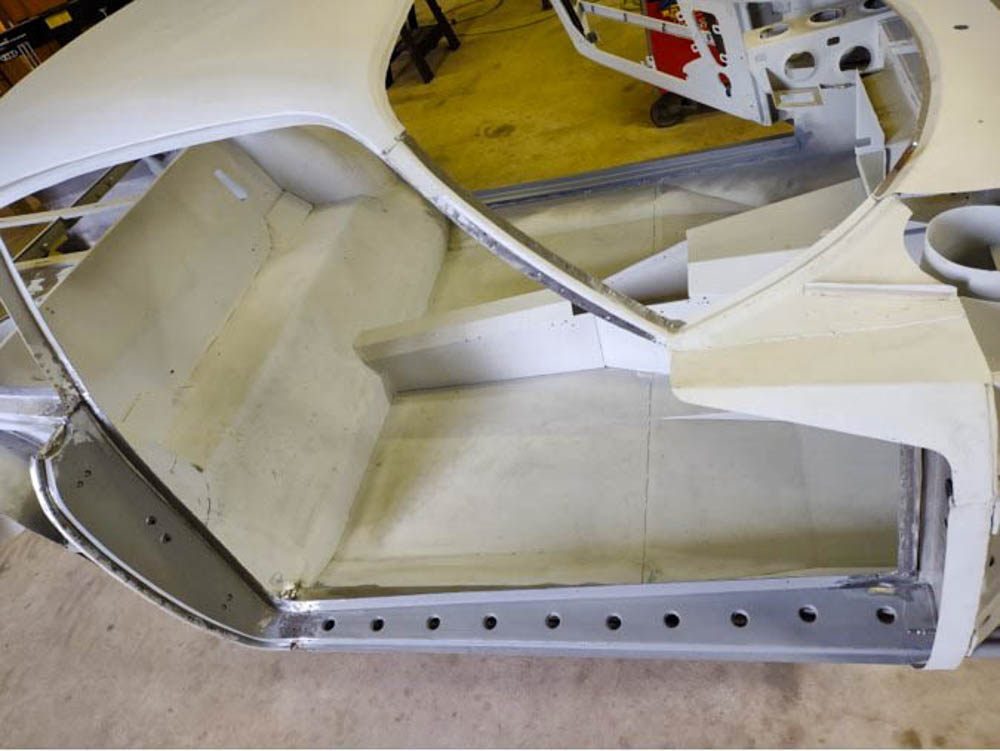
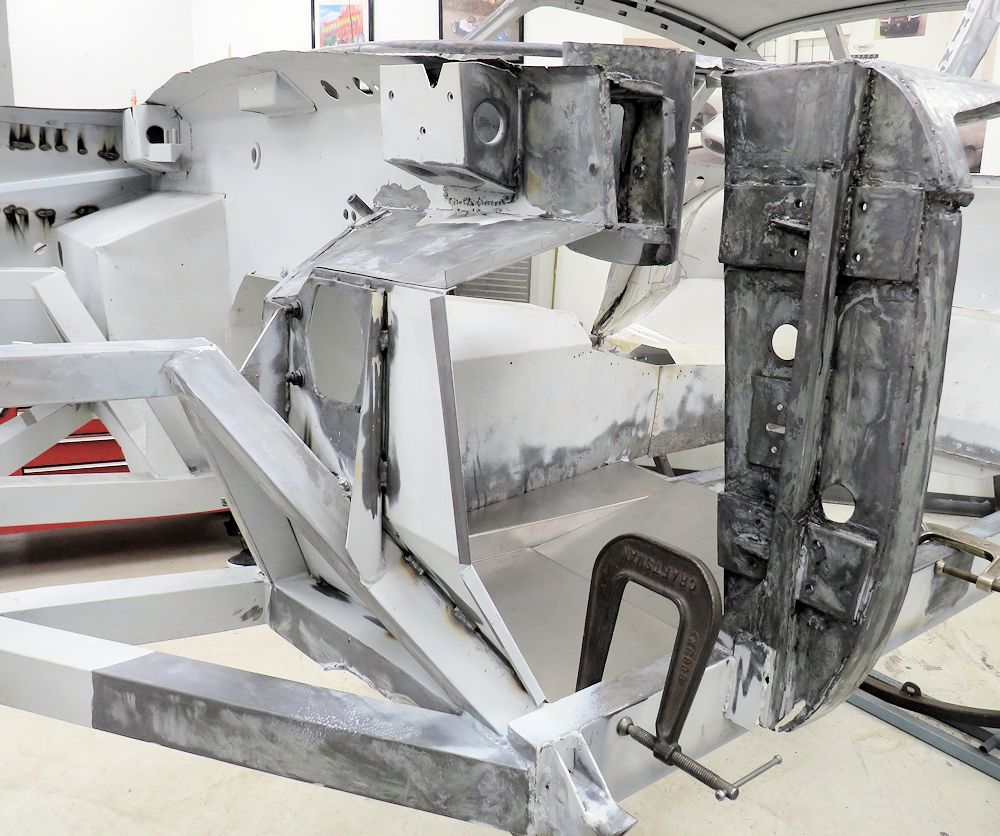
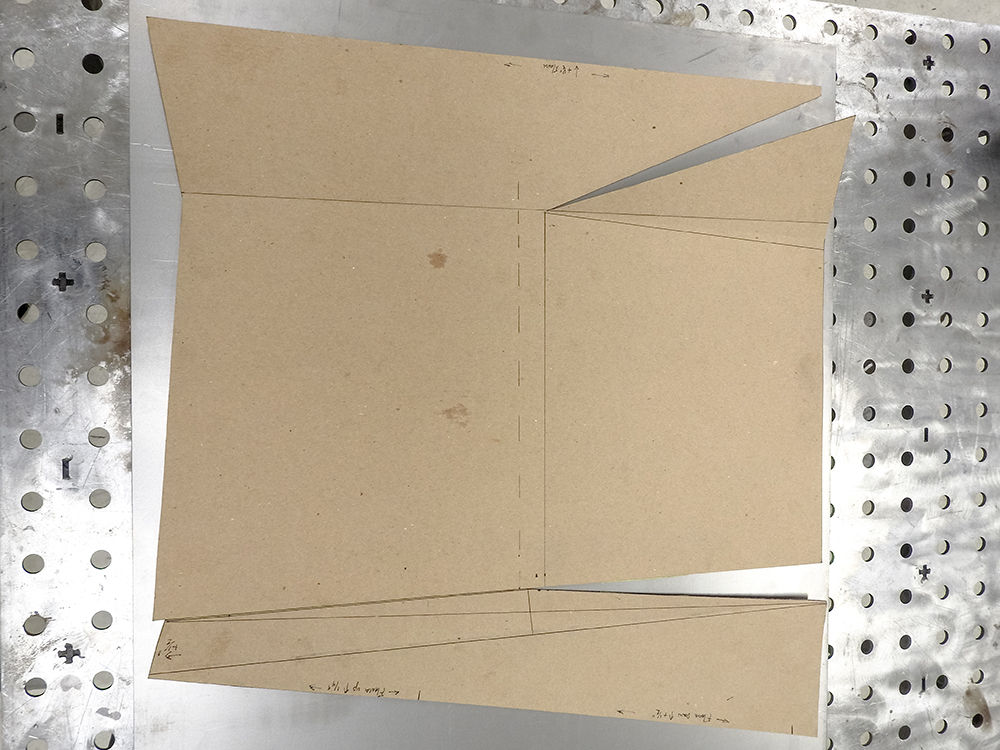
Jake has
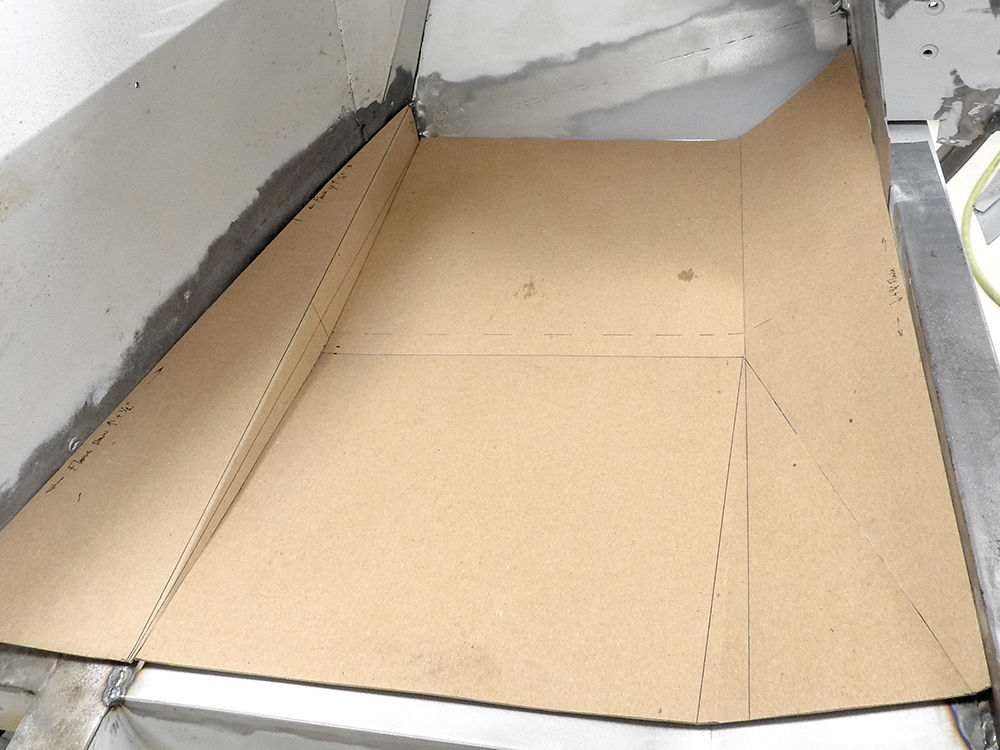
been busy fabricating new footwell and firewall panels.
Making a chipboard template for the new
passenger footwell
Trial fitting the template in place
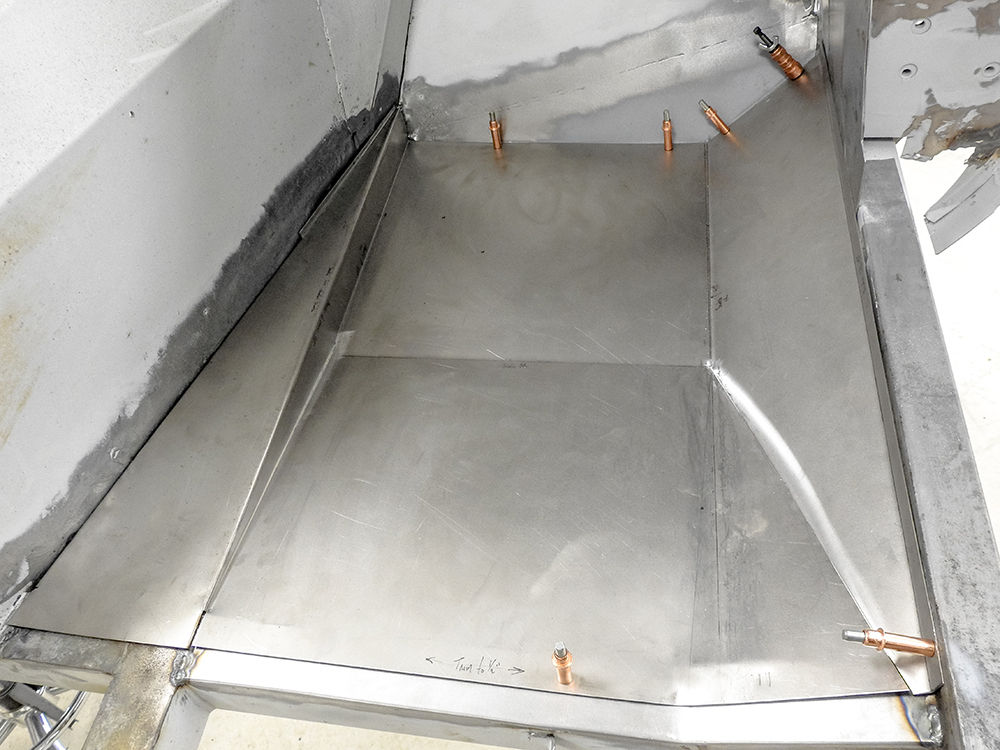
Trial fitting new footwell
Clekos hold the new footwell together
Now spot welded together
Left side firewall is in poor shape and will
need
a lot of work
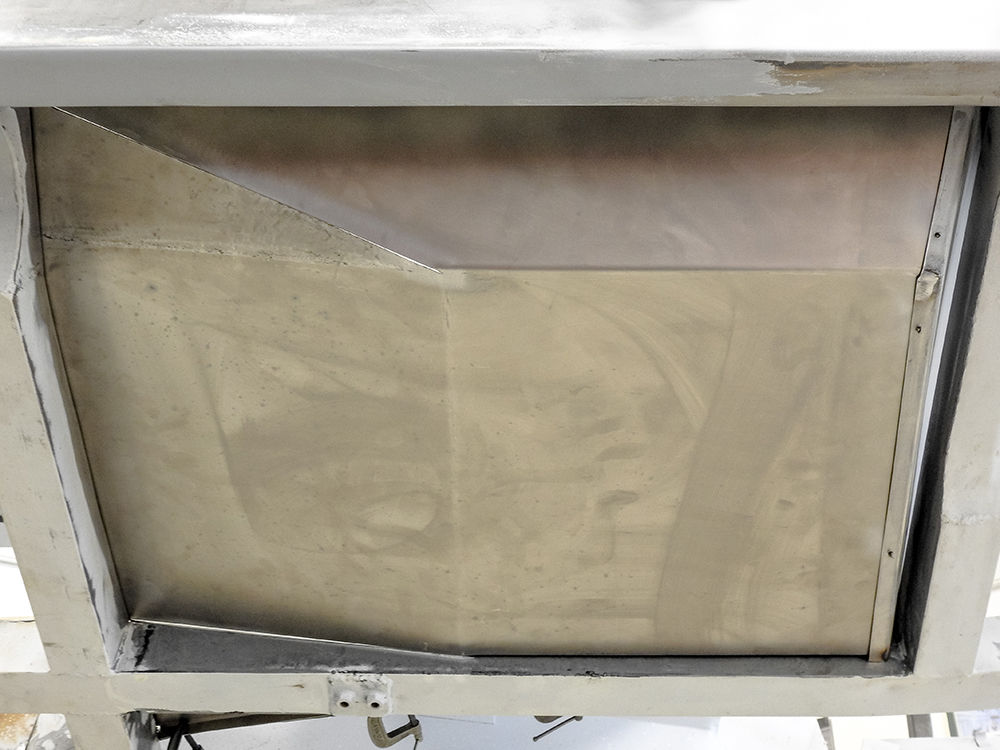
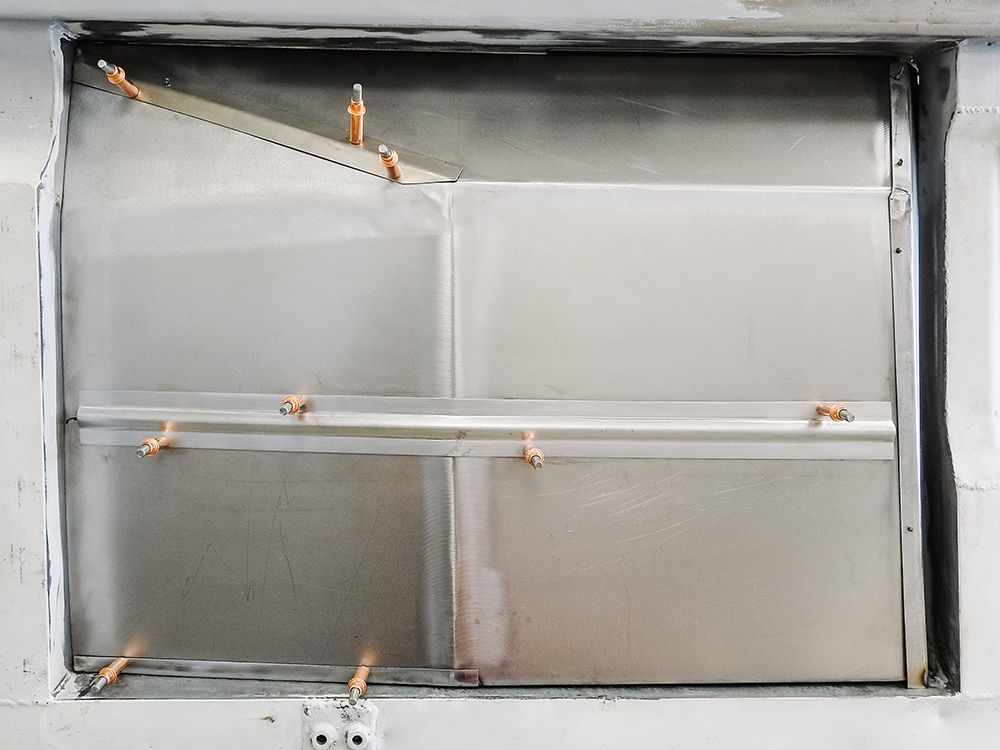
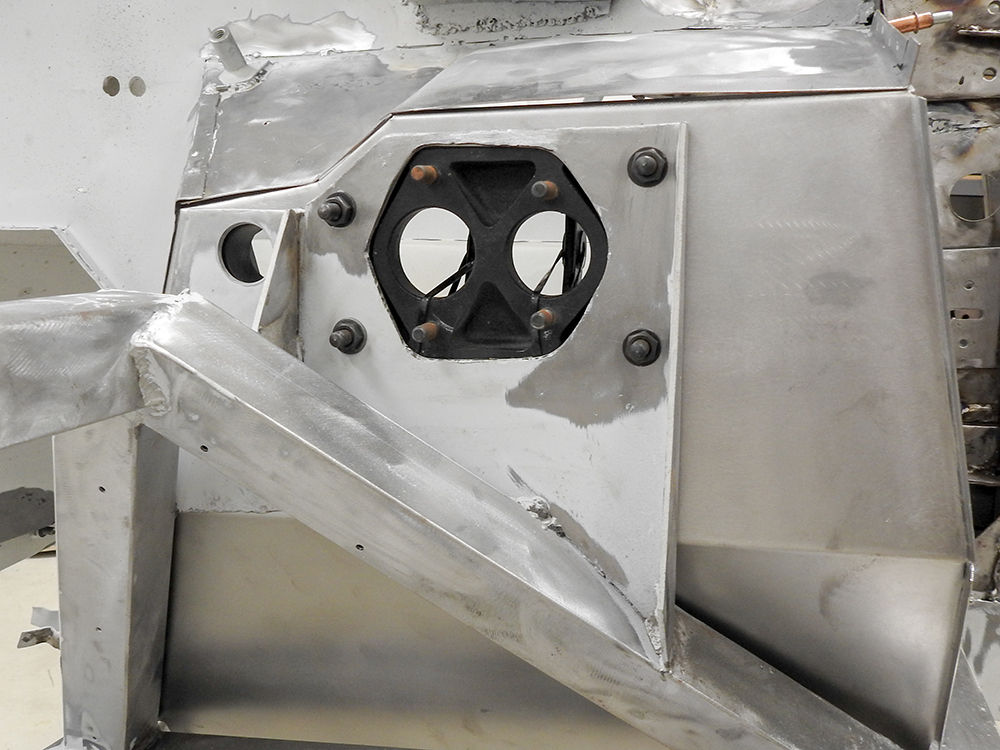
Fabricating new driver's footwell kick panel
Trial fitting the new kick panel and marking
the
location of the holes required for the pedals
\
Trial fitting the pedal box
To be continued..
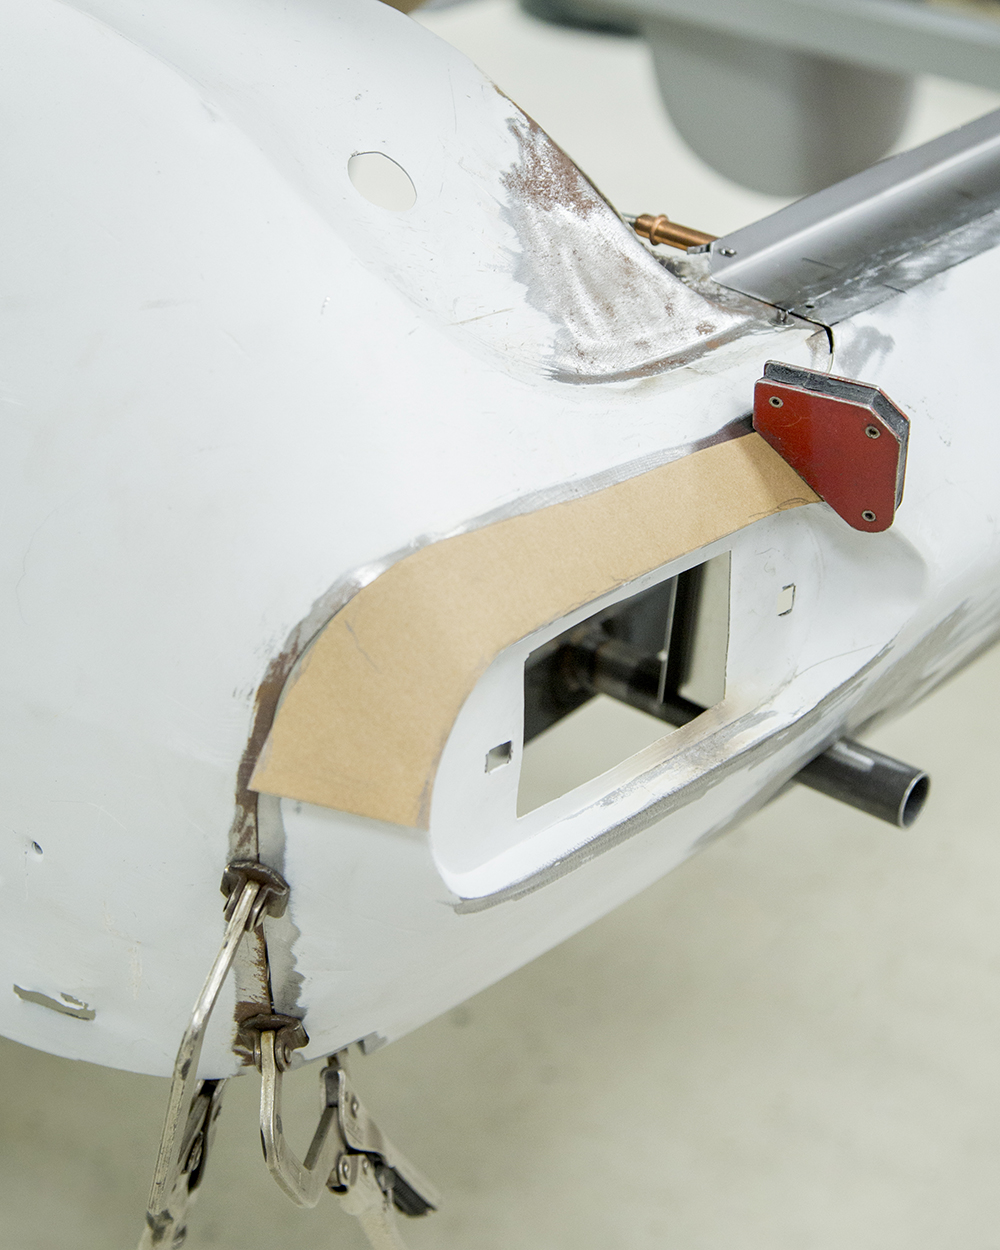
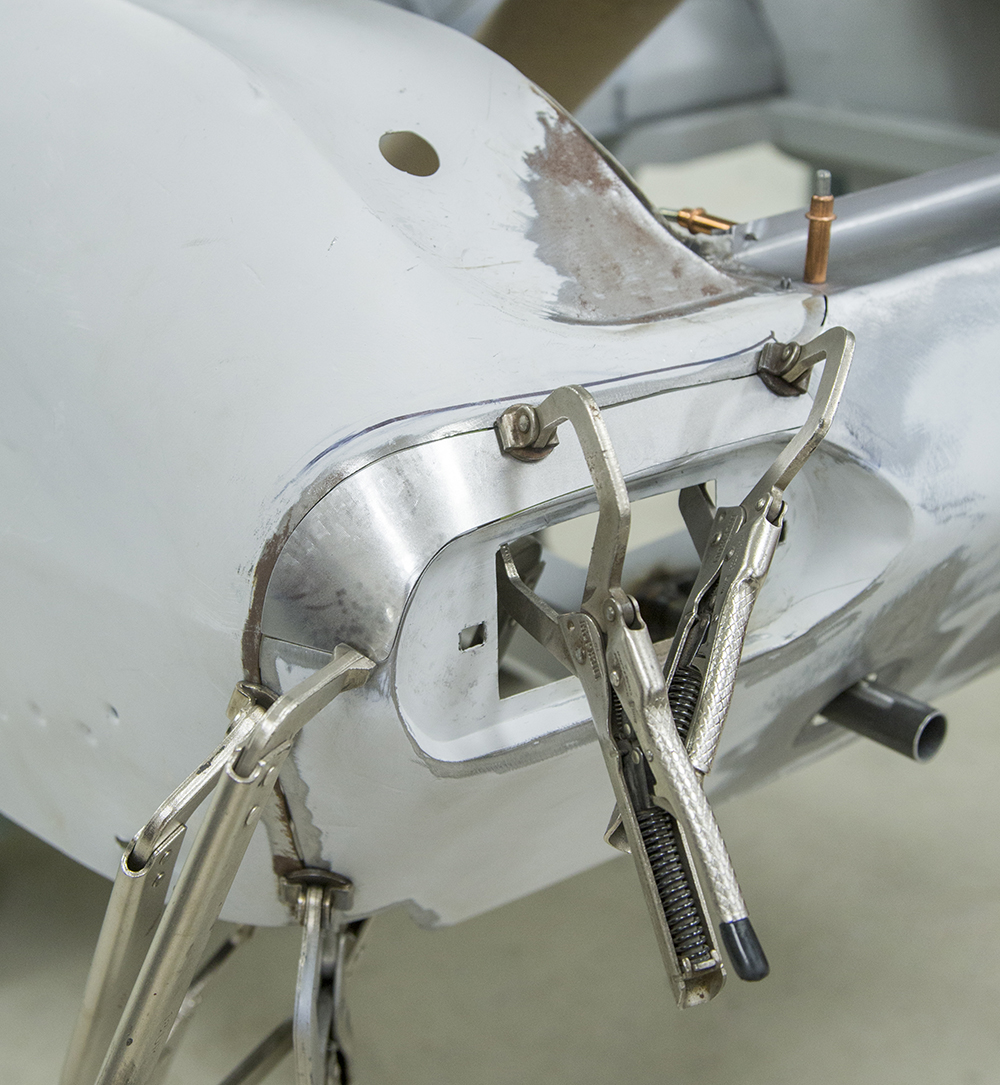
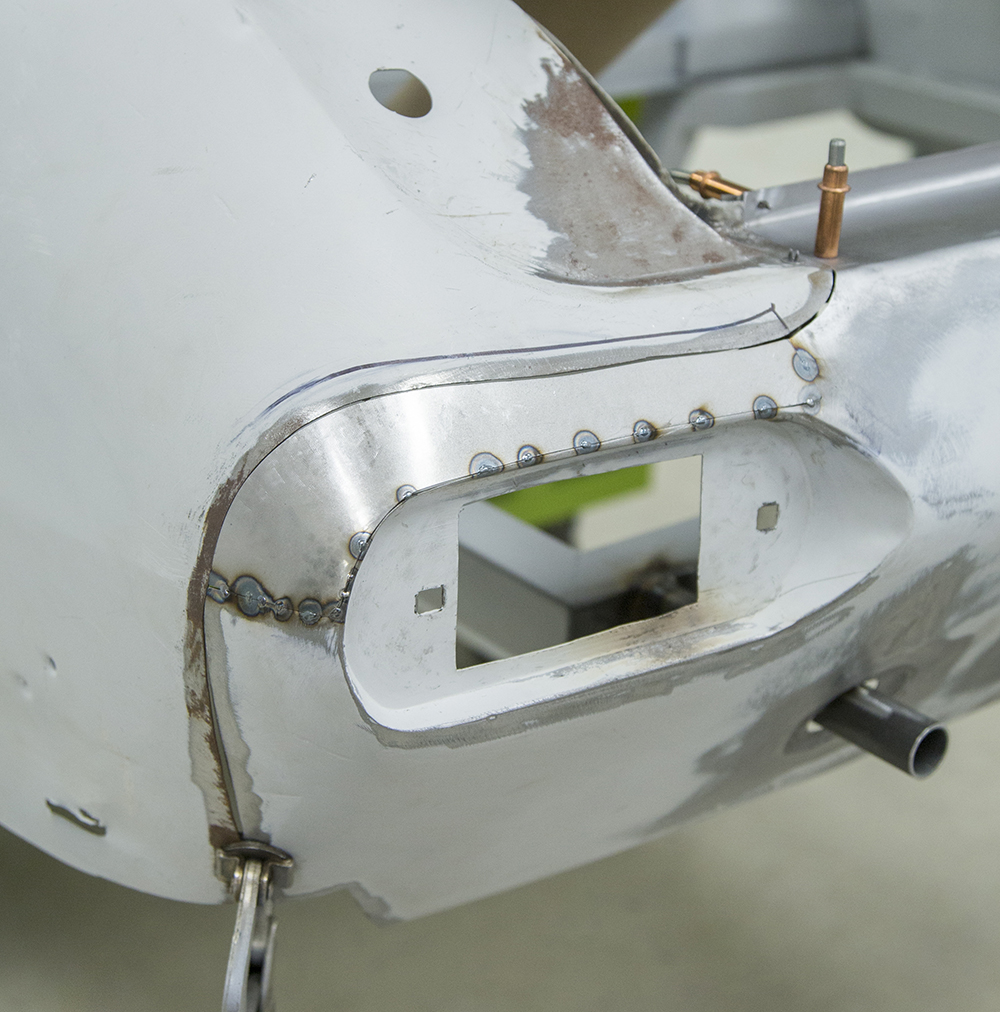
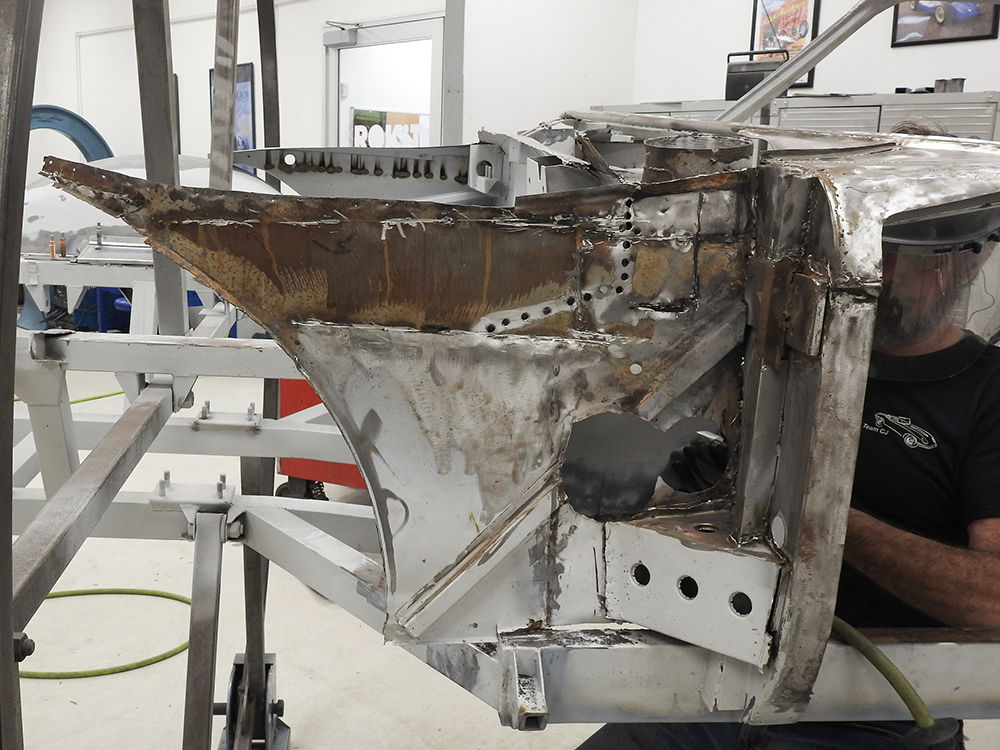
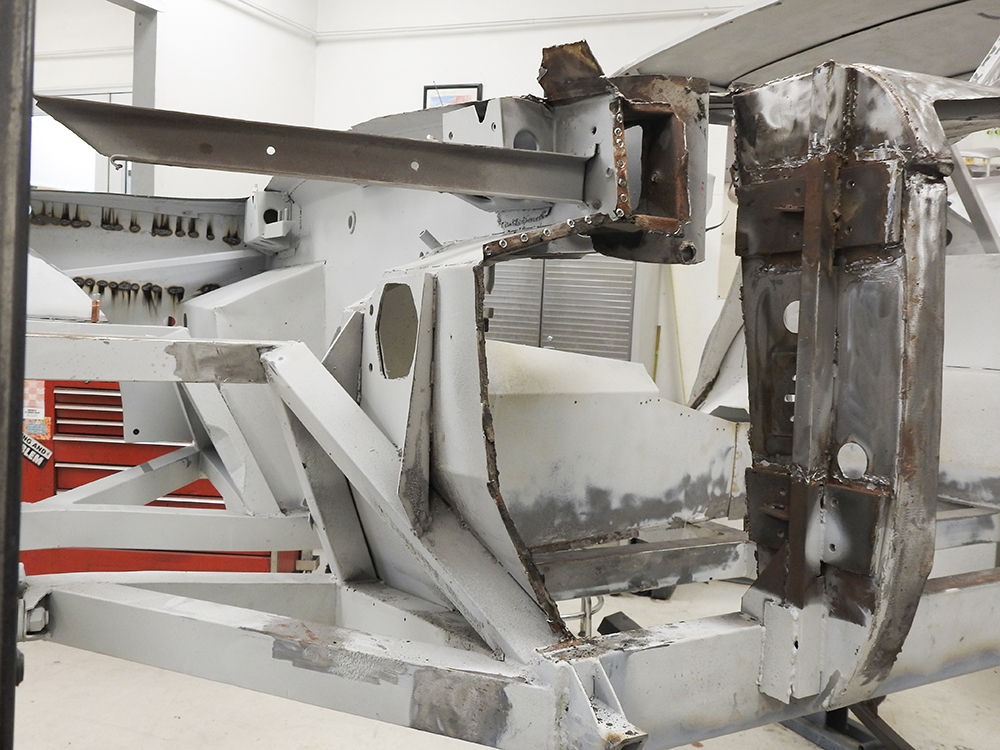
Update report - March 2, 2020
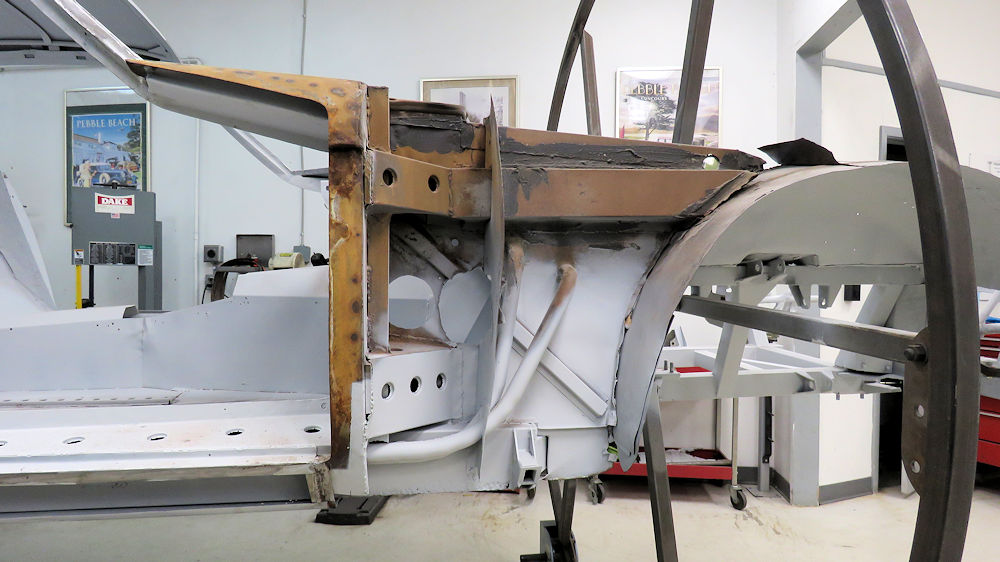
Jake explains the repair
of the right hand cowl and right hand engine bay panel
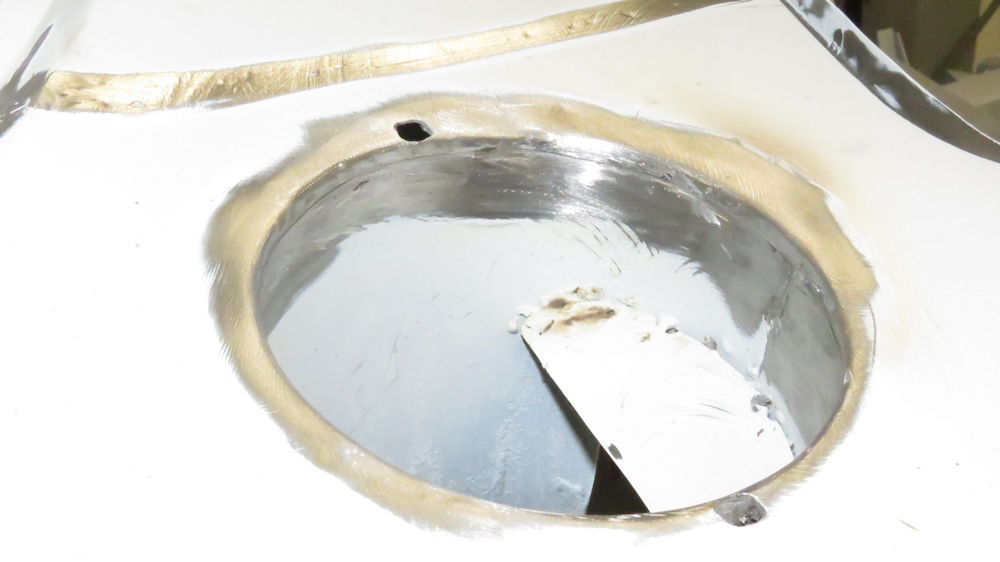
Update report - February 12, 2020
Jake explaining the construction of
the right hand cowl panel
Upper drain entering the right hand cowl panel
Exit hole for the lower drain in new cowl side
panel
Cleaning off spot welds
Trial fitting new panel in place
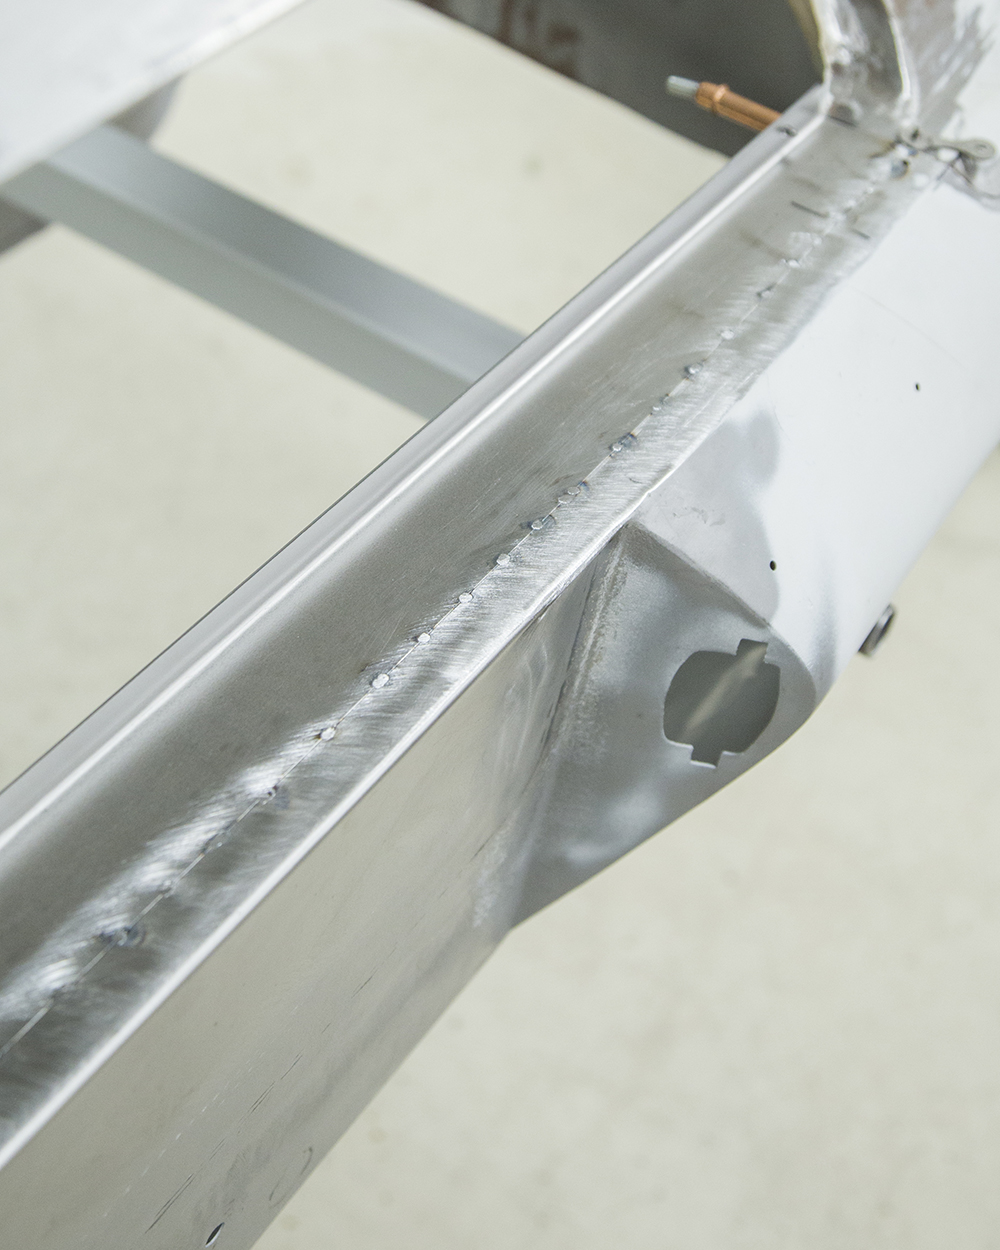
Update report - January 30, 2020
Jake explains the
construction of the body and outlines the work in progress
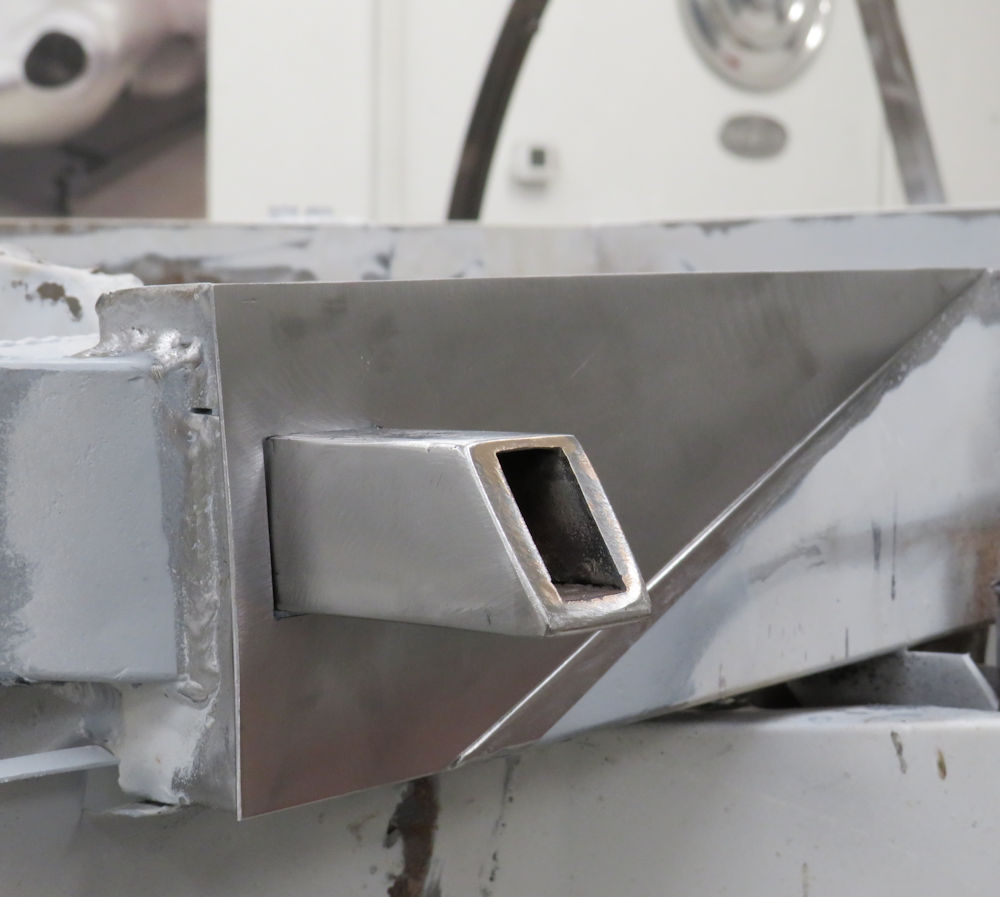
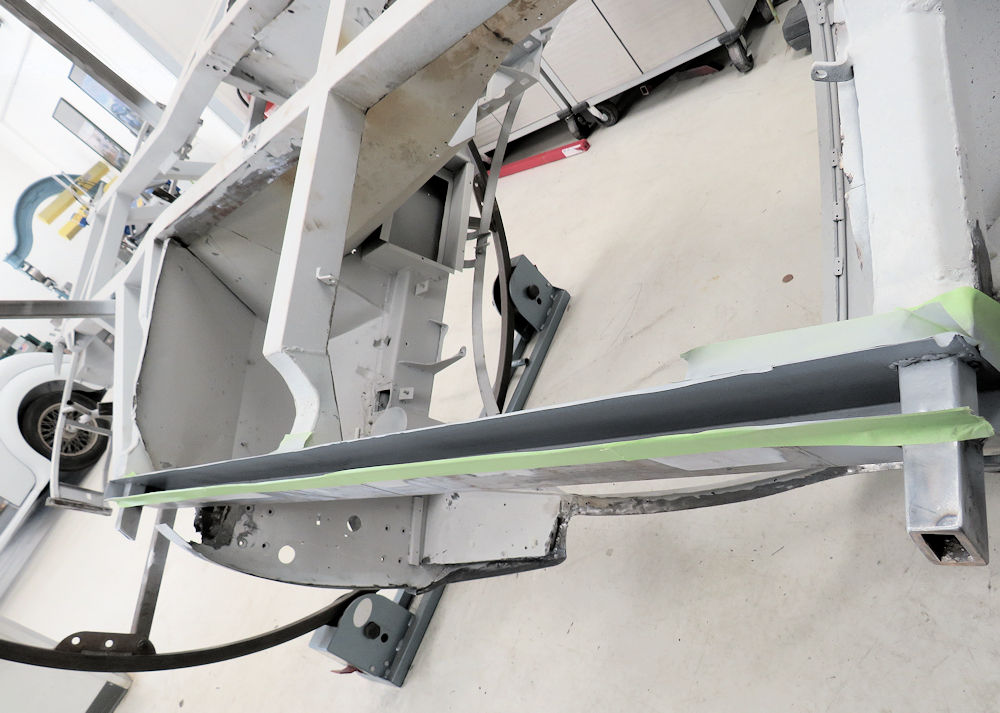
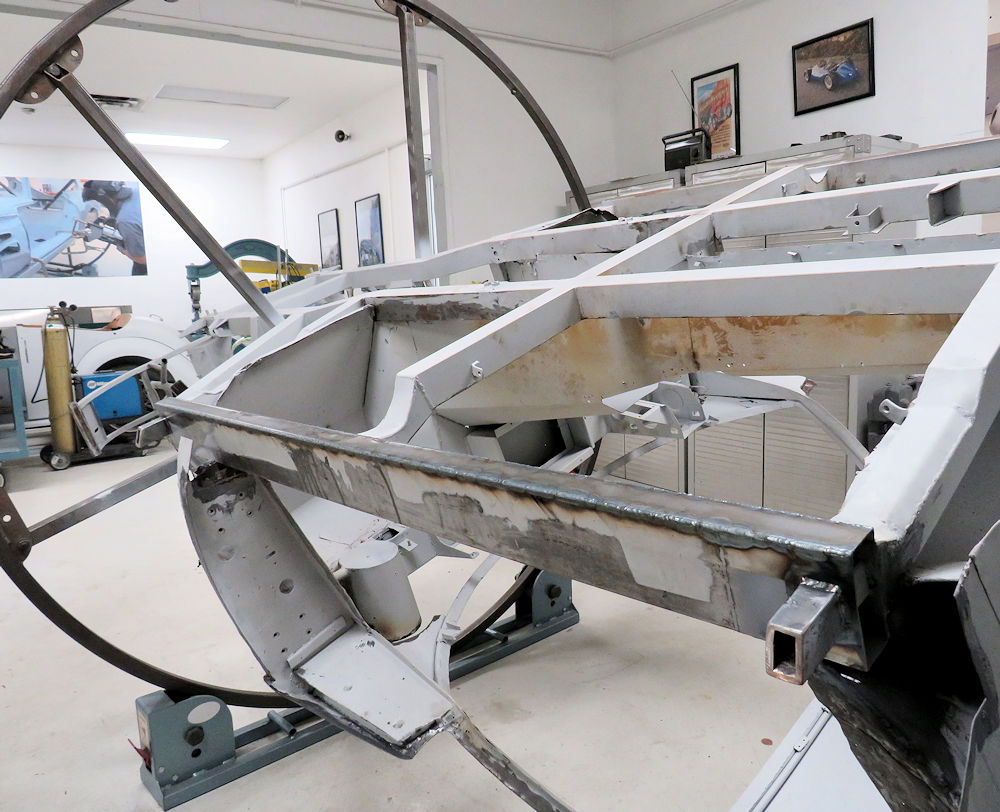
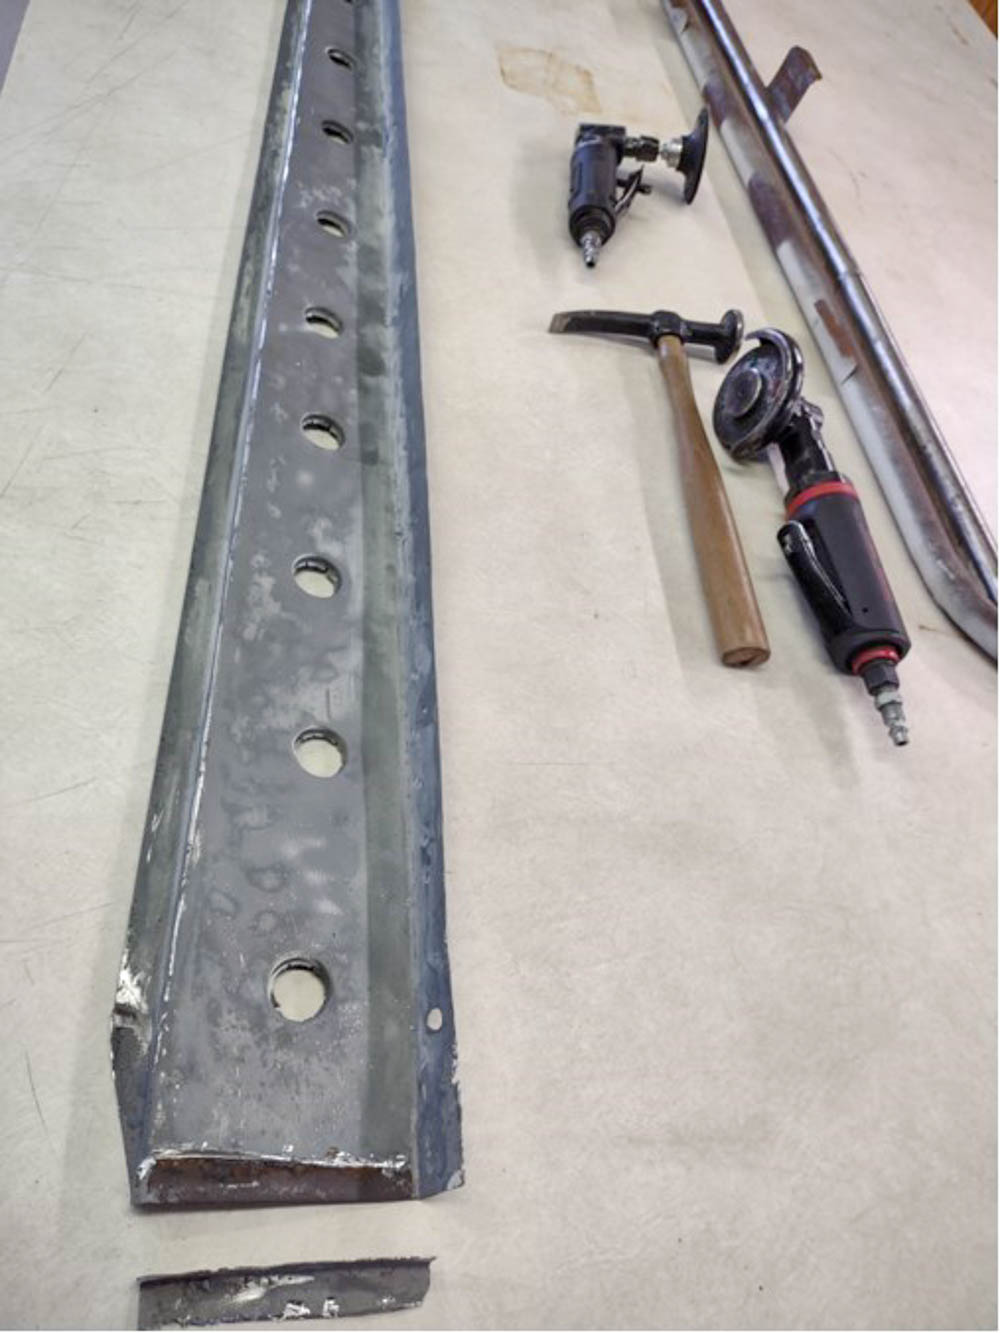
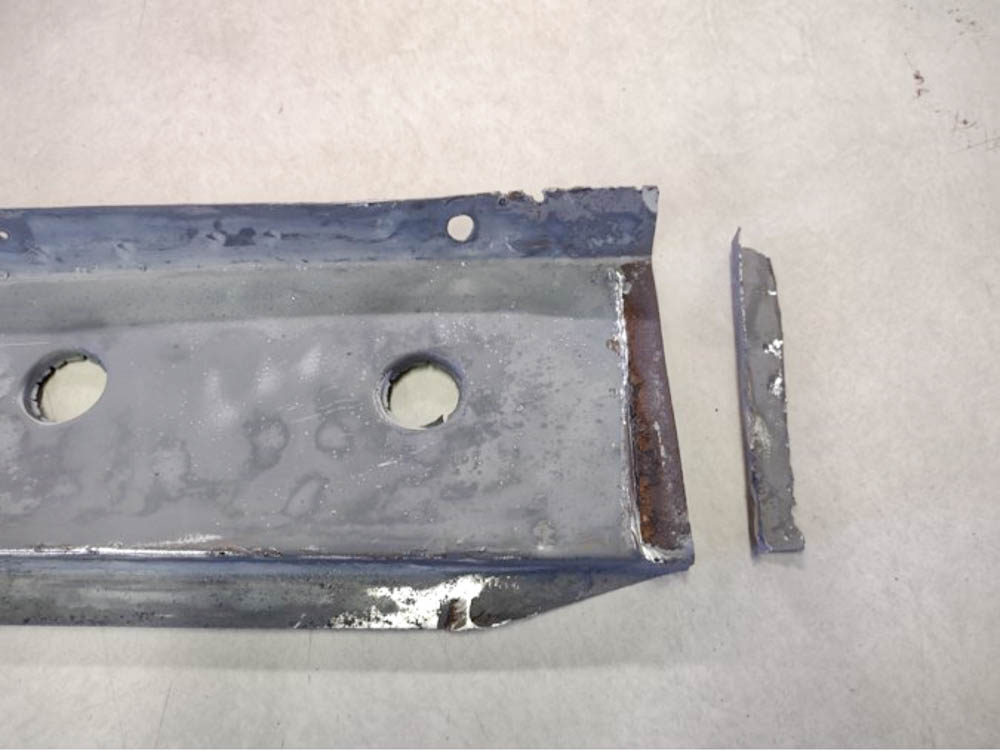
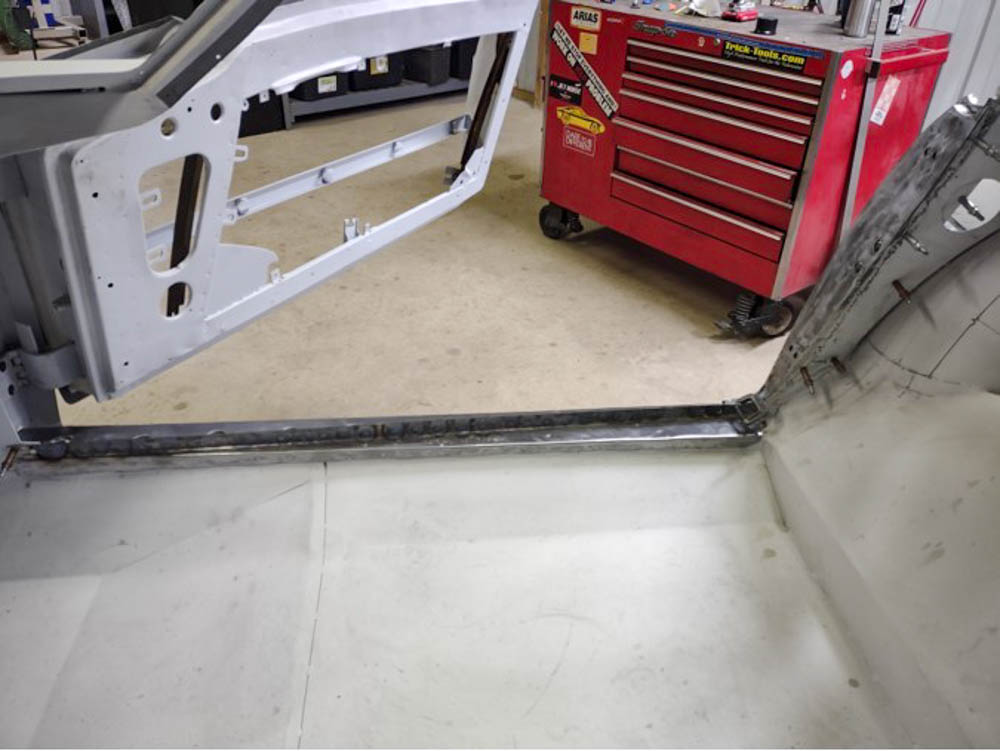
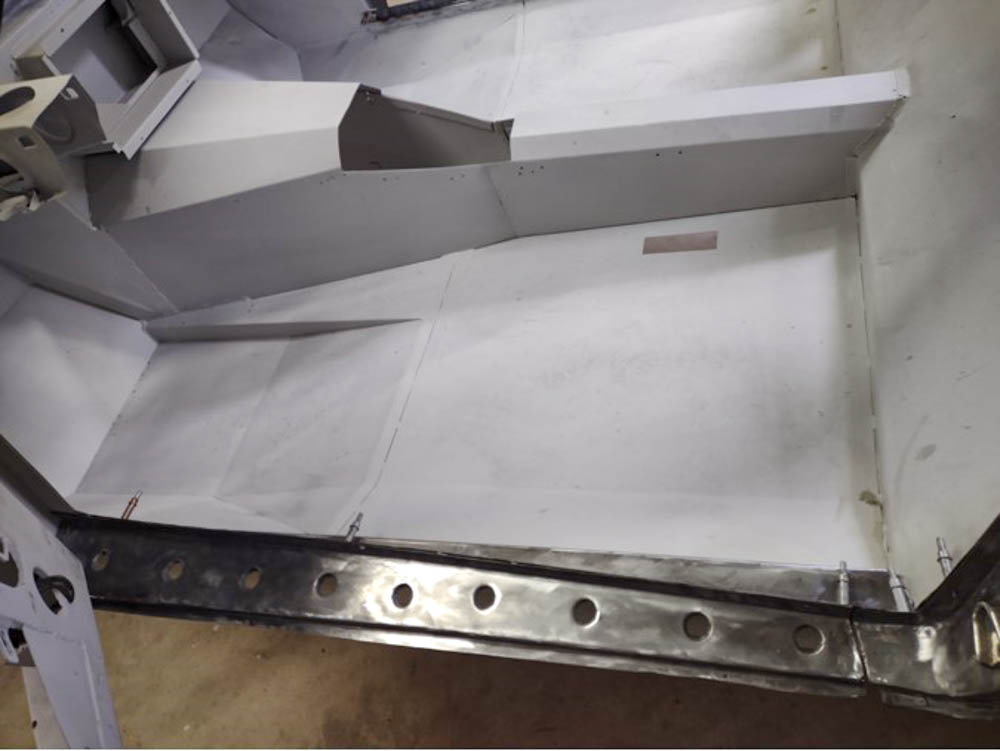
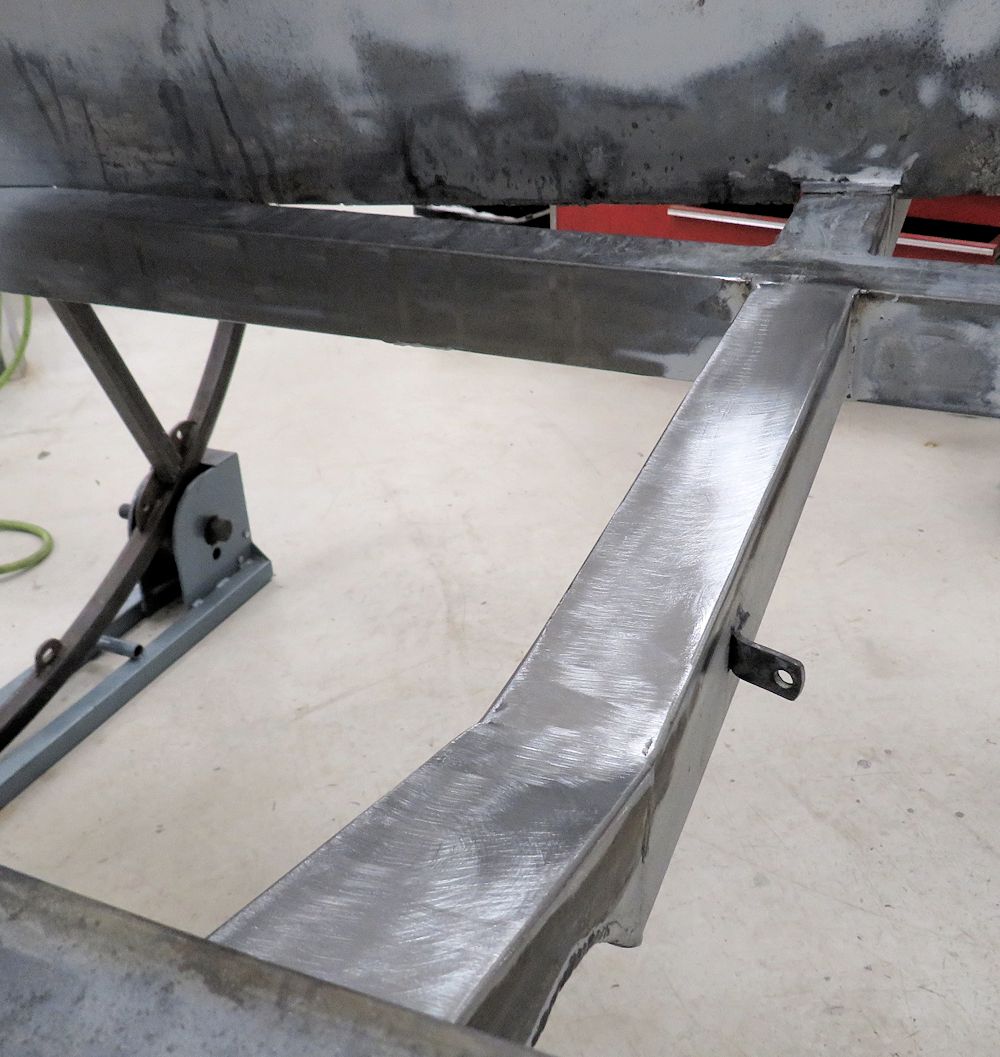
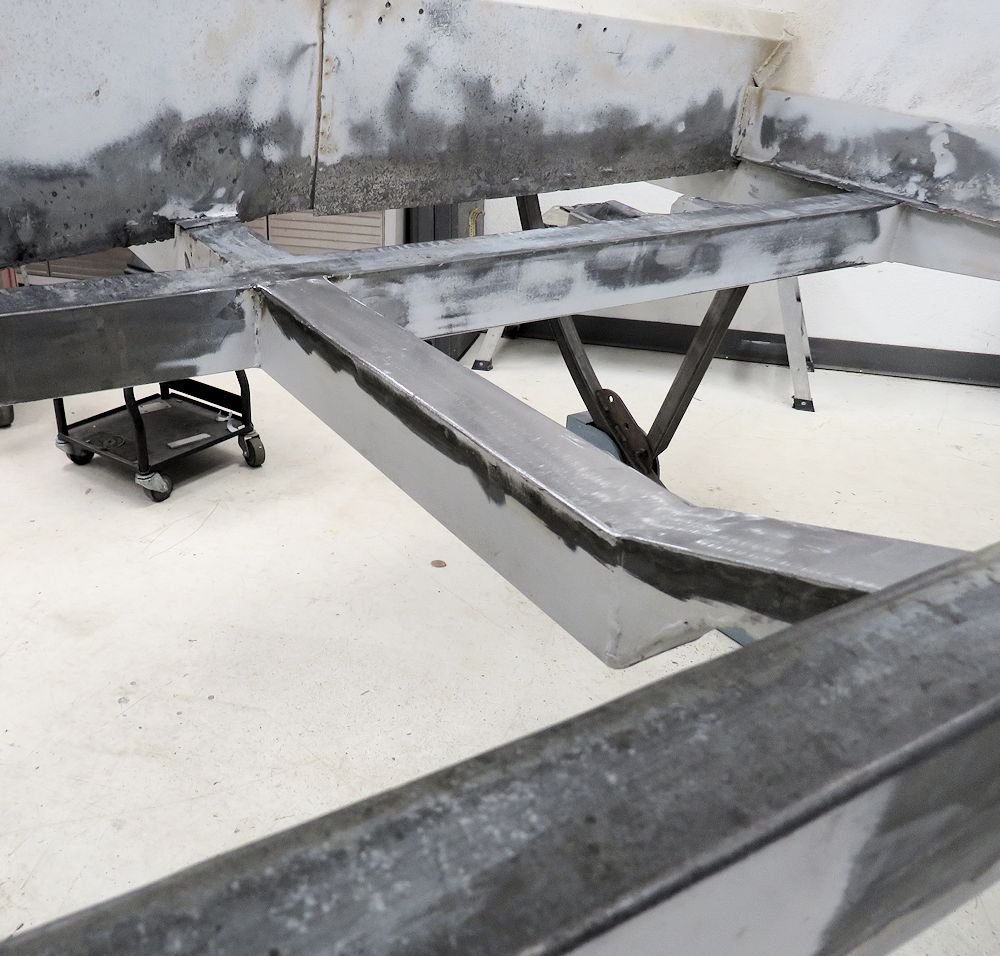
Jake has now
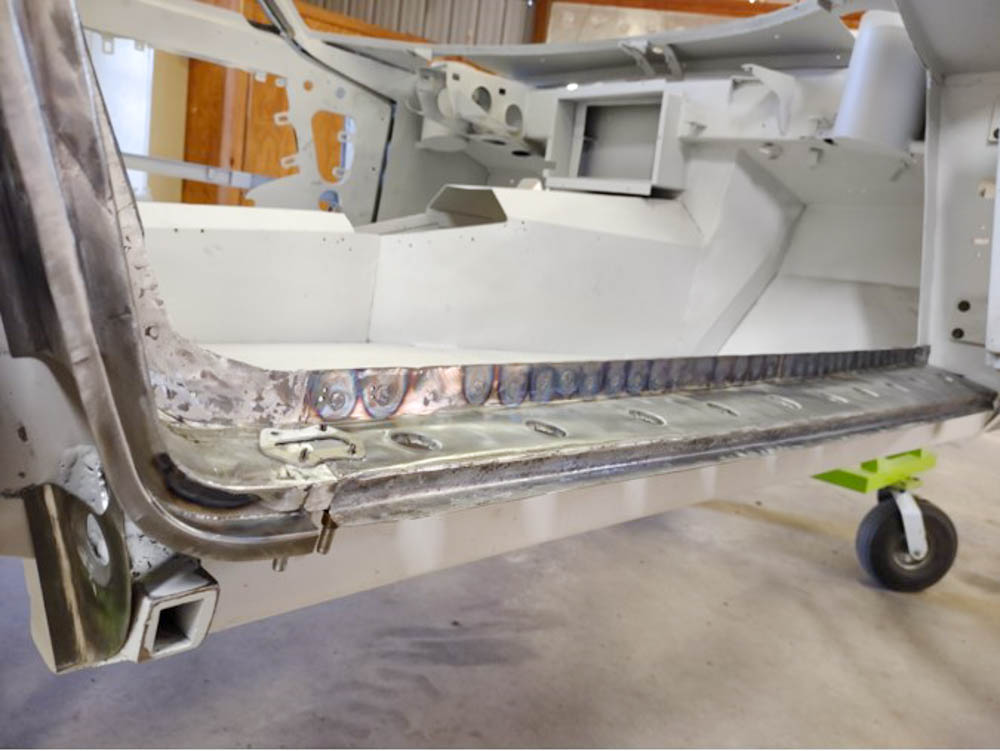
begun fabricating and welding new replacement panels into
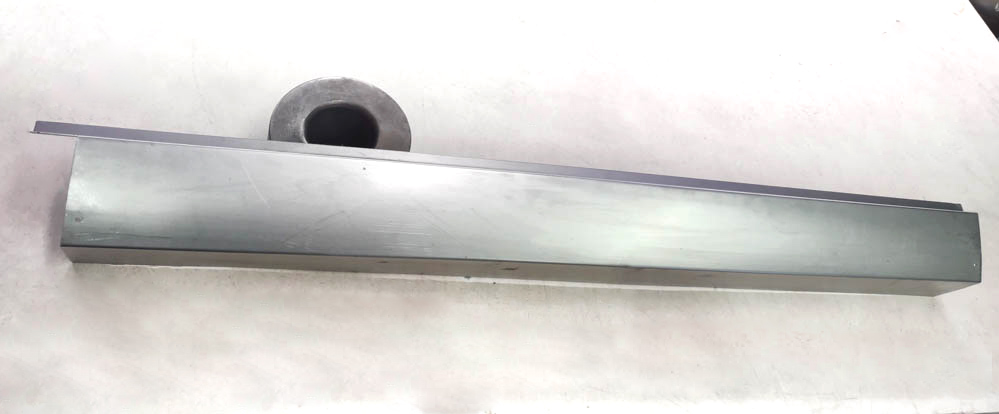
place. First up is the right hand chassis rail that runs the
length of the body and has a jacking point at each end.
This is the front right jacking point shown
with
the body inverted
Now shown with the body the right way up
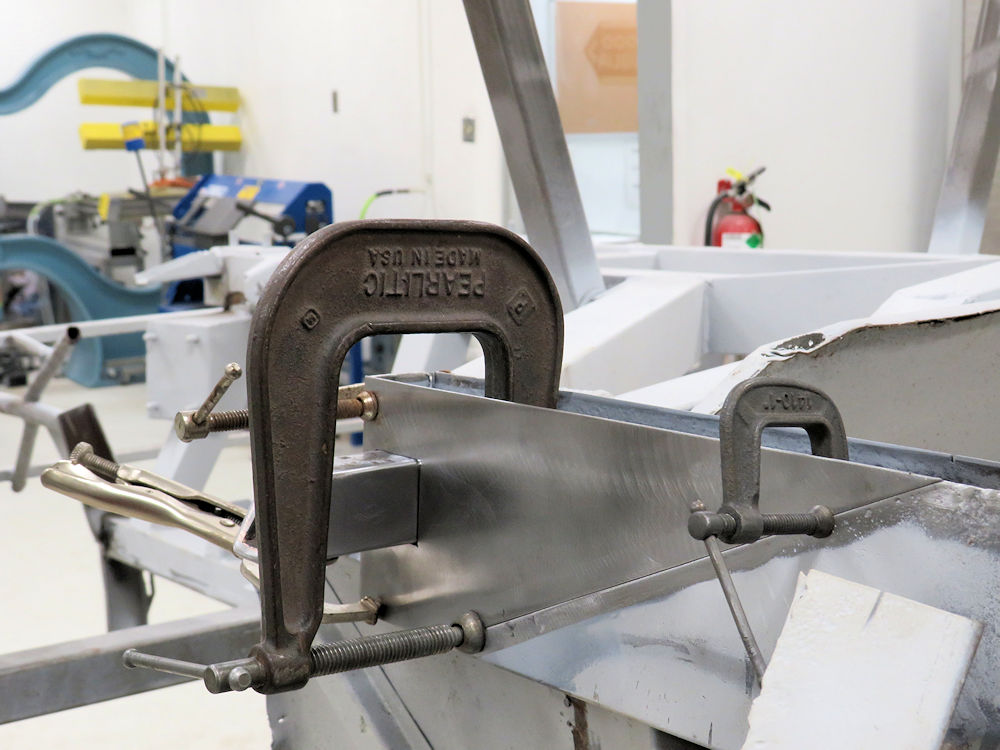
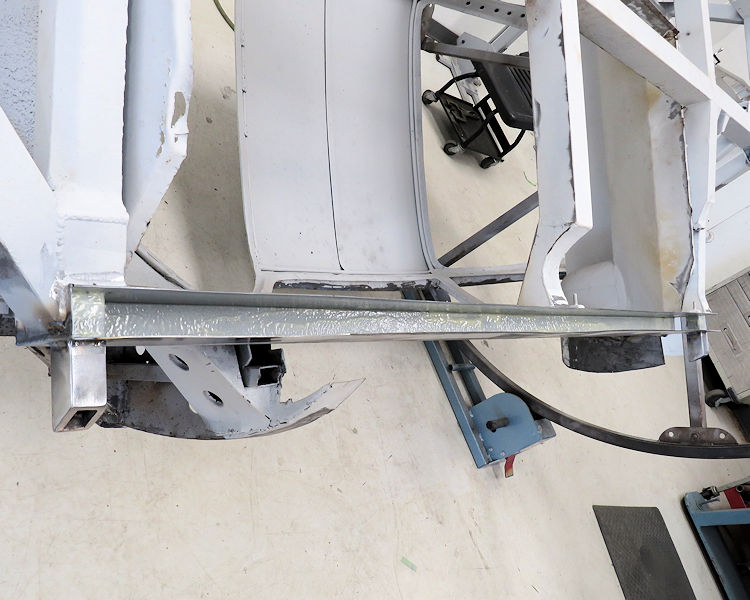
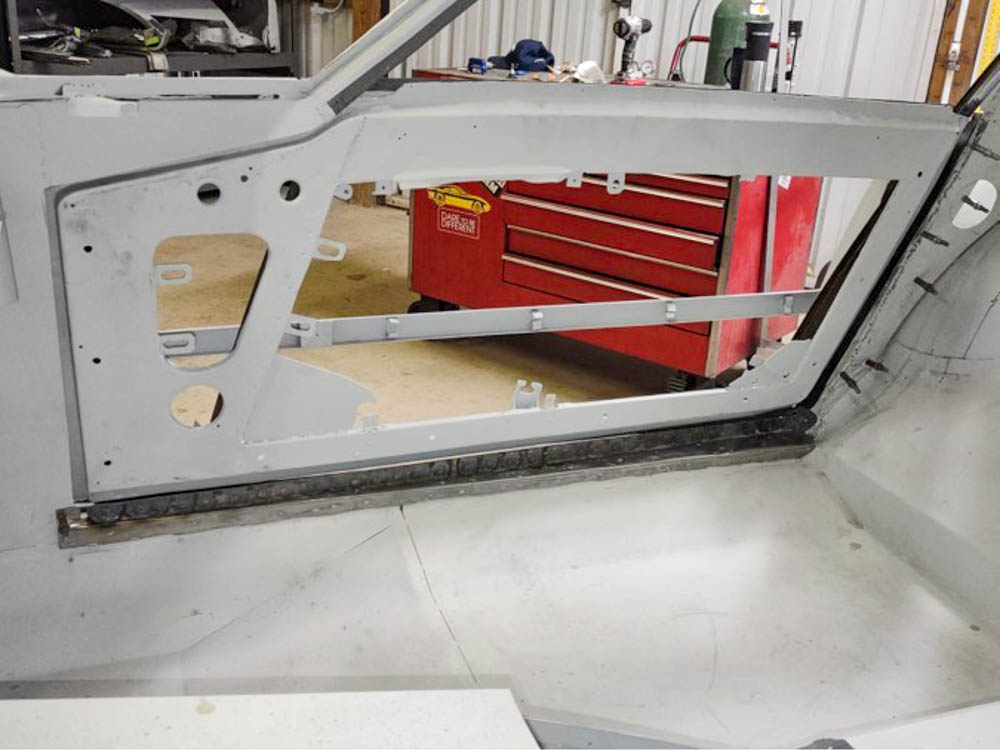
The first of many repair panels fabricated
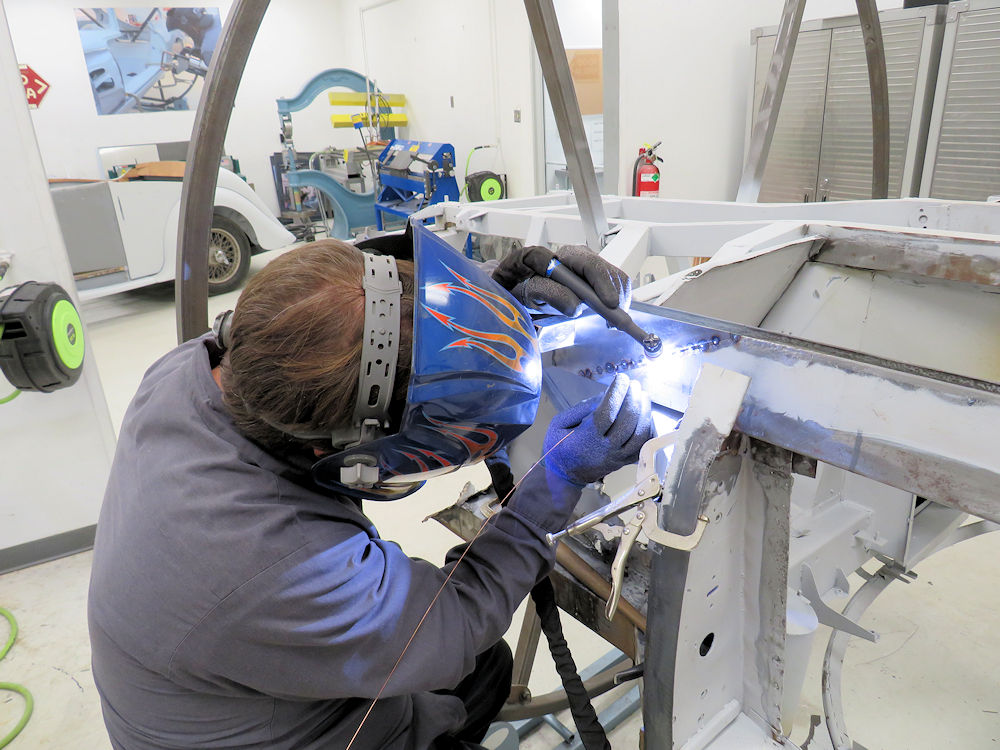
Jake welding the first repair panel into place
After sealing all inner surfaces with epoxy
primer, the
area is sprayed with Wurth Body Wax
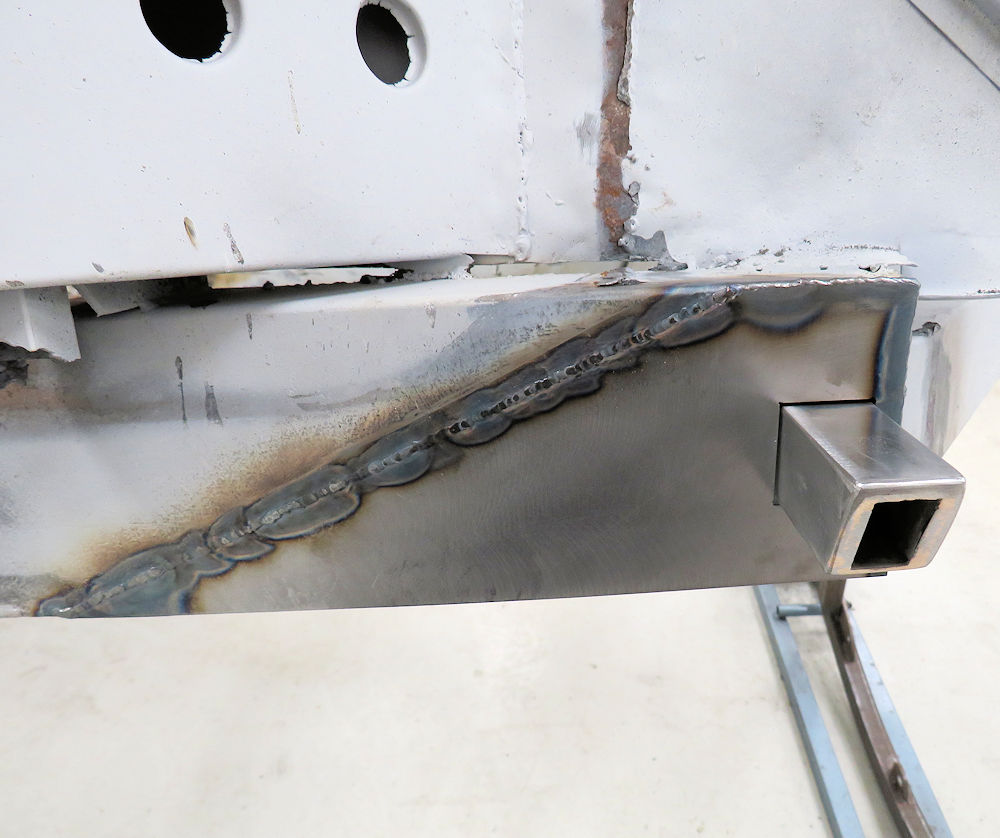
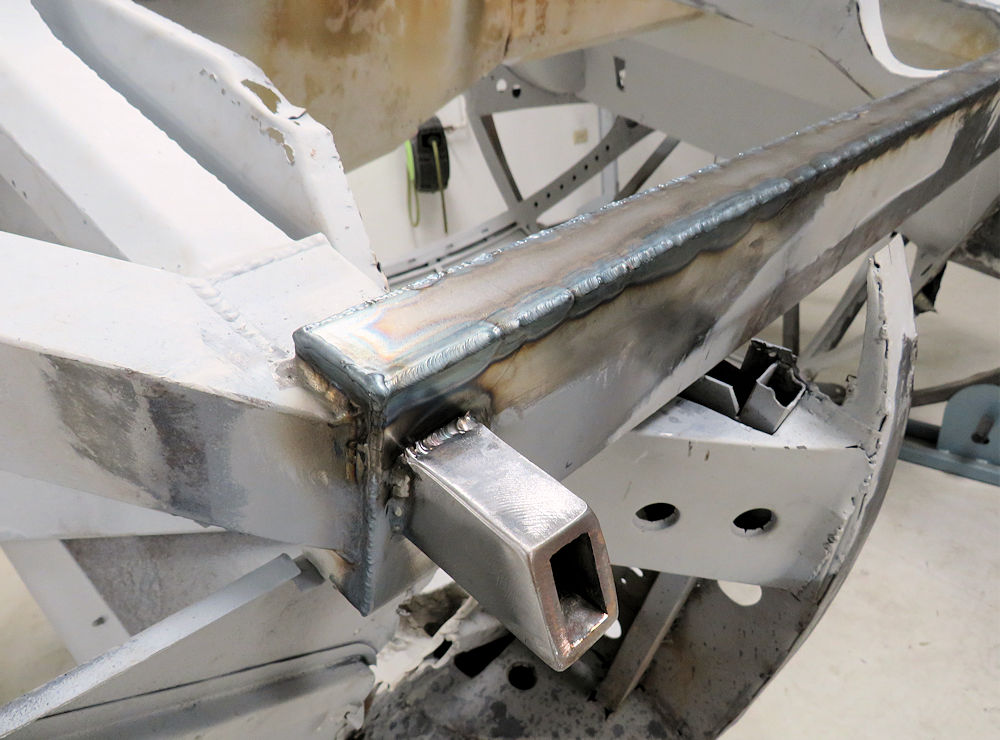
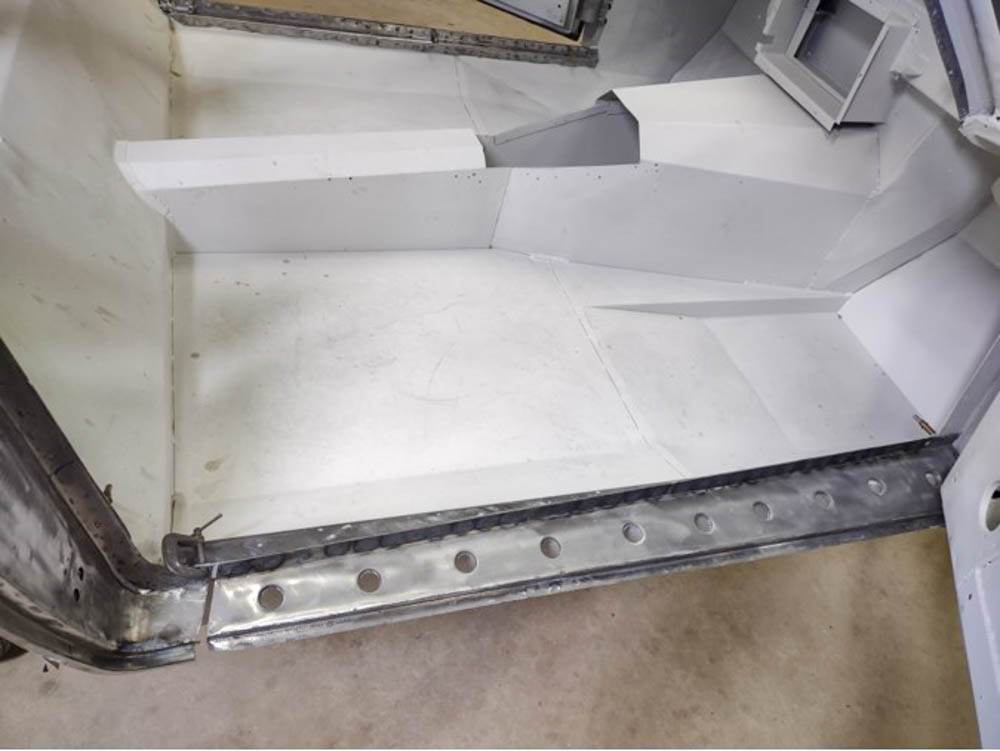
Bottom section of the chassis rail now TIG
welded
into place
On to the next panel!
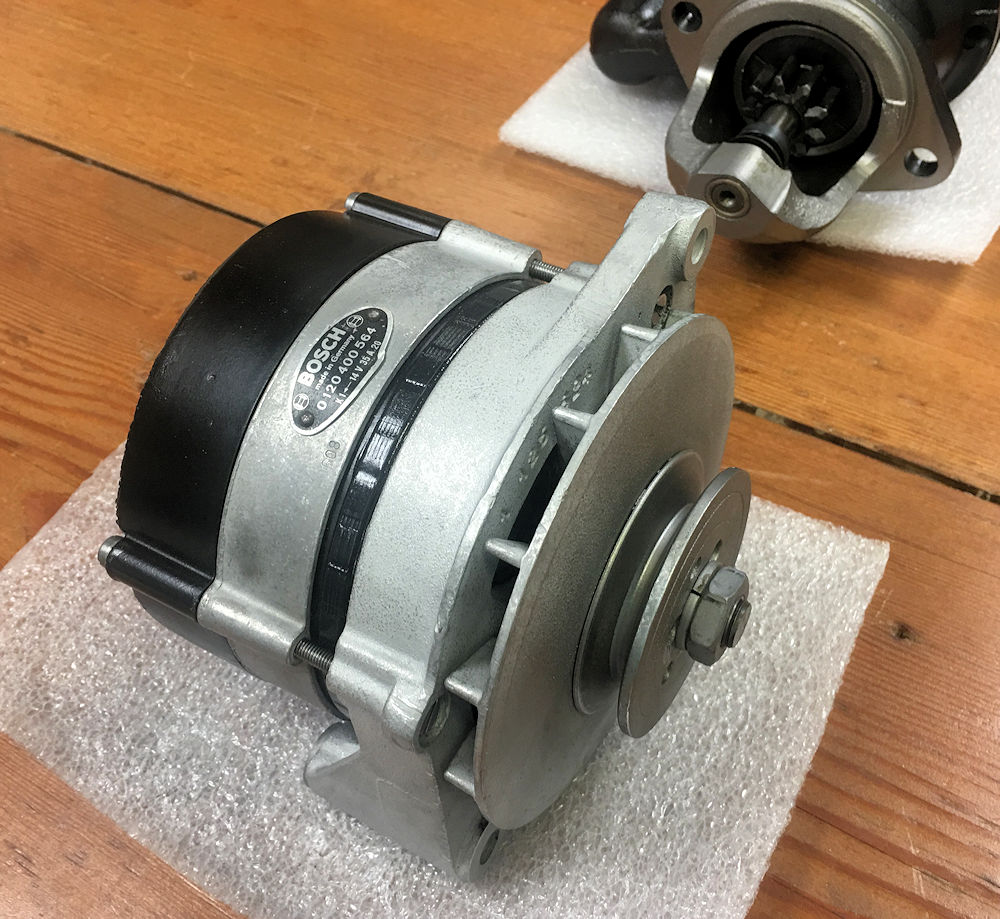
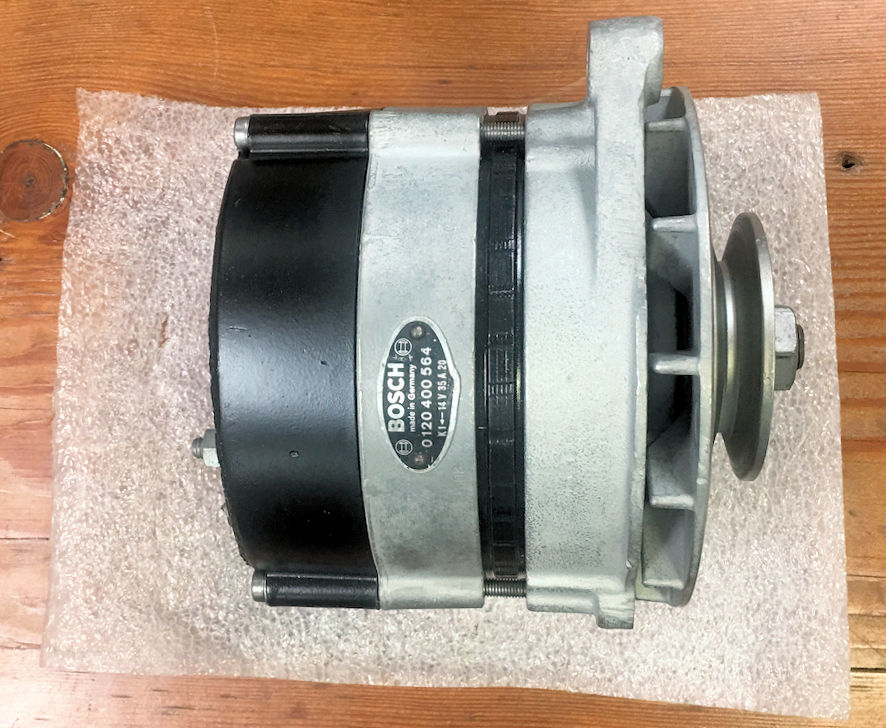
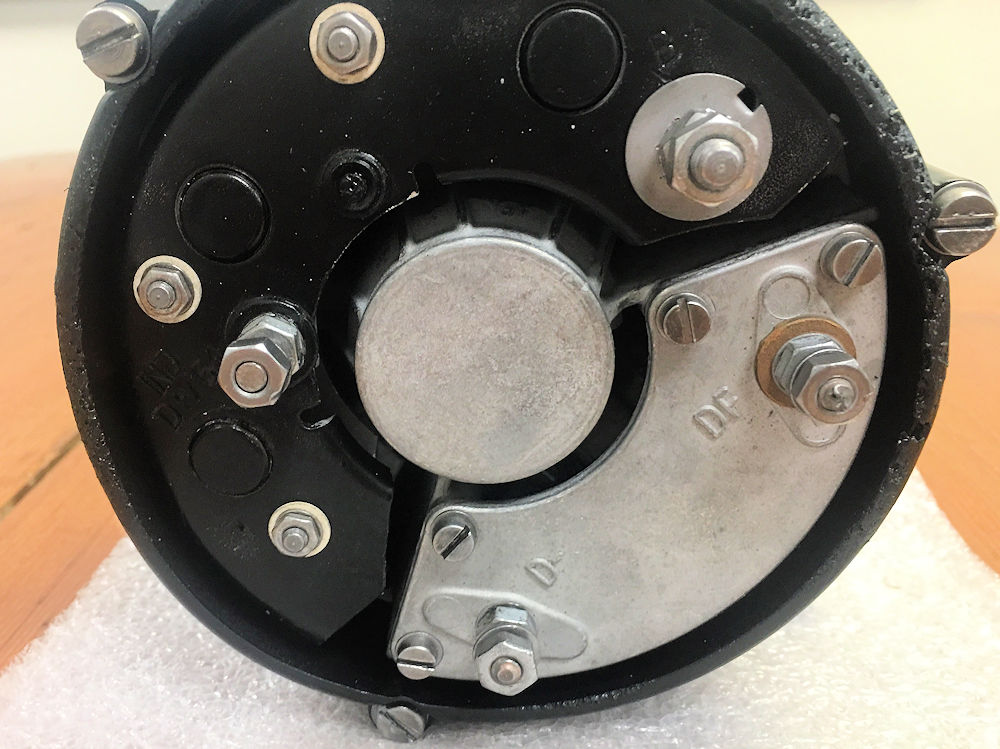
Original
starter motor and alternator have now been rebuilt and
restored.
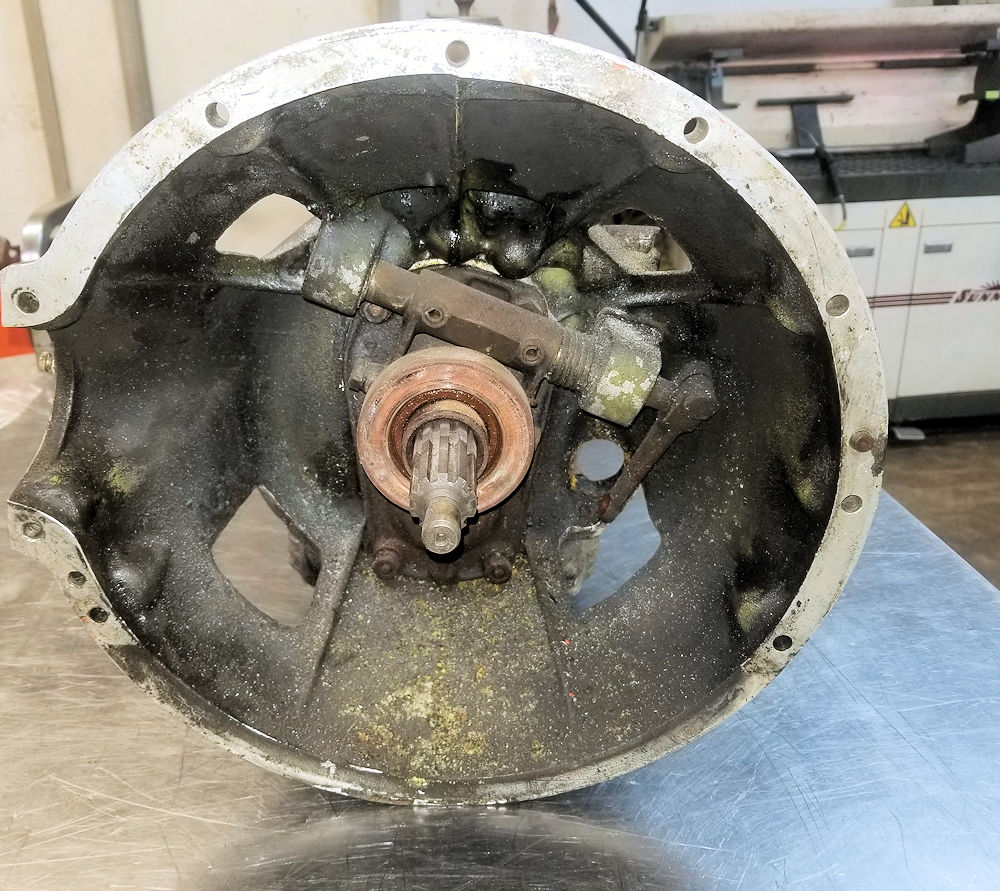
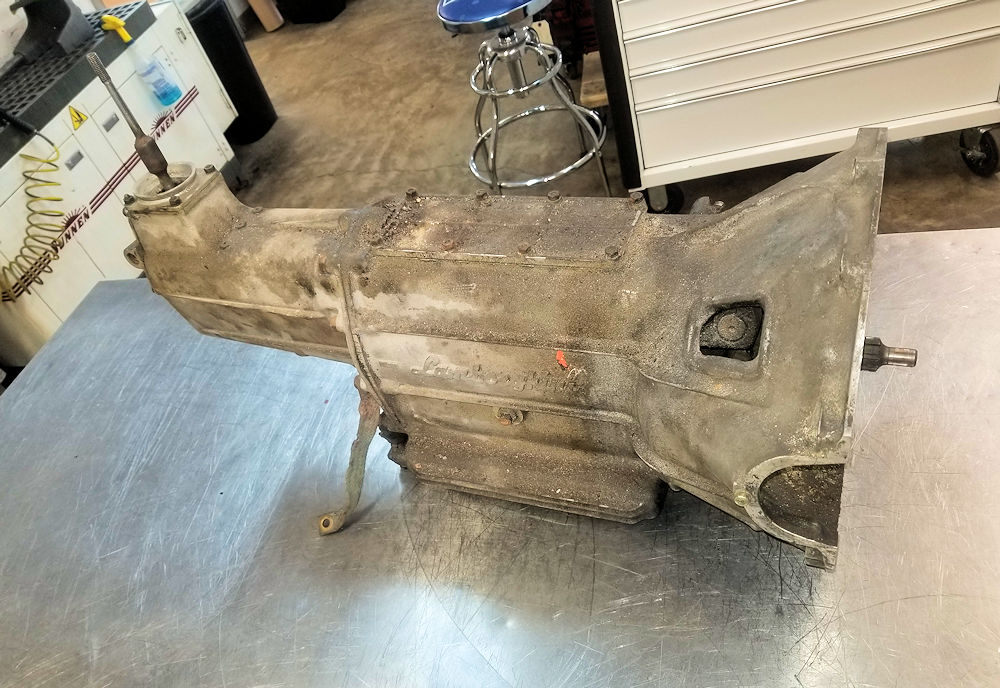
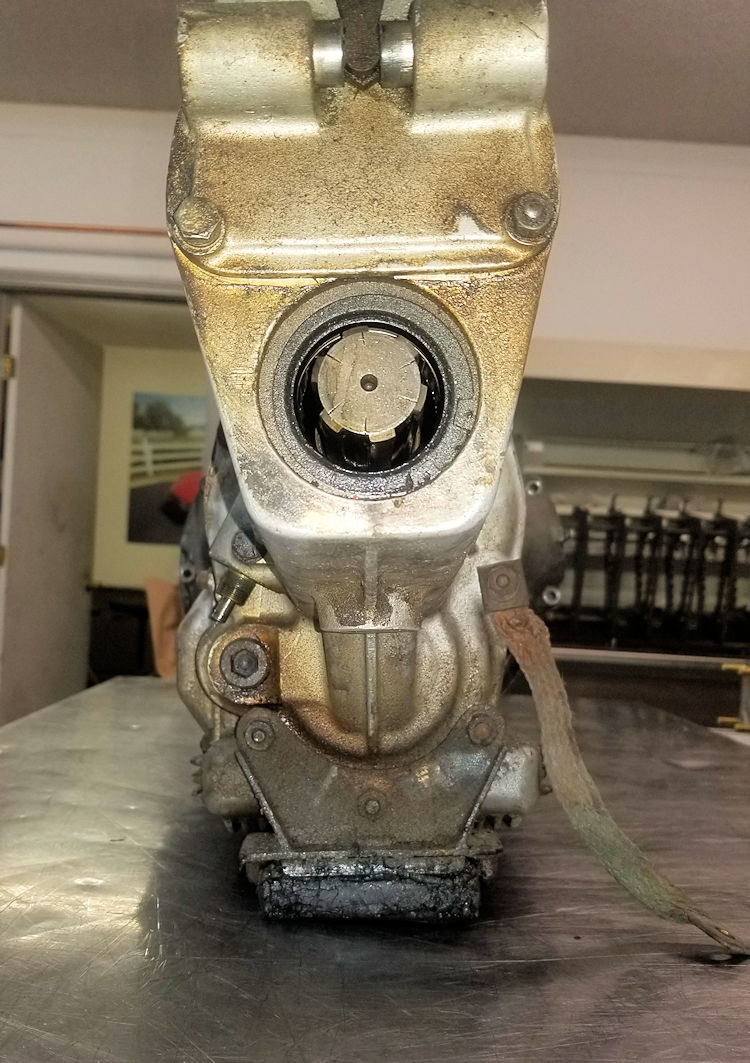
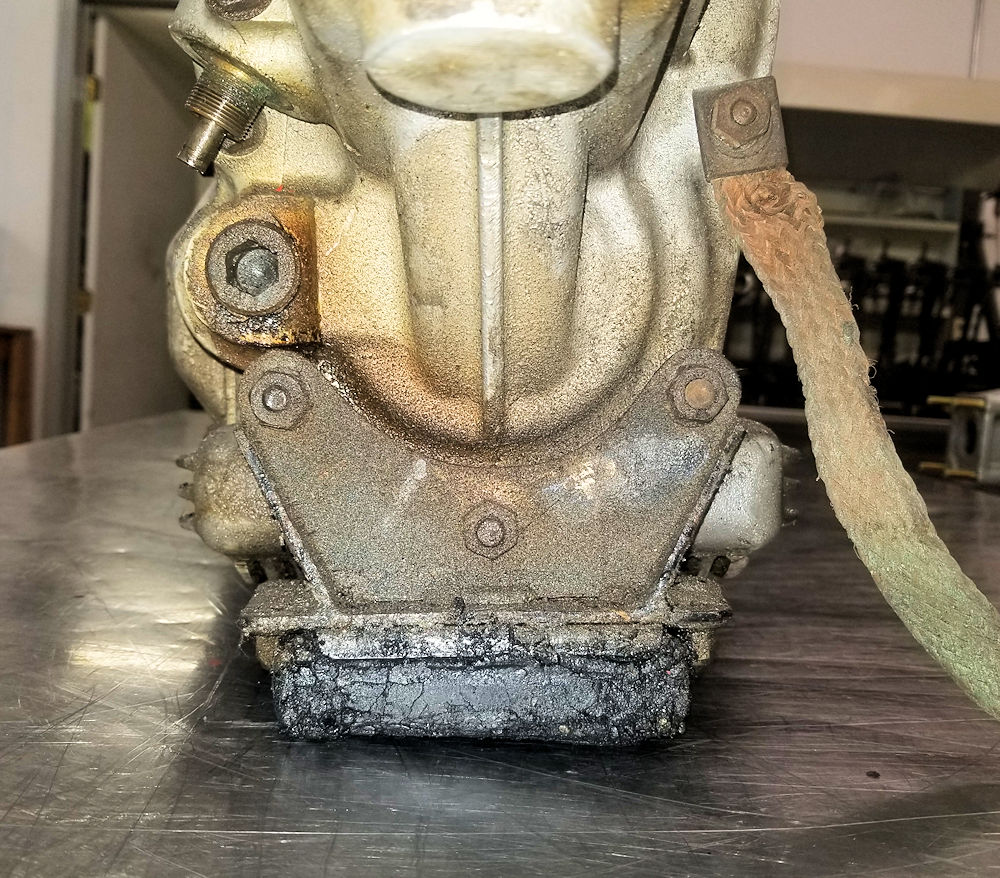
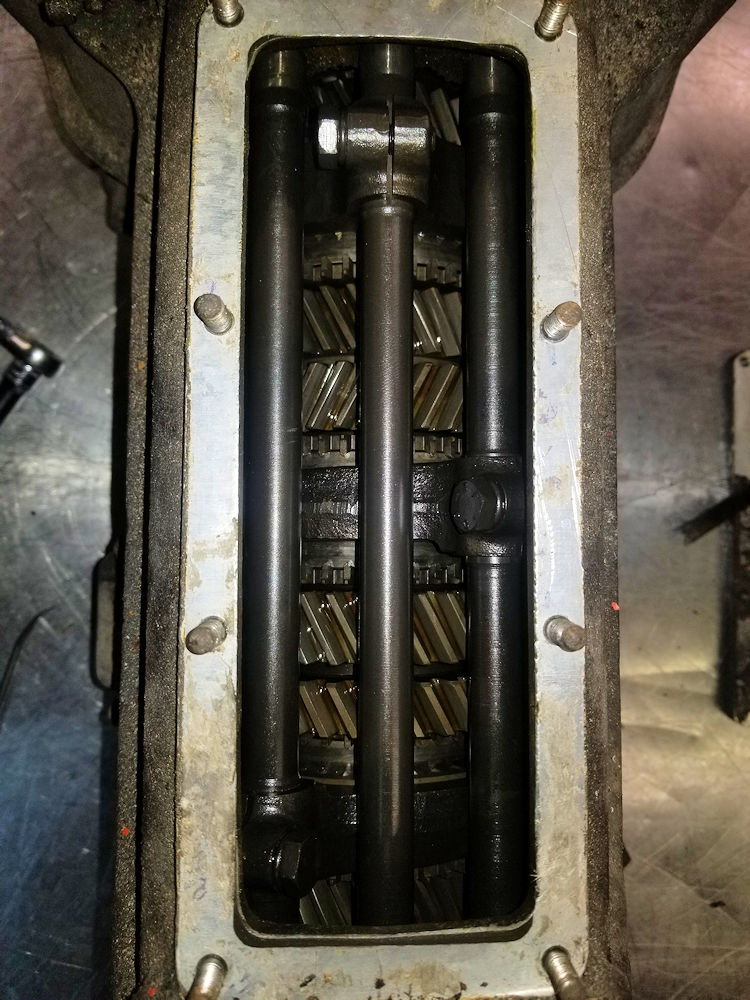
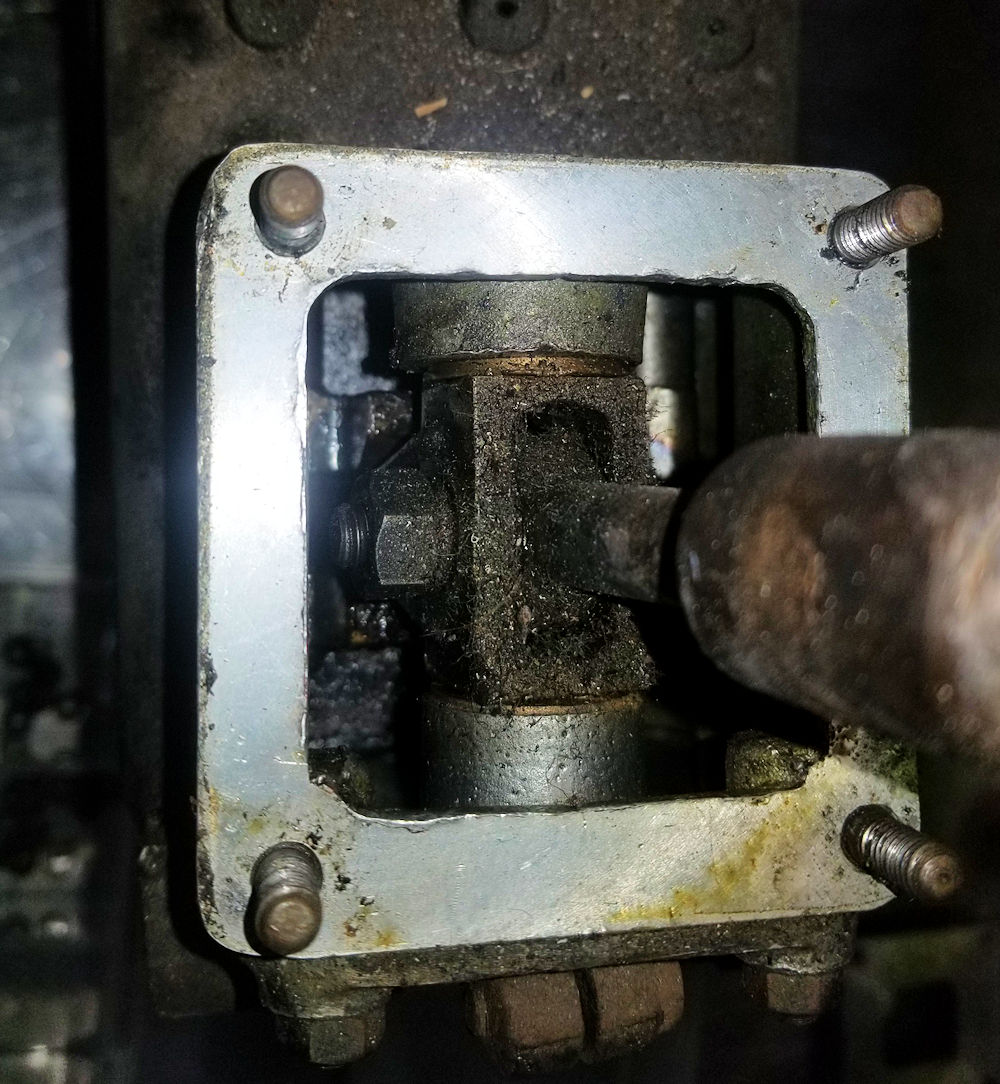
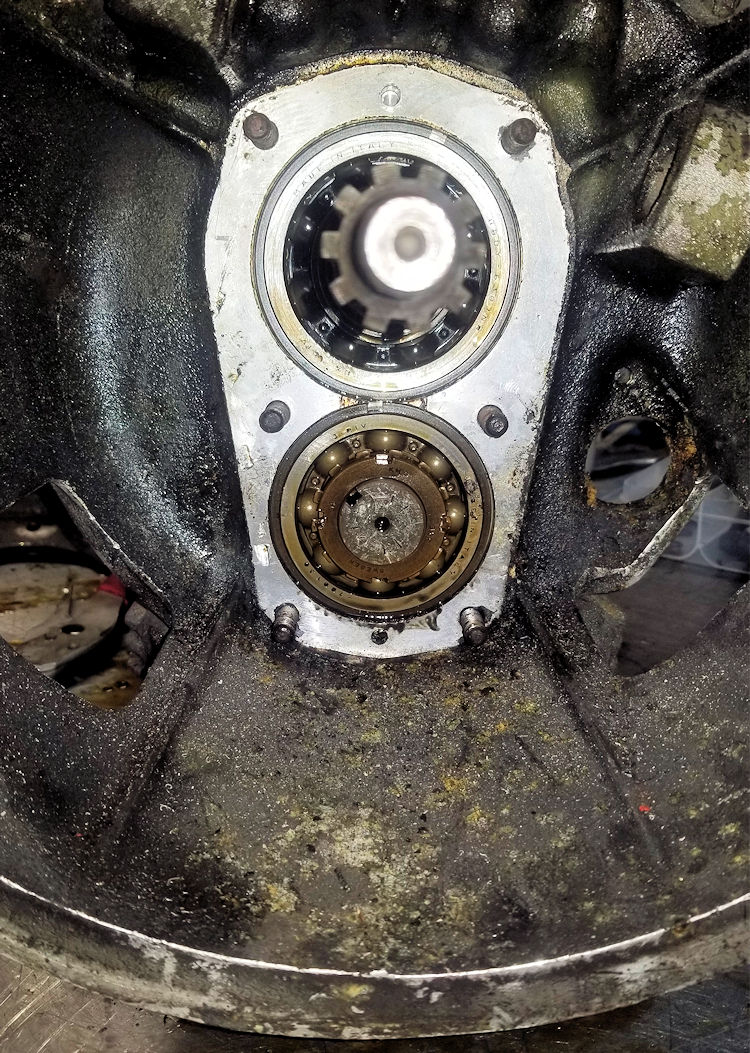
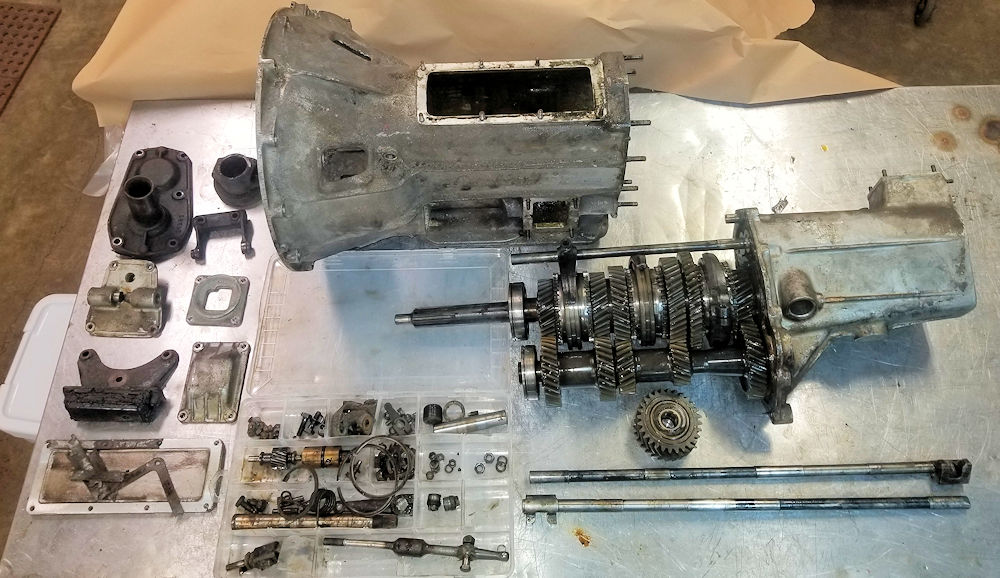
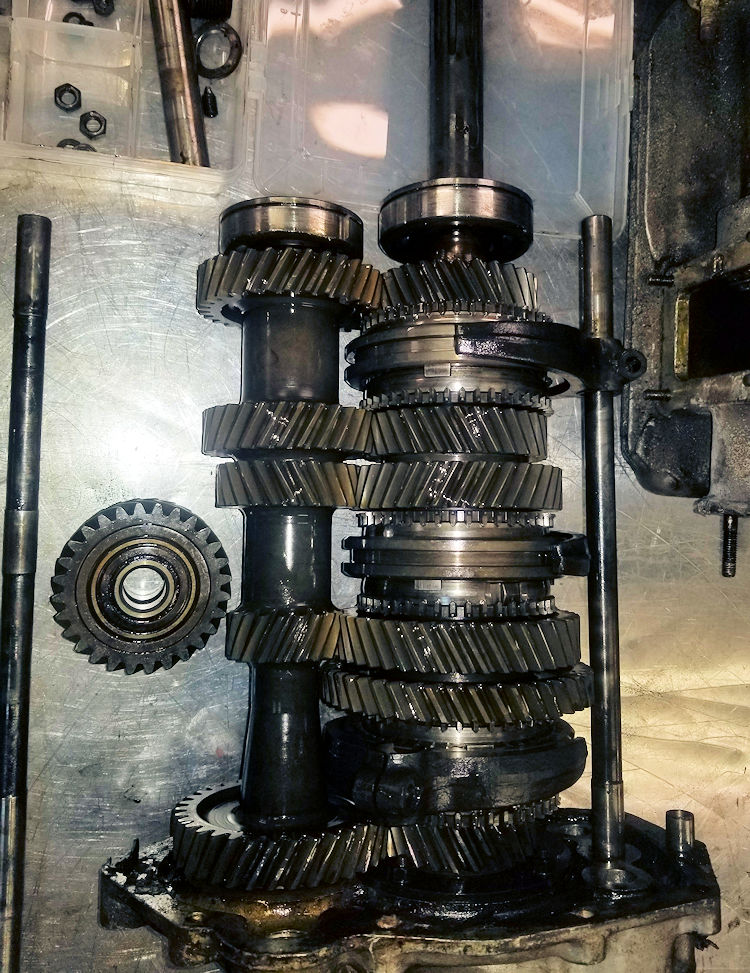
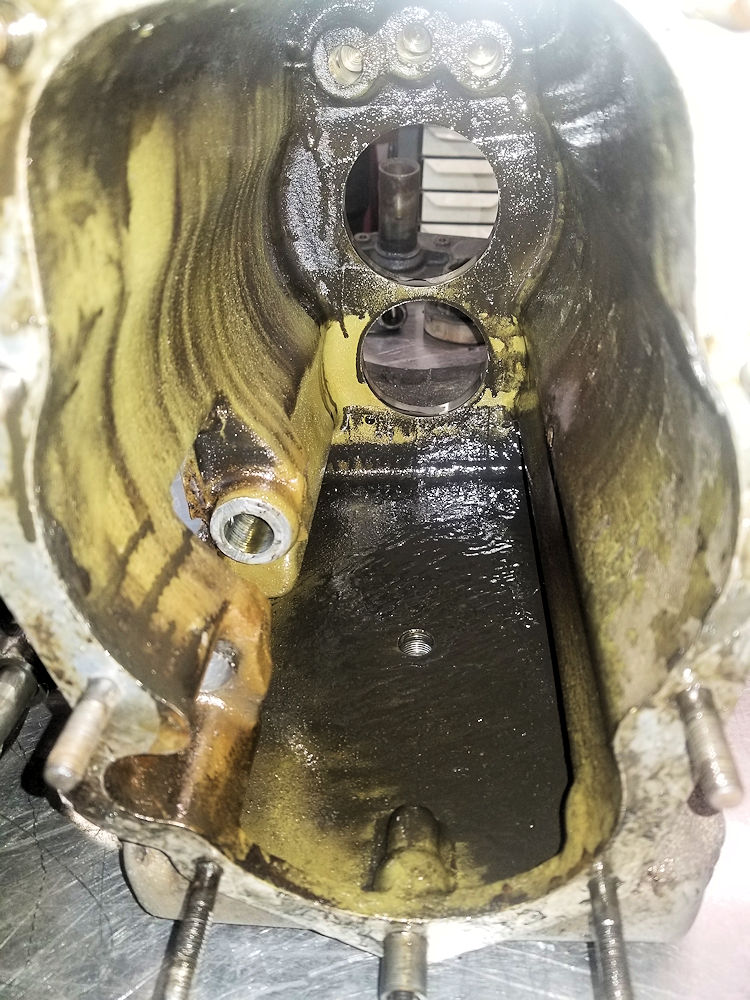
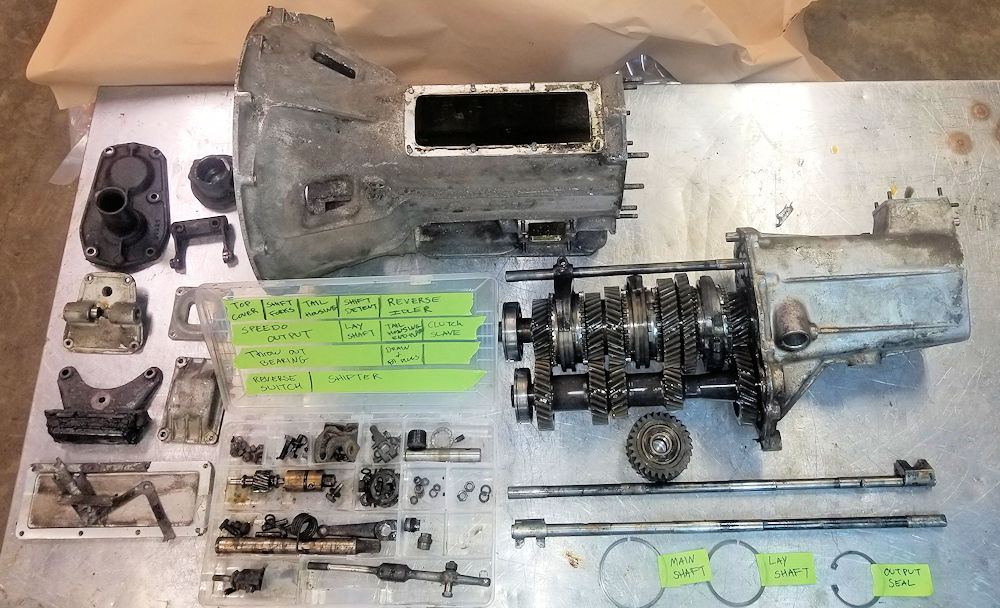
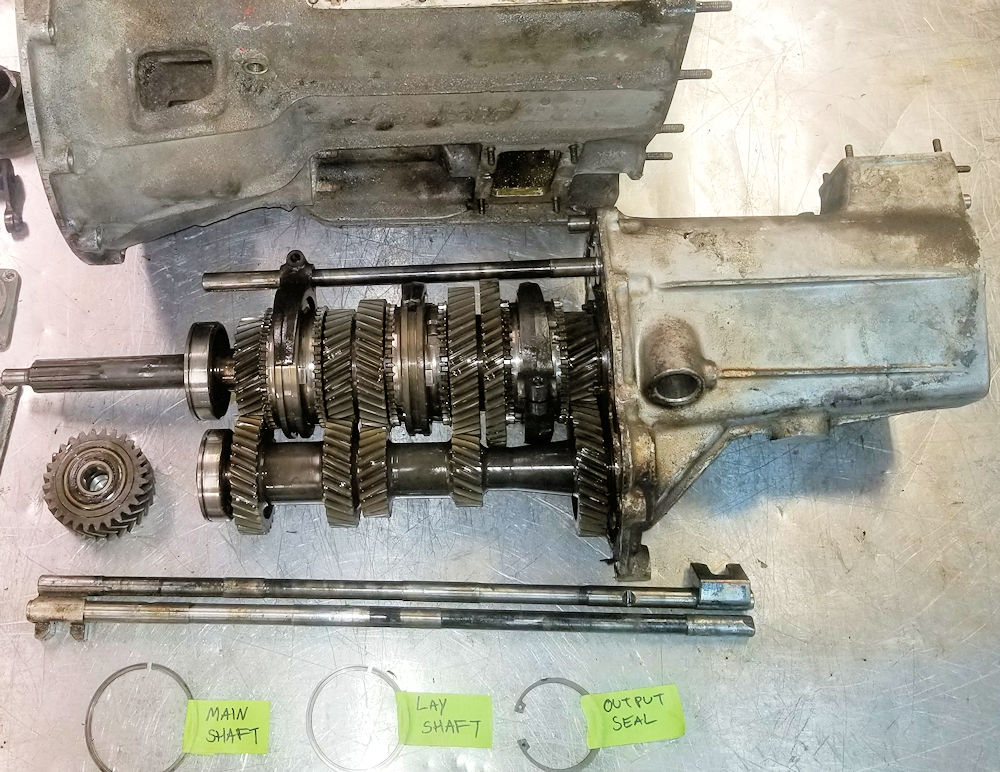
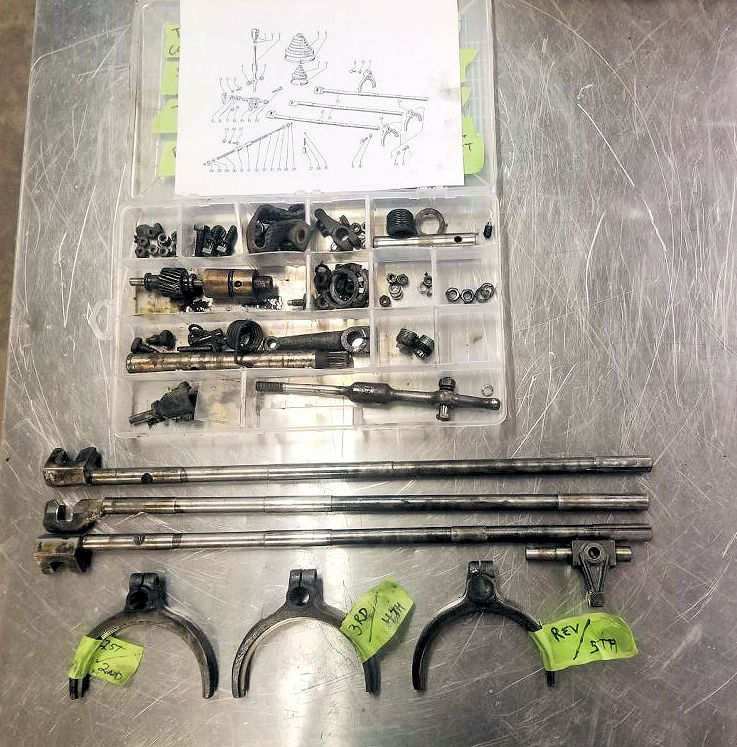
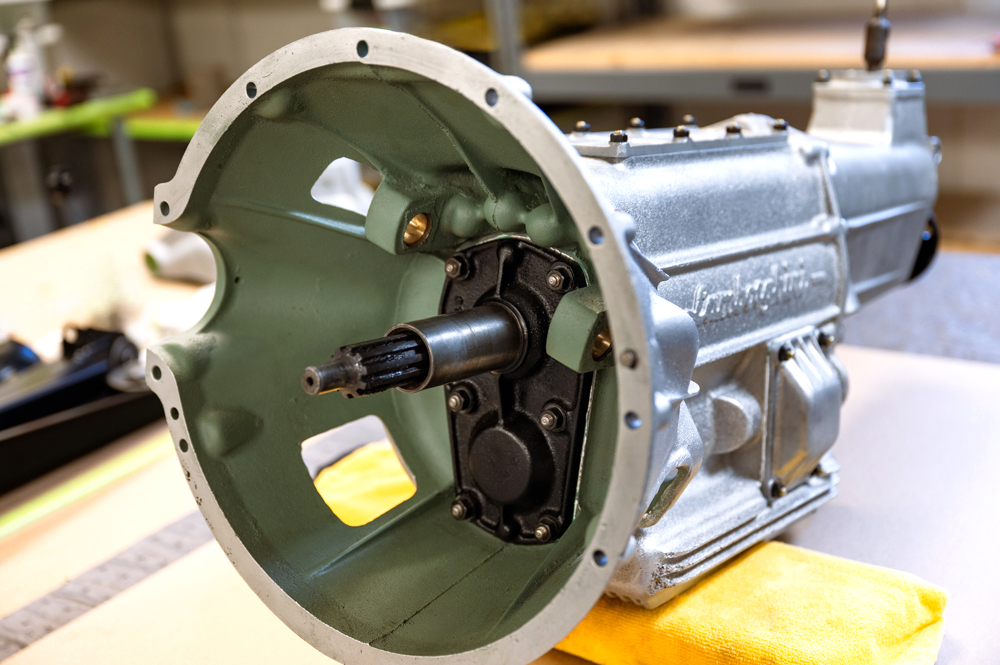
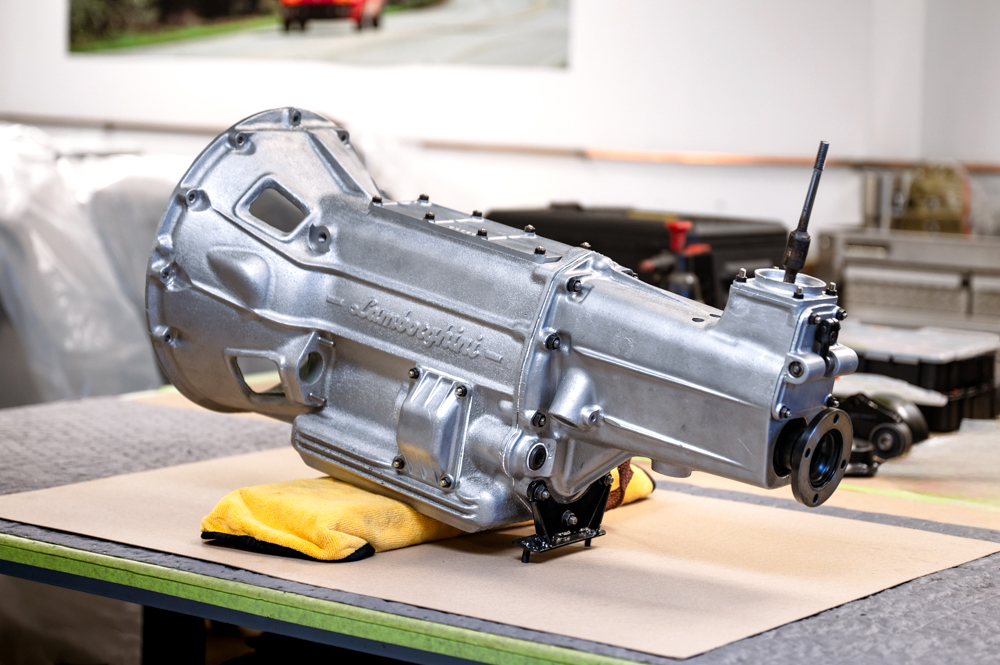
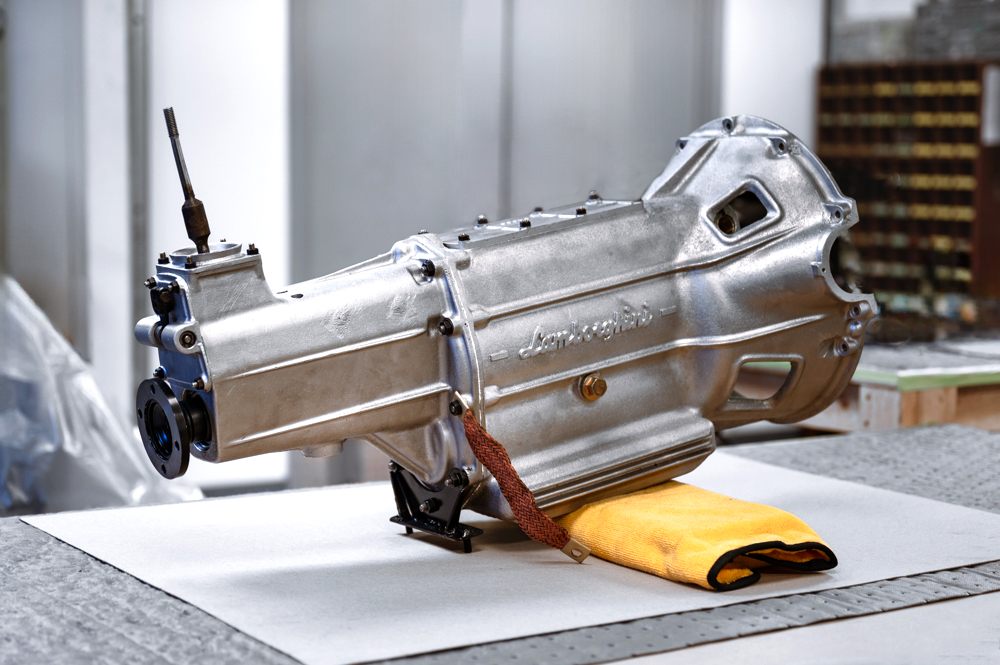
Josh has your
transmission rebuild well underway.
Jake has been
busy cutting away corroded sheet metal.
Jake is stripping the body down to a virtually
bare skeleton
Rear section now removed
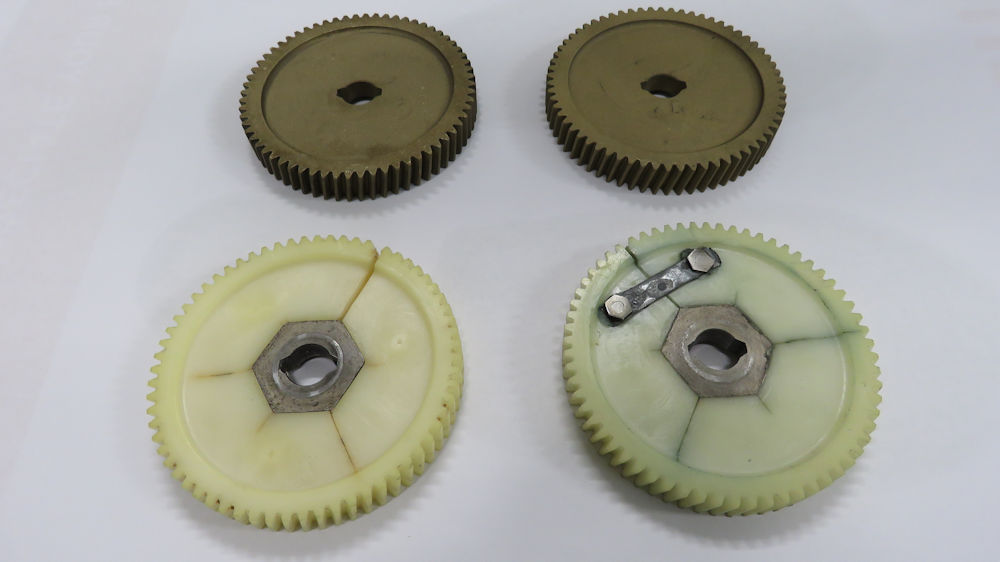
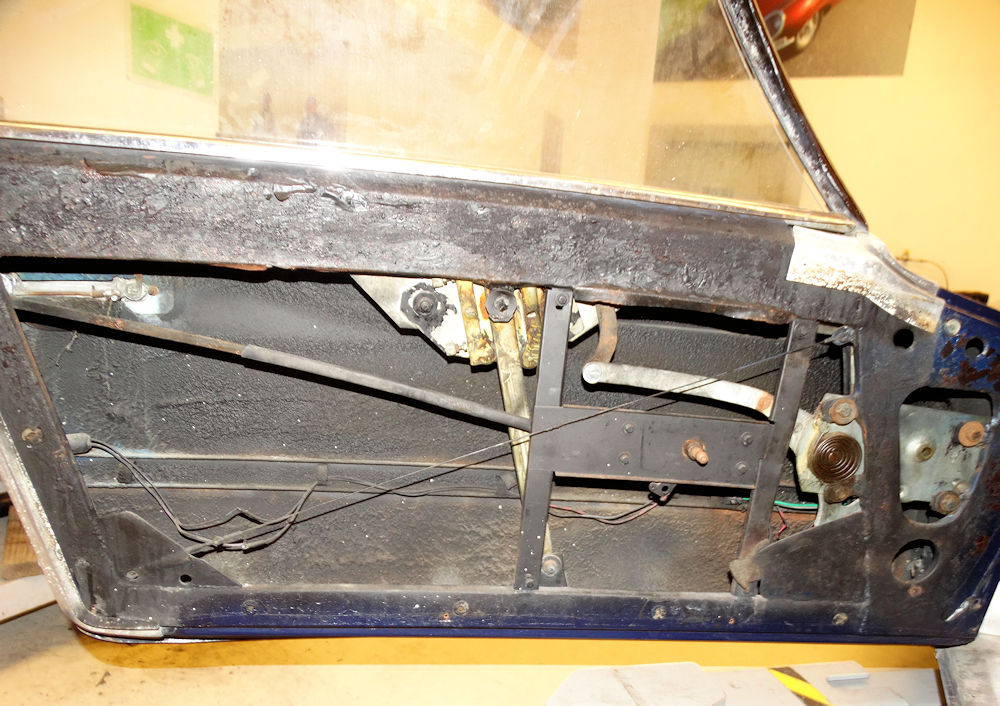
Original cracked plastic window gears have
been
replaced by new bronze gears
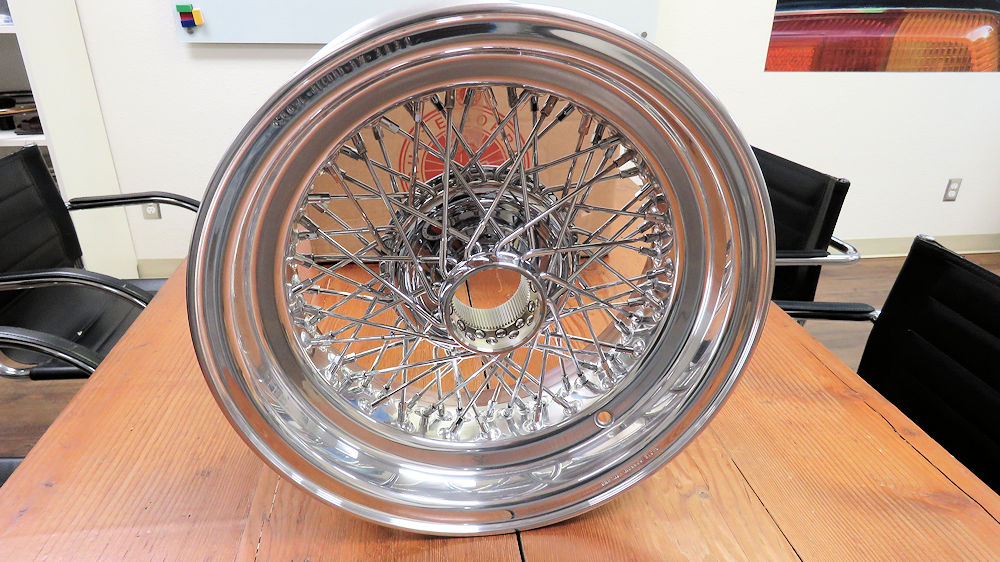
Just received a new set
of stunning Borrani RW3831 wire wheelsfor the 350 GT
The
following sequence of photos show Jake removing the rear
wings and license plate panel, as well as cutting away the
floor pans.
Cutting away welds around the left
rear wing
Repeating the process on the right side
Rear wings, cowl and license plate panel
now removed
Cutting away the rusted floor pans
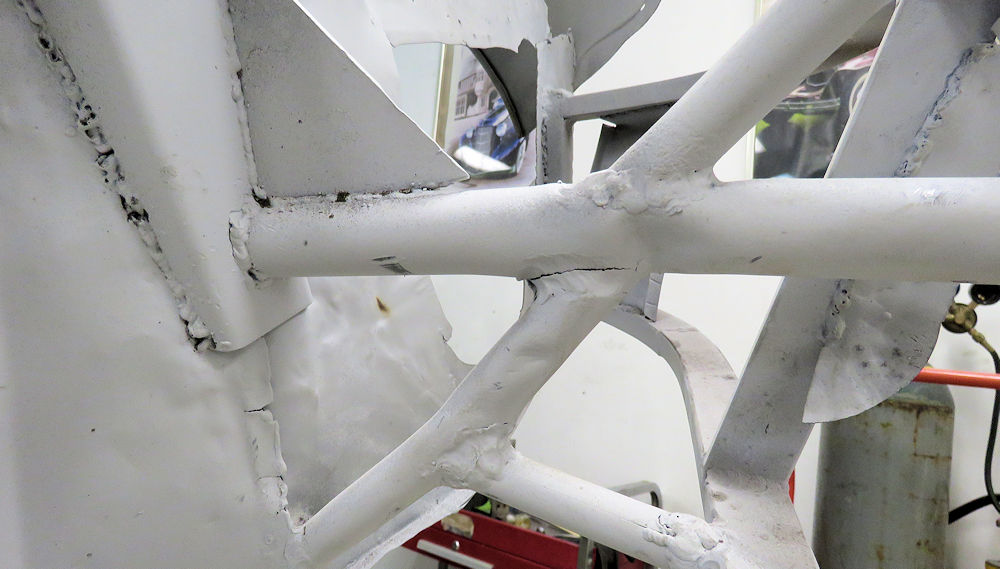
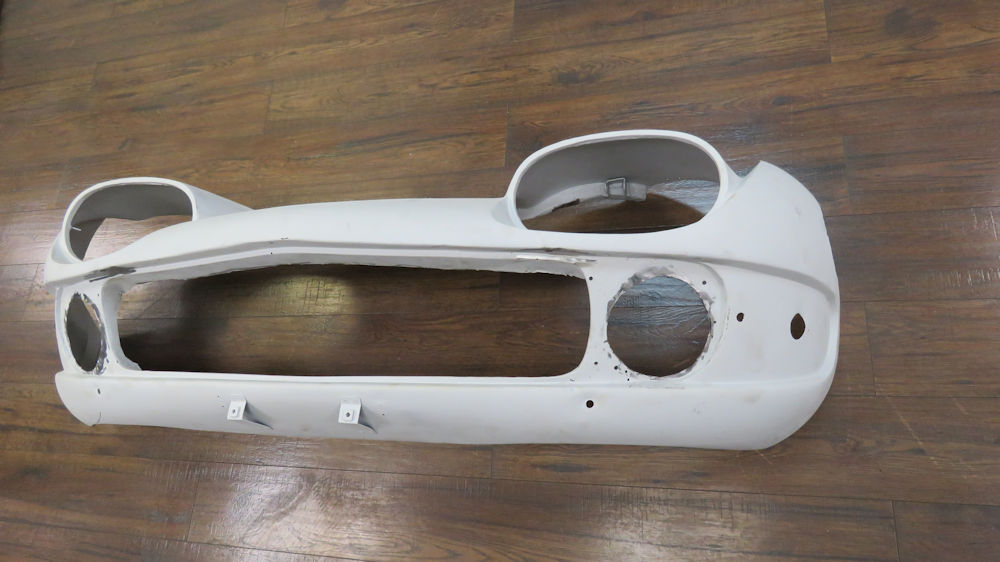
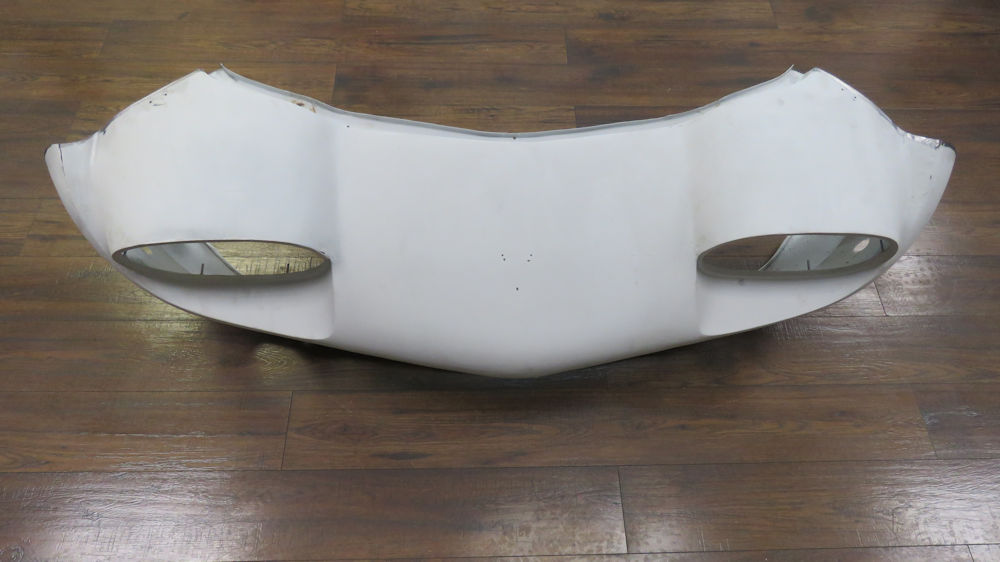
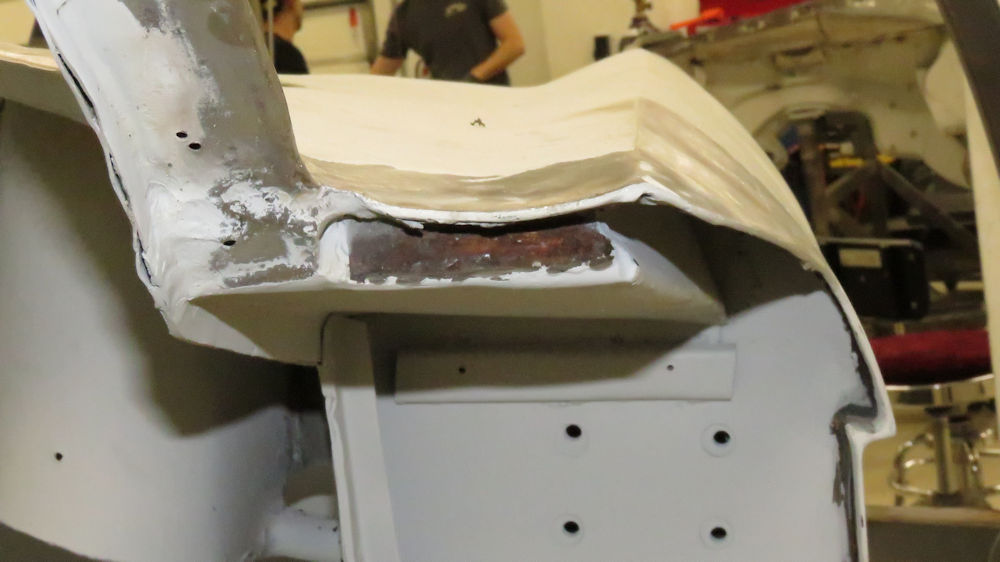
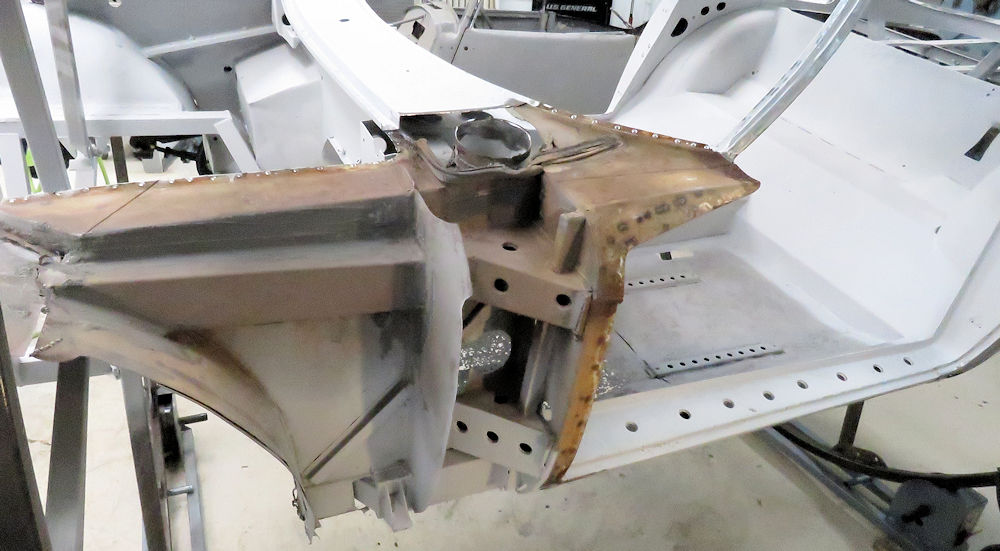
The
following sequence of photographs show Jake removing both
front wings to reveal previous accident repairs and damage
to the Superleggera framework beneath.
Jake preparing to remove the nose section
Note damage to Superleggera tubing and
failed welds
Separating welded seams in order to remove
the RH front wing
Inner structure behind RH front wing looks to
be
in reasonable condition
Lots of evidence of previous accident repairs
Drilling out spot welds at the rear edge of
the cowl
More evidence of previous bodywork repairs
Corrosion at the rear edge of the LH front
wing
To be continued!
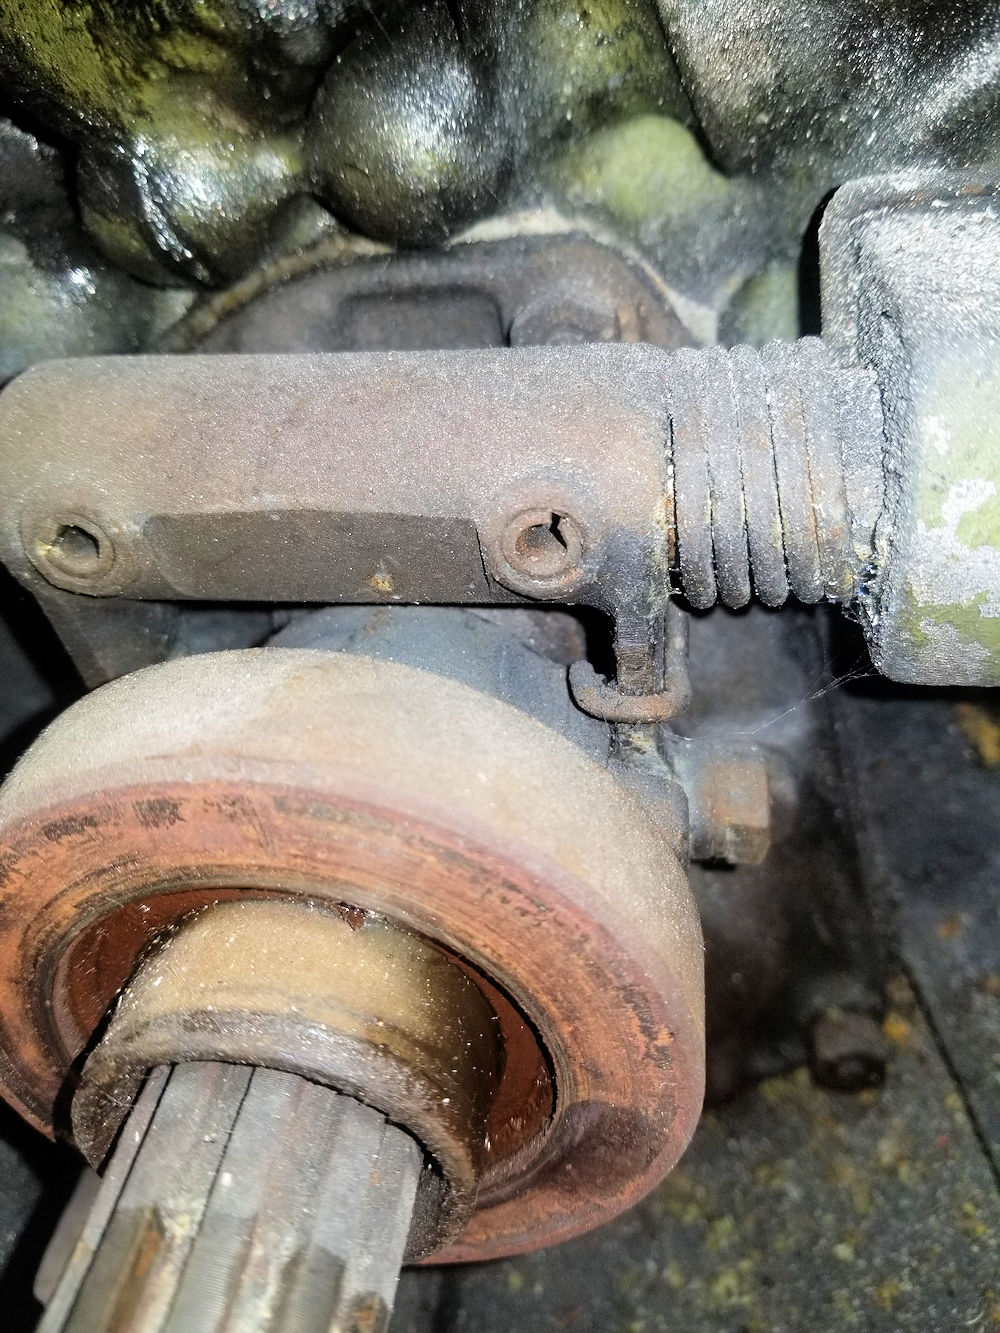
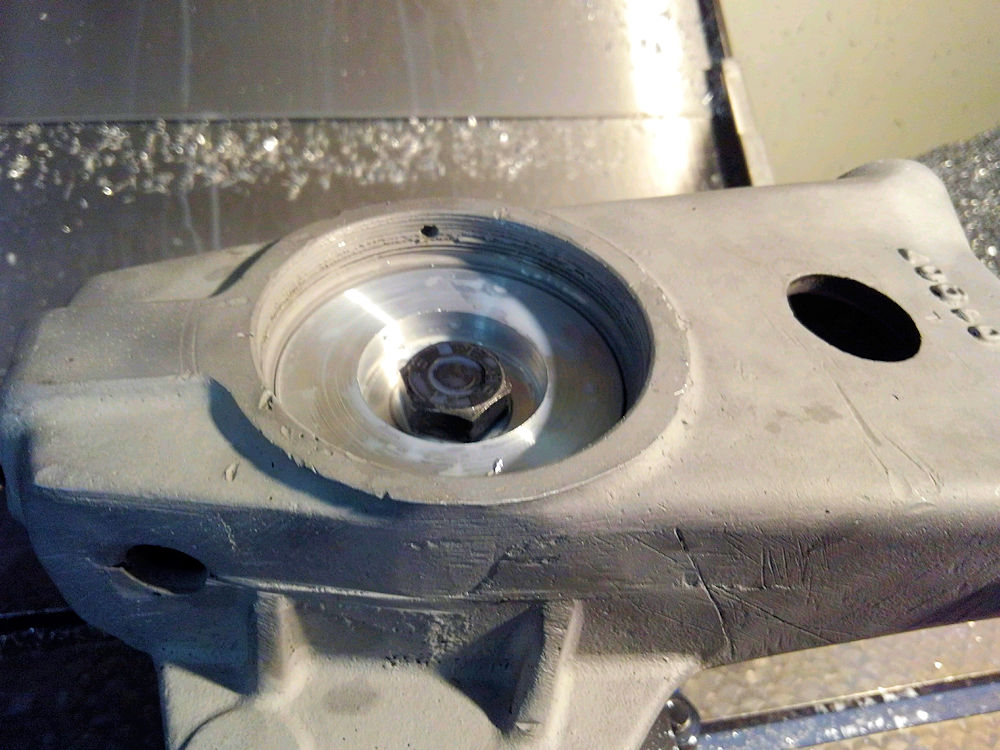
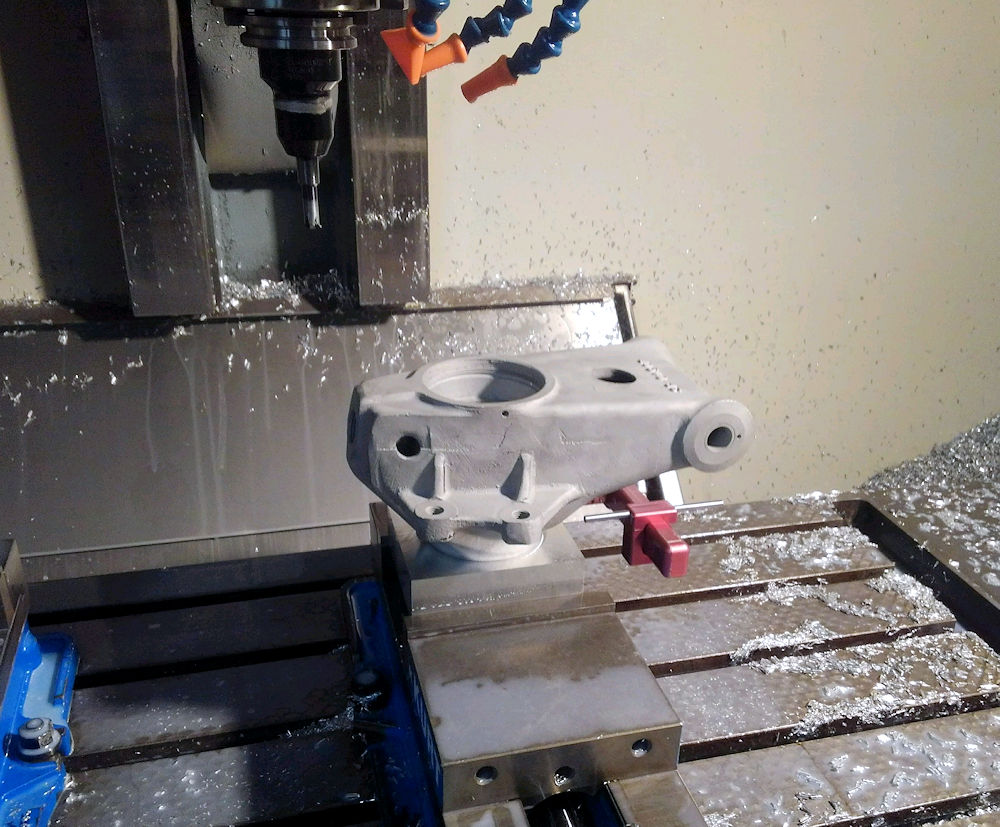
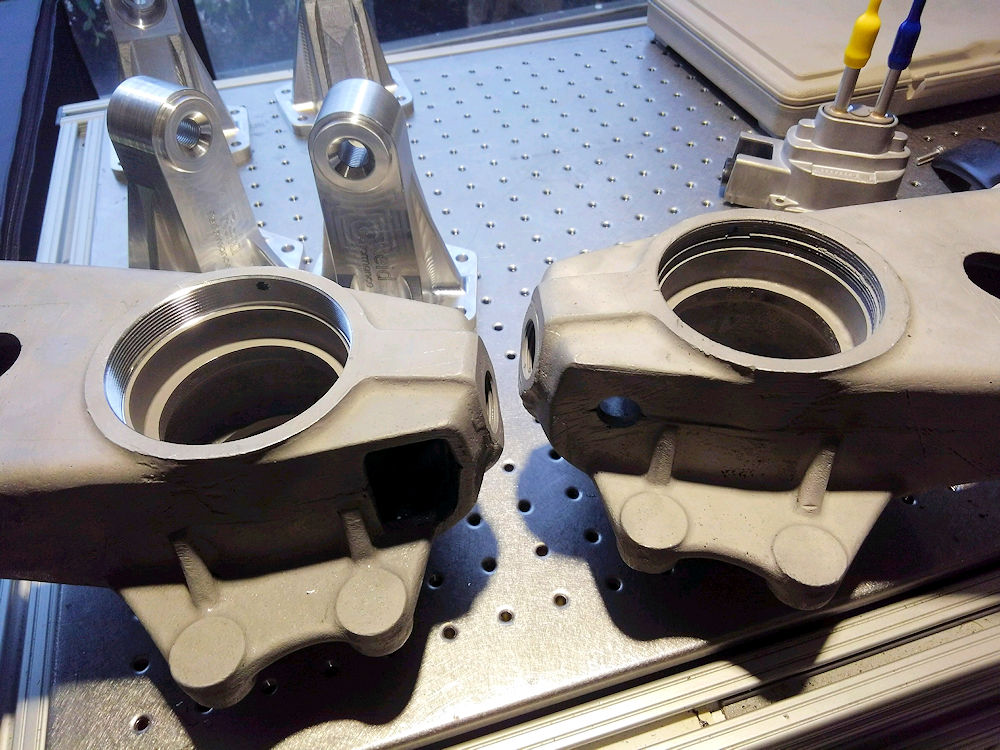
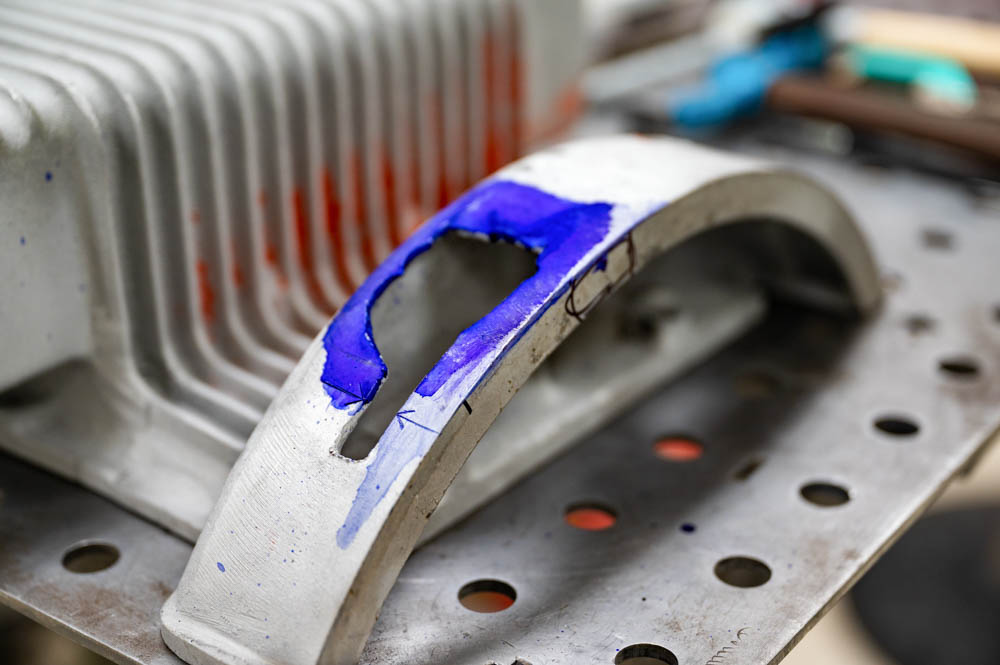
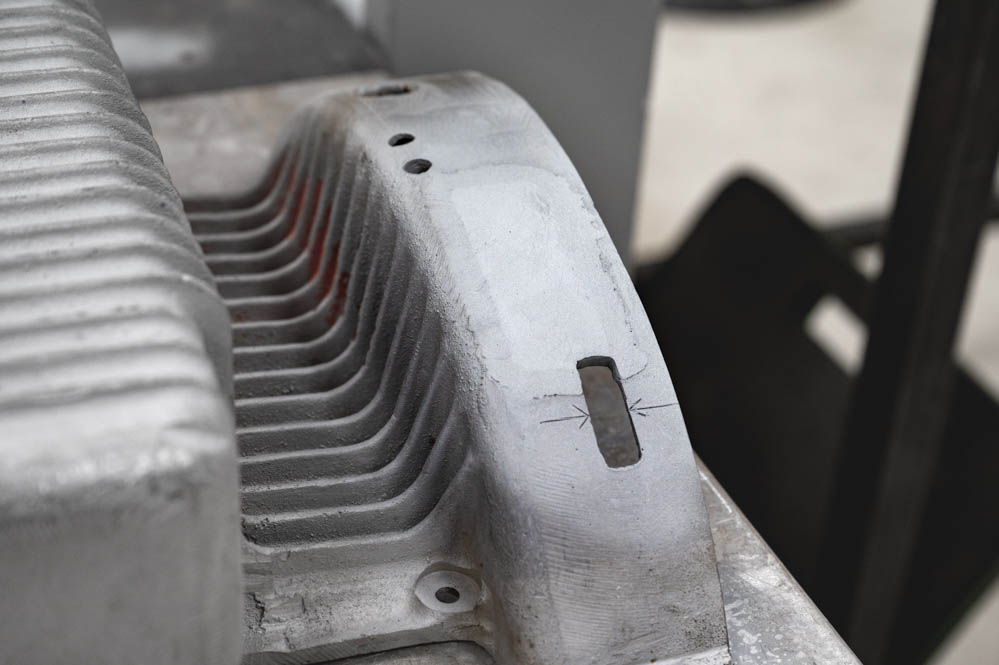
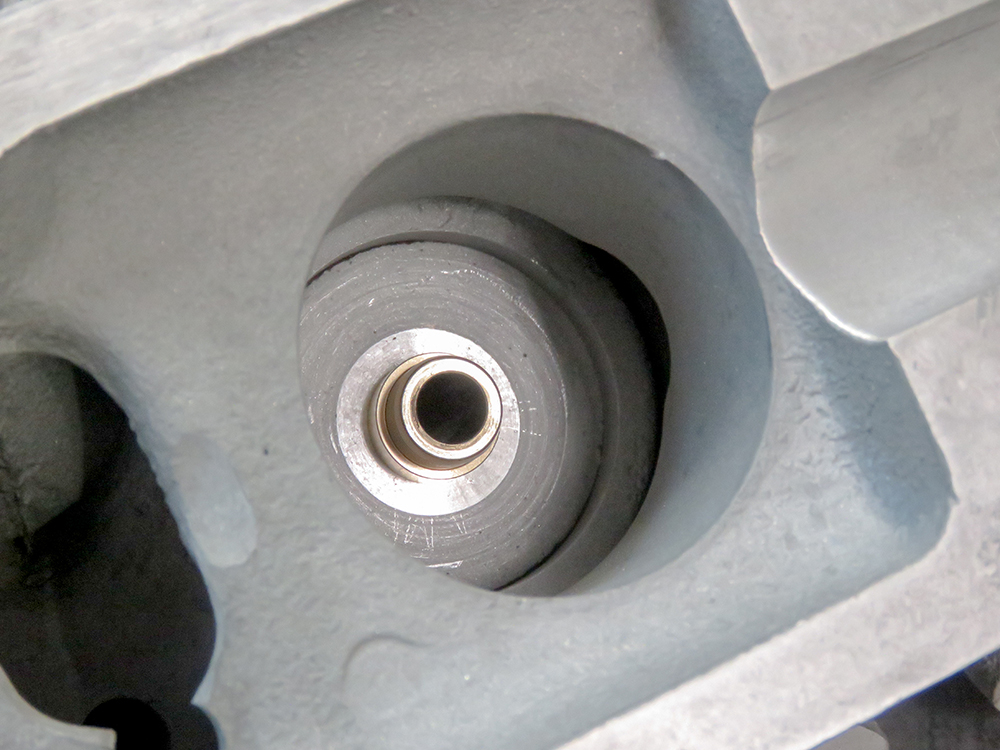
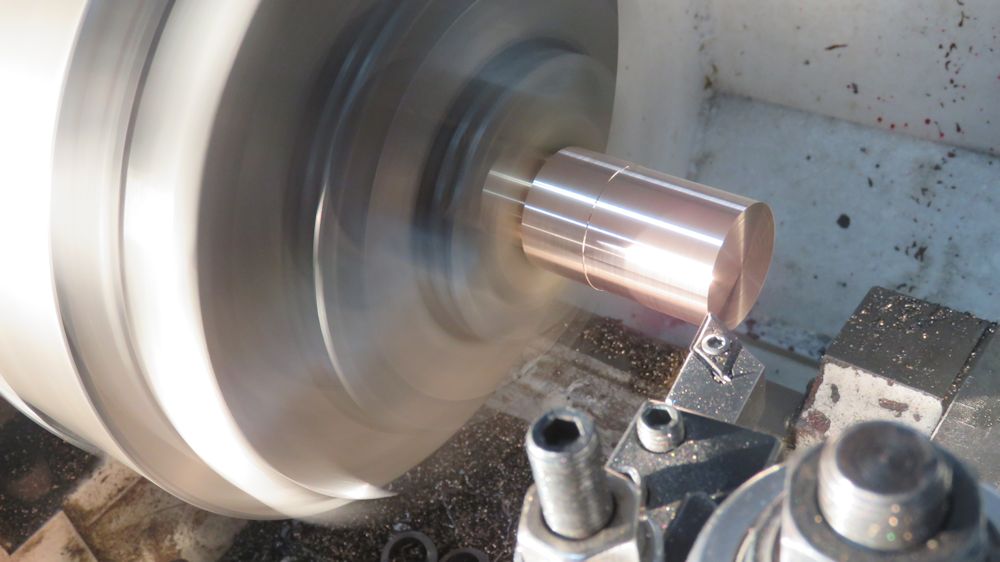
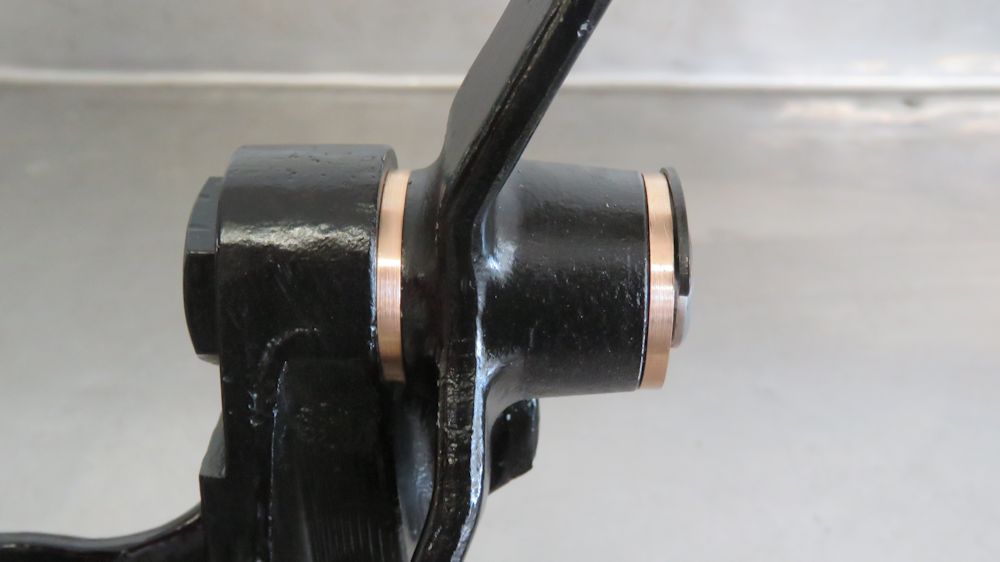
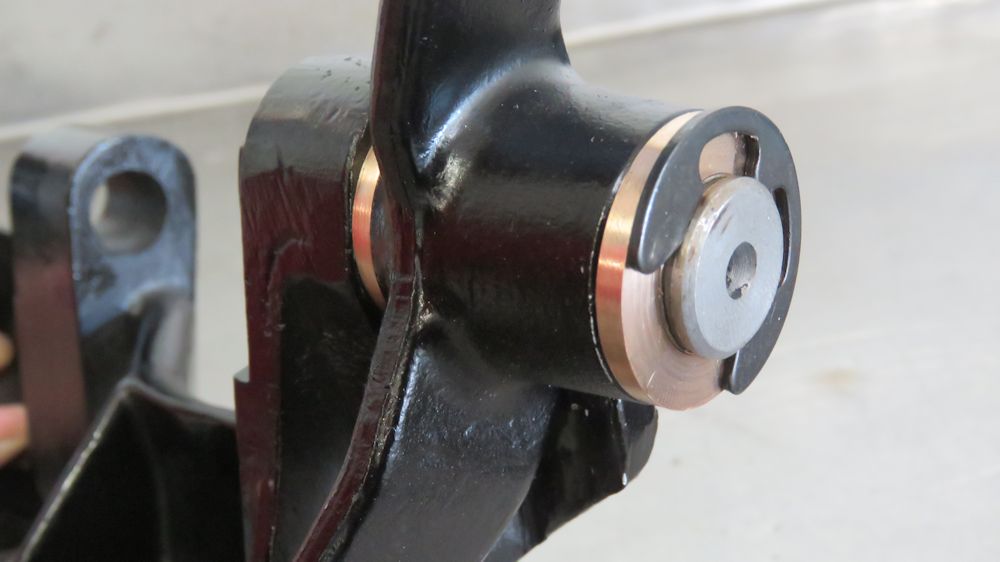
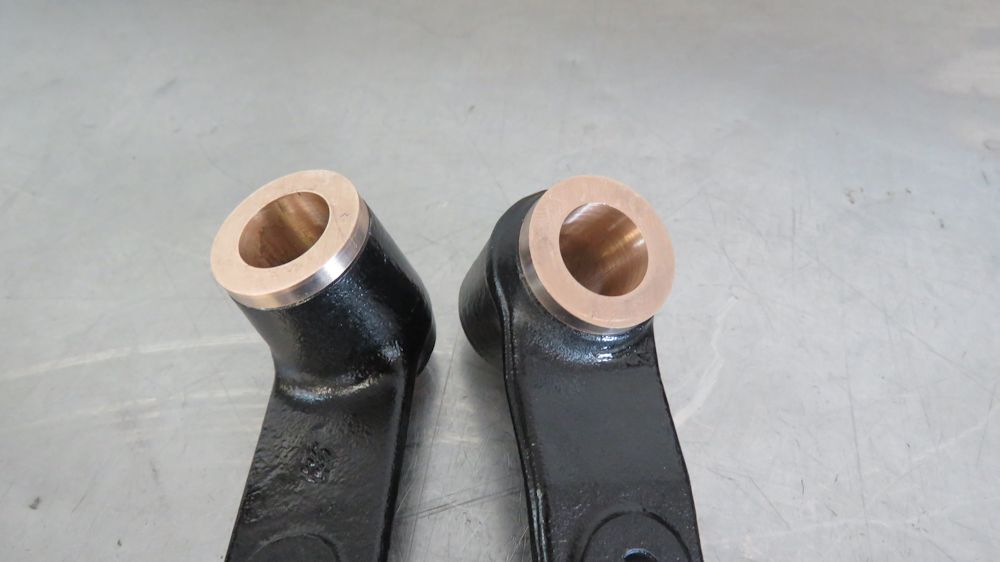
The threads in
Lamborghini rear hub carriers are often damaged because the steel bearing retainers
can become seized to the aluminum housing. When this occurs,
subsequent removal of the steel retainers can damage the
much softer threads in the alloy carrier. The solution is to
machine oversized threads in the housing and machine
similarly oversized steel bearing retainers. The images
below show each stage of this process.
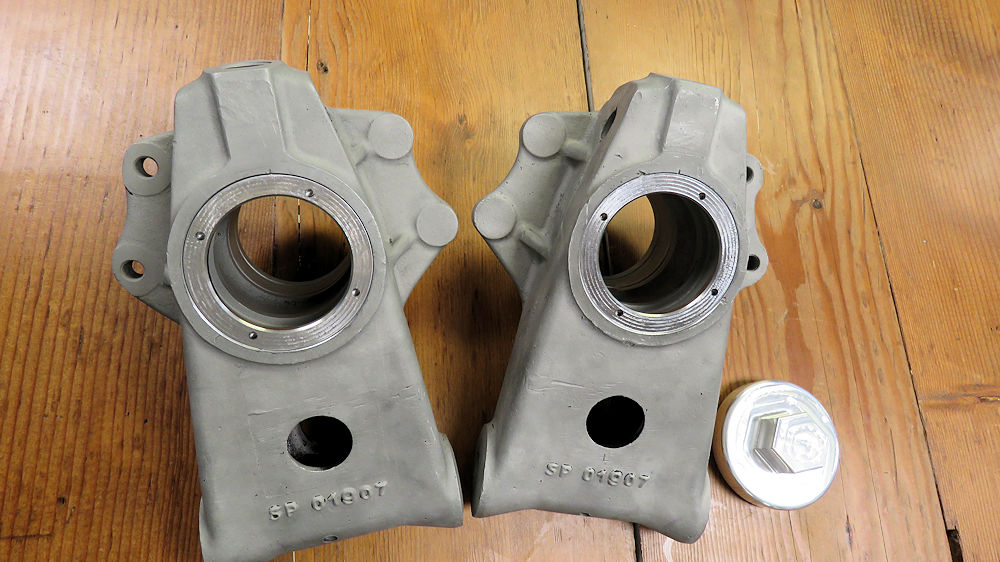
Note damaged threads in hub carrier
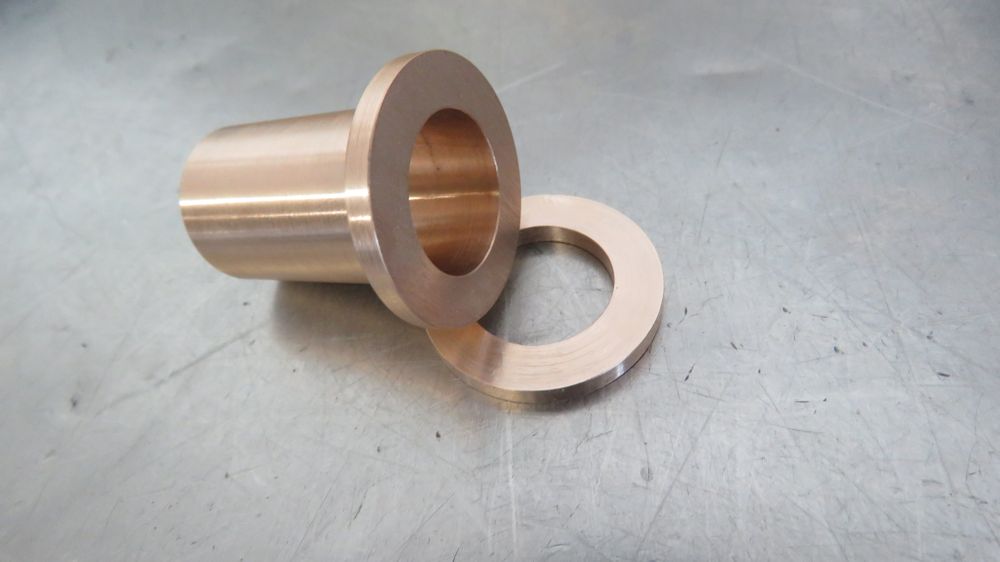
The carrier on the left has now had new
threads
machined
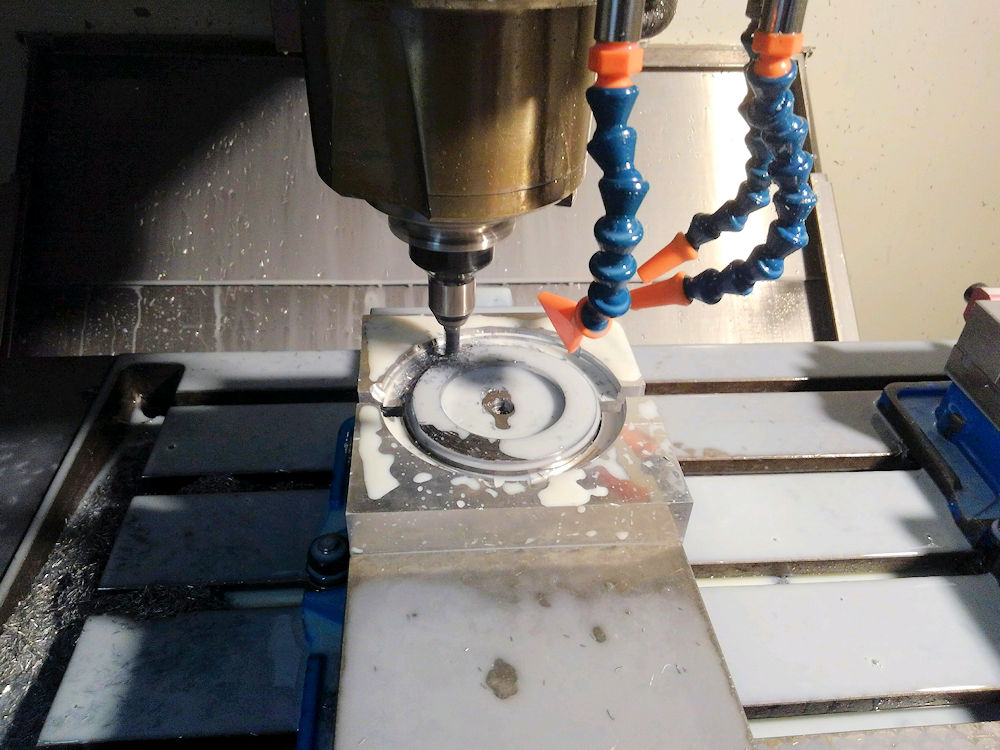
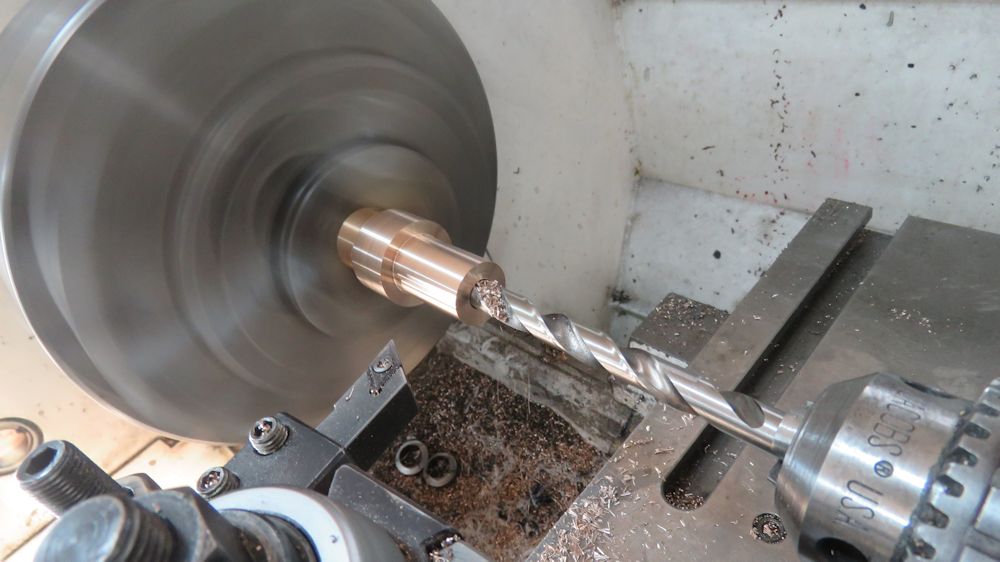
Fabricating the oversized bearing retainers
Cutting the threads on the bearing retainers
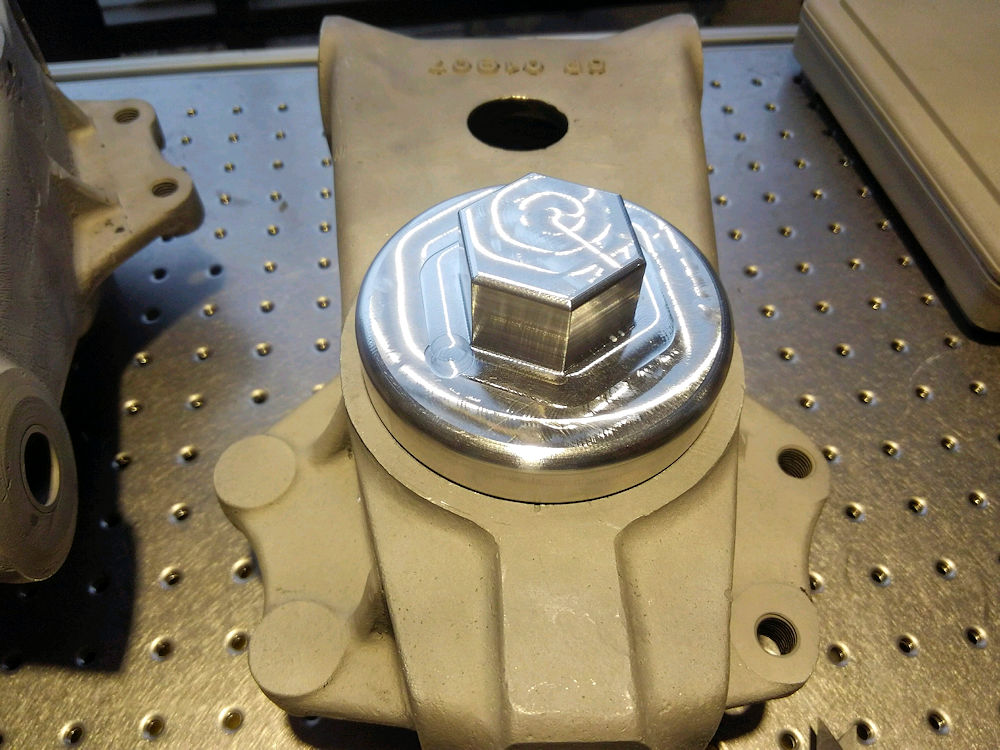
Special tool to install and remove the bearing
retainers
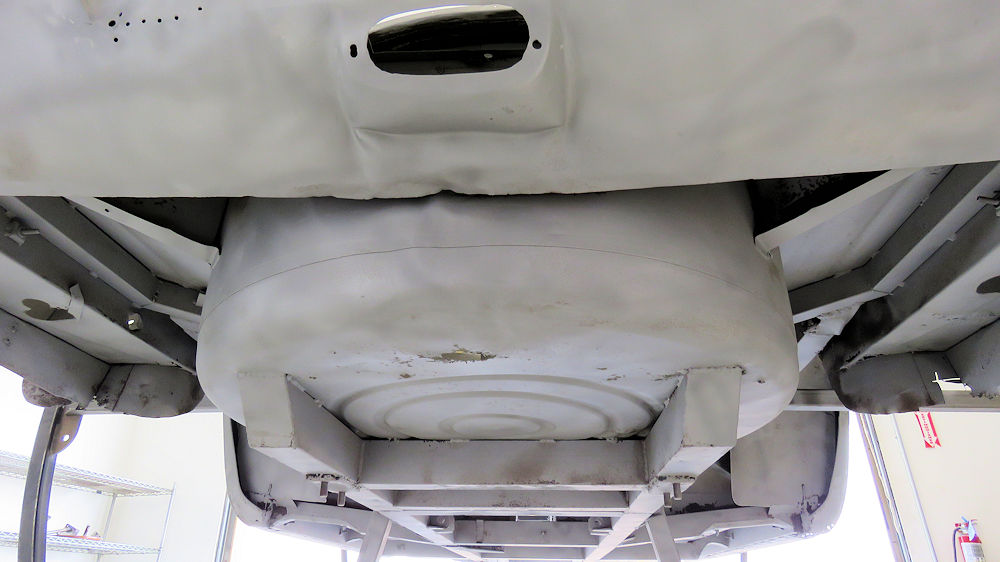
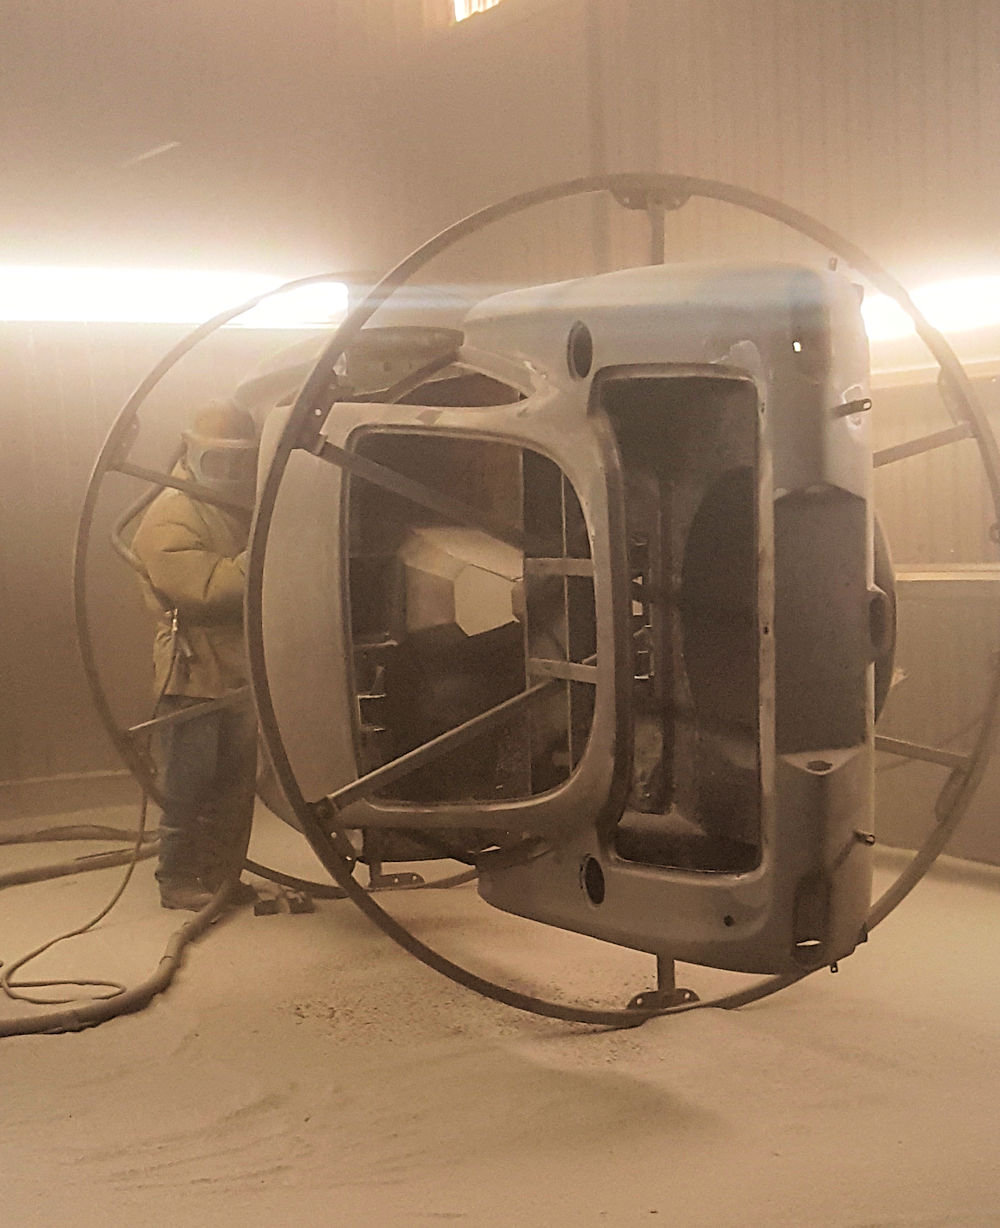
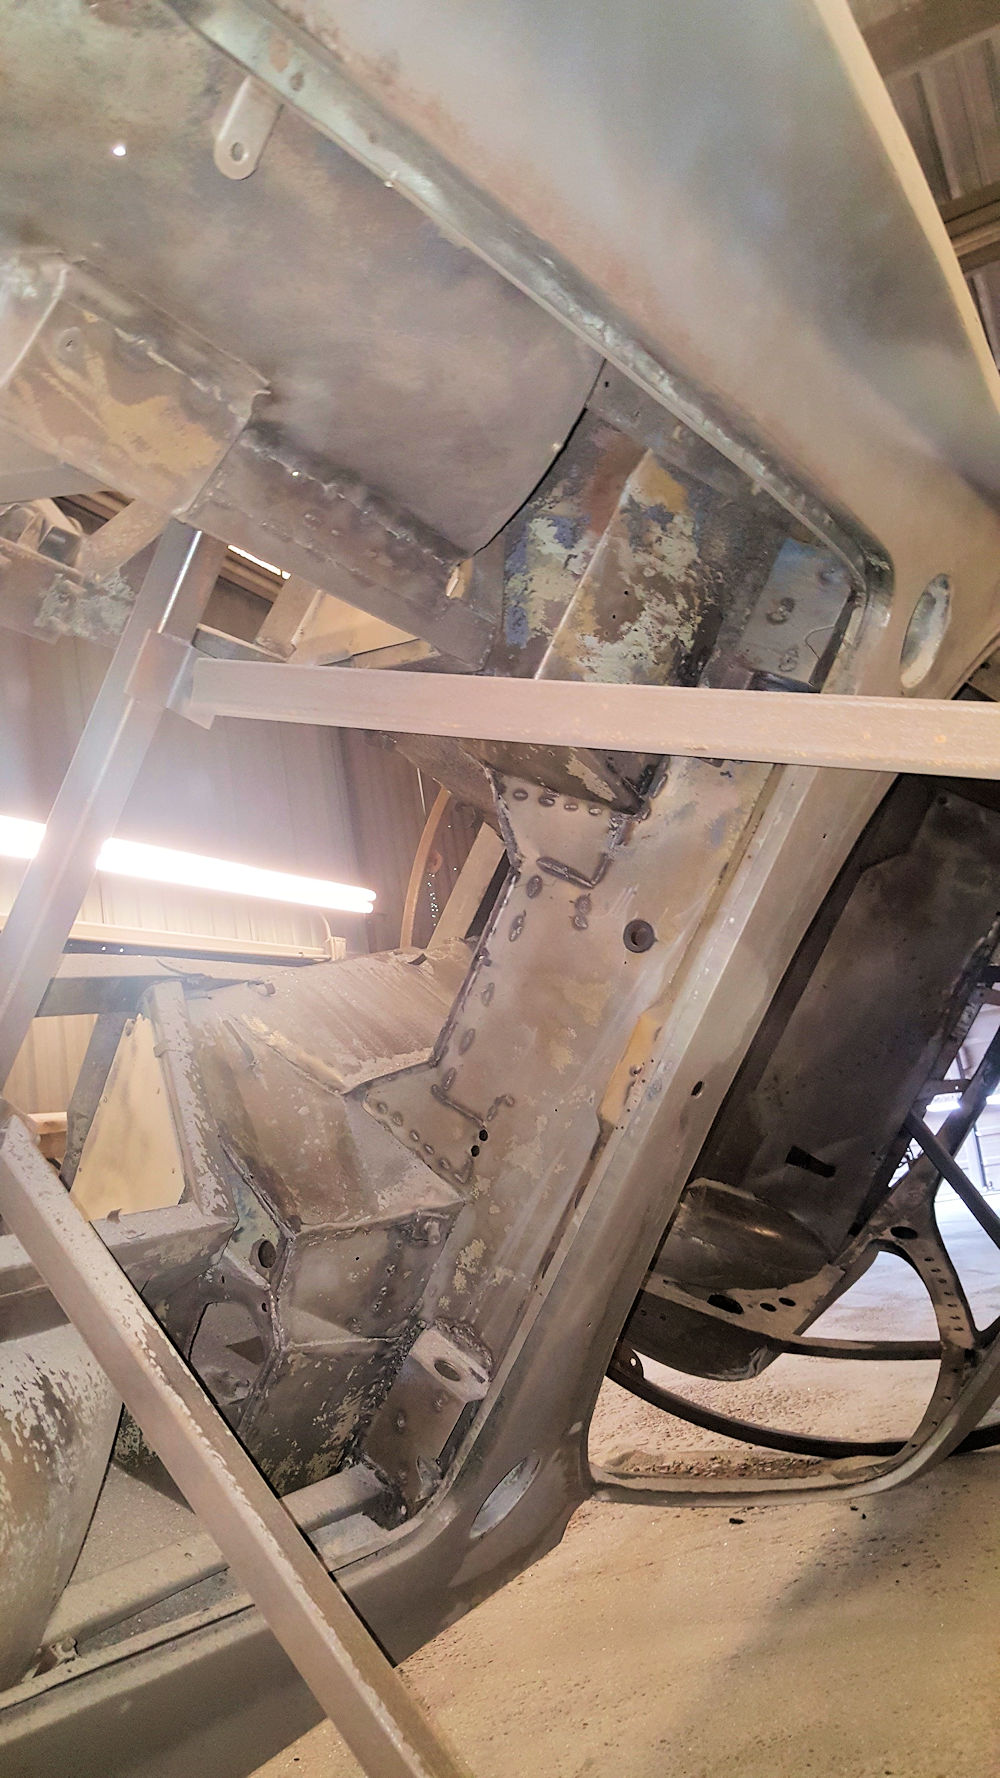
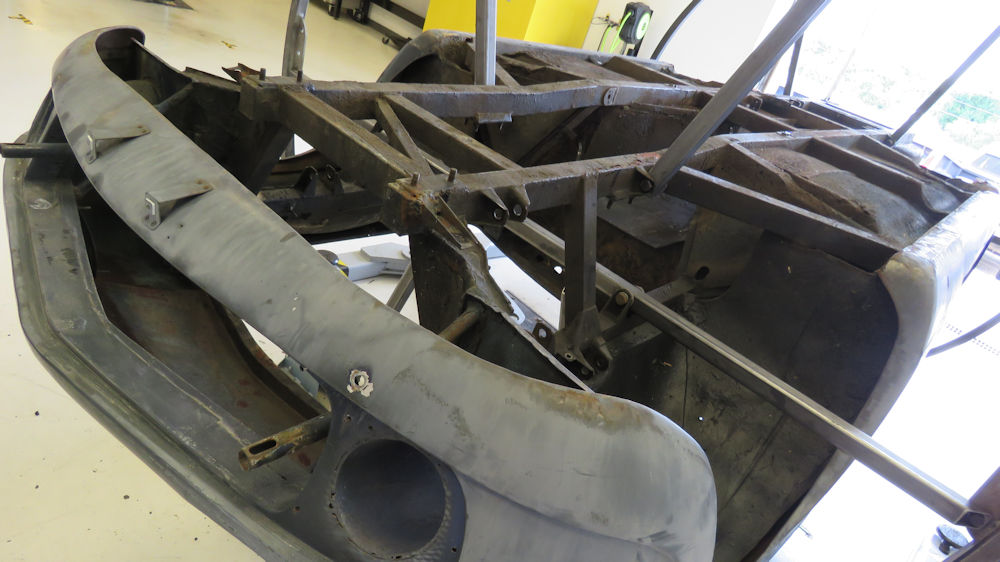
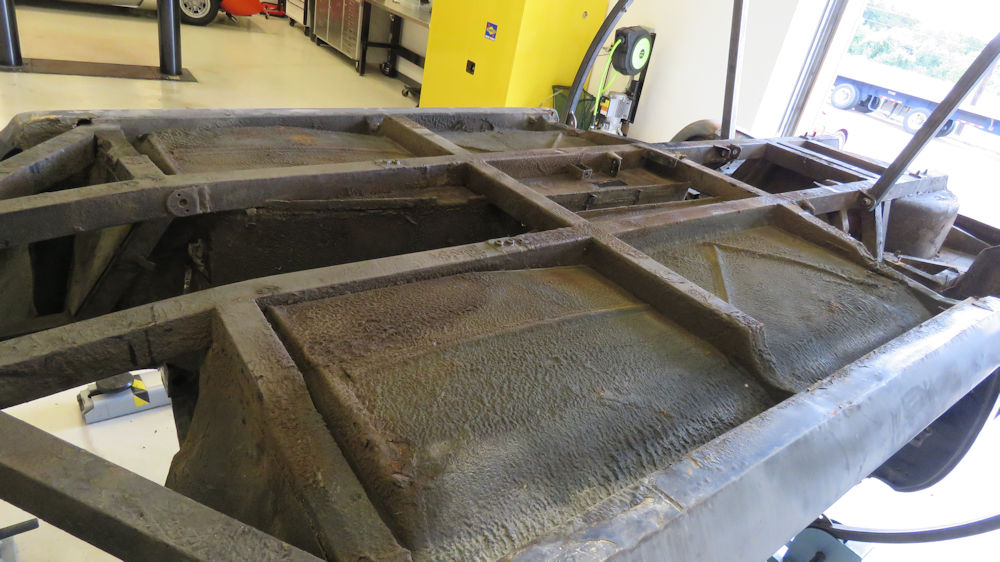
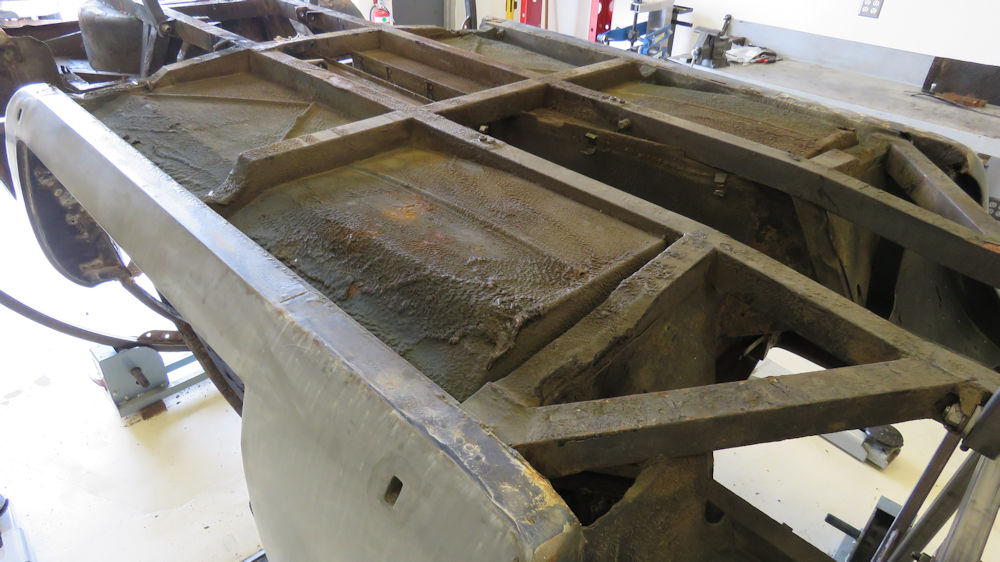
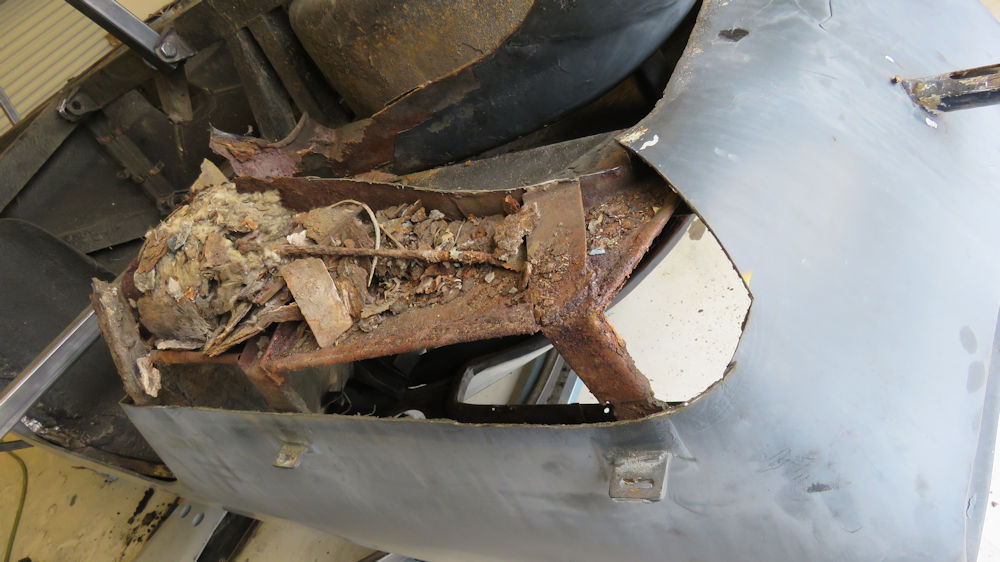
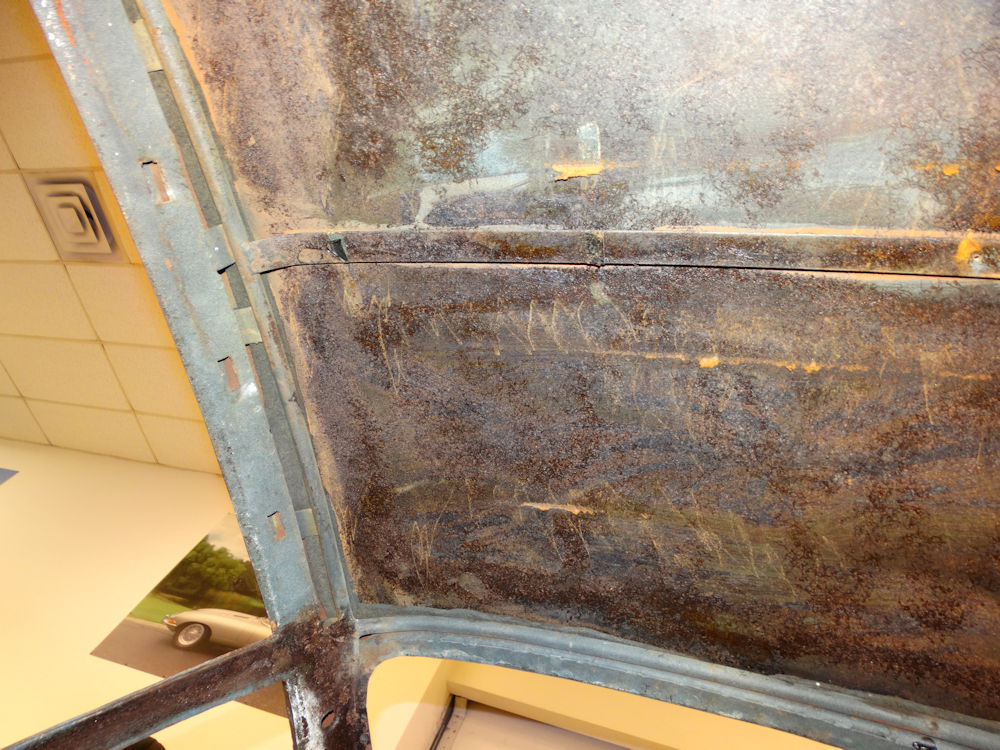
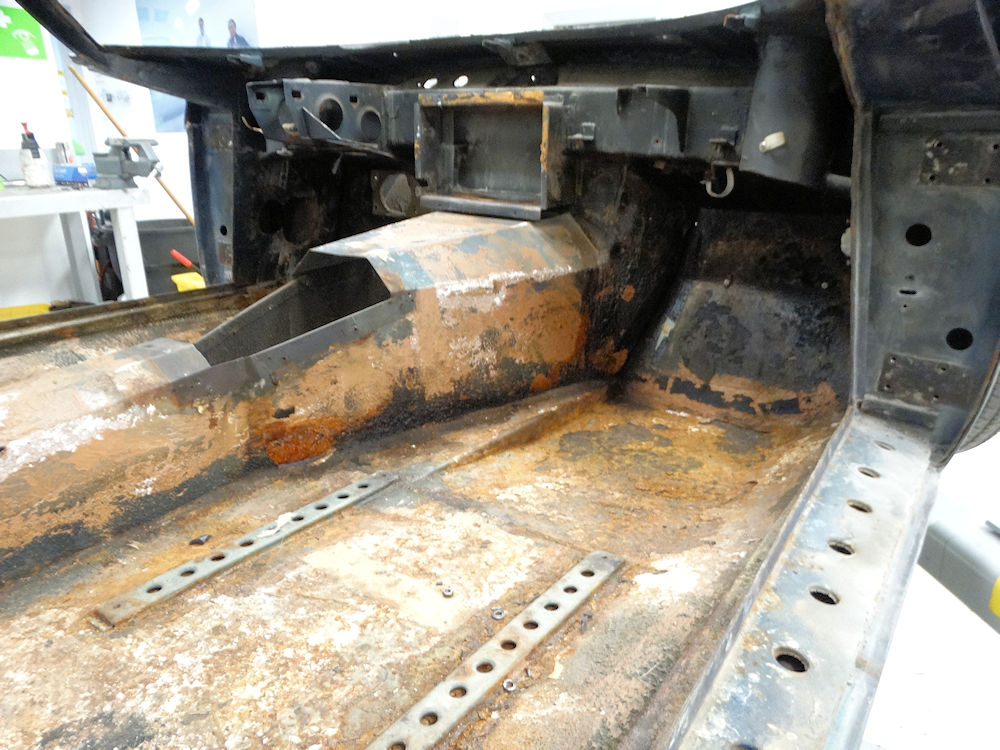
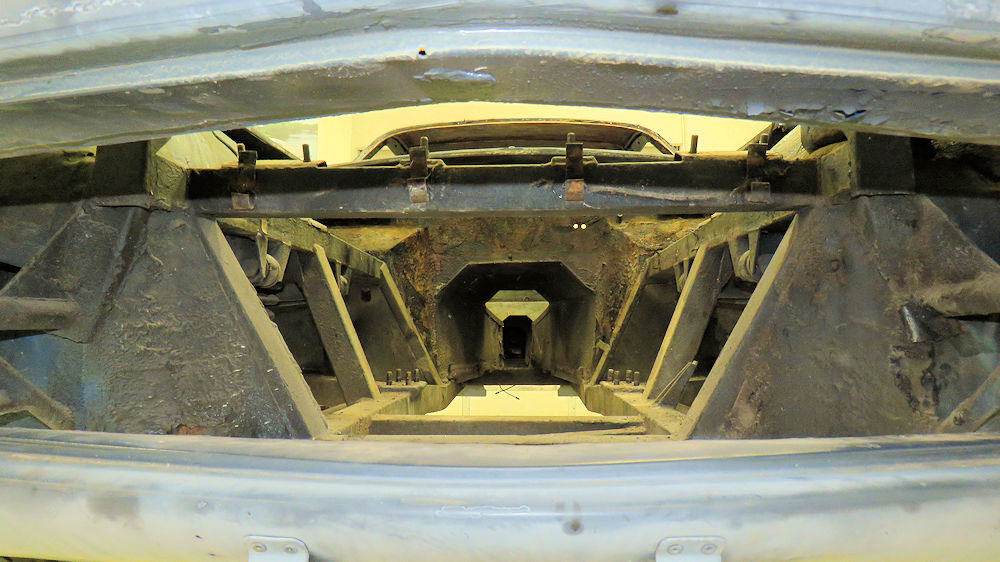
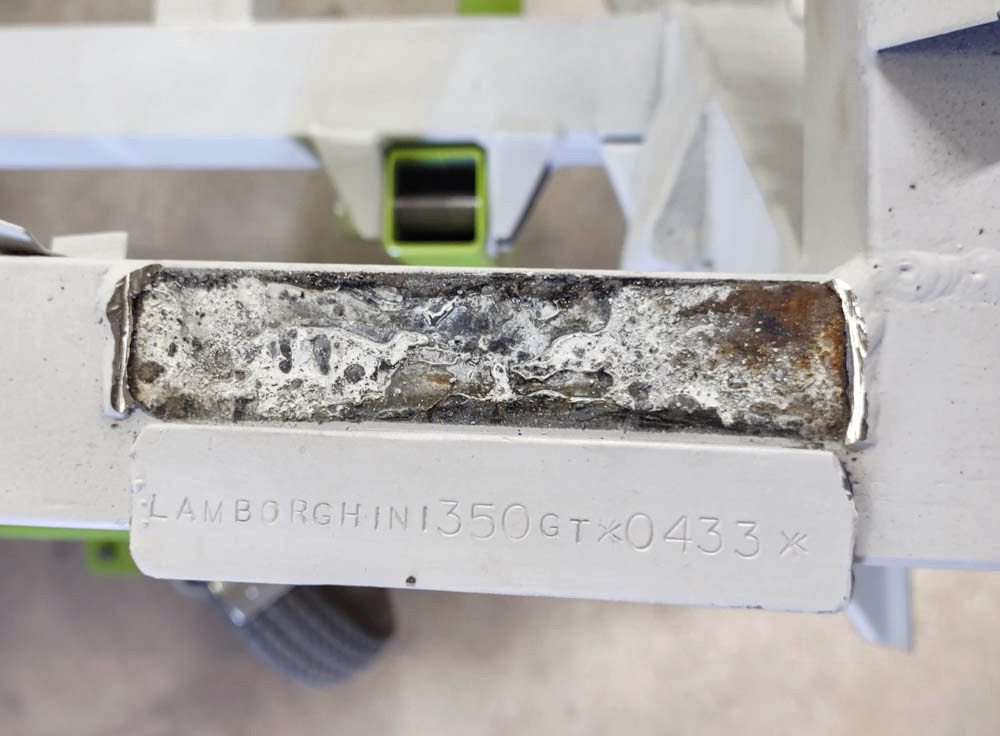
Now that the body and frame has been
media blasted back to bare metal, the full extent of
corrosion and previous damage repairs can be seen.
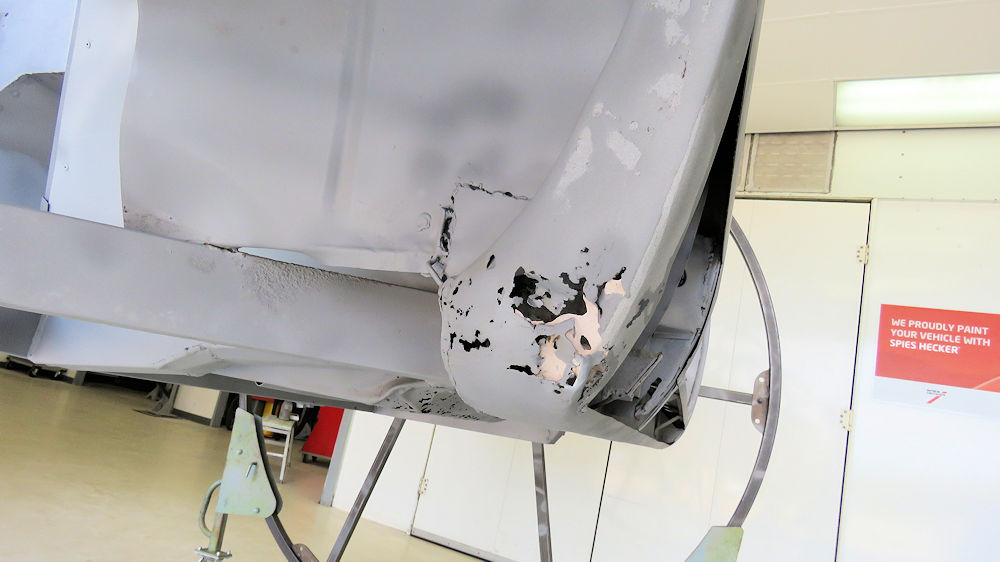
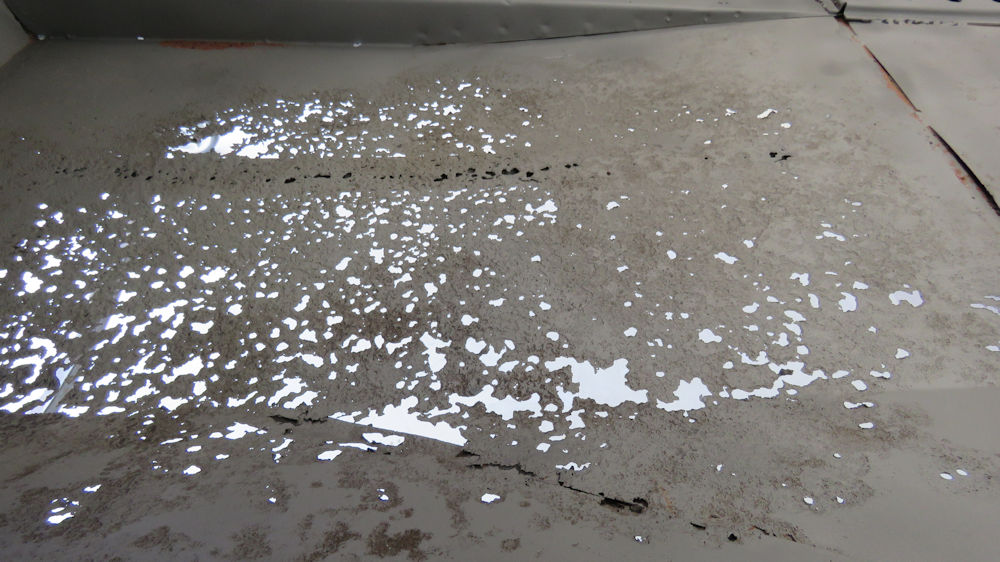
The following
sequence of photos show the car during the blasting process.
Initially the panels were
blasted with crushed plastic media to remove the paint, then
120 grit aluminum oxide was used to strip everything back to
bare metal.
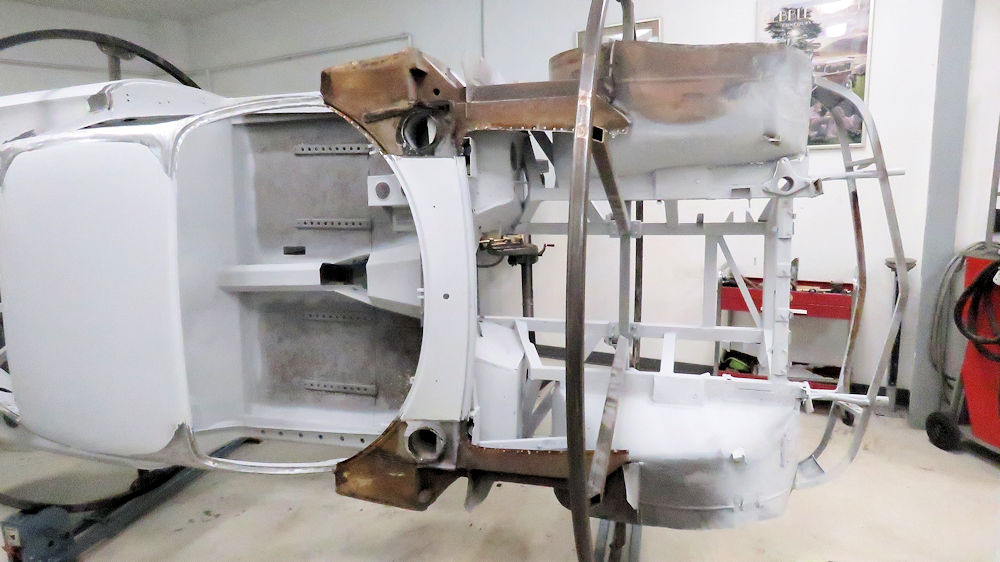
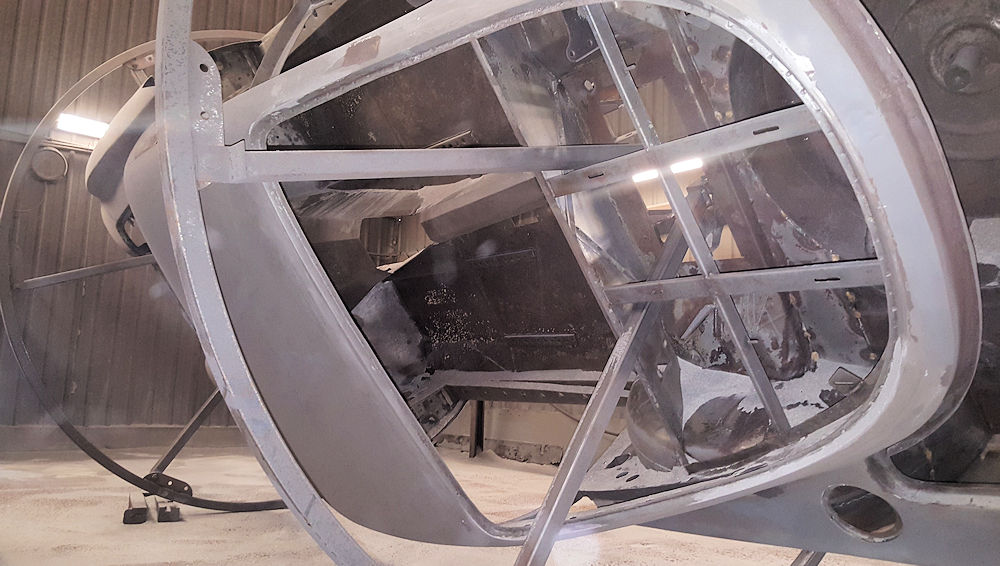
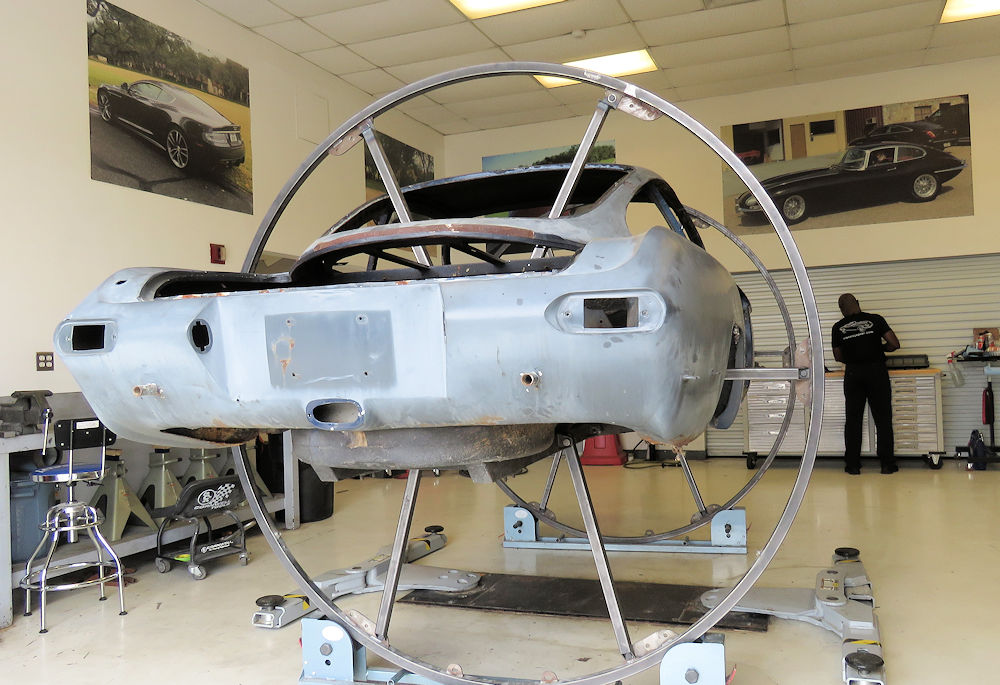
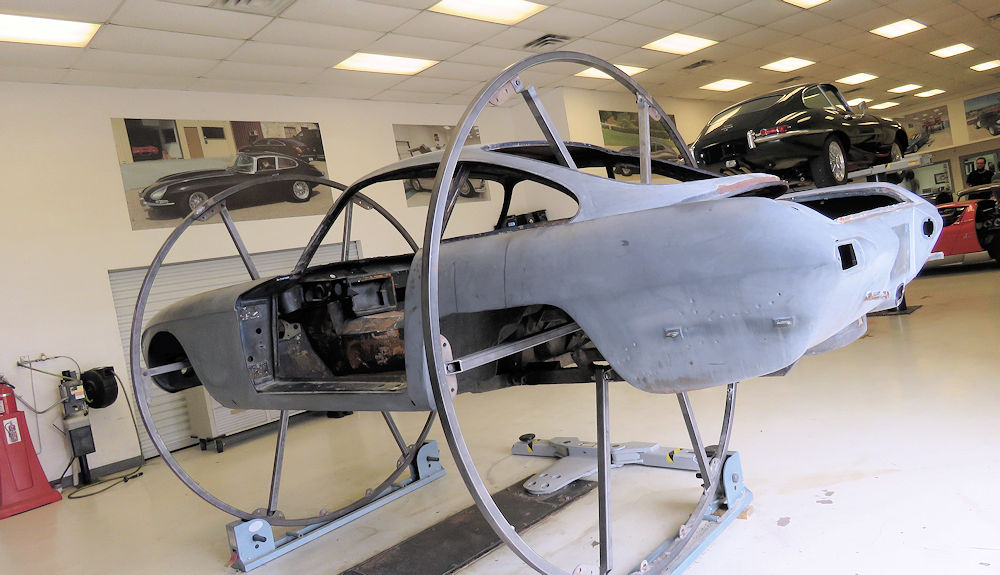
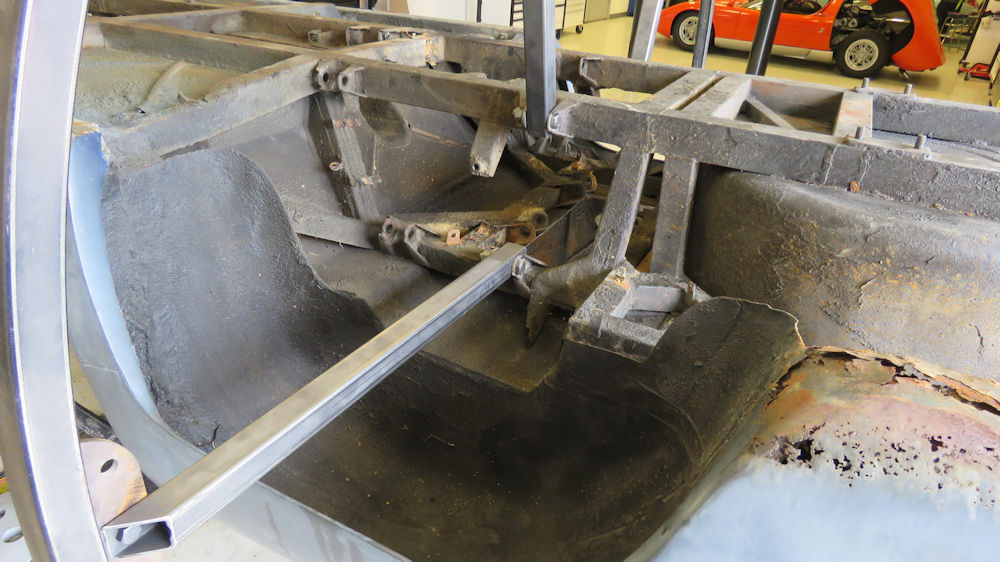
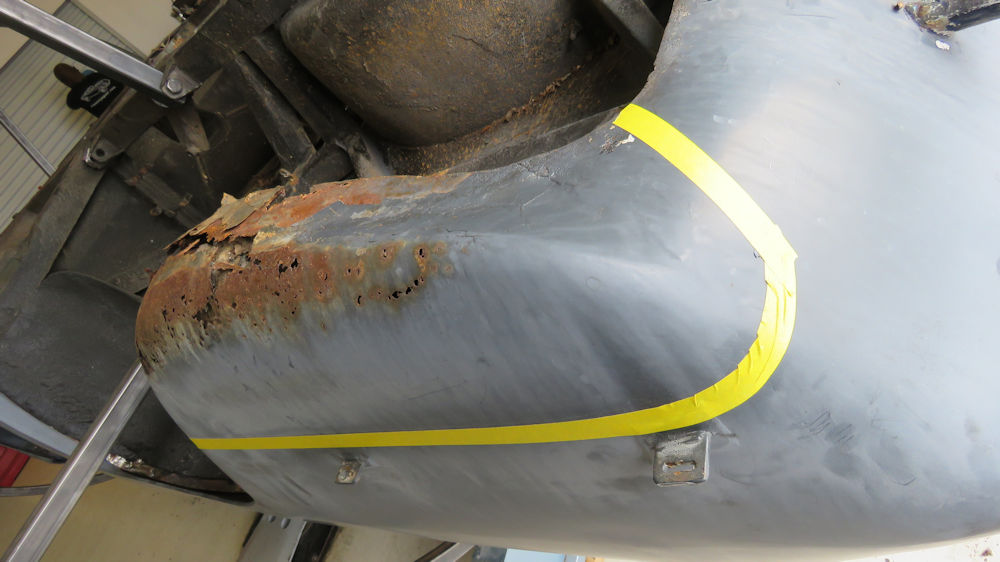
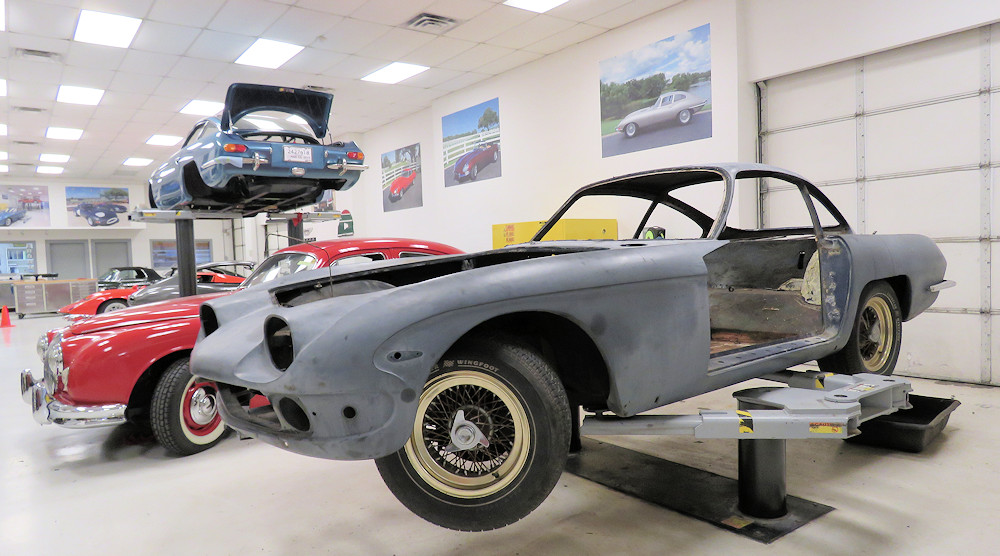
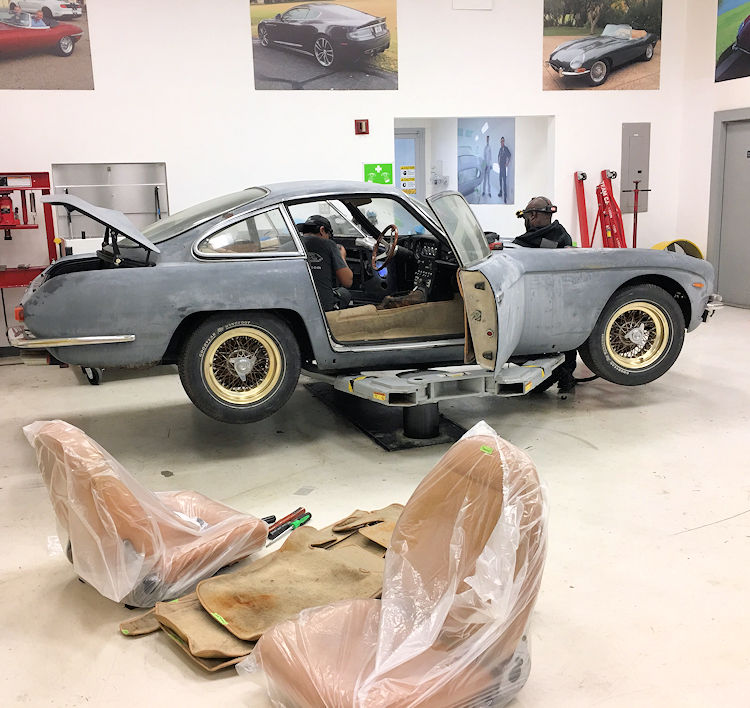
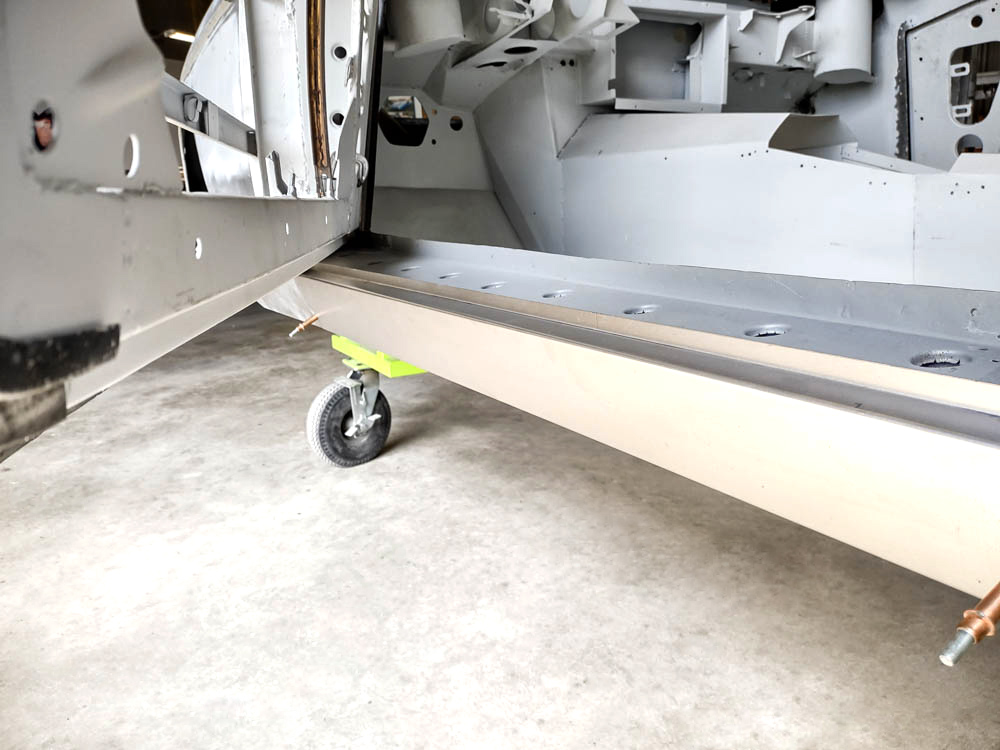
We have now placed the 350GT on one
of the roller-hoop jigs and we will be blasting the body
back to bare metal next week. Jake removed the outer sills
and the obviously rusted lower rear quarter panels as we need to make templates for the
replacement panels.
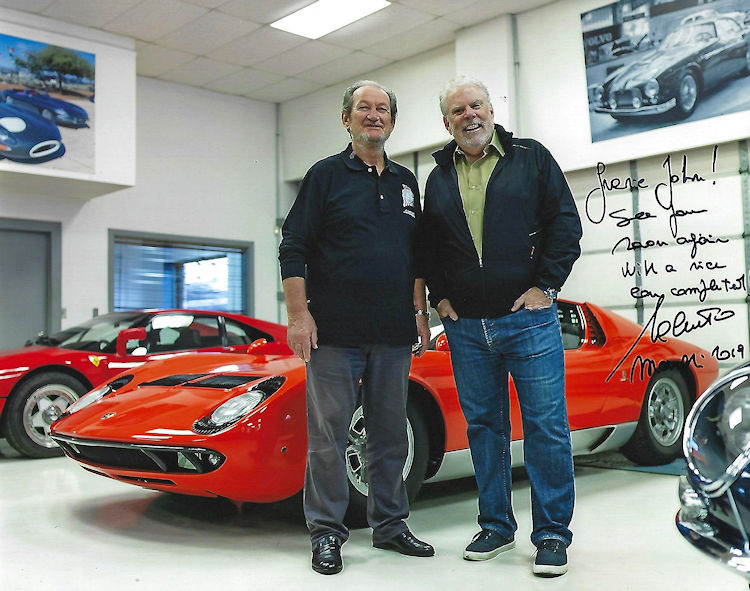
Valentino Balboni
Happy to introduce you to my 'special adviser' on your
restoration, John!
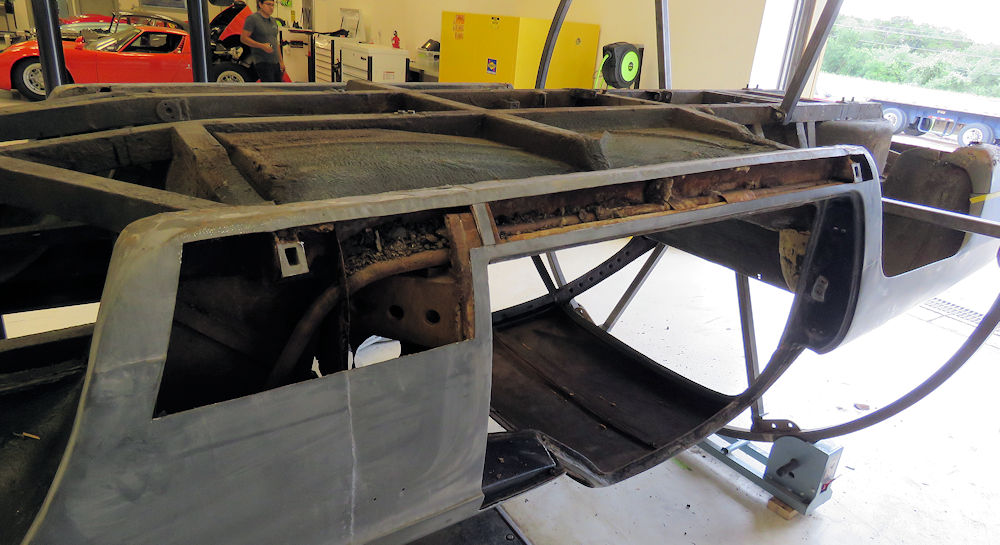
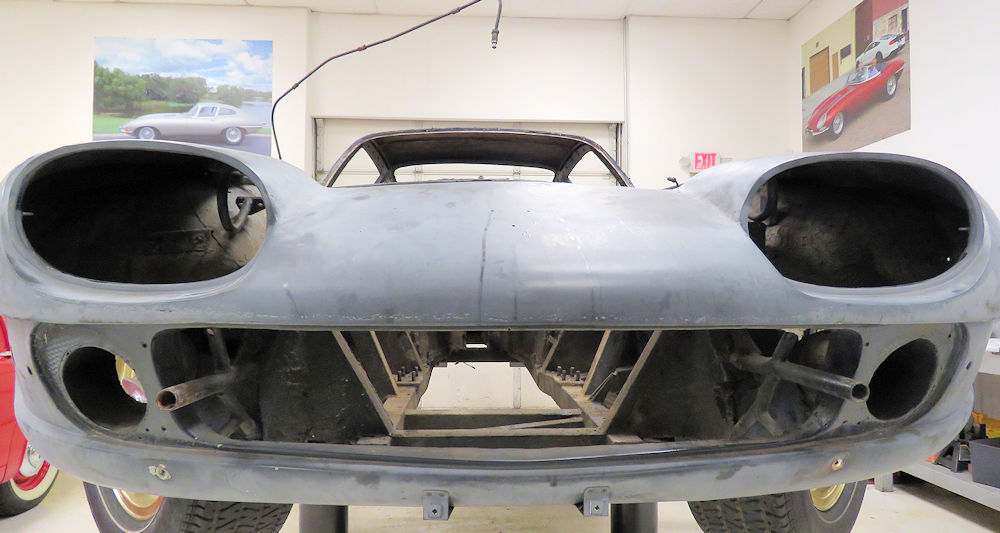
Our 1967 350GT project is now
stripped to a bare shell.
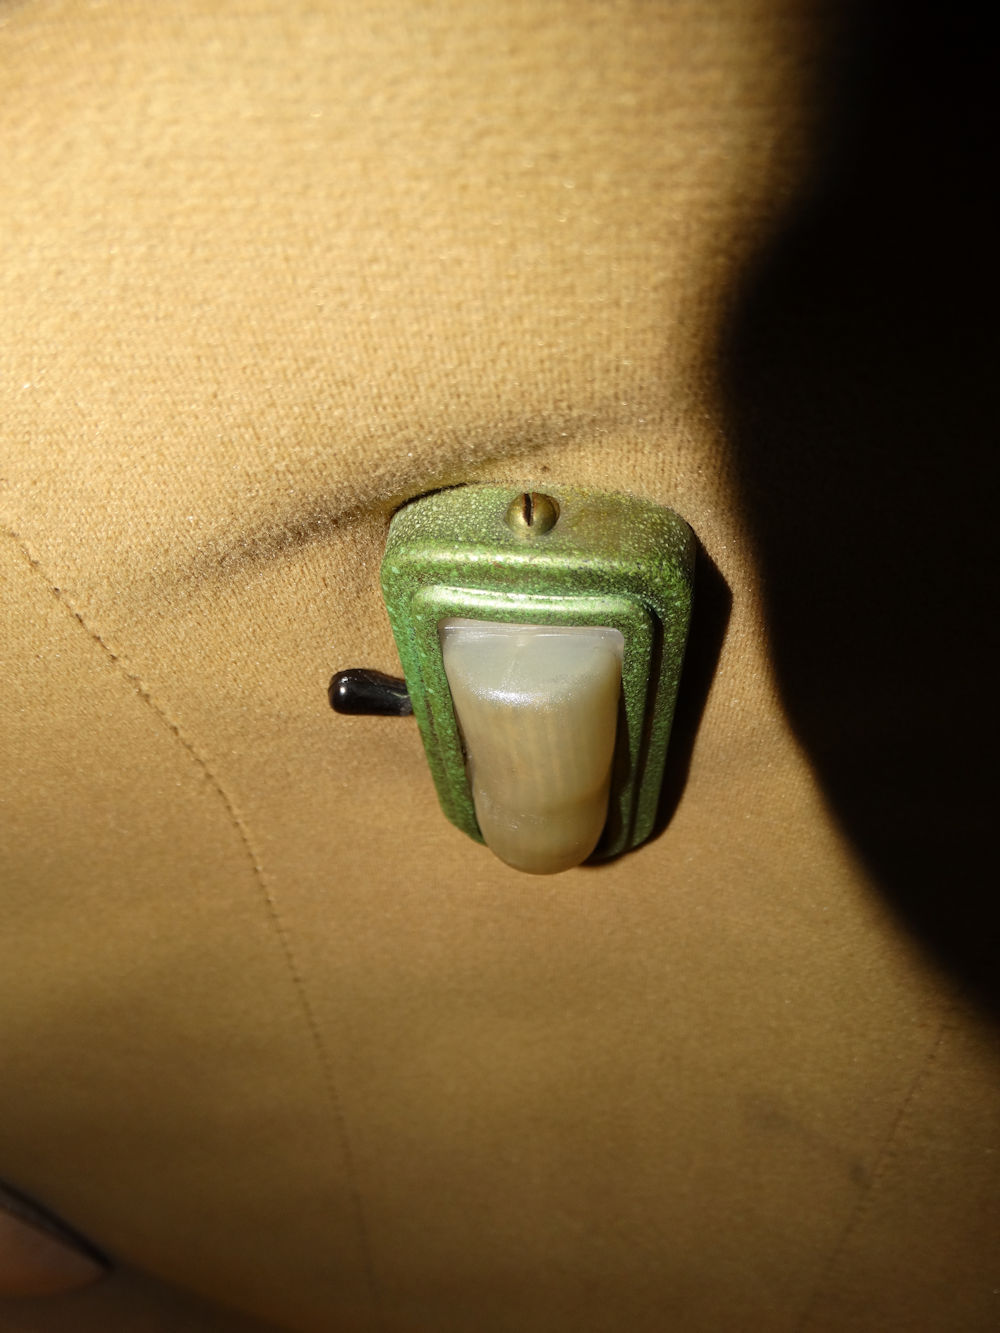
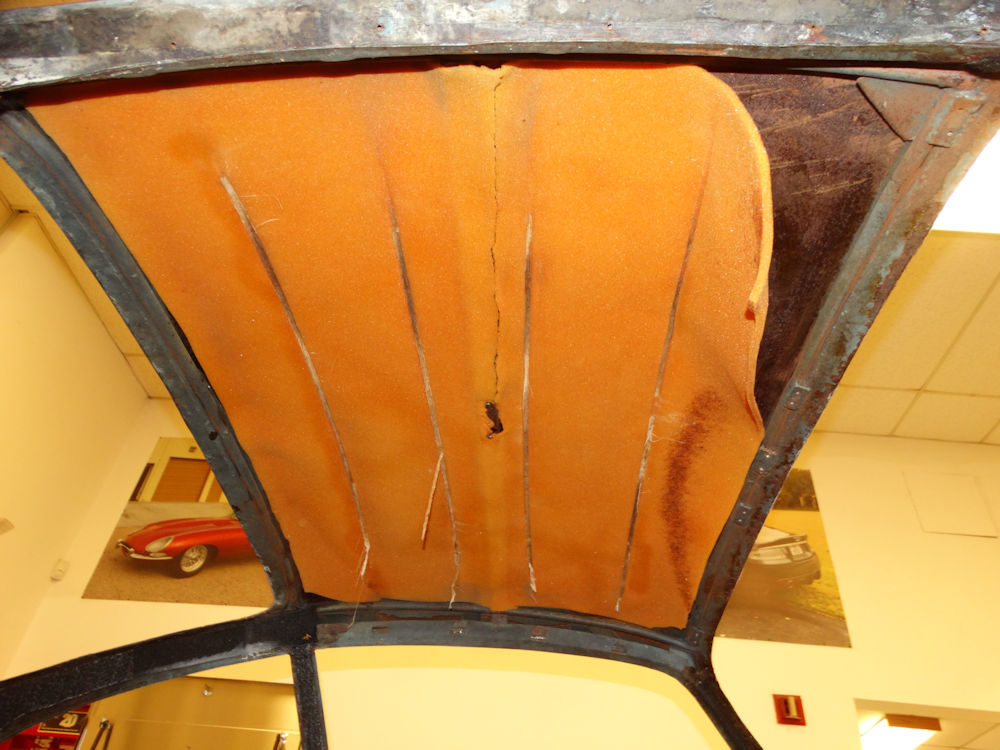
Interior roof lamp
Removing the headliner foam
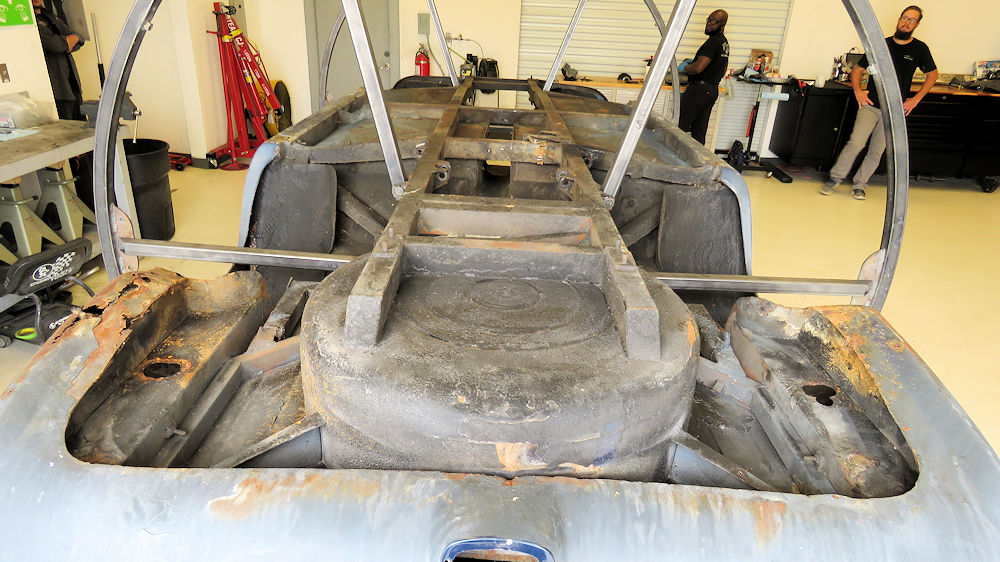
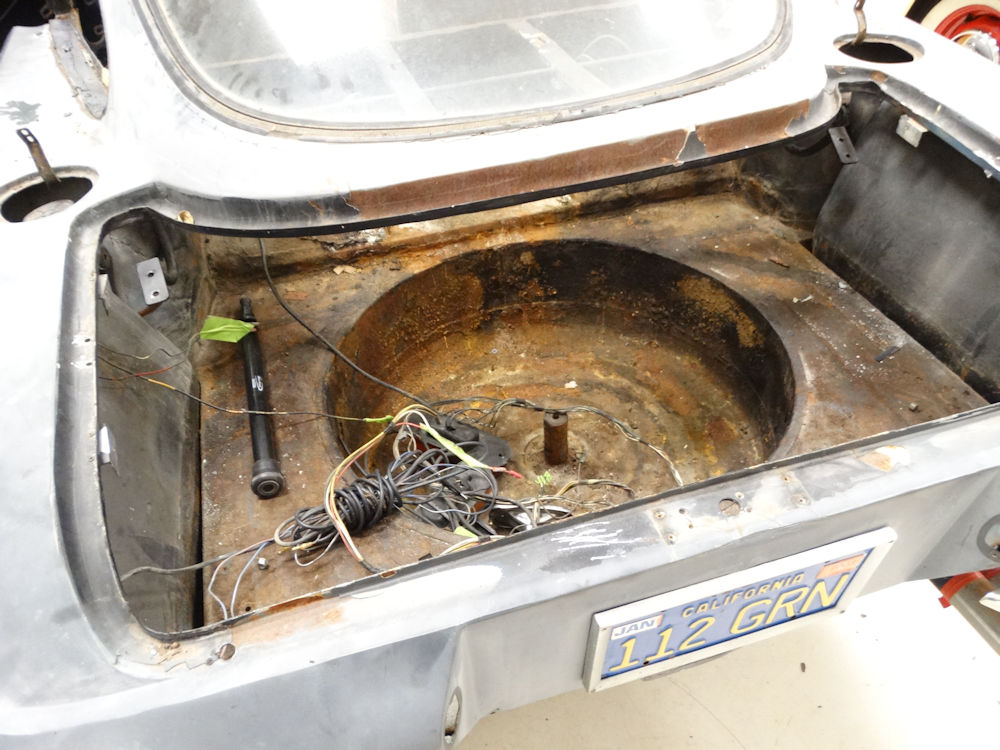
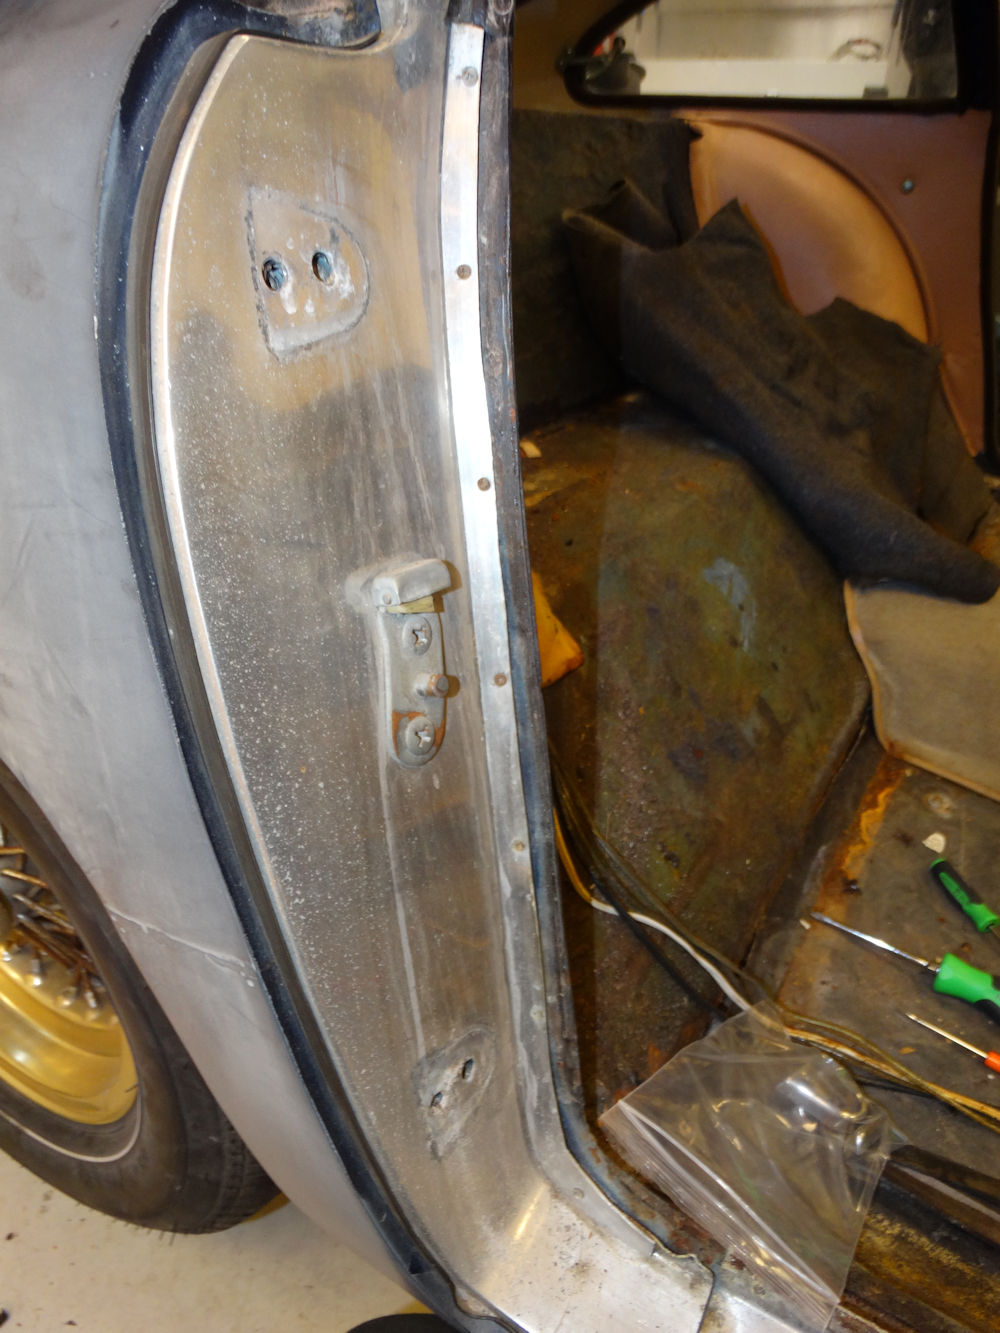
Note battery tray in rear of boot compartment
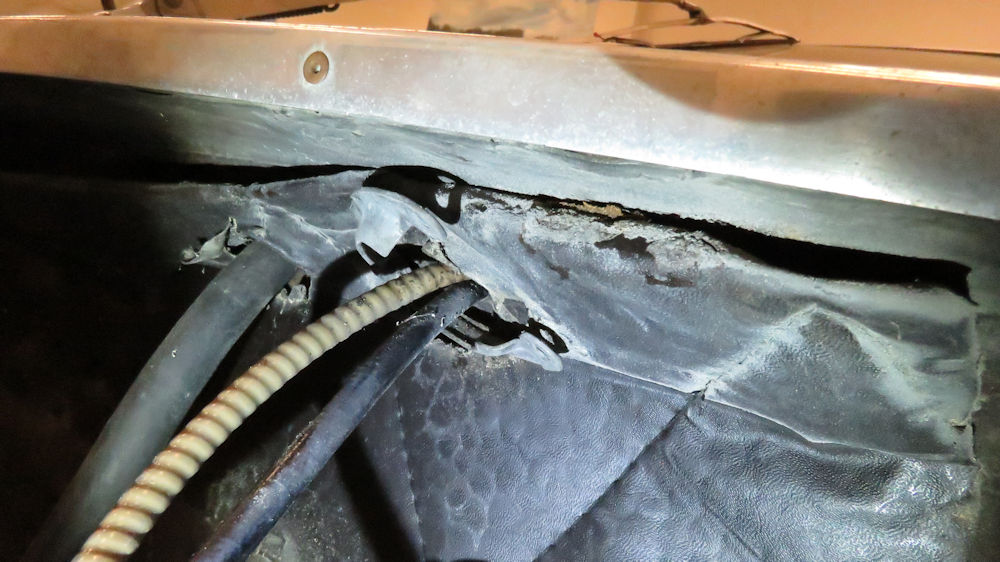
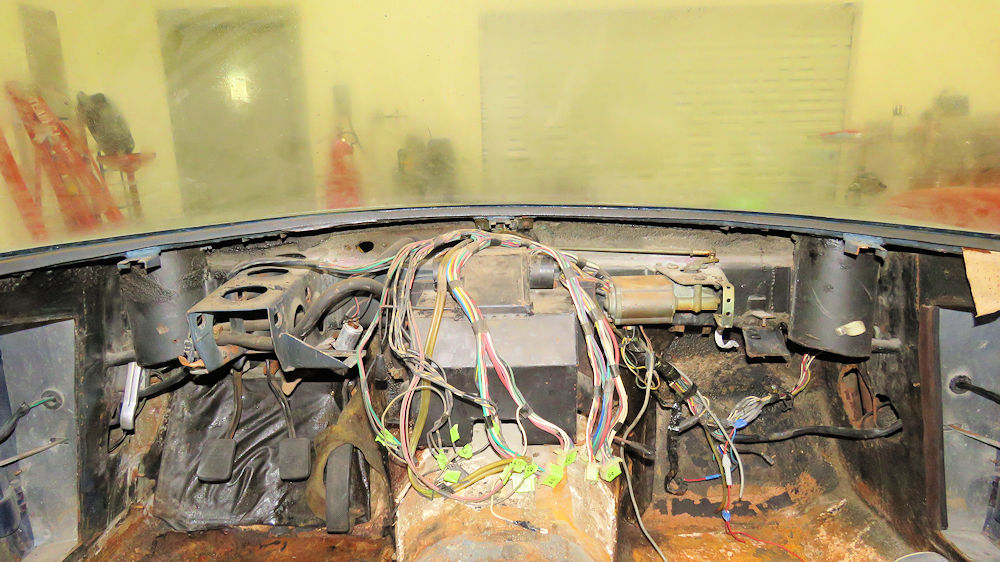
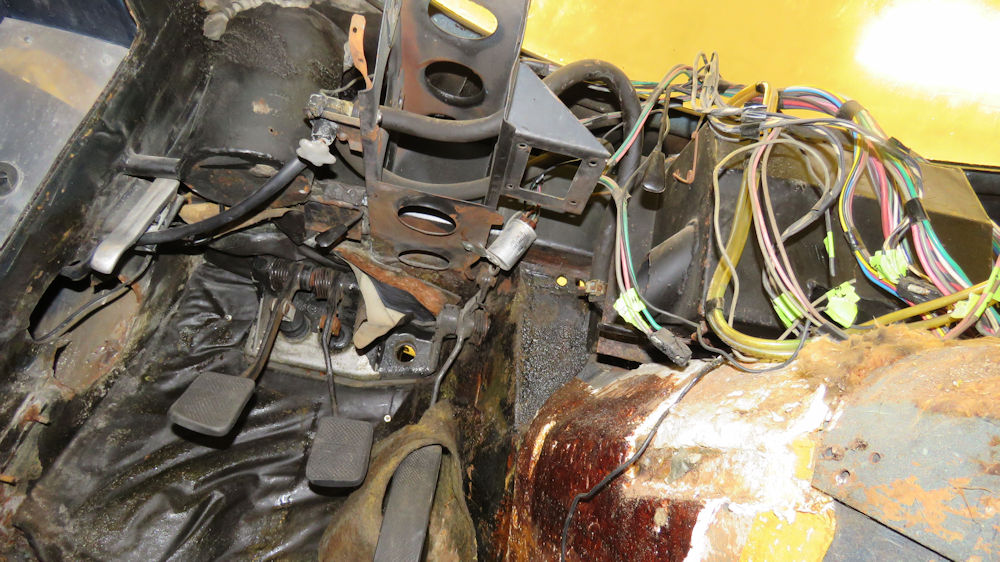
The main wiring loom has been carefully
labeled
prior to removal
Firewall and dash now completely stripped
All of the glass has now been removed
Sturdy inner frame structure on show peering
into the
car through the grille opening
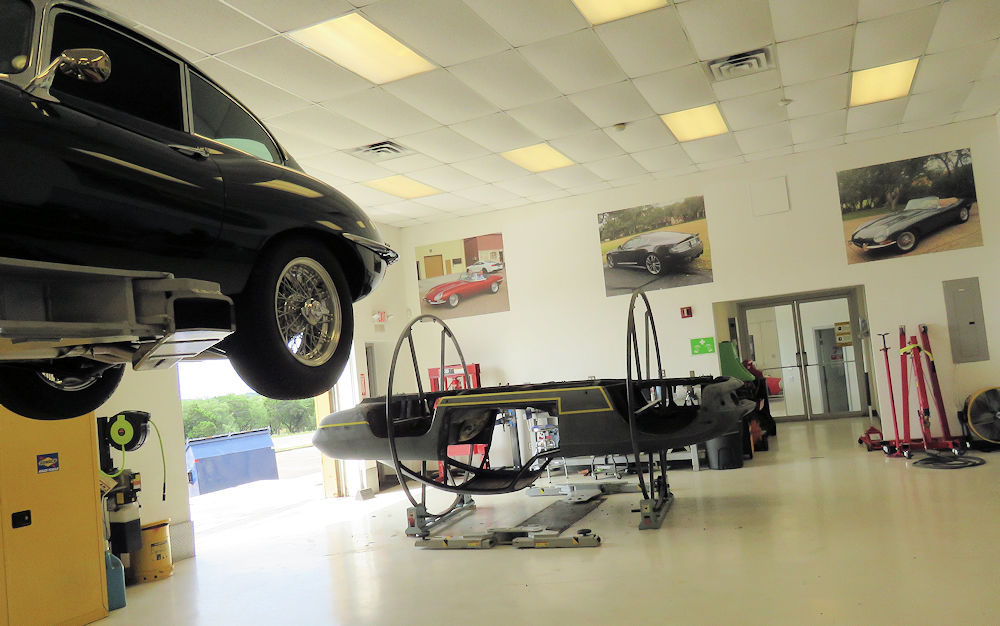
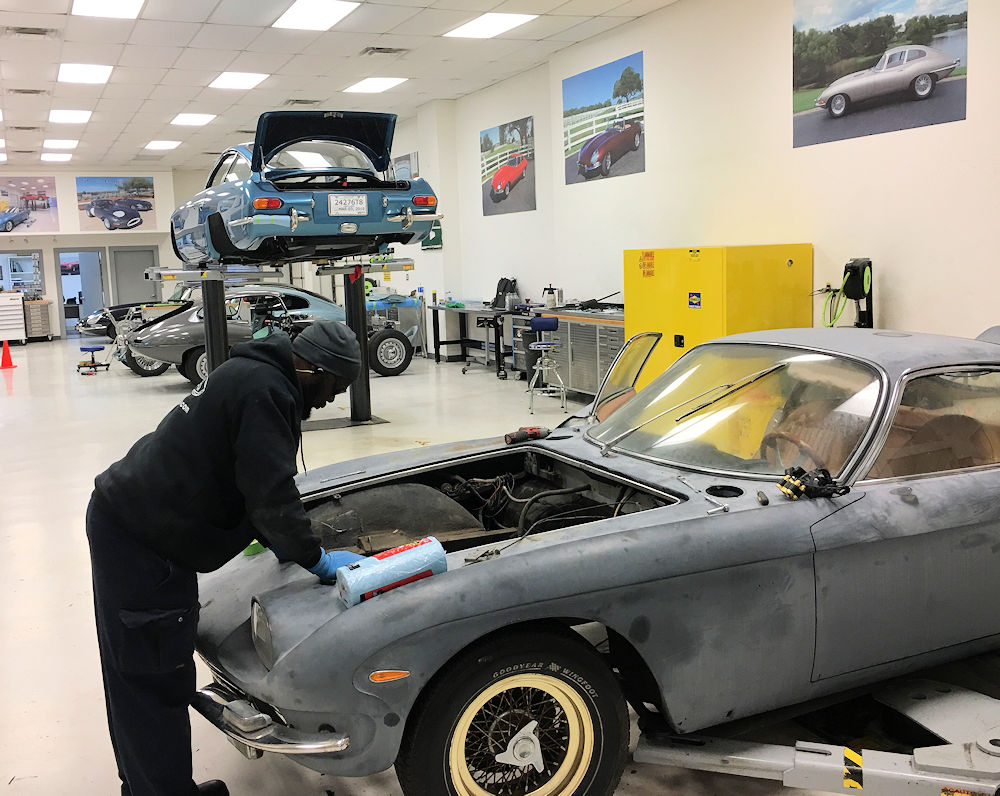
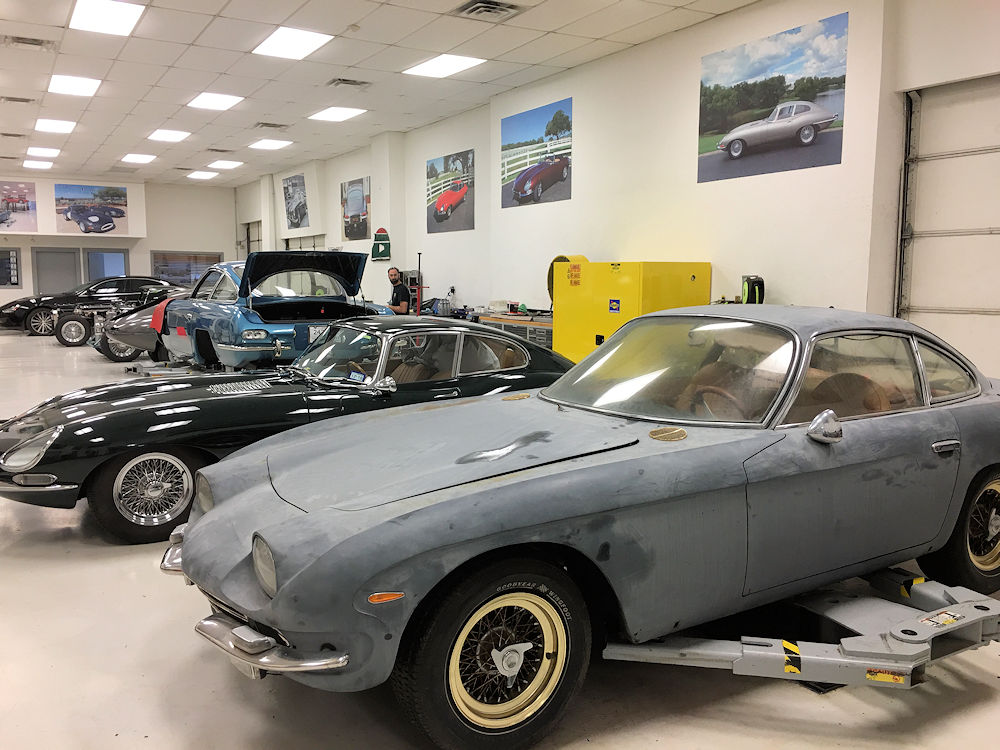
3 vintage Lamborghinis in the Team CJ Works
today!
The disassembly process is well
underway!
Godwin has been busy stripping the engine bay
Hector has been carefully removing the
interior trim
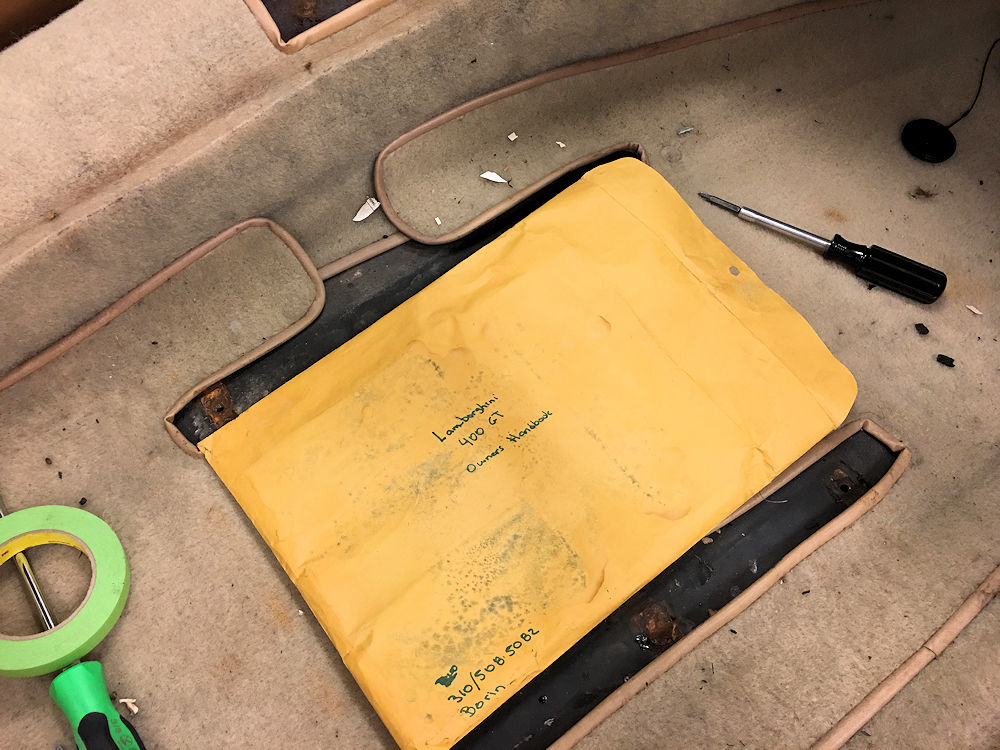
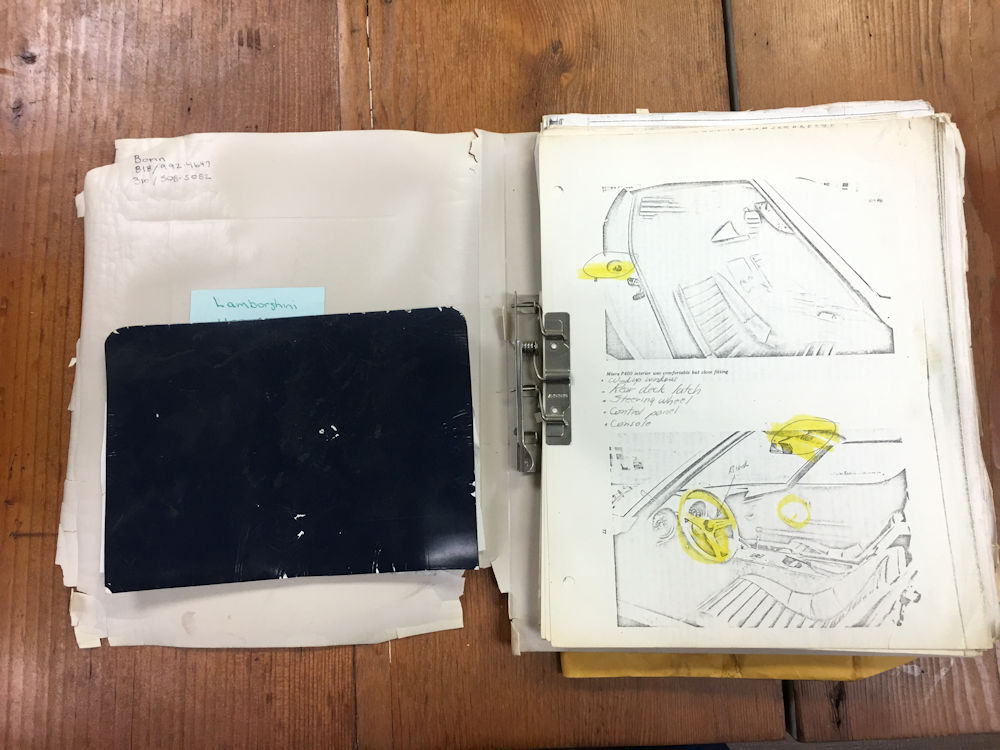
Hidden beneath the passenger seat was the
previous
owners copy of a 400GT workshop manual
Interesting that the late Mr Borin always
thought
his car was a 400 GT Interim model
Note quilted vinyl padding on firewall
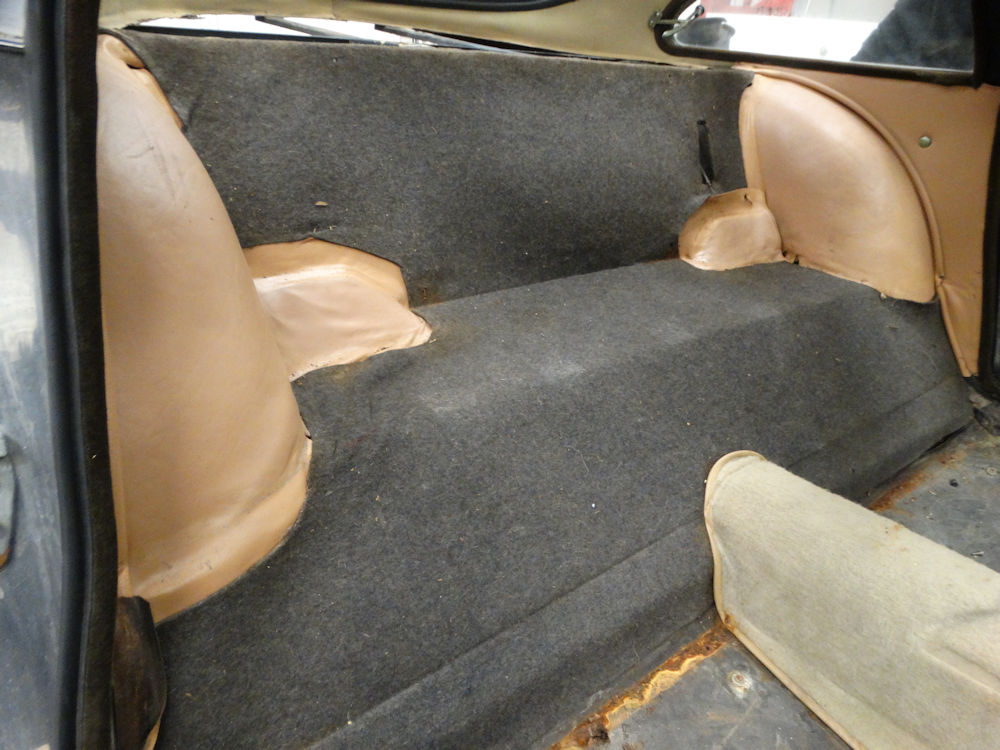
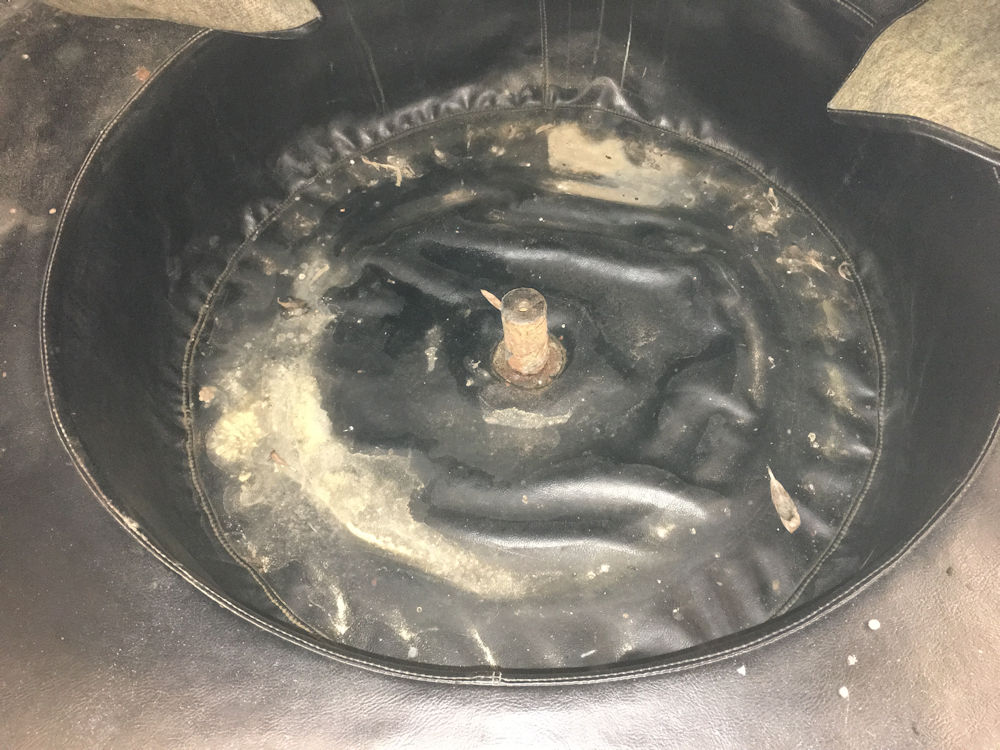
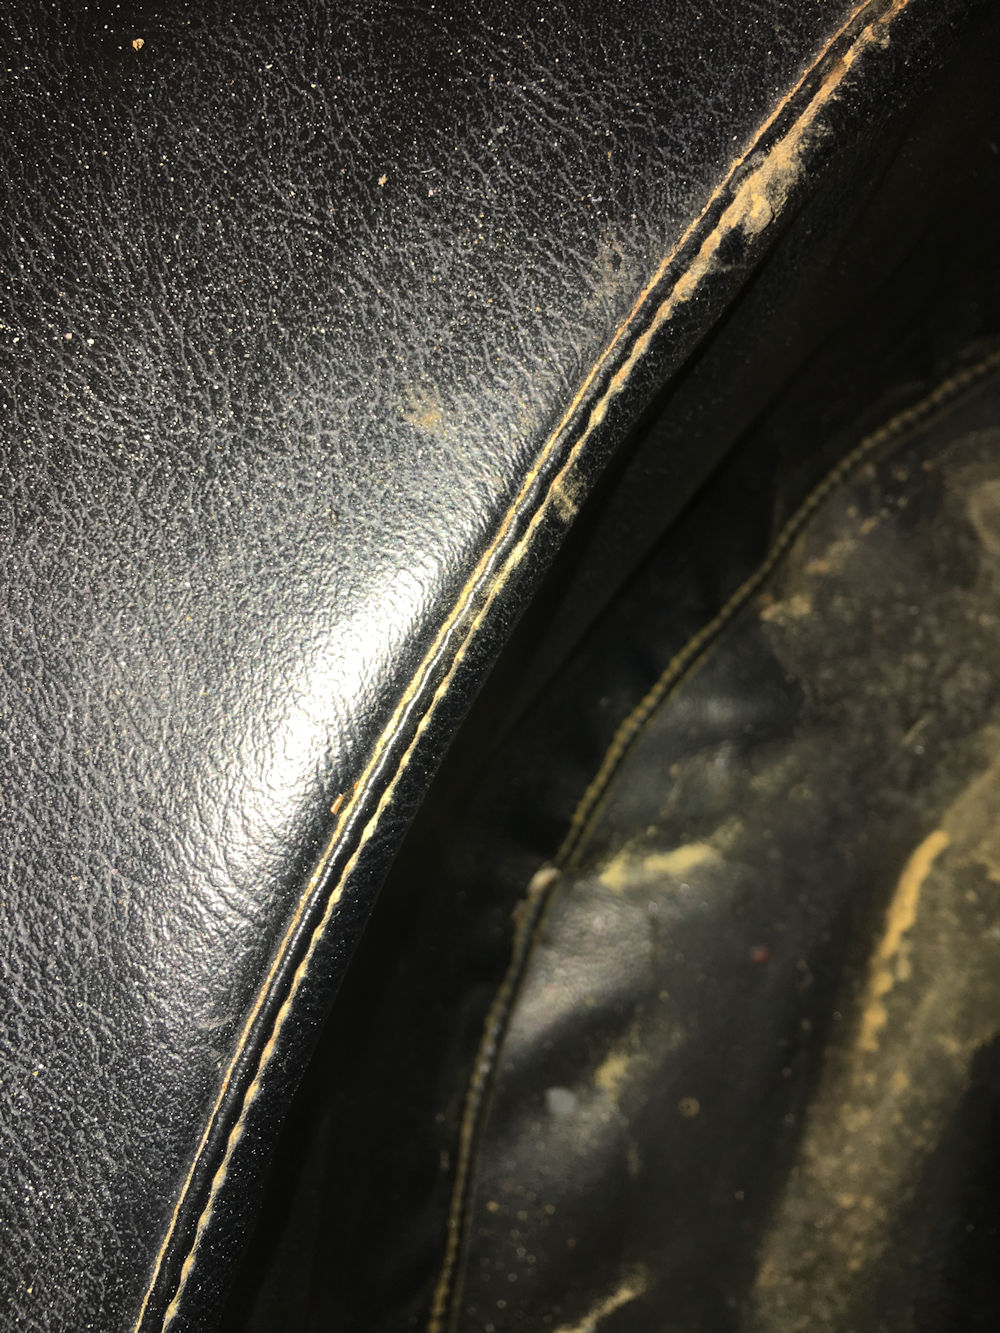
Elaborate boot and spare wheel well lining
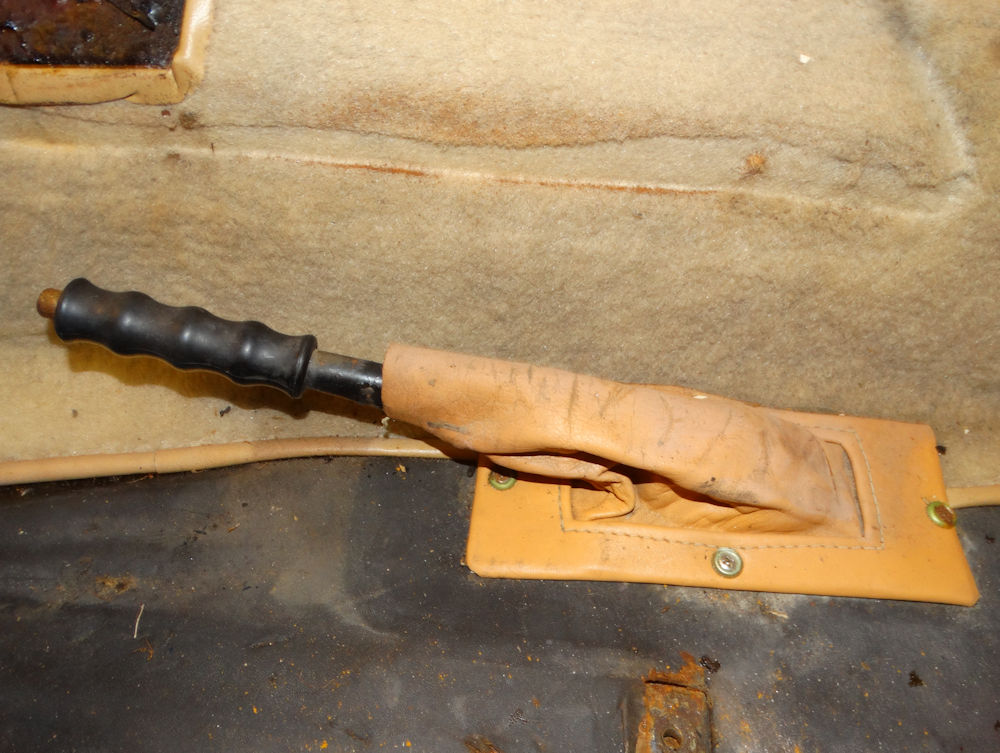
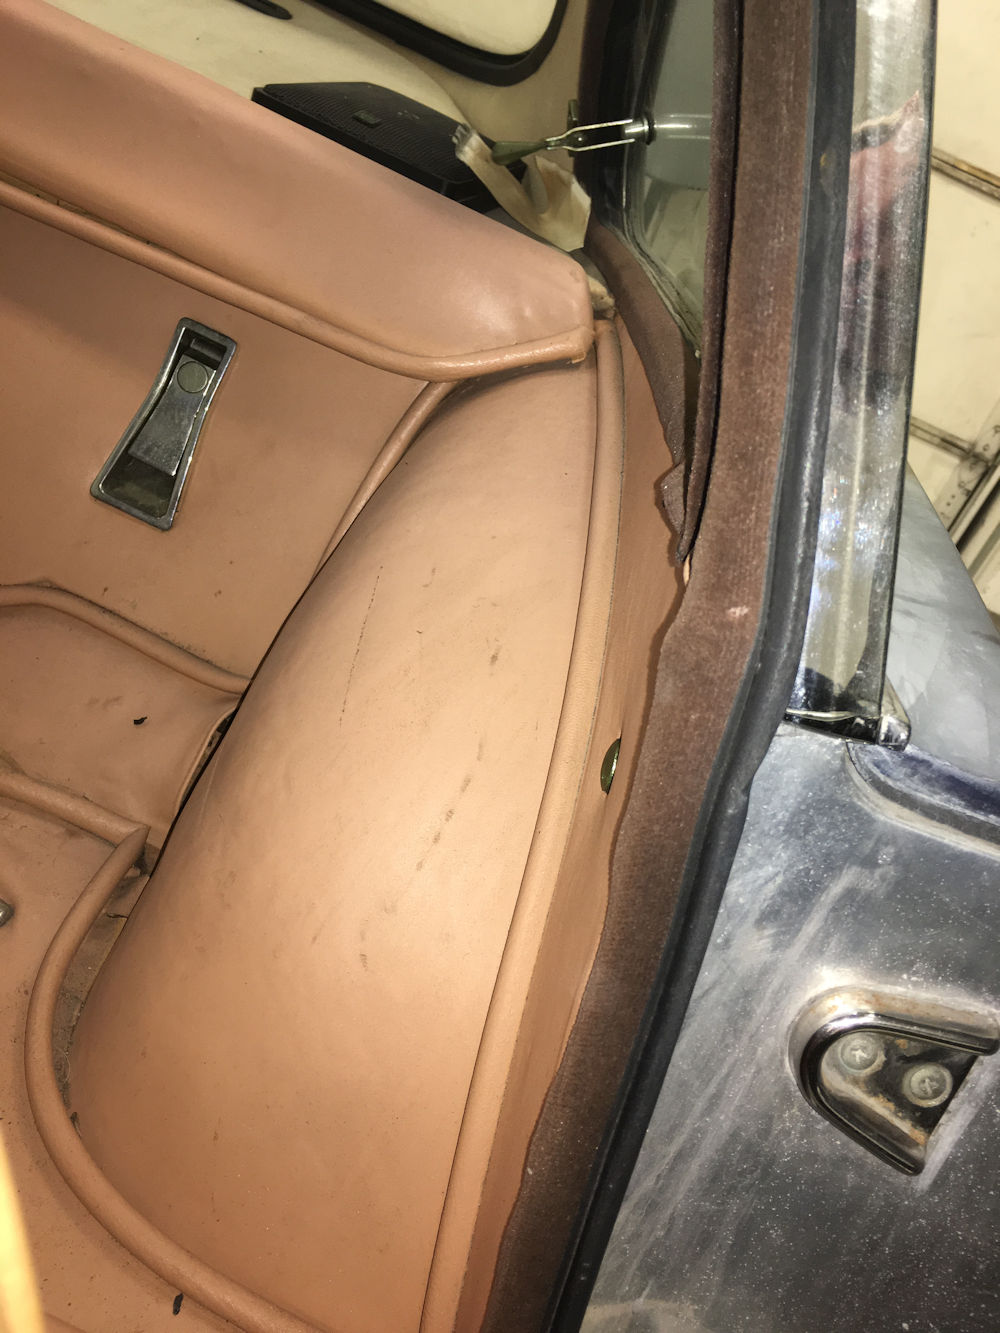
Trim at base of handbrake is our best example
of
the original Senape (Italian for mustard) color
Polystyrene glued beneath carpeting
The rust color is actually trim glue on to
of the Polystyrene
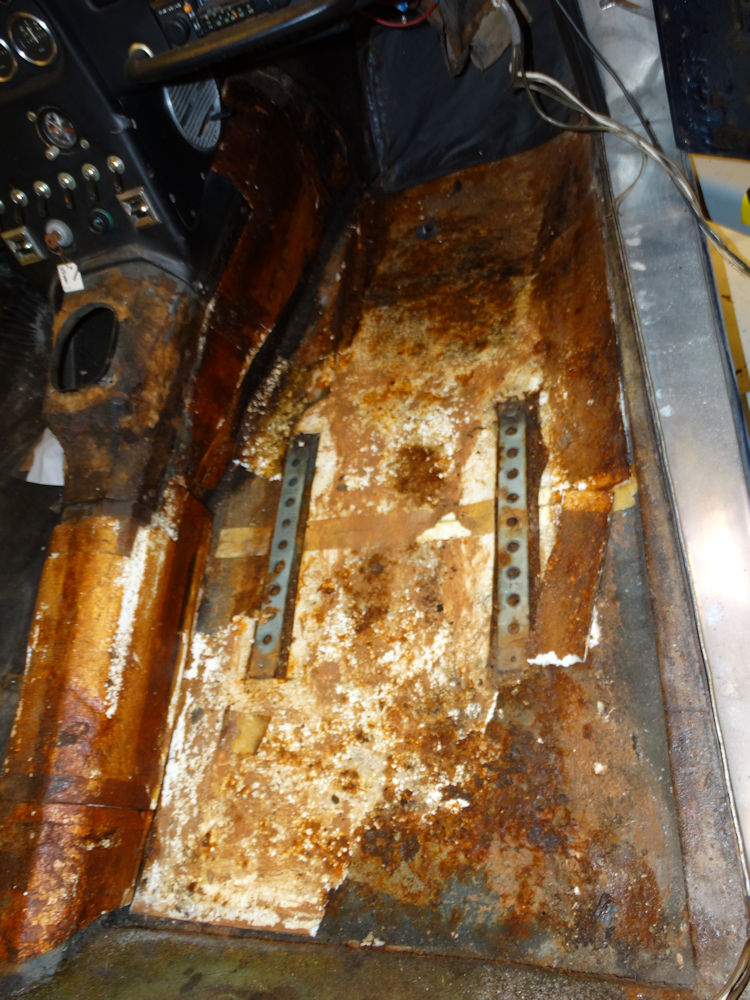
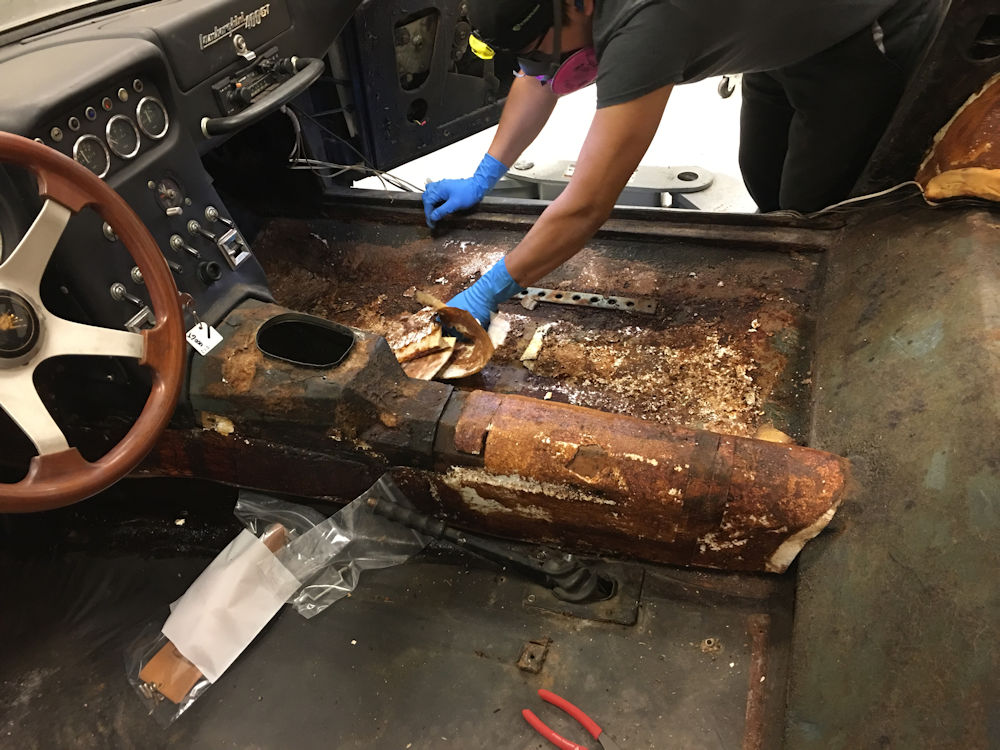
Hector starting the laborious process of
scraping
away the Polystyrene
To be continued!
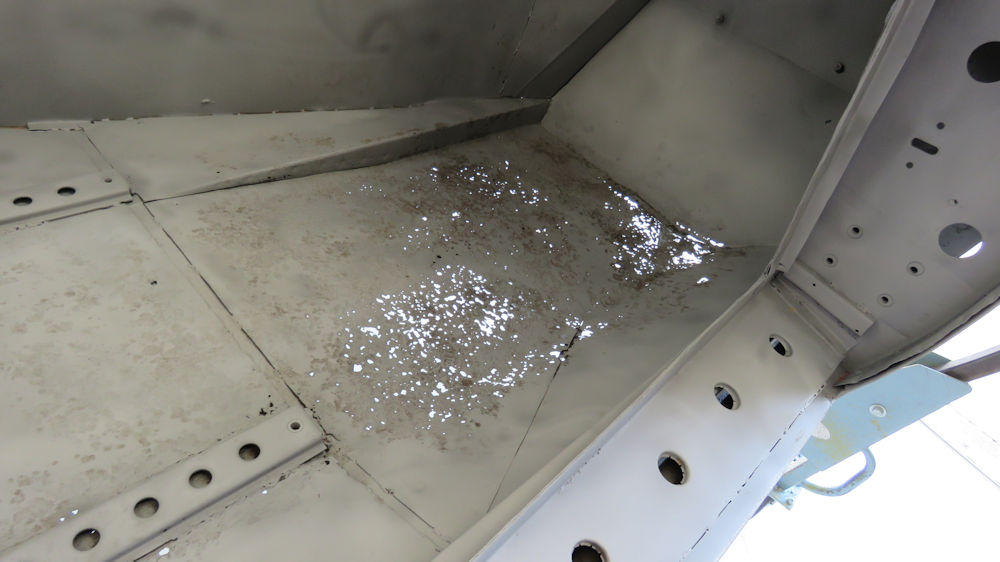
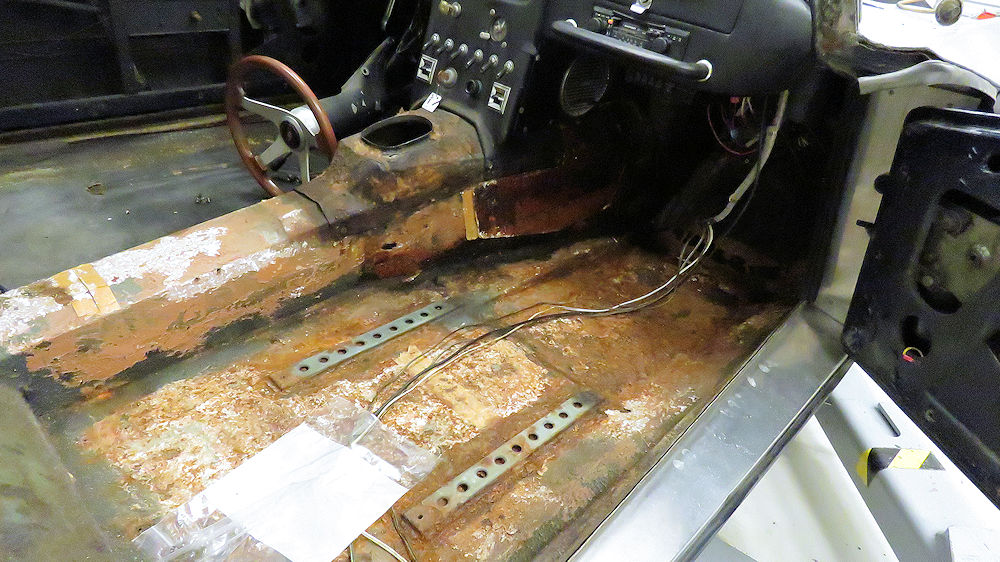
Floors appear to be pretty solid
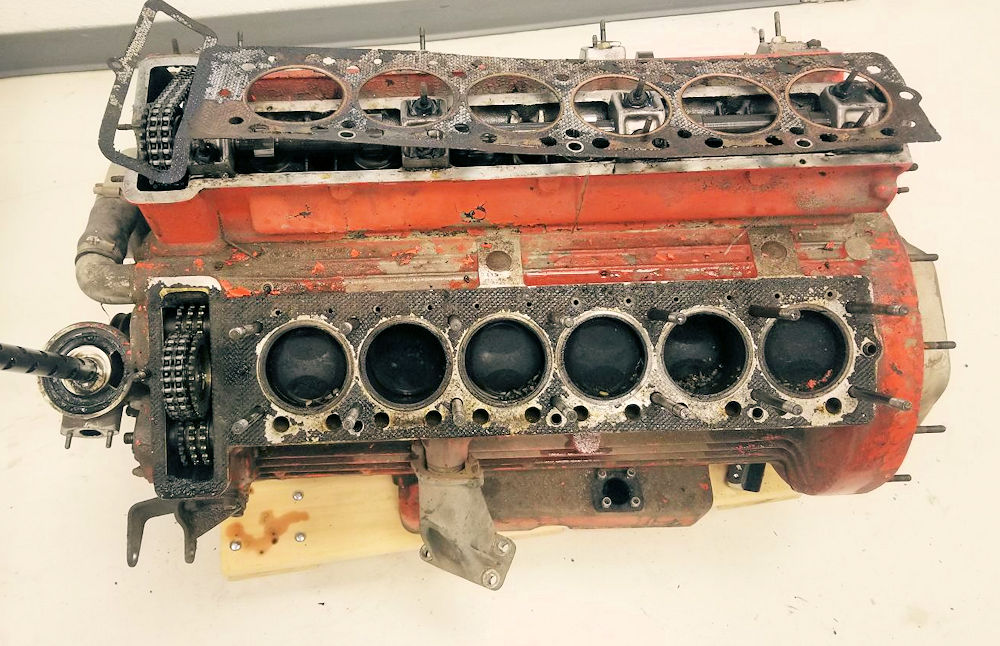
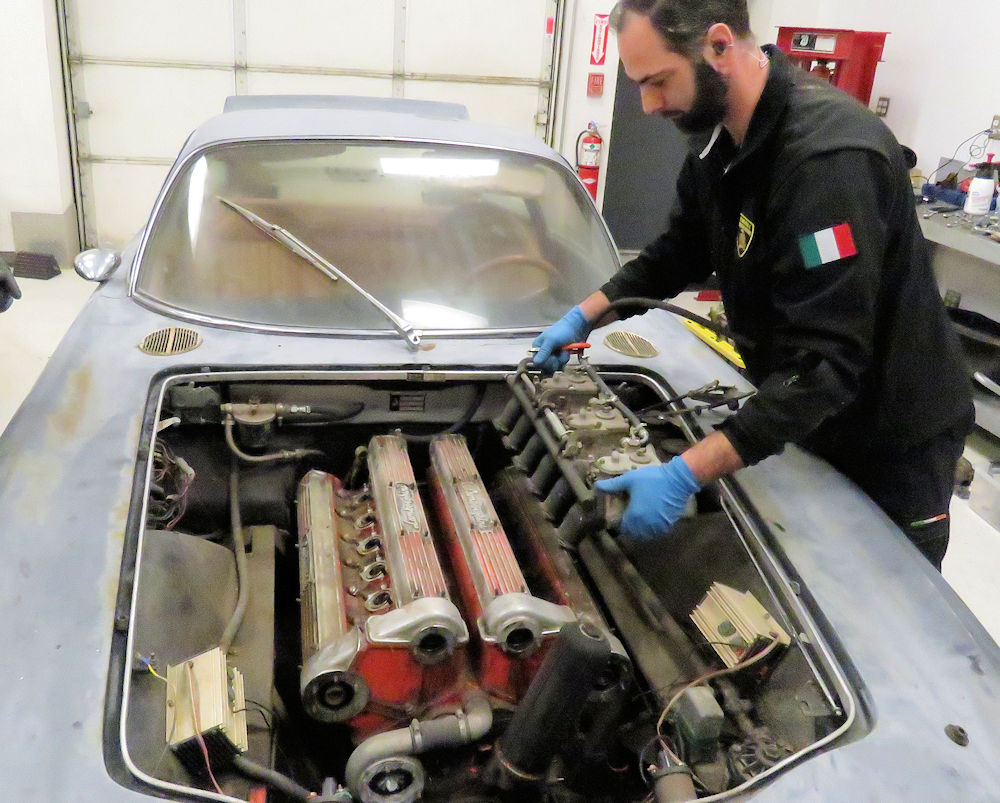
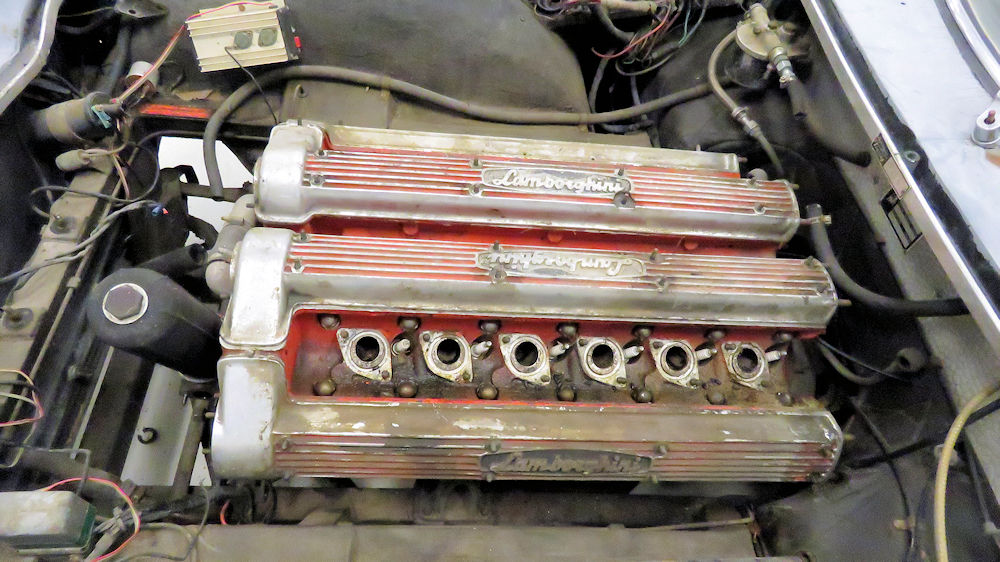
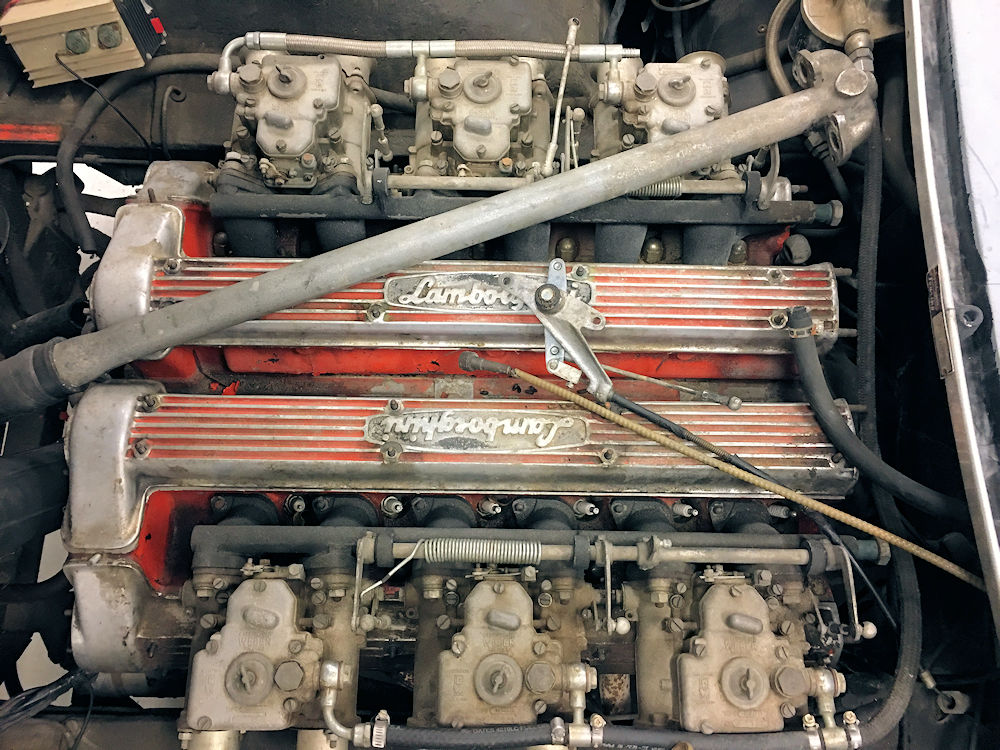
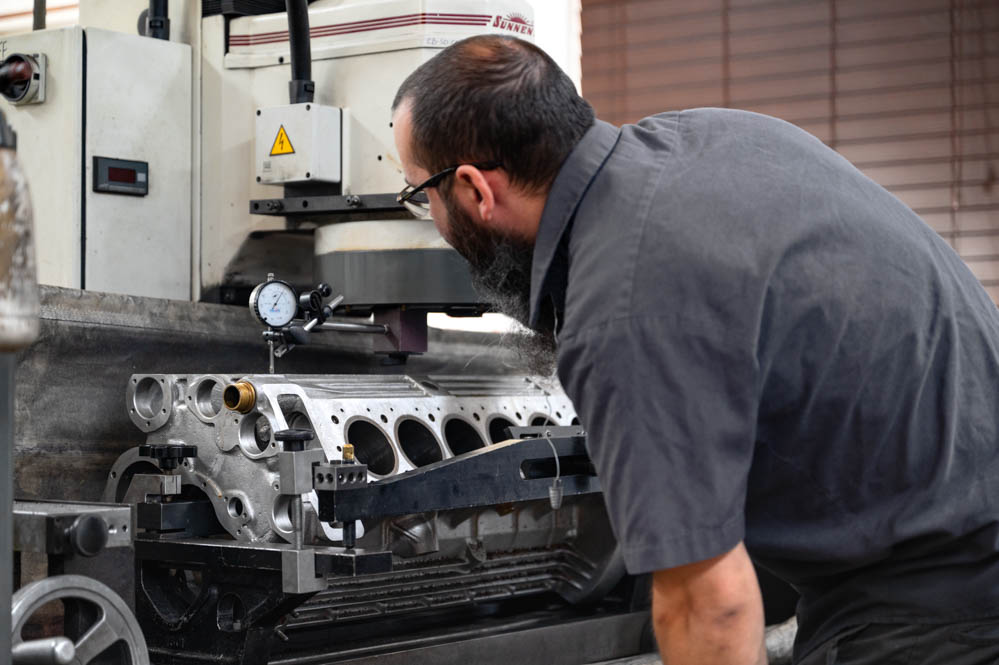
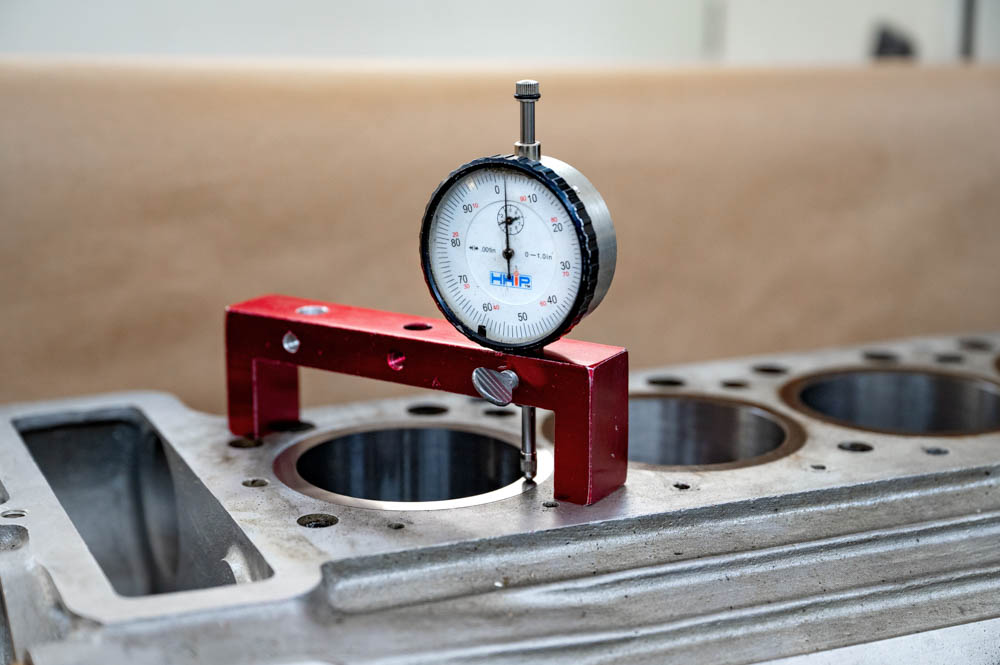
Curiosity got the better
of us this morning and we removed one of the cylinder heads and
confirmed that we have 77mm
bores, meaning this is a 3.5L engine - and the car is
unequivocally a 350 GT, not
a 400 Interimmodel
This restoration is now officially
underway! During the disassembly process we will be observing and documenting
everything in minute detail. One of the interesting things
about this particular car is that it was thought at one time
(by a previous owner) to be one of the 'interim' 400 GTs,
although at this stage it seems much more likely that it was
actually one of the late production 350 GTs that were built
using a steel (rather than aluminum) body. In due course we
will measure the cylinder bore which will tell us whether we
have a 3.5 or 4L. Watch this space!
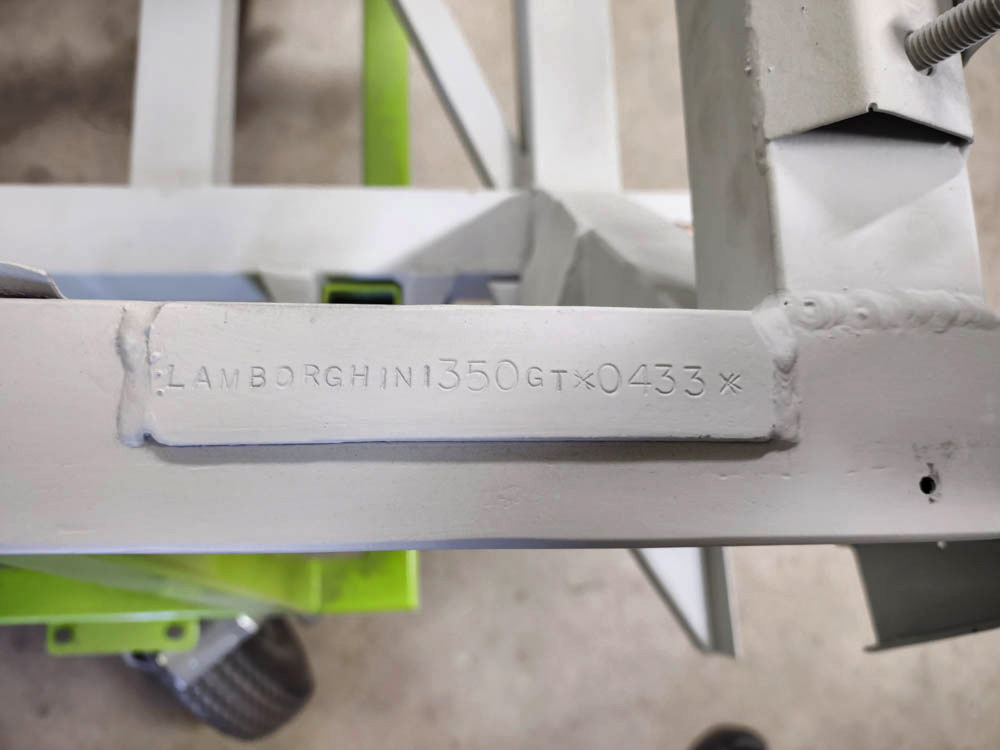
We are very lucky to have our good friend Andrew Romanowski
of the Lamborghini
Club America advising on points of originality
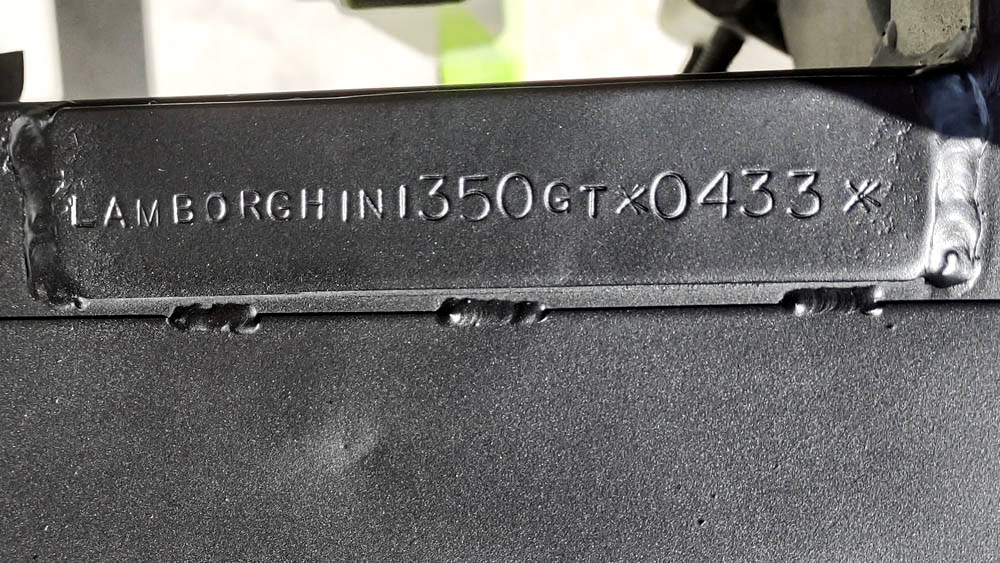
for this project. We already know that the car was built
5/18/66 and the original chassis plate, as well as the
chassis stamping in the engine bay, both identify the car as
car number 0433. Furthermore, the chassis plate also
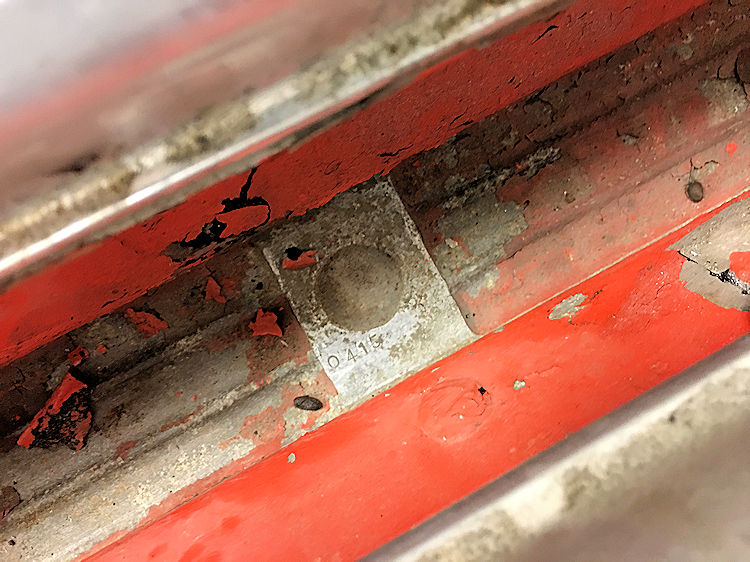
describes the car as a 350 GT. The rear of each cylinder
head is date stamped 5/65, exactly the same date stamped on
the heads of a 1965 350GT we also have under restoration,
although the 65 car's engine number is 174 units earlier
(0241 versus 0415). This leads us to believe that a
significant run of cylinder heads were cast in May 1965,
possibly enough to last throughout 350 production.
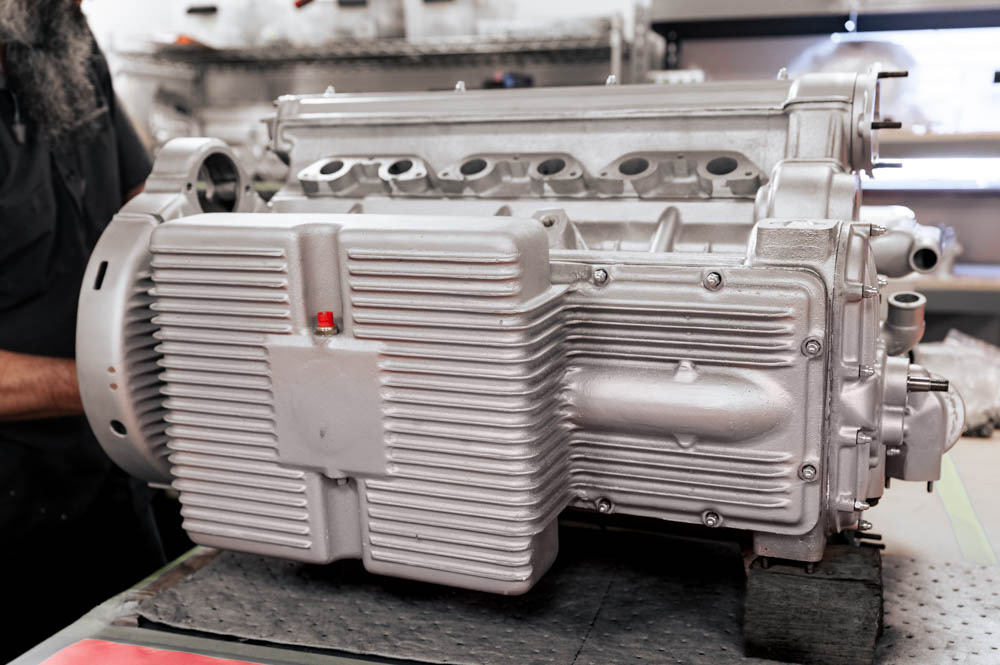
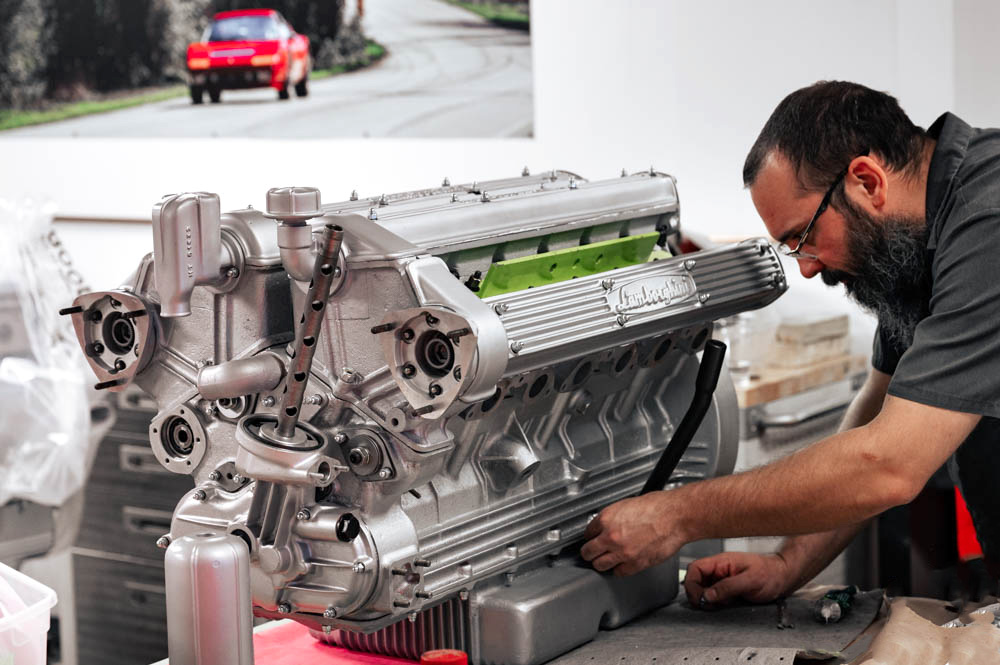
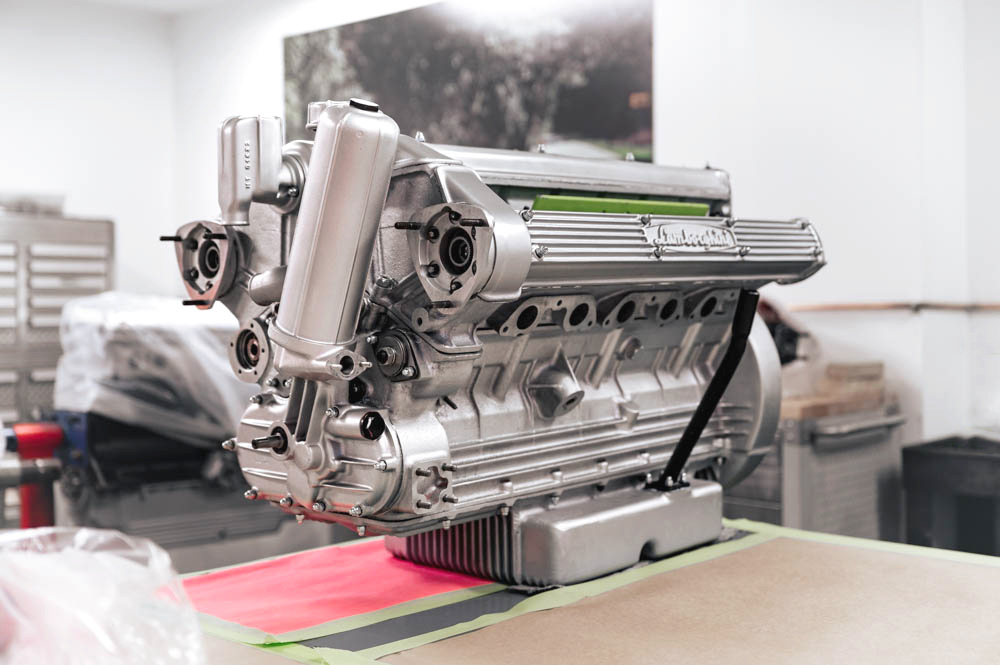
Matching number engine block
Chassis number stamped at right hand front
corner of the engine bay
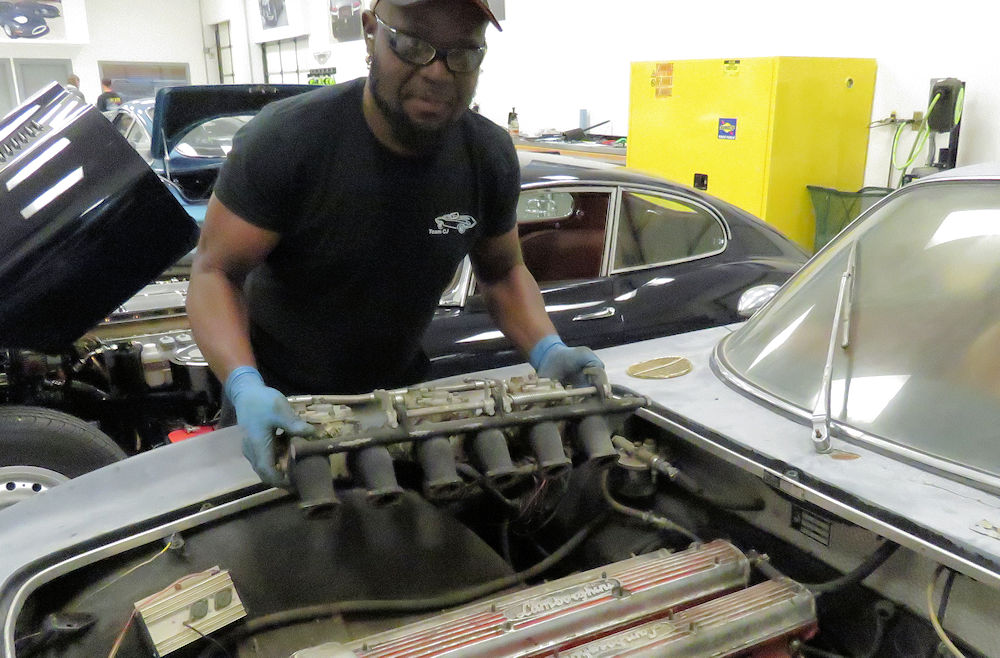
Godwin removing the right bank of Webers
Josh helping out with the other side
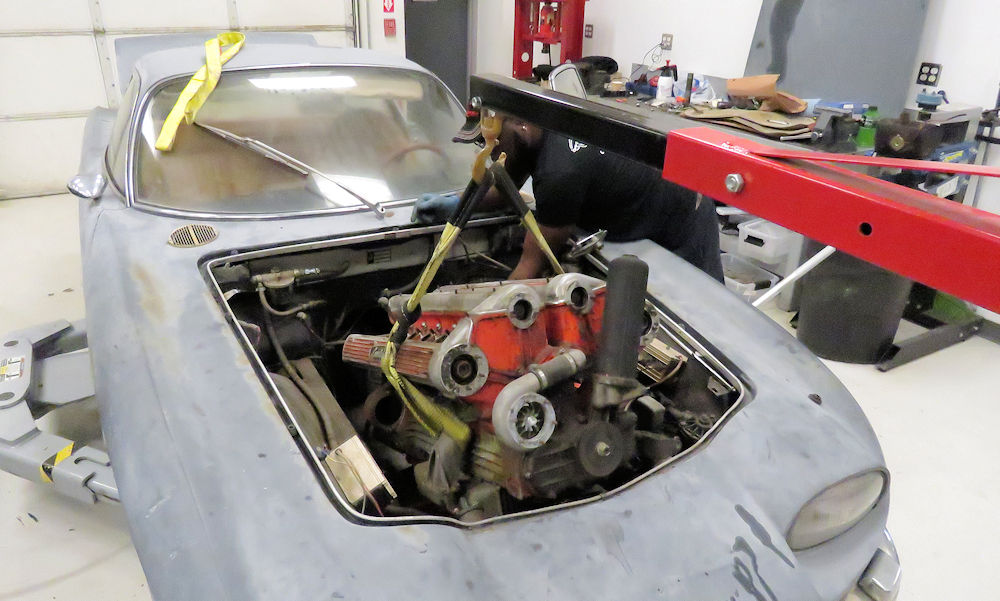
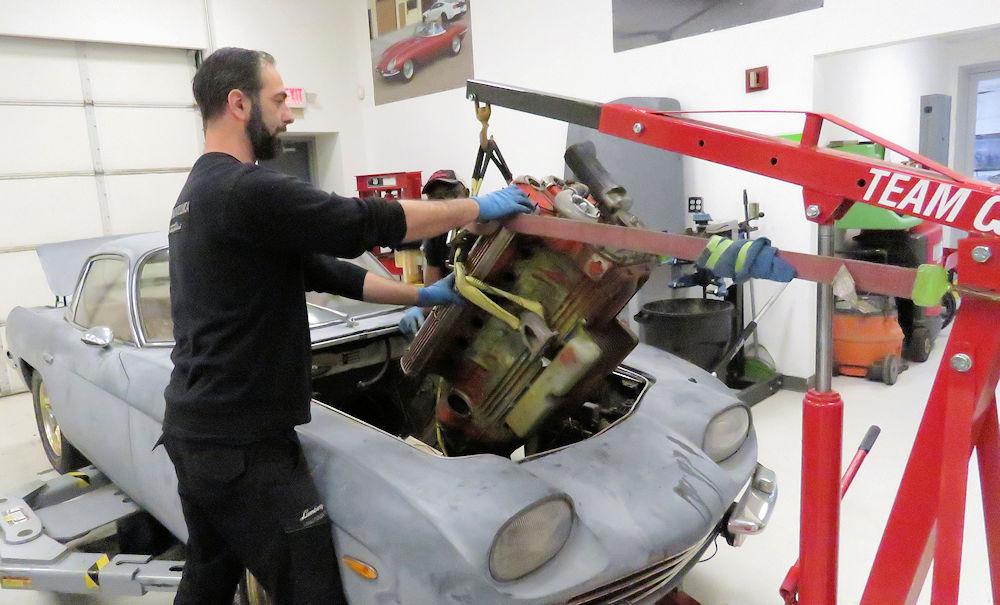
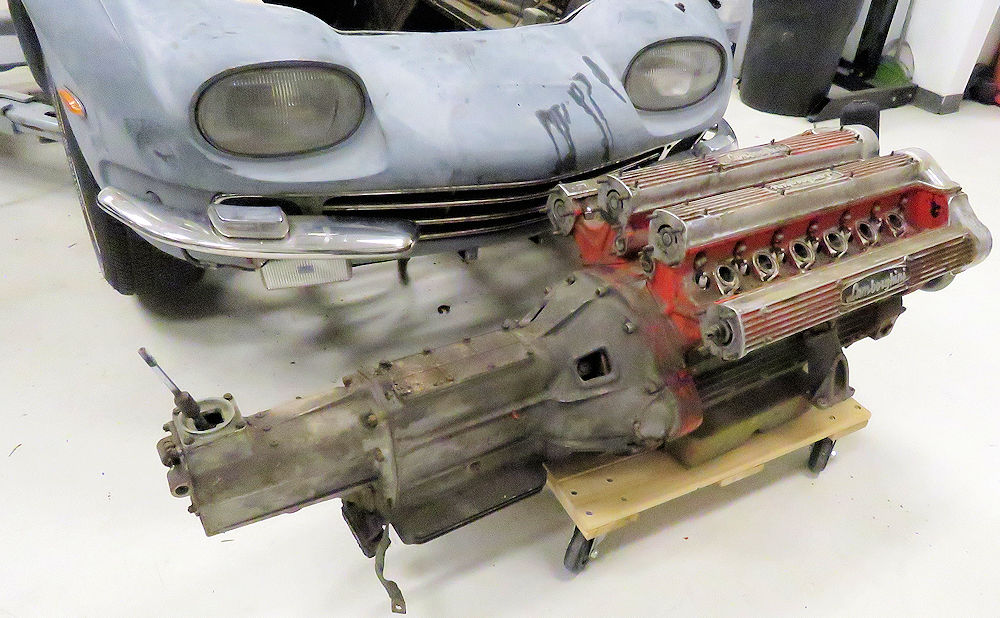
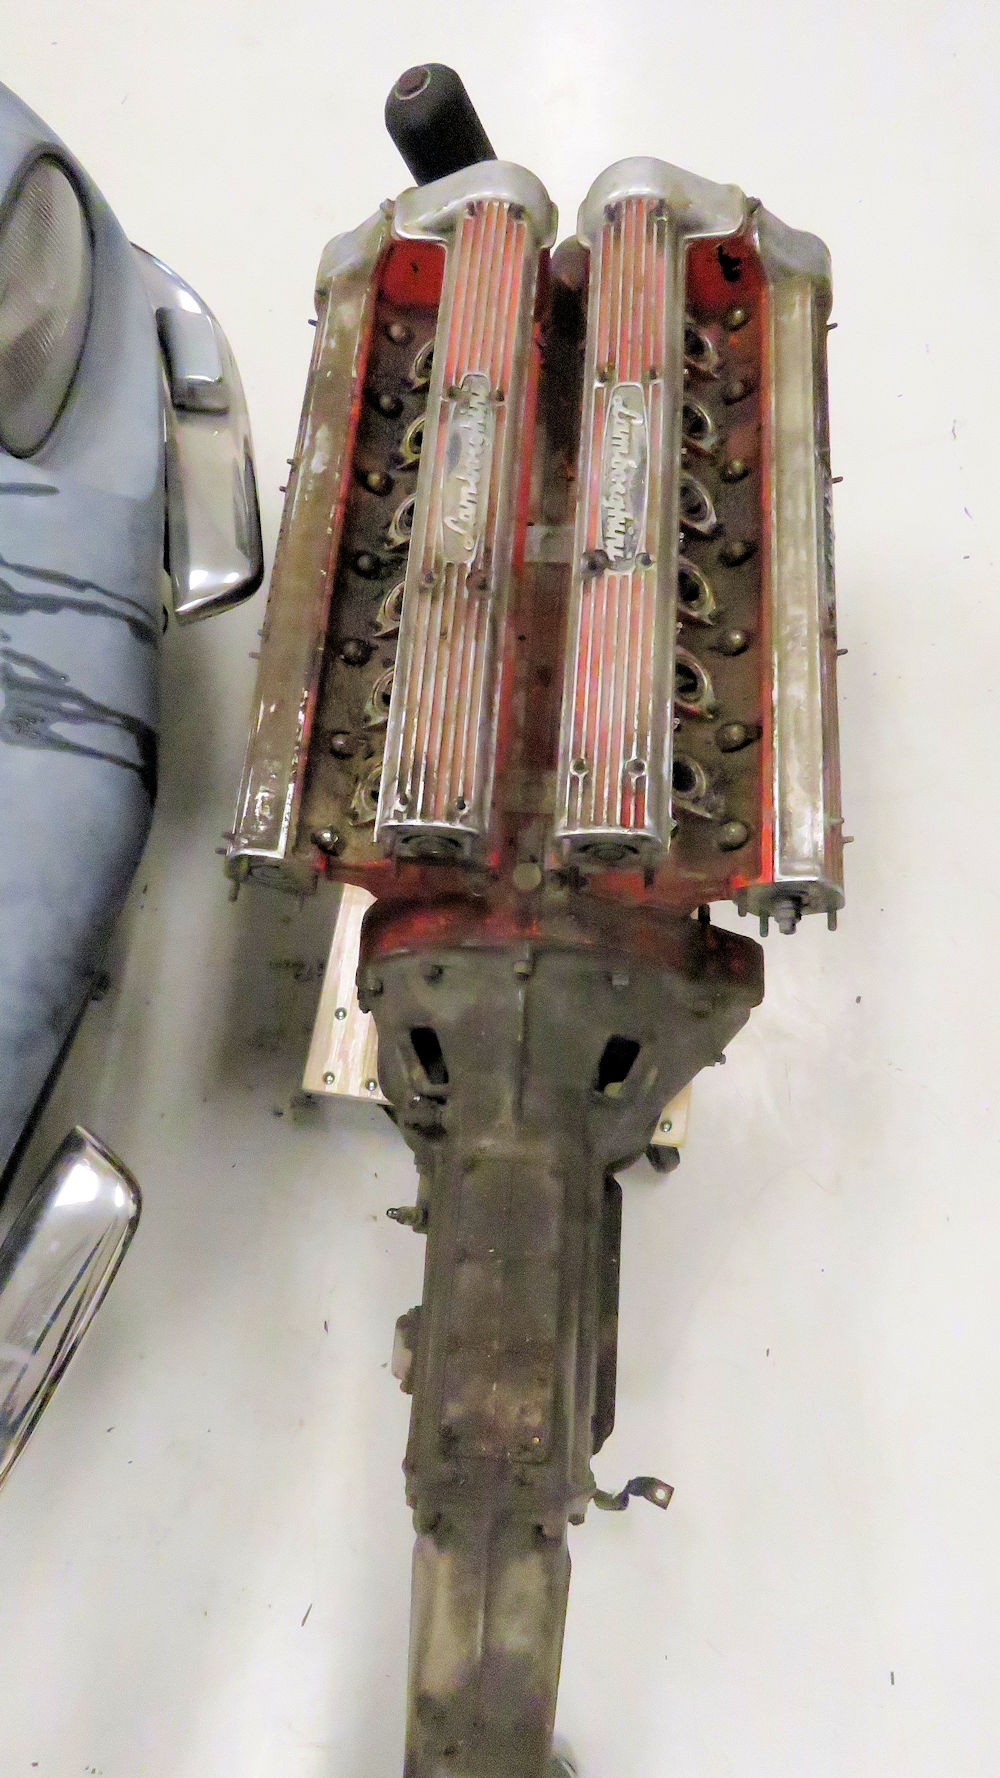
Out with the engine and transmission!
Both cylinder heads are date stamped 5/65
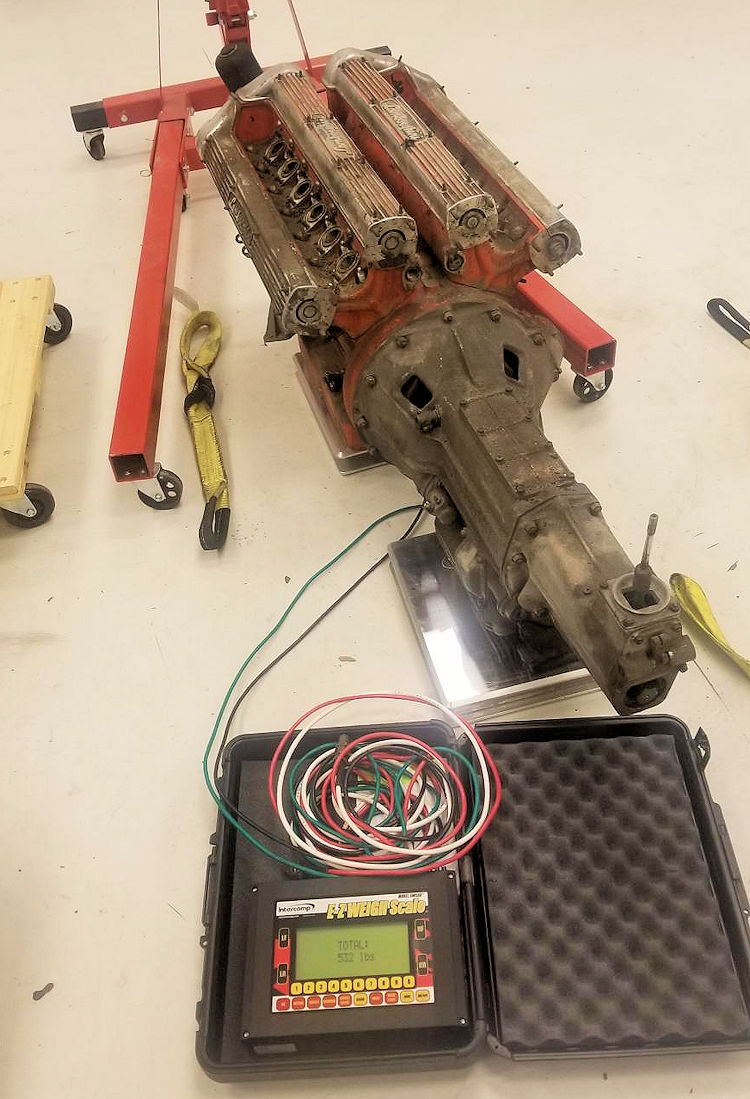
Engine and transmission weigh 532 lbs
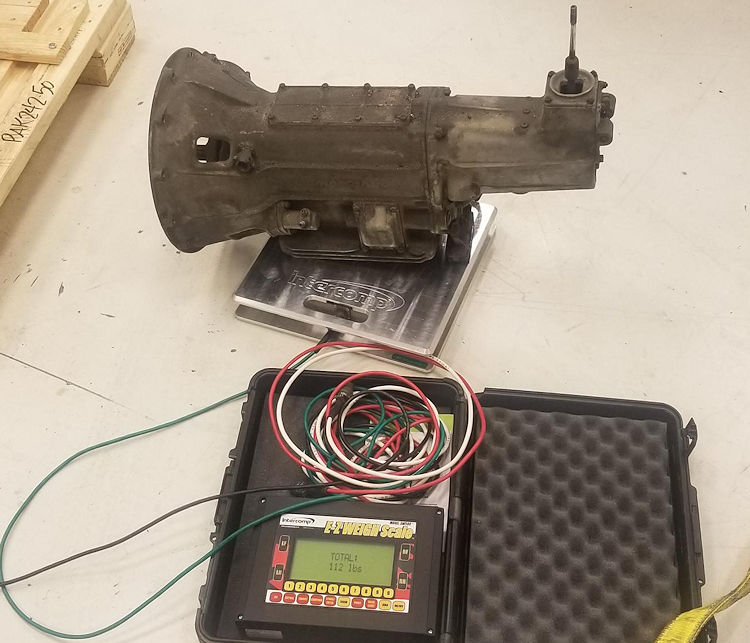
Tran weighs 112 lbs, meaning the engine is 420
lbs
I am delighted to report that your
car has arrived safely in the Team CJ Workshop and we will
have this exciting restoration underway in the next few
days.
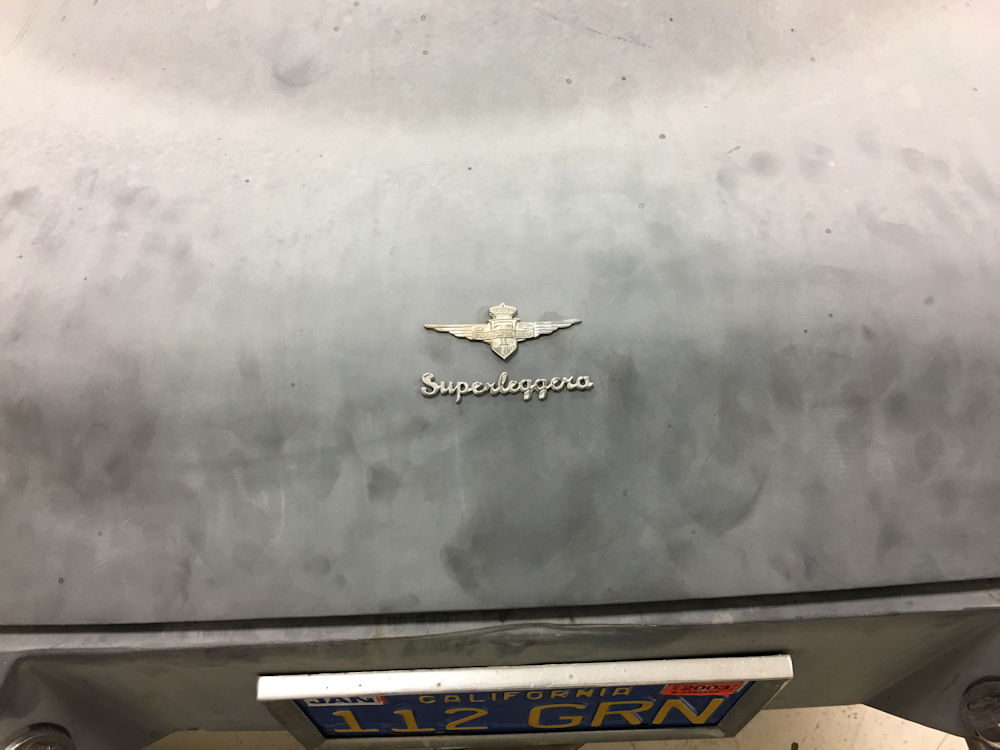
Touring Superleggera badges
Original bonnet badge
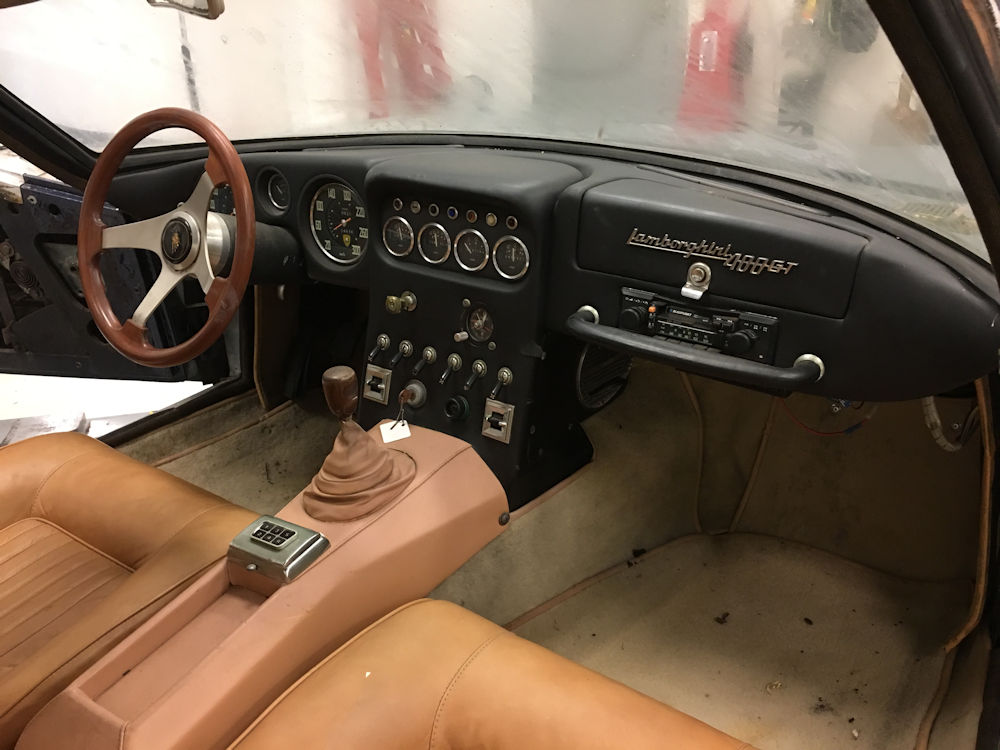
Steering wheel, radio and dash mounted
400GT badge are later additions
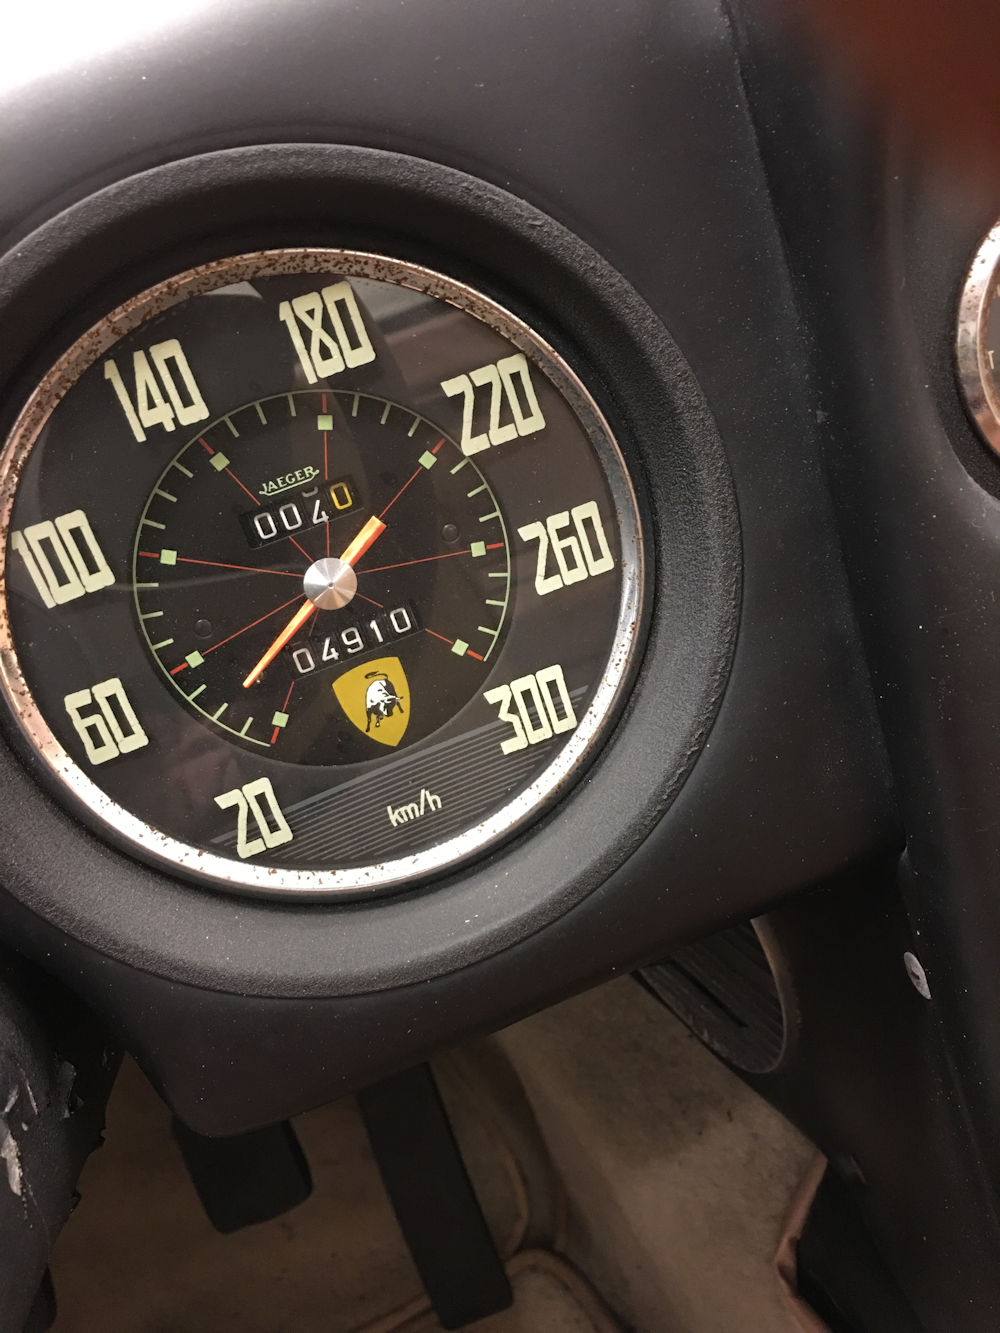
4,910 kms showing on the odometer, true miles
unknown at this point
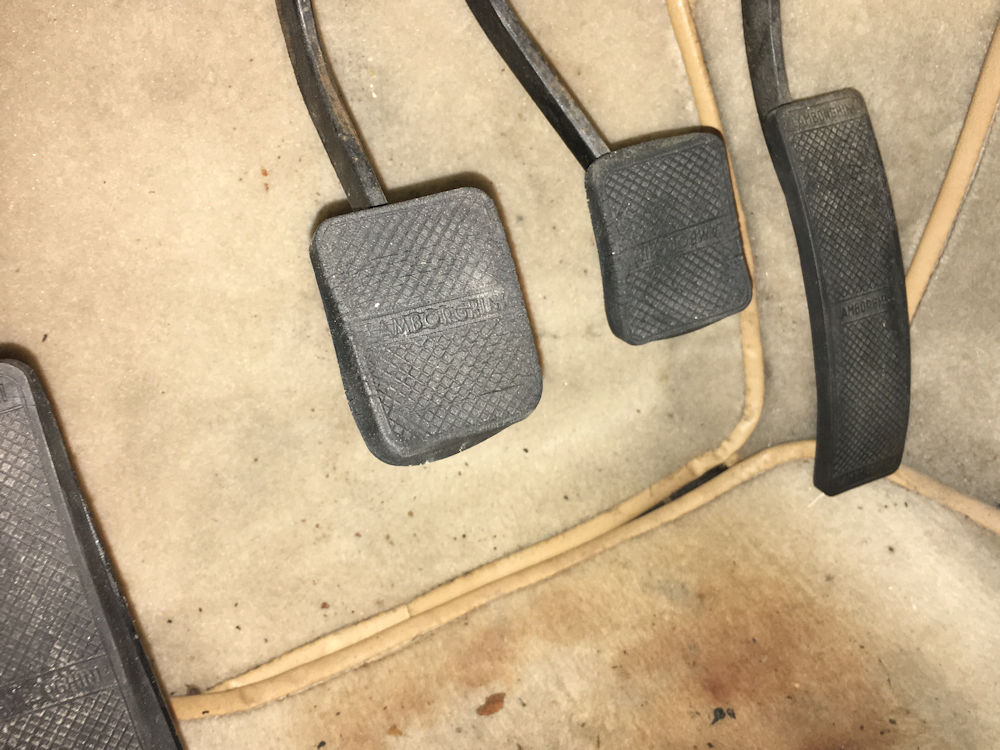
Original looking pedal pads show very little
wear,
so it is possible this is a very low mileage car
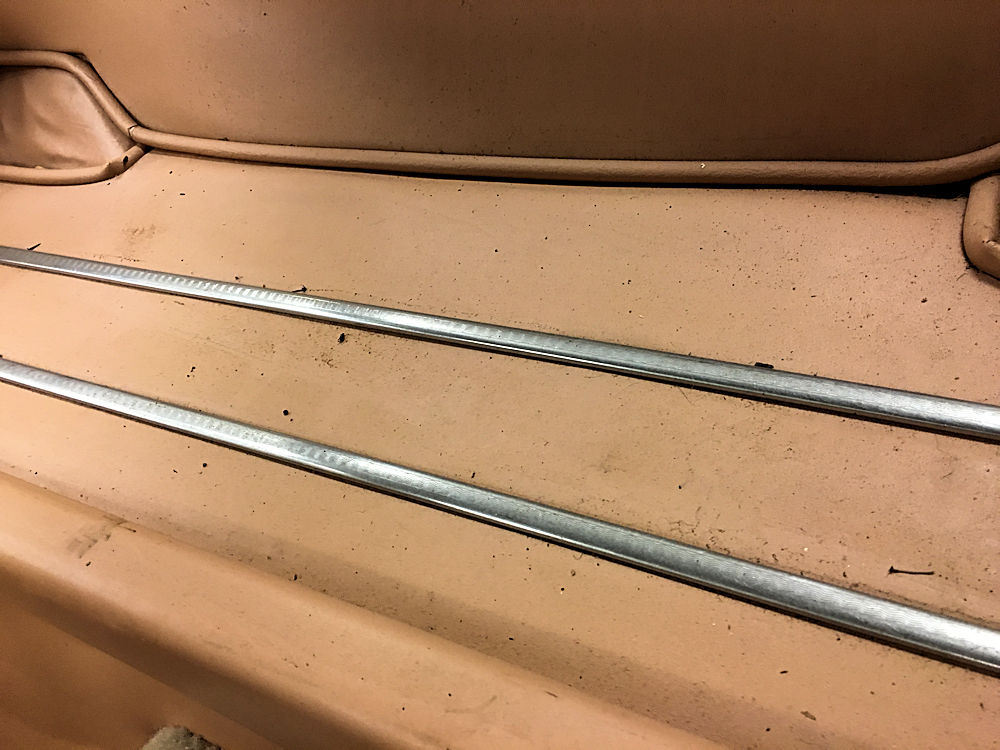
Typical Touring design feature
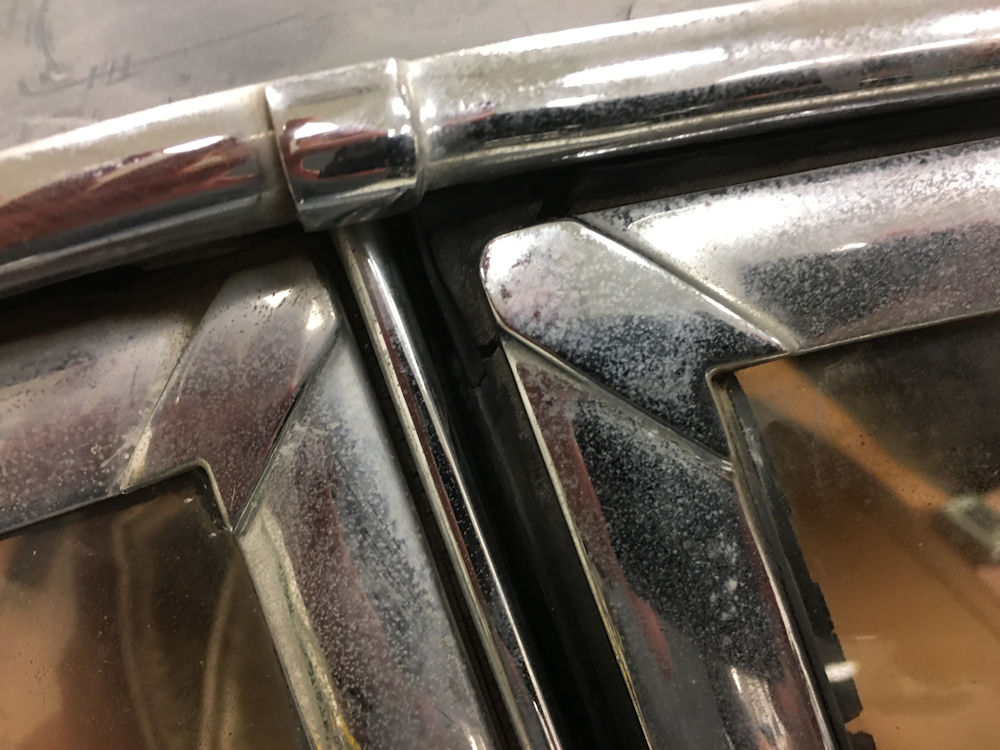
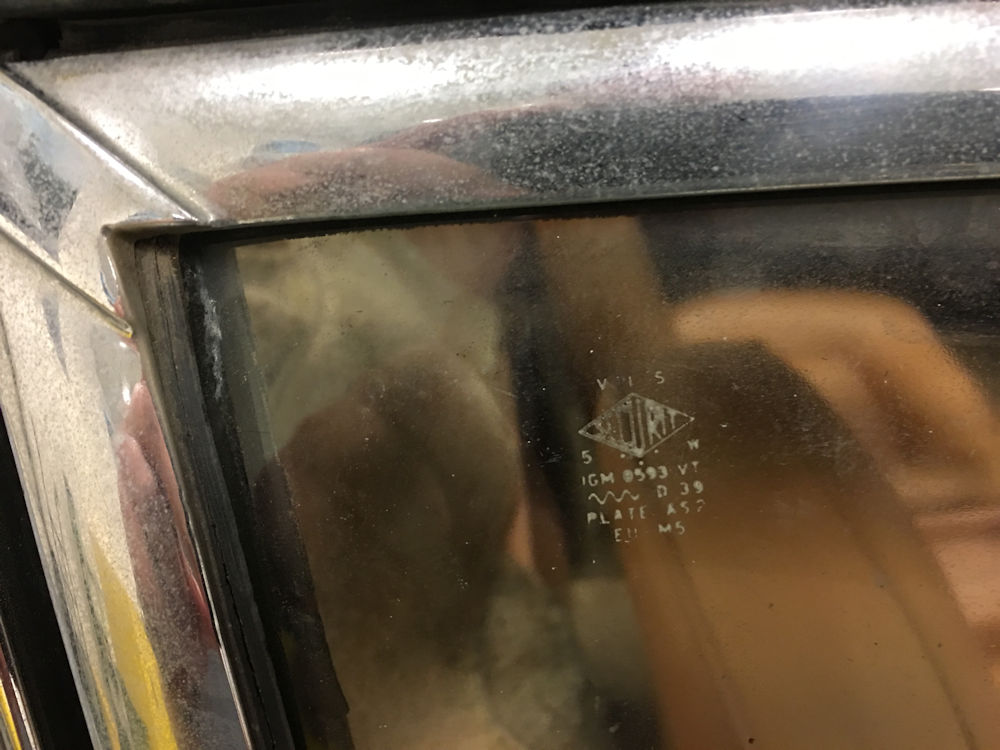
All of the glass in the car is original and in
excellent shape
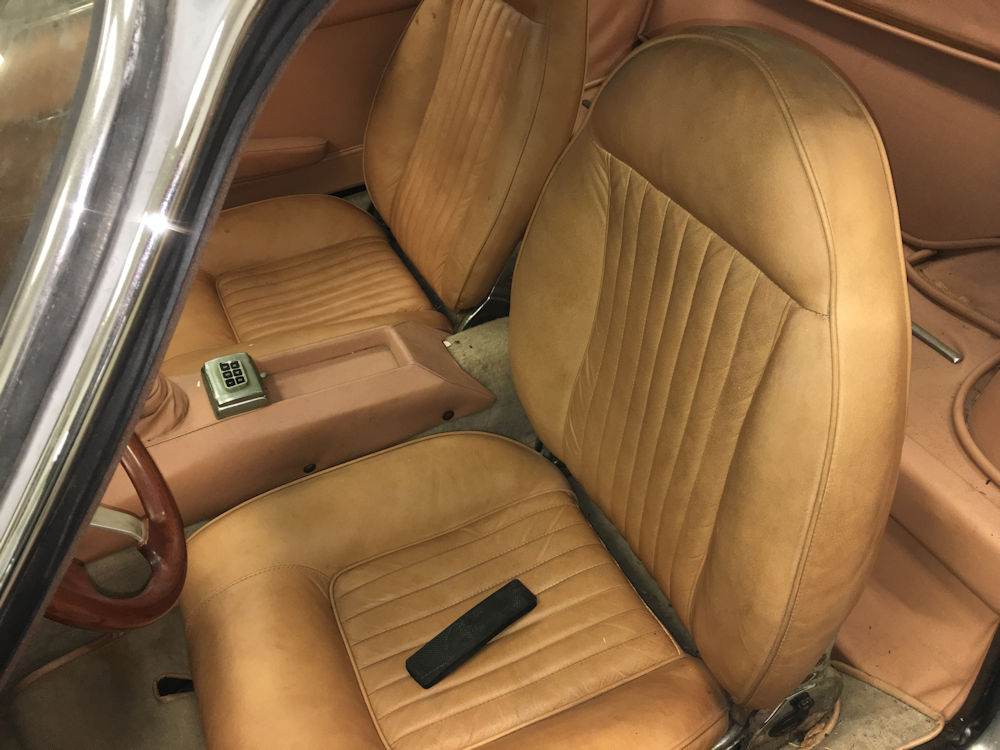
Original color was Blu Notte
Original interior color was Senape (tan)
Original door seals have furflex on the
interior
side, rubber to the outer
Chassis rails are 100% straight and look to be
extremely solid and rust free


 \
\