Mechanical rebuild/upgrade
Photo Archive
| 1973
V12 E Type (GT)
Mechanical rebuild/upgrade Photo Archive |
|
Report date - October 6, 1999
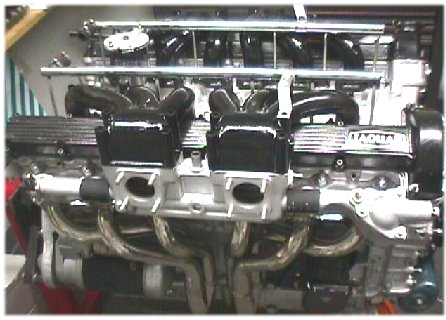
The engine is now complete! I hope you agree with me that the finished result has been worth the wait. Look for photographs of the installation over the next couple of days.
 |
 |
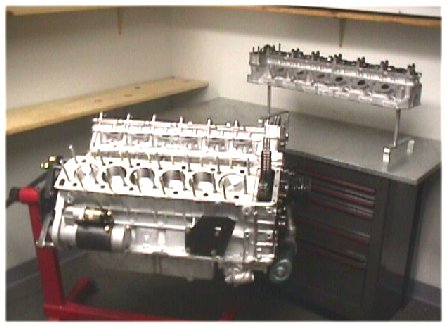
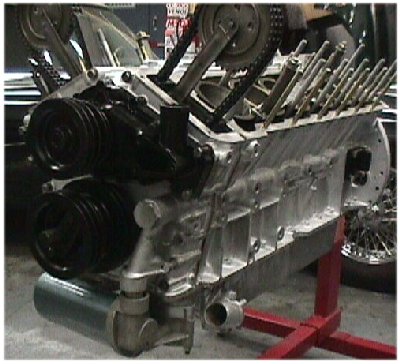
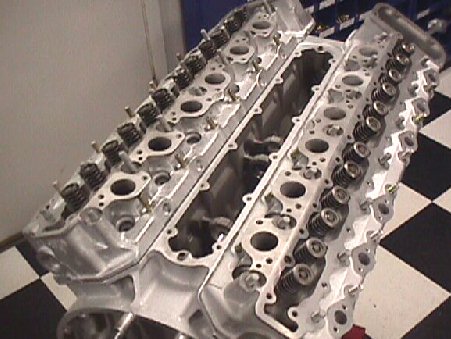
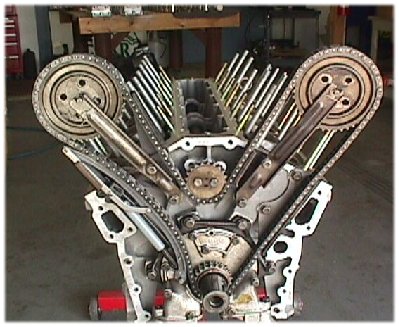
Some excellent progress on the engine this week. Having got the remachined heads back last week, with all new valve seats and some weld repair work having been done to some corrosion damage on the deck surface, John set about assembling them and setting up the valve clearances. This time, I am pleased to report, the process went smoothly and without incident.Both heads were finished up today and installed to the engine block for the last time. The photographs below show John and Eric in the engine clean room installing the final head. It doesn't matter how many V12 engines I see being rebuilt, I never cease to be amazed by the sheer size and magnificence of the things. A newly rebuilt Jaguar V12 engine 'sans heads' remains one of the most photogenic of all Jaguar components!
We also received back the flywheel, clutch and harmonic balancer - all of which we had zero balanced - so we are rapidly running out of excuses for not installing the engine and gearbox back in the car! Look for another significant update later this week.
 |
 |
Report date - September 12, 1999
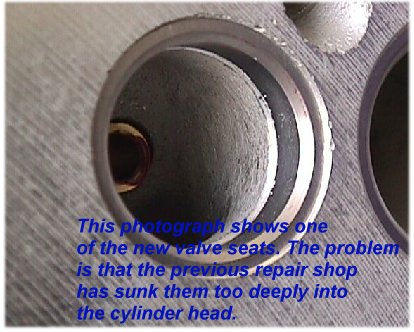
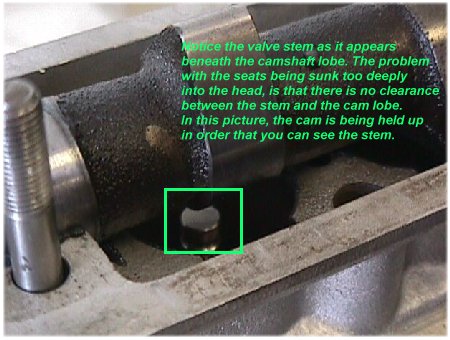
The problem is that once the valves are installed, there must be clearance (around 320 thousandths of an inch, plus whatever the valve lash should be) between the top of the valve stem and the bottom of the camshaft lobe. In this case, because the seats were incorrectly installed, there was actually no clearance whatsoever.
The only solution, as per our telephone conversation yesterday, is to cut out all 24 valve seats and correctly install new seats.
As a matter of interest, our predecessors did not lap in any of the valves either. Bearing in mind that when you had these heads delivered to us they were fully assembled, one assumes that they were considered ready for installation. Had this engine run at all, it would have done so with disastrous consequences. The good news is that John and his team spotted the errors, and disaster has been averted. The heads have already been completely torn down and will be collected by my machinist on Monday morning.
Our plan is to press on and finish the assembly of the block, and install that and the new Getrag 5 speed into the car on Tuesday. We will then finish up everything we possibly can prior to receiving the cylinder heads back from the machinist. My apologies for the delays that this is obviously causing, but I know you will appreciate that it is far better that we caught this now!
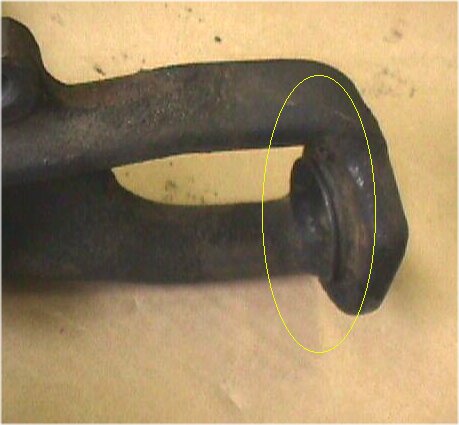
Hopefully the photographs below will help explain our findings. The last image shows what half an hour on the buffing wheel can do to clean up your engine bay! The enlarged images also include a little more written explanation for you.
Click
on thumbnails to view larger images
 |
 |
 |
 |
Report date - August 16, 1999
Click
on thumbnails to view larger images
 |
 |

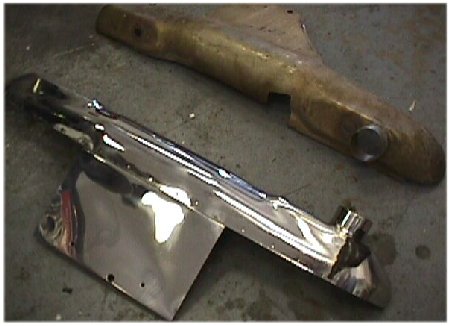
Report date - August 12, 1999
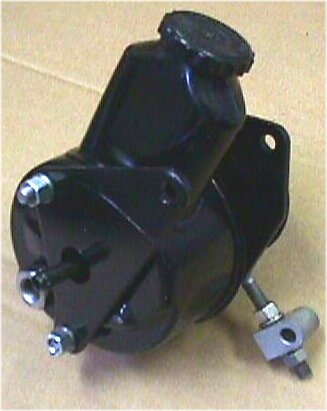
For the extra hour it took, we also cleaned it up for you and painted it.
We
have been making some excellent progress this week!
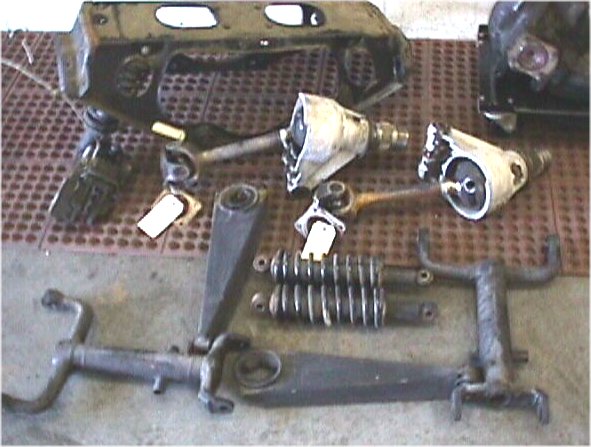
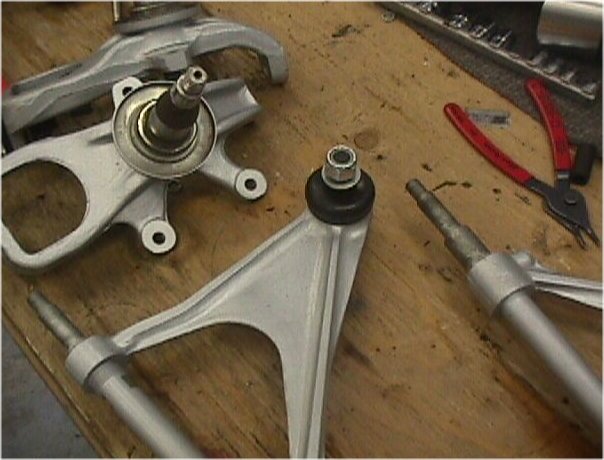
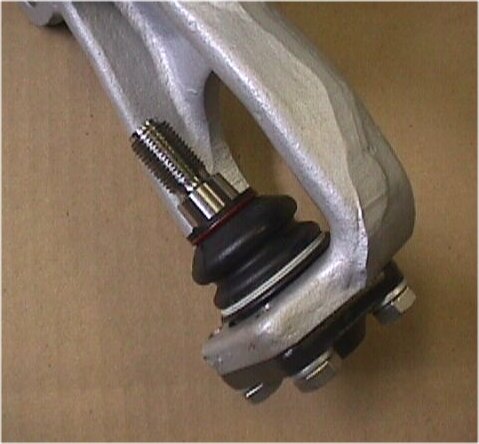
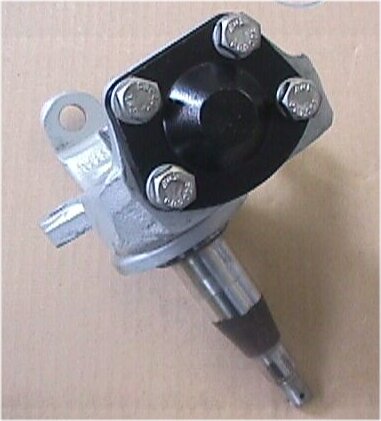
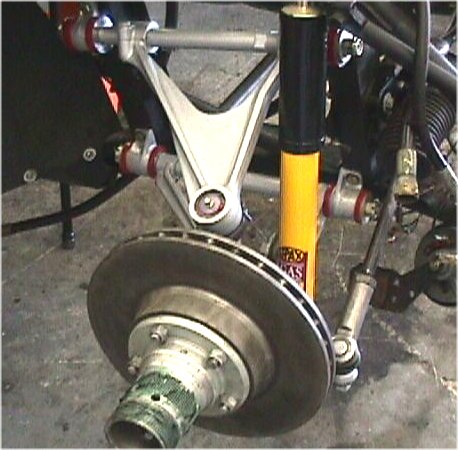
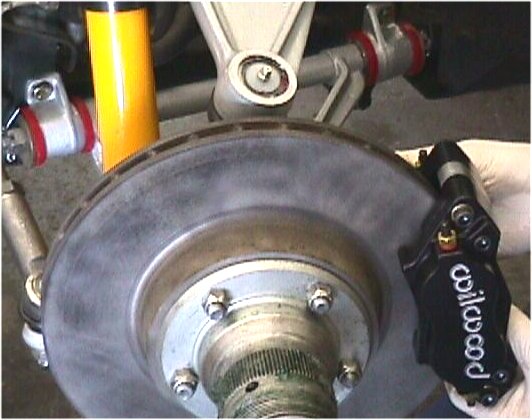
Notice how we have substituted the later style sealed lower balljoints during the rebuilding process. This is an upgrade we recommend with all E Types. The sealed units are stronger and far more durable than the original multi-piece item.
Once
the suspension is fully rebuilt, we will be installing the rebuilt engine
and Getrag gearbox - shouldn't be long now, Greg!
 |
 |
 |
 |
 |
 |
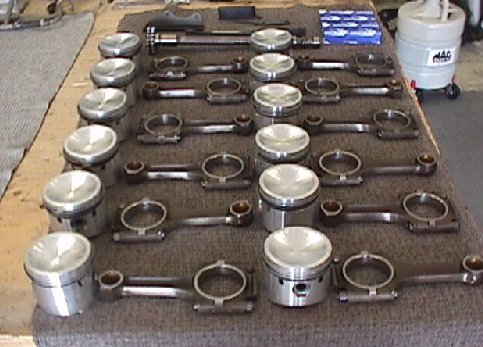
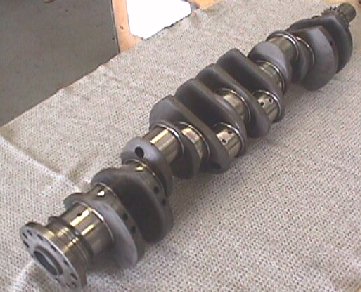
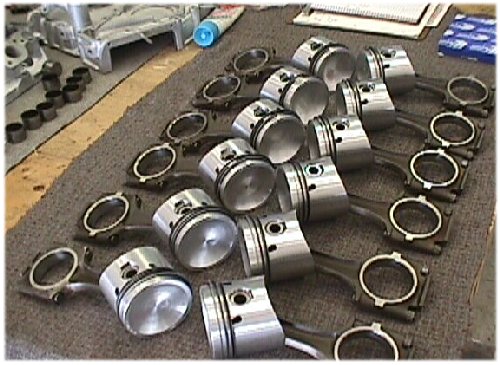
Report date - July 8th, 1999 This vehicle is currently undergoing a full engine rebuild, suspension upgrade, brake upgrade and 5 speed conversion in our workshops. The following pictures show the engine starting to go back together following completion of all the machine work and balancing.
Click on thumbnails to view larger images.
 |
 |
 |
 |
 |
 |