Restoration to rolling shell stage
| 1965
E Type roadster (Gil)
Restoration to rolling shell stage |
|
|
 |
 |
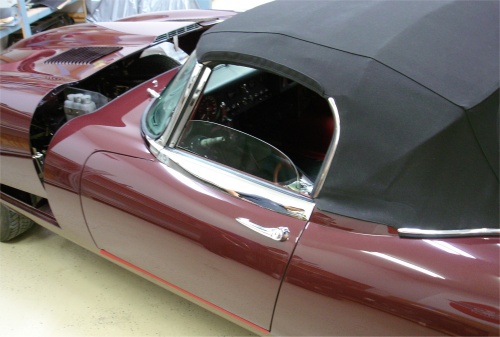
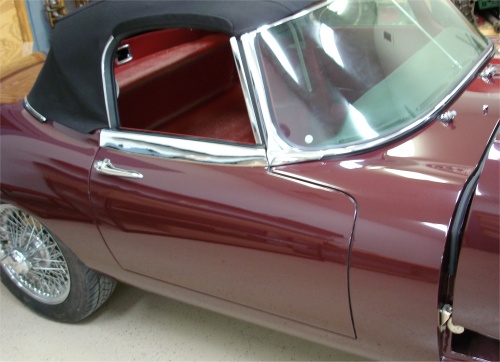
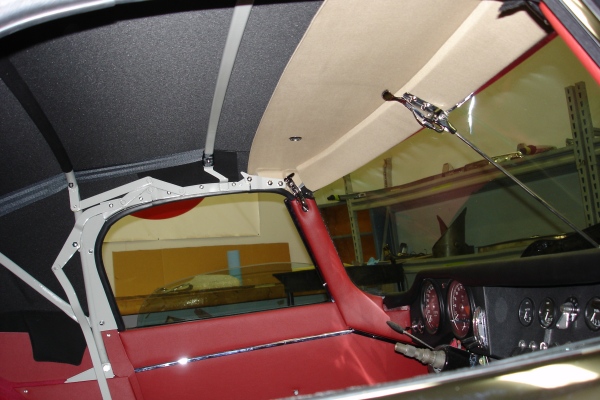
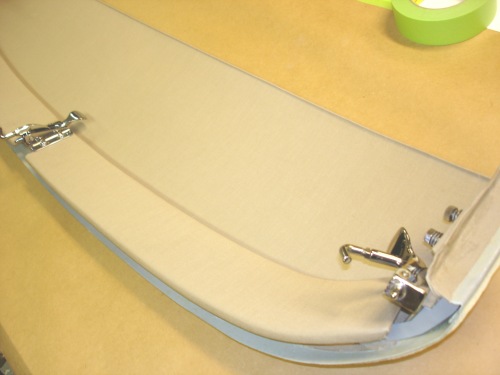
Installing your new convertible top.
 |
 |
 |
 |
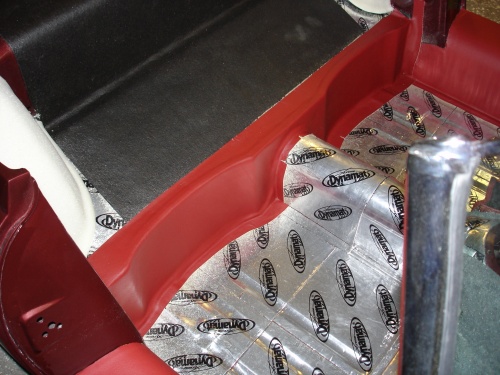
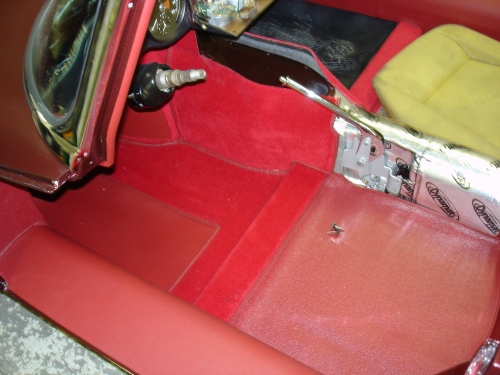
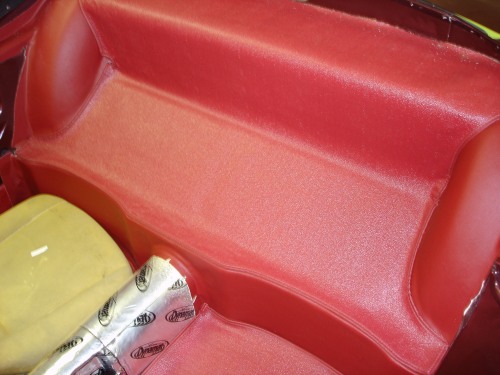
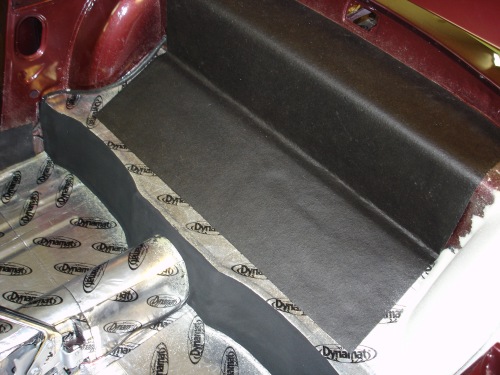
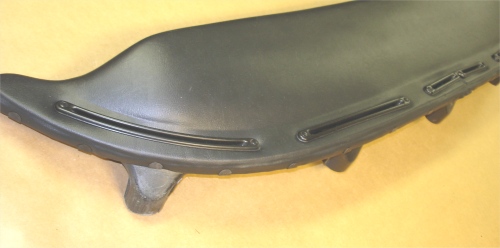
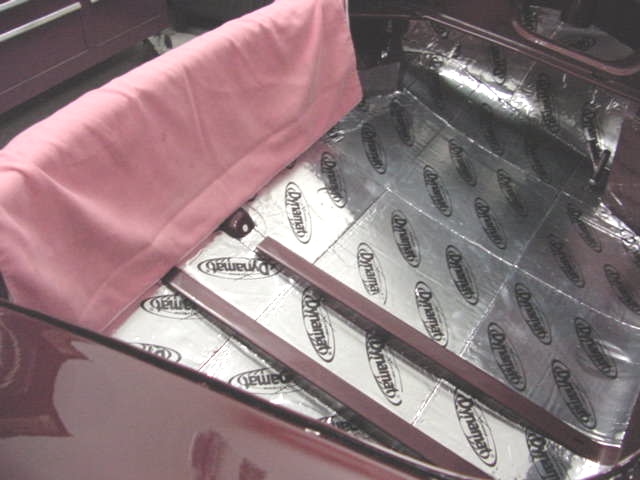
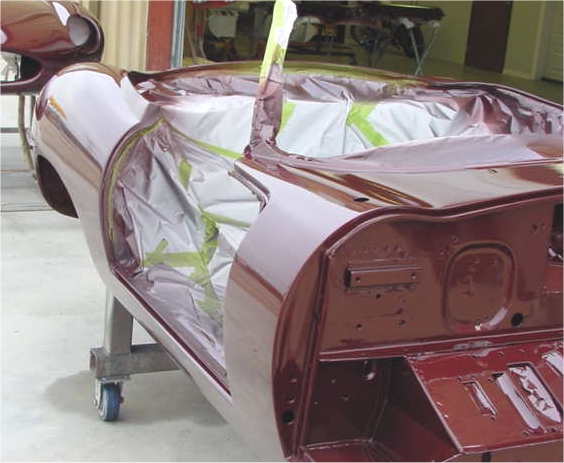
More interior trim progress....
 |
 |
 |
 |
 |
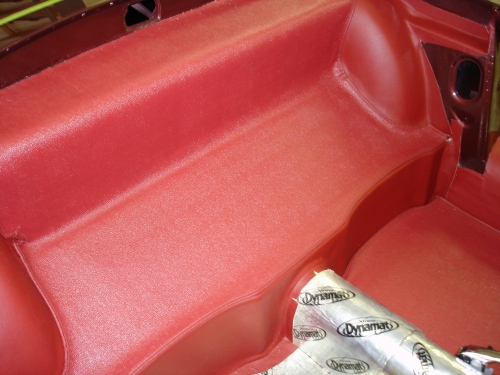 |
As you can see, your car is now receiving attention in the CJ trim room.
 |
 |
 |
|
|
also now installed |
|
 |
 |
 |
|
|
|
|
 |
 |
|
|
|
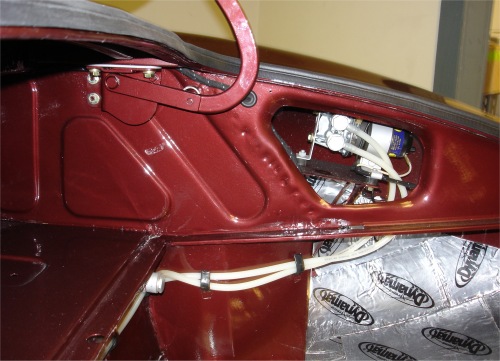
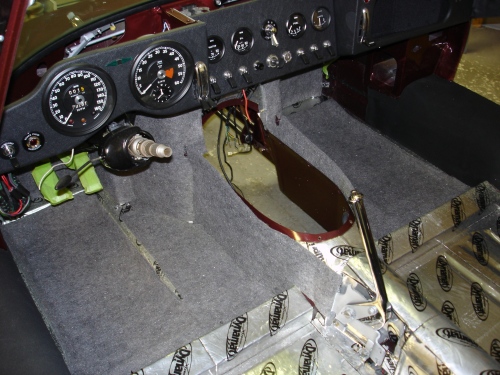
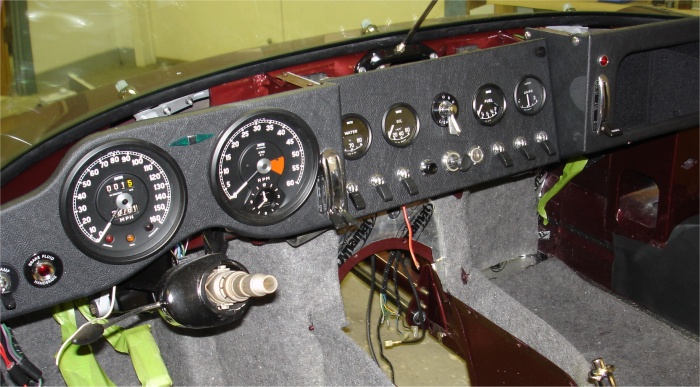
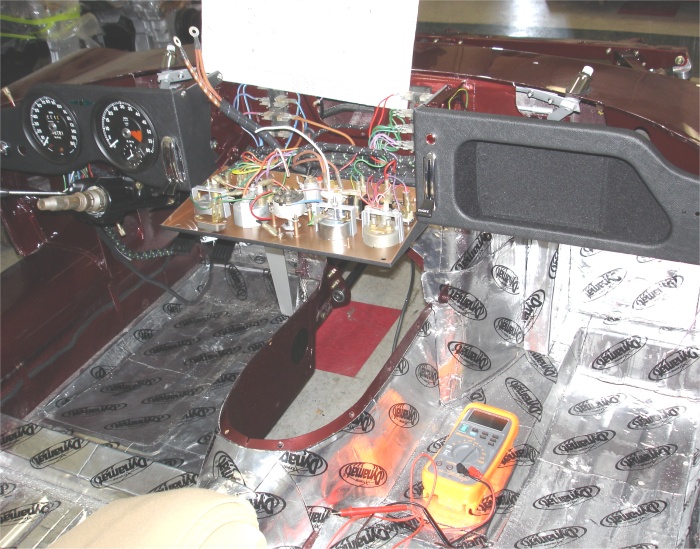
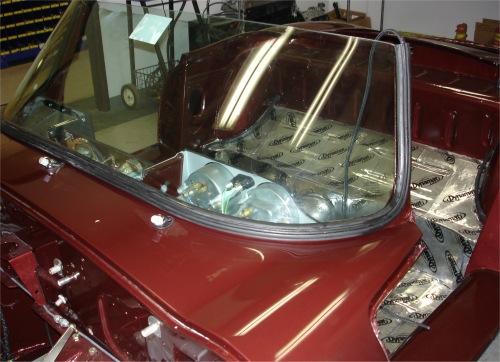
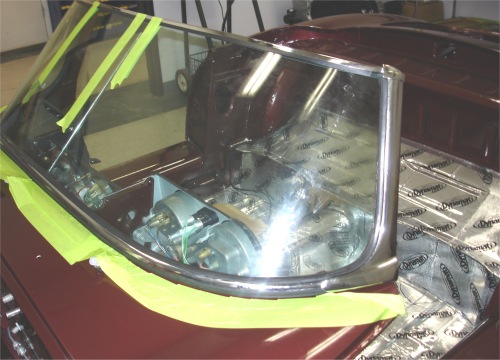
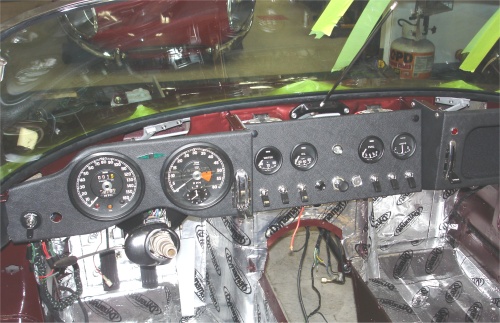
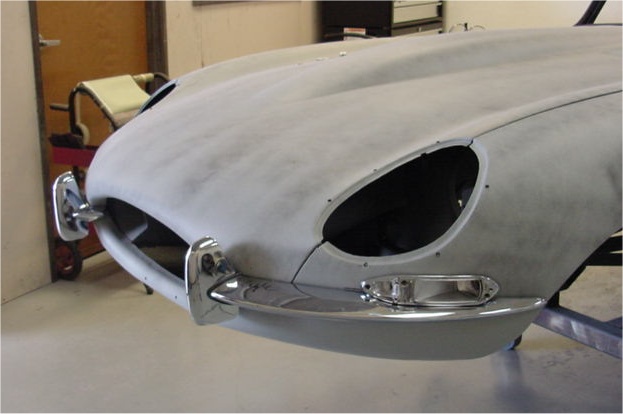
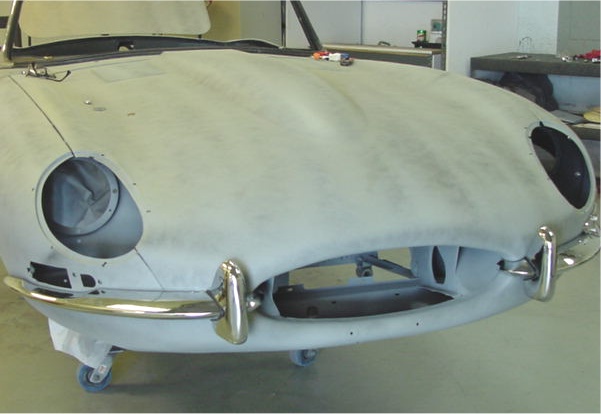
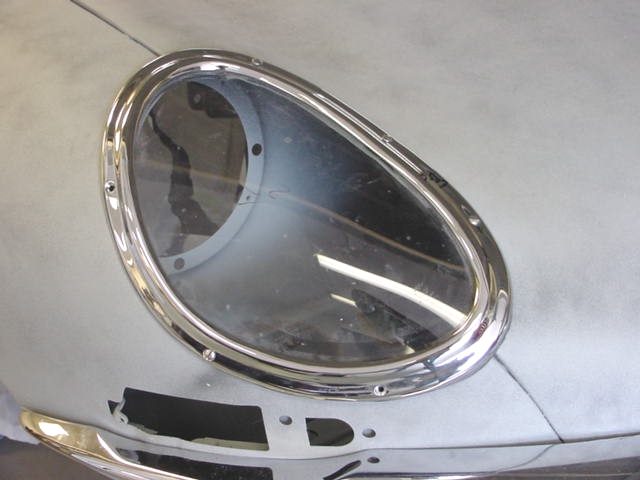
Installing the dash, bumpers, lights and new windscreen....
 |
 |
 |
 |
 |
 |
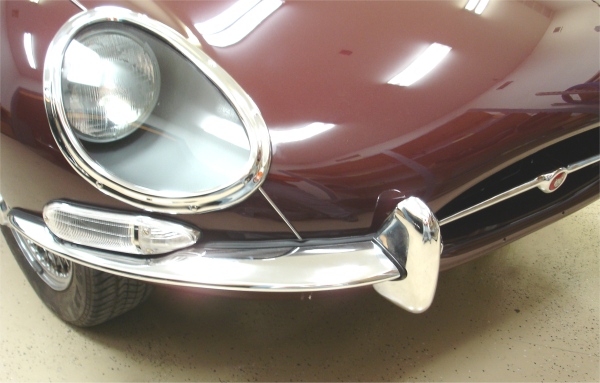
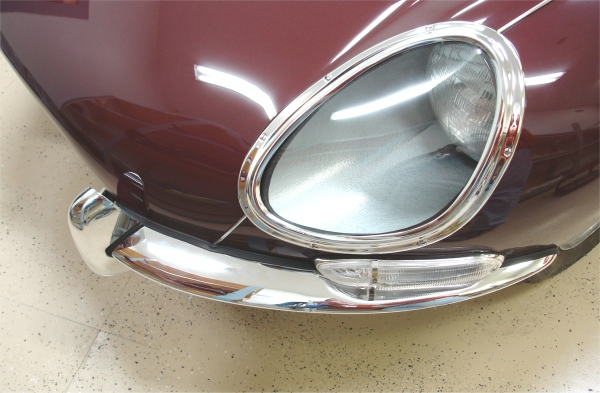
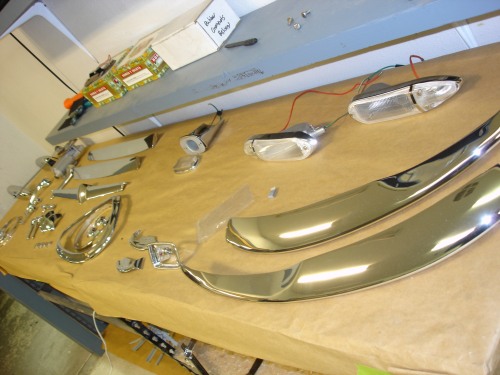
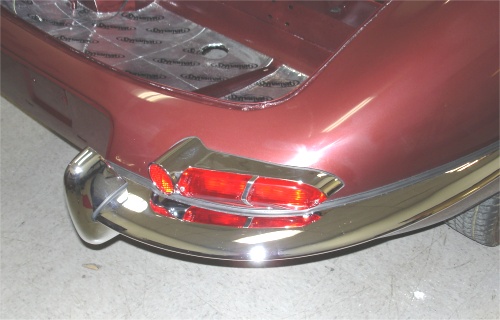
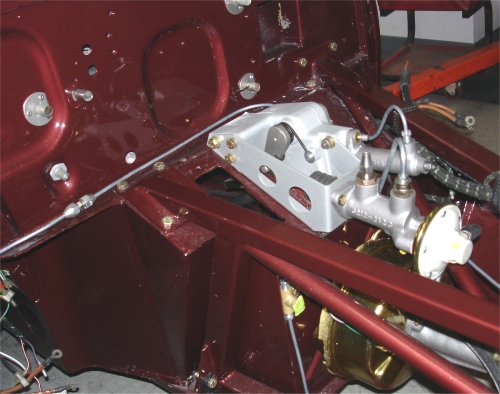
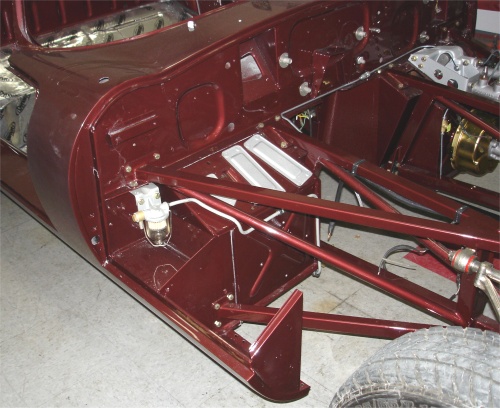
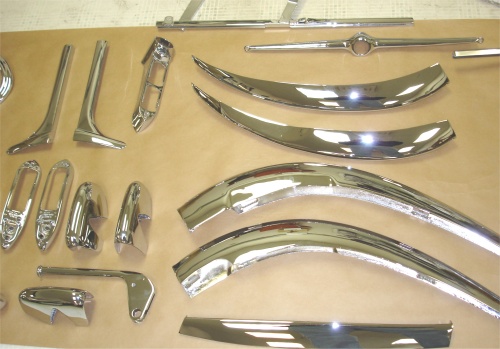
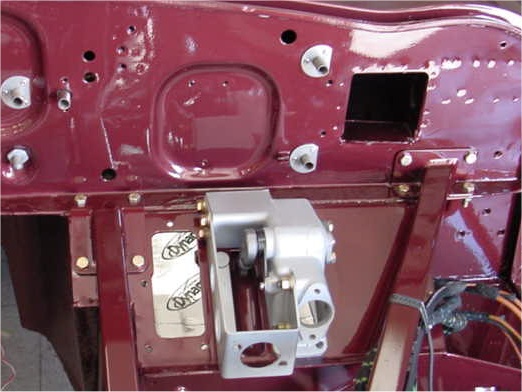
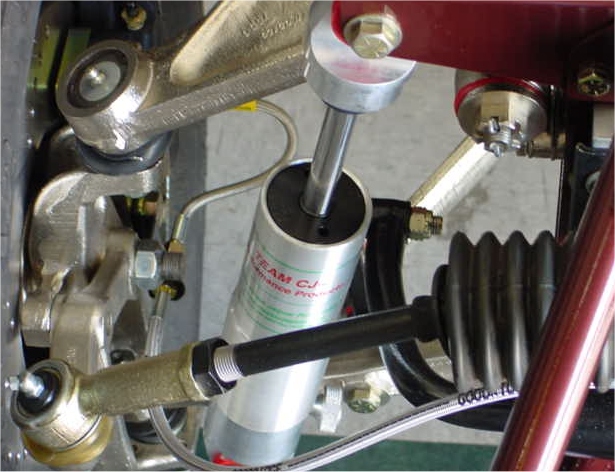
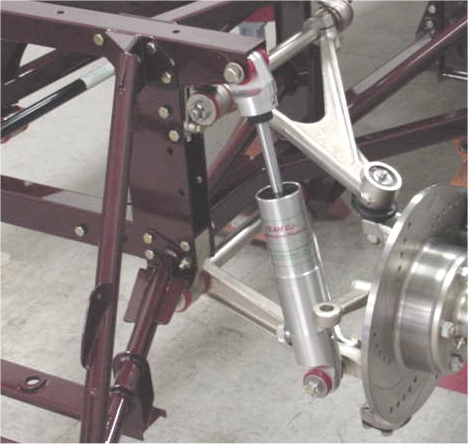
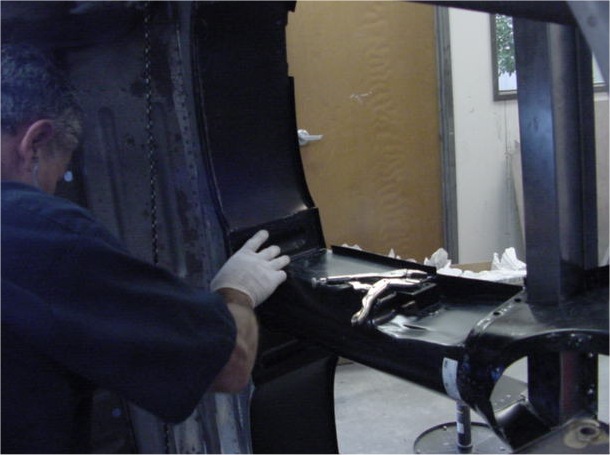
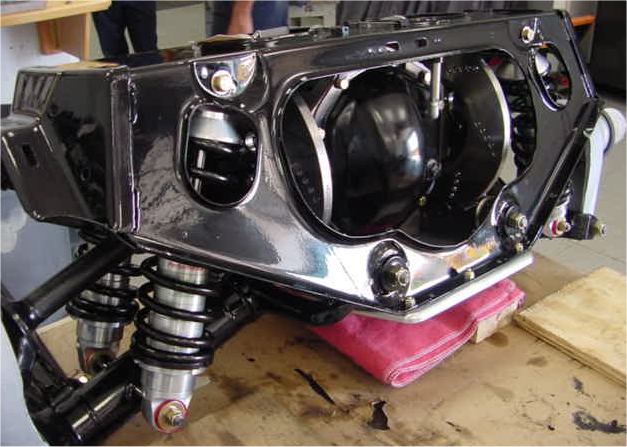
The photographs below show the installation of the rebuilt brake hydraulics and the fuel lines, etc. We also now have all the re-plated chrome back, so lots of shiny bits will be installed over the coming weeks!
 |
 |
 |
 |
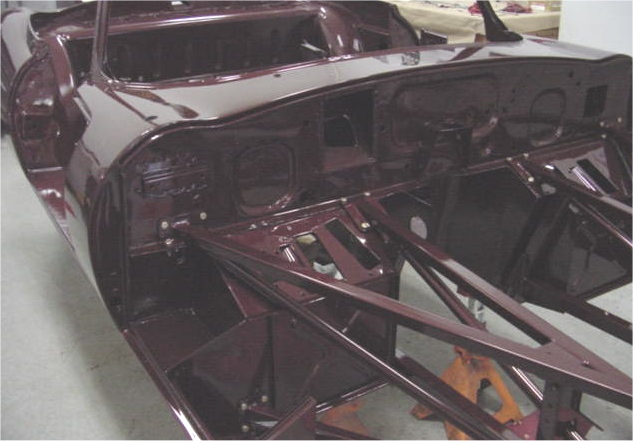
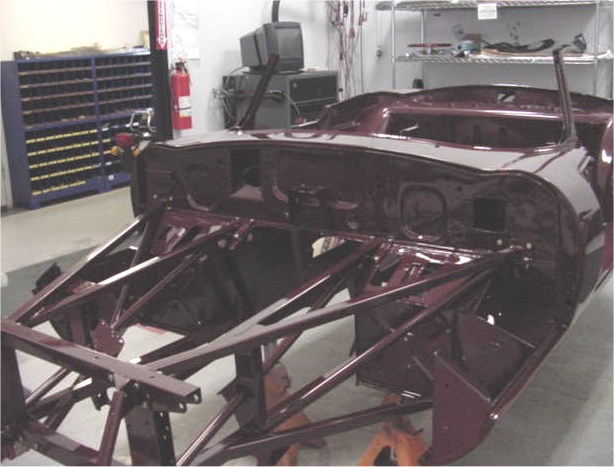
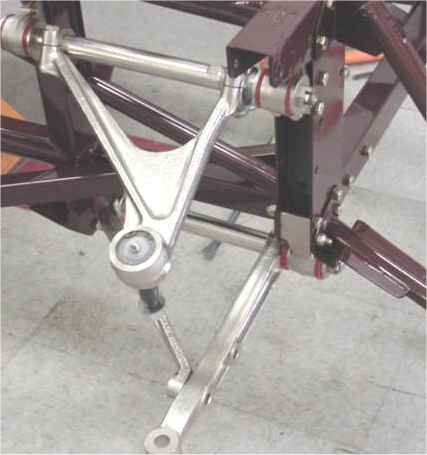
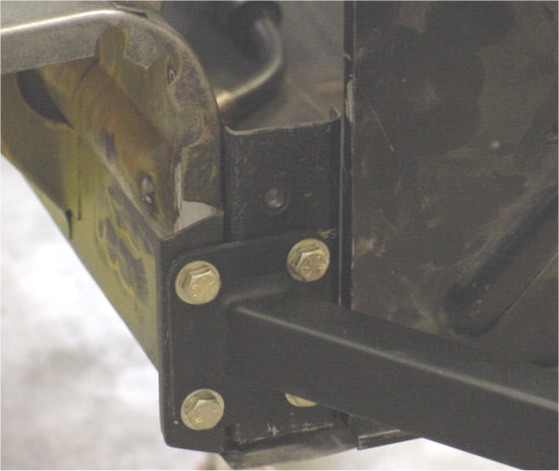
The reassembly process is now well underway - the fun part of any restoration!
 |
 |
 |
|
was in excellent condition |
first thing to be installed |
|
|
|
|
|
 |
 |
 |
|
|
|
|
 |
 |
 |
|
drilled and slotted rotors |
|
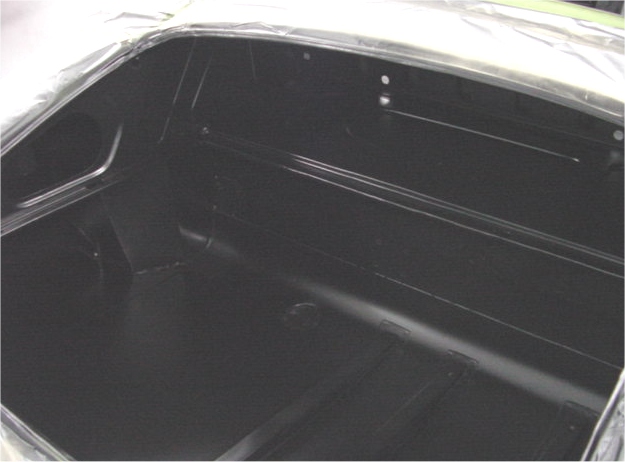
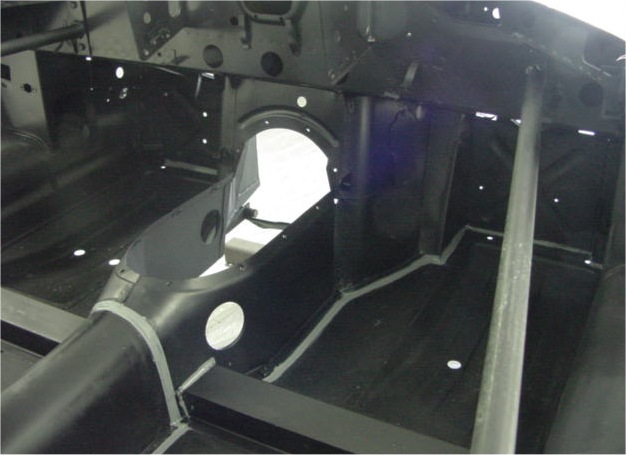
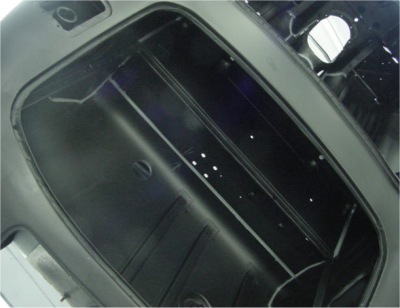
boot compartment |
 |
 |
 |
|
the first time in a while |
|
|
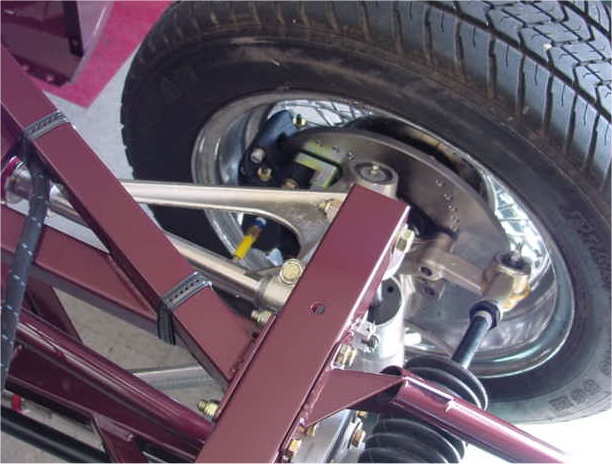
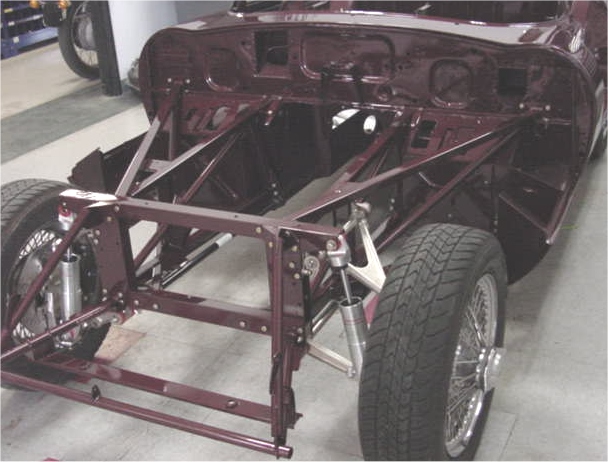
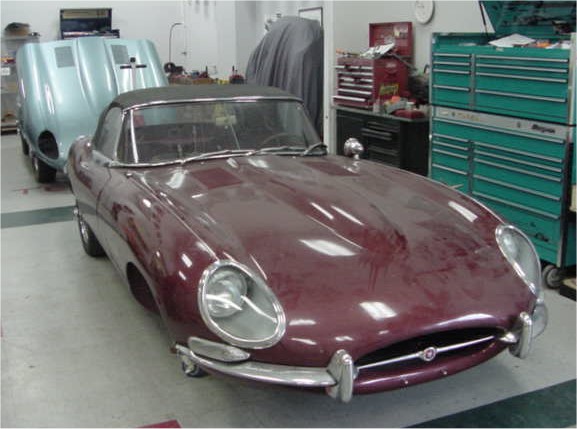
It is now time to put your car back on its wheels. Over the next week or so the car will take a huge visual leap!
 |
 |
 |
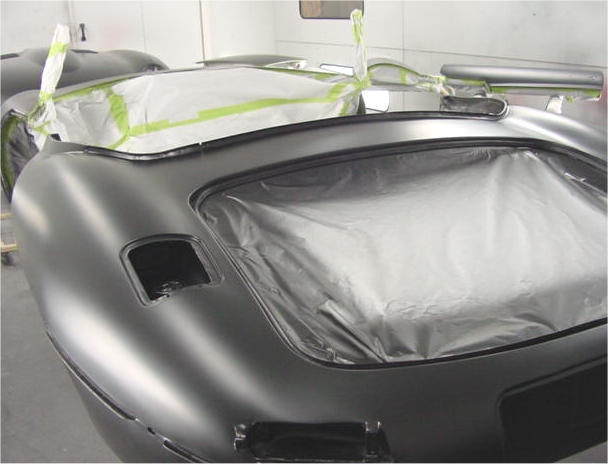
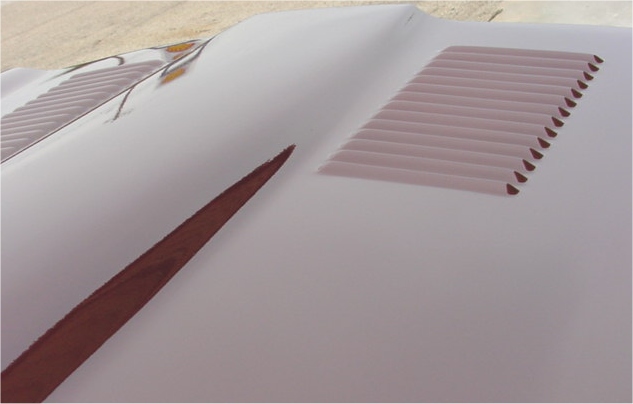
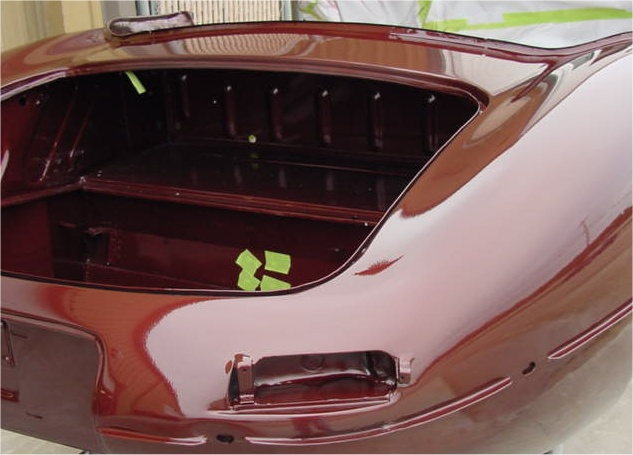
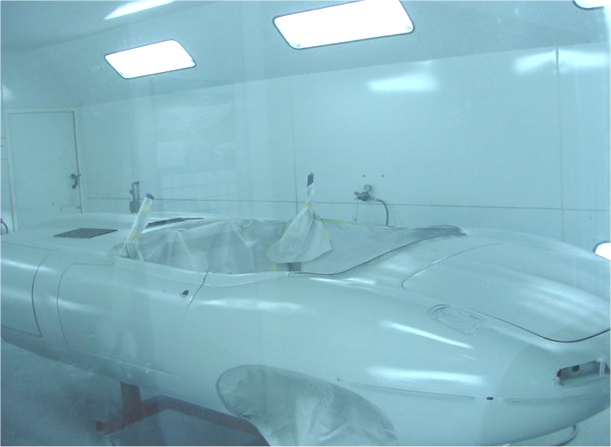
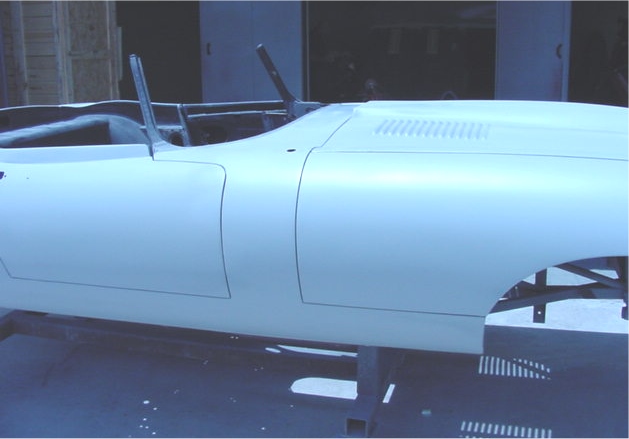
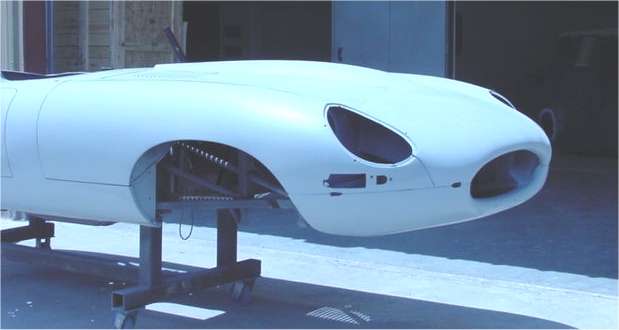
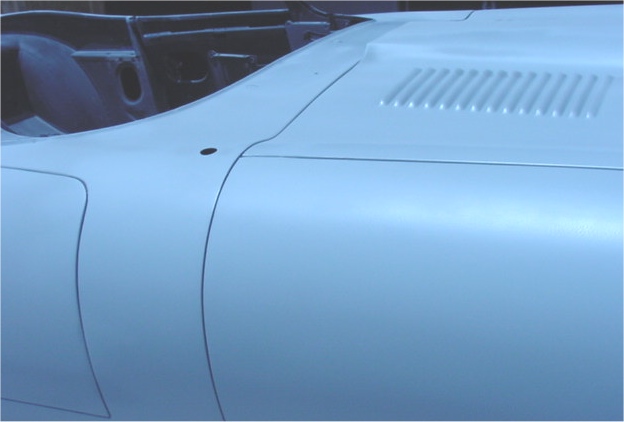
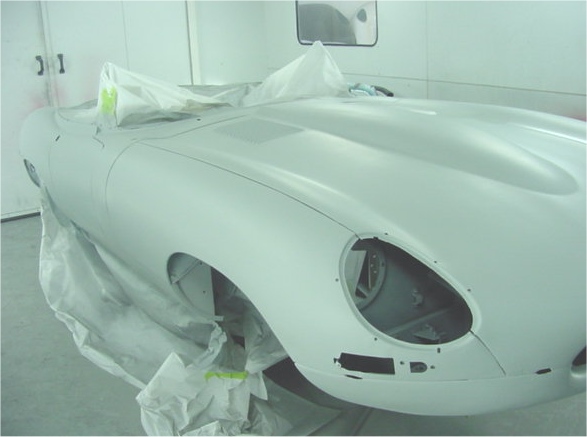
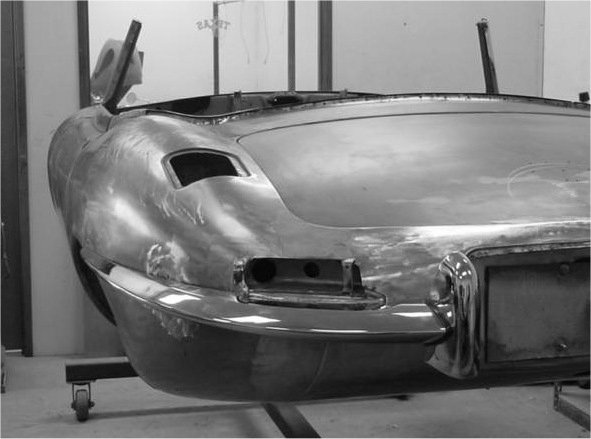
I am delighted to report that your paintwork has now been completed. We will be colour sanding the car this afternoon then applying a further couple of coats of clear coat tomorrow or Thursday. So far, as you can hopefully tell from the photographs, your car is looking absolutely fabulous!
 |
 |
 |
|
|
sealing coat when painting metallics |
beautifully |
 |
 |
 |
|
straightness of the car |
in various lighting conditions |
the car later today |
 |
||
|
in a few days |
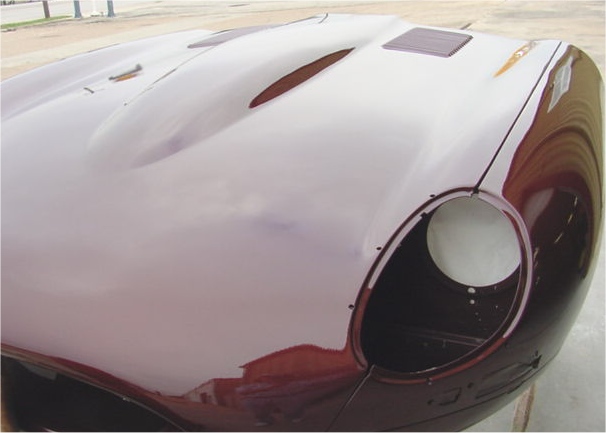
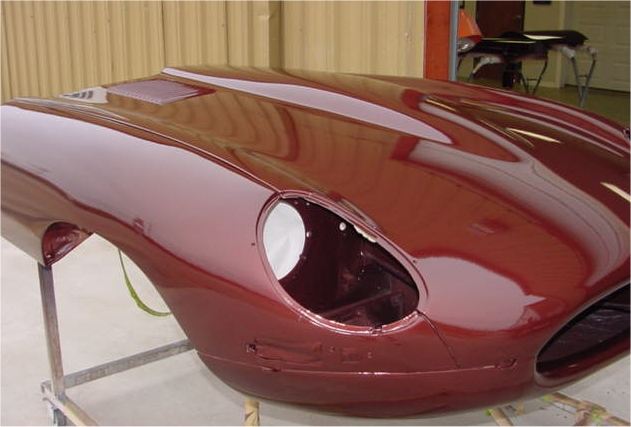
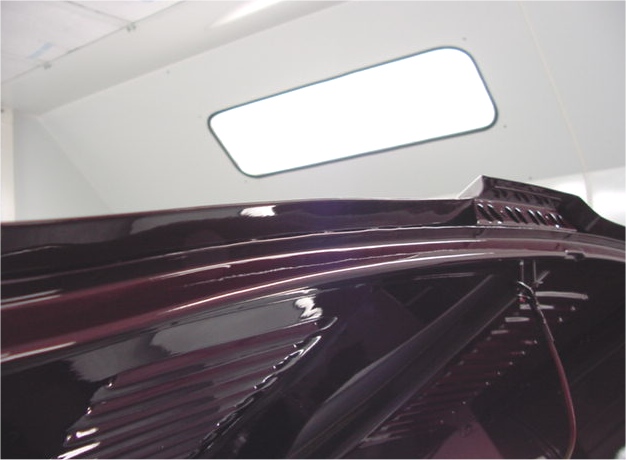
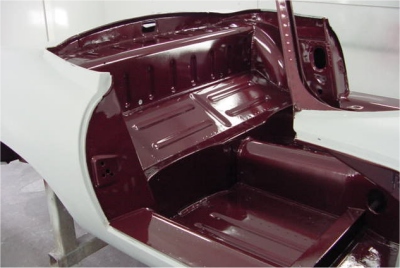
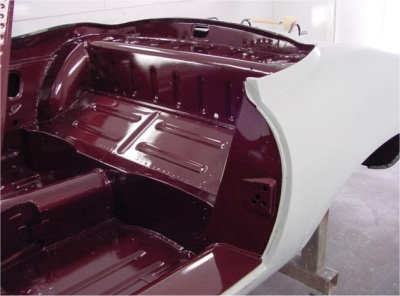
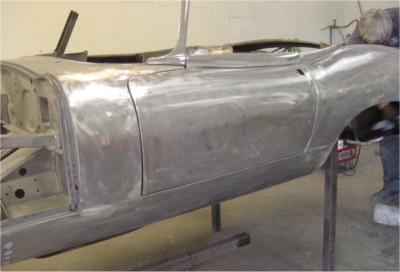
We now have the underside of the bonnet painted and are in the final stages of preparation for the final shoot of all the outer panels. The Opalescent Maroon paintwork is looking absolutely spectacular!
 |
 |
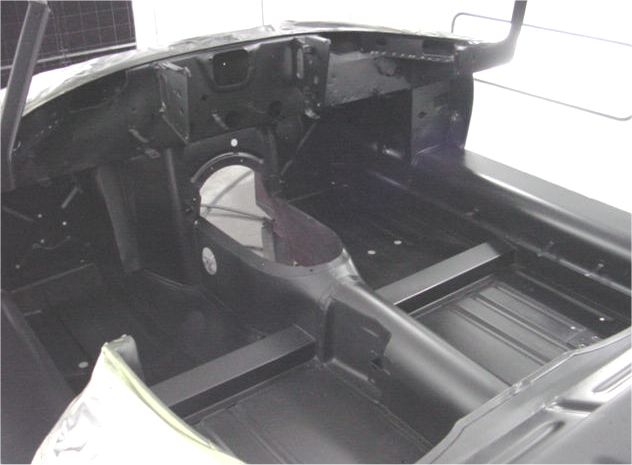
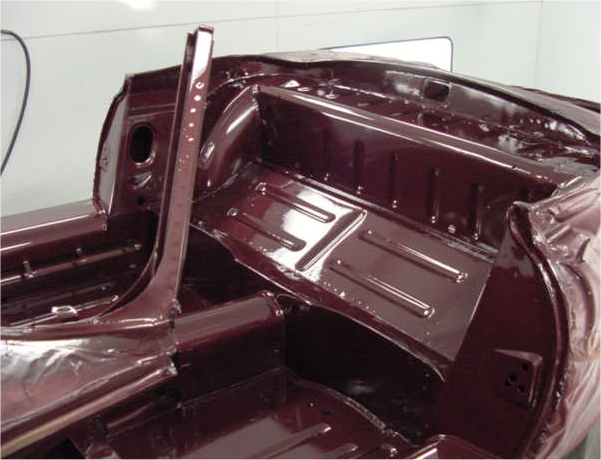
After all the hard work and countless hours of blocking, it is finally time to paint your E Type! The following photographs show the cabin, firewall and the boot areas changing colour. The process of painting the outer panels will follow the painting of the underside of the bonnet - which will be completed in the next few days.
 |
 |
 |
|
the cabin... |
|
|
|
|
|
|
 |
 |
 |
|
|
Opalescent Maroon |
|
 |
 |
|
|
outer panels are painted |
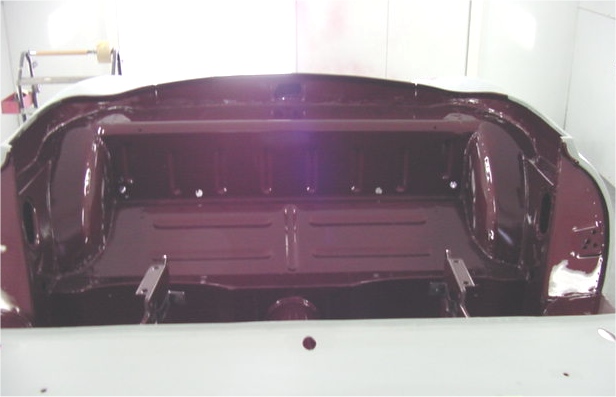
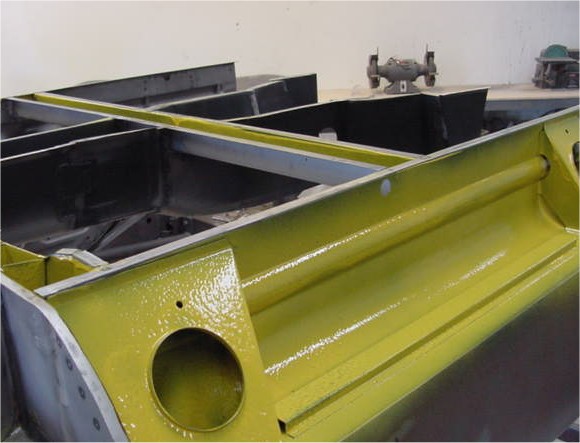
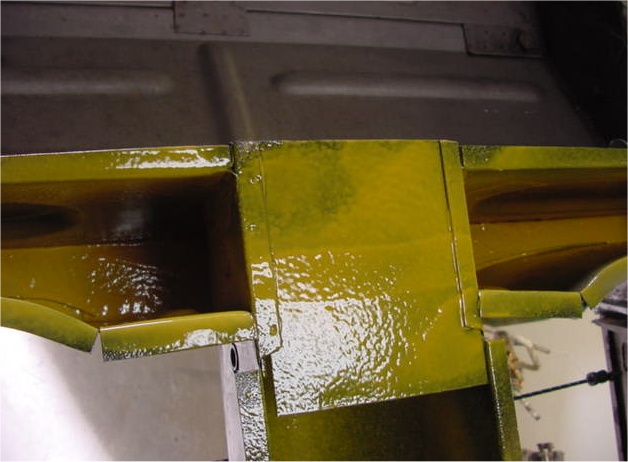
Time to start applying some Opalescent Maroon! As you can see, we have painted your new CJ engine frames and over the course of this week we will be painting inside the cabin, the underside of the bonnet, doors and bootlid, then finally all the outer panels.Opalescent Maroon is one of my all-time favourite colours for an E Type, so I am looking forward to seeing the finished article over the next few days.

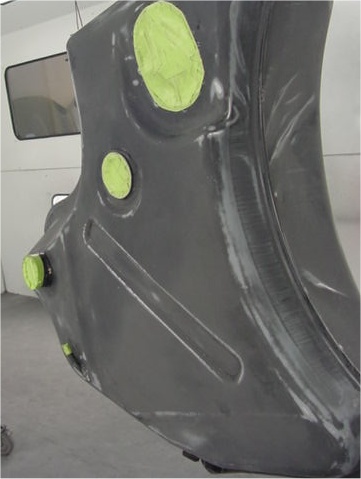
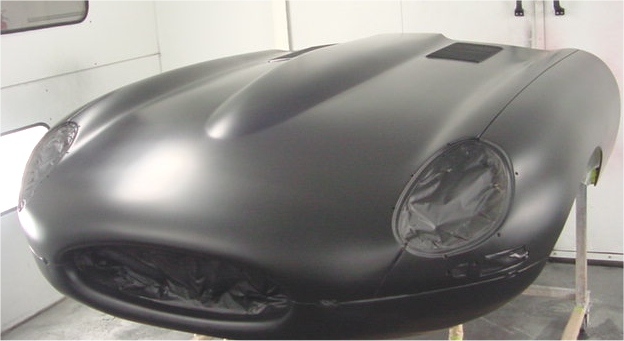
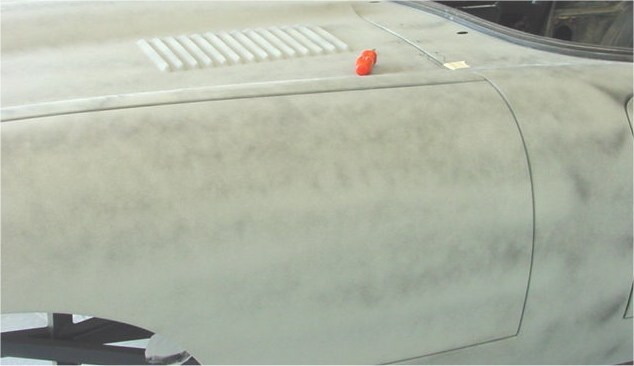
The long and tedious blocking stage is not really very photogenic, although I thought you might like to see a photograph of your car receiving its final coats of high build primer before being removed from the booth and left to bake in the Texas sun for a few hours. Although the door and bonnet latches are obviously removed at this stage, I think the photographs I took earlier today still see all the beautiful panel gaps!
 |
 |
 |
|
271 high build primer |
|
on your car |
 |
 |
|
|
blocked on the body |
|
The bonnet, doors and boot lid are fully latched with rubber seals temporarily in place as the serious blocking gets underway. With E Types it is important to block each panel in conjunction with its neighbour in order to achieve a beautifully straight car.
 |
 |
|
high build primer |
well underway |
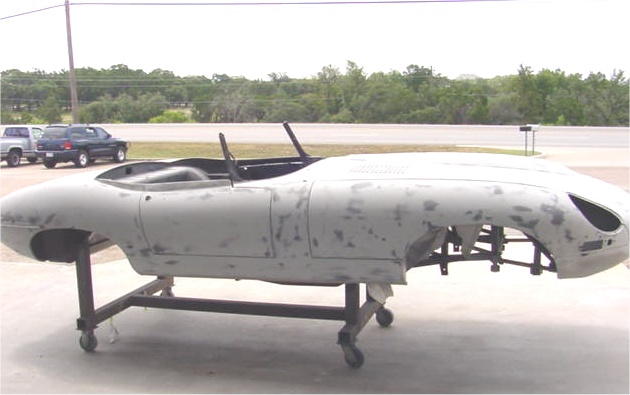
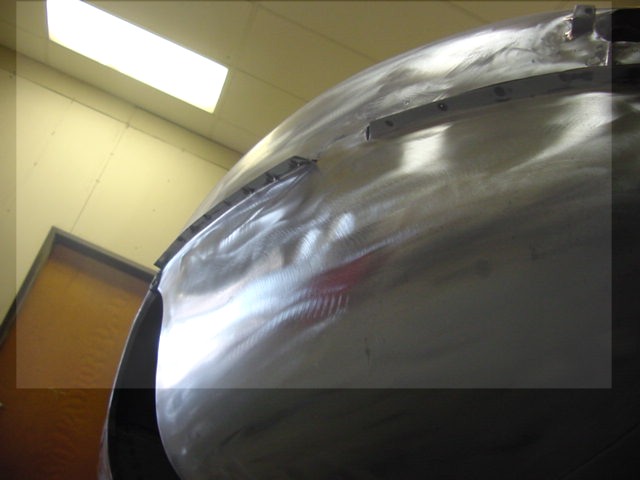
Final trial fit of the chrome and brightwork, then intensive blocking followed by another application of high build primer....and more blocking! This will be the next car to be painted in the Team CJ Coachworks.
 |
 |
 |
 |
As you can see, we now have the entire car in 271 high build primer. This layer will be blocked then followed with another application of high build. Once that has been blocked, Opalescent Maroon will follow! Allowing for cure times for the high build primer, we plan to have your car painted and resting on its wheels in about 4 weeks time.
 |
 |
 |
As you can see, the first splash of Opalescent Maroon is now on your car! Next week we will be repairing and assembling your bonnet and fitting it to your restored bodyshell.
 |
 |
 |
|
|
to reach everywhere |
|
I ran out of time yesterday and didn't get to finish your update report! As you can see, today's photographs show the application of the 3M Body Schutz. Before the car is removed from the rotisserie we will paint the underside and the cabin area Opalescent Maroon.
 |
 |
 |
|
|
the underside of the car |
been removed |
 |
 |
|
|
over the Body Schutz |
wheel arches |
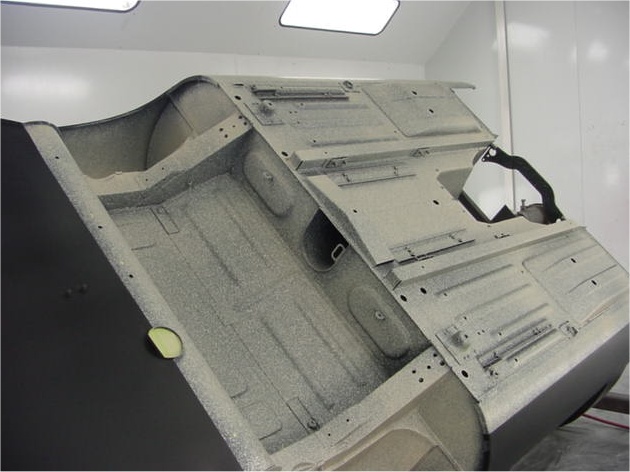
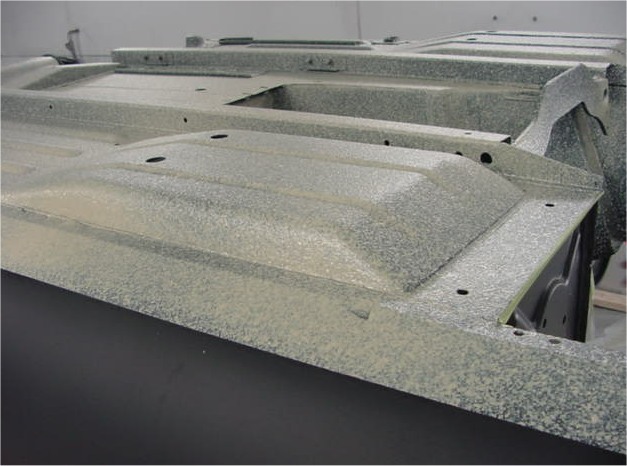
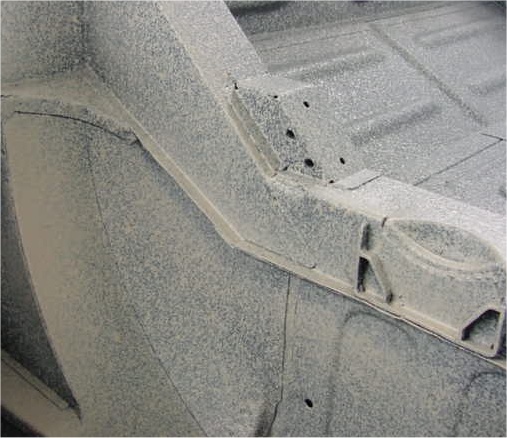
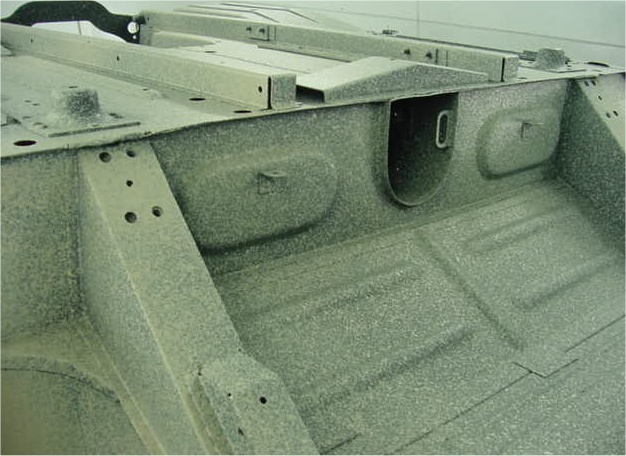
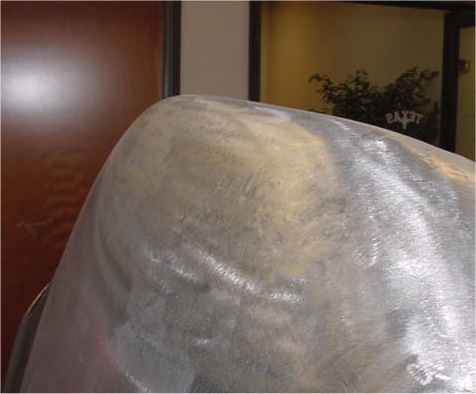
Lead loading of the body is now complete so the car is now in epoxy primer. All the joints have been seam sealed and we are about to apply the 3M Body Shutz to the underside and all the inner arches. It's getting close now!
 |
 |
 |
|
epoxy primer |
|
with 3M Body Schutz |
 |
 |
 |
|
underneath |
transmission tunnel |
|
 |
||
|
|
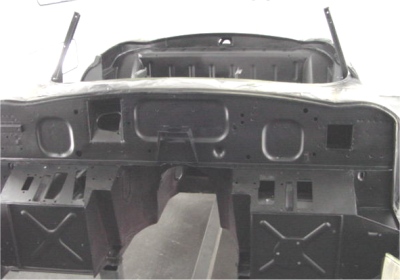
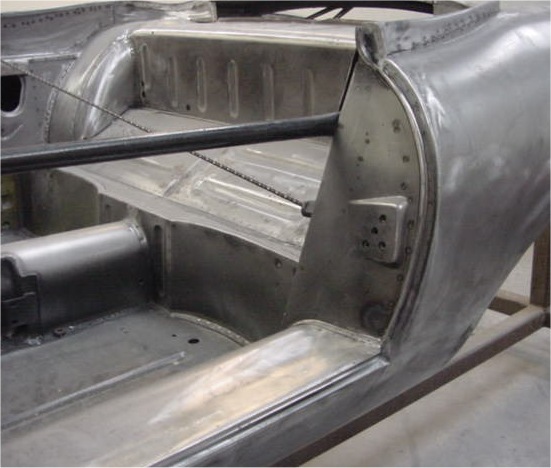
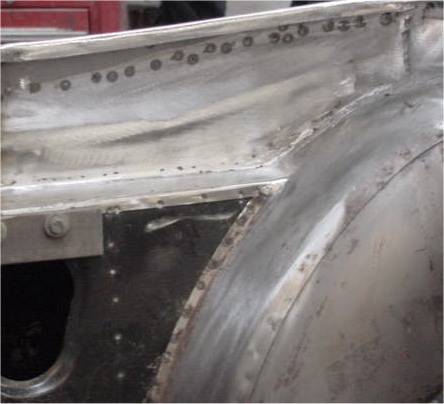
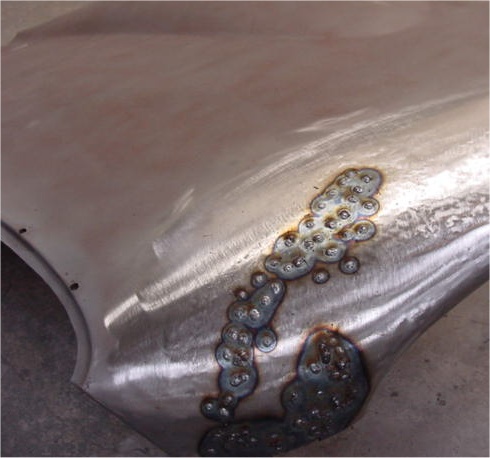
All the panel replacement has now been completed and the lead loading process is well underway.
 |
 |
 |
|
|
|
rear bumpers |
|
|
|
|
 |
 |
 |
|
|
installed |
the new lower quarter panels |
|
|
|
|
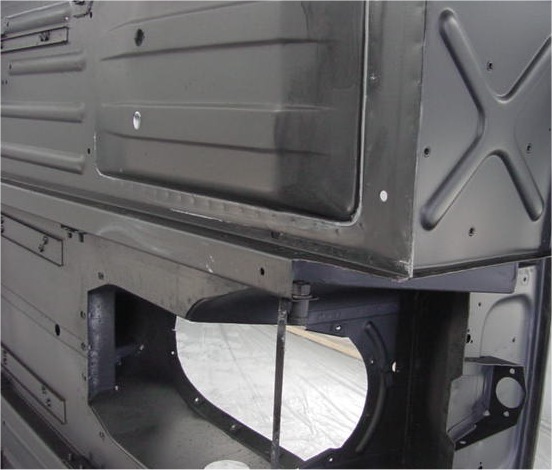
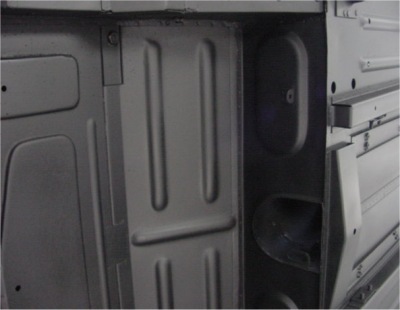
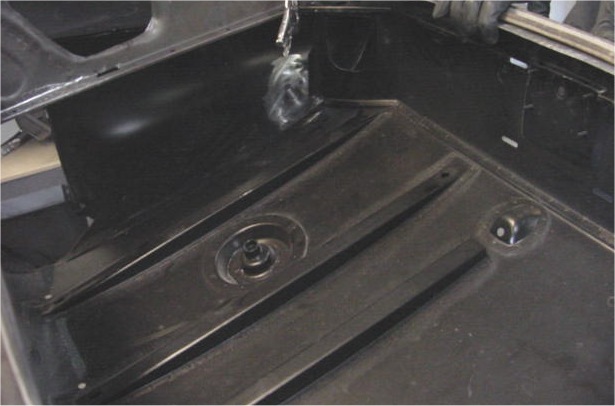
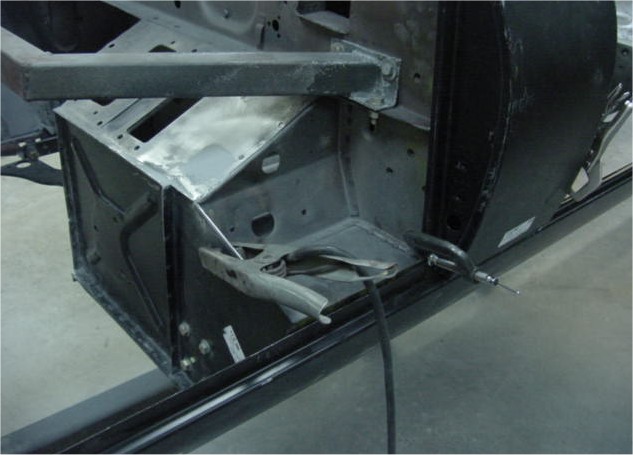
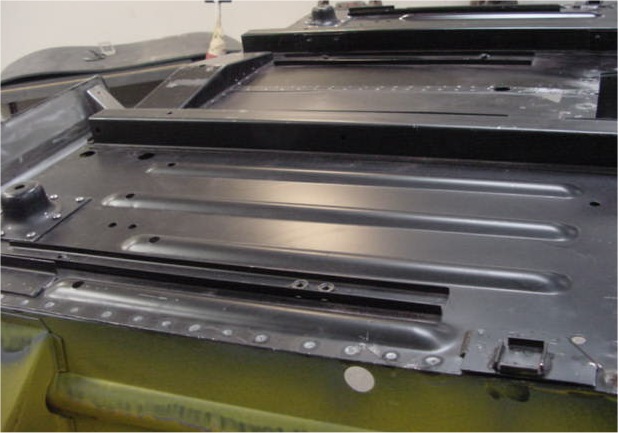
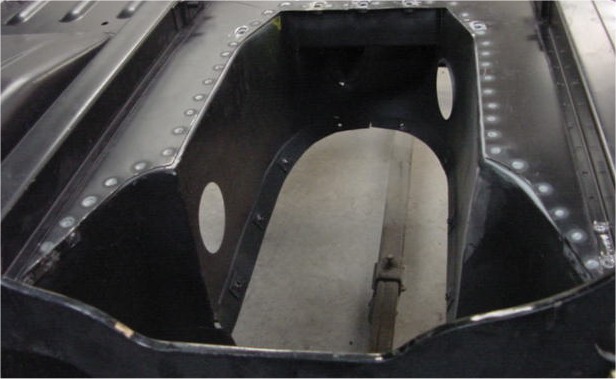
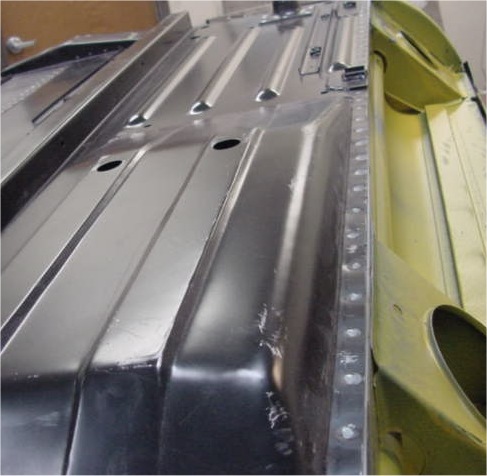
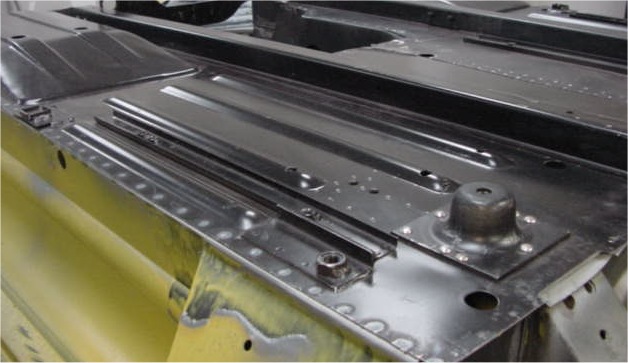
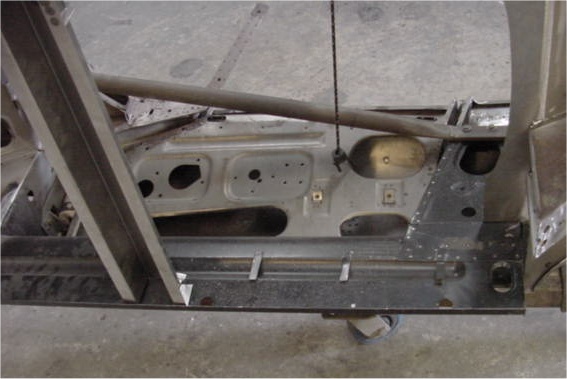
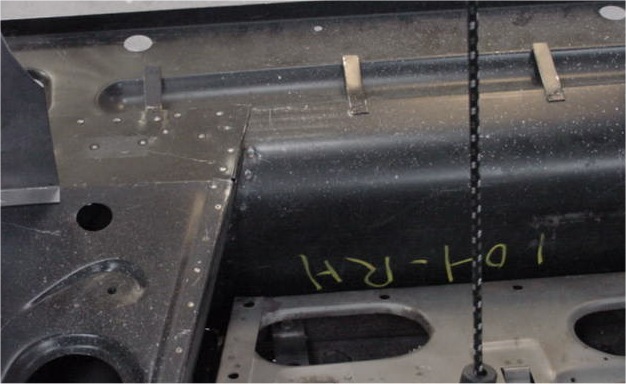
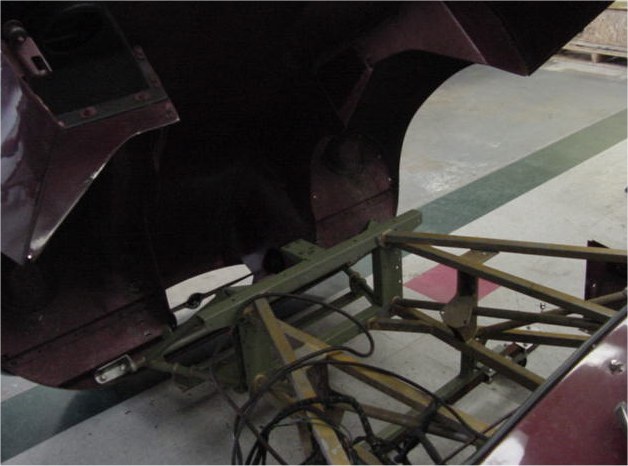
As you can see, the complete boot floor assembly has now been welded into place and all that remains is to replace the inner rear arches. Next we will be turning our attention to fitting the new engine frames and bonnet and then starting the lead loading process.
 |
 |
 |
|
goes up behind the lic plate |
into place |
on new boot floor |
 |
 |
 |
|
is an excellent fit |
into place |
spot welded in place |
 |
 |
|
|
boot compartment! |
completed |
|
We now have the doors rebuilt and the outer sills spot welded into place. Lots of good progress since our last report!
 |
 |
 |
|
|
|
cut away |
|
|
 |
 |
|
|
|
into place |
 |
 |
 |
|
repaired/primed door frames |
place |
between sill and cowl |
 |
 |
|
|
B pillar seams |
other side! |
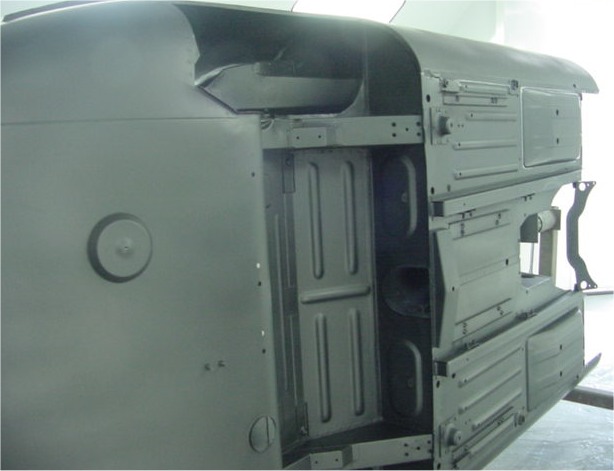
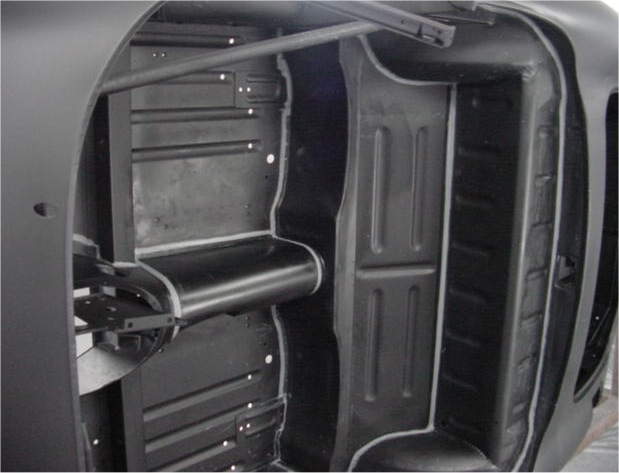
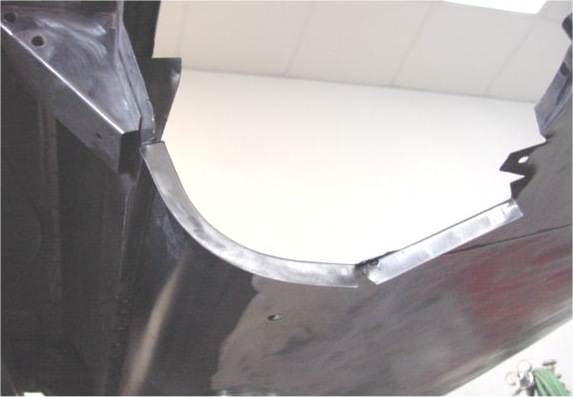
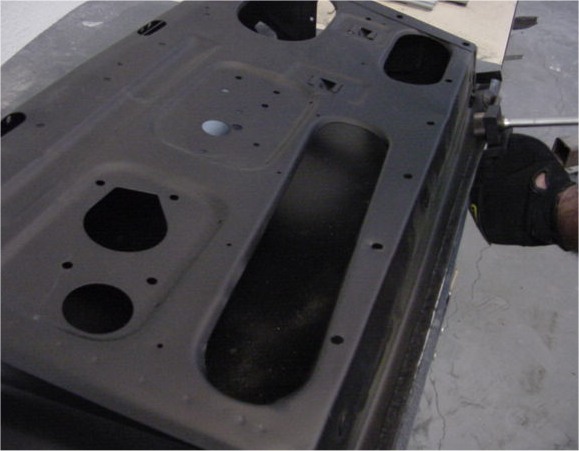
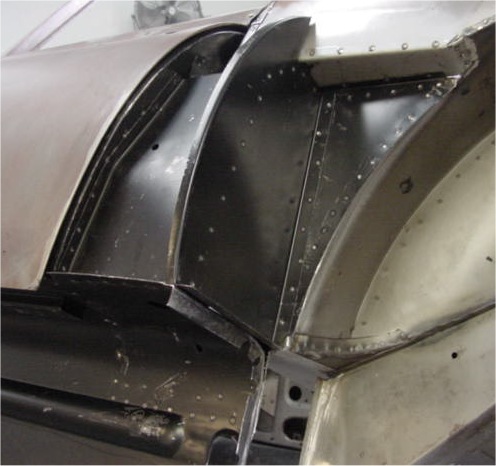
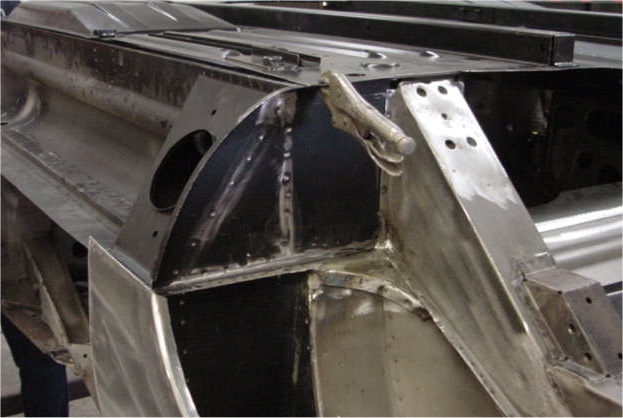
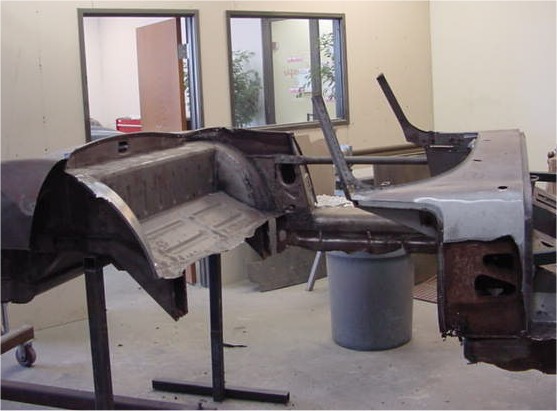
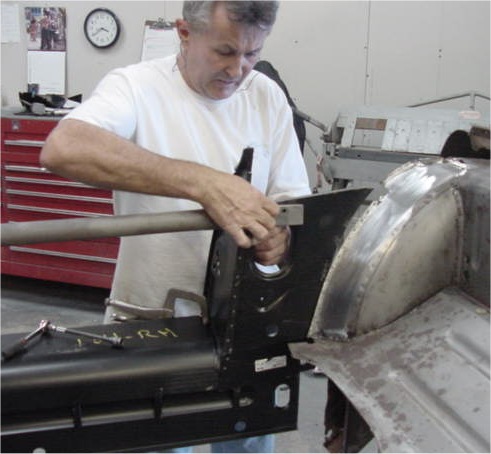
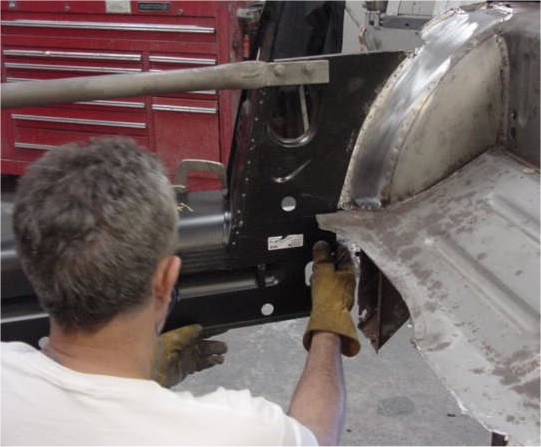
Full steam ahead with the panel replacement! As you can see from the following photographs, the new floors have now been spot welded into place, as well as all the firewall panels and the new engine frame support brackets, etc. Next we will be installing the new outer sill panels before moving on to the replacement of the complete boot assembly.
 |
 |
 |
|
floors |
thoroughly rust proofed |
brackets |
 |
 |
 |
|
and outer sills.... |
panels |
panels into place |
 |
 |
 |
|
welded into place |
|
trans tunnel |
 |
 |
|
|
new outer sills |
rivetted in place |
Lots of progress since our last update!
 |
 |
 |
|
mounts were missing! |
place |
and welded into place |
 |
 |
 |
|
|
floor cross member |
inner sill and B pillar |
 |
 |
 |
|
fitted |
|
|
 |
 |
 |
|
trimmed as required |
reaction plate now |
tunnel welded in place |
 |
 |
 |
|
being installed |
inner box sections |
again in our lifetime! |
 |
 |
 |
|
the new floors |
welding up of holes |
|
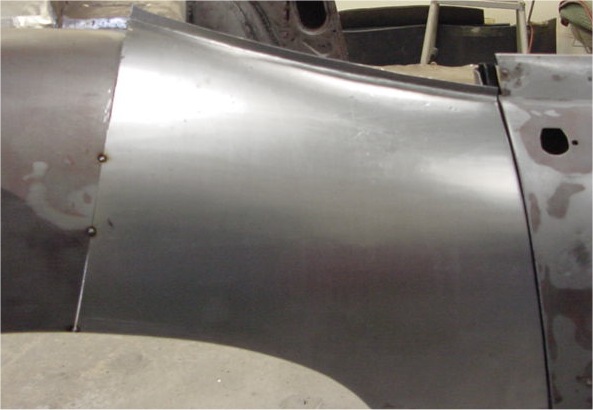
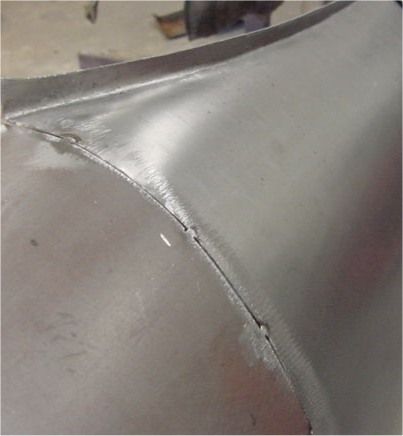
Slowly, but surely, sheet metal is now being attached, rather than cut away!
 |
 |
 |
|
shut panel in place |
remove any remnants of corrosion |
support panel welded in place |
|
|
|
|
 |
 |
 |
|
be fabricated from scratch |
|
|
 |
 |
|
|
repair panel |
beautifully |
|
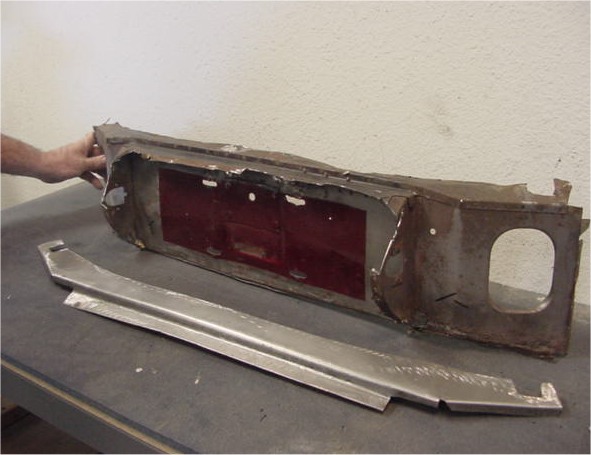
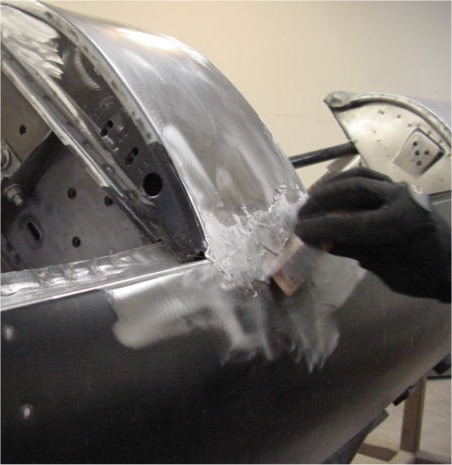
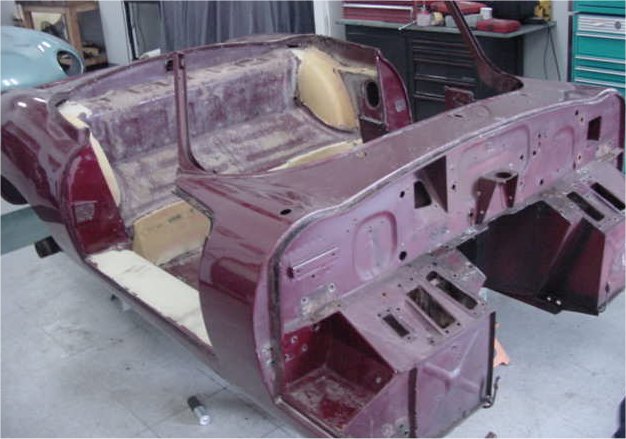
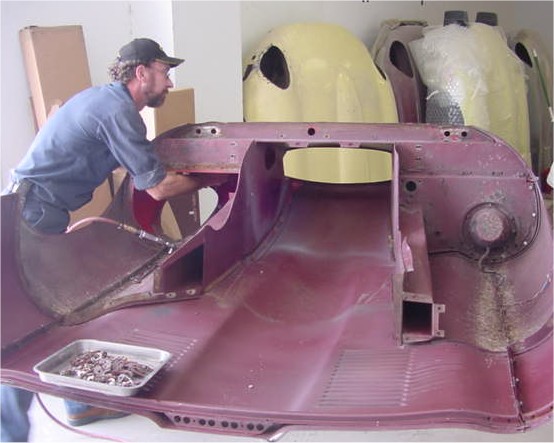
I am delighted to report that we have now begun the restoration of your E Type body. As you already know, this bodyshell has suffered from some horrendous corrosion problems during its lifetime - as well as falling victim to some unbelievably butchery!Having said that, given the extent of the sheet metal replacement we have underway, rest assured that your car will be significantly better than new by the time we are finished with it in the Team CJ Coachworks.
 |
 |
 |
|
|
corroded metal |
one on top of the other! |
 |
 |
 |
|
grow! |
|
RHS of your car! |
 |
 |
|
|
|
|
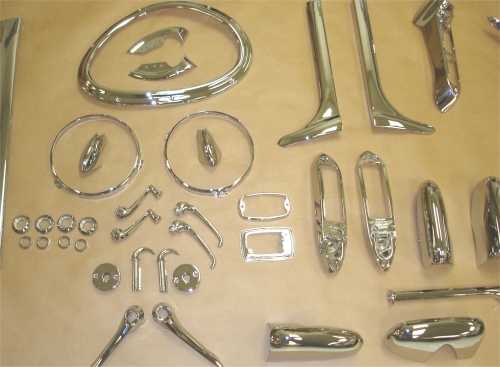
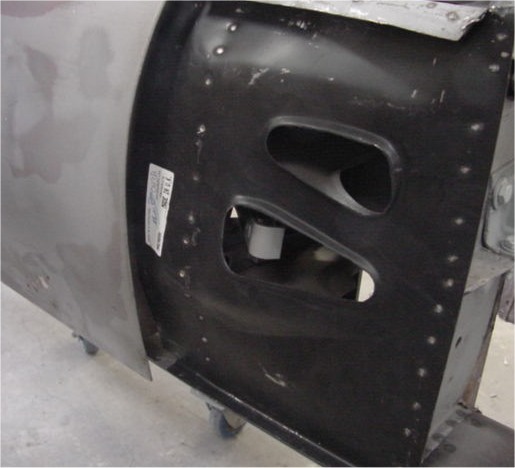
We now have all your Nickel plated items back from the platers and all of the replacement body panels have been purchased in readiness for the monocoque restoration.
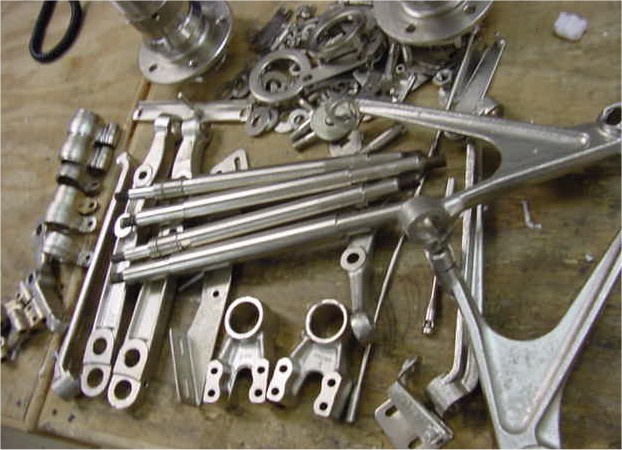
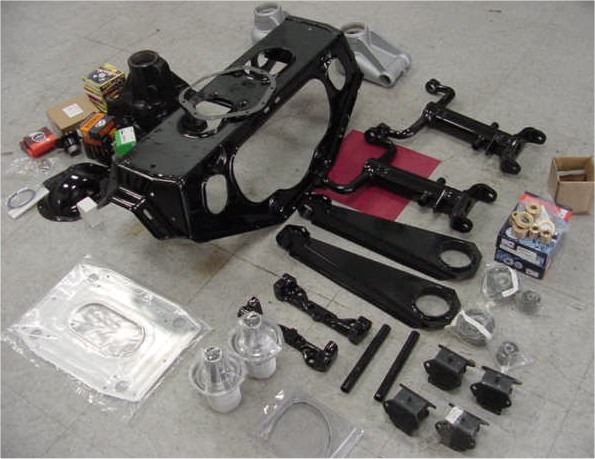
As you can see, the following photographs show your IRS - which has been completely rebuilt since our last update report.
 |
 |
 |
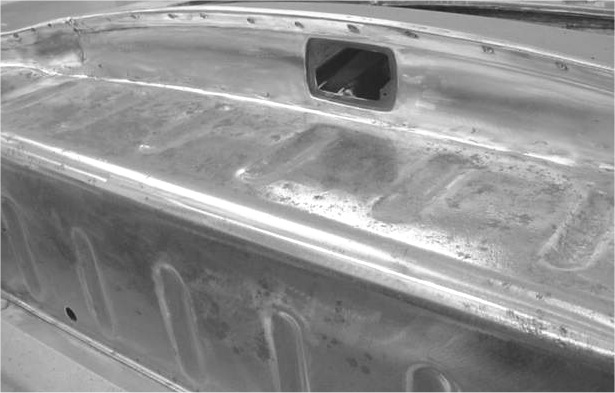
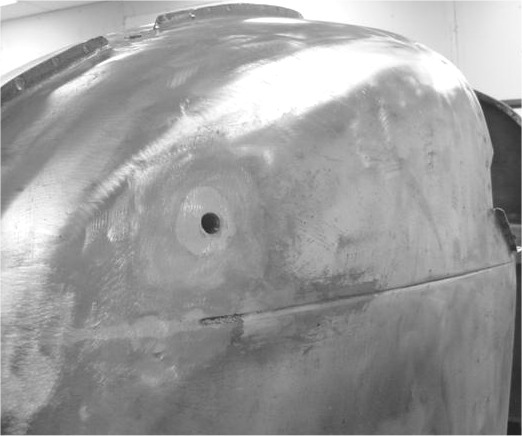
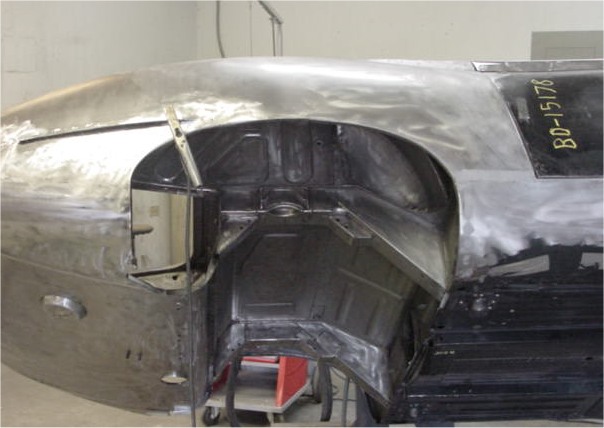
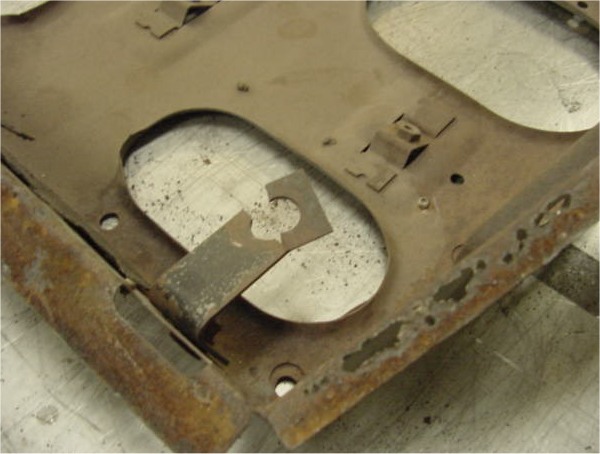
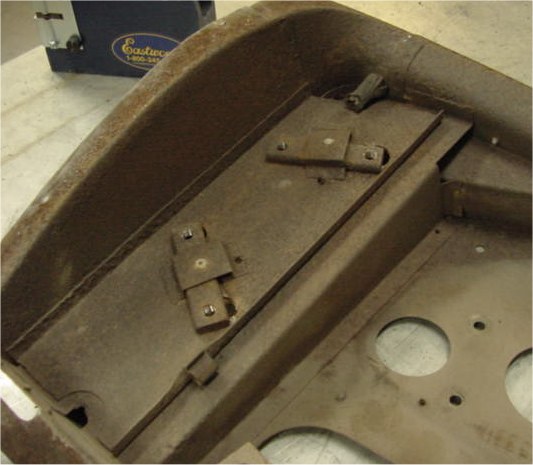
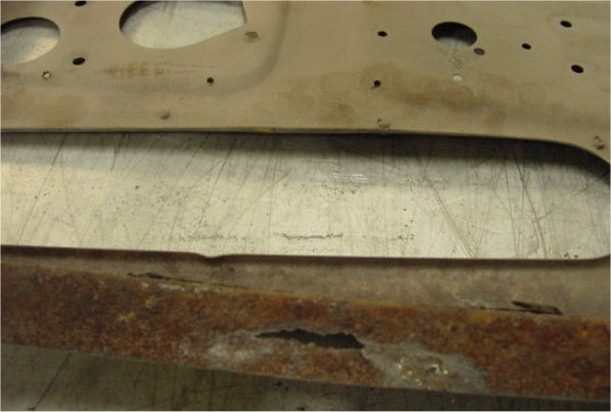
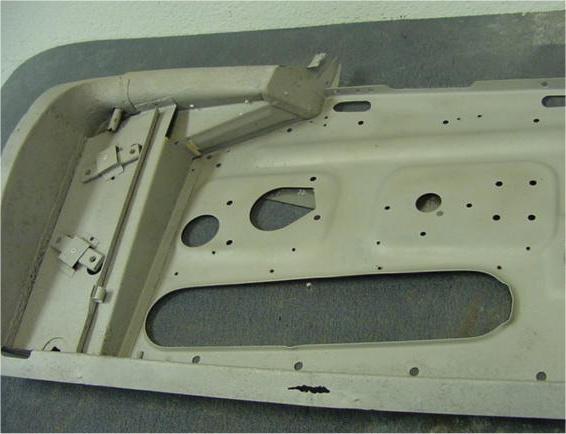
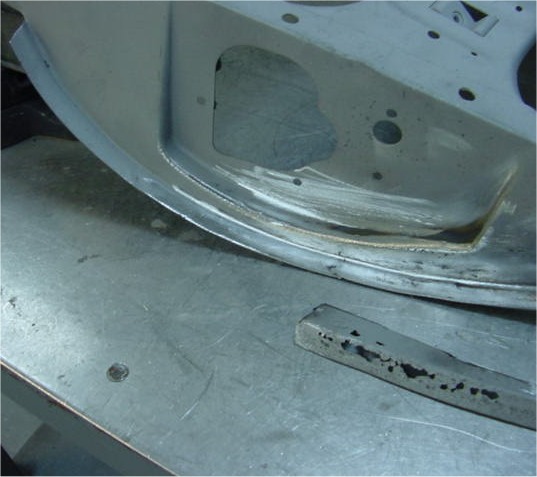
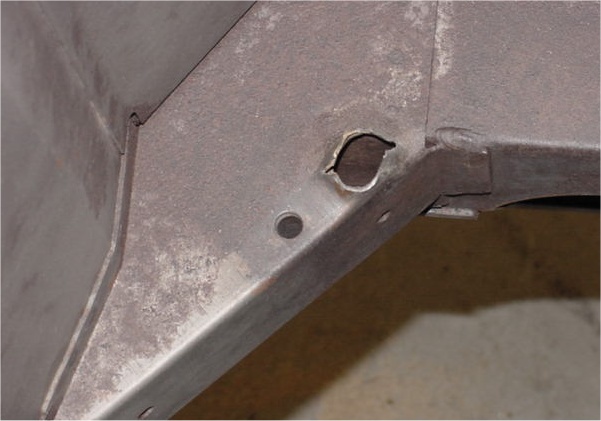
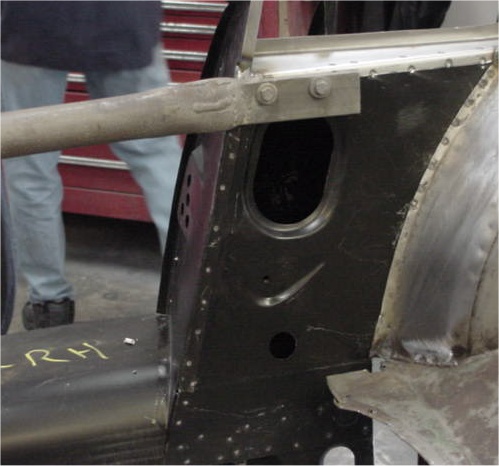
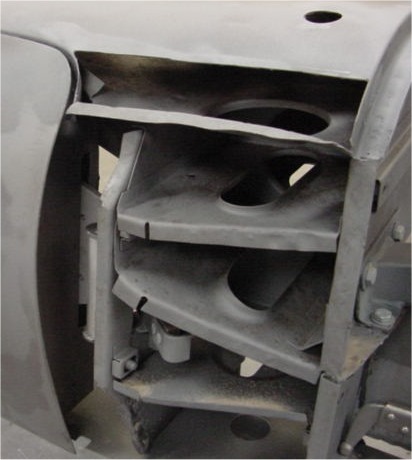
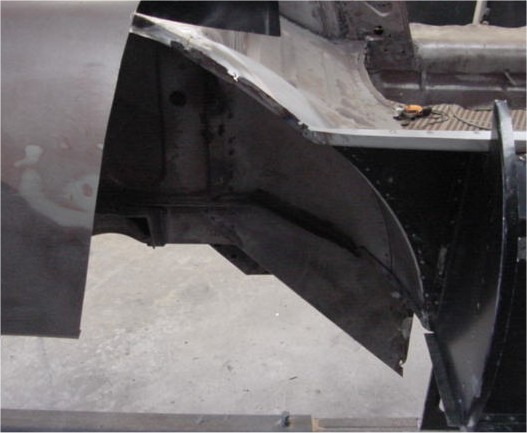
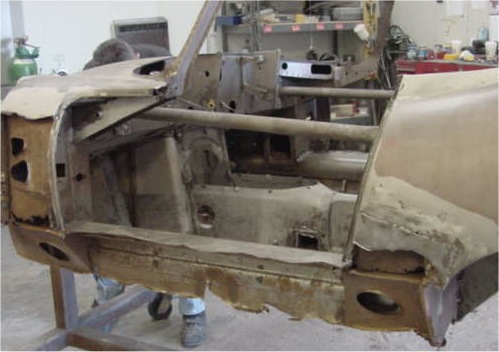
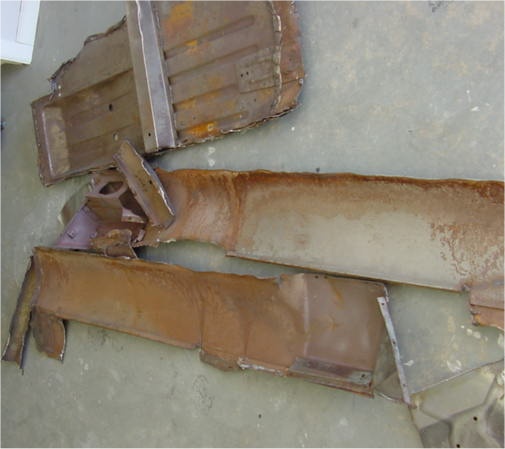
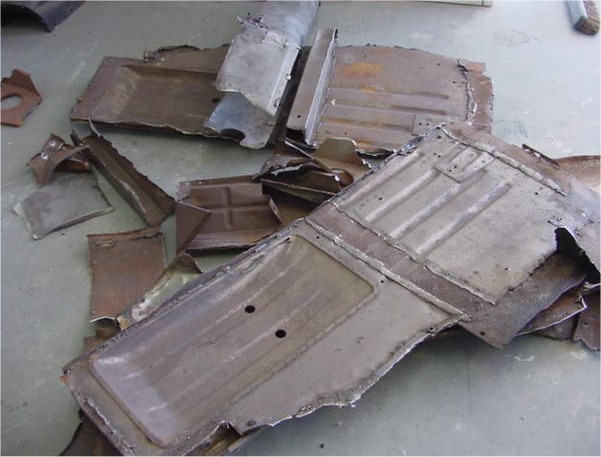
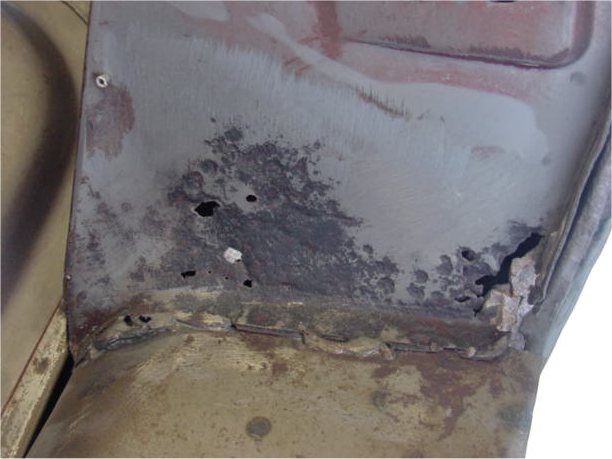
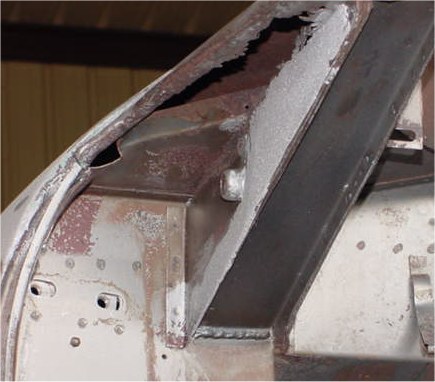
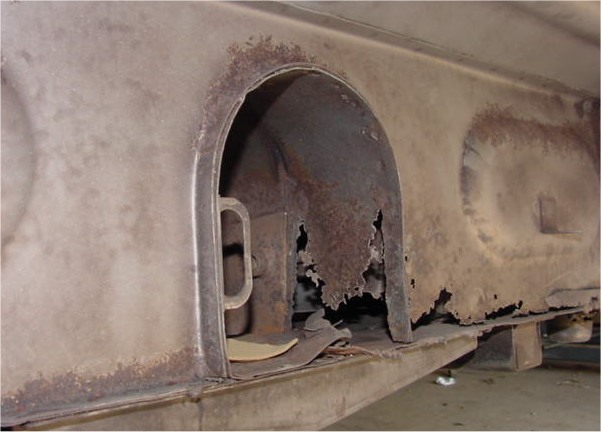
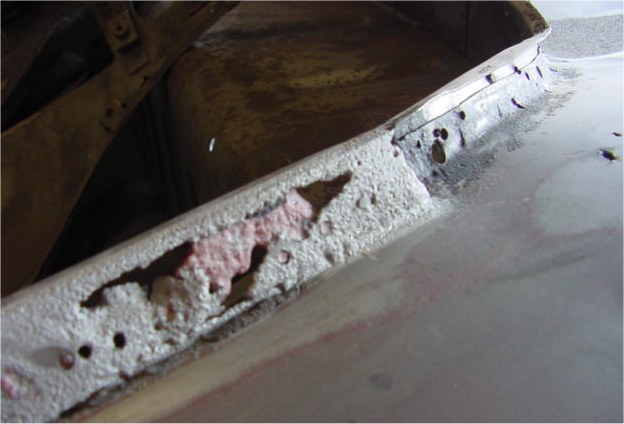
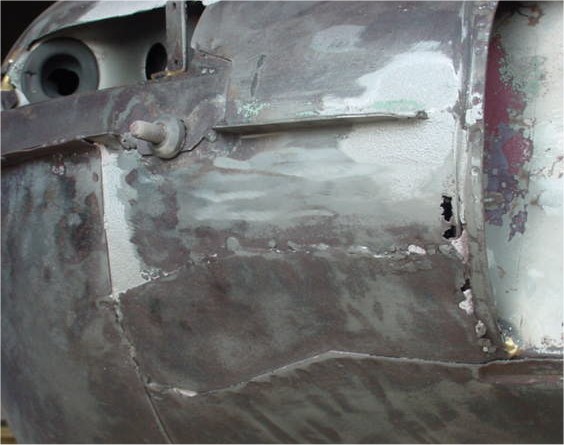
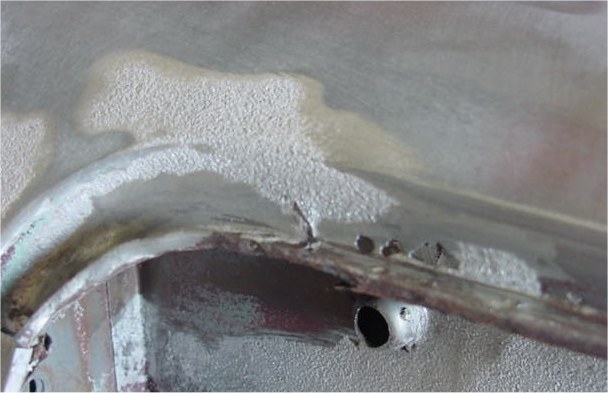
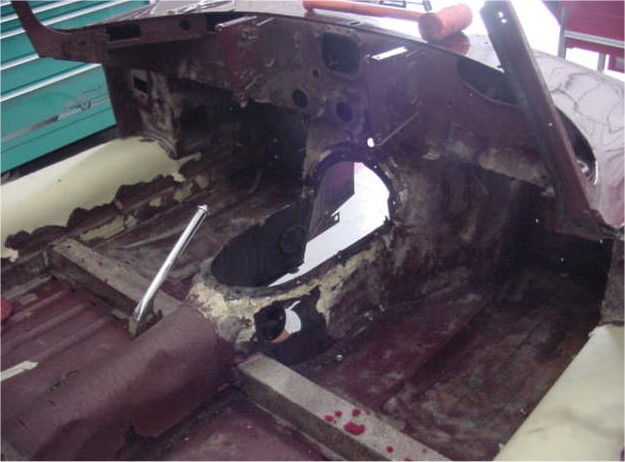
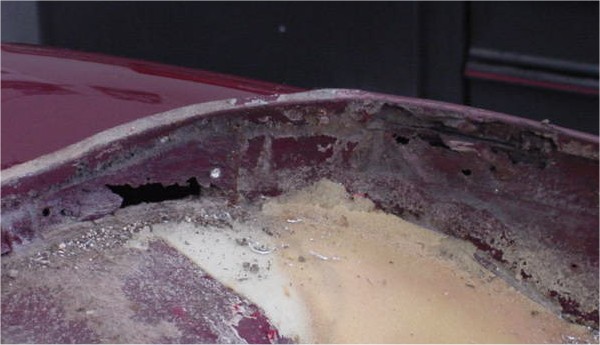
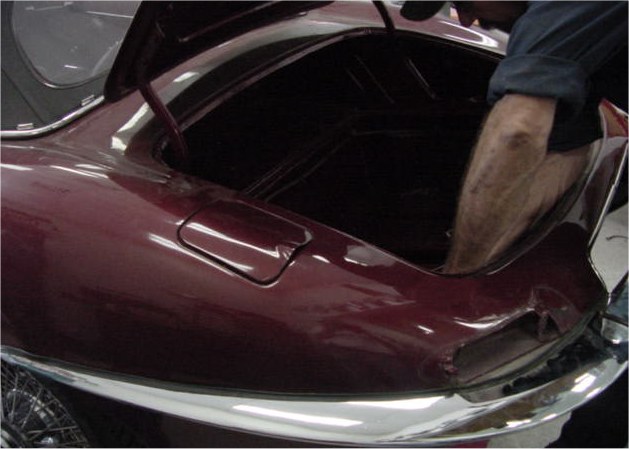
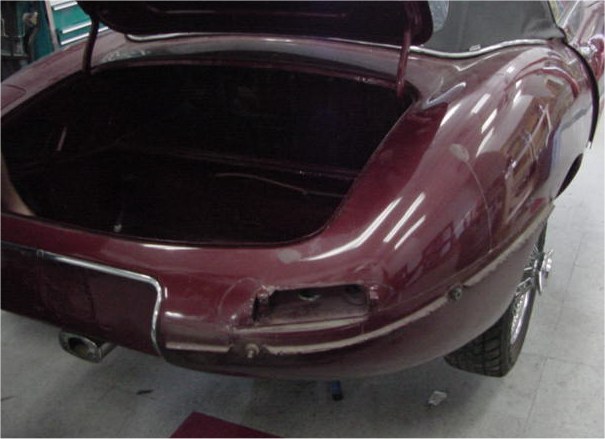
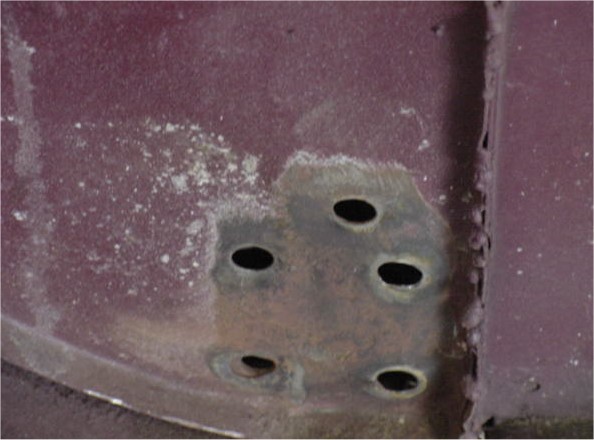
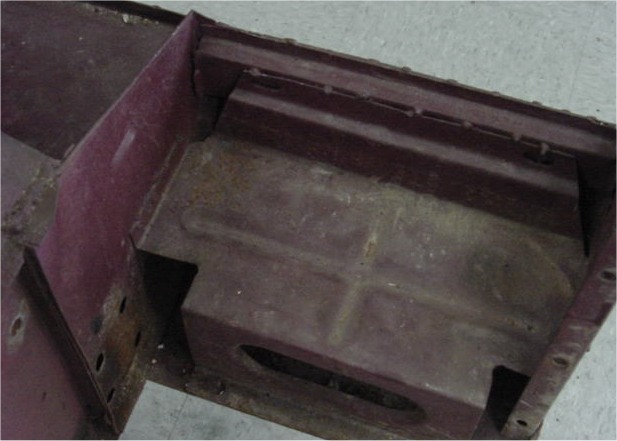
I'm afraid the news is not good. As you can see from the folowing photographs, your car has very serious corrosion issues and has also been badly butchered at some time in the past.
 |
 |
 |
|
|
|
|
 |
 |
 |
|
|
lower edges |
|
 |
 |
 |
|
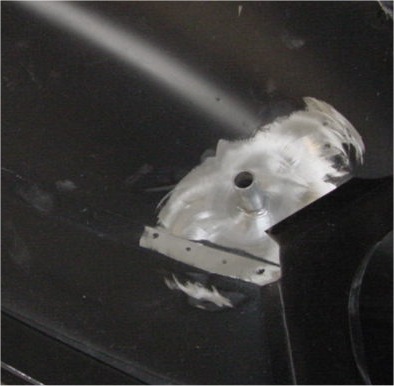
conv top mounting point |
are missing altogether! |
|
|
|
||
 |
 |
 |
|
|
|
|
 |
 |
 |
|
|
|
|
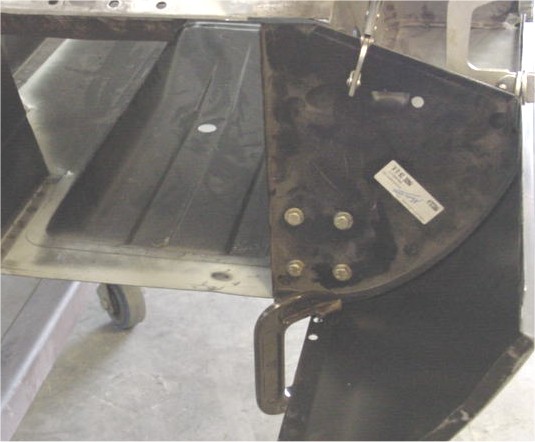
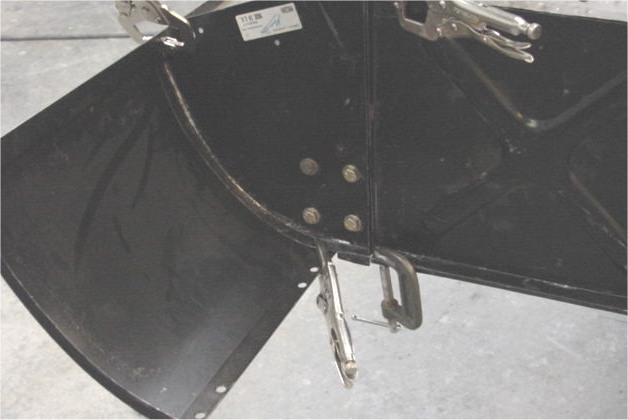
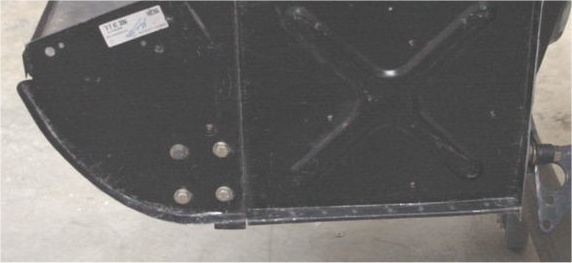
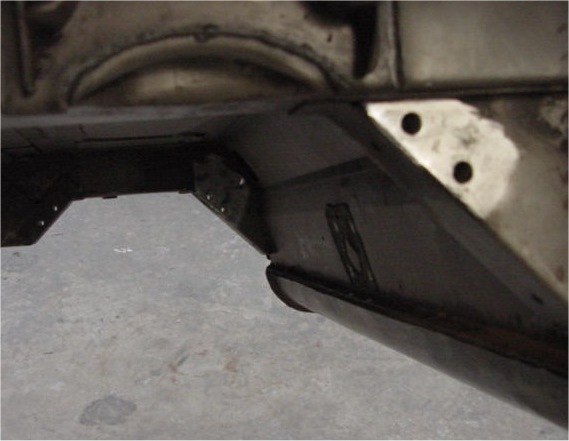
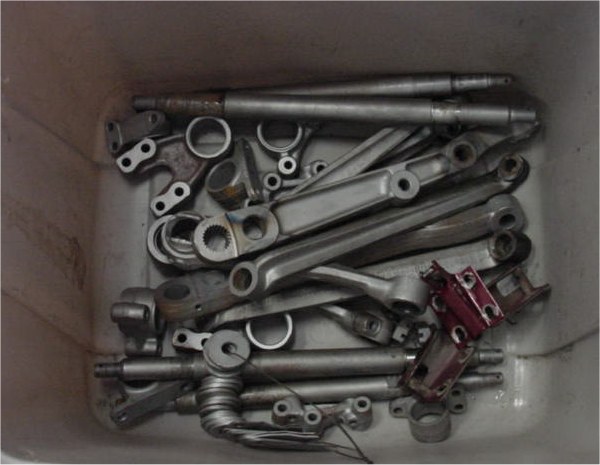
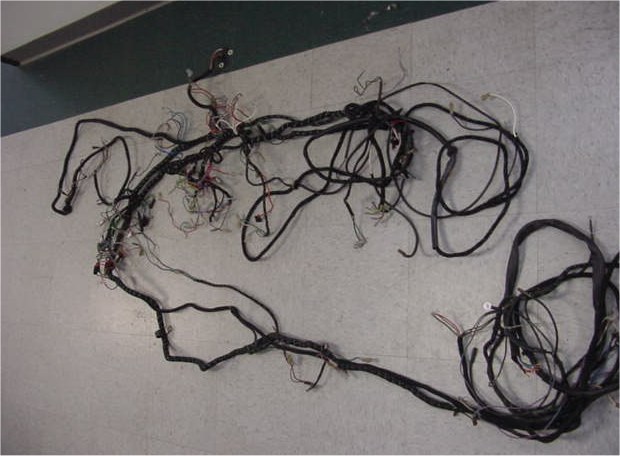
We are taking a little more care than usual disassembling your car as things like the convertible top and wiring harness (for example) appear to have been replaced in the not too distant past. You may want to re-use some of these items when the car is reassembled.I'm afraid the disassembly process has revealed some very heavy handed welding, although that will be taken care of when the car makes its way through to the Team CJ Coachworks.
 |
 |
 |
|
|
|
|
|
|
|
|
 |
 |
 |
|
|
|
|
|
|
|
|
 |
 |
 |
|
|
|
point almost non-existant |
 |
||
|
to bead blasting |
Starting to come apart....
 |
 |
 |
|
|
|
|
|
|
|
|
 |
 |
 |
|
|
|
have been replaced.... |
 |
 |
|
|
arrangement for engine frames.. |
|
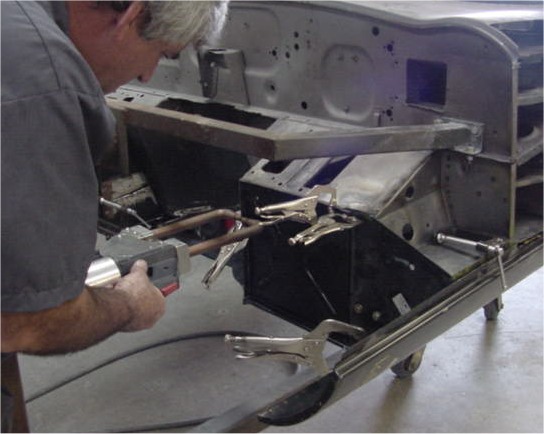
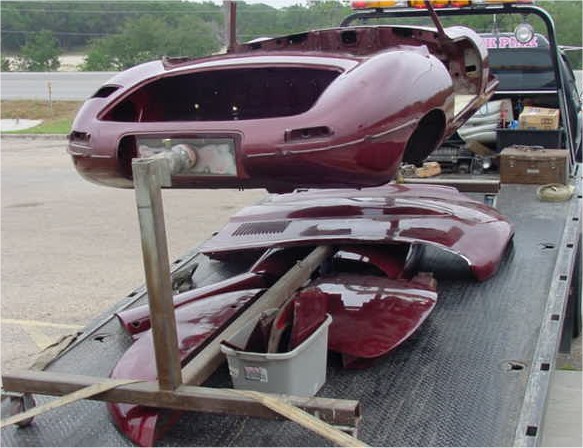
I am delighted to report that your car arrived safely and that work is already underway in the CJ workshops. The first task will be to fully disassemble the car, take the body back to bare metal and assess the extent of the body restoration we have in front of us.I hope you enjoy watching the work progress and I thank you for entrusting this important project to Classic Jaguar!
 |
 |
 |
|
|
immediately |
|
