Total Team CJ restoration
| 1961
E Type FHC (ES)
Total Team CJ restoration |
|
|
Update report - November 18, 2009
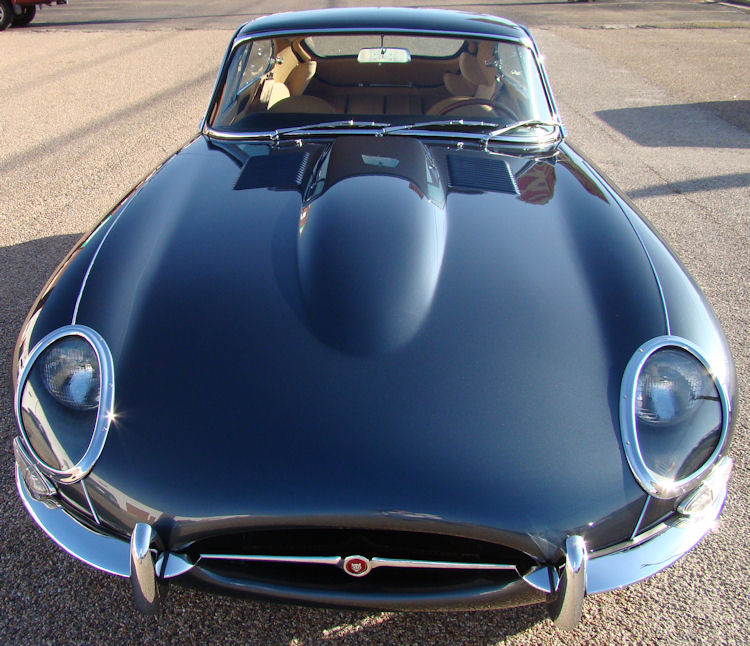
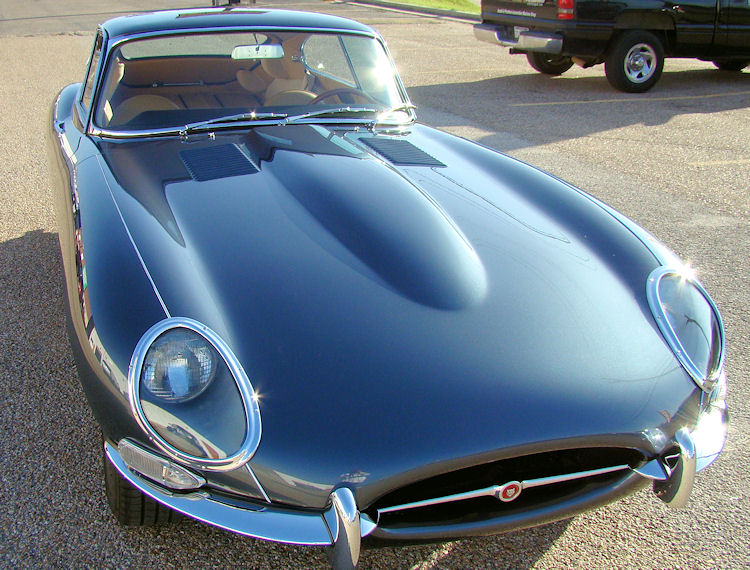
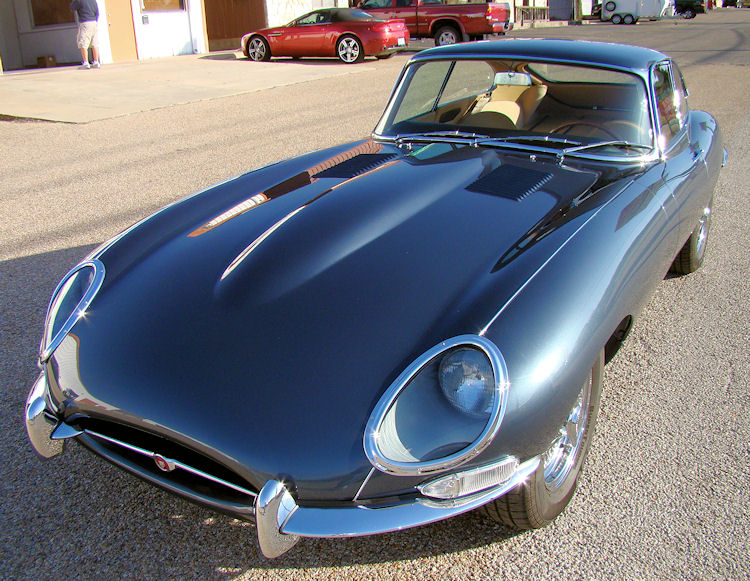
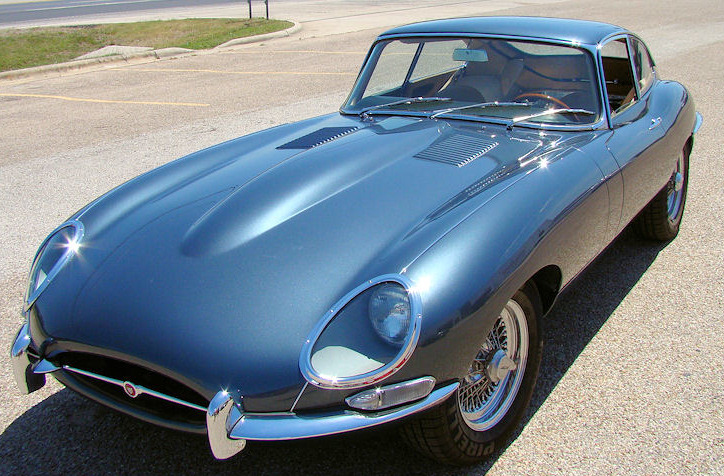
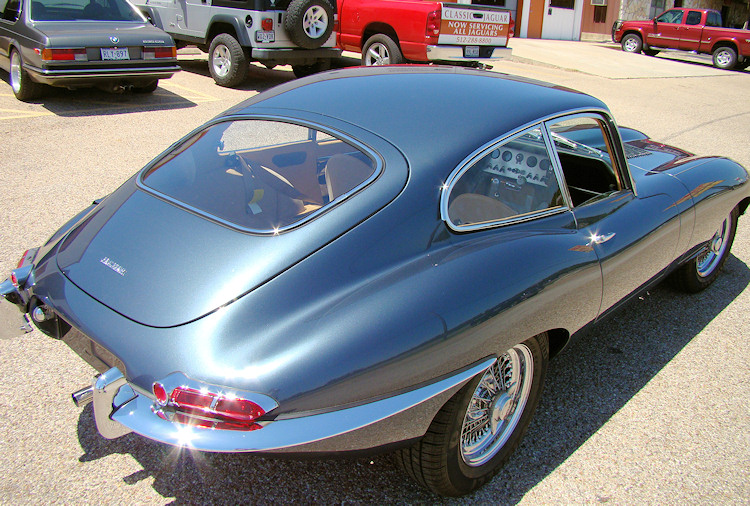
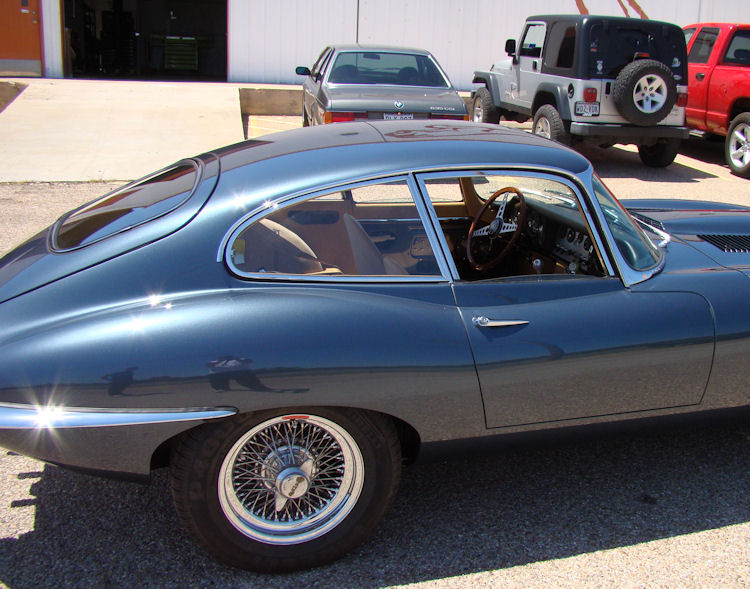
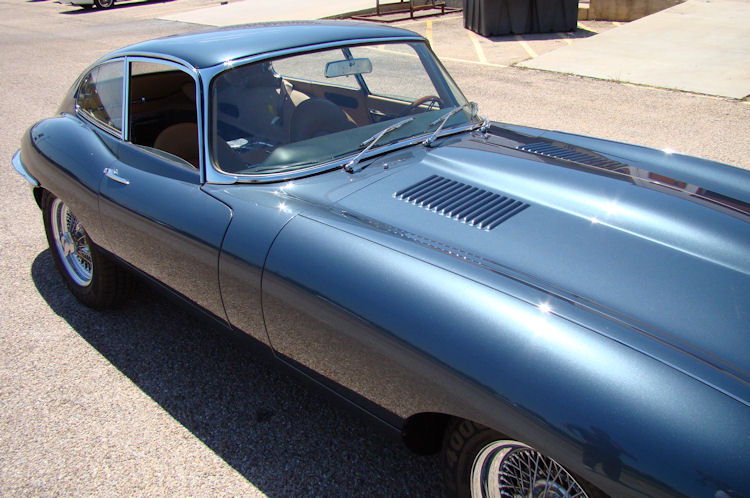
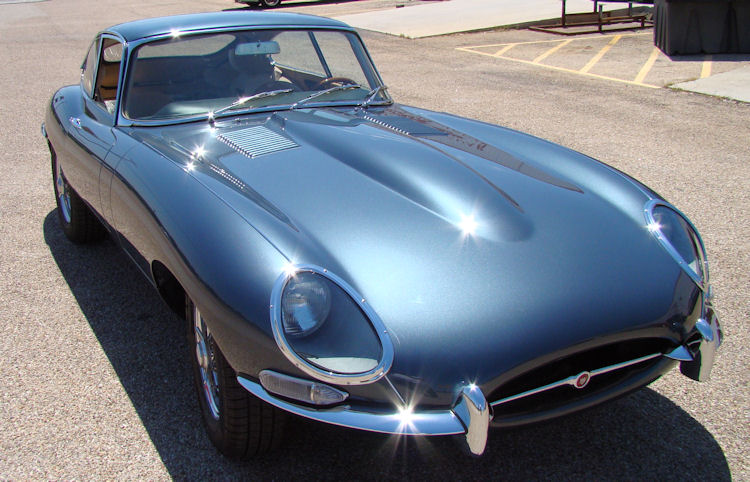
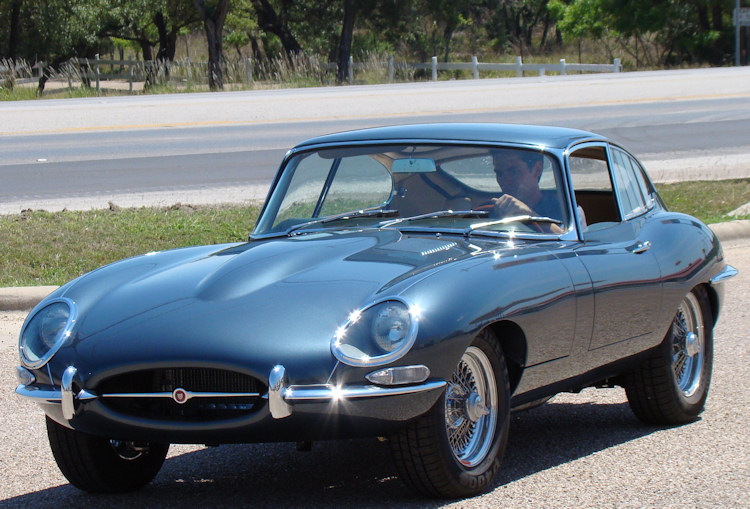
Your finished car is being collected and will be New York bound later today....
 |
 |
 |
|
|
||
 |
 |
 |
Time for shake down and road testing. We anticipate your car will be ready for delivery in less than two weeks...
 |
 |
 |
 |
 |
 |
 |
 |
 |
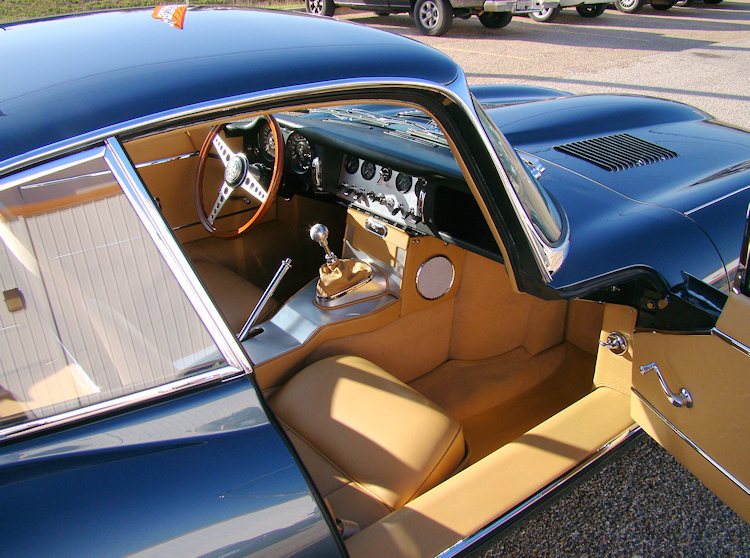
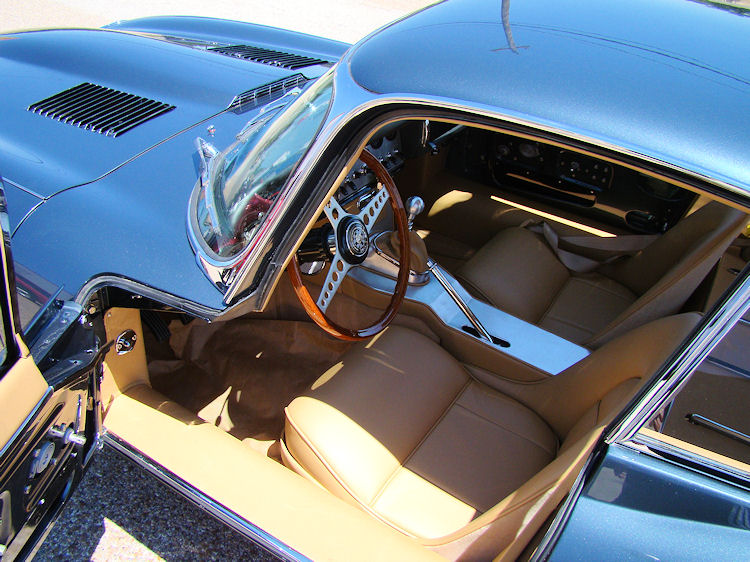
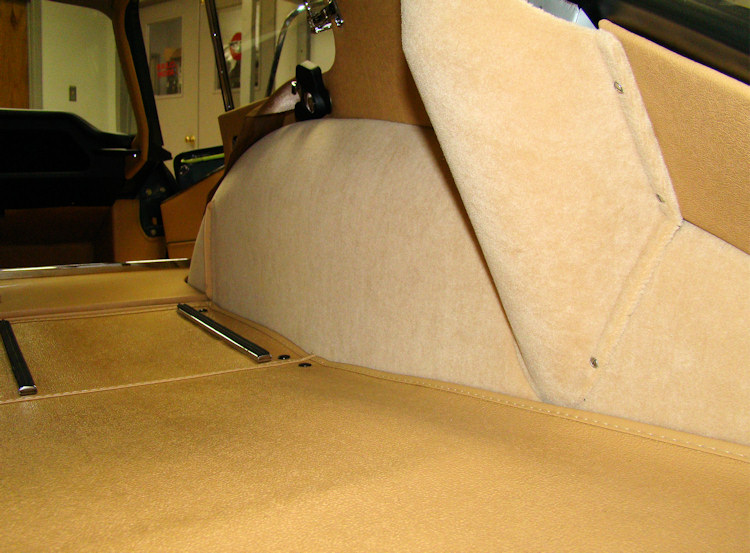
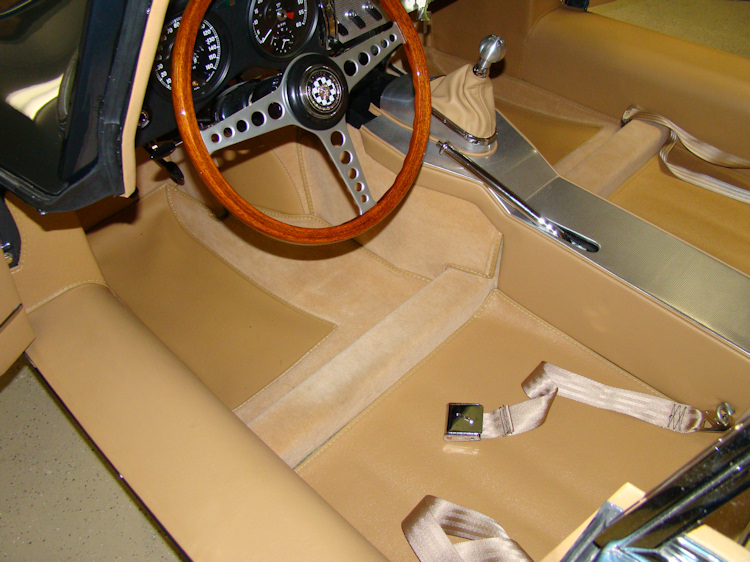
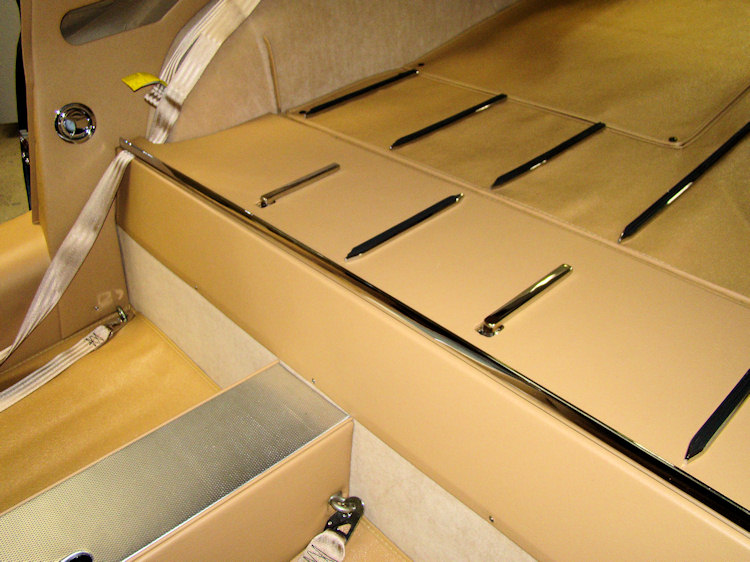
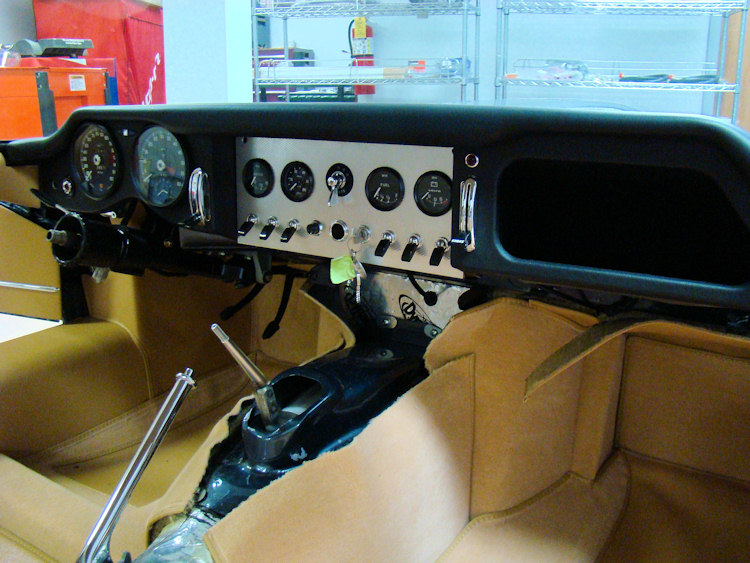
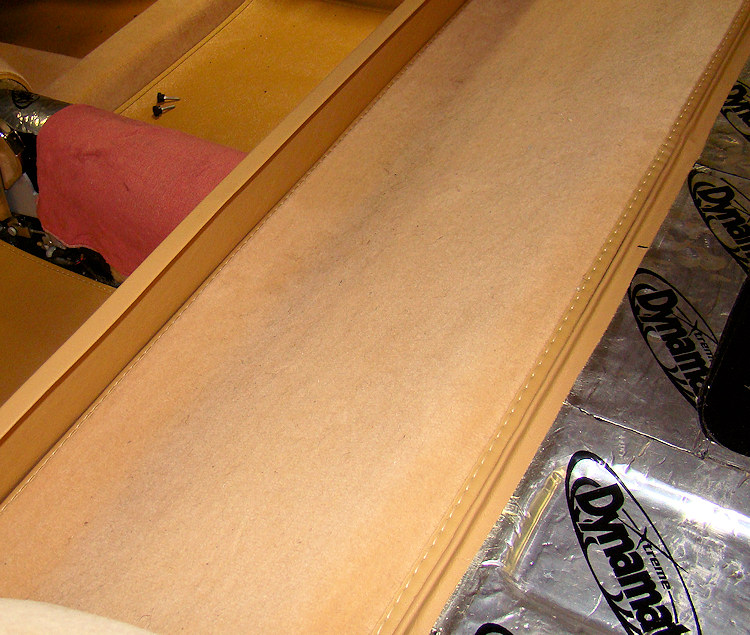
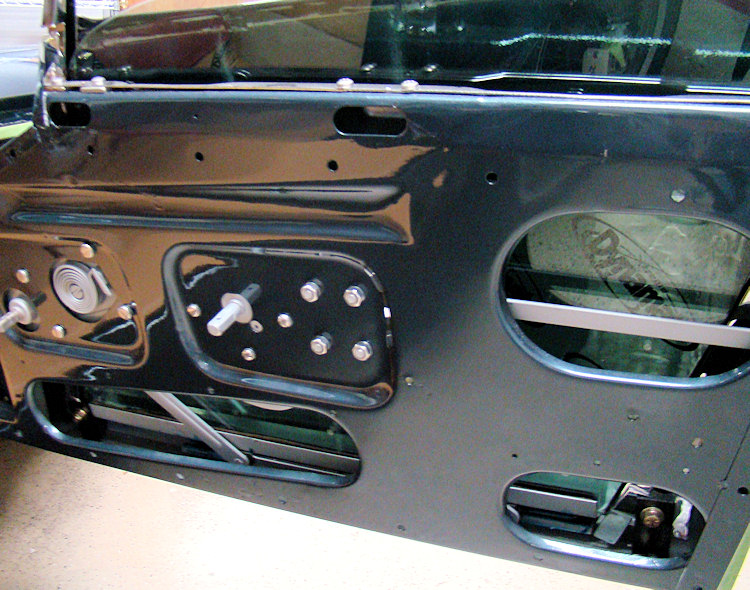
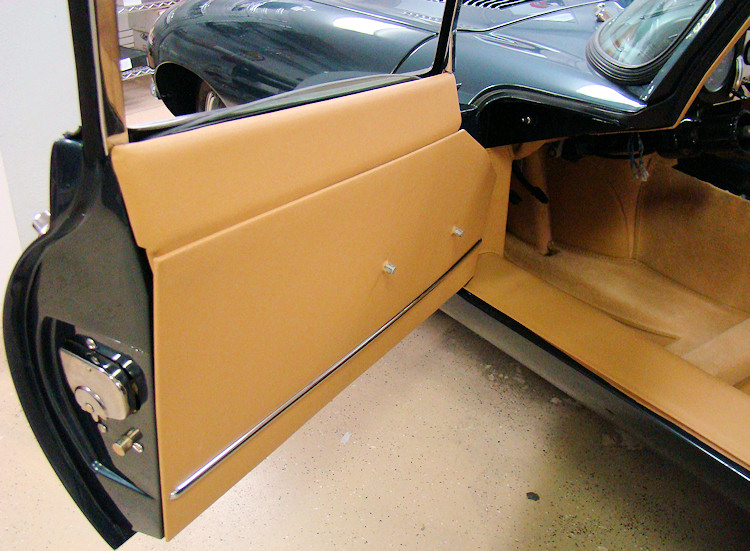
Interior installation now virtually complete...
 |
 |
 |
|
|
|
|
|
|
|
|
 |
 |
 |
|
|
|
|
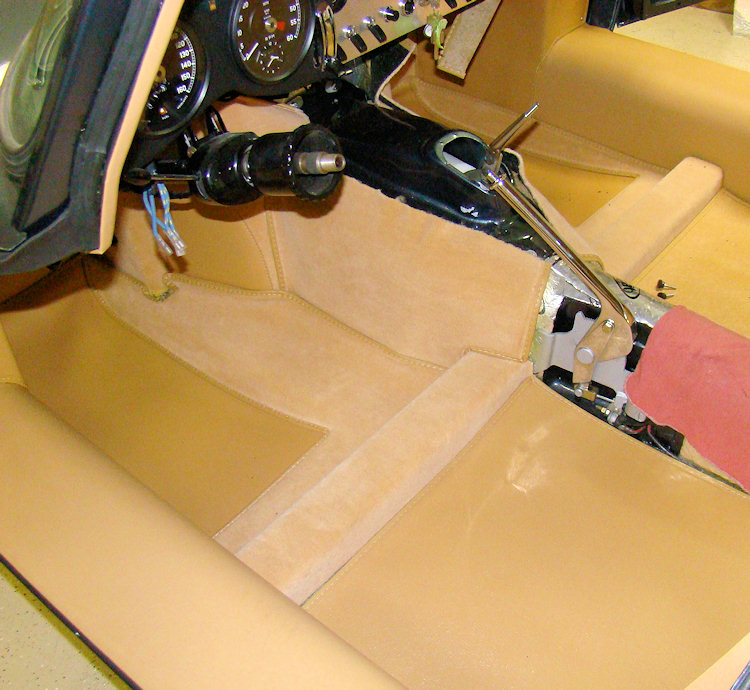
Lots of progress with your interior installation....
 |
 |
 |
|
now complete |
||
 |
 |
 |
|
|
||
 |
 |
|
|
|
|
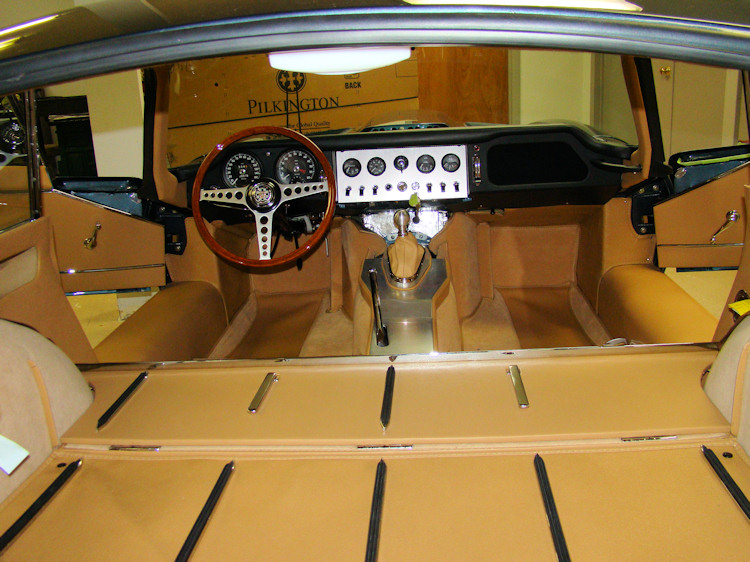
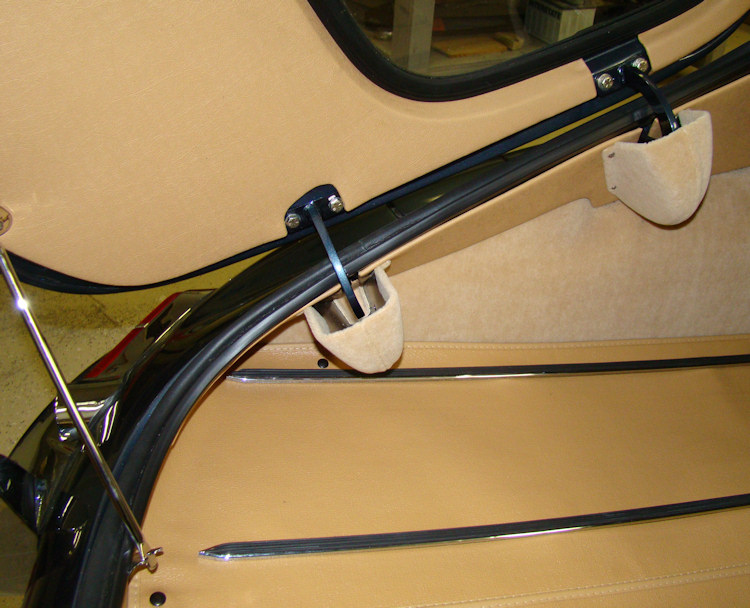
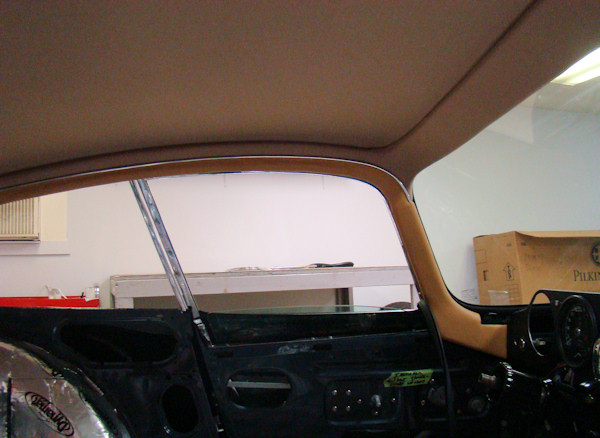
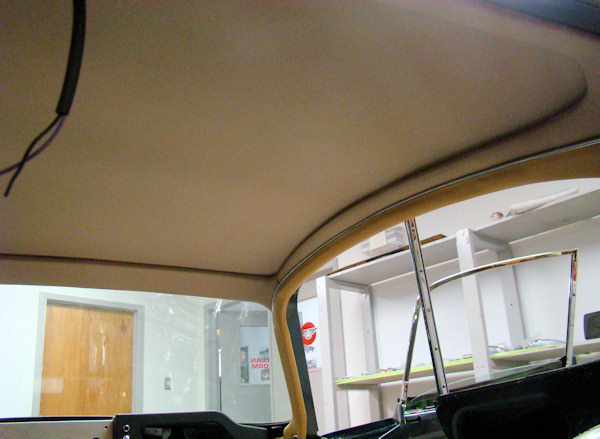
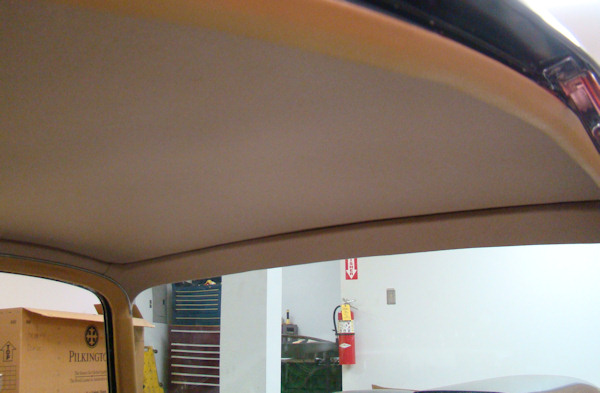
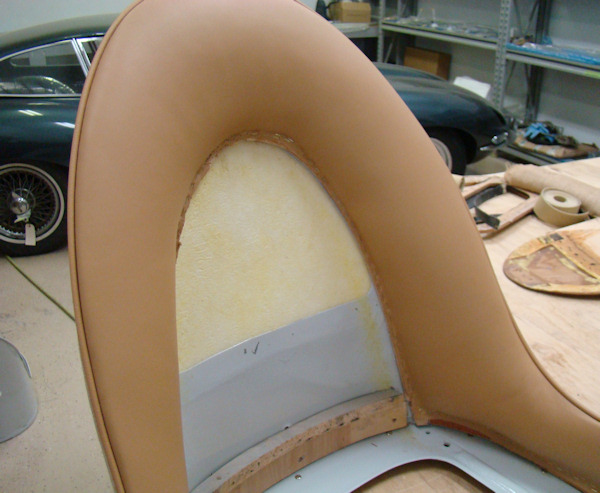
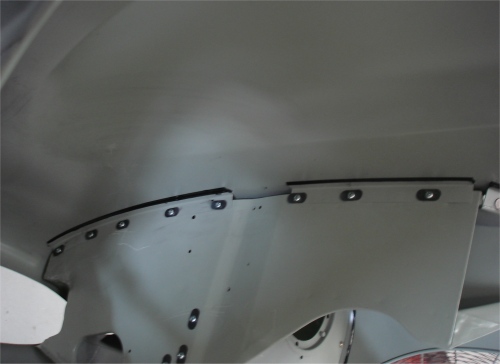
I am pleased to report that we have begun the installation of your new interior. First up was the headliner and cantrails..
 |
 |
 |
|
|
||
 |
 |
 |
|
|
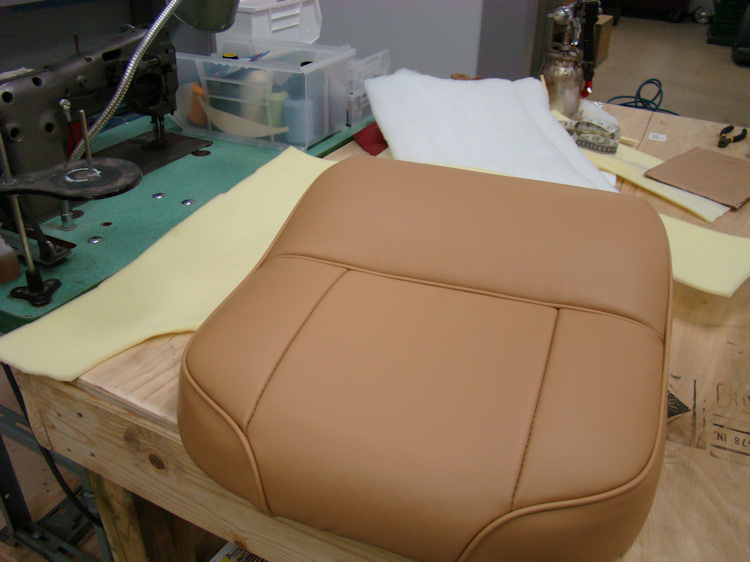
Restoring and retrimming your seats...
 |
 |
 |
|
|
|
|
|
|
|
|
 |
 |
 |
|
|
|
|
|
|
|
|
 |
 |
 |
|
|
|
|
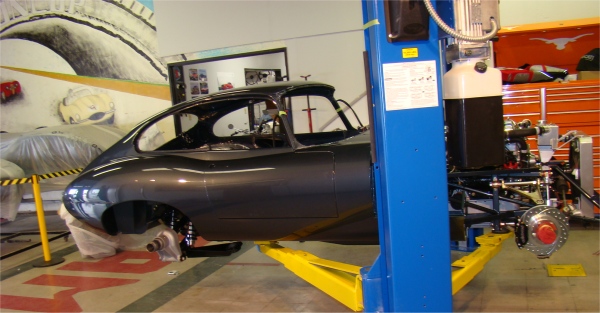
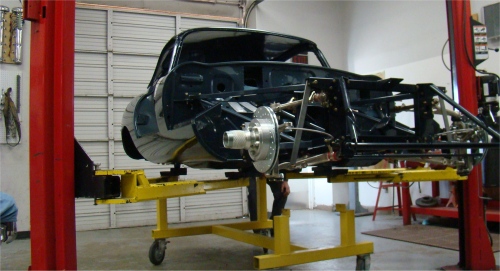
Maiden voyage time! Click on the large image for a short video clip of your vehicle on the move again for the first time in decades!
 |
 |
 |
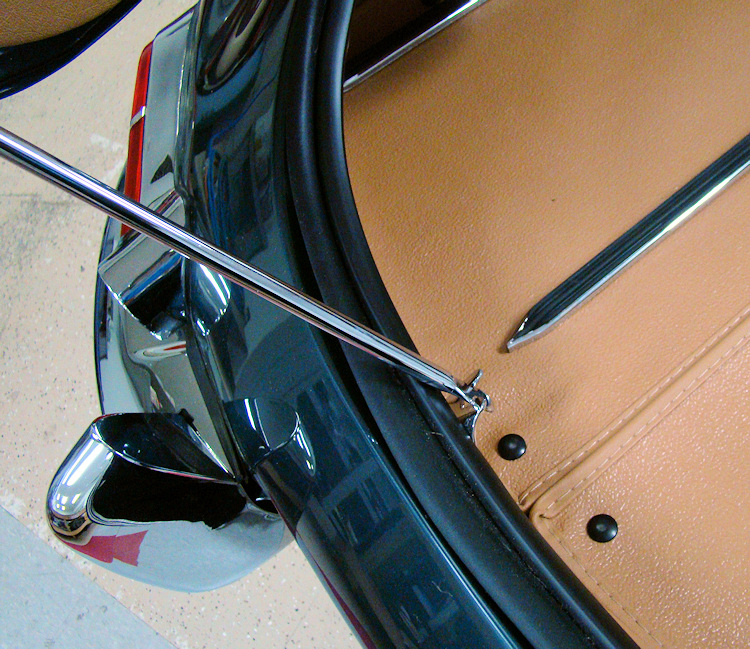
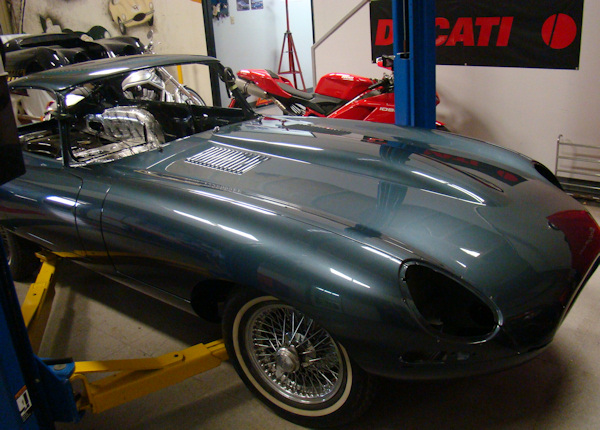
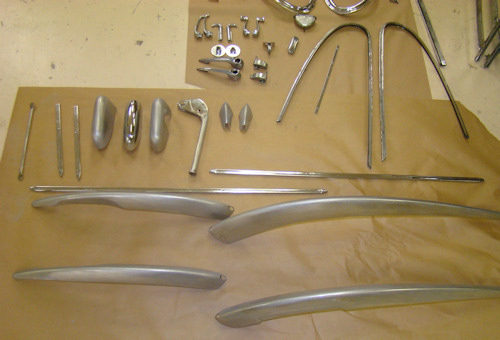
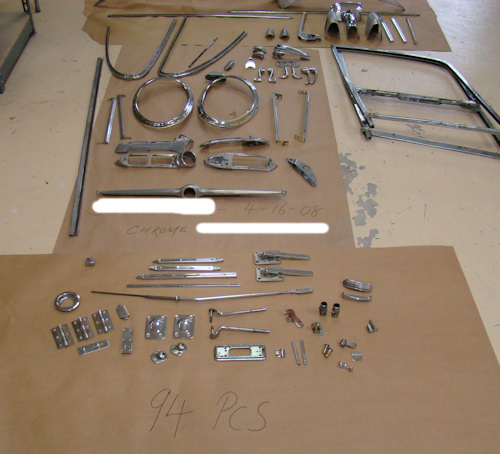
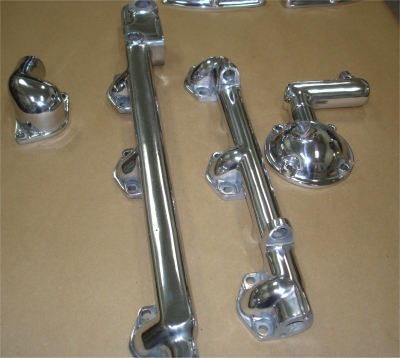
Next on the agenda will be installing the glass and replated chrome trim.
 |
 |
 |
|
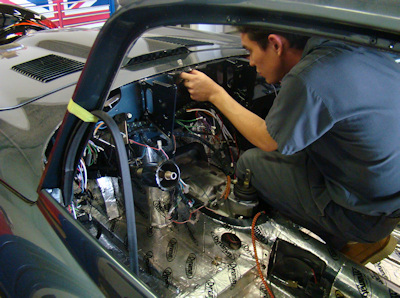
color in the workshop today! |
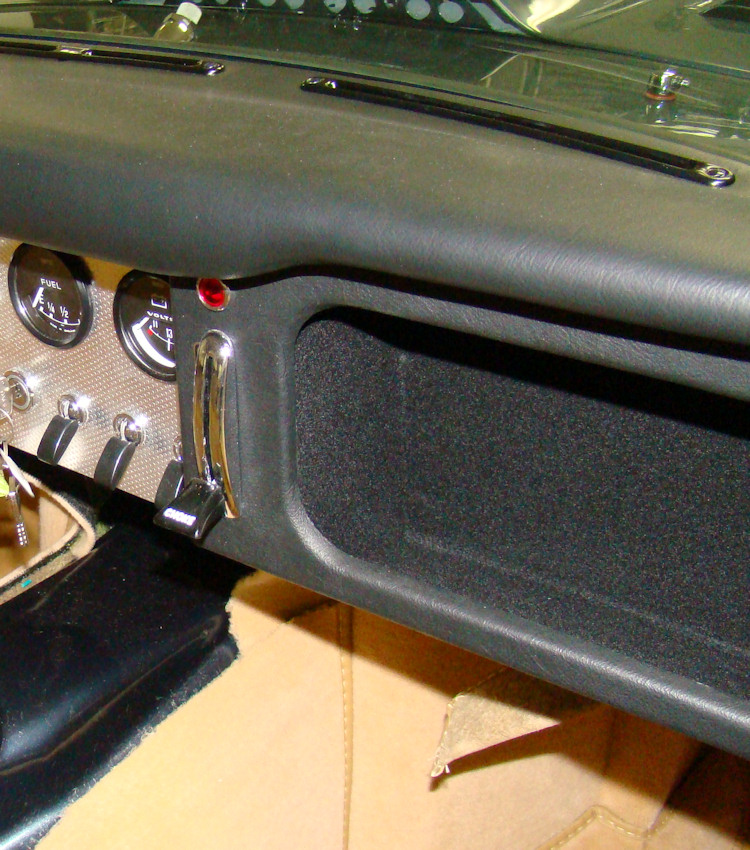
gauge and volt meter |
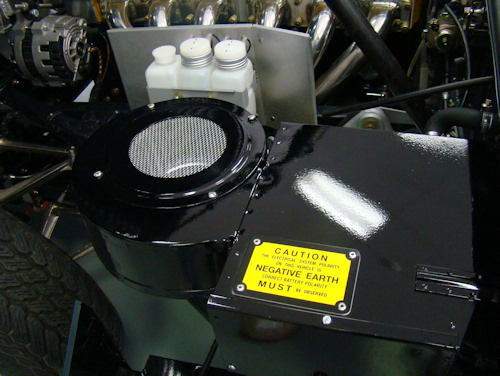
mechanics of alternator conversion |
We are expecting to receive all the chrome plating back in next few days and we are also getting very close to maiden voyage time!
 |
 |
 |
|
|
|
|
|
|
|
|
 |
 |
 |
|
|
|
any day |
 |
||
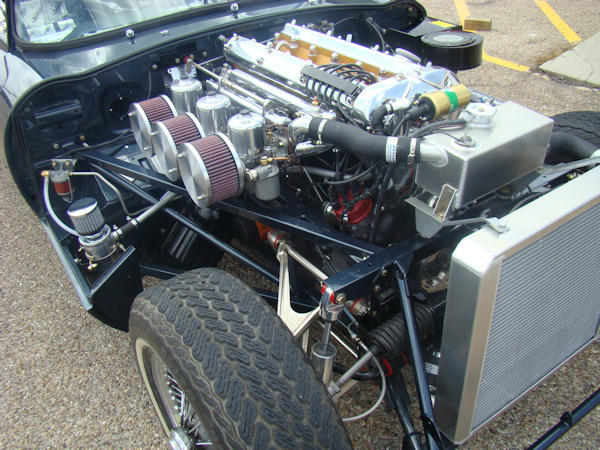
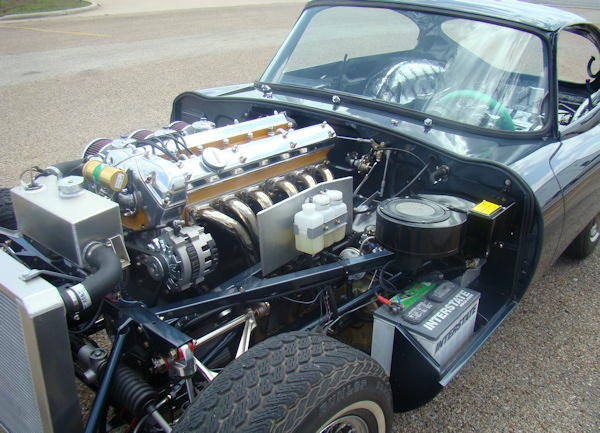
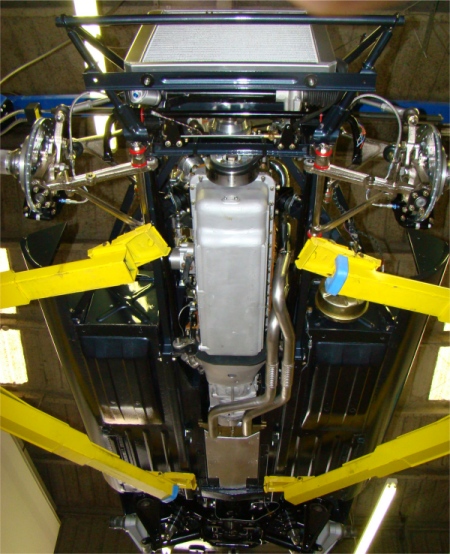
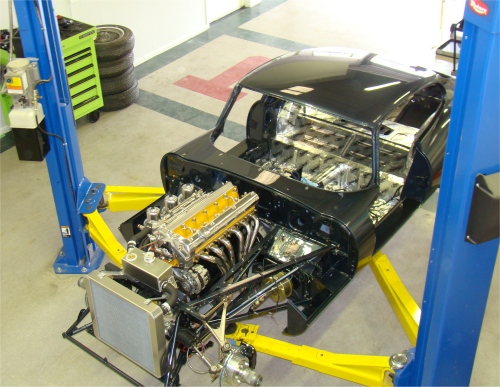
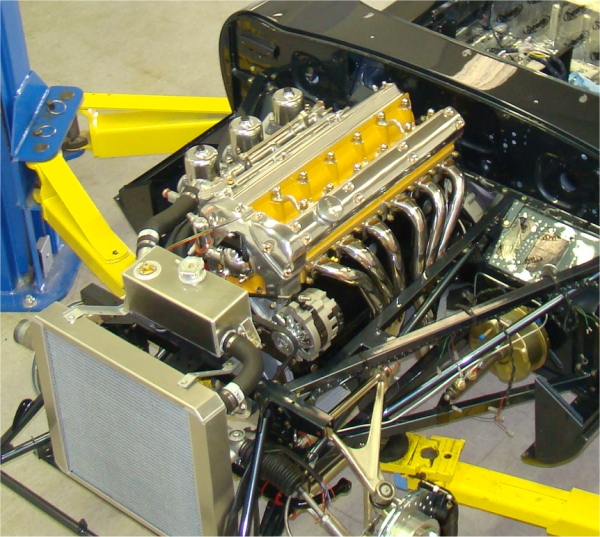
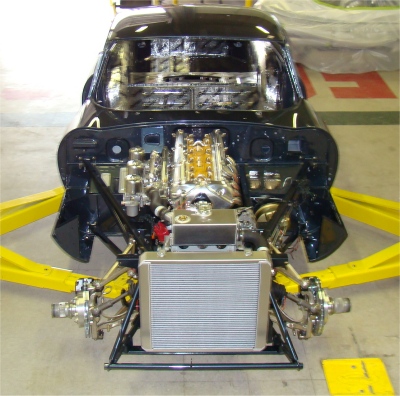
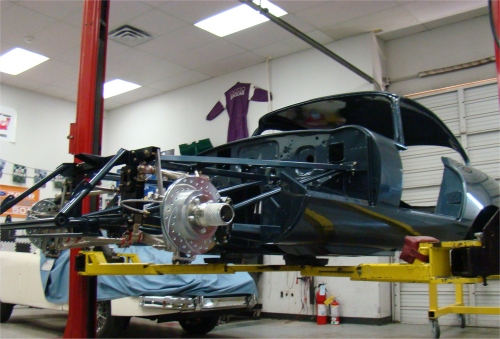
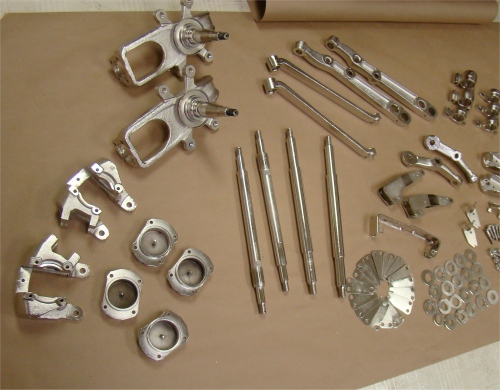
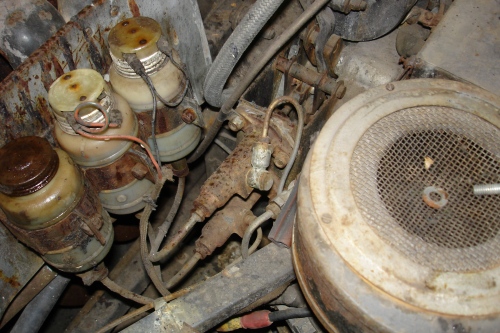
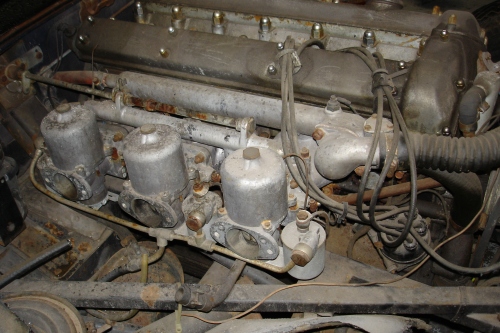
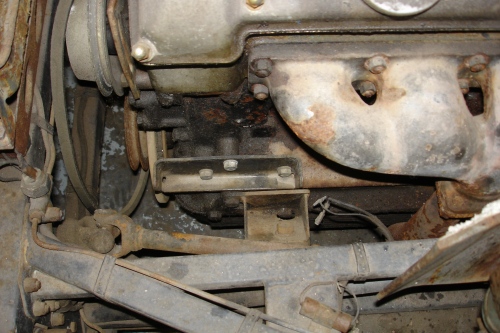
Installing the IRS, engine, transmission, carbs...
 |
 |
 |
 |
 |
 |
 |
 |
 |
 |
 |
 |
Time to start going back together. This is the fun part!
 |
 |
 |
|
|
|
|
 |
 |
|
|
|
early next week |
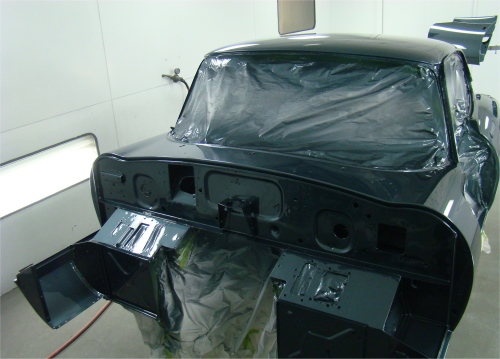
Painting in progress....
 |
 |
 |
 |
 |
 |
 |
 |
 |
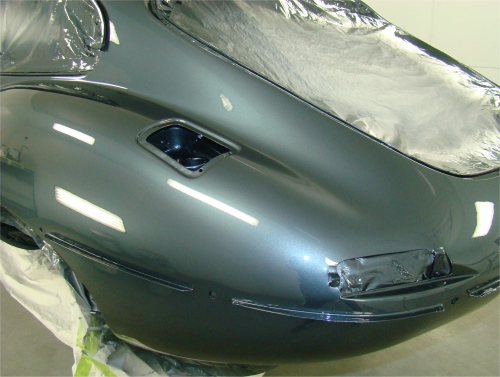
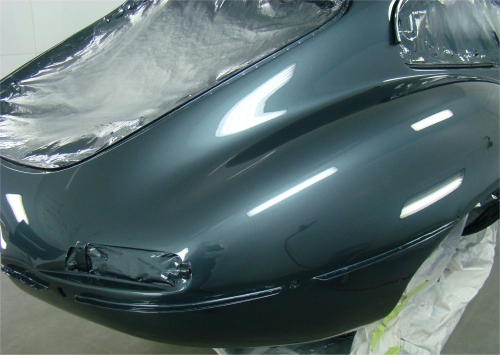
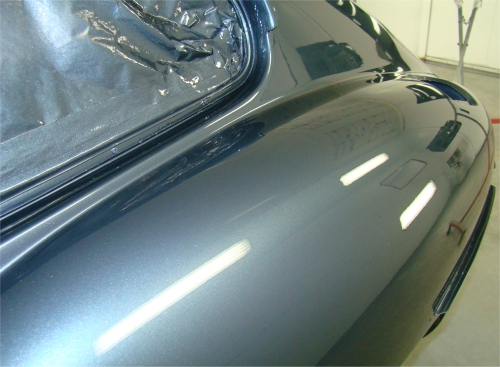
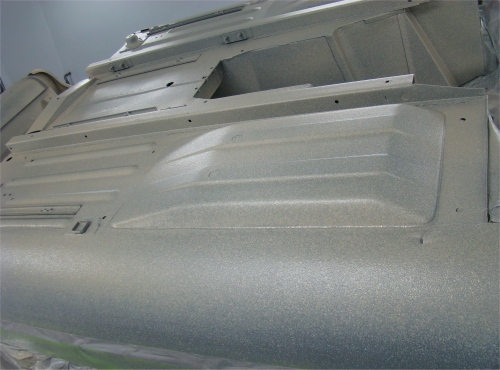
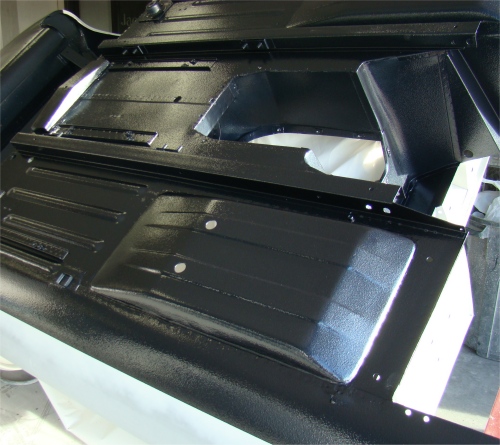
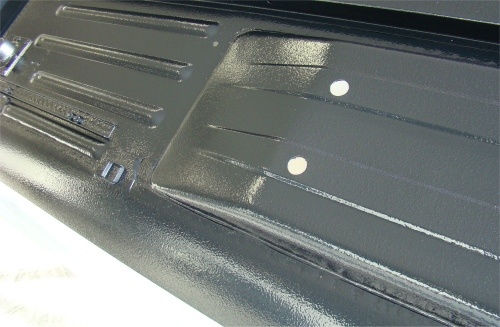
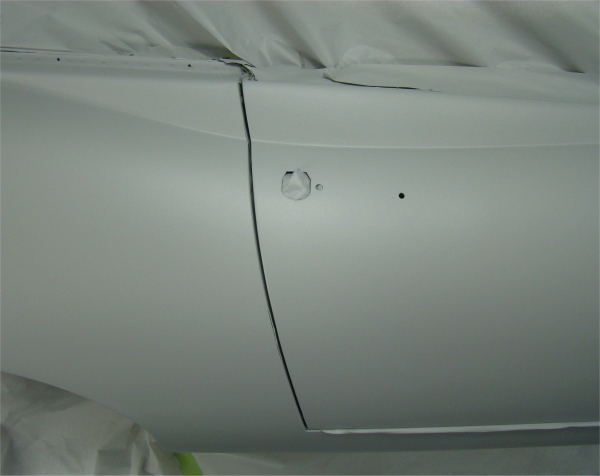
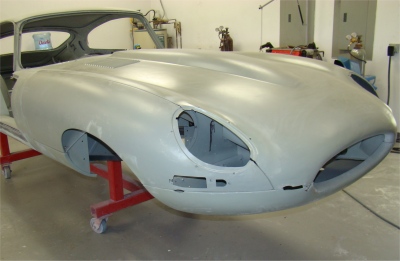
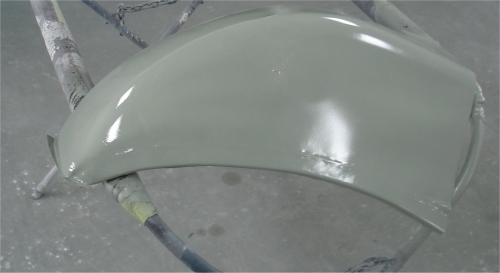
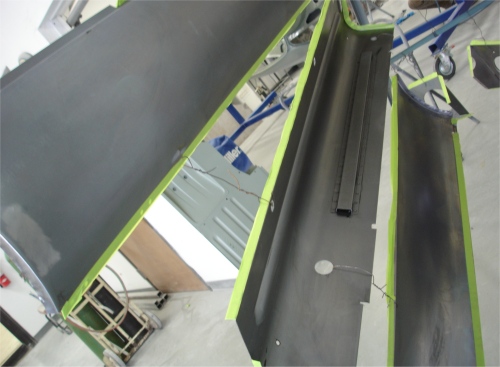
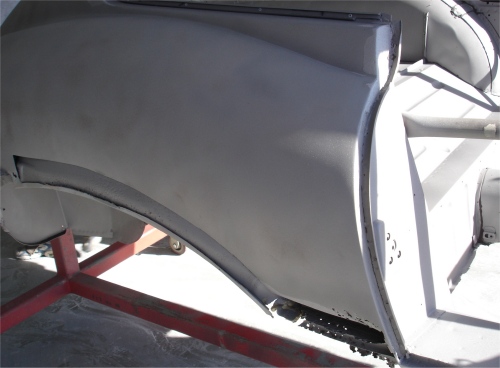
Time to start applying the first of the Opalescent Dark Blue paint...
 |
 |
 |
|
underside of the floors |
Dark Blue |
|
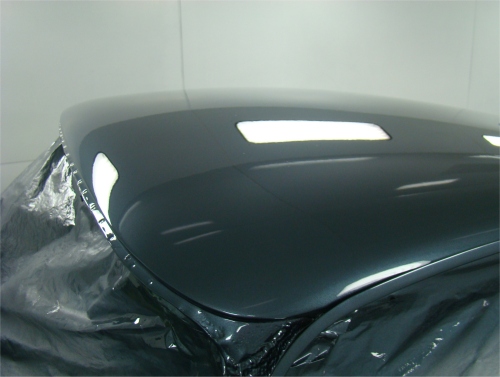
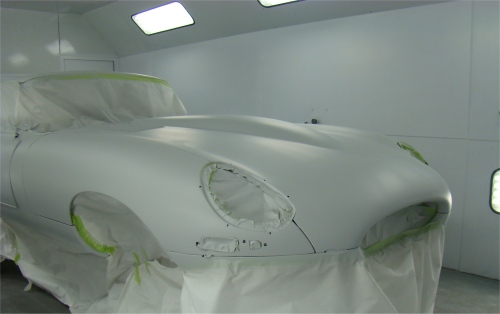
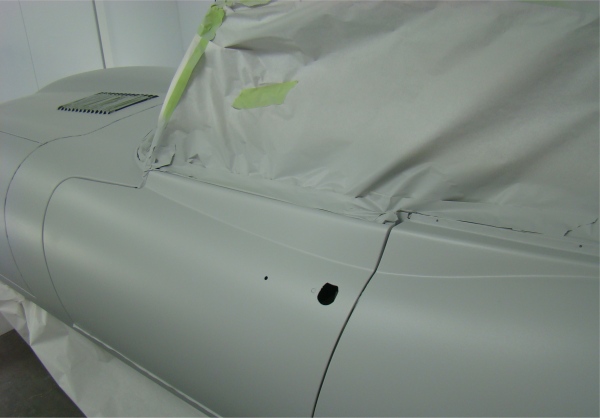
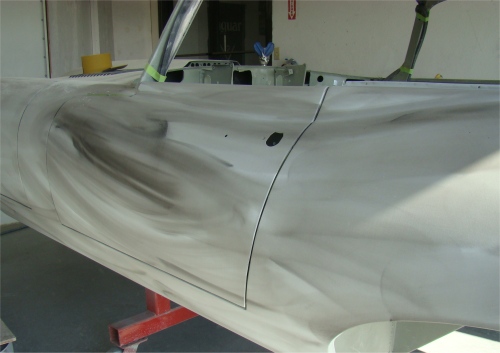
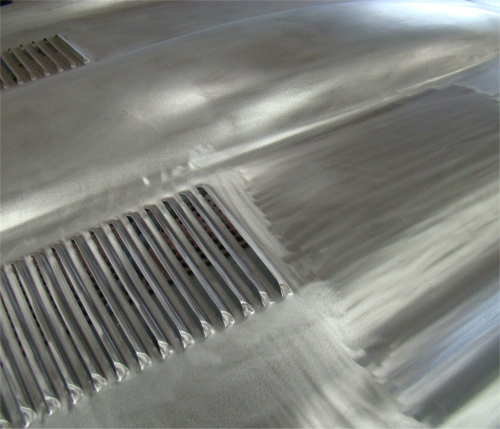
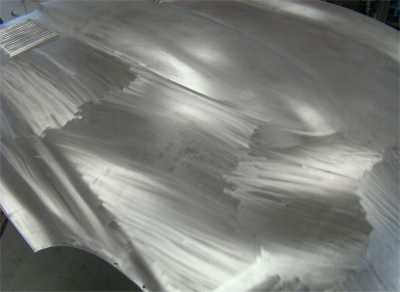
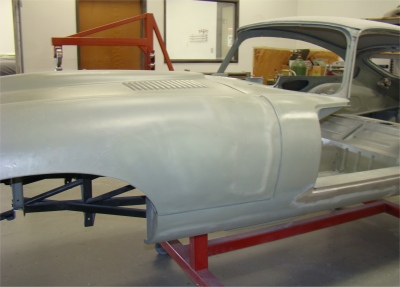
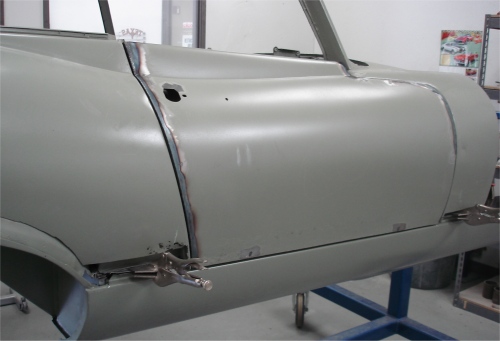
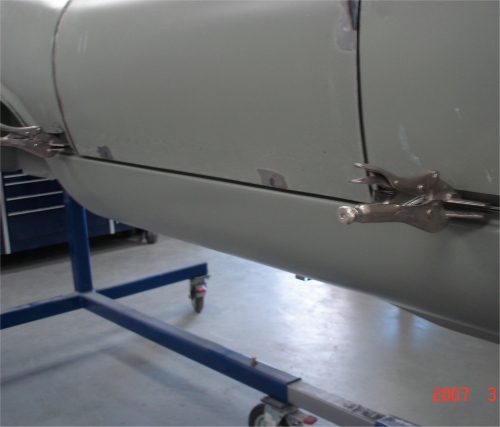
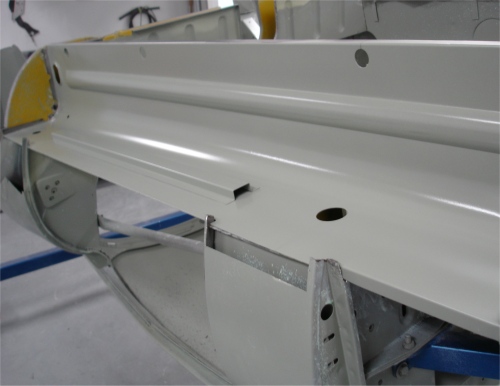
The bodywork has now been completed and the car is going through the Slick Sand process. It is painstakingly blocked with the doors, tailgate and bonnet in place before being primed and painted. The panel fit is absolutely spectacular on your car.
 |
 |
 |
|
assembled |
with one panel flowing into the next |
|
|
|
|
|
 |
 |
 |
|
|
|
|
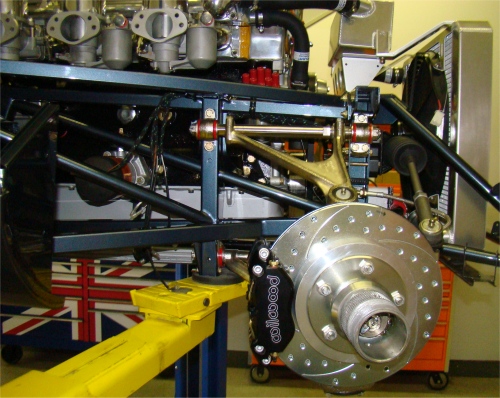
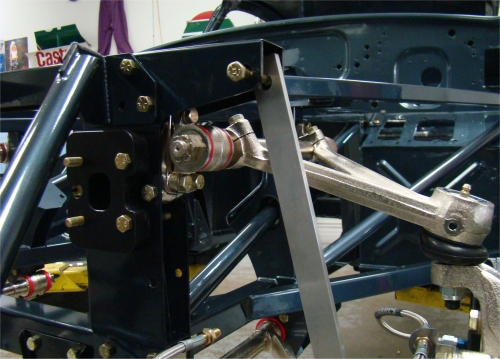
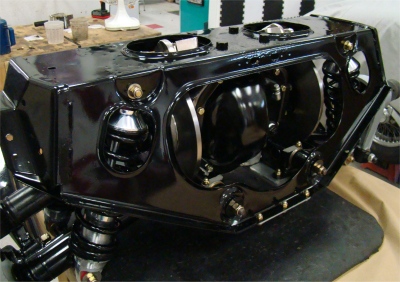
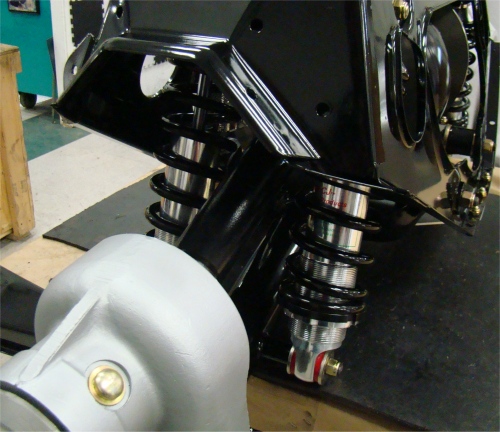
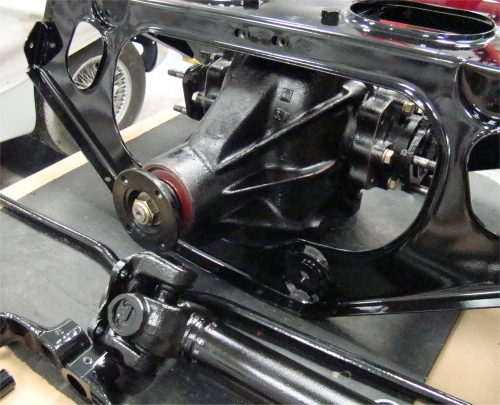
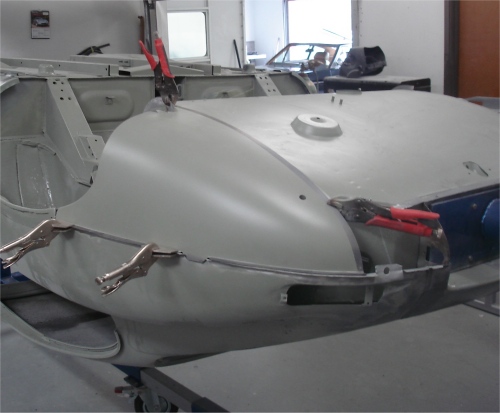
Your IRS has now been completely rebuilt and we have also now reassembled and installed the bonnet.
 |
 |
 |
|
|
|
|
 |
 |
 |
|
bare metal |
||
 |
 |
 |
|
|
bolted into place |
|
 |
 |
 |
|
|
|
|
 |
 |
 |
|
of doors |
installed |
|
 |
 |
|
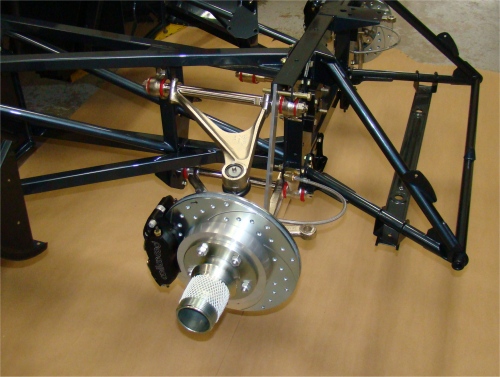
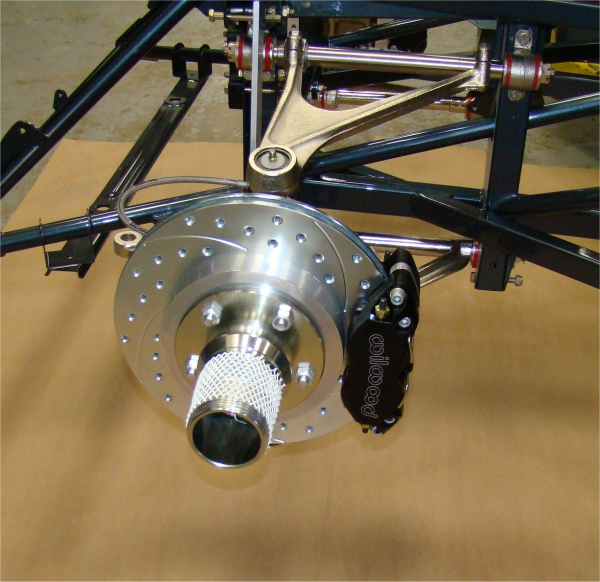
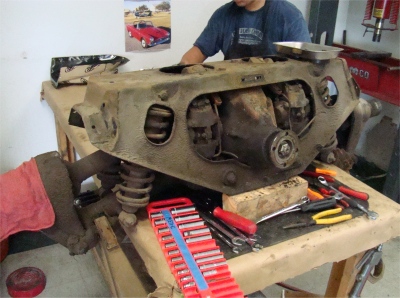
Your differential has now been rebuilt and we have started assembling your IRS. Darrell has been working away on your body and I will publish some coachworks shots (as well as completion of the IRS) for you next week.
 |
 |
 |
|
|
|
|
 |
 |
 |
|
|
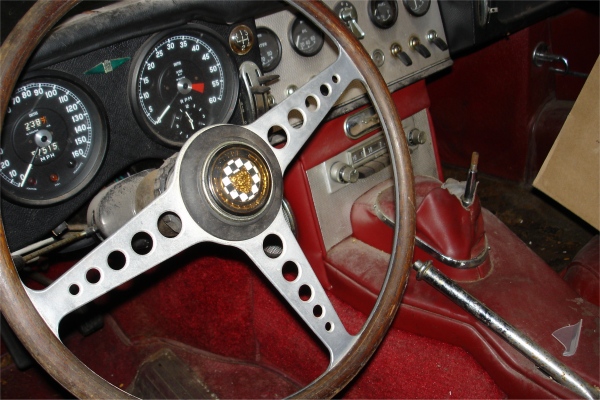
Your gauges have now been rebuilt with the exception of the speedo that will be calibrated by a rolling test once the car is back on its wheels.

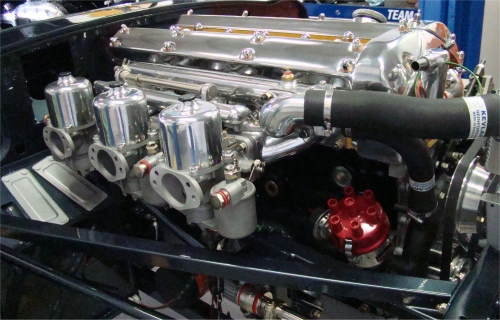
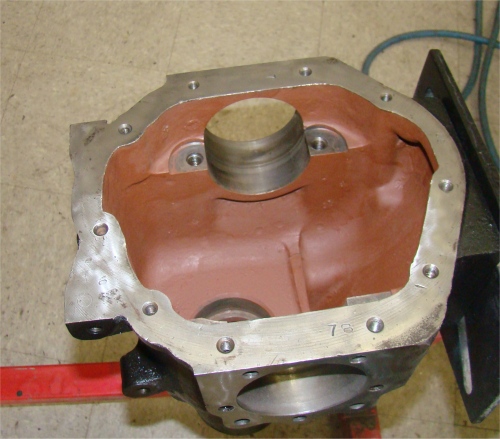
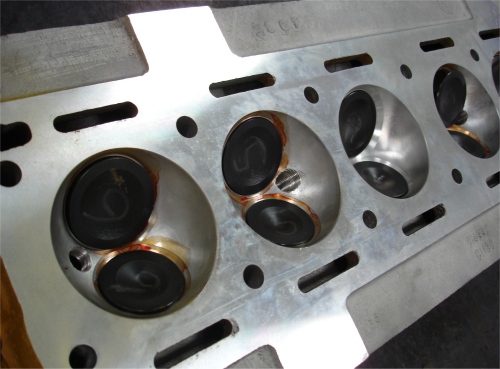
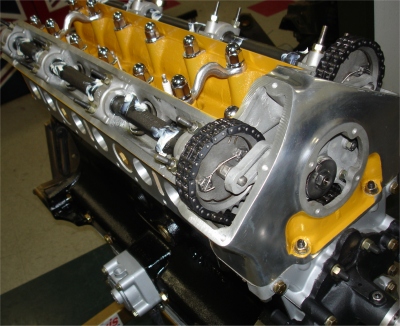
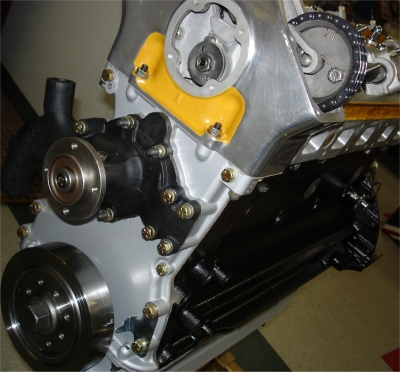
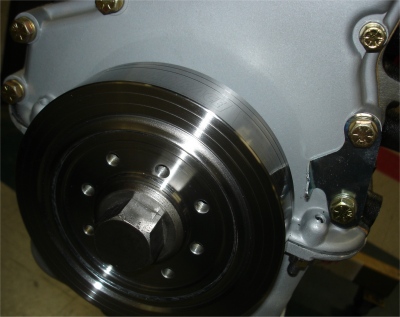
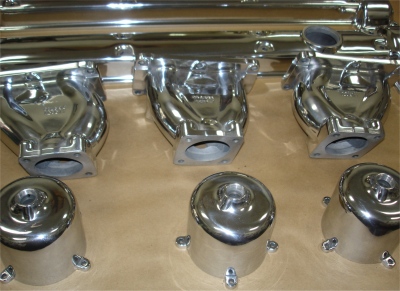
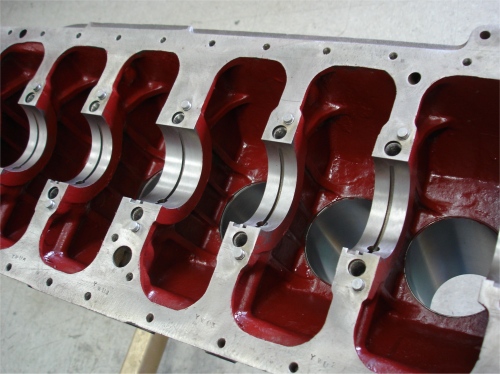
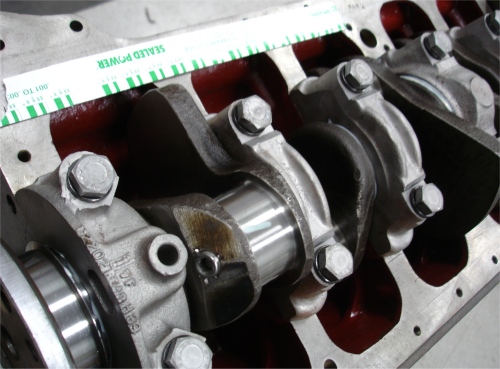
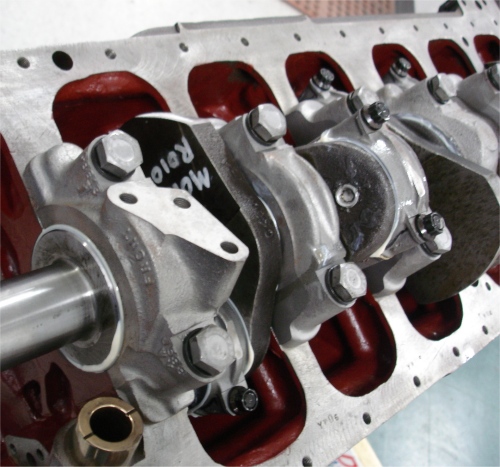
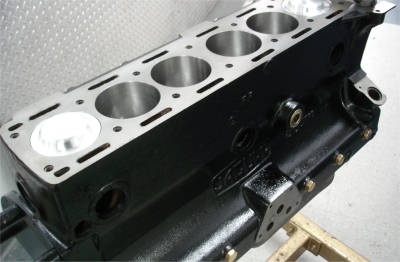
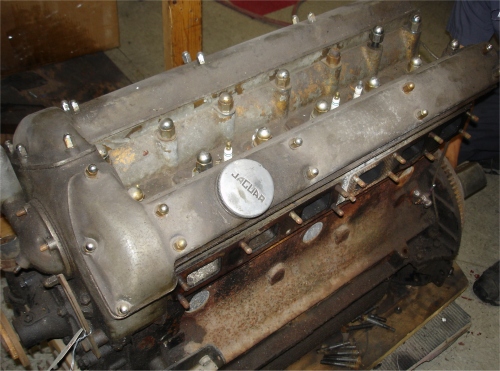
Your Stage One CJ engine rebuild has now been completed.
 |
 |
 |
|
|
|
exhaust side |
|
|
|
|
 |
 |
 |
|
|
|
|
 |
 |
|
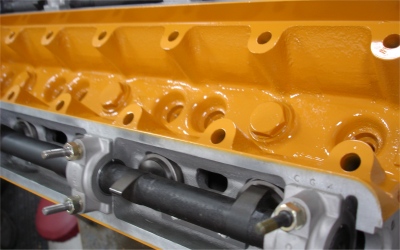
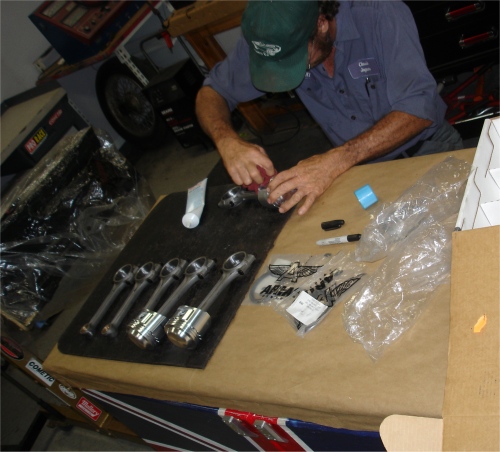
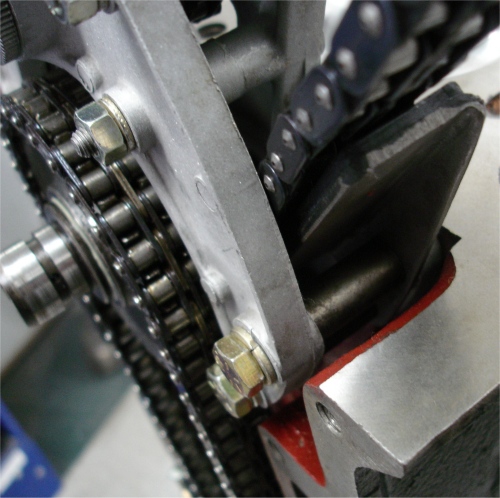
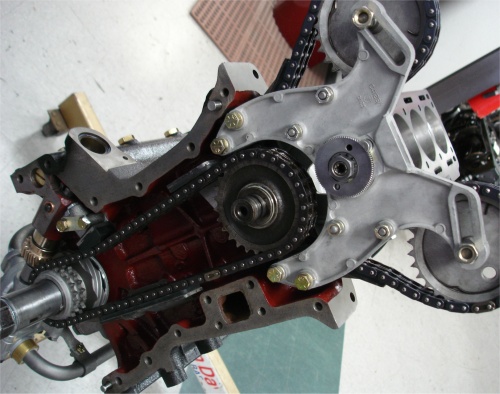
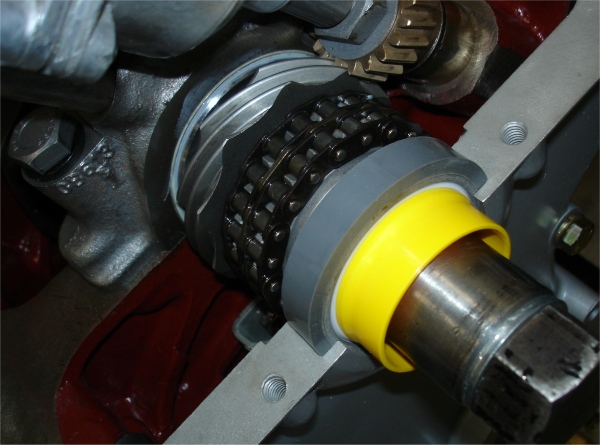
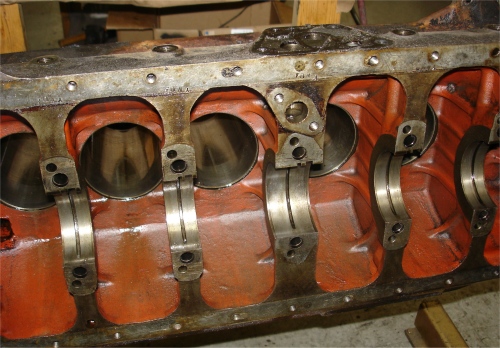
The following photos show your engine rebuild in progress.
 |
 |
 |
|
Glyptal paint |
building engines for 40 years |
in all CJ engine rebuilds |
|
|
|
|
 |
 |
 |
|
double checked |
|
|
|
|
|
|
 |
 |
 |
|
|
to better center the chain in the pad and for improved rigidity when bolted to the block rather than the aluminium chain tree |
|
|
|
|
|
 |
 |
 |
|
Teflon front seal installed |
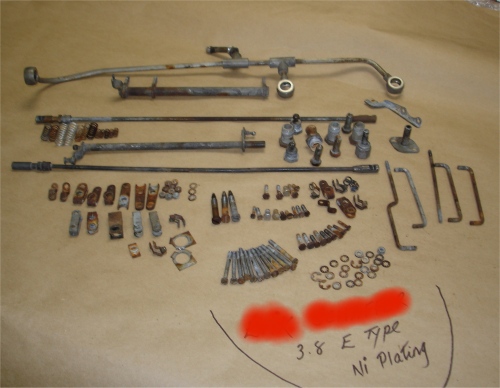
Nickel plating |
|
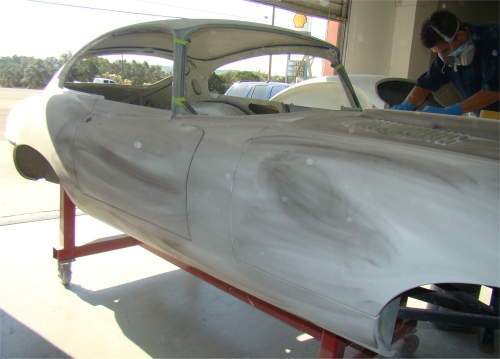
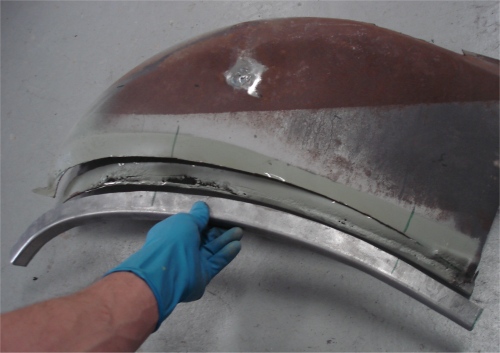
More bodywork progress....
 |
 |
 |
|
|
and outer panels |
is also coated with wax |
 |
 |
 |
|
|
|
|
 |
 |
 |
|
|
||
 |
 |
 |
|
|
||
 |
 |
|
|
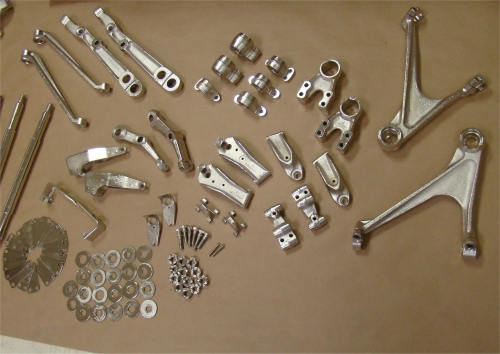
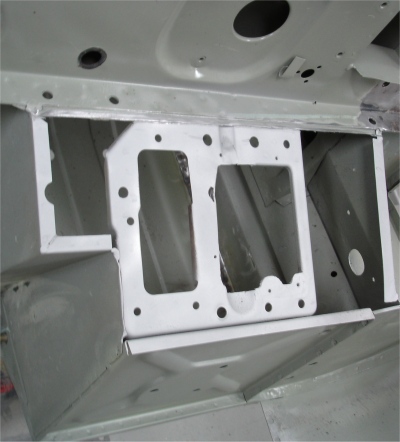
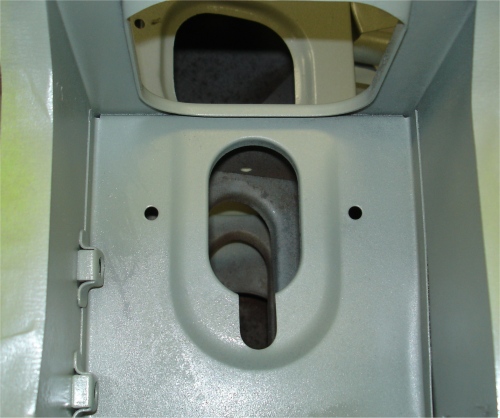
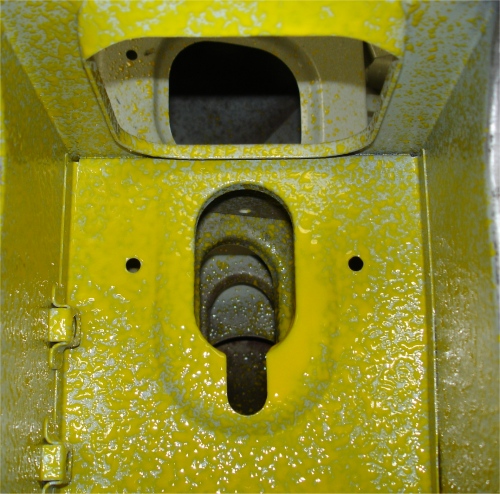
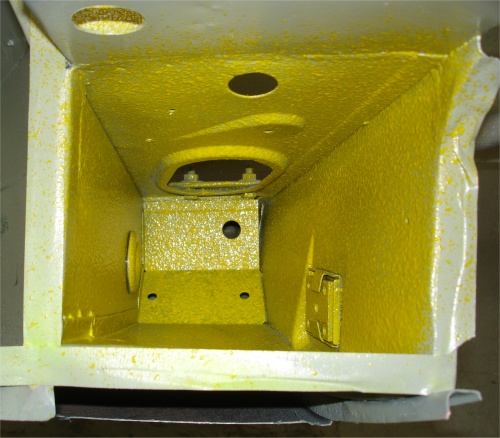
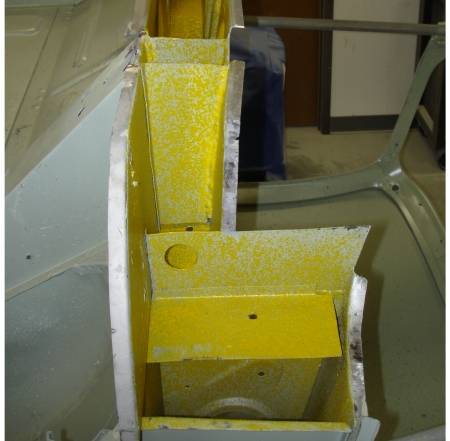
upgraded pedal box |
This may be my biggest single photographic update ever! As you can see, we have been very busy with this project since my last report!
 |
 |
 |
 |
 |
 |
 |
 |
 |
 |
 |
 |
 |
 |
 |
 |
 |
 |
 |
 |
 |
 |
 |
 |
 |
 |
 |
 |
 |
 |
 |
 |
 |
 |
 |
 |
 |
 |
 |
 |
 |
 |
 |
 |
 |
 |
 |
 |
 |
 |
 |
 |
 |
 |
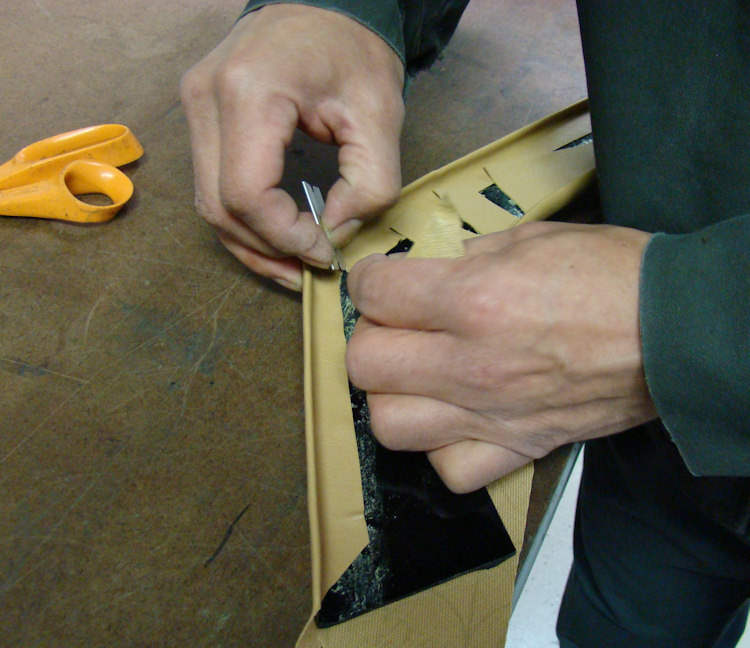
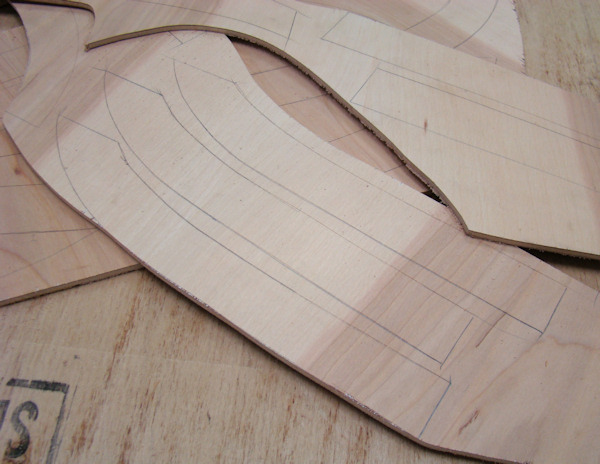
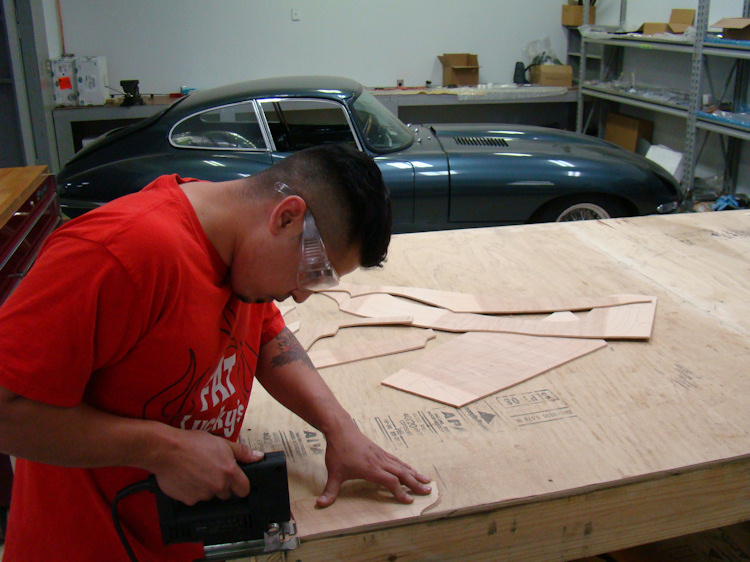
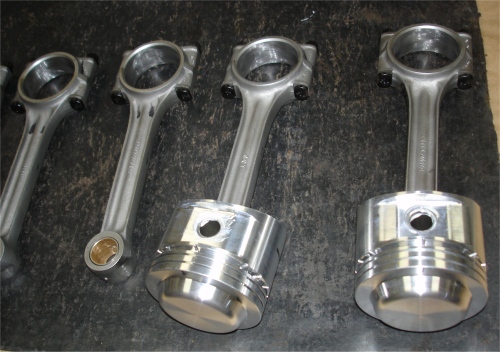
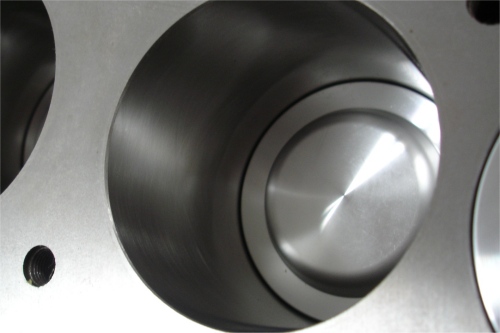
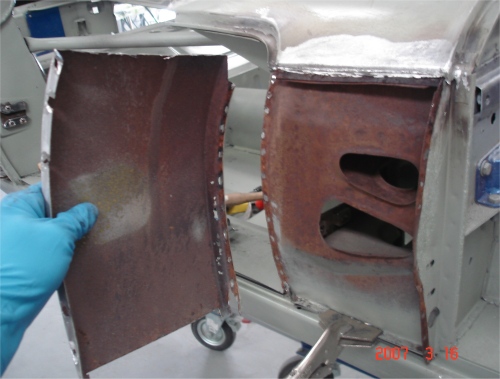
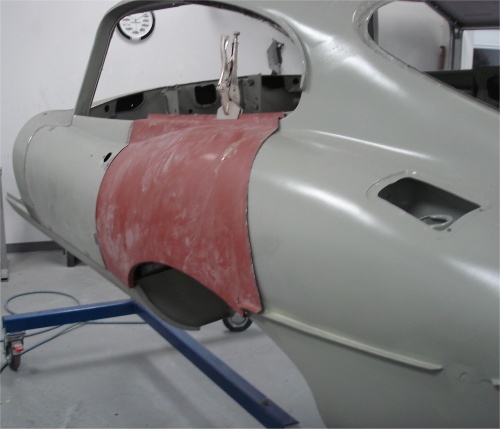
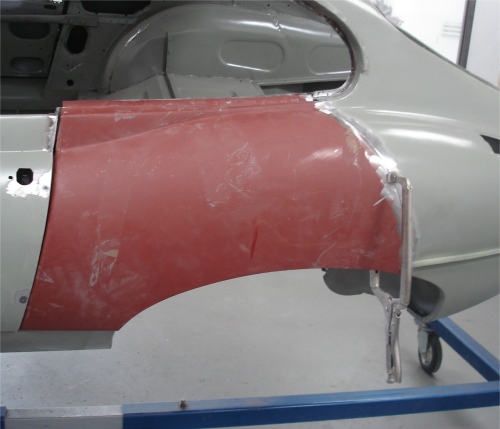
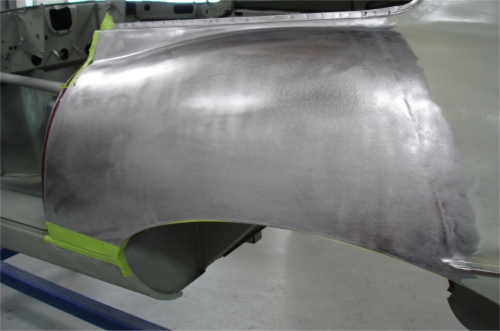
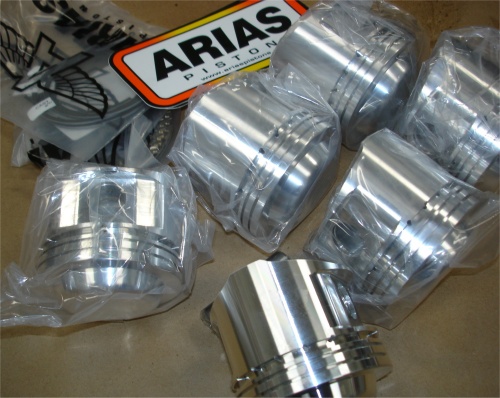
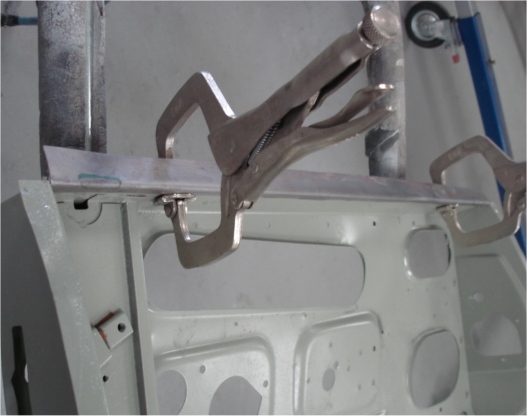
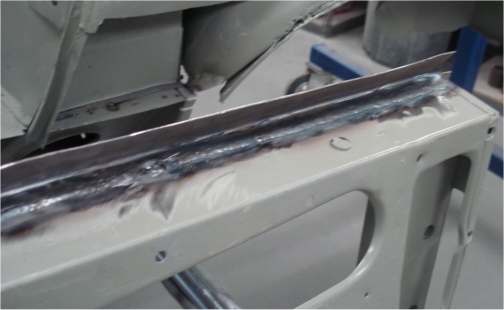
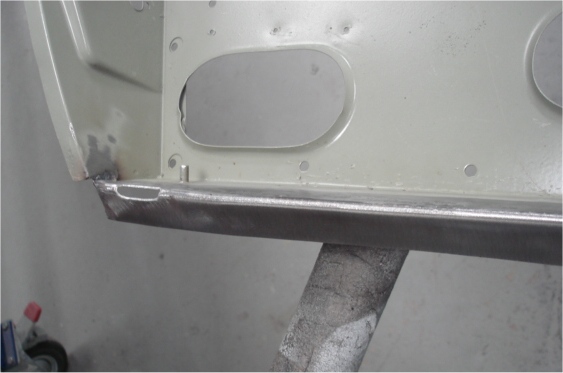
The following photos detail the restoration of your door frames and the installation of your new skins. The first photo shows some beautiful forged pistons specially made for your car by Arias.
 |
 |
 |
|
|
that need attention |
|
 |
 |
 |
|
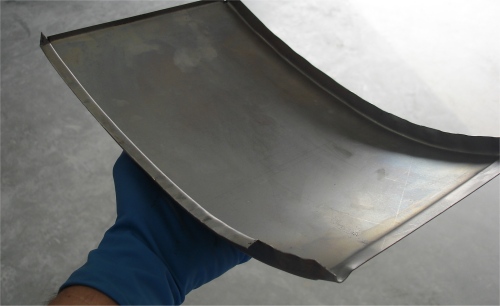
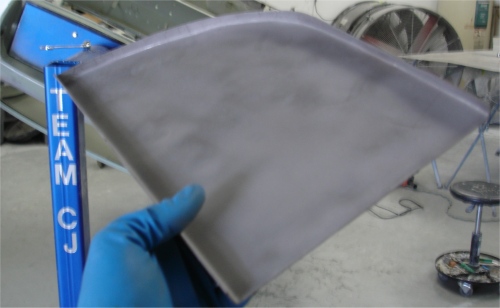
some new sheet metal |
||
 |
 |
 |
|
|
||
 |
||
|
|
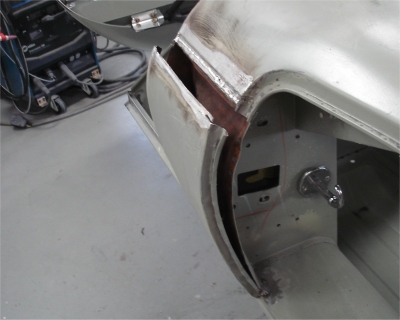
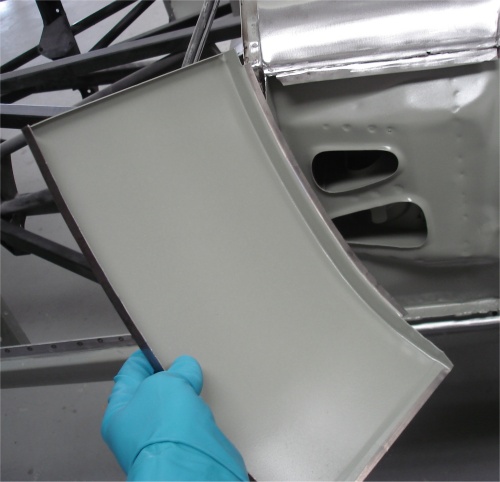
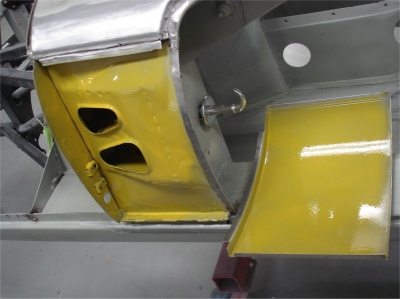
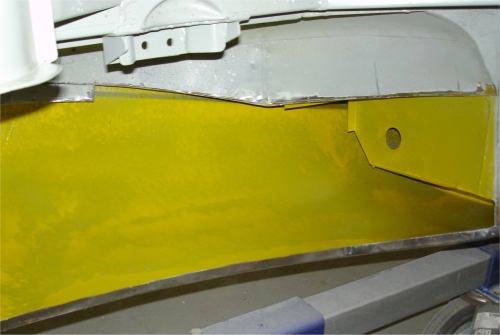
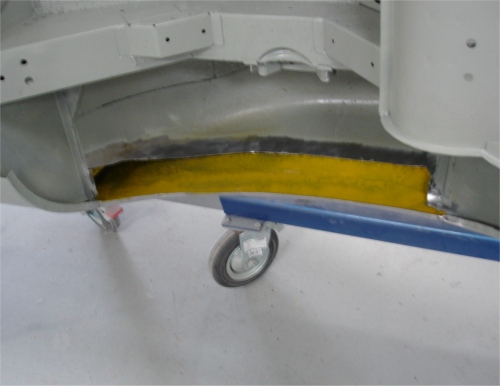
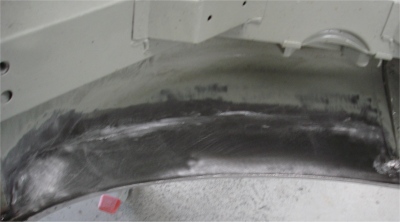
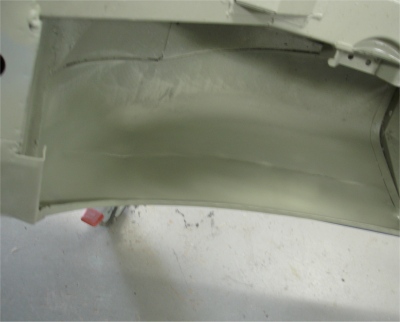
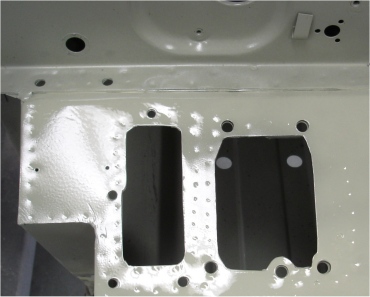
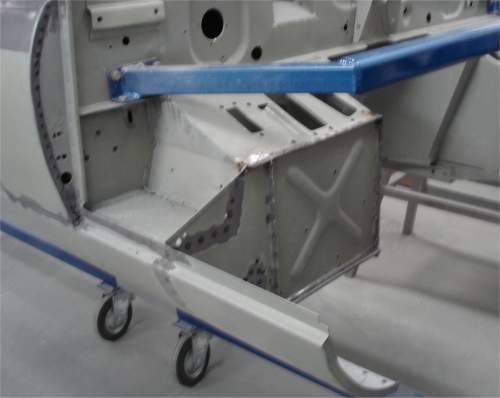
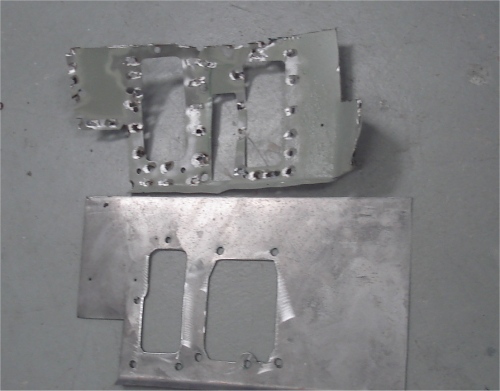
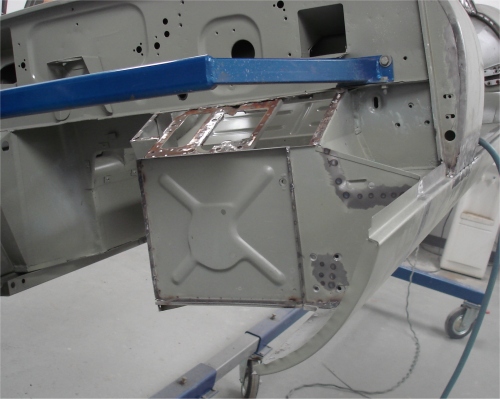
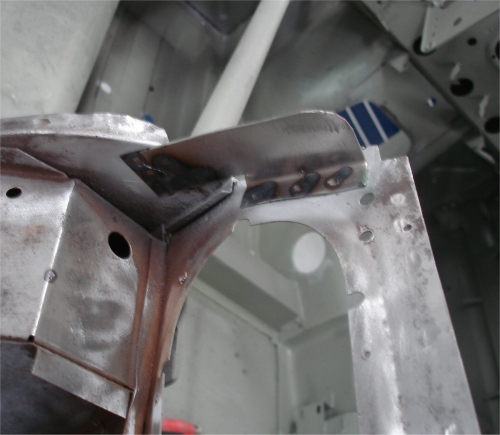
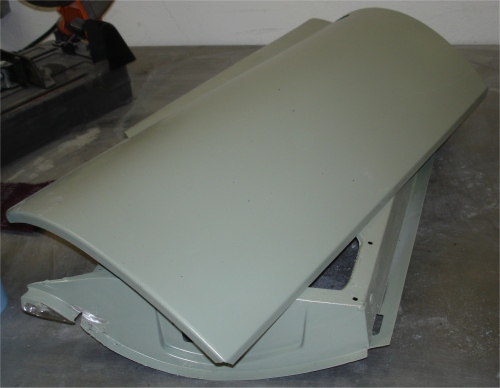
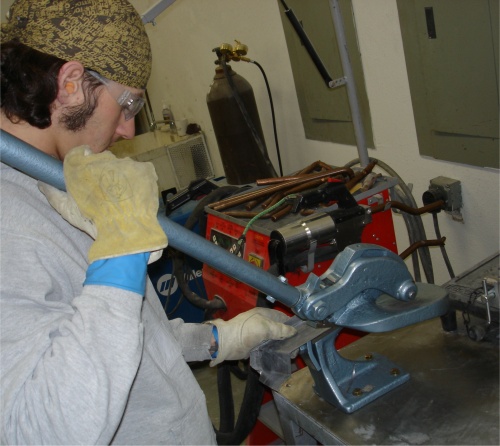
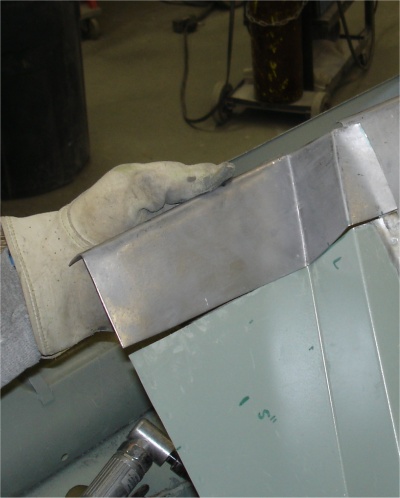
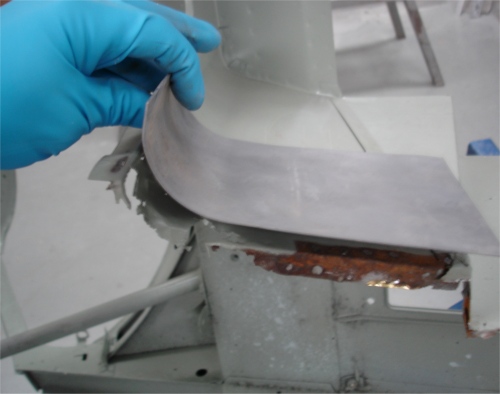
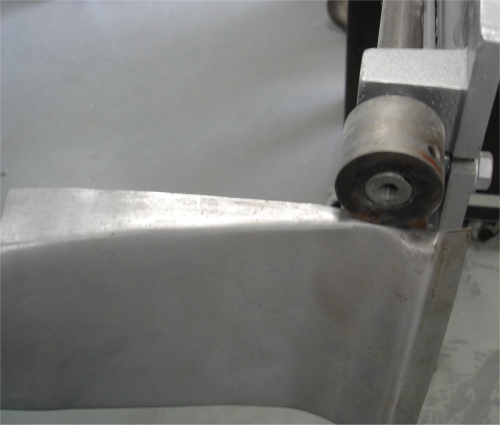
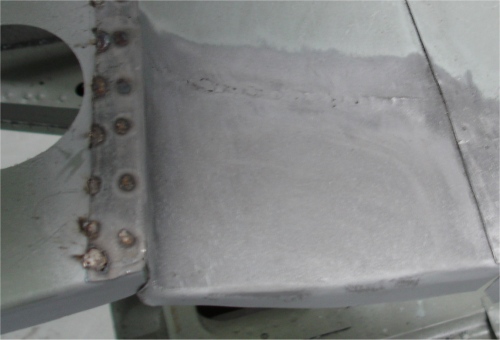
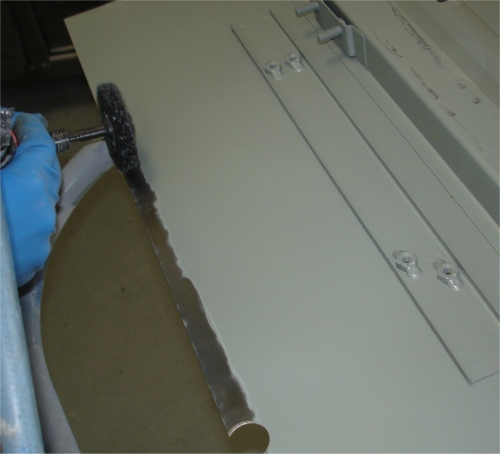
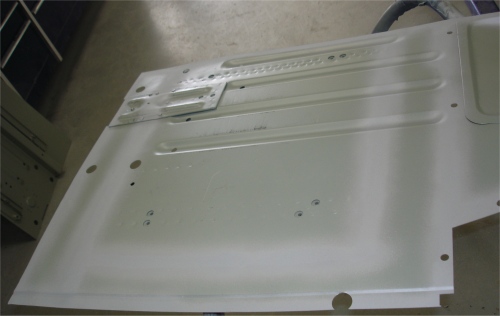
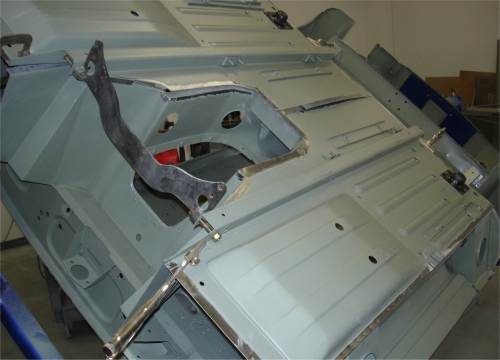
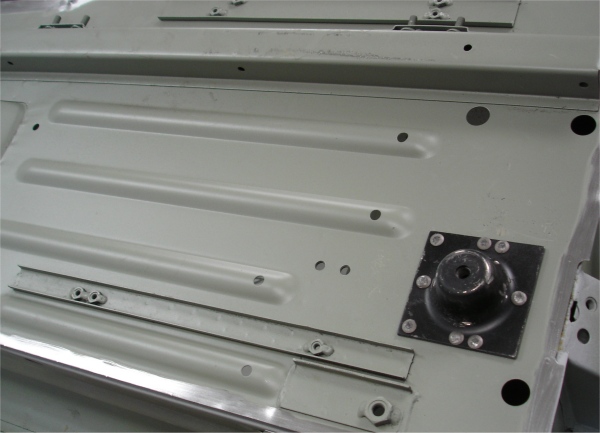
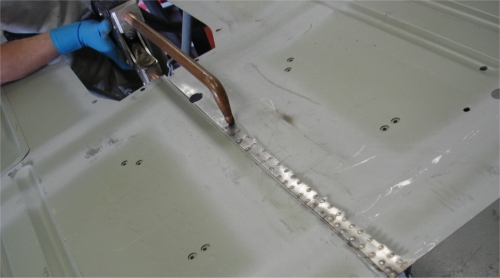
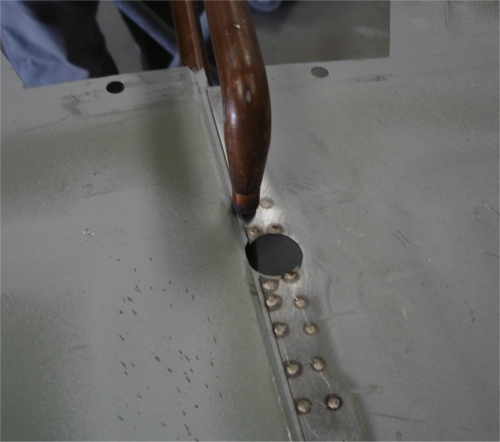
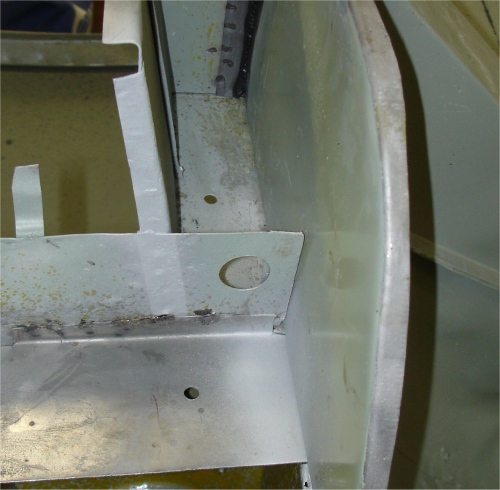
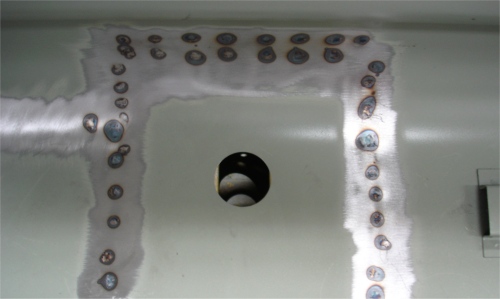
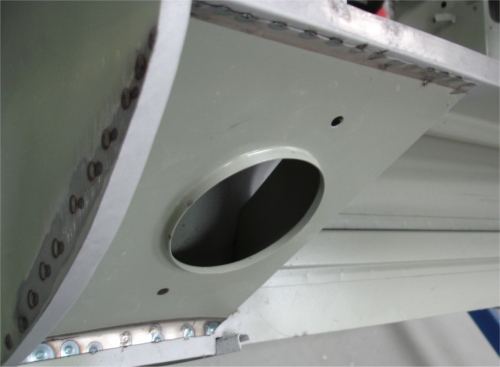
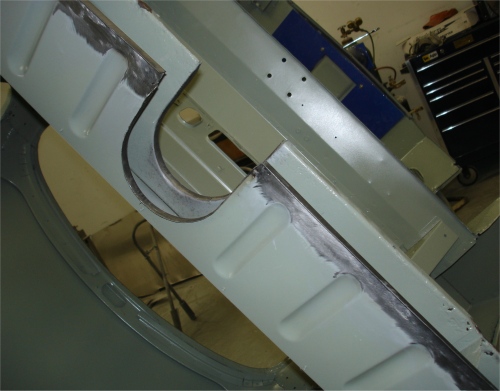
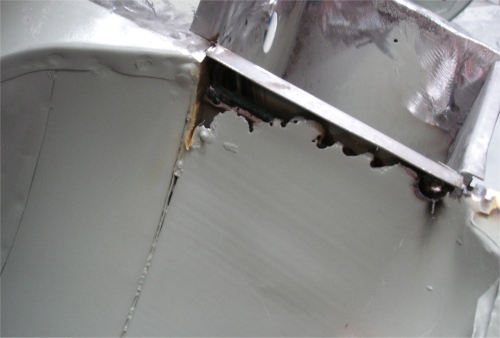
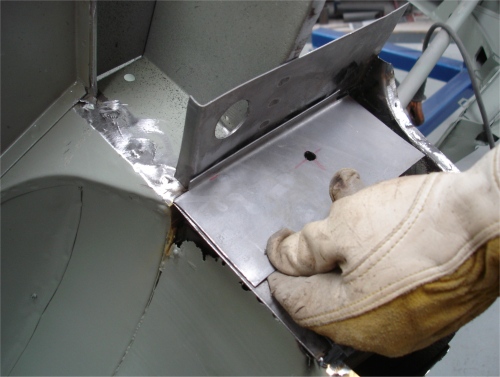
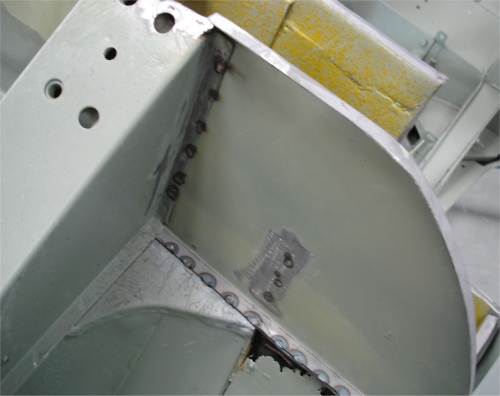
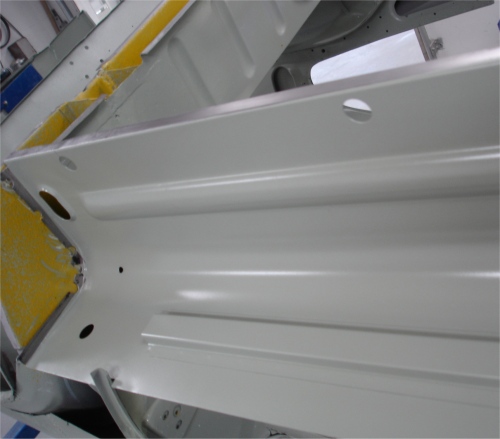
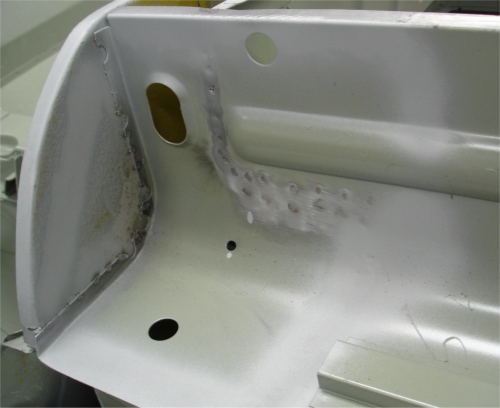
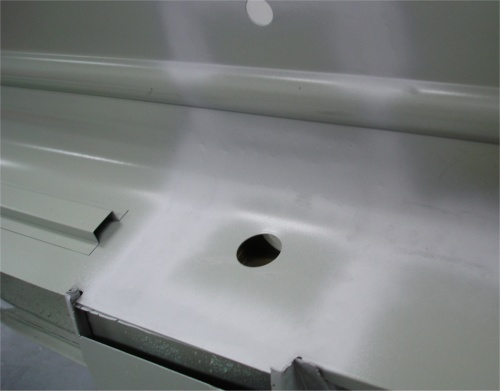
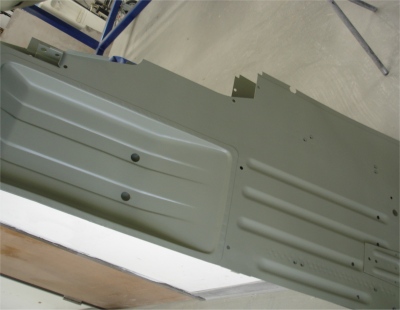
The following sequence of photographs shows Darrell repairing the forward transmission tunnel as well as trial fitting and assembling the new floors.
 |
 |
 |
|
|
repair panel |
|
|
|
|
|
 |
 |
 |
|
into position |
|
|
|
|
|
|
 |
 |
 |
|
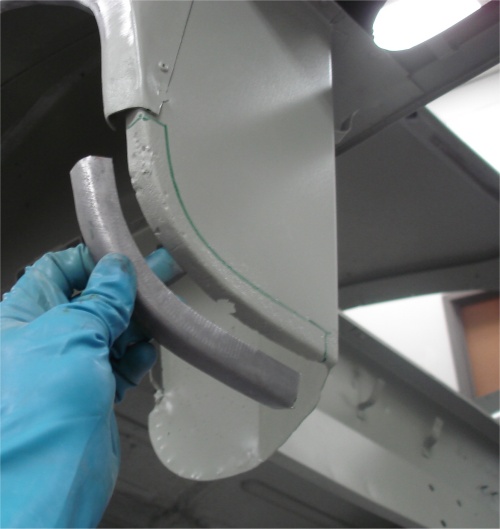
required lip |
|
|
|
|
|
|
 |
 |
 |
|
|
to areas to be spot welded |
|
|
|
|
|
 |
 |
 |
|
|
|
together |
|
|
|
|
 |
||
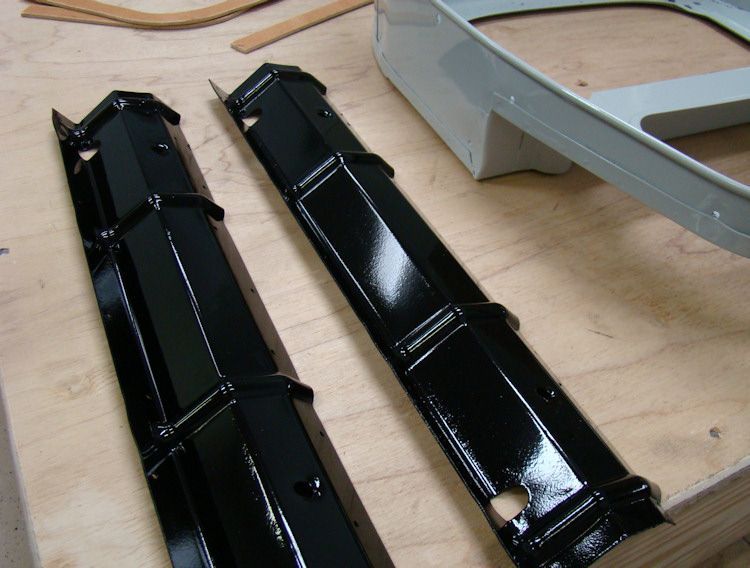
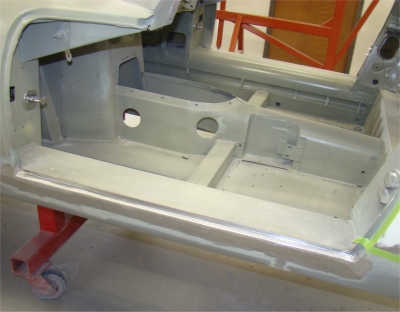
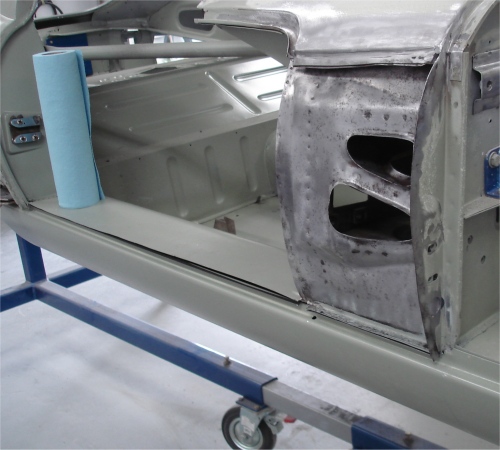
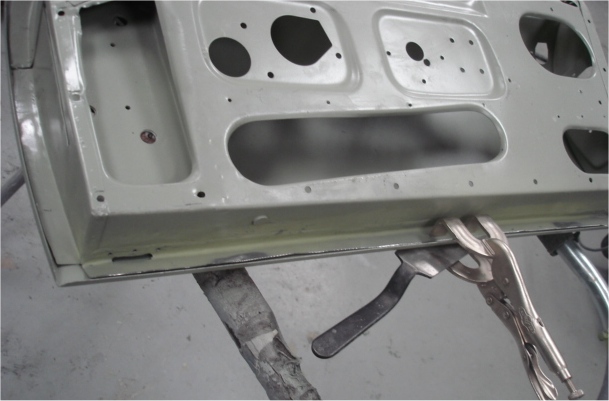
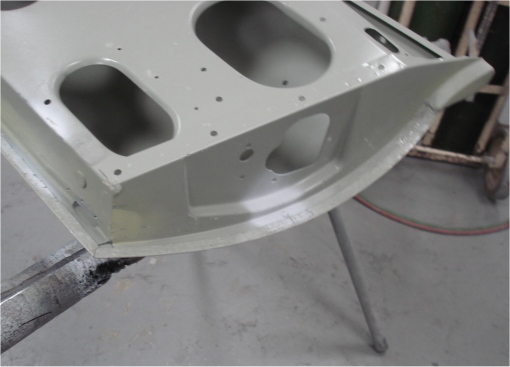
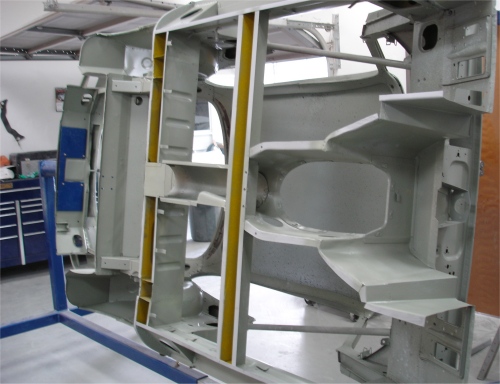
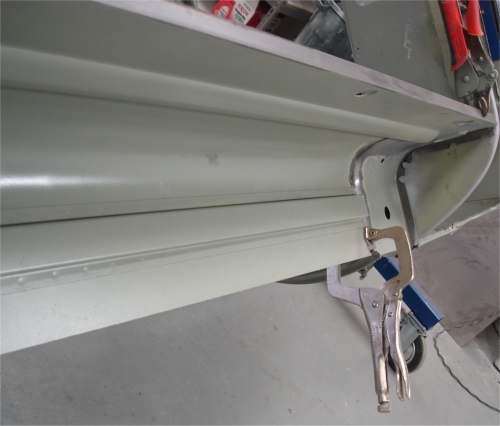
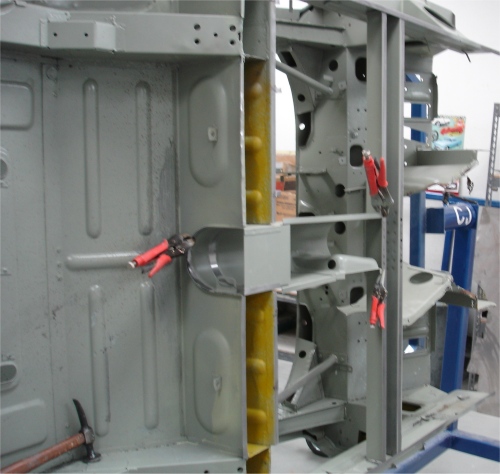
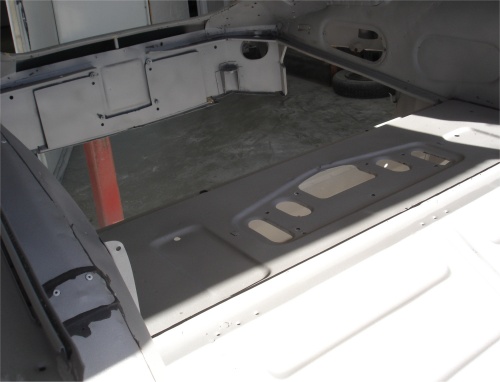
Installing the RH inner sill, the floor cross-member and the rear driveshaft tunnel. Almost time to install the new floors.
 |
 |
 |
|
|
||
 |
 |
 |
|
much work as the LH |
|
|
 |
 |
 |
|
|
||
 |
 |
 |
|
|
|
into place |
 |
||
|
|
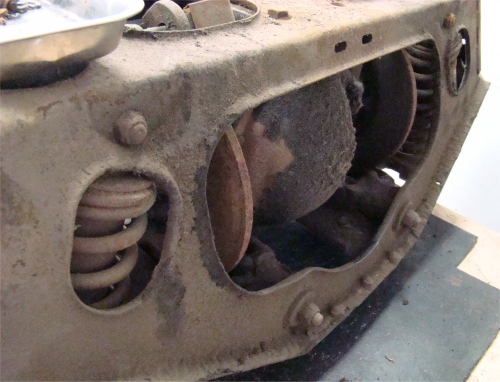
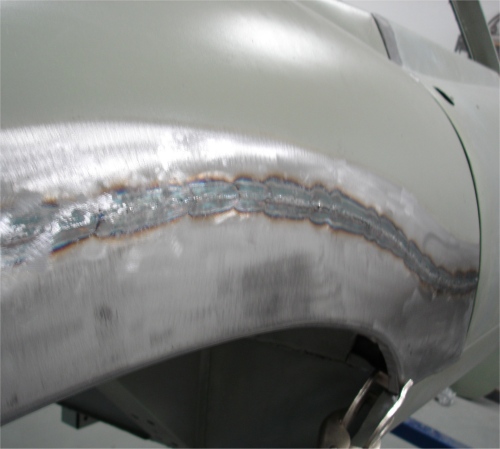
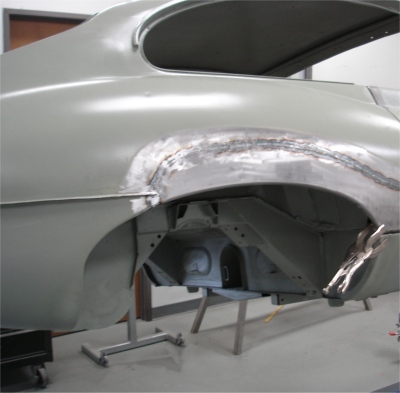
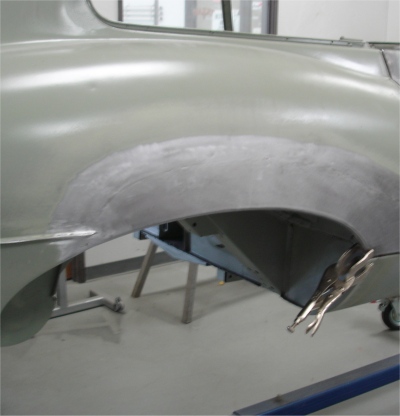
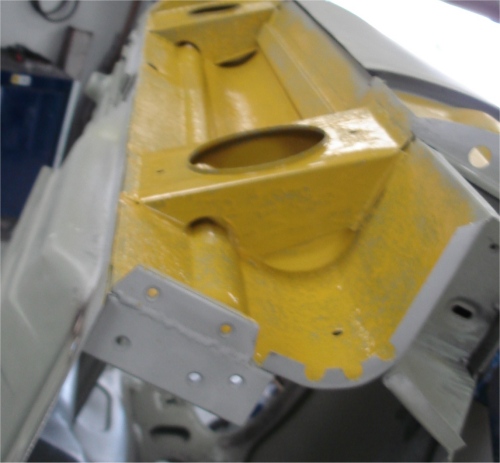
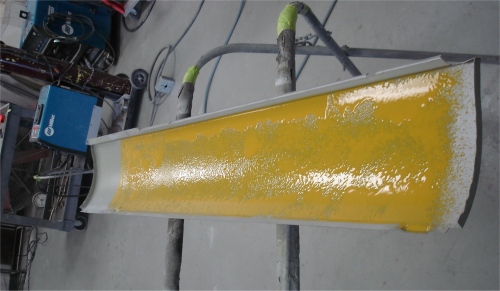
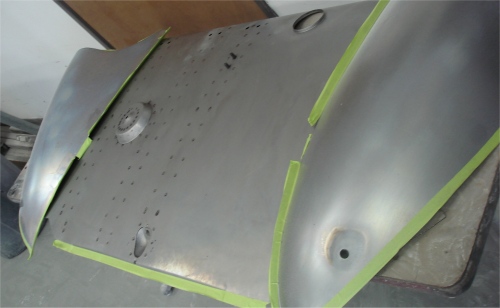
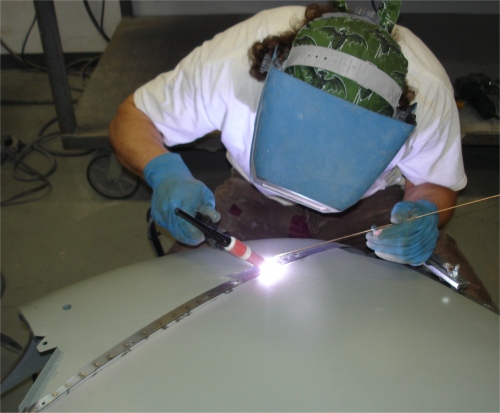
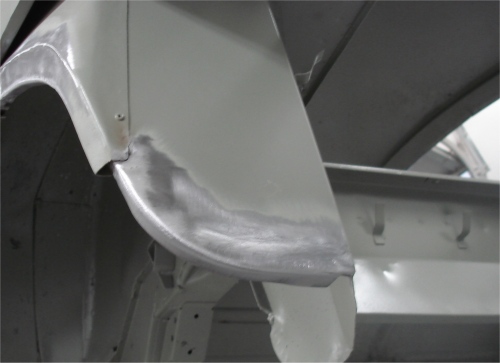
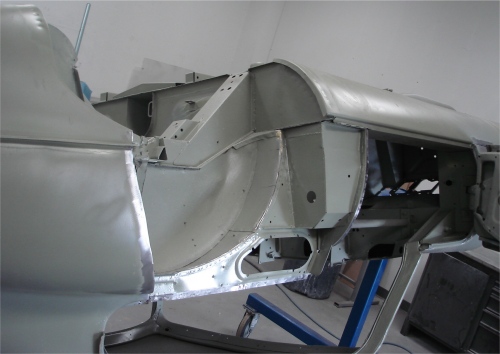
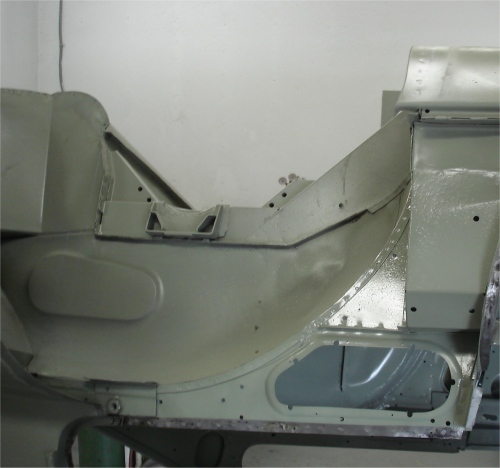
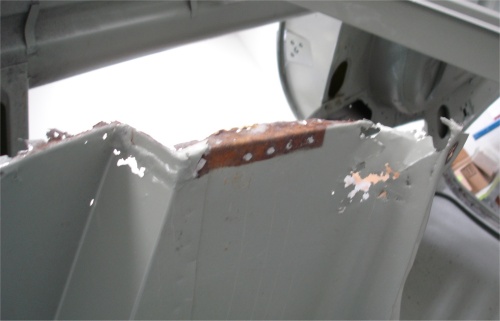
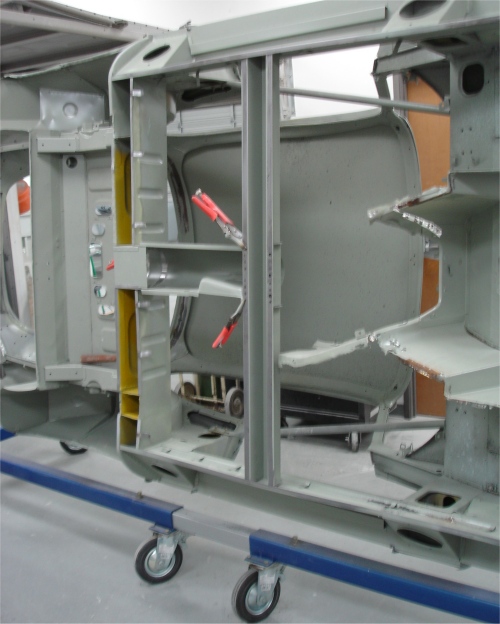
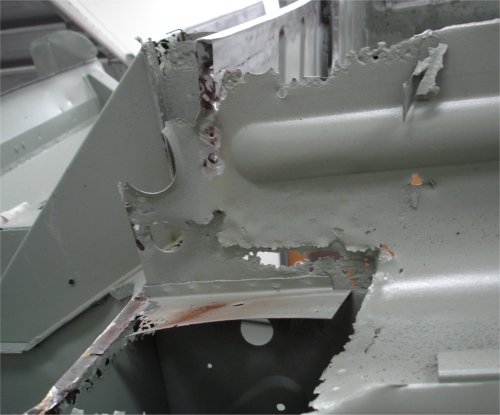
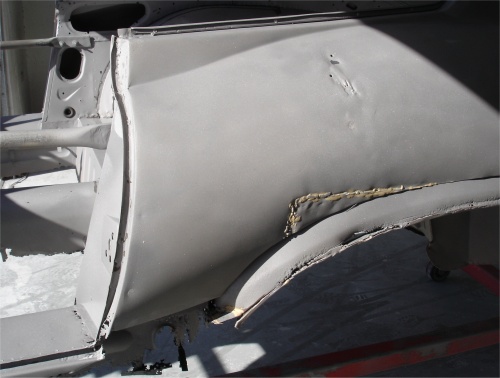
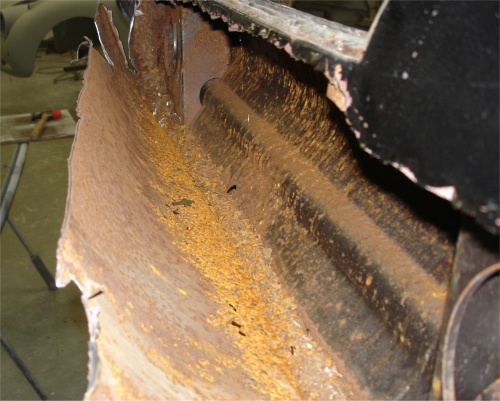
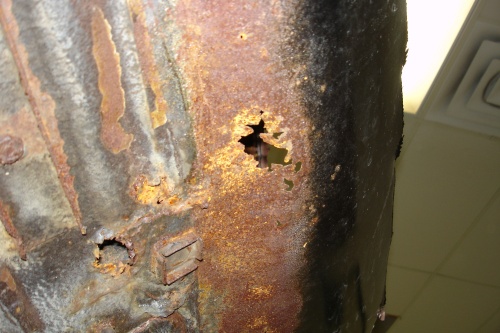
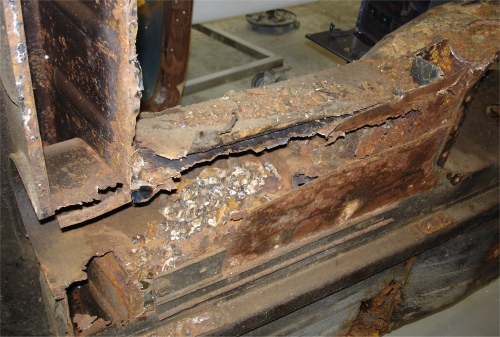
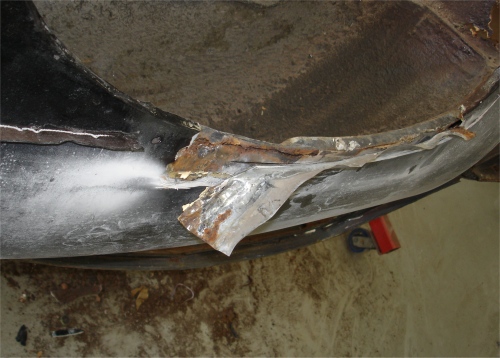
The second photograph in the following sequence gives an idea of just how rusty this particular E Type monocoque was. Thankfully, some of the later photographs should be a little more encouraging for you!
 |
 |
 |
|
first... |
|
|
|
|
|
|
 |
 |
 |
|
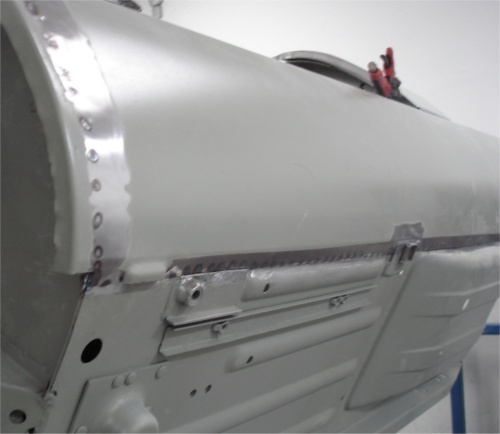
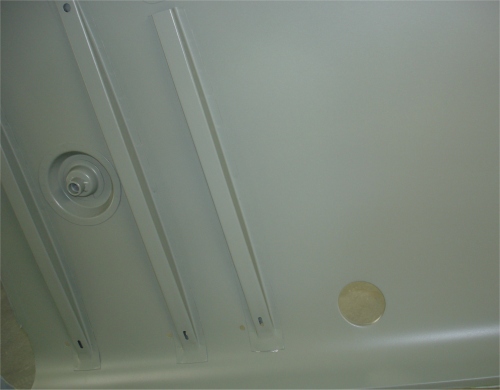
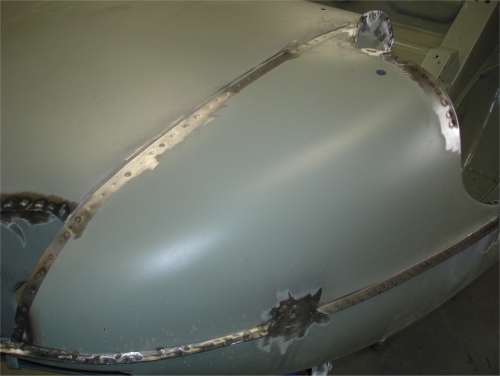
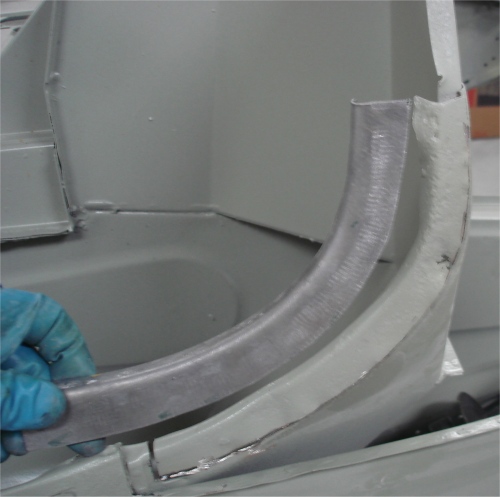
gradually rebuilt.... |
are fabricated |
|
|
|
|
|
 |
 |
 |
|
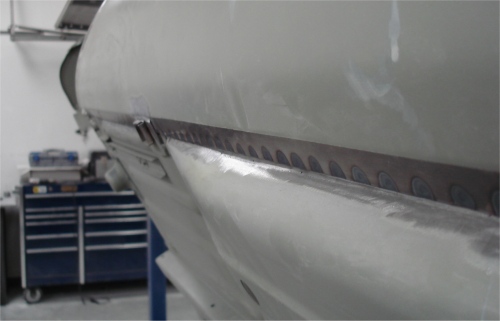
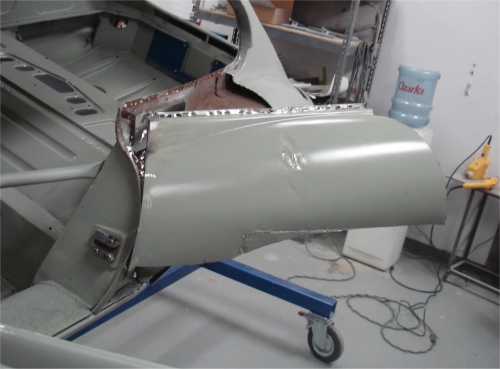
welded into place |
with Wurth Body Wax |
|
|
|
|
|
 |
 |
 |
|
|
|
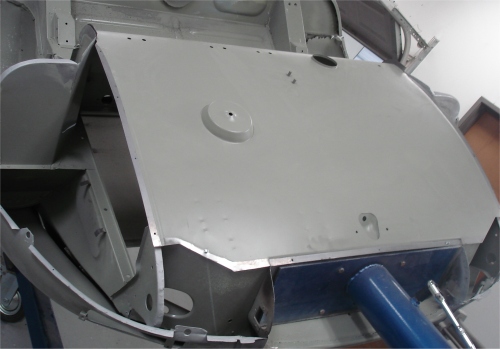
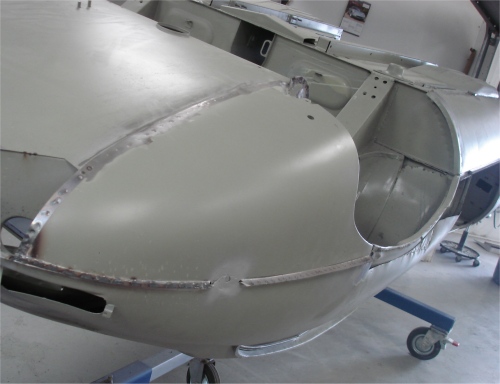
new panels are properly etch primed |
|
|
|
|
 |
 |
 |
|
|
|
|
|
|
|
|
 |
 |
 |
|
|
|
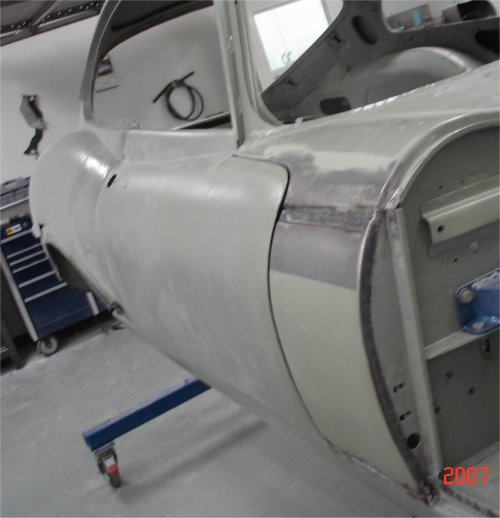
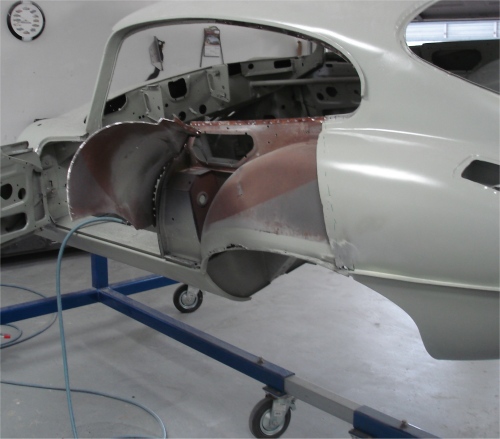
etch primed |
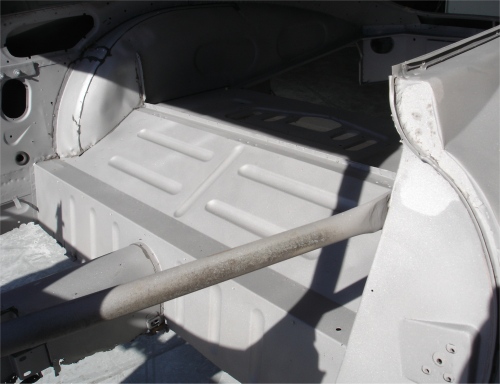
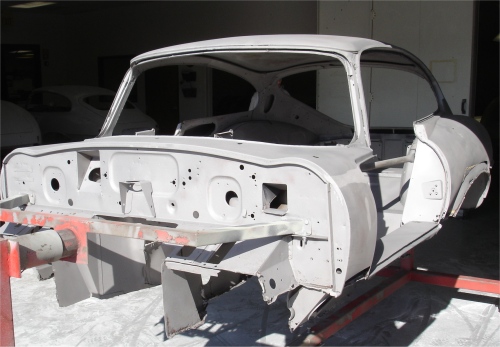
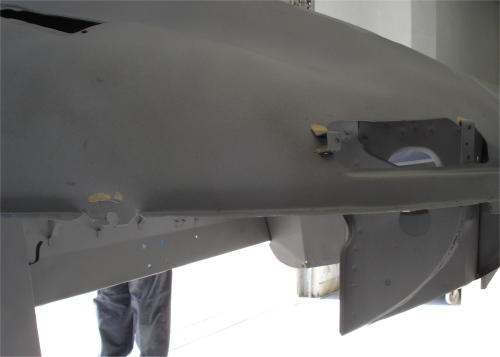
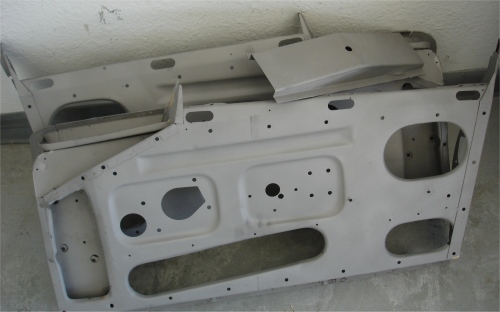
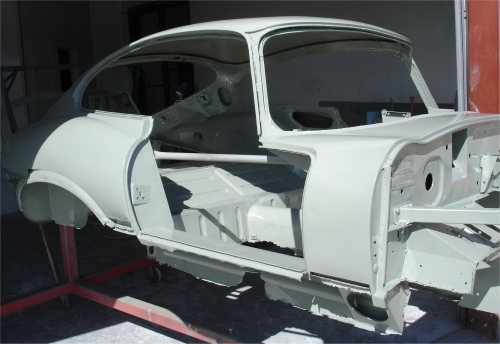
We now have your car back from the blasters. What was left of the bodyshell we have sealed with BASF etching primer.
 |
 |
 |
|
|
||
 |
 |
 |
|
|
||
 |
 |
 |
|
significant help |
|
|
 |
 |
|
|
delay |
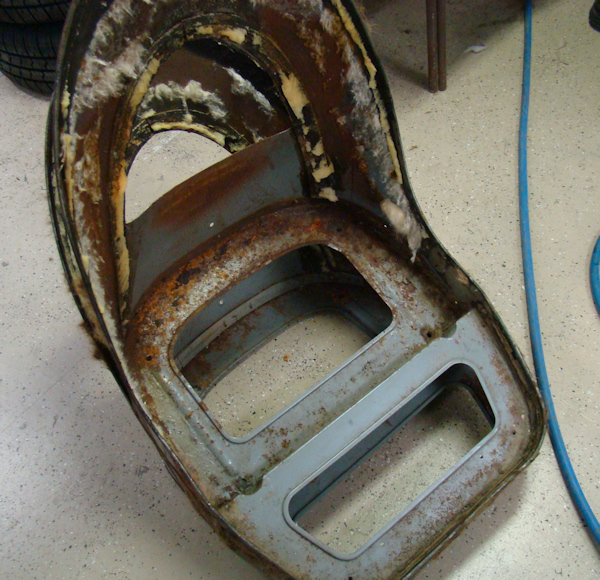
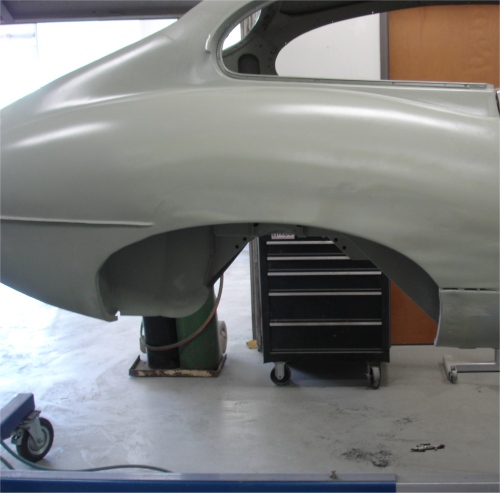
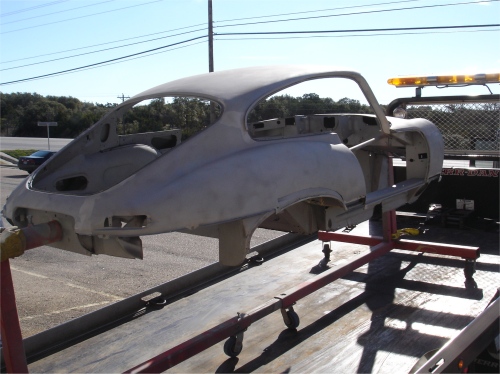
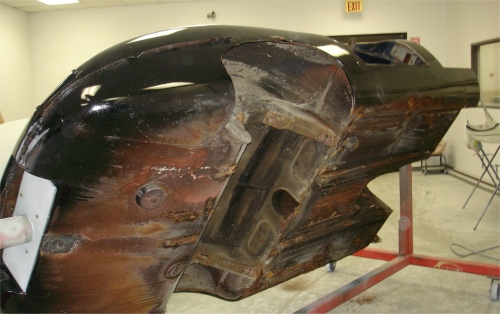
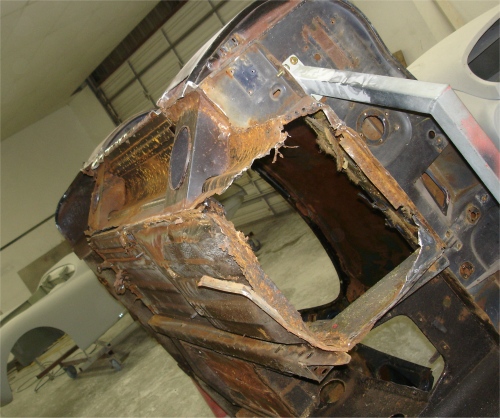
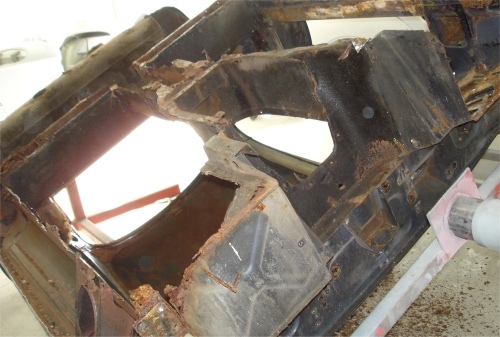
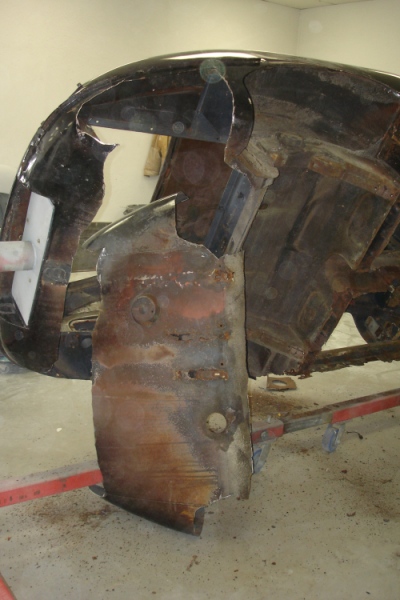
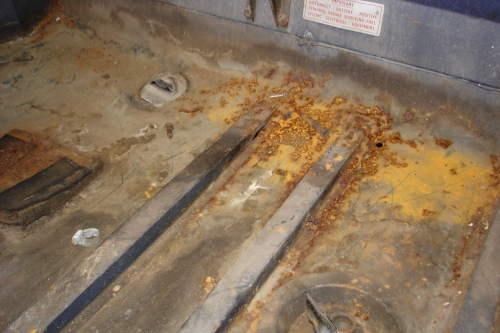
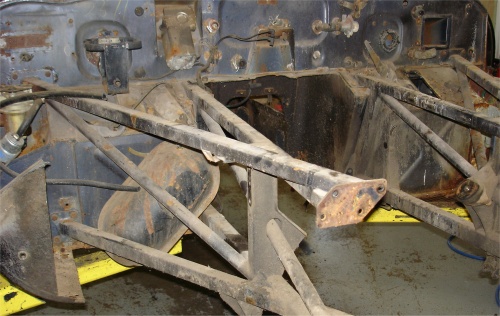
We have now cut away all the panels that are obviously going to be replaced and have the car ready for blasting, which is scheduled for early next week. As you can see, this is one very rusty E Type!
 |
 |
 |
|
|
||
 |
 |
 |
|
poor shape |
|
|
 |
 |
 |
|
|
|
|
 |
 |
|
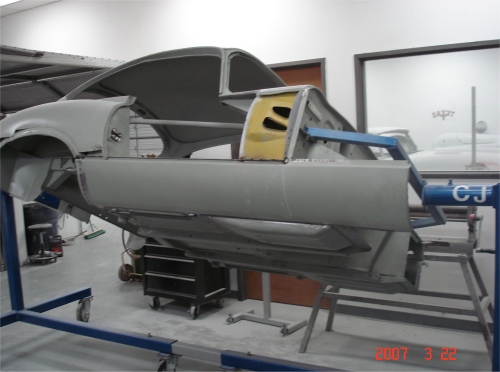
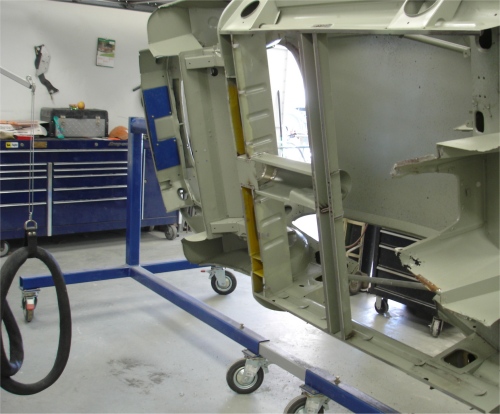
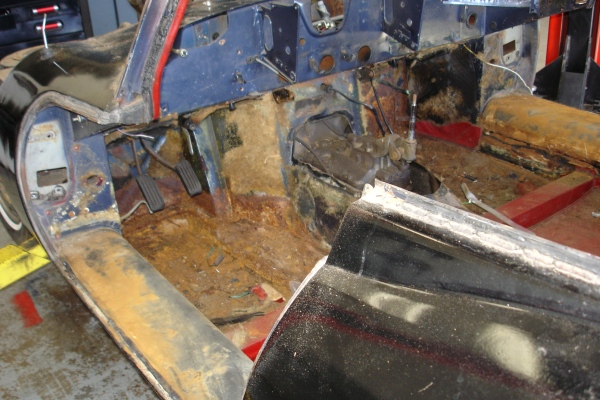
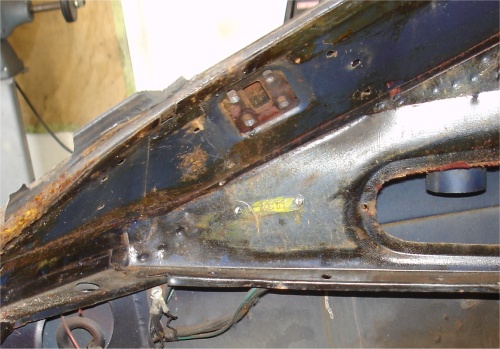
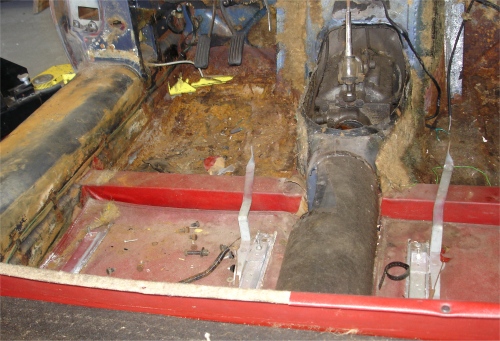
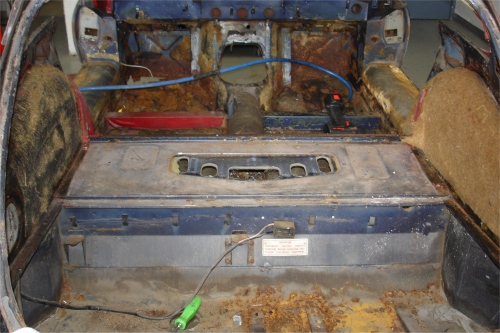
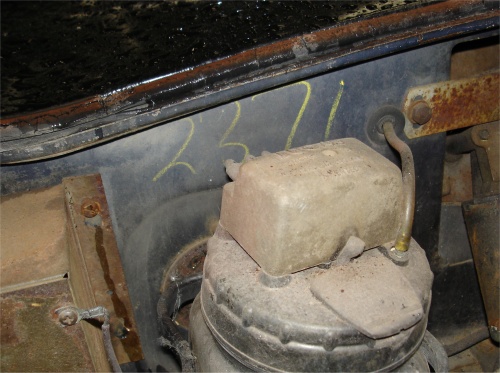
Your car is now completely disassembled and will be placed on one of the rotisserie jigs on Monday morning in readiness for media blasting.
 |
 |
 |
|
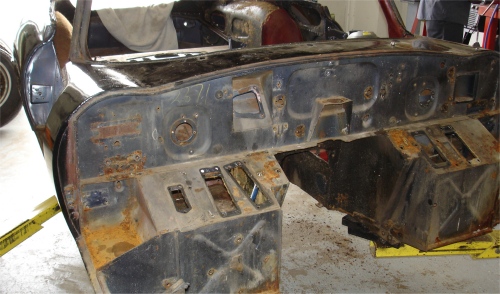
compartment |
||
 |
 |
 |
|
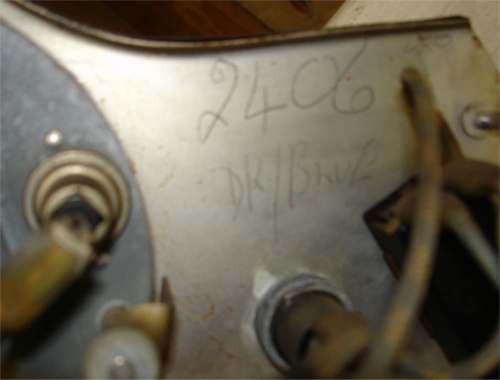
for a different body? |
|
|
 |
 |
|
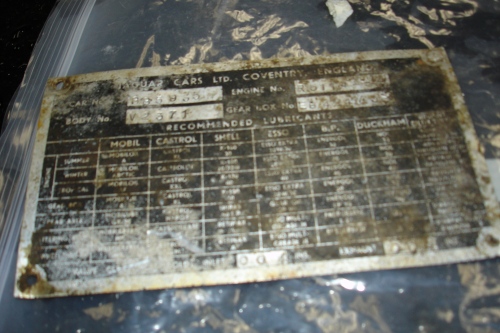
This 62 FHC (car # 935) was recently acquired by the grandson of the original owner and is about to receive the full treatment in the CJ workshop. I hope you enjoy watching your come car together over the coming months!
 |
 |
 |
|
|
|
|
 |
 |
 |
|
|
|
|
 |
 |
 |
|
|
|
|
 |
||
|
|
