Germany
SIII E Type Coupe & Roadster
| Craig
Balzer
Germany SIII E Type Coupe & Roadster |
|
August 9, 2001
Craig has sent us the following writen and photographic update.(First 6 photos)
Photo: air rail
The decision to remove the air rails from the top of the engine in an effort to clean up the engine bay was, for me, an easy one. This photo shows the result of years of operation without an air pump keeping the air way clear. The upper rail was so weak from rust it virtually broke in two pieces when being removed. It was either replace the item (at $350) or not. I wish all my decisions were that simply and frugal.
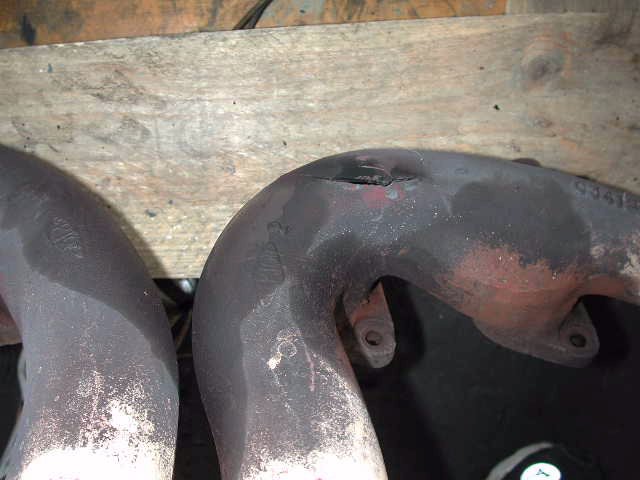
Photos: cracked exhaust manifolds
Likewise the decision to buy a set of Dan's headers was made all the easier when it was painfully obvious where the exhaust leak emanated from. This manifold has seen better days. The exhaust leak came from the right front but until the engine was out I couldn't see how badly damaged the manifold was. At $200 to $250 each for replacement manifolds, the price of replacing some or all of the manifolds was made less painful by replacing them with chromed headers. Can't wait to hear it fired up for the first time!
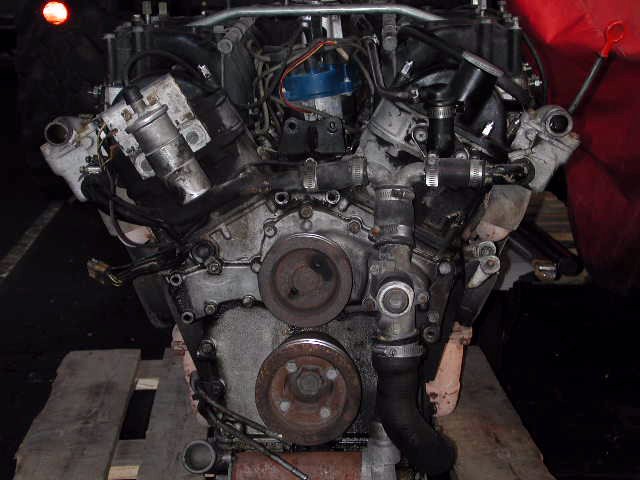
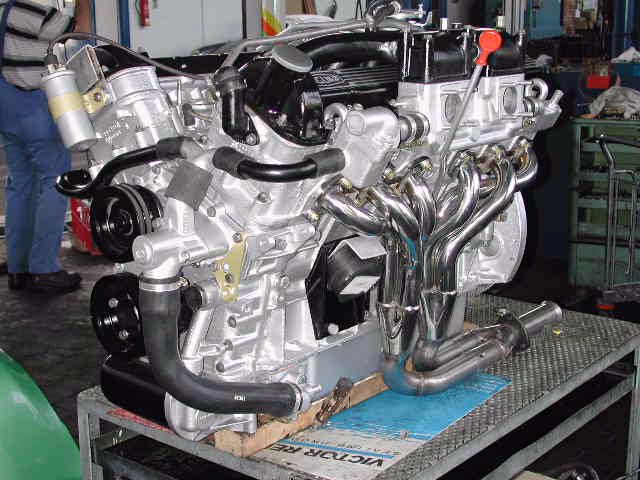
Photos: "Engine Before front" and "Engine after . . ."
The oil, grime, and dirt accumulation over 30 years and 100,000 miles is quite evident here. The before/after shot really is quite stunning. The "after" photo is still missing the carburetors. I delivered the four newly rebuild and refreshed Strombergs the same day I took this photo. They should be installed very soon, now.
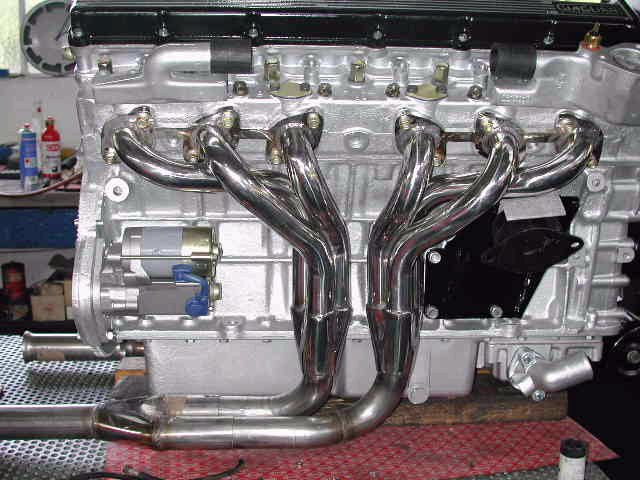
Photo: Headers and starter
This view really emphasizes the small dimensions of the high torque starter -- it is nearly lost tucked in the side of the big V-12 beneath those beautiful headers.
(Last 5 photos)
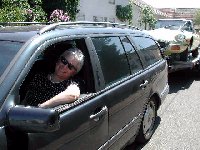
Sheri snapped this photo while I was playing hooky from work. It was 92 degrees which explains why I am out of uniform. Sheri gained her experience with handling long trailers as a Michigan farm girl backing double trailers of hay into the barn for off-loading. She did all the towing, corners and backing of the rig. She is my "Big Rig Sally".
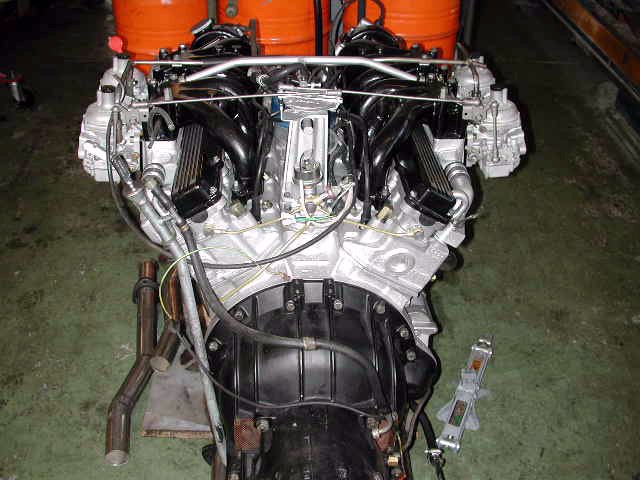
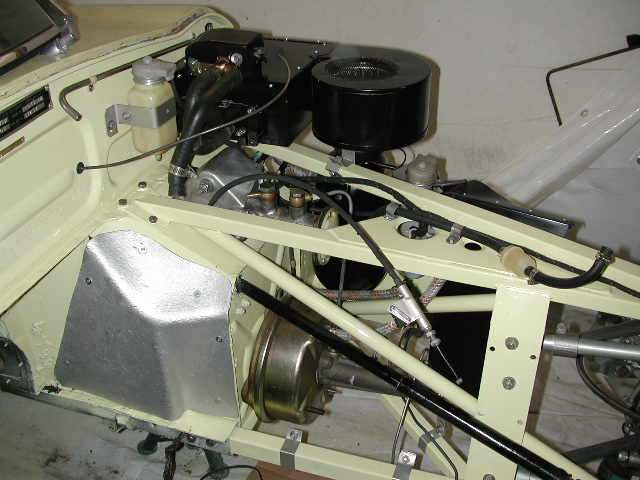
A big step in reducing the number of pieces: engine and transmission are one again for the first time in months. It's now down to only two big parts: the car and the engine/tranny assembly. You can also see how the machinist capped off the pipe that would have fed into the gulp valve below and beneath the throttle pedestal.
The engine looks great! For only having previously built 2 or 3 Jaguar V-12 engines, Thomas did a great job. I'll know soon enough if it runs as well as it looks. You'll notice that the air rails have been relegated to the trash bin. Sure helps to clean up the top of the engine. The A/C compressor will "clutter" it back up.
Pascal -- I was inspired to take this shot by your photo of your car being reassembled. I hope to get another shot at the same angle when the engine is back in place. You can see the KOOLMAT placed along the top of the transmission tunnel. Another was cut to fit the tunnel above the transmission. I'll let you know if it does anything to reduce heat build up in the passenger compartment.
 |
 |
 |
 |
 |
 |
 |
 |
 |
 |

June 24, 2001
(Click on thumbnails to view larger images)
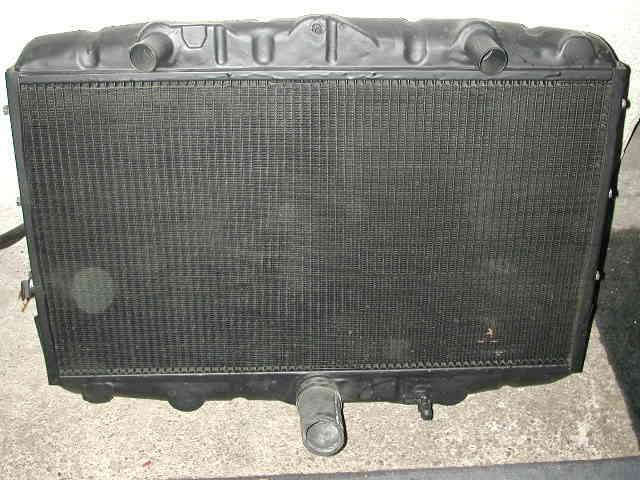
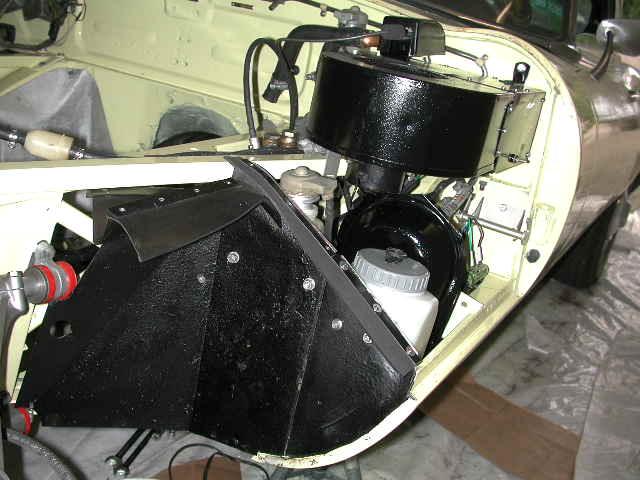
PHOTOs: "Cooling fans..." and "Radiator" and "Heater box ..."While awaiting the engine rebuild by a professional, I redid the fan shroud to include a new fan relay harness. The harness was the cheapest and easiest to install of all I bought. The heater box was taken apart and dressed up with new paint. I had the radiator cleaned and rodded in an effort to ensure cool running of the new engine.
 |
 |
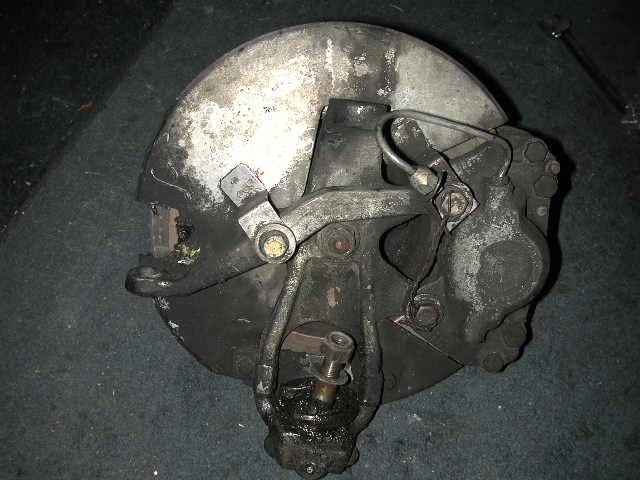
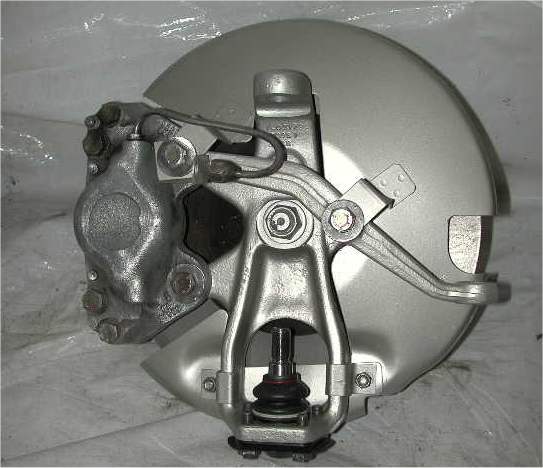
PHOTOs: Pass side brakes..." and "Drive side - cleaned..."This is a before and after of the clean up I did on the brake and steering pieces. The bearings had been replaced a little bit ago so I left them alone. All these pieces are painted rather than plated. Let's see how they hold up over time and how they clean up after use.
 |
 |
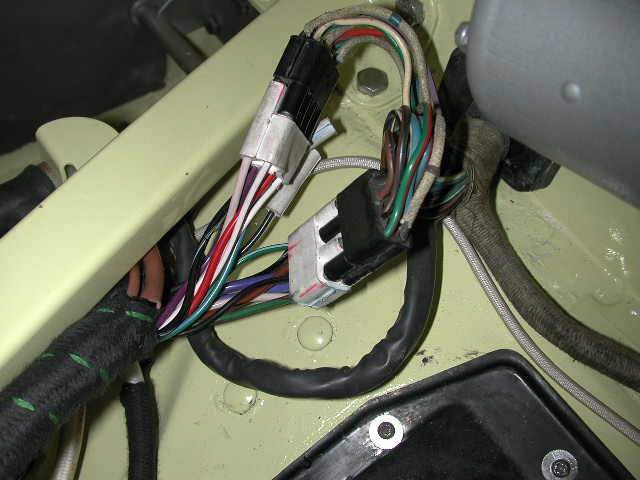
PHOTOs: Forward harness..." and "Forward harness..."As the engine bay was cleaned up and things were painted, and as I saw the detailed and careful approach to the engine rebuild that my machinist was taking, I just couldn't abide returning to the car my tattered and grease-soaked original wiring harnesses. So, I contacted Lesley at British
Wiring and got a great deal. The harnesses are exact reproductions as far as color coding of the wires, the type and color of terminal and, of course, the lengths, design and harness covering. It pretty much "just lays in place". It was a joy to add it to the engine bay. I'm going to wait until
everything is back in place before installing the harness hold-down straps.
 |
 |
PHOTOS: "Firewall..." and "Heater box back......"The bits and pieces are all cleaned and/or painted. Putting them in place was straight forward and a real joy. However, I do seem to have few extra bolts and fasteners left over. I really don't understand how that happens. I was so careful to tag and bag everything. I guess this falls into the same category as the odd sock that never materializes out of the dryer. Editor's note: All good mechanics end up with a few nuts and bolts left over ;-)
 |
 |
PHOTO: Installing torsion bars"I learned the hard way to read the directions. It seems that if you leave the torsion to be installed last, you have to disconnect the sway bar, the steering rack, the shock and the upper suspension arm. So, I went backwards a few hours to get there from here. It wasn't as bad removing these pieces the second time compared to the initial removal. After I get the Dan Mooney HD torsion bar installed, my reassembly will be complete. Everything that came off is back in place and looking, if I may be so bold, better for it.

THE NEXT STEP: The engine should be nearing completion. I have stopped by twice to see the progress (and photograph it) but keep bumping into German
holidays. Last I saw it, the crankshaft and timing chain were in place and both heads were set up. The liners and pistons were next with buttoning up
the whole thing following. Hopefully, the next several photos should be of the completed engine and it's installation. My timeline of driving the car
to the 6-9 July Jaguar Festival in Geneva is looking a little doubtful. We'll see.Craig Balzer
May 2001
Craig has been busy rebuilding his engine and transmission and stripping and reassembling the entire front end of his V12 E Type. I will let him describe the following photographs to you in his own words.Cleaning and Rebuilding UC1S70257 BW, a 1971 V12 2+2
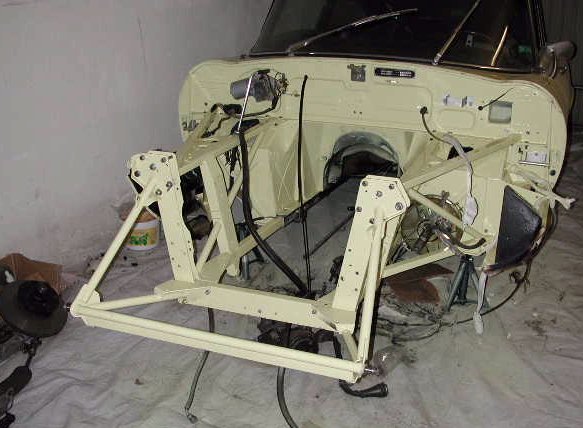
ENGINE BAY NO RADIATOR
The engine is out and the bay scrubbed clean at a coin operated car wash. The jacks are merely holding the front frame up so I can loosen the attaching bolts. There is no weight on the frame; all weight is borne by jack stands. A work-around while working solo. Original color (Lt. Blue) is evident on the side frames and footwells. It really grew on me over time -- but painting two frames Pale Primrose was significantly cheaper than painting one car Lt. Blue. The Dk. Blue interior goes nicely with the Primrose paint.

ENGINE BAY NO FRAMESPretty much as far apart as I cared to go at one time. Nothing much left to do but remove the ancillaries on the firewall. Rebuilt the master and slave brake cylinders, and the heater box. The steering rack didn't leak, so I left it alone. Cleaned up and painted the rest.

FIREWALL NEW PAINTThe shop that painted the frame rails (and coated the inside with Waxoyl), made up 6 aerosol paint cans at the same time. From a distance, it doesn't look too bad. I later masked off the firewall to paint the battery box and steering column. Next time (oh, God -- NEXT TIME?!?) I'll be sure to mask off the pedal box opening. A surprising amount of over-spray went down that small hole. Carpets were out, so only a misting of paint on the floor board.
ENGINE BAY WITH FRAMESThe frames went back in place surprisingly easily. Since I didn't remove the battery box, getting the passenger side back in place was tricky. Ended up having to touch up an inch long scratch (gouge?) at the upper attaching point.
 |
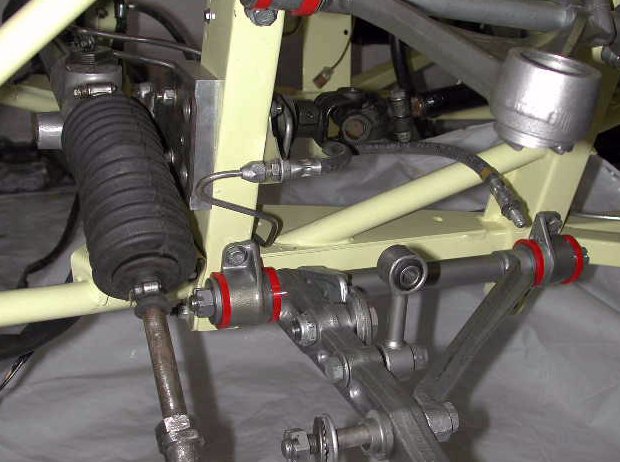 |
Suspension cleaned and painted. I couldn't afford re-plating and wanted to test the durability of paint on the suspension pieces -- we'll see. Installed with Poly bushings and new steering rack mounting bracket. It's a good thing you can't see the end of the lower suspension arm -- it's up-side-down in this photo. Found that out when TRYING to install axle stub carrier. And I thought I was SO careful in putting them back together after cleaning and painting. ++++++++++++Dan, the wiring harnesses are pretty much in place, and will finish today re-attaching the vertical links to the suspension arms. More photos will follow, but I don't want to over load your in-box. Engine is scheduled to be done first week of June -- they got into 2 or 3 other engines while waiting for the liners and the correct connecting rod bolts. Am still expecting to drive it to Geneva the first weekend of July (fingers crossed).
Best Regards,
Dan
Mooney
Team
CJ
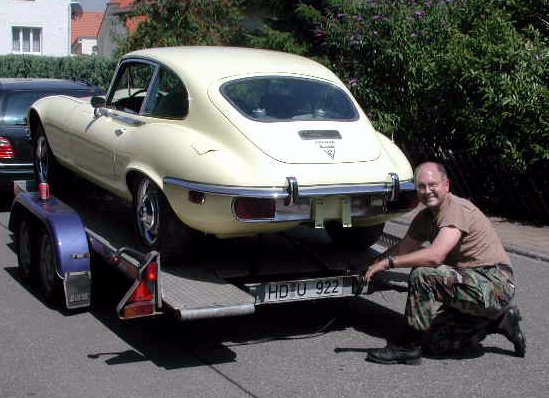
Craig recently sent us this wonderful story of how he came to be husband to his bride, Sheri and the proud owner of the two V12 E Types shown in the main photograph below.This e-mail, in addition to saying Happy New Year and thanks for all the support over the past year, is to provide a bit more explanation to the Jags. They are also how I met Sheri.
I bought my '72 OTS in 1980 at Fort Huachuca AZ as a brand new Captain with a set of orders in-hand to report to Munich for a three-year tour. In hindsight, my 68 Cutlass Supreme convertible with 2 bbl 350 and 2-speed tranny would have been a big hit in Germany. But, I wanted a car capable of enjoying the autobahns. I found the '72 E-Type five months prior to shipping out and arrived in style. Six years later, I returned to Fort Huachuca as an instructor at the Military Intelligence School. I met an old guy (he was in his 60's and I was 33) with a newly acquired '71 Series III 2+2. He had left a note on my windshield asking for help in balancing the four carbs. Earl and I became close friends, the cars bridging the gap in our ages. In 1988, he and his wife were going to visit her folks in Paris for Christmas. He asked his oldest daughter, Sheri, to house-, car-, and dog-sit. If she had any problems with his E-Type, she was to call me. He invited me over to his house for dinner a few nights before leaving so Sheri wouldn't be calling a total stranger. Well, shortly after Earl and Nadine flew to Paris, Sheri and I were anything but strangers.

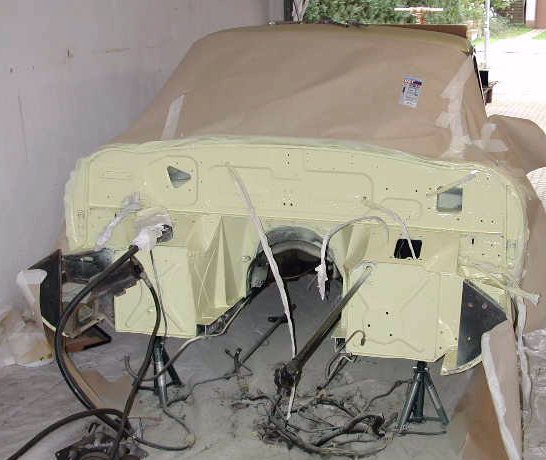
Earl and I became active members of the Jaguar Club of Southern Arizona in Tucson, about an hour up the road. The club sponsors an annual British Car show with a twist. Oh, sure - they invite the Morgan Club, the Healey Club, the Triumph Club (both car and bike) and others. But here's the twist. The indoor show is held on Father's Day weekend in one of the bigger mall's in Tucson. The club sells votes for half a buck a piece for a People's Choice trophy or two or three, depending on the number and variety of cars/bikes on display. So, the car owners benefit; to say nothing of talking about their beloved for the whole weekend (the cars, not their wives). After the votes are counted, each one becomes a raffle ticket for the dozen or so prizes. So, the public benefits. All the money that is collected (usually several hundred dollars) is donated to a local hospice. So, the elderly benefit. This weekend is one of the largest weekends for gross sales for the entire mall, second only to the weekend prior to Christmas. So, the vendors all benefit. AND, the table the club sets up to collect the votes also has a club member present to sign up new members. So, the club really benefits. It's a win-win-win-win-win situation. The photo of Earl's Primrose 2+2 and my Signal Red OTS is at one of those British Car / Bike Shows, I think it was 1988.When it came time to leave Fort Huachuca in 1990, I decided to have a top quality paint job done on my '72 Signal Red (originally Sable Brown) OTS. I left it with a garage in Tempe for the paint and bodywork, and reported to Korea for a 12-month tour. The concept was to have the work done over the intervening months and have it completed when I returned from Korea. I ended up staying in Korea for 3 years and then moved on to Germany. I've been in Germany for 8 years and counting. The car is currently still in primer with all bodywork completed: all rust removed or repaired, all dents, dings and blemishes repaired, all seams re-leaded, all chrome work check fitted; it's
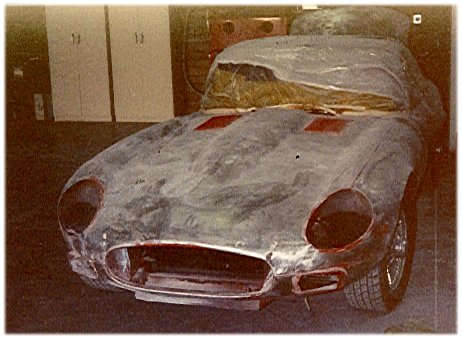
just waiting for paint. It doesn't make sense to put a super paint job on a car and then turn it over to the longshoremen to manhandle. The photo below is of my Series III in the midst of being striped naked for the body and paint work; this photo was probably taken in 1991.
As age, a bad back and a new found love for Corvettes grabbed hold of Earl, Sheri learned he was going to sell his 2+2. In 1998, it became the best birthday gift I have ever received.So, not only did these two Jaguars bring Sheri and I together, now I own both of them. Little did I know in the late 1980's that the photo of Earl's and mine Jaguar was a prophecy of things to come! The 2+2 is with me in Germany stretching it legs occasionally on the autobahn while the OTS is patiently awaiting my return stateside to complete what I started ten years ago.
All the best for a prosperous New Year. I sincerely hope you continue your string of successive record braking
months.With Warmest Personal Regards,
Craig