| 1955
XK 140 roadster (CK)
Total Team CJ restoration |
|
| 1955
XK 140 roadster (CK)
Total Team CJ restoration |
|
|
Customer
update - October 21, 2012
Hi Dan!
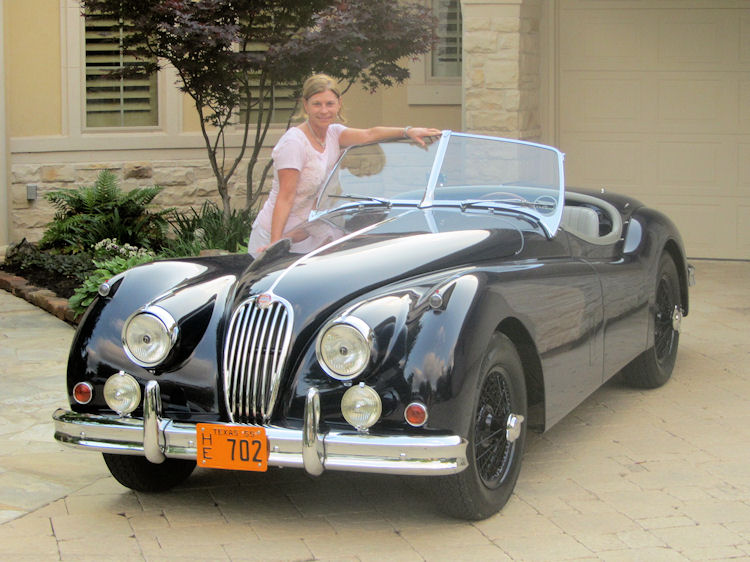
We tied for best in class with John (1963 E Type roadster) at the Houston concours yesterday with a perfect score ... but we trumped John with best in show honors! That gives us perfect 10.0's in Austin and Houston, and a 9.998 in San Antonio (a couple of spots I missed on the headliner).Should be enough (hopefully) to win national JCNA honors in the S3 division (modified) for the second year in a row !!!

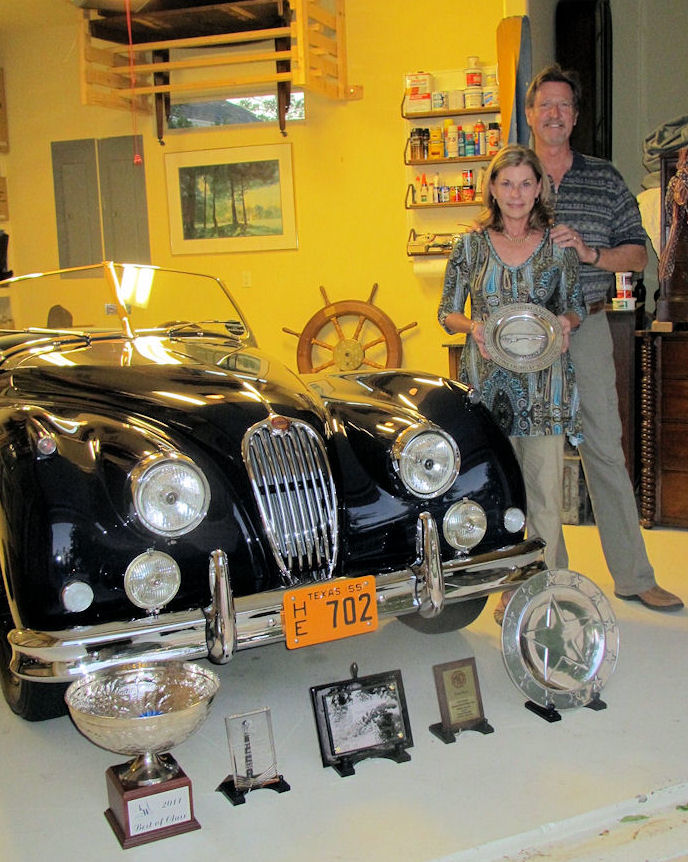
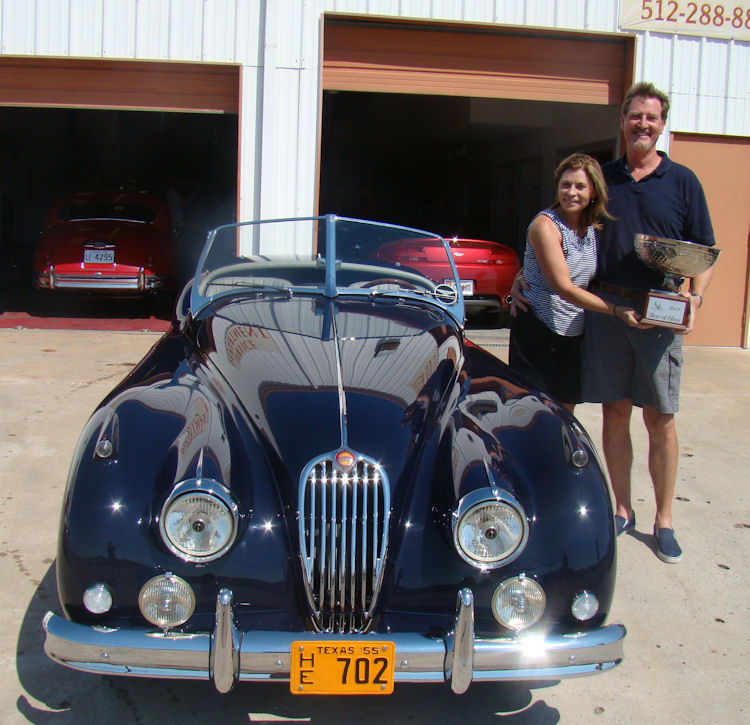
Lynne
and Chip Keener with their Best of Show trophy at the JCNA Houston Concours
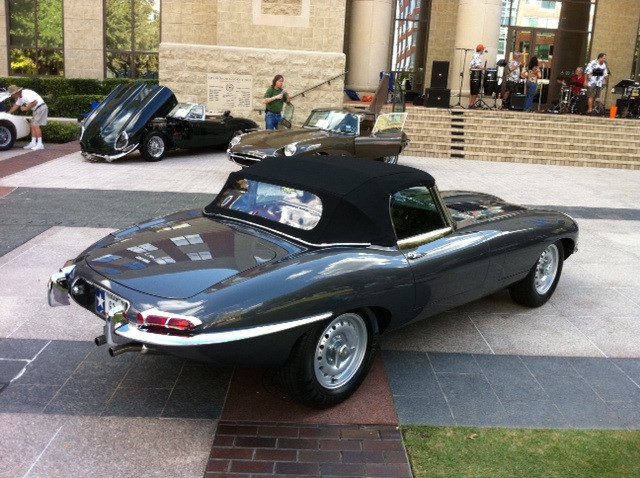
Customer update - November 2011
On 10/23/11, this CJ restored 1963 E Type received a perfect 100 point score at the Houston Jaguar Club Concours. Congratulations to the car's owner and driver, John Knock. By a strange twist of fate that day, John beat another CJ alum, Chip Keener and his 1955 XK140 roadster, into second place.Chip will no doubt take some consolation in his defeat from the fact that his 99.99 point score, when added to his two previous 100 point scores, makes him a lock for a National Championship in his class.
Congratulations to both John and Chip - and thanks for flying the CJ flag!
October 2011
Jaguar
Club of Austin Concours
Best
in Class
Another 100 point score and Best of Class win at the JCNA sanctioned Jaguar Club of Austin Concours last weekend. Congratulations, Chip and Lynne!
 |
 |
|
|
|
September 2011
Jaguar
Clubs of the South West Concours
Best
of Show
 |
Racking up the trophies! Best in Class & Best of Show. We showed the car in the S3 division (modified) at the Jaguar Clubs of the South West JCNA sanctioned concours last weekend. Stunned to get Best of Show! |
August
2011
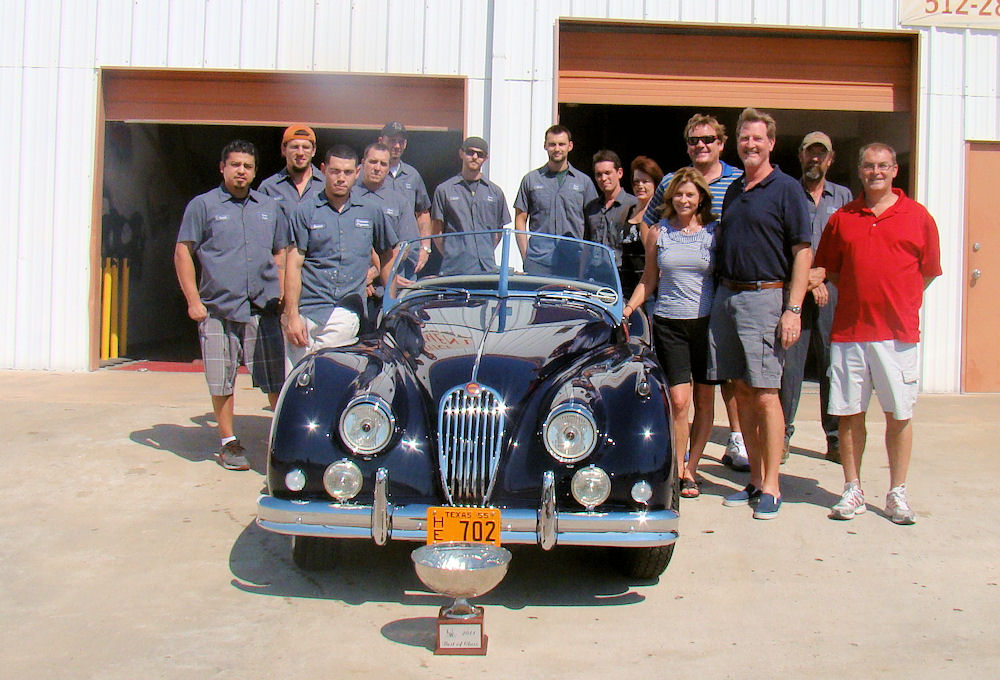
Chip and Lynn Keener stopping by CJ with the Keels and Wheels trophy
(Left to right) Carlos, Darrell, Gerardo, Kevin, Chris, Zakk, Chris, Alec, Tammy, Lynne, Dan, Chip, Ray and Andy
|
|
 |
|
|
|
May 2011
Keels and Wheels, Seabrook, TX
Best in Class
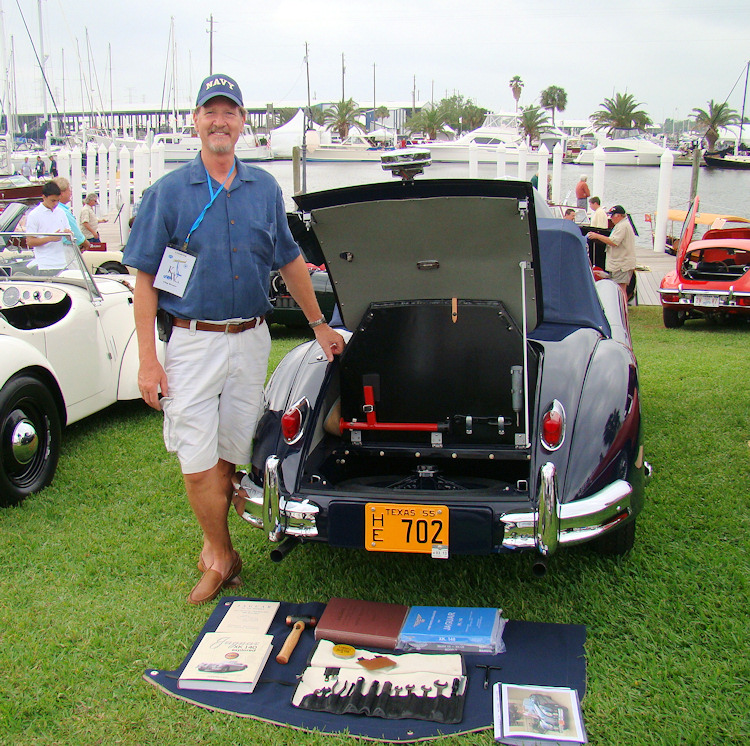
Click
on above photo for a video of Chip describing how he came to own
and restore his beautiful Jaguar XK140
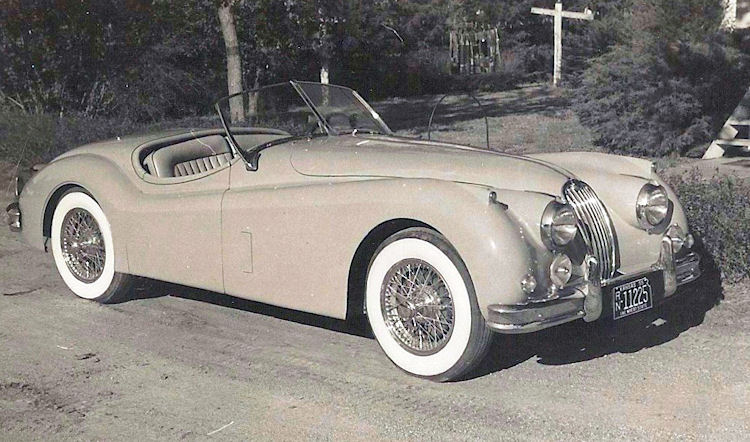
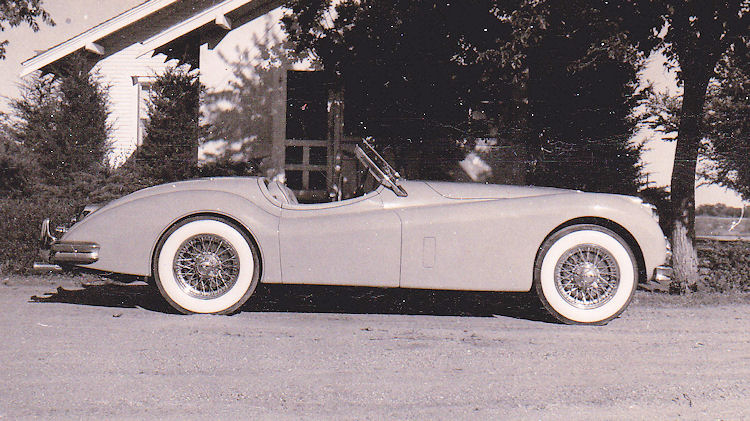
Chip has been excited to track down the widow of the very first owner of his XK140, a gentleman by the name of Orrin Dodge Jr. from Buhler, Kansas. Mr. Dodge passed away in 2002, although a surviving friend of his turned up the black and white photos below, taken shortly after Orrin bought the car new in 1955.Click on the large photo of Chip with his car at the Keels and Wheels Concours for a video describing how he came to own and restore this beautiful Jaguar. The video highlights just how derelict (and incomplete) the car was at the outset of the project. Certainly one of our more challenging restorations!
 |
 |
 |
Update report - April, 2011
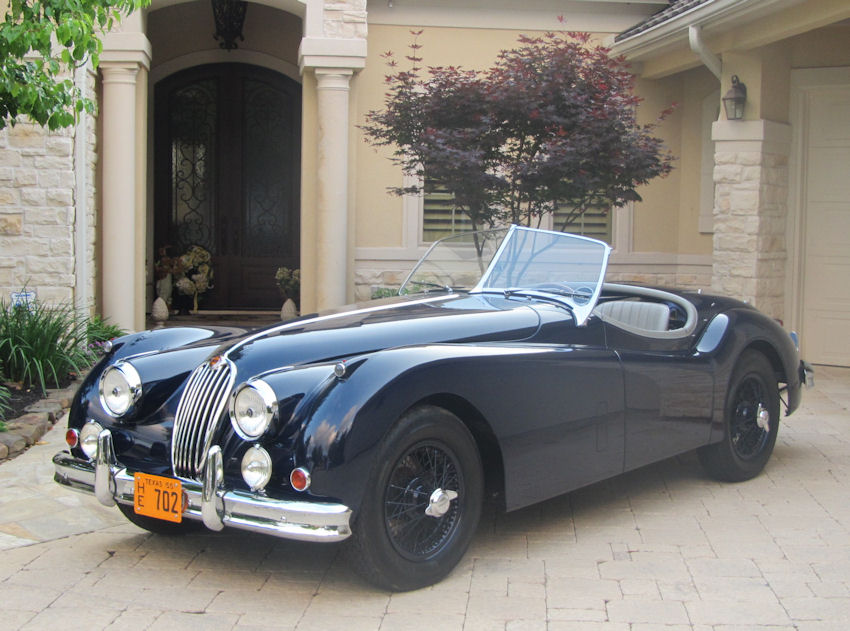
Home at last...
 |
 |
|
|
|
|
|
|
 |
 |
|
|
|
Test driving on the roads behind Classic Jaguar. Click on the photo for a short (rather blustery) video clip.

 |
 |
 |
 |
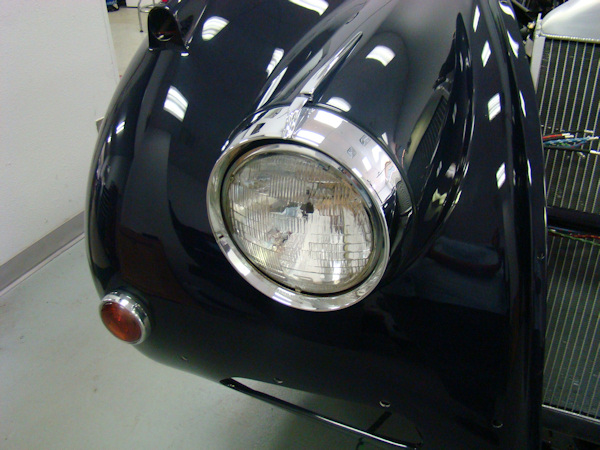
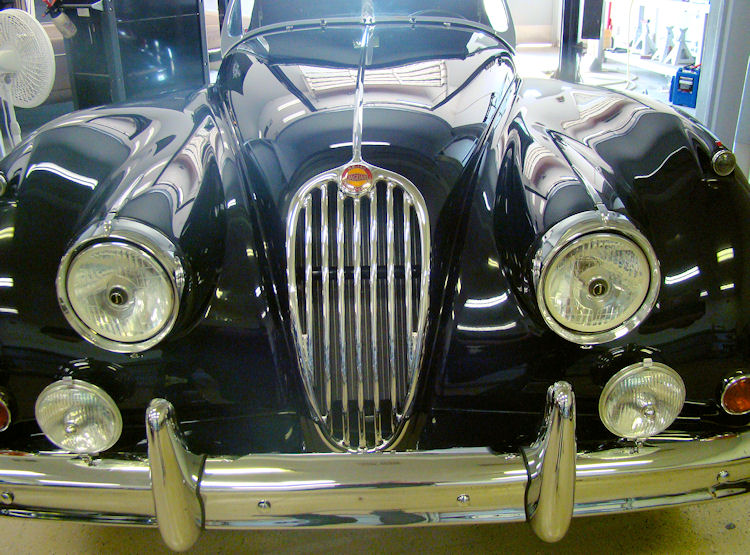
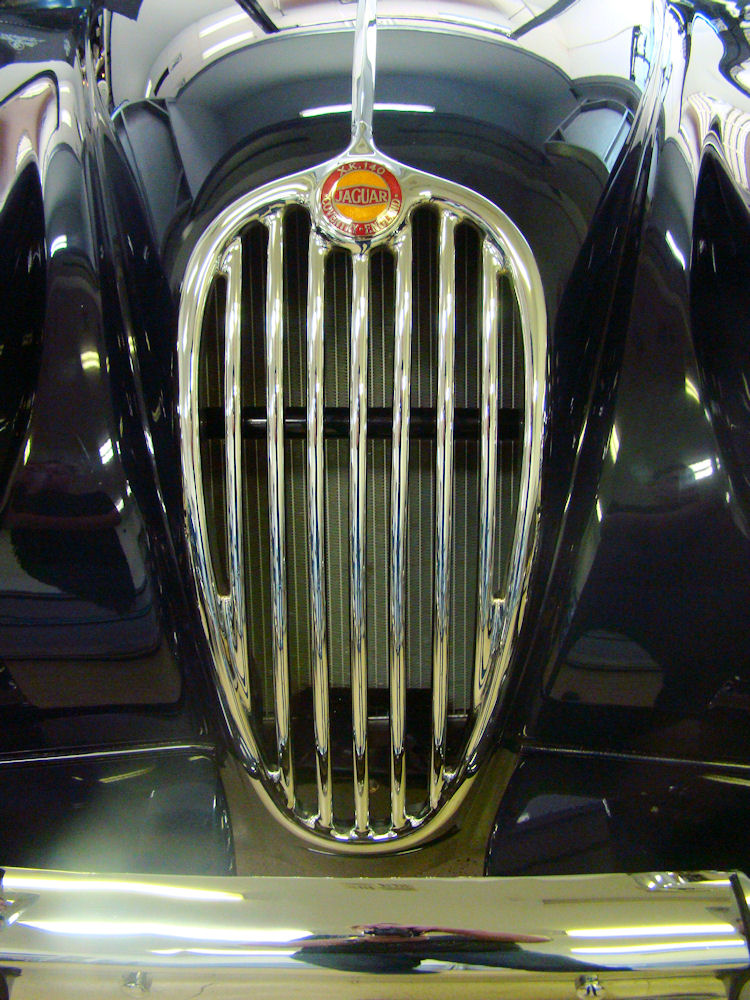
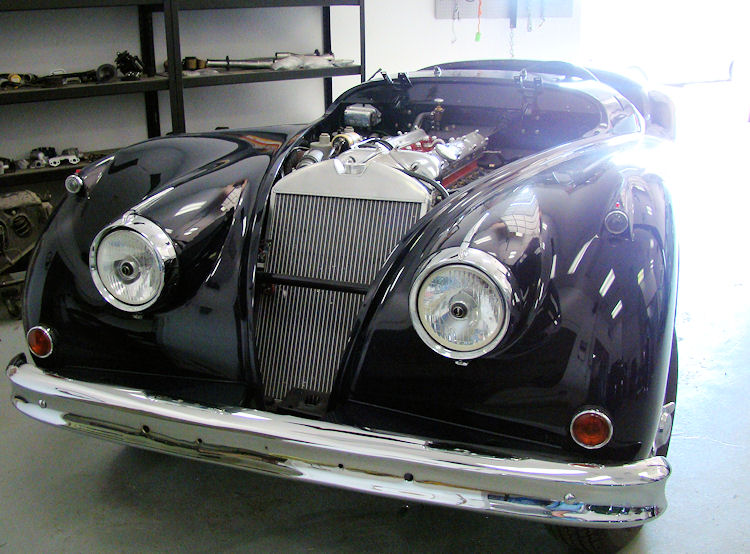
Installing bonnet brightowrk and grill.
 |
 |
|
|
|
 |
 |
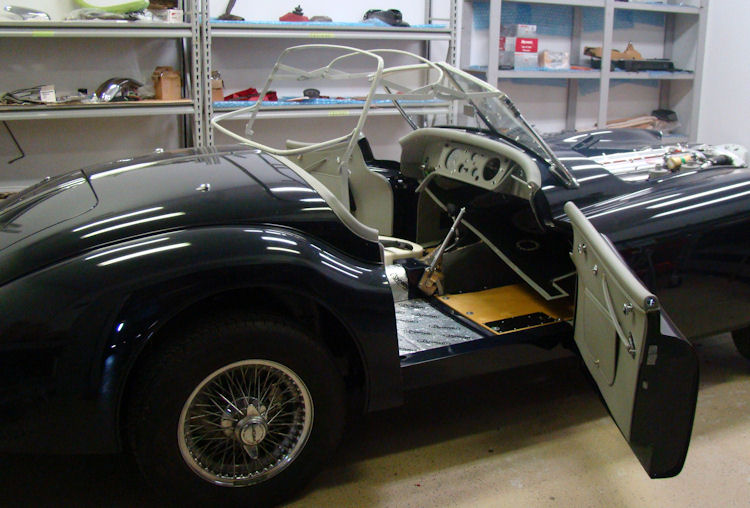
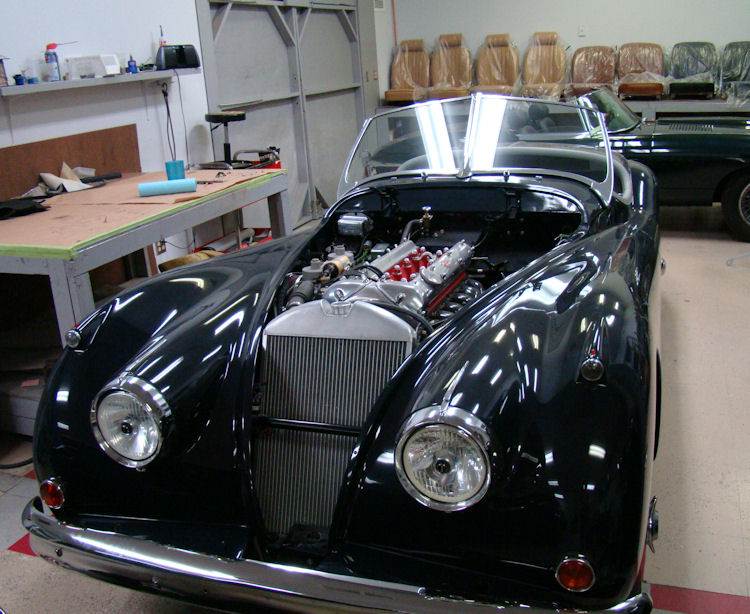
This car is rapidly approaching the road testing and shake down stage...
 |
 |
|
|
|
 |
 |
 |
 |
|
|
|
|
|
|
 |
 |
|
|
|
|
|
|
 |
 |
|
|
|
 |
 |
|
|
|
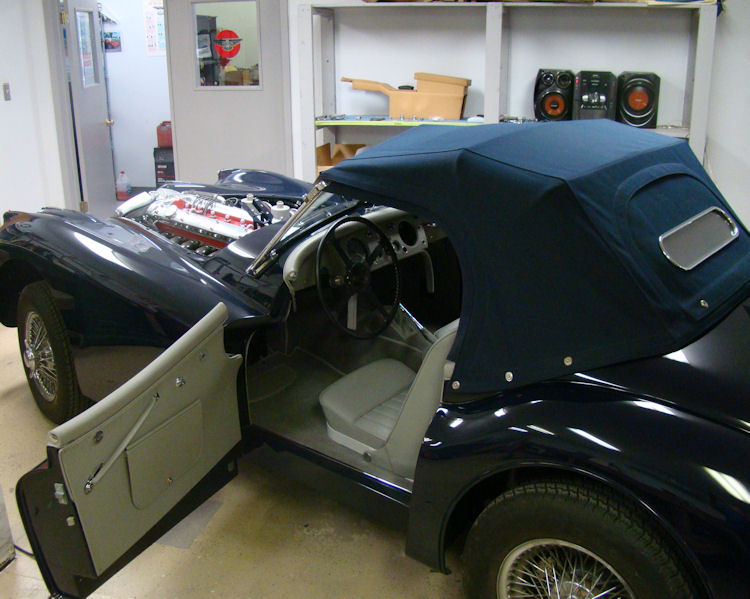
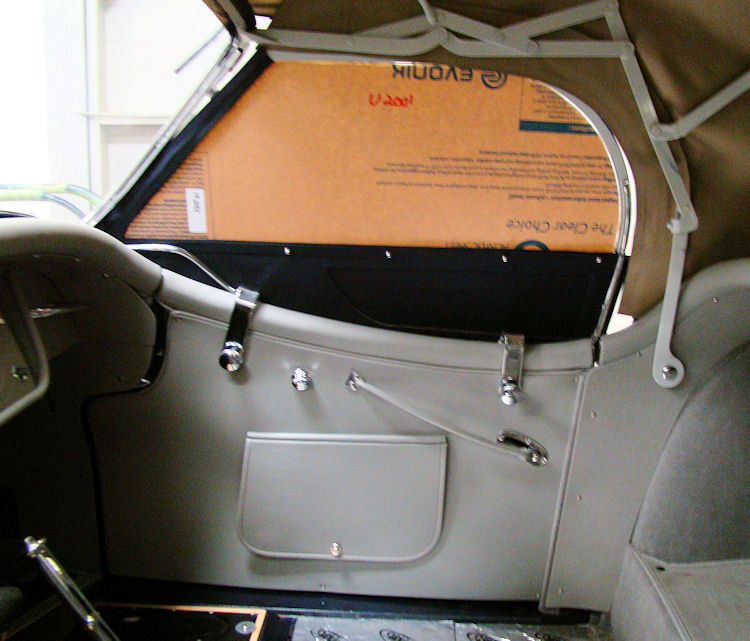
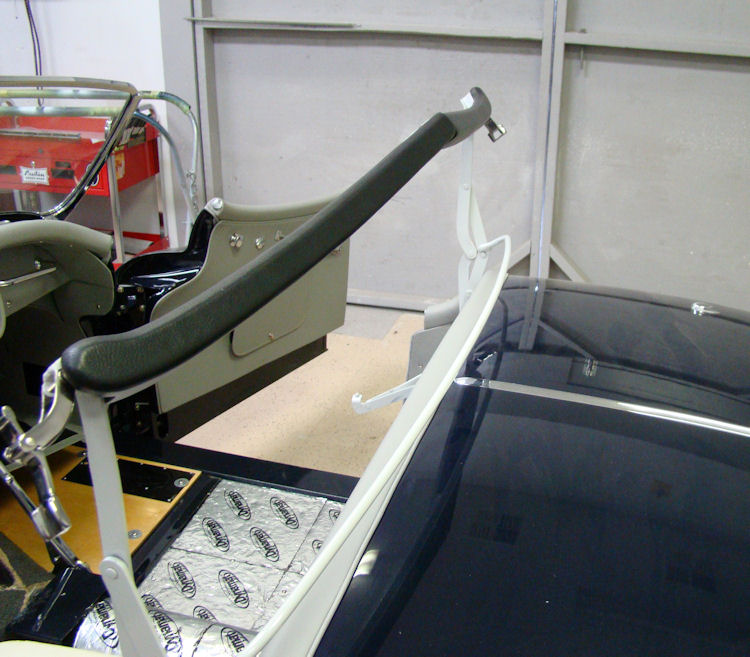
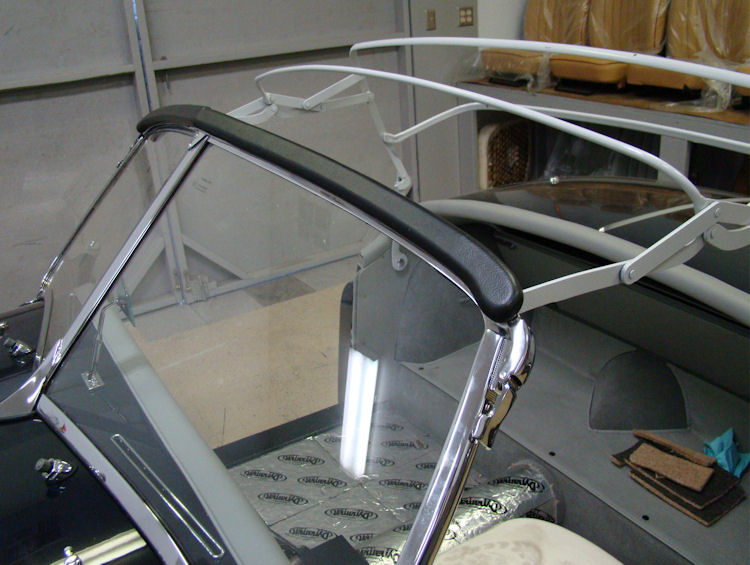
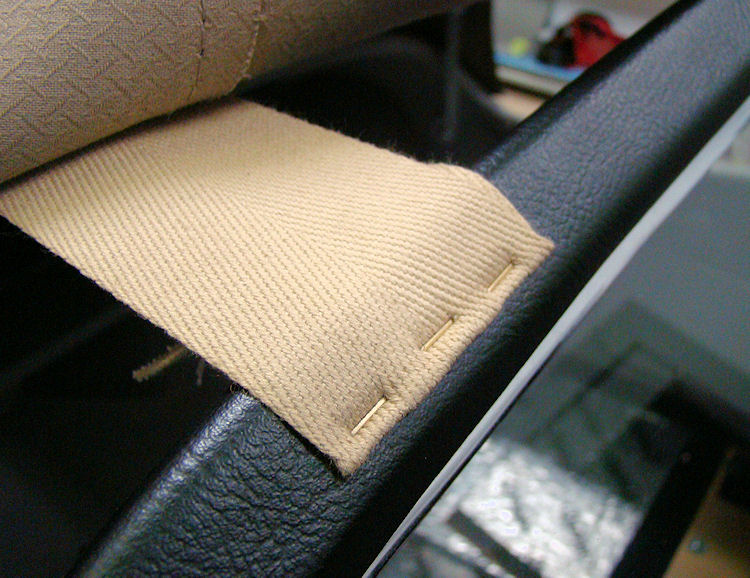
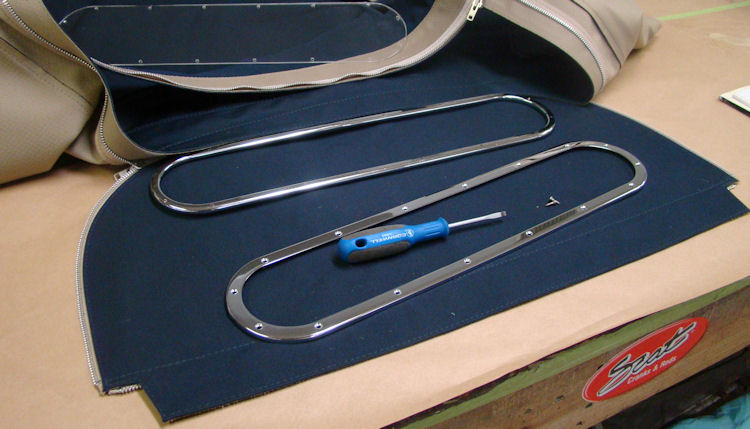
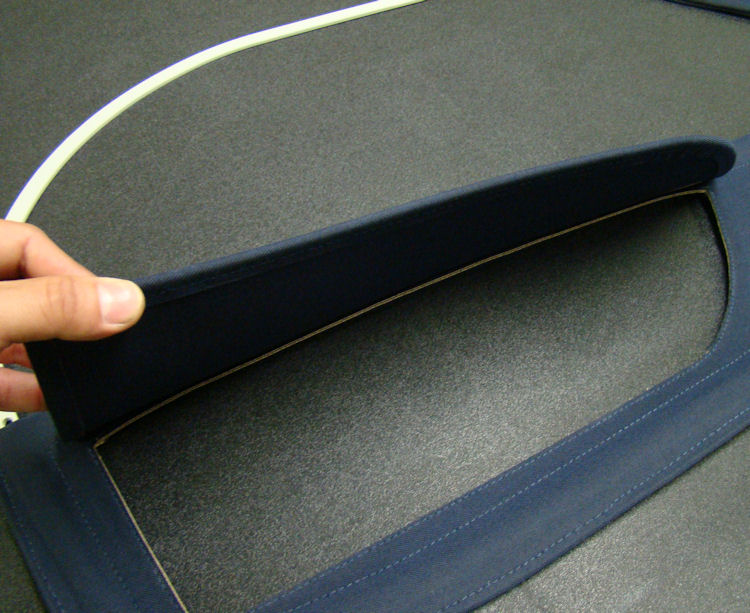
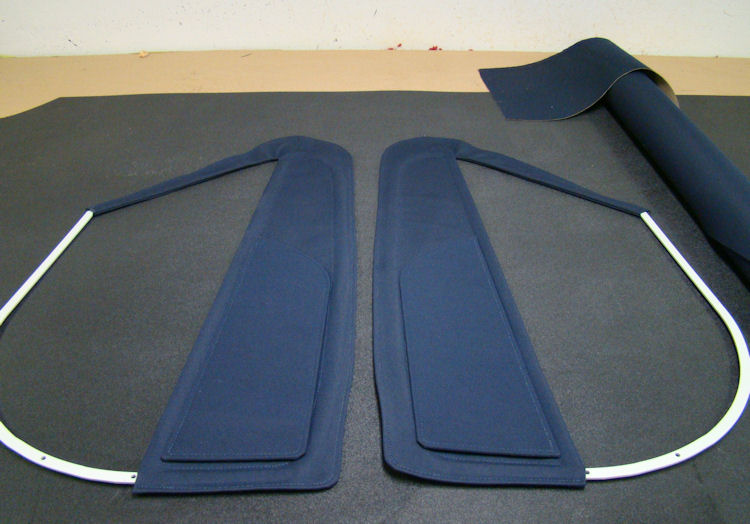
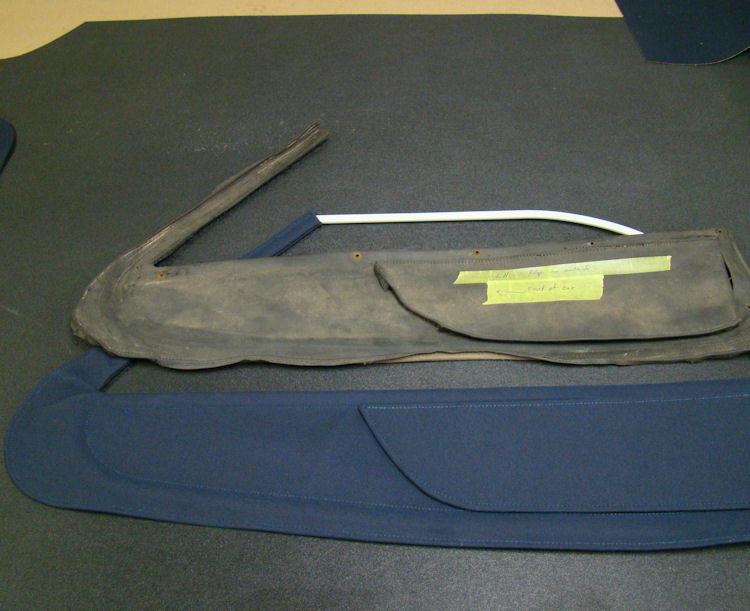
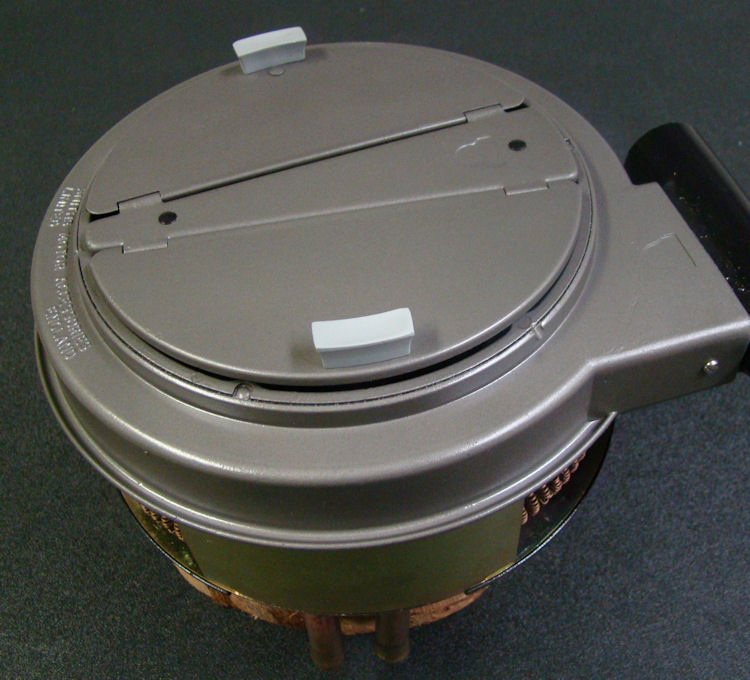
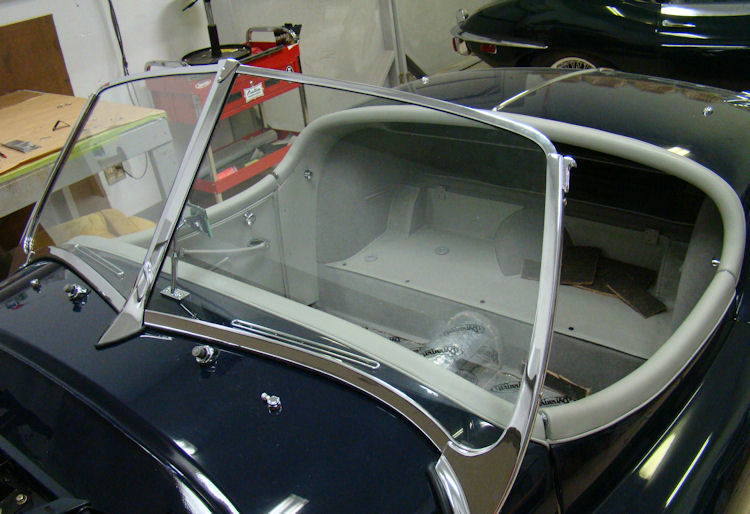
Fabricating side screens, restoring heater box, installing convertible top window...
 |
 |
 |
|
|
|
|
|
|
||
 |
 |
 |
|
|
|
|
|
|
||
 |
 |
|
|
|
Lots of progress in the trim room...
 |
 |
 |
|
|
||
 |
 |
 |
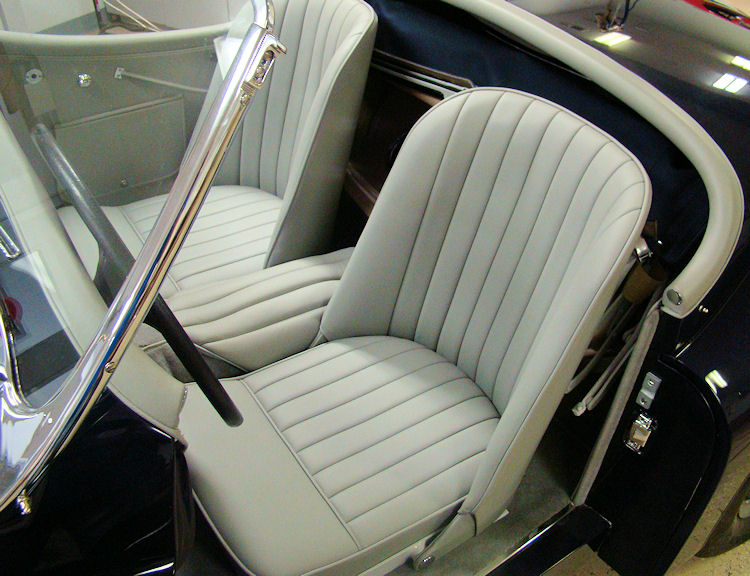
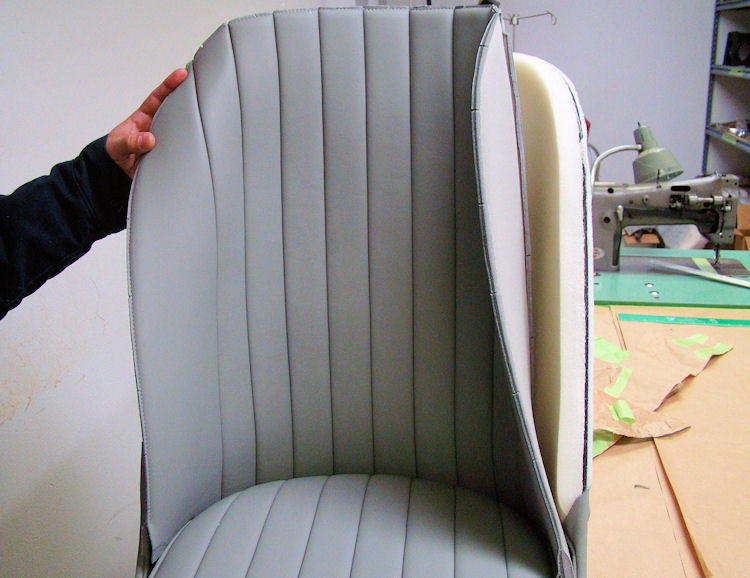
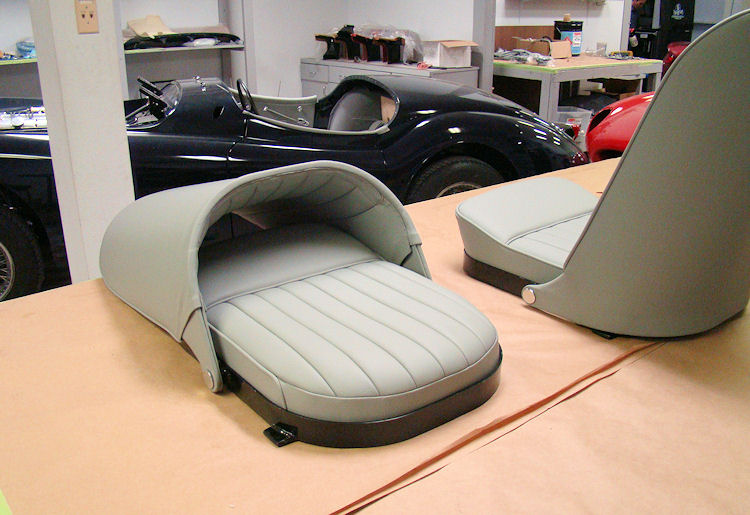
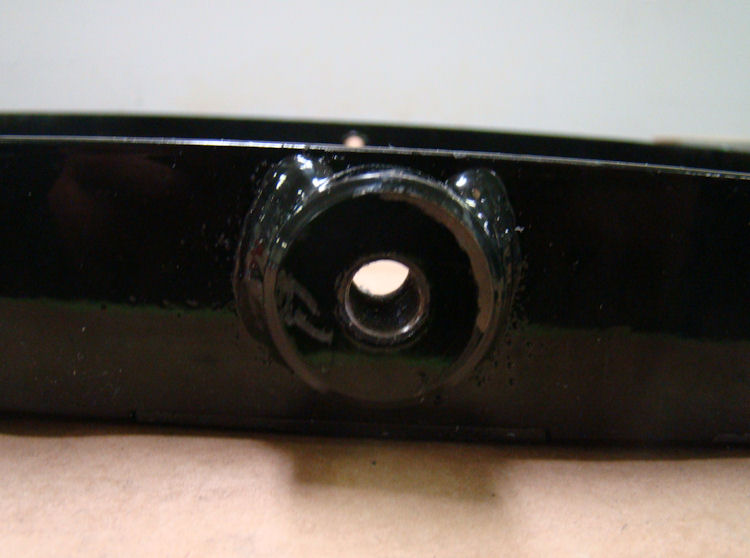
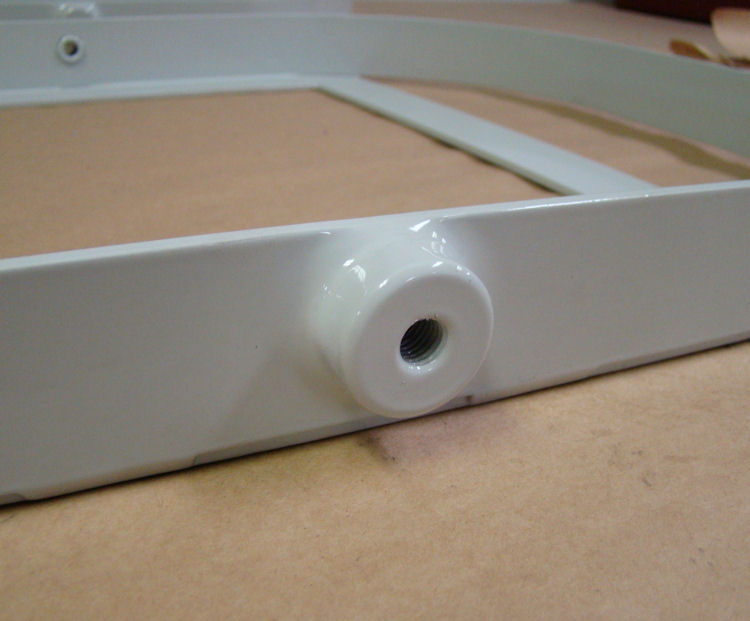
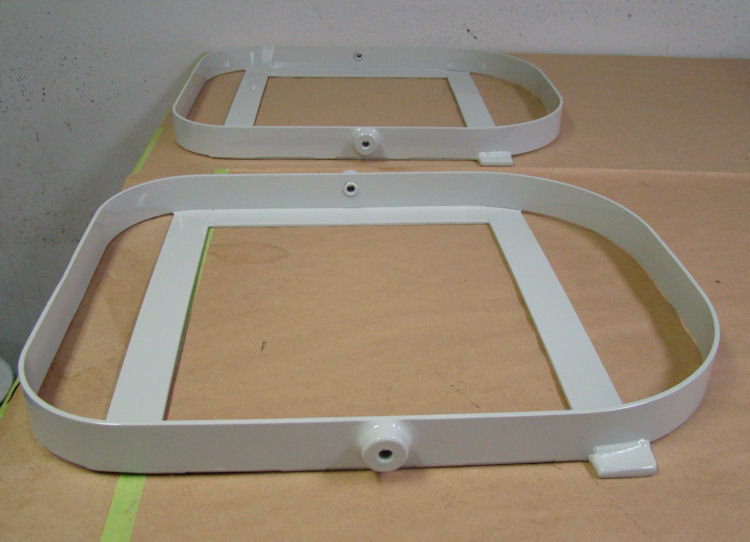
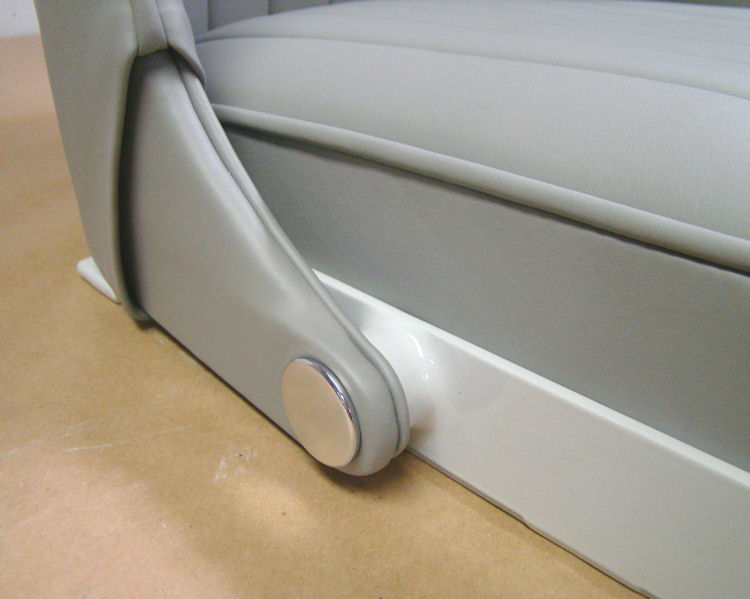
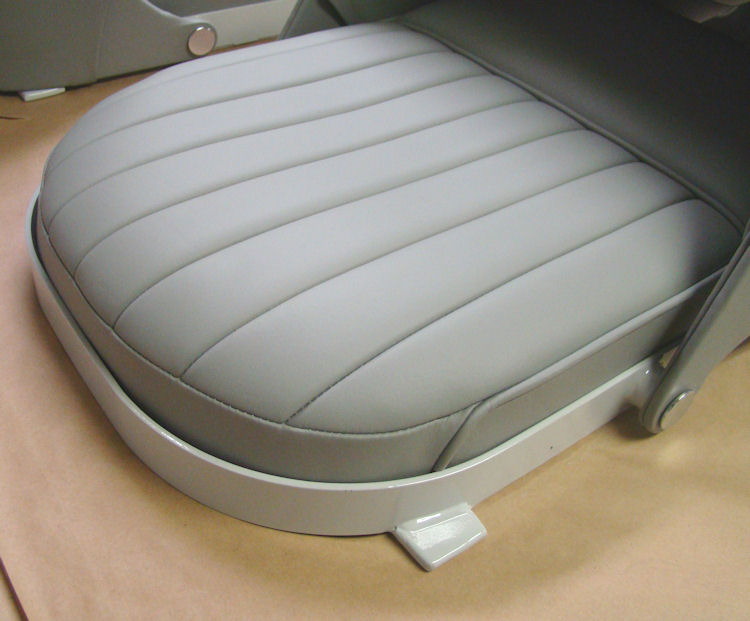
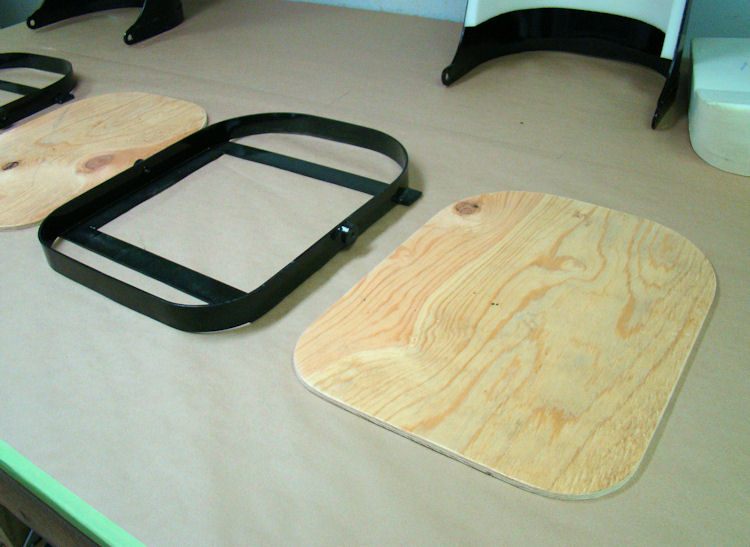
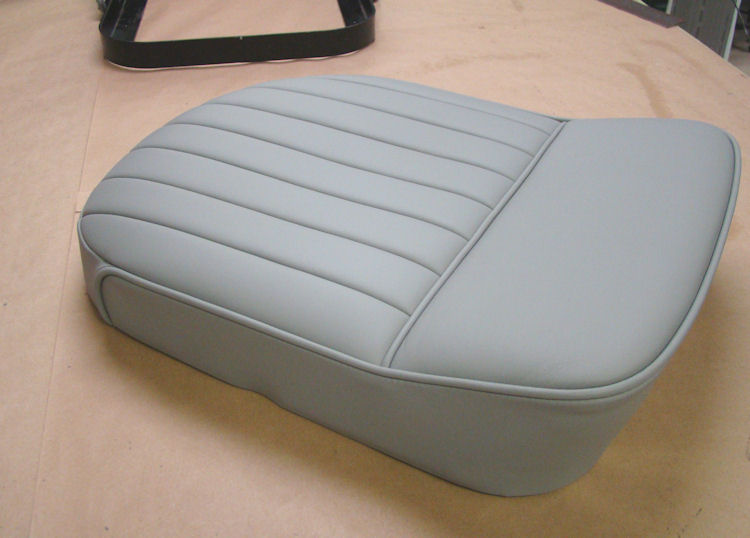
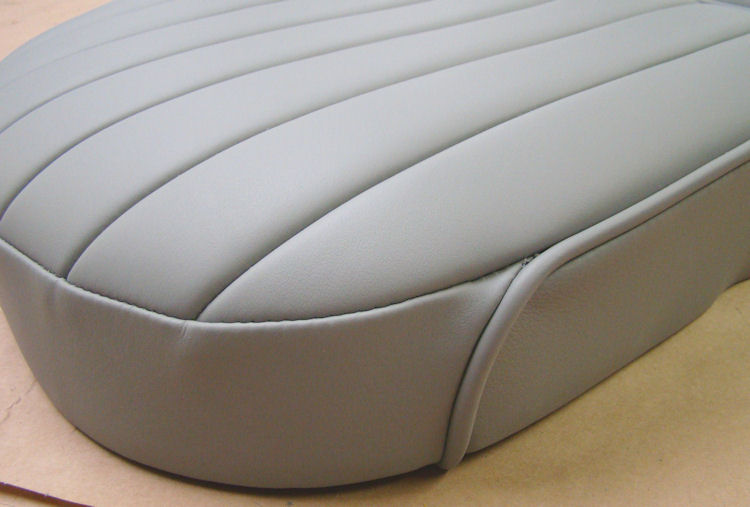
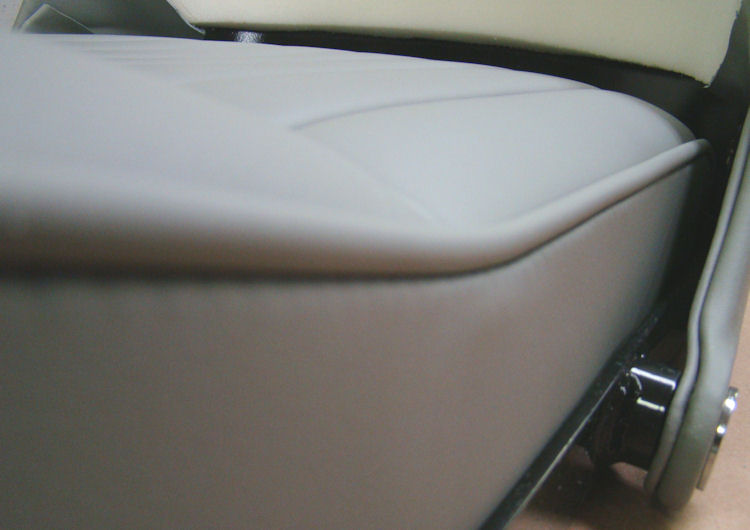
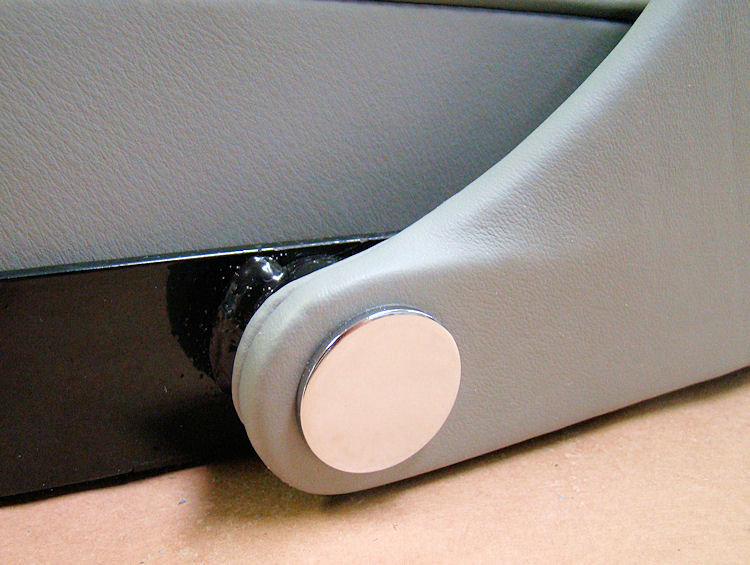
Carlos has now finished making and installing your new seats. We had intended trimming the seat frame bases in grey vinyl but limited space between the seat base and the seat back led us to paint the frames instead.
 |
 |
 |
|
the seat backs |
|
|
|
|
|
|
 |
 |
 |
|
and installed |
|
|
|
|
|
|
 |
 |
 |
|
prior to painting |
|
|
|
|
|
|
 |
 |
 |
|
|
|
|
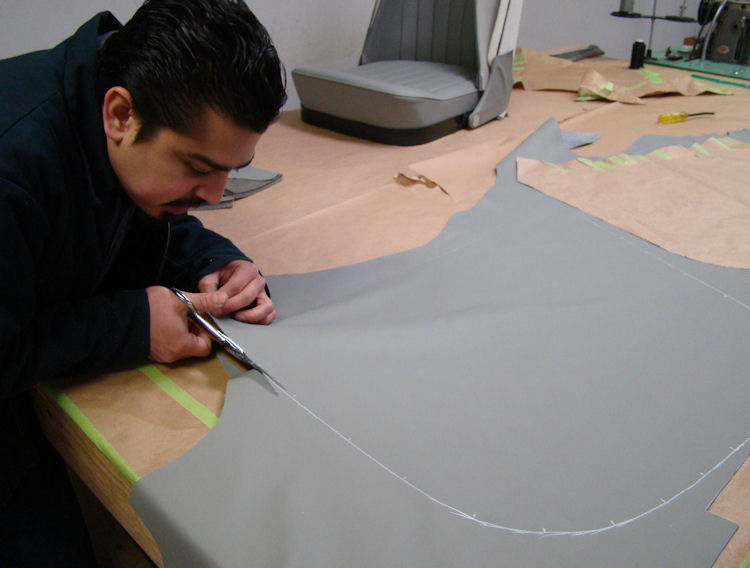
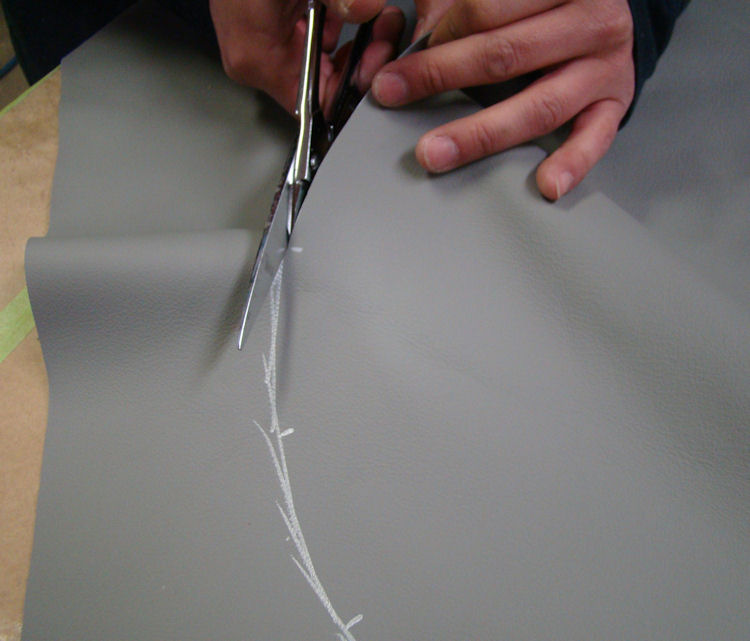
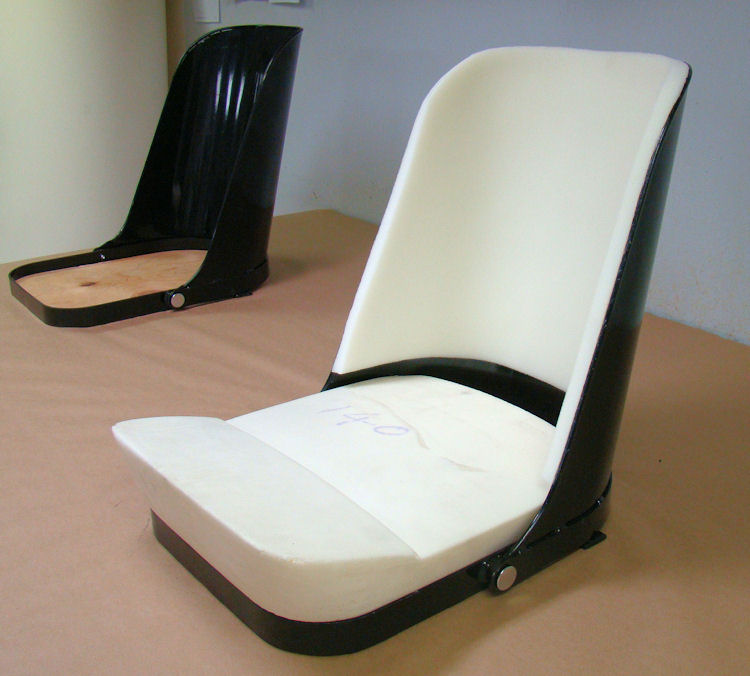
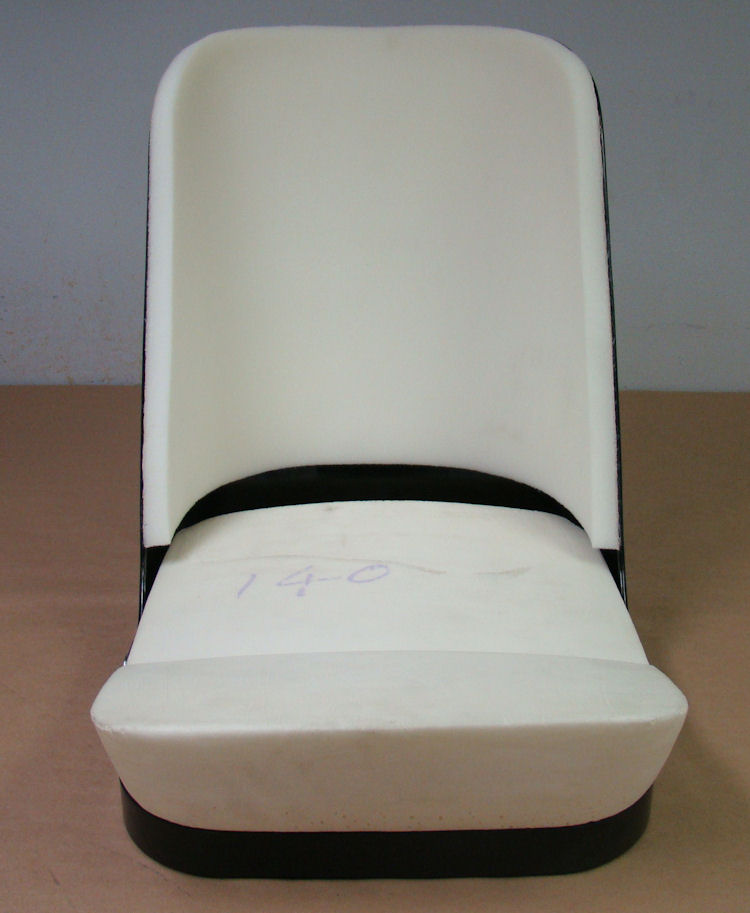
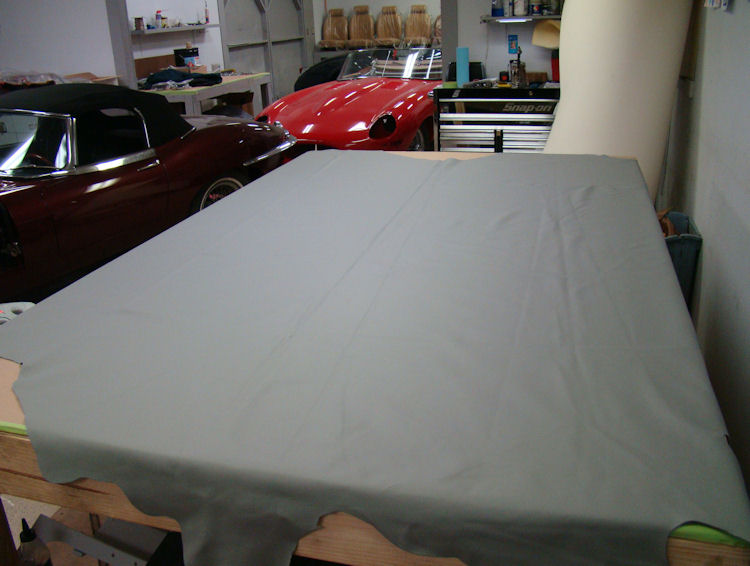
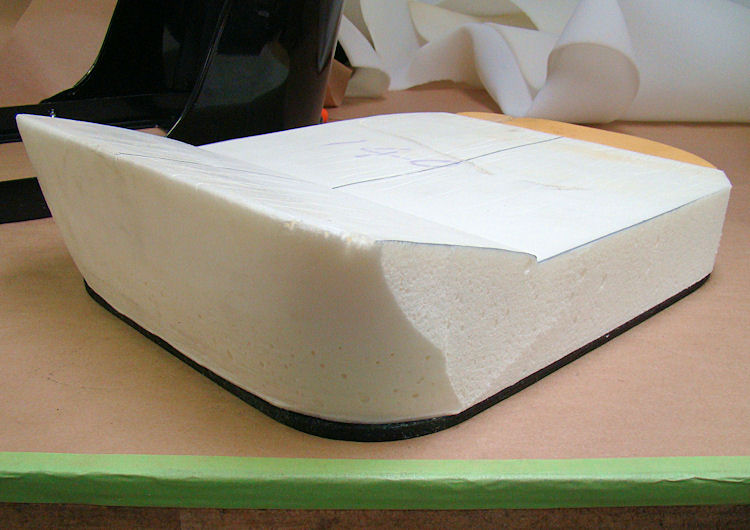
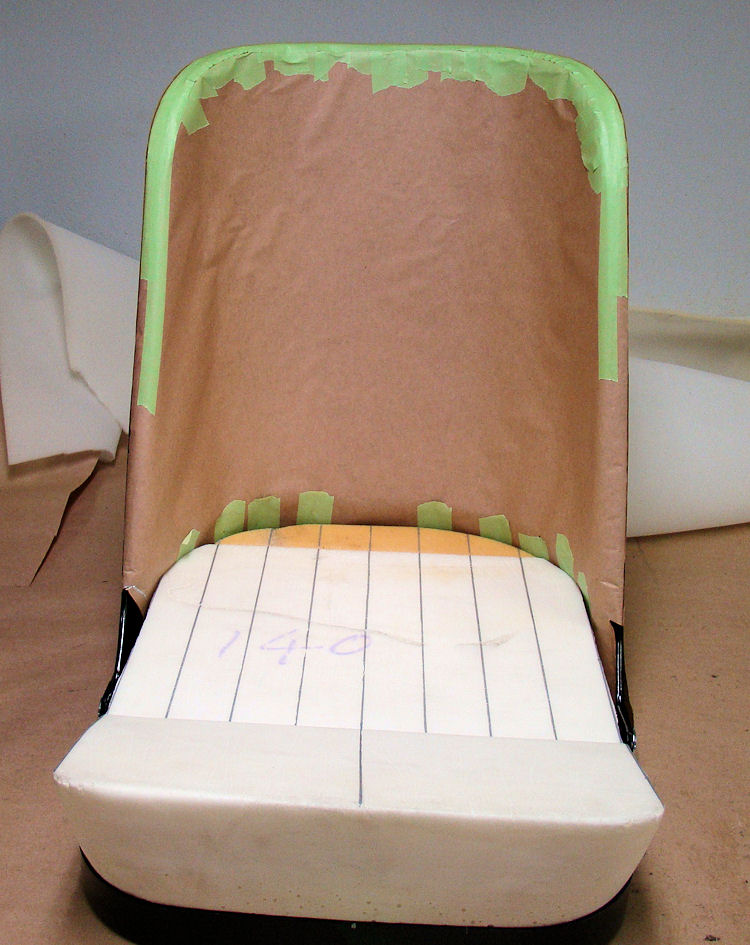
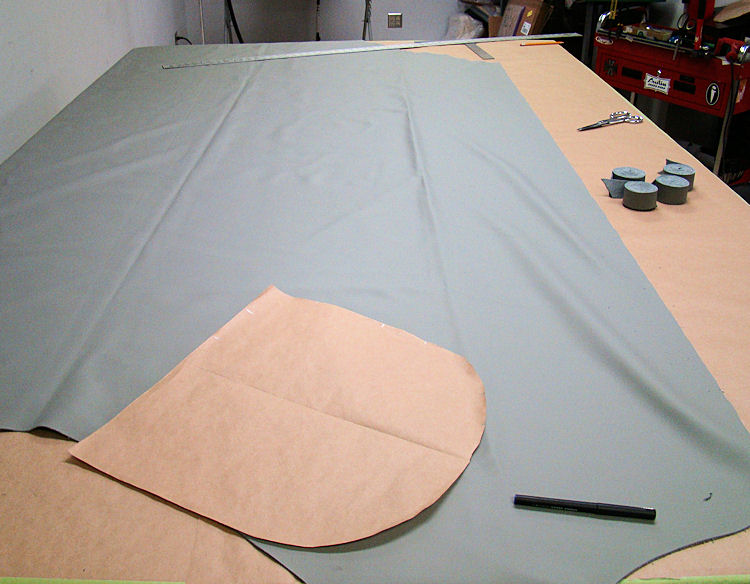
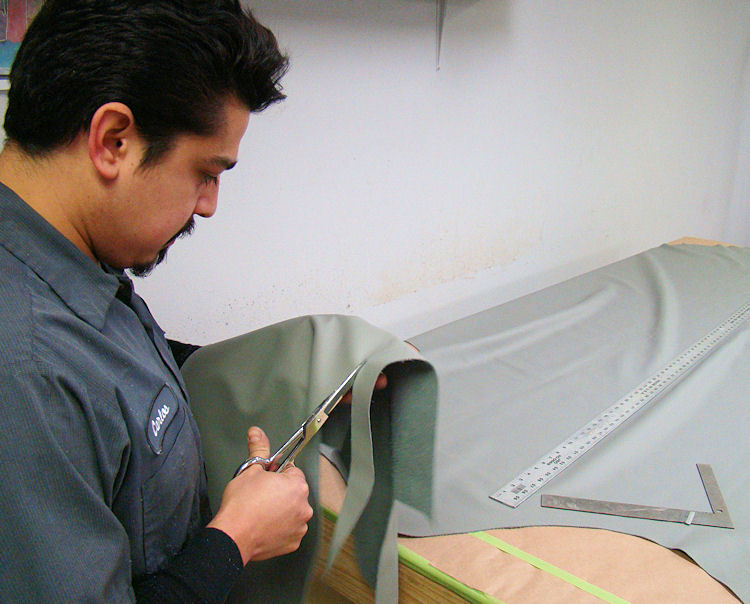
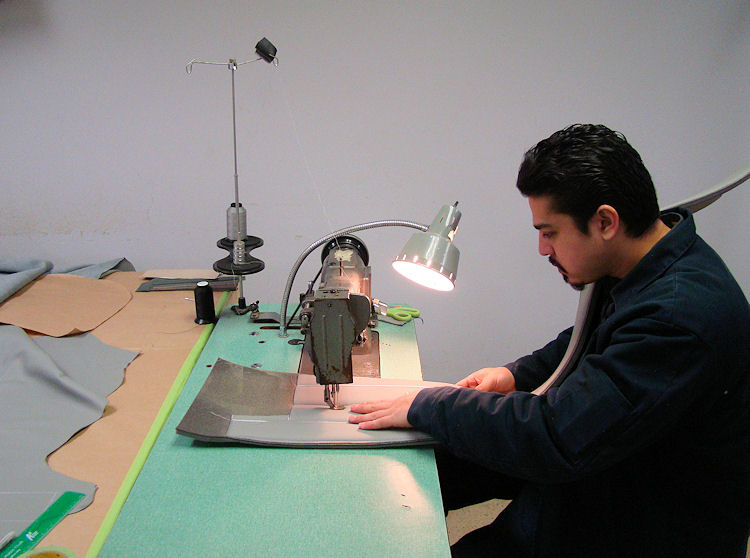
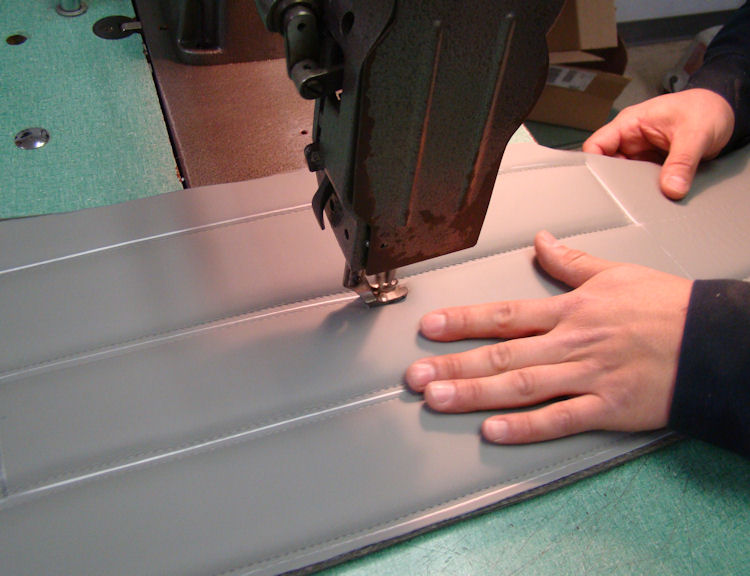
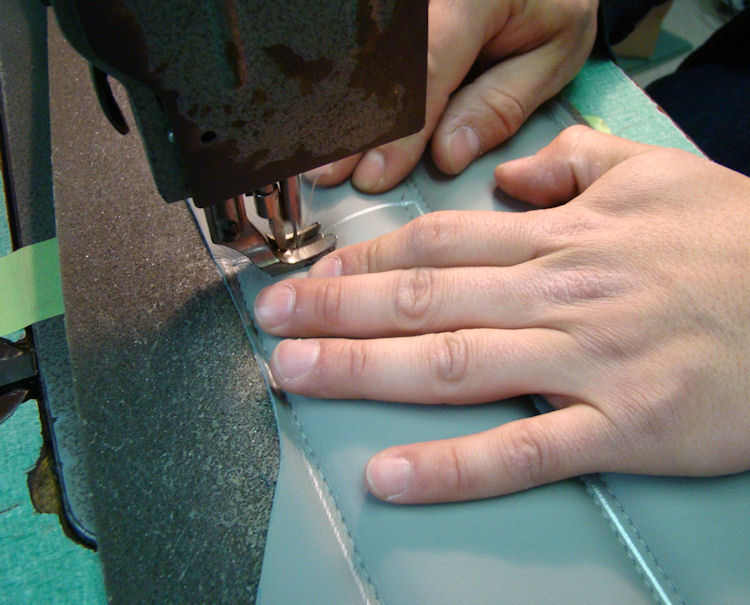
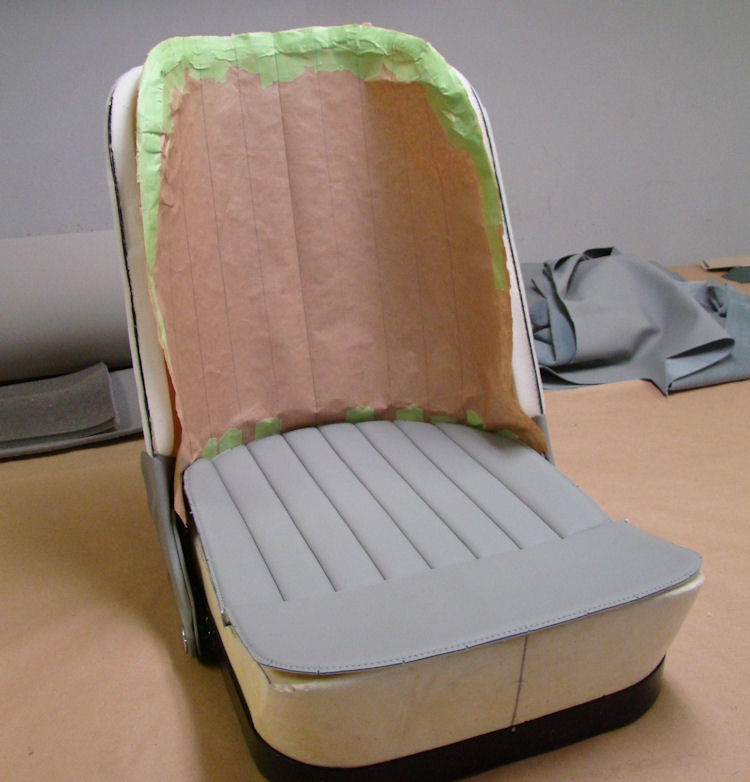
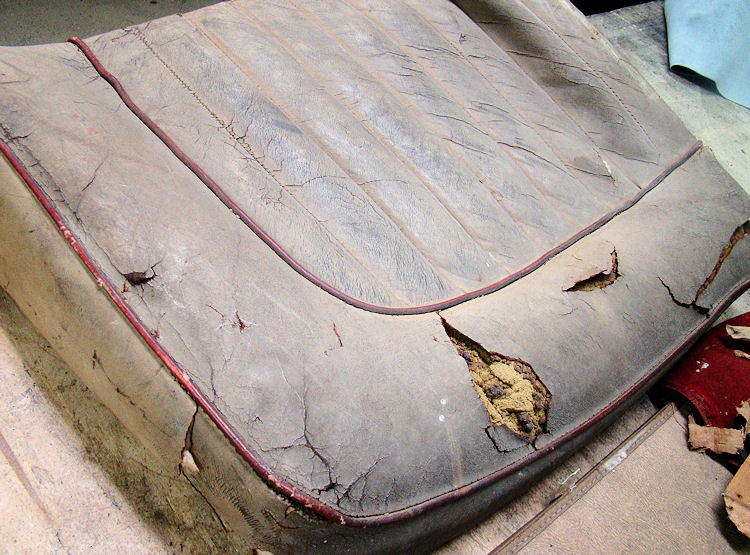
Carlos has been busy fabricating new custom seat covers for your bucket seats...
 |
 |
 |
|
|
||
 |
 |
 |
|
oversized hide for the job |
||
 |
 |
 |
 |
 |
 |
|
|
||
 |
 |
 |
|
|
|
|
 |
 |
 |
|
|
||
 |
 |
 |
|
|
|
|
 |
 |
 |
|
|
We have ordered a new hide for your custom bucket seats...
 |
 |
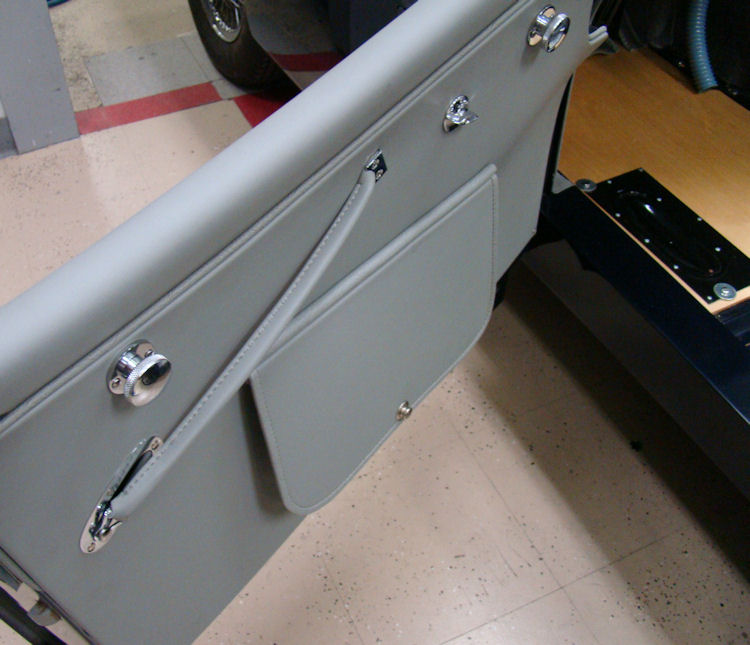
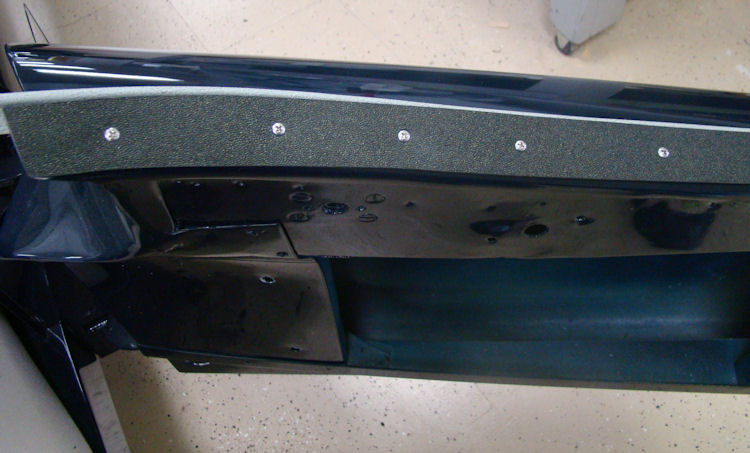
Front bumper installed, trimming interior door panels and crash rolls...
 |
 |
 |
More progress in the trim room...
 |
 |
 |
 |
 |
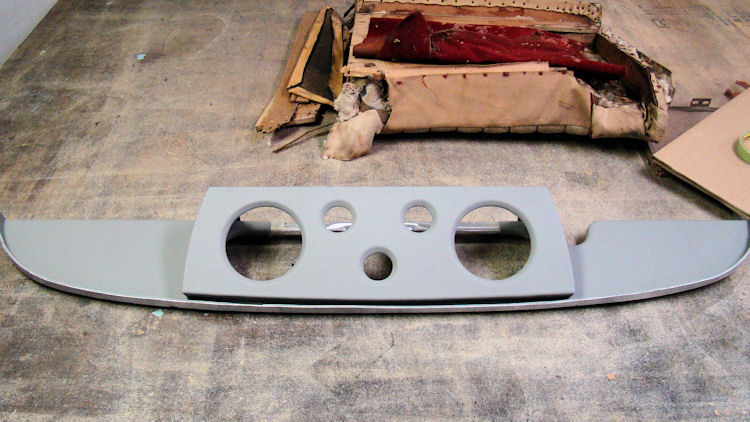 |
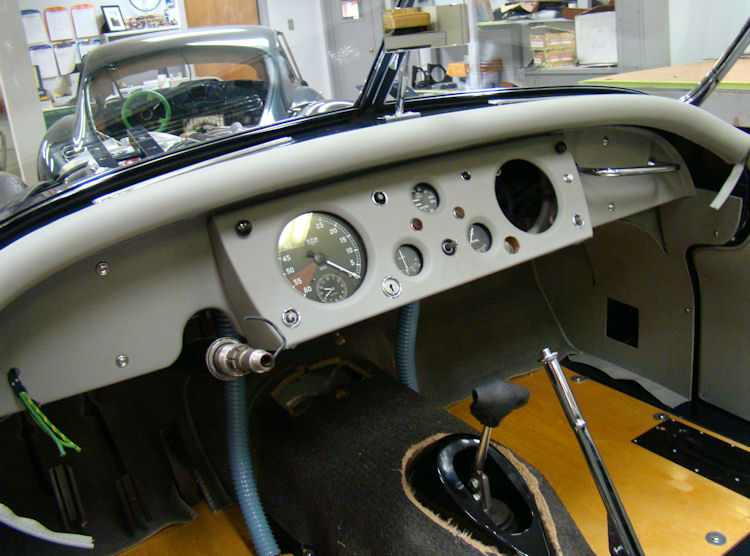
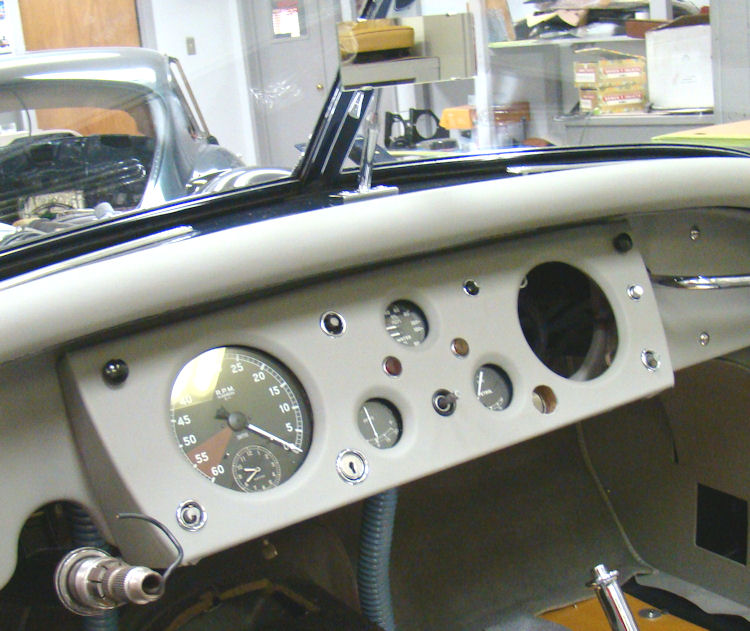
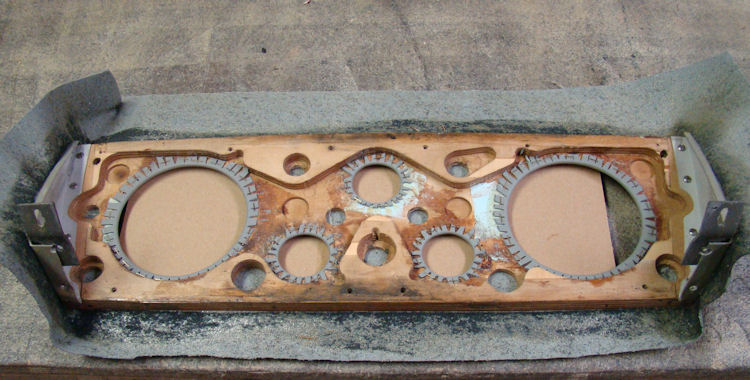
I am delighted to report that we now have this project back underway. Next up, the restoration and trimming of the dash and seats..
 |
 |
 |
|
will be replaced |
||
 |
 |
|
|
|
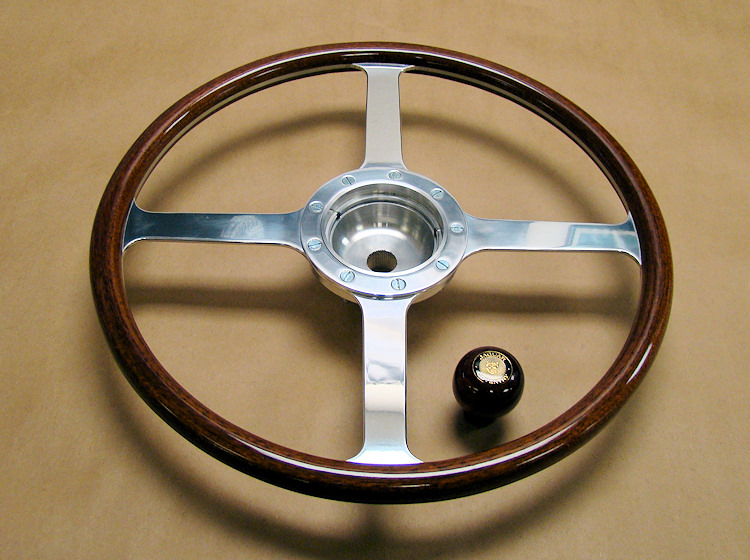
Your new custom wood rim steering wheel...
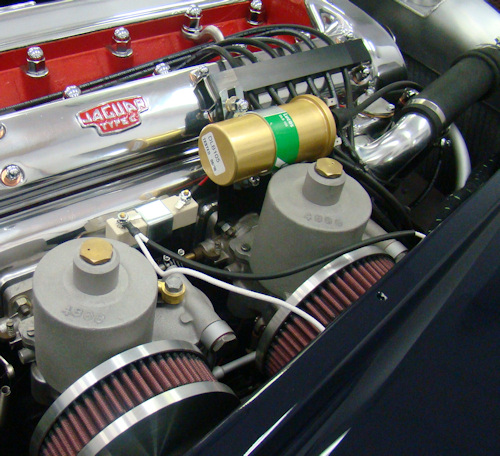
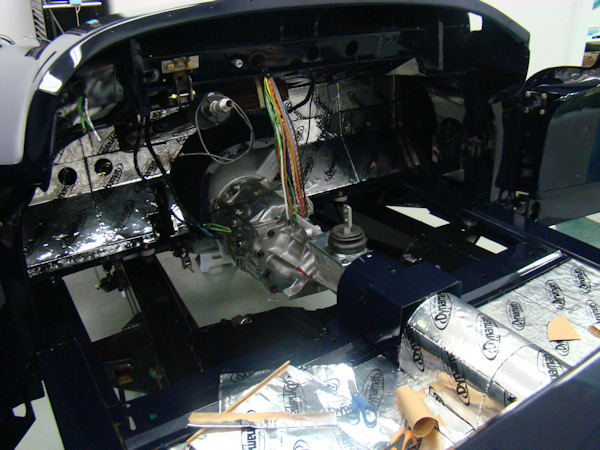
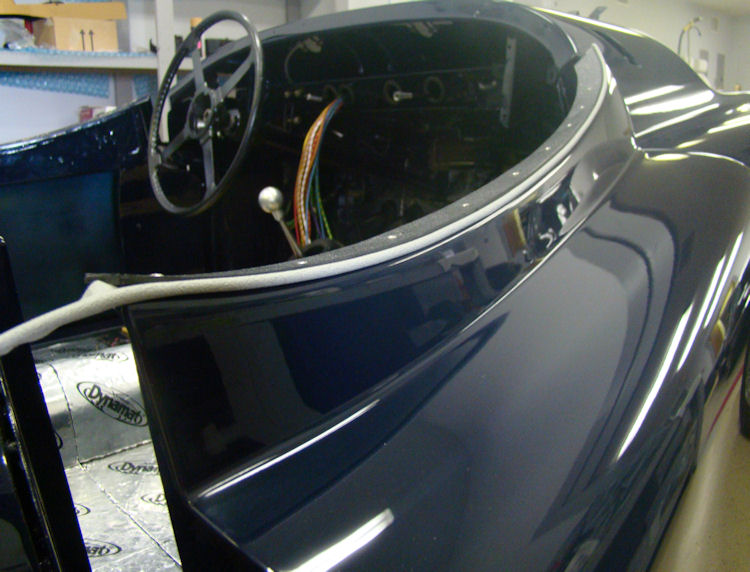
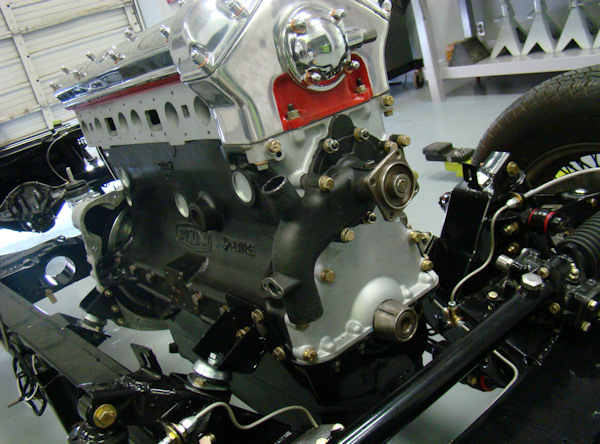
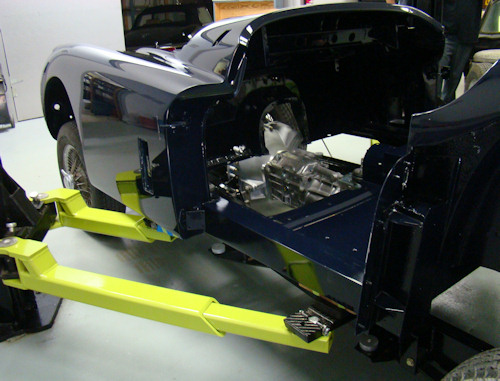
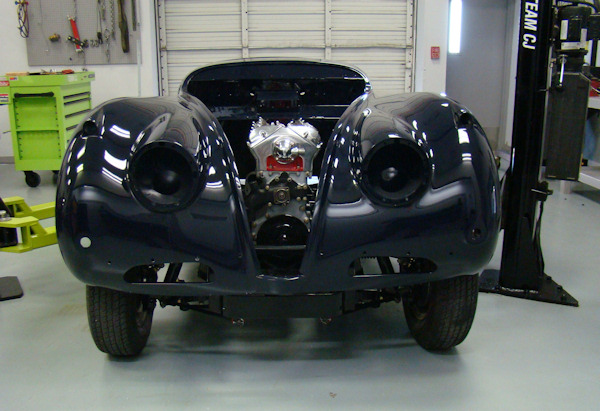
The engine bay has been filling up rapidly and we are in the process of installing your Dynamat inside the cabin.
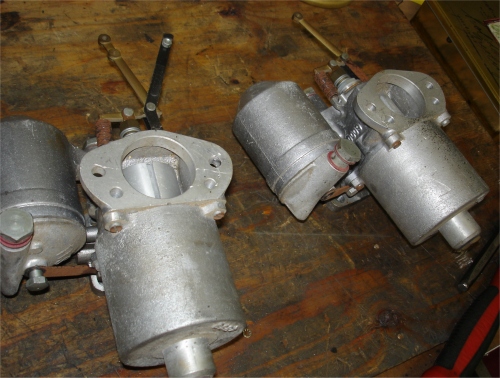
We custom made K&N filter housings
for your Sand Cast SU carbsWiring in the front lamps Installing Dynamat inside the cabin Also used on the verticalsections of
the firewall
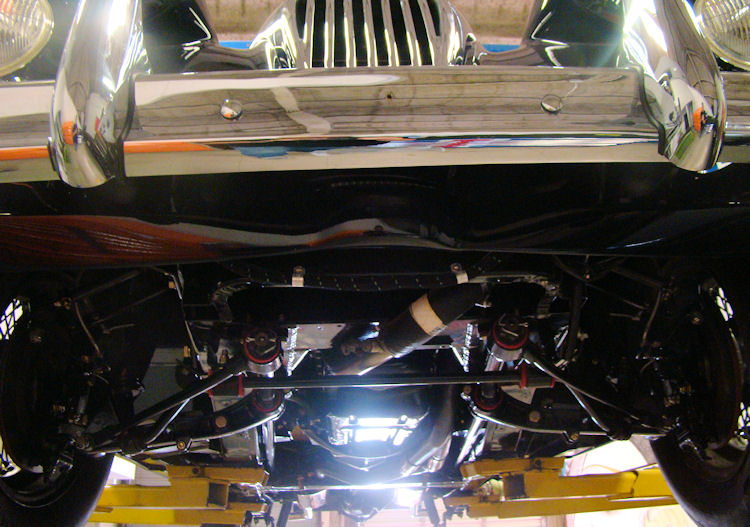
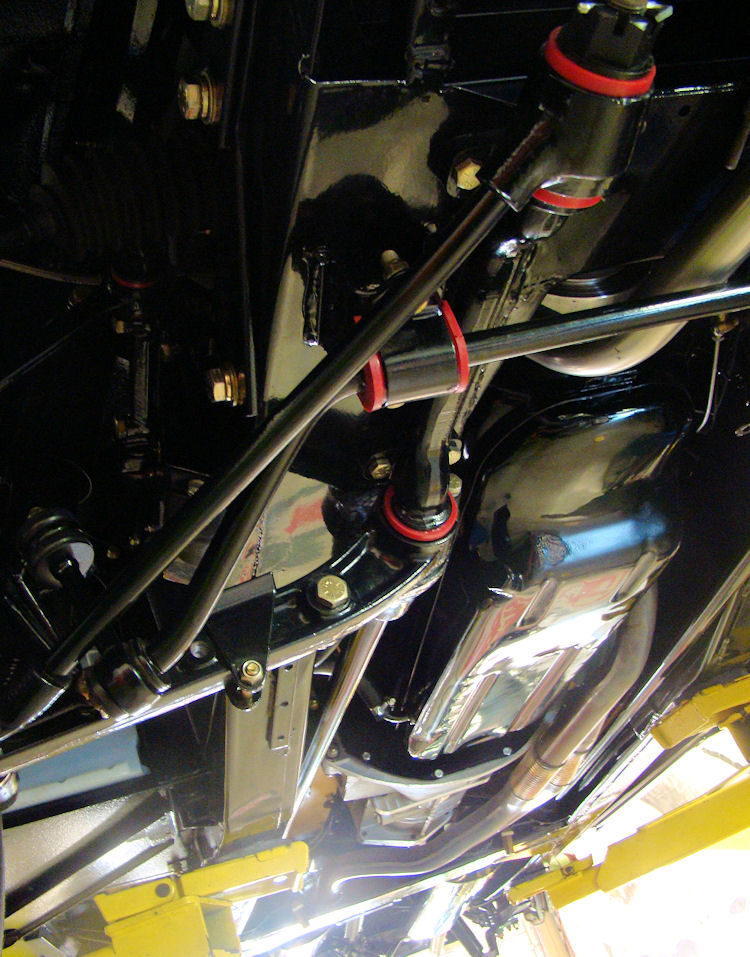
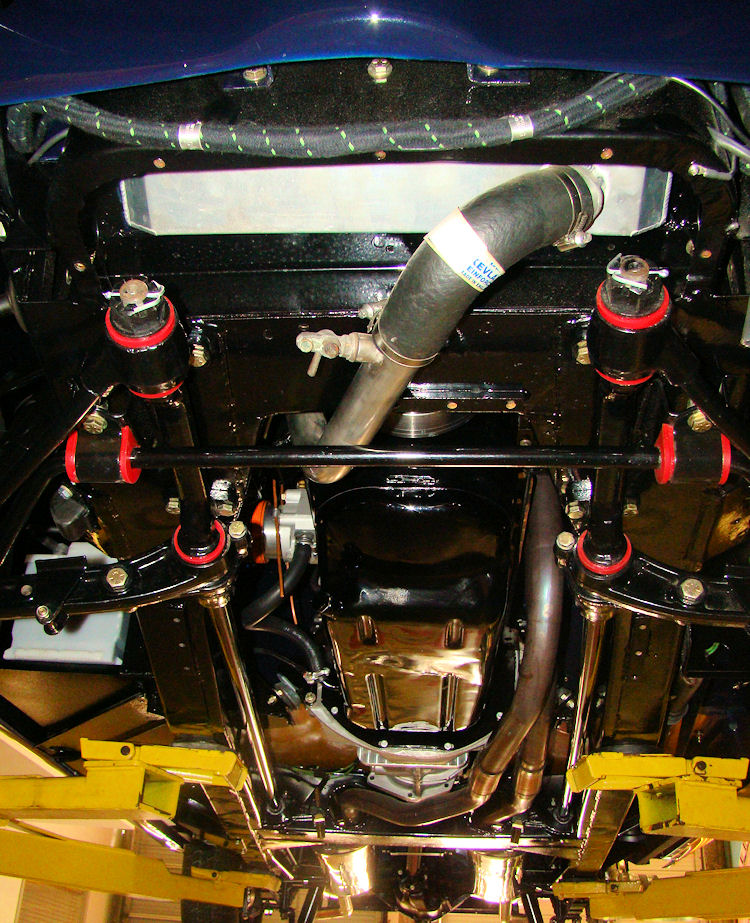
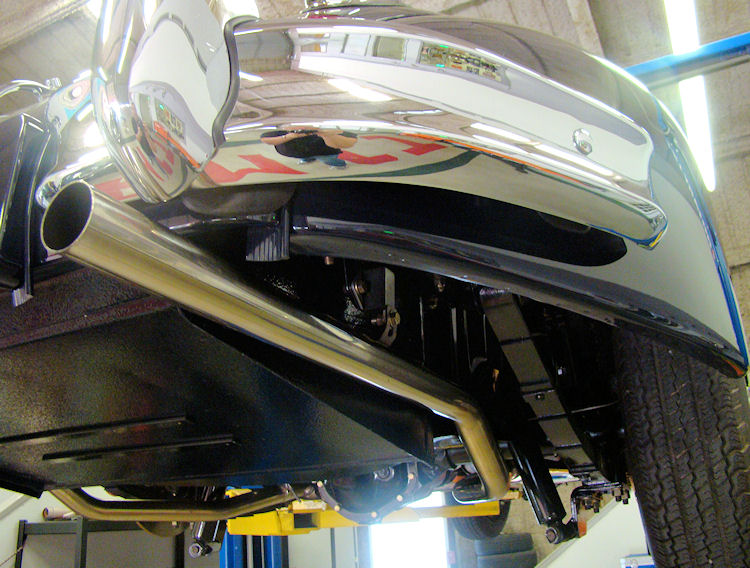
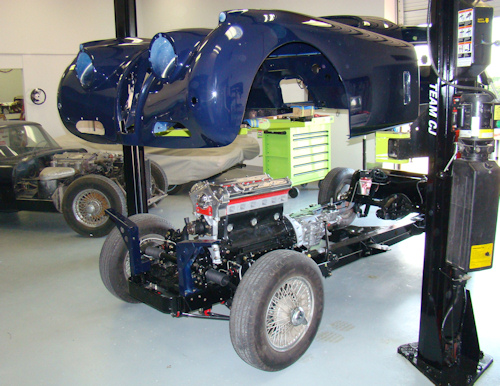
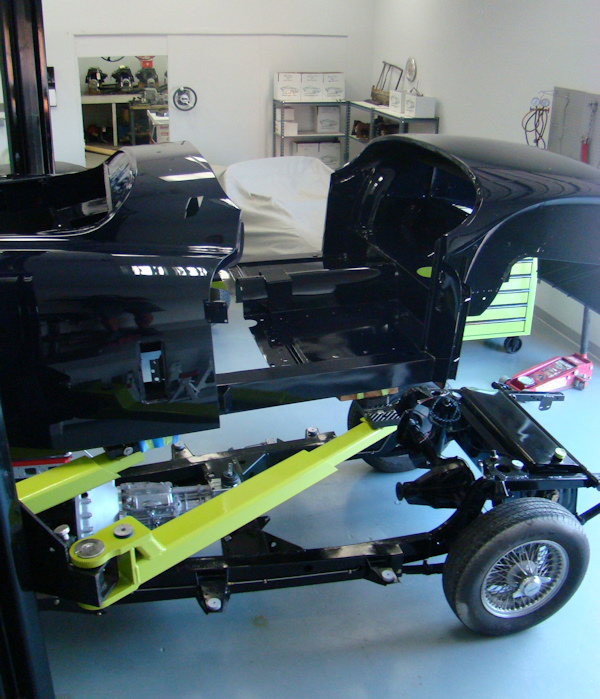
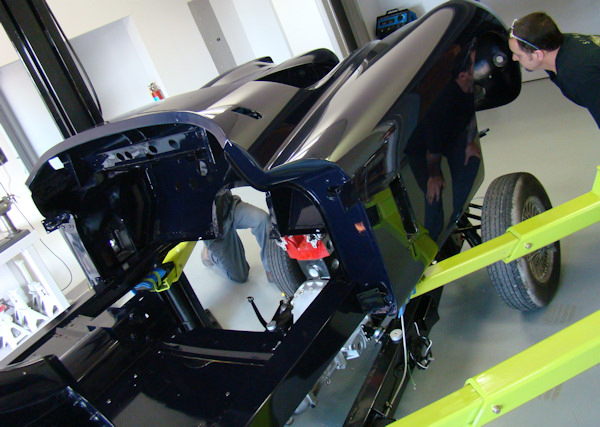
Installing the restored body back onto the chassis...
 |
 |
 |
 |
 |
 |
 |
 |
 |
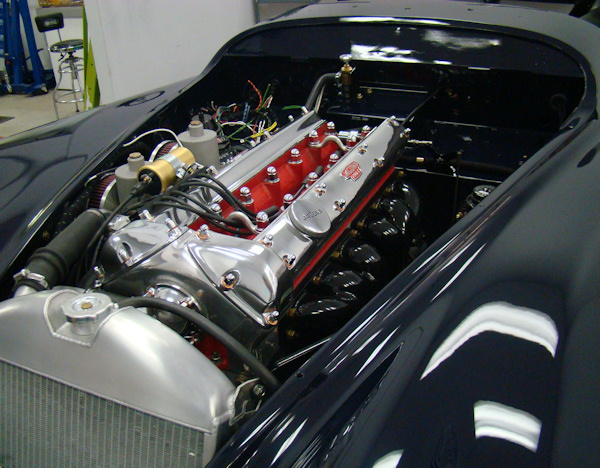
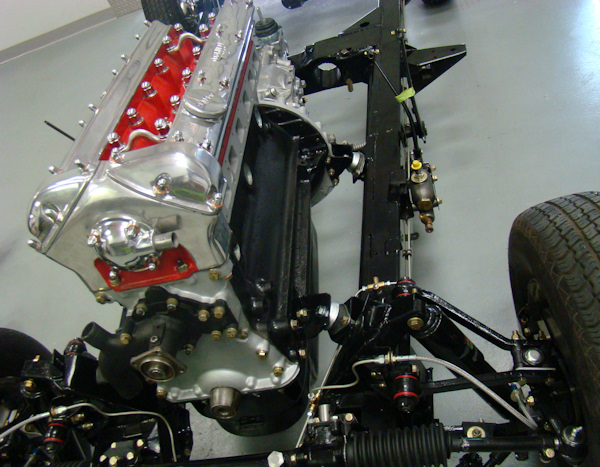
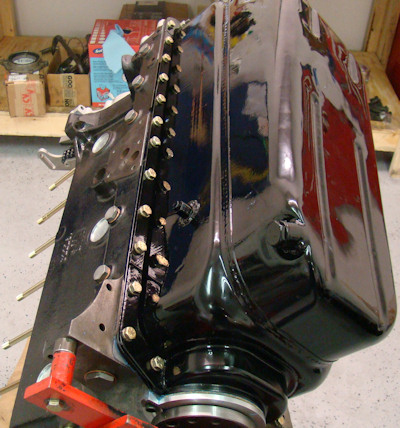
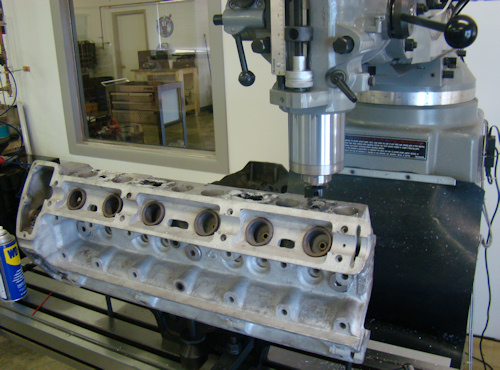
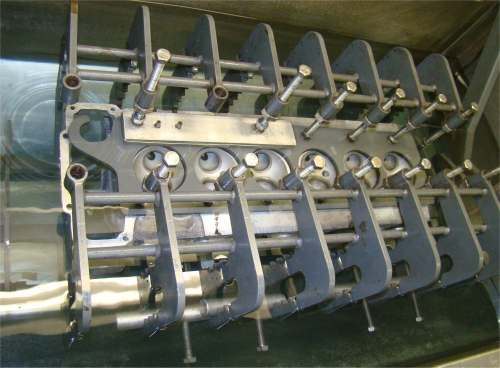
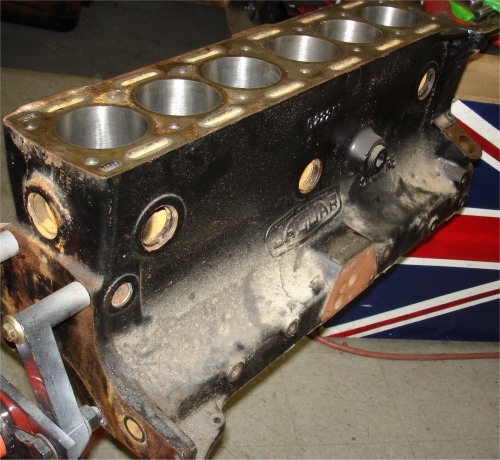
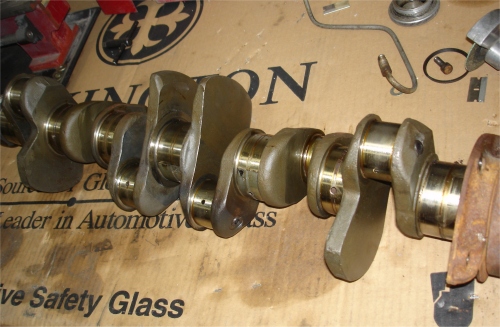
We now have your engine rebuild completed. Next we will be installing the engine and transmission to the chassis, then installing the body to the frame.
 |
 |
 |
|
completed |
||
 |
 |
 |
|
|
|
|
 |
 |
 |
|
|
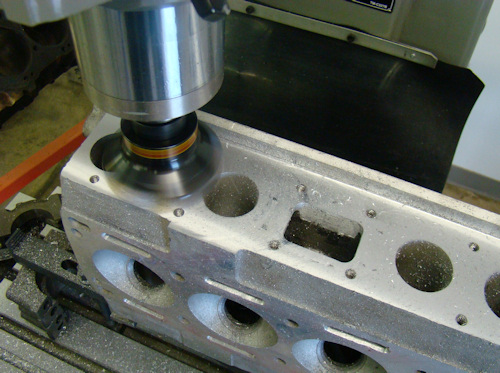
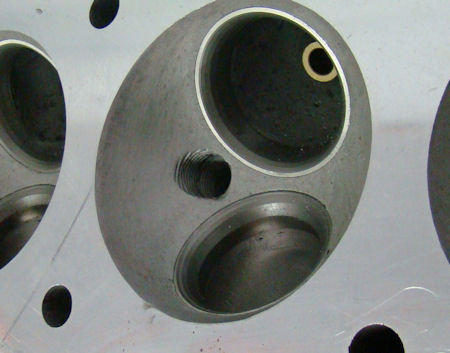
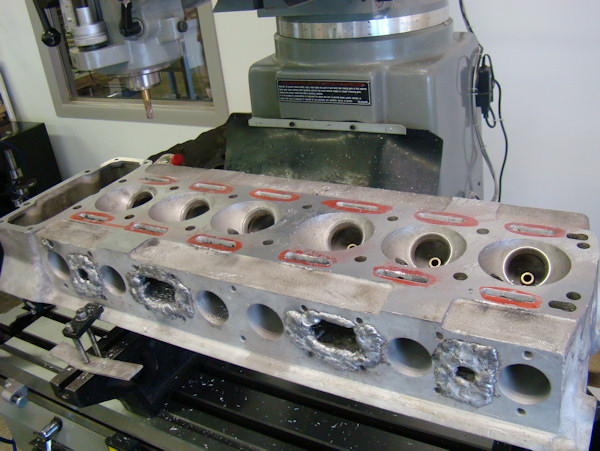
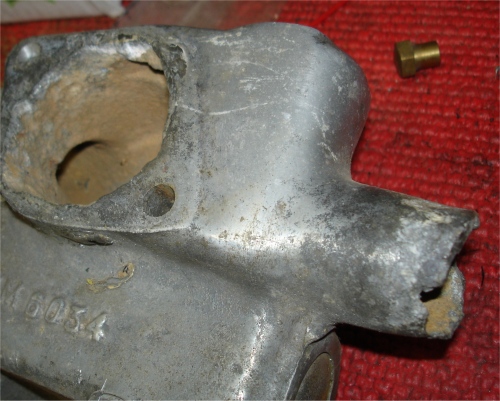
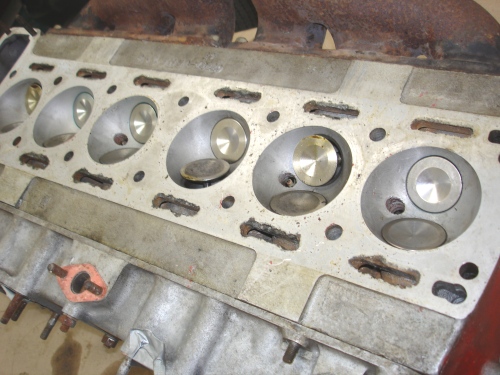
holes to accept later style plugs |
the chassis |
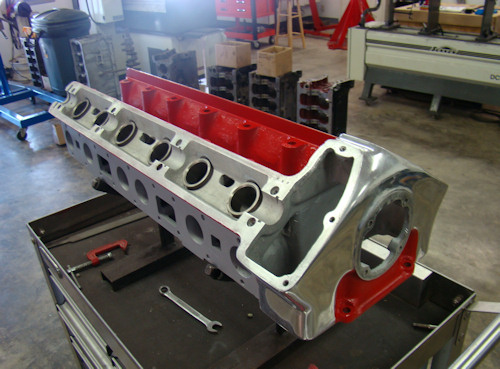
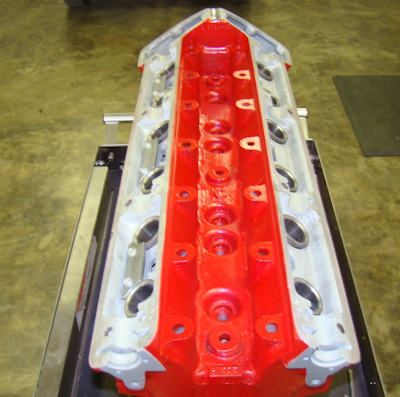
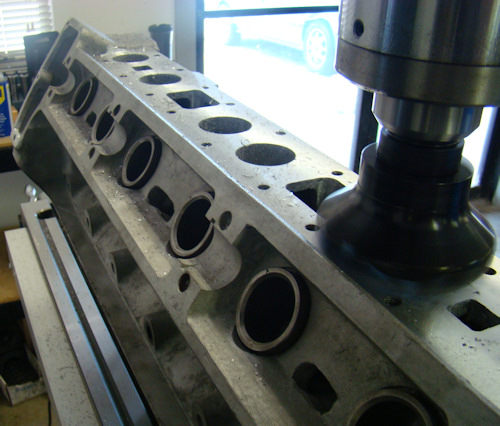
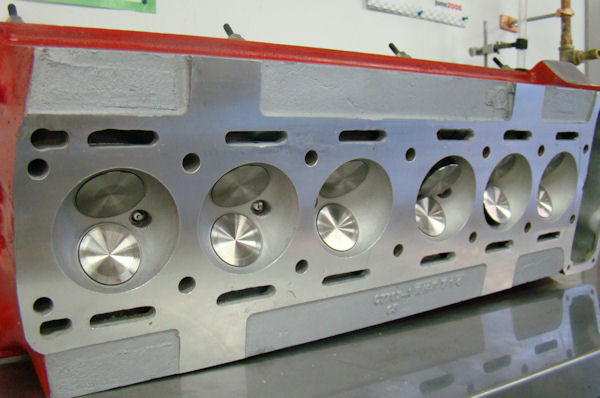
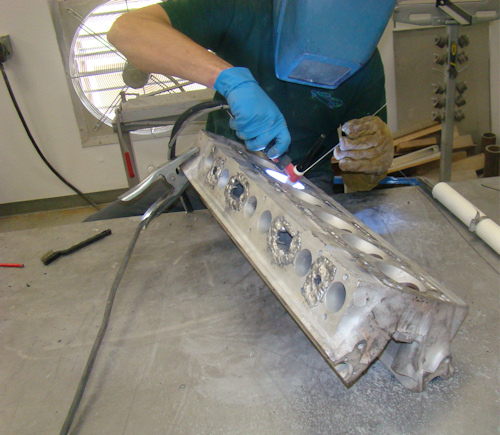
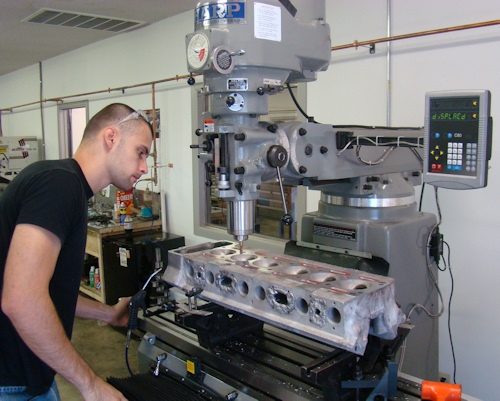
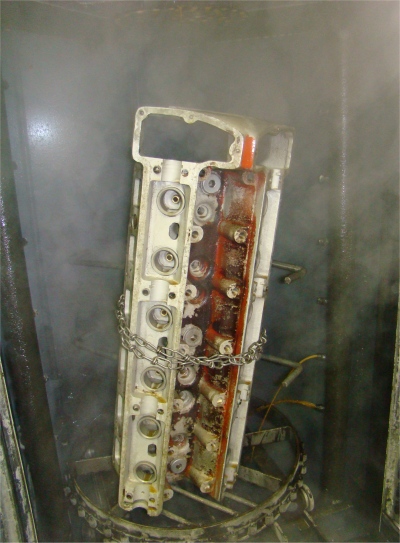
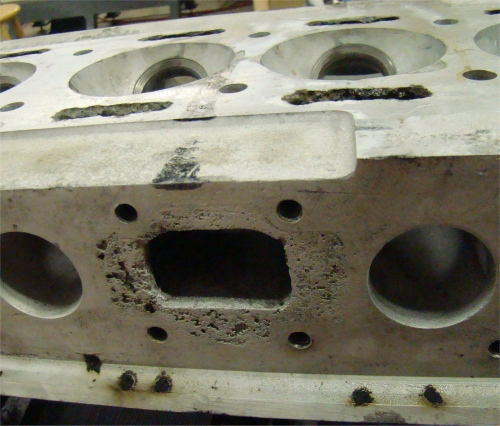
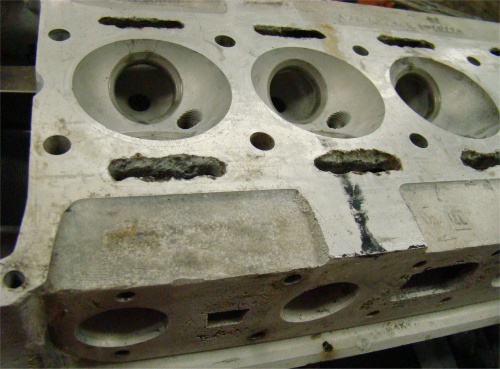
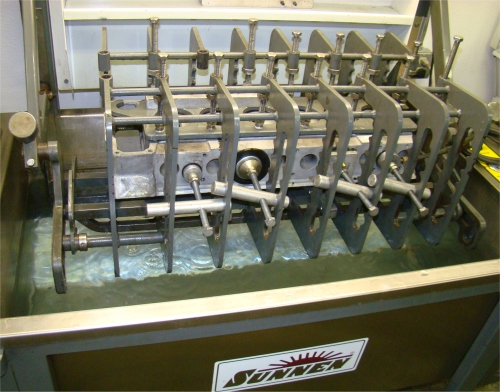
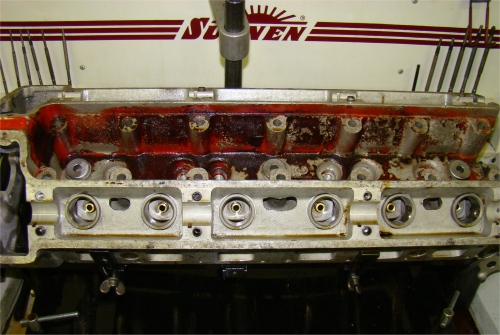
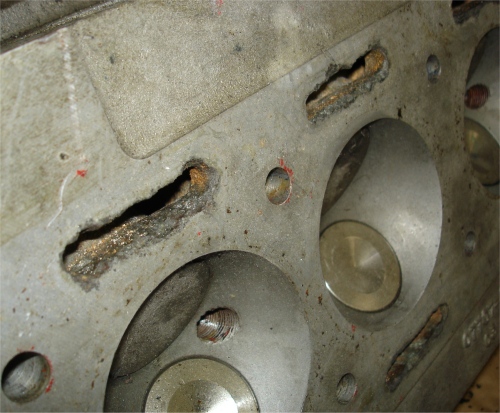
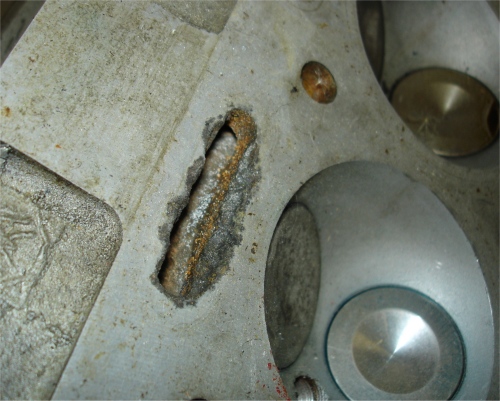
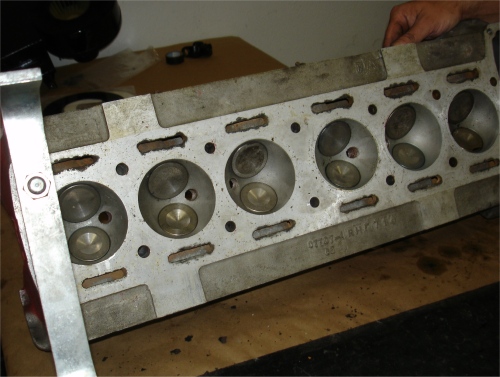
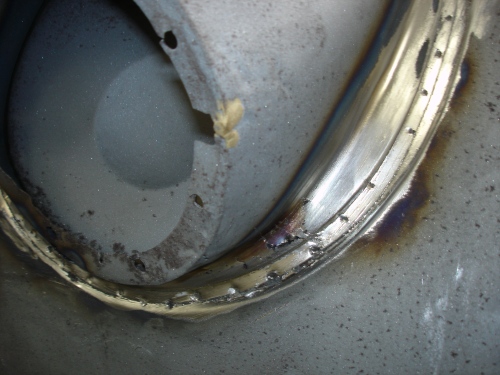
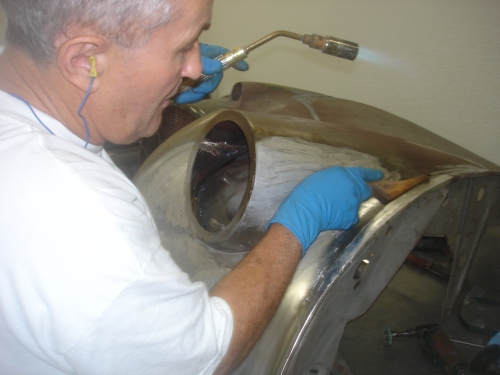
Unfortunately this cylinder head was in terrible condition when we got hold of it. As well as being very badly warped, it had extensive corrosion damage and was also cracked in one of the chambers between the seat pocket and the spark plug hole. Although this has been one of the more challenging cylinder head rescues we have performed, I am pleased to report that it is now as good as new and hopefully ready for another fifty years of service!
 |
 |
 |
|
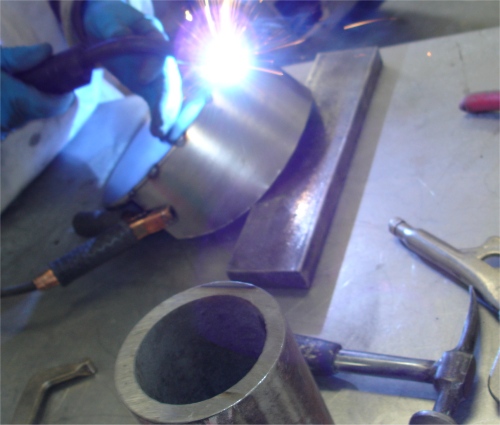
straighteneing and welding |
spend time with Darrell in the Coachworks! |
|
|
|
|
|
 |
 |
 |
|
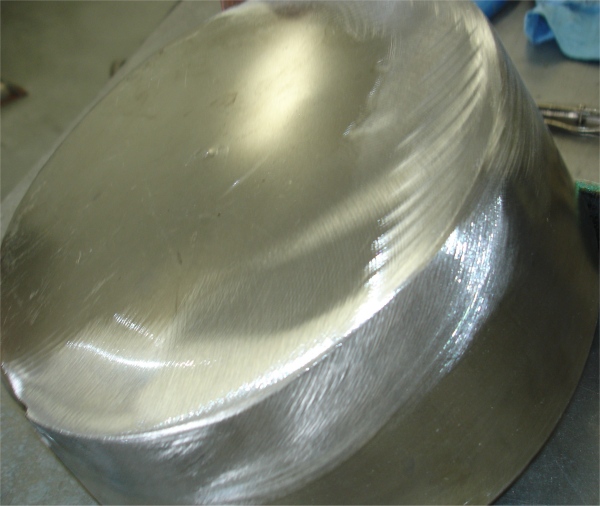
chamber cleaned up quite nicely |
to the required shape |
to extensive corrosion issues |
|
|
|
|
 |
in the next few days! |
|
|
|
|
|
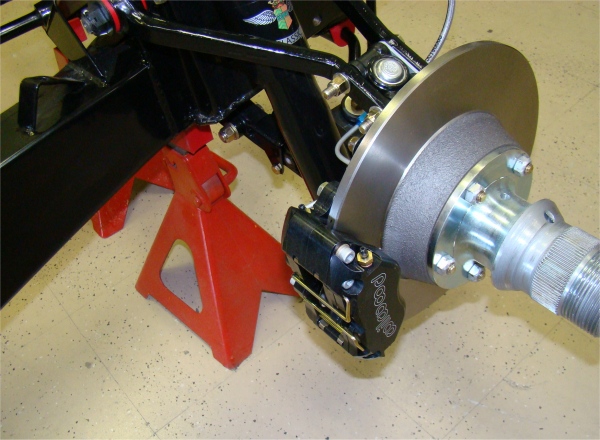
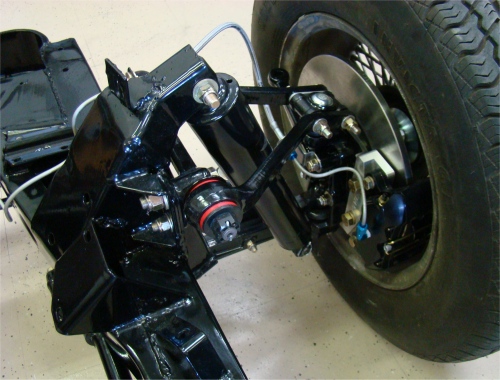
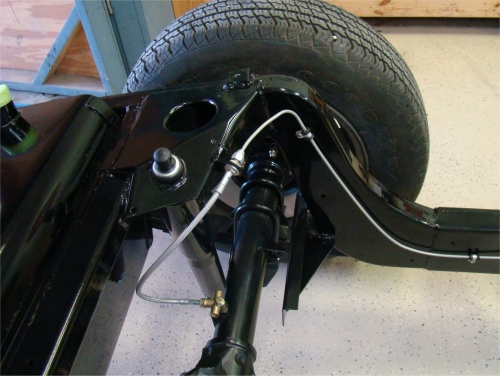
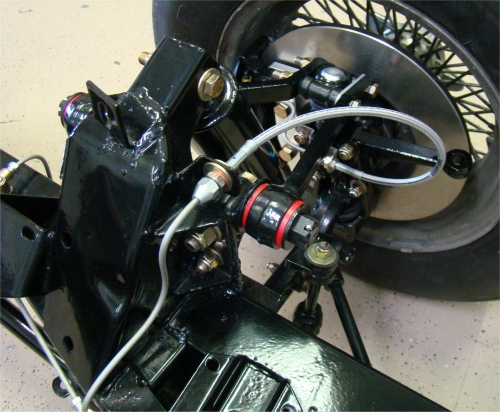
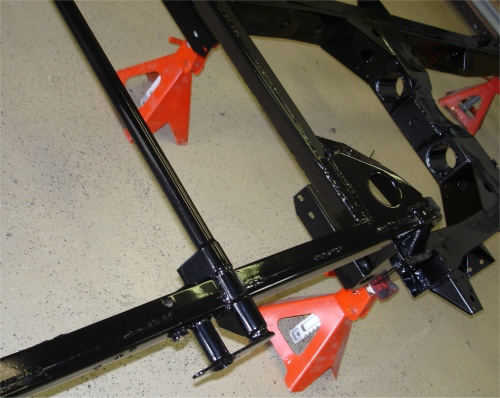
Building up the restored chassis ....
 |
 |
 |
 |
 |
 |
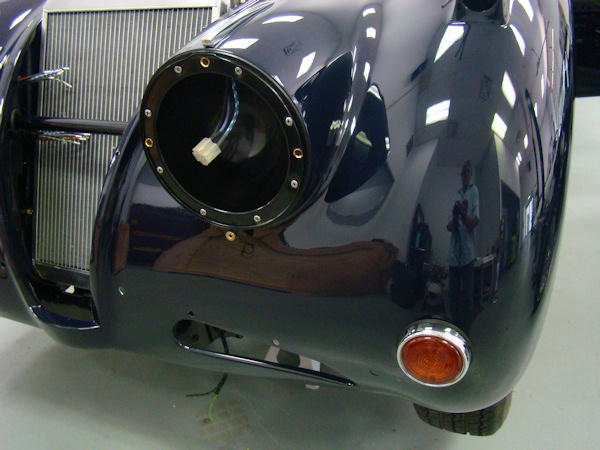
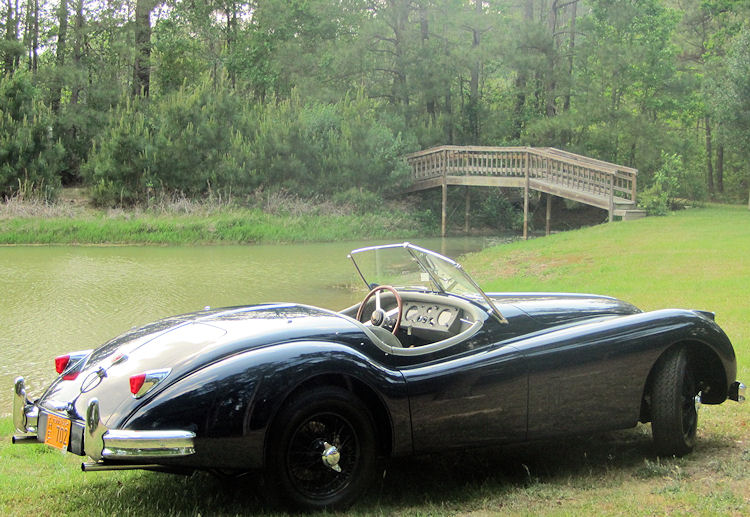
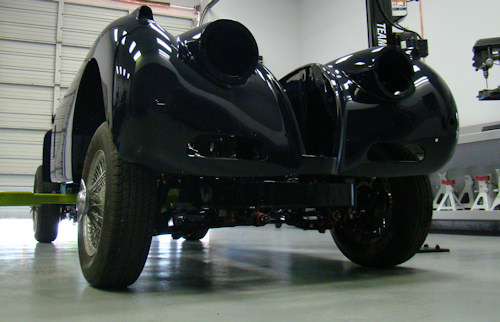
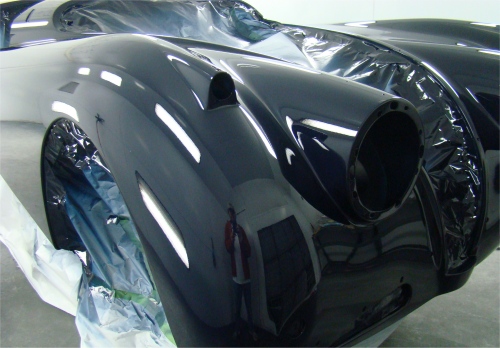
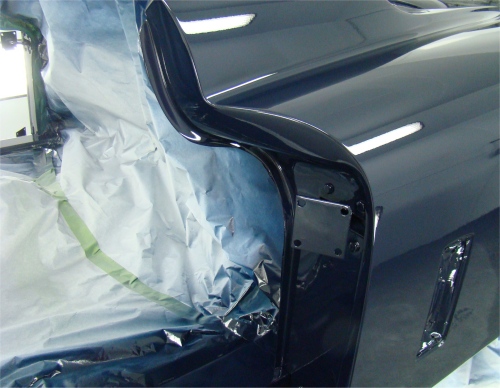
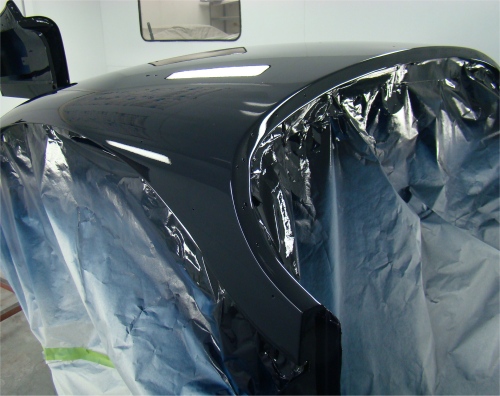
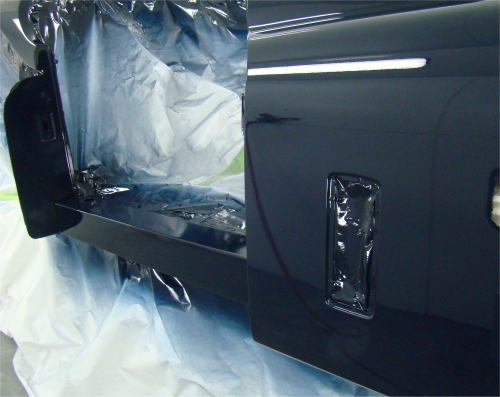
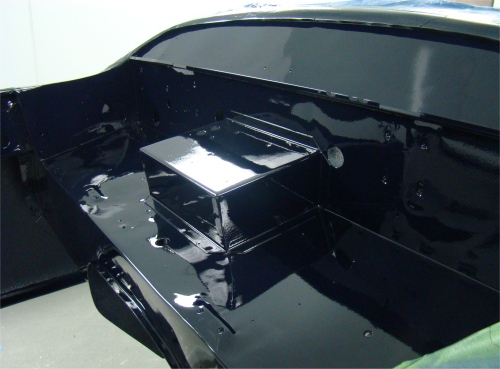
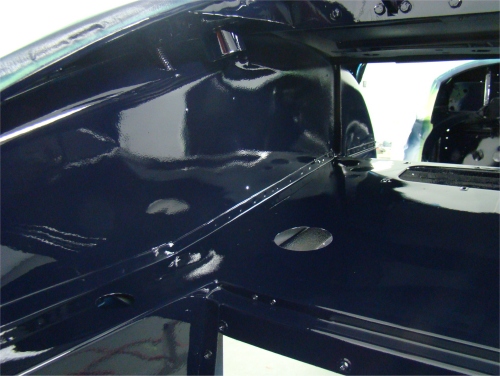
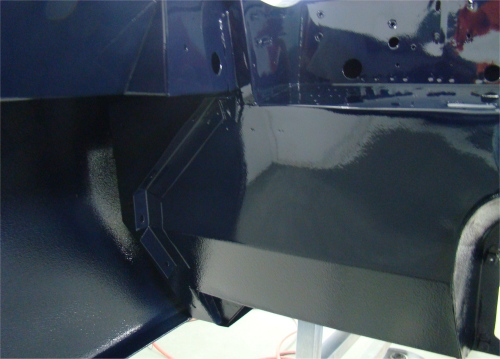
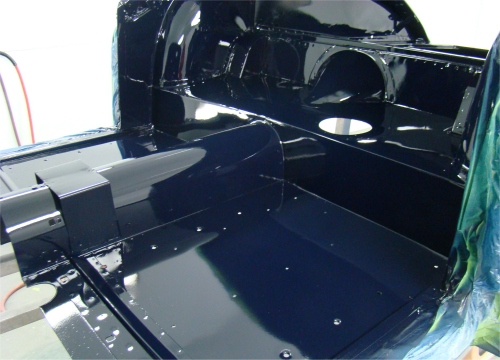
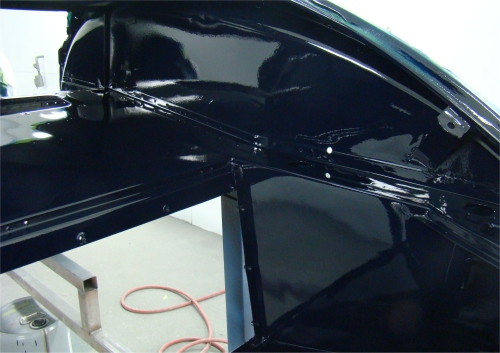
Yesterday evening we finished painting the body and doors. I think the Pacific Blue looks absolutely spectacular - I hope you like it!
 |
 |
 |
 |
 |
 |
 |
 |
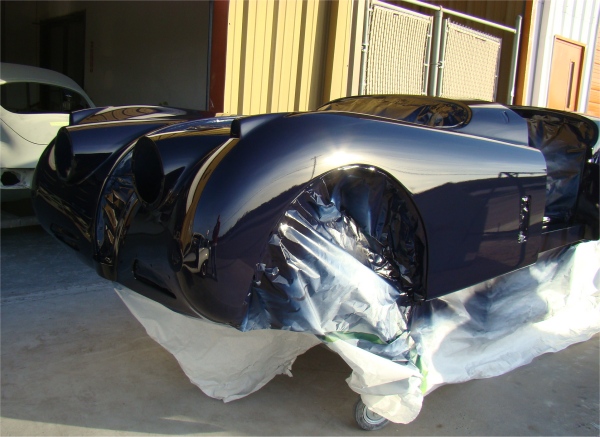 |
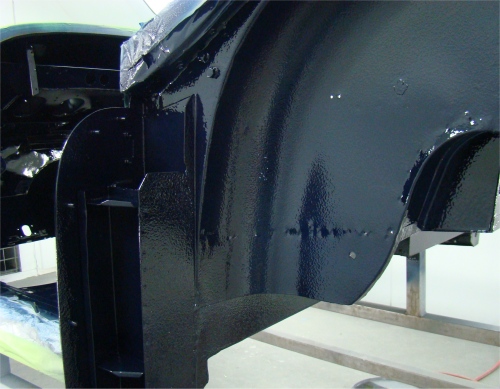
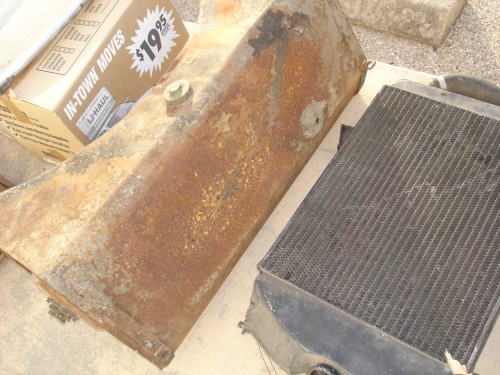
Yesterday saw the first of the Pacific Blue paint being applied. It is difficult to represent the true color in the photographs, although I would describe it as being slightly lighter than the more common Indigo Blue. I think it is going to look beautiful.The cylinder head has some serious issues due to extensive corrosion damage. We can save it, although it is going to be a challenge!
 |
 |
 |
|
|
particular cylinder head |
|
|
|
|
|
 |
 |
 |
|
|
|
|
|
|
|
|
 |
 |
 |
|
|
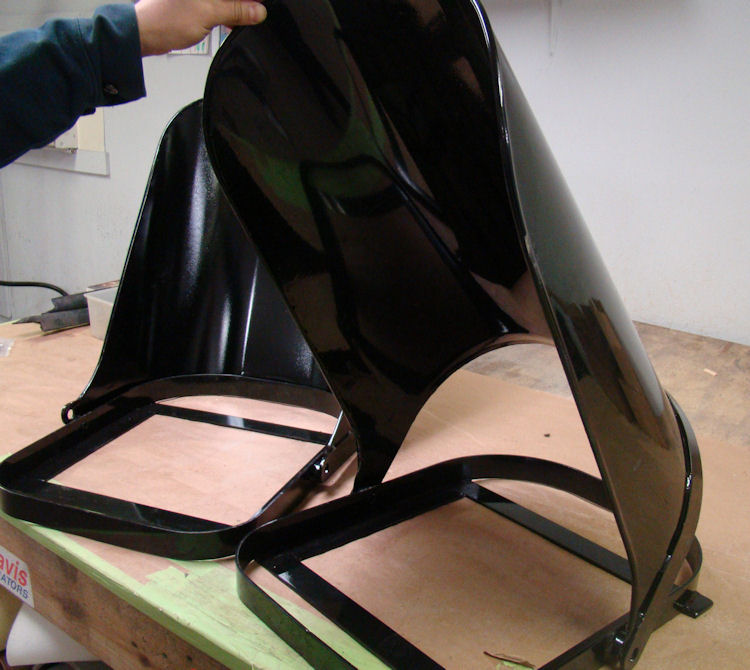
the front wings.... |
|
|
|
|
|
 |
 |
 |
|
|
|
|
|
|
|
|
 |
 |
 |
|
|
|
|
|
|
|
|
 |
 |
 |
|
|
|
|
|
|
|
|
 |
 |
|
|
|
|
|
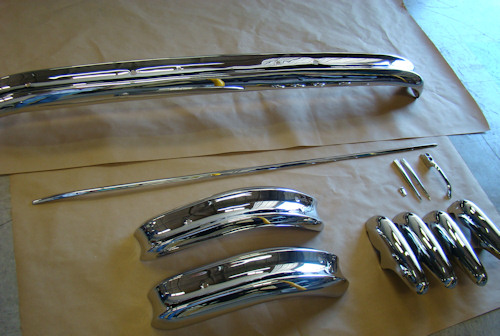
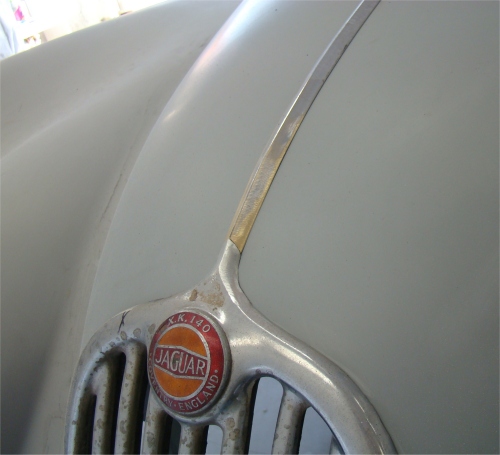
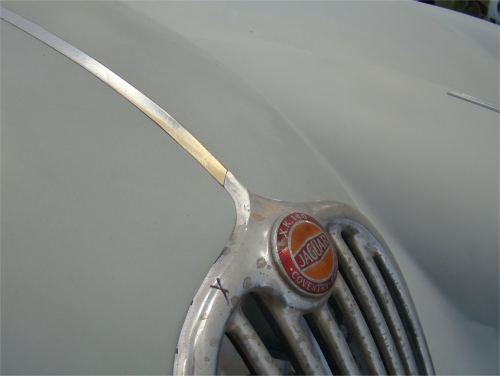
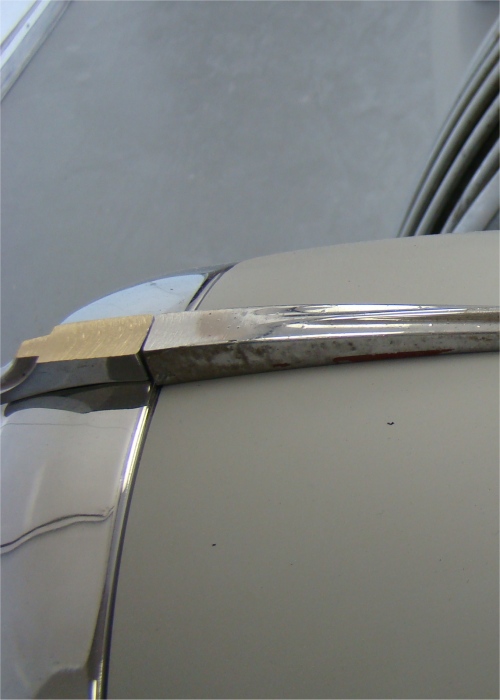
The final push to paint includes meticulous trial fit of the chrome and brightwork.
 |
 |
 |
|
|
trimmed to fit perfectly with each other |
|
|
|
|
|
 |
 |
|
|
|
|
|
After a lengthy break in the action (at our customer's request) I am pleased to report that we now have this project back underway. First up, a complete engine rebuild.
 |
 |
 |
|
|
have are serviceable |
|
|
|
|
|
 |
 |
 |
|
neither of which is very pretty |
some pretty extensive weld repairs |
|
|
|
|
|
 |
 |
 |
|
|
|
|
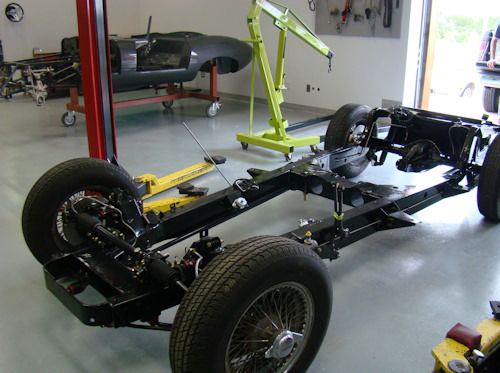
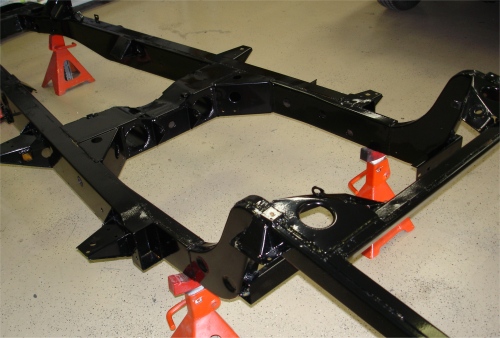
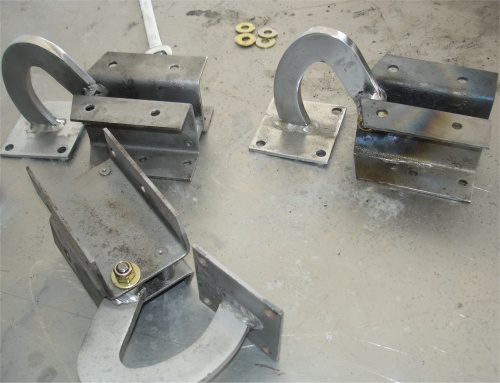
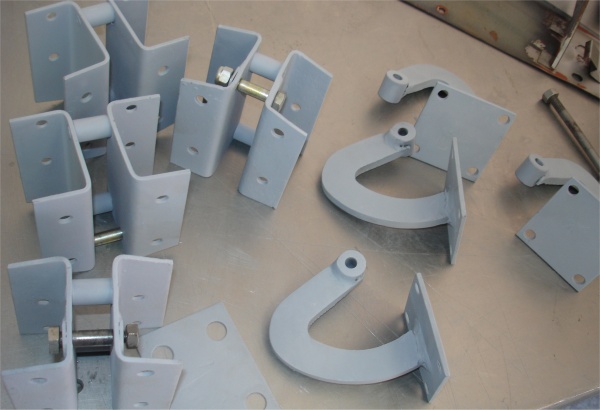
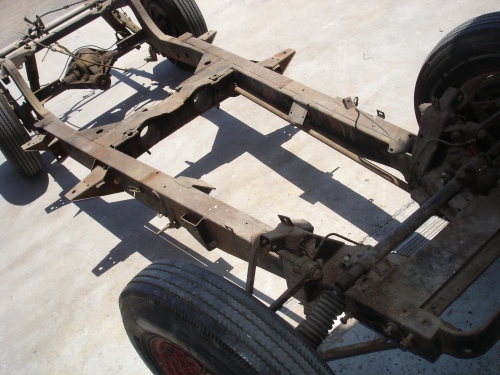
Your chassis has now been stripped, blasted and powder coated - and looks absolutely brand new.
 |
 |
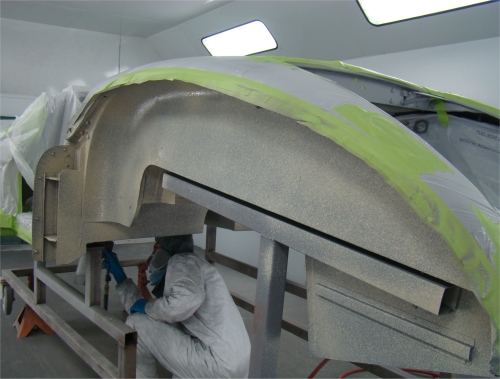
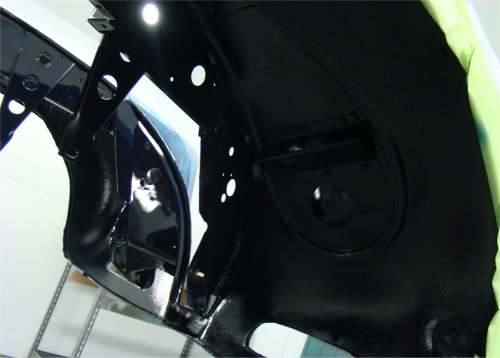
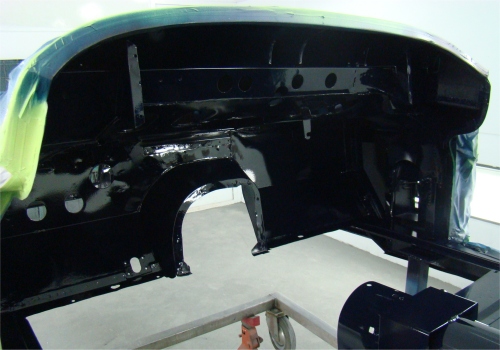
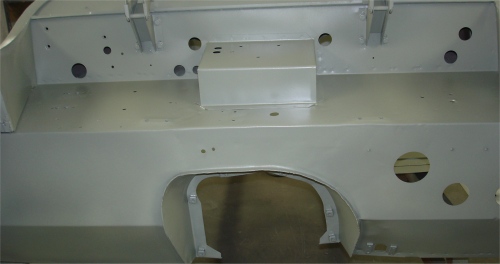
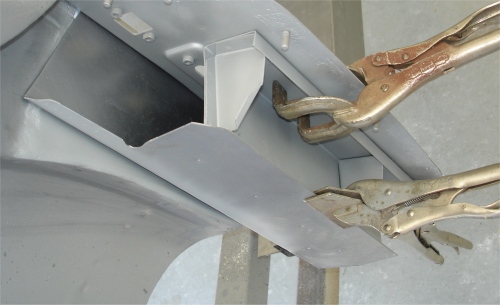
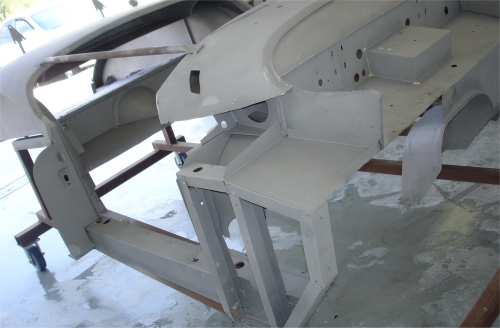
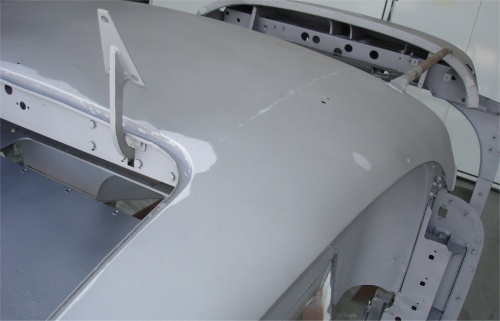
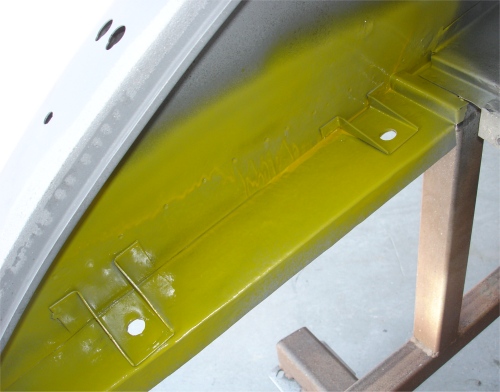
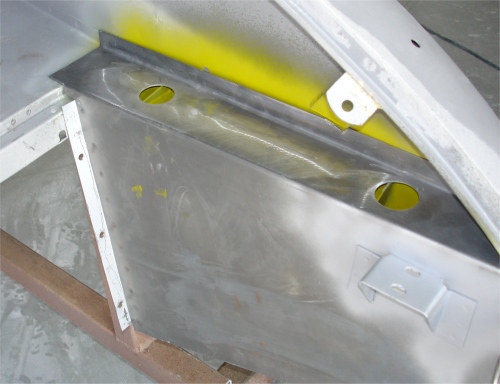
With the sheet metal replacement and the vast majority of the lead loading completed, the car went onto the alignment jig and was sealed with BASF etching primer.
 |
 |
 |
 |
 |
|
 |
 |
 |
|
cracks that needed repair |
|
|
 |
 |
 |
|
thro'out fabrication process |
||
 |
 |
 |
|
|
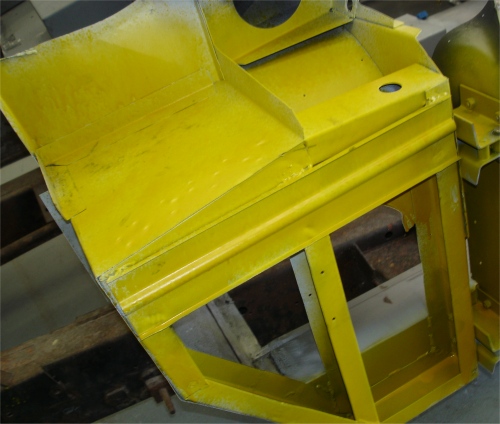
jig for priming |
|
 |
 |
|
 |
 |
 |
|
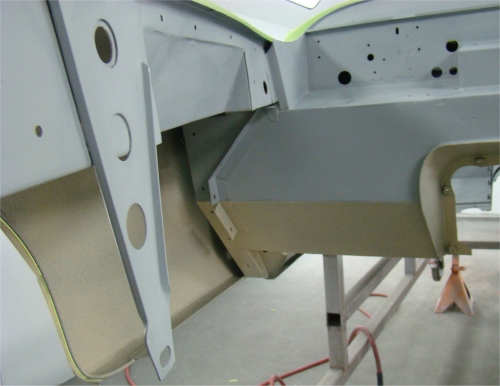
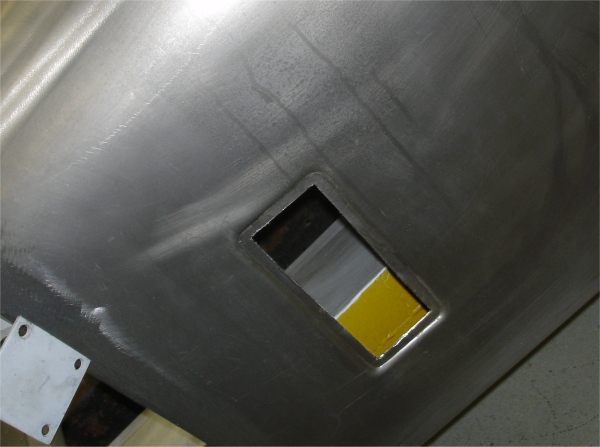
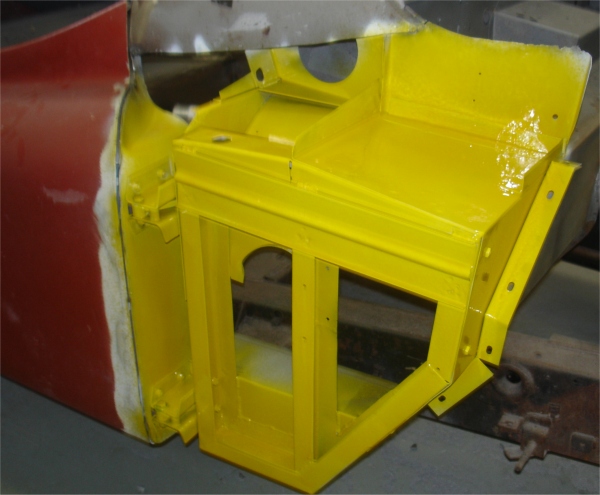
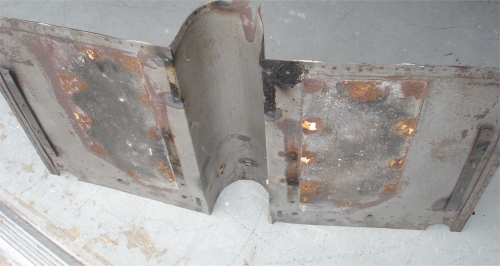
the footwell vent |
||
 |
||
|
|
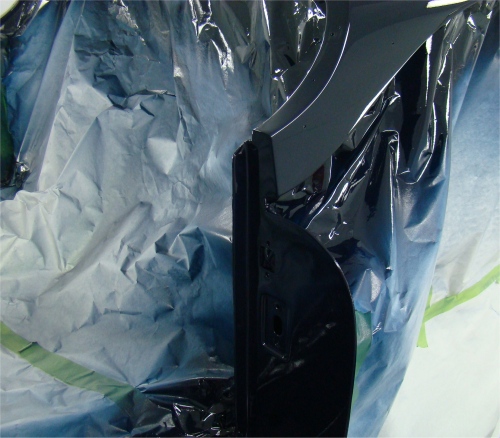
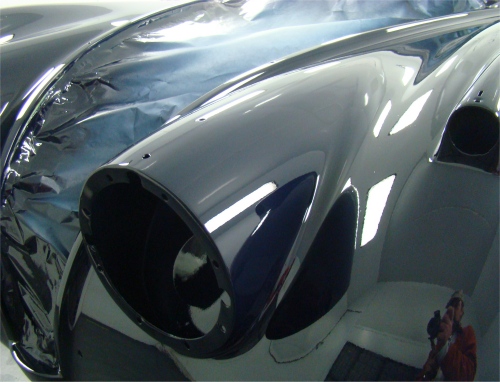
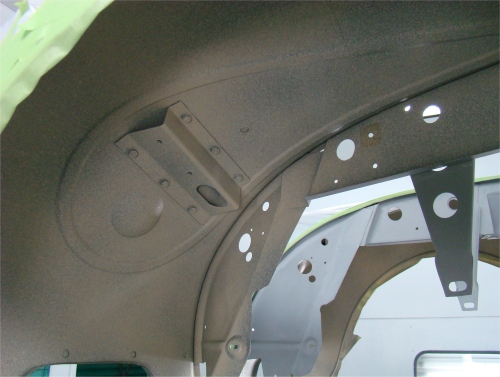
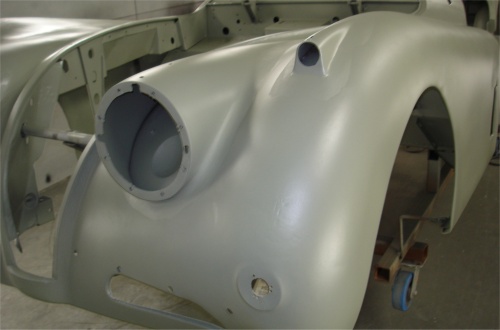
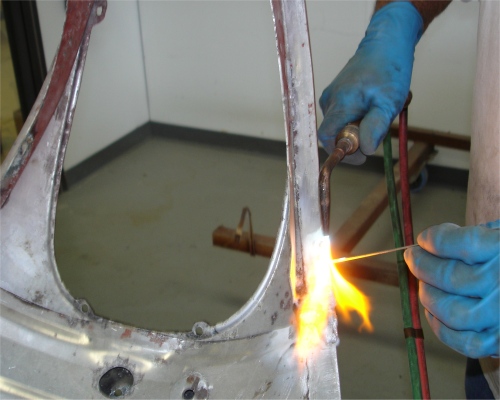
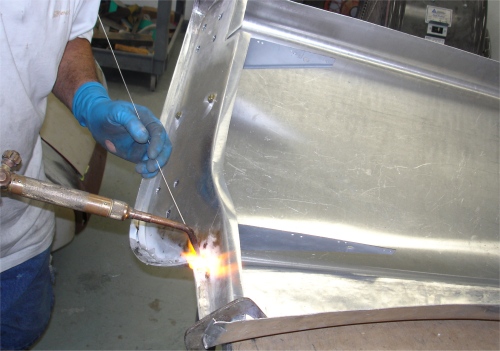
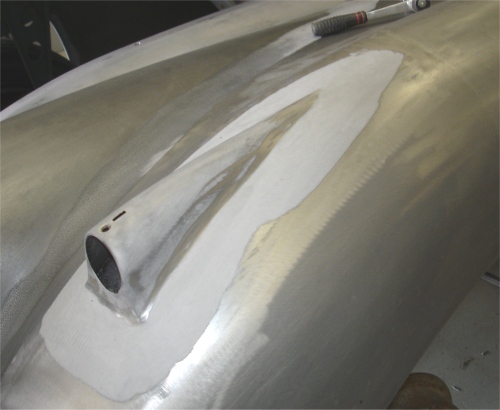
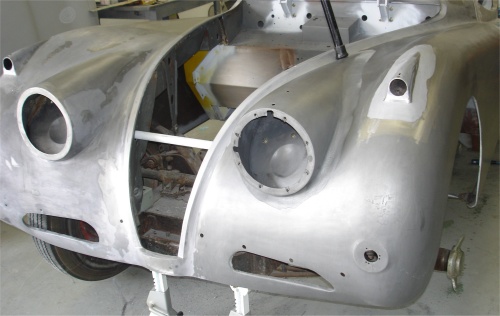
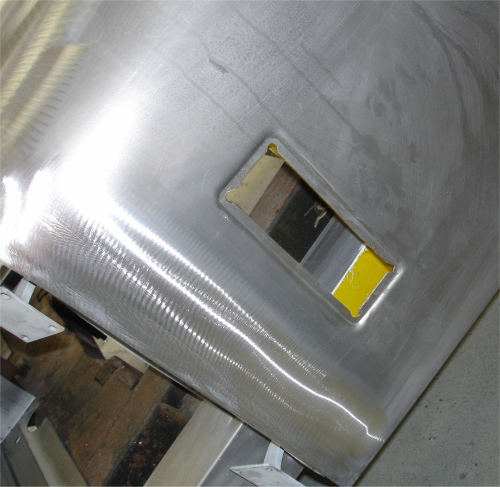
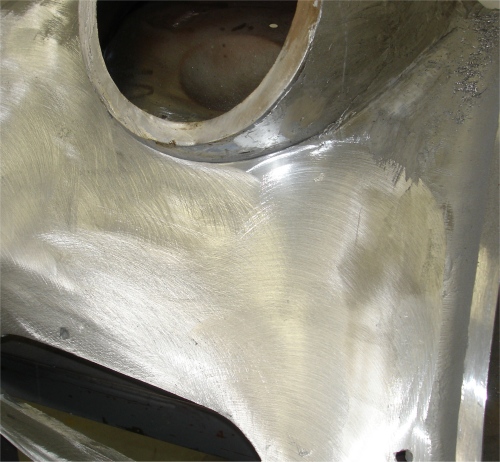
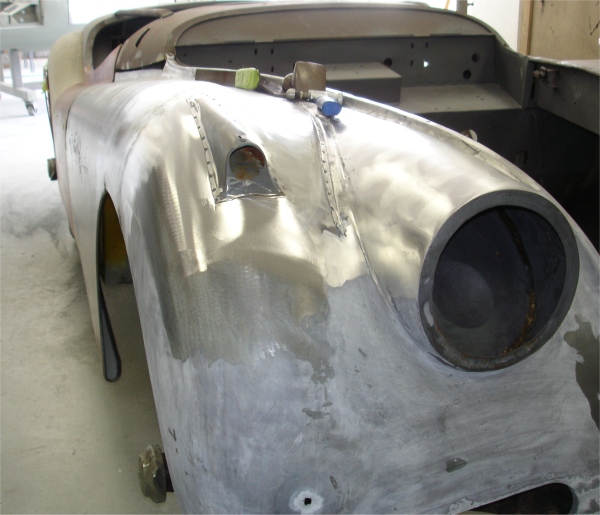
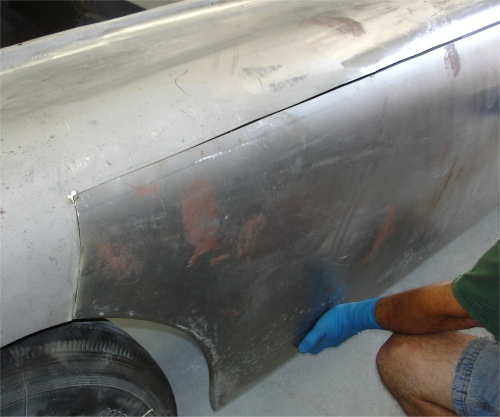
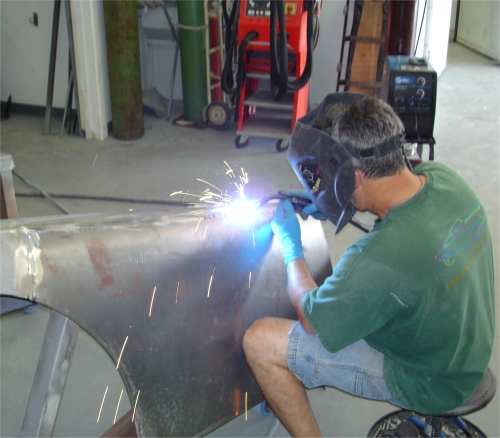
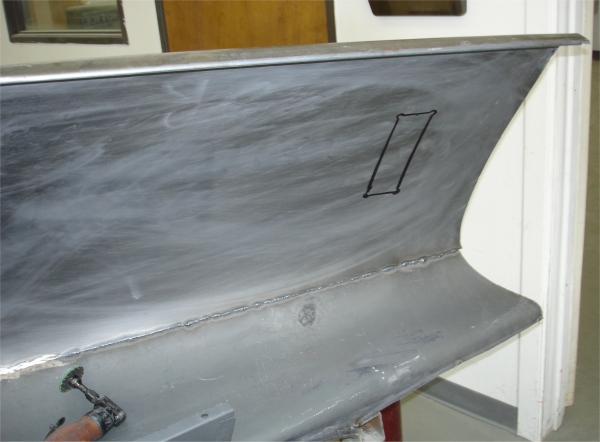
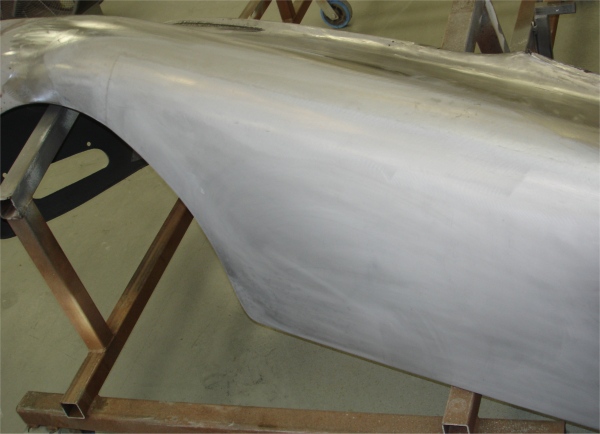
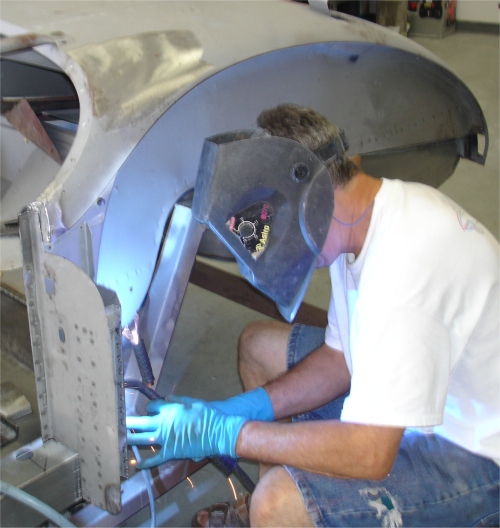
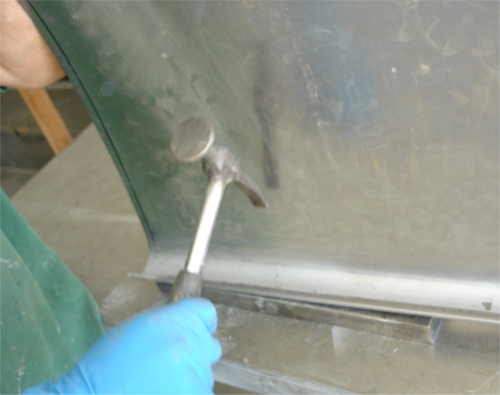
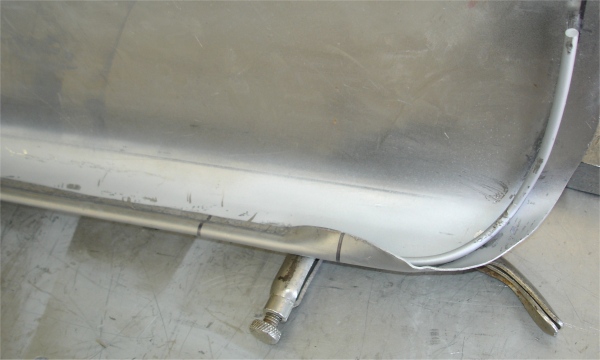
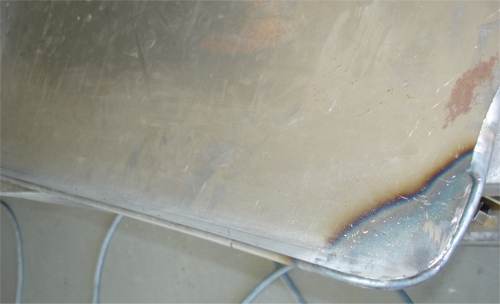
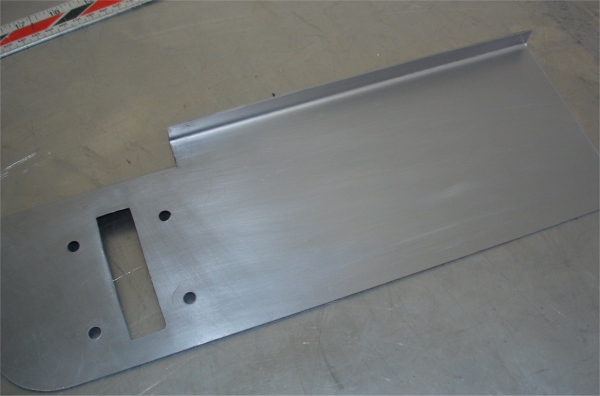
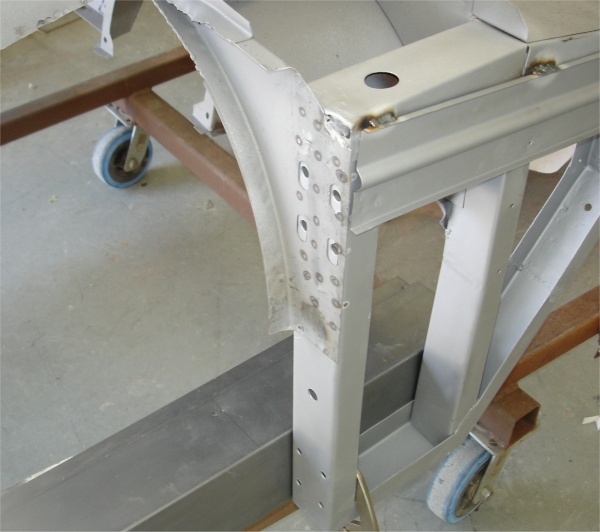
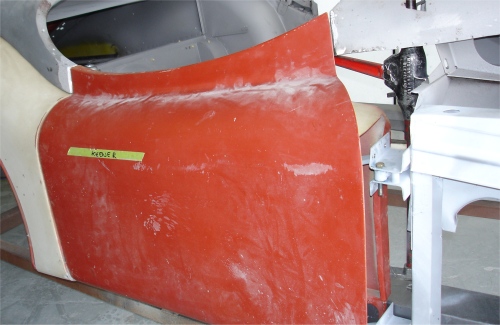
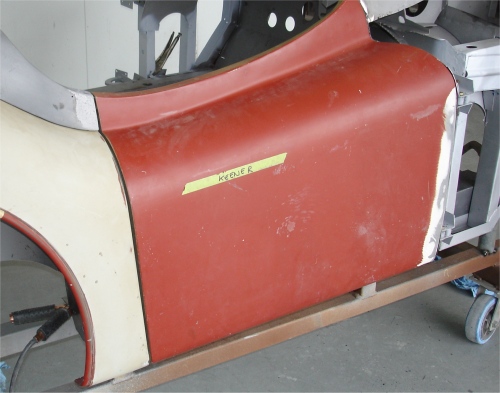
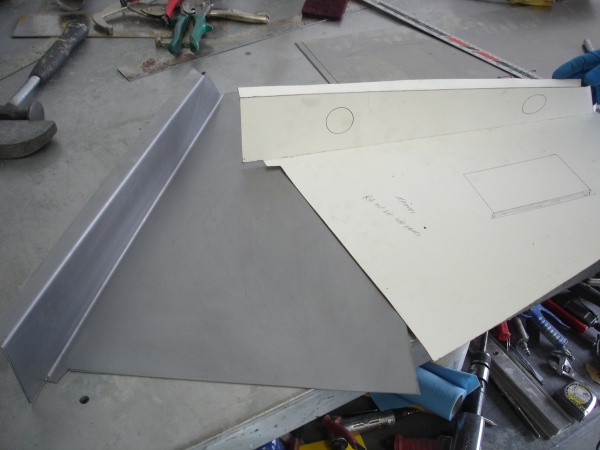
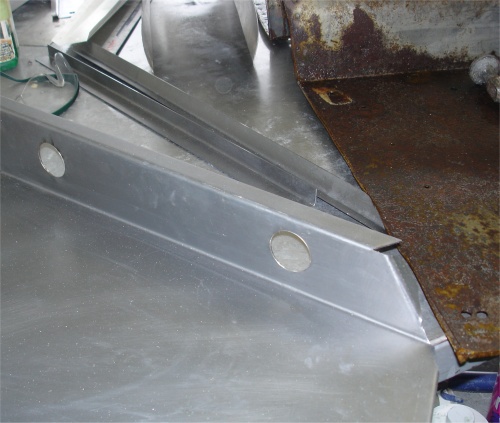
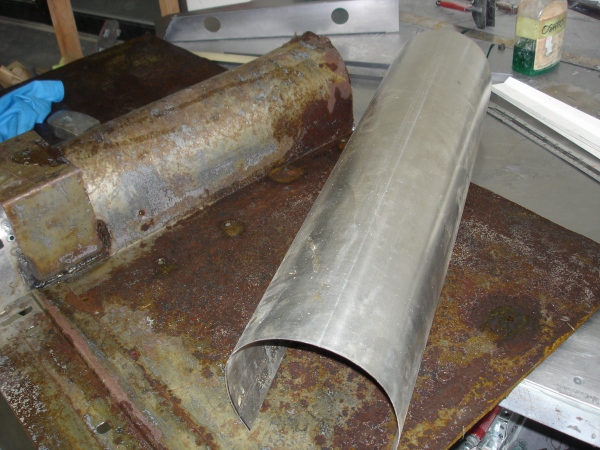
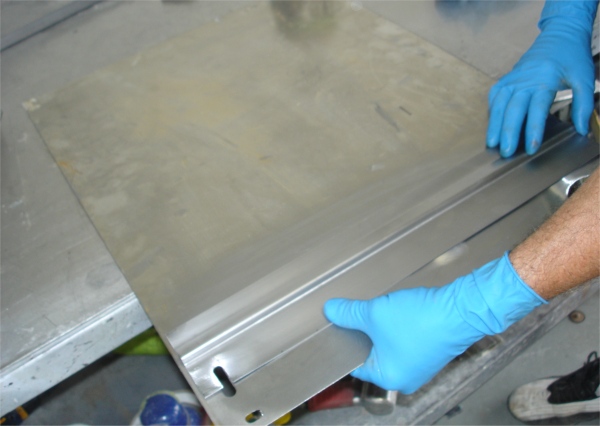
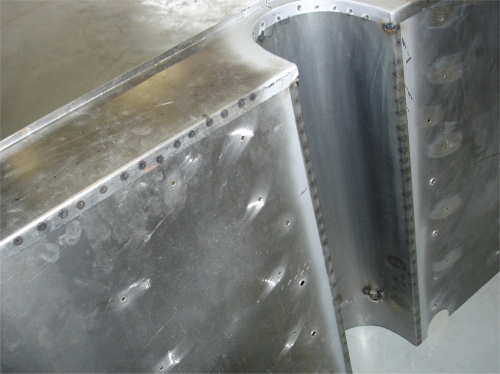
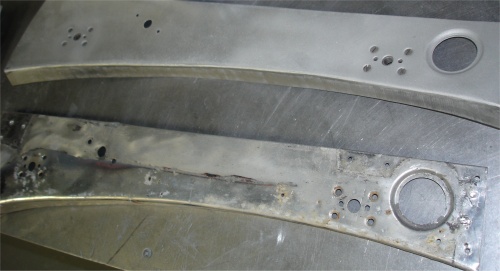
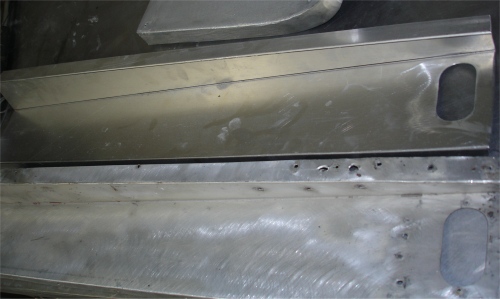
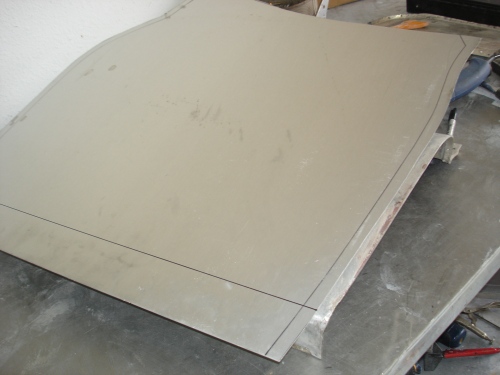
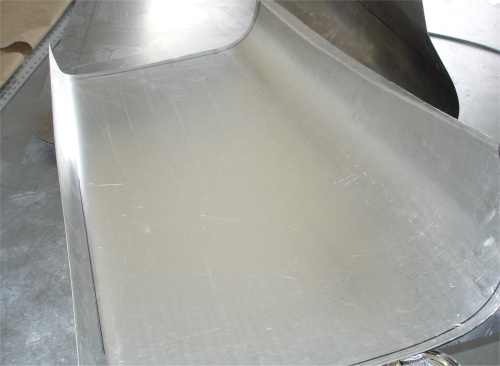
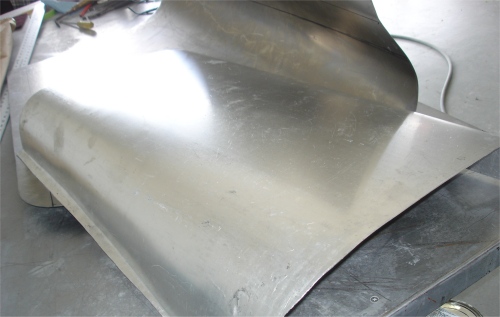
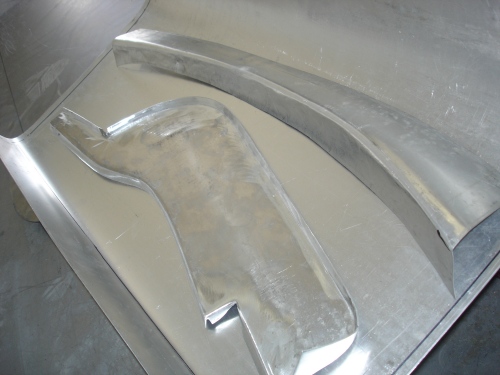
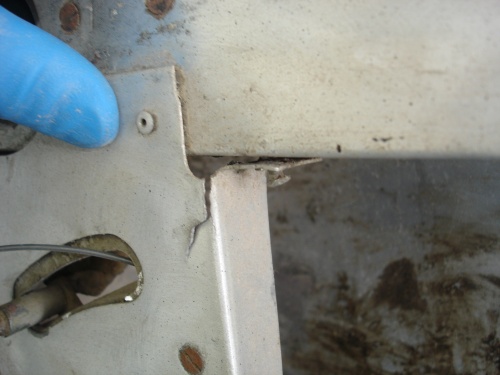
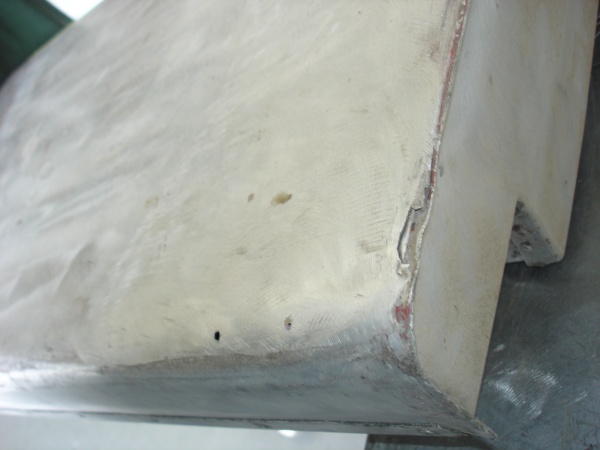
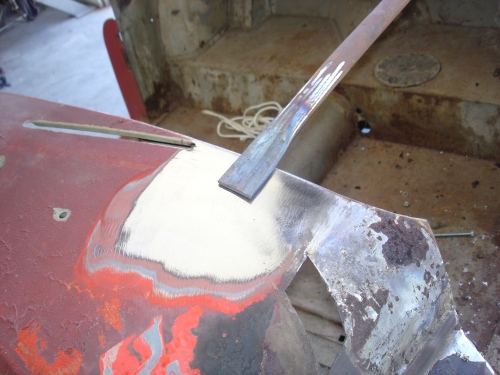
The following sequence shows the fabrication not only of a new RH front wing, but also a new headlamp pod.
 |
 |
 |
|
will be replaced |
|
|
 |
 |
 |
|
|
be fabricated |
|
 |
 |
 |
|
|
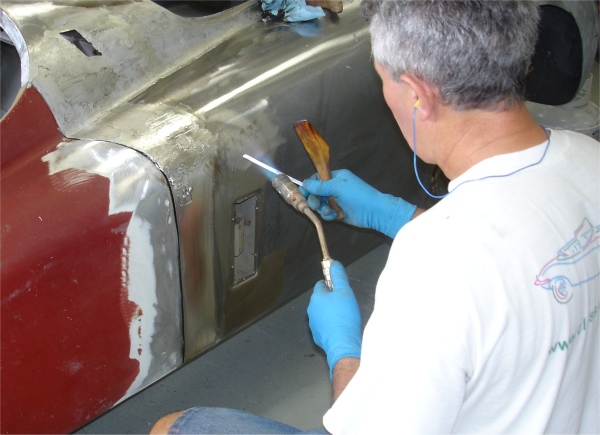
front was cut out |
place, it is lead loaded |
 |
 |
 |
|
|
|
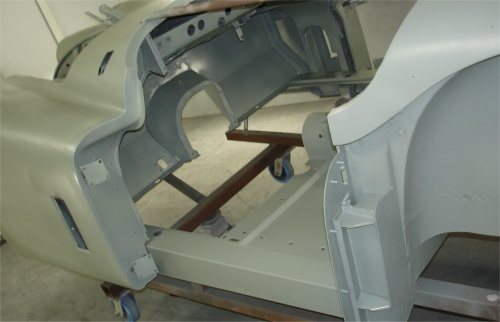
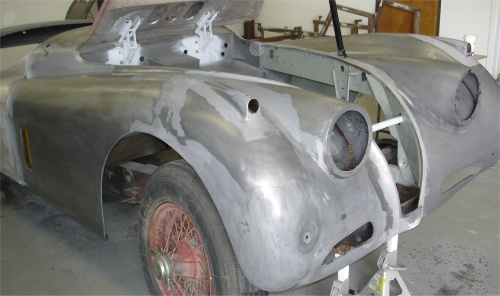
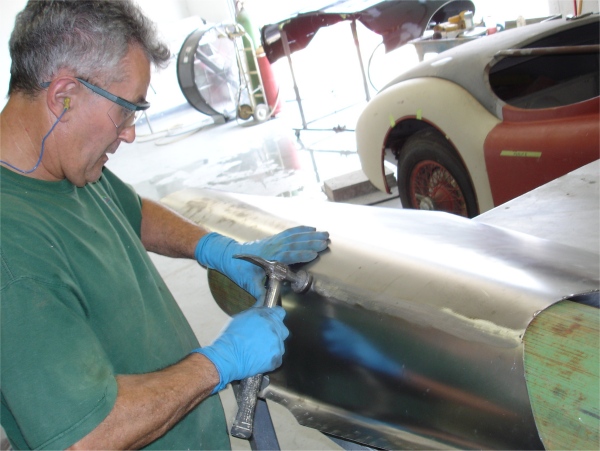
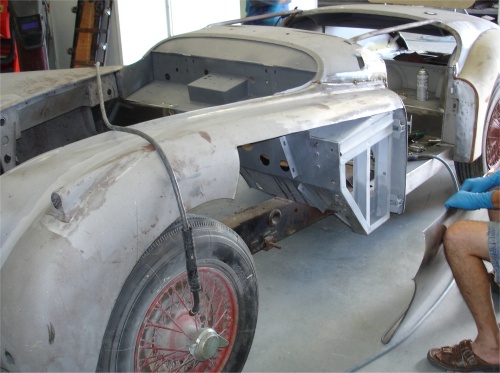
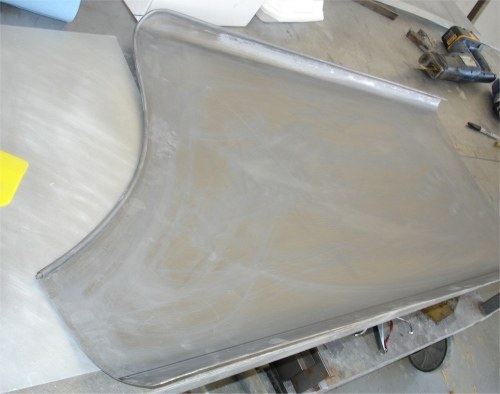
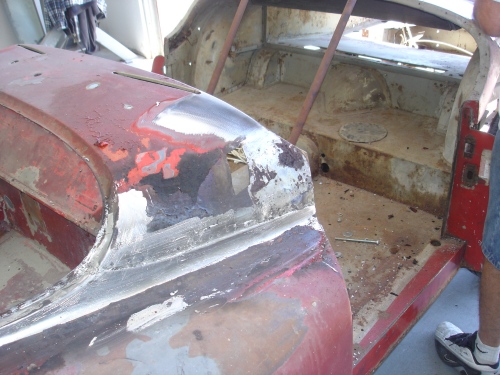
The following photographs show the completion and installation of the LH front wing. Note that the body has been put back on the chassis temporarily while we fit the doors and wings, etc.
 |
 |
 |
|
panel into place |
|
|
 |
 |
 |
|
|
|
|
 |
||
|
not been cut yet) |
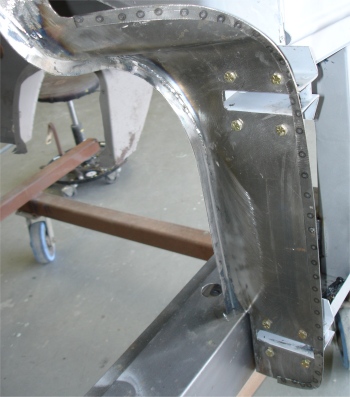
We don't expect to see Lawrence today, at least not until after the Brazil v Ghana World Cup matchThe following photographs show what he was he was up to yesterday....
 |
 |
 |
|
|
|
completely rebuilt |
 |
 |
 |
|
B pillar support |
welded into place |
next |
 |
 |
 |
|
for one of the front wings |
to size |
|
|
|
|
|
 |
 |
 |
|
to watch |
|
|
|
|
|
|
 |
 |
 |
|
|
re-constructed |
|
|
|
|
|
 |
 |
 |
|
|
|
|
|
|
|
|
 |
 |
 |
|
the doors |
|
now been welded in place |
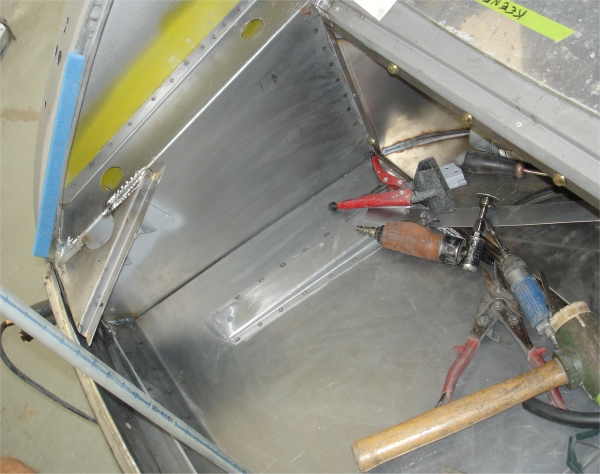
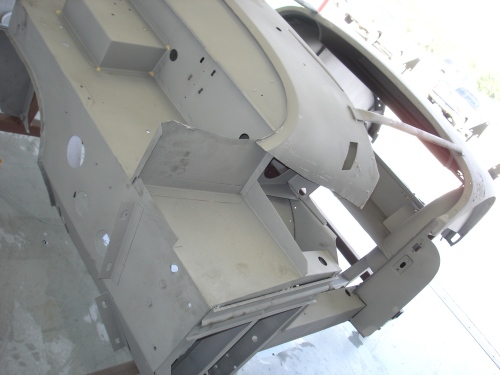
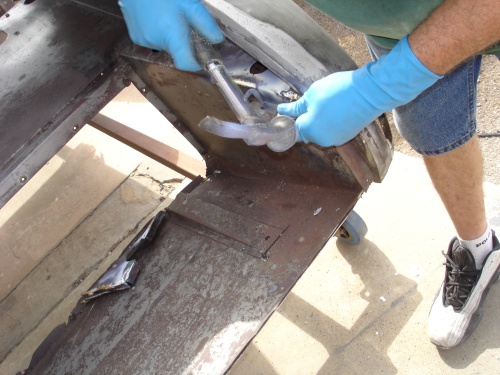
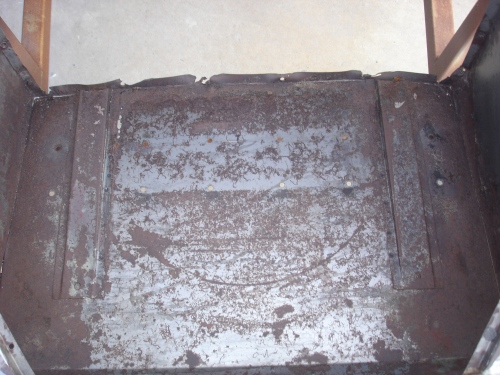
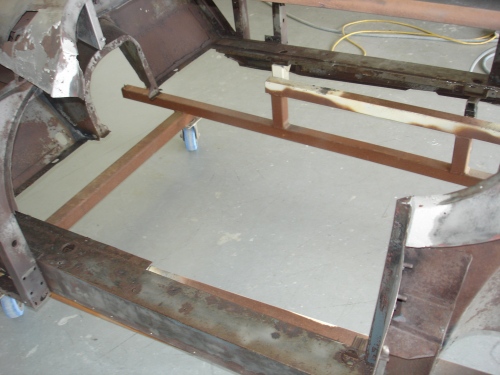
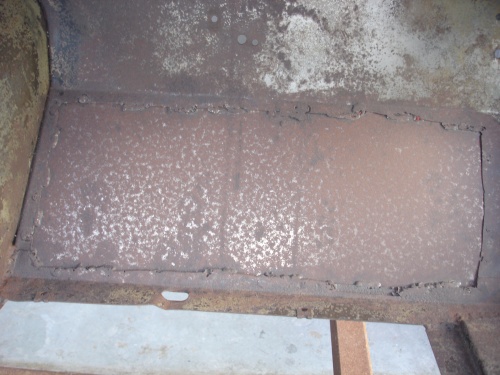
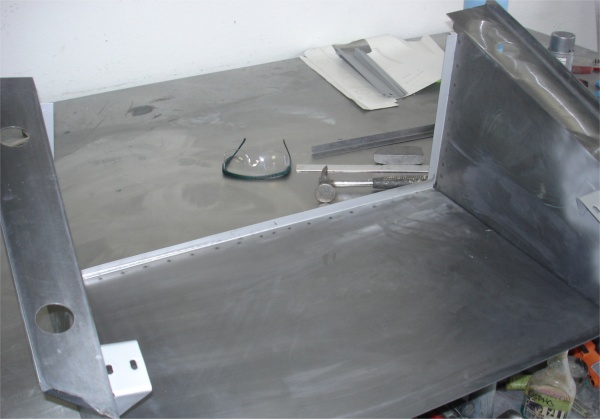
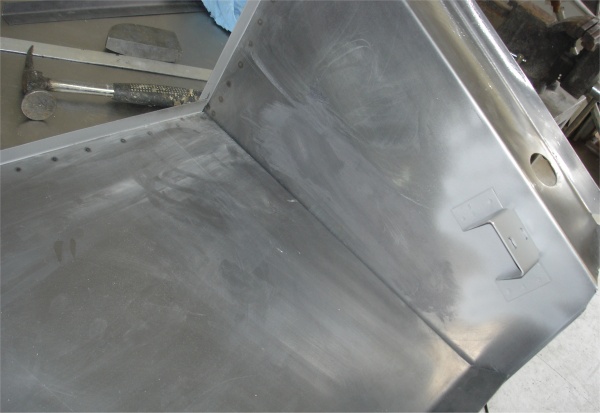
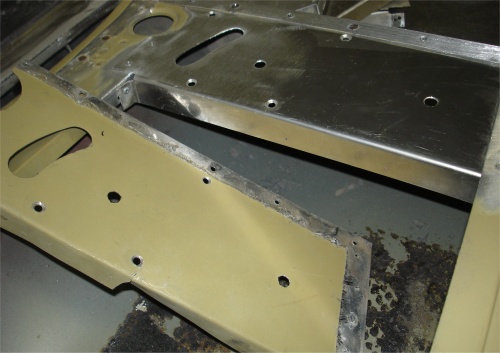
With the main tub sand blasted clean, it is now time to start attaching some of the panels we have fabricated over the last week or so.
 |
 |
 |
 |
 |
 |
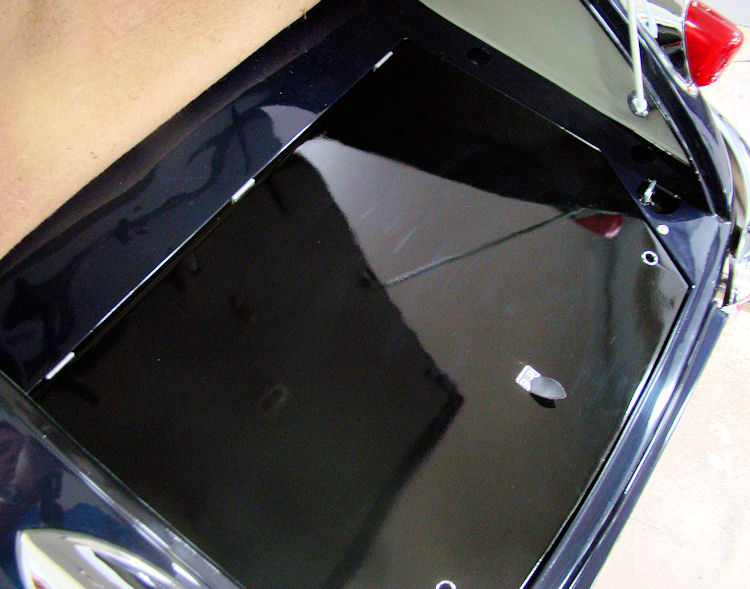
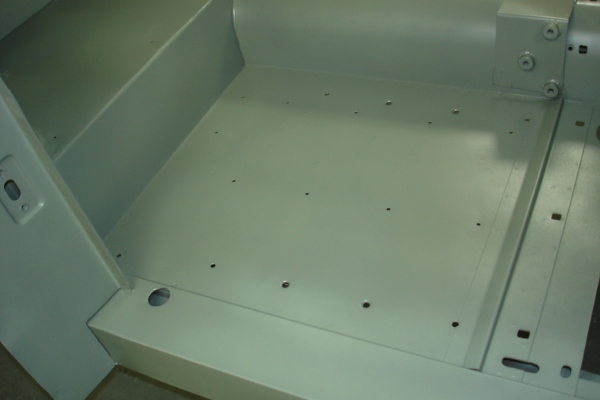
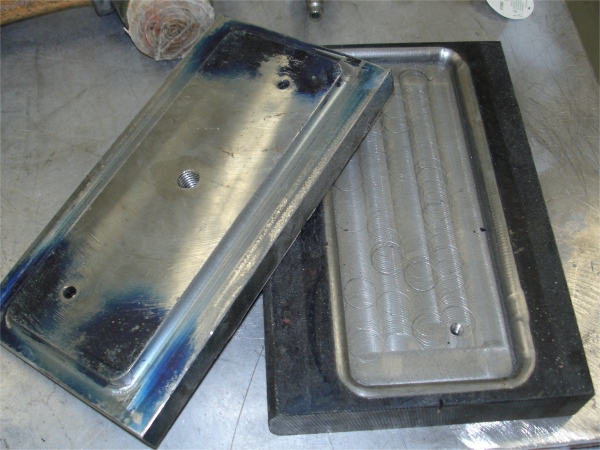
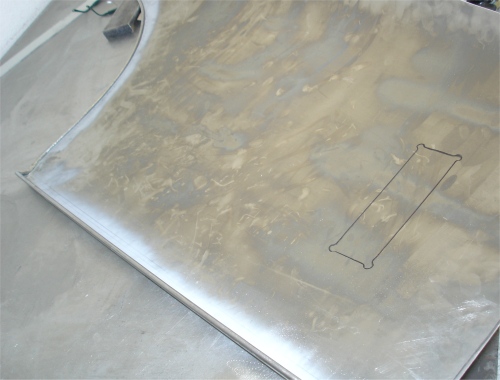
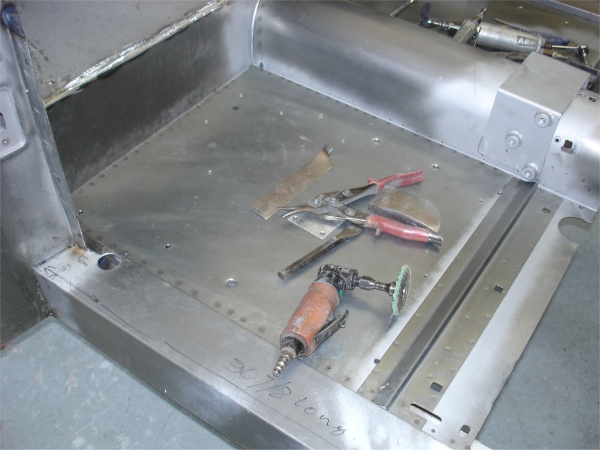
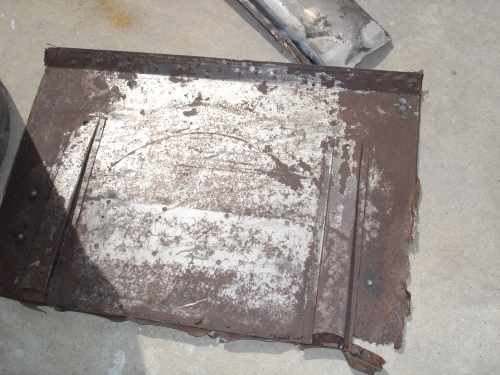
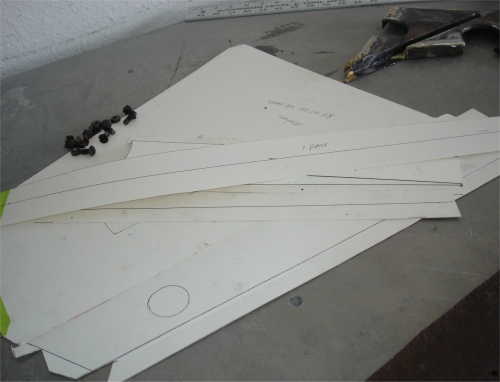
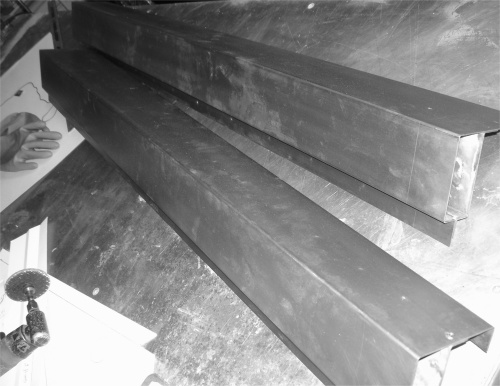
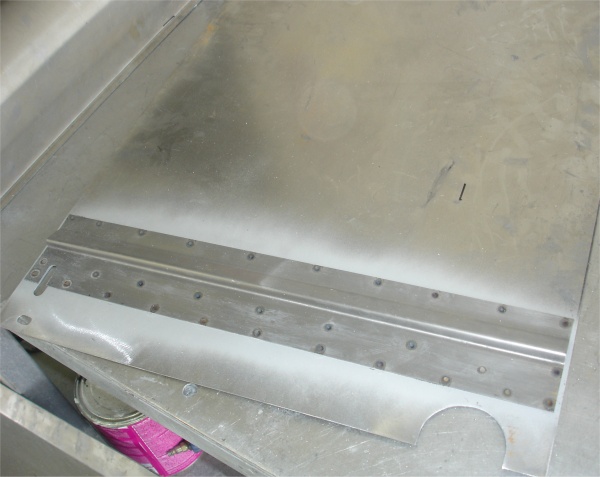
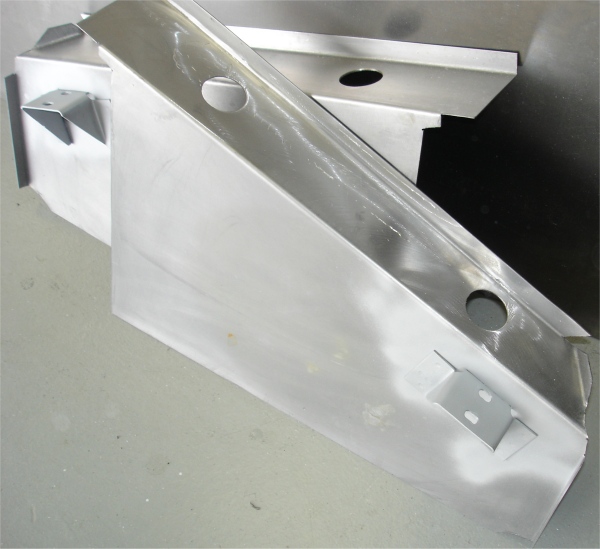
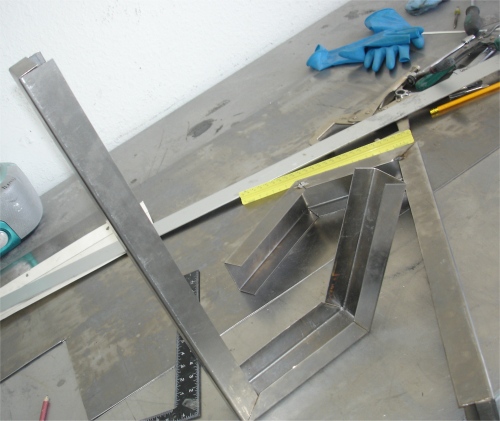
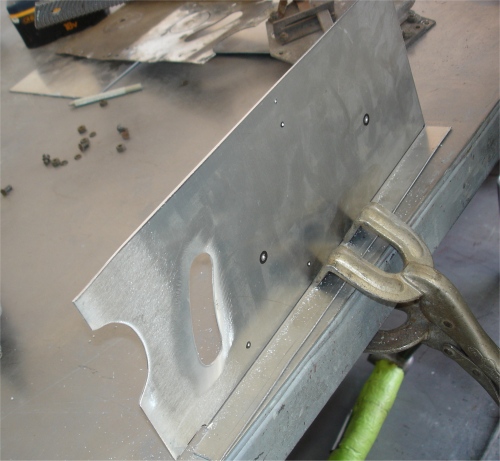
This week we have been busy fabricating all the various sheet metal panels we need to restore the tub. Check out your new floors, firewall, boot compartment, etc, etc.
 |
 |
 |
|
compartment panels |
|
|
 |
 |
 |
|
fabricated and replaced |
has to go |
|
 |
 |
 |
|
up and cut to size |
fabricated |
|
 |
 |
 |
|
|
tunnel |
|
 |
 |
 |
|
|
wall panels |
|
 |
 |
 |
|
|
||
 |
 |
 |
|
|
|
|
 |
 |
 |
|
|
to the firewall and A post rames |
|
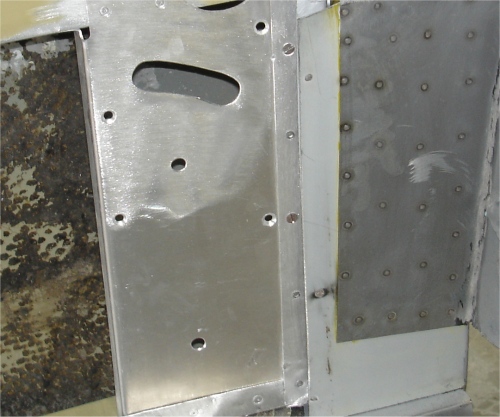
All the various panels for the LH door have now been fabricated. The door will not be assembled until that can be done in conjunction with the restored tub/door apertures. The right hand door is thankfully in much better condition and only needed a new side latch panel. We have now turned our attention to body. Watch this space...
 |
 |
 |
|
and riveted in place |
|
|
 |
 |
 |
|
into shape |
||
 |
||
|
panels all now fabricated |
 |
 |
 |
|
|
problems |
|
 |
 |
 |
|
poor condition |
||
 |
 |
|
|
|
fabricated using new aluminum |
|
Time to get another CJ body restoration underway!
 |
 |
 |
|
a special jig for blasting |
|
|
|
|
|
|
 |
 |
 |
|
|
A posts |
|
|
|
|
|
 |
 |
 |
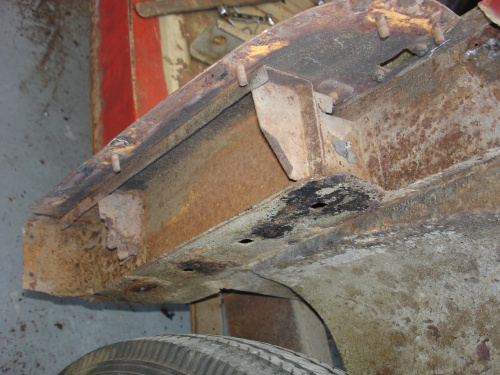
|
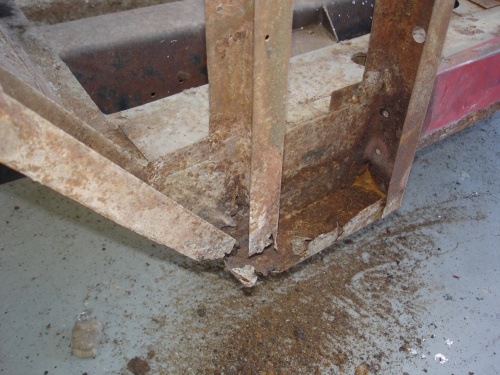
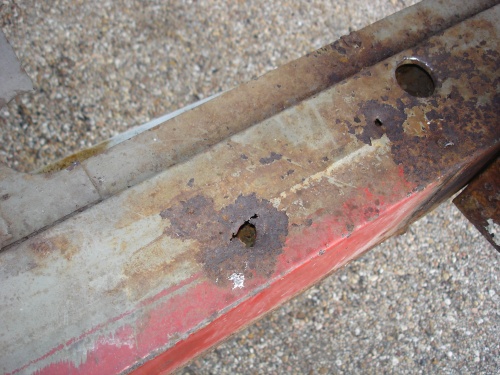
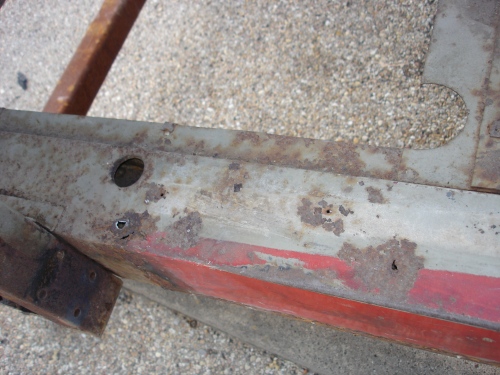
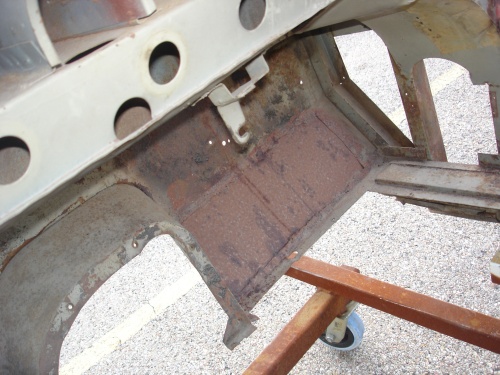
corrosion issues |
until they are blasted |
|
|
|
|
|
 |
 |
 |
|
|
|
|
 |
 |
 |
|
|
|
|
 |
||
|
RH bulkhead |
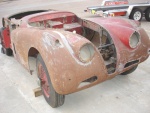
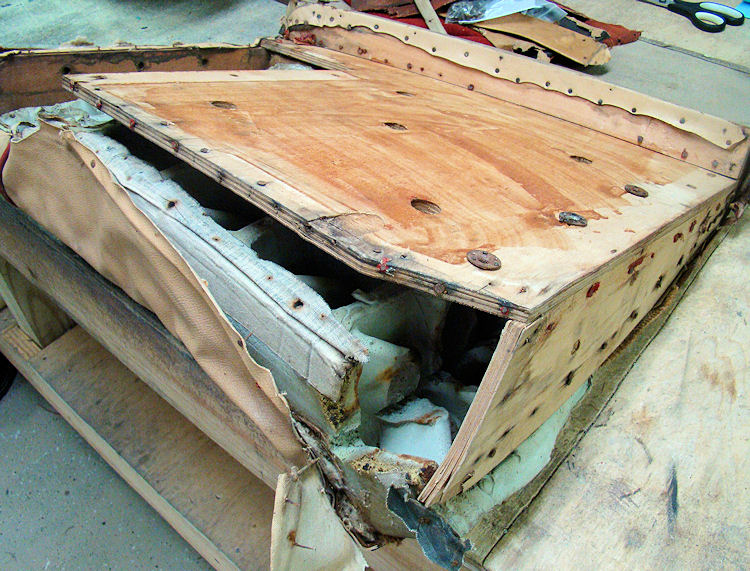
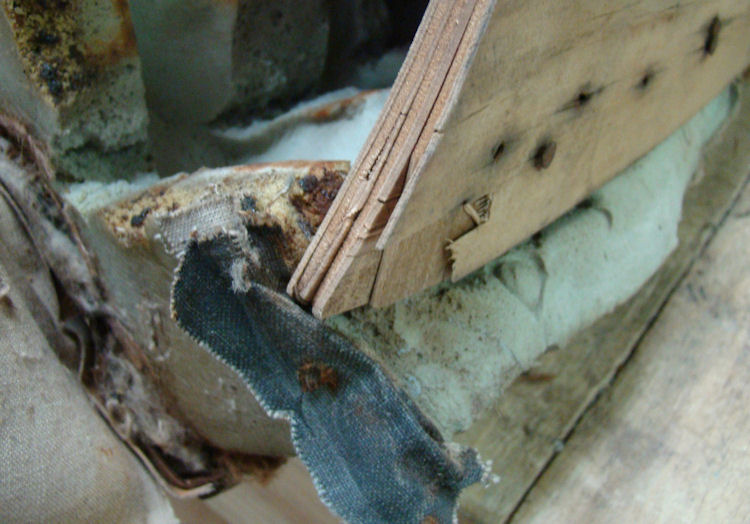
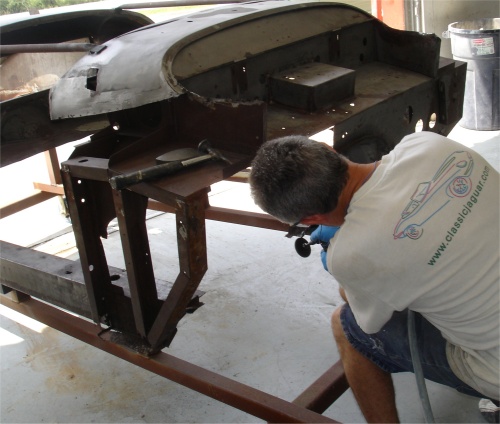
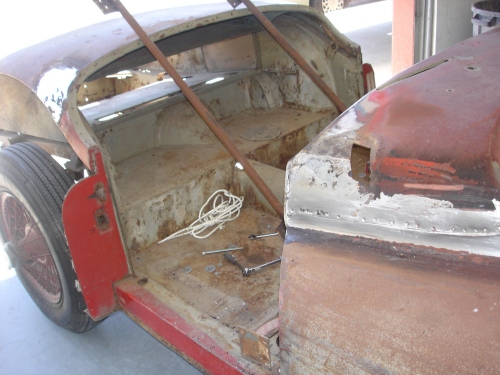
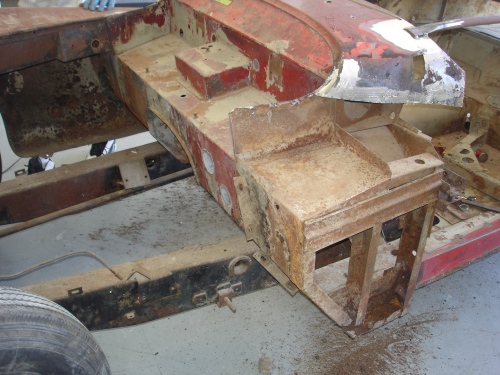
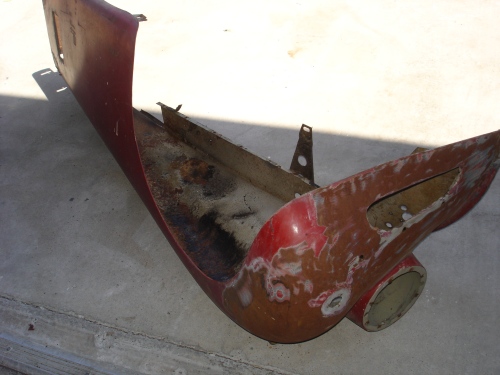
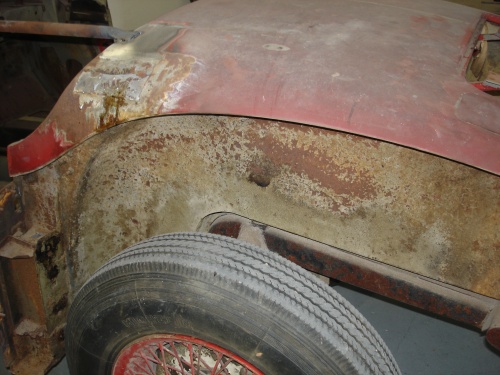
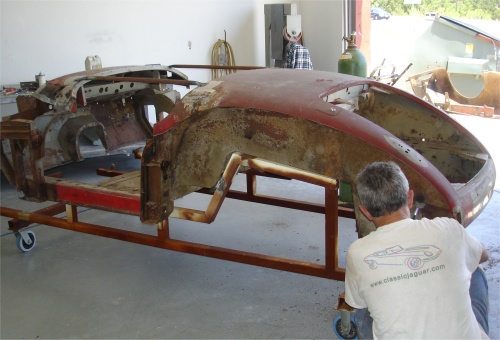
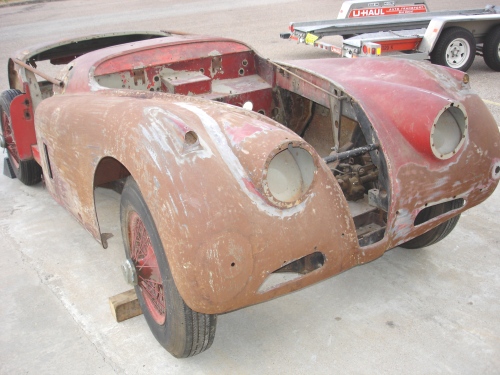
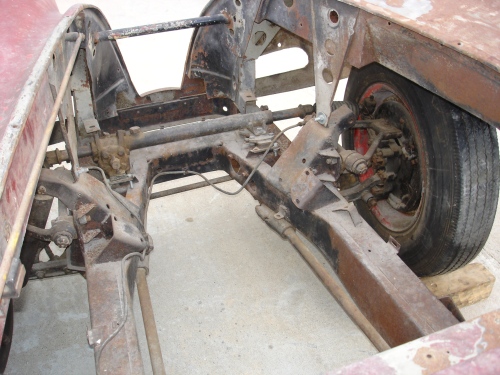
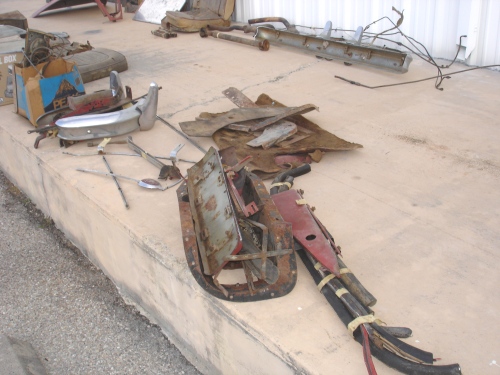
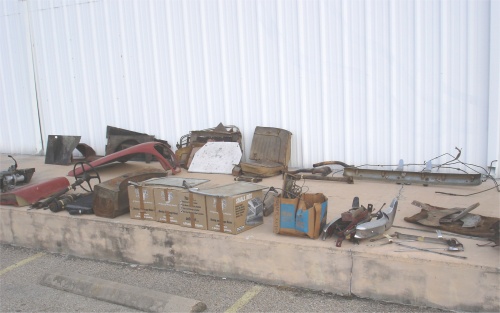
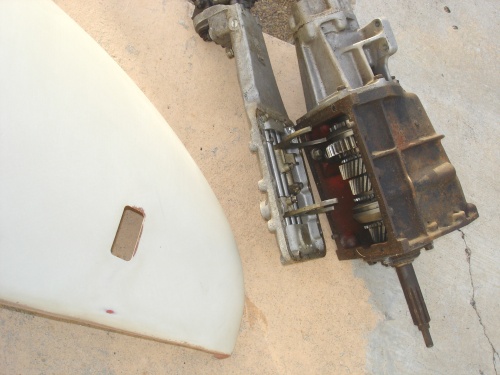
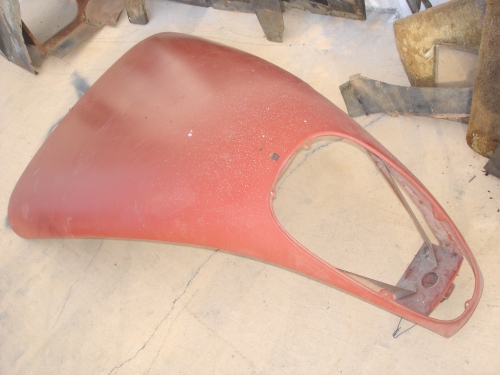
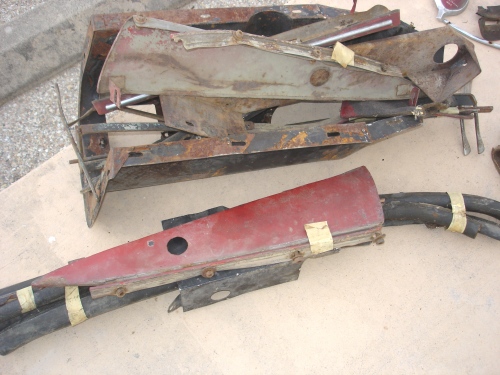
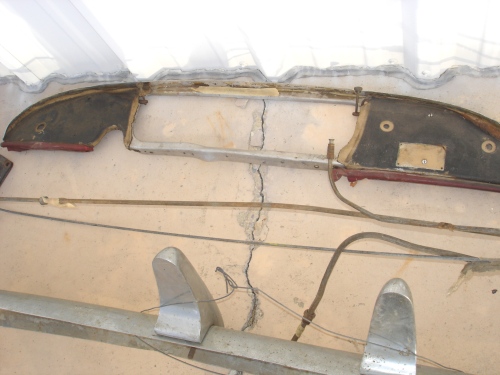
The following photographs show our latest project car, as delivered. Basically, a once proud 1955 XK140 roadster in kit form! I hope you enjoy following the restoration process unfold - and thank you for entrusting this important project to the Classic Jaguar team.
 |
 |
 |
 |
 |
 |
 |
 |
 |
 |
 |
 |
 |
 |
|