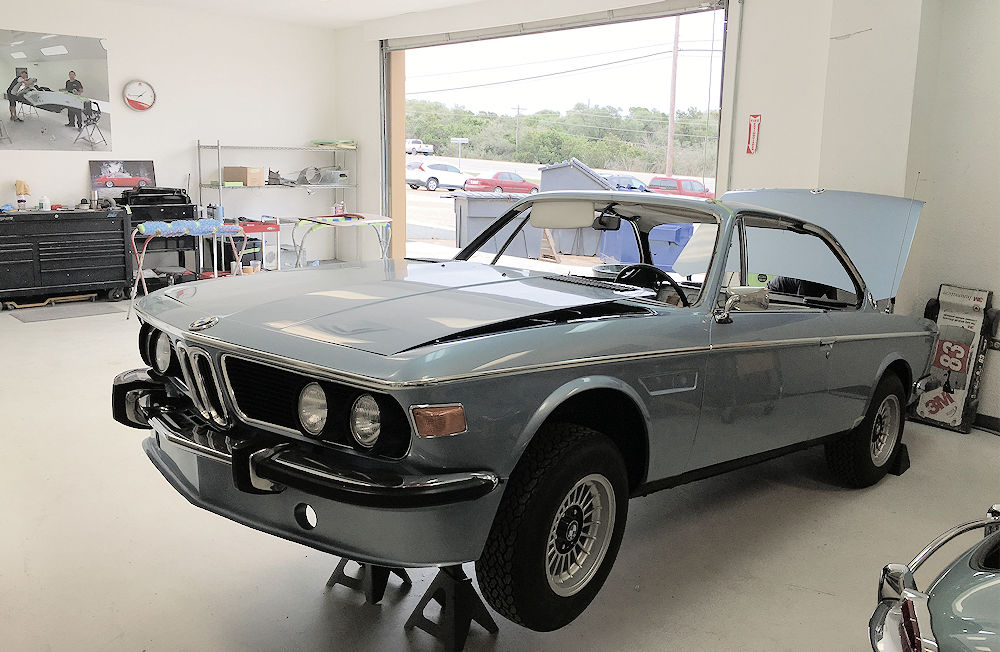
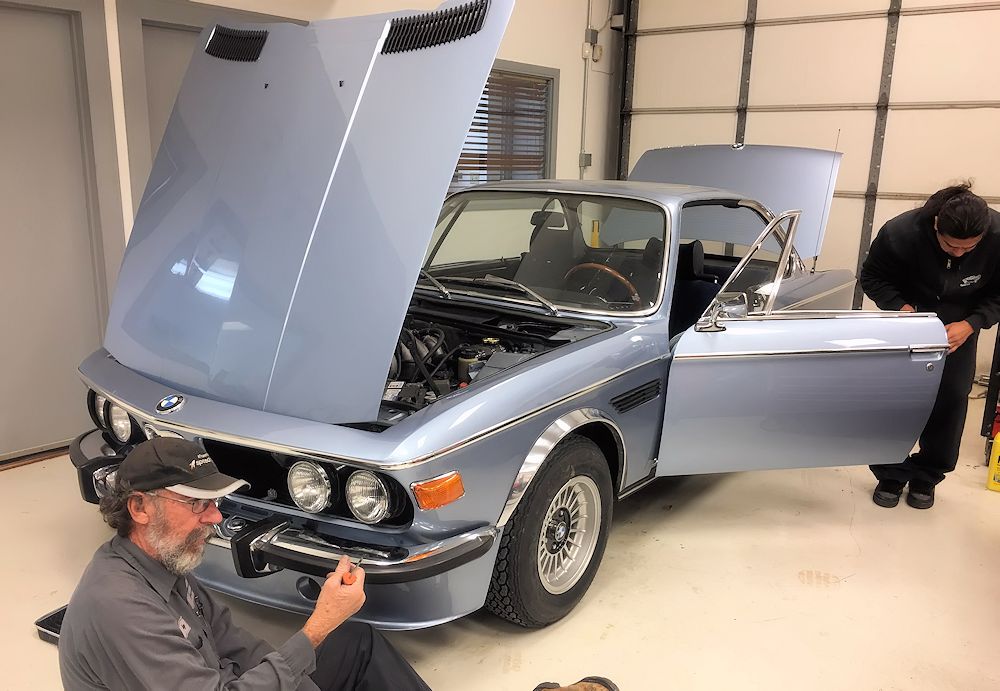
Driver Restoration
| Our Cars - 1973 BMW 3.0 CSi Driver Restoration |
by Dan Mooney |
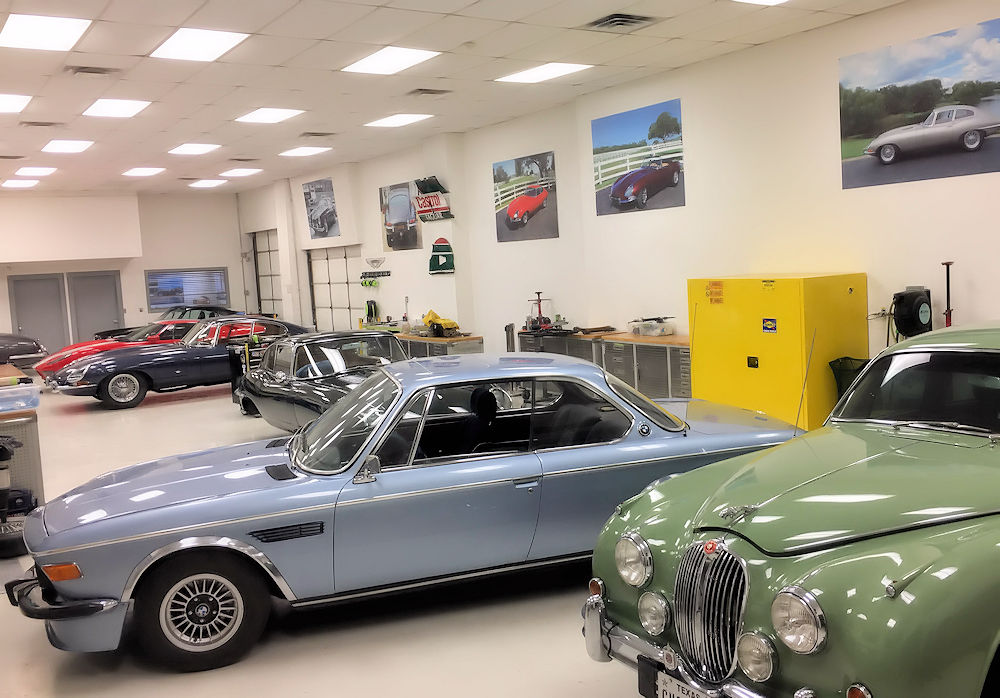
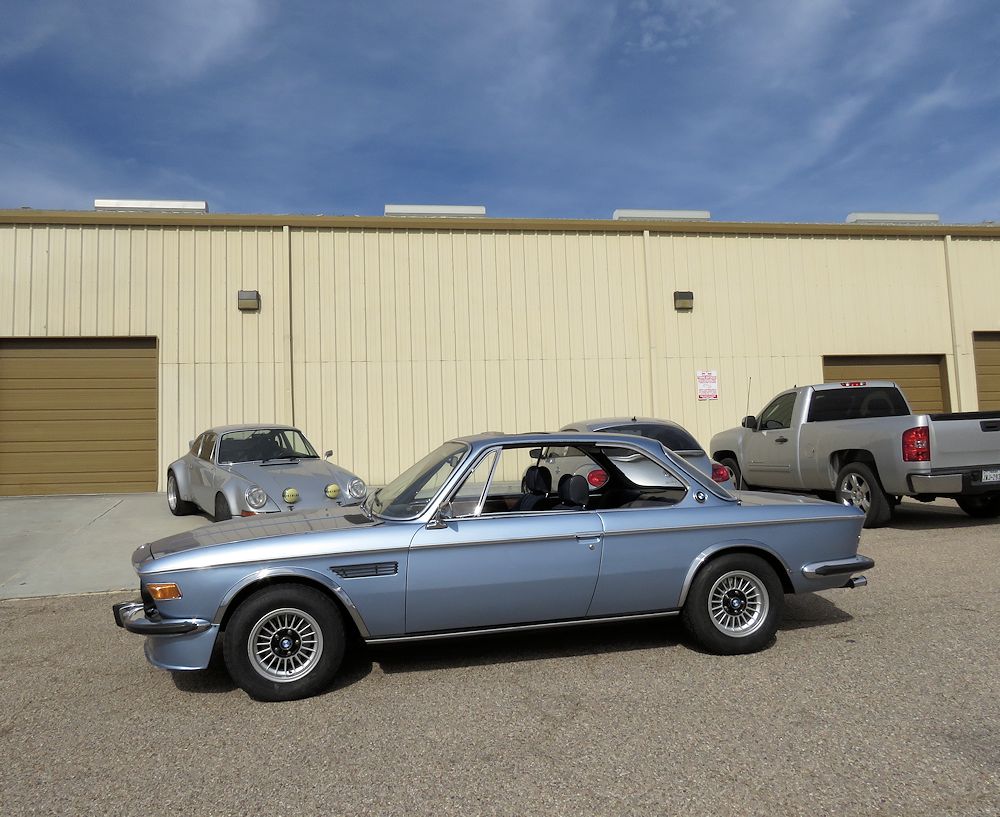
Other
cars in the CJ fleet |
|
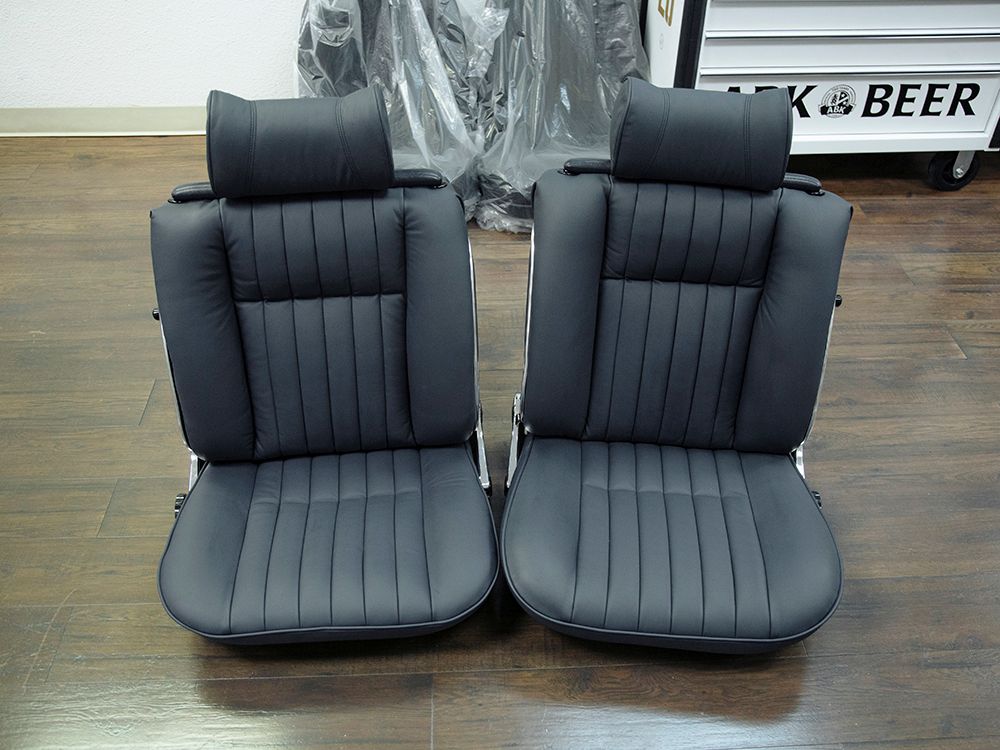
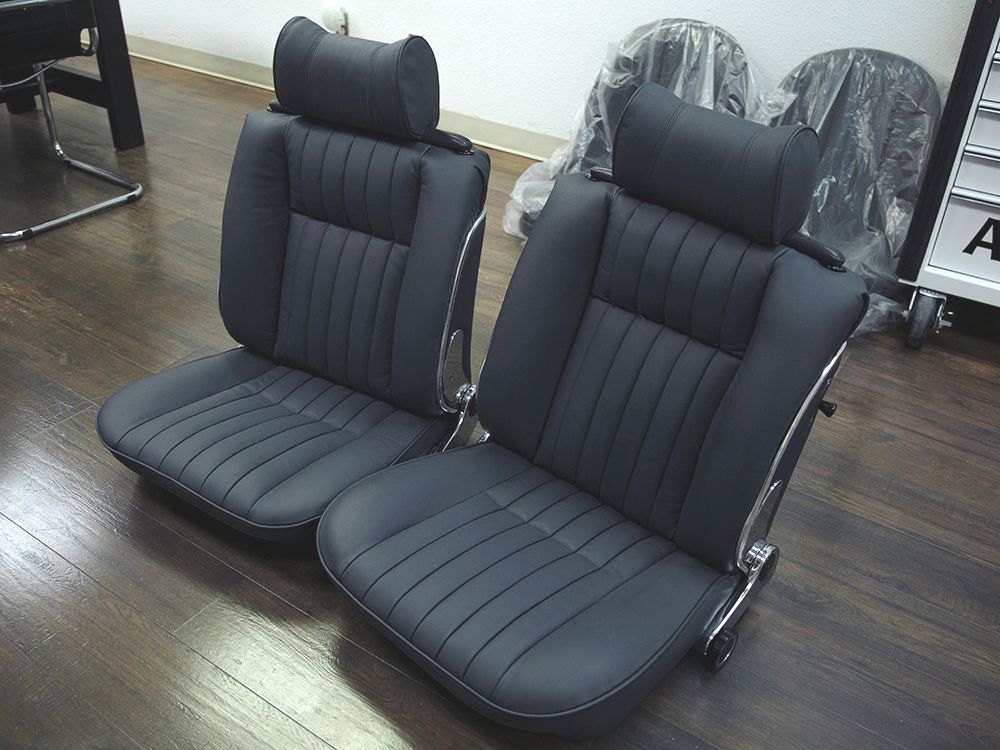
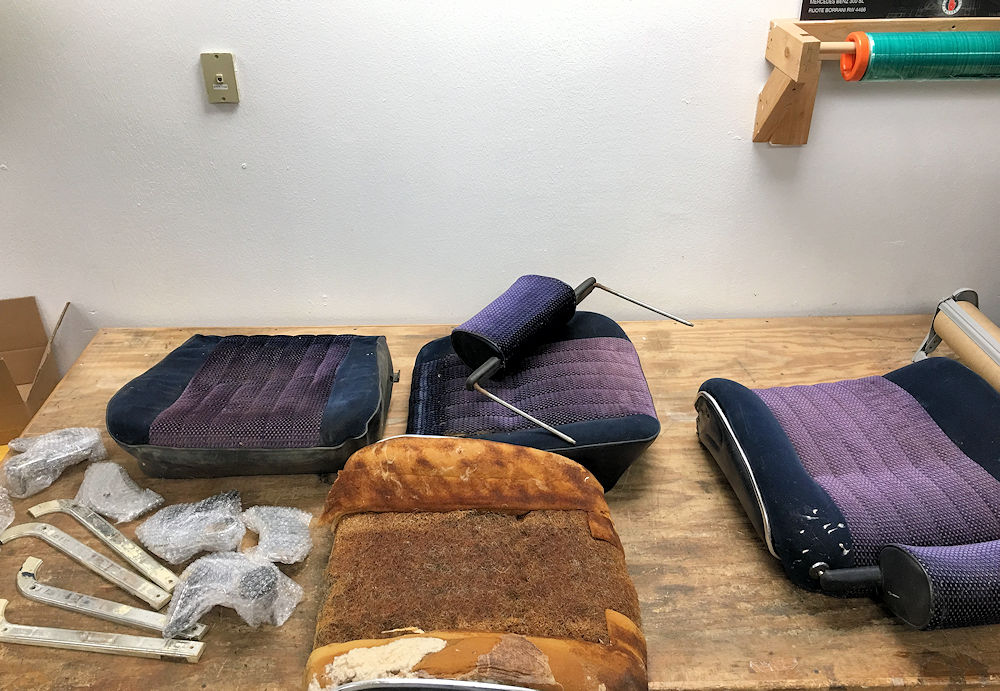
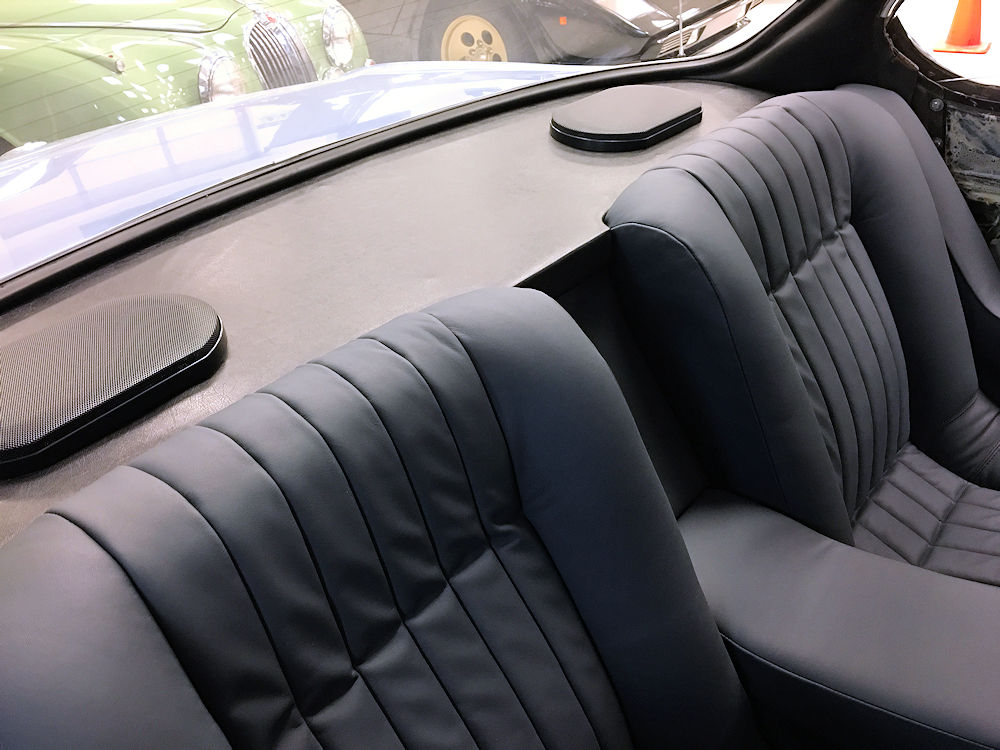
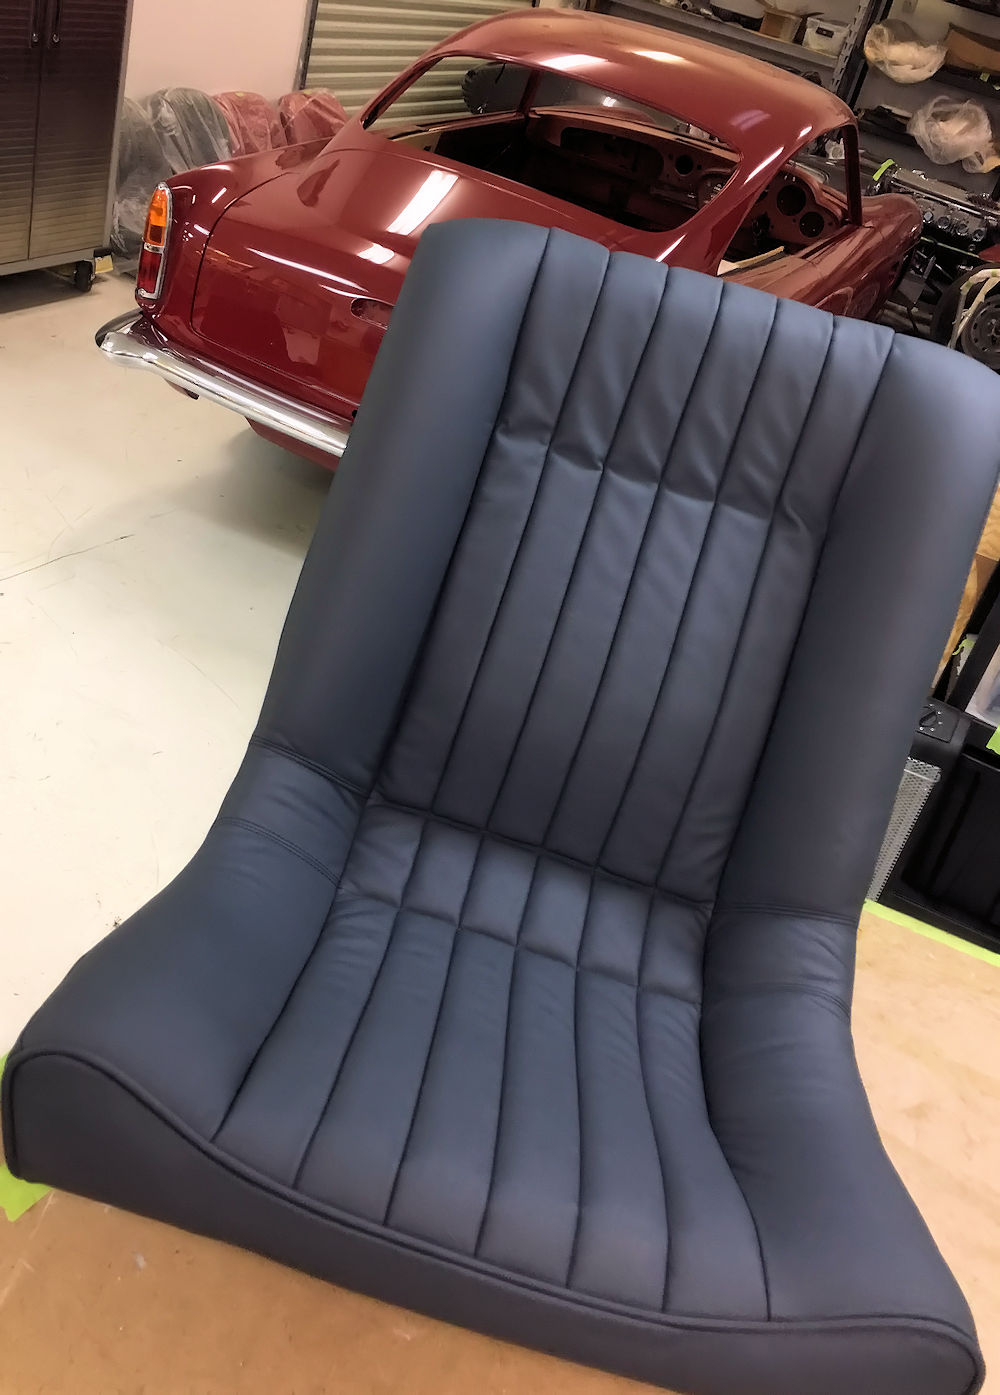
Last week Carlos re-trimmed the spare front seats I acquired a while back for the CSi. (The original velour covered seats have been retained, should any future owners prefer the velour over hide.)
 |
 |
 |
 |
 |
 |
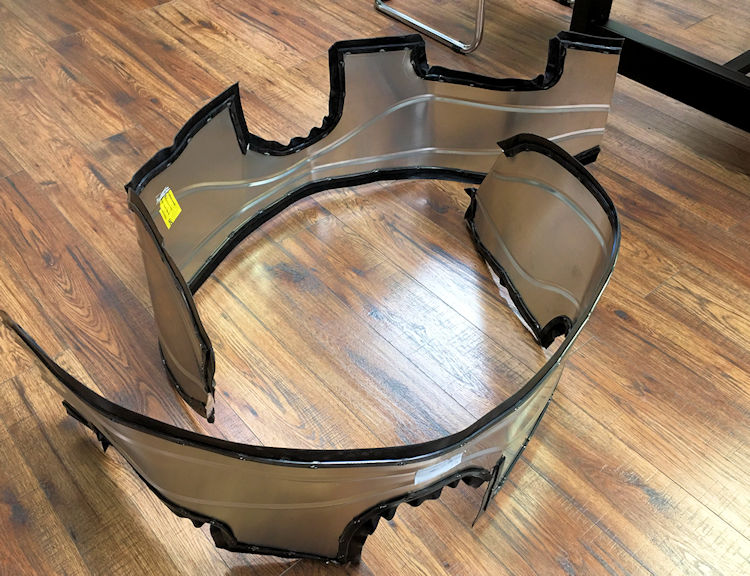
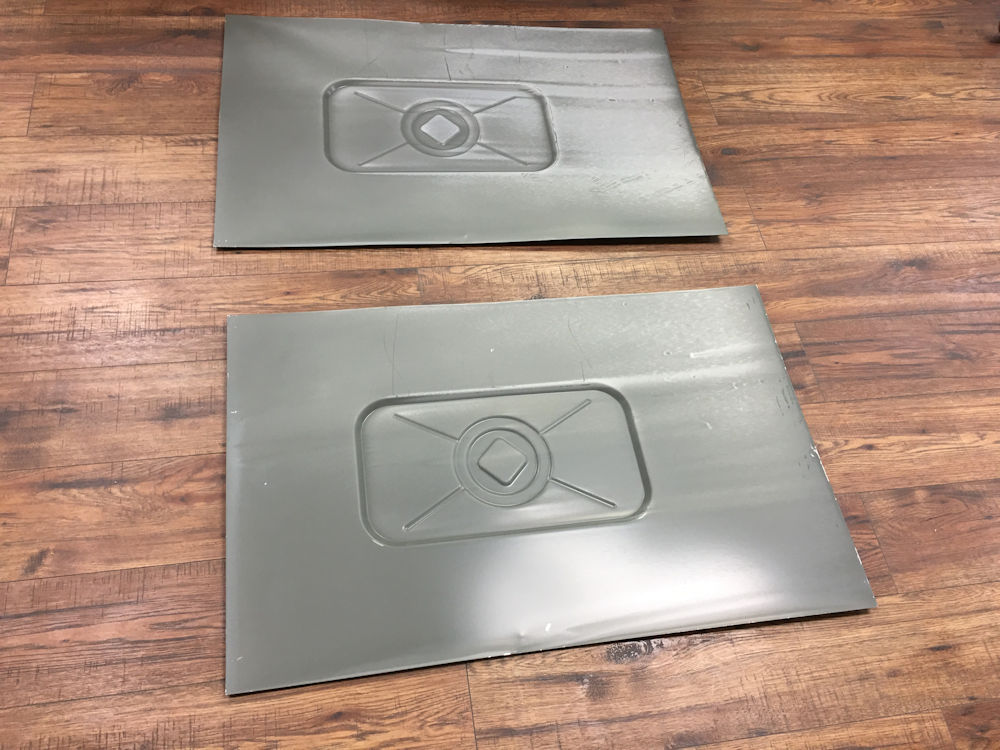
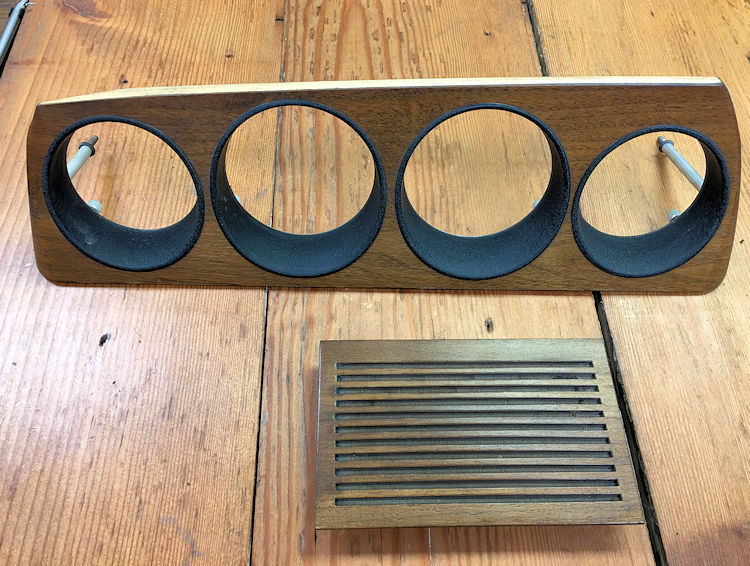
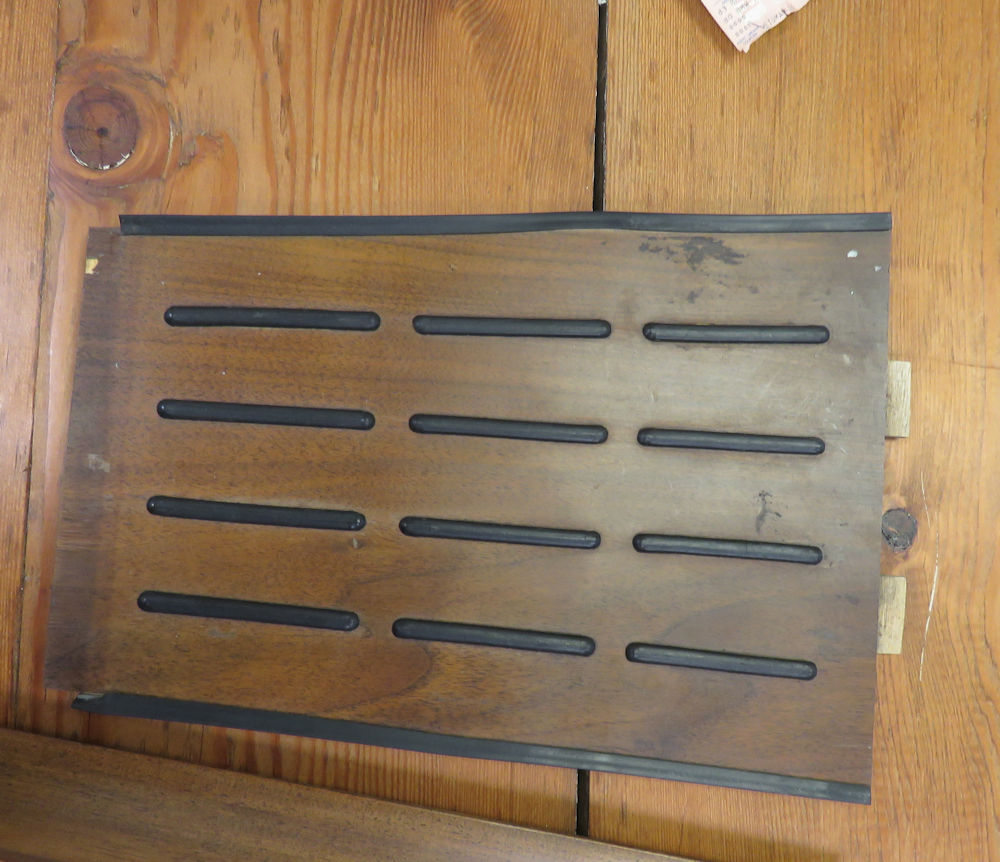
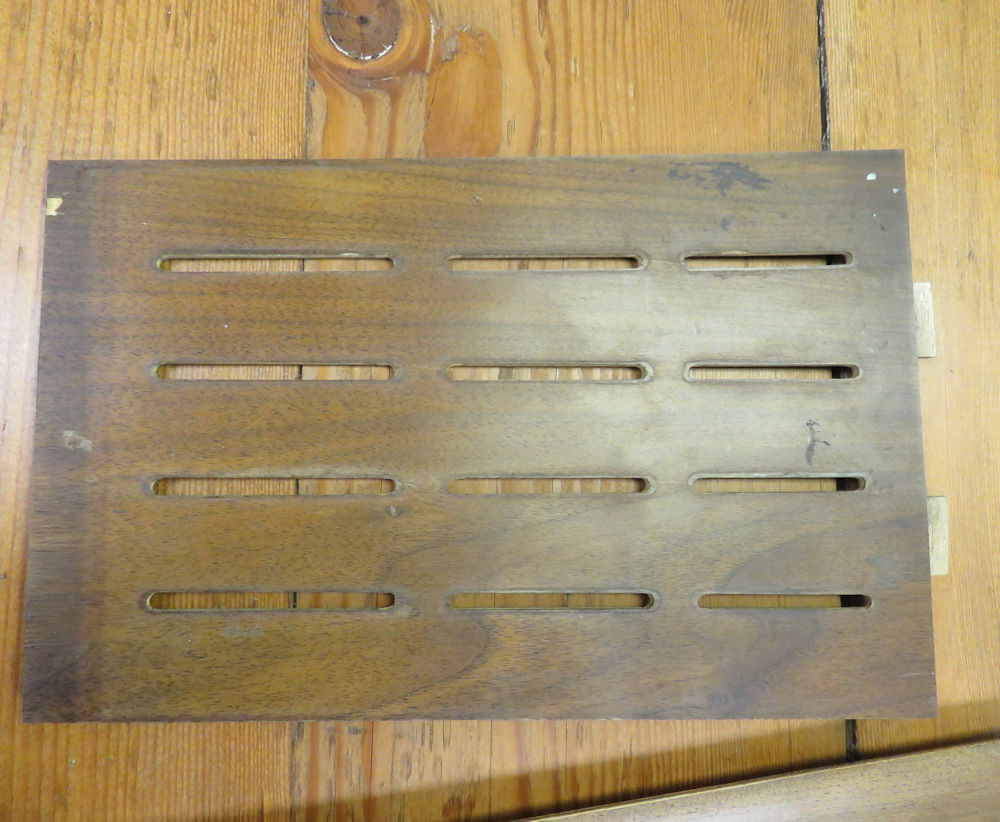
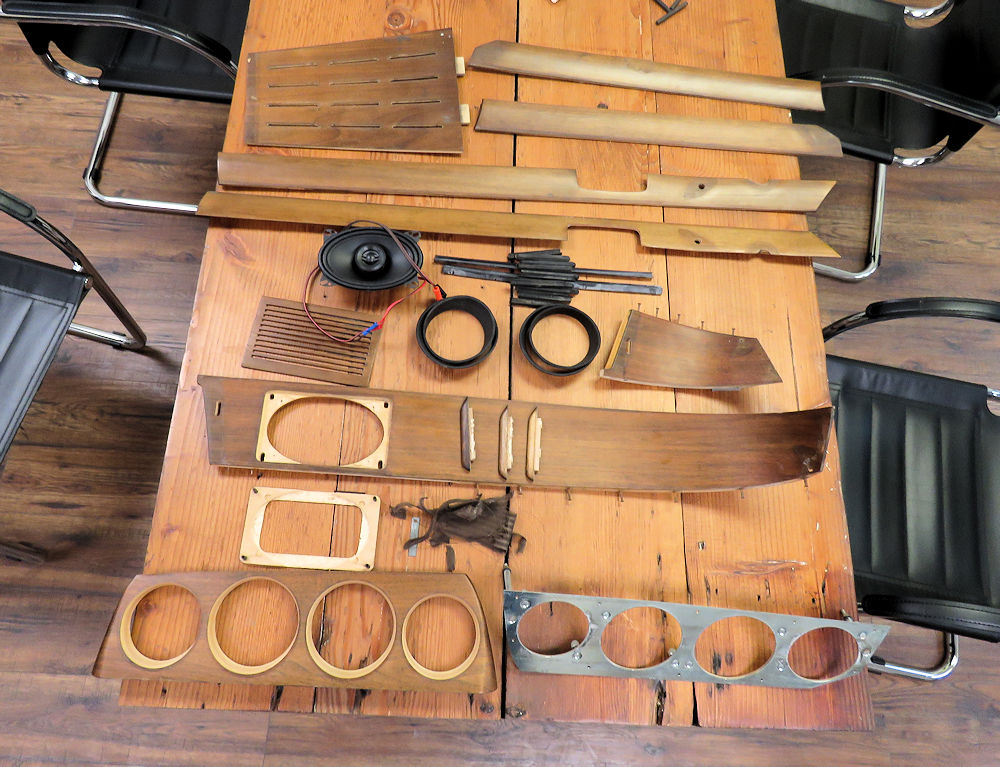
I recently received shipments from Bela in Hungary, who did a fantastic job restoring the interior wood trim, and Walloth & Nesch in Germany, who sent me several replacement panels and a new tool tray.
 |
 |
| Wood prior to restoration |
Bela did a fantastic job restoring the
interior wood with new Massacar Ebony veneer |
 |
 |
| The old tool tray was cracked so I obtained
a new replacement from Walloth & Nesch |
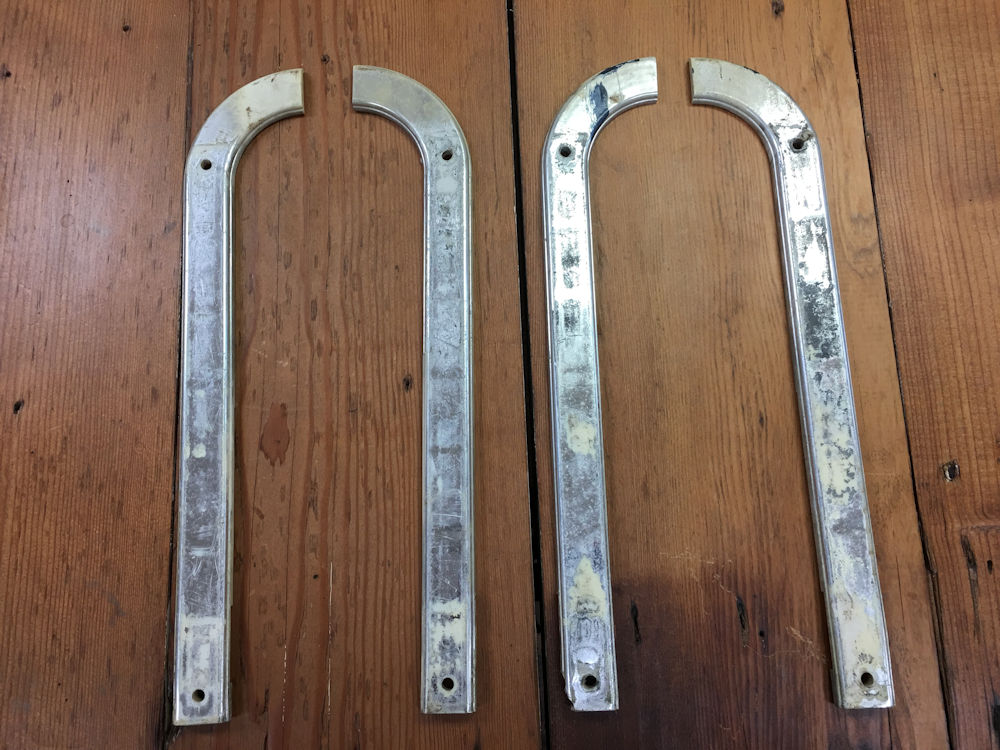
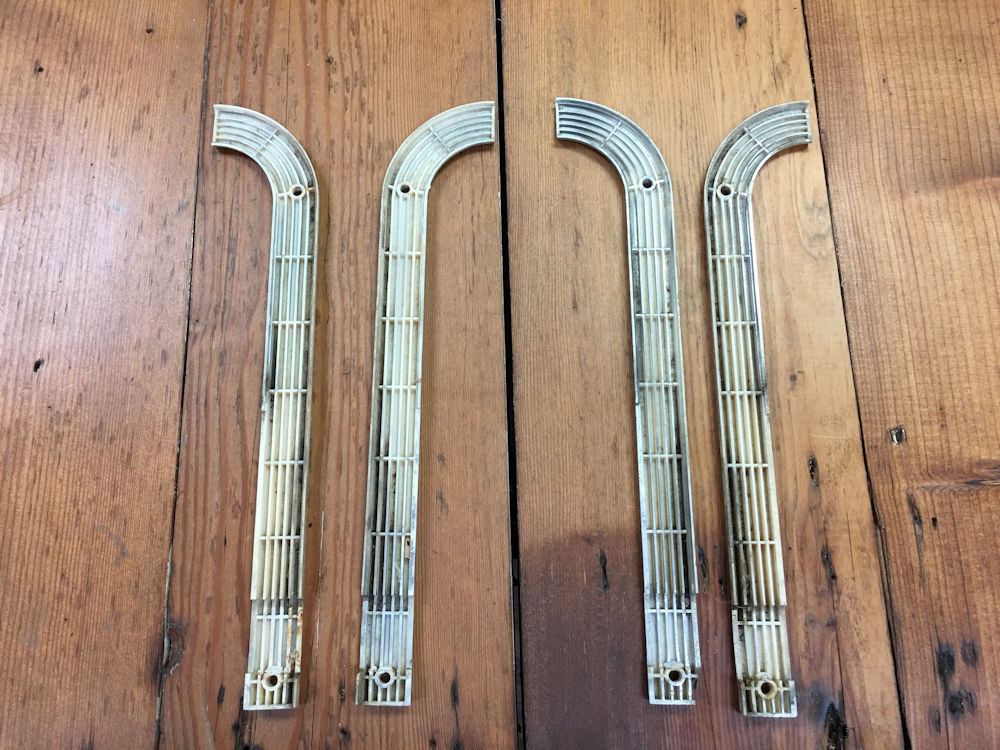
W&N also sent me some of the
replacement panels the car needs |
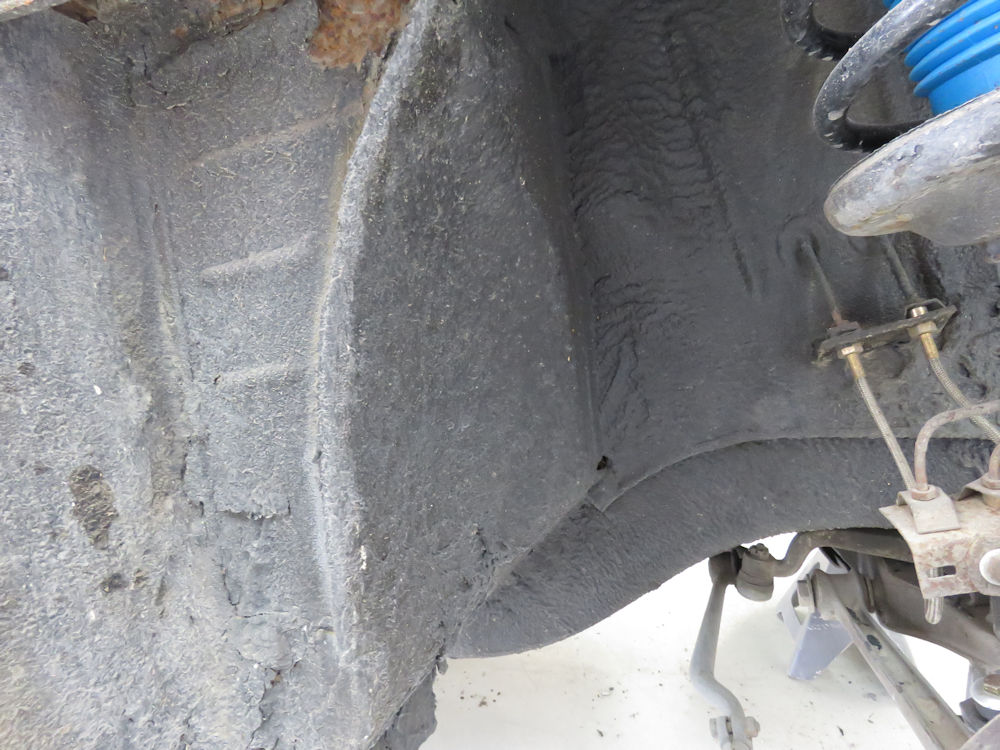
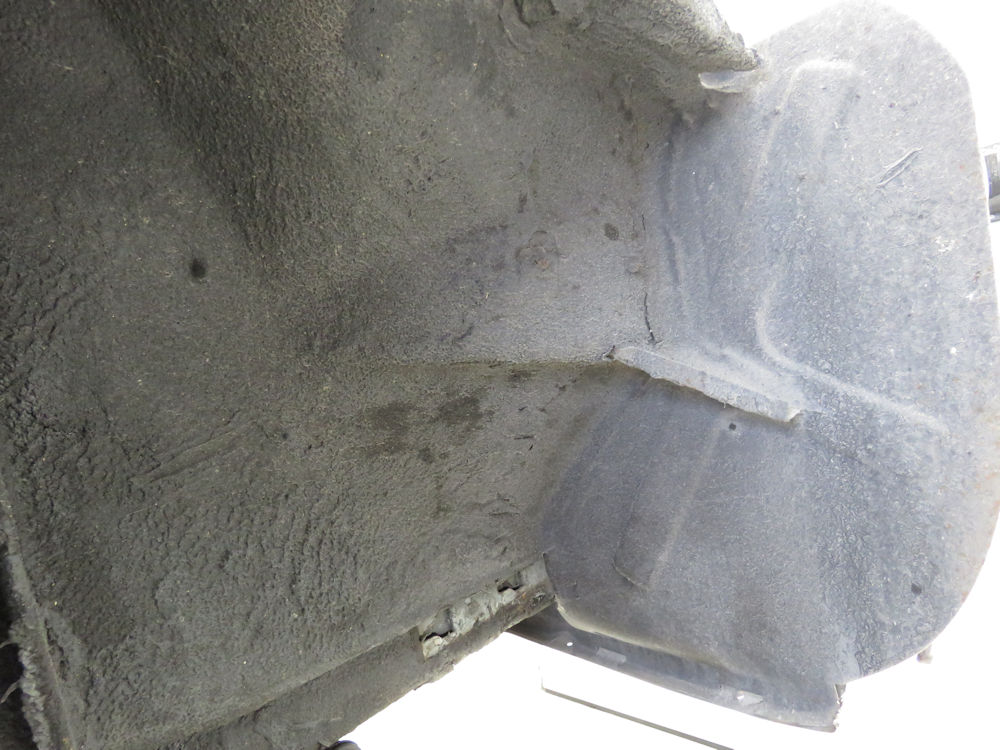
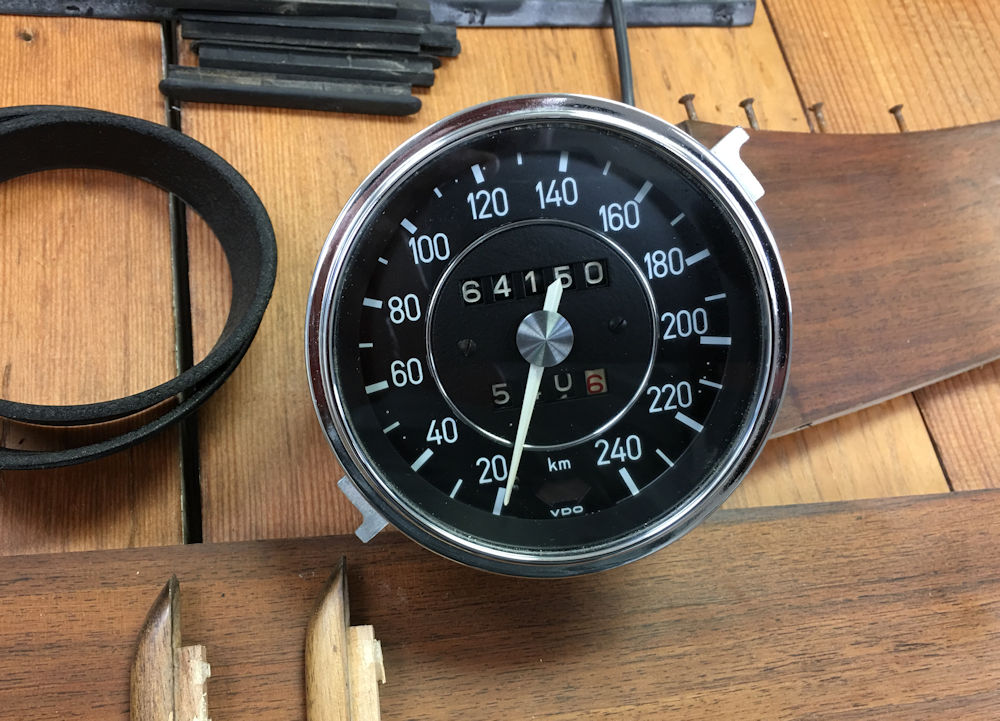
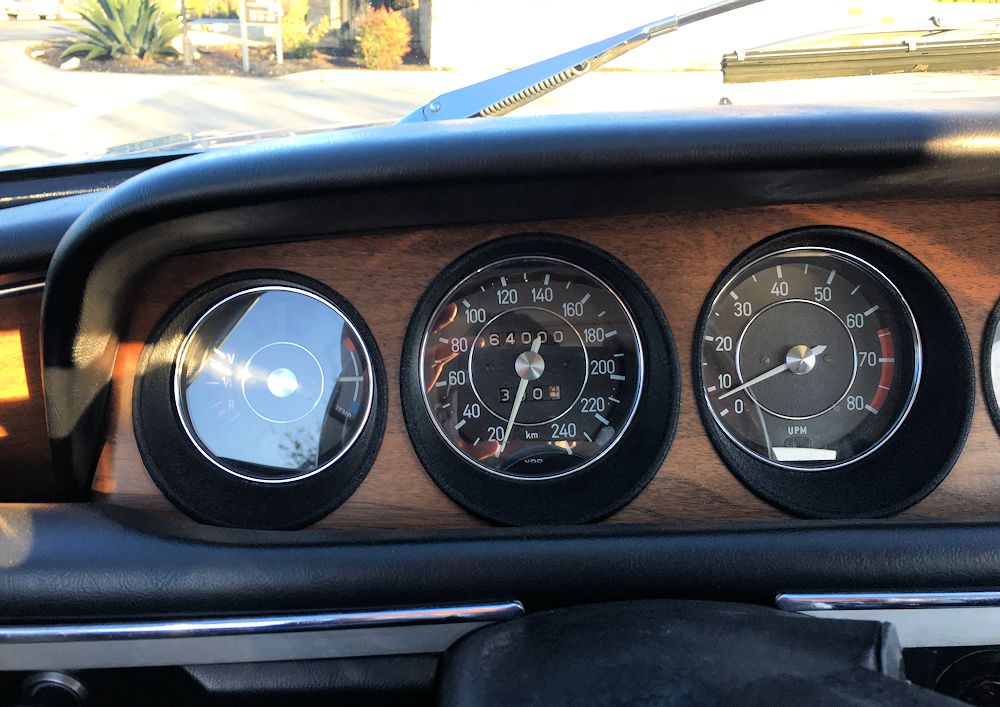
Not much to report so far this month, although I did receive the rebuilt and recalibrated MPH speedo back from Nisonger instruments and I also received my Lokari inner wing liners from Germany.
 |
 |
| Rebuilt and recalibrated speedo (64,150km = 39,861 miles) |
Lokari inner wing liners |

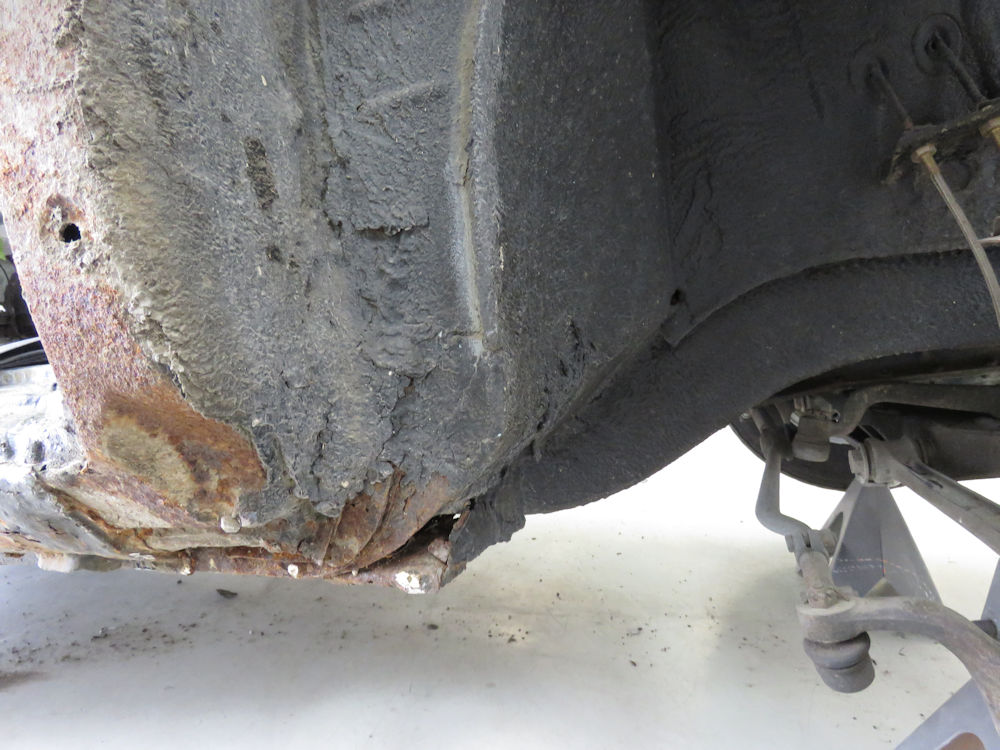
Time to remove the front wings and find out the true extent of the rust lurking within.
 |
 |
| Exposing the welded seams at the front of
the wings |
|
 |
 |
 |
 |
| Splitting the seam along the inner edge of
the wing |
|
 |
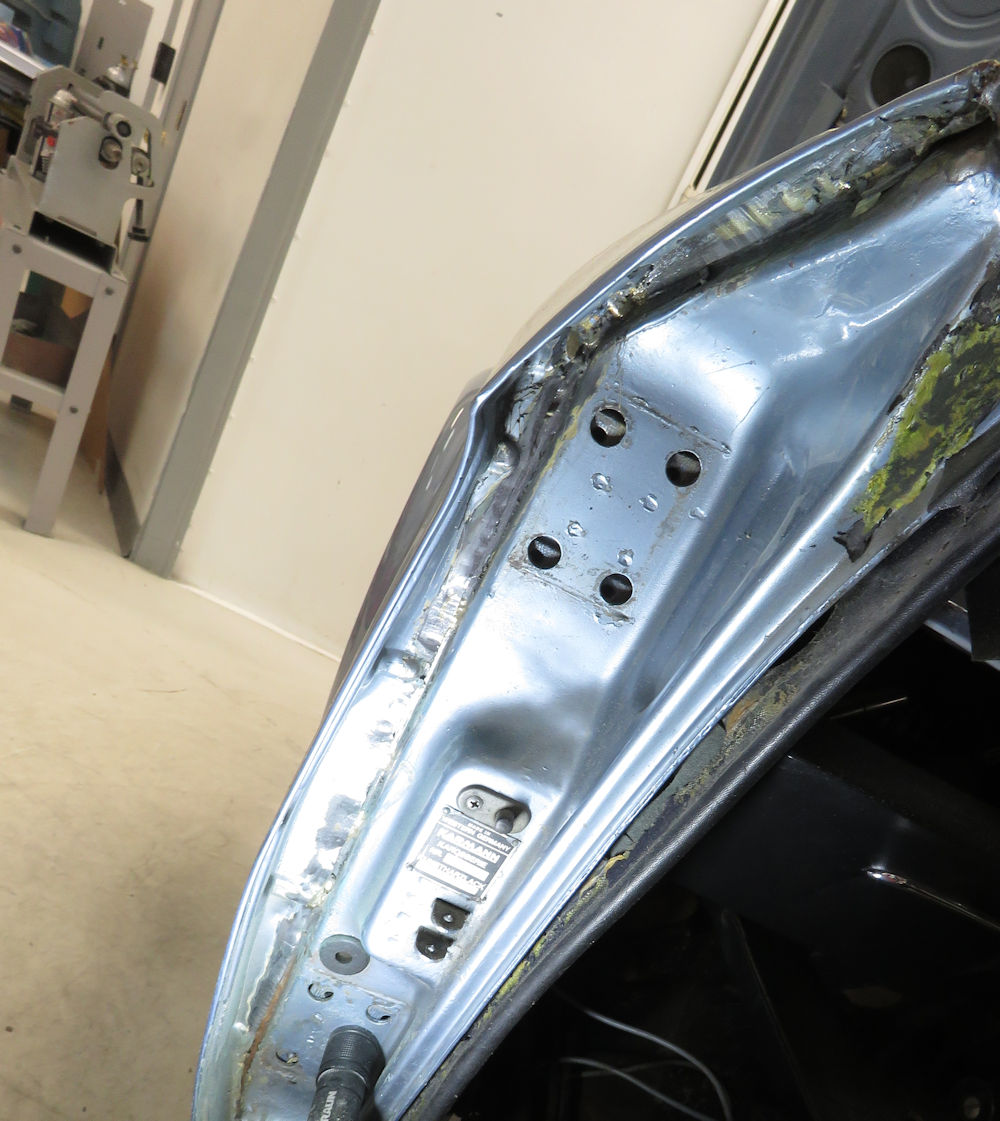 |
| Evidence of earlier repairs where the wing
meets lower screen surround |
|
 |
 |
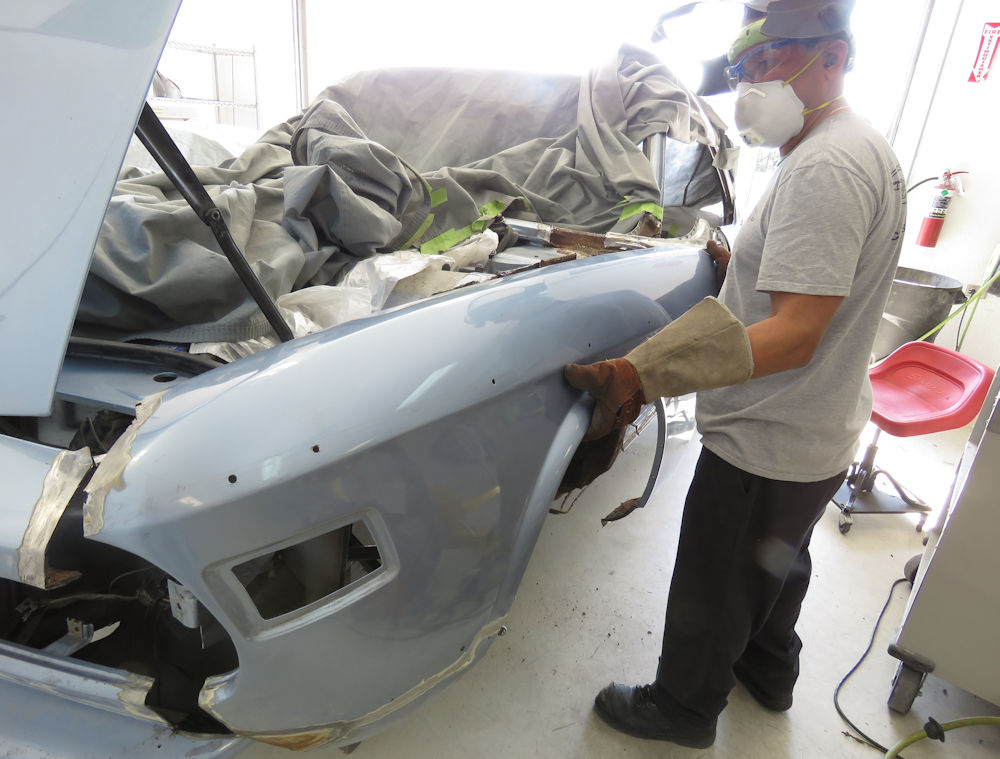
| Oscar lifting the first wing away from the
body |
|
 |
 |
| Removing the wing really is the only way to
assess and repair rust that lies behind it |
|
 |
 |
 |
 |
 |
 |
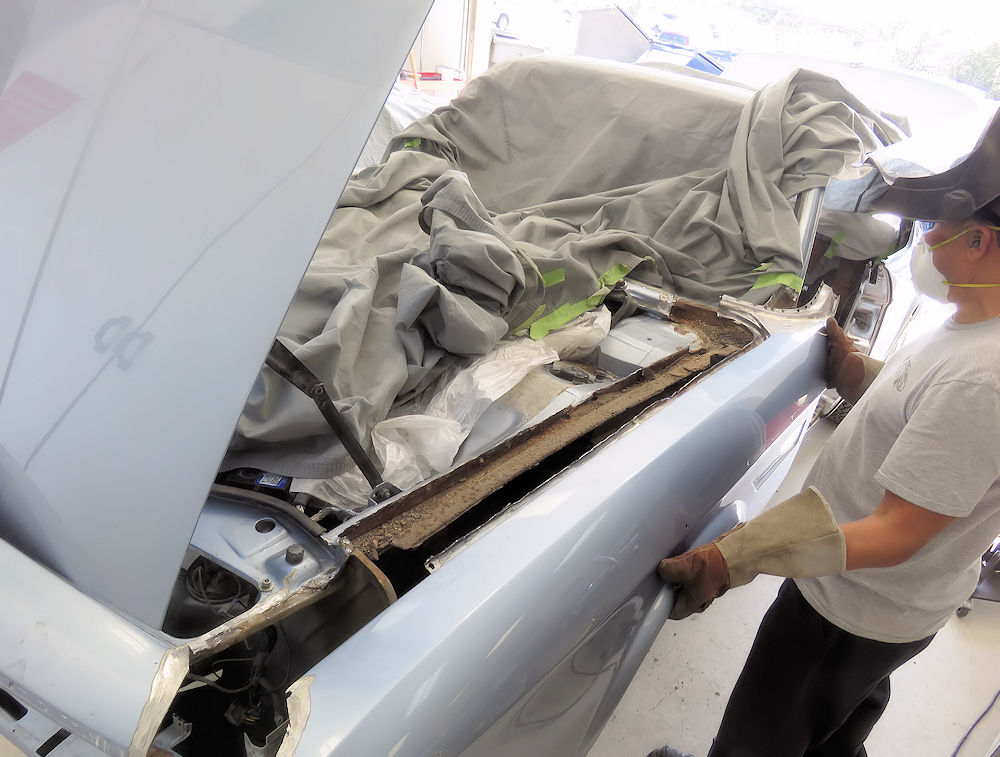
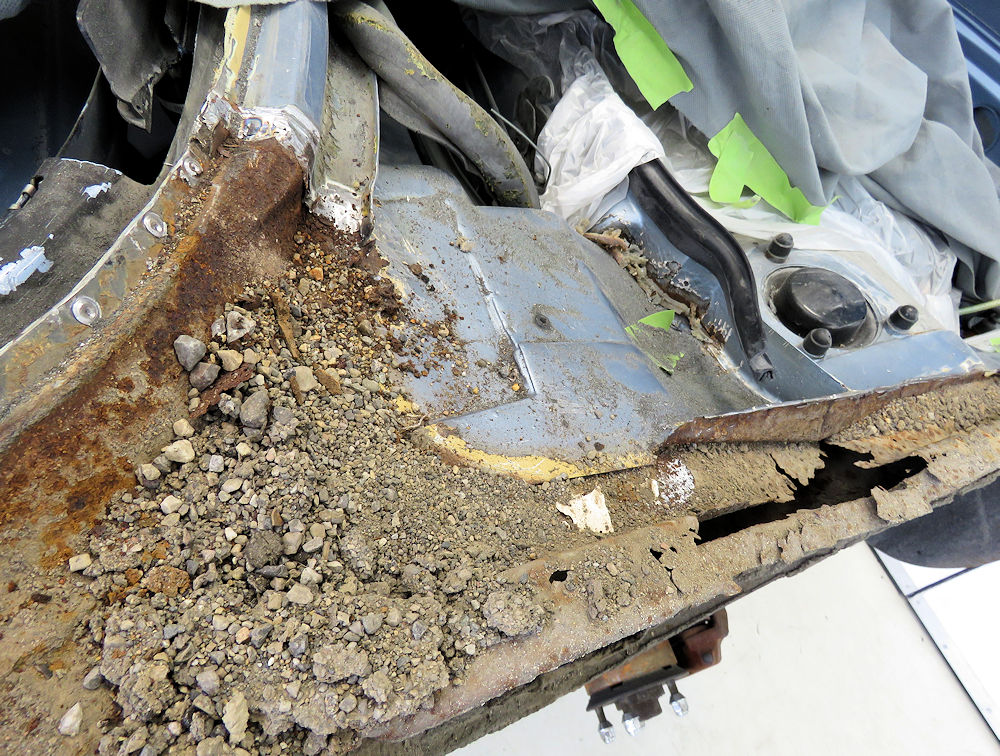
| Decades of road grime trapped between the
wing and the cowl panel has led to some nasty rust |
More rust at the front of the LH inner wing |
 |
 |
 |
 |
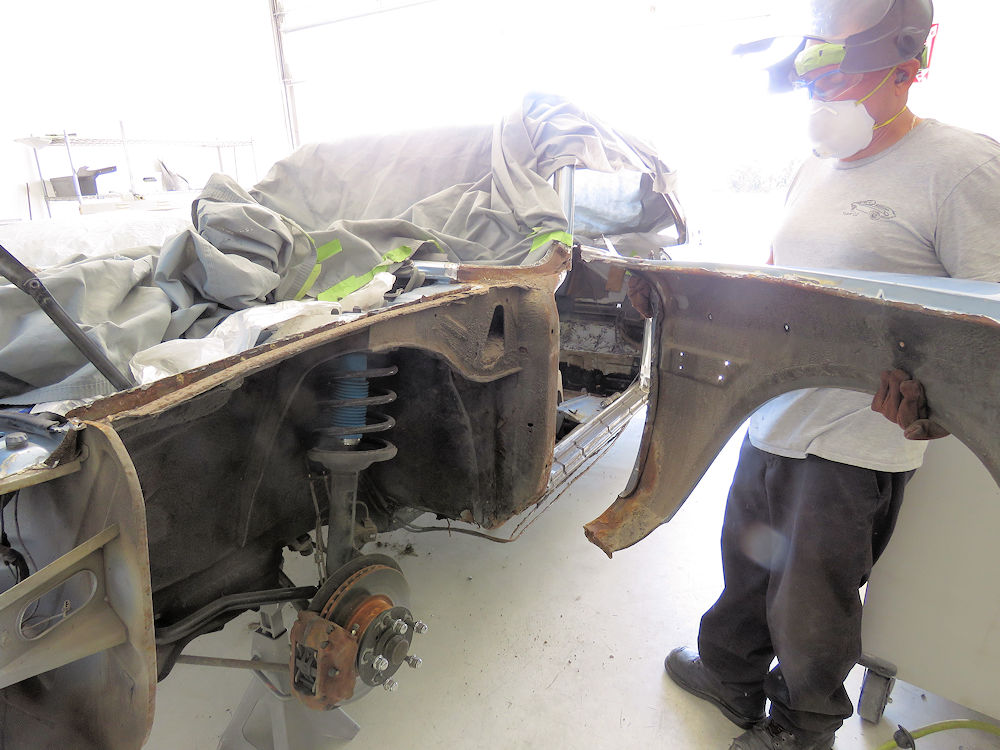
| RH wing cut loose at the rear edge |
|
 |
 |
| Substantial pile of rubble hiding behind
the wing! |
|
 |
 |
 |
 |
 |
 |
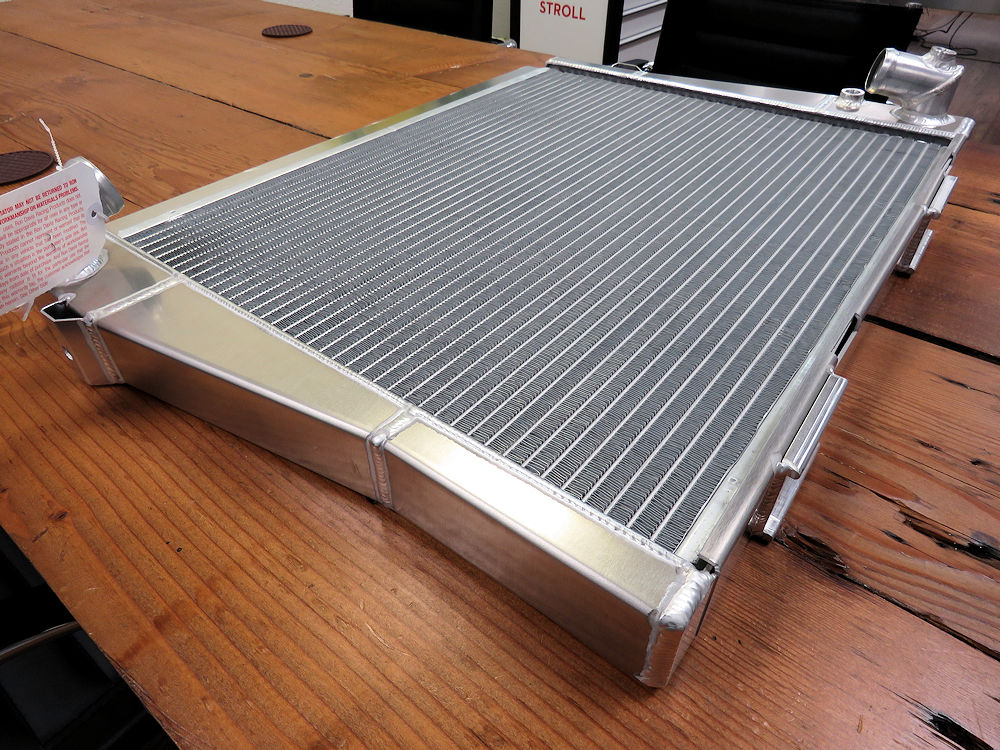
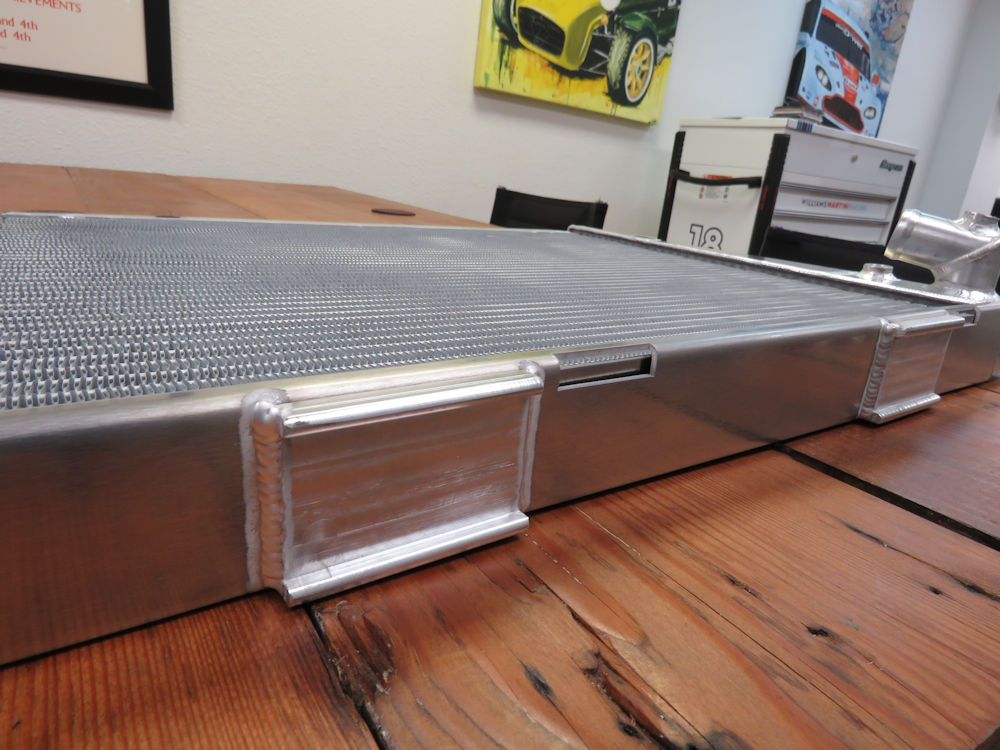
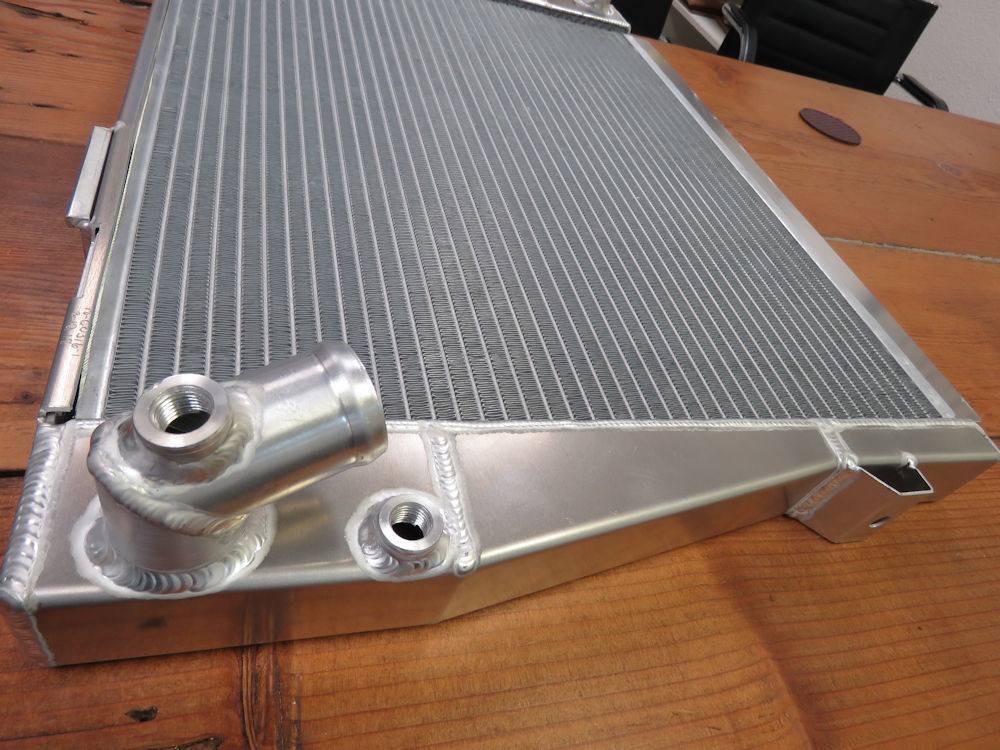
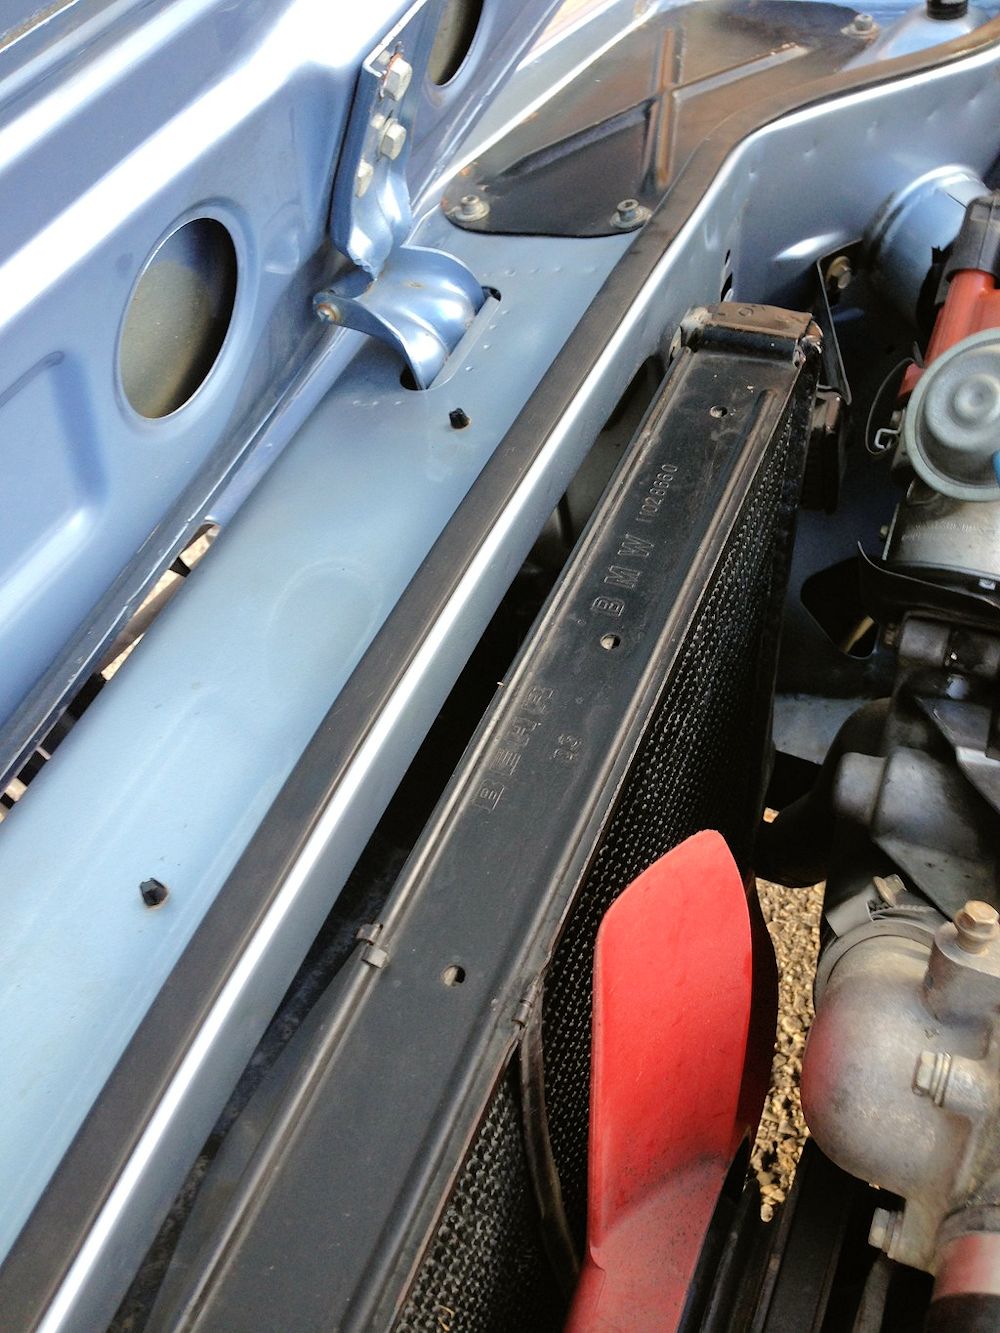
| Ron Davis could obviously sense that I
needed cheering up, so he sent me a new radiator |
|
 |
 |
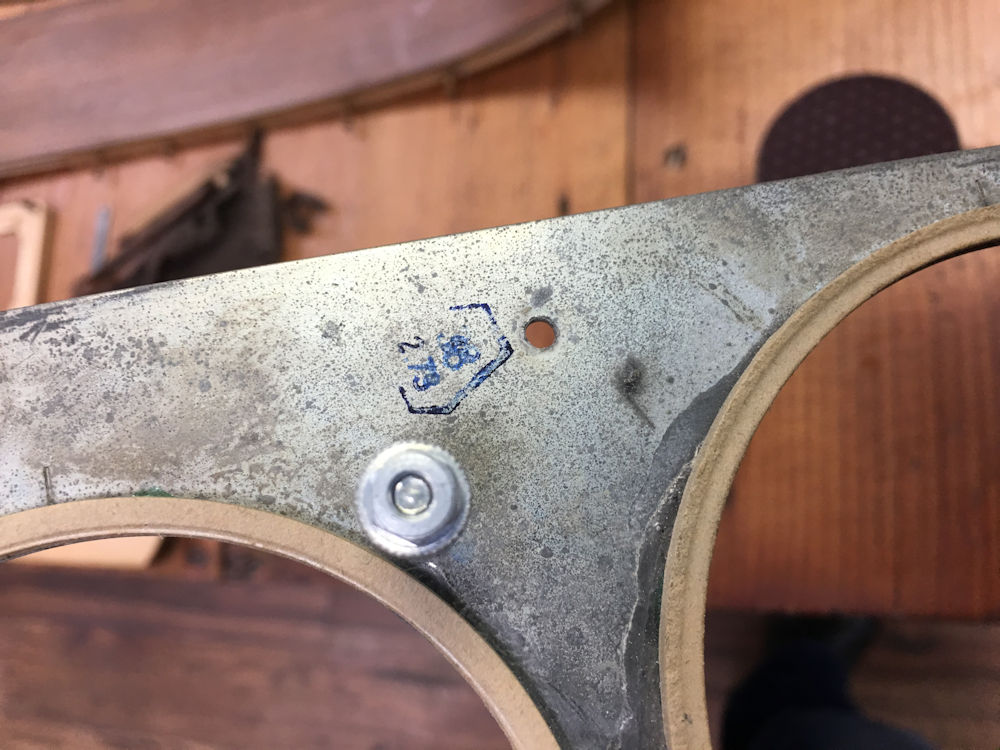
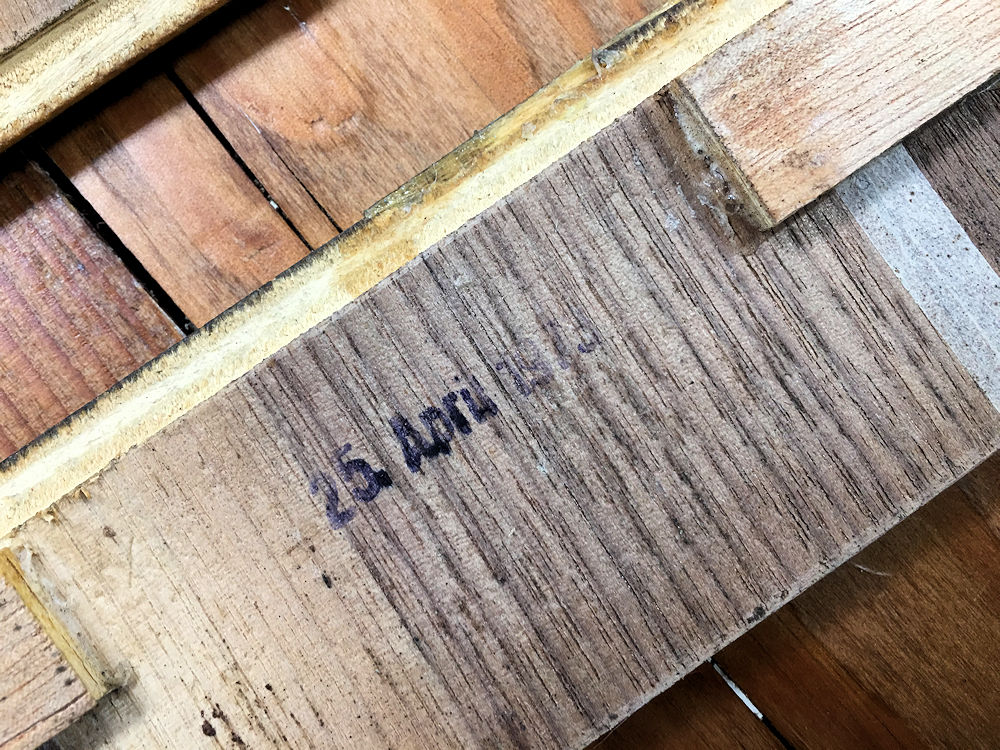
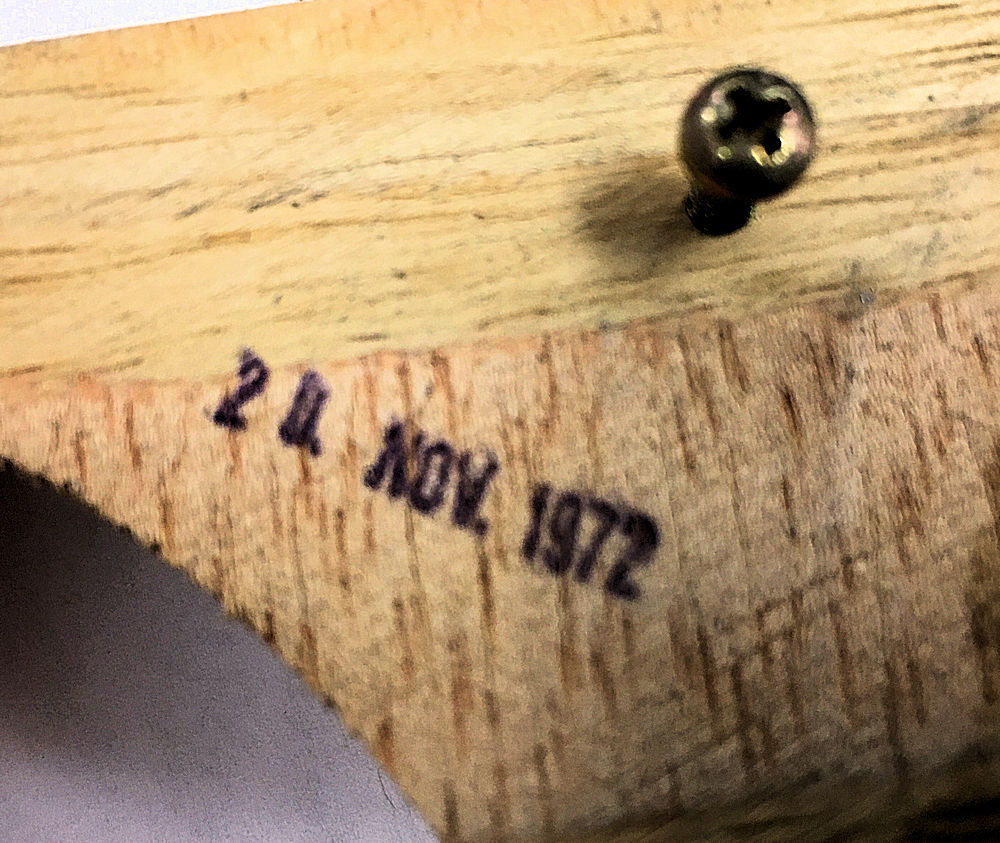
Interesting to note that lots of the trim and dash components we removed yesterday are date stamped.
 |
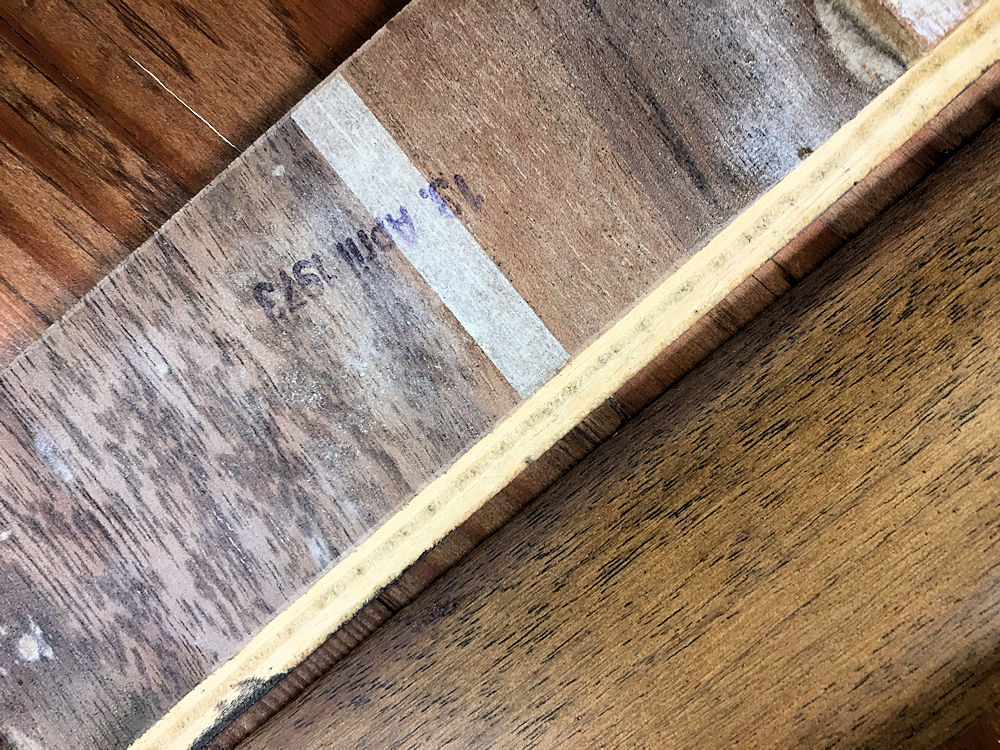 |
| Steel frame of gauge cluster dated February
1972 |
Rear wood dated April 13, 1973 |
 |
 |
| Door cappings dated April 25, 1973 |
Speedo dated February 1973 |
 |
 |
| Wooden frame of gauge cluster dated November 20, 1972 |
New floor panels from Walloth & Nesch
dated February 2018 |
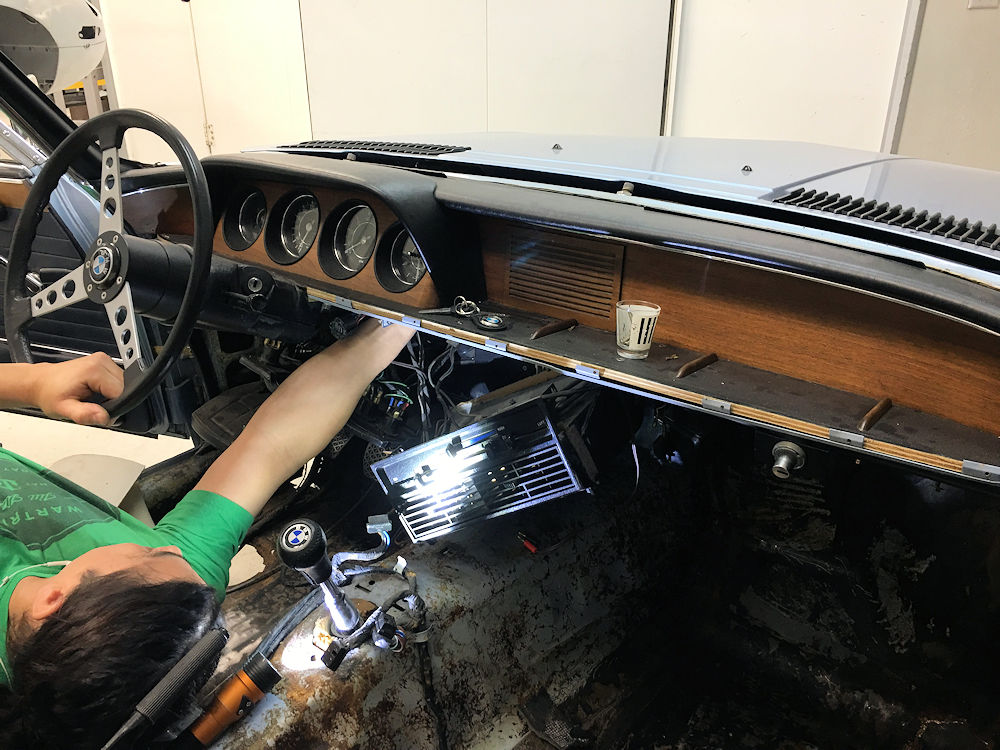
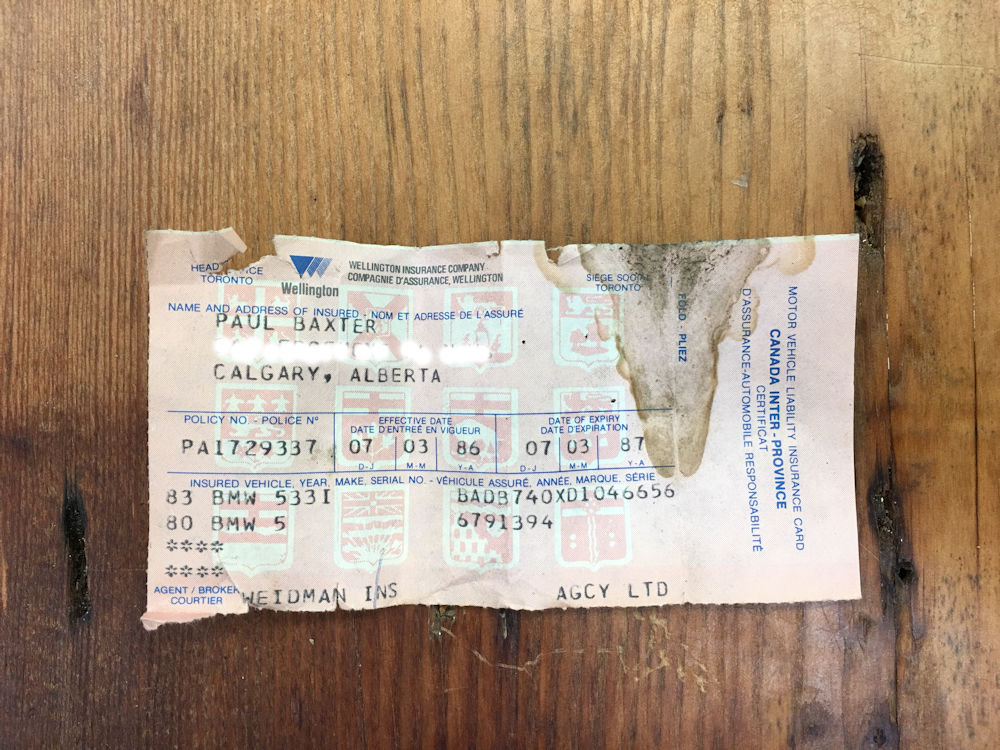
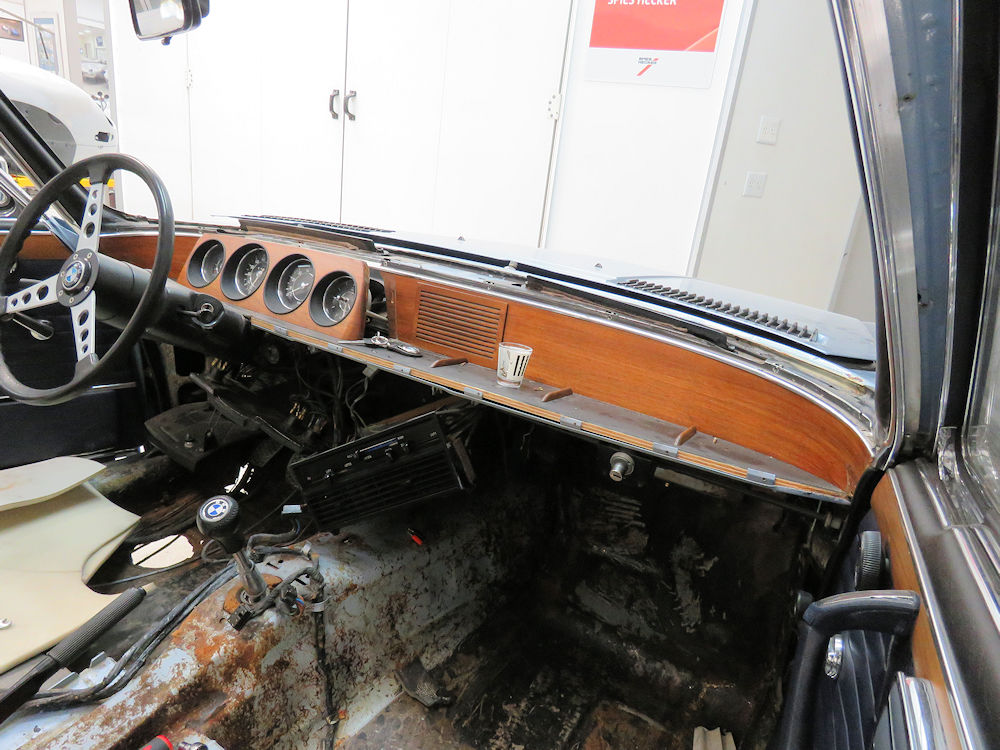
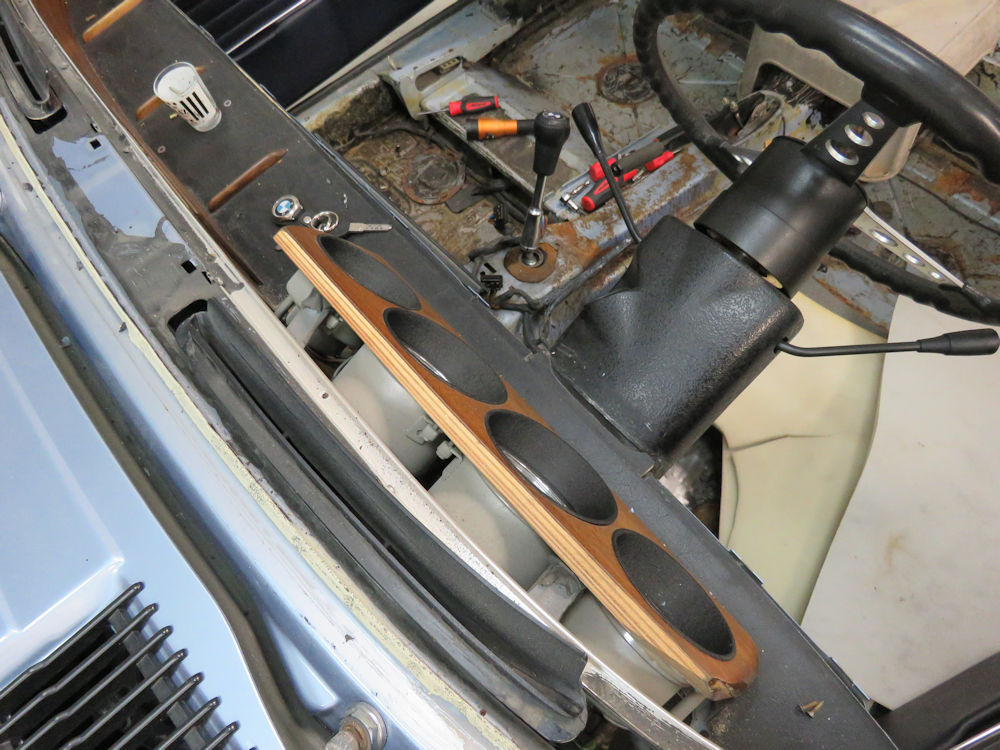
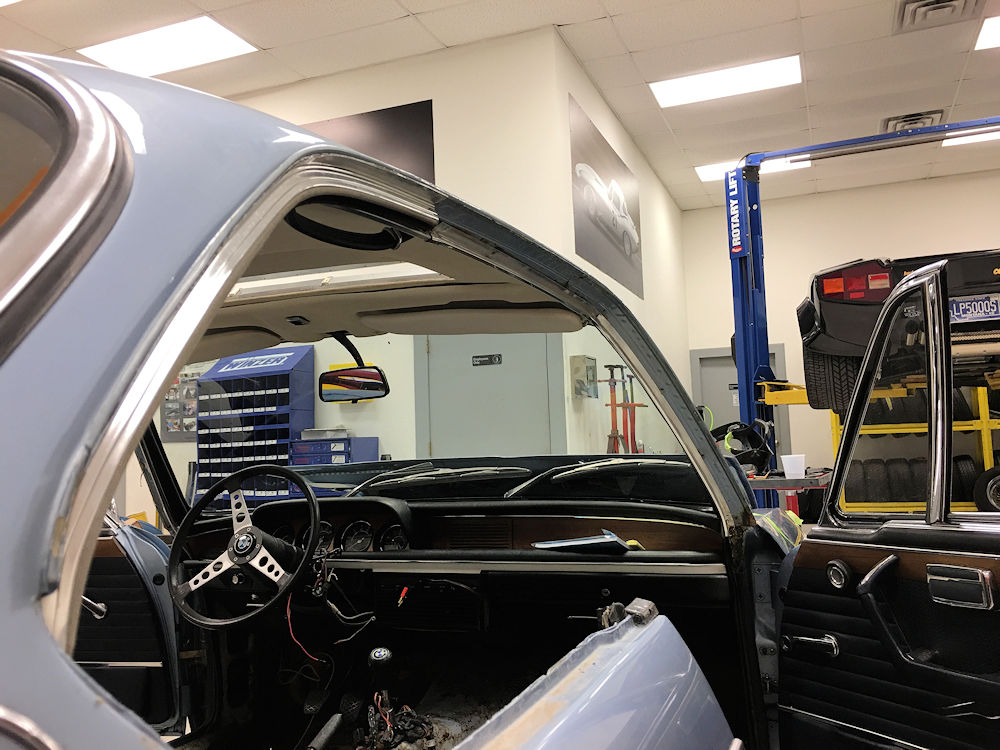
Earlier today Carlos removed the dash and interior wood trim which will be sent to Hungary for restoration. I think I am going to go with a bold Zebrano veneer, rather than the more conservative French walnut that was originally installed. While removing the glove box, Carlos found an old insurance card in the name of Paul Baxter, a previous owner of the big coupe. Mr Baxter was a very well known professional ice hockey player who apparently holds the dubious honor of accruing more penalty minutes in a season than any other ice hockey player before or since!
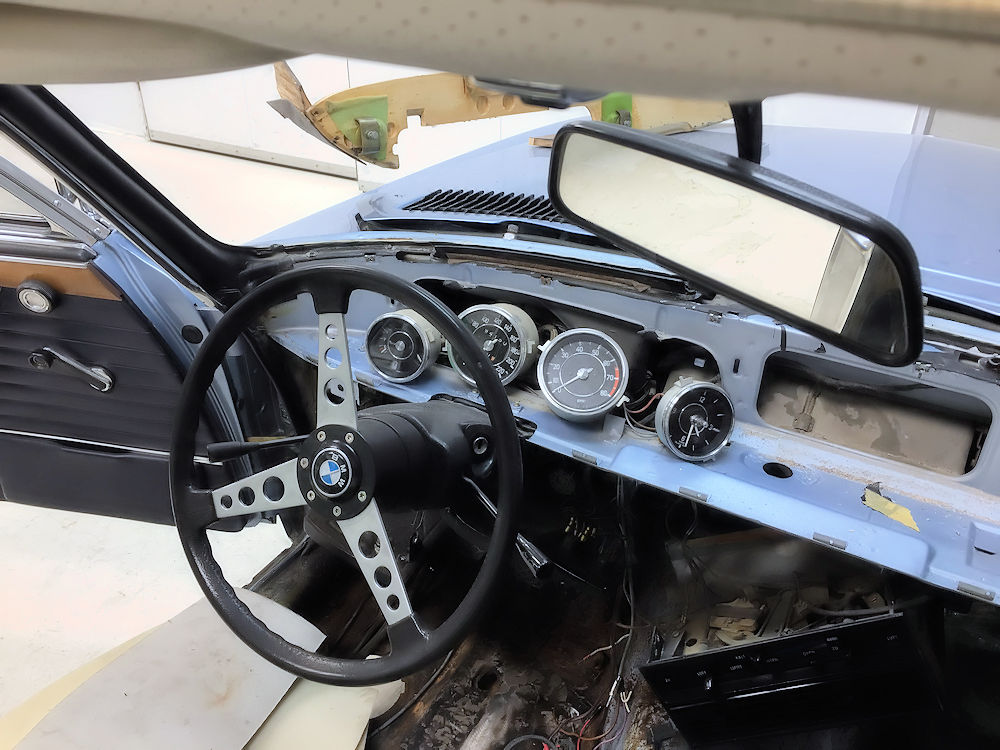
We also removed the speedo and documented the odometer. We will be replacing the KM speedo with a MPH version and we will match the miles (39,861) to the 64,150 recorded kms, as we believe the odometer to be correct.
 |
 |
| Carlos removing dash and interior wood trim |
Previous owner, Paul Baxter, was a well
known professional ice hockey player |
 |
 |
 |
 |
 |
 |
 |
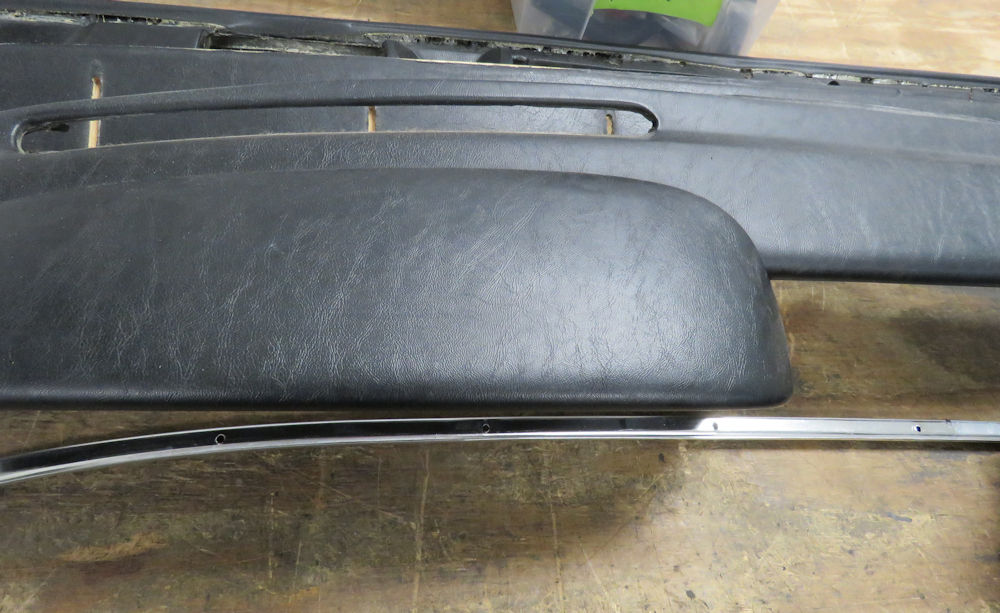 |
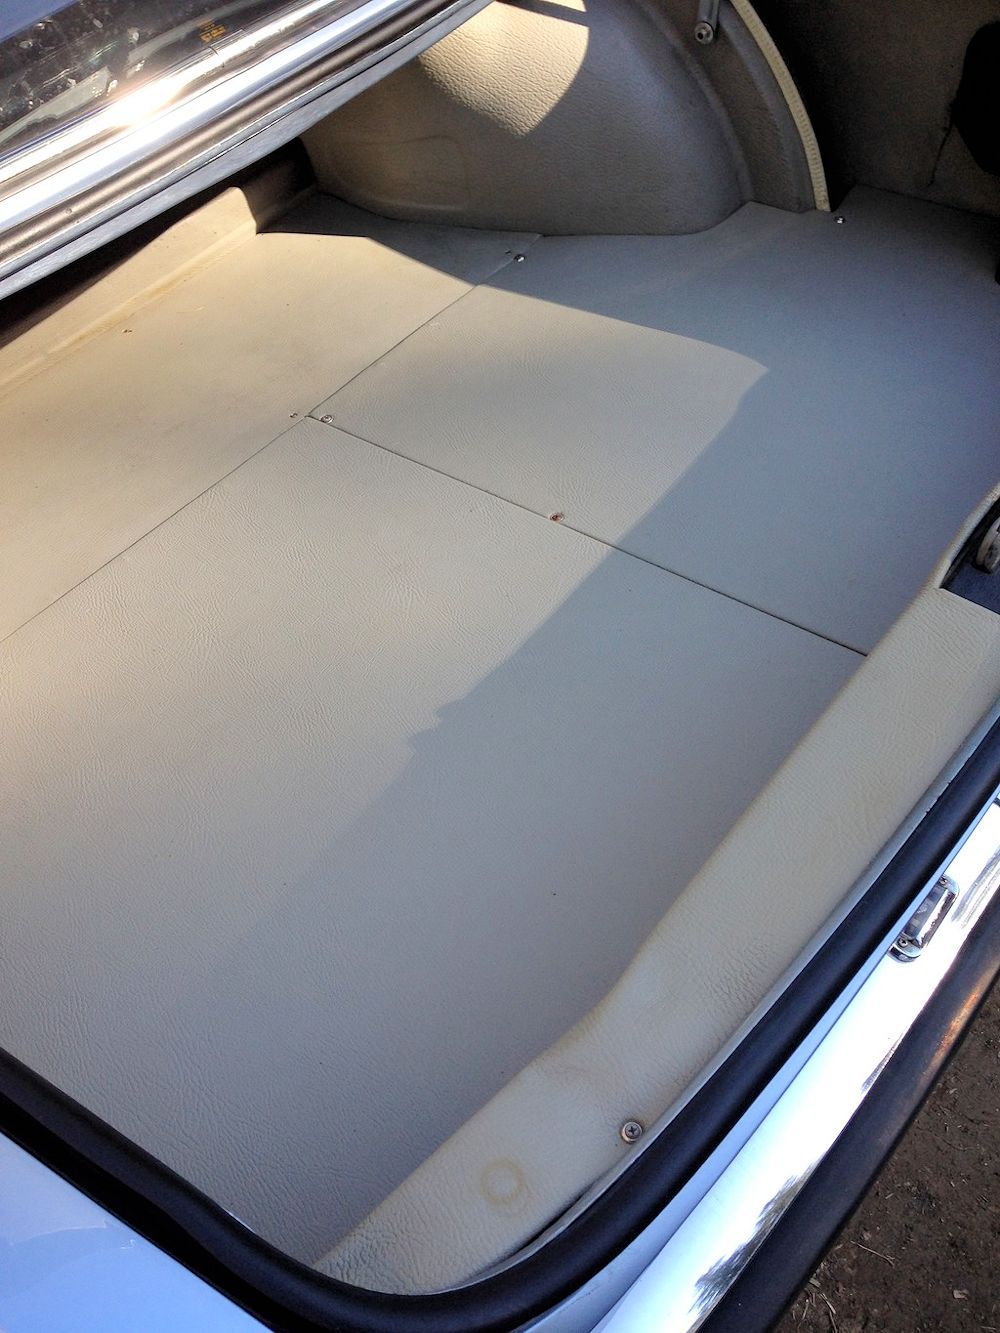
| Dash top and shelf vinyl are in perfect
condition and will be cleaned and reused |
|
 |
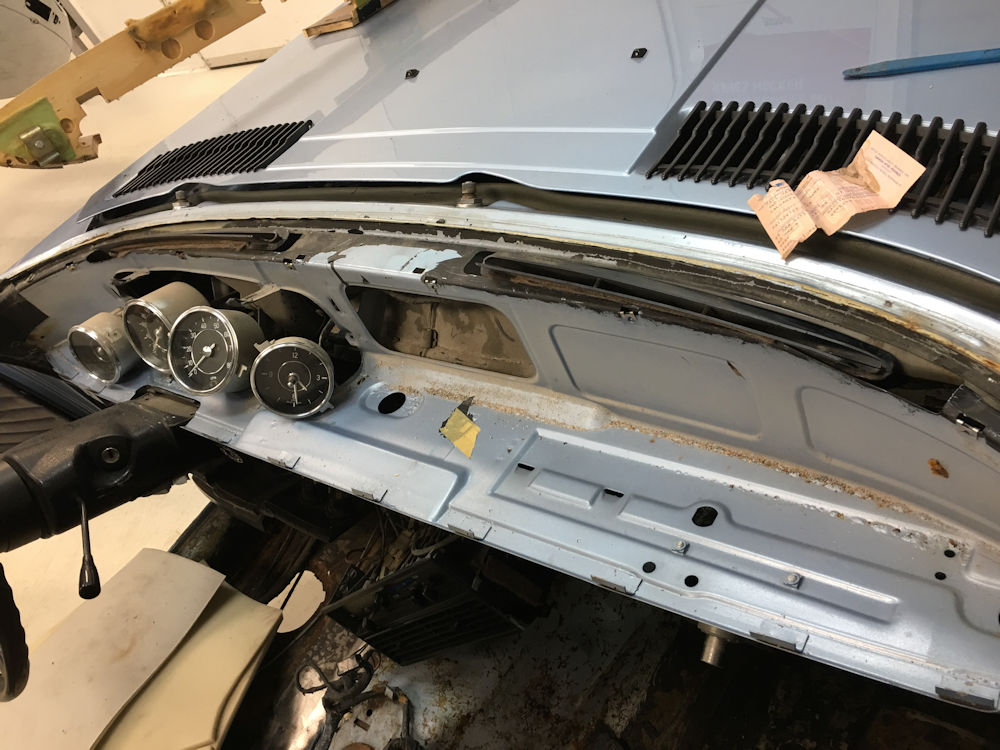 |
| Wood trim will be sent to Bela in Hungary
to be restored with Massacar Ebony veneer |
|
 |
 |
| Speedo will be replaced with a MPH unit and
the miles matched to 64,150 kms |
We believe the car has only done 39,861 miles from new |
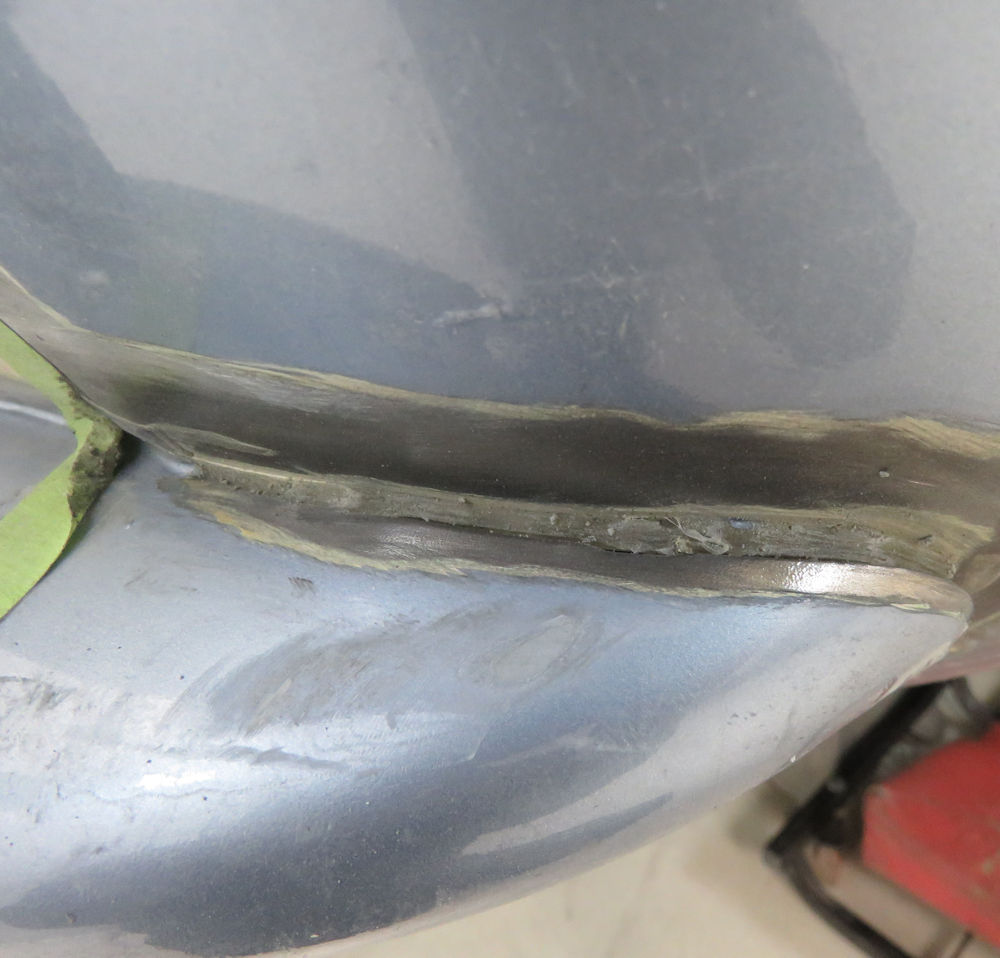
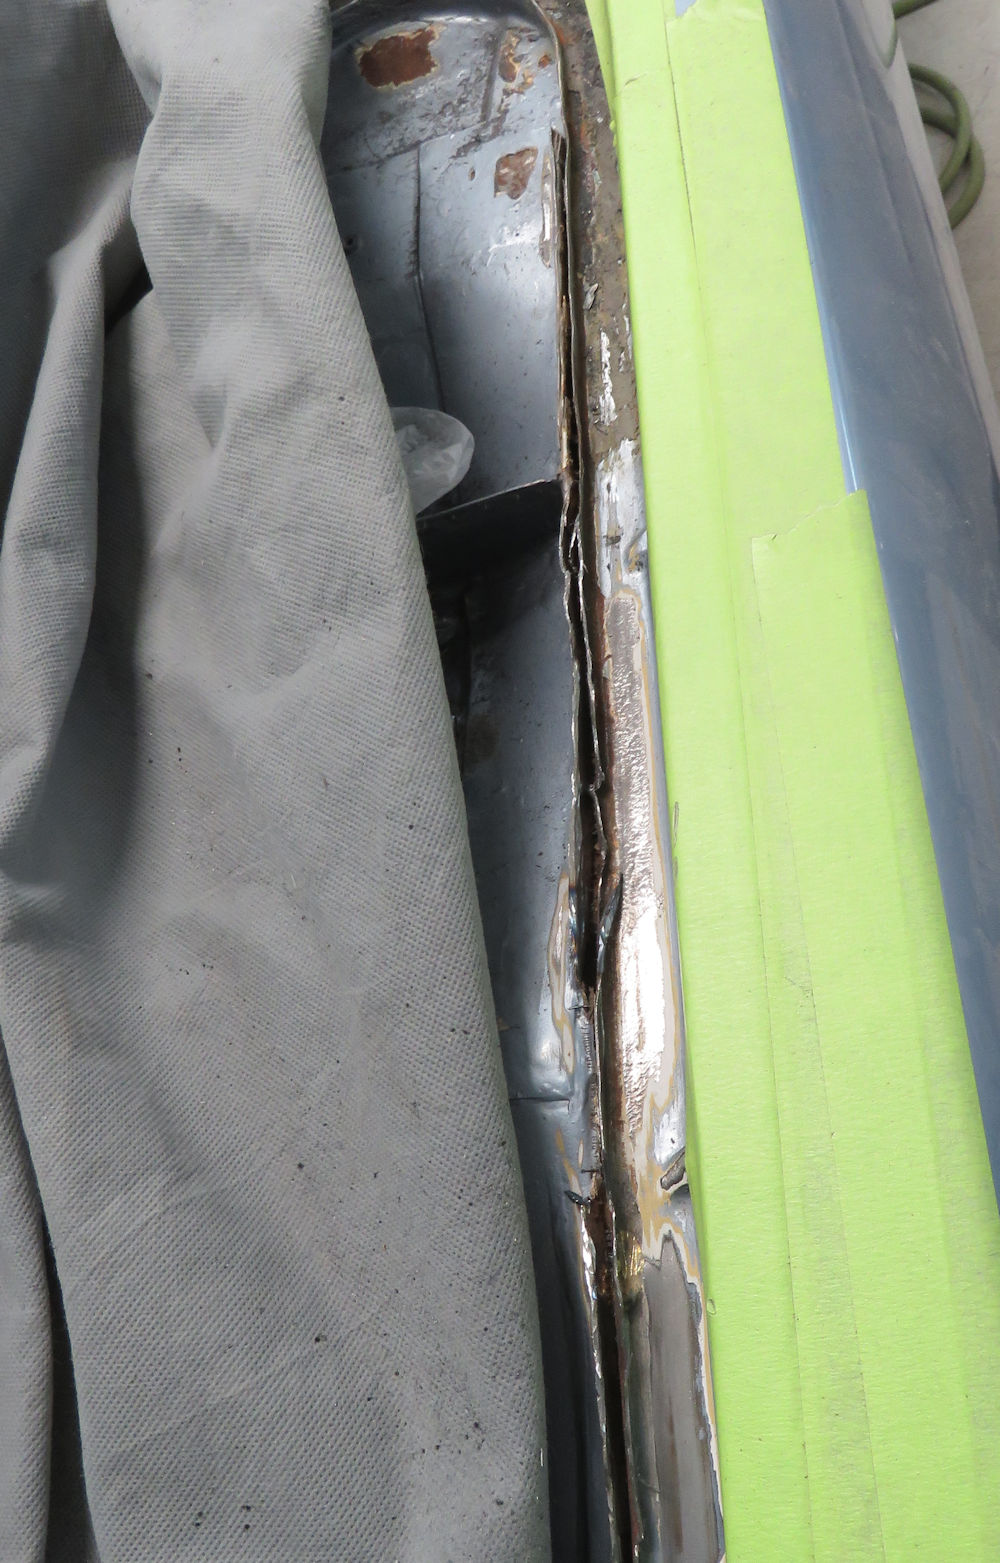
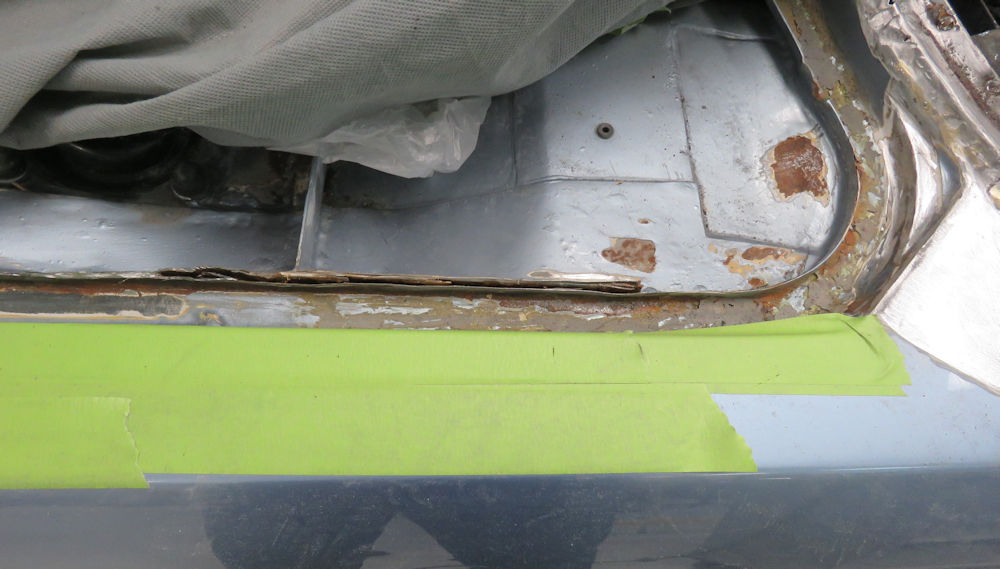
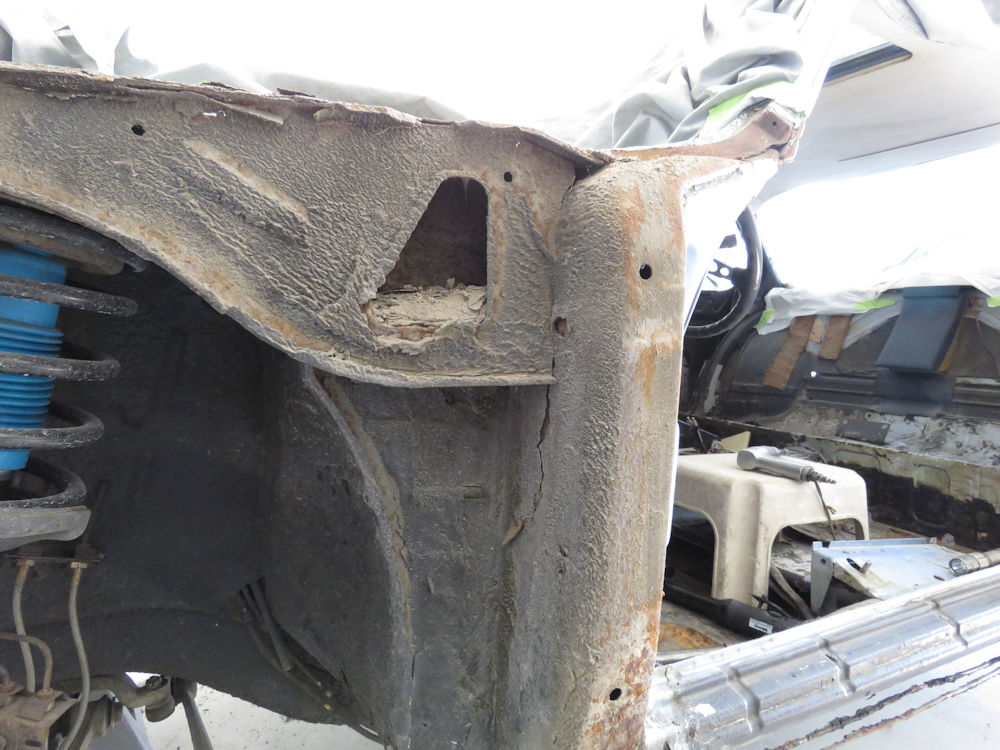
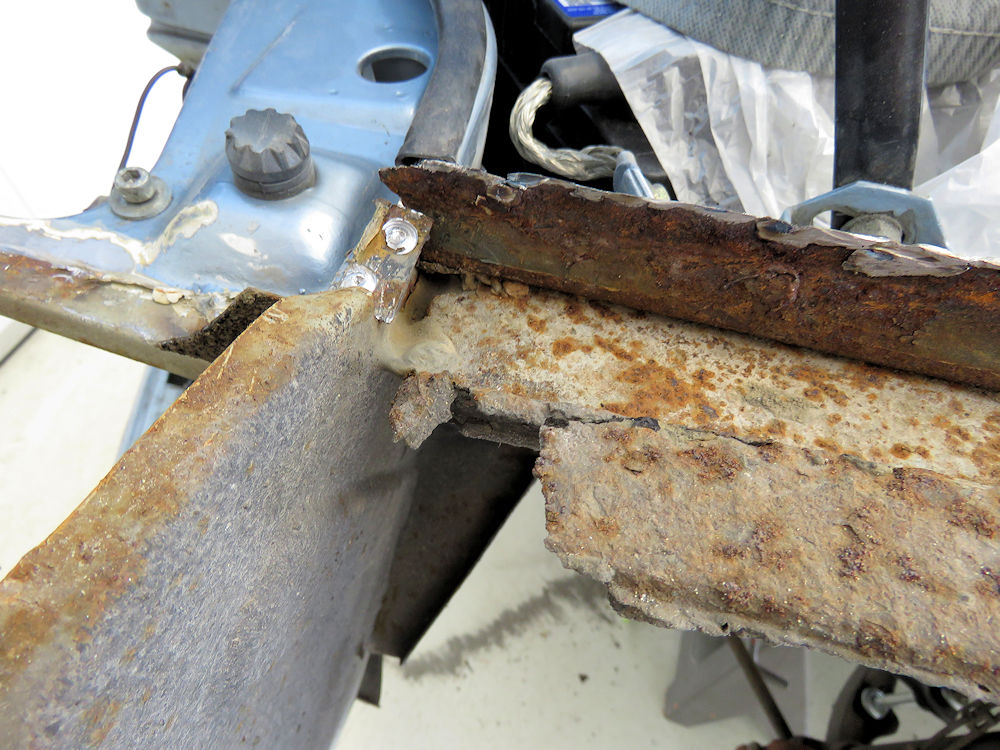
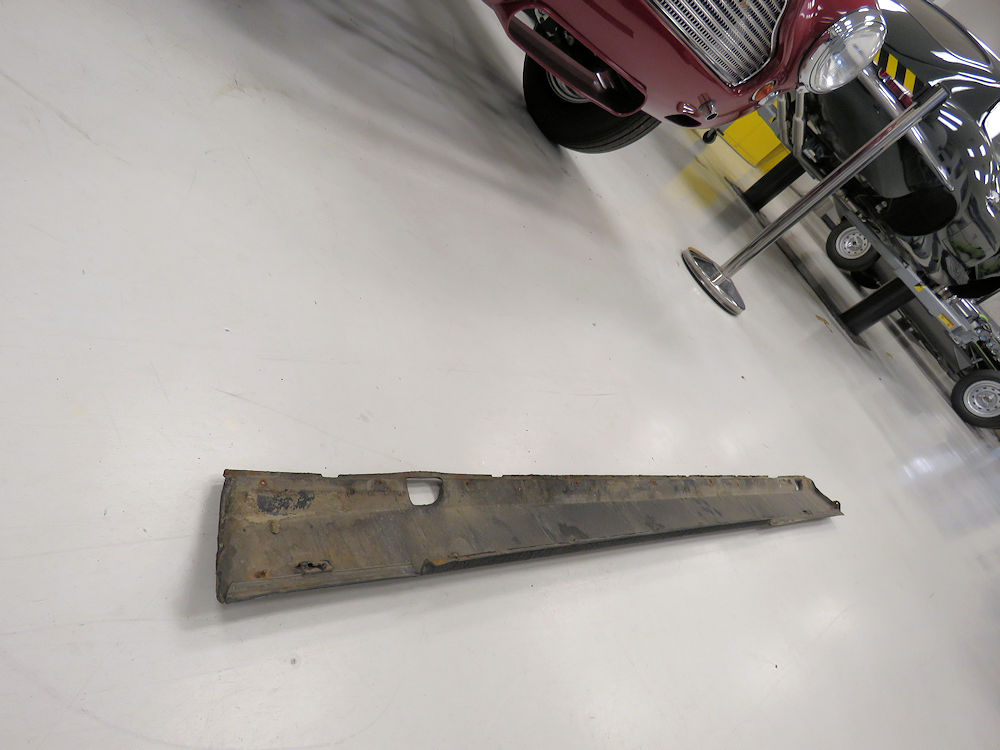
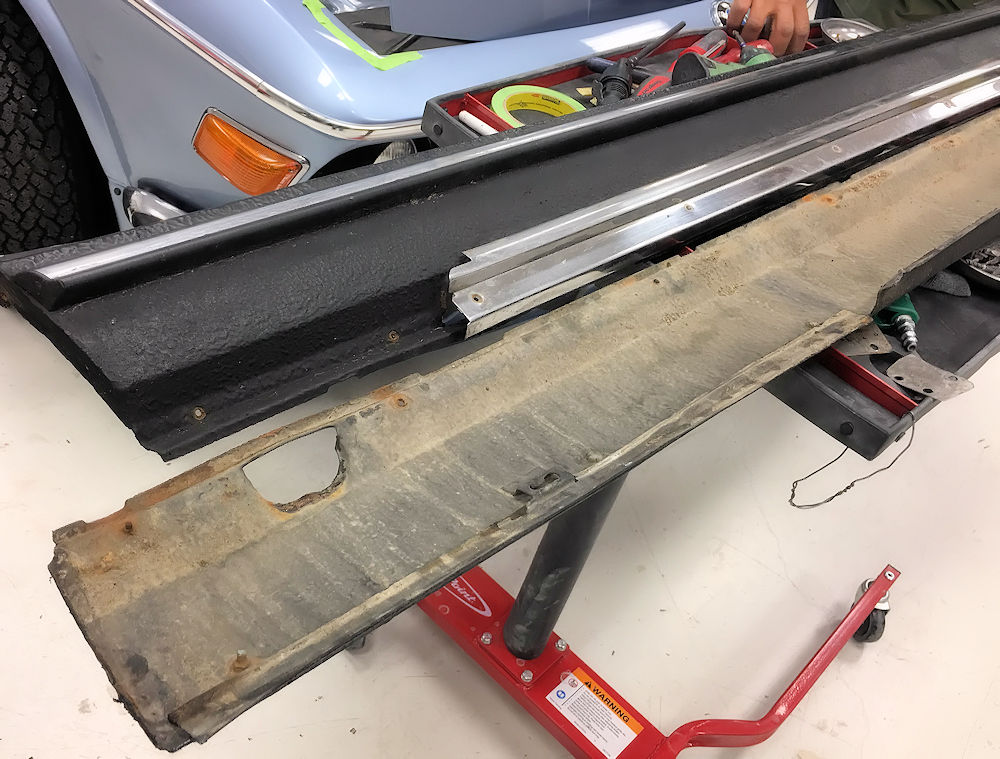
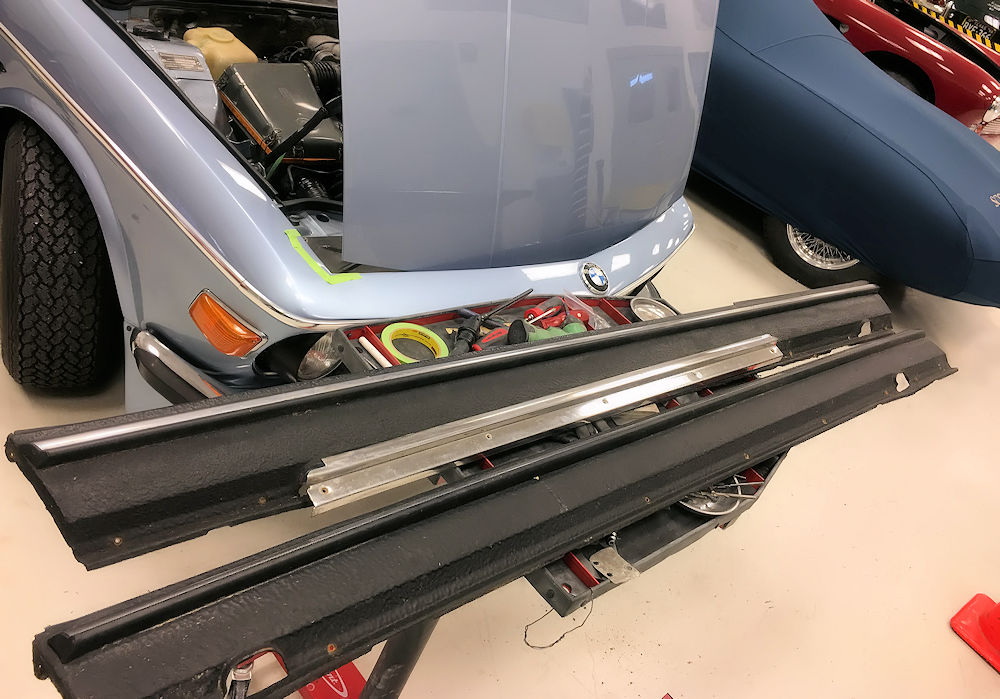
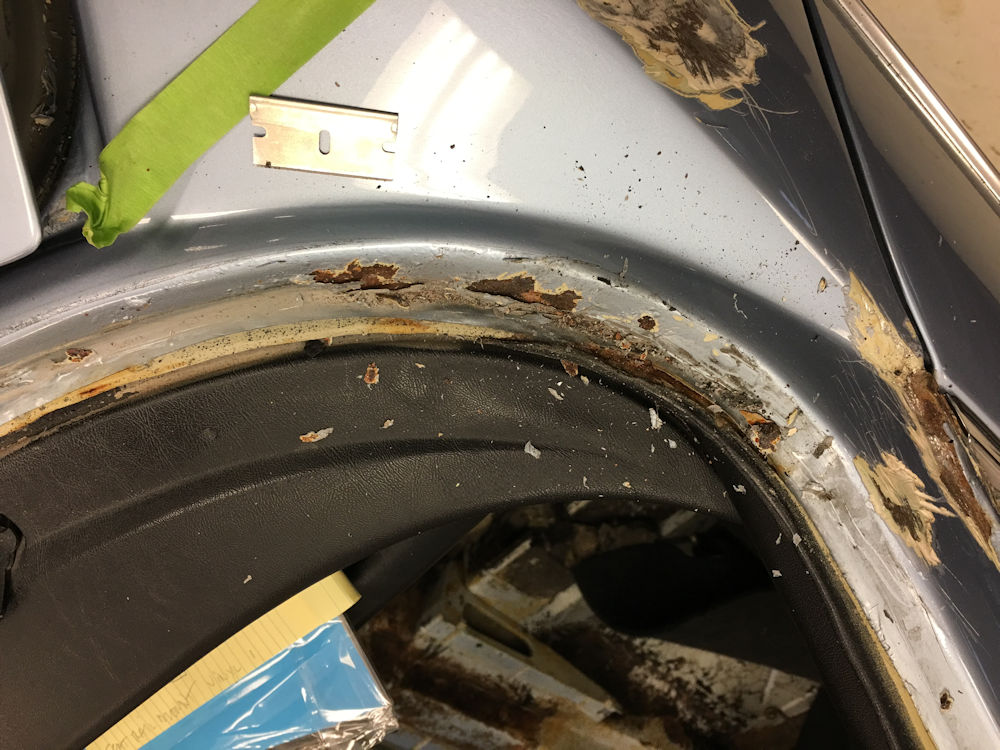
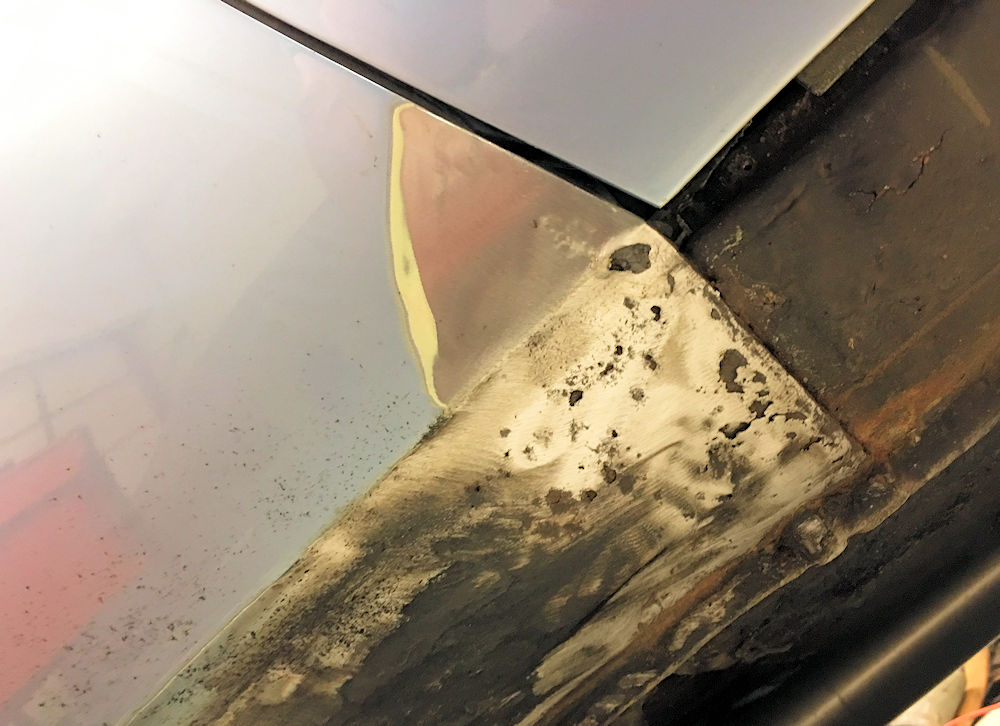
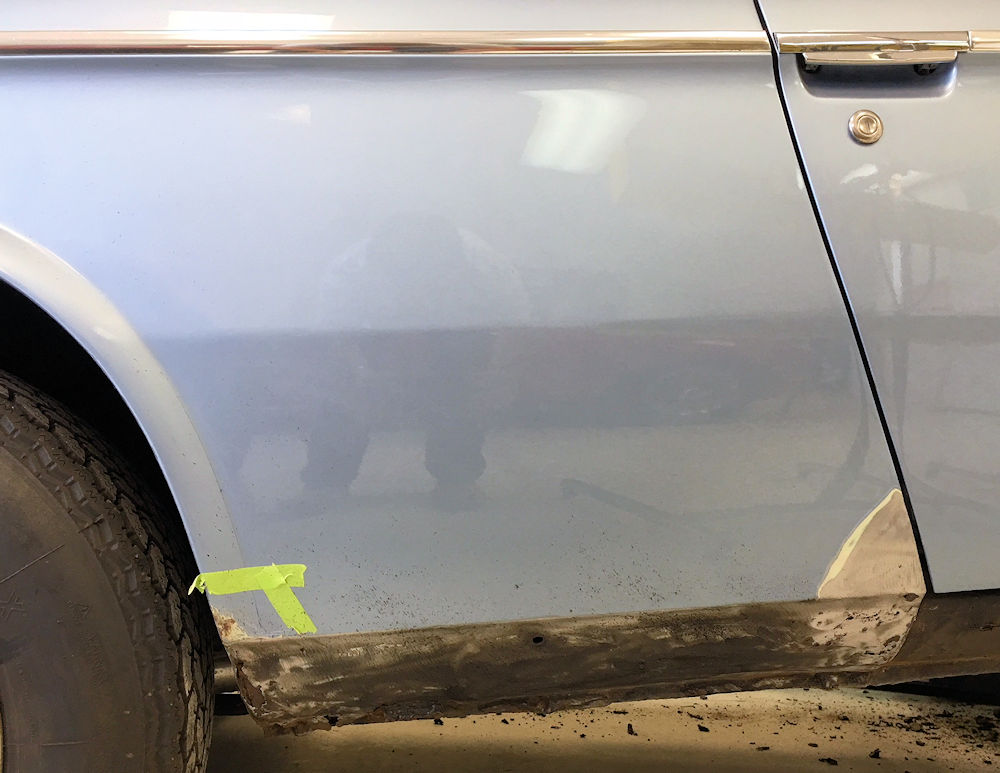
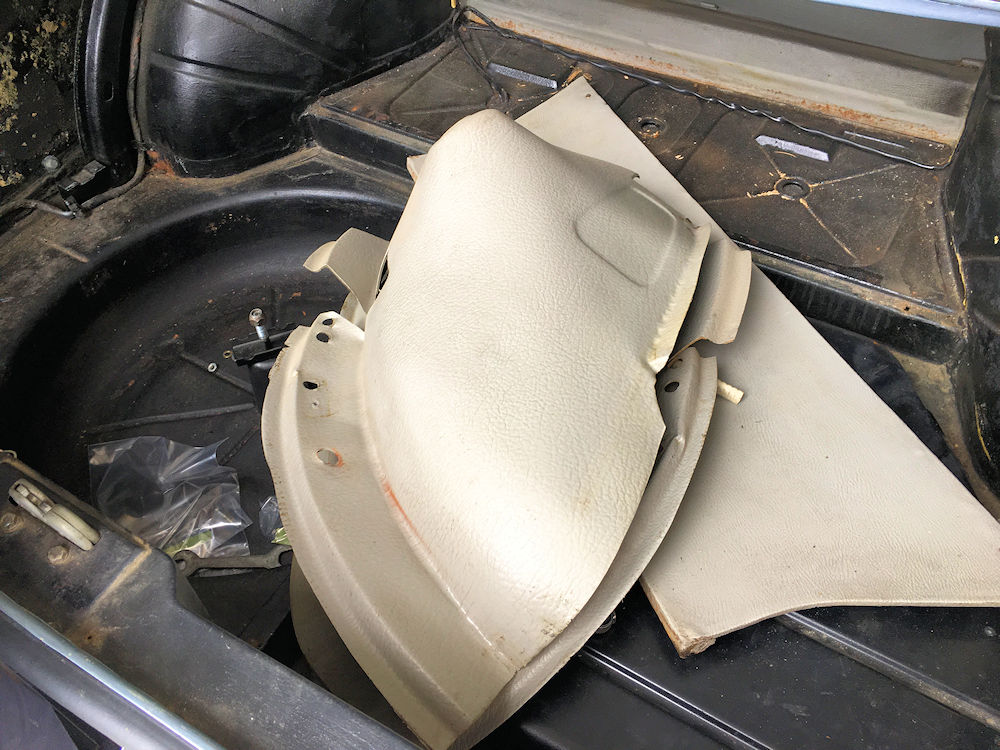
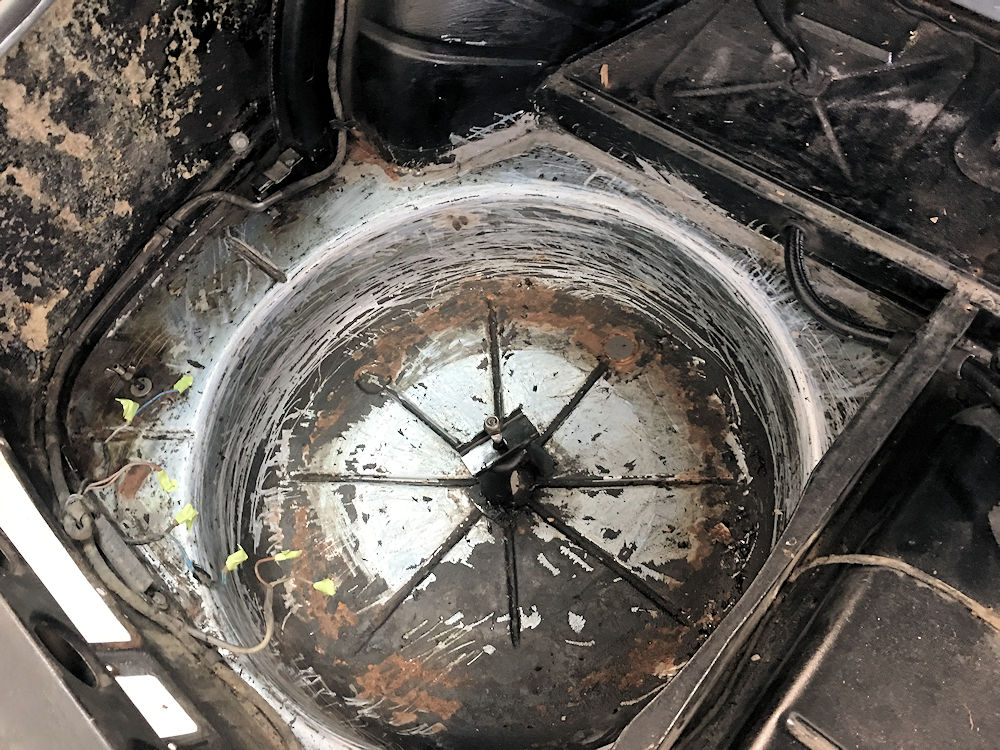
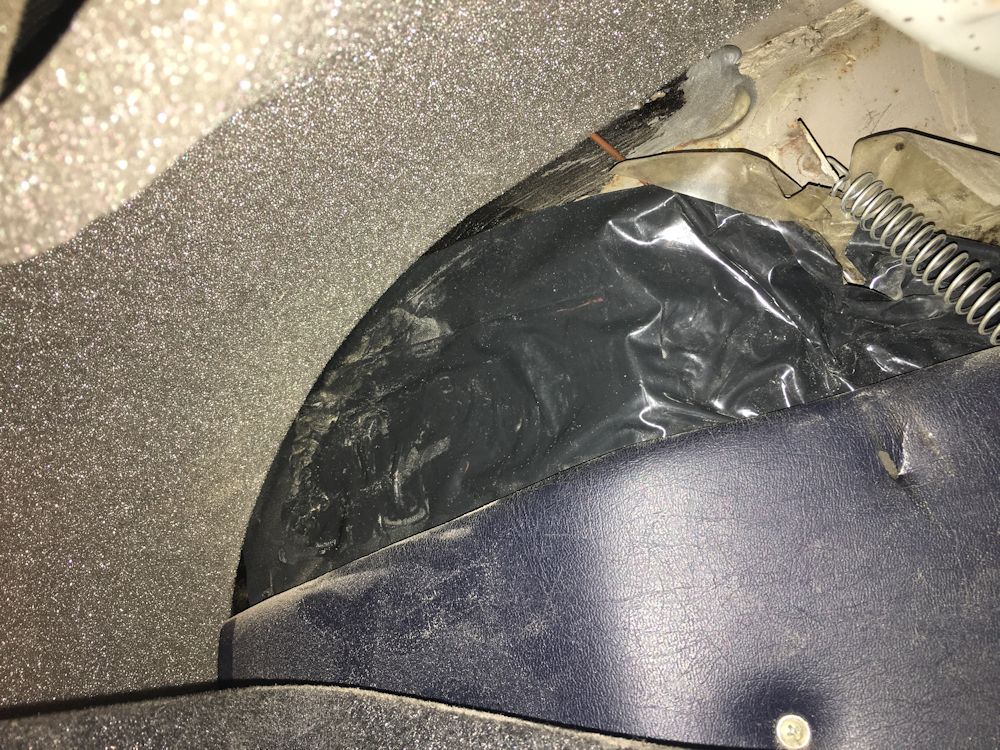
Unfortunately we have found significant rust in both outer rocker panels and both front floors. While we are dealing with this, I have decided to remove all the textured coating from the boot compartment and the spare wheel well, which will also be refinished. I have new floors and outer rocker panels on order from Walloth and Nesch in Germany.
 |
 |
| Several issues manifesting beneath the
paint had to be properly investigated |
|
 |
 |
| Oscar removing the outer sill covers |
Sill covers are in very good condition |
 |
 |
 |
 |
 |
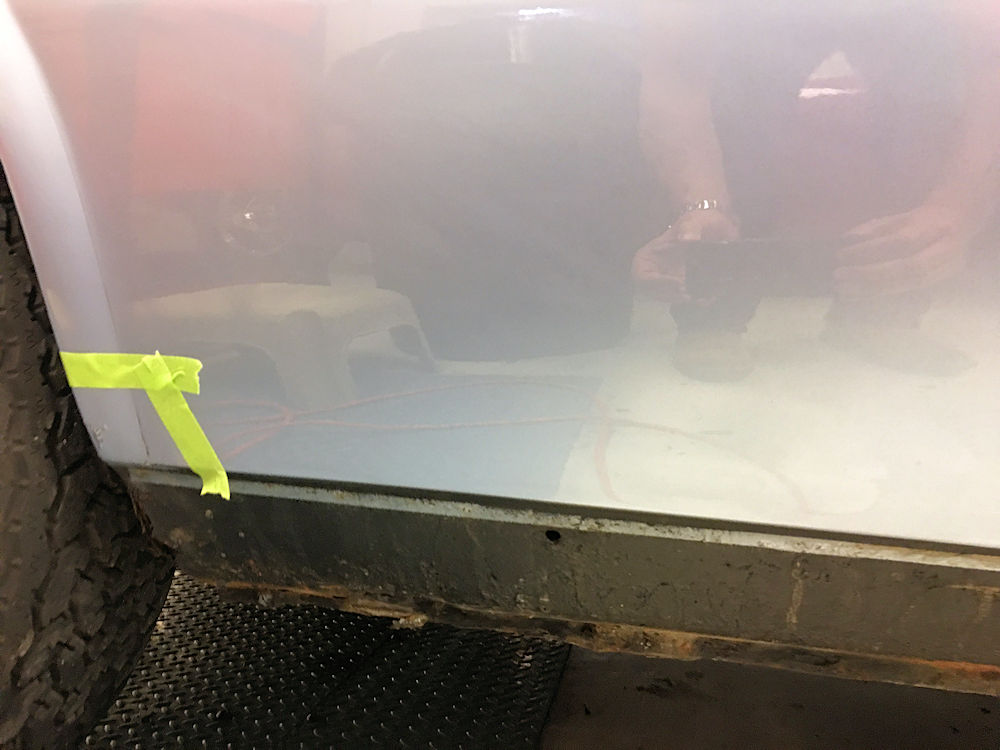 |
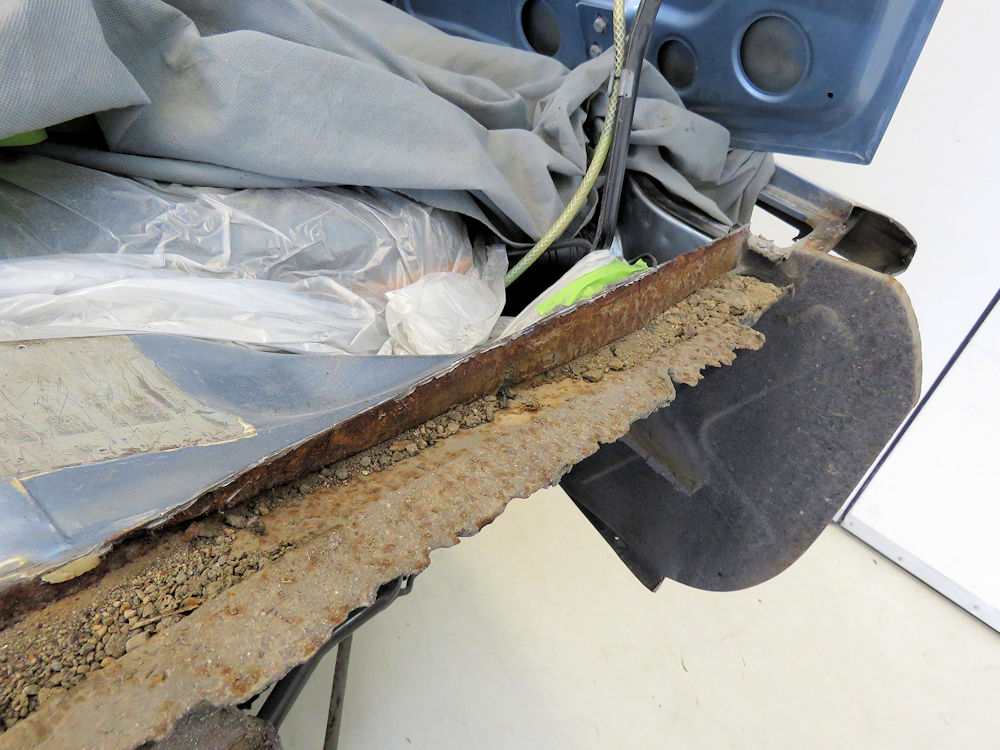
| Sadly the outer sills both have
significant rust, especially in the rear sections |
Lower section of both rear quarters
will be replaced |
 |
 |
 |
 |
| Thankfully we didn't find any rust of
note beneath all the heat and sound insulation inside the cabin |
|
 |
 |
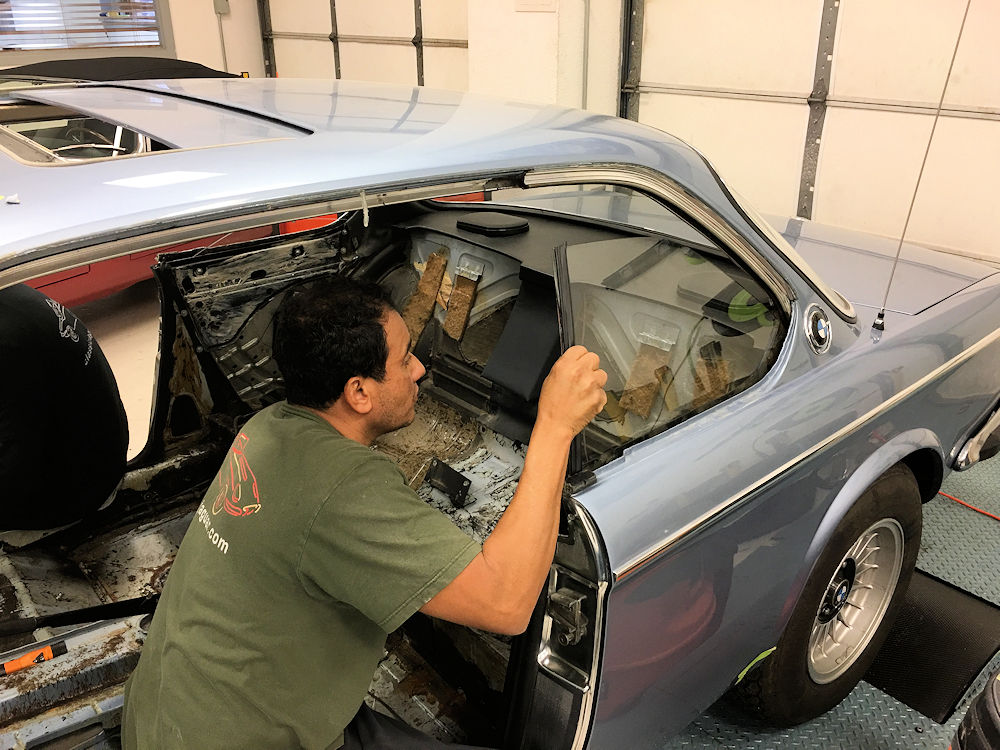
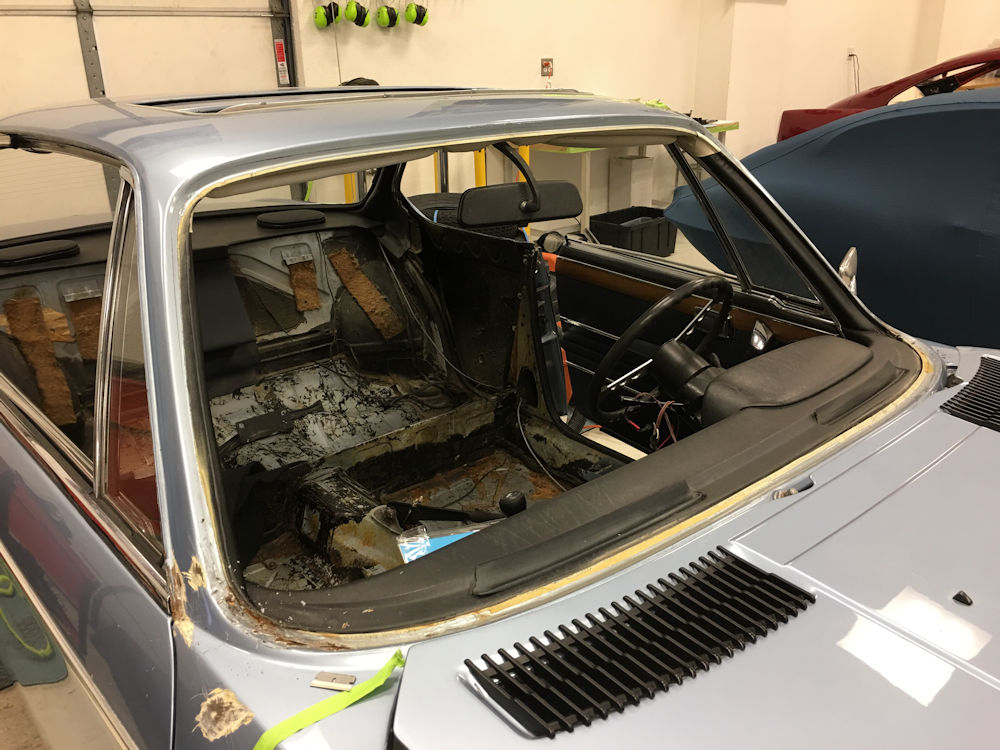
| Oscar removing the rear windows |
Rear window motors will be upgraded |
 |
 |
| All glass and trim will be removed for
body repairs |
|
 |
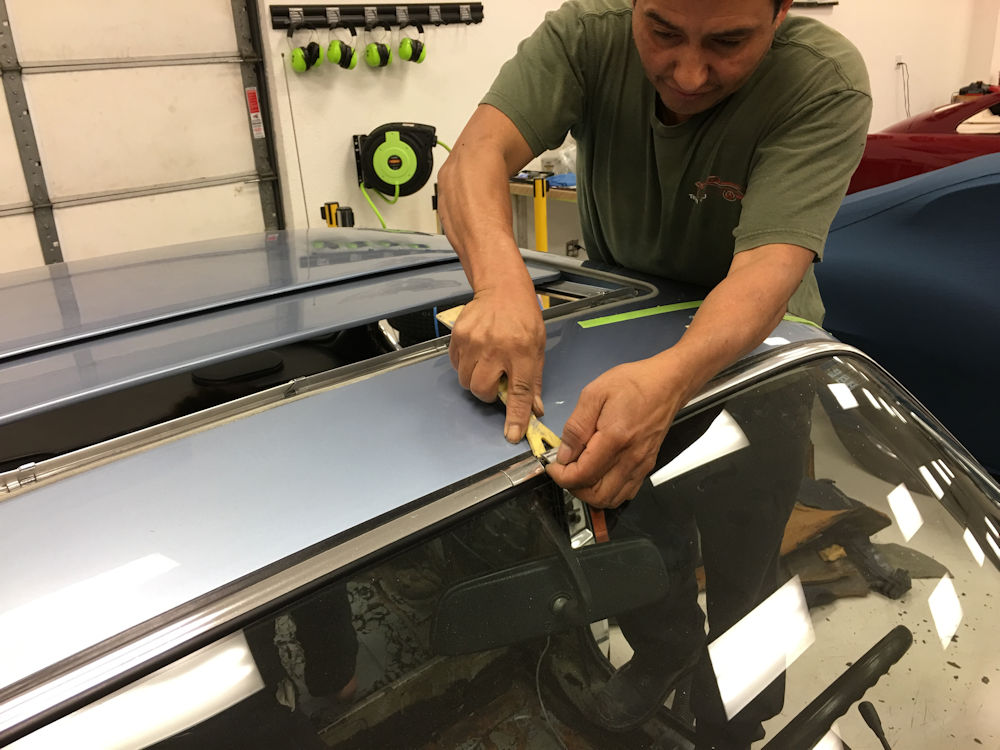 |
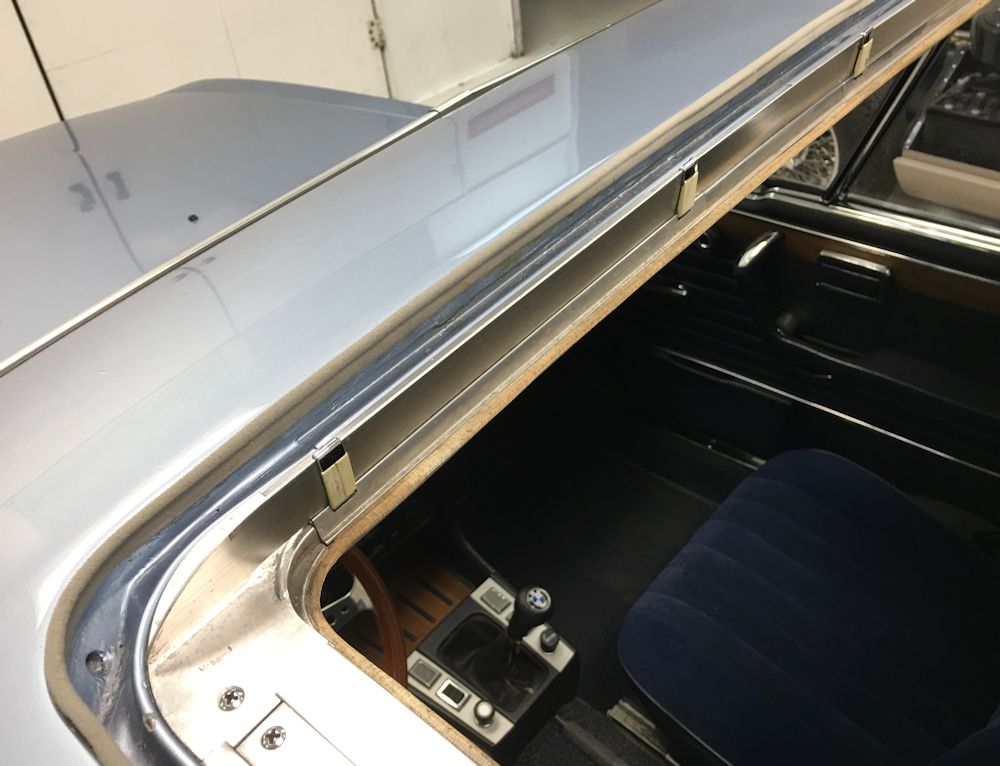
| Removing the windscreen |
|
 |
 |
 |
 |
 |
 |
 |
 |
 |
 |
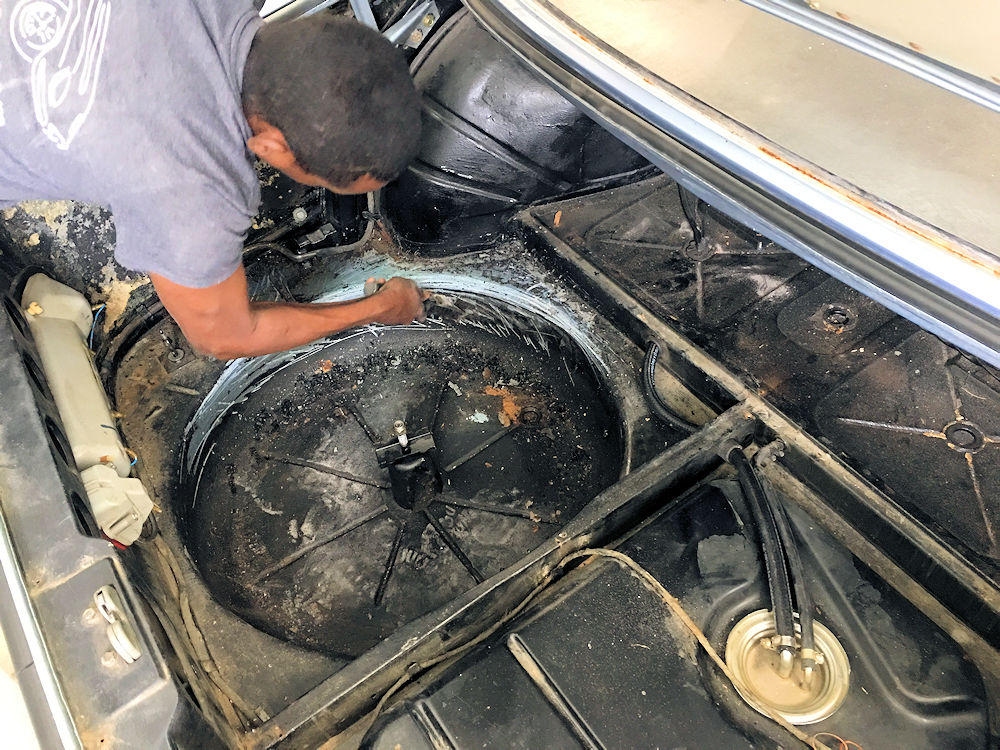
| Removing the elephant skin from the
boot compartment |
All textured coating will be removed
and the boot compartment refinished in Fjord Blue |
 |
 |
| Sulieman scraping away the textured
coating from the wheel well |
Fortunately we are not finding any
serious corrosion in the boot compartment |
 |
 |
| Oscar starting to hack away at the
corroded driver's footwell |
Fuel lines will be replaced |
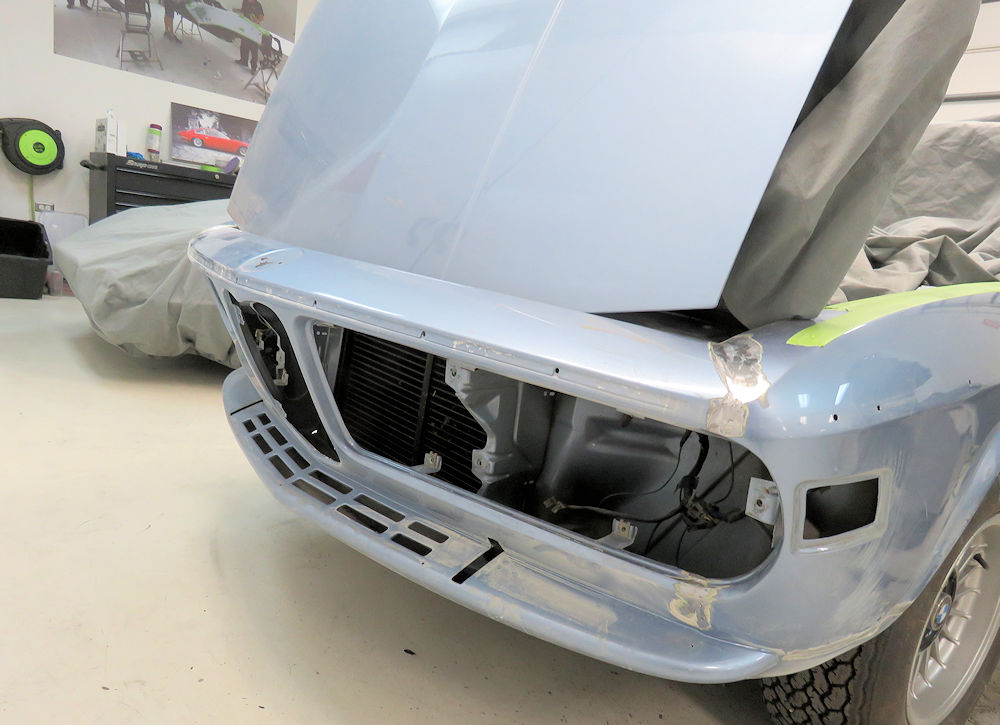
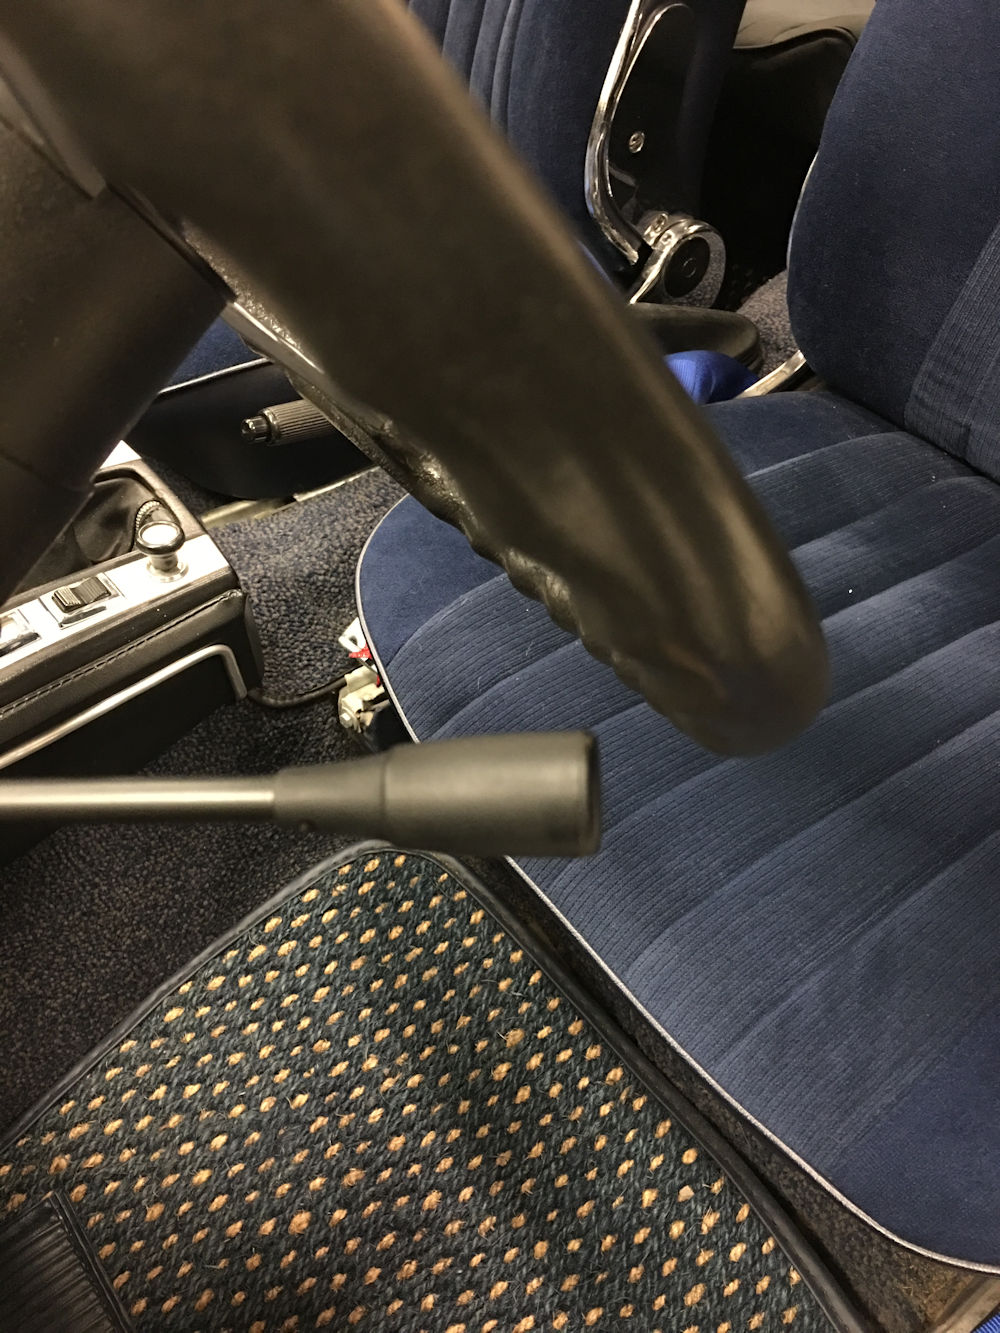
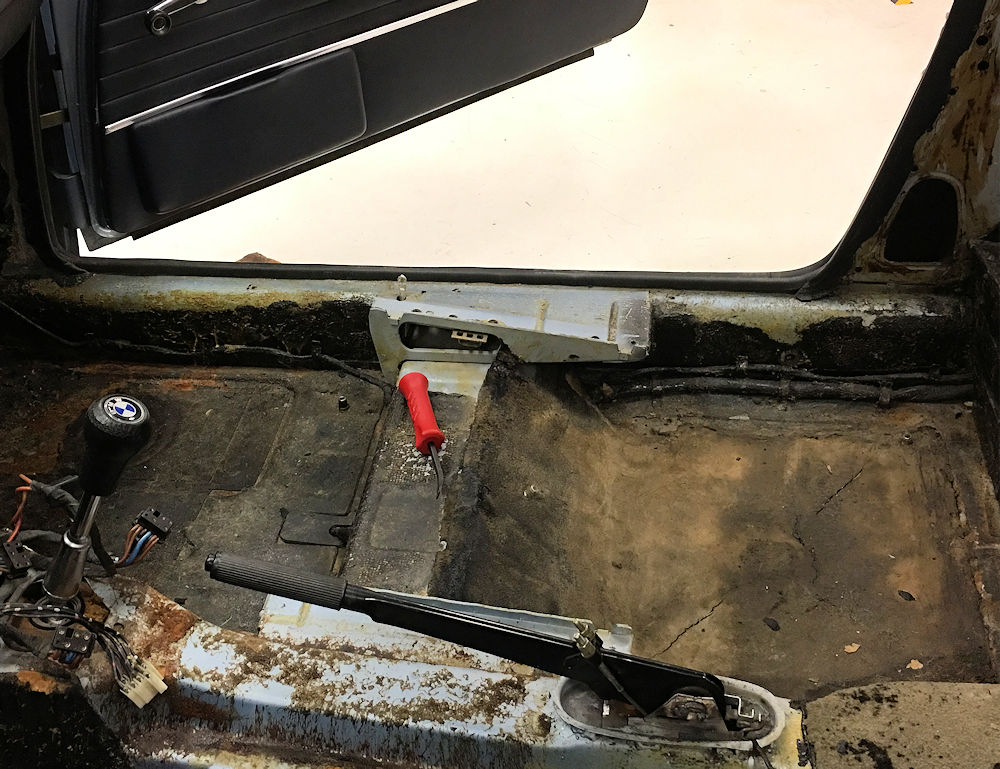
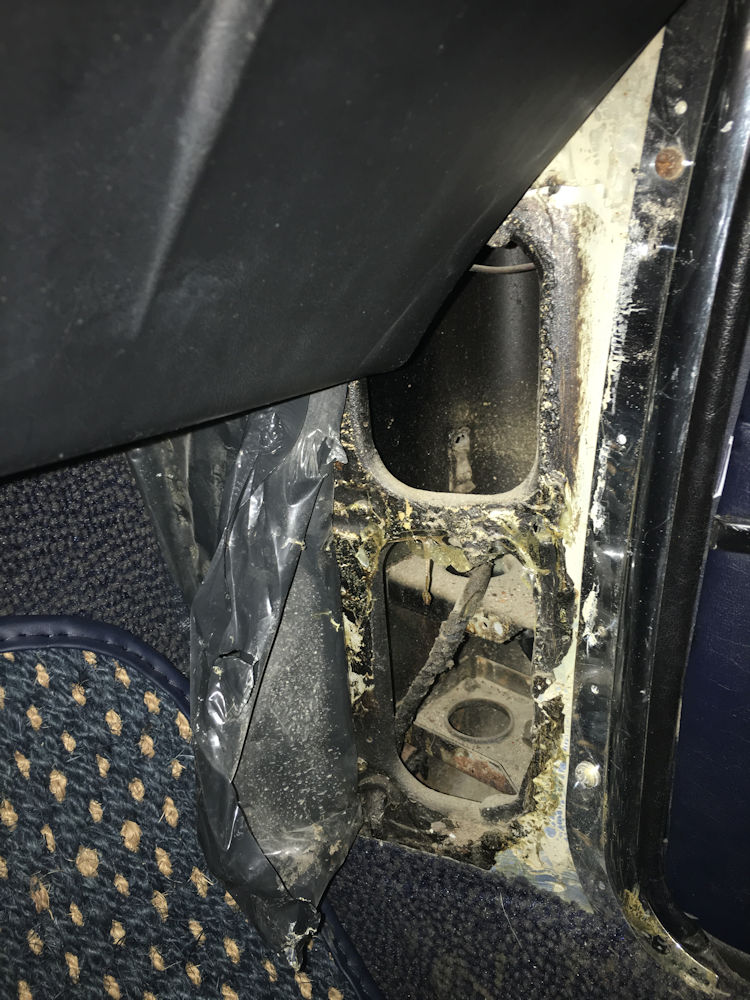
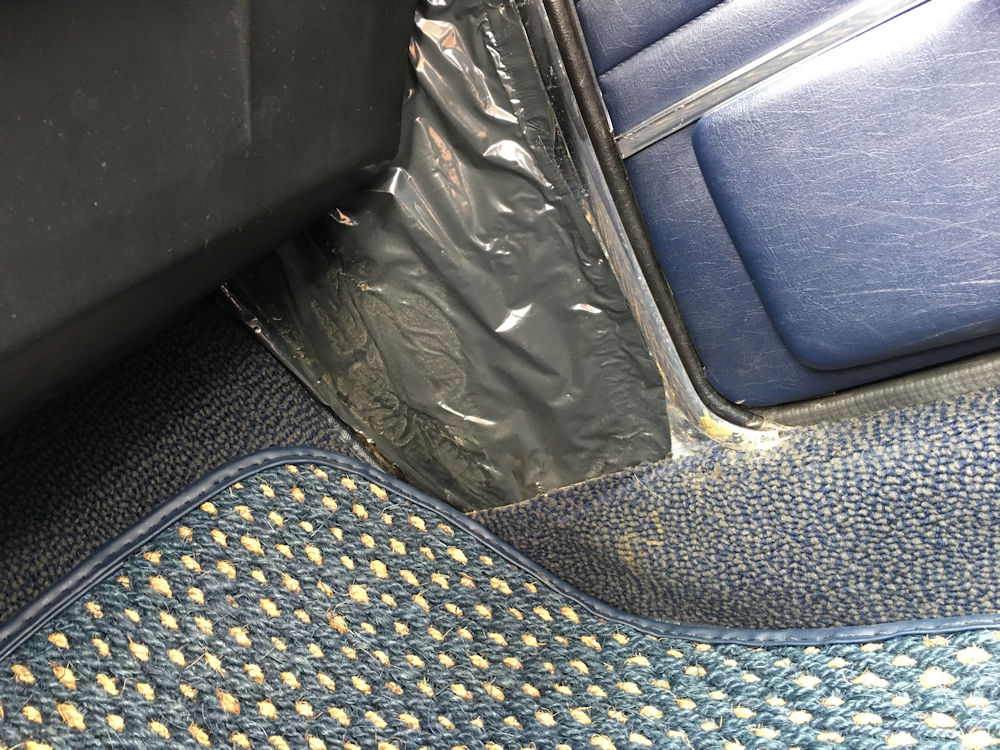
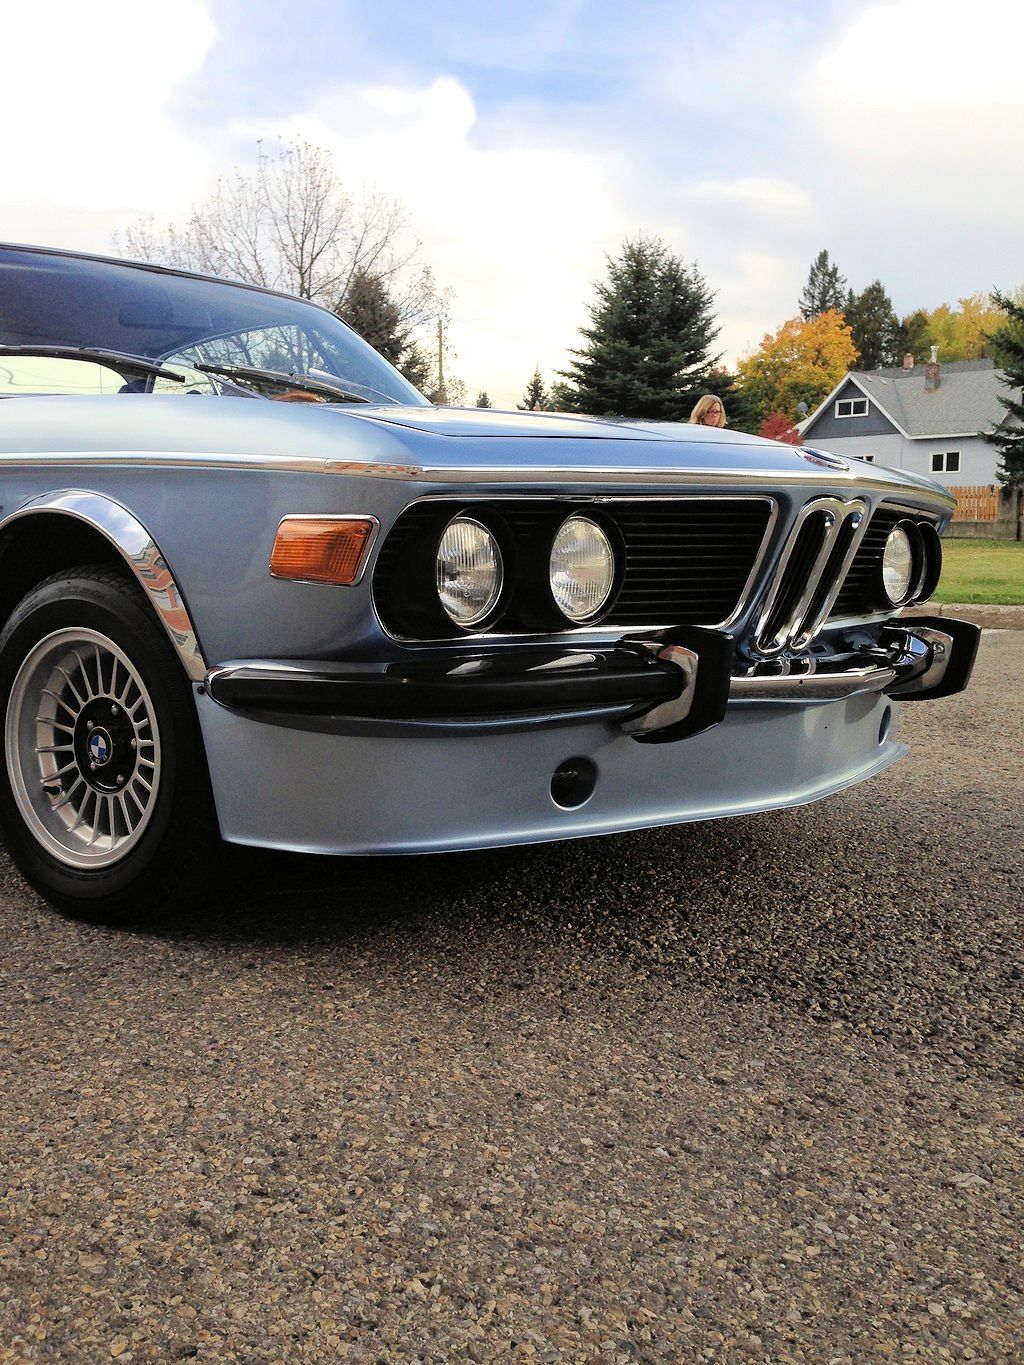
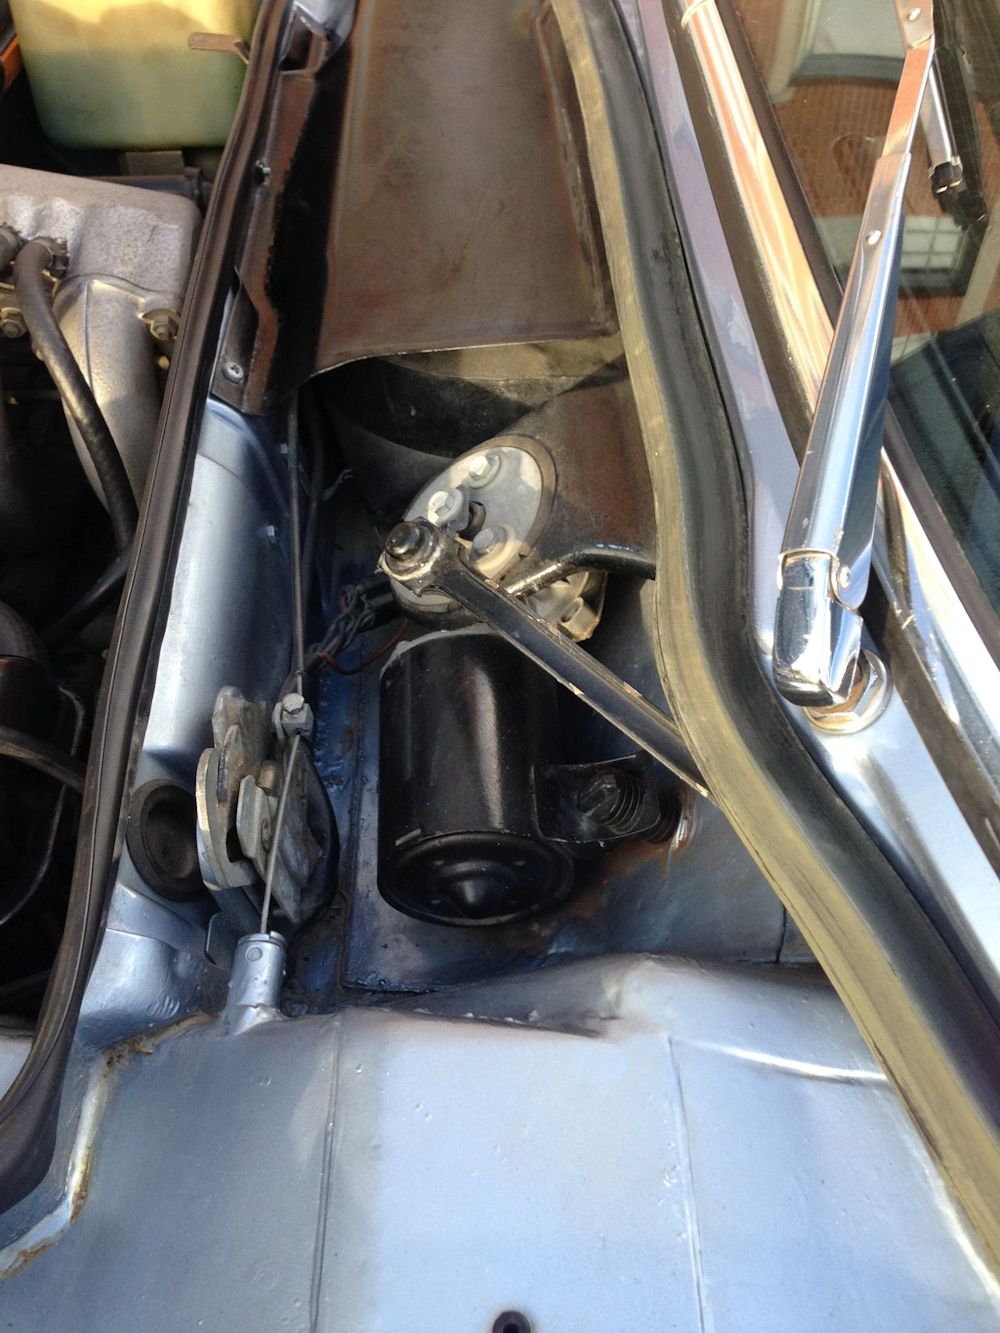
I was recently investigating why my headlamp stalk was so close to the rim of my recently installed Petri 380mm steering wheel. I had initially thought it was because I was using a 2002 hub, rather than an E9 hub, although the 6mm difference between the two didn't explain how close my headlamp stalk was to the wheel rim. Eventually someone at e9coupe.com recognized that my headlamp stalk was not an E9 component and most likely from some other BMW. Accordingly, the search is on for a correct (shorter) replacement headlamp stalk.
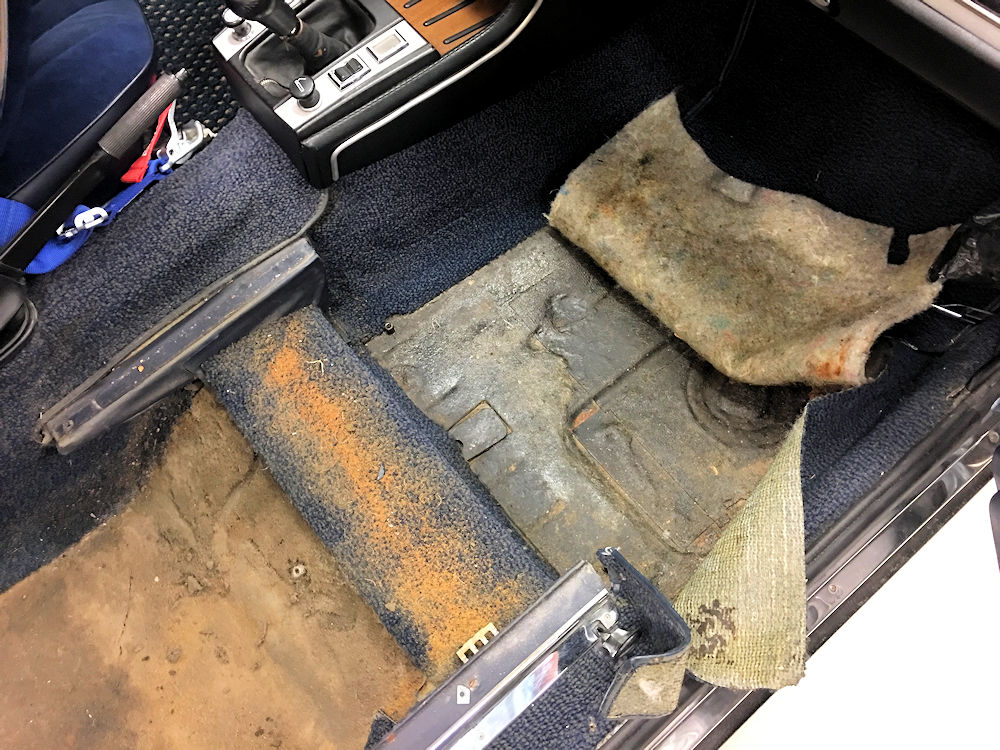
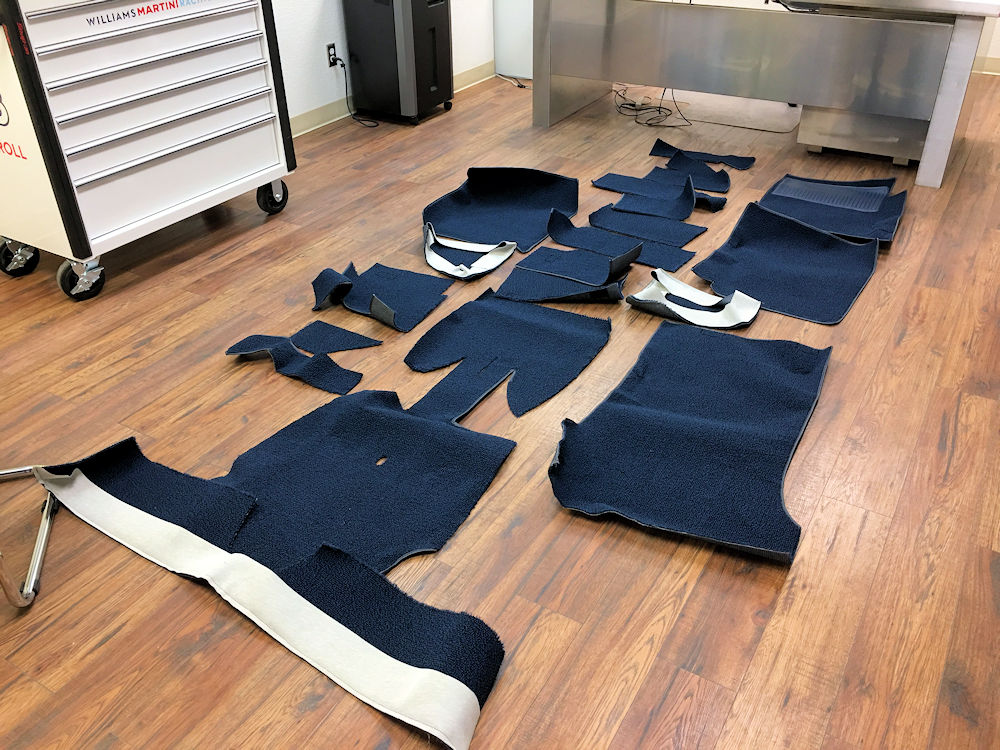
I mention this only because while I was sitting in the car contemplating the headlamp stalk mystery, I noticed an old repair to the carpet in the driver's footwell. Truth be told, the repair was effectively hidden beneath my Cocomats, but I knew it was there, and it bothered me. I removed the offending piece of carpet, then began tugging away at the surrounding carpets, wondering what I'd find beneath. As a professional car restorer for the last 25 years, you'd think I'd know better. Anyway, the net result of me investigating my incorrect headlamp stalk was the purchase of a new carpet set from GAHH.
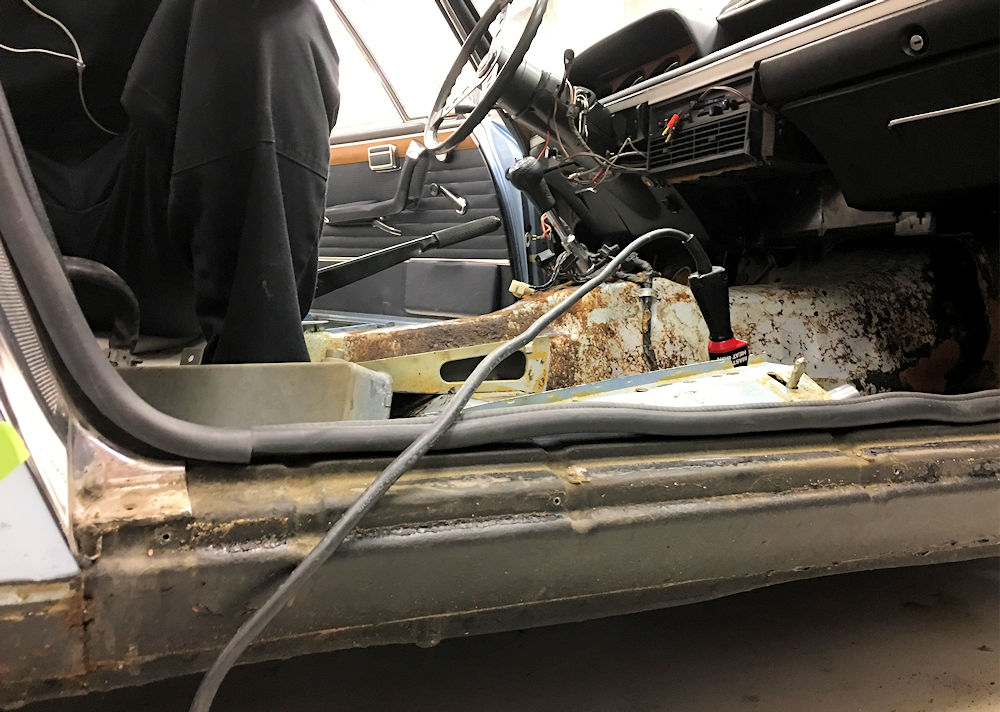
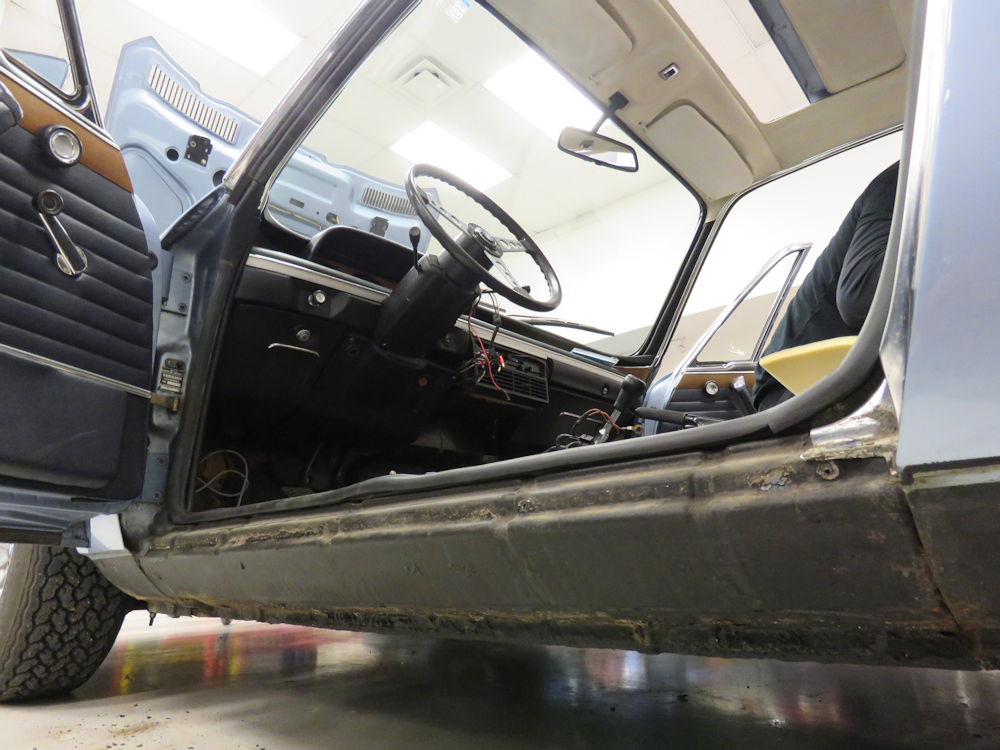
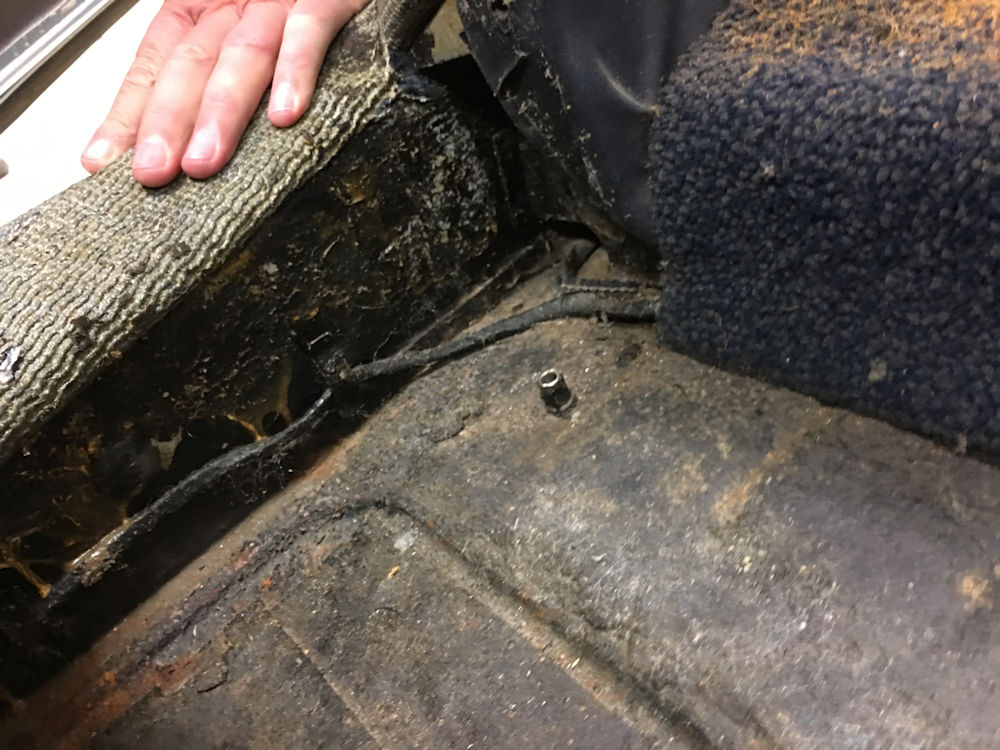
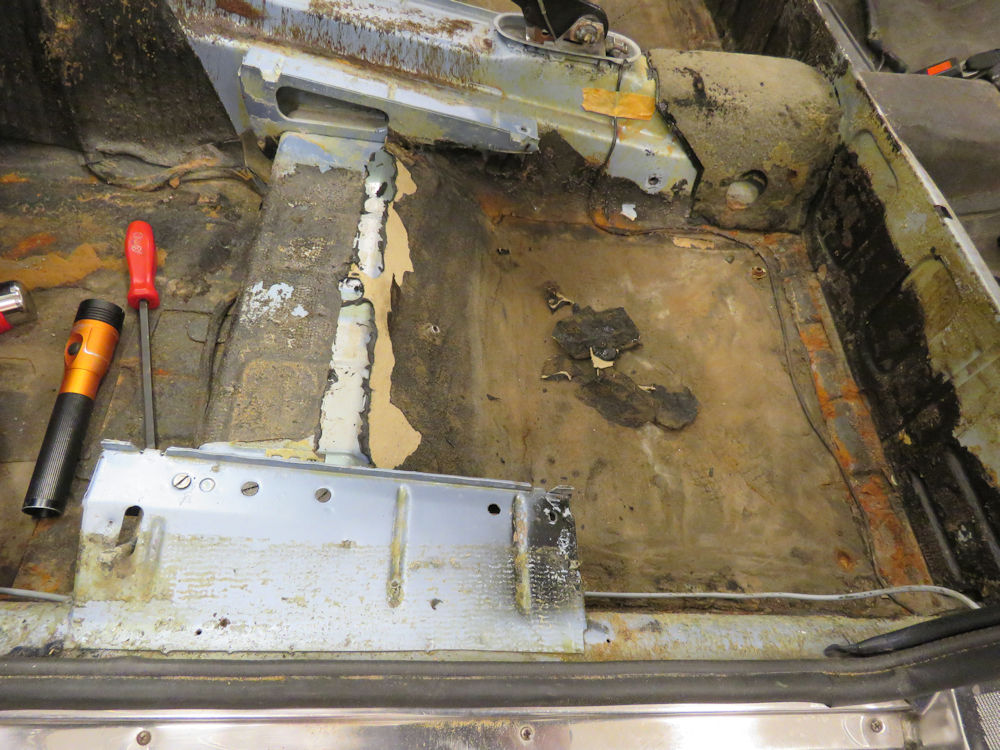
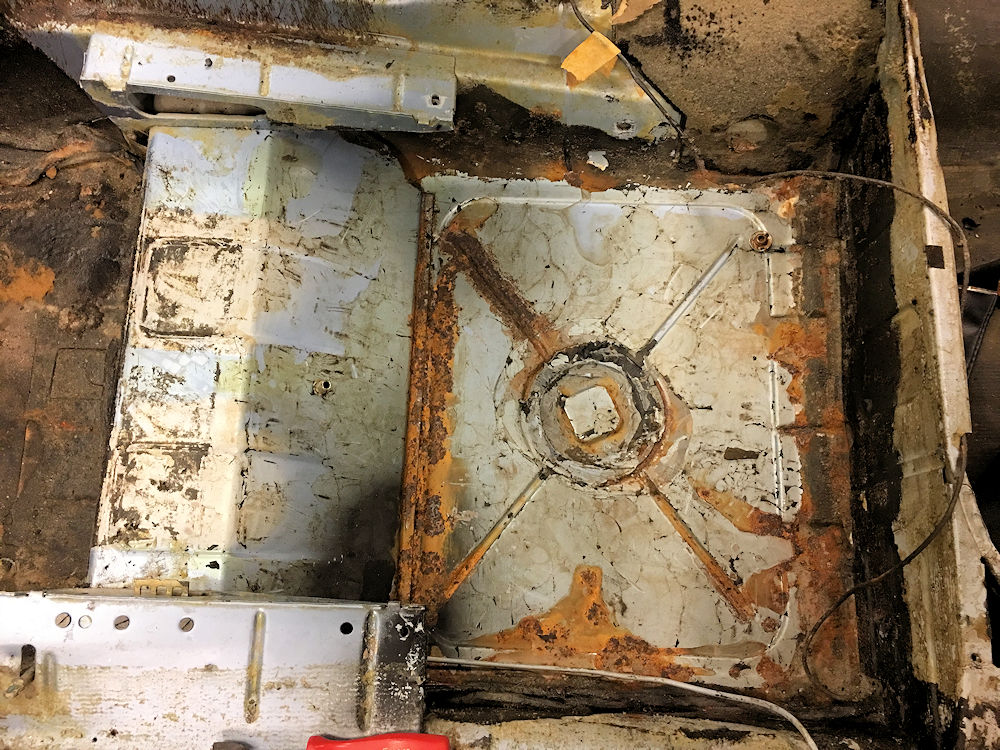
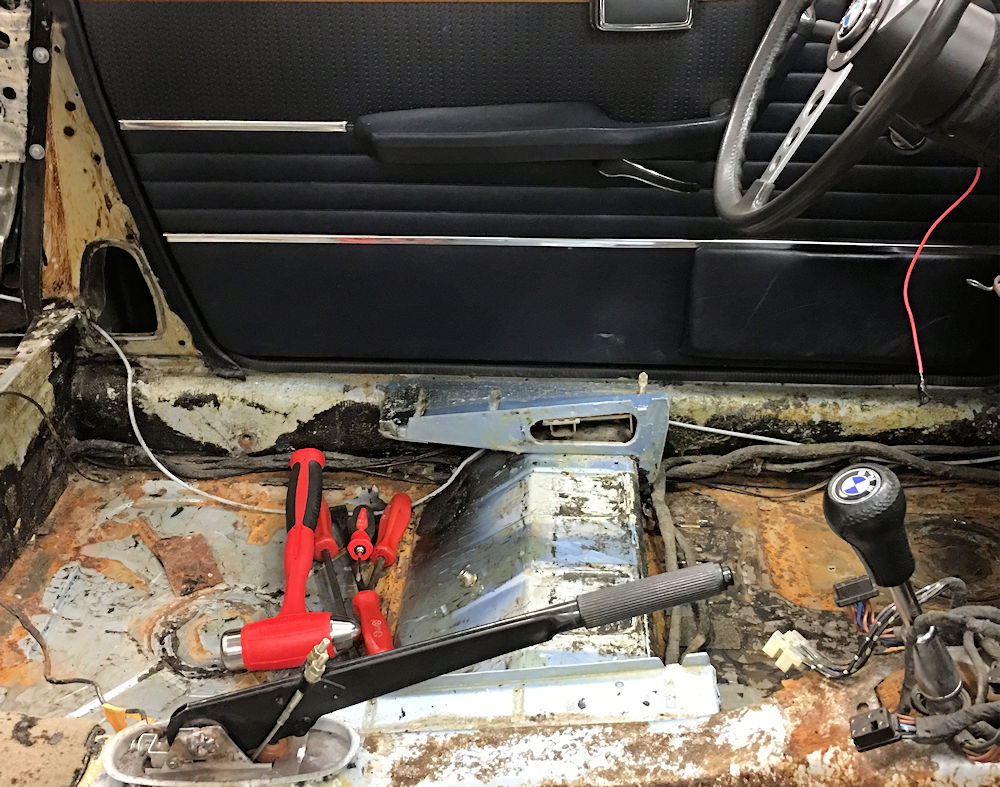
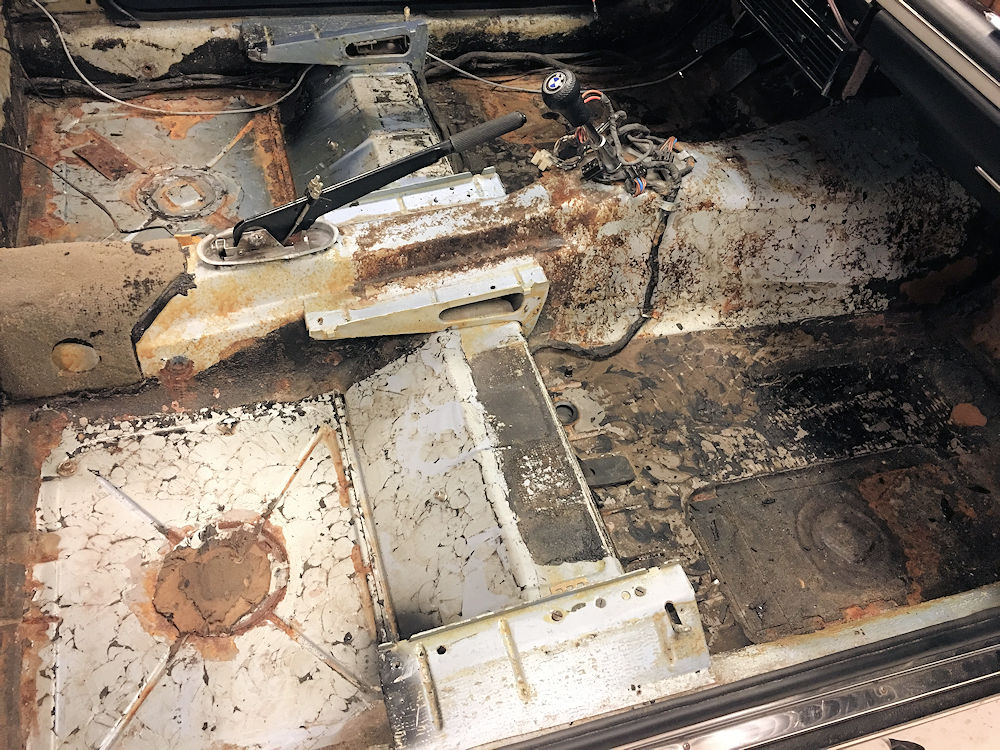
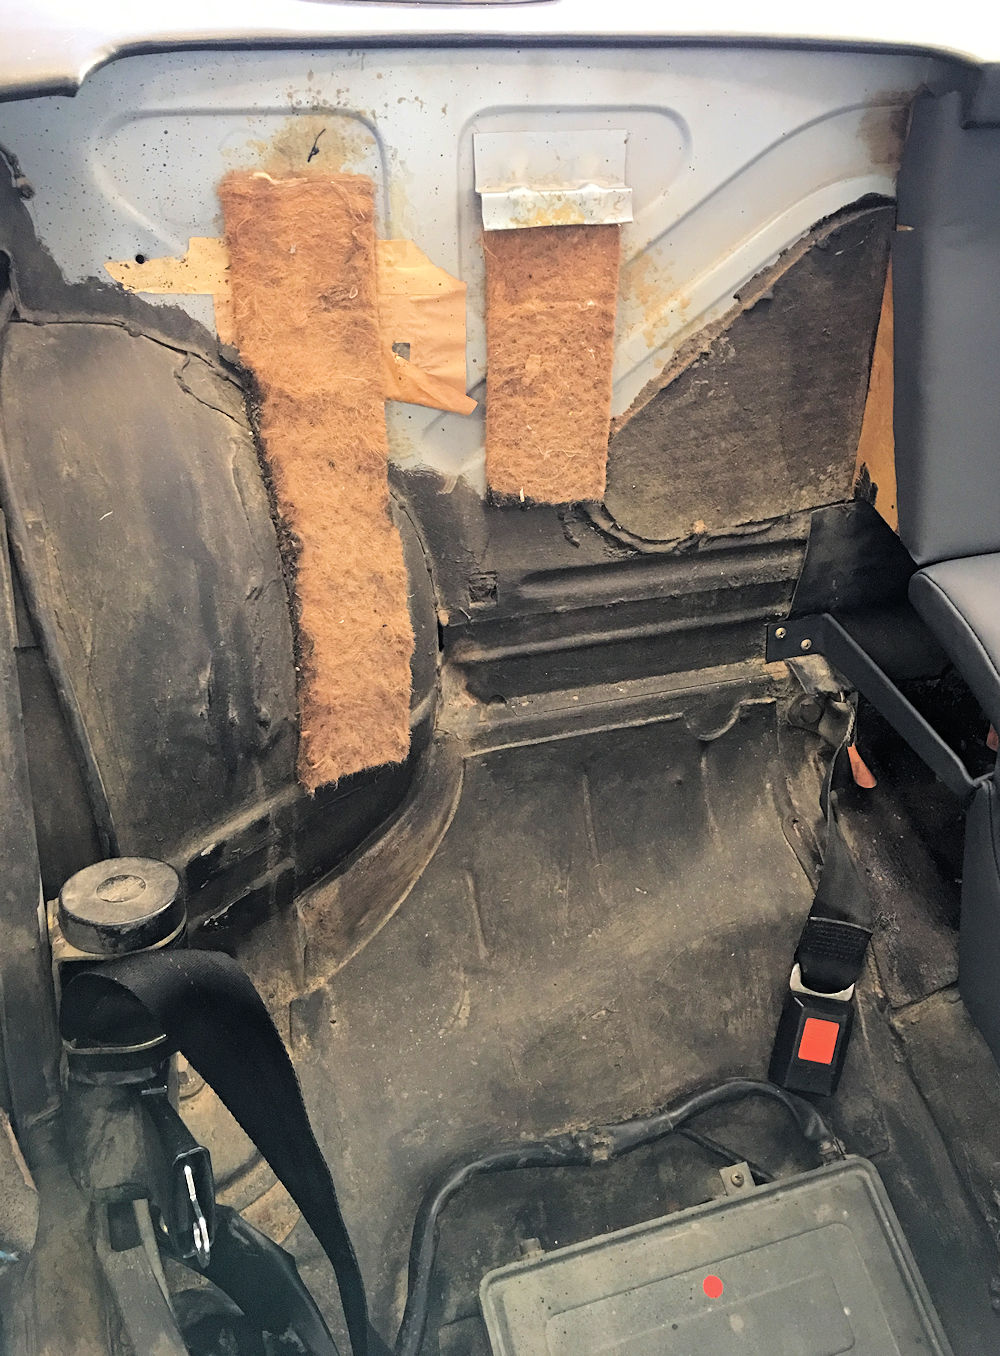
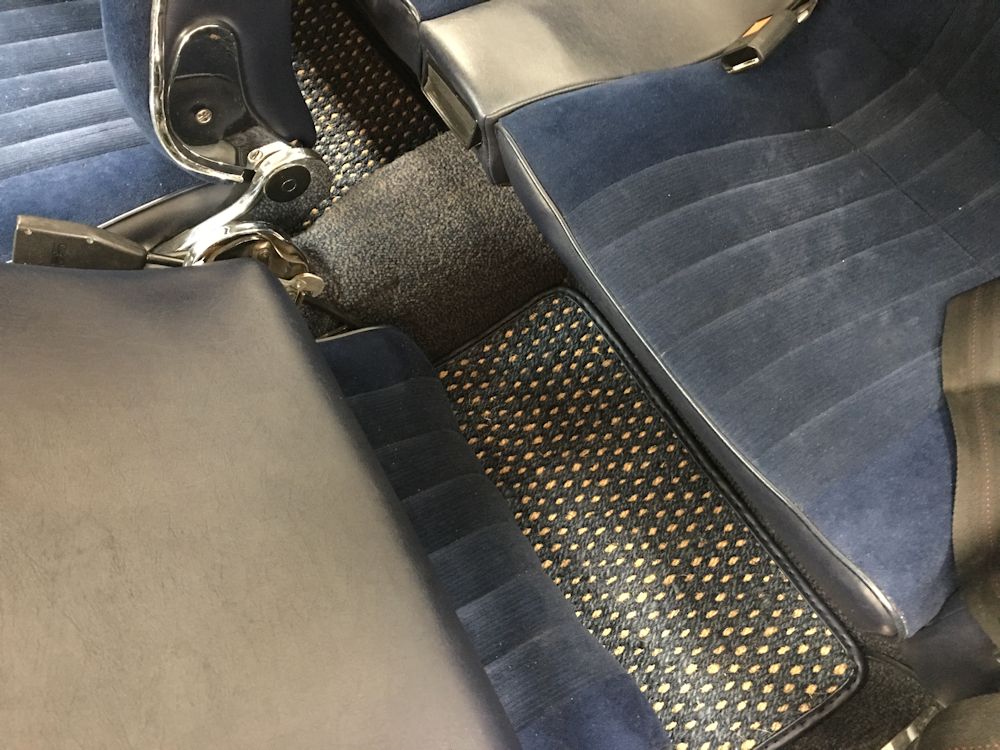
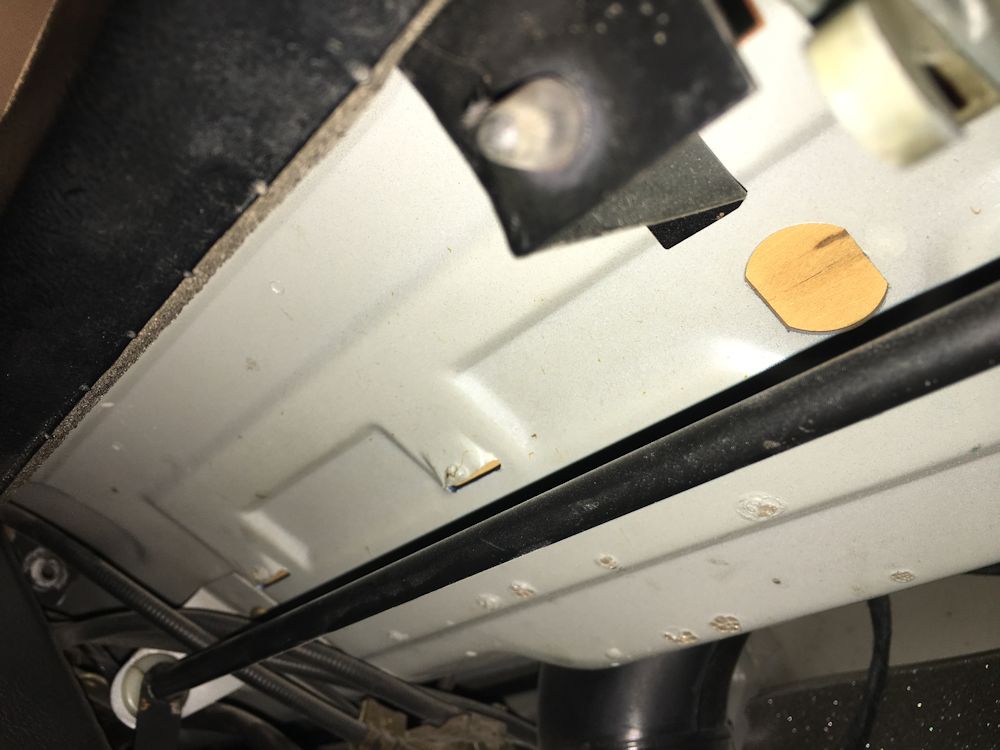
Having received the new carpets, I decided it would be unwise to install them without thoroughly investigating the condition of the sheet metal beneath, so I removed the seats and center console, and began pulling up all the insulation and sound deadening material. Although the main floors and inner rockers are actually in much better shape than I expected, the front floors are bad enough that I am just going to replace them. New floor panels are ordered and on way from Walloth & Nesch in Germany.
My incorrect (but perfectly functional) headlamp stalk has turned into something of a Pandora's Box.
 |
 |
| Headlamp stalk, AKA Pandora's Box |
Old repair in driver's footwell carpet |
 |
 |
| While we are here, we might as well have a
good poke around beneath all the carpets |
|
 |
 |
| Main floors and inner rockers look solid |
Looking through B pillar panels into rocker
area |
 |
 |
| Inner rocker sheet metal is reassuringly
sound |
|
 |
 |
| Ancient sound deadening must be removed |
New 20 piece carpet set |
 |
 |
| Prior to installing new carpet set, I need
to know all the sheet metal beneath is sound |
|
 |
 |
| Area beneath the seats looks surprisingly
solid |
|
 |
 |
| Both inner rockers appear to be sound |
|
 |
 |
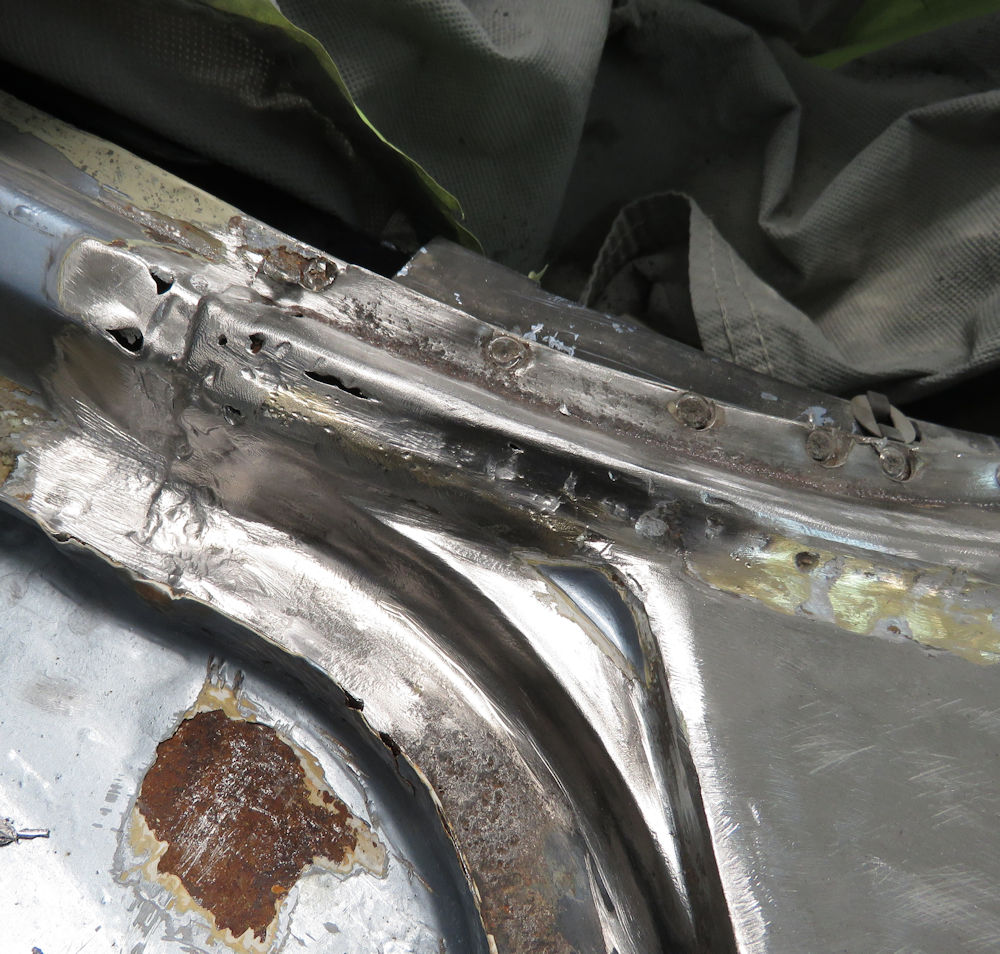
| Big rust hole in front corner of driver's
footwell |
Obviously a little disappointing, but it
could have been much worse |
 |
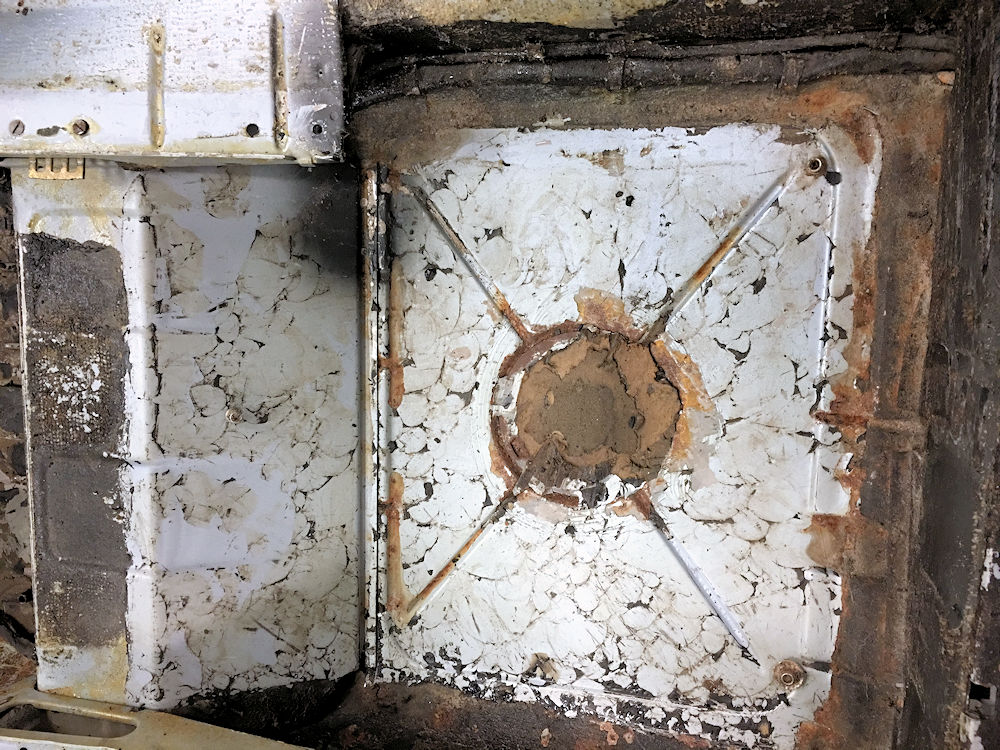 |
| I decided to strip every last bit of
insulation, just to make sure we catch everything |
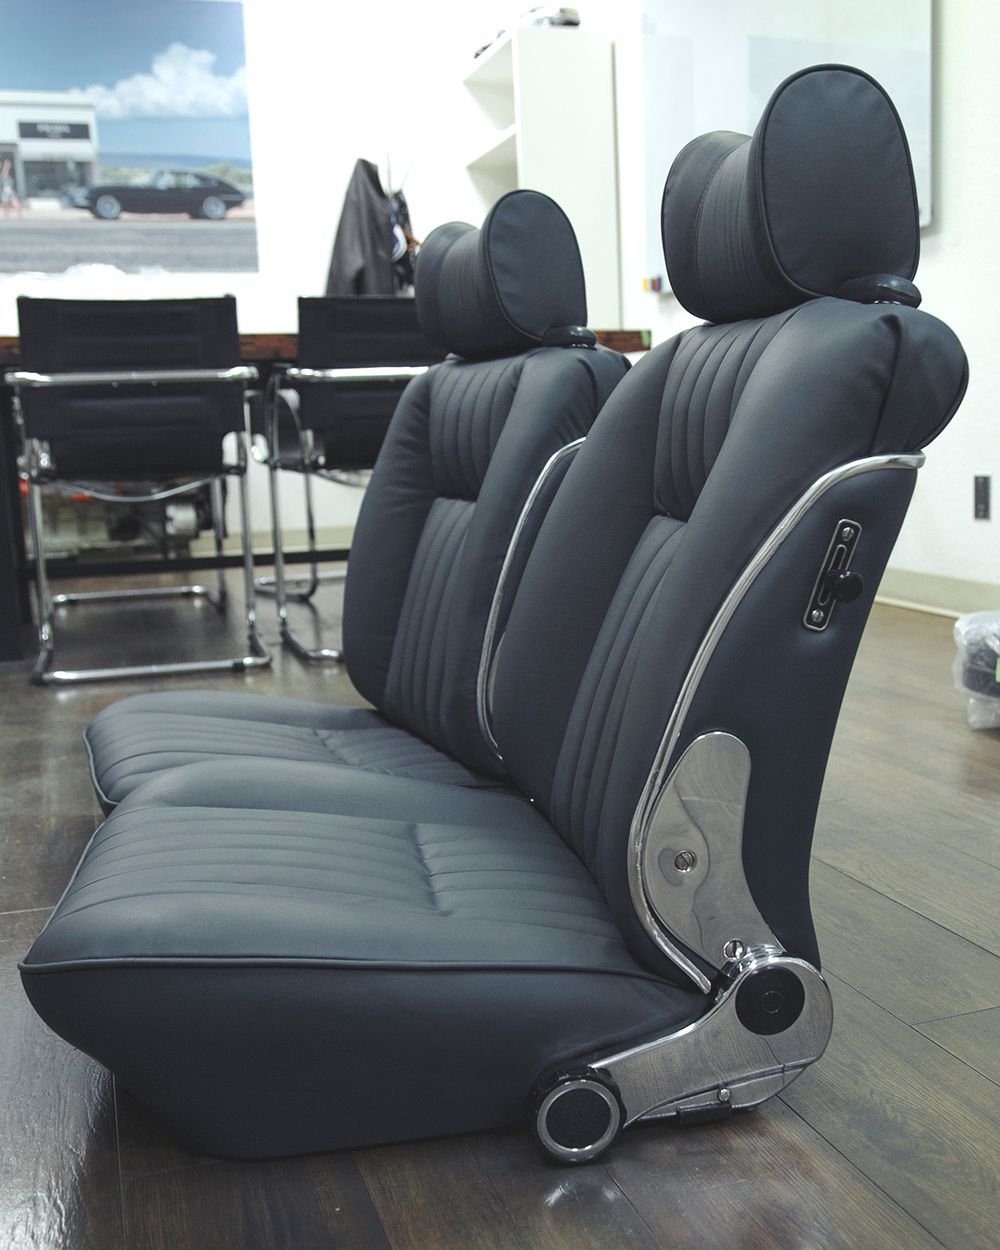
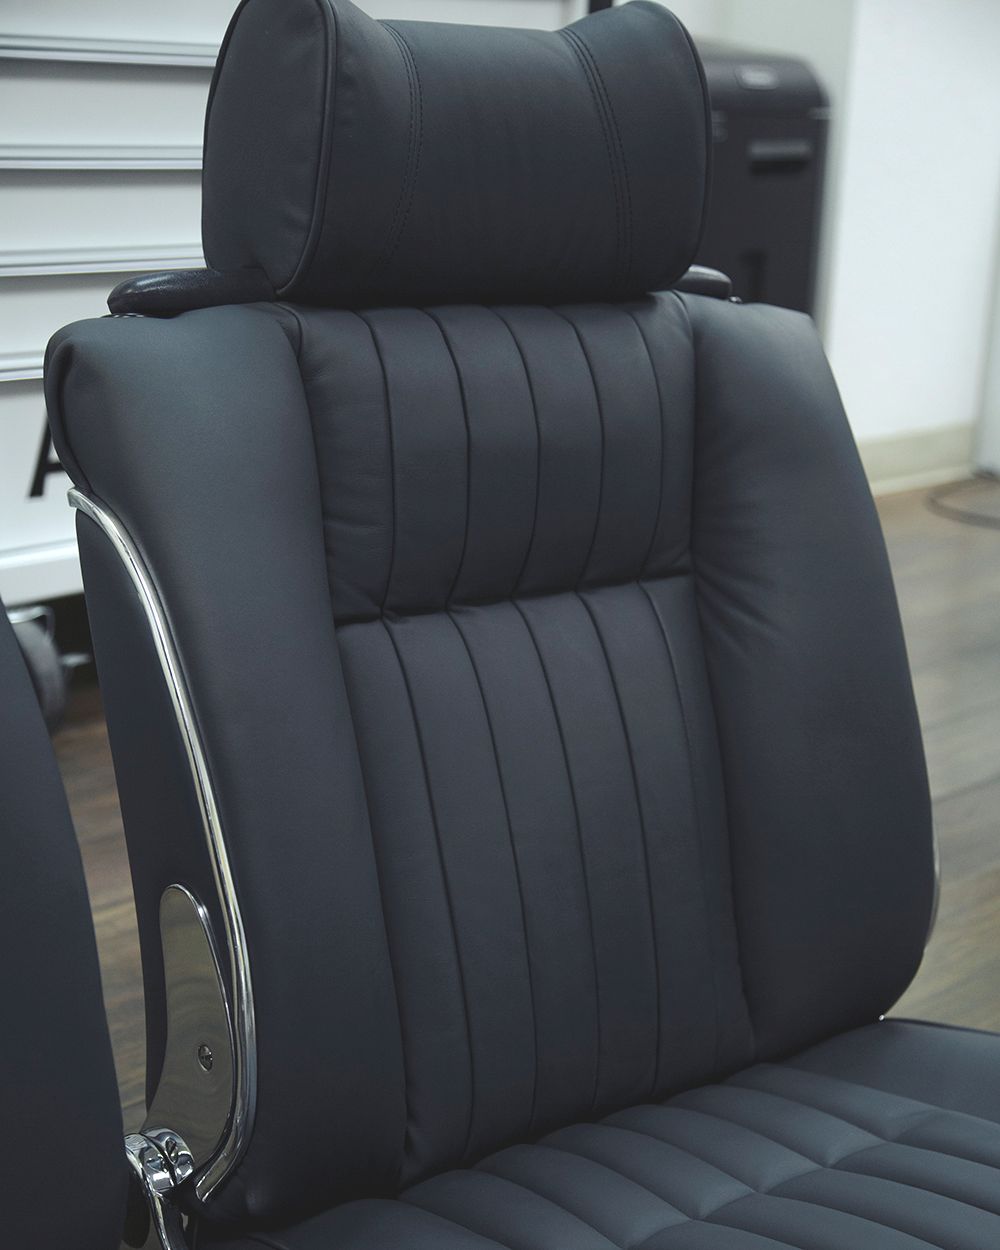
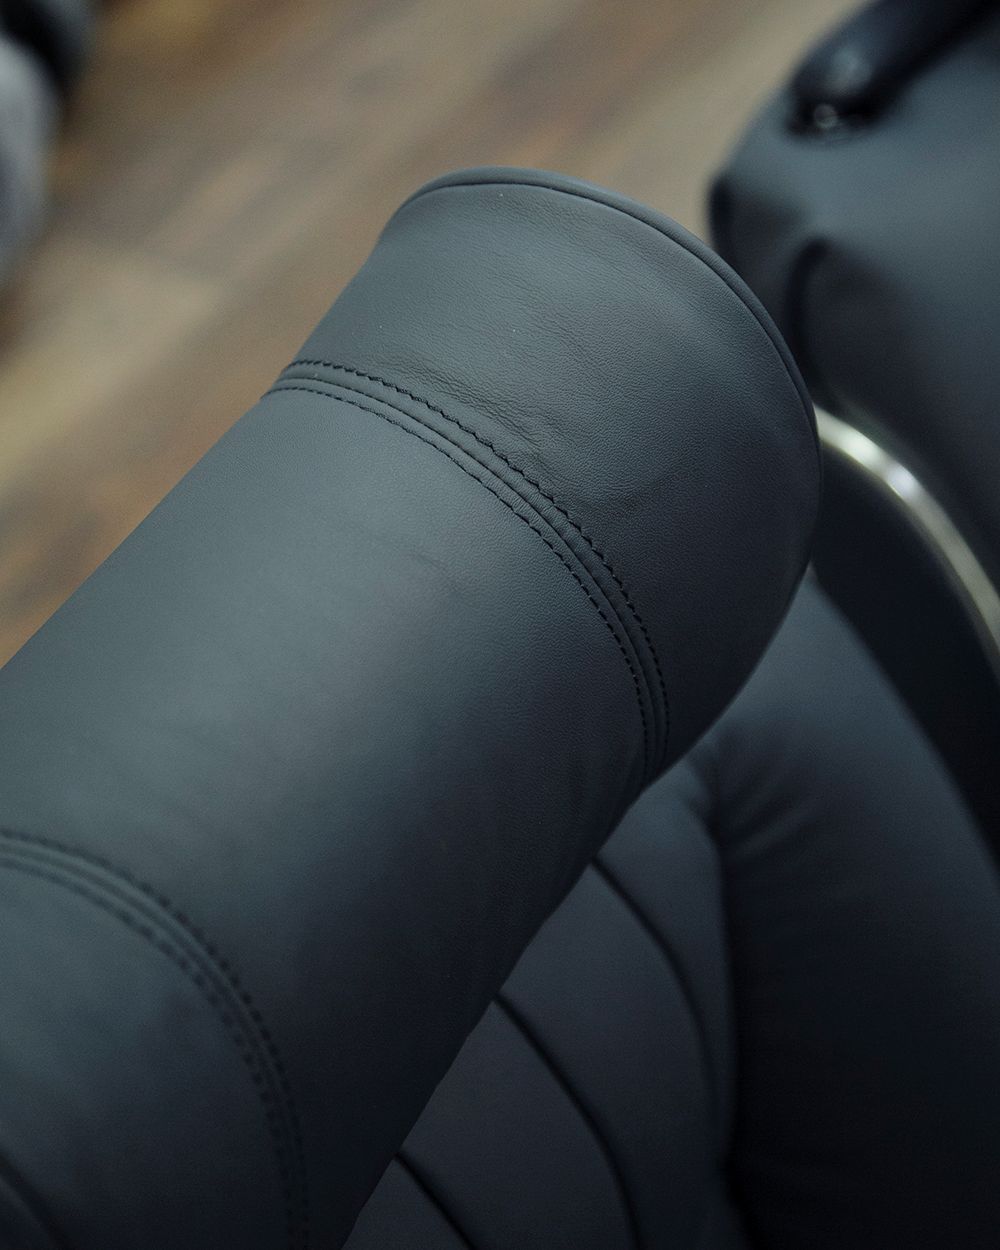
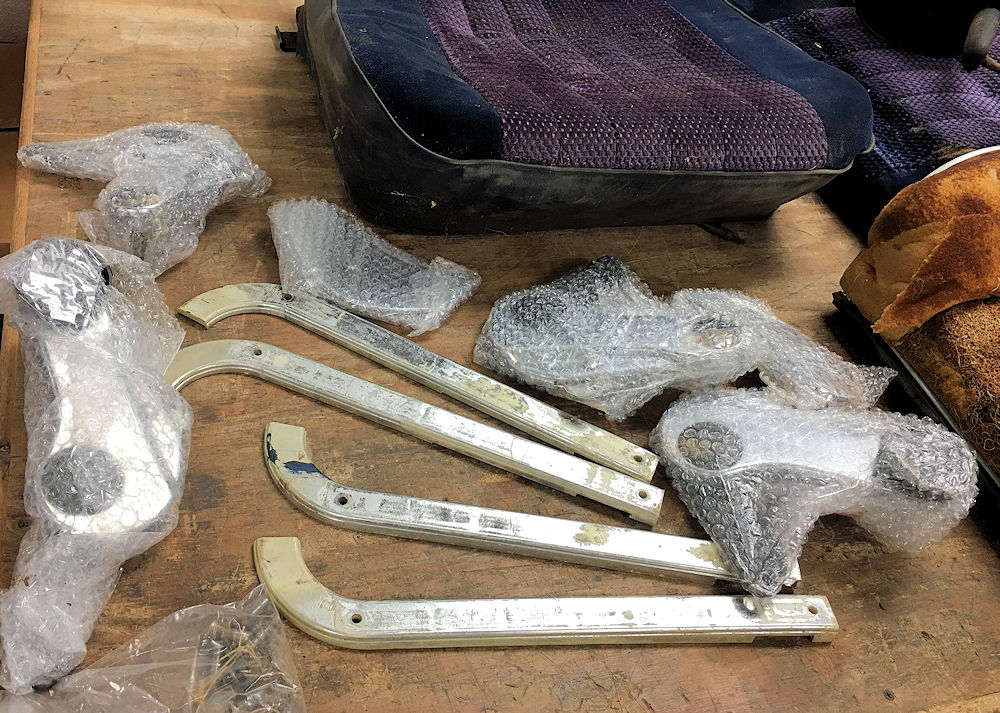
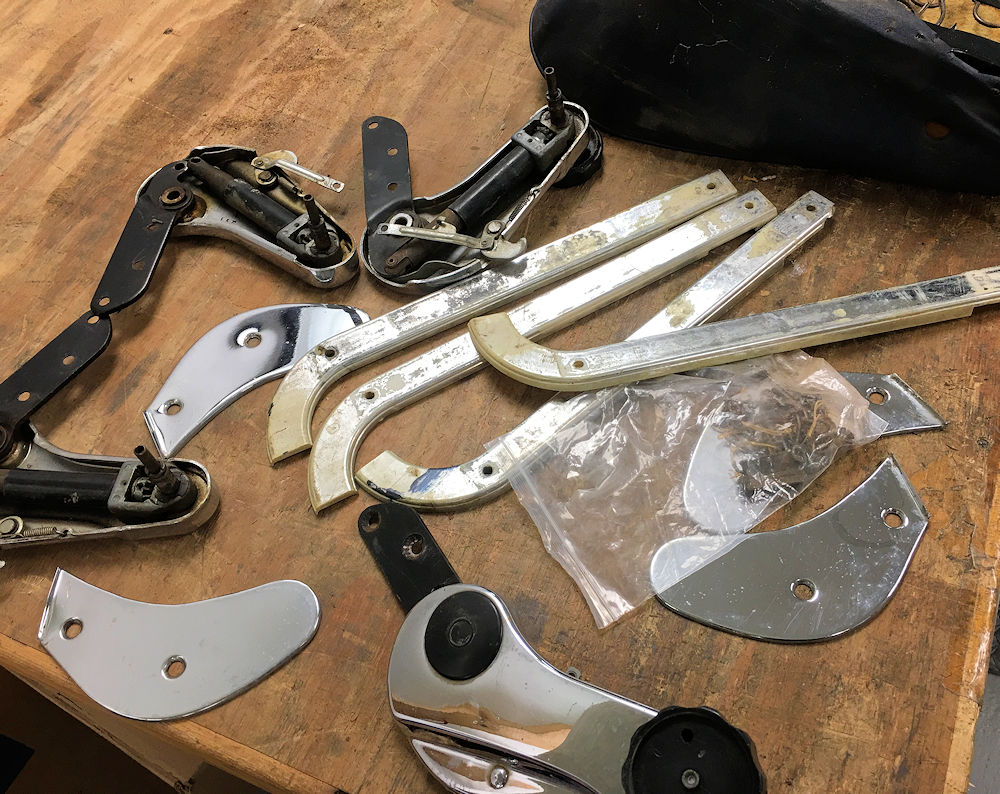
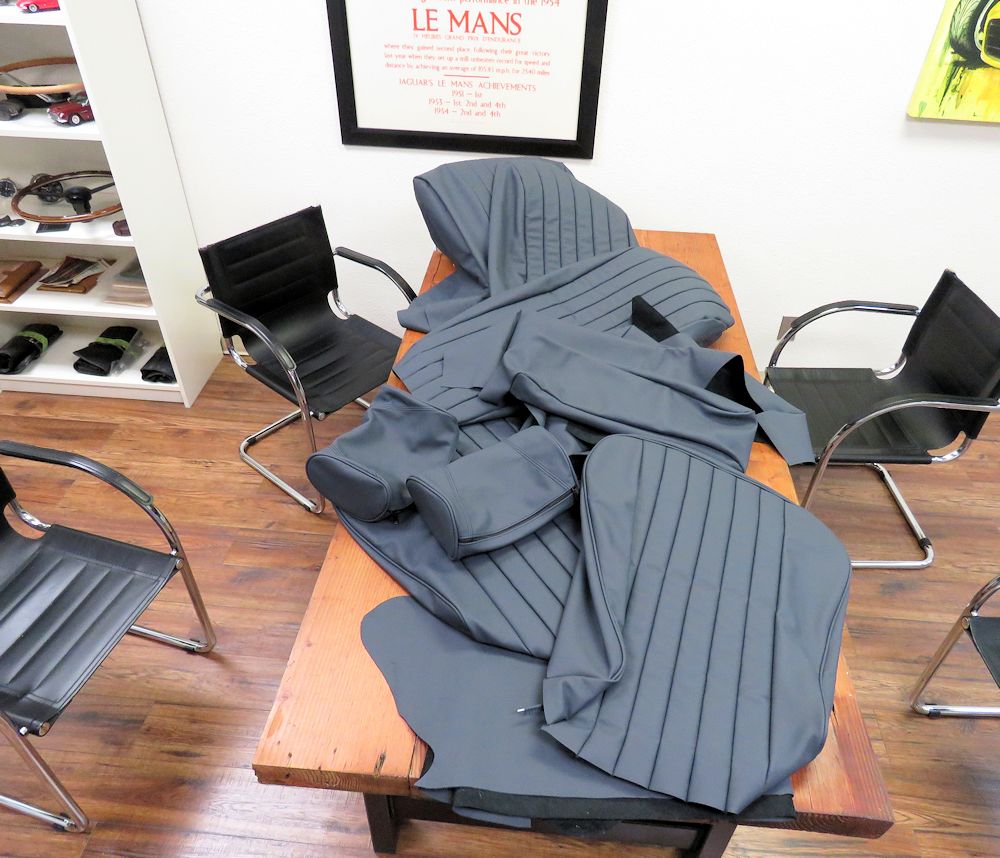
As I am keeping the original velour trimmed seats in case some future owner wants to return to that specification, I recently picked up some core seats that we will restore and trim in new hide covers. We will also be replacing or re-plating all of the seat trim and brightwork. The goal is to end up with seats looking as close to new as possible.
The following sequence of photographs shows the starting point of our front seat restoration project!
 |
 |
| Seats obtained at a very reasonable price
courtesy of an E9 enthusiast at e9coupe.com |
Plastic hockey stick seat base trim was
missing from the original velour seats |
 |
 |
 |
 |
| All chrome will be re-plated or replaced
with new |
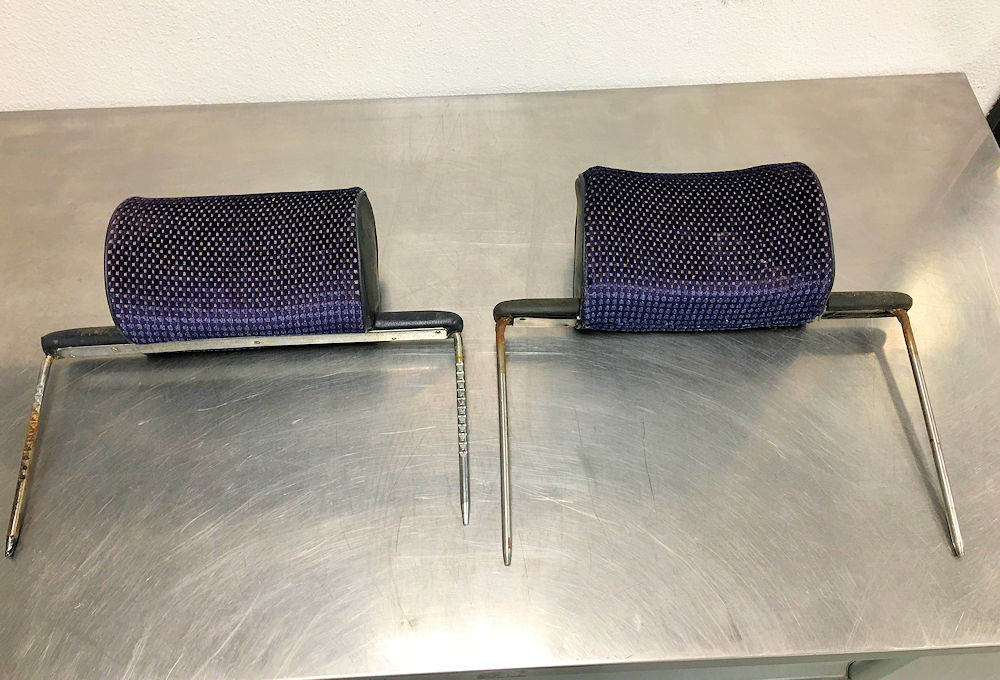
One of the headrests required some fairly
heavy persuasion before it could be removed |
 |
 |
| Headrest on left is correct early style.
Headrest on the right has been modified and isn't serviceable |
Early style E9 headrest had a nice chrome
finisher across the entire width of the headrest frame |
 |
 |
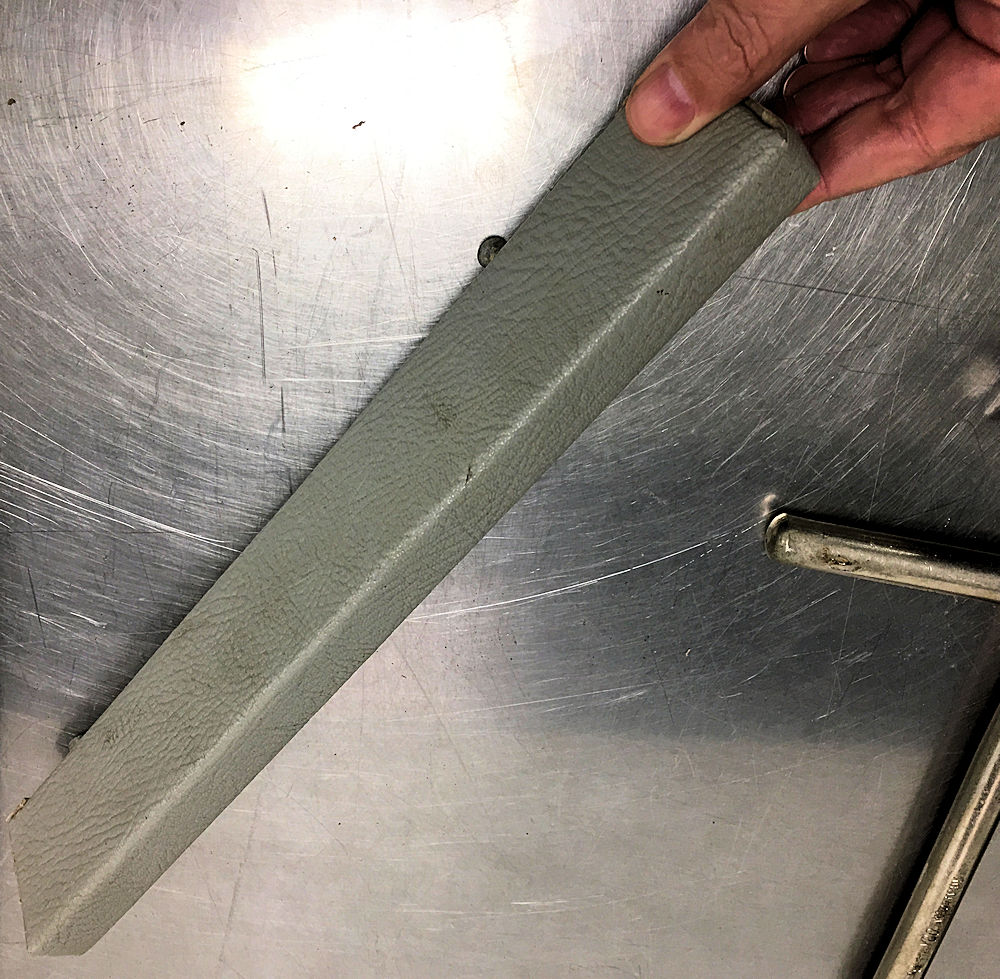
| Plastic seat base trim will be restored and refinished |
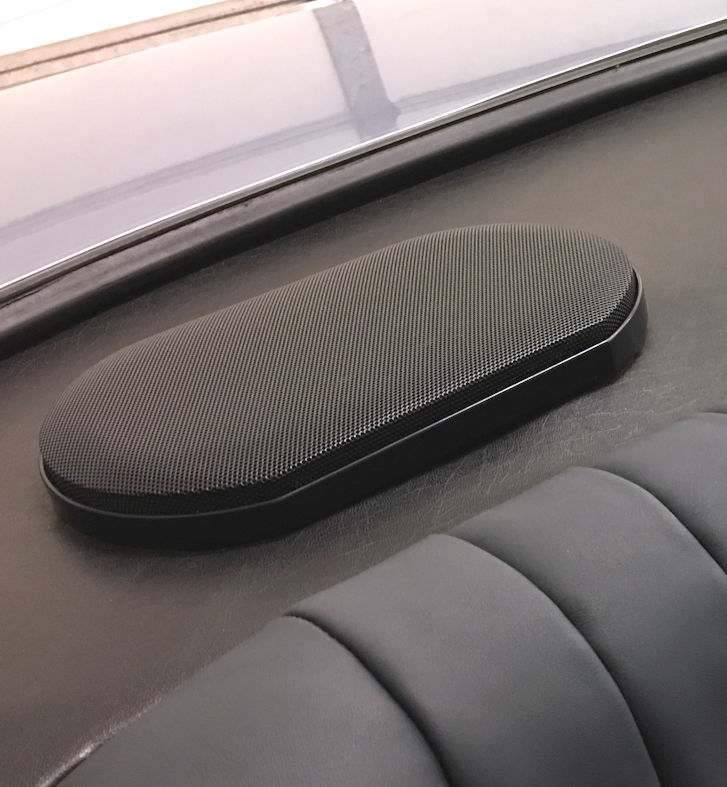
Earlier today I adjusted the boot lid for a much improved fit, and one of my technicians kindly installed new front and rear speakers for me. My old rear speakers were a bit of a mess. One was missing its cover and the other cover popped off every time the boot lid was slammed - which was necessary for it to latch prior to adjusting the fit. I chose some Retro Sound speakers for the rear (Part # R-573N) and a Memphis Audio 15-SRX462 for the front speaker. I also received my Heritage Certificate from Classic BMW today.
 |
 |
| Adjusted boot lid now closes and latches
easily |
|
 |
 |
| The gap is now consistent throughout |
Retro Sound speakers have provided a nice improvement in sound and appearance |
 |
 |
| I wanted the speakers to be as plain and
nondescript as possible |
BMW Heritage certificate |
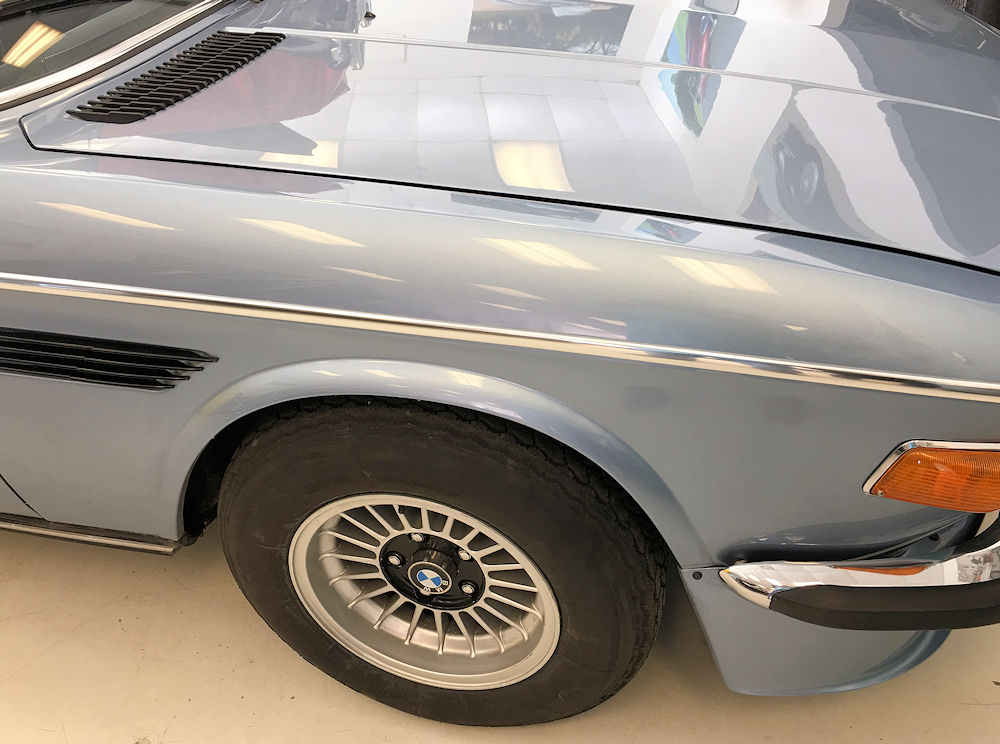
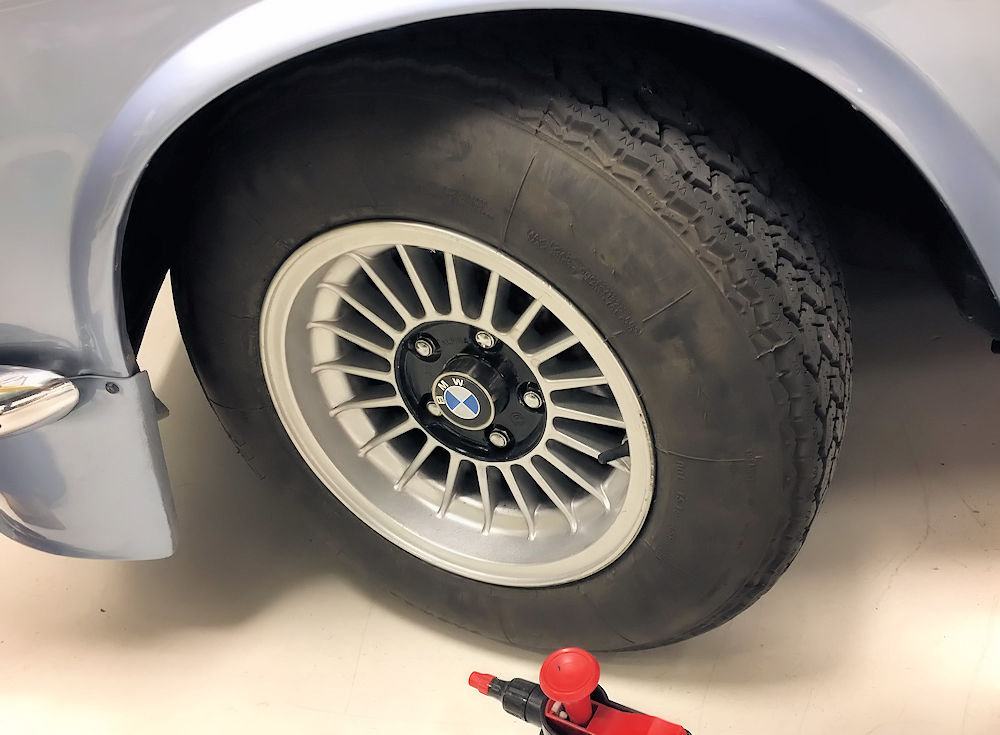
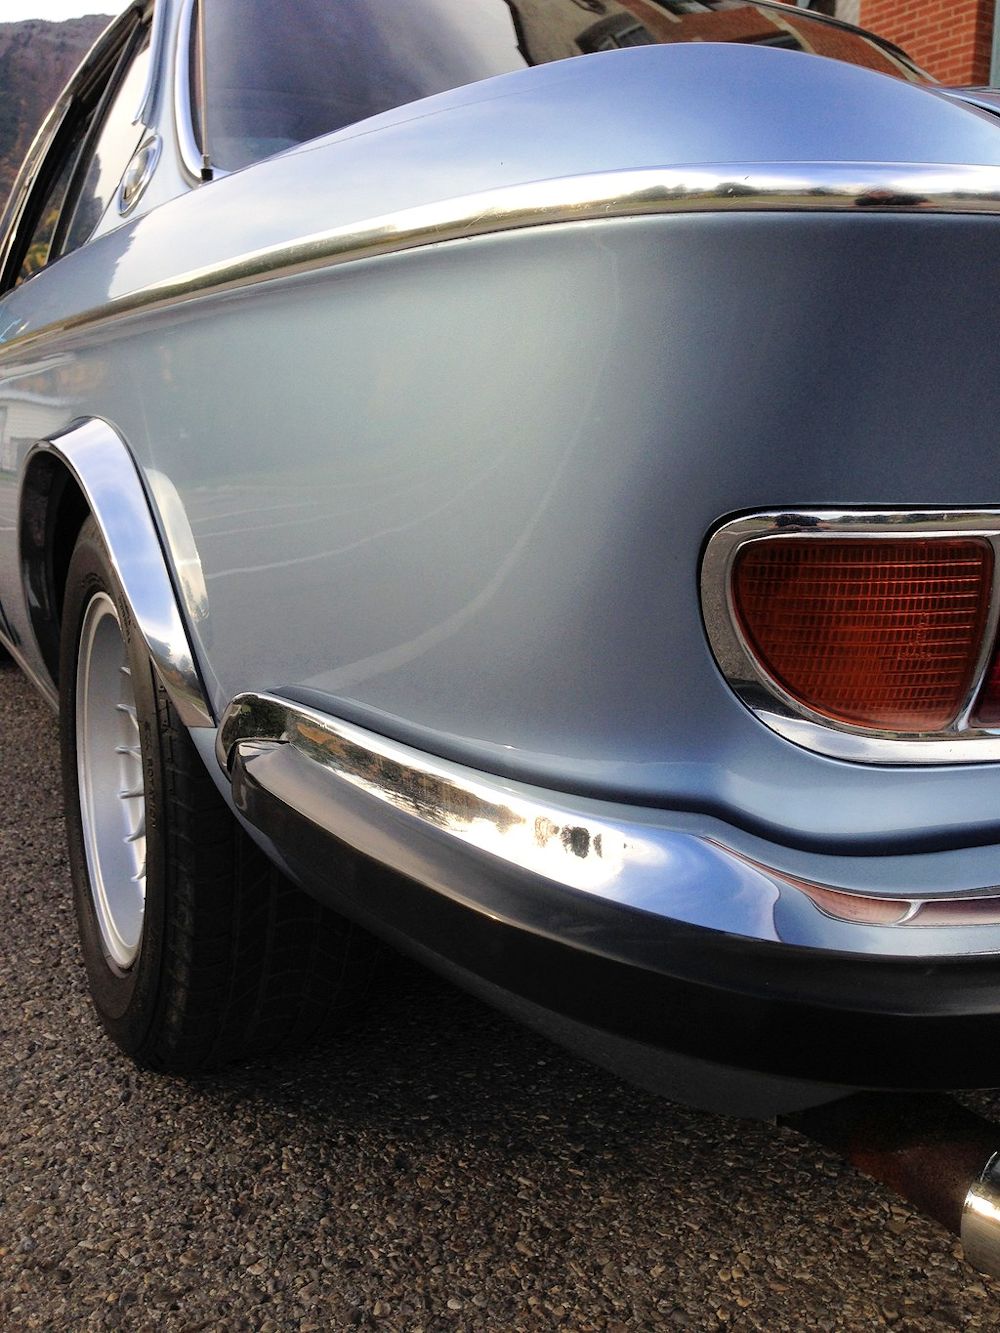
Earlier today I decided to remove the CSL style polished stainless steel wheel arch trim. As well as wanting to see what the car looked like without the trim, I also wanted to see what might be lurking behind the chrome trim! Thankfully the front arches are both excellent, although I did find some minor rust bubbles beneath the paint directly in front of both rear wheel arches. Regardless of whether or not I decide to reinstall the polished CSL wheel arch trim, I will not do so without first dealing with the rust bubbling beneath the surface.
 |
 |
| Front right arch was very clean beneath the
chrome trim |
Front left arch also pretty clean beneath
the chrome trim |
 |
 |
| At first glance the LR wheel arch looked
good |
|
 |
 |
| Lower leading edge of LR arch has some
minor bubbling beneath the surface |
Close up of bubbling beneath paint LR arch |
 |
 |
| Right rear arch also has similar bubbling
beneath the surface of the paint |
Close up of the bubbling at forward edge of
RR arch |
 |
 |
| View upward, inside and up towards LH A
pillar |
Looking up towards the RH A pillar |
 |
 |
| View upward, inside and up towards RH A
pillar |
View downward towards inner rocker, inside RH A pillar - note gravel |
 |
 |
| View downward towards inner rocker, inside LH A pillar - even more gravel! |
It's like a scene from James Cameron's
Titanic behind the kick panels of an E9! |
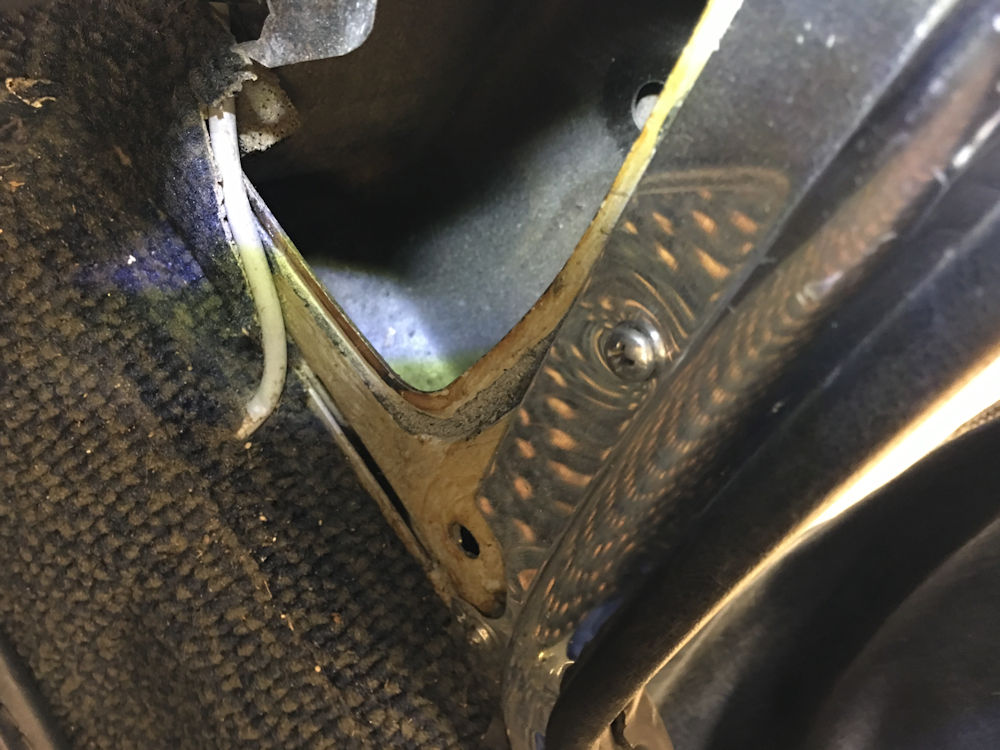
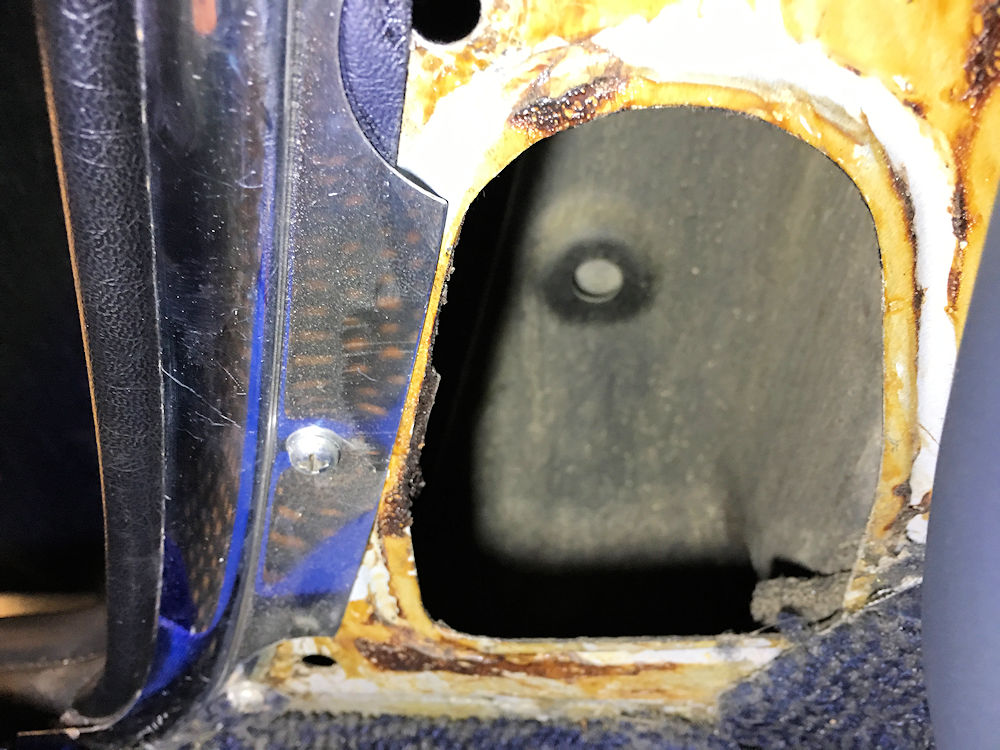
Not much going on with the big coupe this week. Carlos removed several interior trim panels for some remedial work, which gave me an opportunity to have a good look at some of the inner structure of the monocoque. I was actually pleasantly surprised at how dry and corrosion free everything appears to be behind the front and rear wings and beneath the rear seats.
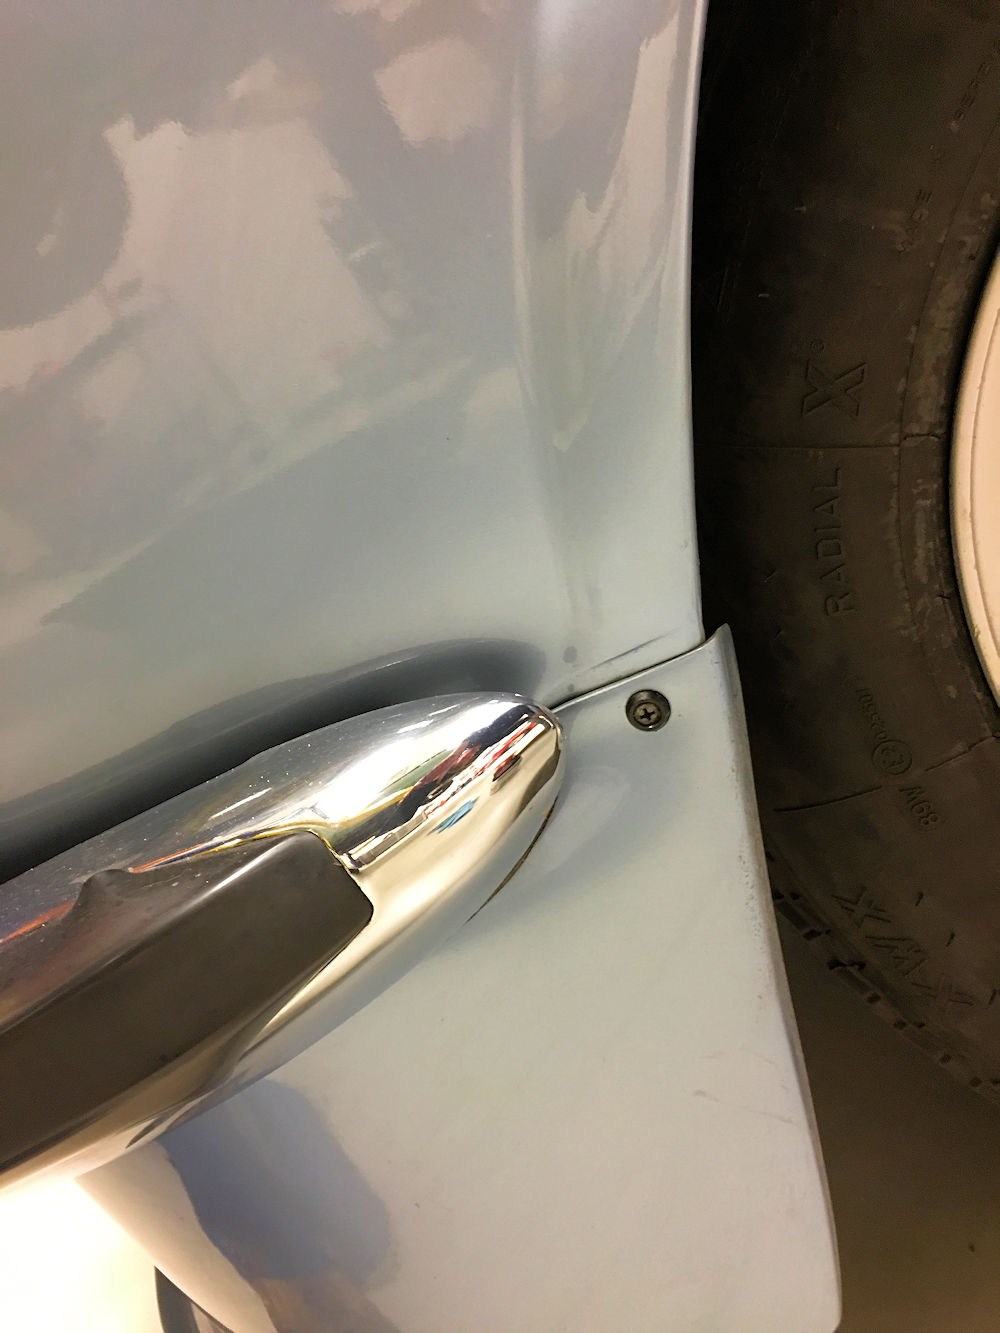
One of the jobs I have decided to do is to gradually remove all the exposed screws, most of which are tarnished or surface rusted, and replace them all with shiny new stainless steel fasteners. This includes all the interior trim screws, as well as the screws holding the CSL fender flares in place. While doing this I got a chance to see the coupe without its CSL wheel arch flares, which led to pondering the question, which looks better - with or without the wheel arch flares? In the end I decided to reinstall the flares for the time being, although I reserve the right to change my mind at some point in the future.
 |
 |
| With one of the CSL wheel arch flares
removed, I got to pondering....better with or without? |
|
|
 |
| The flares don't appear to have damaged the
paint, so I do have the option of removing them |
Looking inside the A pillar section behind
the driver's side front wing |
 |
|
| I was a little nervous to find out what was
lurking behind the plastic sheet on the passenger side |
But I needn't have worried - it is
thankfully all dry and rust free back there! |
 |
 |
| Equally dry and rust free beneath the rear
seats |
Nice and clean here, too. I think I'll stop
poking around now and quit while I'm ahead... |
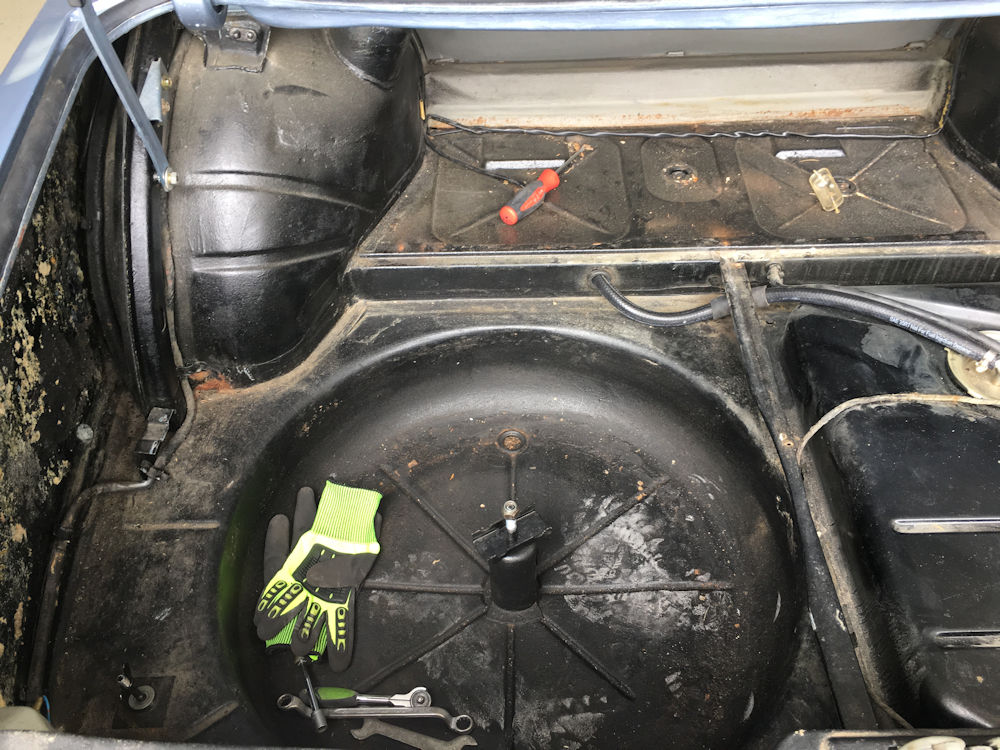
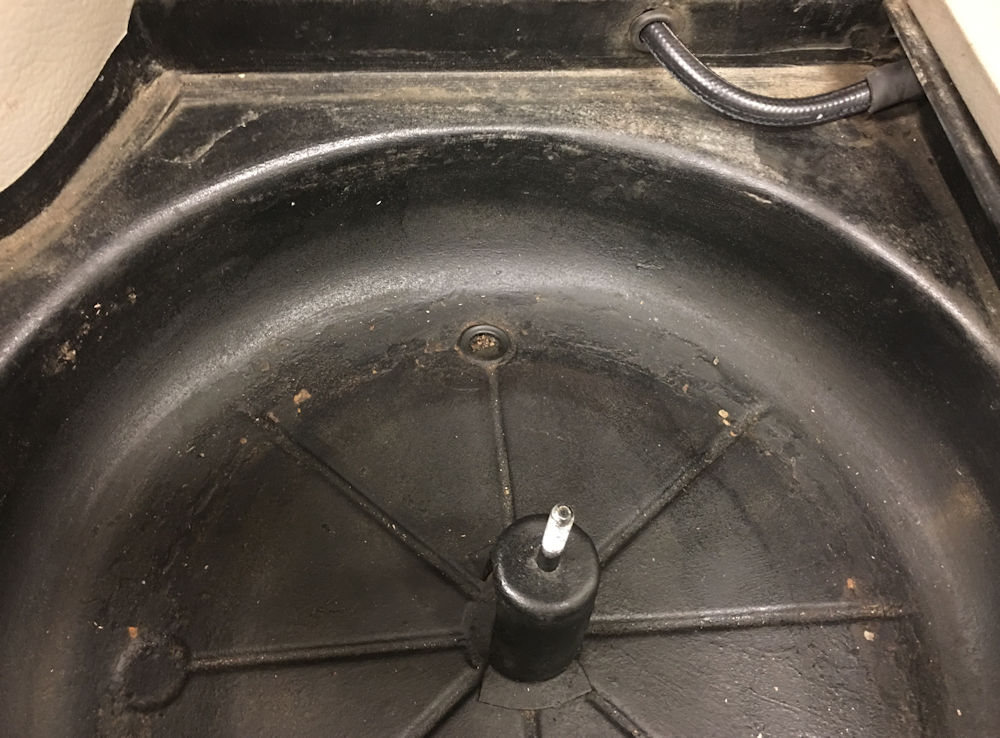
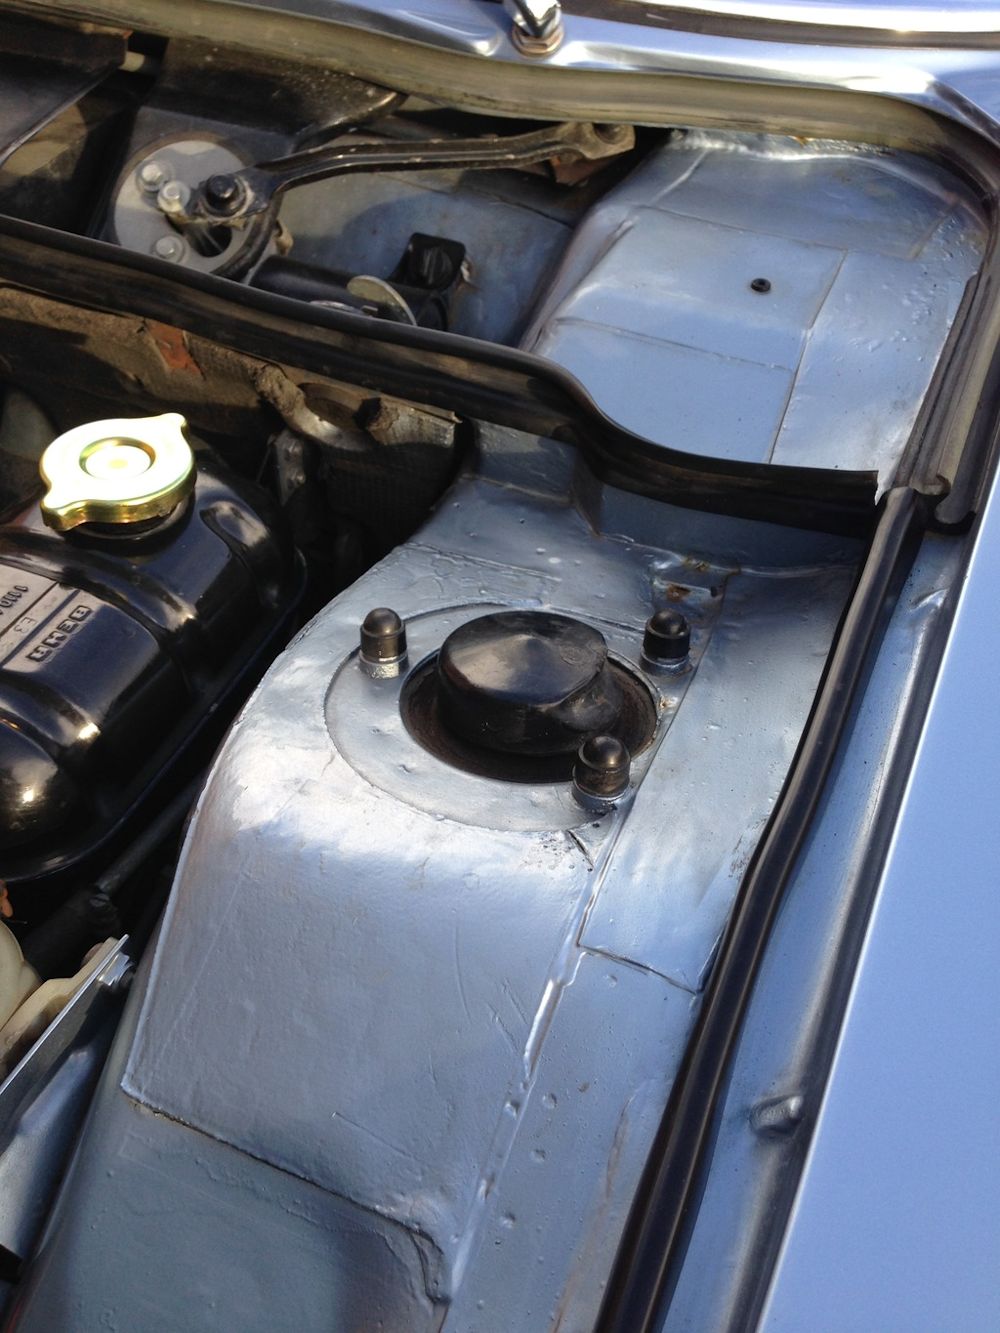
One of my next jobs will be to tidy up the boot compartment. When the car was restored back in the mid eighties, the restorer covered the spare wheel well and surrounding panels with a black, textured undercoating. At some point I will remove all the undercoating and refinish the boot compartment in Fjord Blue, as it would have been from the factory. The good news is that the spare wheel well appears to be very solid with no serious rust issues.
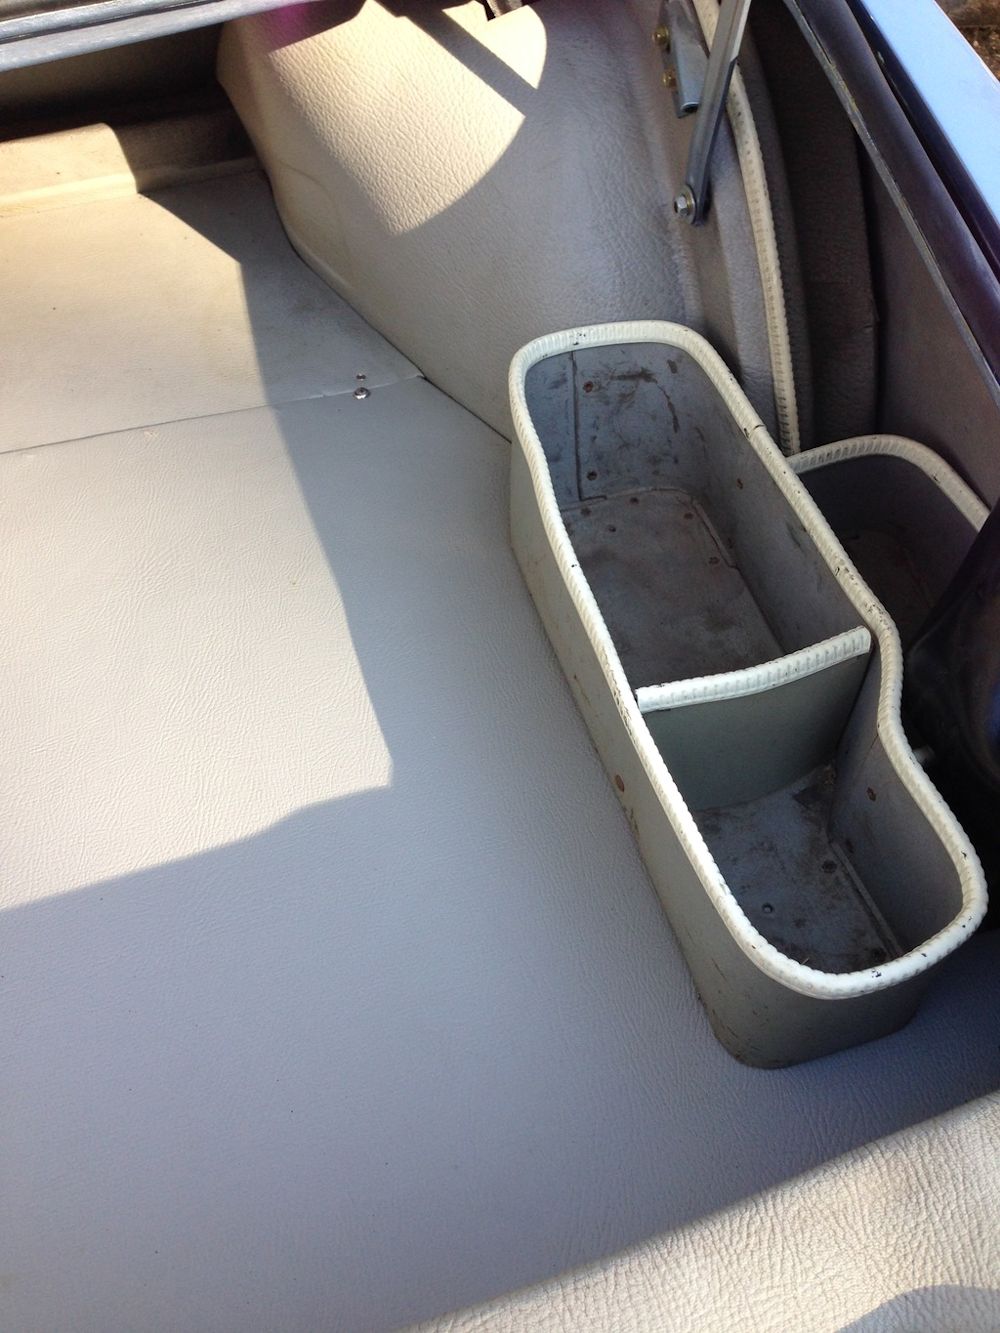
My car was previously missing the small divider from the left side of the boot floor, so a friend of mine gave me a divider from an E9 parts car he has stashed. I am frankly not sure of the purpose of this divider, but as it was missing, I am glad to have corrected another small issue with the car!
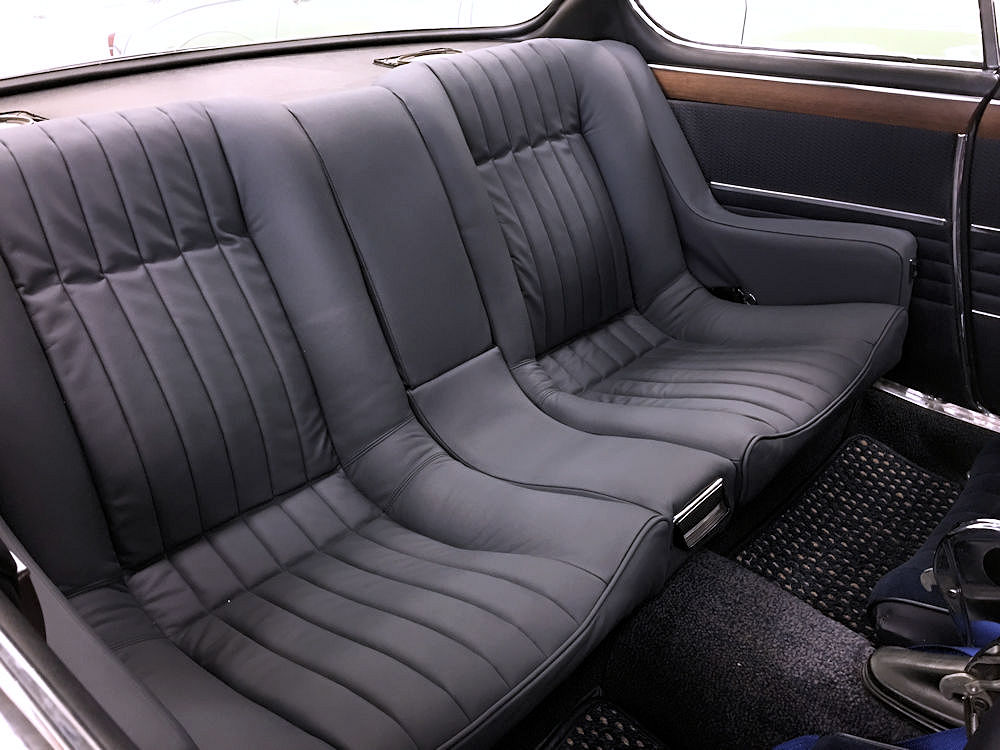
Finally, I have been persuaded by several people on the E9coupe.com forum to keep the European specification velour seats in case some future owner wants to revert back to original specs. To that end I have bought some replacement front and rear seats and Carlos (in the CJ trim room) is currently installing the new hide covers that I picked up from GAHH in North Hollywood, California.
 |
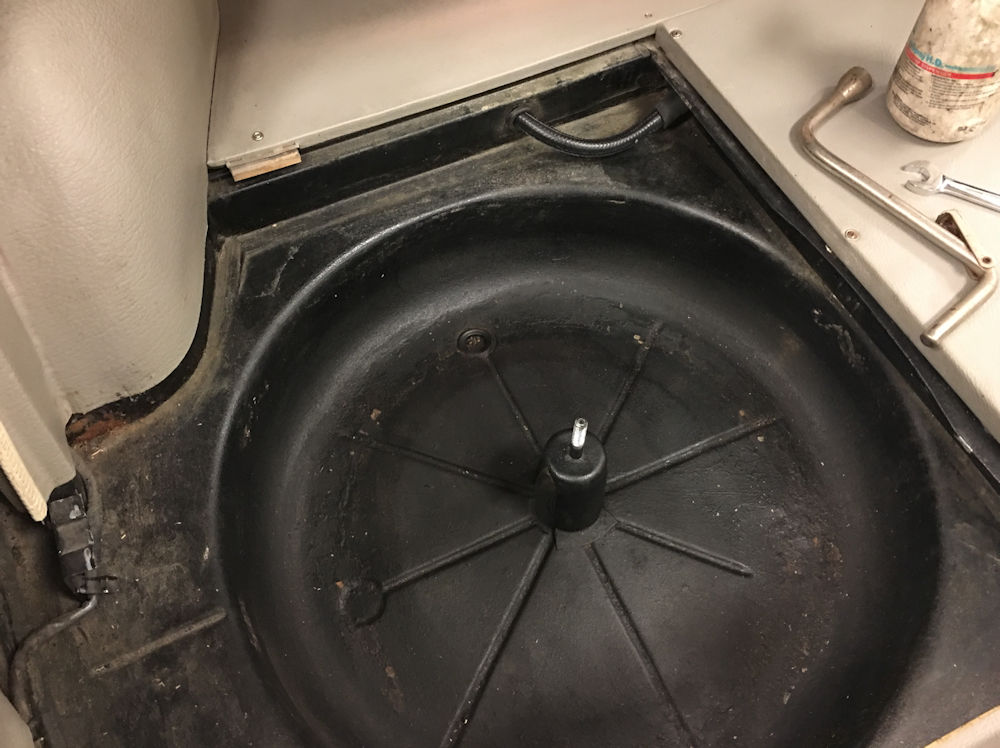 |
| Spare wheel well will be cleaned up |
|
 |
 |
| Previously missing left hand boot divider
panel |
|
 |
 |
| Divider panel now installed |
|
 |
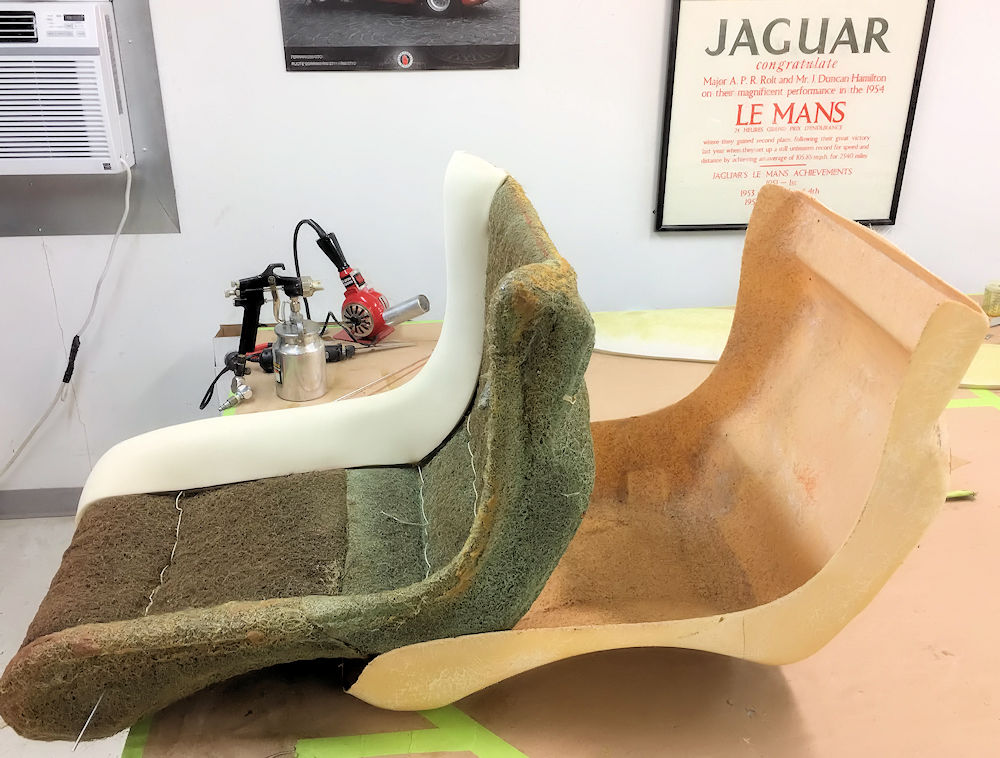 |
| Rear seats are first to be trimmed |
A good look at the fiberglass rear seat
shells |
 |
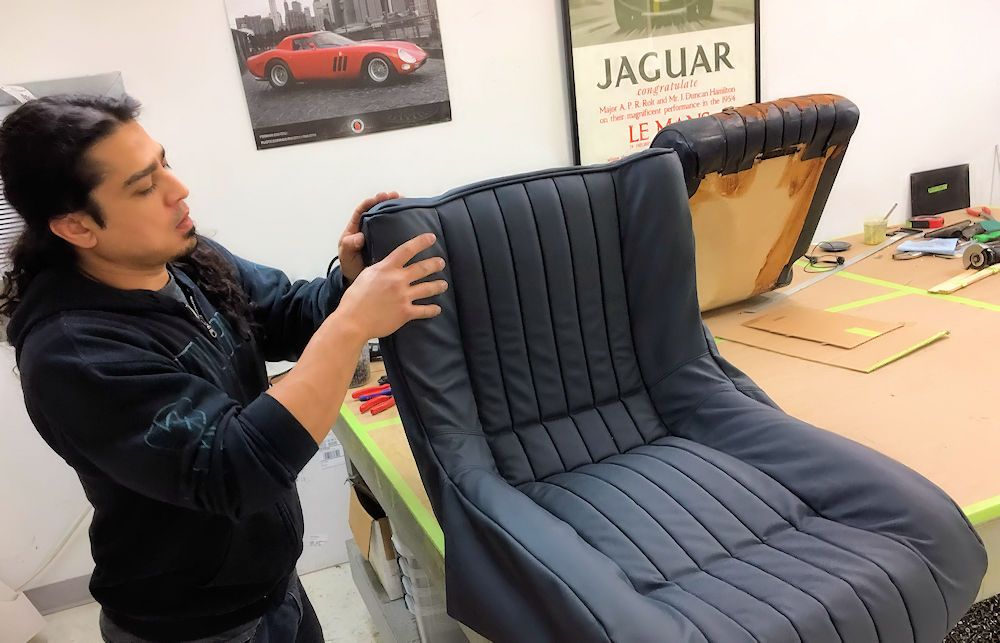 |
| After padding the side bolsters. starting
to install the first cover |
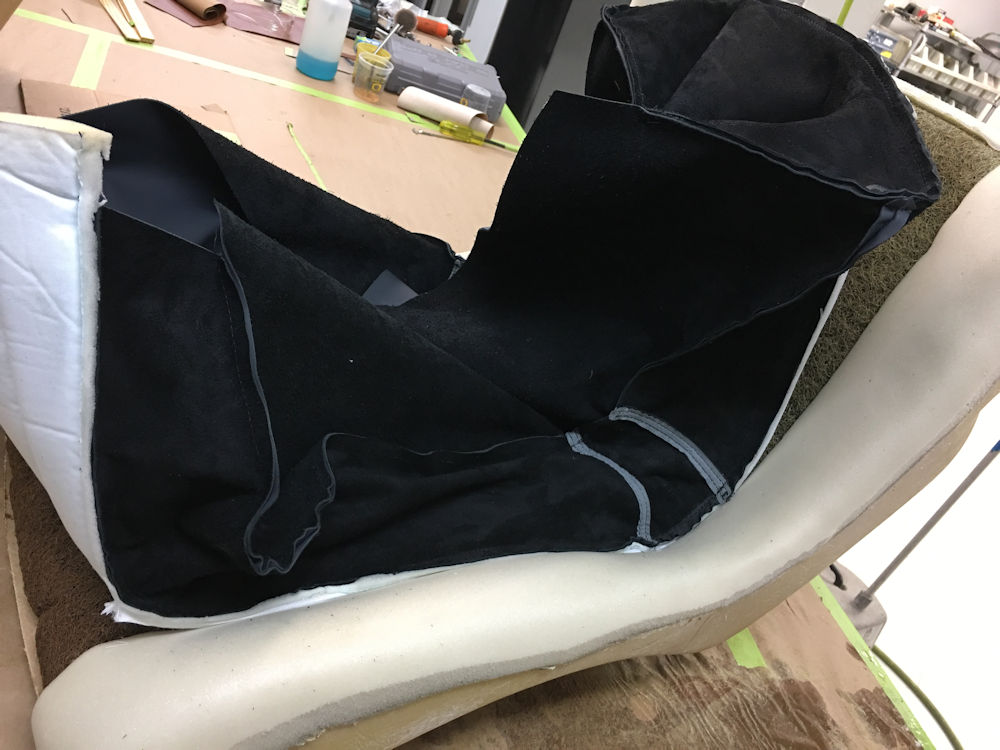
Carlos installing the first of the new hide
covers |
 |
|
| It is dusty, but thankfully nice and dry,
in the area beneath the rear seats! |
|
 |
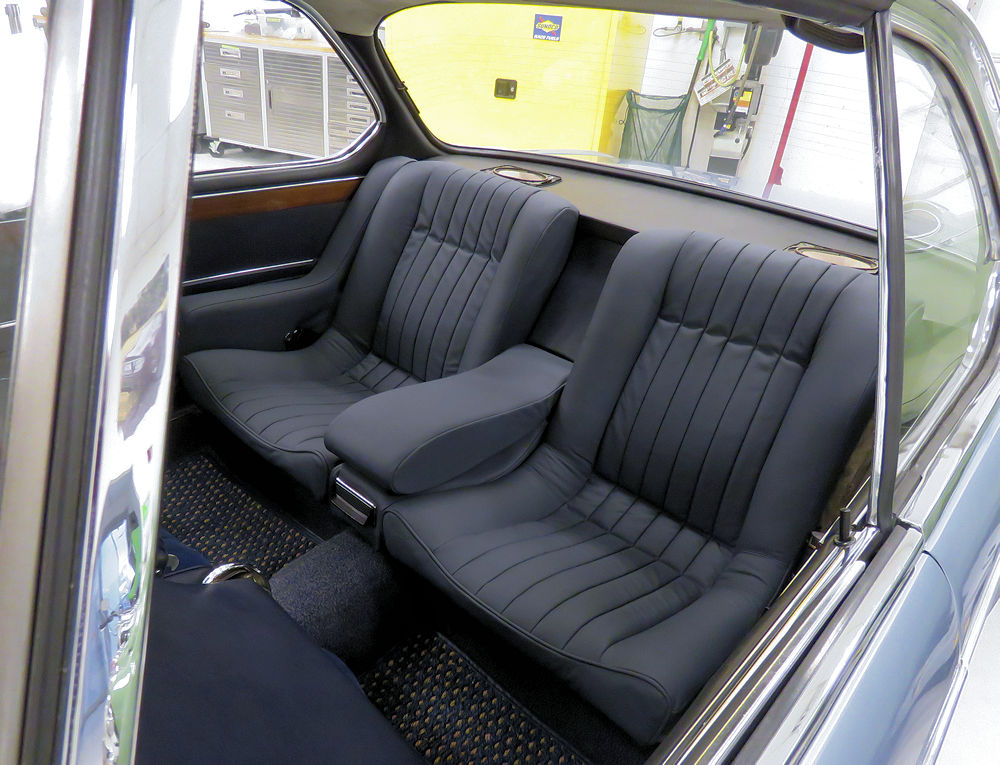 |
| New hides are a little lighter than the
door and quarter panel trim |
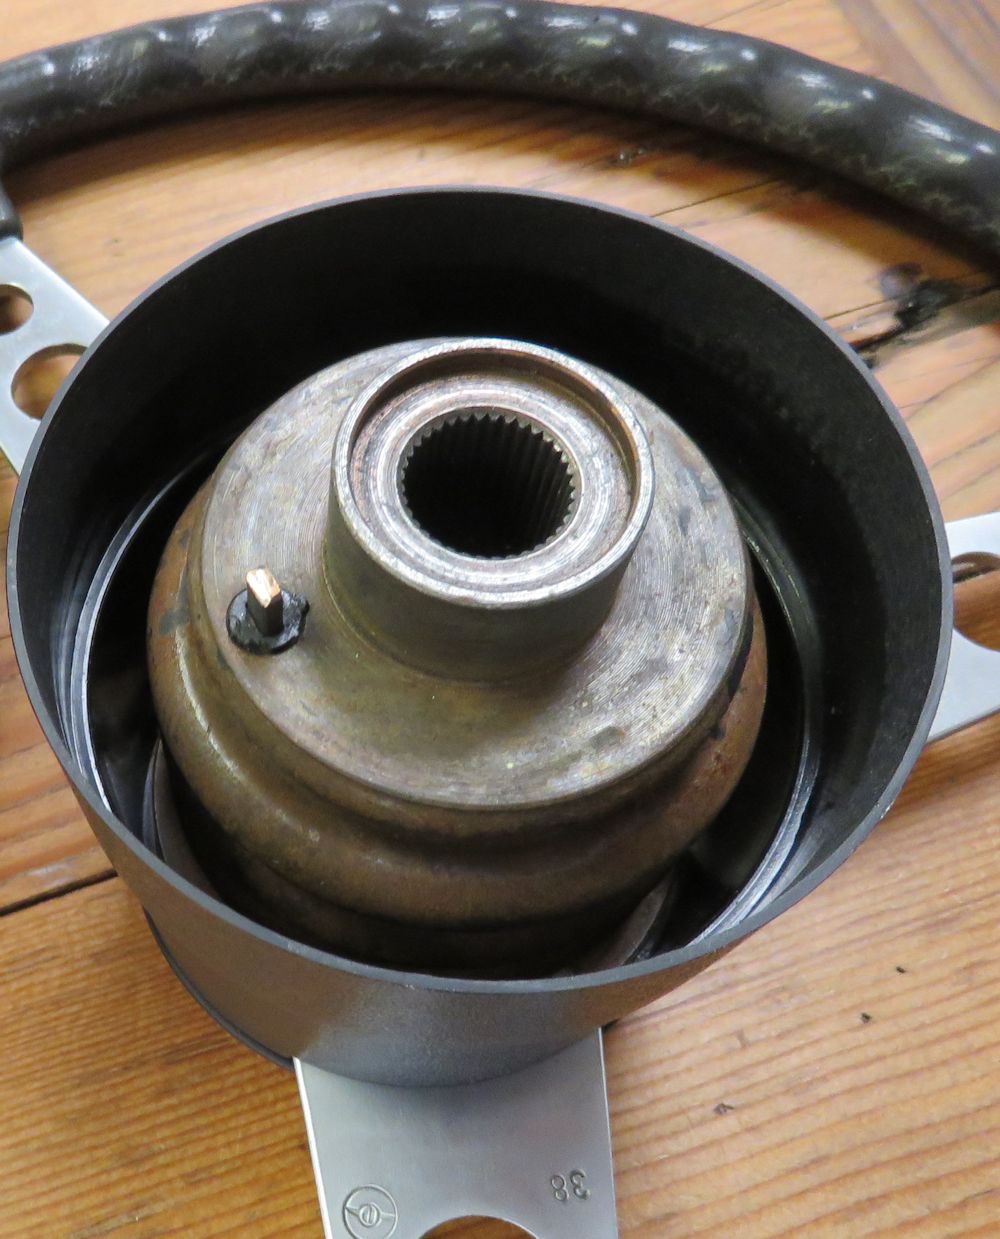
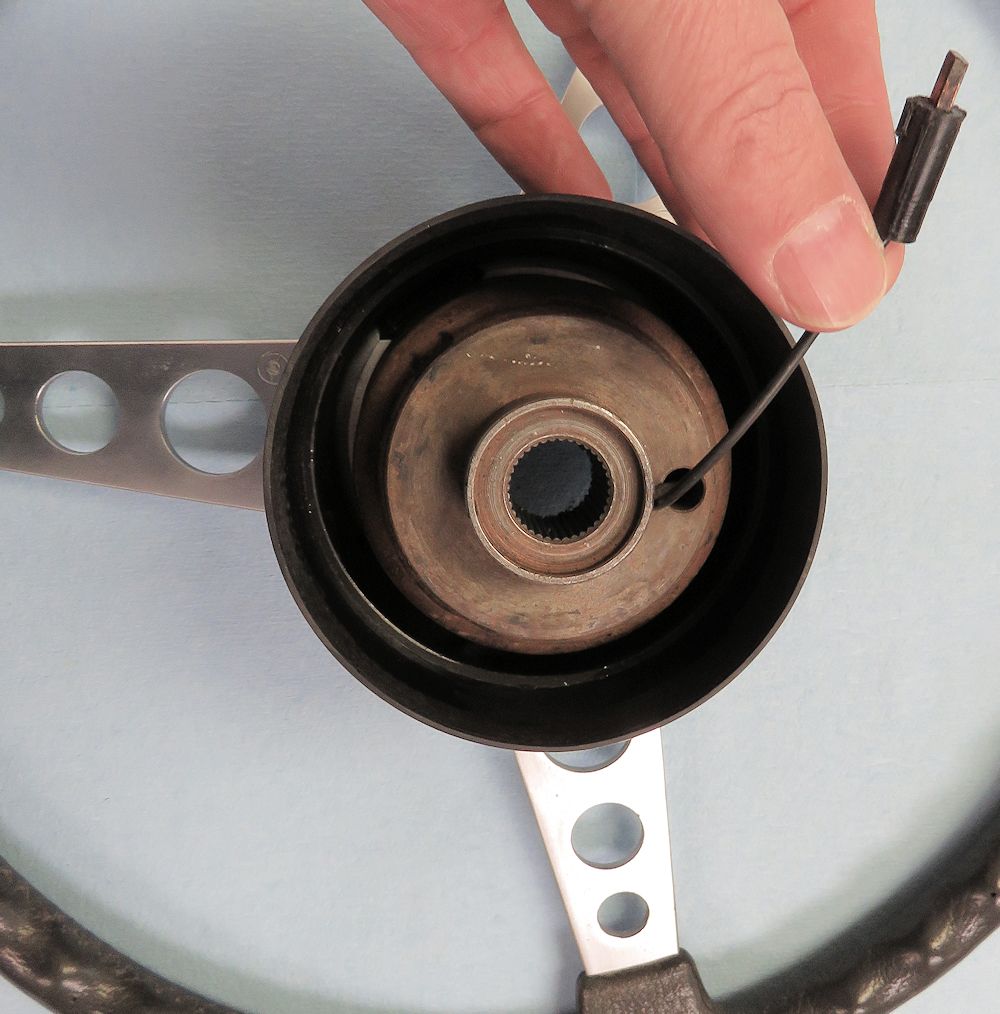
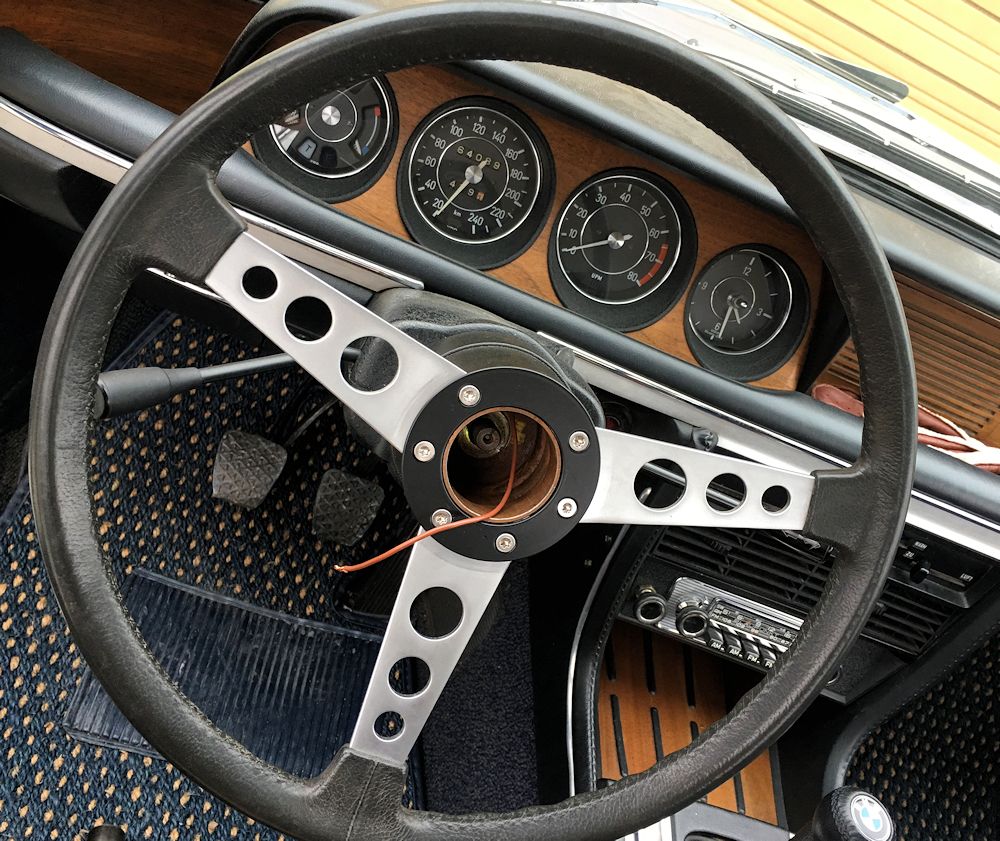
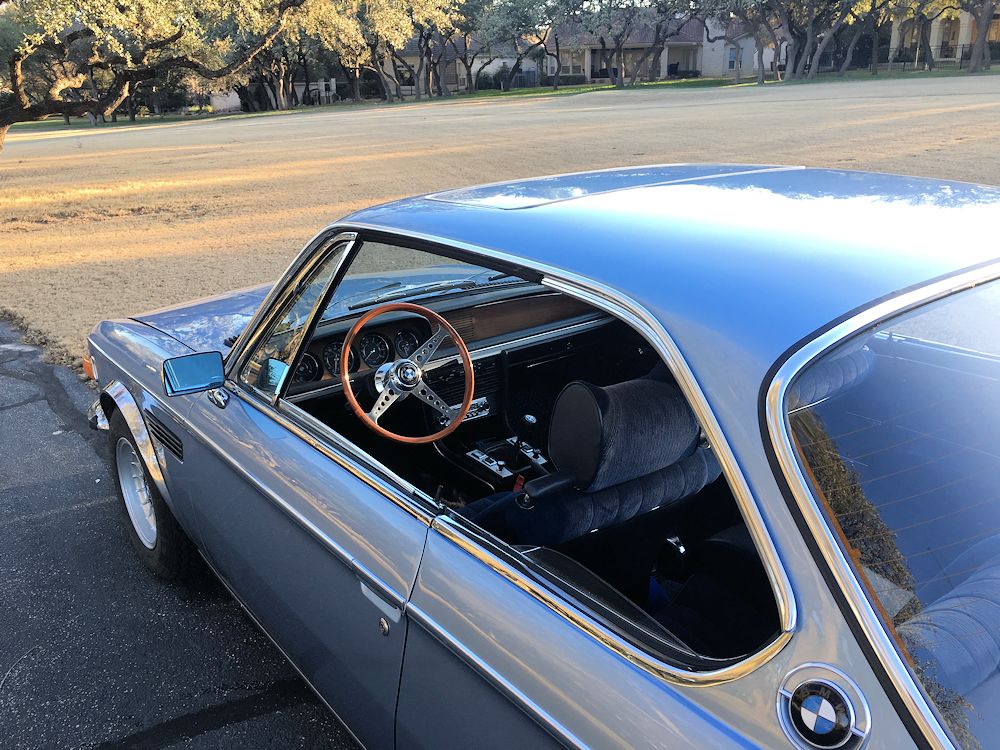
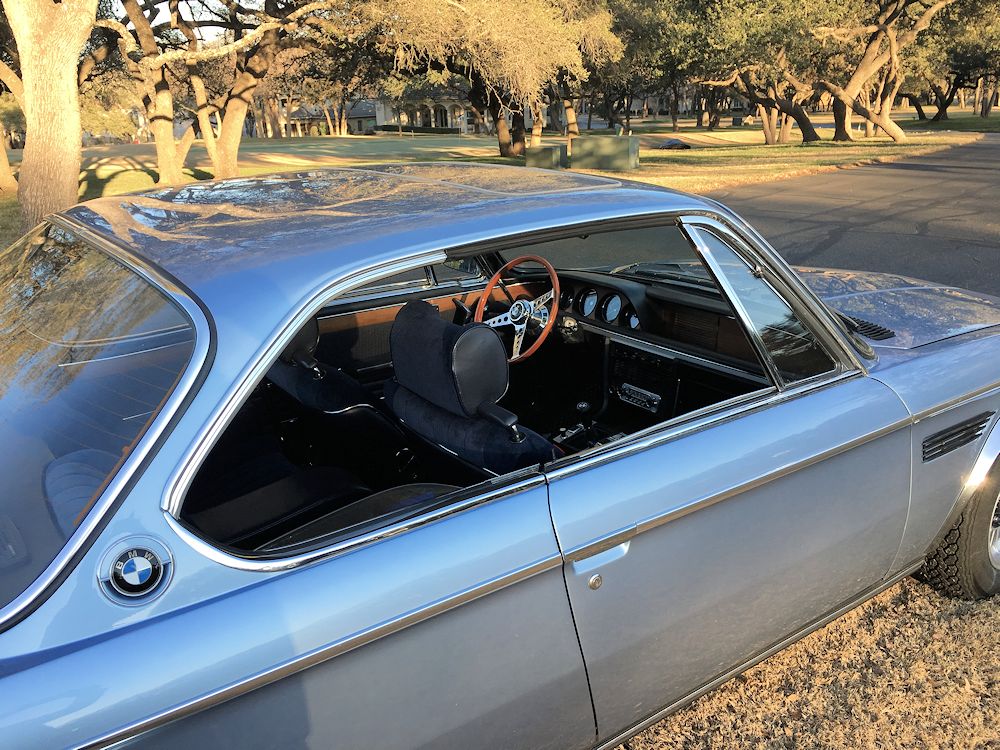
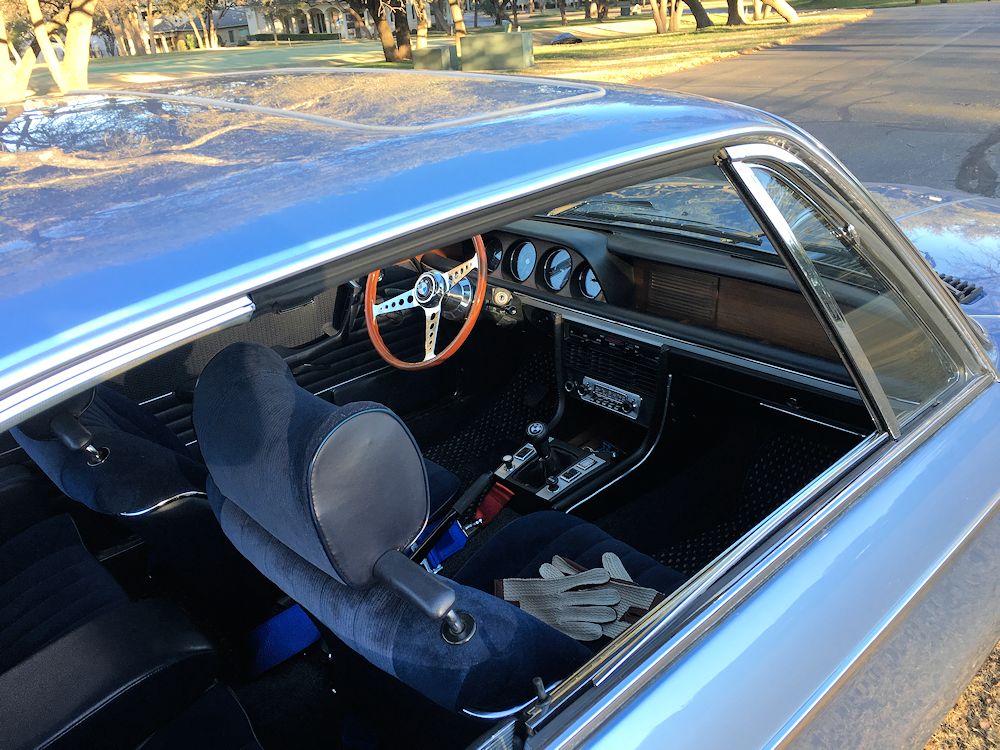
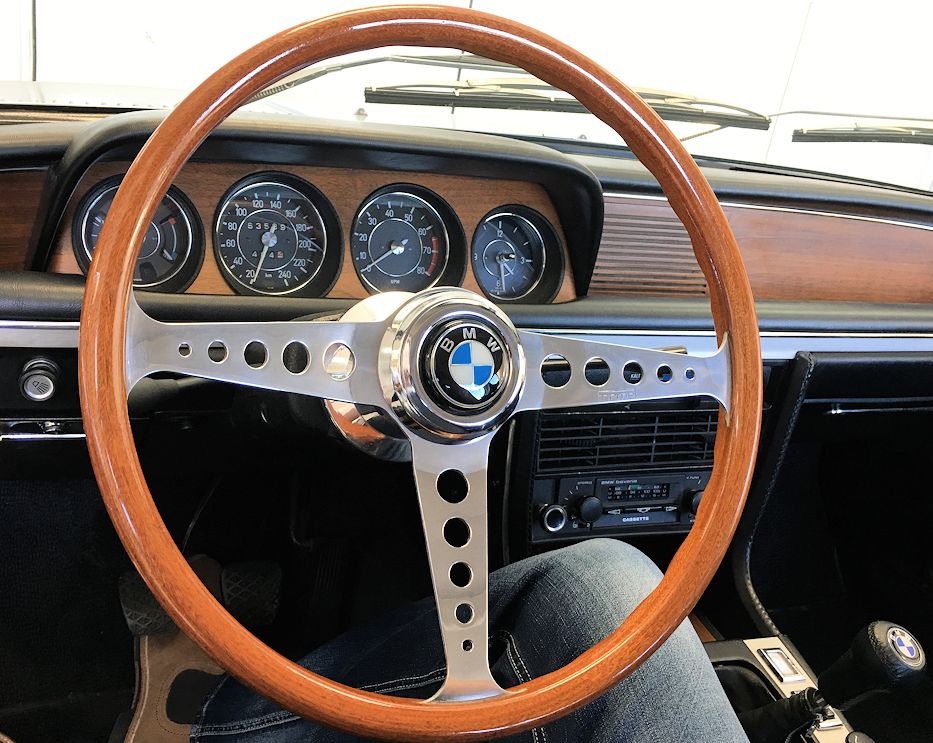
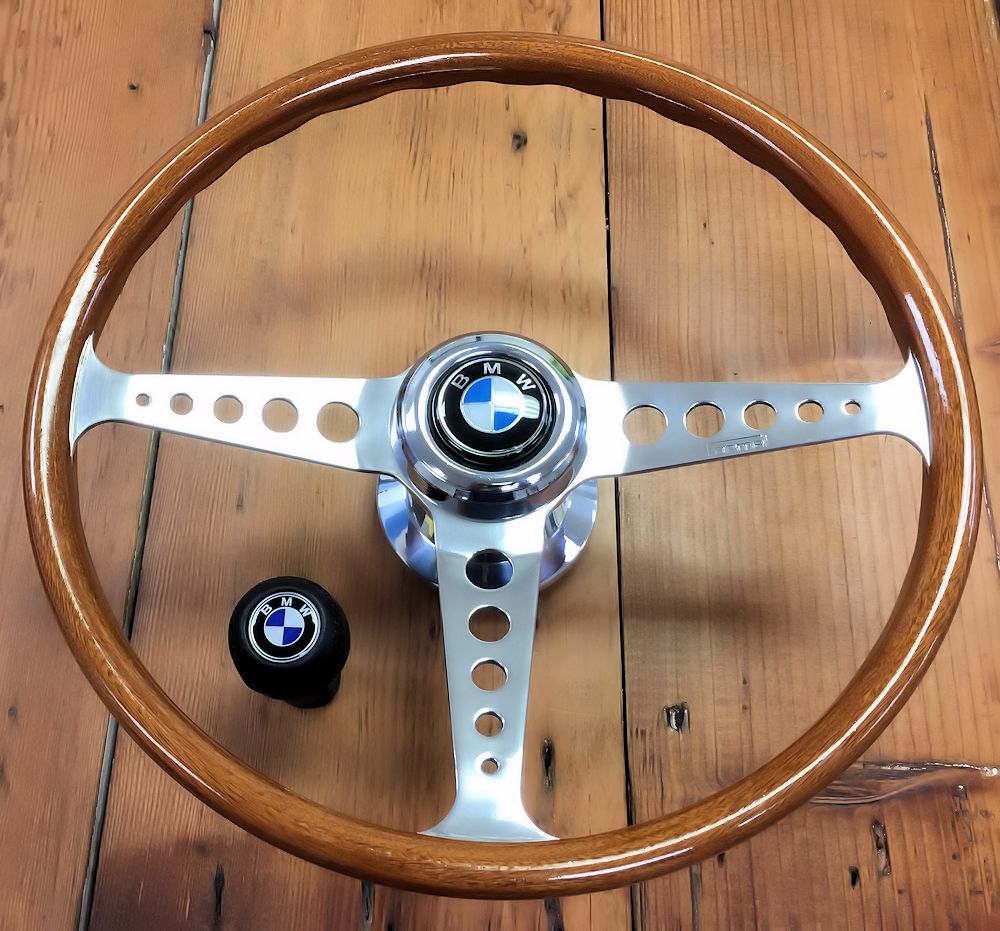
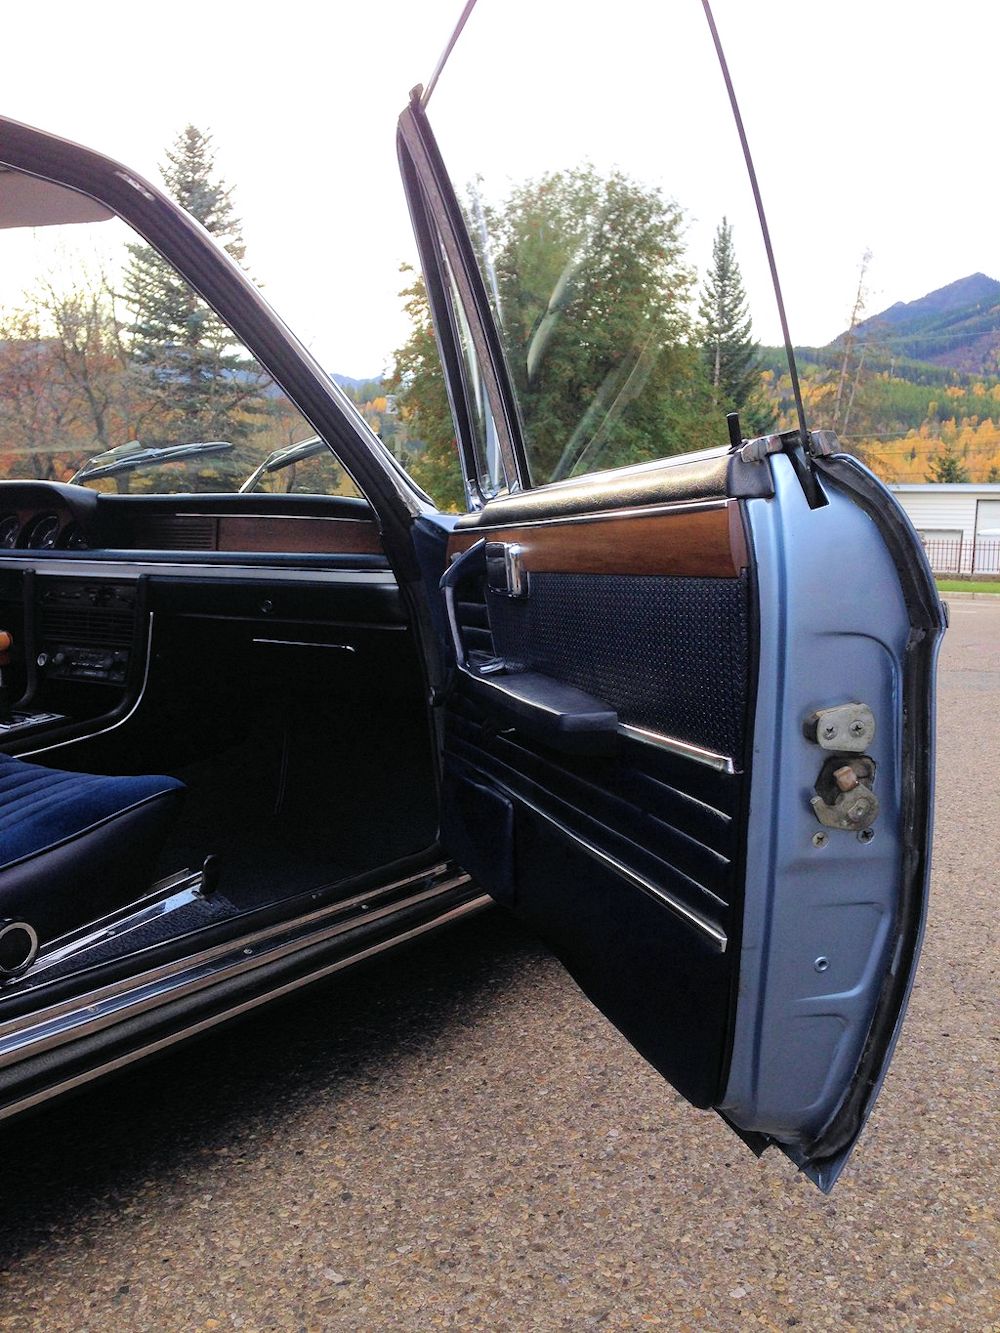
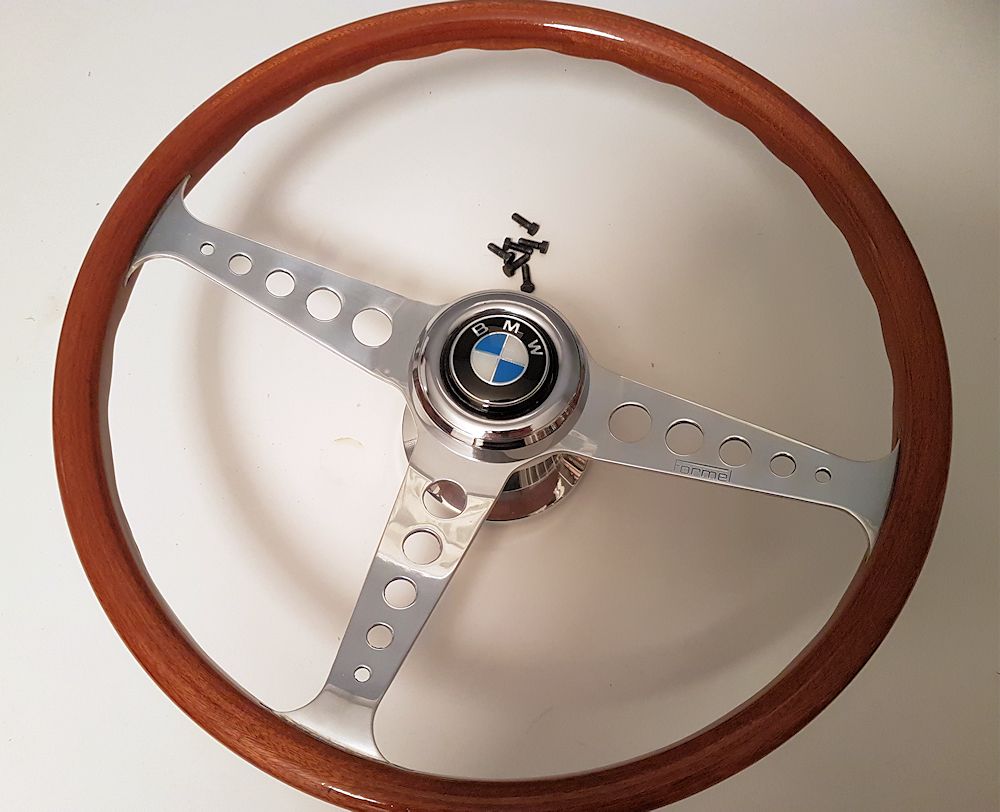
Yesterday we installed the Petri steering wheel in the CSi. As our wheel came with a 2002 hub, it was necessary to convert the horn function from the 2002 style plunger to the E9 ring. This really couldn't have been easier to do and I think the wheel looks great in the big coupe. The beautiful Formel wood rim wheel that was previously in the BMW will now be relocated to Justine's Lancia Fulvia.
 |
 |
| The 380mm Petri is in exceptionally good
condition |
Note the 2002 hub and horn plunger |
 |
 |
| We removed the plunger as it won't work on
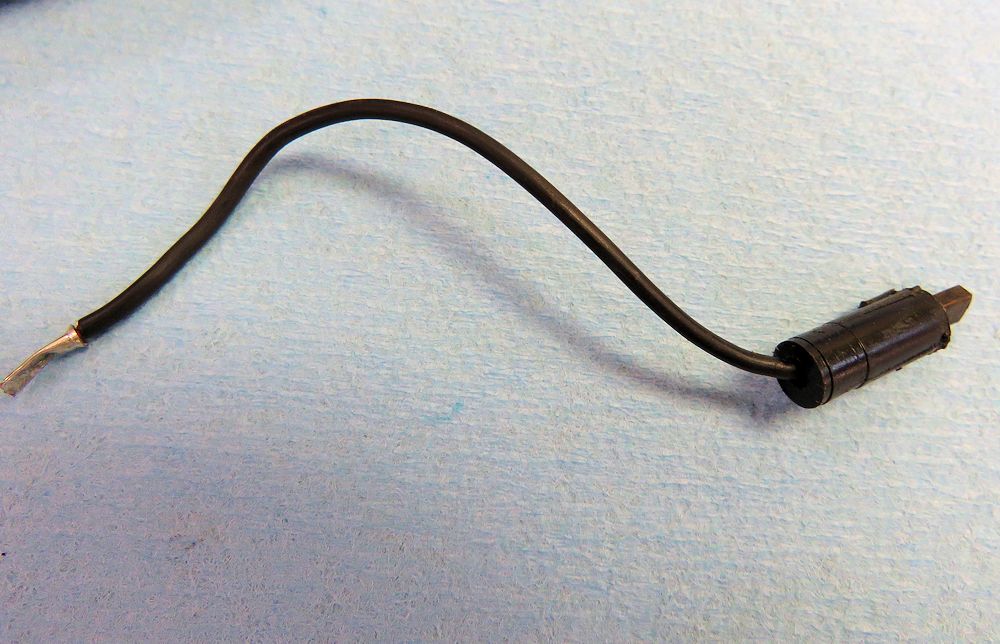
the E9 |
|
 |
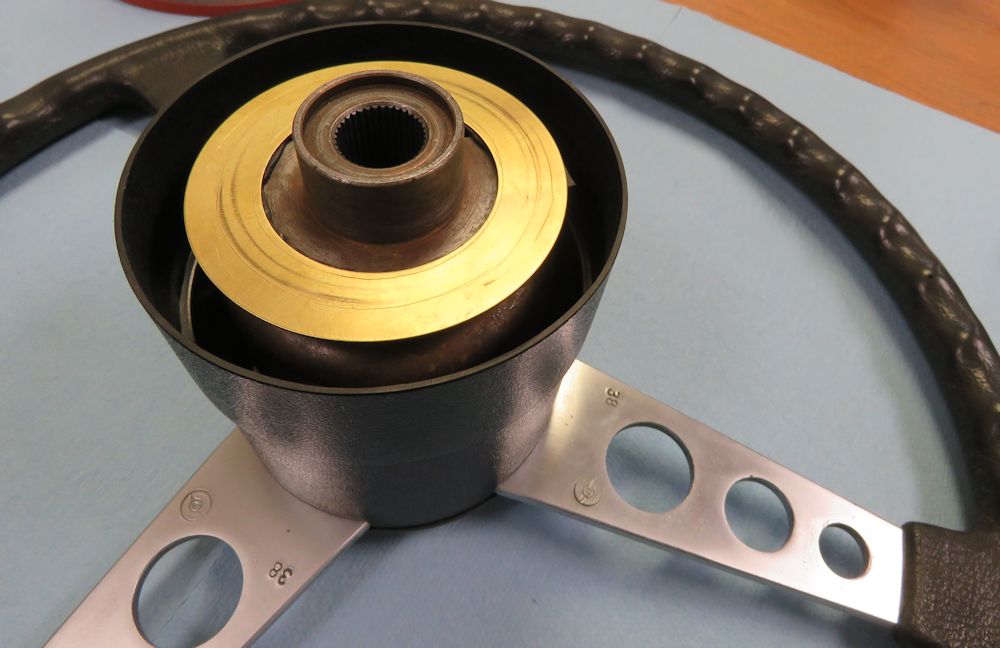 |
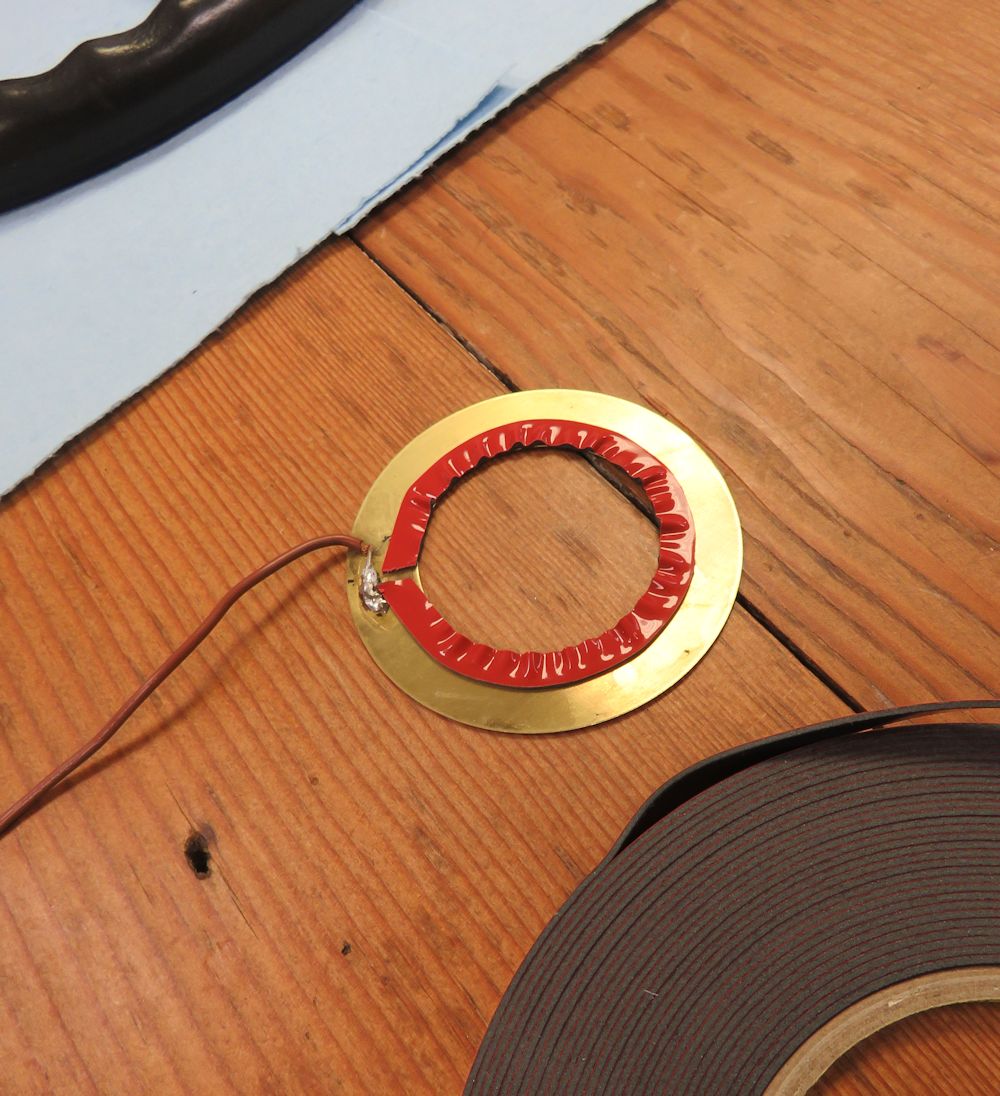
| Applying double sided tape to the ring that
had been on the Formel wood rim hub |
|
 |
 |
| Petri steering wheel is a nice upgrade for
the coupe |
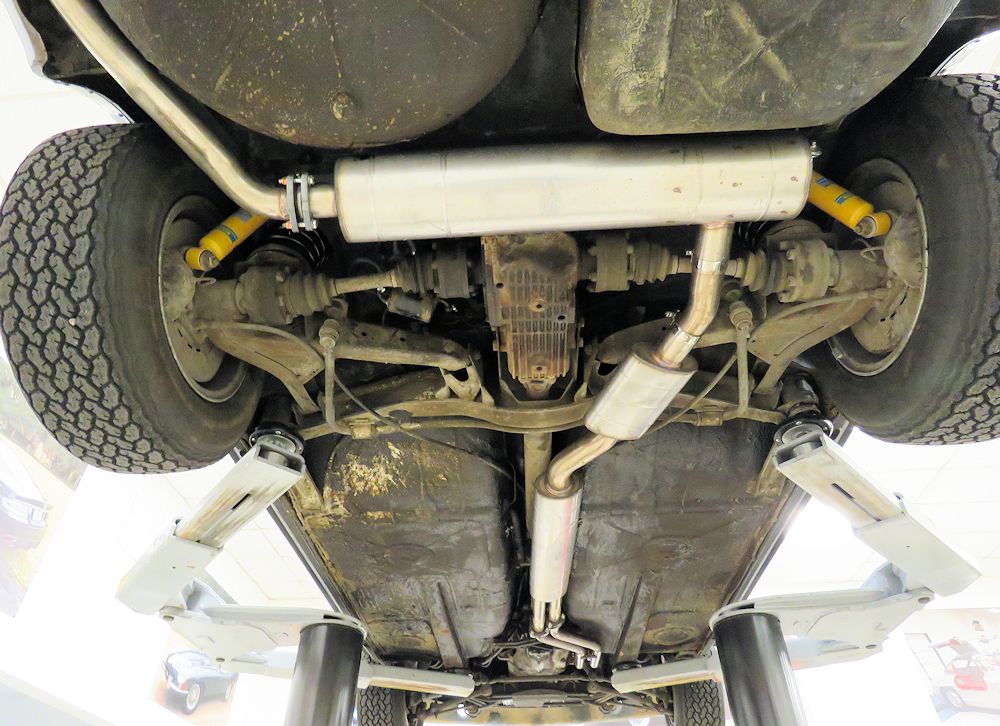
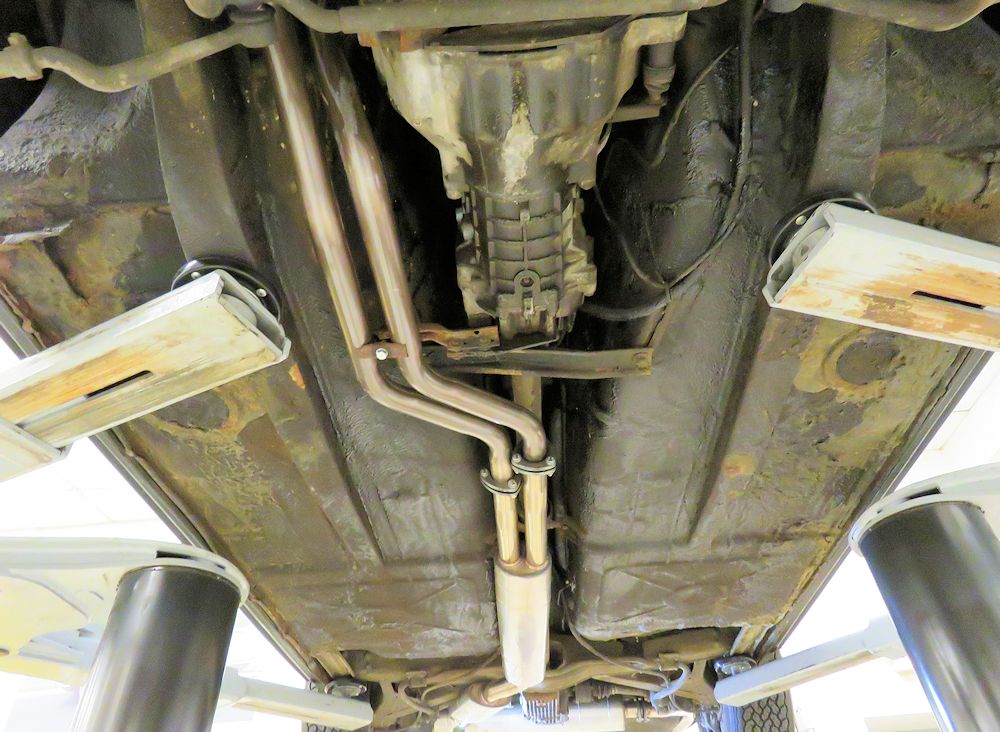
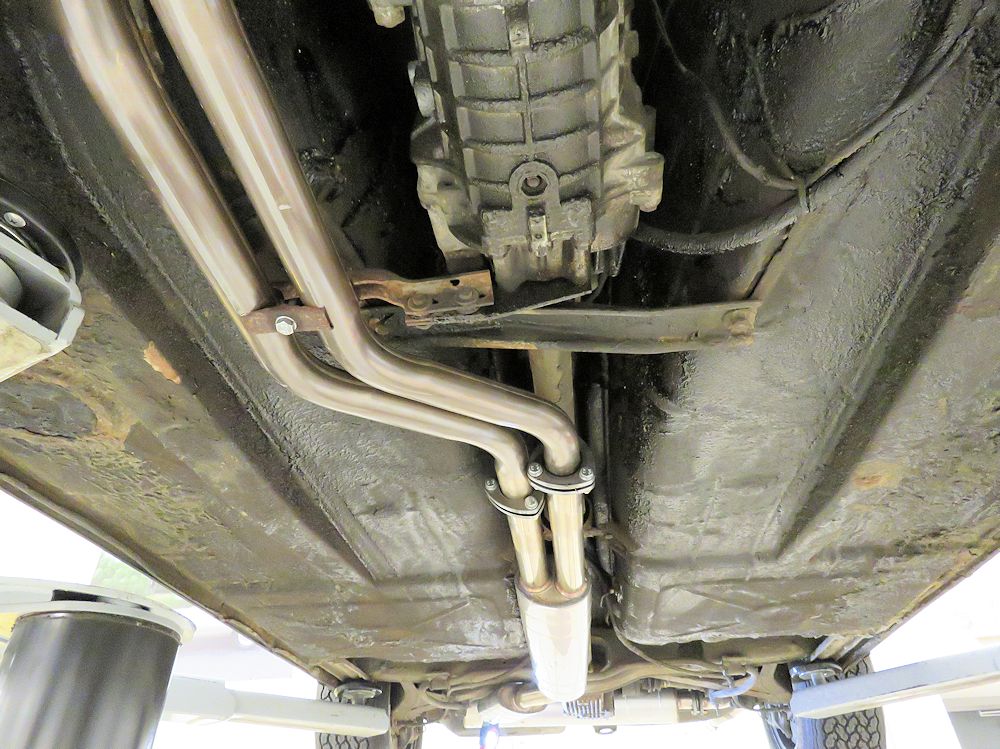
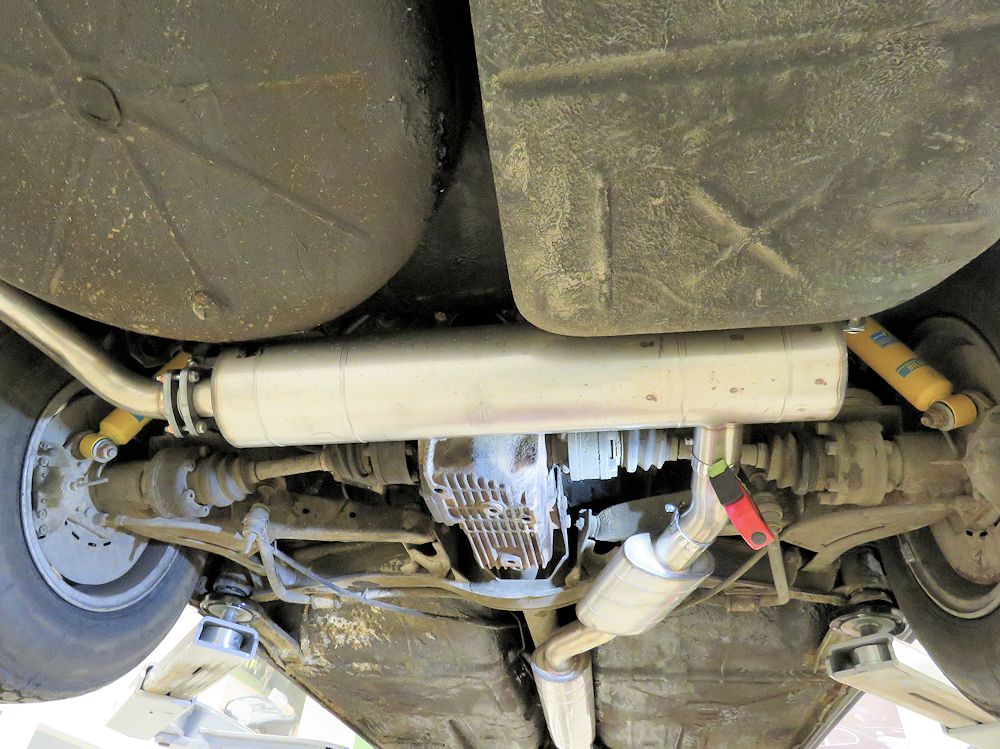
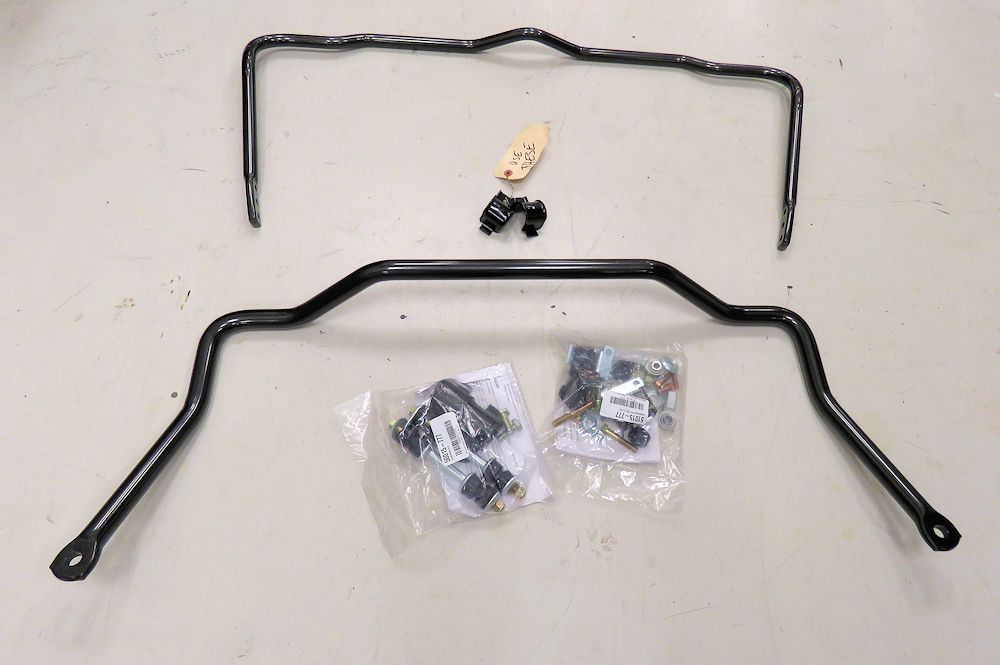
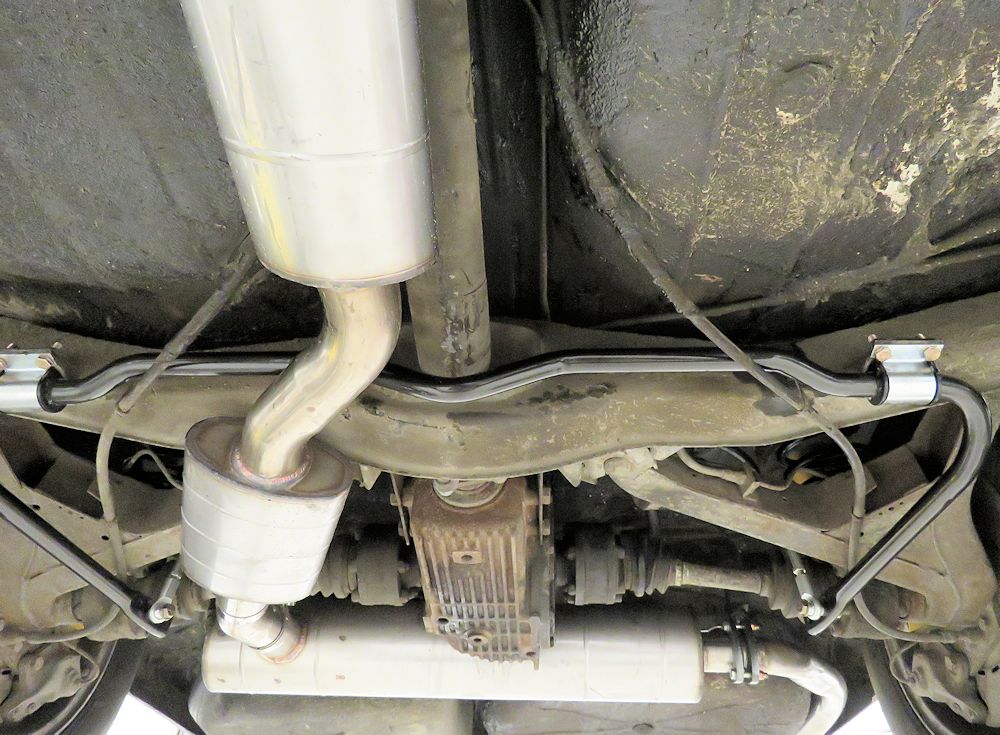
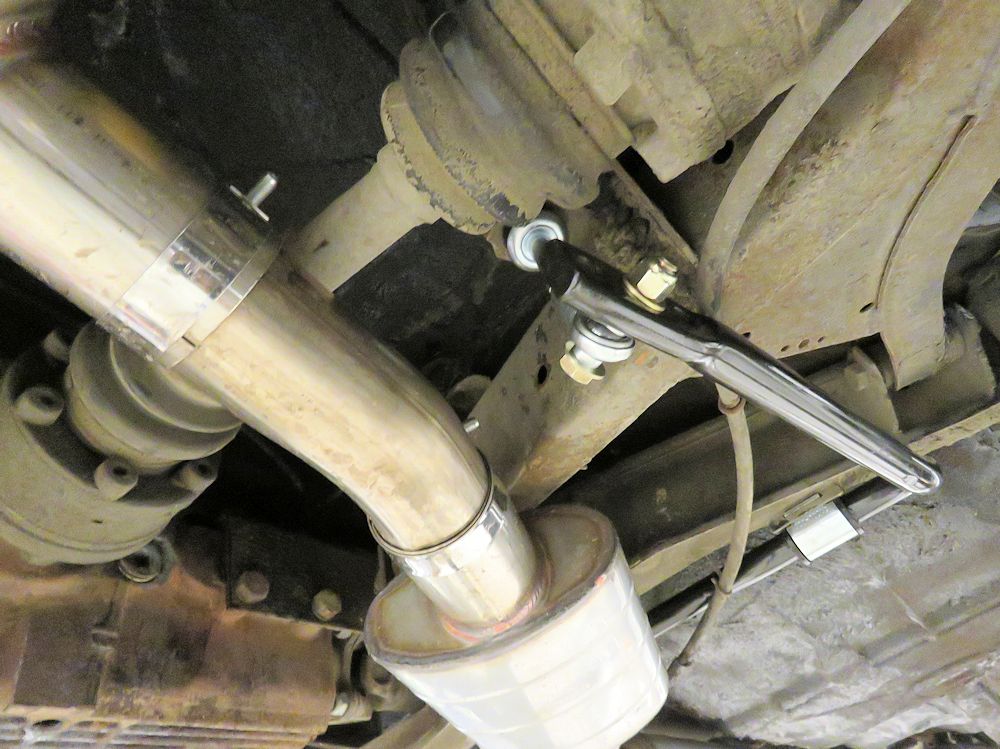
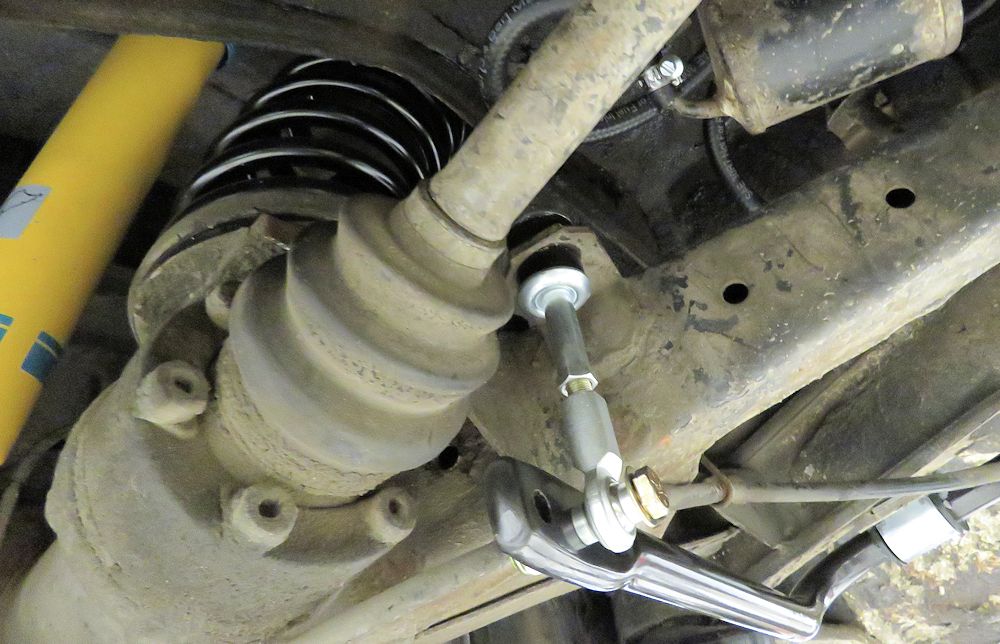
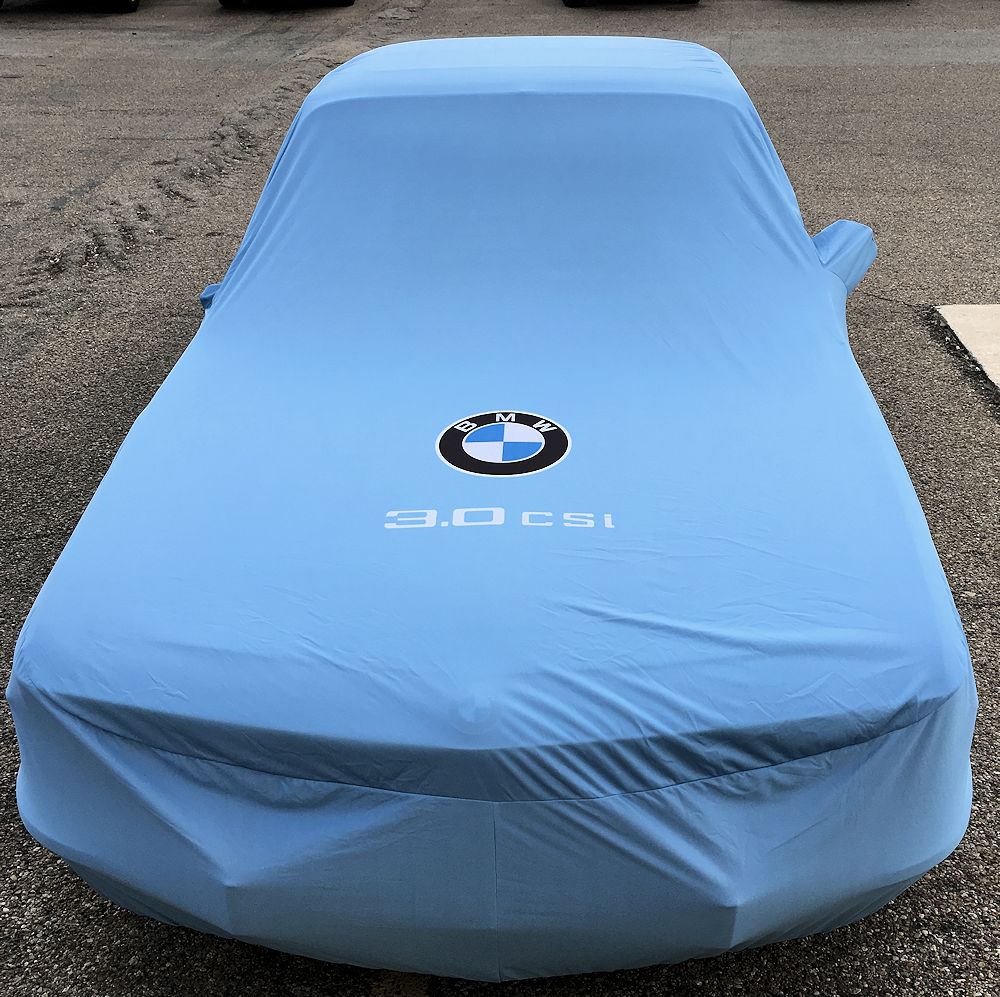
The following sequence of photographs show the installation of the new Quick Silver exhaust, Bilstein shocks and Carl Nelson springs all round, and a set of uprated front and rear sway bars, also courtesy of Carl Nelson. The last couple of photos show a rather nice car color coordinated car cover made for me by the good folk at the Cover Company in Barcelona, Spain.
 |
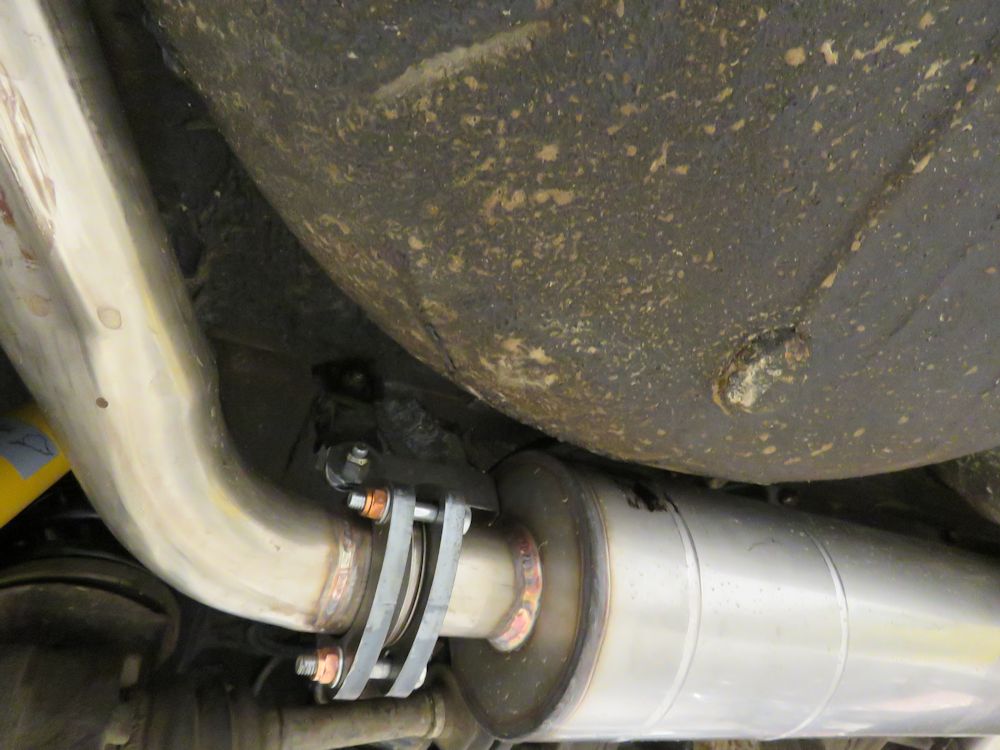 |
| New Quick Silver exhaust was a fantastic
upgrade |
The exhaust is of extremely high quality
and fit exceptionally well |
 |
 |
 |
 |
 |
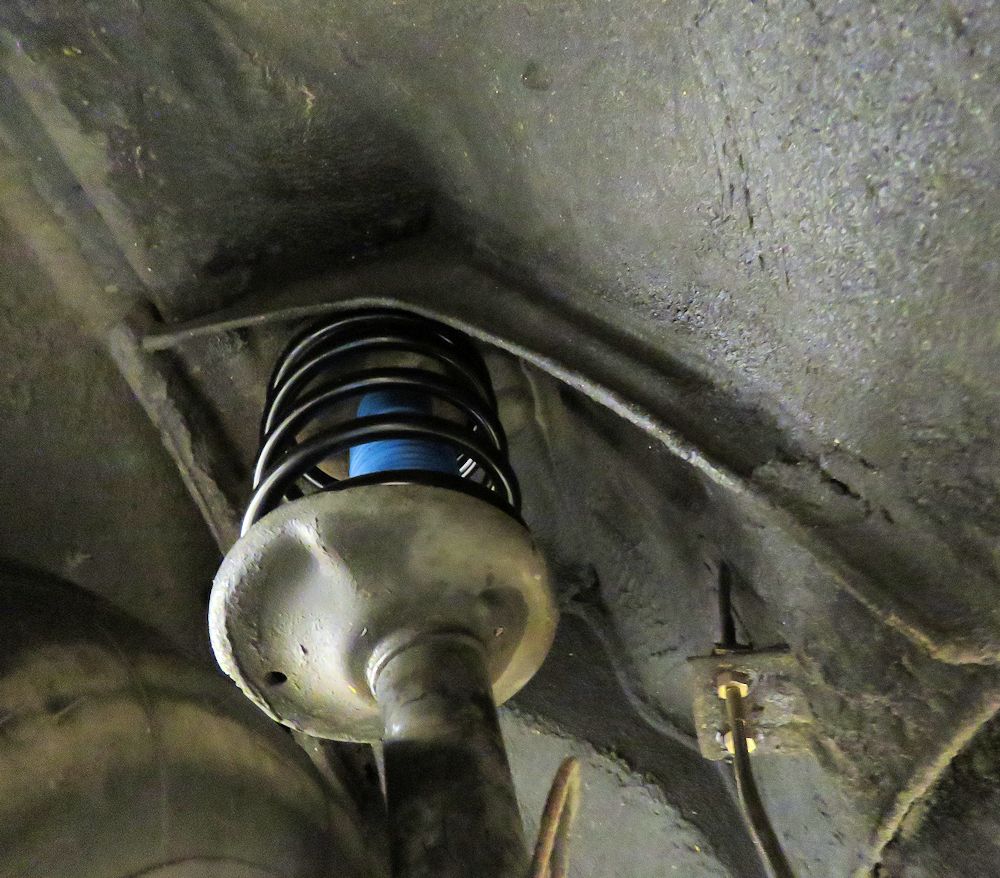 |
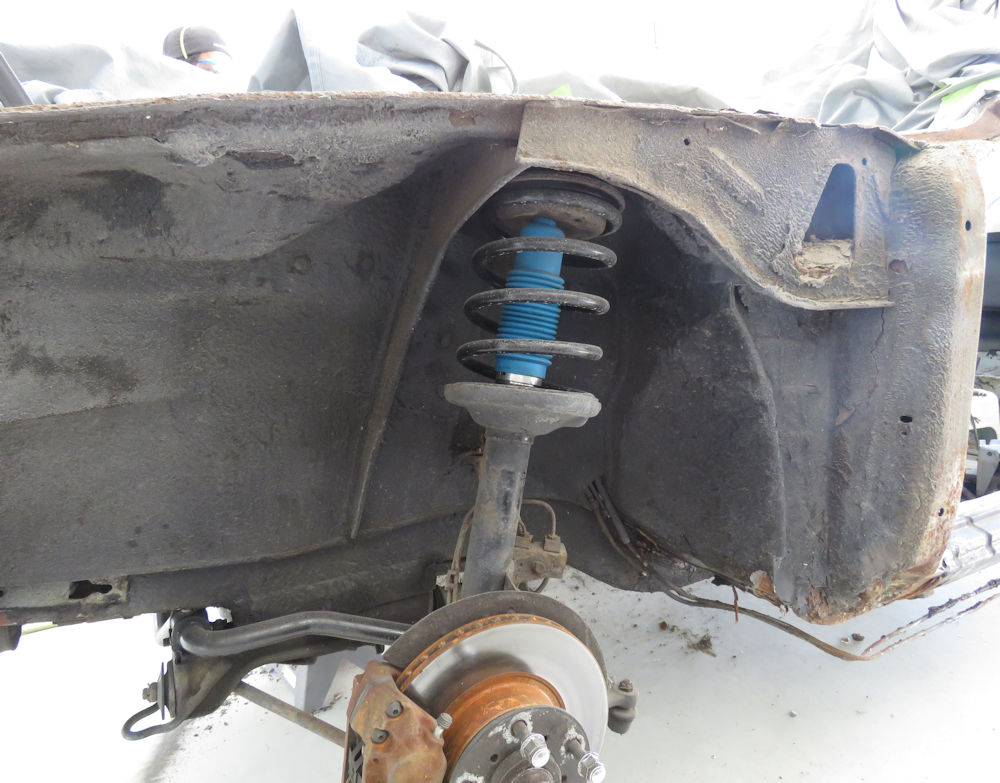
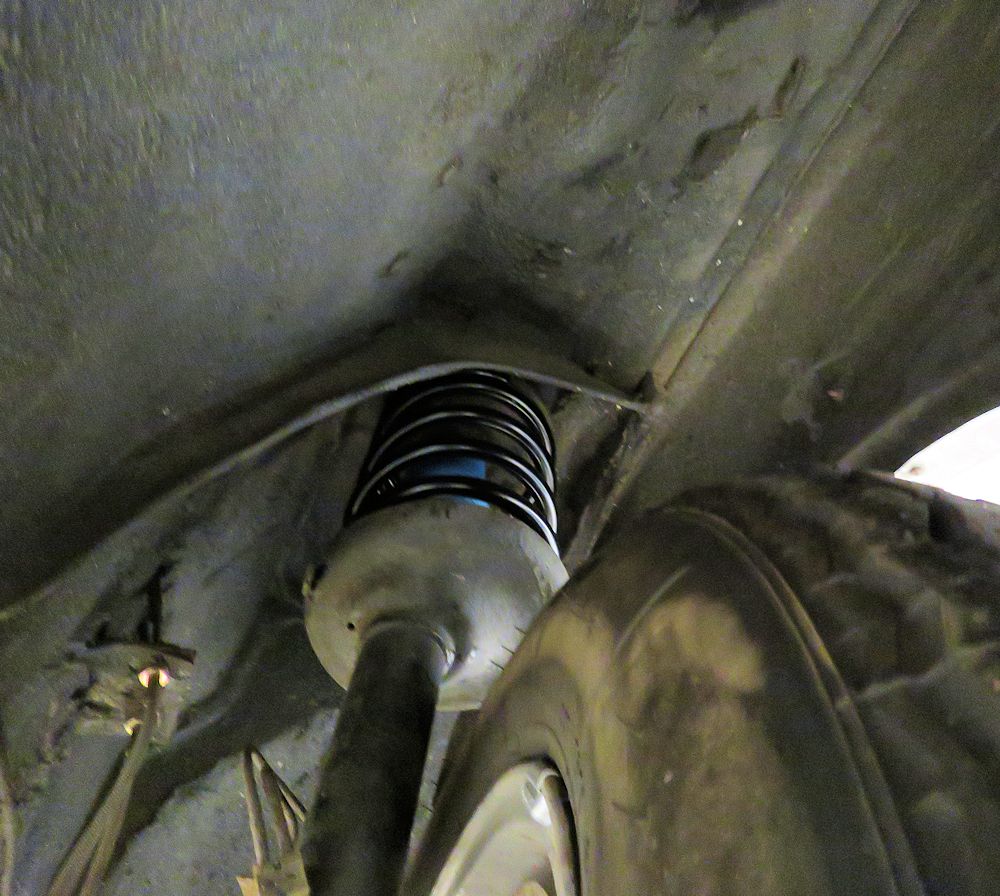
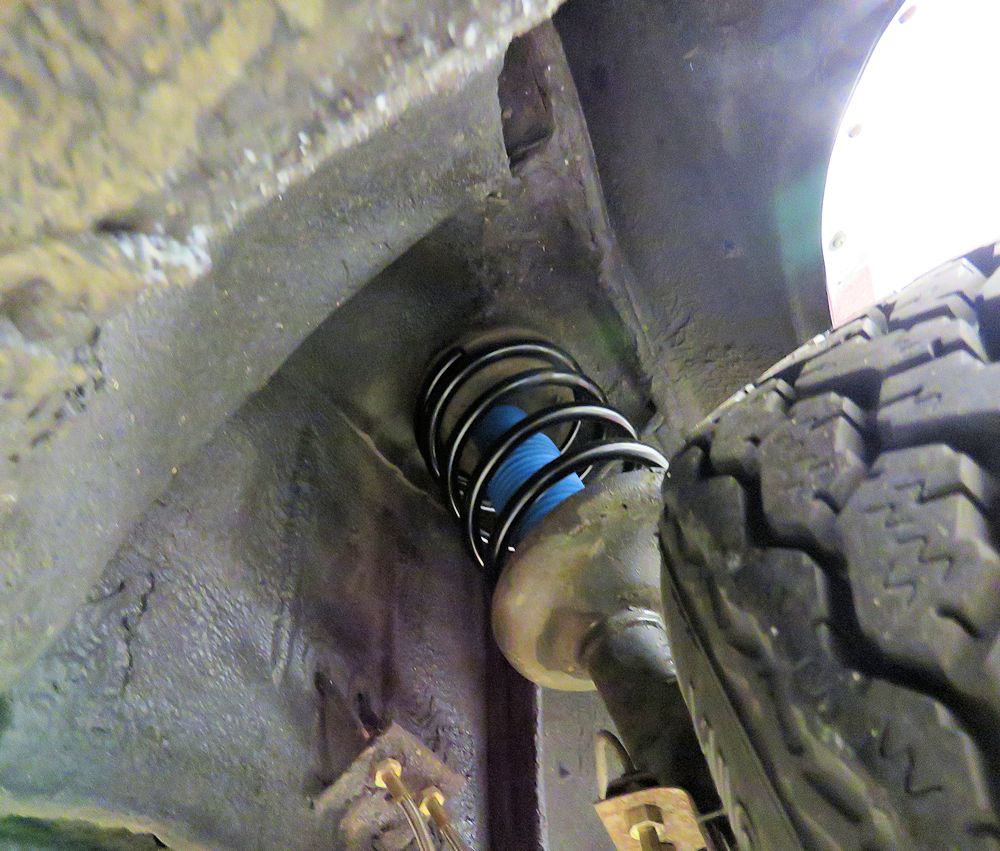
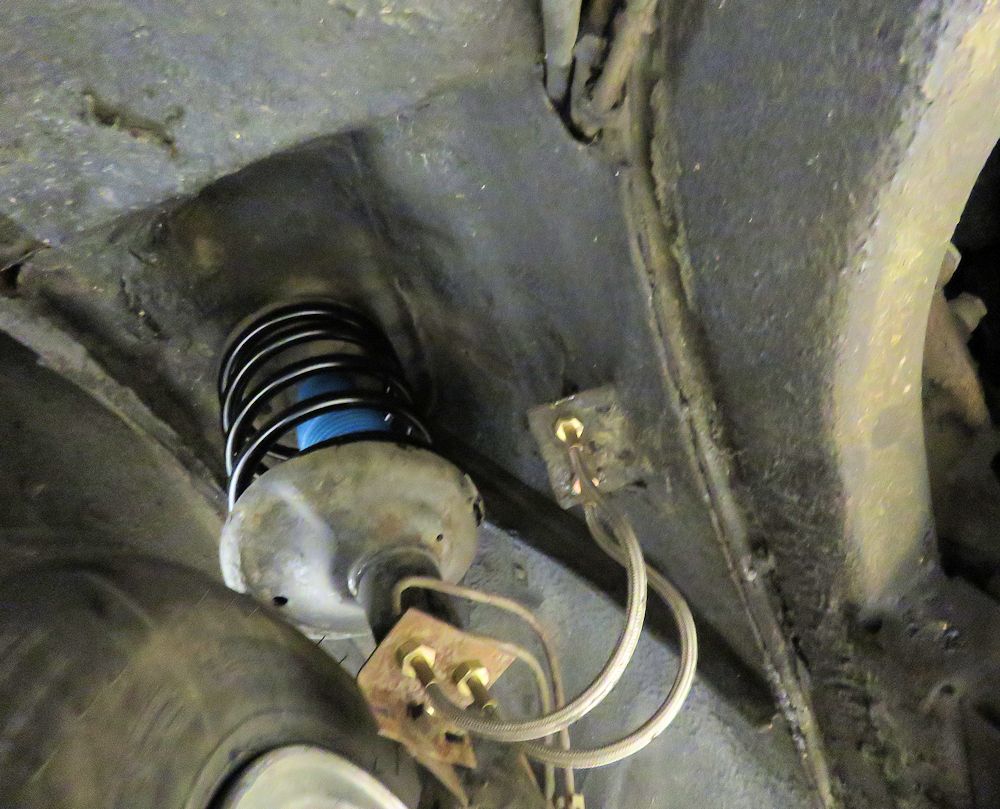
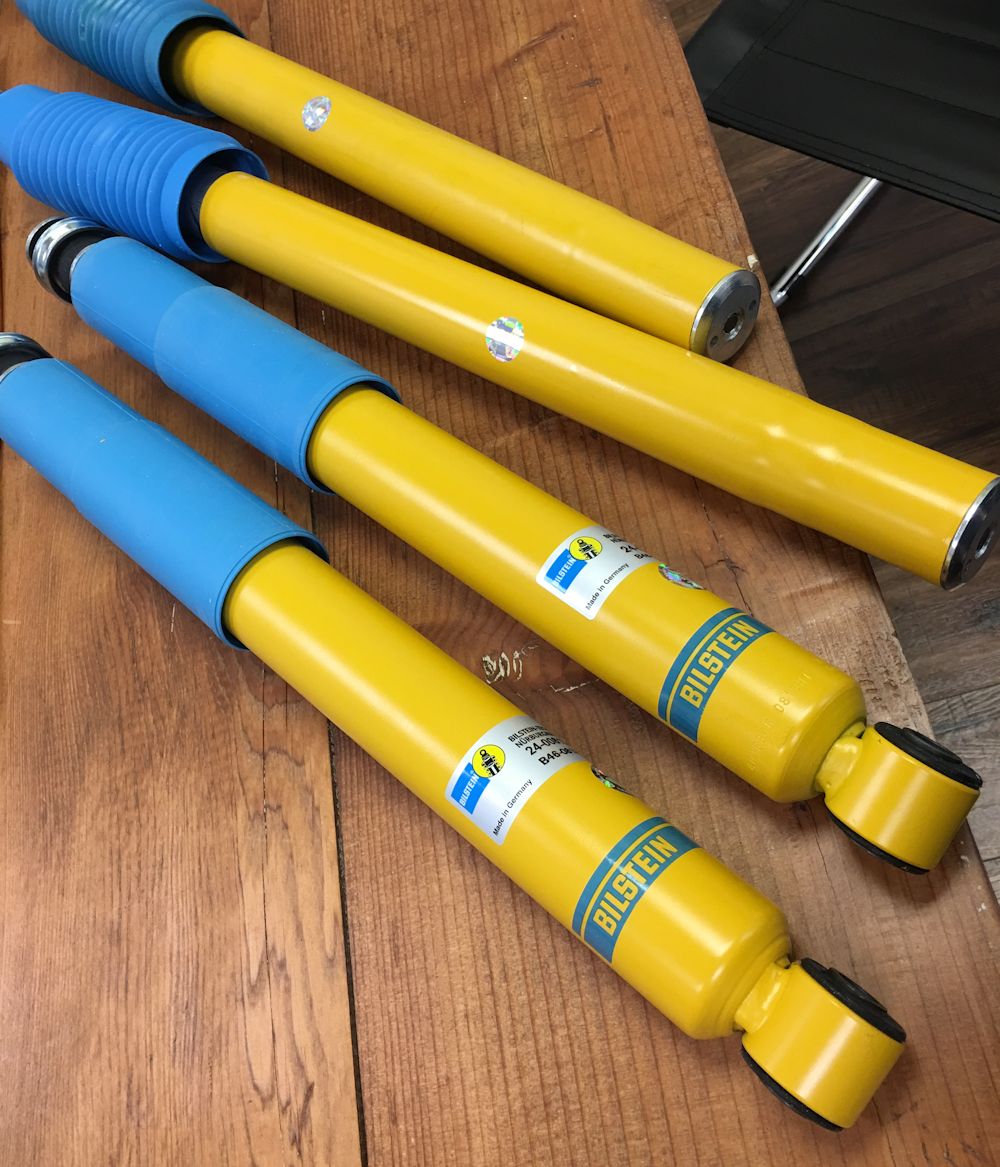
| New Bilstein shocks and Carl Nelson springs |
|
 |
 |
 |
 |
 |
 |
 |
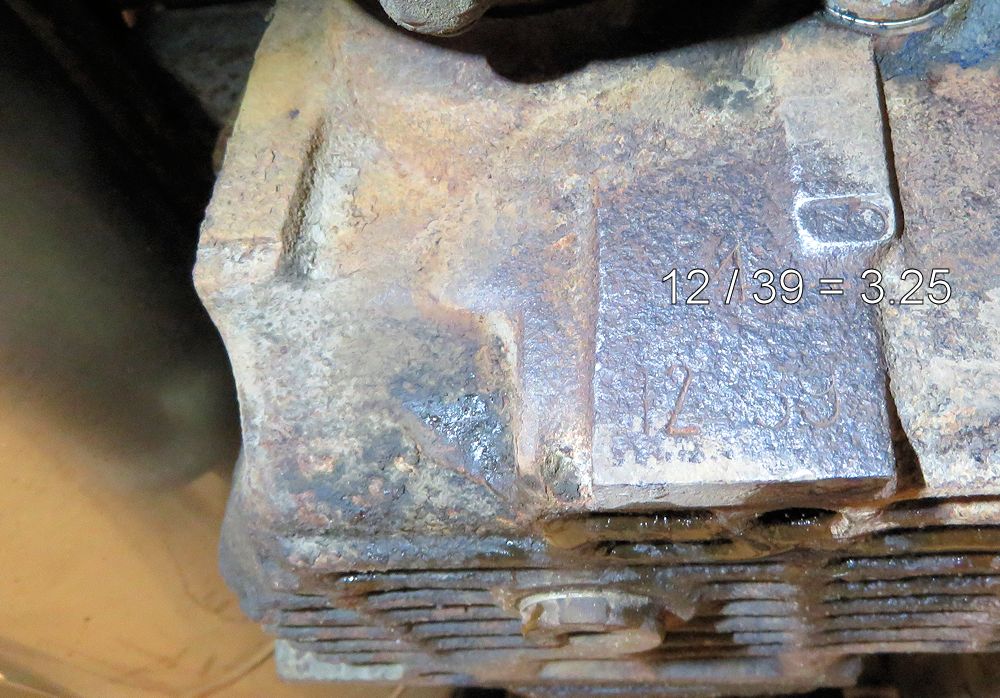 |
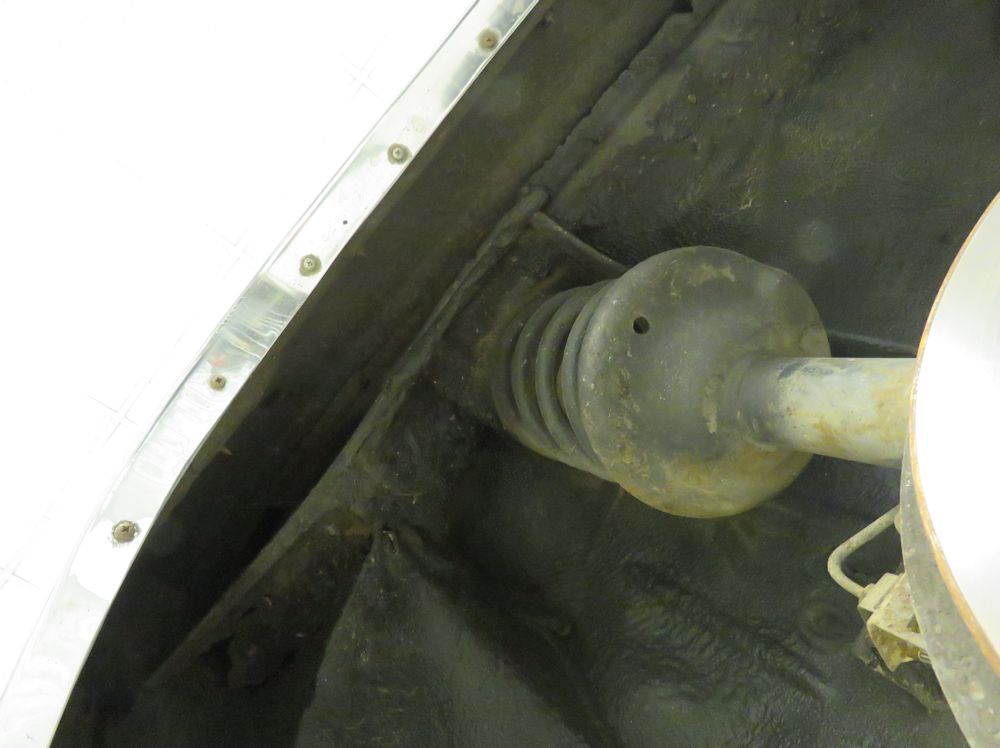
| Scrubbing the passenger side of the diff
casing in order to identify the ratio |
Barely visible thanks to surface rust on
the diff case, but we have confirmed the ratio as 3.25 |
 |
 |
| Carl Nelson sway bars are 28mm (f) and 22mm
(r) |
|
 |
 |
| The Carl nelson sway bars were easy to
install |
|
 |
 |
 |
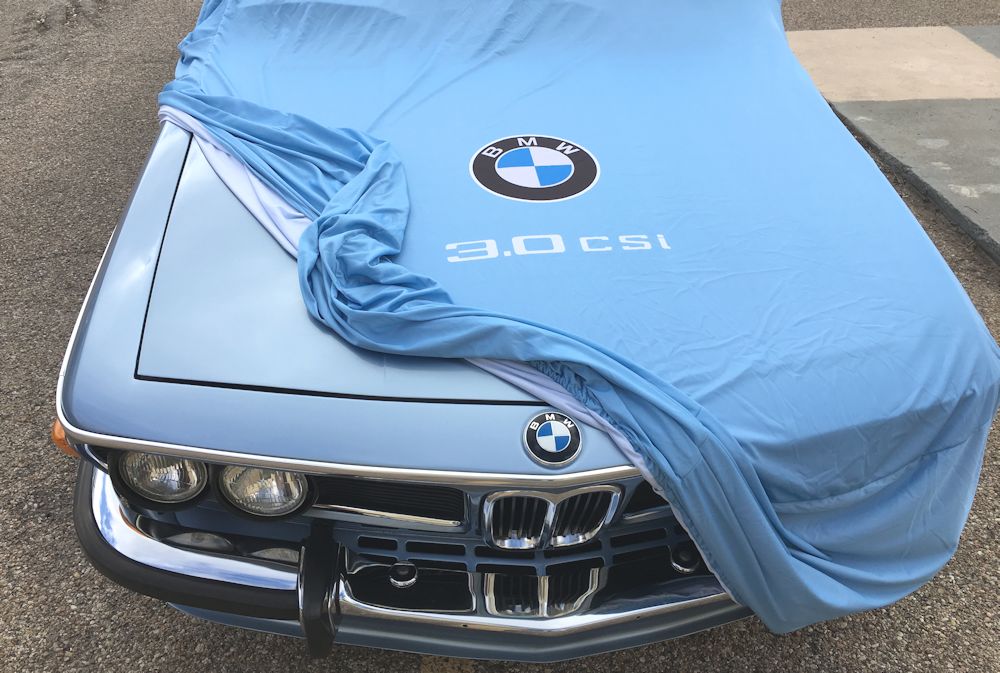 |
| Color coordinated car cover made for me be
my friends at the Cover Company in Barcelona |
|
 |
 |
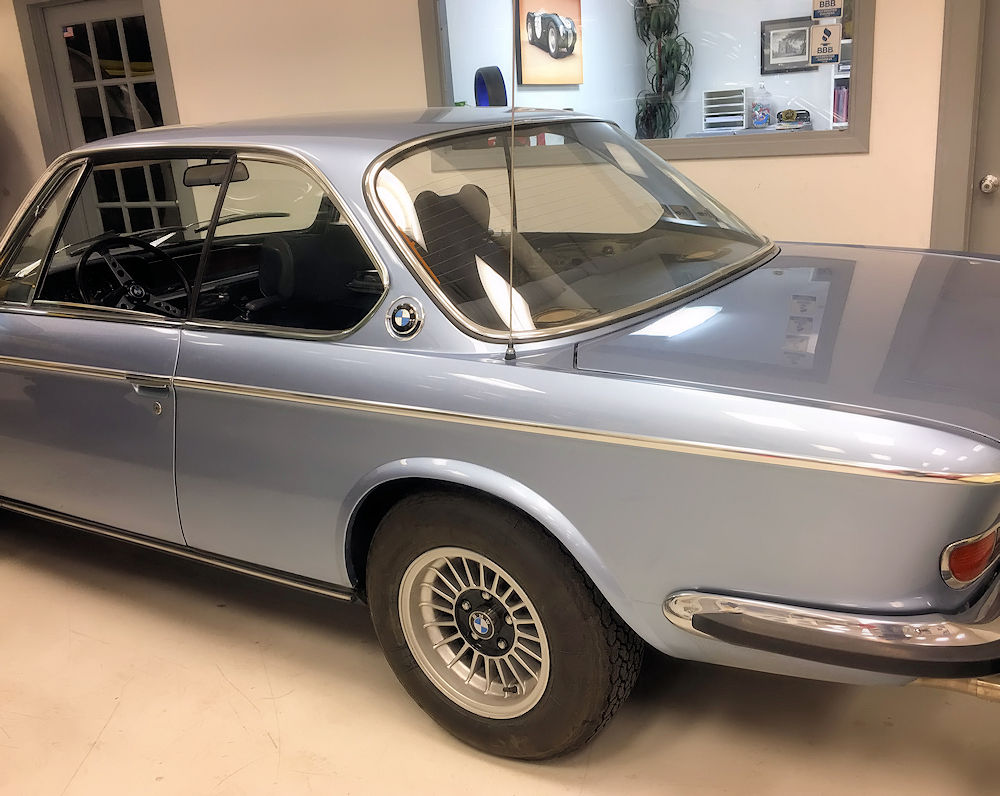
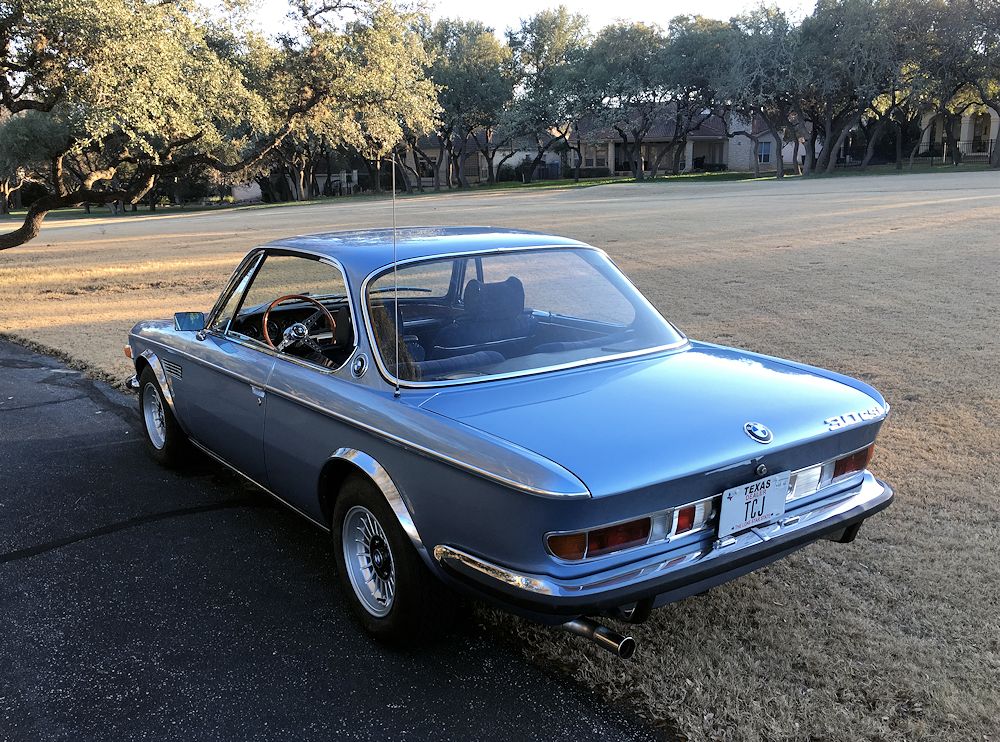
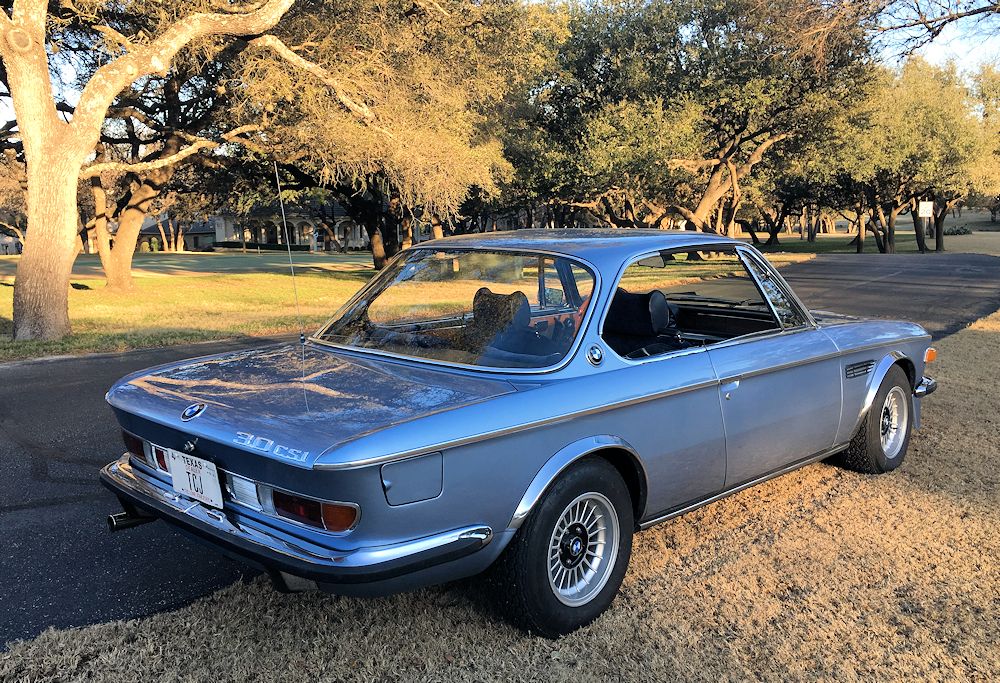
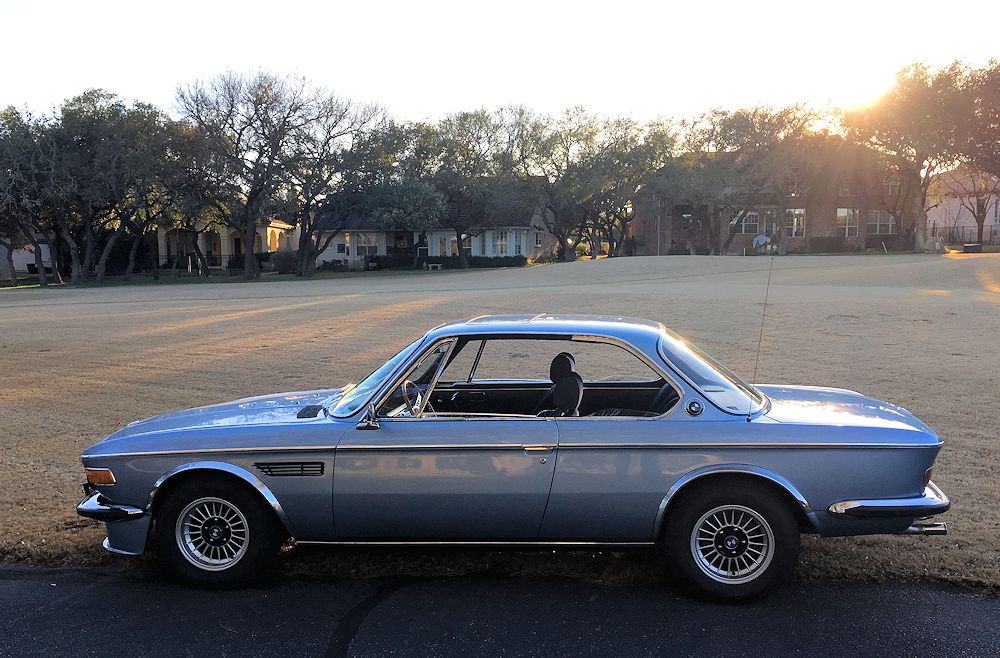
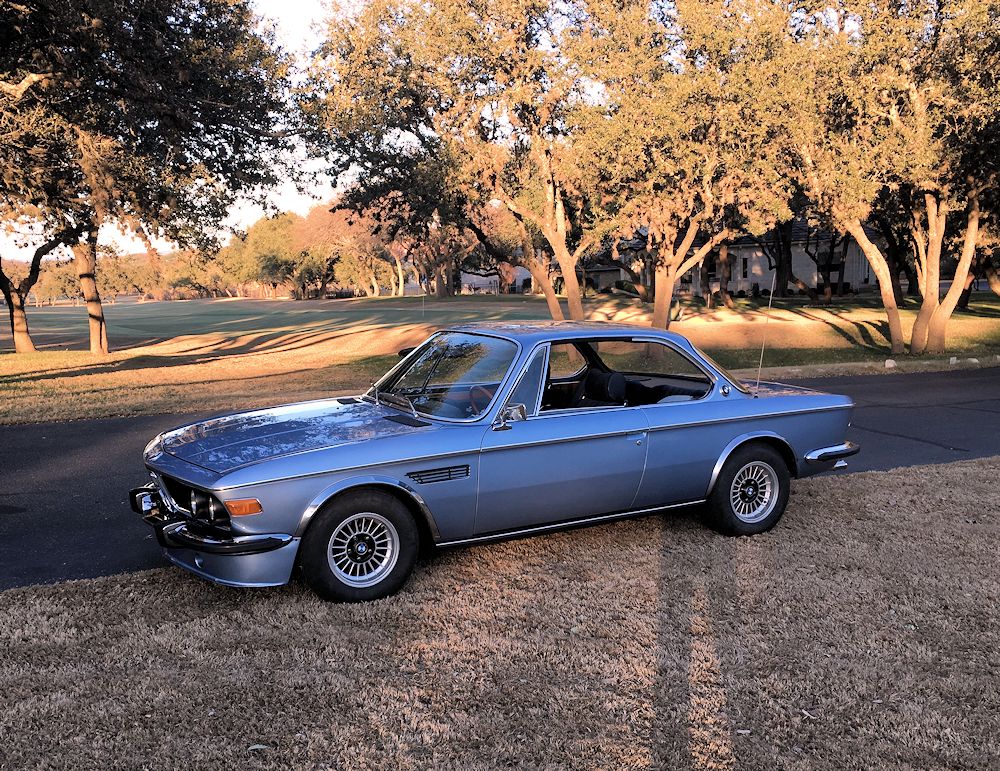
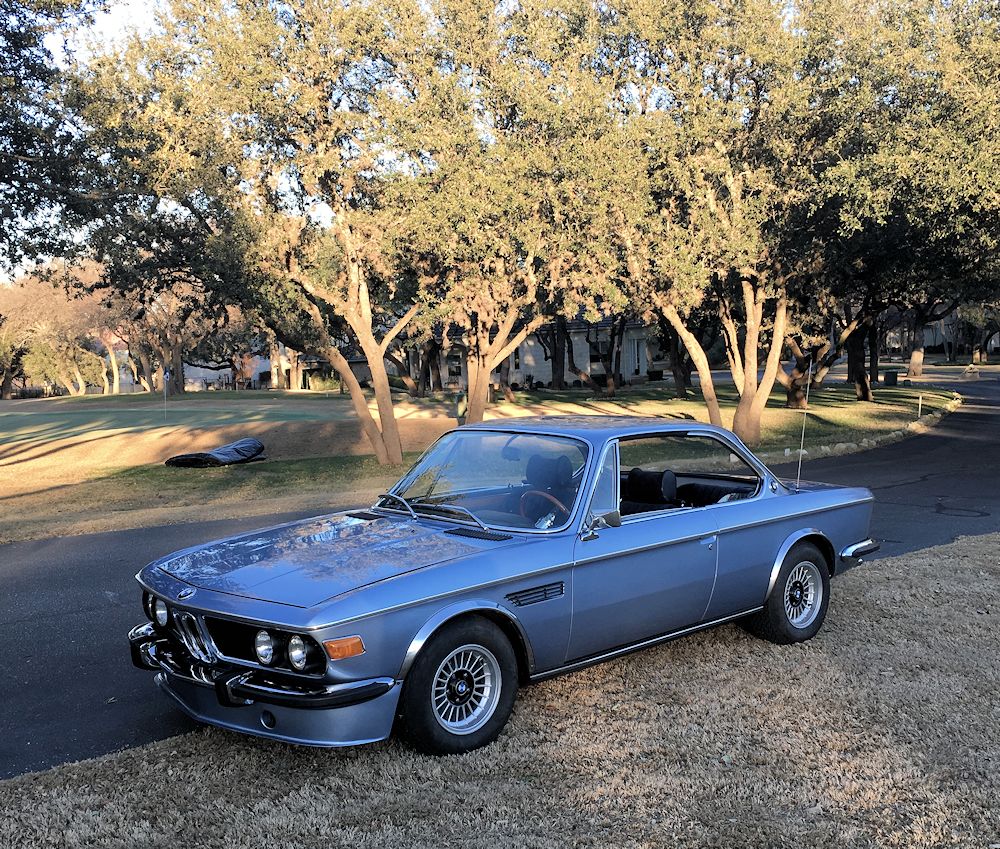
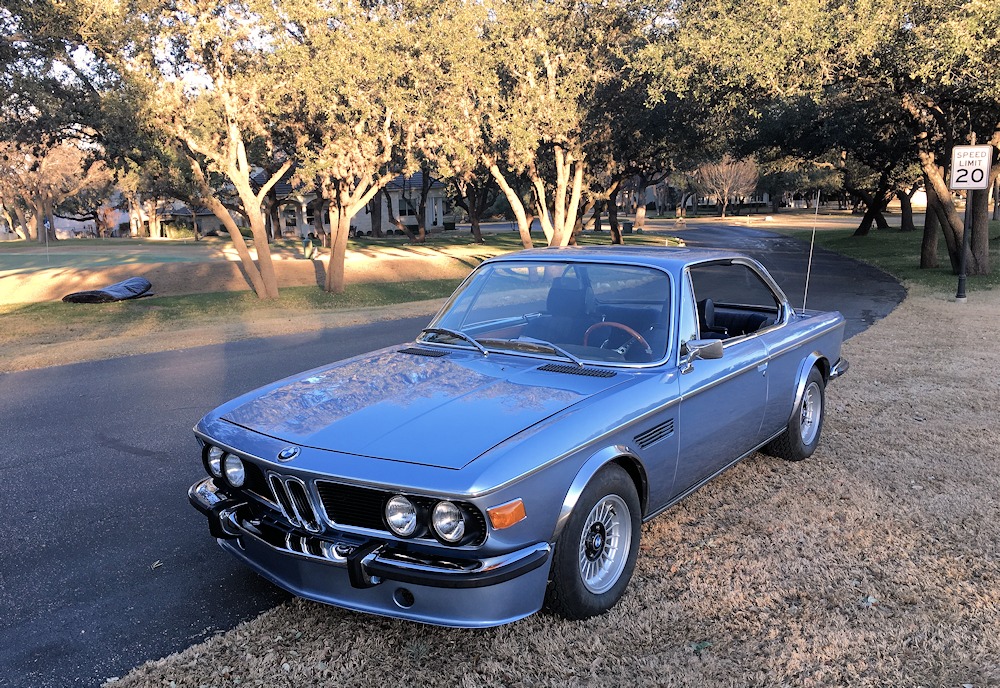
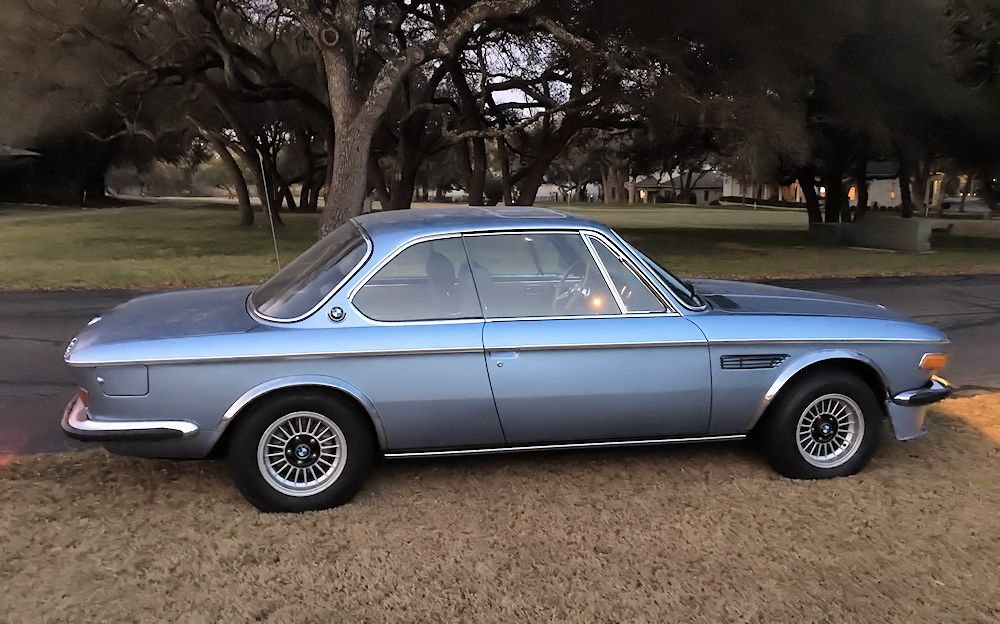
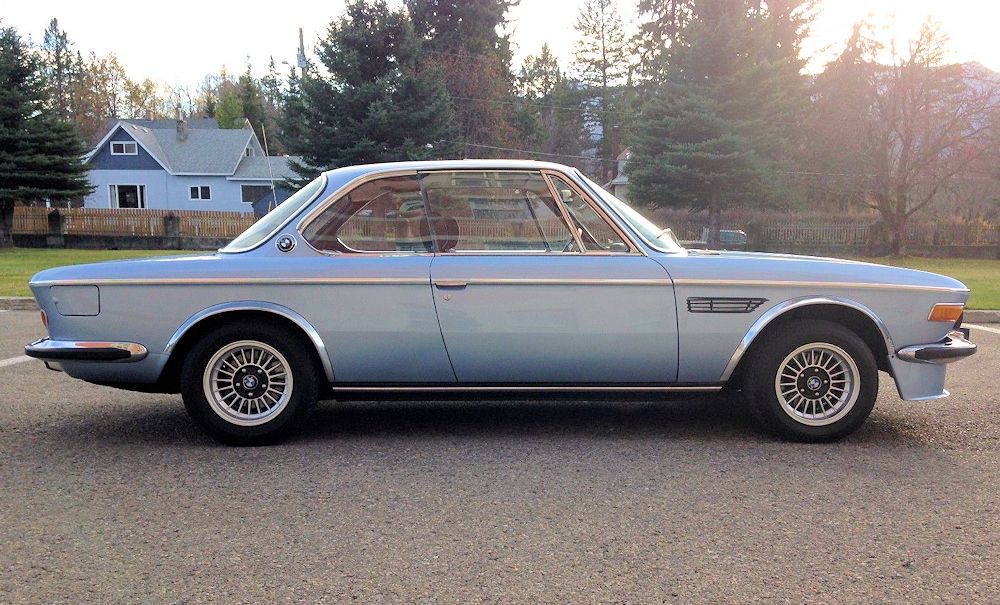
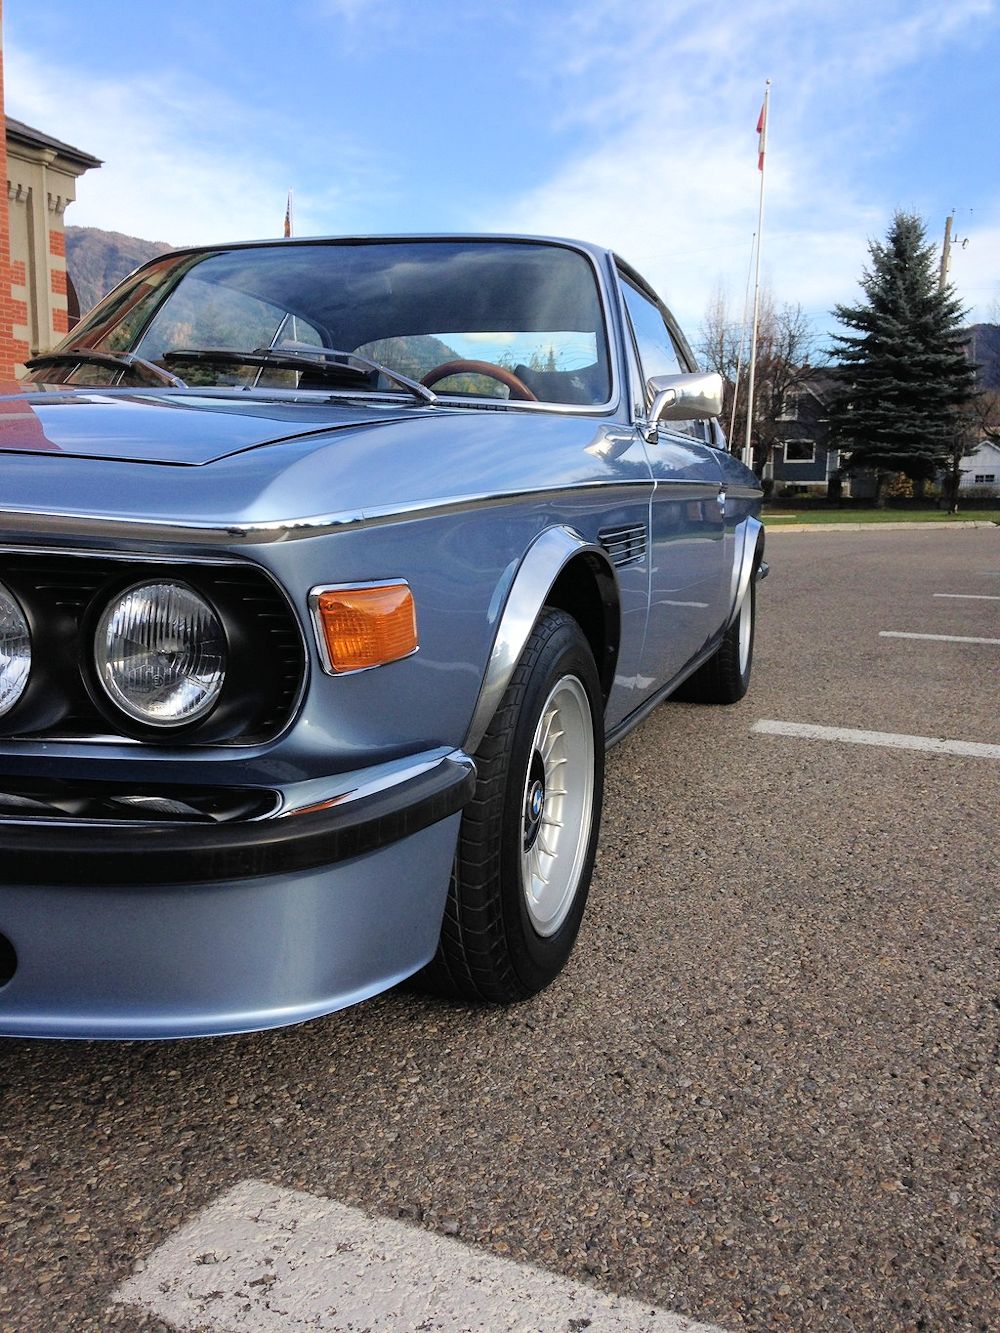
I was cruising around in the BMW yesterday afternoon as the odometer clicked over 64,000 kms (39,768 miles). I mentioned on Twitter last night that I don't think I have ever owned a more photogenic car, and I really think that is true. The big coupe is an absolute rock star in the looks department, crying out to be photographed whenever the hand brake is applied.
 |
 |
 |
 |
 |
 |
 |
 |
 |
 |
 |
 |
 |
 |
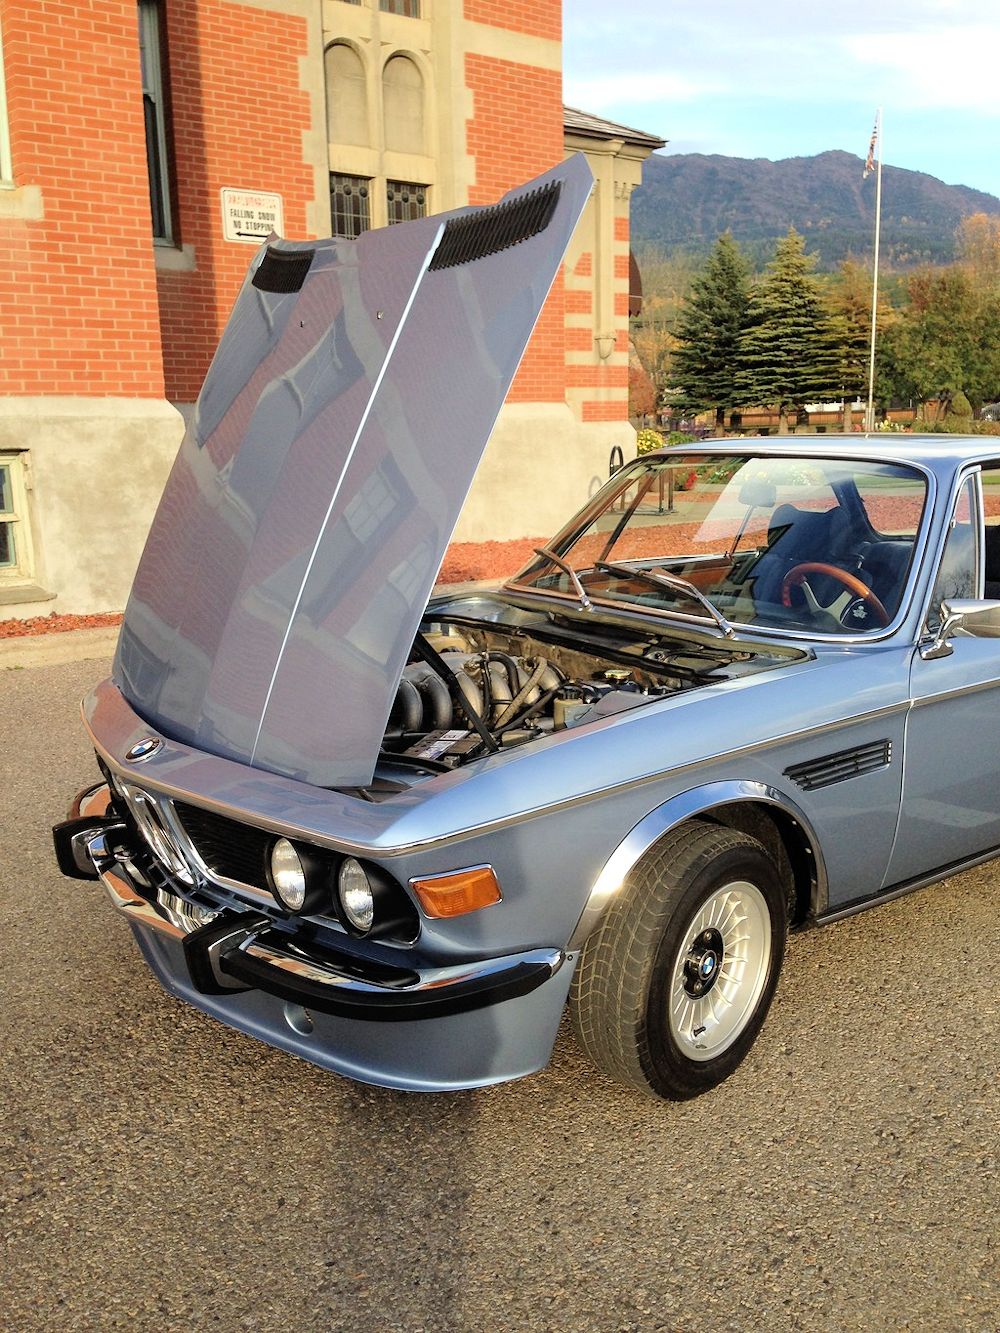
I picked up the big coupe from E9 guru Terry Sayther this morning, and it feels like a completely different car after Terry and his guys have worked their magic on it. They performed a major service, adjusted the valves, replaced engine and differential mounts, belts, converted to a modern BMW oil filter set-up, installed Carl Nelson springs and Bilsteins all round, got the windows and boot lid sealing properly, remounted and rewired the fuel pump, replaced fuel lines, adjusted the driver's door latch, installed a full stainless steel Quick Silver exhaust system, and on and on and on.
The drive back to CJ was absolutely fantastic! Great customer service and top notch marque specific expertise from Terry Sayther Automotive.
 |
 |
| This Petri 380mm steering wheel is the
latest toy purchased for the CSi |
Introducing the coupe to a distant
relative! |
 |
 |
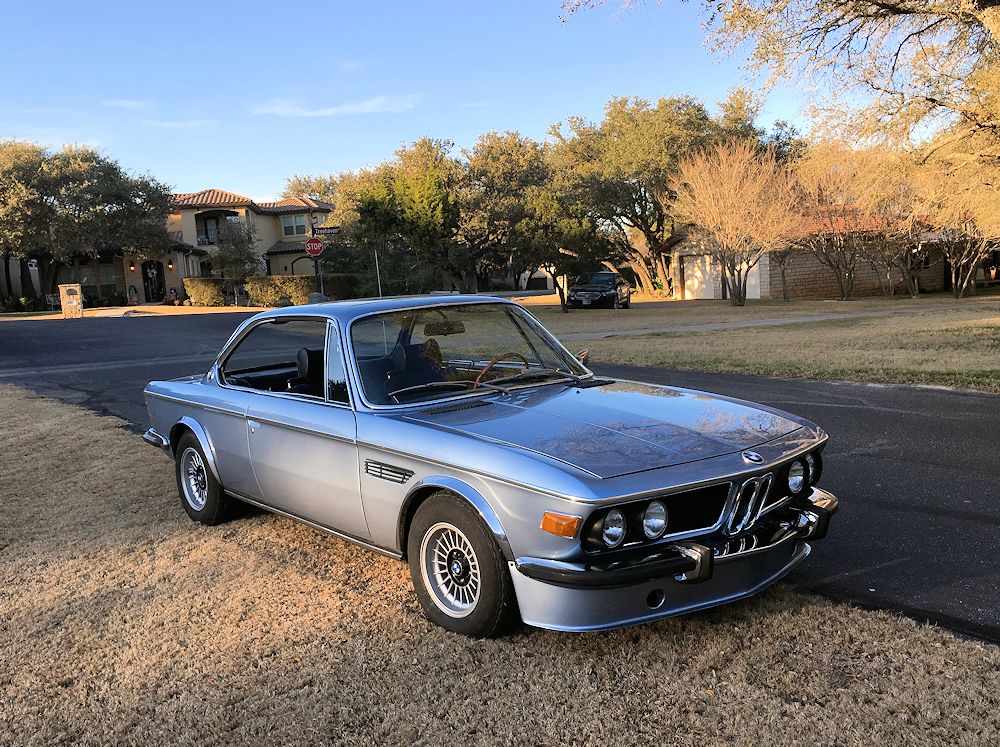
| I really like the stance with Carl Nelson
springs and Bilsteins all round |
|
 |
 |
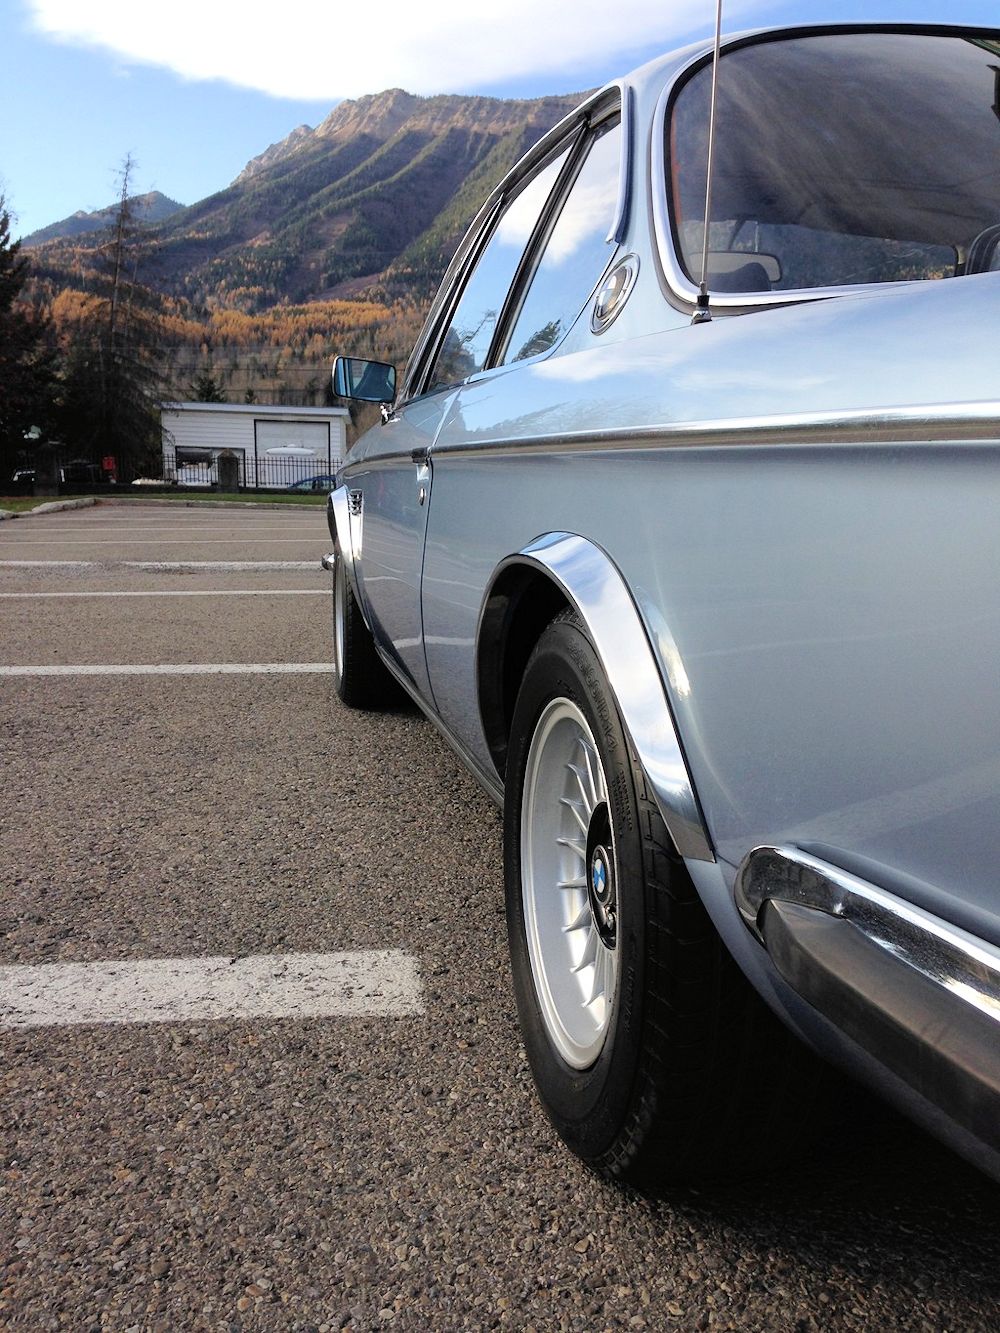
| I found out recently that my 14 X 7 Alpina
wheels are original CSL rims, which is cool |
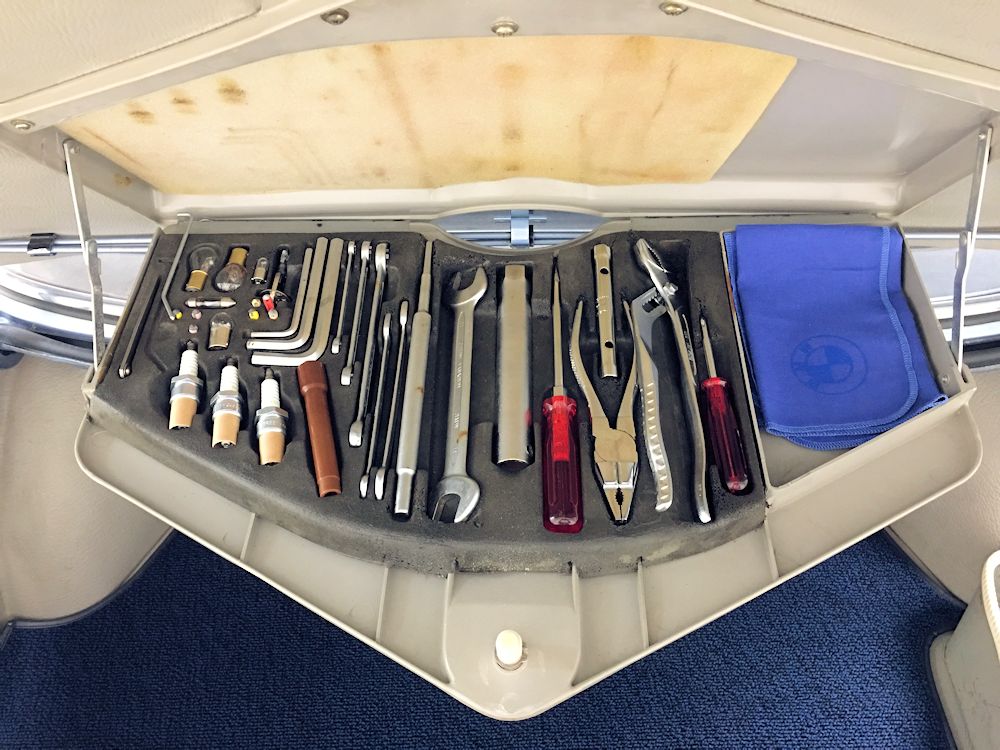
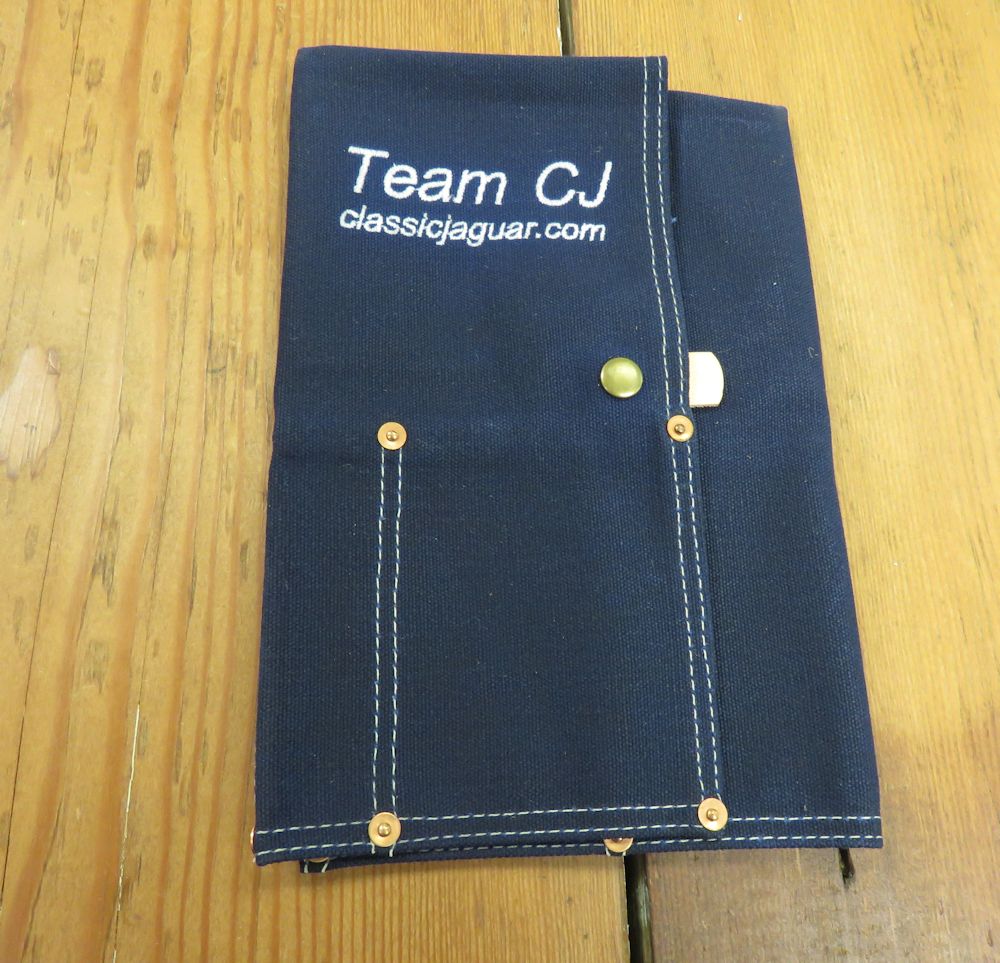
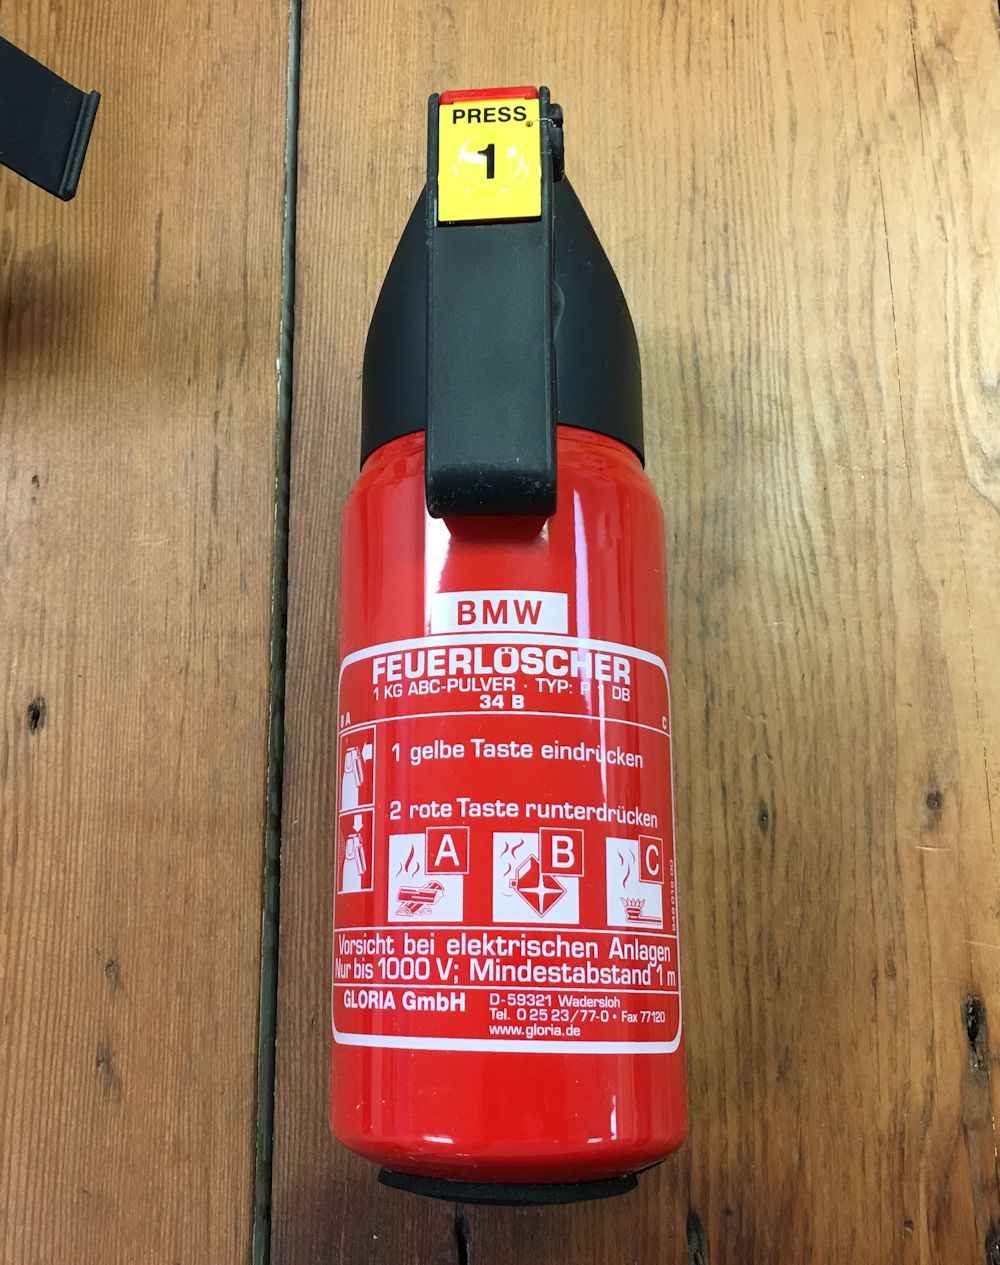
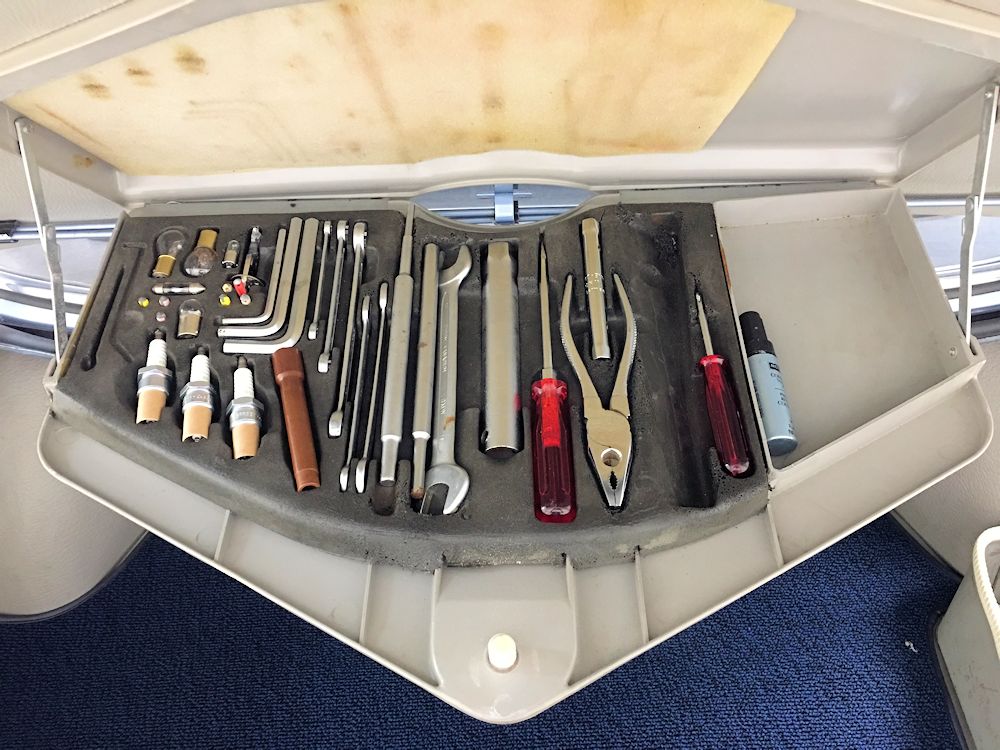
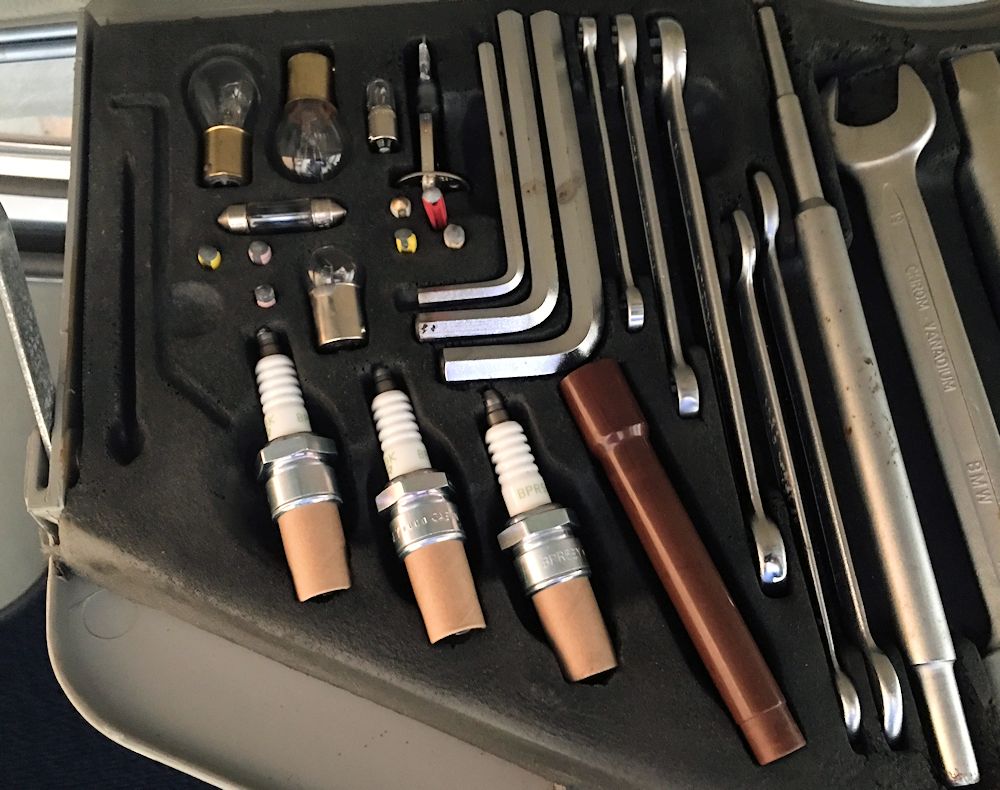
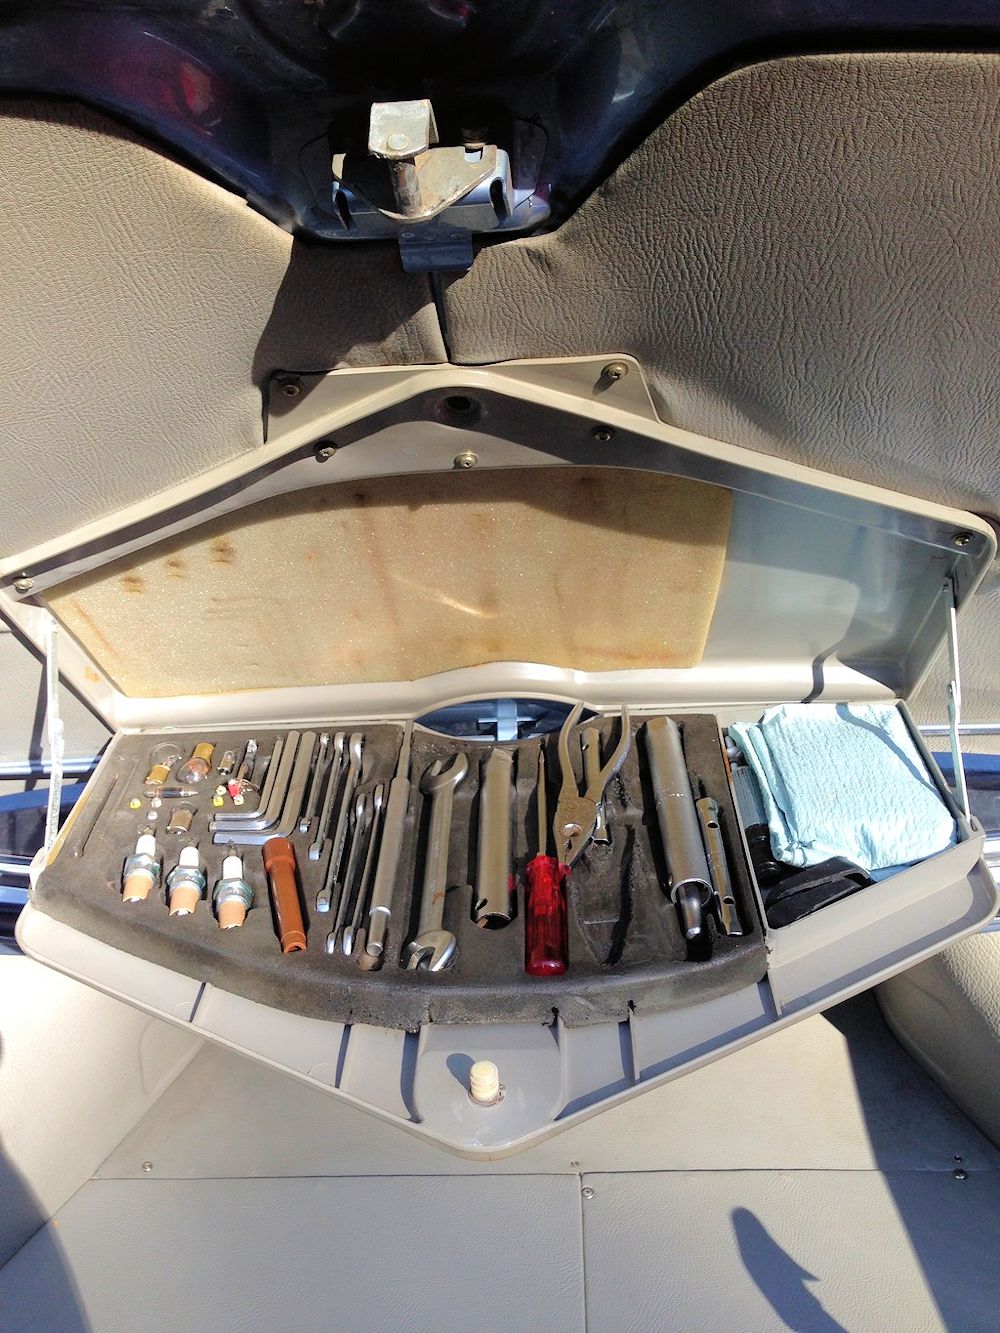
Today is a red letter day because I can finally declare my tool kit complete! Having completed the tray, I decided to heed the advice I received over at E9coupe.com which was to store the heavier components of the tool kit in a separate roll, and thereby prevent the fragile plastic tool tray from cracking and breaking under the load of my now complete tool kit. I used one of the waxed cotton tool rolls that I have made for my restoration customers, which did the job very nicely. I also picked up a fire extinguisher that hopefully I will never need.
 |
 |
| Now that I finally have the tool kit
complete... |
I removed the heavier tools in order to
relieve the strain on the fragile tool tray |
 |
 |
| Heavier tools will be stored in a wax
cotton tool roll |
|
 |
 |
| This represents a 4lb weight saving for the
plastic tool tray |
|
 |
 |
| Job done! |
New fire extinguisher will be installed in
front of the front passenger seat |
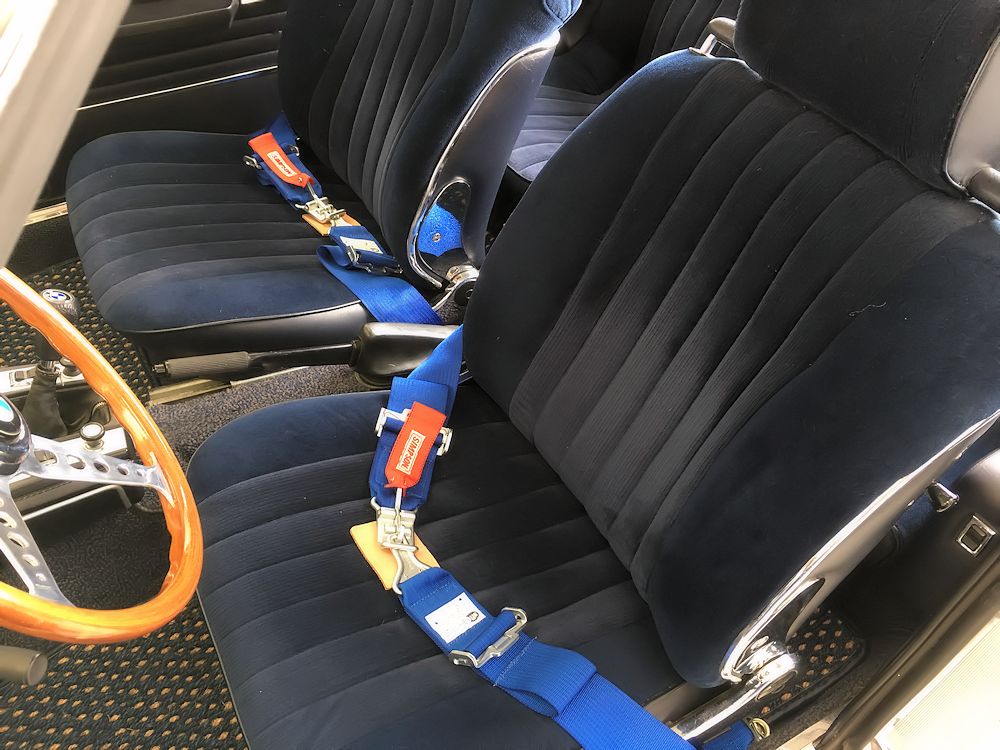
I was not a huge fan of the factory retractable (barely) seat belts fitted to the CSi, so I decided to replace them with a set of Simpson clip-on lap belts. We left the original inertia belts in place, albeit hidden behind the rear side panels/seats. We installed new eye bolts in the factory anchor points either side of the seat bases, and simply clipped the new belts in place. I think they look pretty sporty - and the car definitely feels faster with the new belts
 |
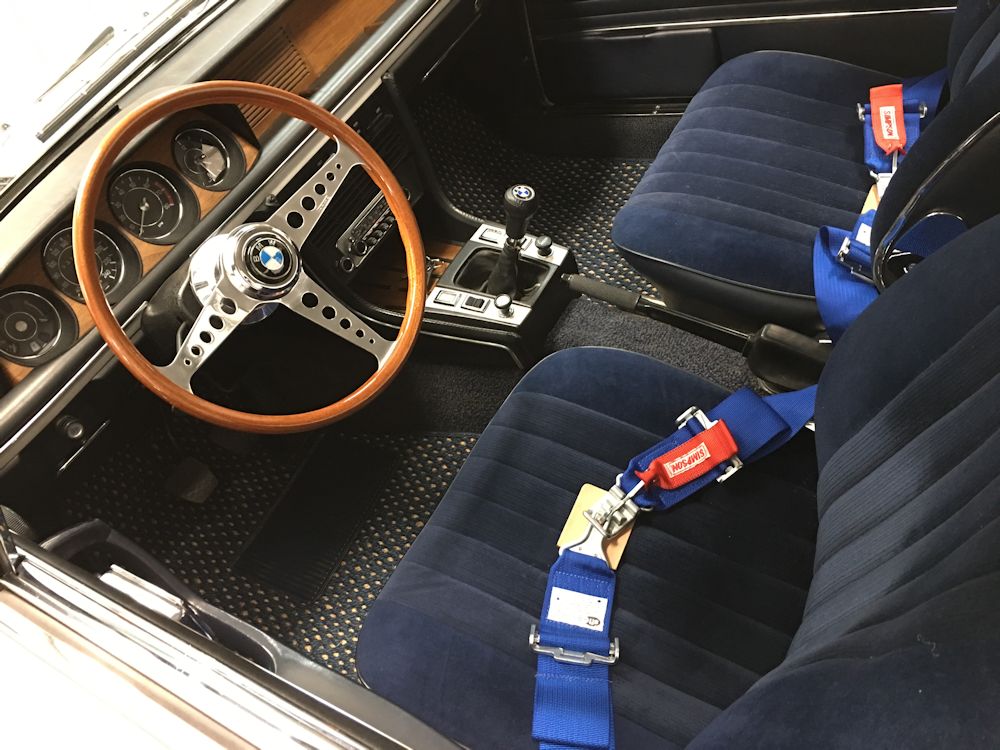 |
| Simpson laps belts will add a sporty look
to the coupe's interior |
|
 |
 |
| Driver's seat base has an annoying squeak
that I will address when the new hide covers are installed |
New eye bolts in the factory seat belt
anchor points |
 |
 |
| My other cars are feeling left out because
I can't stop driving the CSi |
I received my new Coco Mats for the BMW today and I am really pleased with the fit and quality. They really are a sturdy, well made product. Good company to work with, too. Thoroughly recommended!
 |
 |
| Coco mats fit perfectly and took seconds
to install |
|
 |
 |
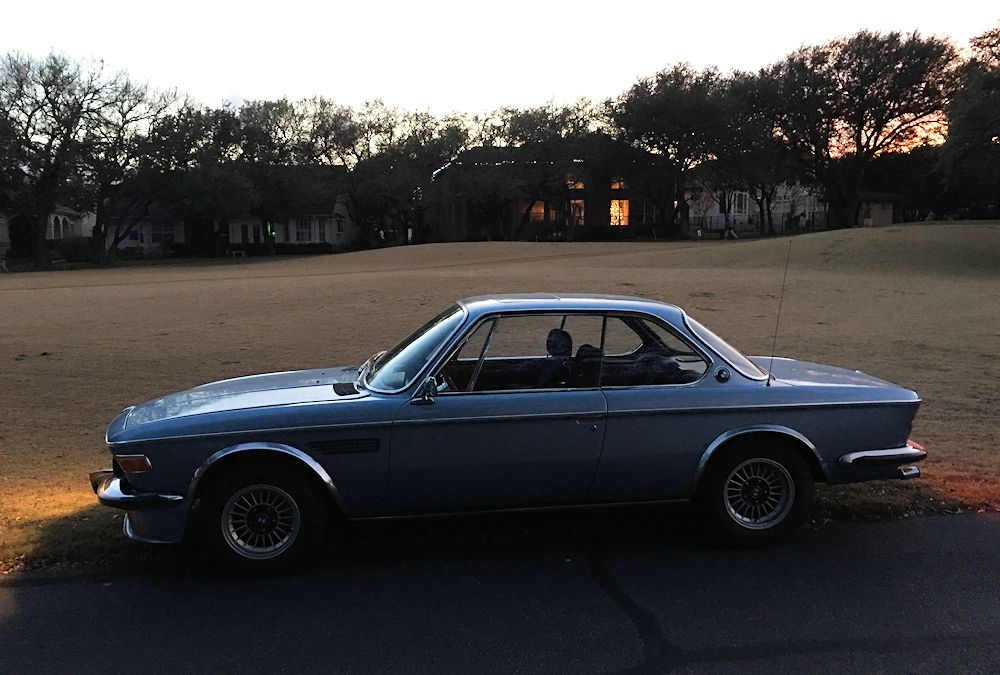
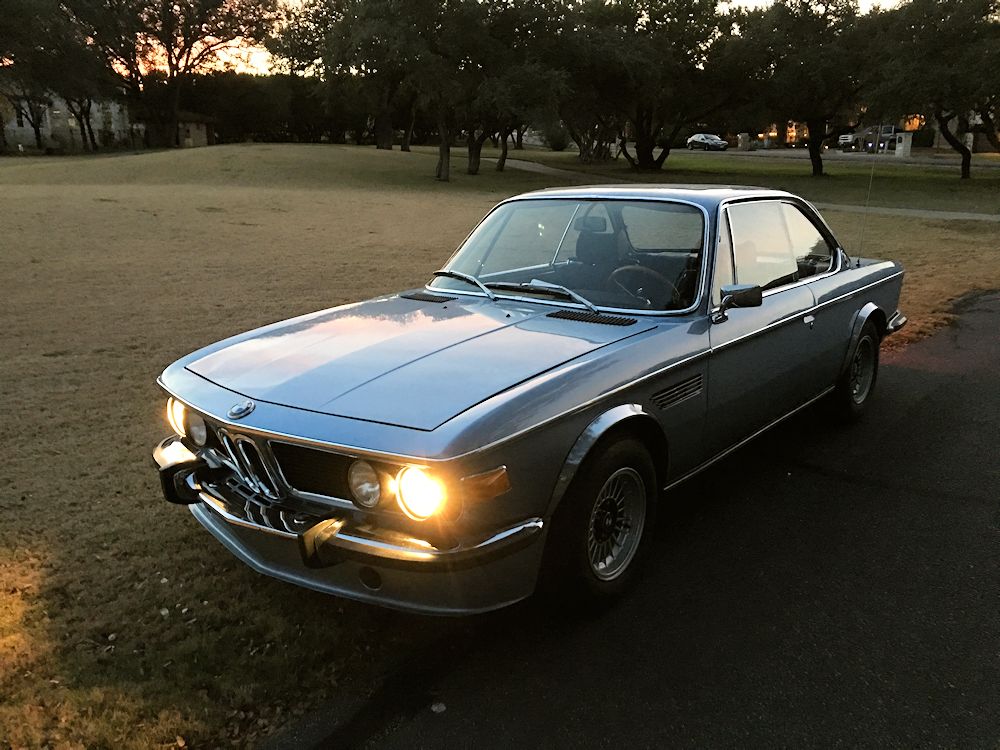
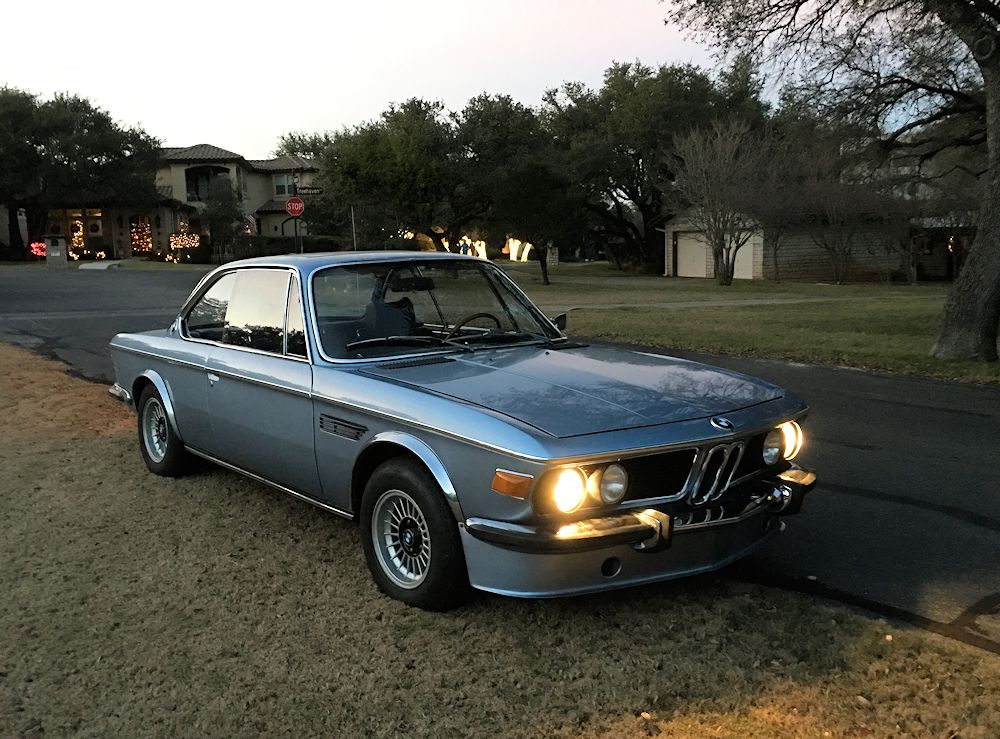
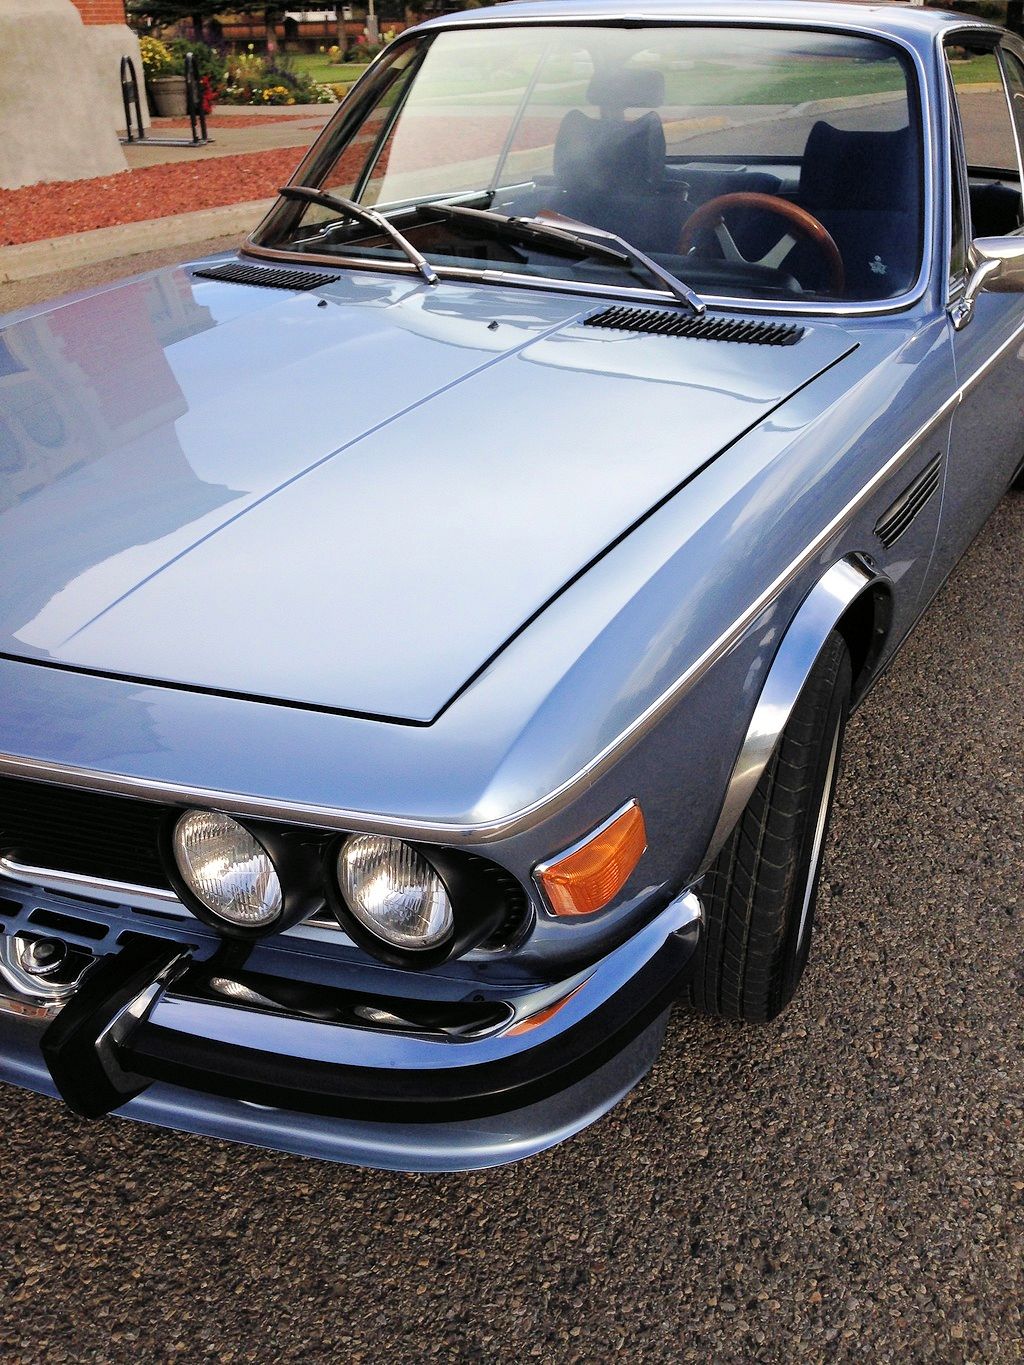
I took the CSi cruising at dusk yesterday using the excuse that I was testing the function of all the lights. In fact I put 111 km (69 miles) on the car yesterday, as I gradually work my way through a few minor mechanical niggles. Replacing the upper and lower intake manifold gaskets (and thereby eliminating a major vacuum leak) improved performance greatly, although I am still trying to track down a slight hunting issue at idle. At a steady mid-range throttle I also have just a hint of a hesitation, so I still have a little work to do before I declare myself completely satisfied with the tune.
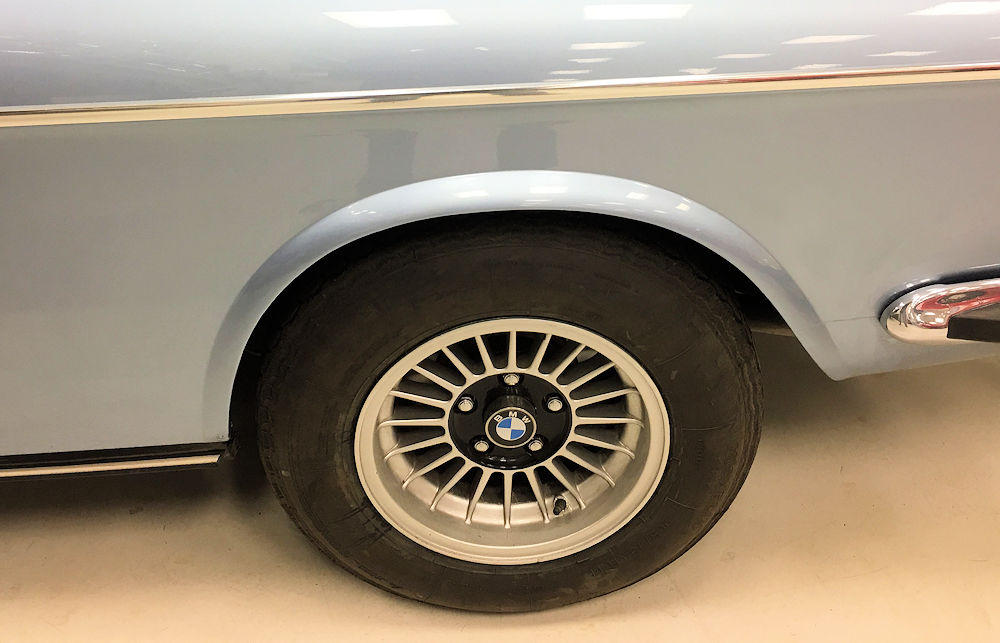
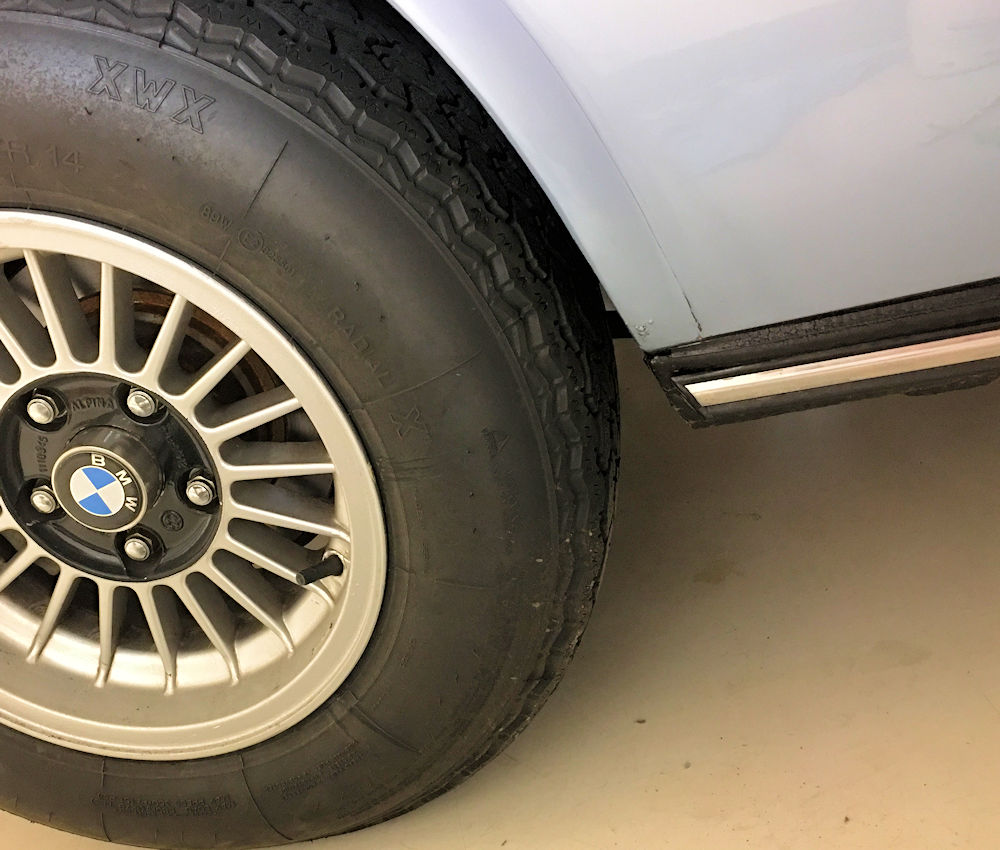
The steering, suspension and brakes all feel reassuring solid, so much so that I am actually rethinking installing the lowered/uprated springs and Bilstein shocks. I think the new Michelin XWX 205/70 tires are a perfect match for the 14 x 7 Alpinas. They look great and ride beautifully. I have also been pleasantly surprised with the original 4 speed transmission, which is as smooth as silk and super quiet through all gears.
 |
 |
| I love the side profile of the E9 coupes |
Somehow the elegant lines of the CSi are
even more evident at dusk |
 |
 |
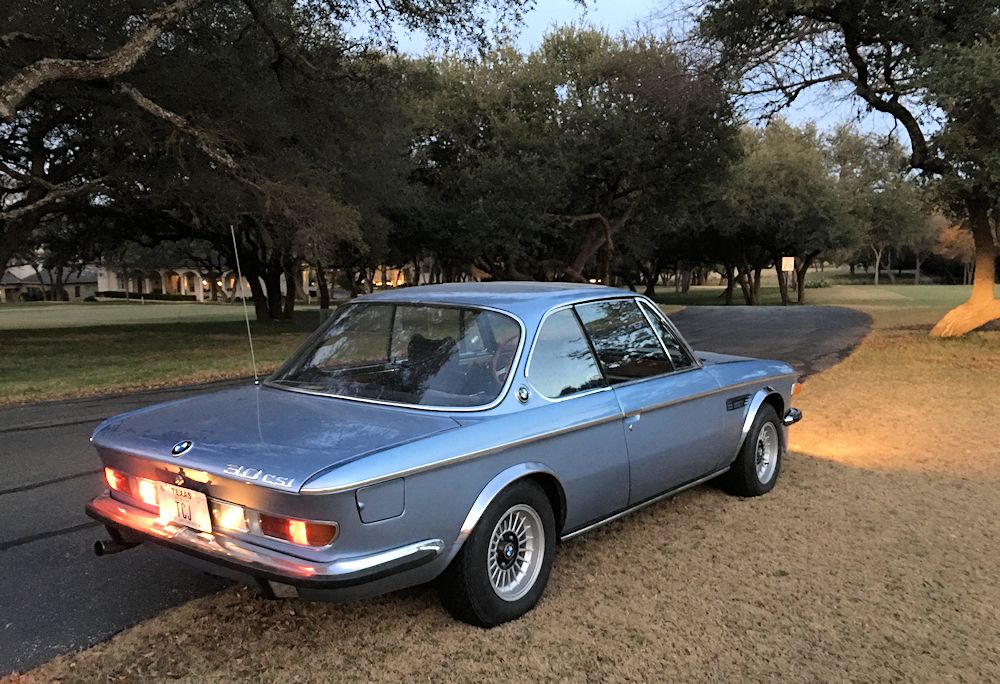 |
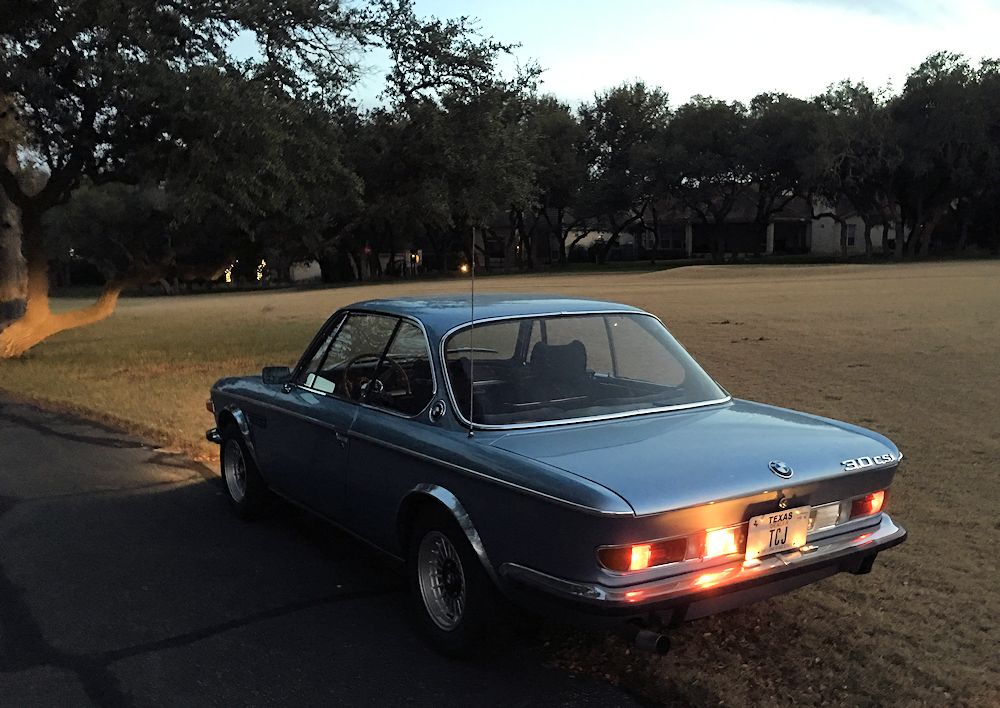 |
| All the lights are working, which was the
reason for my early evening cruise! |
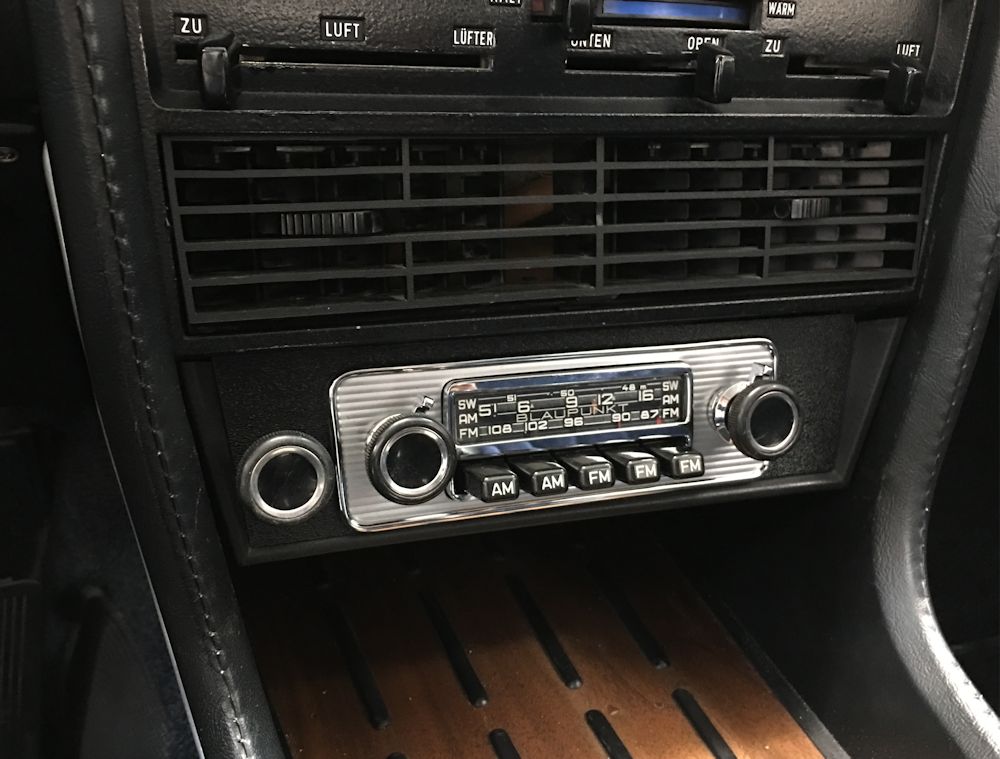
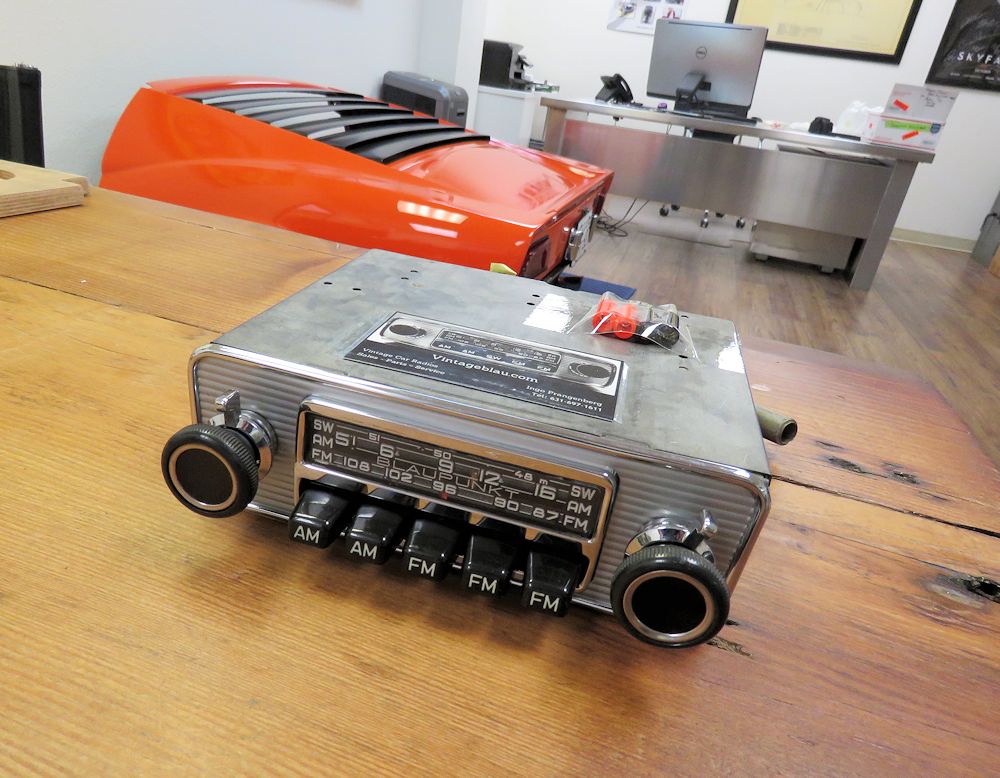
Earlier today we installed the vintage Blaupunkt that had previously been restored for me by vintageblau.com. I was pleasantly surprised how closely the radio's knobs matched the fore/aft balance knob to the left of the head unit. Turns out the Blaupunkt had received some Becker control knobs when it was restored, making it an even better match for the Coupe, which would have had a Becker radio when it was new. As I bought the Blaupunkt long before I even thought of buying the BMW, it is more by luck than judgment that it is such a great fit!
 |
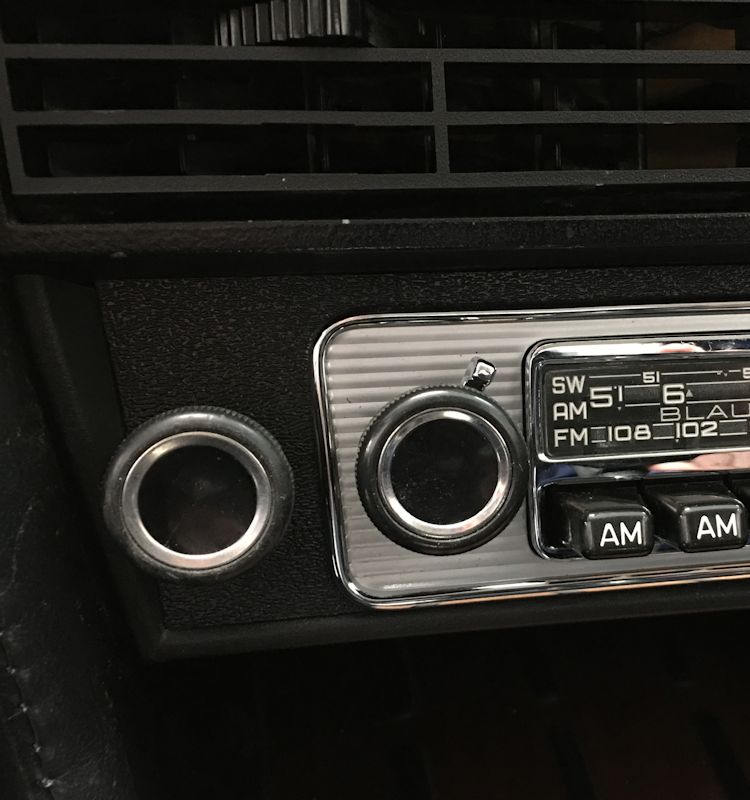 |
| Vintage Blaupunkt unit looks and sounds
great! |
Blaupunkt control knobs are identical to
BMW fore/aft balance knob - an unexpected bonus! |
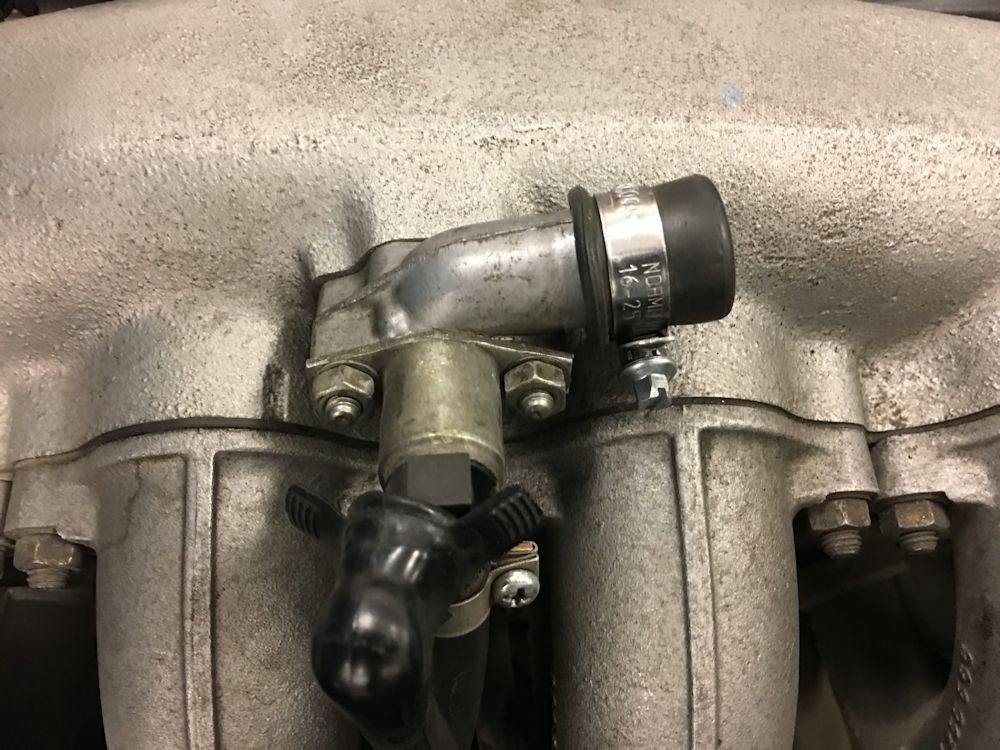
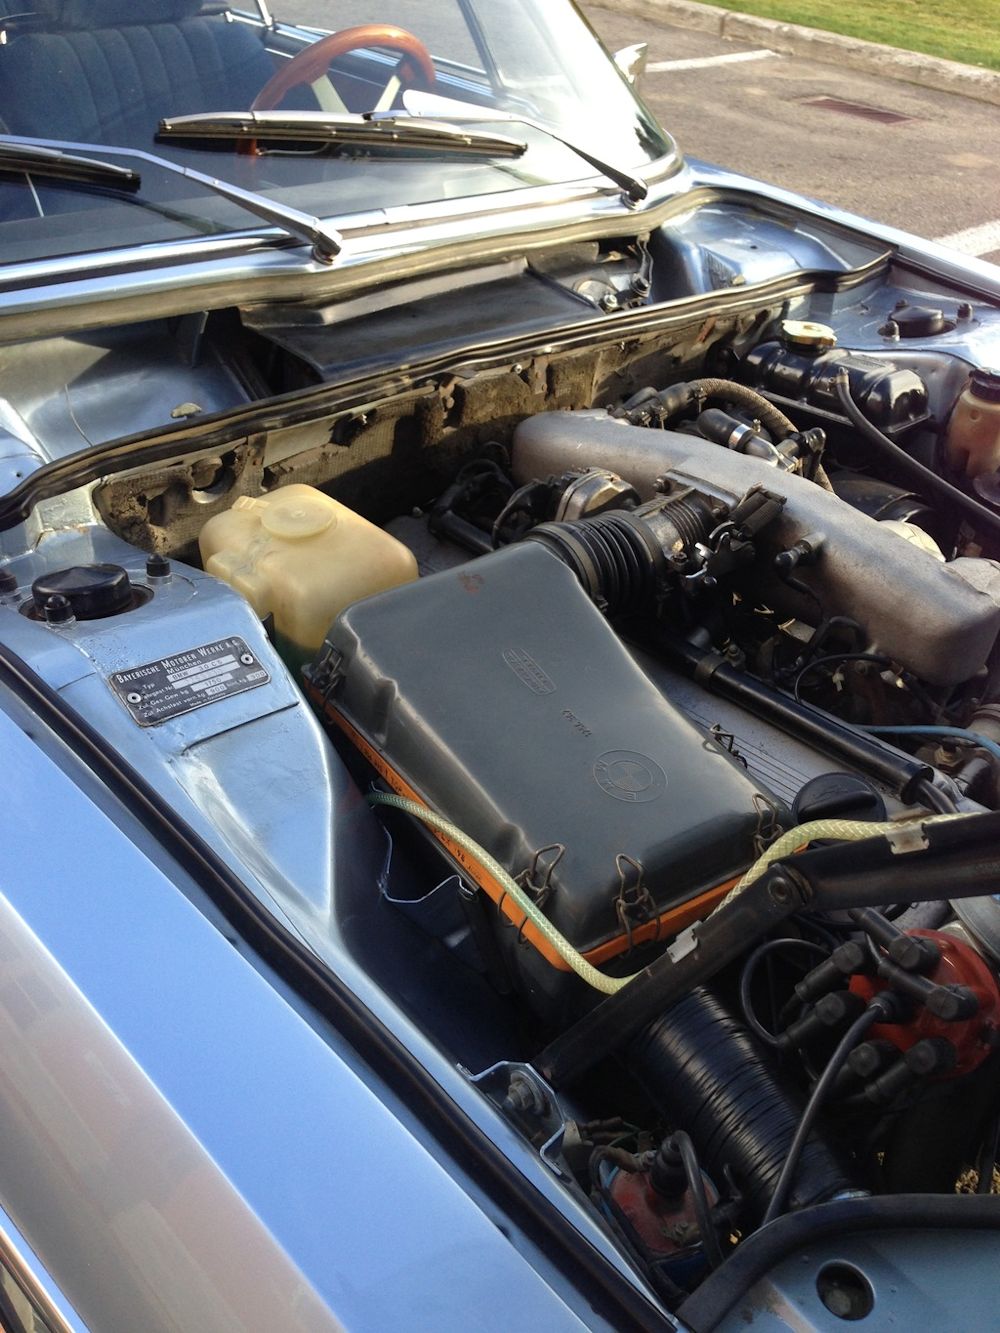
We spent a couple of hours on the car yesterday in the hope of getting it back on the road. Unfortunately, we ran into a couple of issues which brought us to something of a grinding halt. The car has never idled properly since it arrived at CJ last month, and it was also really struggling to pull past about 3,000 rpm without a bunch of stumbling and hesitation. We smoke tested the intake and found a bad vacuum leak at the rearmost intake runner. Replacing the intake manifold gaskets should hopefully take care of the stumbling and hesitation.
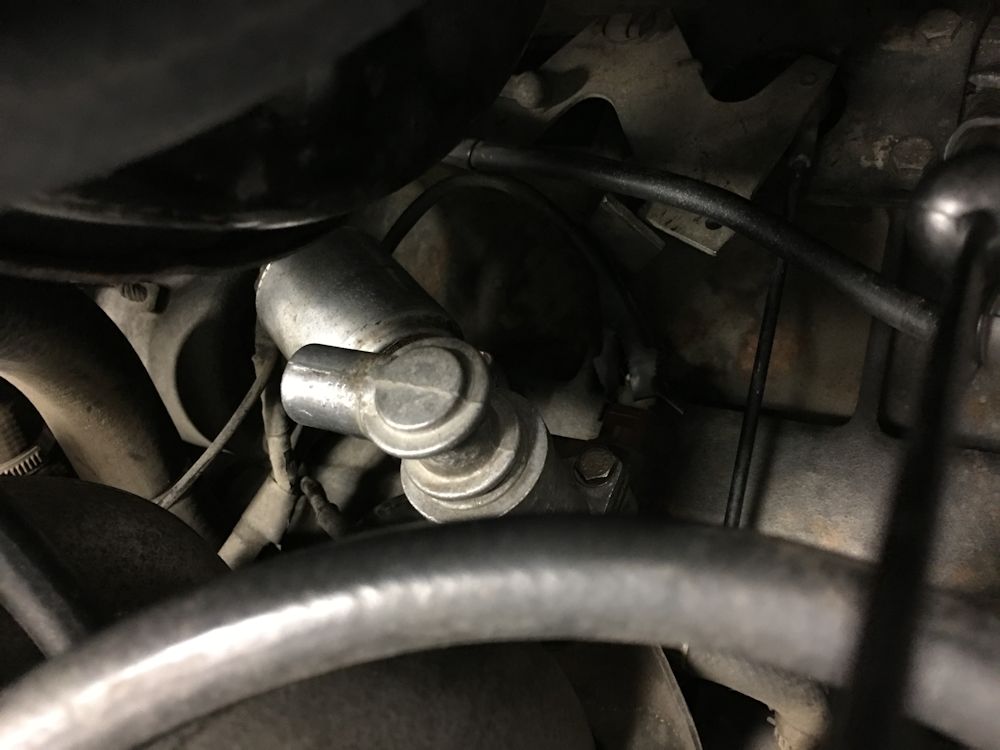
We also discovered that the Bosch Auxiliary Air Slide (part # 280140036) on the left side of the engine block was inoperative - and the likely cause of our idle issues. We confirmed this by taking the air slide out of the loop by capping the outlet on the intake manifold (which connects to the air slide beneath it). Doing so immediately resulted in a steady, smooth idle. Unfortunately the auxiliary air slides are rare as hen's teeth, and nobody in the states appears to have one. I spoke to Carl Nelson who told me he had just got one in from Germany, but that it was already spoken for. Carl said that he typically gets them in at a rate of about one a month, so I put my name on the next one to land in California. In the meantime, Carl confirmed that the car will run fine (once warmed through) with the fitting at the manifold capped the way we currently have it. As well as the intake manifold gasket set, I also placed an order with Carl for a new air filter and new vacuum lines.
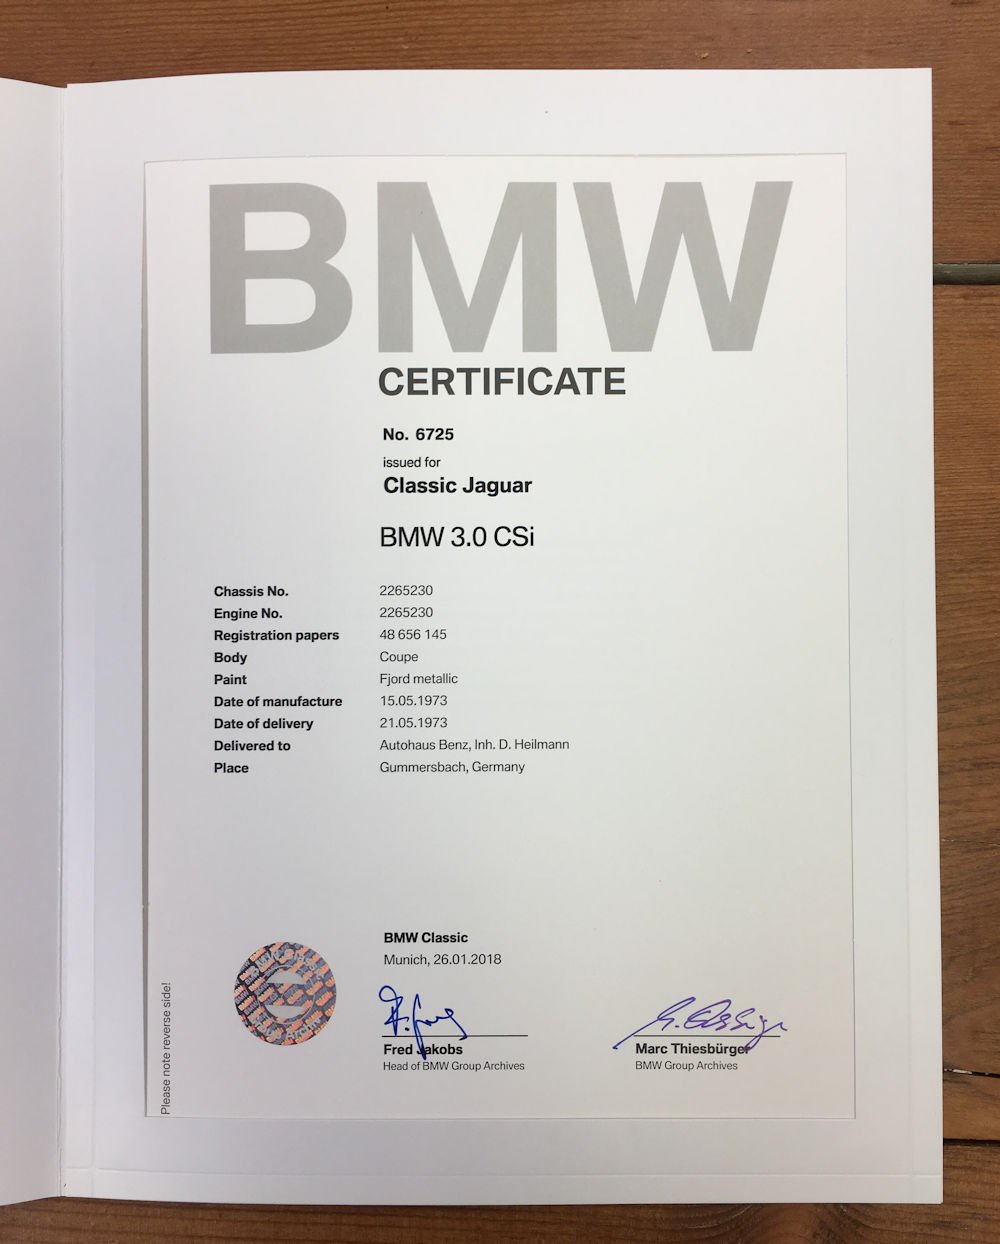
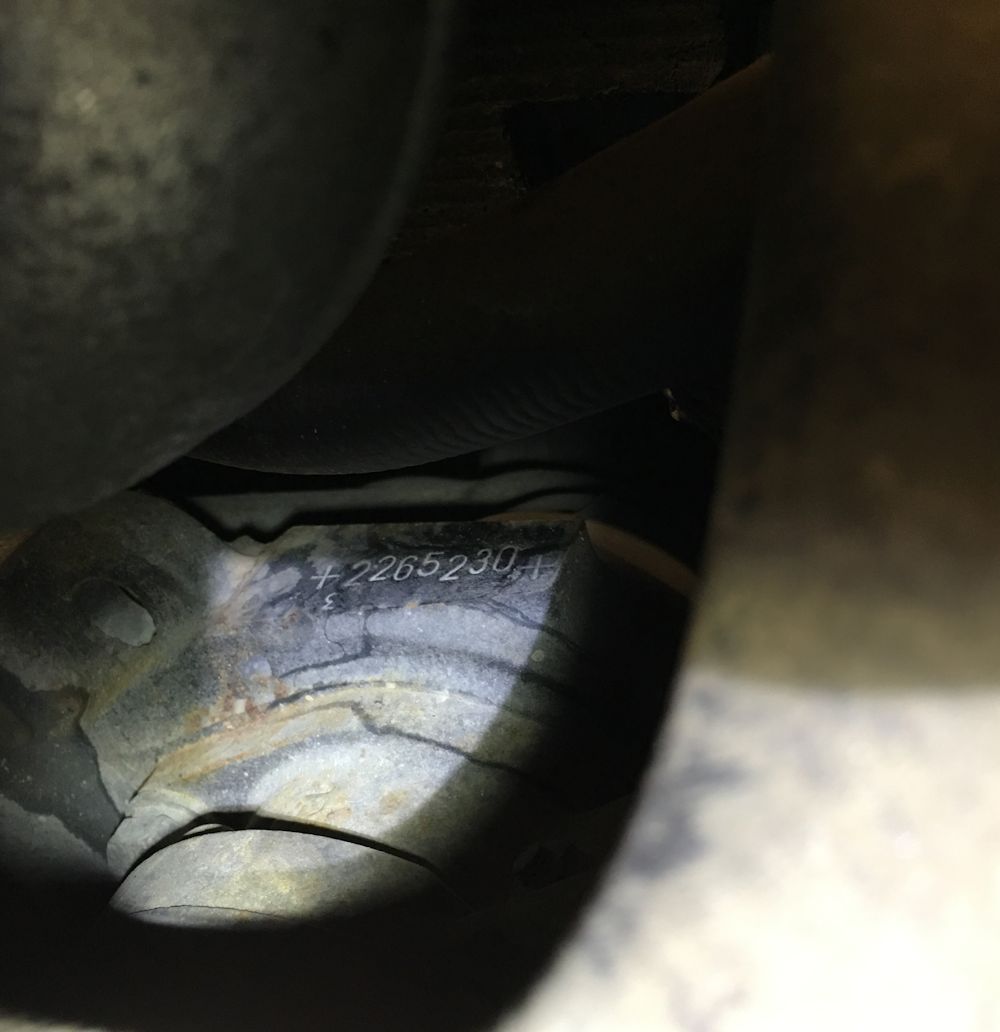
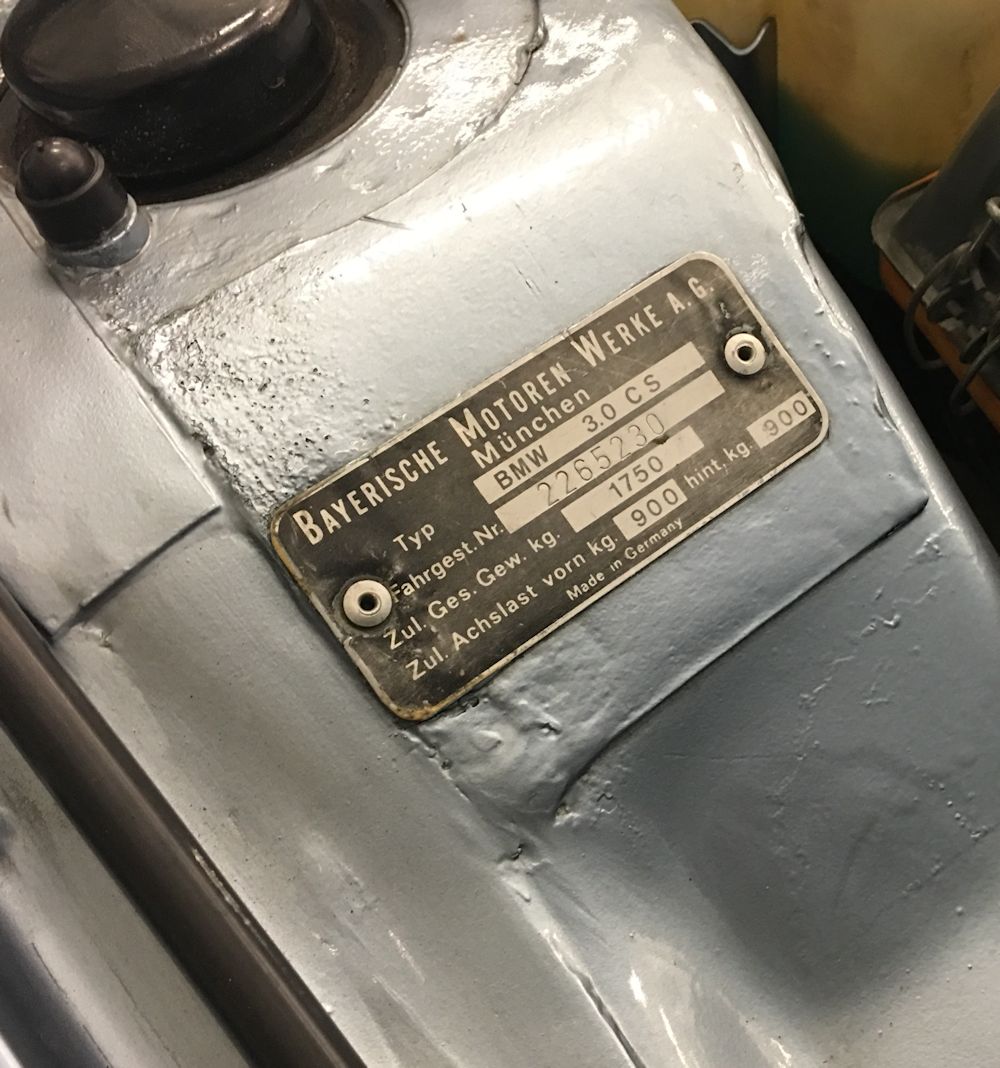
While I was in the engine bay yesterday I checked the engine number and confirmed that it matched the chassis number. Armed with this information, I applied for a heritage certificate from BMW Classic in Germany.
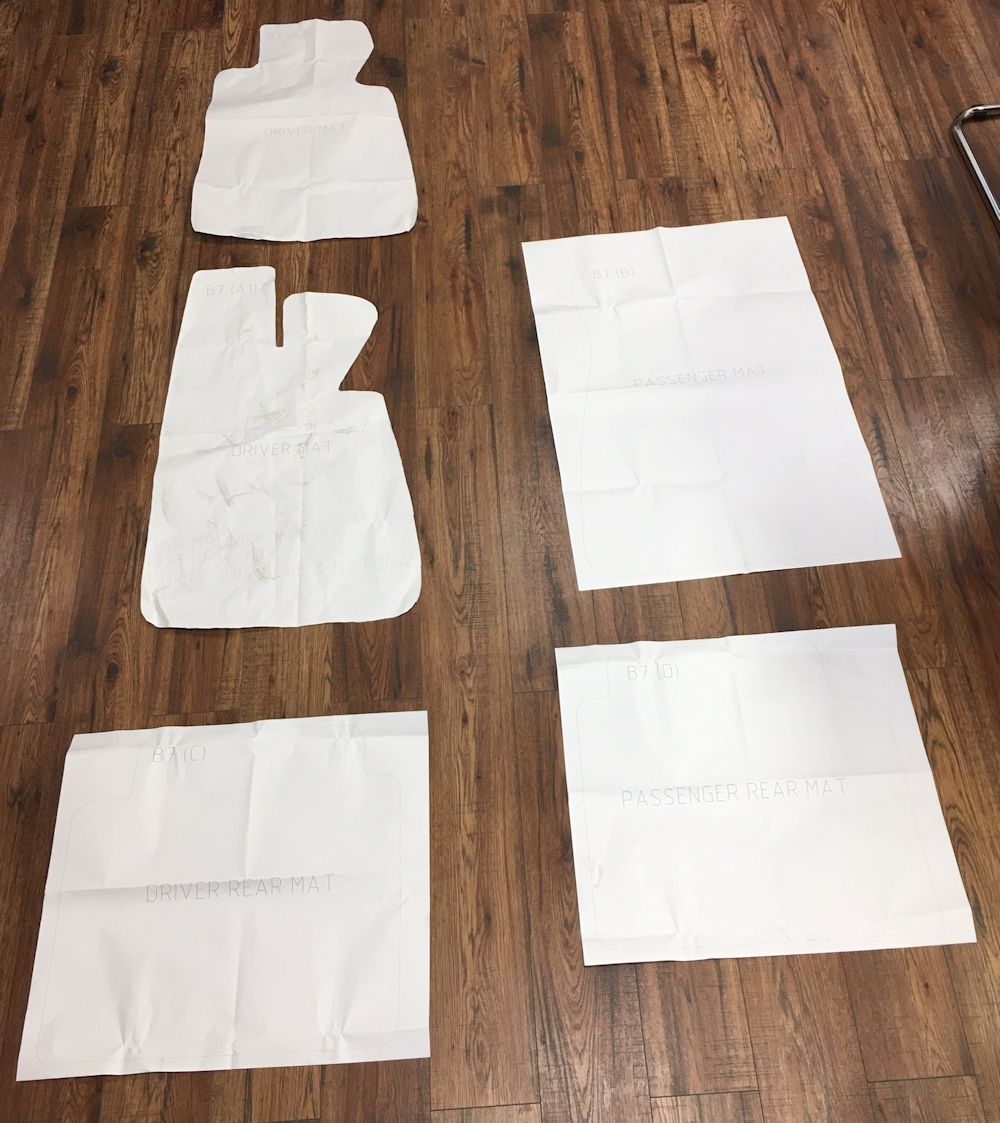
I recently ordered some Coco Mats for the BMW and the good folk at Cocomats.com mailed me some paper templates to cut out and trial fit before making my mats. Apparently there are a couple of different options for the driver's footwell, and I was able to establish the correct pattern for my particular car. I like the fact that the Coco Mats people go the extra mile to make sure you get the correct mats for your car.
Hopefully my intake manifold gaskets will come in today and I will finally be able to get the CSi on the road!
 |
 |
| Bosch Auxiliary Air Slide is kaput |
Capping the valve at the intake manifold to
take the auxiliary air slide out of the loop |
 |
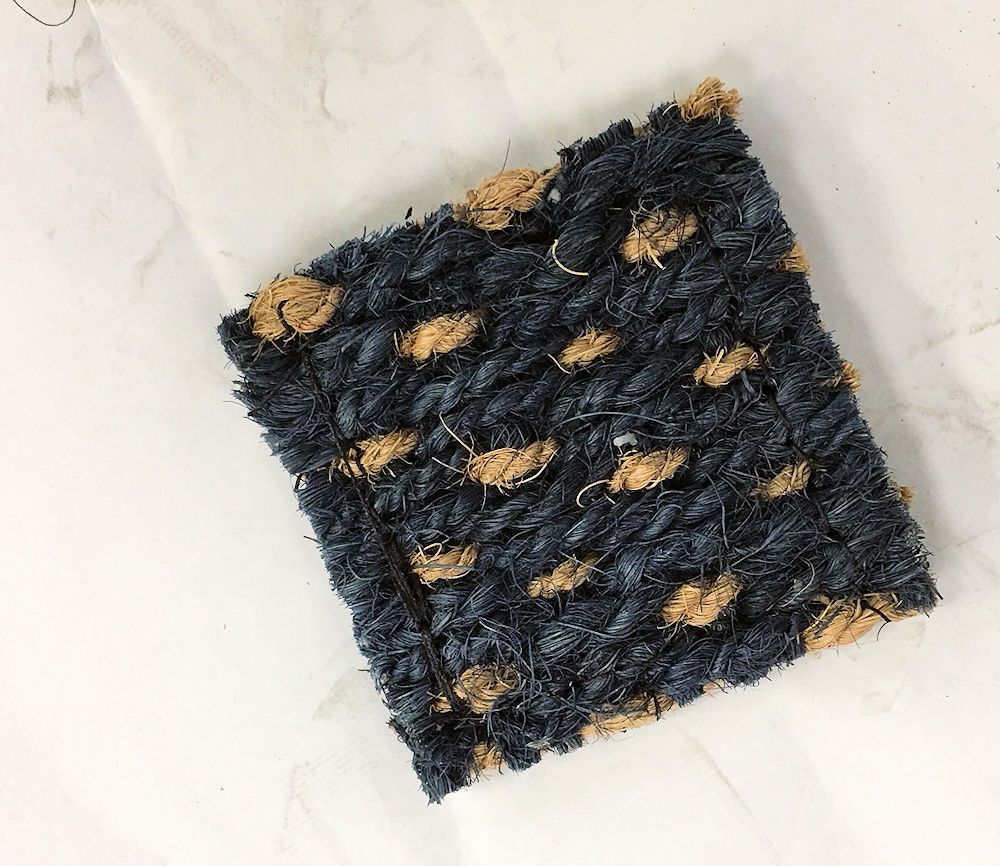 |
| Time for some Origami, courtesy of
CocoMats.com |
I chose blue/natural (#4) |
 |
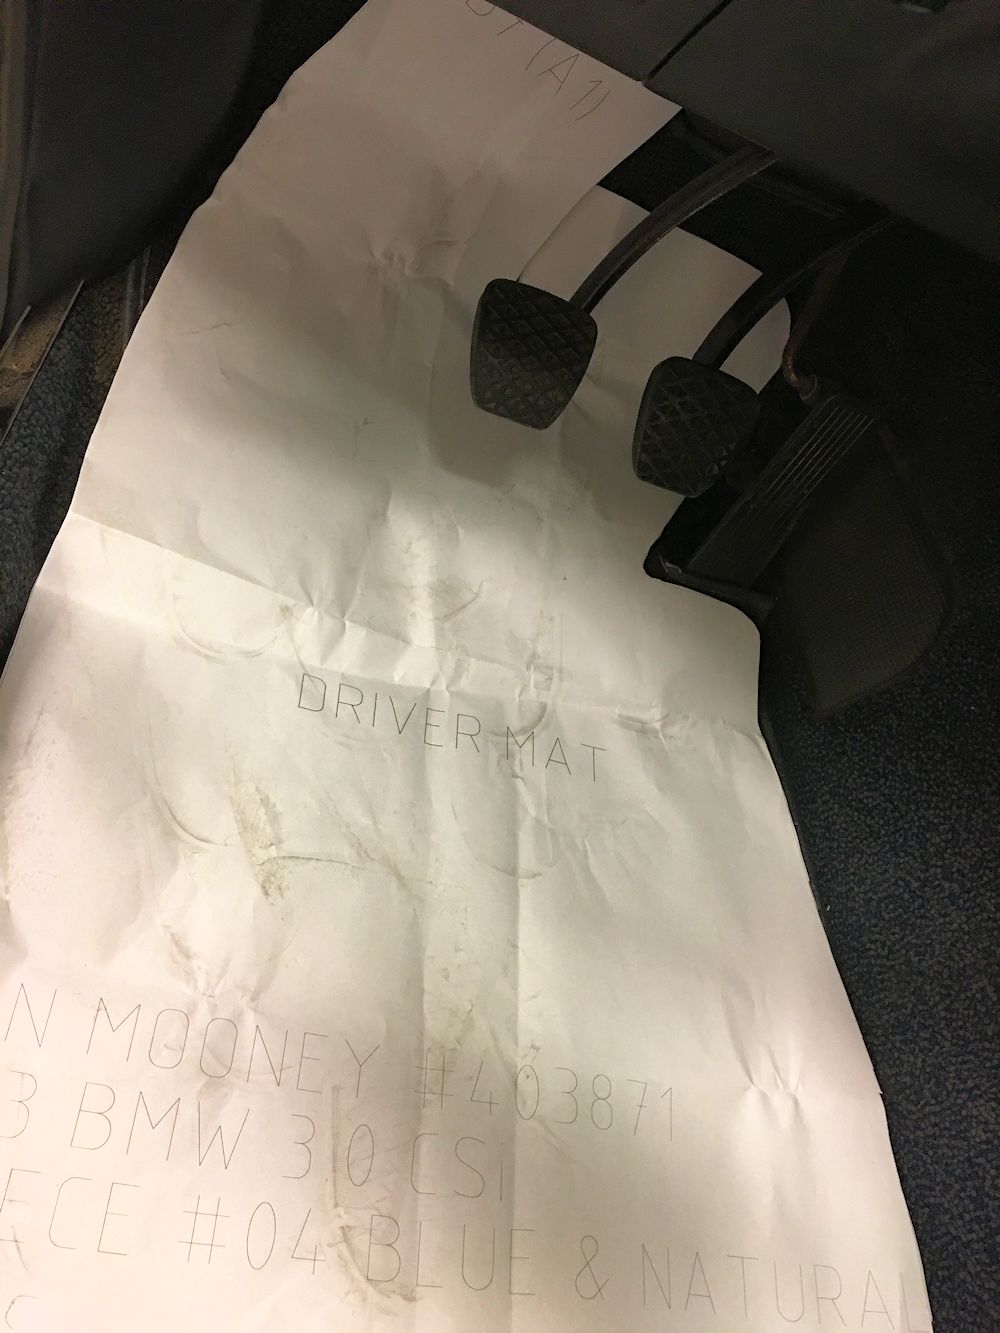 |
| Pattern B7 (A2) is not quite right... |
Pattern B7 (A1) appears to be a winner |
 |
 |
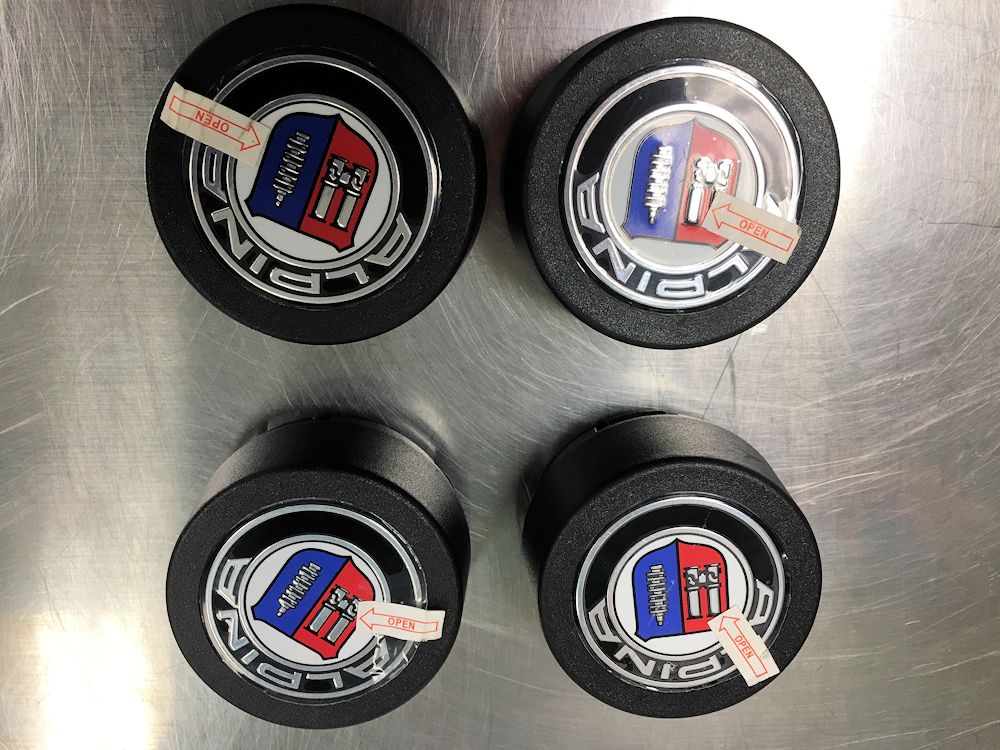
| Some new Alpina caps |
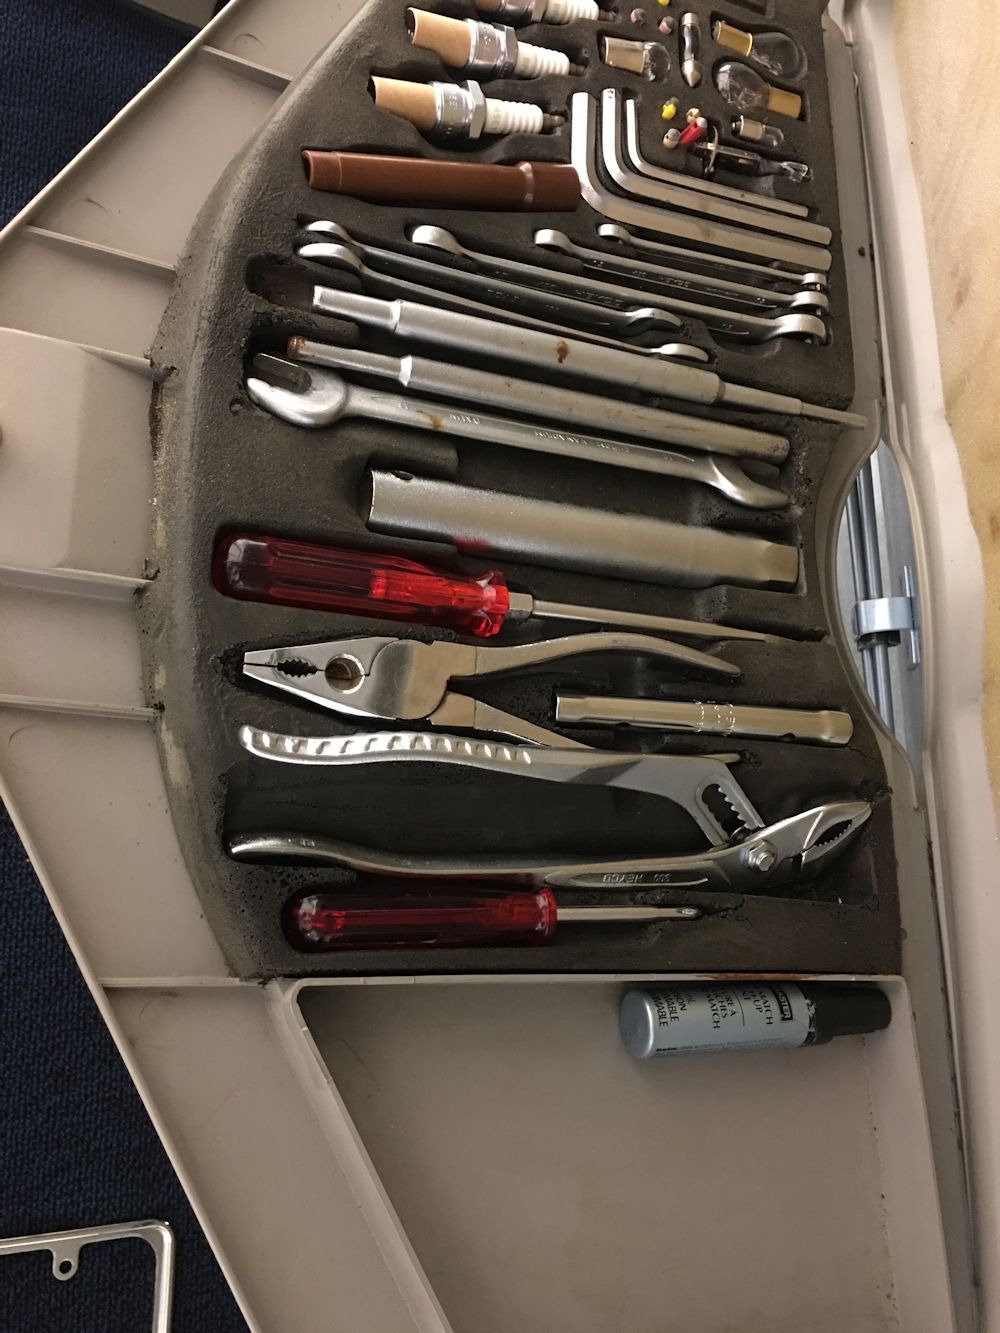
Water pump pliers sourced and added to the
tool tray |
 |
 |
| Pleased to see the engine and chassis nos
match |
Introducing the BMW to one of its siblings |
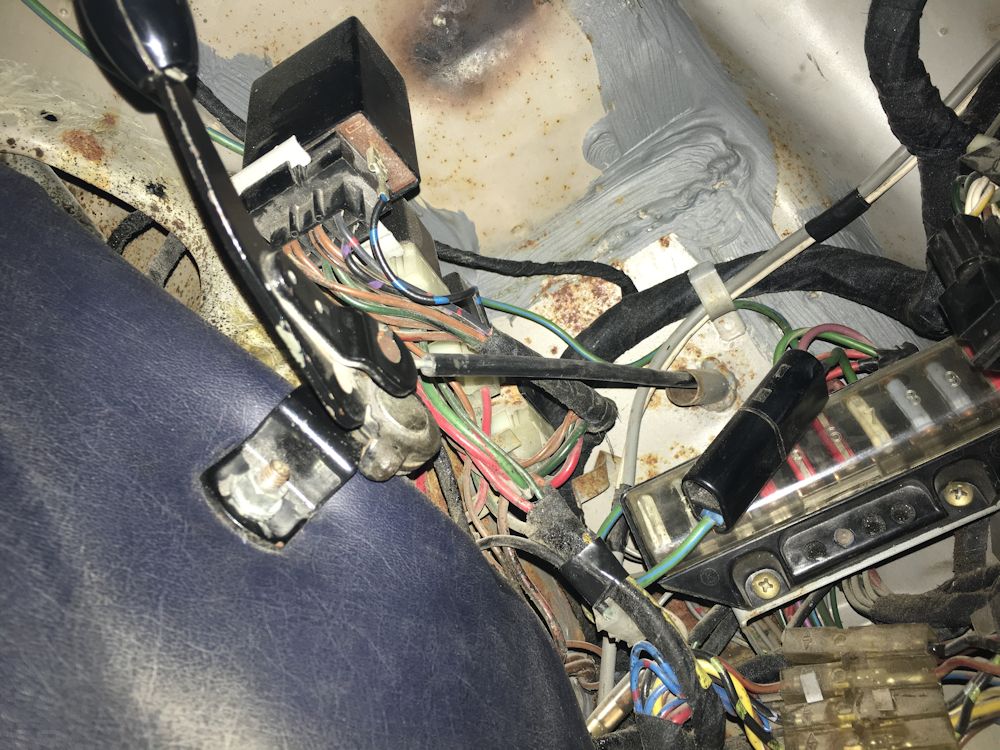
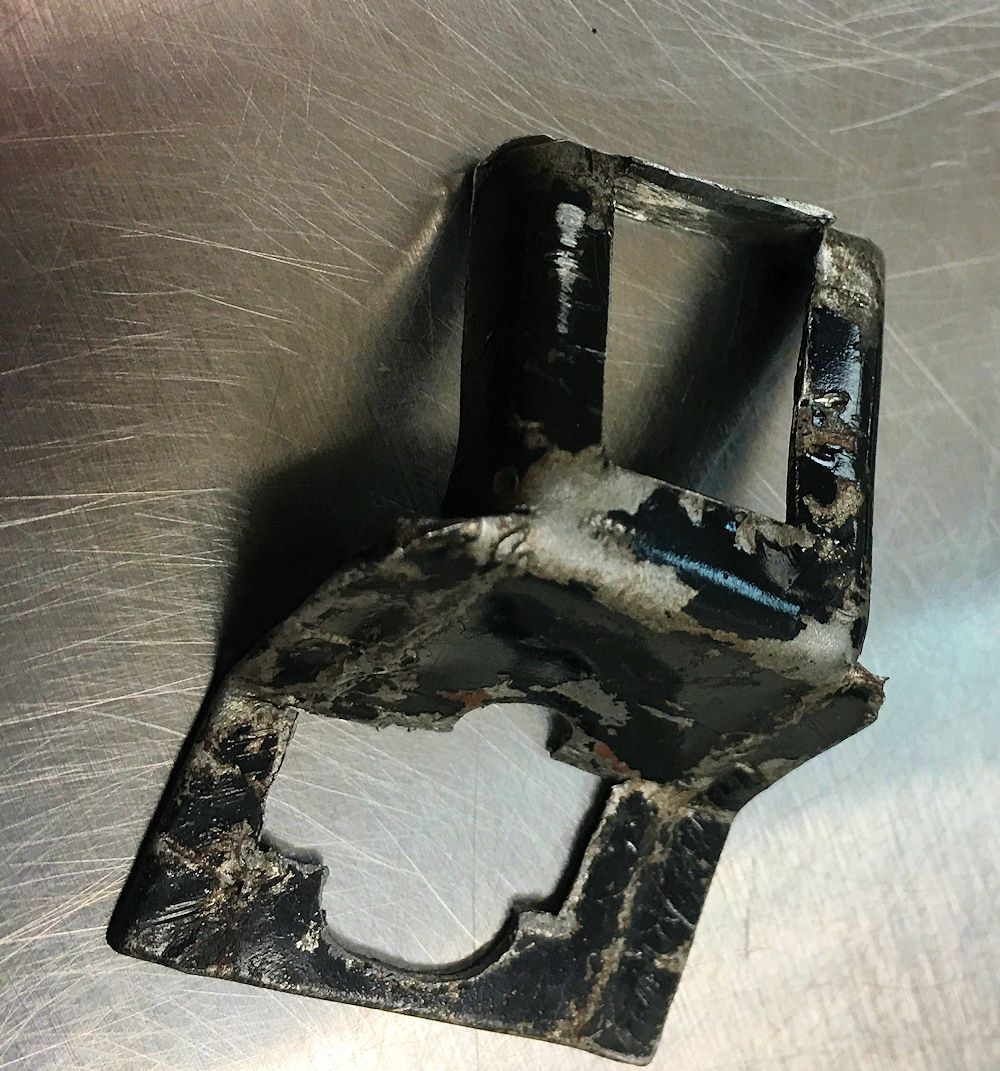
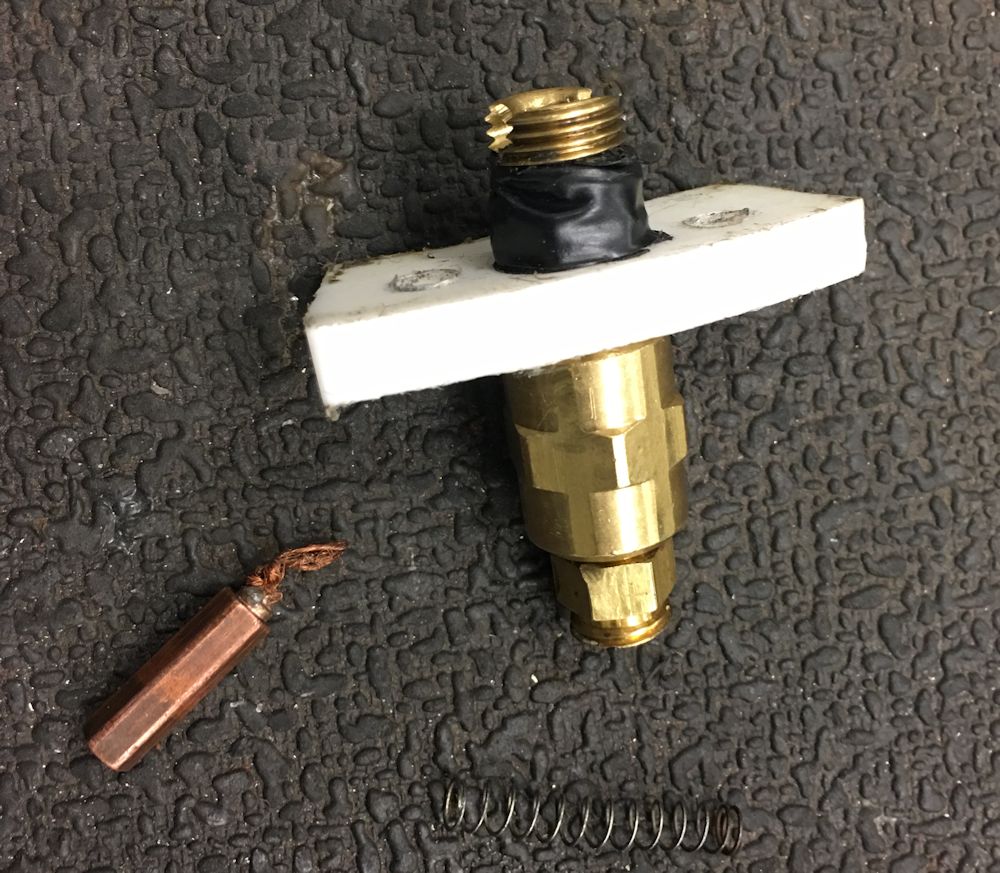
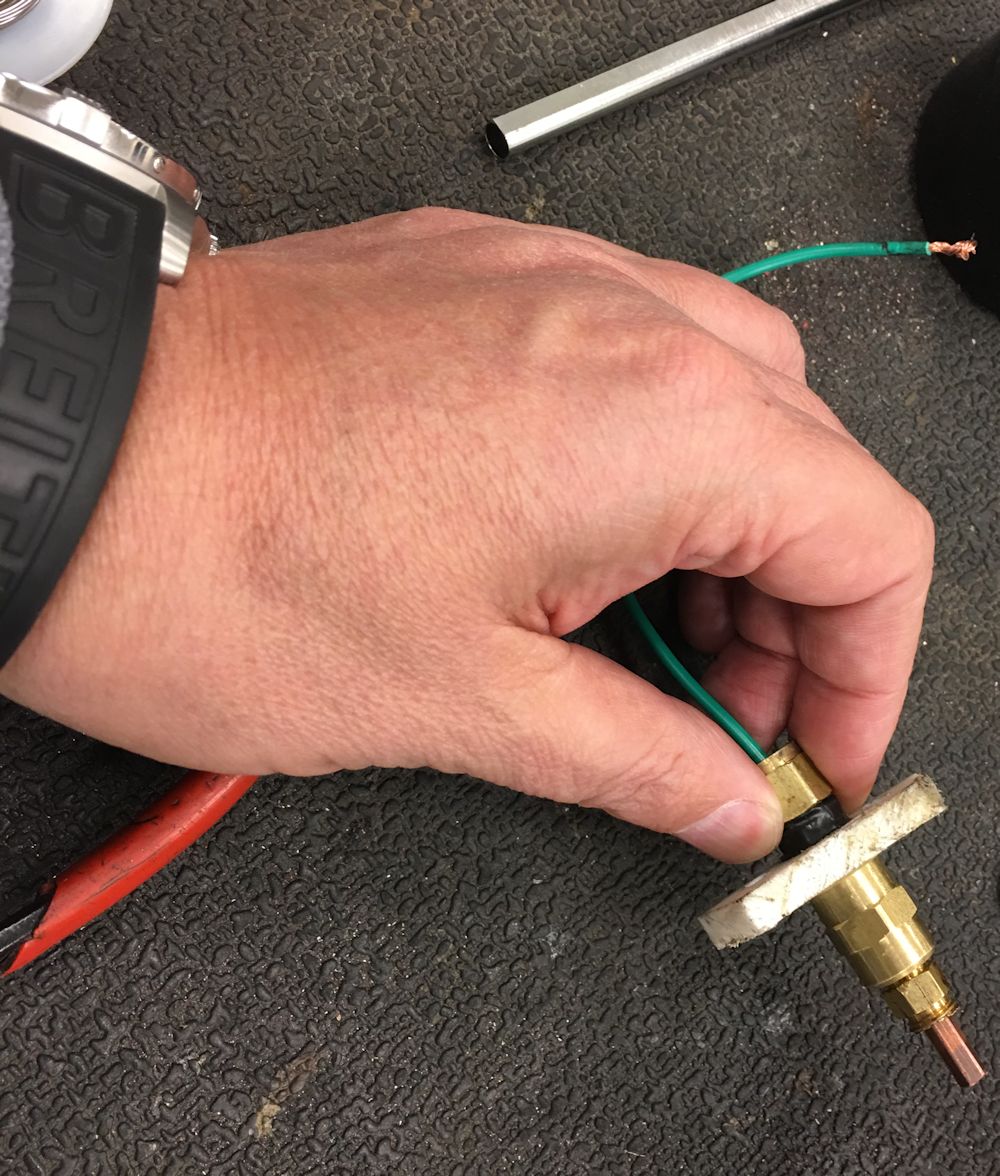
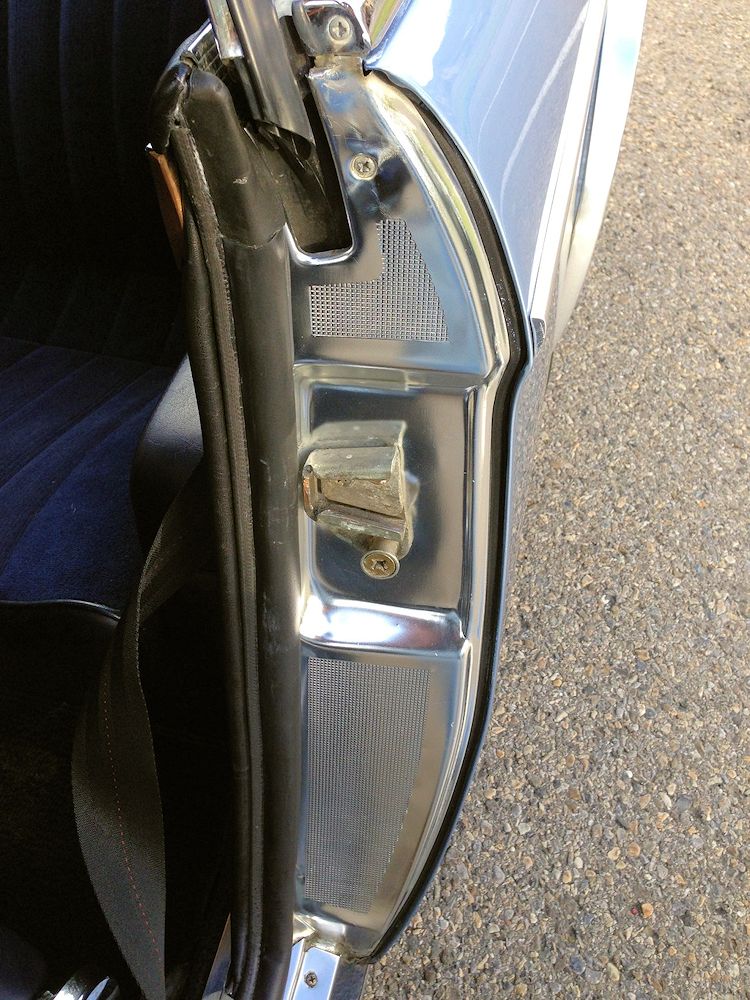
Today I decided to prepare the BMW for a state safety inspection. Unfortunately when the car was delivered it had numerous issues that I had not been expecting. Literally none of the lights worked, front or rear, the indicators didn't work, the driver's door could only be opened from the inside, the fuse panel door would not remain closed and the horn didn't work.
I had Ray work his way through all the various lighting issues, and Carlos attended to and repaired the driver's door handle. When we addressed the inoperative horn we were surprised to find that the home made horn internals consisted of a selection of brass plumbing fittings, a hand carved phenolic bracket, a ballpoint pen spring and some electrical tape.
 |
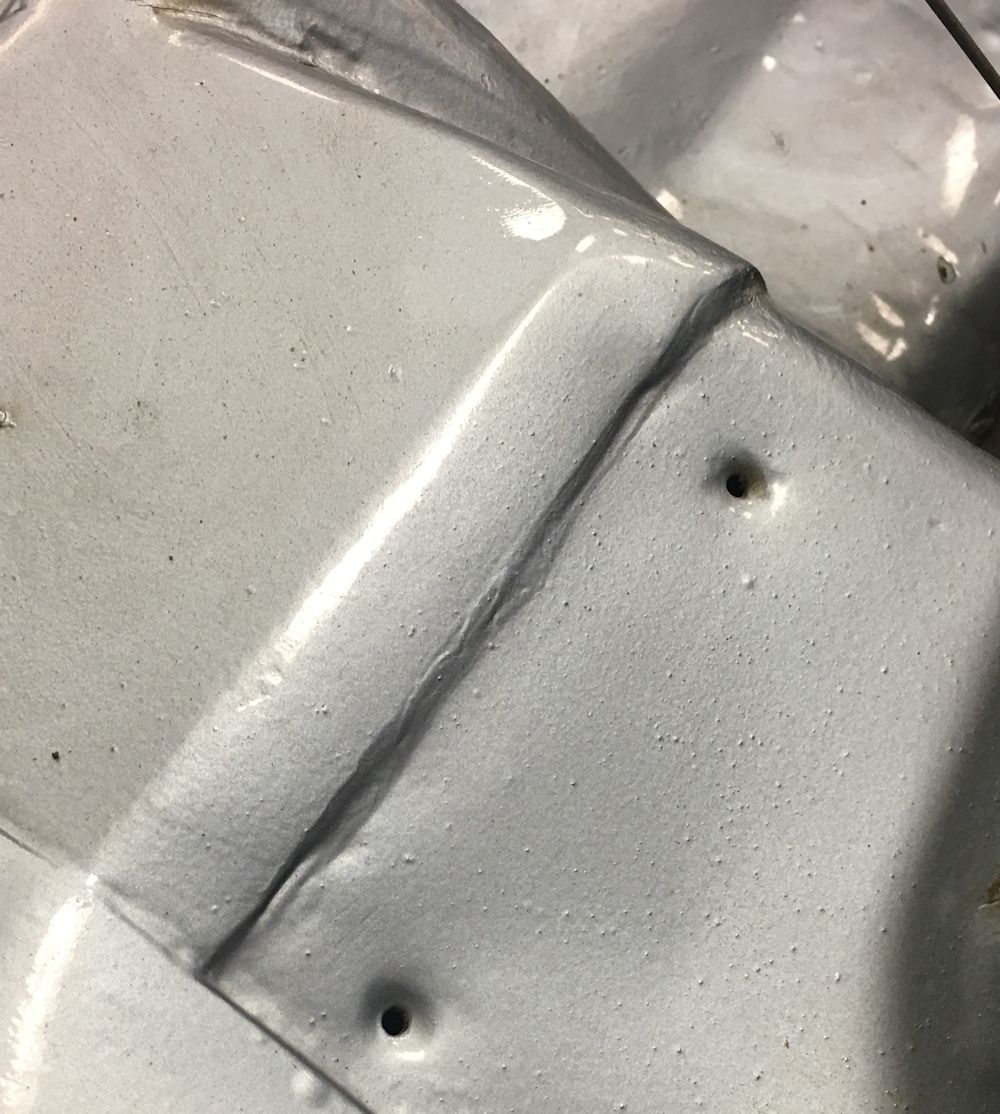 |
| Chassis plate has been moved from behind
the front right shock tower to in front of it |
The original location of the chassis
plate |
 |
 |
| Carlos fixing the driver's door handle,
Ray working on the lights (none of which worked) |
Photo taken inside the glove box |
 |
 |
| Thankfully everything looks dry and rust
free inside the glove box |
|
 |
 |
| View inside a rather cluttered fuse area |
Fuse door latch had been modified and was
not working - now remedied |
 |
 |
| Horn mechanicals an interesting mix of
plumbing fittings and a ballpoint pen spring |
We have lights! |
 |
 |
| Assembling the custom, home made horn mechanism |
Note how the round hole beneath the shaft
has been modified (oggled out) with a square file |
 |
 |
| The horn now works - I suspect for the
first time in several decades |
Passed with flying colors! |
Today's update is a mixed bag of good and bad. On the positive side, I discovered that my electric sunroof works and has a very cool deflector which the good folk on e9coupe.com tell me is a rare and desirable feature. The other bit of good news is that my new Michelin XWX 205/70/14 tires came in and will be installed later today. Many thanks to Simon Cox at Longstone Classic Tyres in the UK who not only gave me a great deal on the Michelins (better than I could get here in the US) but also had them delivered to my door 3 days after I ordered them. I also received my small red screw driver for the tool kit today. I have the water pump pliers, valve adjustment tool and correct BMW blue cloth on way to me, leaving only the feeler gauges to find to complete the tool tray!
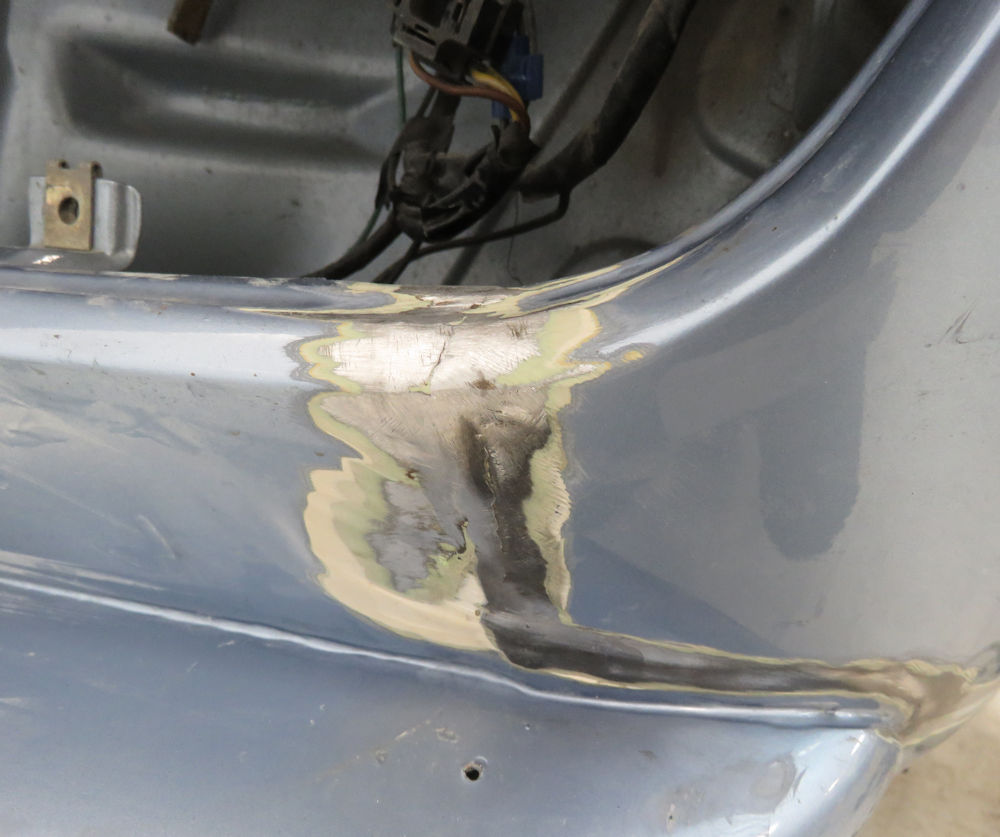
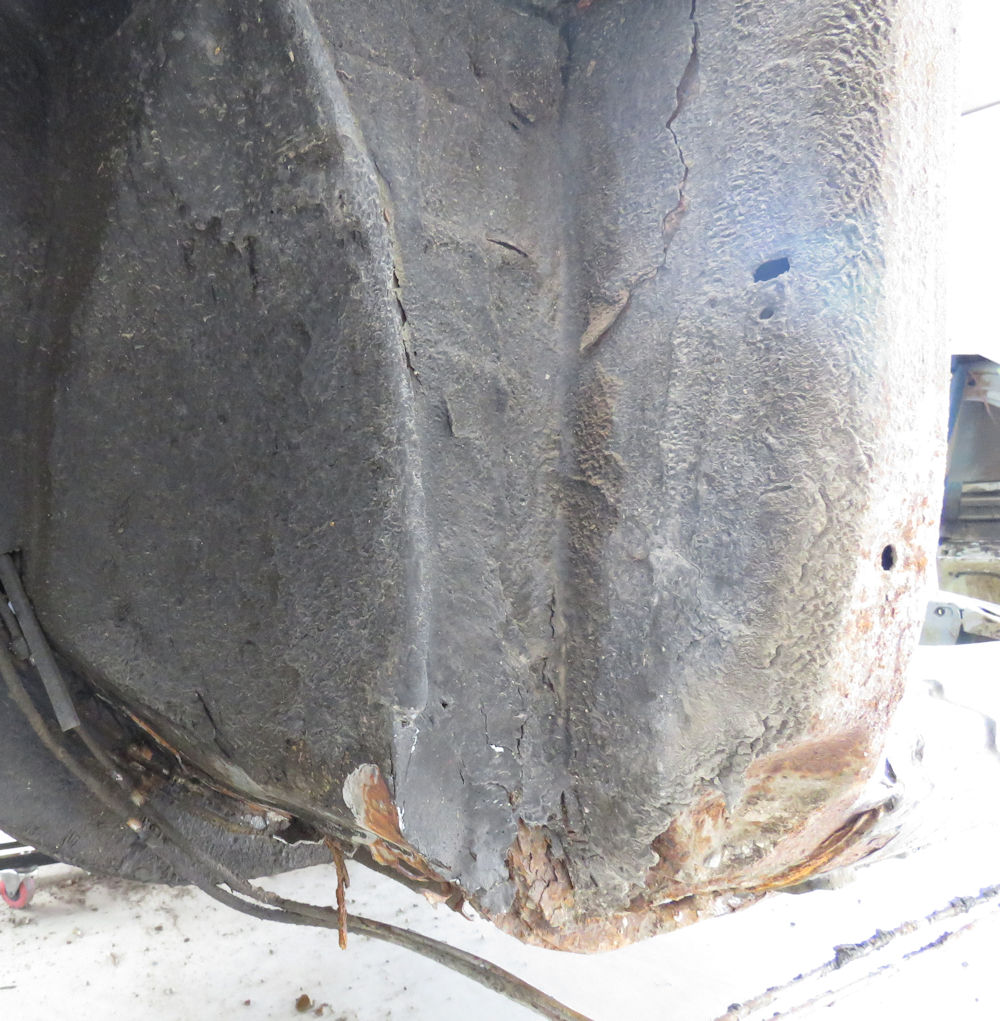
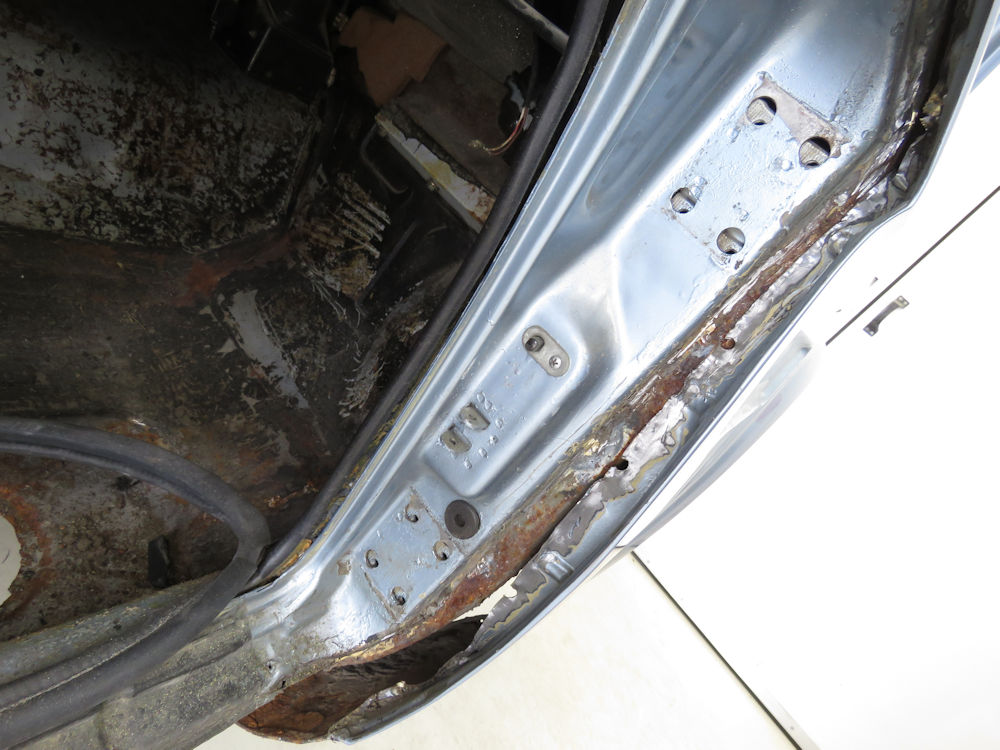
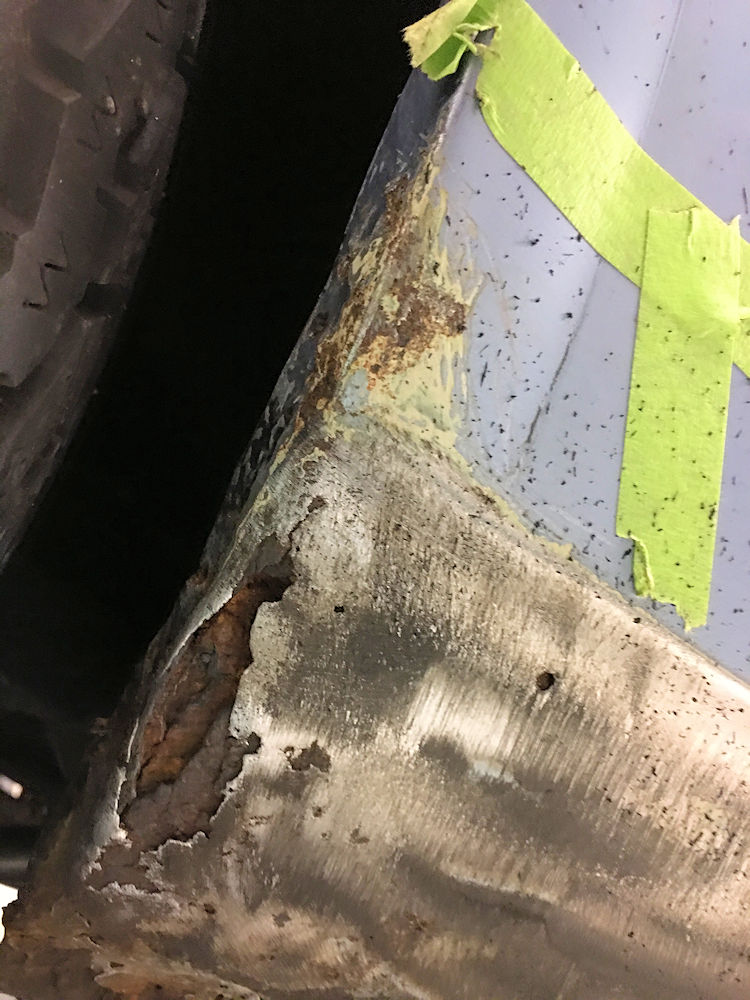
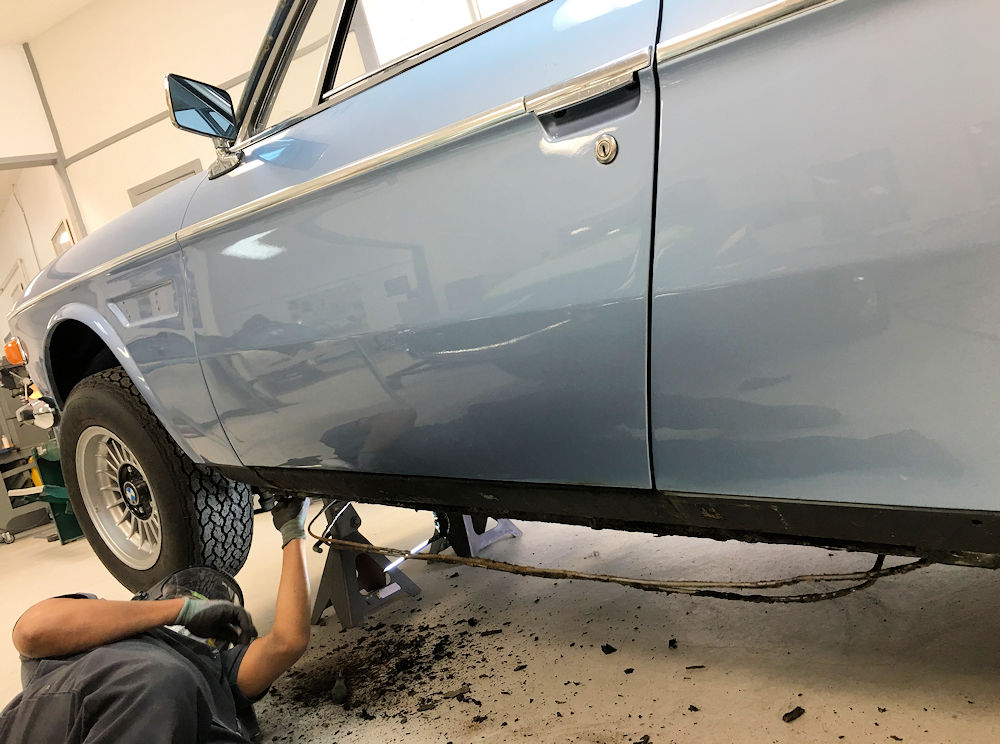
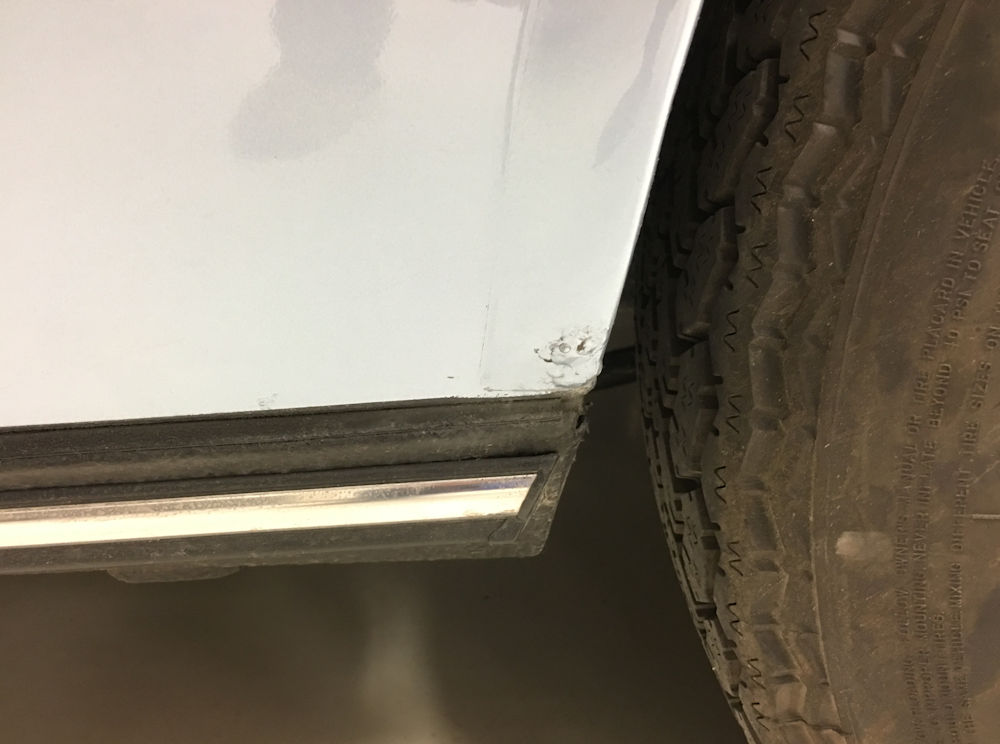
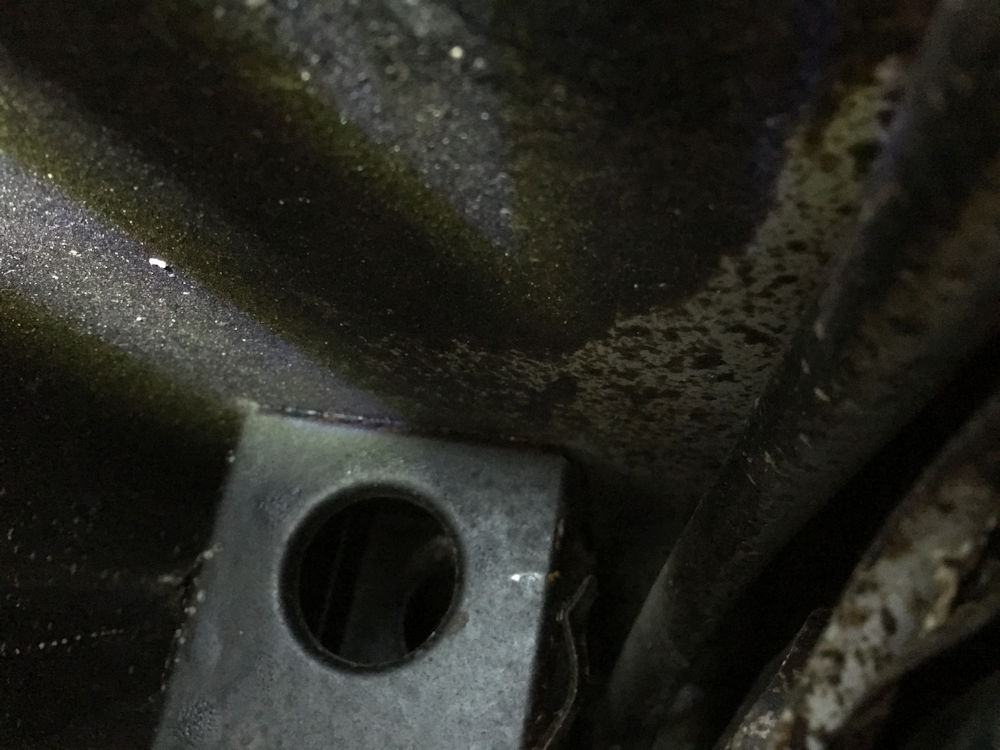
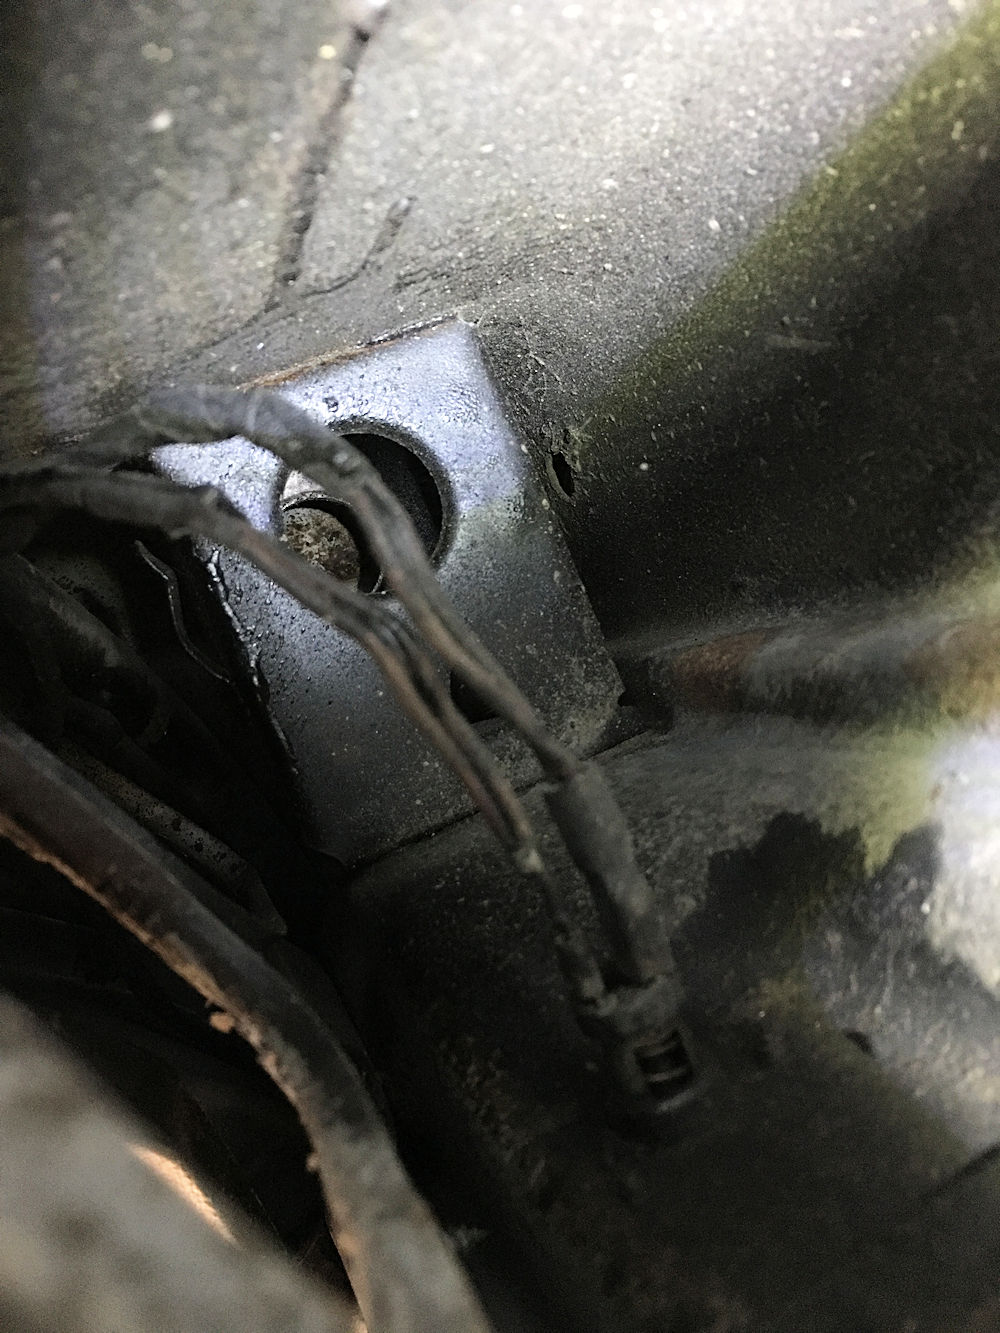
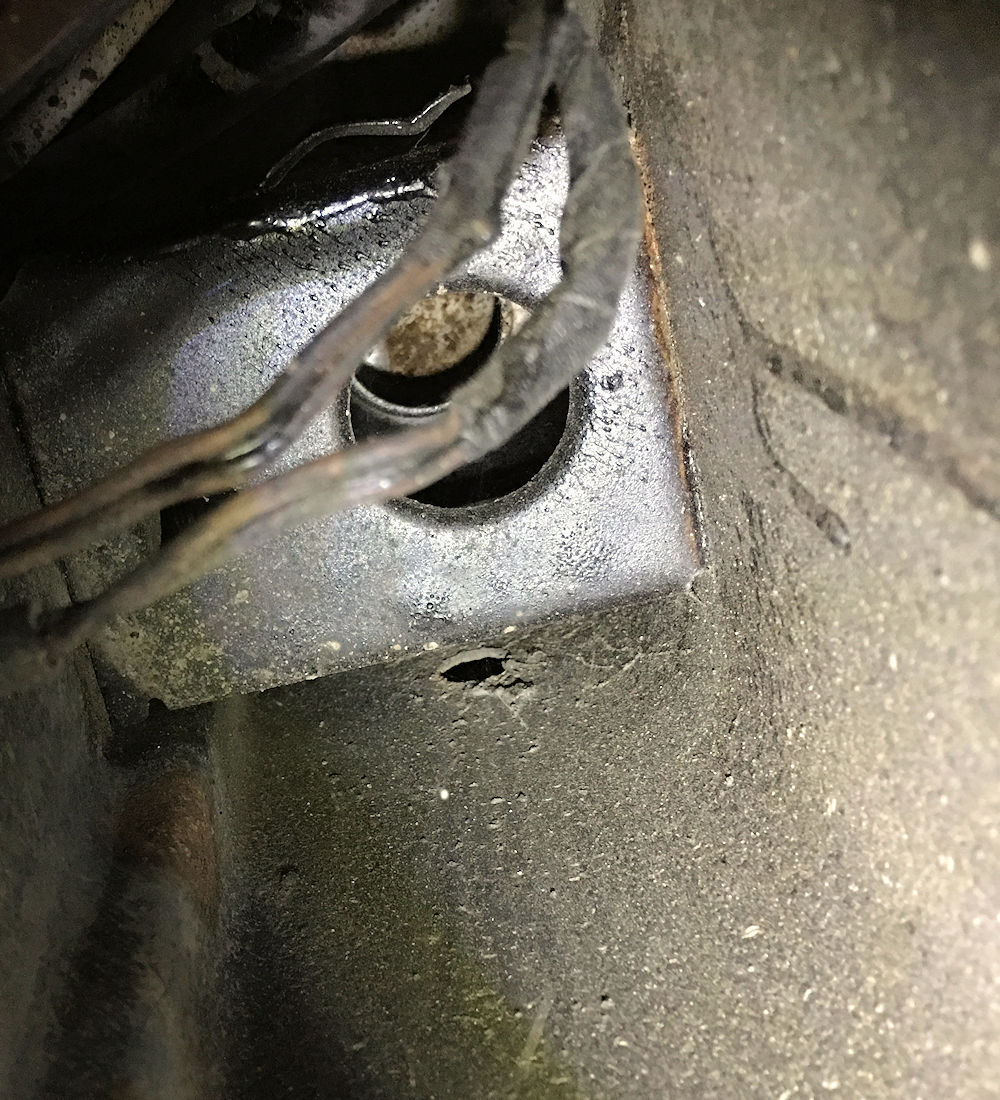
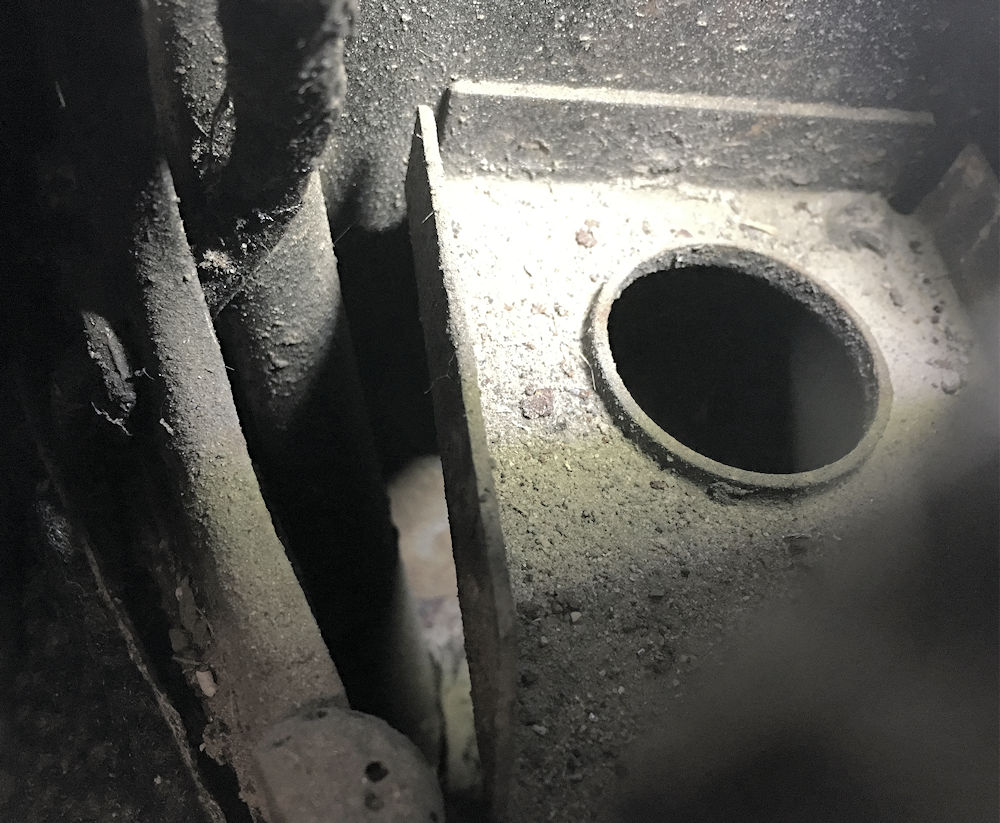
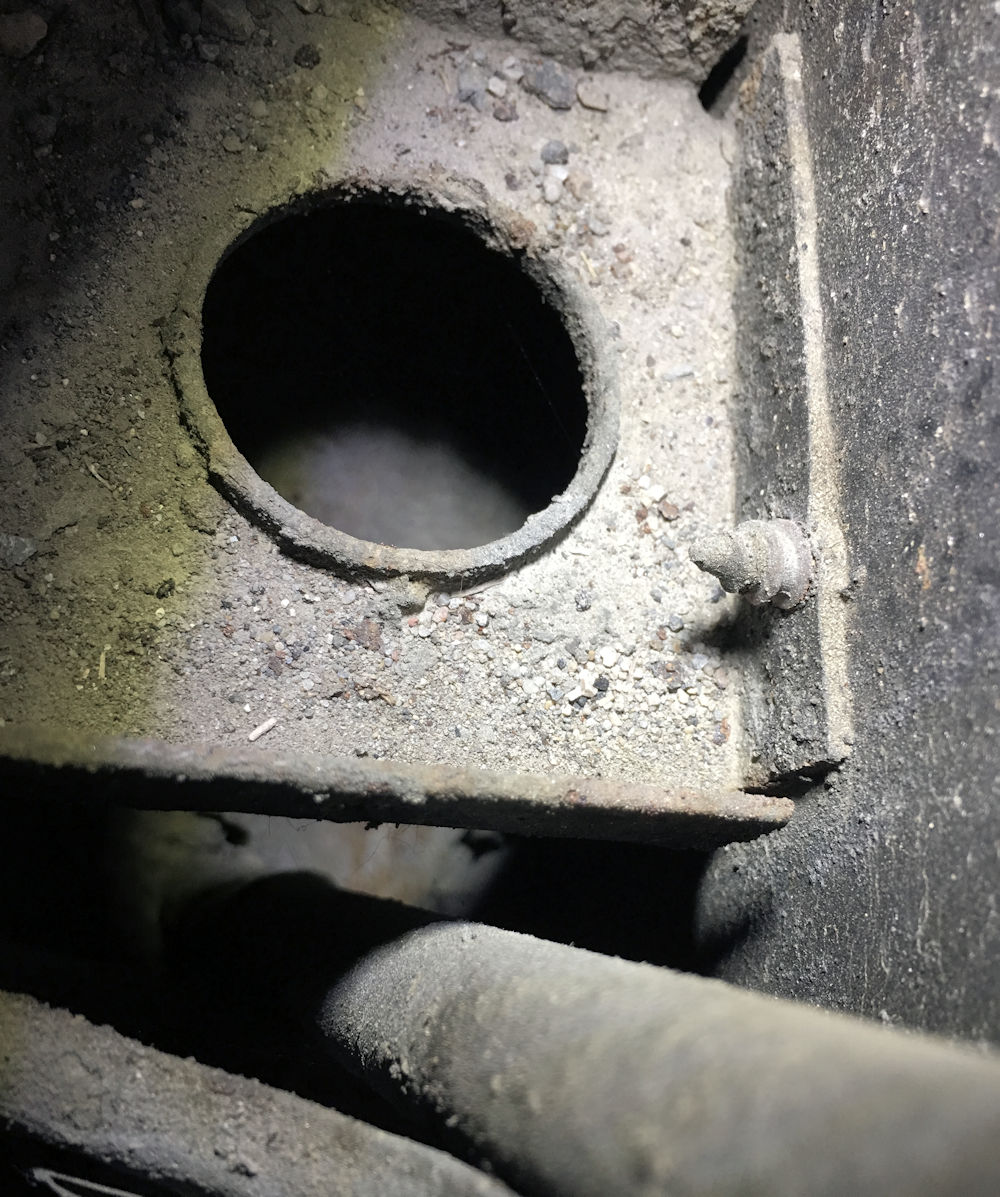
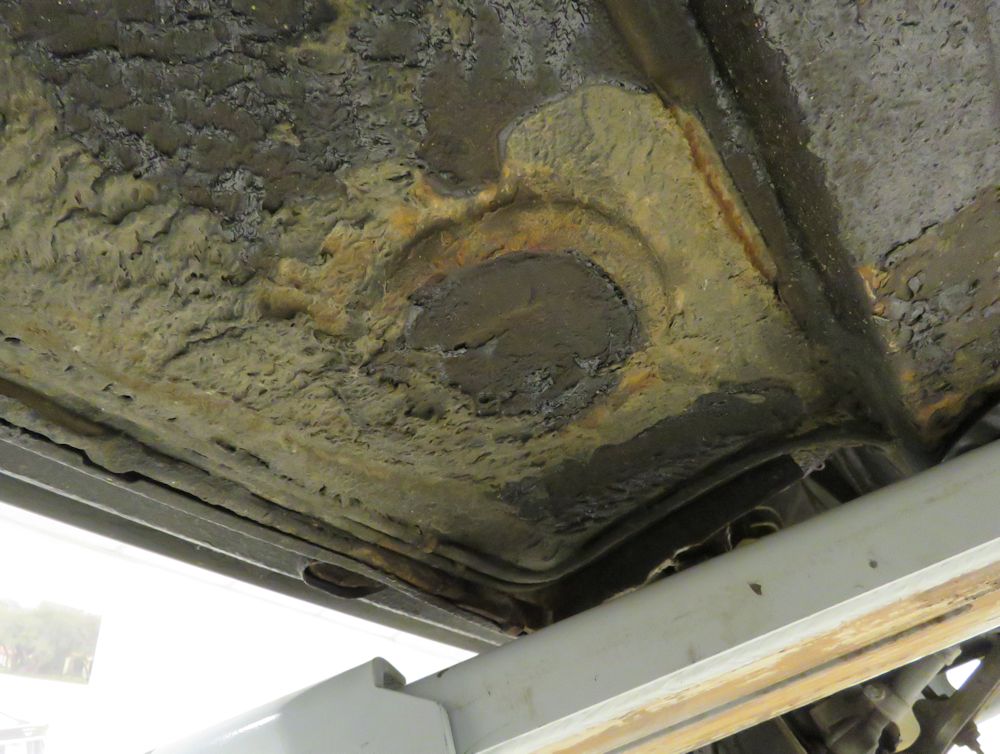
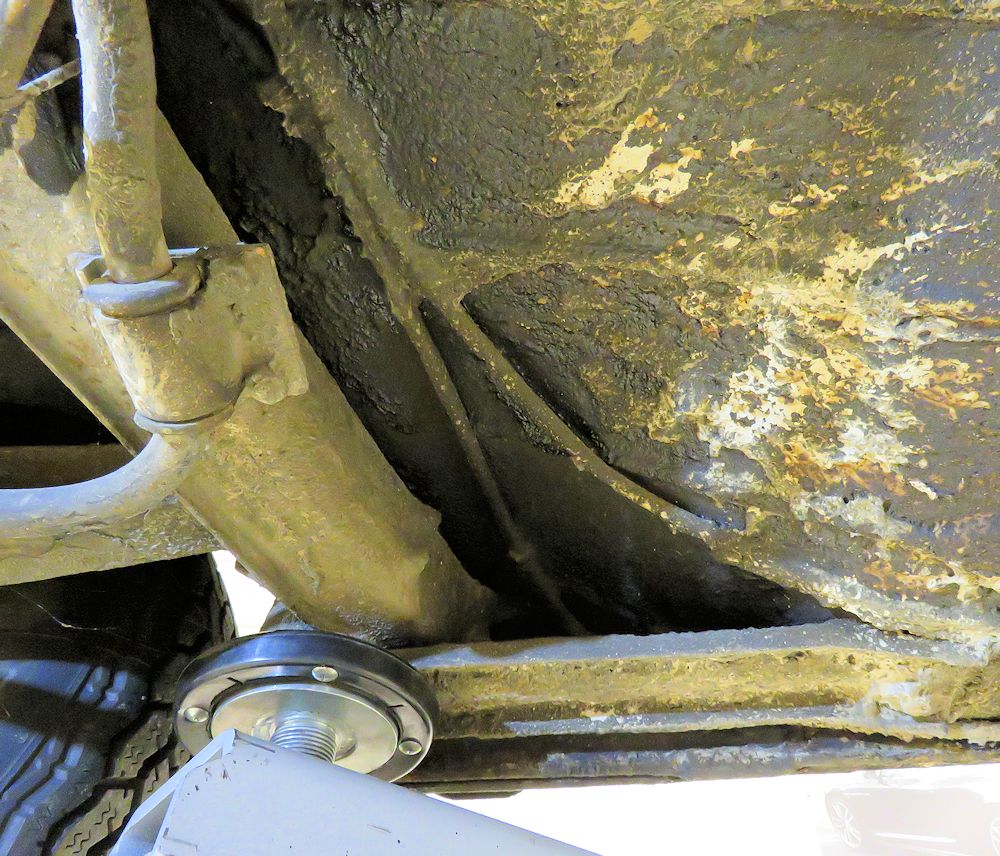
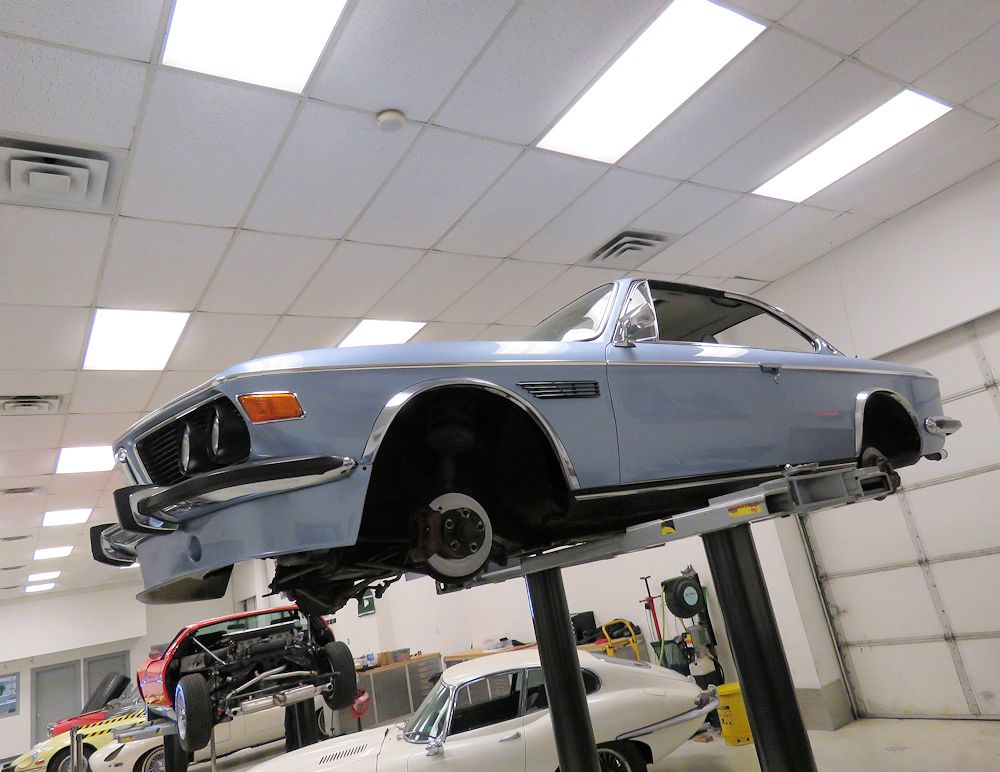
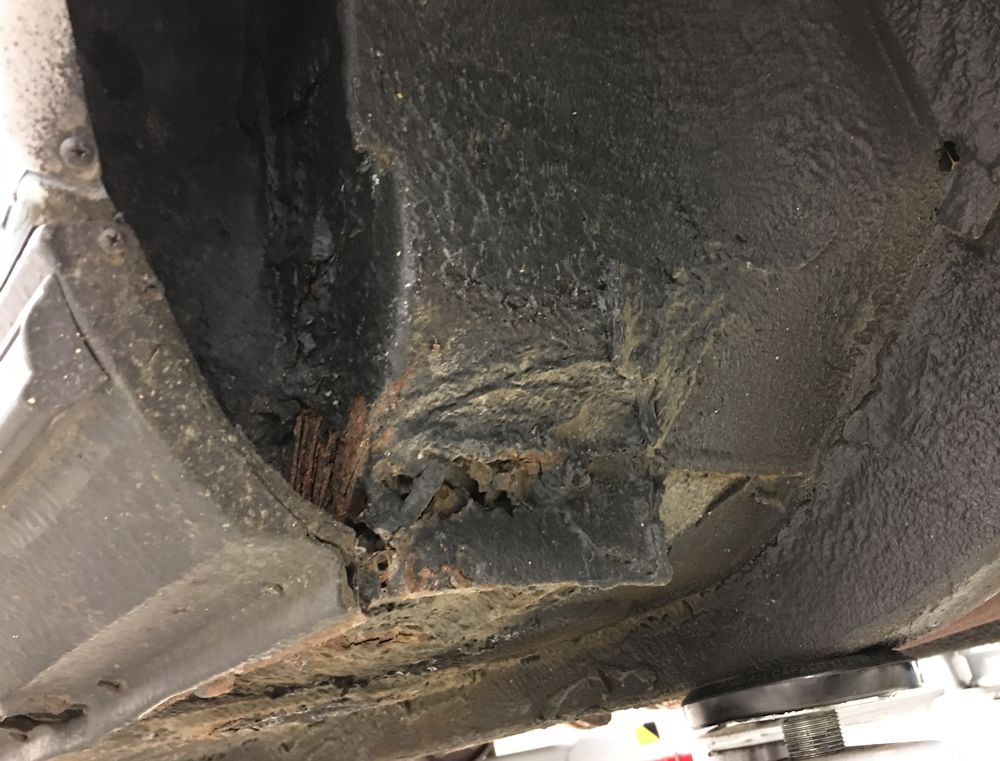
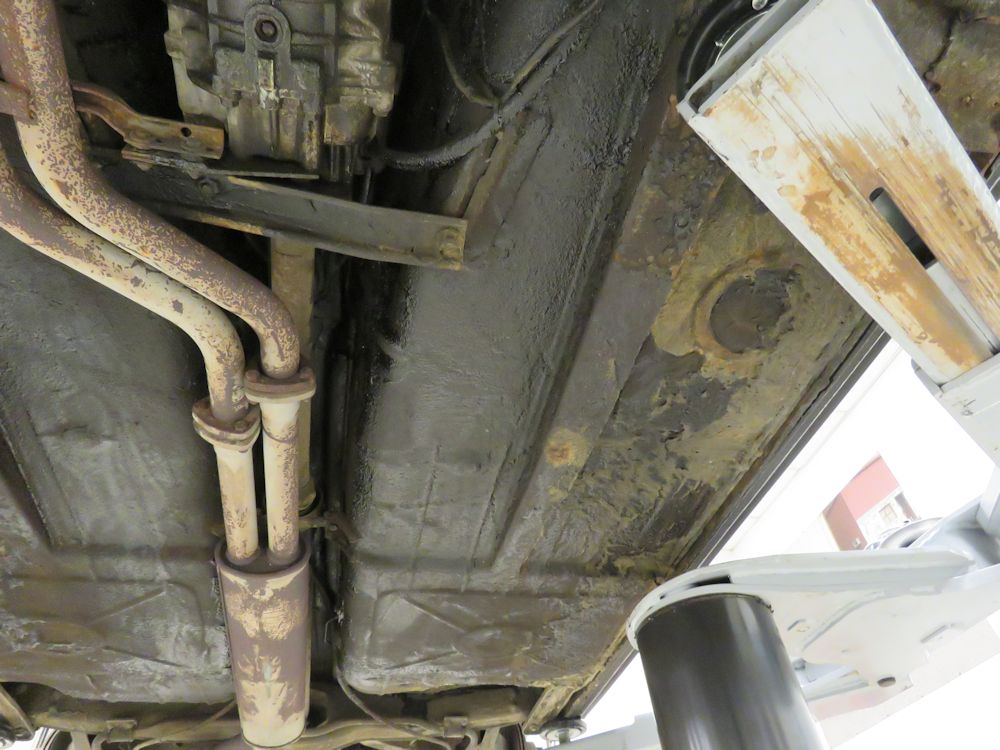
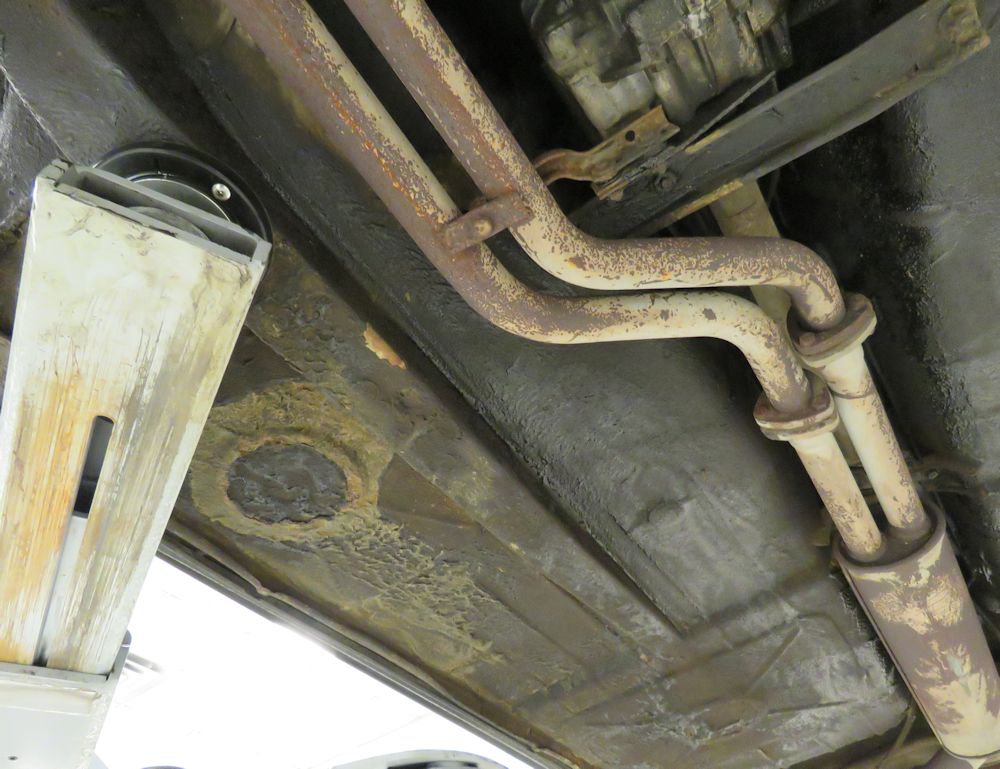
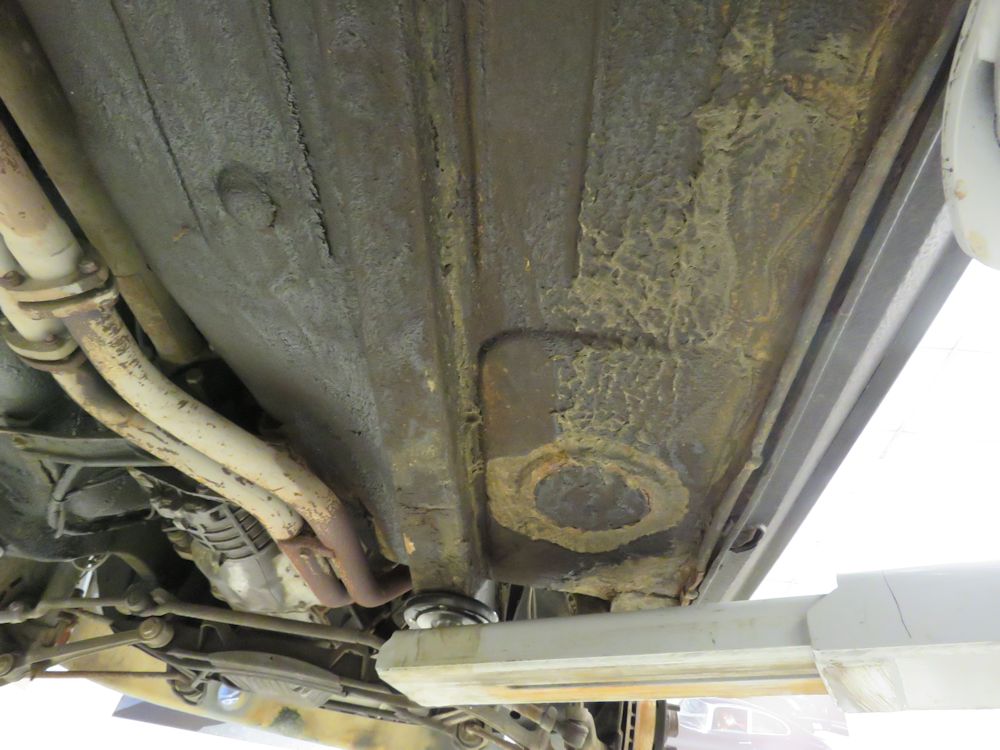
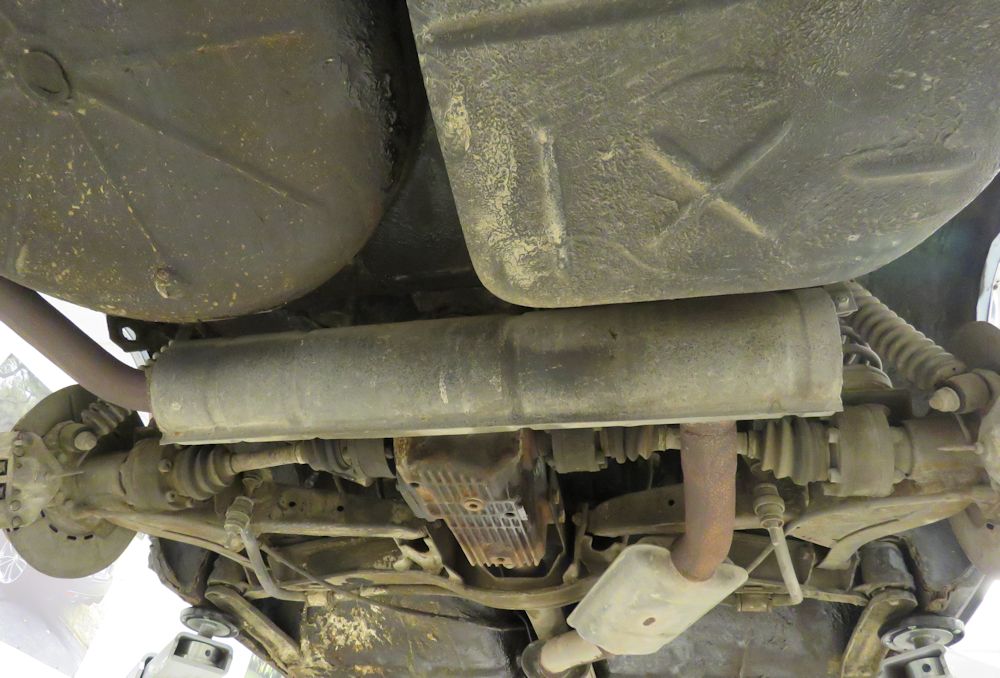
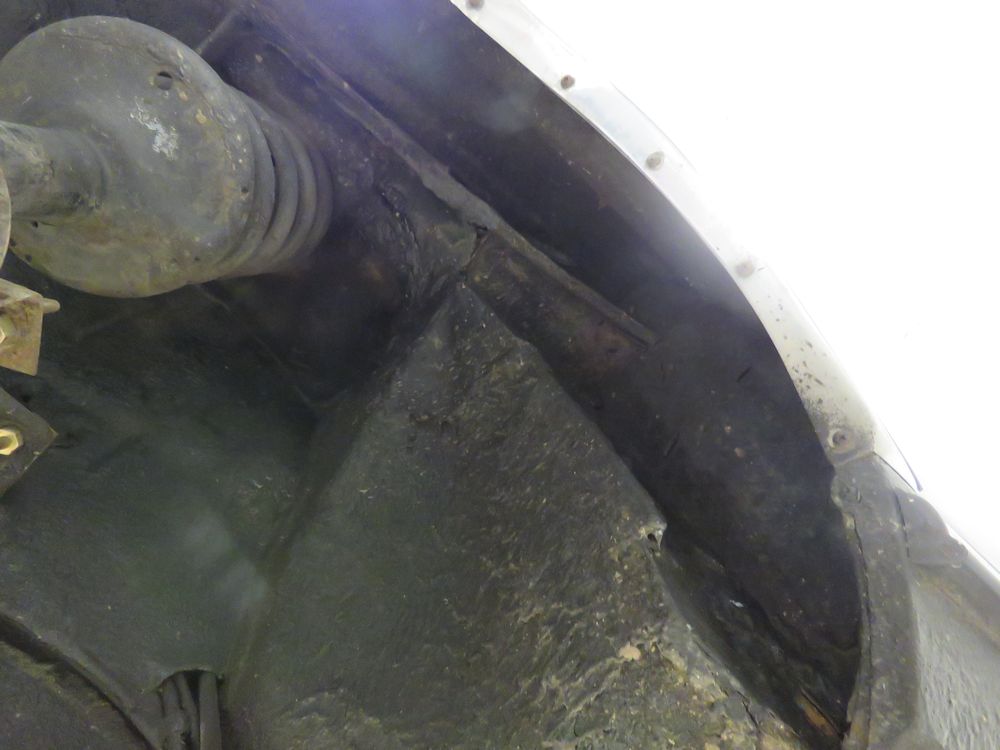
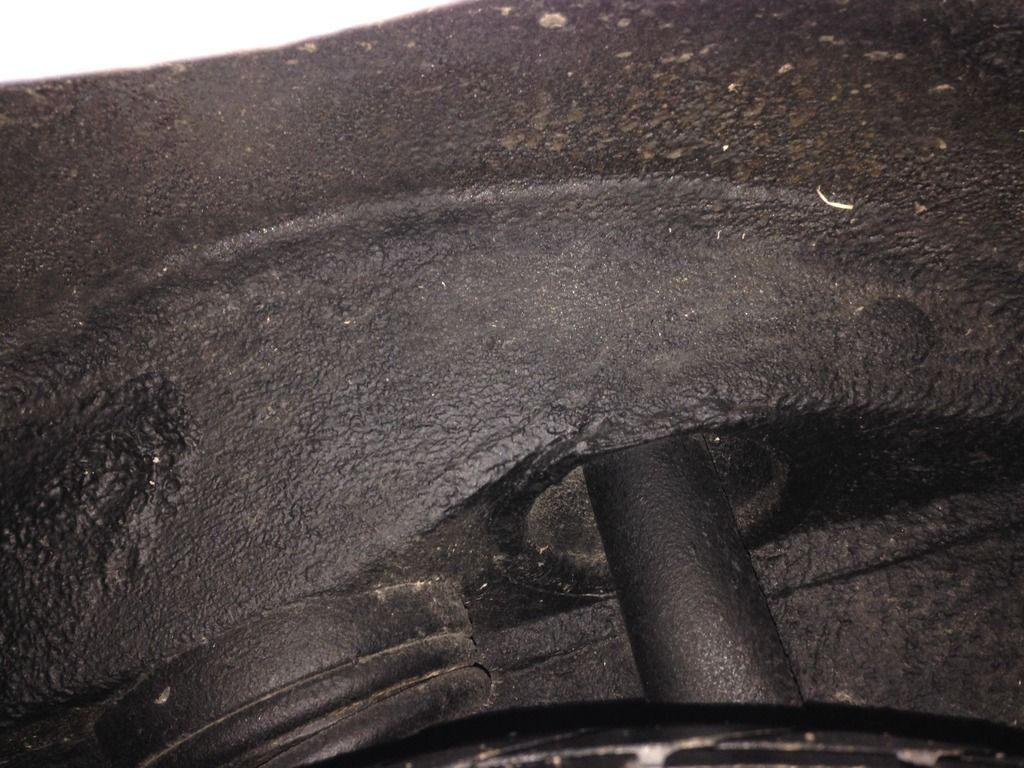
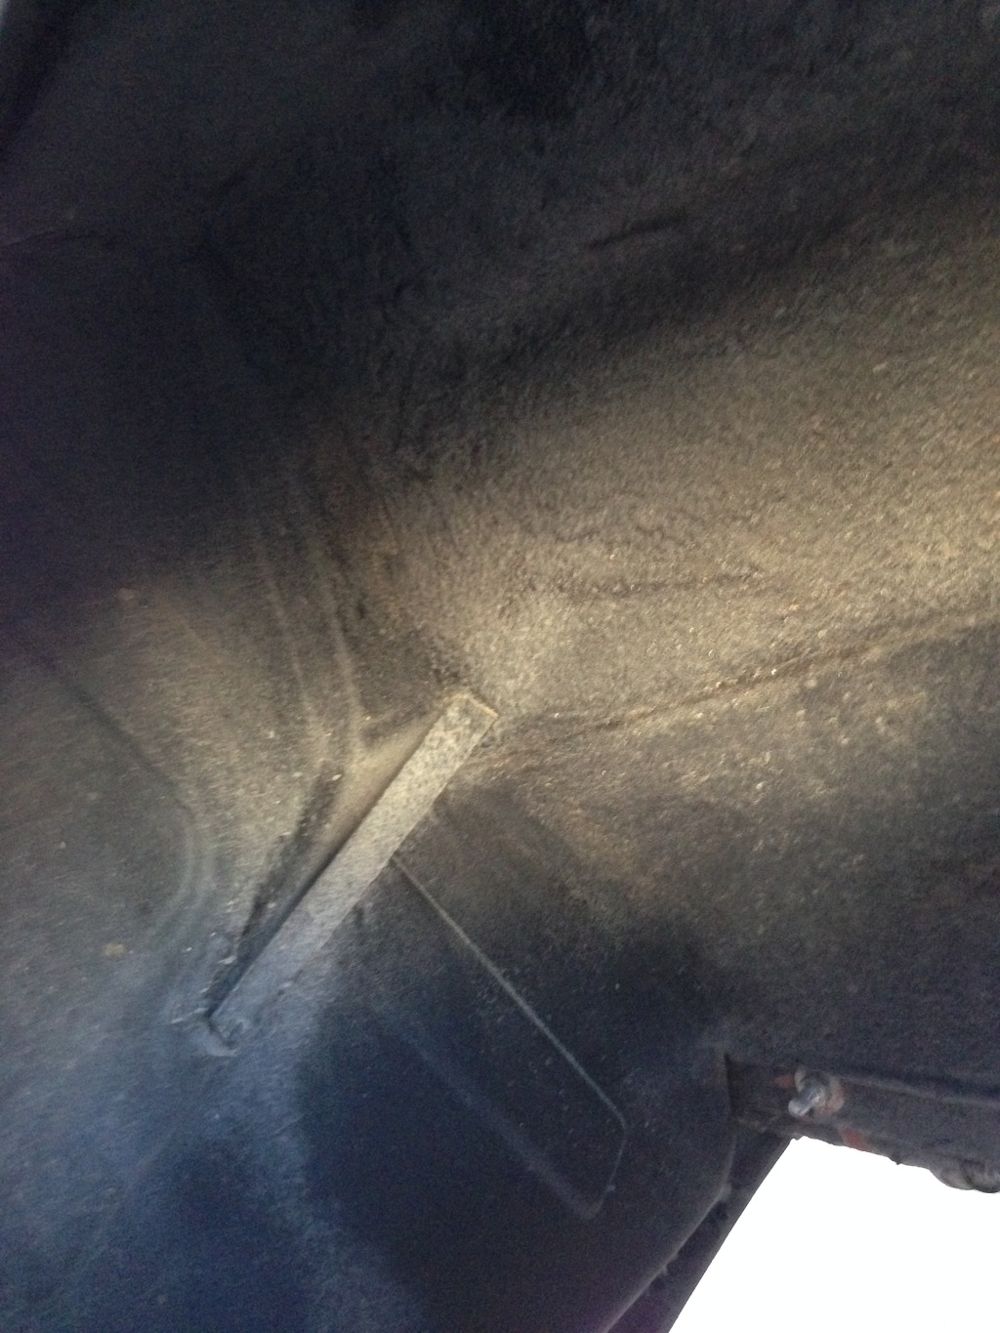
On the not so positive side, putting the car up in the air to install the new Michelin XWX tires gave me the opportunity to examine the car closely from beneath. To be perfectly honest, it is not quite as clean and dry underneath as I had been led to believe. There are 4 areas that will need the attention of one of my body guys, most notably at the front right corner, where the floor meets the rear edge of the wheel arch. The entire underside is swathed in a really thick layer of textured under coating. At some point I can see several days scraping everything back to the bare bones to see what I really have lurking beneath! The main floors look to be original, and actually appear to be pretty solid, although I will reserve judgment until I have all the goop removed.
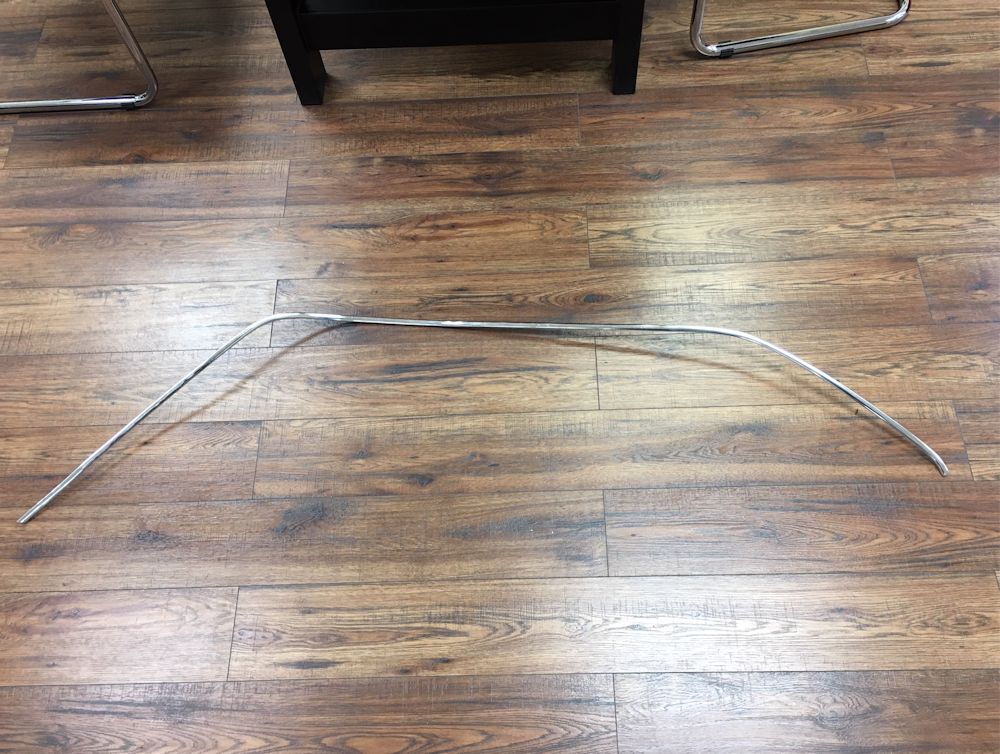 |
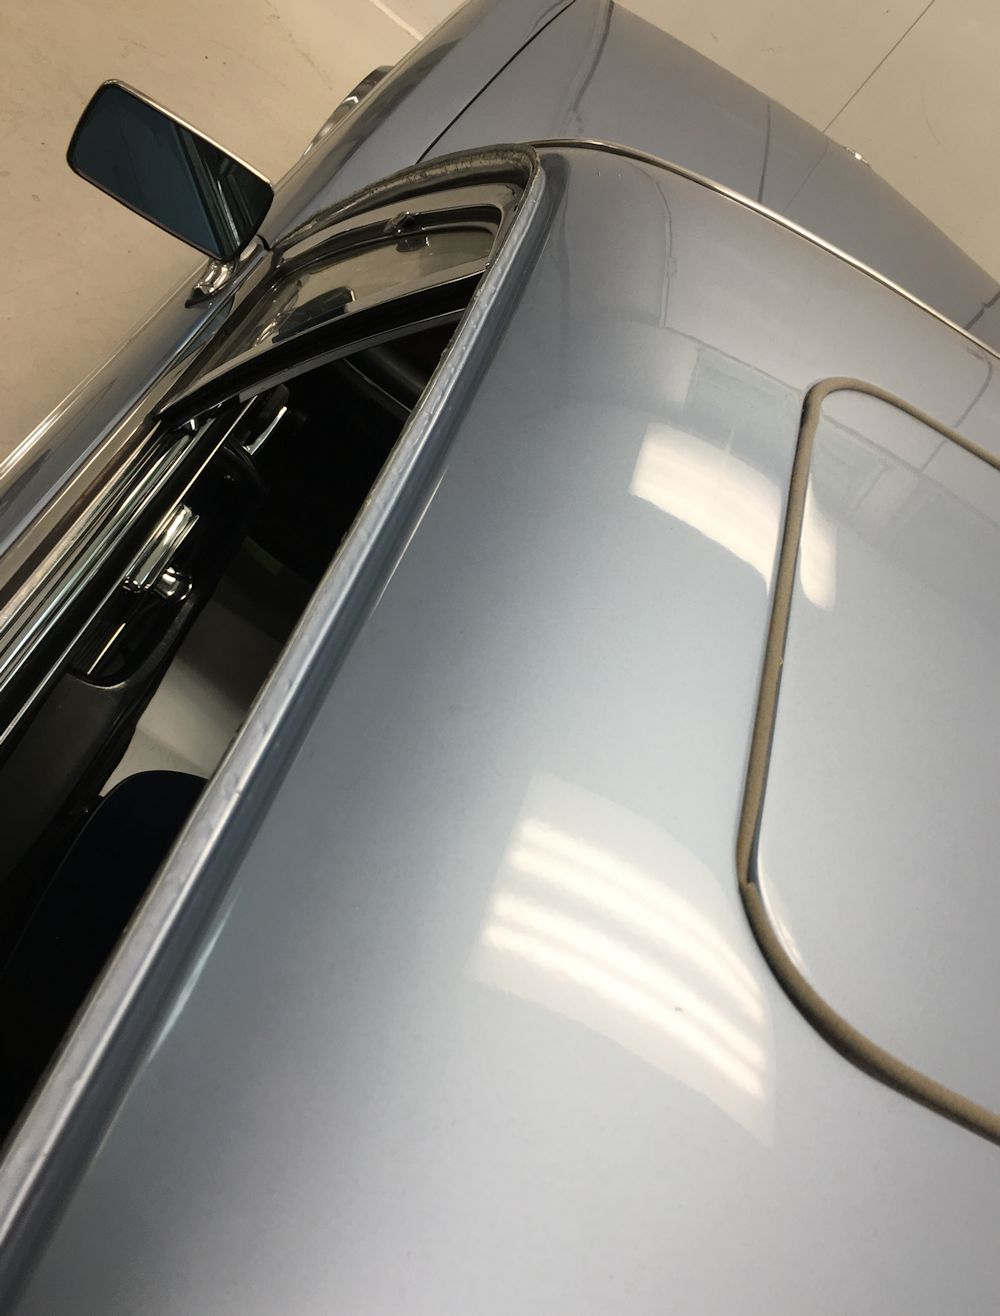 |
| Driver's side gutter chrome was dinged up
so I have sourced a new OEM BMW replacement |
Old chrome popped off in a few seconds |
 |
 |
| Hopefully the new piece will go on just
as easily! |
Love these old vent windows - memories of
flicking fag ash out of cars at speed a lifetime ago |
 |
 |
| Time to see if the electric roof works... |
And it does! |
 |
 |
| Cool aluminum wind deflector pops up when
the roof is opened |
Wheels removed to install new Michelins |
 |
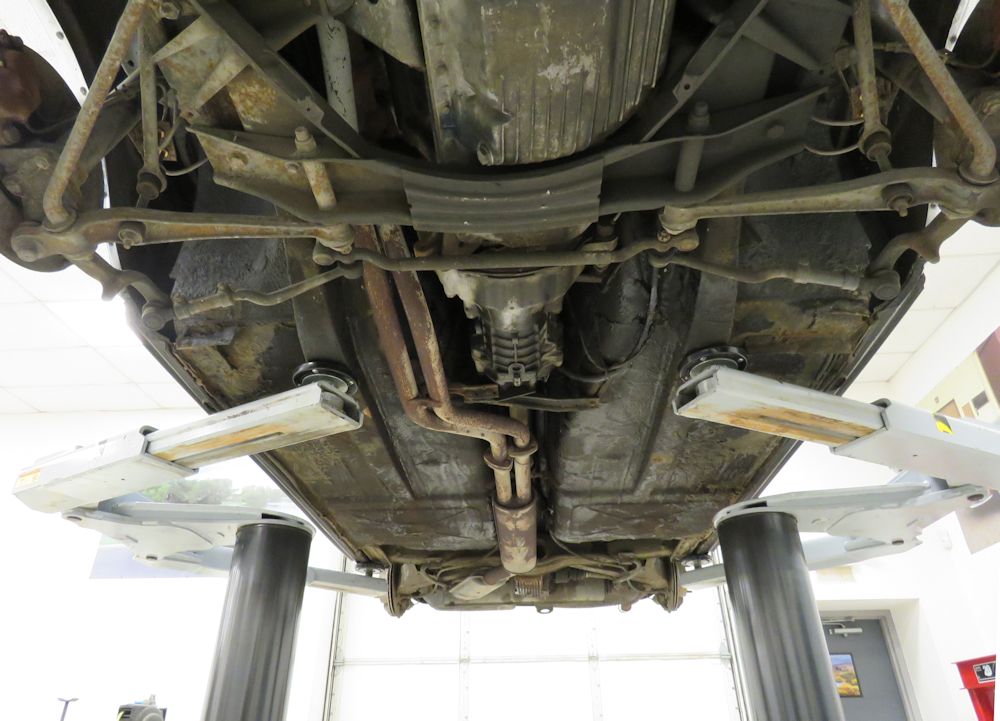 |
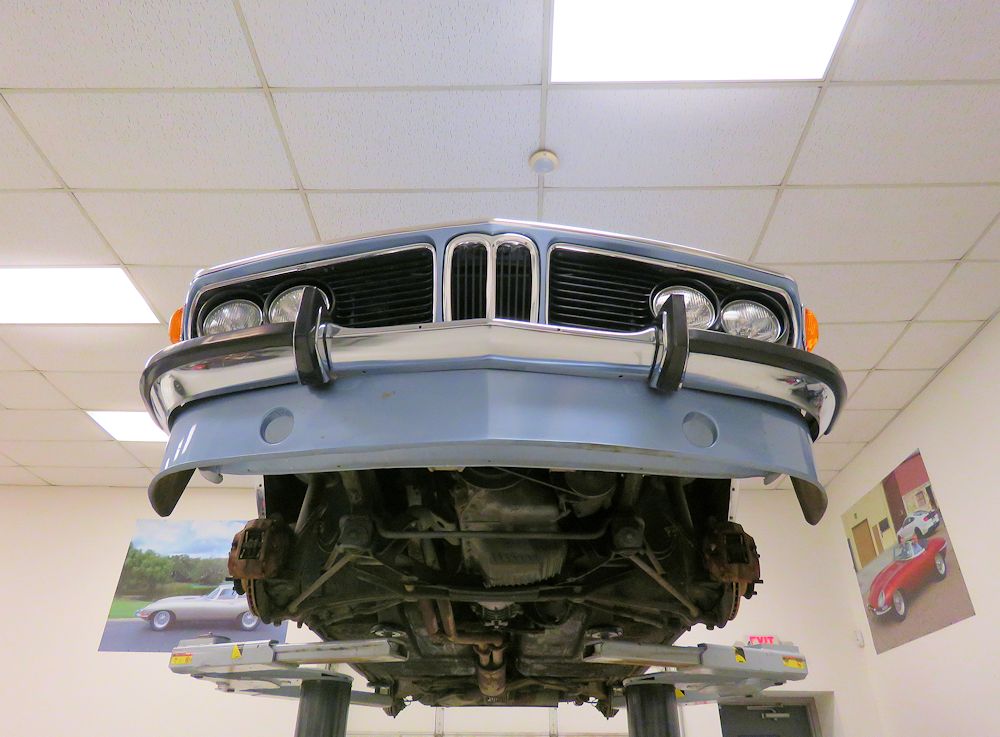
| Time to bite the bullet and look
underneath the CSi |
A little worse than I had hoped for |
 |
 |
| This appears to be the worst area (at the
front right corner) |
Main floors appear to be original and
pretty solid |
 |
 |
 |
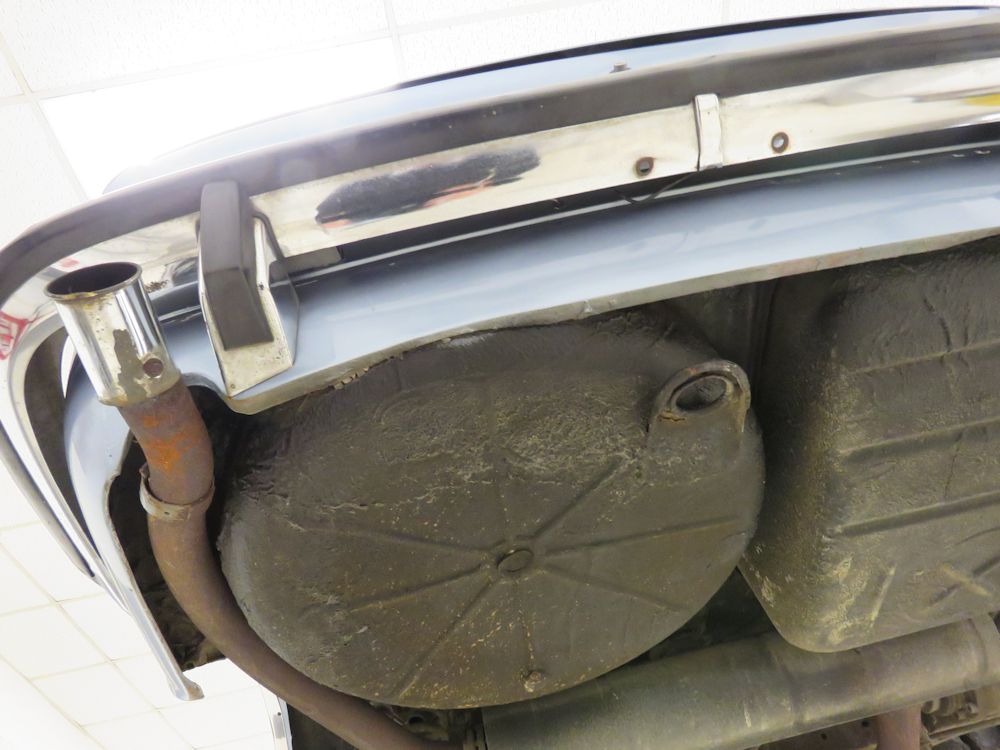 |
| Spare tire well appears to be solid |
|
 |
 |
 |
 |
 |
 |
| Love the look of the new Michelin XWX
tires |
Gutter chrome currently removed from
driver's side |
 |
 |
 |
 |
| Tool tray filling up rapidly! |
View through the open sunroof |
This afternoon I installed the vintage Formel steering wheel and I think it looks great!
 |
 |
| Vintage Formel 380mm wheel looks great |
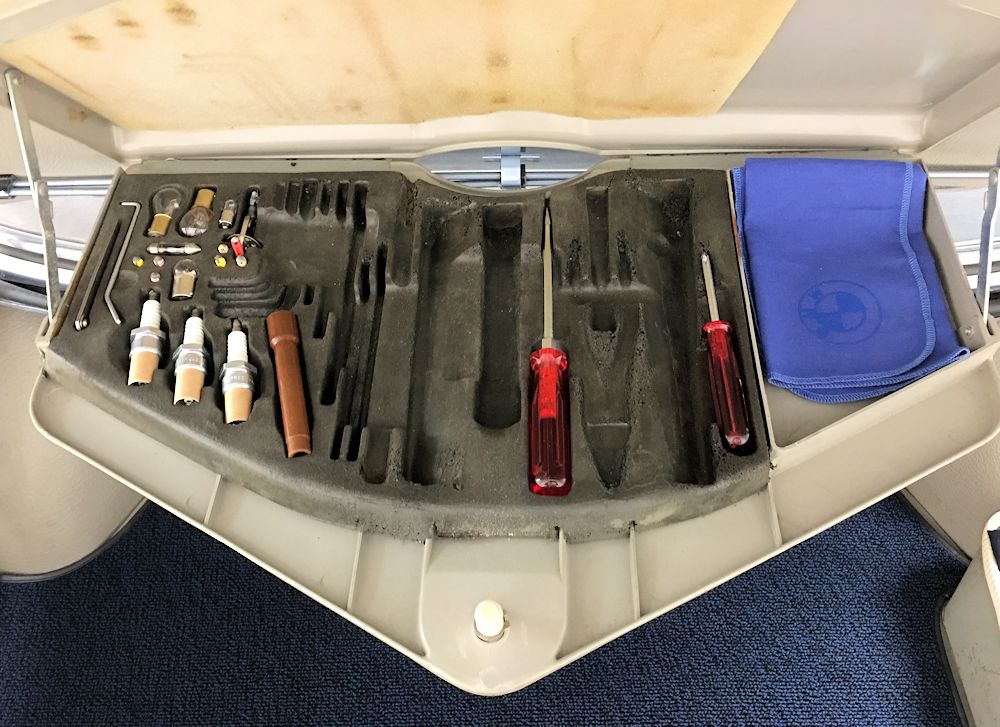
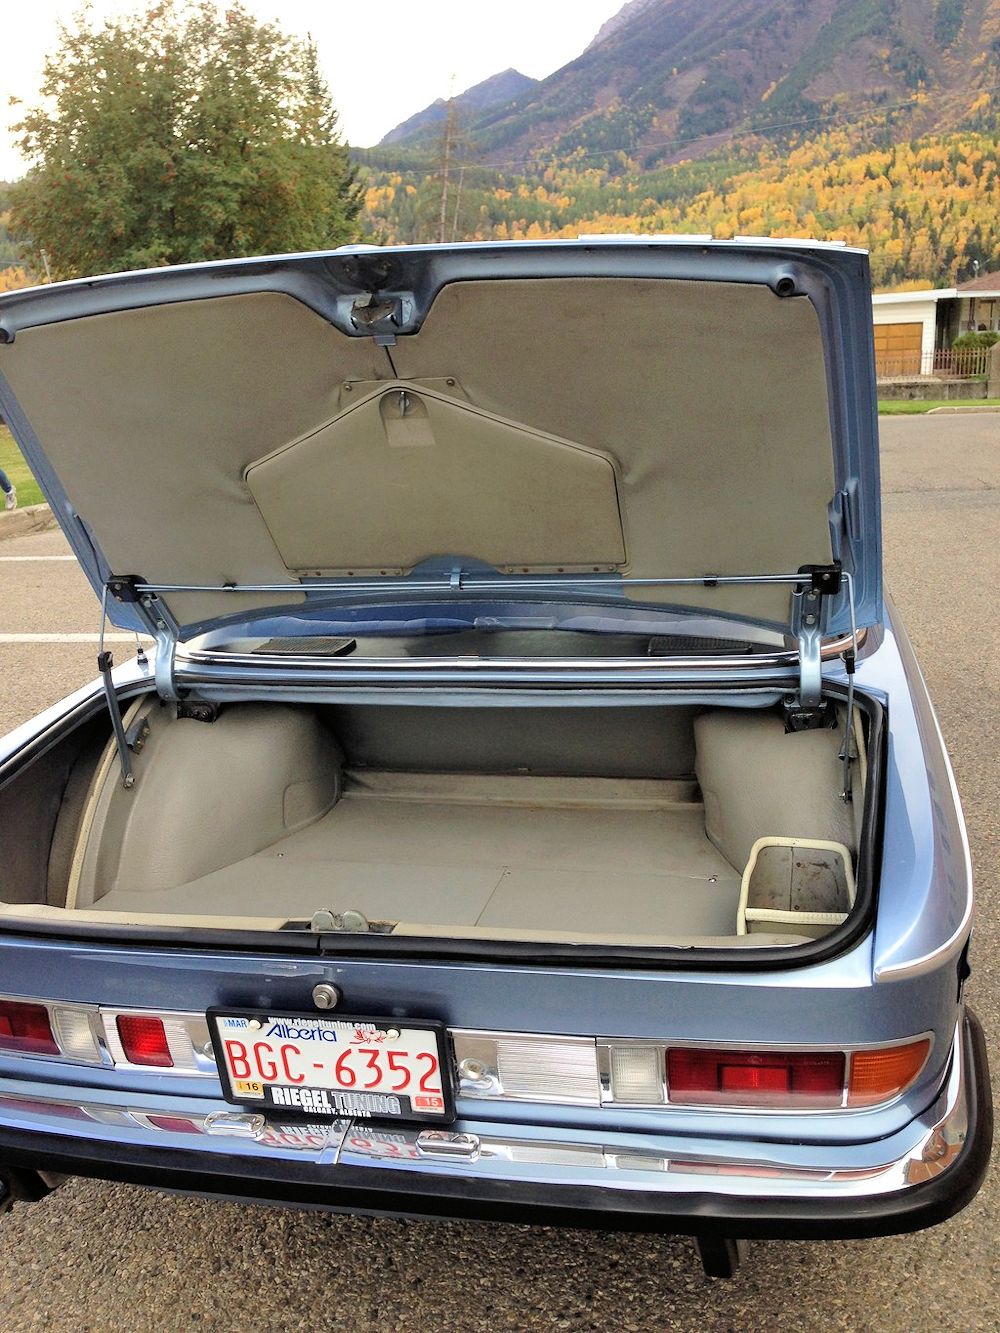
I received a new boot mat for the CSi from World Upholstery in California. It looks like a quality piece, made from the correct German loop material, although the pattern does not quite match my boot floor. As the first image below shows, there is an accurately tailored cut out for the cubby box on the right hand side of the boot floor, but unfortunately there is also a cut out on the left hand side - which probably means I am missing something from that area of the boot floor. More on that later. On a more positive note, the CSi tool kit looks to be mostly complete. I appear to be missing whatever the two items are (or should be) on the extreme left of the tray. Back to ebay I go...
 |
 |
| Nice quality German loop boot carpet mat |
Apparently I am missing something on the
left side of the boot floor |
 |
 |
| Tool kit only missing a few items |
Missing the two items on the extreme left
of the tray |
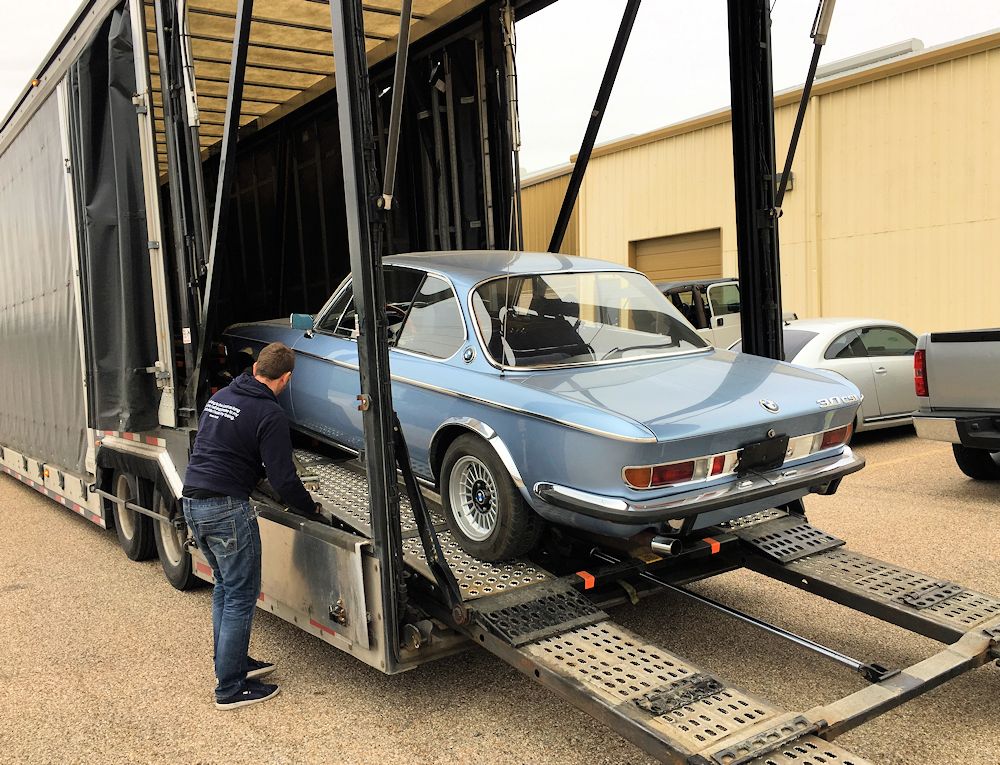
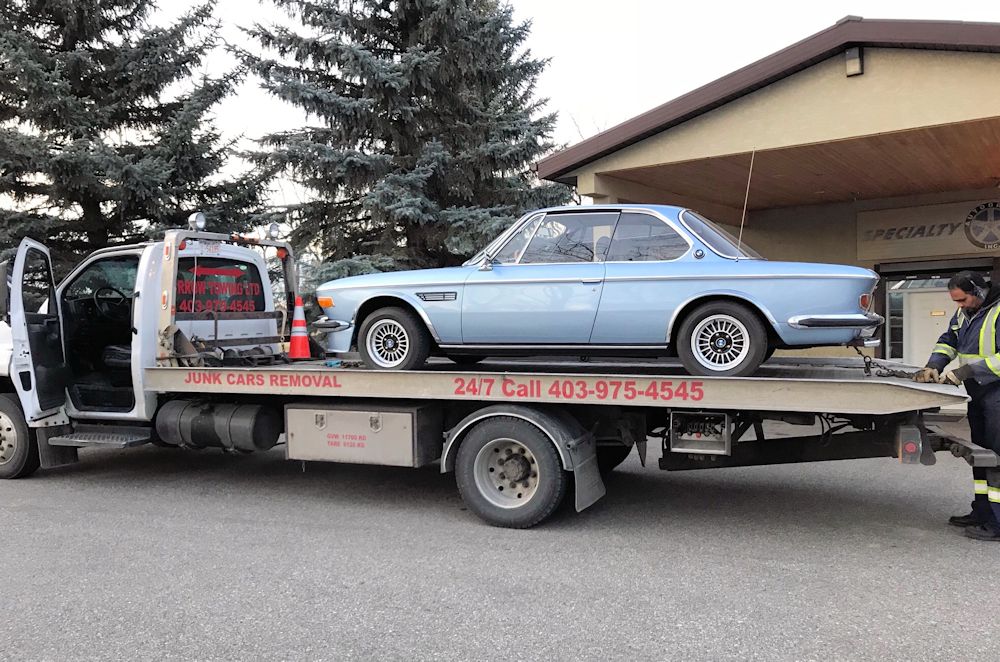
I am delighted to report that the BMW was safely delivered to Classic Jaguar earlier today. Kudos to Turbo Auto Transport of Great Falls, MT who made the importation and transportation a breeze. They collected the car in Calgary on Wednesday of last week, took care of all of the customs paperwork and had the car delivered to me in Austin six days later. This is the first time I have bought and imported a car from Canada, and it really could not have been easier.
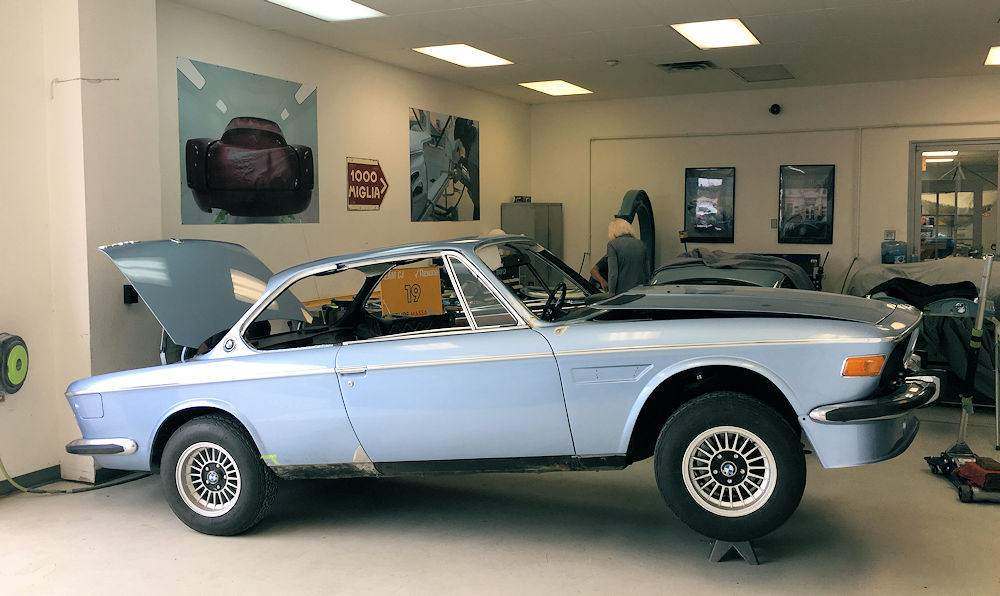
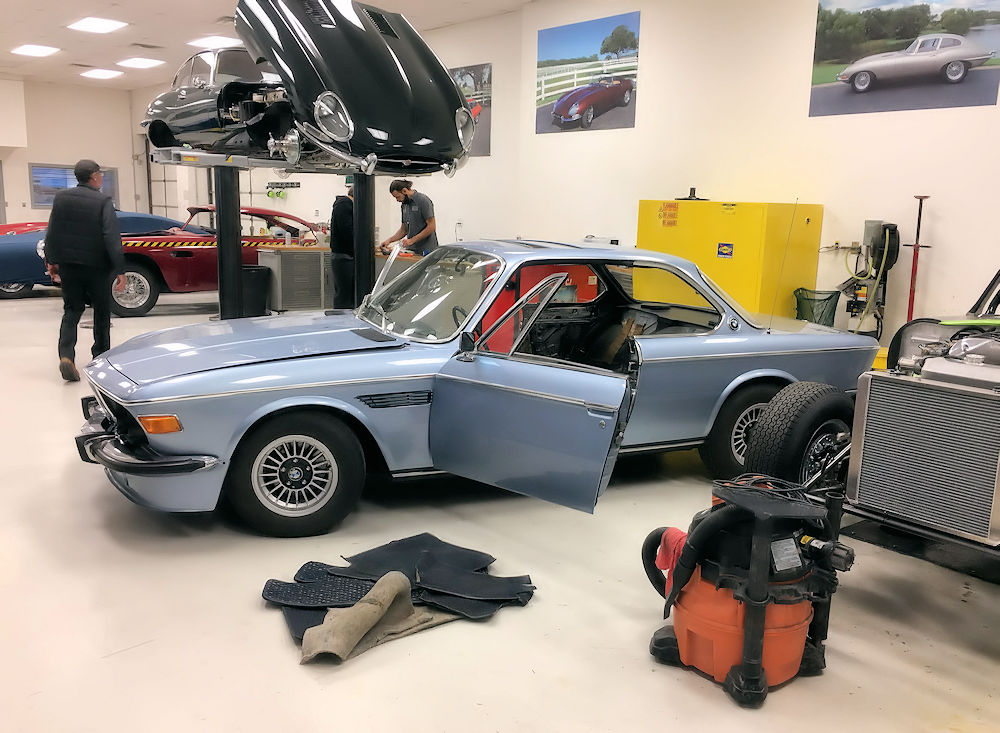
I am looking forward to working on the car and bringing it to the next condition level!
 |
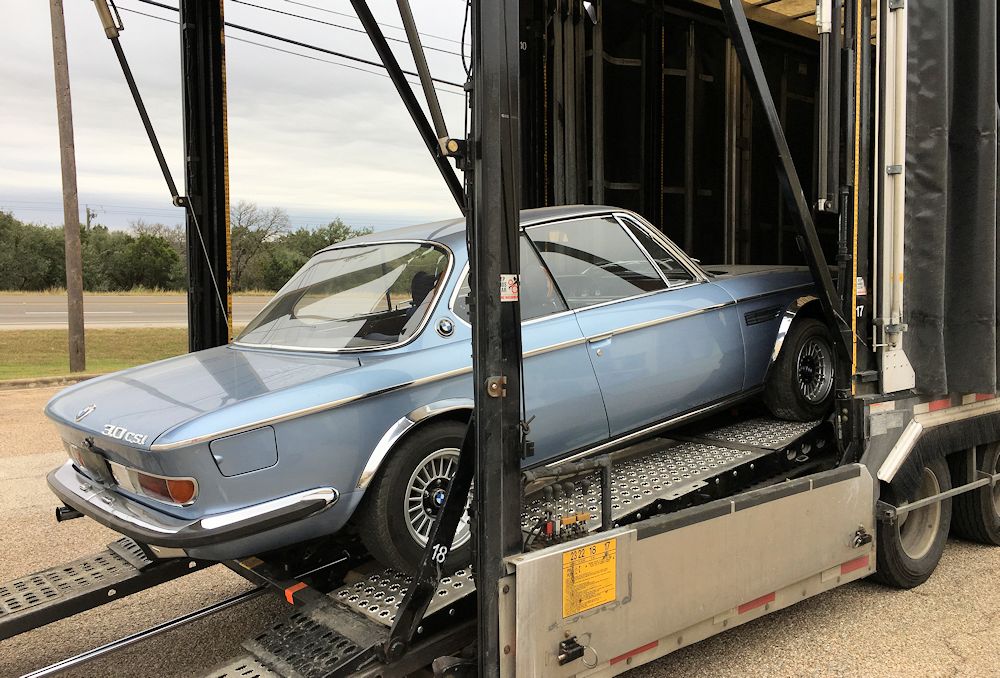 |
| Having 'new' cars delivered never gets old! | |
 |
 |
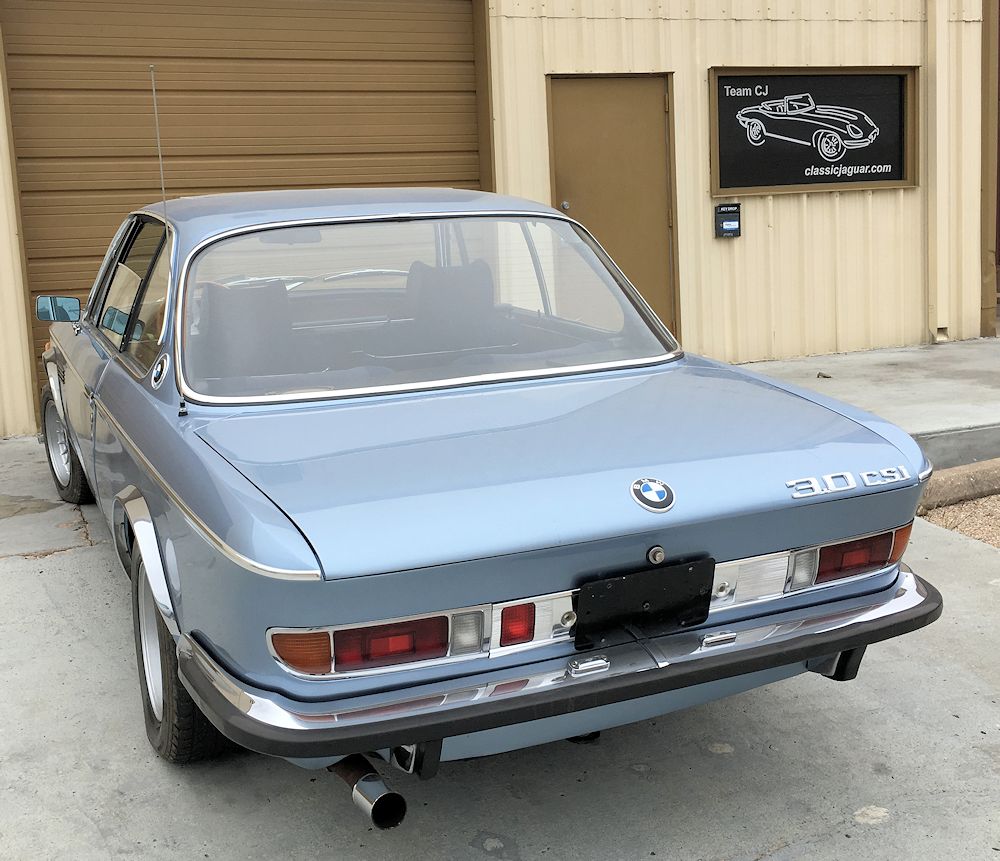
| Fjord Blue suits the big coupe so well |
|
 |
 |
| The car will receive a major service over
the next few days |
Watch this space! |
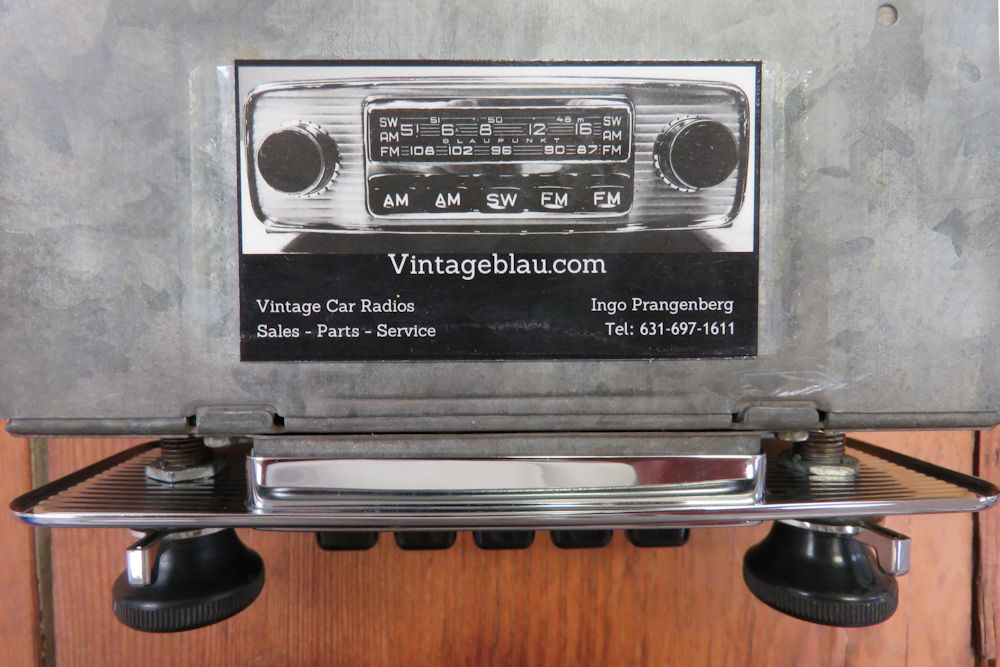
I recently picked up this lovely old Z-Series Blaupunkt radio from Ingo Prangenberg of Vintageblau.com in New York.
 |
 |
| Restored vintage Blaupunkt will soon take
up residence in the BMW's dash |
A great source for restored vintage radios |
I am delighted to report that the BMW was collected on Wednesday and will be stateside by the weekend. In the meantime, the influx of shiny new parts continues! The latest deliveries have been a set of Bilstein shocks and a great looking stainless steel exhaust made for me by my friends at Quick Silver in the UK.
 |
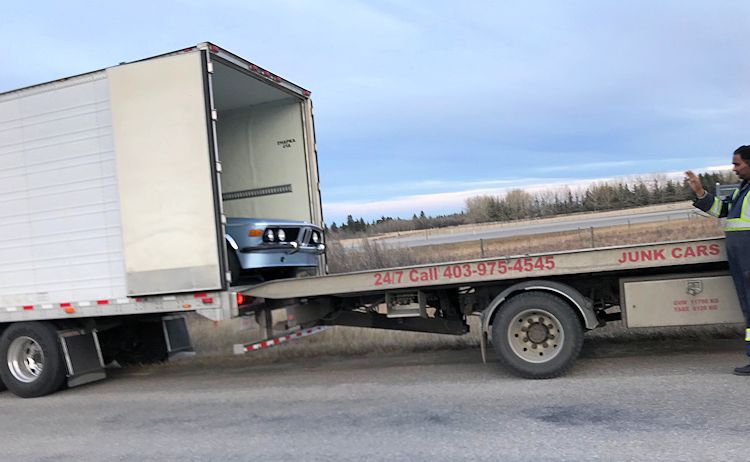 |
| Loading the car up in Calgary yesterday
afternoon |
On its way to Austin! |
 |
 |
| New Bilstein shocks |
Custom stainless steel exhaust made for
me by Quick Silver in the UK |
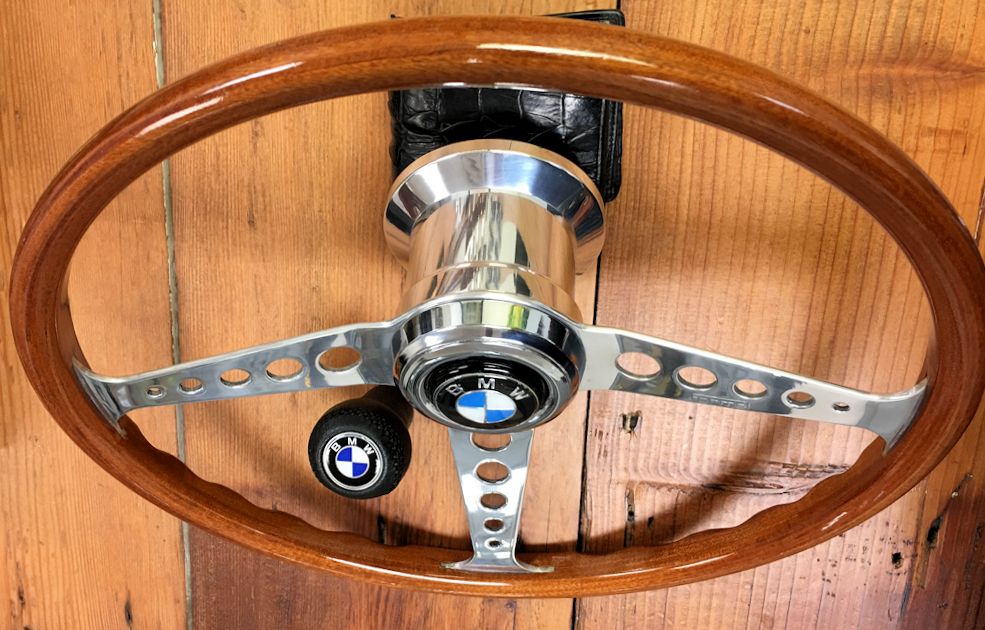
Earlier today I received the restored Formel steering wheel from Vintage Volante in Holland. I really could not be more pleased with the wheel, which is absolutely beautiful.
 |
 |
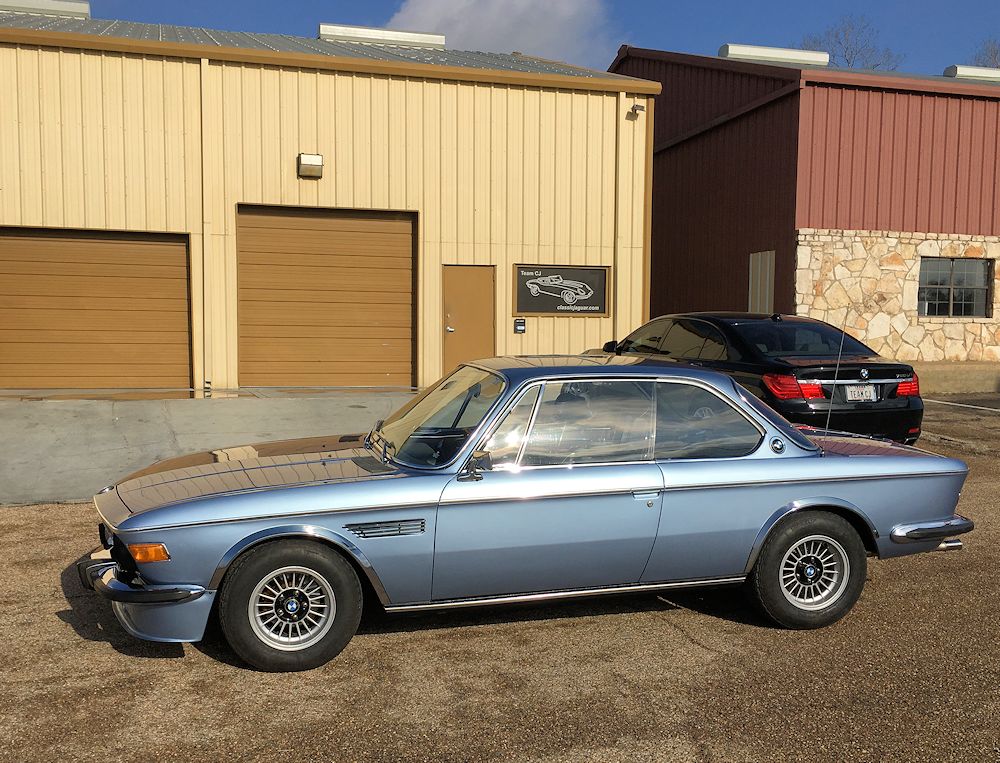
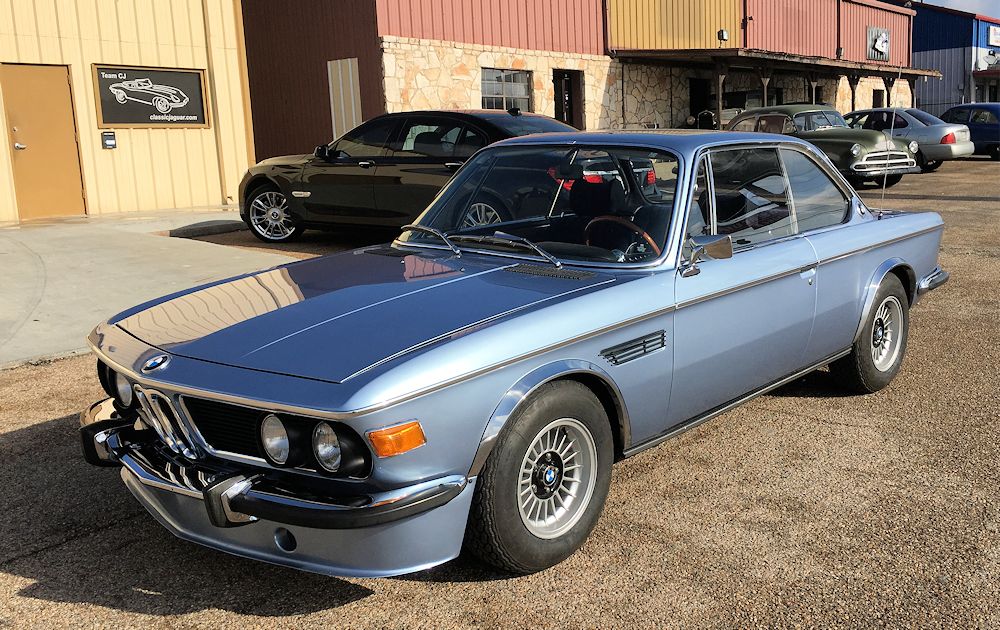
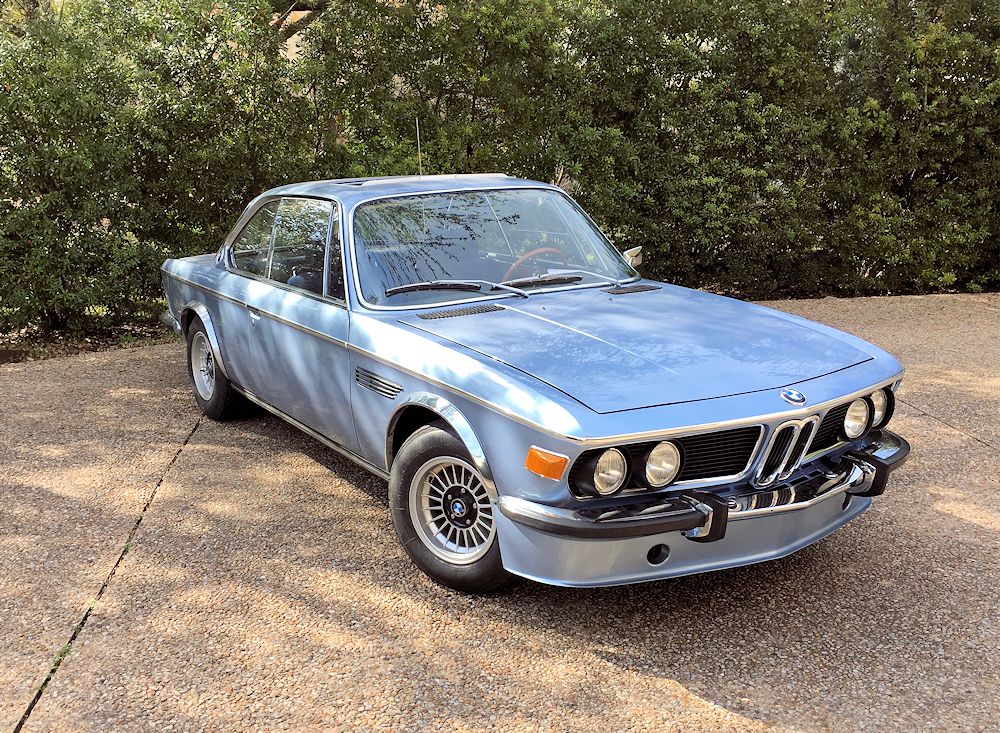
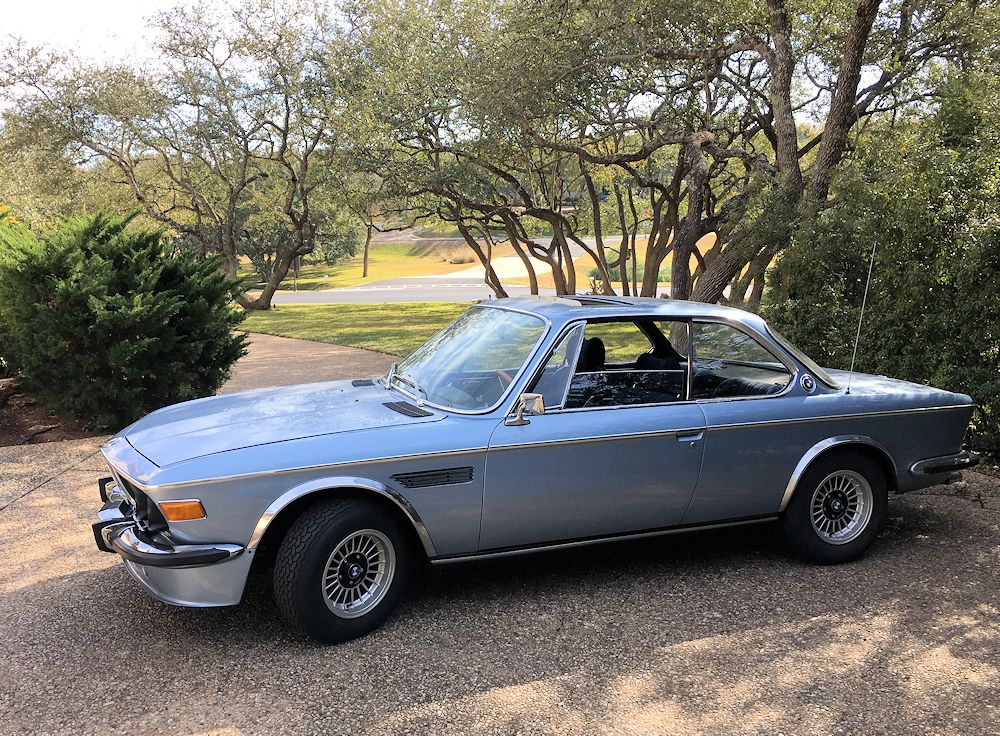
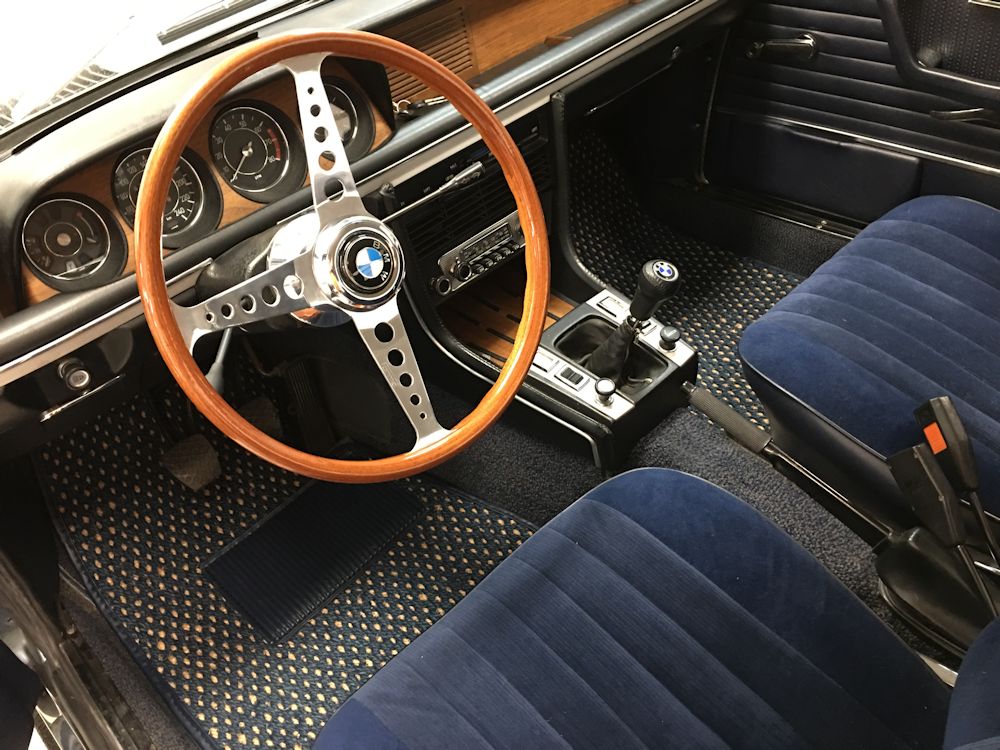
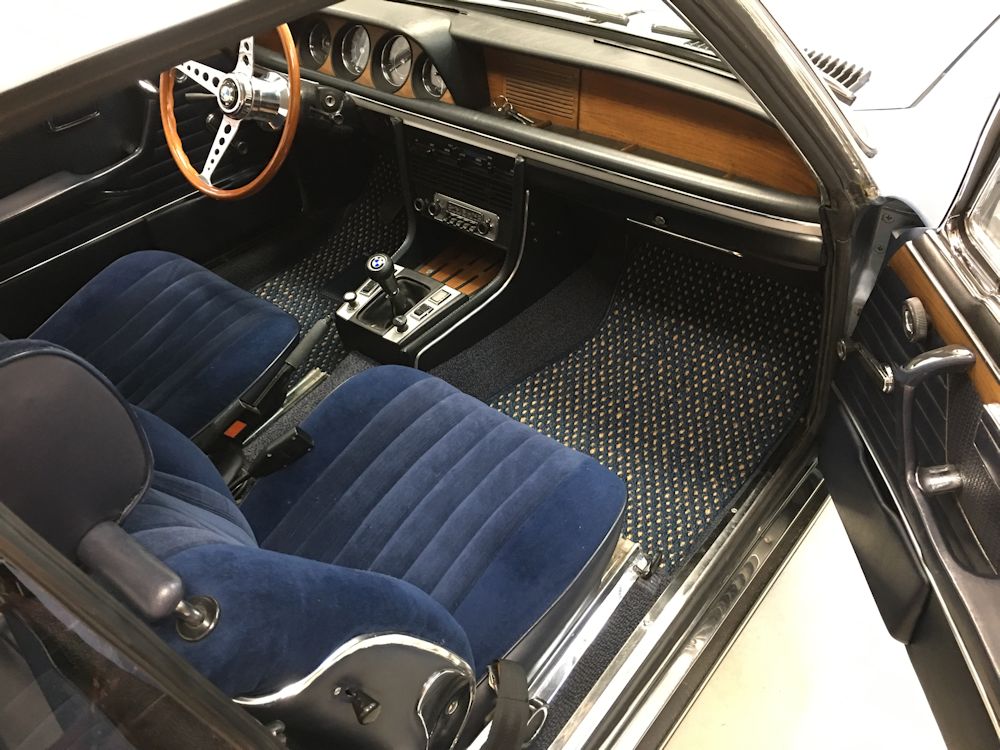
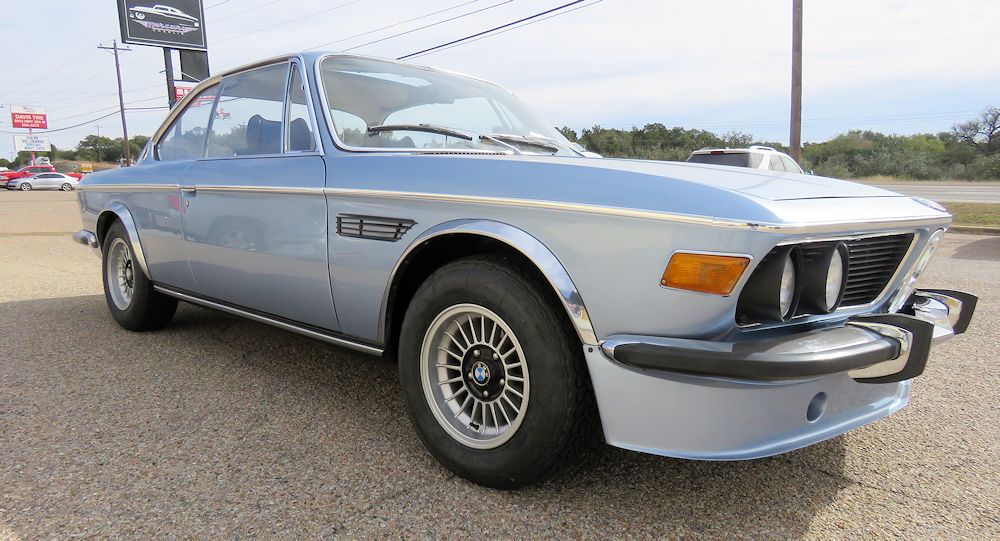
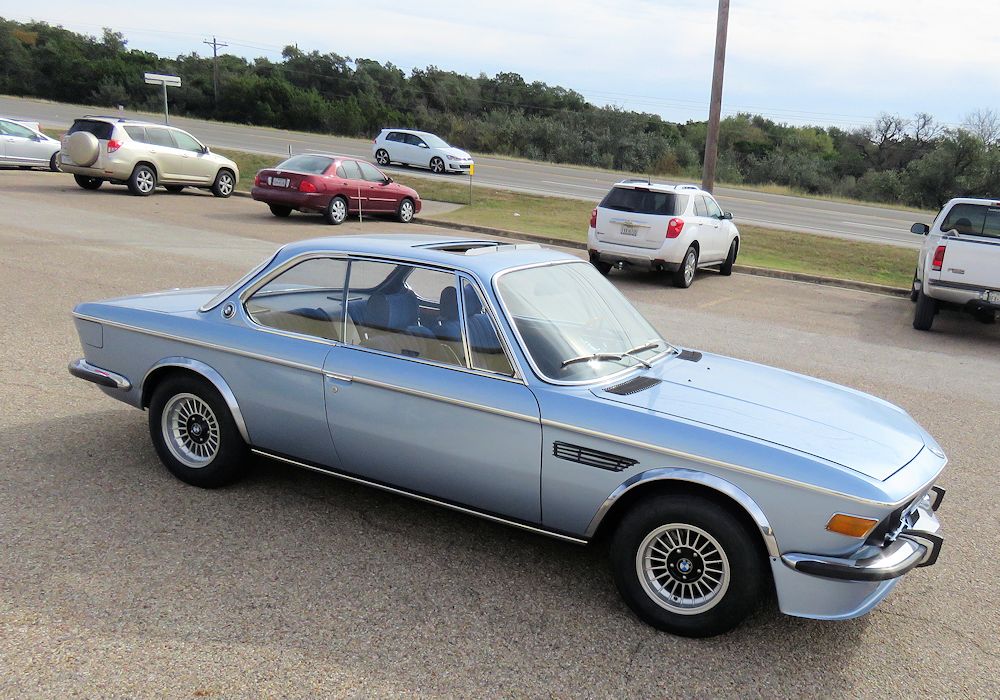
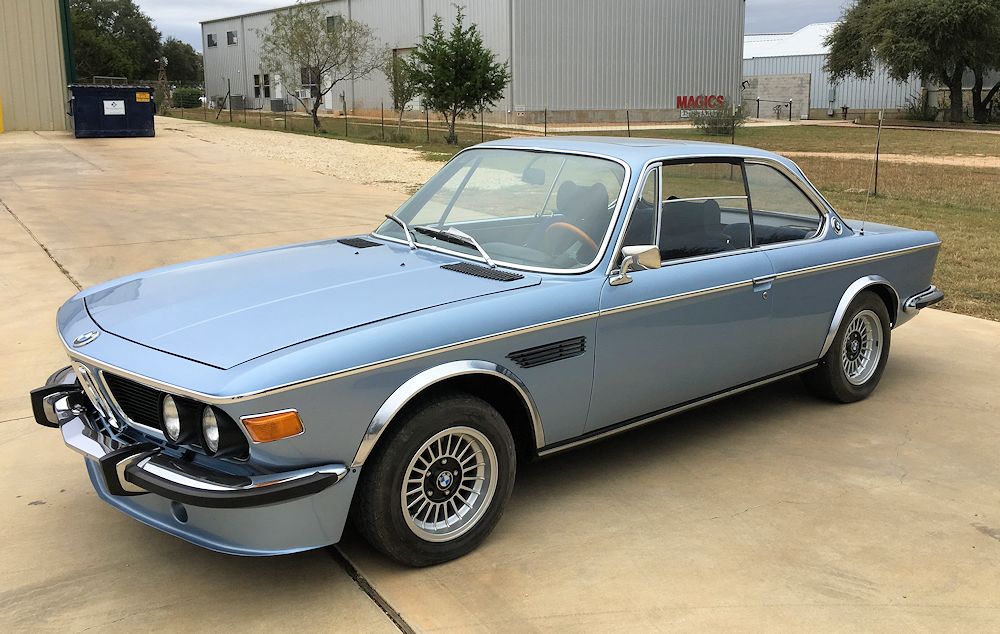
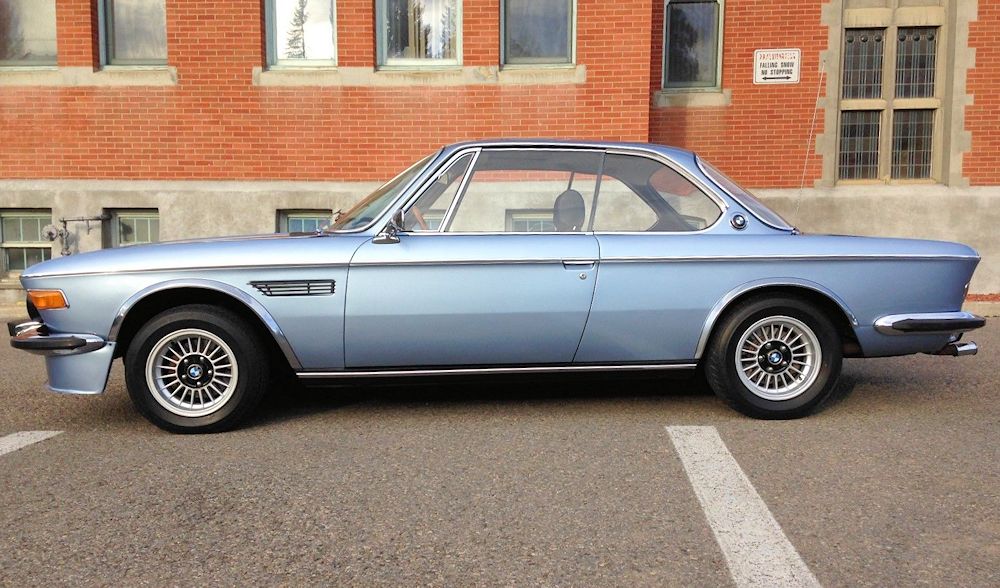
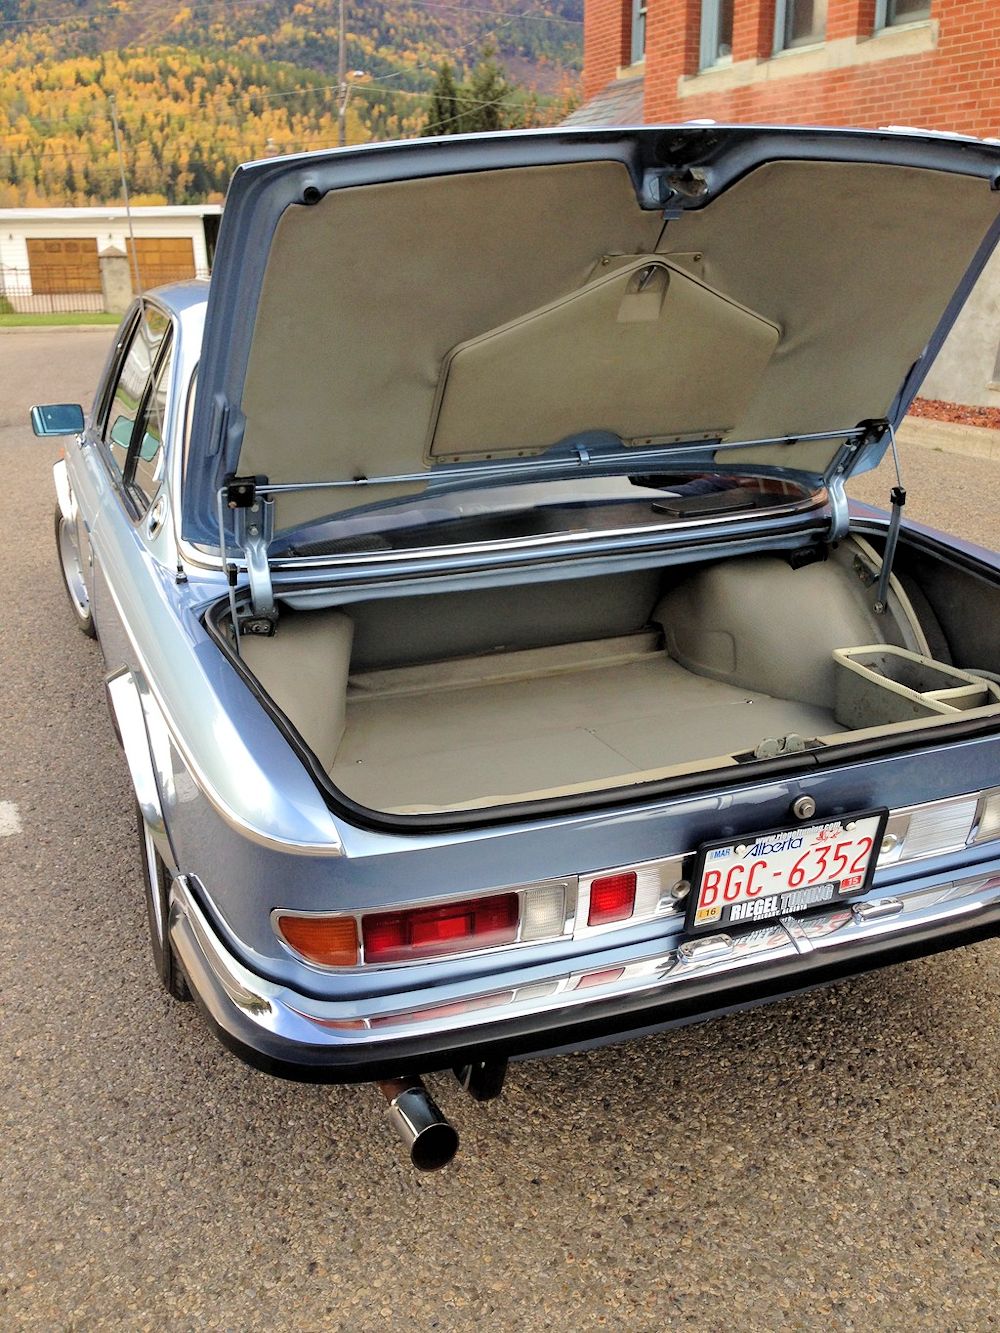
I am delighted to have recently added this low mileage European spec BMW CSi to the CJ fleet. Purchased out of long term (30 year) ownership in Calgary, it will be several weeks before the car lands in Austin. Nonetheless, I have already started gathering some of the things I will need to bring the car up to the next condition level, and make it a little more to my taste. For example, although the interior was restored several years ago and remains in excellent condition, I really don't care for the velour seat trim which was common to the Euro spec cars. Accordingly, I have already bought new navy blue hide seat covers that will be installed shortly after the car arrives in Austin.
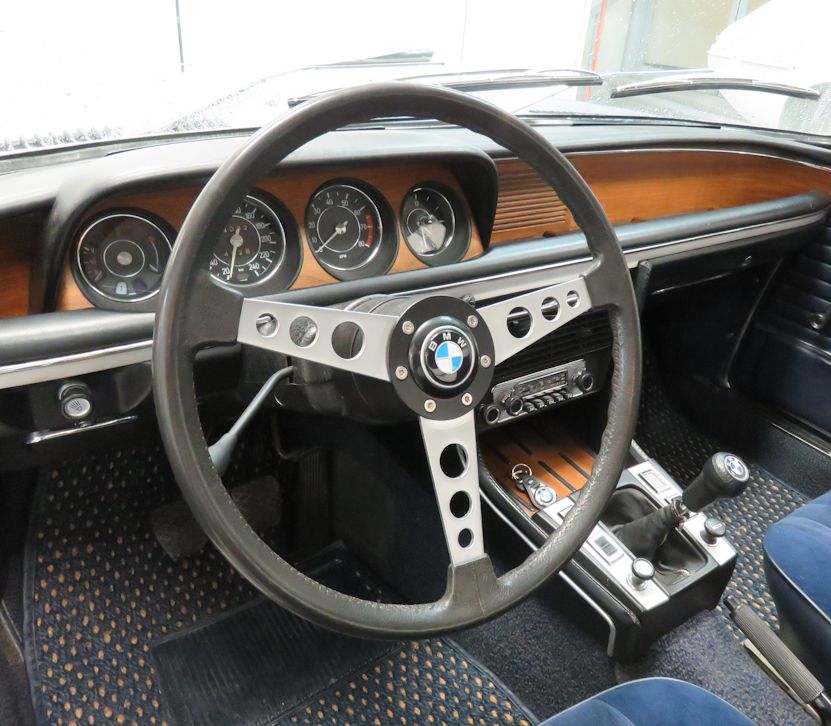
I have also picked up a beautiful vintage (1966) Formel 380mm wood rim steering wheel that I think will compliment the interior very nicely. I found the wheel at Vintage Volante in Holland. Vintage Volante is run by hobbyists Bouke and his friend Hans, both of whom clearly see classic steering wheels as an art form. I had planned on installing a 380mm Petri wheel, which is de rigueur for any well dressed BMW E9, but in the end I fell for the charms of the Formel wood rim when I saw it on the Vintage Volante website.
Other items already in the expense column include a Quick Silver stainless steel exhaust system, a set of Carl Nelson road springs, some Bilstein performance shock absorbers, a pair of new grilles for the front wings, a new German loop carpet mat for the boot and some new rubber for the Alpina wheels. This beautiful E9 coupe has only done approximately 40,000 miles (65,000 kms) from new and reportedly runs and drives like a new car. I am looking forward to putting that claim to the test!
 |
 |
| A set of Carl Nelson roads springs will
lower the ride height a little |
|
 |
 |
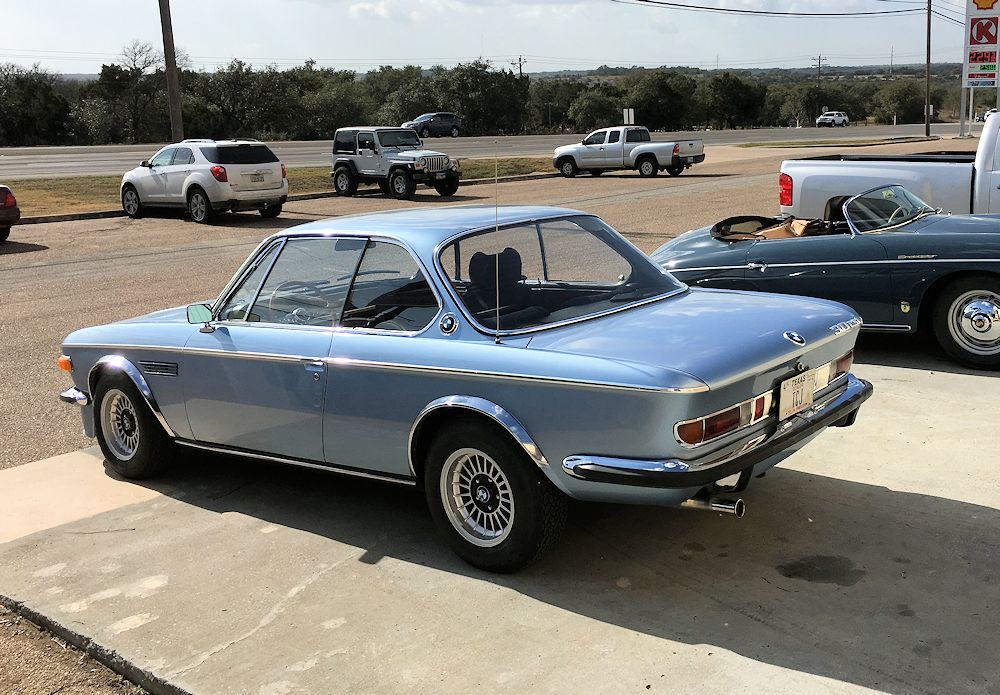
| Very high quality paintwork done in 1986 is still holding up very well |
Chrome and bright work appears to be in excellent shape |
 |
 |
 |
 |
 |
 |
| Very clean boot compartment, new German
loop boot mat on order |
Virtually complete tool kit |
 |
 |
| Car has been cherished and kept in a heated garage for the last 30 years |
|
 |
 |
| Interior in very good condition, but will
be treated to some new Navy hide seat covers soon |
|
 |
 |
 |
 |
 |
 |
 |
 |
 |
 |
 |
 |
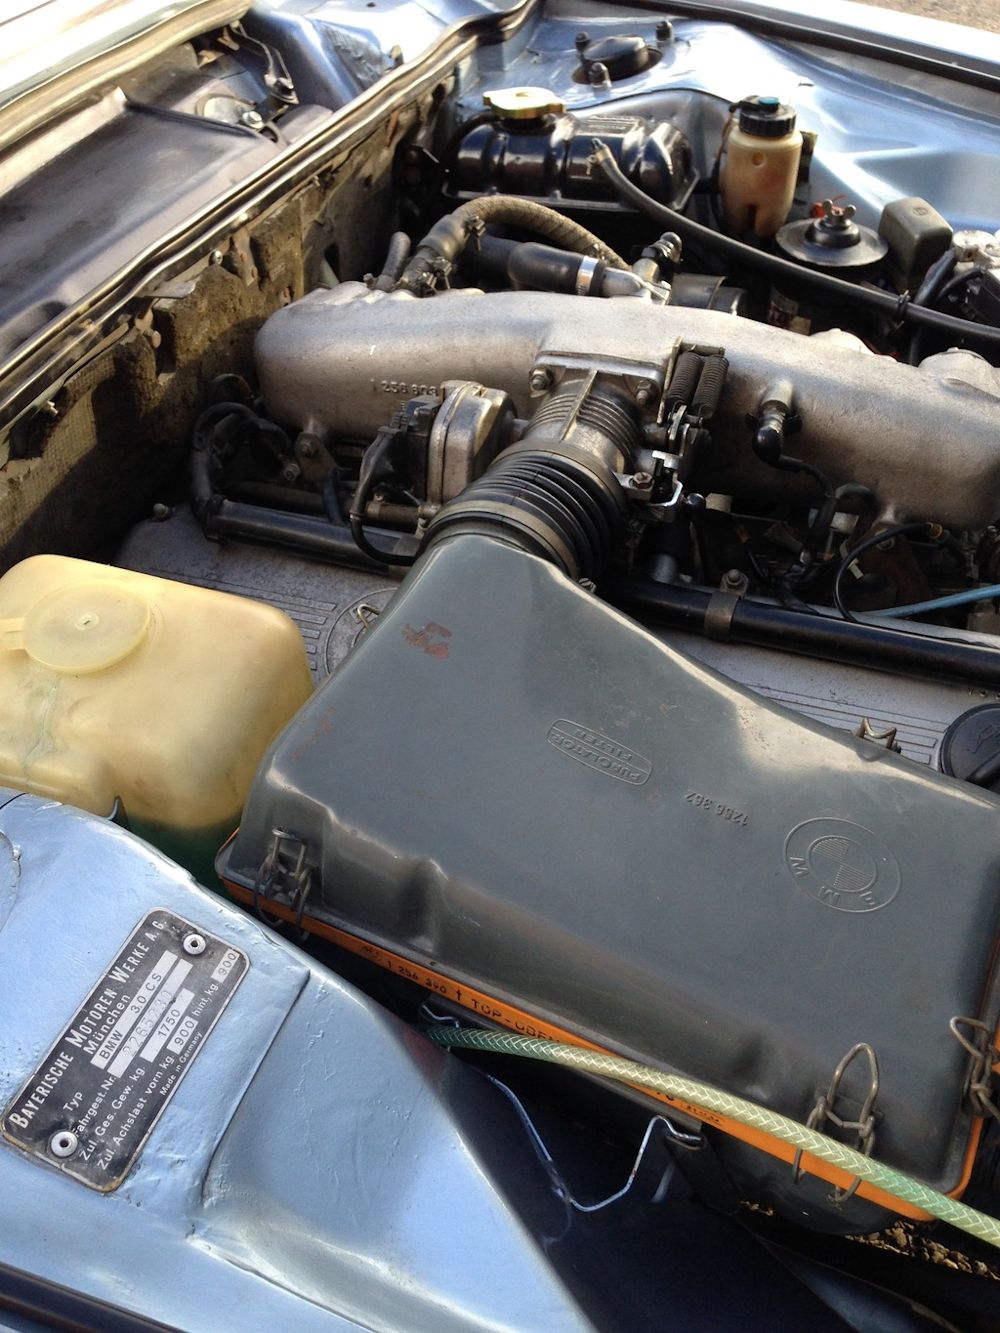
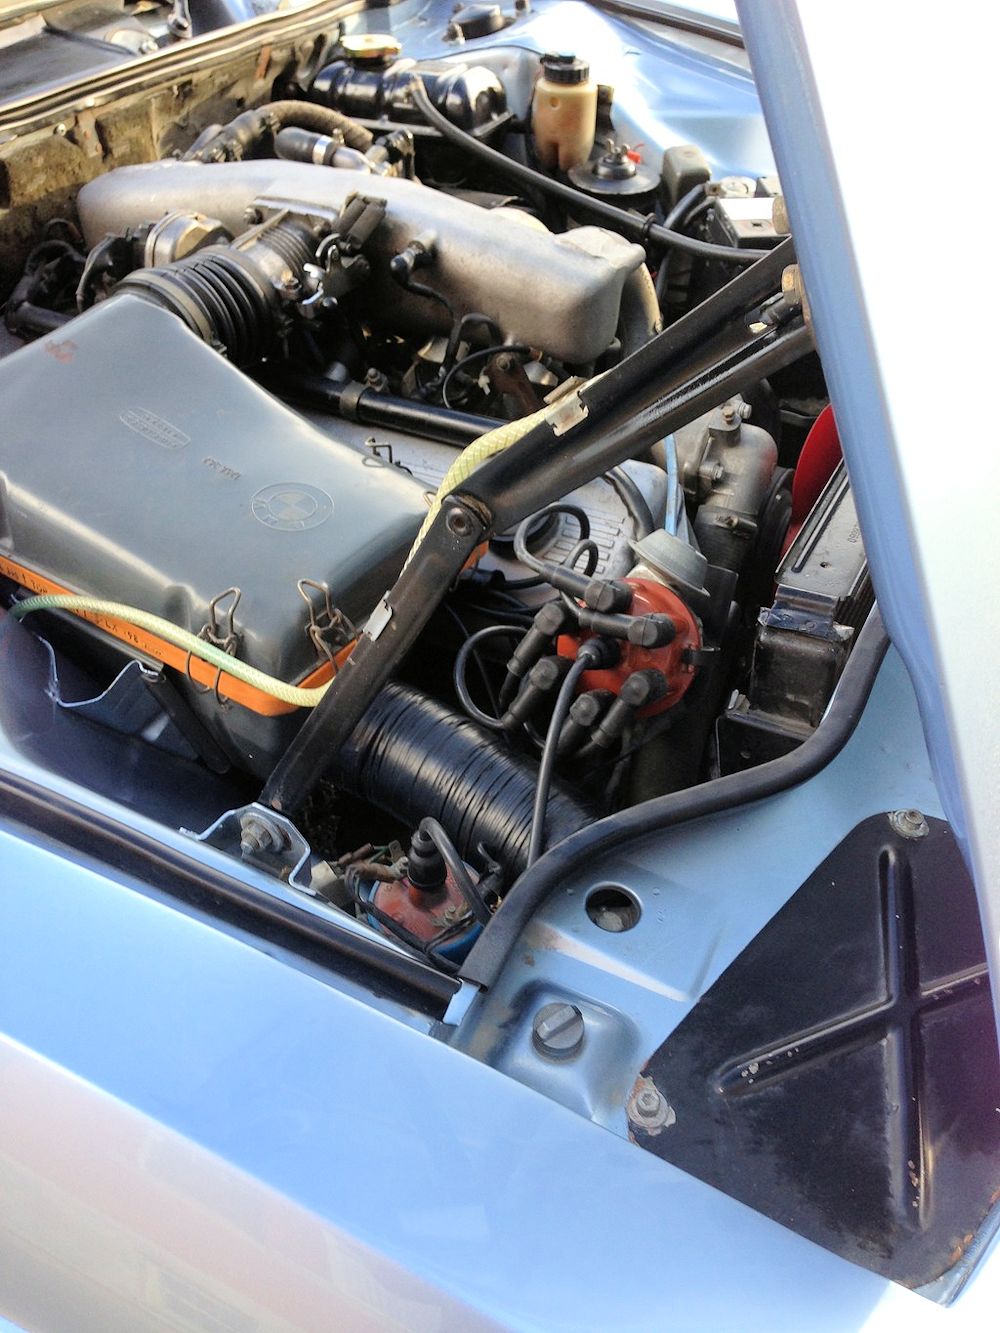
| Engine bay is clean and presentable |
|
 |
 |
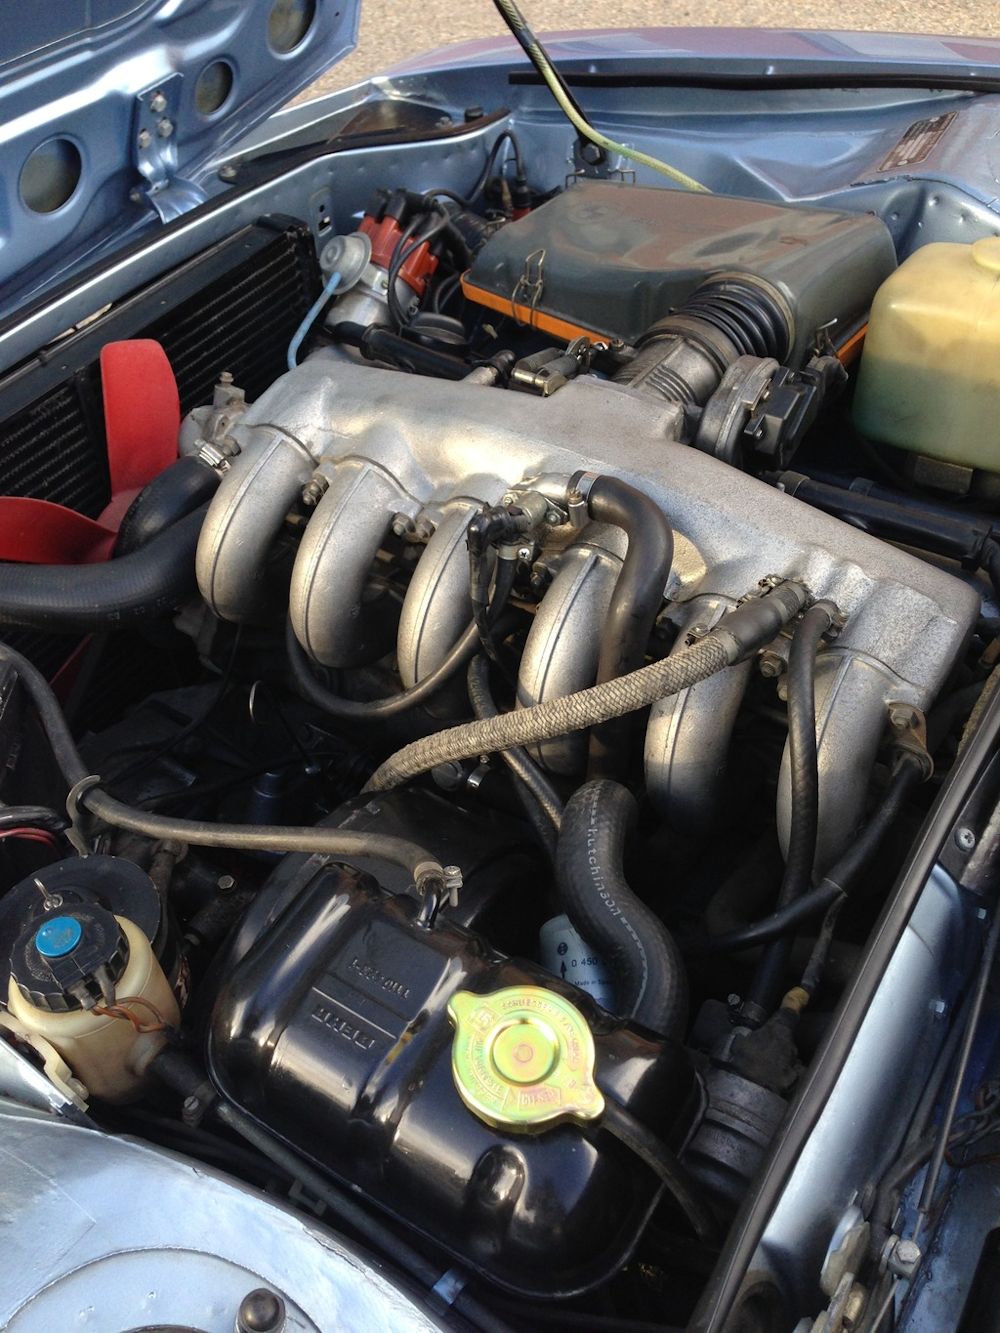
| Fuel injected 6 cyl in the CSi was first
BMW with more than 200HP |
|
 |
 |
 |
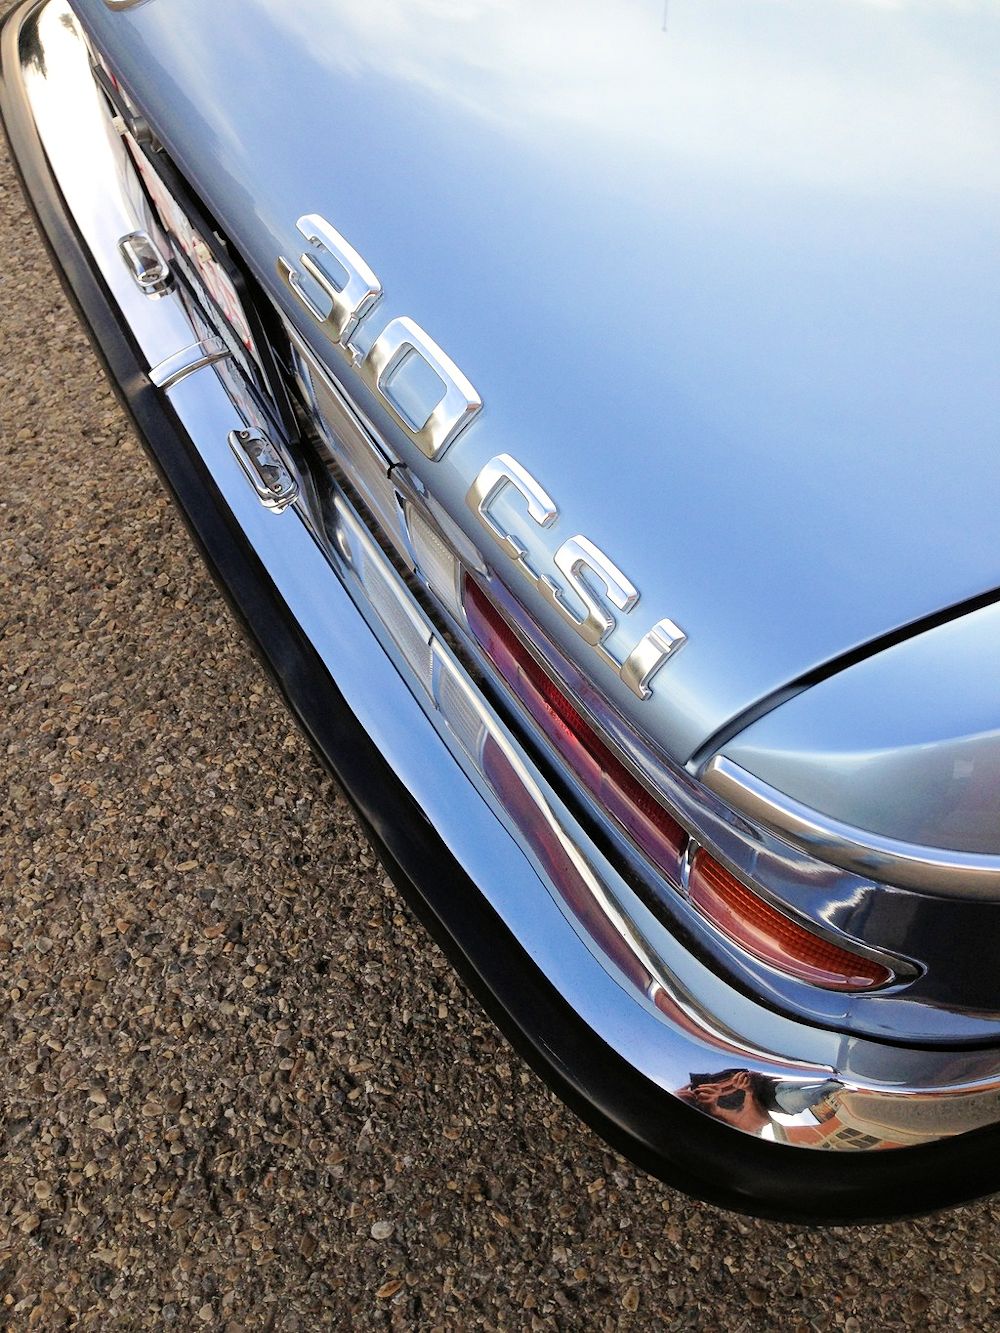 |
| Iconic boot lid badge |
|
 |
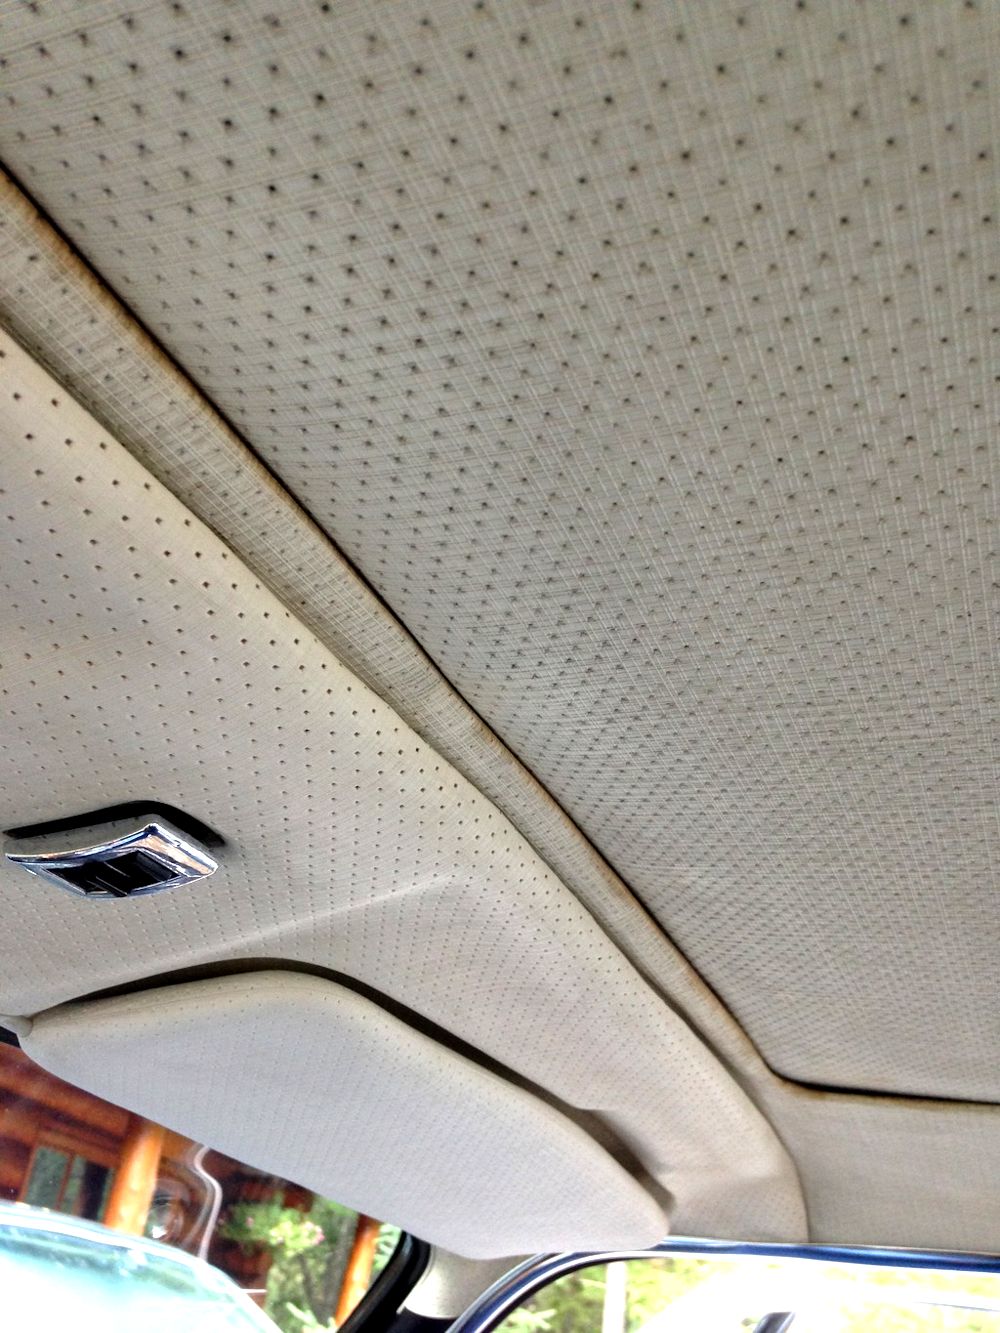 |
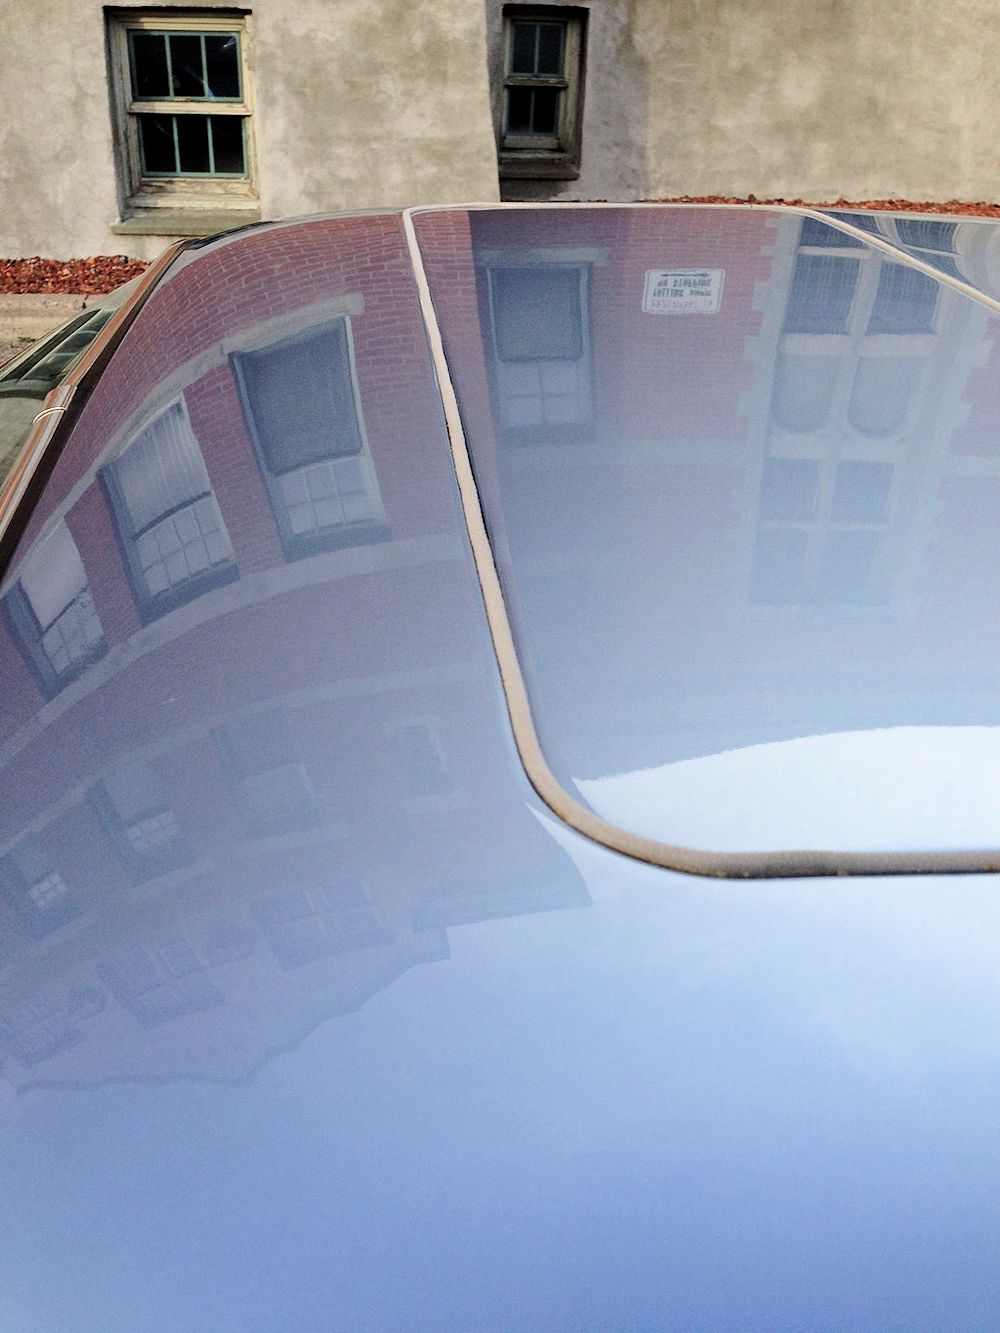
| Factory electric sunroof is a nice option |
Original headliner is in good condition,
should clean up very nicely |
 |
 |
| New Bilstein shocks and Carl Nelson springs
will be installed very soon |
|
 |
 |
 |
 |
| New Navy Blue hide seat covers already in
hand |
Beautiful Formel 380mm wood rim steering
wheel sourced from Vintage Volante in Holland |