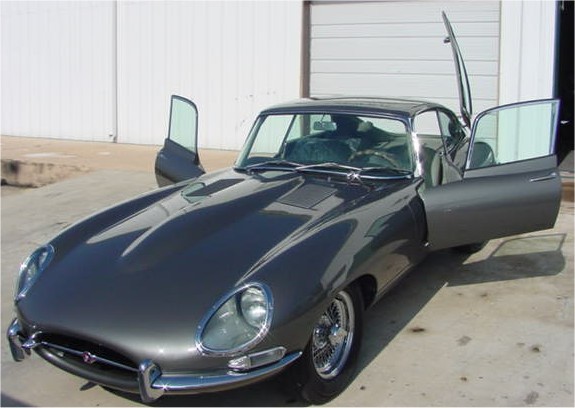
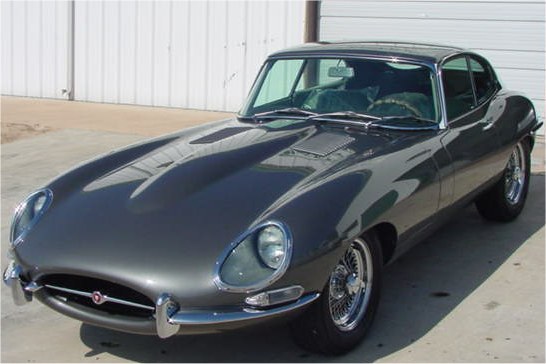
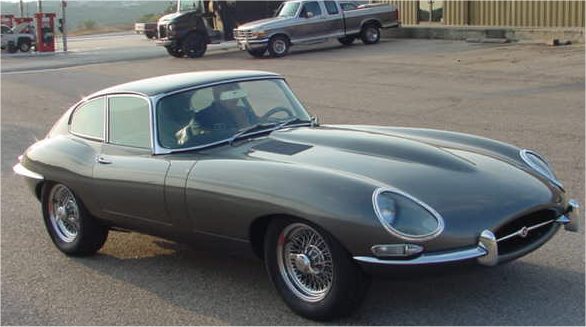
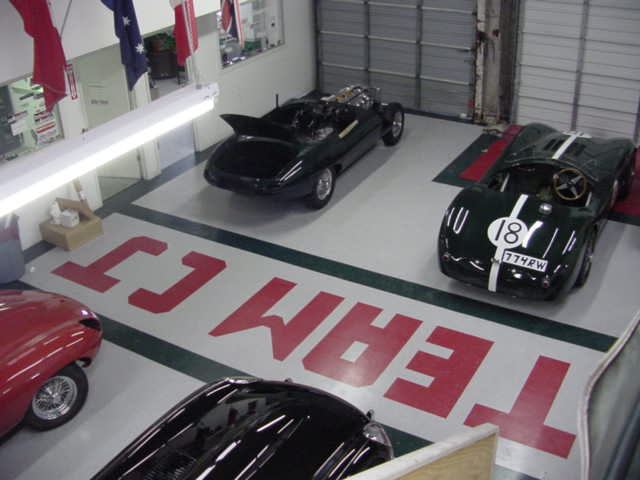
Full Team CJ (modified) restoration
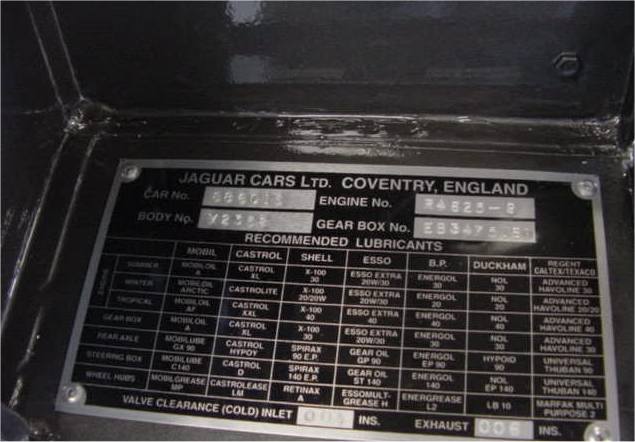
| 1962
E Type FHC - 886015
Full Team CJ (modified) restoration |
|
|
 |
 |
 |
|
|
|
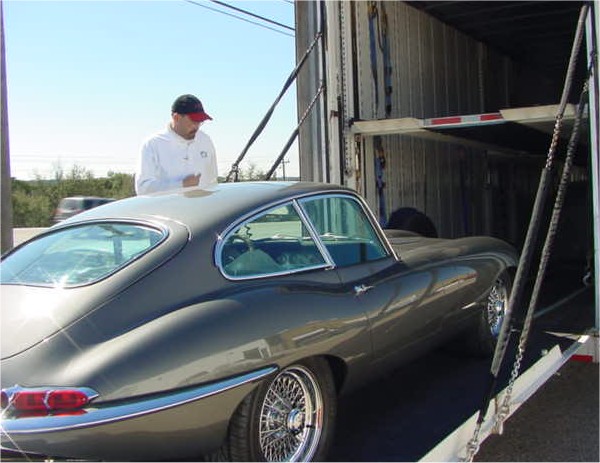
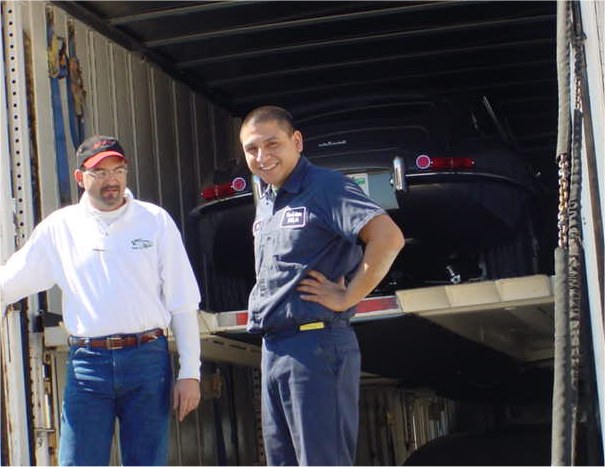
Team CJ logo on his shirt! |
 |
 |
|
|
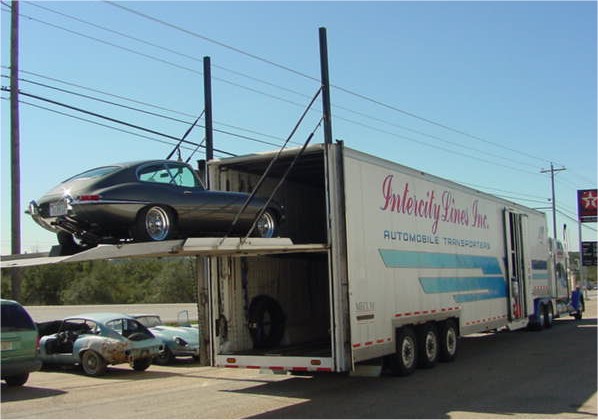
with car safely loaded! |
|
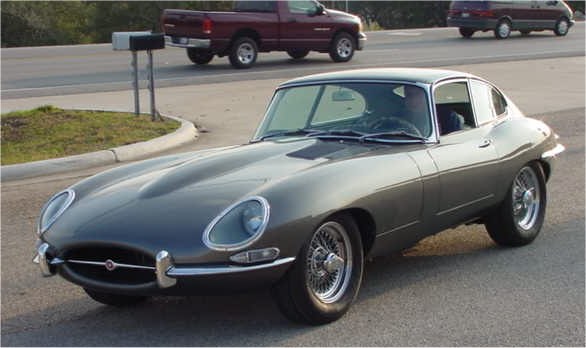
I am pleased to report that the mechanical shakedown is now complete and your car will be with Intercity Transport in the next few days. I hope you have enjoyed watching your car come together as much as we have enjoyed building it for you!Thank you, Bob, and best regards from everybody at Team CJ.
 |
 |
 |
 |
 |
 |
 |
 |
 |
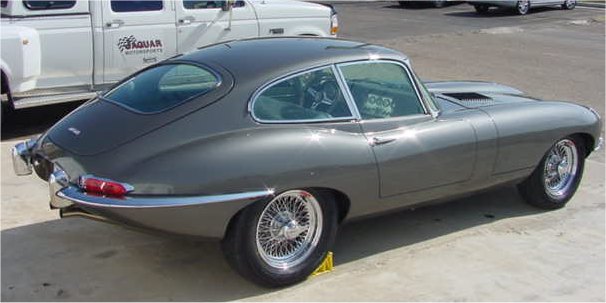
Merry Christmas, Bob. I believe I can hear the fat lady singing!
 |
 |
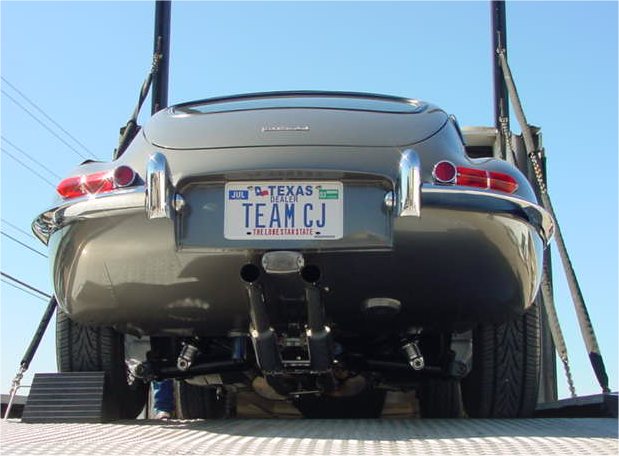
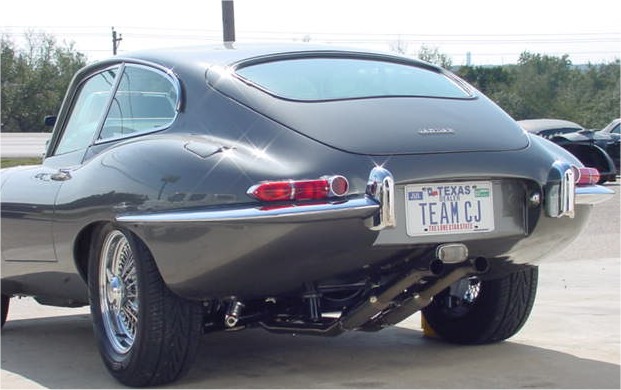
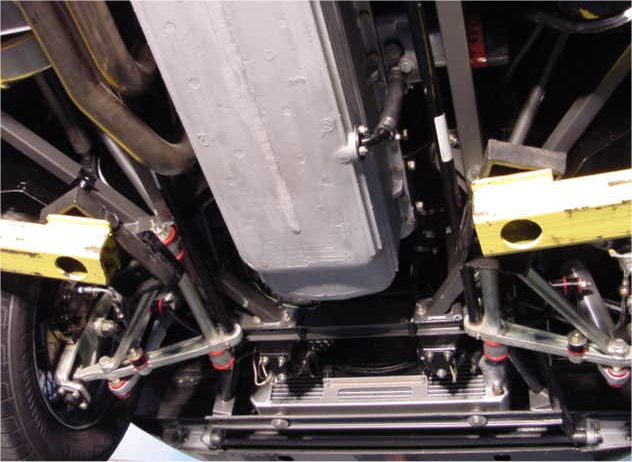
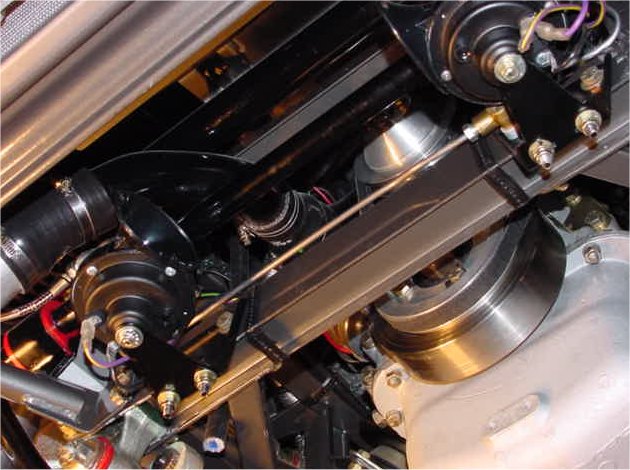
Although it has a few road miles under her belt, it still doesn't look too shabby underneath!
 |
 |
 |
 |
 |
 |
 |
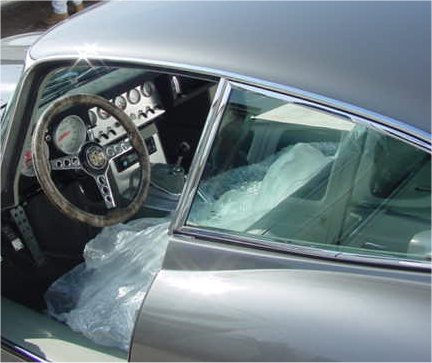
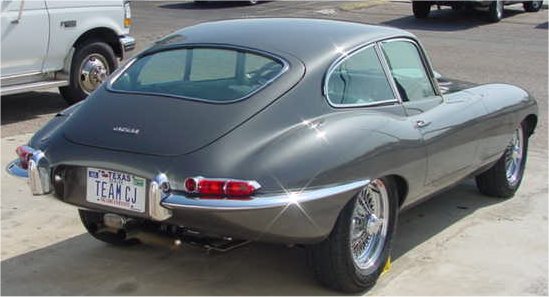
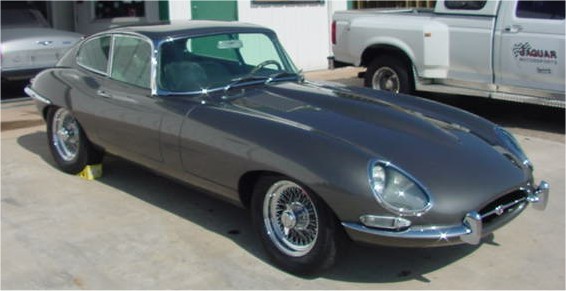
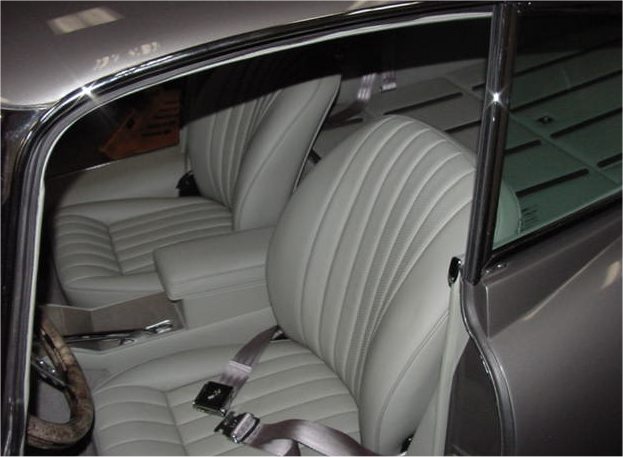
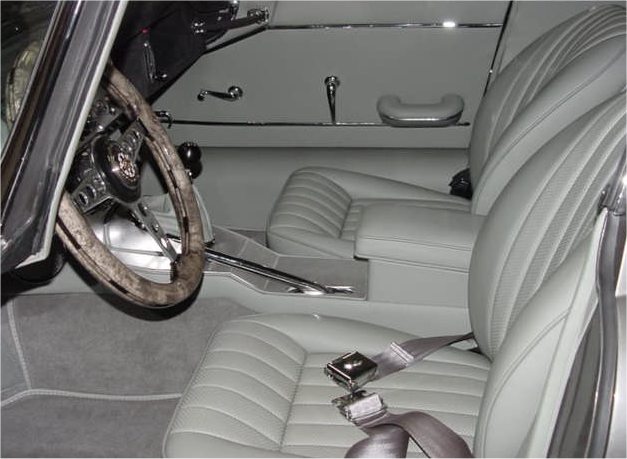
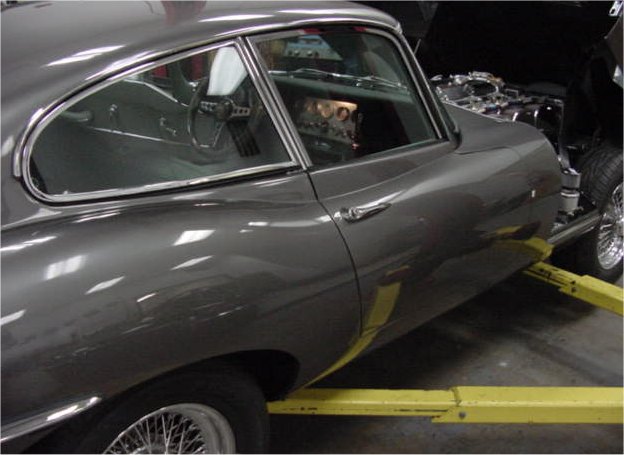
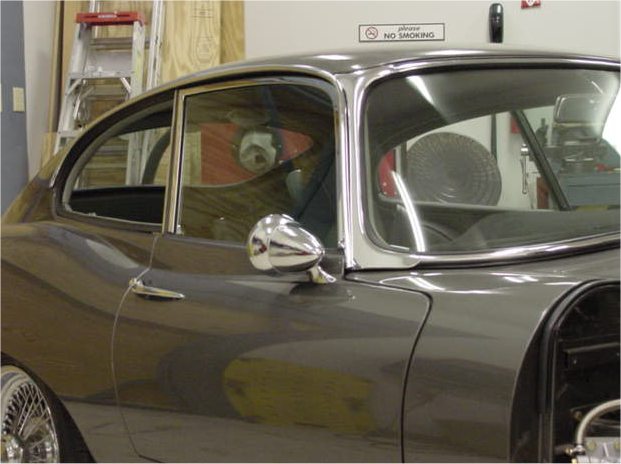
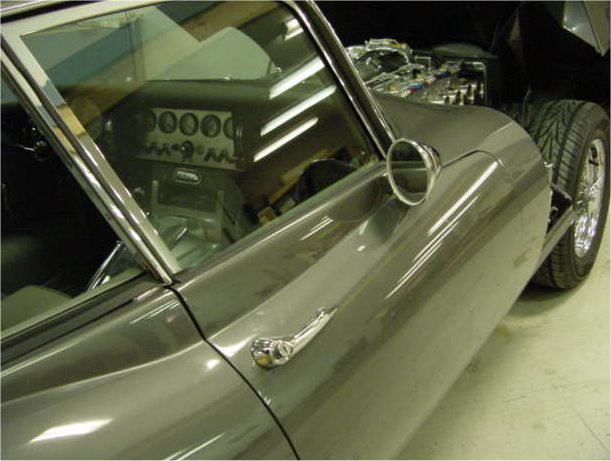
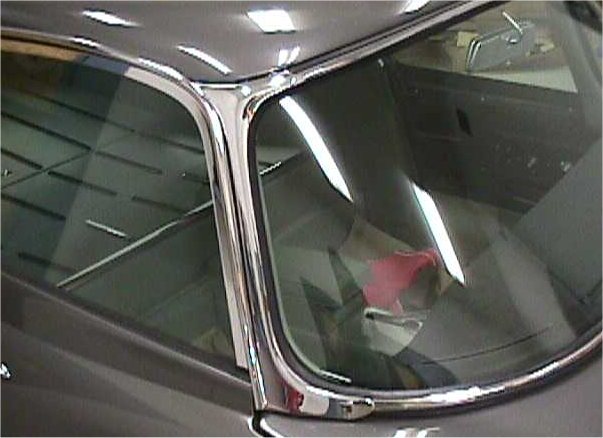
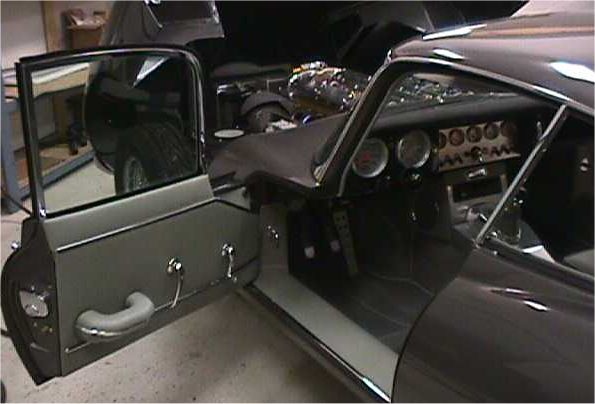
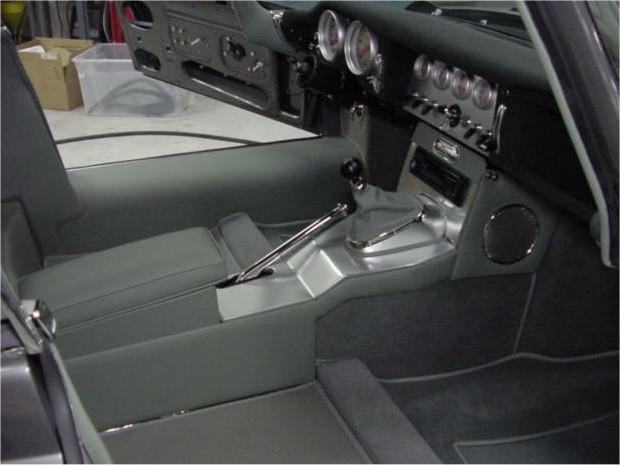
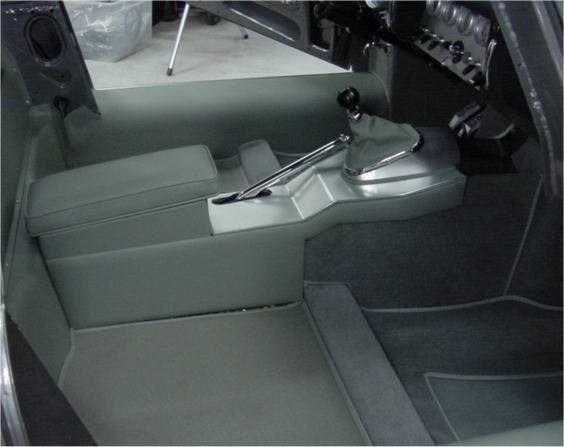
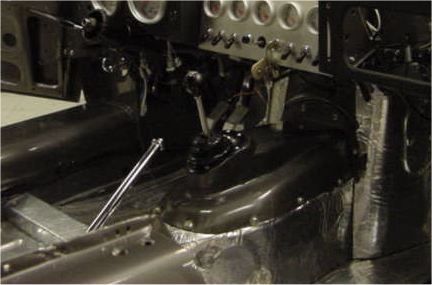
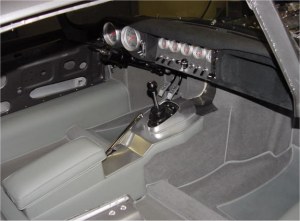
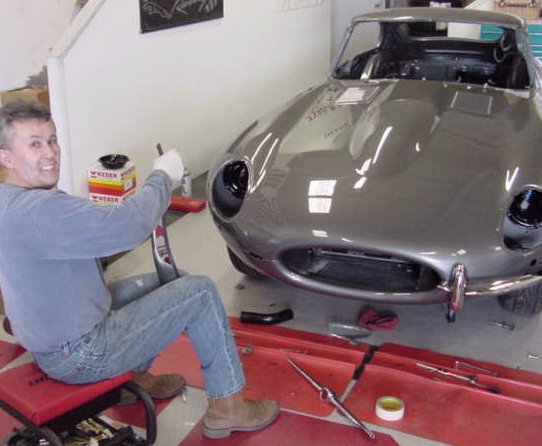
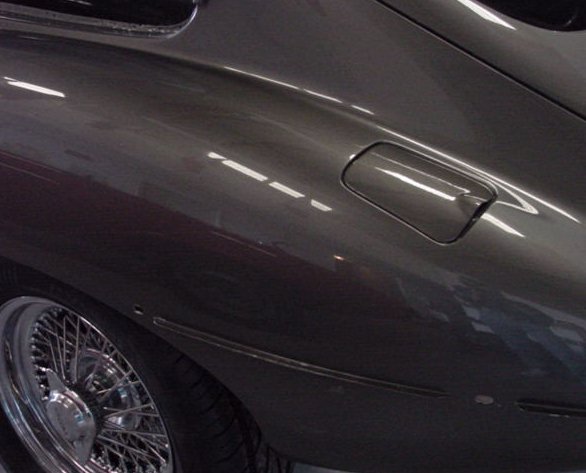
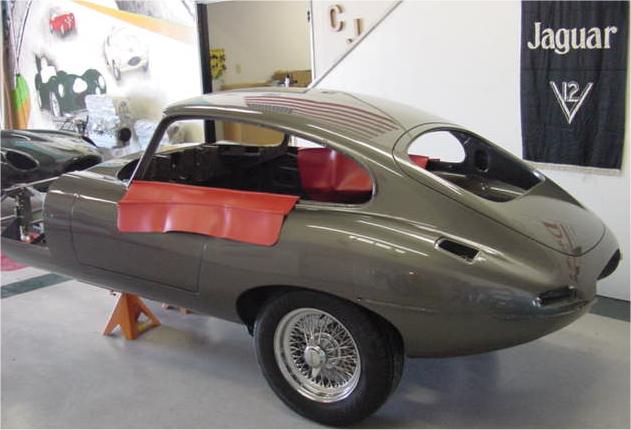
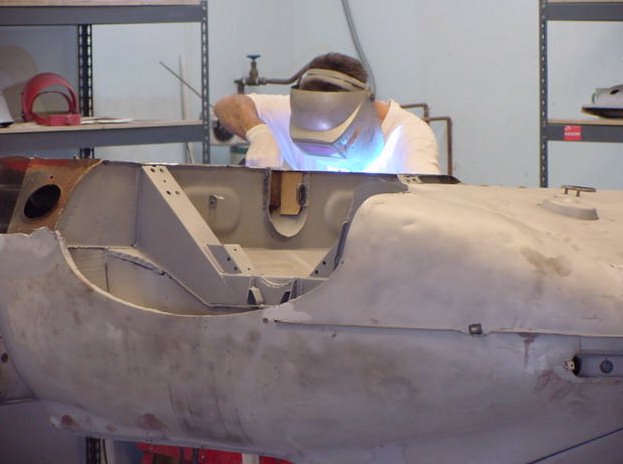
I took the following shots for you while your car was up on a workshop lift, so the lighting was less than ideal. Hopefully you can see the additional contour we put into the seat backs, as well as the custom steering wheel you designed. Notice in the final photograph that the Talbot wing mirrors have been removed, per your instructions.Untypically cold and wet Texas weather has been hindering the road testing process somewhat, but I am pleased to report that the final shakedown is going very well. Not long now, Bob!
 |
 |
 |
 |
 |
 |
 |
 |
I apologise for the fact that the latest photographs are somewhat blurred, but at least they show how close this project is moving to completion. Not long now.
 |
 |
|
|
|
 |
 |
|
|
|
 |
 |
|
|
|
 |
|
|
|
Lots of progress to report today, including the execution of a number of custom ideas that came from the customer himself.
 |
 |
 |
 |
 |
 |
 |
 |
 |
 |
 |
 |
 |
 |
 |
 |
 |
 |
 |
 |
 |
 |
 |
 |
 |
 |
 |
 |
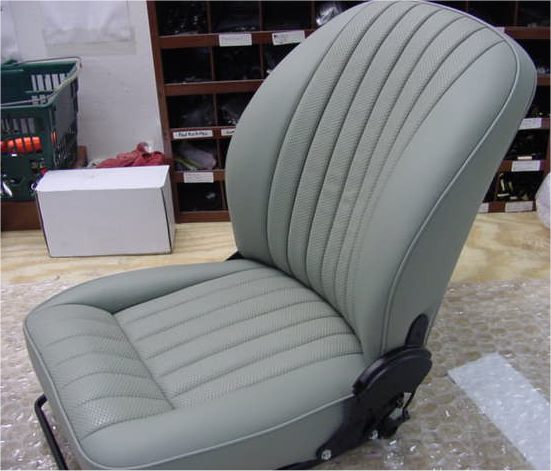
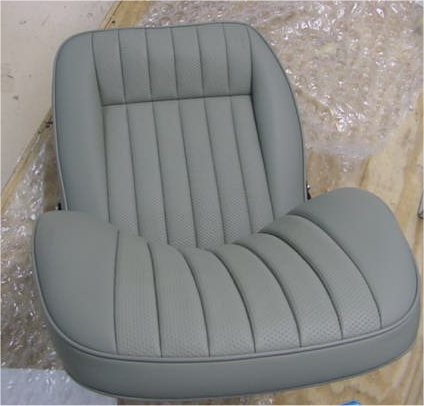
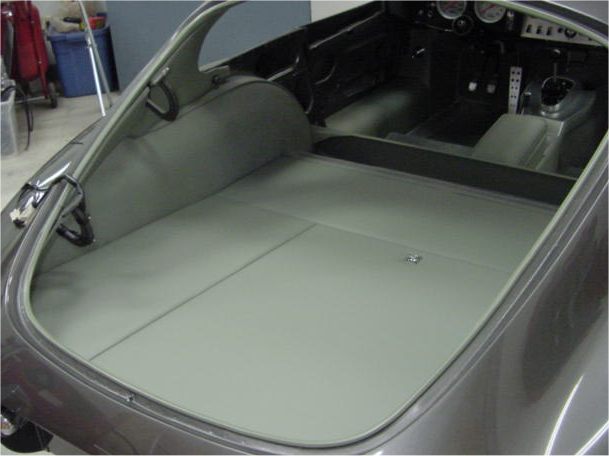
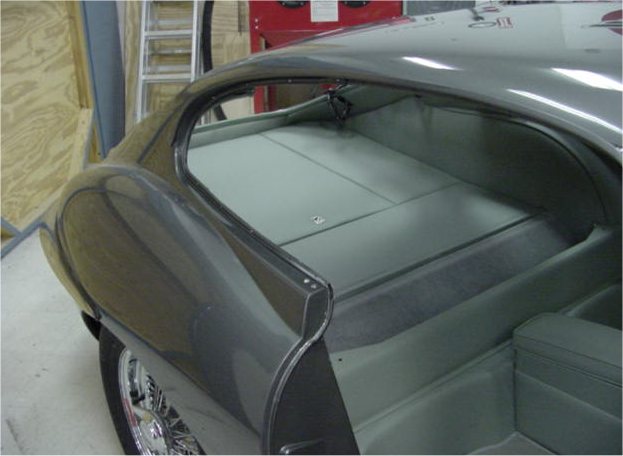
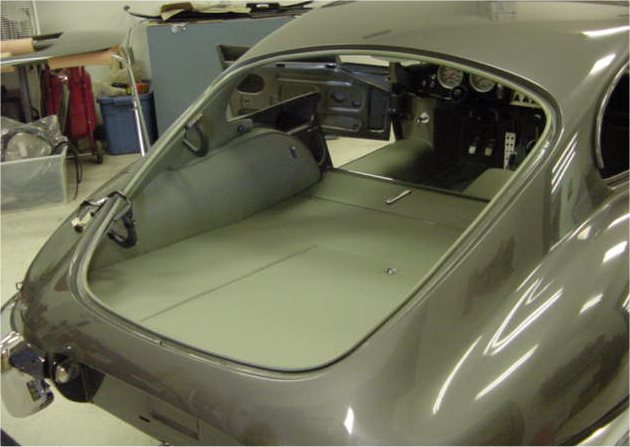
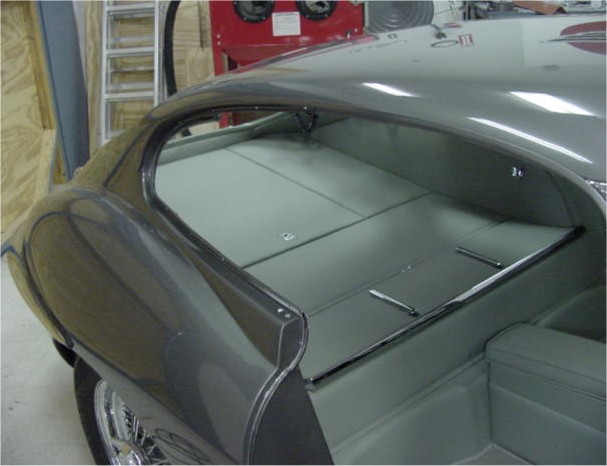
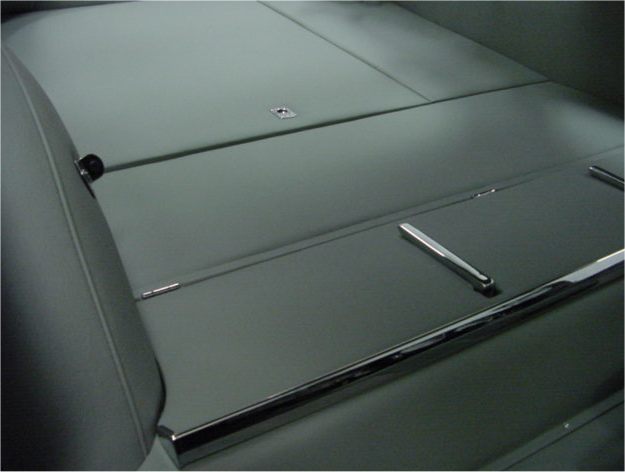
Another batch of interior shots to take you into the weekend thoroughly encouraged that we are pressing on relentlessly with your project!
 |
 |
|
|
|
 |
 |
|
|
|
 |
 |
|
back in fawlty acres..... |
|
 |
 |
|
|
|
 |
 |
|
|
|
 |
 |
|
|
|
 |
 |
|
|
|
 |
 |
|
|
|
 |
 |
|
|
|
 |
 |
|
|
|
 |
 |
|
|
|
 |
 |
|
|
|
 |
 |
|
|
|
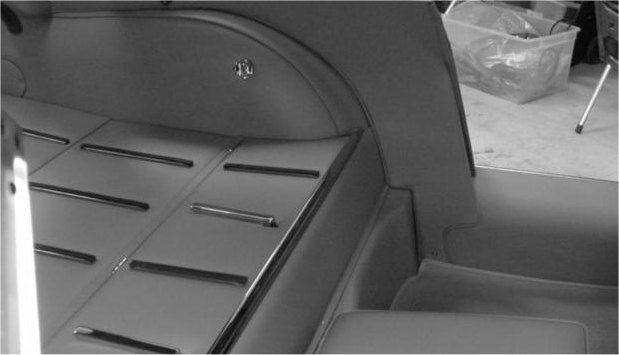
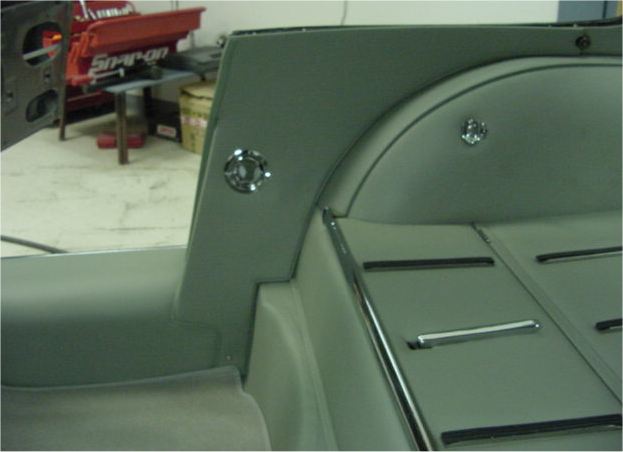
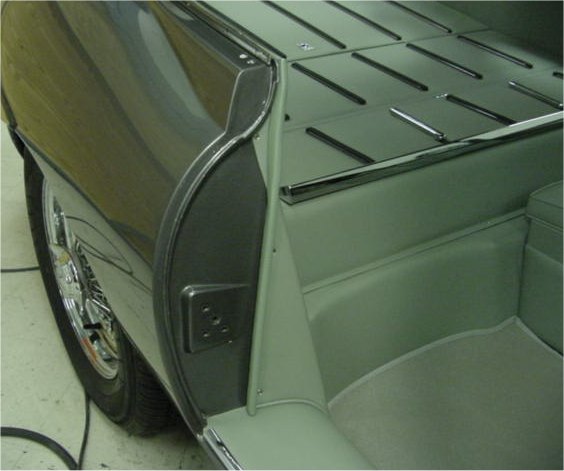
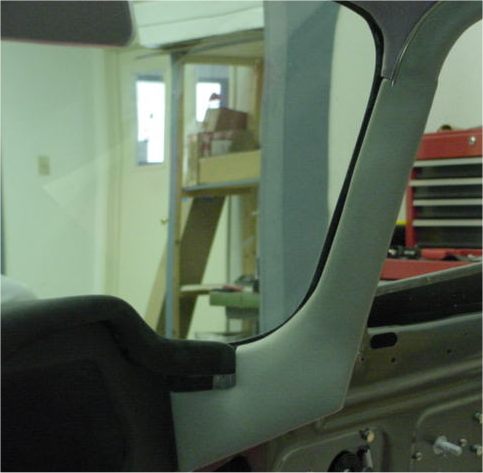
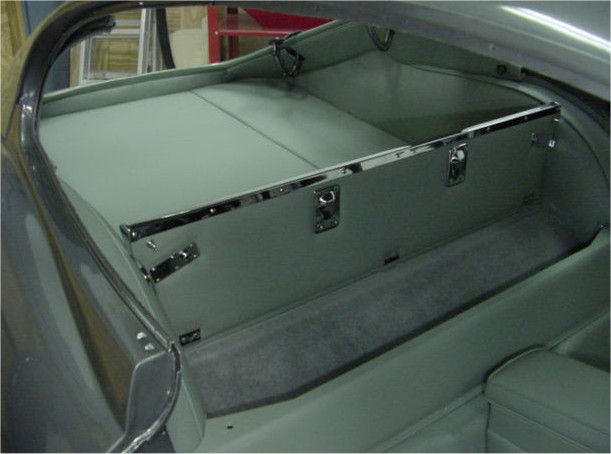
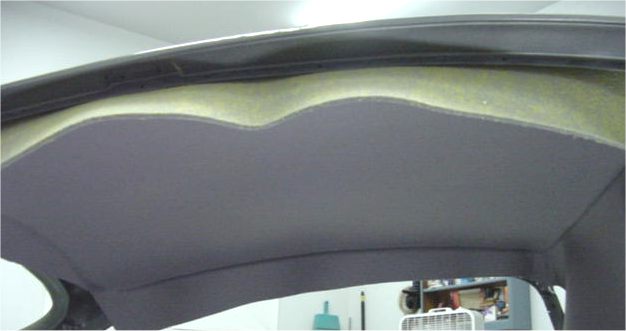
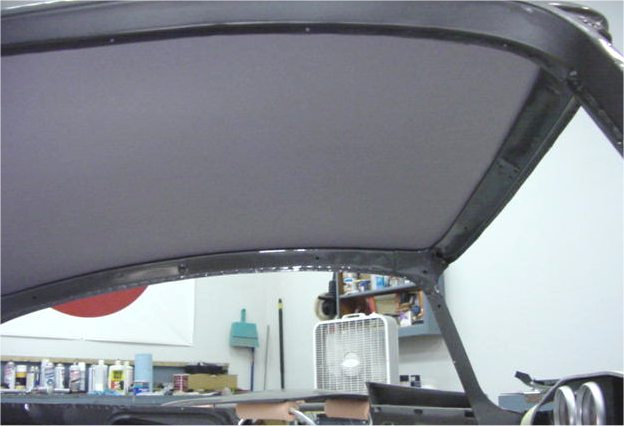
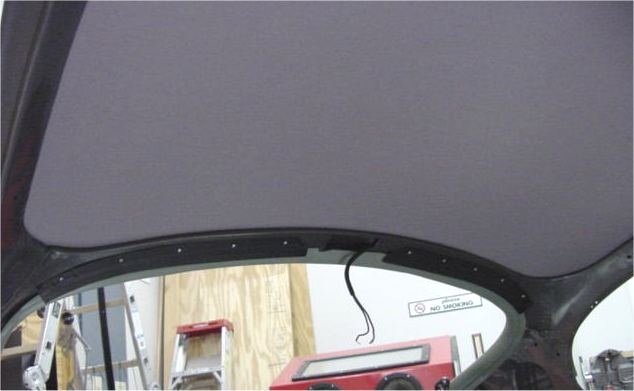
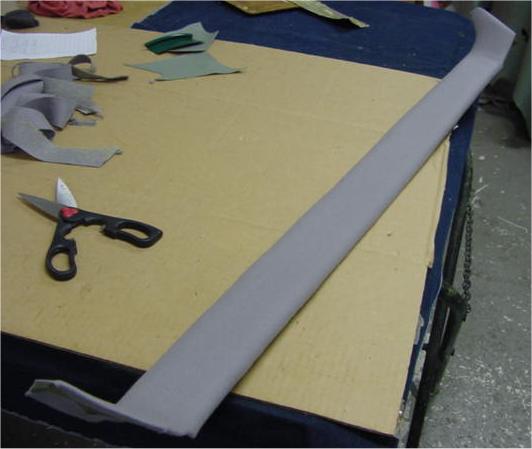
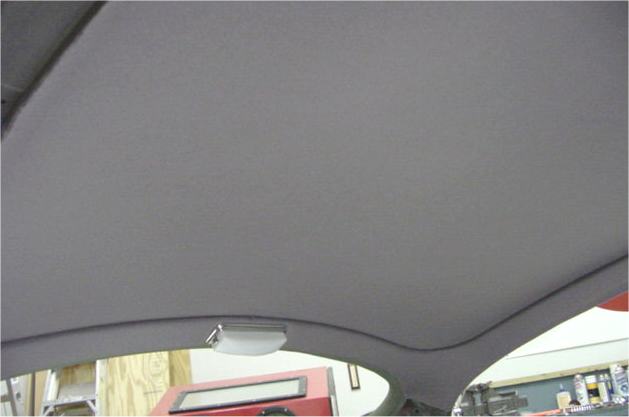
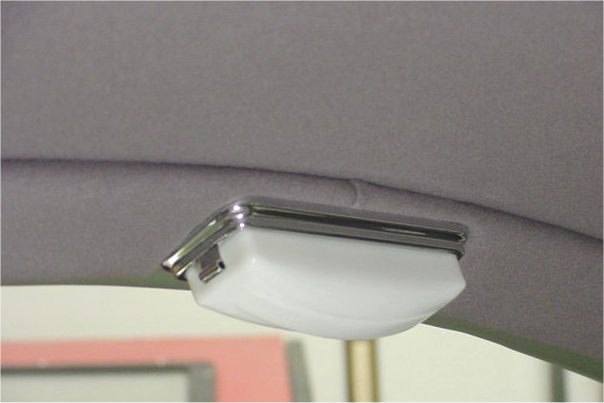
This might very well be the biggest single workshop update ever! I think this report includes some 60 photographs showing David's truly magnificent trim work. Some of the photographs are a little out of sequence as they are being published retrospectively in response to a specific request. I hope you enjoy the show!
 |
 |
|
|
|
 |
 |
|
|
|
 |
 |
|
|
|
 |
 |
|
|
|
 |
 |
|
|
|
 |
 |
|
|
|
 |
 |
|
|
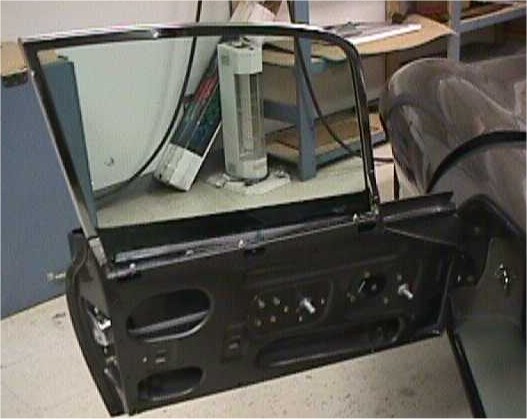
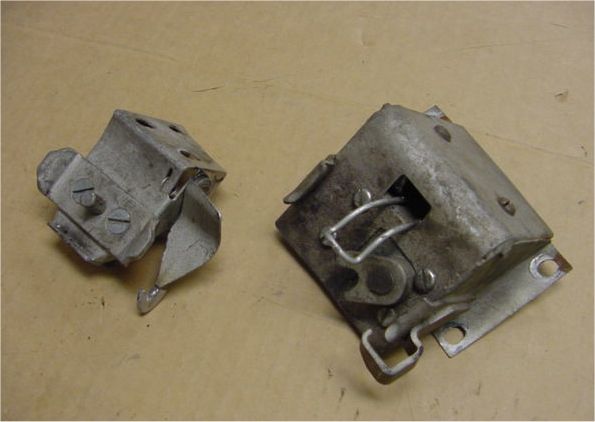
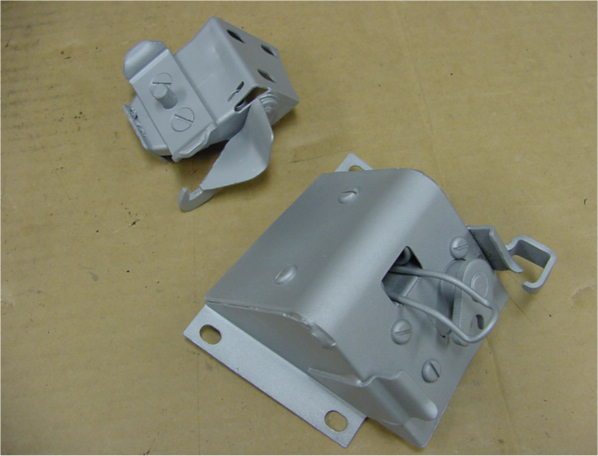
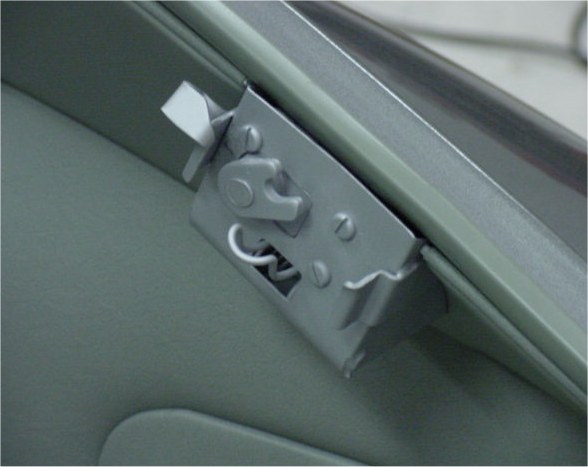
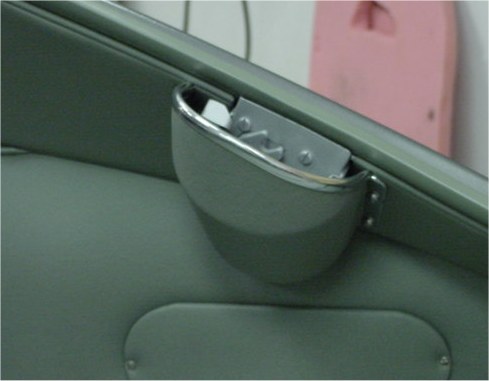
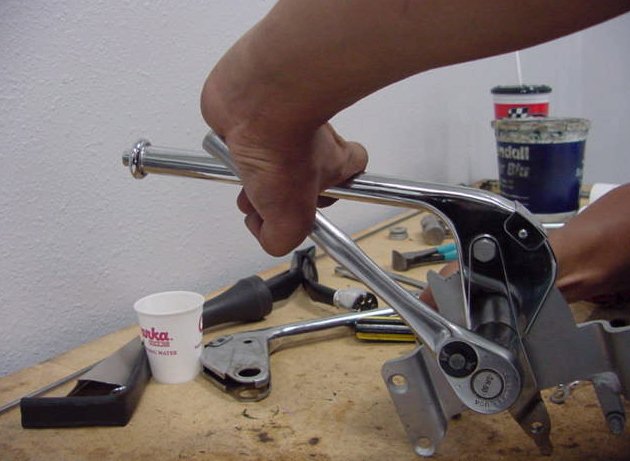
latching mechanism will attach |
 |
 |
|
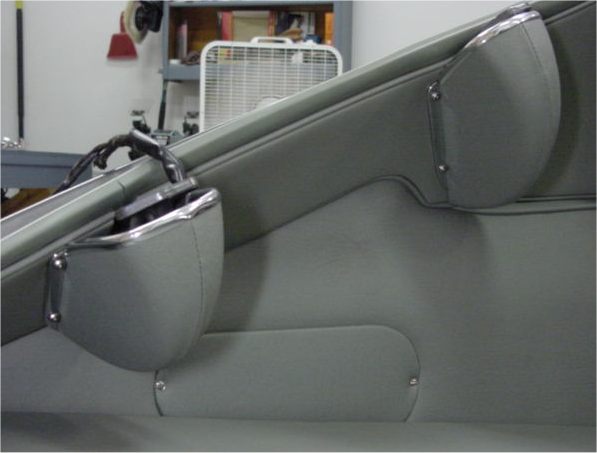
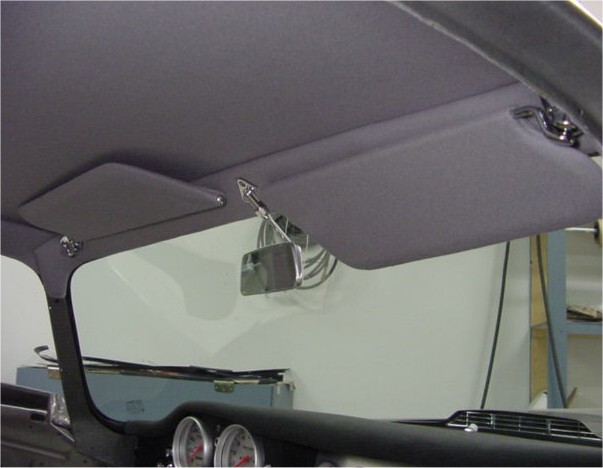
visors installed |
|
 |
 |
|
|
|
 |
 |
|
|
|
 |
 |
|
|
|
 |
 |
|
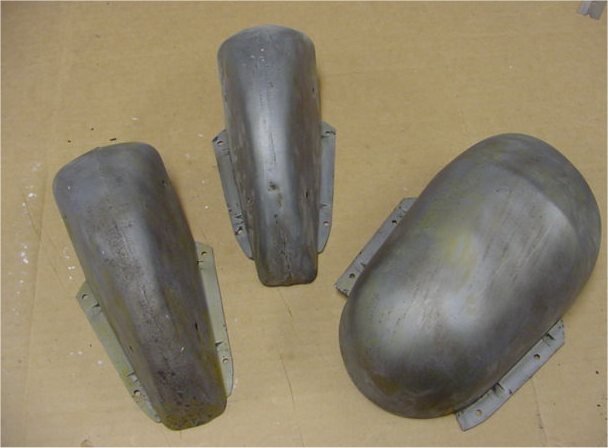
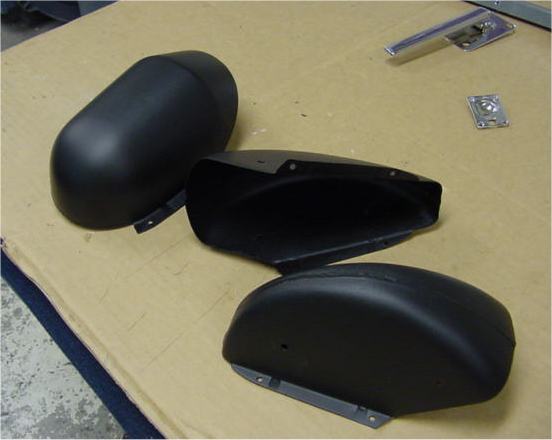
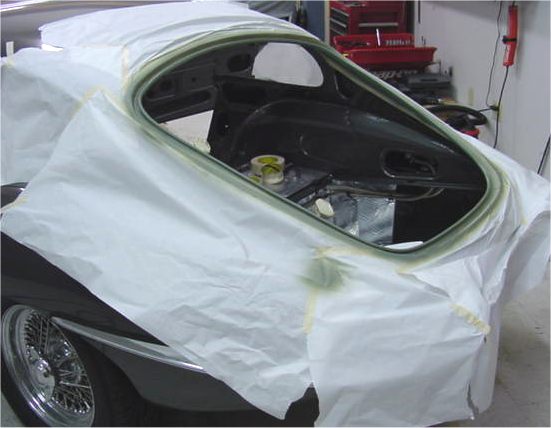
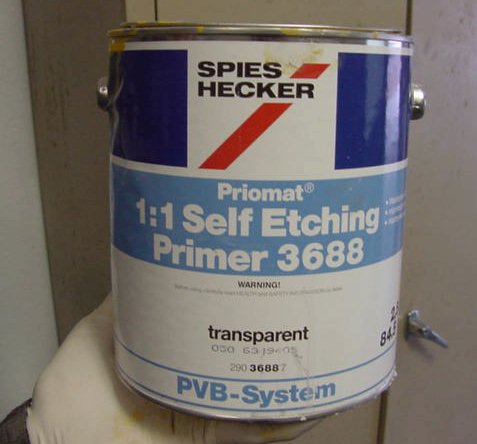
in epoxy primer |
|
 |
 |
|
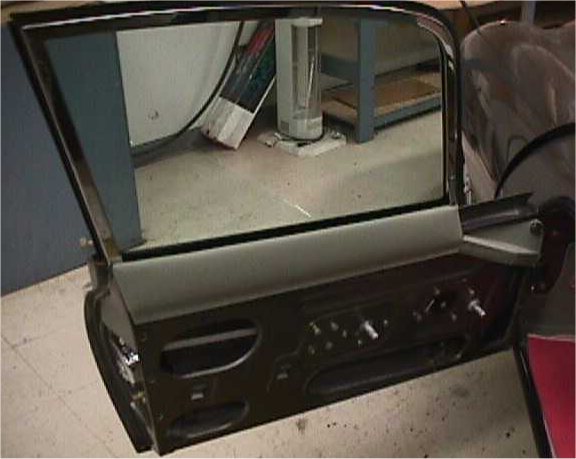
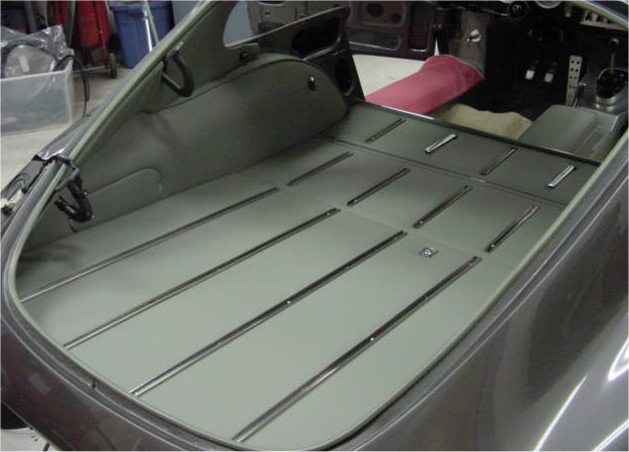
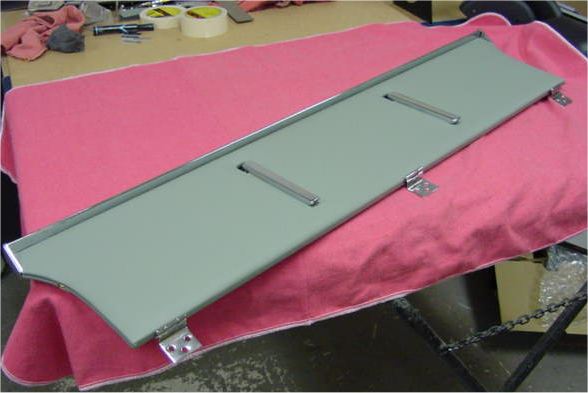
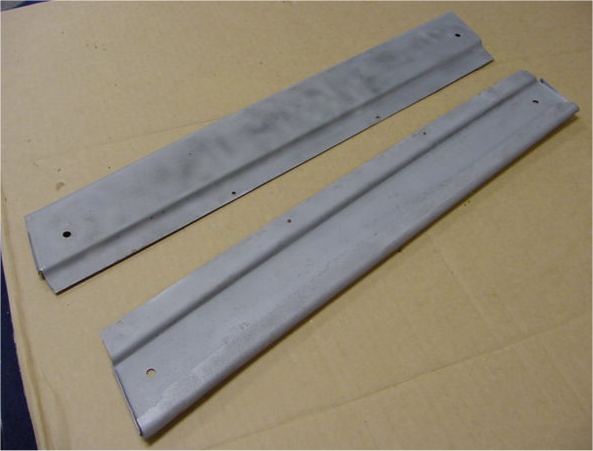
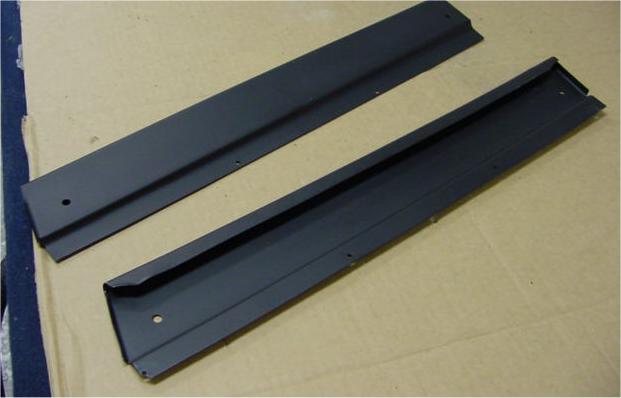
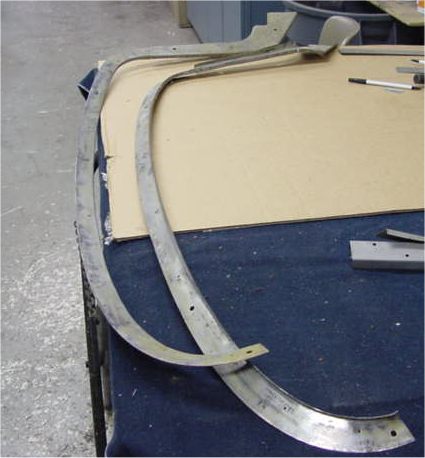
runners and rubber strips |
|
 |
 |
|
|
|
 |
 |
|
|
|
 |
 |
|
|
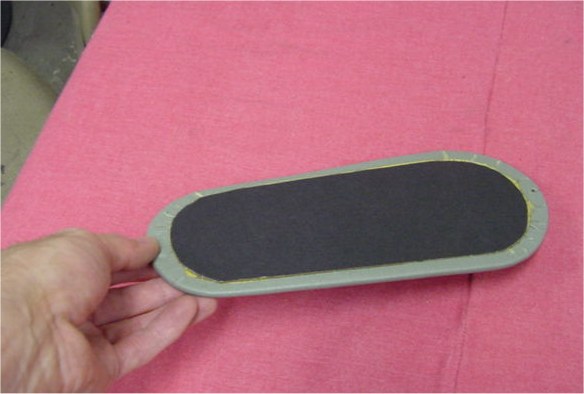
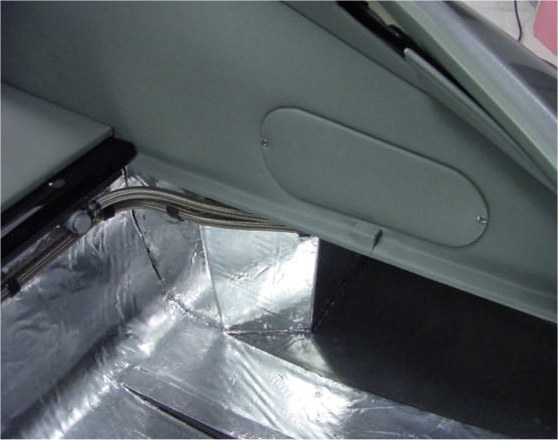
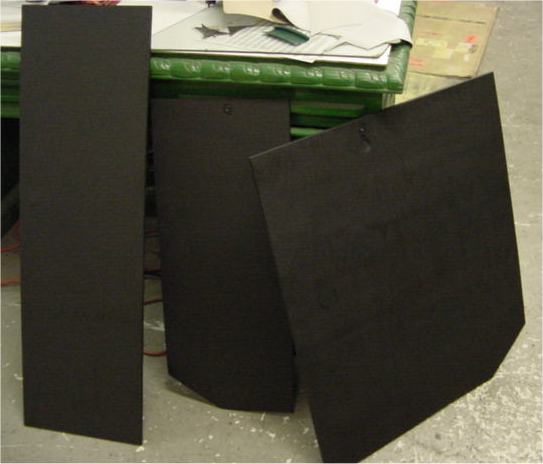
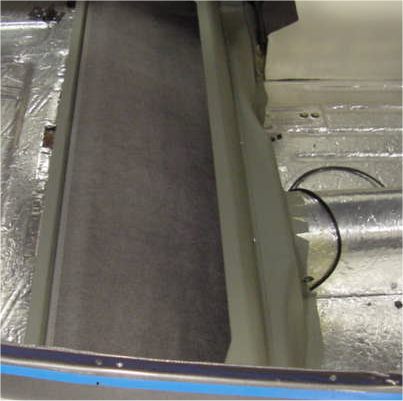
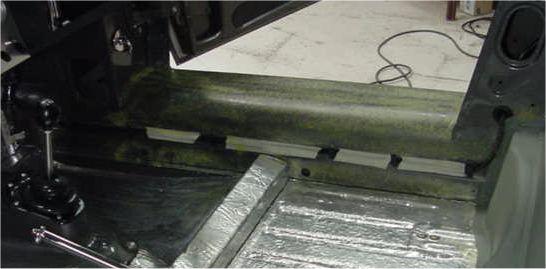
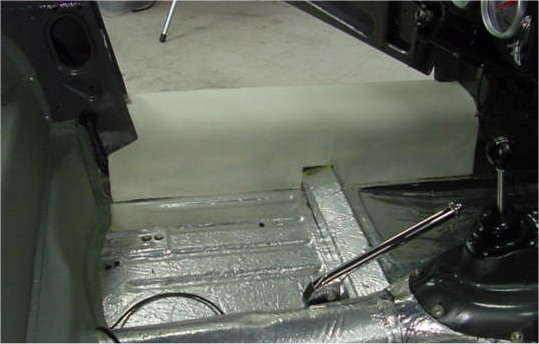
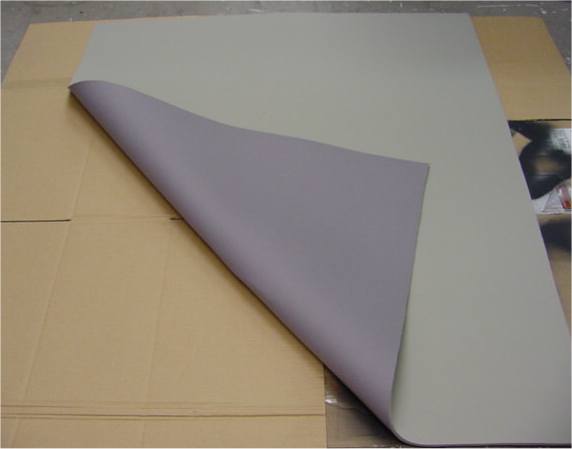
great heat barrrier |
 |
 |
|
along the firewall |
|
 |
 |
|
|
|
 |
 |
|
|
|
 |
 |
|
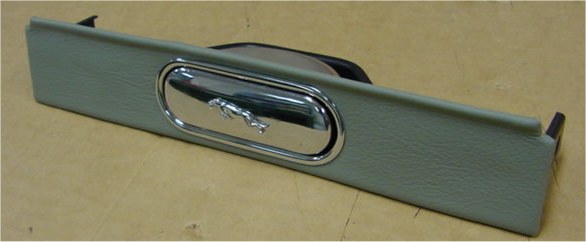
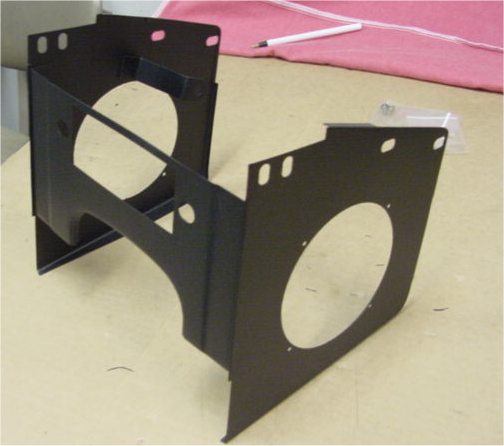
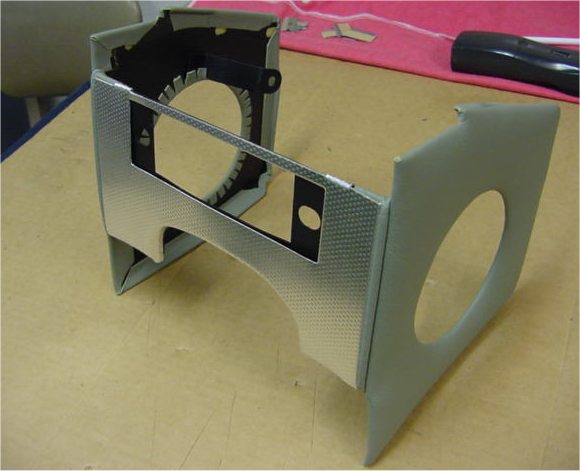
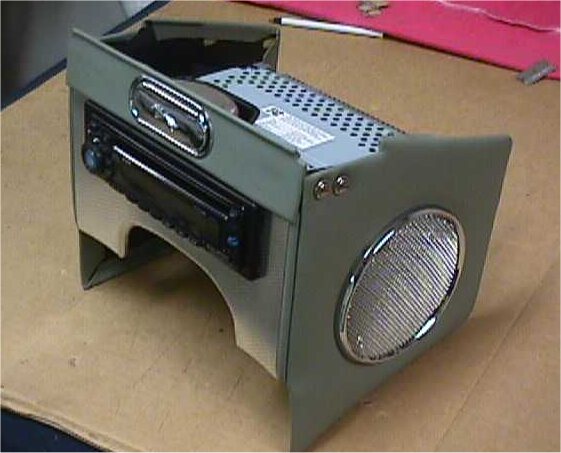
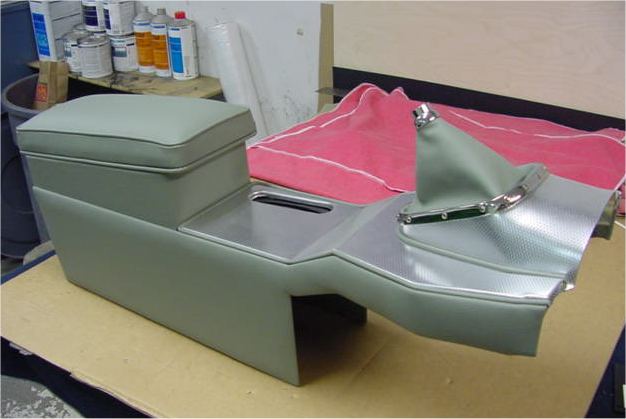
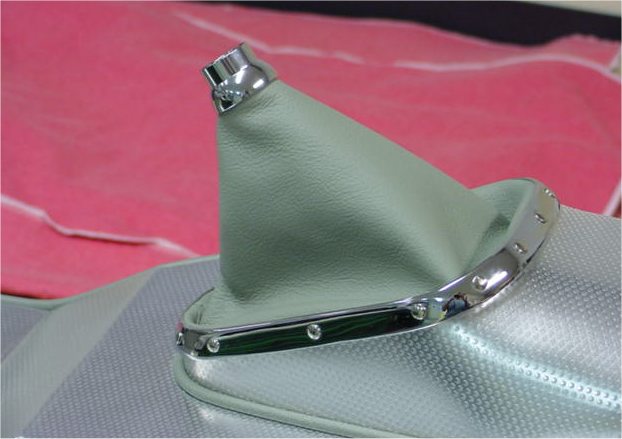
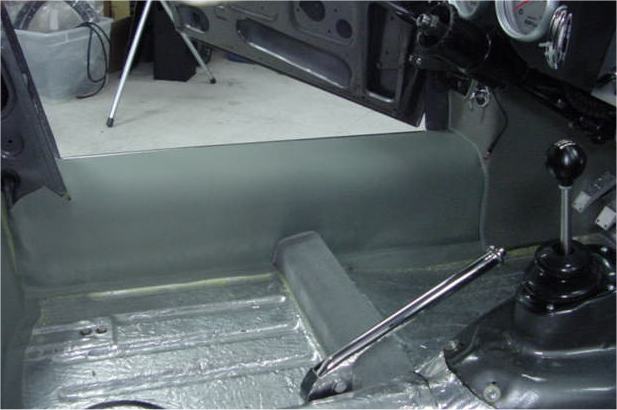
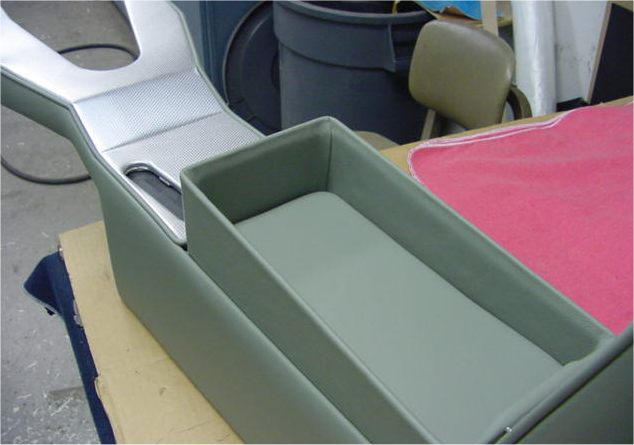
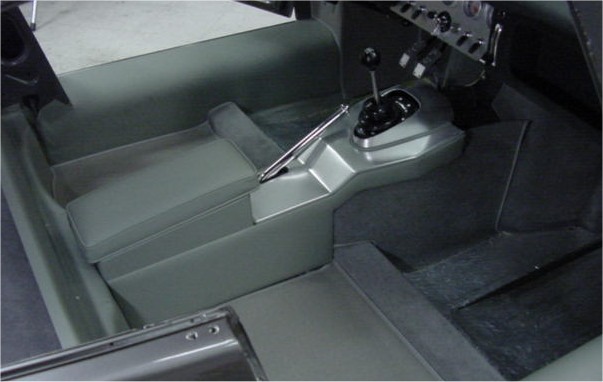
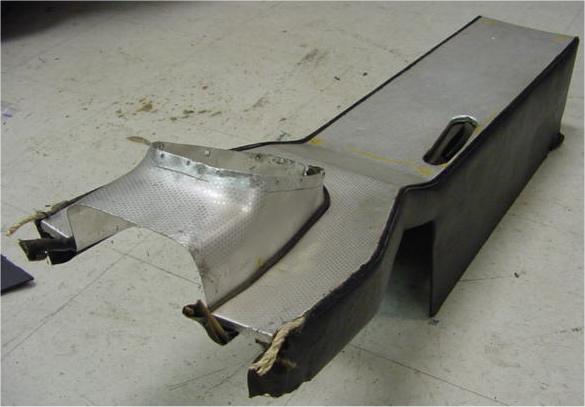
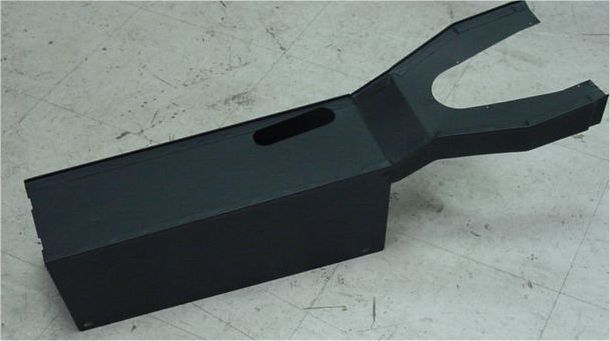
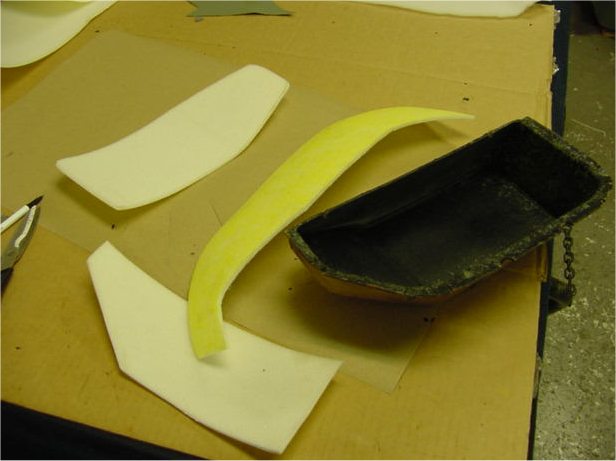
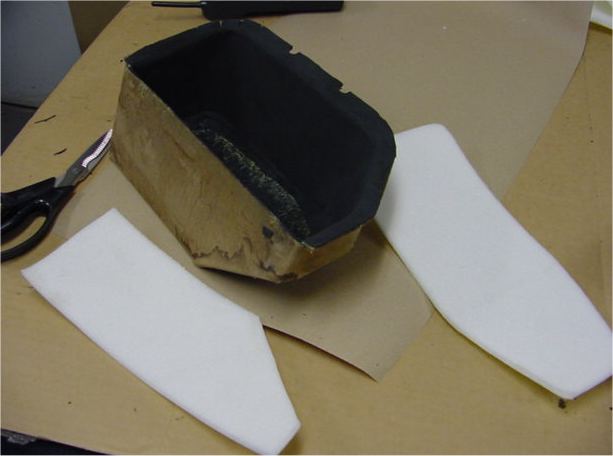
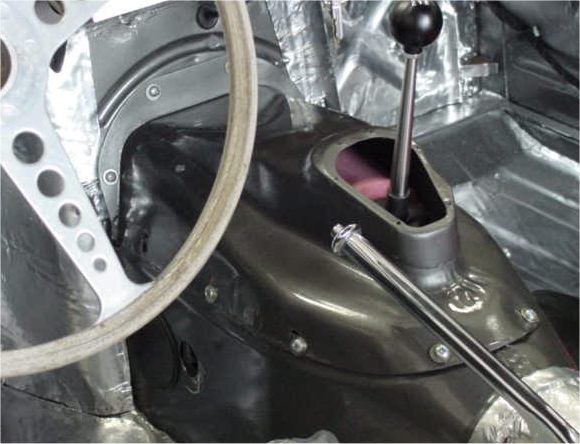
custom centre console |
|
 |
 |
|
|
|
 |
 |
|
|
|
 |
 |
|
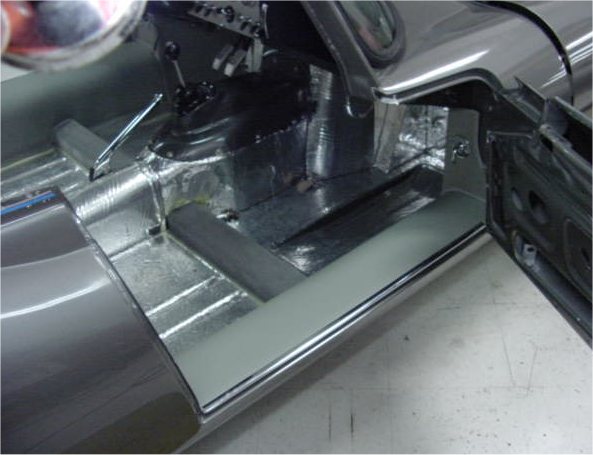
around the back edge of the aluminium |
|
 |
 |
|
|
|
 |
 |
|
|
|
 |
 |
|
|
|
 |
 |
|
|
|
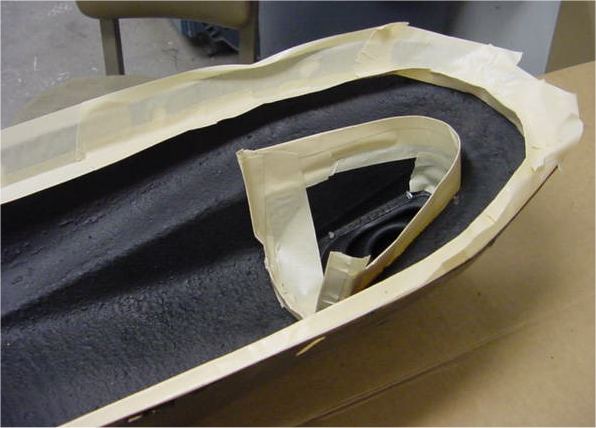
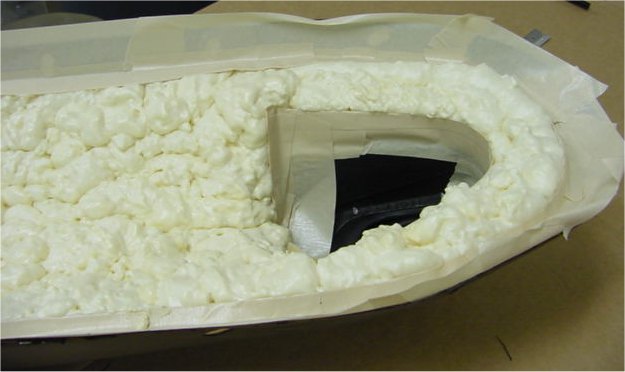
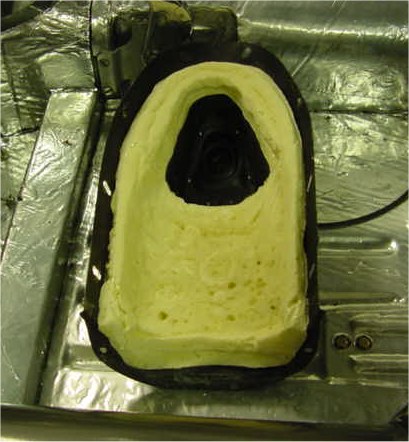
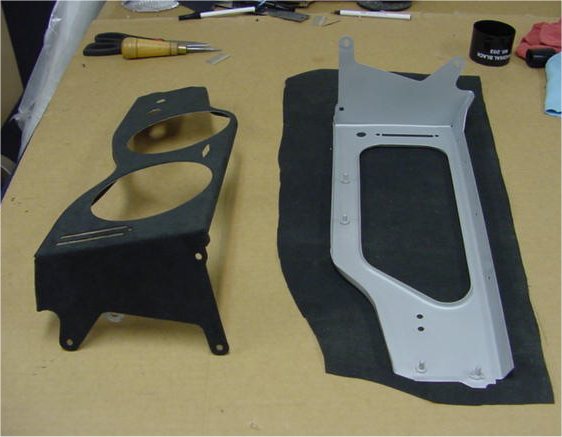
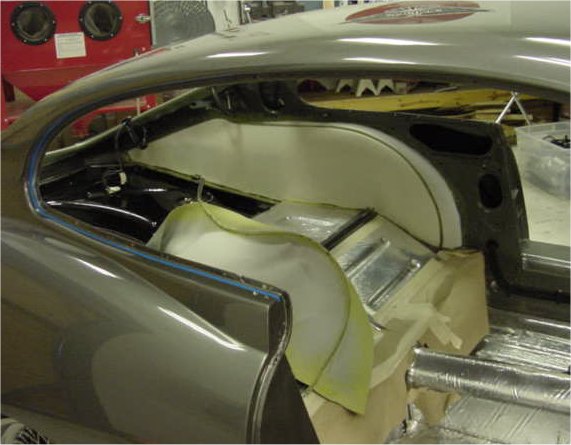
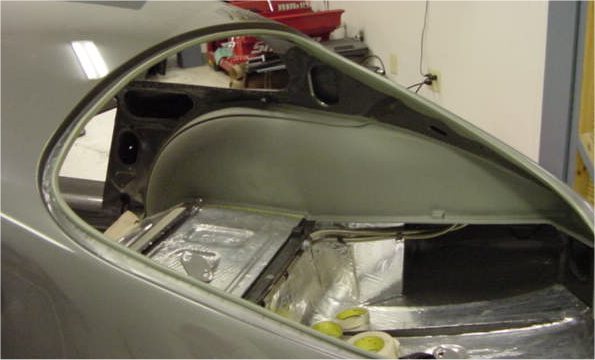
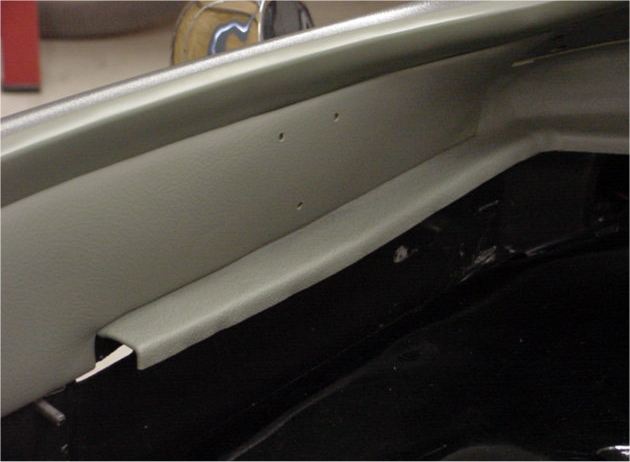
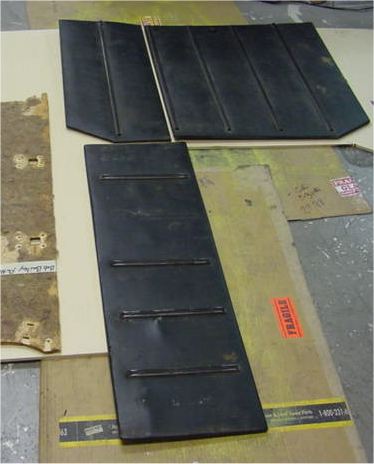
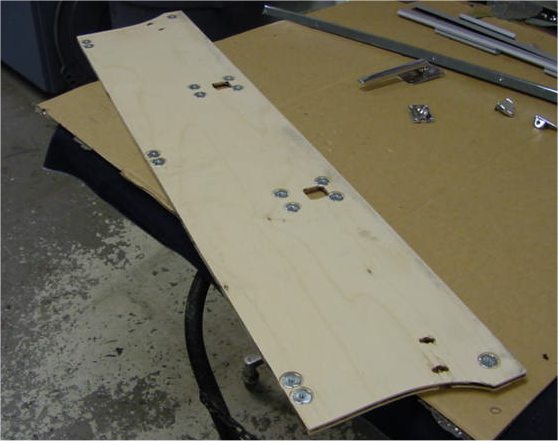
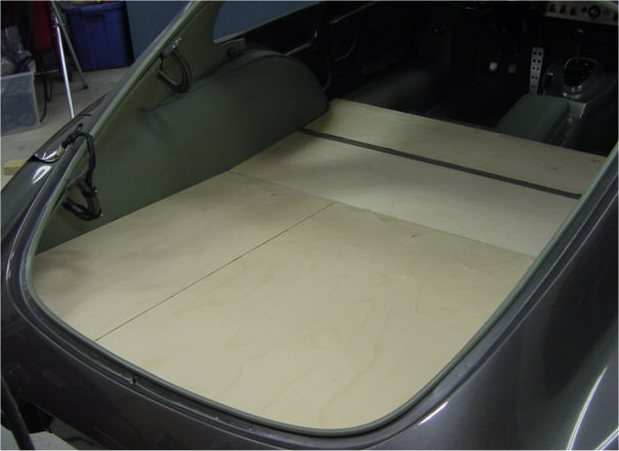
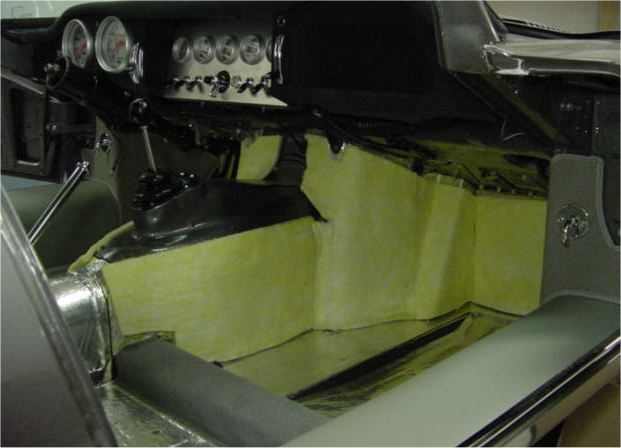
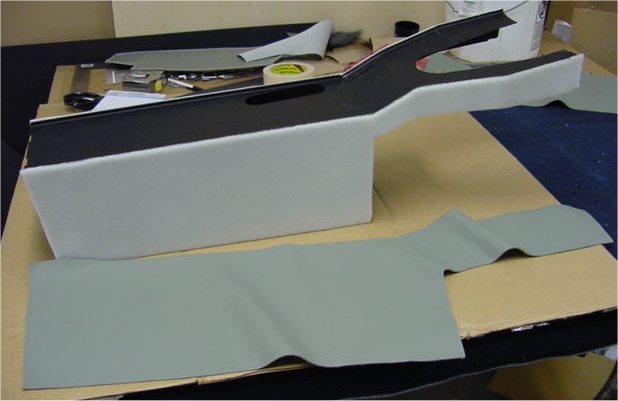
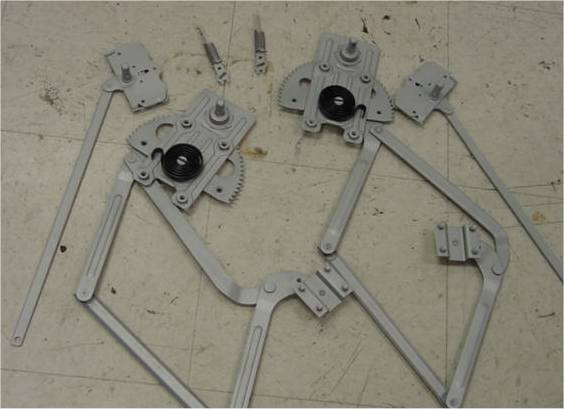
Proving emphatically that we have not lost any focus or direction with this very difficult and extremely challenging project, I am pleased to provide you with the following extensive photographic update.As you can see, David has been working away diligently at your highly customized interior and making excellent progress. For my part I meet with him daily in my best attempt at meeting all your special needs, requests and design preferences.
 |
 |
|
|
|
|
|
|
 |
 |
|
|
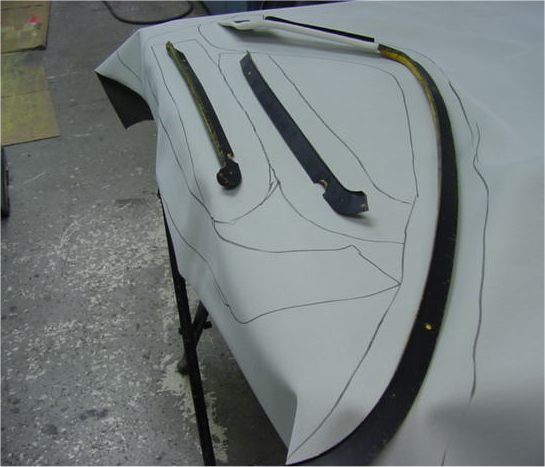
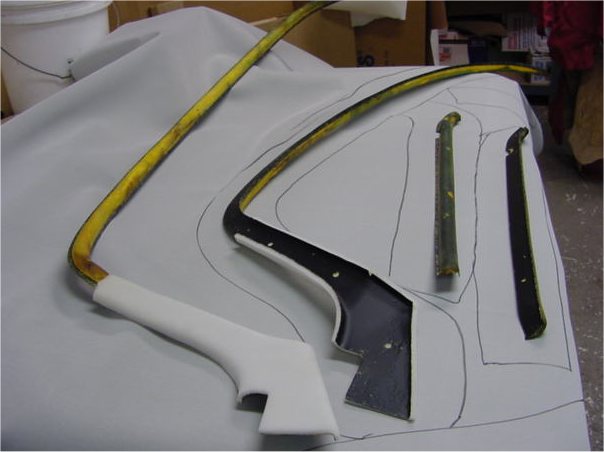
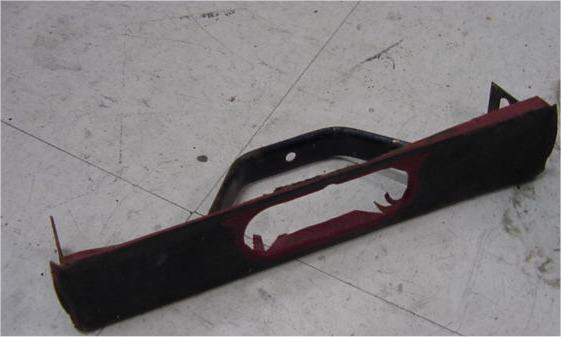
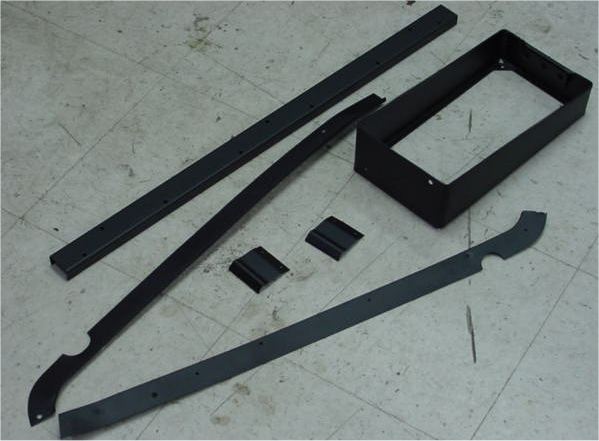
the interior trim pieces for your car as much was missing as received |
|
|
|
 |
 |
|
|
|
|
|
|
 |
 |
|
|
|
|
|
|
 |
 |
|
|
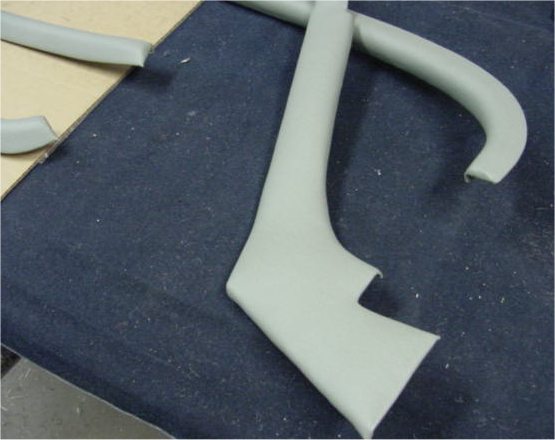
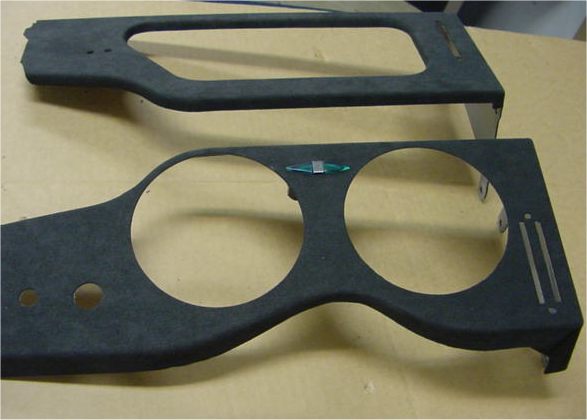
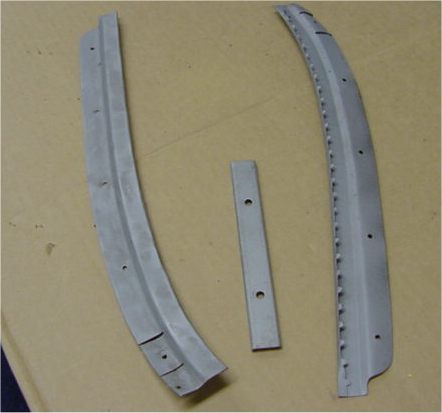
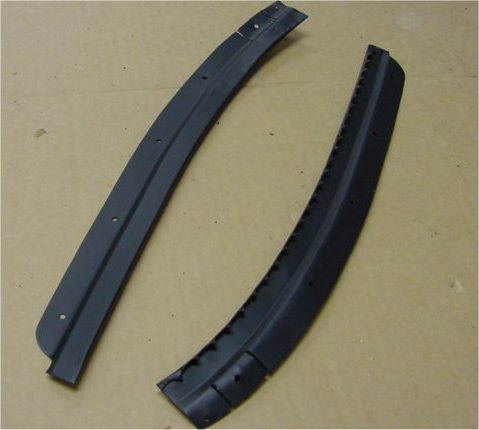
interior panels prior to trimming |
|
|
|
 |
 |
|
|
|
|
|
|
 |
 |
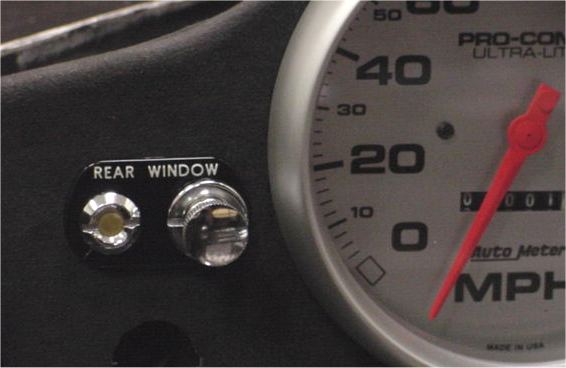
|
|
|
|
|
|
 |
 |
|
|
|
|
|
|
 |
 |
|
|
|
|
|
|
 |
 |
|
|
|
|
|
|
 |
 |
|
|
|
|
|
|
 |
 |
|
|
|
|
|
|
 |
 |
|
|
|
|
|
|
 |
 |
|
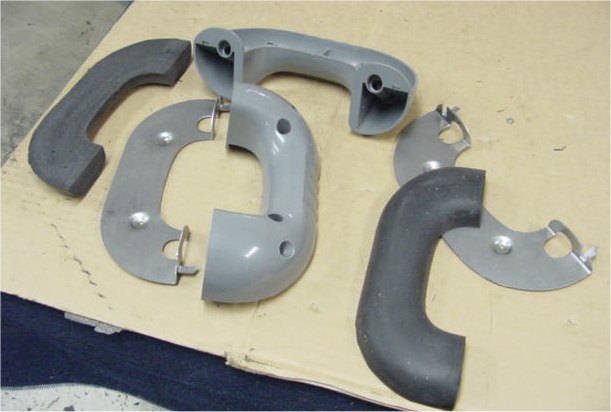
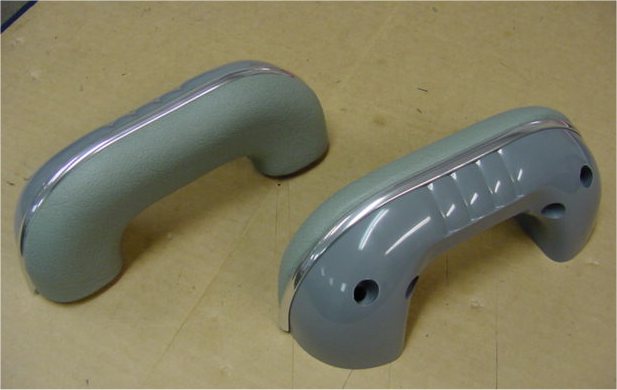
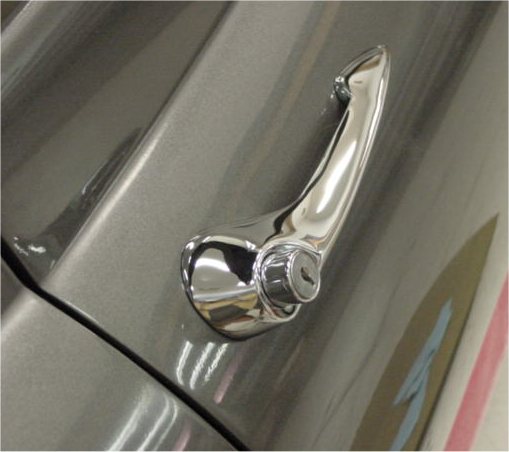
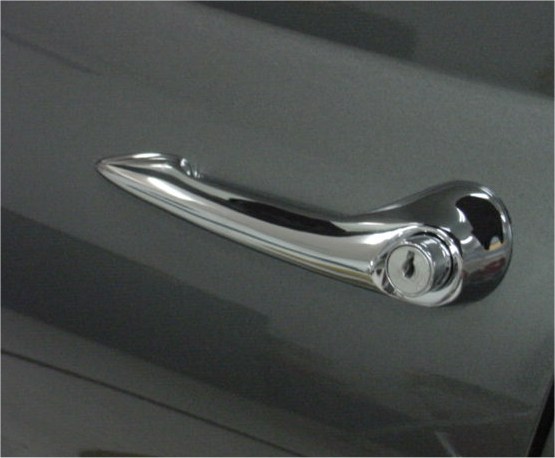
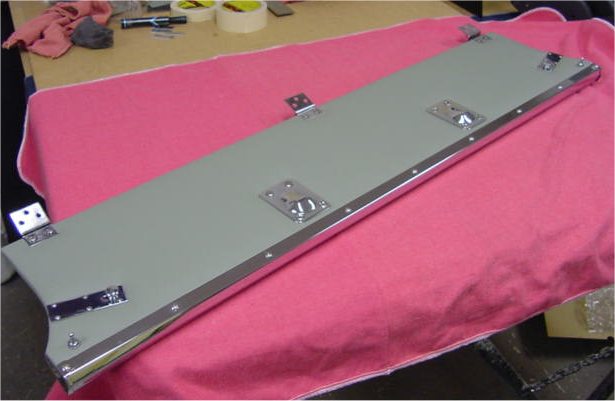
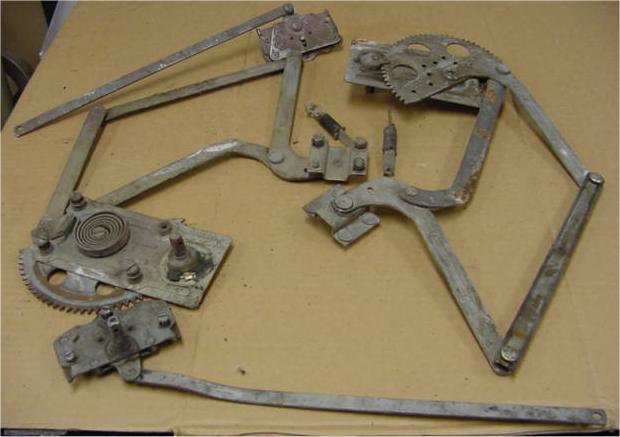
latching mechanisms about to be restored |
|
|
|
|
 |
 |
|
|
|
|
|
|
 |
 |
|
|
|
|
|
|
 |
 |
|
|
|
 |
 |
|
|
|
 |
 |
|
|
|
 |
 |
|
|
|
 |
 |
|
|
|
 |
 |
|
|
|
 |
 |
|
and fascia panels |
|
 |
 |
|
|
|
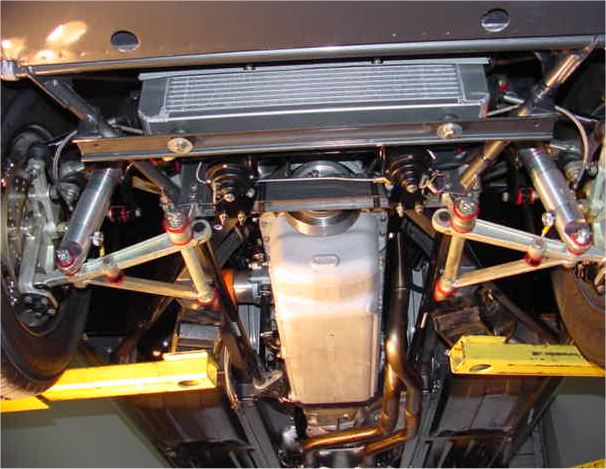
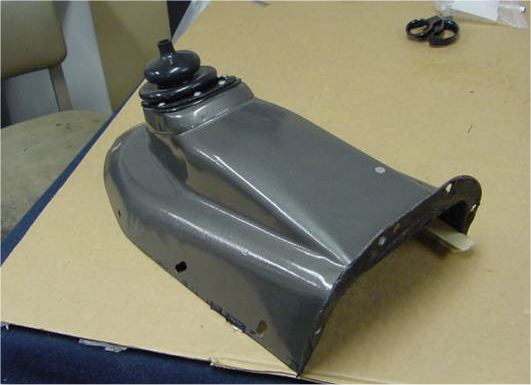
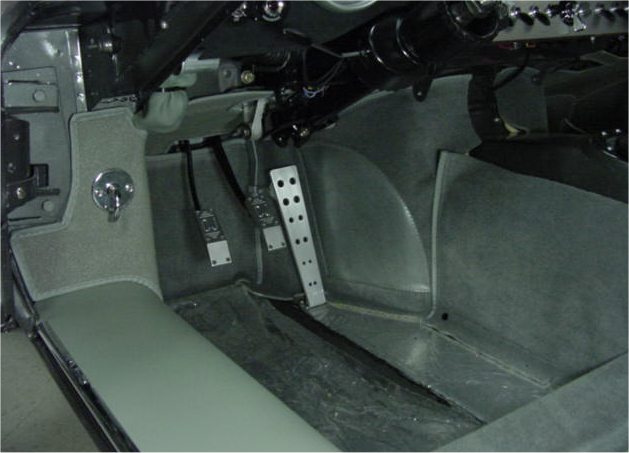
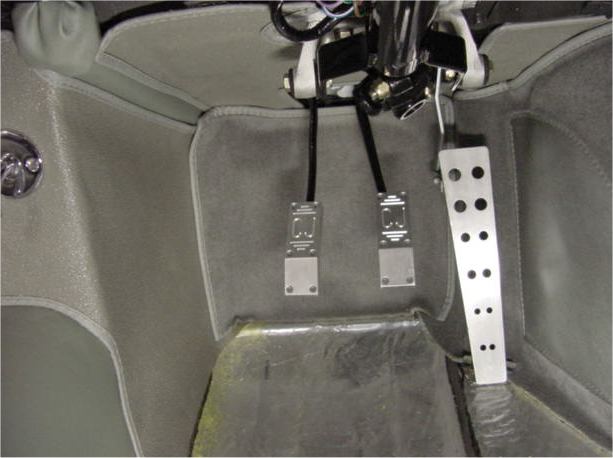
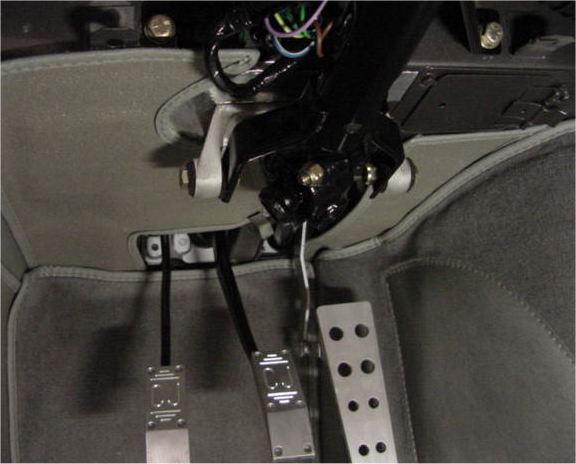
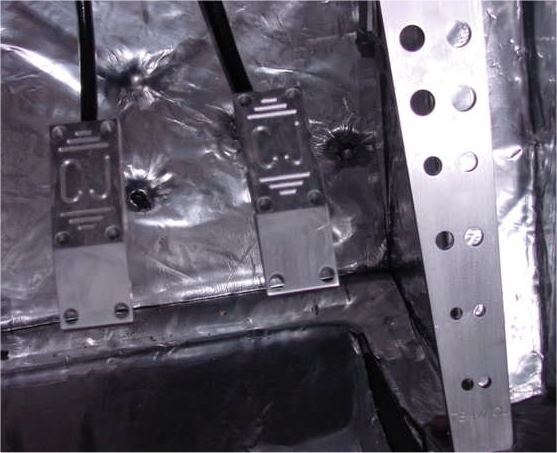
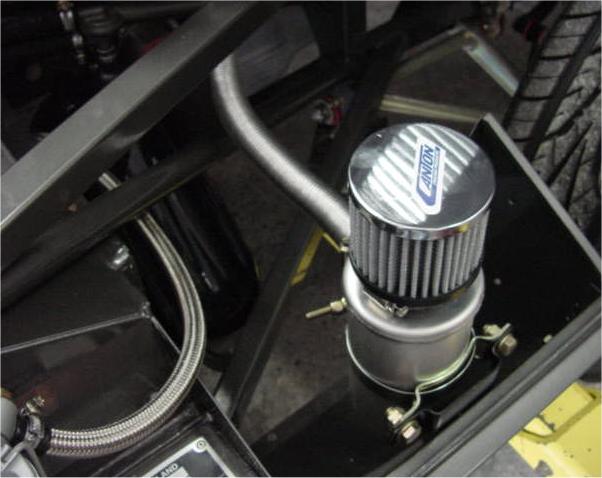
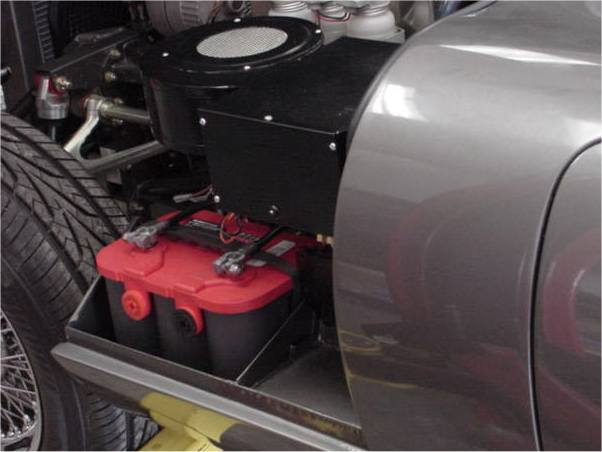
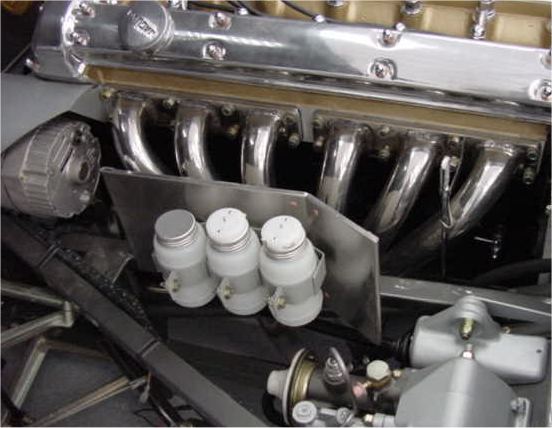
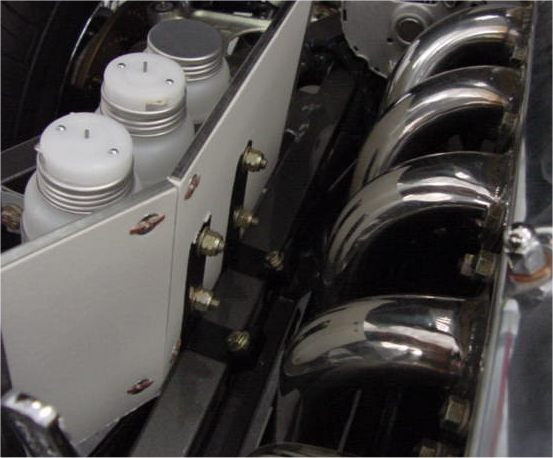
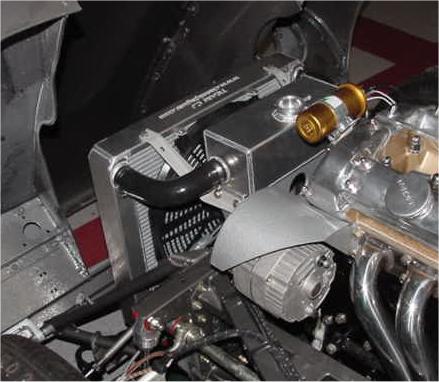
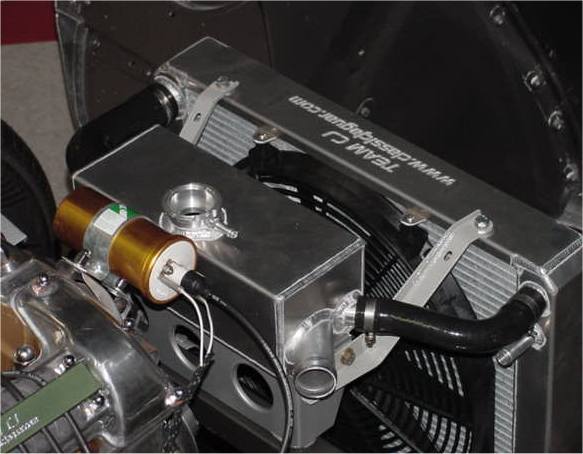
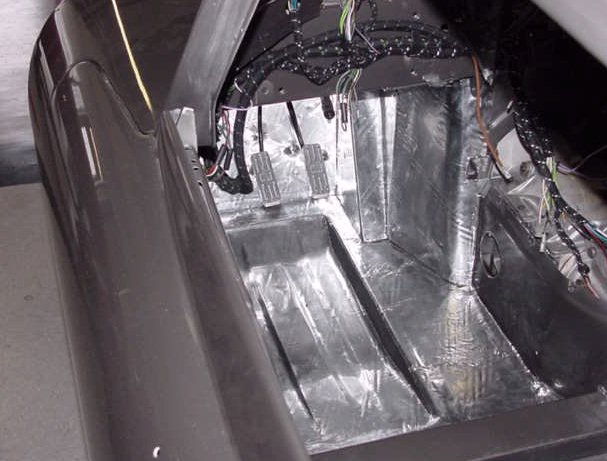
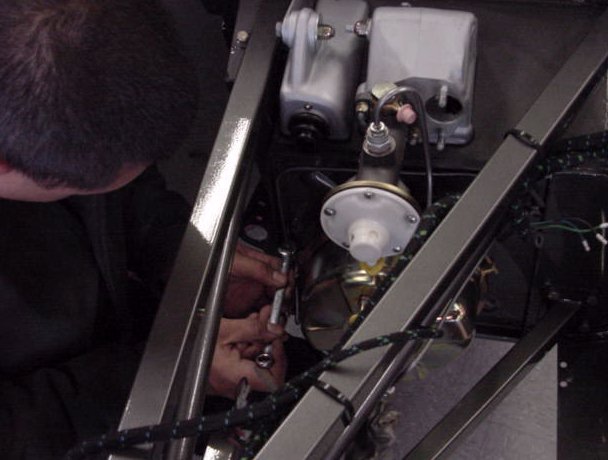
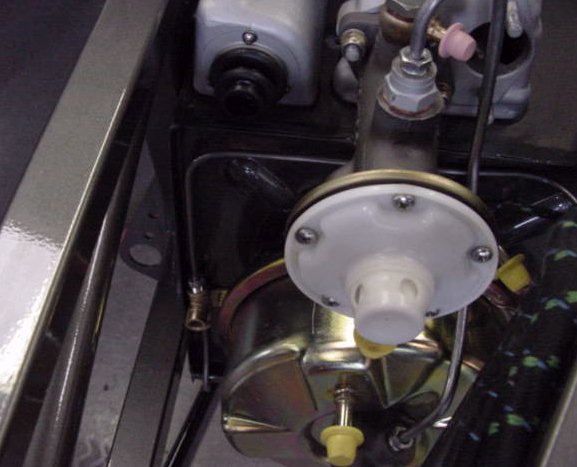
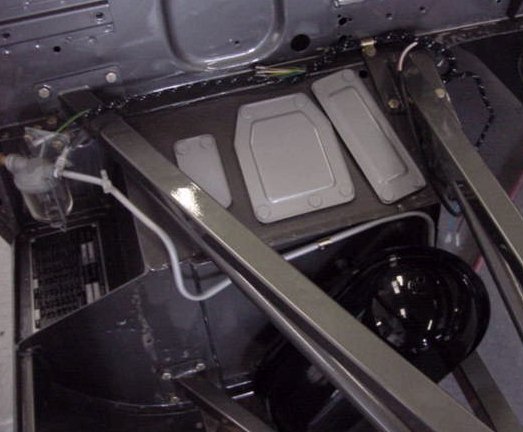
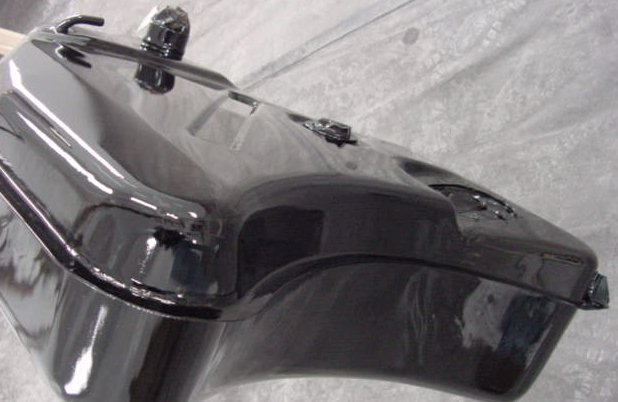
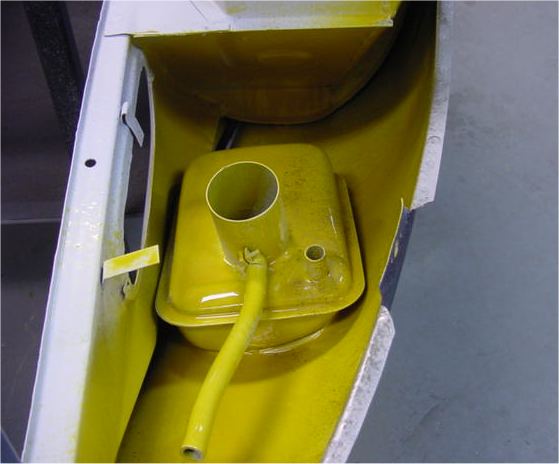
Here you can see the infamous puke tank going into place, as well as the transmission cover and cross drilled pedals. Later today we will be test running the new Auto Meter speedo and tach afterwhich the car will be ready for David (trim room).
 |
 |
|
|
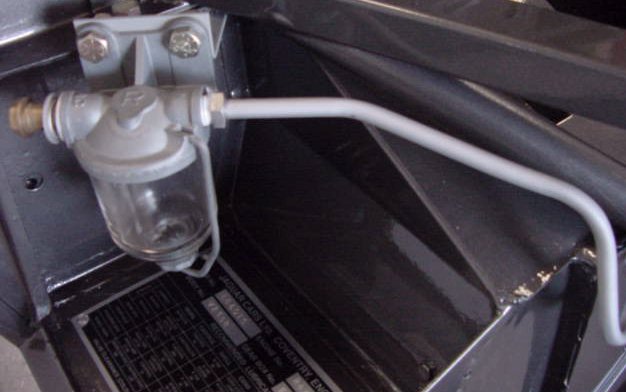
air filter canister |
 |
 |
|
|
|
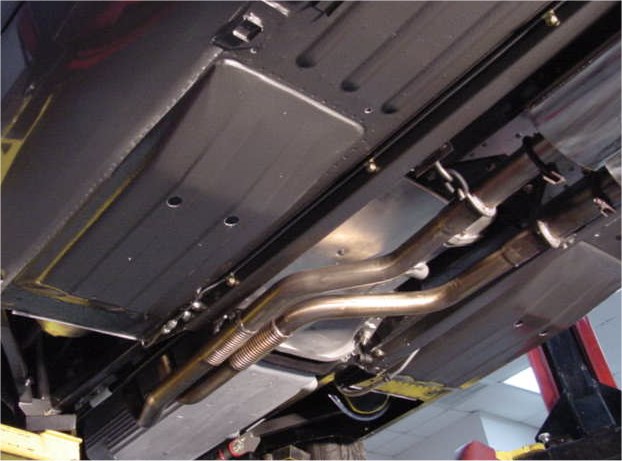
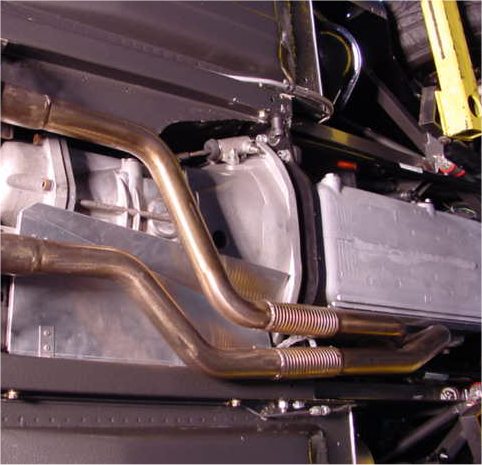
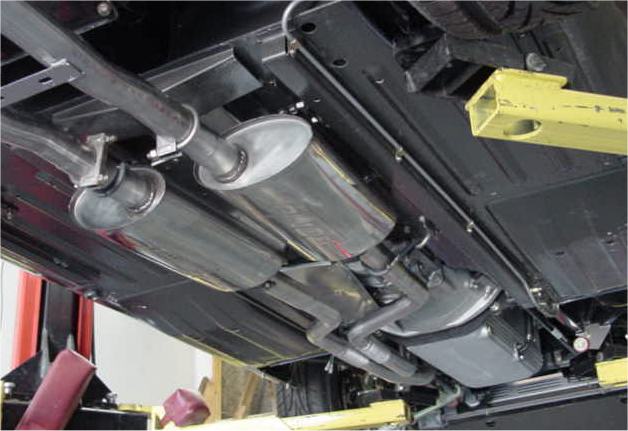
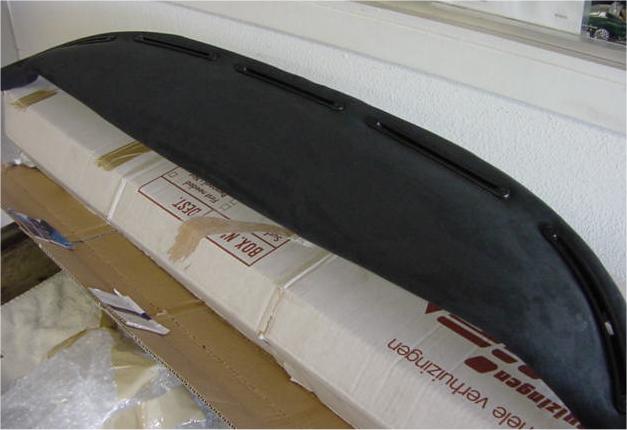
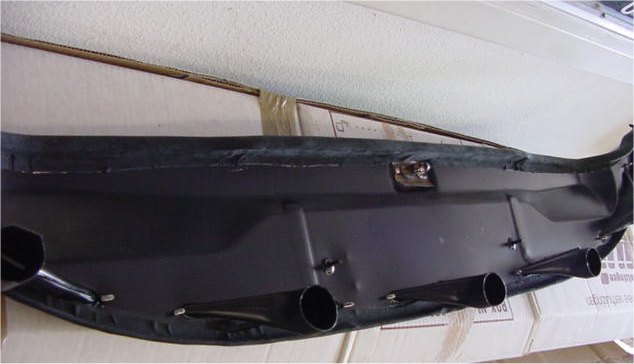
The following photographs show the exhaust layout beneath the car and also the padded suede dash we have now received from Eric Suffolk.I am delighted to report that the all important maiden voyage passed withjout negative incident. A major milestone achieved.
 |
 |
|
|
|
 |
 |
|
|
|
 |
|
|
|
I am delighted to report that we have now test run the engine and everything is AOK. John and Sam have both worked extremely hard on your car over the last week or so.All the gauges are functioning normally and really only positive things to report today. I couldn't resist a little bit of video film making.....

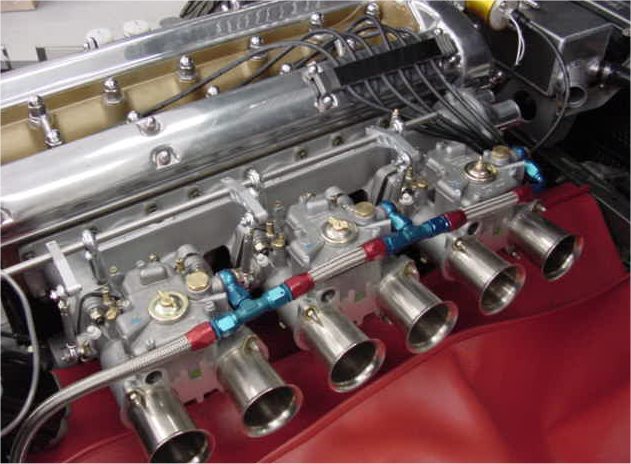
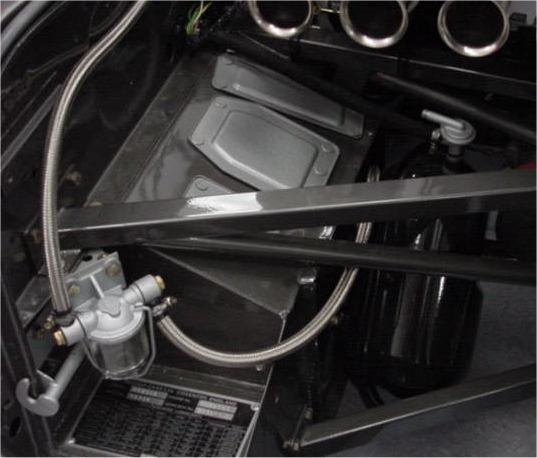
Glad to report that we are now pressing ahead with this project once more. The following photographs show the Webers and also the braided fuel lines that you specified. With any luck we hope to fire the car up for the first time next week.
 |
 |
 |
 |
A lot of work behind the scenes this week, much of it effectively beyond the reach of my camera lense. Hopefully the following photographs will encourage you that we are still making steady progress!
 |
 |
|
sealed beans |
article every day |
 |
 |
|
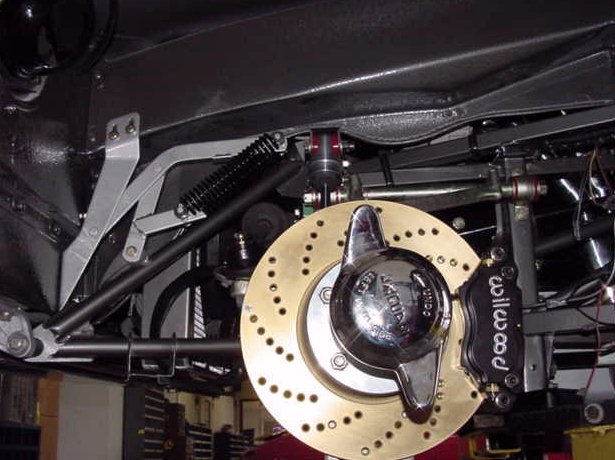
and Wilwood brakes |
|
 |
 |
|
next week - the brown box contains the braided fuel lines |
workshop to have the exhaust installed |
 |
 |
|
in the photograph, I have actually rejected the installation..... |
be satisfied with the fit |
 |
|
|
|
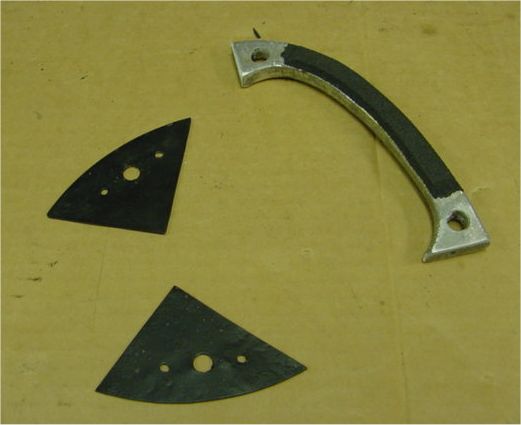
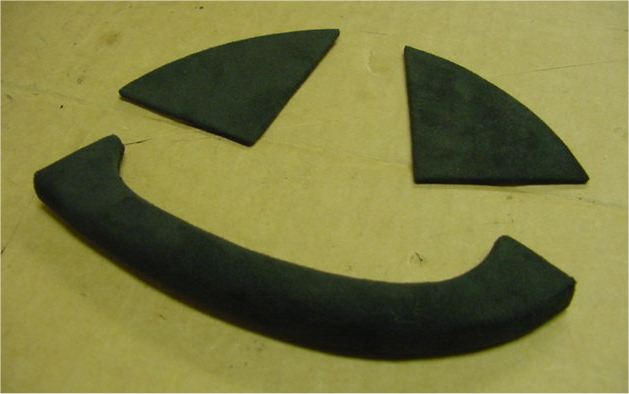
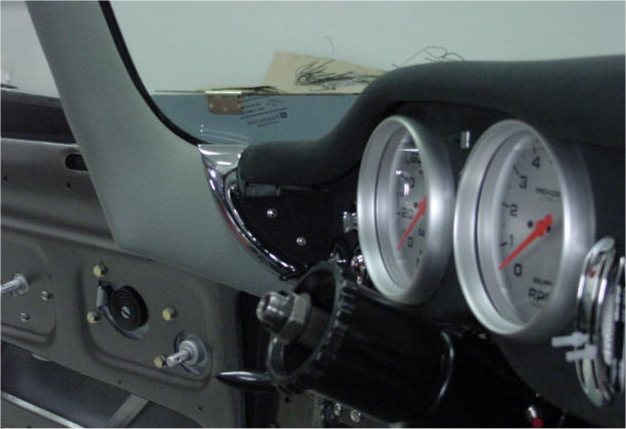
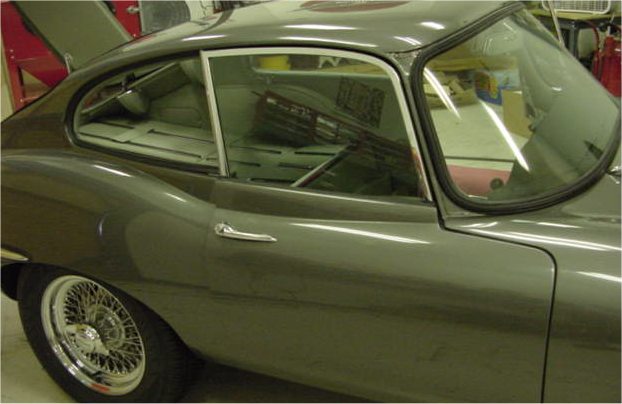
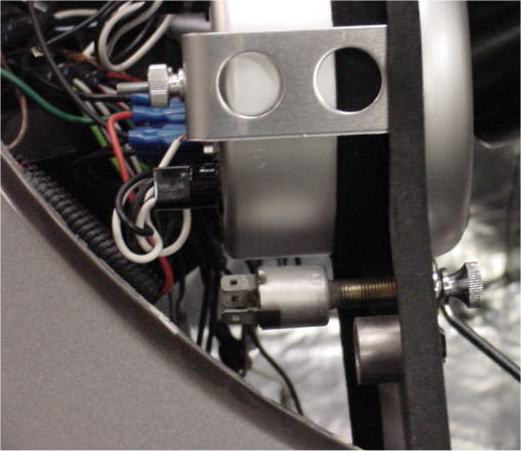
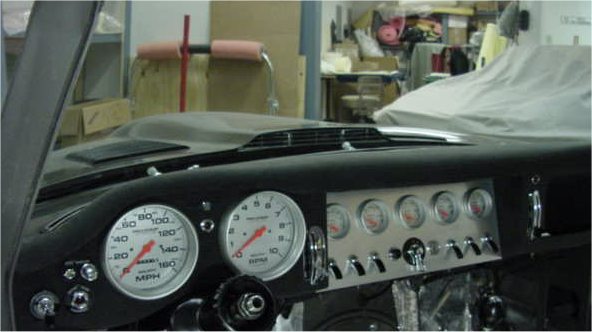
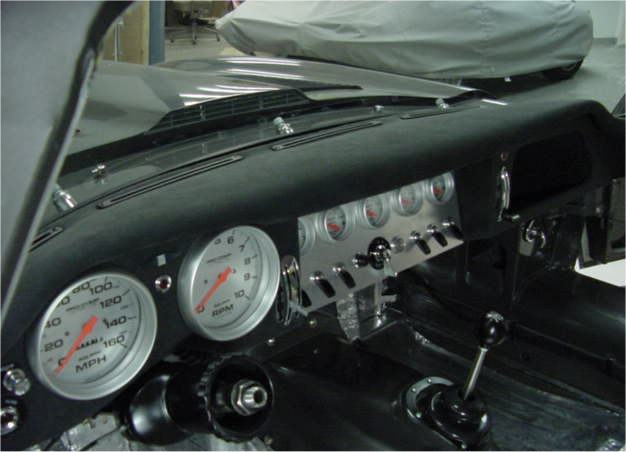
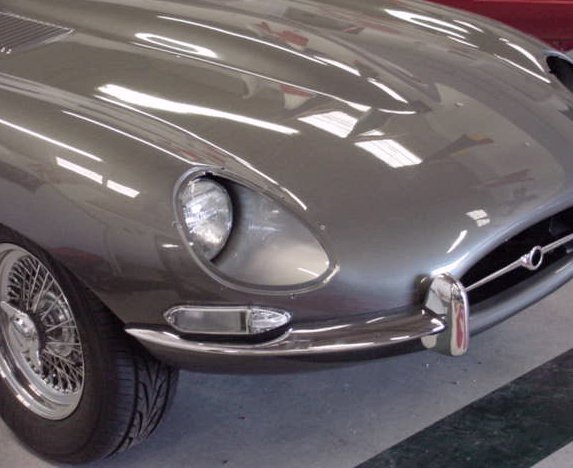
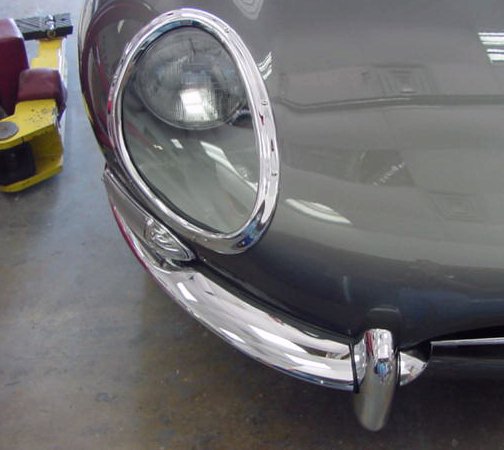
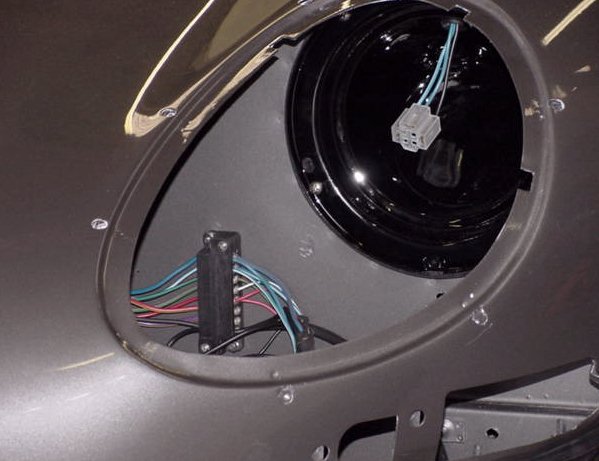
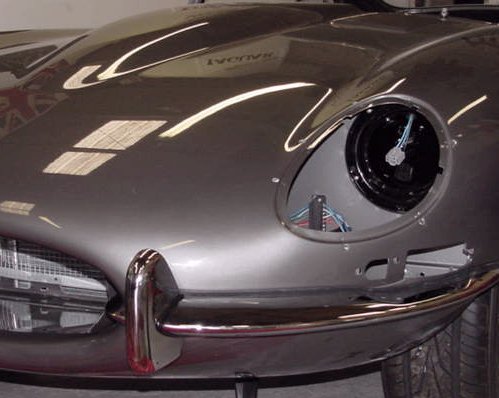
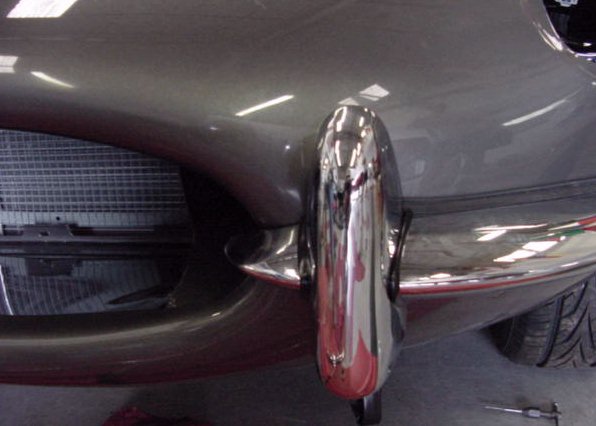
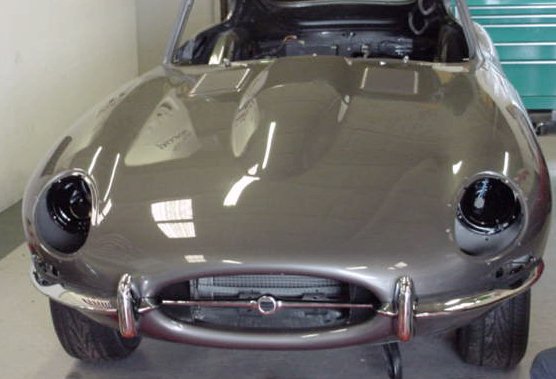
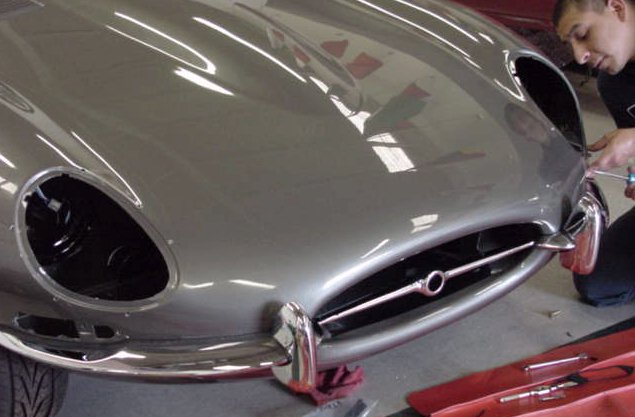
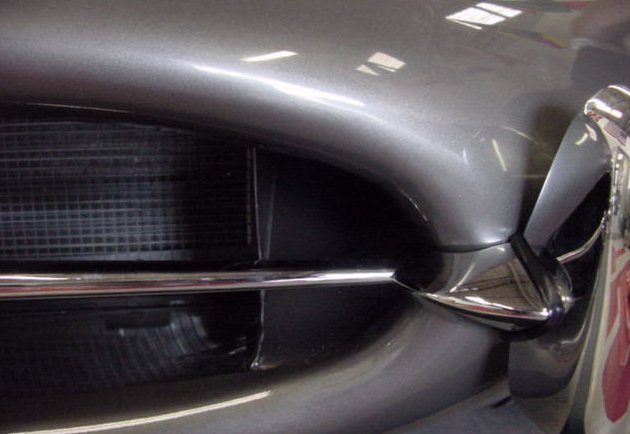
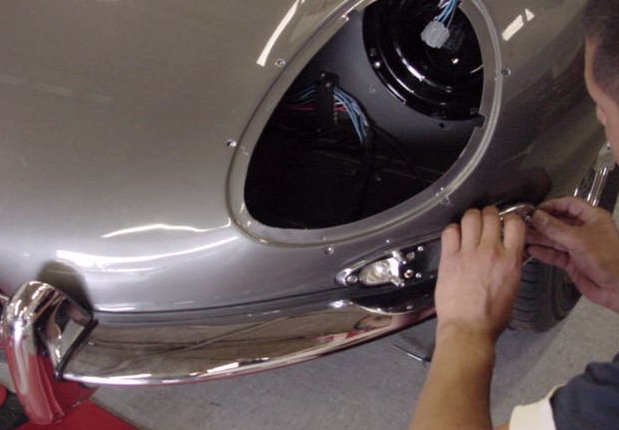
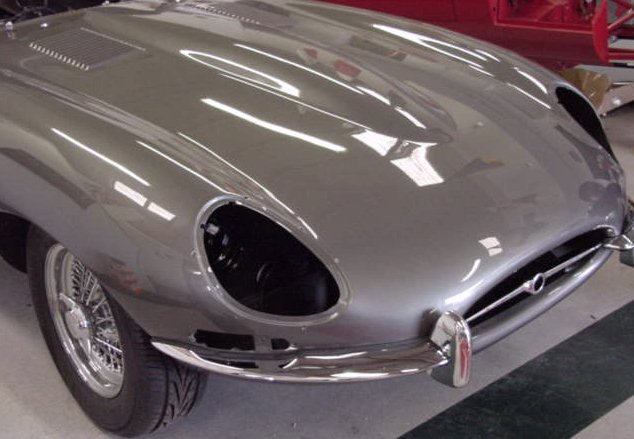
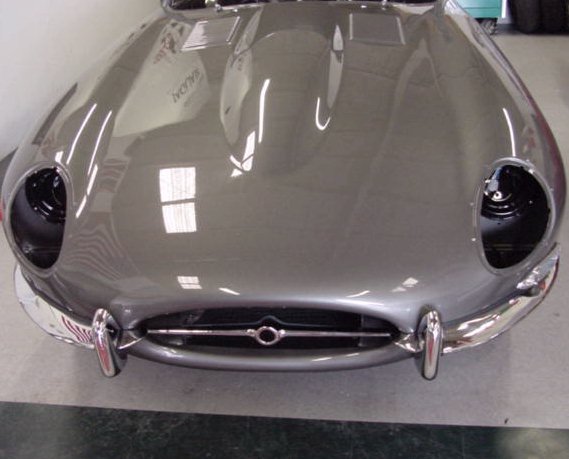
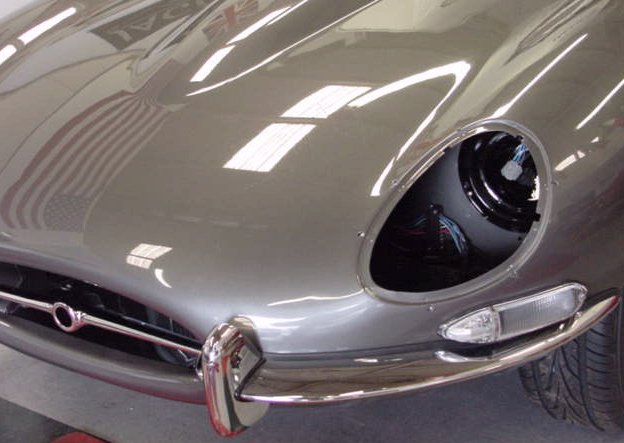
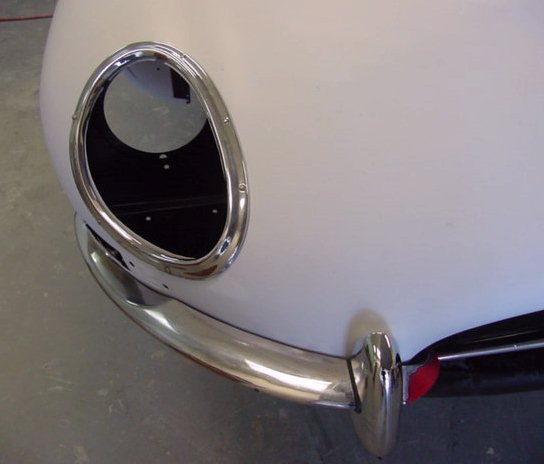
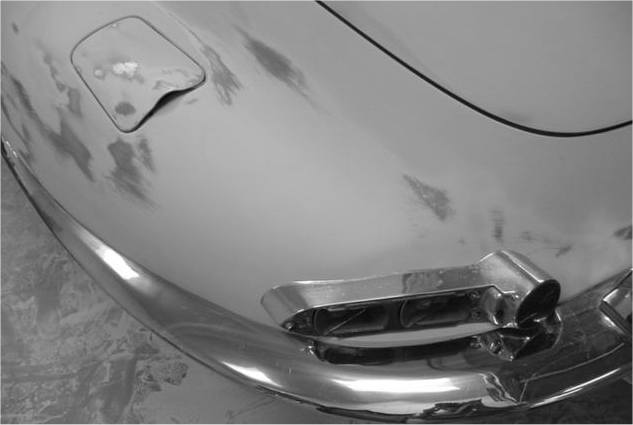
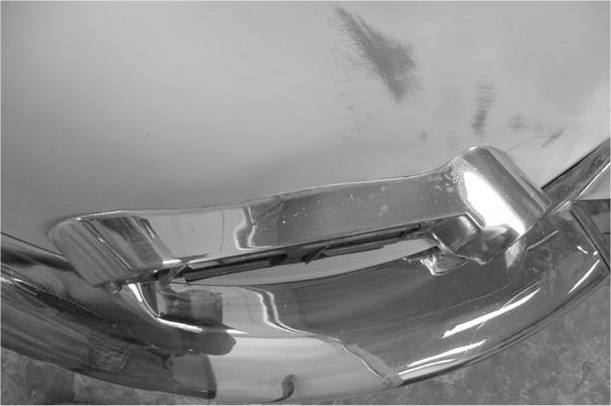
I have included more photographs than I normally would of the front lamps and bumpers going into place as I know you have expressed a particular interest in this area. If I get time later today I will add some photographs showing the headlights and glass covers going into place.In due course David will be adding suede to the corners of the centre dash panel, per your design, but we wanted to get all the gauges wired in at this stage to make sure we wouldn't have a problem either with the custom units themselves or the relocation of th headlamp switch, etc. Sam tells me that he didn't have much room to work with behind the panel....but he had just enough!
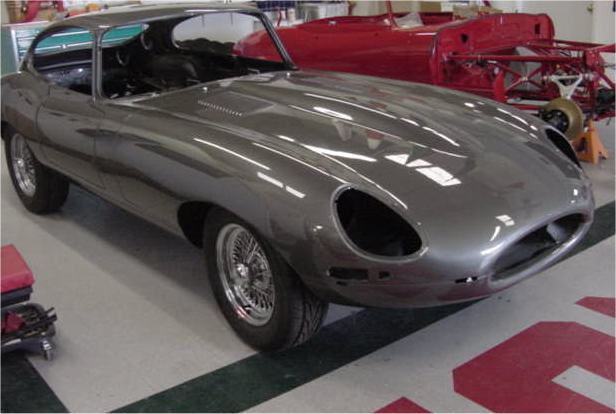
To say that I am delighted with our progress on this particular project is an understatement. Glance back through the update reports below and you will see that we we only began reassembly in mid February. This car is going together beautifully.
 |
 |
|
|
the front bumpers |
 |
 |
|
|
|
 |
 |
|
trial fitted by Lawrence |
|
 |
 |
|
Sam with the bumper installation |
|
 |
 |
|
|
of radiator |
 |
 |
 |
 |
|
in the world - sorry about the bolt cabinets in the background! |
|
 |
 |
|
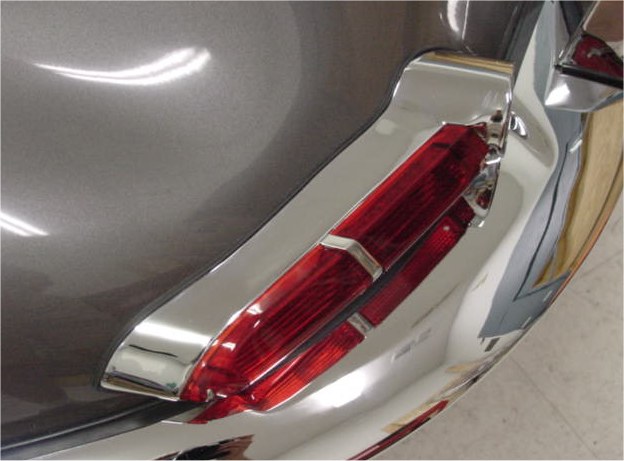
clear lense hiding orange bulb... |
Sam is making great headway and really doing a superb job. With regard to the silicone hoses: we started installing the blue hoses but really didn't like the way they looked against the various other coloured items in the engine bay. I took an executive decision and went with the black. If you absolutely insist on the blue, I will change them back over for you in my own time.
 |
 |
|
|
|
|
|
|
 |
 |
|
|
|
|
|
|
 |
 |
|
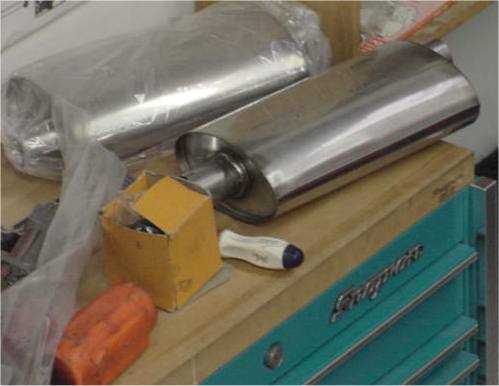
they call this shameless product placement) |
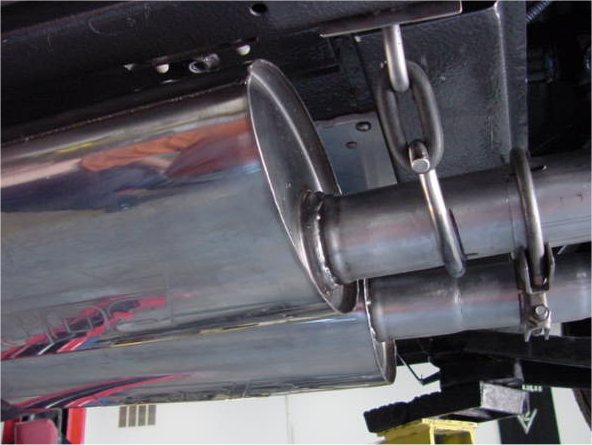
to install these Borla mufflers under the car |
|
|
|
 |
 |
|
all the dust, etc, but X marks the location of the new sway bar reinforcement blocks |
insulating material |
|
|
|
 |
|
|
installed behind the dash |
|
The following photographs show the 'Brown Bread' insulating material being installed, as well as a rather fuller engine bay than you had seen up until now!Over the next week or so we will be installing the new gas tank, exhaust, bonnet, etc with a view to firing her up in a couple of weeks time.
 |
 |
|
|
material everywhere we possibly can! |
 |
 |
|
|
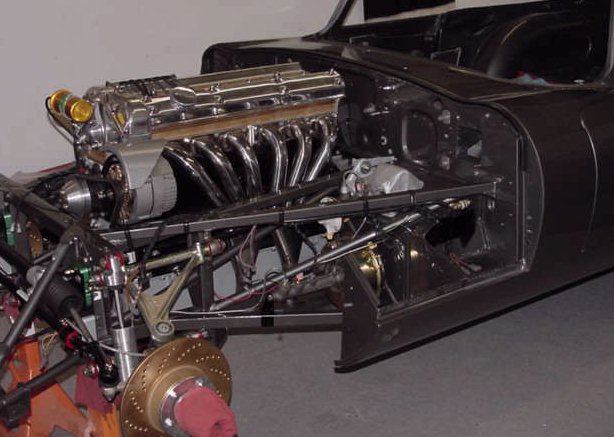
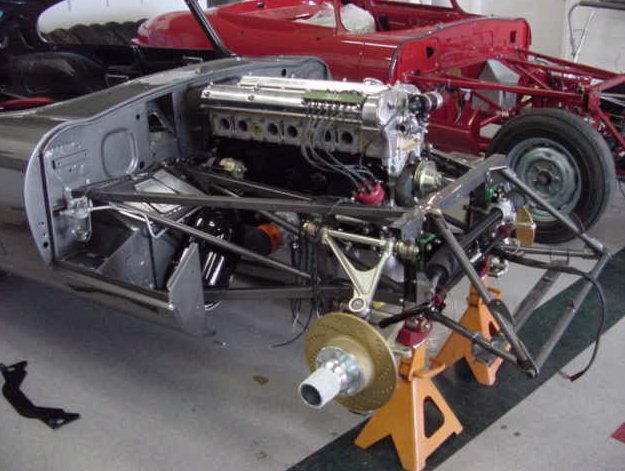
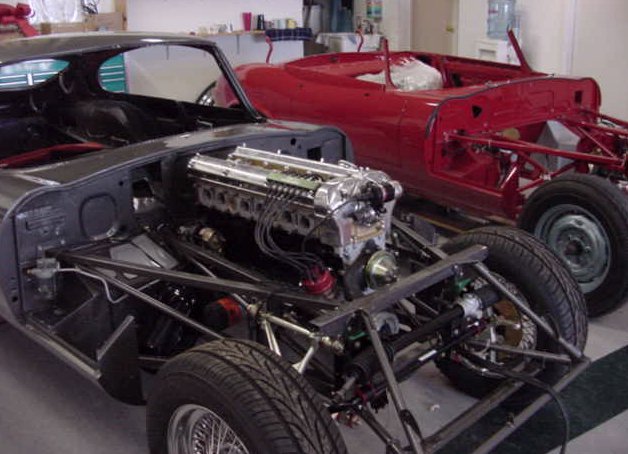
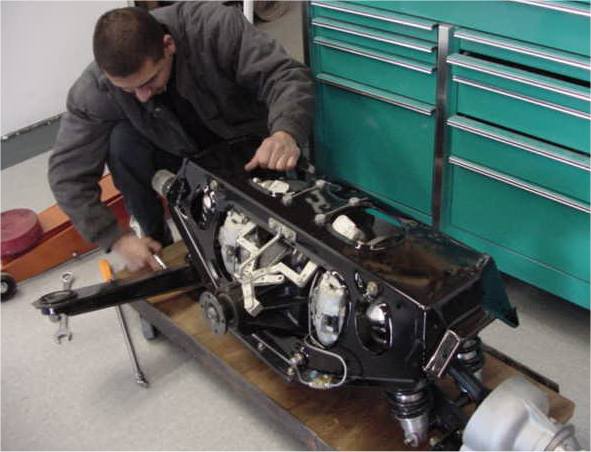
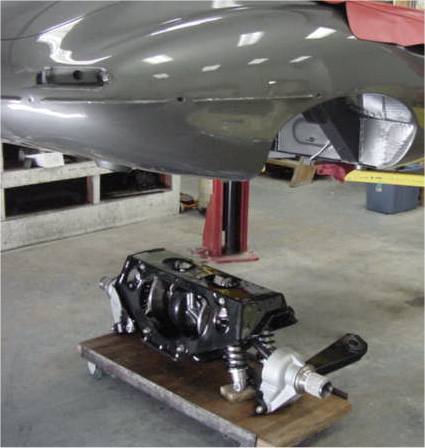
I am delighted to report excellent progress since our last update. As you can see in the following photographs, the engine and JT5 five speed have now been installed and the car is back on all four wheels for the first time.My thanks to Justine for taking this sequence of photographs during my enforced absence from CJ.
 |
 |
|
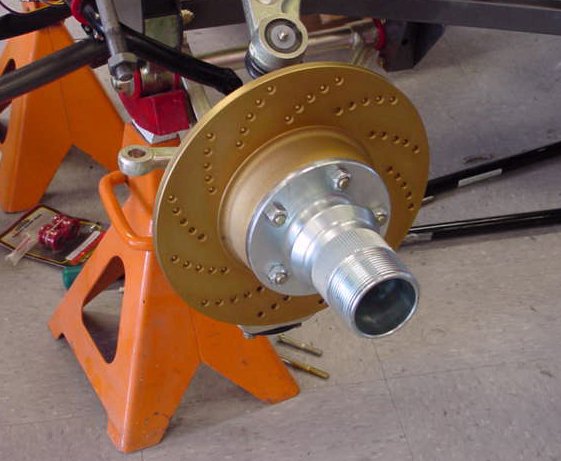
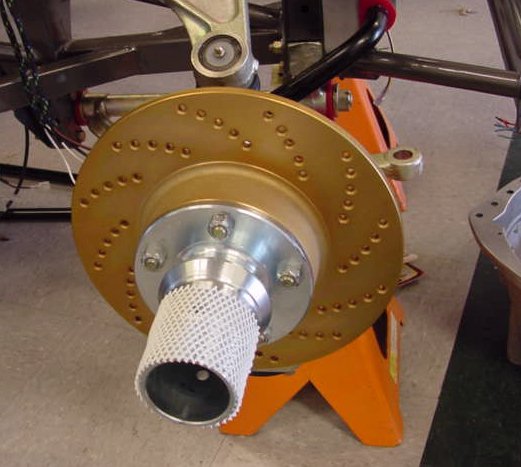
and new splined hubs |
|
 |
 |
|
new brake line switch |
|
 |
 |
|
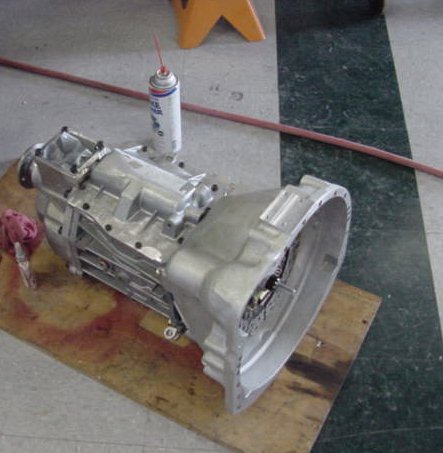
speed gearbox |
along with RHD blanking plates |
 |
 |
|
|
|
 |
 |
|
milestone achieved |
|
 |
|
|
I figured it must have amounted to such an effort on Justine's part that I'd better include it in the ensemble........ |
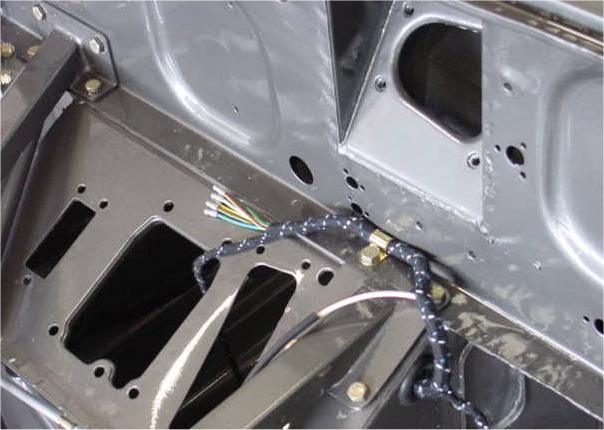
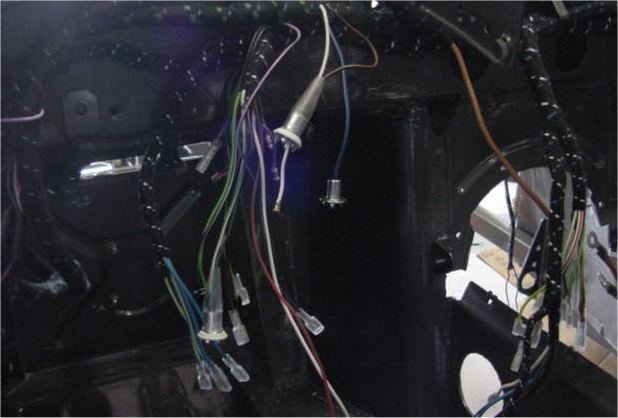
After a slight technology afflicted delay, for which I apologize, here are some photographs of the wiring harness starting to go into place.
 |
 |
|
|
|
 |
 |
|
|
|
 |
|
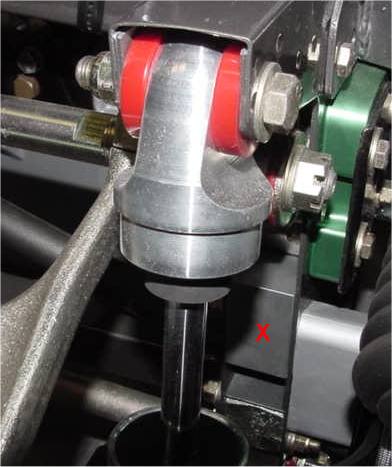
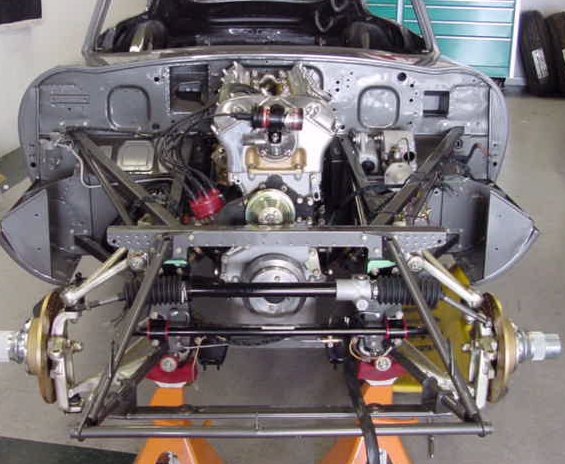
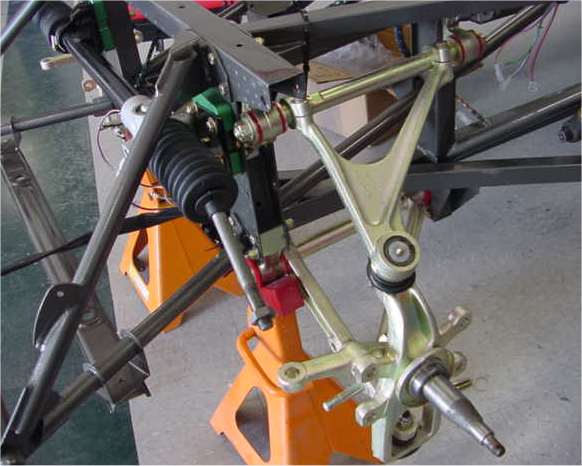
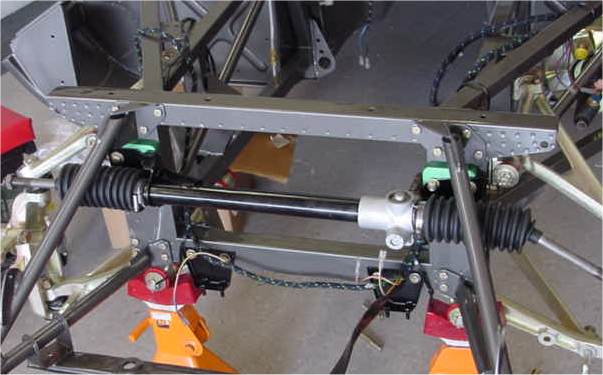
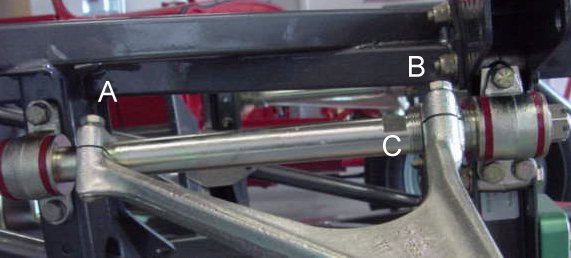
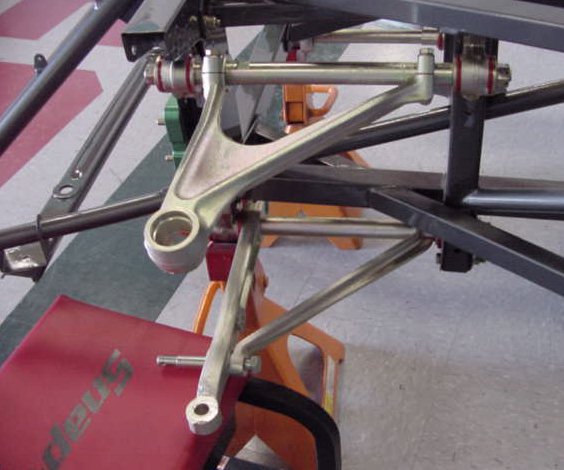
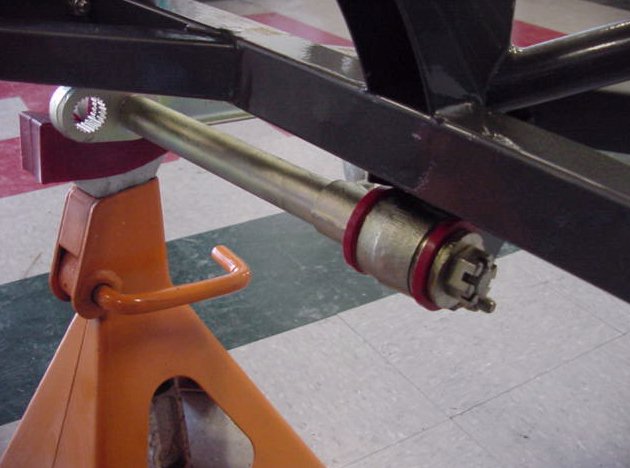
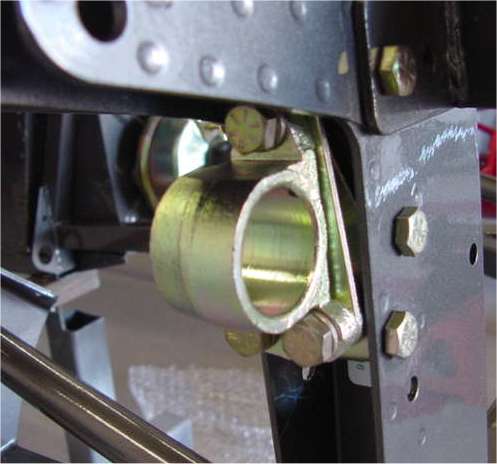
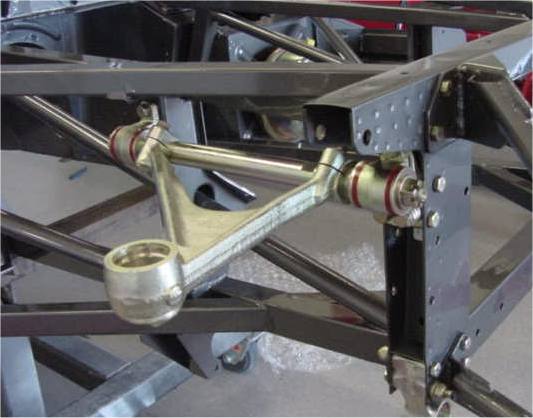
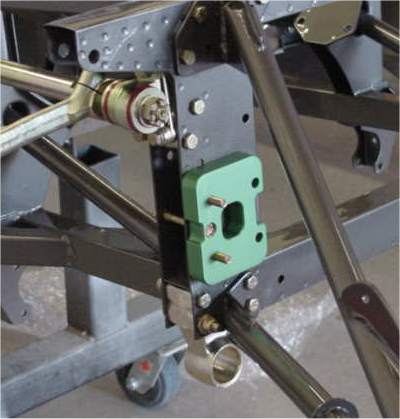
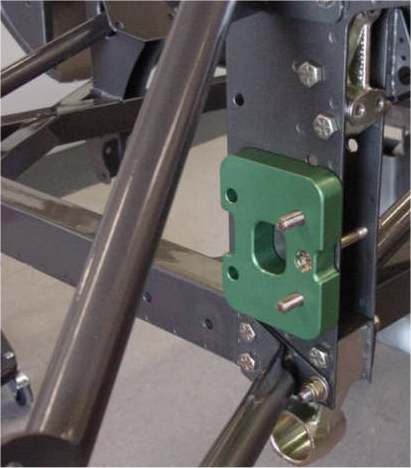
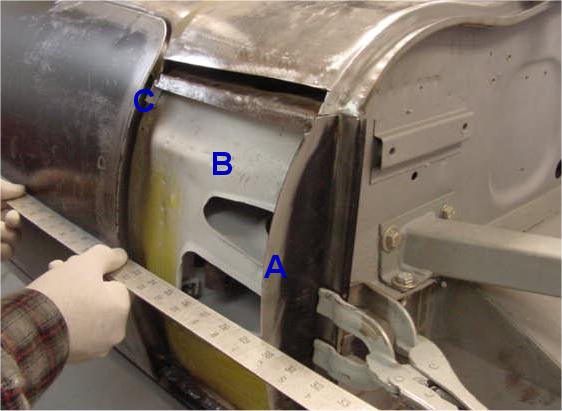
Per your emailed questions of yesterday, the following photographs are intended to explain a little more about the front suspension geometry as it relates to your E Type. If you require any further clarification, don't hesitate to contact me.
 |
 |
|
and the fulcrum shaft can then be rotated by gripping the shaft at the flattened area of the shaft (C) |
the midpoint of the threaded adjustment (note threads beneath bolt labeled B in previous photograph |
 |
 |
|
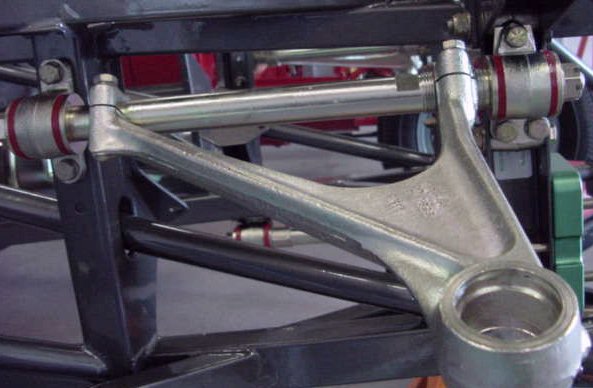
control arm (RH) - the shims behind each of the upper control arm mounting points adjust the camber |
coming together |
 |
 |
|
arm - notice how at the front it is anchored at the bottom corner of the picture frame |
back of the car - the splined attachment you see at the front is the forward mounting point for the torsion bars |
 |
 |
|
|
with Yokohama 215/65 tyres |
 |
 |
|
has the junk primer applied by Martin Robey Ltd removed..... |
|
 |
 |
|
one last time |
|
 |
 |
|
|
|
 |
 |
|
|
|
 |
 |
|
|
|
 |
 |
|
|
|
 |
 |
|
fast he is a bit blurred....... |
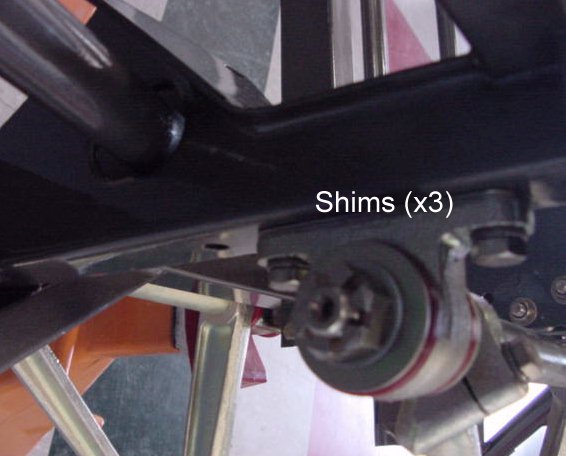
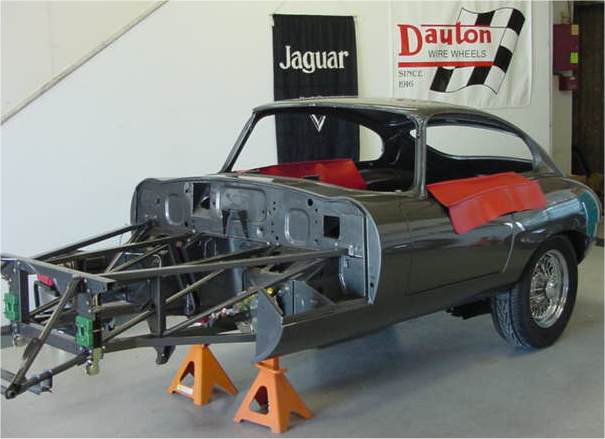
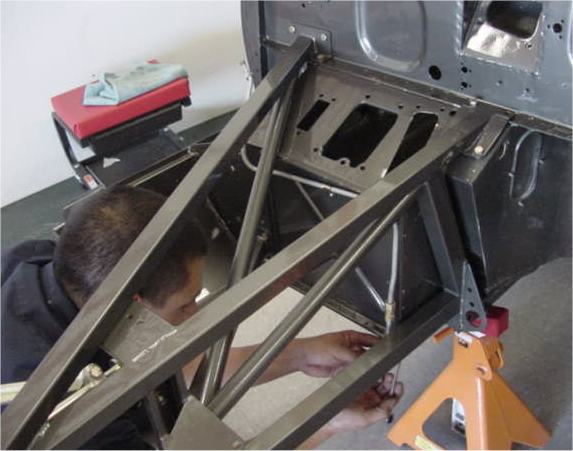
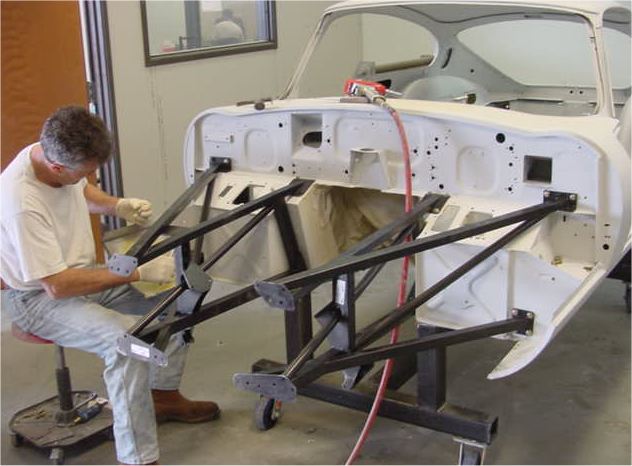
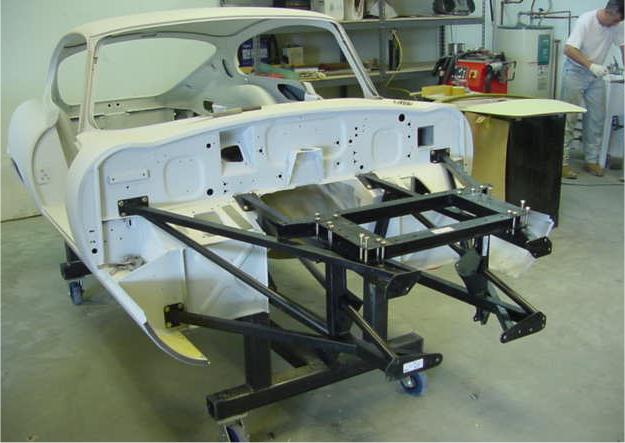
If you have ever wondered how an E Type is bolted together, watch as we start assembling our 1962 FHC project.
 |
 |
|
|
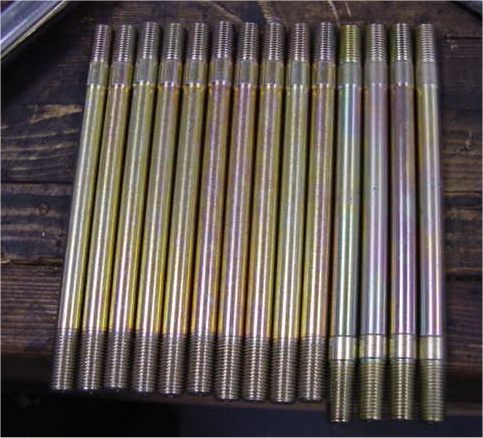
threads on the firewall |
 |
 |
|
|
|
 |
 |
|
|
the bolts, remember that certain suspension components are an integral part of the frame assembly |
 |
 |
|
|
at this stage - we use 3 shims as a starting point |
 |
 |
|
|
|
 |
 |
|
|
|
 |
|
|
|
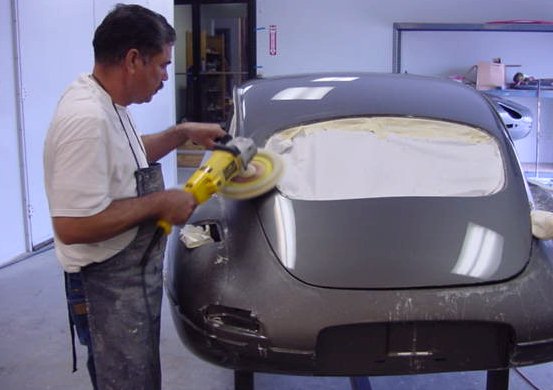
I thought you might like to see Cosme in action...so to speak.
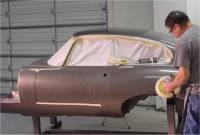
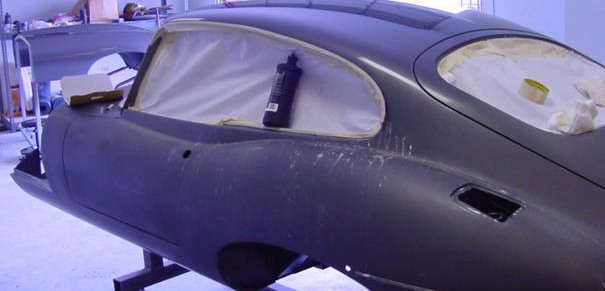
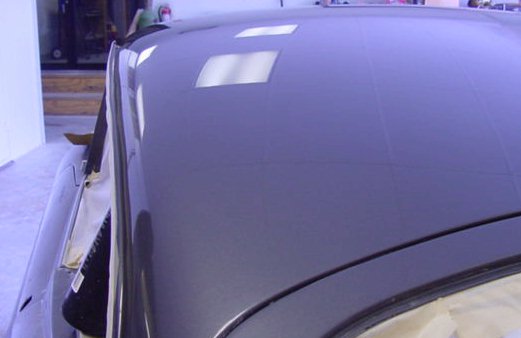
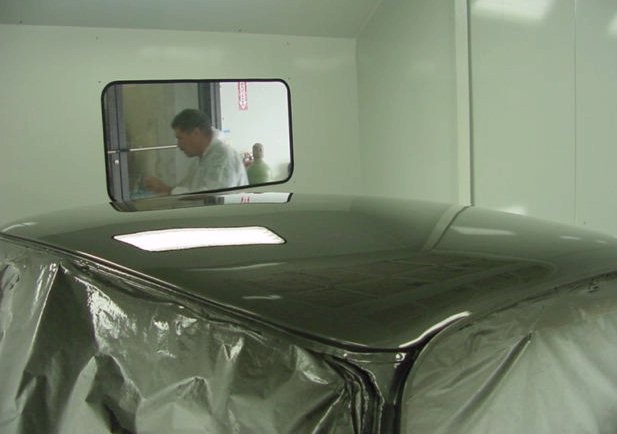
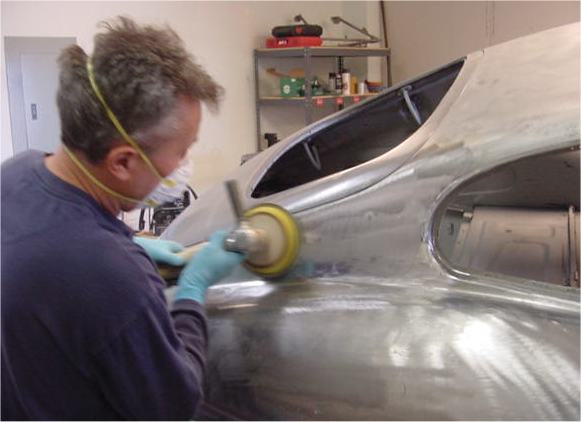
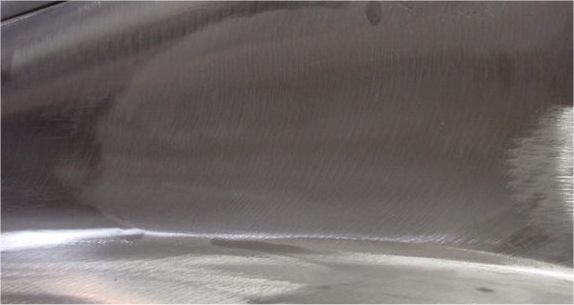
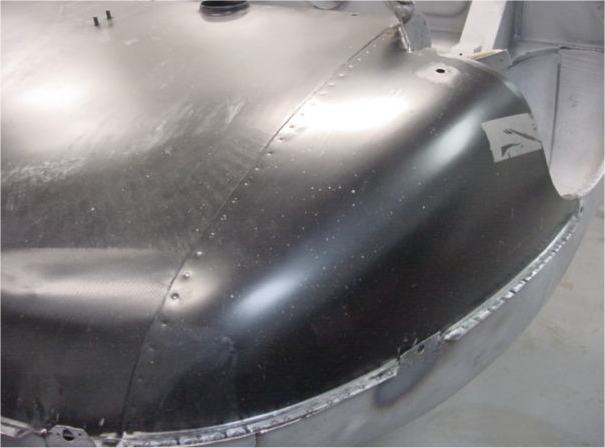
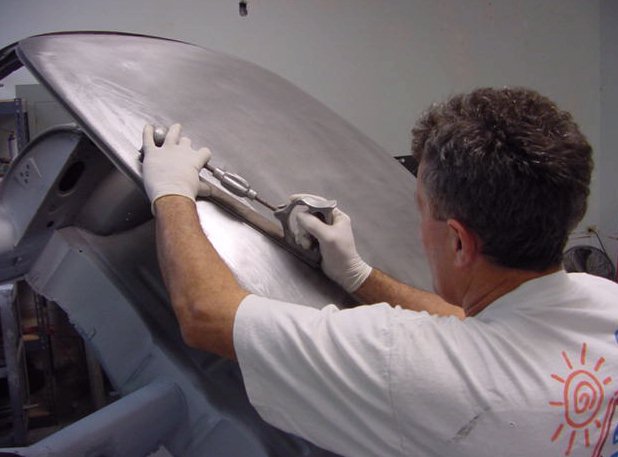
Cosme has now finished block sanding the entire car and is well into the buffing process. As you can see, the bonnet is pretty much completed and he is working on the main roof panel and the rear tailgate. So far everything is looking perfect.
 |
 |
|
coat is blocked using 1500 grit paper |
using a fine compound |
 |
 |
|
his version of the Ali shuffle |
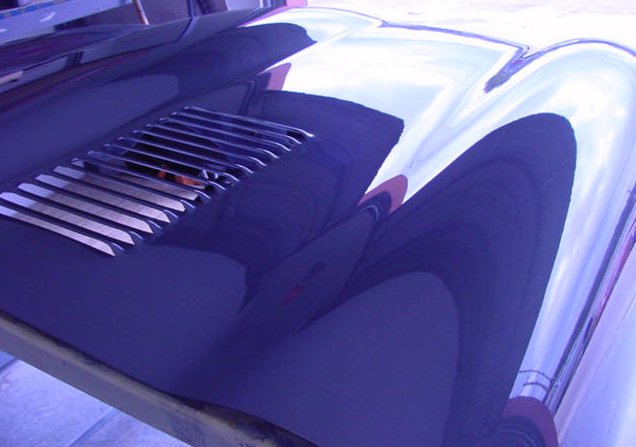
Having allowed the paint a couple of days to cure, Cosme has now begun the sanding and buffing process. I'm afraid the photographs below really don't do his work justice - the car looks truly magnificent.
 |
 |
|
body waiting its turn in the background |
|
 |
 |
|
|
|
 |
 |
 |
 |
|
the buffing wheel |
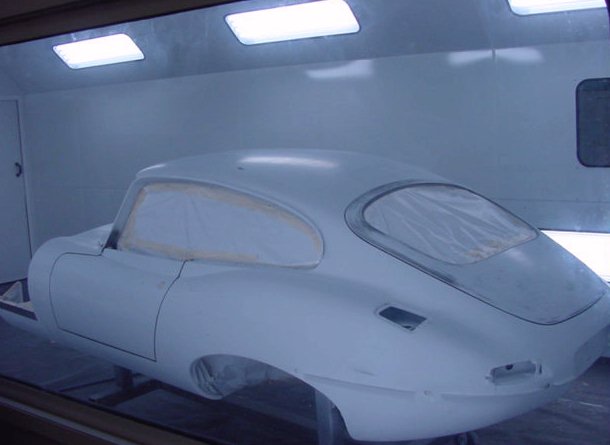
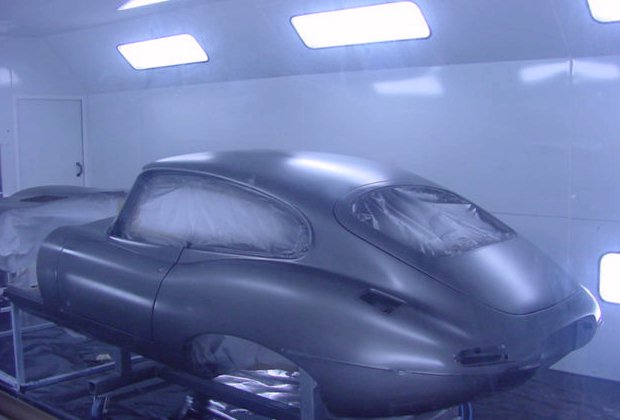
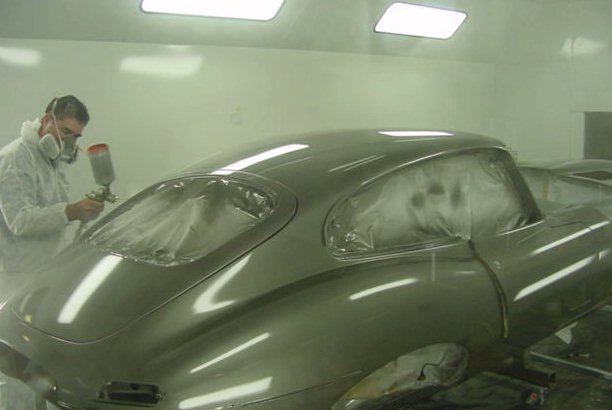
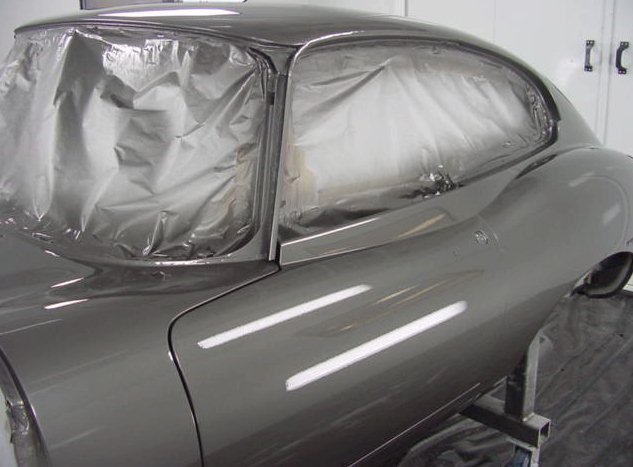
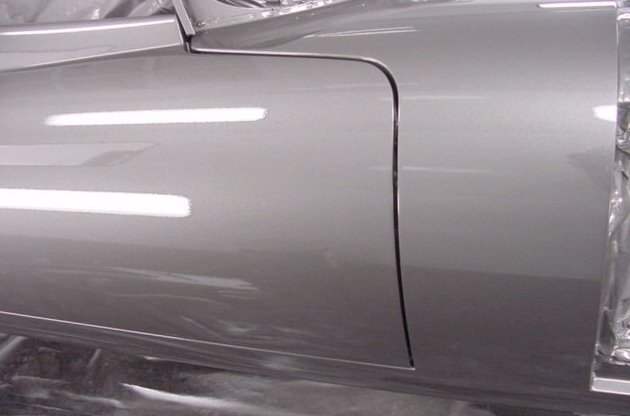
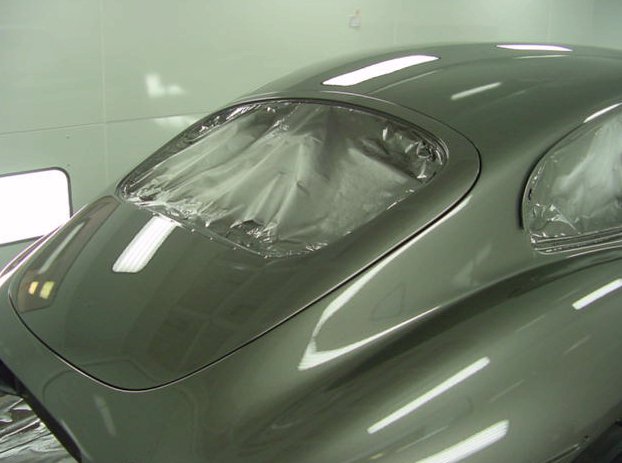
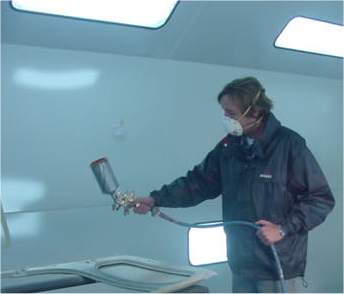
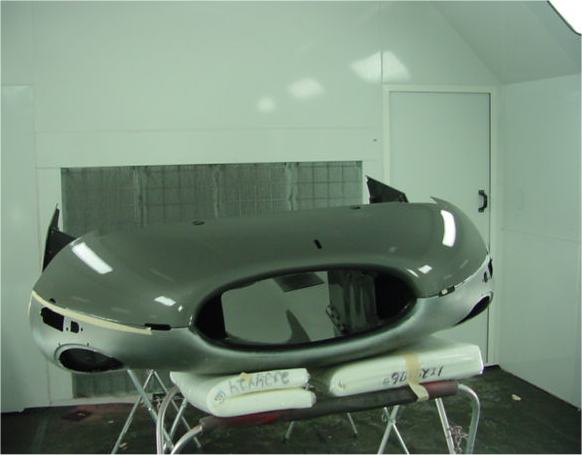
You will be relieved to see that we decided to let someone who actually knows what they are doing paint all the visible bits of your car! Here you see Cosme putting the finishing touches to some truly awesome paintwork.
 |
 |
|
for the final shoot - this allows us to achieve a perfectly even finish with the opalescent (metallic) base coat |
trial fitting a couple of weeks ago - now beautifully replated |
 |
 |
|
|
|
 |
 |
|
|
|
 |
 |
|
entirely different as the clear coat goes on |
|
 |
 |
|
|
|
 |
 |
|
|

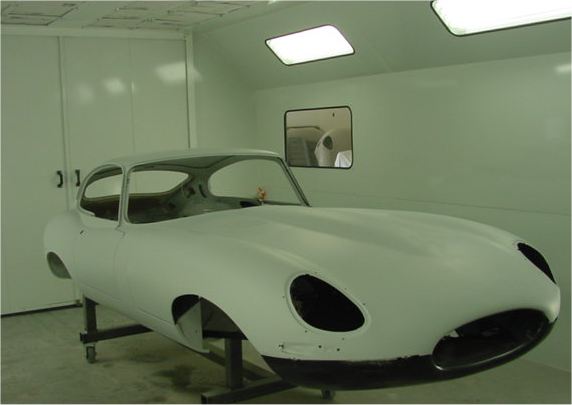
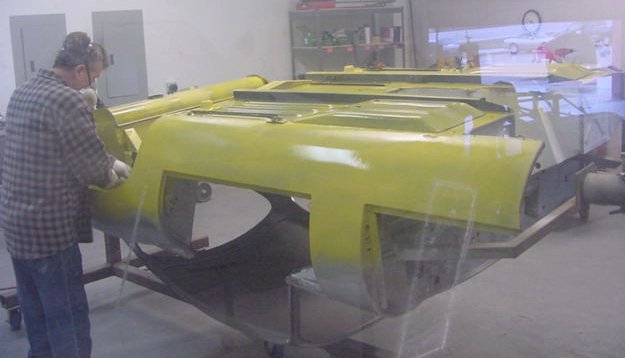
Today we are having fun - well I am, anyway. I managed to persuade Cosme to let me have a turn in his paint booth and paint some of the more tricky areas myself.Frankly, I don't know what all the fuss is about....there doesn't seem to be much to this painting lark.
 |
 |
|
|
learn sometime...... |
 |
 |
|
|
|
 |
 |
 |
|
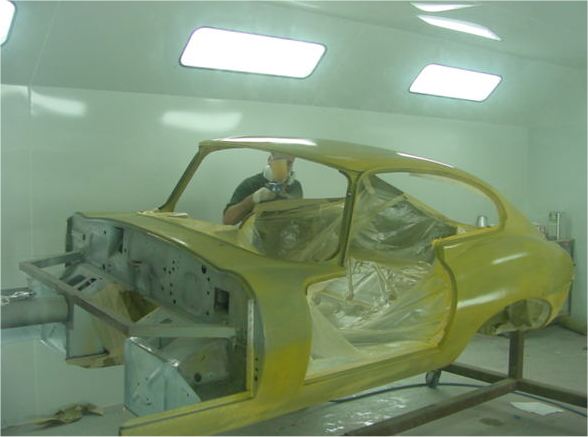
interior - the exterior will be painted on Monday |
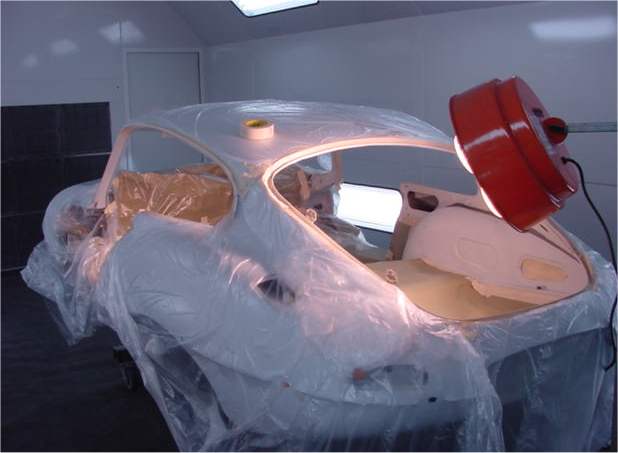
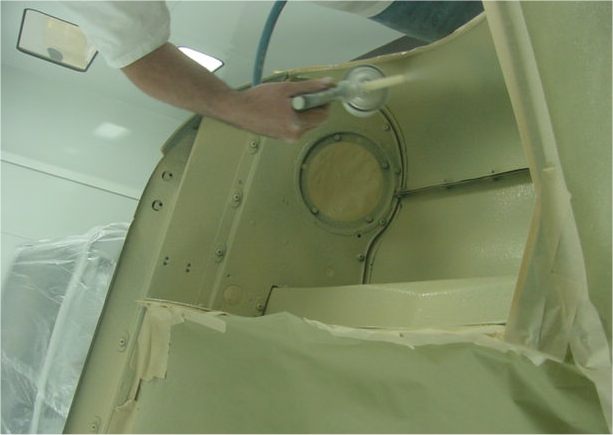
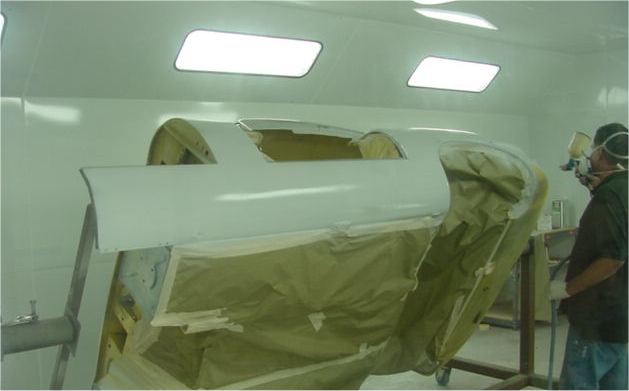
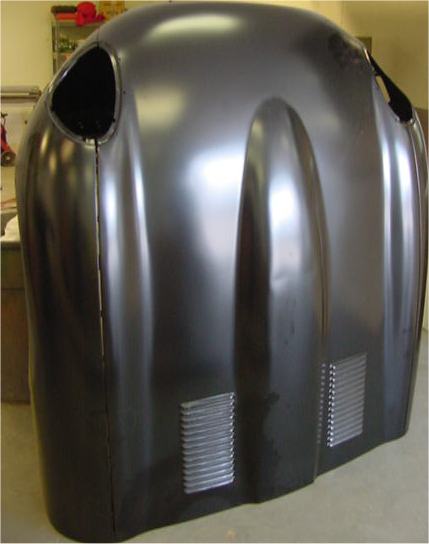
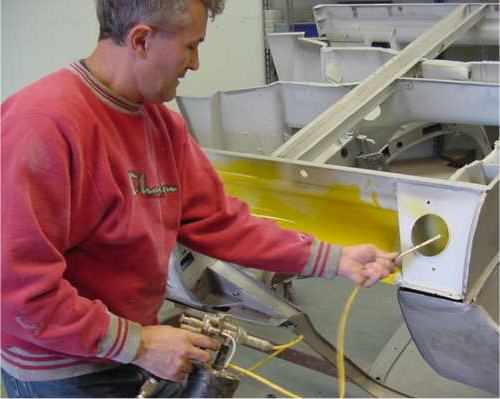
Back on the move with this project! Cosme has now painted the two cars that were ahead of the 62 FHC in the queue for the booth and is back working on your car. I will be posting lots of photographs for you over the next few days.The following pictures show the painting of the underside of the bonnet.
 |
|
|
 |
 |
|
bonnet at this stage |
|
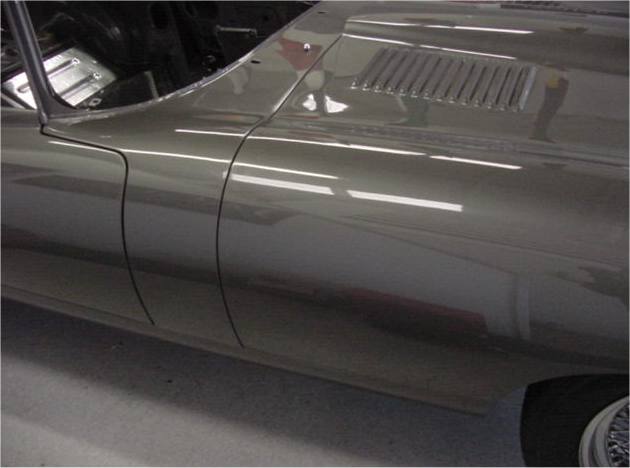
Not the most exciting stage of the restoration, perhaps, although trial fitting chrome and brightwork before painting (and replating) is nonetheless an essential task which is often overlooked. At CJ we allow 12 hours to trial fit all the chrome on a FHC E Type - 15 hours in the case of a roadster.Notice the gaps between the top edges of the bumpers and the wings.
 |
 |
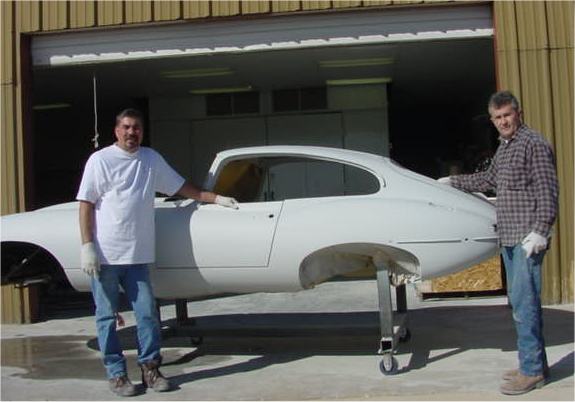
Lawrence's work is now done. The body is completely finished, bullet straight, gapped to perfection and (impatiently) awaiting its turn in the paint booth. The following photographs really don't do justice to Lawrence and Cosme's efforts in the week that has passed since my last report. The car is absolutely magnificent and has the best panel gaps that I have ever seen.Lawrence summed it up simply and succinctly in a statement he made earlier today:
"This is my 25th E Type and I believe it is the best one I have ever done".
 |
 |
|
|
|
 |
 |
|
|
|
 |
 |
|
any better than this..... |
|
 |
 |
|
|
|
 |
 |
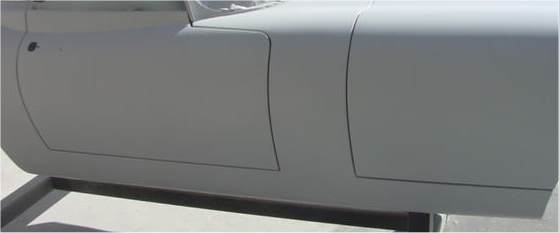
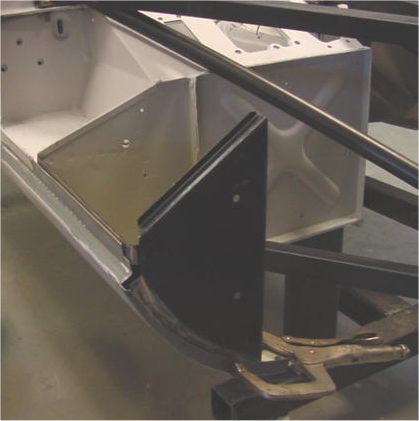
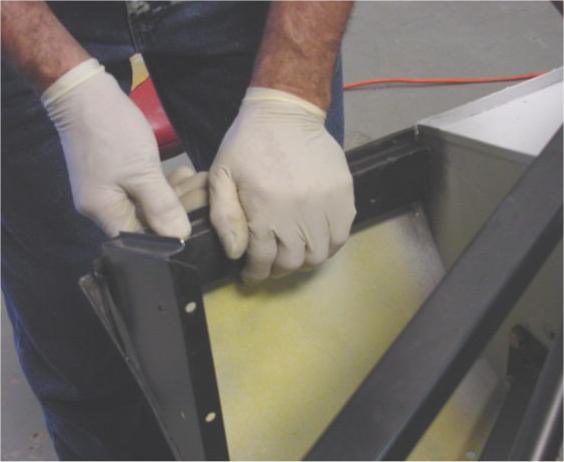
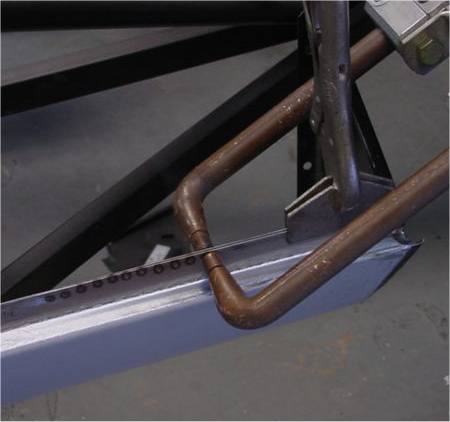
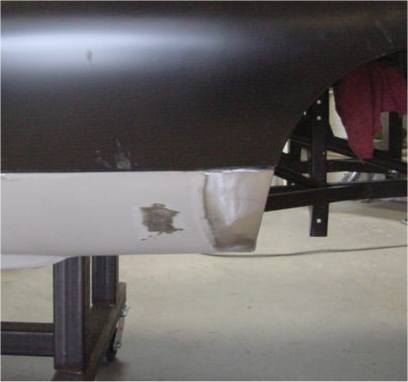
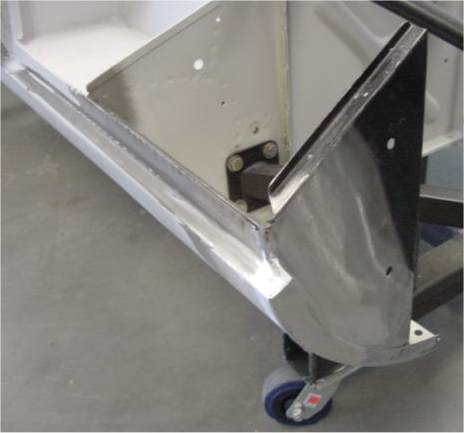
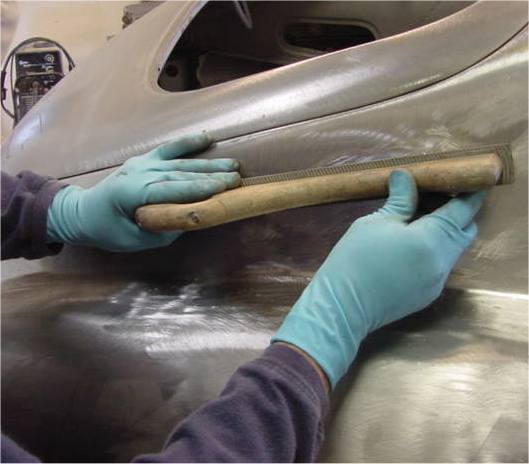
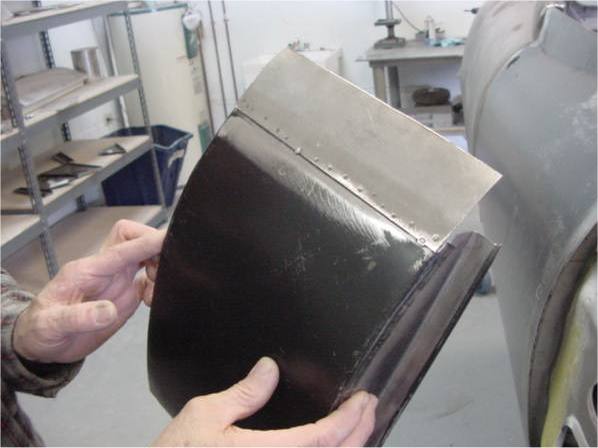
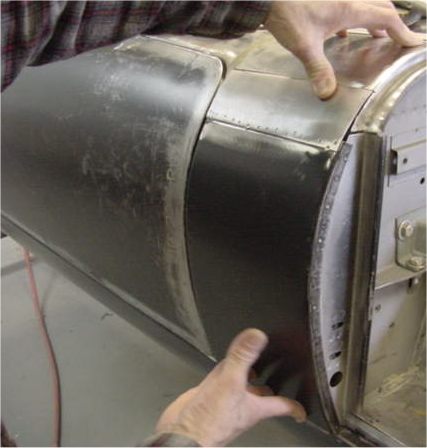
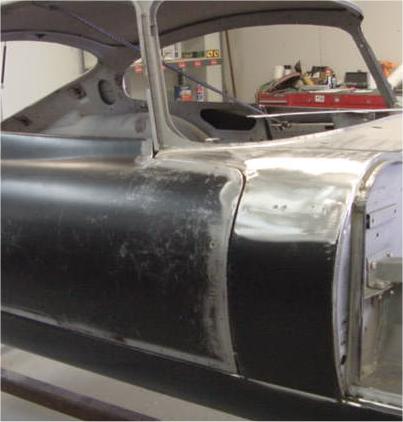
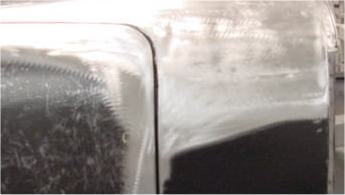
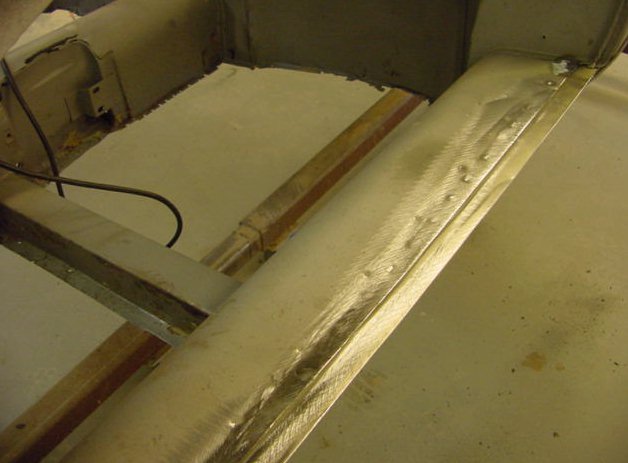
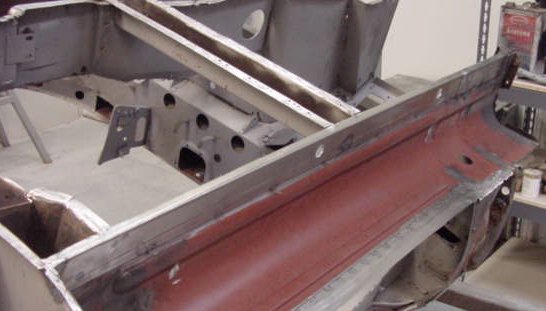
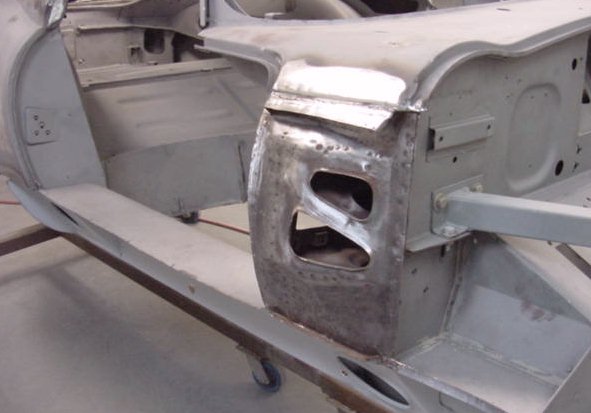
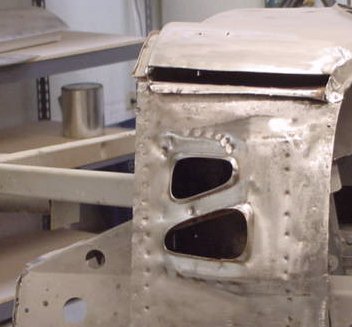
The following sequence of photographs show how Lawrence installs the sill end closing panels in relation to the bonnet fit and the air cleaner and battery brackets. The ends of the sills are built up using lead, in the same way it was done at the factory when the cars were new. The bonnet fit is coming along very nicely.....
 |
 |
|
|
air cleaner bracket |
 |
 |
|
bracket in place |
edge of the sill so that it meets the wheelarch |
 |
 |
|
(bonnet open) |
|
 |
 |
|
|
|
 |
 |
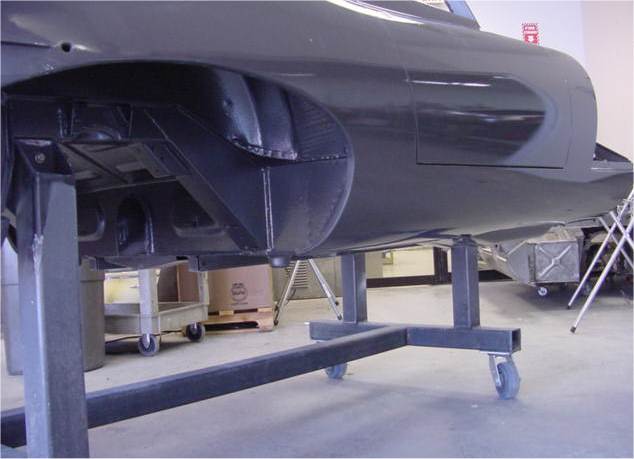
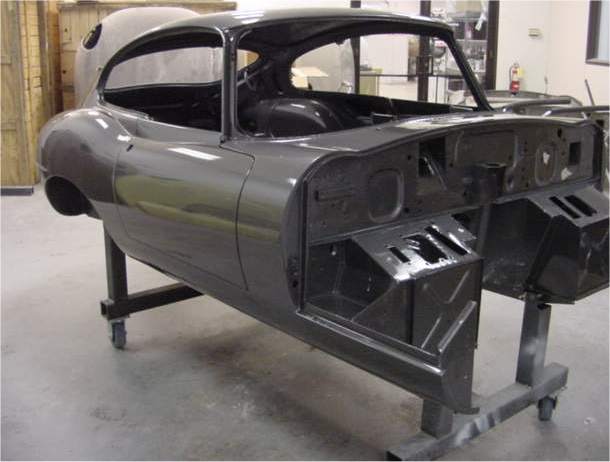
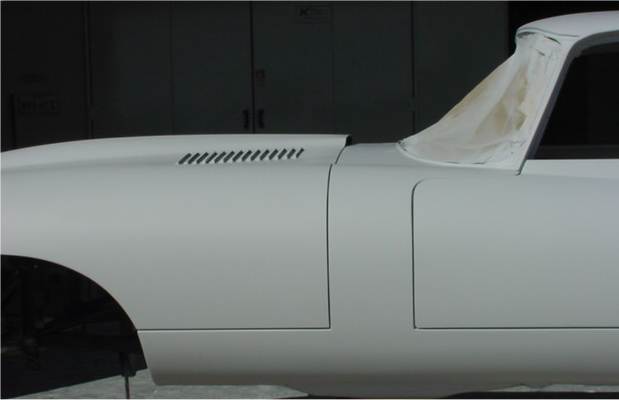
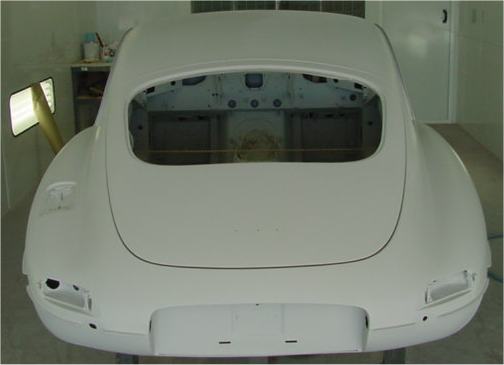
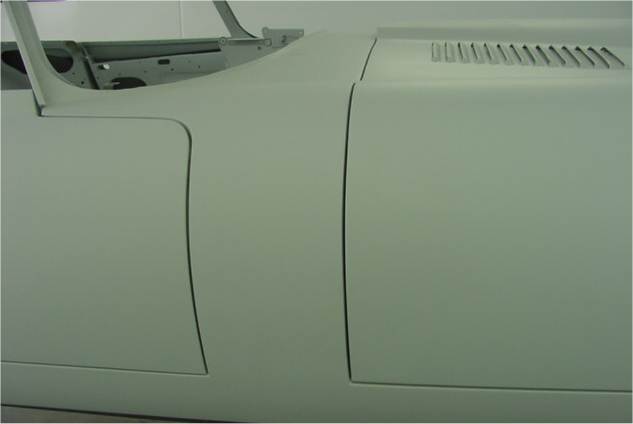
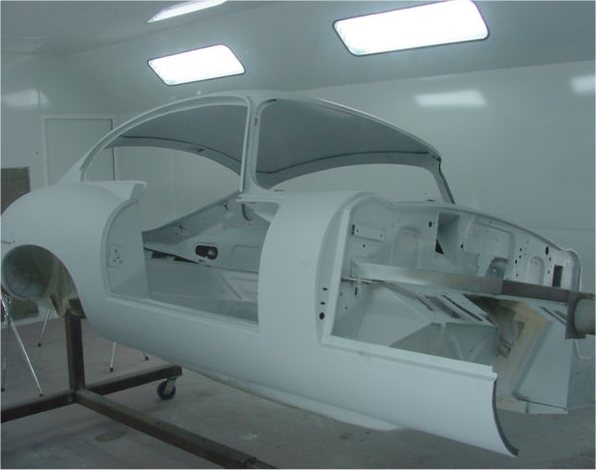
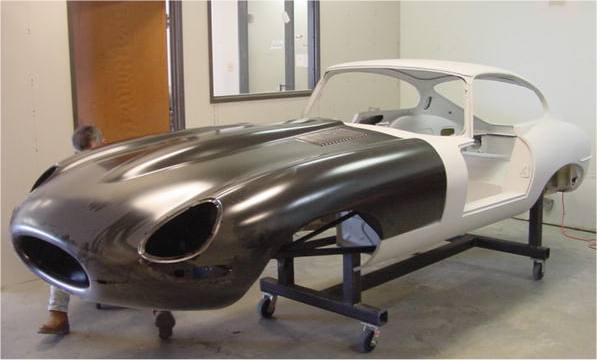
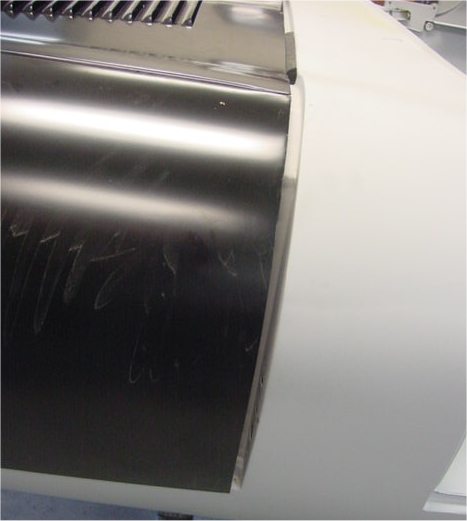
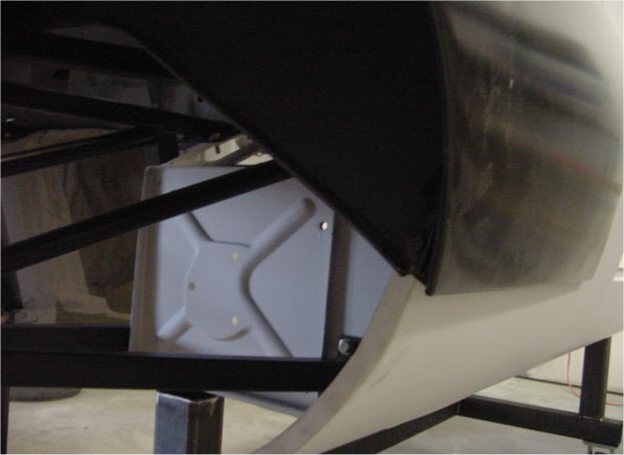
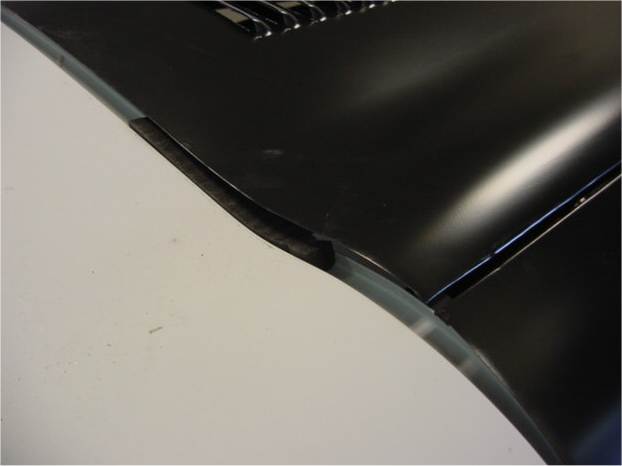
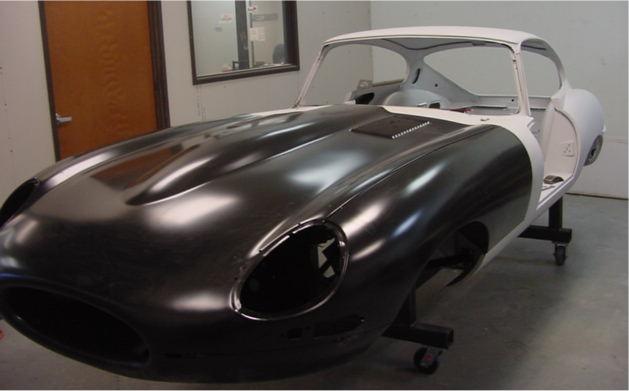
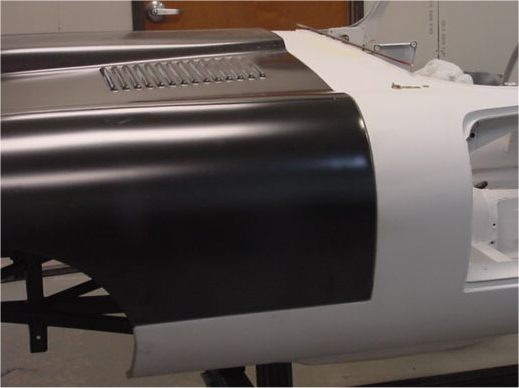
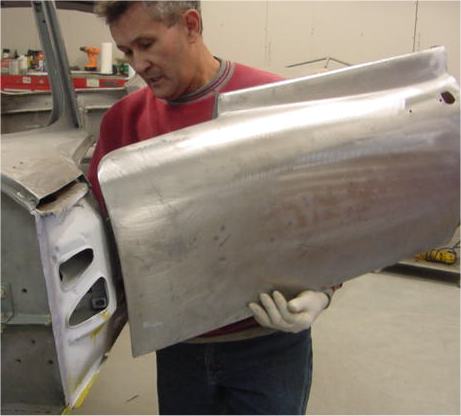
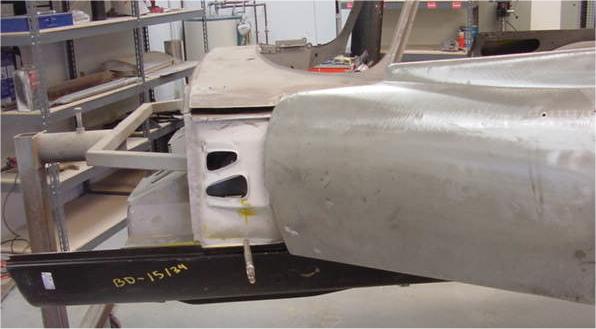
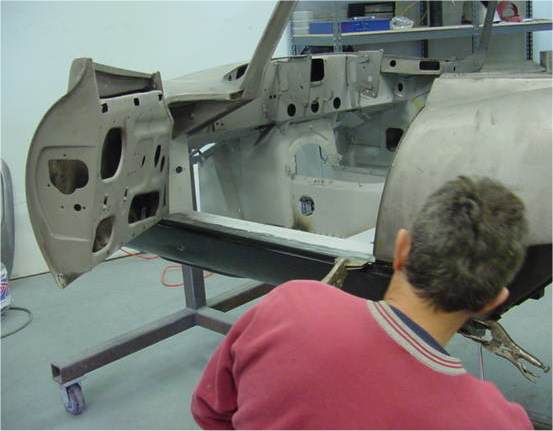
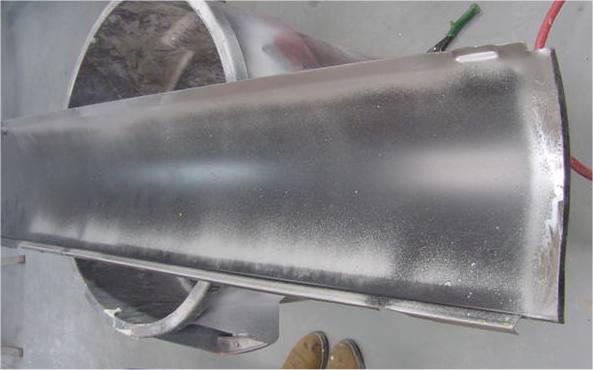
The following photographs show the main bodyshell being epoxy primed and the installation and fitting of the new engine frames and bonnet. As you can see, the bonnet fit 'straight from the crate' was terrible! By the end of today, however, we will have our desired 1/8" gap all the way around the closing panels.
 |
 |
|
|
|
 |
 |
|
doors bullet straight with his home made giant block.... |
|
 |
 |
|
|
|
 |
 |
|
|
|
 |
 |
|
|
|
 |
 |
|
|
|
 |
 |
|
|
|
 |
 |
|
|
desired 1/8" gap |
 |
 |
|
|
|
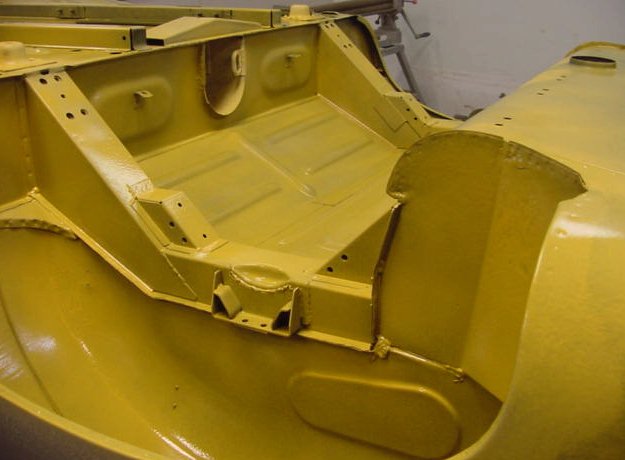
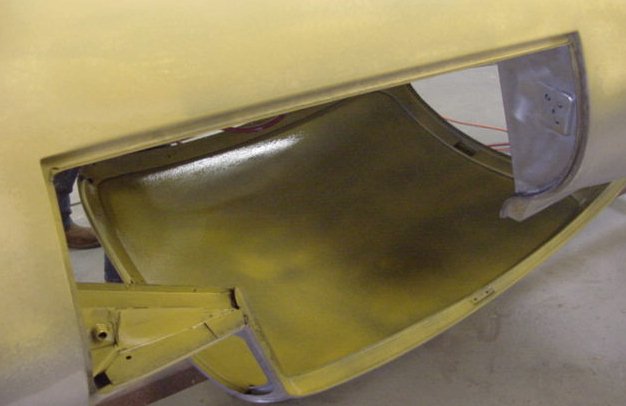
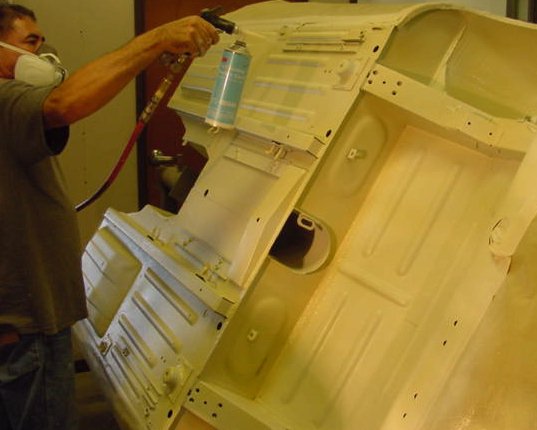
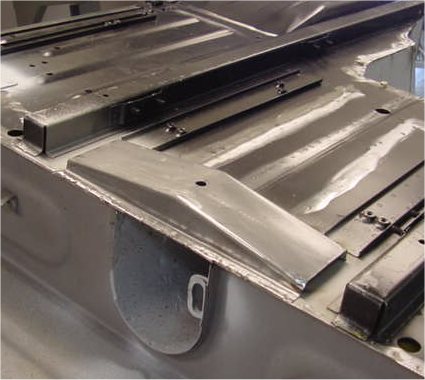
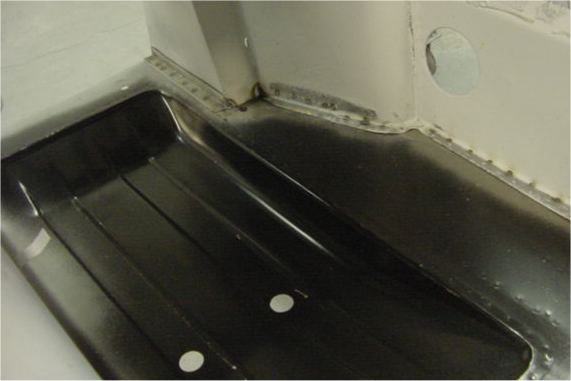
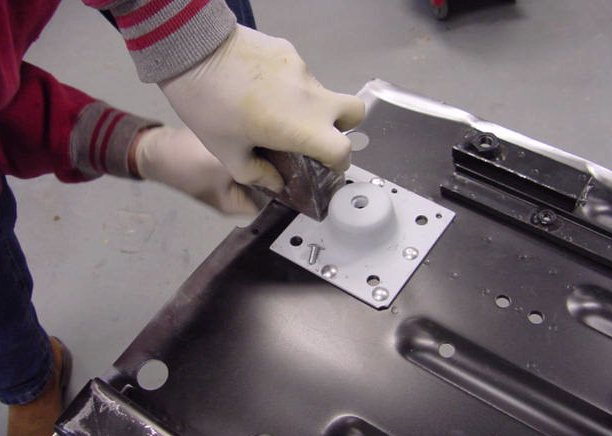
This update deals with the completion of the lead loading process followed by the treatment, undersealing and painting of the floorpan. As you can see from the sequential photographs, there is a massive amount of ground work to be done before you can think about applying any body colour.I think you will find this report informative - and very encouraging!
 |
 |
|
loading process is completed |
corner of the door |
 |
 |
|
|
|
 |
 |
|
|
(has excellent anti-corrosive properties) |
 |
 |
|
the floor pan |
|
 |
 |
|
be trimmed to give more room for the 5 speed |
|
 |
 |
|
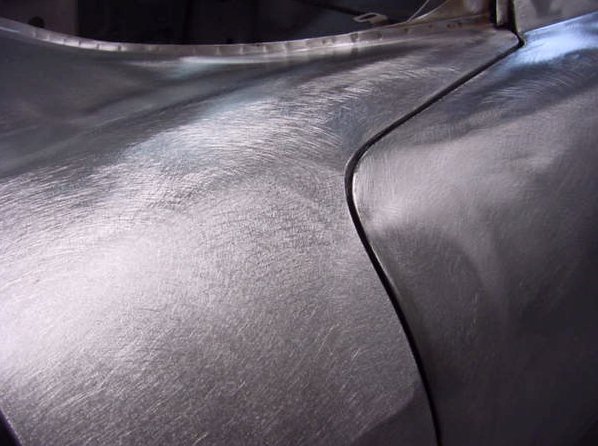
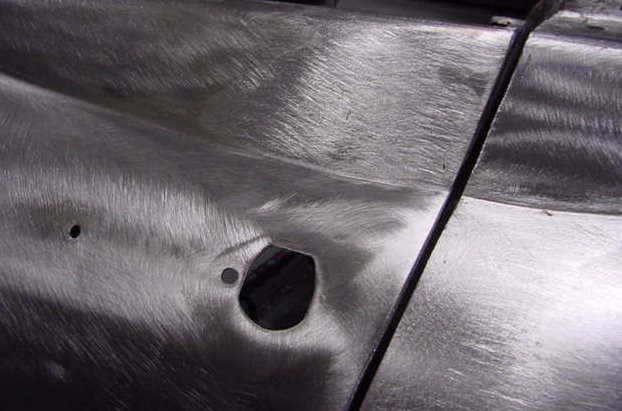
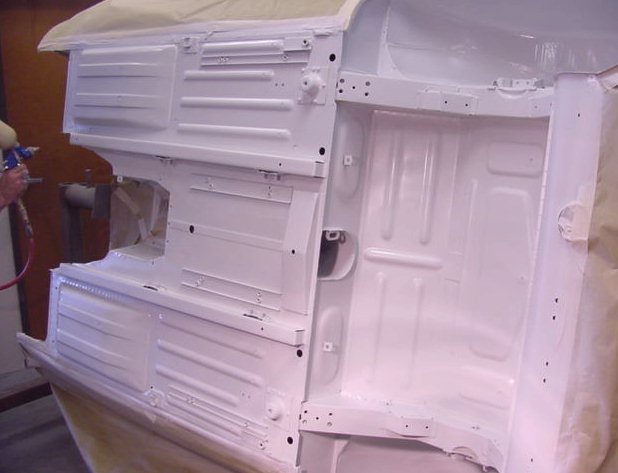
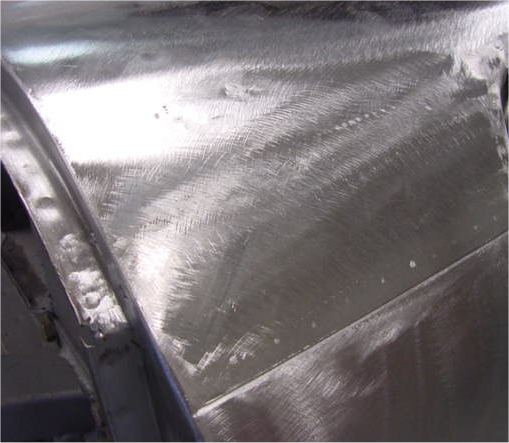
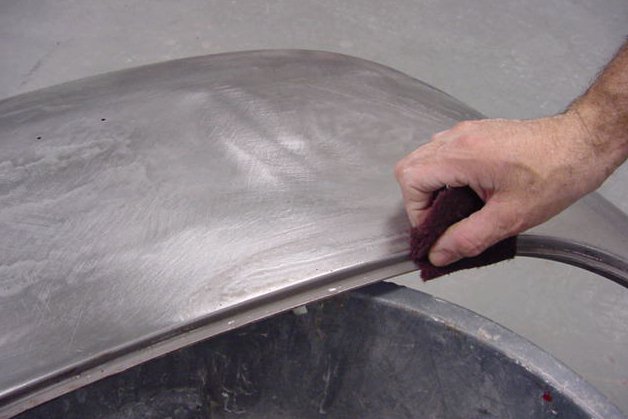
is sanded to bare, shiny metal before being primed |
|
 |
 |
|
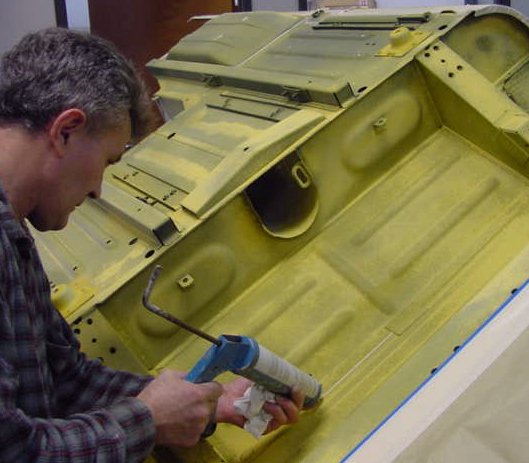
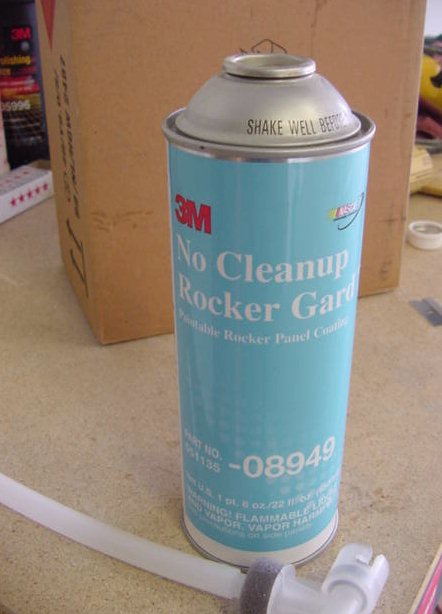
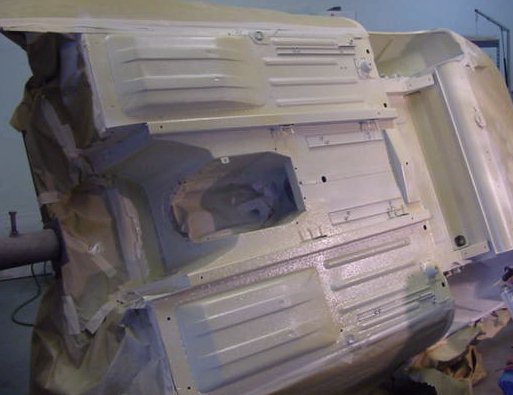
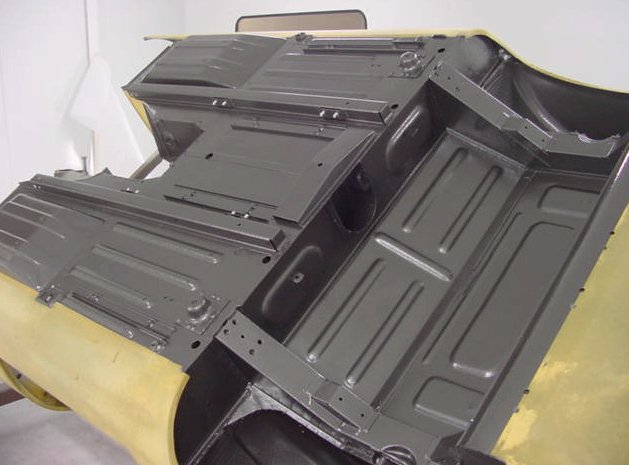
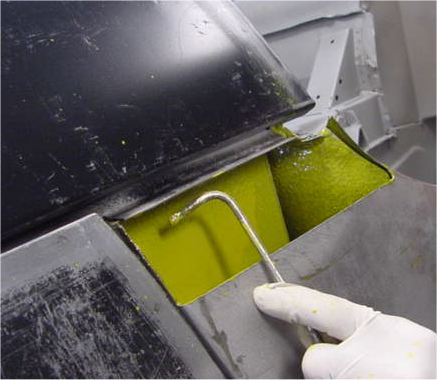
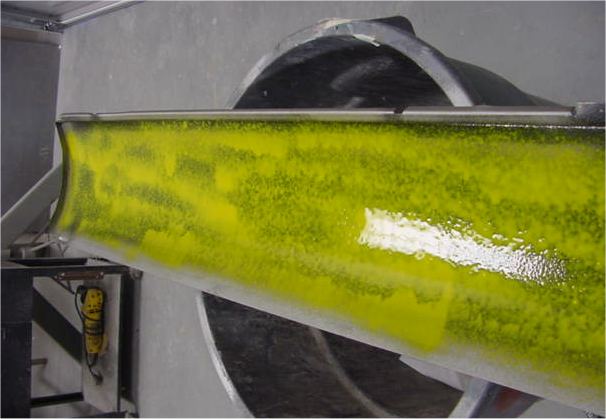
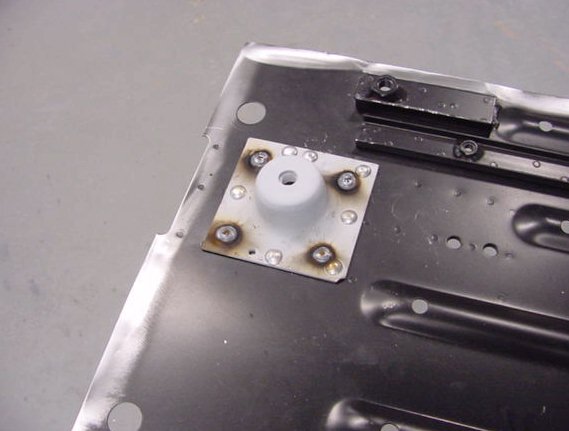
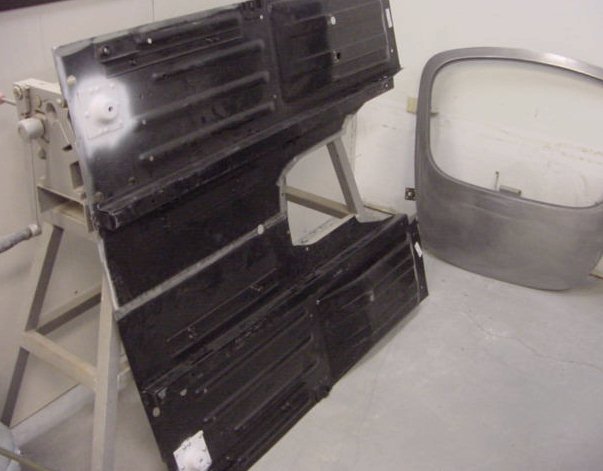
priming and application of 3M Body Schutz |
|
 |
 |
|
body schutz under the boot floor |
|
 |
 |
|
|
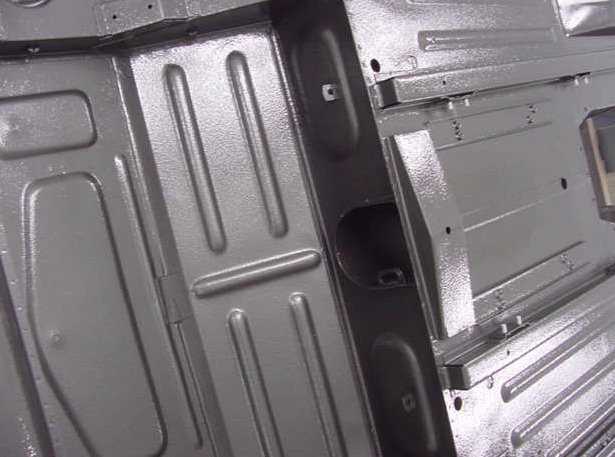
'ripple' finish (see below) |
 |
 |
|
|
|
 |
 |
|
|
on top of the body schutz |
 |
 |
|
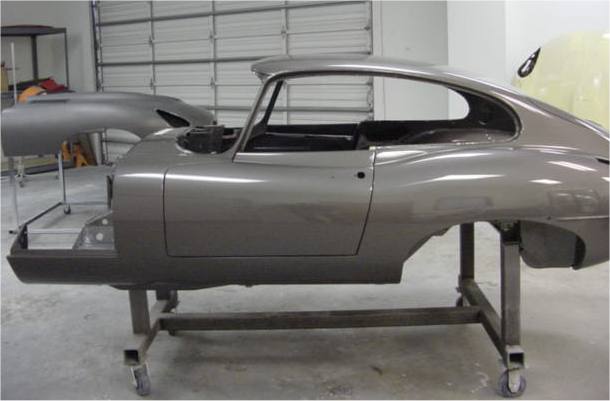
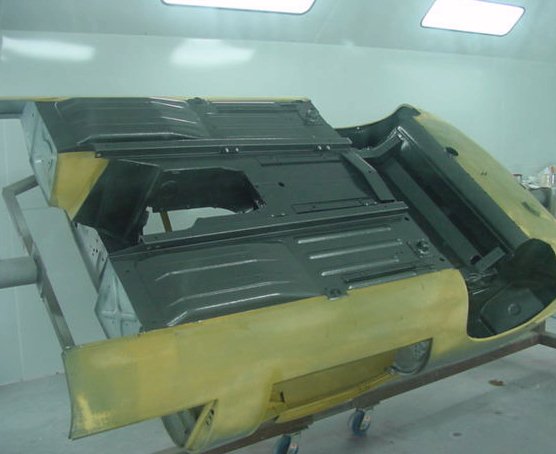
Opalescent Gunmetal |
|
 |
 |
|
|
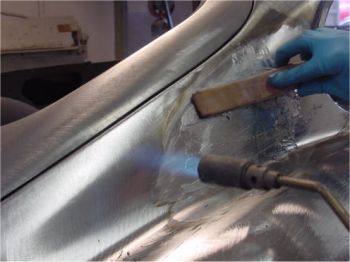
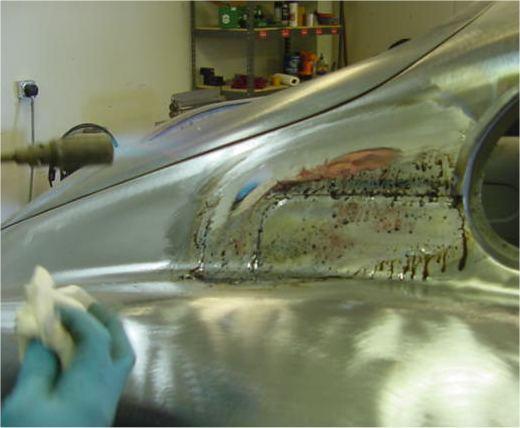
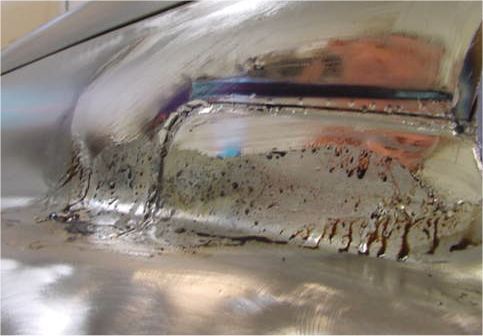
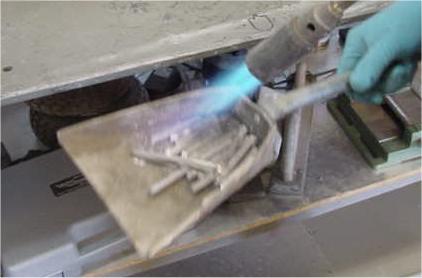
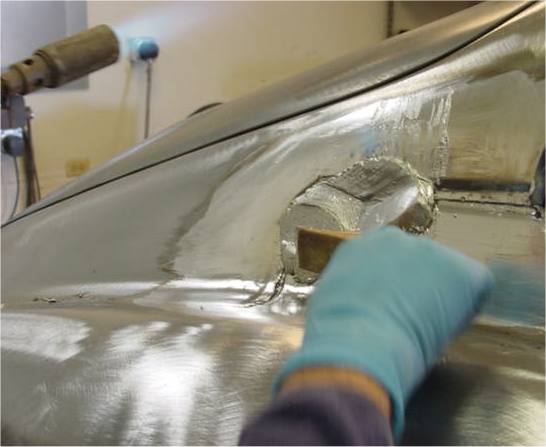
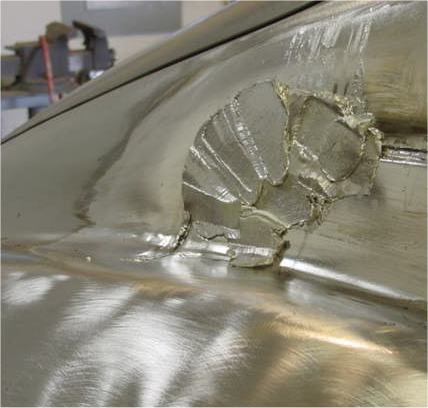
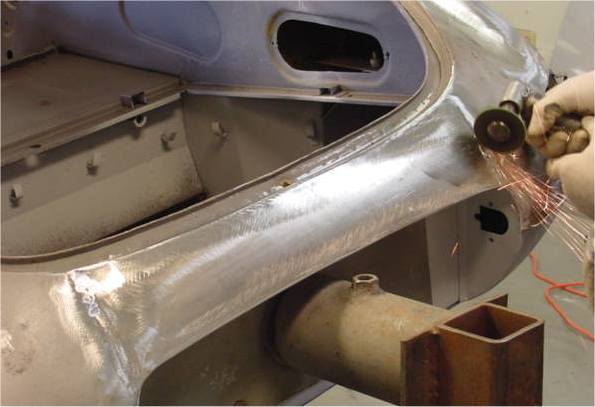
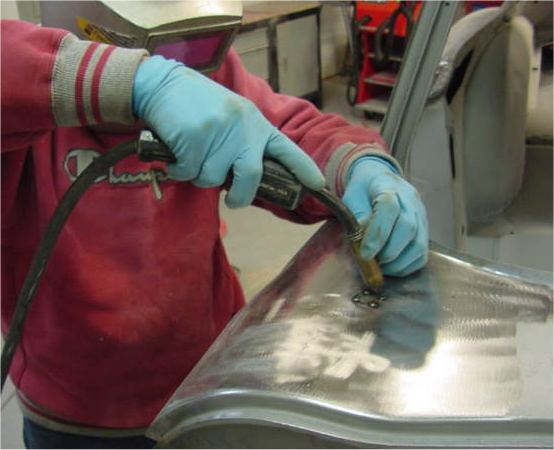
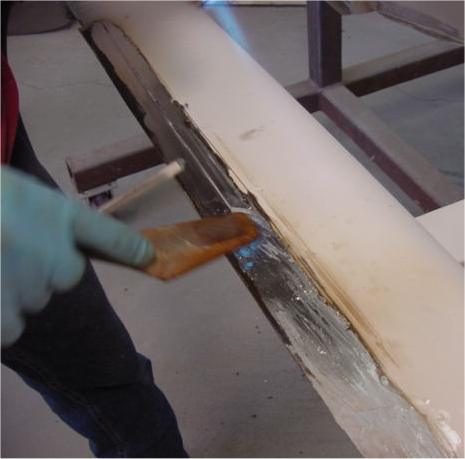
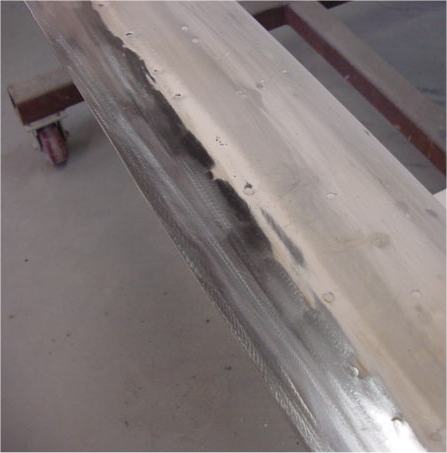
Lawrence will spend the next couple of days lead loading the entire bodyshell. This is a fascinating process to watch and I will try to give you a feel for the activity by taking photographs and also including the occasional video clip.Lead loading body panels is something of a dying art and is of course not practiced by the vast majority of restorers.
 |
|
|
 |
 |
|
|
|
|
|
|
 |
 |
|
|
|
|
|
|
 |
 |
|
|
|
|
|
|
 |
 |
|
|
|
|
|
|
 |
 |
|
|
|
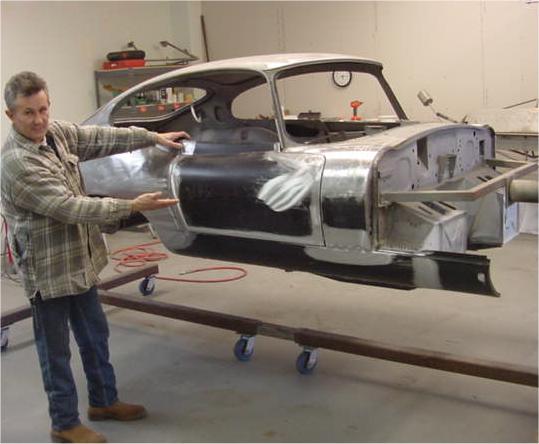
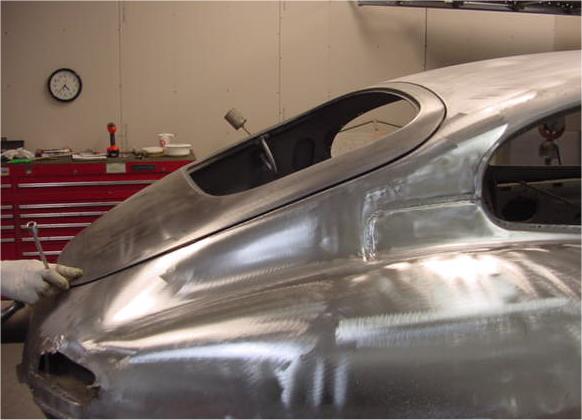
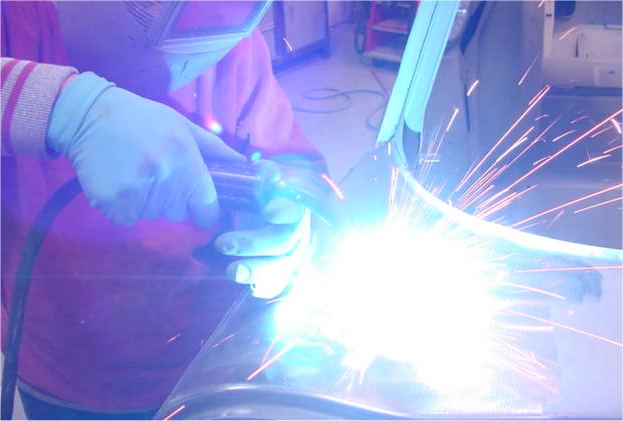
I am delighted to report that all the welding and metalwork has now been completed. Tomorrow Lawrence will be lead loading his creation, making sure that all its many curves and seams are to his liking. The next stage will be to install your new engine frames and fit the new bonnet.I think you will agree that he has done a tremendous amount of work in a relatively short period of time (remember he only began the body repairs on November 8th).
The first picture in this series is Lawrence 'presenting' you with your 'new' bodyshell ;-)
 |
Stop
the clock!
Bodywork labour to completion of all panel replacement as shown below, including some preliminary lead work, etc - 104.25 hours |
 |
 |
|
for the license plate panel (see video clip below) |
|
 |
 |
|
license plate surround (LH) |
|
 |
 |
|
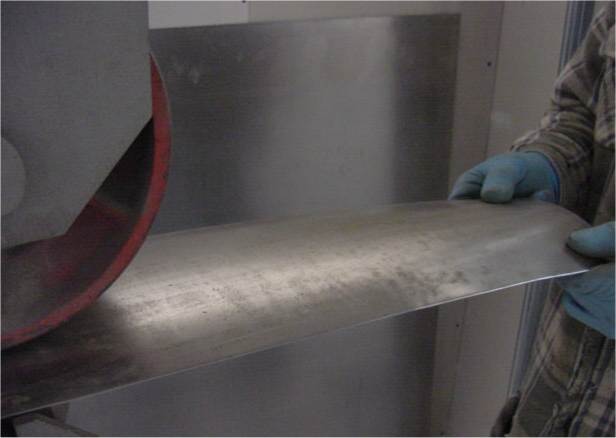
the English wheel |
|
 |
 |
|
|
|
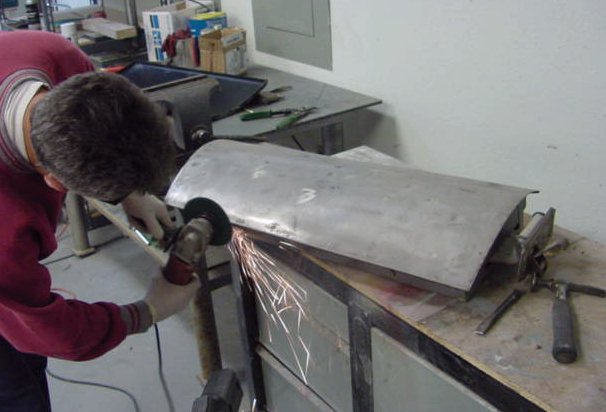
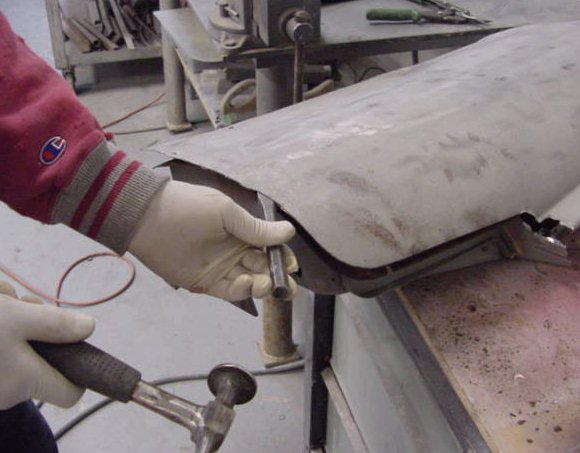
In answer to your question about Lawrence's use of an English wheel, if you click on the following photograph you can watch a short video clip of him shaping a panel he is fabricating for the rear license plate area.Look for a significant update later today!
Today's photographs show the boot floor and rear 3/4 panels being replaced. I was hoping that he might be finished with the welders today - but that was a tad optimistic. He will have to complete the license plate panel repair tomorrow morning. Another excellent day of progress, however.
|
|
Bodywork labour to date - 96.5 hours |
 |
 |
|
and lower quarter panels |
|
 |
 |
|
|
|
 |
 |
|
|
|
 |
 |
|
|
|
We now have the right hand side of the car completed, as well as a good start on the lead loading process. Tomorrow (11/28/01) we will be removing the old trunk floor and lower 3/4 panels - and hopefully welding the new assembly into place. After that we can put the welders away ready for the next project.
|
|
Bodywork labour to date - 87.5 hours |
 |
 |
|
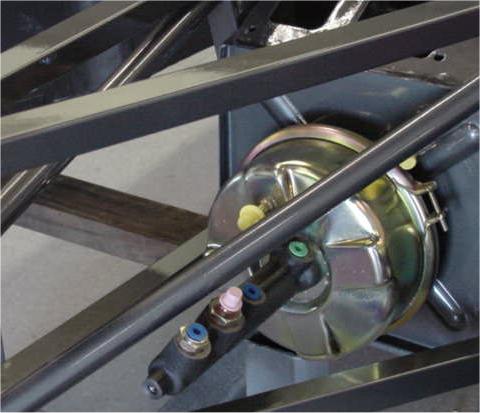
receive later brake booster |
LH cowl panel - it will eventually be lead loaded.... |
 |
 |
 |
 |
|
|
|
 |
 |
|
|
|
 |
 |
|
|
|
 |
 |
|
loading still to come..... |
|
 |
 |
|
|
|
 |
 |
|
wax deep inside the reach arch/wing |
|
 |
 |
|
|
|
 |
 |
|
|
|
 |
 |
|
|
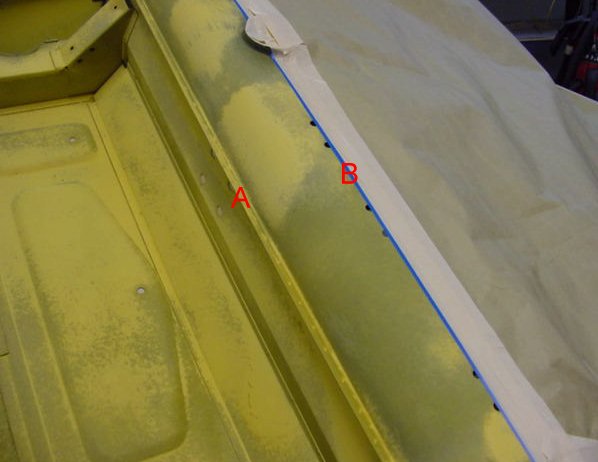
by the letter 'A' in the photograph will not be lead loaded until the bonnet is fitted..... |
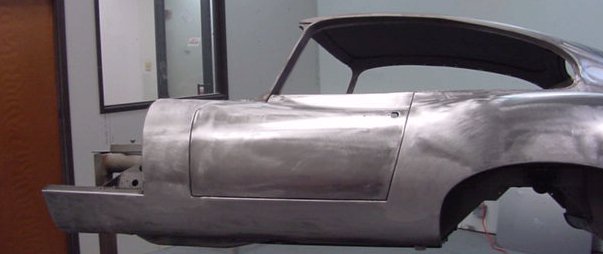
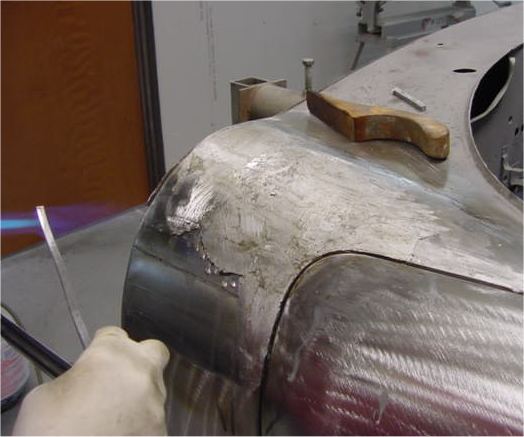
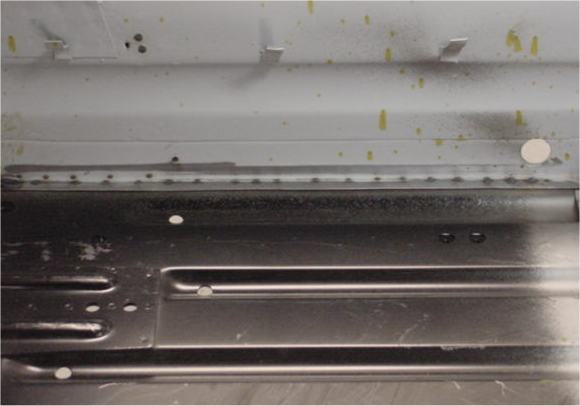
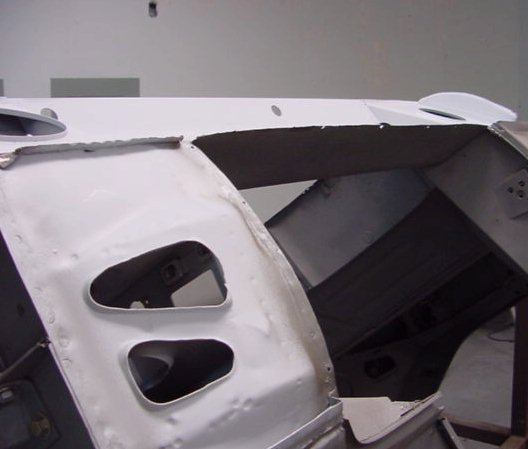
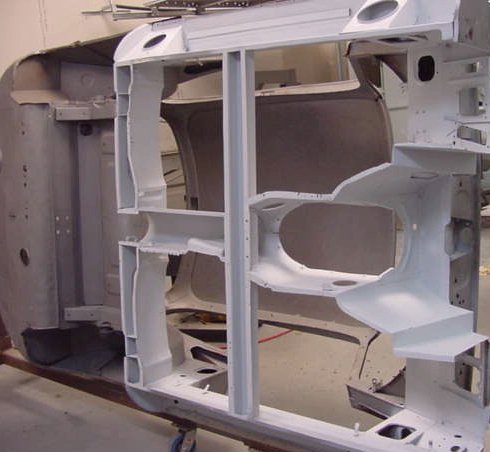
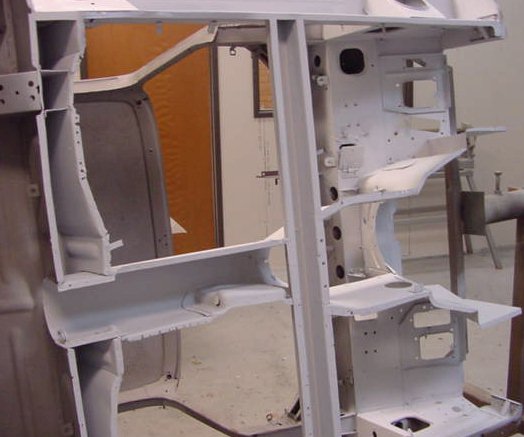
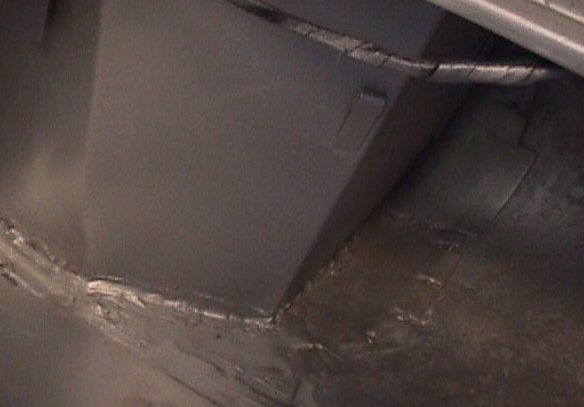
Lawrence now has the left side of the car 'bottoned up' and has turned his attenion to the installation of the right hand sill. He fabricated insertion panels for the top of the left hand front side cowl panel - and also the place where the upper back edge of the left hand sill meets the left hand cowl (forward wheel arch) section.Notice how he had to re-skin the right hand door and install same before he could begin aligning the sill and bulkhead panels. If you are going to obtain perfect panel gaps, you really have no choice but to follow this sequence. Many restorers, both amateur and professional alike, don't touch the doors until the floors and sills have all been repaired.
|
|
Bodywork labour to date - 69 hours |
 |
 |
|
|
|
 |
 |
|
|
|
 |
 |
|
how clean it is inside and out.... |
|
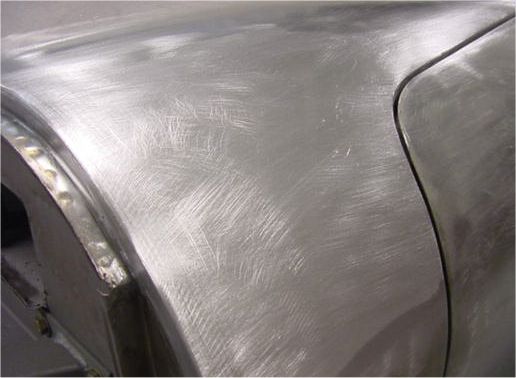
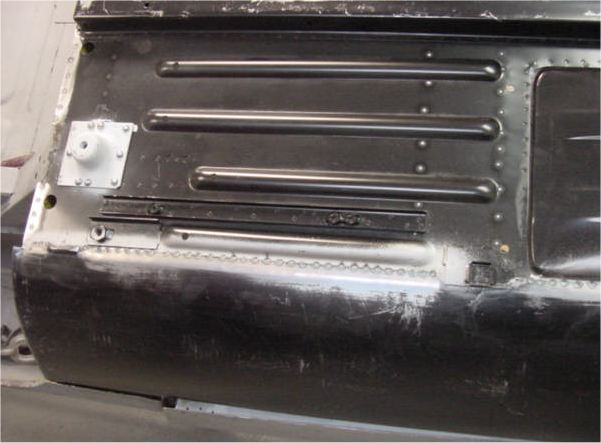
Lawrence made great progress yesterday (11/21) and actually started installing (as opposed to removing) sheet metal. This is always a good sign!The following photographs do not do justice to the time and effort spent aligning all the various panels before they were finally welded into place. Notice how the doors have to be reassembled and installed before the sills and cowl panel can be permanently affixed.
The finished results are truly exceptional.
|
|
Bodywork labour to date - 59 hours |
 |
 |
|
|
|
 |
 |
|
|
|
 |
 |
|
|
|
 |
 |
|
are temporary) |
|
 |
 |
|
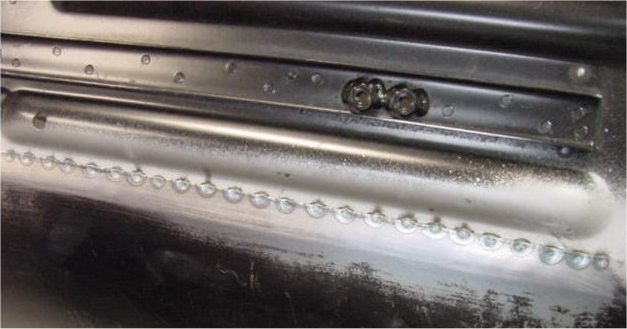
now been stripped, treated and rewelded |
|
 |
 |
|
desired panel gaps |
where the sill is installed and removed a number of times before finally reaching for the spot welder |
 |
 |
|
|
|
 |
 |
|
|
surface of the sill |
 |
 |
|
|
|
 |
 |
|
|
|
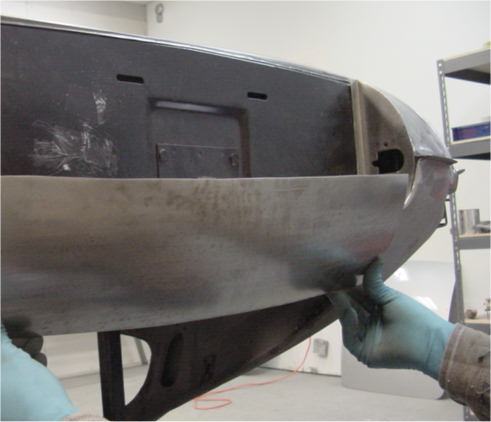
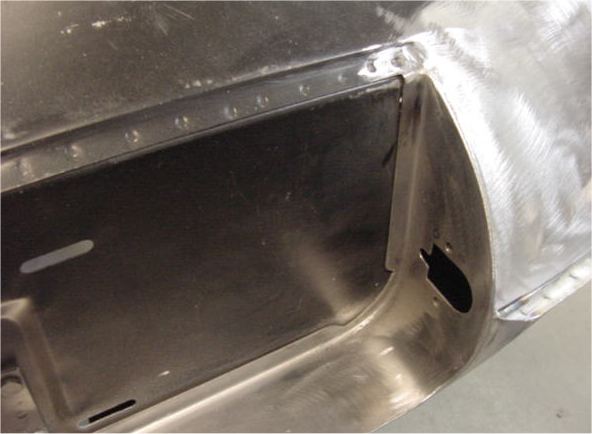
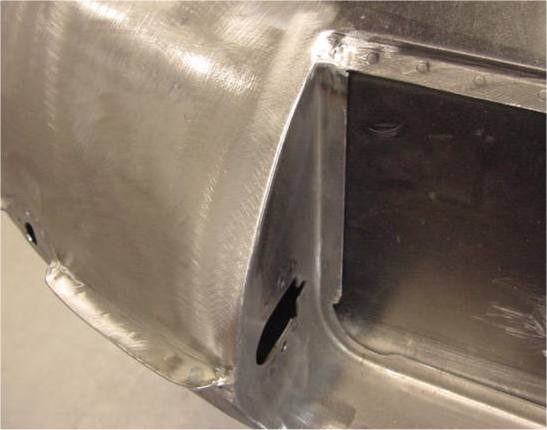
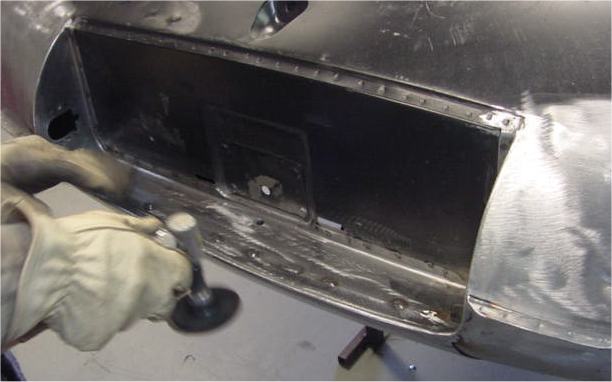
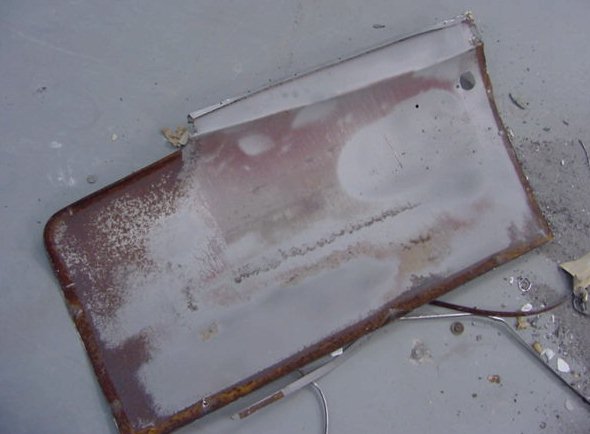
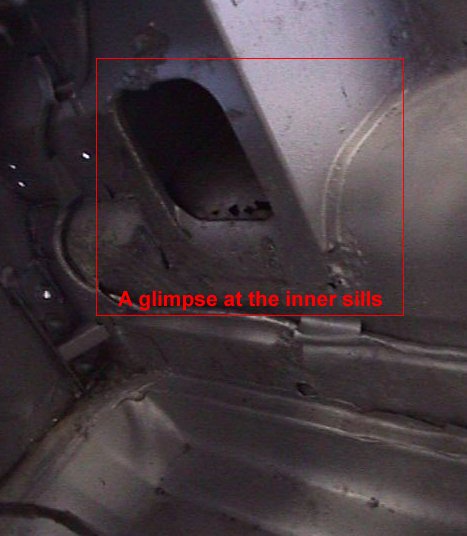
Good news, bad news today. The first photographs in today's sequence (the bad news) show various corroded areas in the rear quarters, boot floor and license plate panel. Although Lawrence is naturally quite capable of performing localized repairs to the problem areas shown, in the end I decided to replace the entire rear section with a new (pre-made) Martin Robey assembly (shown in photograph # 5 below). Using this panel represents a significant saving in labour hours - and therefore makes good financial sense (the good news).The later photographs show Lawrence closing up the antenna hole on the front scuttle (we are going to use a concealed ribbon antenna behind the dash), lead loading the earlier repair to the inner sill and applying the Wurth Body Wax to the inner box sections.
The work scheduled for today (11/21/01) will represent a huge leap forward in the bodywork restoration process. Watch this space!
|
|
Bodywork labour to date - 49.5 hours |
 |
 |
|
panel meets the boot floor |
|
 |
 |
|
|
|
 |
 |
|
|
under the door skin flanges? |
 |
 |
|
|
|
 |
 |
|
|
|
 |
 |
|
|
|
 |
 |
|
|
|
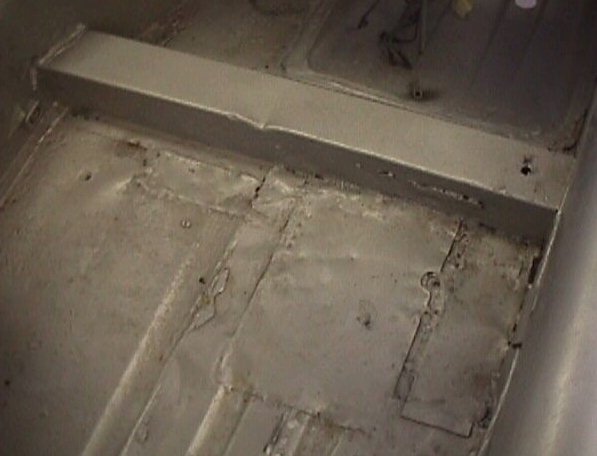
The following photographs show Lawrence trial fitting and welding together the new floors, installing the radius arm cups, preparing metal surfaces, disassembling the doors prior to re-skinning same...and generally putting in a good day's work!
|
|
Bodywork labour to date - 43.5 hours |
 |
 |
|
|
will cause surface corrosion |
 |
 |
|
|
|
 |
 |
|
(remember this used to be a 4.2 bodyshell) |
|
 |
 |
|
the new panels have their factory primer removed and special 'weld thru' primer is used in its place |
trial fits the reaction plate at this stage) |
 |
 |
|
the centre |
panel was attached at the factory - corrosion often forms beneath the original lead...... |
 |
 |
|
cutting wheel around the edges... |
to reaching for the hammer and chisel prevents distortion of the door casing |
 |
 |
|
|
are exposed....note the rubber drain hose |
 |
 |
|
|
|
 |
 |
|
the welded panels at the bottom flange...this will be blasted and treated before it is re-welded |
on apparently excellent doors - as surface rust almost always forms between the panel and the door casing |
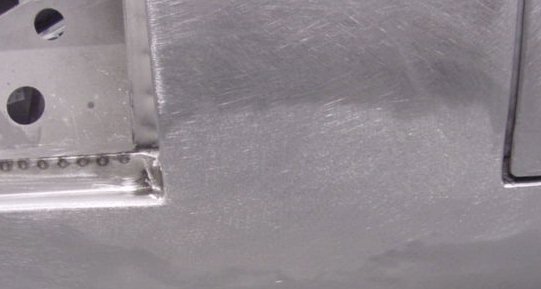
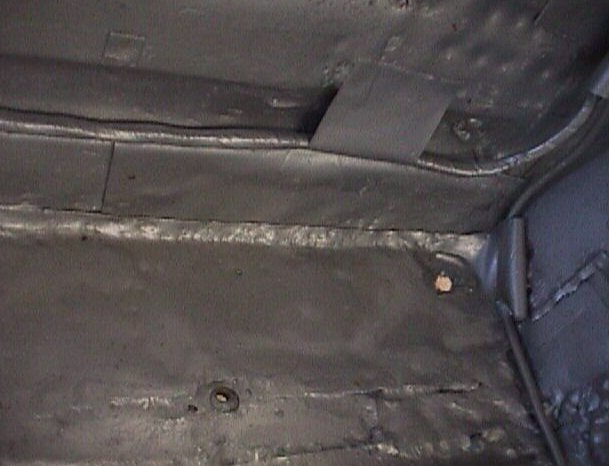
It is vital that proper care and attention is paid at this stage. Nothing very glamorous (or particularly photogenic, alas) about the work Lawrence is currently doing, although it is undoubtedly the most important part of the entire process in terms of longevity and the lasting quality of the restoration.The following photographs show how Lawrence has cut away every single grain of surface rust, repaired or fabricated all the flanges (to which the new floors will ultimately be welded) and begun treating all the bare metal surfaces. The next stage will be to liberally coat all the internal surfaces of the various box sections with Wurth Body Wax.
As you can see, a Team CJ E Type has had much more than a skin deep make-over. When Lawrence is finished, there will not be a better FHC E Type body in the world.
|
|
Bodywork labour to date - 35 hours |
 |
 |
|
|
|
 |
 |
|
will eventually be lead loaded - and invisible) |
|
 |
 |
|
|
|
 |
 |
|
body wax still to come |
|
 |
 |
|
bottom edge of the inner sill - never to be seen again, but beautifully restored, nonetheless |
stage - extensive rust proofing will follow next week before the floors are installed |
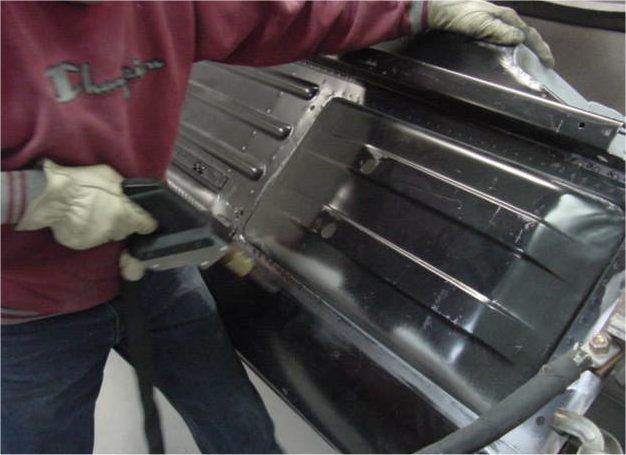
Lawrence does the ground work to replacing your floors, outer sills, front bulkhead 'kick' panels and the right hand door skin. As we discussed on the telephone, despite the fact that we have decided to replace the entire floor section and both outer sills, the structure is in fact quite sound.
 |
 |
|
|
|
 |
|
ready for the new floors, etc |
Bob, meet Lawrence Toneto......

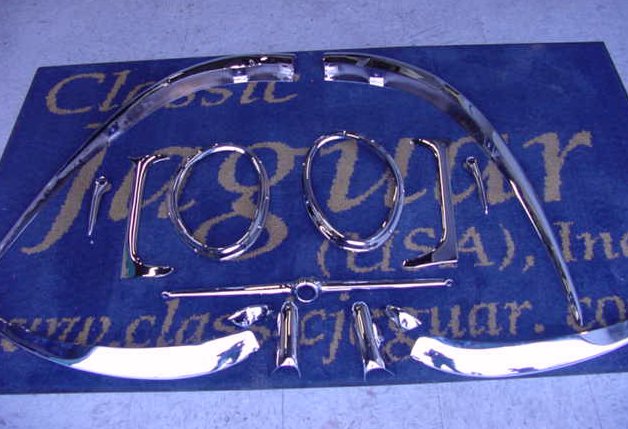
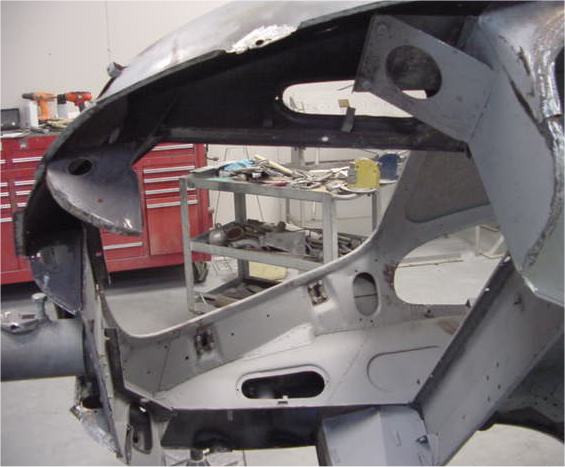
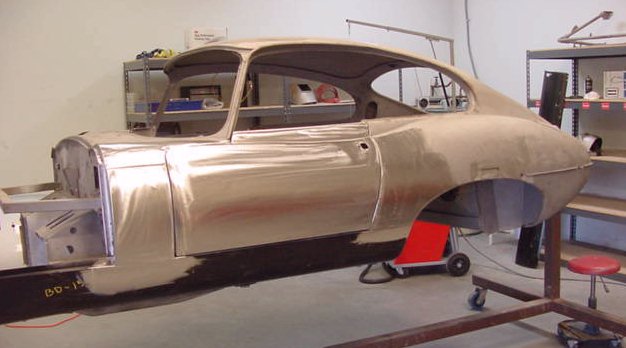
The following photographs show the soda blasted body after we had placed it on the jig. All in all I am quite pleased with the condition although as we discussed on the telephone, it is going to need at least one sill and a fair amount of massaging in Lawrences capable hands. (I have also included a picture of some of your re-plated chrome).
 |
 |
|
|
|
 |
 |
|
|
|

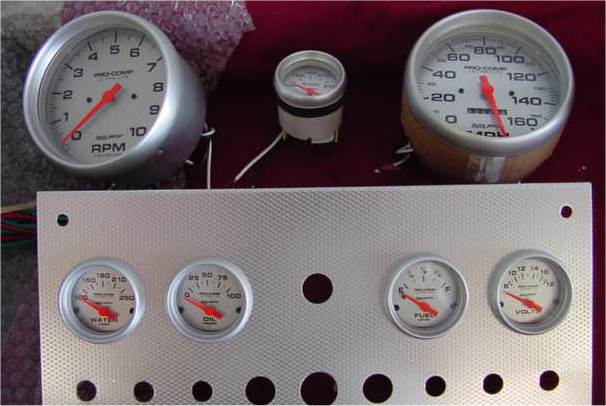
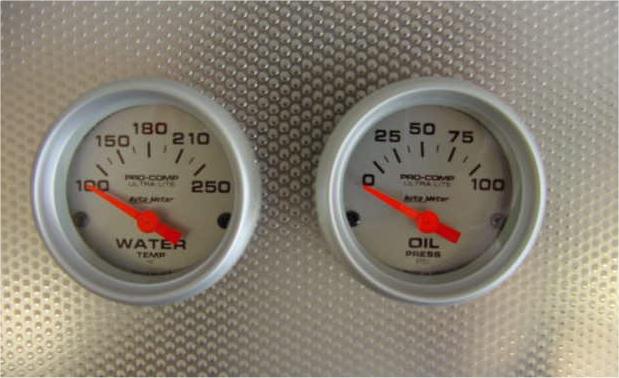
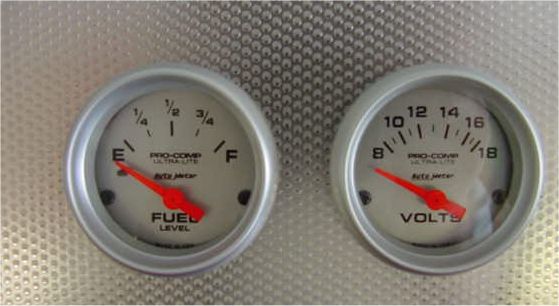
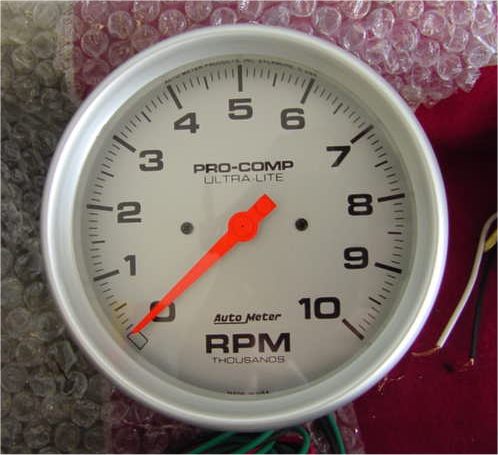
David has now modified the centre dash panel and the following photograph shows how the minor gauges will be arranged.

Trying something different with the dash and gauges......
 |
 |
 |
 |
I thought you might enjoy the following photograph(s).
 |
 |
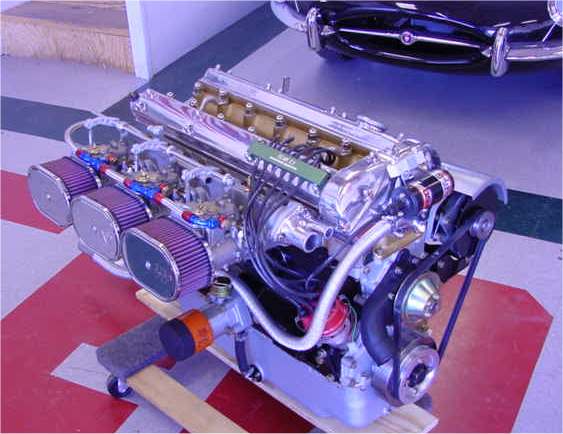 |
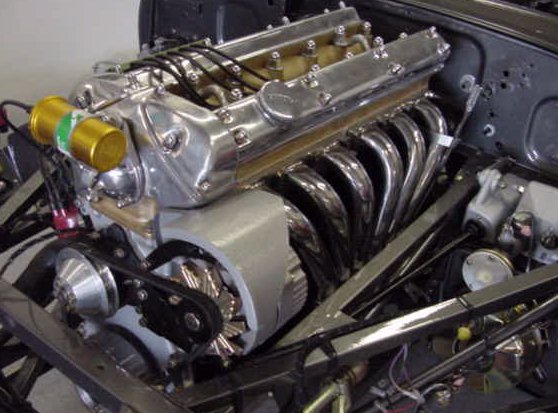
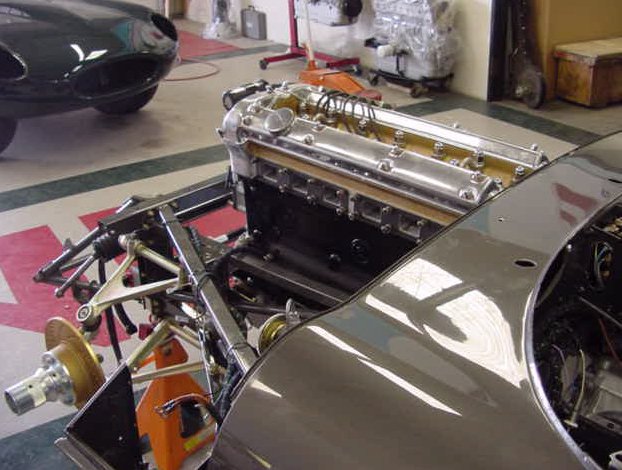
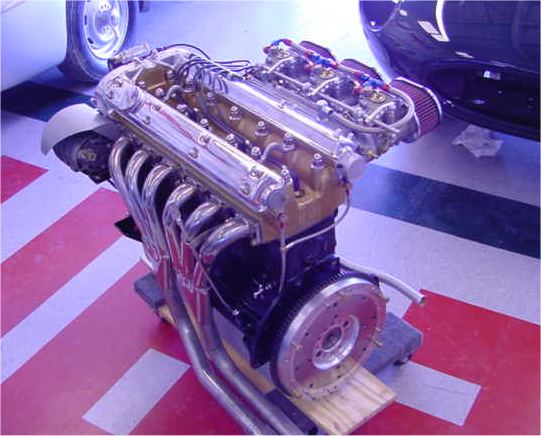
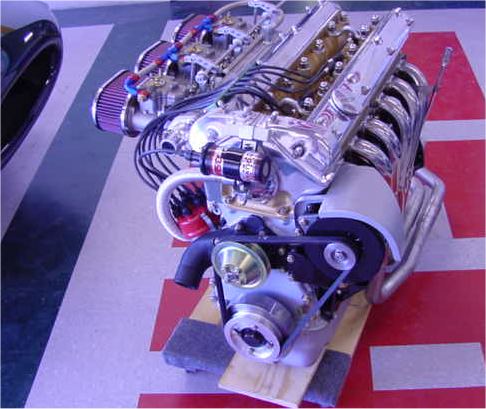
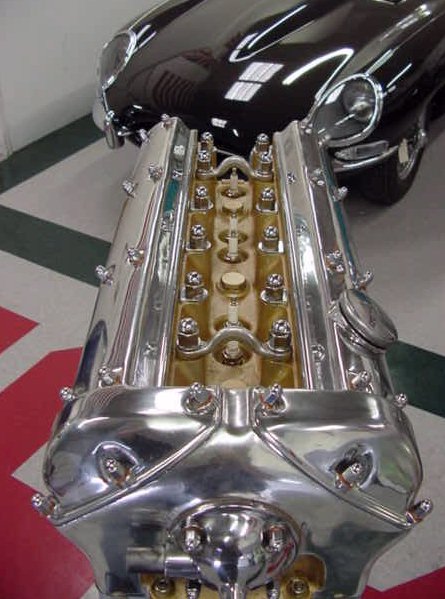
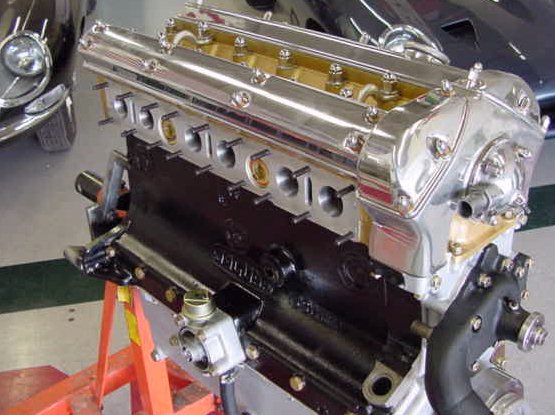
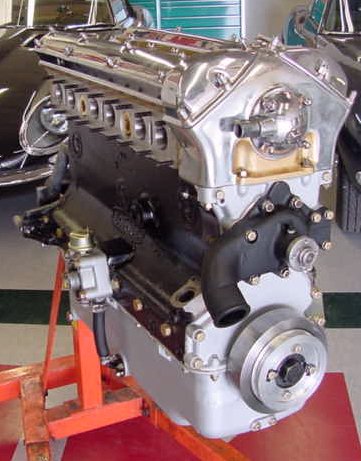
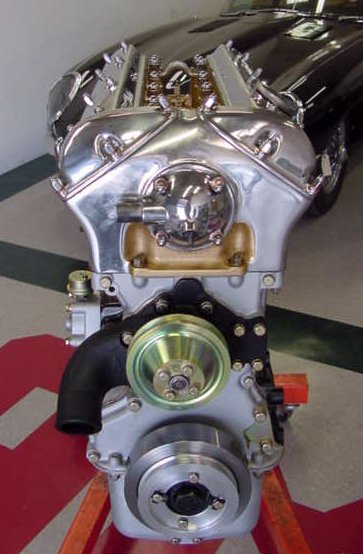
The most beautiful engine in automotive history. The sharp eyed amongst you will spot the later style waterpump, custom machined crank pulley, high performance damper (balancer), etc, etc.
 |
 |
 |
 |
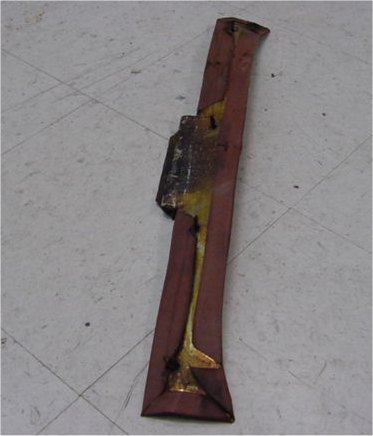
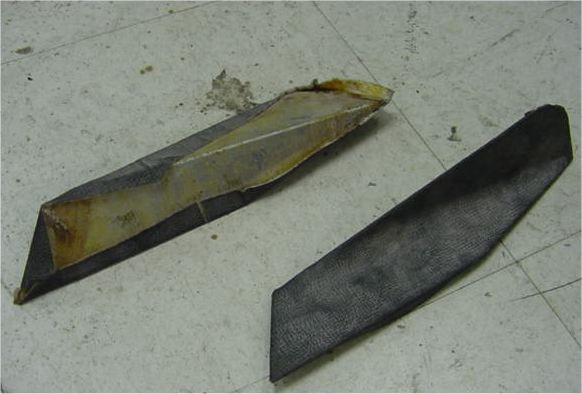
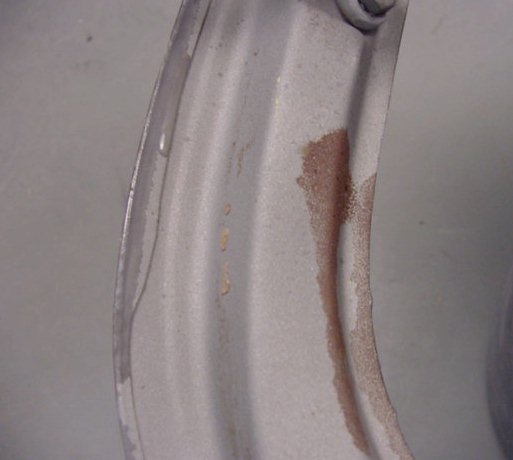
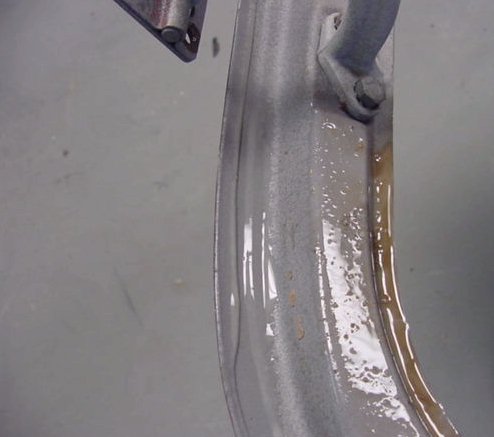
As you can see in the attached photographs, we have encountered some problems with the original oil pan. There is a serious crack that would undoubtedly have leaked like the proverbial sieve. Difficult to spot these things until the pan is properly cleaned up as happened yesterday afternoon. Although oil pans can be welded, it makes more (economical) sense to replace it with a good used one from stock.
 |
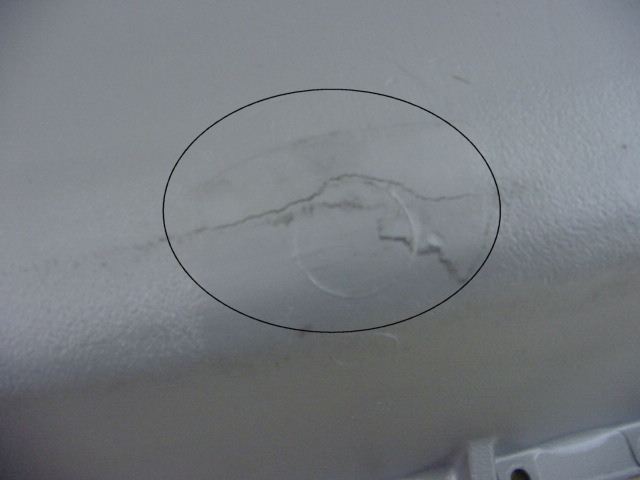 |
The
crack viewed from inside the oil pan
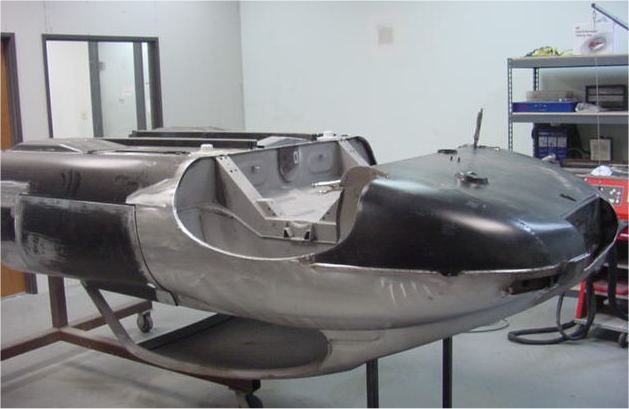
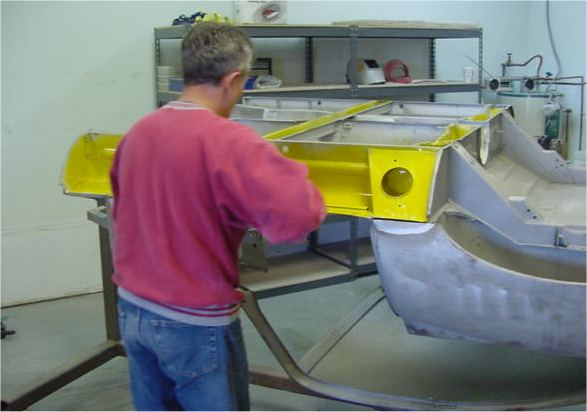
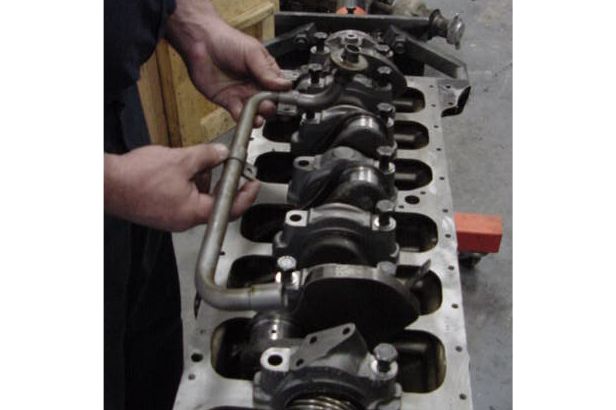
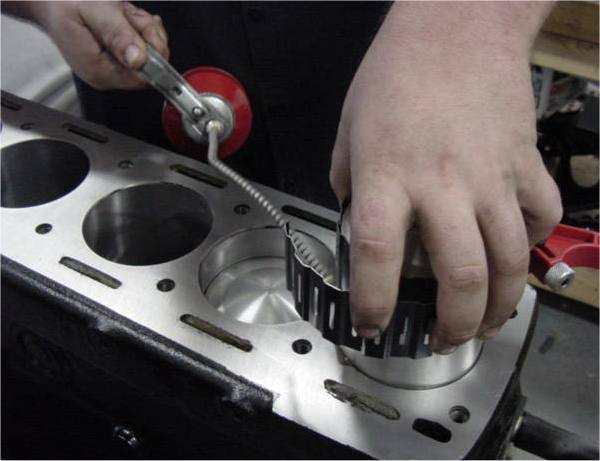
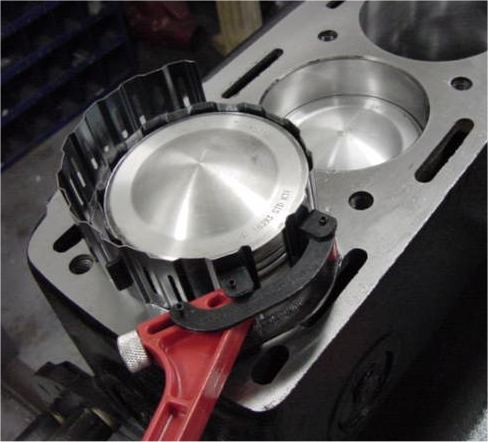
The following photographs show the body (and bonnet) part way through the blasting process. The bodyshell is being soda blasted, although the bonnet required bead blasting due to excessive layers of bondo beneath the primer. I have also included some photographs of your repaired (re-sleeved) engine block and the reassembly process.
 |
 |
 |
 |
 |
 |
 |
 |
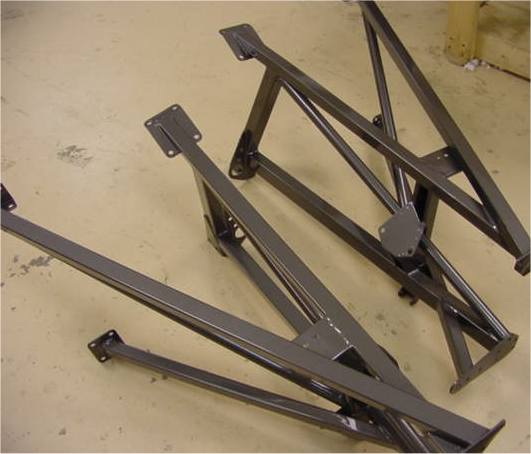
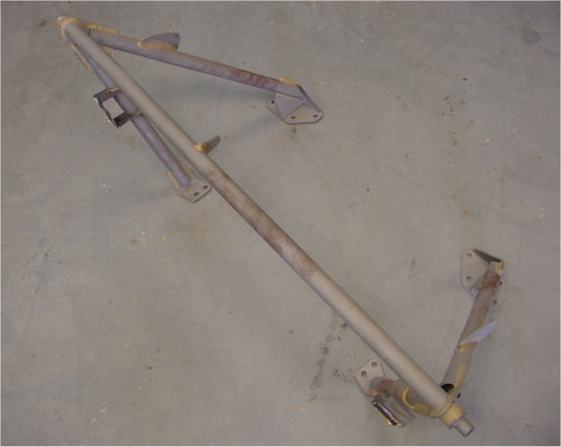
We now have the front suspension back from the platers (see below) and we are hoping to get the stripped bodyshell back by the end of the month. I am delighted with the finish on the suspension components - which should look great in the silver engine bay. As you can see, we already have the big bore Borla mufflers in hand and the 2 inch rear pipes and resonators should be here within the next few days.
 |
 |
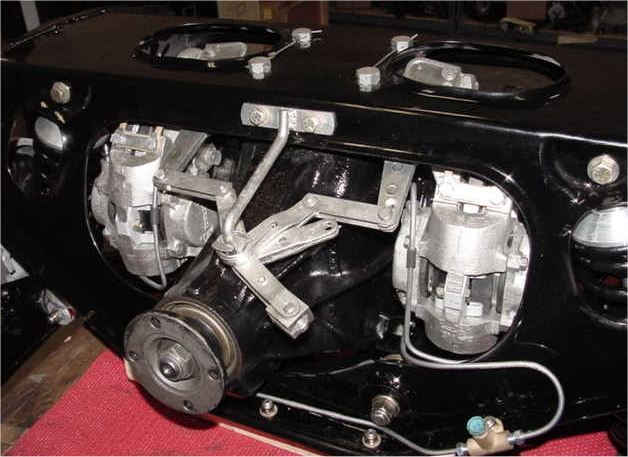
The following photographs show the IRS rebuild now completed. Note the larger 2 1/8" calipers used for the rear rotors.

 |
 |
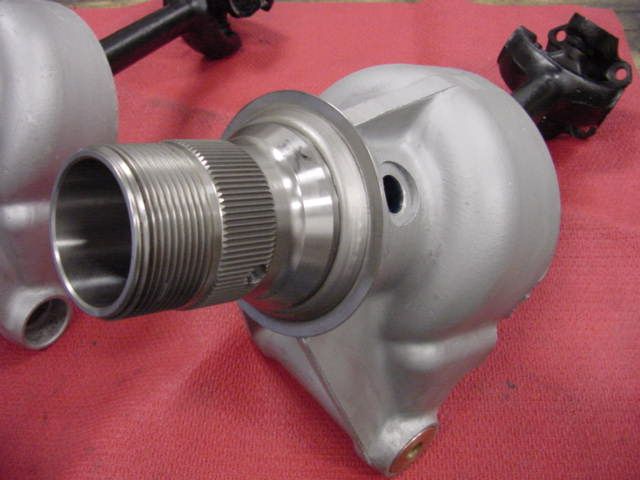
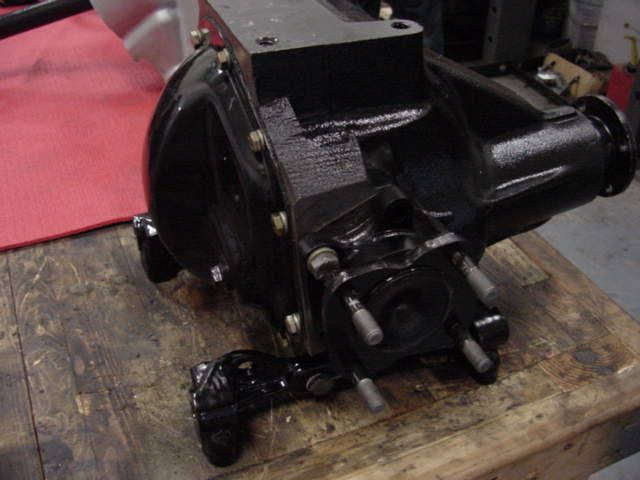
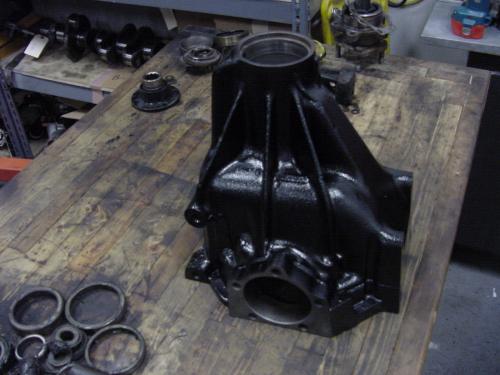
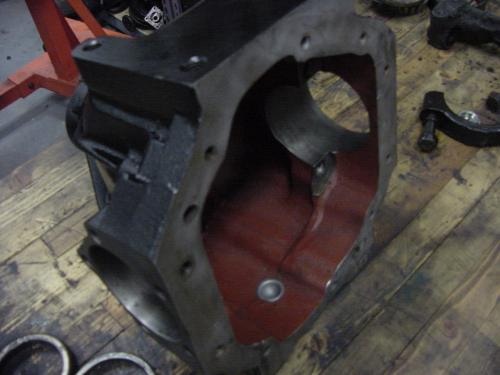
The following photographs show the assembly of the rear half shafts, hub carriers, new splined hubs - and the completed differential. Oh yes....and a picture of the new tiled workshop!
 |
 |
 |
 |
 |
 |
The following chart shows speed versus RPM comparisons for the JT5 five speed as opposed to your original Moss gearbox. My calculations are based upon the 215/65/15 tyre and 3:31 final drive ratio combination that I have proposed for your car.Now all we have to do is recover the JT5 five speed you already bought through your 'previous' restorer.....;-(
|
|
|
|
|
|
|
|
|
|
|
|
|
|
|
|
|
|
|
|
|
|
|
|
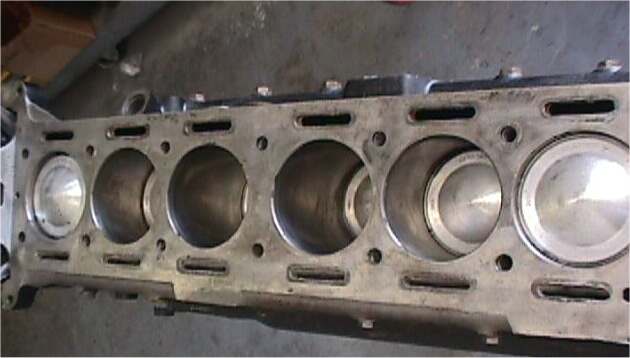
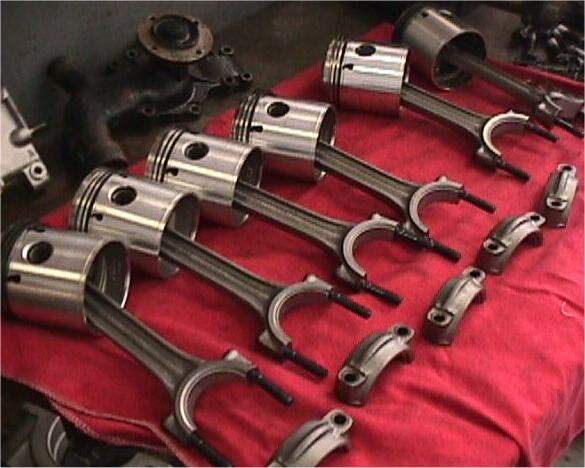
Having unpacked and catalogued the incomplete shipment of parts recovered from the previous 'restorer', I am delighted to report that work has now begun in earnest on this project. Work underway at this time includes the following:It is clear that the engine has not been run since it was reassembled. The pistons appear to be new (standard 9:1 compression) and the cylinder walls show evidence of recent rebore and honing. The rods have been shot peened, the chains and tensioners are all new....and the bearings look as if they have only ever been subjected to the crank being turned by hand.
- The replacement bodyshell has been completely stripped of all its component parts and trim
- A complete front suspension has been disassembled and sent off for zinc plating
- The engine has been torn down and shipped to the machine shop
- The rear end (IRS) rebuild is in progress
- The body has been booked in for plastic media blasting in the first weekend of September
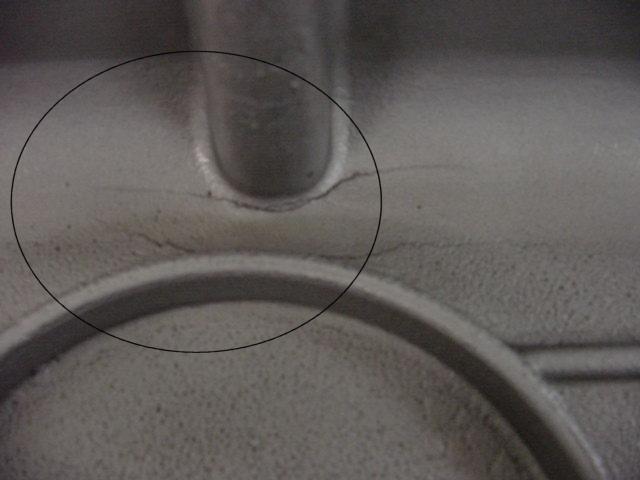
Whilst on the face of it this appears to be good news (and in terms of cost the new parts certainly represent a significant saving over the normal cost of a full engine rebuild) we have, unfortunately, found significant damage to the deck of the block and #4 cylinder sleeve which necessitates re-sleeving at least that cylinder and resurfacing the deck.
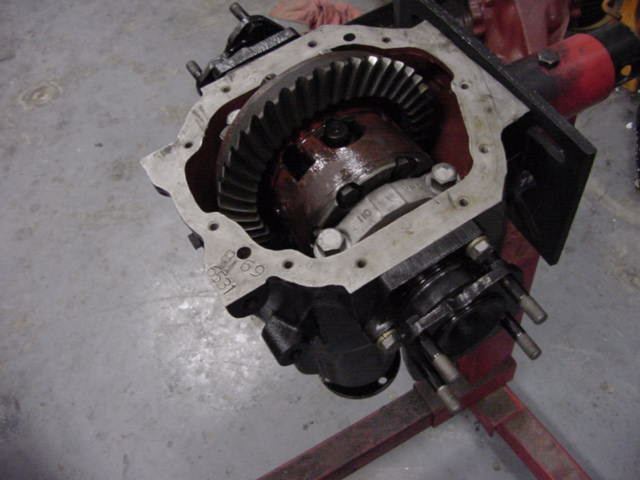
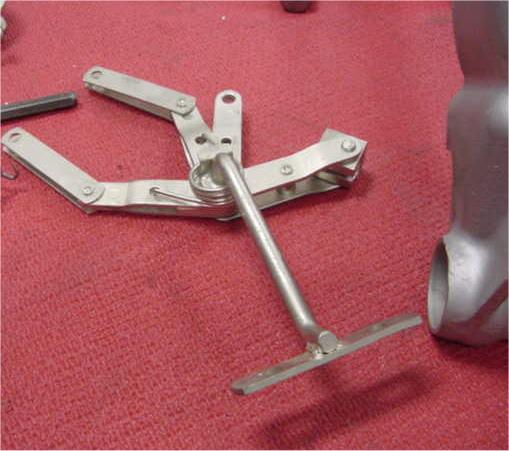
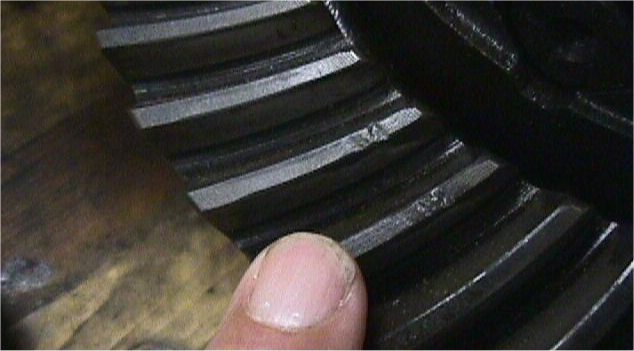
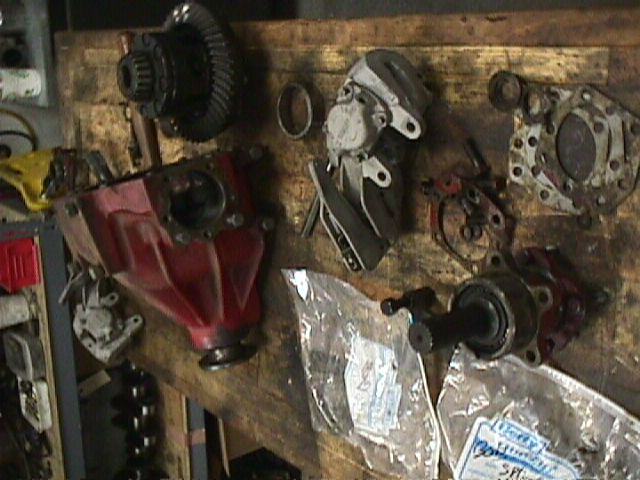
Unfortunately, the differential was in very poor condition indeed. It is difficult to capture (photographically) the damaged teeth on the crown wheel and the worn carriers, but I have nonetheless attempted to illustrate some of the problems for you below. As we discussed on the telephone, I have already provided a replacement core differential and we will be assembling the IRS to 4.2 specs.
 |
 |
|
|
|
 |
|
|
 |
 |
|
|
|
 |
 |
|
|
cleaning and painting |
 |
|
|
 |
 |
|
than we began with! |
|
|
For
the love of Jags........
Who could do such a thing? |
 |
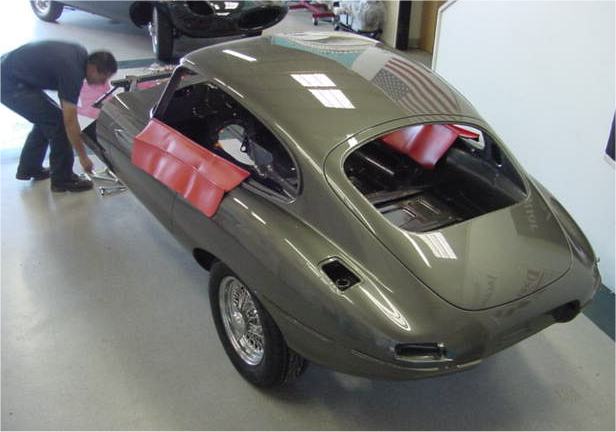
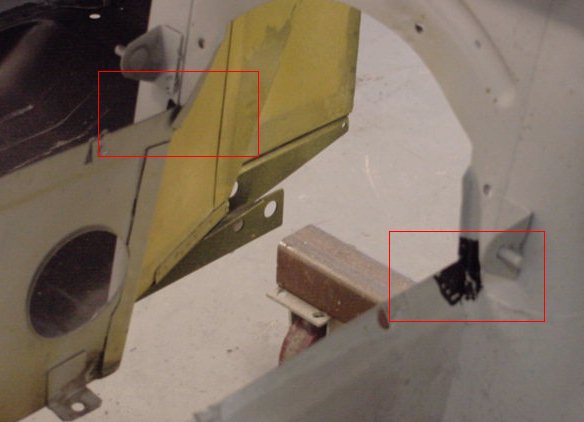
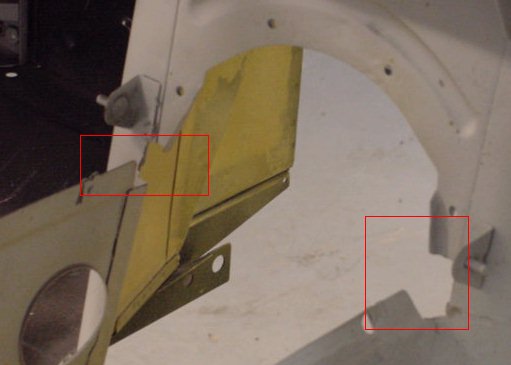
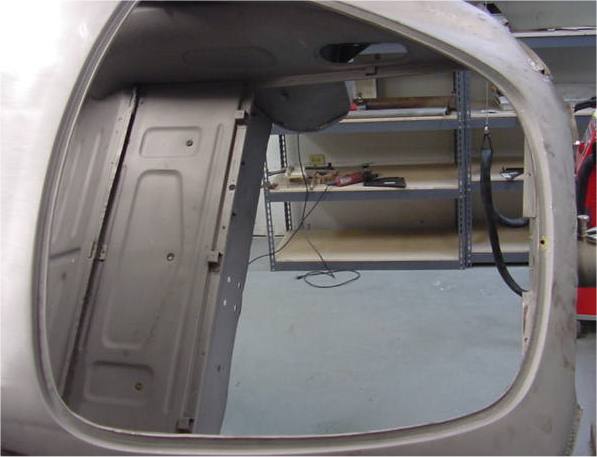
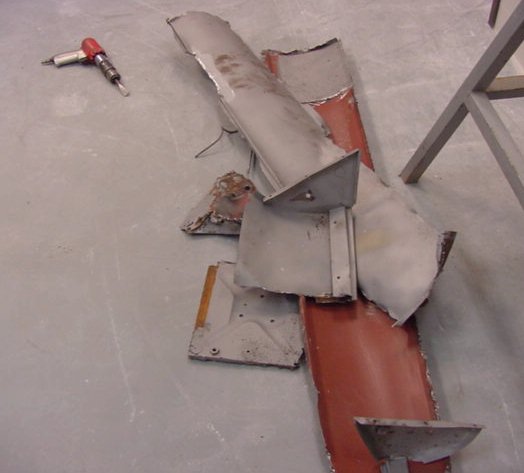
Caveat EmptorNot for the first time, we have been asked to pick up the pieces (literally) of disastrous project that had previously been entrusted to a high profile, yet totally inept, Jaguar Specialist. A great deal of time and money had already been spent on this car long before its arrival at Classic Jaguar. Indeed, at the time of writing, all we have received is a rotten, stripped out bodyshell that has already been plastered with bondo and paint....and precious little else. The previous restorer has yet to release all the original parts and the many new replacement parts, despite the fact that his ransom (sic) has long since been paid.
When embarking upon a major restoration, enthusiasts owe it to themselves to thoroughly investigate whichever company they might be considering for the project. Visit the company, ask to speak to current customers and examine the work being done at first hand. Alternatively, call me and I will tell you the plain facts. There are many, many honourable and talented craftsmen within the Jaguar restoration industry - but there also some predatory sharks. At Team CJ we are committed to blowing the sharks out of the water.
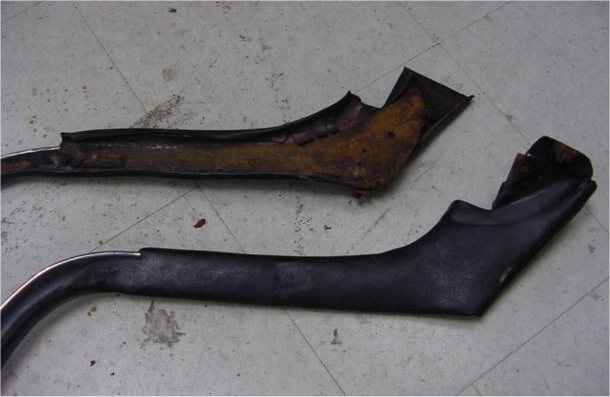
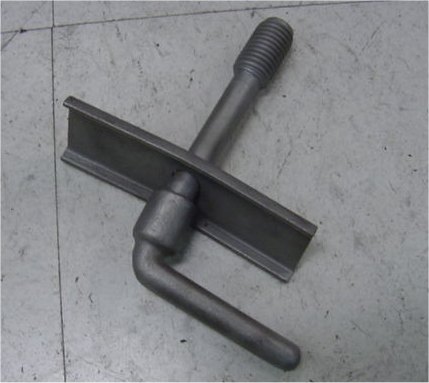
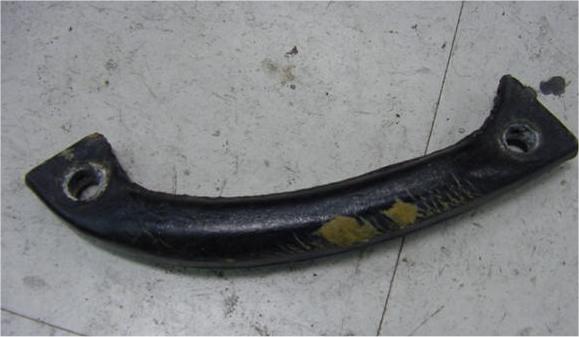
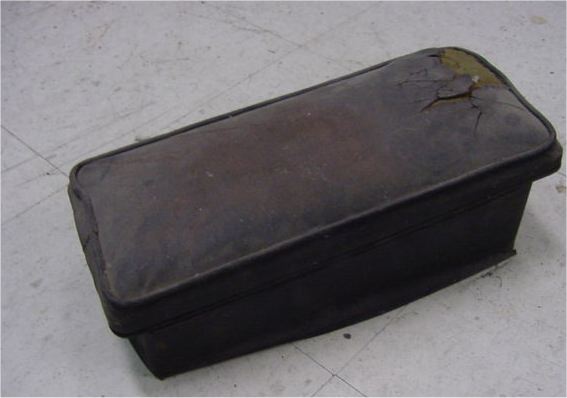
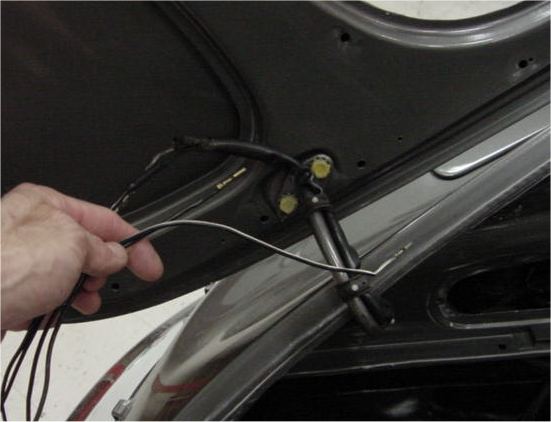
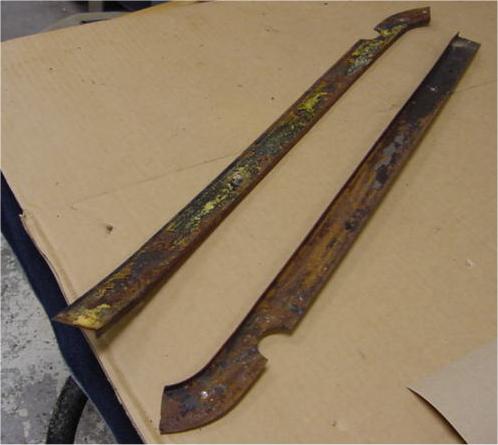
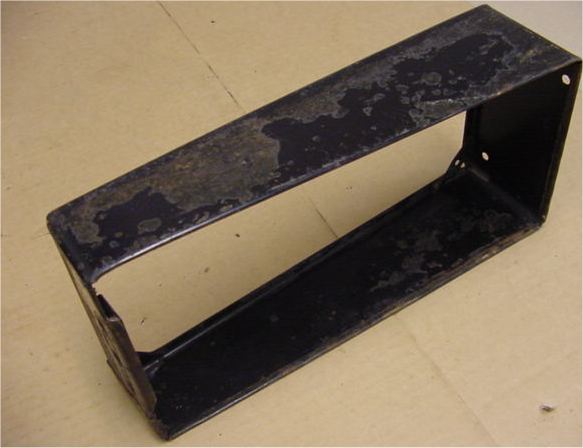
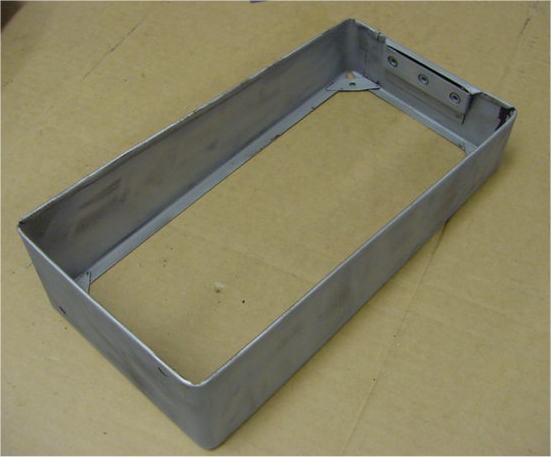
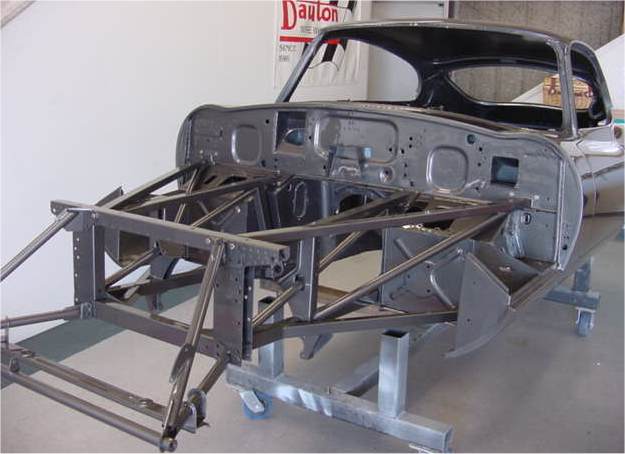
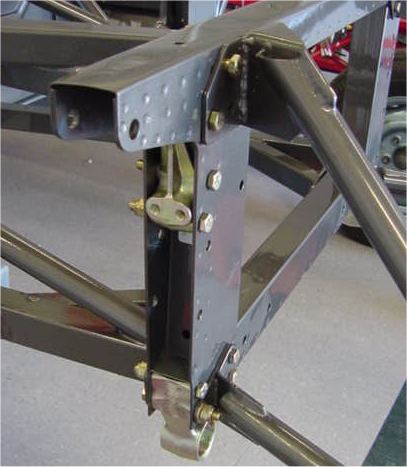
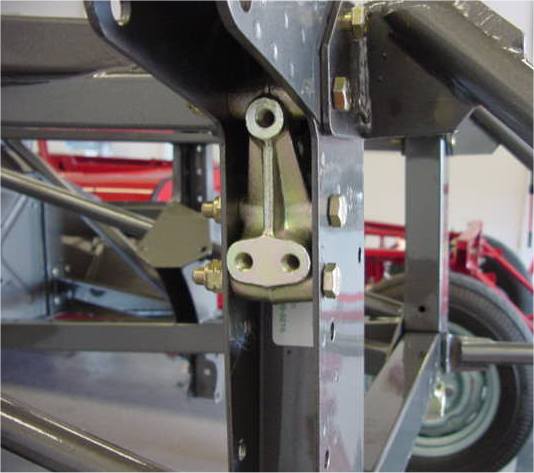
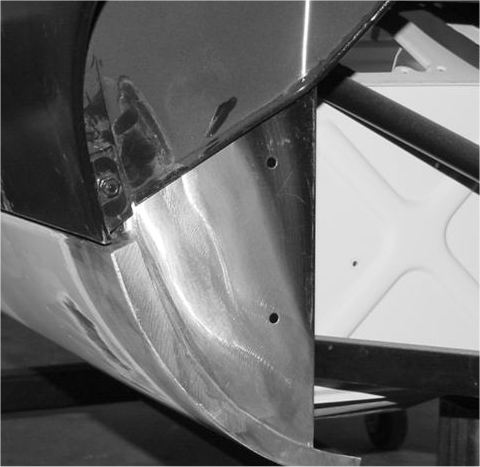
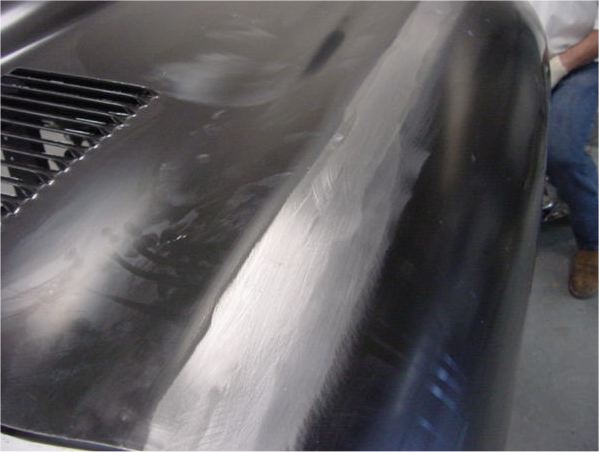
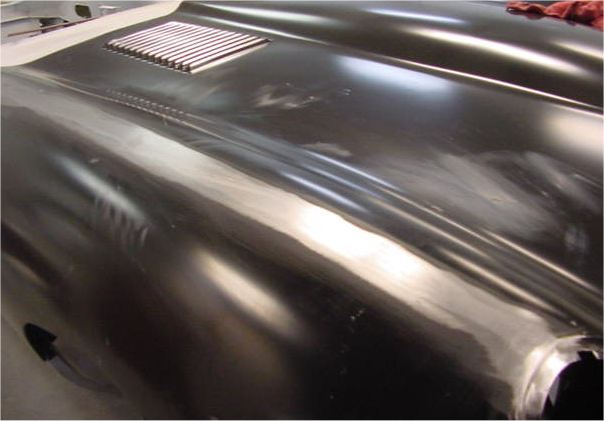
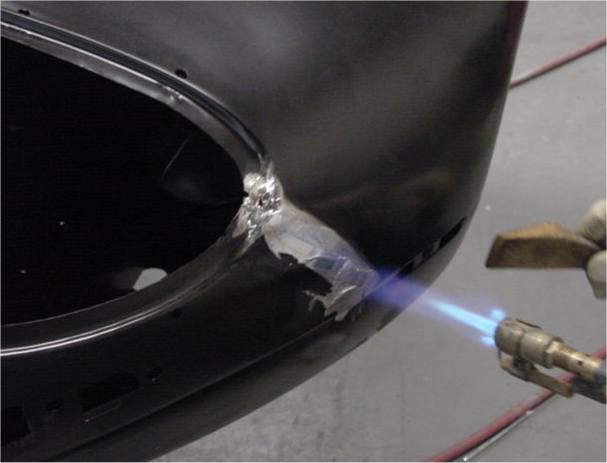
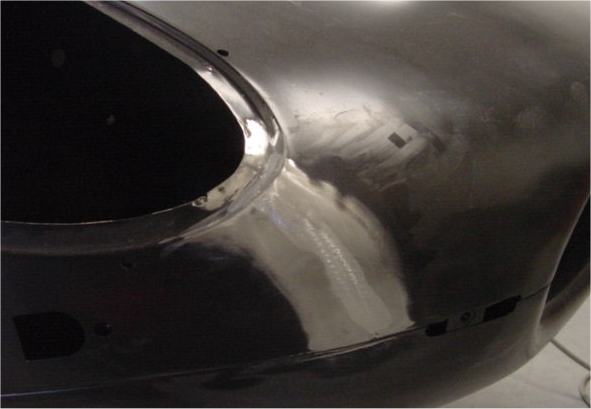
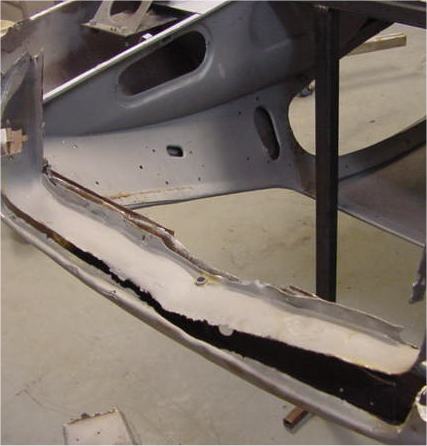
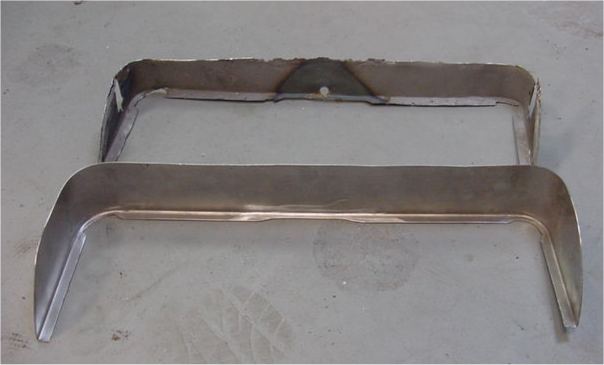
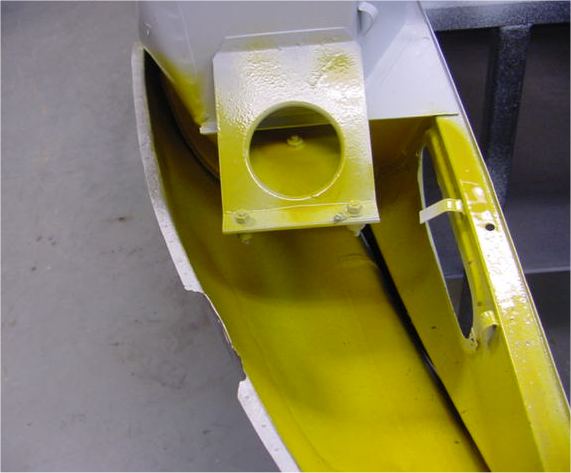
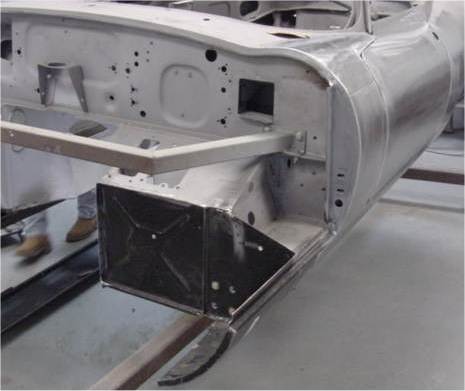
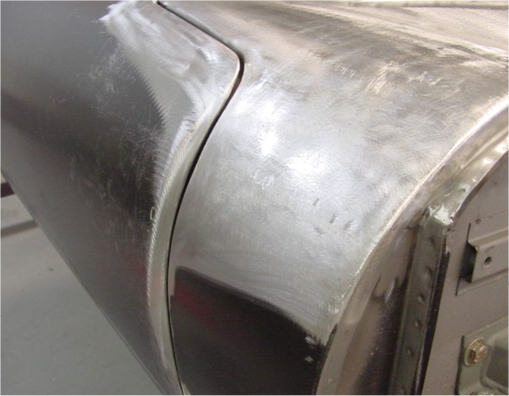
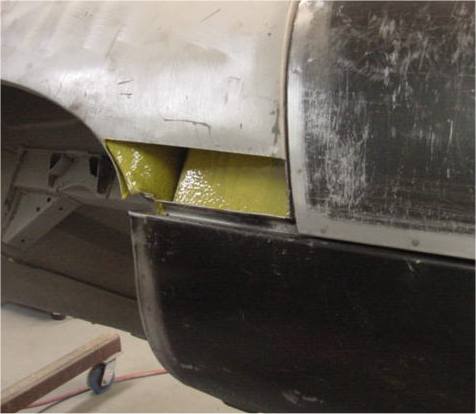
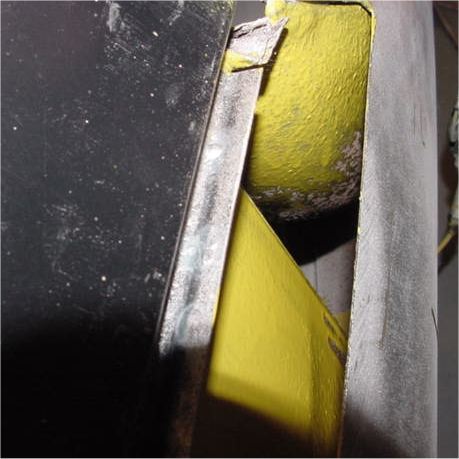
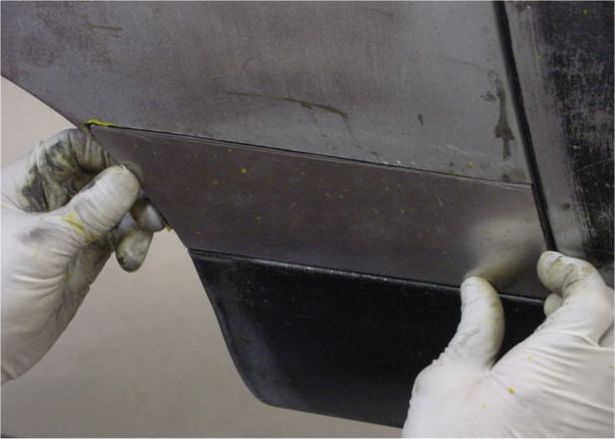
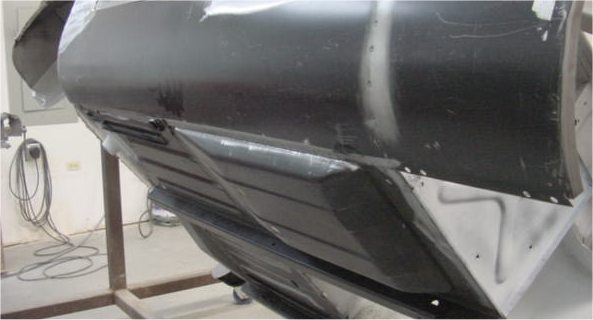
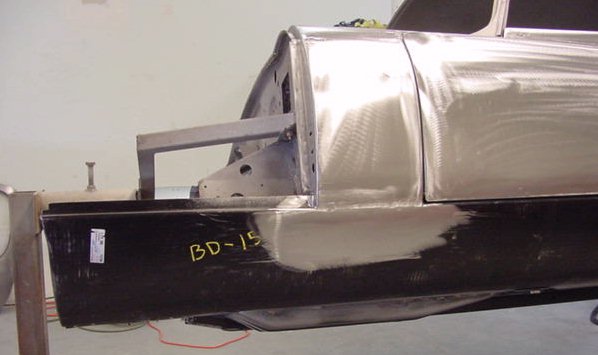
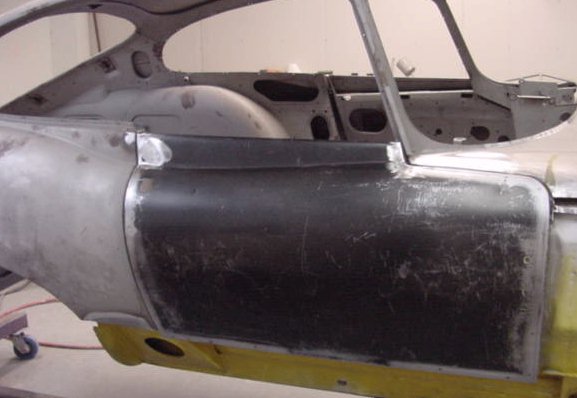
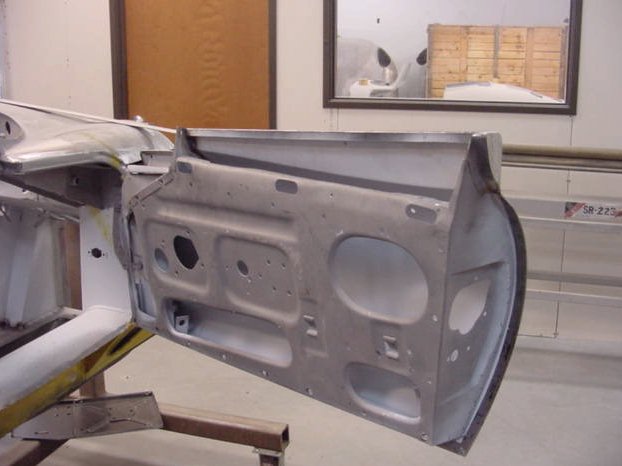
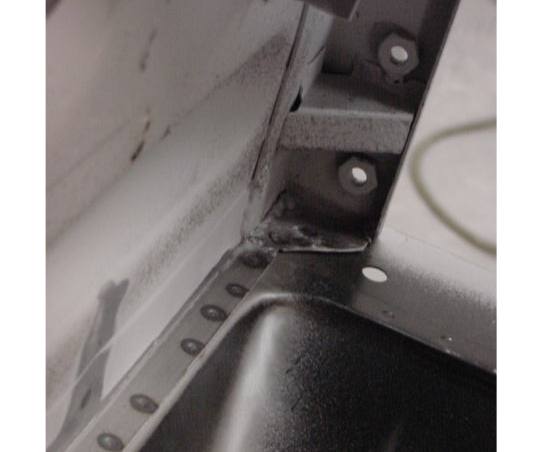
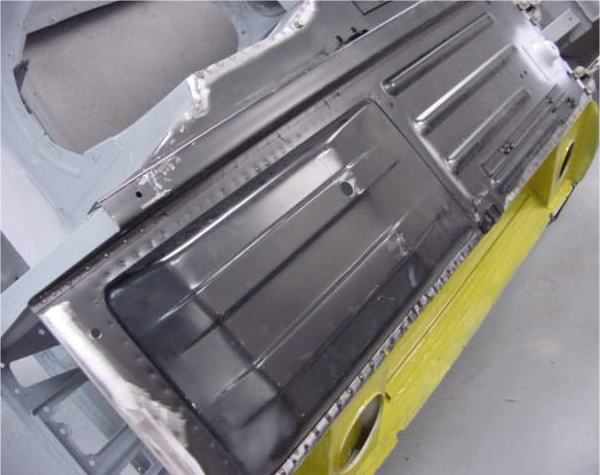
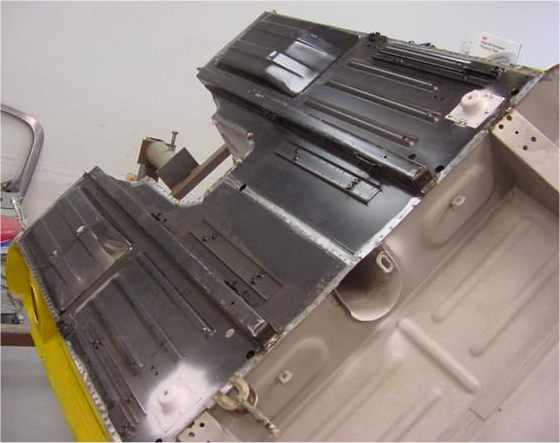
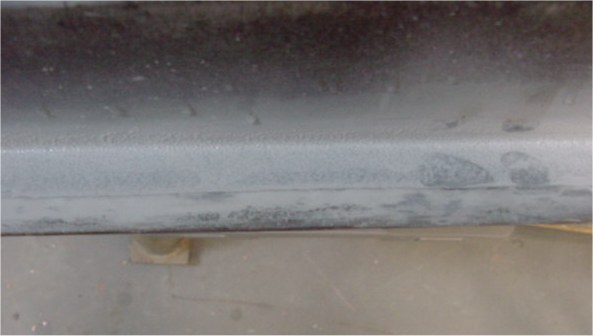
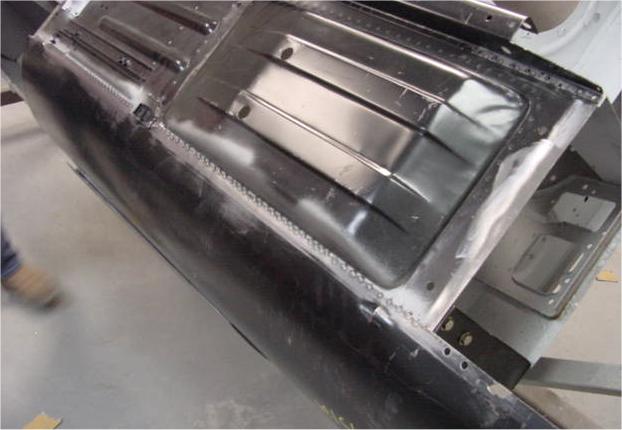
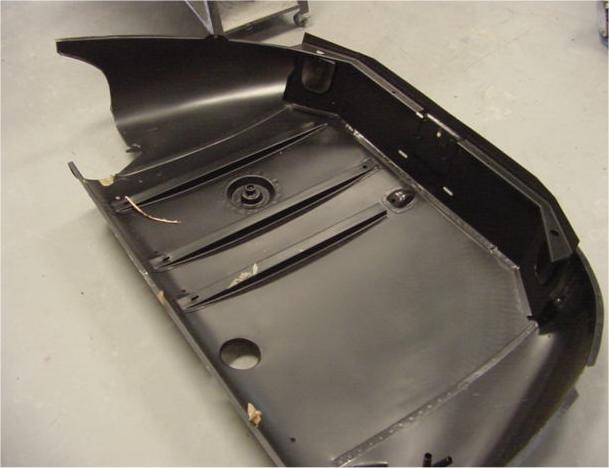
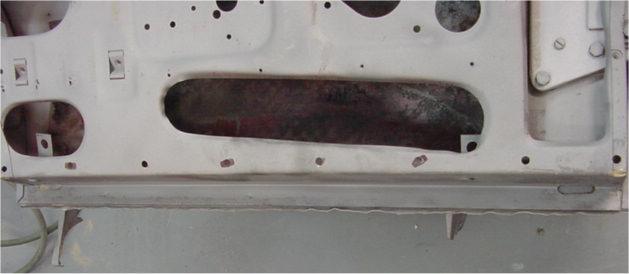
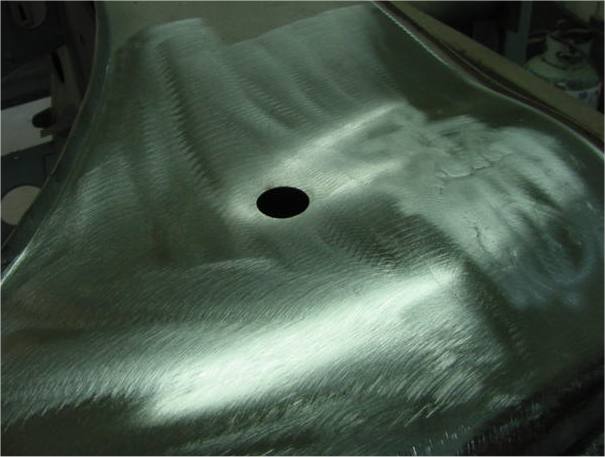
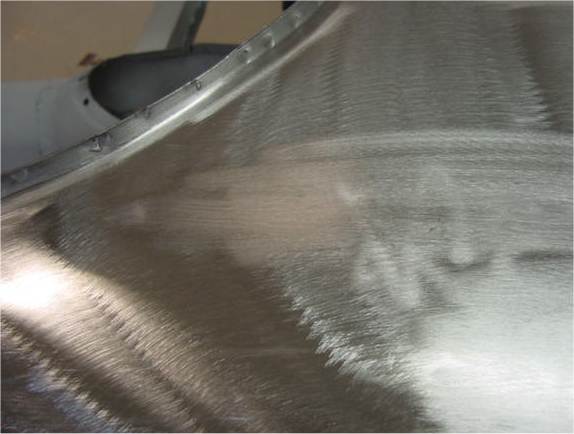
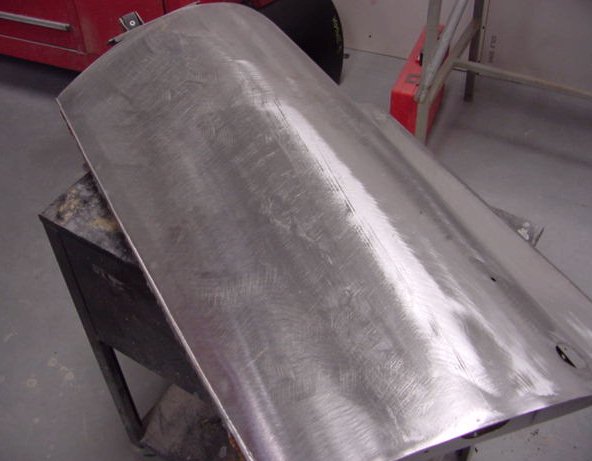
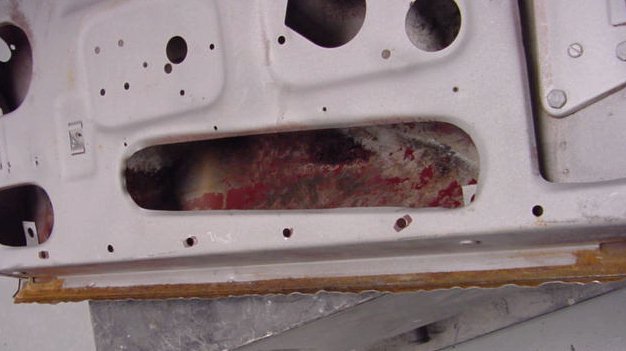
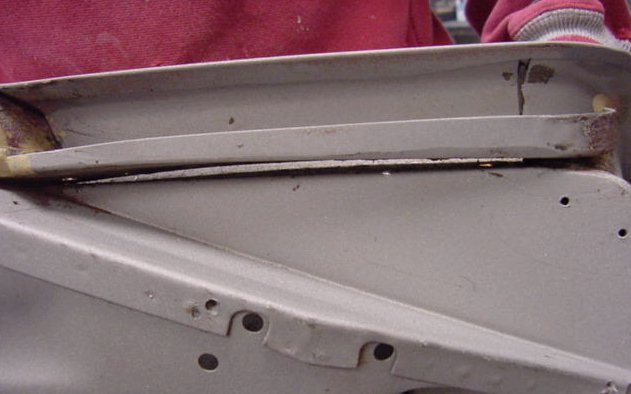
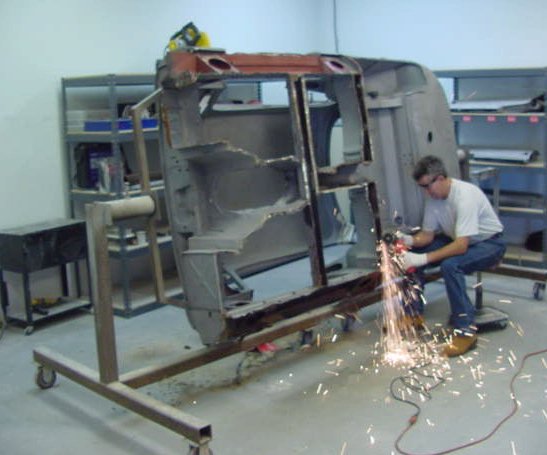
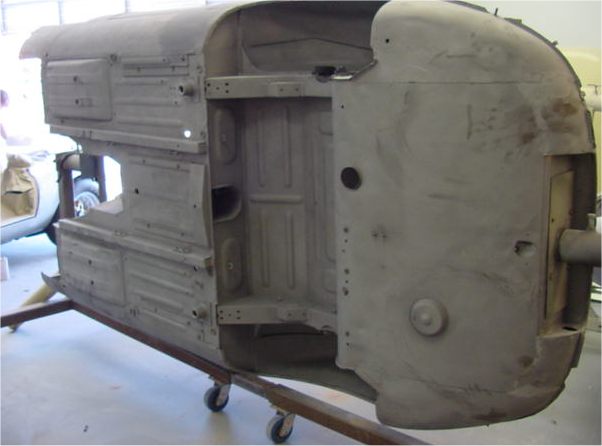
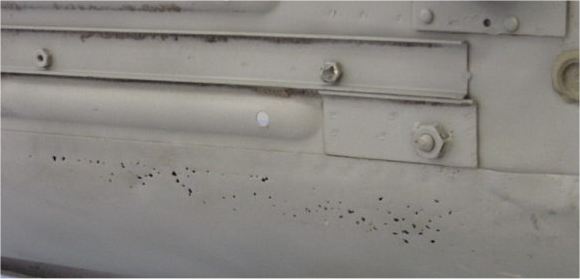
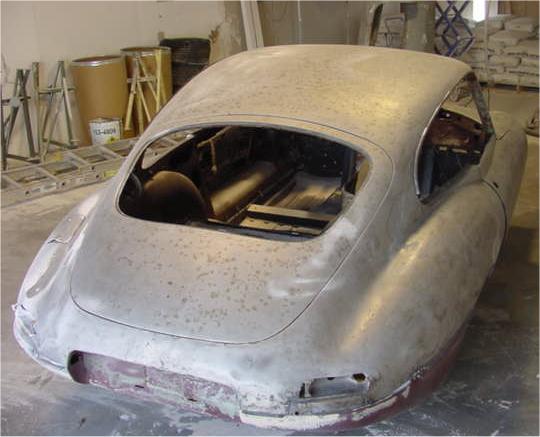
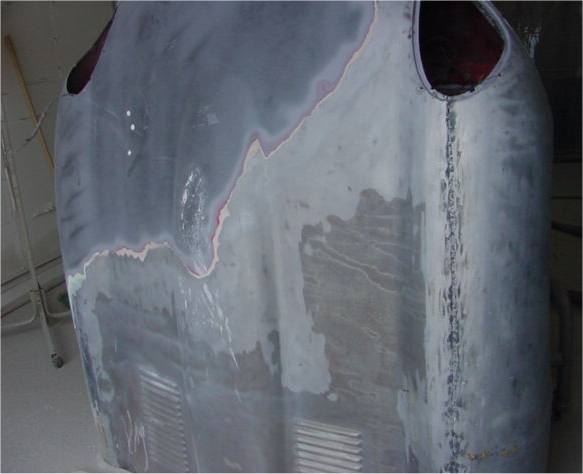
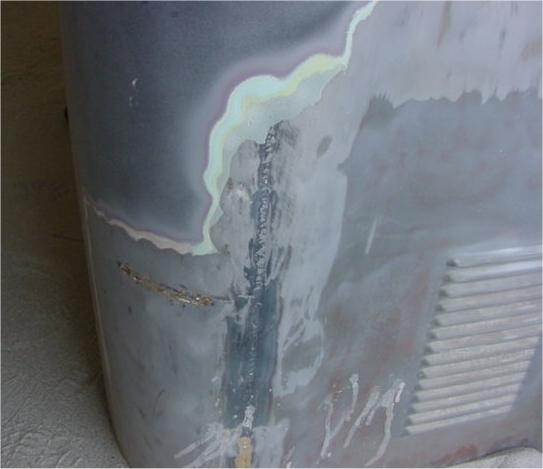
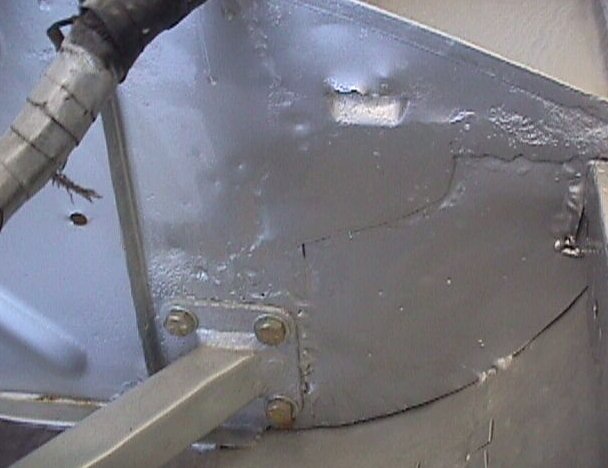
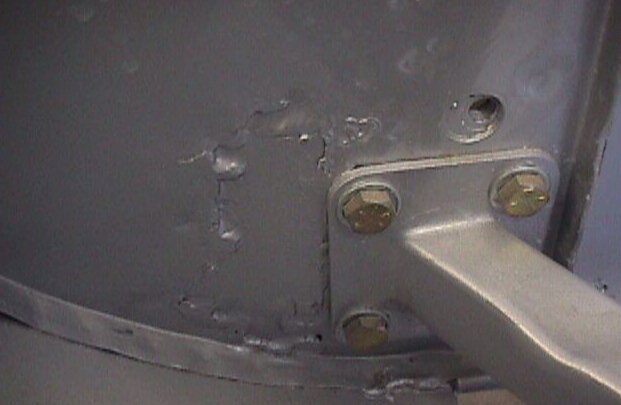
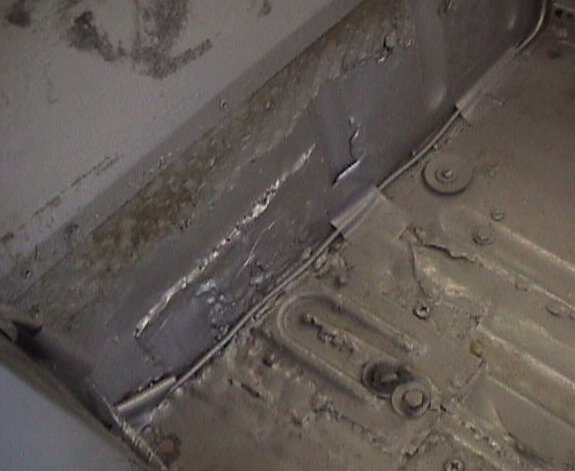
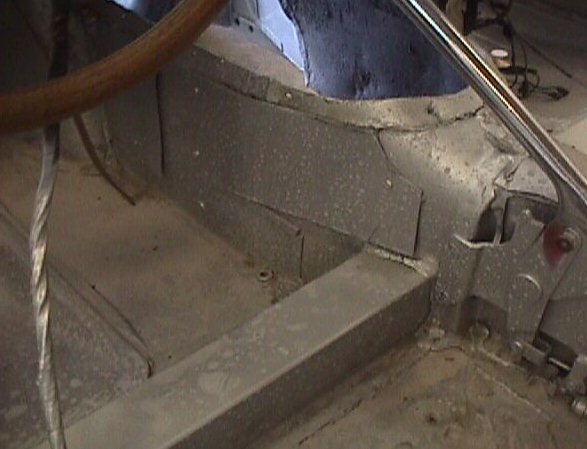
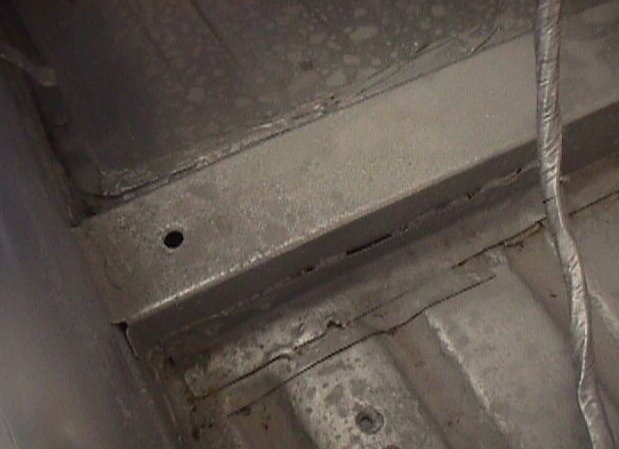
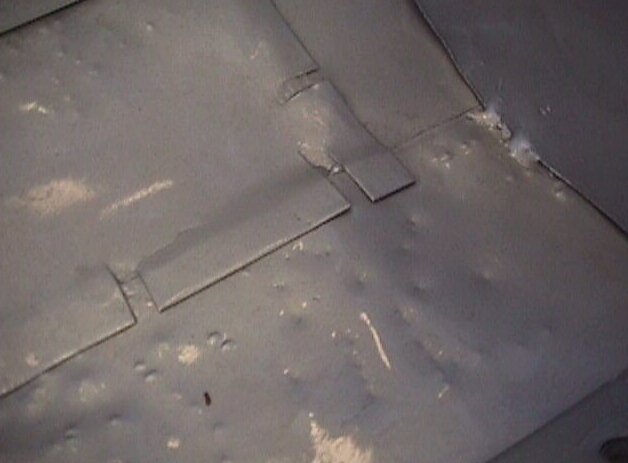
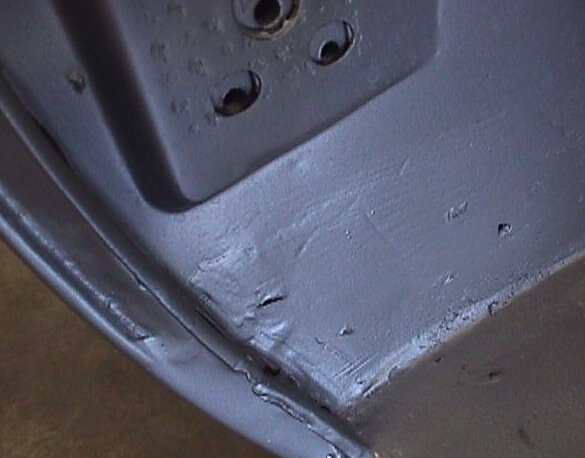
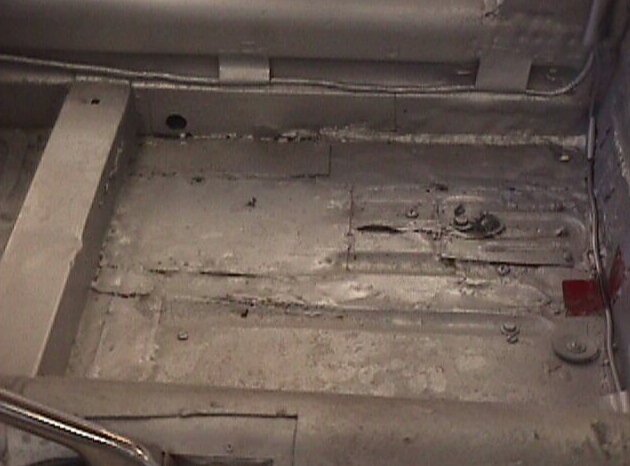
As mentioned above, the bodyshell we received from the previous restorer is an absolute disaster area. After careful consideration, we have decided to source a replacement shell and use that as the basis for this restoration. The following photographs show some of the problem areas that are clearly evident even before any paint/bondo is removed. For the love of Jaguars, indeed.....
 |
 |
|
|
|
 |
 |
|
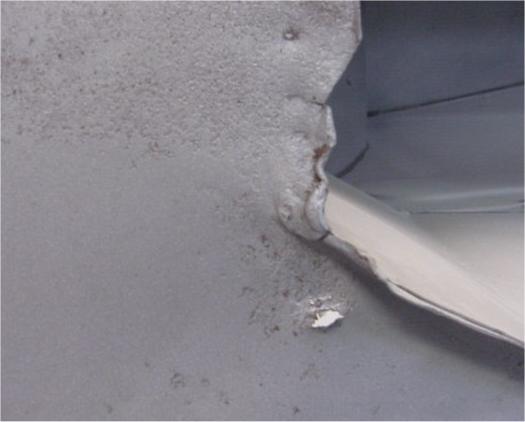
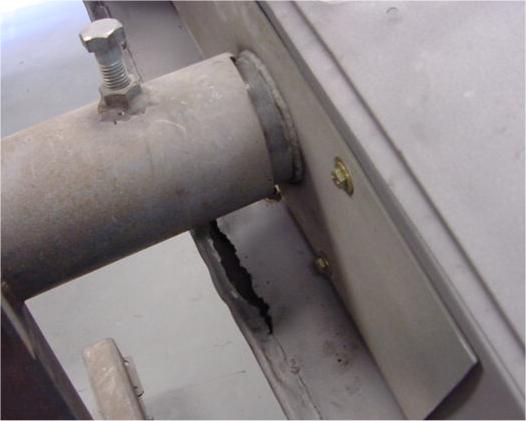
a slightly more substantial anchoring point than this! |
|
 |
 |
|
thickness of bondo) in the LH frame rail
|
|
 |
 |
|
are completely rotten
|
|
 |
 |
|
|
|
 |
 |
|
to be joined together! |
|
 |
 |
 |
 |
|
|
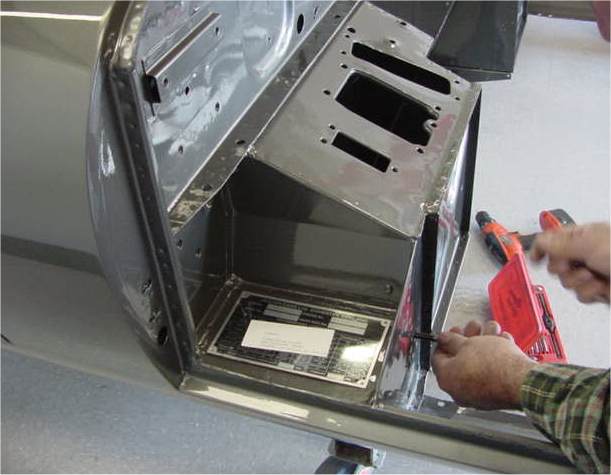
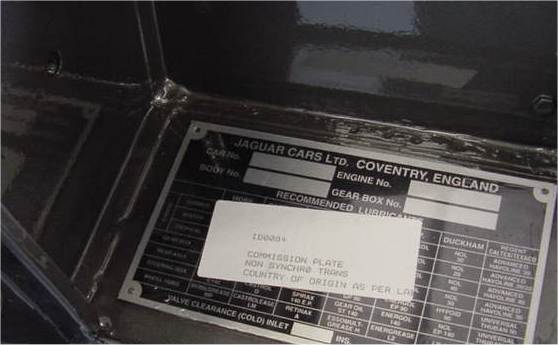
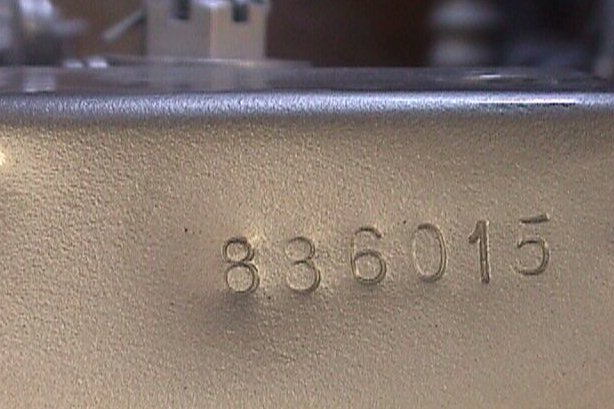
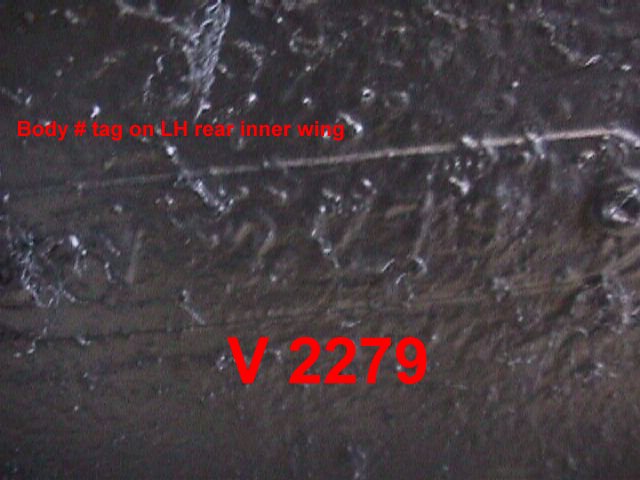
which does not match your data plate....?
|
 |
 |
|
|
|
 |
 |
|
underneath multiple layers of bondo...... |
|