Restoration
| 1965
E Type roadster (Allen)
Restoration |
|
|
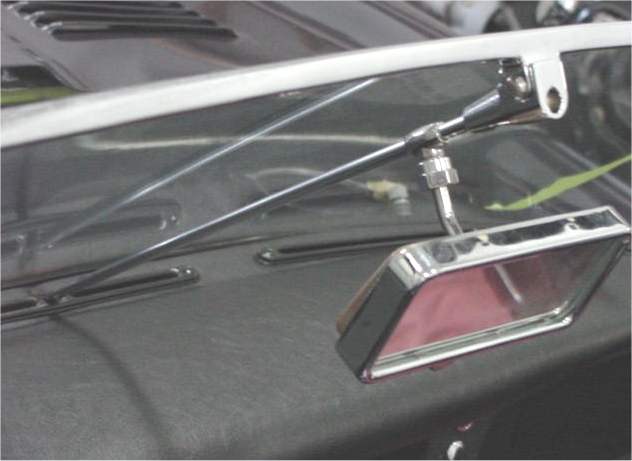
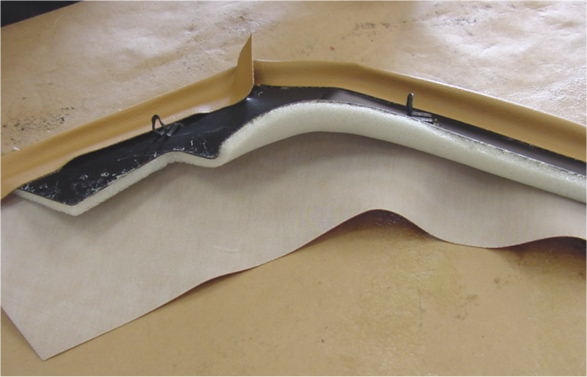
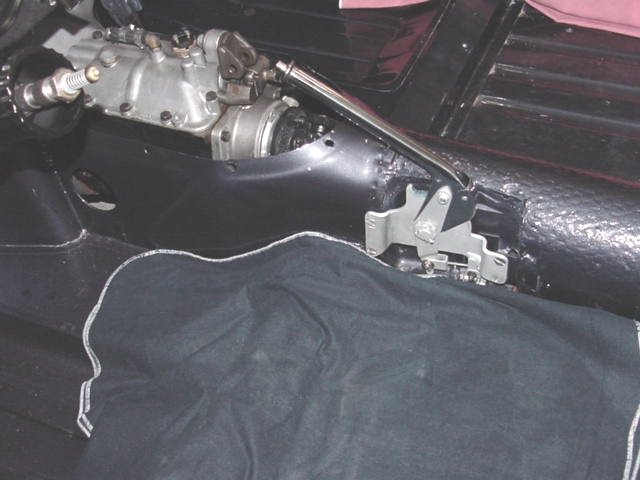
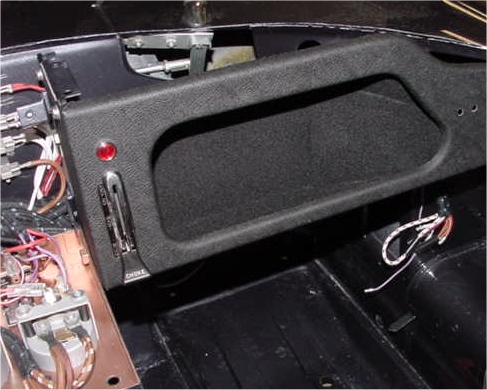
The dashtop has now been retrimmed and installed, as well as the new mirror and the handbrake assembly.
 |
 |
 |
|
and installed |
installed |
|
 |
 |
|
|
|
|
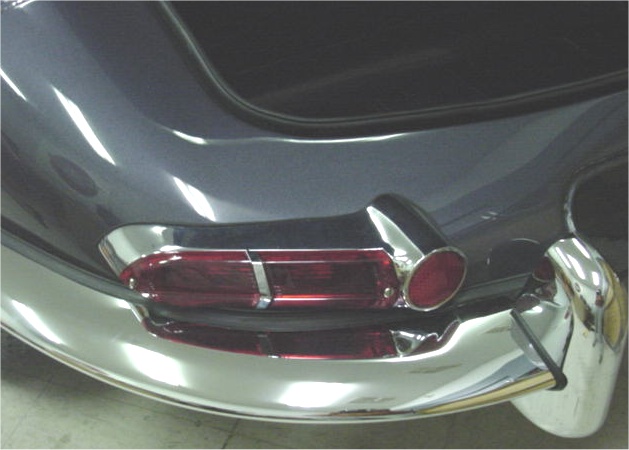
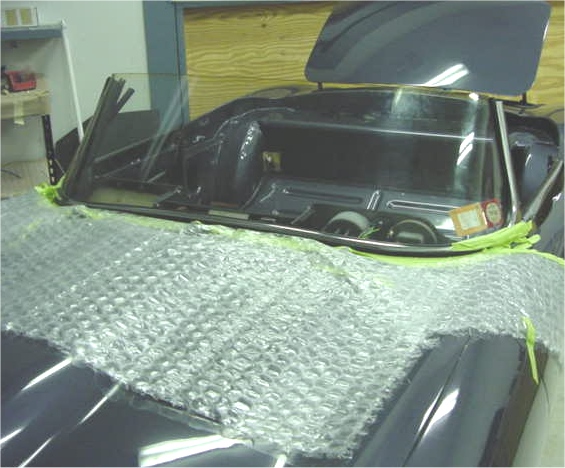
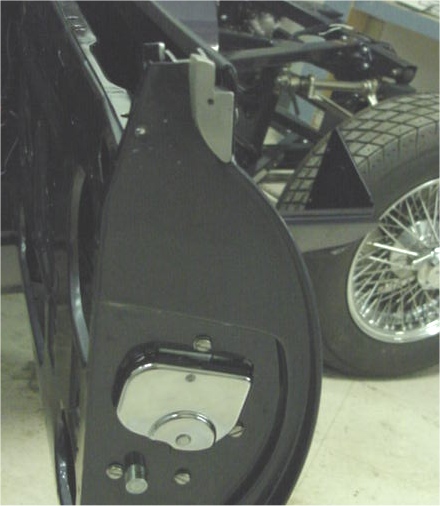
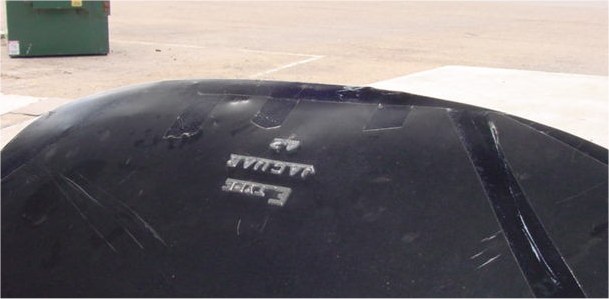
Installing the bonnet, marker lights, front bumpers and the original windscreen.....
 |
 |
 |
 |
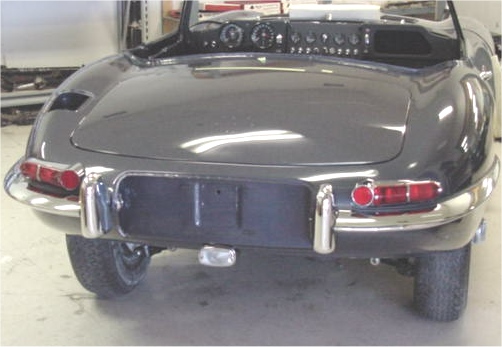
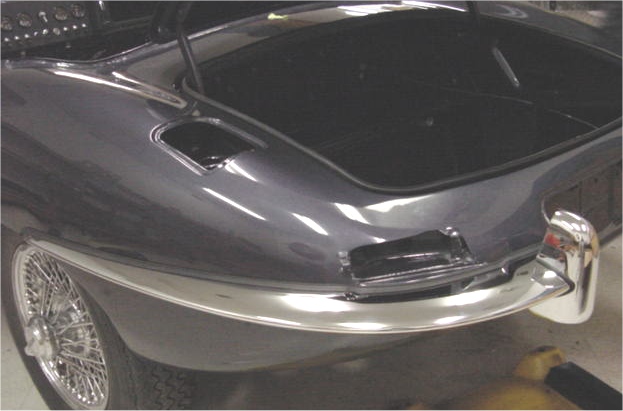
The door handles and locks have now been installed, as well as the replated rear bumpers...
 |
 |
 |
 |
 |
|
|
now installed |
and now installed |
 |
||
|
where they belong! |
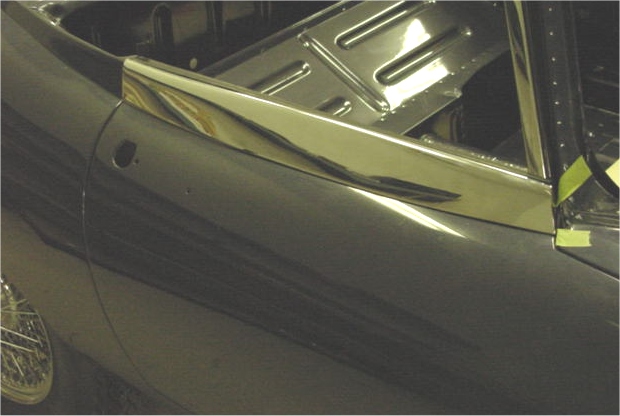
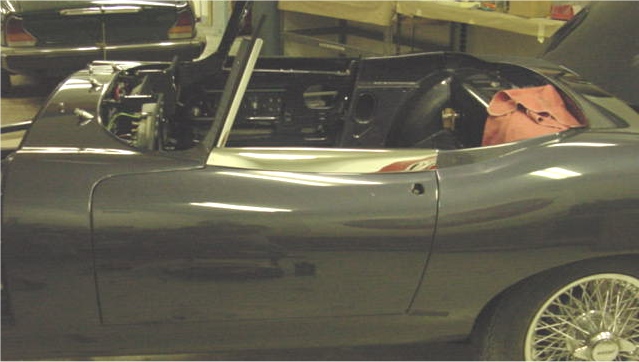
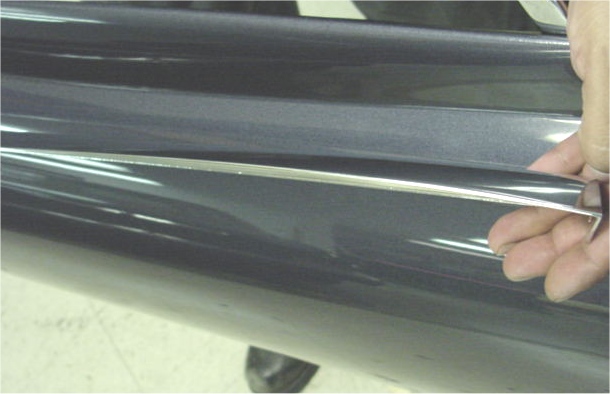
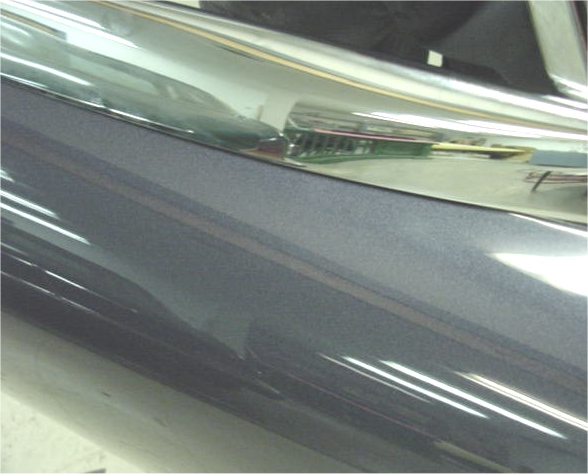
Time to build up and install the doors. We have a slight problem with the RH door top chrome which was obviously warped slightly during the plating process. I tried to take a photograph of the damage for you (see below), although it is not easy to capture on film. Other than that, everything is going together very smoothly.
 |
 |
 |
|
at the front (right of picture) |
|
into place |
 |
||
|
chrome work |
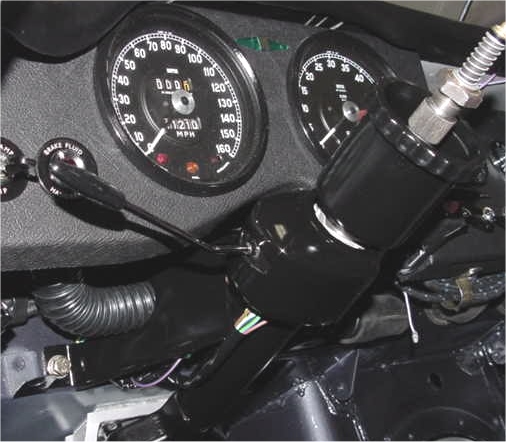
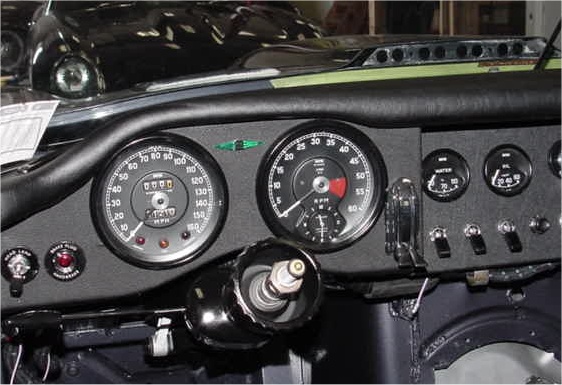
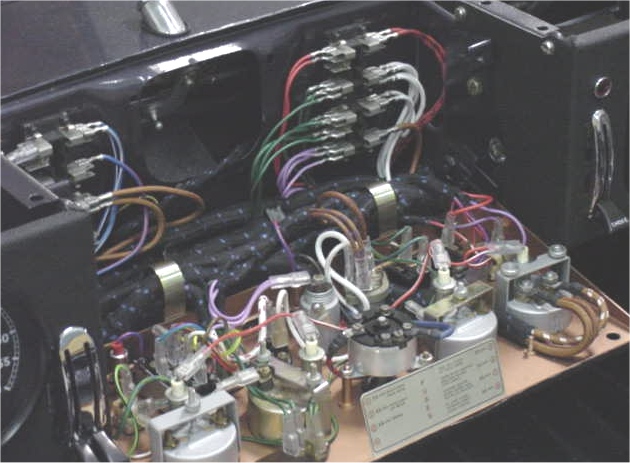
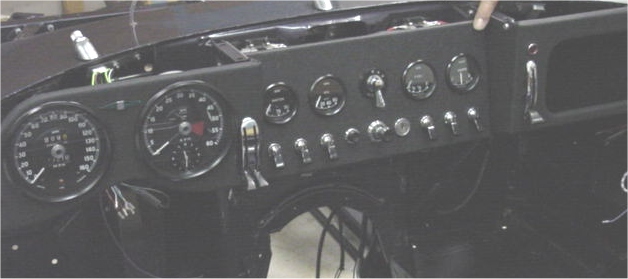
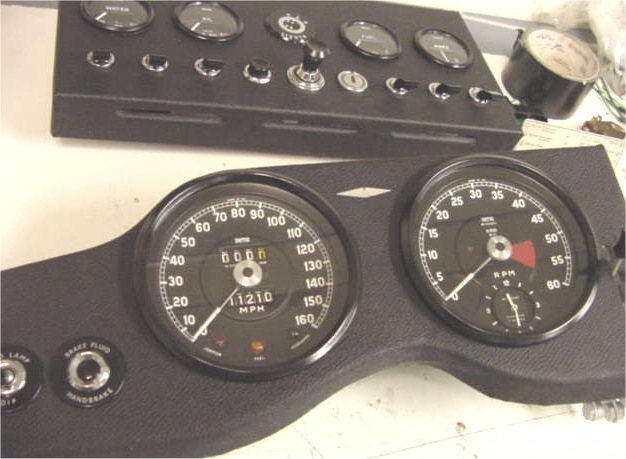
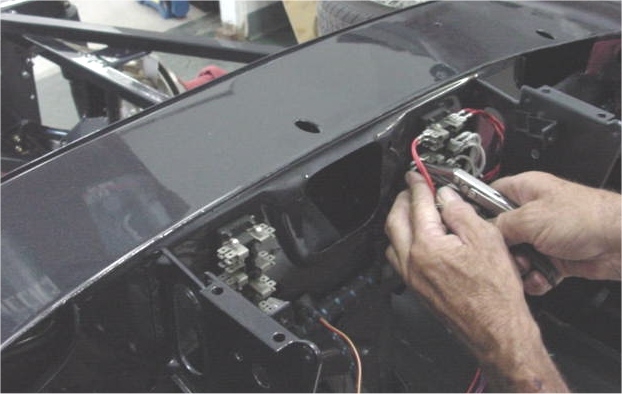
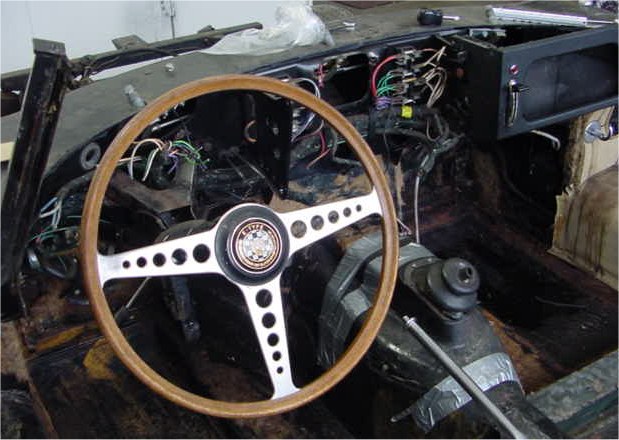
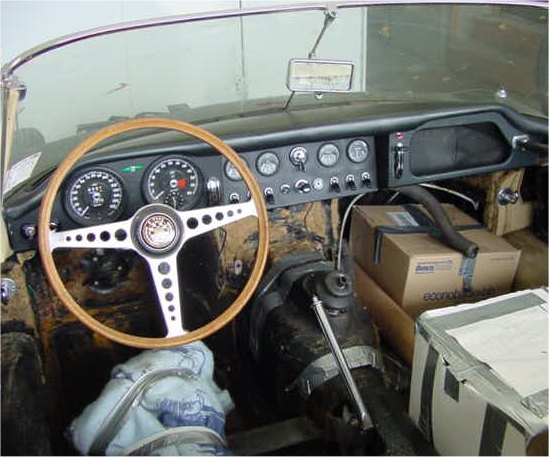
As you can see, we have now installed the various dash components and wired in all your gauges. Sam also restored and installed the wiper assembly and the screen washer tubing prior to putting the dash components in place. The wiper bezels you see in the photograph are only temporarily installed (to hold the wiper rack in place) and will be replaced with new items in due course.This afternoon we will begin building up and installing your doors and bootlid, etc.
 |
 |
 |
|
|
|
of the dash panels |
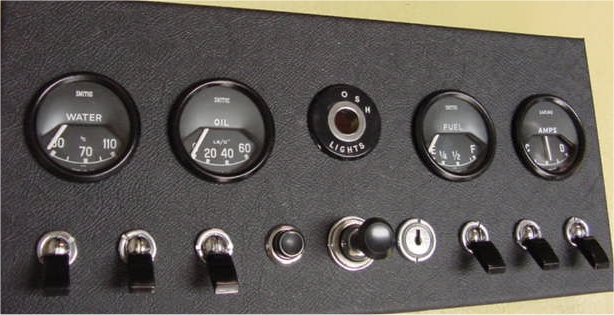
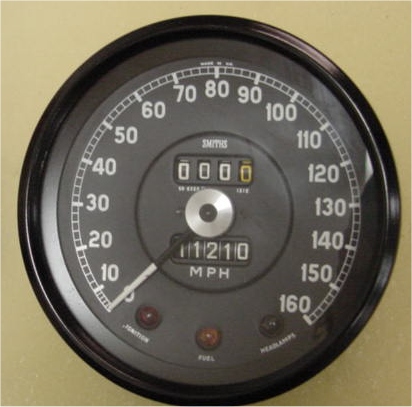
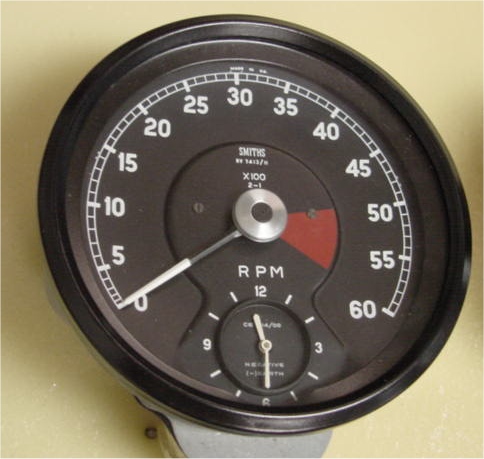
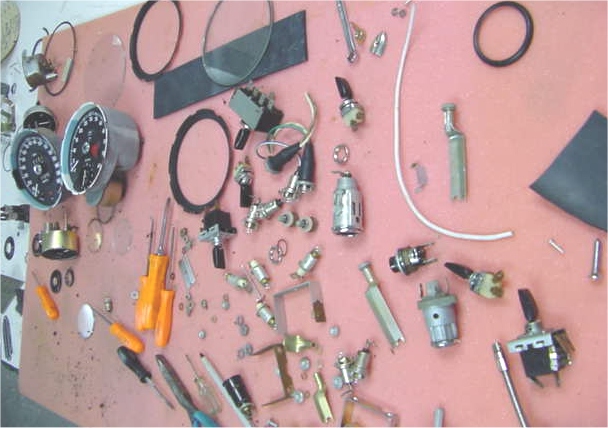
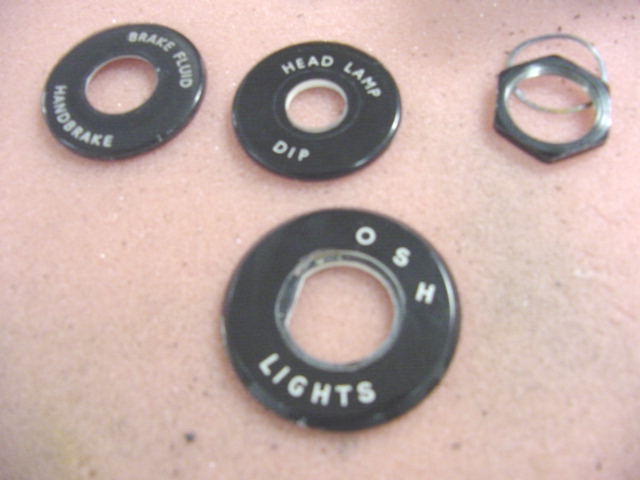
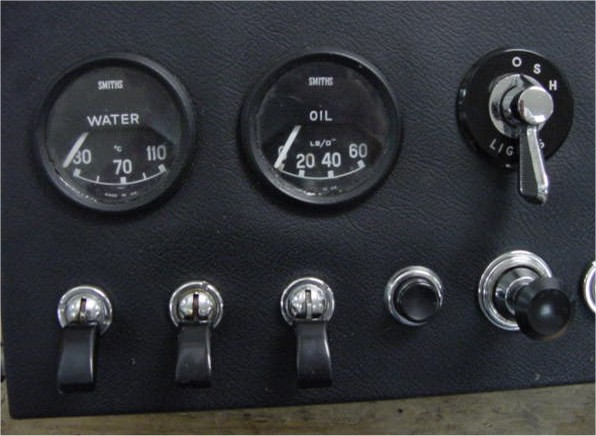
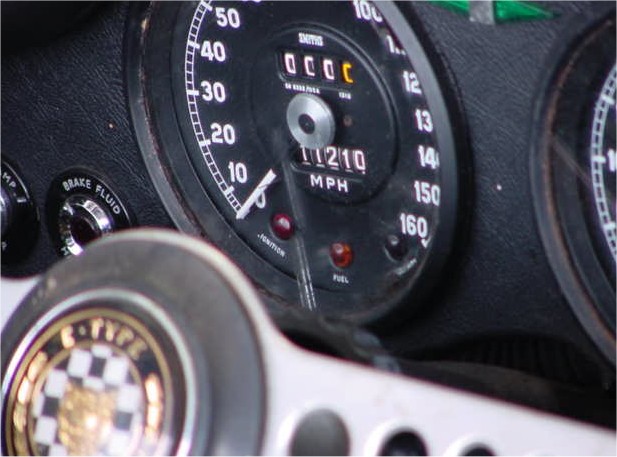
We have now finished refurbishing your gauges and switches and they are ready to be installed in the car.
 |
 |
 |
|
completed |
nicely |
|
 |
 |
|
|
very well |
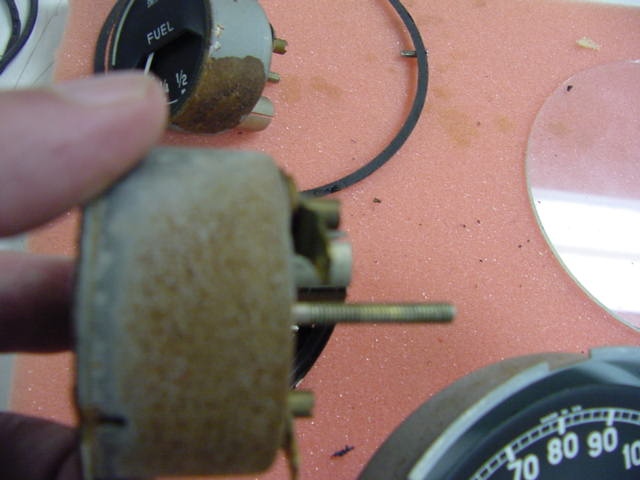
We are going to need some guidance regarding how far you would like us to go in refurbishing your gauges. Obviously some of the casings are pretty corroded and will be an eyesore with the centre dash panel lowered. Andy will contact you directly for your instructions.
 |
 |
 |
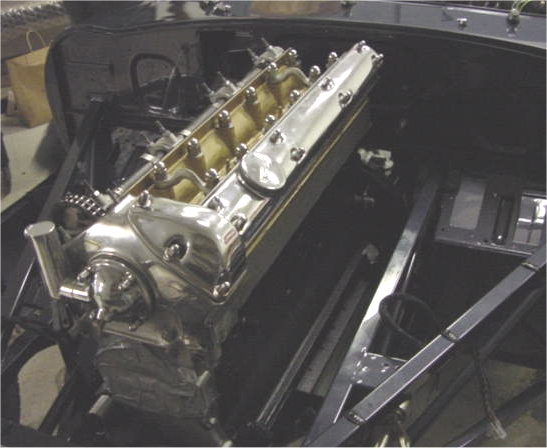
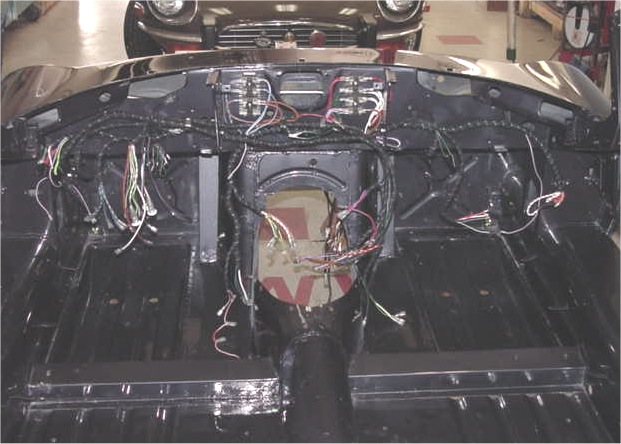
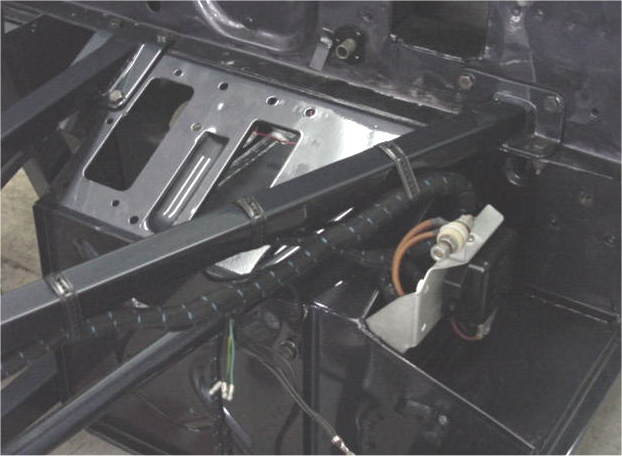
More reassembly process. As soon as we receive your driveshaft back from you we will install the engine and transmission. In the meantime we are pressing on with the installation of the wiring harness, etc.
 |
 |
 |
|
the full buffing treatment |
|
wiring harness |
 |
 |
 |
|
firewall (painted black) |
be next |
|
I am pleased to report that your car is now rolling on its temporary wheels and has been transferred to an assembly bay in the CJ Workshop.
 |
 |
 |
|
assembly bays at CJ |
together |
|
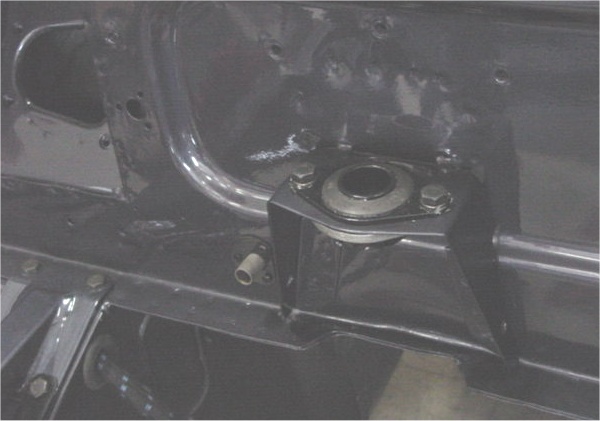
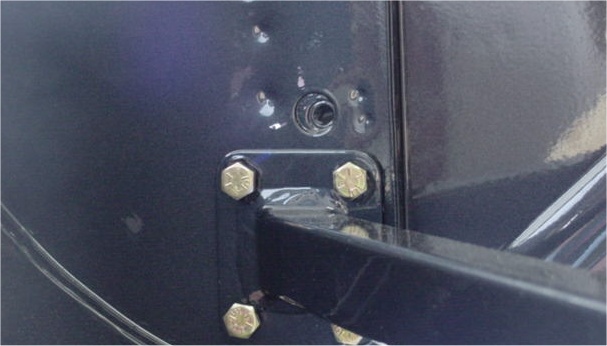
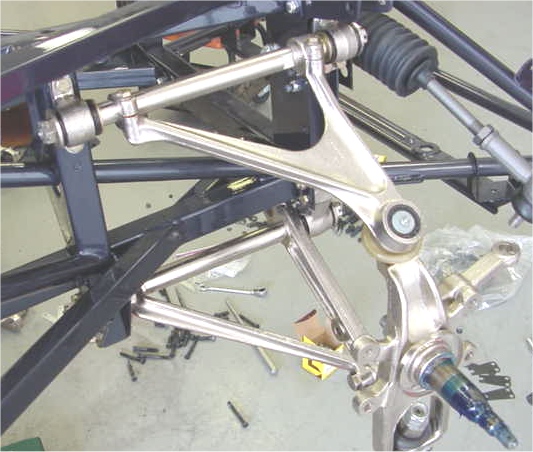
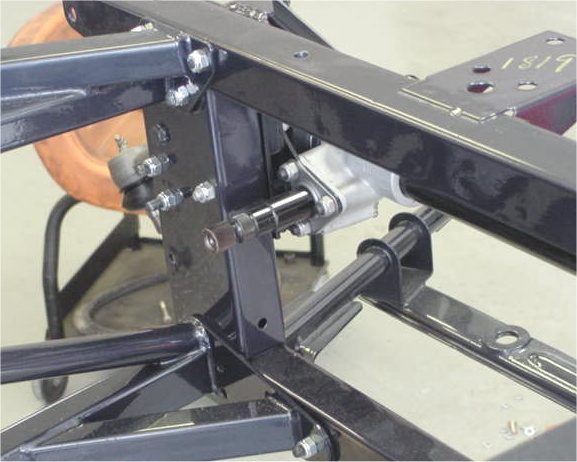
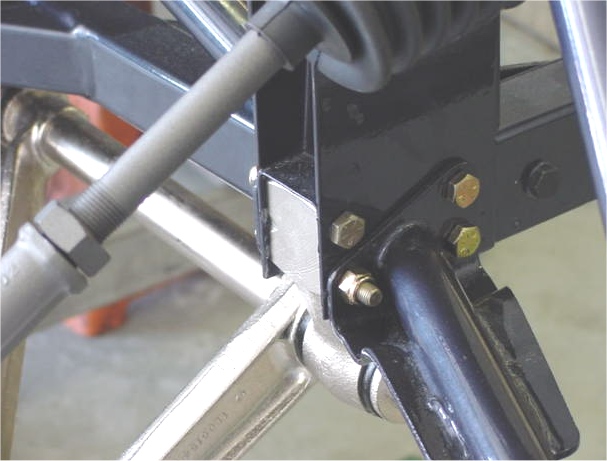
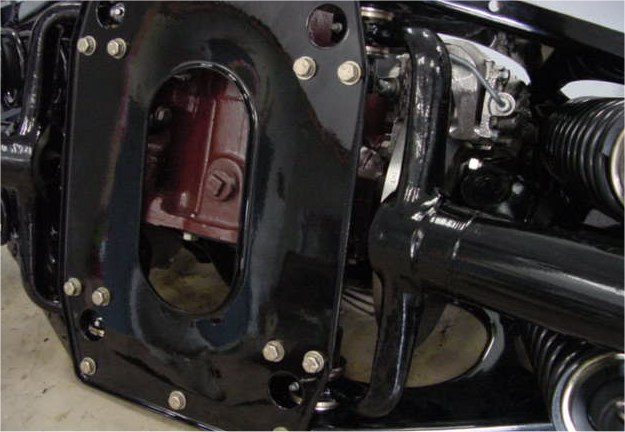
Let the reassembly begin! As we go back together with the engine frames and front suspension, we aim to have your car rolling on all four wheels by the end of the week.Per your instructions, we are re-using the black zinc plated bolts where they will be visible and new Grade 8 fasteners where they cannot be seen. If I get a few spare moments later today(!) I will upload some further photographs for you.
 |
 |
 |
|
that could be saved |
bolts would not be visible.... |
keep the concours judges happy! |
 |
 |
 |
|
place |
|
suspension mounting points |
 |
 |
 |
|
restoration |
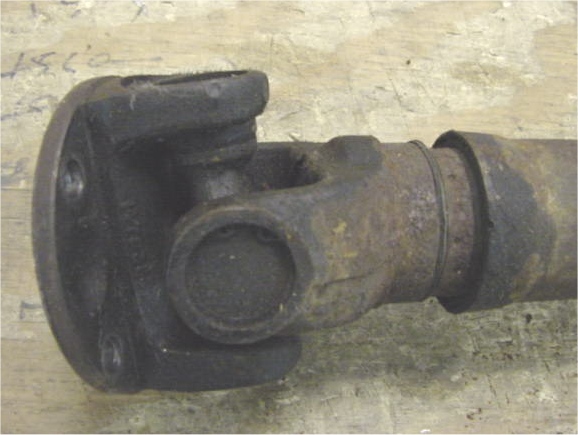
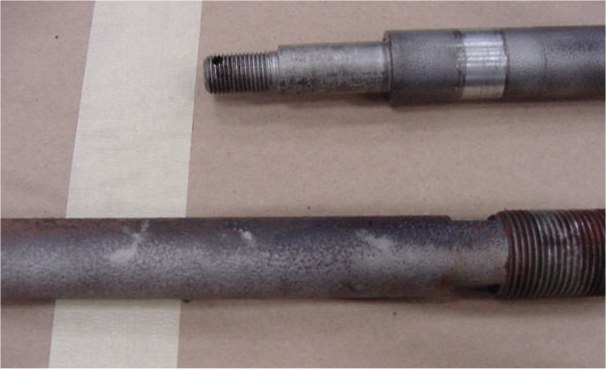
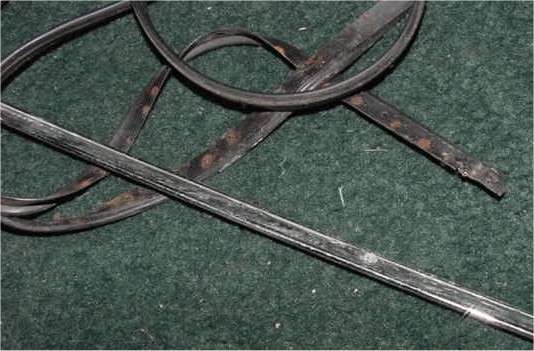
pitted |
driveshaft? |
 |
||
|
|
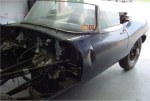
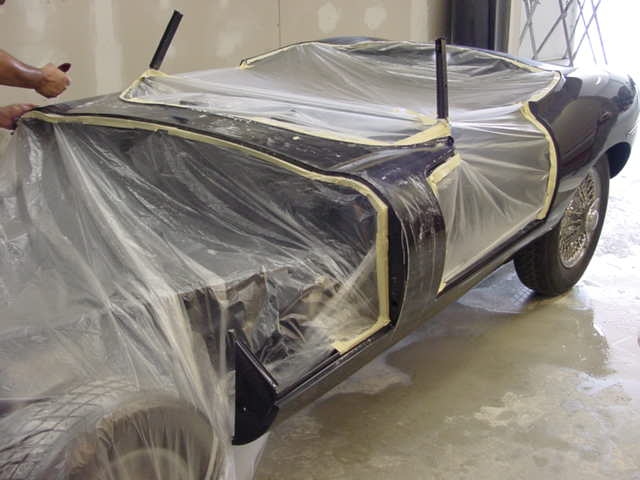
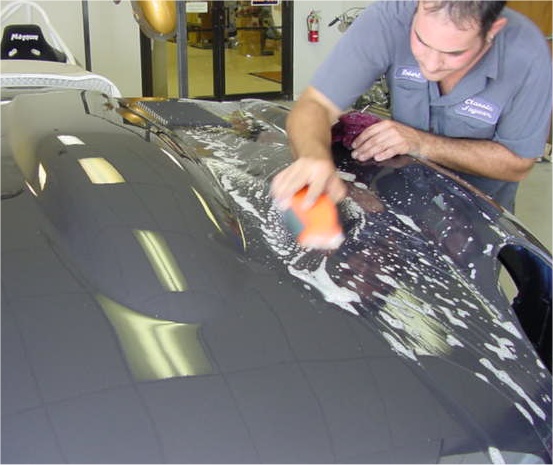
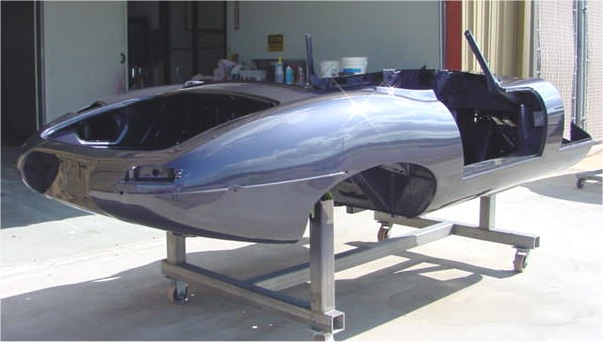
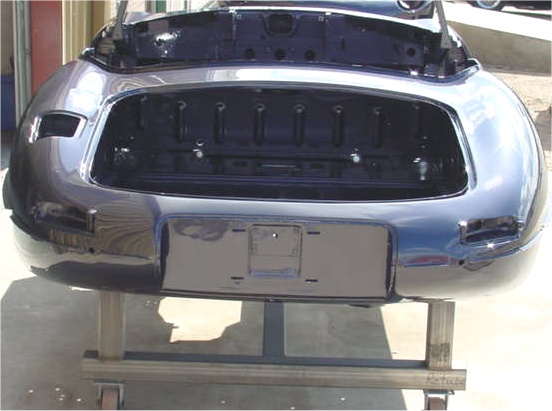
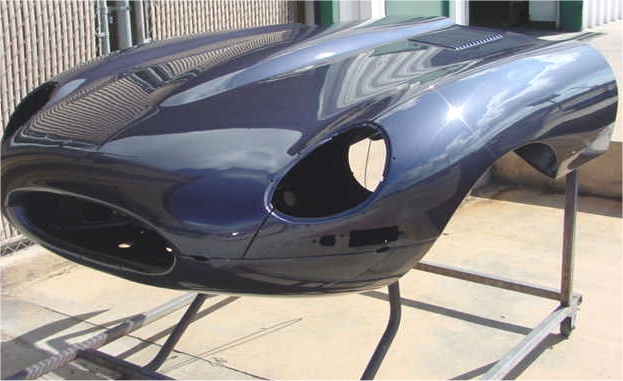
I am delighted to report that your car is now painted and the Opalescent Dark Blue looks spectacular. In fact, having seen how your car turned out, Sam and I have decided to do Evan and Earl's car the same colour.The following photographs were taken out in the Texas sunshine - the best possible place for the paint to fully cure. The sanding and buffing process will begin this afternoon.
 |
 |
 |
 |
 |
|
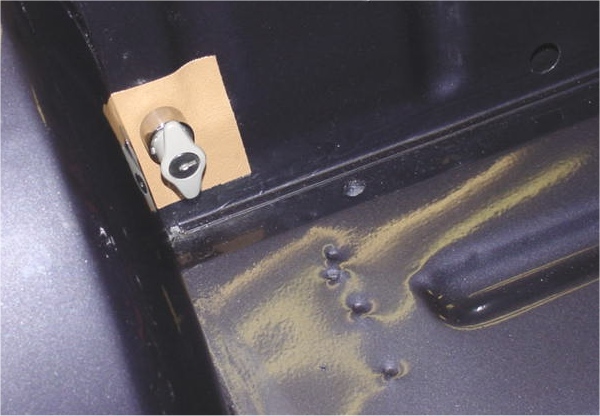
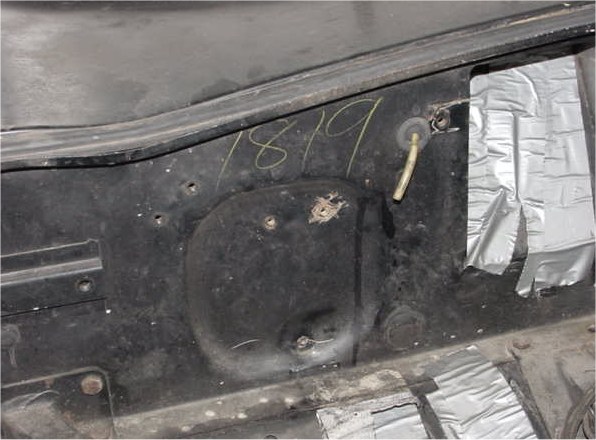
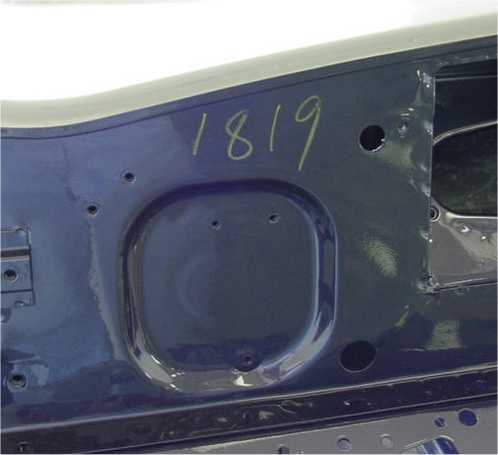
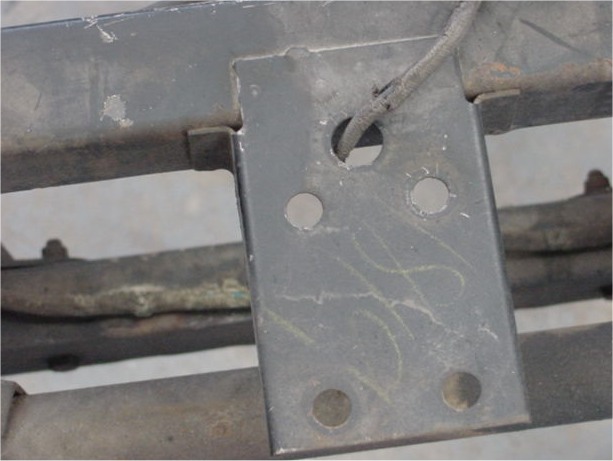
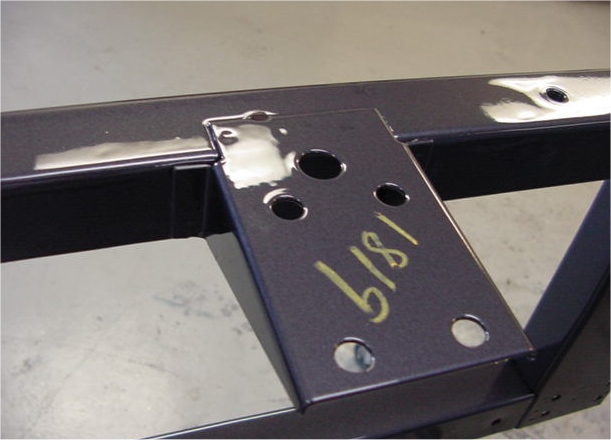
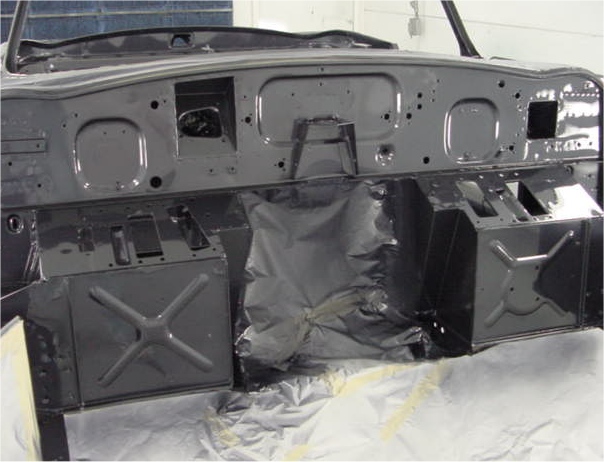
Today is the big day as we are in the process of painting all the outer surfaces of your car. Look for some photographs of the finished product later this afternoon, although in the meantime I thought you might like to see how we replicated the factory crayon markings for you on the firewall and the picture frame.For anyone wanting to recreate the factory crayon markings on their home restorations, we use the following product: CAMEL TIRE CRAYON part # 17-236 (available at most auto parts stores)
 |
 |
|
|
|
 |
 |
|
|
|
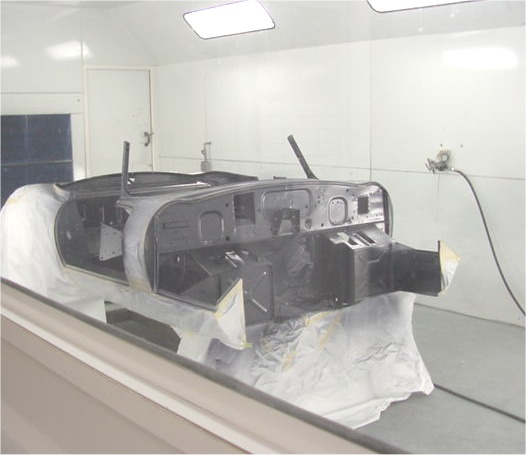
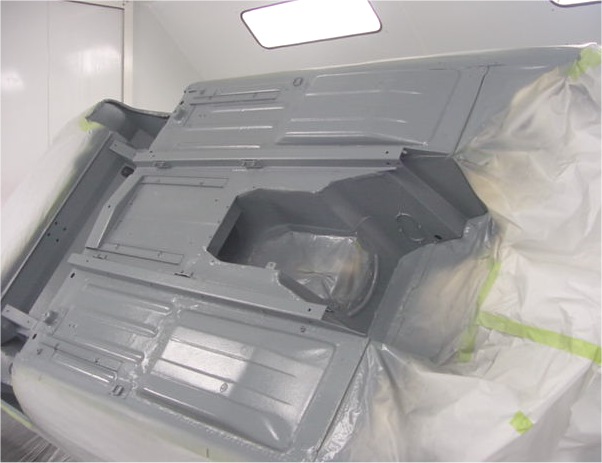
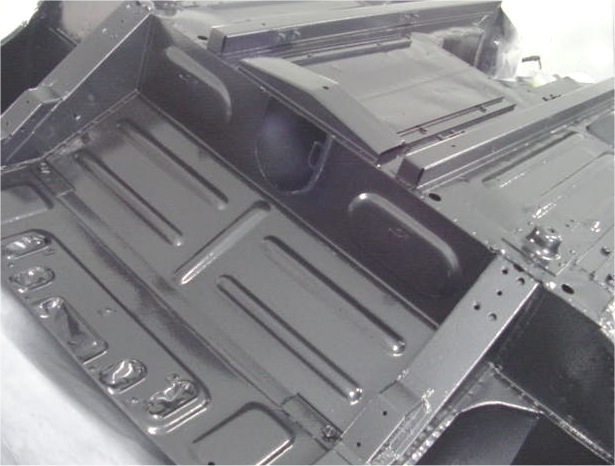
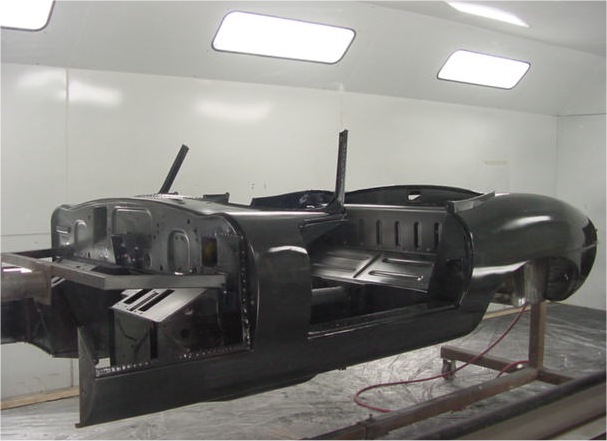
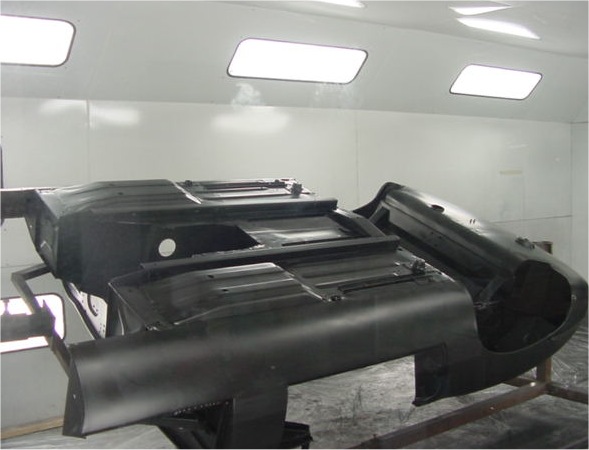
With all the blocking completed, it is now time to start applying Opalescent Dark Blue. The engine frames and the interior panels (cabin, boot, firewall, underside of bonnet, etc) are the first to be painted, followed by all the outer panels (tomorrow). We would have started this project last Thursday but for some tropical weather we have had to endure over the last few days.
 |
 |
 |
|
epoxy primer (see below) |
masked off |
|
 |
 |
 |
|
|
been painted ODB |
|
|
|
|
|
 |
 |
 |
|
|
|
|
 |
 |
 |
|
|
|
|
|
|
|
|
 |
||
|
|
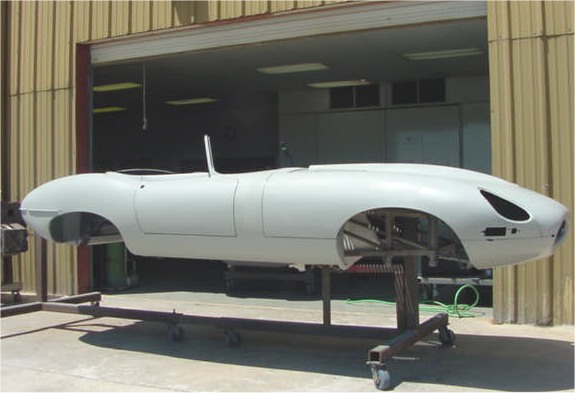
Your car has now been thoroughly blocked and recoated with 271 high build primer and a black guide coat to aid in the next round of blocking with will take place in the next week to ten days. After only one round of 271, I am pleased to report that the car is already looking exceptionally straight. As I know you are aware, it is the effort put in at this stage that will distinguish a good paint job from a world class paint job!
 |
 |
 |
 |
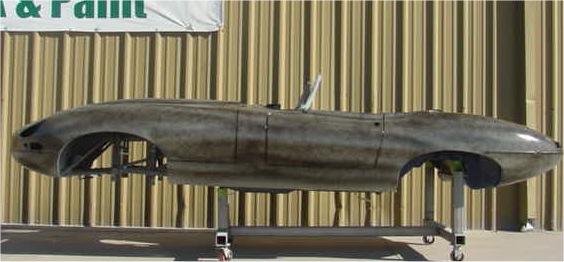
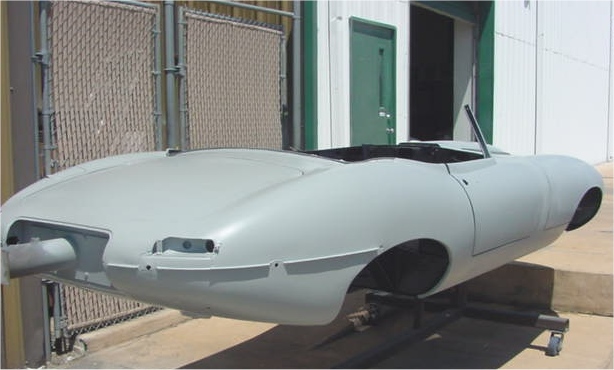
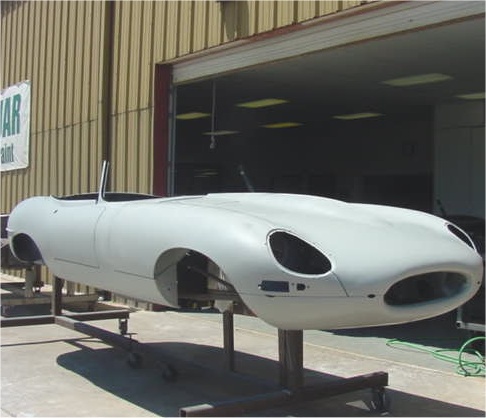
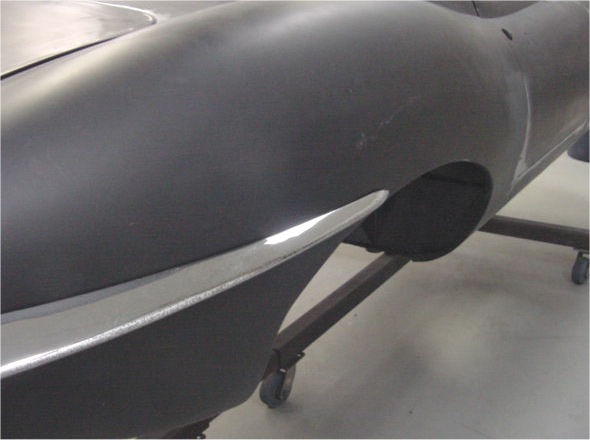
I am pleased to report that we have finished trial fitting all the brightwork and trim (except for the headlamp glass which we discussed on the telephone) and now have the car in its first coat of 271 high build primer. The following photographs show it baking in the Texas sun. When the 271 is thoroughly cured, we will block the entire body then recoat it with a further layer of high build primer - followed by more blocking.
 |
 |
 |
 |
 |
|
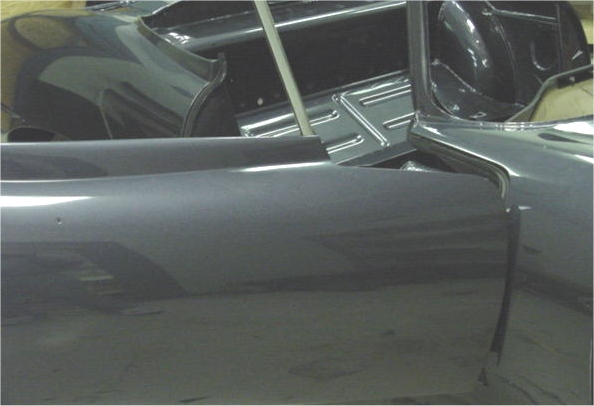
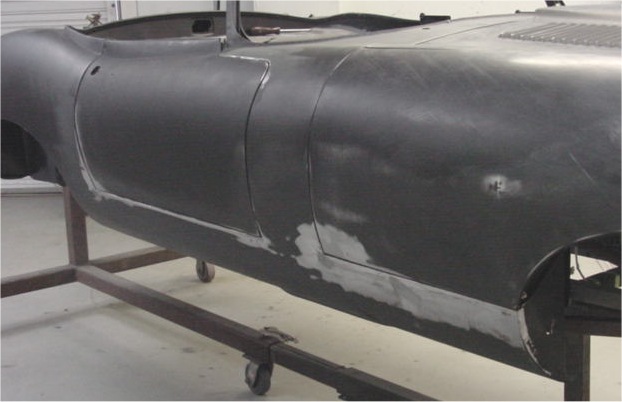
With the bonnet and doors now fitted and latching with perfect panel gaps, we just have some fine tuning of the bootlid fit to complete before sealing the entire car with DP 90 primer followed by 271 high build primer on Monday and Tuesday of next week.Please note, this car is comprised of sheet metal, lead and epoxy primer - there is zero plastic filler anywhere on the car.
 |
 |
 |
|
|
chrome components |
with DP90 before high build |
 |
 |
 |
|
with rubber seals in place |
|
|
 |
||
|
chrome |
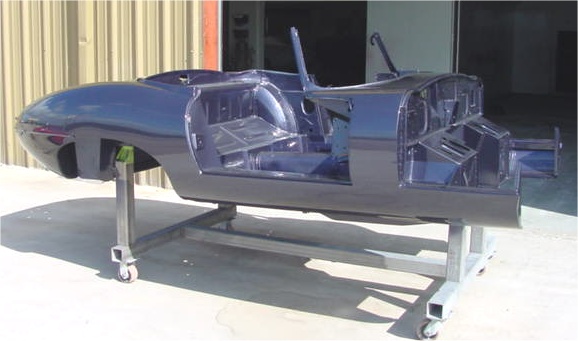
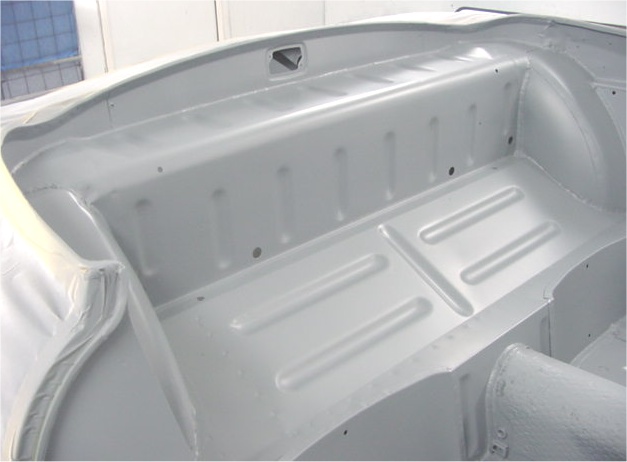
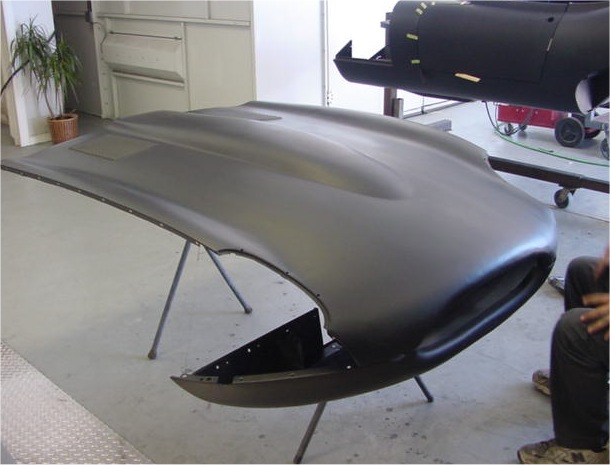
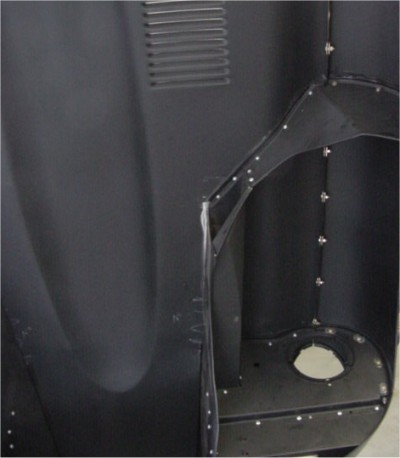
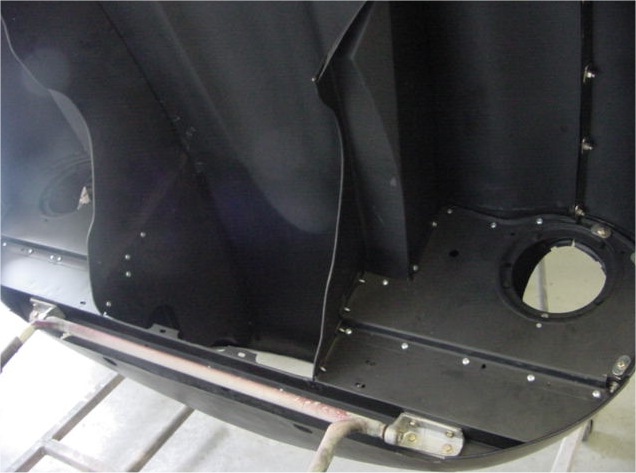
We now have the bonnet fully assembled and the underside of the car has been coated with 3M Body Shutz, DP 50 epoxy primer and the car's first helping of Opalescent Dark Blue!
 |
 |
 |
|
|
to DP 90 primer |
|
|
|
|
|
 |
 |
 |
|
|
|
|
|
|
|
|
 |
 |
 |
|
line for concours cars |
|
applied over Body Schutz |
|
|
|
|
 |
 |
 |
|
|
base for Opalescent Dark Blue |
|
|
|
|
|
 |
 |
 |
|
|
painted with Body Schutz |
Dark Blue |
|
|
|
|
 |
 |
 |
|
|
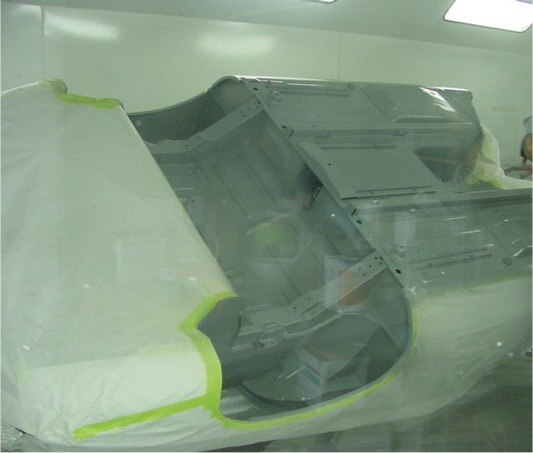
car still on rotisserie |
the rich metallic justice |
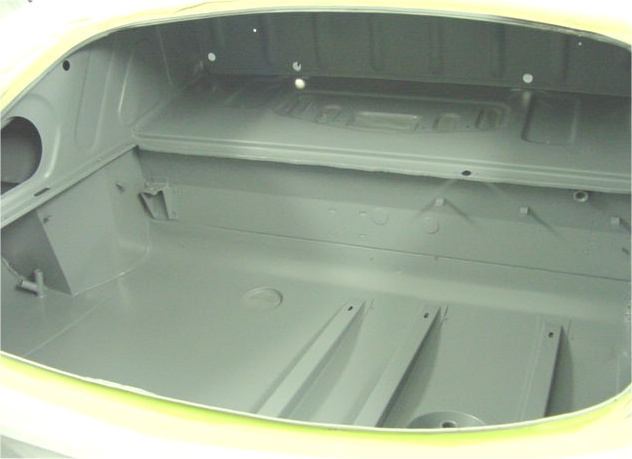
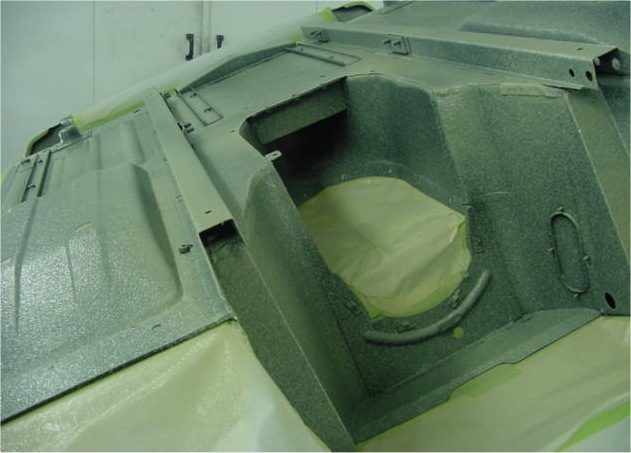
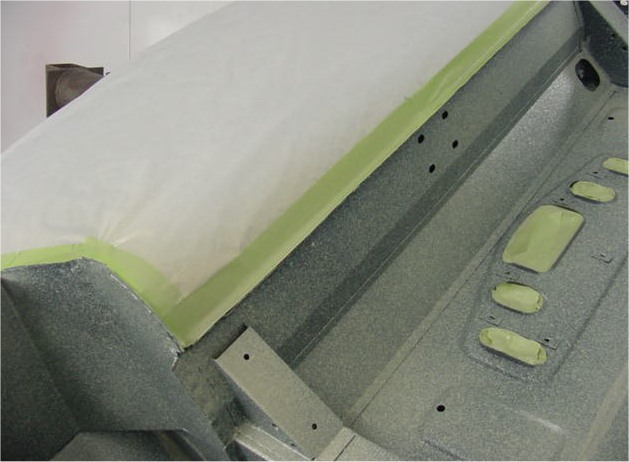
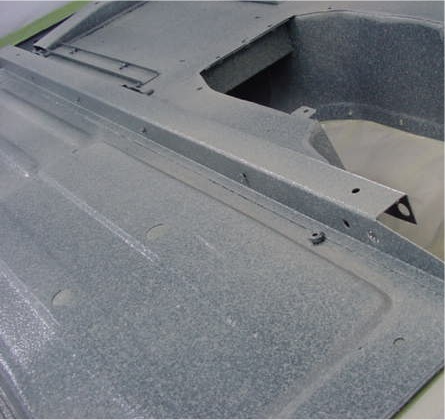
With the epoxy primer now dry, it is time to seam seal all the various joints before applying a coat of Body Schutz and then the first splash of Opalescent Dark Blue to the underside of the car.
 |
 |
 |
|
inside the cabin |
|
|
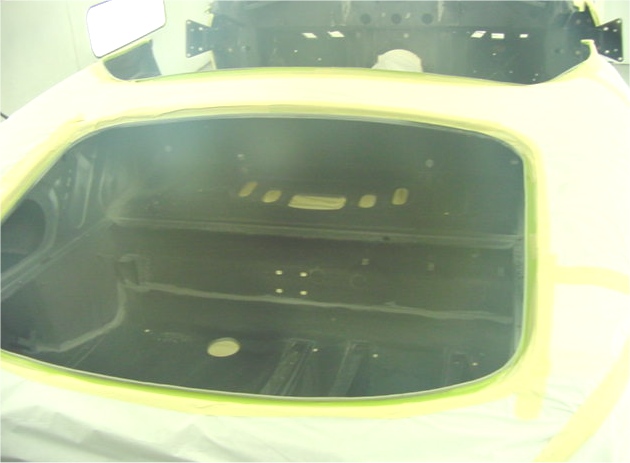
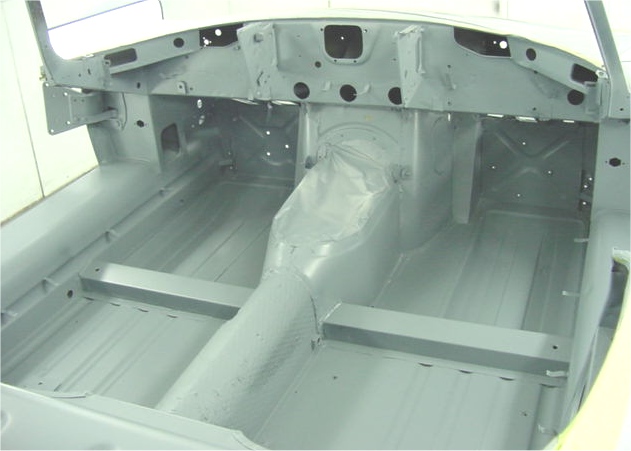
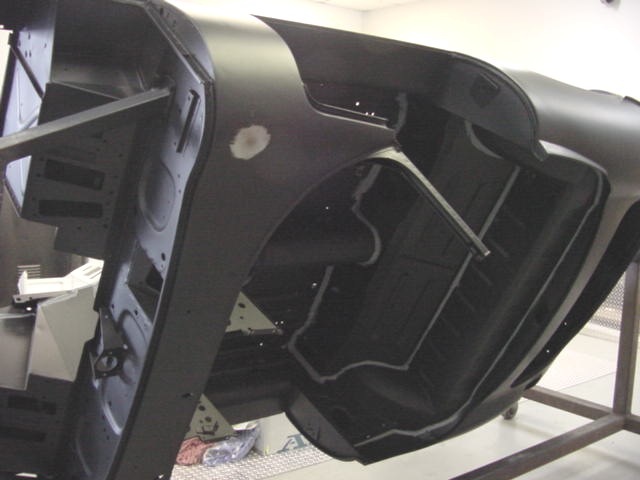
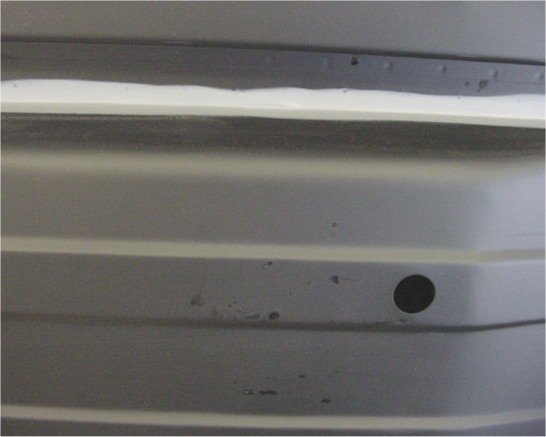
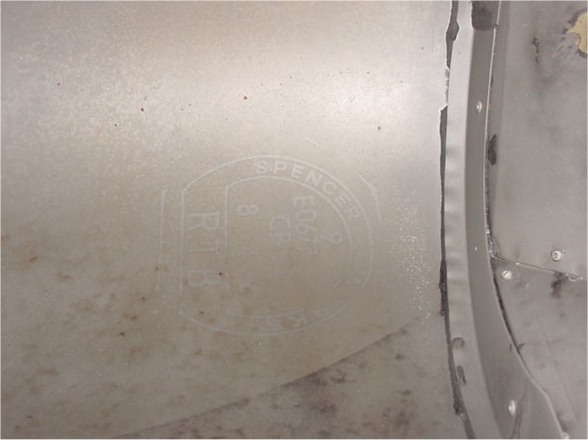
Time to seal up the main bodyshell in DP90 epoxy primer. I have included the first photograph because I can never before recall seeing the steel supplier's brand still visible on an E Type body.
 |
 |
 |
|
bought their steel from! |
|
prime the unerside |
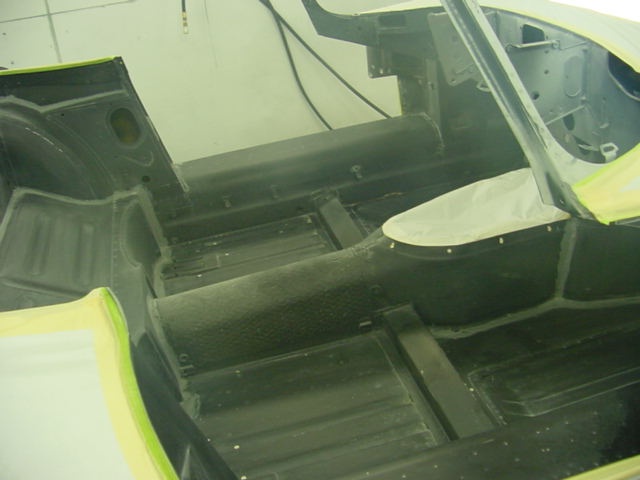
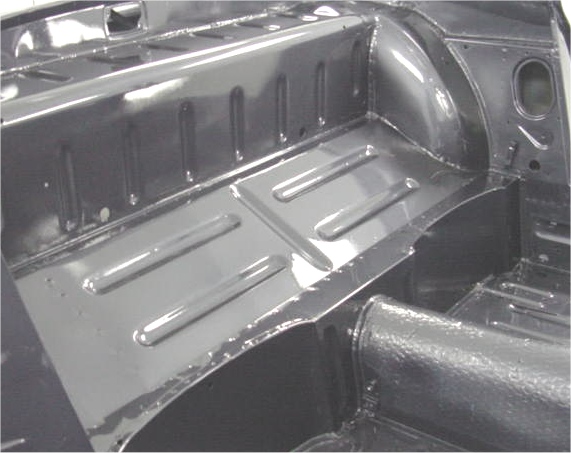
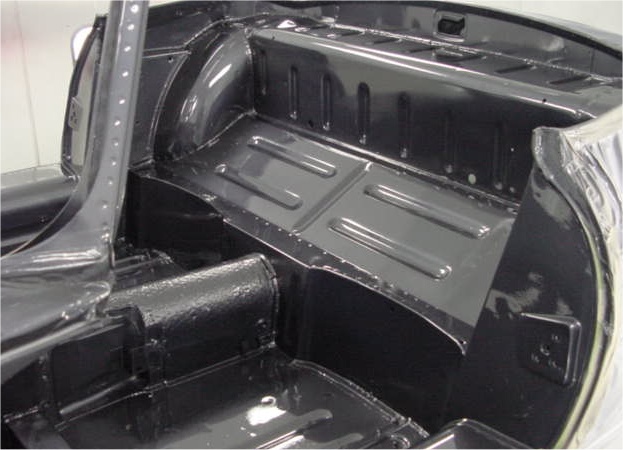
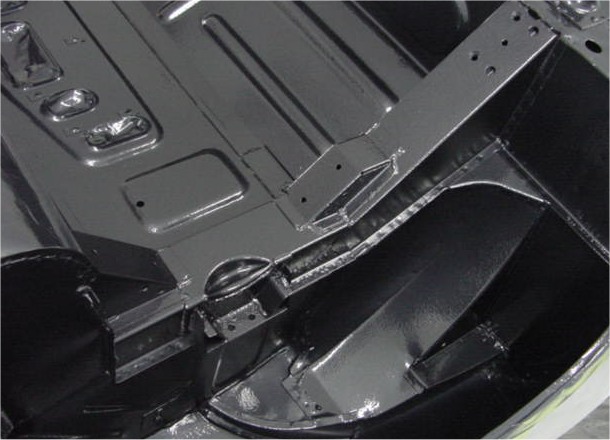
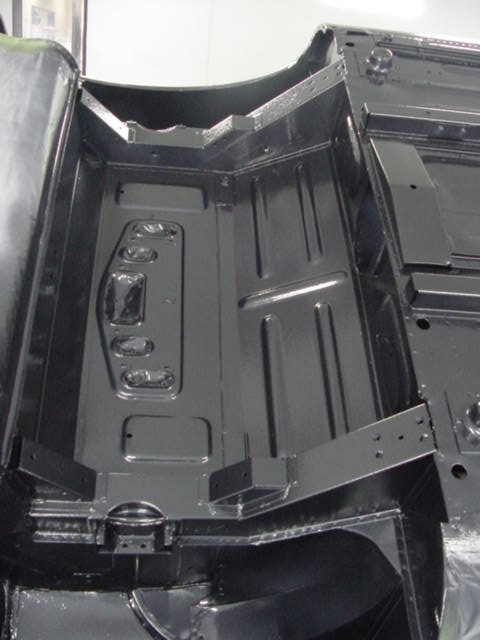
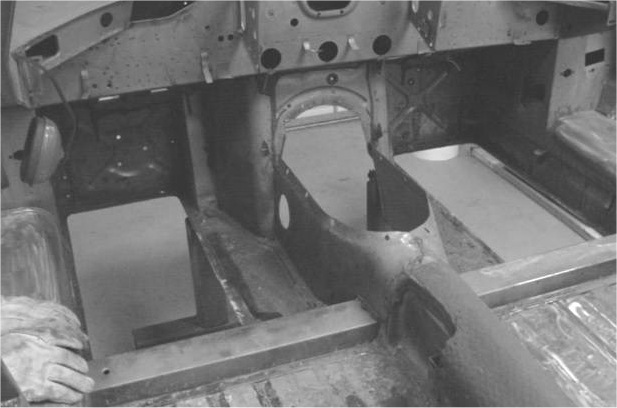
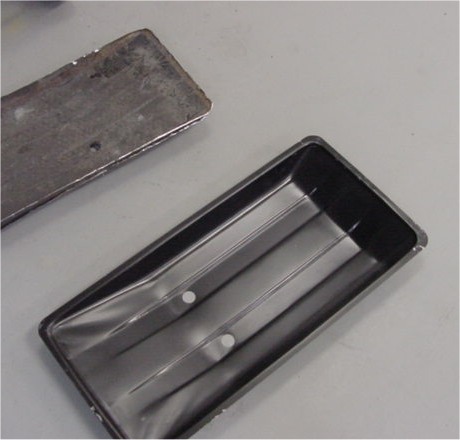
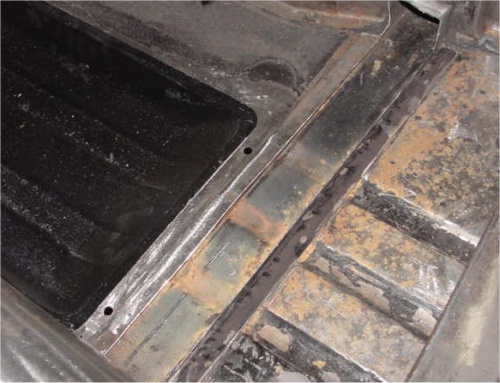
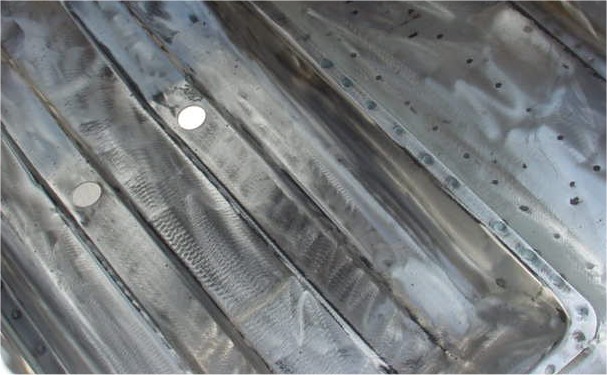
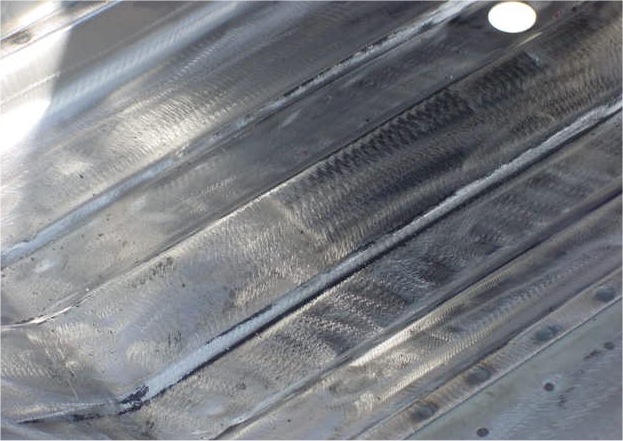
An update especially for the Jaguar Club of CT.....We have now replaced the footwell panels and cut open and reinstalled the floor cross-members (they were in excellent condition internally). We have also acid washed the entire bodyshell again and applied Wurth Body Wax to all the internal box sections. After a little more lead loading on Monday morning, the bodyshell will be sealed in epoxy primer on Monday afternoon.
 |
 |
 |
|
|
cutting out corroded footwells |
about to be installed |
|
|
|
|
 |
 |
 |
|
inside the cross-members |
liberal acid bath |
footwells into place |
|
|
|
|
 |
 |
 |
|
now installed |
bodyshell |
all inner panels |
|
|
|
|
 |
|
|
|
|
|
|
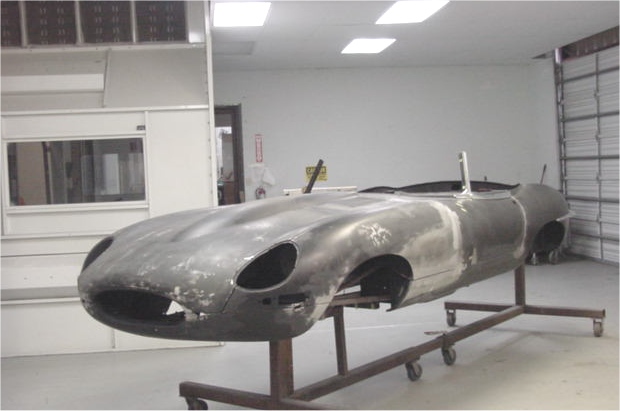
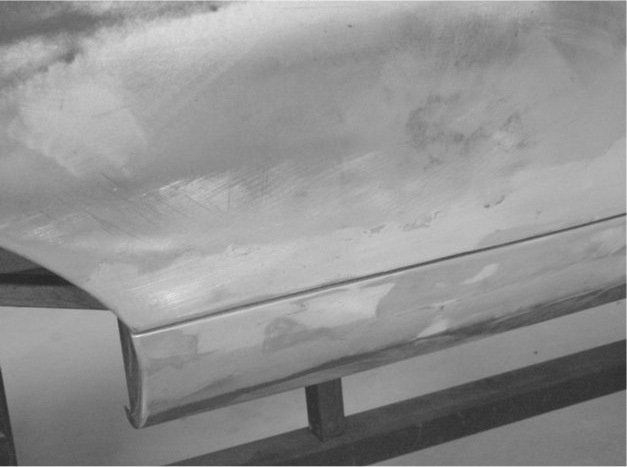
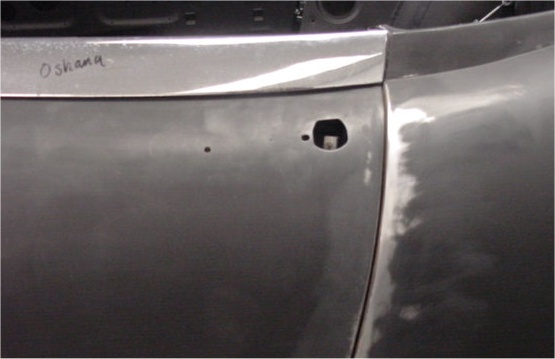
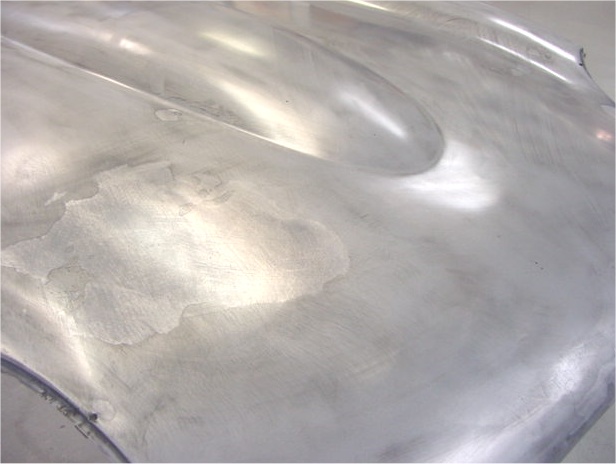
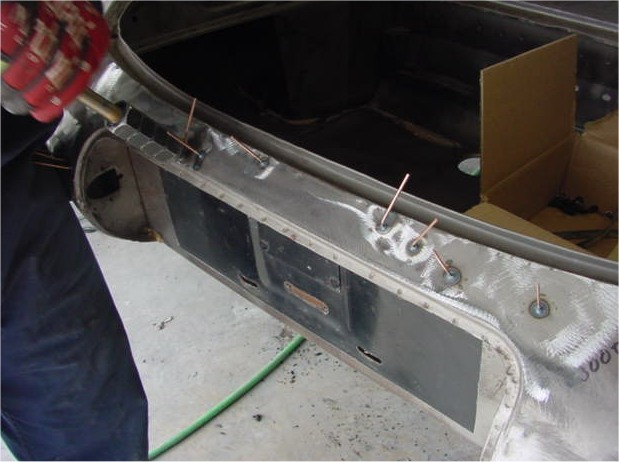
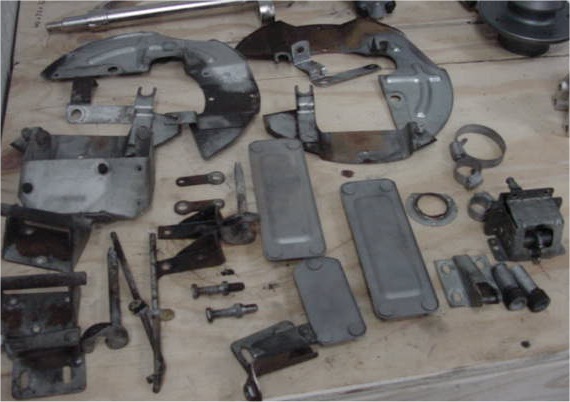
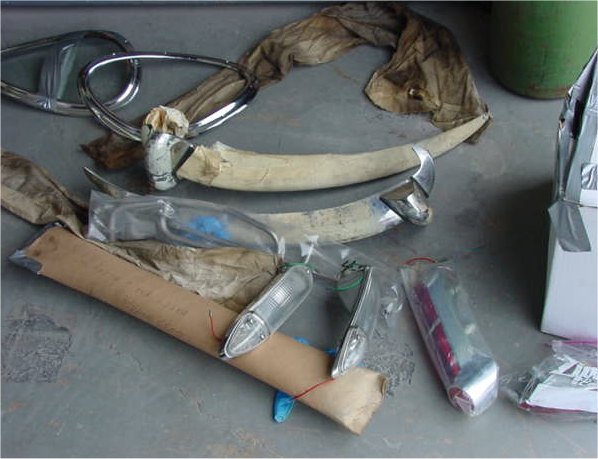
We have already begun straightening out some of the dented sheet metal around the rear apron and down the left hand cowl side panel. We will send the items in the last photograph to you (for Cad plating at your local facility) once we have finished with them in terms of door, bootlid and bonnet fit, etc.
 |
 |
 |
|
all the sound deadening |
rear apron |
good as new! |
 |
 |
 |
|
apron and lead loaded that |
|
sending up to you for Cad plating |
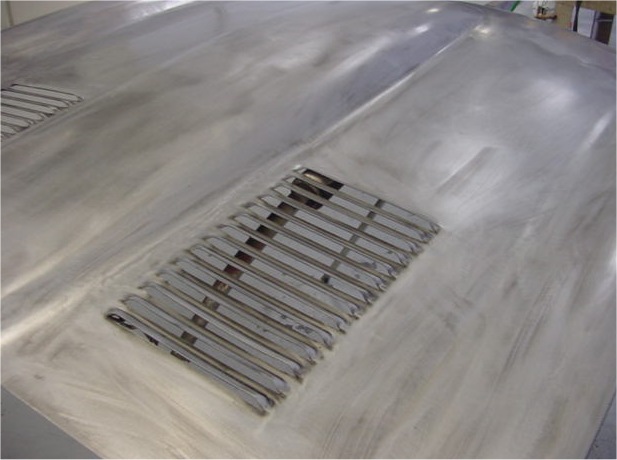
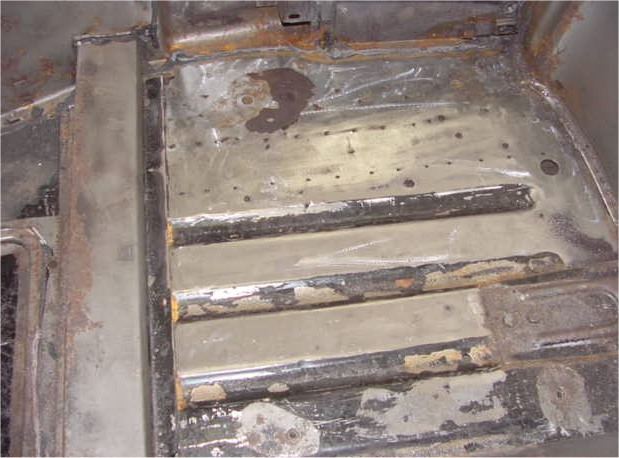
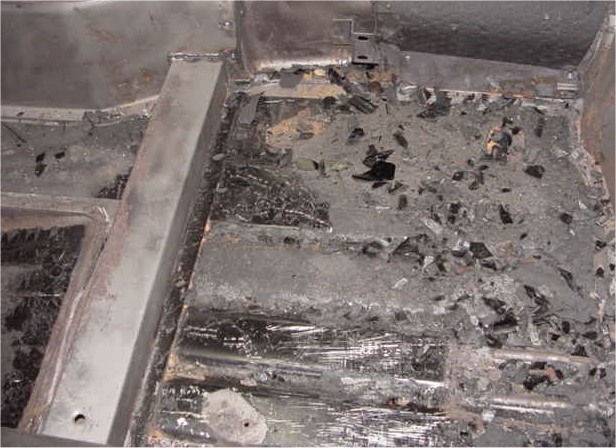
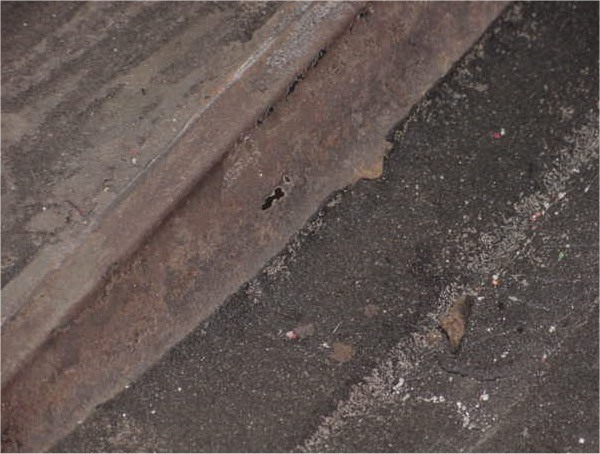
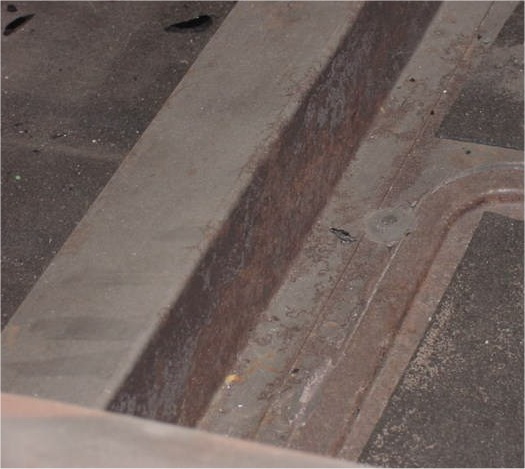
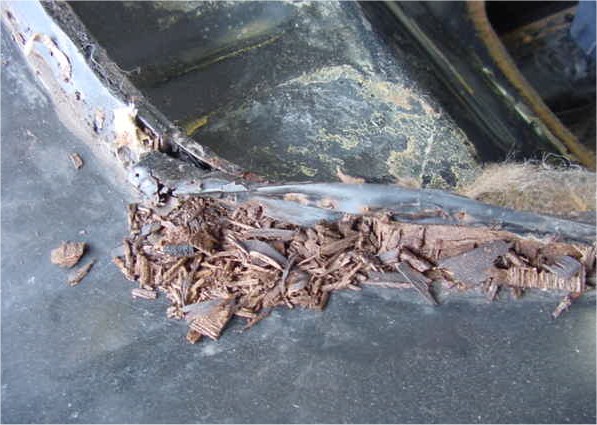
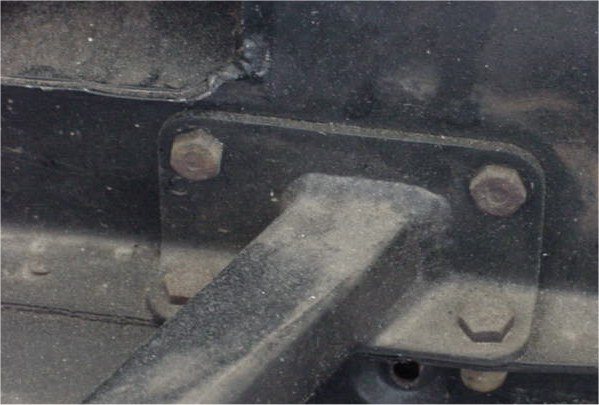
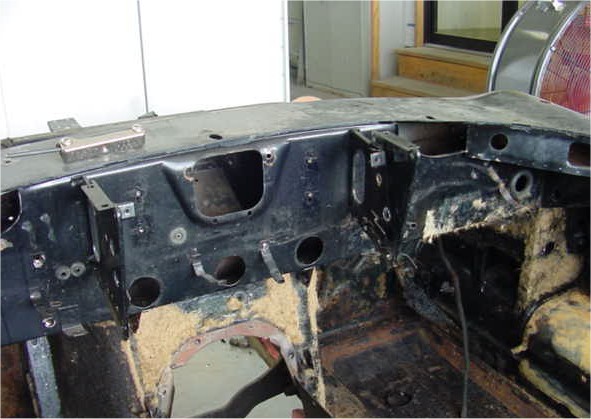
I am delighted to report that it is now time to attack the bodywork on this project. Although this is one of the most solid E Types we have ever seen, it is still going to need some panel replacement. Close examination of the floors reveals rust holes in both footwells and also a fair amount of suspicious surface rust on the floor cross-members (particularly on the driver's side).The first job is to remove all the factory sound deadening material as moisture gets trapped between it and the sheet metal. Once we have done that, we will be cutting out the footwells and making an even closer examination of the cross-members. We may end up laser cutting the front section of the cross-members to gain access to the inside of the box section.
 |
 |
 |
|
factory sound deadening |
rust through (holes) |
footwell |
 |
 |
 |
|
crossmember is not bad |
cause of some concern |
|
 |
 |
|
|
been completely rebuilt |
|
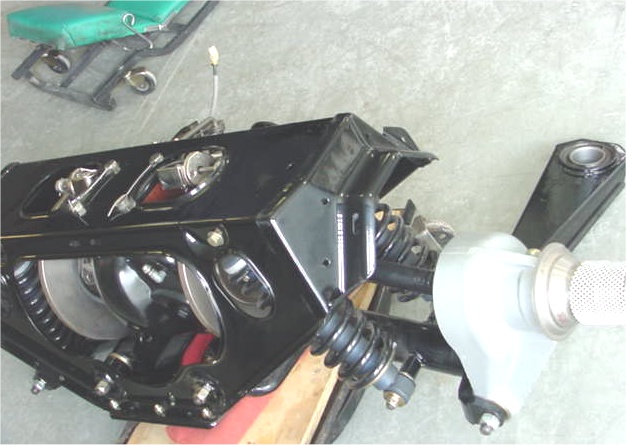
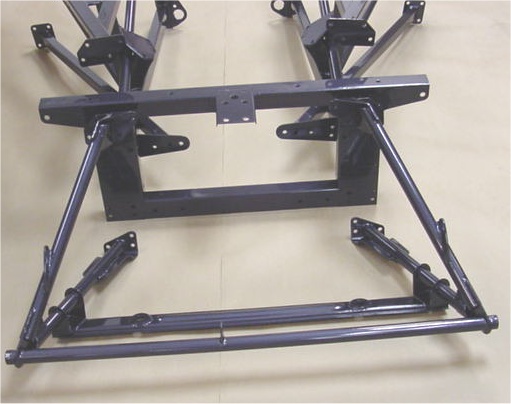
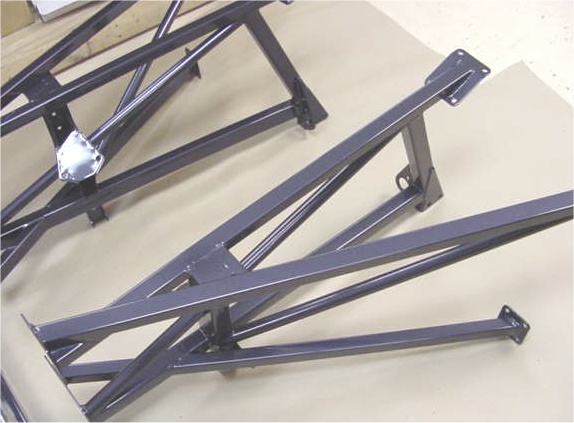
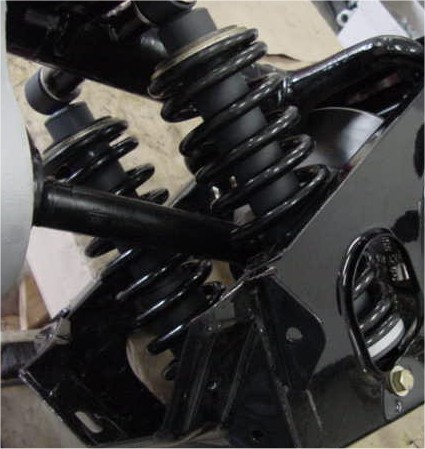
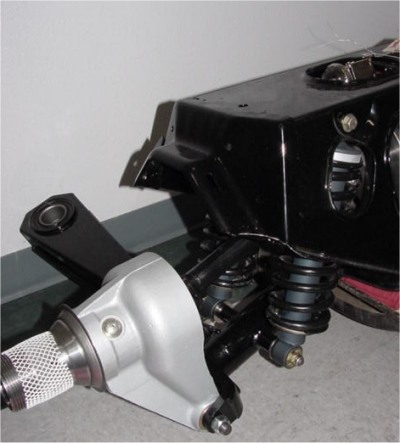
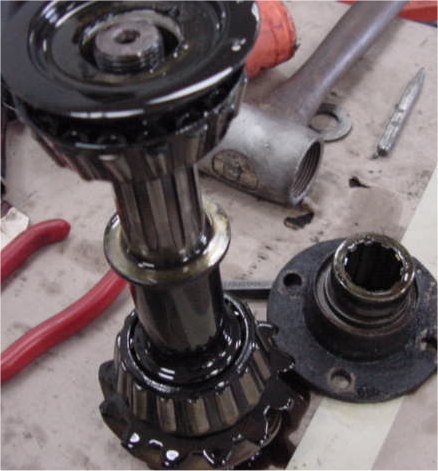
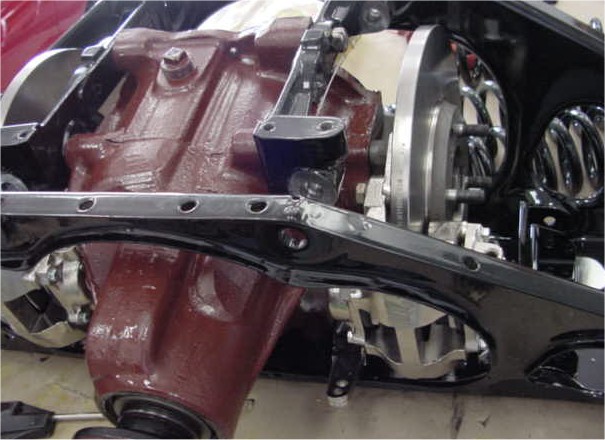
The IRS assembly is now fully rebuilt.
 |
 |
 |
 |
||
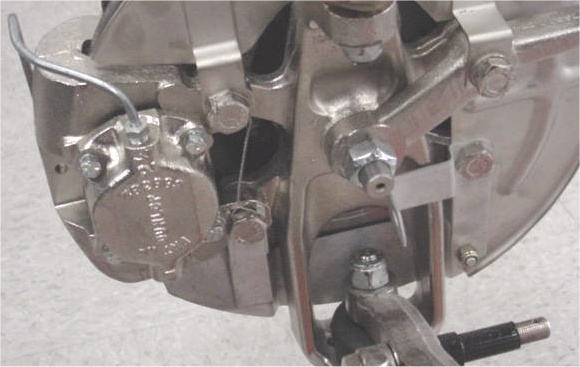
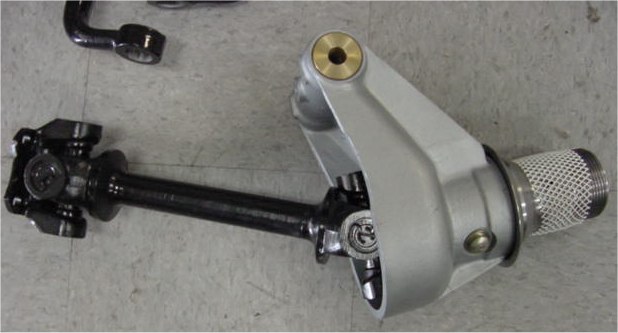
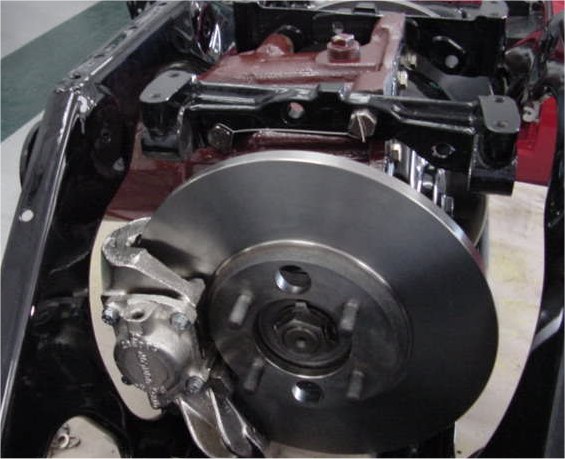
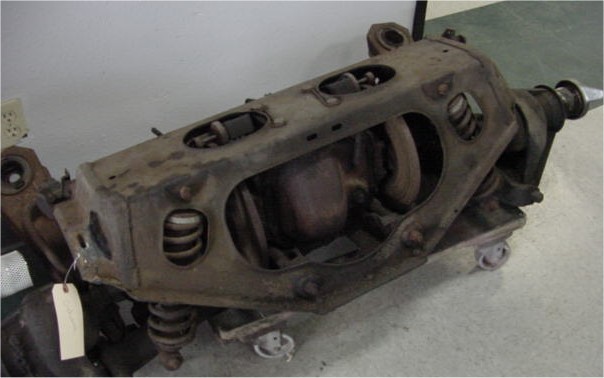
As you can see in the following photographs, we have been busy restoring and rebuilding your IRS. I'm pretty sure it didn't look this good in 1965!
 |
 |
 |
|
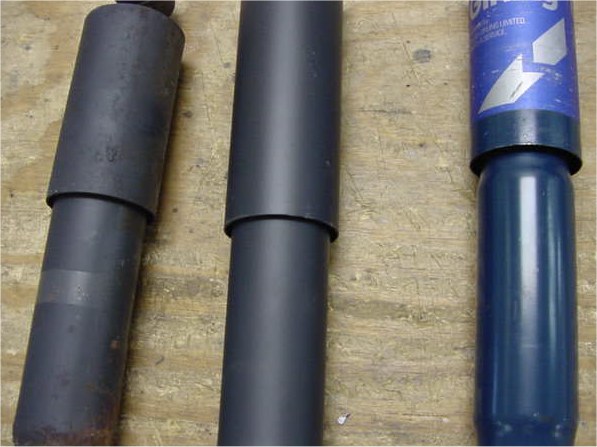
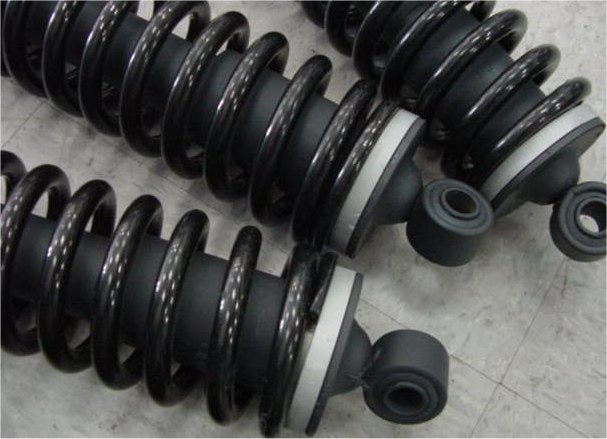
Original, CJ paint, aftermarket Girling |
|
low mileage |
|
|
|
|
 |
 |
 |
|
|
|
|
 |
 |
 |
|
|
and hubs carriers |
|
 |
 |
 |
|
|
|
|
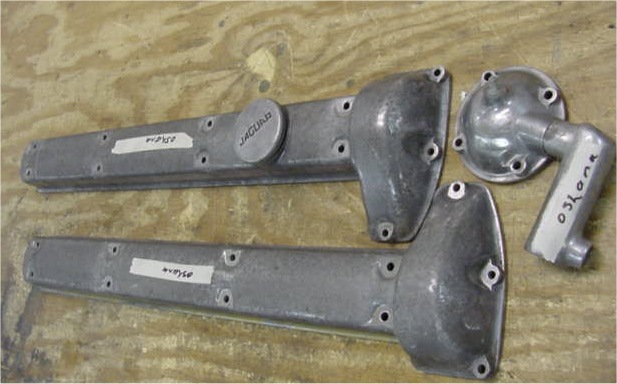
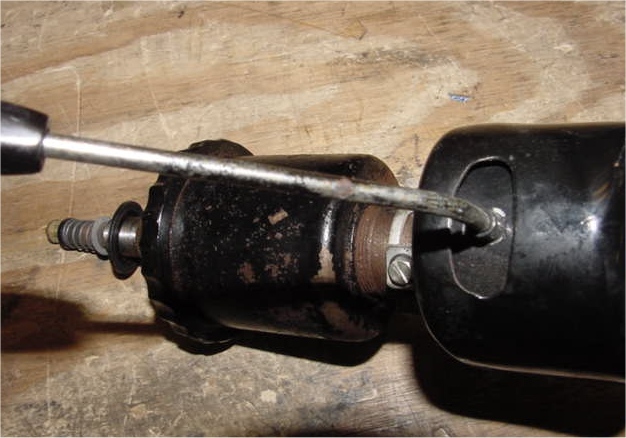
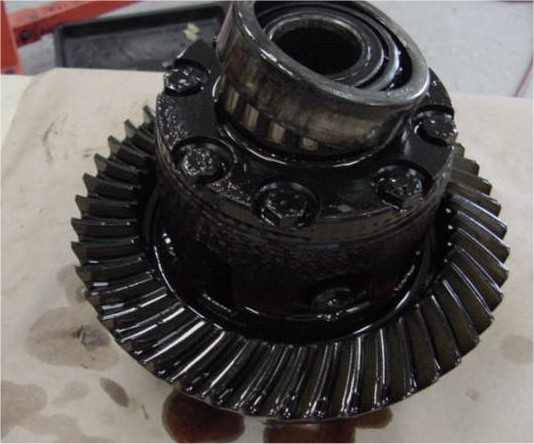
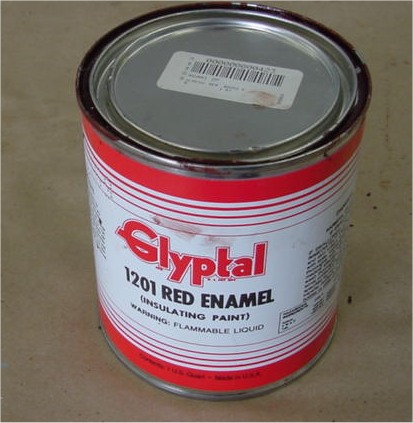
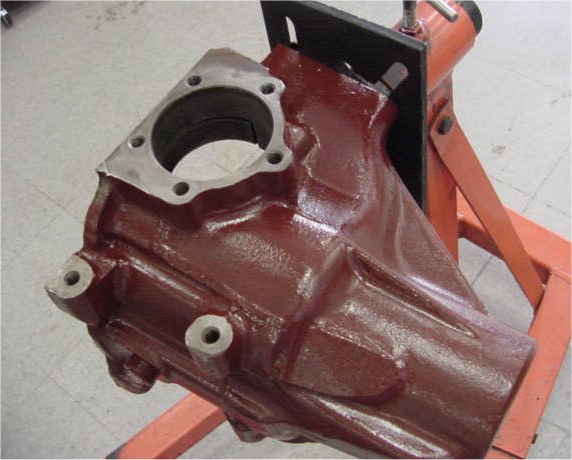
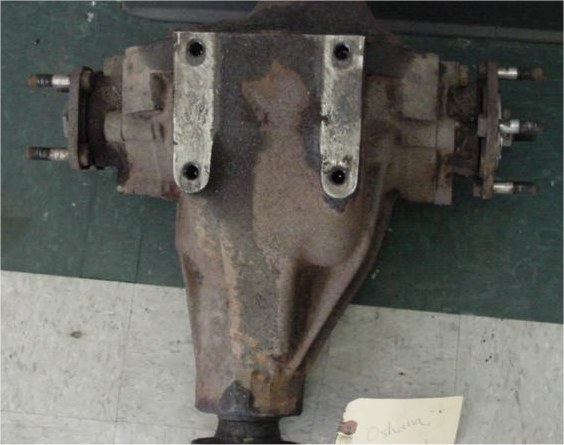
Your differential has now been disassembled and the casing painted with the paint you provided. Despite the undoubted low mileage, the bearings were in poor condition and will be replaced (retained for your inspection).
 |
 |
|
|
|
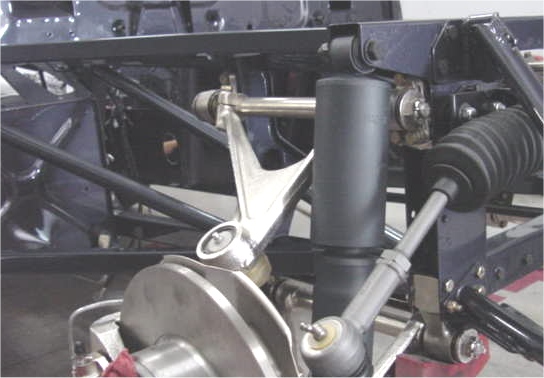
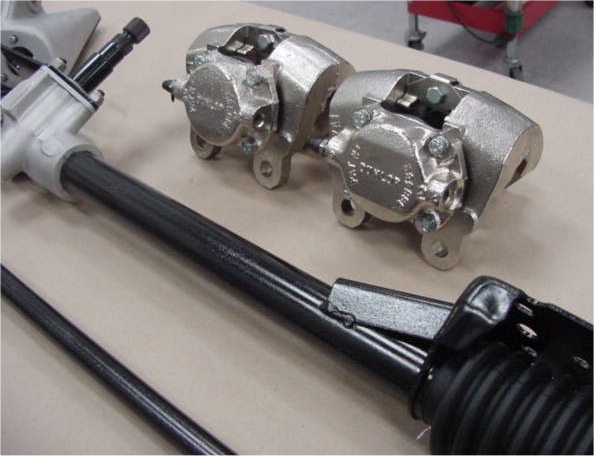
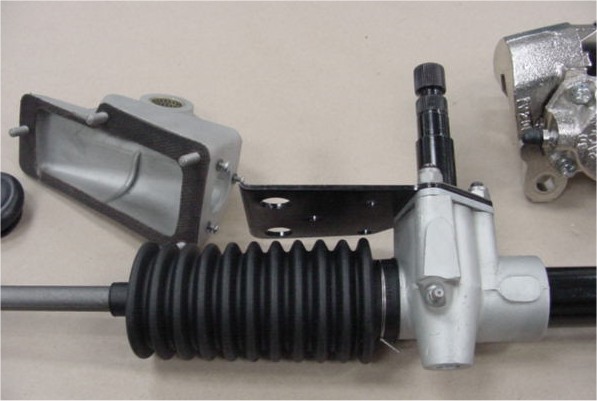
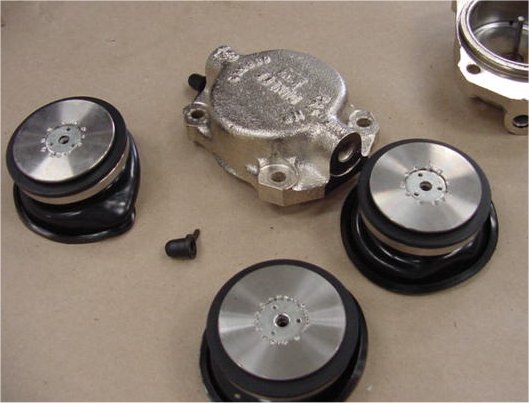
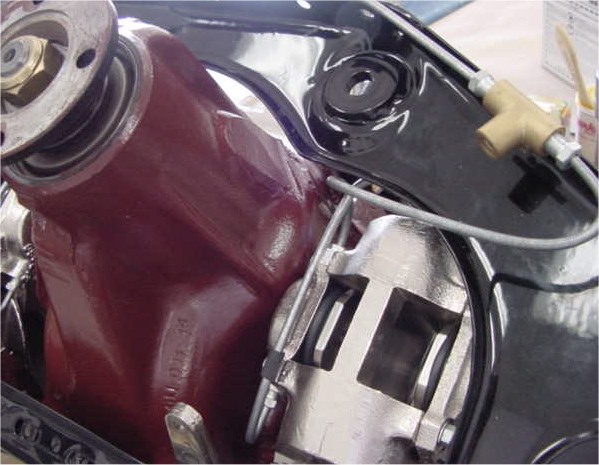
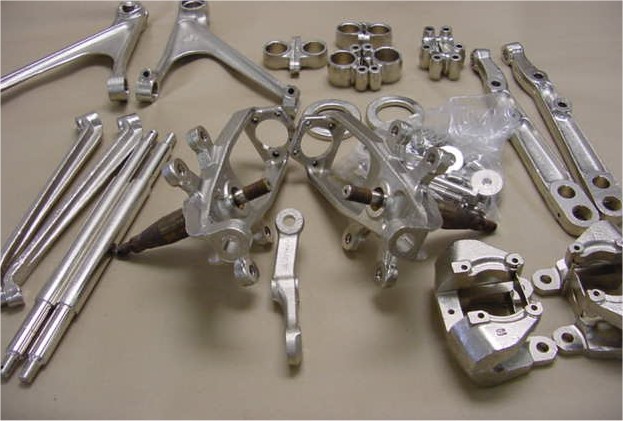
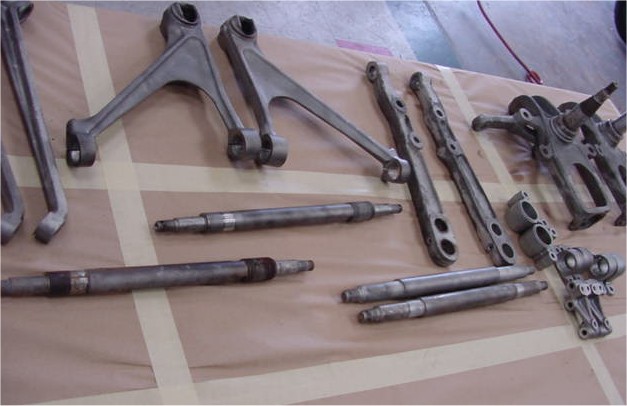
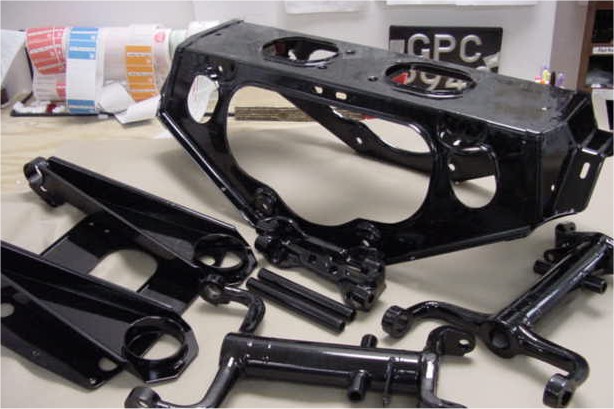
We have now torn down the IRS and had the various components powder coated. We have also resleeved the calipers (front and rear) in stainless and had them Nickel plated. The front suspension has been sent off for Nickel plating, with the exception of the upper control arms which were badly pitted and will be replaced.
 |
 |
 |
|
|
|
|
|
|
|
|
 |
 |
|
|
|
|
|
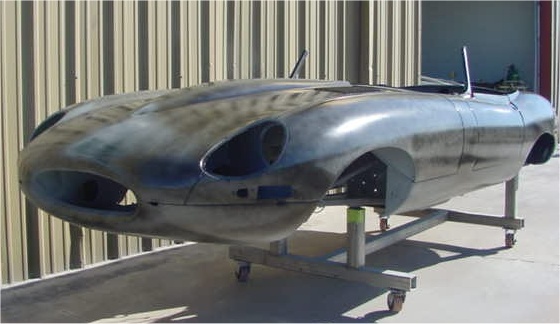
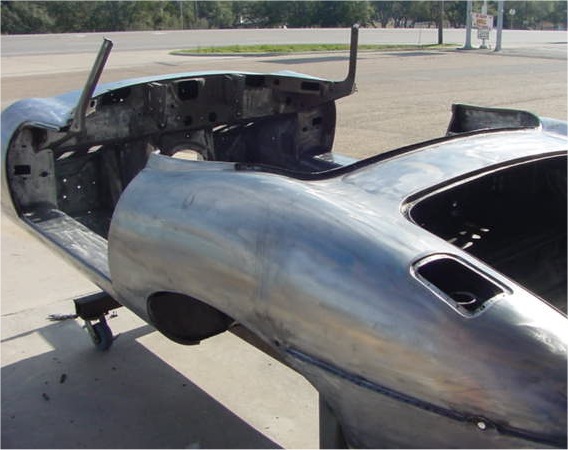
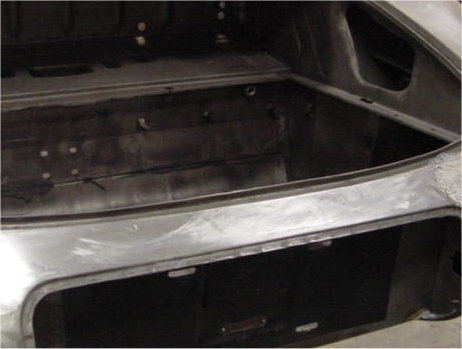
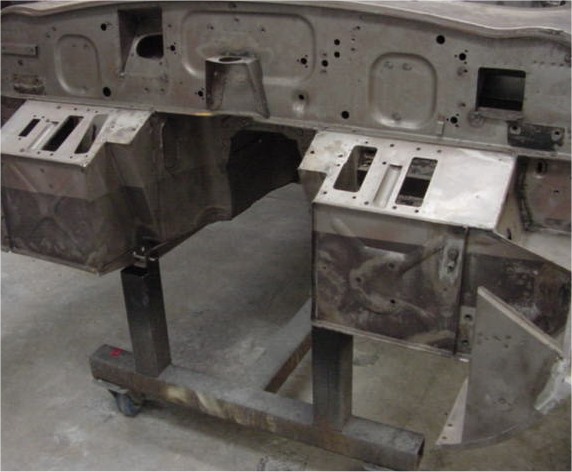
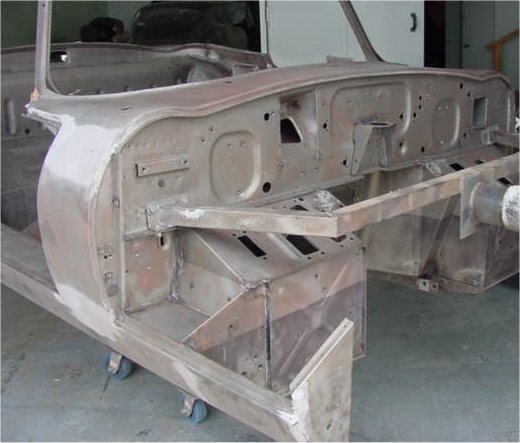
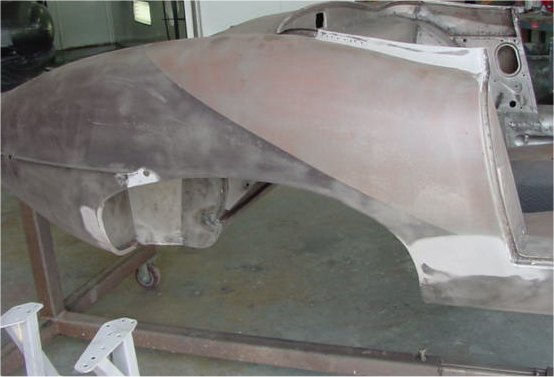
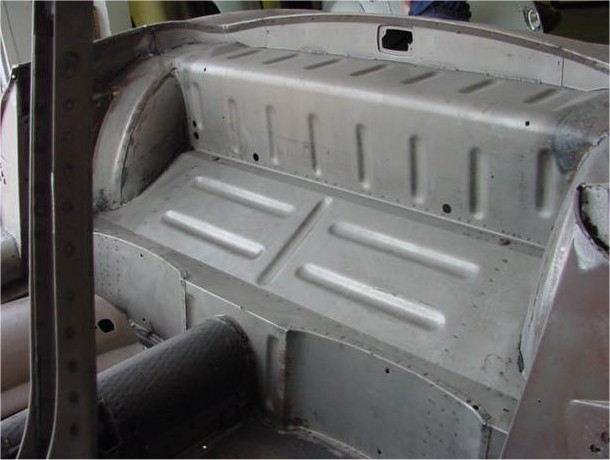
As you can see, the body has now been completely stripped and I am pleased to report that the news is excellent. This roadster shell is truly the holy grail - a 100% rust free E Type monocoque!
 |
 |
 |
|
|
|
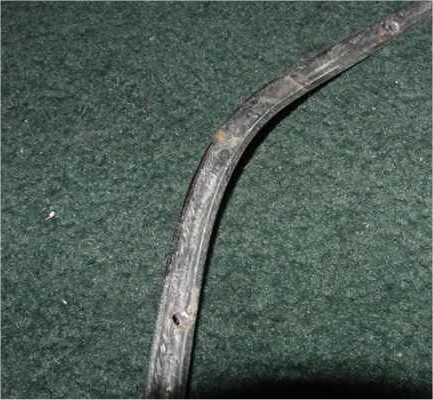
dry rotted |
 |
 |
 |
|
zinc plated |
|
|
 |
 |
 |
|
|
|
|
 |
 |
|
|
seen! |
|
 |
 |
 |
|
economical repair |
|
originals I have ever seen |
|
|
 |
|
|
floor are suspect |
|
I am very pleased to report that you car arrived safely and is already being disassembled in the CJ workshop. We hope to have it plastic media blasted within the next 10 days.Thanks for entrusting this important project to Team CJ!
 |
 |
 |
|
|
|
engine bay |
|
|
|
|
 |
|
 |
|
|
on firewall |
|
|
|
|
|
|
|
 |
 |
|
|
|
|
 |
 |
|
|
|
|