Click anywhere on image to close window
| 1961
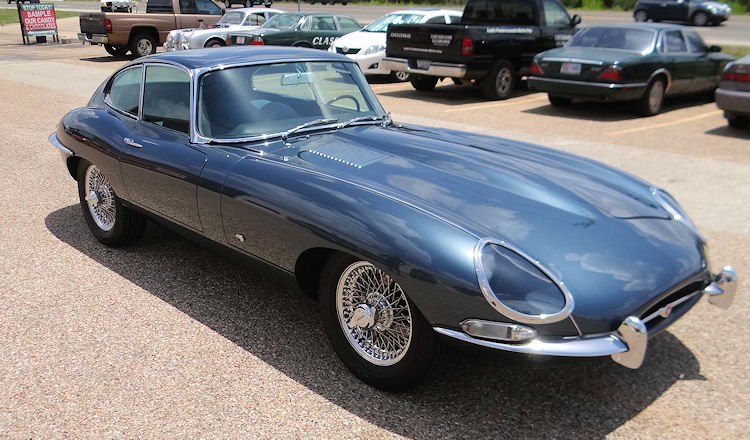
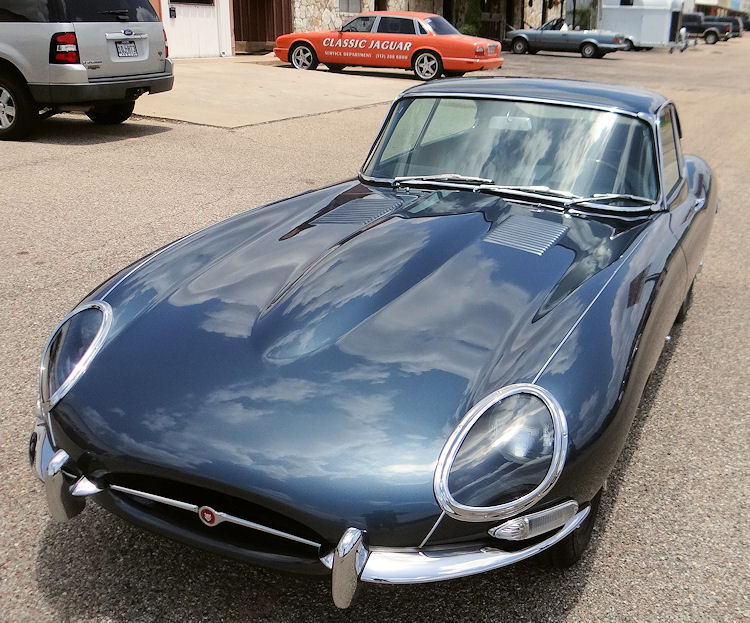
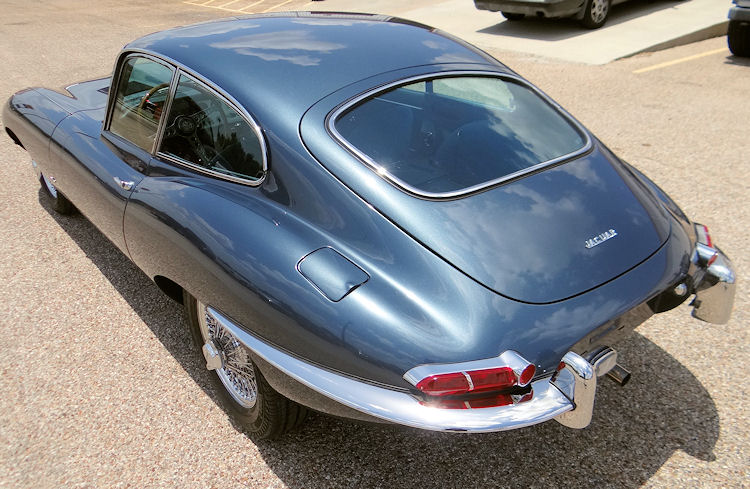
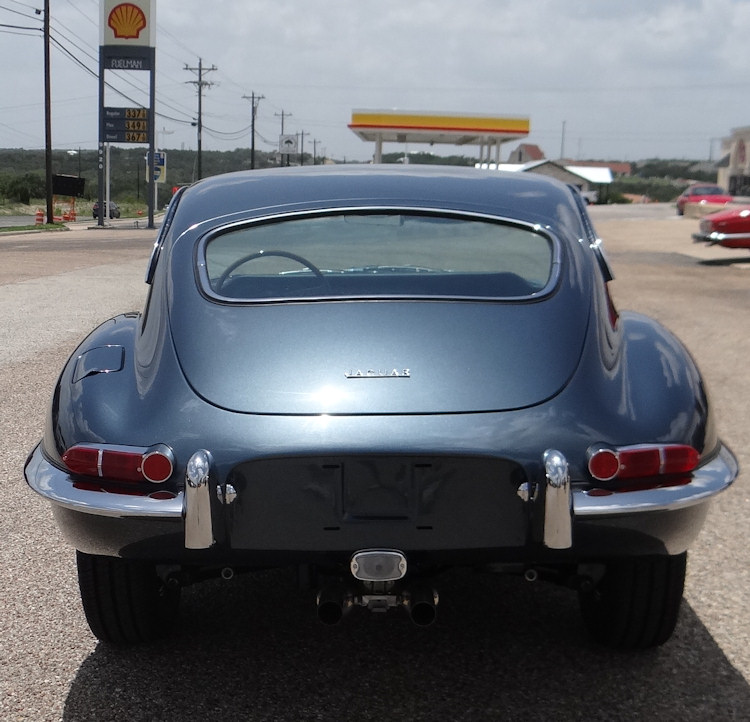
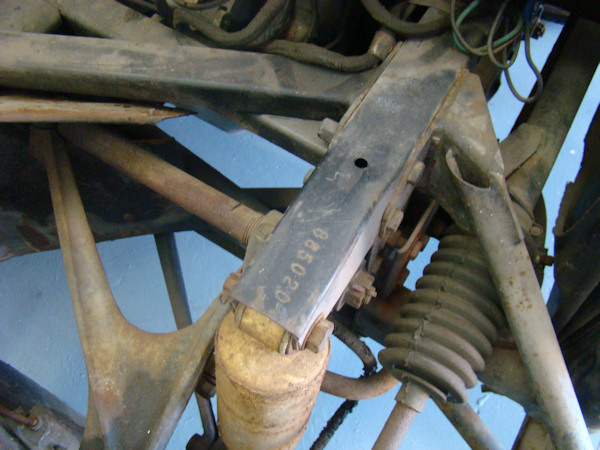
E Type FHC - 885020
Total restoration for a client in The Netherlands |
|
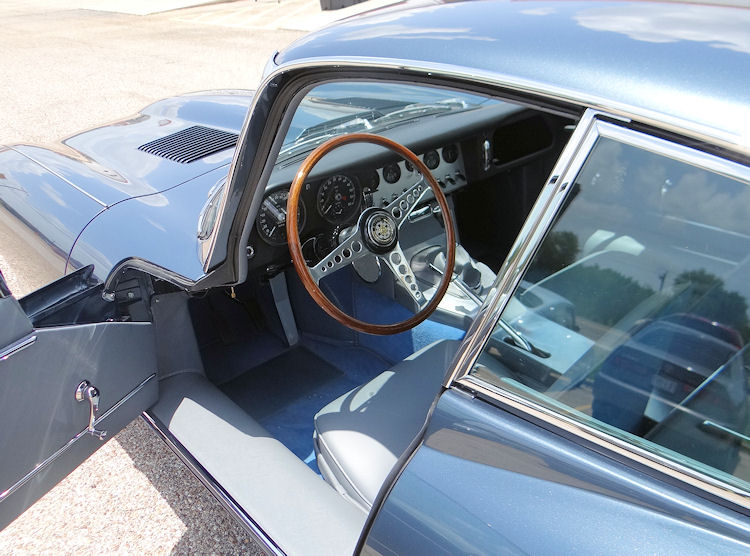
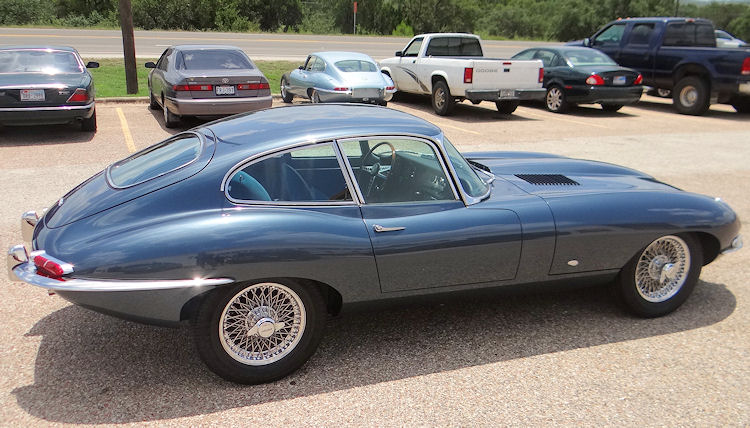
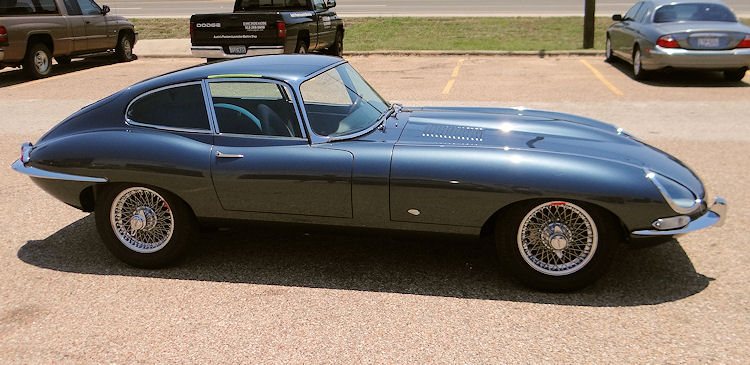
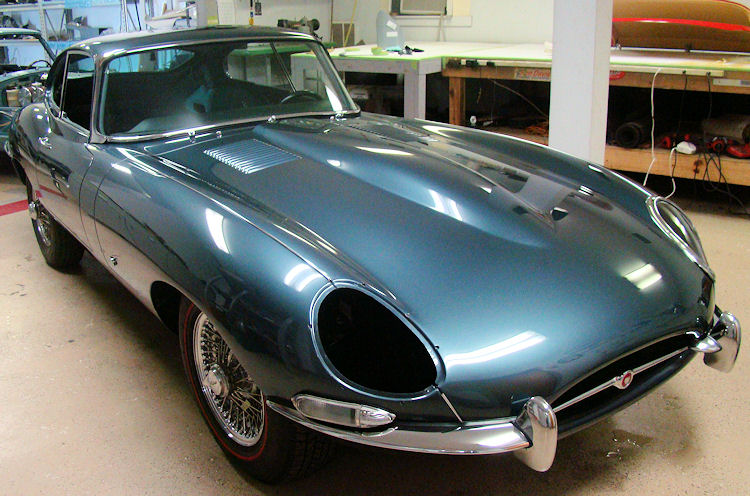
I am pleased to report that the restoration of your E Type is now complete and the car is being collected and taken to the docks in Houston on Monday morning. All being well she will be in Holland by the end of August. I hope you enjoyed following the restoration of this beautiful car in these pages.

 |
 |
 |
 |
 |
 |
 |
 |
 |
|
 |
 |
Almost finished....
 |
 |
|
|
|
|
|
|
 |
 |
|
|
|
|
|
|
 |
 |
|
|
|
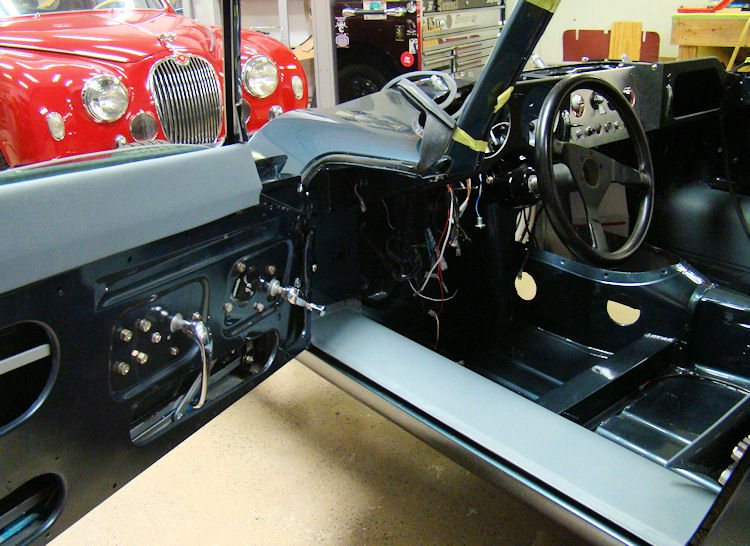
More progress in the trim room...
 |
 |
|
|
We have entered the finishing straight with this restoration, which should be completed in the next couple of weeks.
 |
 |
|
|
|
|
|
|
 |
 |
|
|
|
|
|
|
 |
 |
|
|
|
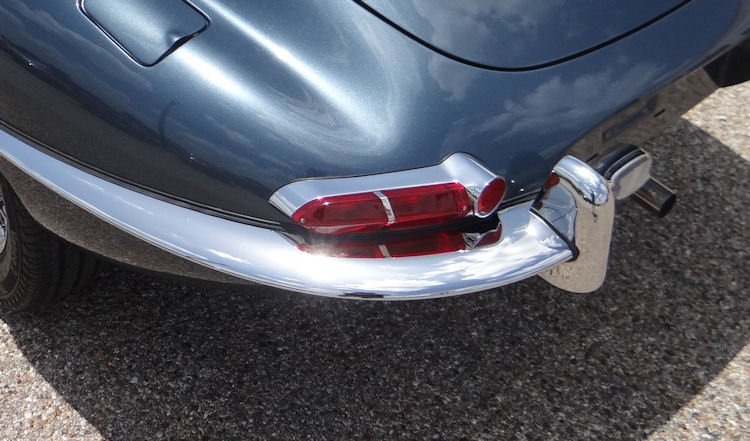
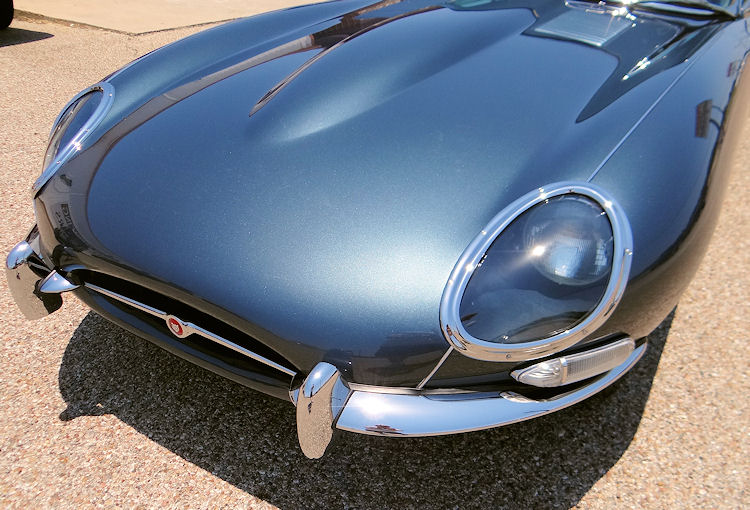
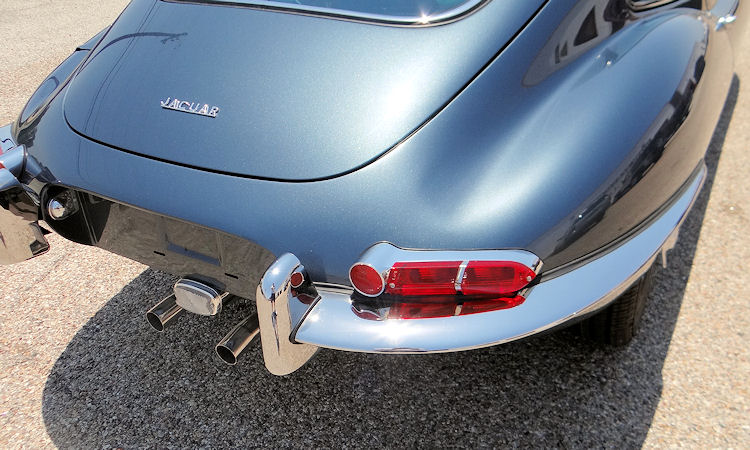
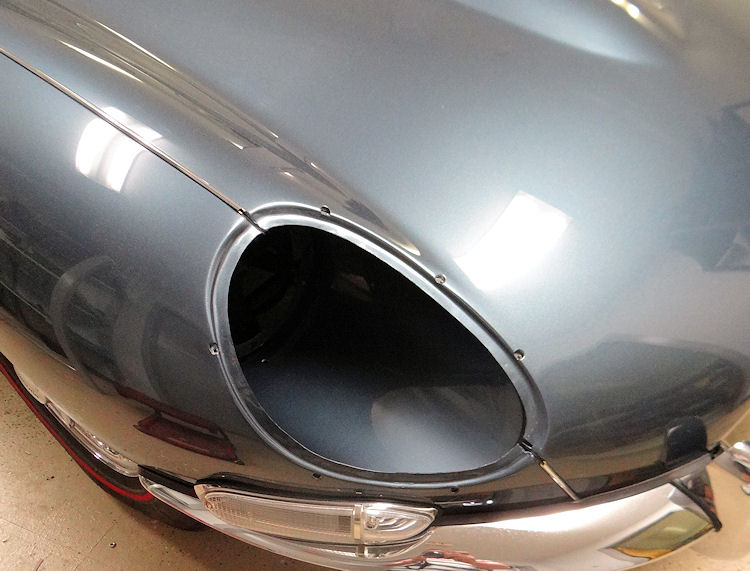
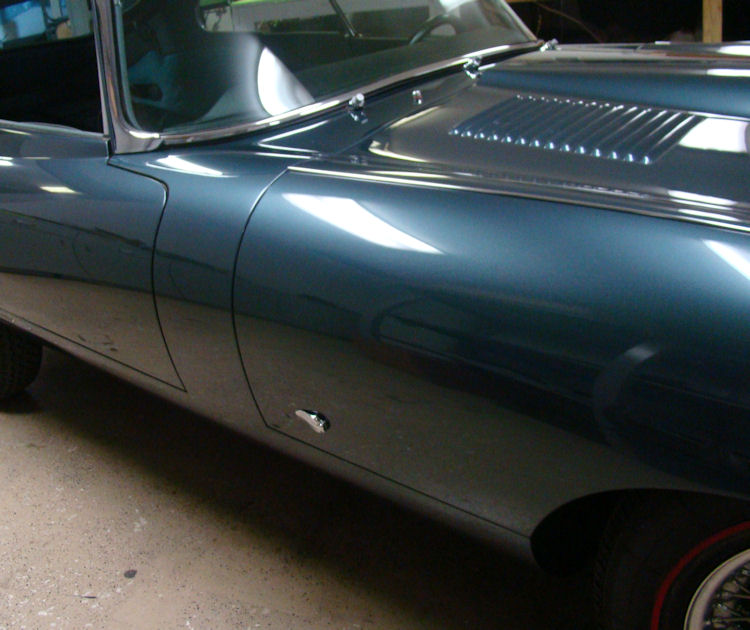
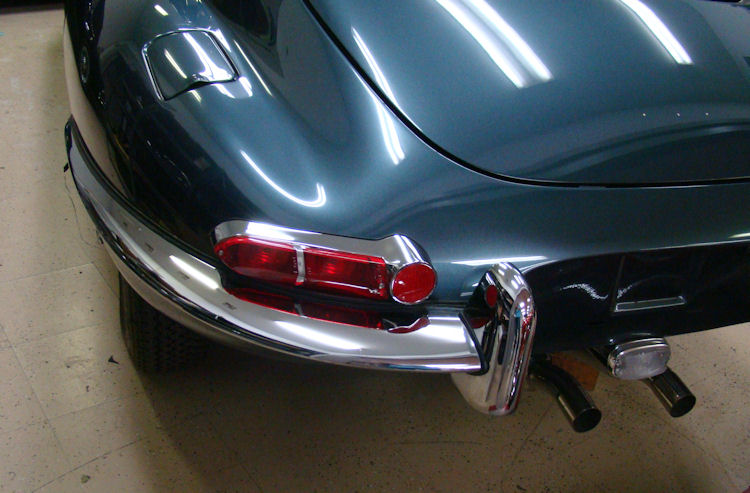
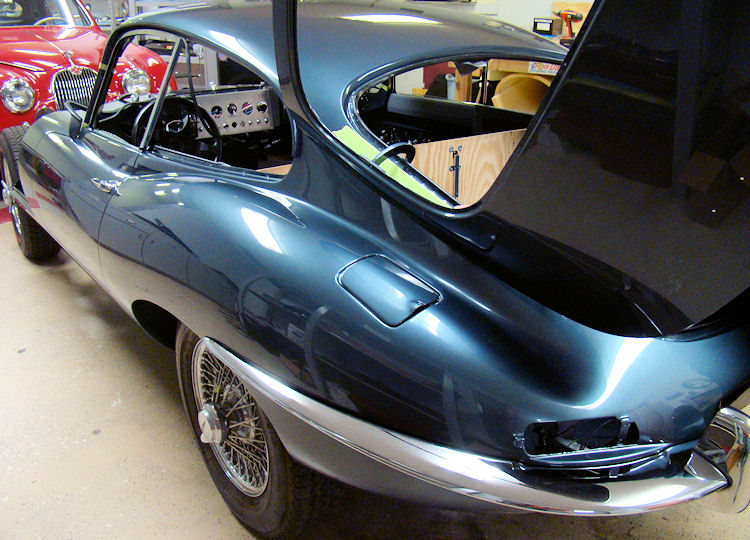
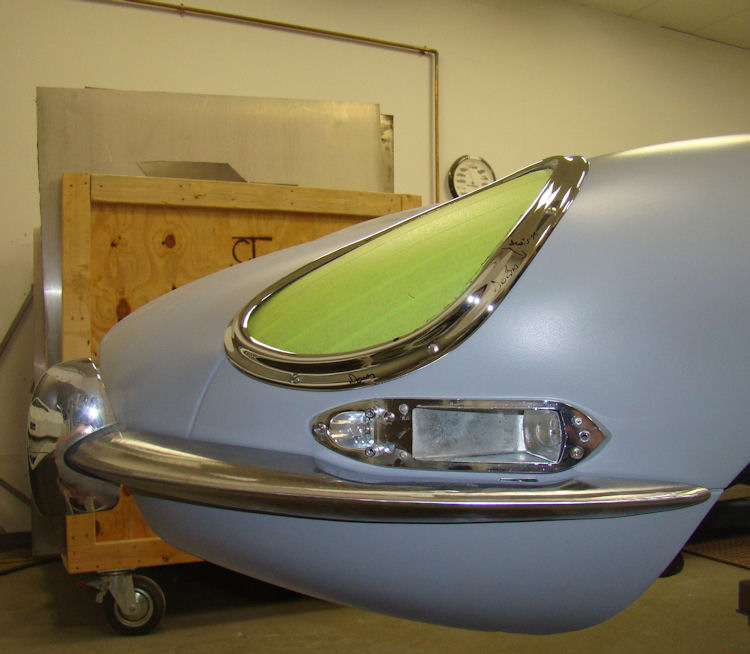
Since our last update we have installed the front bumpers, motif bar, outside bonnet latch covers, bonnet chrome beading and retrimmed and fitted the dash top.
 |
 |
|
|
|
 |
 |
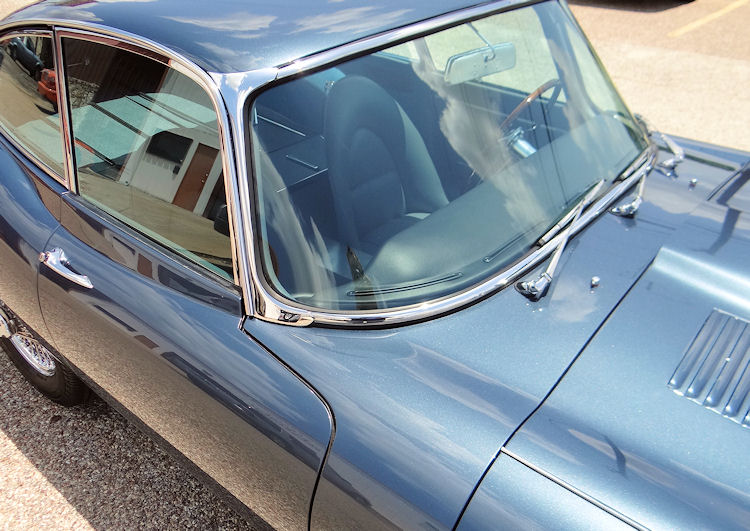
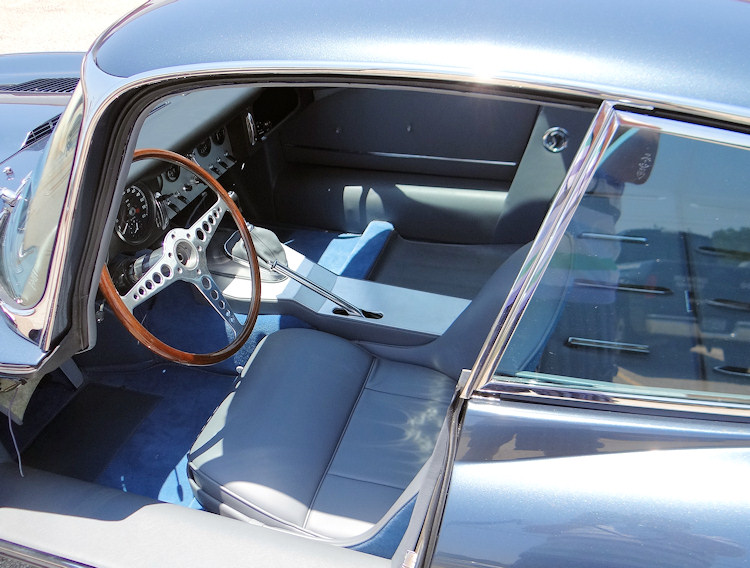
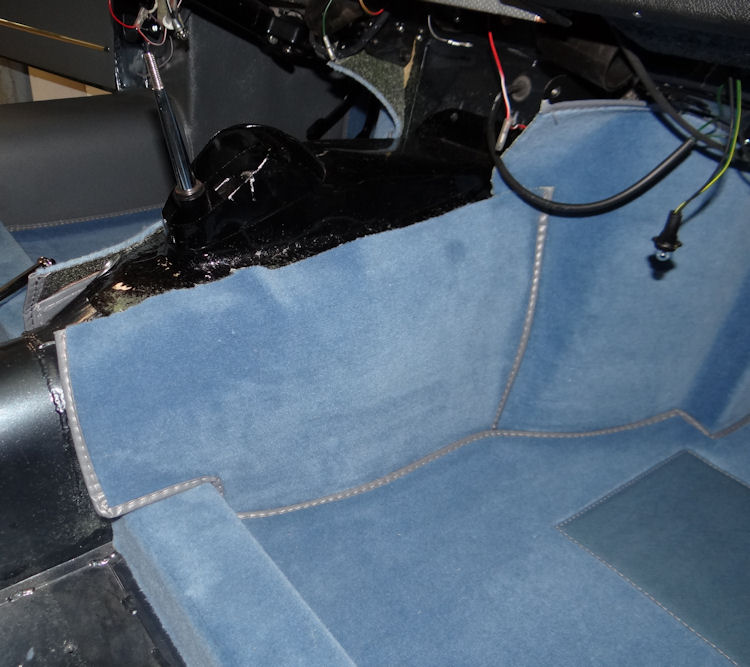
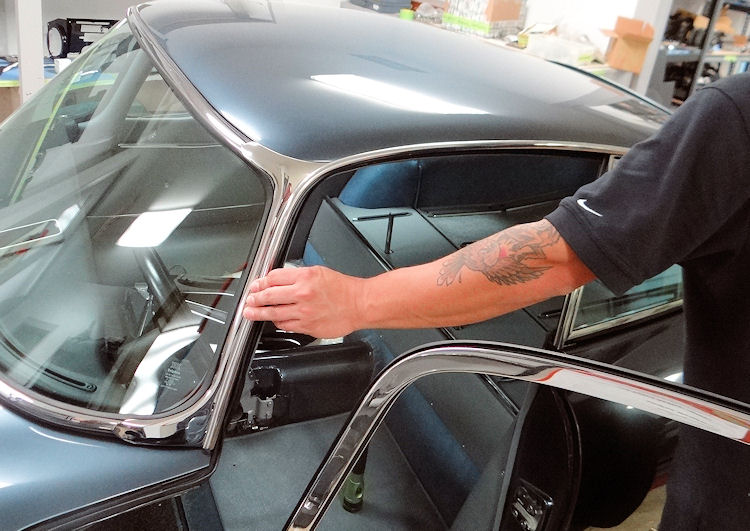
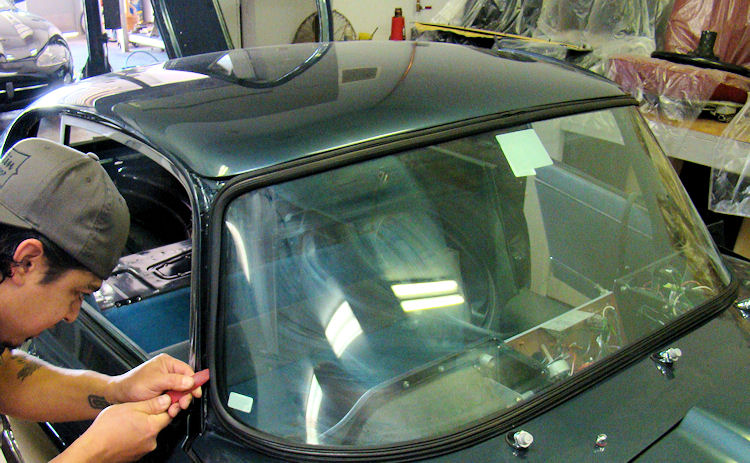
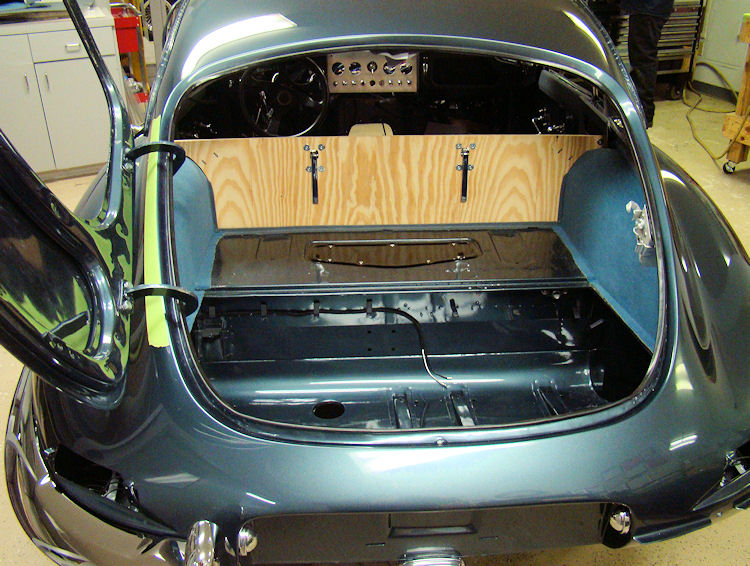
We have now installed your front and rear screens and chrome trim, and have begun installing the cabin underfelt and carpeting.
 |
 |
Update report - February 2, 2012
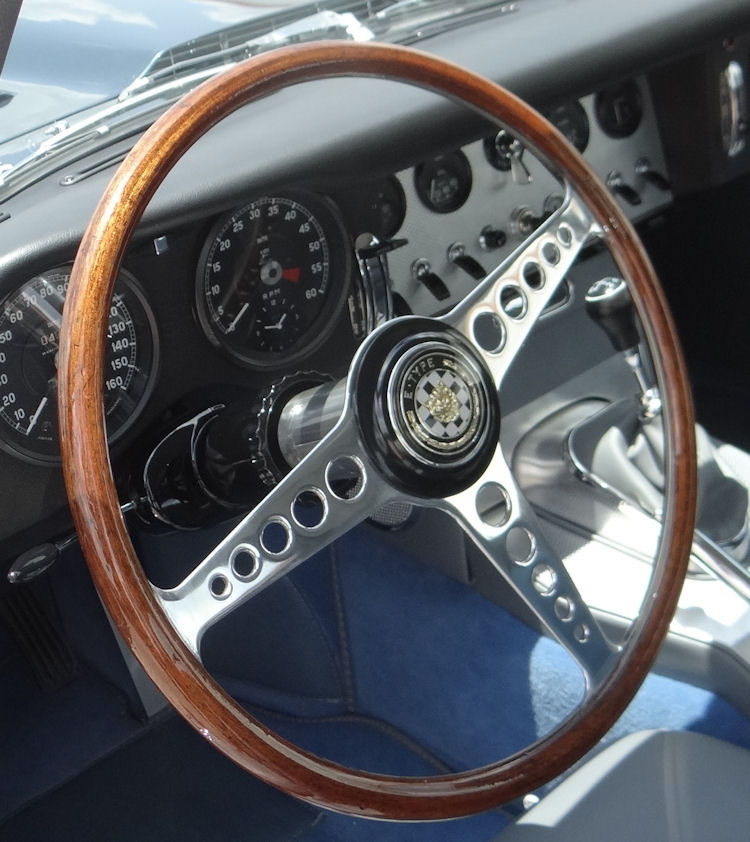
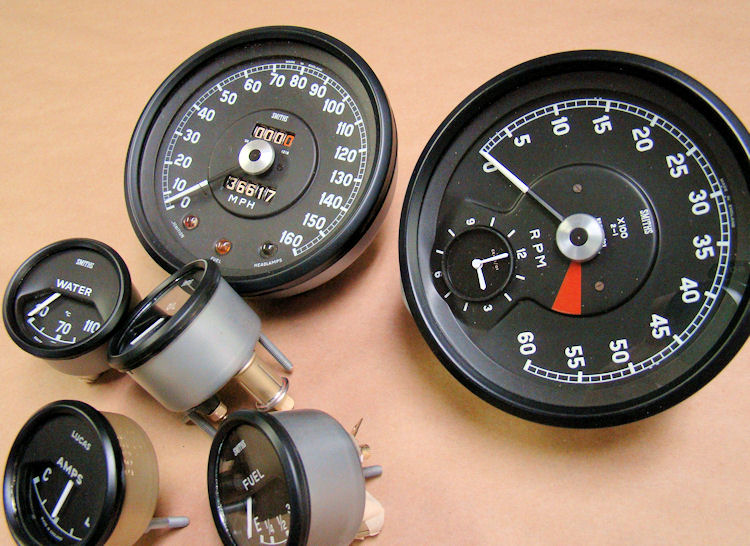
Your gauges have now been totally rebuilt, mechanically and cosmetically.
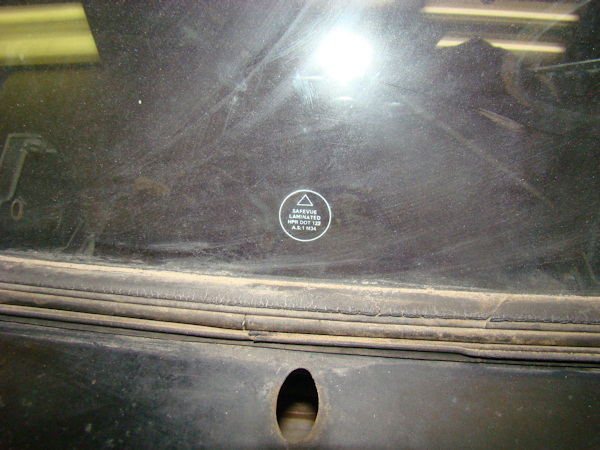
Update report - January 20, 2012 Today we installed the new Triplex windhsield and began installing the rear quarterlight windows. We are getting very close to maiden voyage time!
 |
 |
Installing and adjusting the bonnet...
 |
 |
 |
|
|
|
|
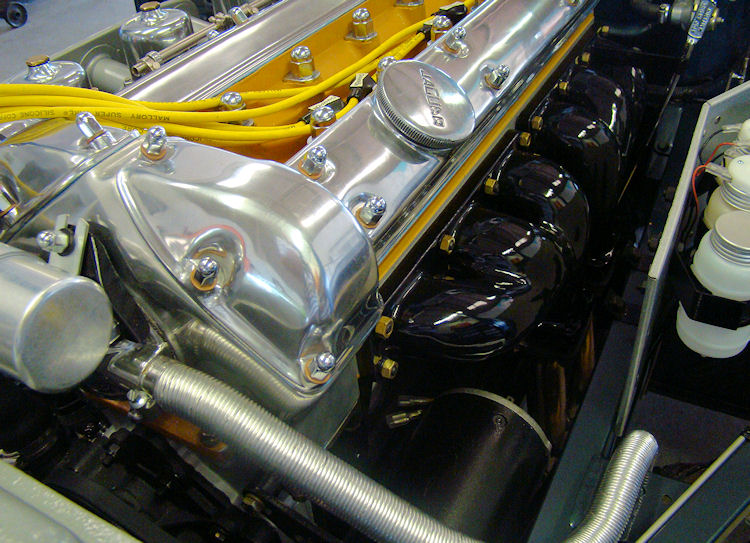
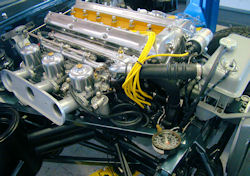
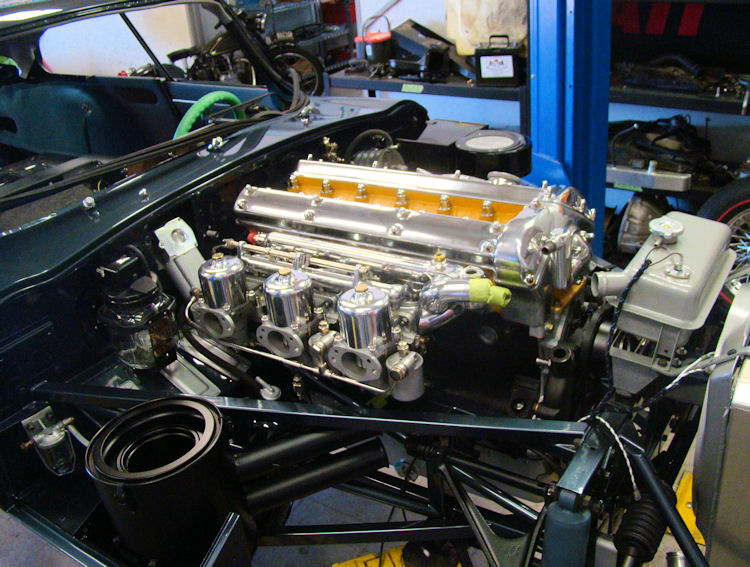
I am delighted to report that we have now test run the engine for the first time and everything went perfectly. For tuning and break-in purposes we are using temporary plug wires, a spin-on oil filter kit and a CJ aluminum radiator. The finished car will use OEM spec plug wires and oil filtration, etc.Click on the second image below for a short video clip of the initial firing.
 |
 |
|
|
|
|
|
|
 |
 |
|
|
|
|
|
|
 |
 |
|
original style unti |
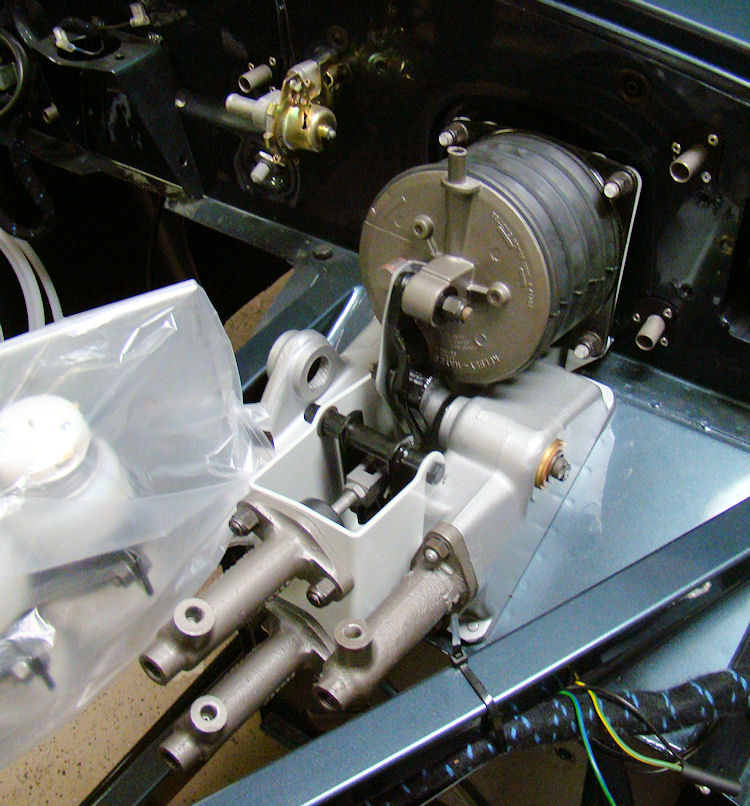
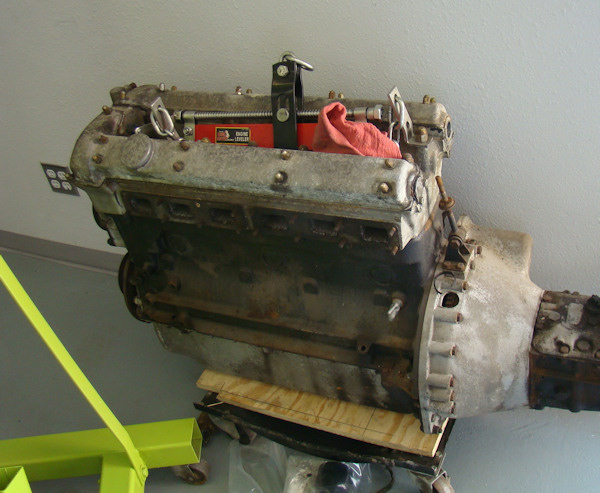
Engine and transmission installed...
 |
 |
 |
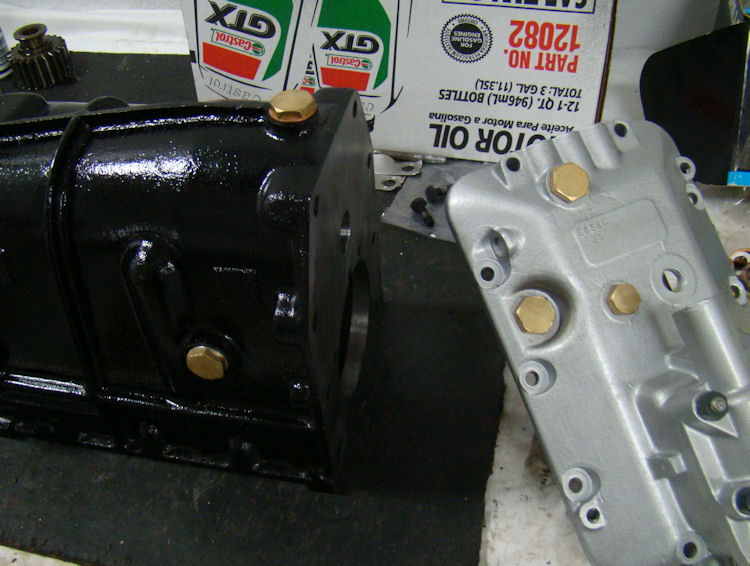
We are currently rebuilding the original transmission and should be ready to install the engine in the next week or so.
 |
 |
|
|
|
|
|
|
 |
 |
|
|
|
|
|
|
 |
 |
|
|
|
Happy New Year, Marten!
 |
 |
|
|
|
|
|
|
 |
 |
|
|
|
|
|
|
 |
 |
|
as this panel was missing on your car |
|
|
|
|
 |
 |
|
|
|
|
|
|
 |
 |
|
|
|
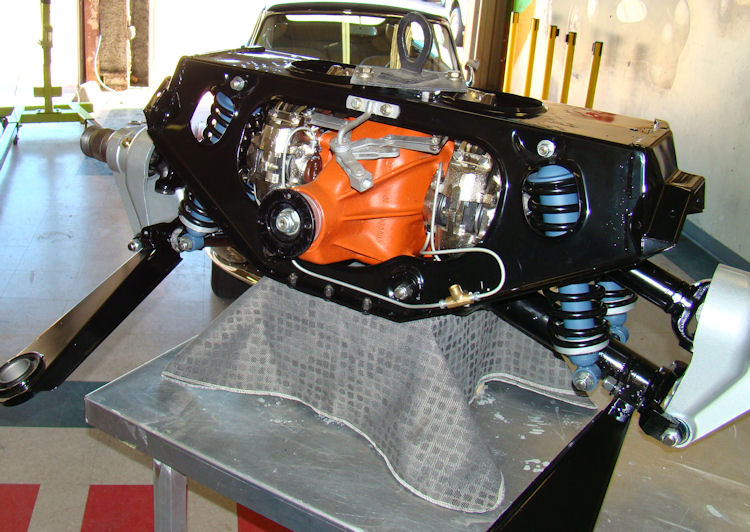
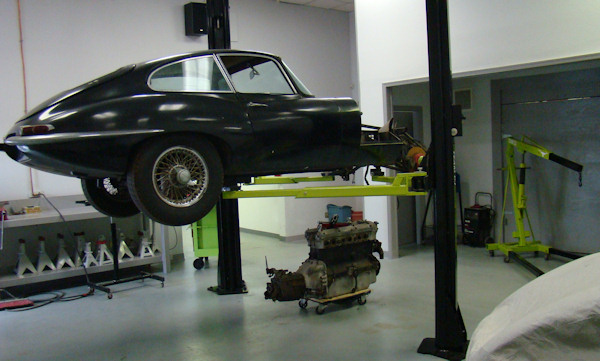
Time to assemble the IRS and put this car back on its wheels....
 |
 |
|
|
|
 |
 |
|
|
|
 |
 |
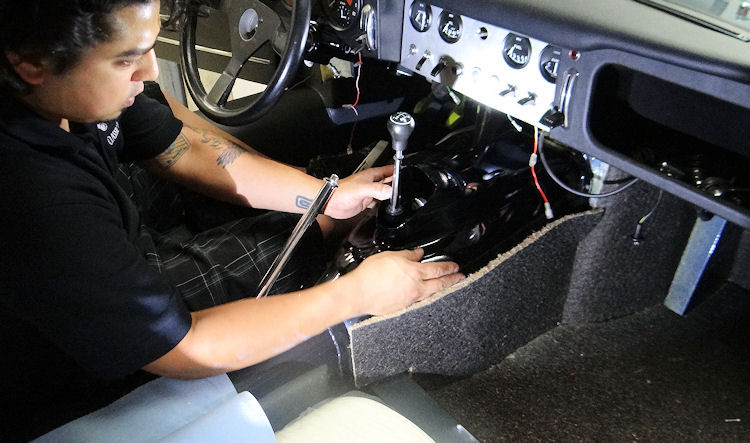
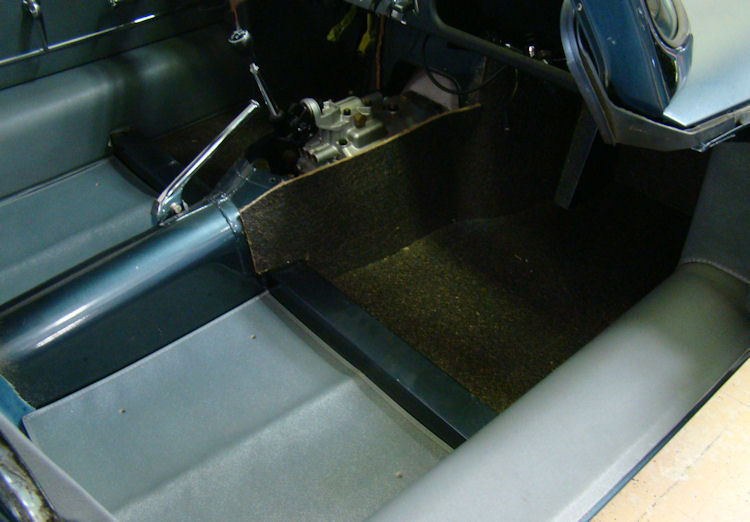
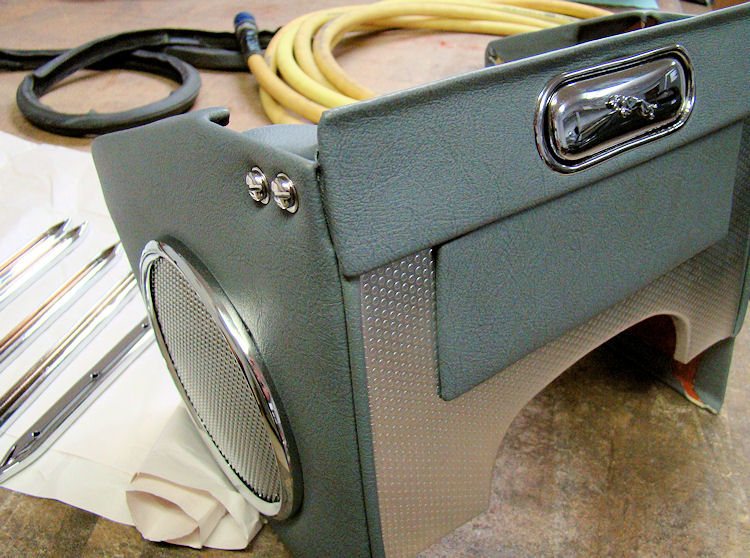
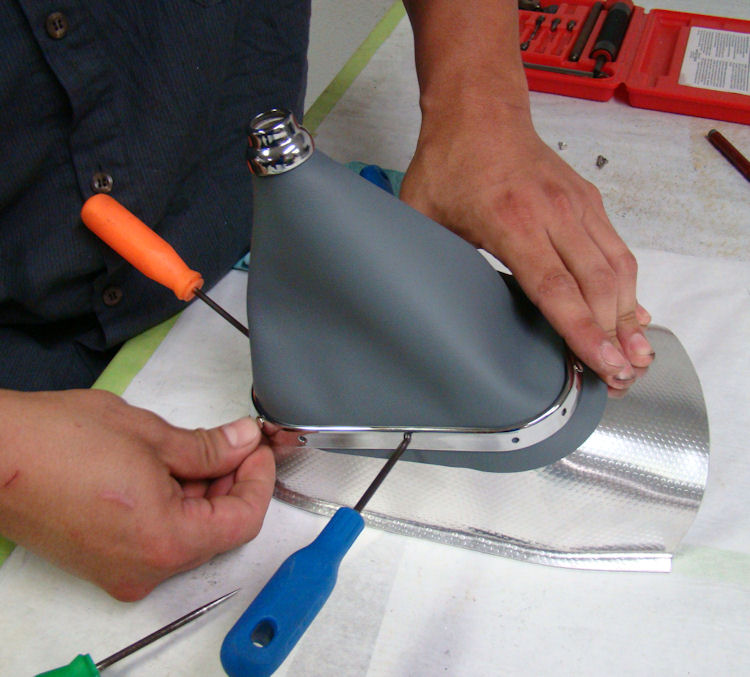
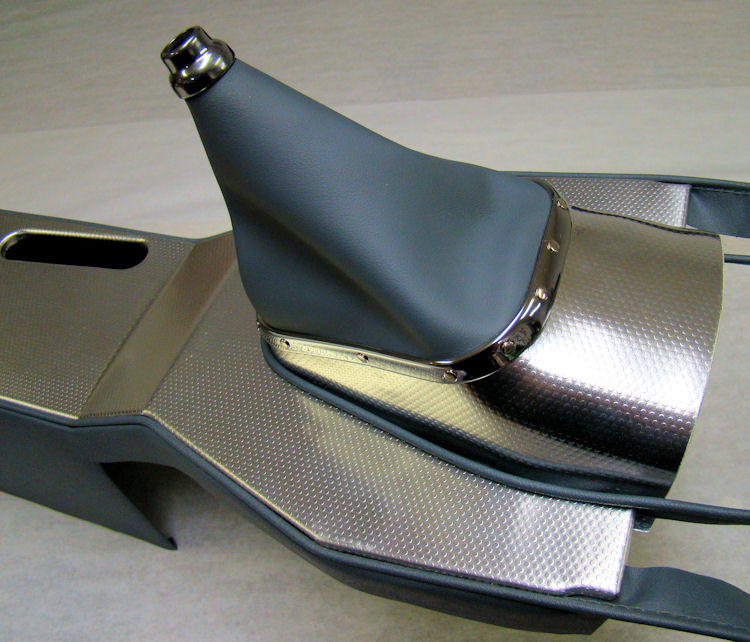
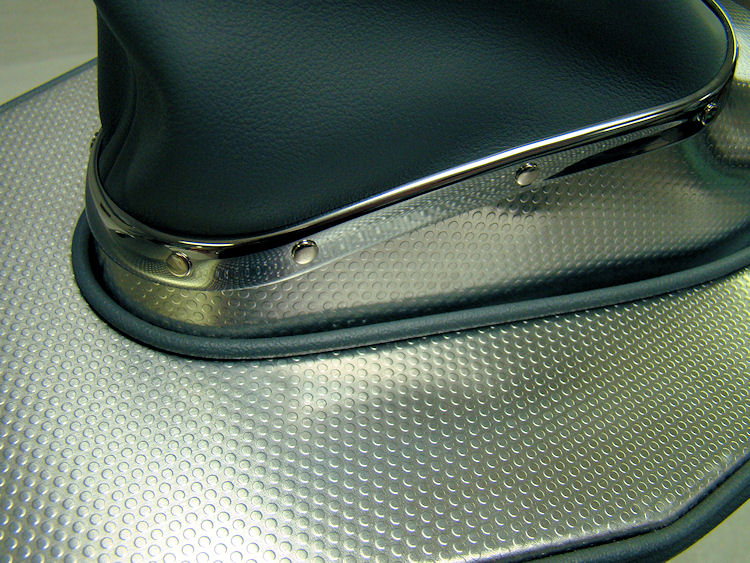
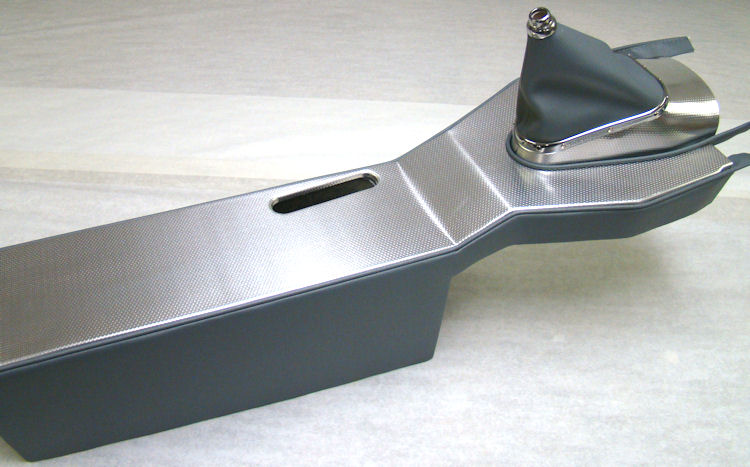
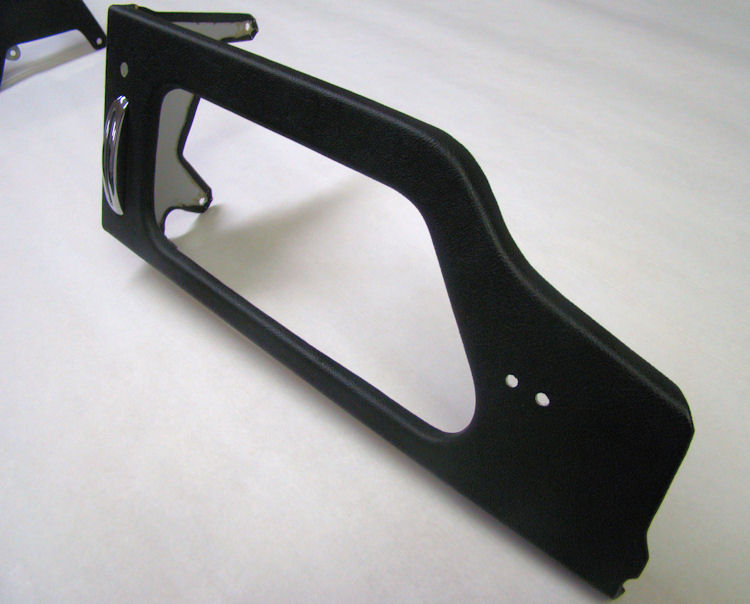
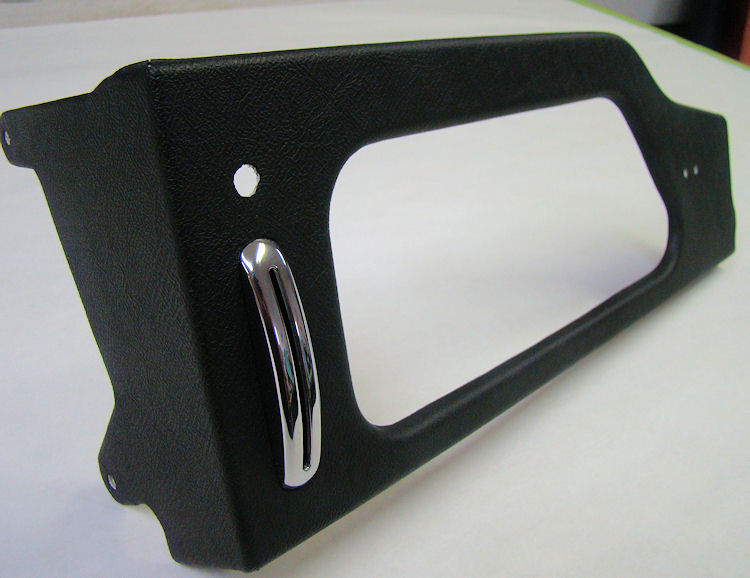
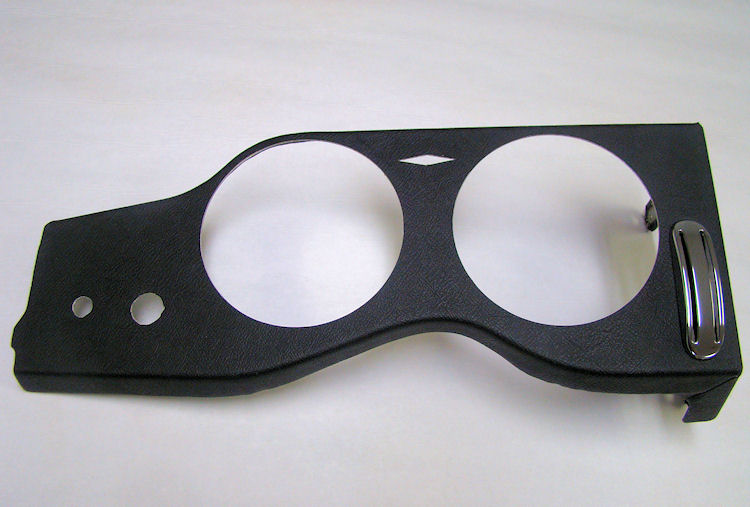
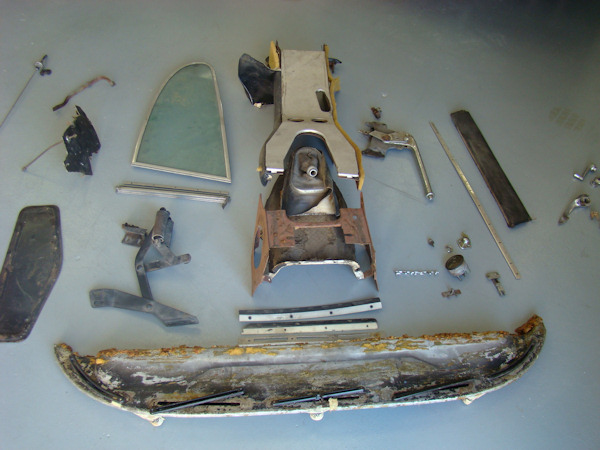
Restoring center console and shifter tower...
 |
 |
|
|
|
 |
 |
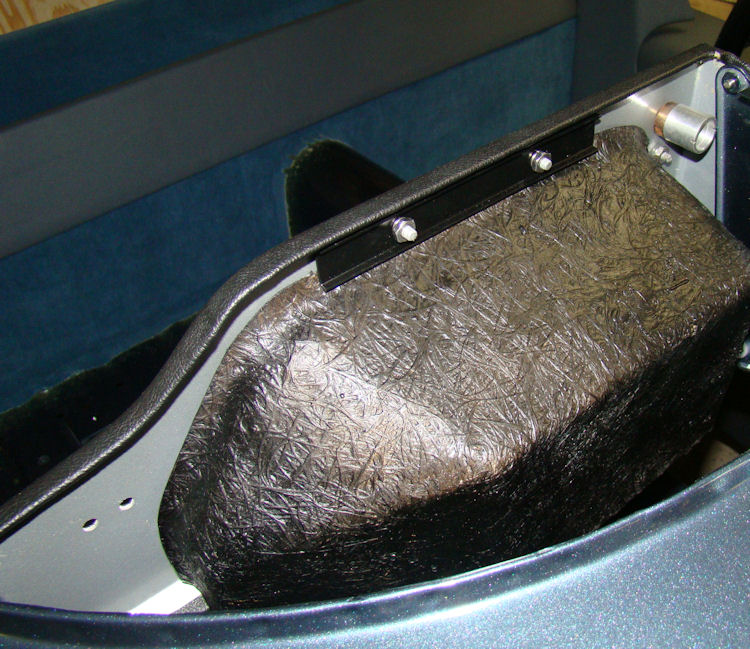
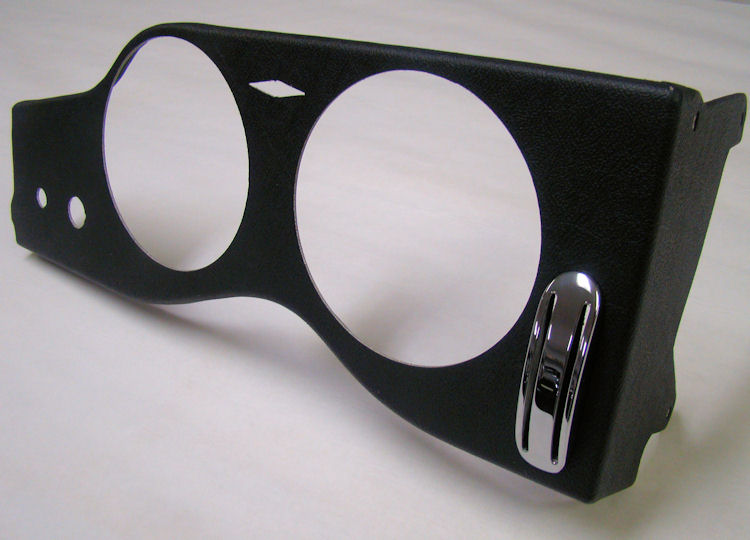
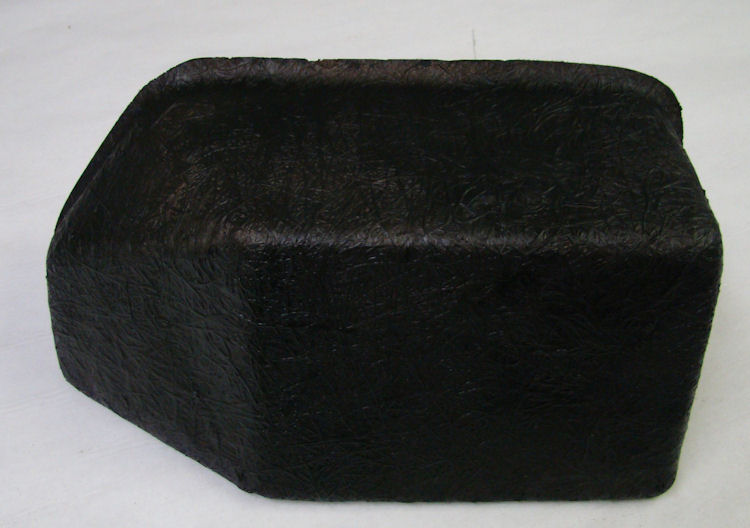
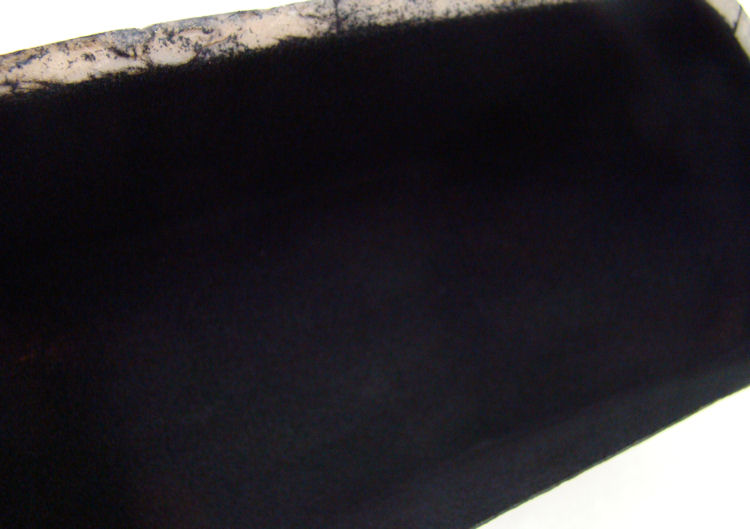
Restoring dash components, including very early style fiberglass glove box...
 |
 |
|
|
|
|
|
|
 |
 |
|
|
|
 |
 |
|
|
|
|
|
|
 |
 |
|
|
|
|
|
|
 |
 |
|
|
|
|
|
|
 |
 |
|
|
|
 |
|
|
|
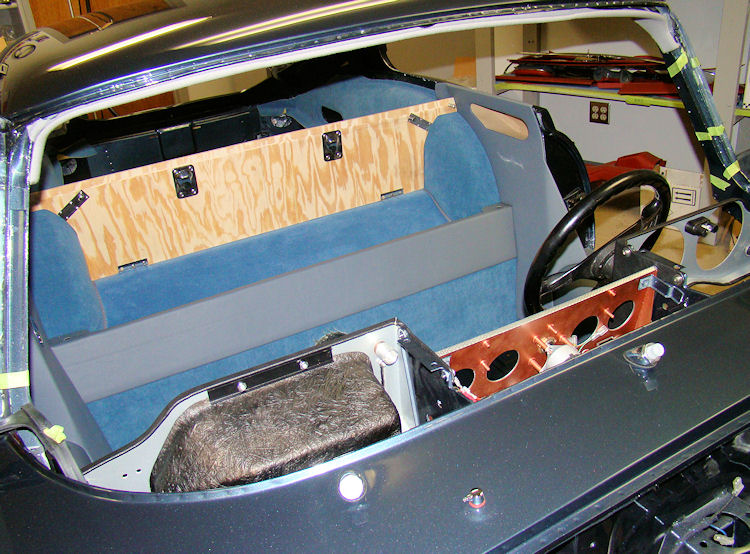
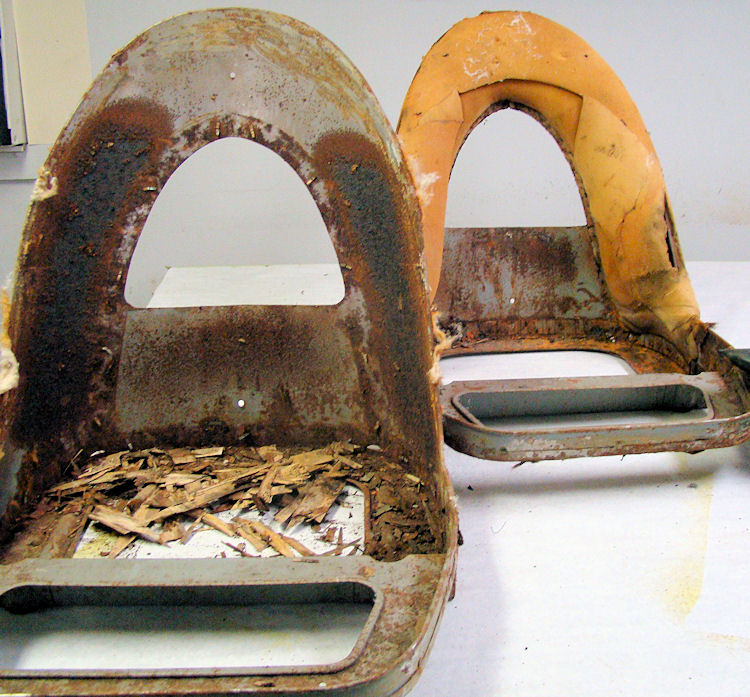
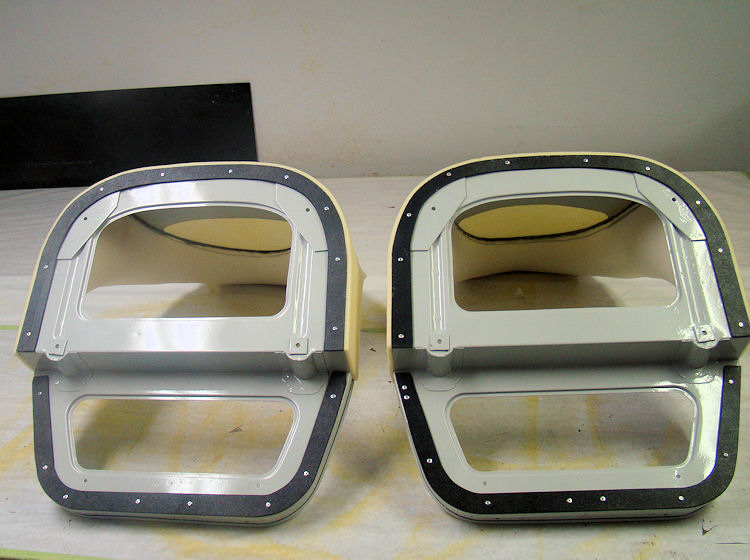
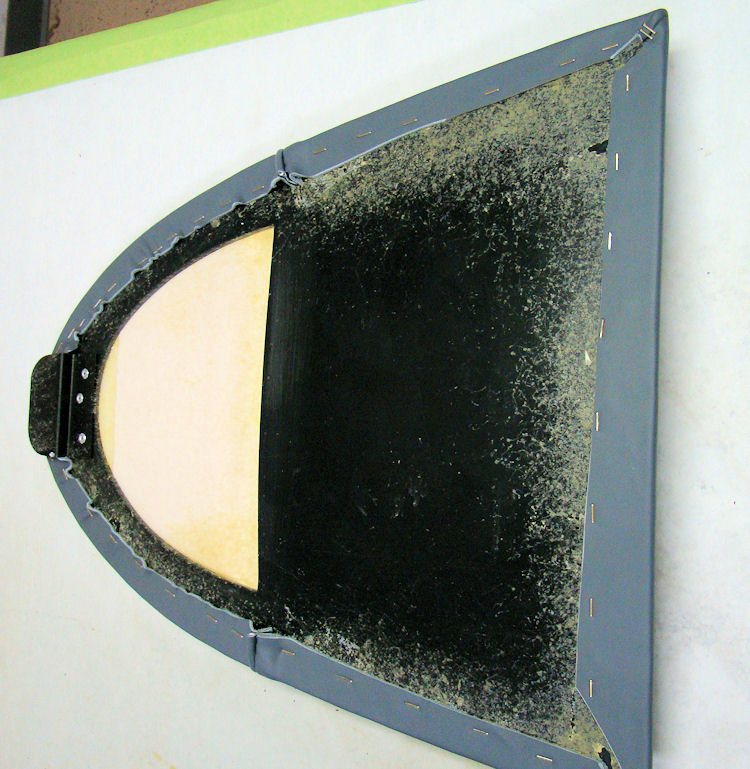
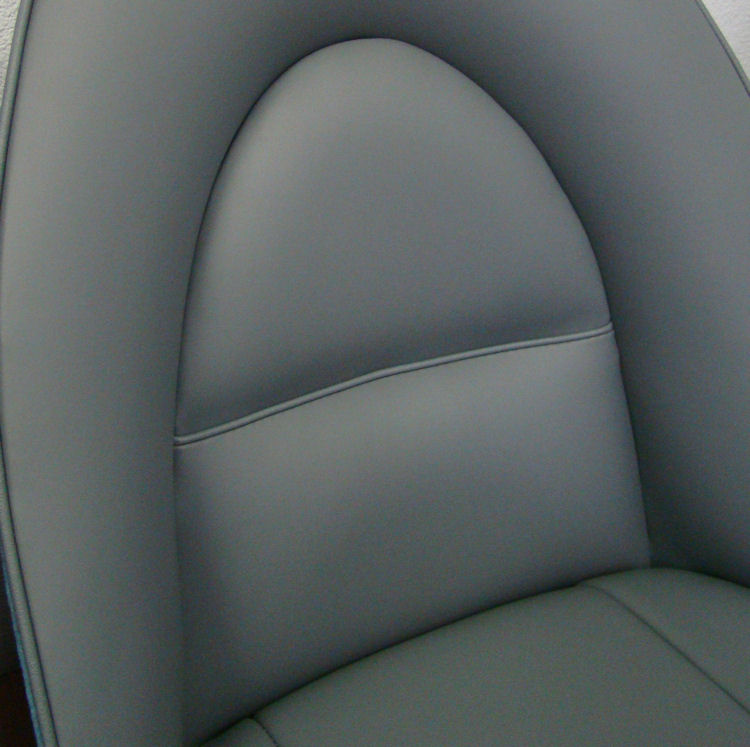
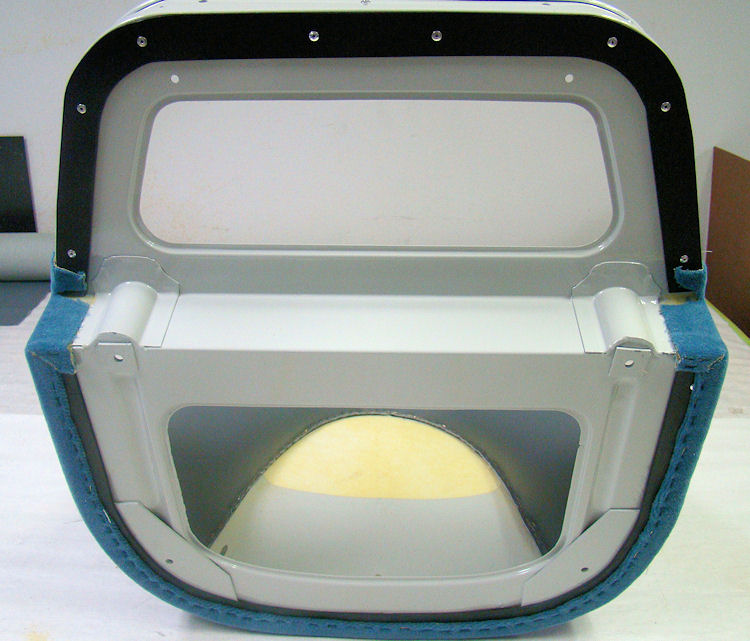
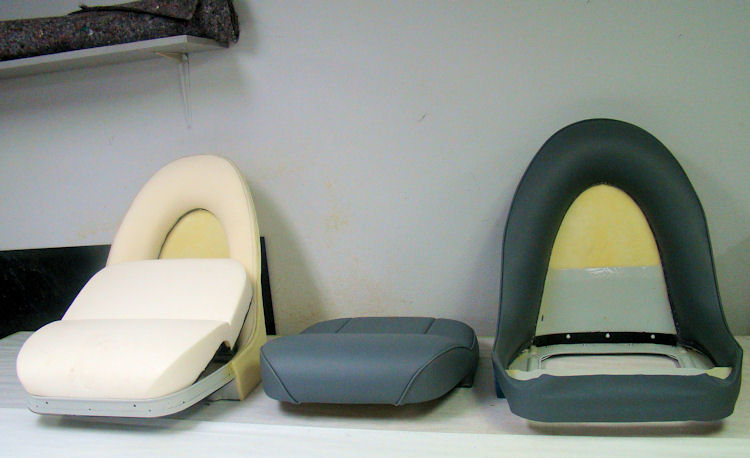
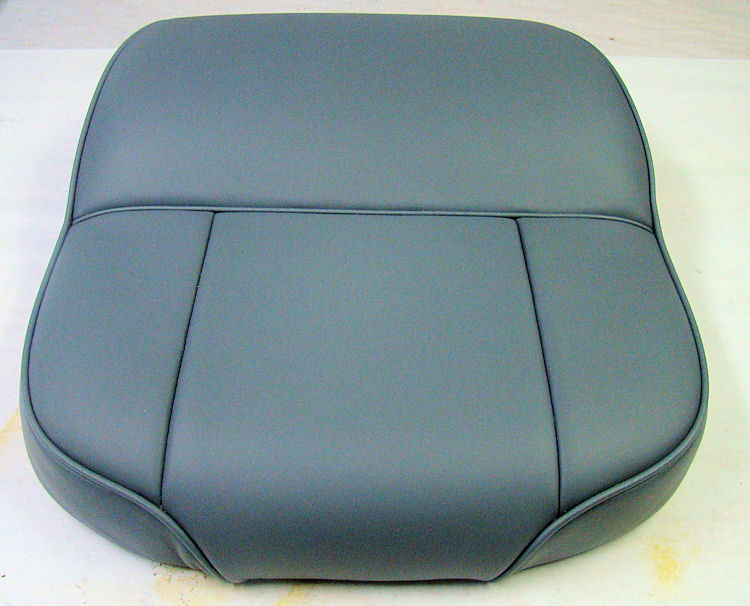
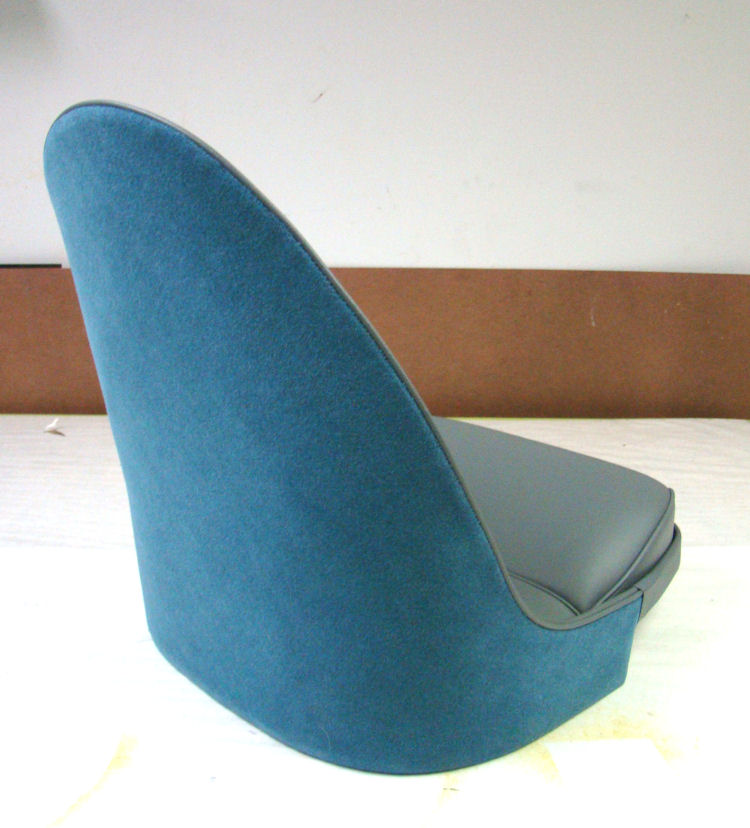
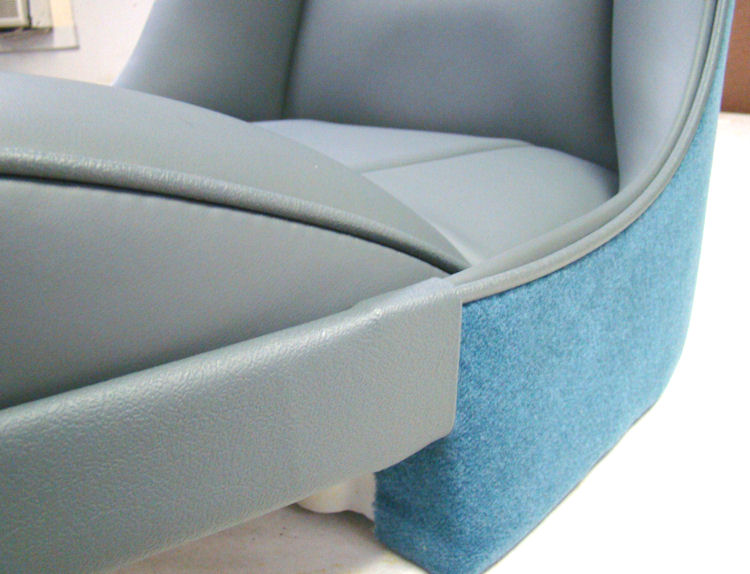
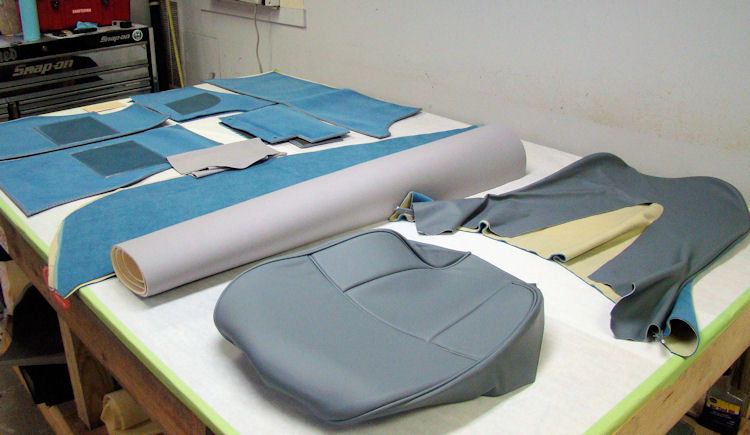
Restoring and trimming your seats...
 |
 |
|
|
|
 |
 |
|
|
|
 |
 |
|
|
|
 |
 |
|
|
|
 |
 |
|
|
|
 |
 |
|
|
|
 |
 |
|
|
|
 |
 |
|
|
|
 |
 |
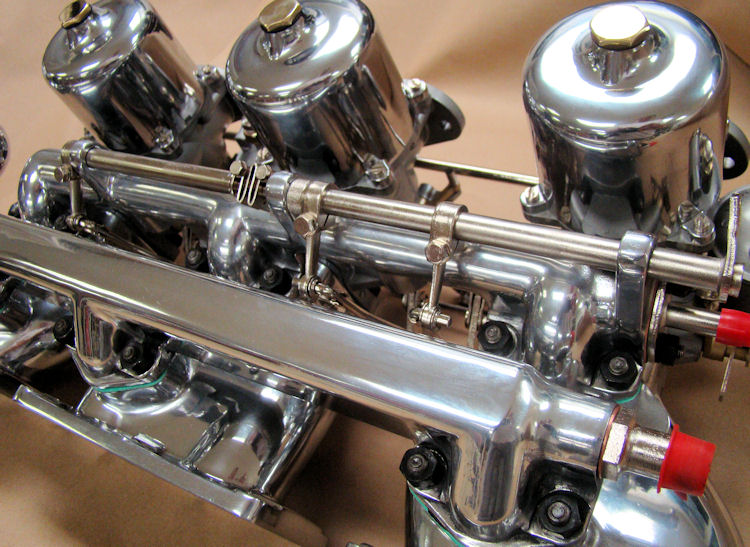
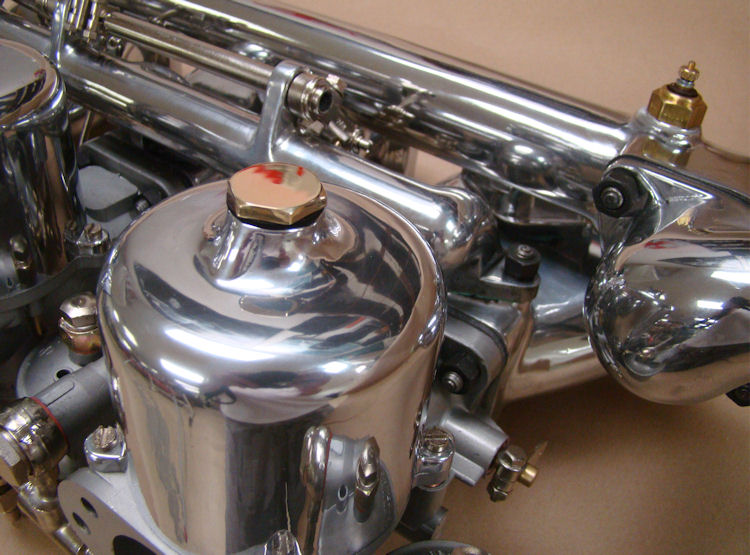
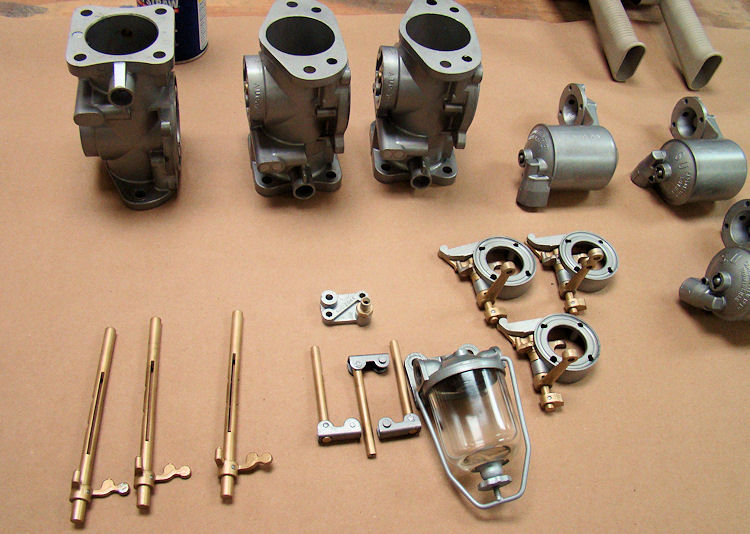
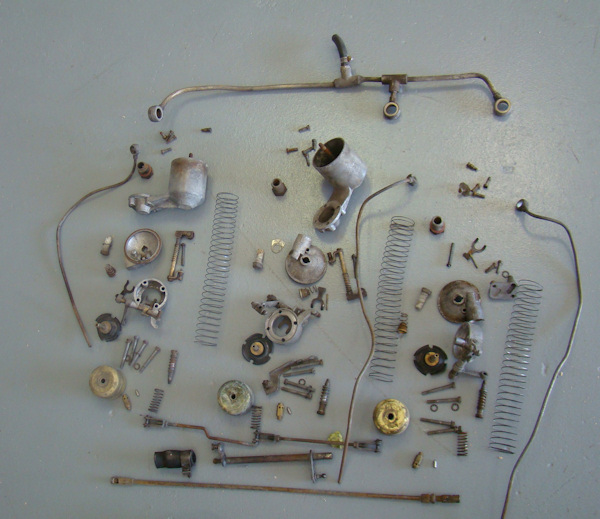
Your carbs have now been completely rebuilt...
 |
 |
|
|
|
 |
 |
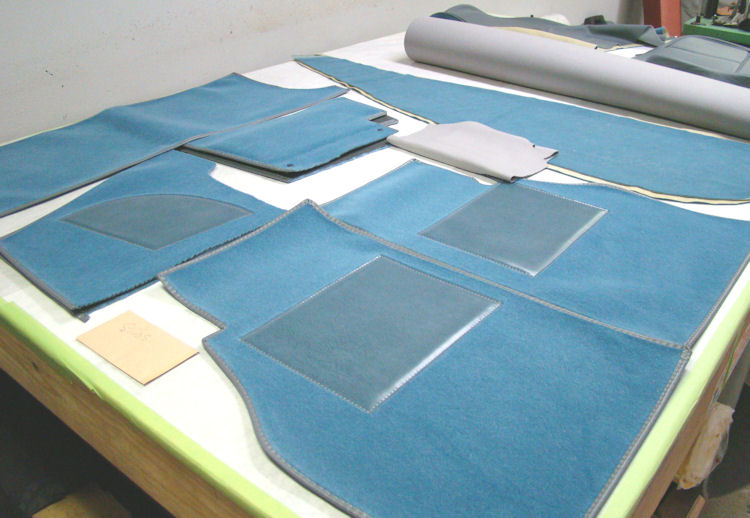
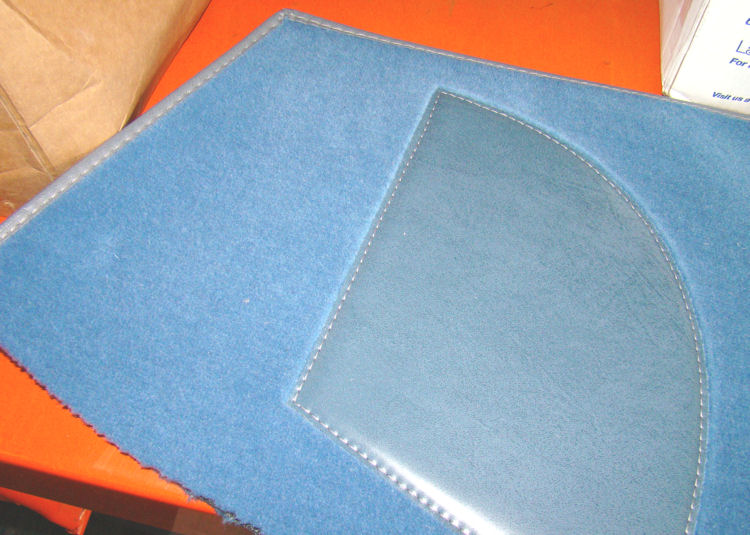
With the new light blue interior kit in hand, Carlos has begun the process of restoring and retrimming the seats. Note that the photos make the carpets look brighter than they really are. Image # 3 below is the most representative of the actual color.
 |
 |
|
|
|
|
|
|
 |
 |
|
|
|
|
|
|
 |
 |
|
|
|
|
|
|
 |
 |
|
|
|
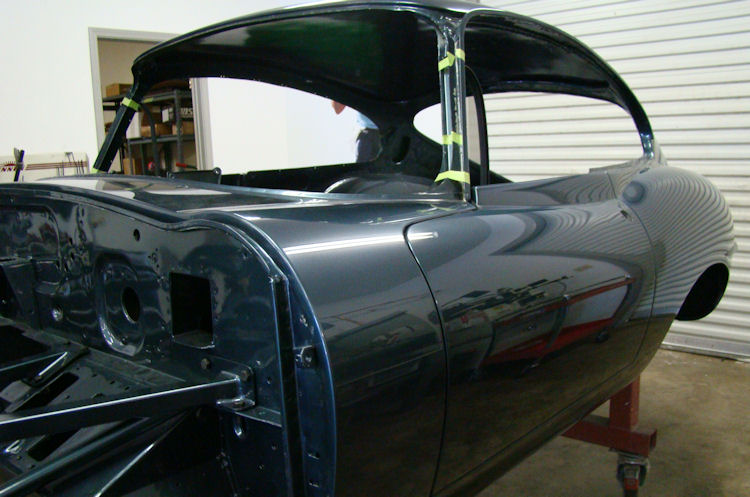
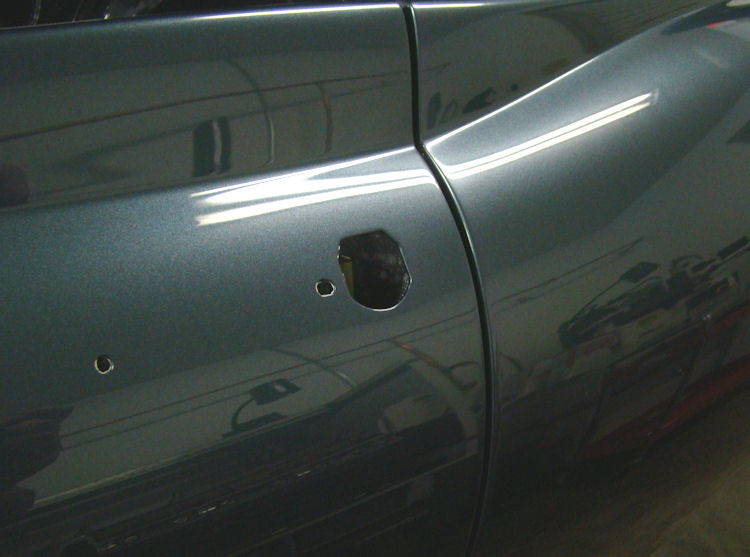
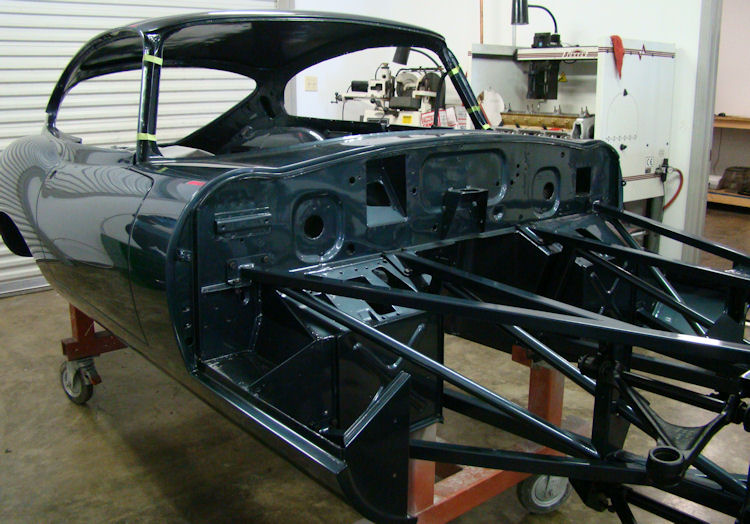
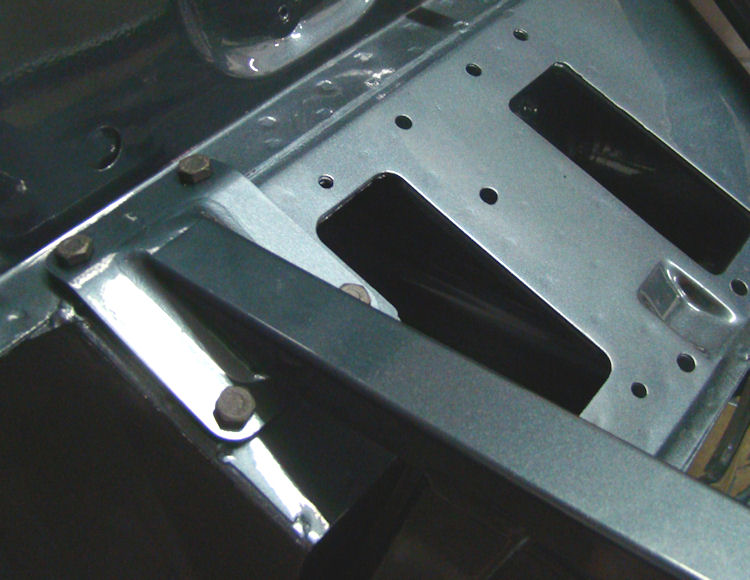
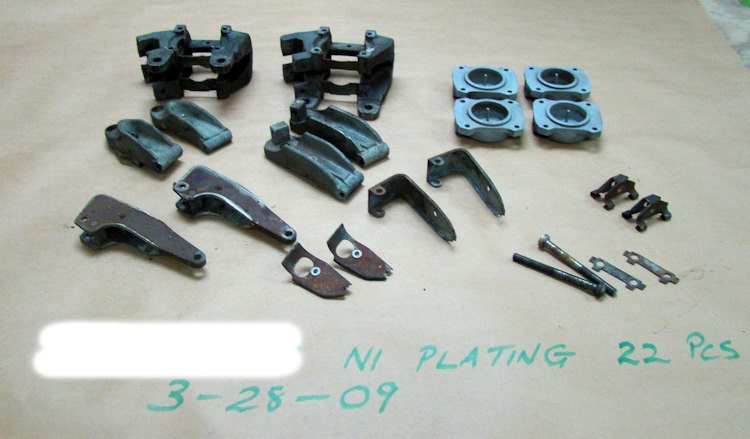
We have now received all of the chrome plating back and begun assembling the front engine frames and front suspension, using the original fasteners that we had plated in black oxide. We have also installed both doors, which fit and latch beautifully.Over the next couple of weeks we will have the car back on its wheels and proceed with the installation of the engine and other major mechanical components.
 |
 |
 |
|
seals and latches |
|
black oxide |
|
|
||
 |
 |
 |
|
|
||
|
|
||
 |
 |
|
|
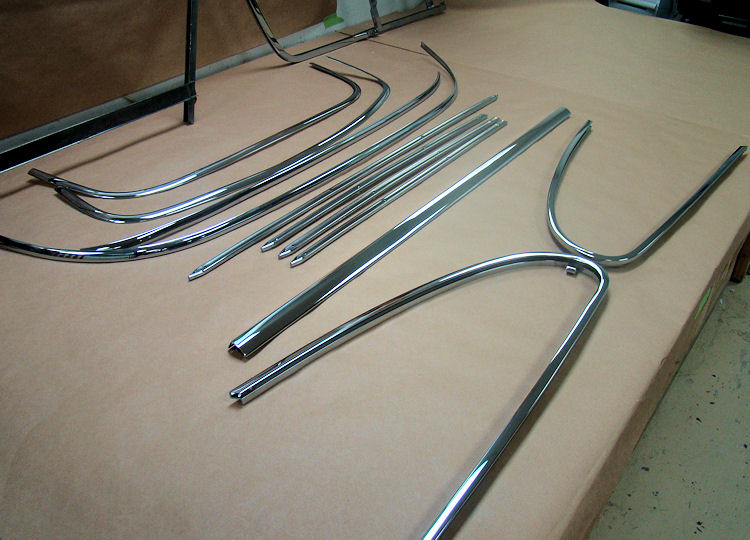
ready to install |
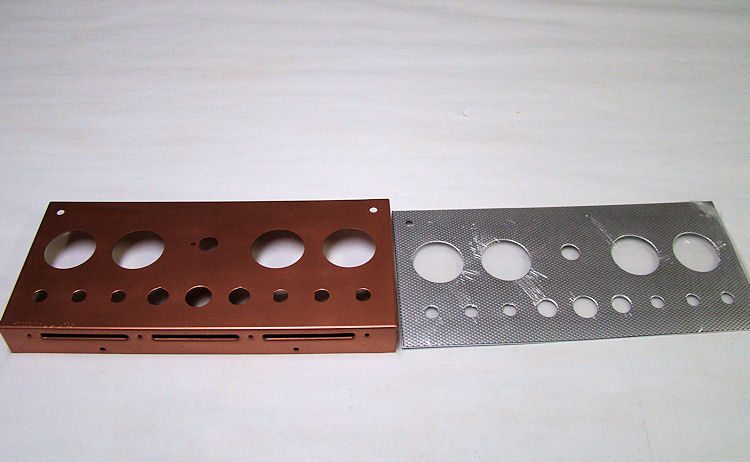
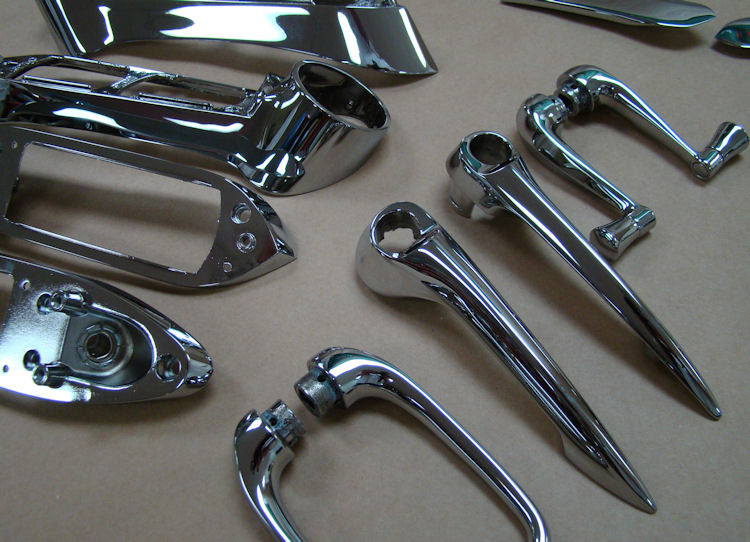
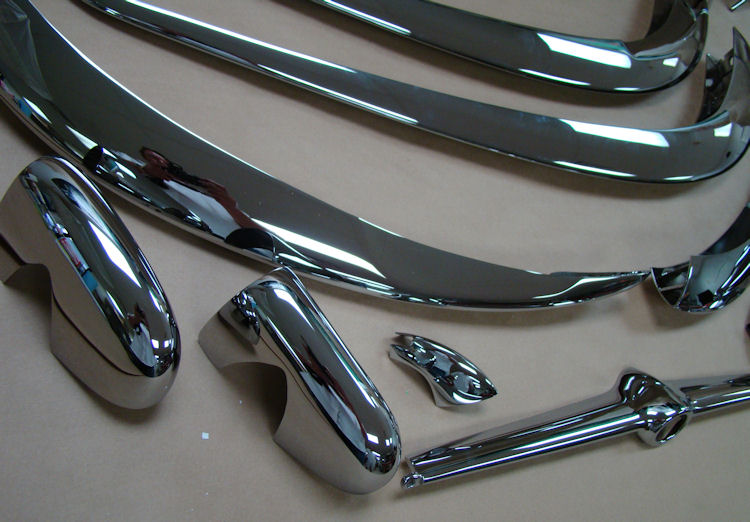
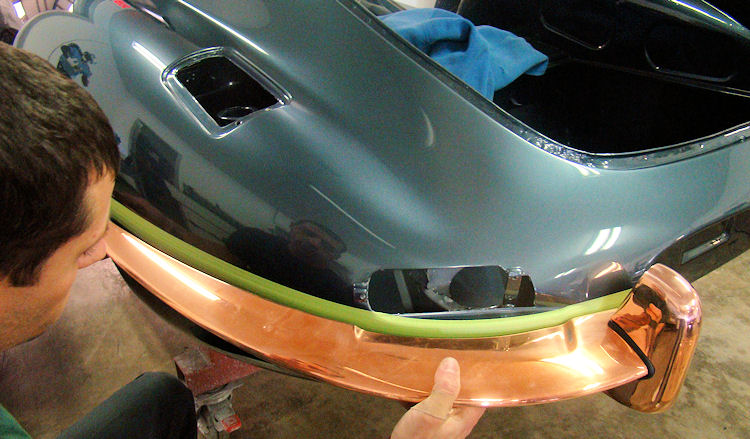
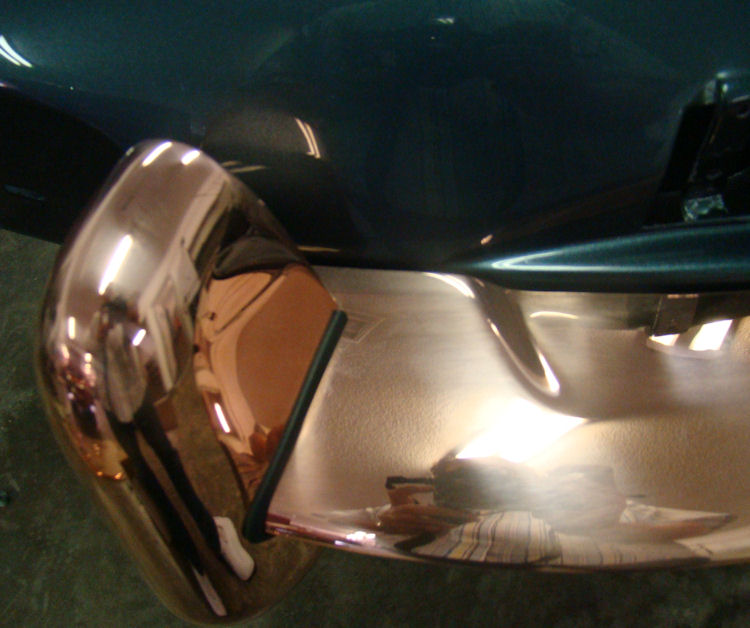
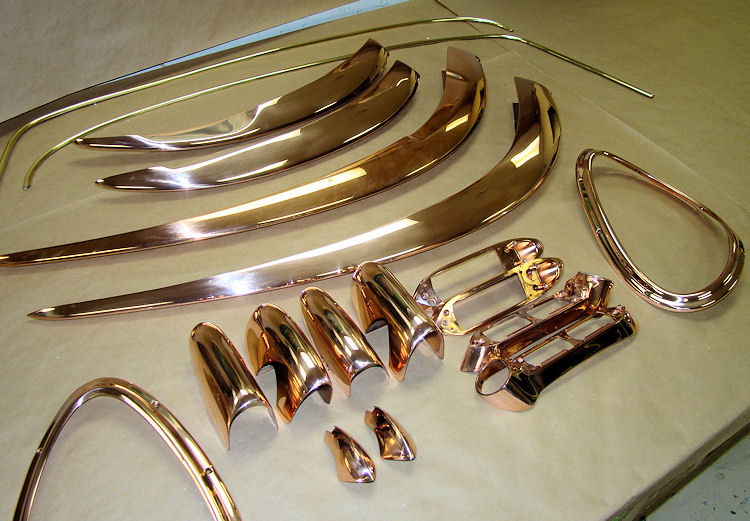
Double checking fit of 'trial fit' items before final chrome plate is applied.
 |
 |
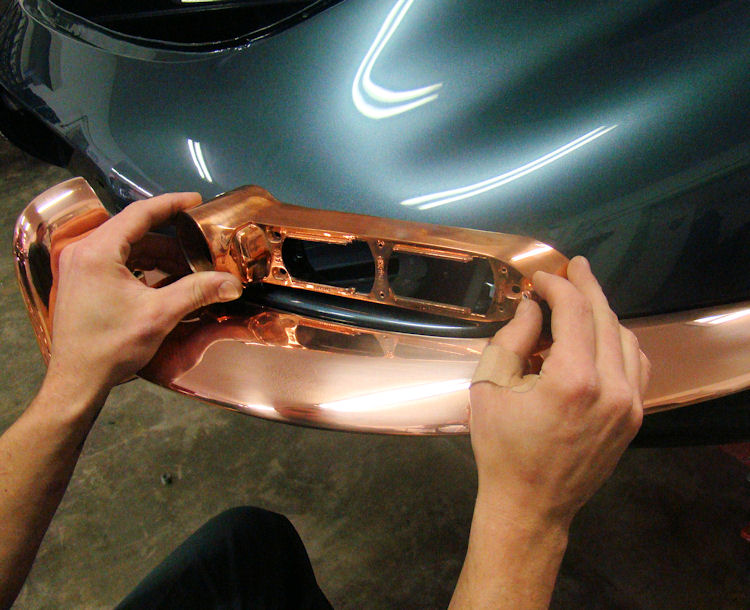 |
We have now received back the bulk of the chrome plating. Certain 'trial fit' items have been returned in copper plate so we can re-check fit before the final chrome plating is applied. This extra step adds time and expense to the process, but when perfection is the goal, it is well worth the extra effort.
 |
 |
|
sent out for black oxide plating |
been returned to re-check fit |
|
|
|
 |
 |
Update report - February 16, 2010
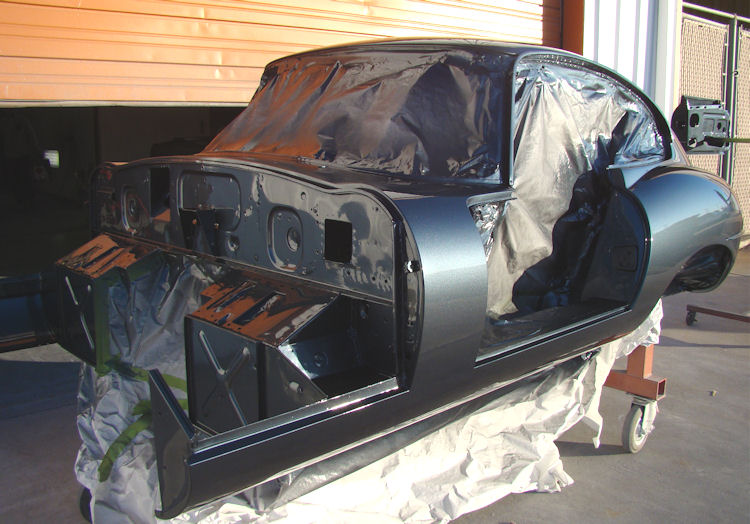
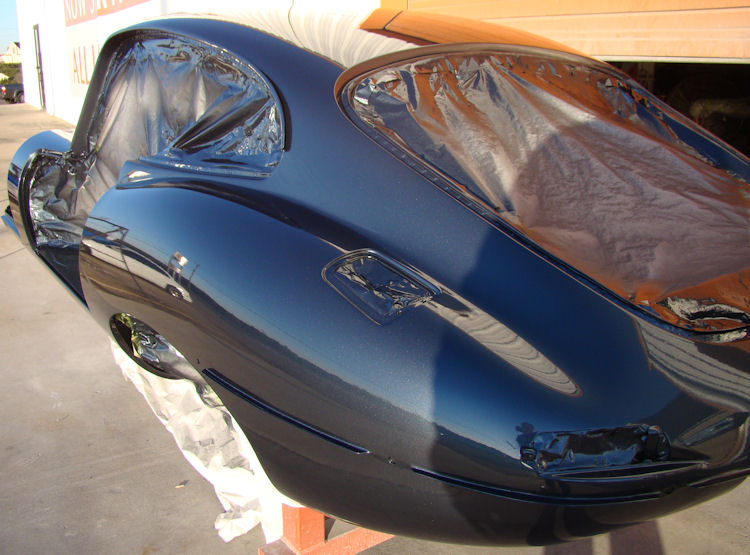
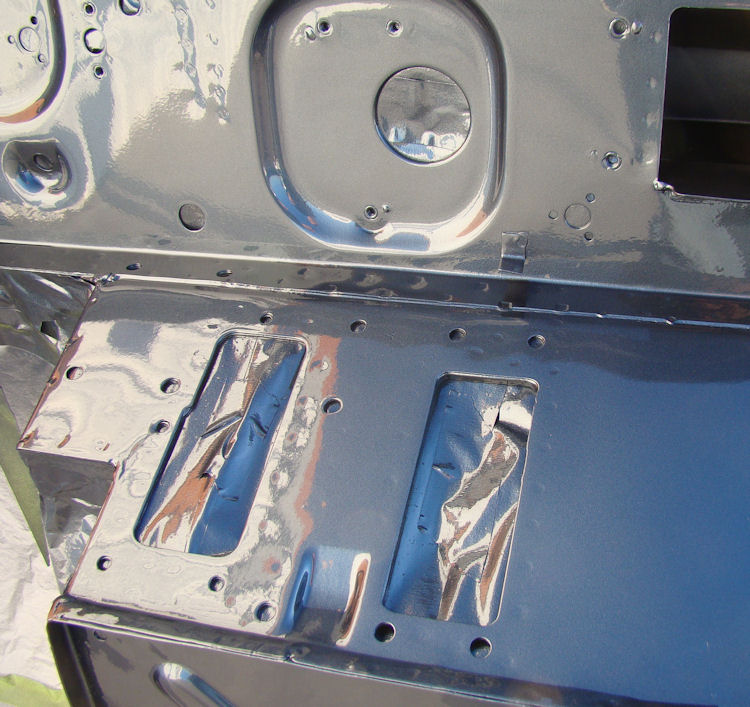
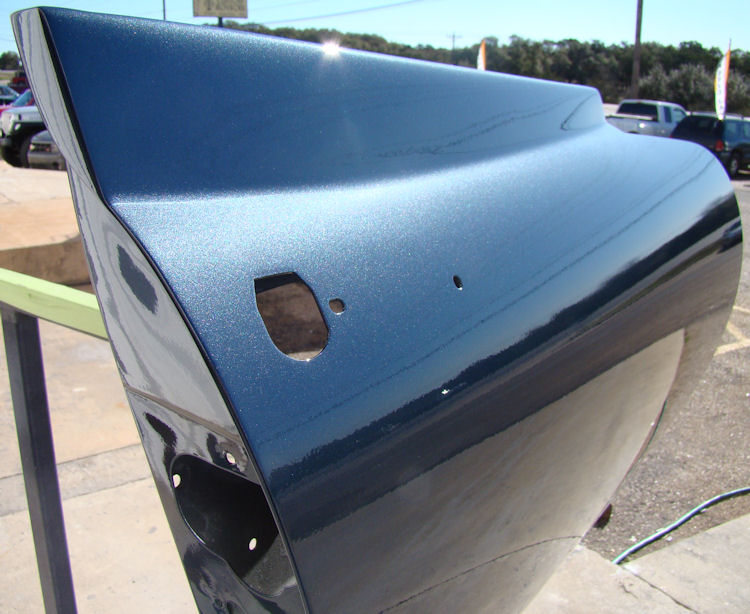
Yesterday afternoon we painted the bodyshell and doors...
 |
 |
|
|
|
|
|
|
 |
 |
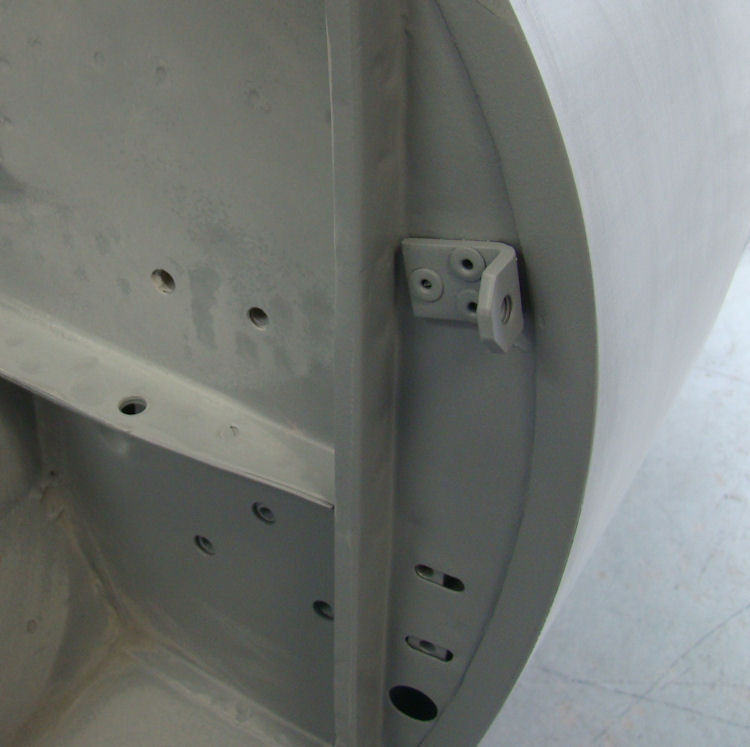
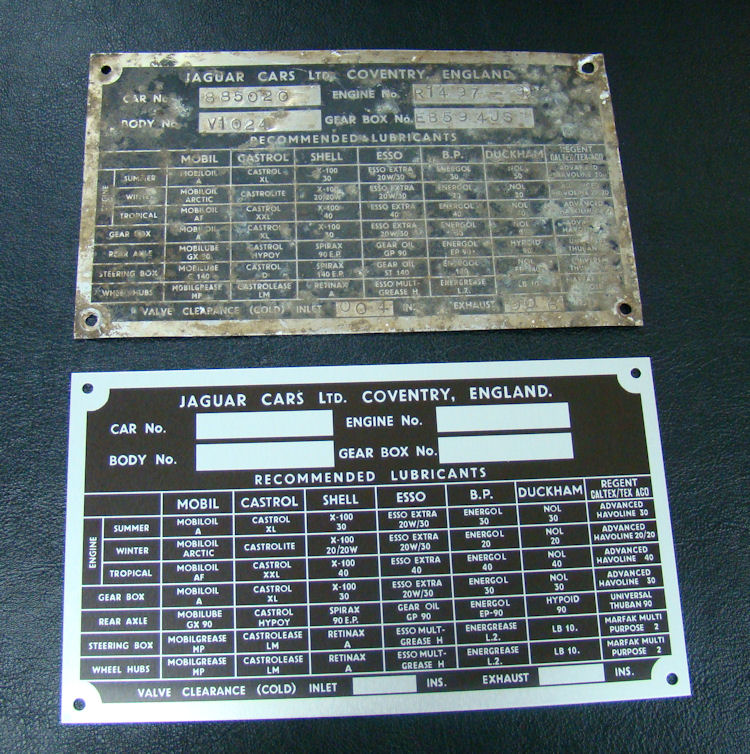
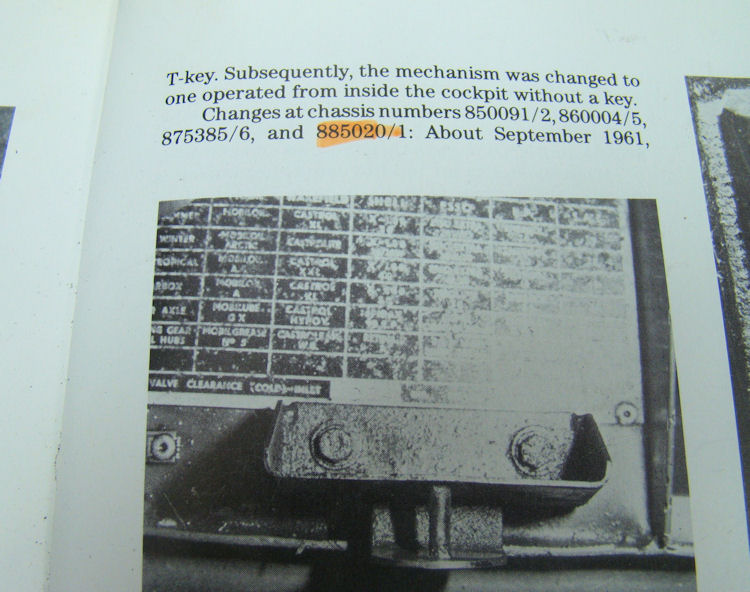
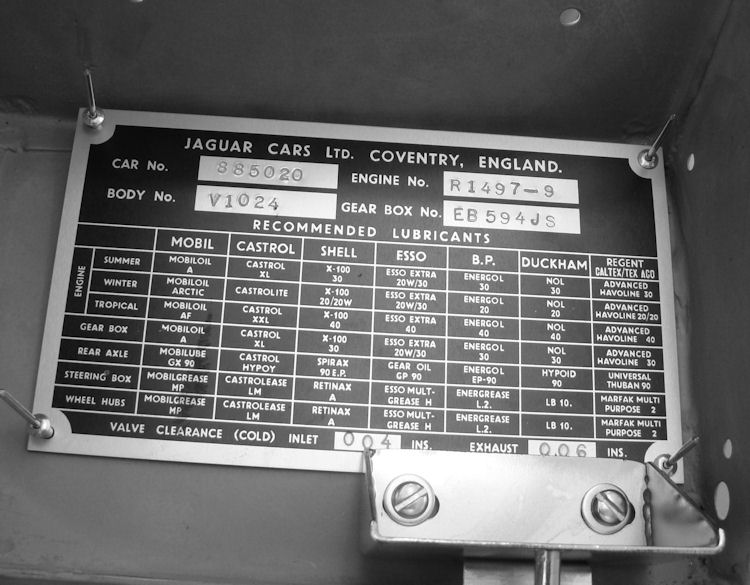
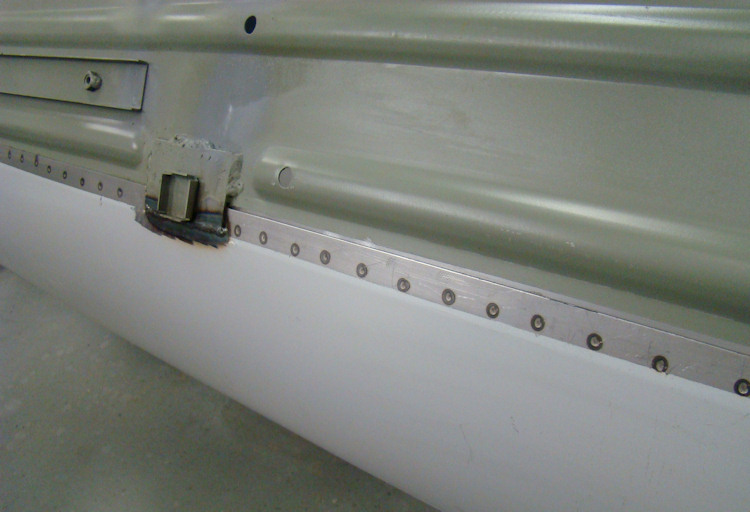
This week we have been busy painting the inner panels, including the cabin, boot compartment and the underside of the bonnet. The photos below also show us trial fitting and stamping the new data plate. Interestingly, when using Haddock's "Originality Guide" to try to make sure we positioned the data plate in exactly the right position, your actual car was referenced in the text immediately above the photograph we were using as a reference. It's a small world...
 |
 |
 |
|
the right rivets for this bracket |
photographed in Haddock's book (at left) |
the original |
|
|
|
|
 |
 |
 |
|
|
reference photo! |
|
|
|
|
|
 |
 |
 |
|
|
|
next week... |
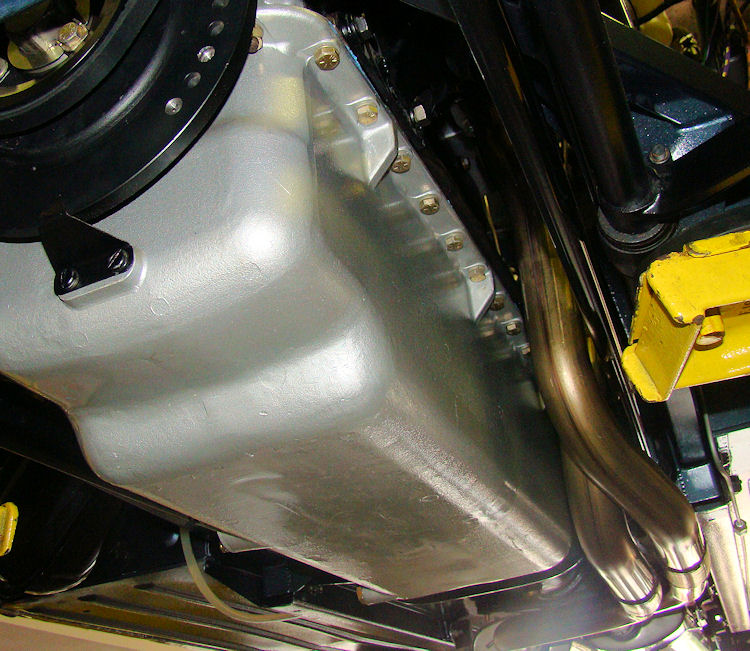
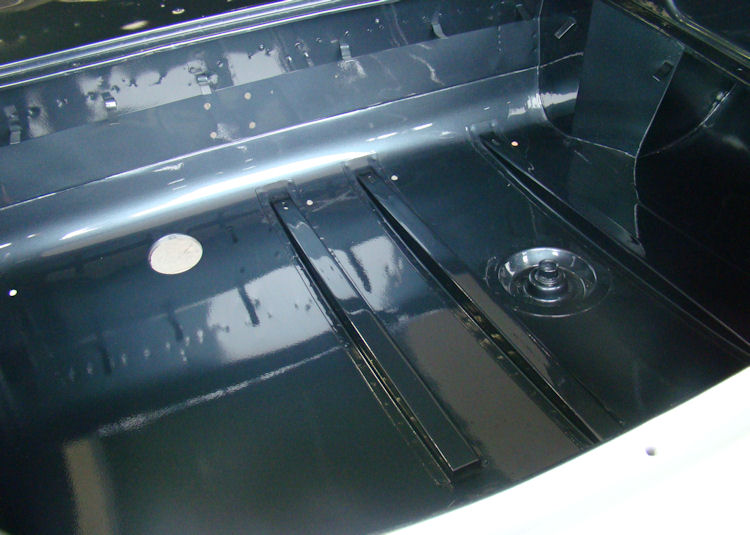
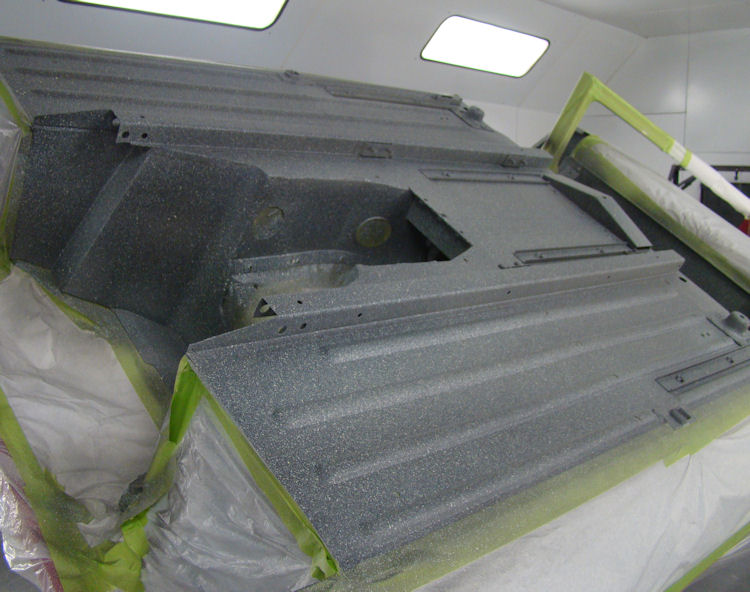
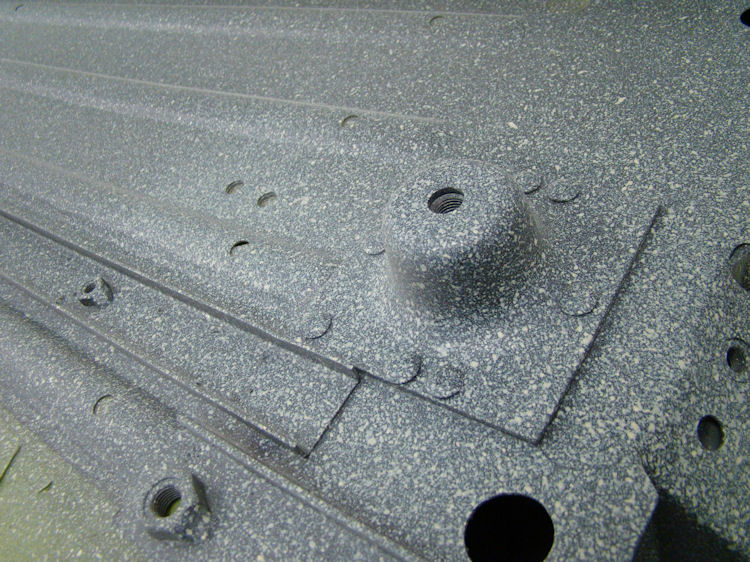
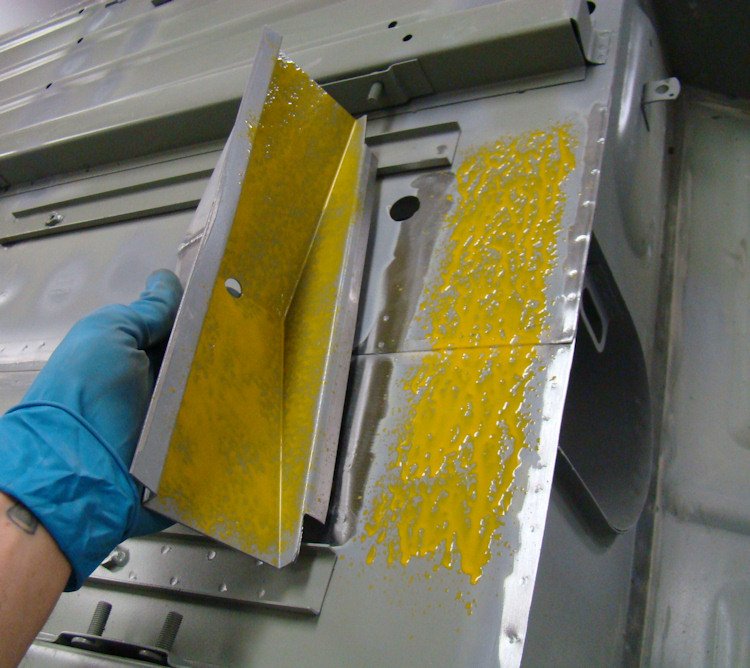
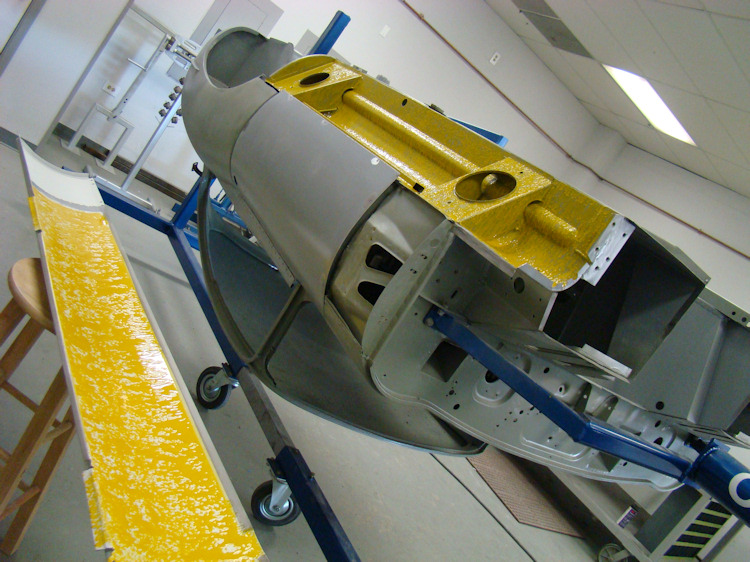
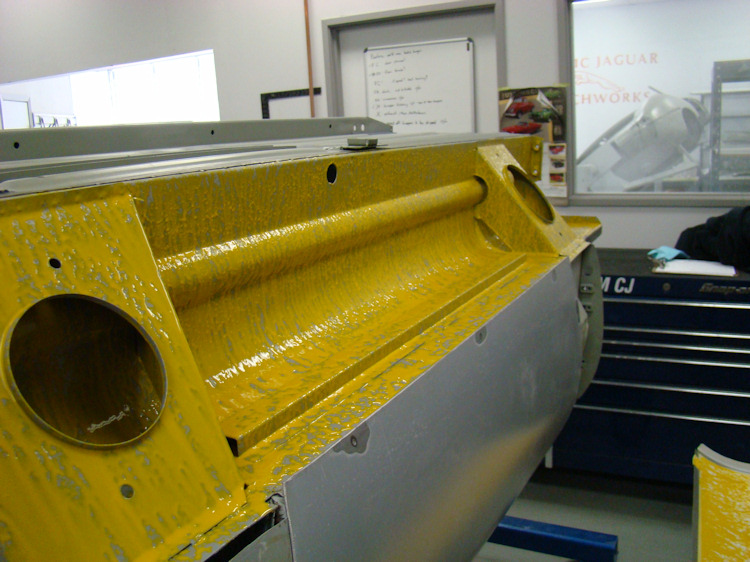
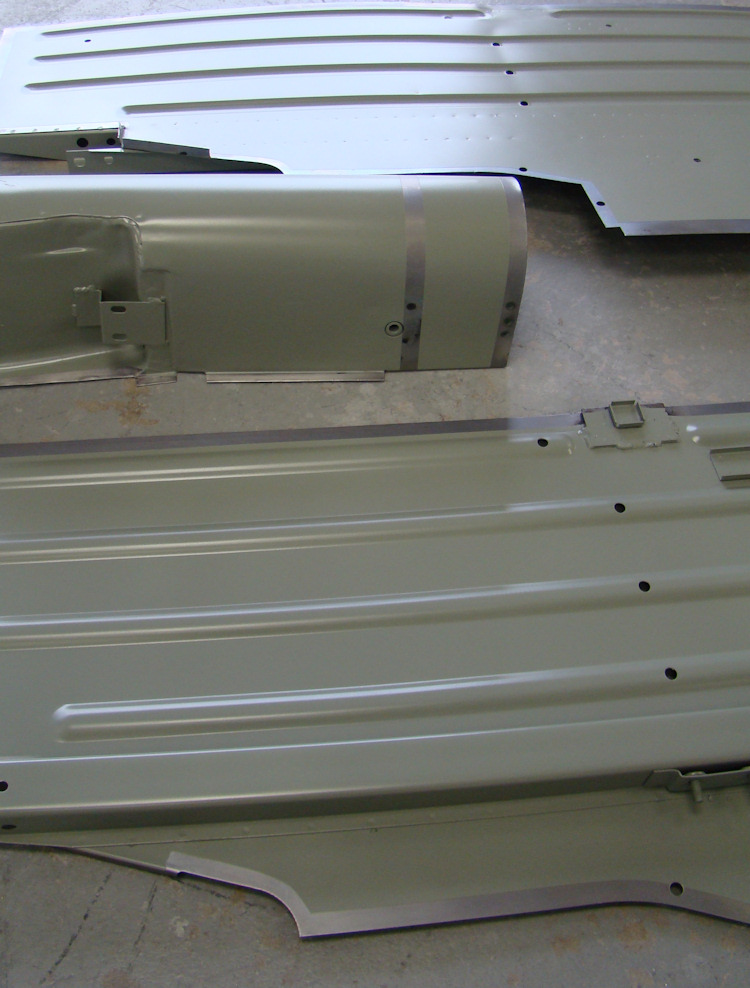
The first of the Opalescent Dark Blue being applied to the underside of the floors. With this car we are limiting the use of the Rocker Guard to the underside of the floors, inside the transmission tunnel and inside the rear arches. We have not applied rocker guard to the outer sills or the underside of the boot floor, as we normally do.
 |
 |
|
|
|
 |
 |
|
|
|
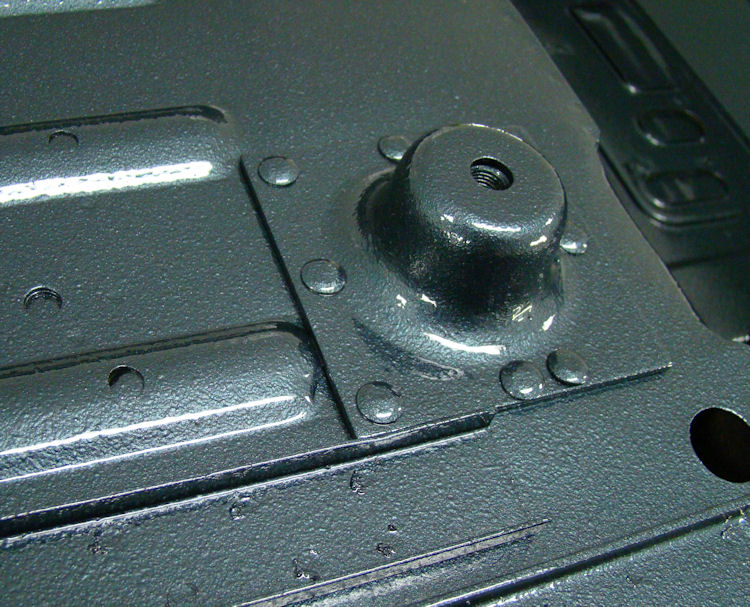
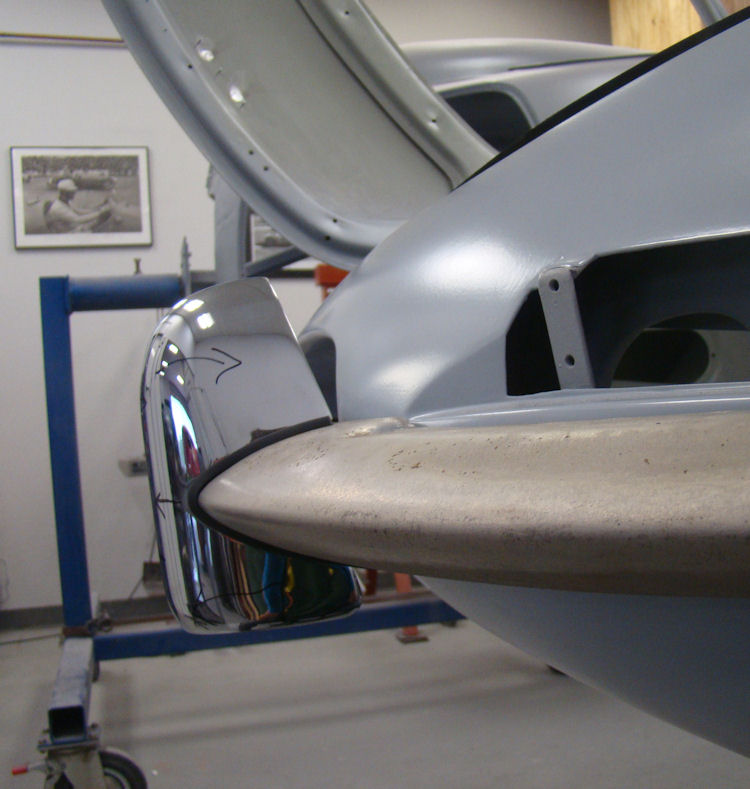
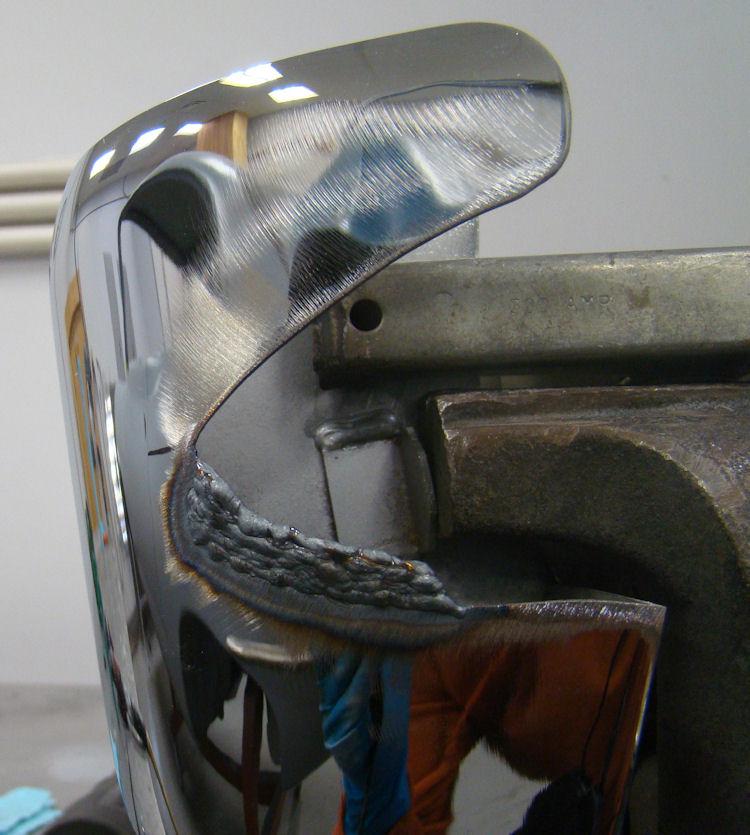
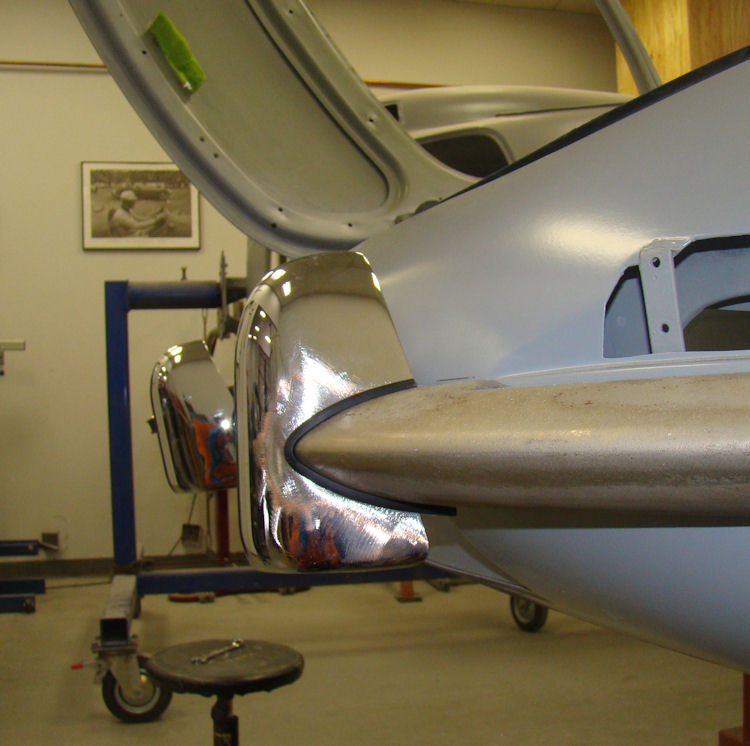
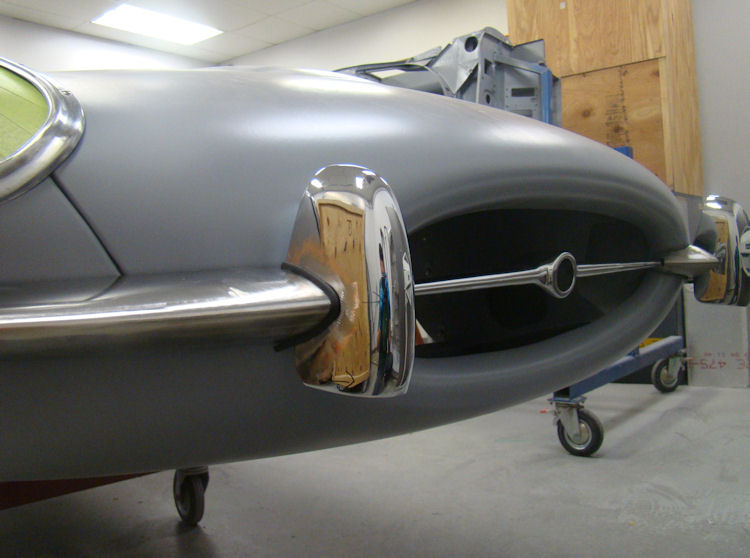
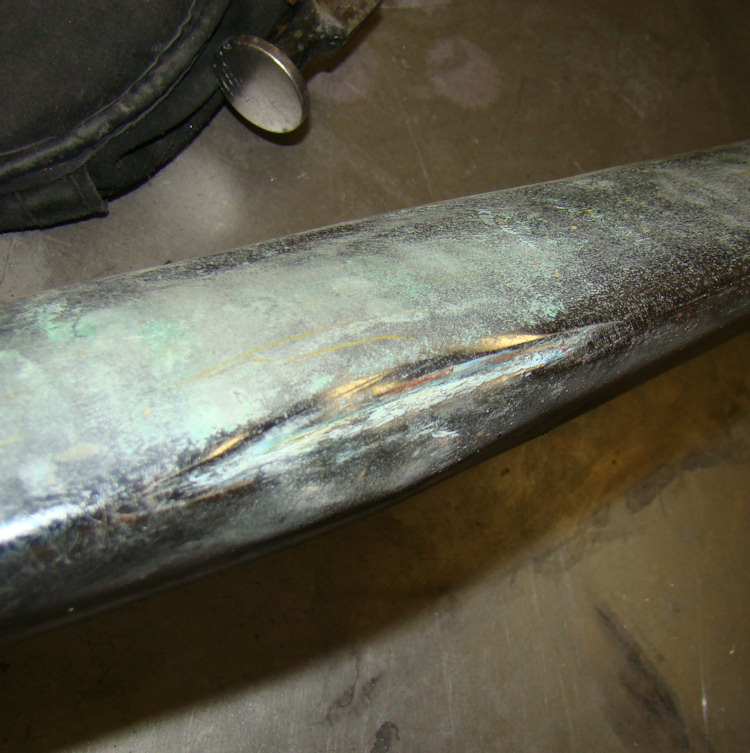
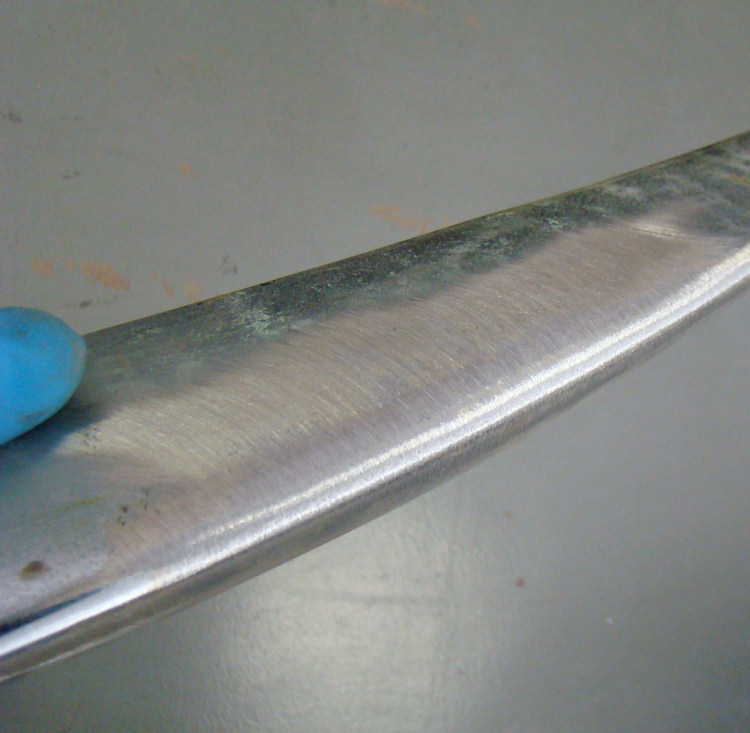
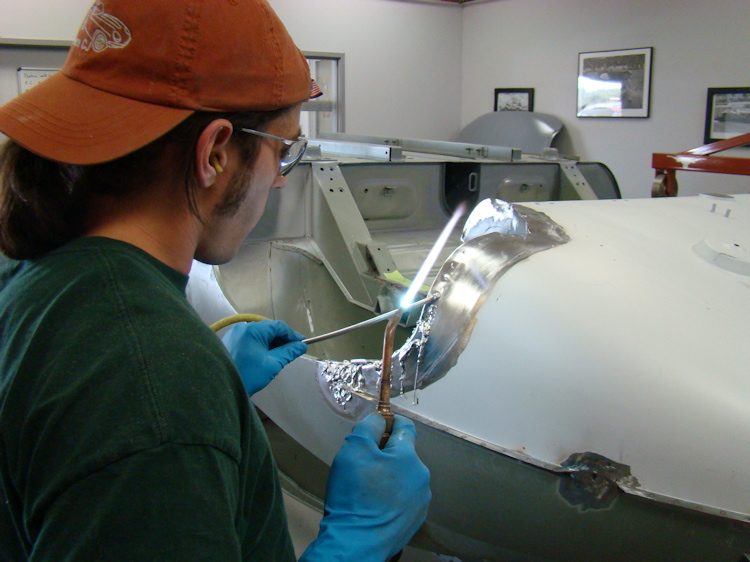
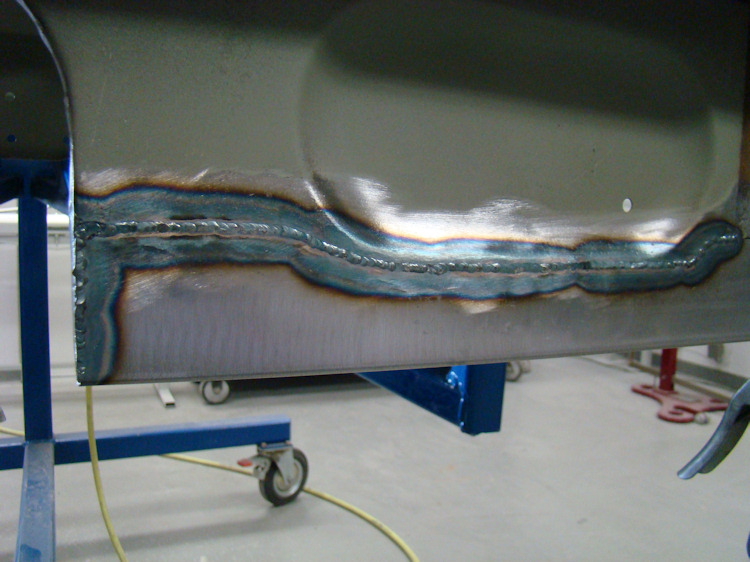
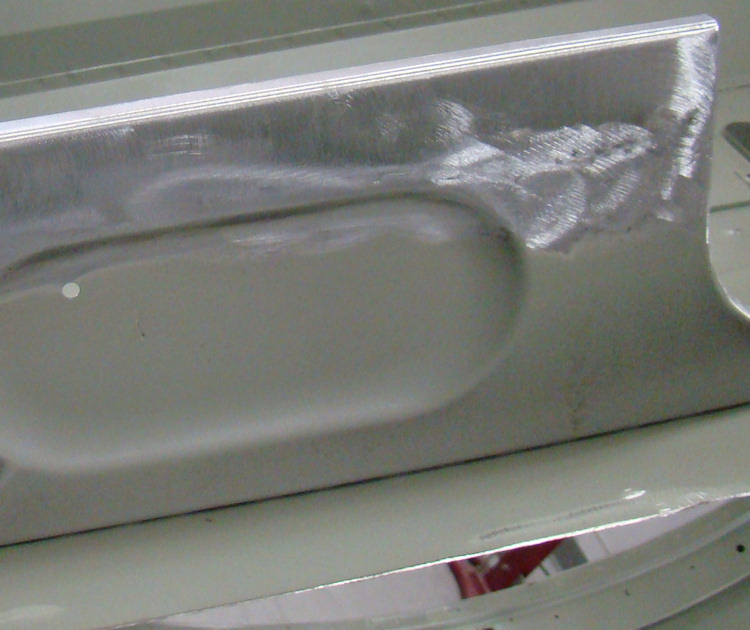
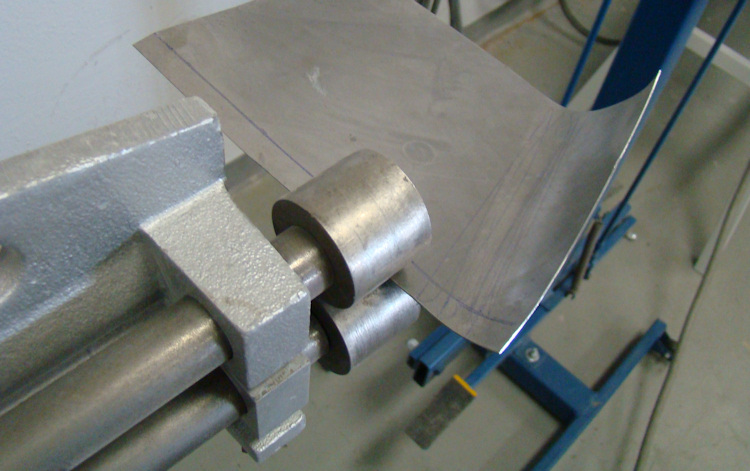
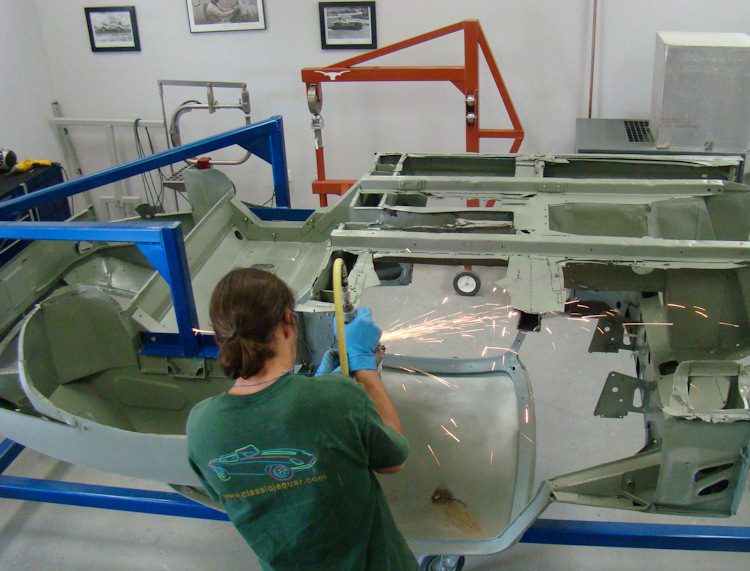
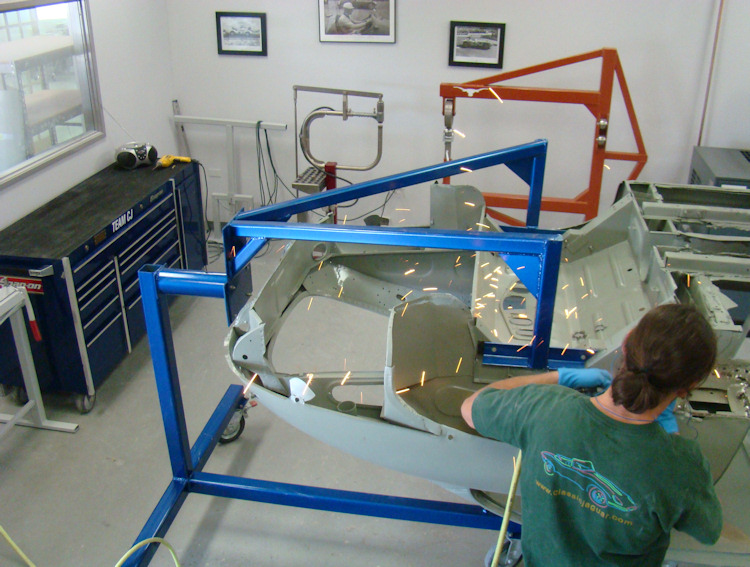
People are often surprised to hear that it takes us around 40 hours to trial fit an E Type's chrome so that it will fit perfectly following the re-plating process. The photos below demonstrate how much work is involved in getting new bumper over-riders to fit the way they should. If you look carefully at the first two images, you will see Darrell has drawn in arrows showing all the various directions in which the over-rider needs to be adjusted, to fit correctly.The third photo shows how Darrell modifies the shape of the new over-rider using multiple beads of weld, which is then ground back into the desired shape to match the contour of the bumper blade. The fourth photograph shows the disparity between the installed angles of the left and right over-riders after the fit of the right hand over-rider has been addressed (and before the left hand unit has been modified). It is a lot of work, but the finished look justifies all the extra effort!
 |
 |
 |
|
|
|
|
|
|
|
|
 |
 |
 |
|
|
|
|
|
|
|
|
 |
 |
|
|
|
|
|
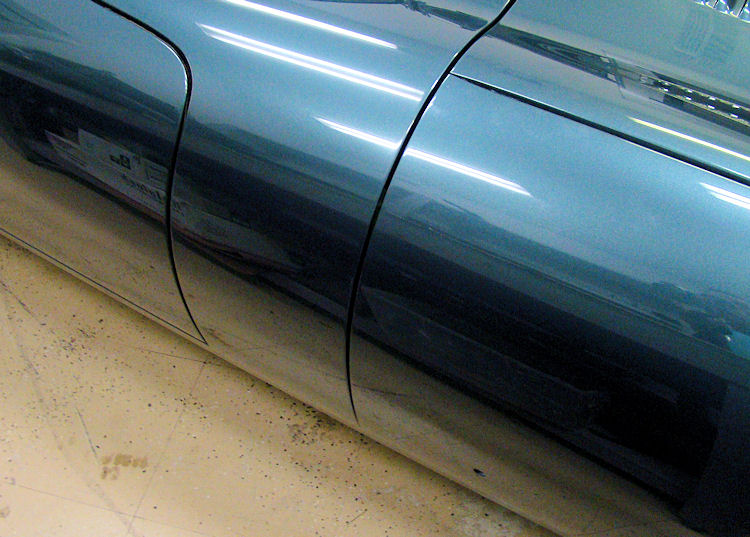
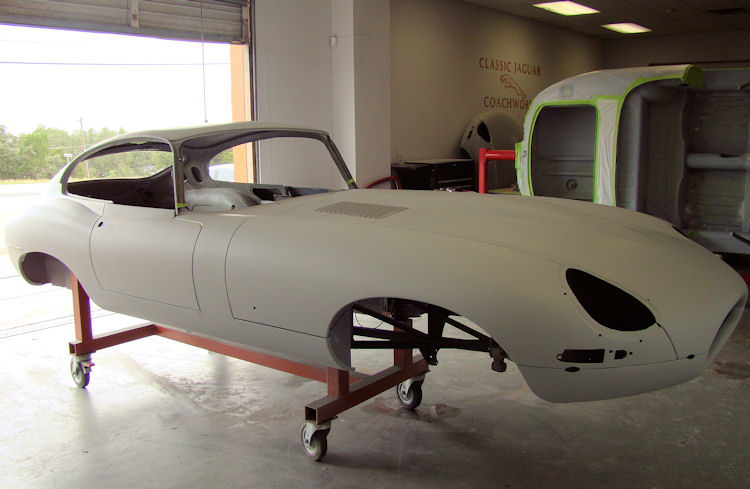
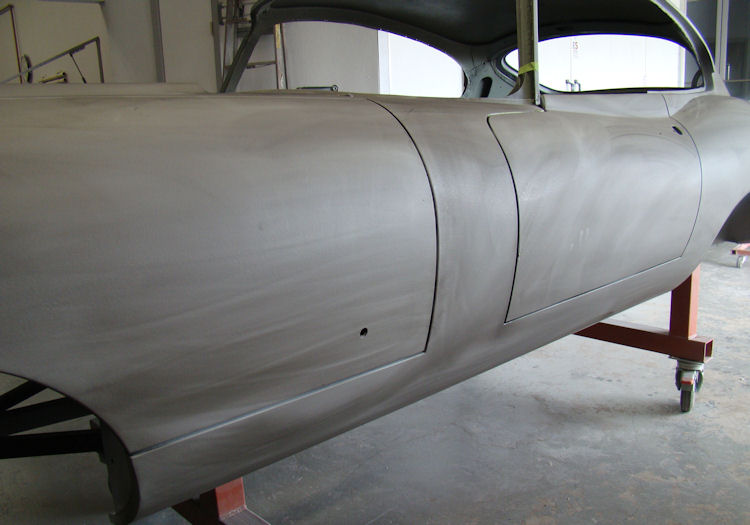
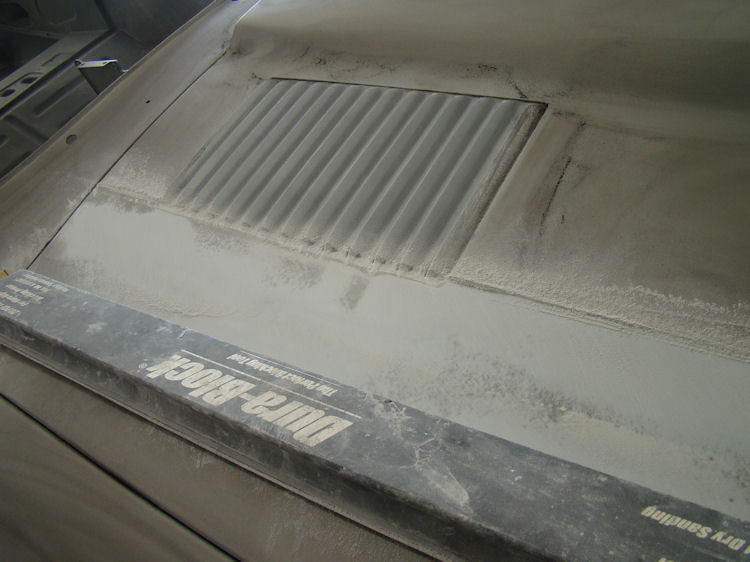
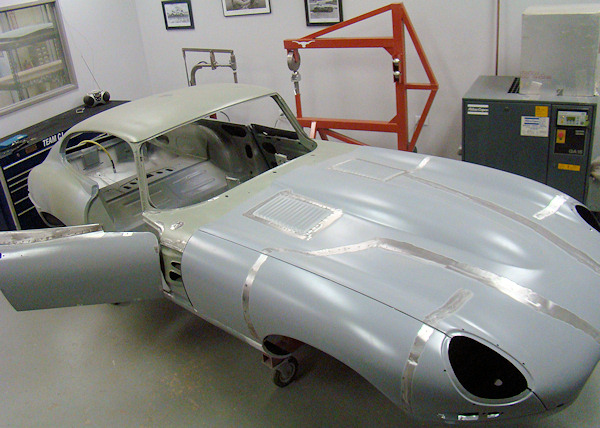
With all of the bodywork completed, your car has now been put into Slick Sand. New rubber seals have been installed and the doors, tailgate and bonnet are all latched and adjusted ready for the final blocking stage. Check out the quality of the panel fit of the doors and bonnet in the photos below.
 |
 |
|
|
|
 |
 |
|
|
|
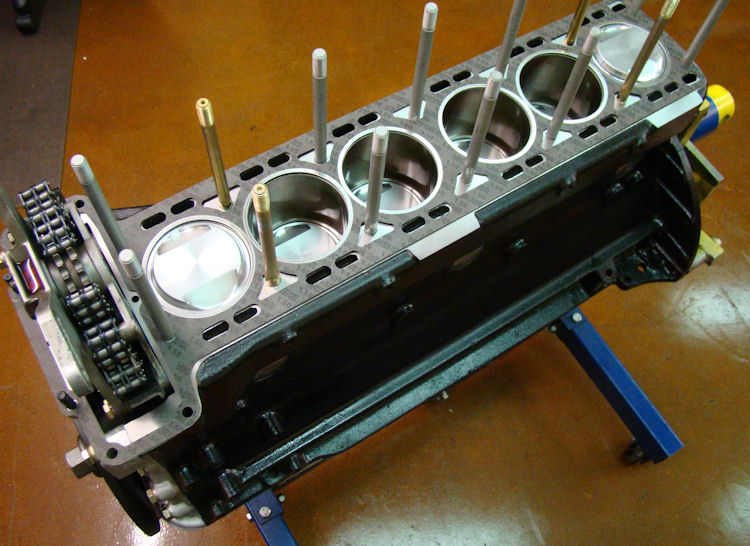
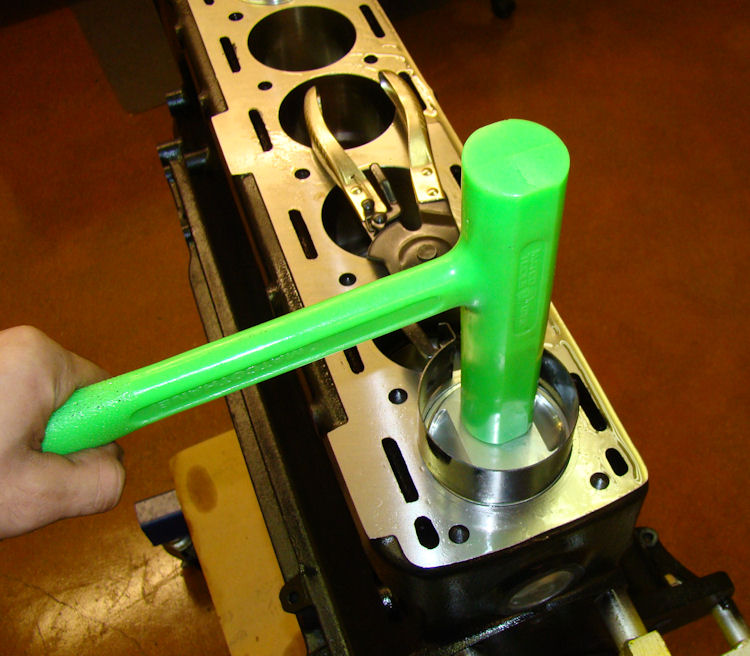
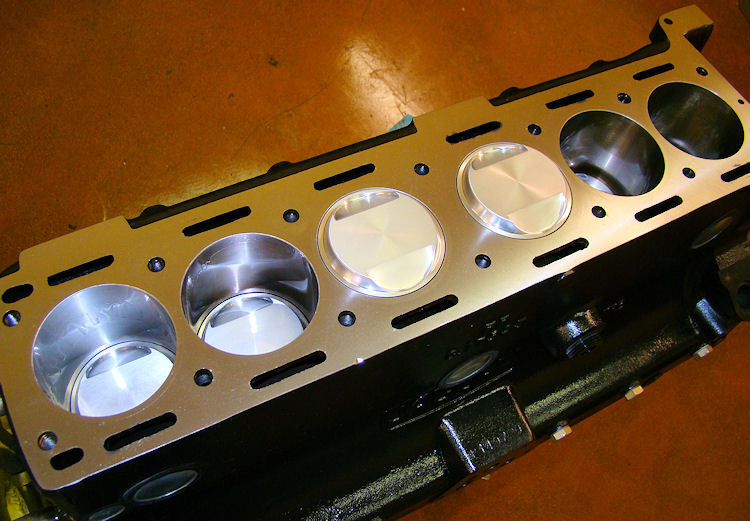
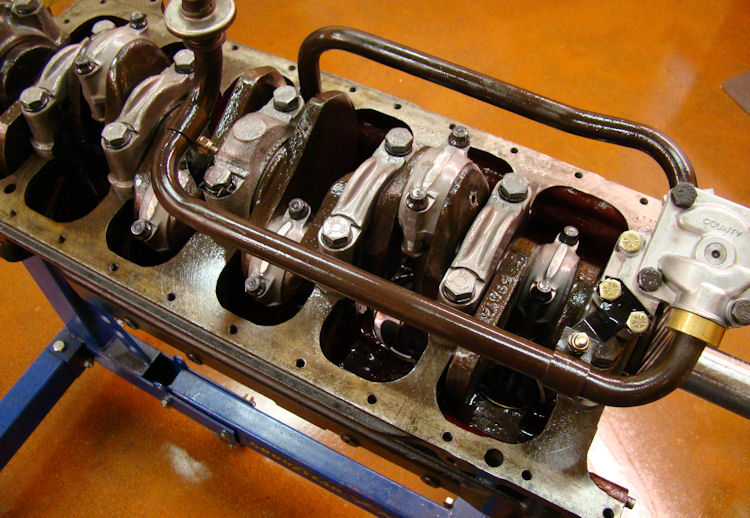
Your engine is now fully built and assembled...
 |
 |
 |
Assembling the engine short block..
 |
 |
 |
|
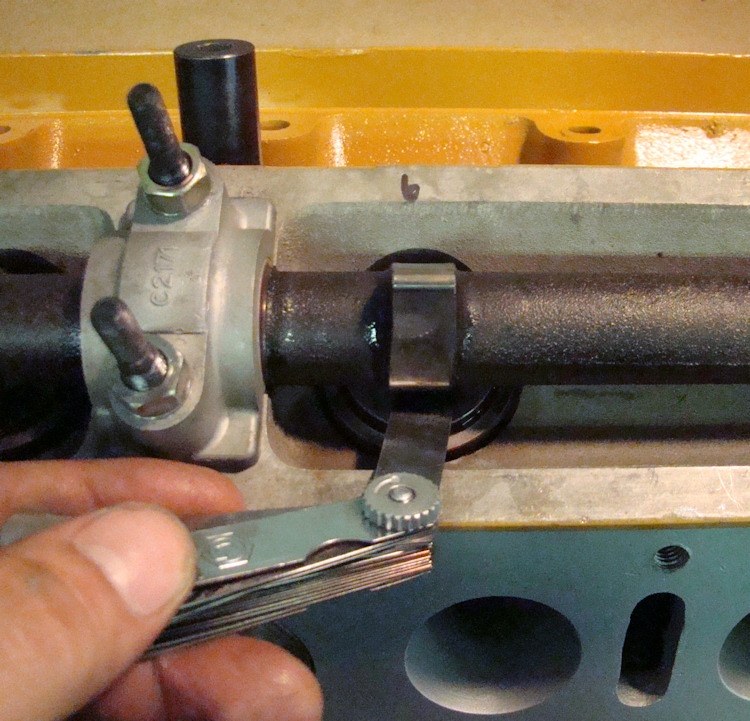
bearing clearances |
|
|
 |
 |
 |
|
pipes |
|
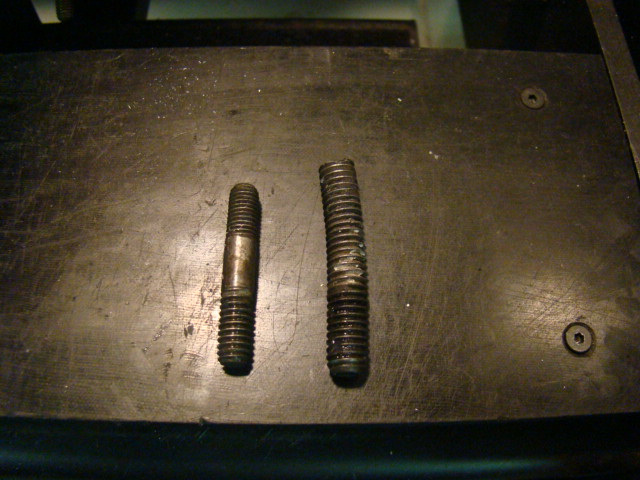
up and re-threaded |
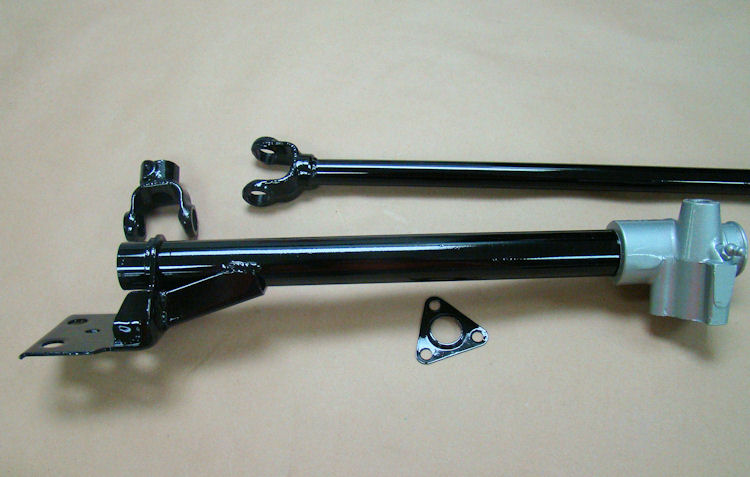
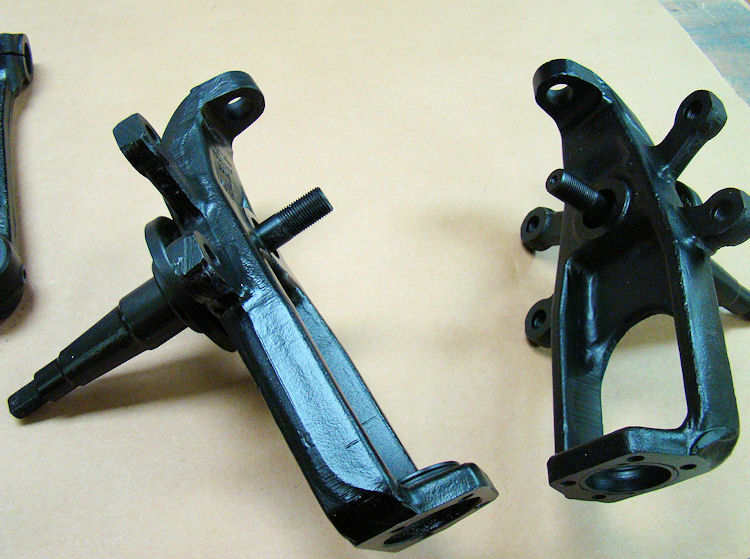
A special flatting agent was added to the clear coat to provide the desired 'satin black' finish for the front suspension.
 |
 |
 |
|
|
oxide |
to the skill-saw |
|
|
|
|
 |
 |
 |
|
|
|
flat black |
|
|
|
|
 |
 |
 |
|
with a flatting agent in clear coat |
|
|
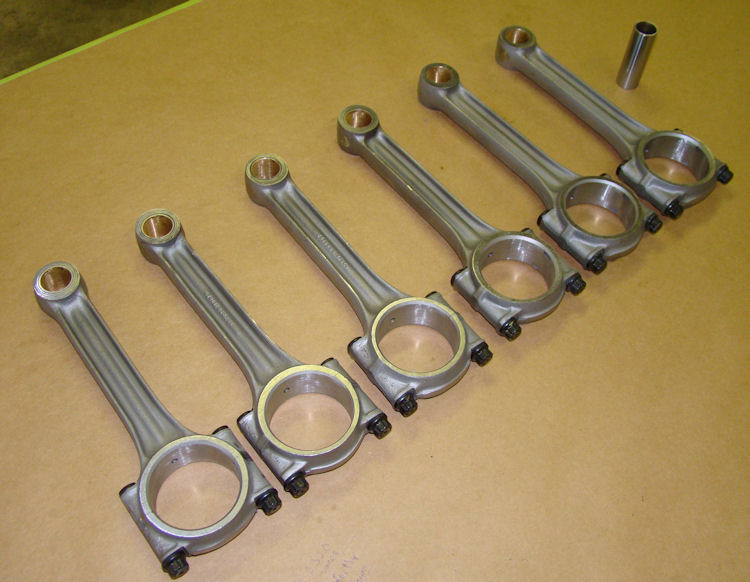
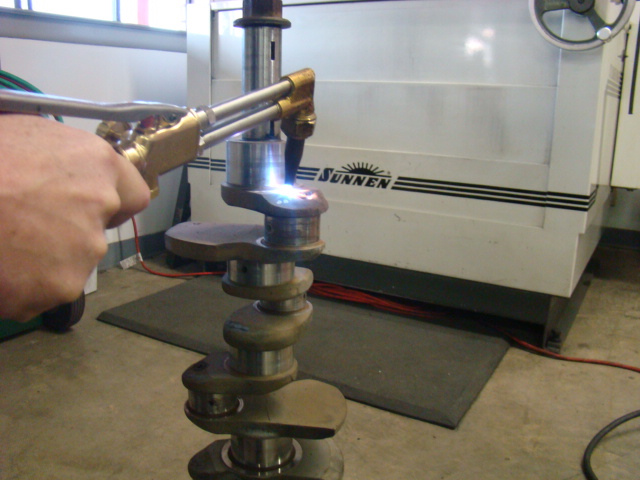
When we cleaned up your connecting rods prior to re-sizing and bushing them, we found one of the rods to be bent. If you look carefully at the first photo below you can see the slight bend in the shaft of the rod. We decided to replace all six rods with a matched set, rather than just the one damaged rod.
 |
 |
|
|
and bushed |
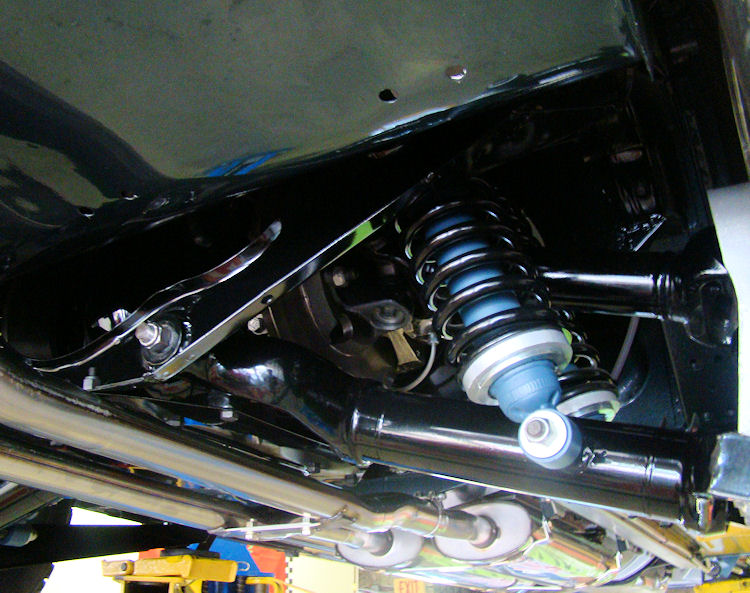
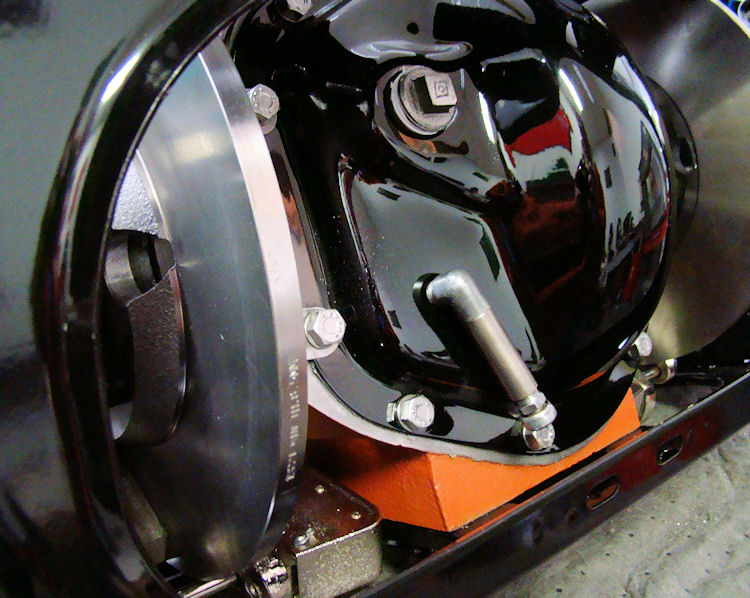
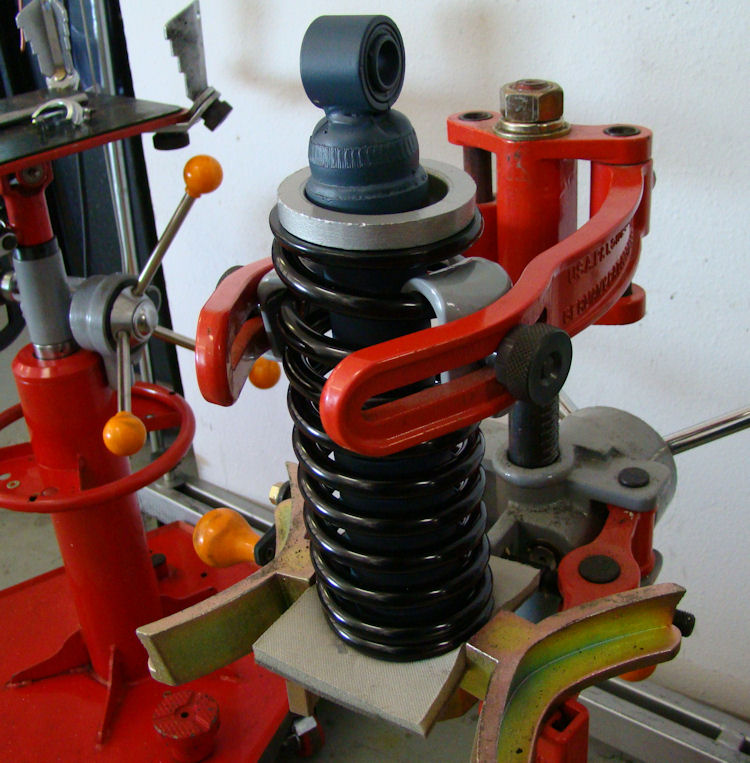
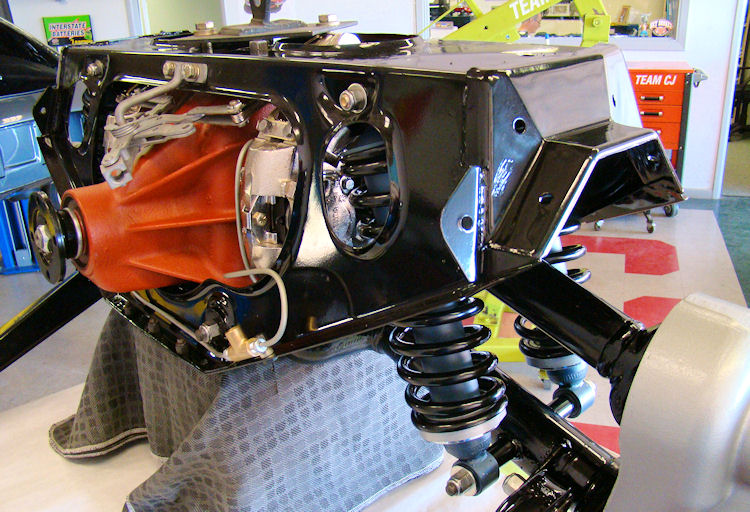
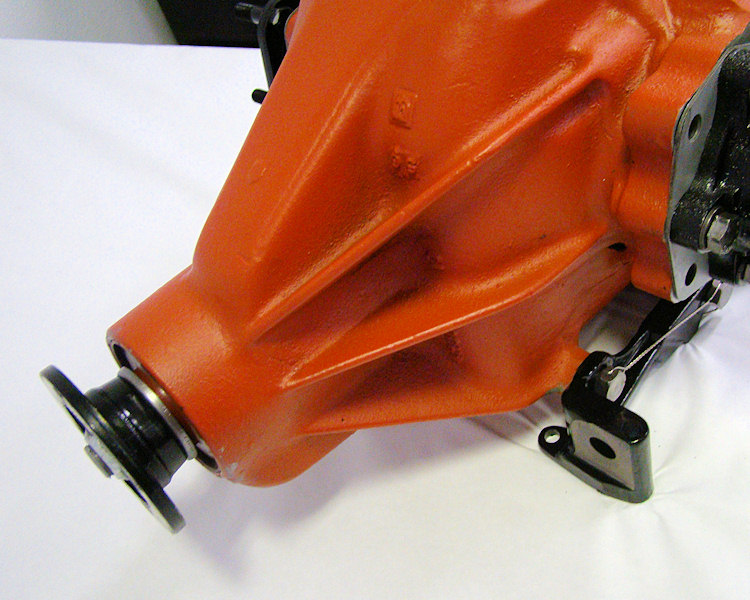
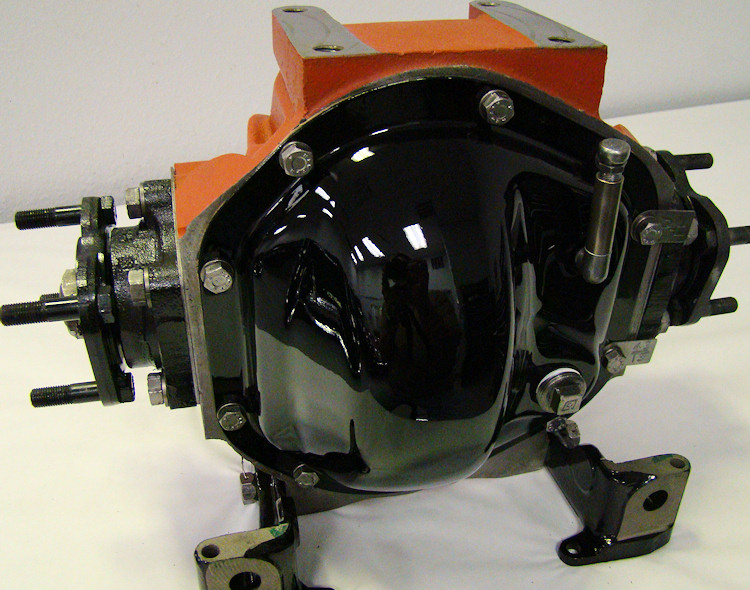
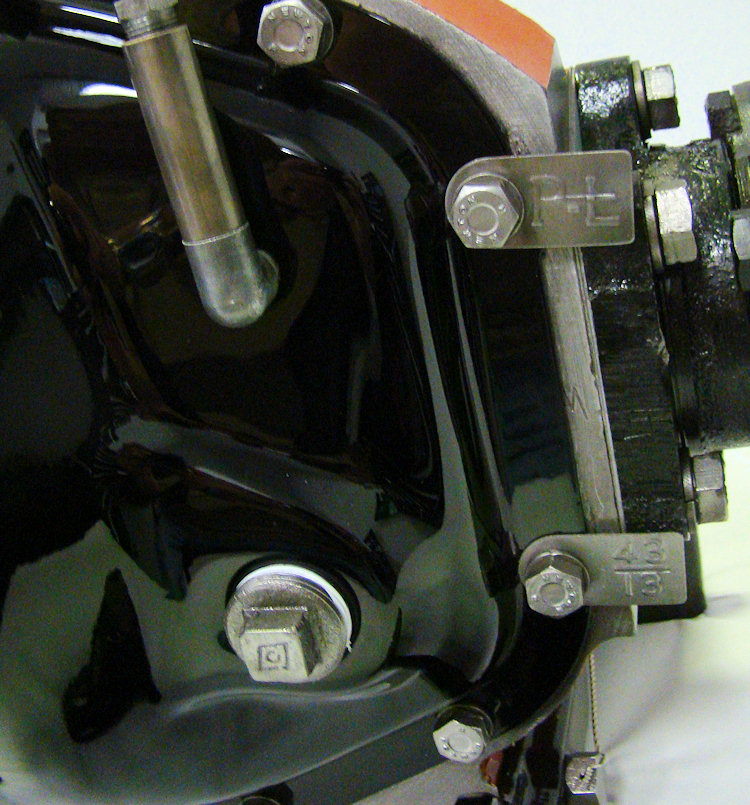
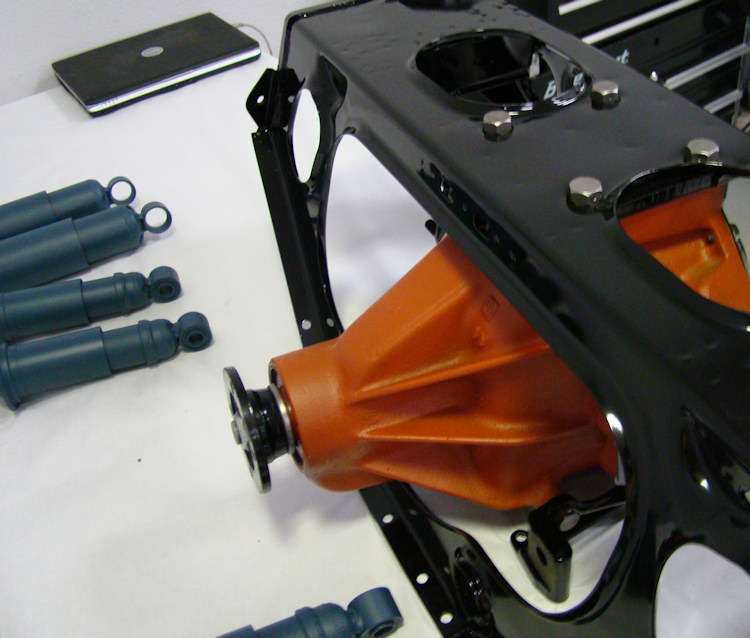
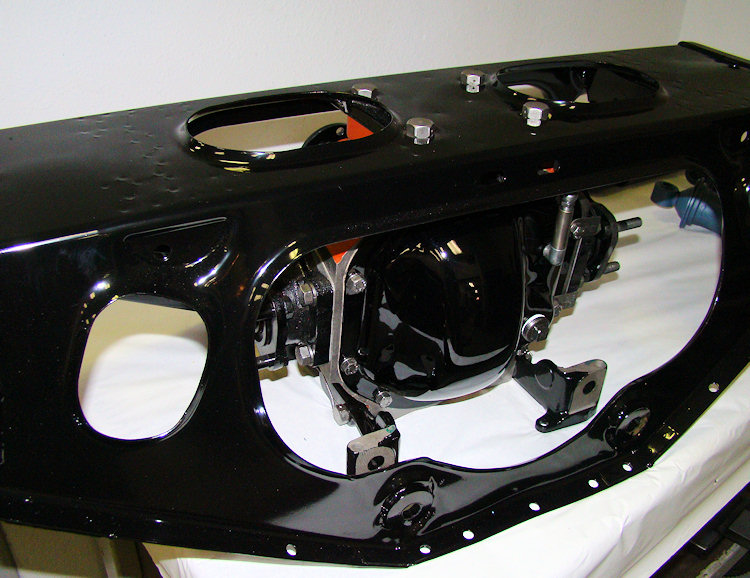
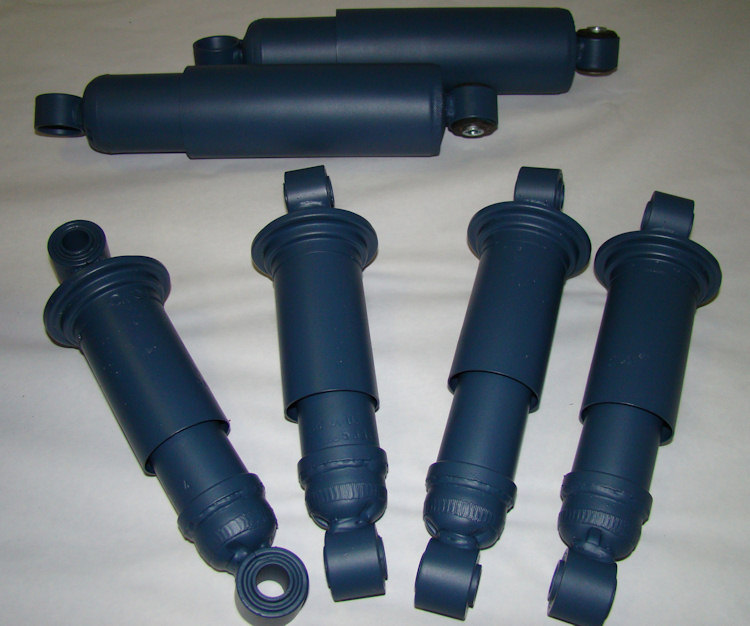
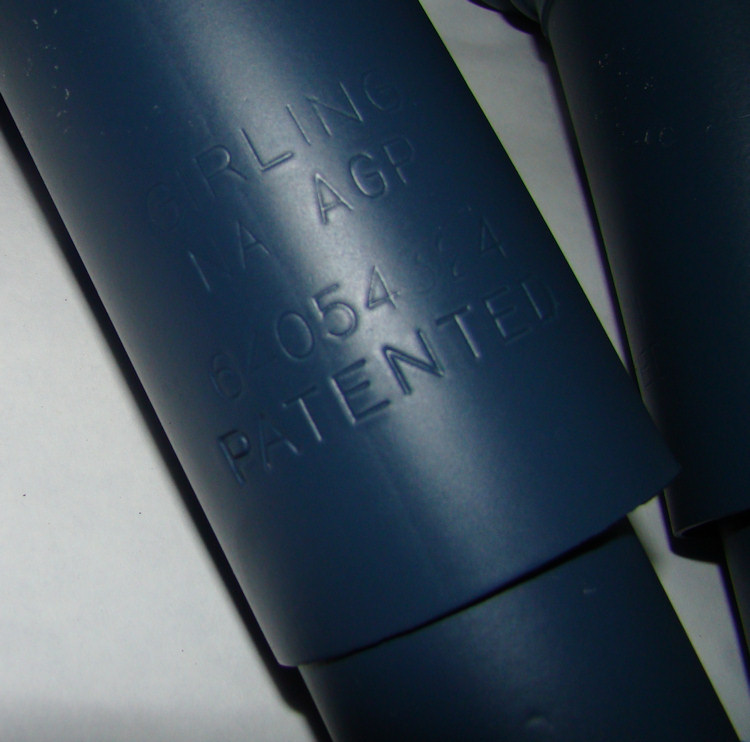
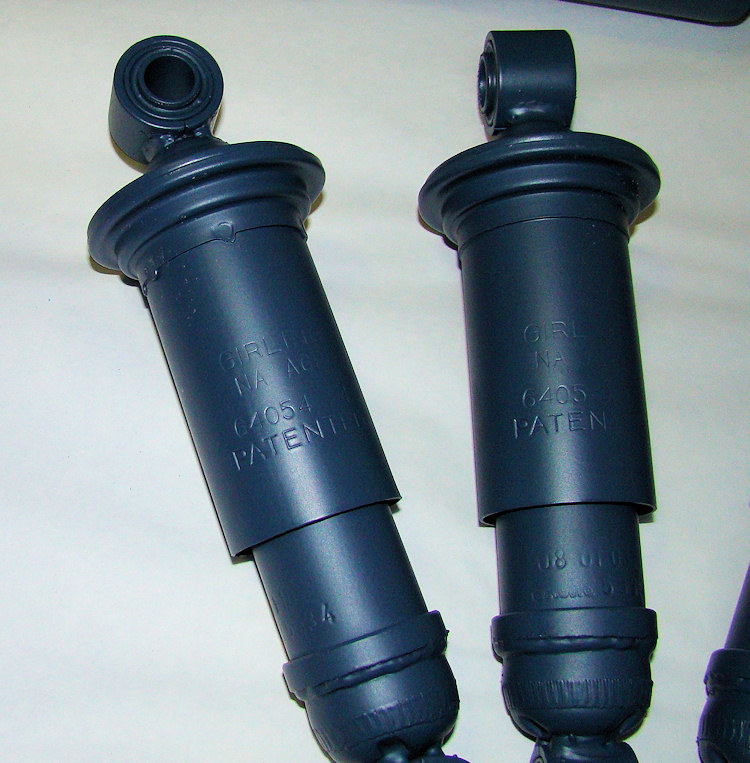
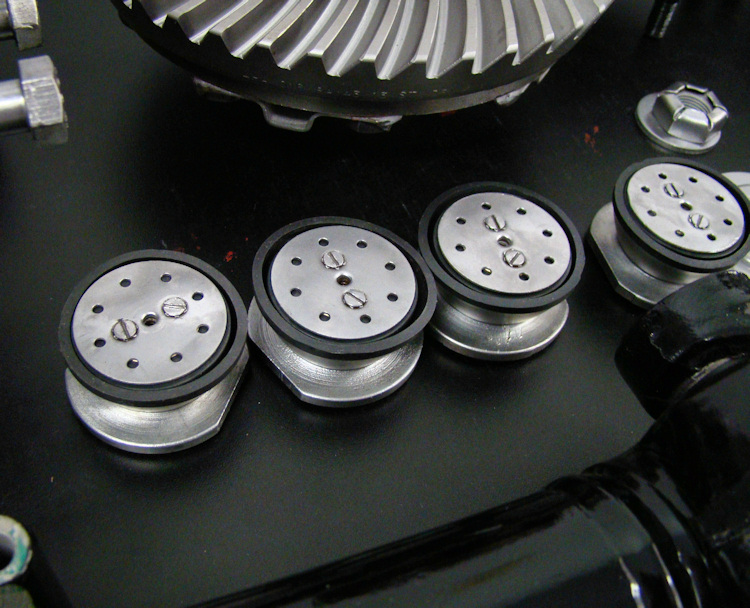
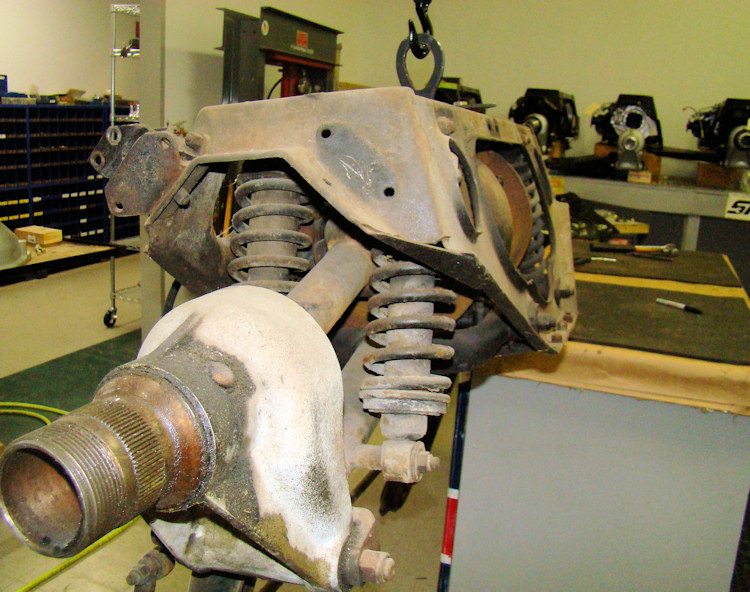
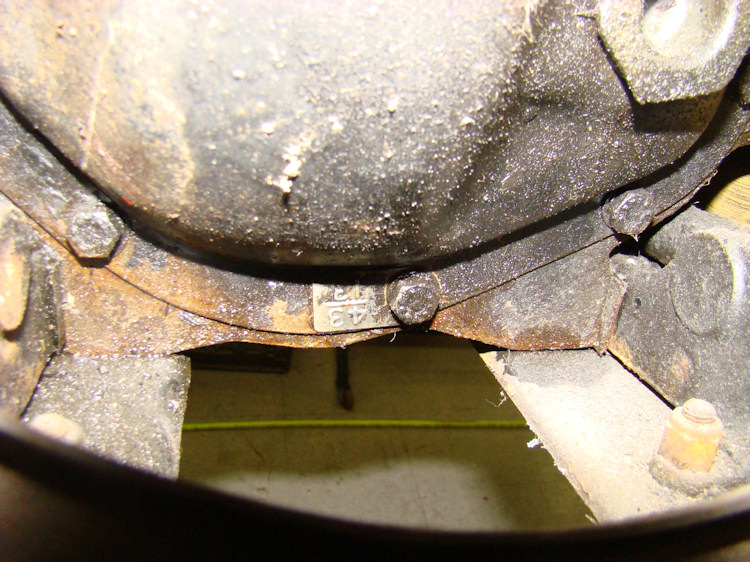
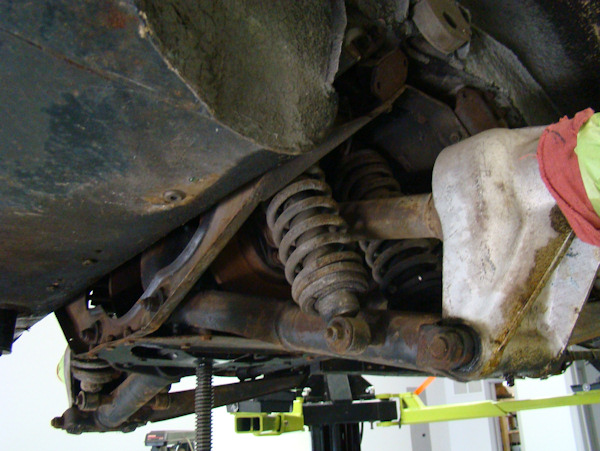
We have now completed the rebuild of your differential and have begun the reassembly of the IRS. The shock absorbers in the photographs below are new Boges (OEM Girlings are no longer available). Boge shocks are supplied black, so we custom mixed some blue paint to match the color the original Girlings would have been, and we also saved/restored the original Girling caps for the rear shocks. Our goal is for the entire IRS to look exactly like the day it was assembled at the factory. We have re-used all the original fasteners, treated with acid and sealed with a special 'bare metal' clear coat to prevent rusting.
 |
 |
 |
|
corrosion resistant clear coat |
||
 |
 |
 |
|
|
|
|
 |
 |
 |
|
Girling Blue |
rear shocks |
|
IRS rebuild progress...
 |
 |
 |
|
then sleeved in stainless steel |
|
to match original finish |
 |
 |
 |
|
|
re-used throughout |
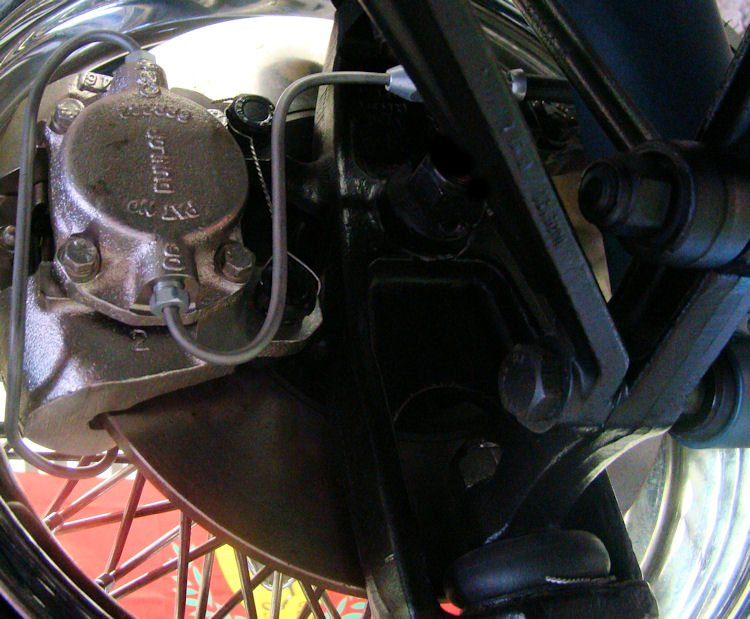
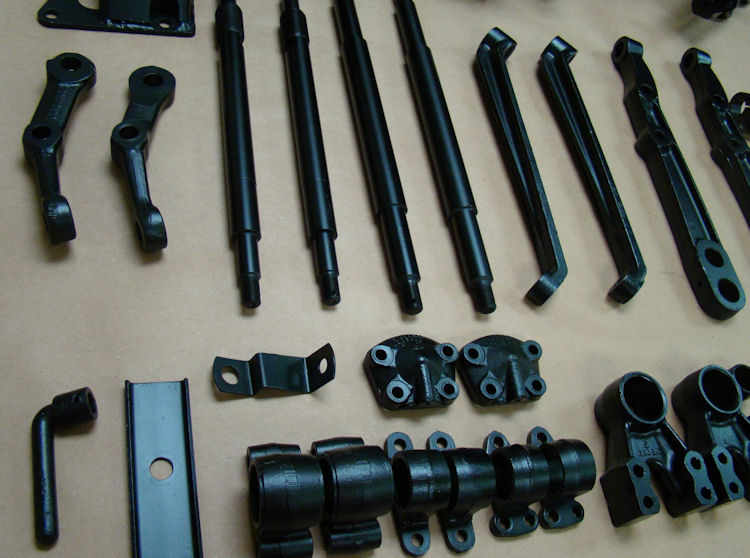
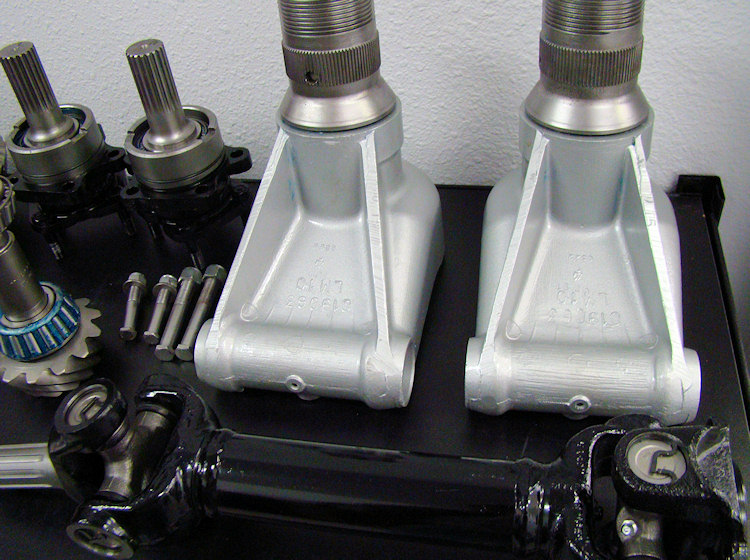
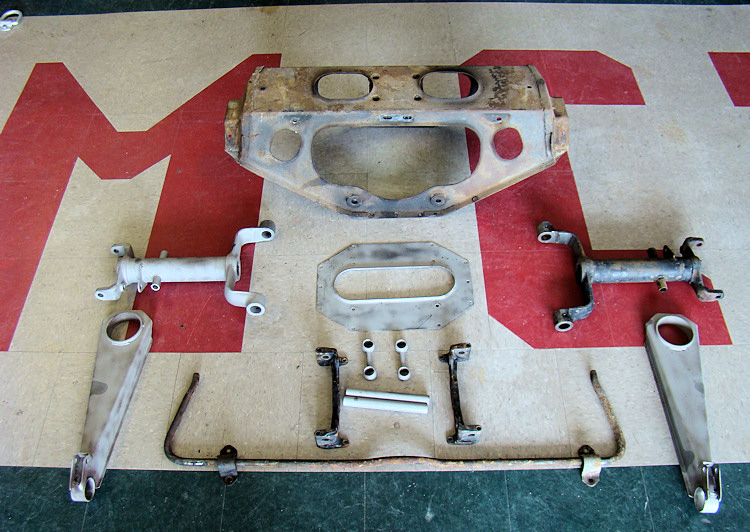
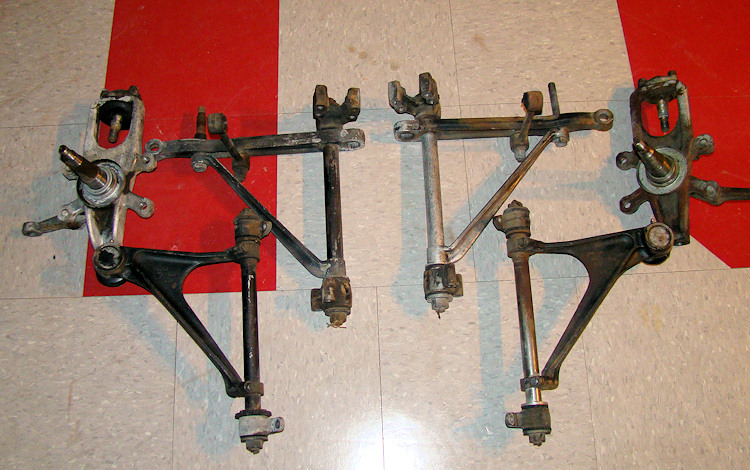
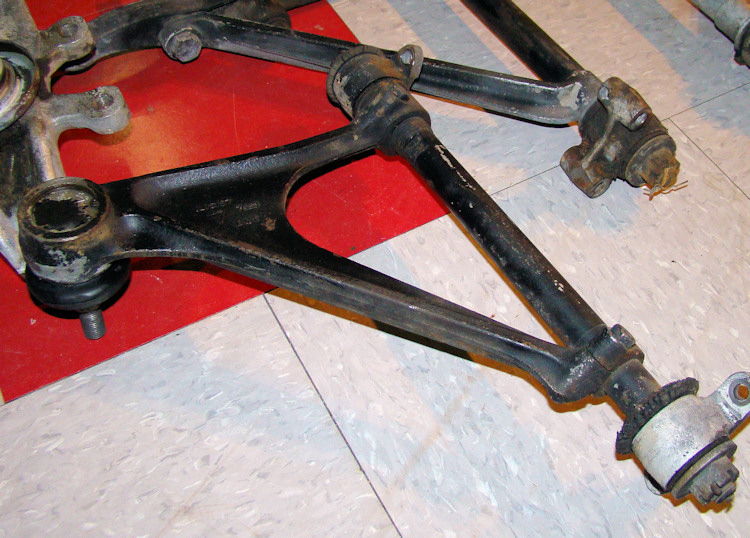
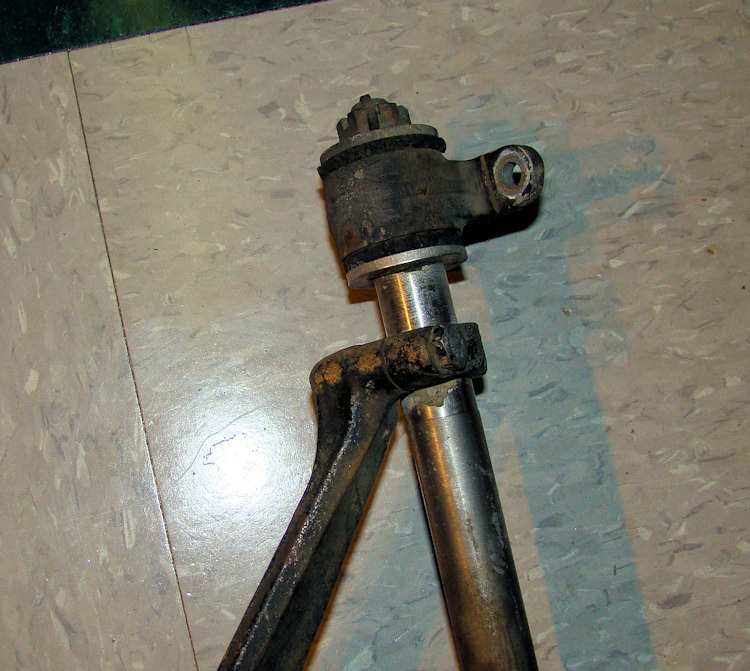
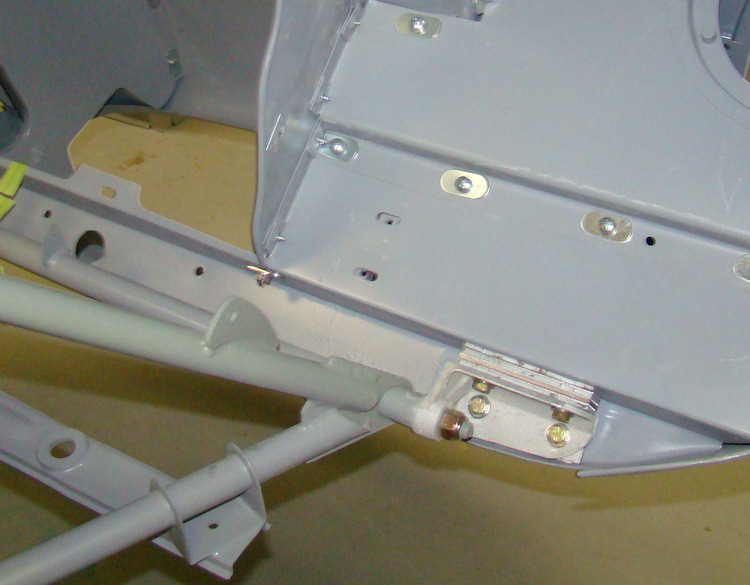
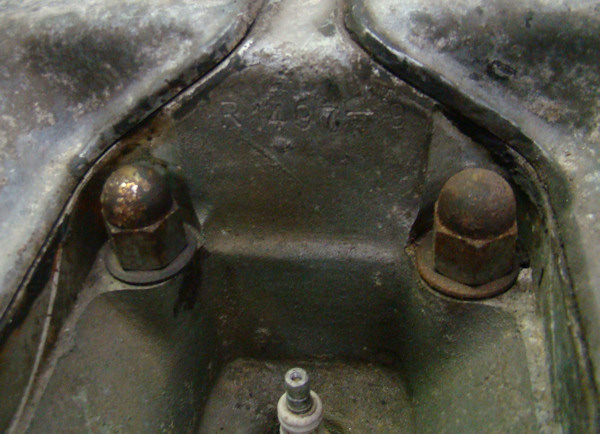
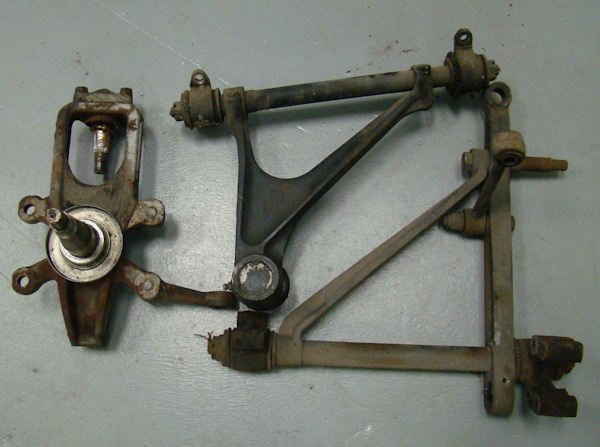
Typically, on very early E Types, I would expect the front suspension (control arms and uprights) to be black. In the case of 885020, although most of the components still show evidence of the original black factory coating, the right hand upper fulcrum shaft doesn't look like it has ever been painted or anodized (see photo # 5 below). My best guess is that the shaft must have been replaced at some time in this car's troubled past. In any event, over the next few days we will be refinishing all the various front suspension components in a highly durable, satin black urethane coating.
 |
 |
 |
|
before .... |
|
|
 |
 |
 |
|
|
replaced |
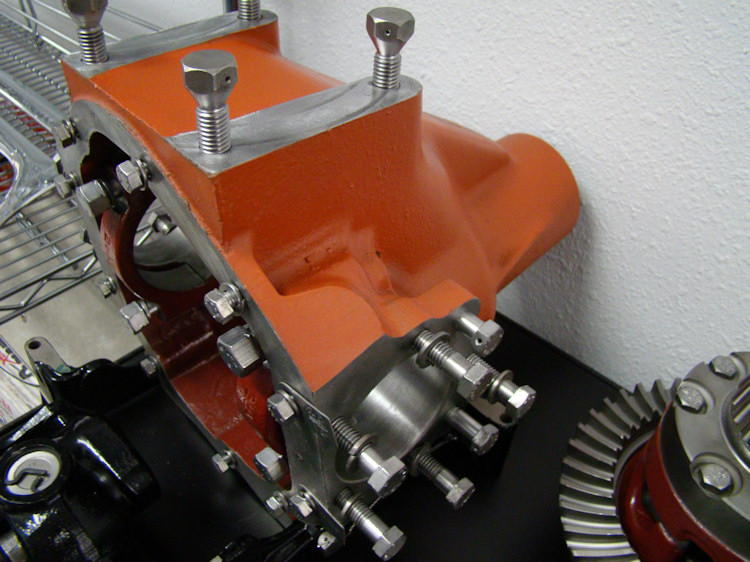
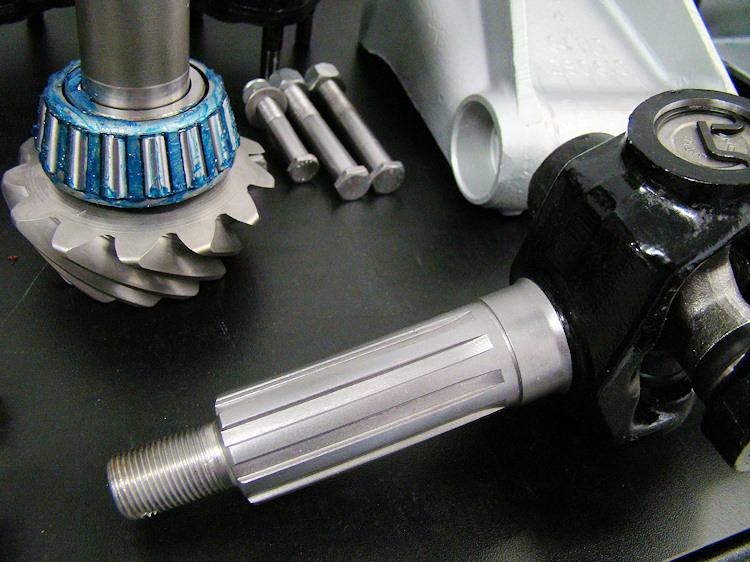
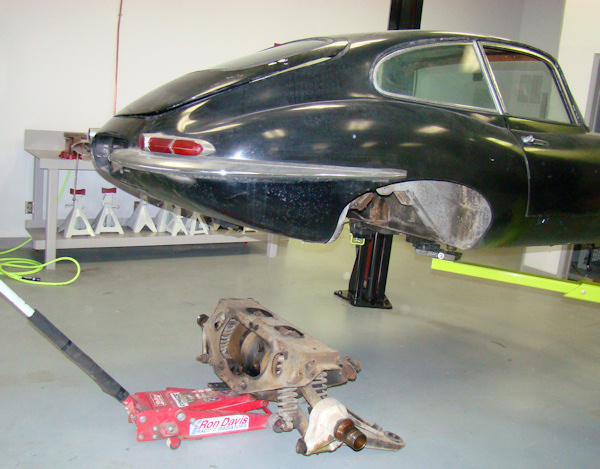
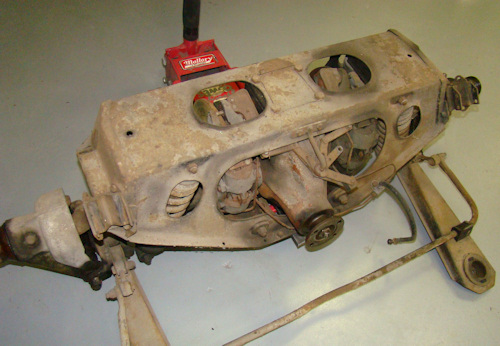
We now have the rebuild of your IRS underway..
 |
 |
 |
|
for disassembly |
water throwers |
|
 |
 |
|
|
finished in red oxide |
||
 |
 |
|
|
|
Glyptal |
|
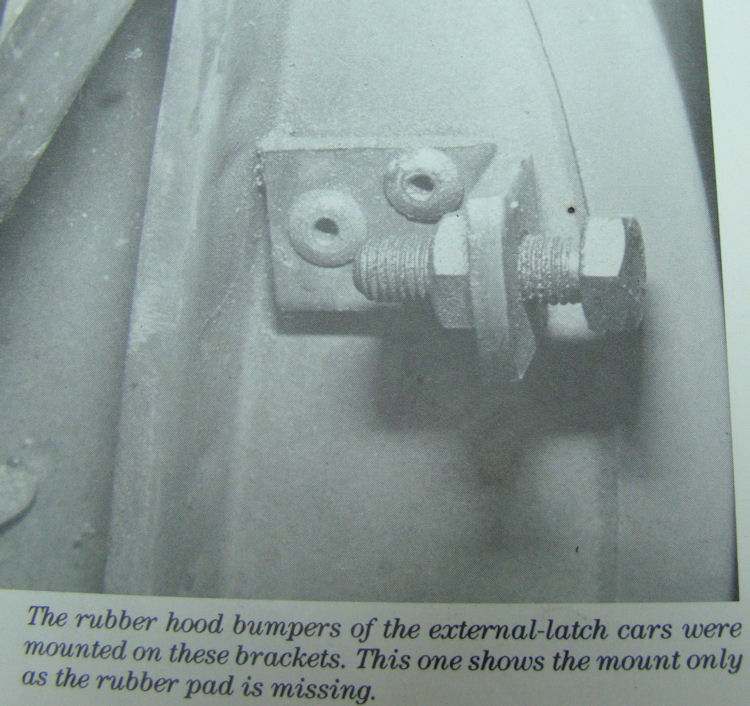
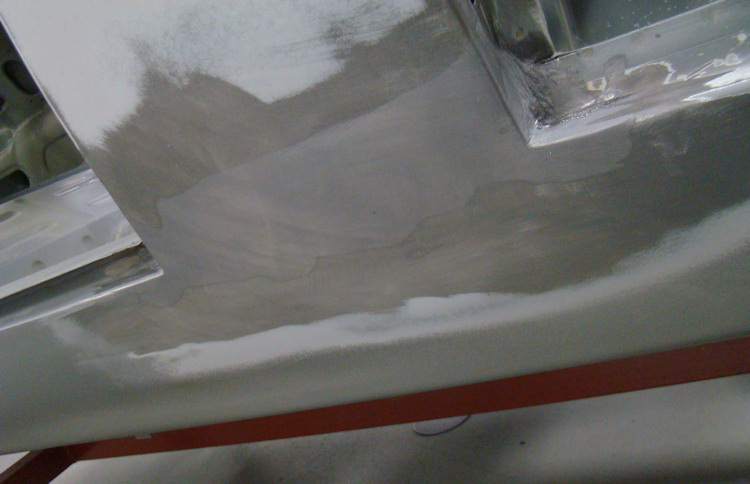
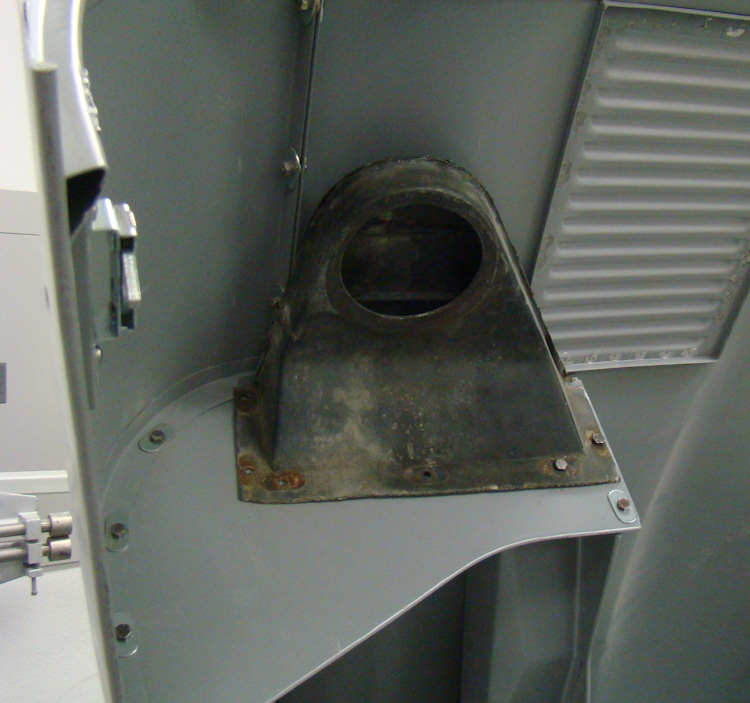
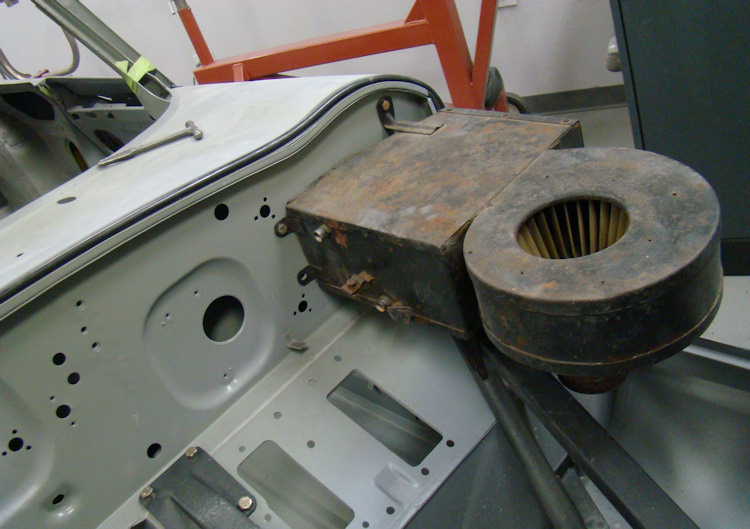
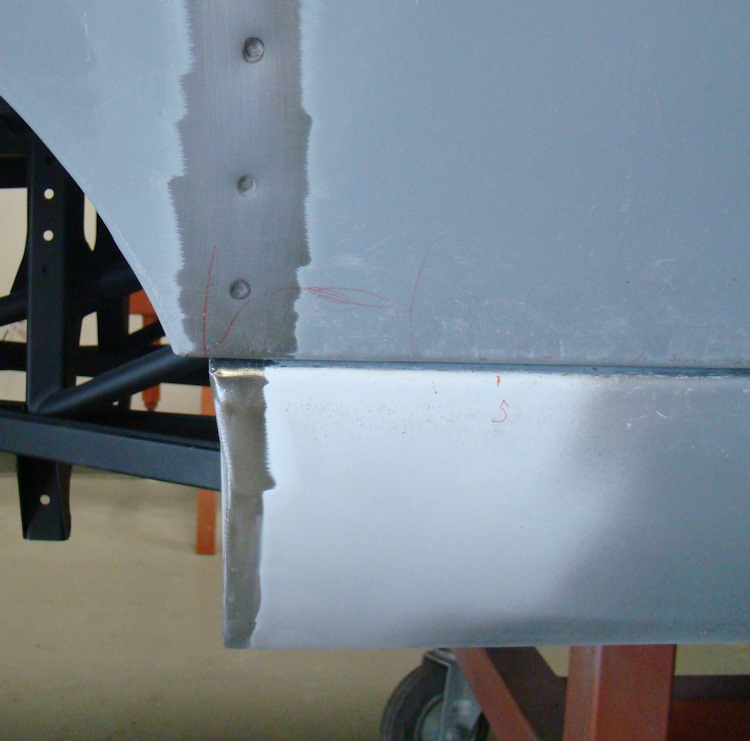
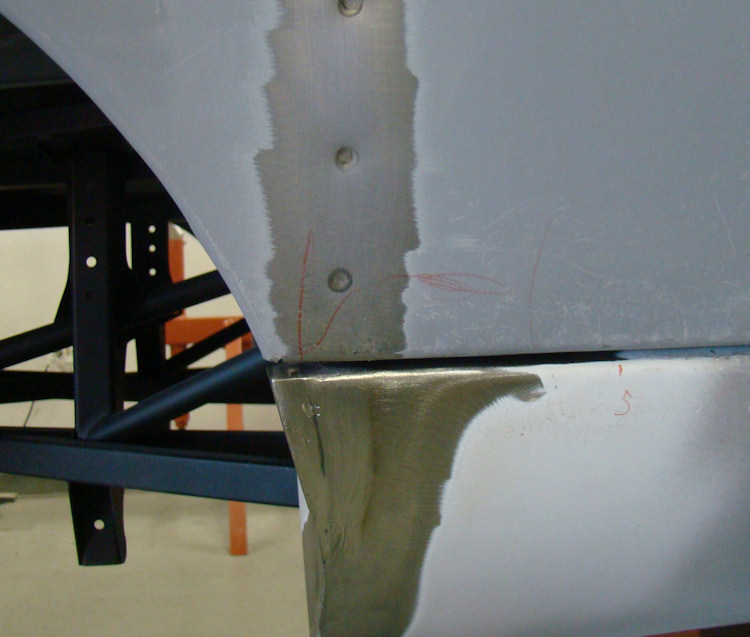
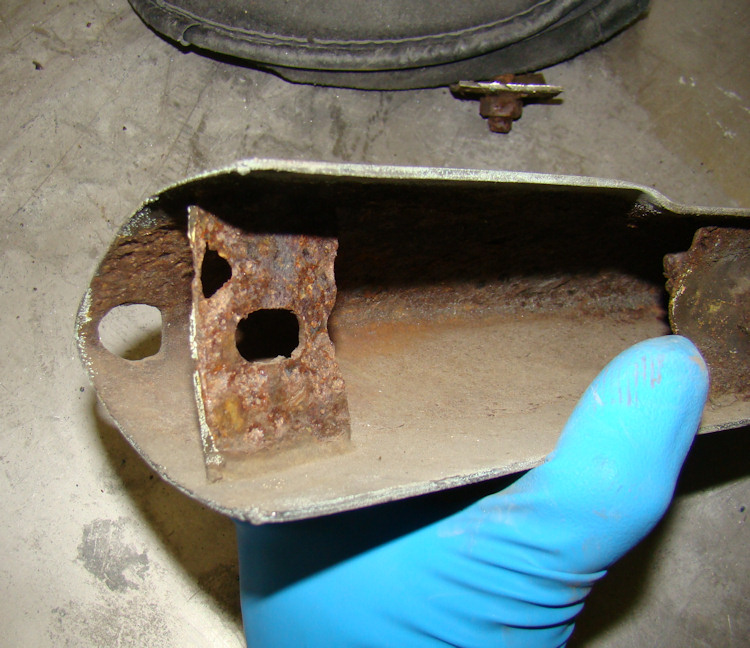
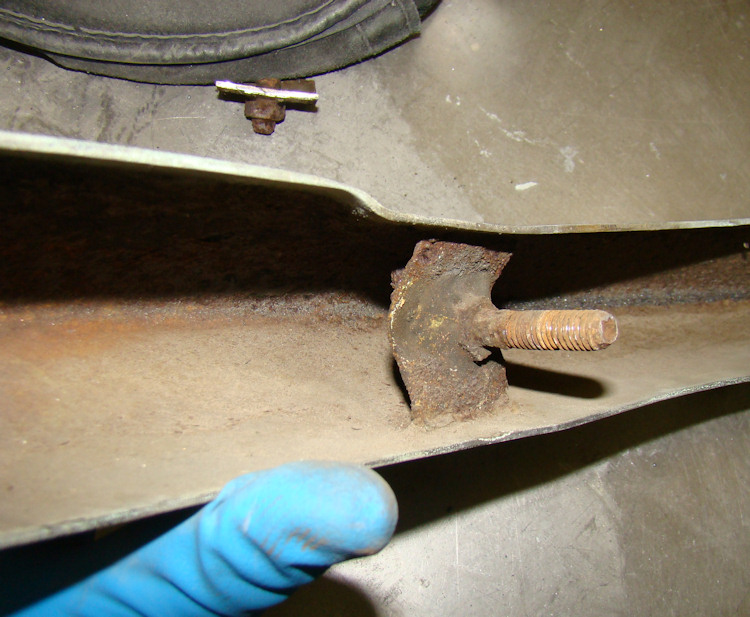
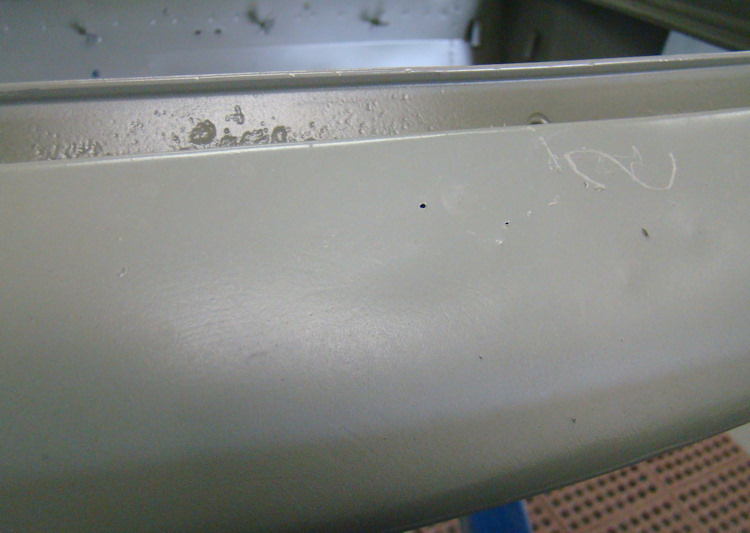
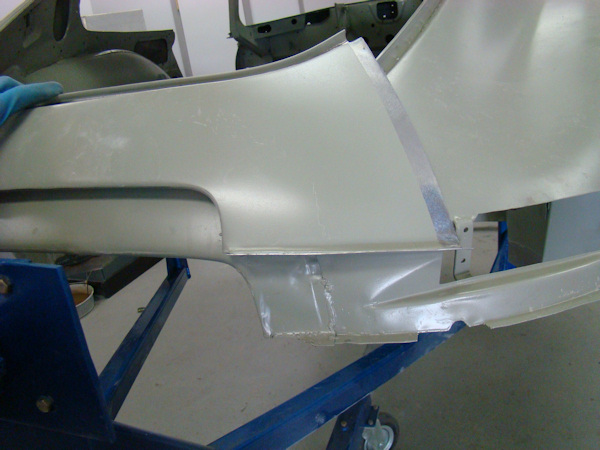
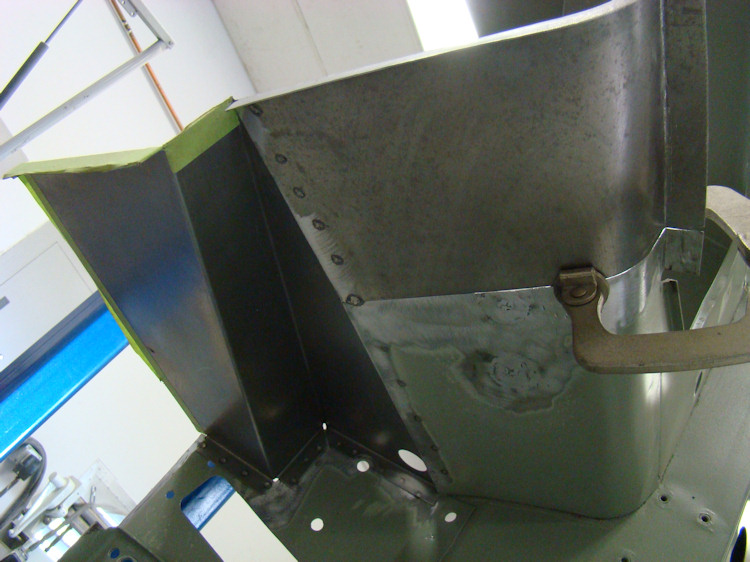
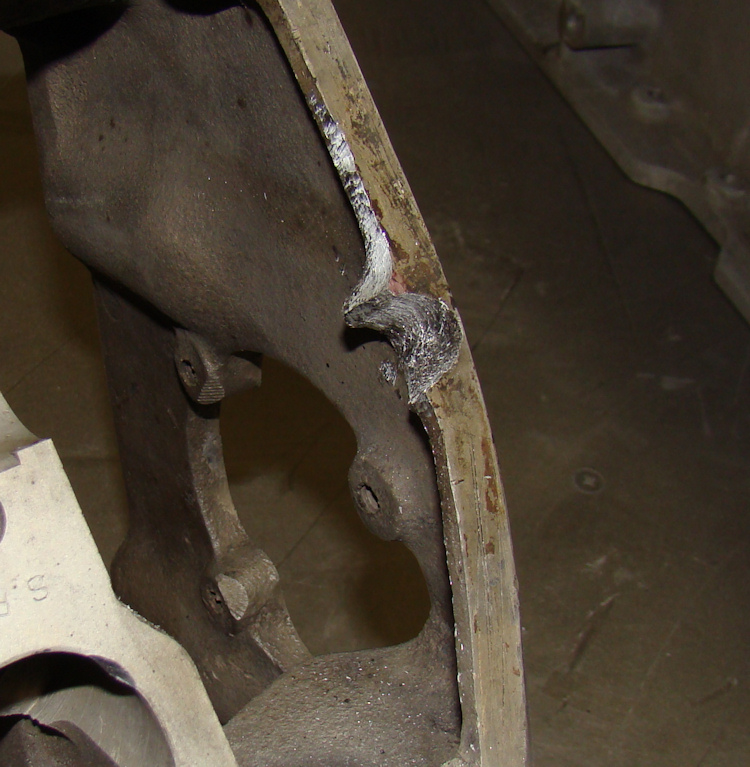
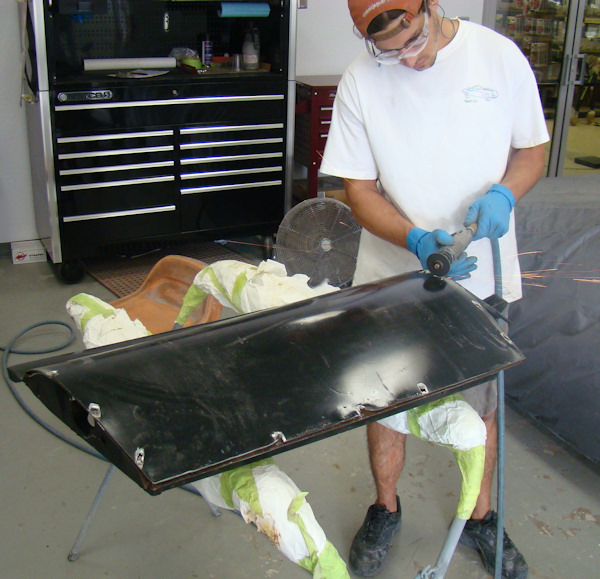
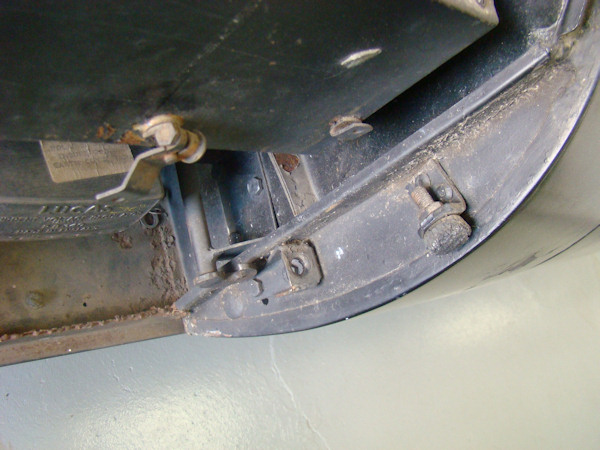
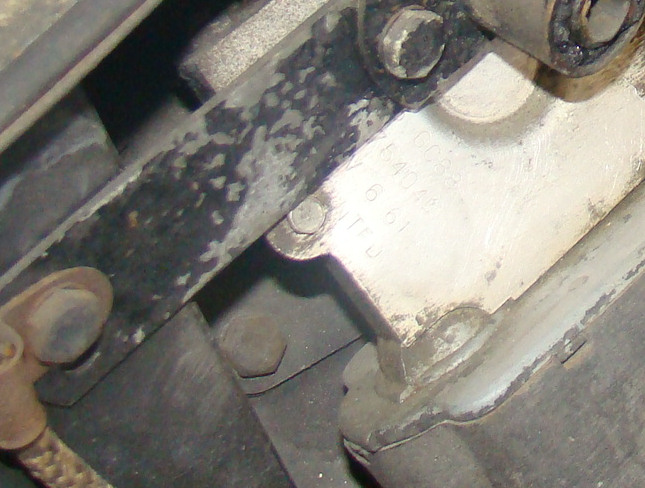
Installing the external bonnet latch mechanisms, repairing a badly damaged front bumper, fine tuning the fit of the new bonnet...
 |
 |
 |
|
|
during bonnet fit stage |
|
 |
 |
 |
|
sure it clears the heater box |
bonnet fit will be affected |
in place |
 |
 |
 |
|
now begin bonnet fit in earnest |
with weld to match wheel arch line |
|
 |
 |
 |
|
|
need extensive repairs |
|
 |
 |
 |
|
|
|
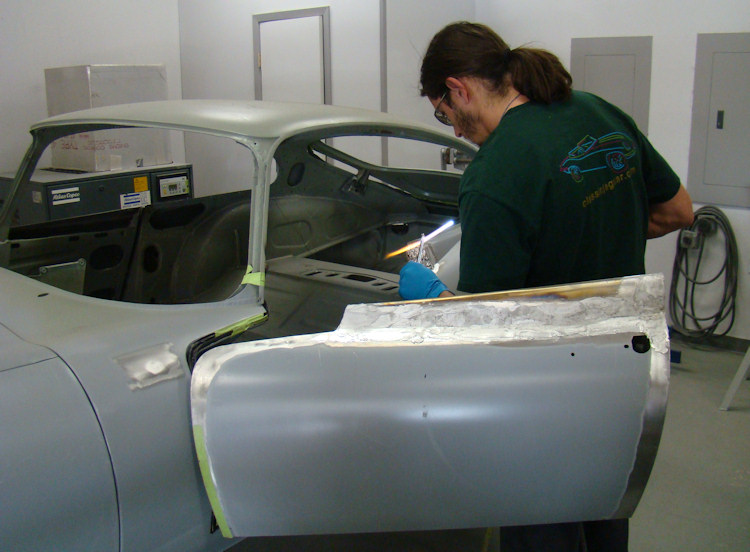
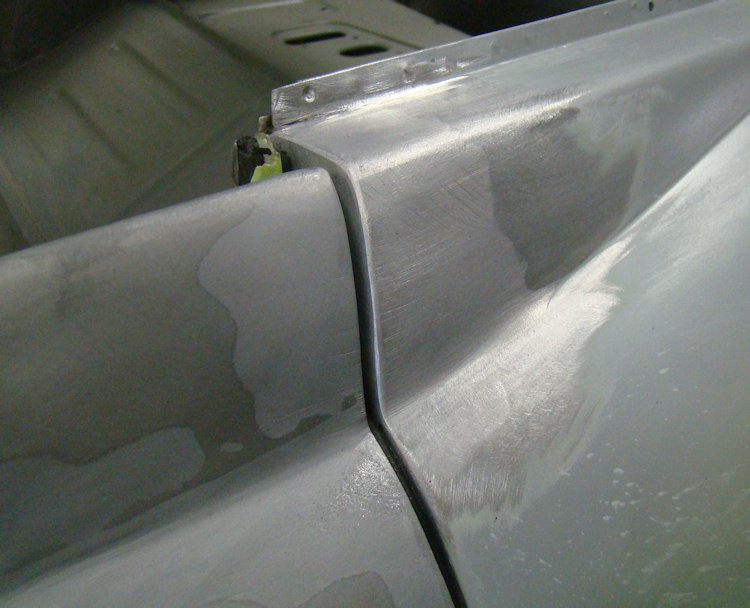
Darrell lead loading the driver's door and left rear quarter panel.
 |
 |
 |
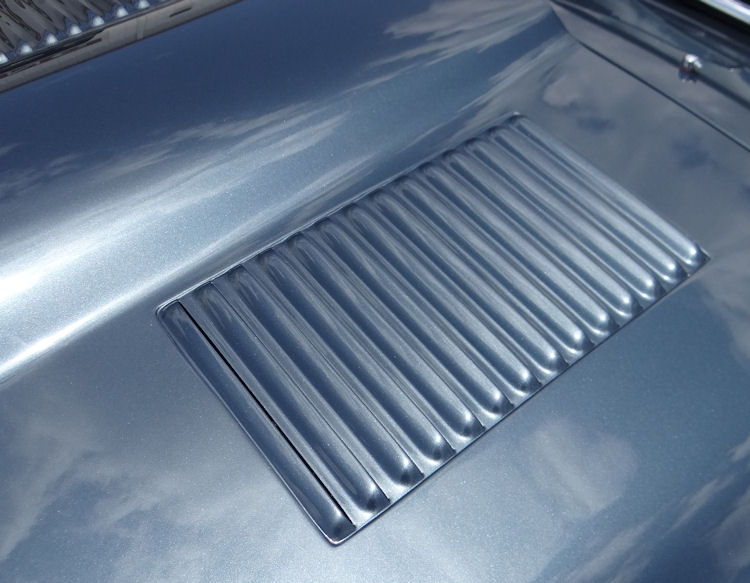
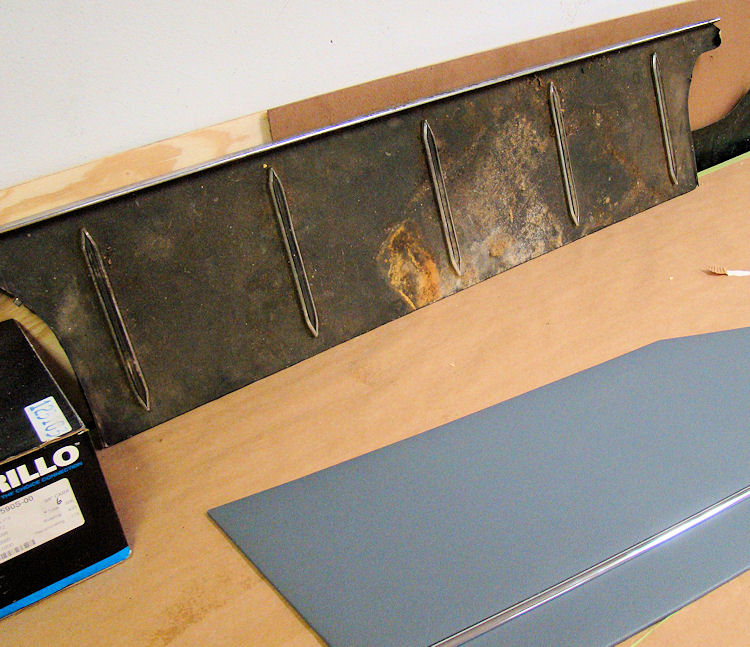
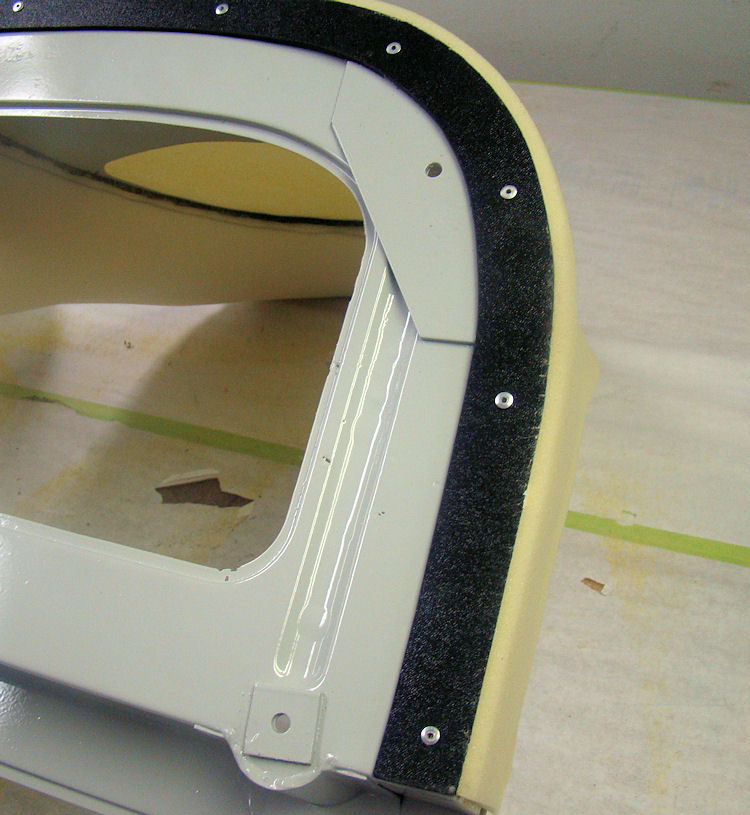
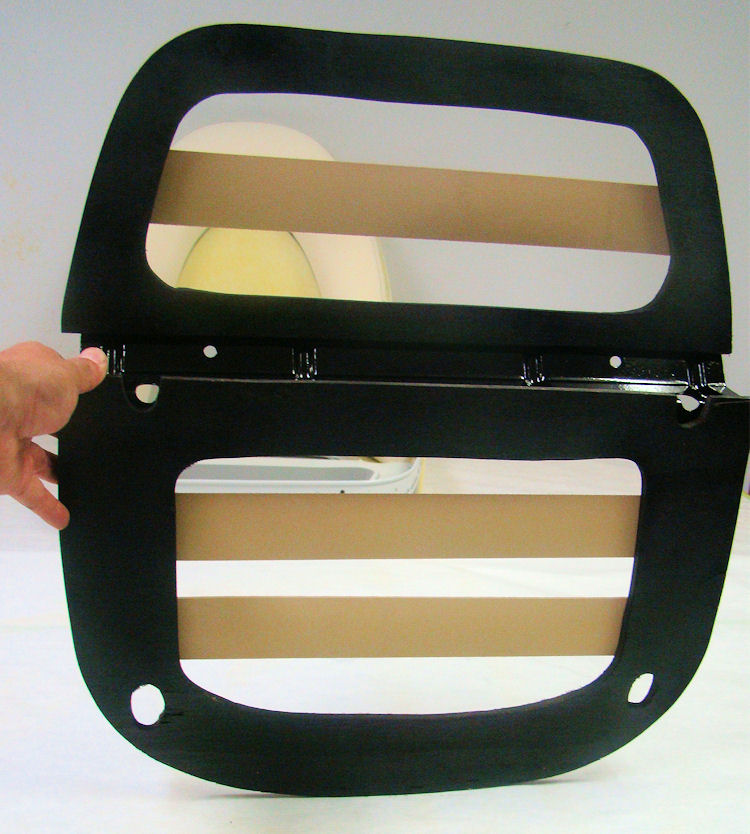
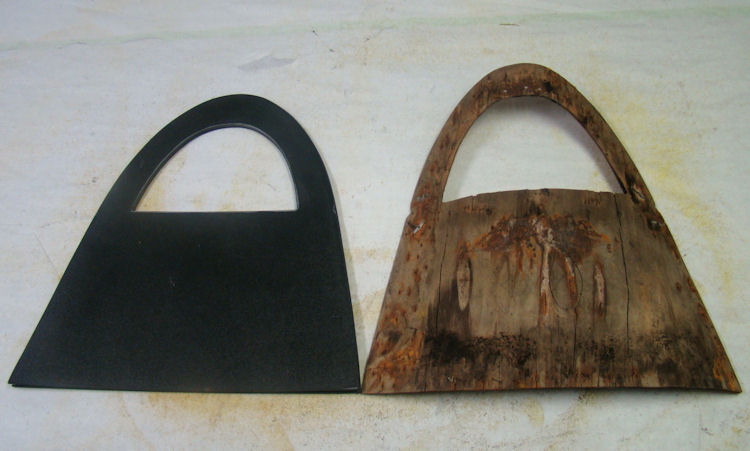
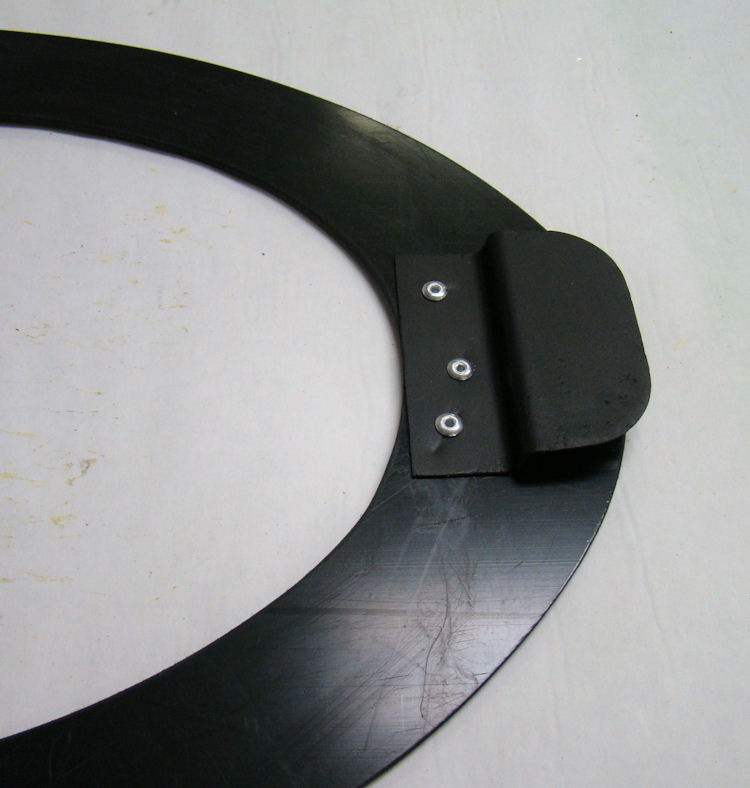
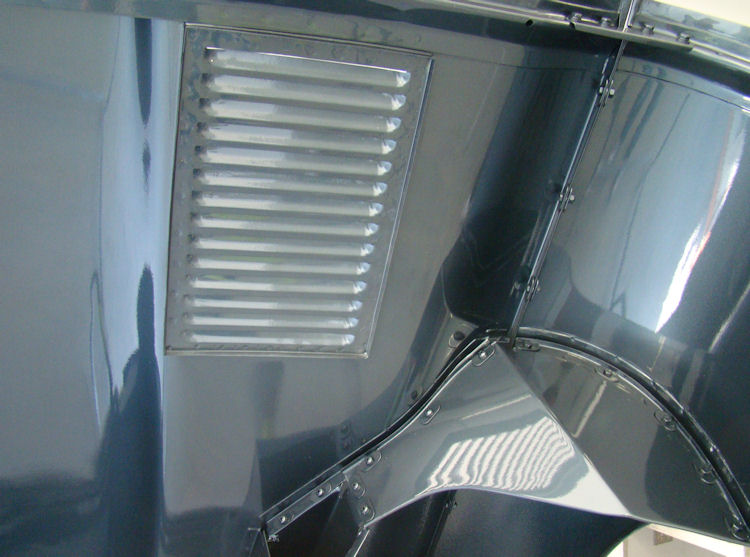
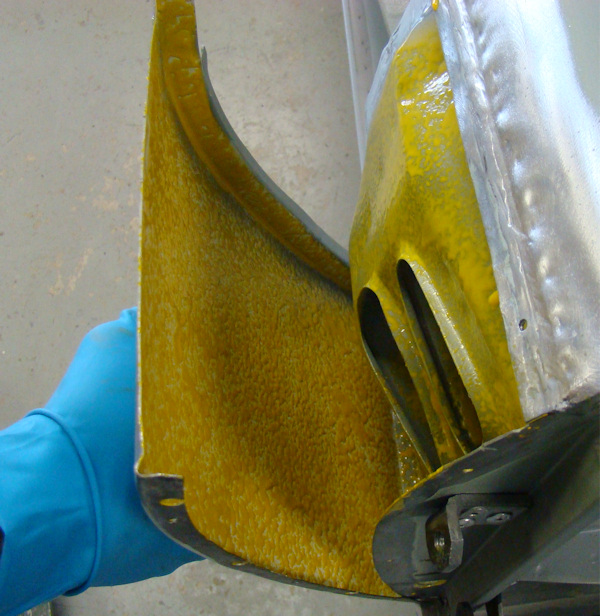
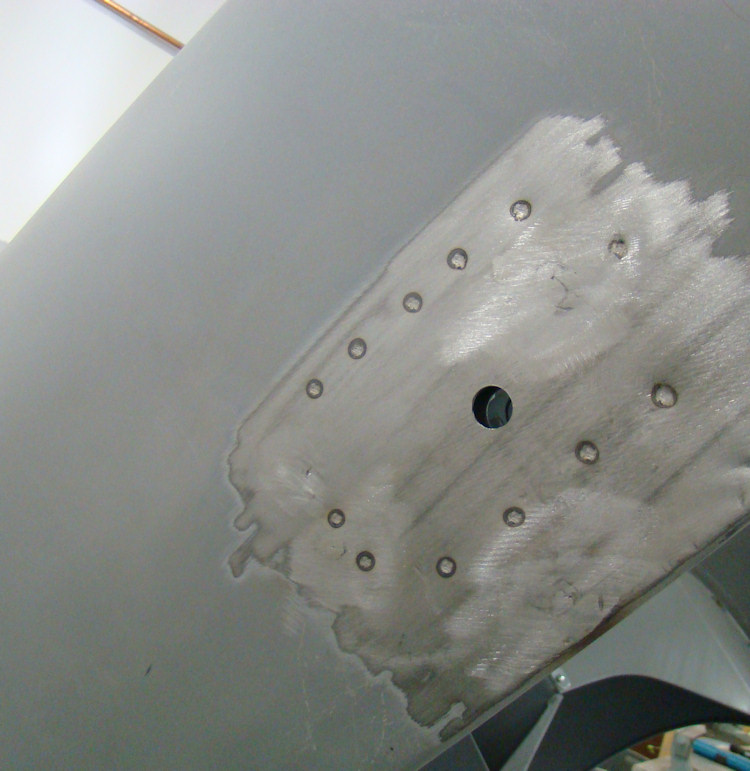
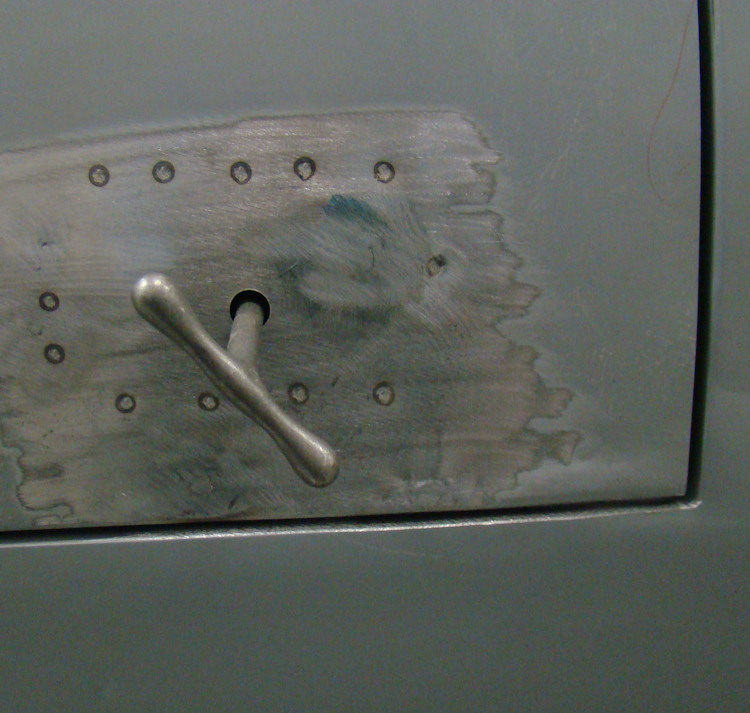
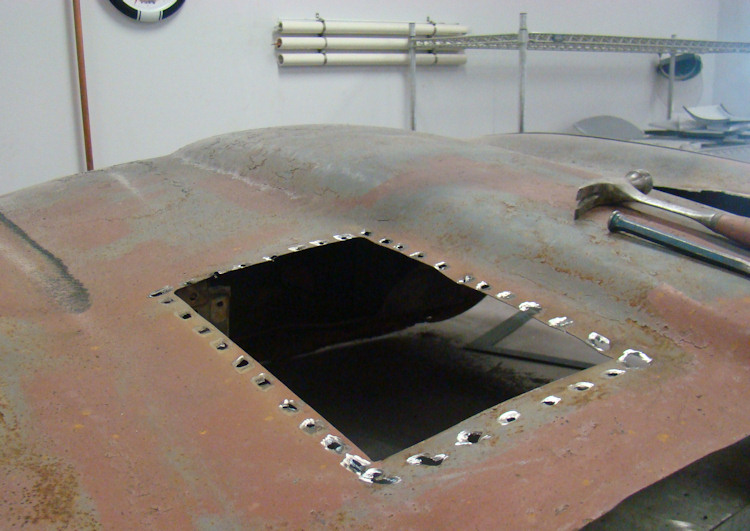
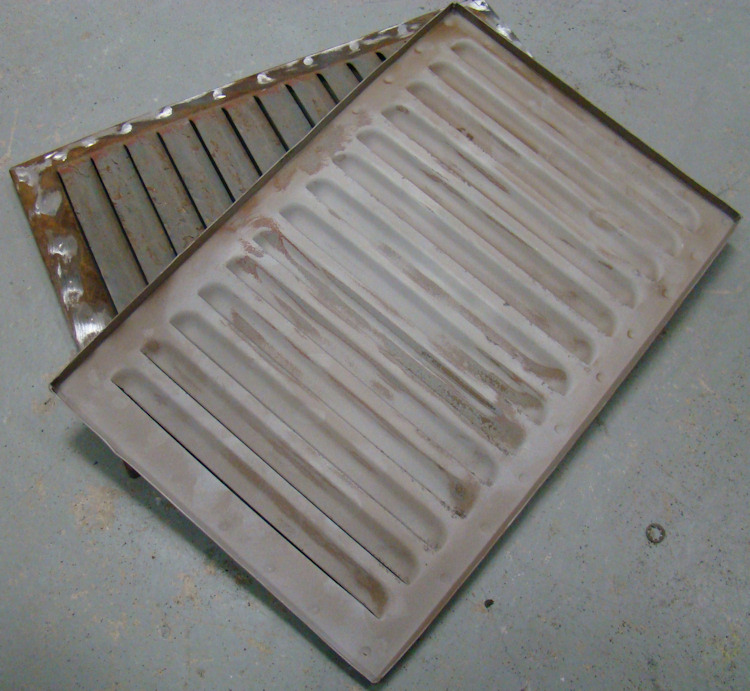
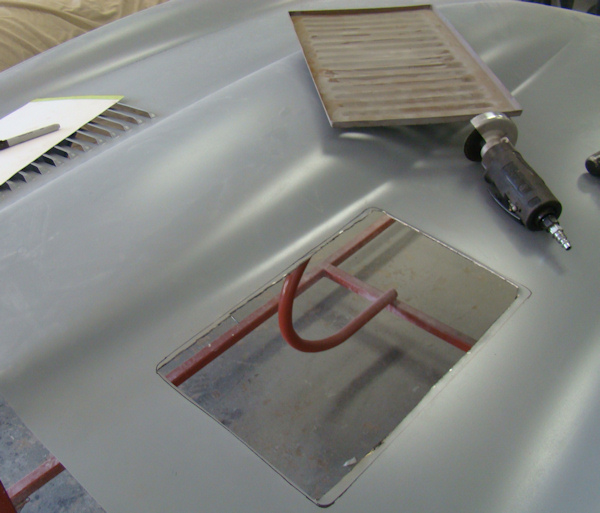
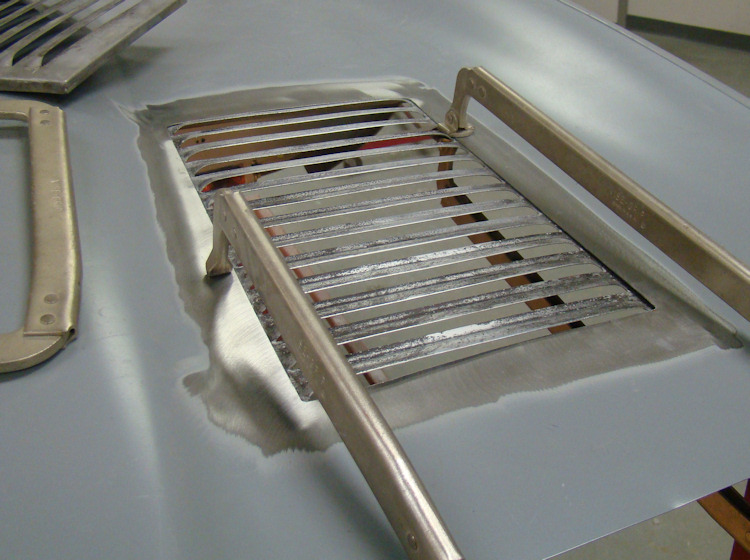
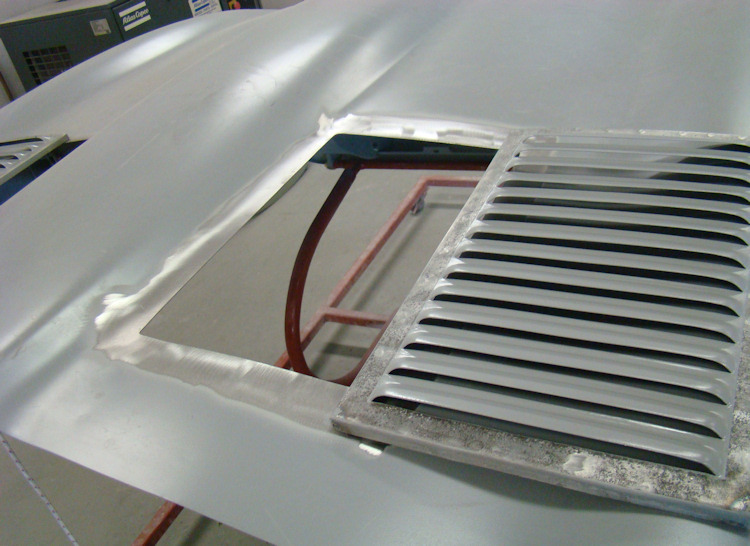
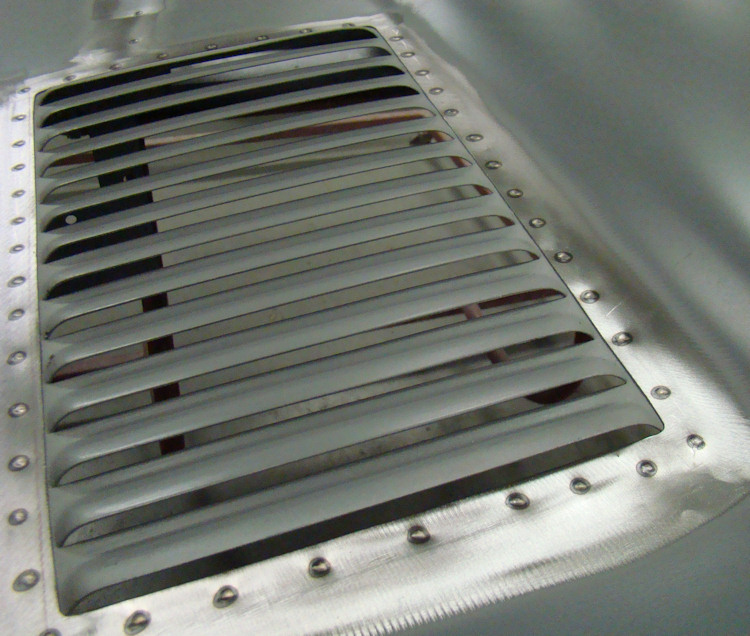
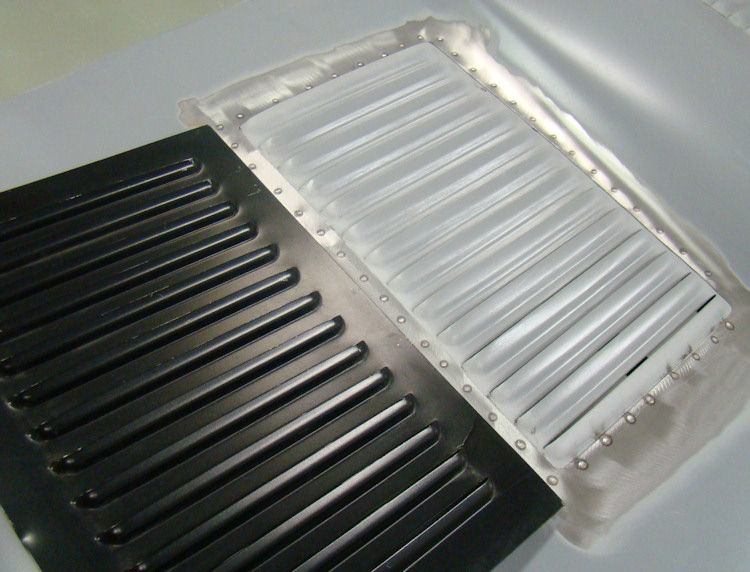
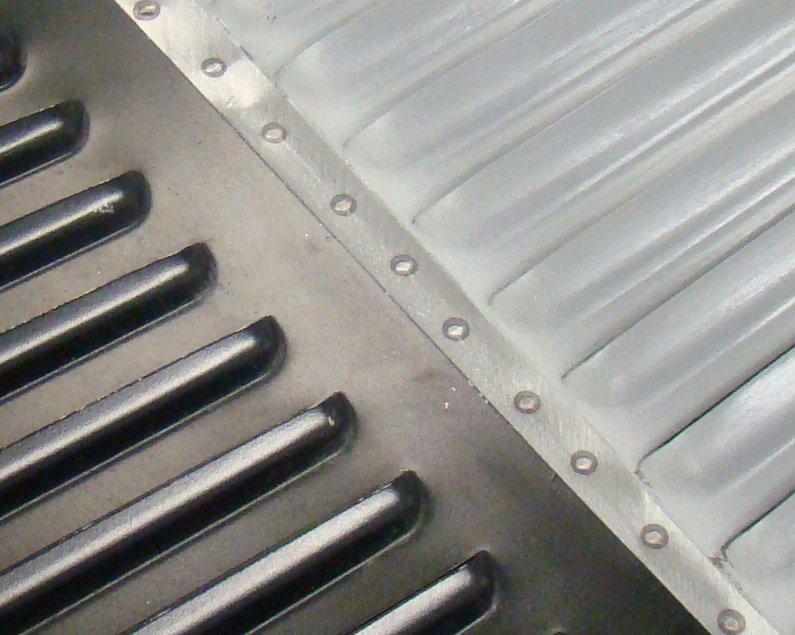
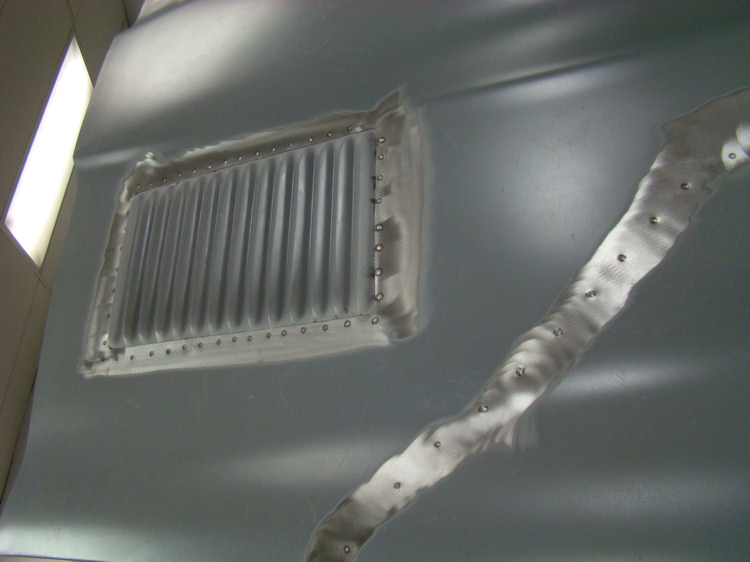
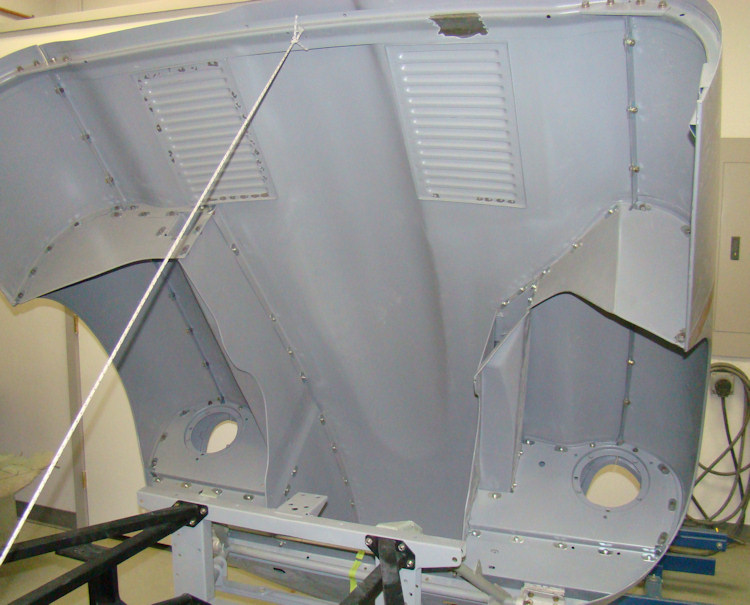
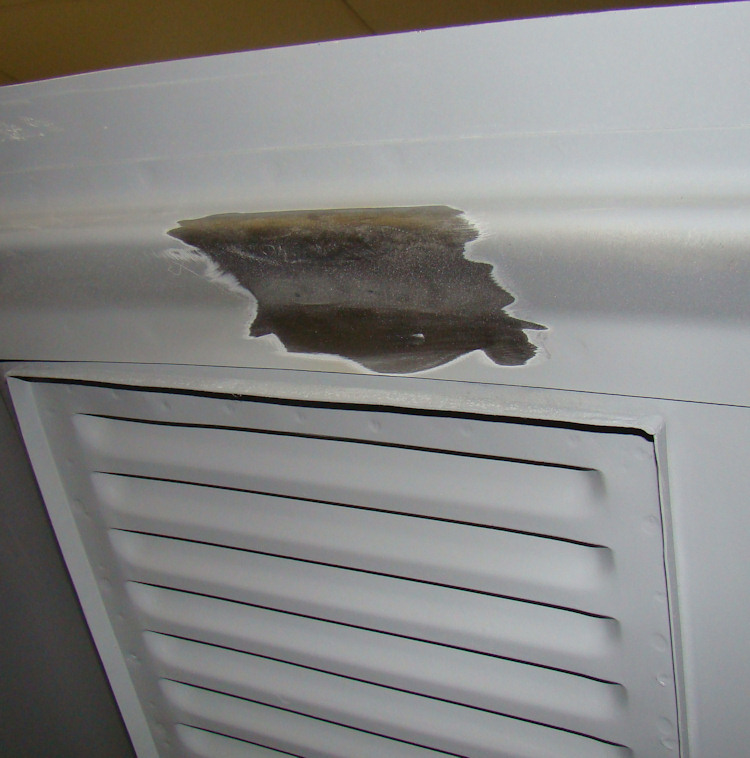
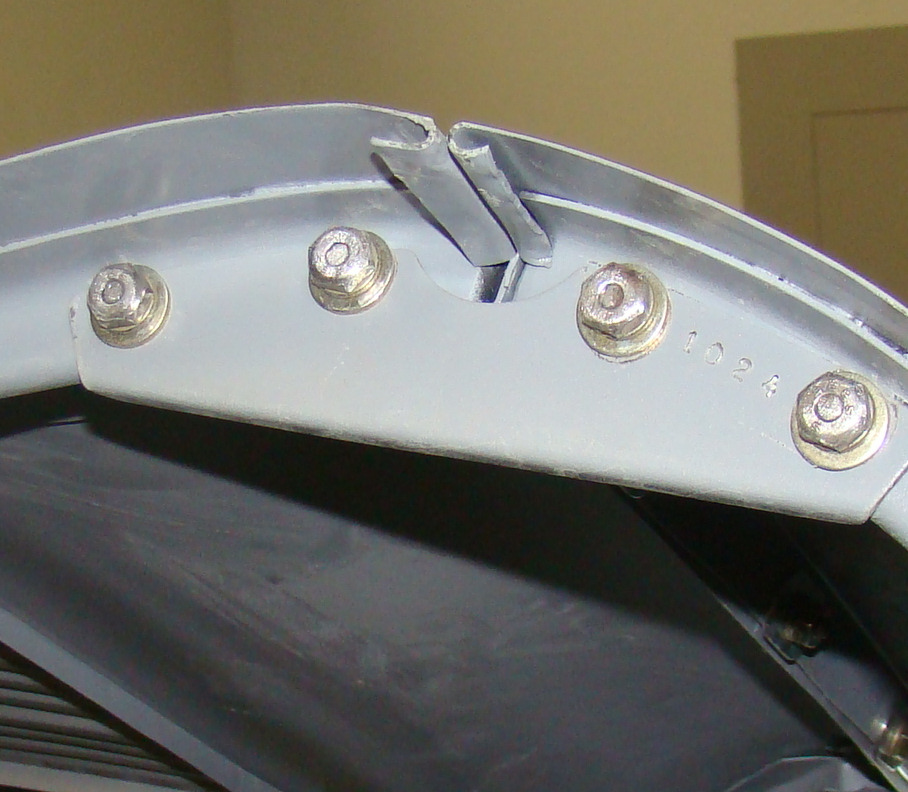
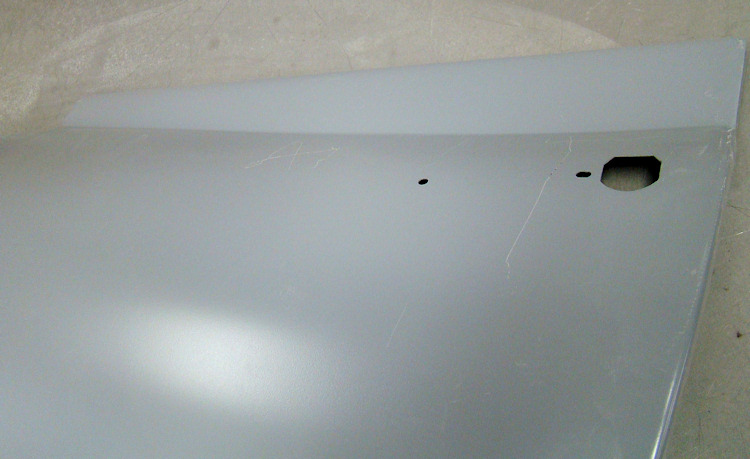
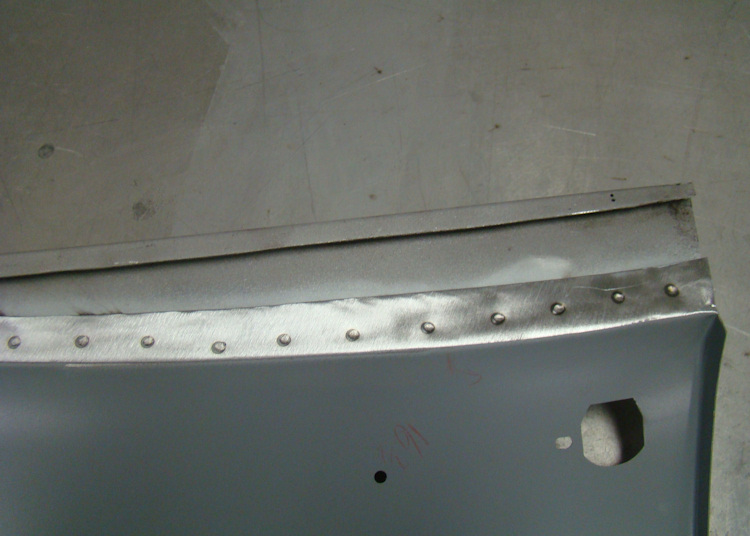
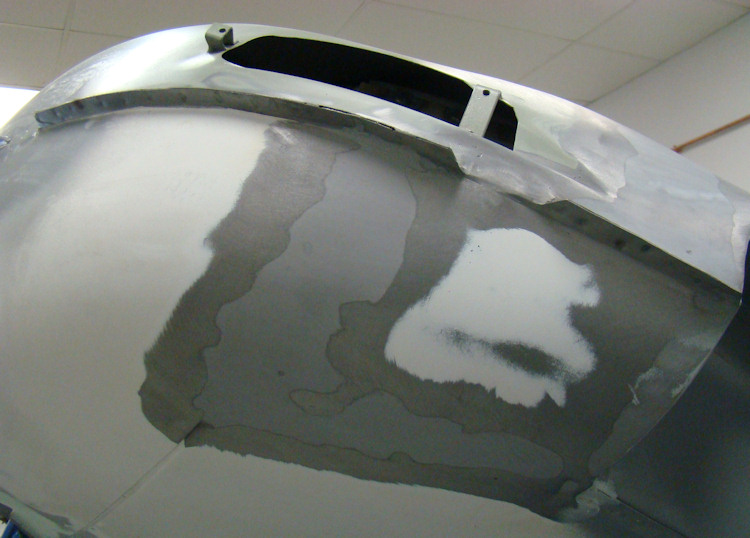
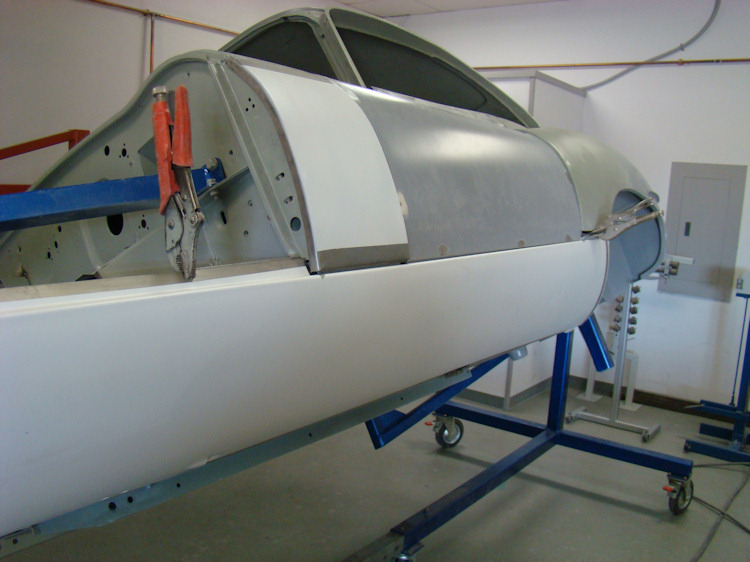
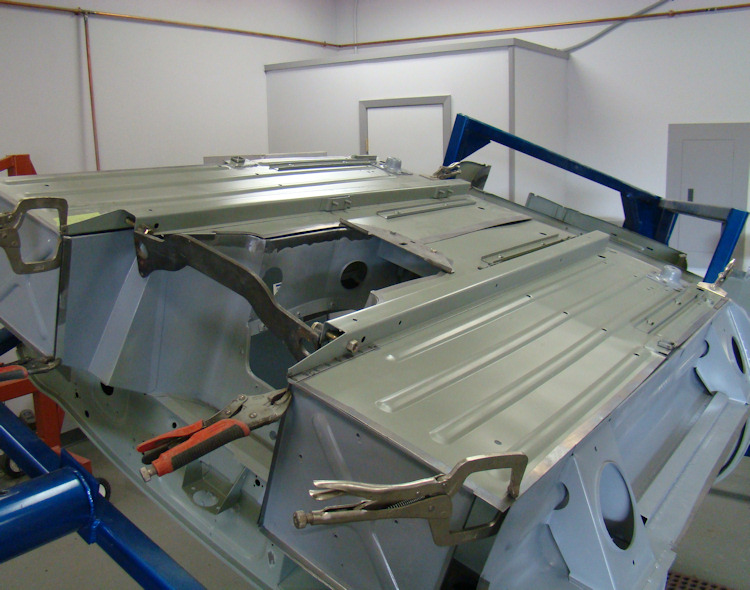
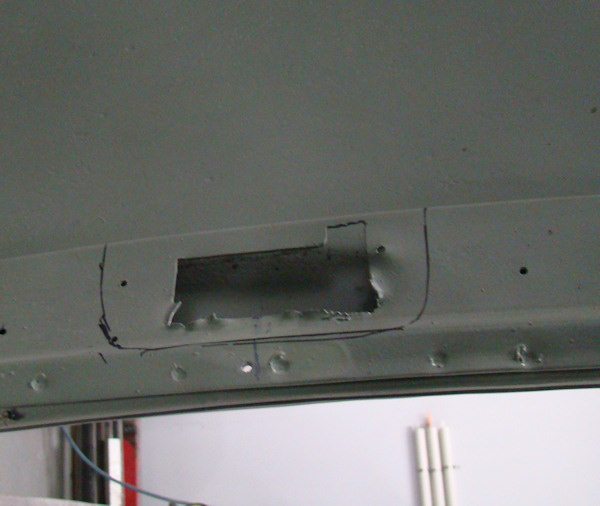
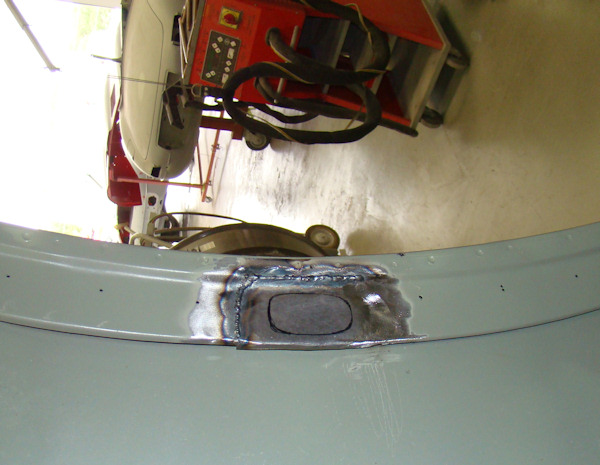
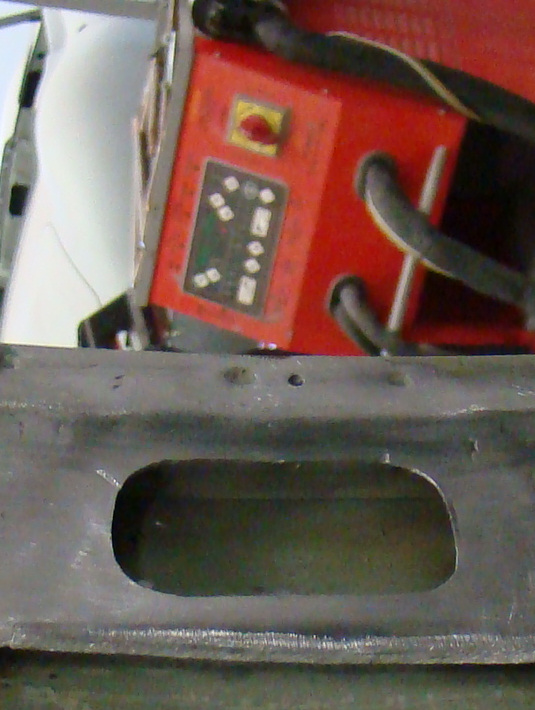
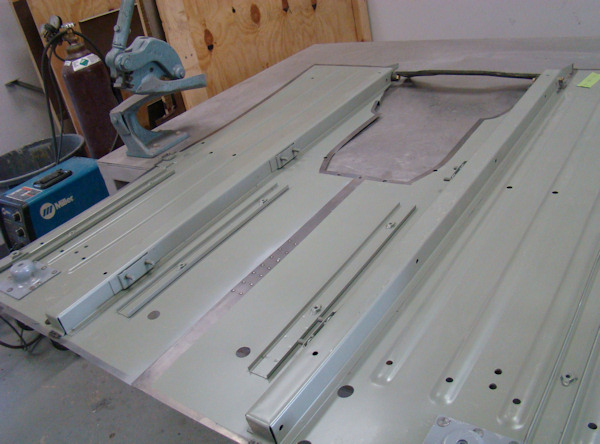
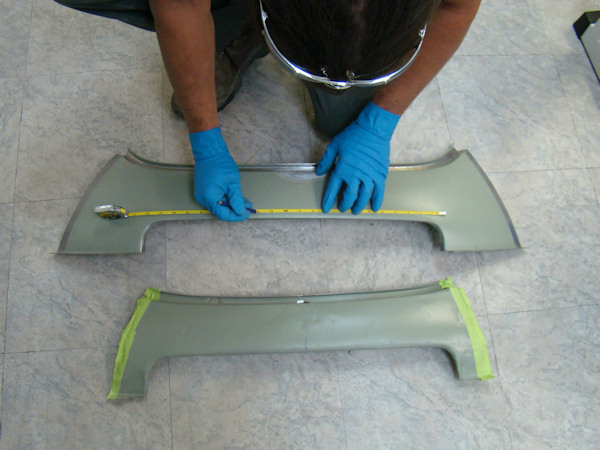
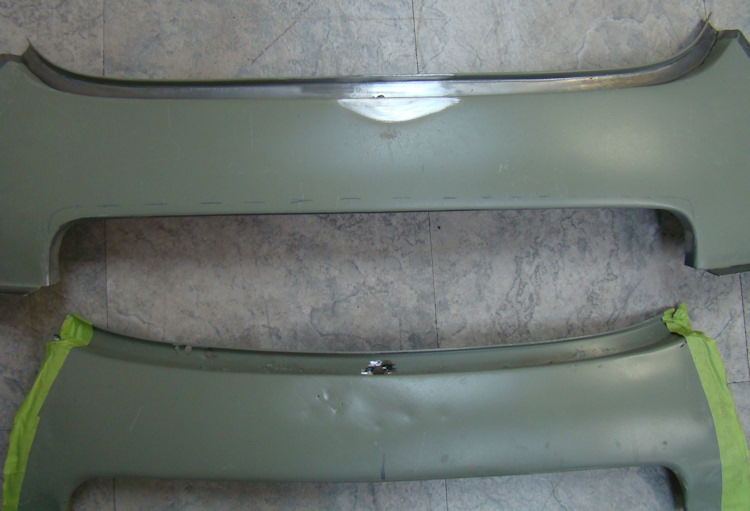
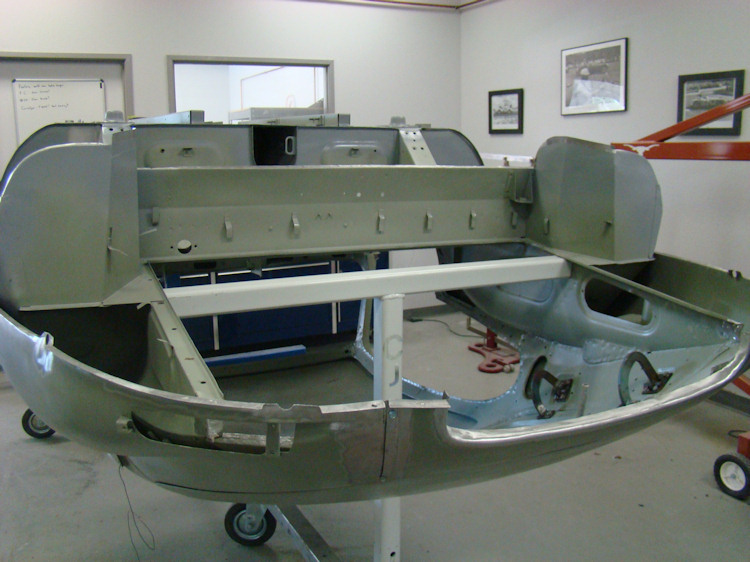
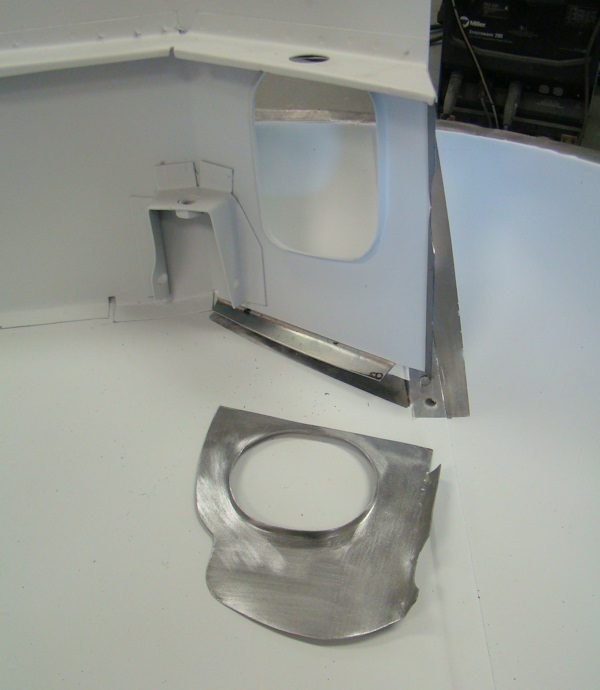
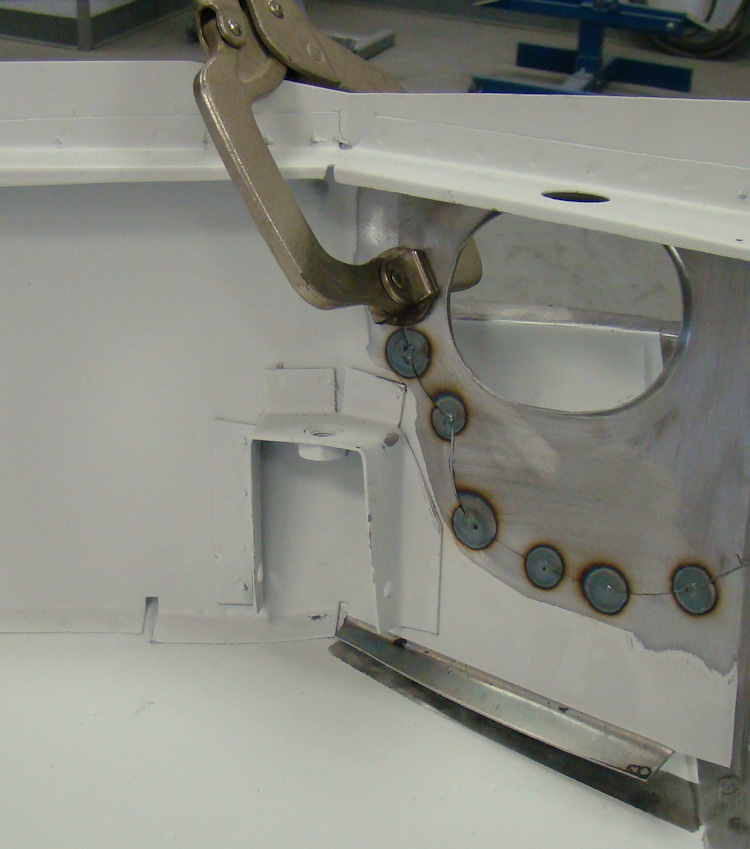
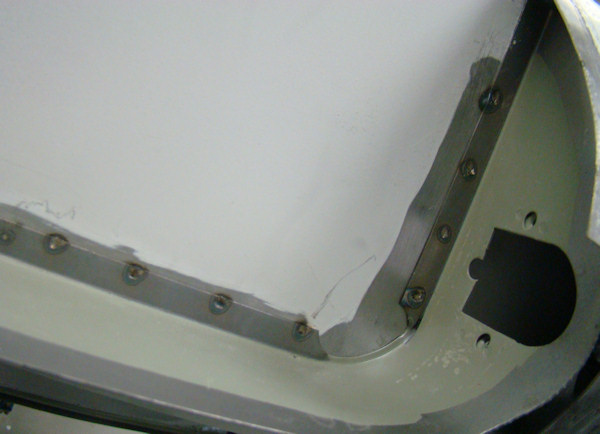
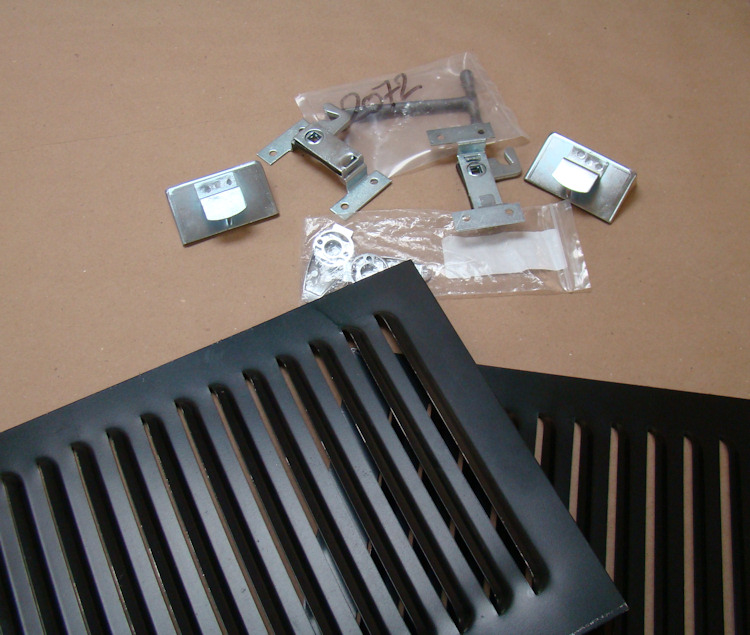
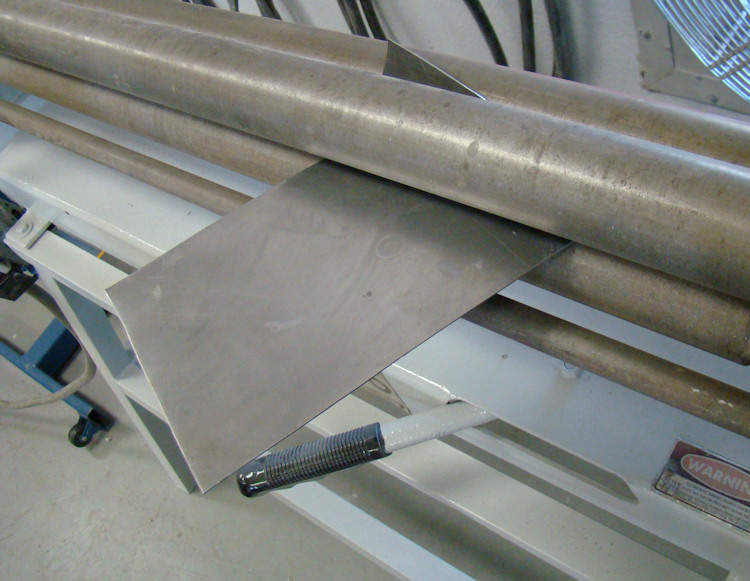
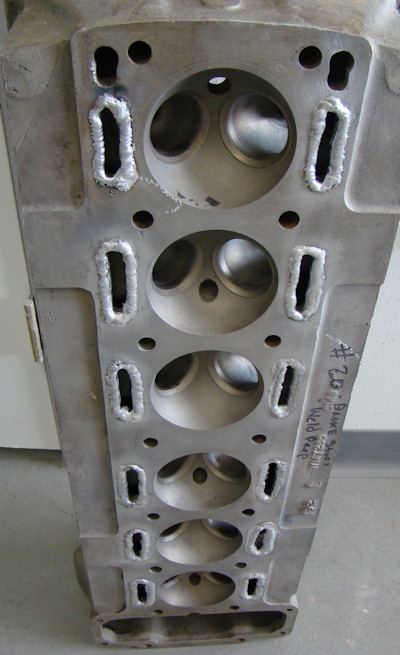
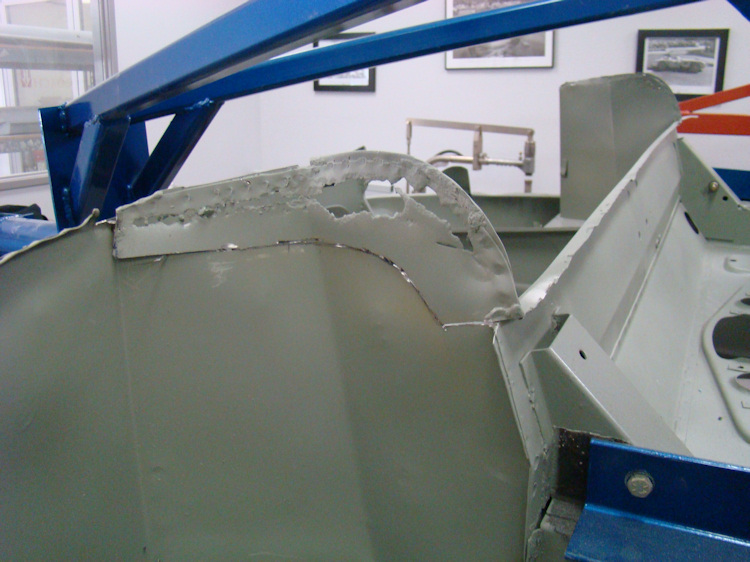
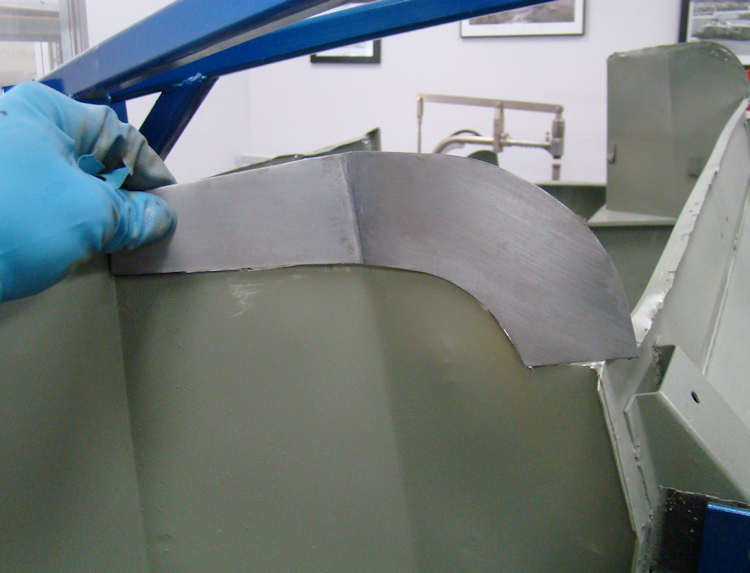
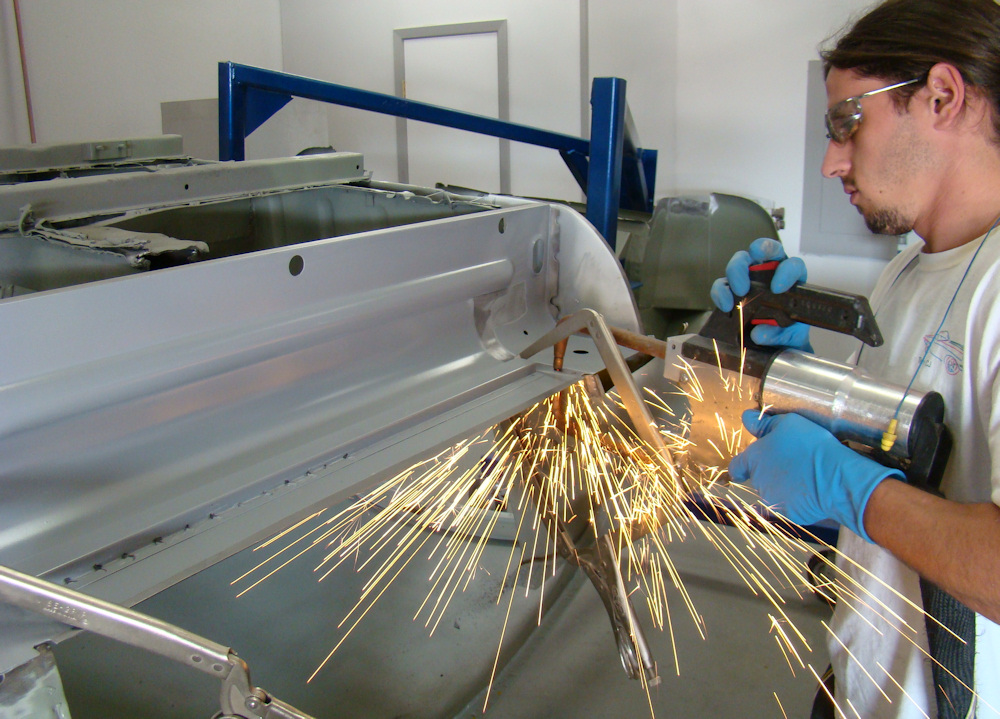
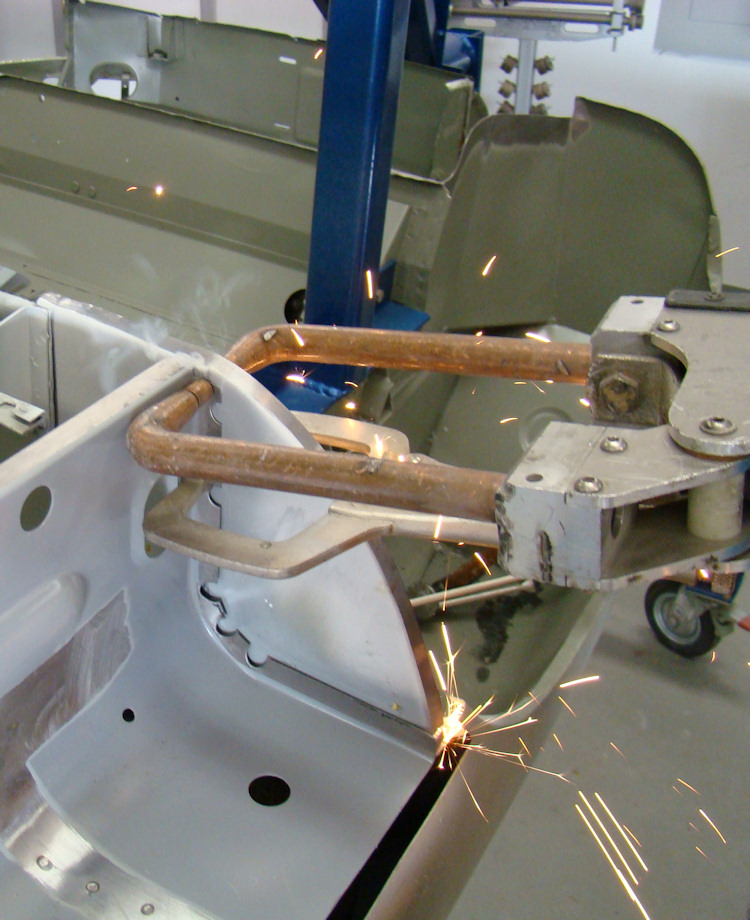
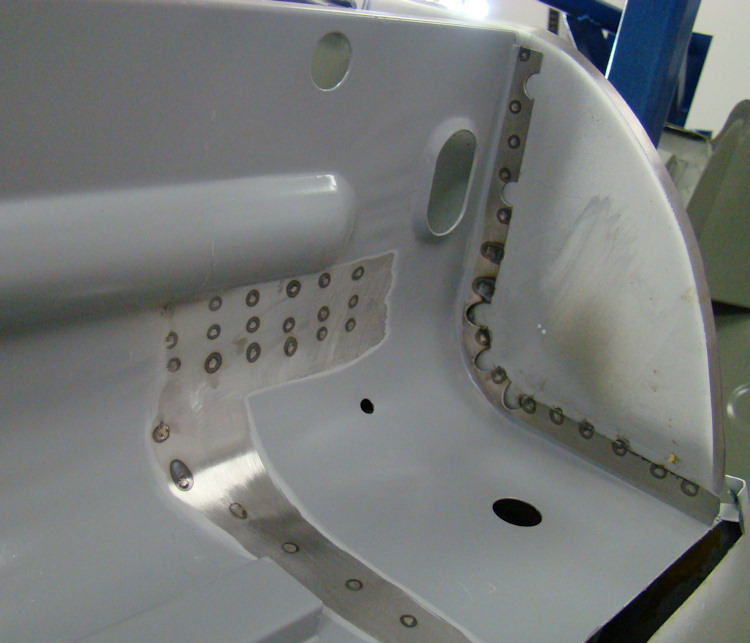
We have been busy converting your new bonnet into a welded louver, outside latch bonnet. This is not as straightforward as one might think, as there are many subtle differences beyond the obvious louvers and latches. We had originally planned on using new louvers that we purchased from the UK. Unfortunately, when we compared those to a set of original welded louvers, there were a number of significant differences (see comparison photos below). In the end we decided to cut out a set of original welded louvers and weld those in place in the new bonnet center section.We also spot welded all the mounting flanges for the heater/air intakes and the mudguards, items which were glued in place on the underside of later (and new) bonnets. We welded up the extra holes that are present on new bonnets to make them compatible with both the centrally located swb and the offset (to the right) 2+2 safety catches.
 |
 |
 |
|
original bonnet |
|
the new bonnet |
|
|
|
|
 |
 |
 |
|
|
|
as they would have been originally |
|
|
|
|
 |
 |
 |
|
and original welded louvers |
|
mounting flanges in place |
|
|
|
|
 |
 |
 |
|
paint on original bonnets |
|
|
|
|
|
|
 |
 |
 |
|
frames installed |
reassemble bonnet |
|
|
|
|
|
 |
 |
 |
|
bonnet brace - so we did the same for you |
and hinges |
|
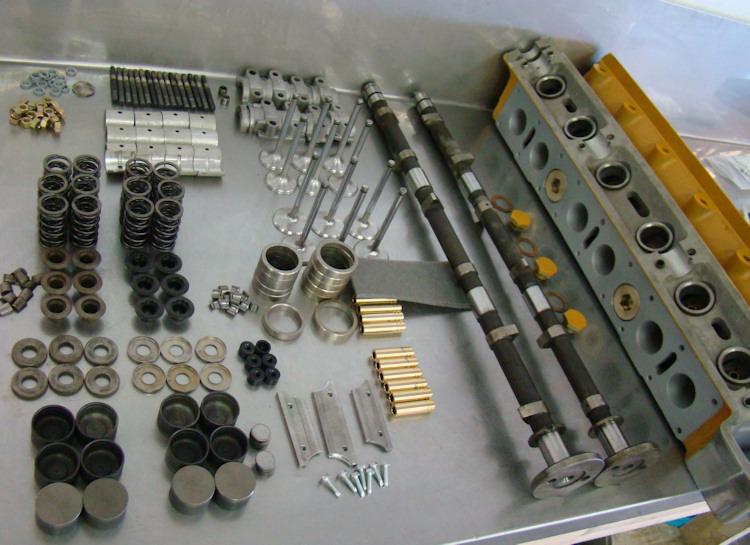
More progress in both the engine machine shop and the Coachworks....
 |
 |
 |
|
|
|
|
 |
 |
 |
|
|
|
|
 |
 |
 |
|
installed on the exhaust side |
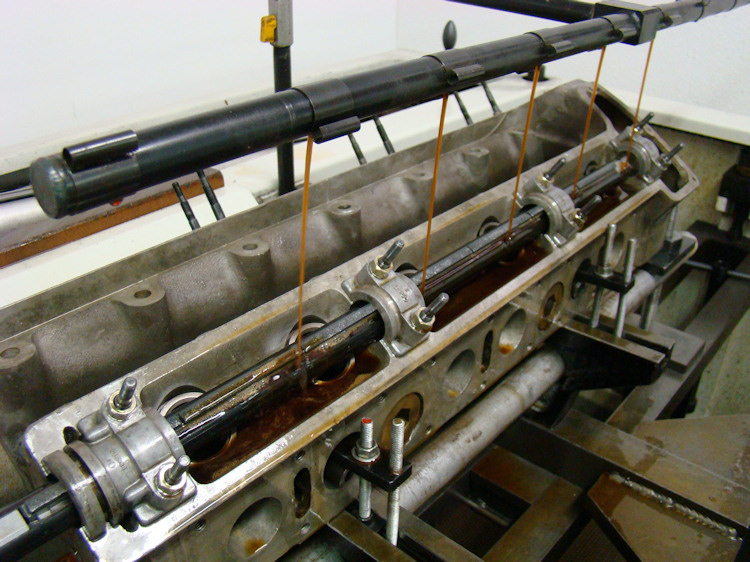
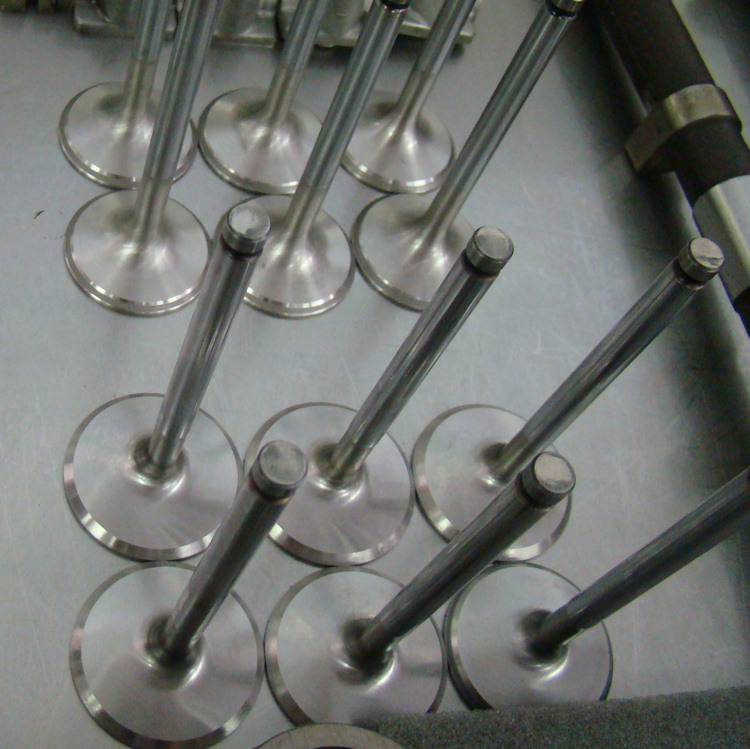
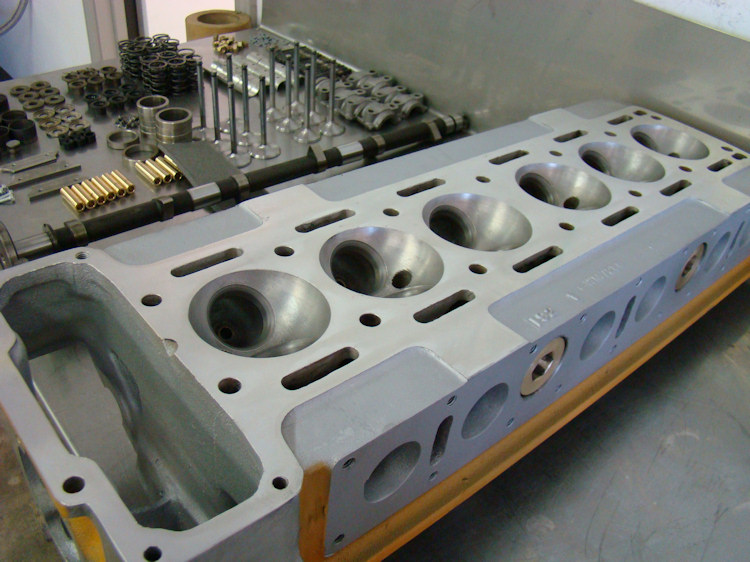
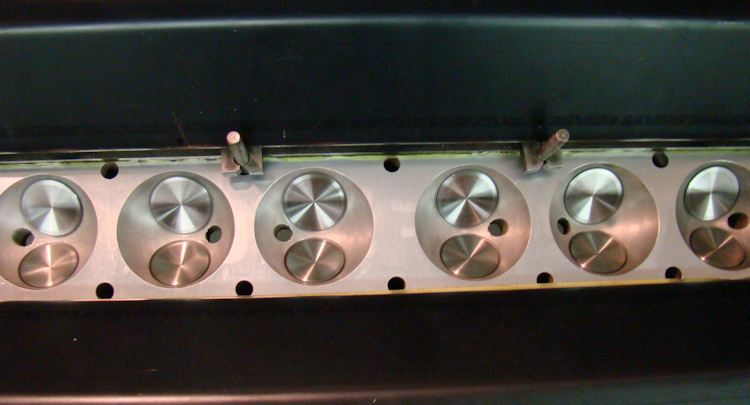
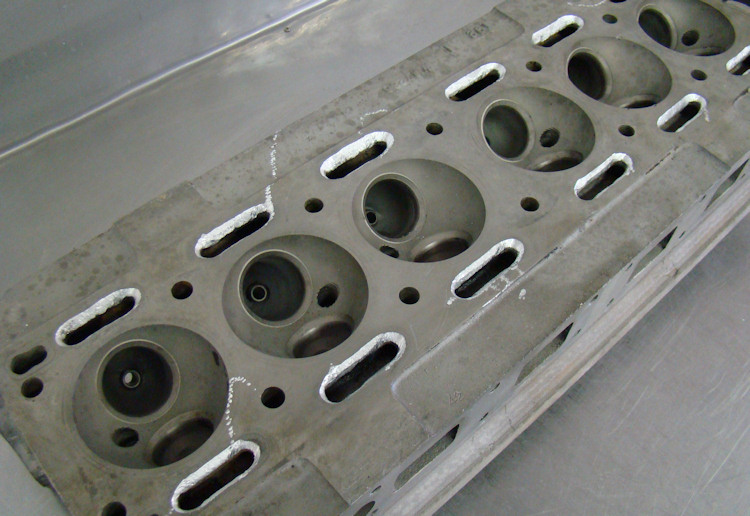
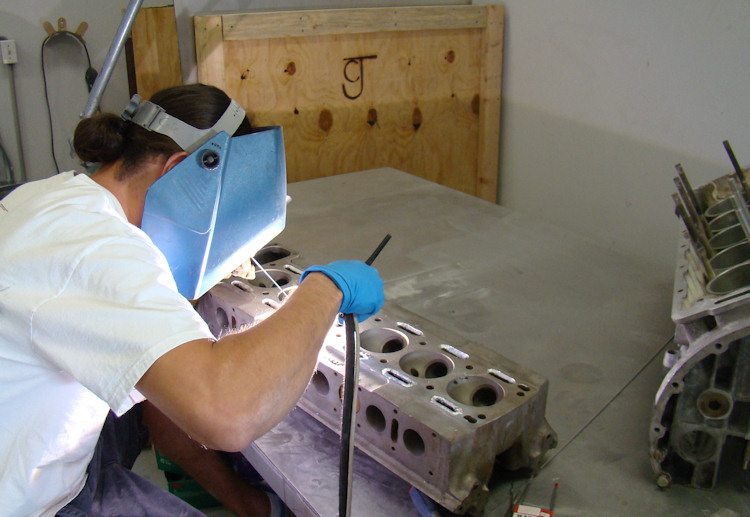
cylinder head rebuild |
|
 |
 |
 |
|
|
angled valve job |
|
 |
 |
 |
|
|
originals in that they are one piece |
welded old tops to new skins |
 |
 |
 |
|
loaded |
|
the doors |
 |
 |
 |
|
outer sills together |
|
and inside surface of new outer sill |
 |
 |
 |
|
|
Lots of progress in the Coachworks since my last update...
 |
 |
 |
|
|
|
|
 |
 |
 |
|
|
when trial fitting floors |
interior light |
 |
 |
 |
|
|
||
 |
 |
 |
|
|
will be replaced |
right shape |
 |
 |
 |
|
will be re-shaped |
|
|
 |
 |
 |
|
trial fitting new boot floor assembly |
are much larger than originals |
|
 |
 |
 |
|
|
||
 |
||
|
|
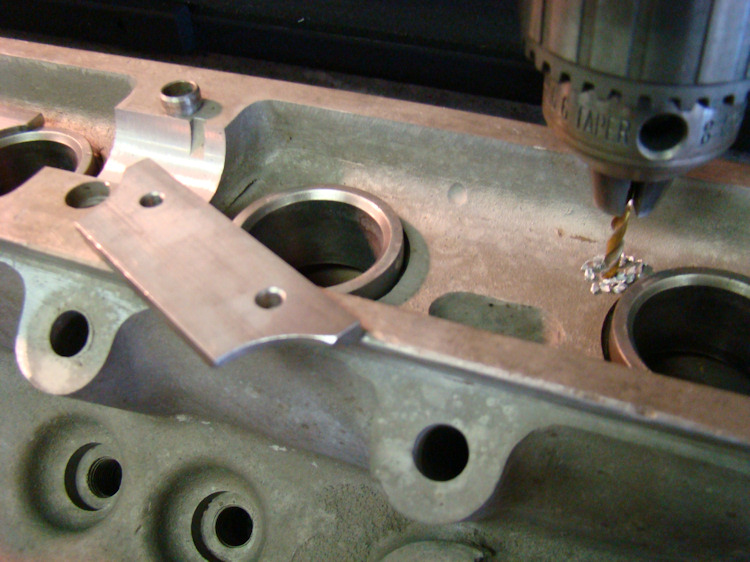
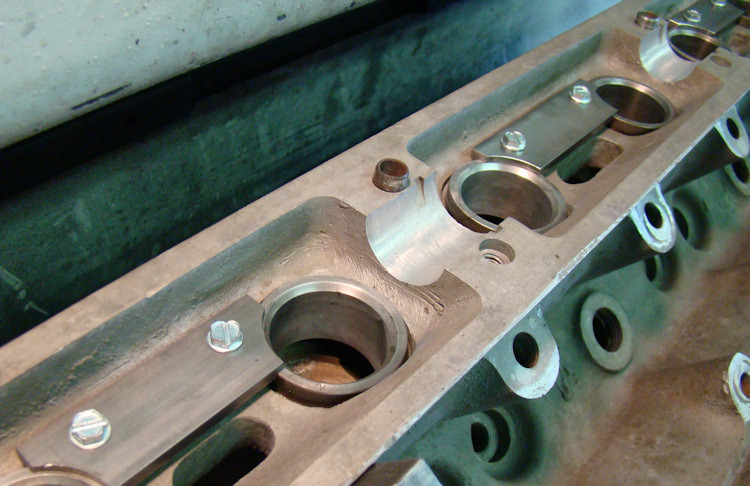
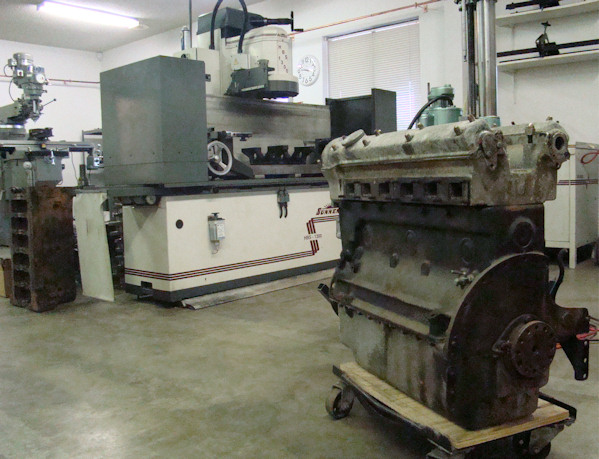
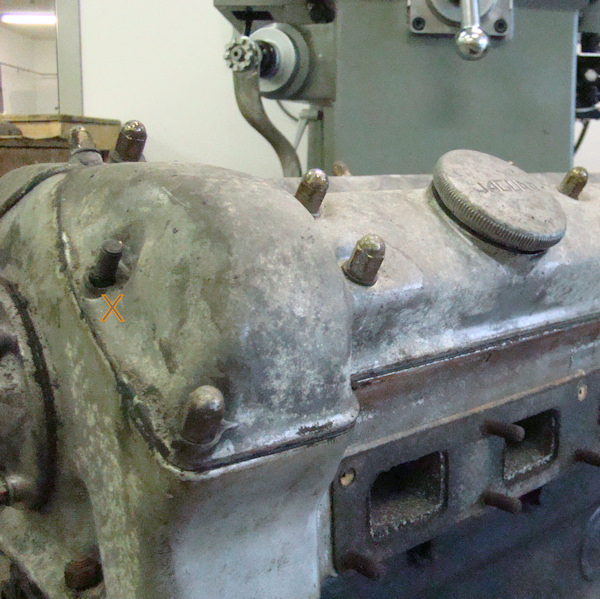
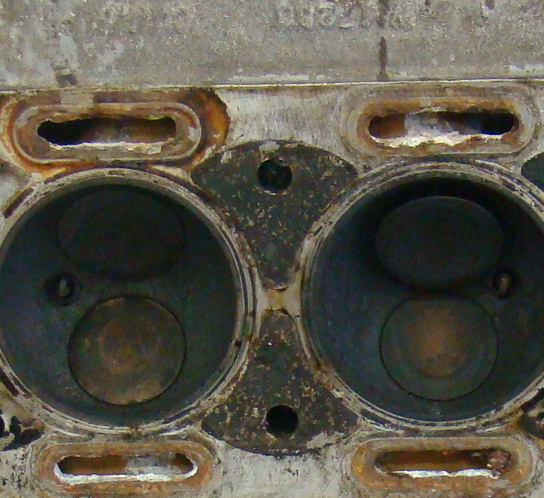
Lots of progress in the machine shop and in the Coachworks...
 |
 |
 |
|
|
|
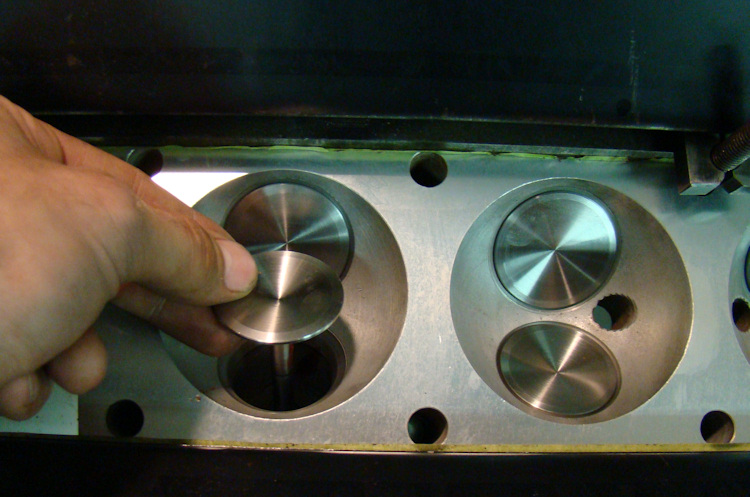
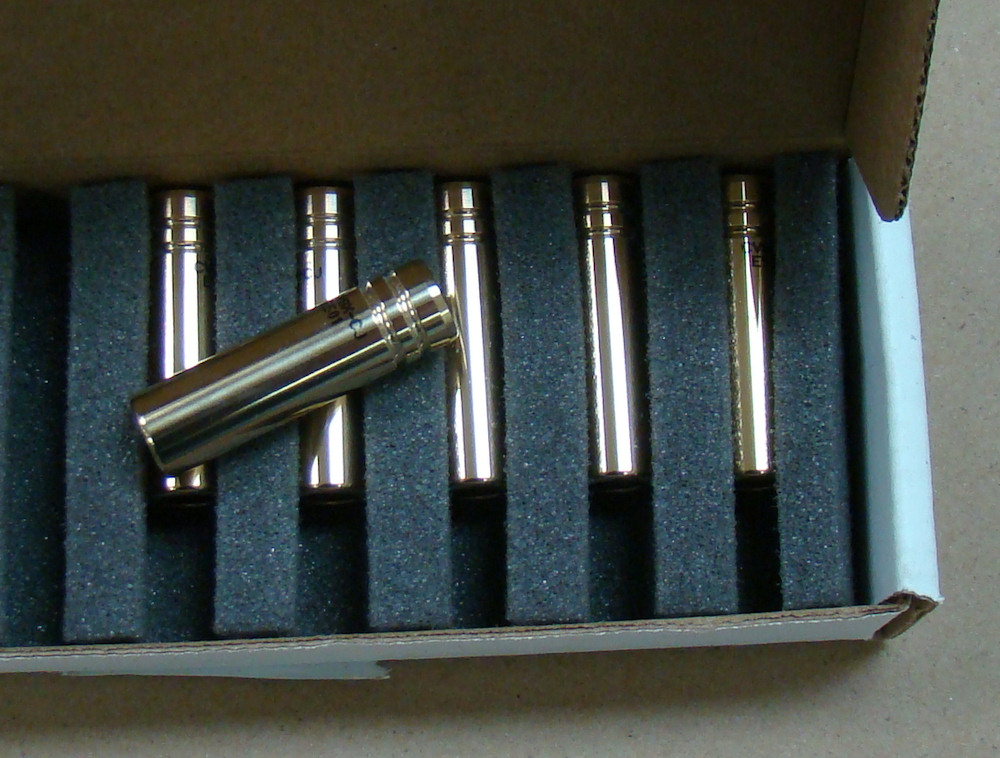
valve guides |
 |
 |
 |
|
|
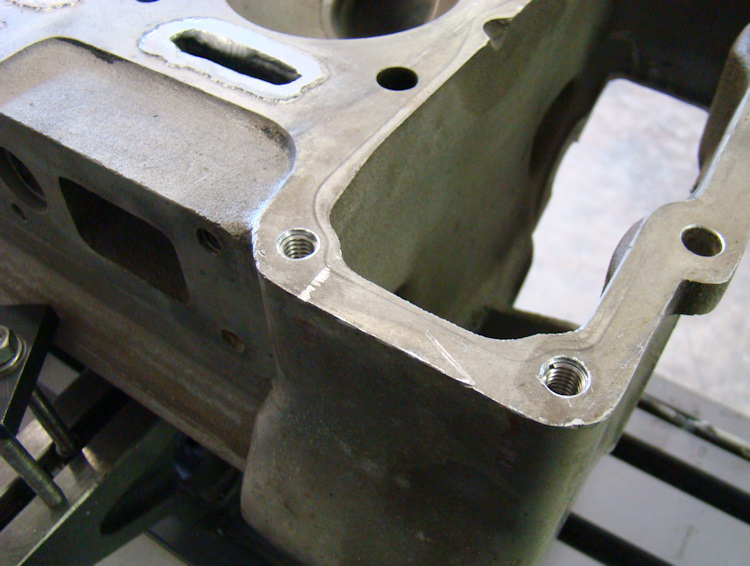
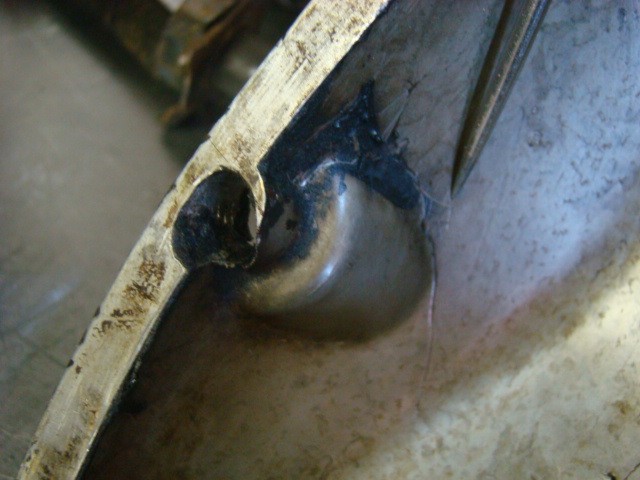
stud hole |
|
 |
 |
 |
|
|
|
|
 |
 |
 |
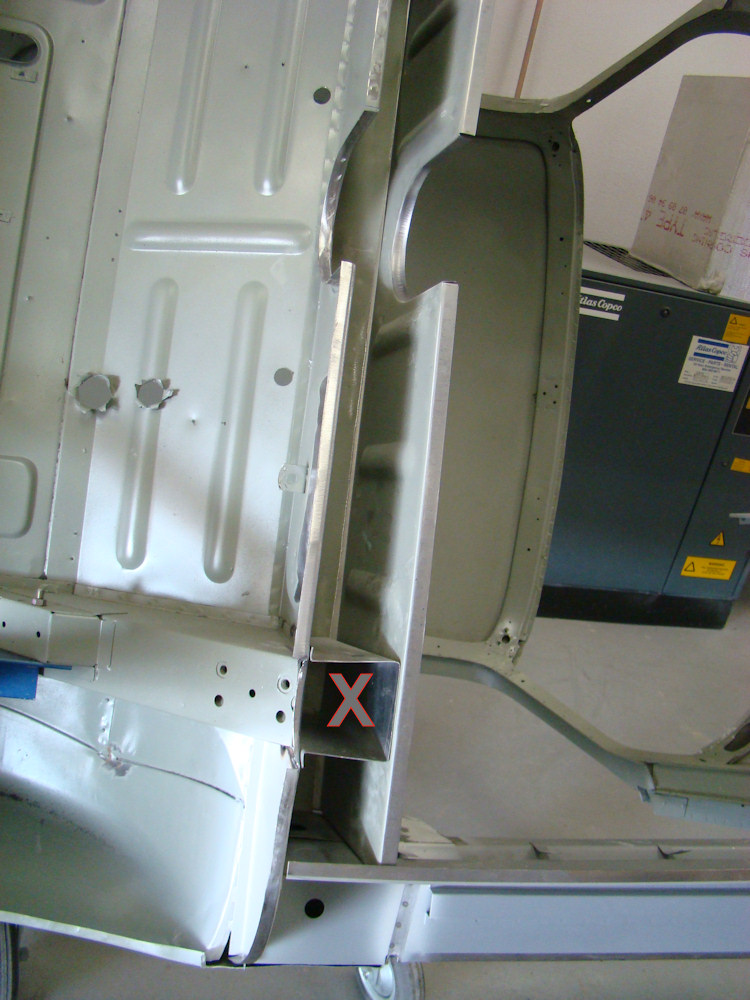
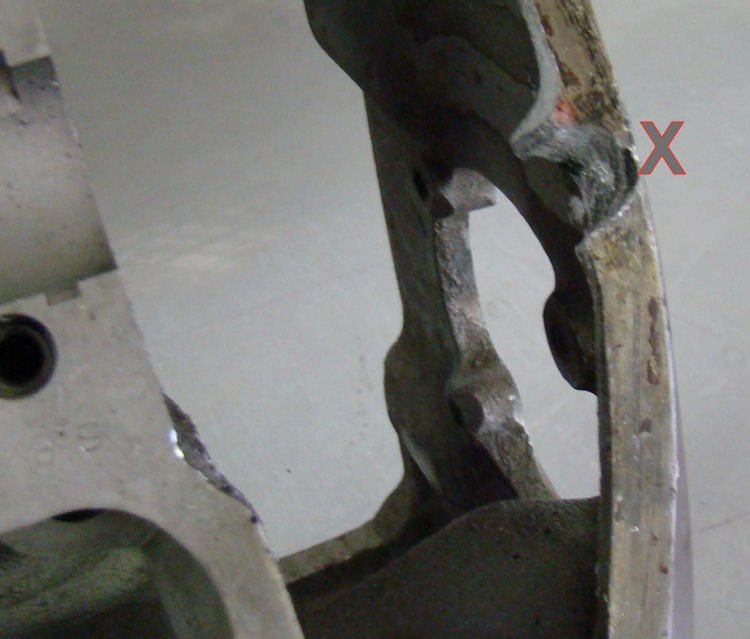
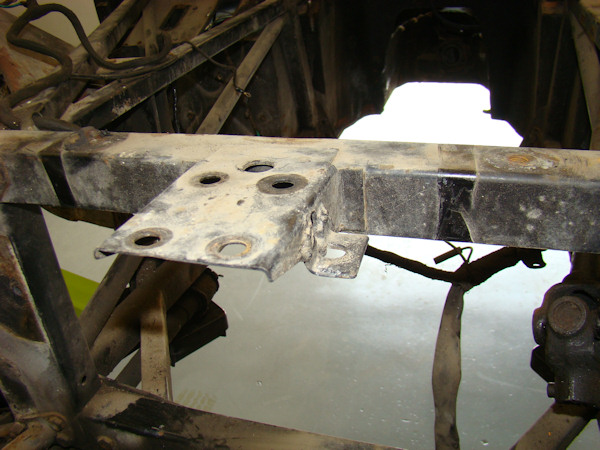
|
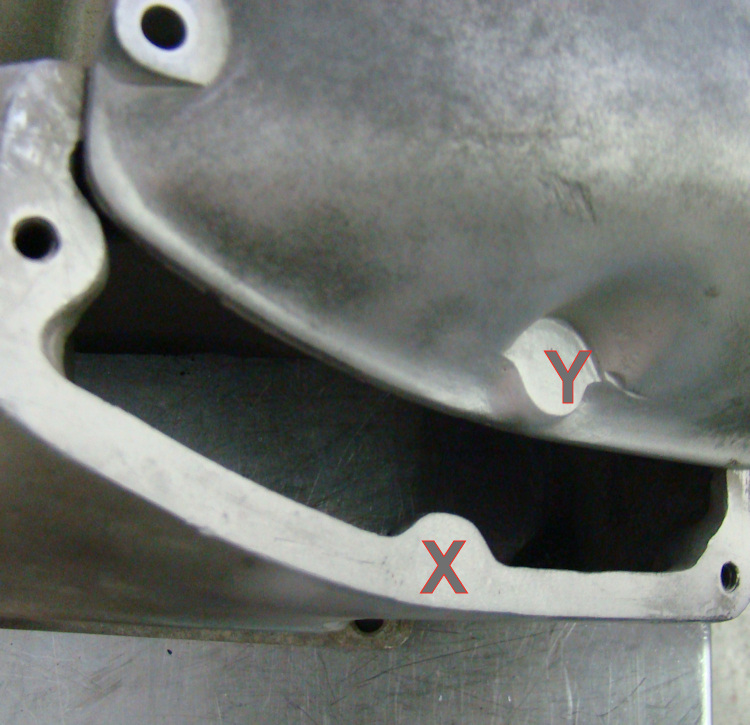
support bracket (marked X) |
to outside latch specs |
|
 |
 |
 |
|
|
lower trans tunnel side |
|
 |
 |
 |
|
|
||
 |
 |
|
|
|
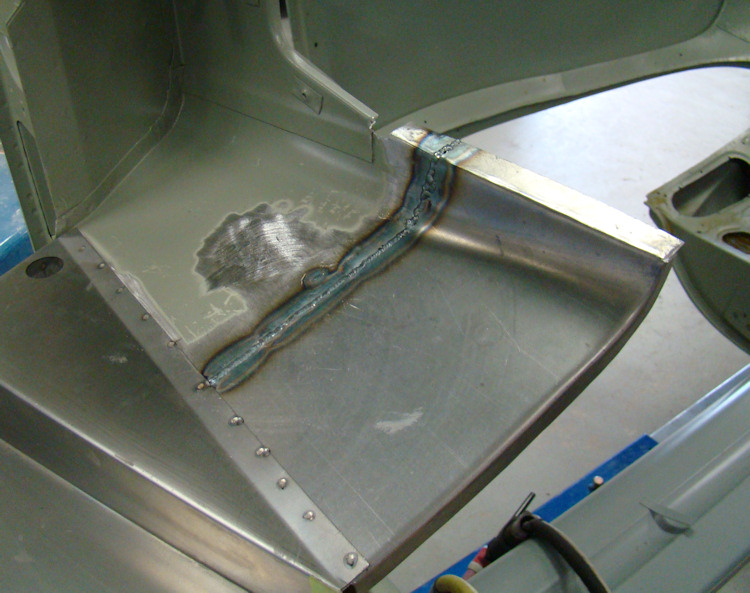
invisible repair |
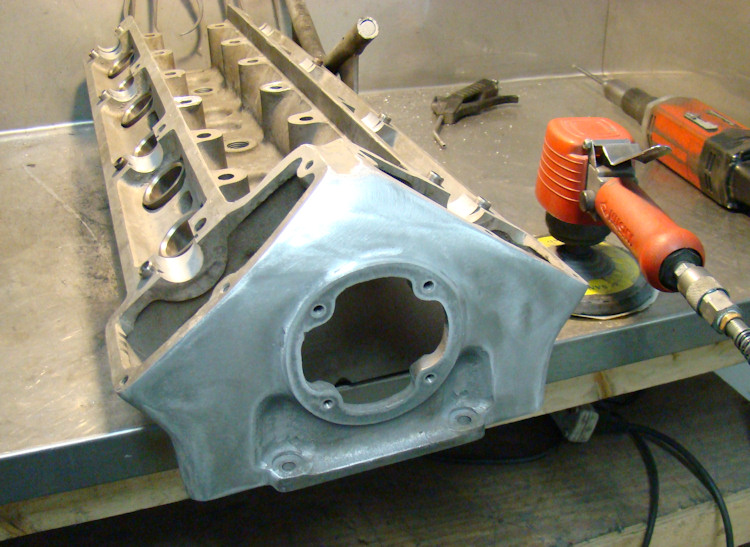
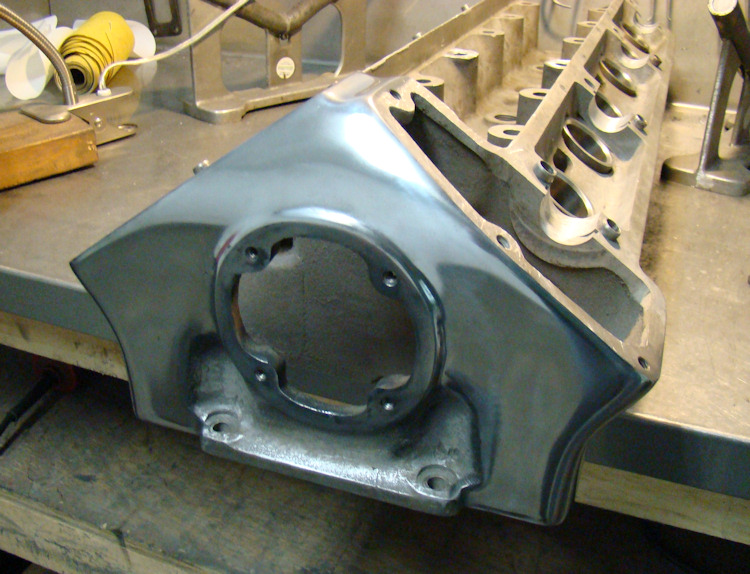
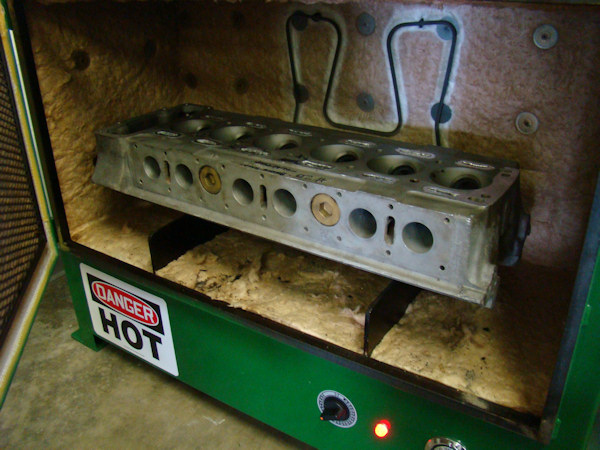
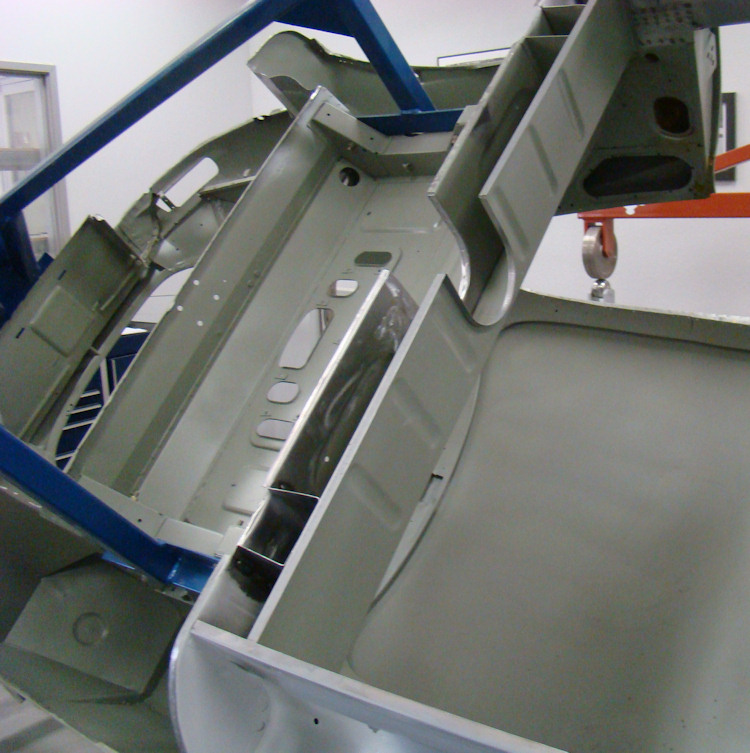
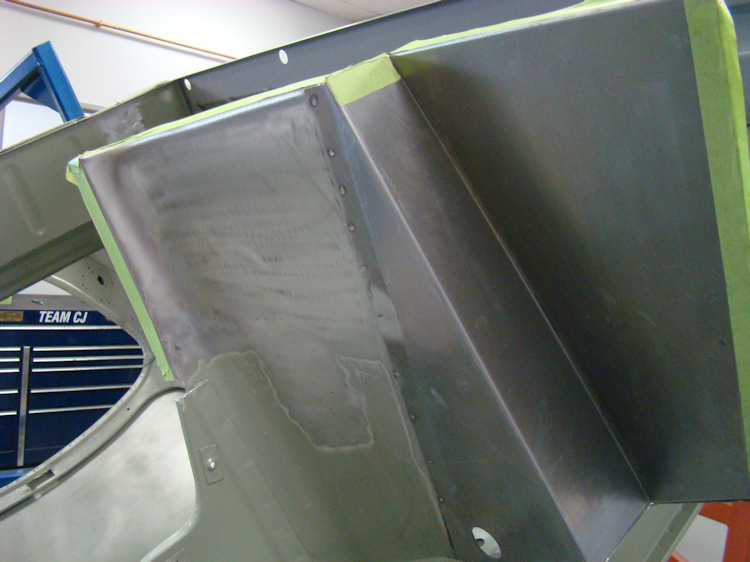
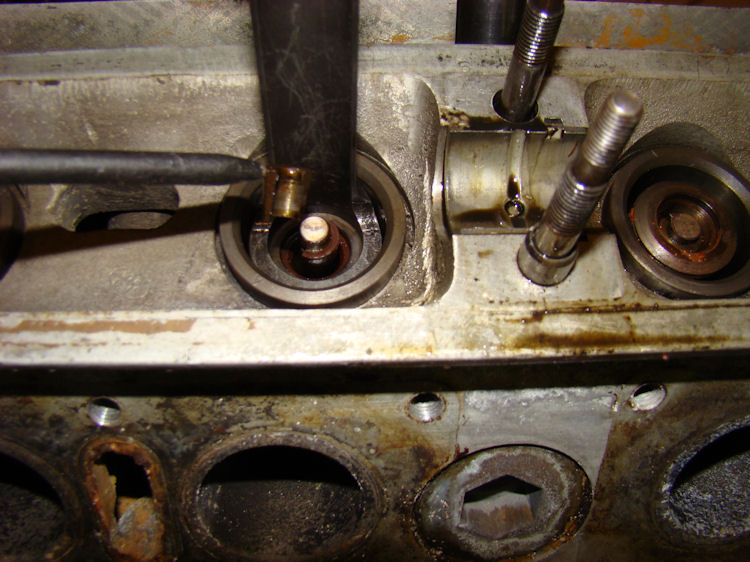
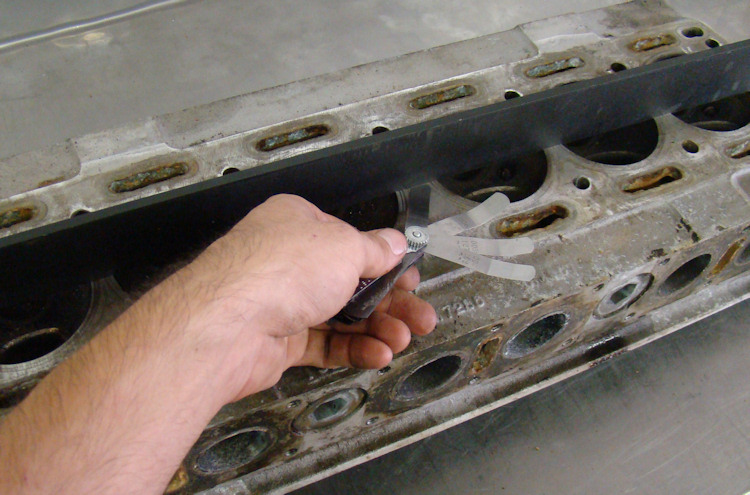
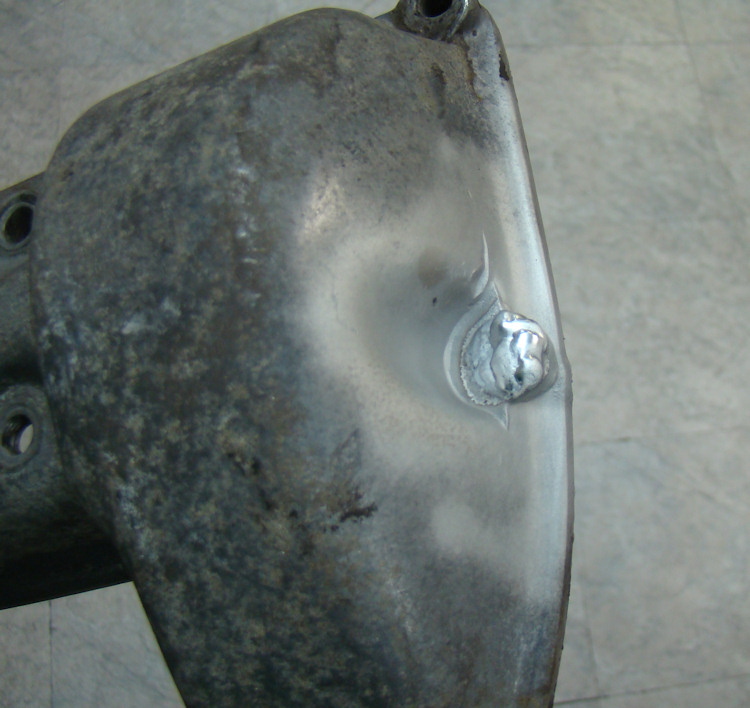
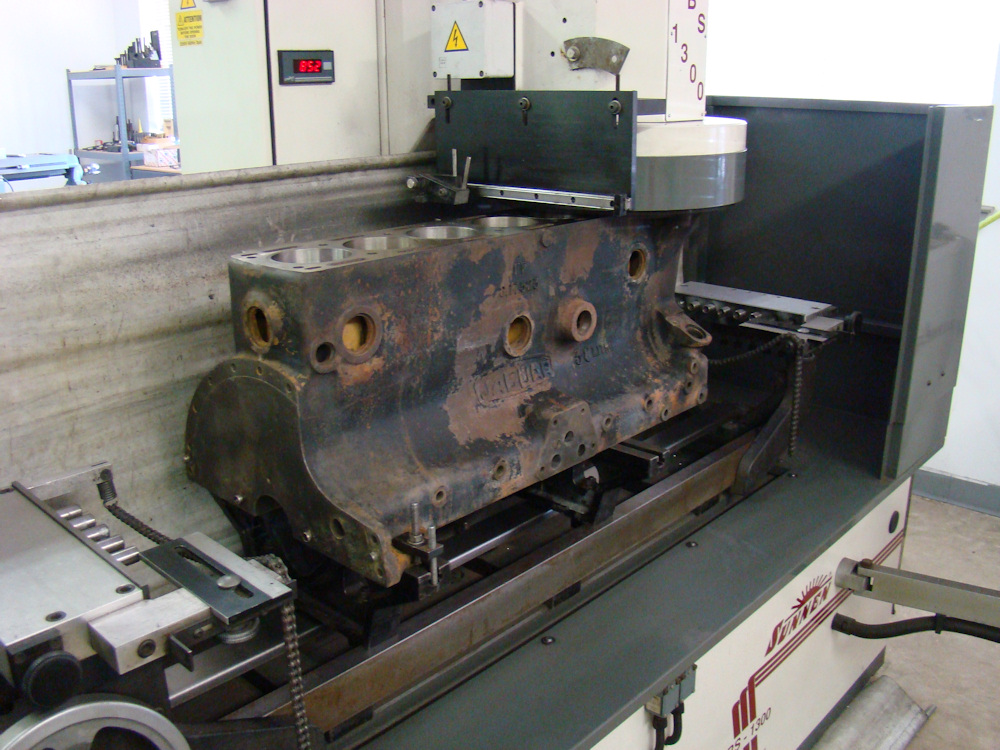
We now have the reconstruction of your bodyshell well underway. Even your cylinder head has been spending some time in the Coachworks...
 |
 |
 |
|
|
have to be straightened |
|
 |
 |
 |
|
water jackets |
|
|
 |
 |
 |
|
to welding |
|
|
 |
 |
 |
|
|
|
also welded up |
|
|
 |
 |
|
ready to be re-drilled and re-tapped |
|
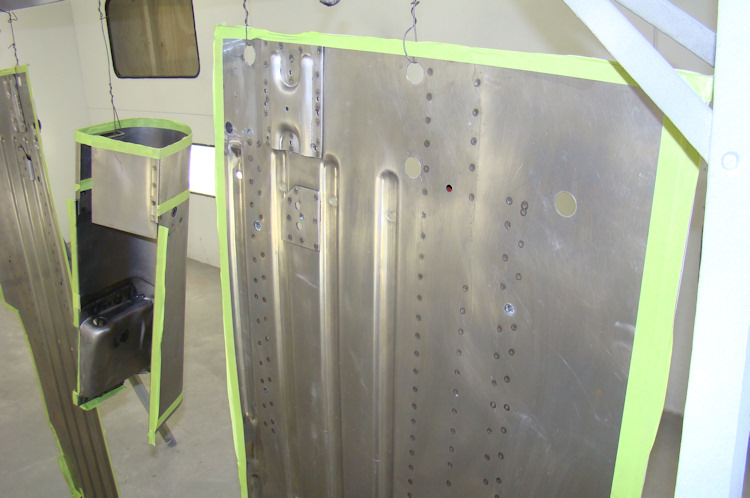
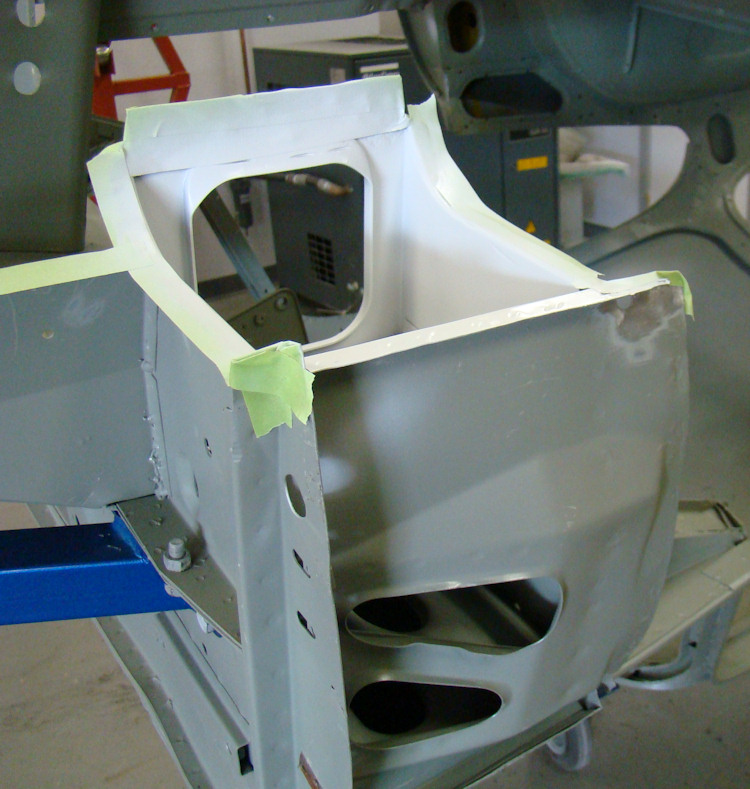
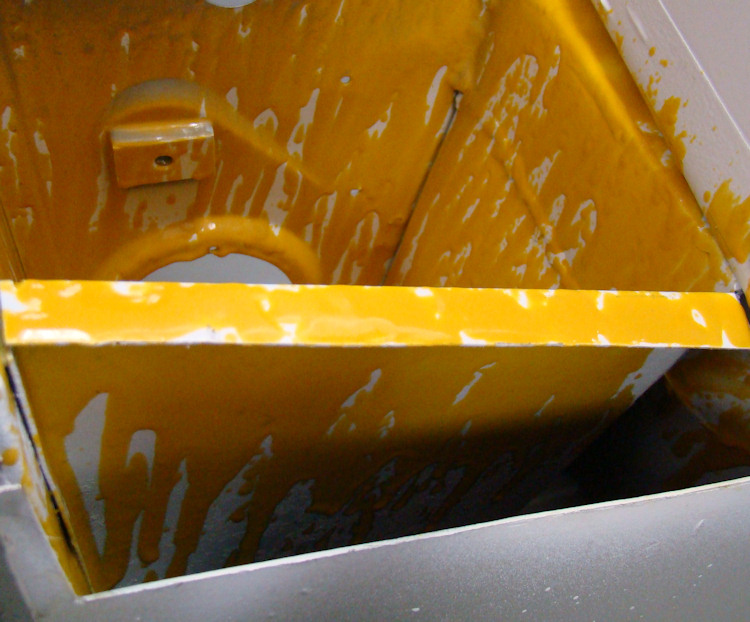
have 'weld zones' masked before priming |
 |
 |
 |
|
panels will be spot welded |
|
|
 |
 |
 |
|
|
boot floor assembly |
|
 |
 |
 |
|
|
||
 |
 |
 |
|
|
|
|
 |
 |
 |
|
in its place... |
all box sections |
|
 |
 |
 |
|
|
||
 |
 |
 |
|
|
||
 |
 |
 |
|
|
|
|
 |
||
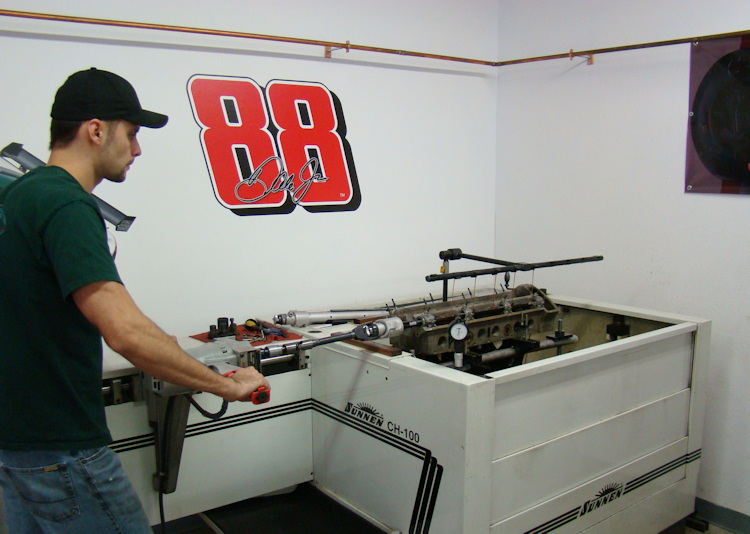
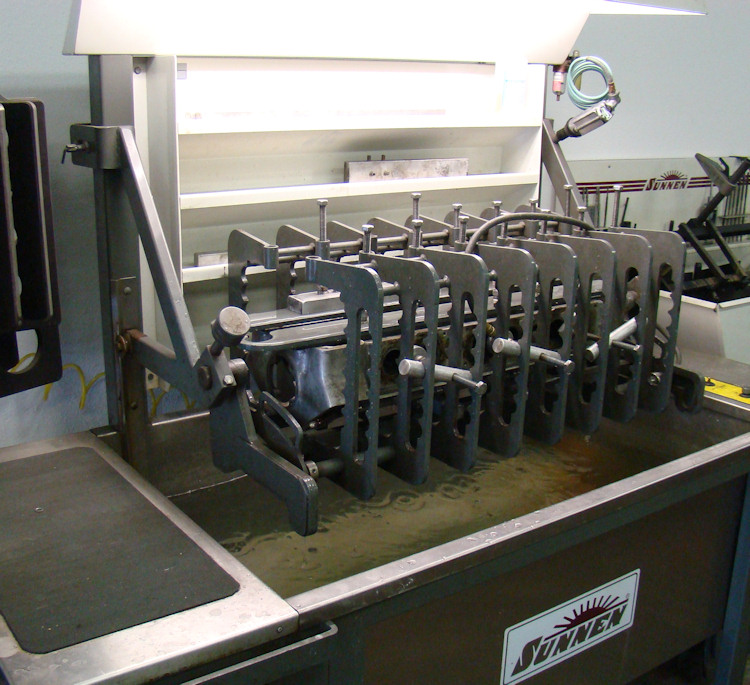
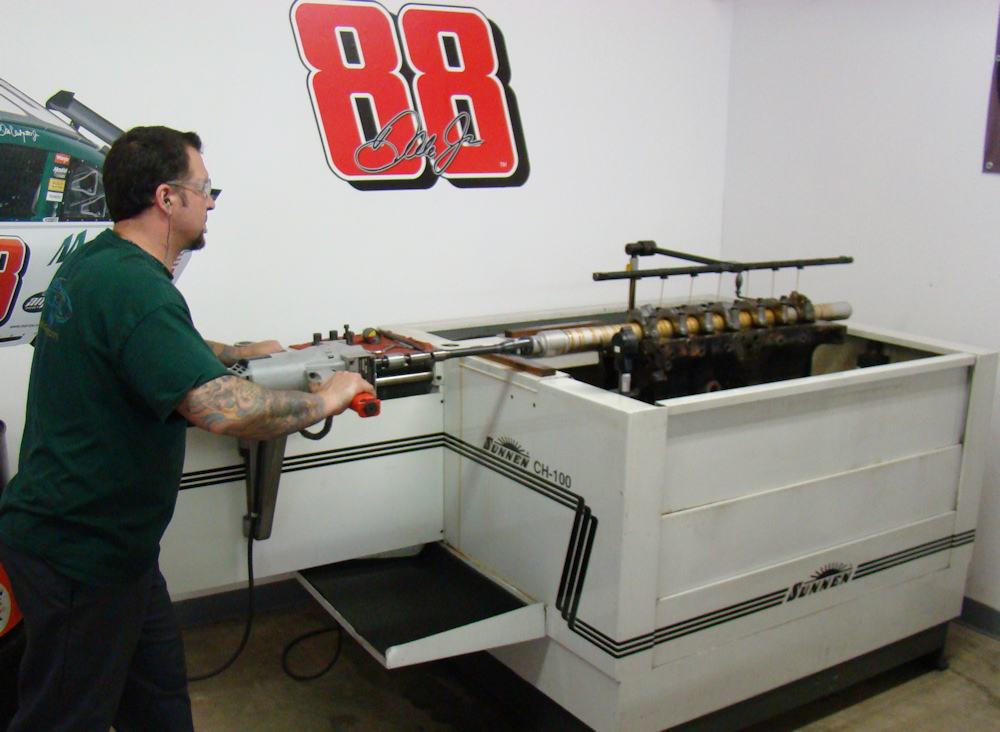
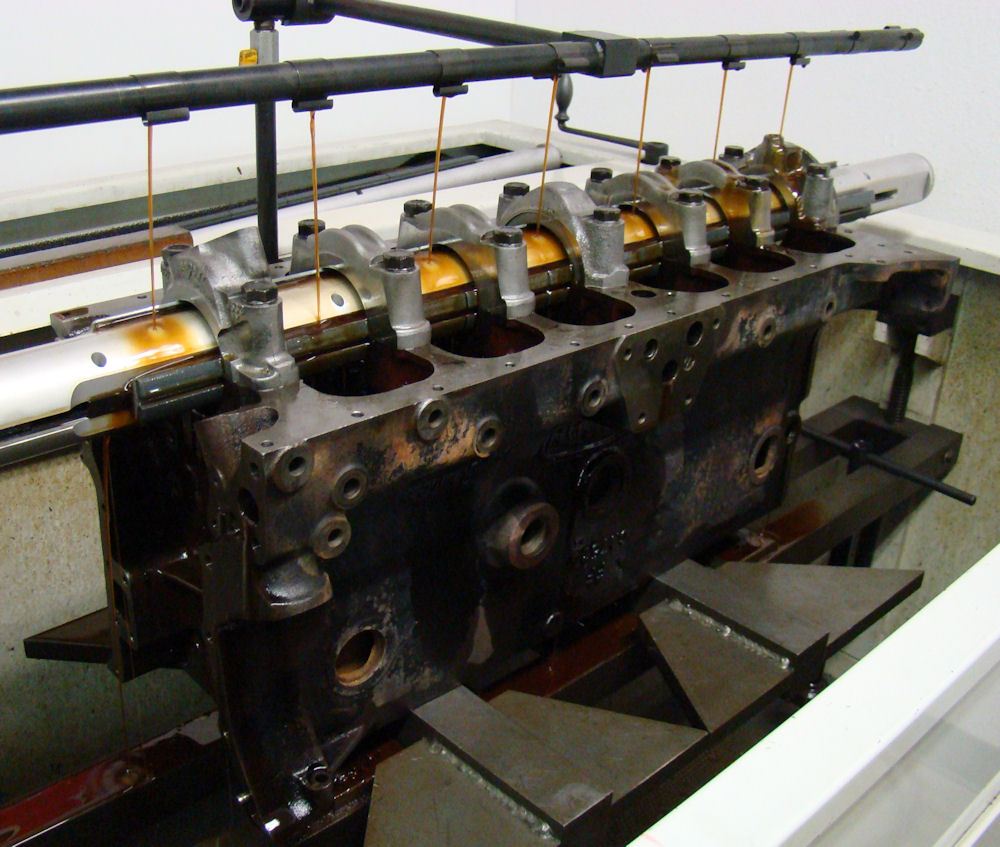
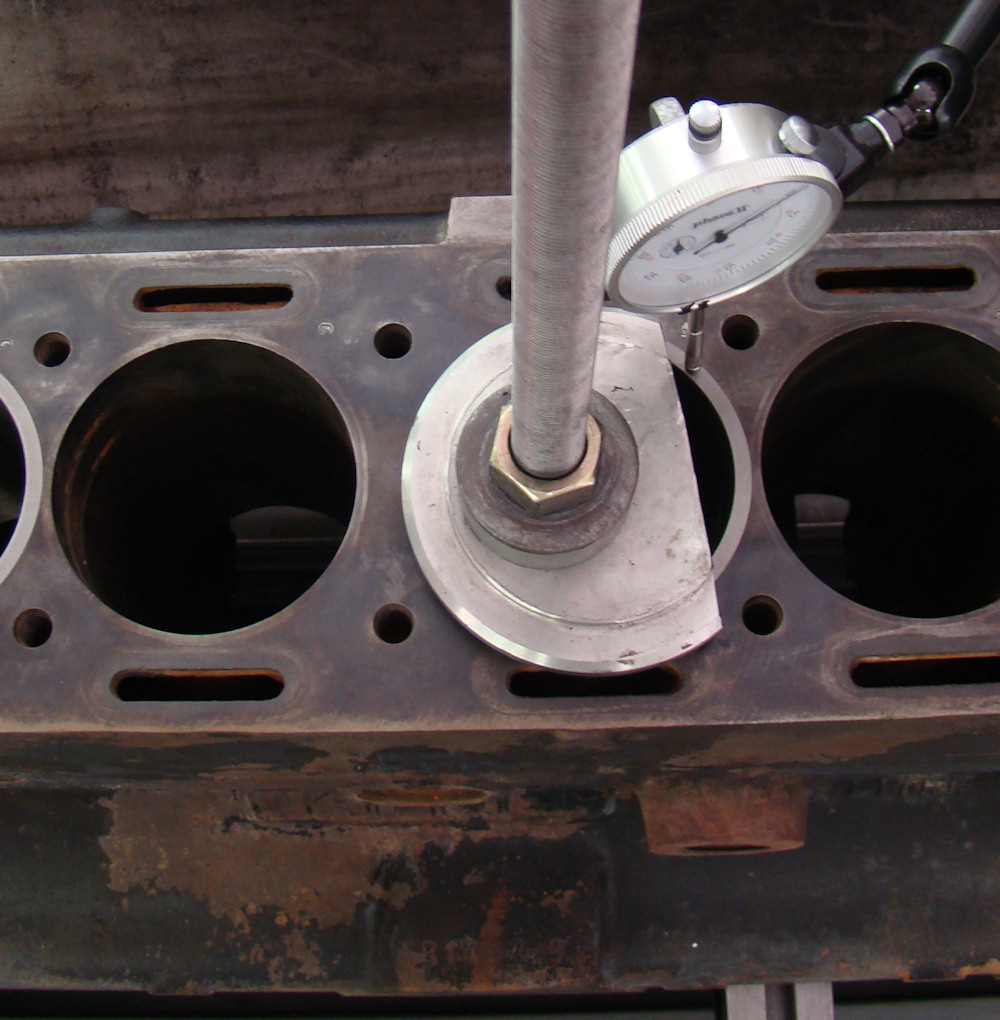
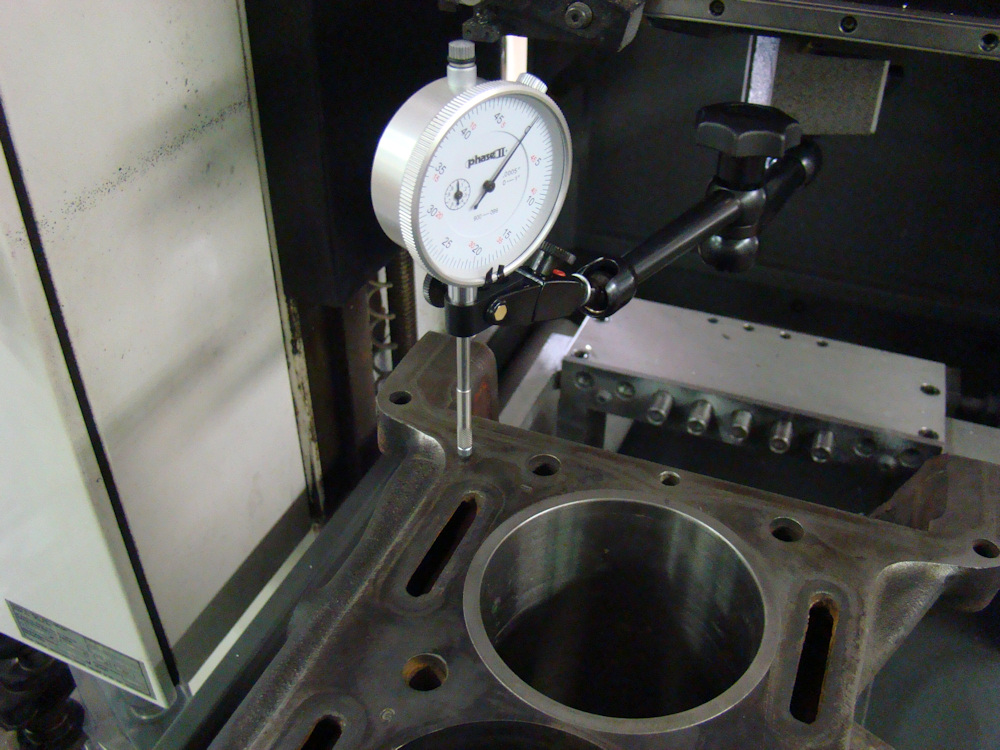
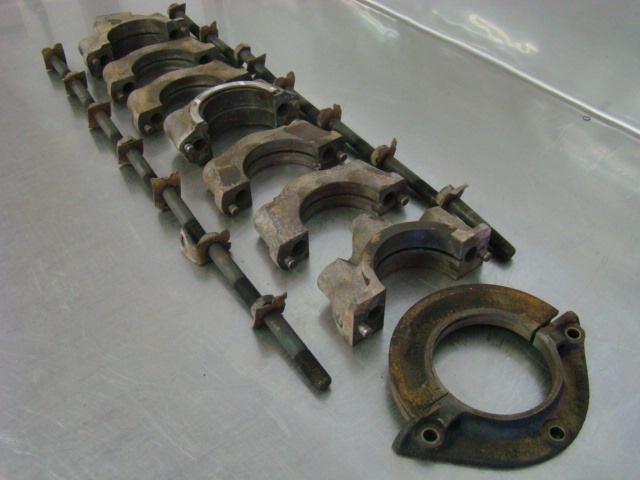
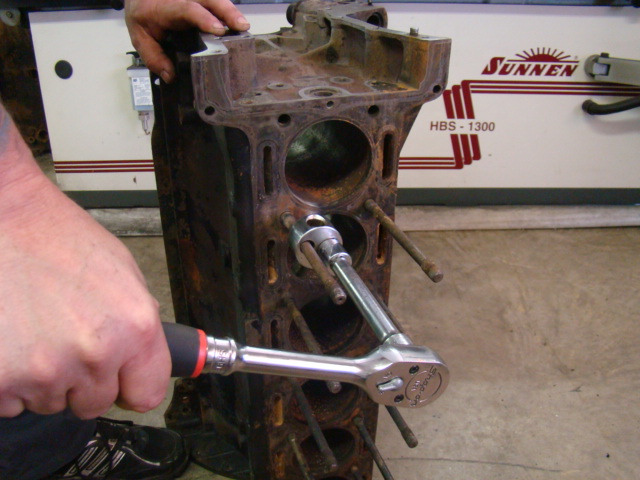
Align honing the main caps and honing the new cylinders.
 |
 |
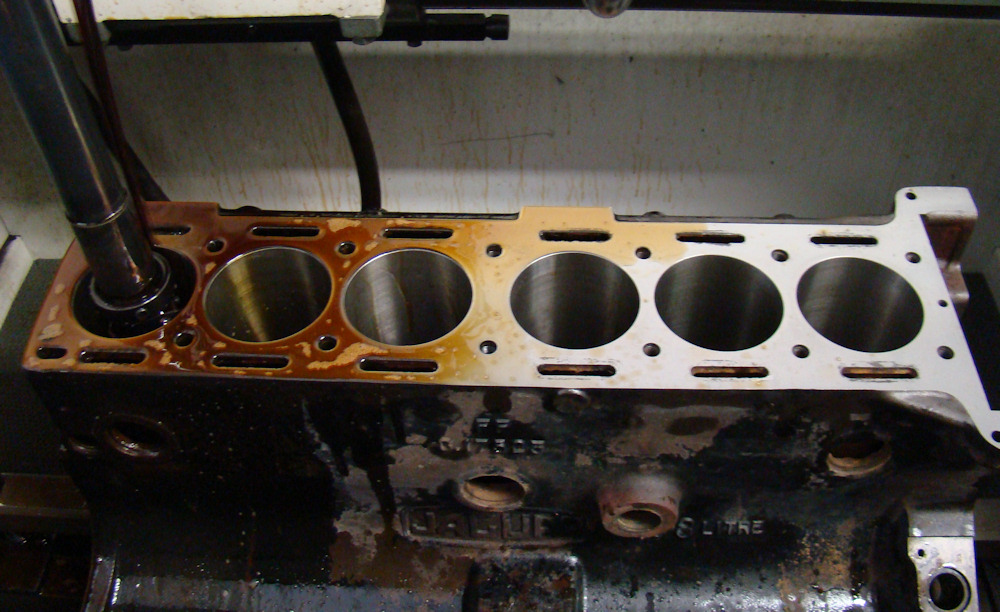 |
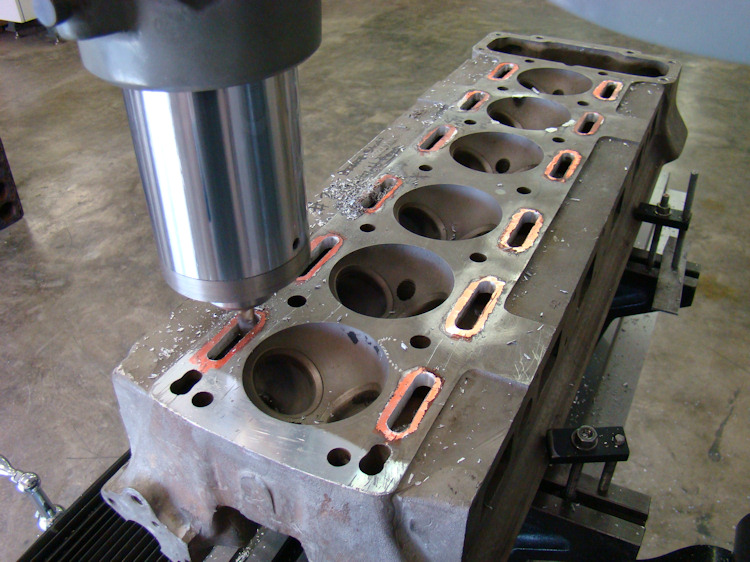
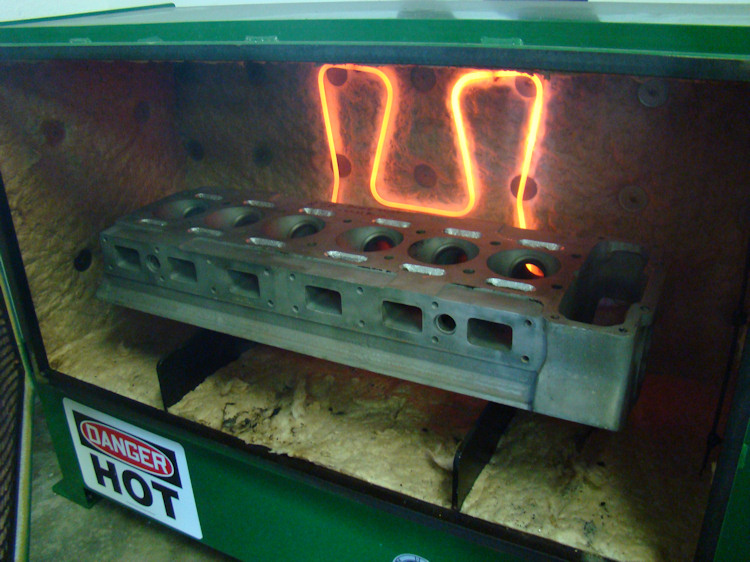
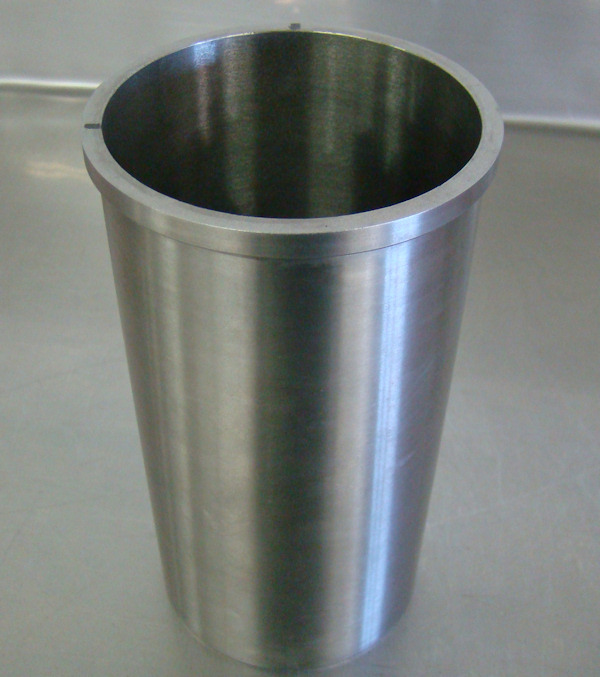
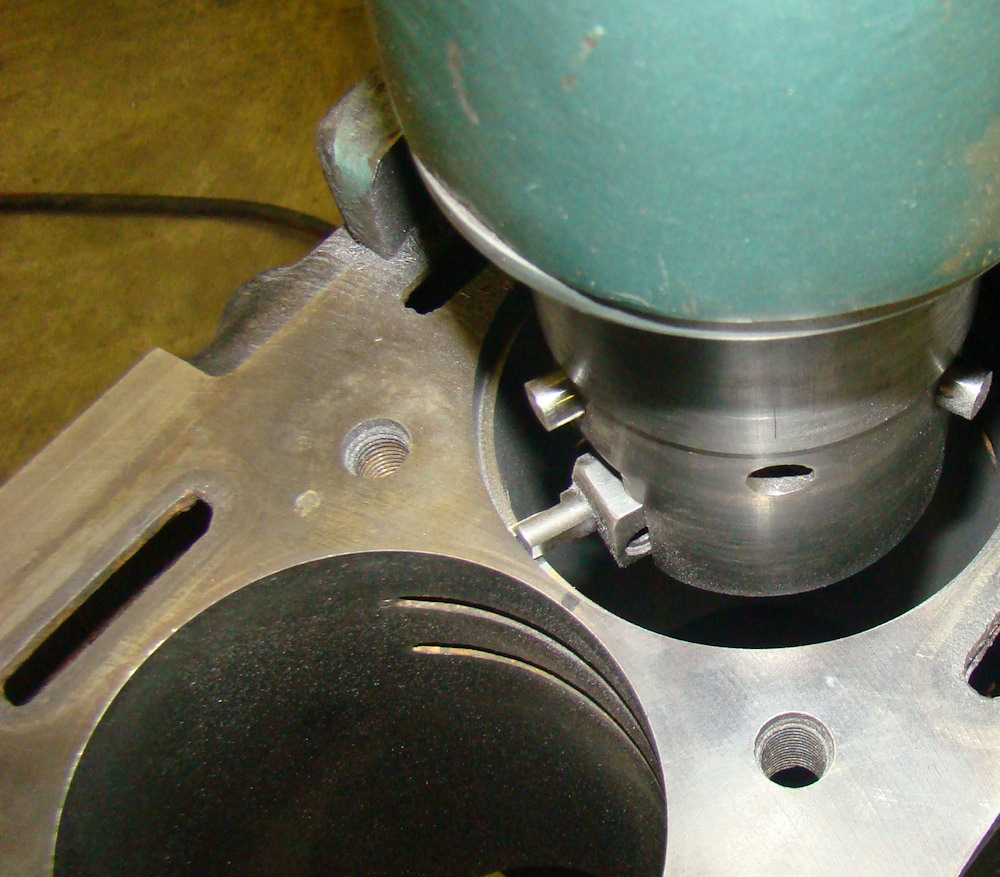
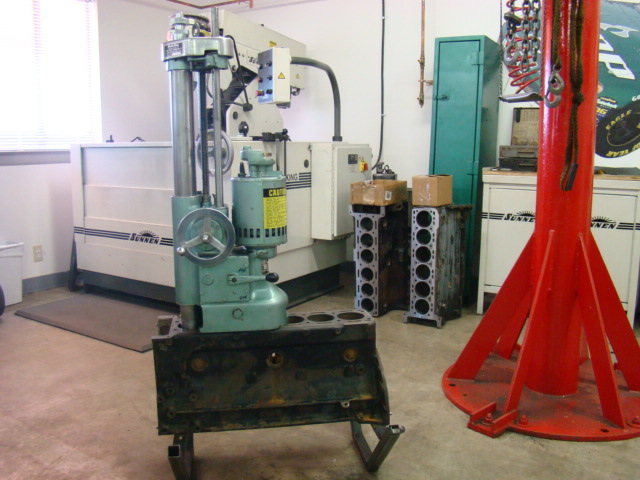
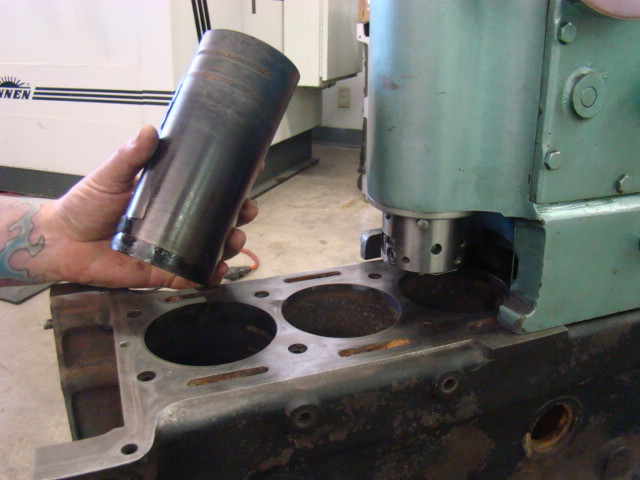
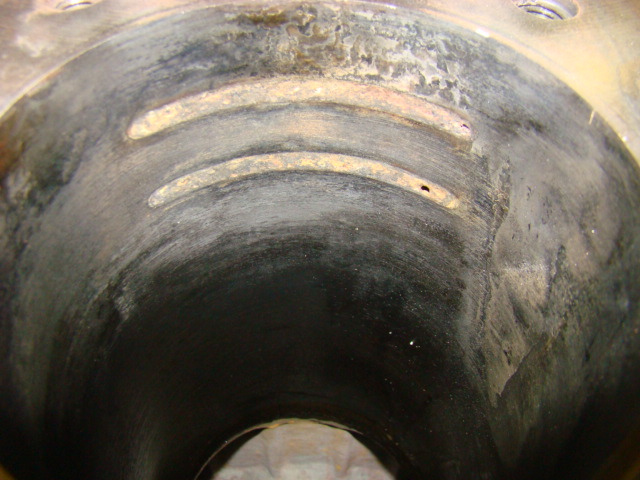
Installing custom CJ (top hat) sleeves in the CJ machine shop...
 |
 |
 |
|
sleeve moving |
hat sleeve |
|
 |
 |
 |
|
|
the heated block |
surfacer |
 |
 |
 |
|
surfacing |
|
|
|
|
|
|
 |
|
|
|
virtually invisible after surfacing |
|
|
We now have your engine rebuild well underway. Outwardly we will be restoring everything to a completely stock appearance, although the rebuild will feature a number of reliability and performance upgrades, such as Venolia forged pistons, custom CJ stainless valves, custom CJ valve seats, Total Seal piston rings, custom CJ magnesium bronze guides, ARP rod bolts, upgraded front and rear main seals, etc, etc.
 |
 |
 |
|
|
incident |
|
 |
 |
 |
|
and cut/reshaped |
corroded |
|
 |
 |
 |
 |
 |
 |
|
and plated |
|
for upgraded seal |
 |
 |
 |
|
|
|
|
 |
 |
 |
|
|
||
 |
 |
 |
|
completely blocked |
|
plugs |
 |
 |
|
|
|
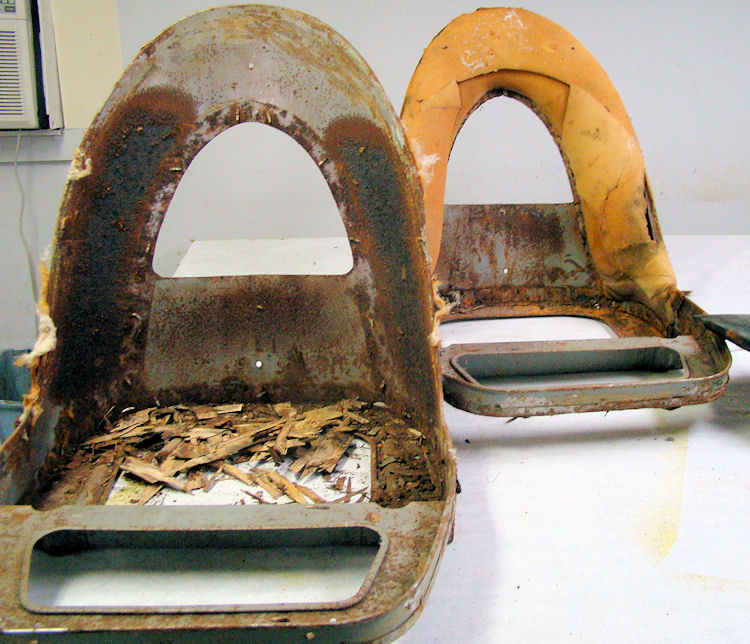
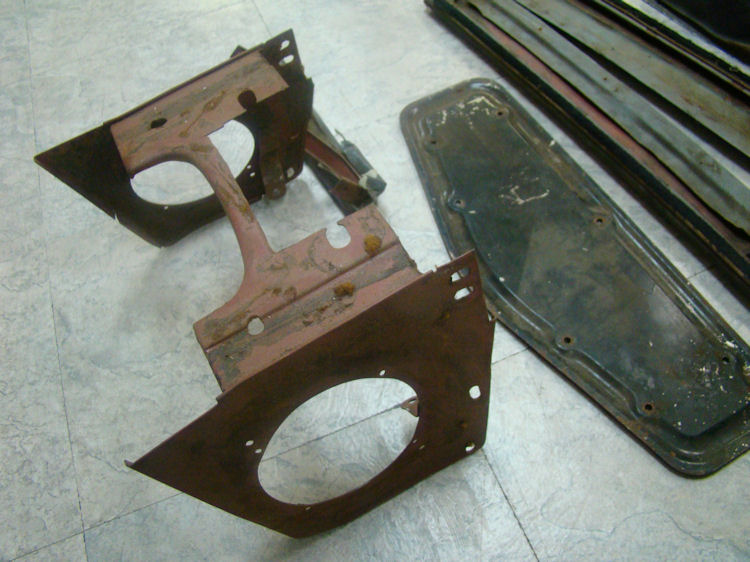
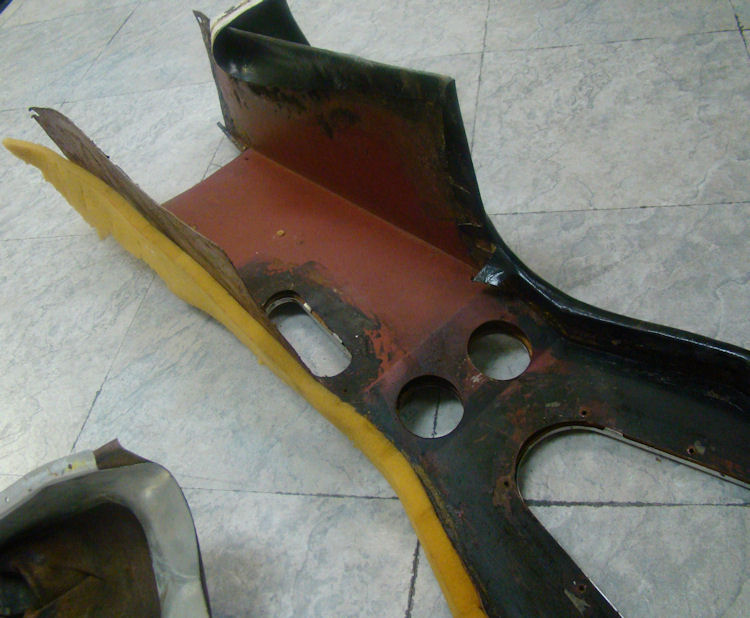
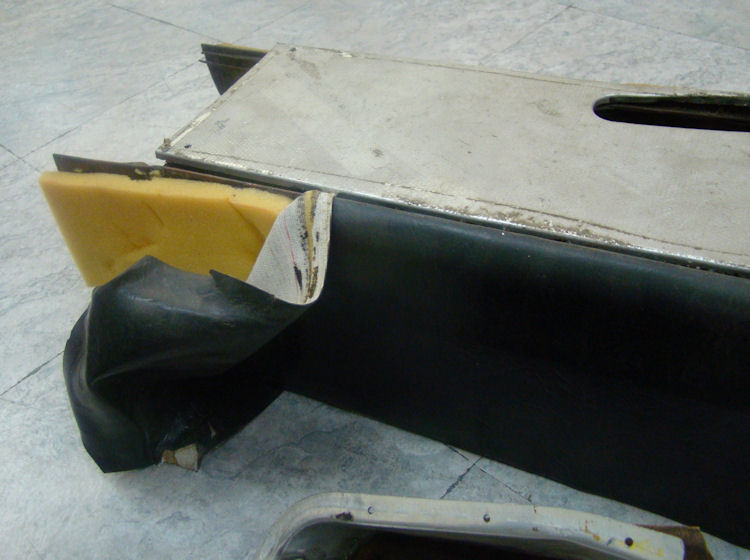
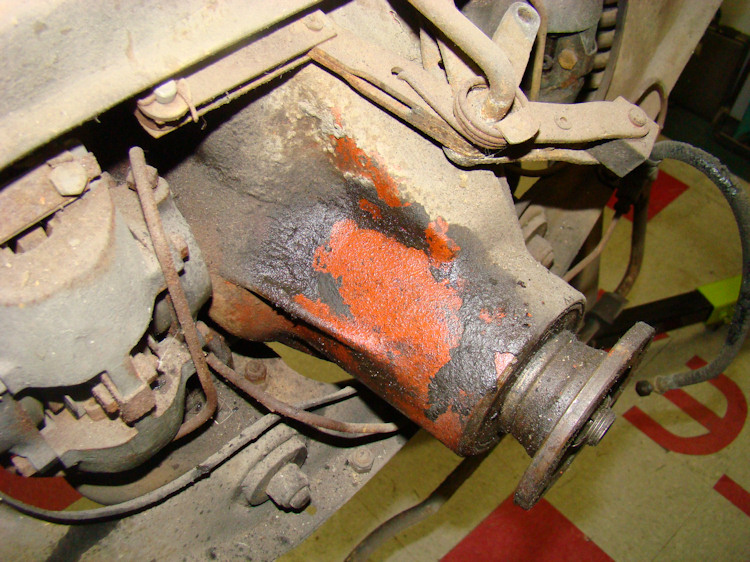
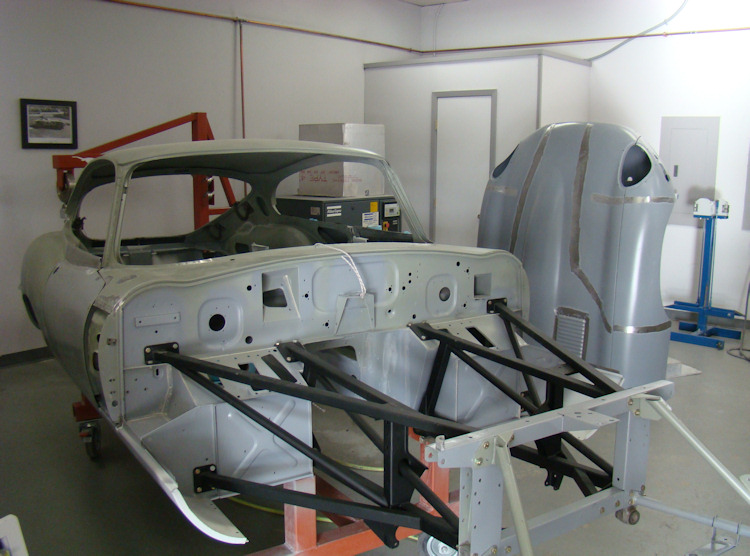
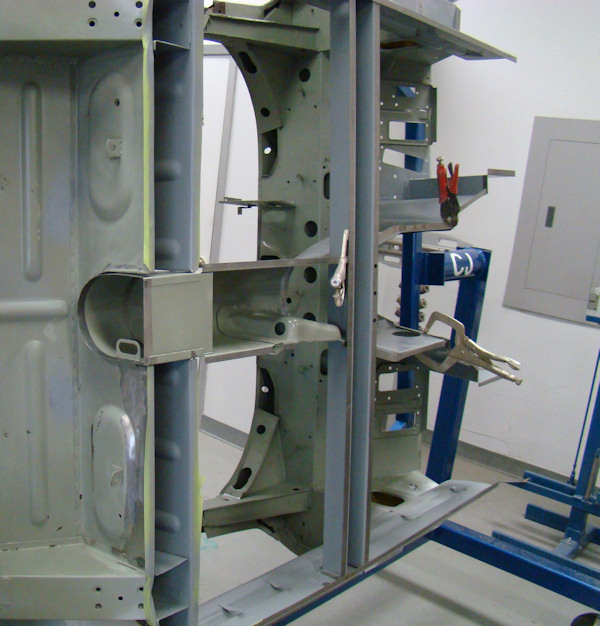
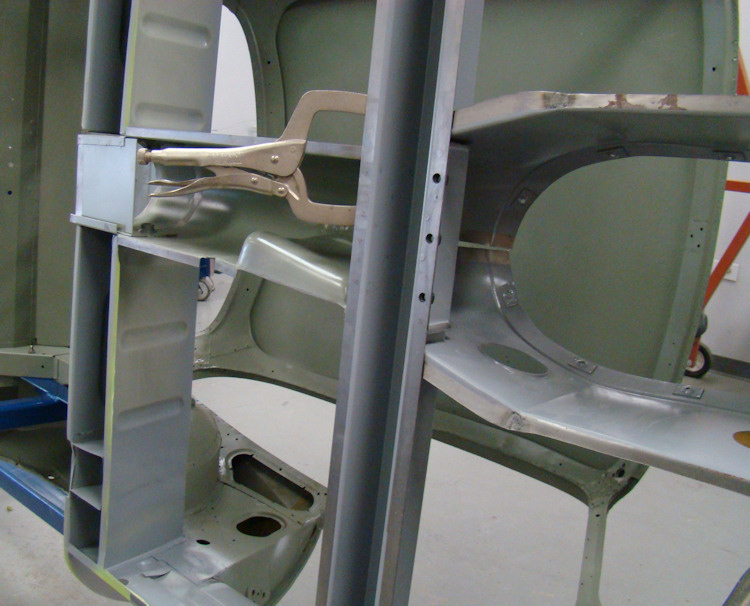
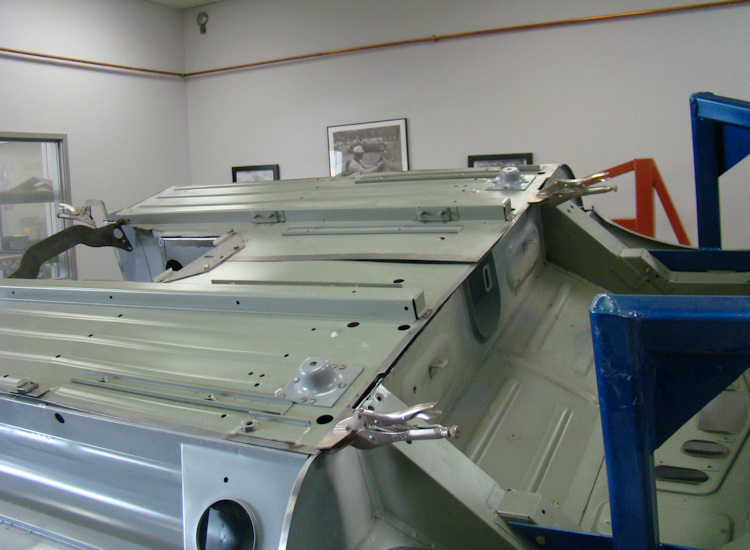
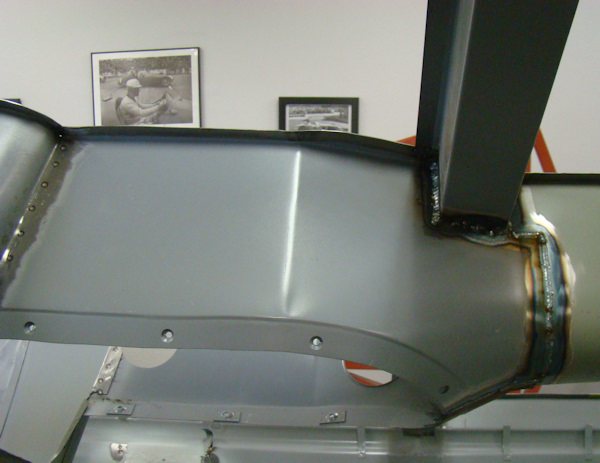
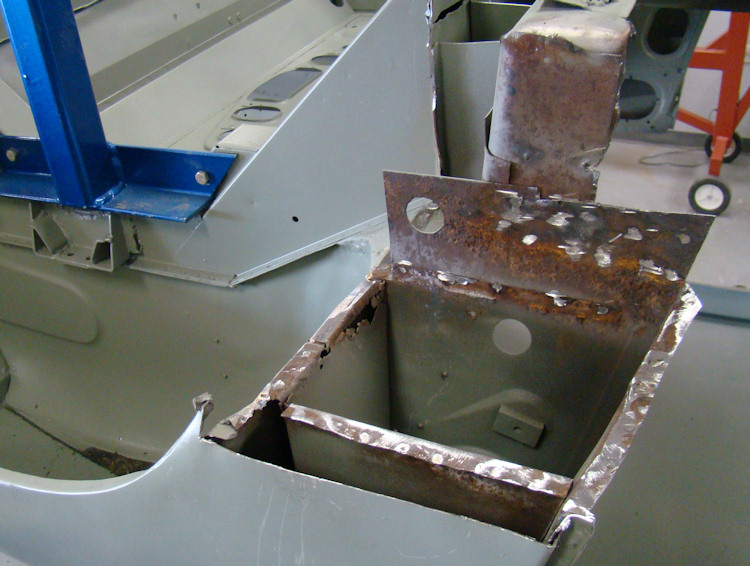
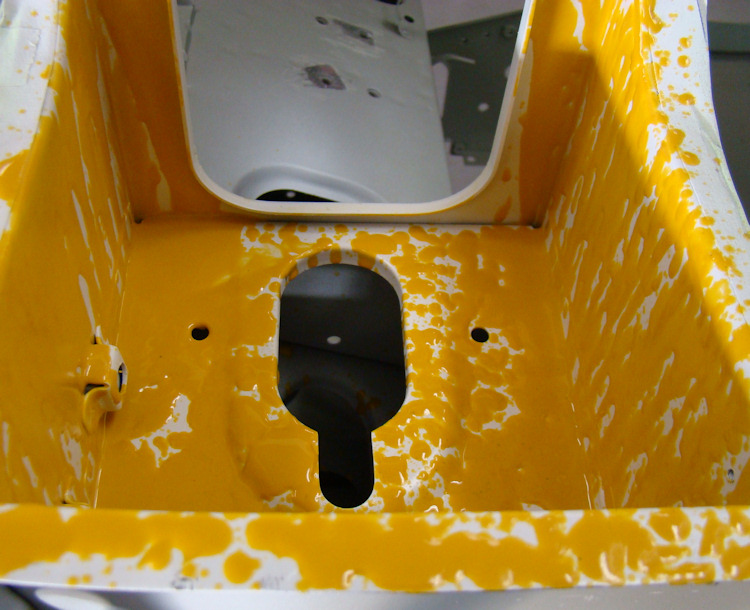
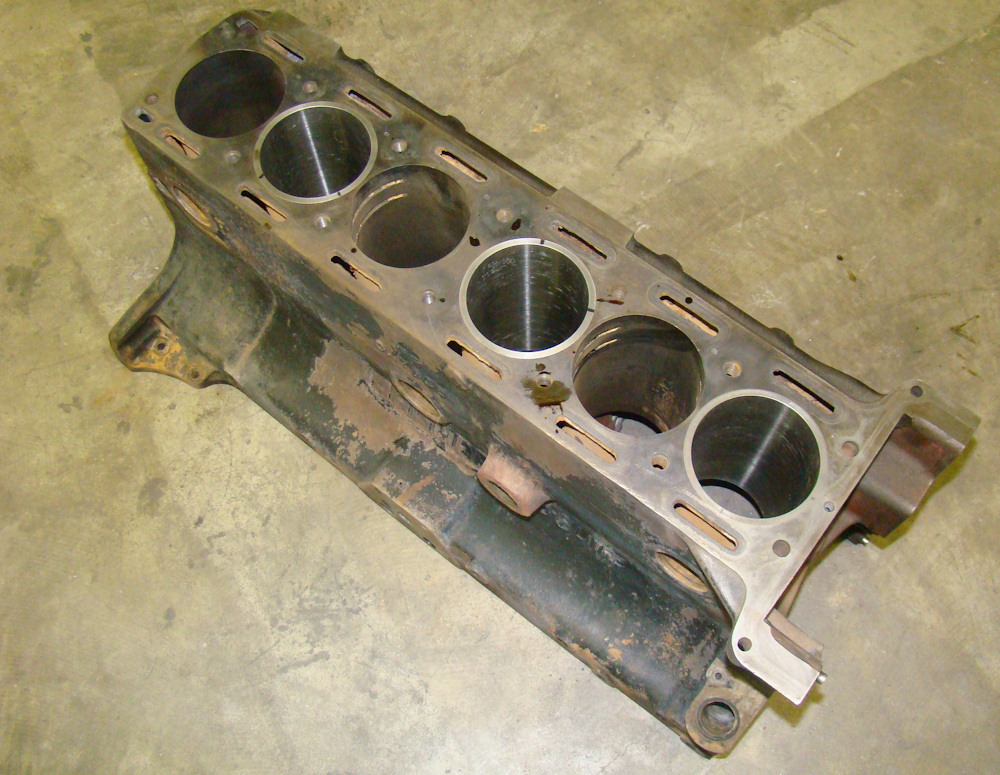
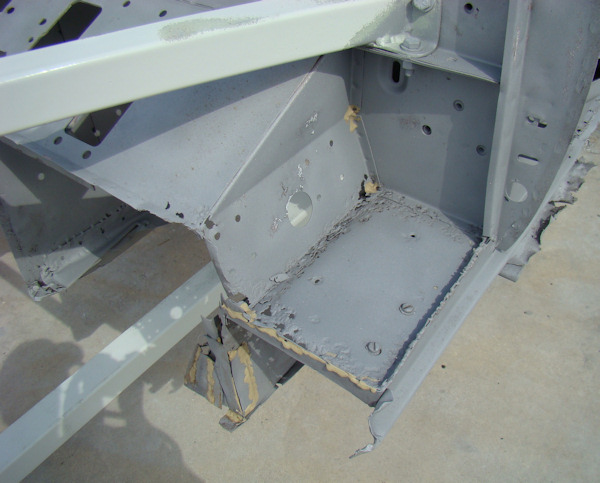
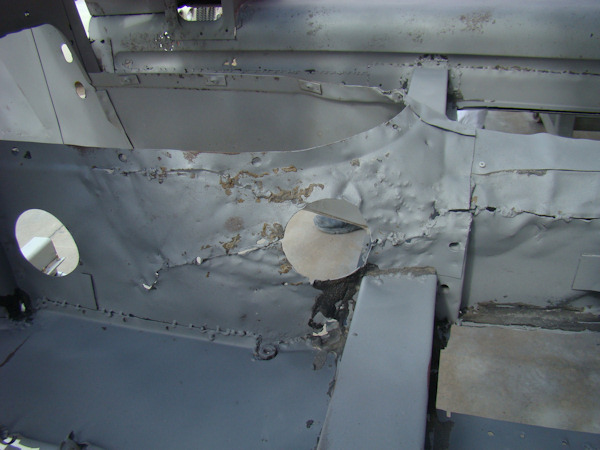
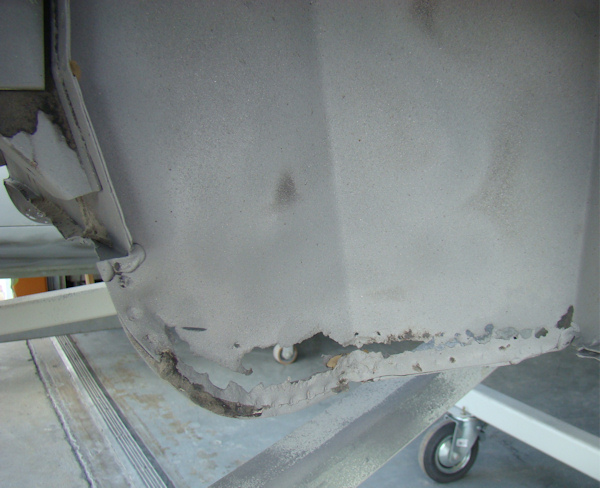
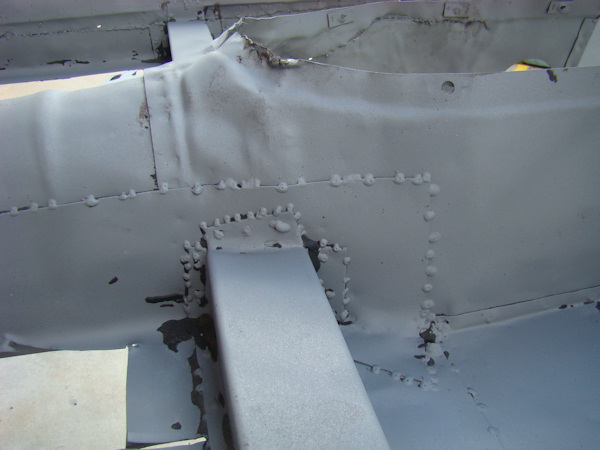
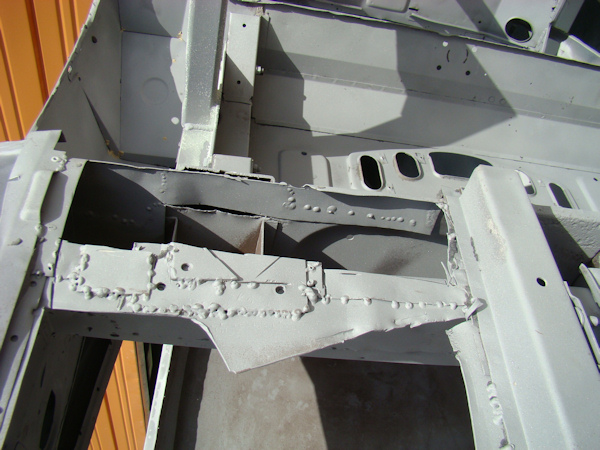
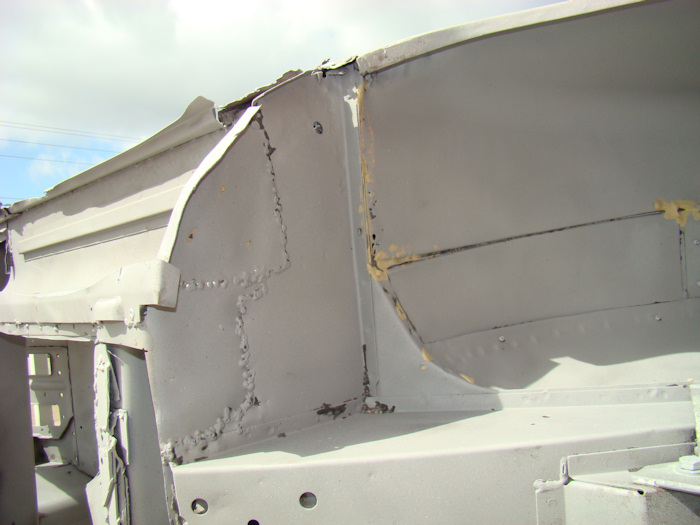
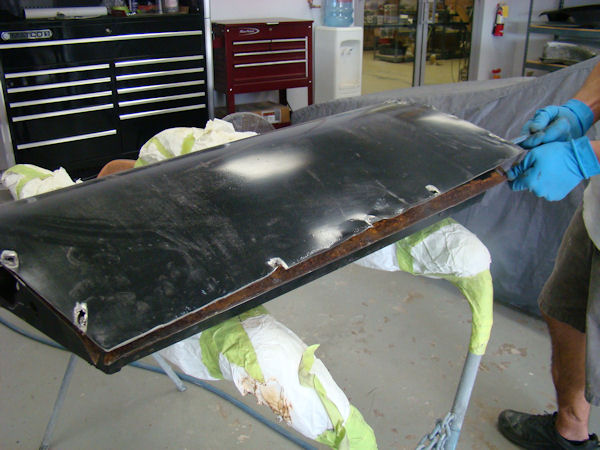
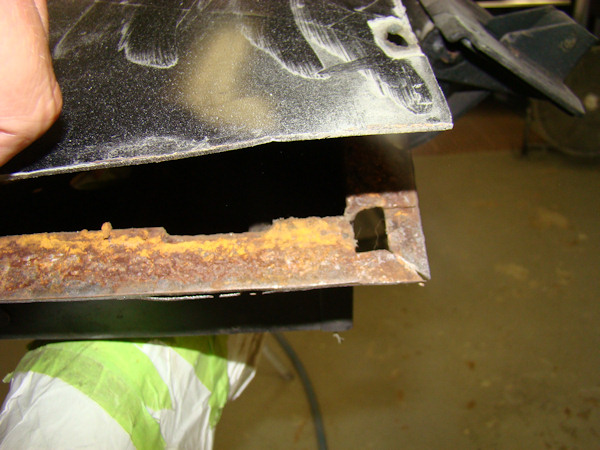
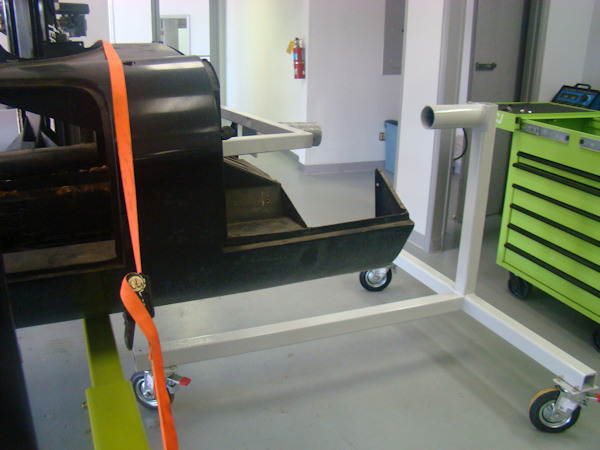
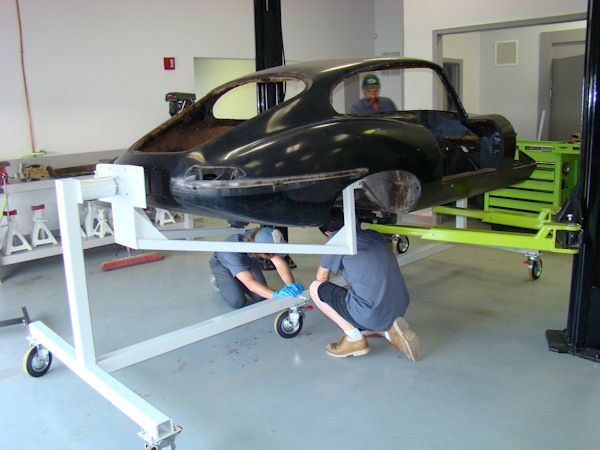
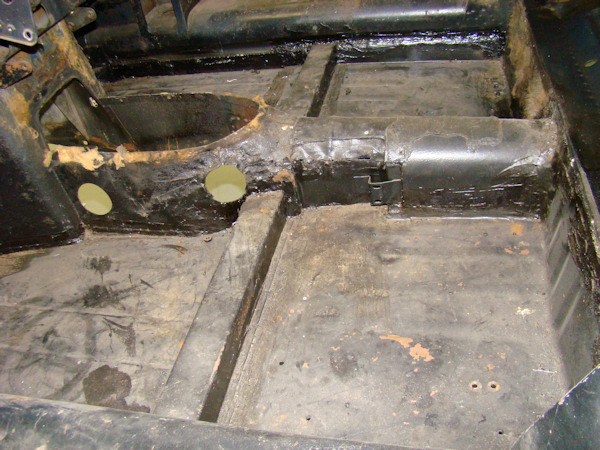
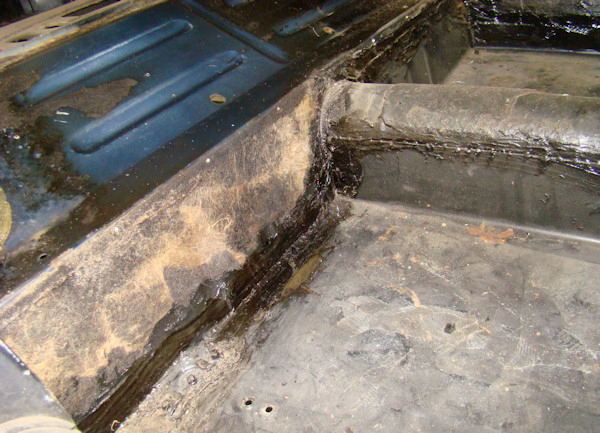
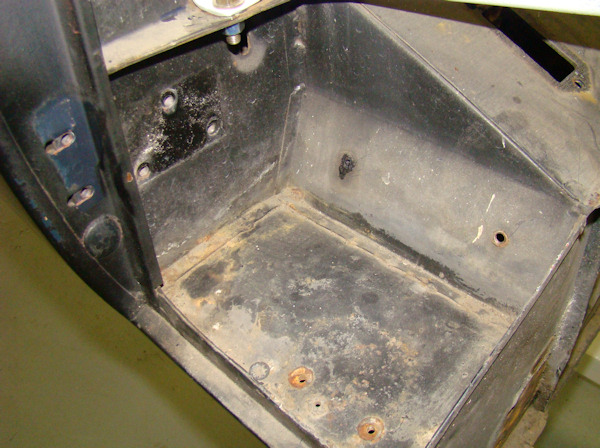
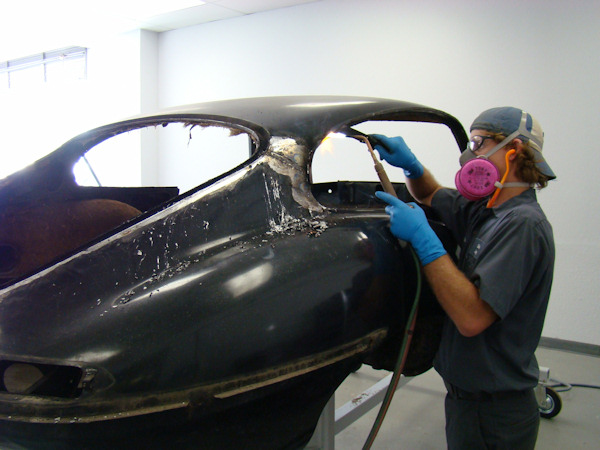
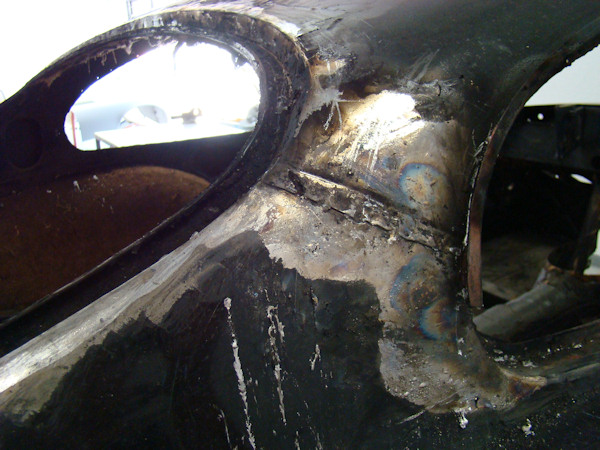
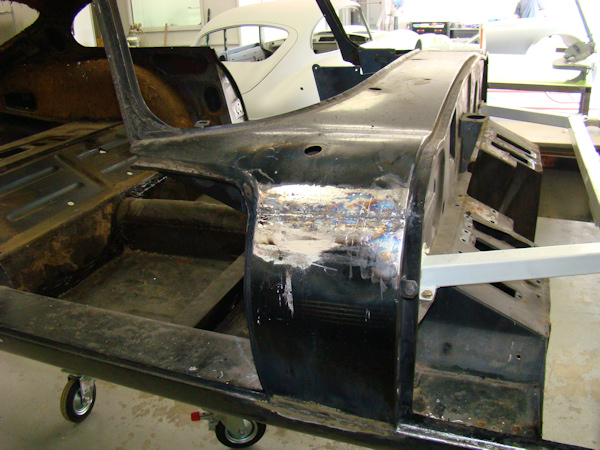
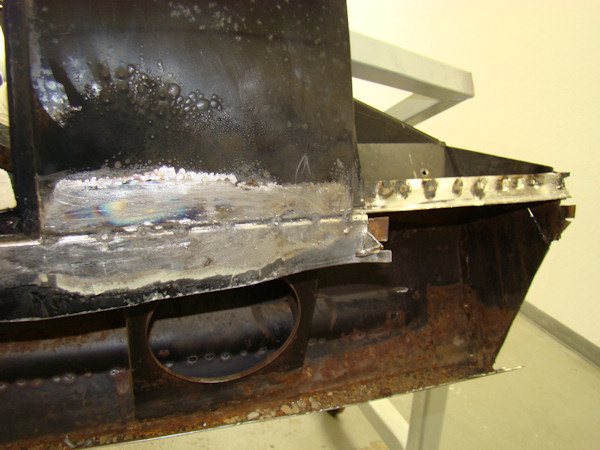
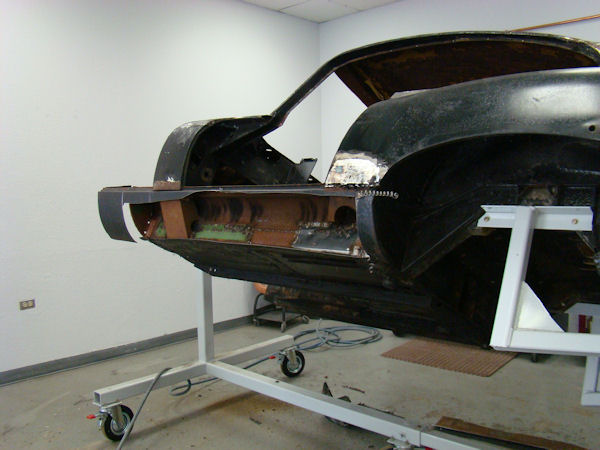
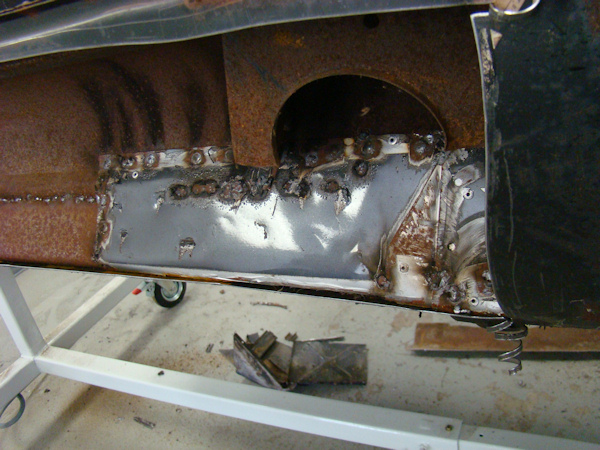
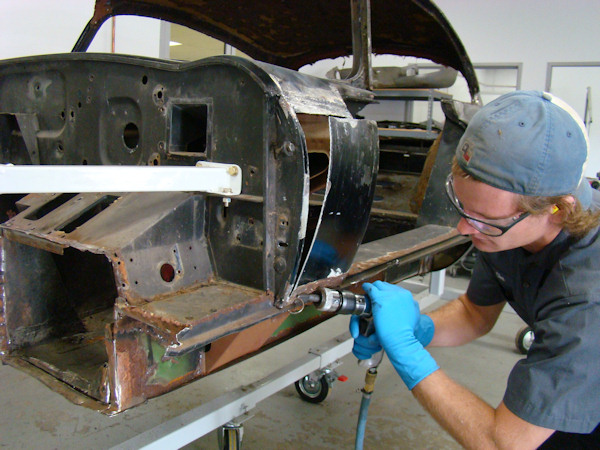
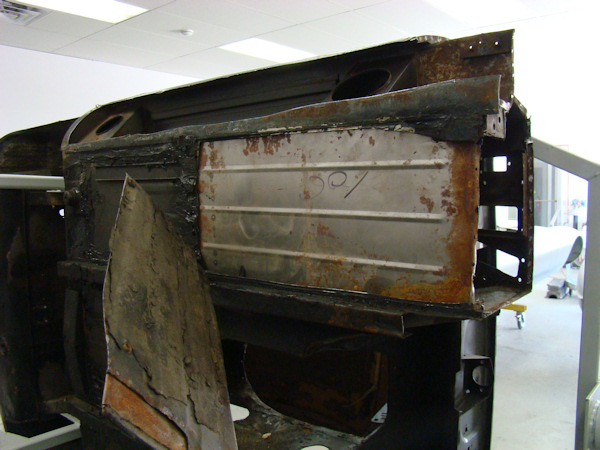
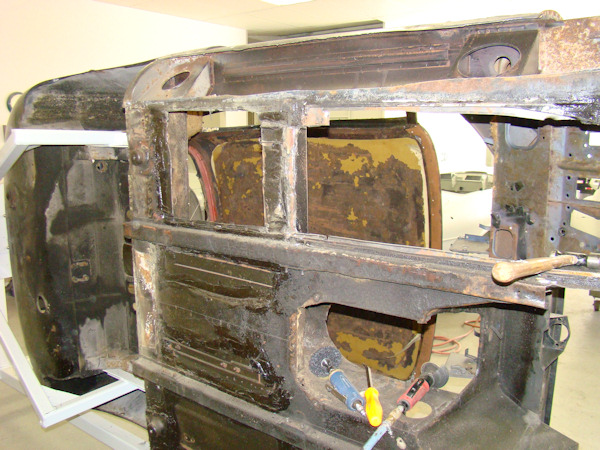
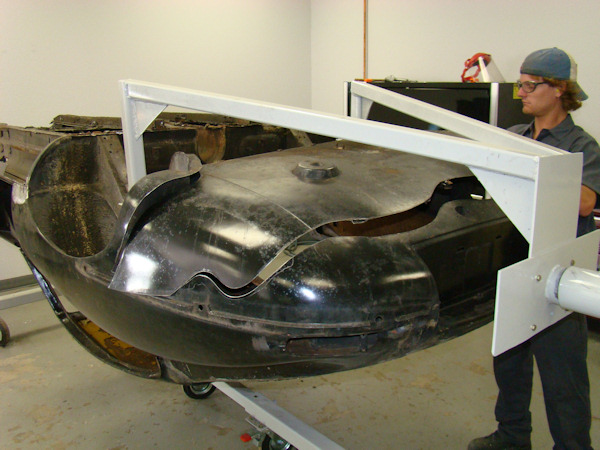
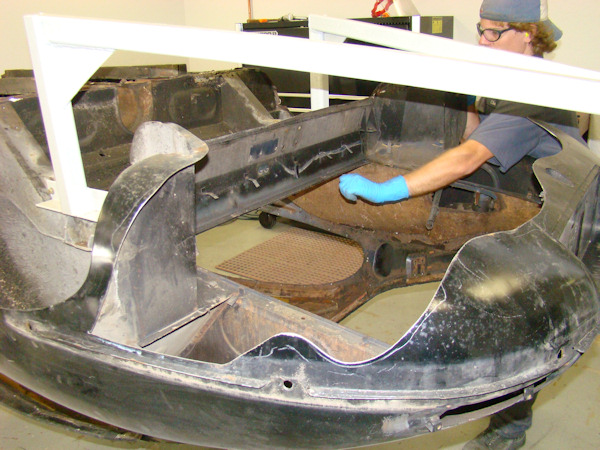
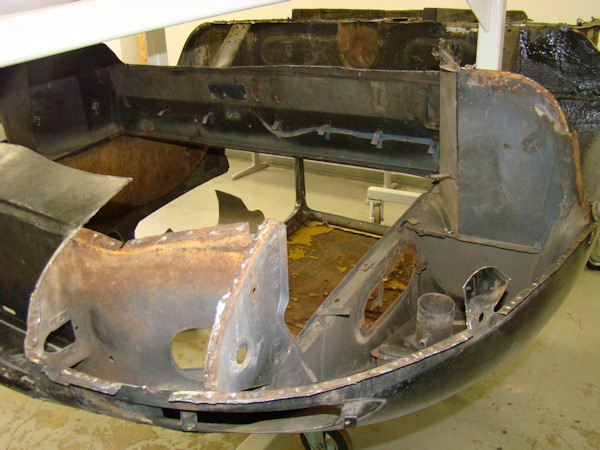
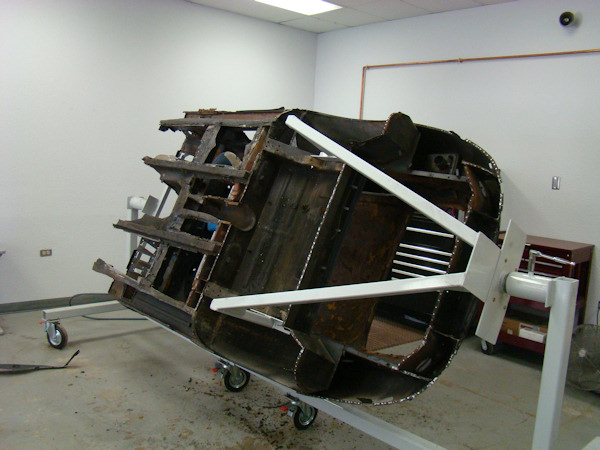
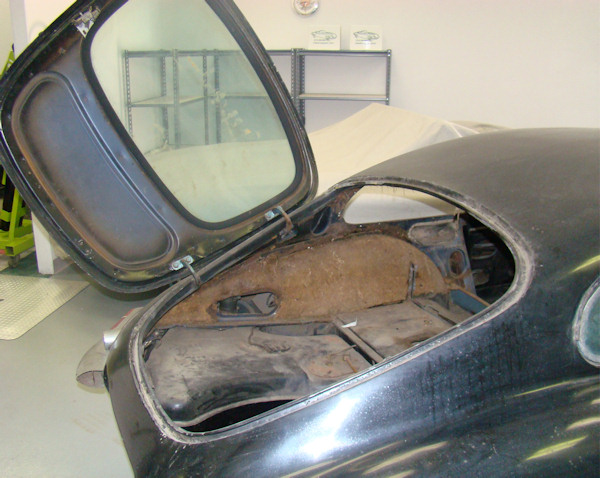
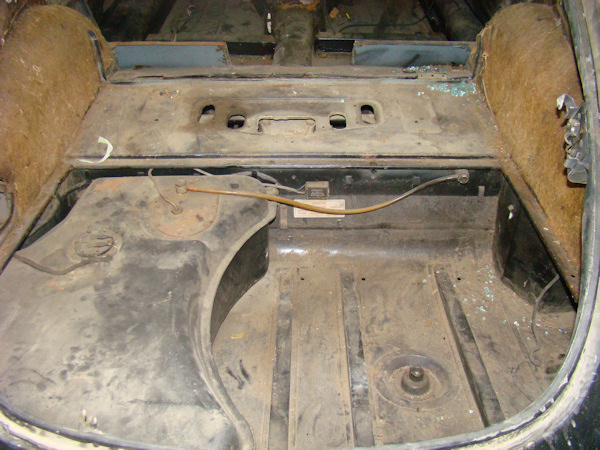
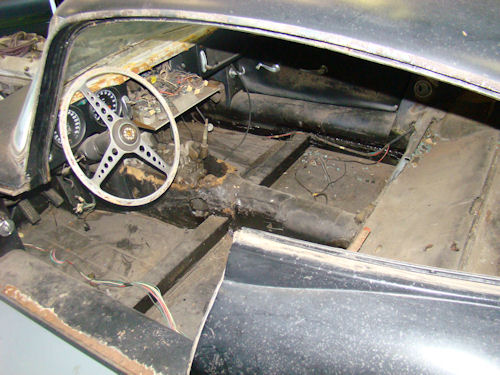
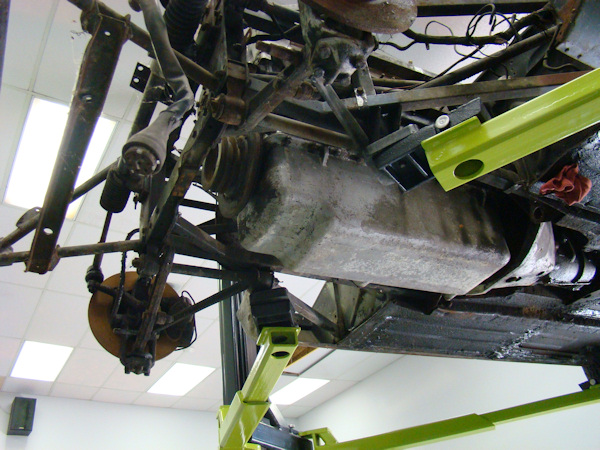
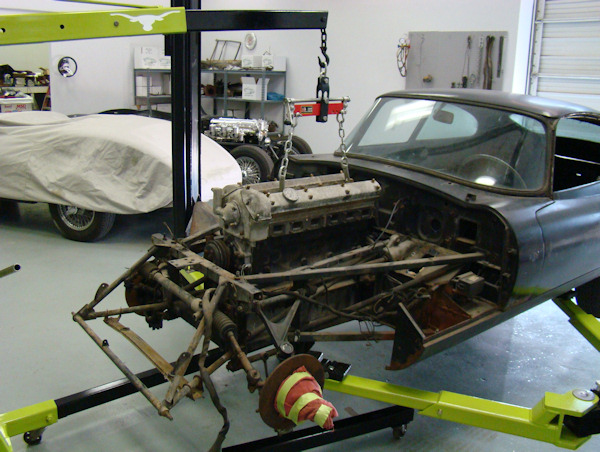
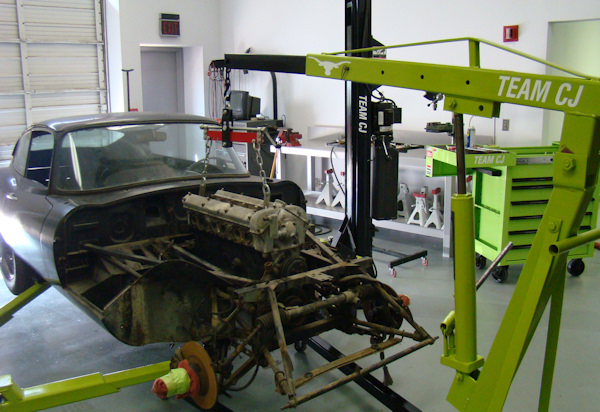
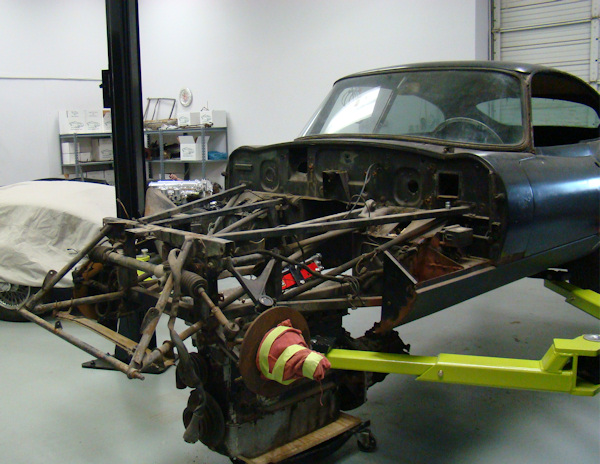
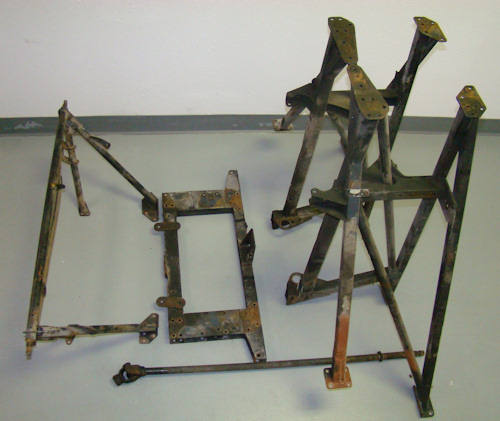
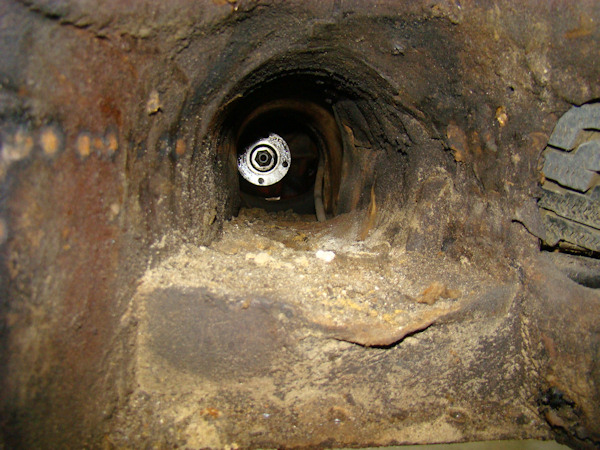
Back from the blasters, we are able to see the full extent of all the corrosion and bodged repairs that we are going to have to deal with when the car takes its turn in the CJ Coachworks.
 |
 |
 |
 |
 |
 |
 |
 |
|
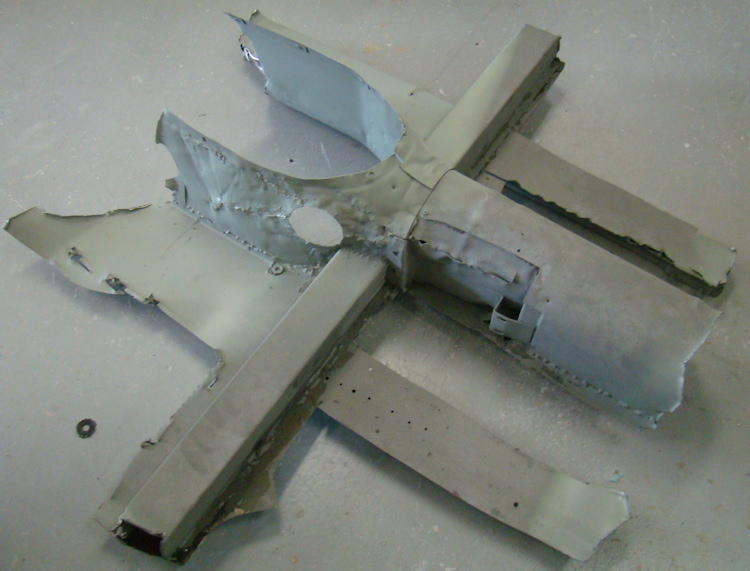
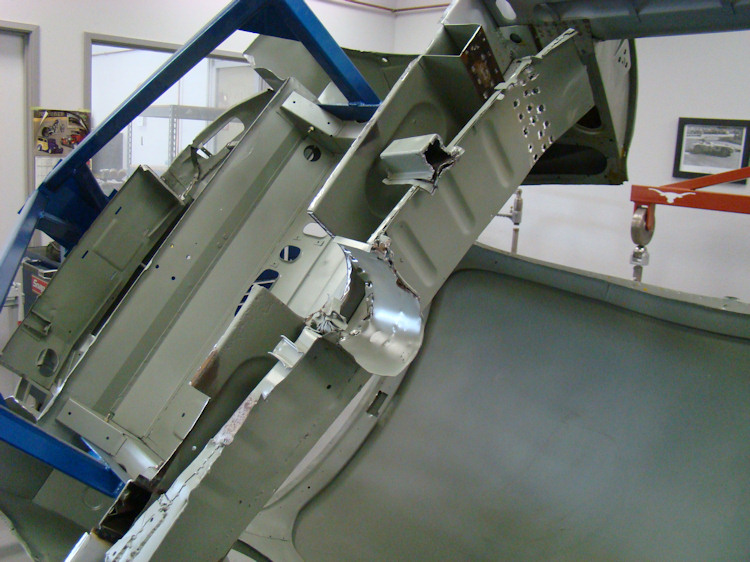
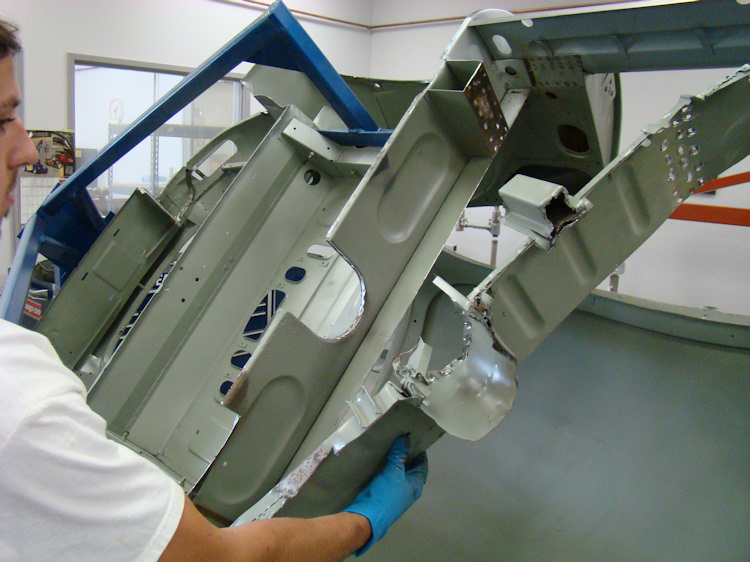
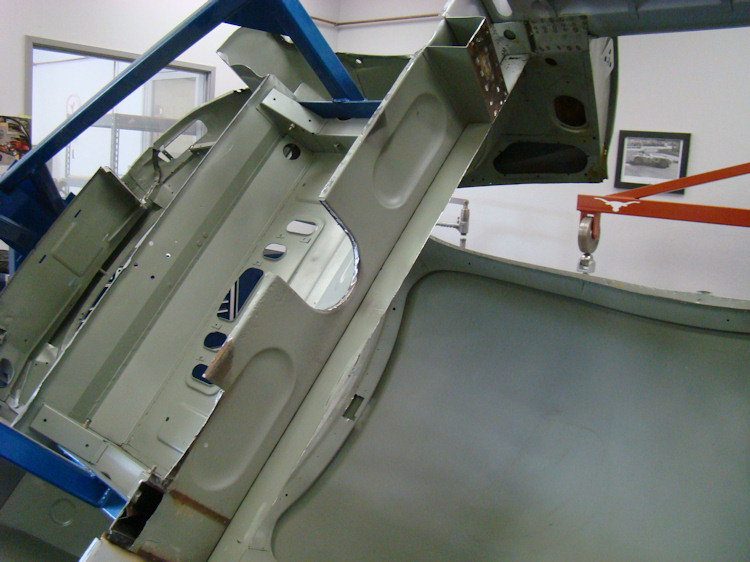
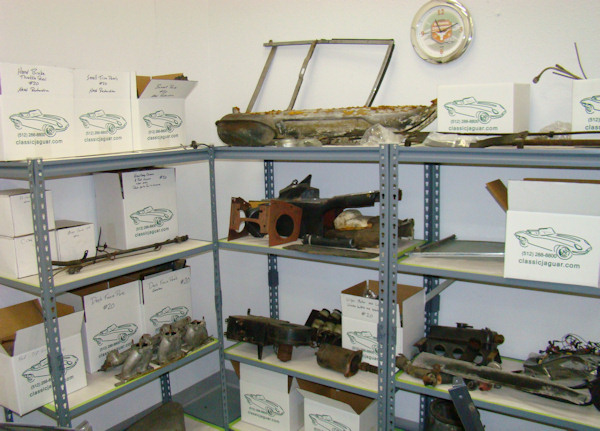
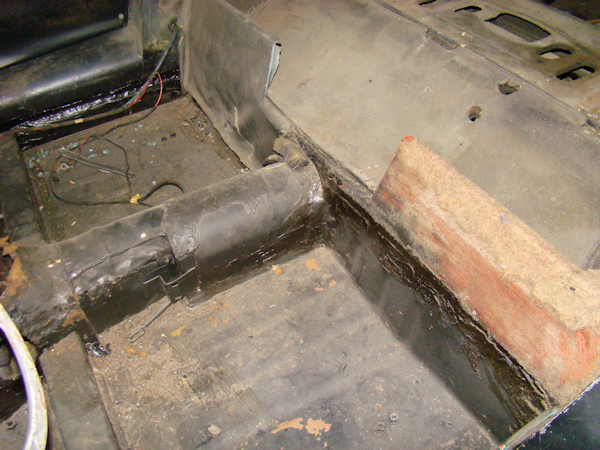
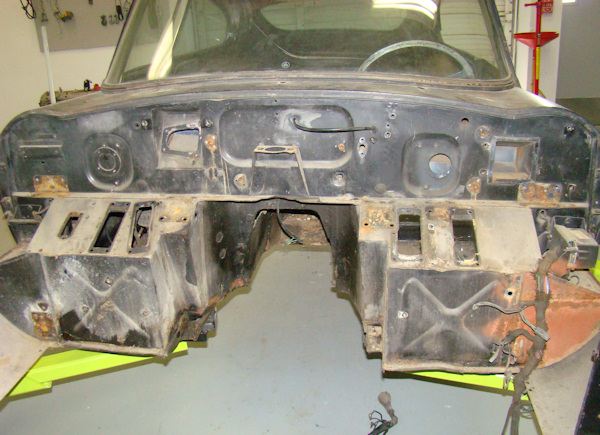
We now have your car completely disassembled and have cut away all the corroded or poorly installed sheet metal. This car has been the victim of some terrible panel replacement at some time in the distant past.
 |
 |
 |
|
and stored |
been removed at some time |
|
 |
 |
 |
 |
 |
 |
|
|
|
|
 |
 |
|
|
|
|
|
 |
 |
 |
|
removal in past |
before being skinned |
|
 |
 |
 |
|
for media blasting |
|
|
 |
 |
 |
|
on top of corroded originals |
|
|
 |
 |
 |
 |
 |
 |
|
|
||
 |
 |
 |
|
|
||
 |
 |
 |
|
each other |
|
|
 |
 |
 |
|
|
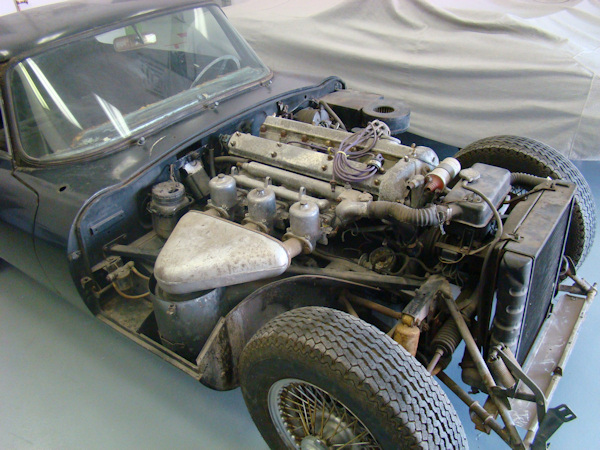
Time to get this very important project underway!
 |
 |
 |
|
|
|
|
|
|
|
|
 |
 |
 |
|
|
|
|
|
|
|
|
 |
 |
 |
|
|
|
|
|
|
|
|
 |
 |
 |
|
|
|
|
|
|
|
|
 |
 |
 |
|
|
|
|
|
|
|
|
 |
 |
 |
|
|
|
|
|
|
|
|
 |
 |
 |
|
|
|
|
|
|
|
|
 |
 |
 |
|
|
|
|
|
|
|
|
 |
 |
 |
|
|
|
|
