| 1961 Jaguar E Type
FHC (BA) Total restoration |
Restoration log by Dan Mooney |
|
| 1961 Jaguar E Type
FHC (BA) Total restoration |
Restoration log by Dan Mooney |
|
|
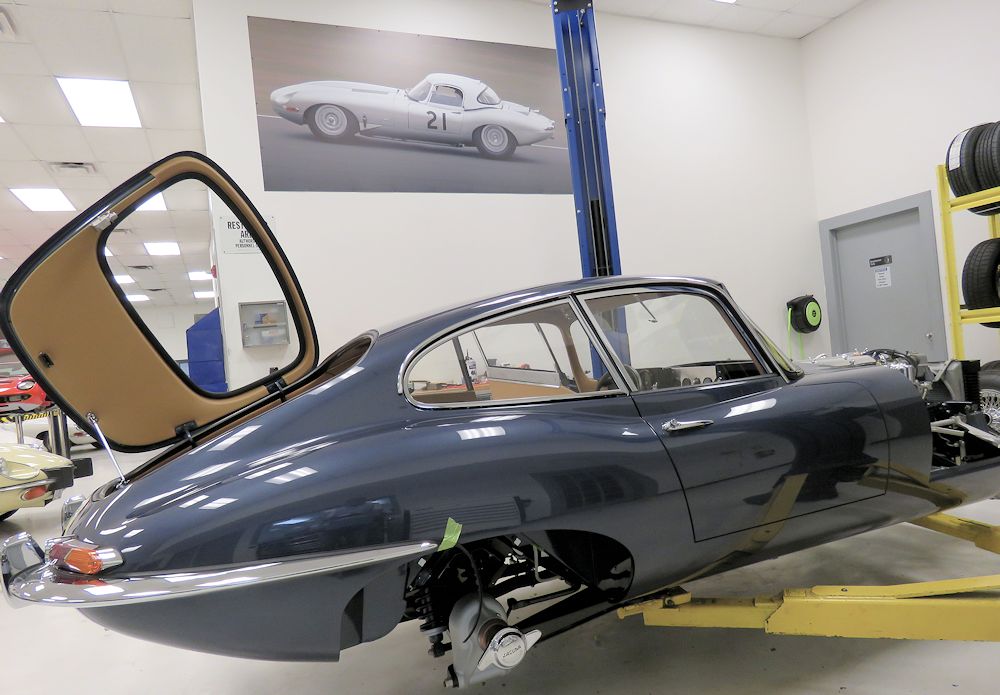
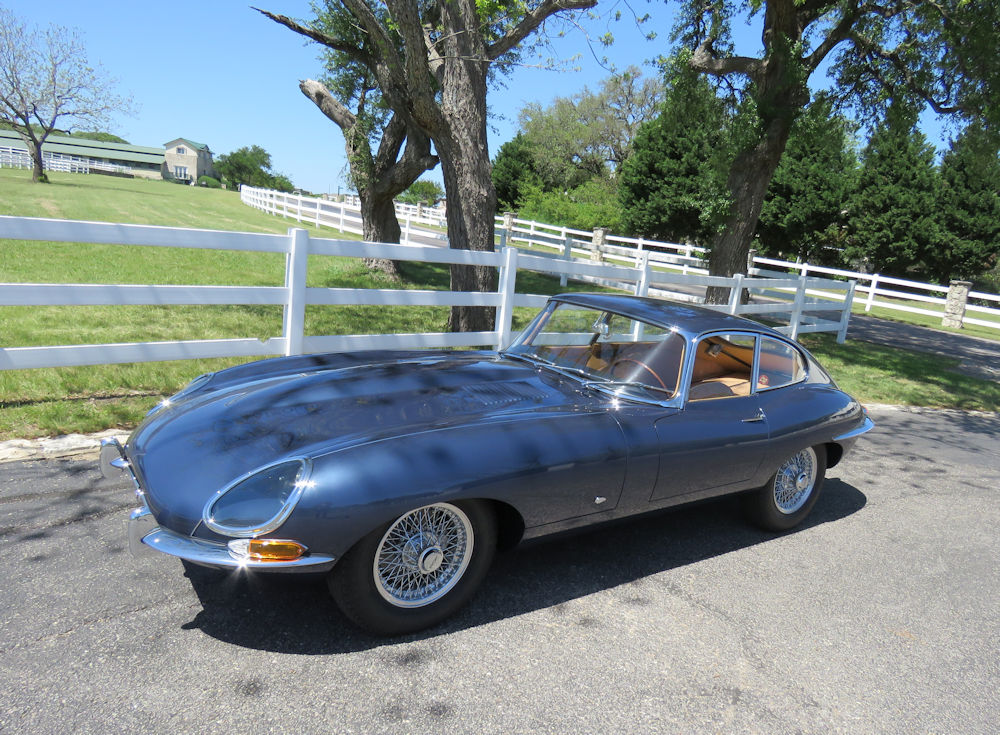
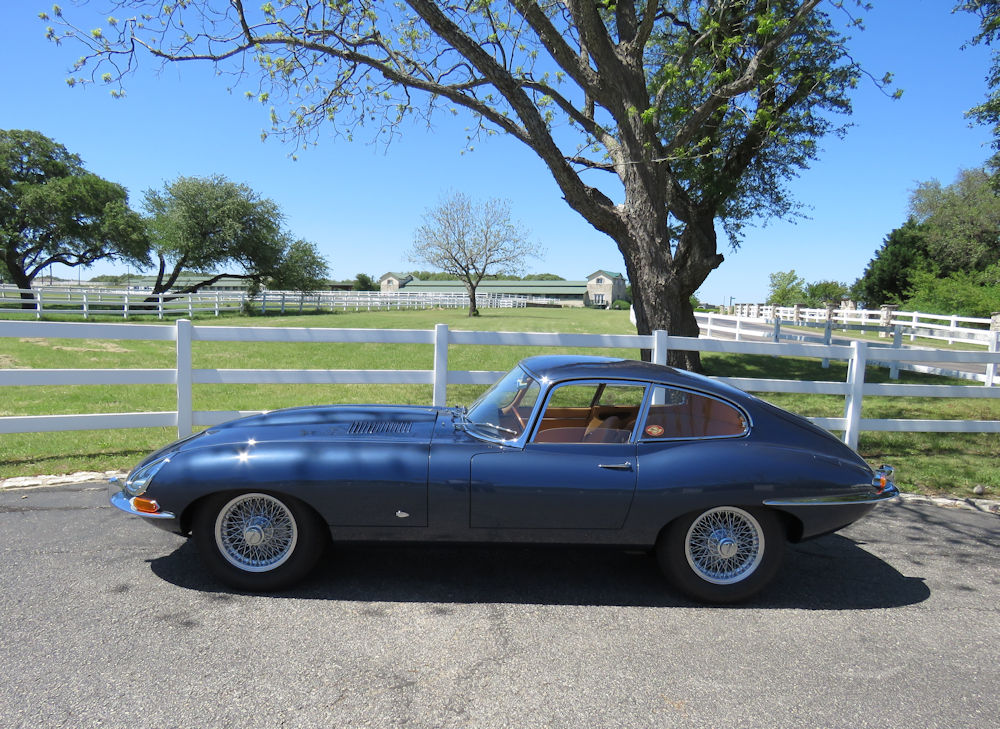
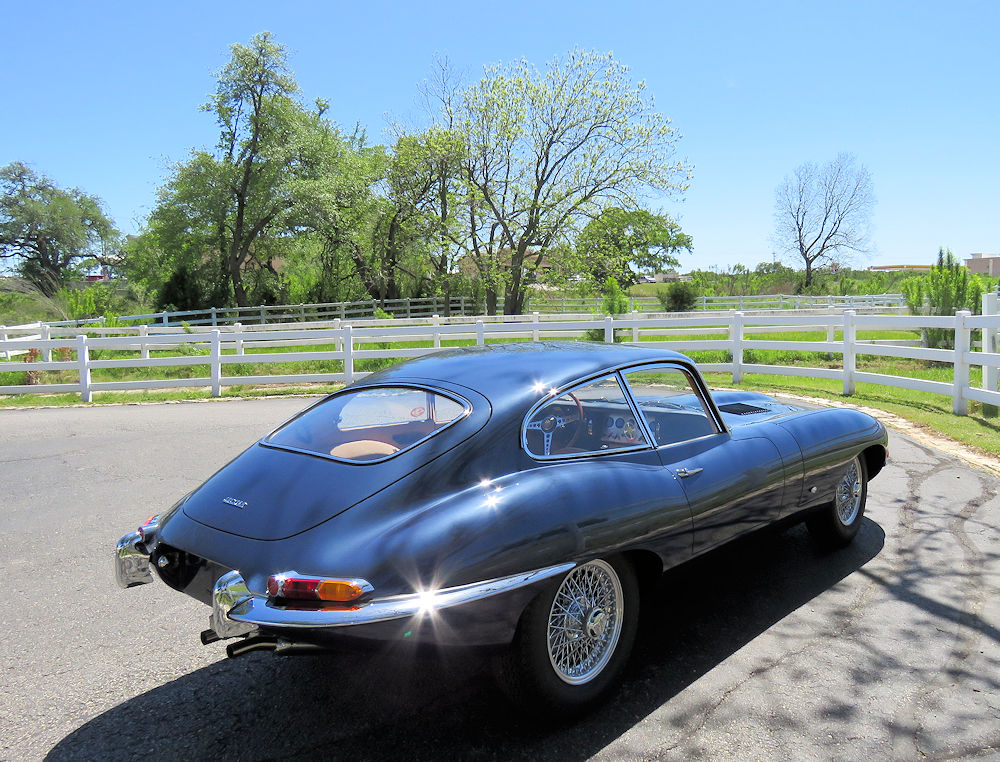
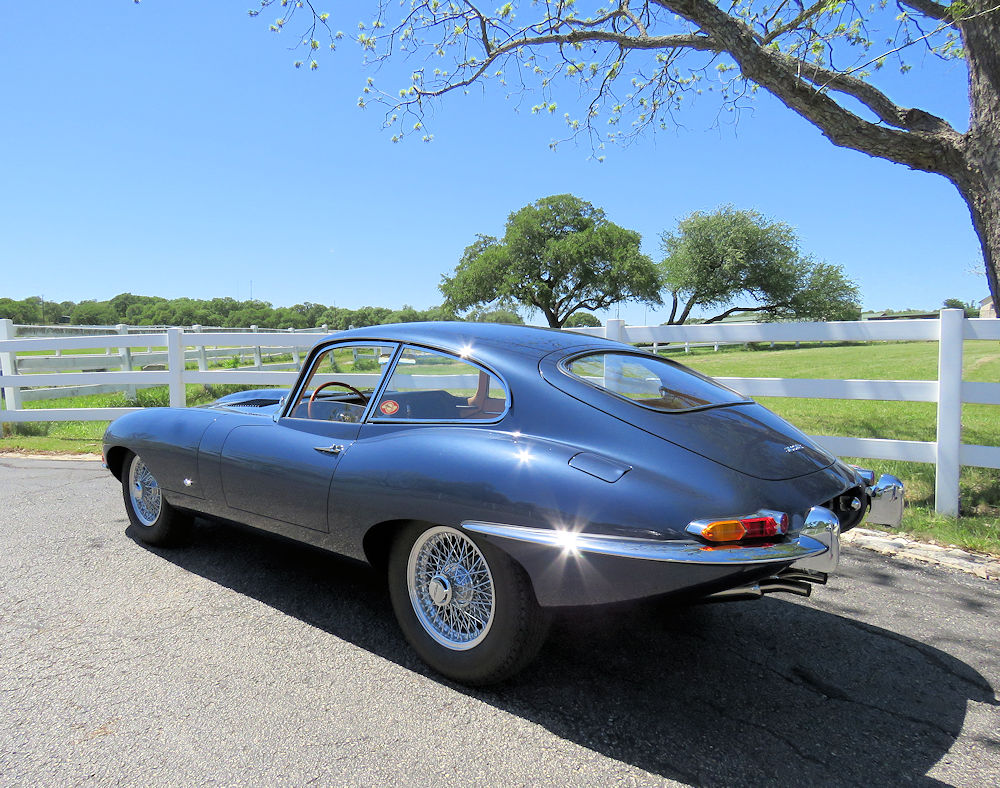
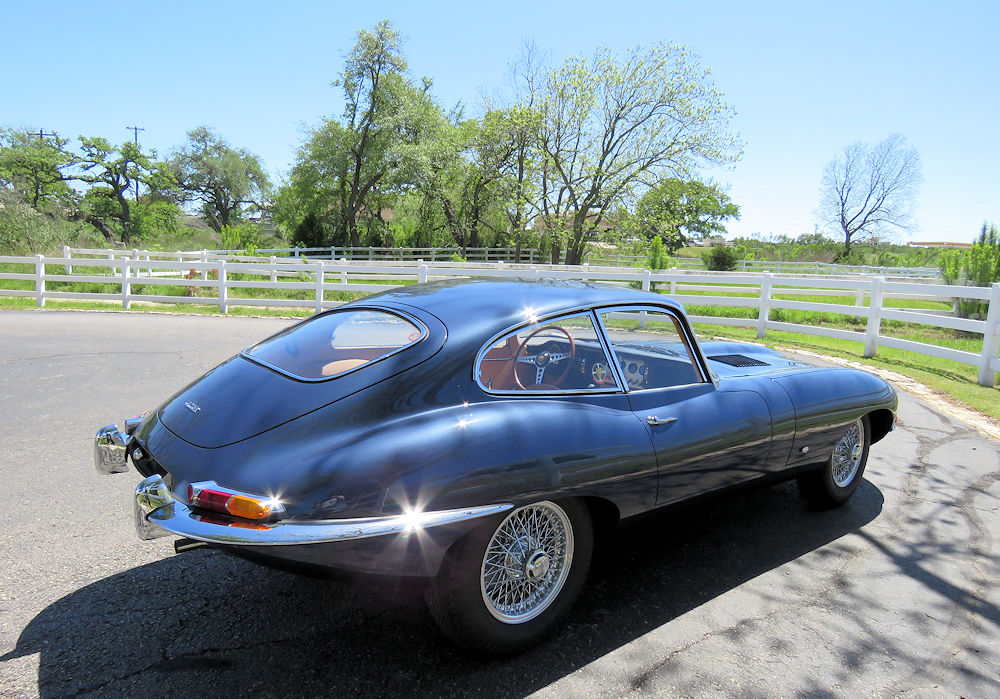
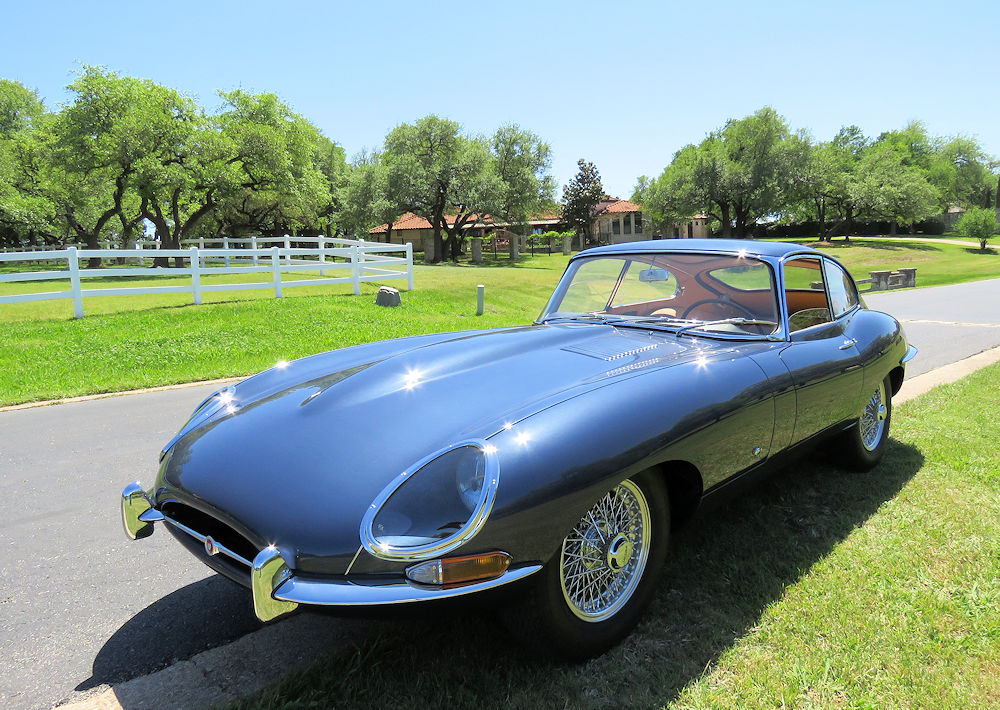
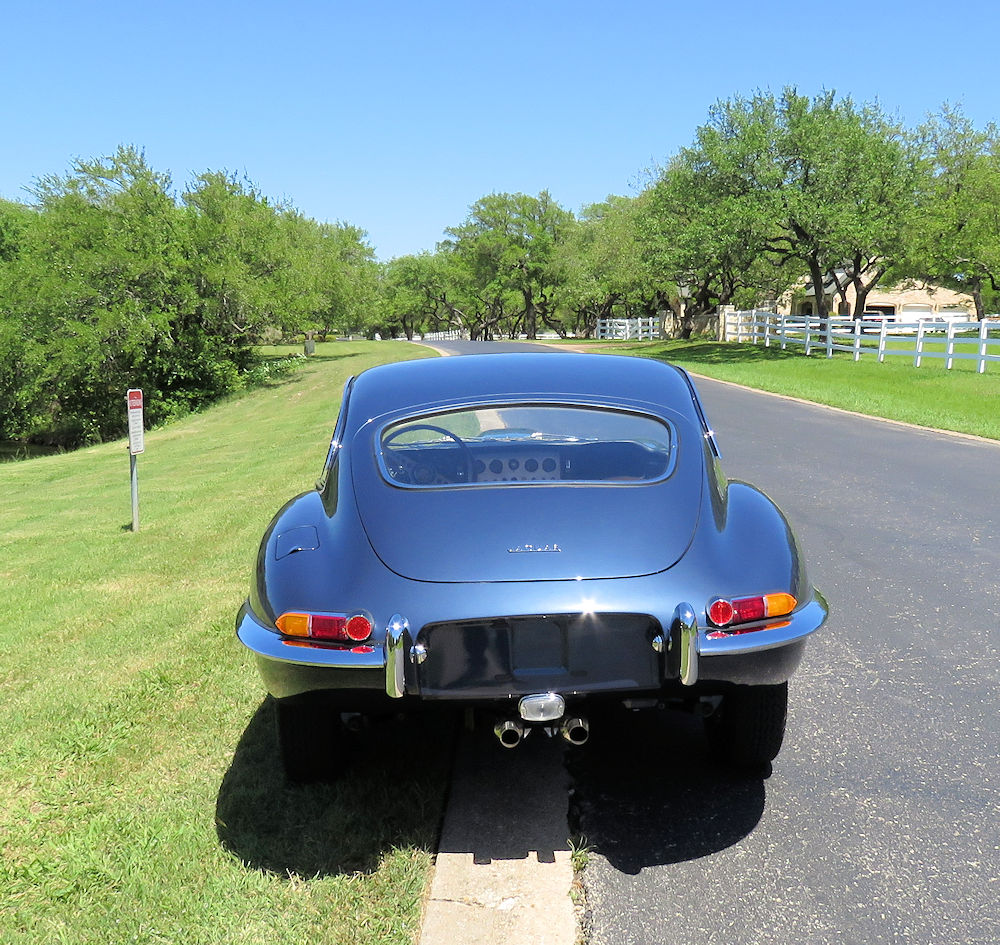
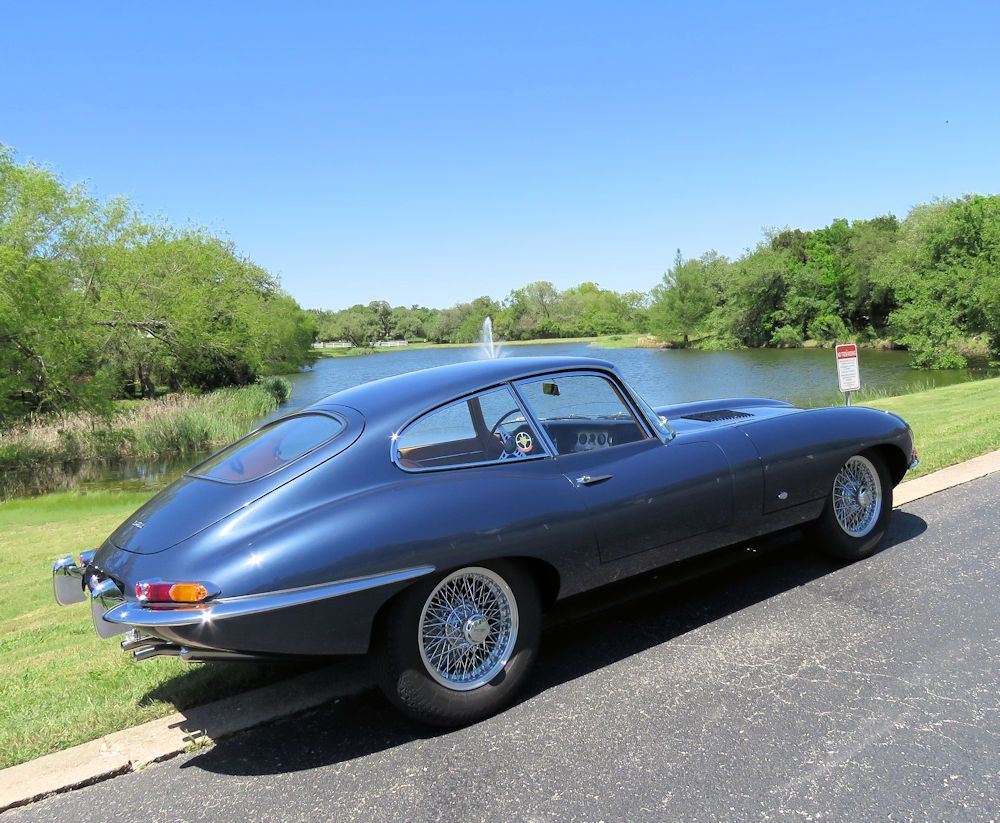
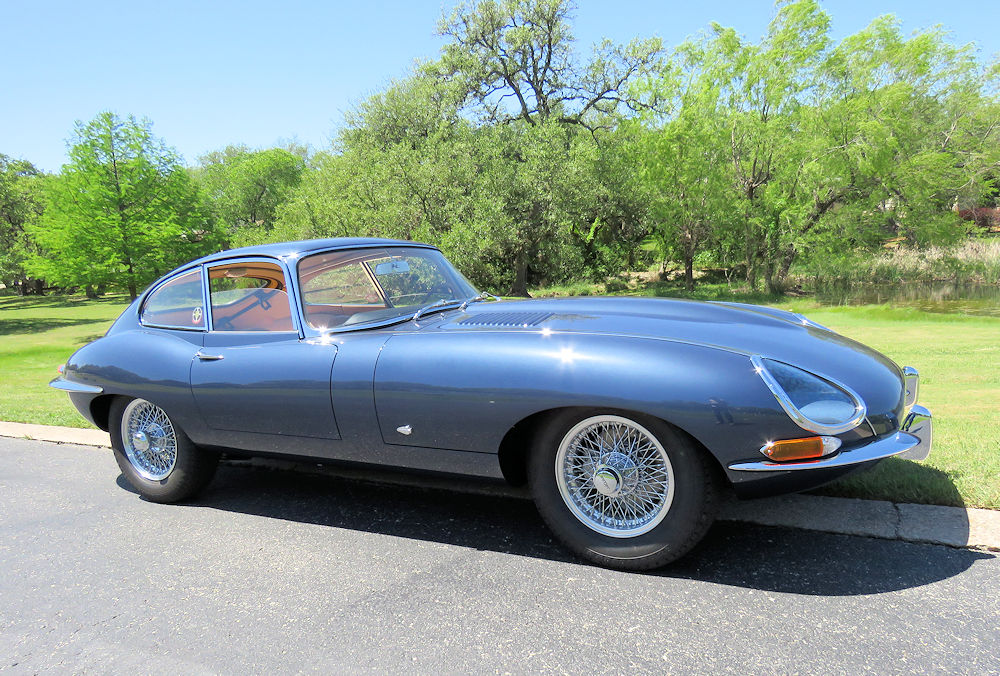
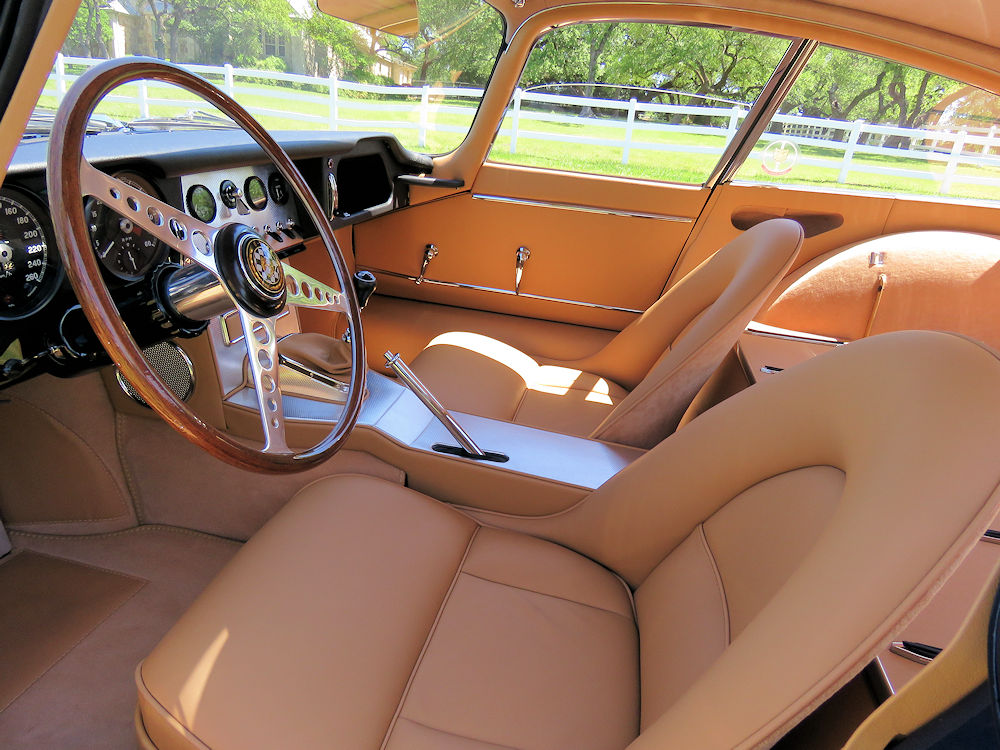
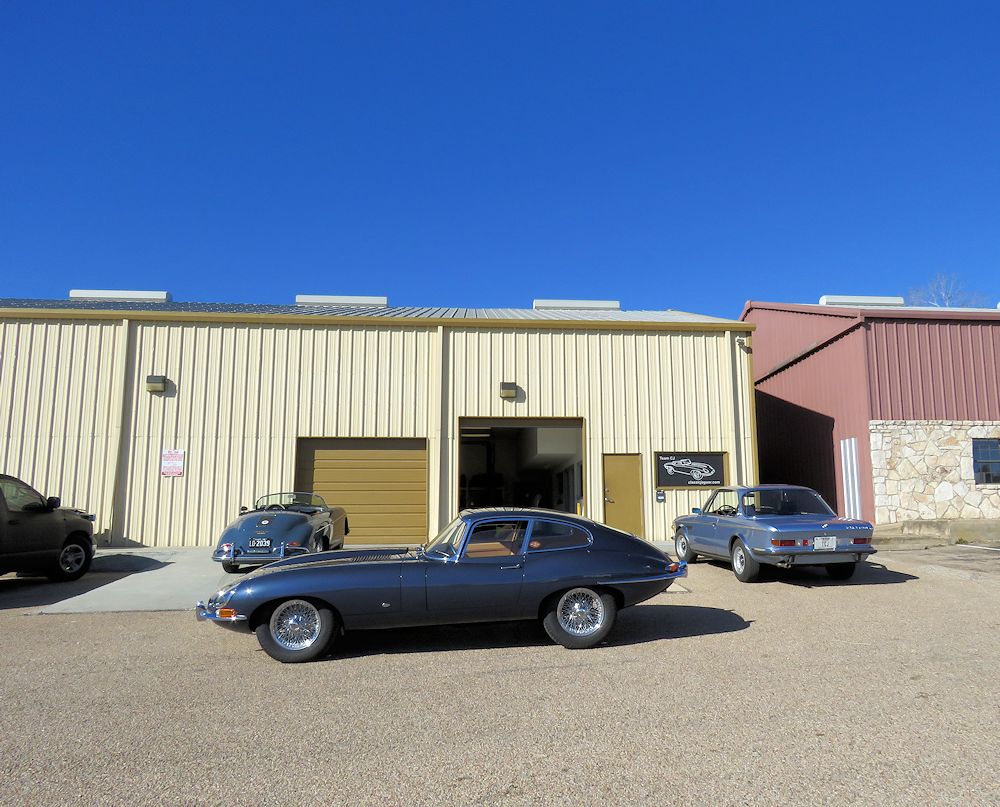
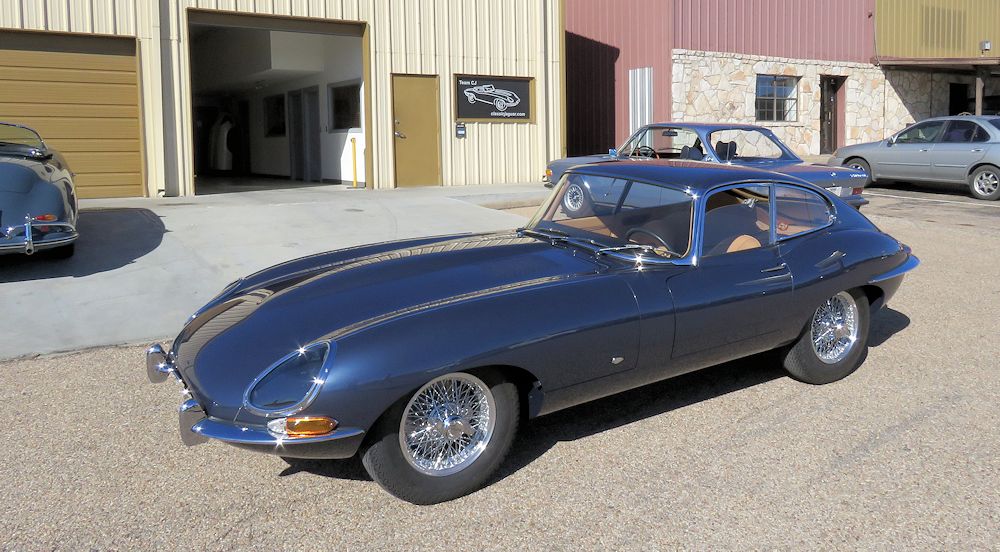
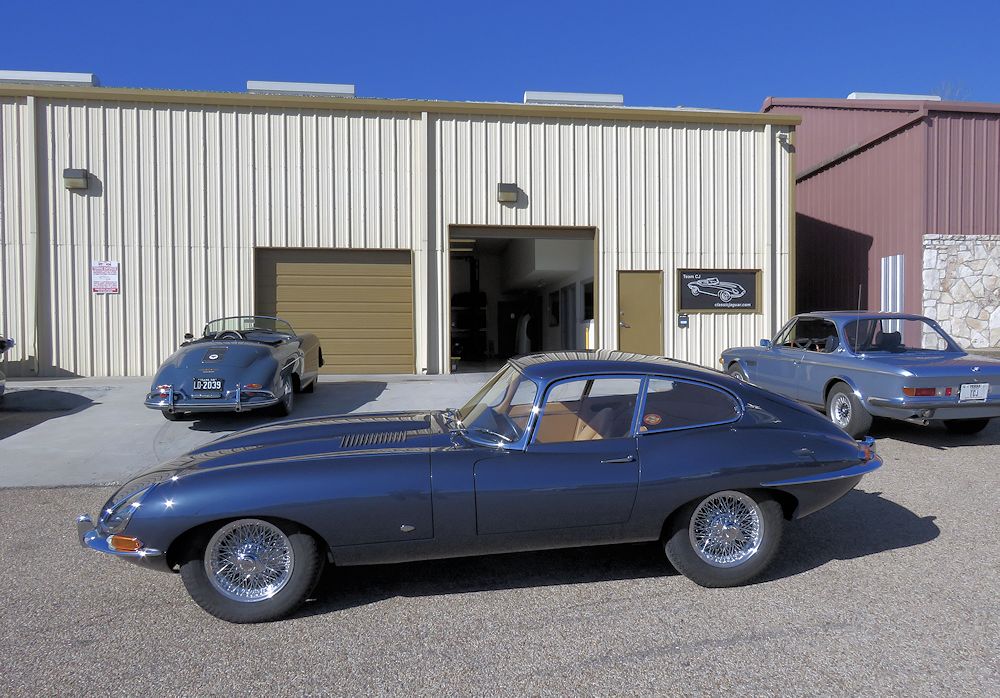
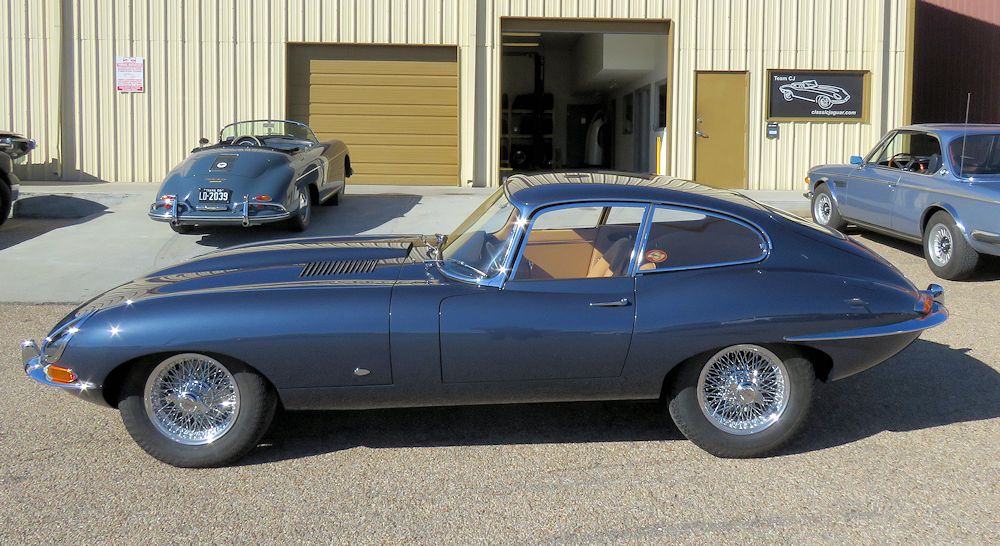
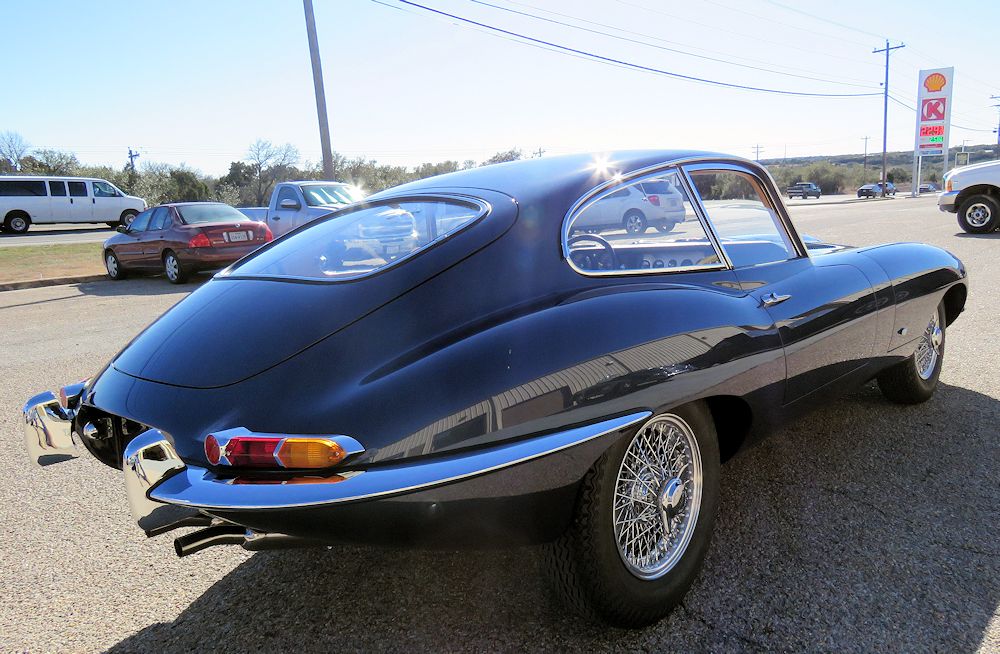
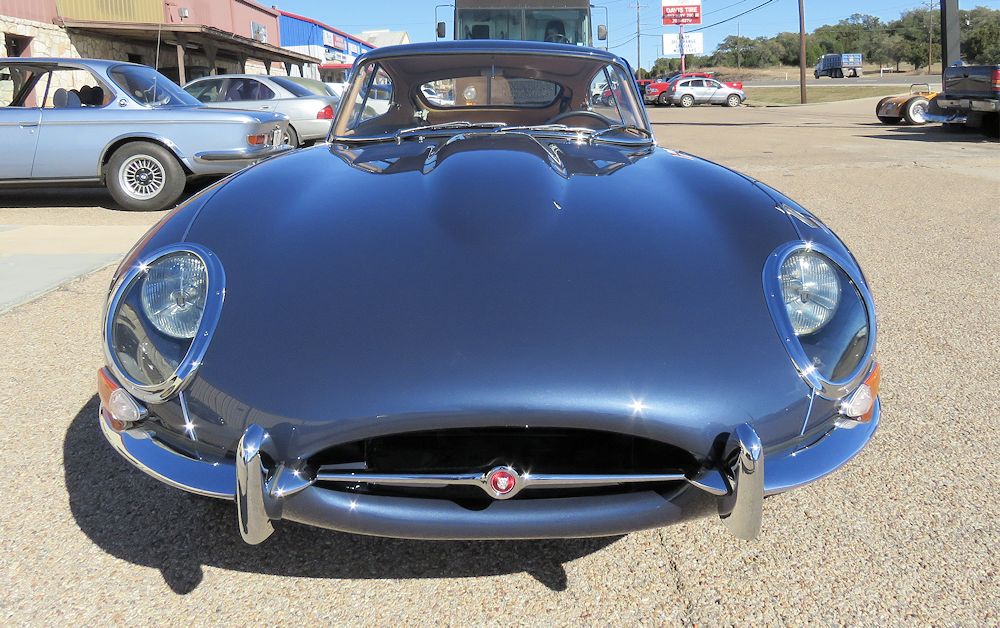
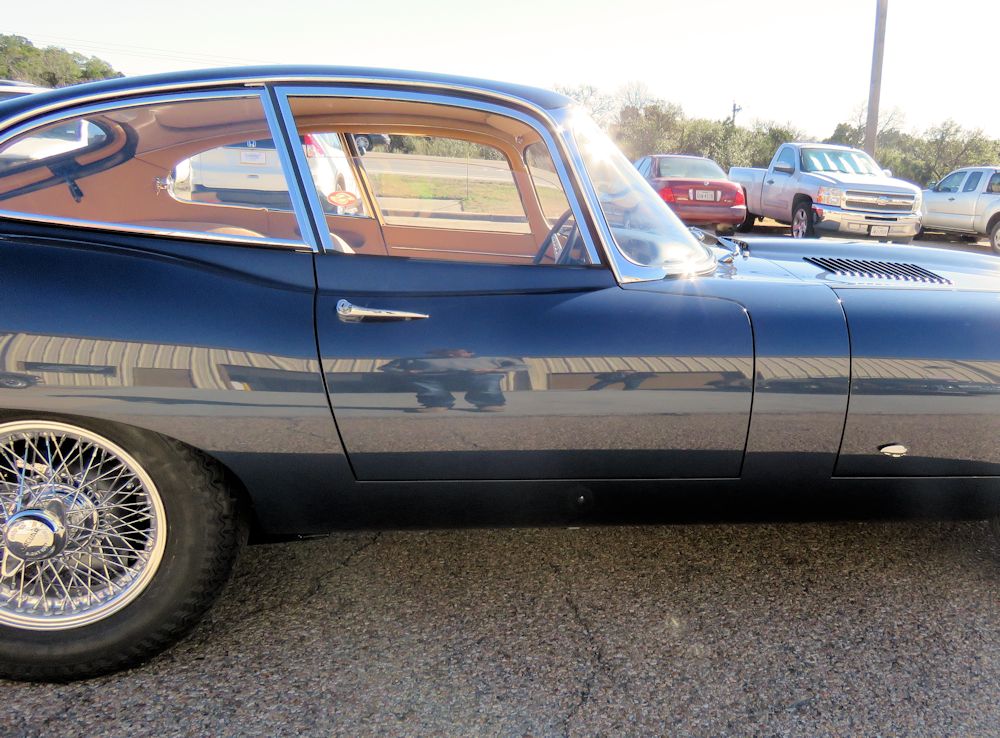
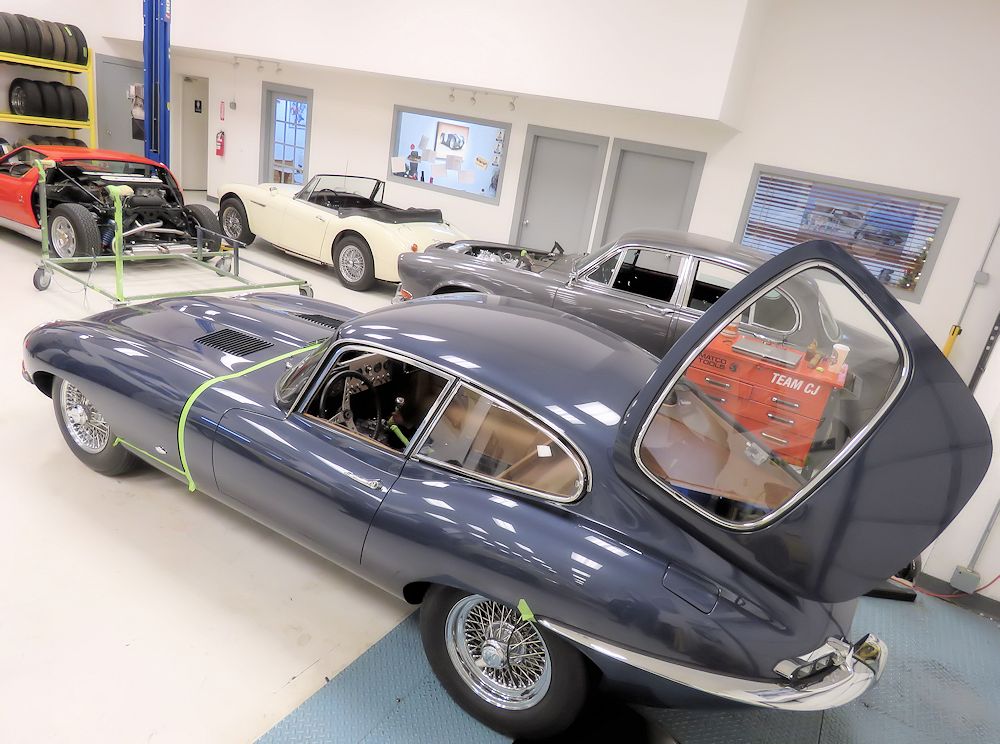
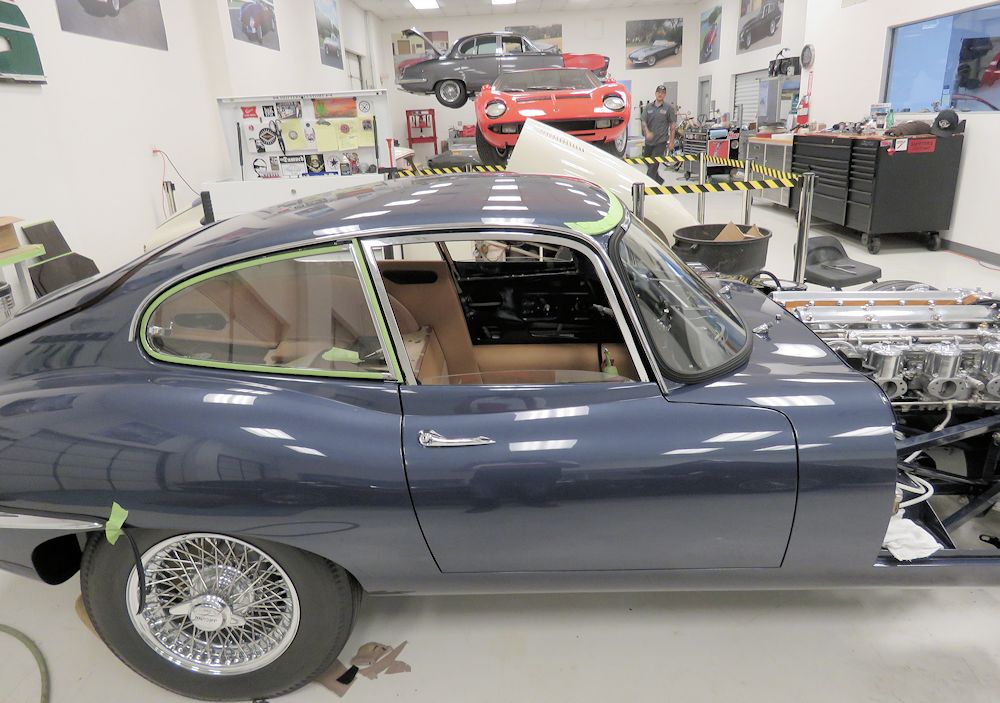
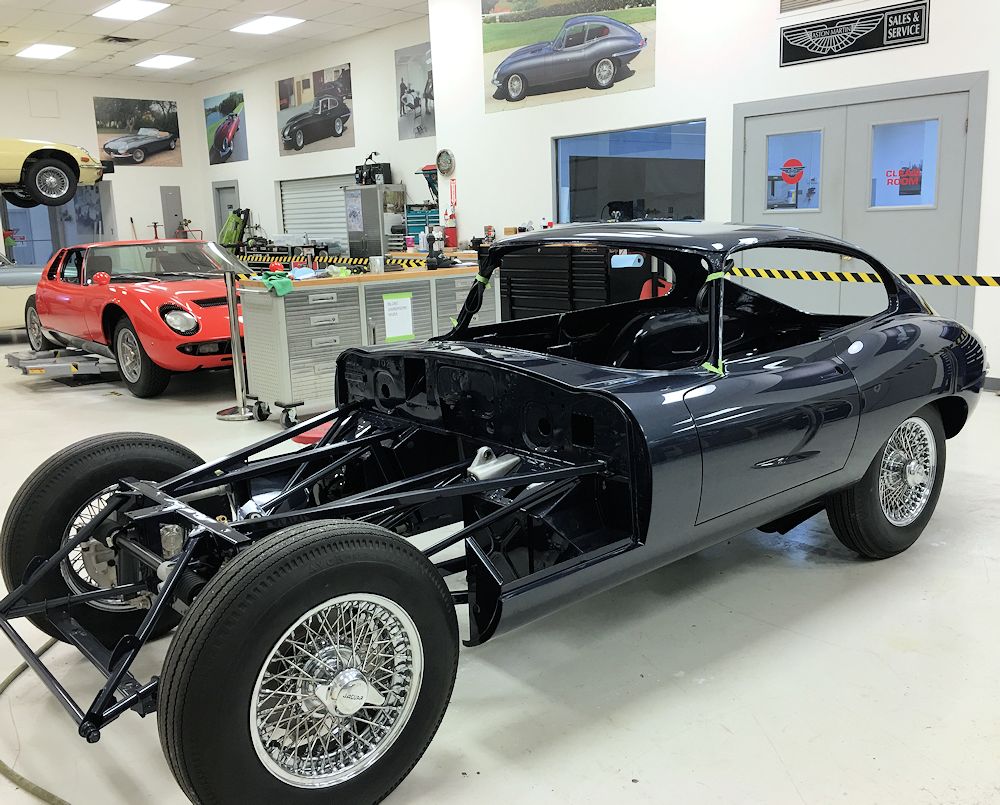
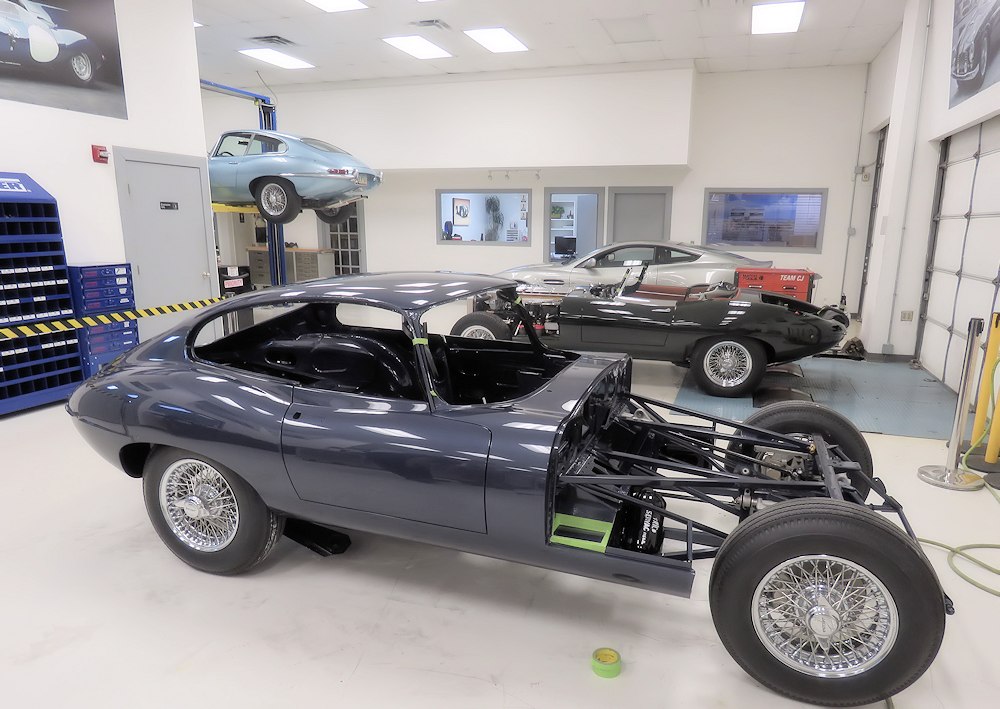
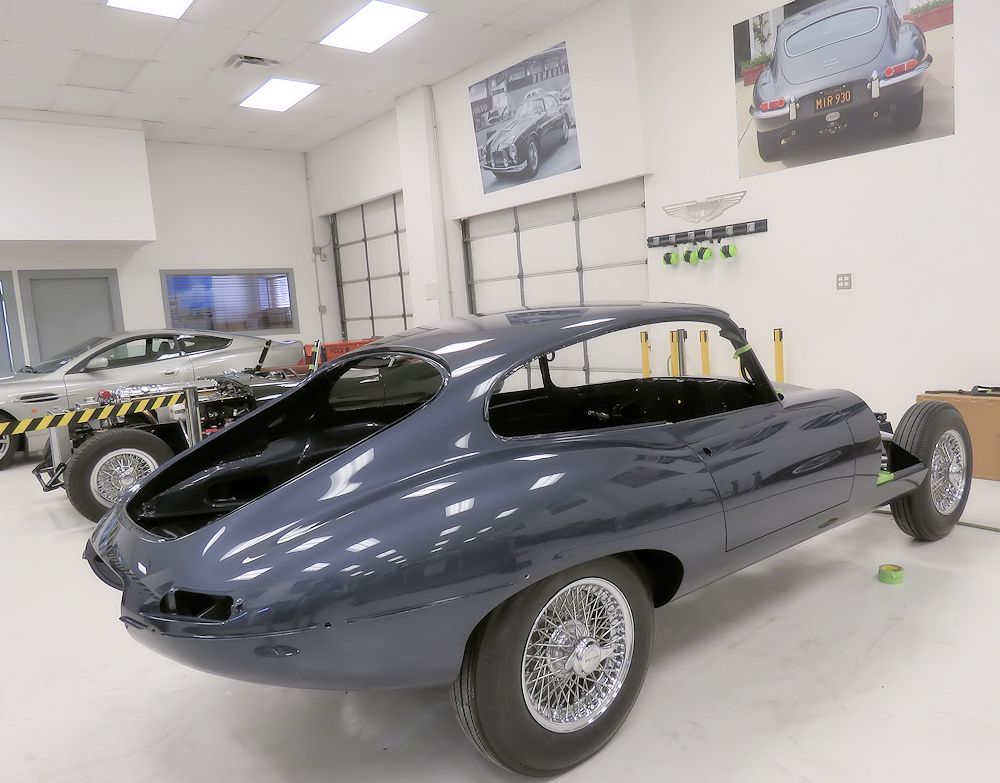
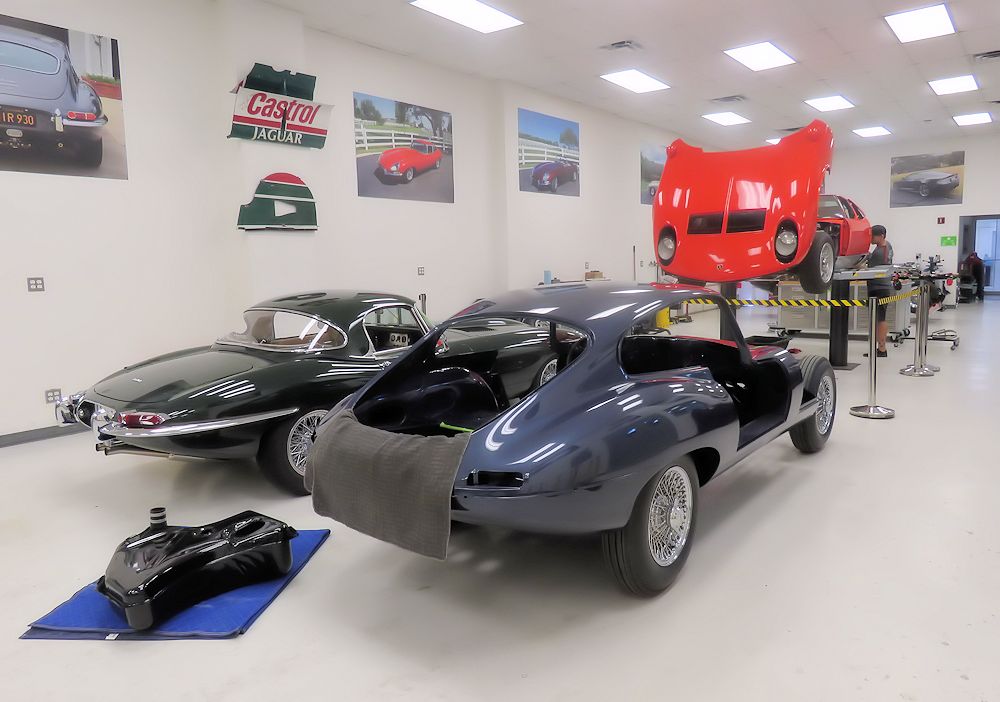
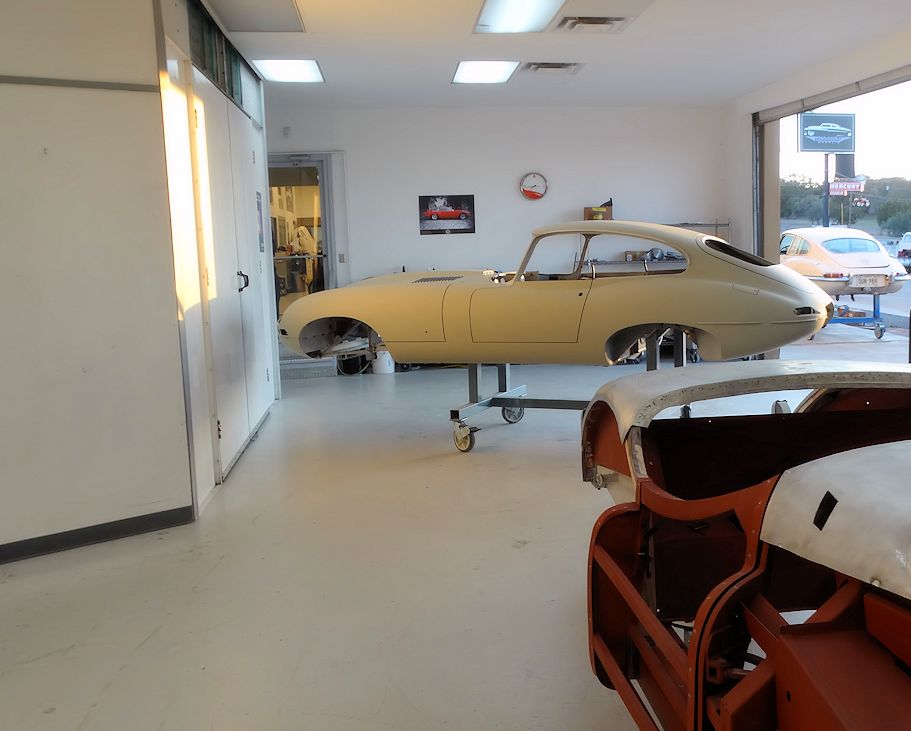
Update report - April 16 2018
One last photo opportunity on a gorgeous spring day in Austin.

 |
 |
 |
|
 |
 |
 |
 |
 |
 |
 |
 |
 |
 |
 |
 |
 |
 |
 |
|
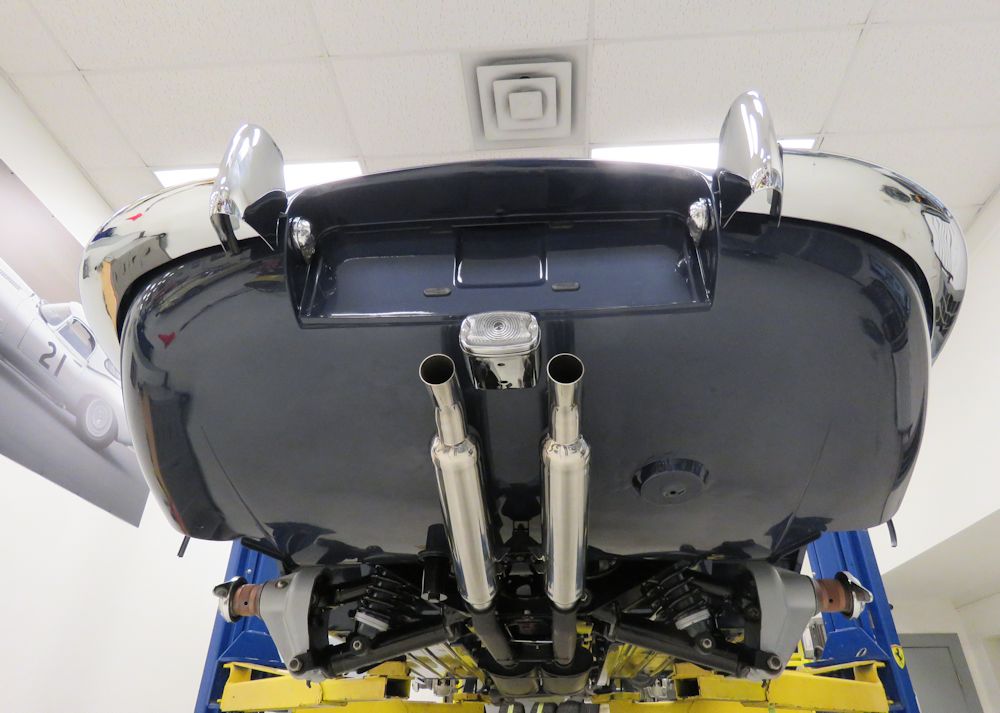
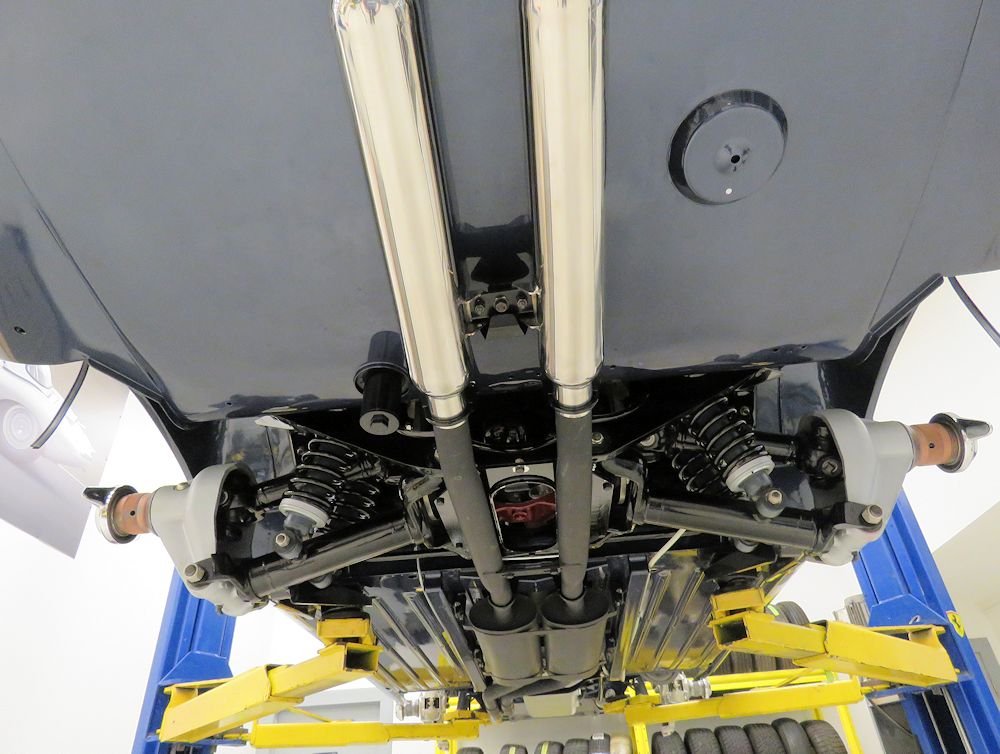
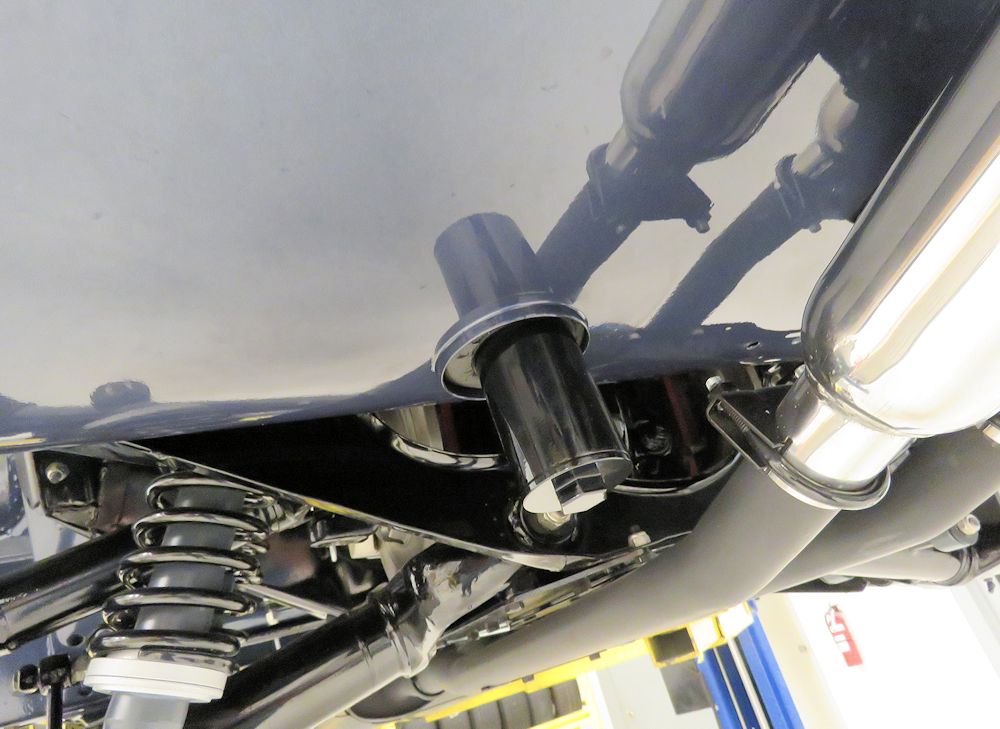
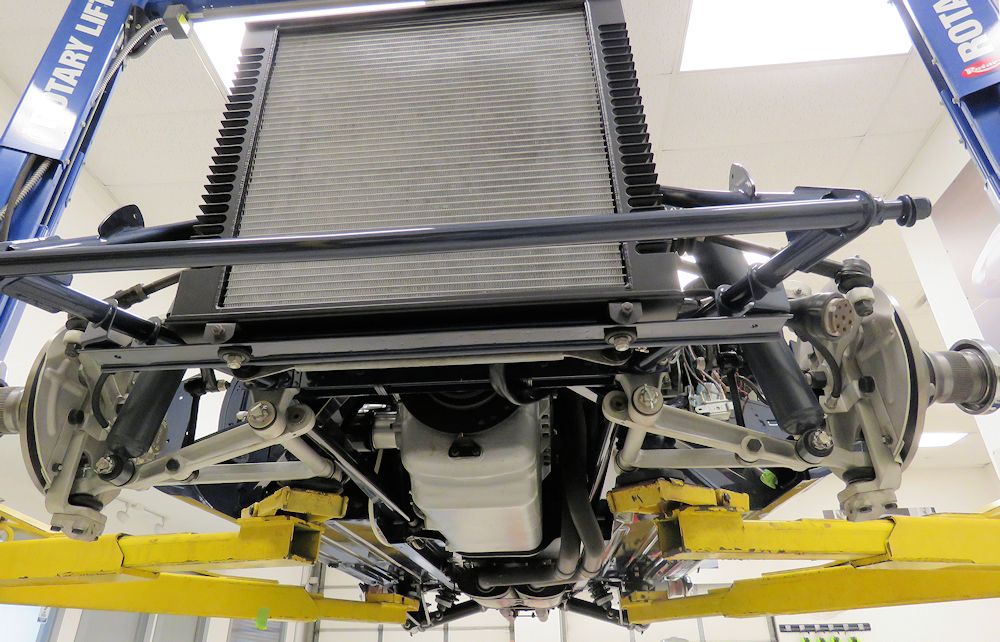
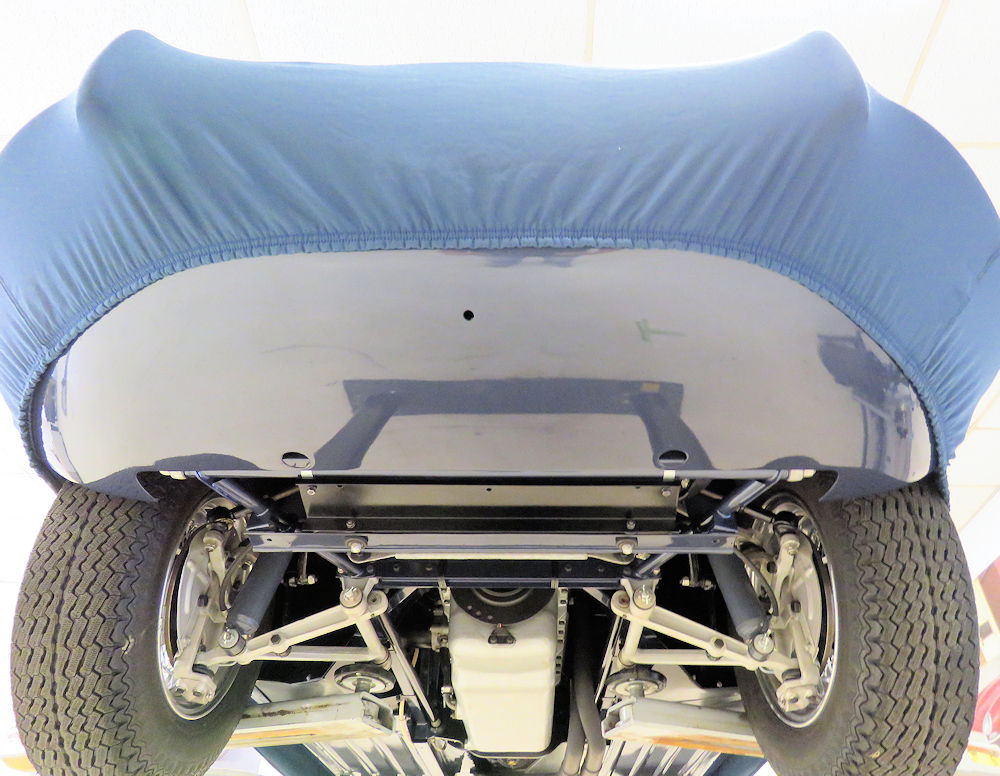
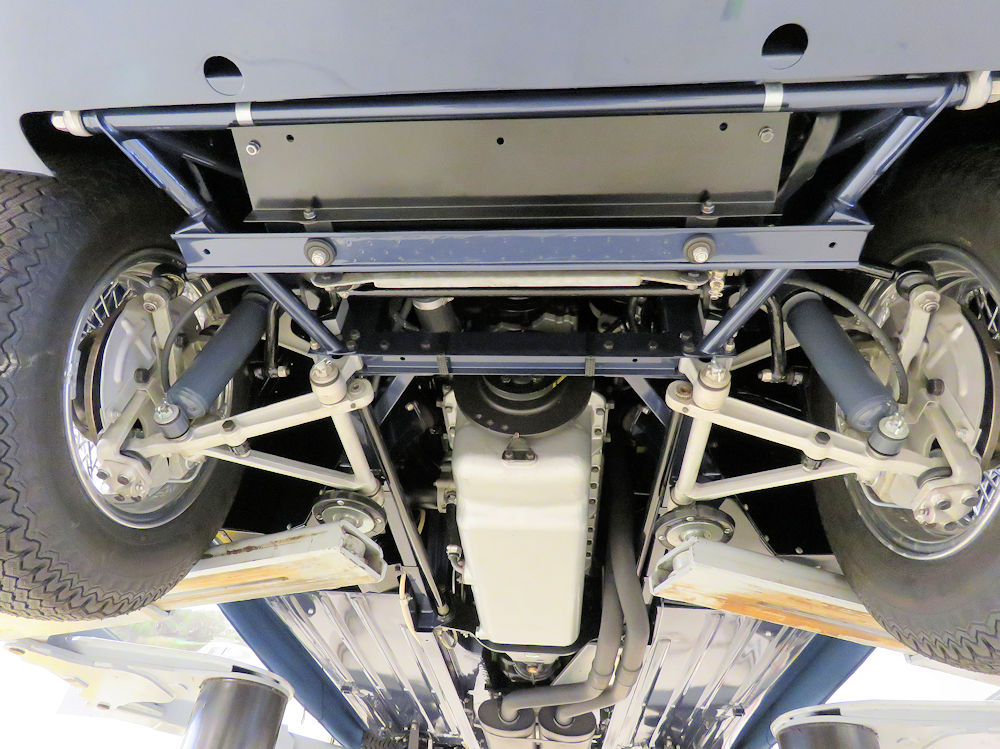
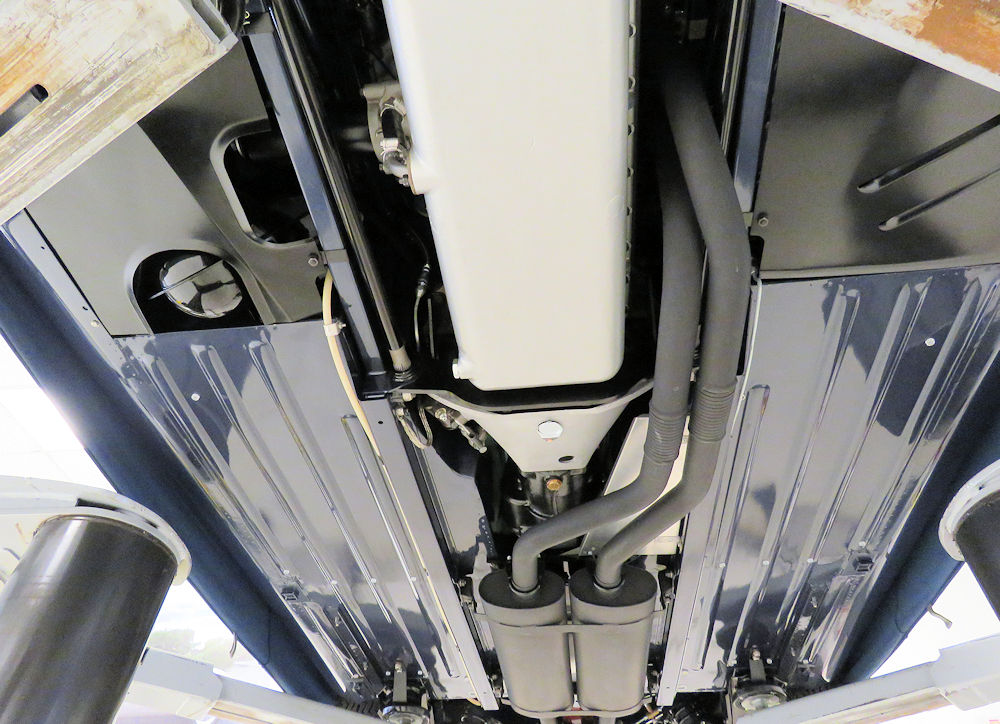
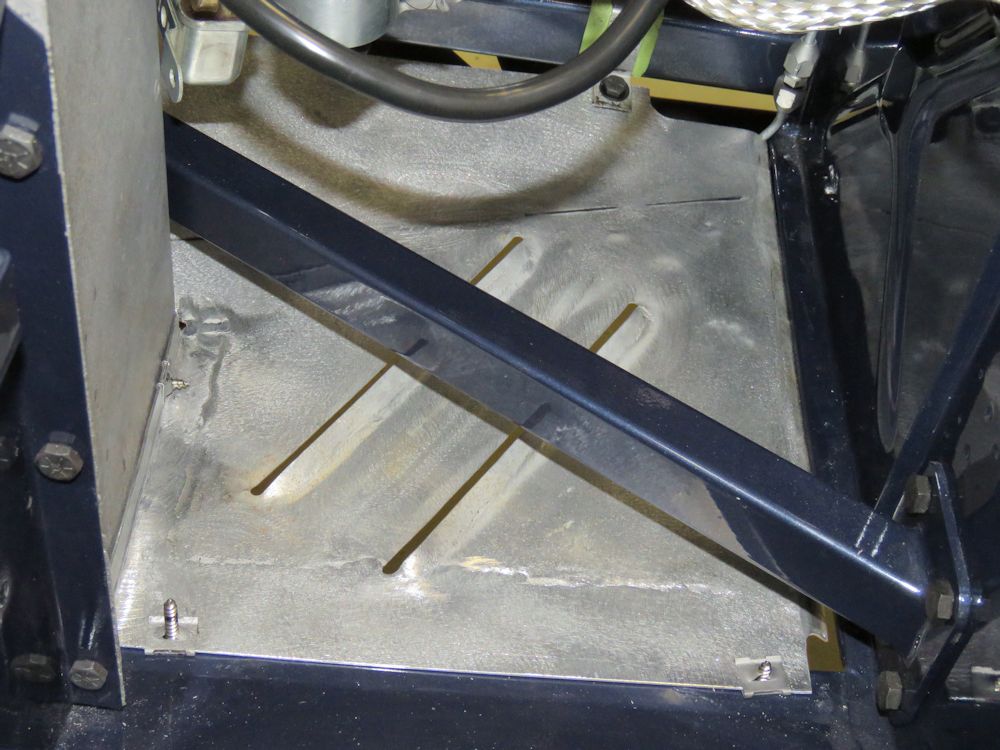
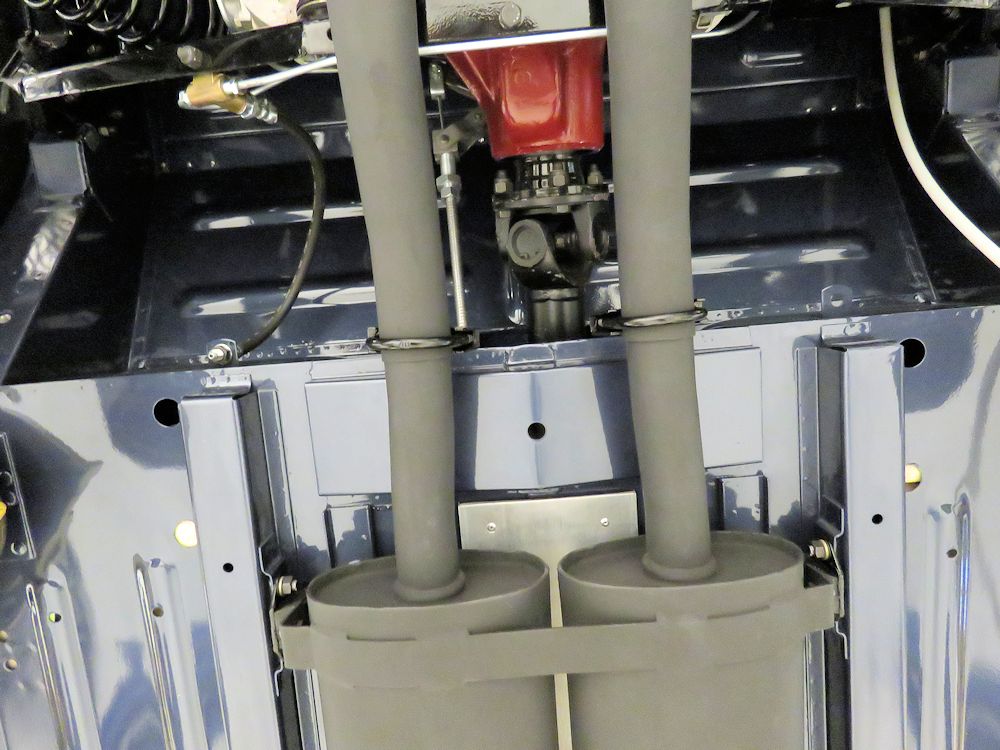
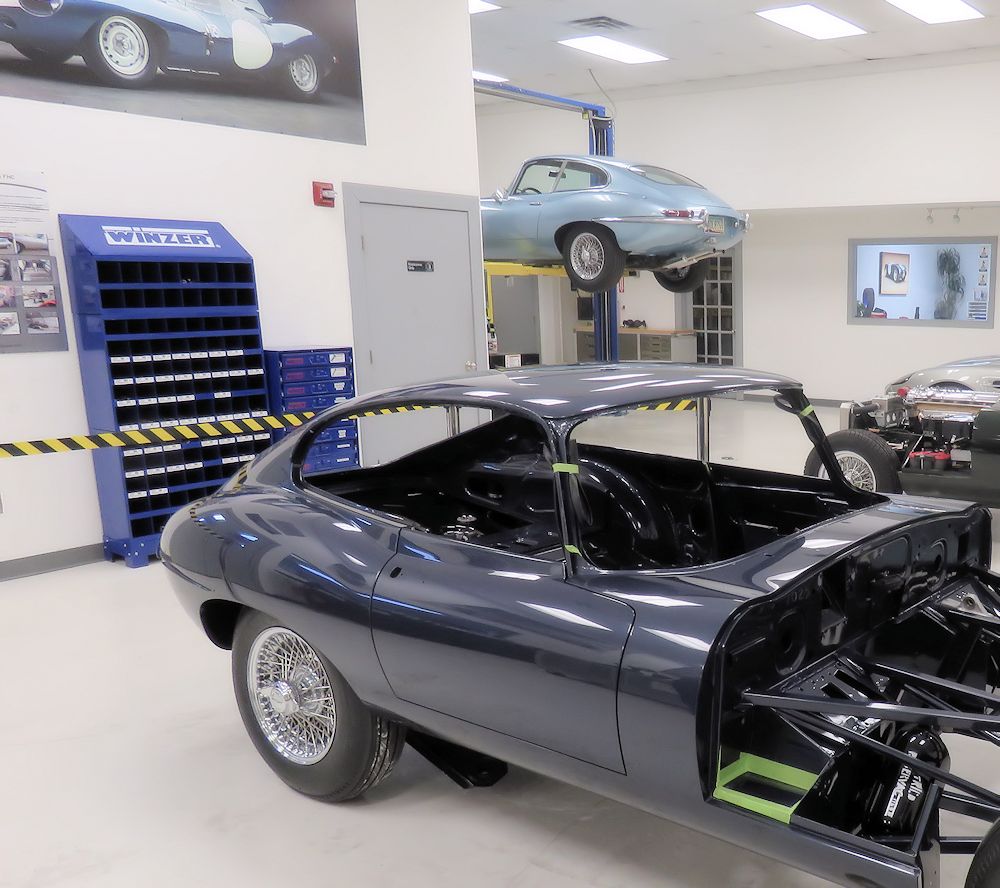
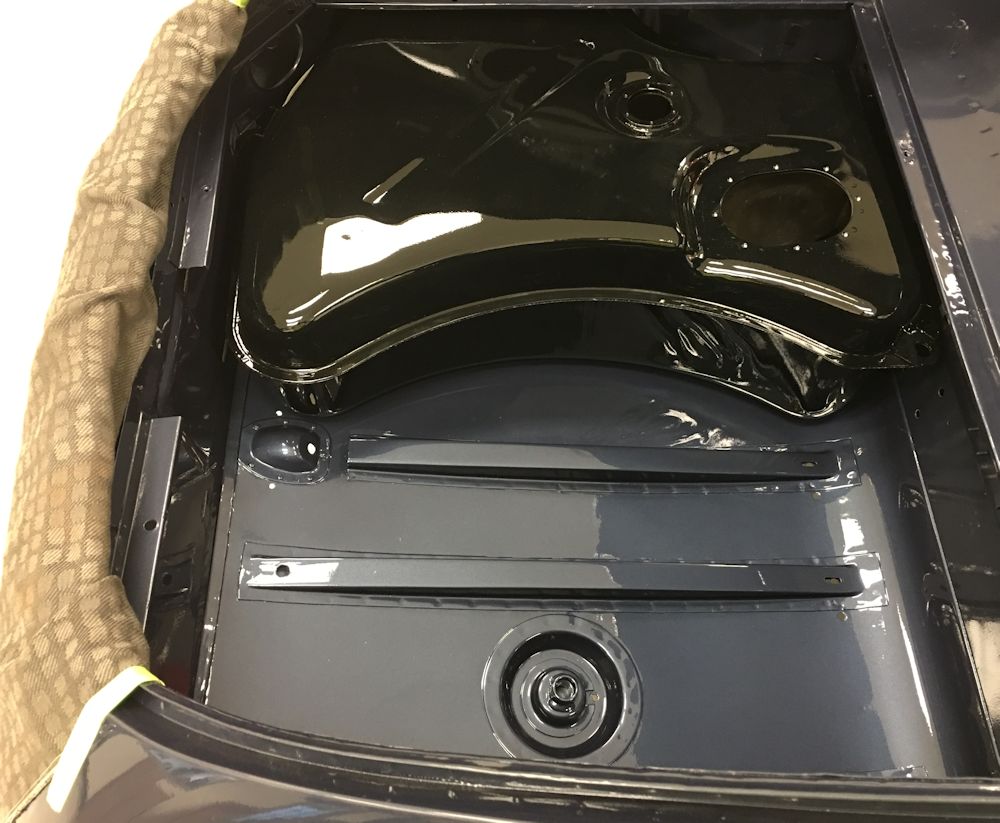
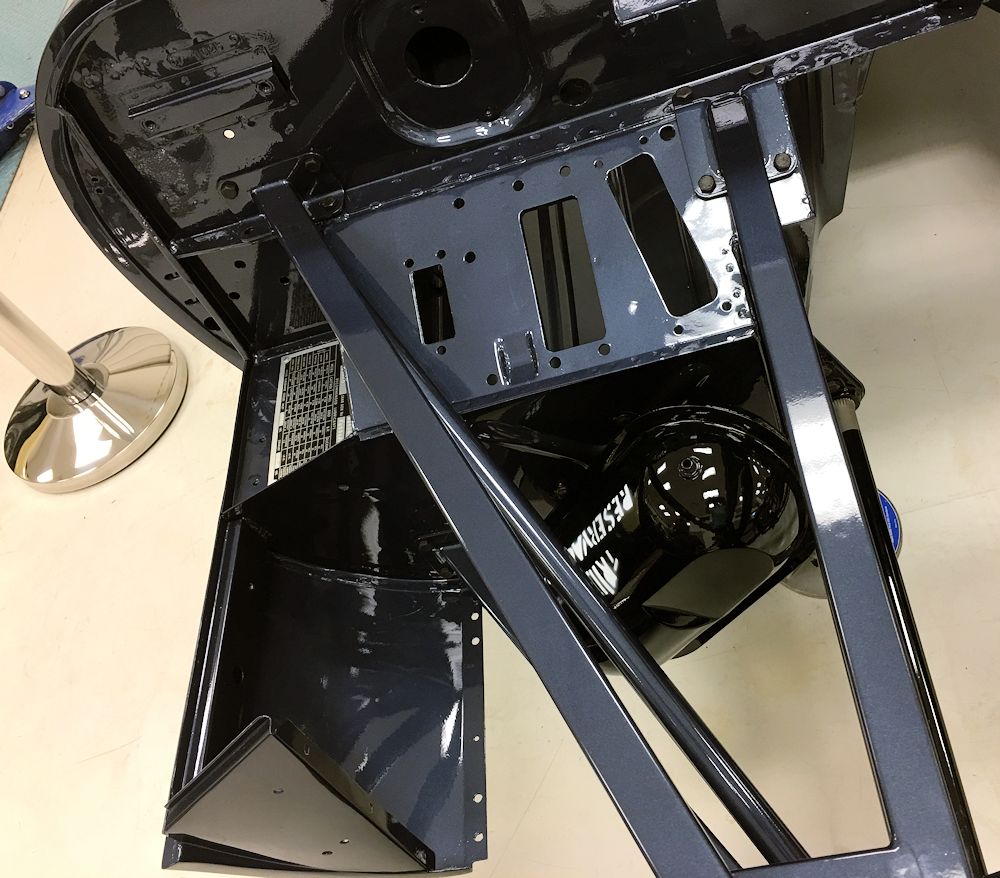
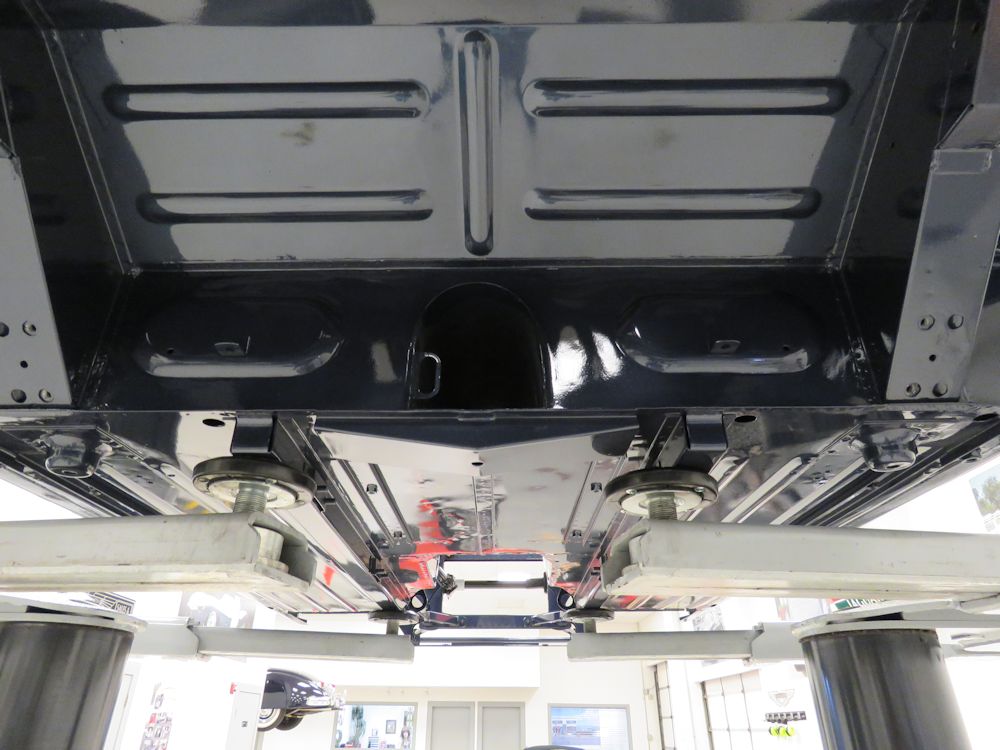
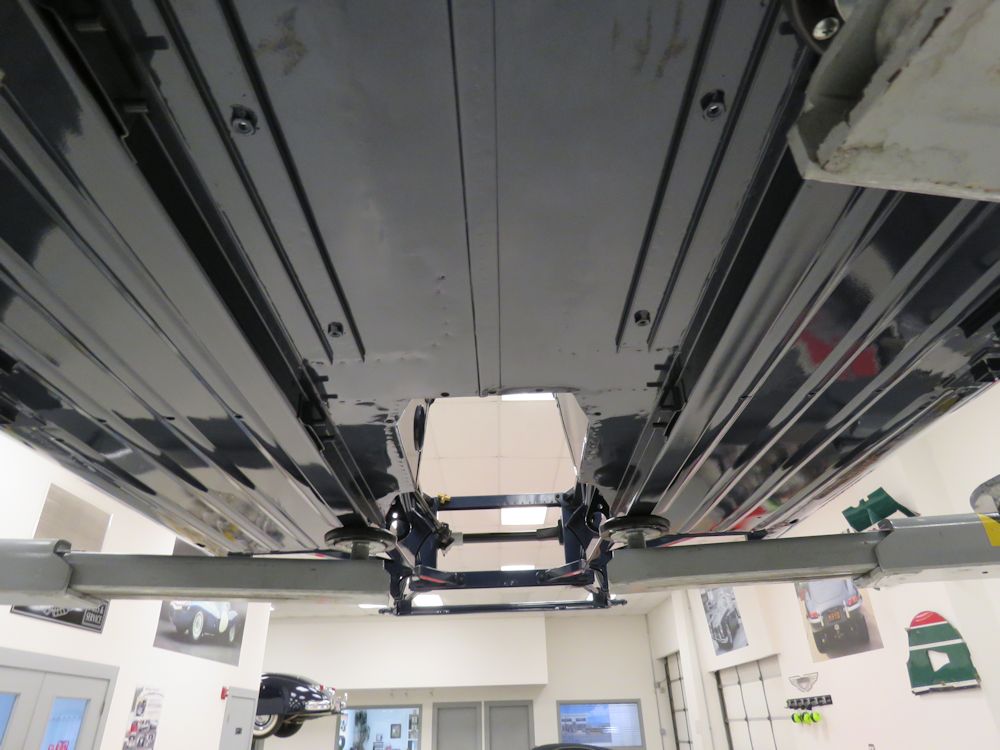
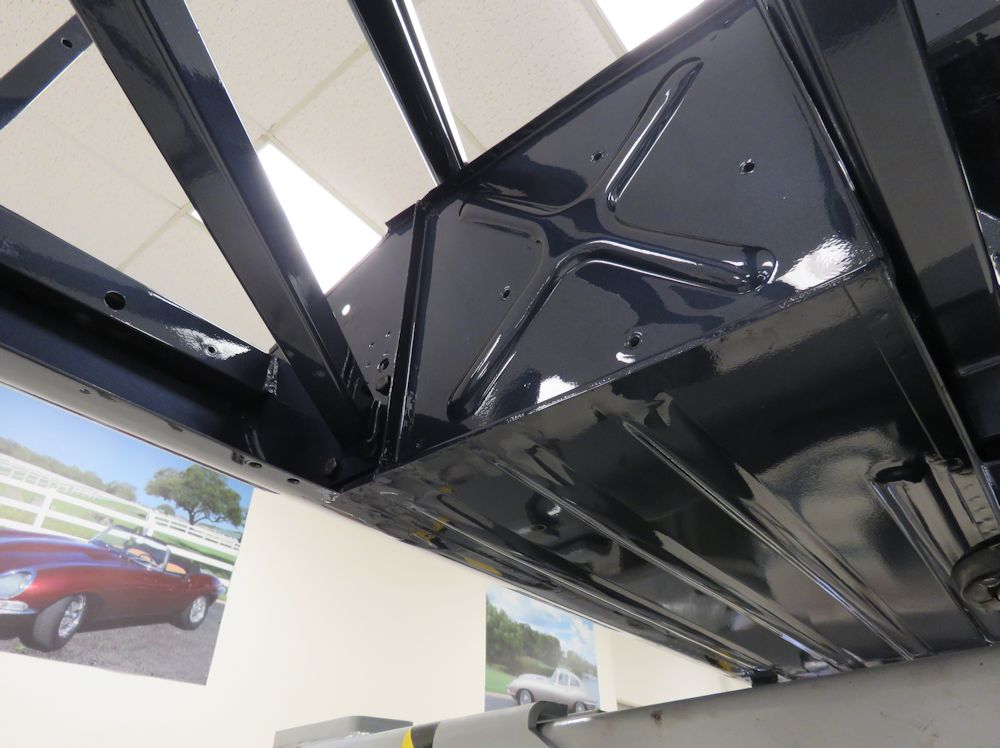
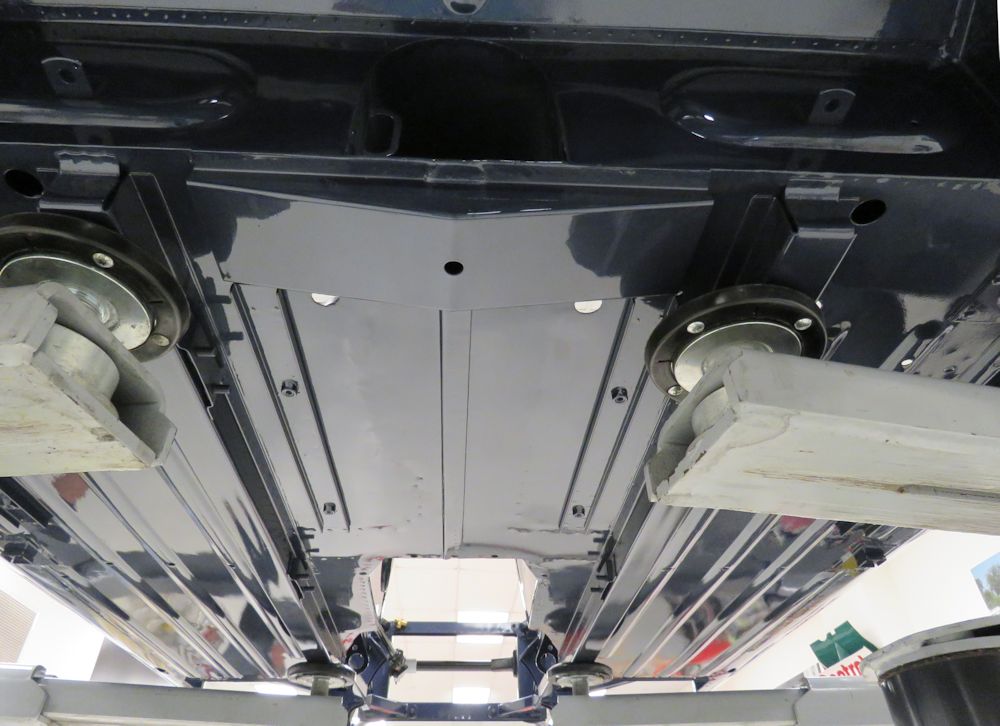
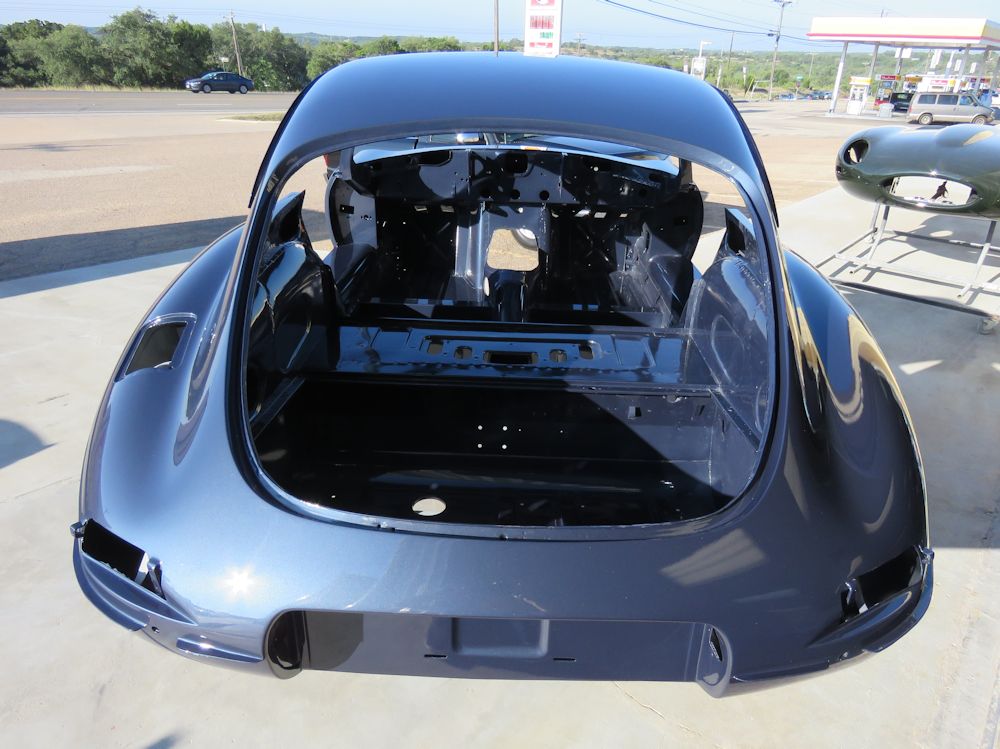
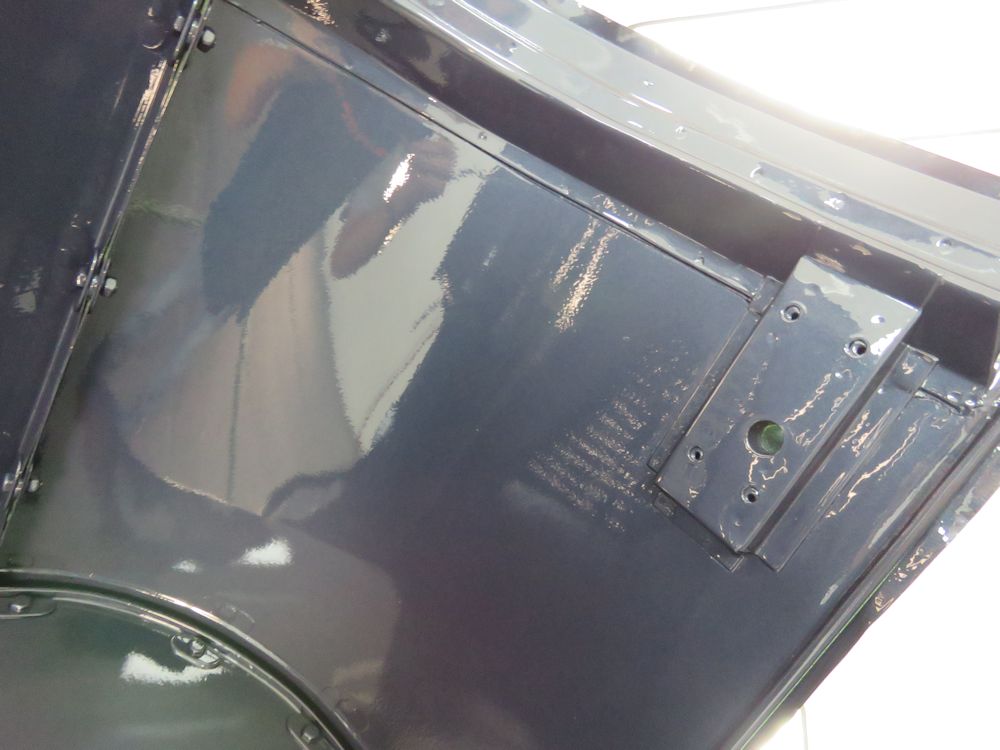
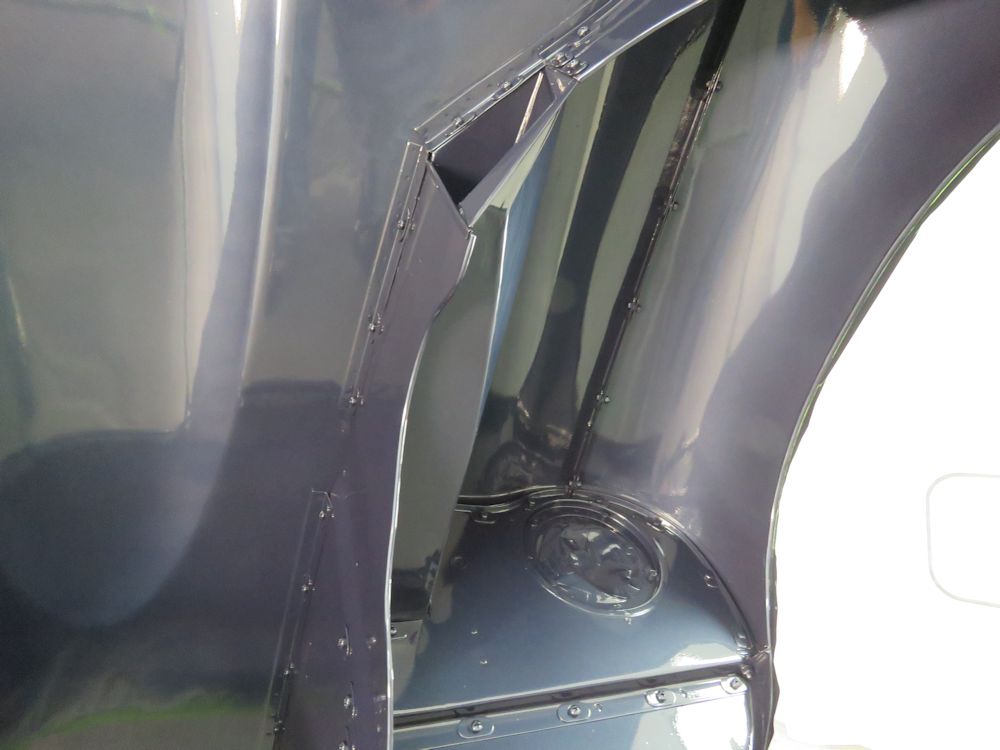
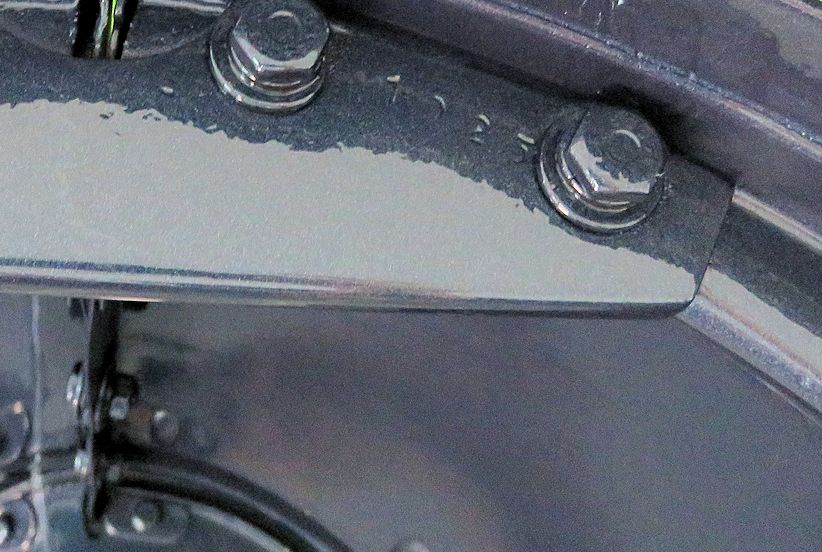
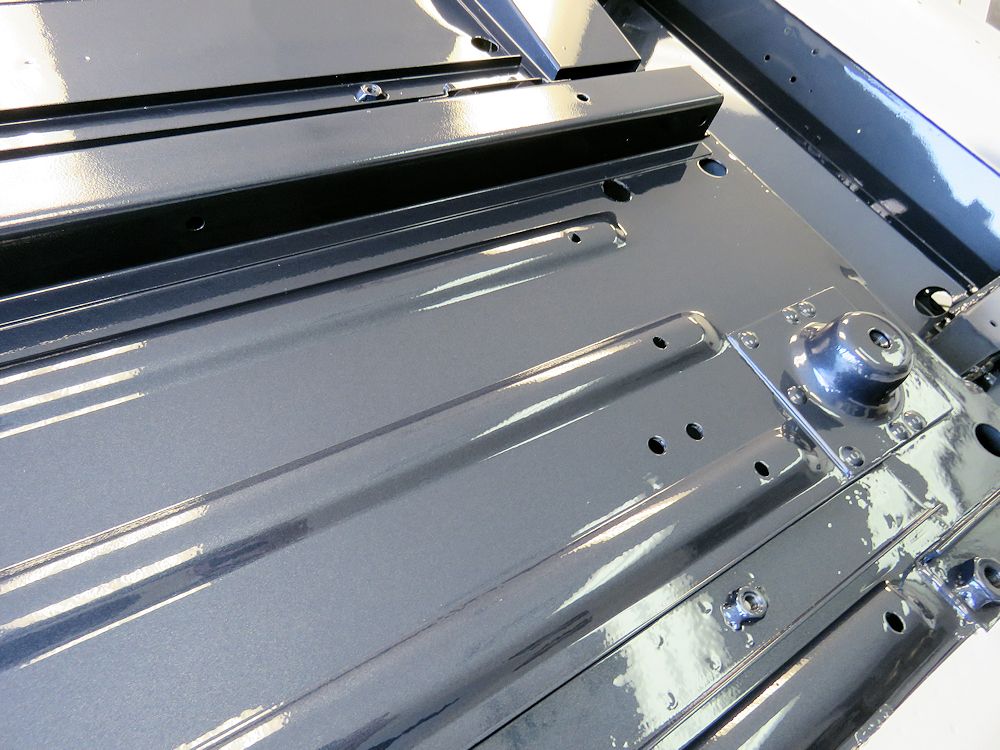
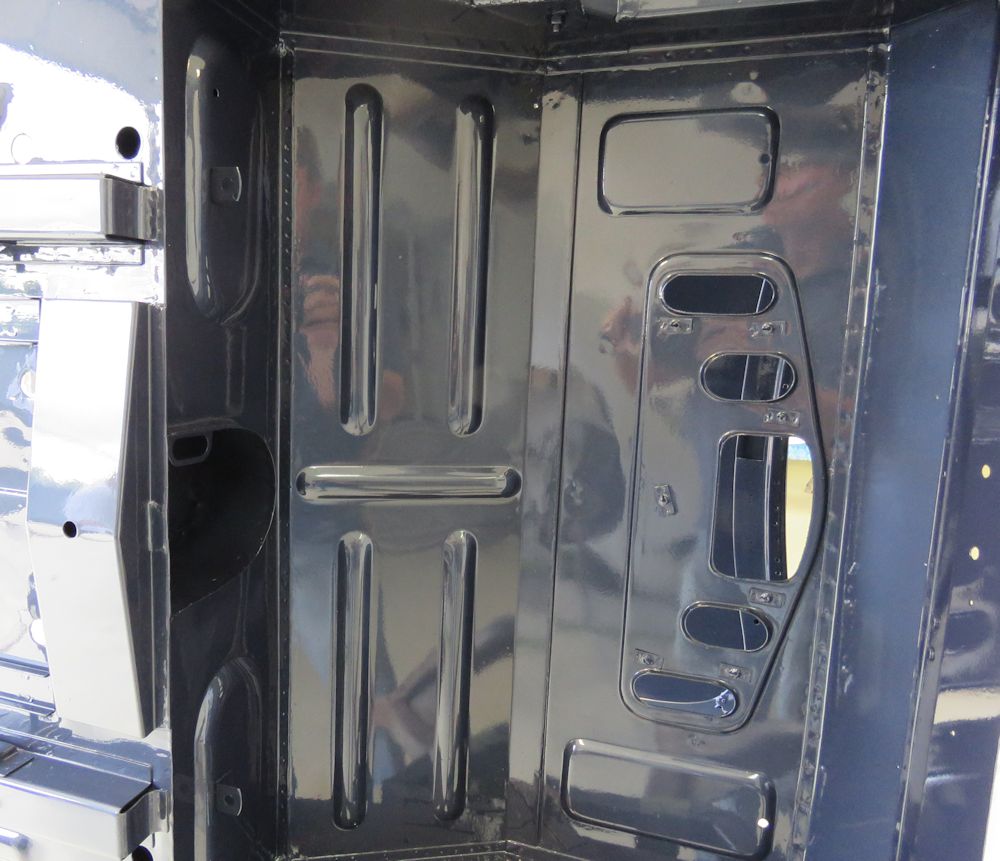
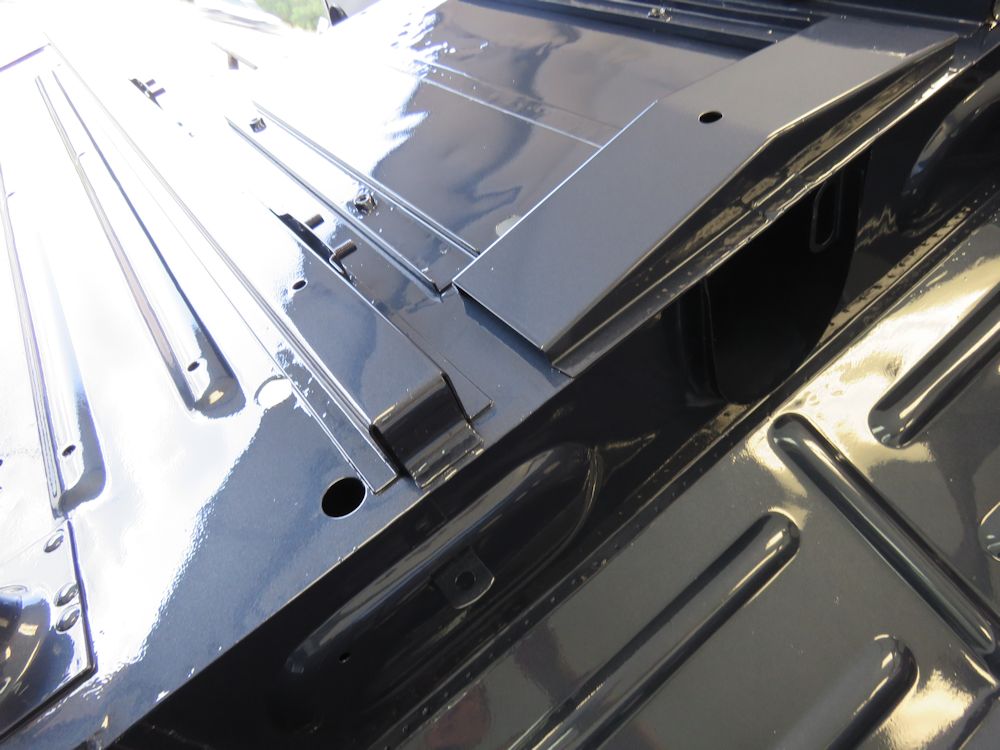
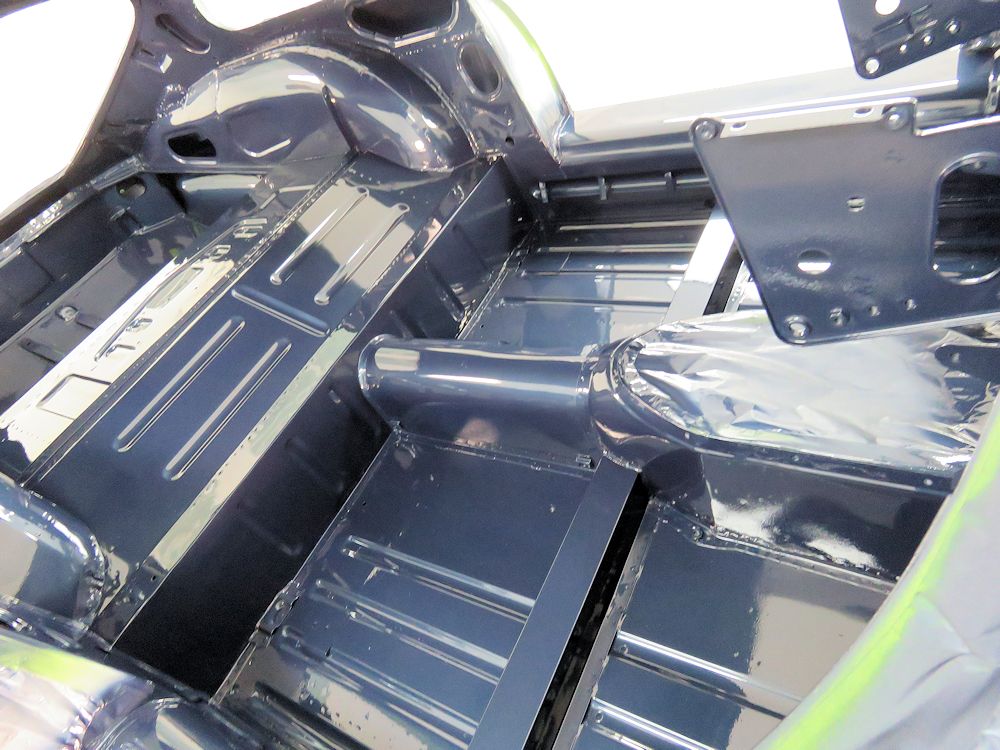
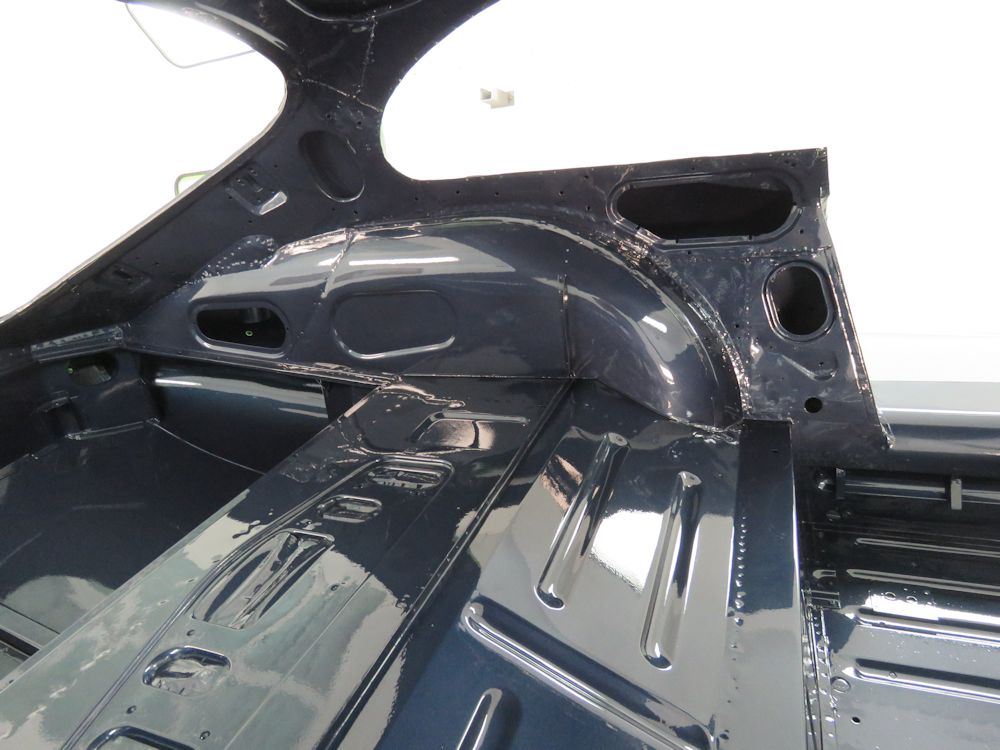
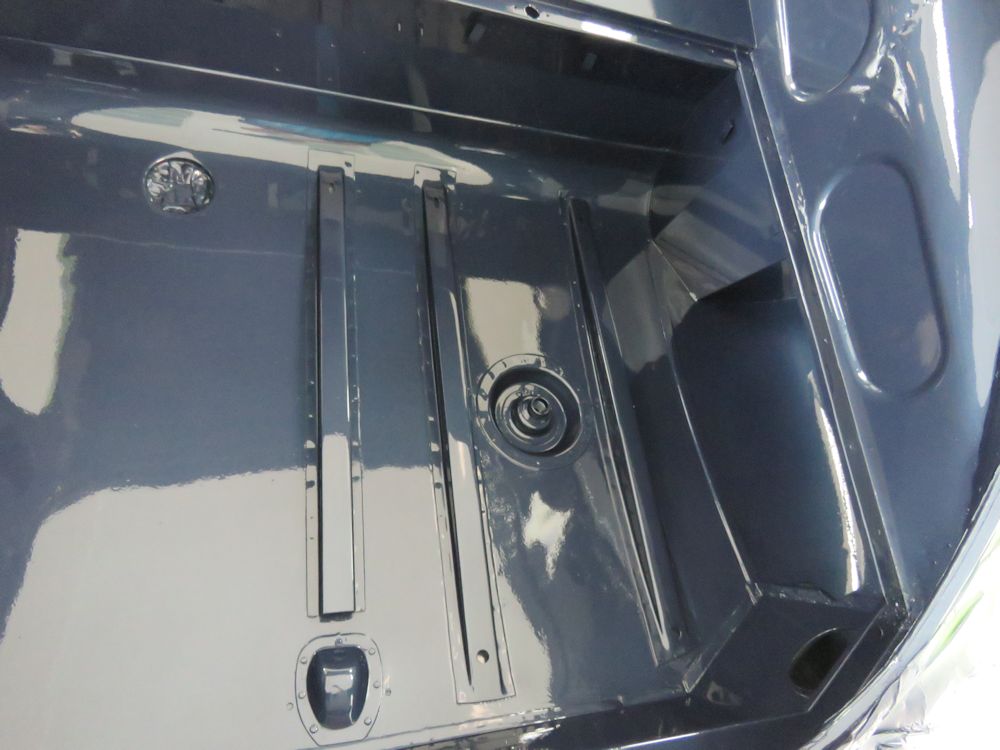
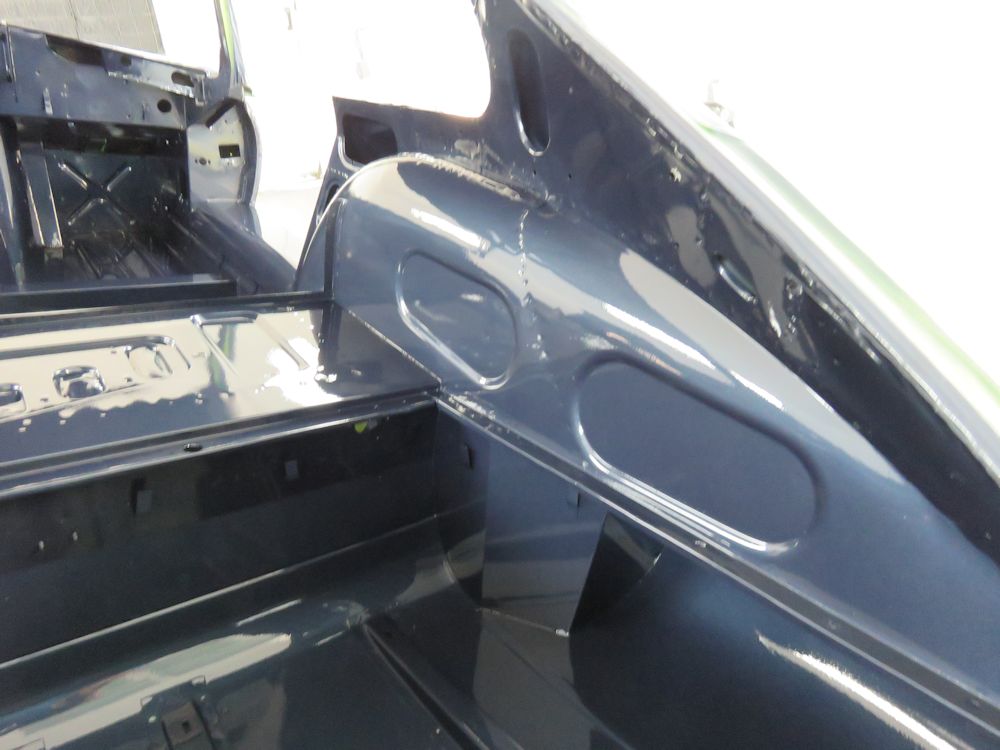
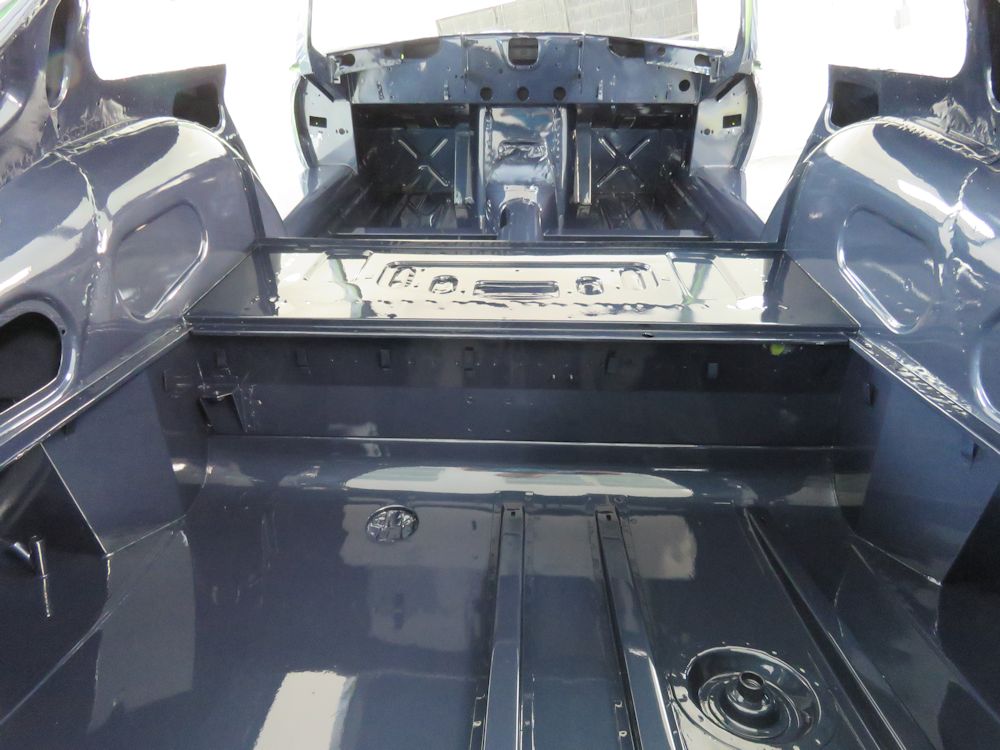
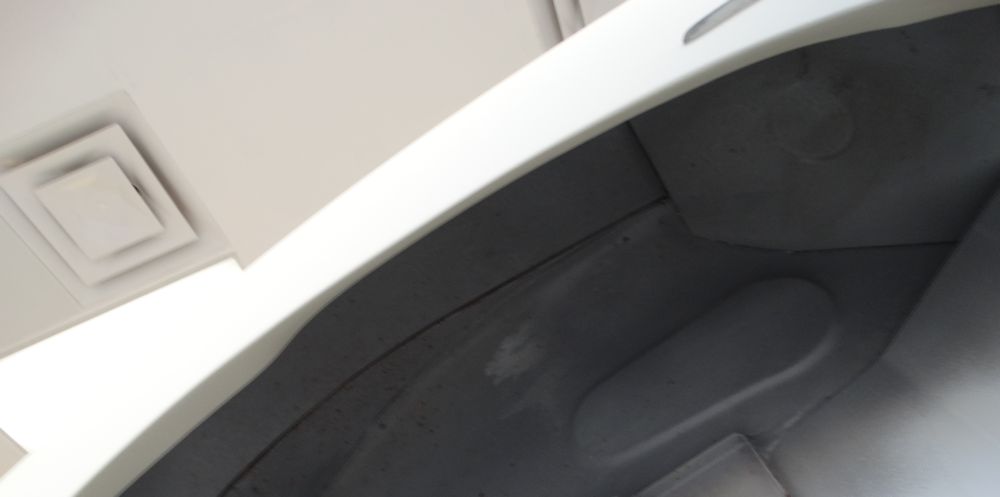
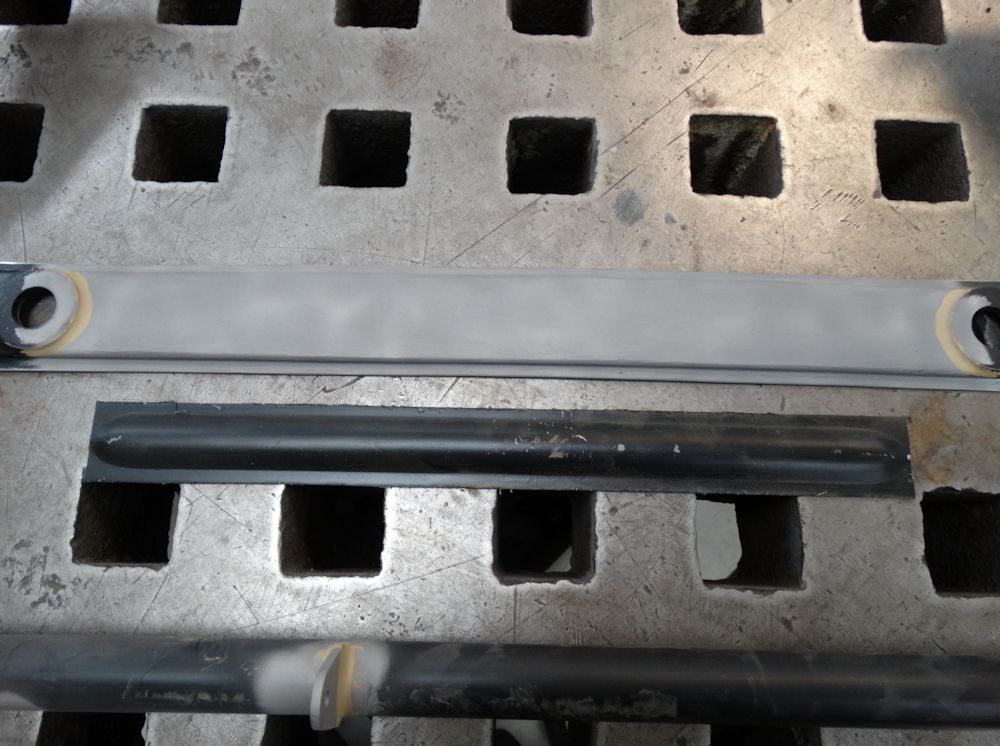
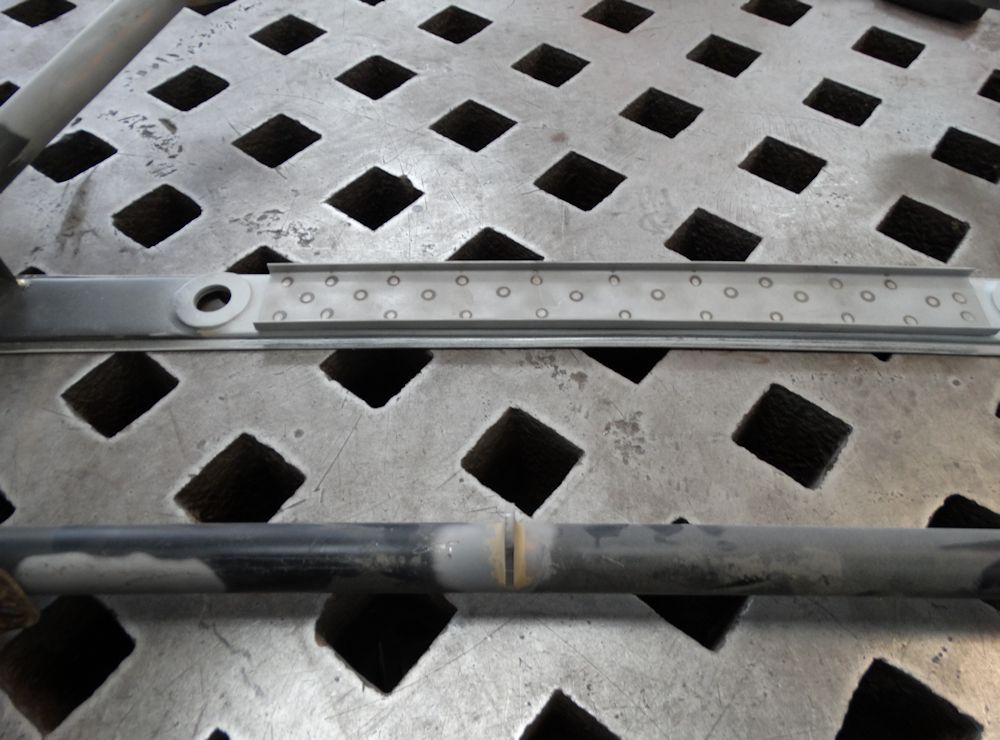
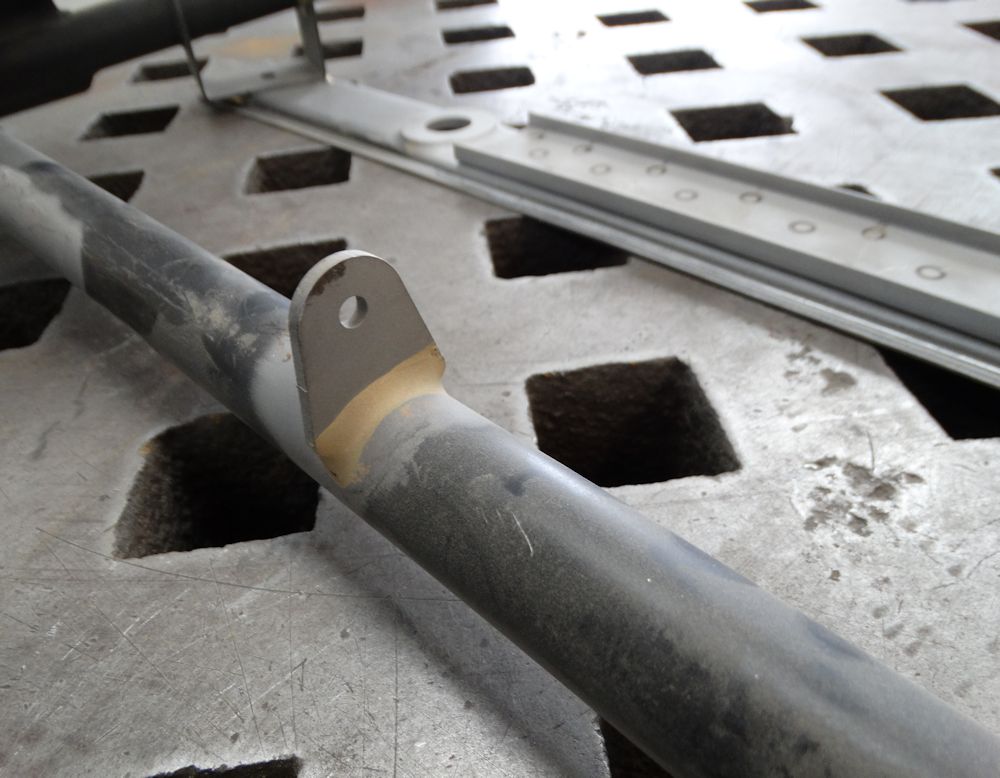
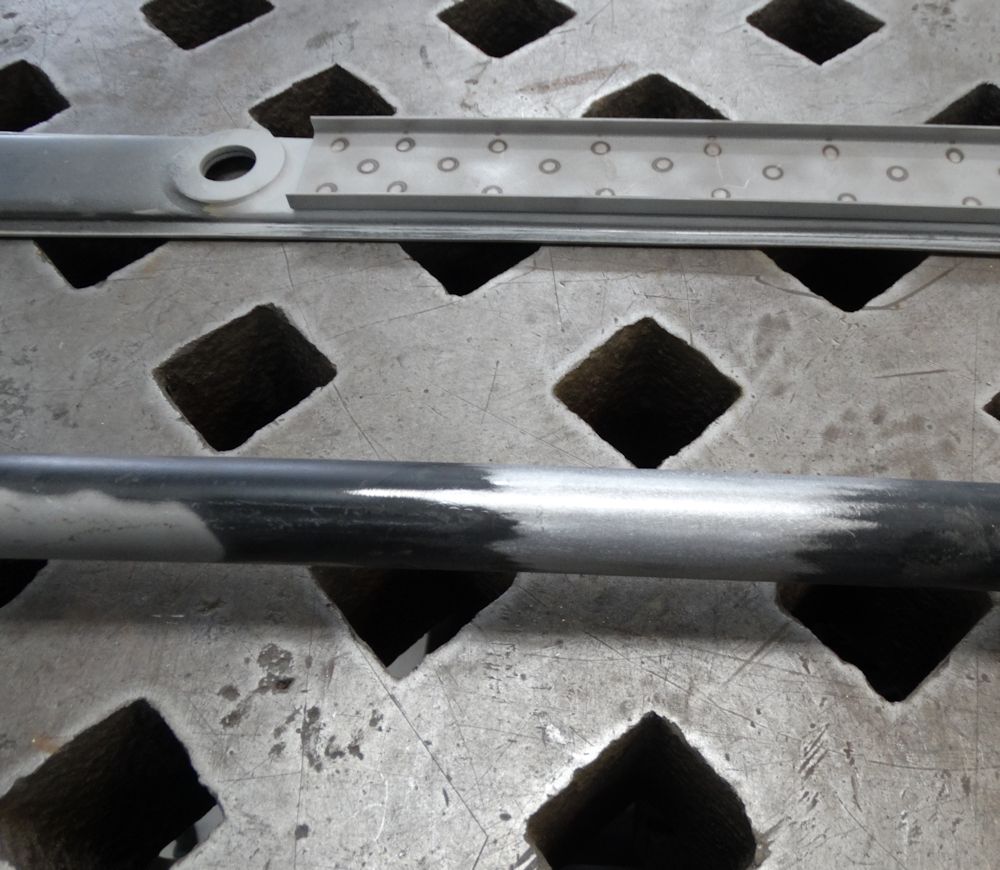
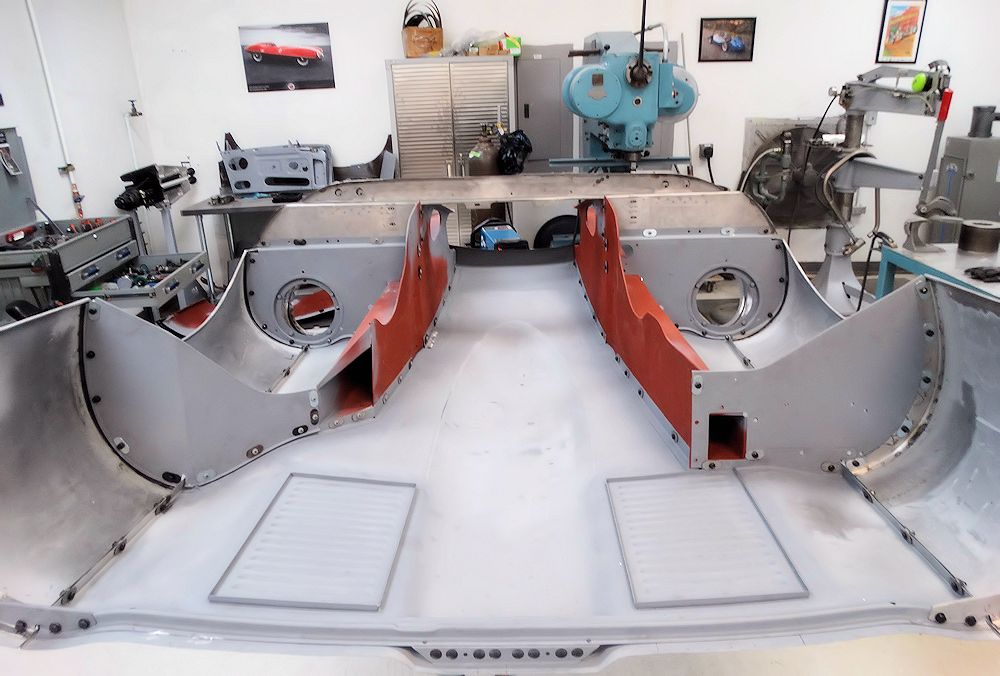
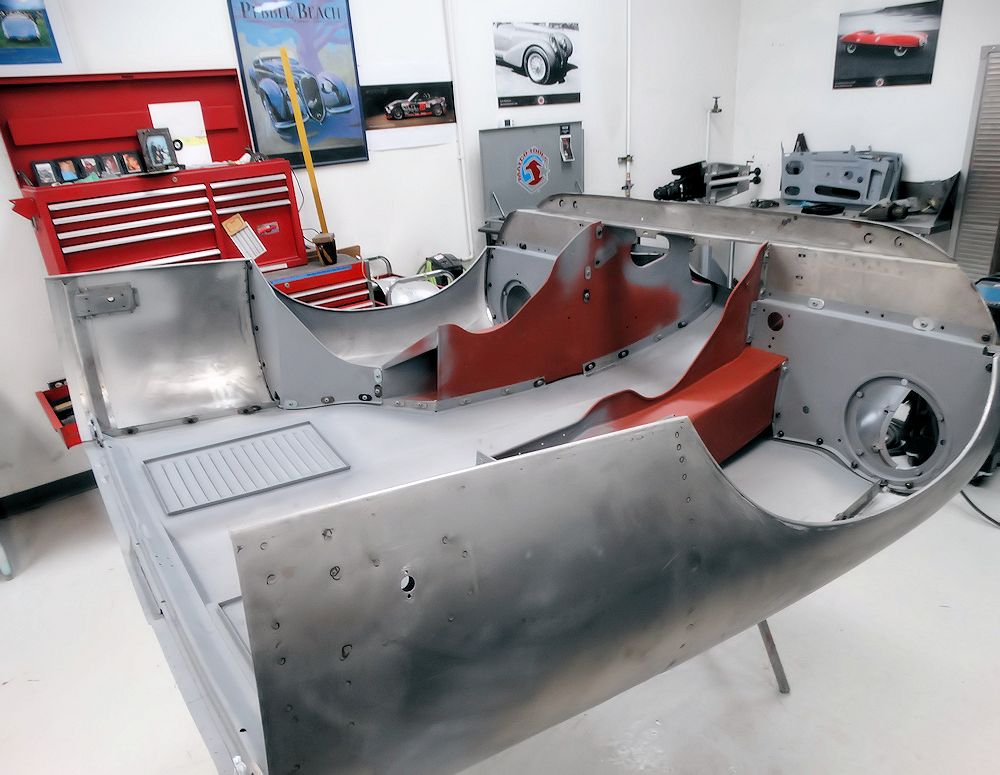
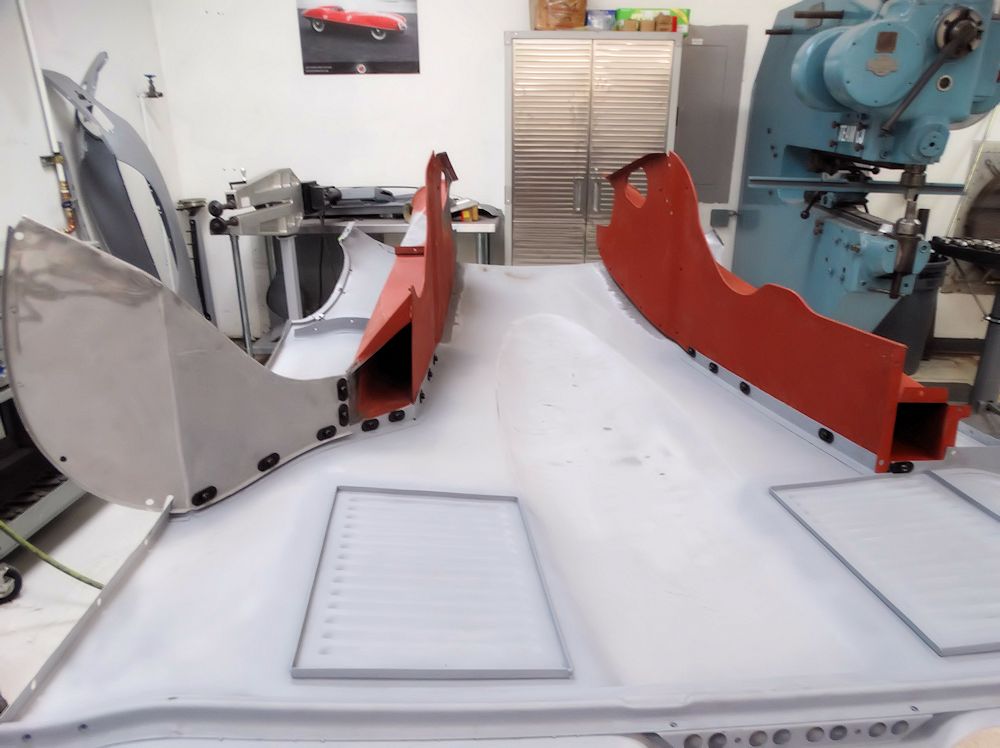
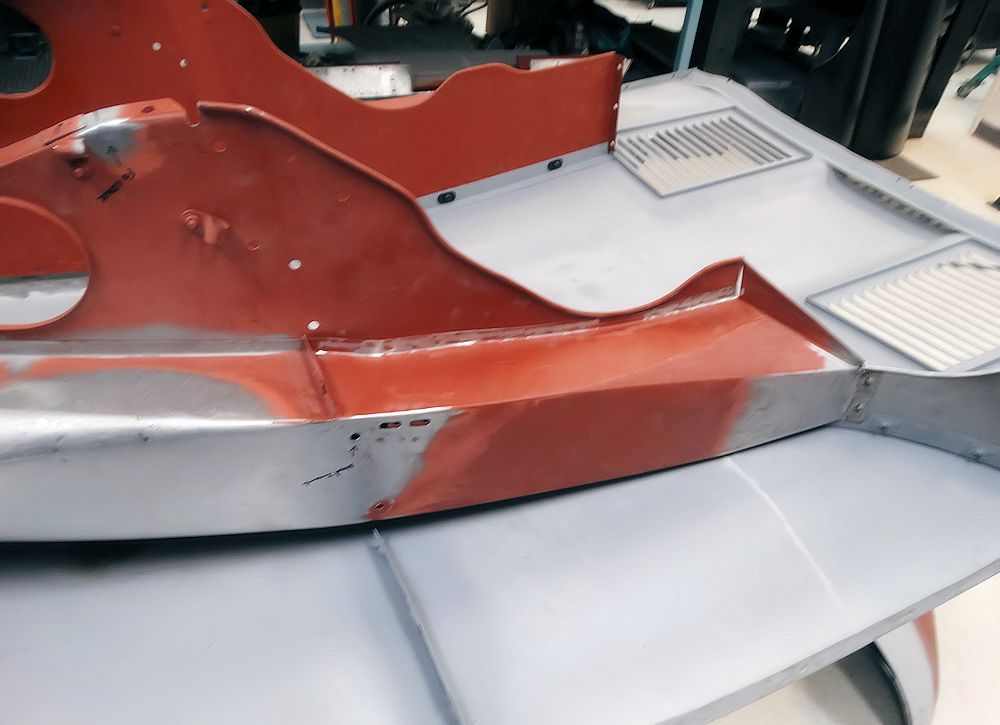
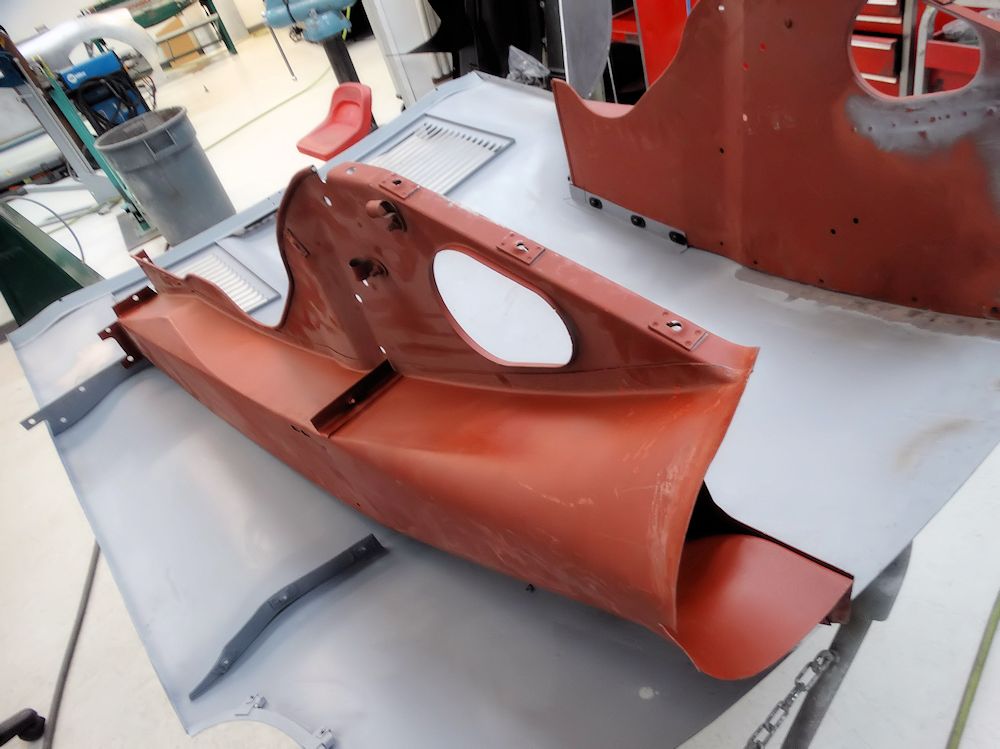
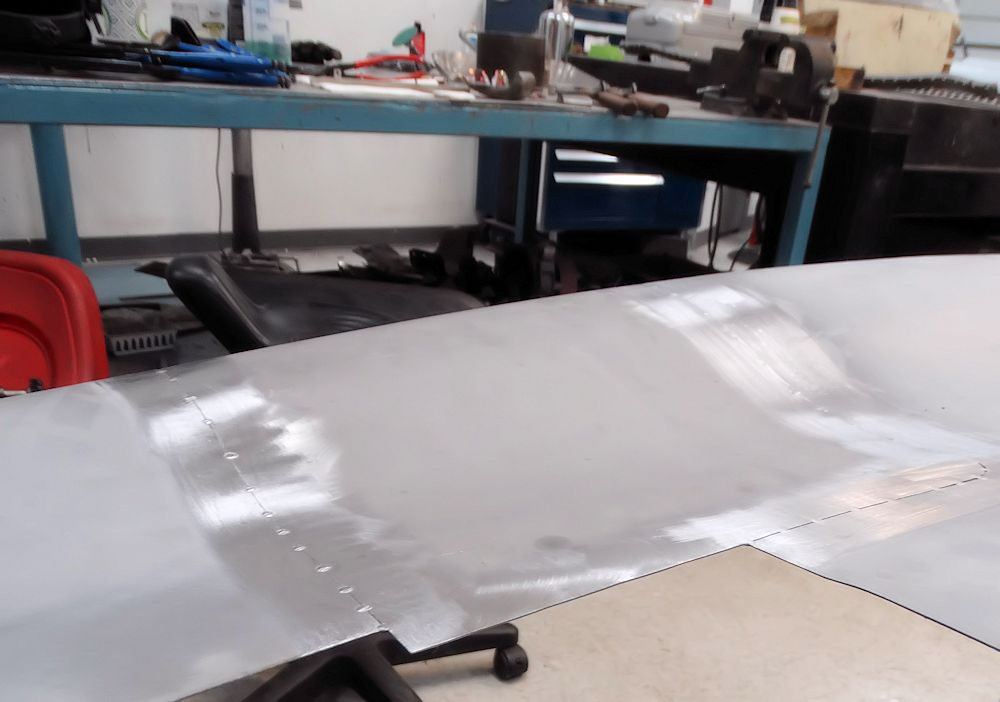
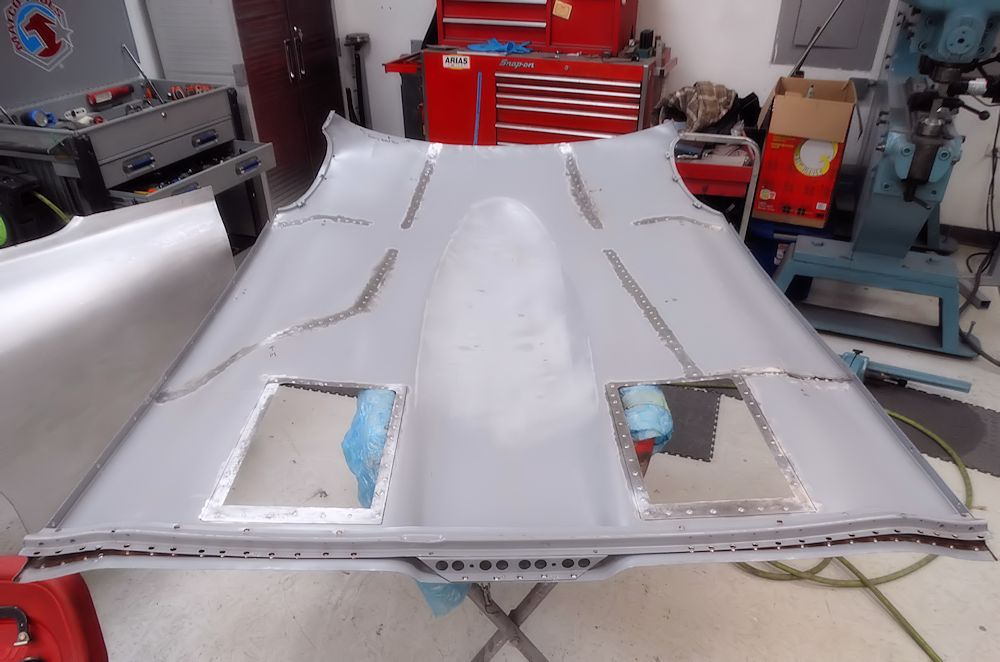
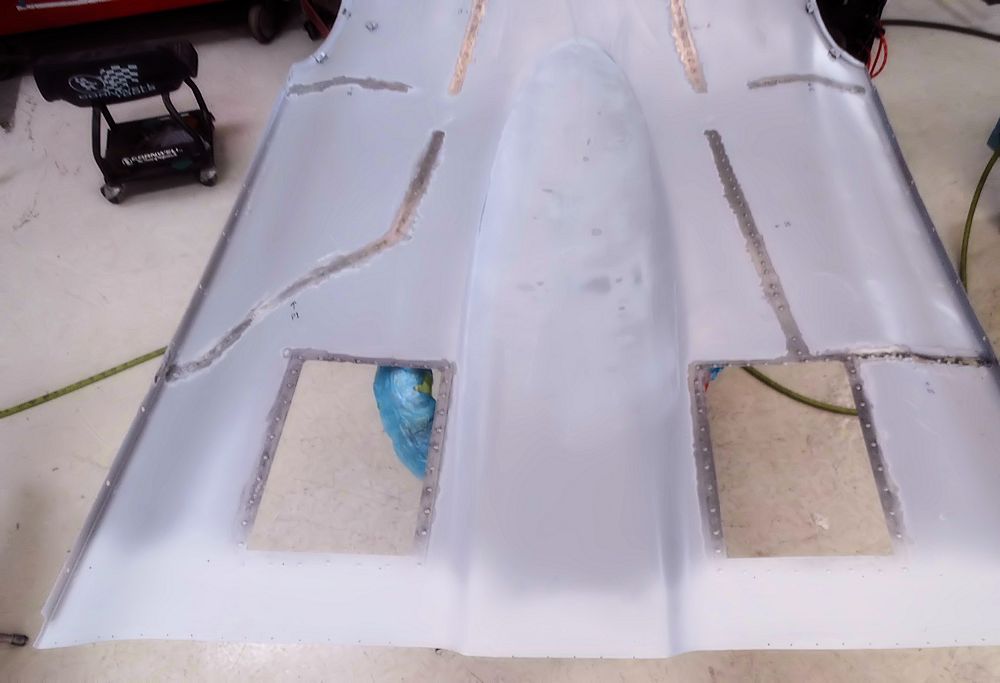
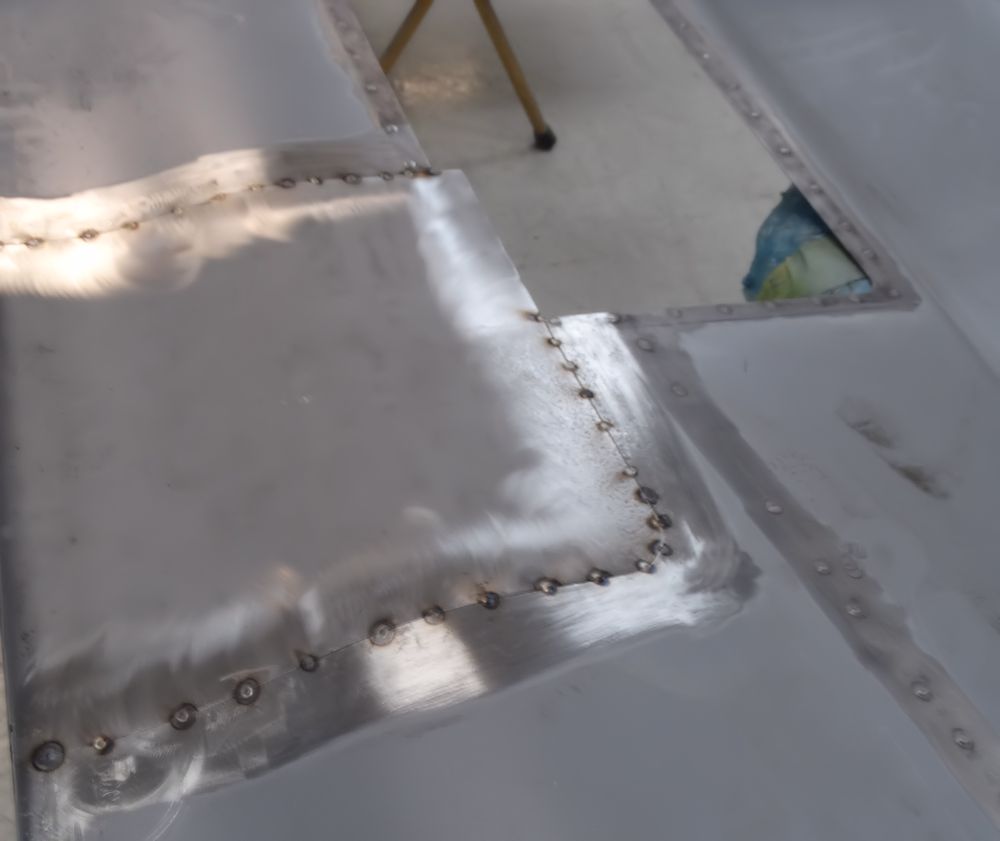
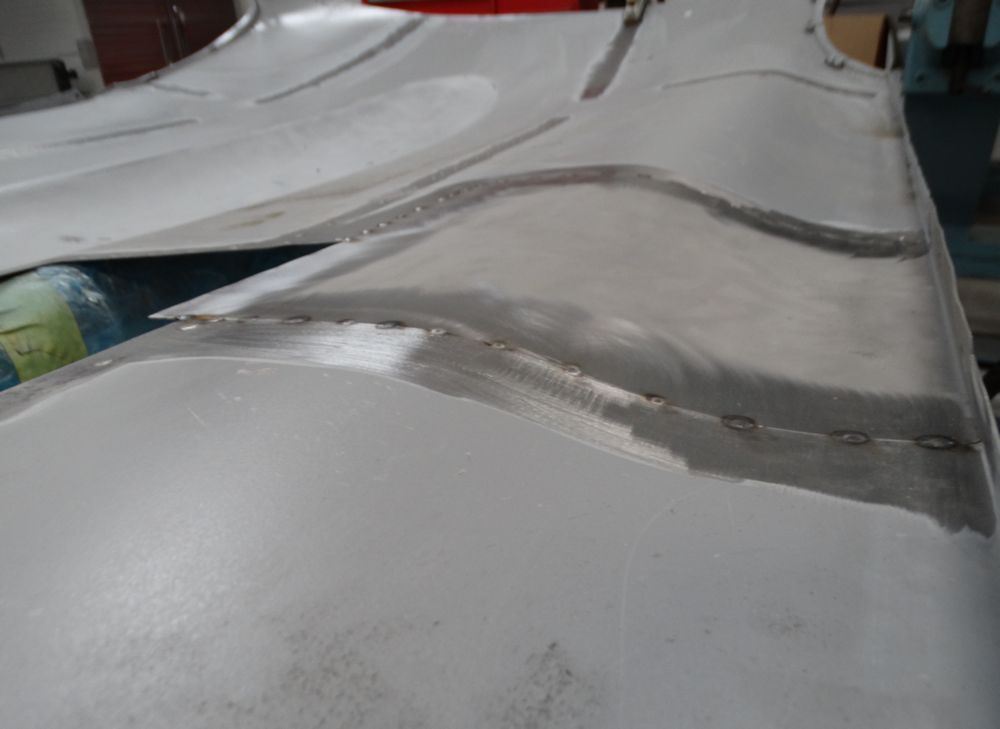
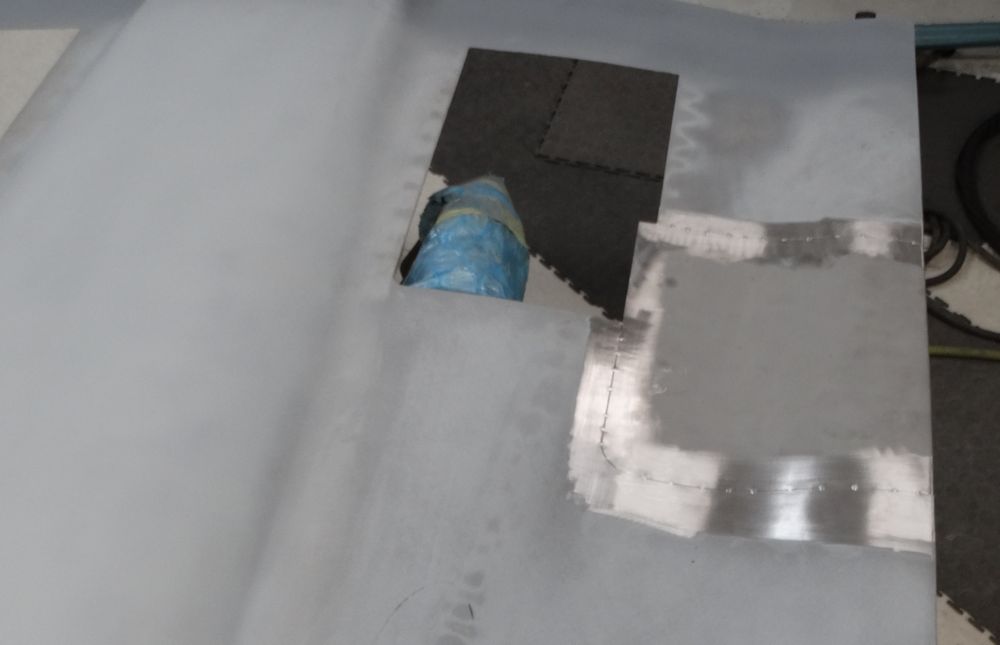
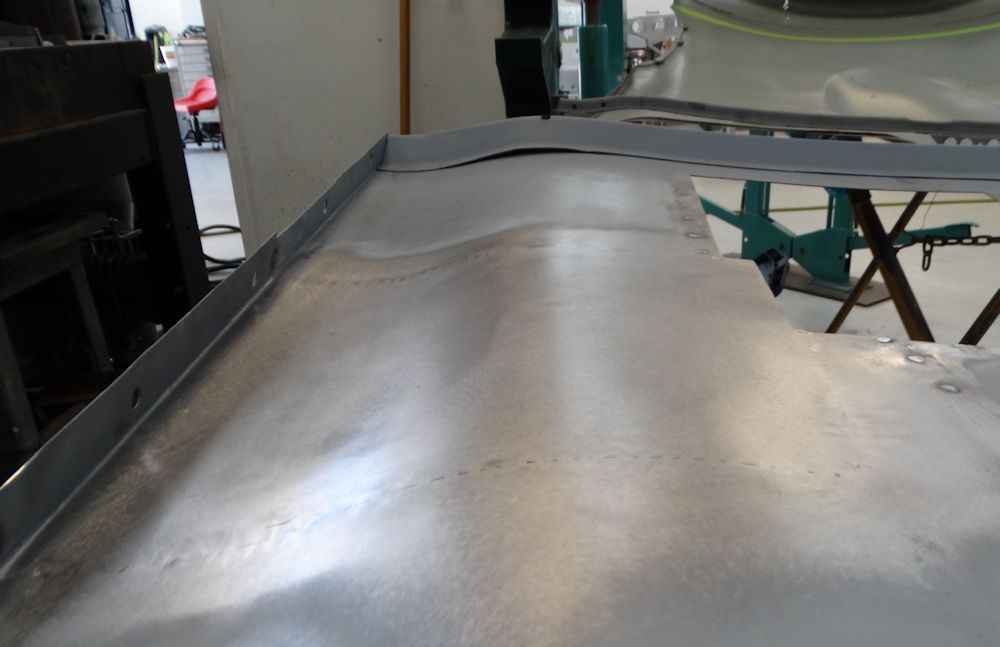
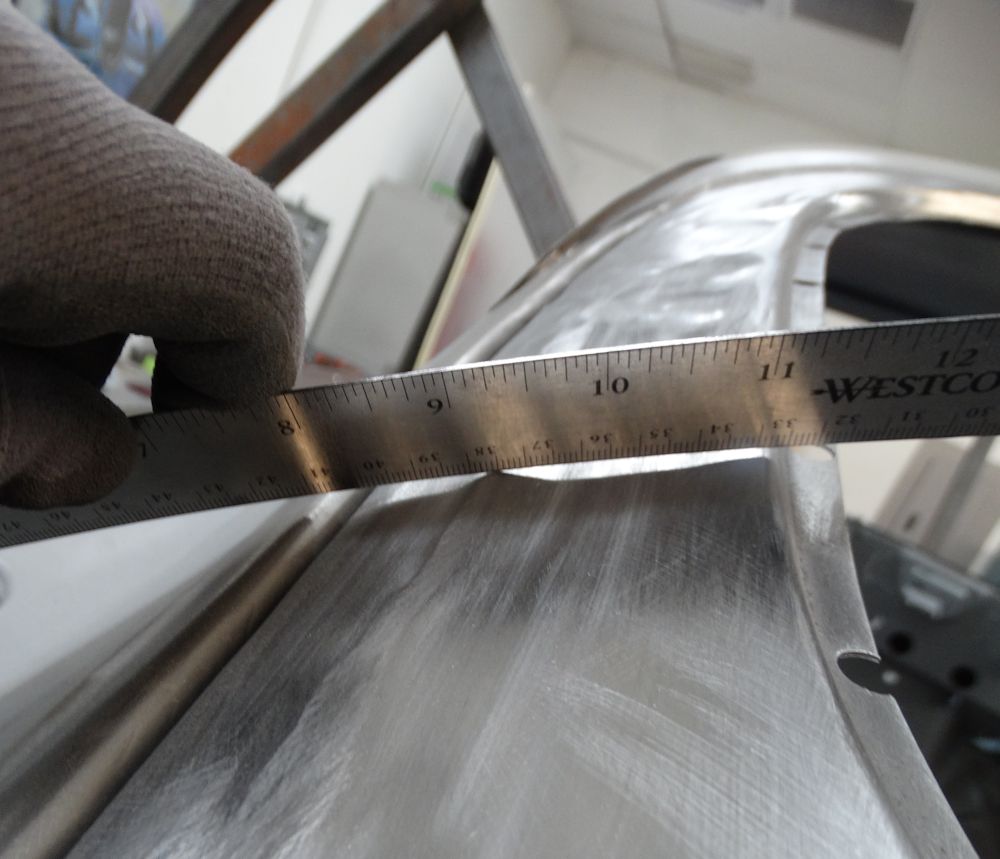
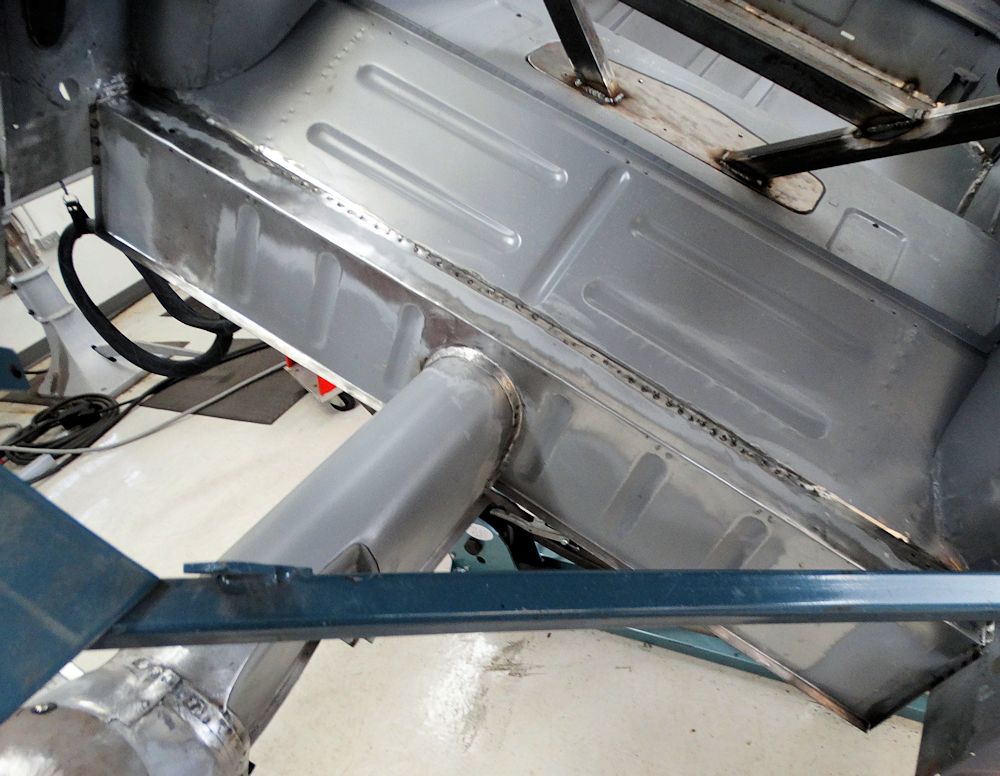
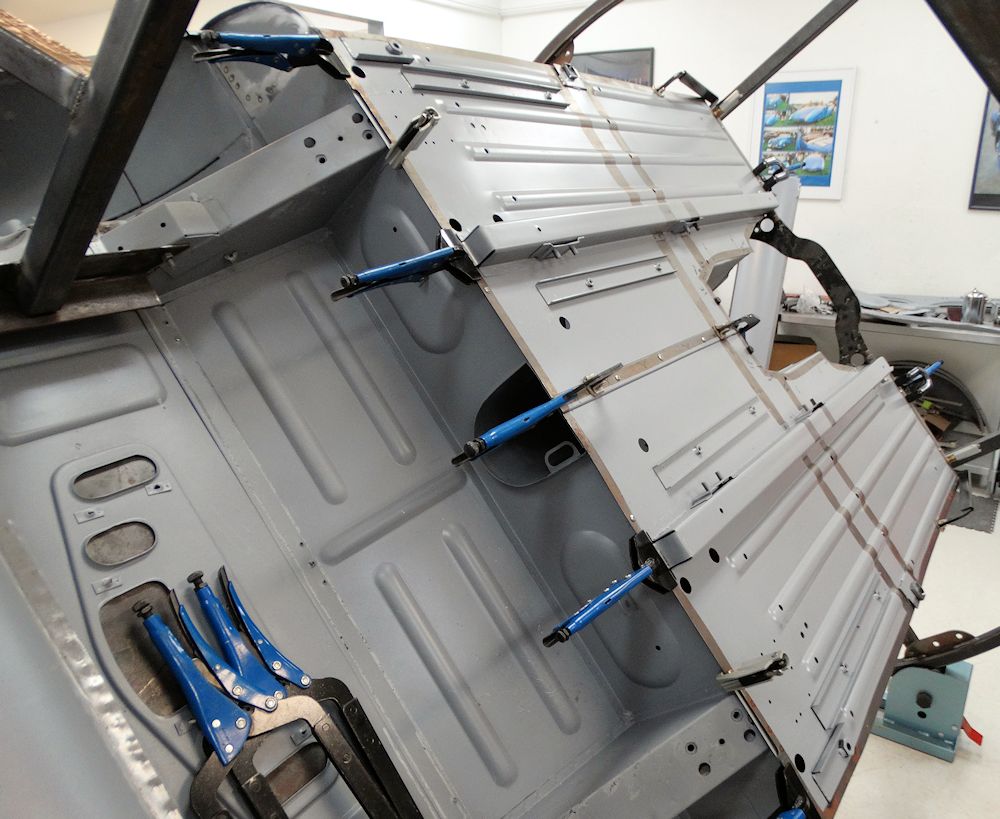
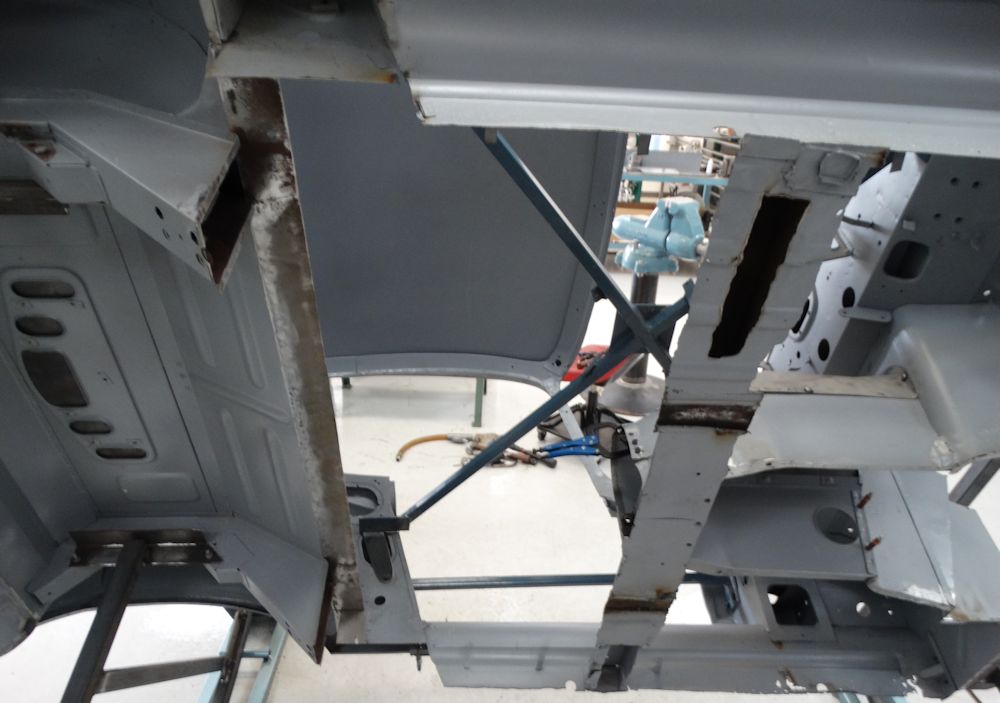
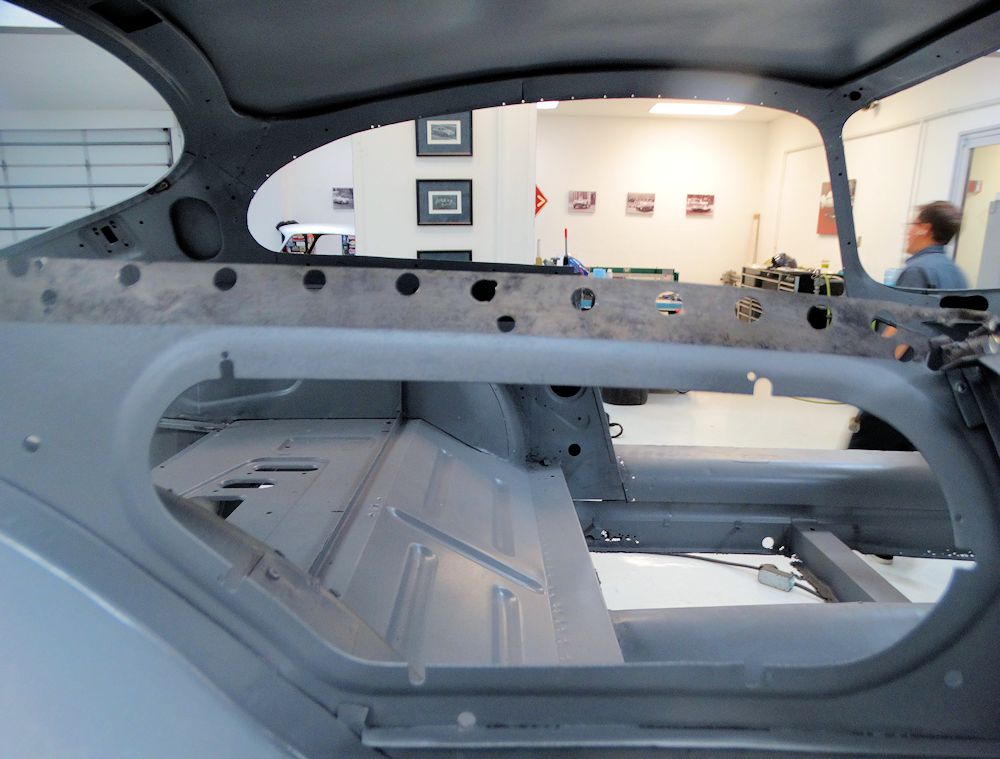
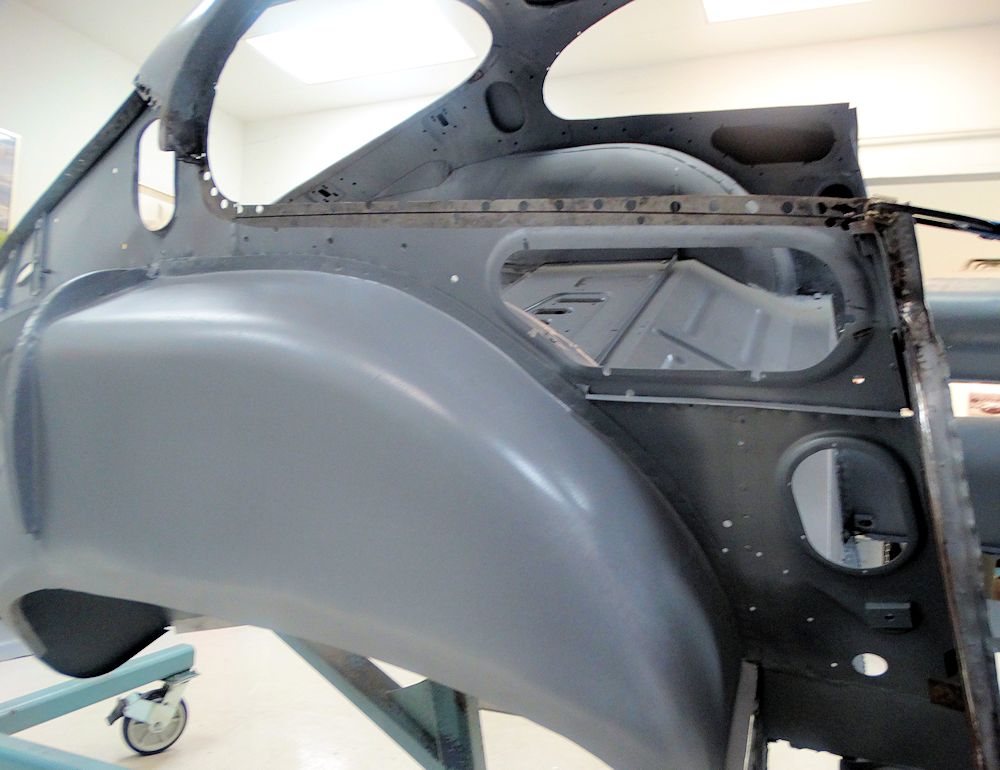
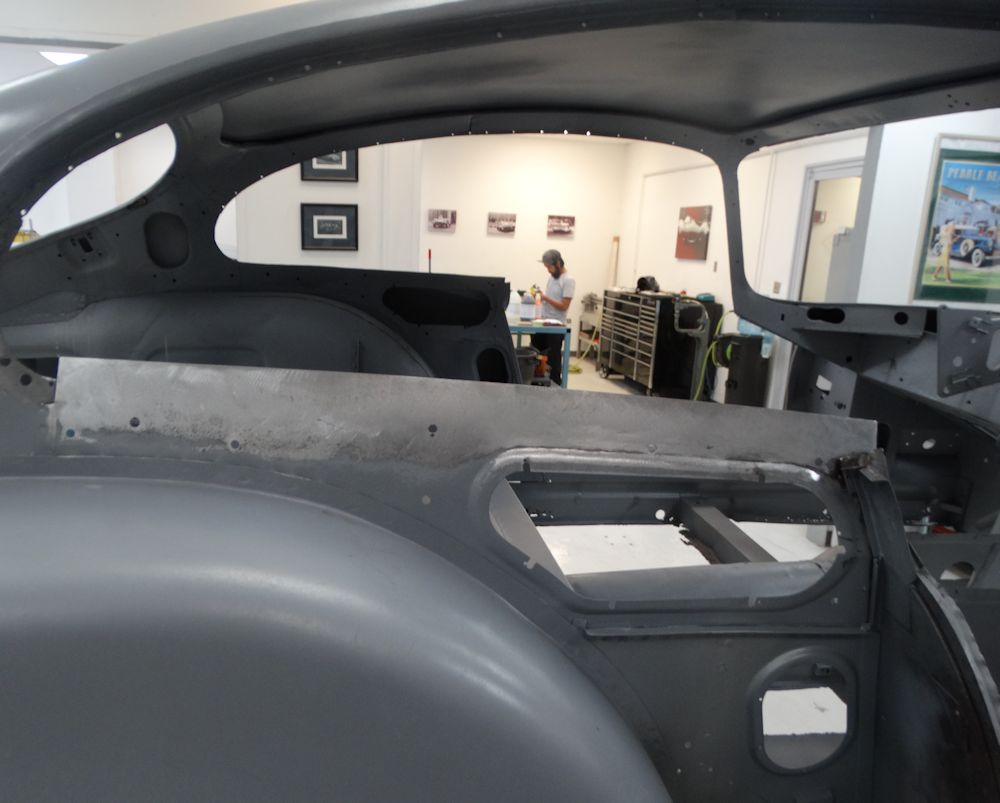
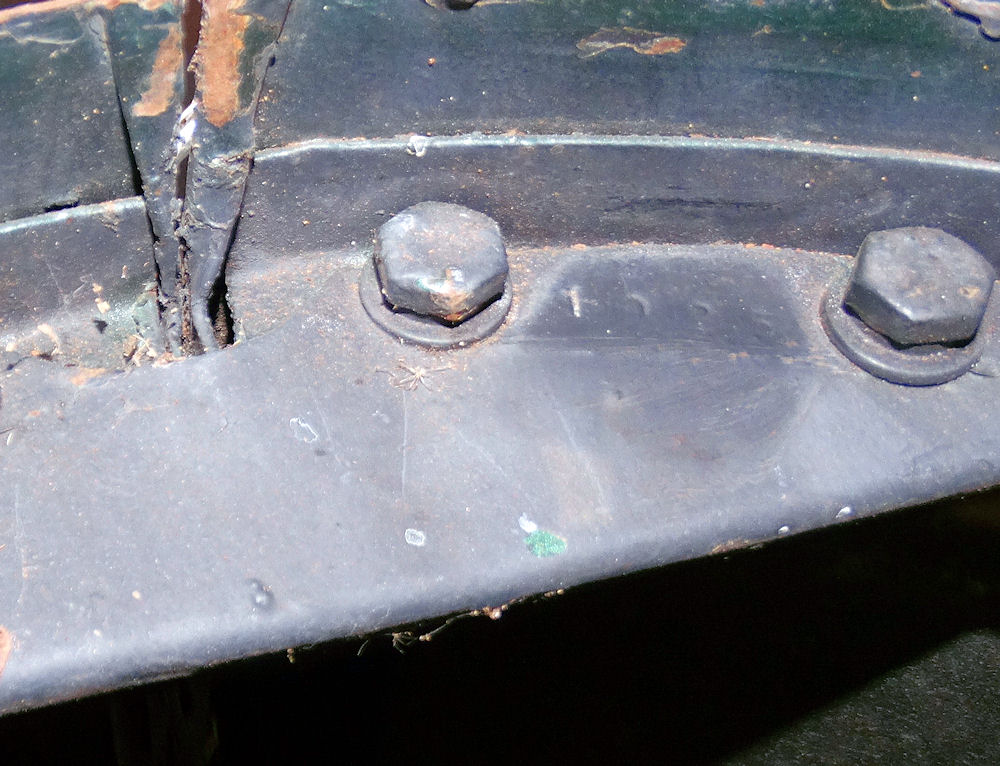
Finished photos of the underside of the car
 |
 |
 |
 |
 |
 |
 |
 |
 |
 |
 |
 |
 |
|
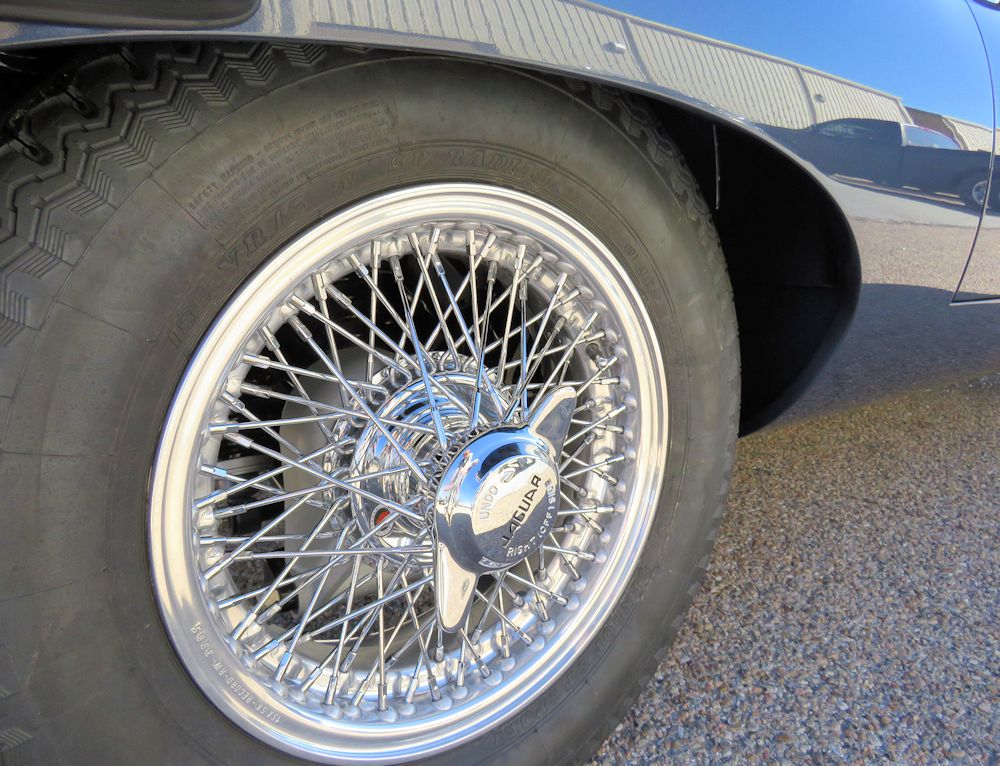
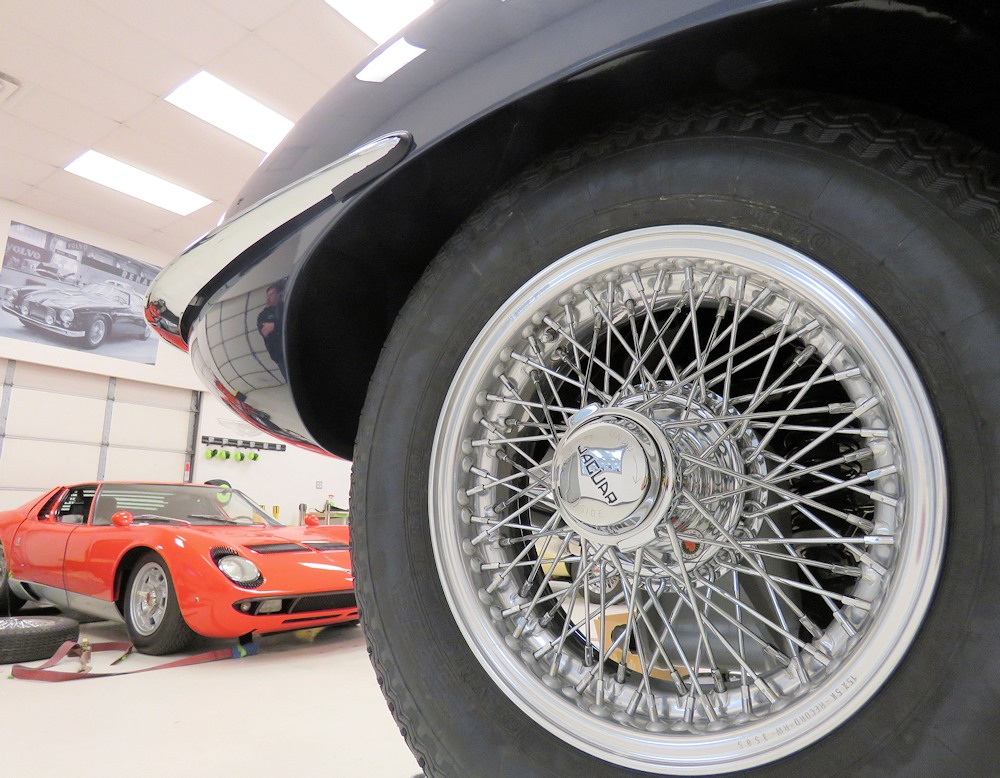
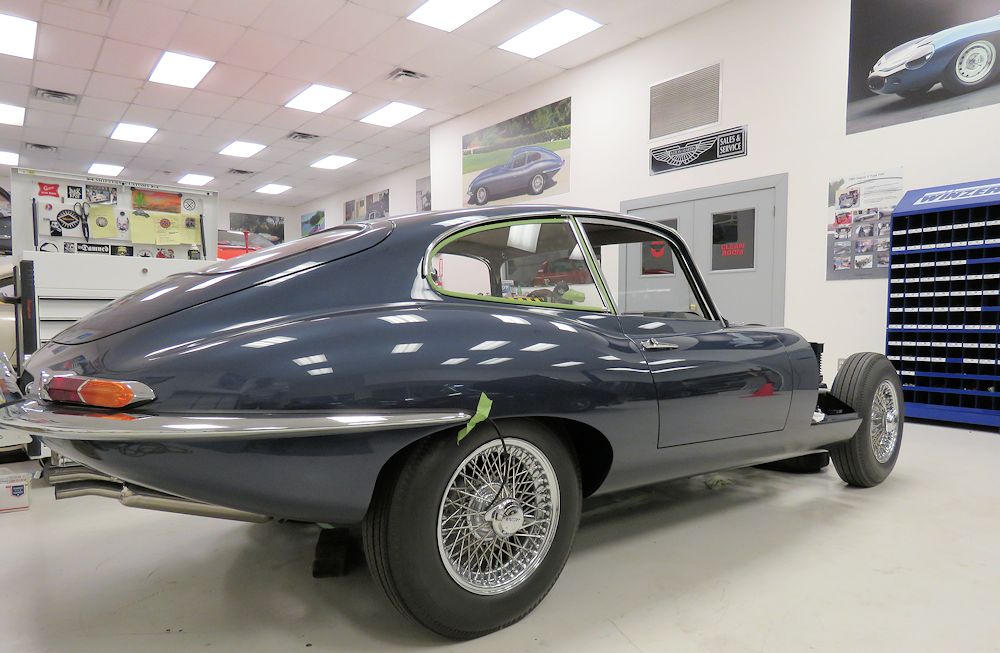
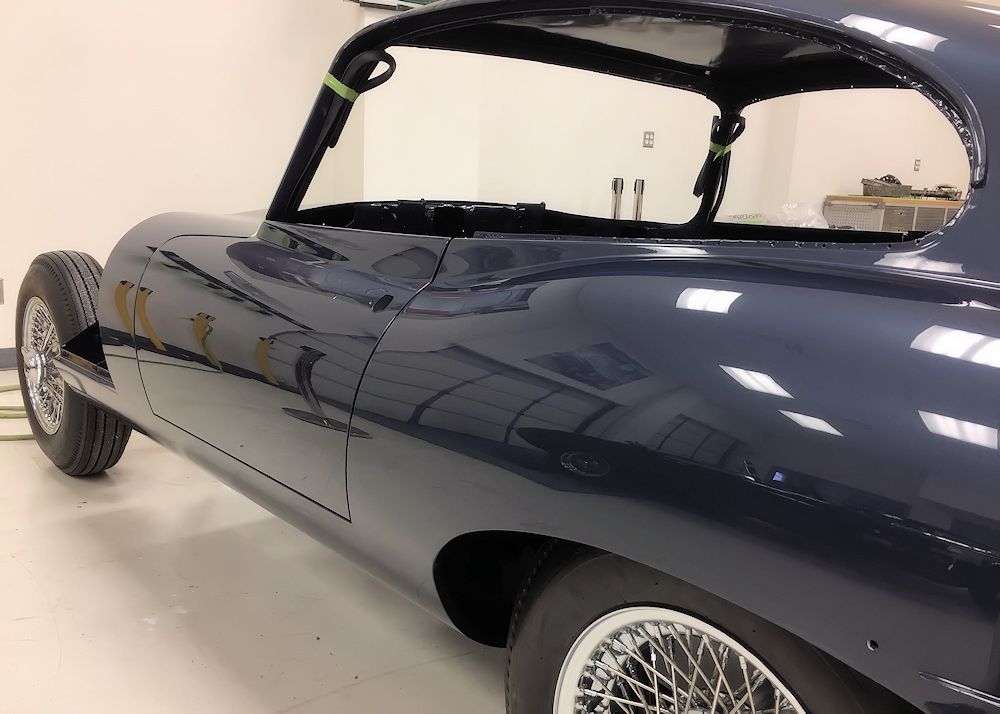
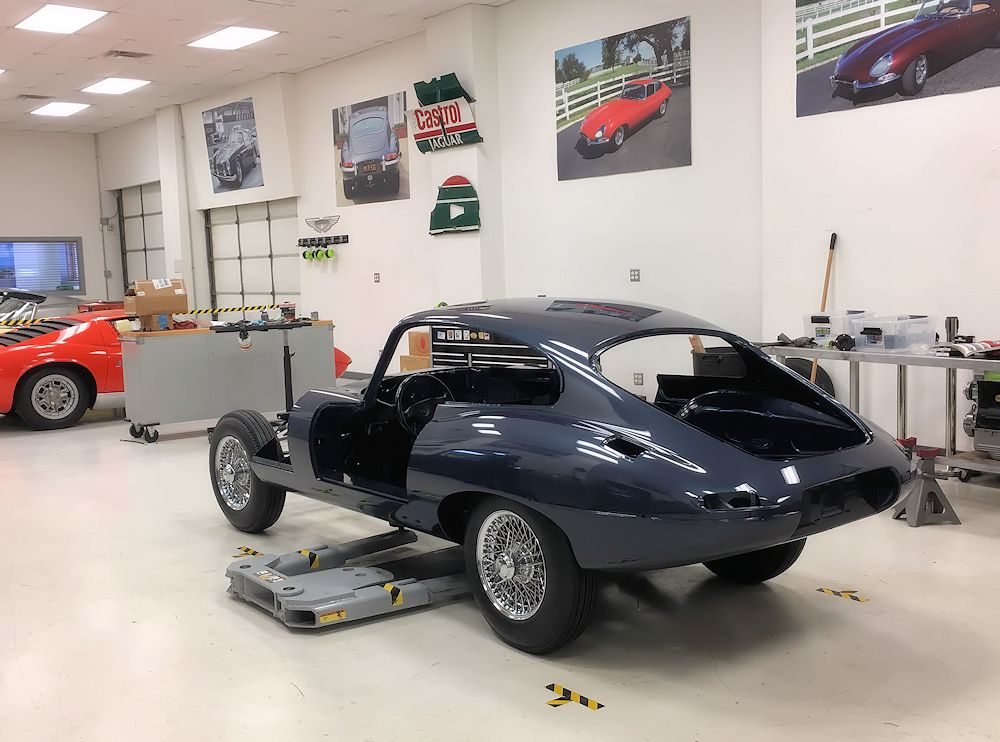
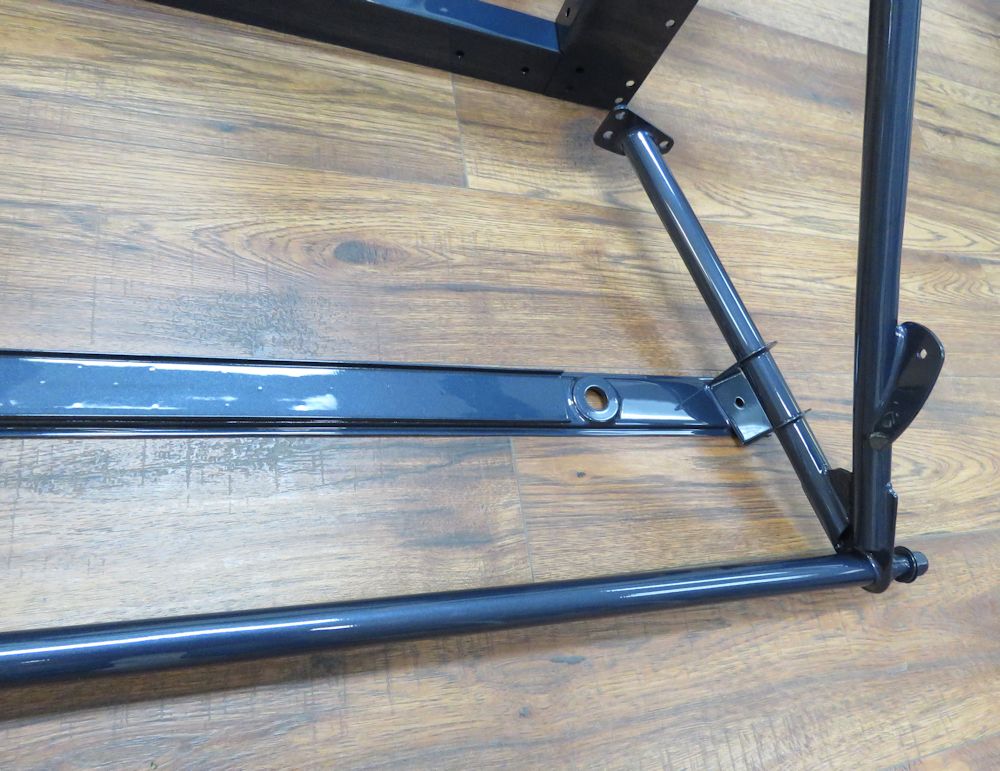
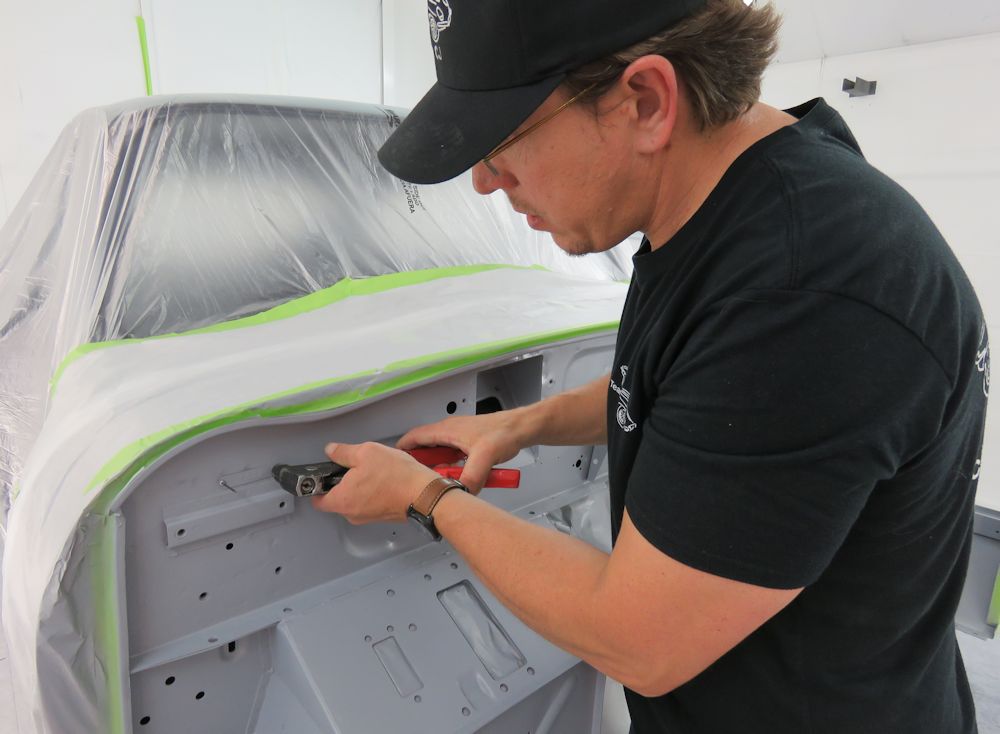
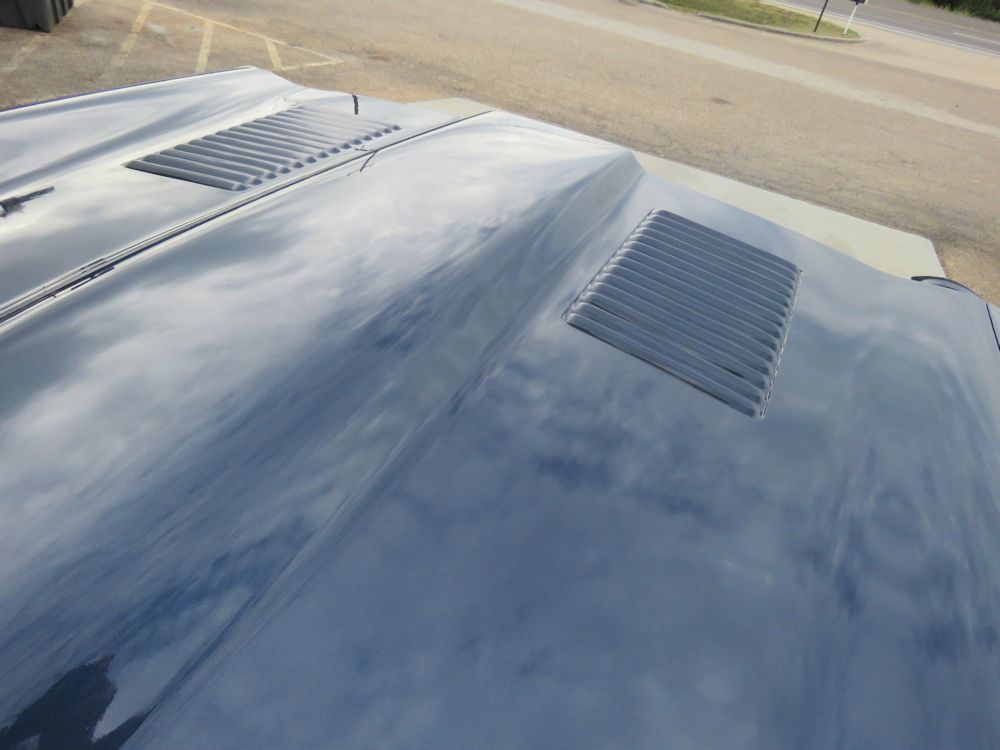
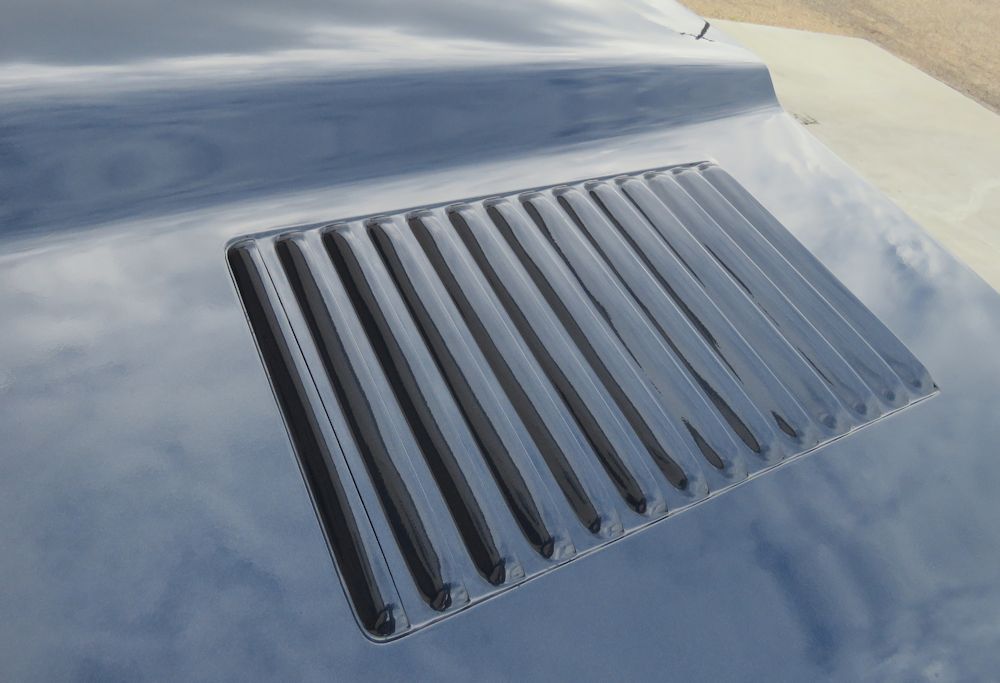
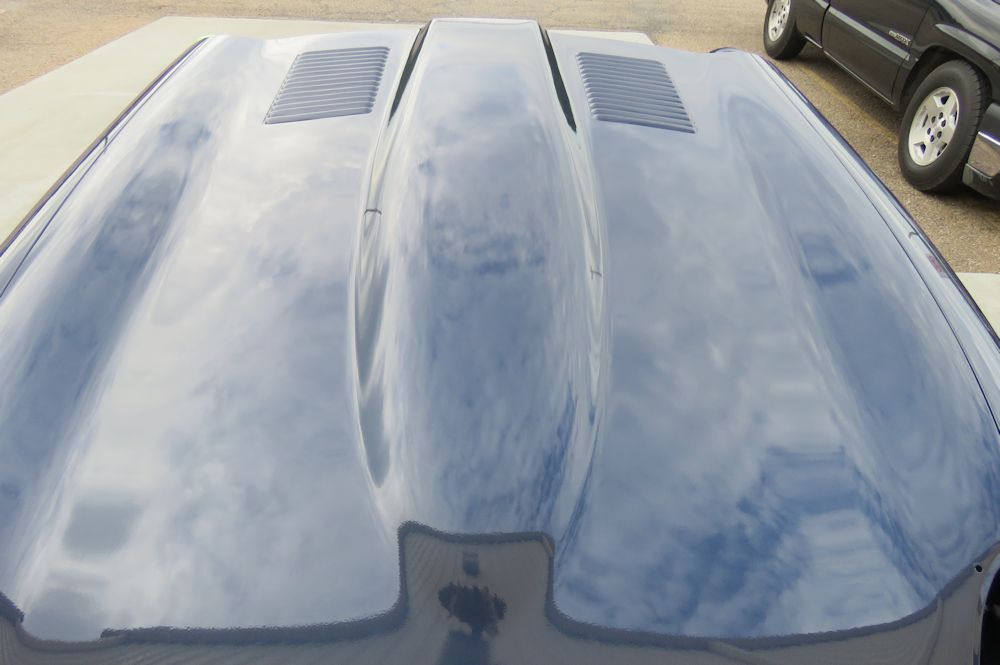
We have been pushing really hard to get this fantastic project finished this week, and we almost made it! We should certainly be able to wrap everything up next week. Earlier today we road tested the car and it performed flawlessly. I snapped the pictures below when Alex was checking the ride height and stance after adjusting the torsion bars. In these photos the car is sitting on its Borrani wire wheels shod with Dunlop R70 SP radials. We also have a set of traditional wire wheels with bias ply tires for the show ground.
 |
 |
| Checking the stance and ride height after
adjusting the torsion bars |
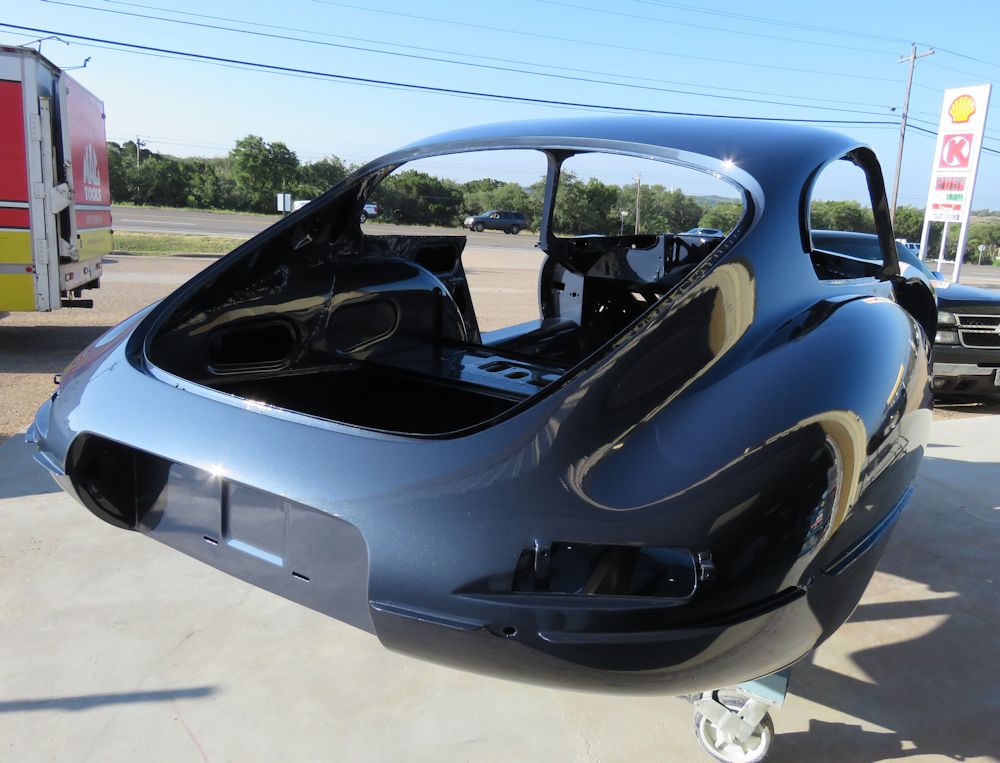
Opalescent Dark Blue looks stunning in the
sunshine |
 |
 |
 |
 |
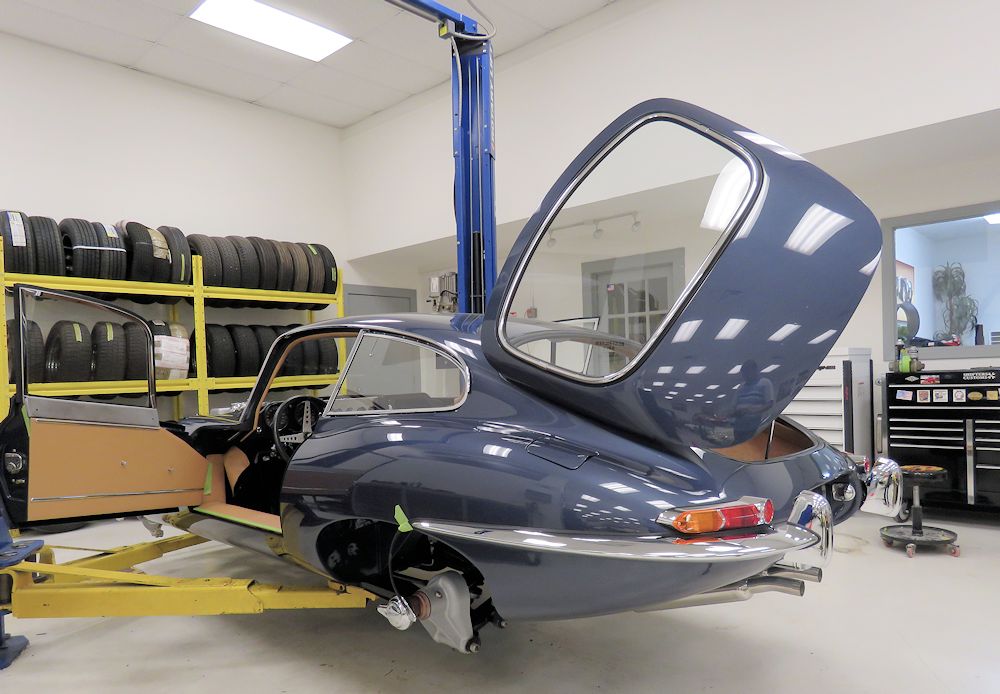
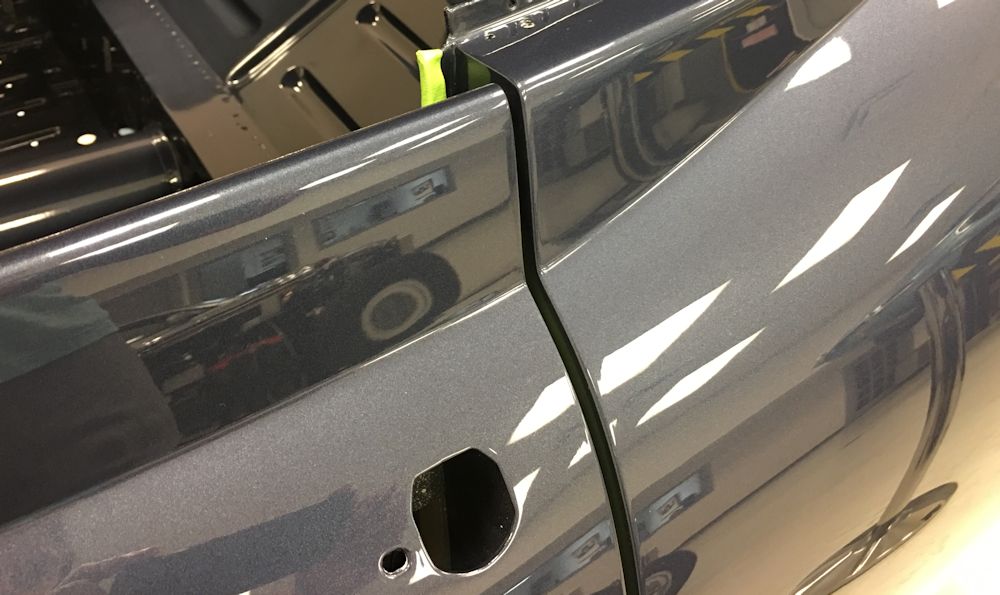
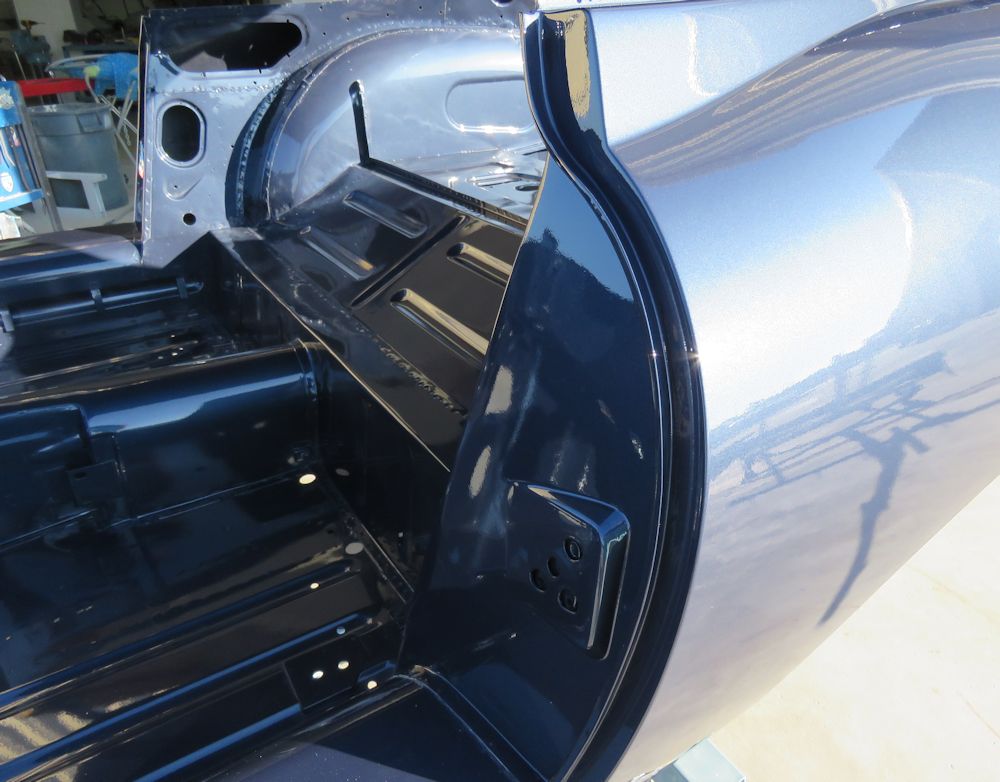
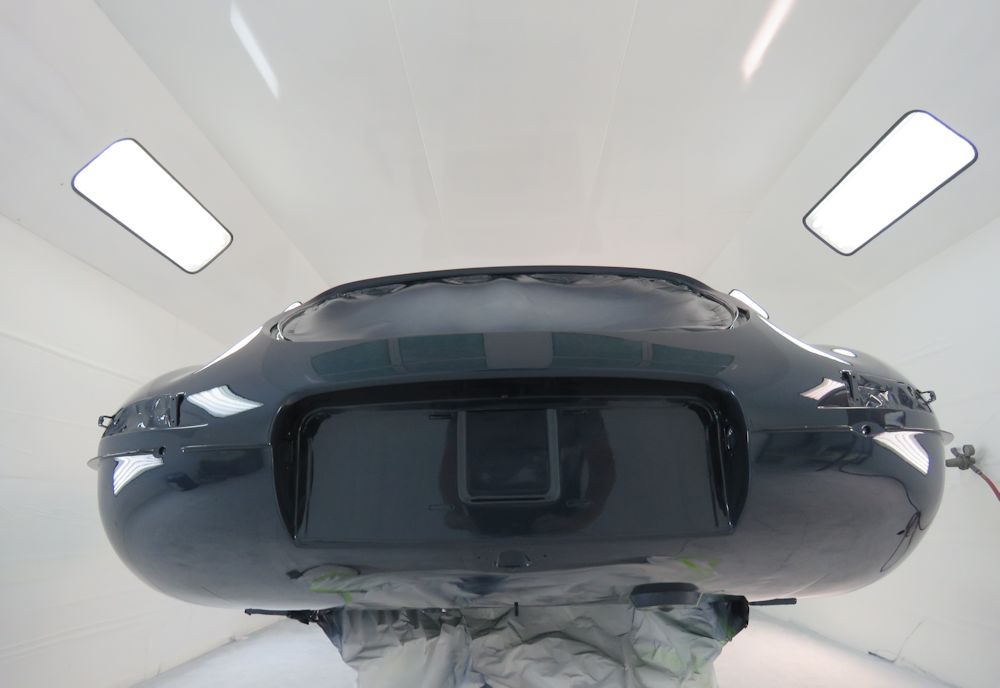
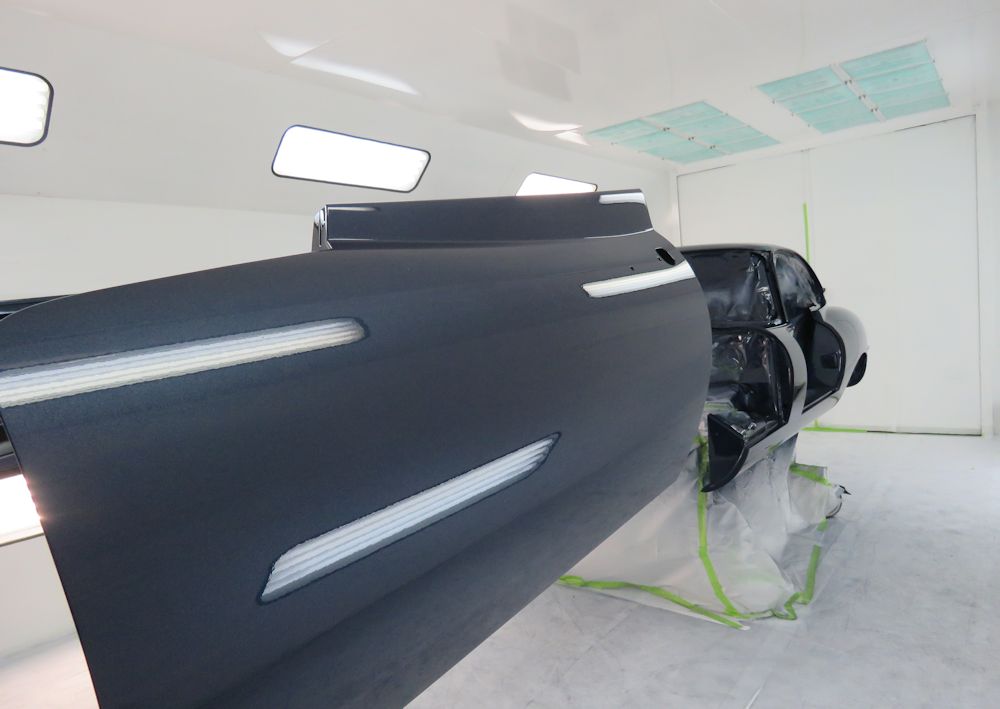
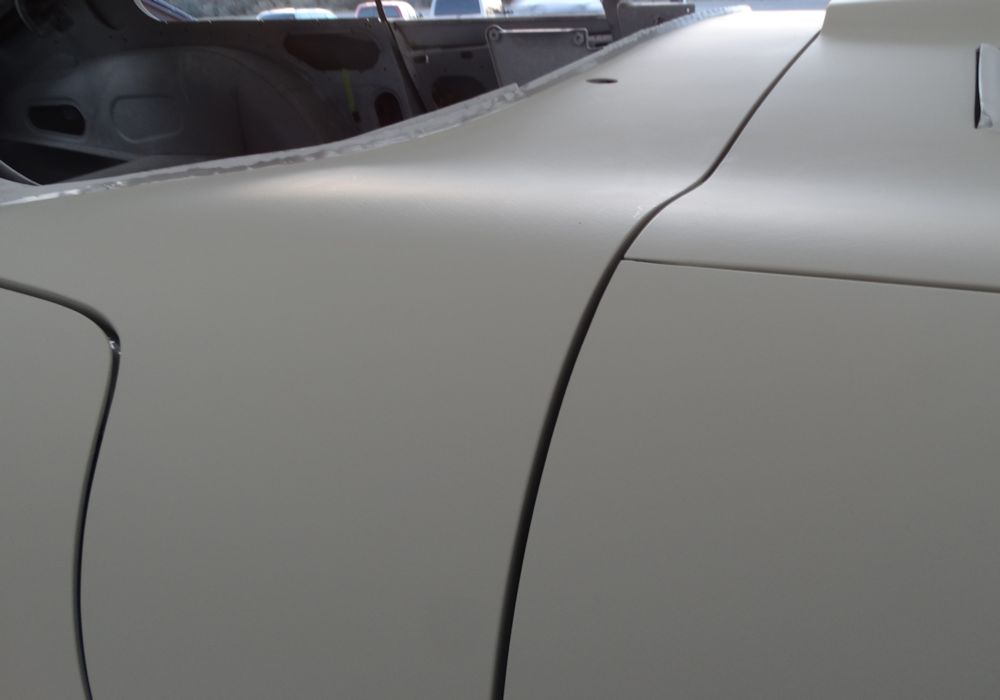
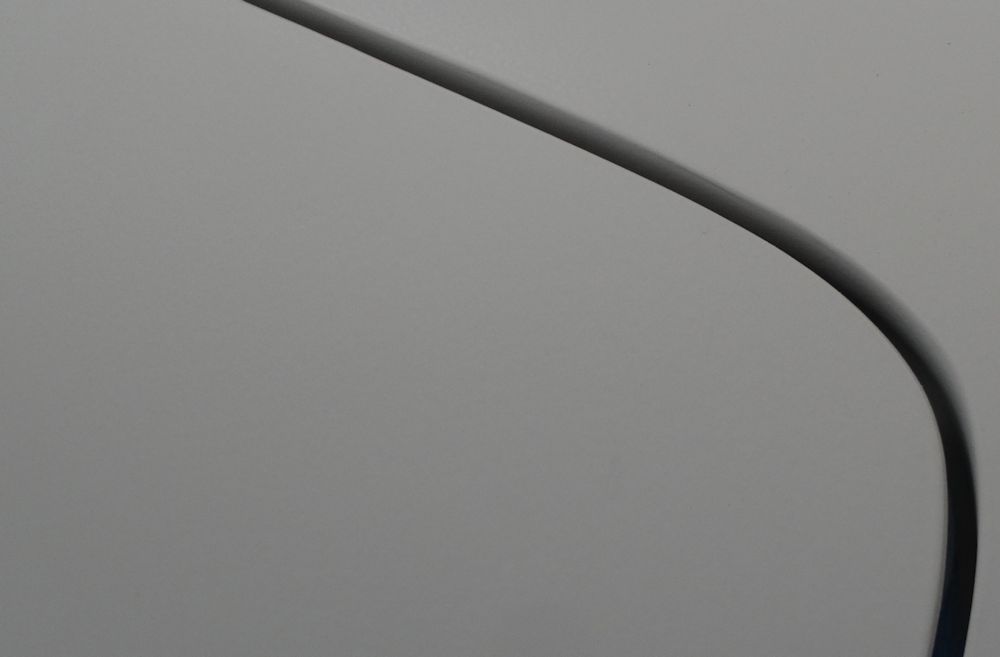
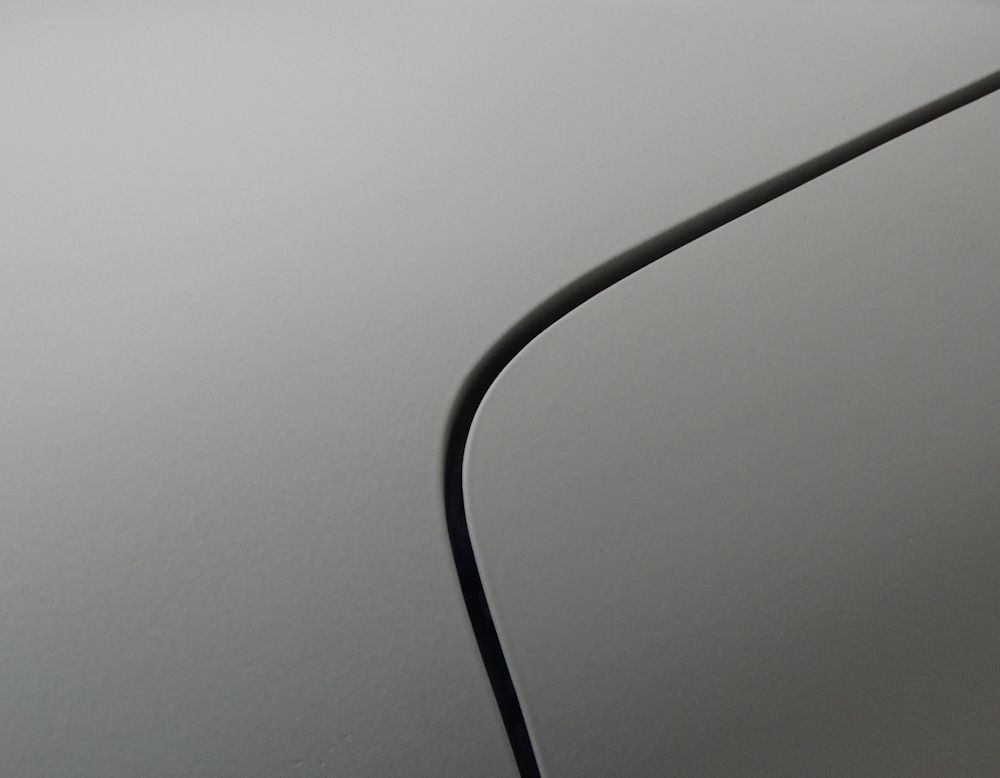
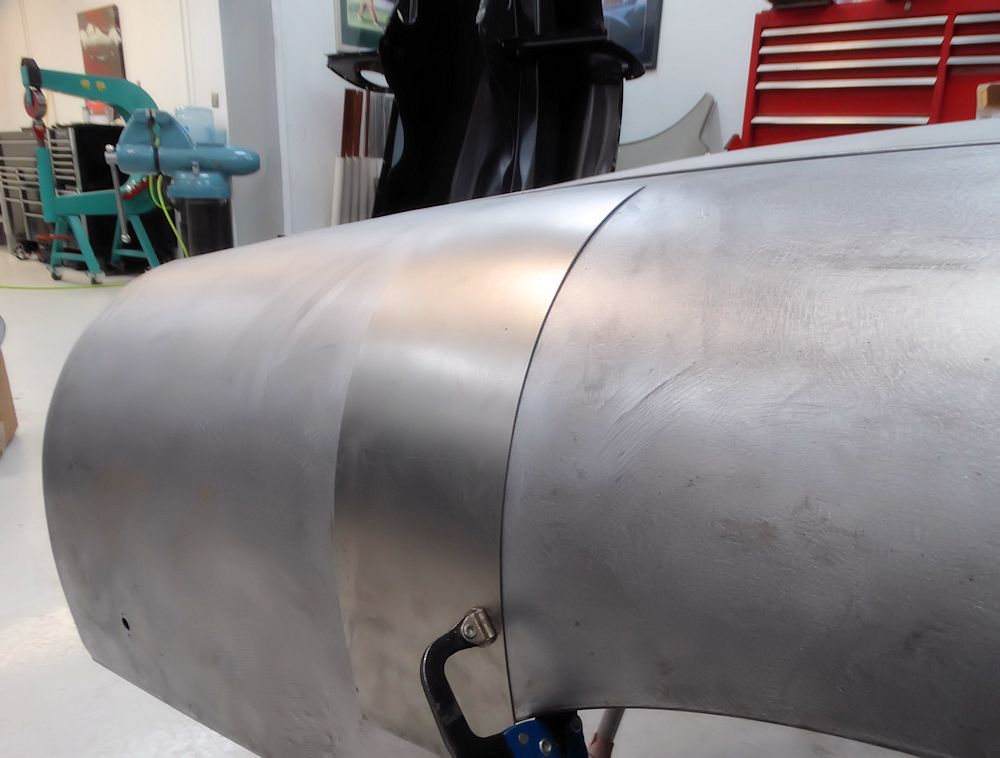
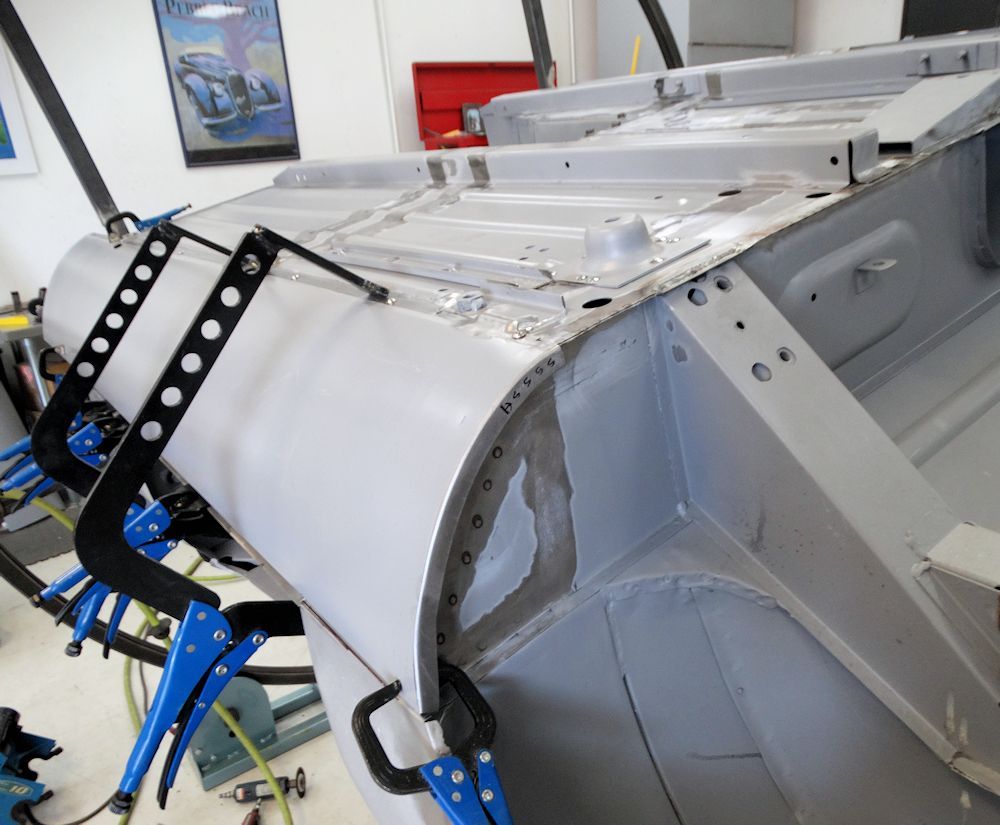
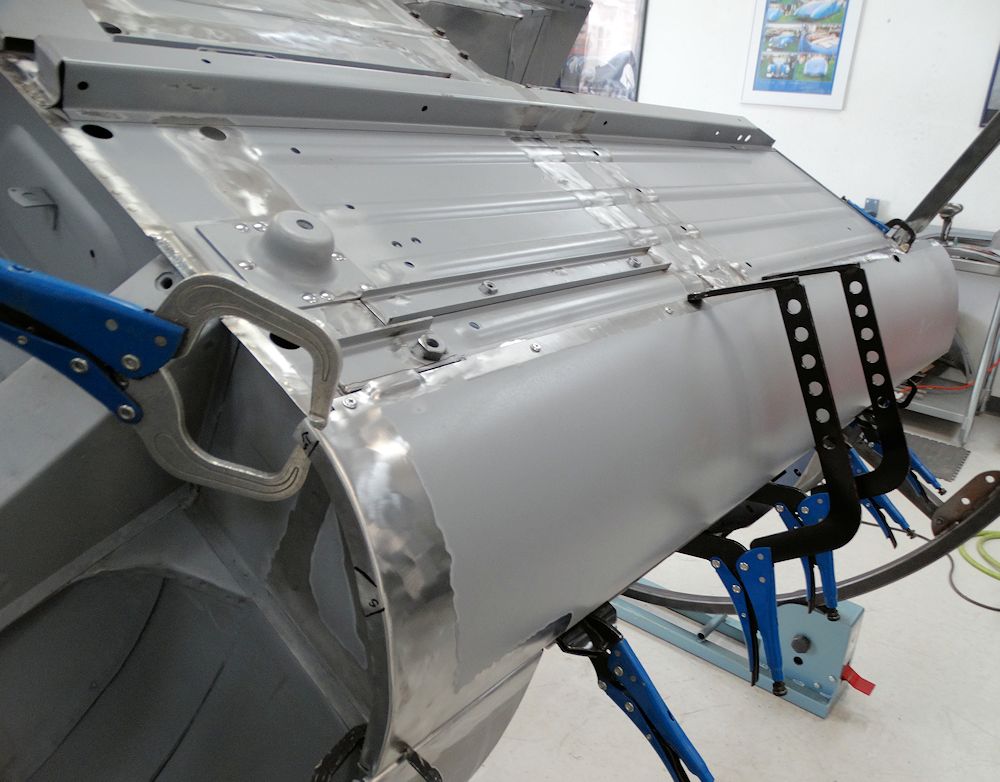
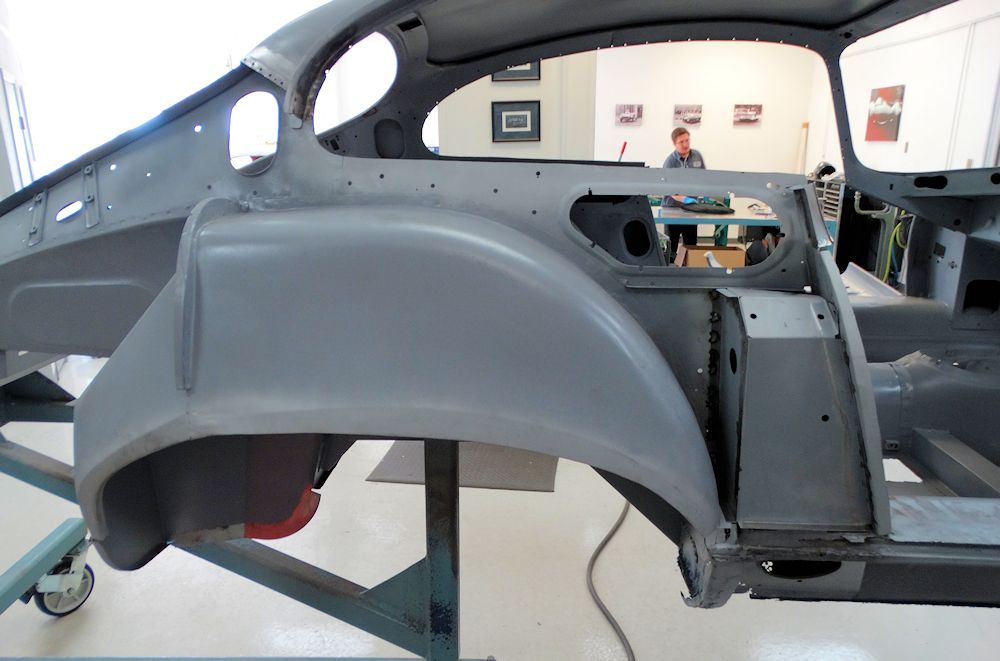
| Panel fit is perfect throughout |
|
 |
 |
 |
 |
 |
 |
 |
 |
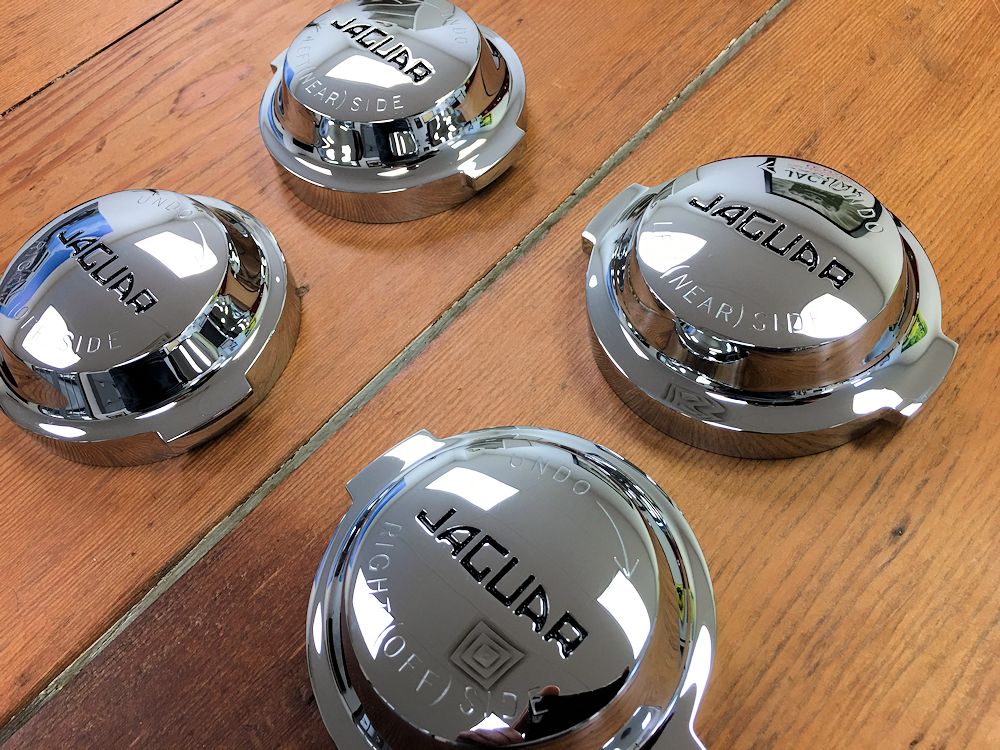
| Borranis being used for road testing with
regular Jaguar knock offs |
Gerardo hand painting the JAGUAR lettering in the spinners |
 |
 |
| German/Swiss knock offs look fabulous |
If you look carefully, Jake is lurking in the
photo! |
Putting some of the finishing touches to this incredibly challenging restoration.
 |
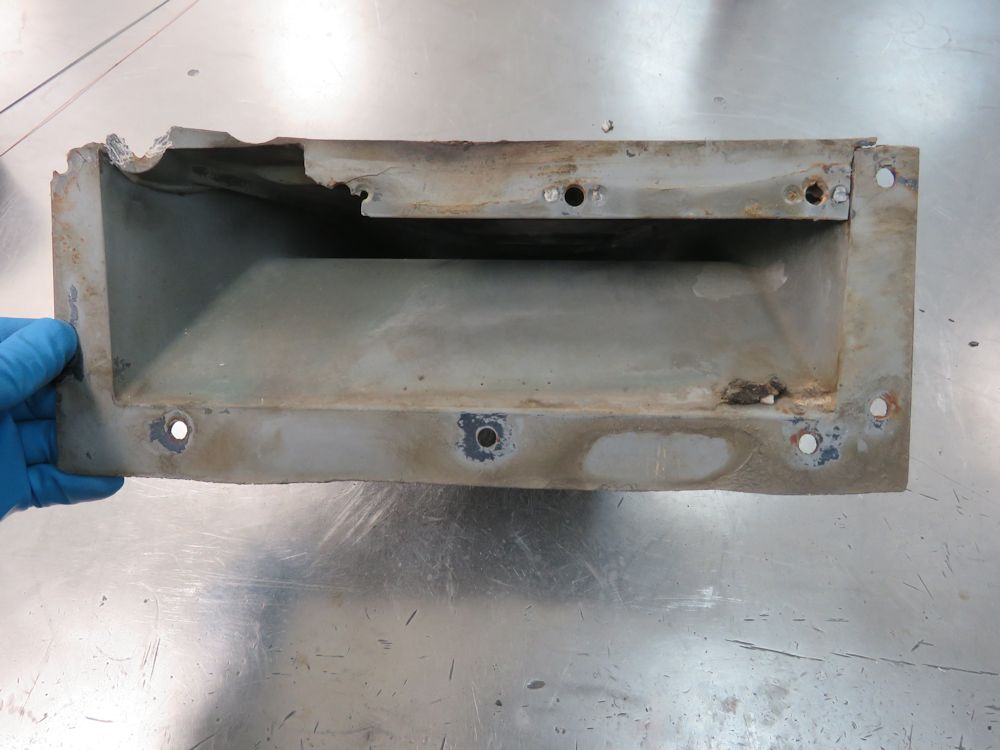 |
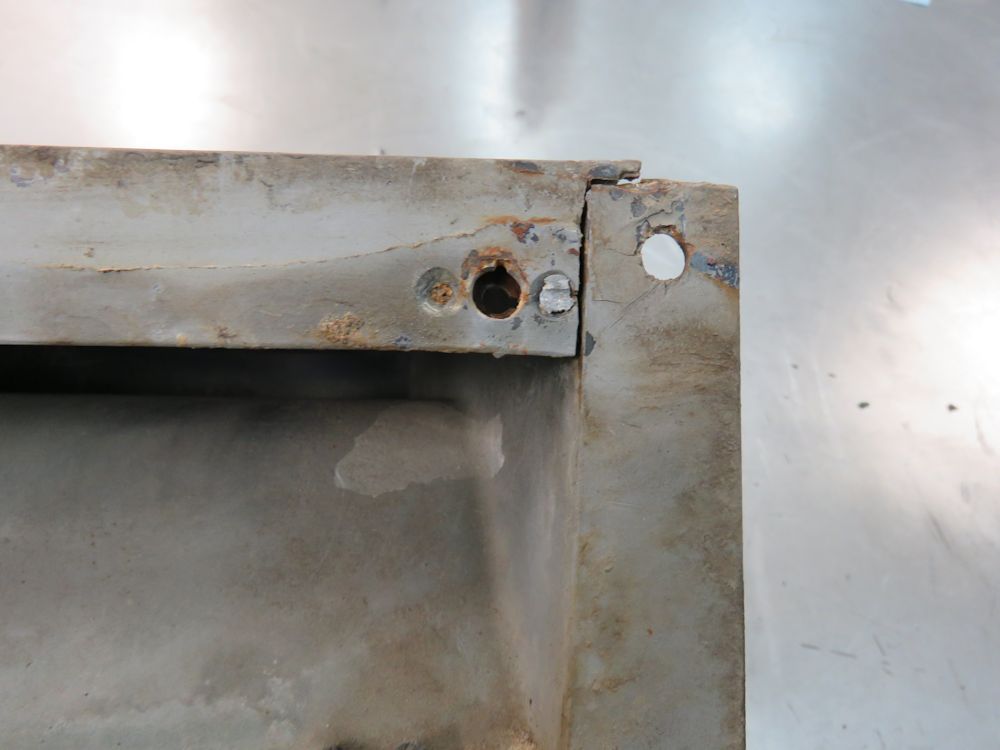
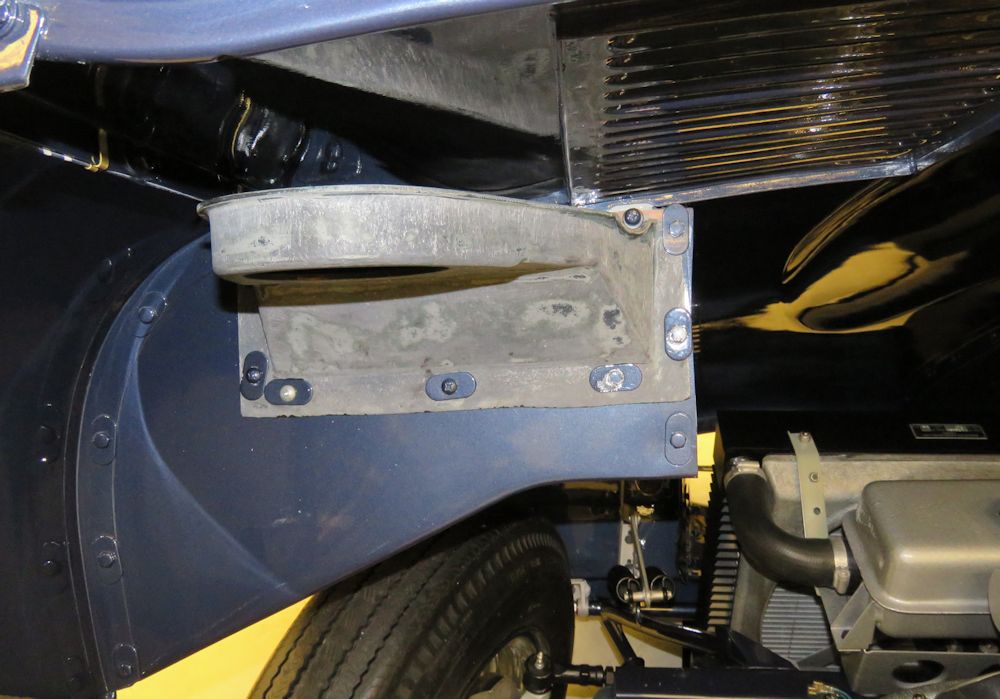
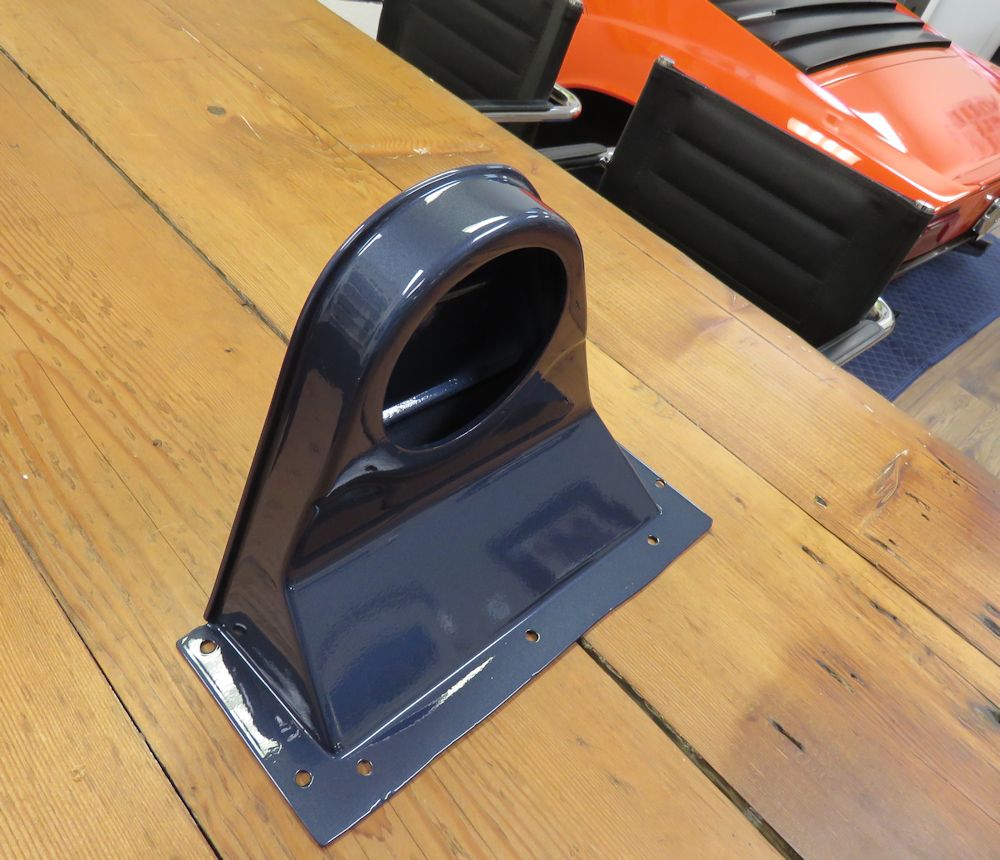
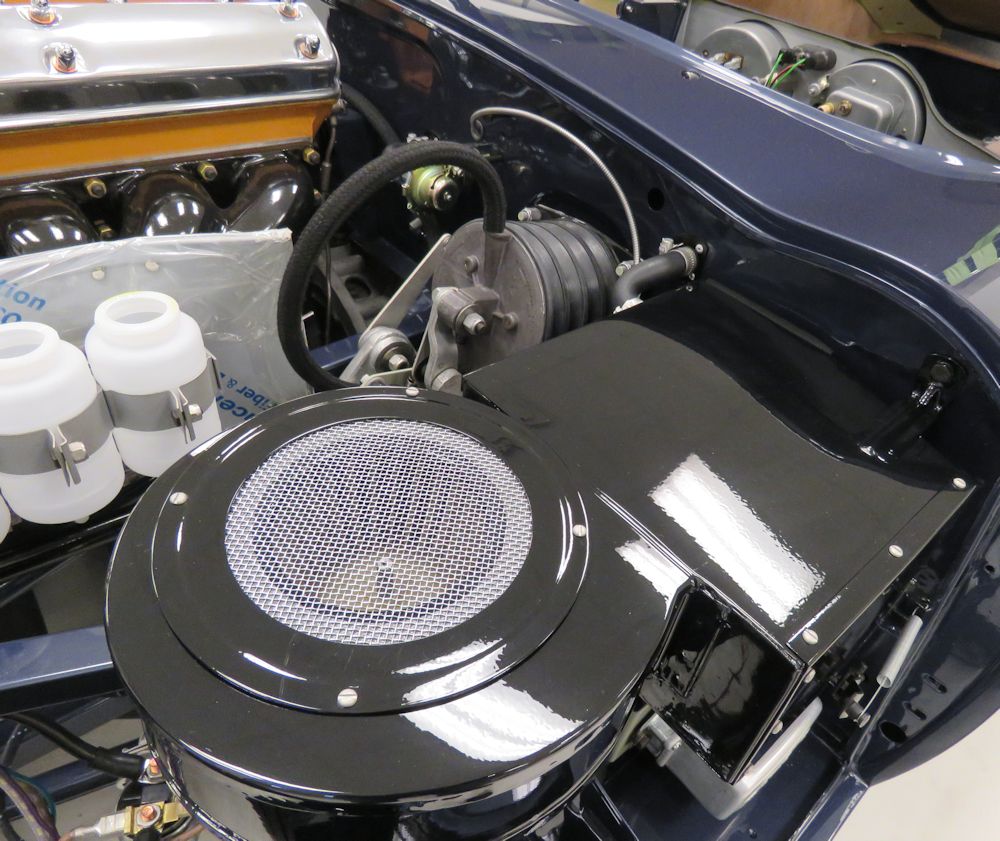
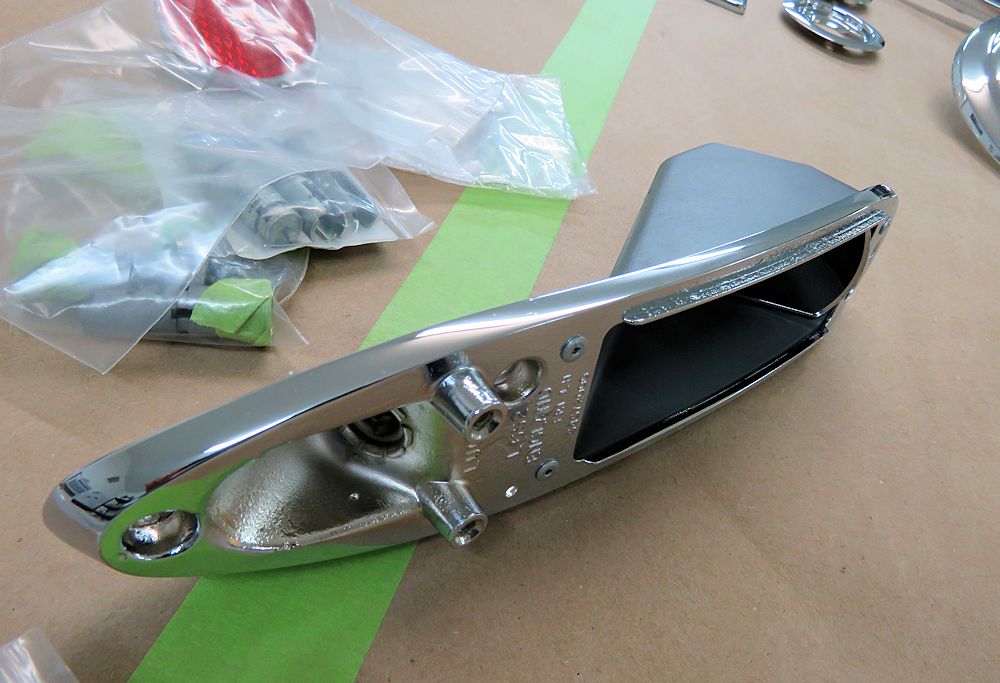
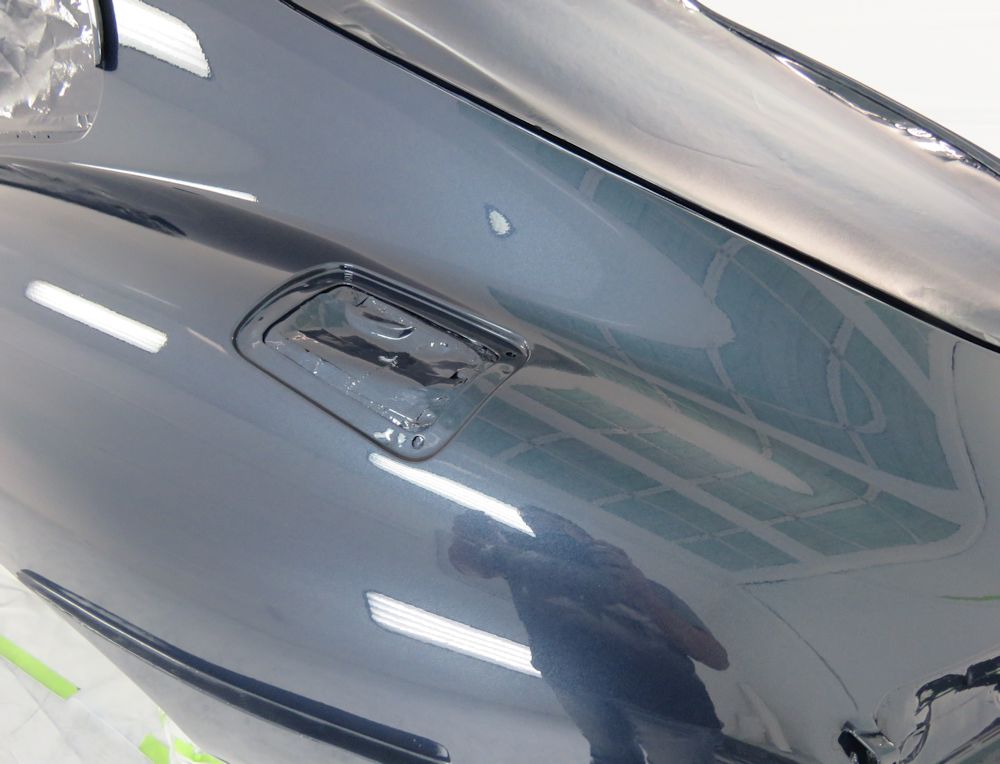
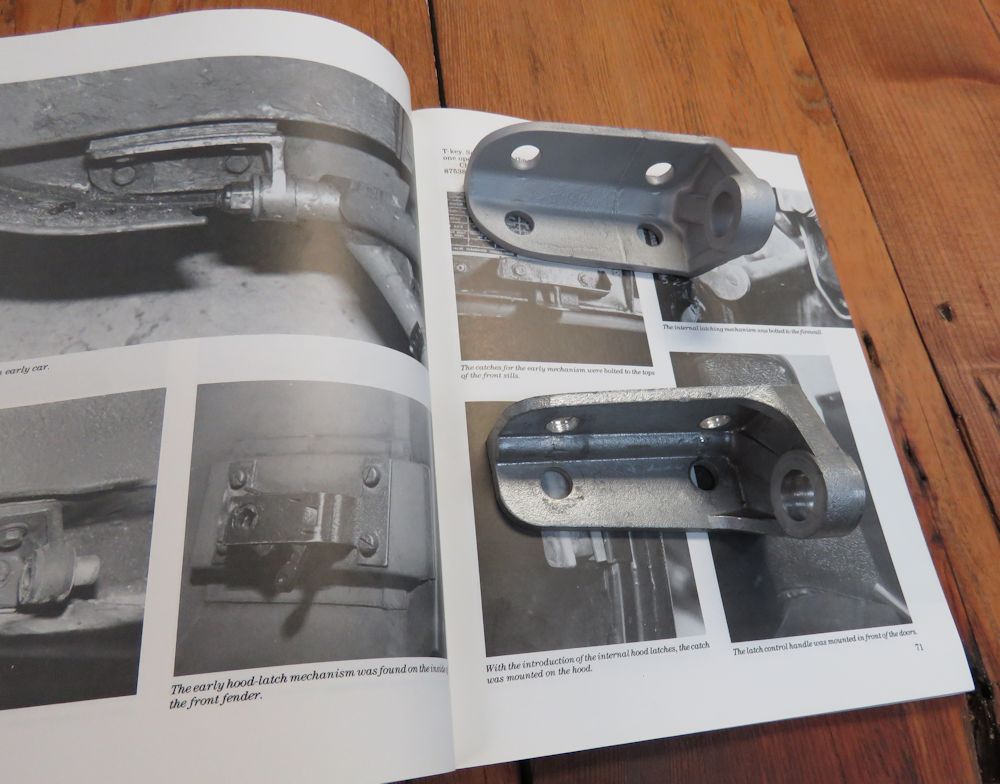
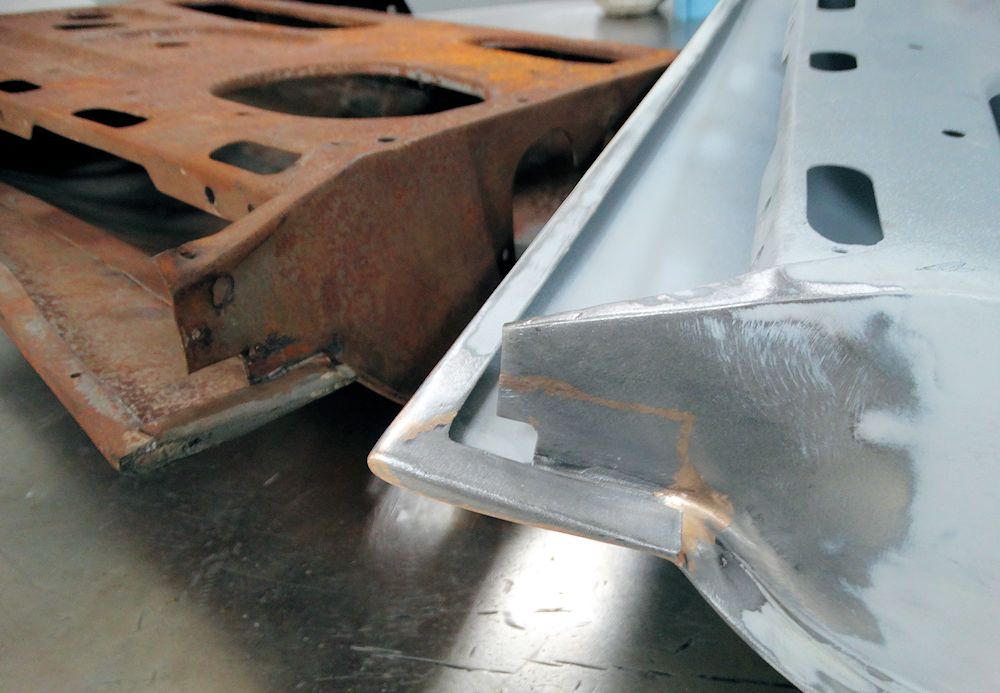
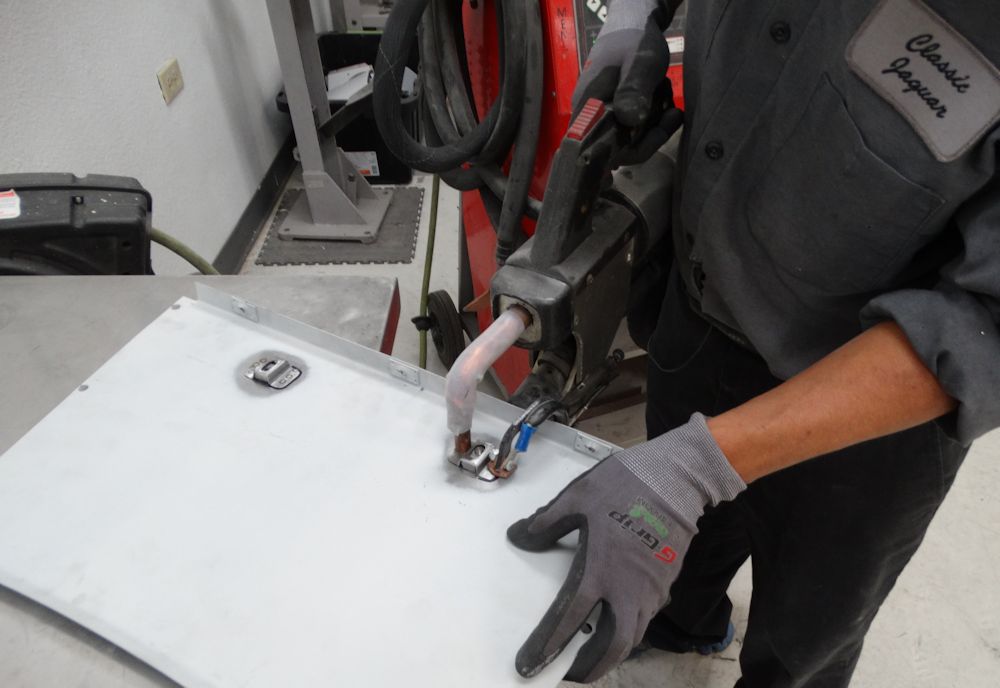
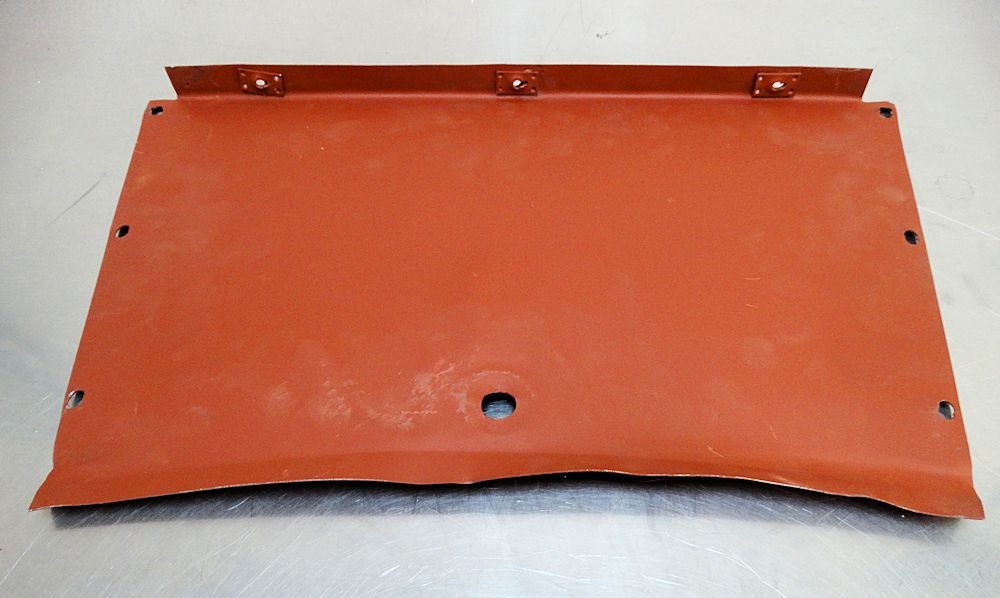
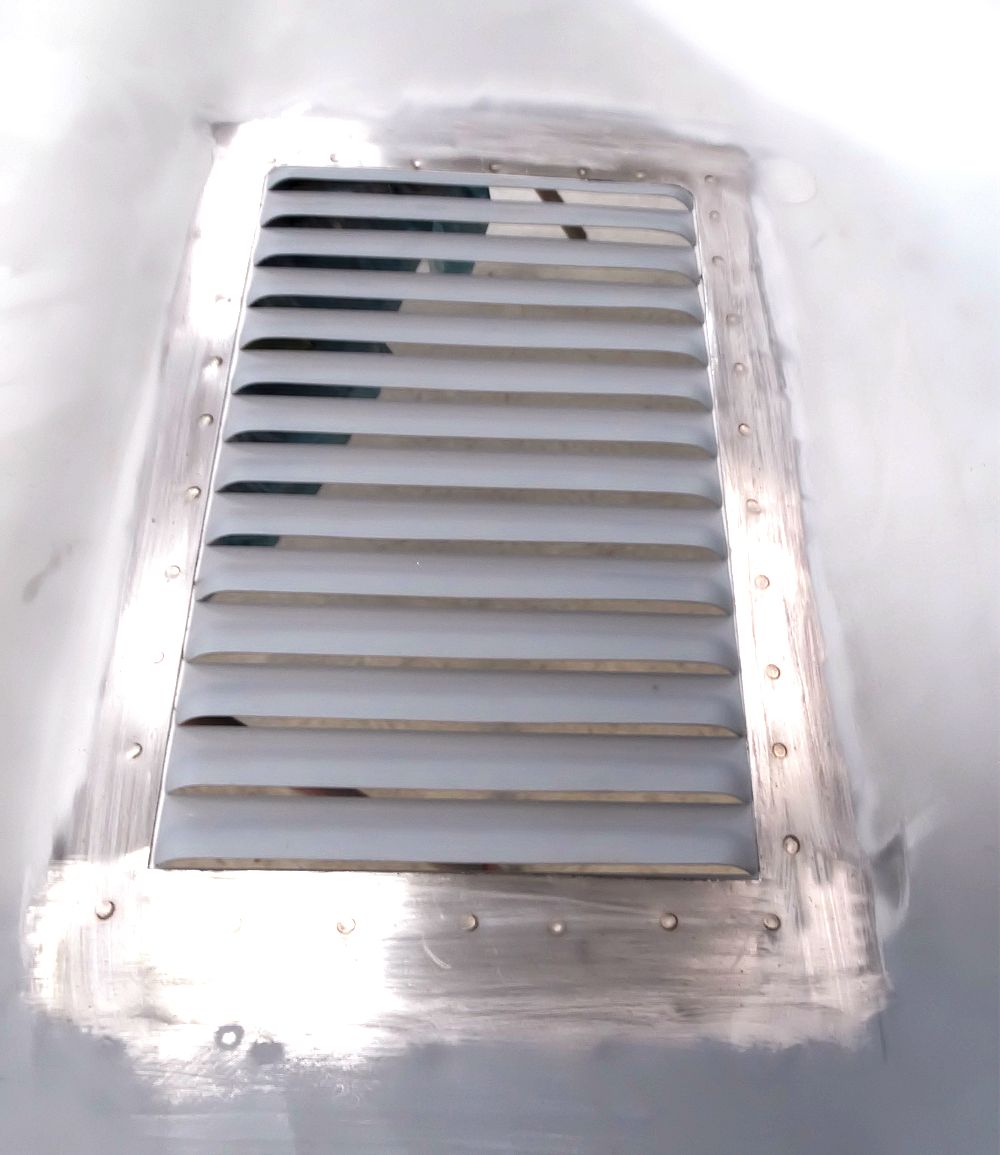
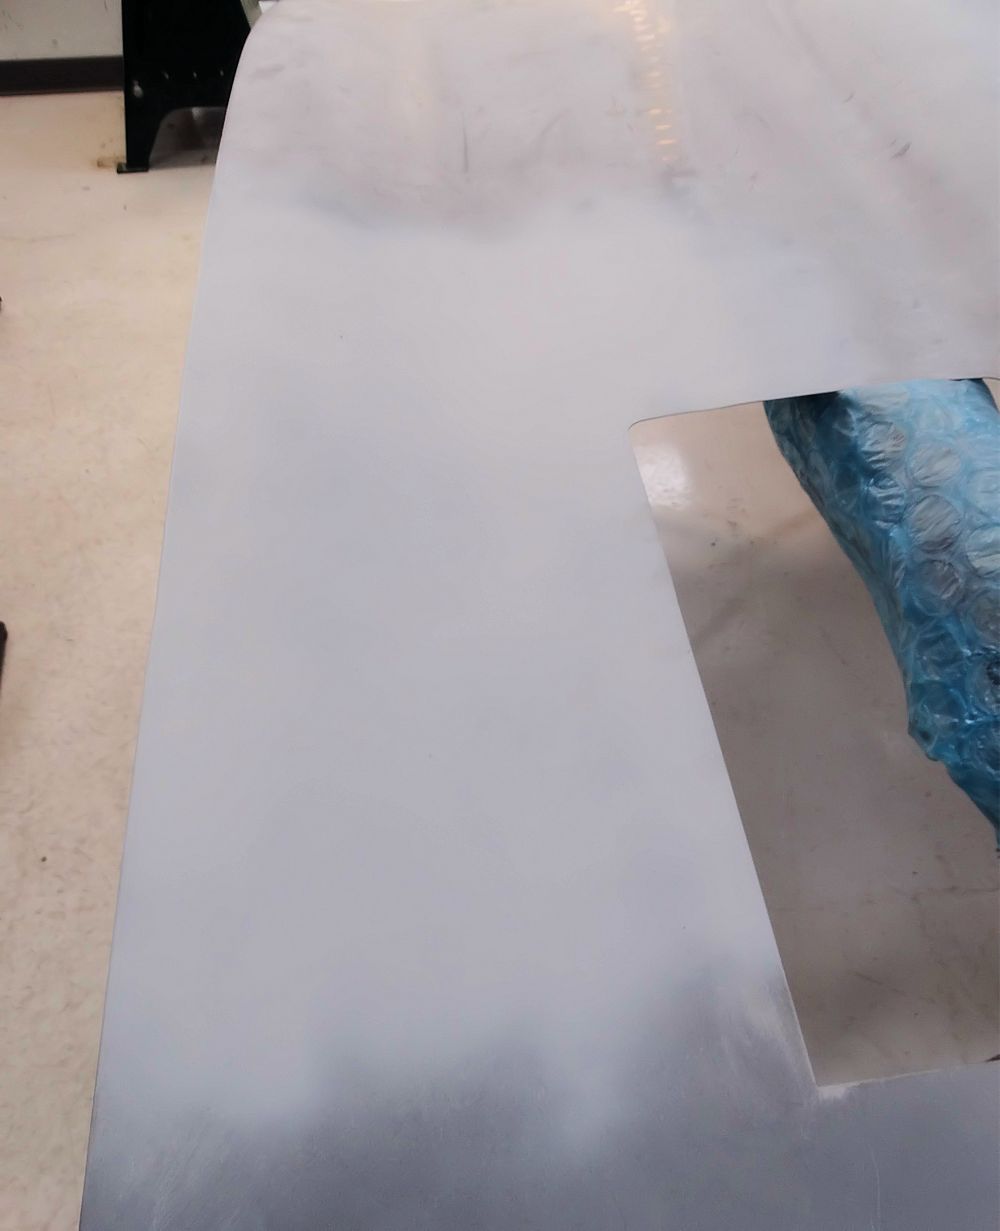
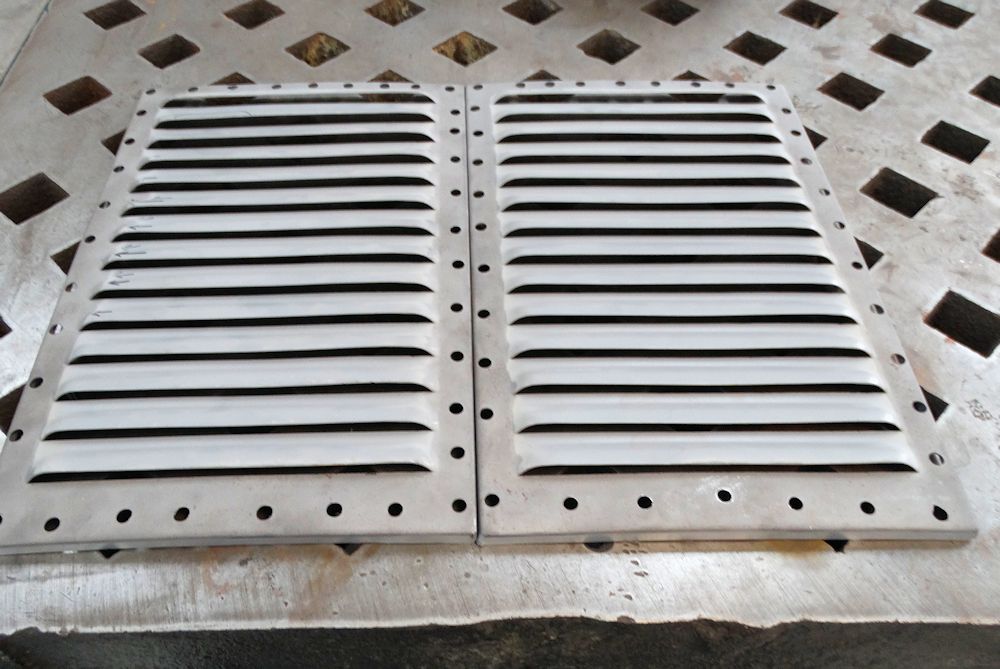
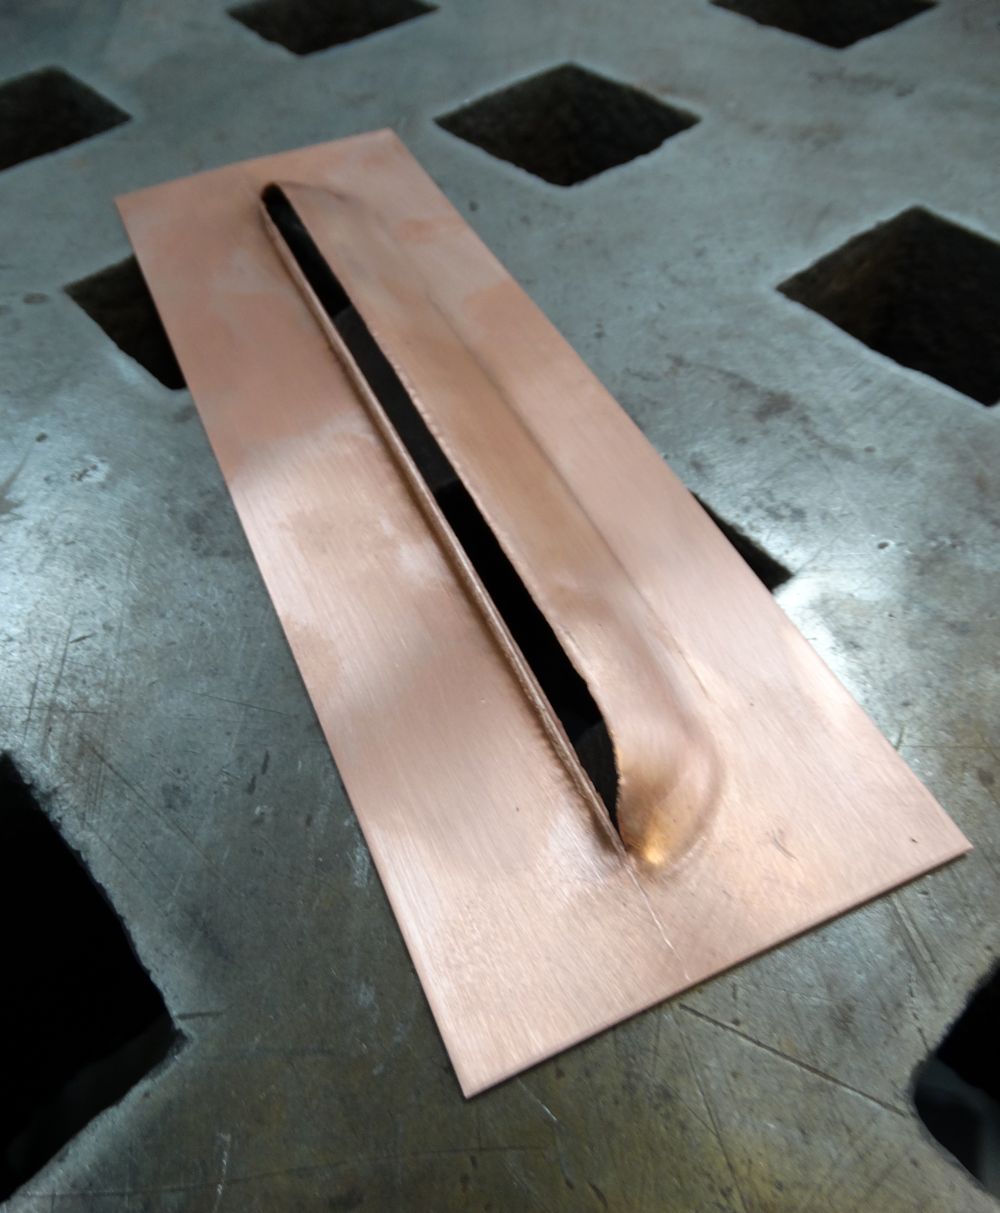
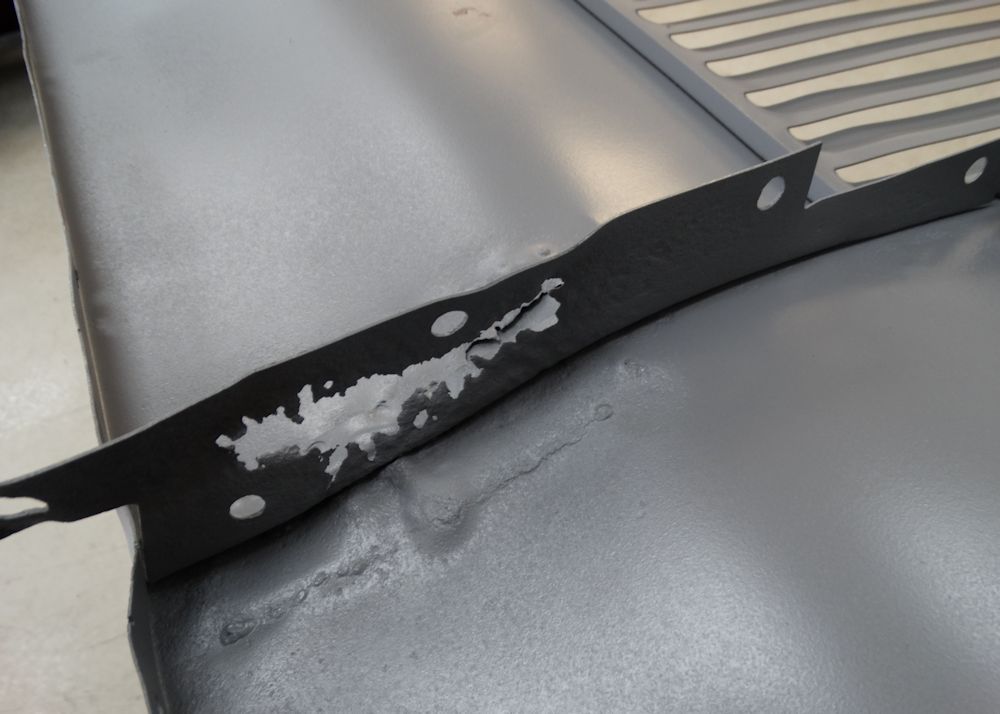
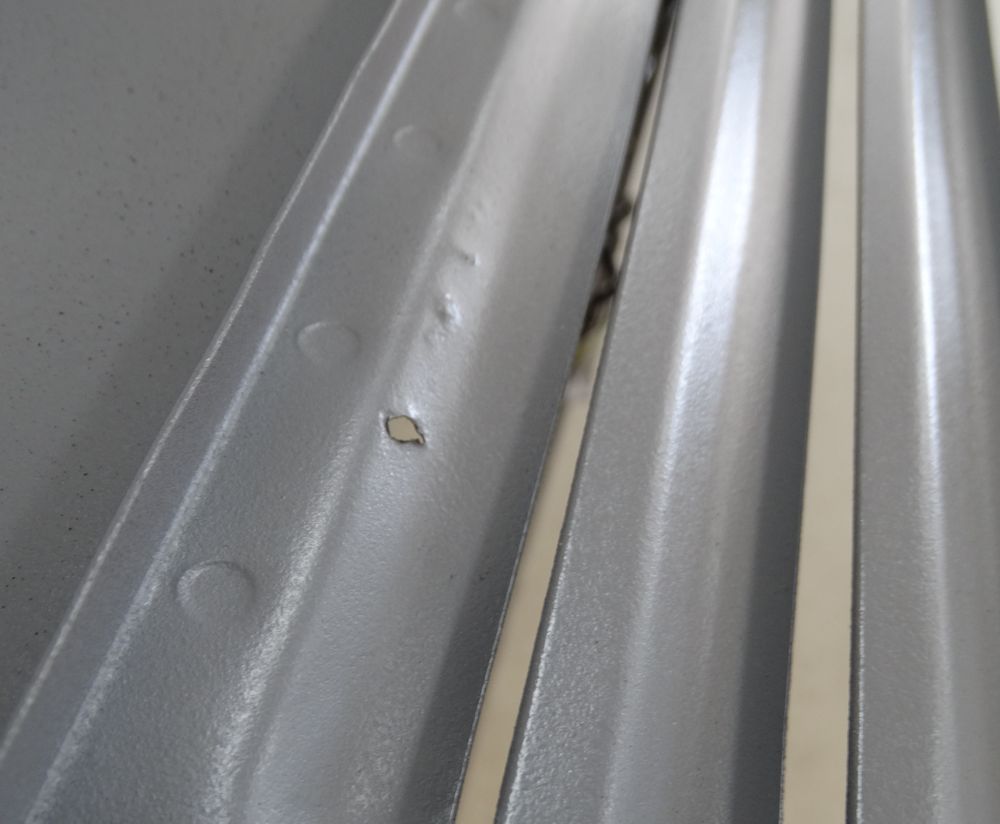
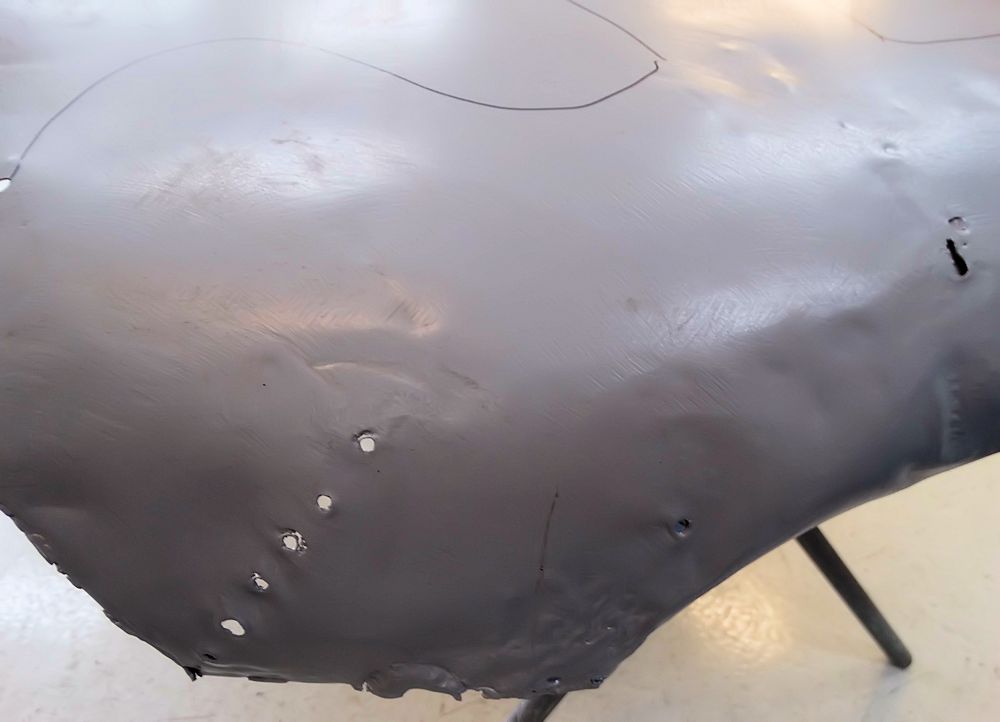
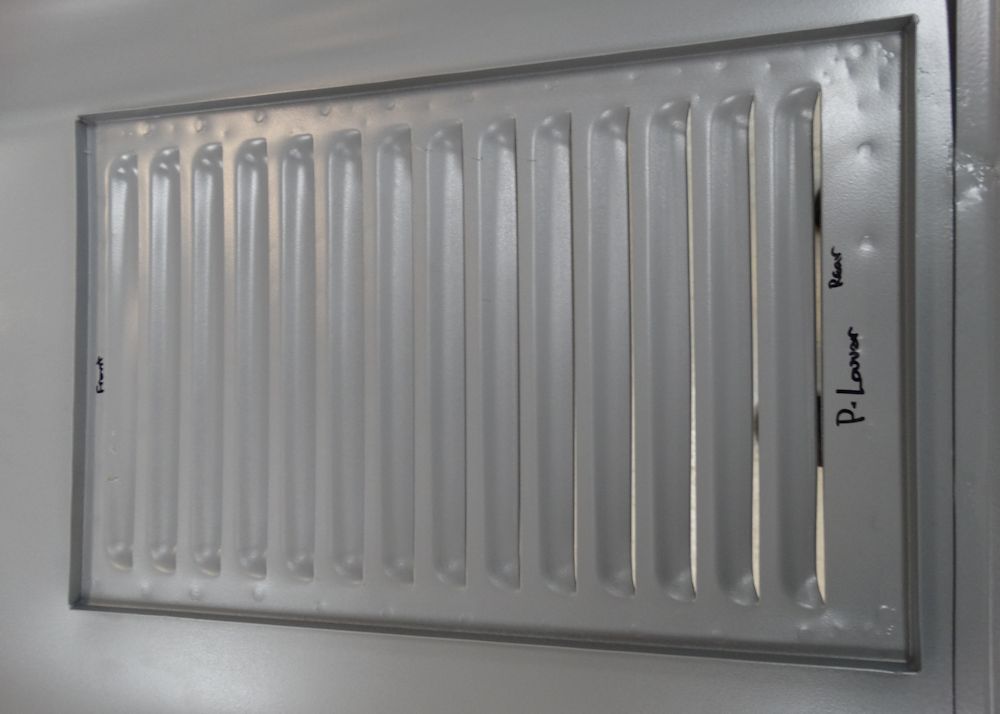
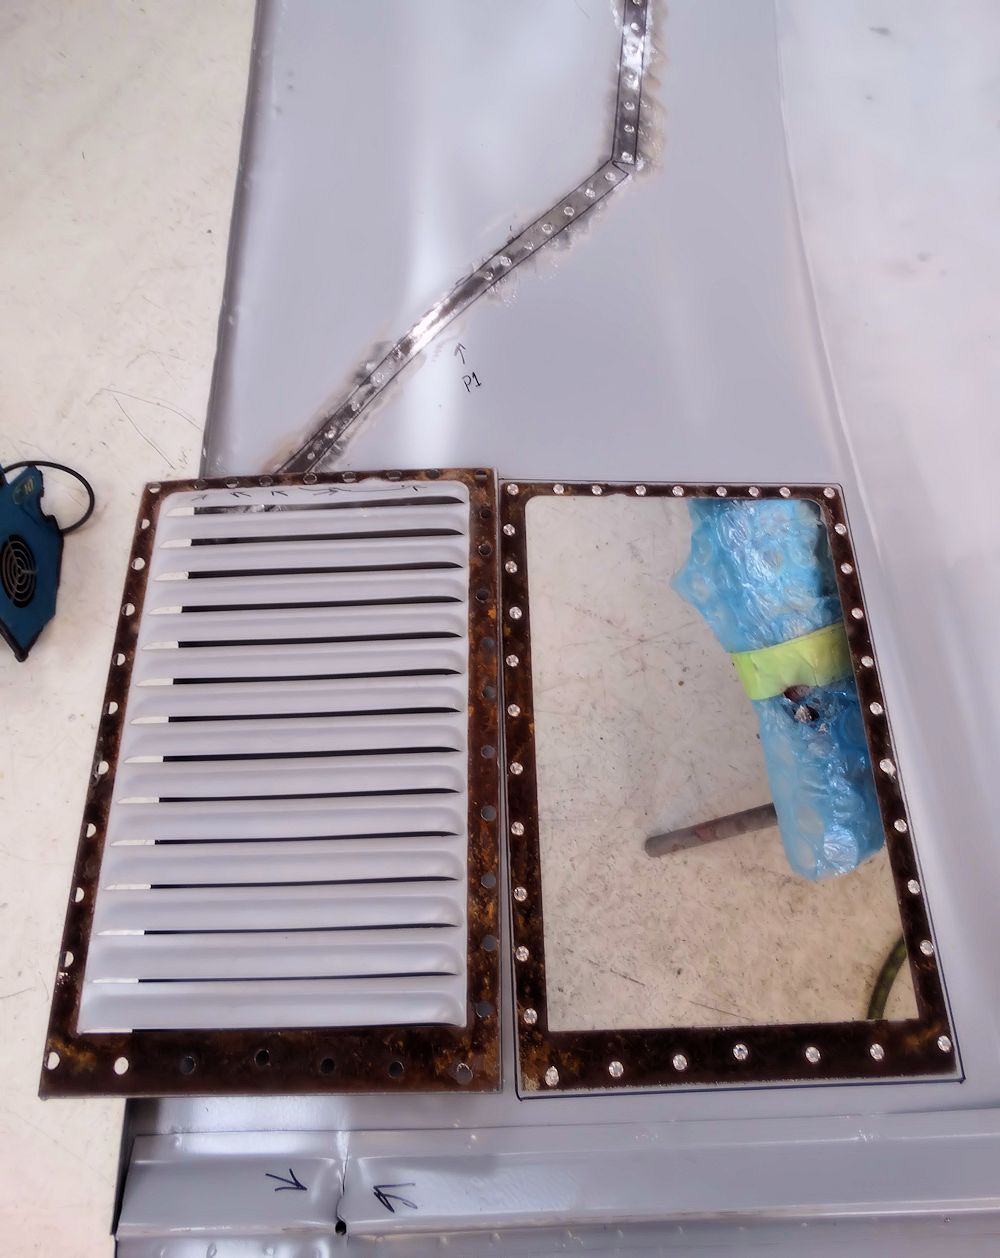
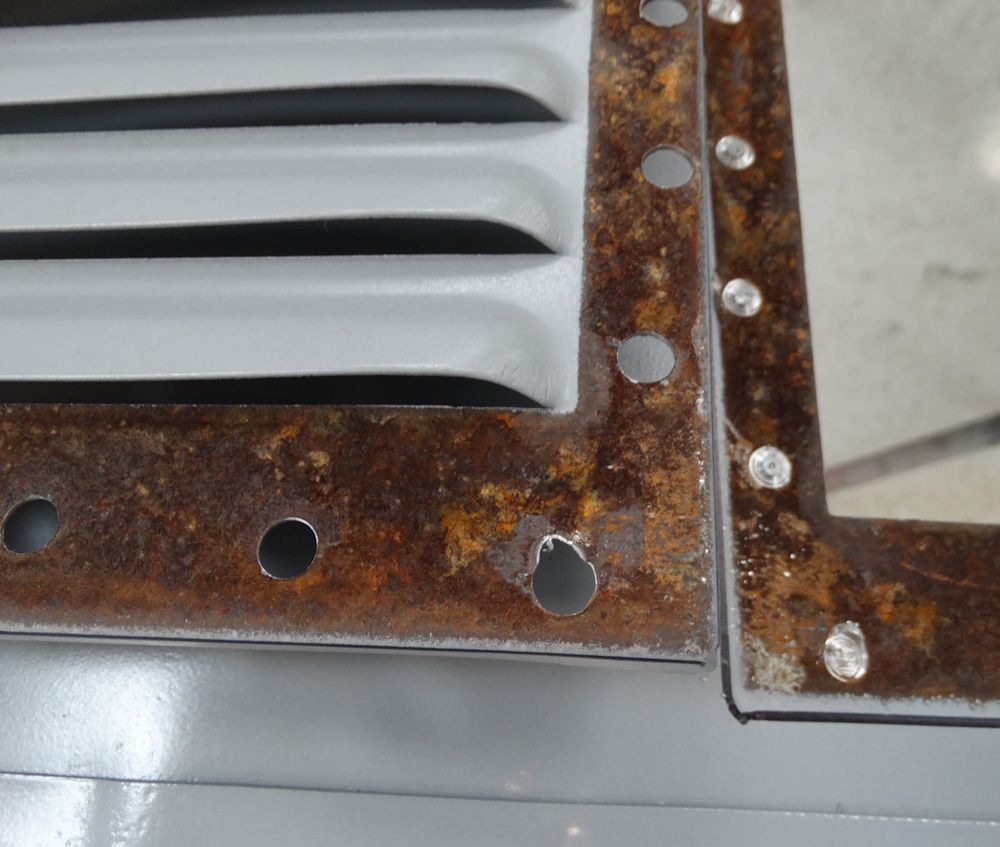
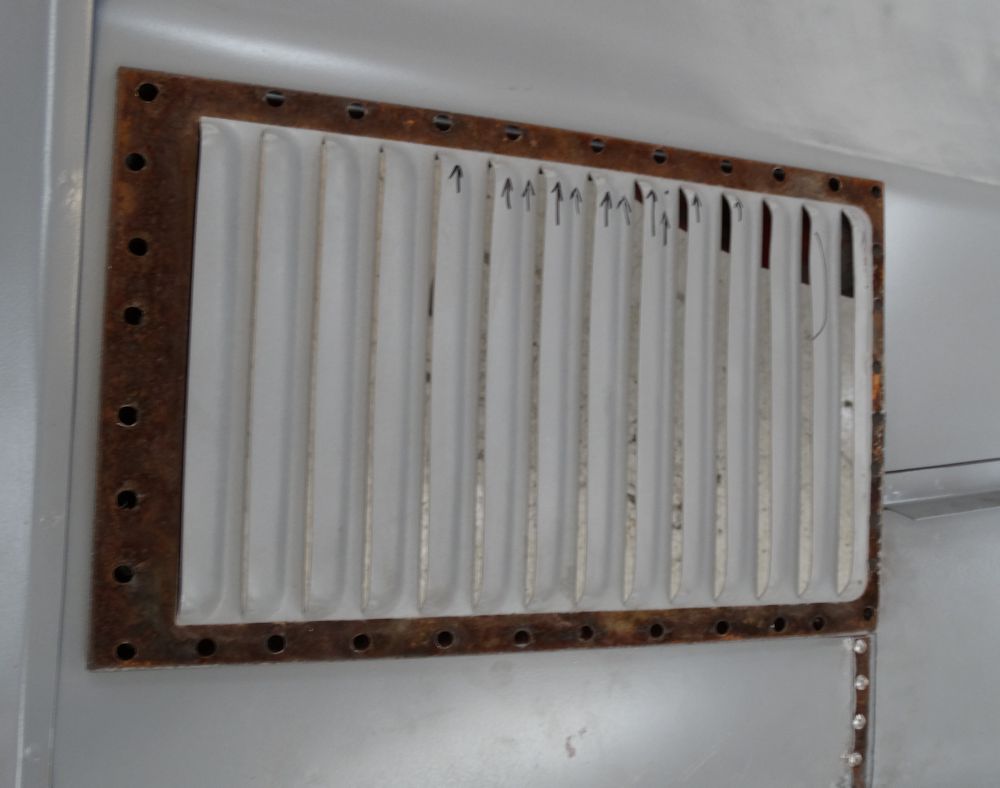
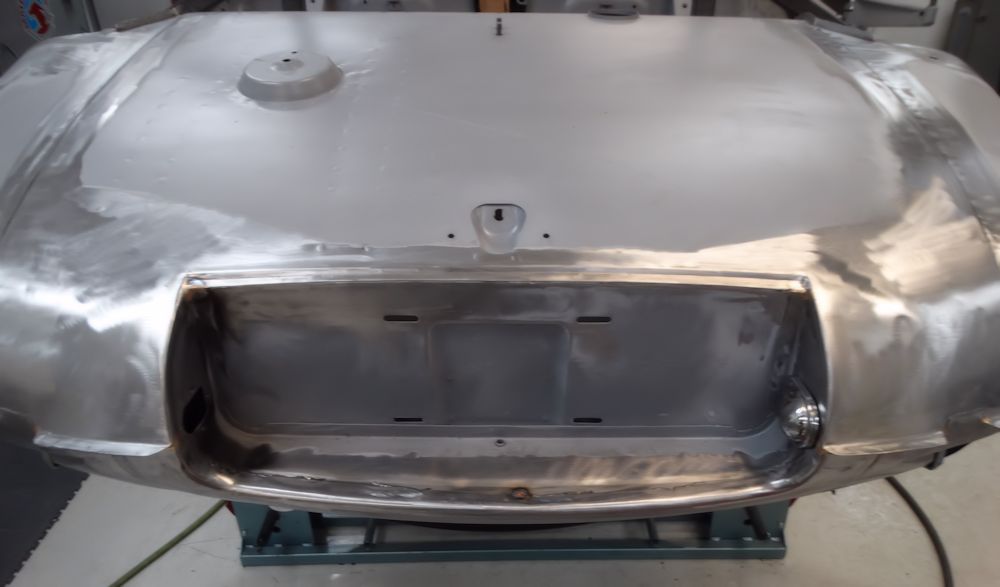
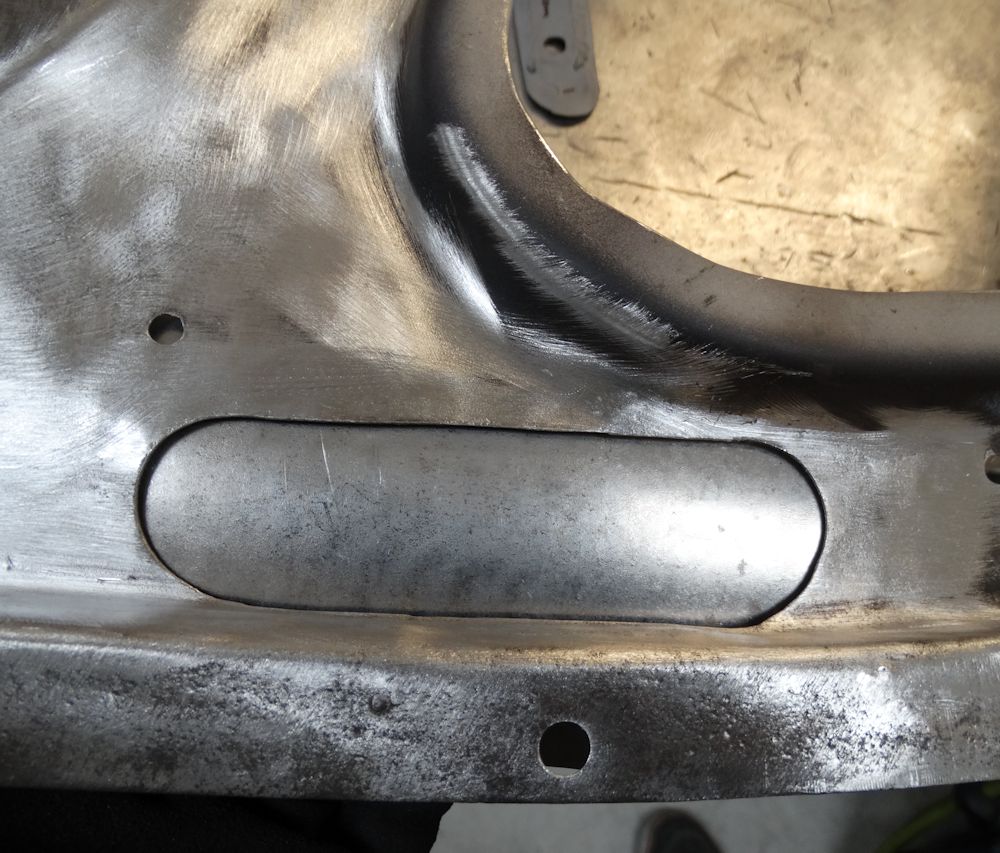
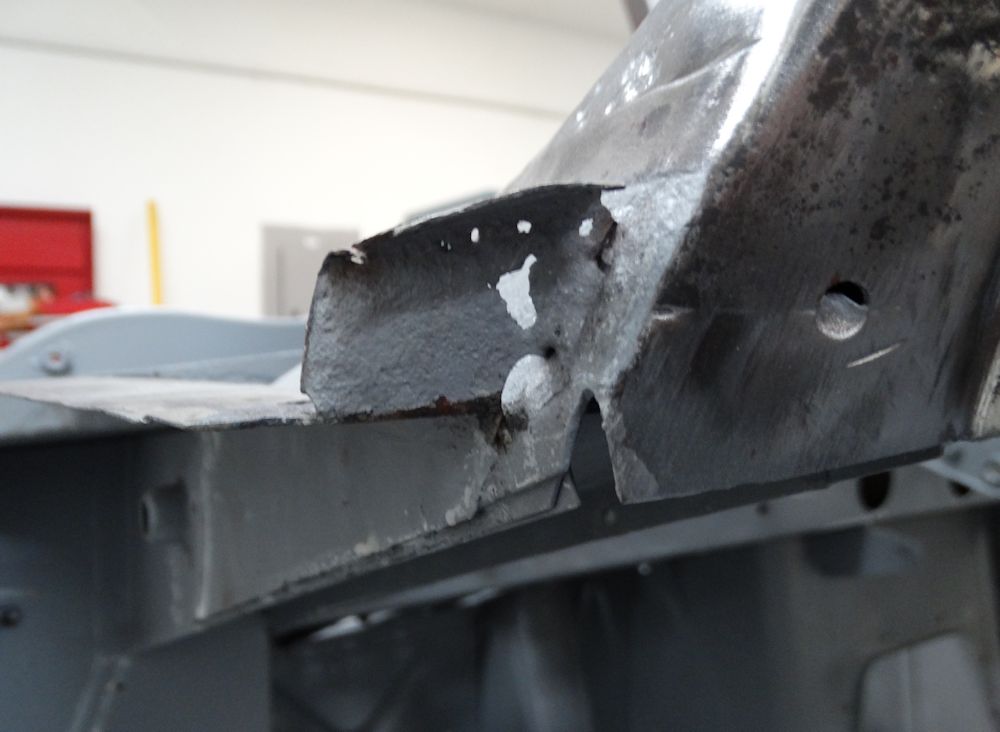
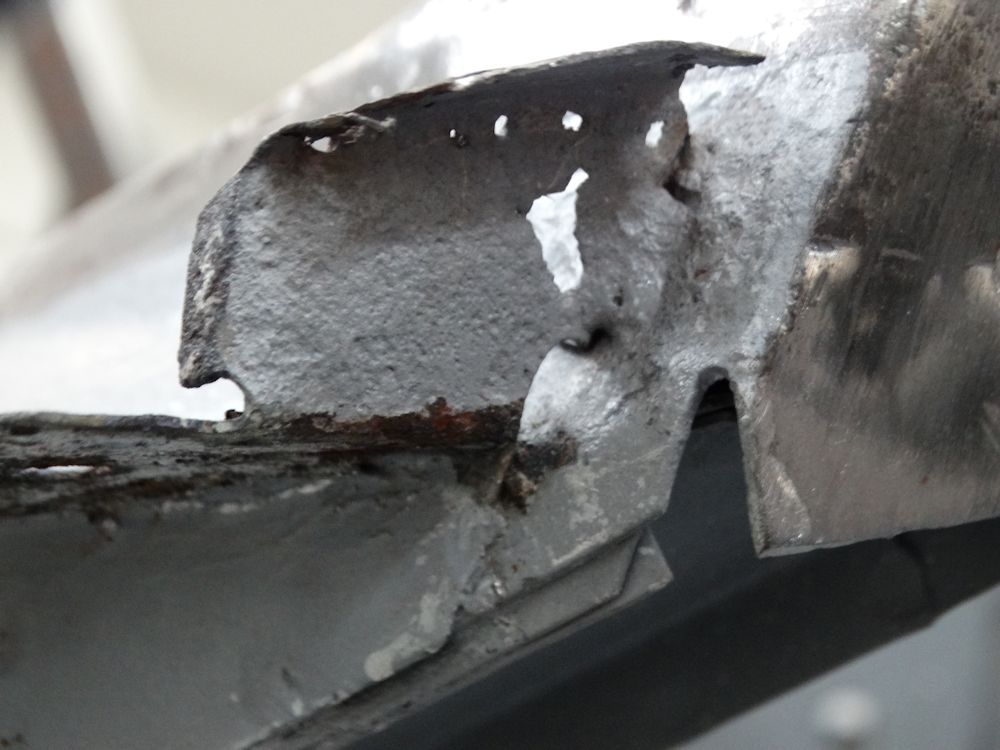
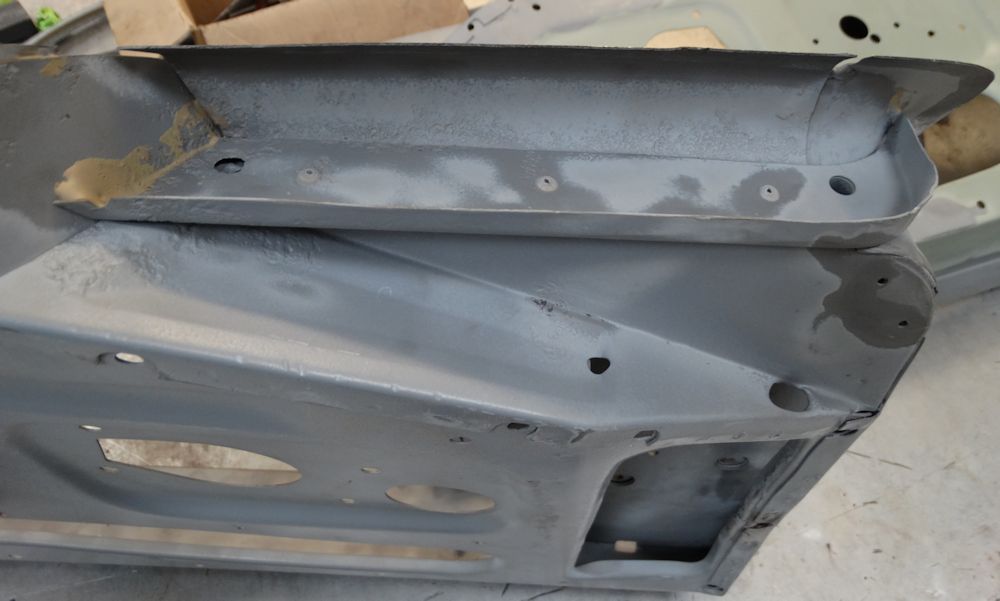
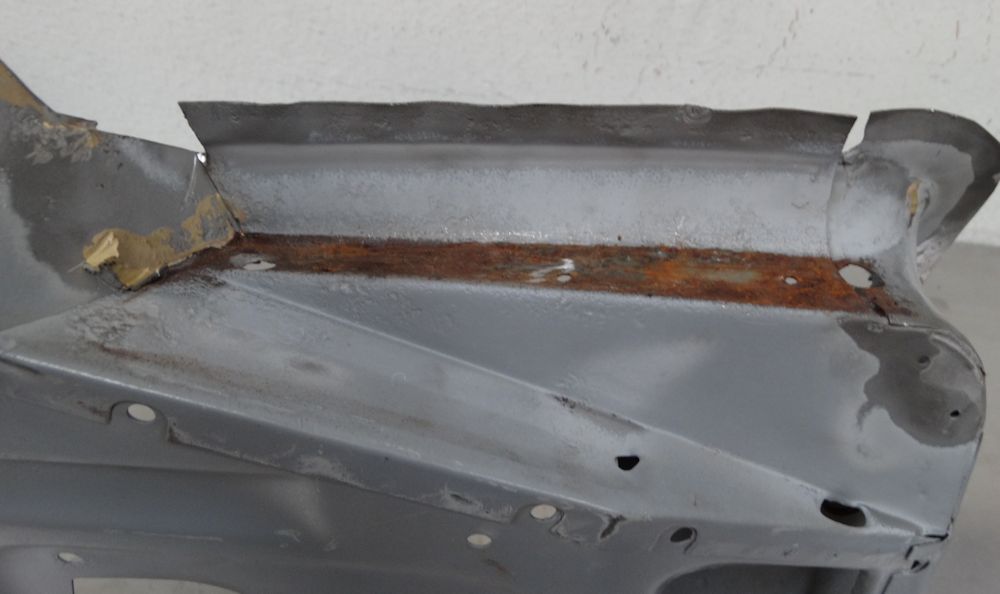
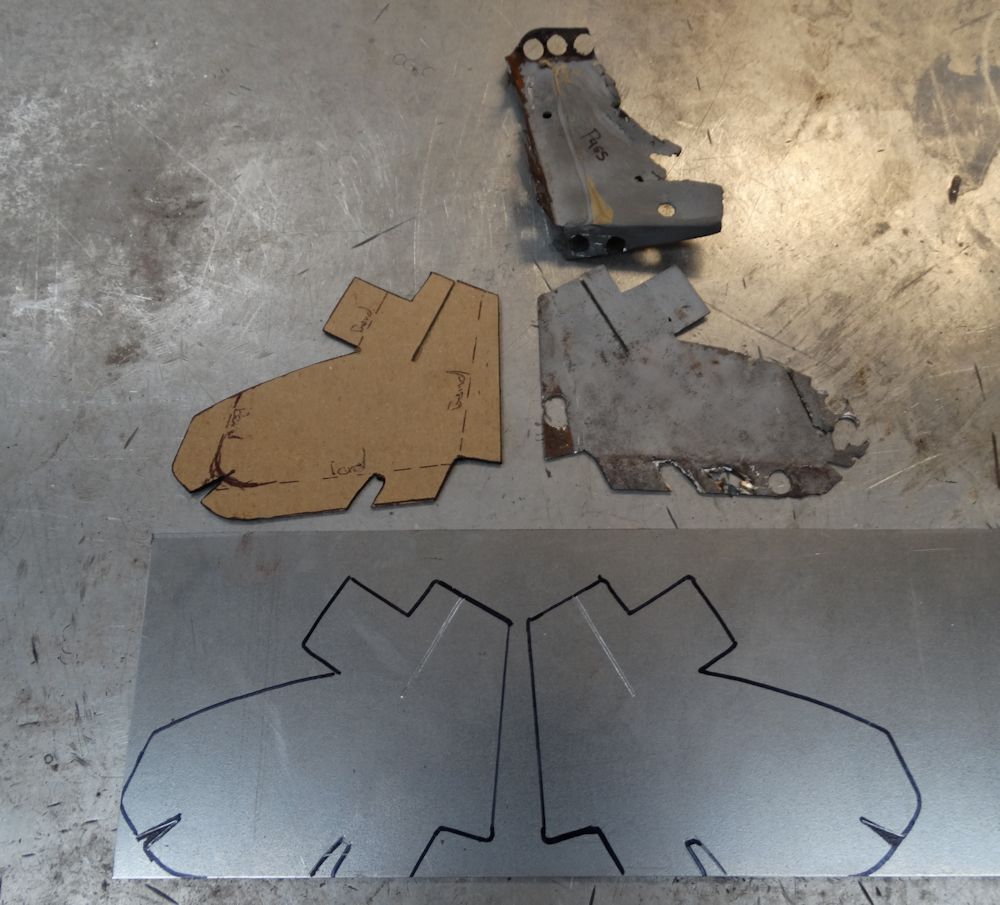
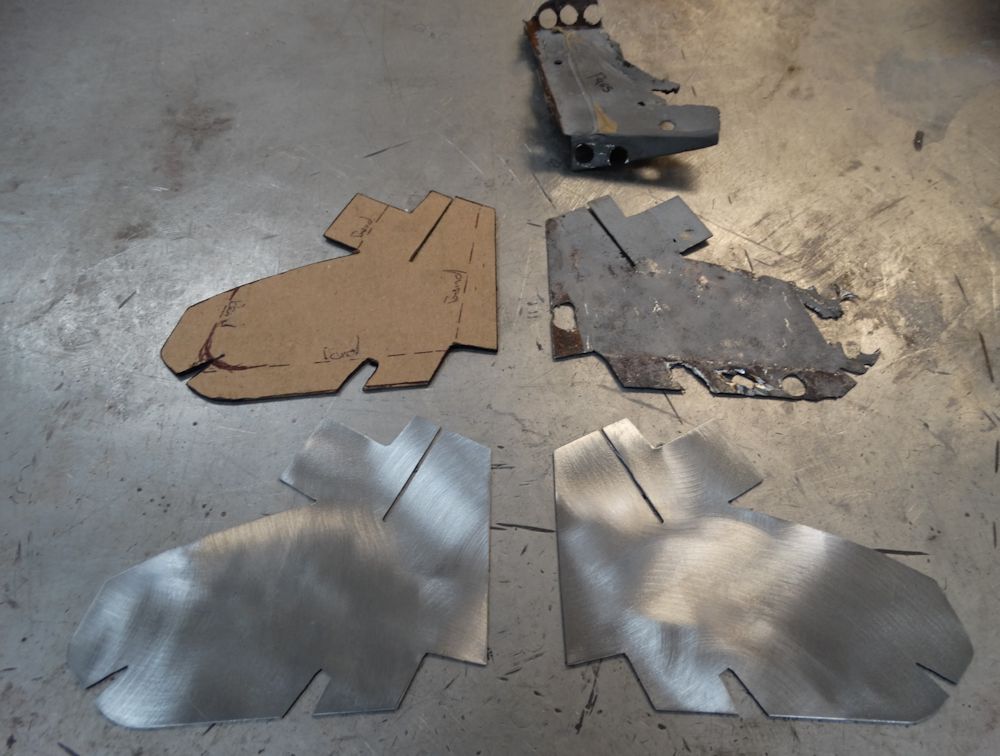
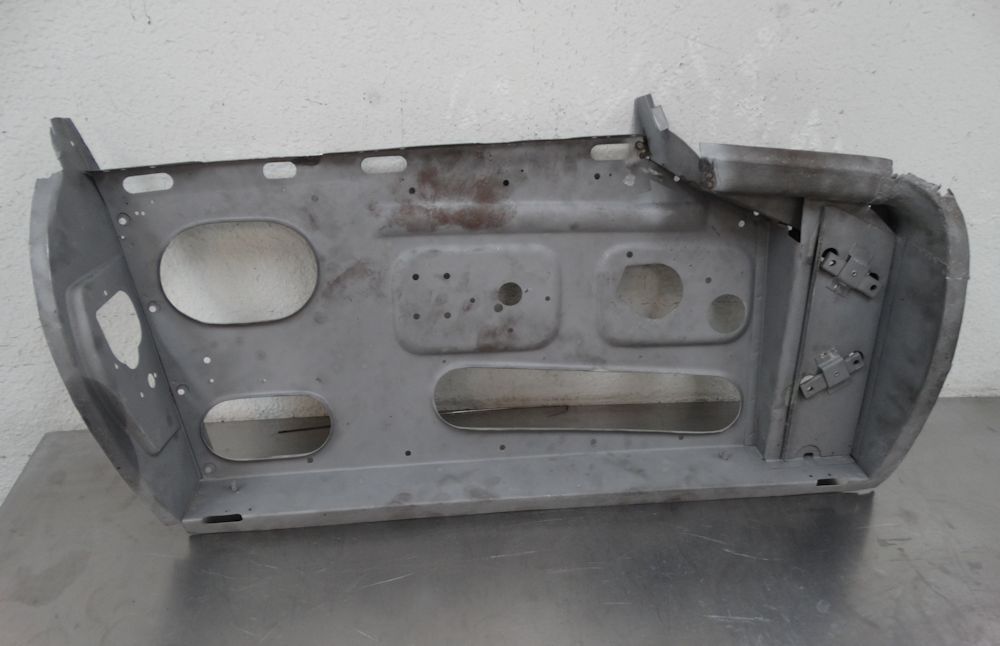
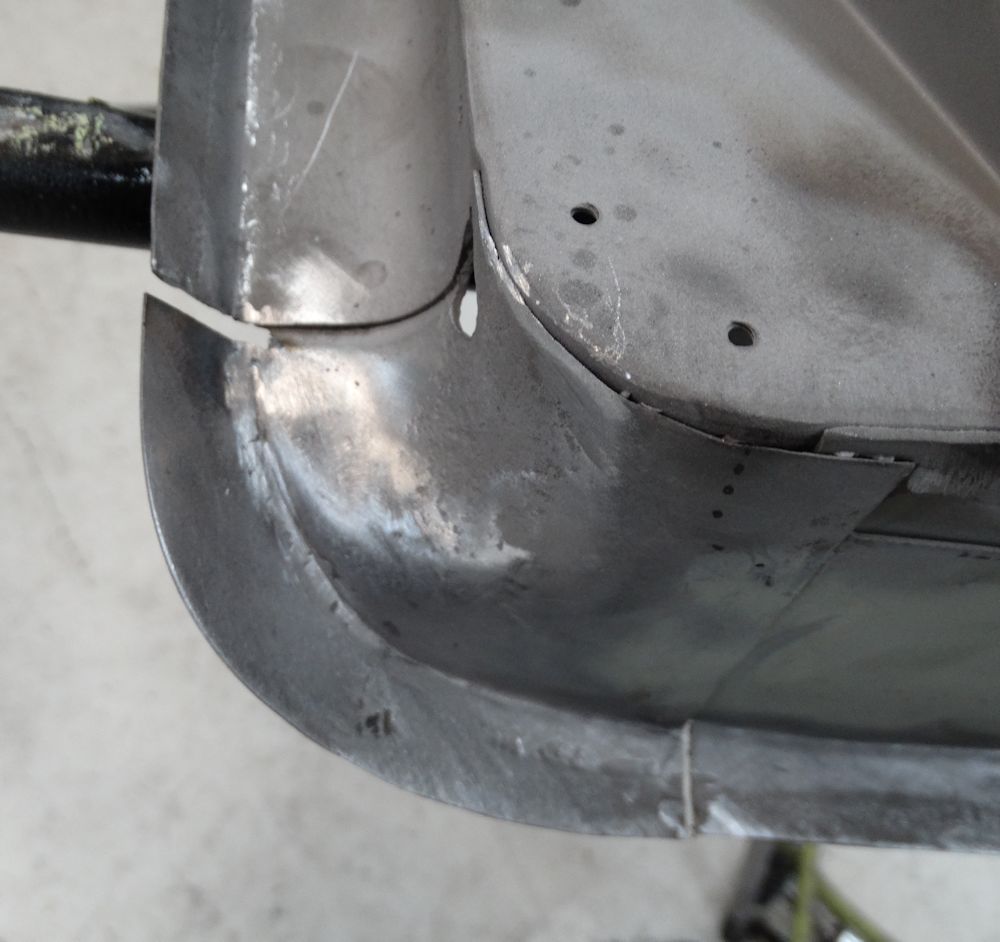
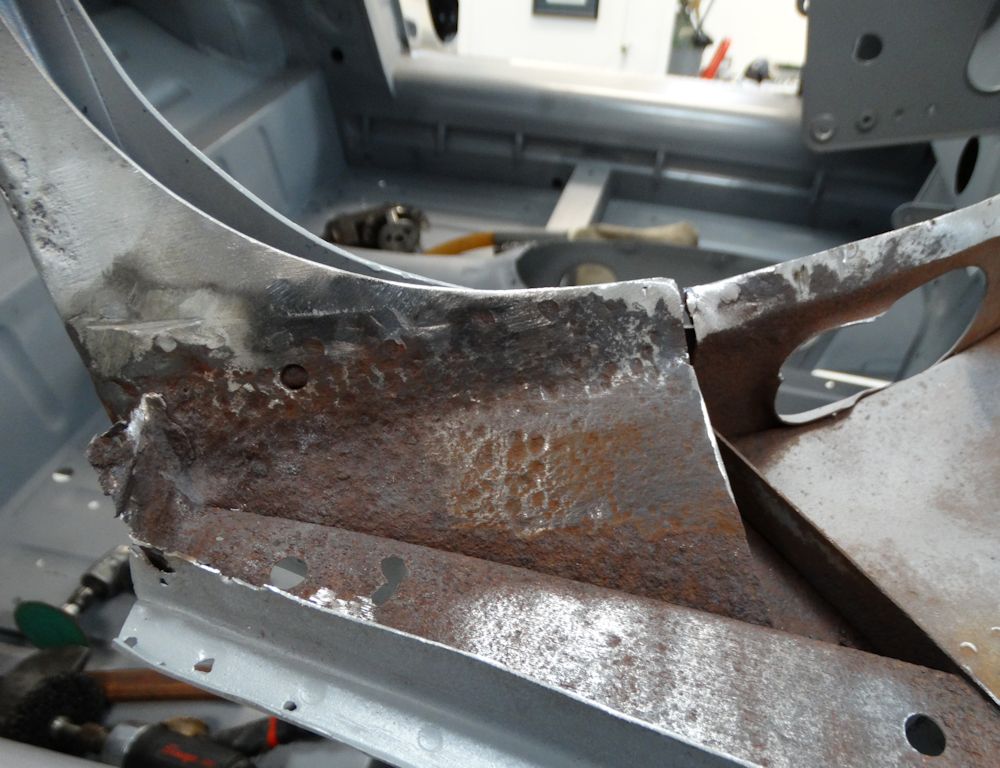
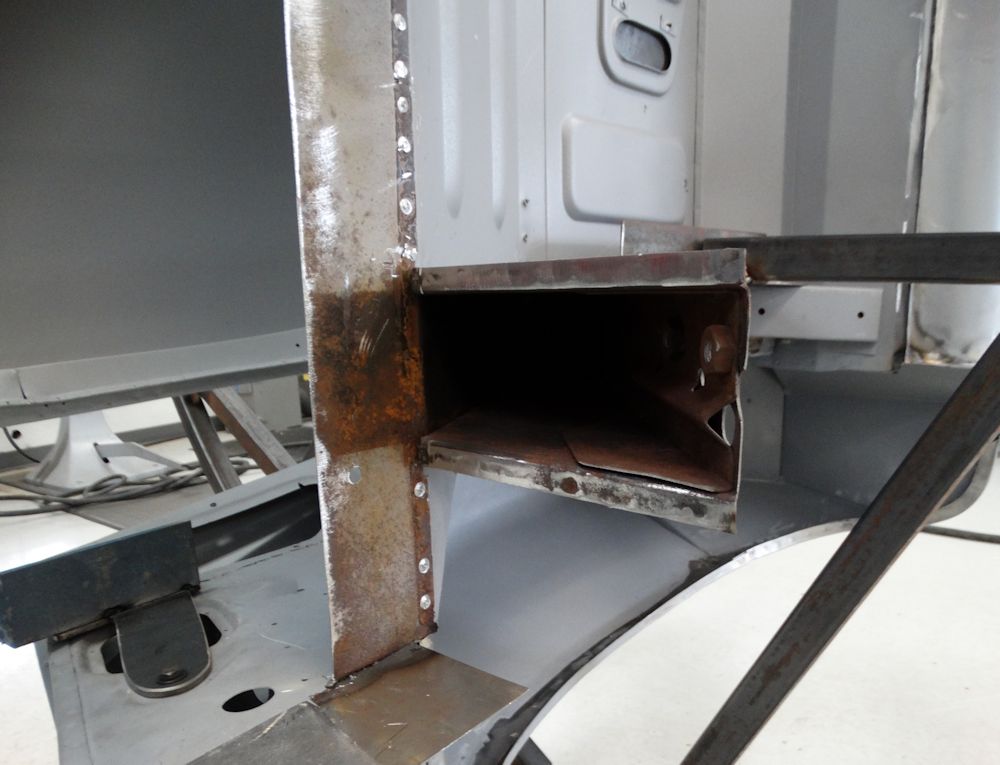
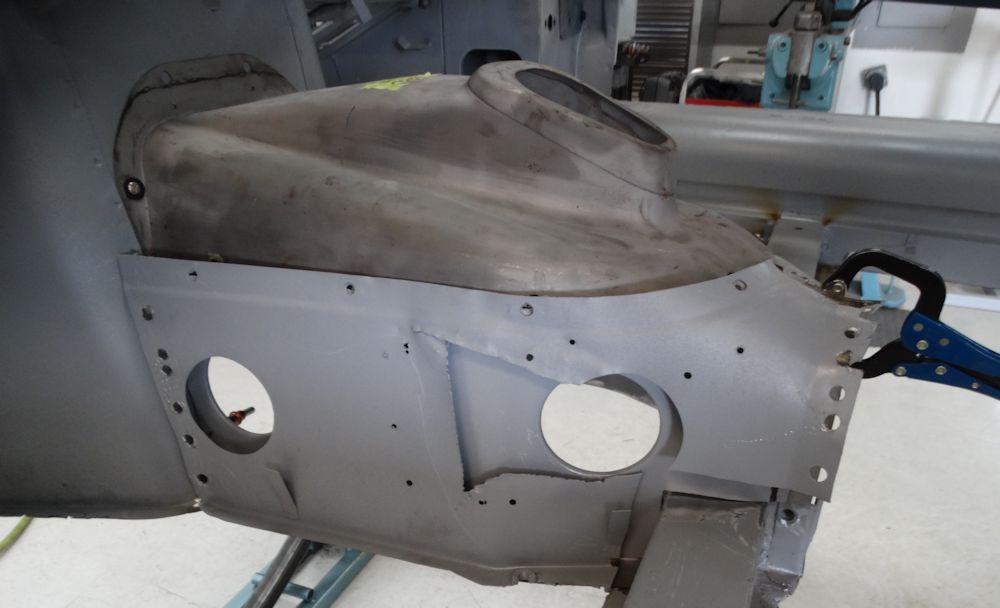
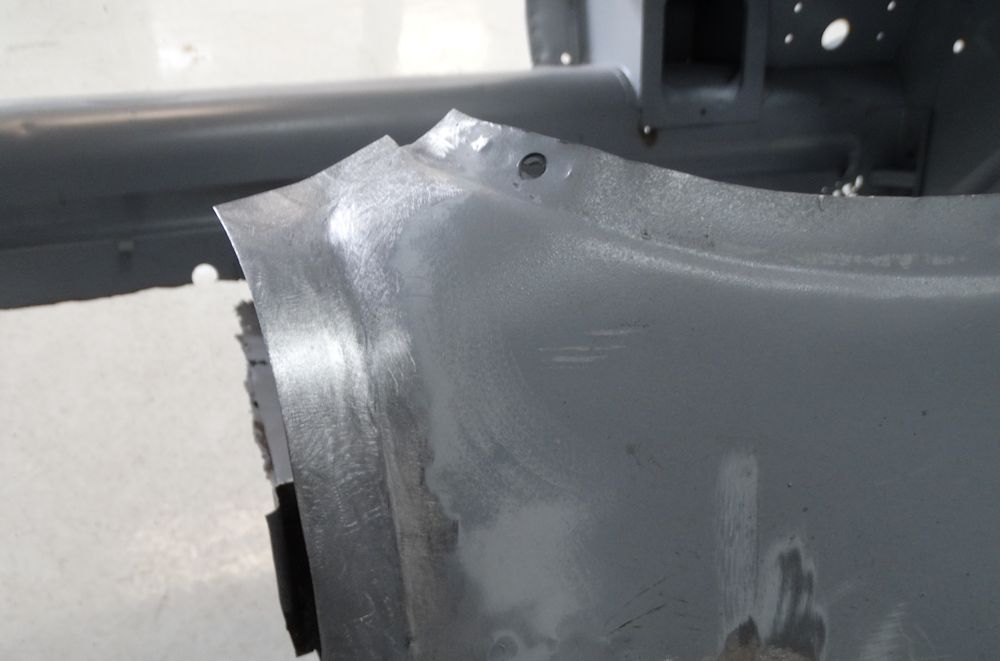
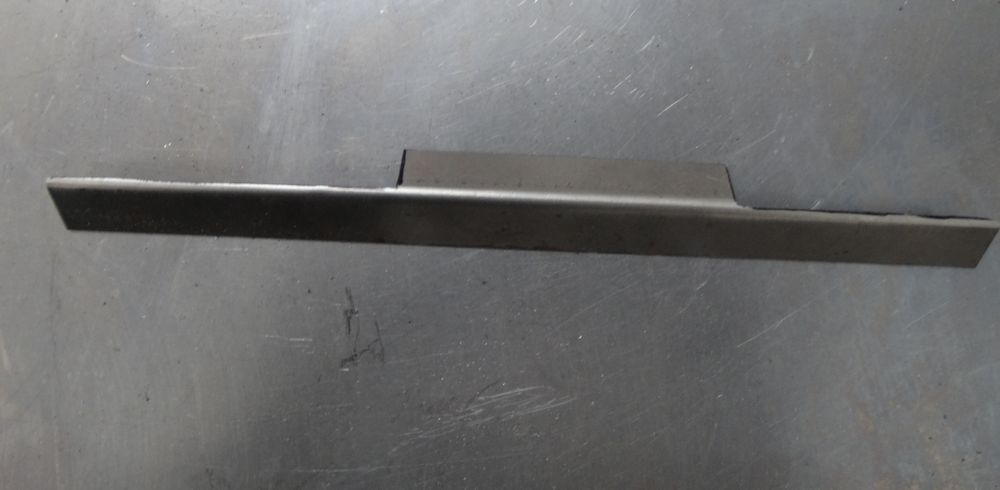
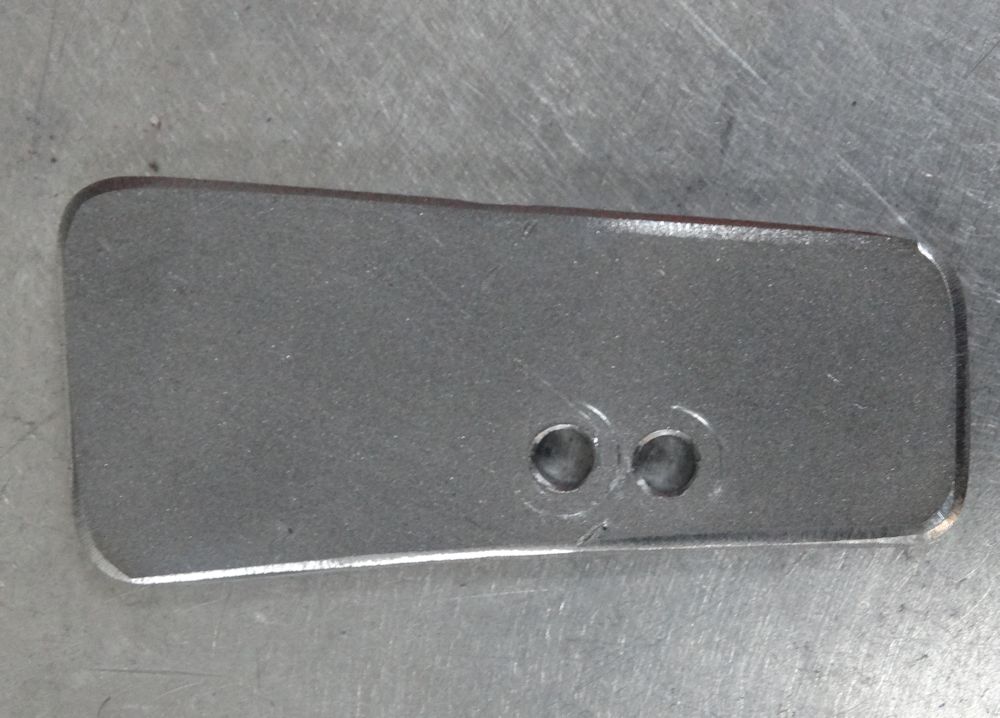
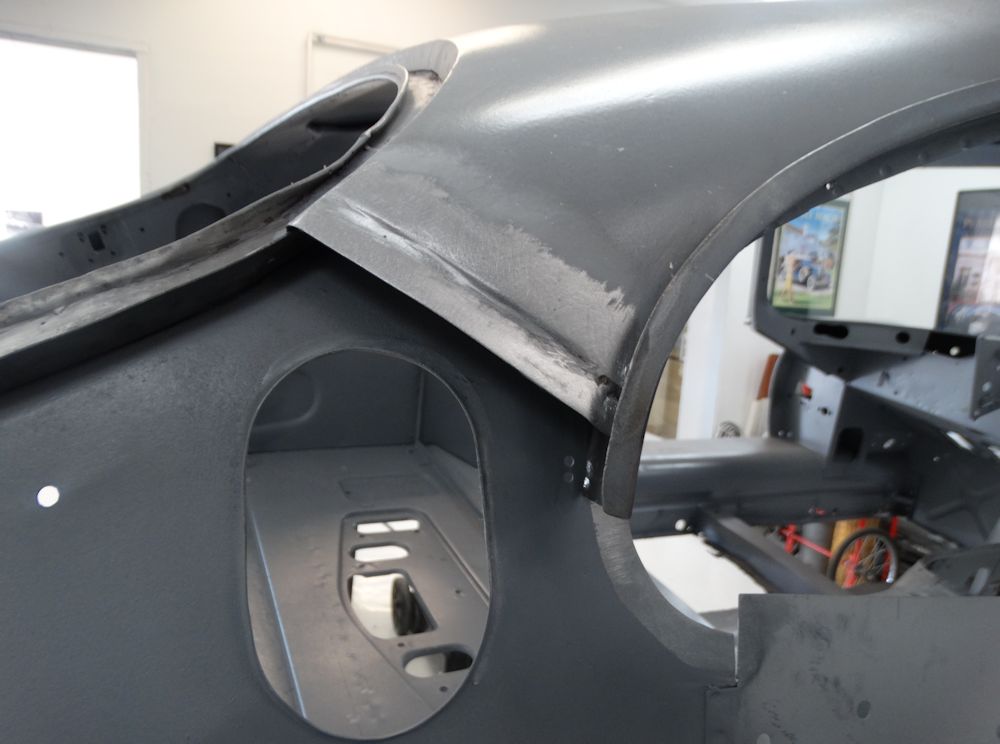
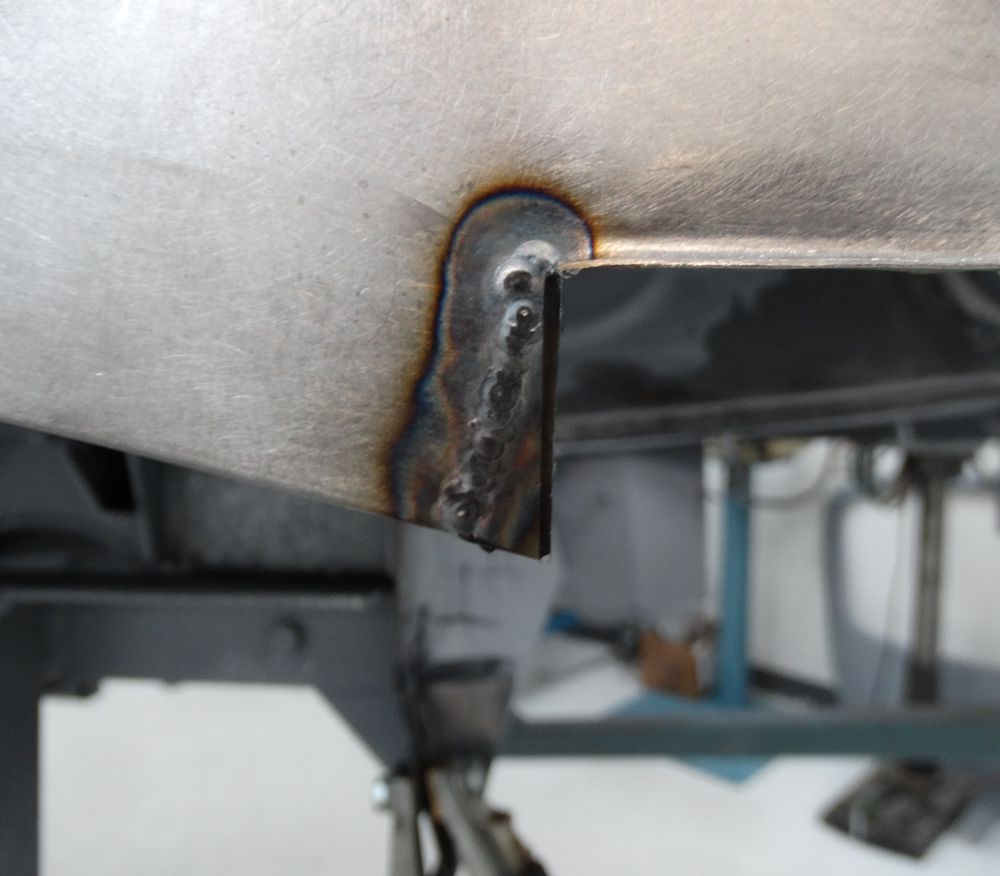
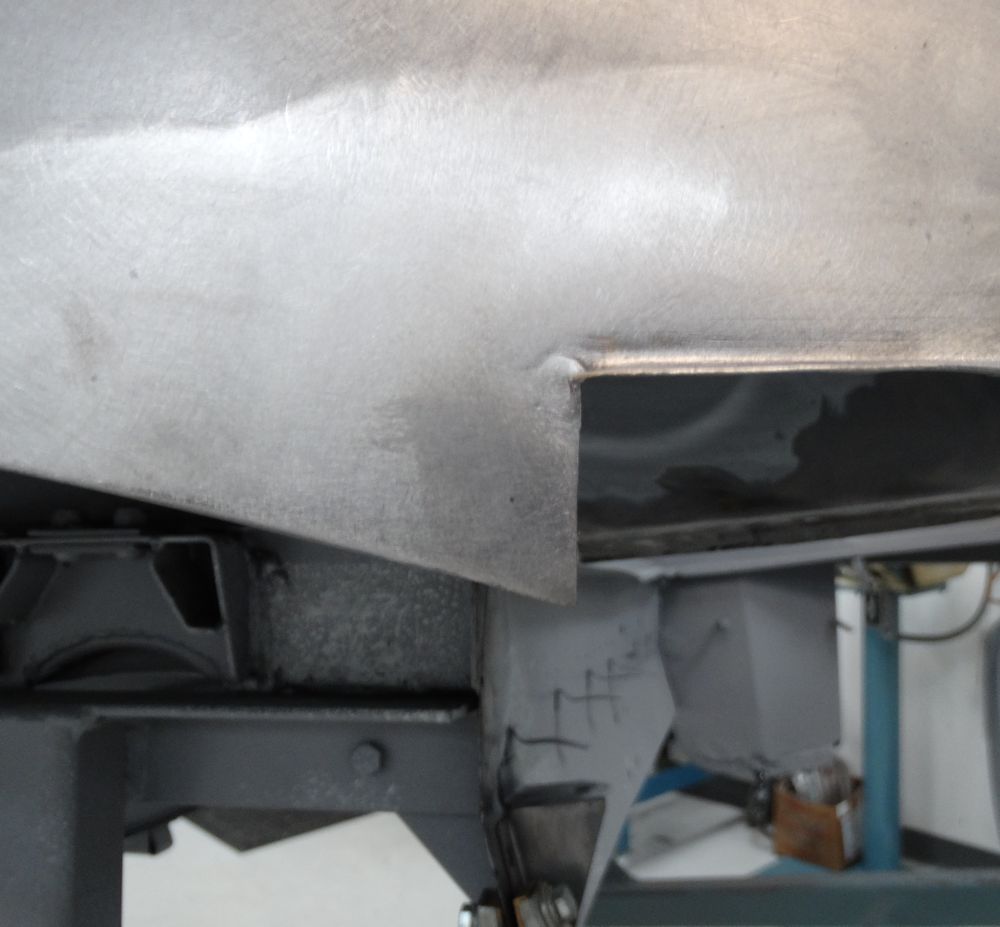
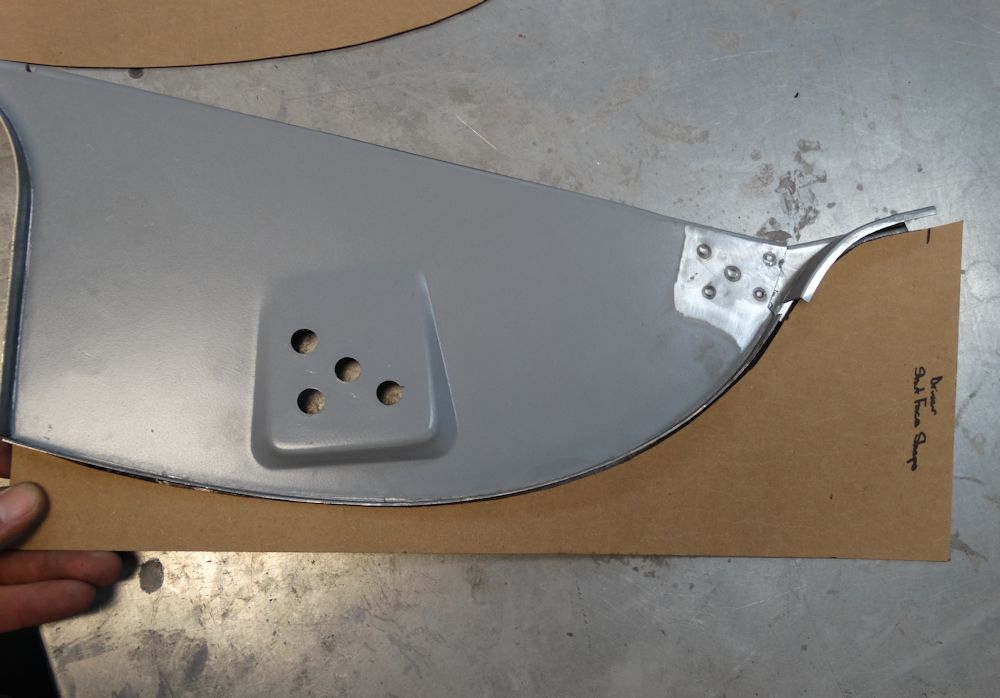
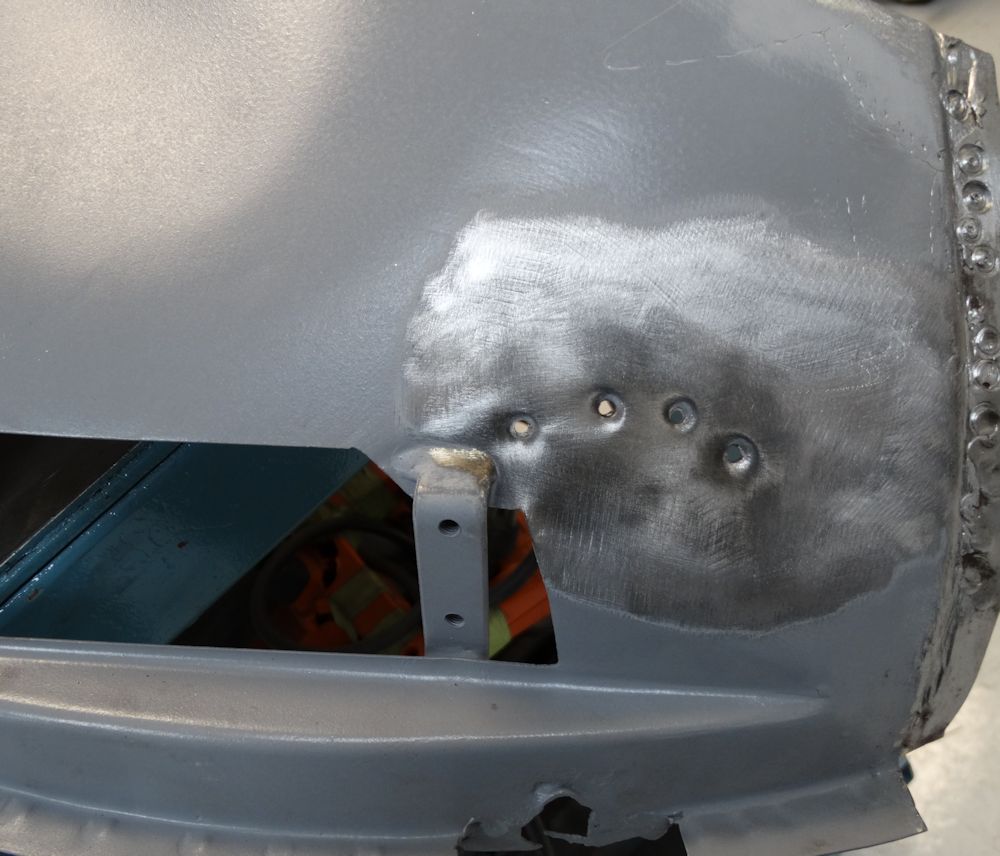
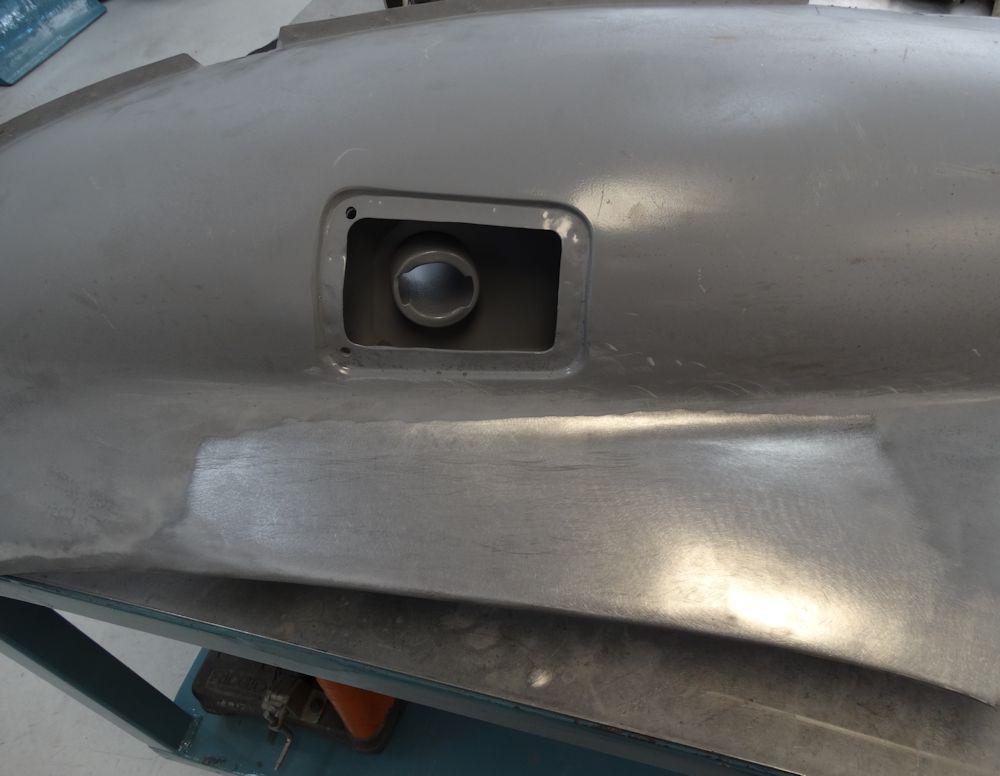
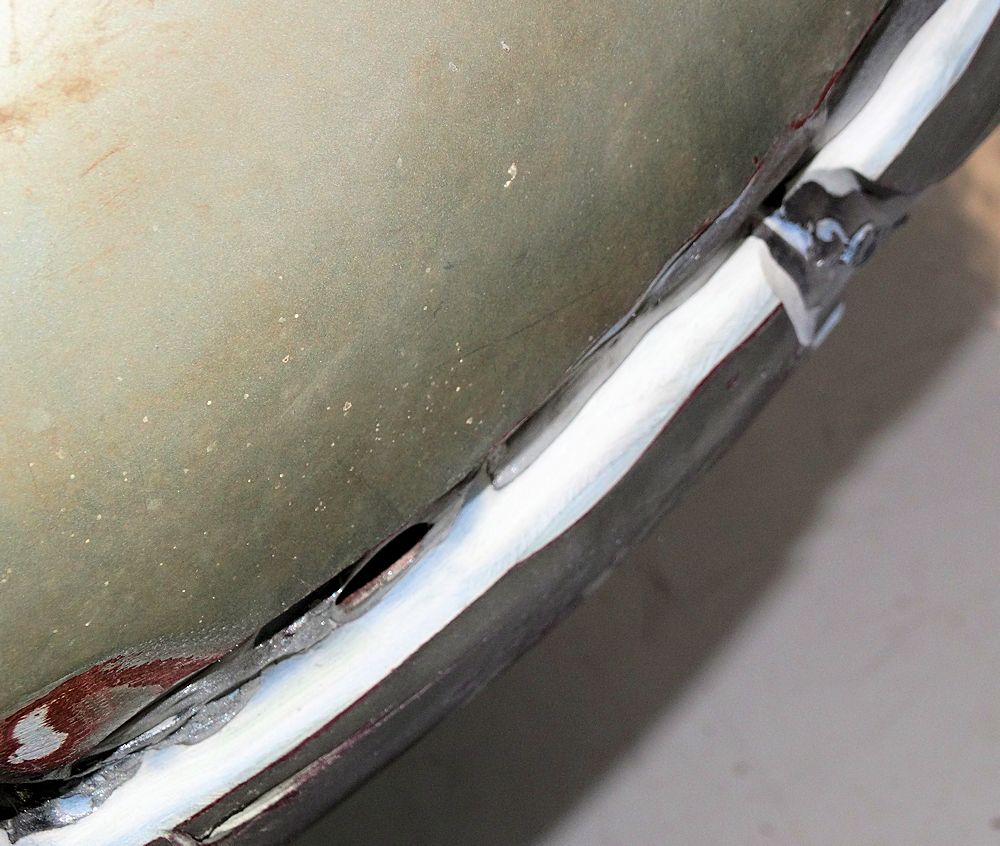
| This heater air intake is original to 885013 |
Although in poor condition, we have to
restore rather than replace as new ones are not the same |
 |
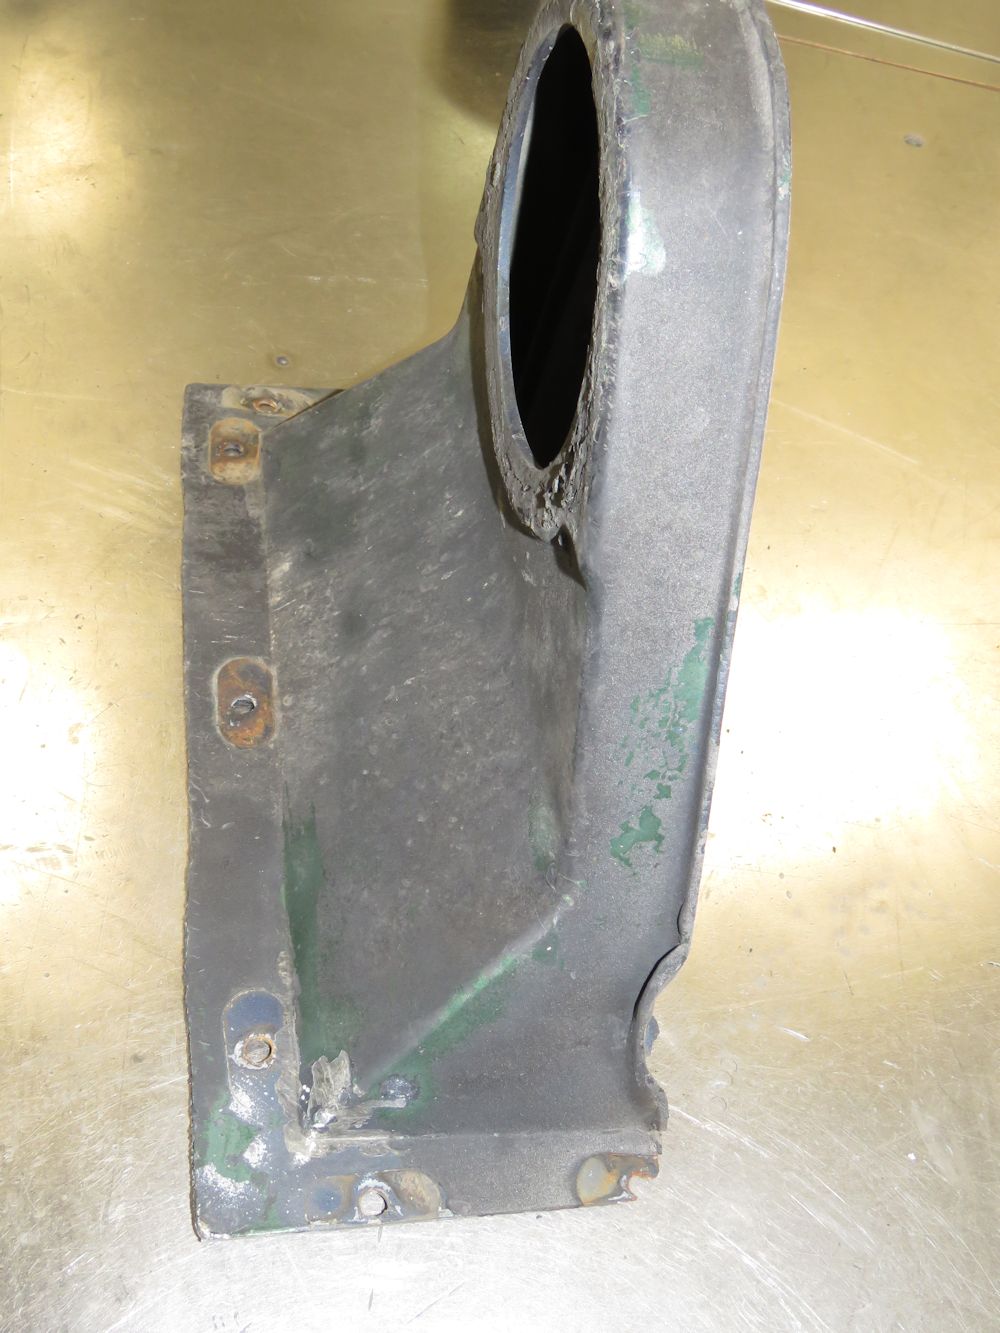 |
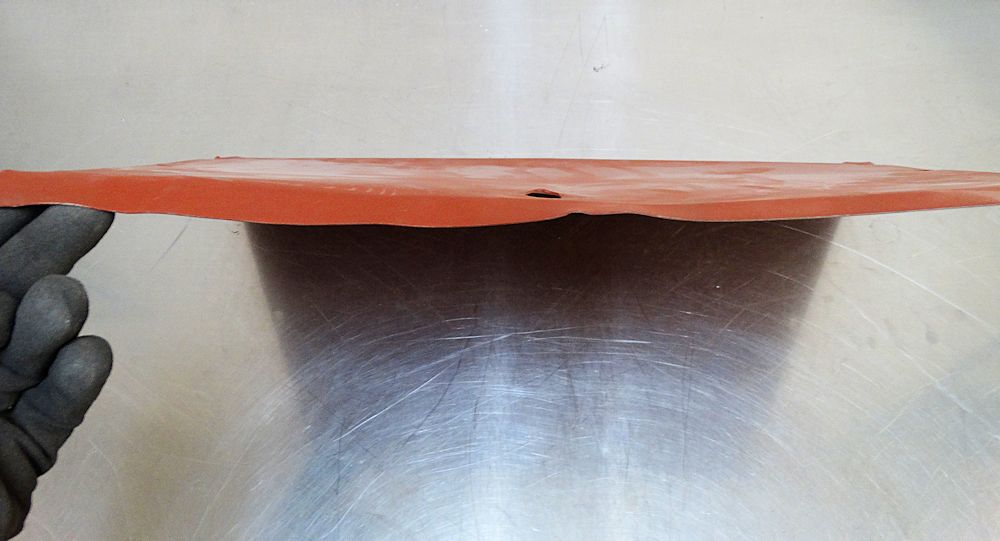
| Note the wavy lower edge, something that is common to the very early intakes |
|
 |
 |
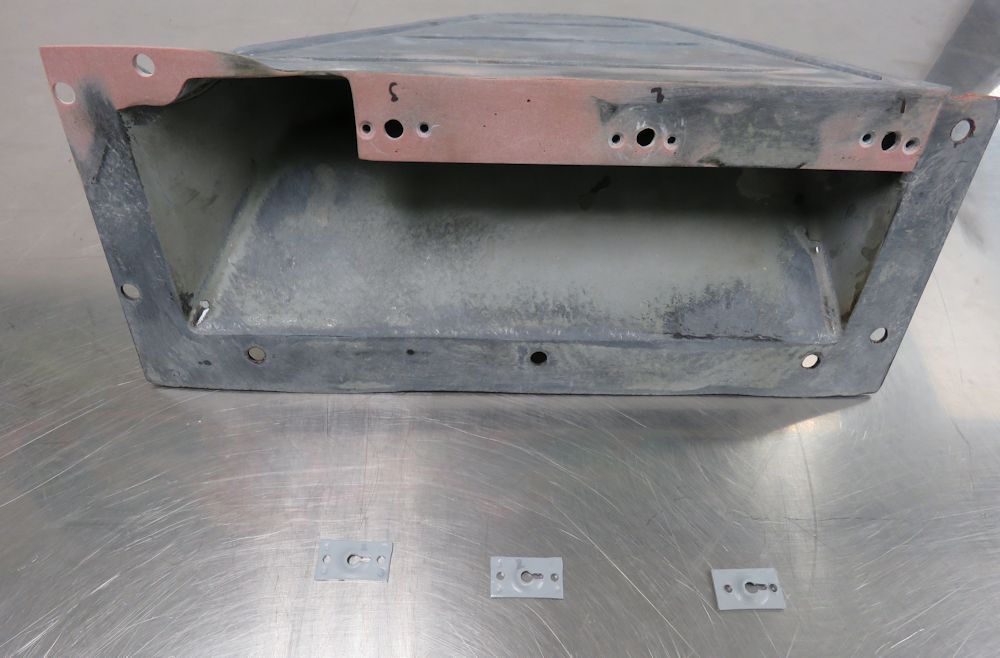
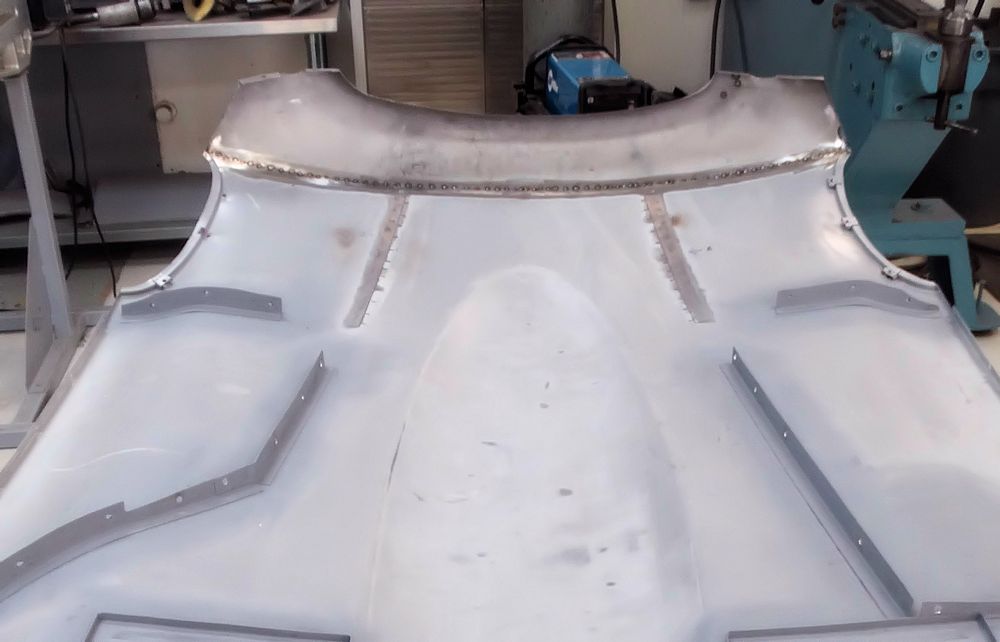
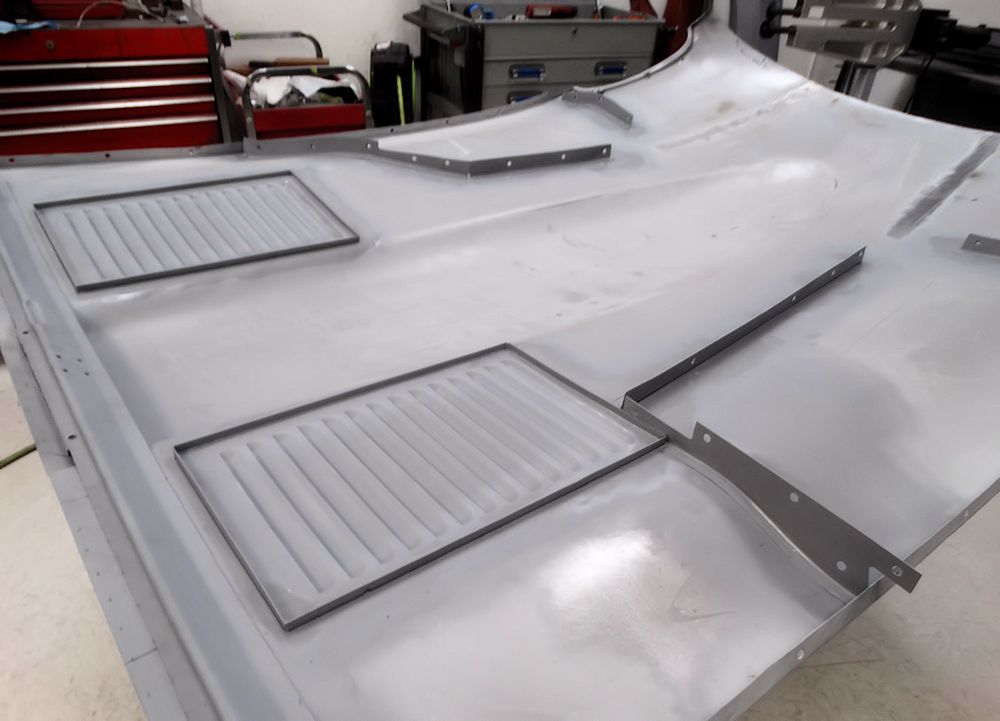
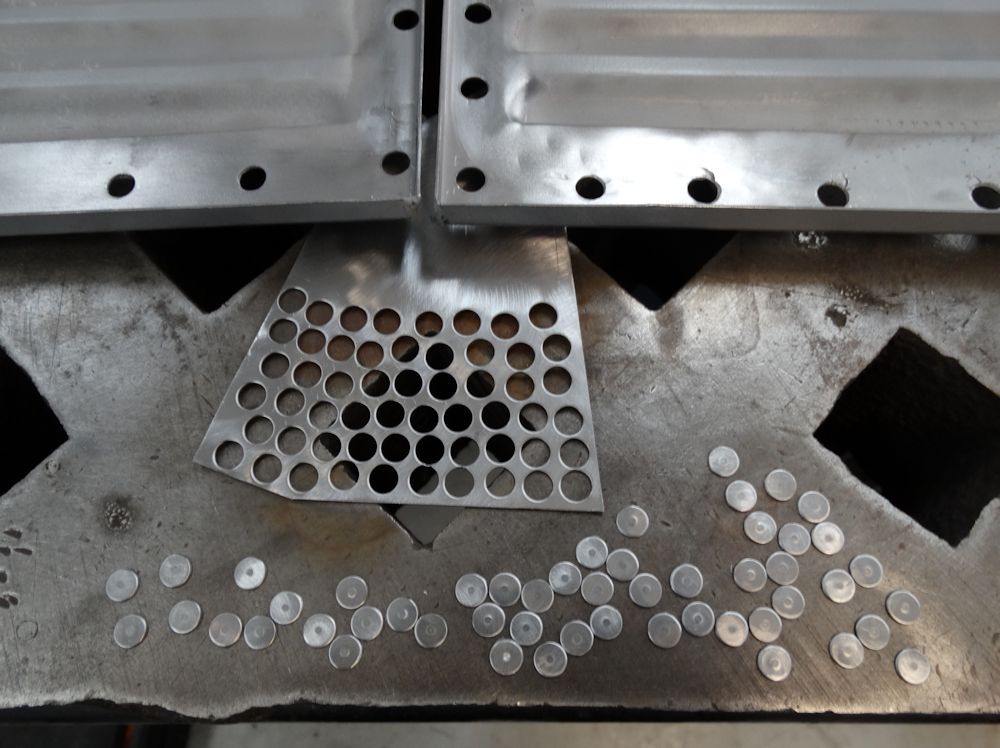
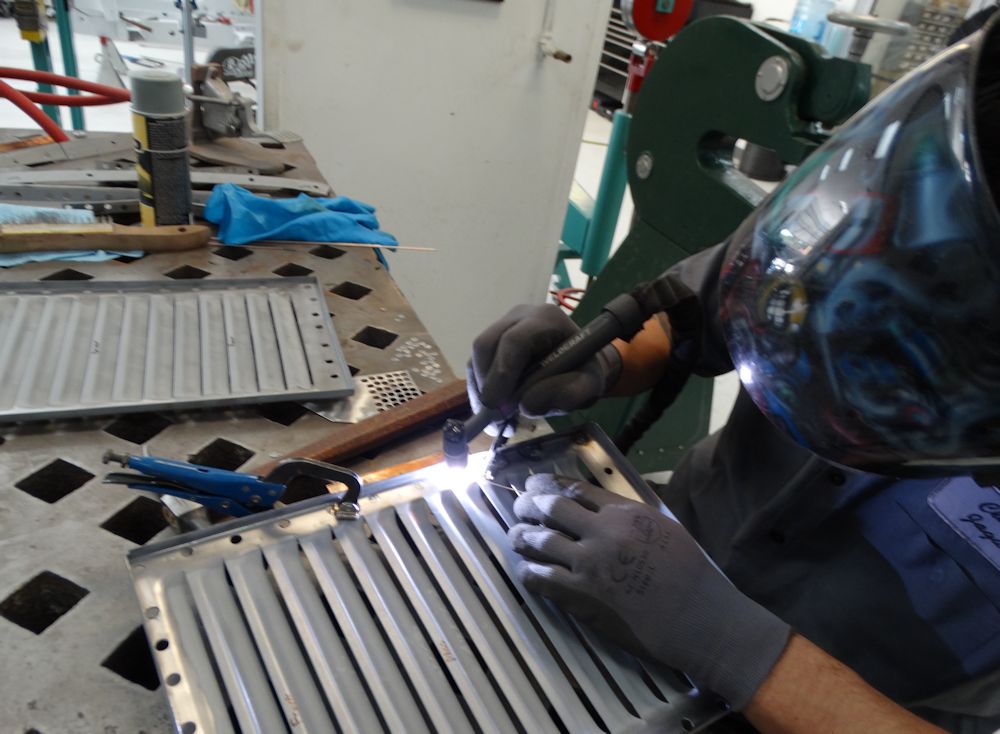
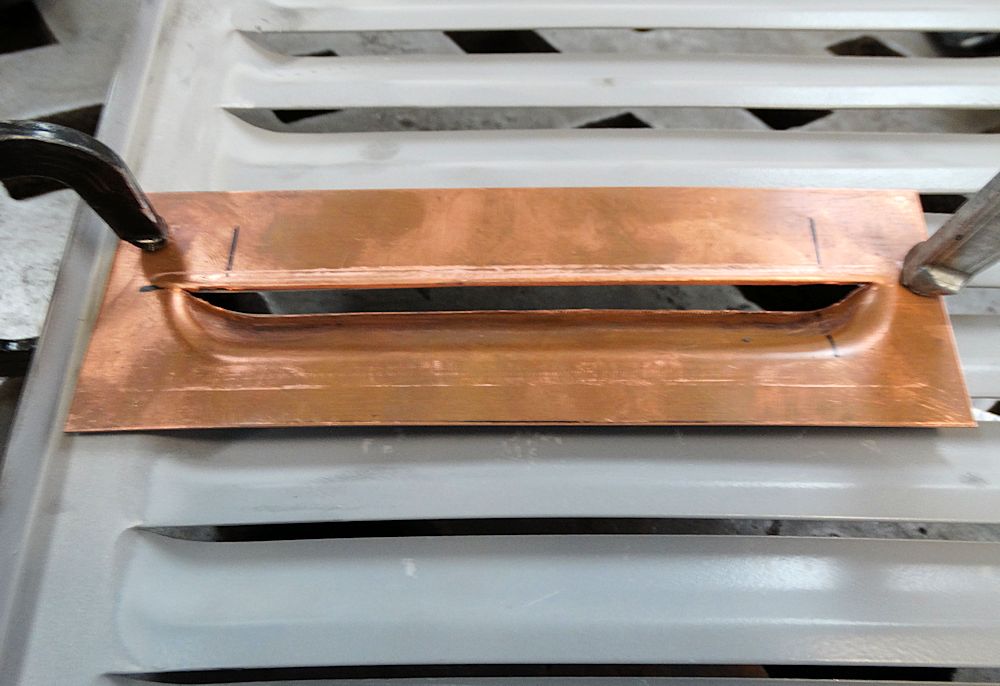
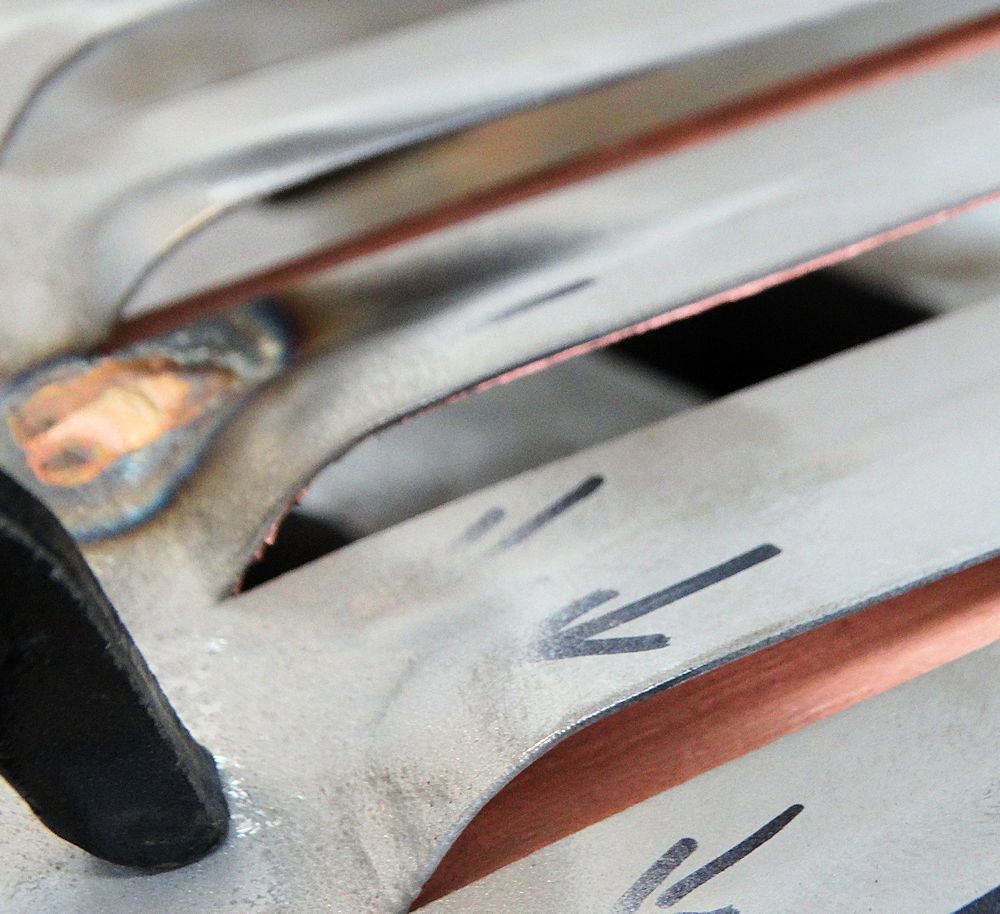
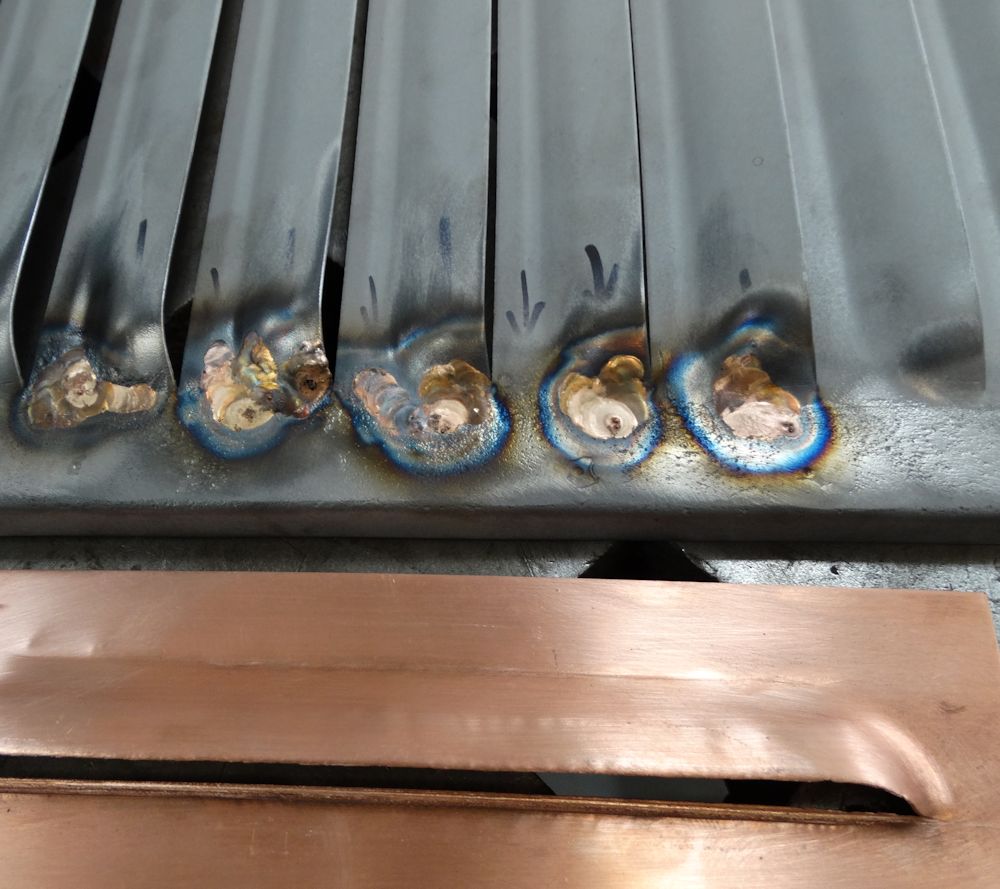
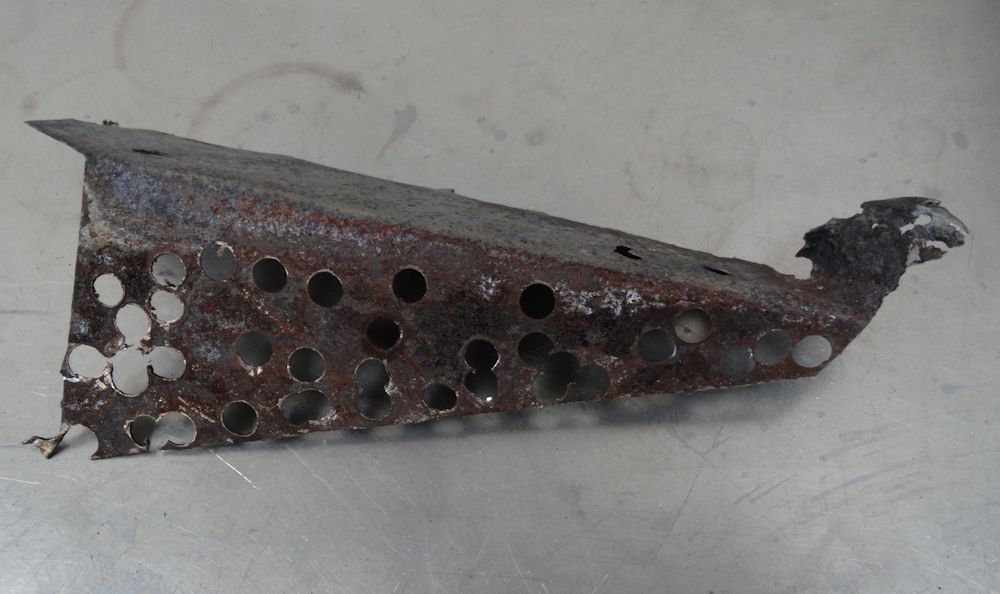
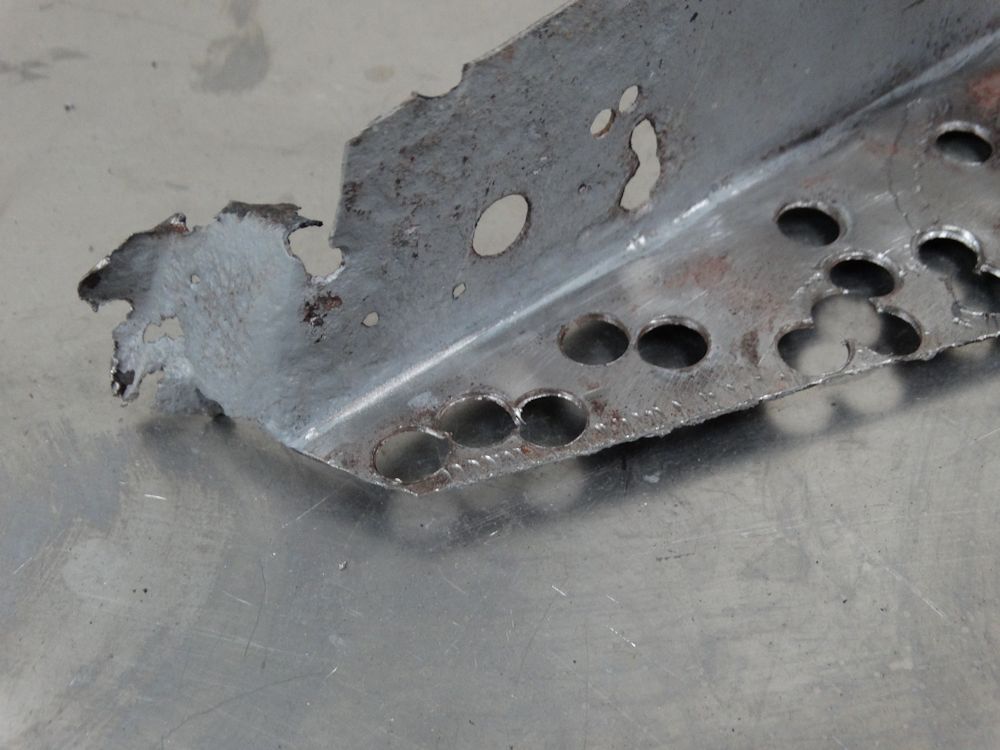
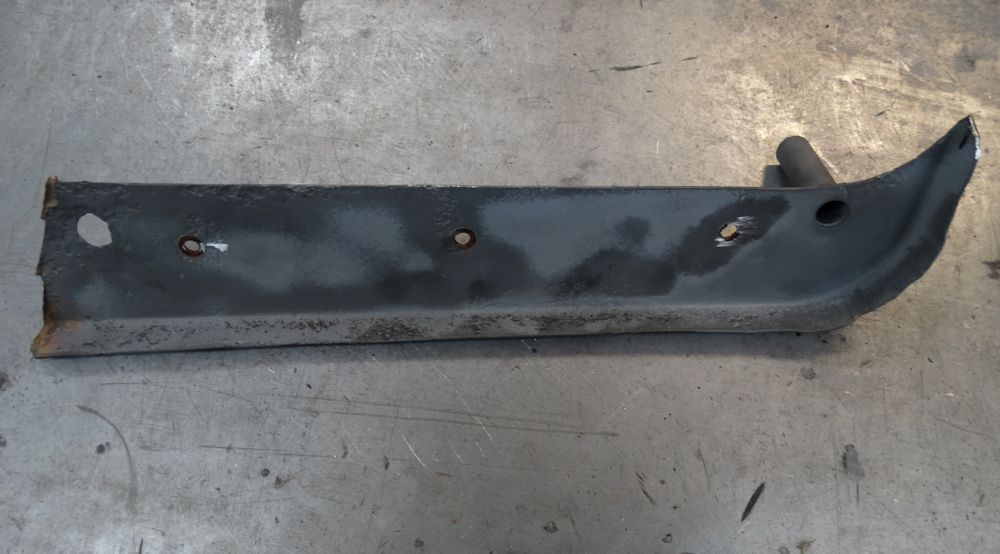
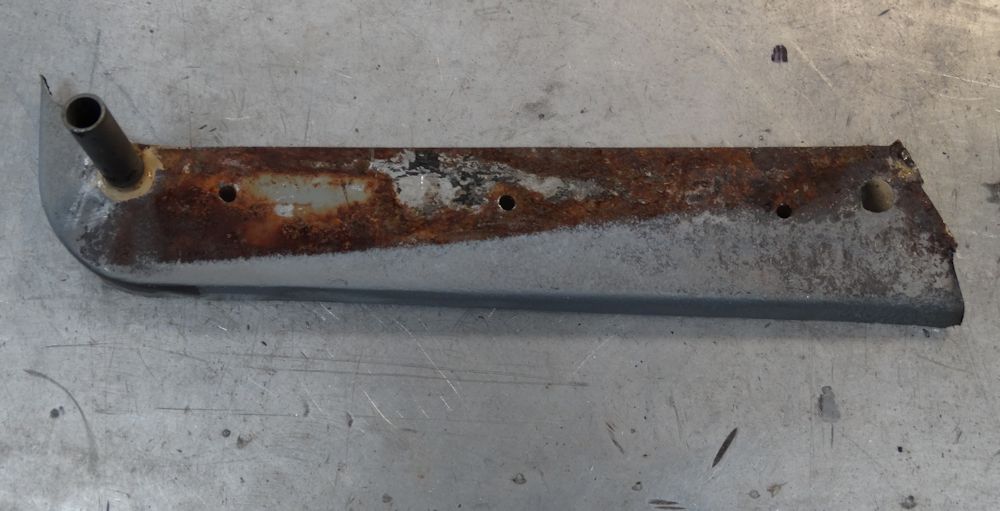
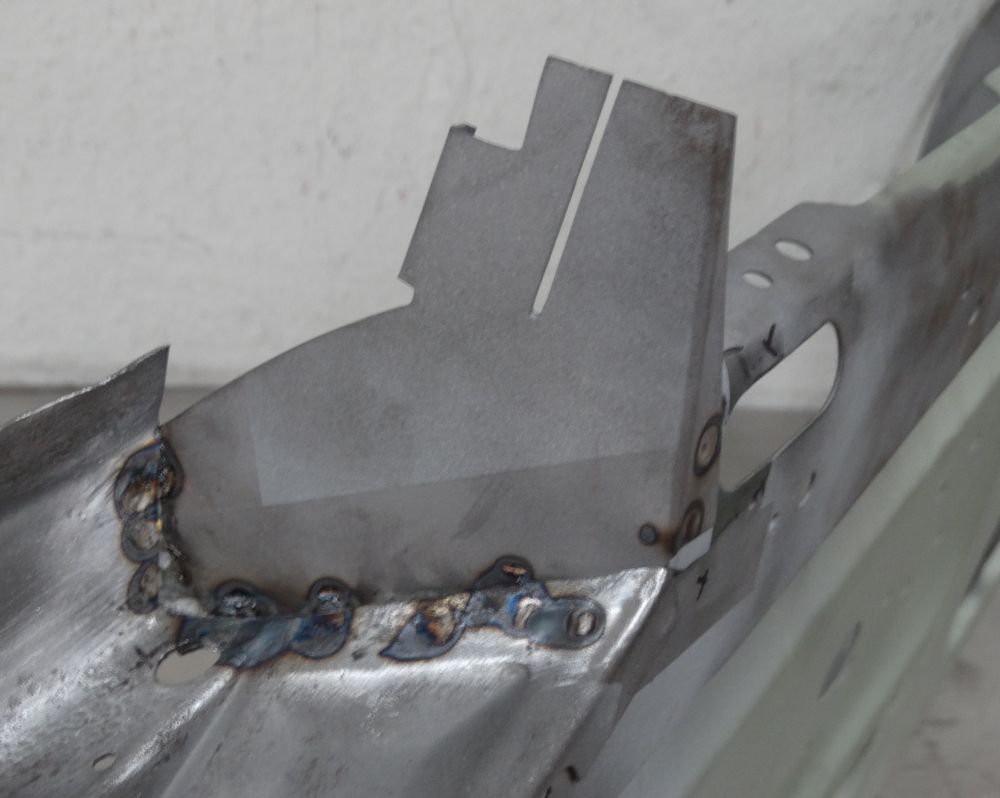
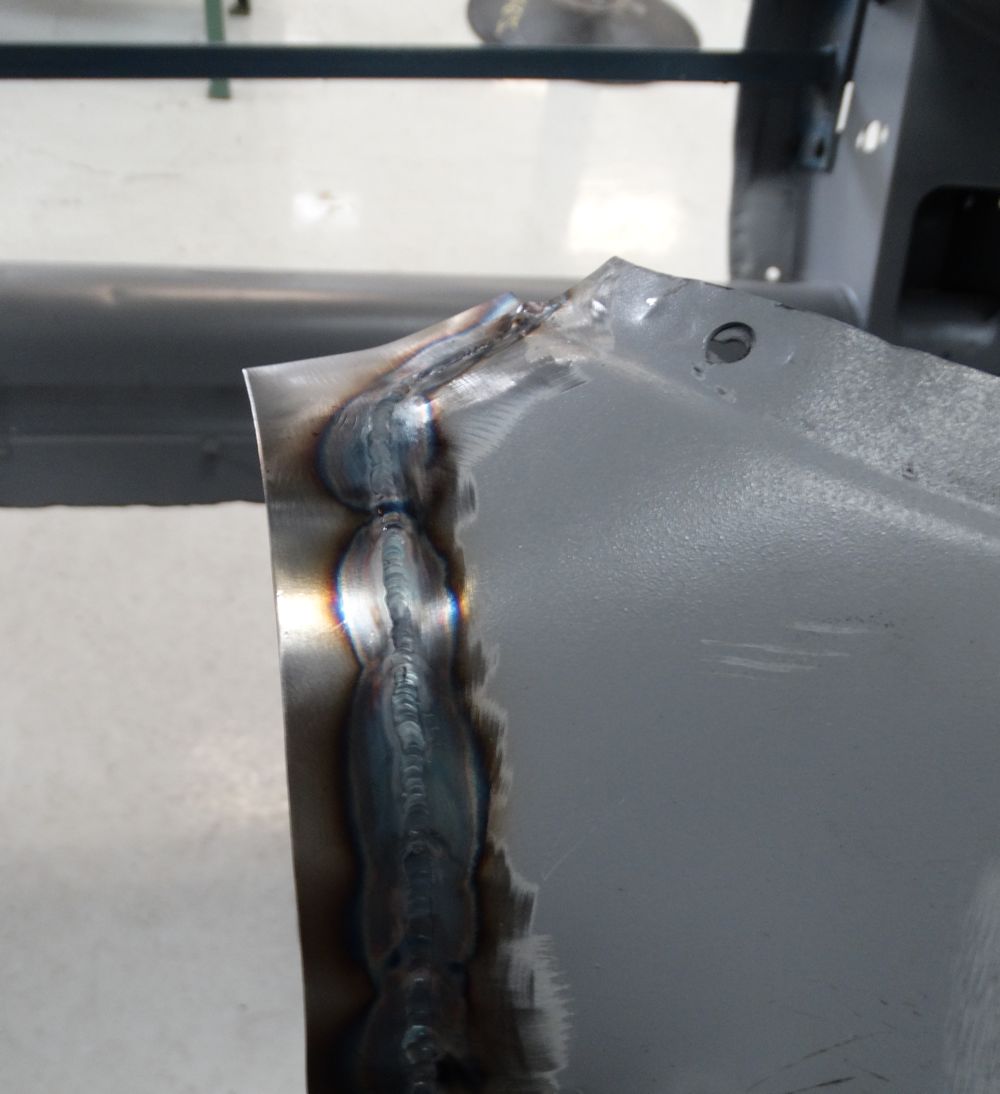
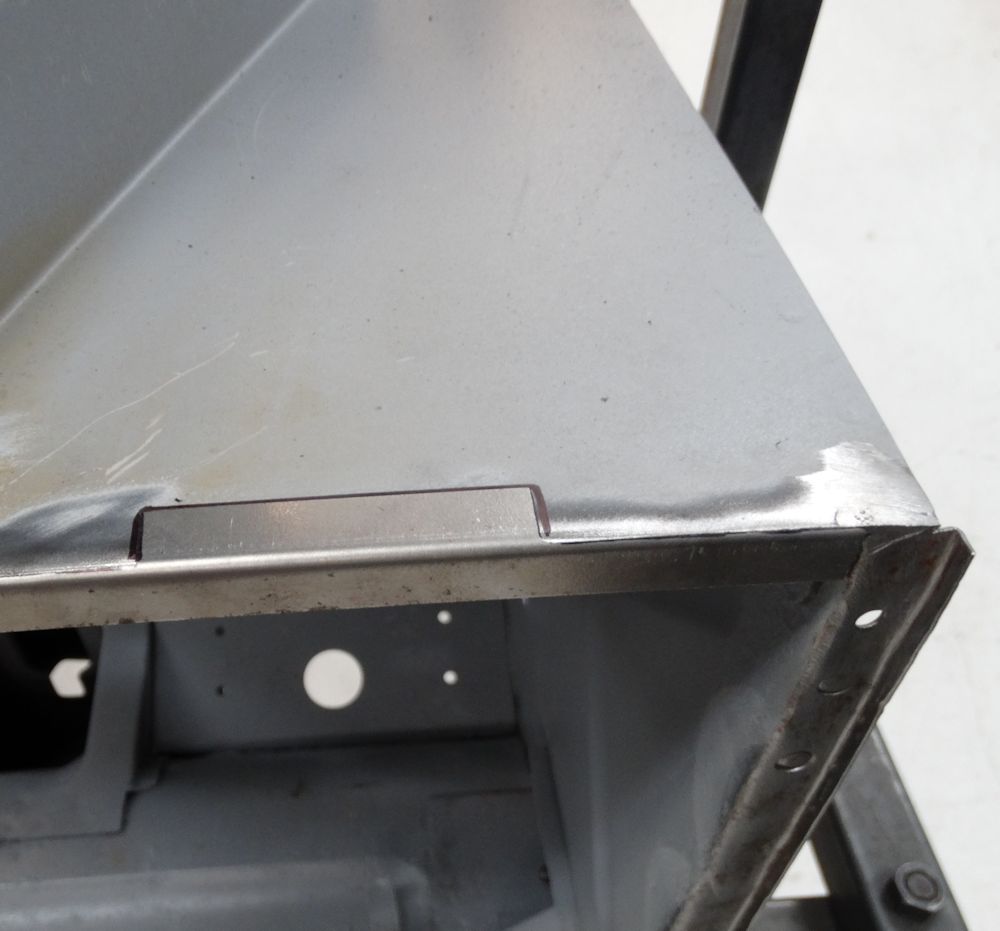
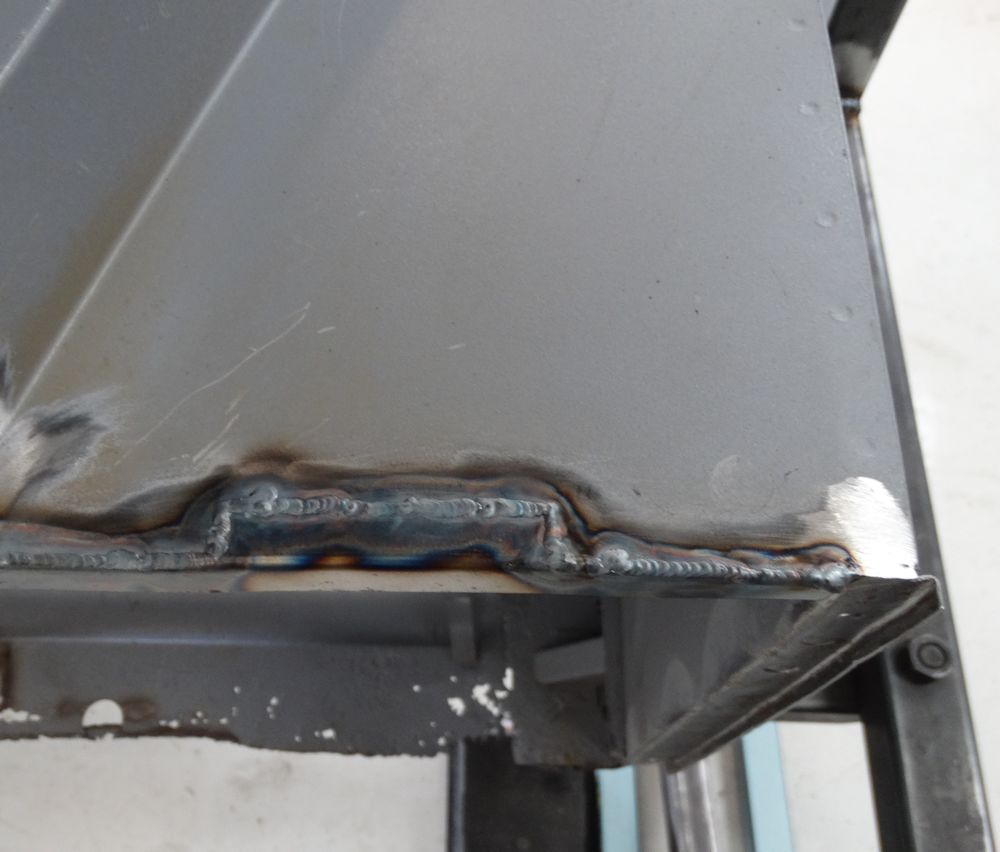
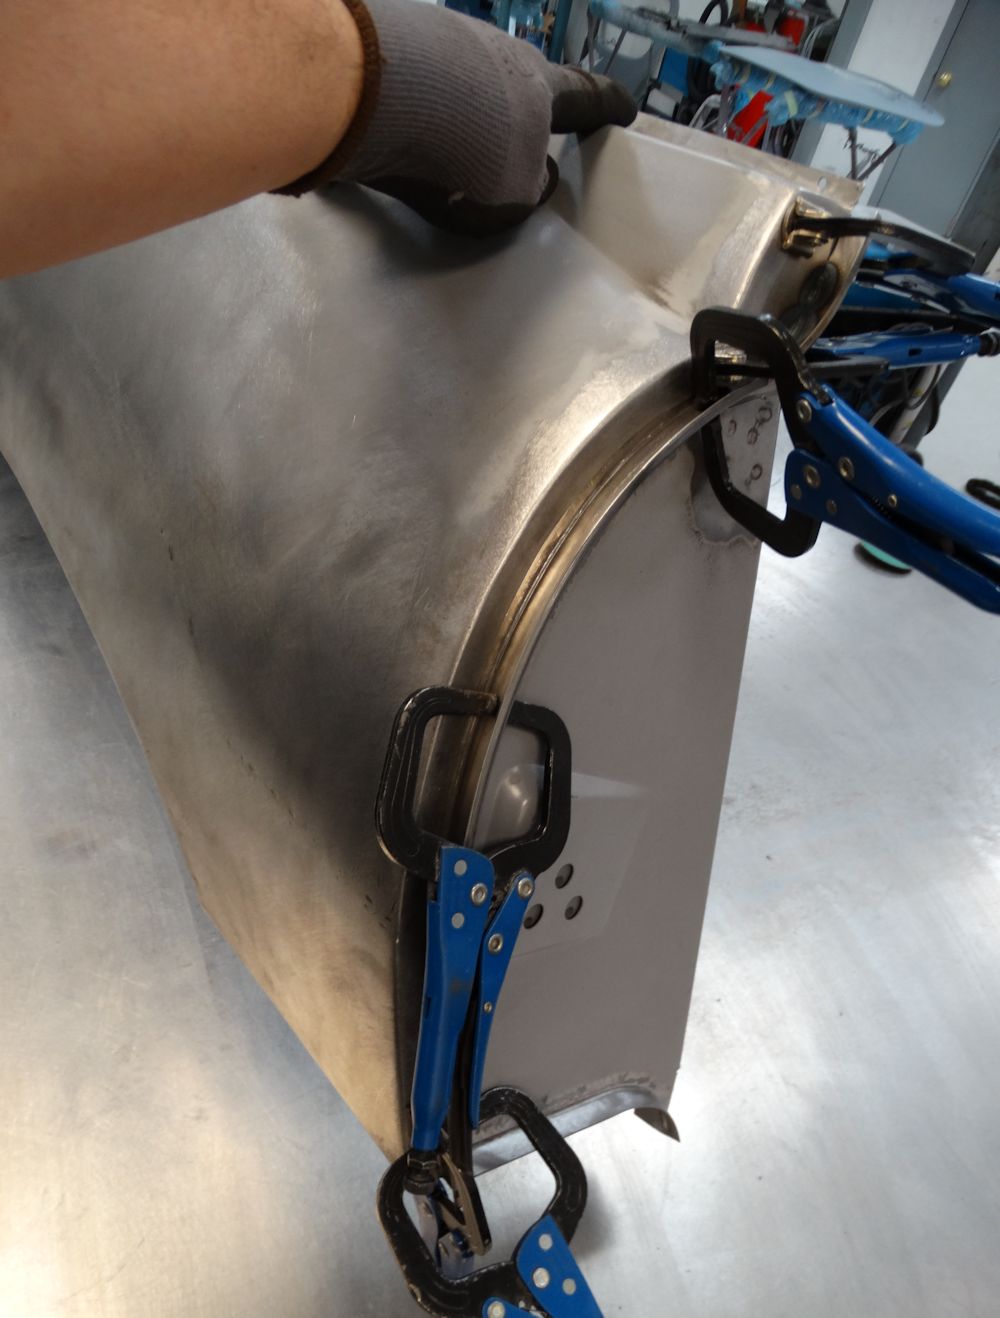
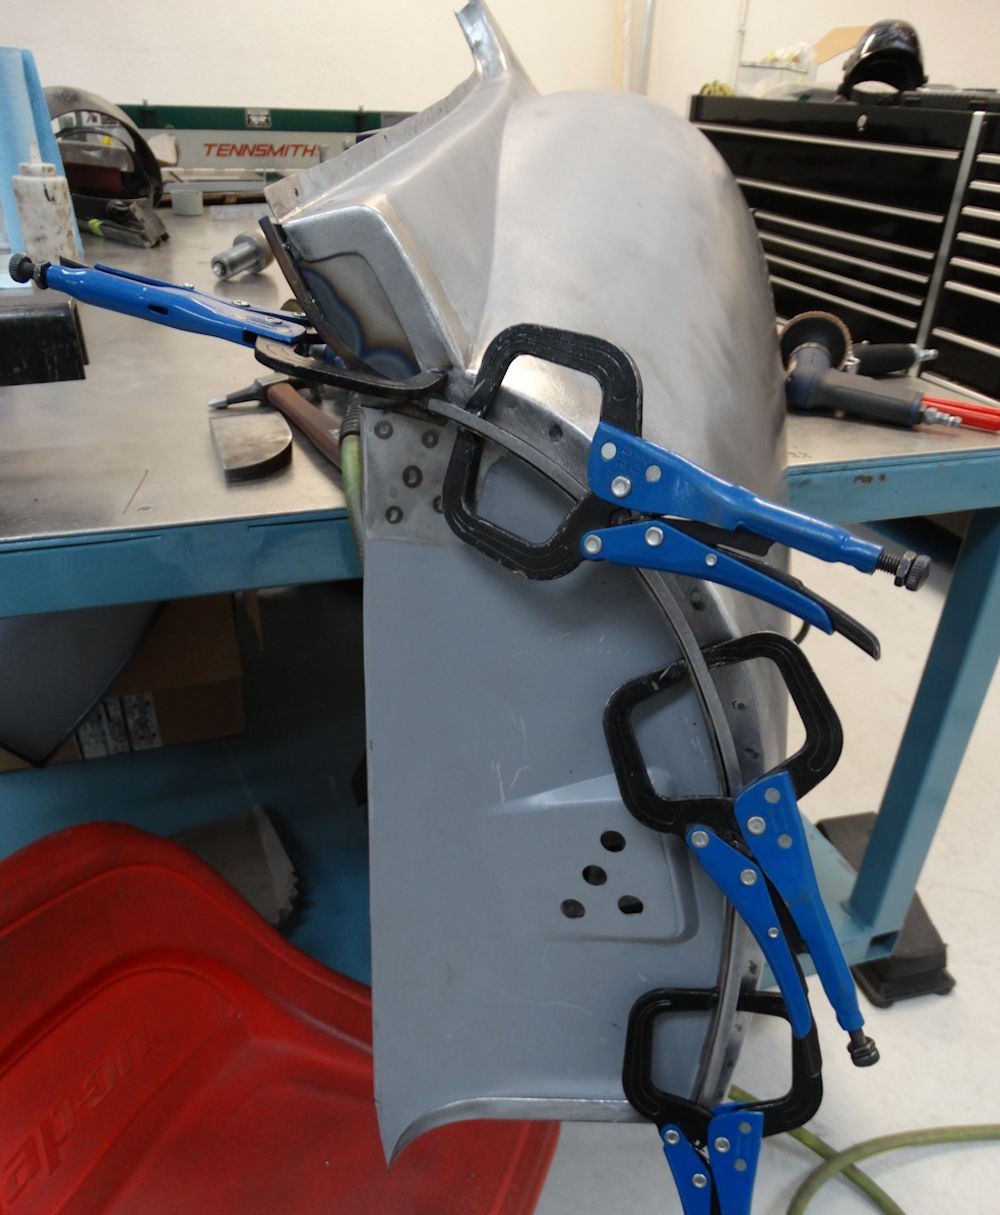
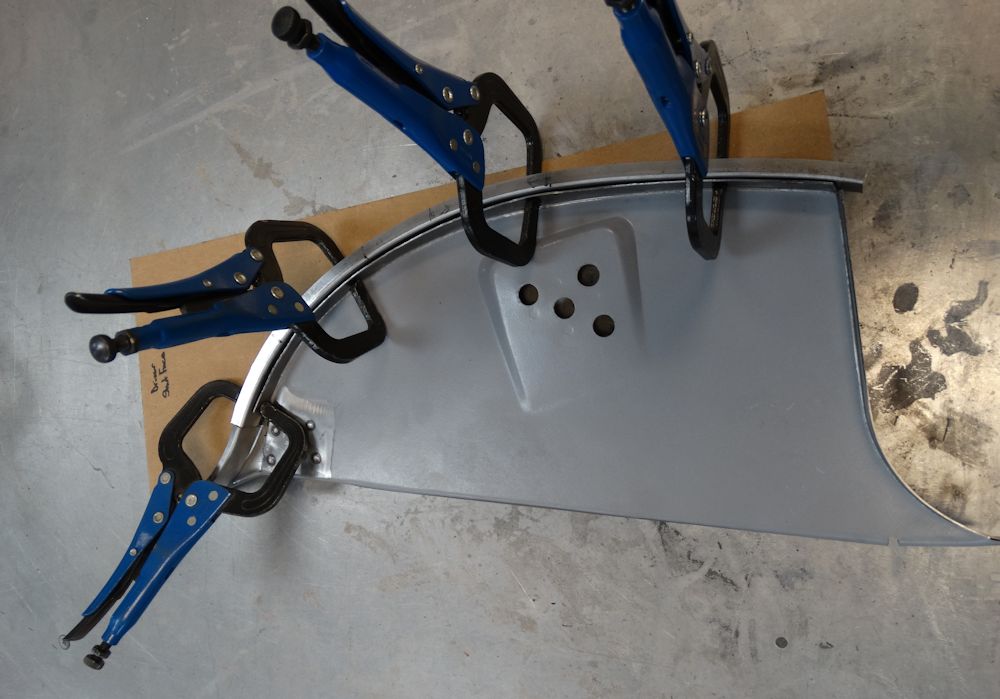
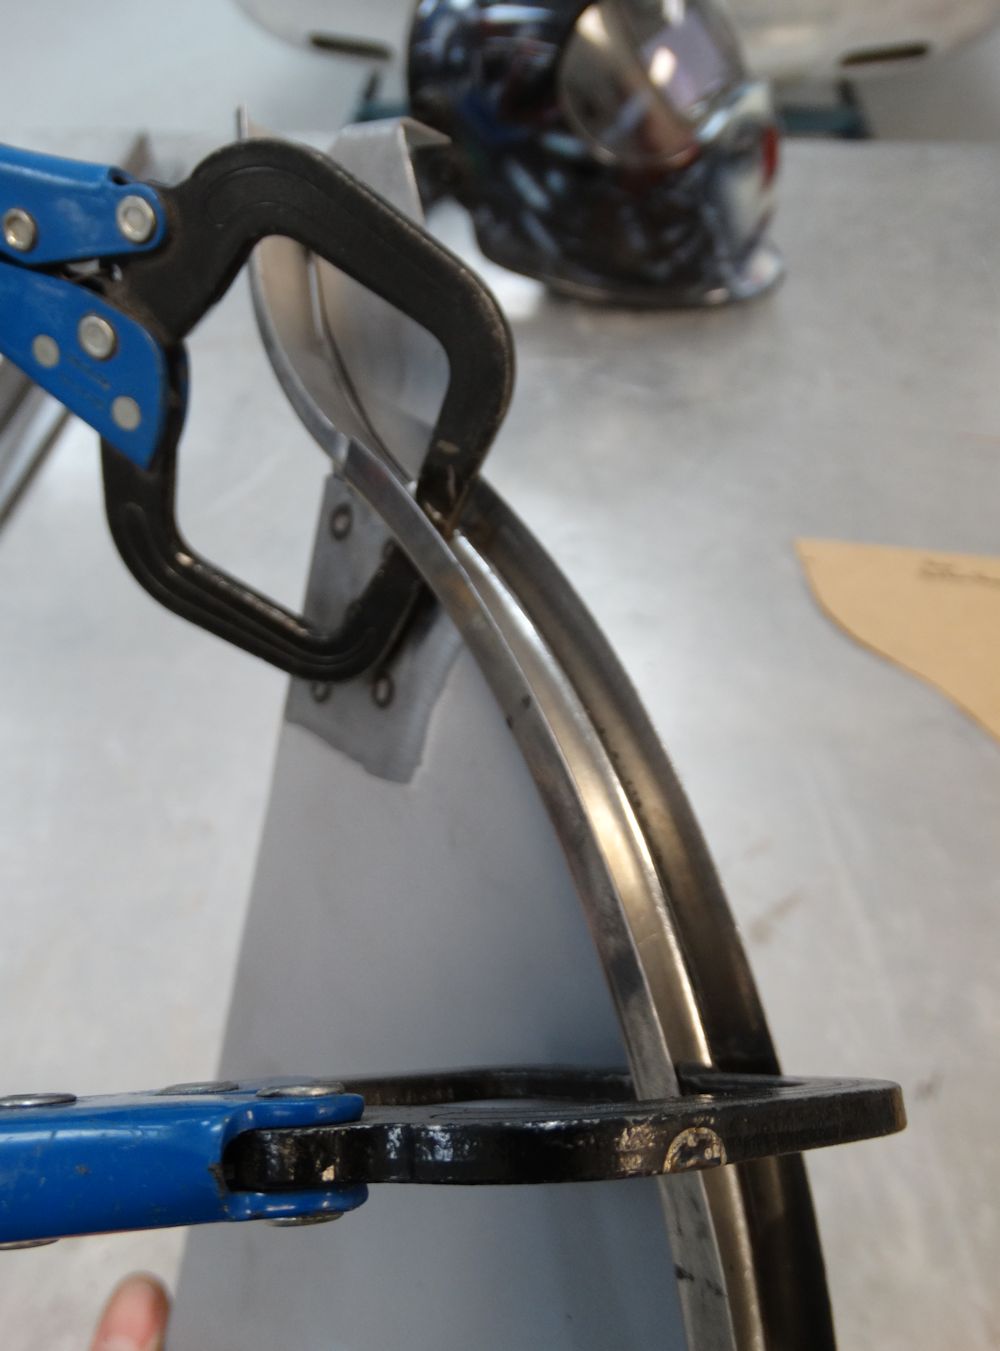
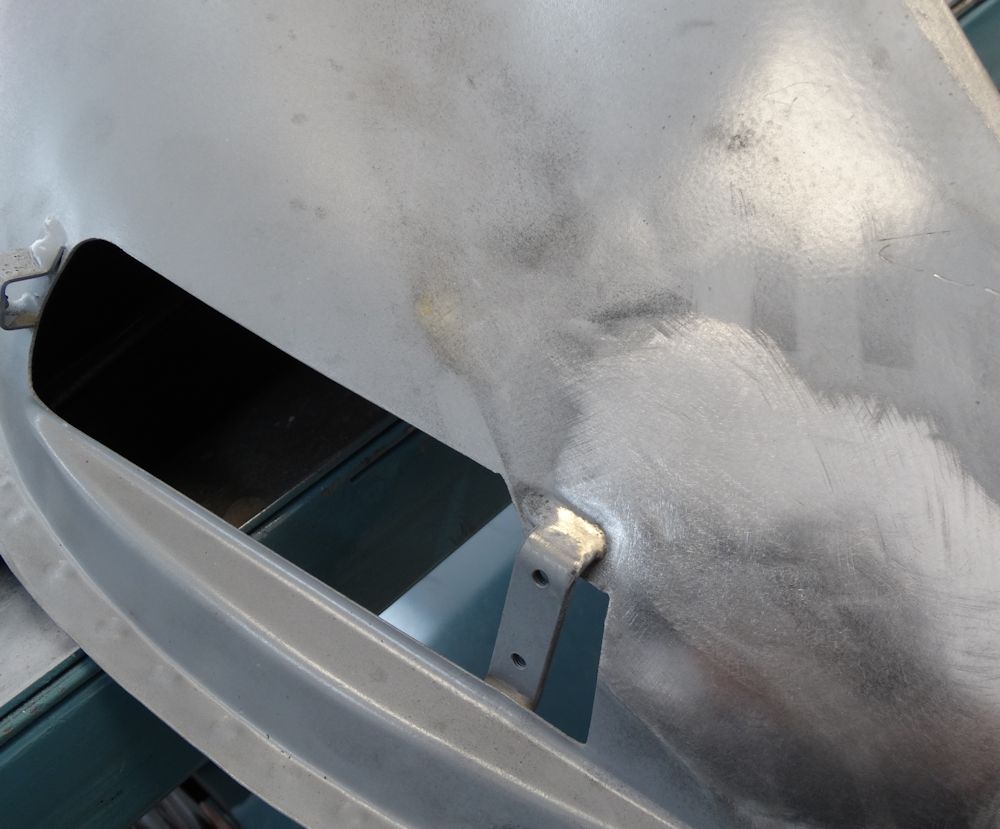
| Repairs in progress |
Trial fitting prior to handing off to Gerardo
for paint |
 |
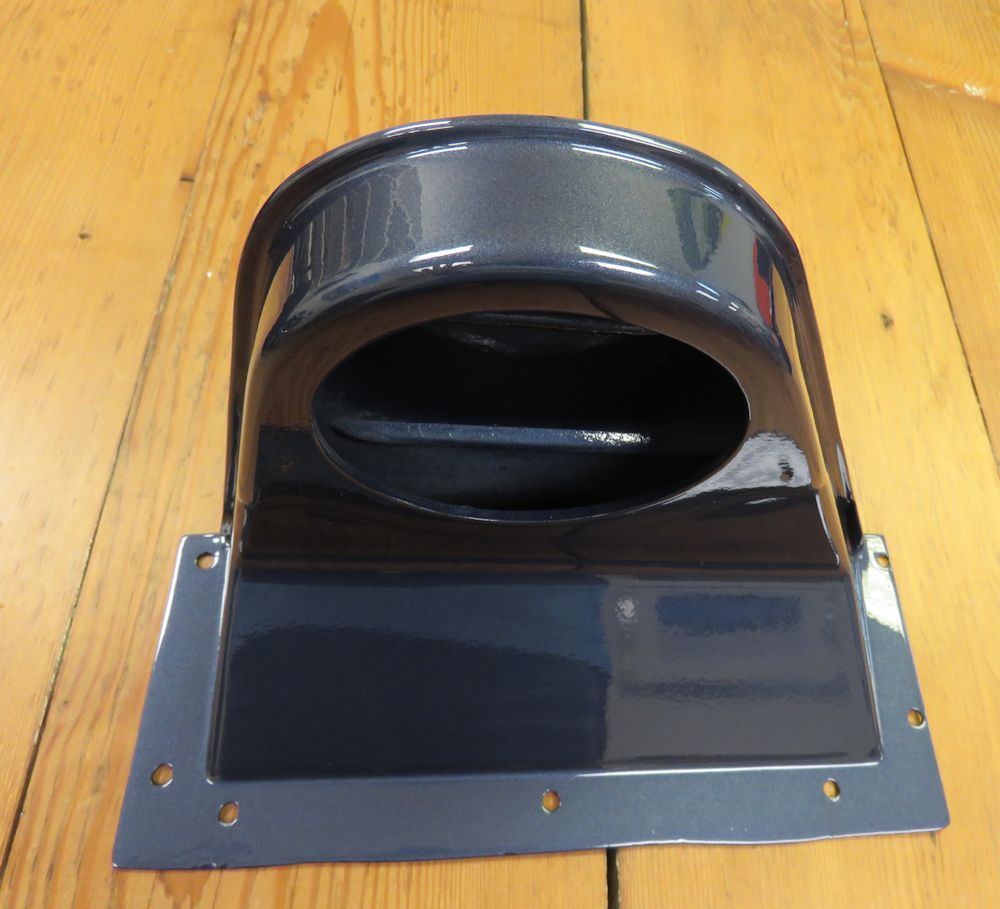 |
| Early heater intakes were painted body color |
|
 |
 |
 |
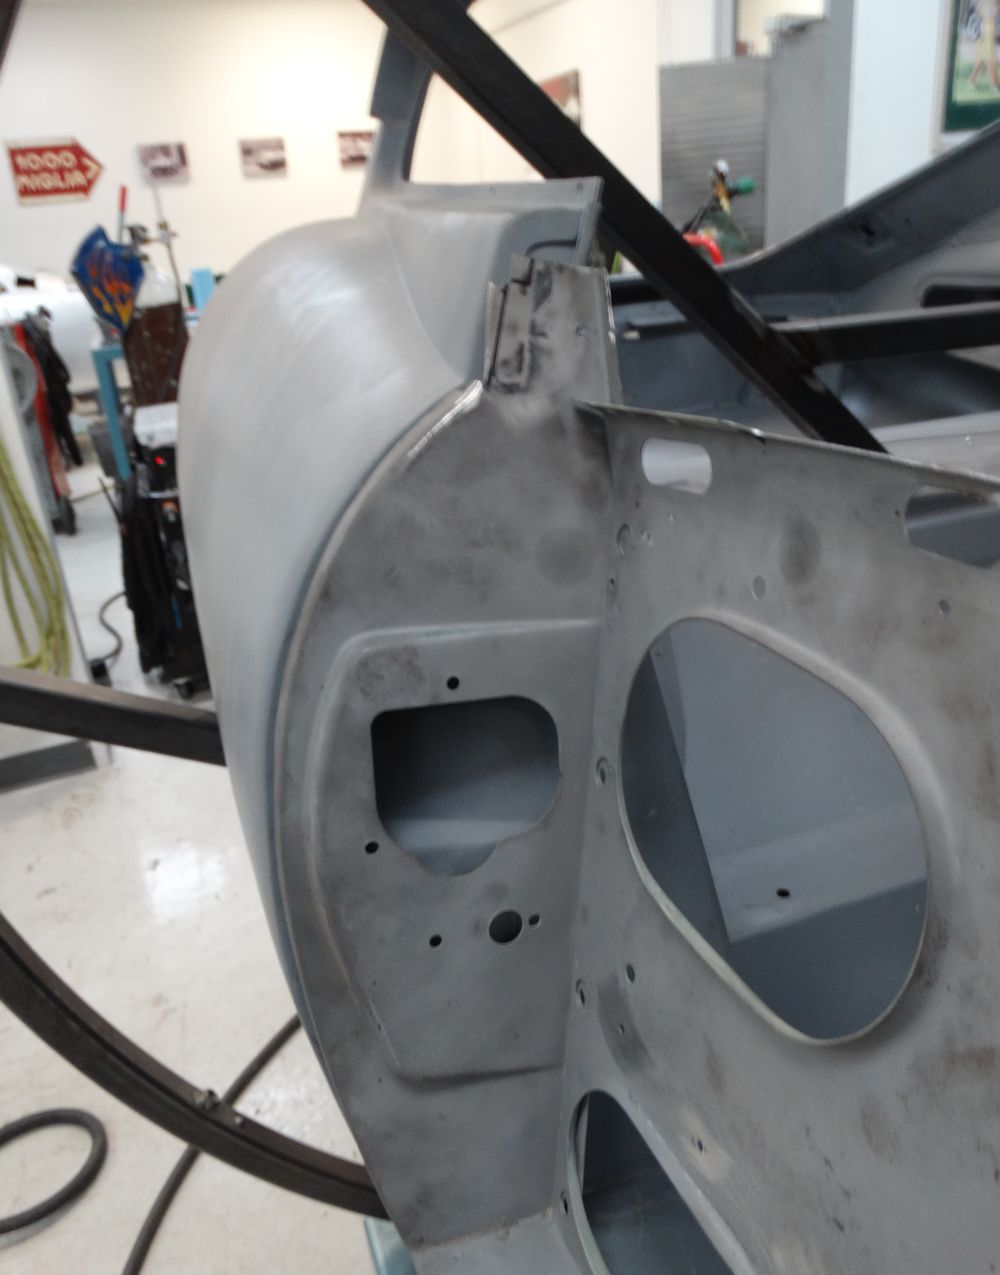
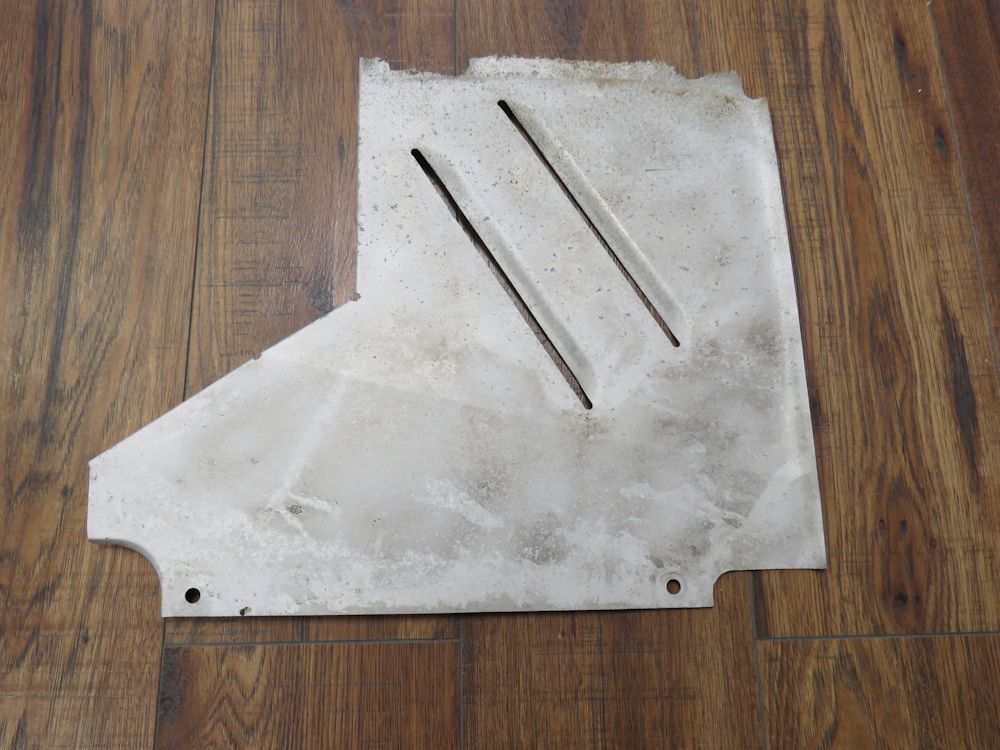 |
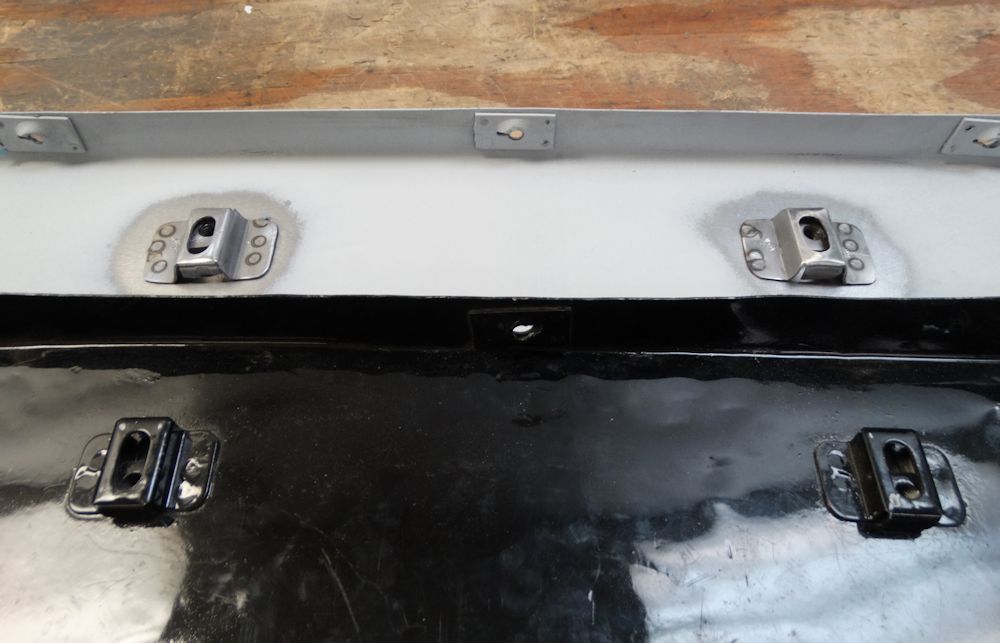
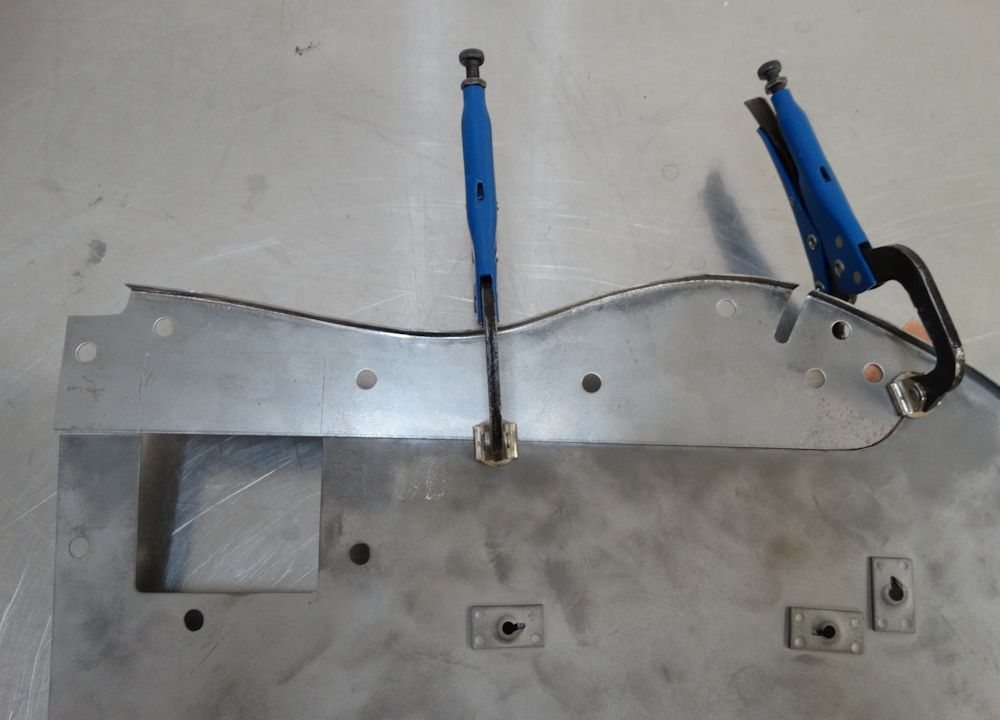
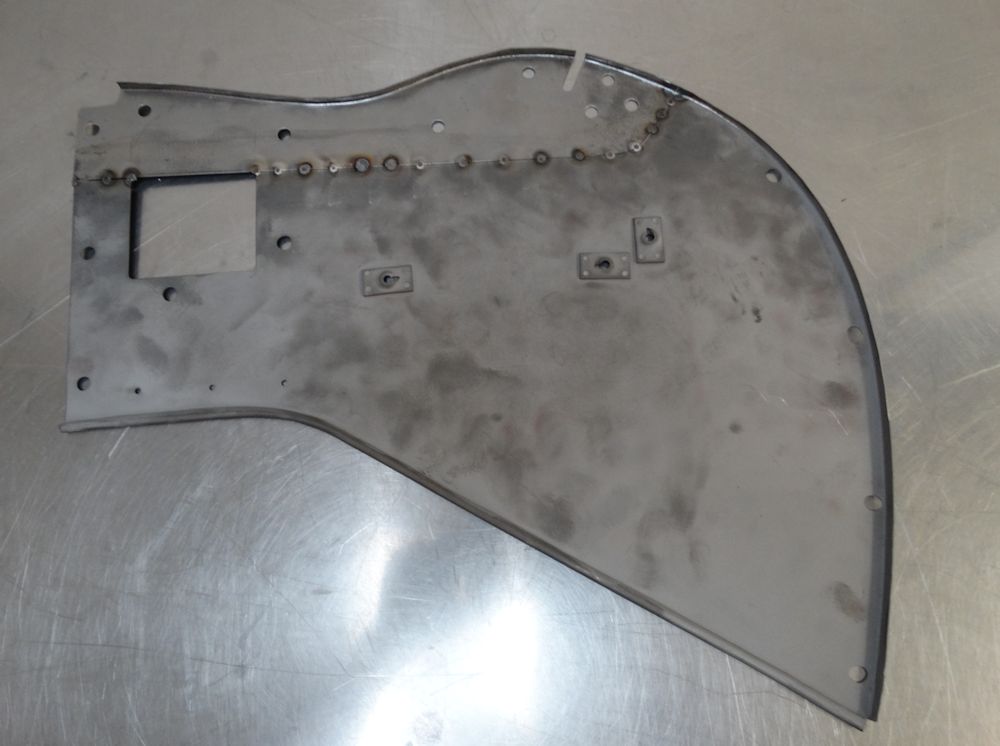
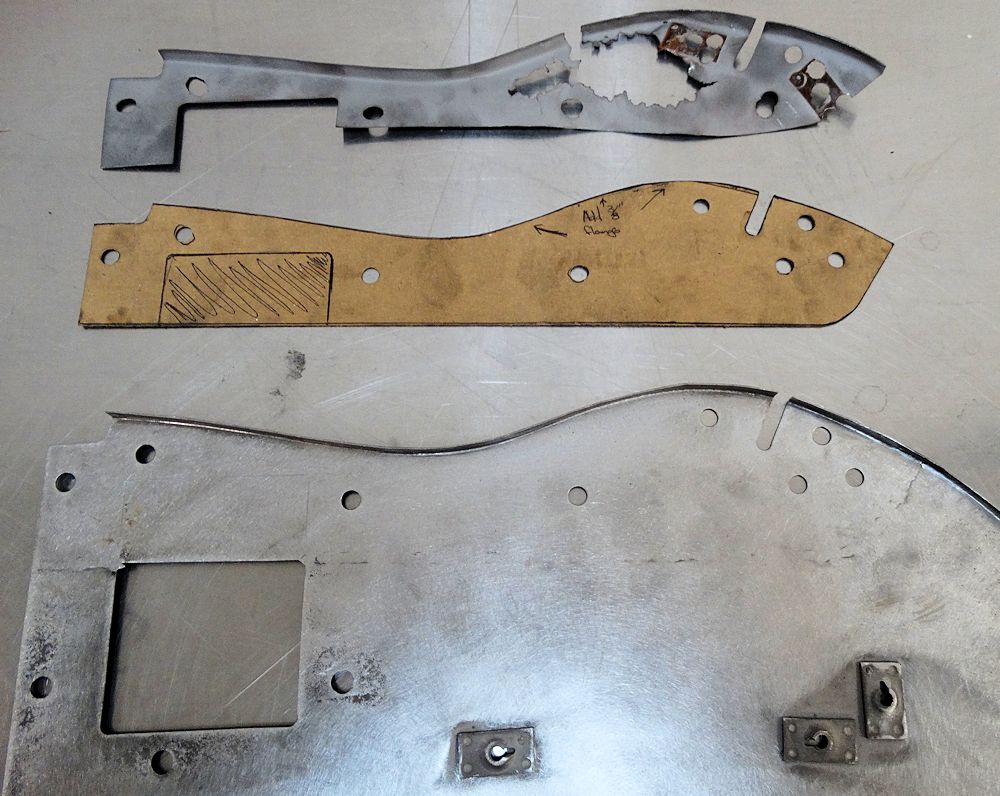
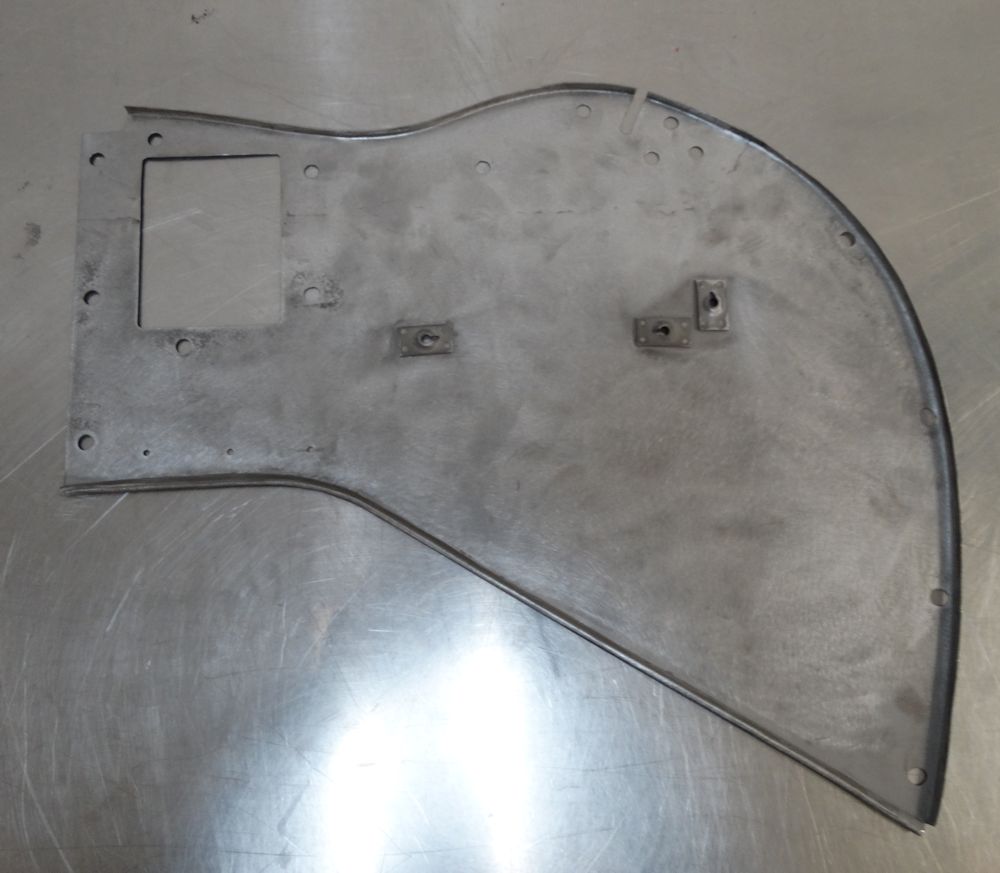
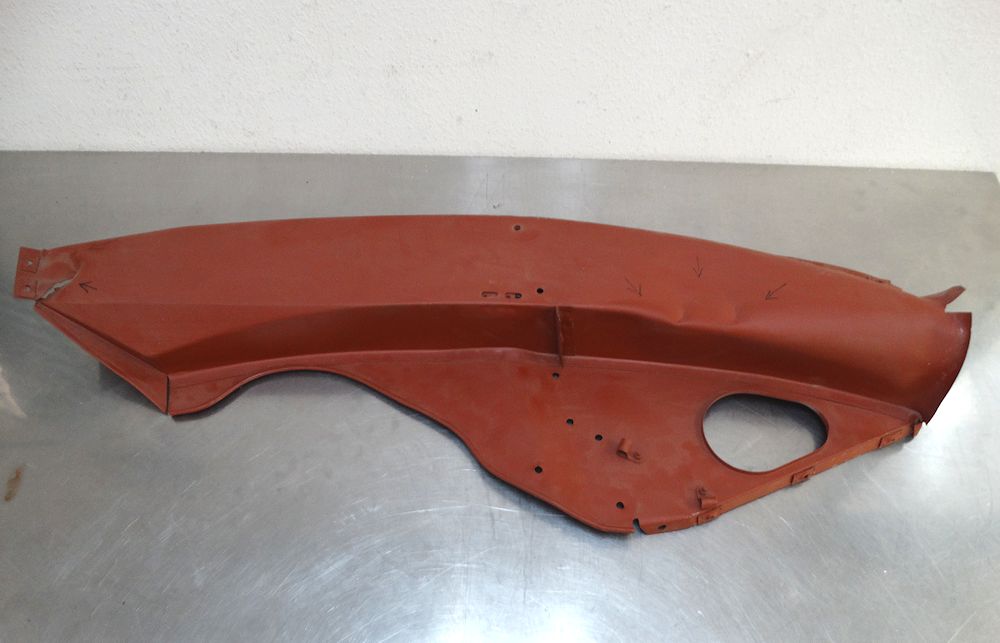
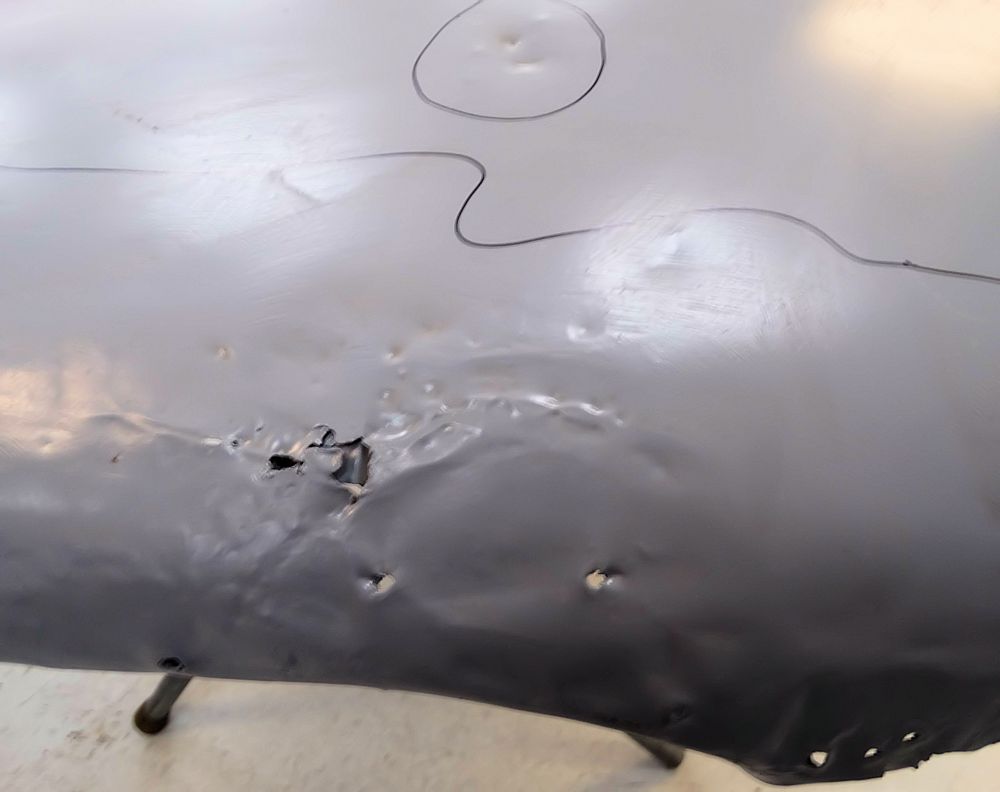
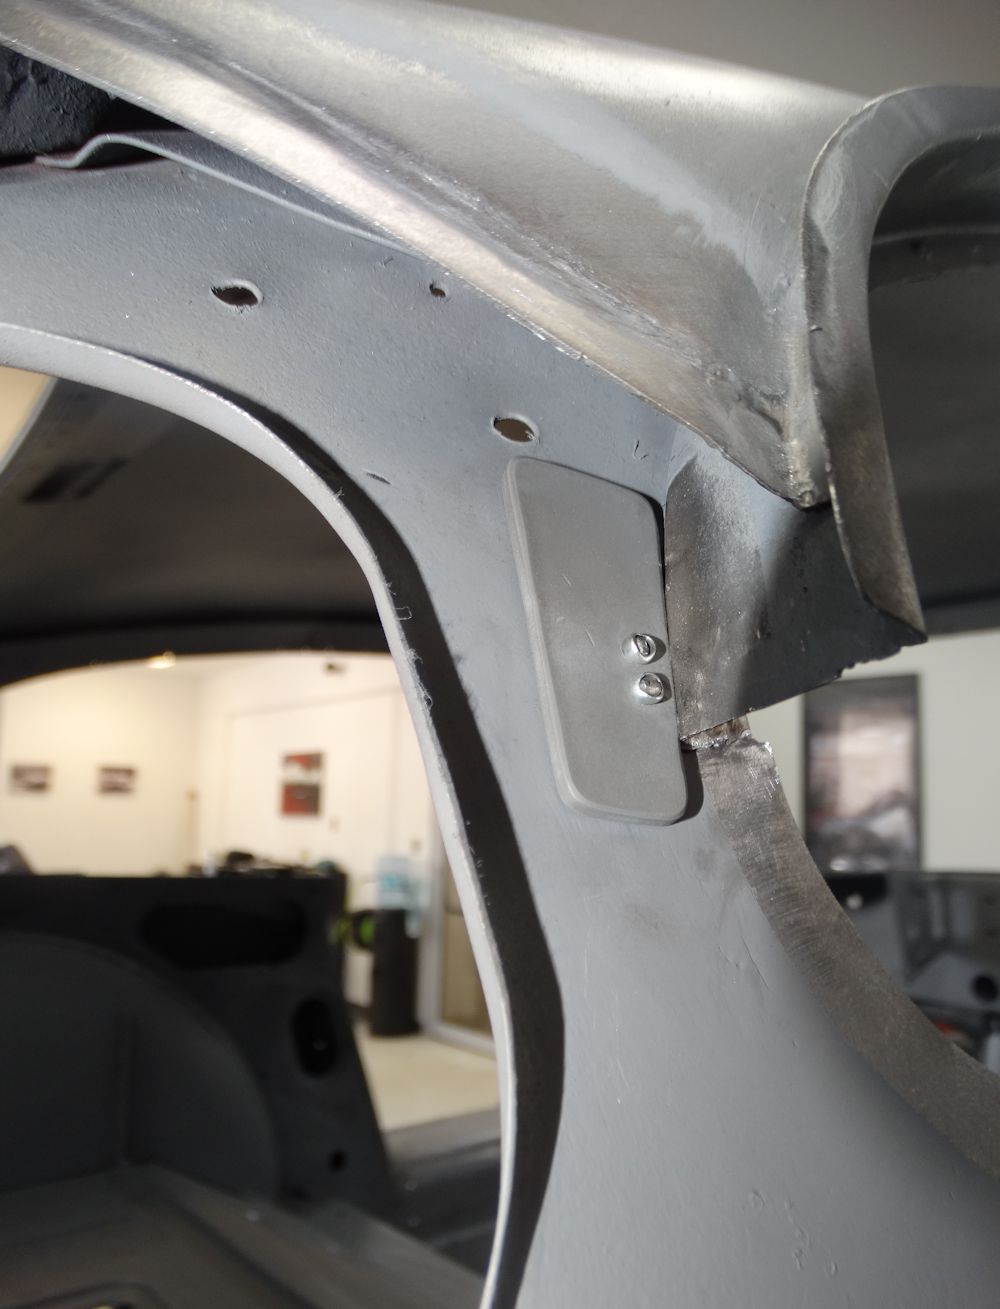
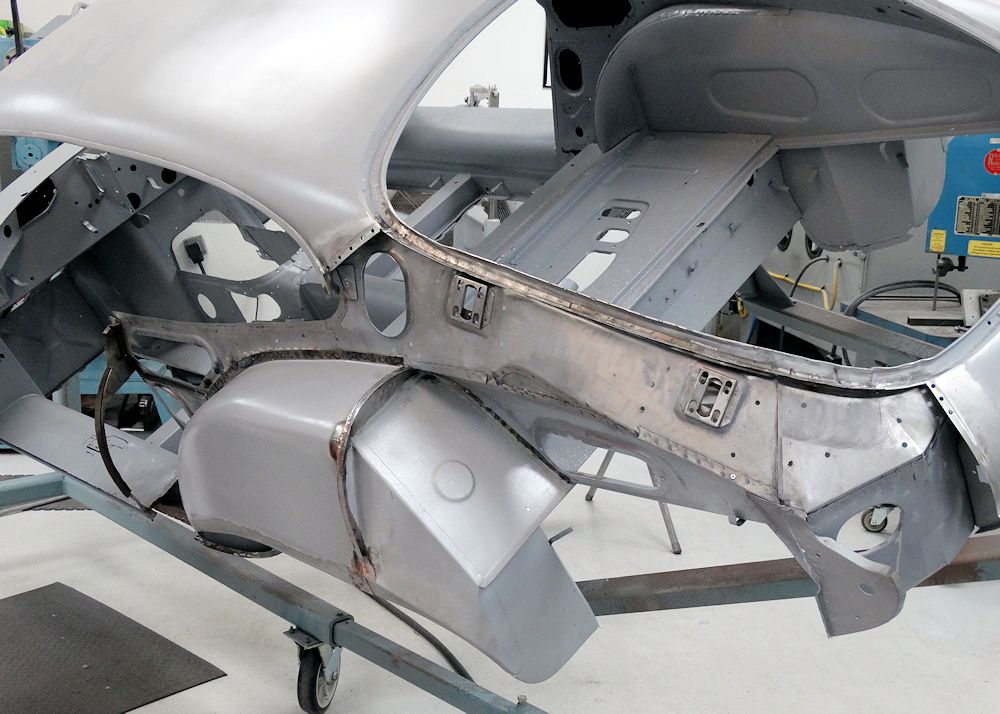
| Left hand engine bay panel is unique to early
cars |
|
 |
 |
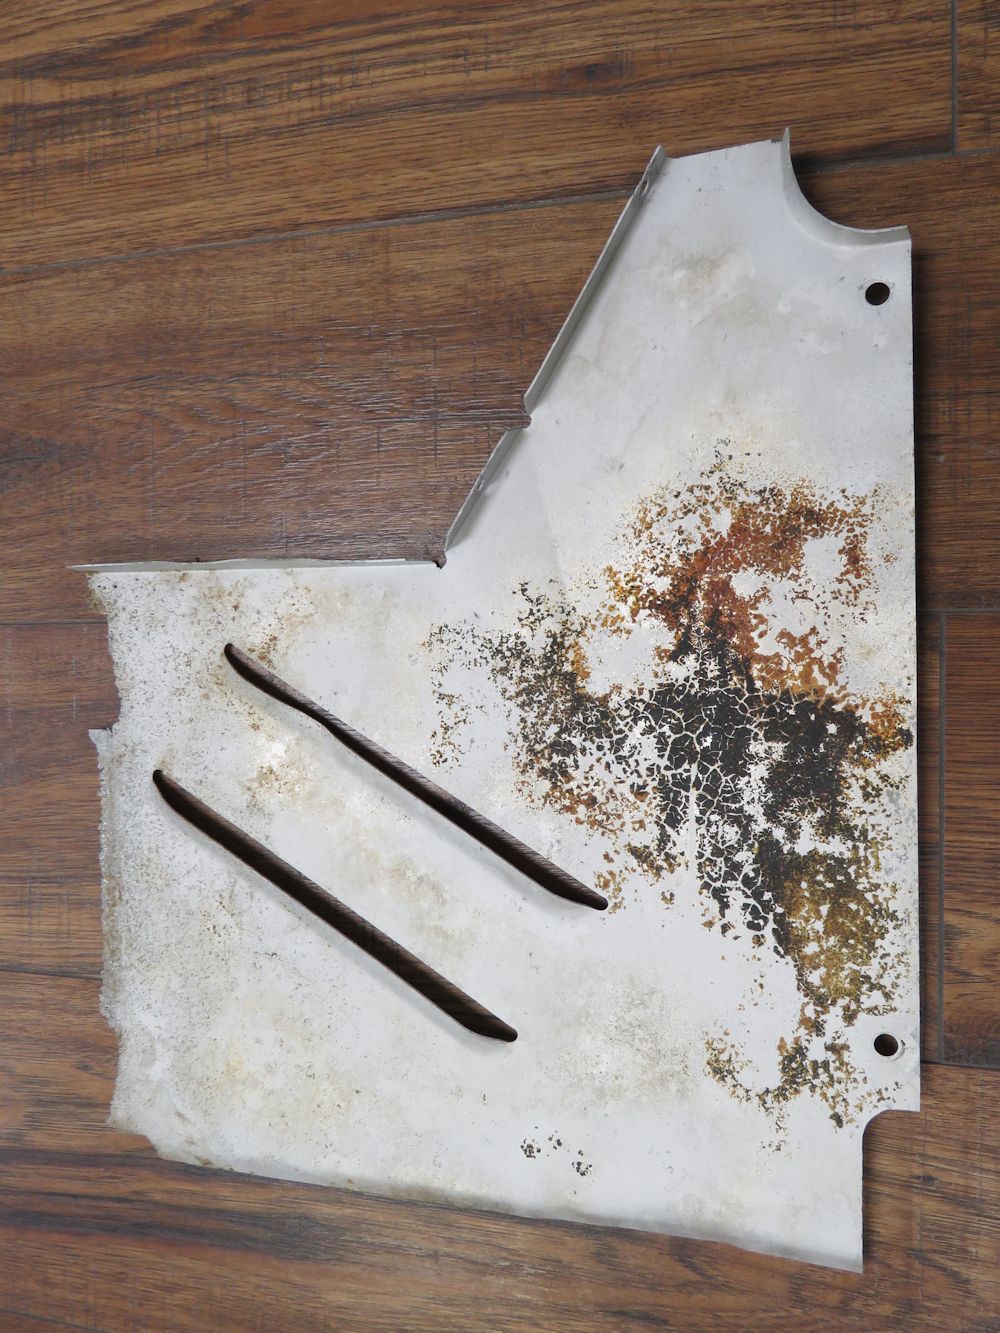
| Note corrosion along left side caused by
battery |
Jake repaired the panel |
 |
 |
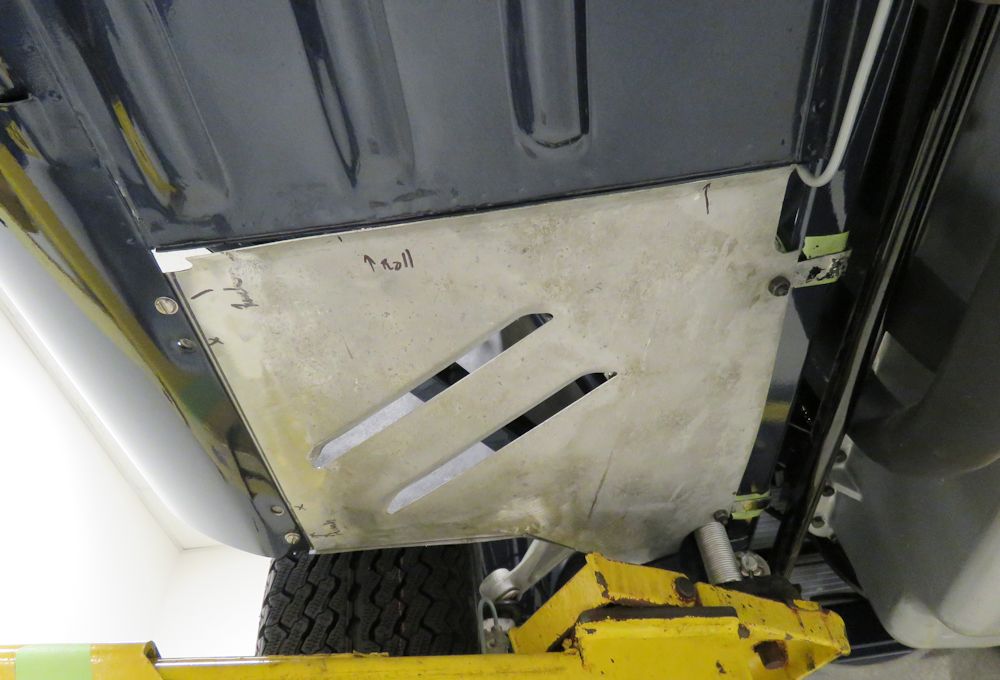
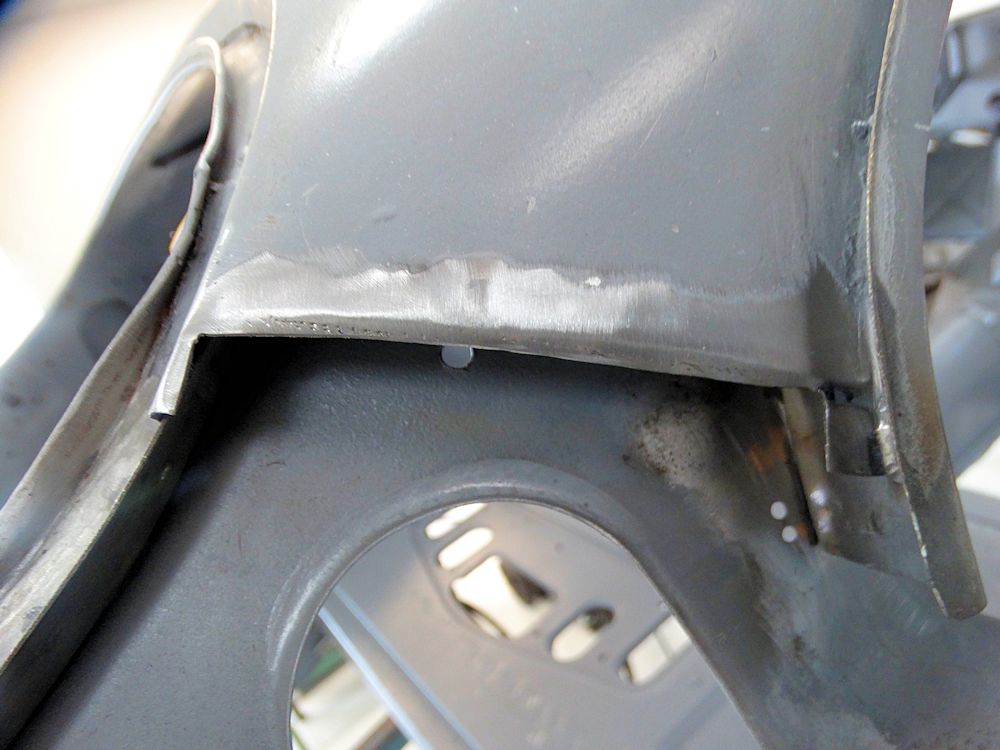
| Trial fitting |
Trial fitting with the left inner mudguard,
which is also a slightly different shape on early cars |
 |
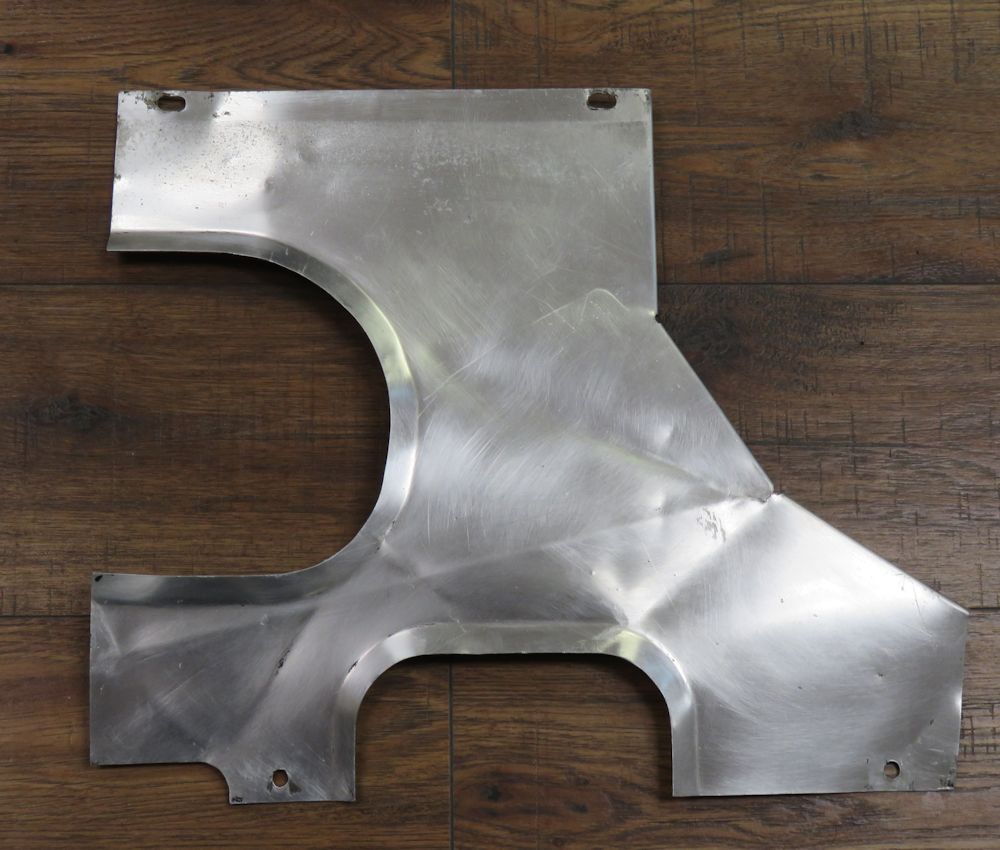 |
| Mike Mueller saved the day with the supply of
this early right hand engine bay panel |
|
 |
 |
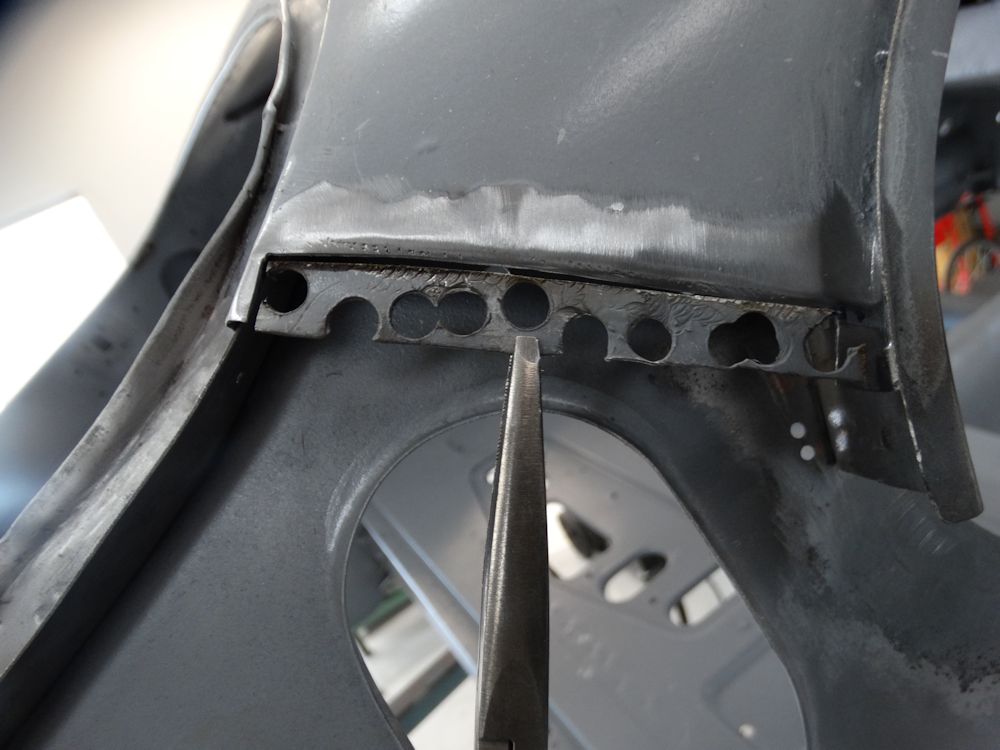
| Later style quarter light window latch |
From the Haddock/Mueller originality guide,
showing the early style quarter light latch |
 |
 |
| Corey in the CJ machine shop machined new
early style handles from stainless stock |
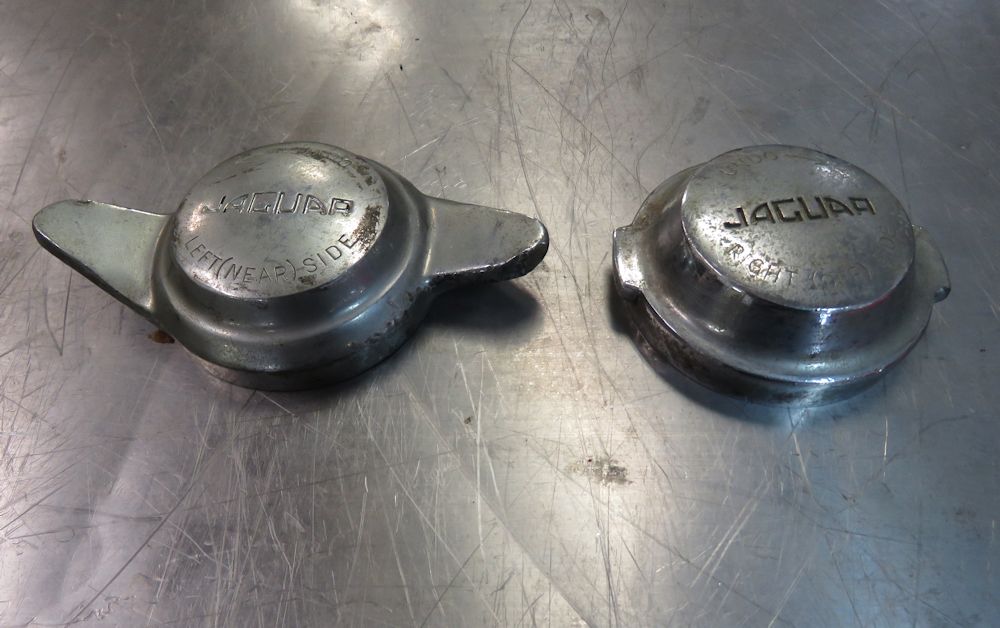
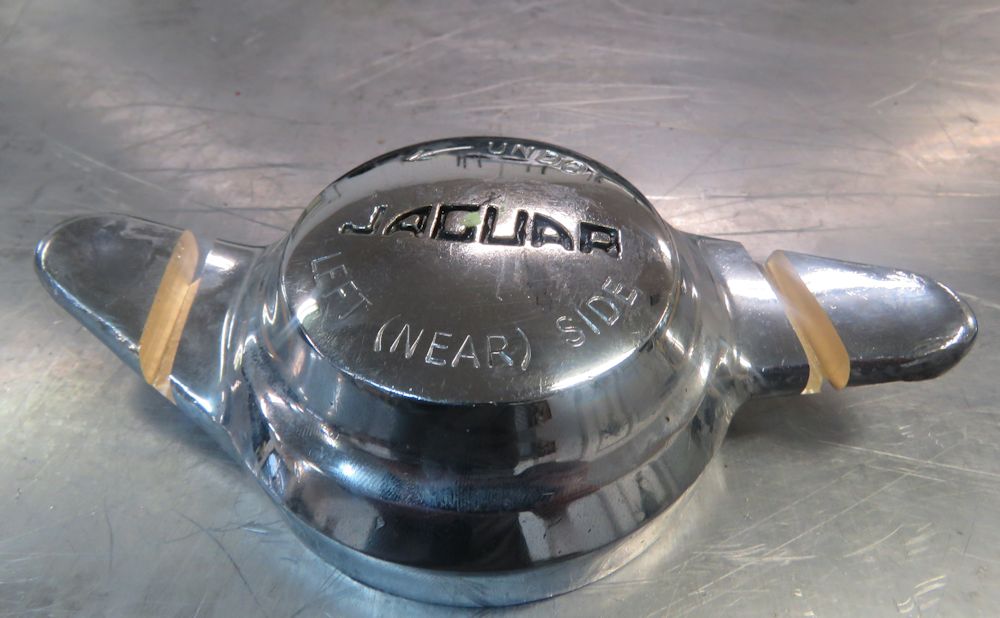
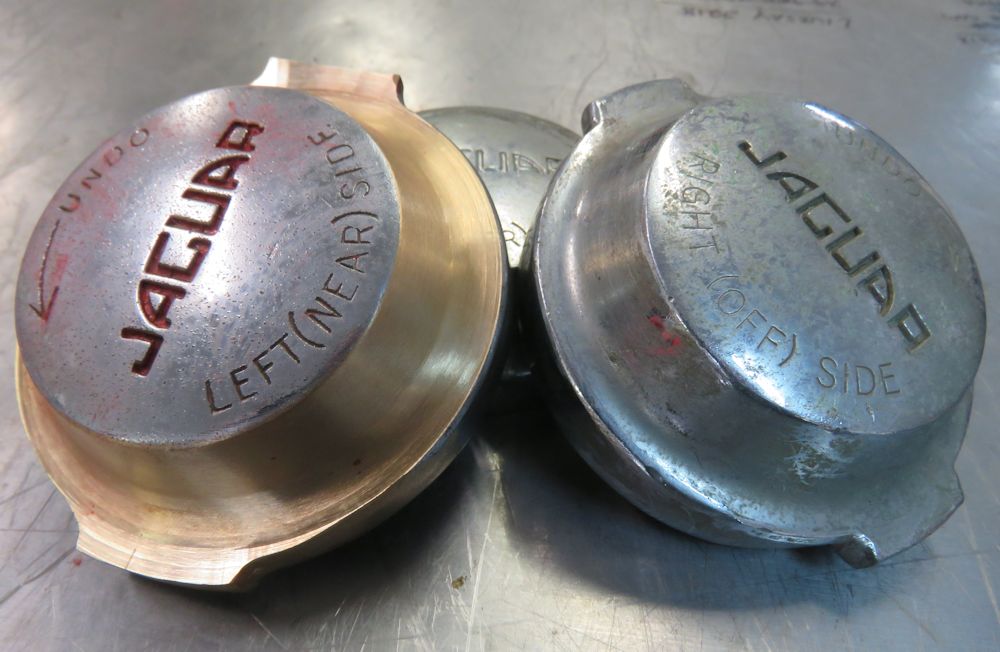
Very early, original brake reservoir caps and
switches |
 |
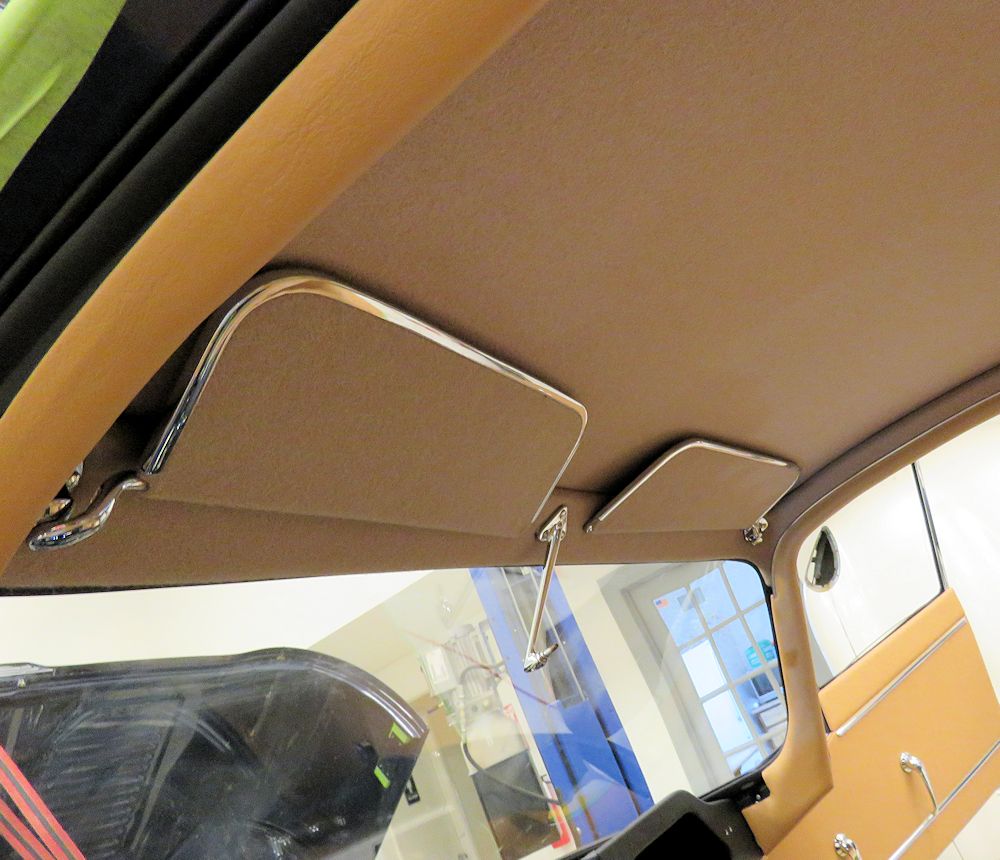 |
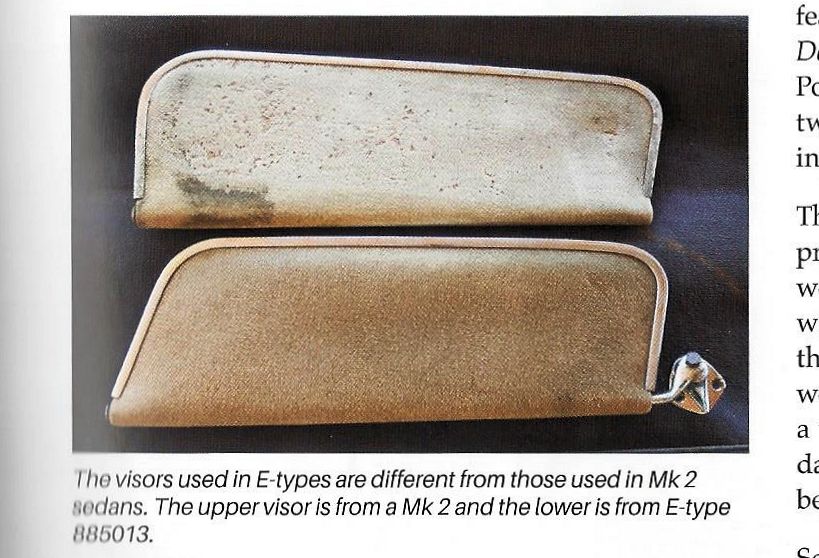
| Early style visors - note how a visor from
885013 is the example in Haddock/Mueller originality guide |
Restored visors now installed |
 |
 |
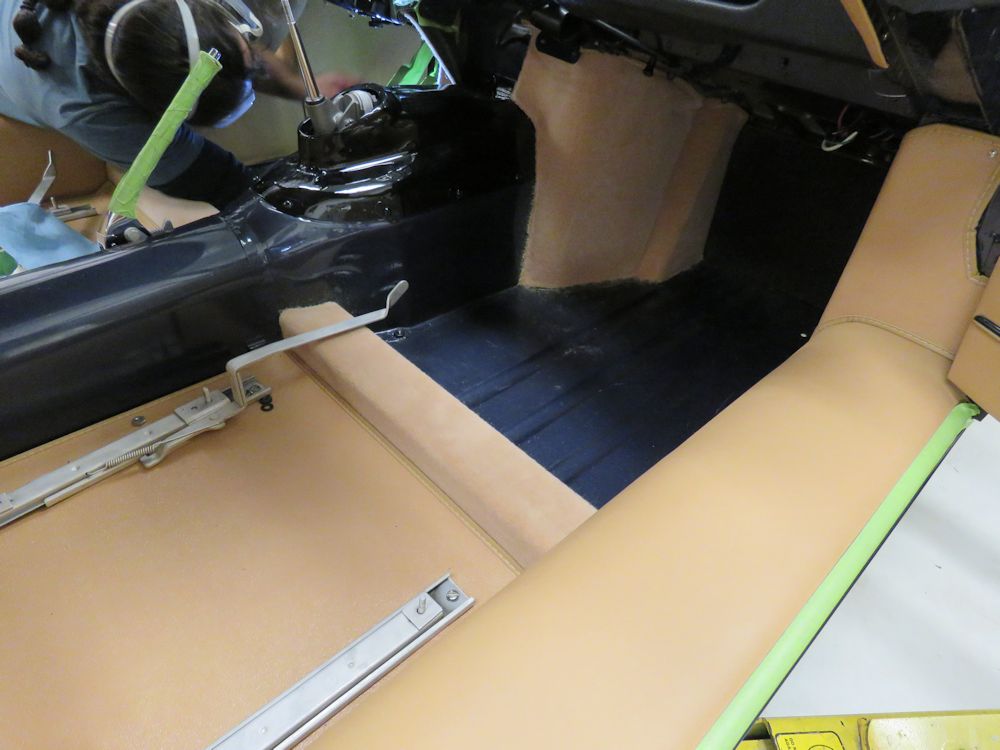
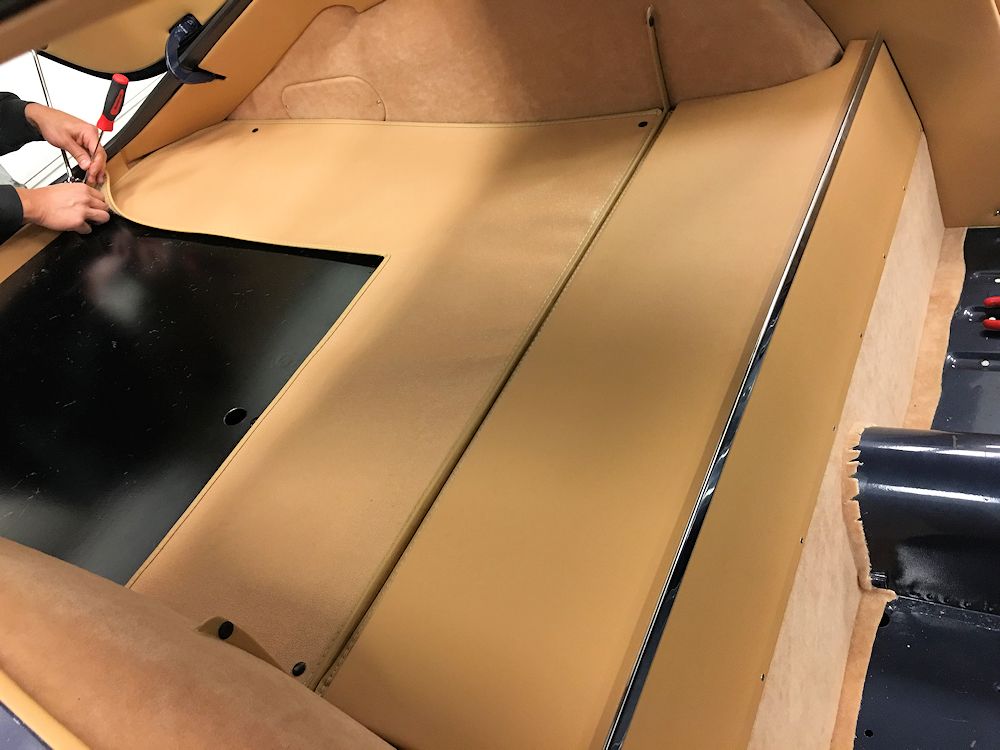
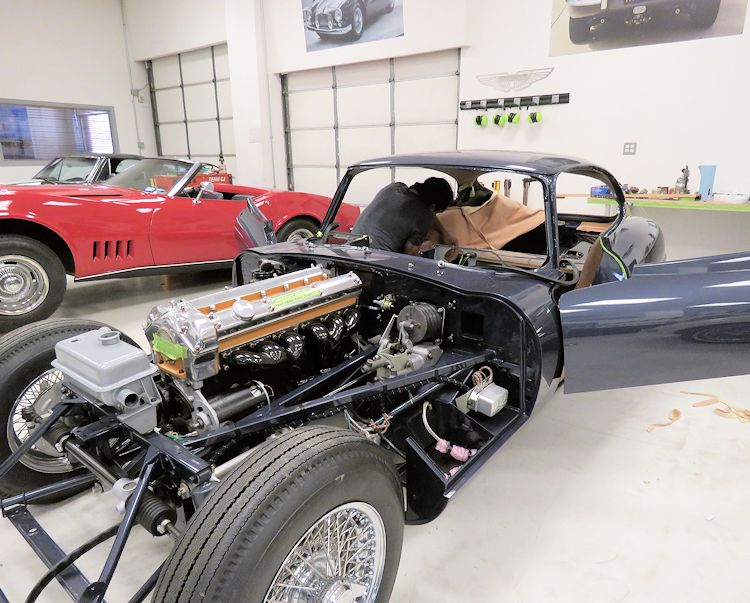
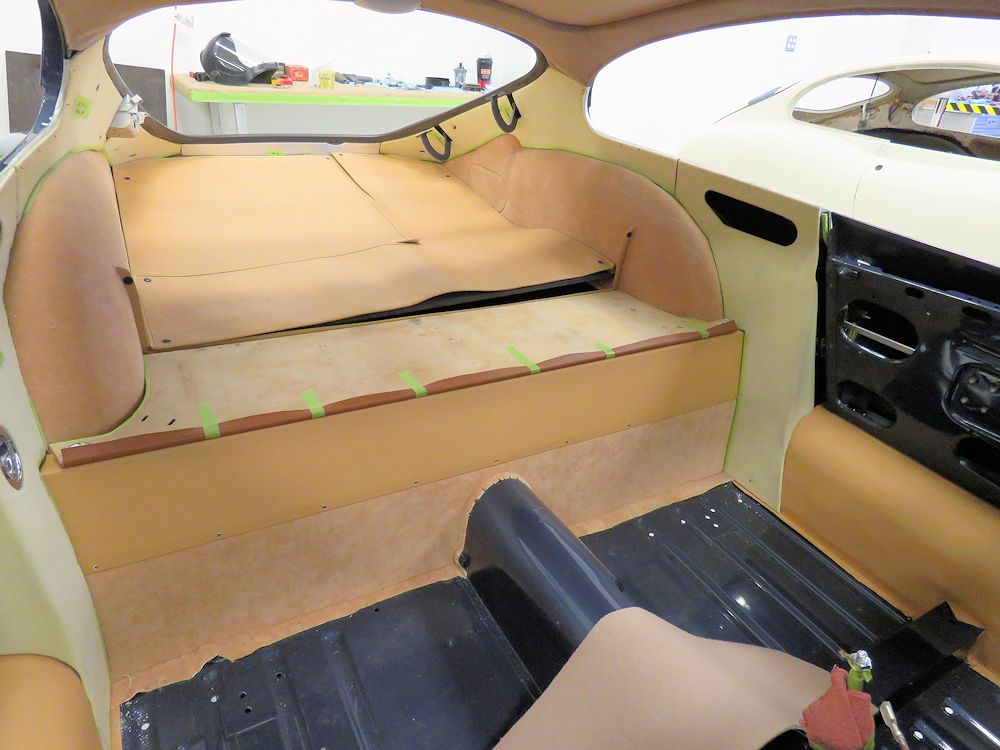
| Carlos in the process of installing the
carpeting |
|
 |
 |
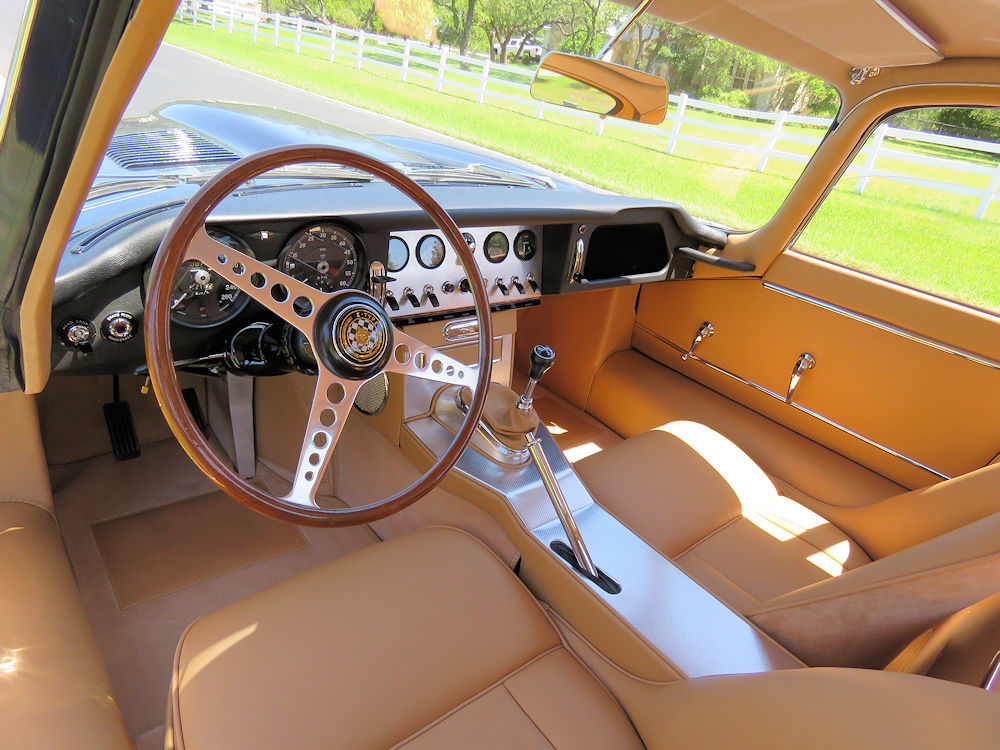
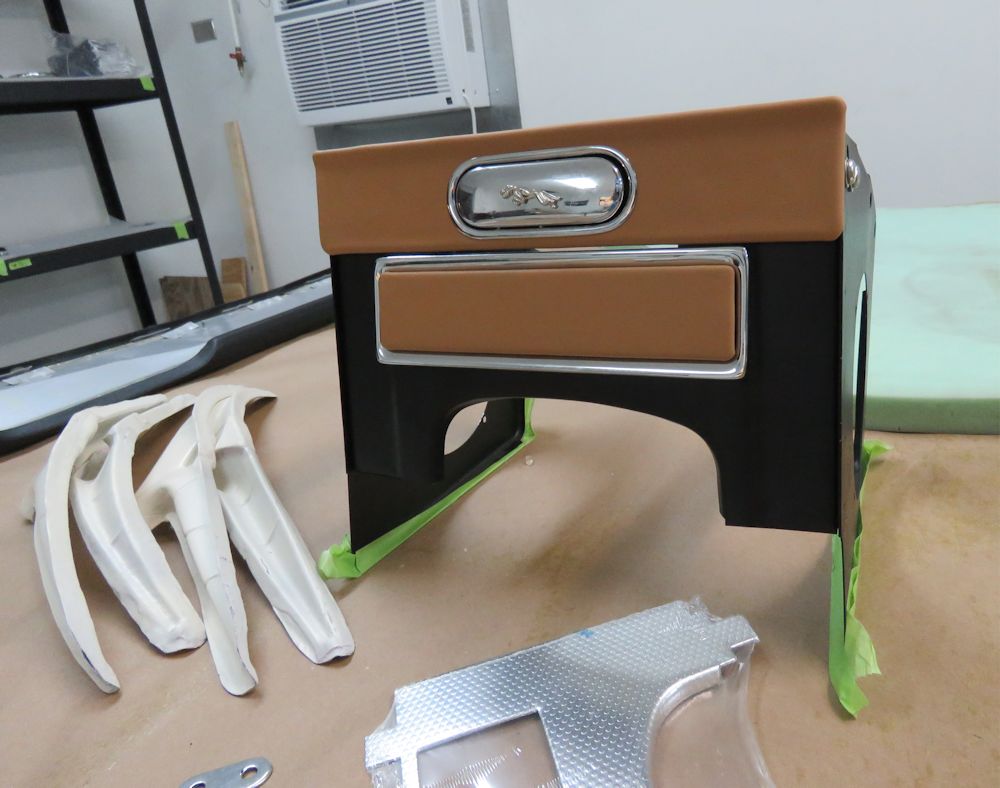
| Assembling the radio console |
885013 was in the bay area 1963 to 1999, so a very appropriate Jaguar club badge! |
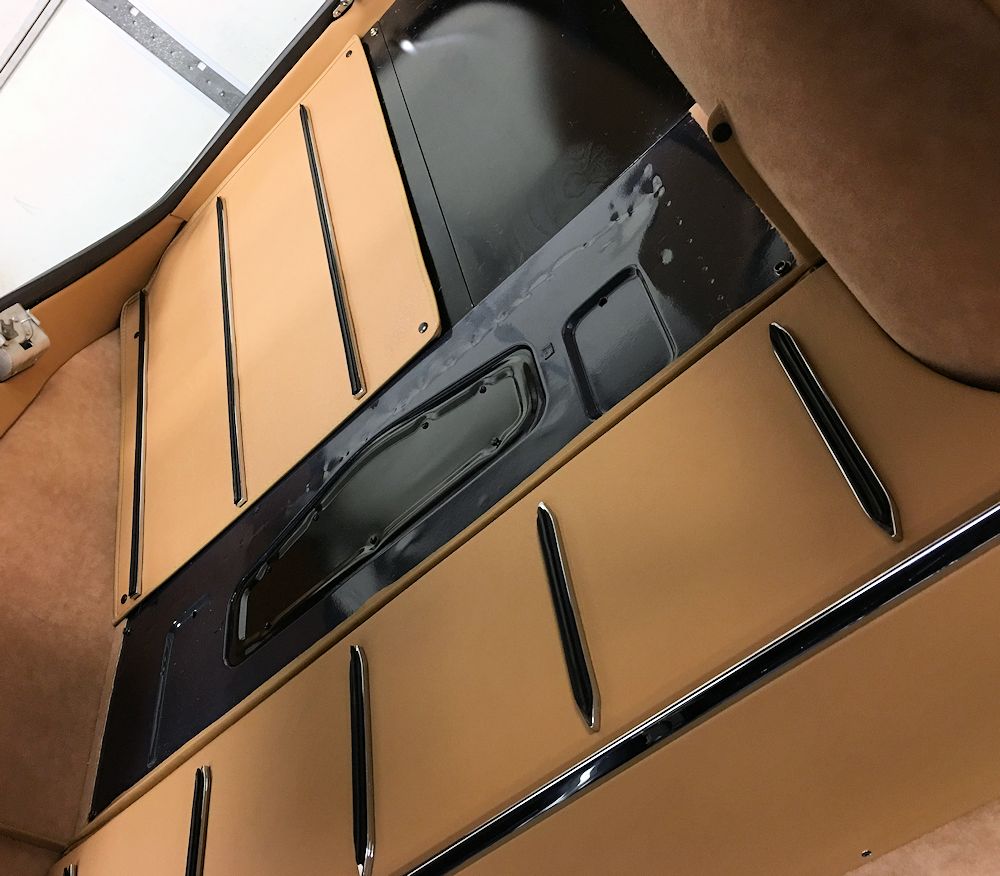
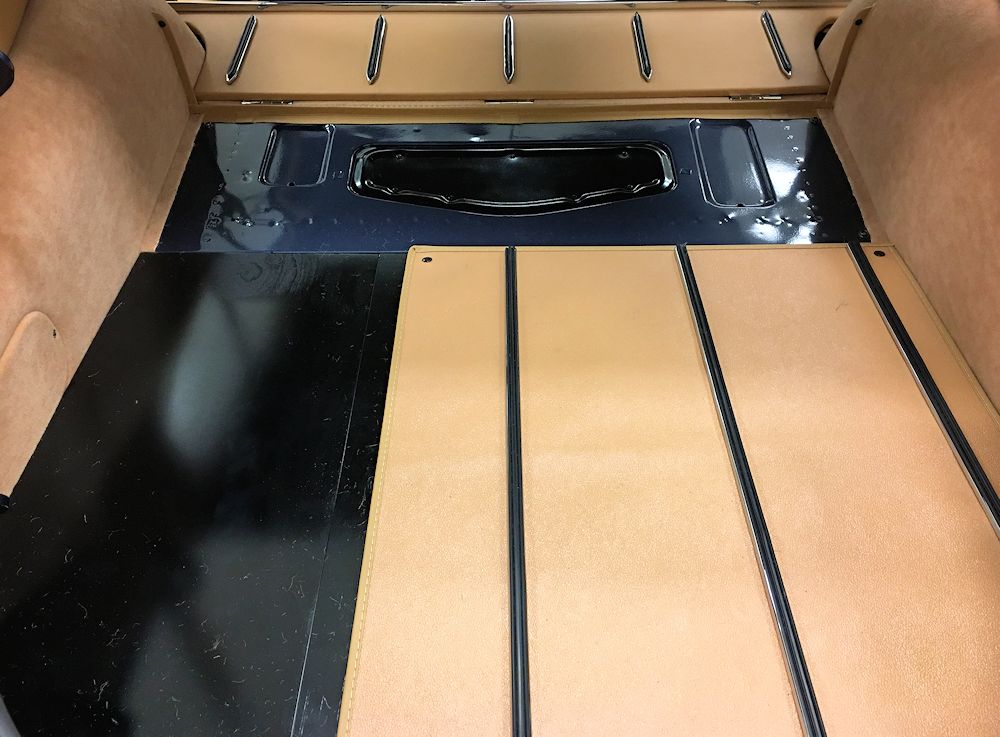
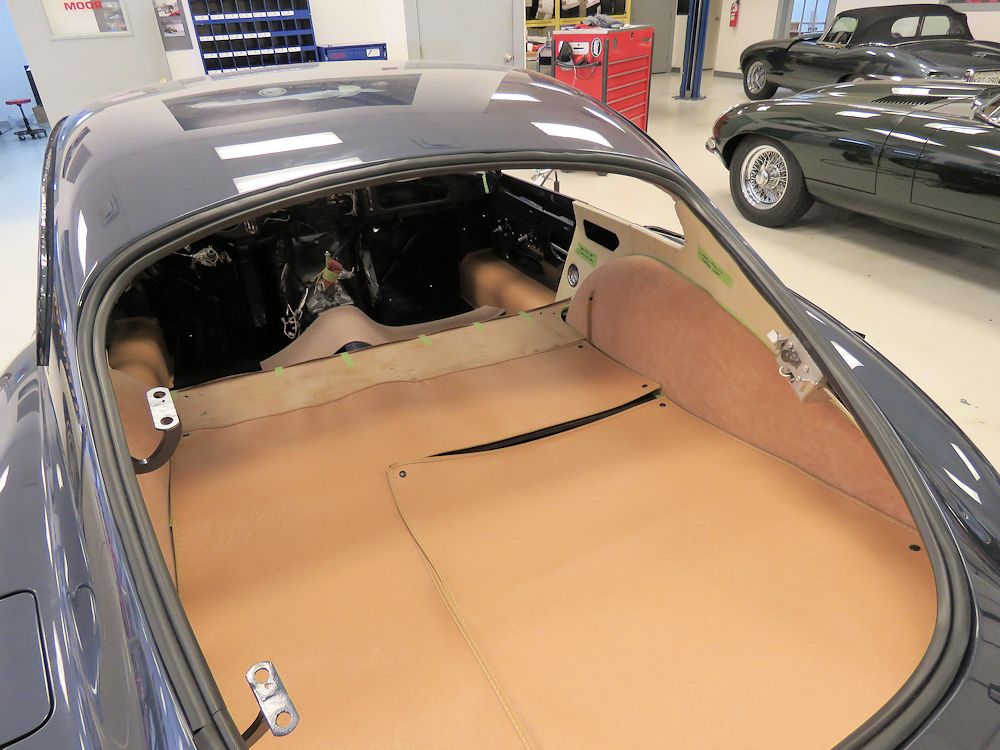
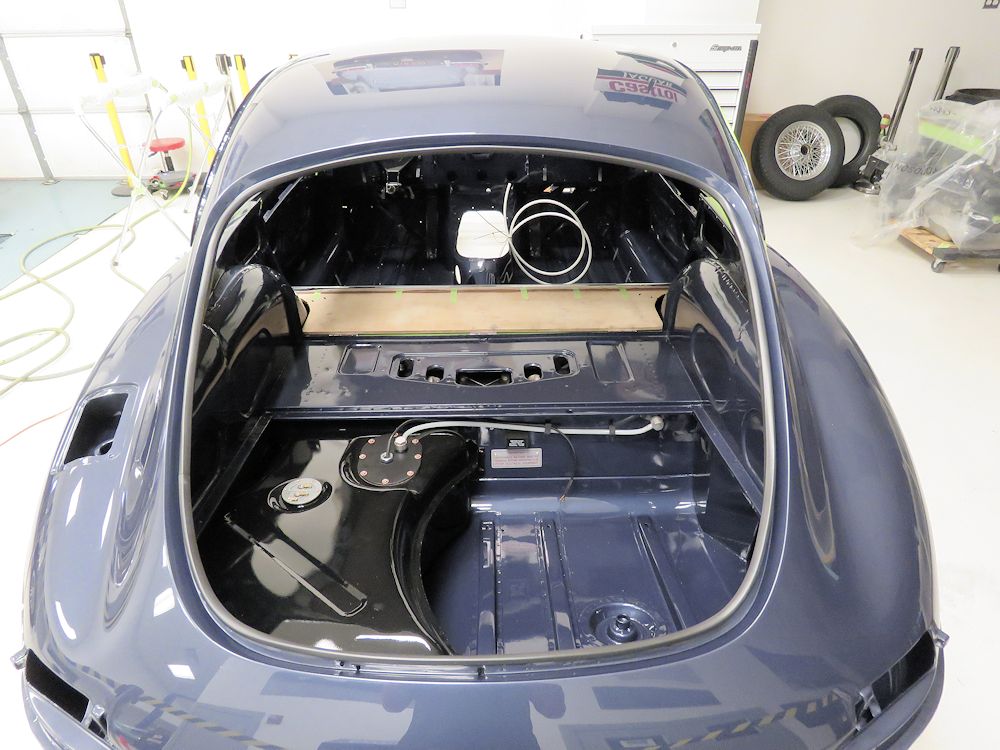
Carlos has been trimming the rear luggage compartment and installing the luggage rails to the two piece rear mat.
 |
 |
| Installing the bonnet for the first time (rear
wheels are slaves used for tuning on Dyno) |
Carlos busy trimming the rear luggage area |
 |
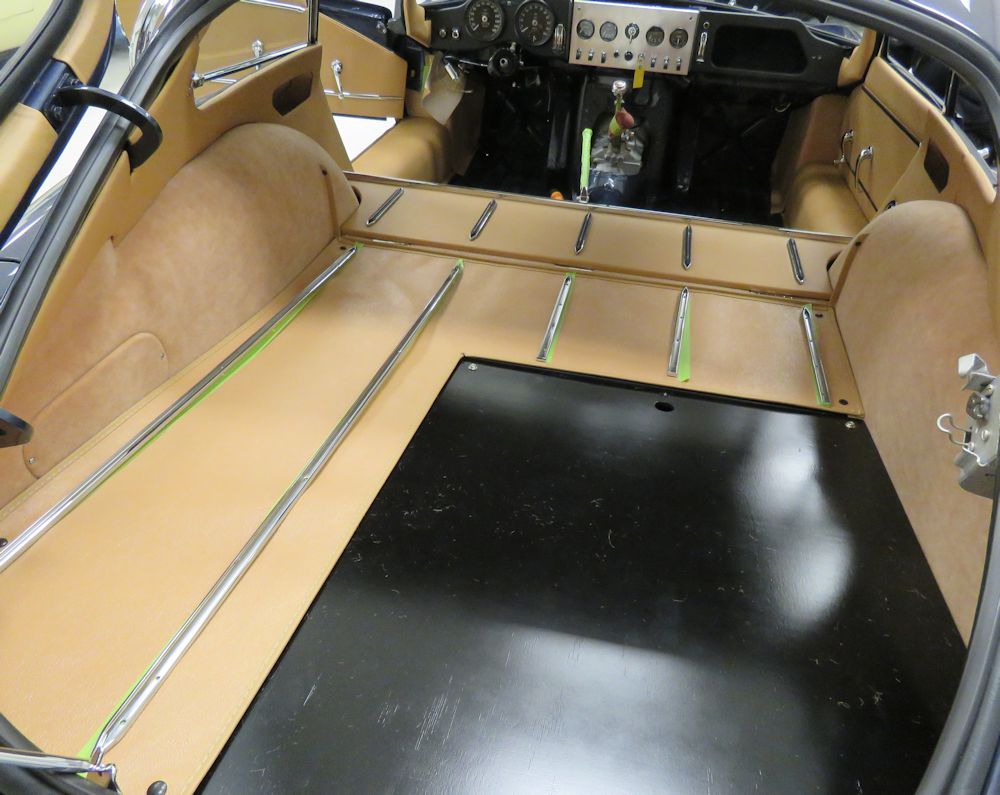 |
| Plotting the location of the luggage rails |
|
 |
 |
| Restored original wiper motor is date stamped
12/60 |
Carlos installing the rubber luggage rail
inserts |
 |
 |
 |
 |
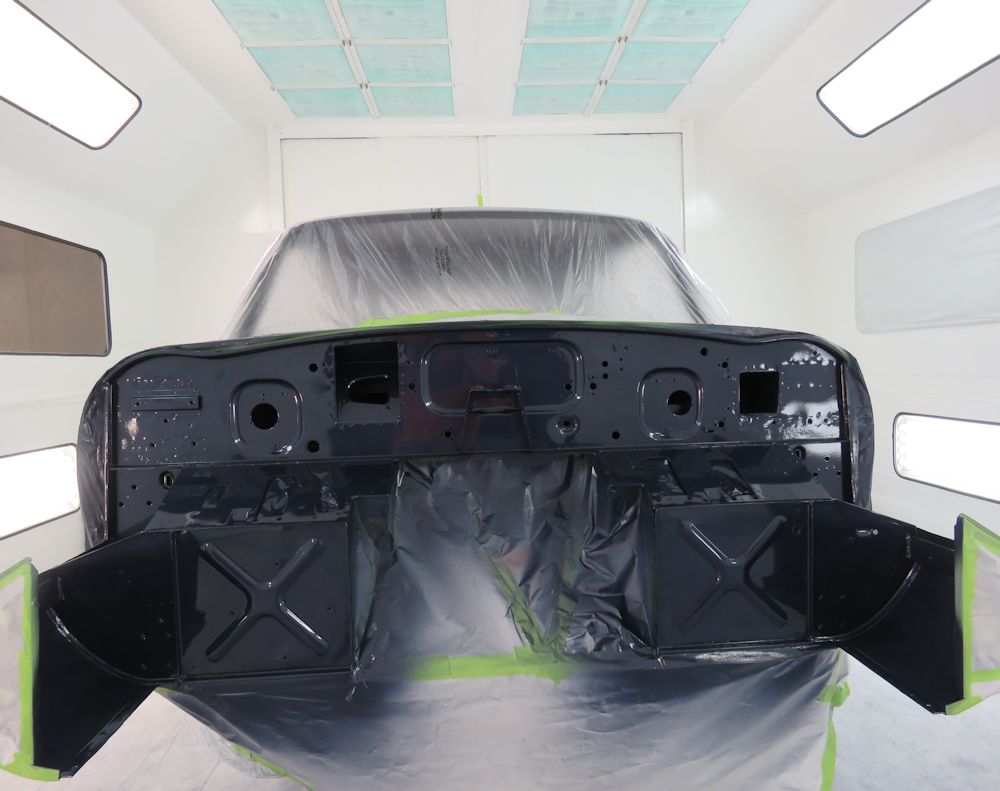
We are now entering the finishing straight of this very special project.
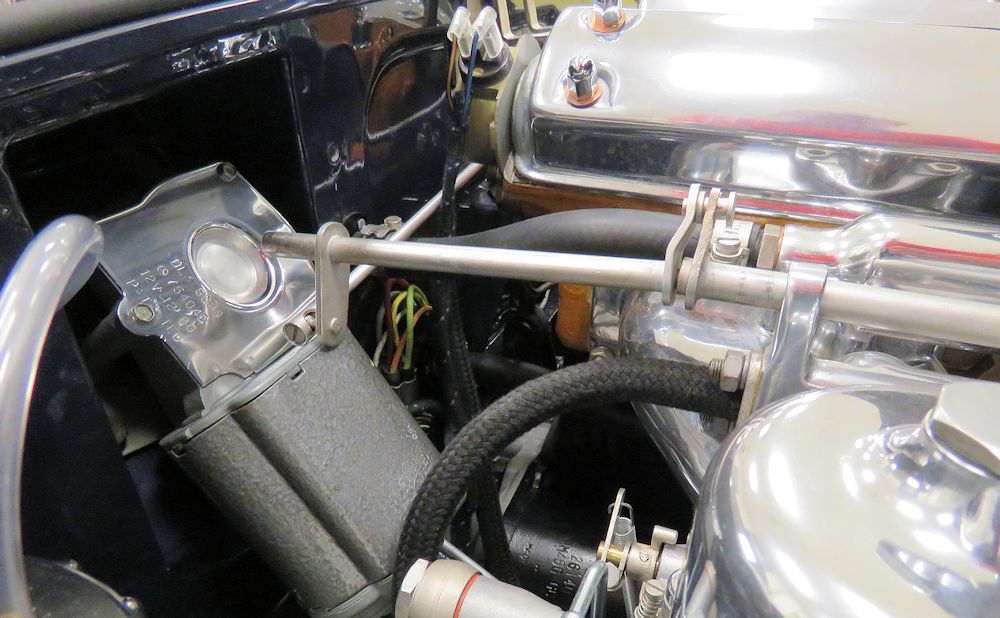
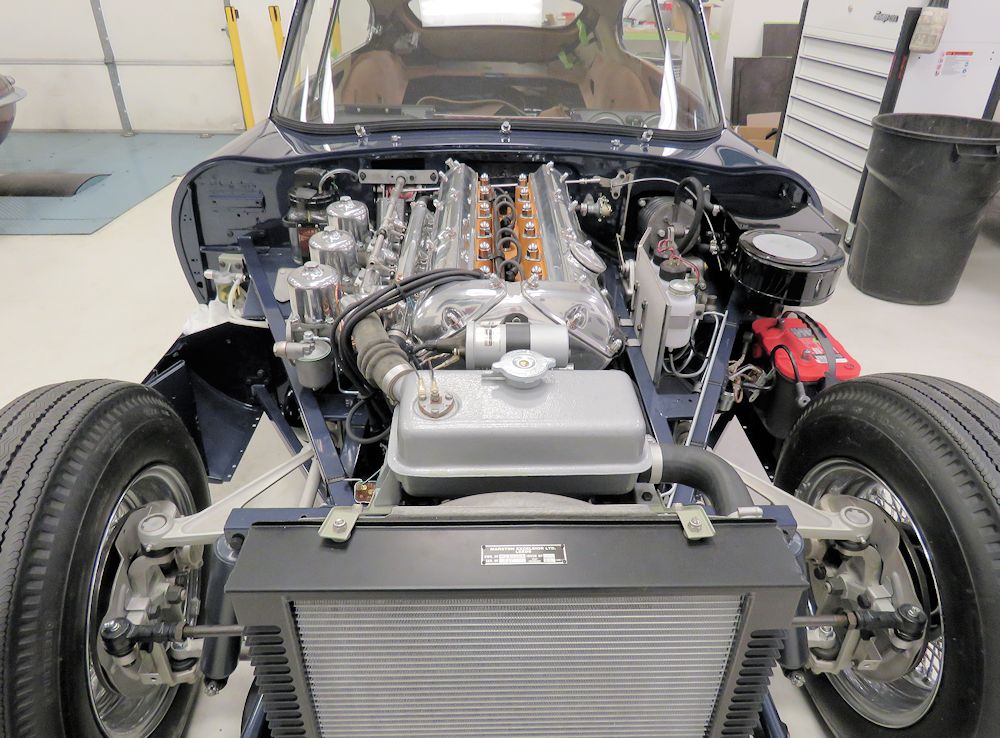
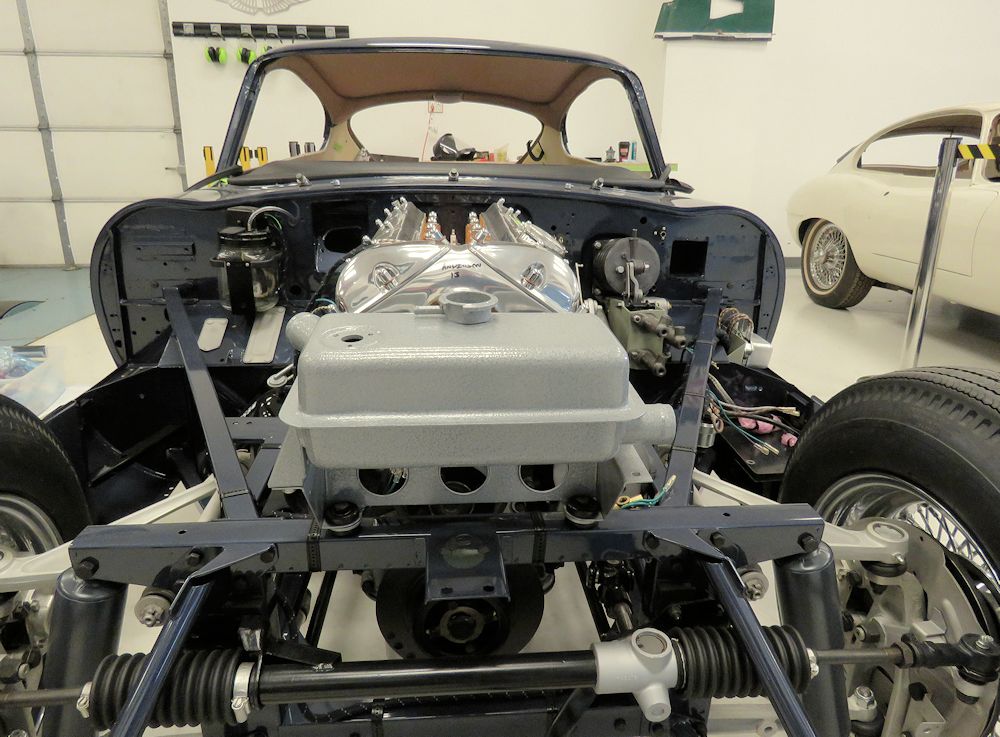
I am pleased to report that we have now run the engine through several heat cycles and everything is working perfectly. We have also installed all of the glass, including the front windscreen.
 |
 |
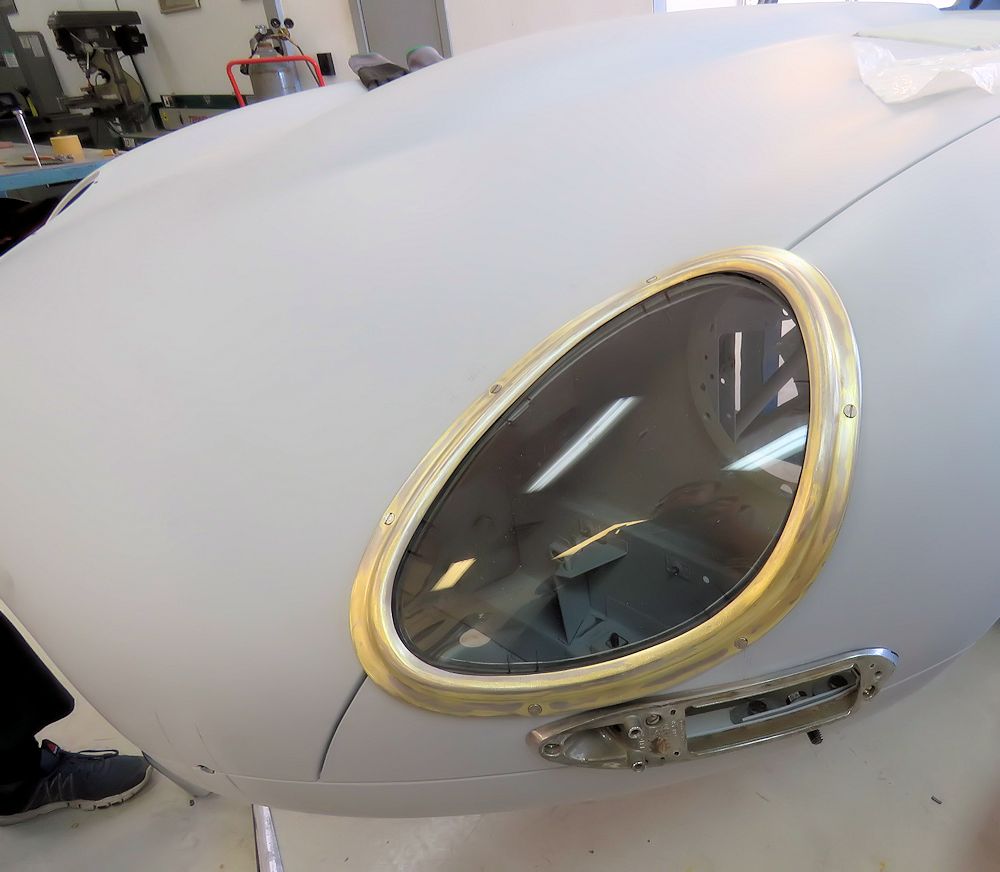
| Trial fitting quarter light windows |
|
 |
 |
| New windscreen installed |
|
 |
 |
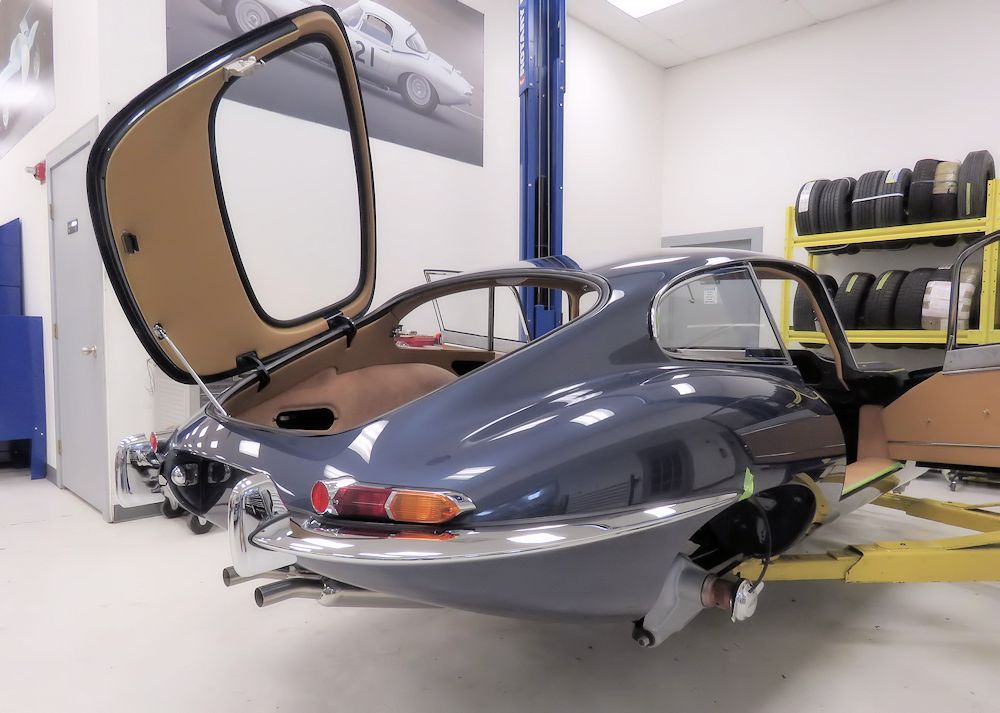
| Rear of the car starting to look complete |
Red Top battery is temporary |
Once again using the Haddock/Mueller Originality Guide, we managed to replicate the original Marston radiator tag. Interesting to note that Marston, the company that supplied Jaguar with their radiators, did not have a letter "L" of the same font size as the rest of the numbers and letters they used when stamping the radiator tags prior to delivery to the Jaguar factory at Browns Lane. As a result, they used either a larger letter "L" or, more commonly, an upside down number "7". We decided to use an upside down 7 on our new tag.
 |
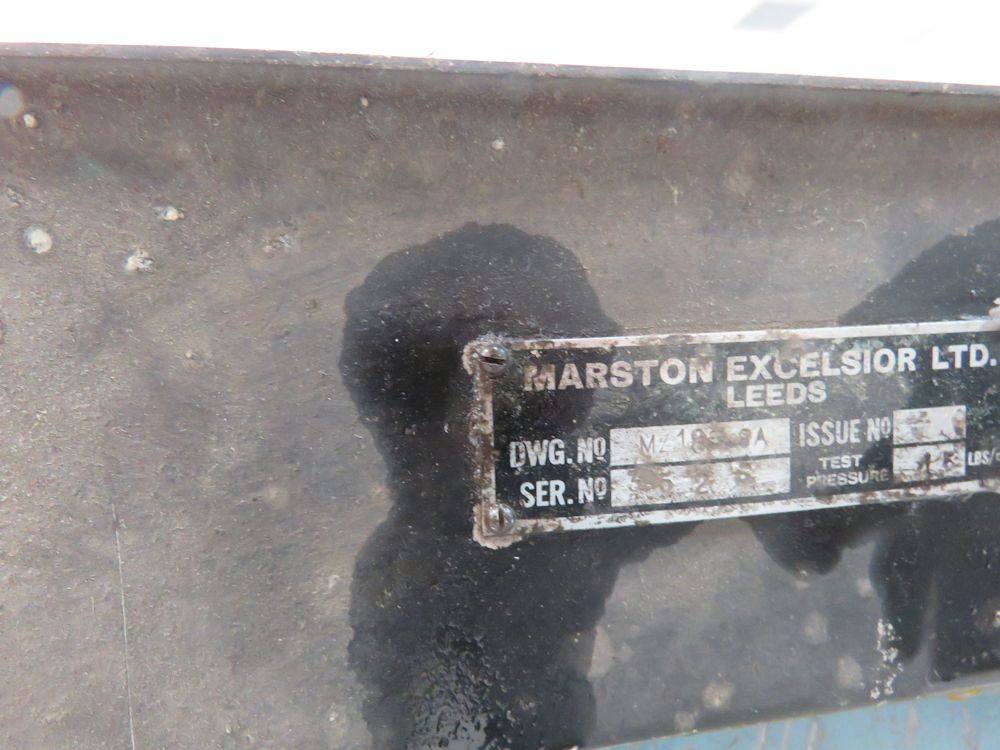 |
| Lots of interesting info about radiator tags
in the Haddock/Mueller Originality Guide |
Note original dome headed screws used to
secure the radiator tag on this original radiator |
 |
 |
| New Marston tag installed using original
screws |
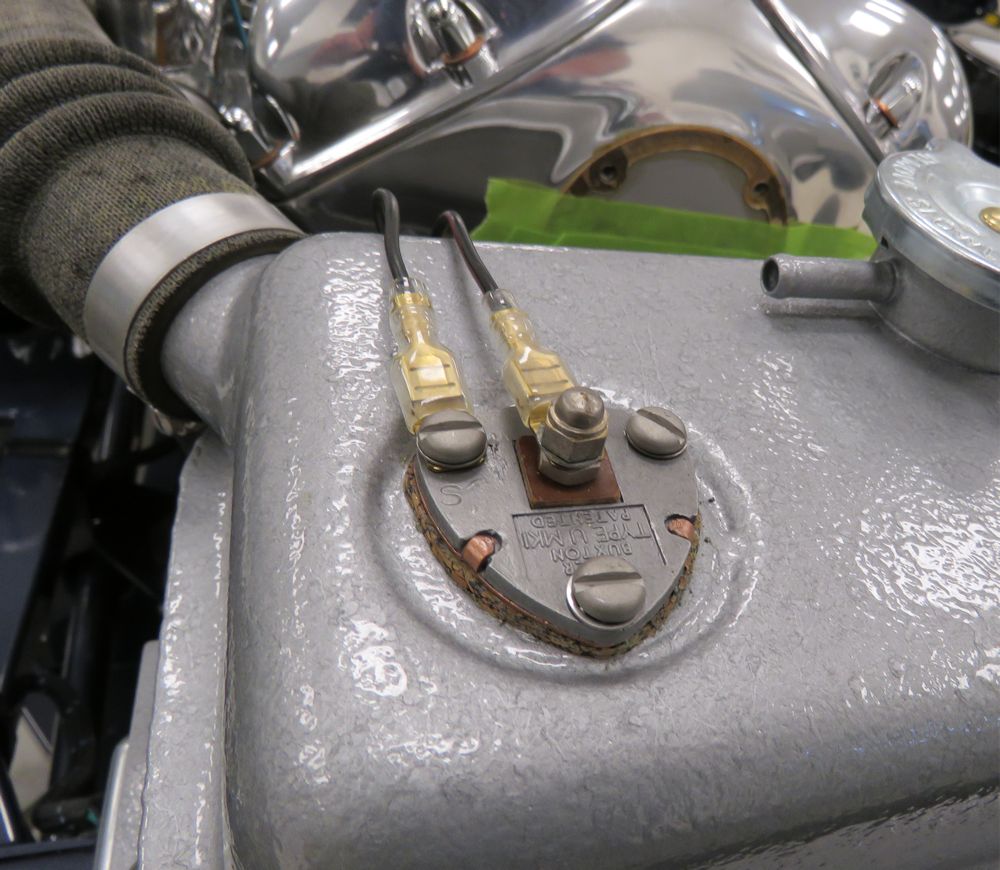
Note original very early Otter switch |
 |
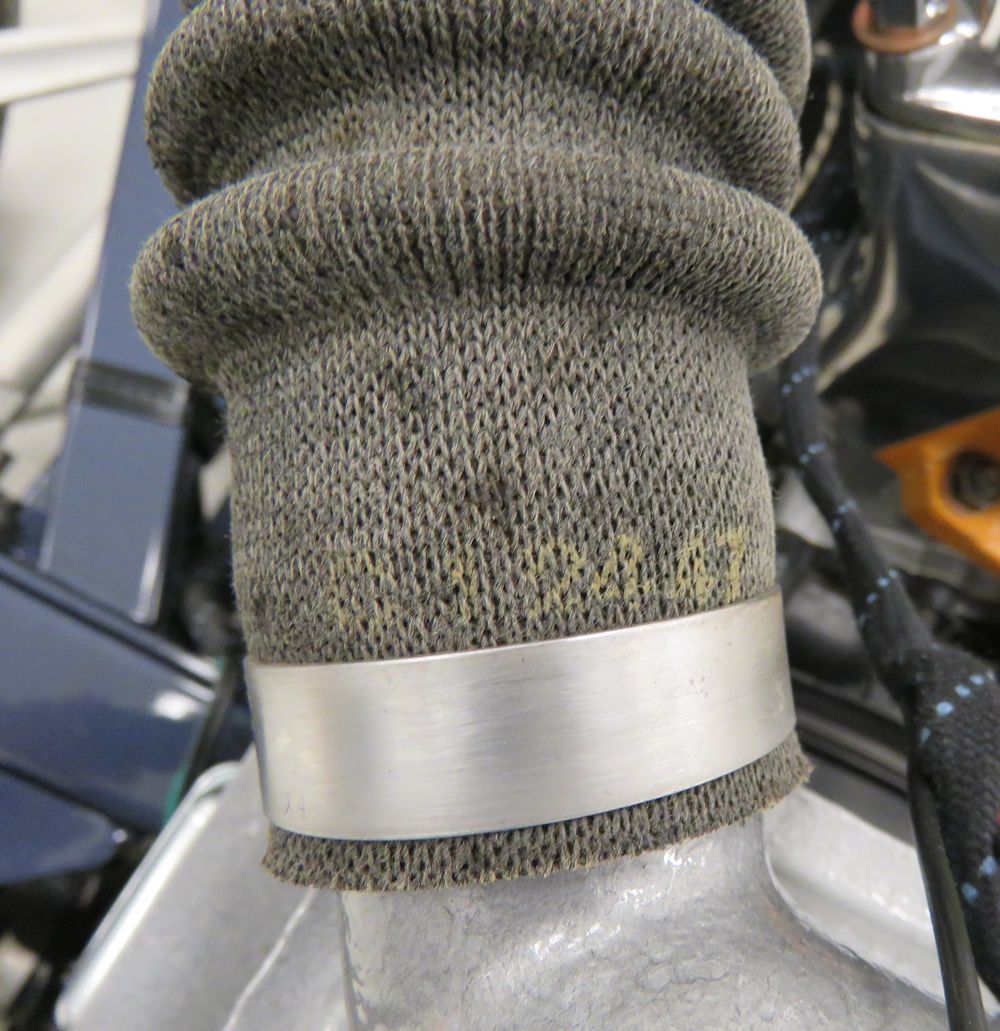 |
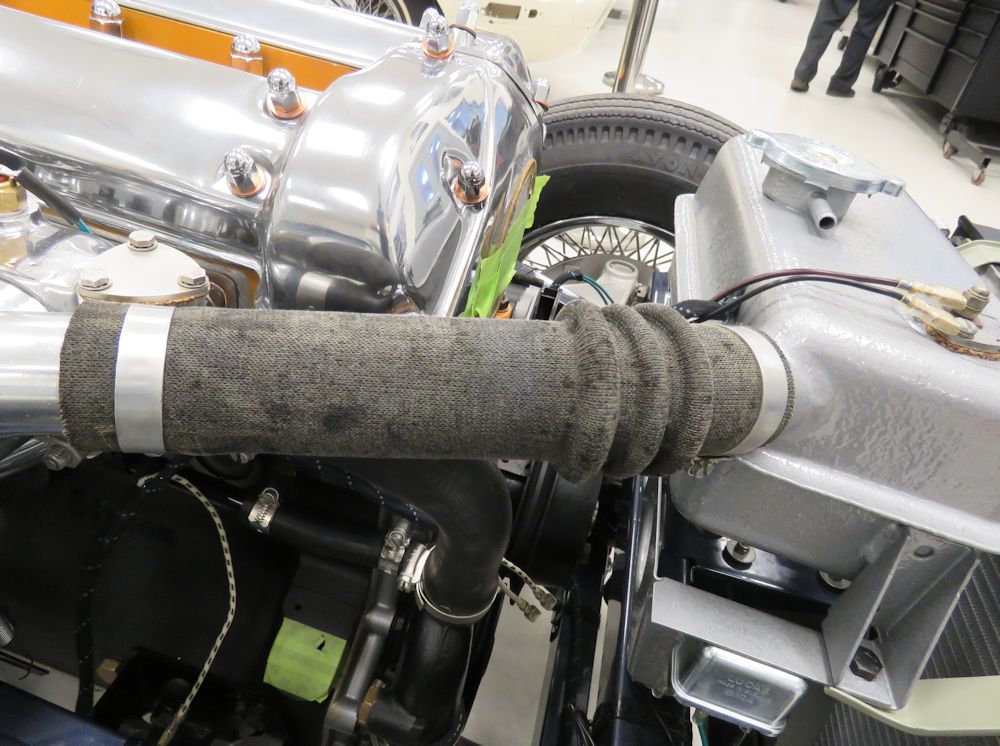
| Mike Mueller supplied this original 1961 coolant hose |
Note Jaguar part number still visible in
canvas |
 |
 |
 |
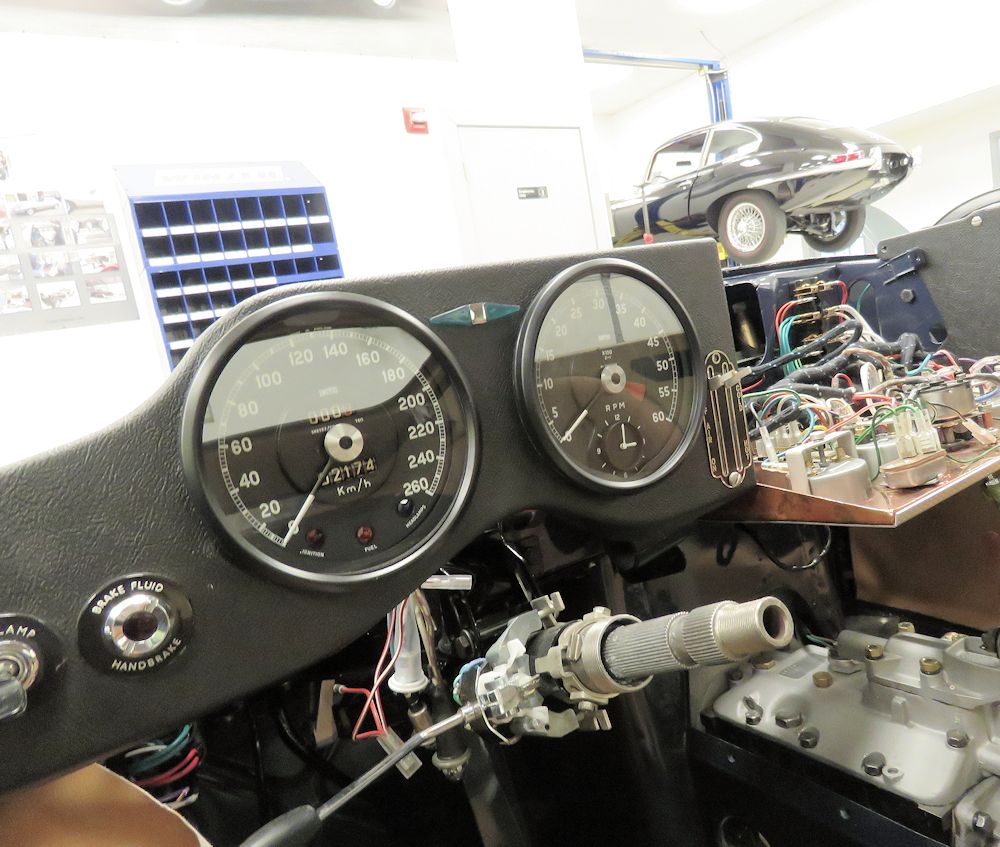 |
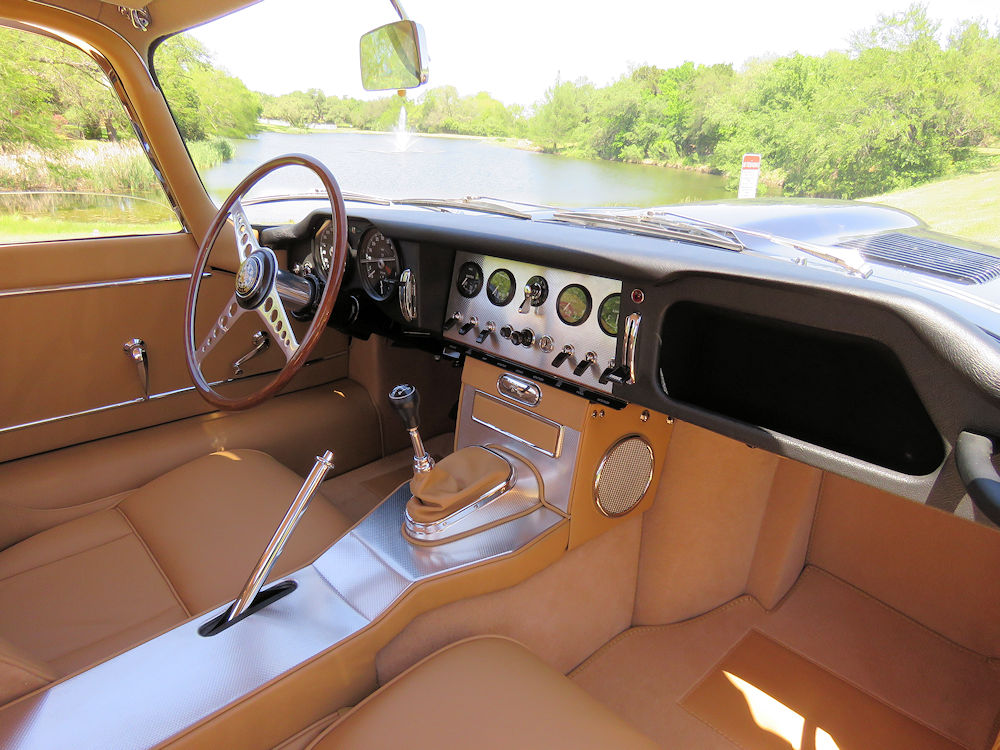
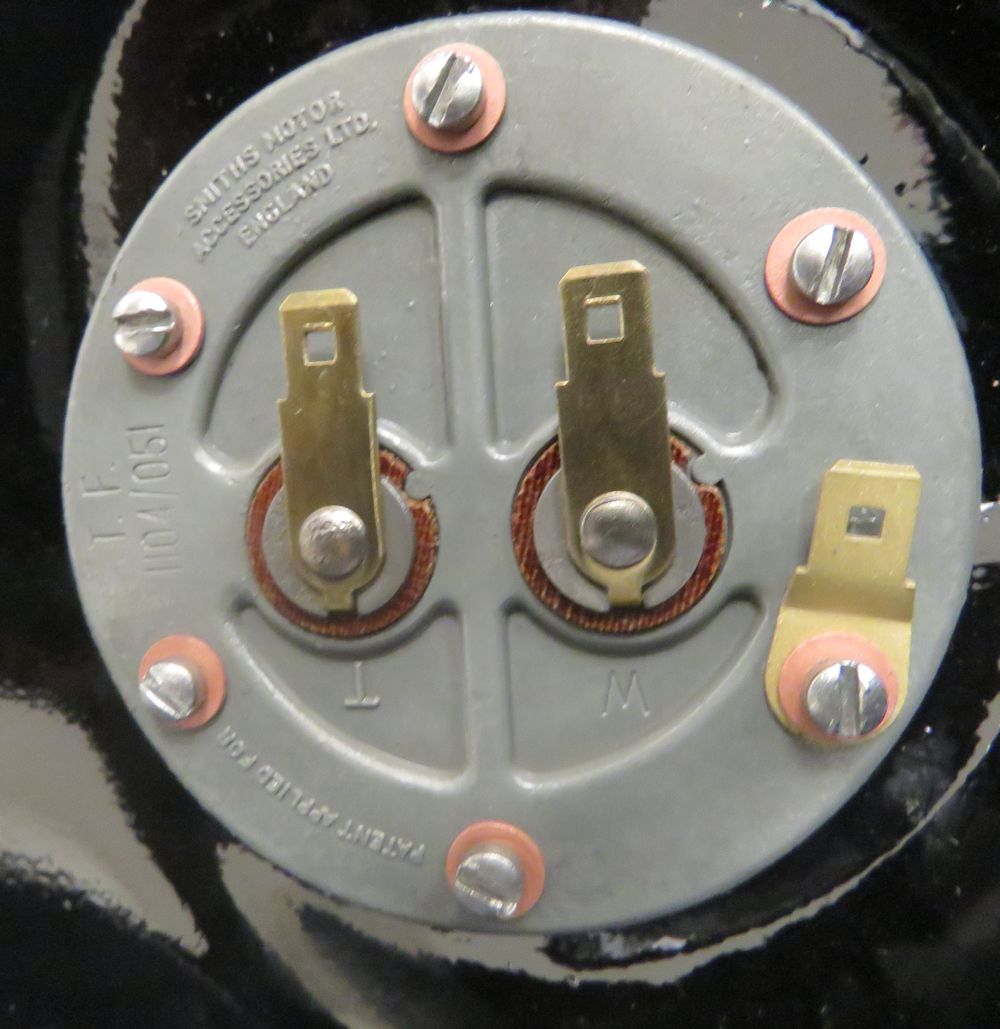
| Restored speedo and tach now installed |
|
 |
 |
| Tailgate, rear window and chrome trim now installed |
Assembling the front marker lights |
 |
 |
| Carlos installing the restored marker lights |
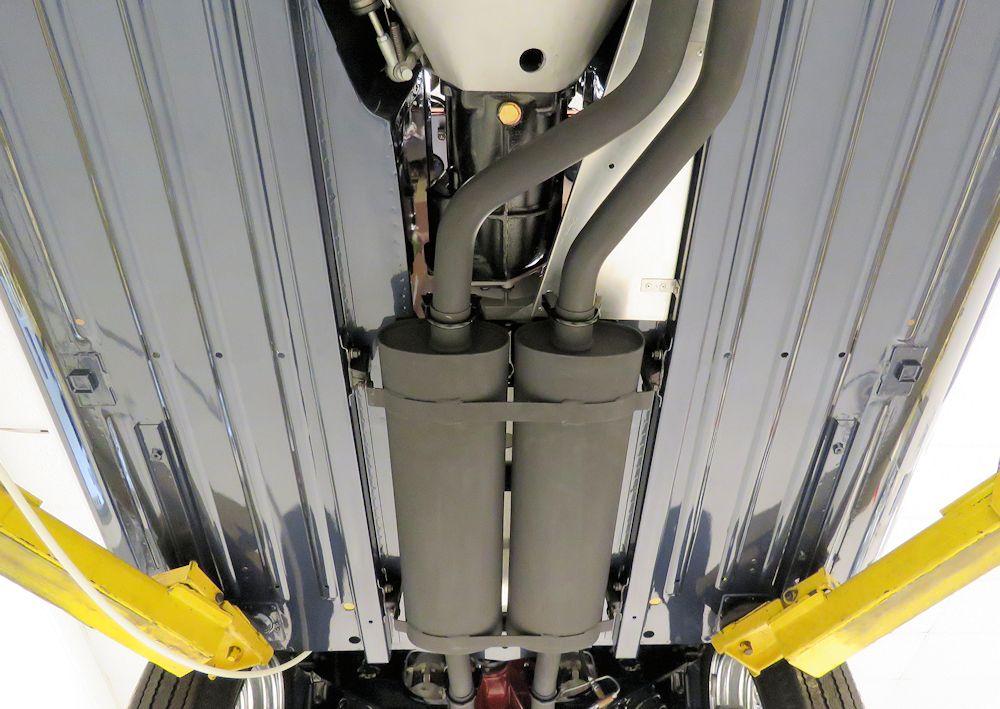
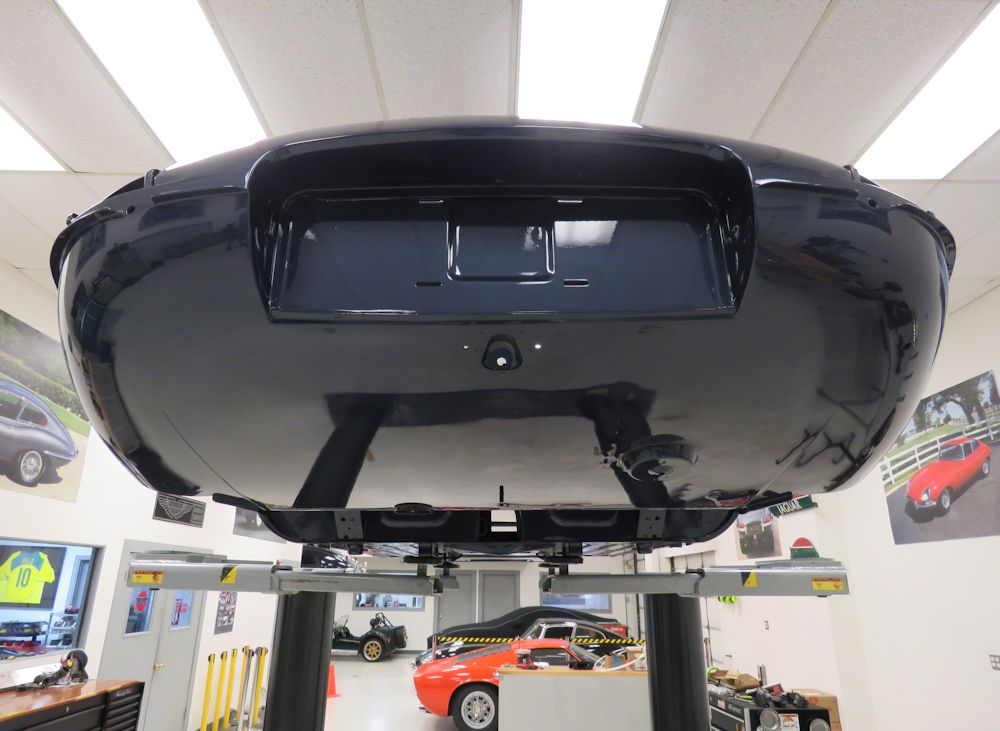
A few shots taken standing beneath the car earlier today.
 |
 |
| Carlos has started installing your re-plated
chrome |
Exhausts were originally satin black, so we
had the new system coated to replicate the original look |
 |
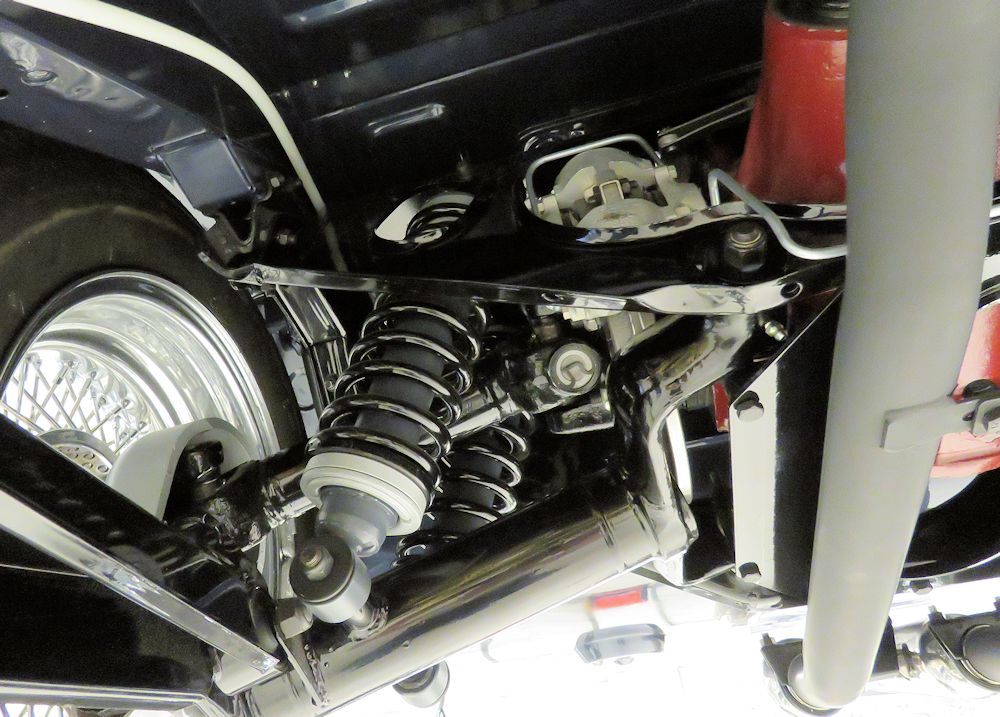 |
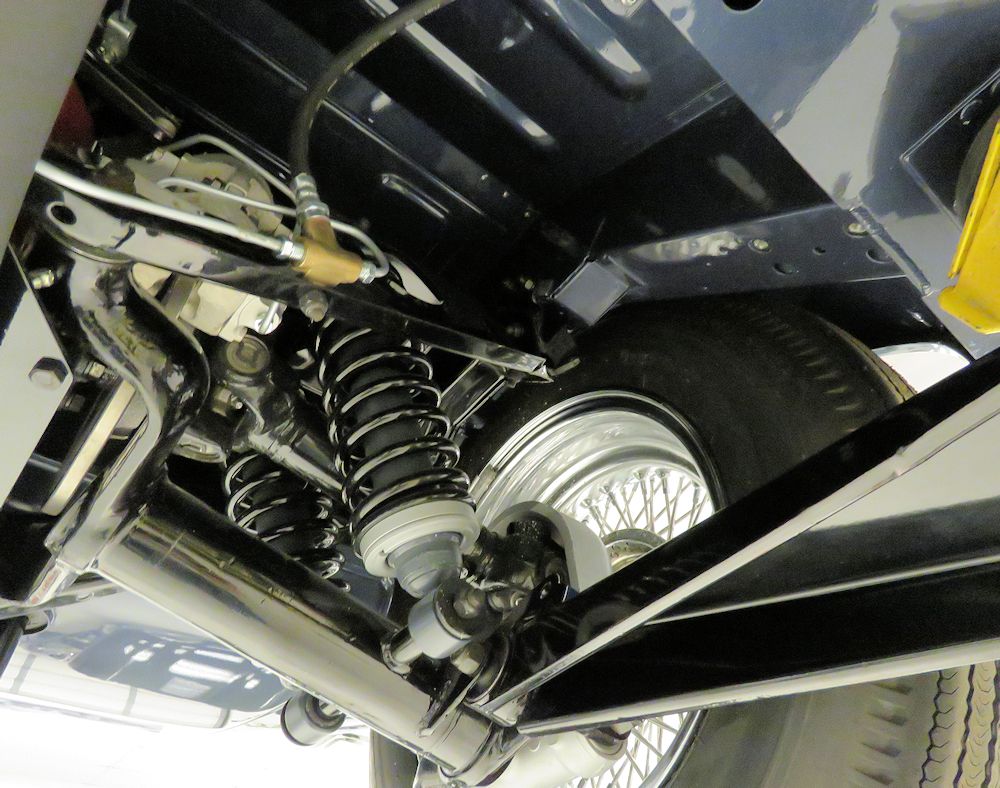
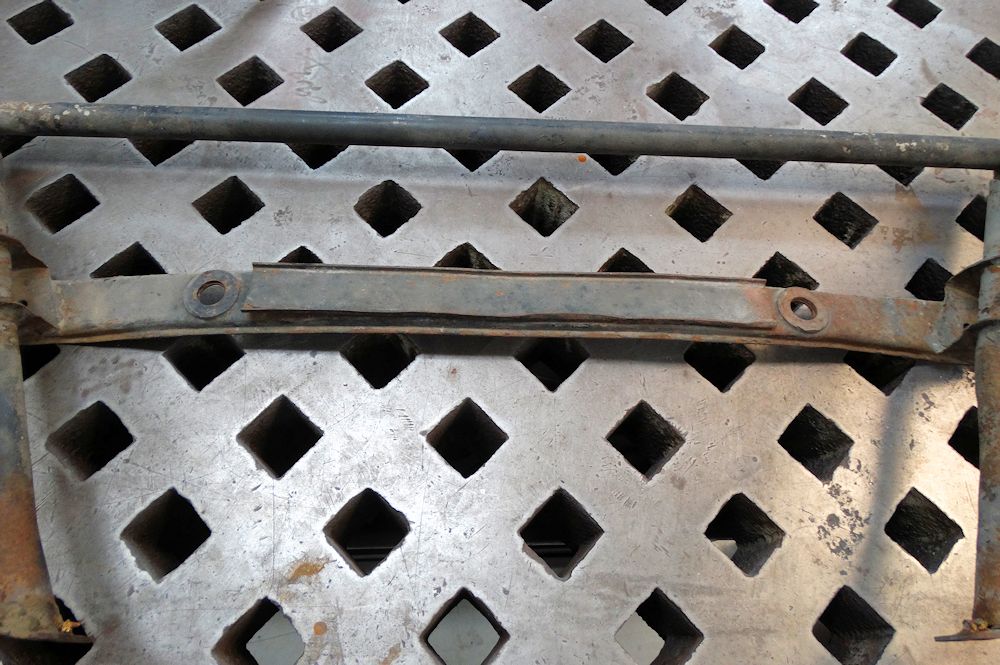
| Looking up into the rebuilt rear suspension |
Note spacers at the bottom of the road springs |
 |
 |
| Another view of the new exhaust system |
|
 |
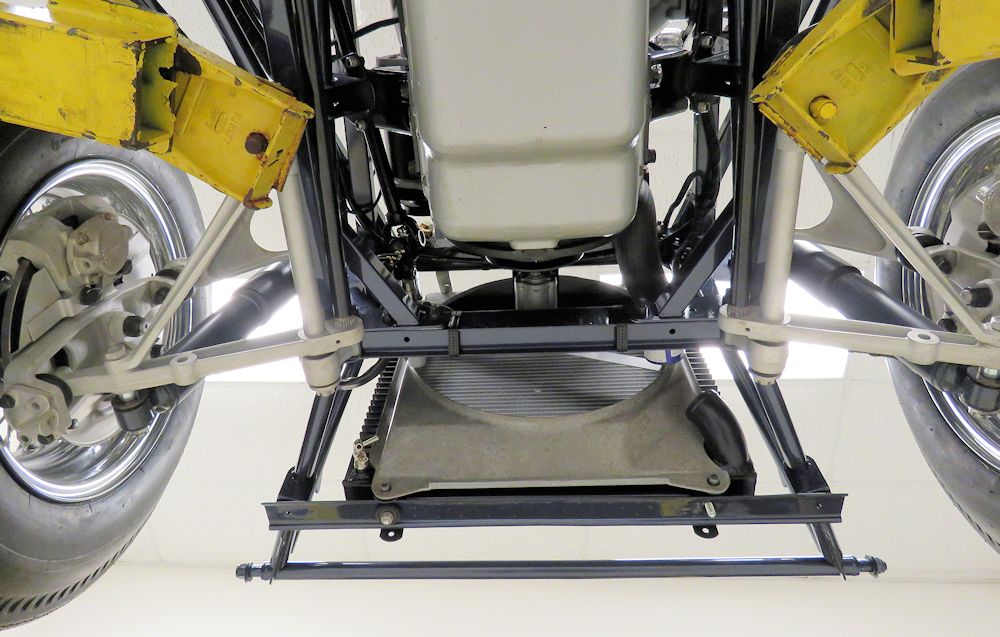 |
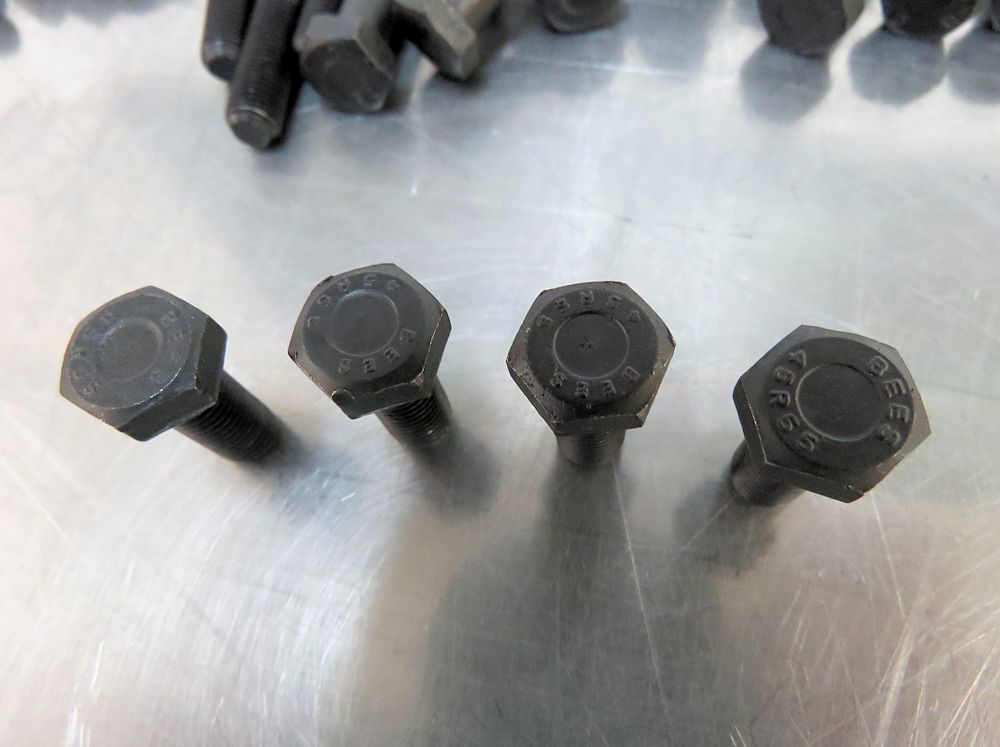
| Original Bees and GKN bolts used throughout, even where invisible beneath the car |
Original fan shroud cleaned up beautifully |
 |
 |
| Tail pipes and rear resonators are chrome
plated |
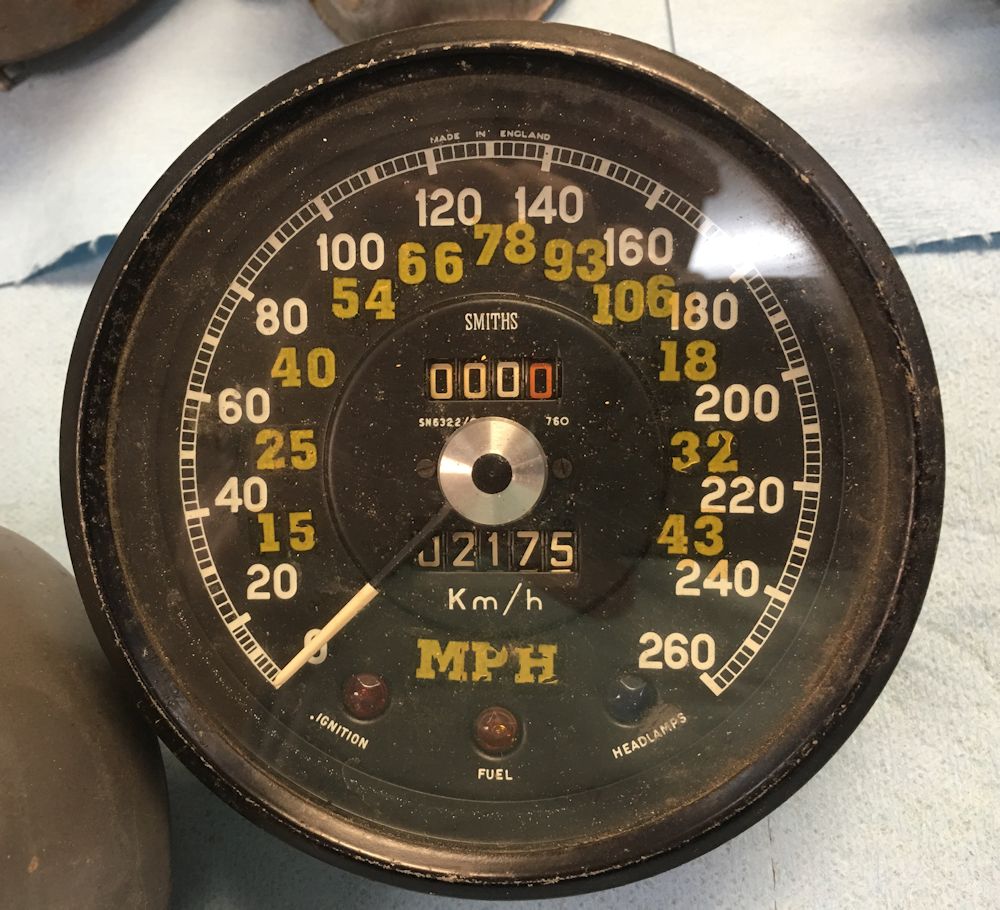
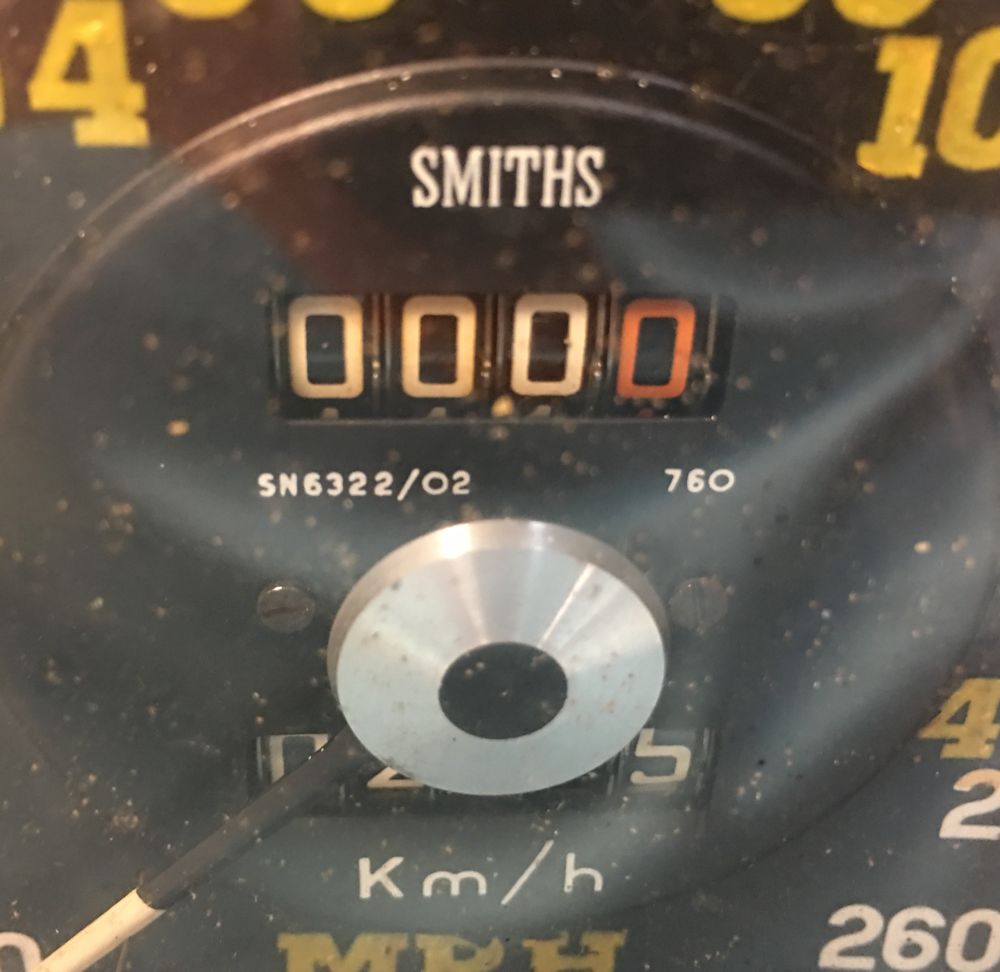
The speedometer for 885013 was always going to be a challenge. MPH stickers had been glued to the face when the car was imported from Germany to the United States and there was no way to remove the stickers without damaging the face. The original speedo face was marked with a serial number (6322/02) and final drive ratio code (760) that is unique to cars with a 3:31 final drive that were supplied new in Germany and Italy, it was important to us that the new face should also have these markings.
My thanks are due to Nisonger Instruments in NY who came up with a correct early, German/Italian km/ph face, and did a beautiful job restoring the speedometer for us.
 |
 |
| Speedo is original to the car |
Restored using correct serial # 6322/02 and differential 3:31 final drive code (760) |
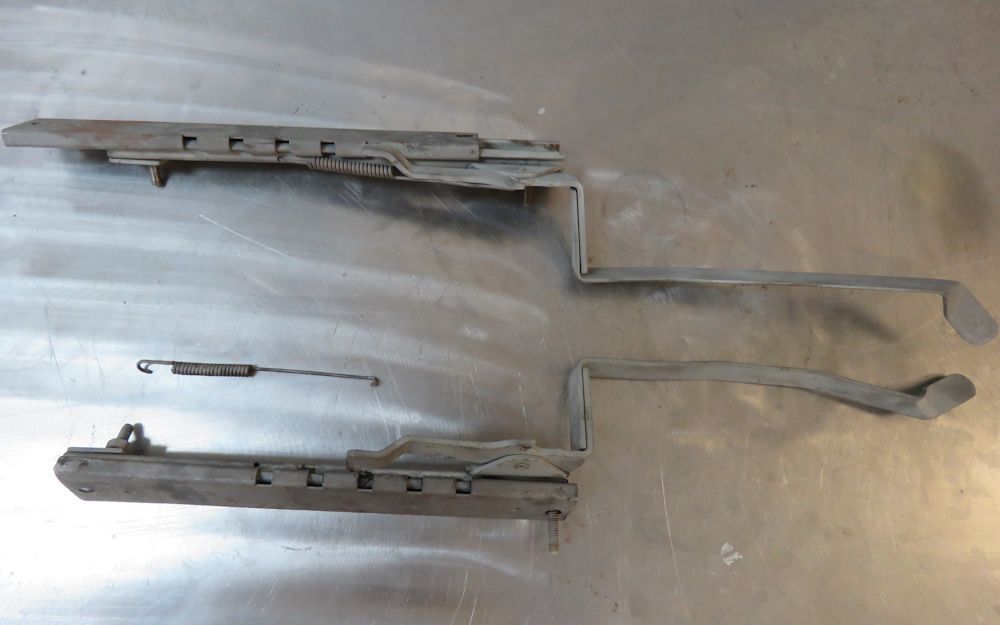
Very early E Types had what are known as 'short' seat tracks. We were fortunate enough to have three out of the four seat track component pieces that were original to 885013, but even Mike Mueller couldn't assist with the missing short track we needed to complete the set. In the end we had Jake modify a later (long) seat track and he was able to replicate the short track perfectly.
 |
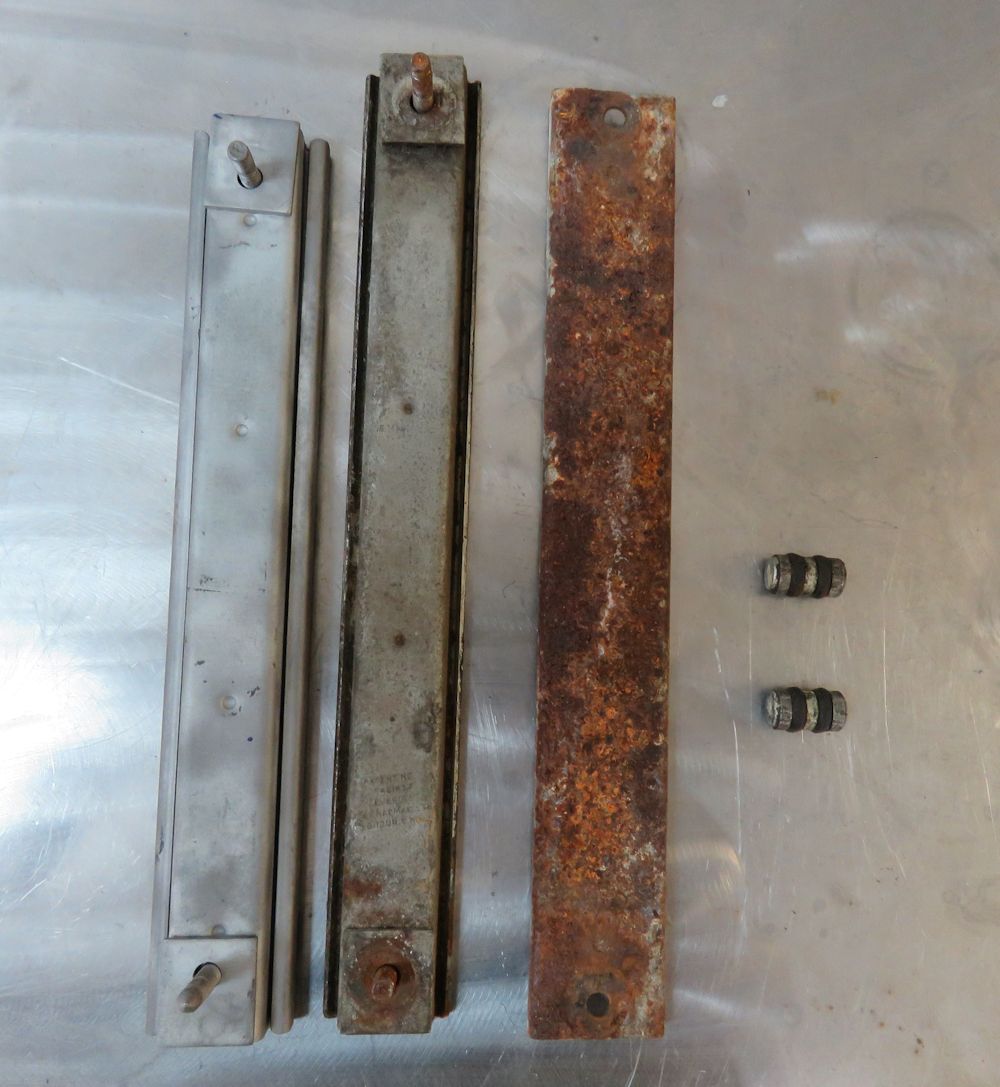 |
| Early style 'short' seat tracks |
Note early short track on left, later (longer)
track in center |
 |
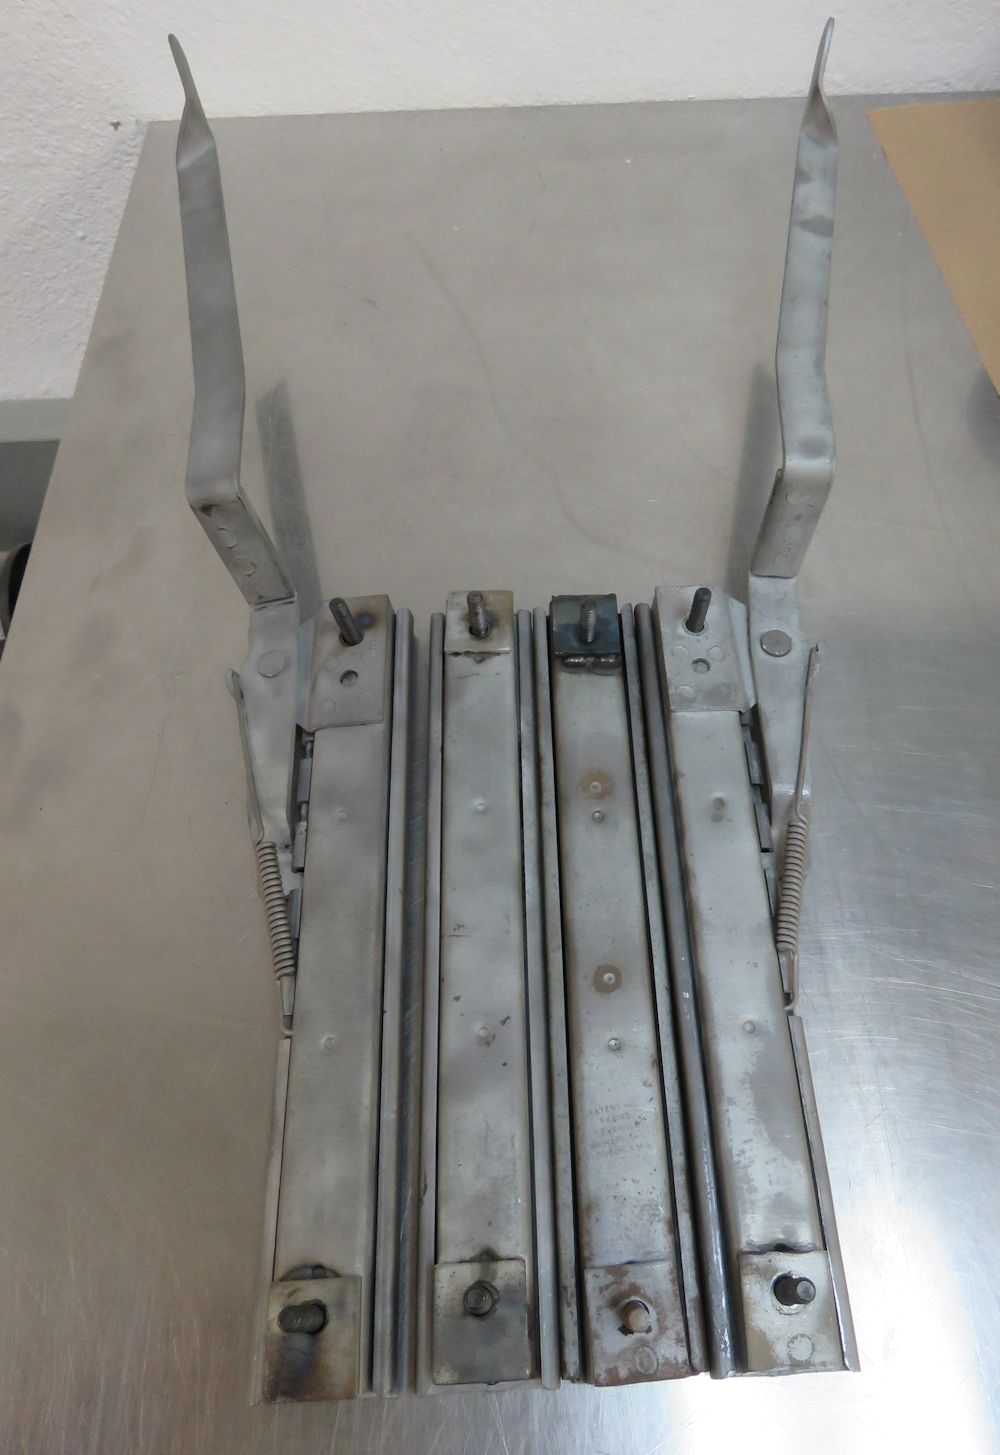 |
| Jake was able to shorten a longer track and
match the earlier short track perfectly |
Seat tracks now ready for Cad plating |
 |
 |
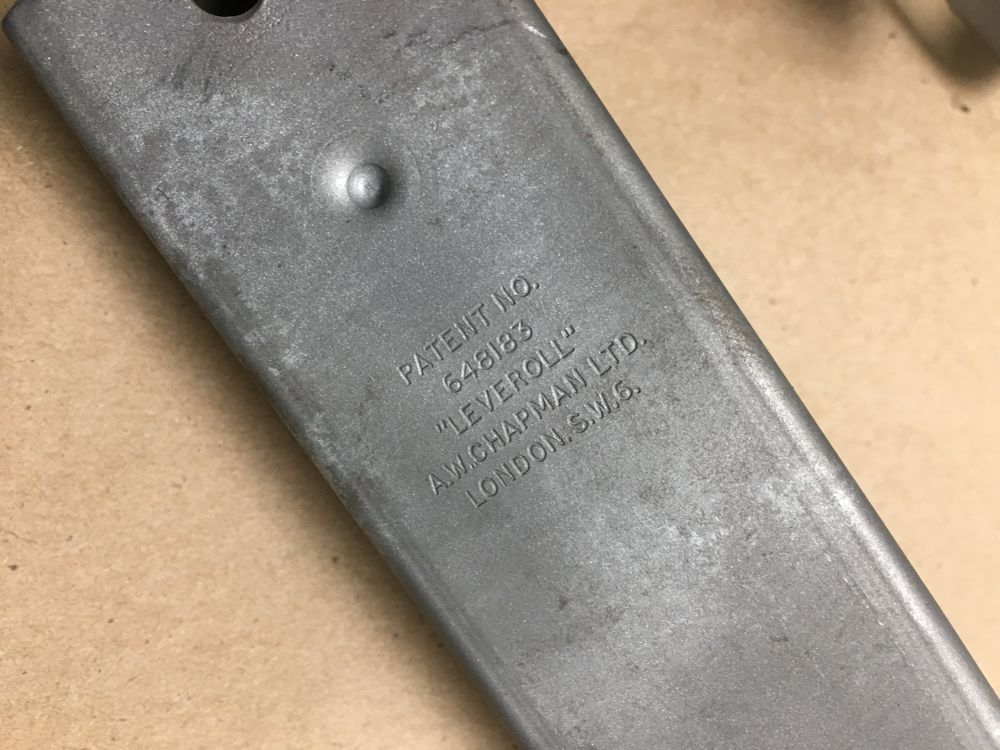
| Patent info found on the upper surface of
early seat tracks (underside on later tracks) |
In very early E Types, the LEVEROL brand name
is found in large script on the adjustment handles |
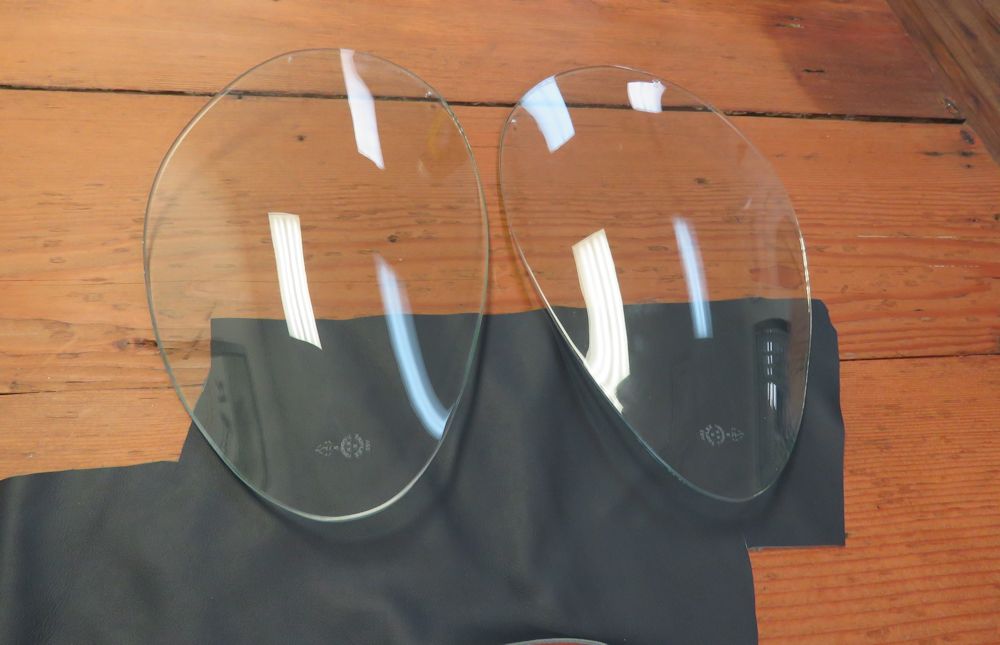
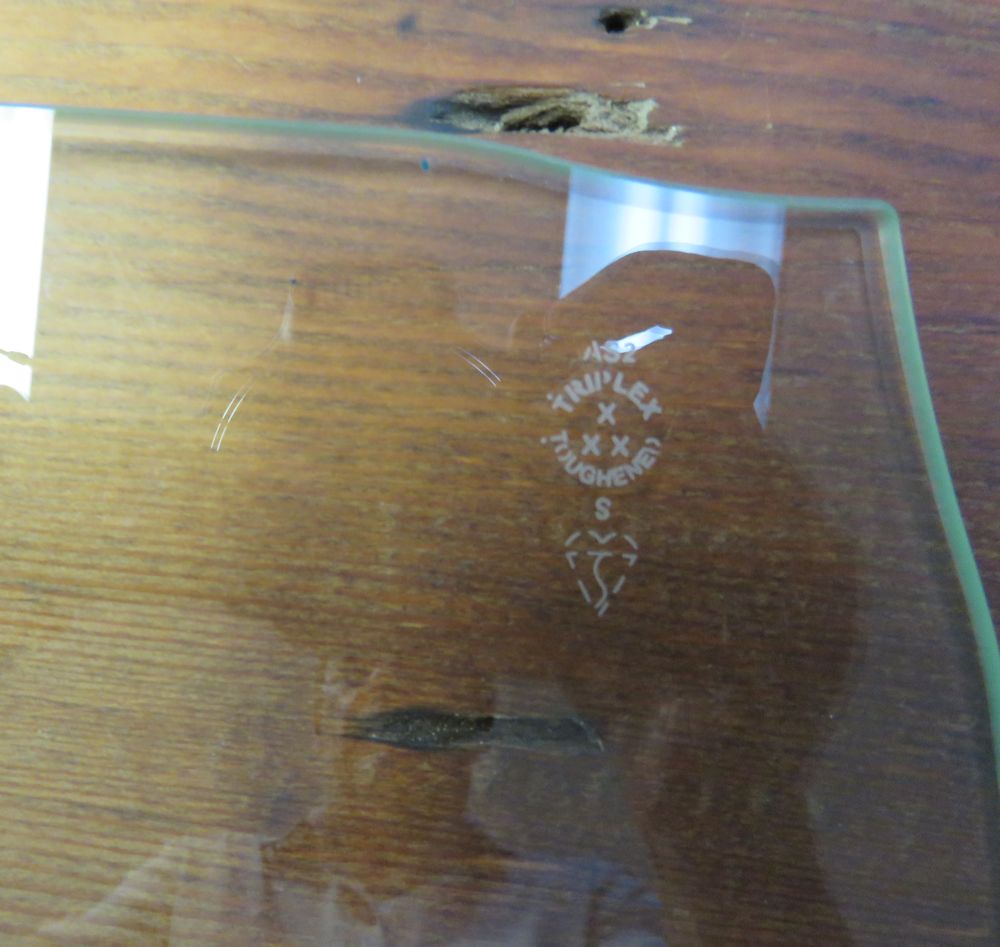
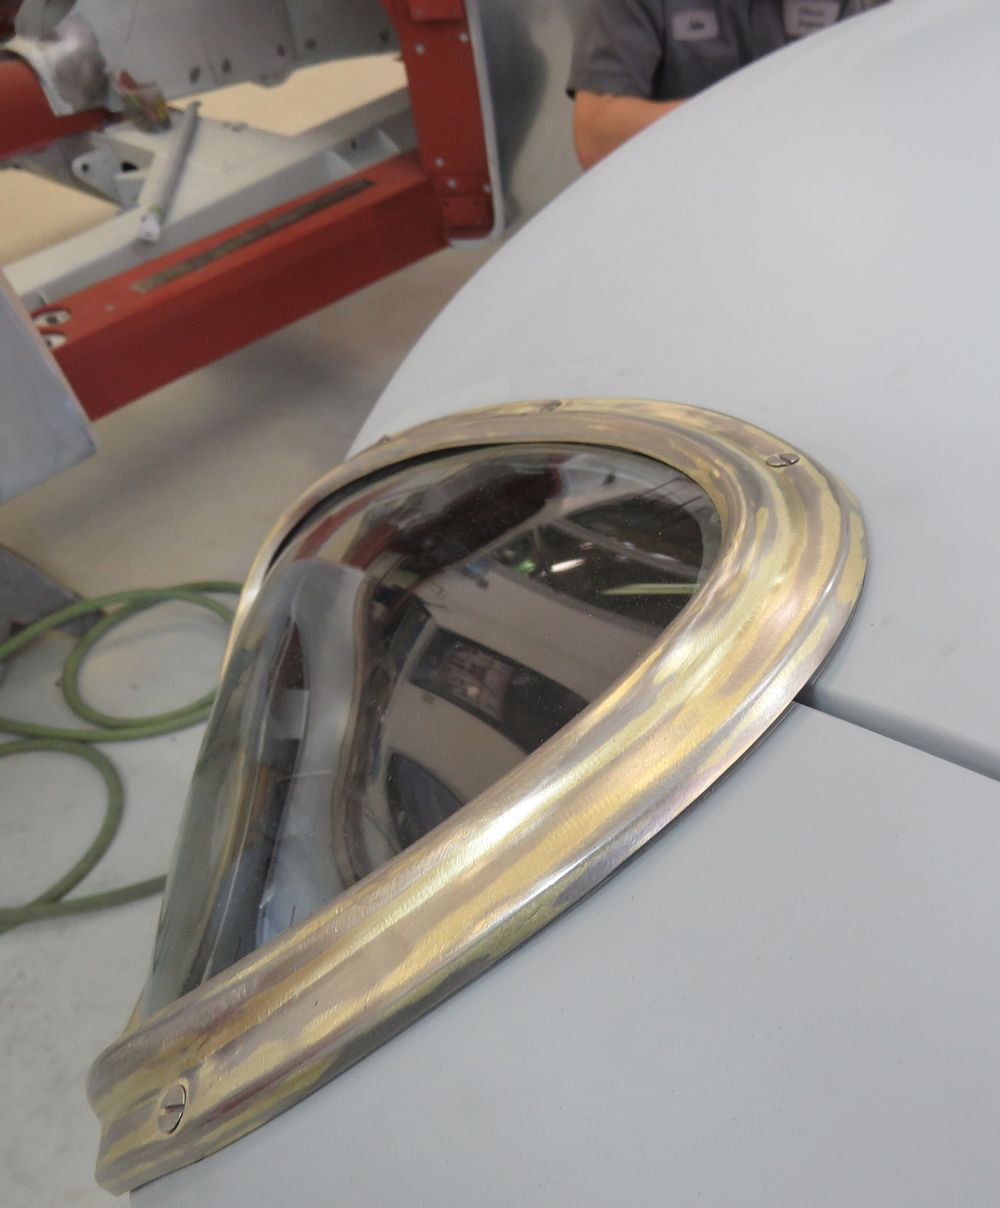
As many of you will know, the Triplex logos etched into the window and headlamp glass on classic cars are usually dated coded. As most of the original glass for 885013 was either missing or damaged, we had no choice but to replace it with new. We therefore had to carefully remove the logos (by sanding and polishing) and have appropriately date coded logos etched on the new glass.
Once again I am grateful to Mike Mueller who actually persuaded the only person we knew who could do the Triplex etching out of retirement to etch all of the new glass for 885013. The finished results are absolutely superb and totally indistinguishable from original etchings. The dots above the lettering (in Triplex) and beneath the lettering (in Toughened) are the indicators of the date. In the case of 885013, the dot above the "T" in Triplex denotes the first quarter of the production year, and the dot beneath the "T" in Toughened denotes the year in a particular decade. Accordingly, all of the glass for 885013 is date coded for the first quarter of 1961.
 |
 |
| Very early E Type headlamp glass has the
Triplex logo etched horizontally |
The dots denote first quarter of 1961 |
 |
 |
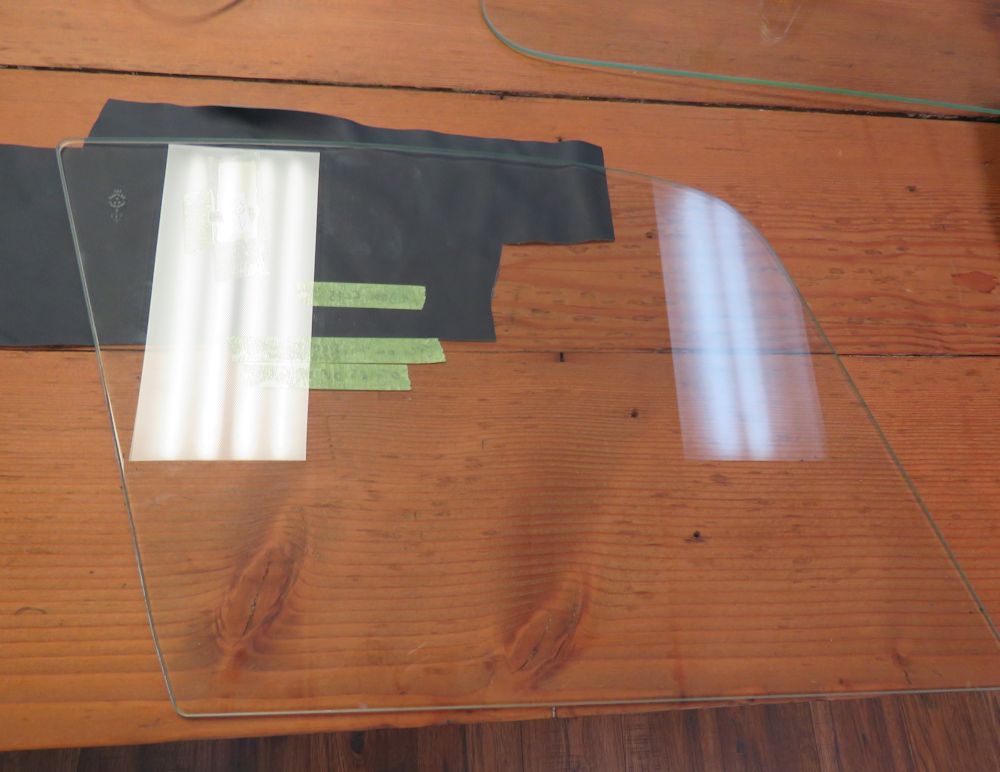
| Each quarter light glass must be etched so it
can be read from the outside of the car |
Close up of the quarter light etching |
 |
 |
| Door glass is also date coded |
Close up of the door glass date coded etching |
Lots of progress with the assembly of 885013.
 |
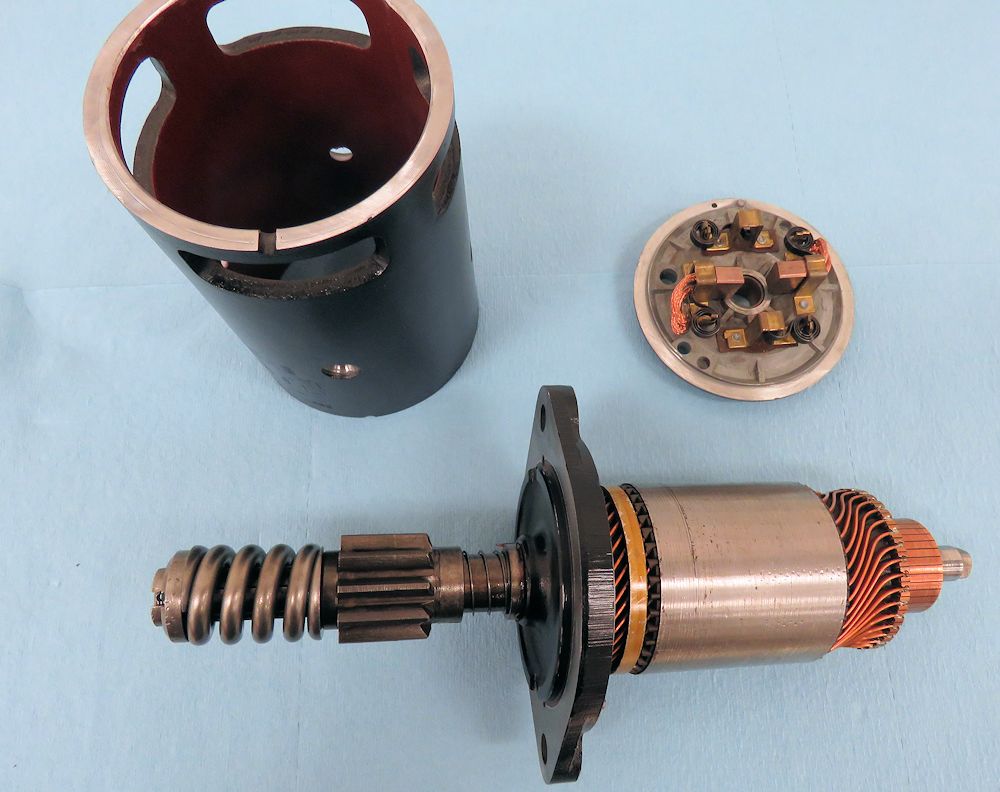 |
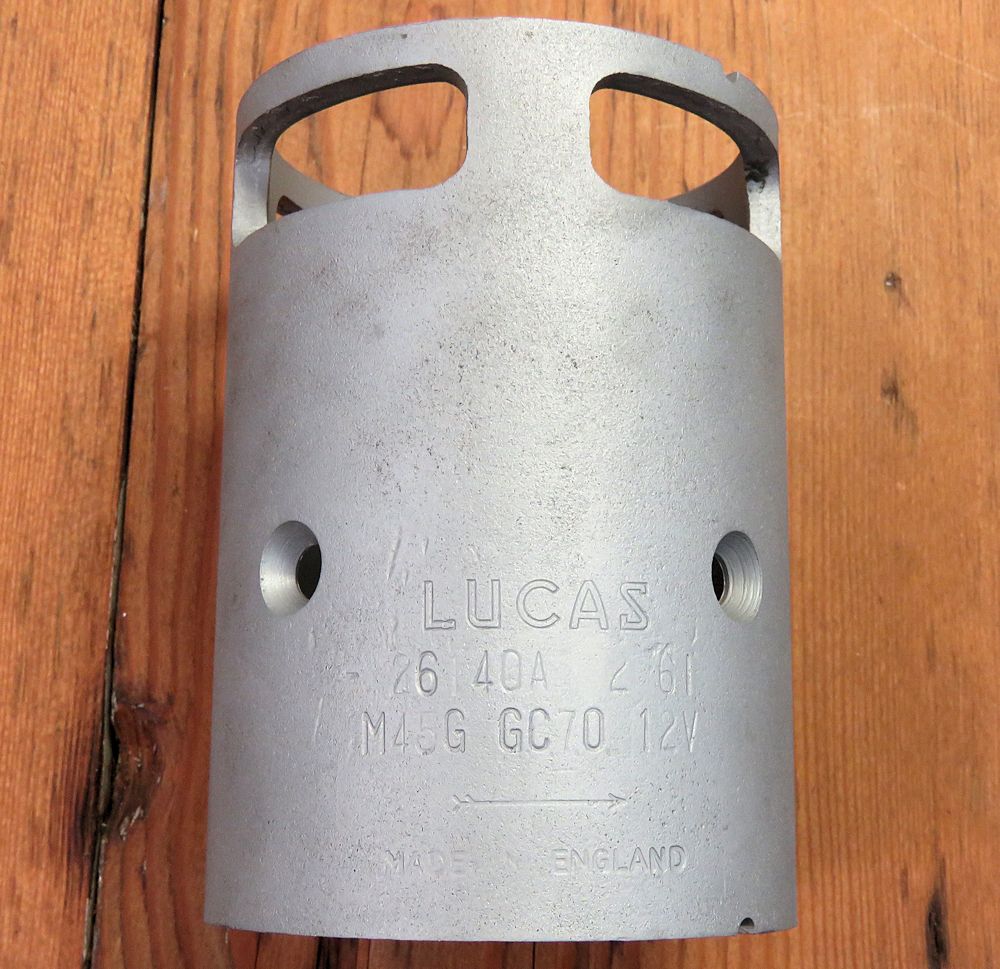
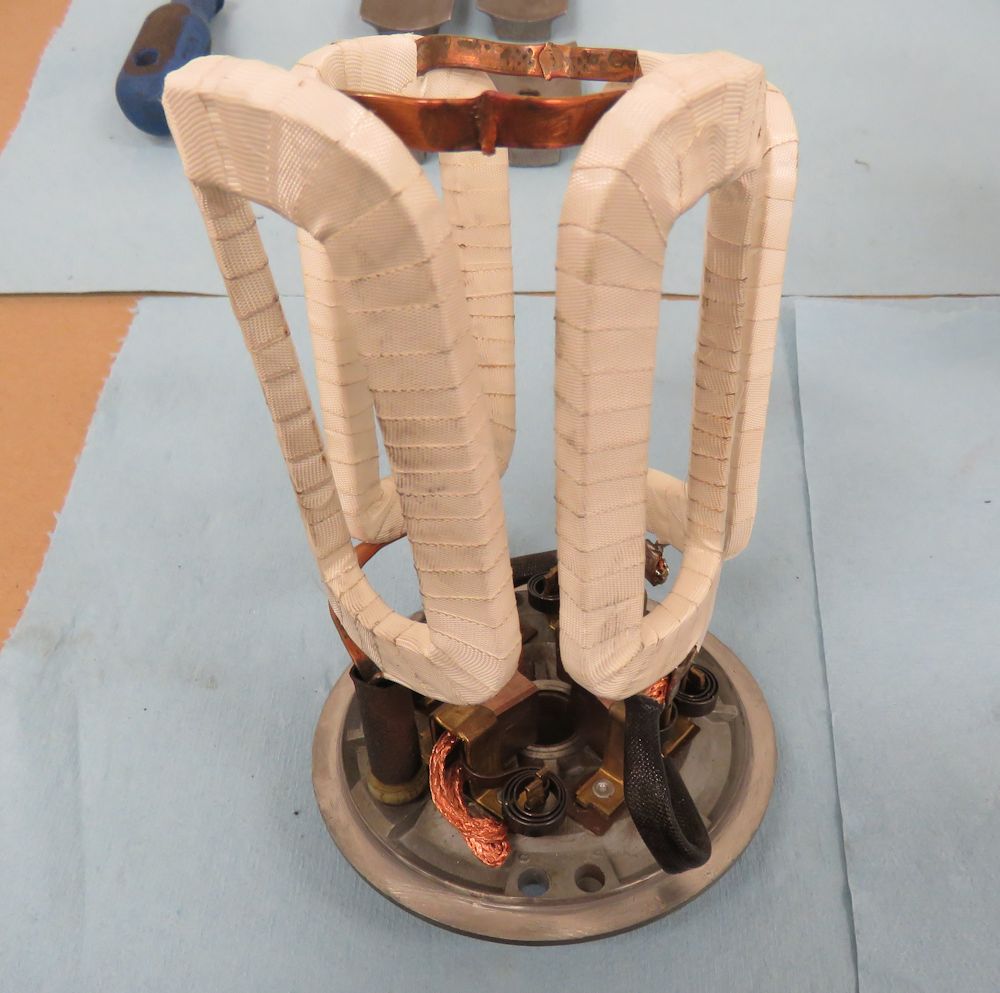
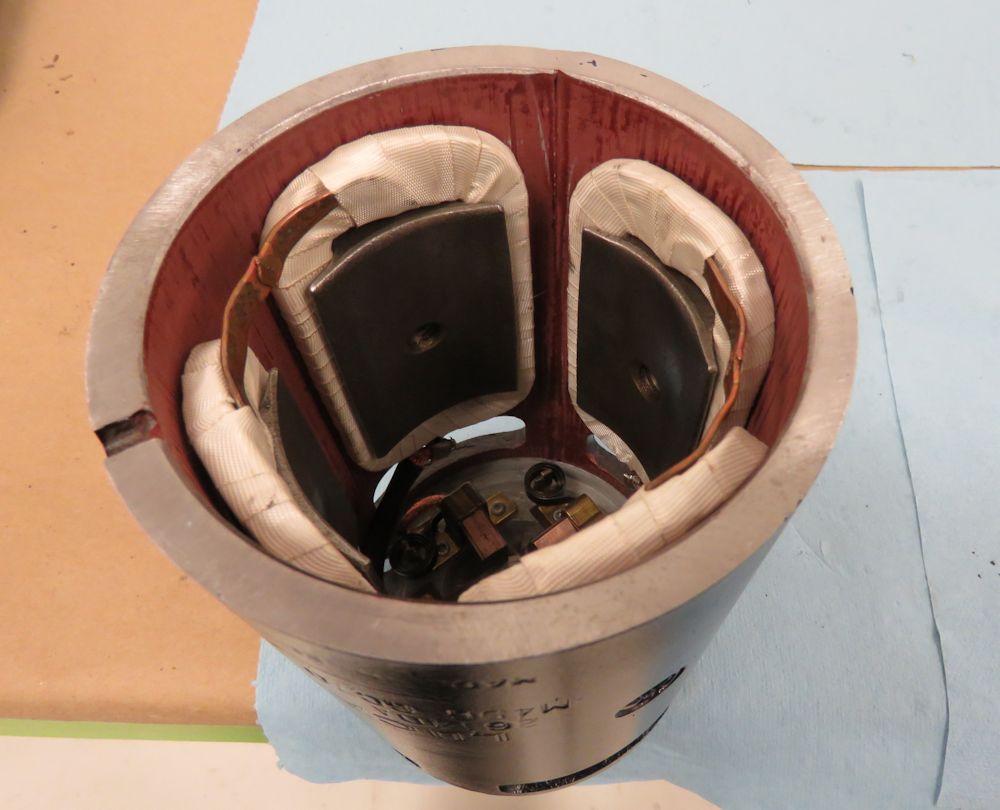
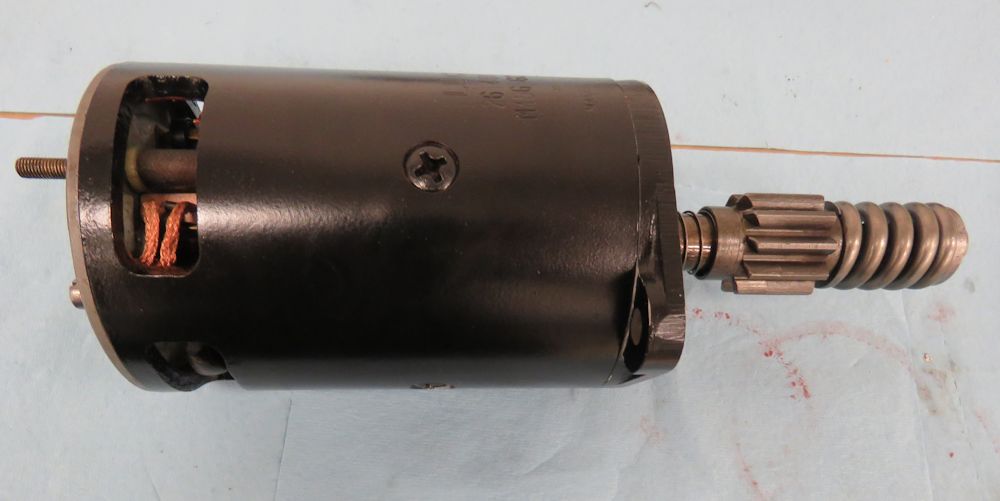
| Starter motor casing dated Feb 61 |
Rebuilding the starter motor |
 |
 |
 |
 |
 |
 |
| Ready to install |
Lots of new old stock goodies obtained from Dr. Mueller |
 |
 |
| Carlos trimming the inner wheel arches |
|
 |
 |
 |
 |
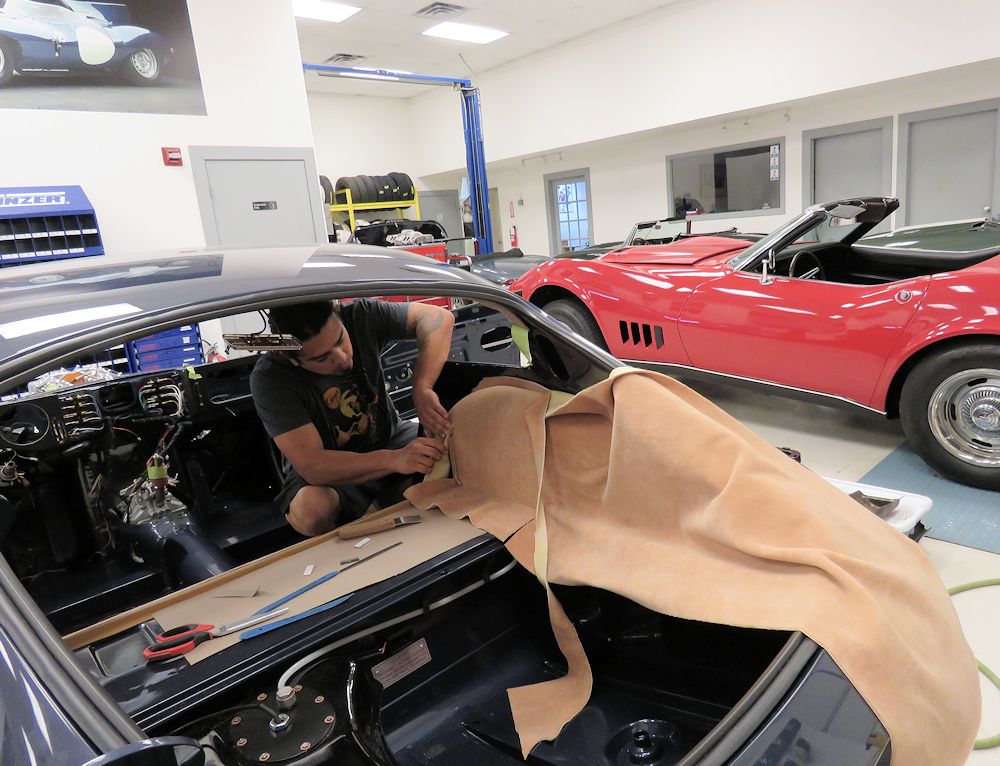
| Interior coming together slowly but surely |
Prior to trimming, all the interior panels are being carefully trial fitted |
 |
 |
| Early style (flat) dash top has been
re-trimmed |
LHD 'tripod' headlamps were original equipment |
 |
 |
| Early style pedal box has been completely
rebuilt |
Engine bay filling up rapidly! |
Time to get the interior installation underway.
|
 |
| Starter motor rebuild underway - note the case is date stamped 2//61 |
Carlos has now begun the process of installing the interior |
 |
 |
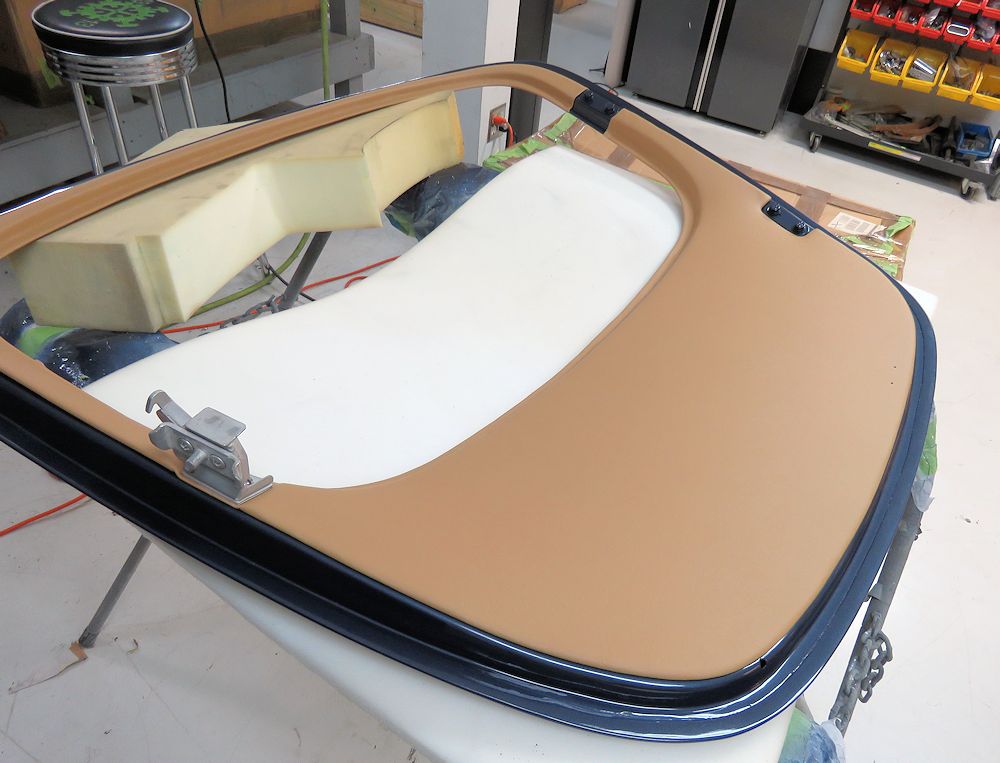
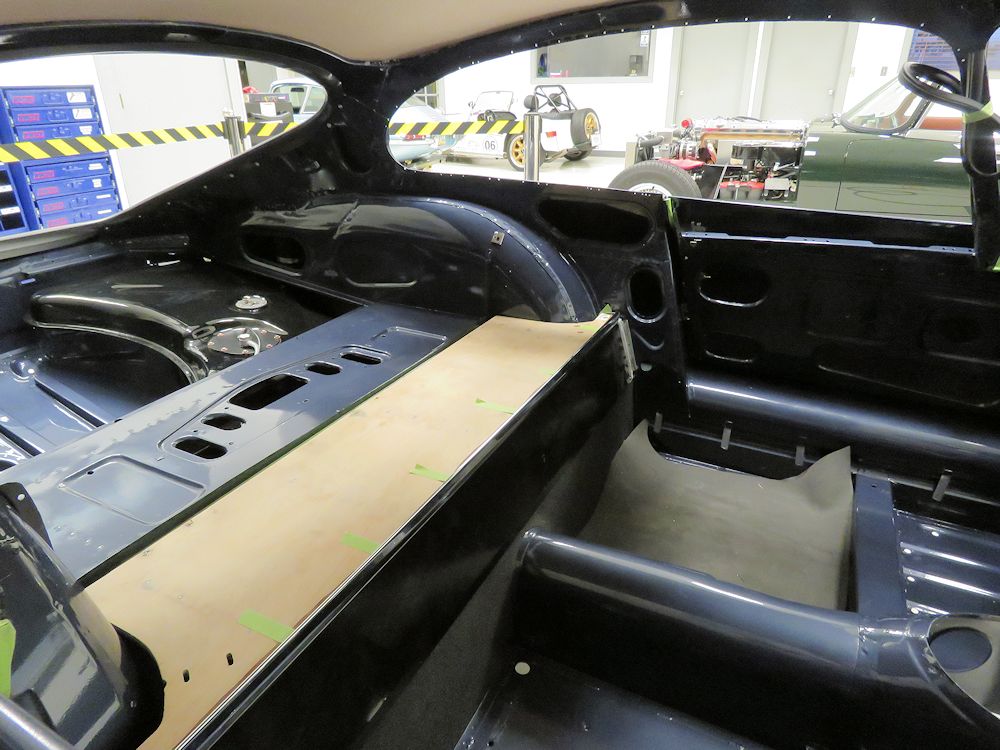
| Trial fitting rear parcel shelf, which is
unique to the very early coupes |
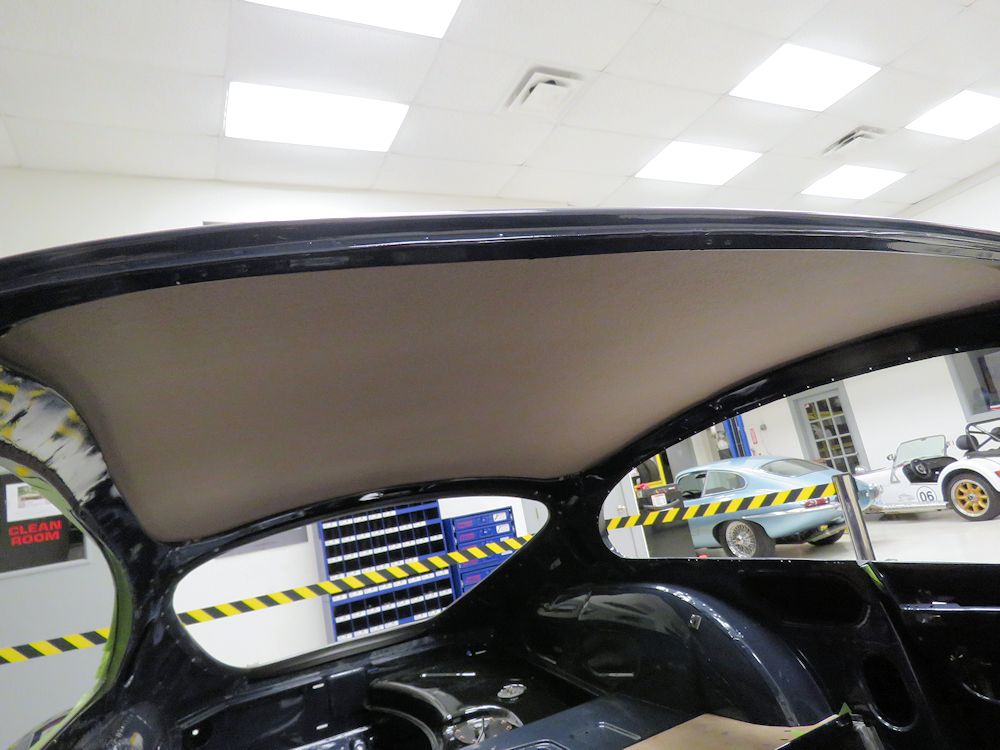
Center section of the wool headliner is the
first trim item to be permanently installed |
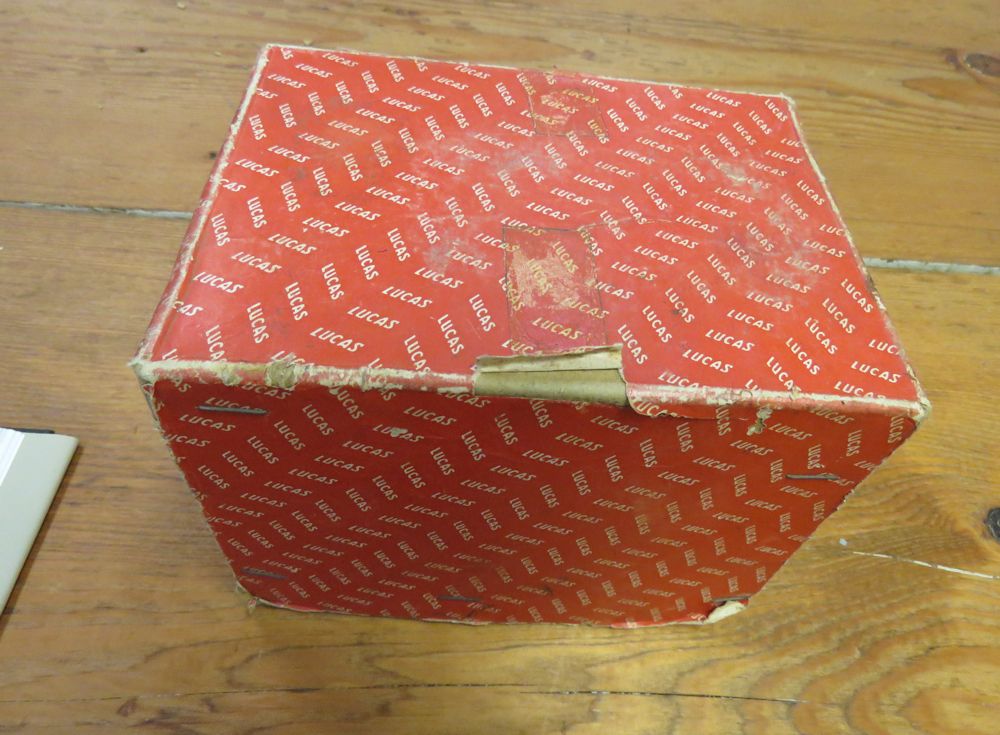
I have previously mentioned that the Haddock/Mueller 6 Cylinder E Type Originality Guide has been an invaluable resource for me as I strive to make this car as correct and true to the original as possible. Interestingly enough, 885013 is mentioned and referenced no fewer than nine times in the book.
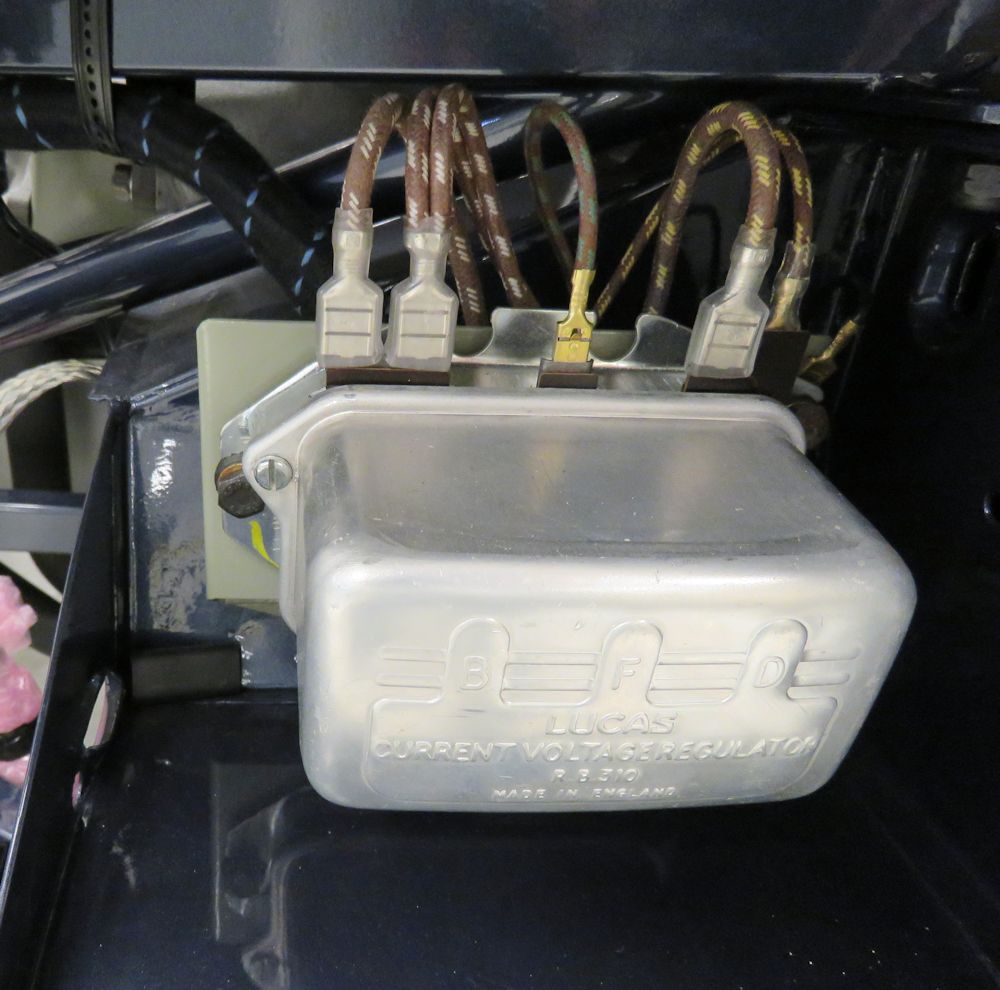
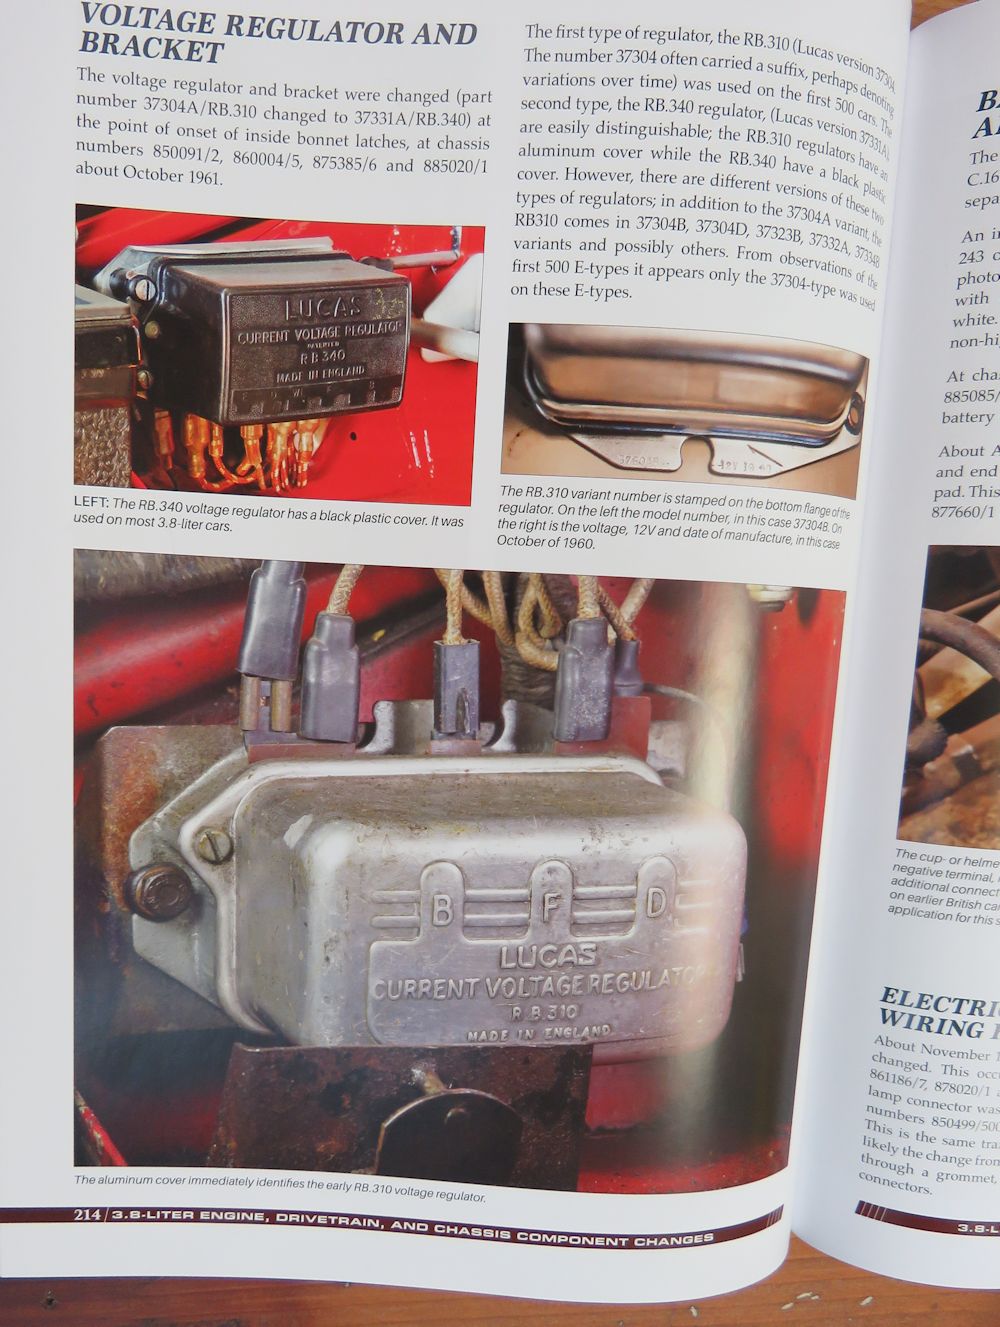
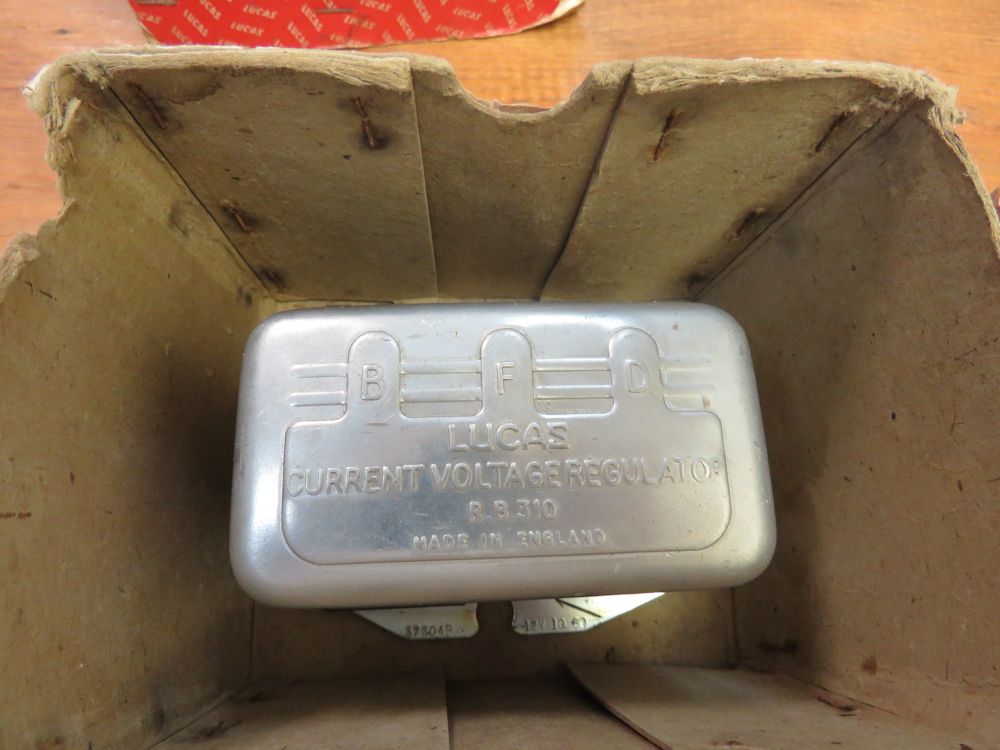
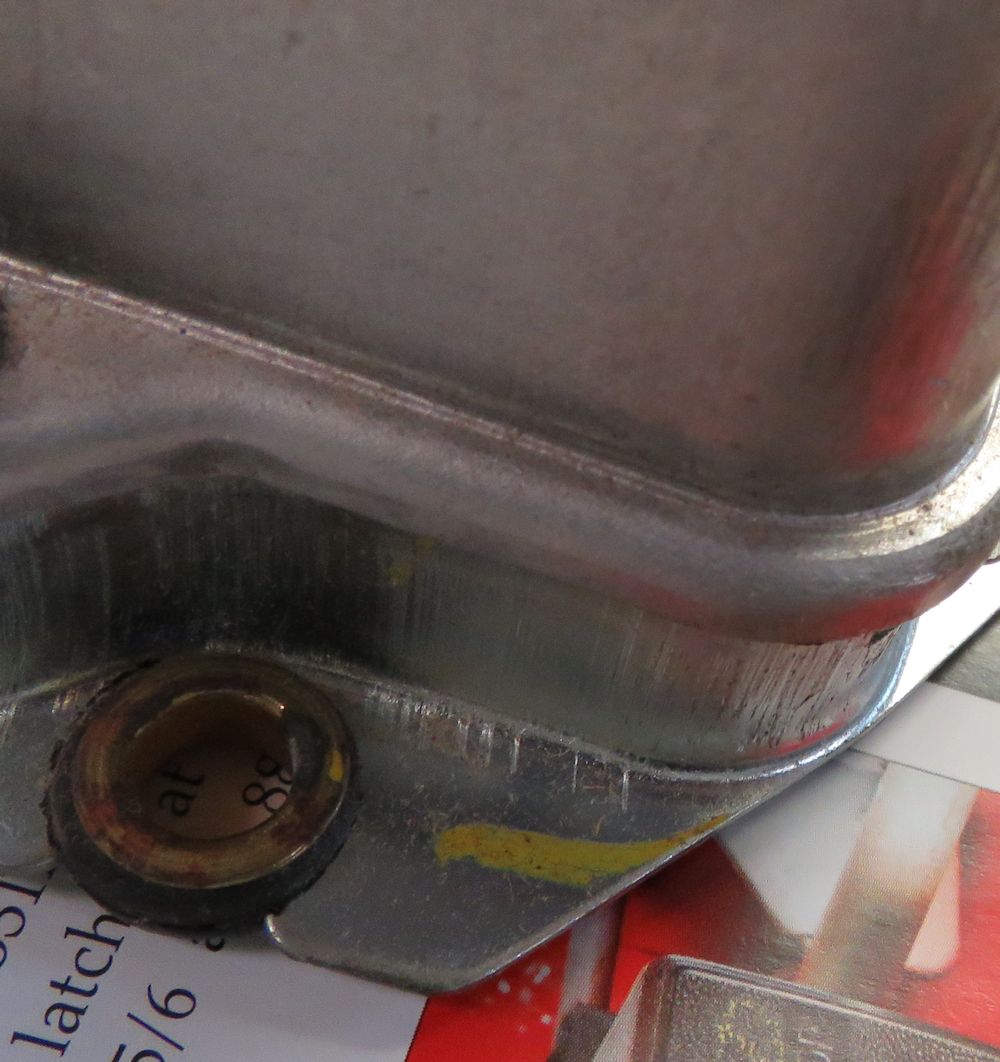
Having researched precisely which voltage regulator I needed using the Haddock/Mueller book, I was able to purchase a brand new old stock RB310 unit with the correct E Type specific model number of 37304B, and a highly appropriate date stamp of 10/60, from Dr. Mike Mueller himself. In fact, it is the actual voltage regulator used as an example of the original type in the book, photographed on page 214.
 |
 |
| Brand new old stock RB310 regulator purchased from Dr. Mike Mueller |
|
 |
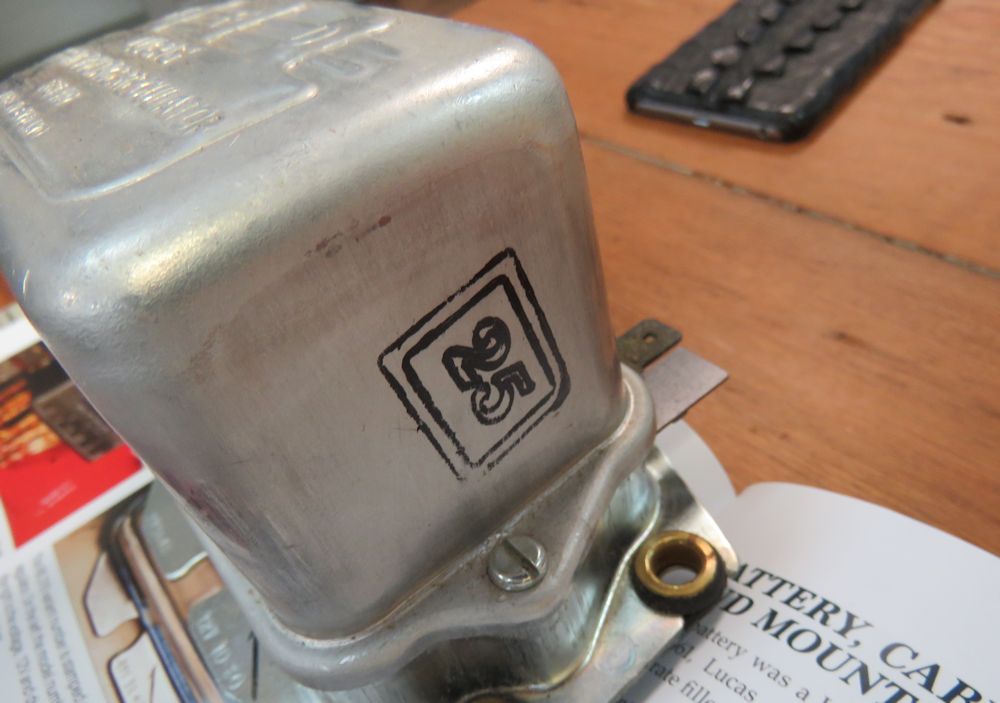 |
| Rarely seen production test stamp |
|
 |
 |
| Yellow crayon mark applied during QC testing on the Lucas production line |
Note that our regulator is the actual one used
as an example of the correct type on page 214 |
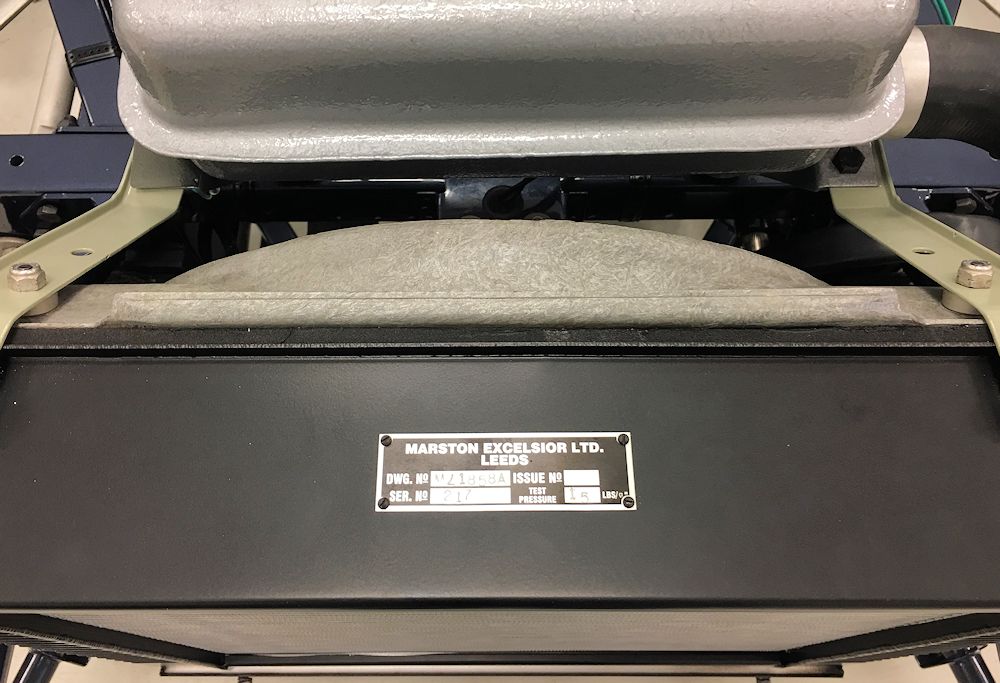
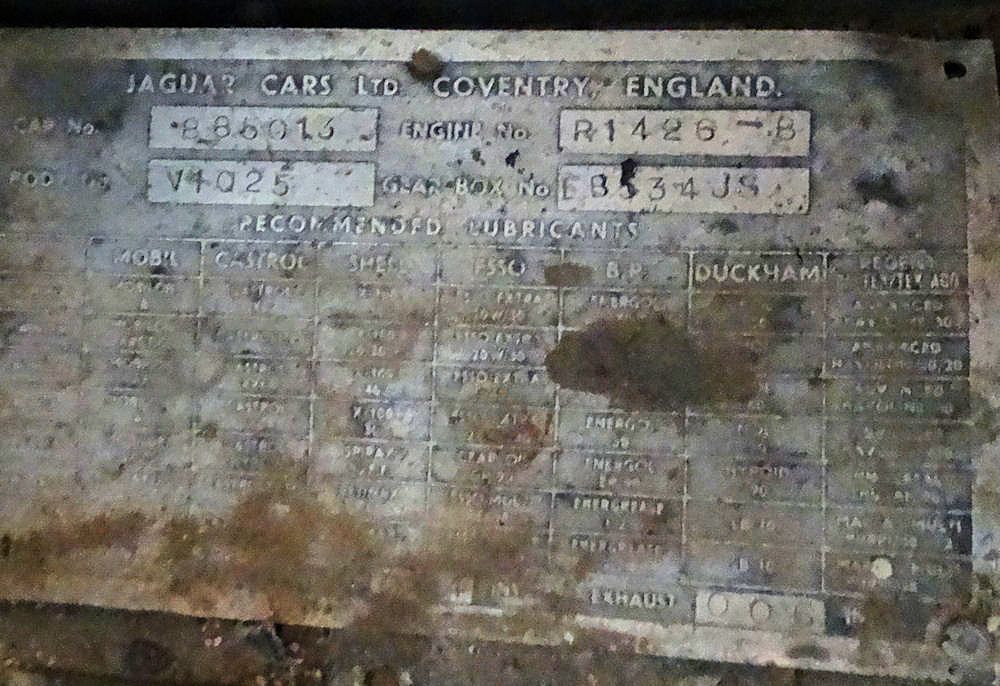
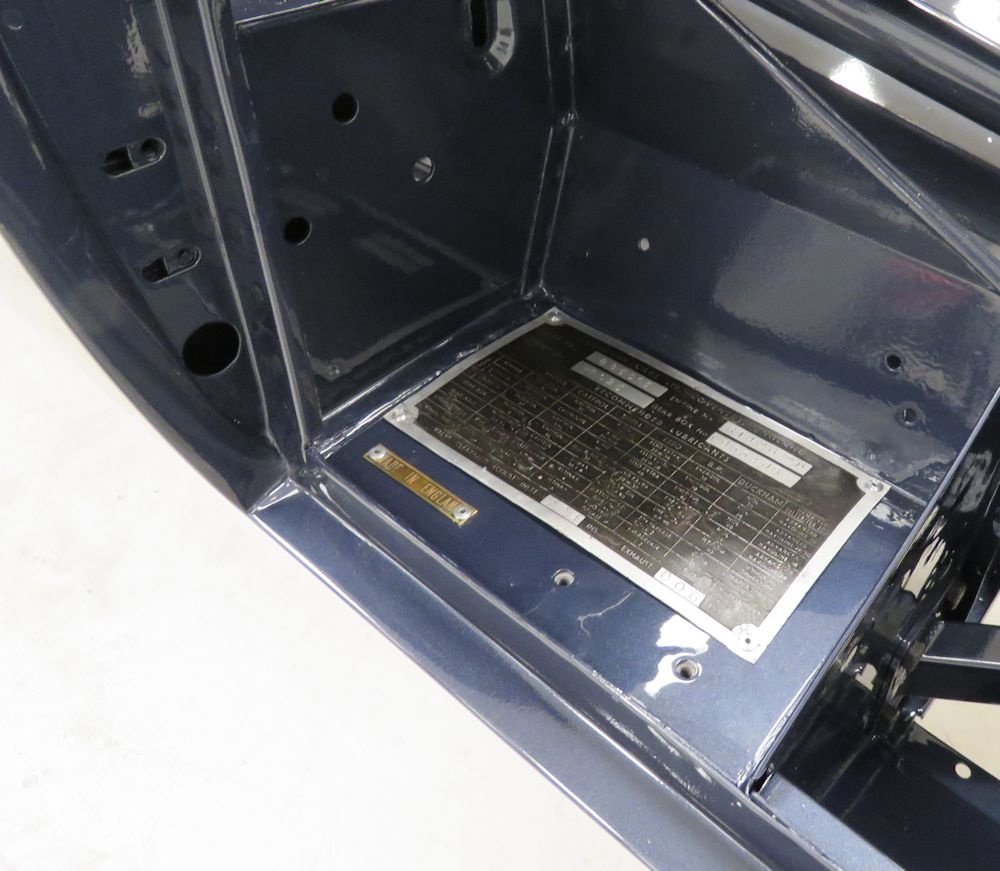
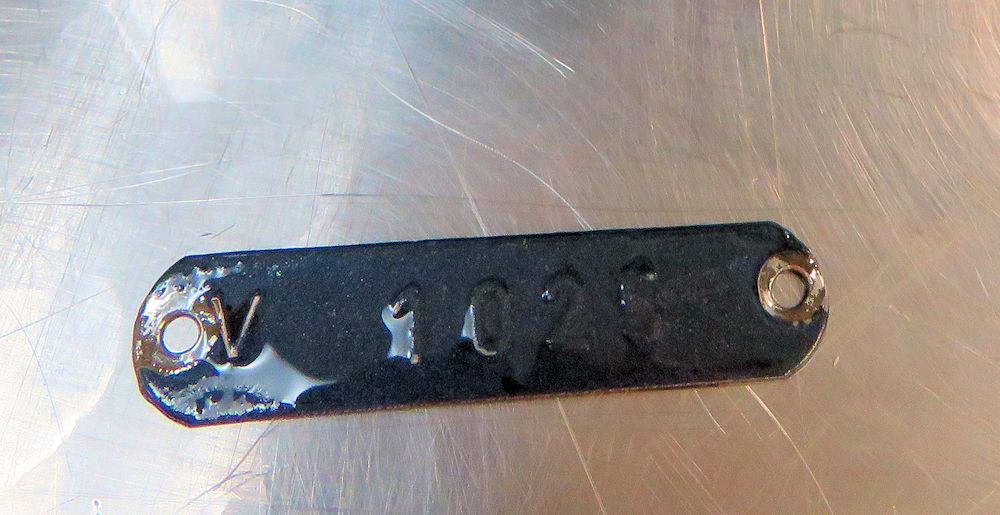
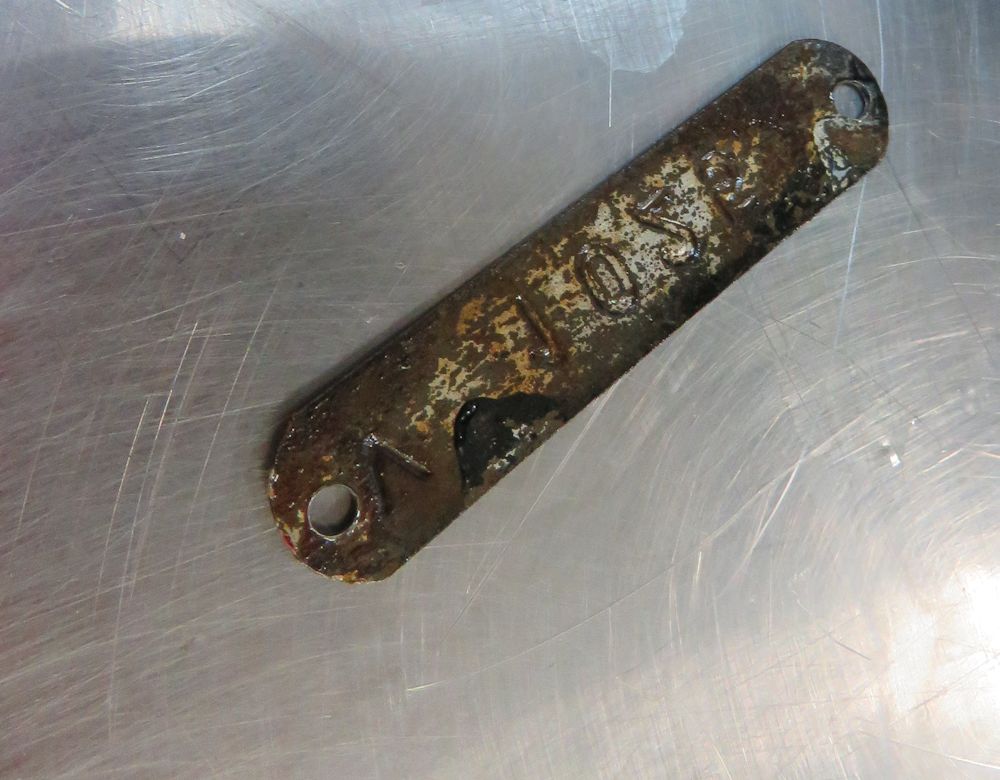
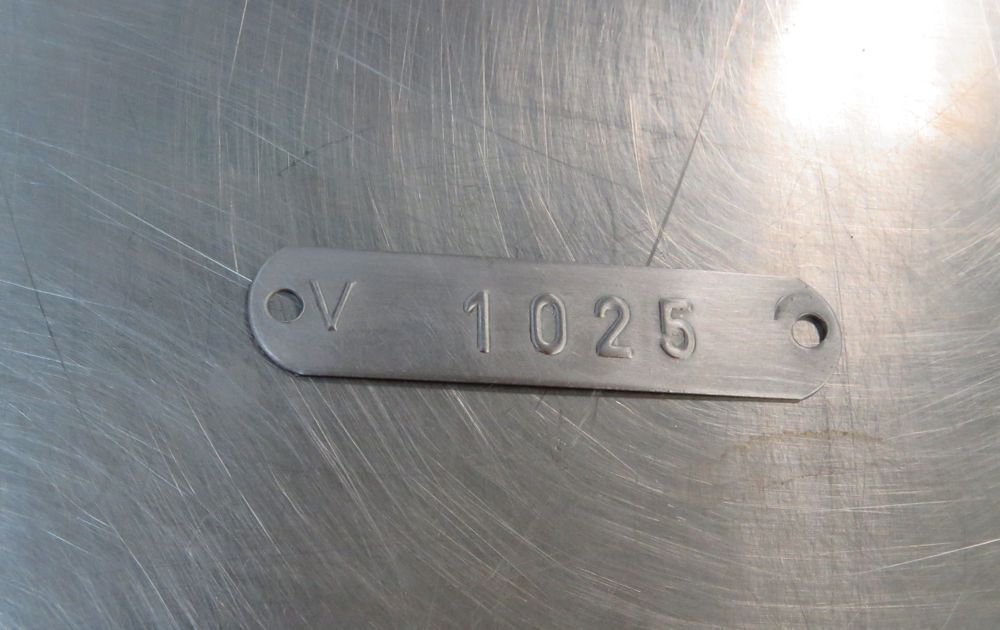
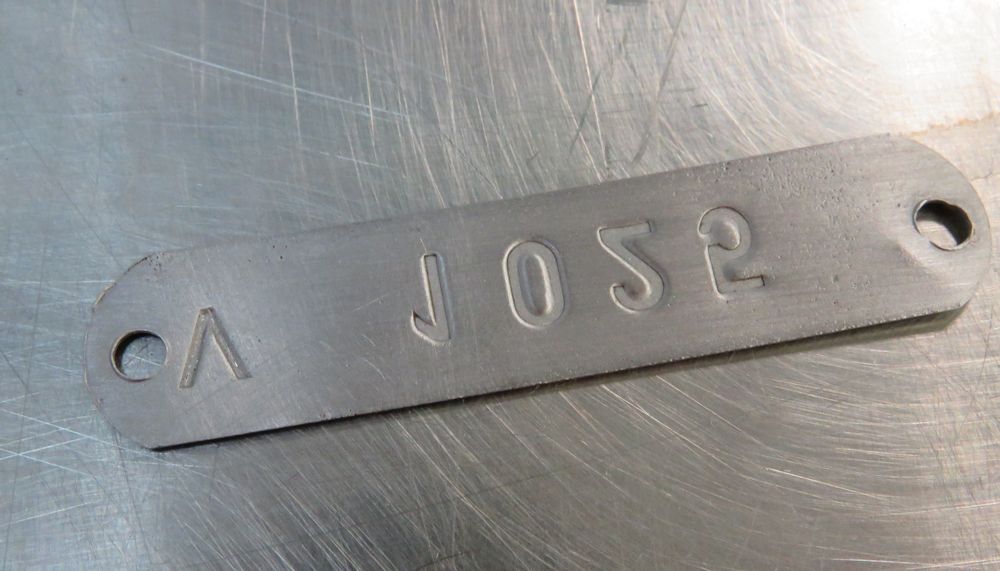
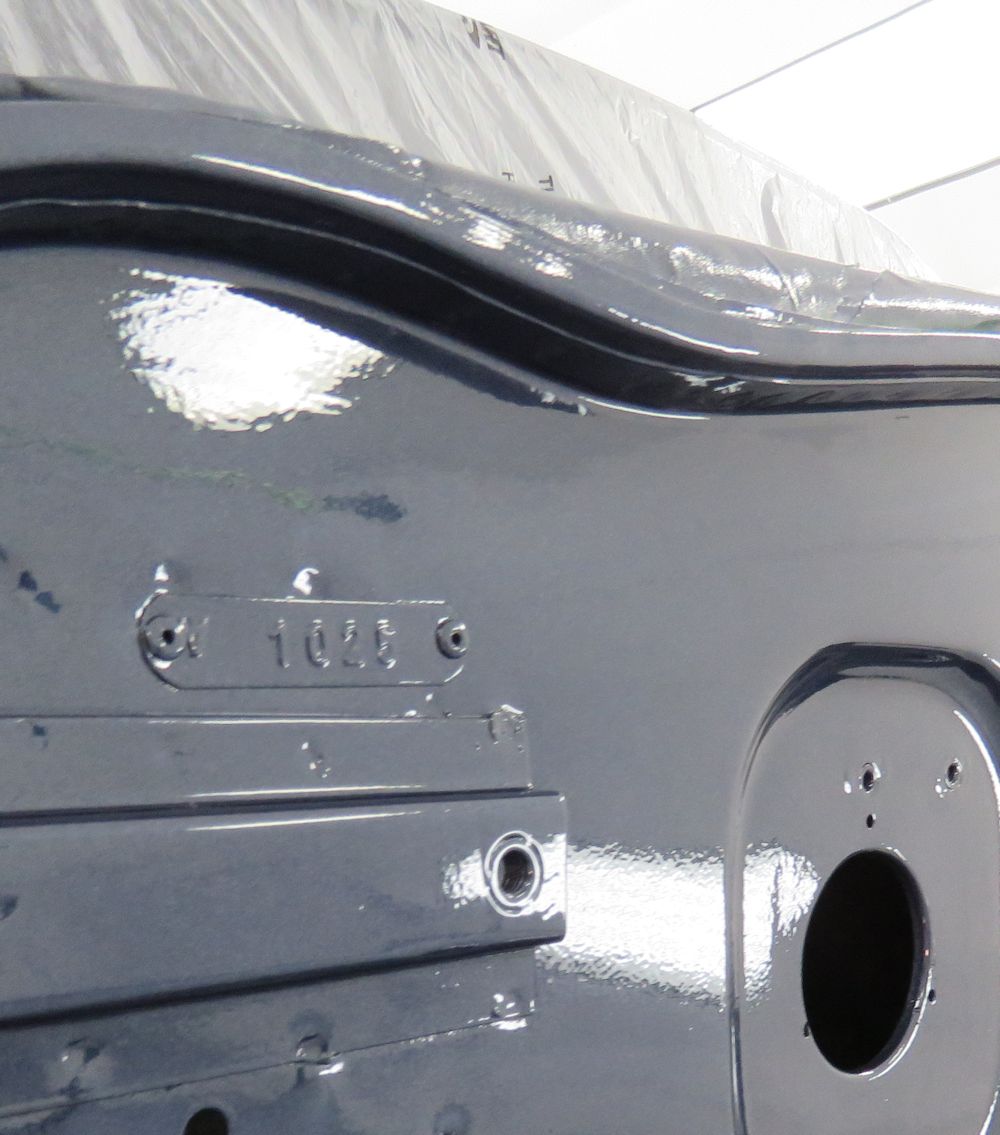
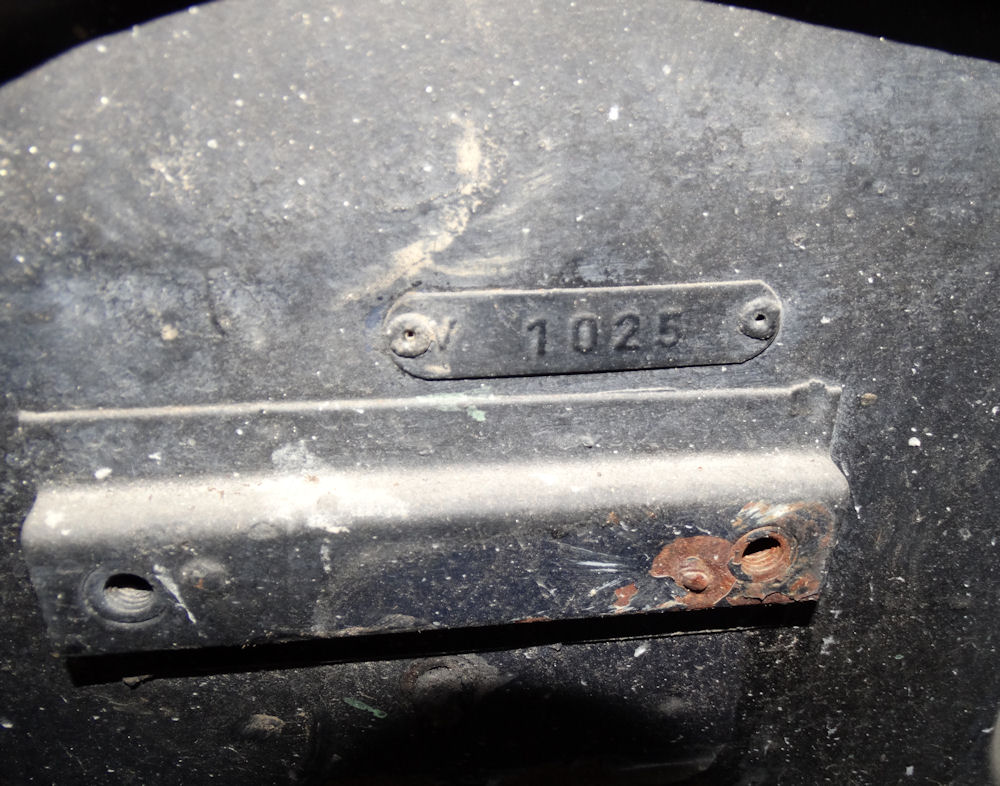
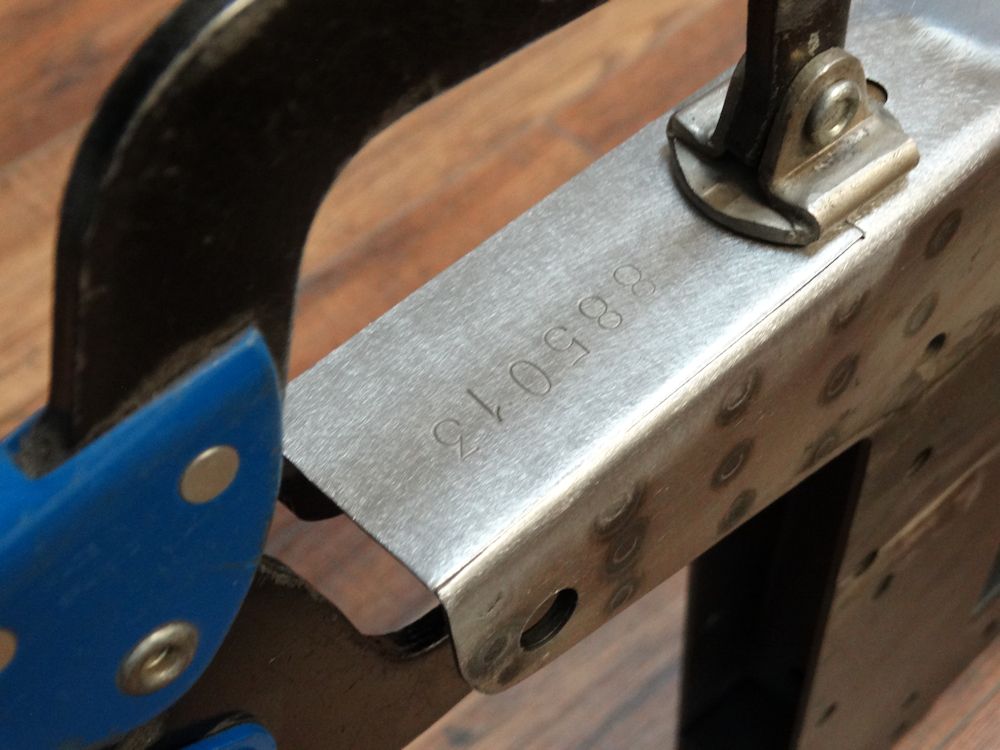
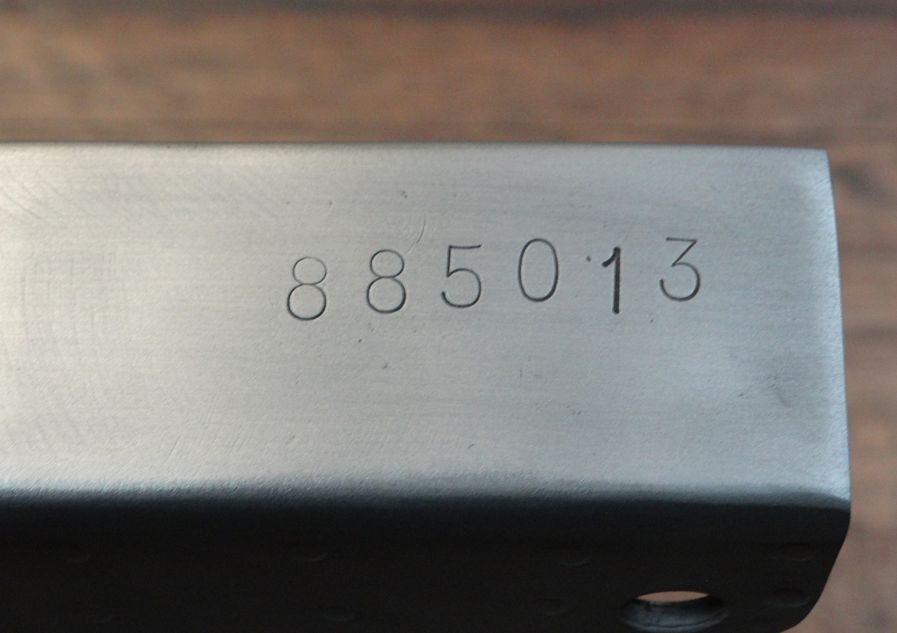
As rough as the original data plate for 885013 obviously was (see first image below), we felt it was important that it should be retained, if at all possible. The following sequence of photos show the steps we took to achieve our goal.
 |
 |
| Original data plate was in very poor condition |
After a lot of scrubbing and a couple of
passes in the English Wheel (really) |
 |
 |
| Masking off the bare aluminum sections |
Jake applying Precision Brand ABC Blackener |
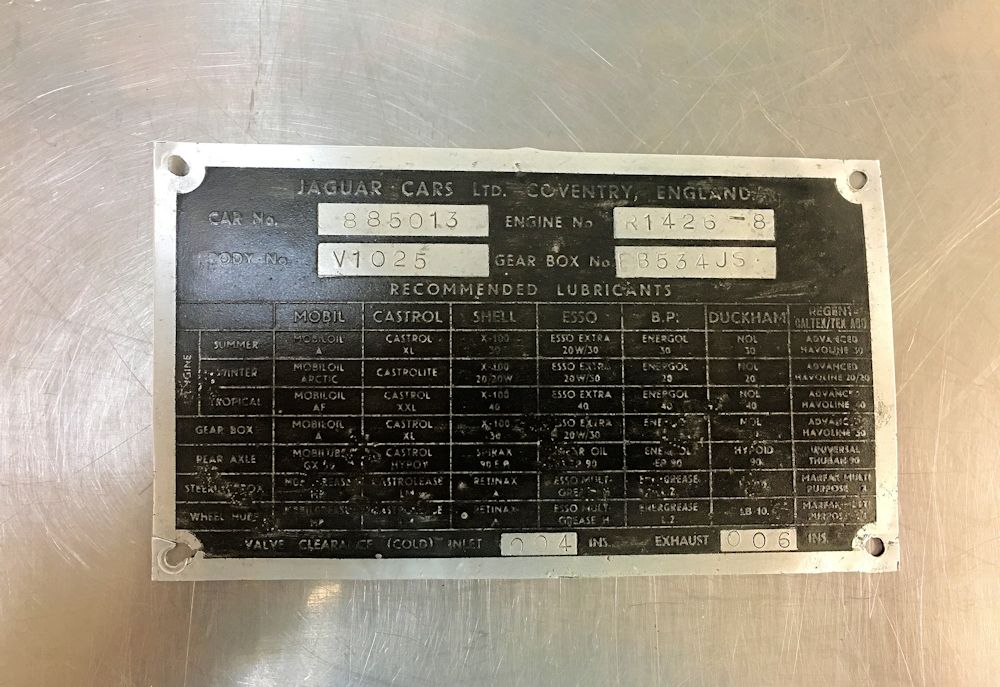 |
 |
| We then applied some flat clear as the ABC Blackener stain is not durable |
Original plate now looks very presentable
riveted back in place on the car |
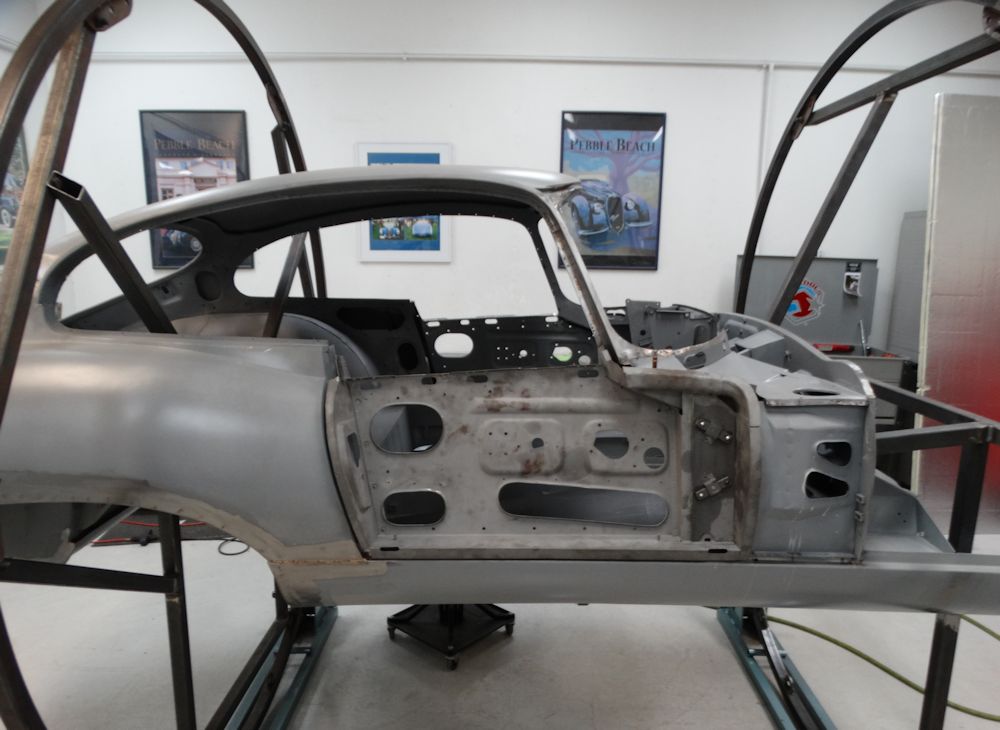
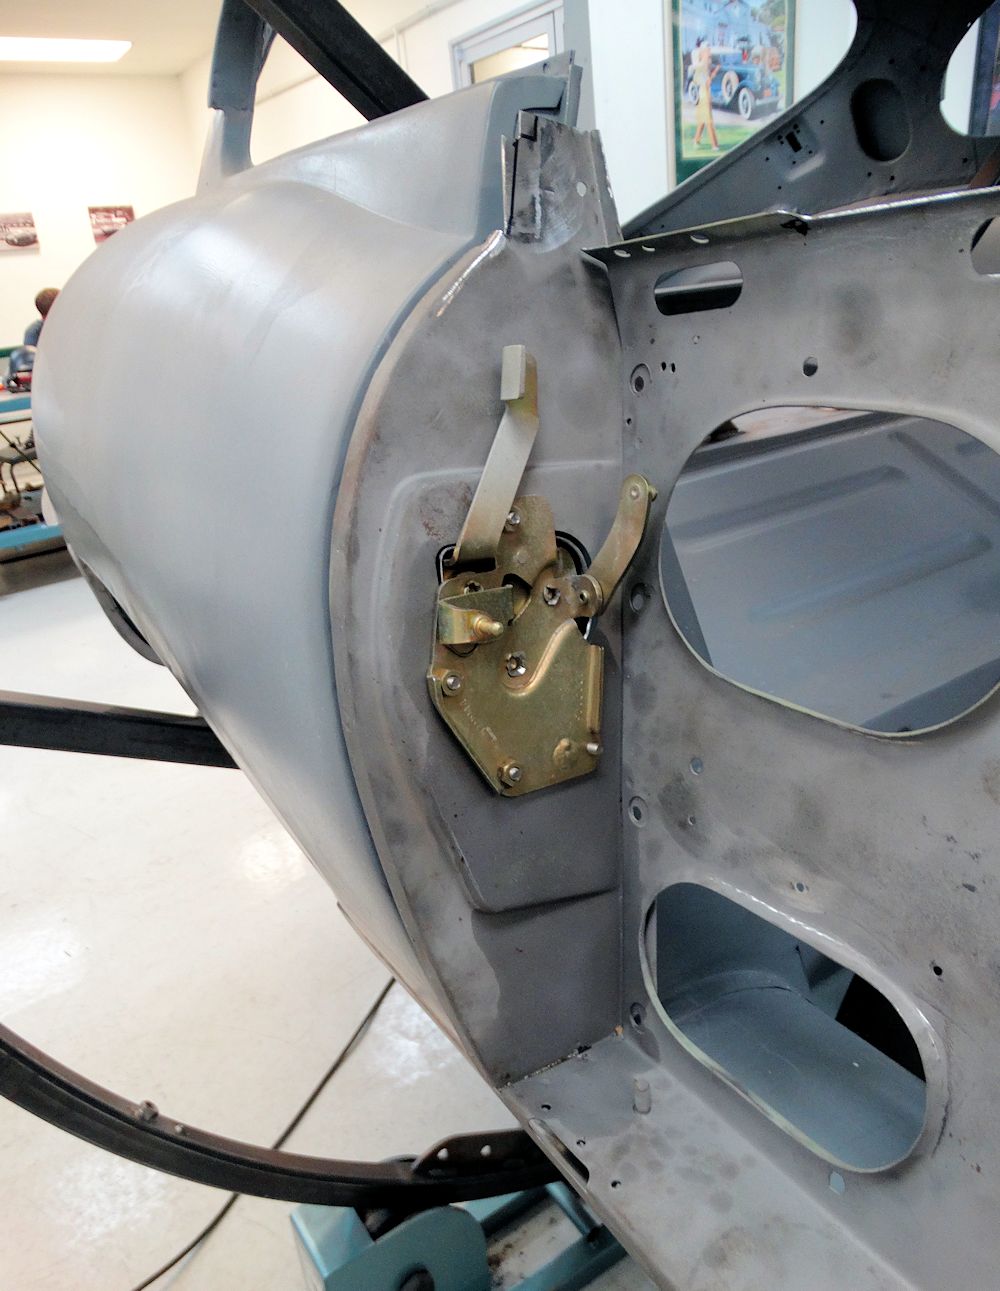
With Gerardo's sanding and buffing of the paintwork now complete, Jake has begun the process of installing and adjusting the doors.
 |
 |
| Driver's door was the first to be installed |
Now fully adjusted and latched |
 |
 |
| Passenger door now installed |
|
 |
 |
Interesting to discover that the unused German/Swiss knock-off tool kindly supplied by Bruce Cox in Canada is actually clear Cad plated.
 |
 |
| Unused German/Swiss knock-off tool (on left) is clear Cad plated |
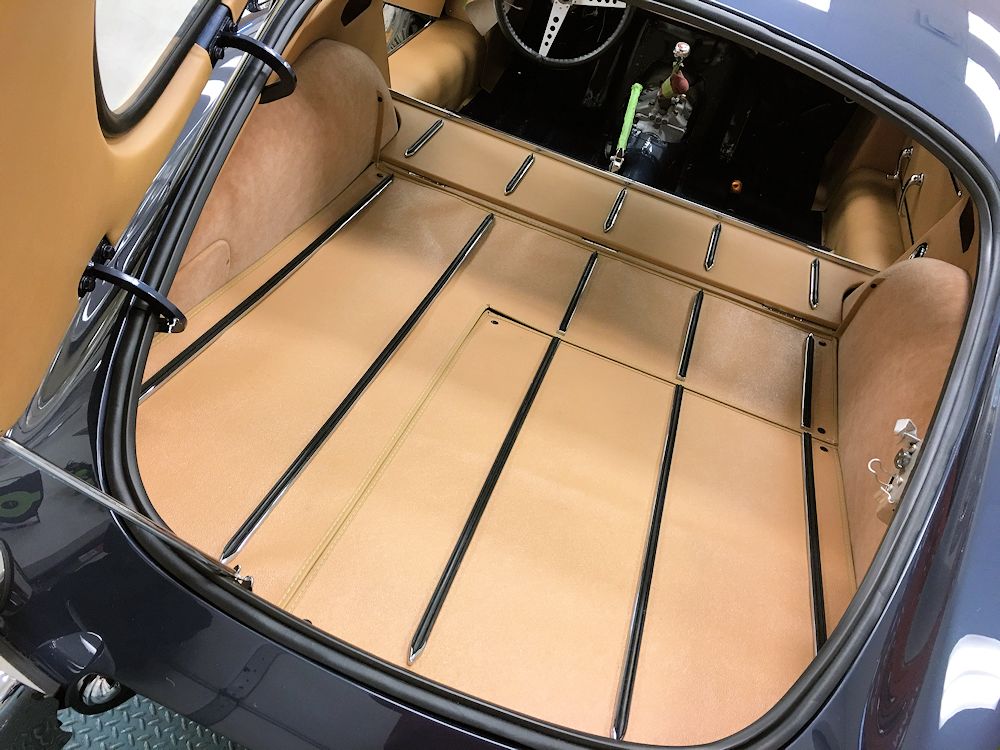
Boot compartment looking very much like it
would have in the summer of '61 |
 |
 |
| Note reverse lamp housing riveted in place |
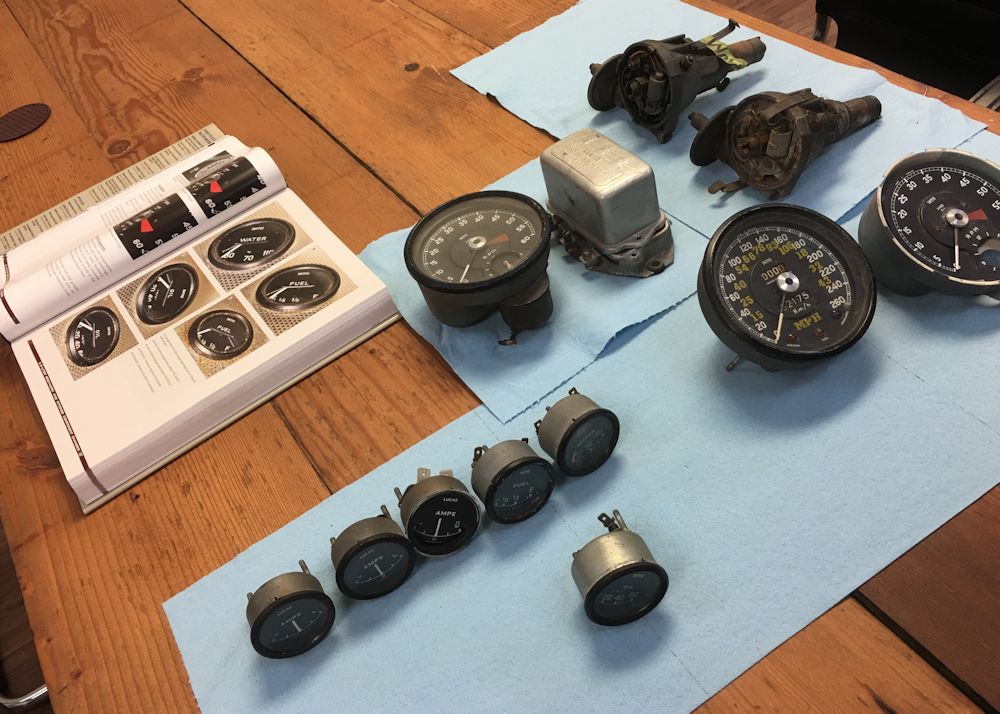
The excellent Haddock/Mueller E Type Originality Guide highlights the differences between early and late E Type gauges. This morning I used it as a reference to confirm that our gauges are correct (and in most cases original) to 885013. According to the Spare Parts Catalogue (J30), the serial number of our speedometer was exclusively used in E Types supplied to the German and Italian markets (with 3.31 final drive ratio).
 |
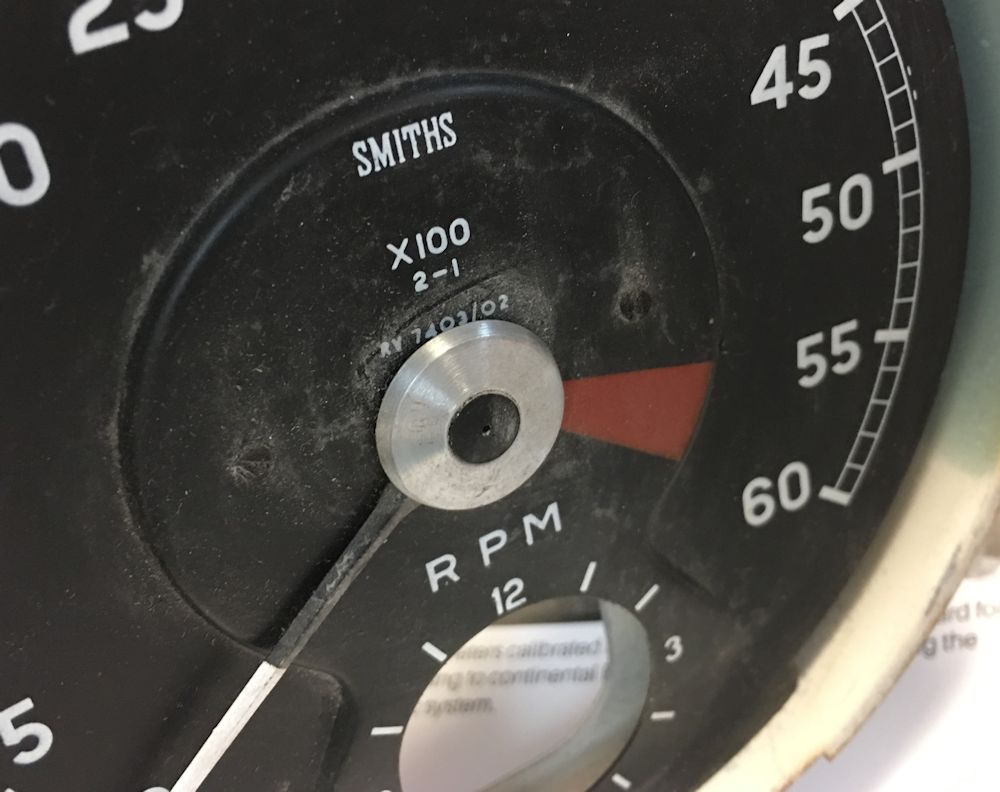 |
| Examining gauges prior to rebuilding |
Early tachometers are marked RV 7403/02 |
|
 |
| The MPH stickers were applied to the speedo
when 885013 was imported to the US from Germany |
SN6322/02 denotes a German or Italian spec car with a 3.31 final drive ratio |
 |
 |
| The spare parts catalogue (J30) confirms our
speedo found only on German and Italian spec E Types |
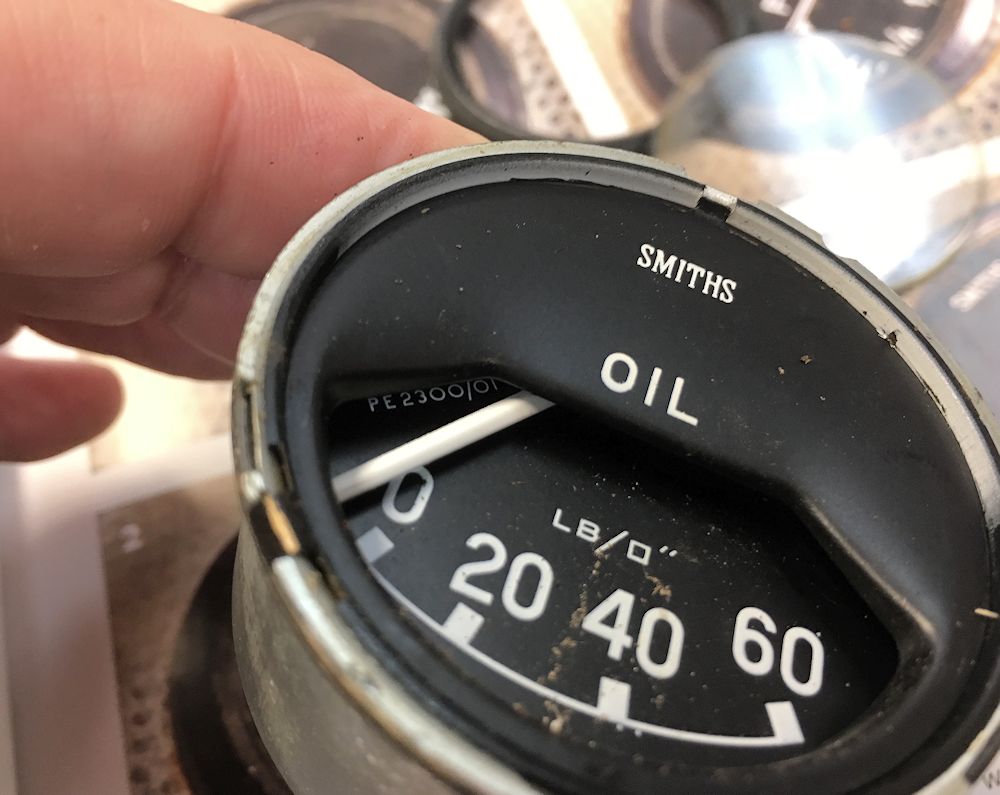
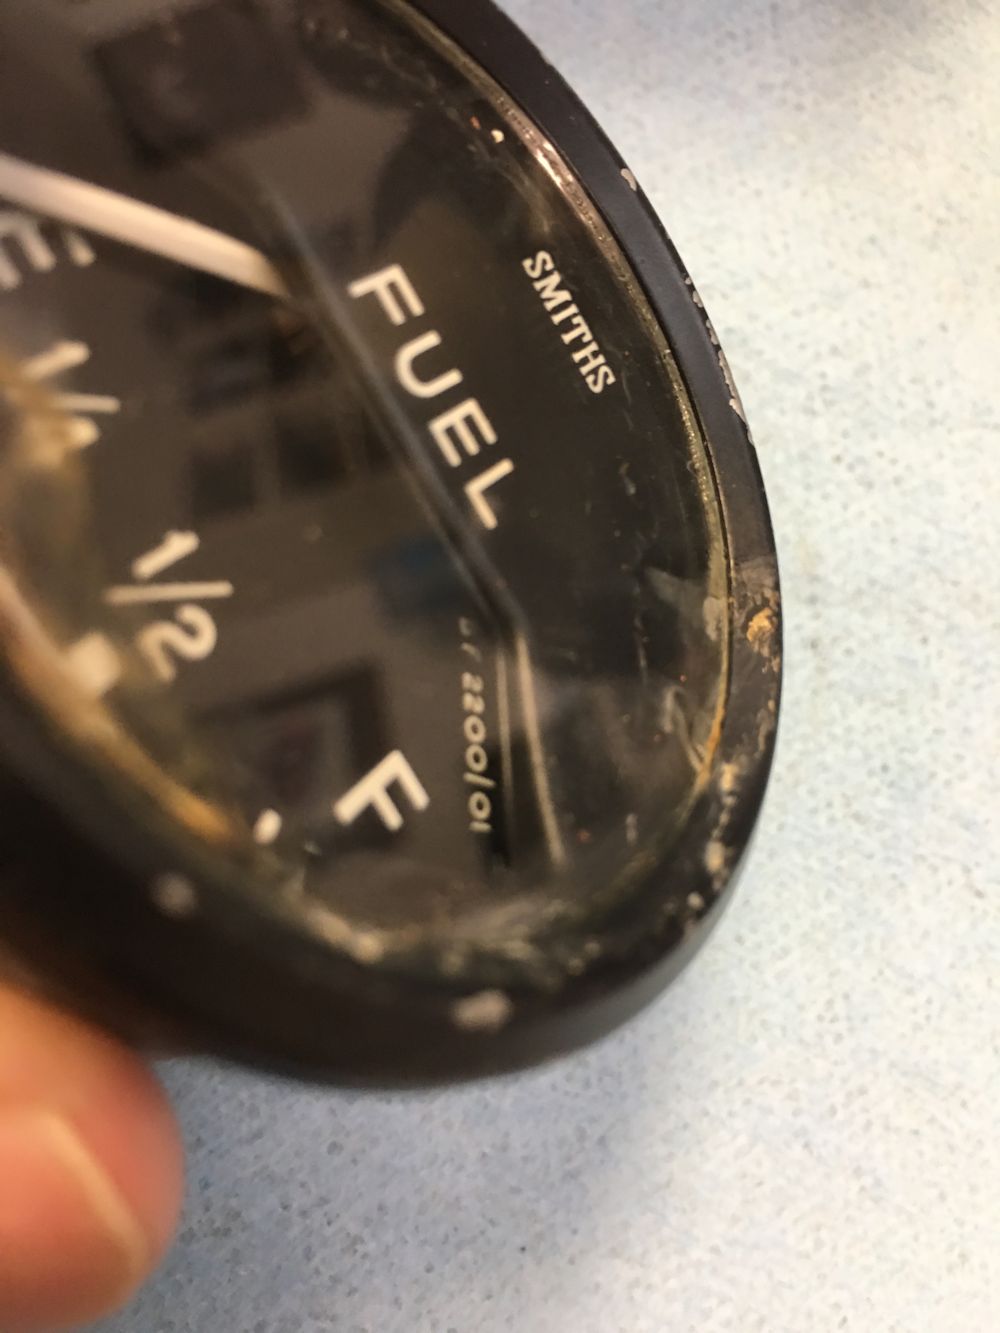
Early oil pressure gauges were marked PE2300/01 |
 |
 |
| Distributor is date stamped April 1961 |
Very early fuel sender was restored prior to being installed |
 |
 |
| Early fuel gauge serial number BF 2200/01 |
Thanks to Bruce Cox in Canada who provided us
with this mint condition German/Swiss knock-off tool! |
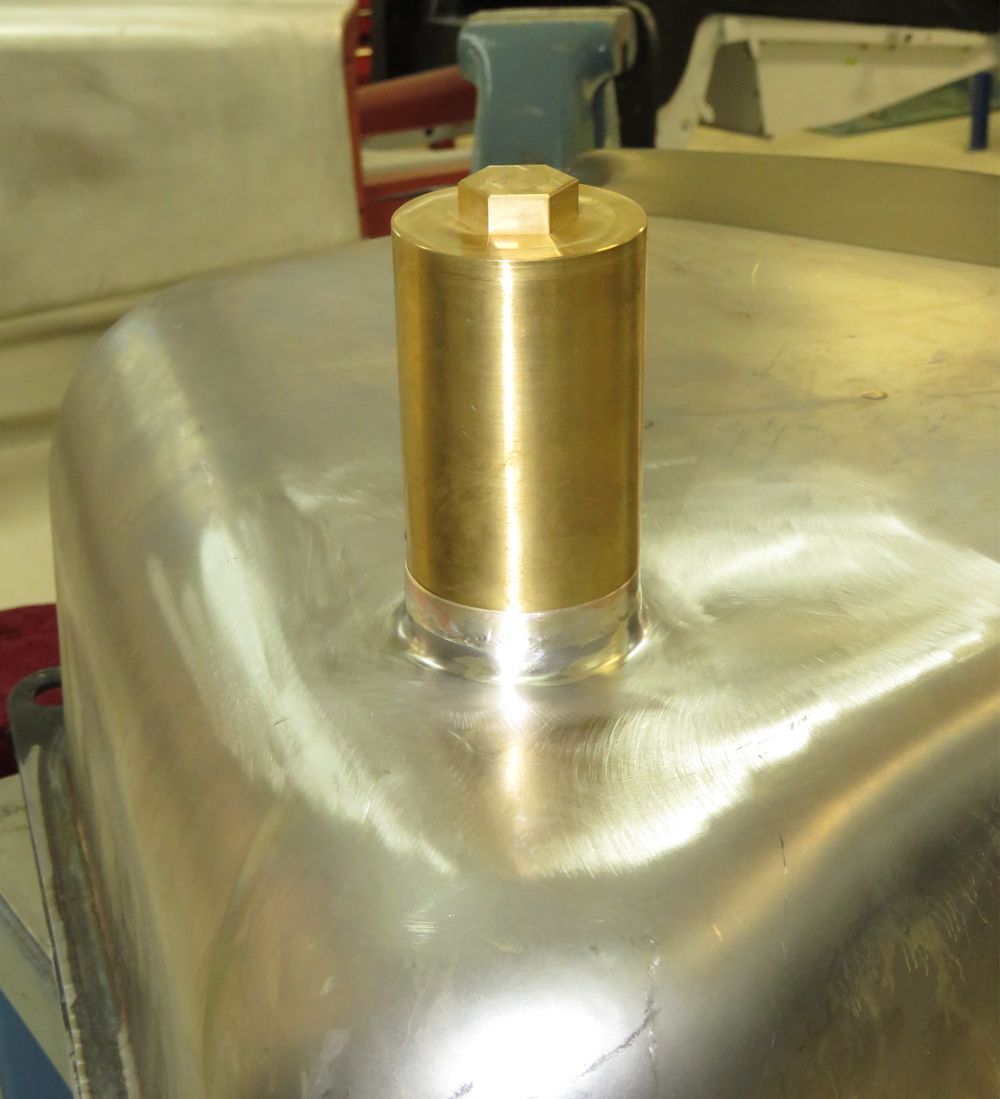
Installing the fuel tank.
 |
 |
| Can you tell which are the restored originals
and which are modified US spec knock-offs? |
Preparing to install the fuel tank |
 |
 |
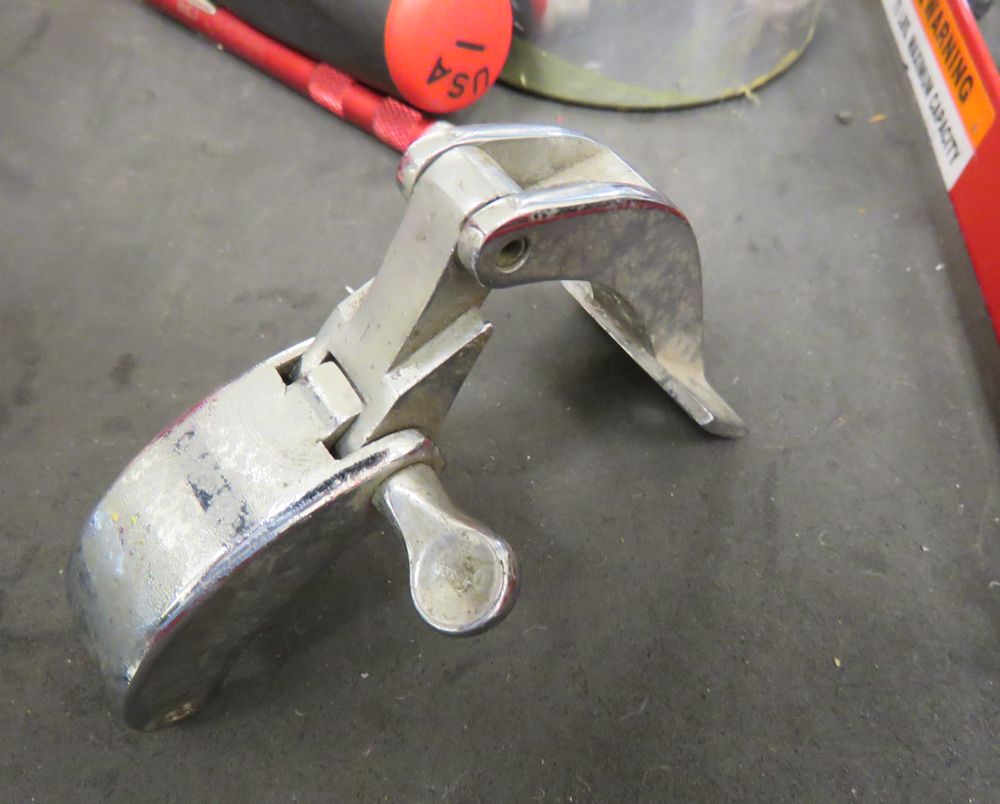
| Cheney clamps on fuel filler pipe |
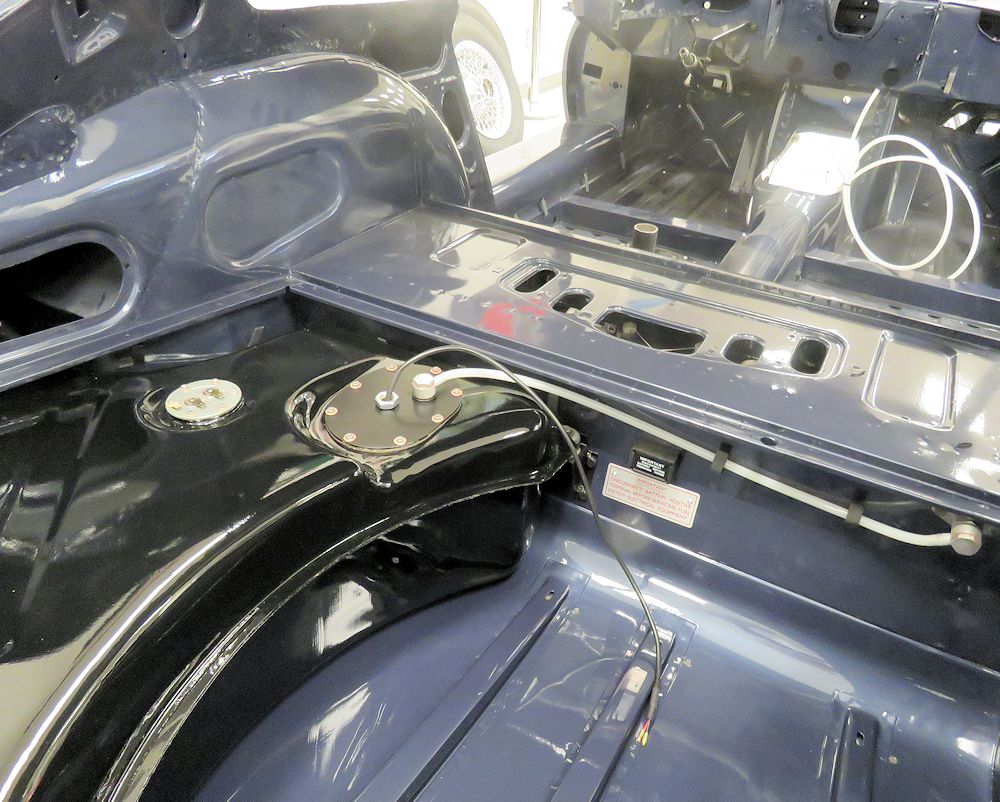
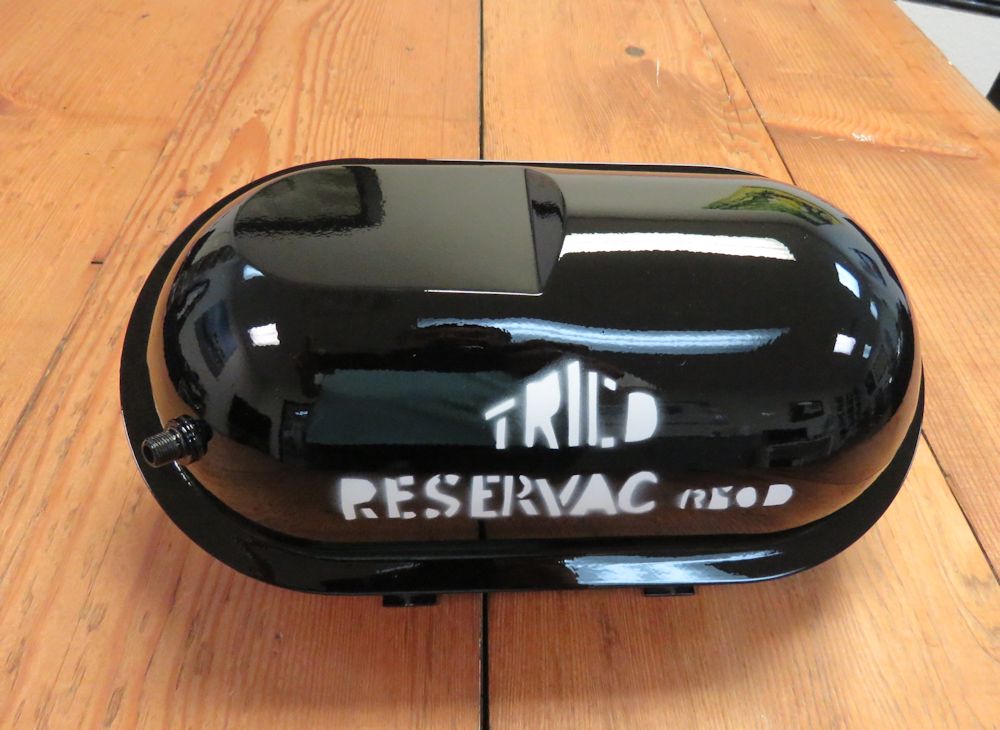
I am pleased to report that 885013 is now back on its wheels! The following sequence of photographs also shows the restoration of the brake vacuum tank, including reproduction of the 'Trico Reservac' label. Some time ago we were fortunate enough to restore a totally original 15,000 mile E Type from which we were able to create a template for the Trico markings. The Trico label was originally painted fairly haphazardly, so we have done our best to replicate the factory markings.
 |
 |
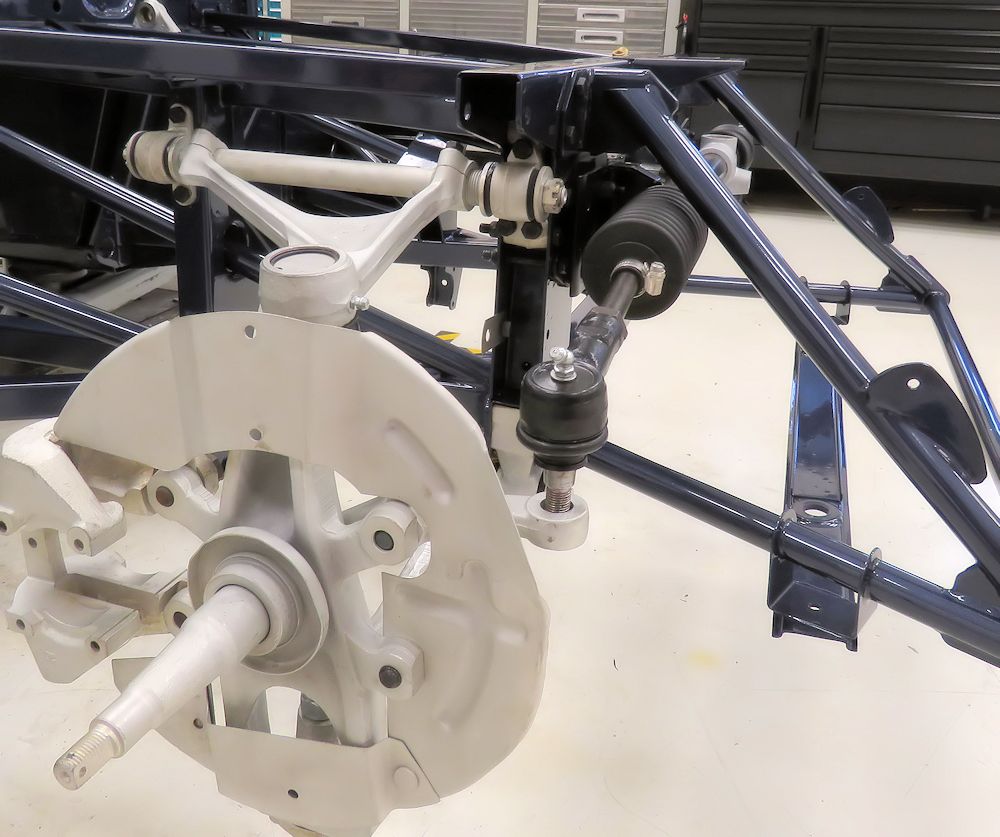
| About to install the front rotors and hubs |
BEES bolts used throughout |
 |
 |
| Car now back on its wheels |
|
 |
 |
| Original brake vacuum tank from a 15,000 mile E Type previously restored by CJ |
Making a template of the original TRICO label |
 |
 |
| TRICO label painted in white on the restored
tank |
In place on the firewall |
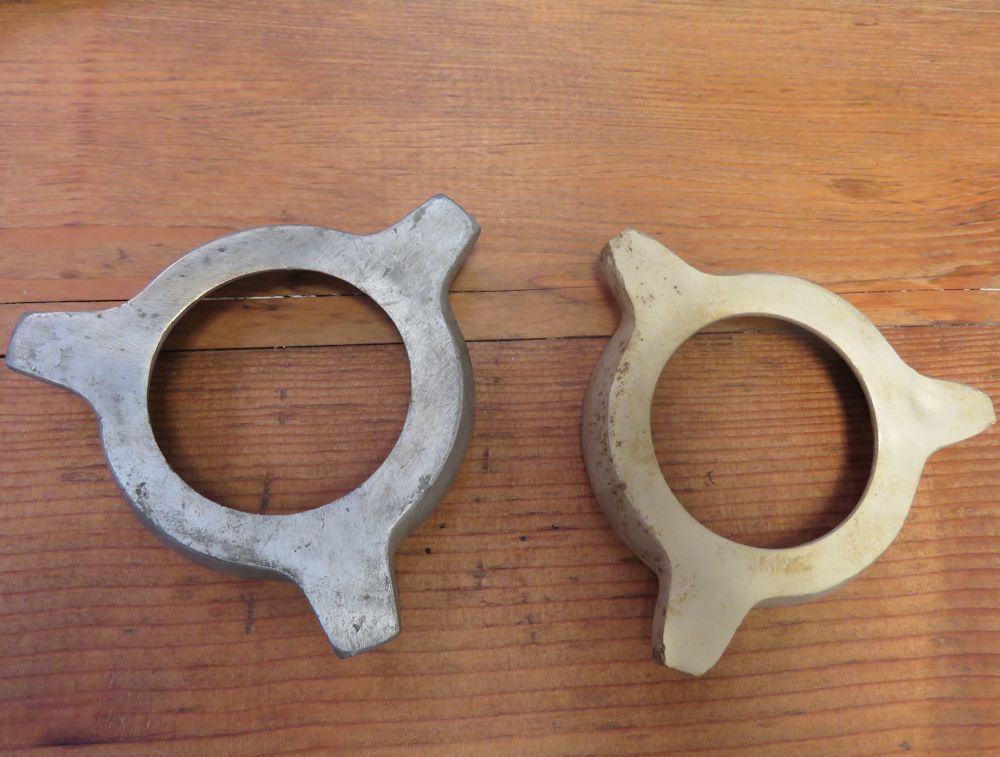
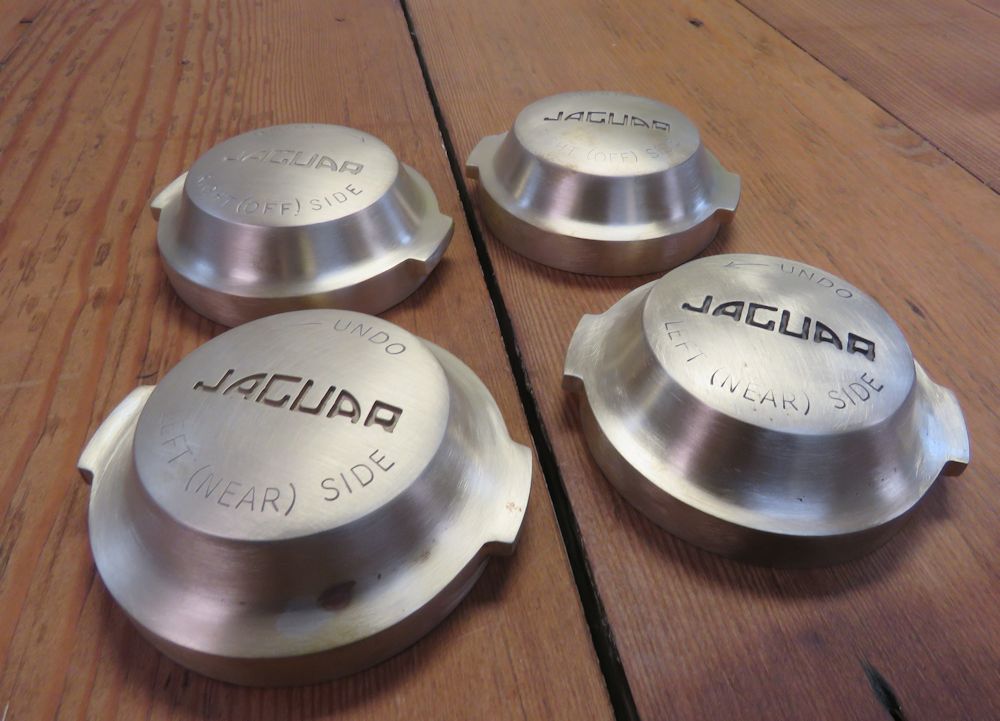
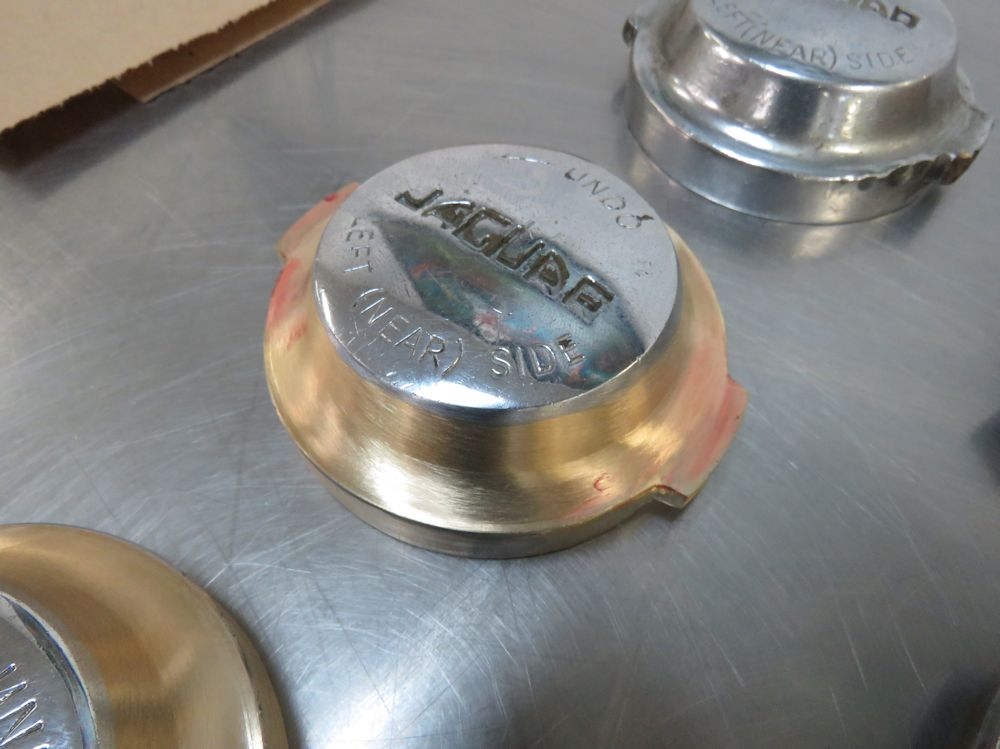
885013 was supplied new in Germany and as a result would have had the rare two eared knock-offs which were unique to the German and Swiss markets. We were lucky enough to obtain a couple of original German/Swiss knock-offs from Dr. Mike Mueller, but after several months of searching, we have been unable to complete our set.
As a result we decided to modify a pair of US spec knock-offs to precisely match the appearance of the original two eared versions. This was not as simple as trimming the larger ears on the US spec component, as the side profile was also slightly different. Corey in the CJ machine shop did a fantastic job of machining the the US knock-offs to look exactly like the German version.
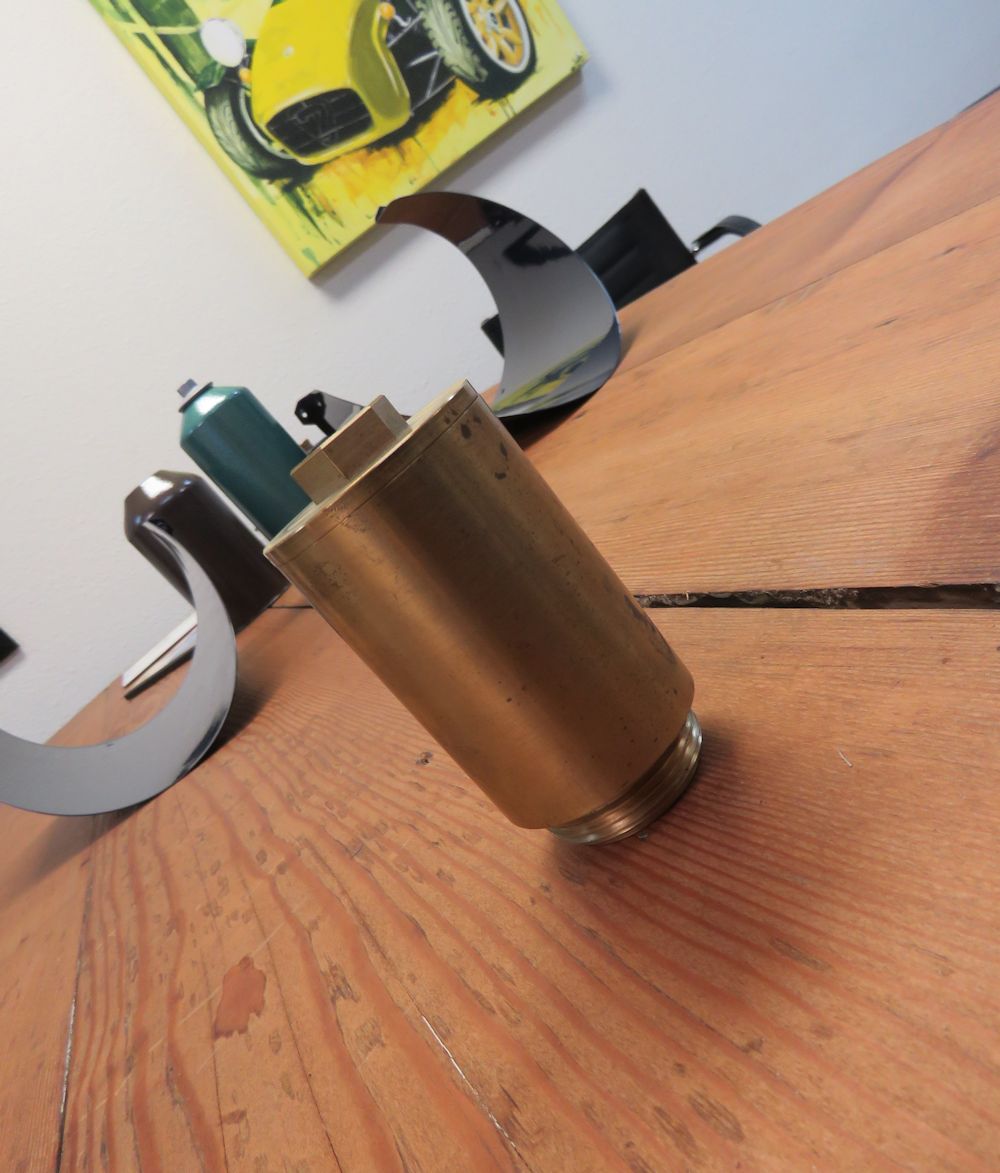
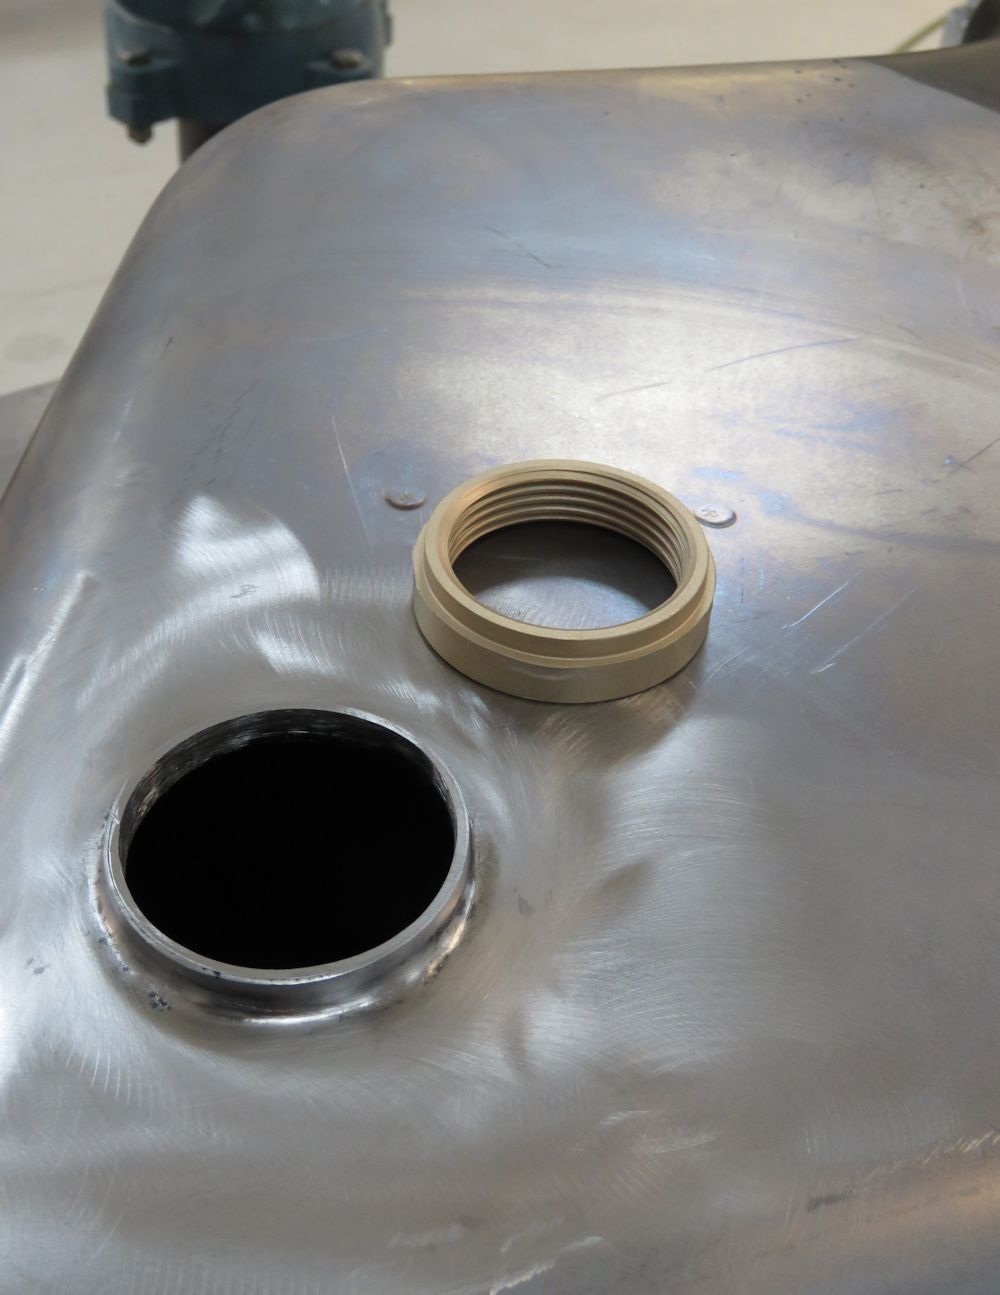
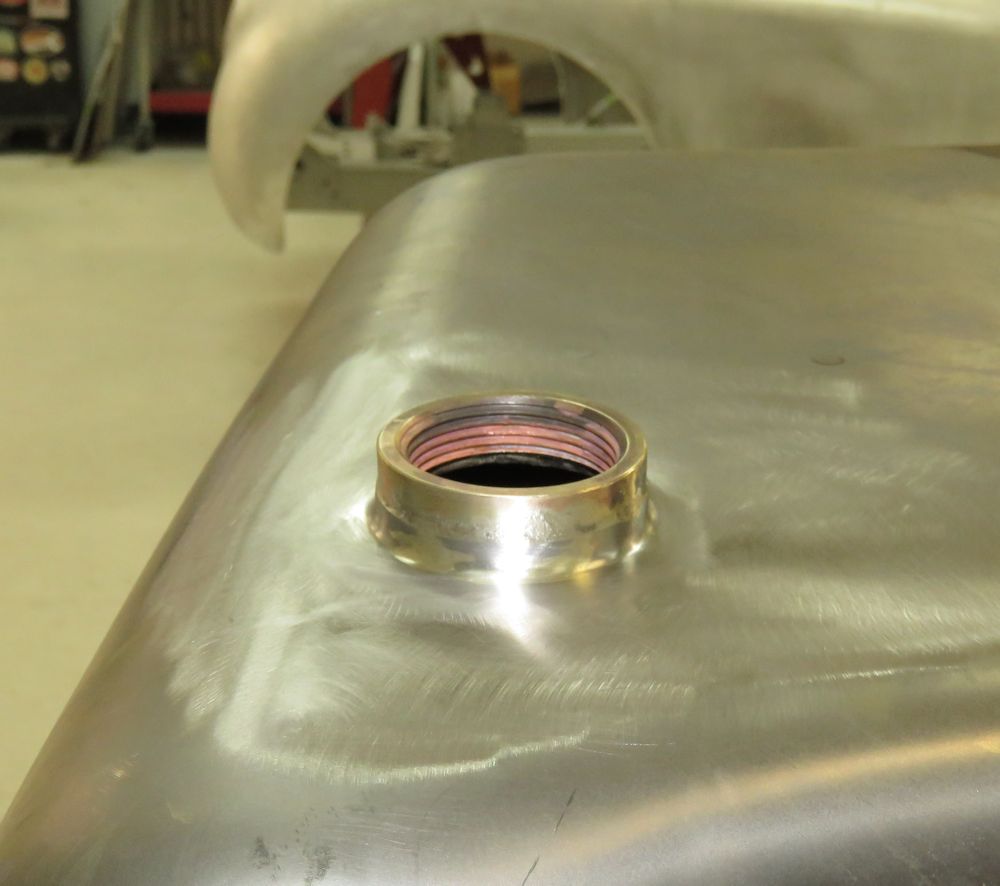
Another example of getting creative in order to get some of the tiny details correct involved the fuel tank drain sump. The very early cars had male threads on the sump, which was quickly reversed early in E Type production. The early male thread sumps (and female thread gas tanks) are obviously no longer available, so huge thanks to Dave Ferguson at Images Auto Body in Campbell, California (who recently restored 885010), who had an extra male thread sump made (when he needed one for 885010) and made a gift of the spare to us for use on 885013. That was very generous of Dave and much appreciated!
With our beautifully machined male thread sump in hand, we then had to modify a new gas tank to receive the early style sump. We achieved this by cutting the female threaded section of a later sump and brazing it to a new tank. The finished result is indistinguishable from an early sump and tank.
 |
 |
| German/Swiss knock-off shown on right |
Note different profiles of German versus US knock-offs |
 |
 |
| First task was to cut off the much larger US
spec ears |
Corey then machined the side profiles to match |
 |
 |
| After hand finishing, the modified knock-offs
will be chrome plated |
Custom made male thread gas tank sump was a gift from Dave Ferguson at Images Auto Body |
 |
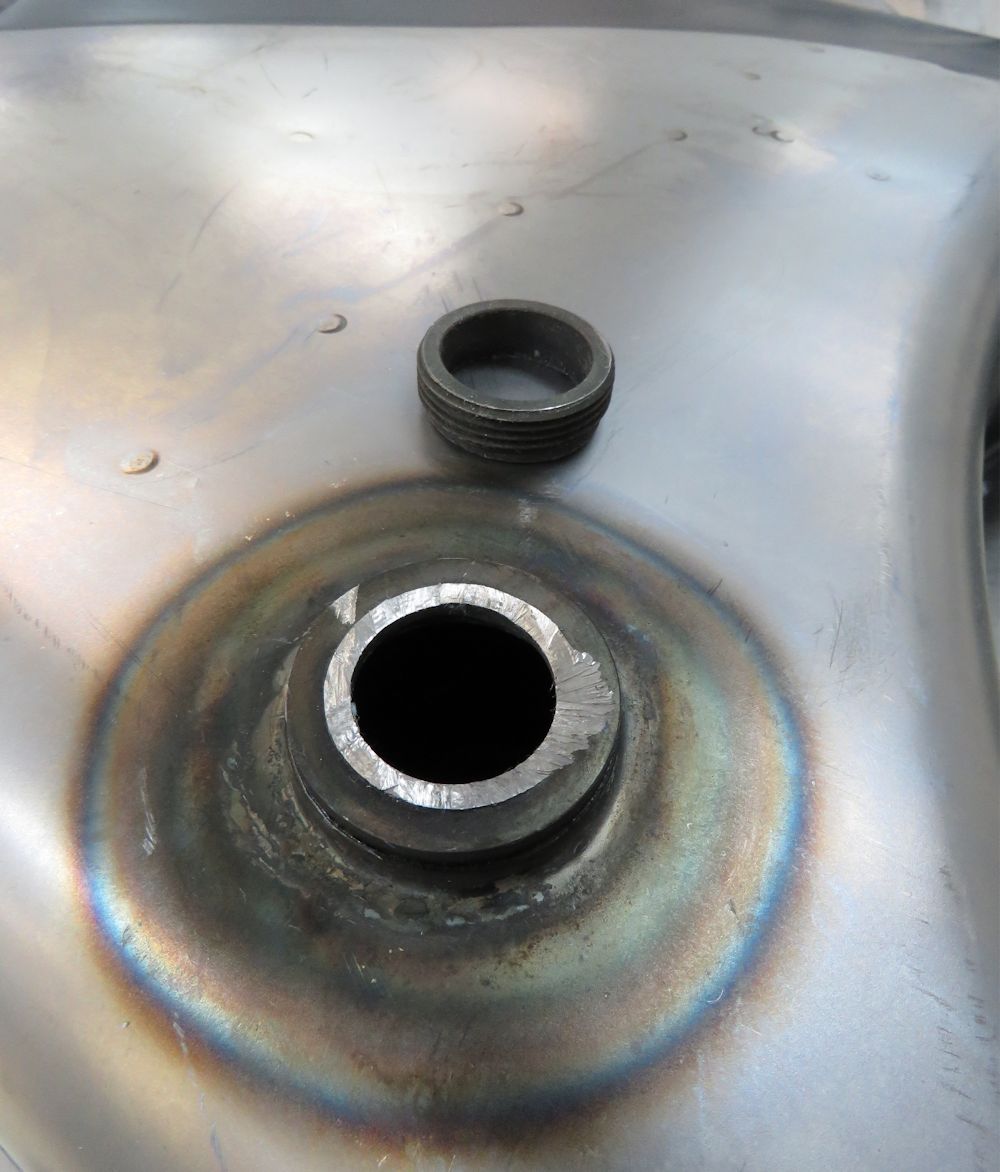 |
| Female threads cut from a later sump |
Male threads cut from new gas tank |
 |
 |
 |
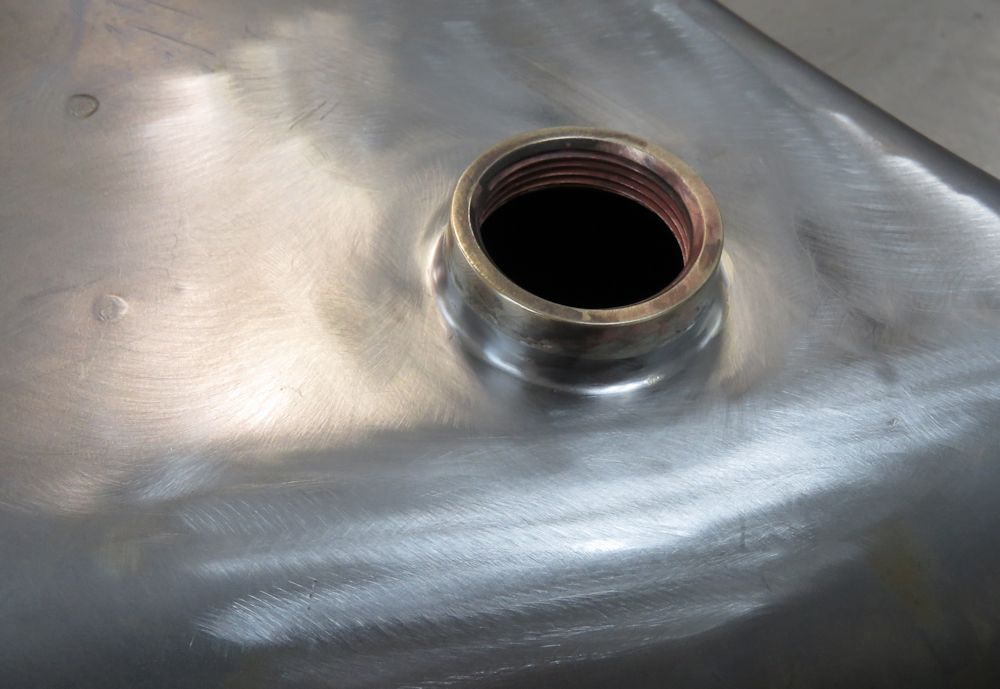 |
| Old threaded section then brazed to new tank |
Indistinguishable from an original early tank |
 |
 |
| Job done! |
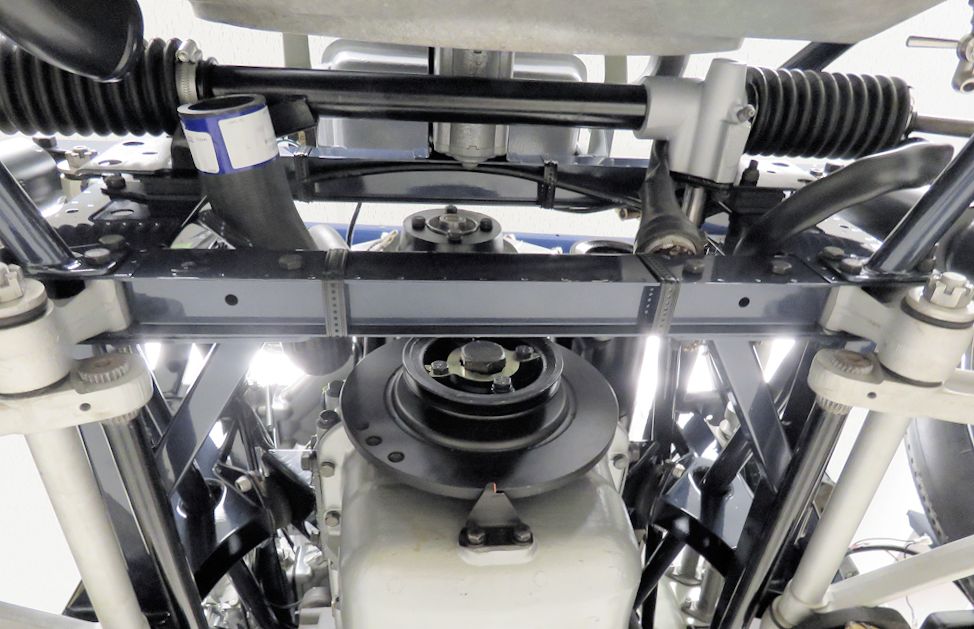
Starting to install Cad plated front
suspension |
 |
 |
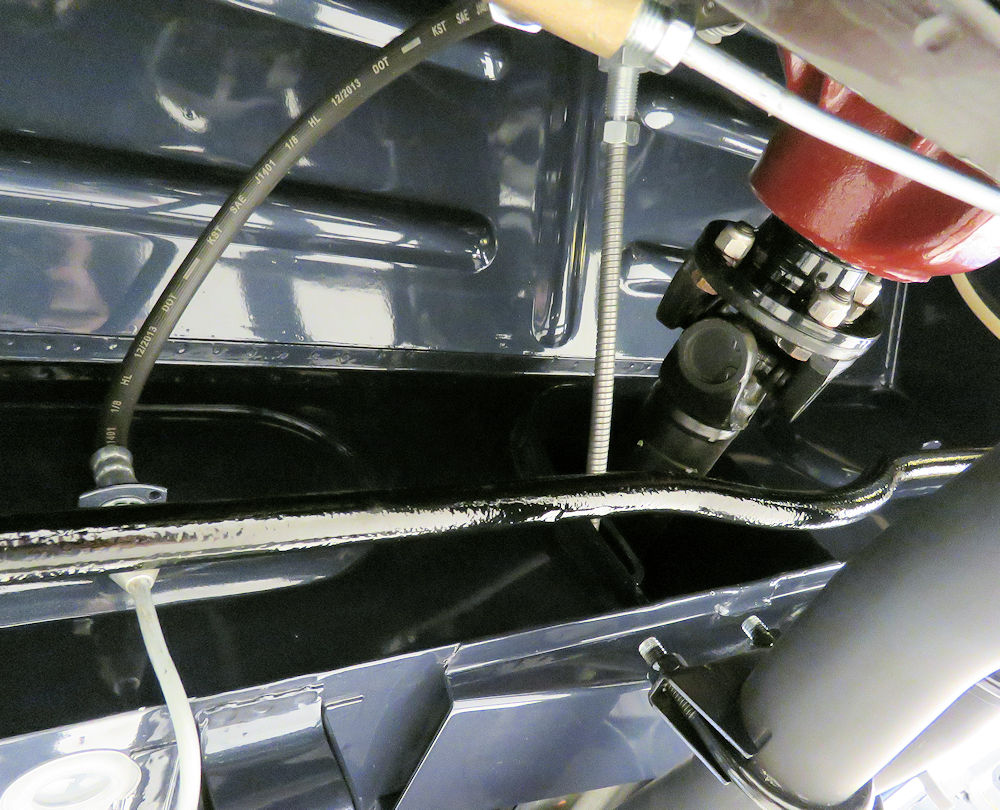
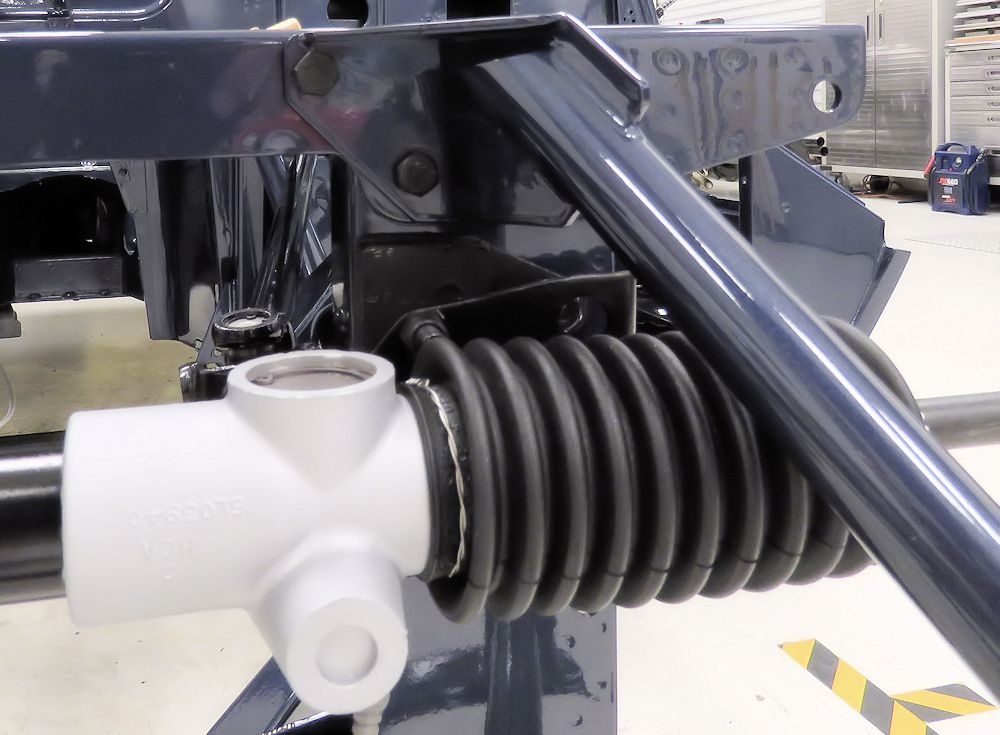
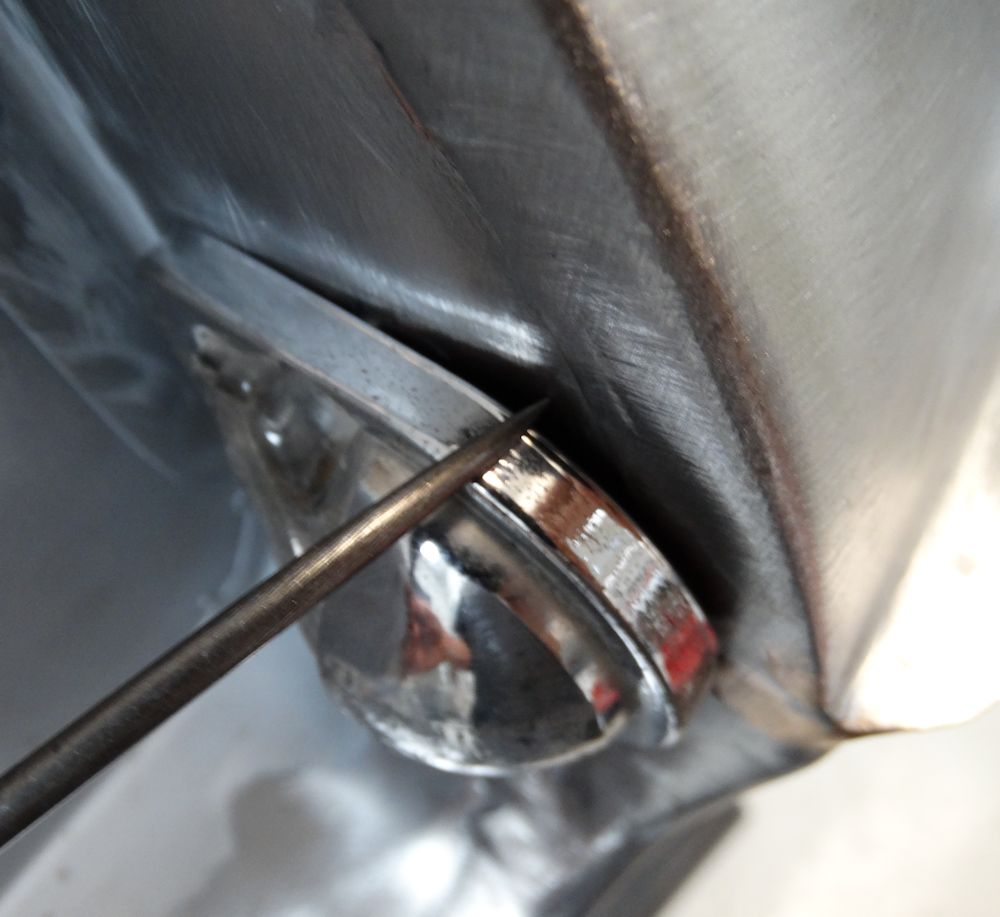
| Steering rack gaiters secured with lock wire
and 3 restored/original Cheney clamps |
Close up of one of the restored Cheney clamps
on the right side of the steering rack |
 |
 |
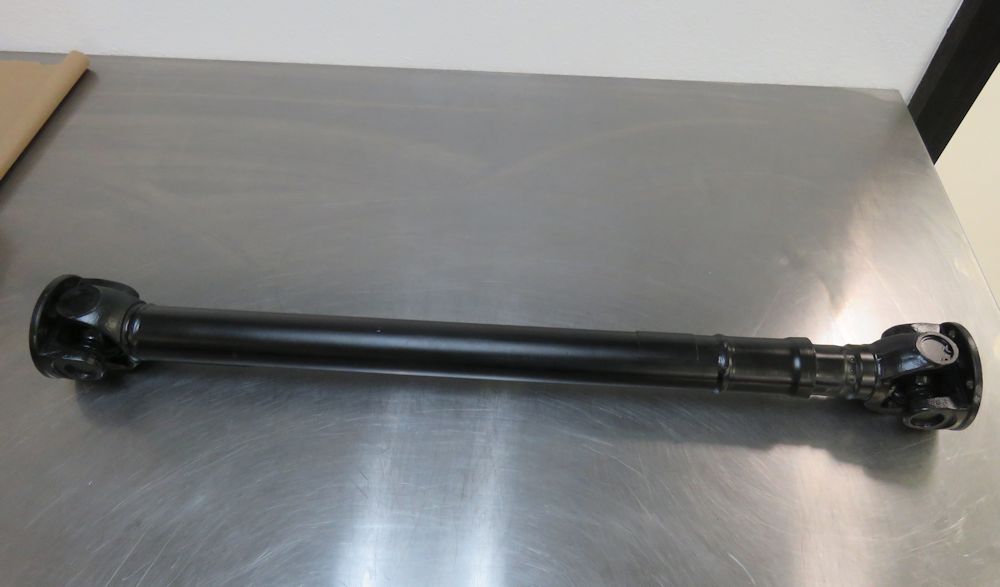
| Early propshafts were hollow |
Headlamp scoops were body color on the early E Types |
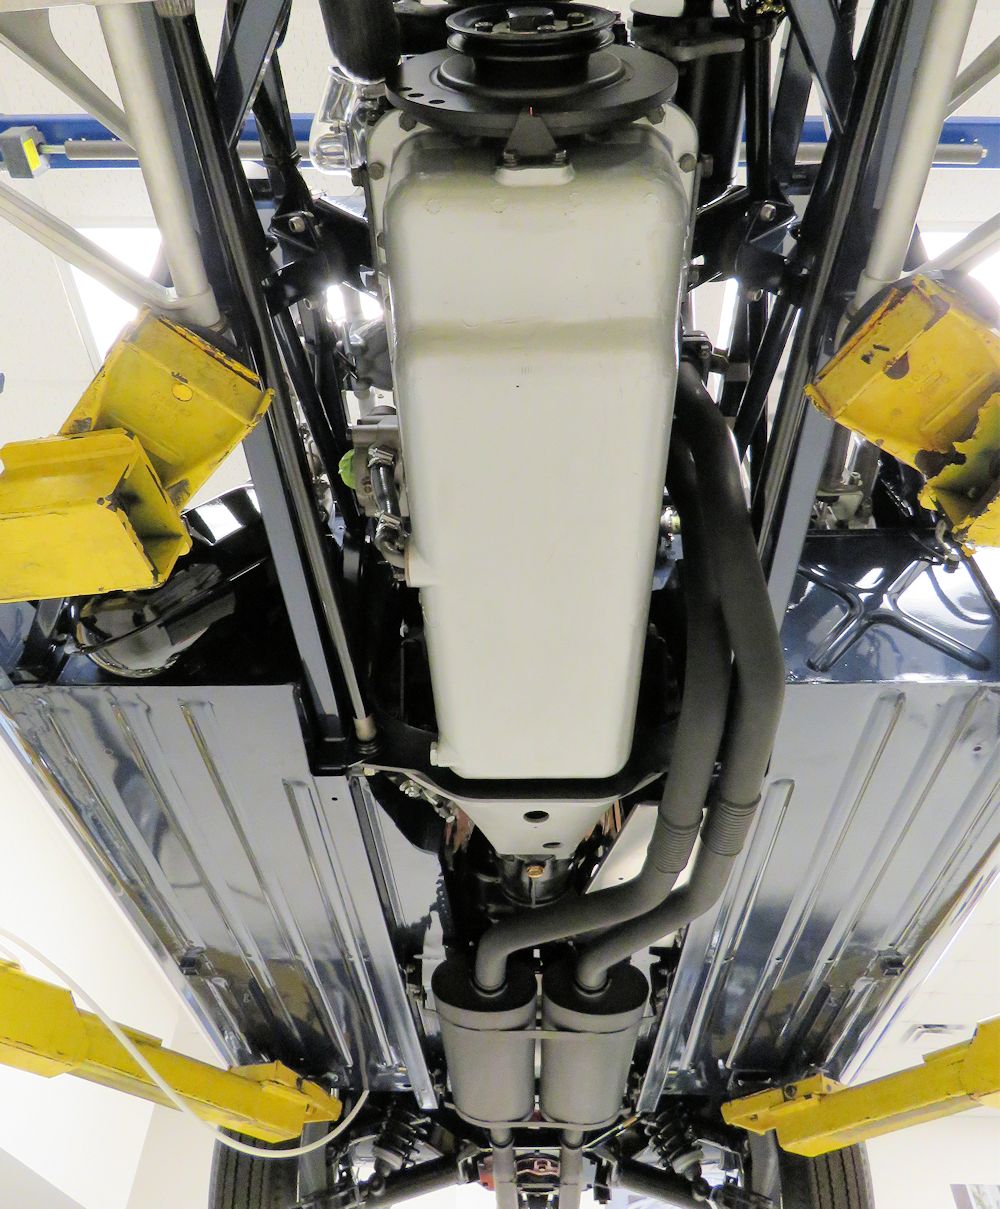
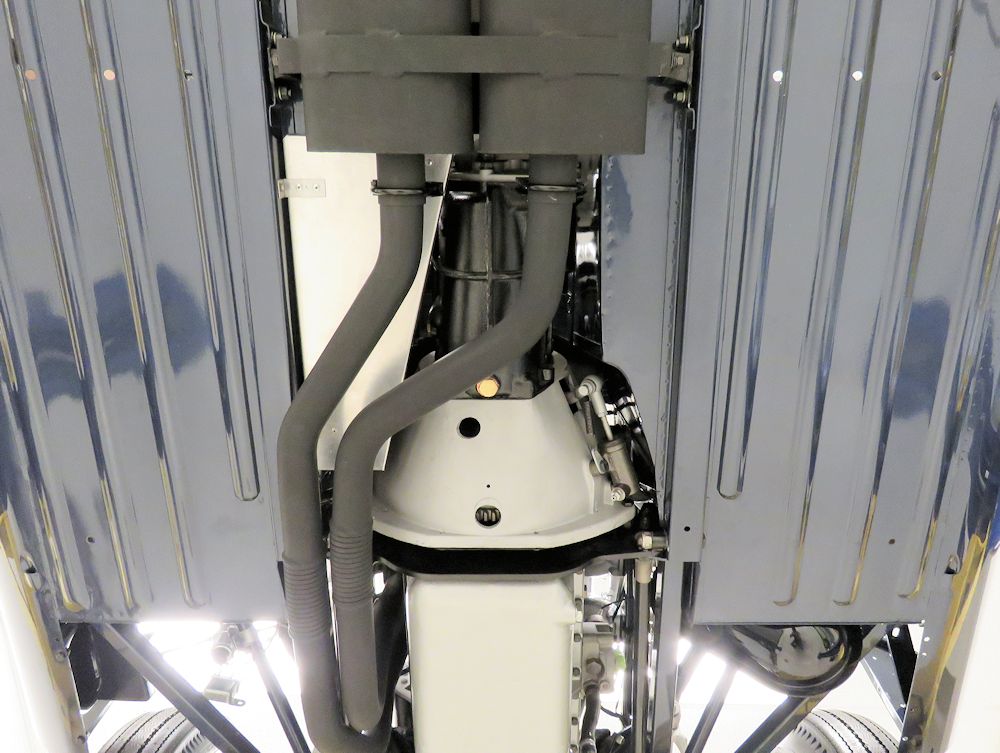
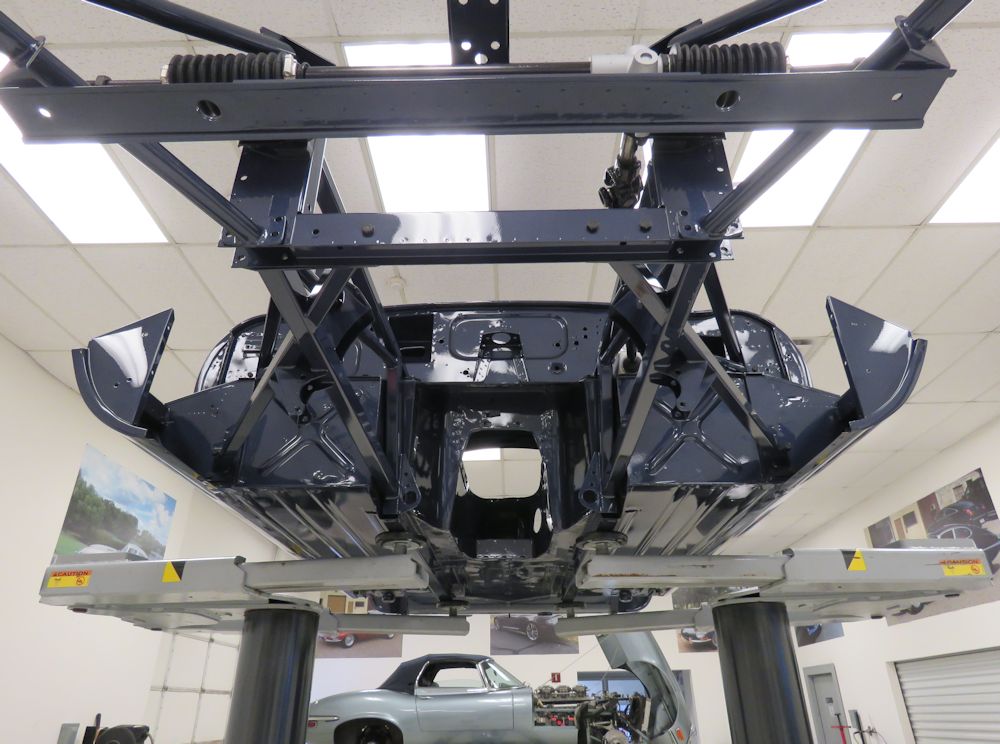
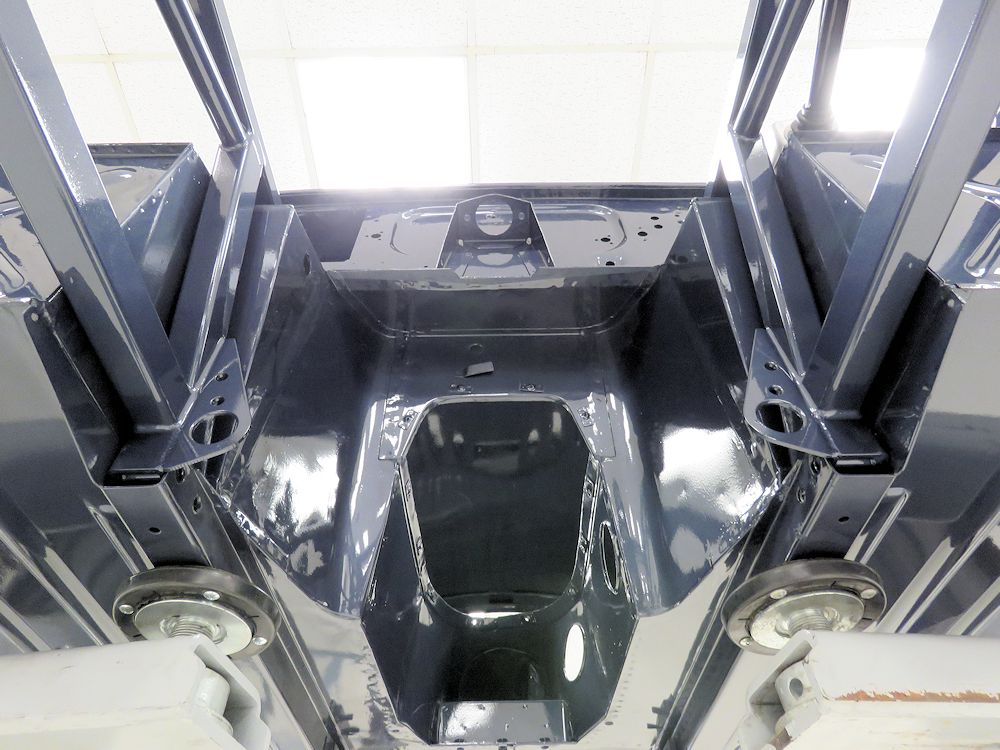
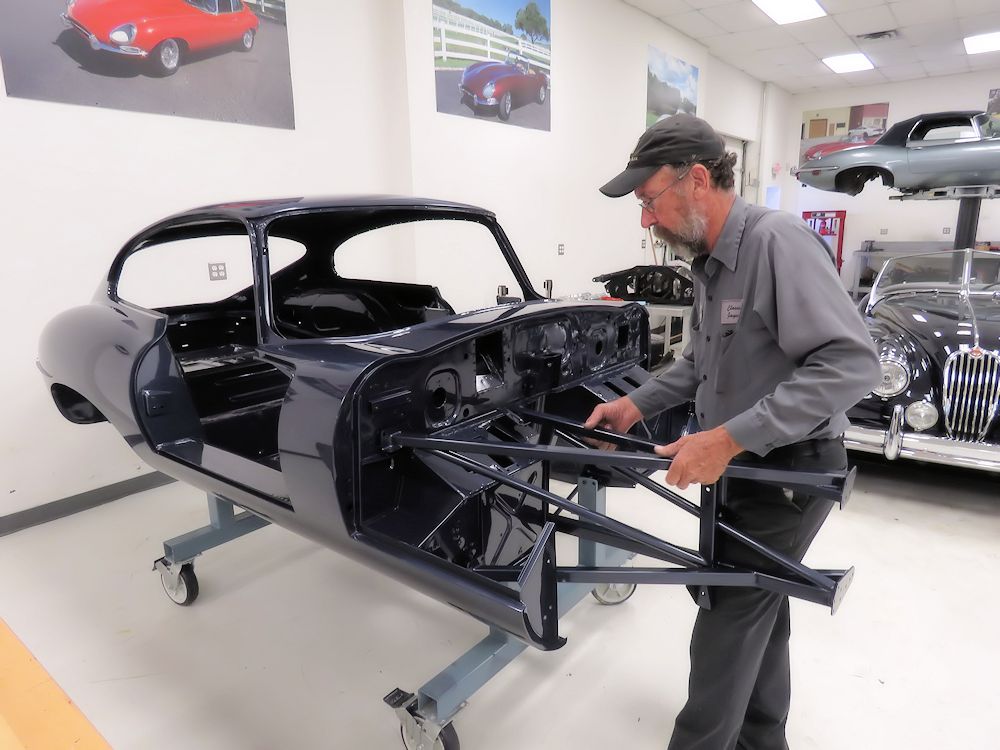
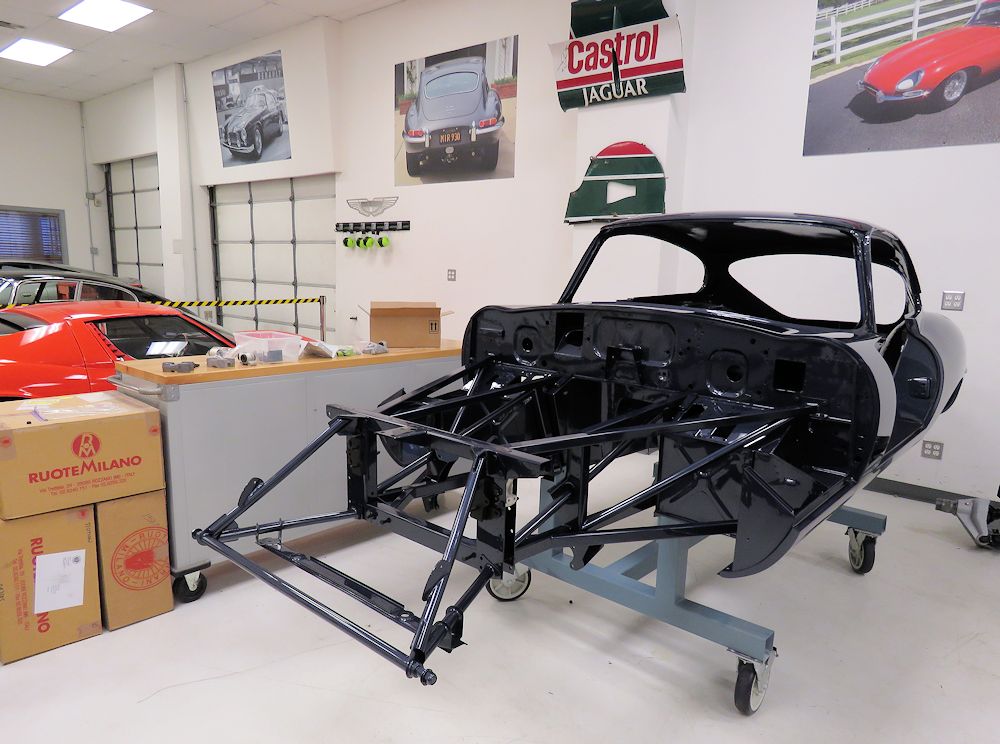
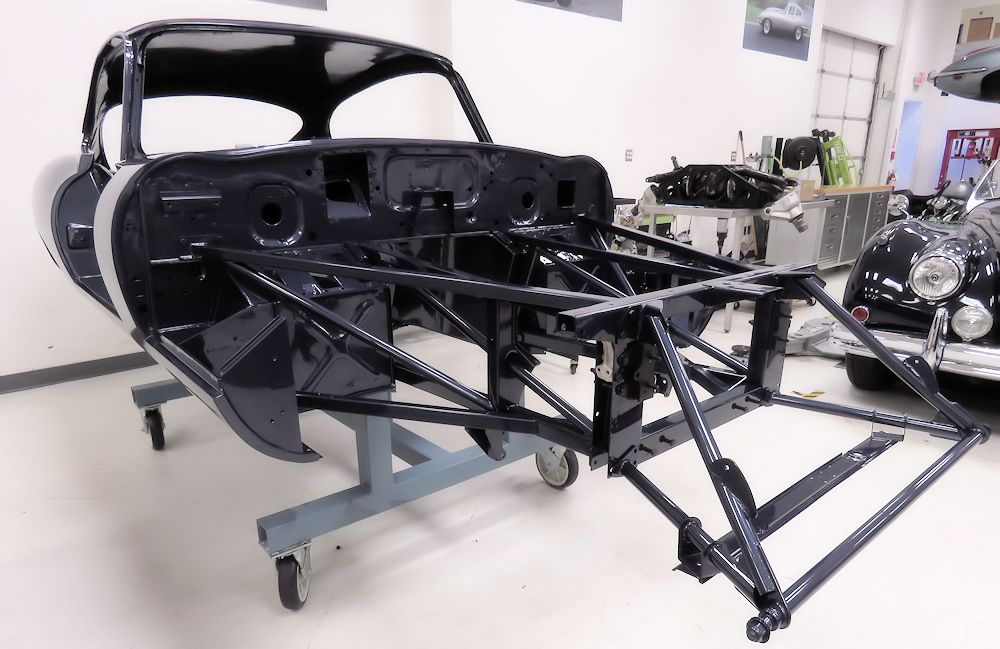
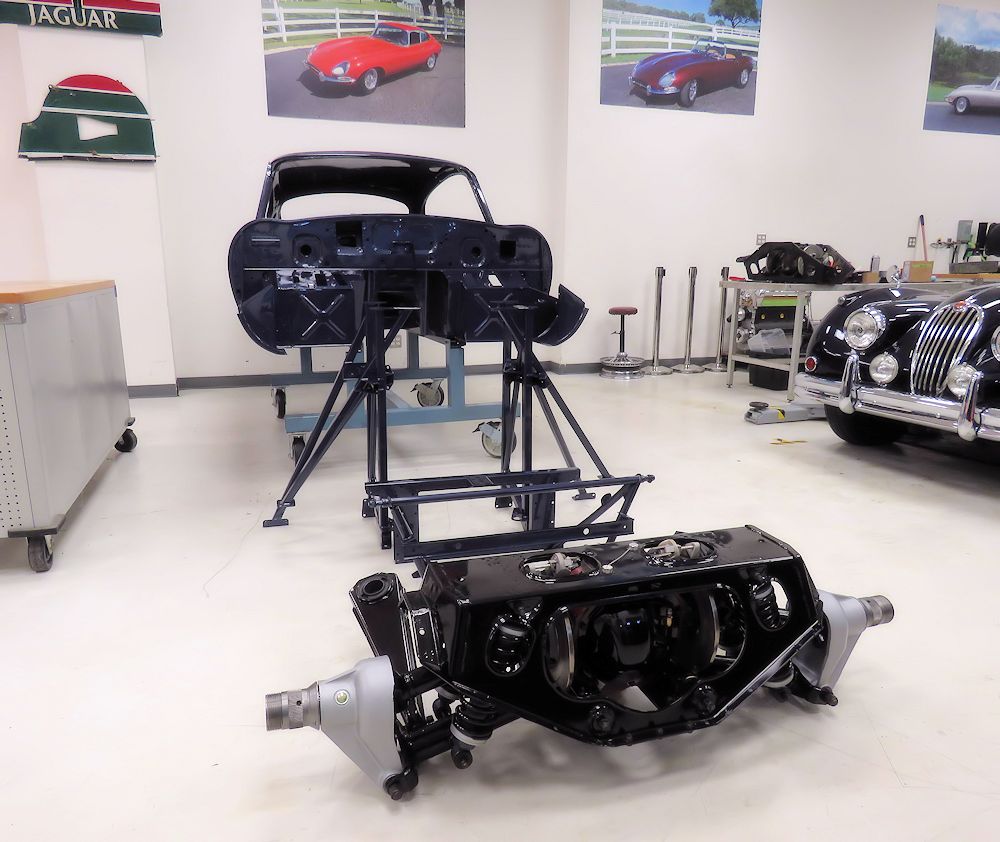
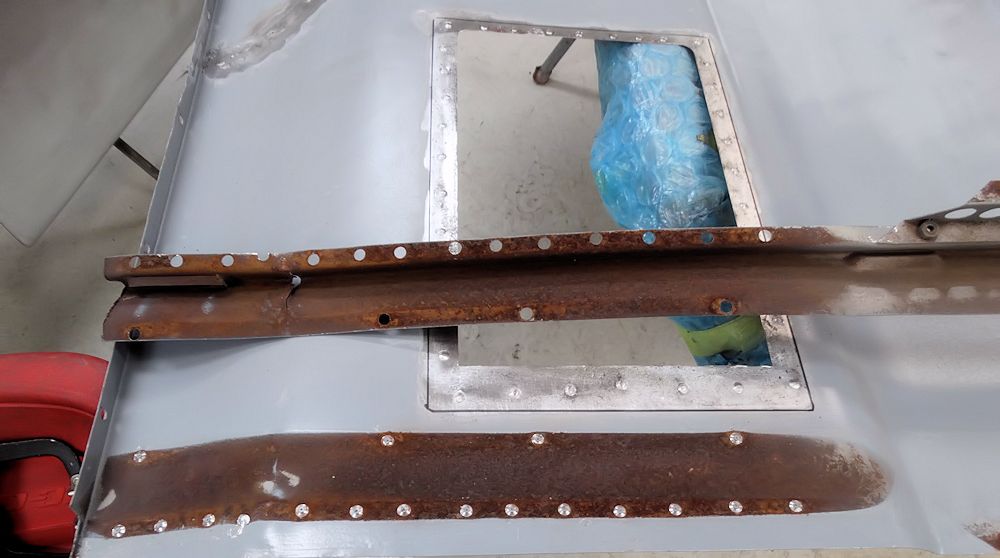
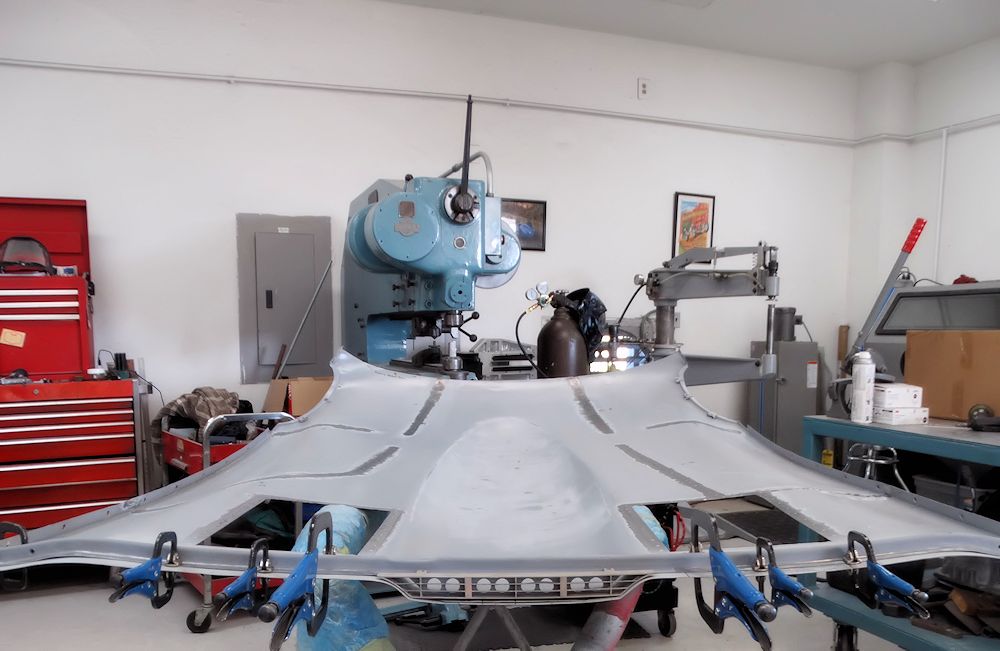
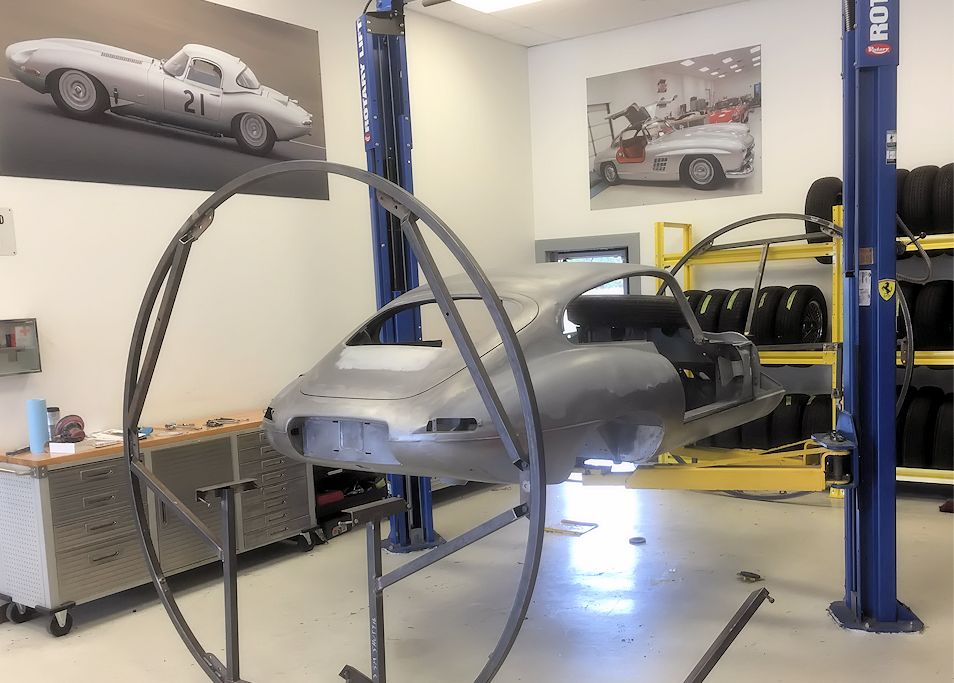
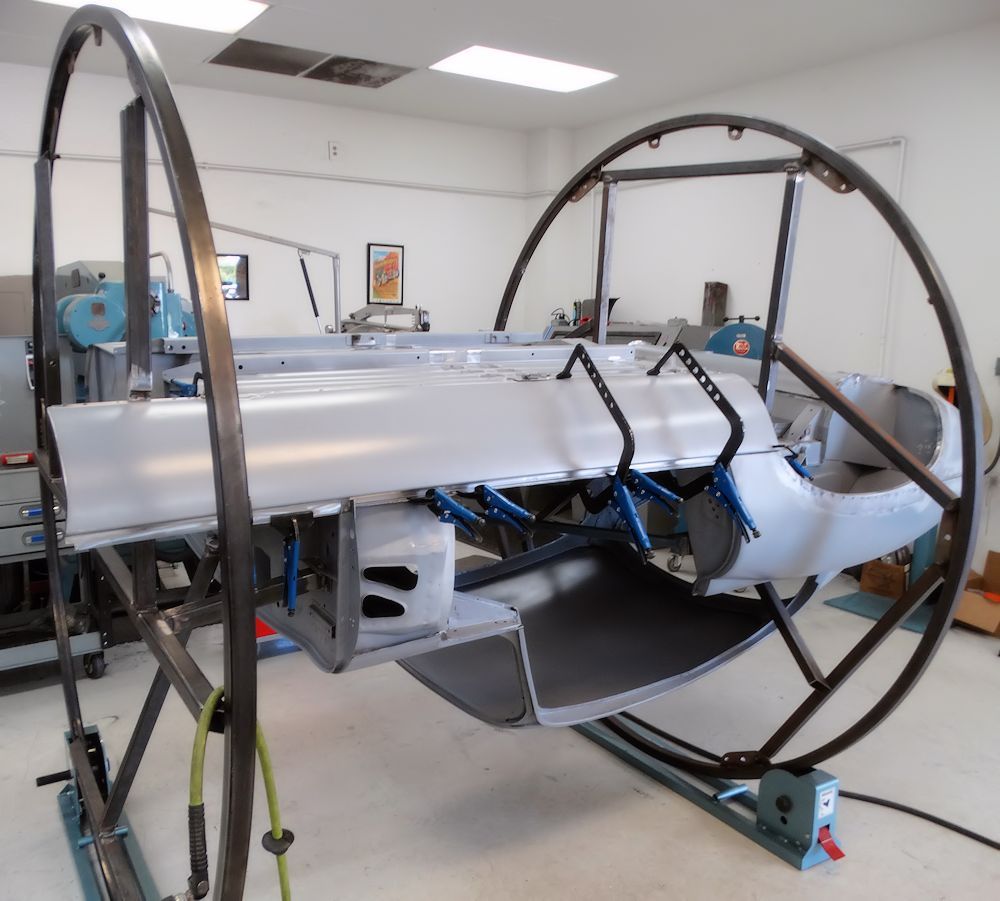
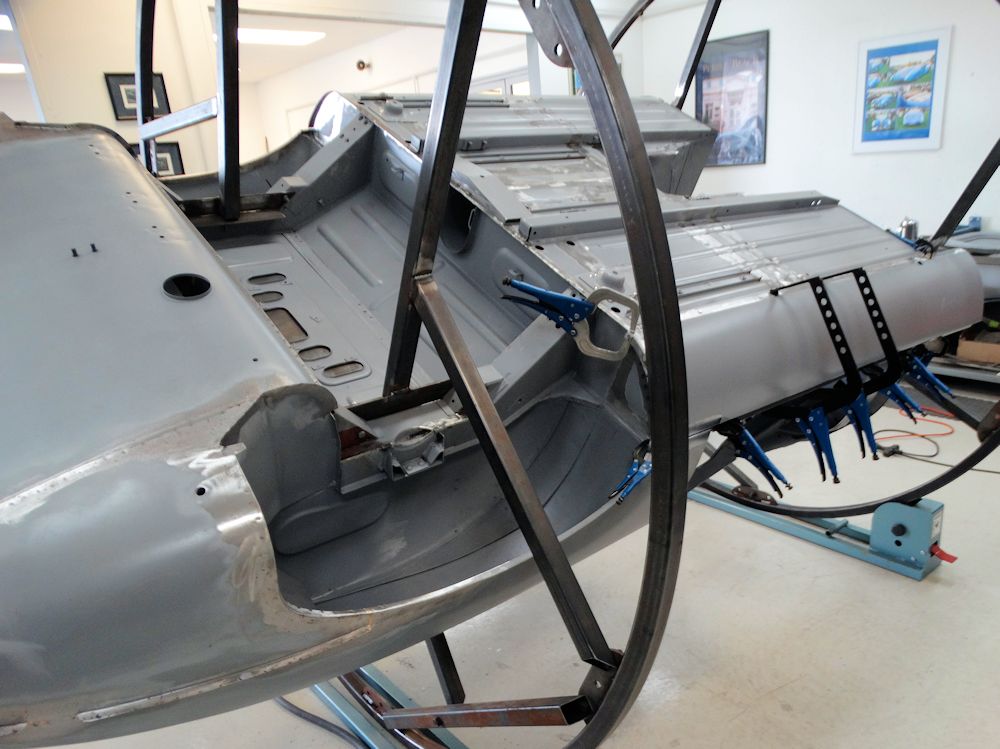
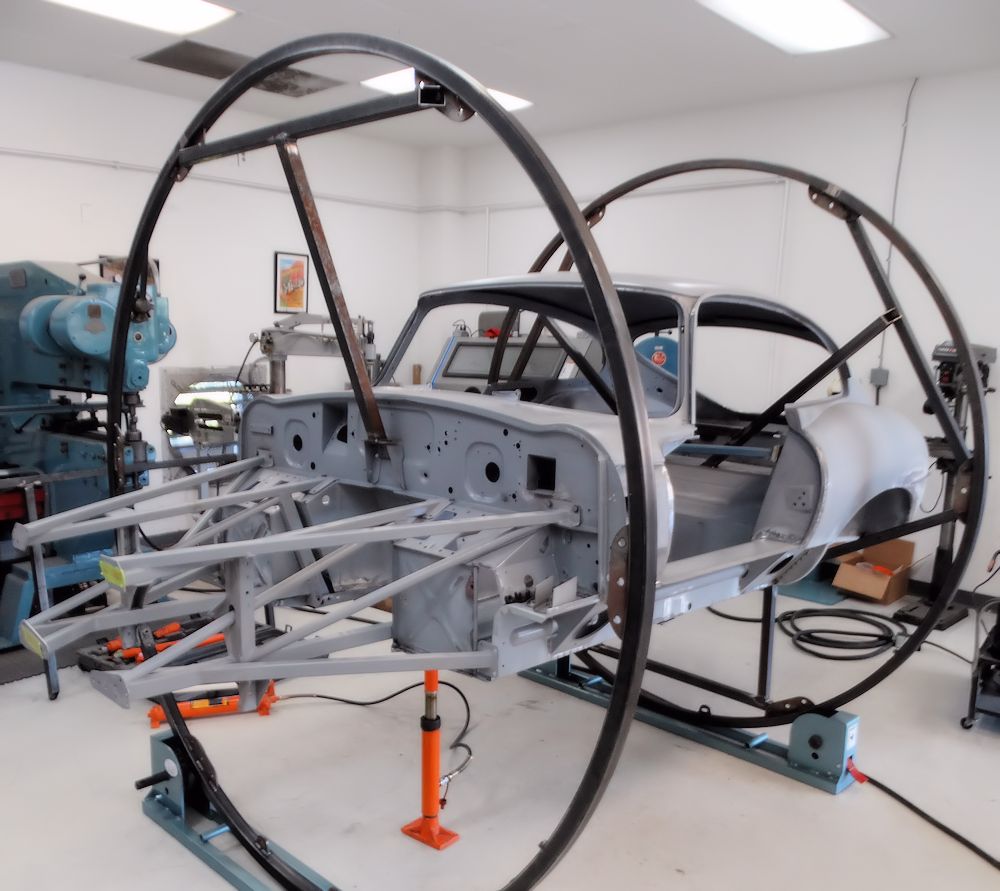
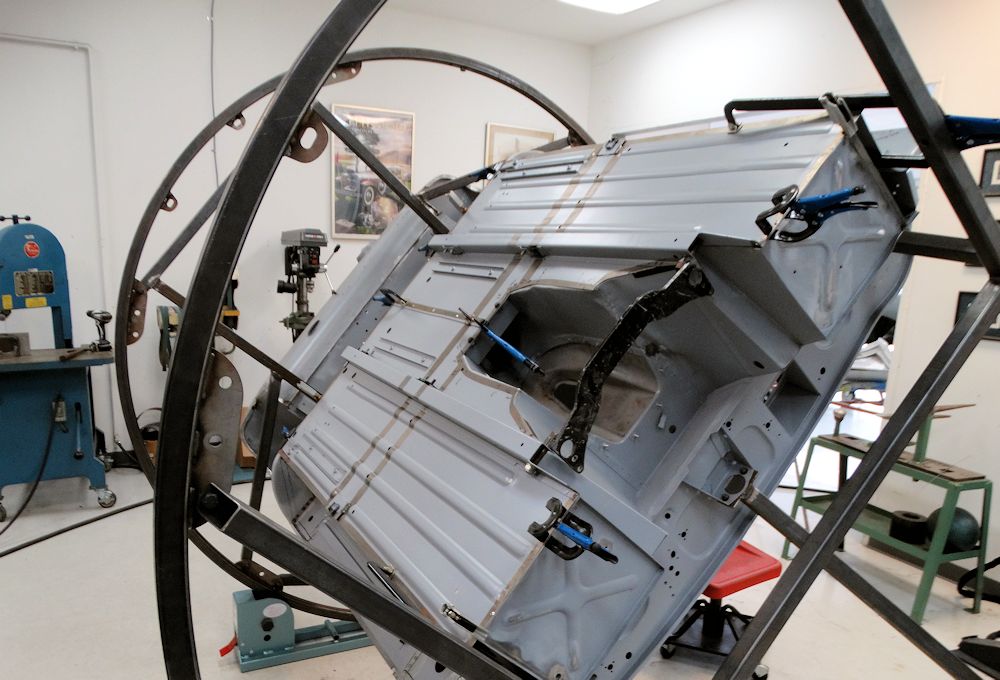
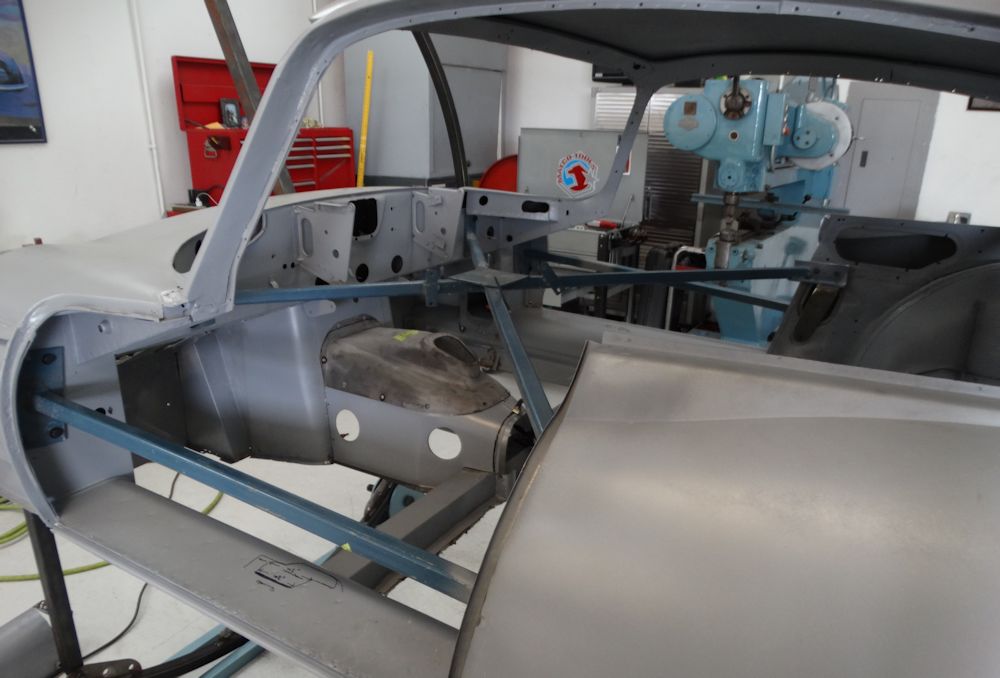
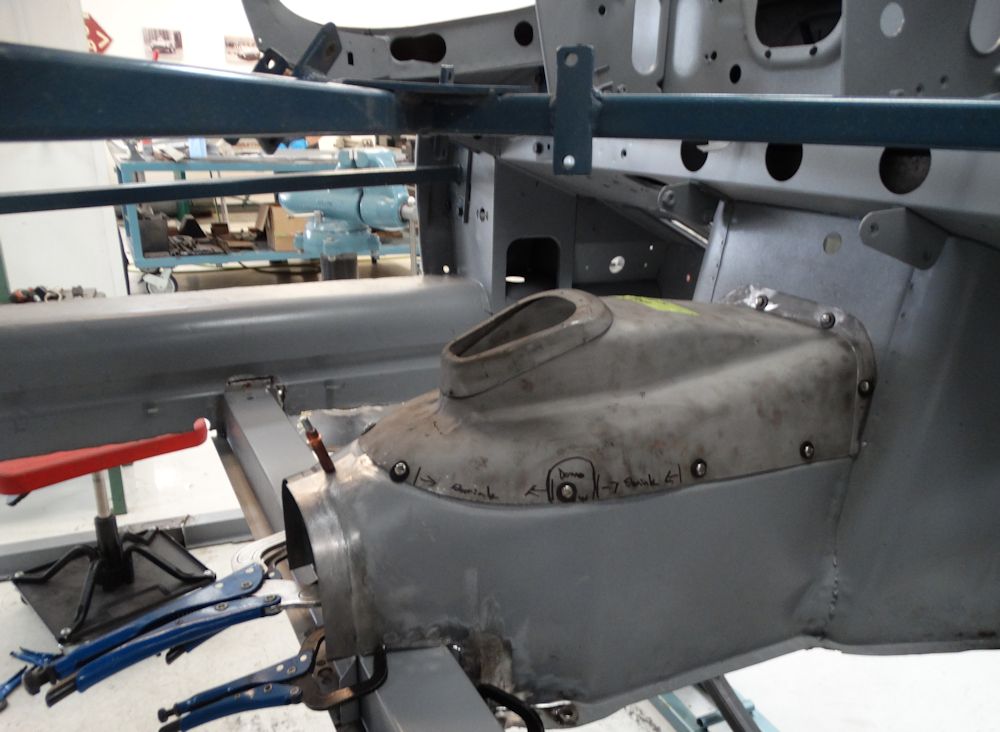
With the body on one of the workshop lifts to have the IRS installed, it was a good opportunity to snap a few photographs showing the underside of the car.
 |
 |
 |
 |
 |
 |
 |
 |
 |
 |
 |
 |
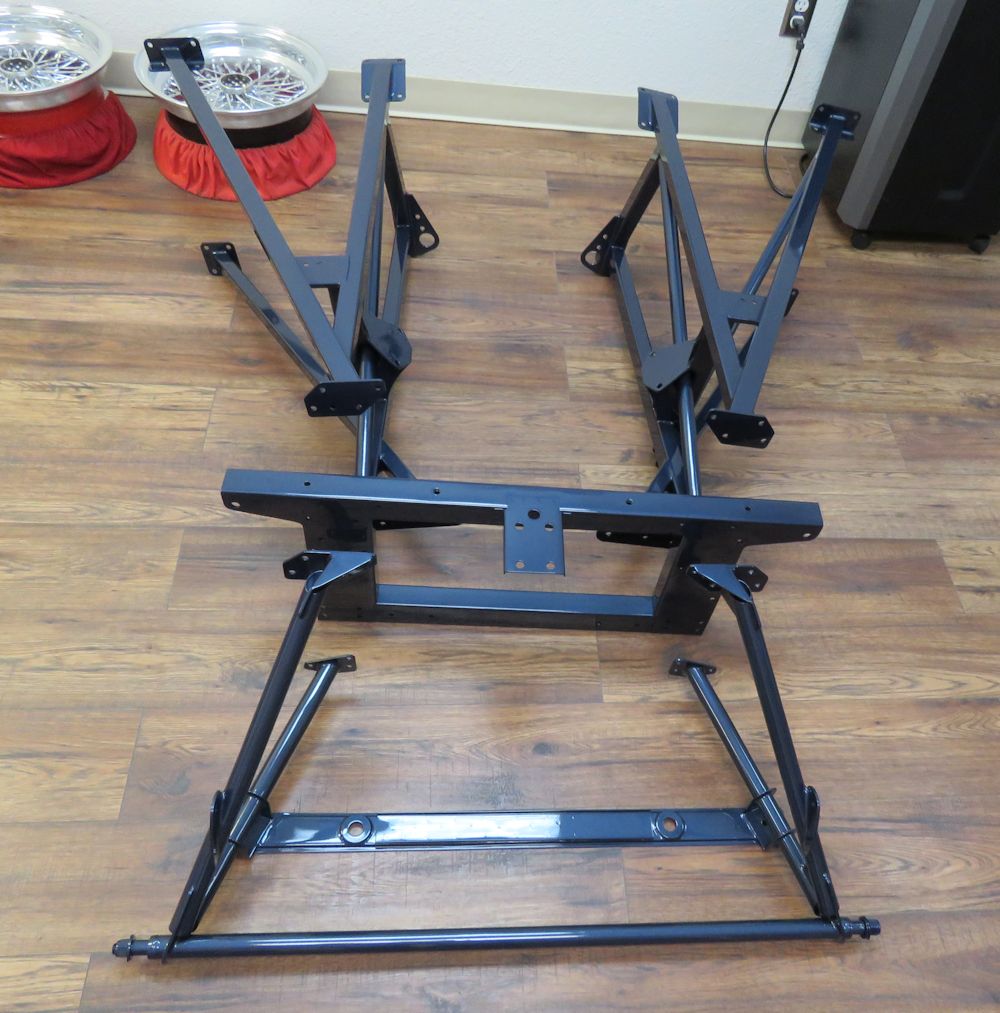
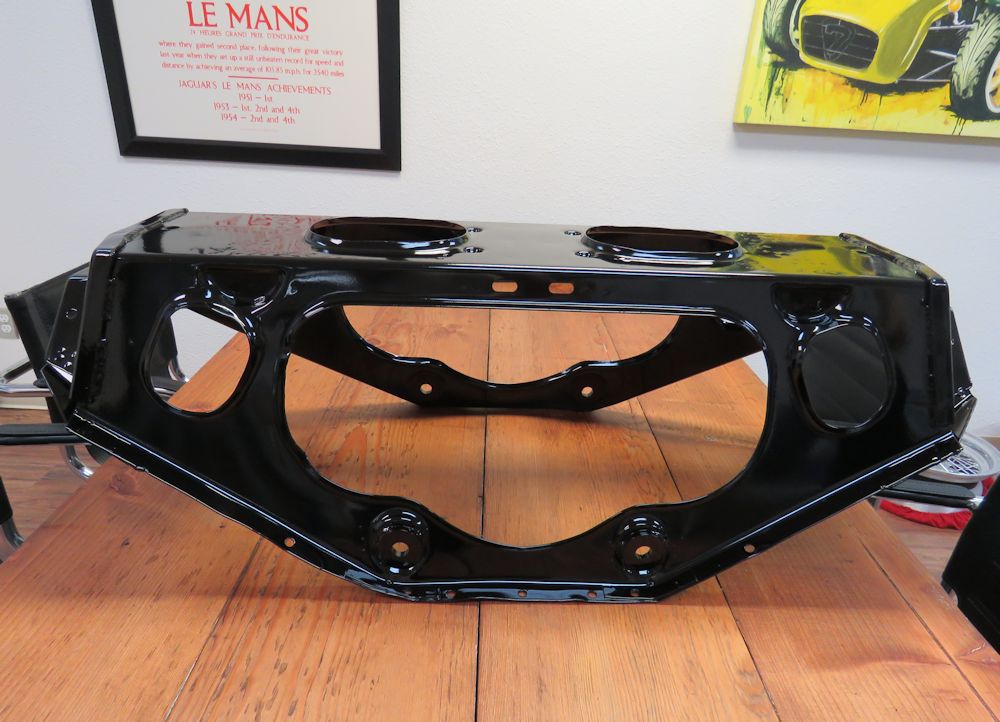
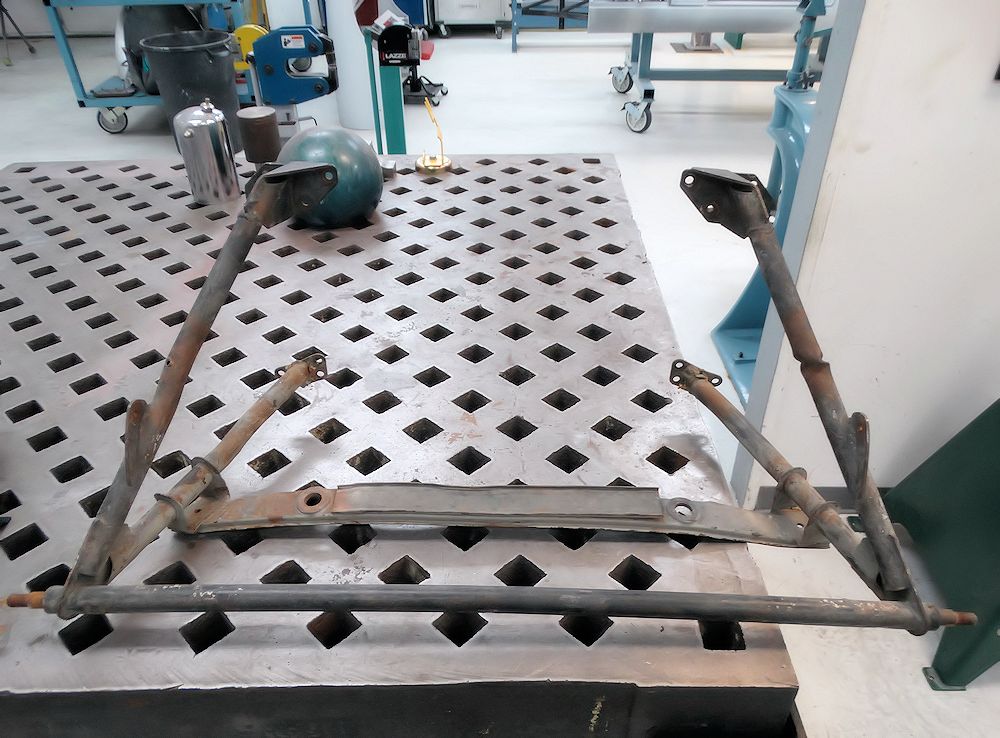
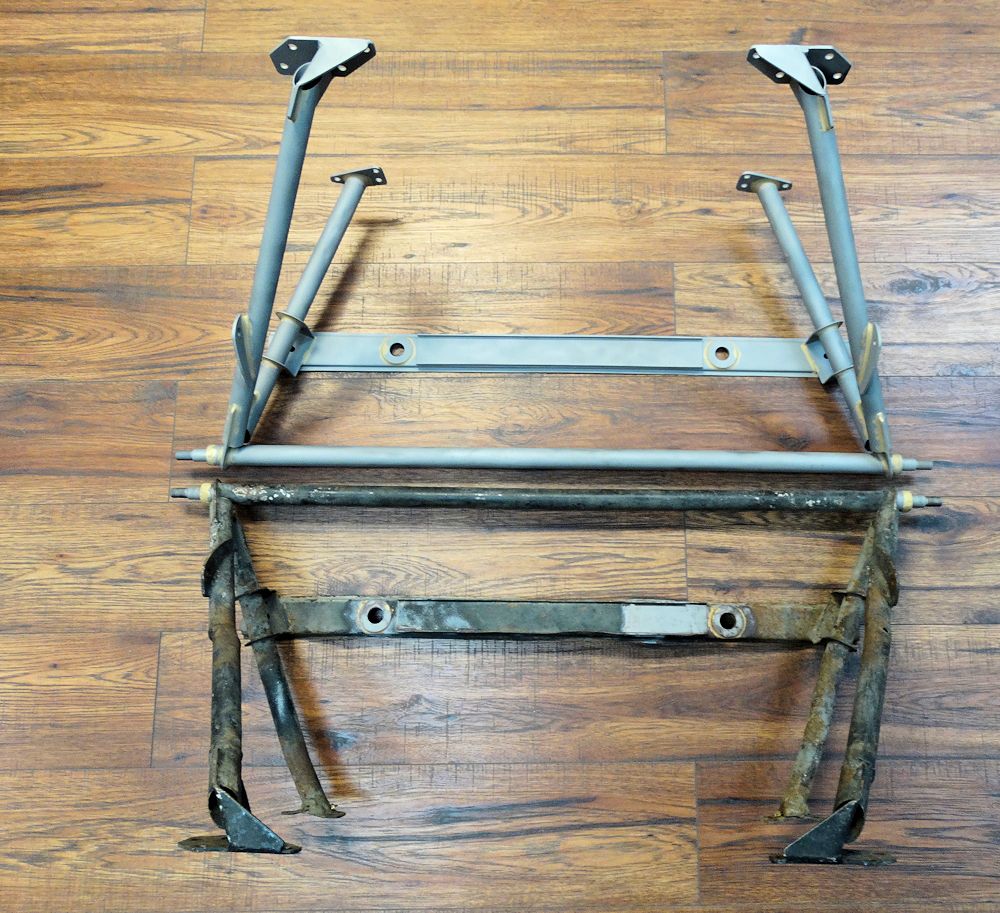
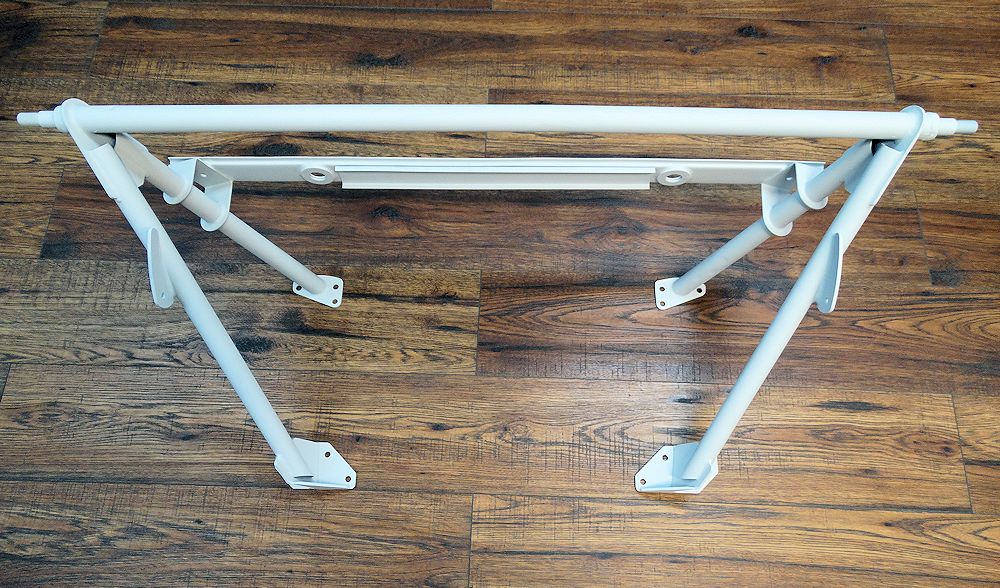
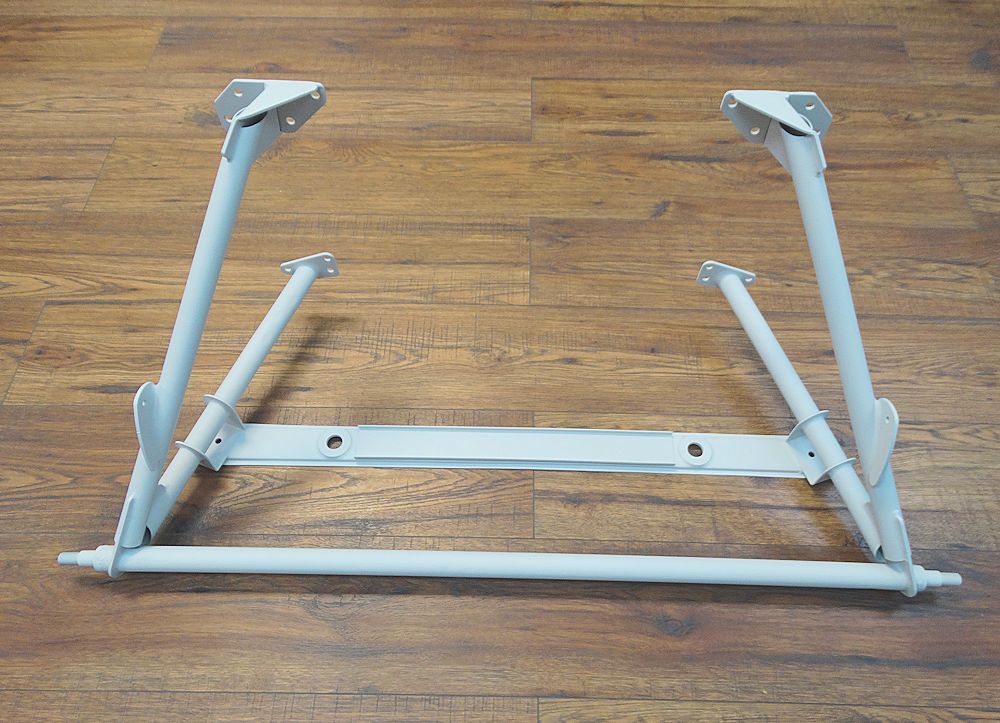
| Always an exciting time installing the
restored engine frames and hanging the suspension |
|
 |
 |
 |
 |
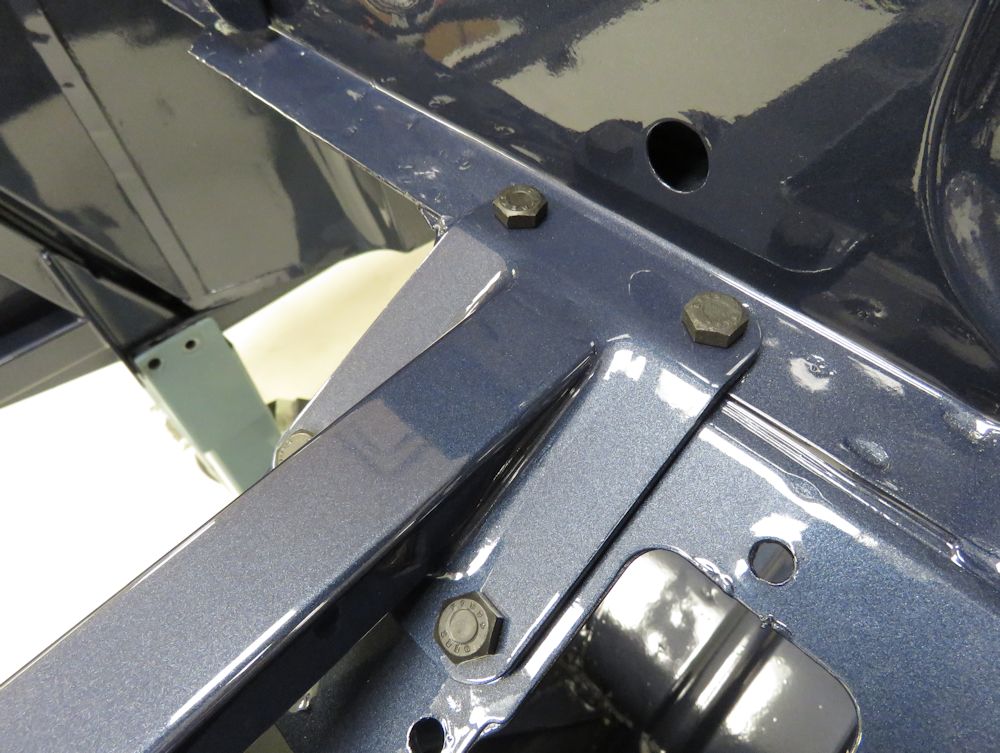
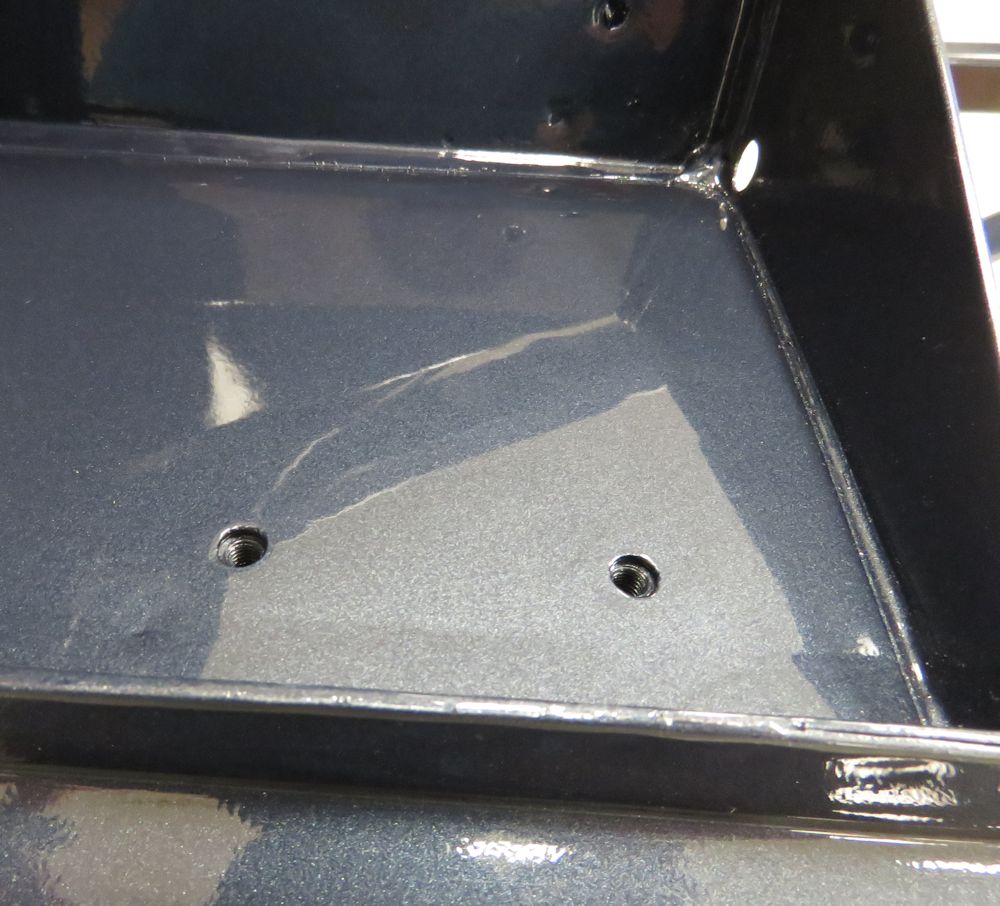
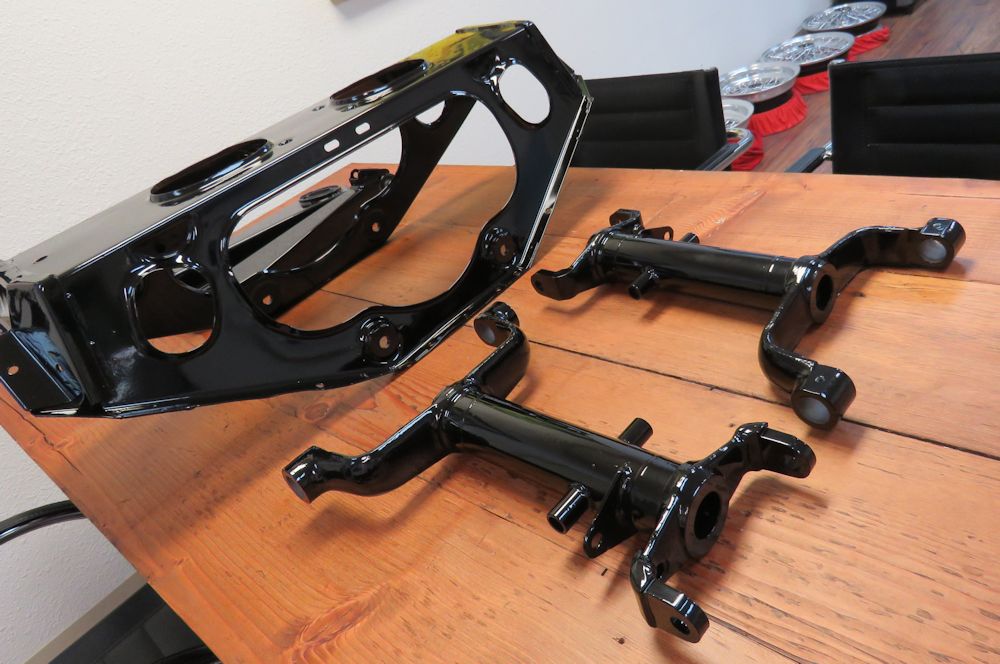
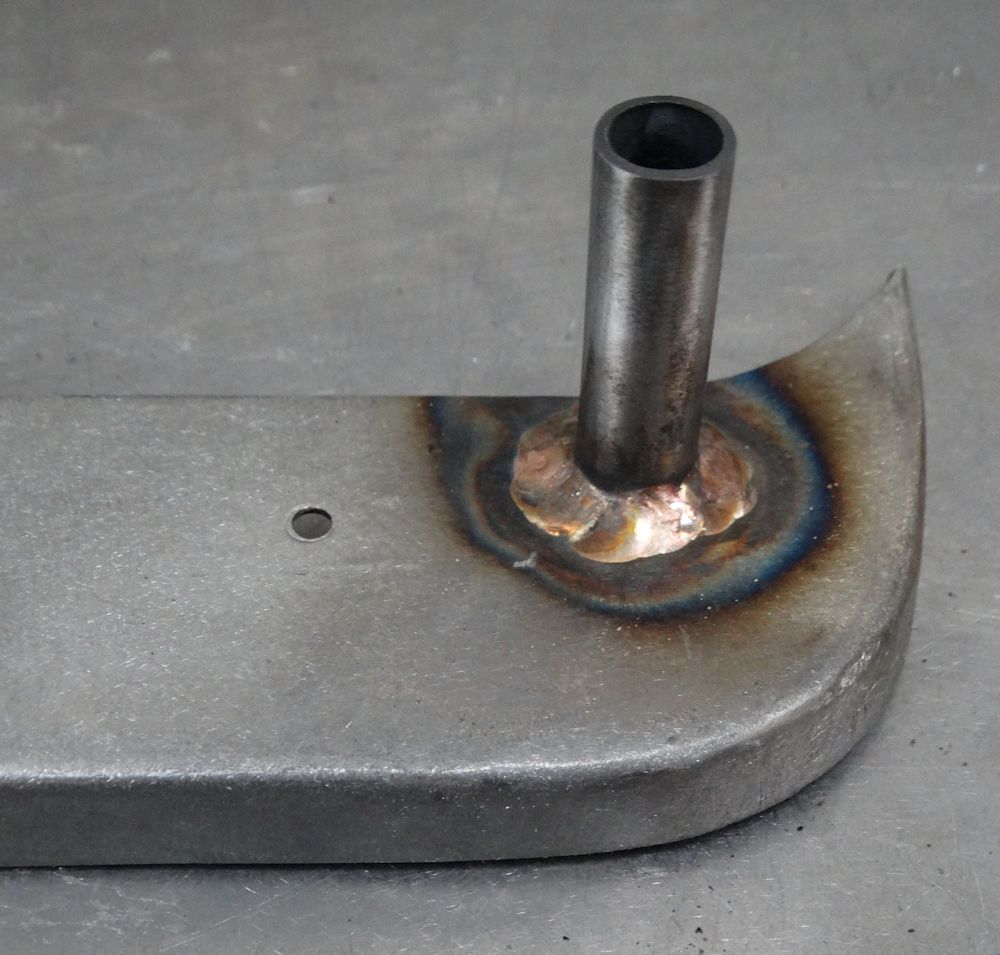
| Restored original BEES bolts used throughout |
Even lower subframe bolts, which will be
invisible when car is fully assembled, are original BEES |
 |
 |
 |
 |
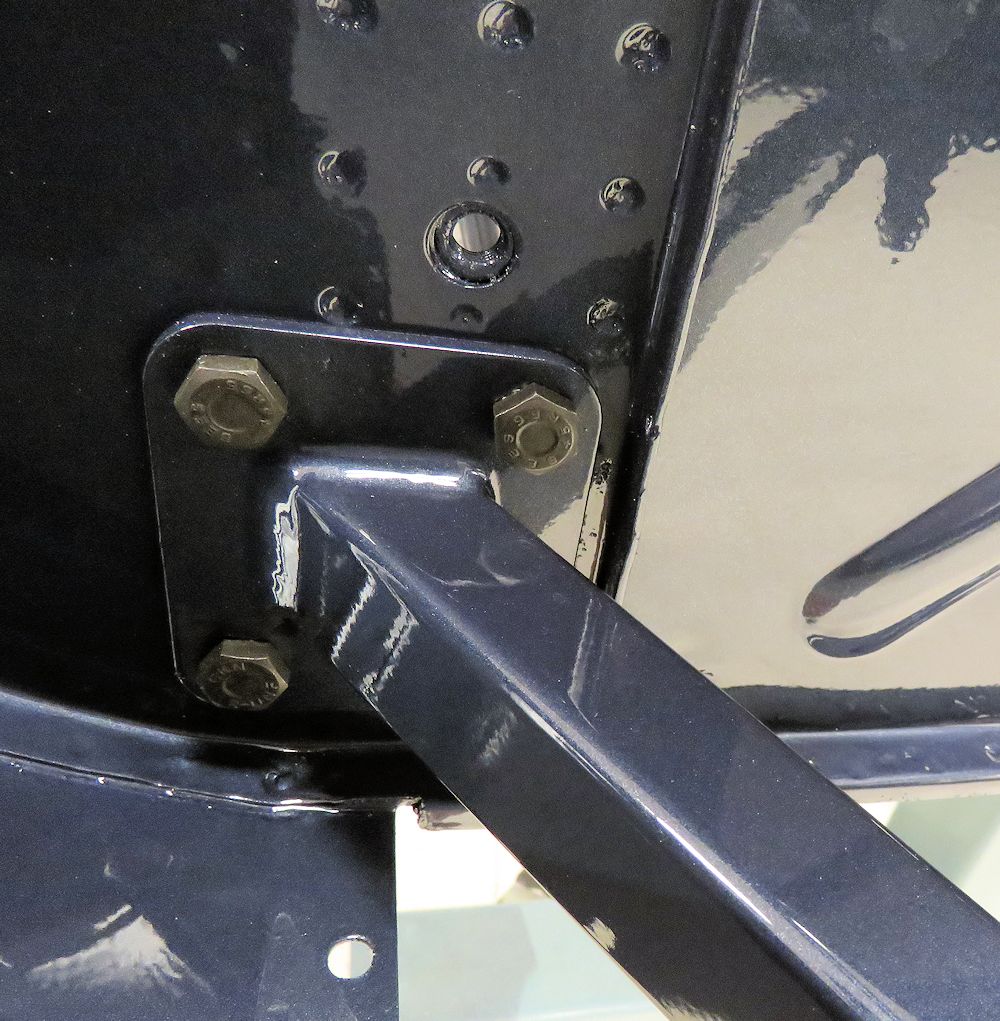
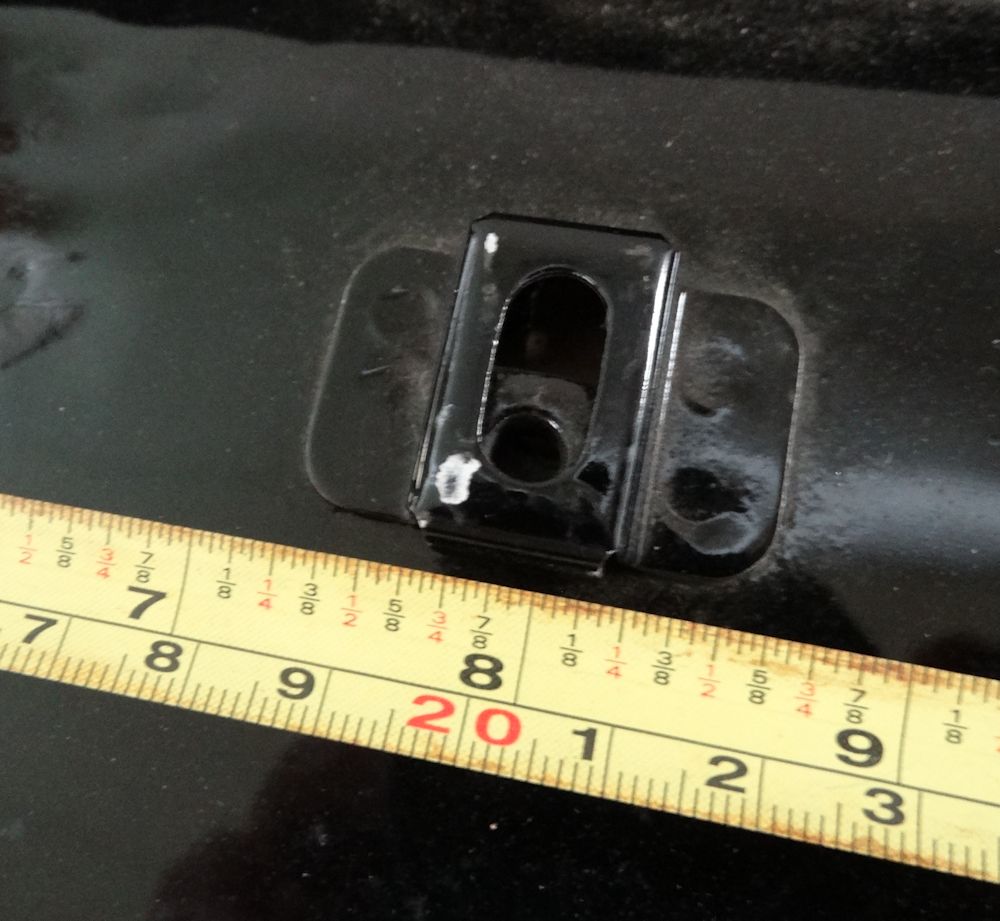
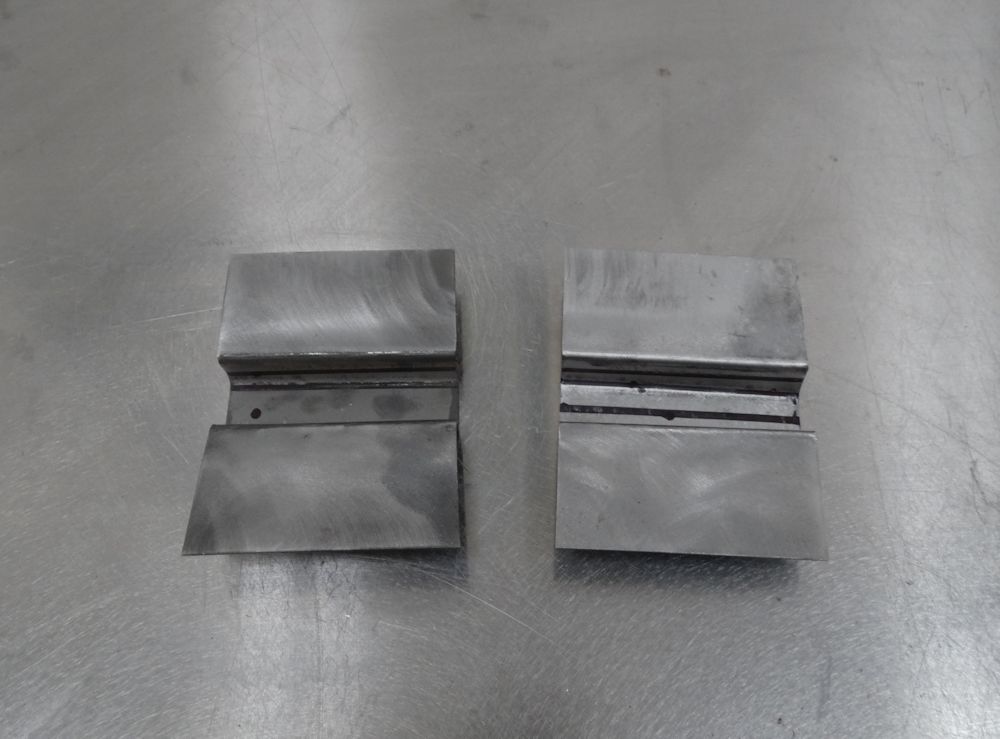
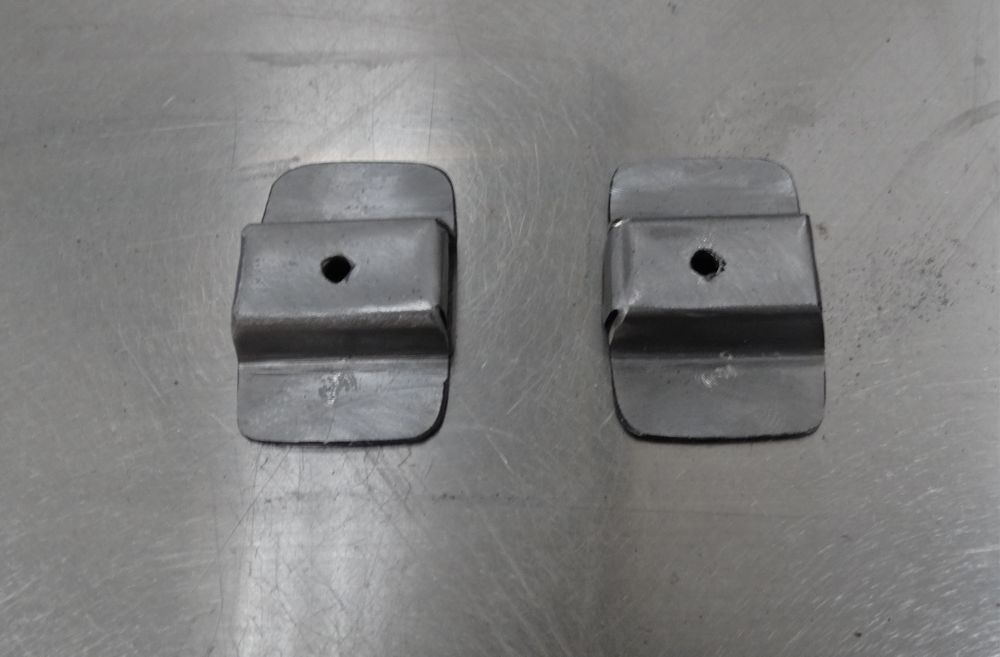
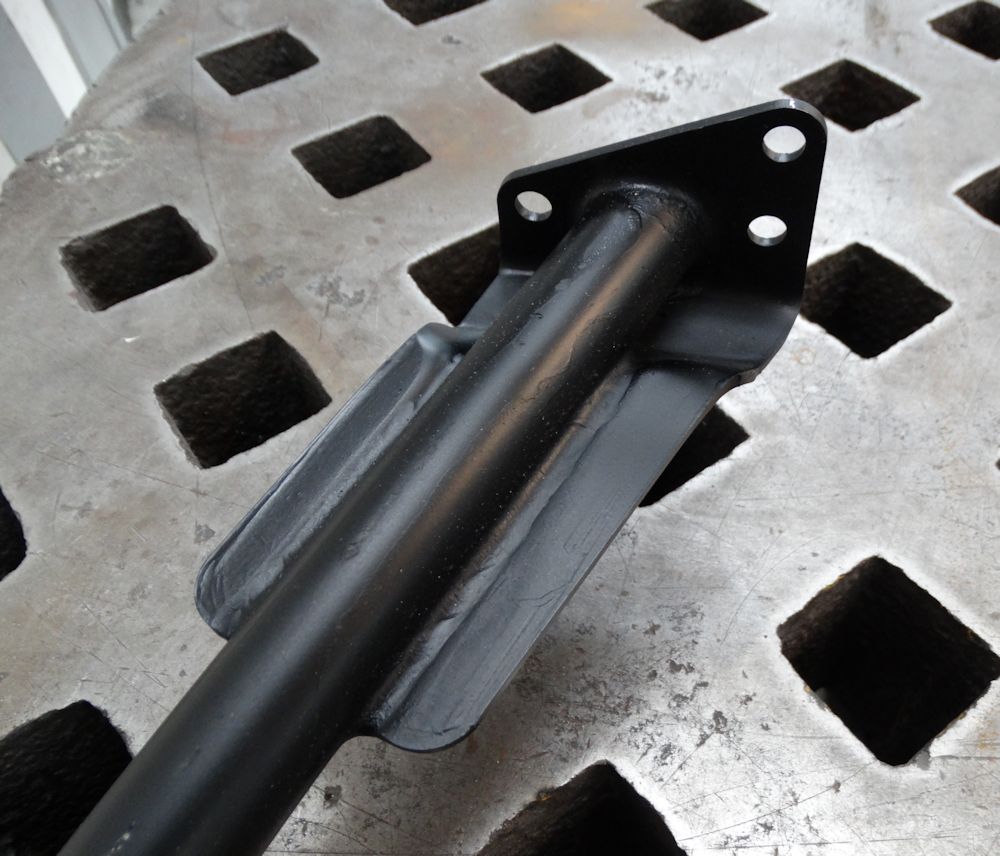
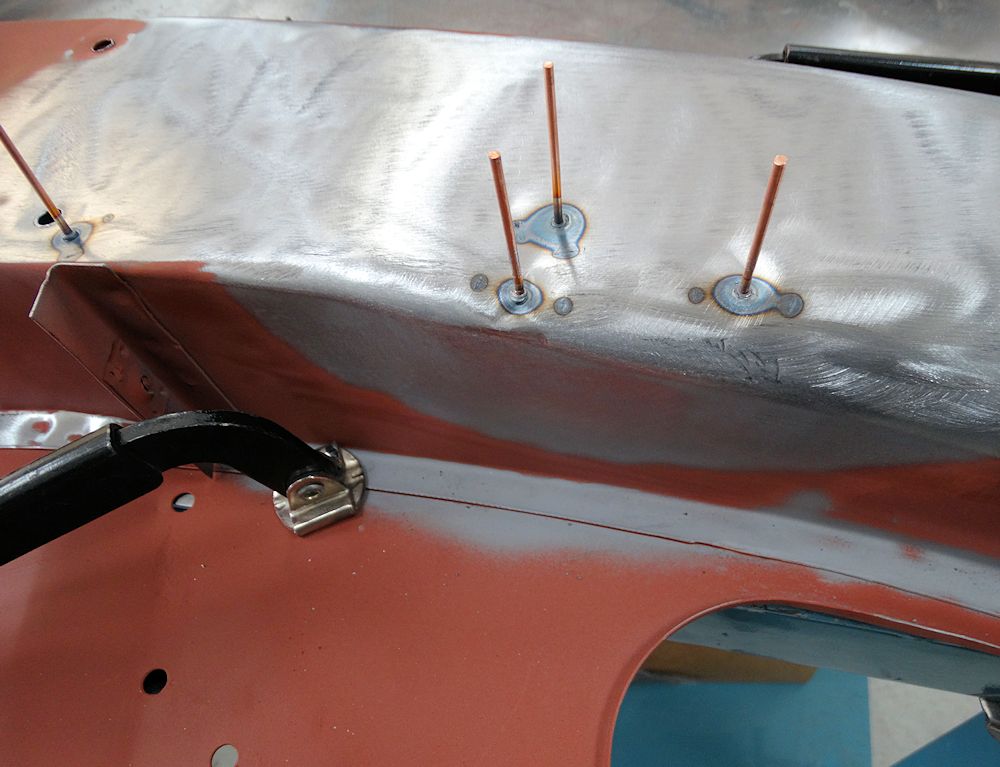
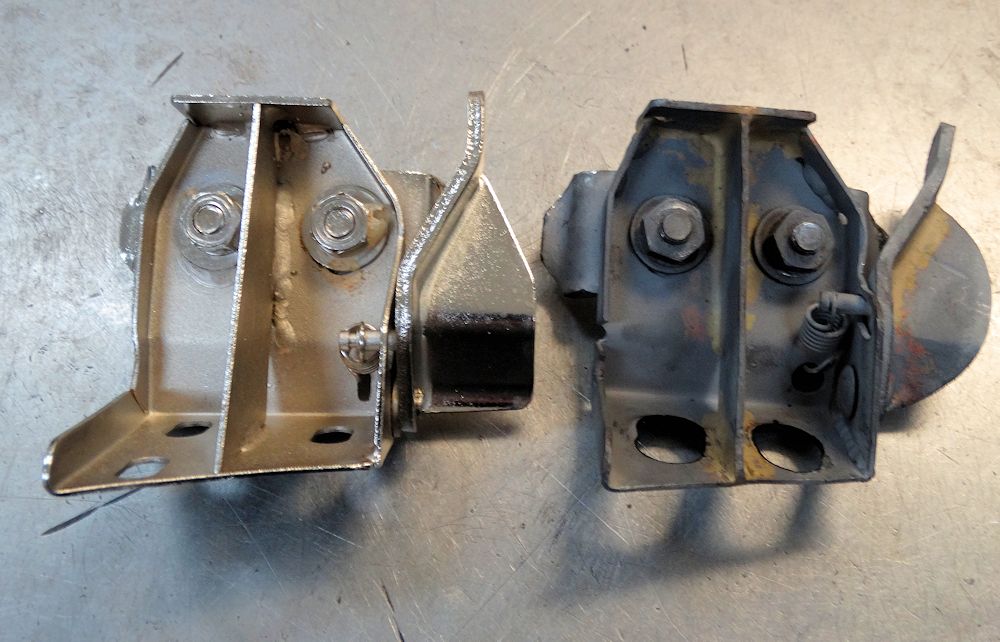
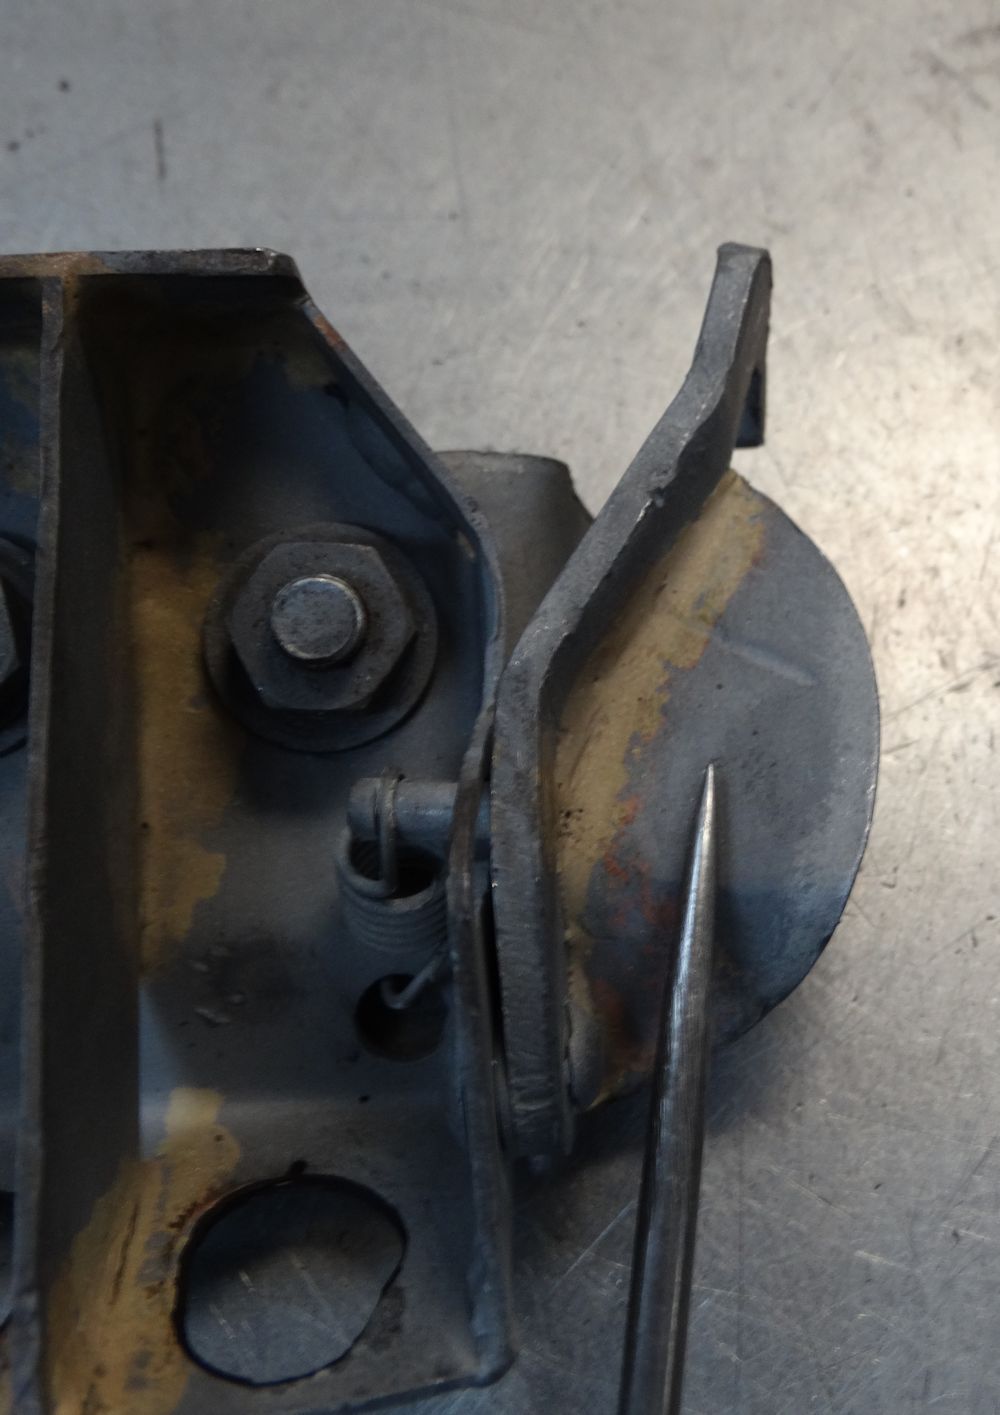
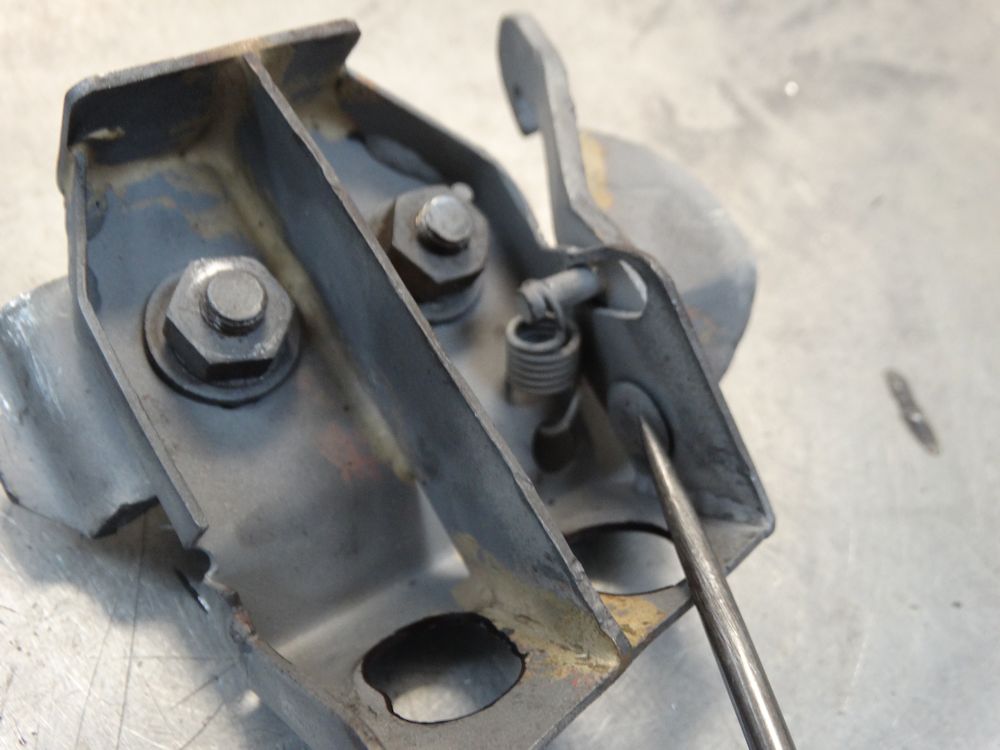
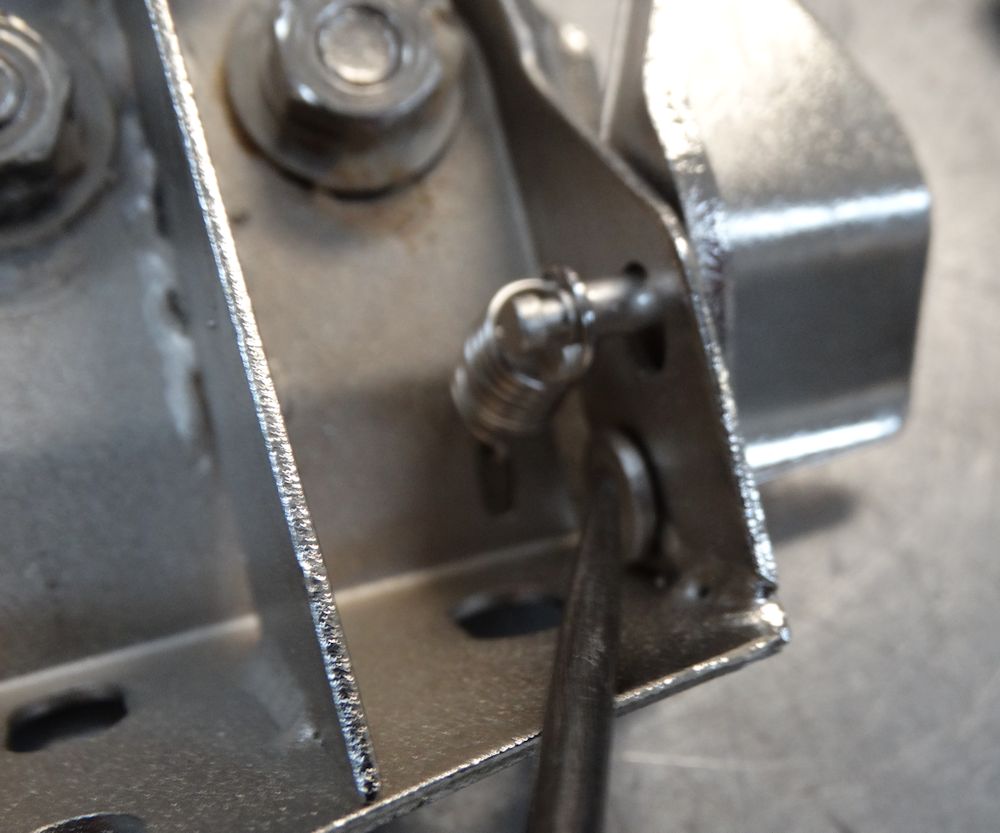
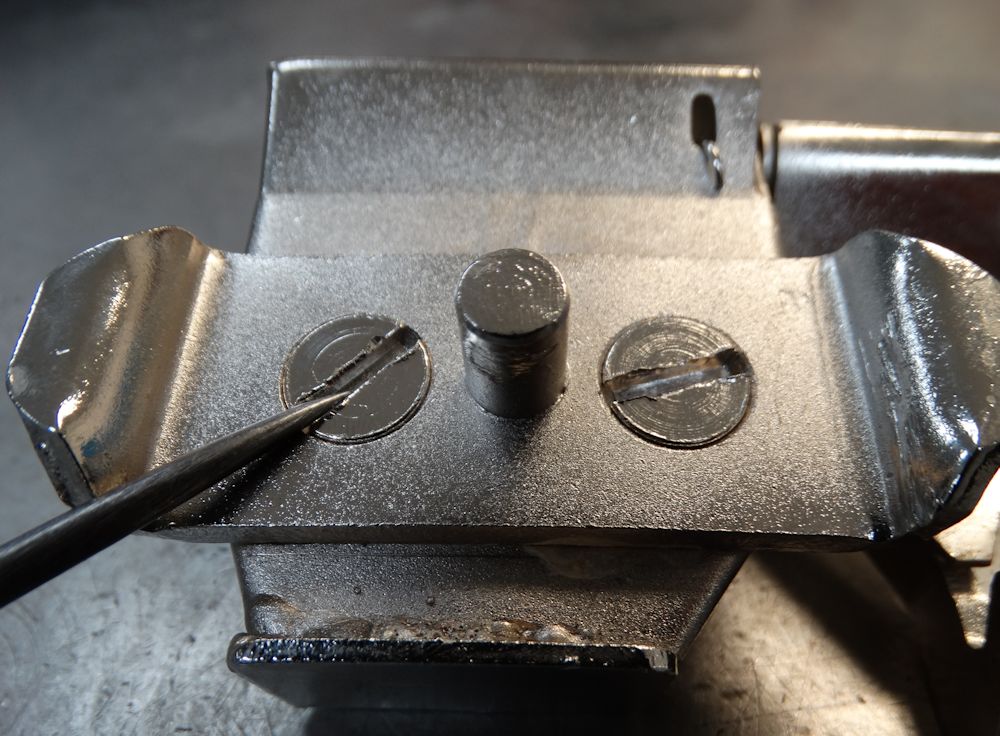
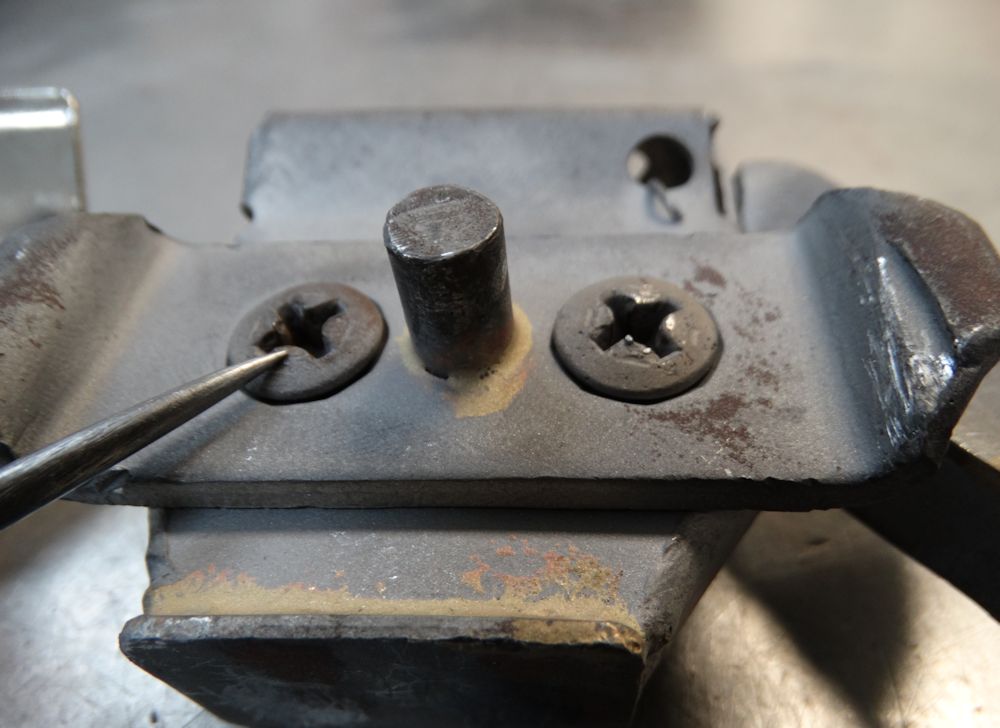
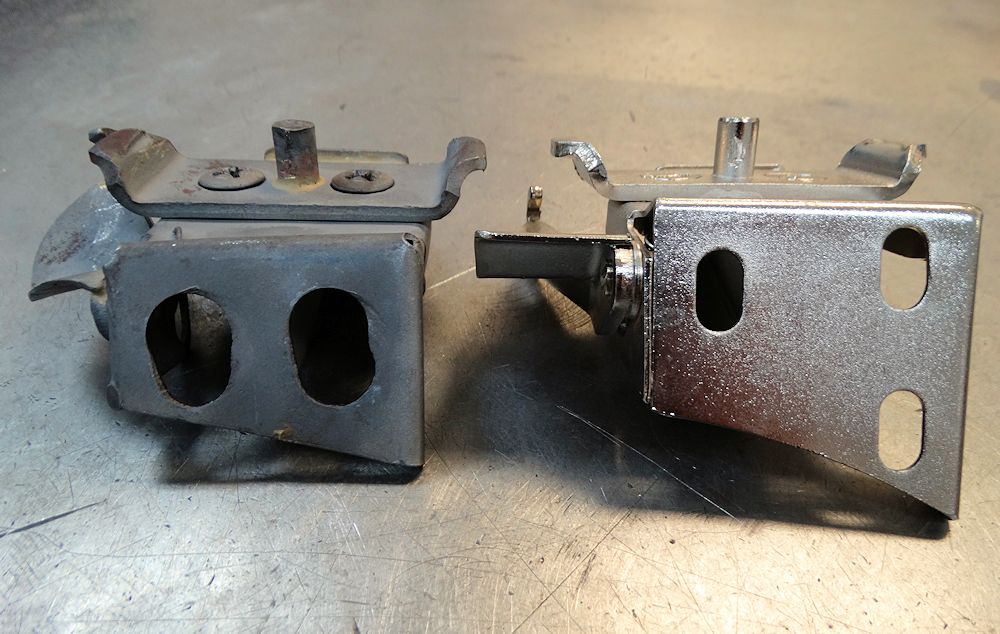
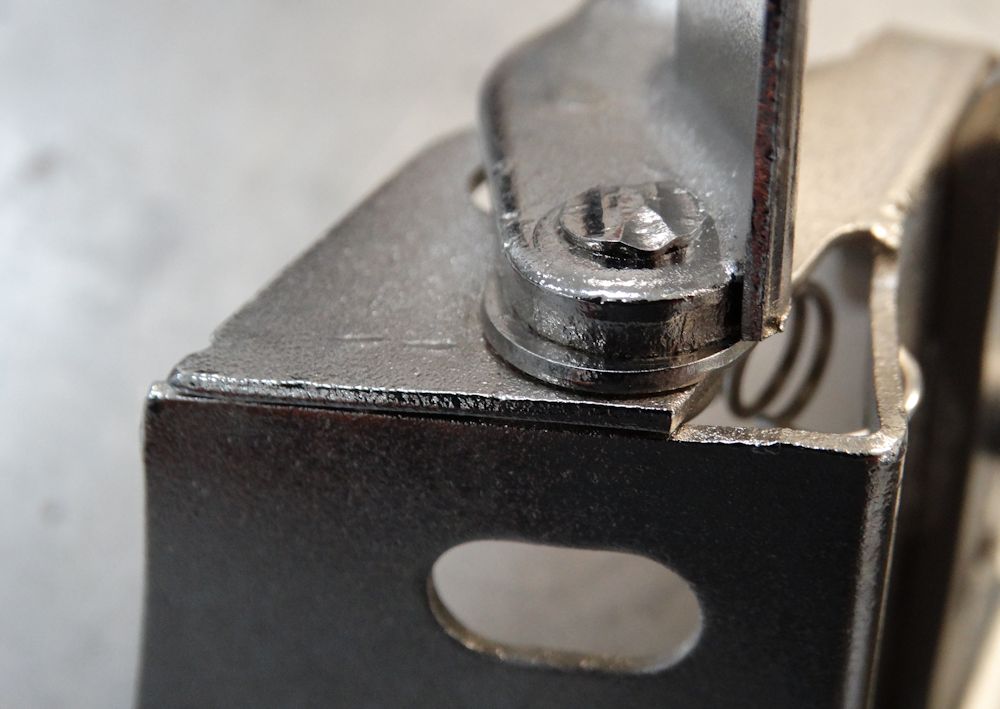
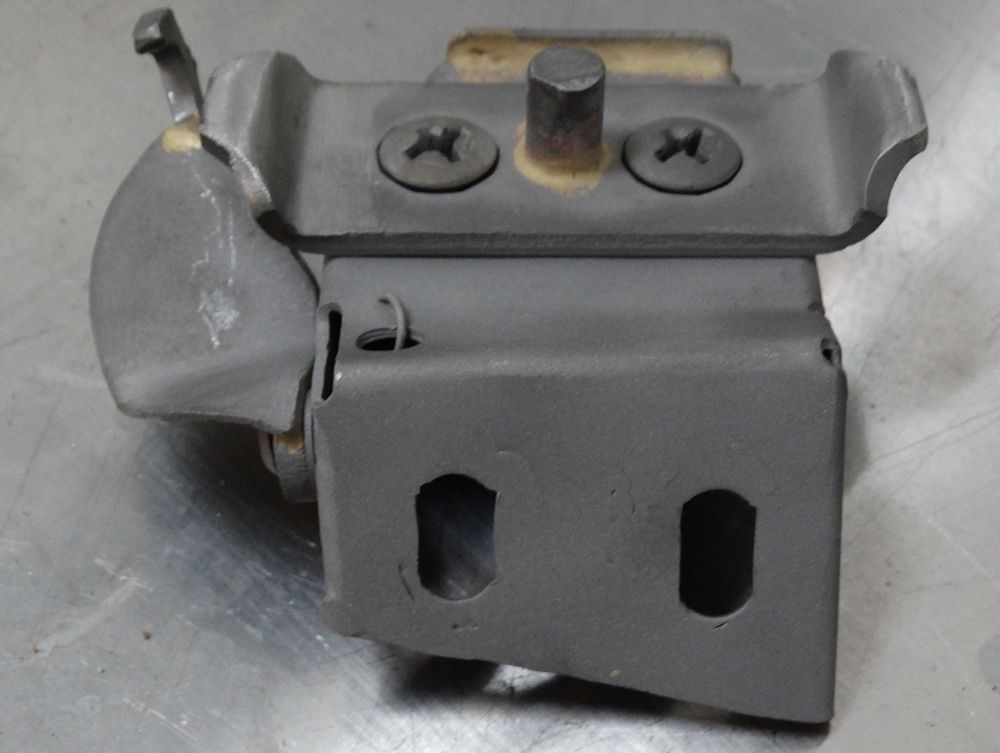
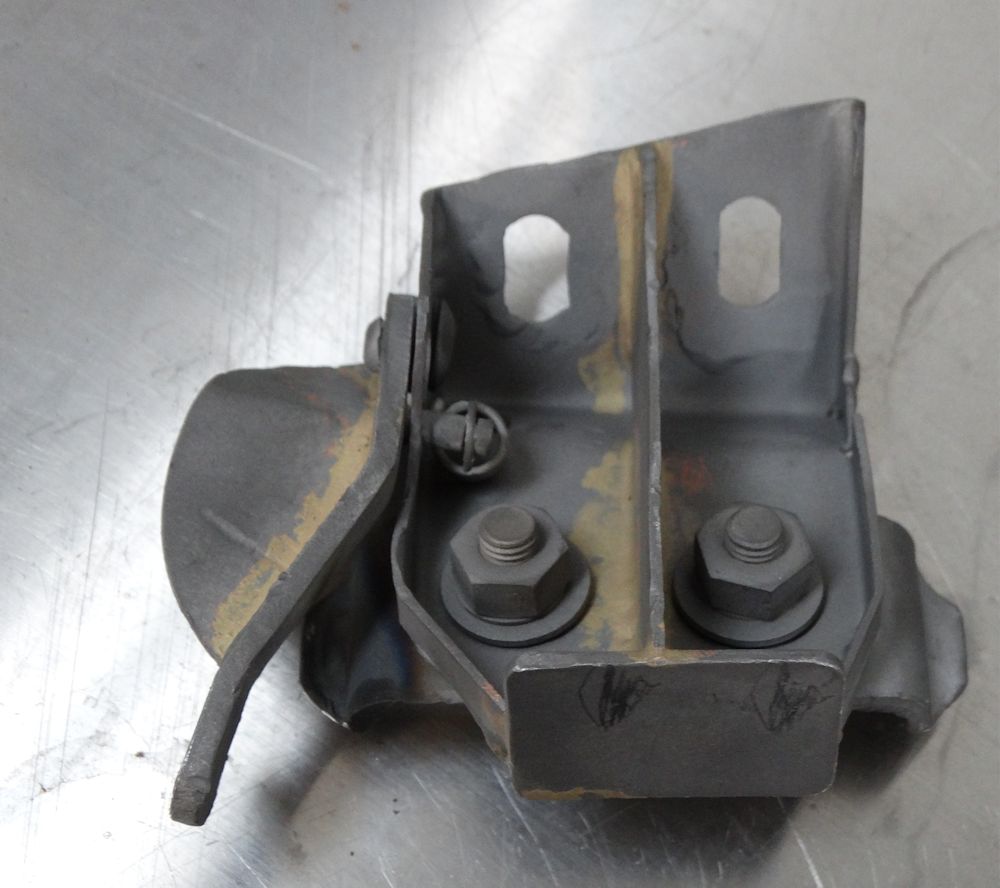
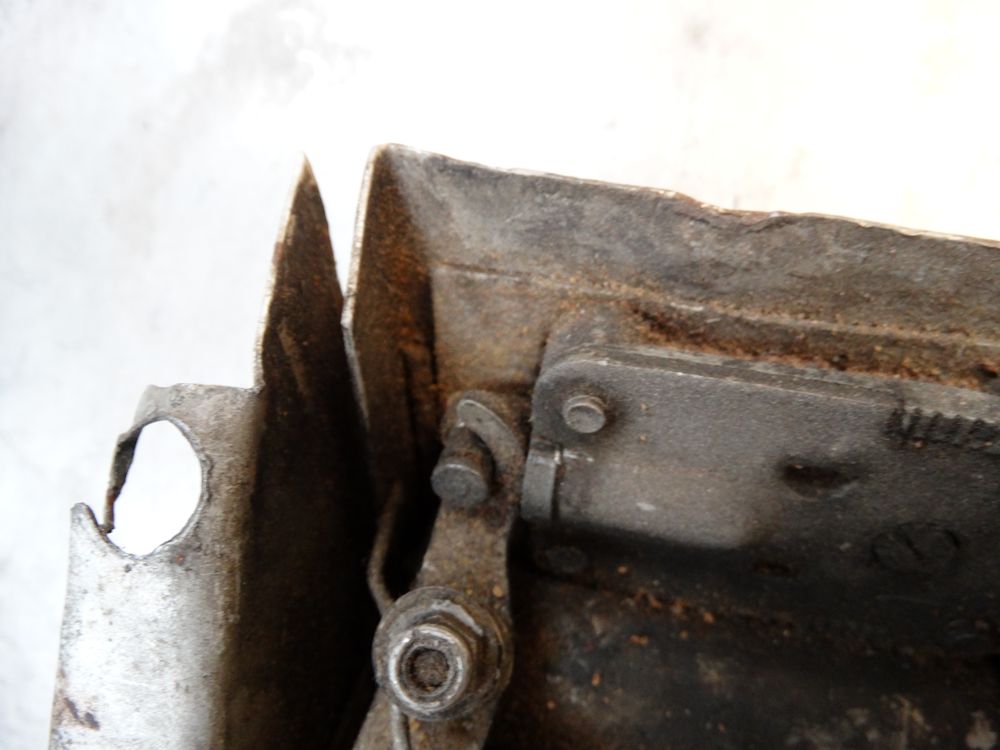
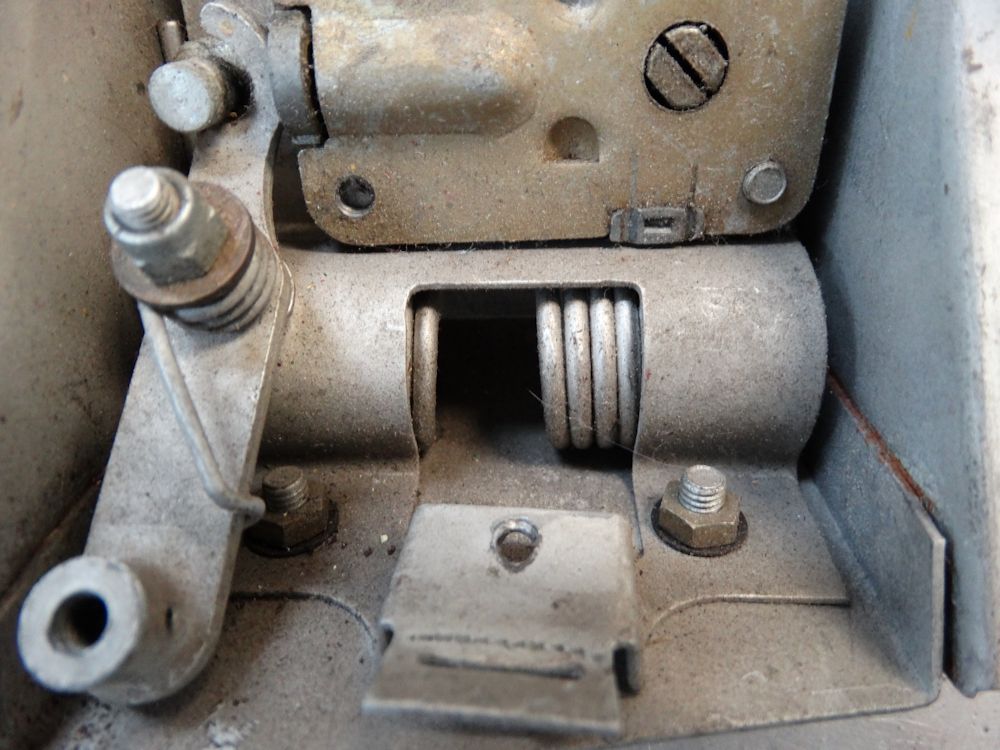
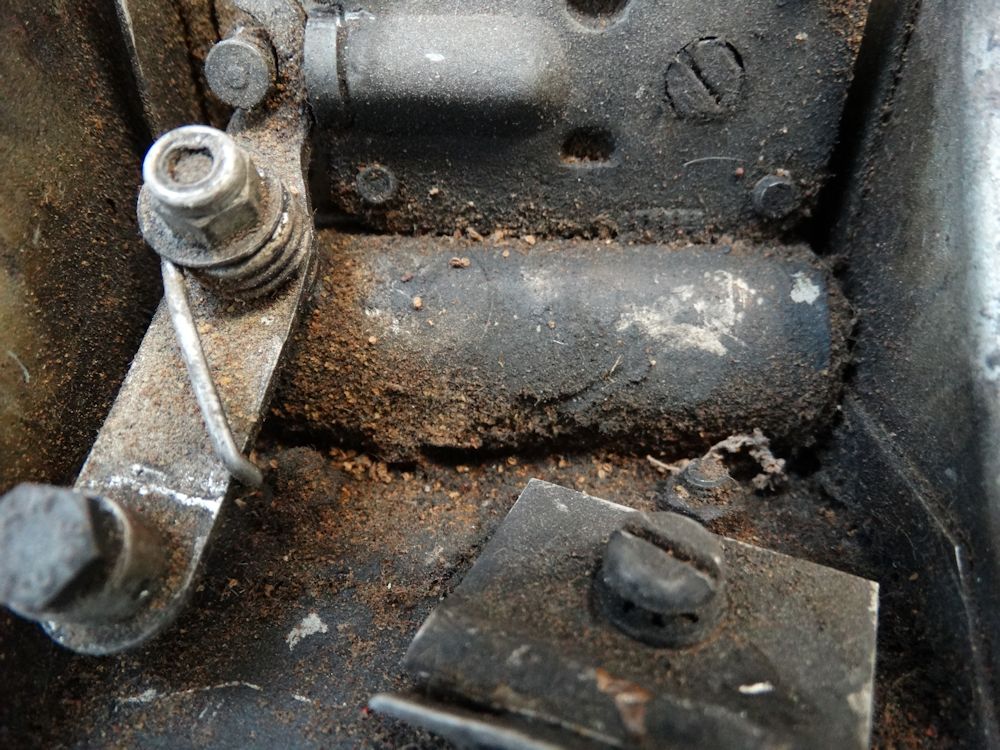
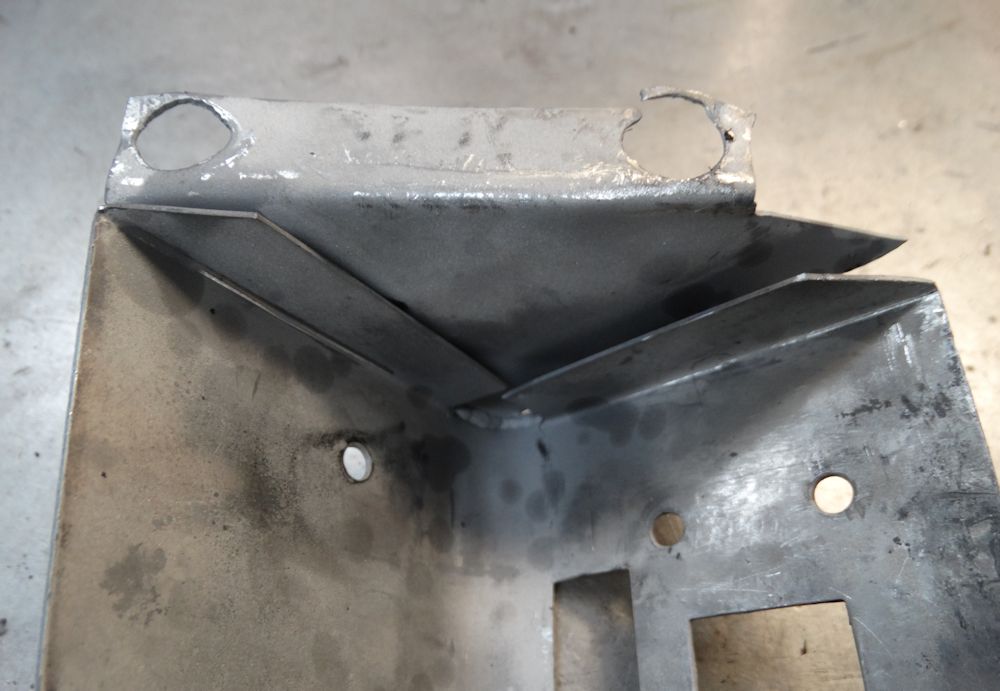
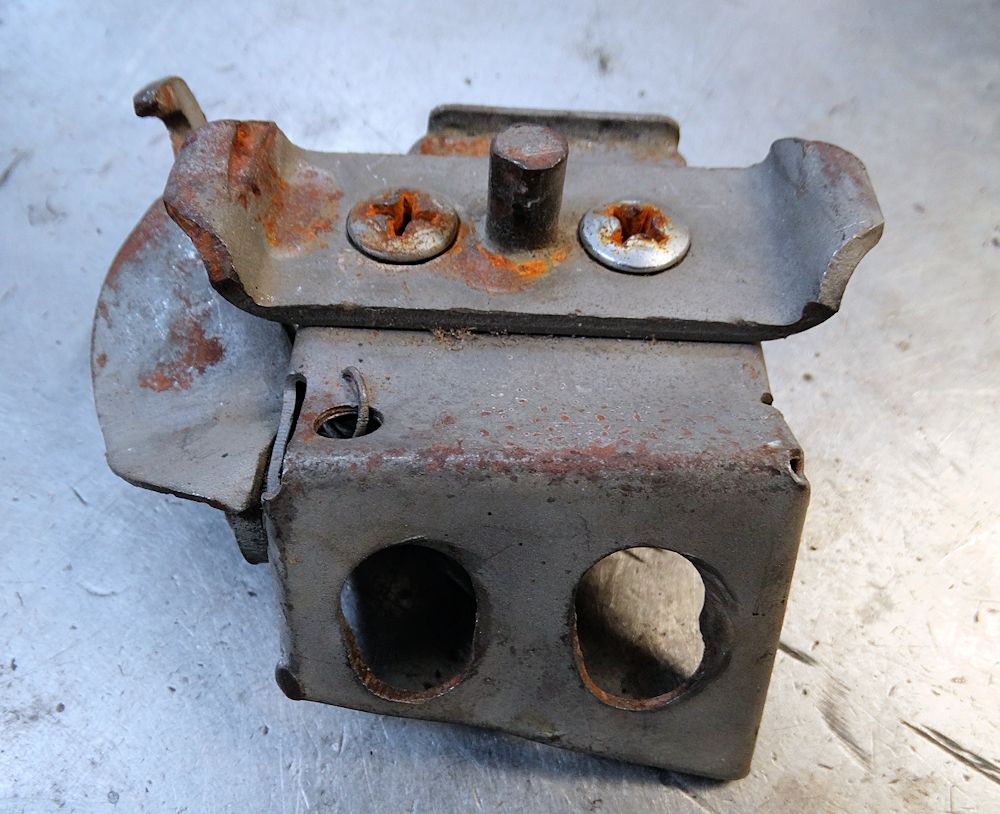
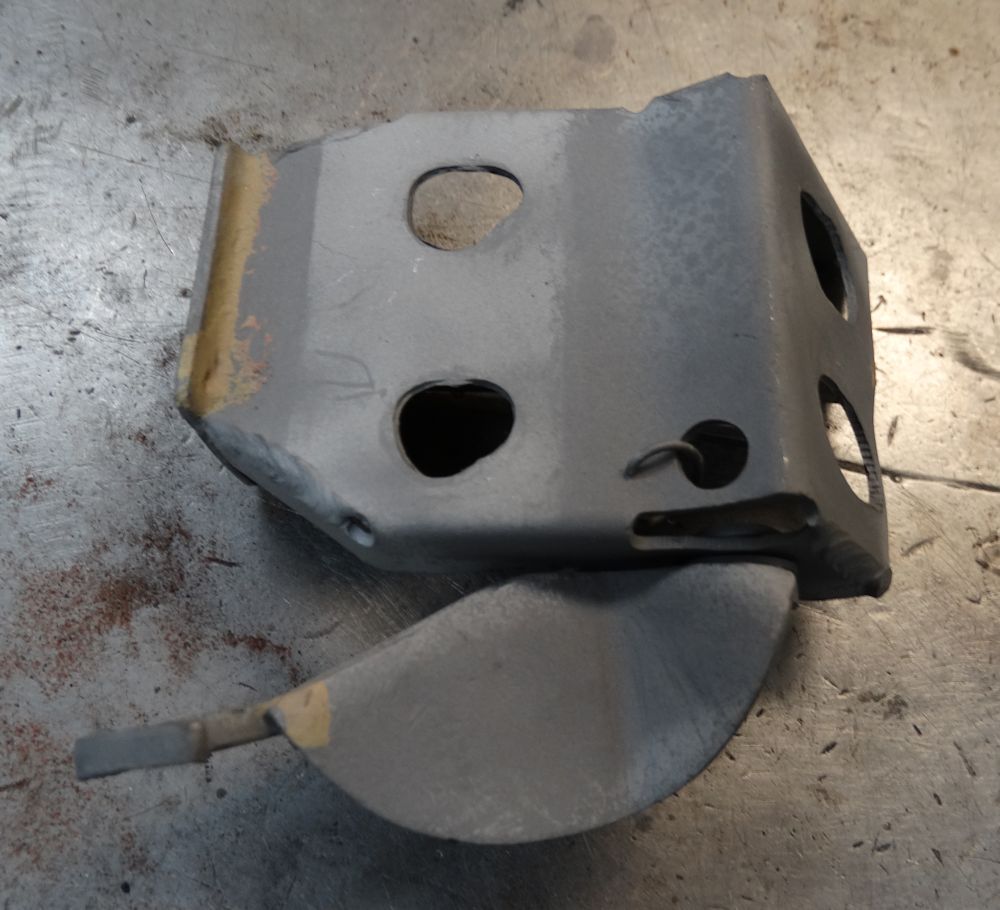
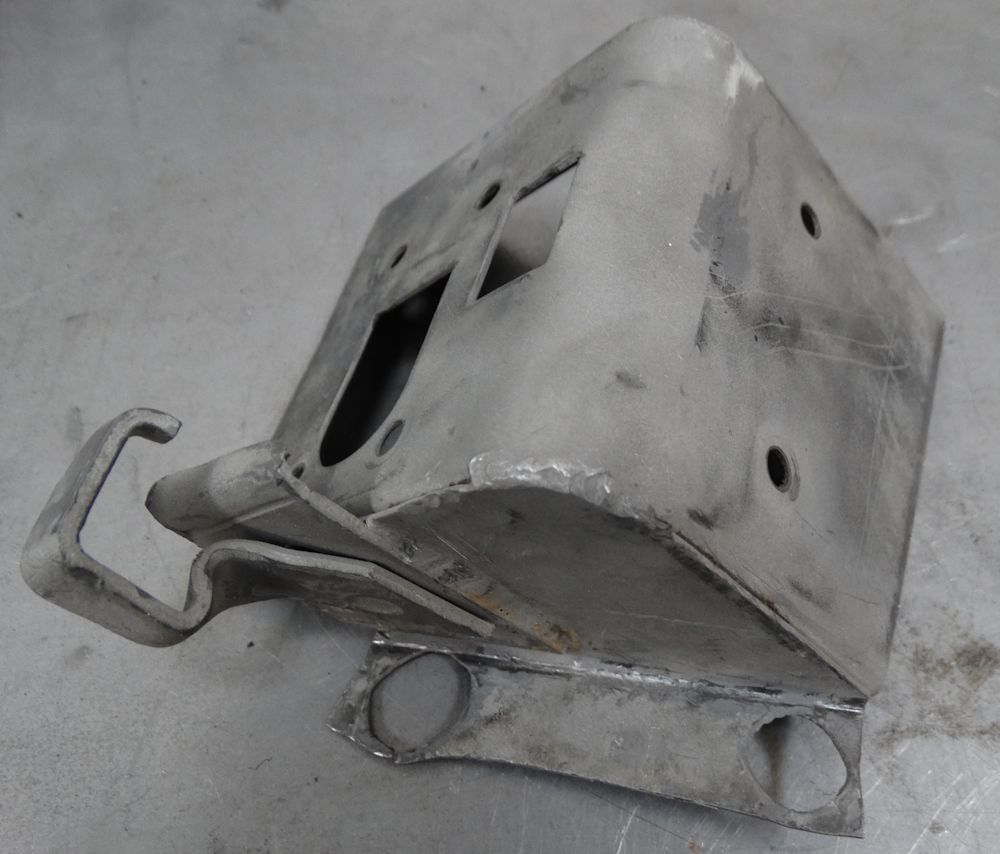
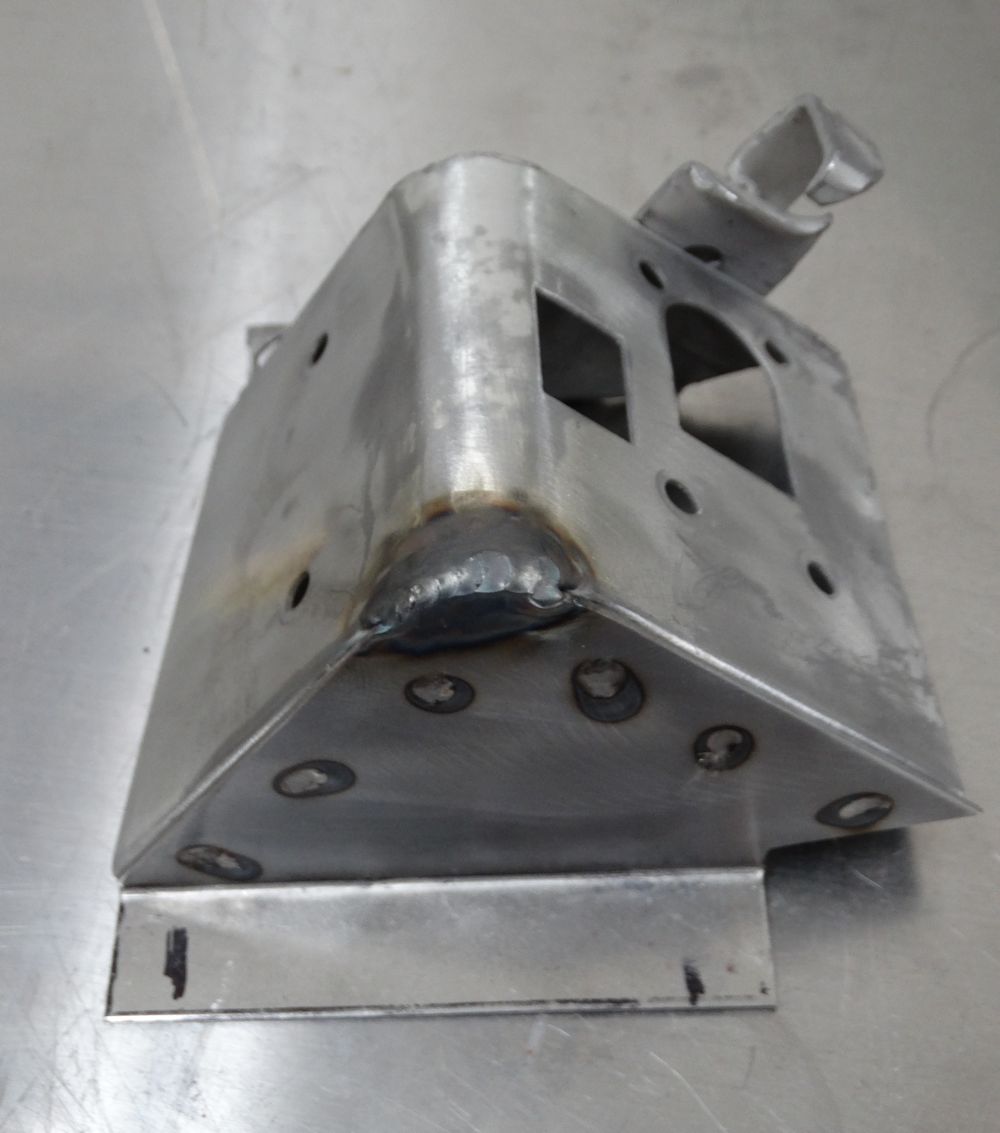
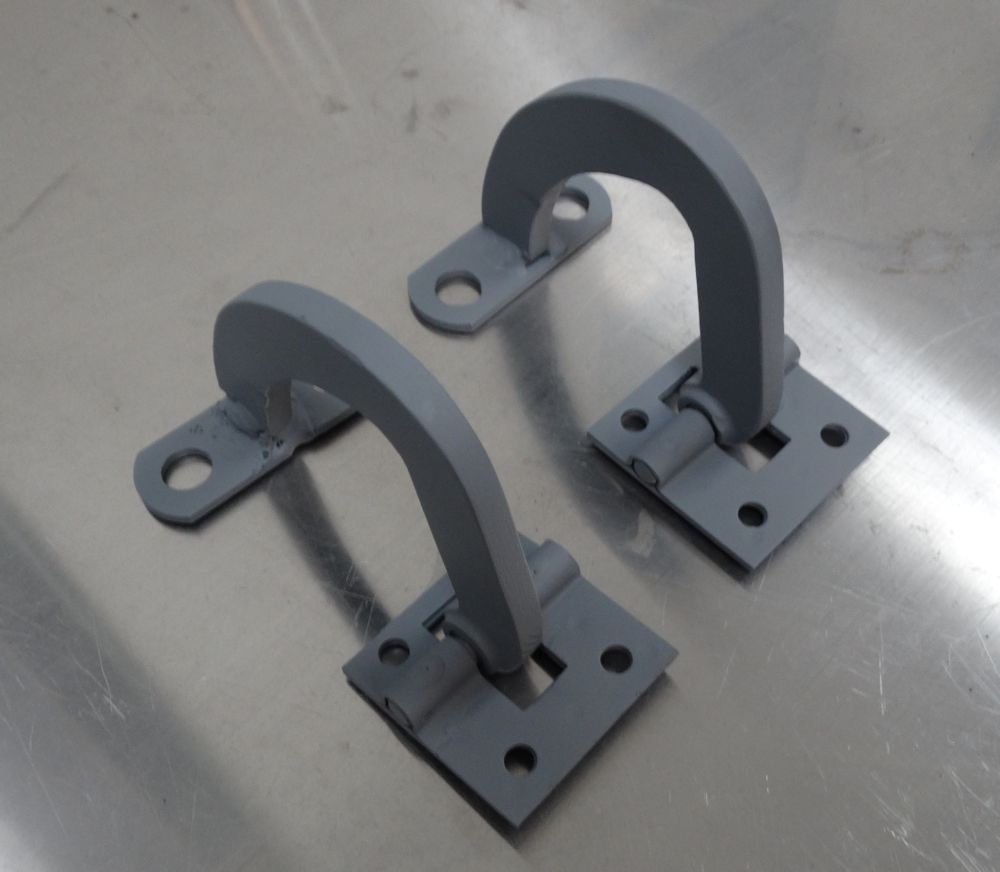
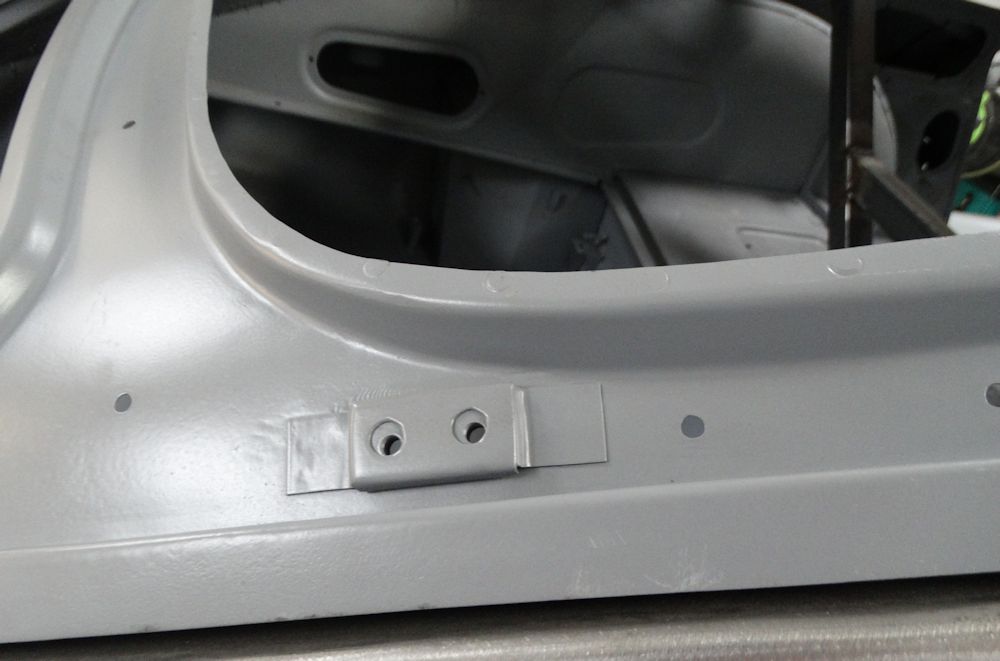
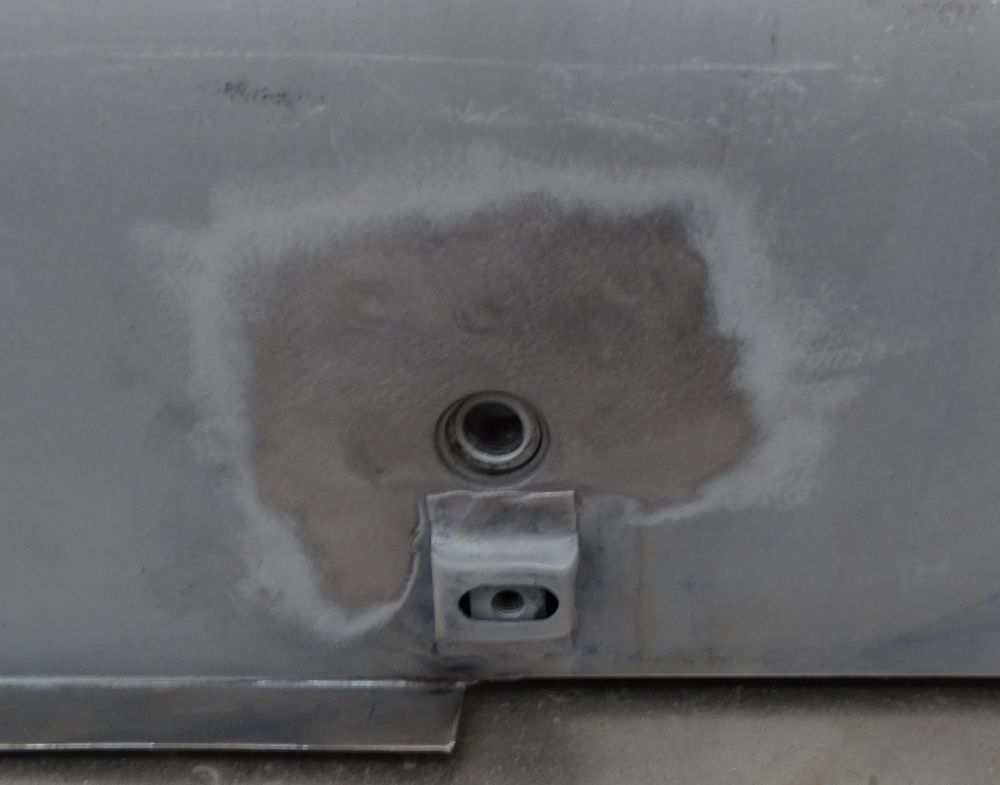
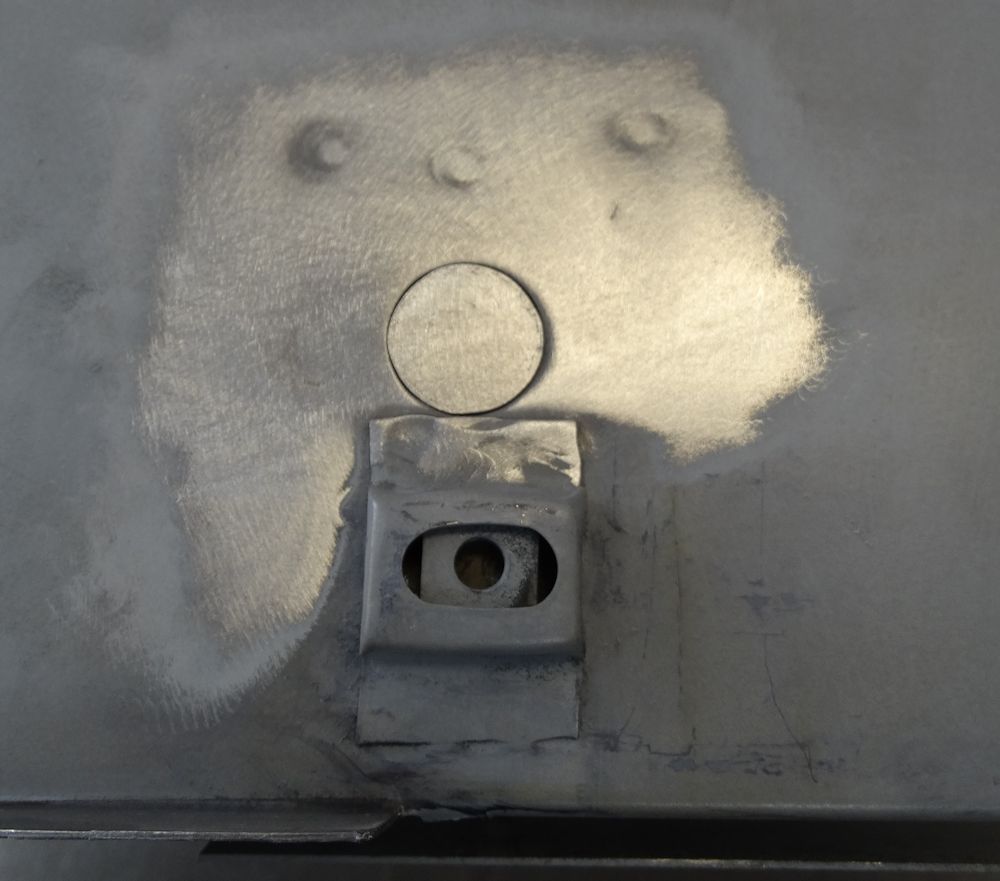
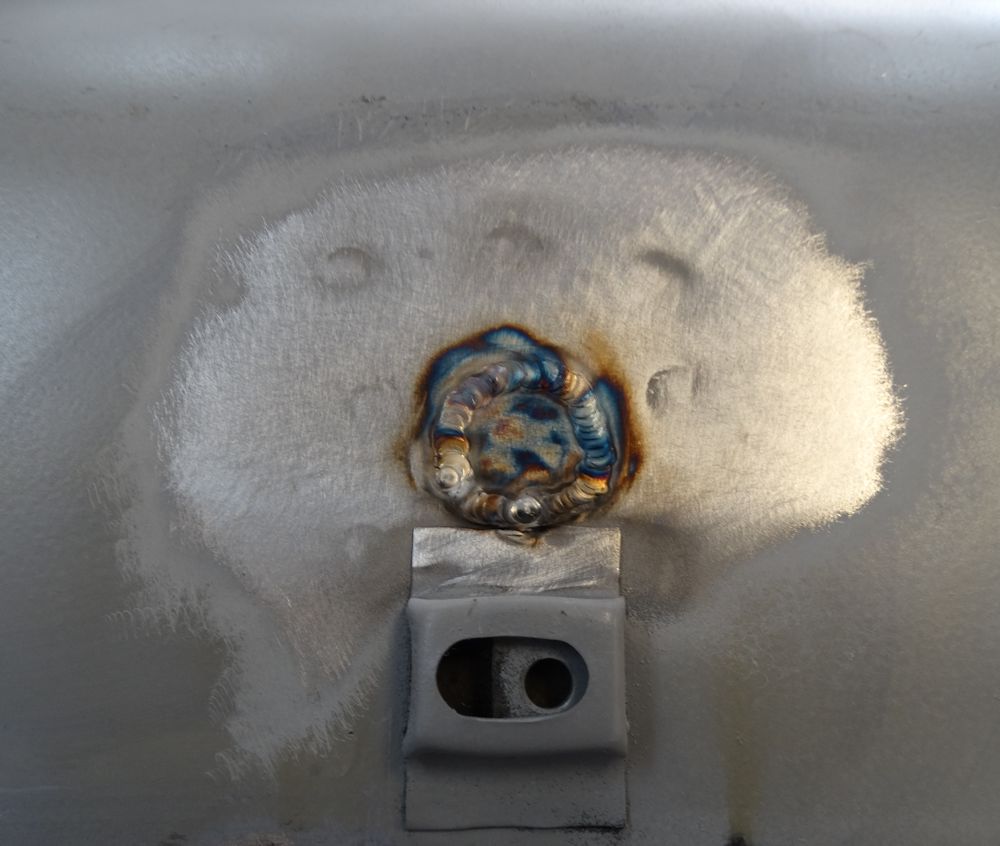
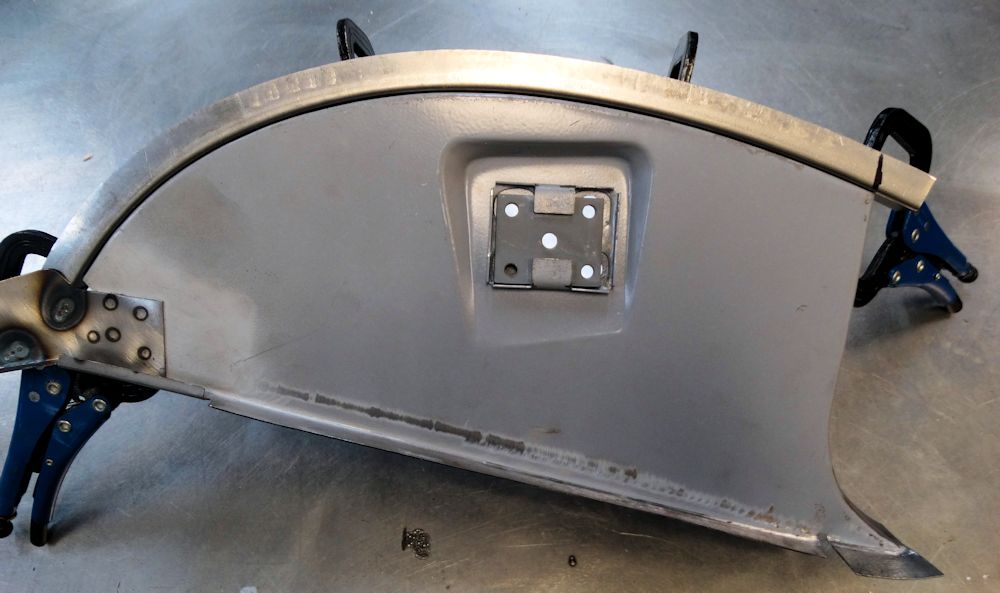
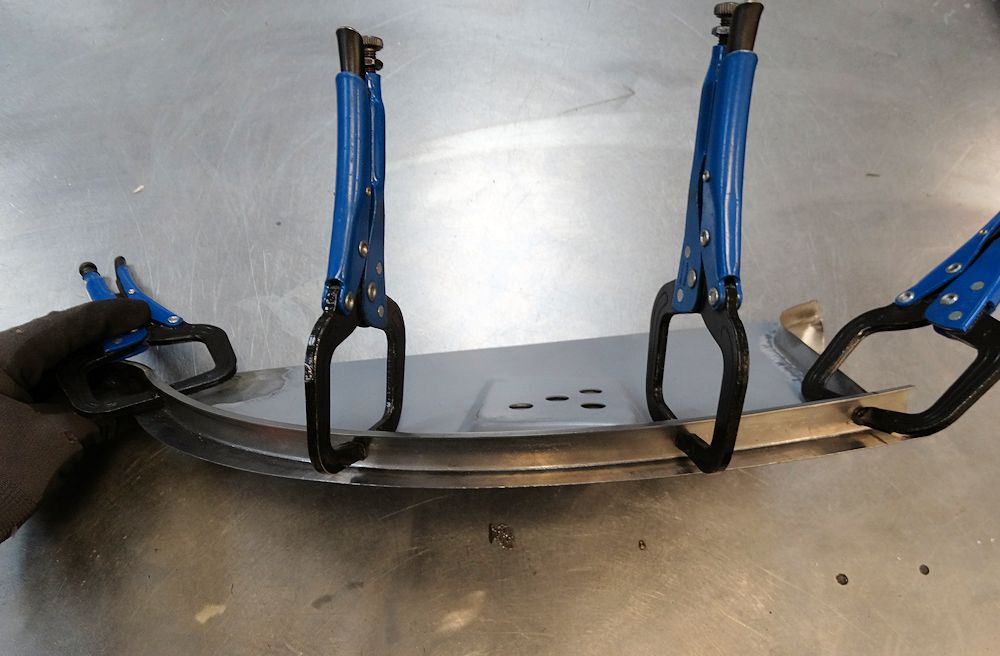
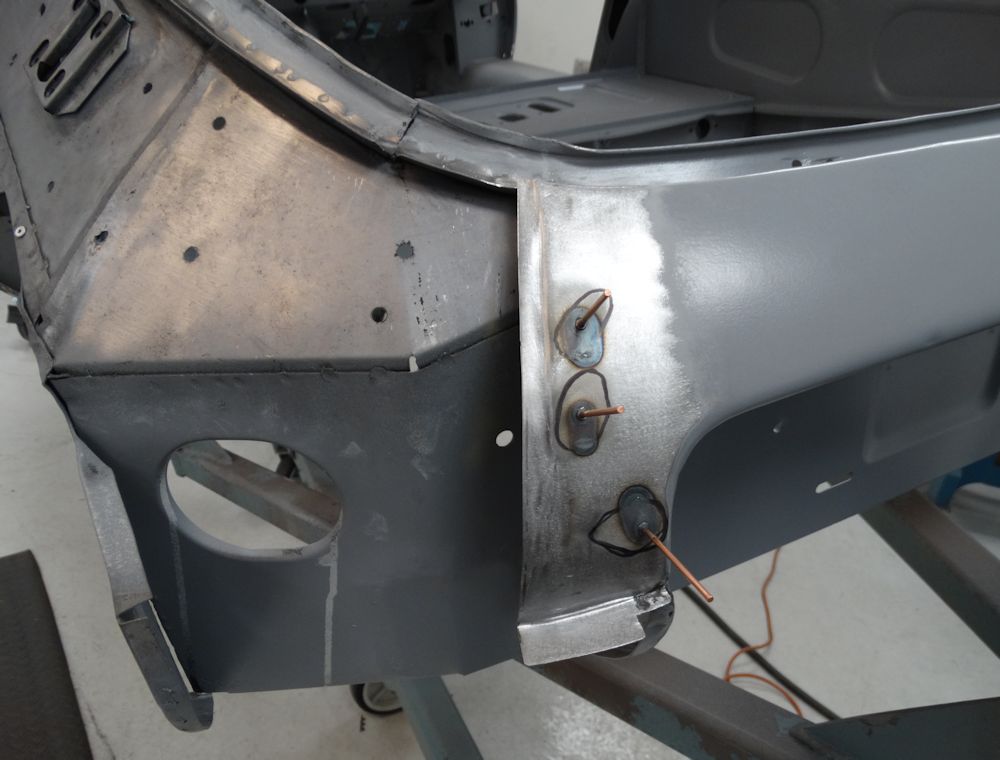
| Mounting point for outside bonnet latch
brackets |
Body number was originally written in yellow
crayon on the firewall behind washer bottle |
Time to put 885013 back on its wheels!
 |
 |
| First task is to install the engine subframes |
Original BEES bolts have been restored and
will be used during the assembly process |
 |
 |
| IRS has been completely rebuilt and will be installed after the engine frames |
|
 |
|
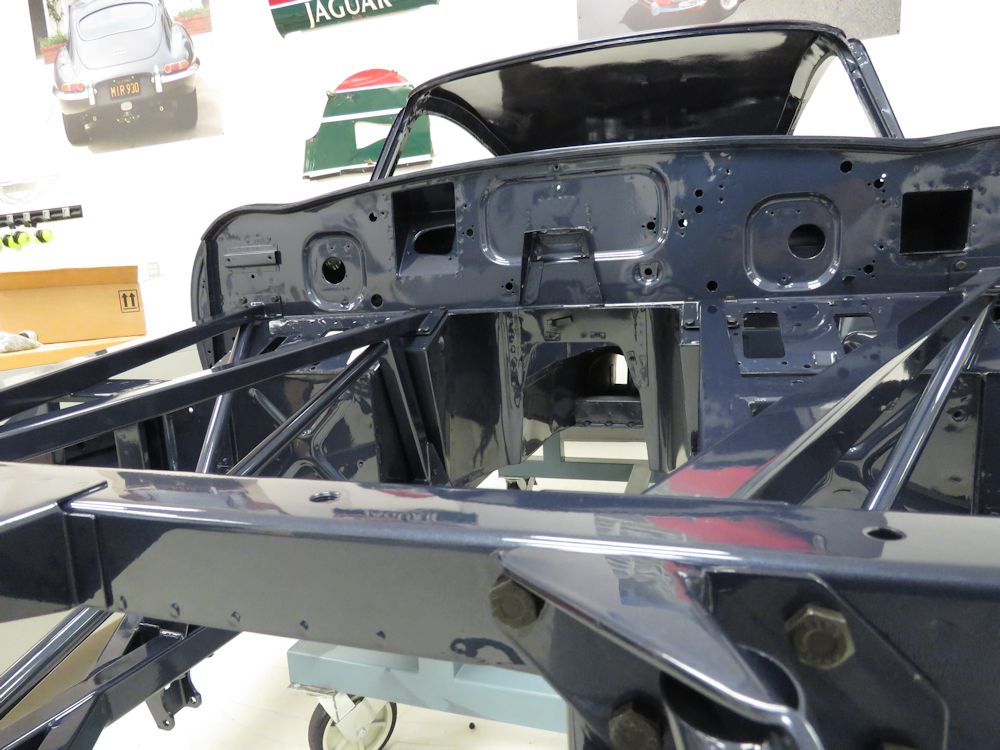
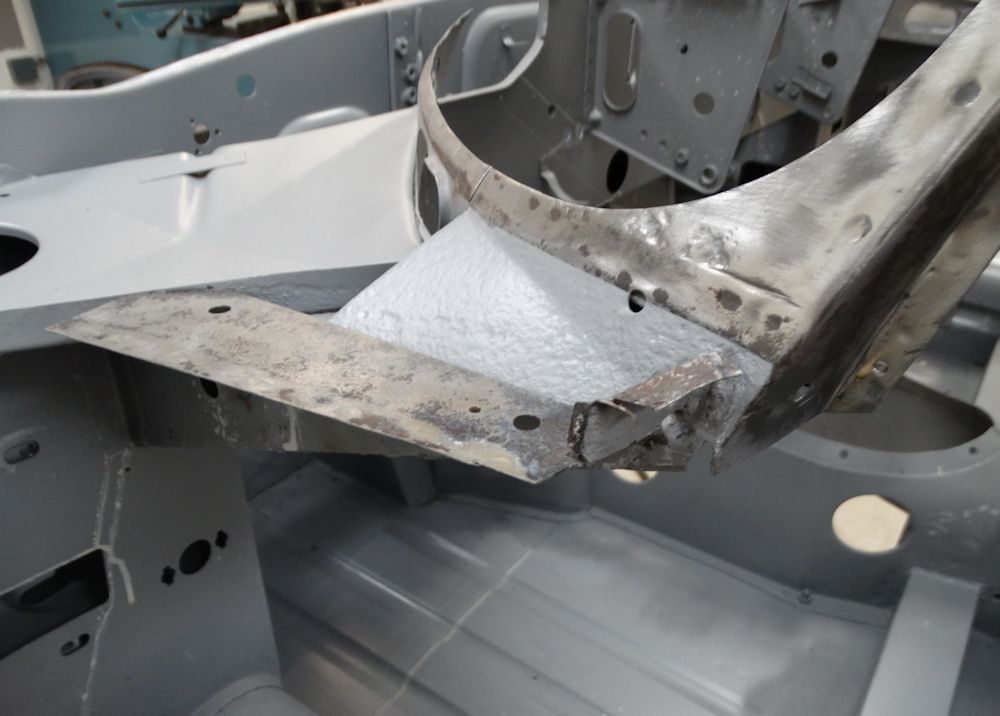
| Ray installing the first of the engine frames |
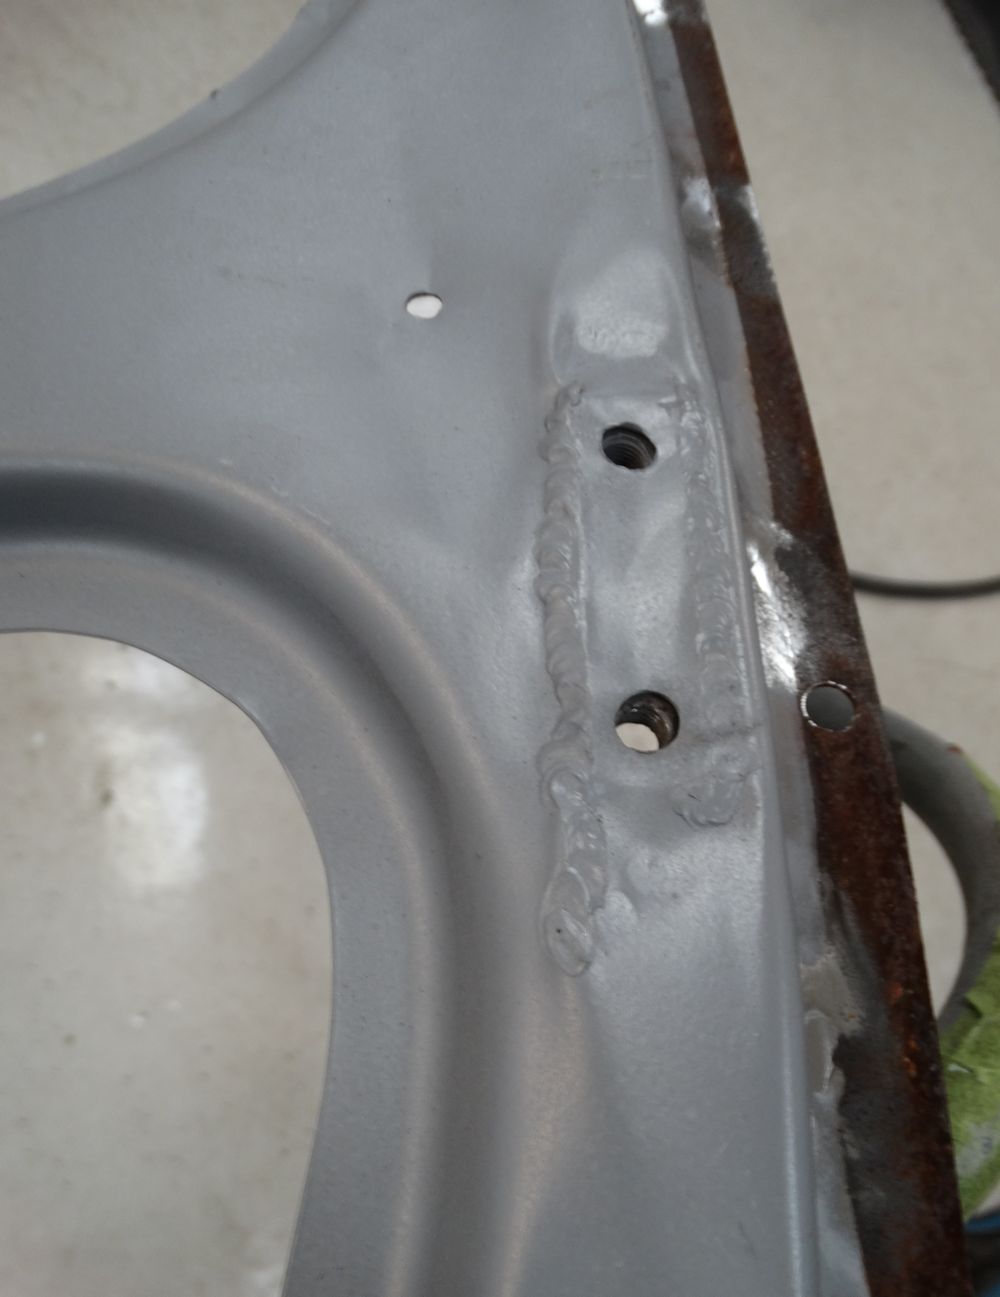
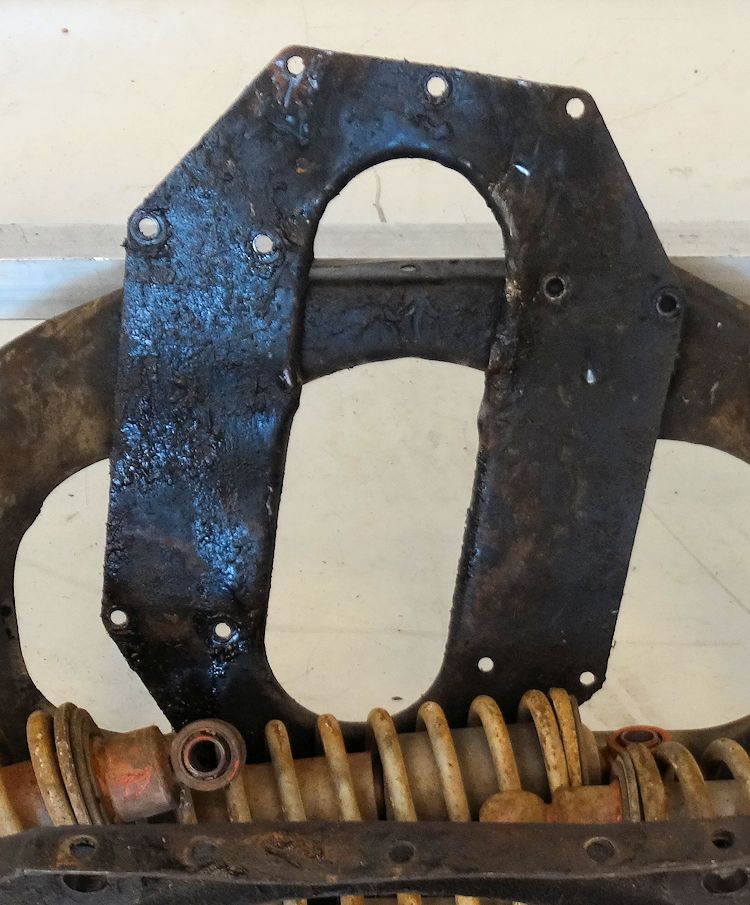
The following sequence of photos show some of the very early features in the painted bonnet hinge frame, as well as the restoration and installation of the all important body number tag on the firewall.
 |
 |
| Engine frames have now been painted |
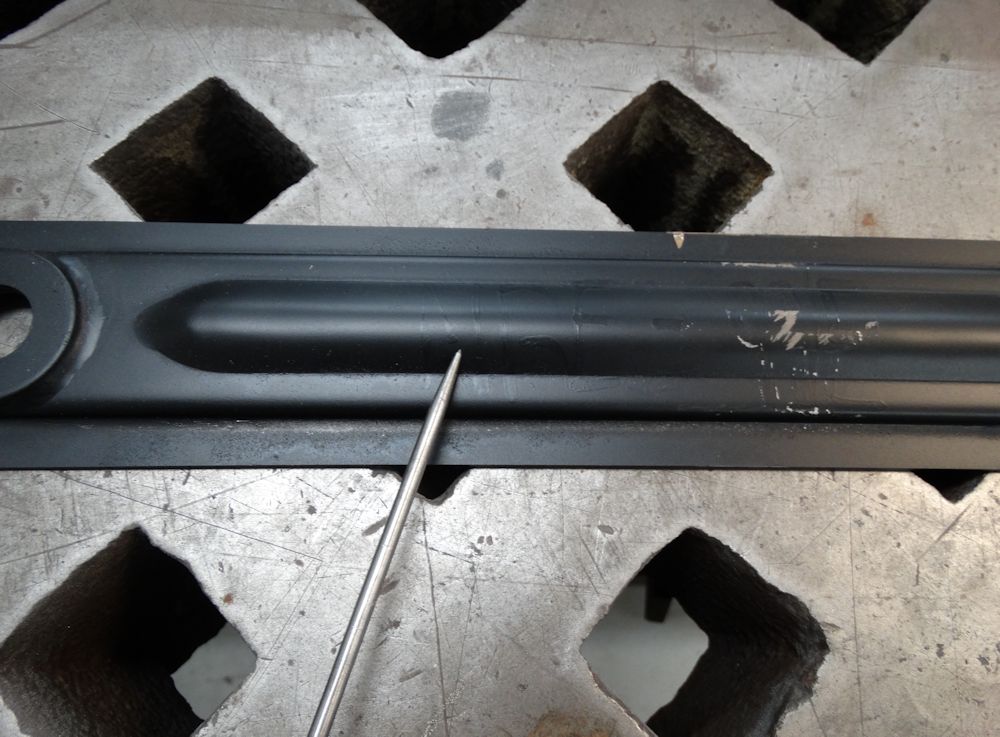
Note spot welded radiator support brace |
 |
 |
| Note no support flange at lower anchor points |
Note male threaded hinge post (nut in place to
keep threads clear of paint) |
 |
 |
| This is the original factory stamping on the picture frame |
Firewall body number tag still has original
paint, note no paint beneath the rivets |
 |
 |
| Unpainted on rear |
We will rivet the tag to the firewall prior to
painting it, as they did at the factory 56 yrs ago |
 |
 |
| Rear of tag will remain unpainted, per
original |
Jake rivets the body tag back on the firewall |
 |
 |
| Firewall now painted Opalescent Dark Blue |
|
 |
 |
| Body tag painted at the same time as the
firewall |
The same tag photographed before the restoration got underway |
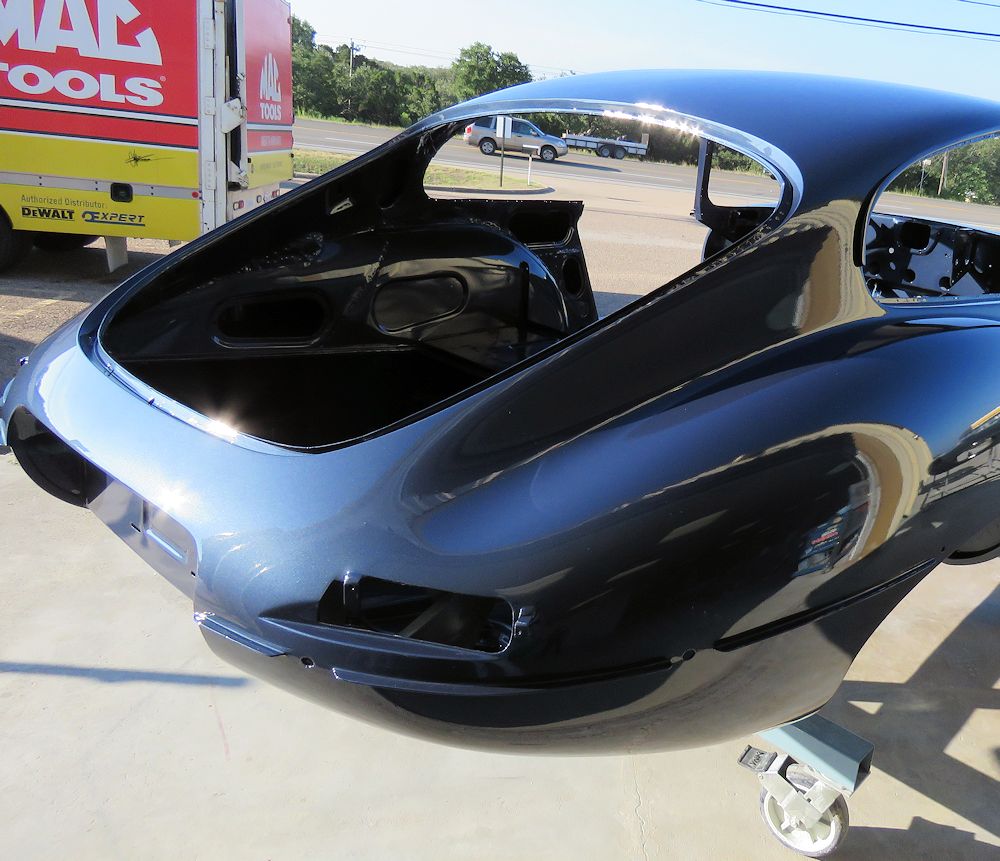
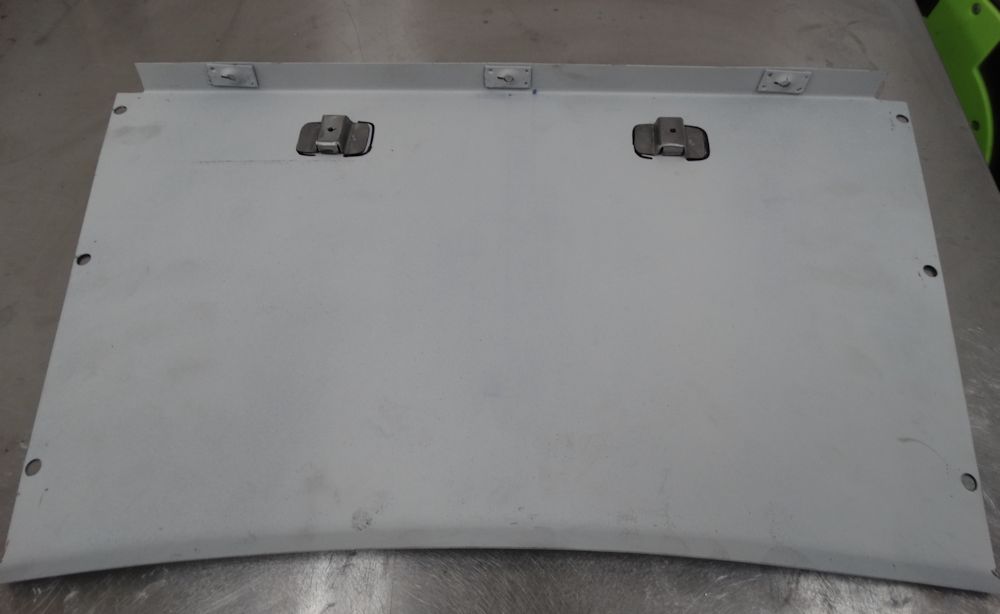
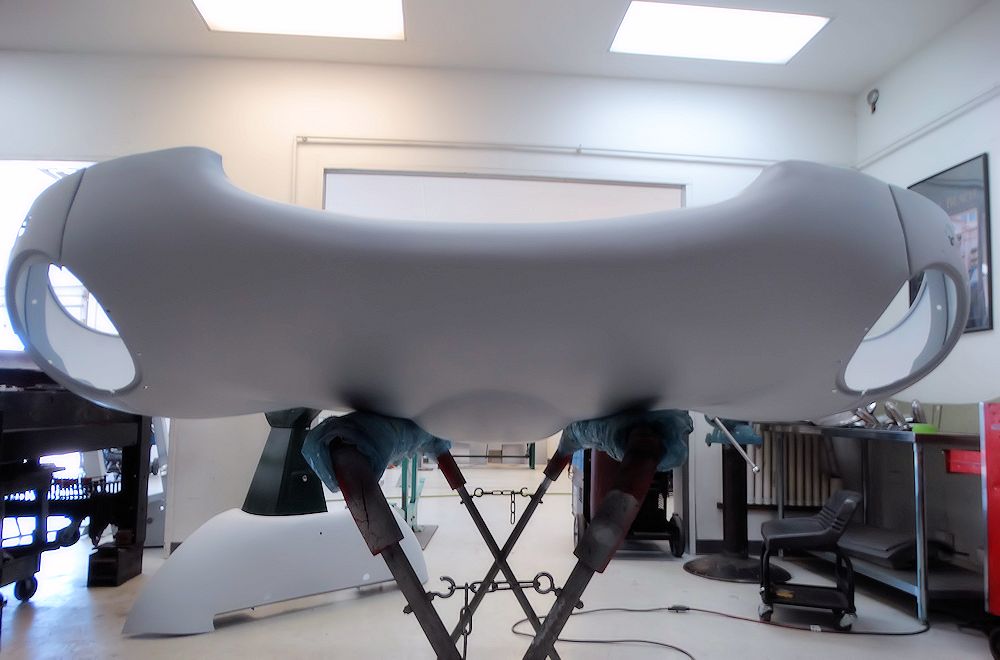
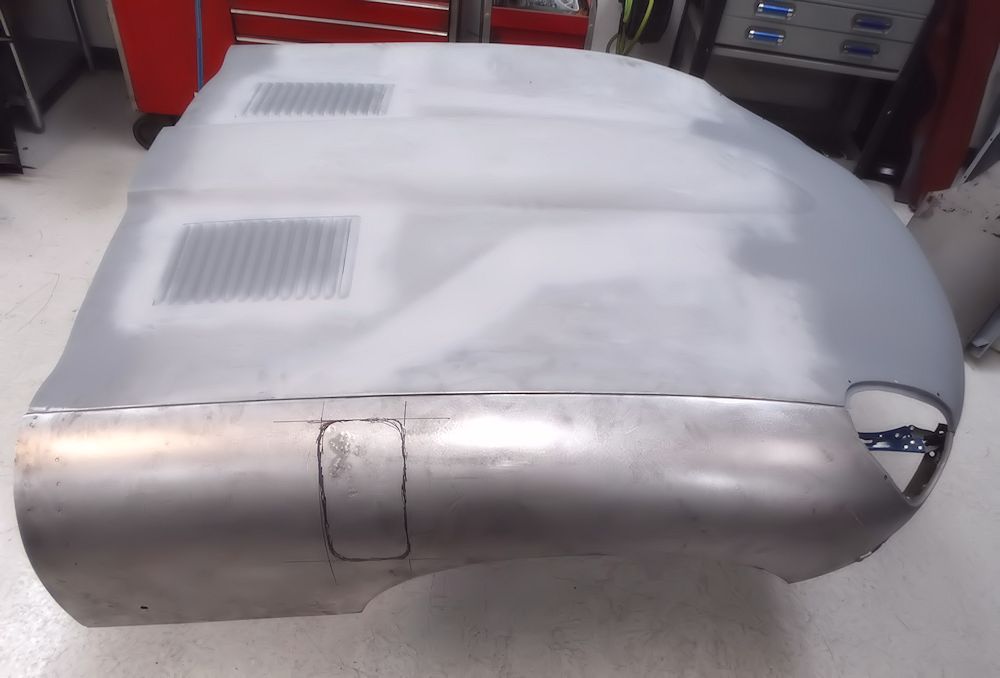
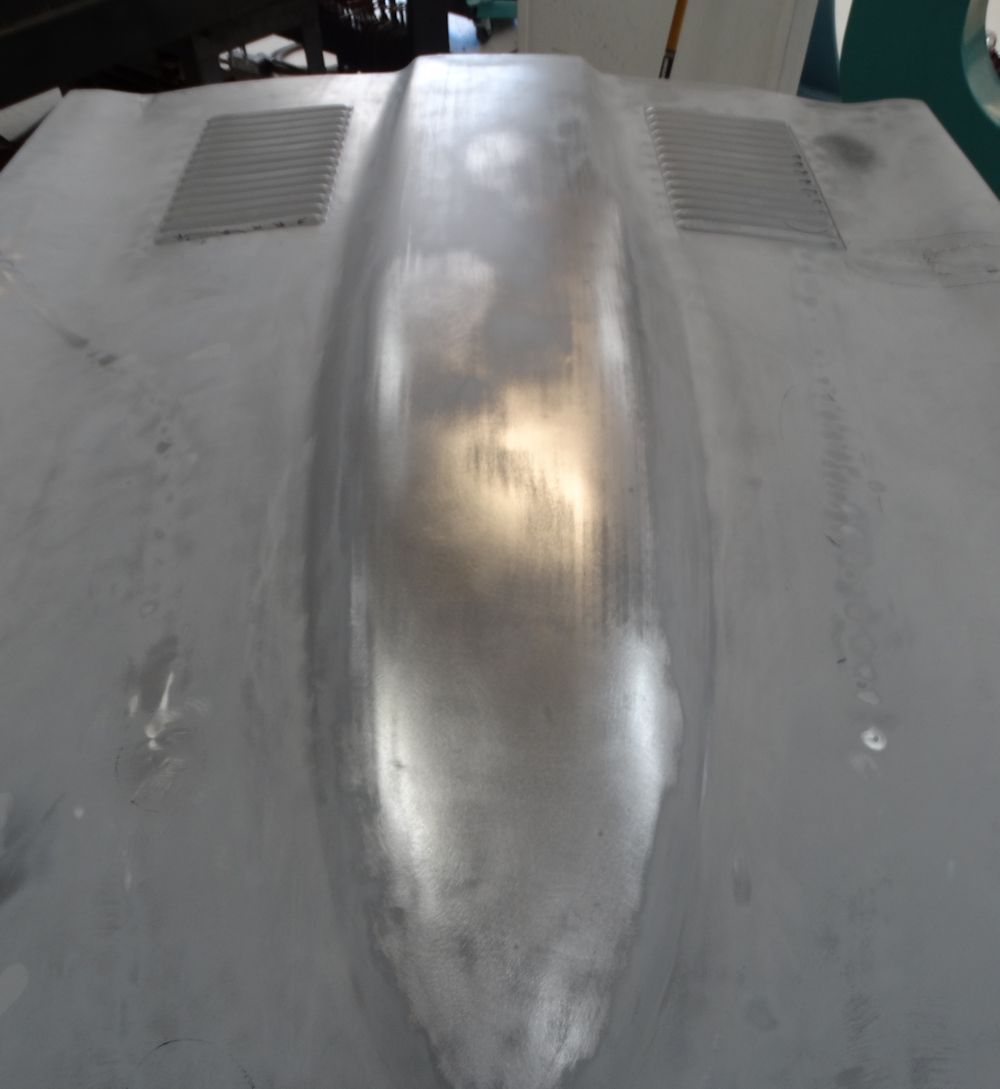
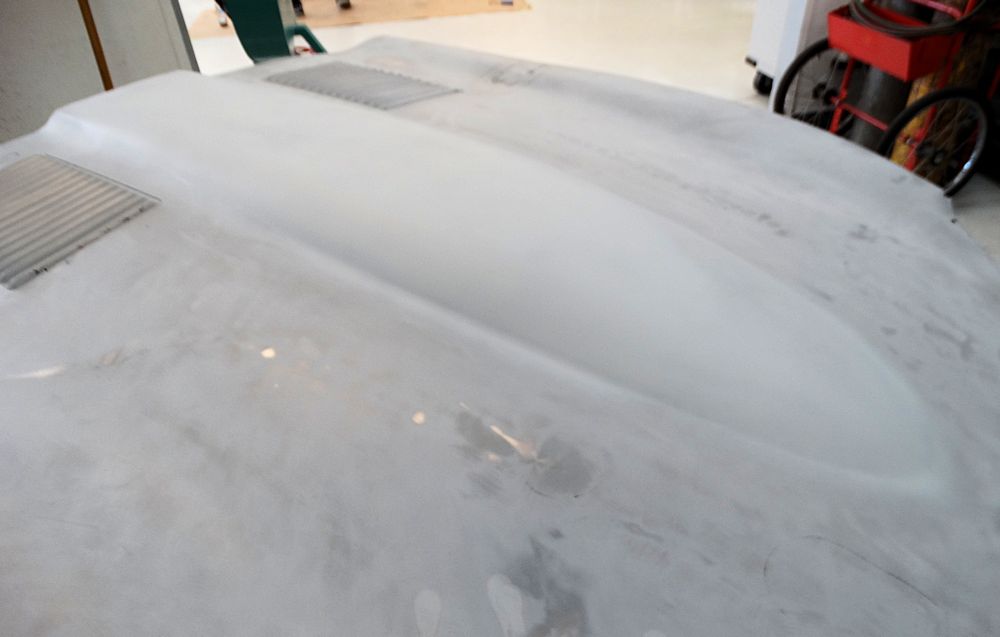
The bonnet and tailgate have now been completed. A huge amount of time and effort went into saving the bonnet for this car as 885013 is believed to be one of just three of the outside latch coupes that still has its original bonnet.
 |
 |
 |
 |
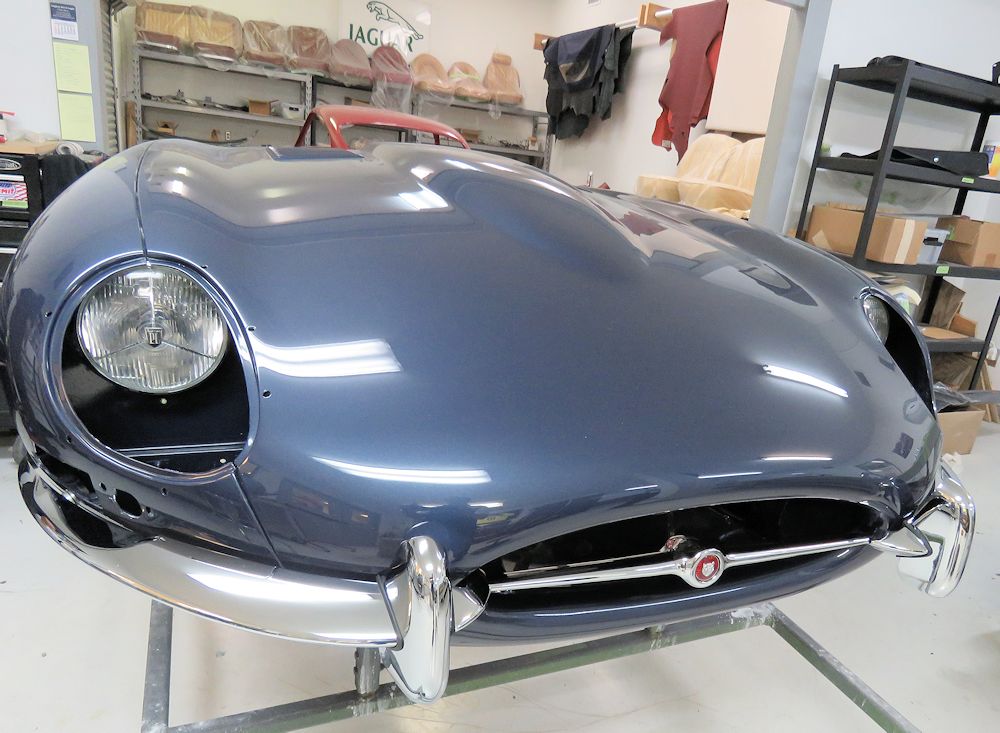
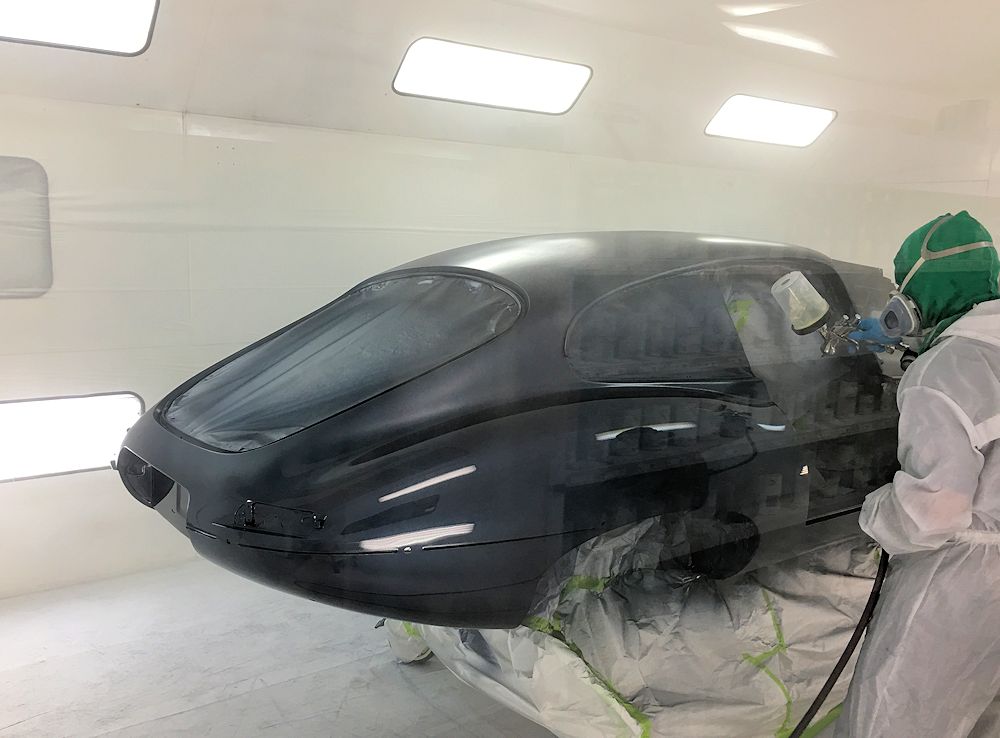
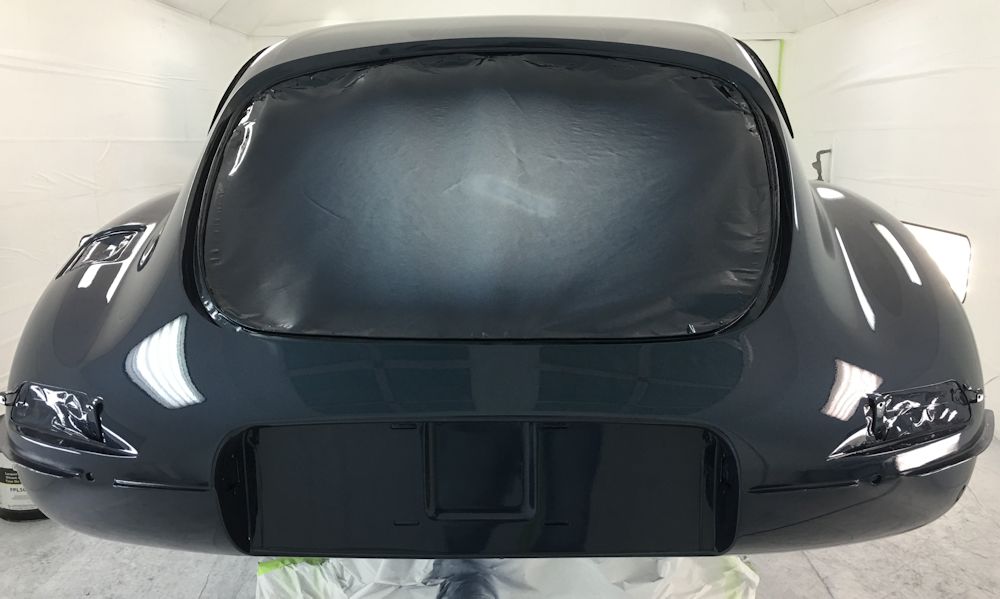
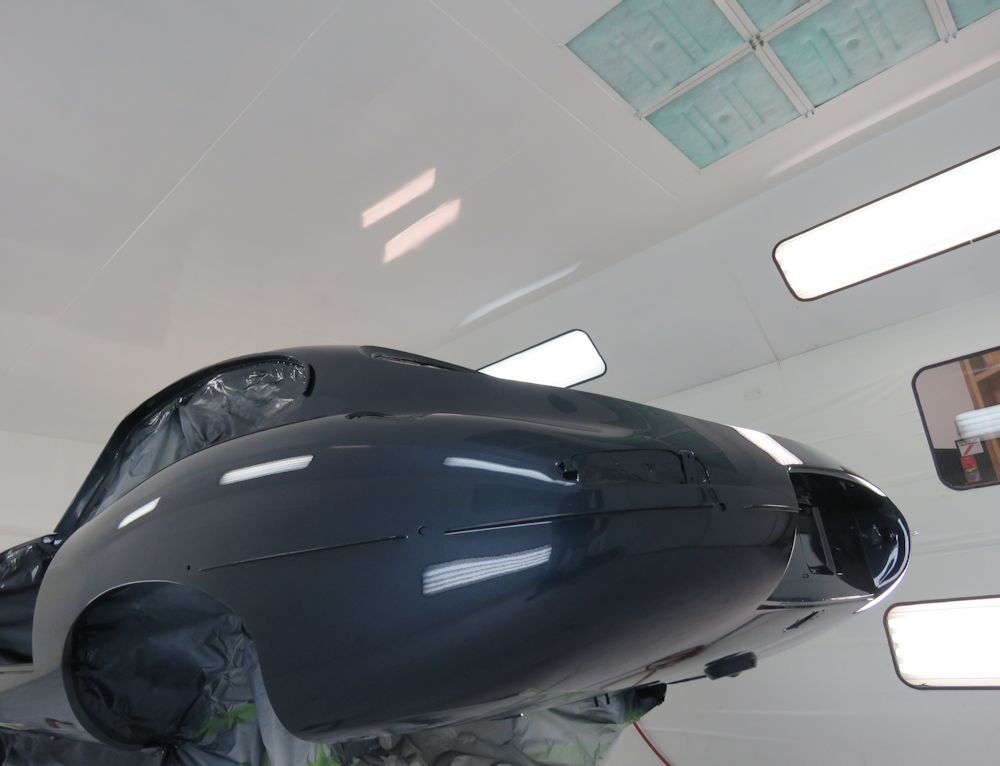
Opalescent Dark Blue is a color that really comes alive in the sunshine.
 |
 |
 |
 |
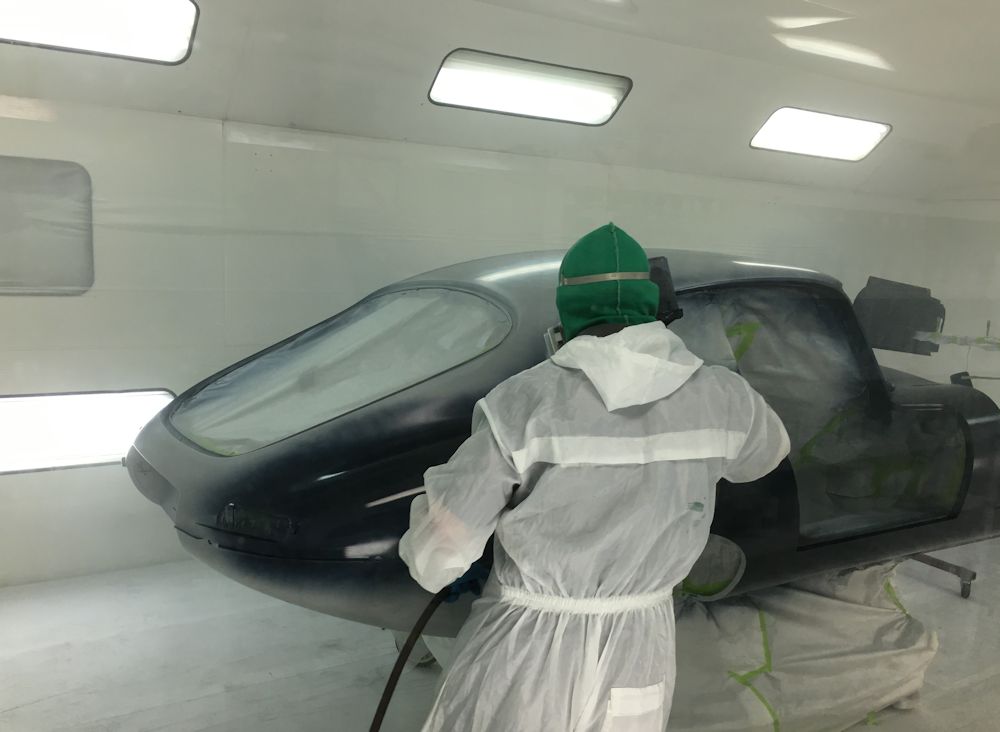
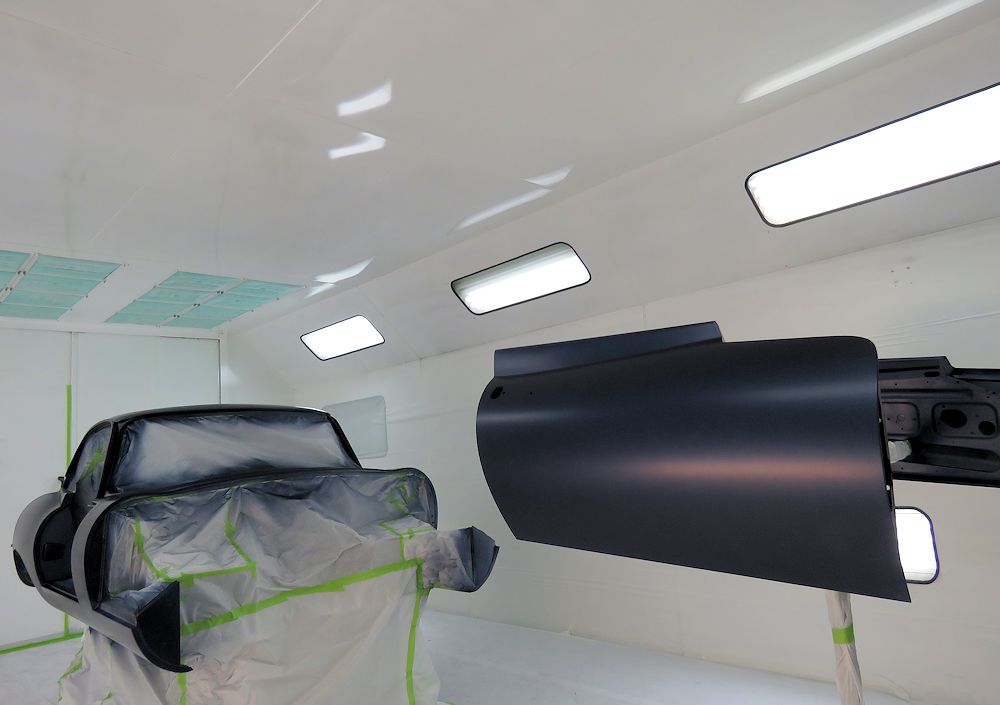
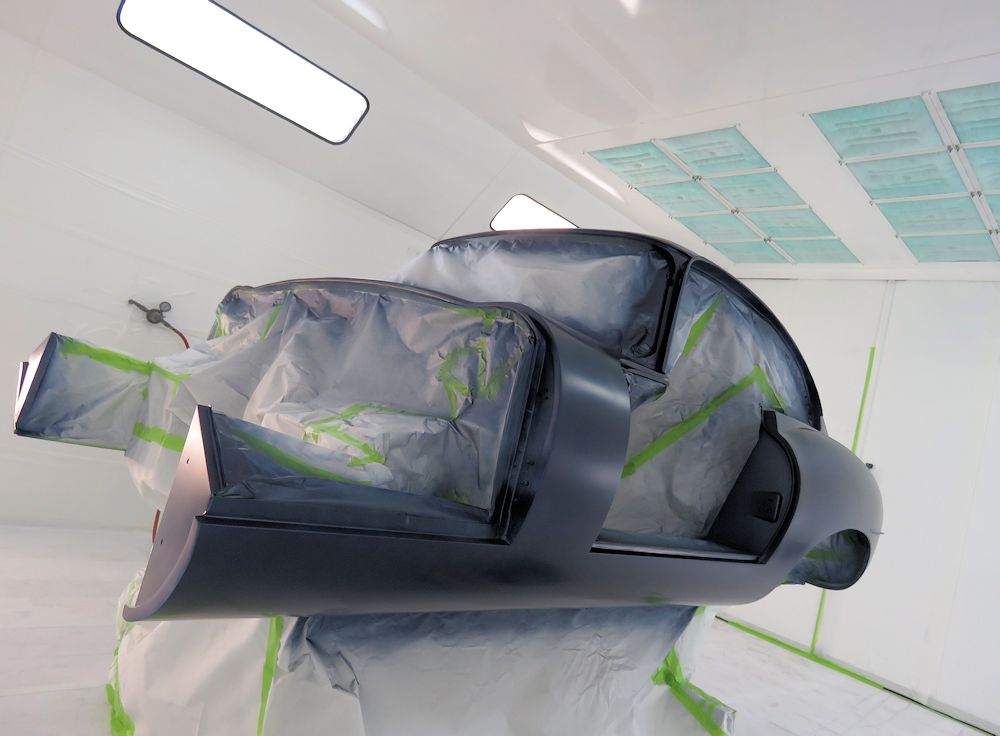
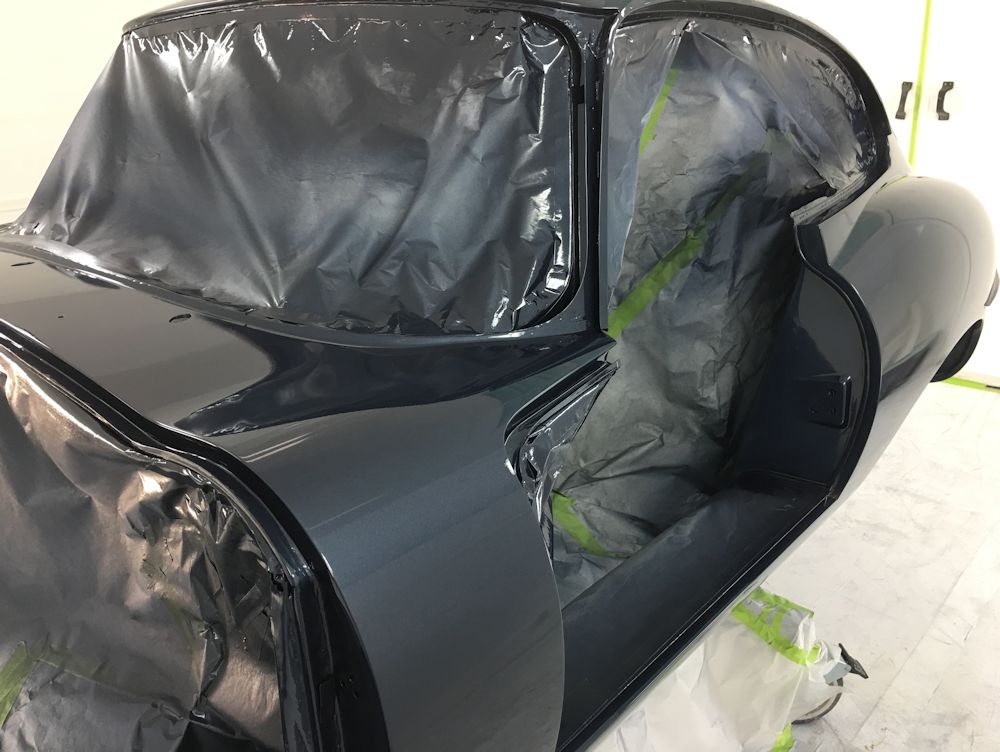
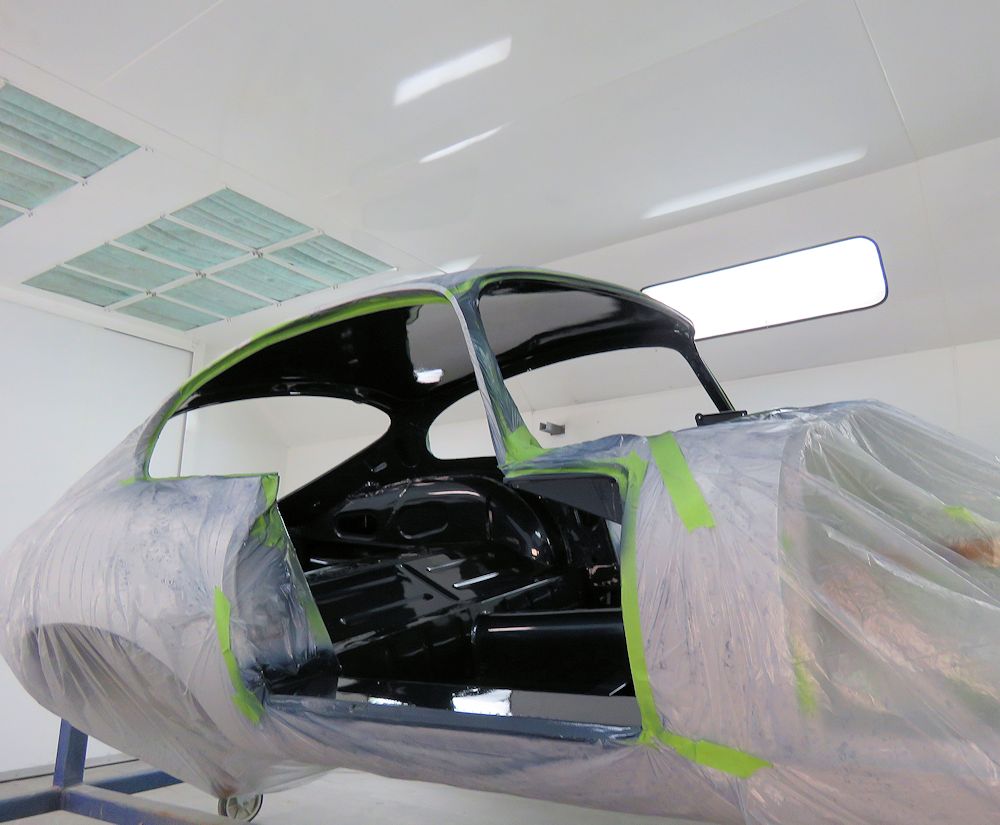
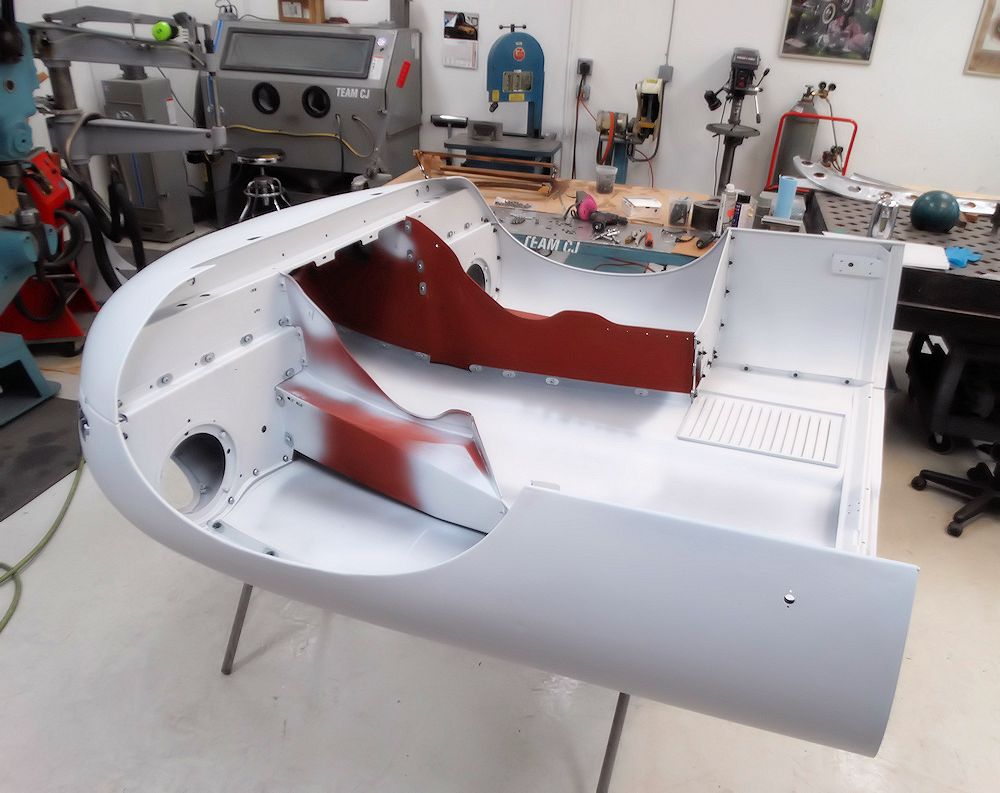
This afternoon Gerardo is painting the main body and doors.
 |
 |
| The view through one of the booth windows as Gerardo applies the first coat |
Main body and doors today, bonnet and
tailgate will be painted tomorrow |
 |
 |
| The first of four coats of Opalescent Dark
Blue base coat |
|
 |
 |
| Final pass of Opalescent Dark Blue base
applied, now time for the clear coat |
First pass of clear going on, viewed through the booth window |
 |
 |
| With one coat of clear applied, the true
Opalescent Dark Blue color begins to appear |
|
 |
 |
| Two more coats will now be applied... |
|
 |
 |
| All three coats of clear now applied |
|
 |
 |
 |
 |
| Bonnet and tailgate tomorrow |
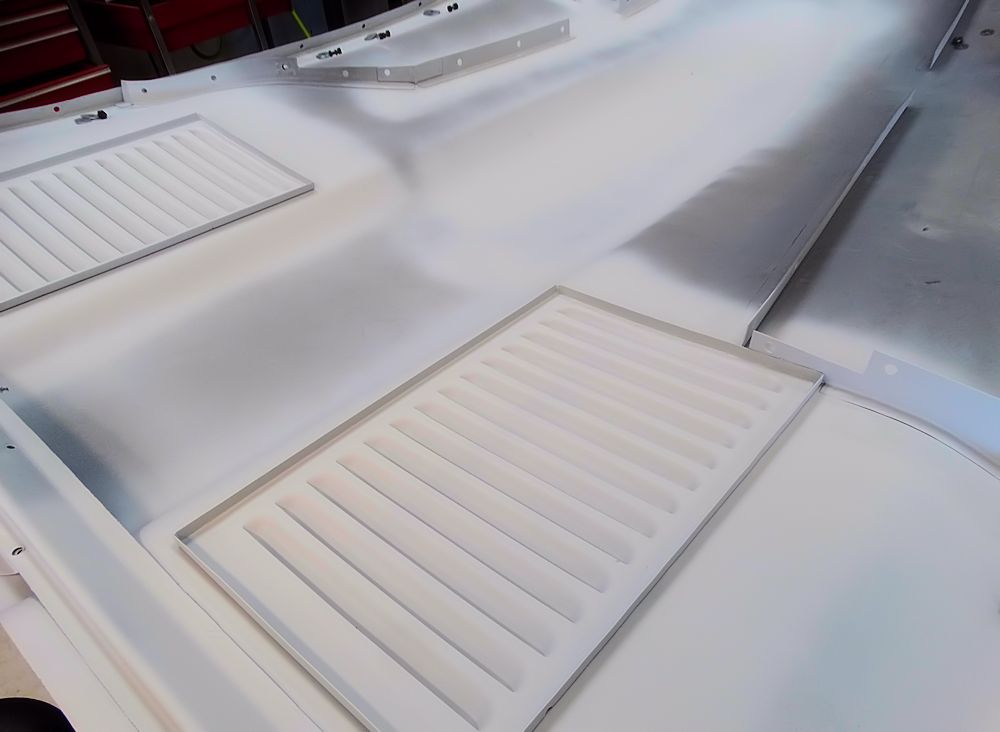
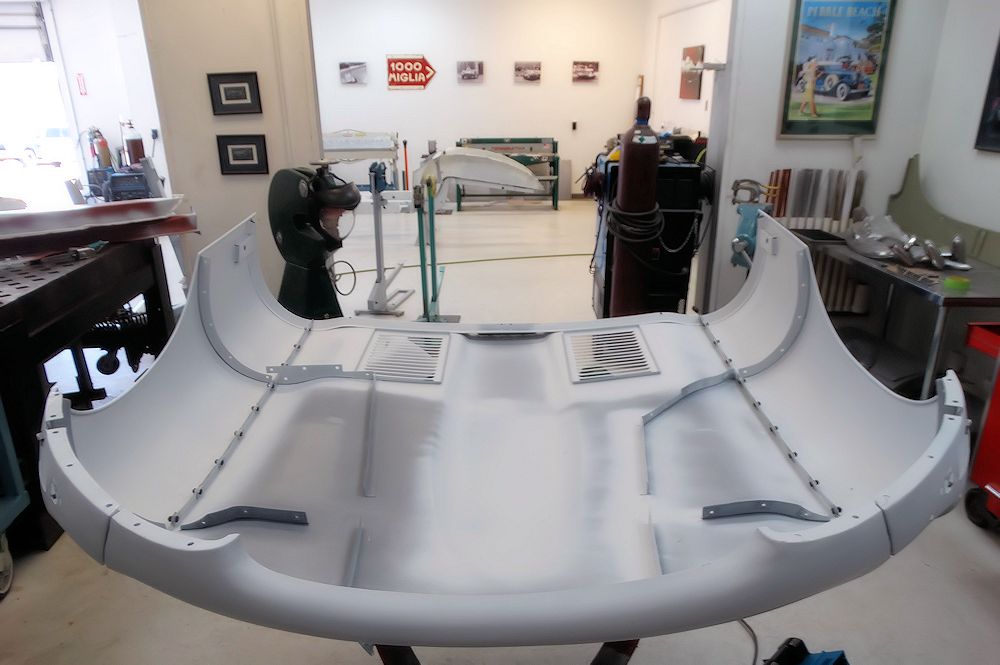
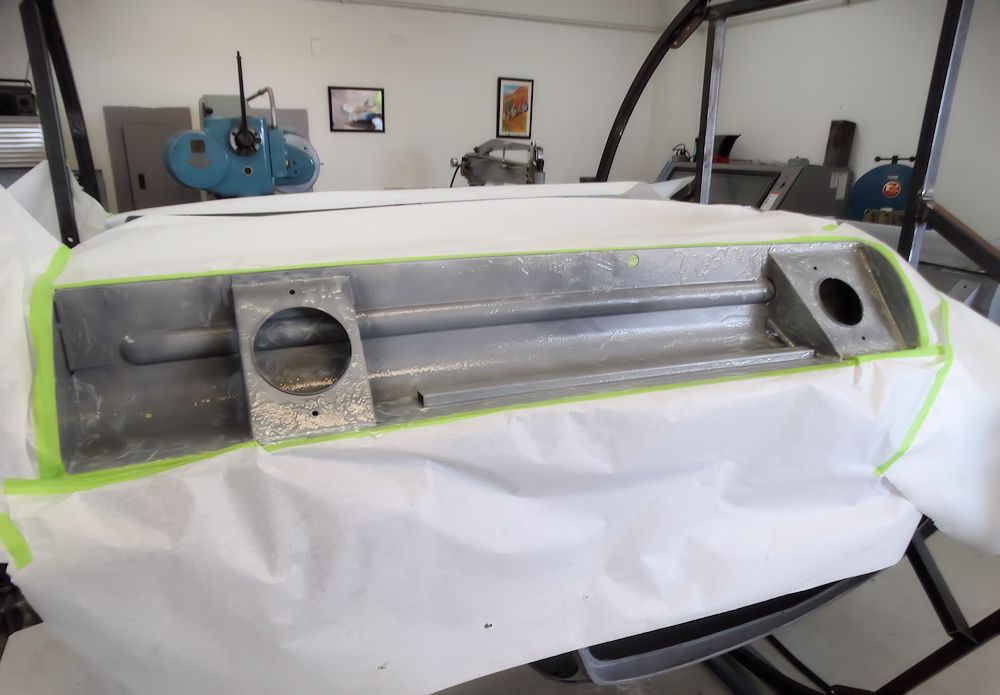
Painting the underside of the bonnet and the main floors.
 |
 |
| A huge amount of work went into preserving the original outside latch bonnet |
|
 |
 |
| Original bonnet brace was stamped with the
body number at the factory |
|
 |
 |
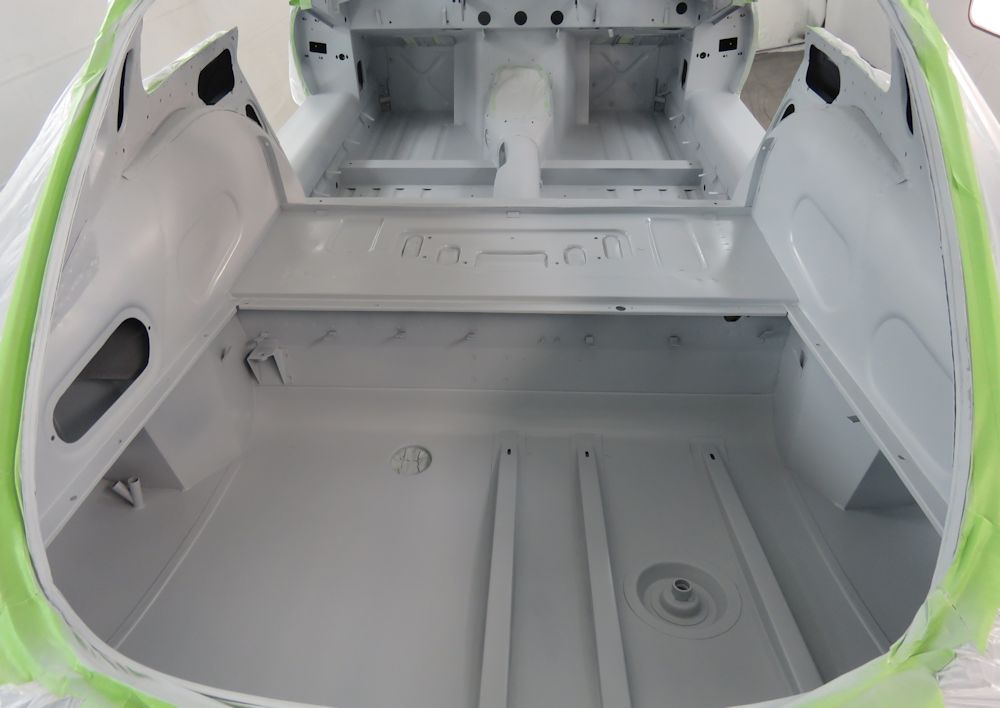
| Body will now be placed on one of the
roll-around jigs to paint the outer panels |
|
 |
 |
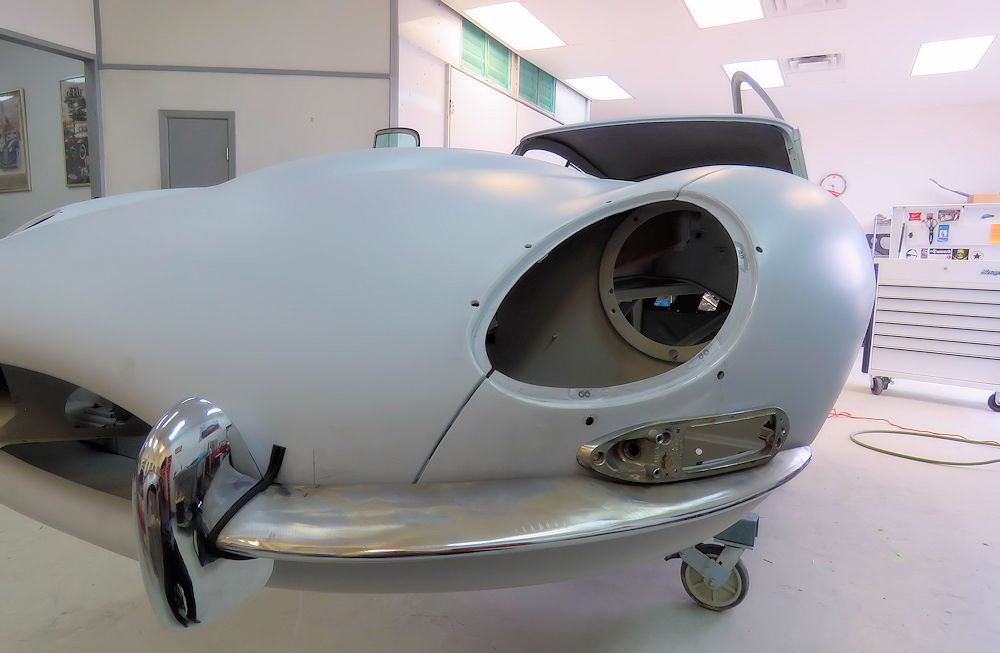
It is finally time to apply the first of the Opalescent Dark Blue paint.
 |
 |
 |
 |
 |
 |
 |
 |
 |
 |
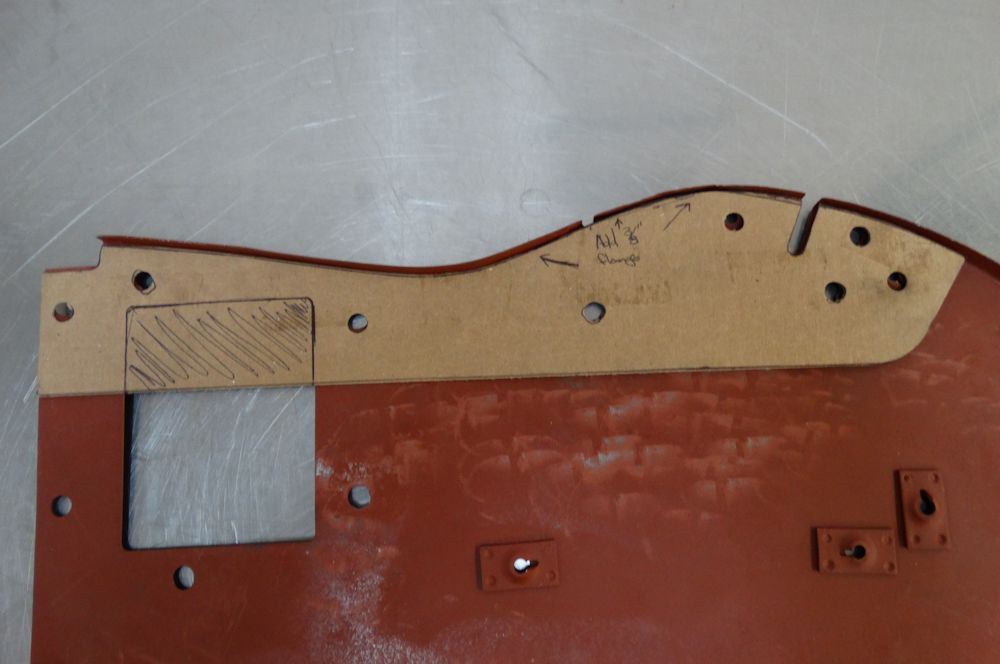
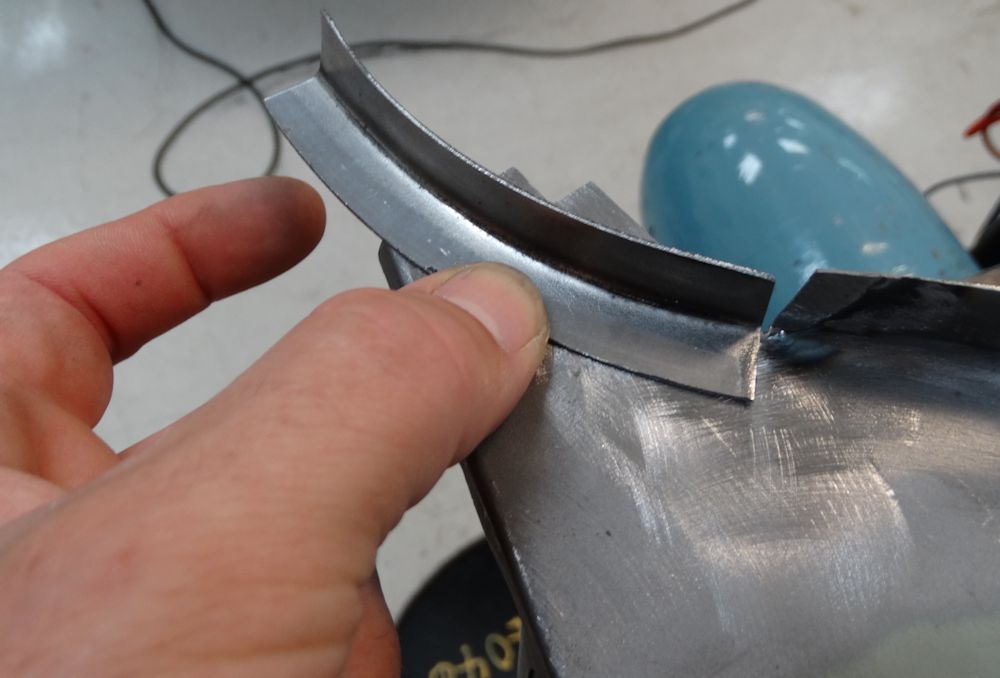
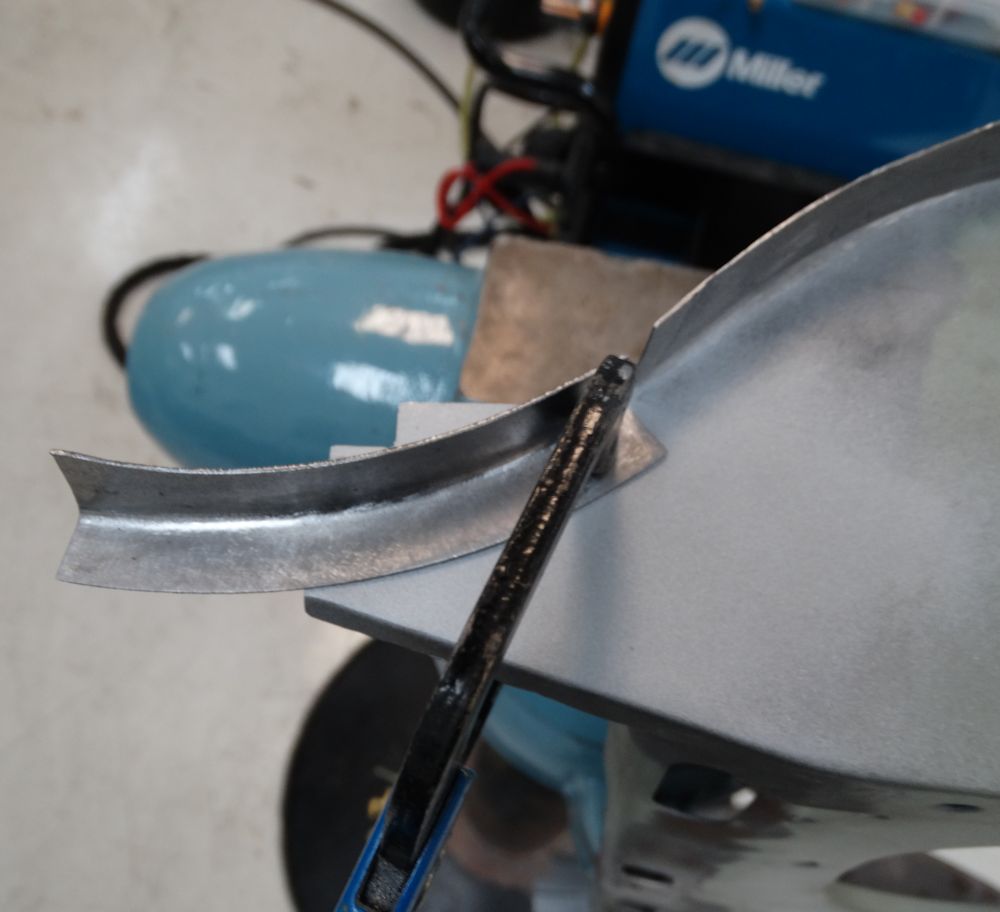
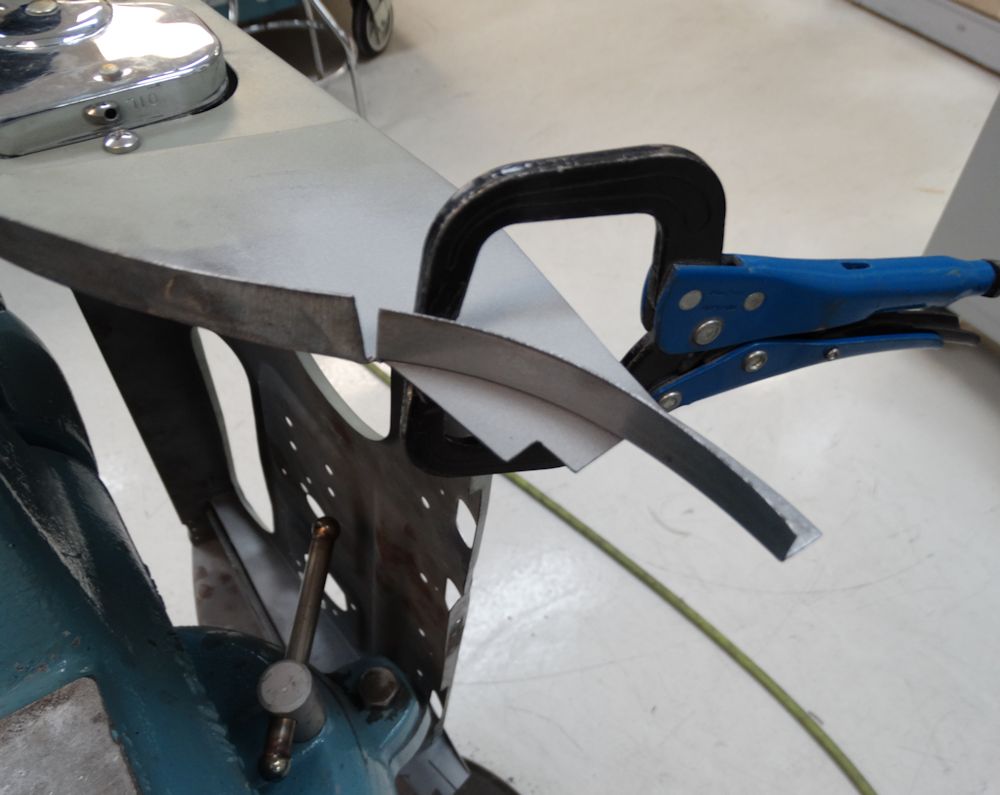
The following images show the difference between very early bonnet hinges and those fitted to E Types beyond the first few months of production.
 |
 |
| Using Tom Haddock's excellent originality book as a reference |
Early hinge at bottom of this image is clearly
a different shape to later hinge |
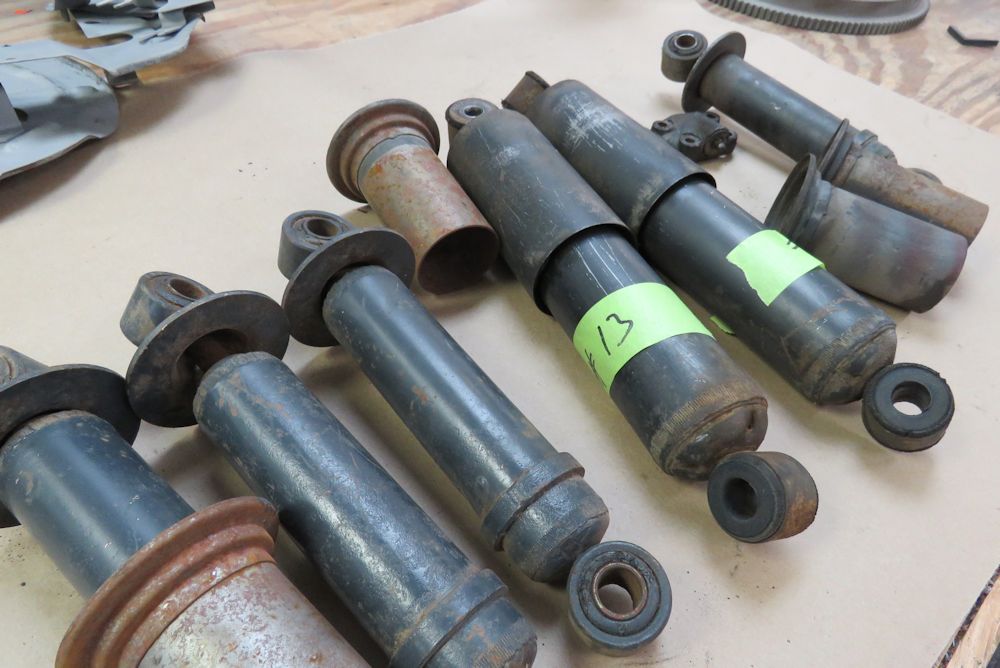
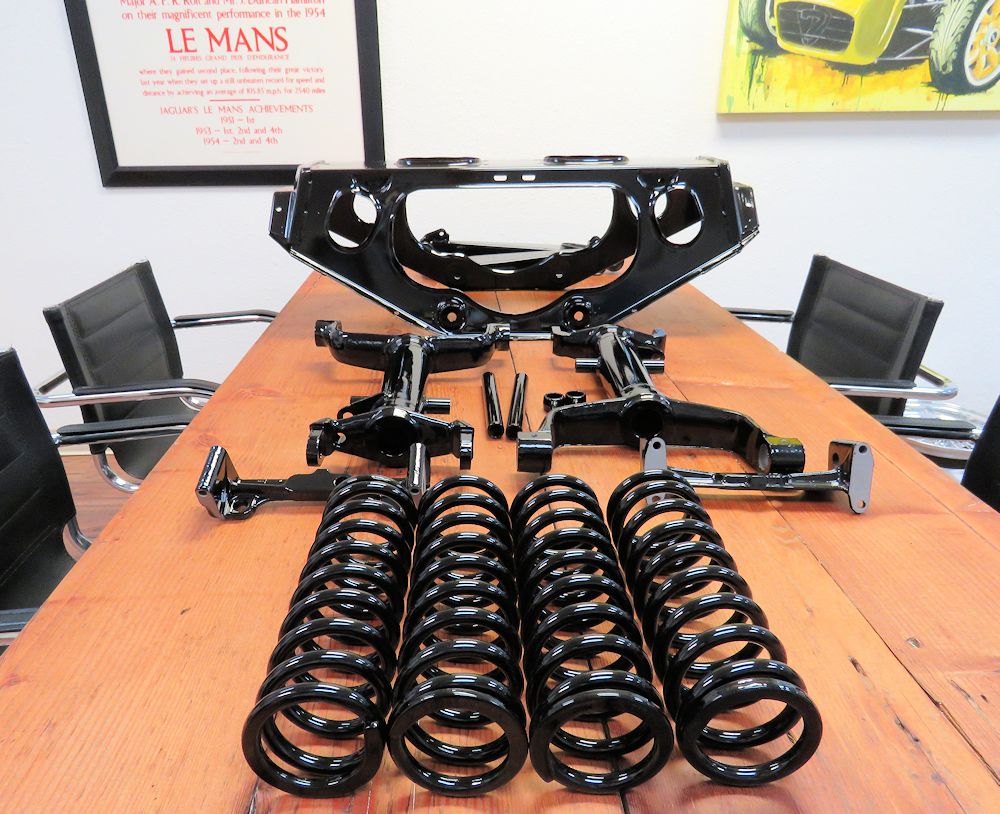
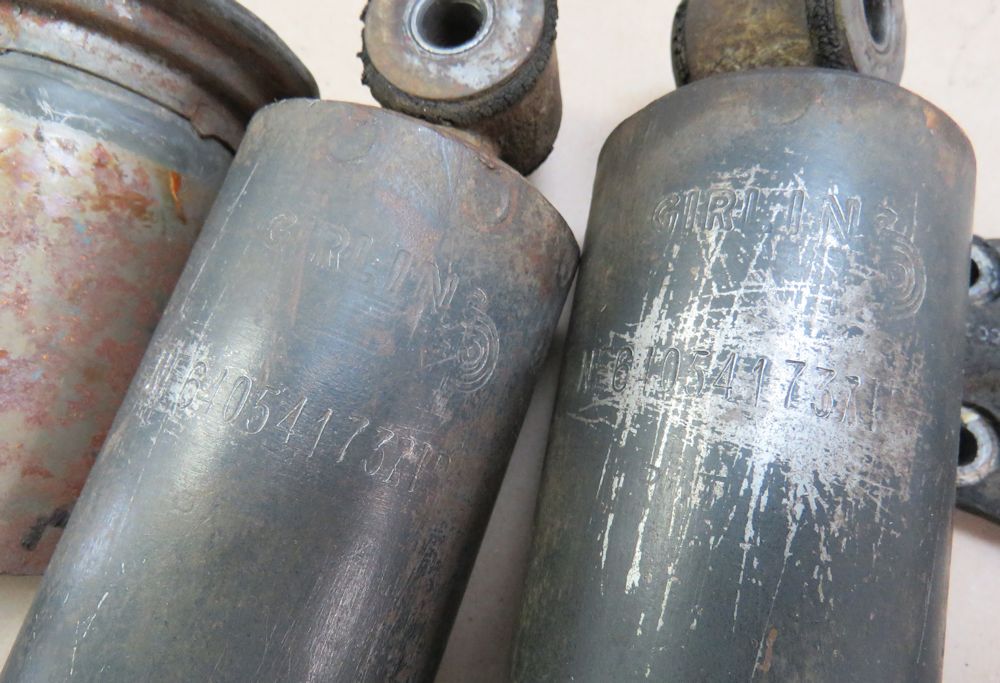
1961 vintage Girling shock absorbers restored to pristine condition.
 |
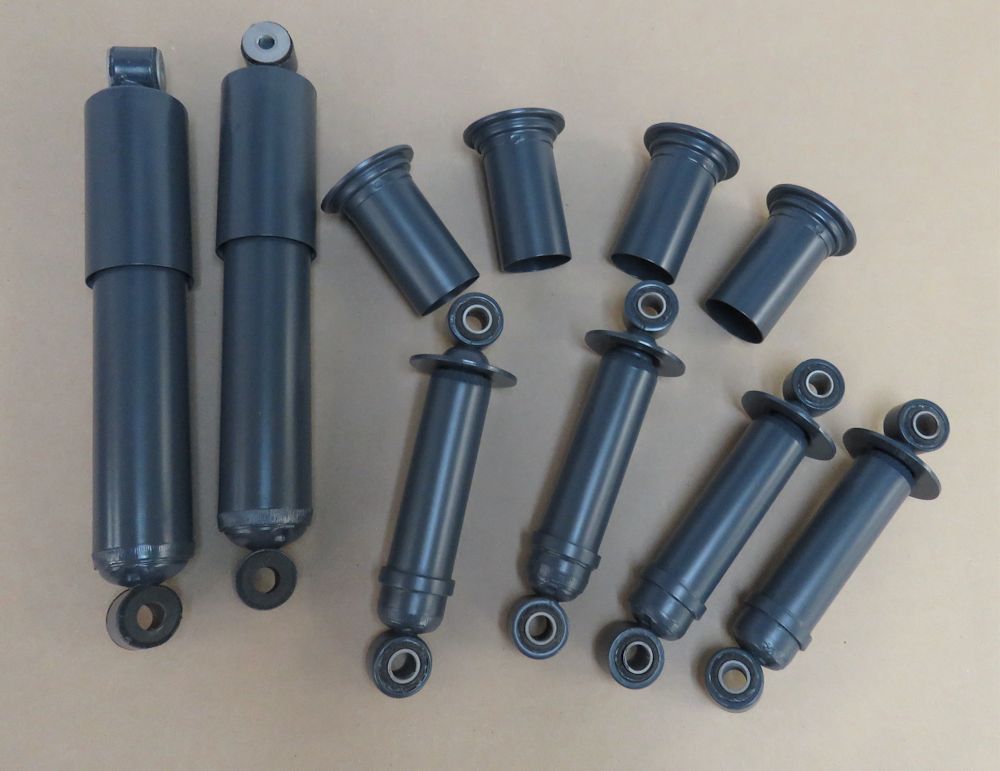 |
| Shocks were stripped, repaired and repainted correct Girling Blue |
|
 |
 |
| Early cars had shorter springs, a spacer at
the top and thick aluminum retainers at the bottom |
Shocks now restored and ready to install! |
Tool kit now complete with all original and period correct tools.
 |
 |
| Tool roll is now 100% complete, tools will be restored |
Comparing to a known original tool kit from chassis # 875462 (in foreground) |
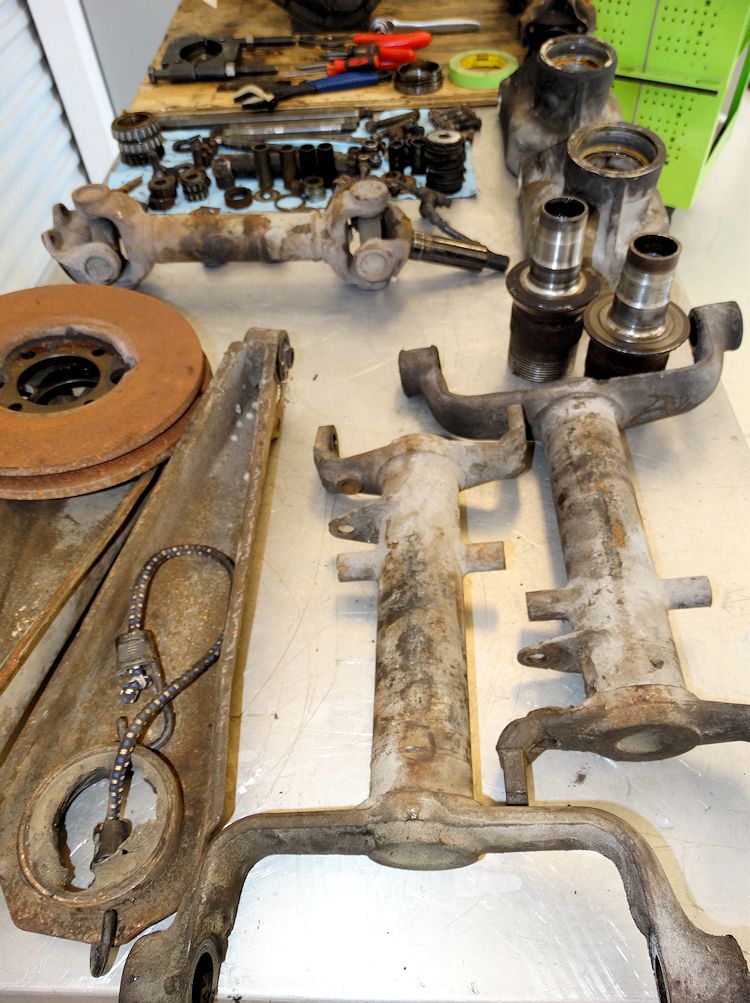
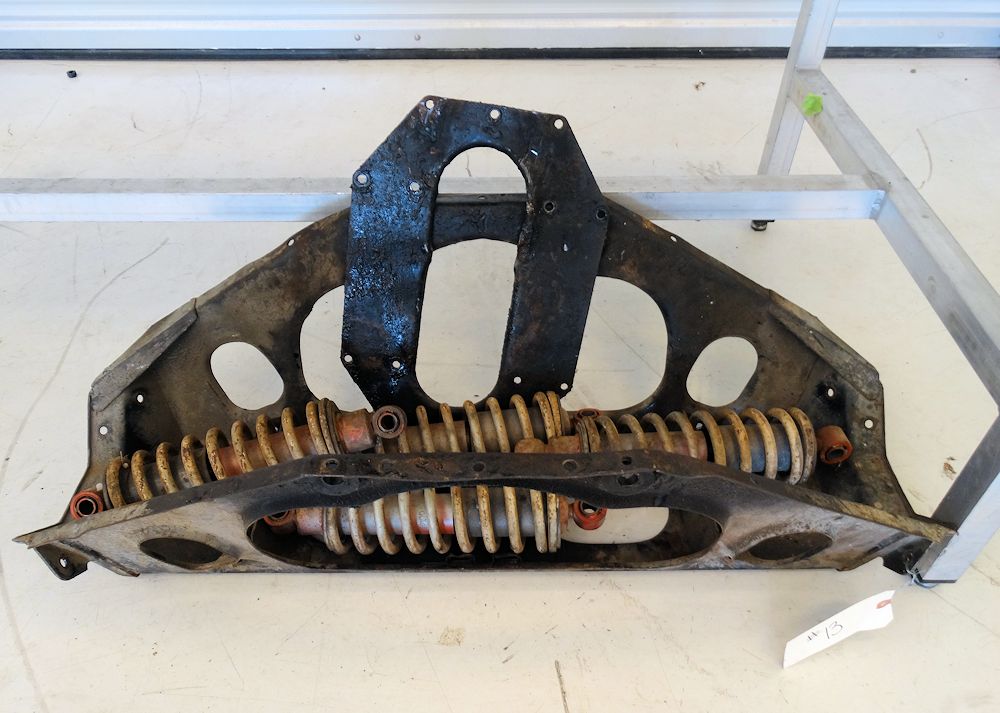
Powder coated IRS components ready for final assembly.
 |
 |
 |
 |
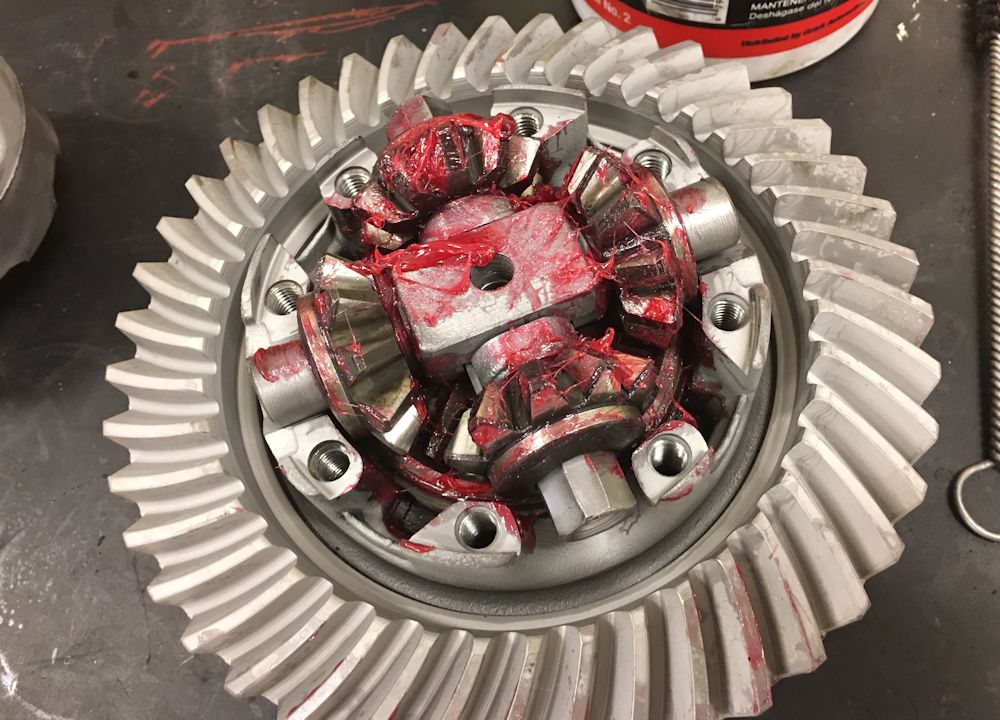
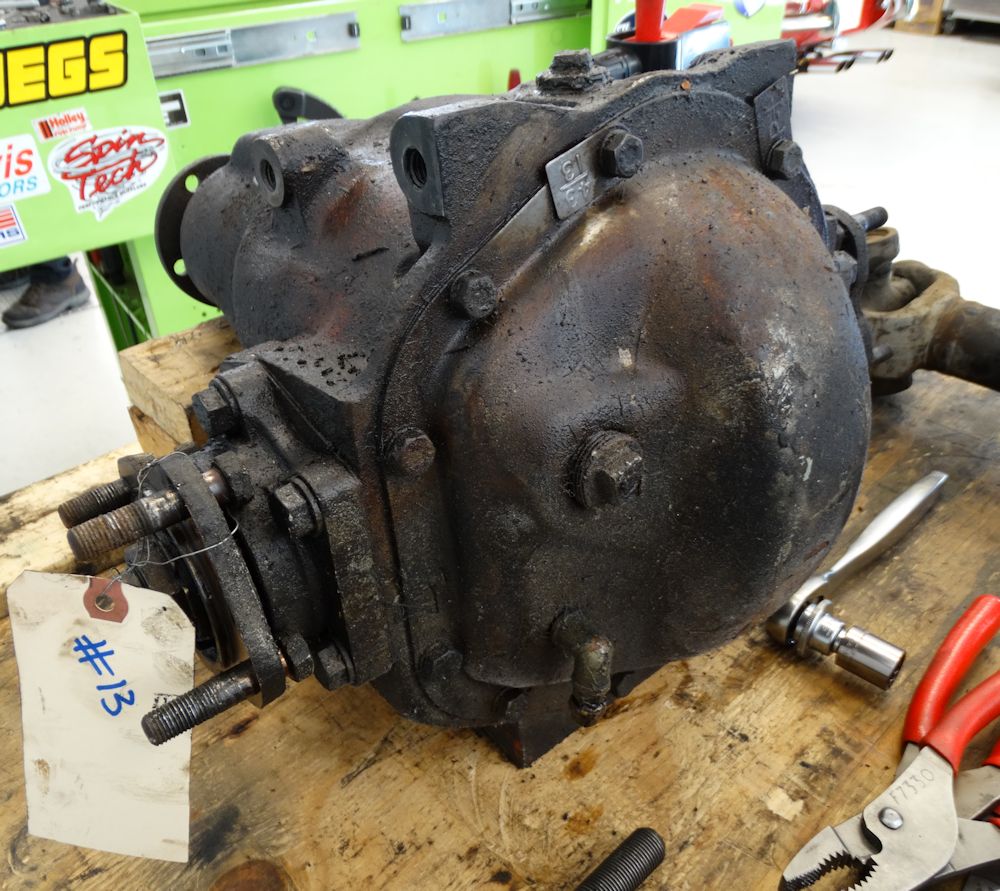
Differential now rebuilt and reassembled using all original fasteners, hub carriers restored and rebuilt, and chrome trial fit continues...
 |
 |
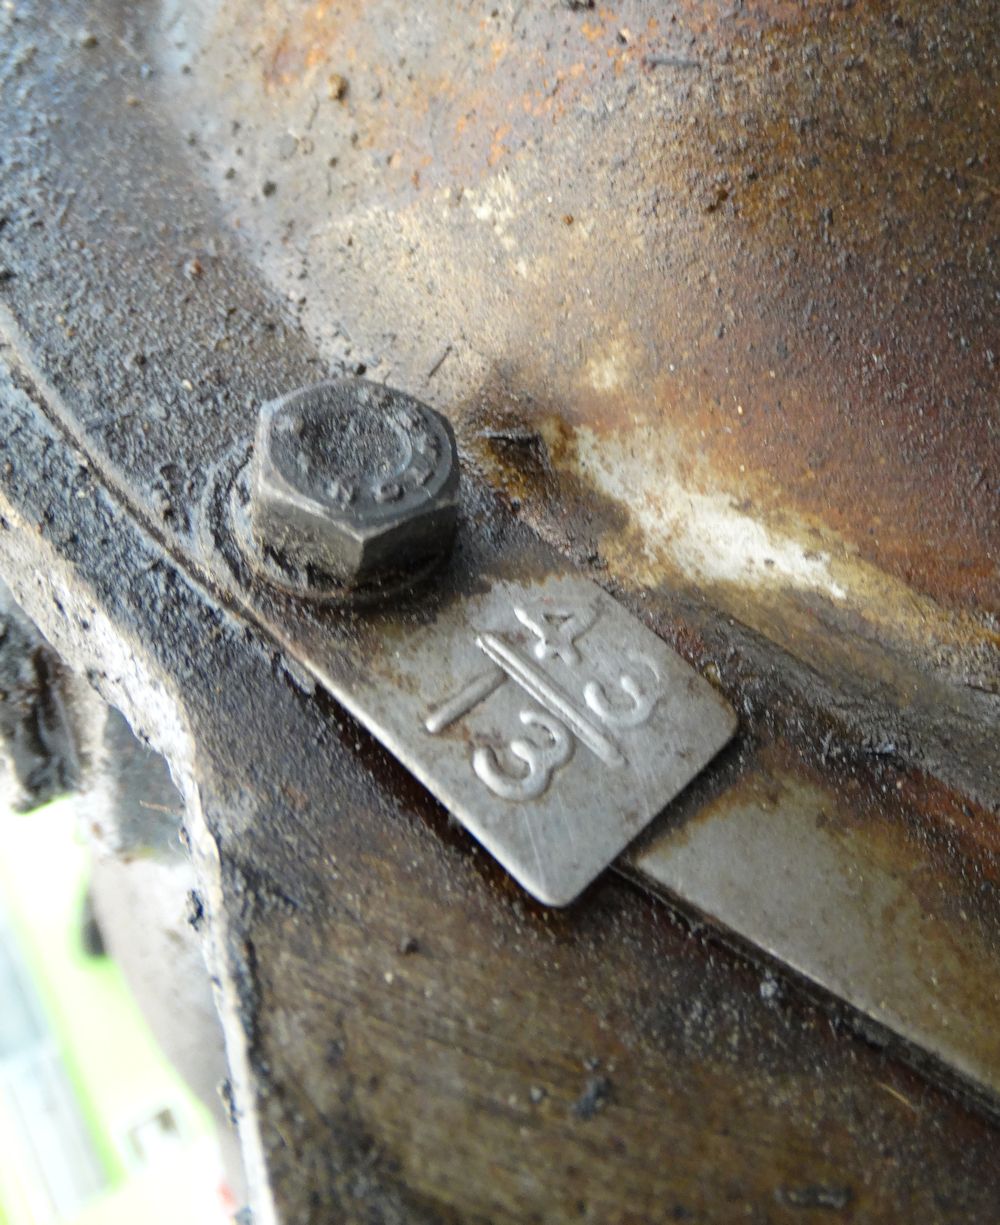
| Diff now assembled using original 'Newton'
bolts and final drive ratio and PL (Powerlok) tags |
|
 |
 |
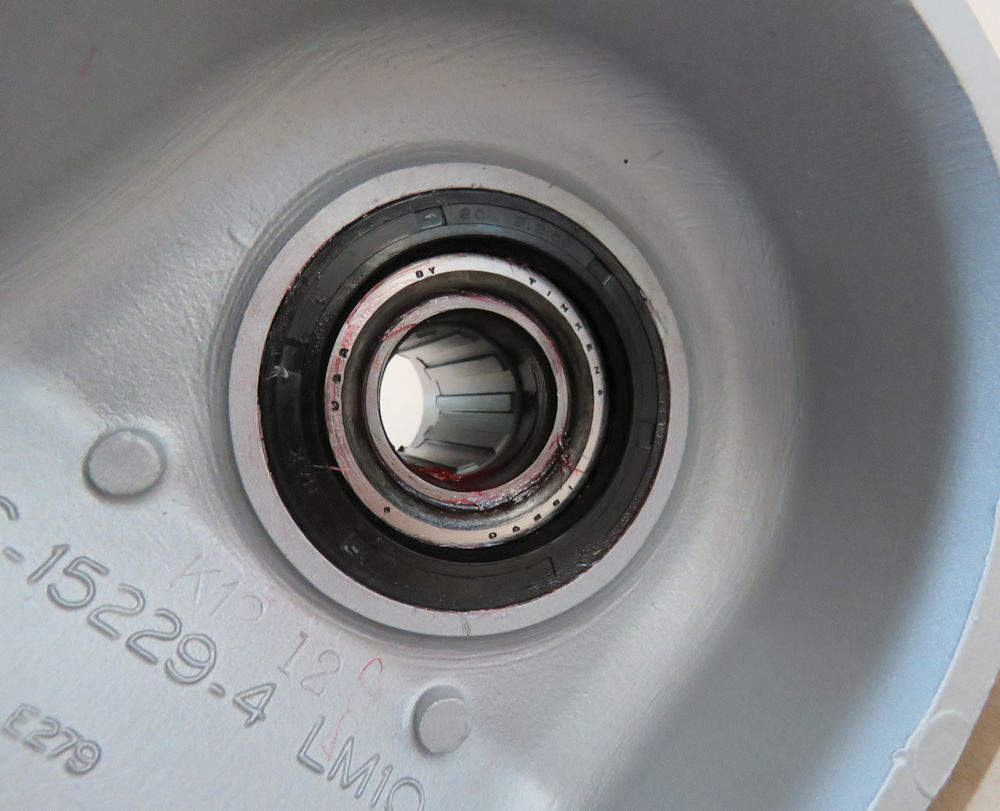
| Ultra early hub carriers have the same sized inner and outer bearings and seals |
Hub carriers now look new |
 |
 |
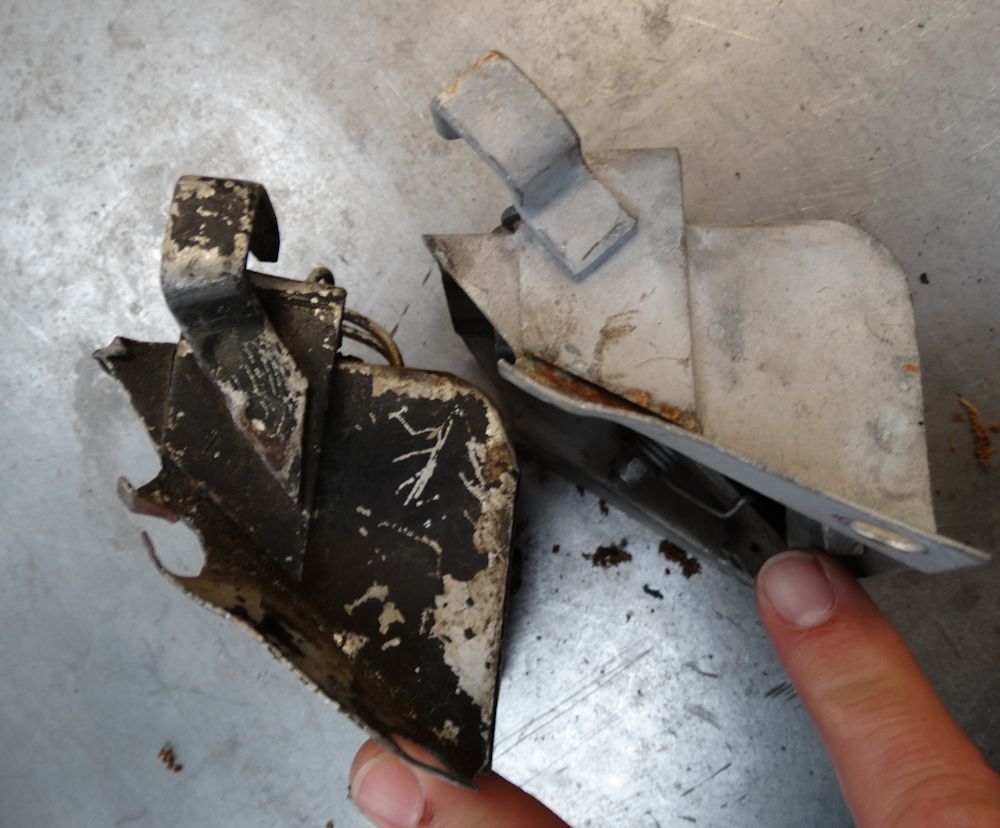
| Trial fitting front bumpers |
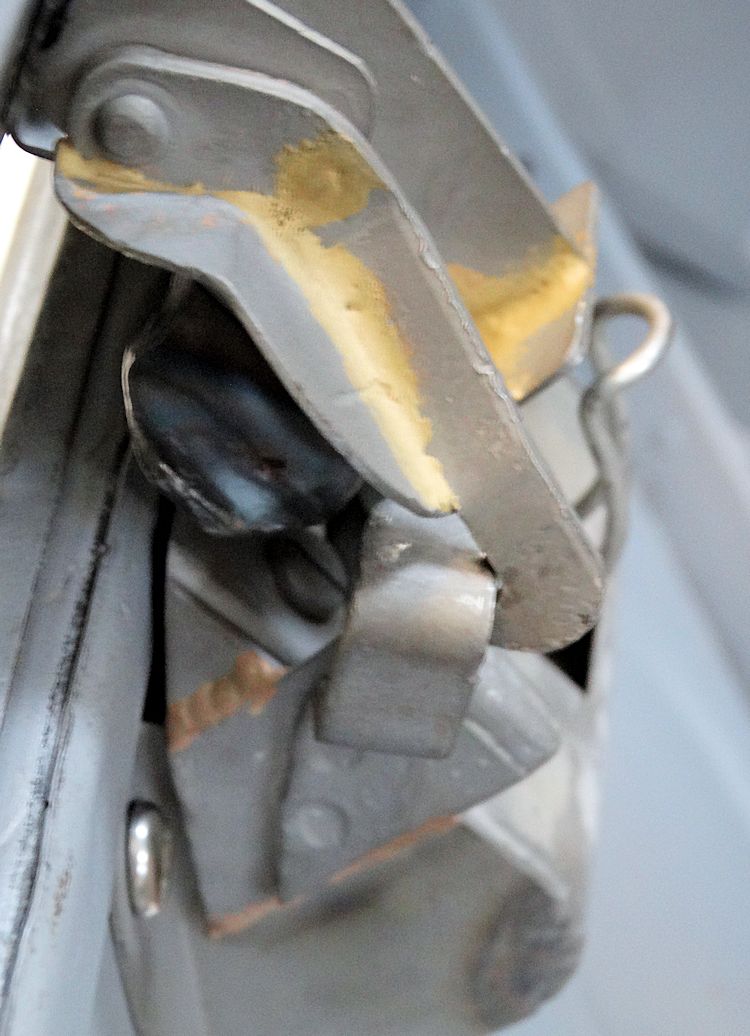
First sighting of the famous outside bonnet
latches! |
Early Girling shock absorbers and two eared German 'safety' knock-offs
In our quest to have everything on this car as original and correct as humanly possible, we are very fortunate to have our friend and early E Type expert Mike Mueller not only advising on some of the finer points of originality, but also coming up with some of the hard to find parts that are unique to the extremely early cars. This week Mike was able to supply us with some very early Girling shock absorbers, as well as three out of four of the extremely rare German two eared 'safety' knock-offs.
If anybody out there has a spare left hand German knock-off, we would love to buy it to complete the set we need for 885013. Our car was supplied new in Germany, which means the two eared 'safety' knock-offs would have been installed originally.
Ultra early hub carriers
In two of the photos below you can see the rear hub carriers. The very earliest cars had an undocumented hub carrier, part number C15229-4. This part number was not mentioned in the J30 Spare Parts Catalogue, which incorrectly cited part number C19063 as the earliest form of hub carrier used. We have restored numerous outside latch roadsters, as well as two of only 18 LHD outside latch coupes to leave the factory, and we have seen several cars with the C15229-4 hub carriers. Interestingly, while 885013 has clearly had the C15229-4 hubs from new, 885020 and 885036 both had the C19063 carrier listed in the Parts Catalogue. We have documented several outside latch roadsters built prior to July 1961 that had the C15229-4 hubs.
|
 |
| 1961 vintage Girling shocks will be rebuilt and restored |
Hard to find the correct part number front
shocks |
 |
 |
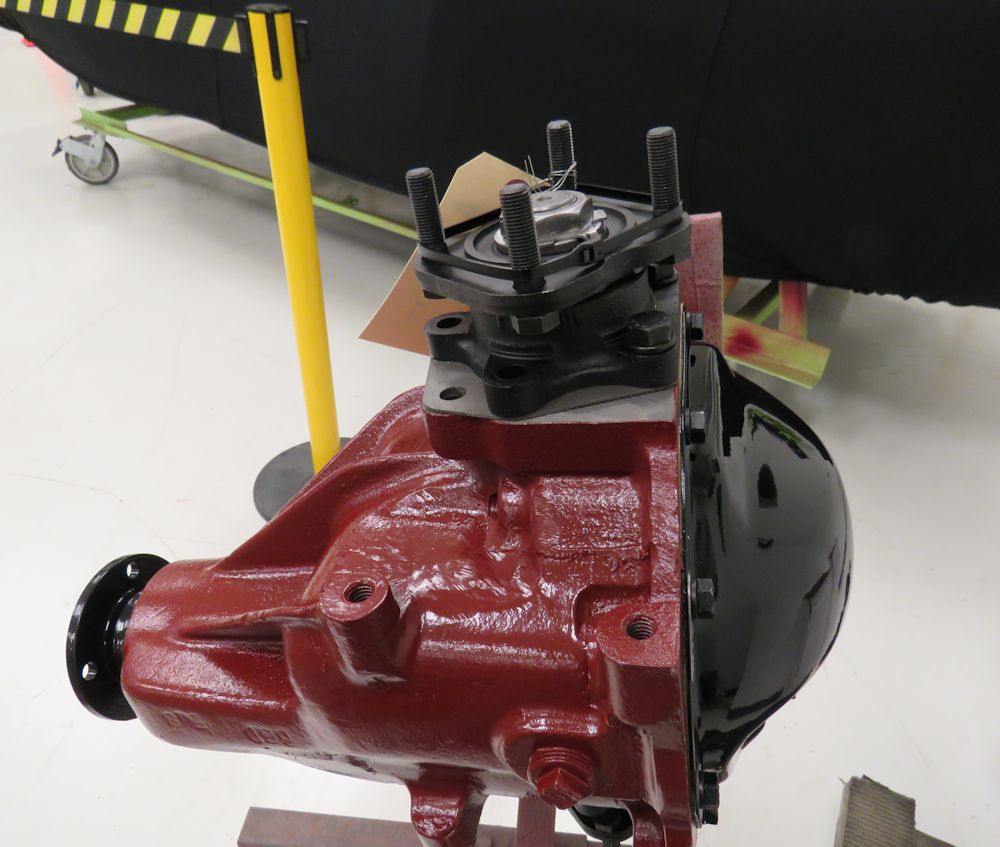
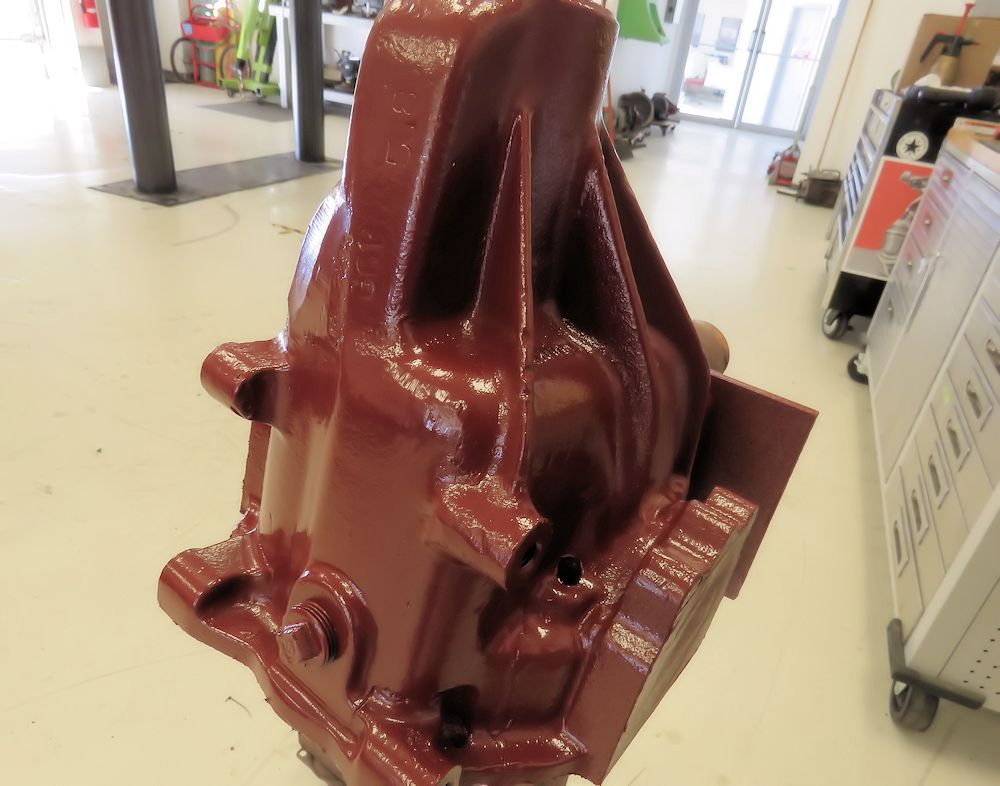
| Early differential housings were red oxide
color when new |
Differential final drive ratio stamped on the crown wheel (3.31) |
 |
 |
| Diff cover was gloss black on the early cars |
|
 |
 |
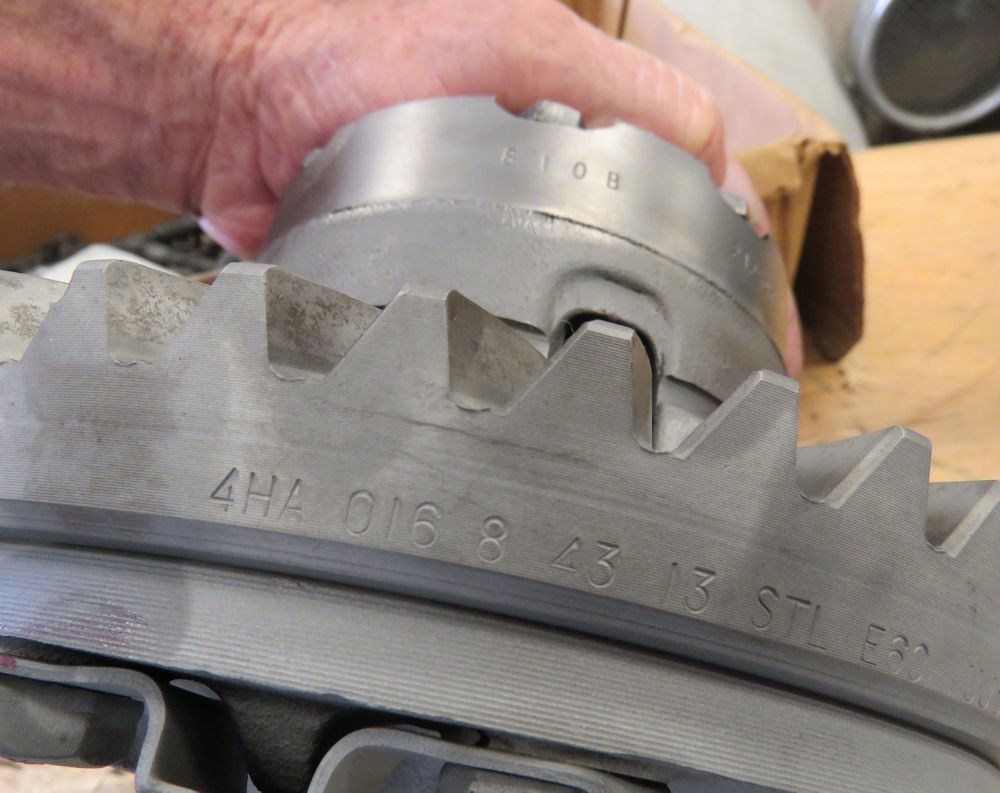
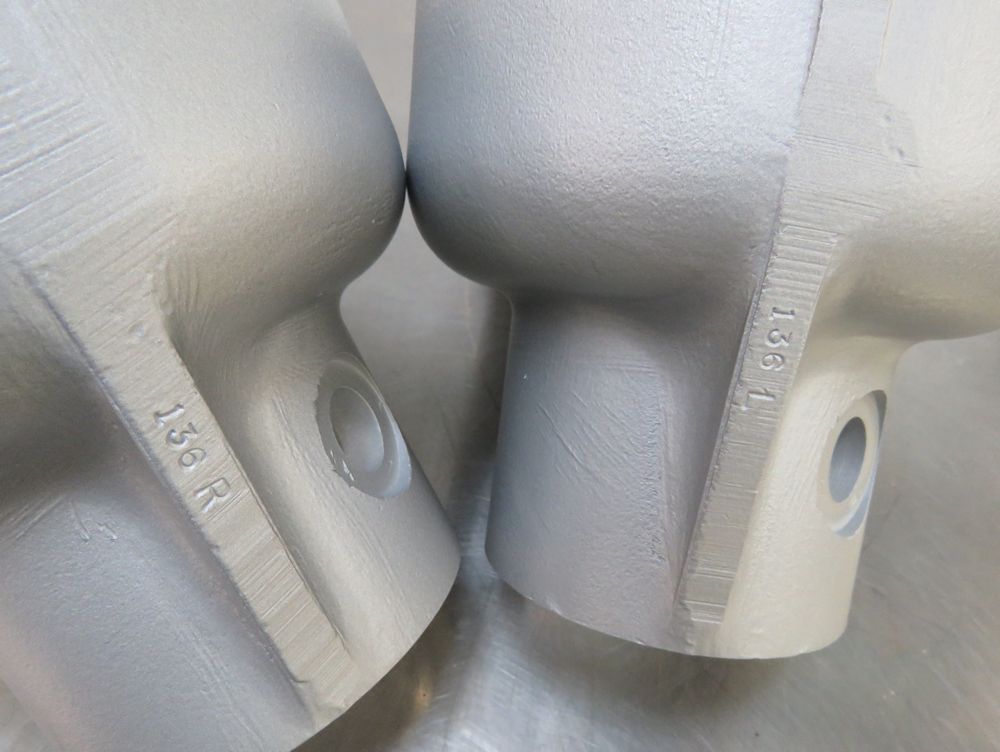
| Hub carriers were stamped left and right,
although I honestly don't know what the 136 denotes.. |
Ultra early hub carriers - Part # C15229-4 |
 |
 |
| Mike Mueller previously loaned us this
original early door so we could replicate the unique rear edge |
Here you can clearly see the modified upper rear door edge |
 |
 |
| Carlos trial fitting door window frames and rear quarter lights |
Trial fitting headlamp chrome |
 |
 |
Special thanks to Dr. Mike Mueller, the accepted world authority on outside latch E Type coupes, who was kind enough to loan us an original outside latch coupe door and an ultra early production bonnet mouth tray, so that we could replicate each of them for our restoration of 885013. The photos below show the modifications in progress.
|
 |
| Note difference between upper rear corners of ultra early versus late coupe doors |
|
 |
 |
| After simple modification, our restored door looks exactly like the original |
Comparing the two side by side |
 |
 |
| This is a very early bonnet mouth tray |
|
 |
 |
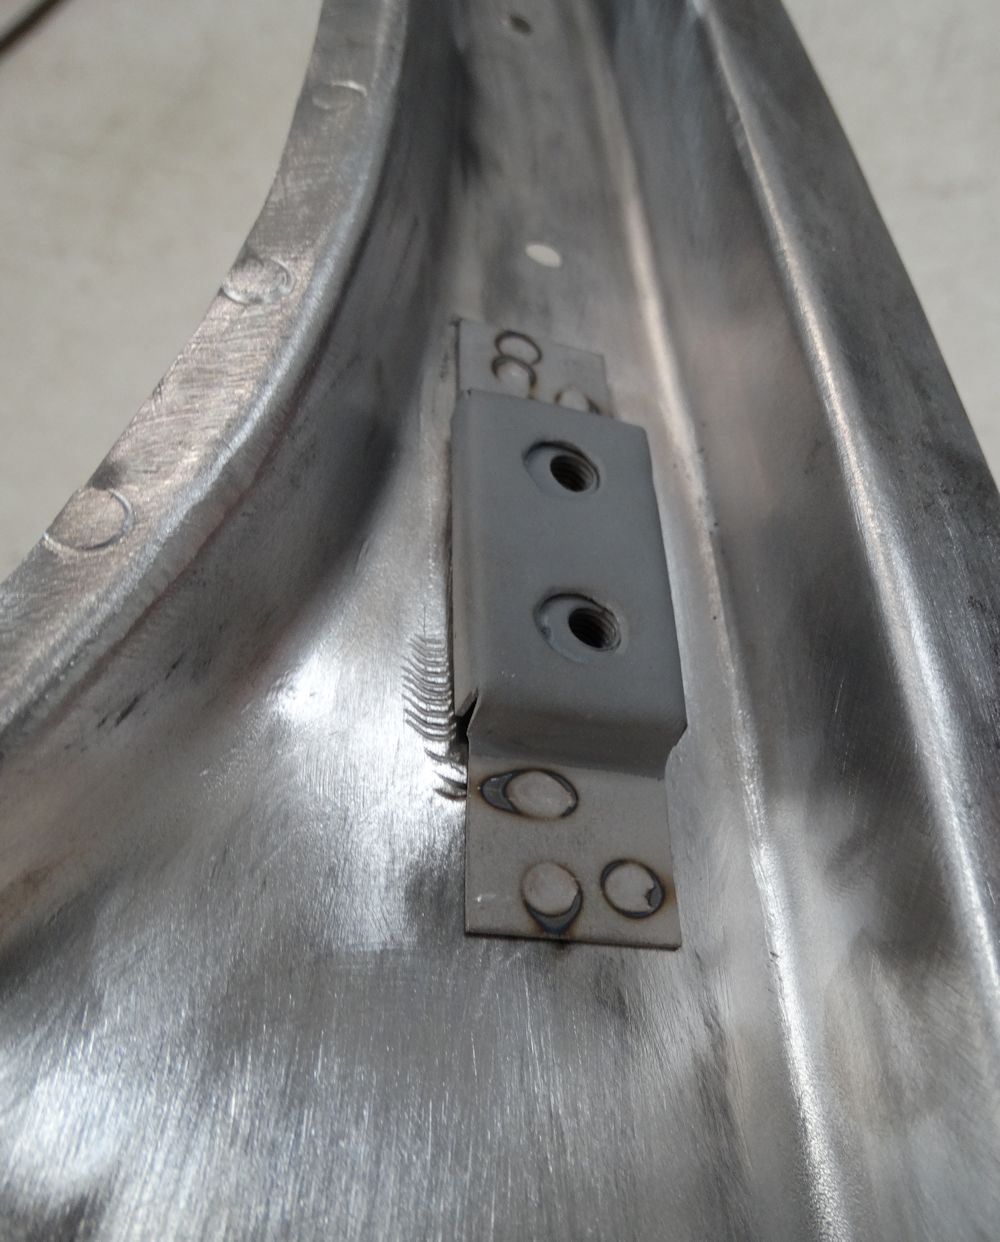
| Captive nut brackets spot welded to early tray |
|
 |
 |
| Fabricating new captive nut brackets |
|
 |
 |
 |
 |
| Spot welding new captive nut brackets in place |
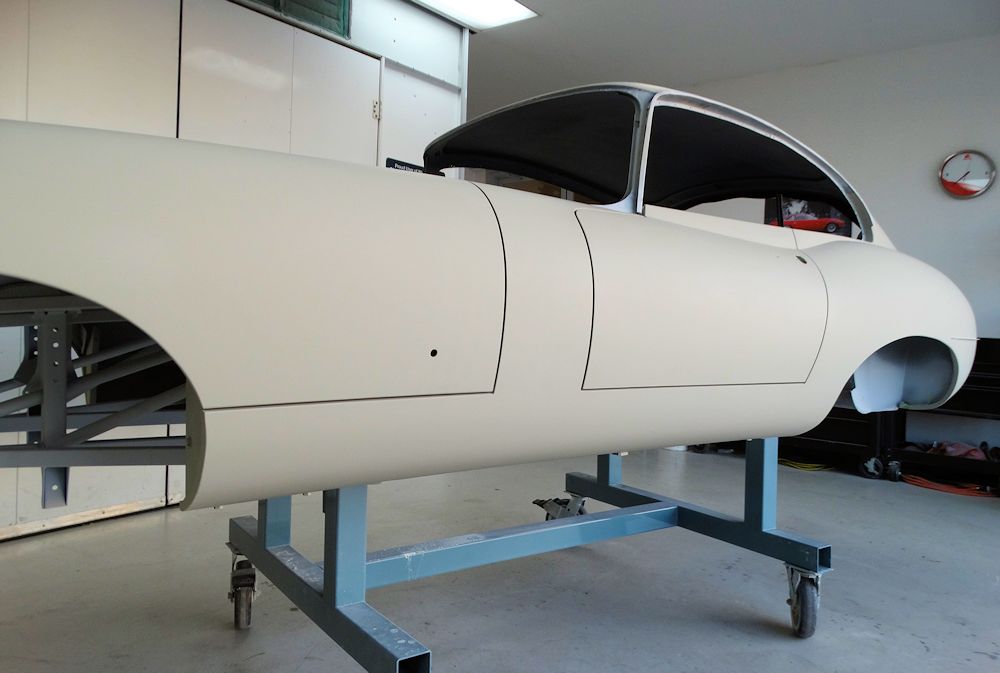
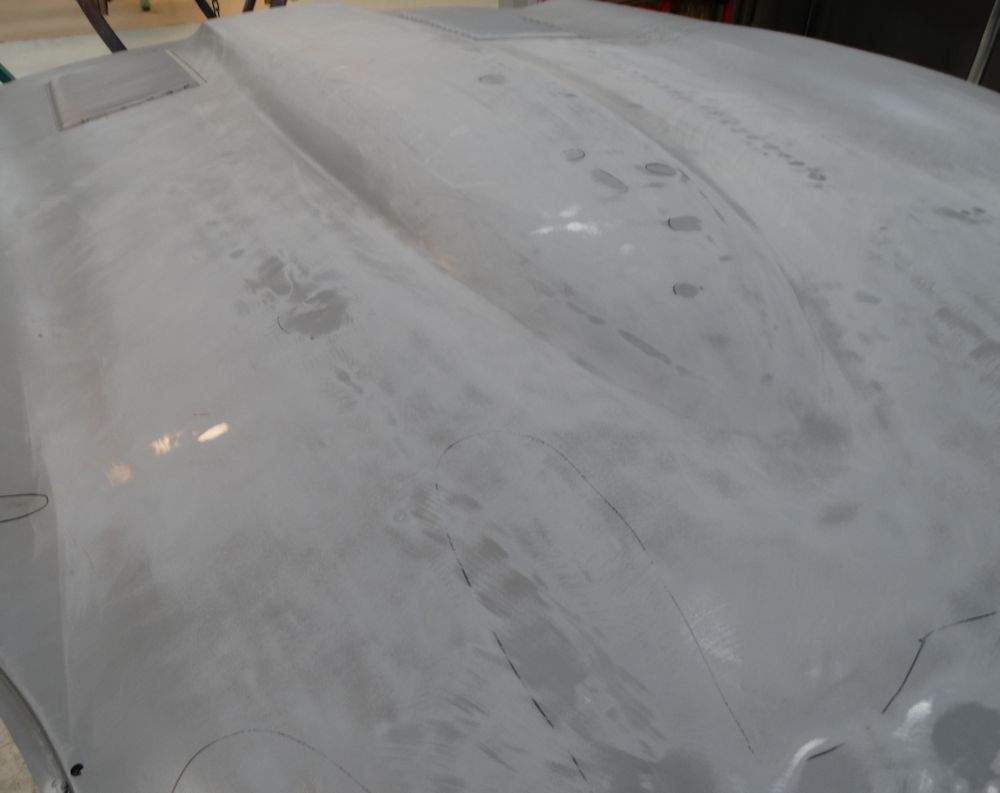
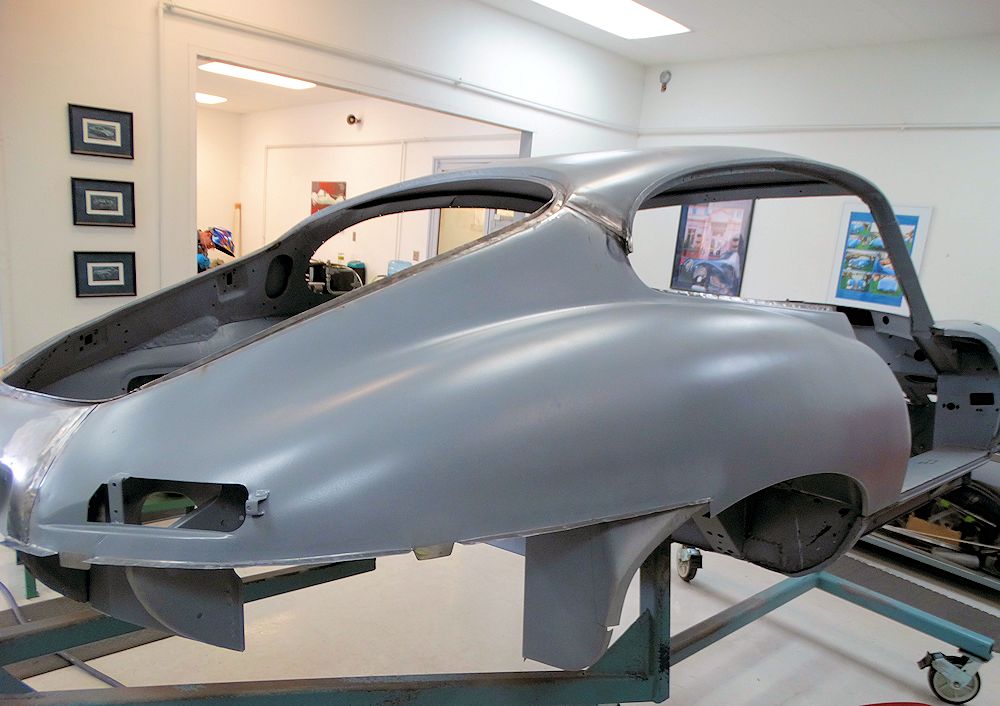
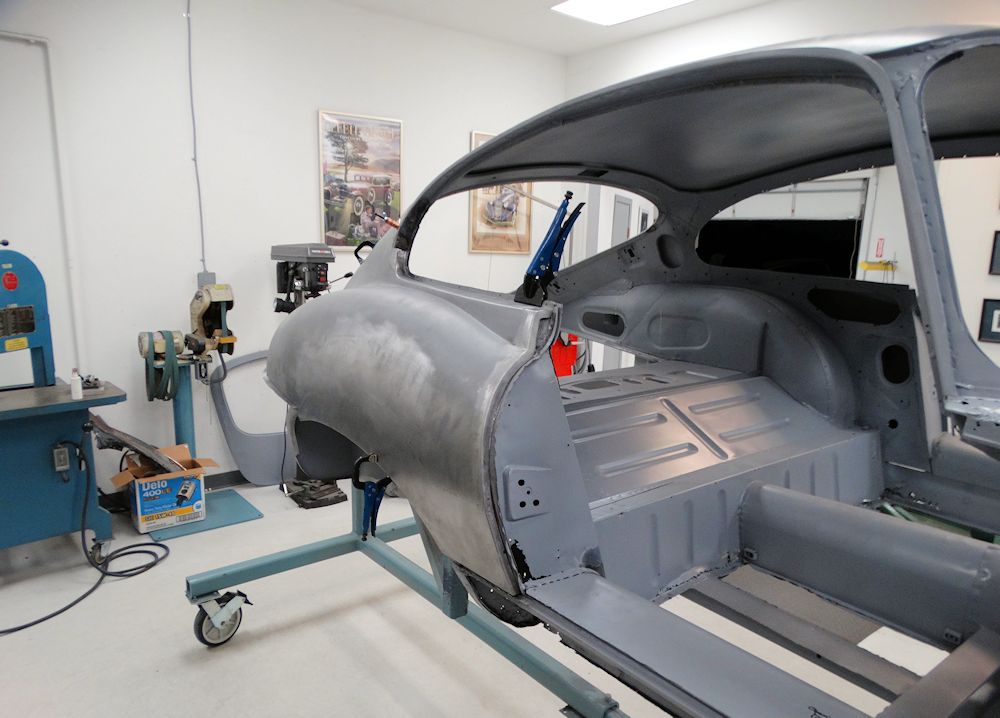
I am delighted to report that we have now completed the bodywork stage of this project and 885013 has been primed with Spies Hecker Raderal sprayable polyester primer. All of the panel gaps have been finalized at this stage and the car is scheduled to be painted very early in the New Year.
 |
 |
| Car has now been put into Spies Hecker Raderal
sprayable Polyester primer |
|
 |
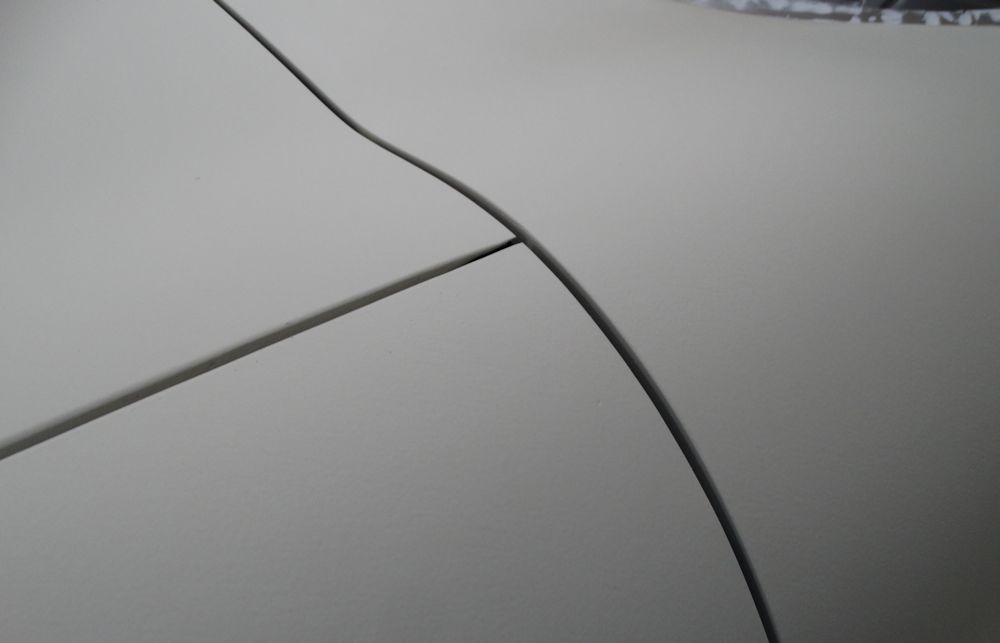 |
| Panel gaps have all been finalized and are spectacular throughout |
You may never see a better fitting bonnet! |
 |
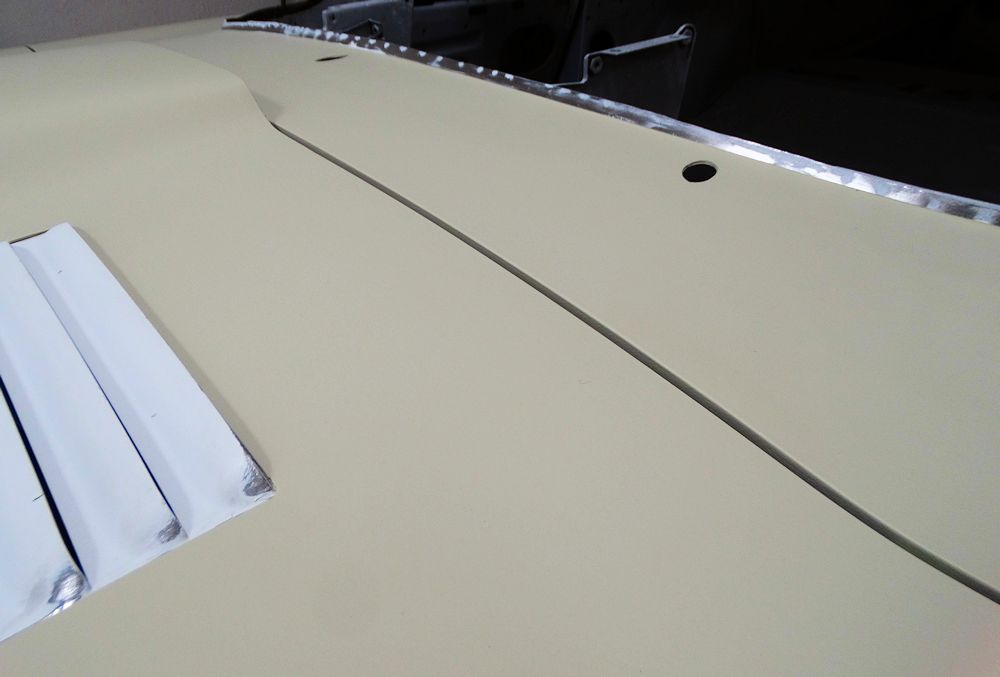 |
| Note how the rear edge of the bonnet follows
the contour of the cowl perfectly |
|
 |
 |
| Door top flows perfectly into rear quarter and
top edge is perfectly straight across both panels |
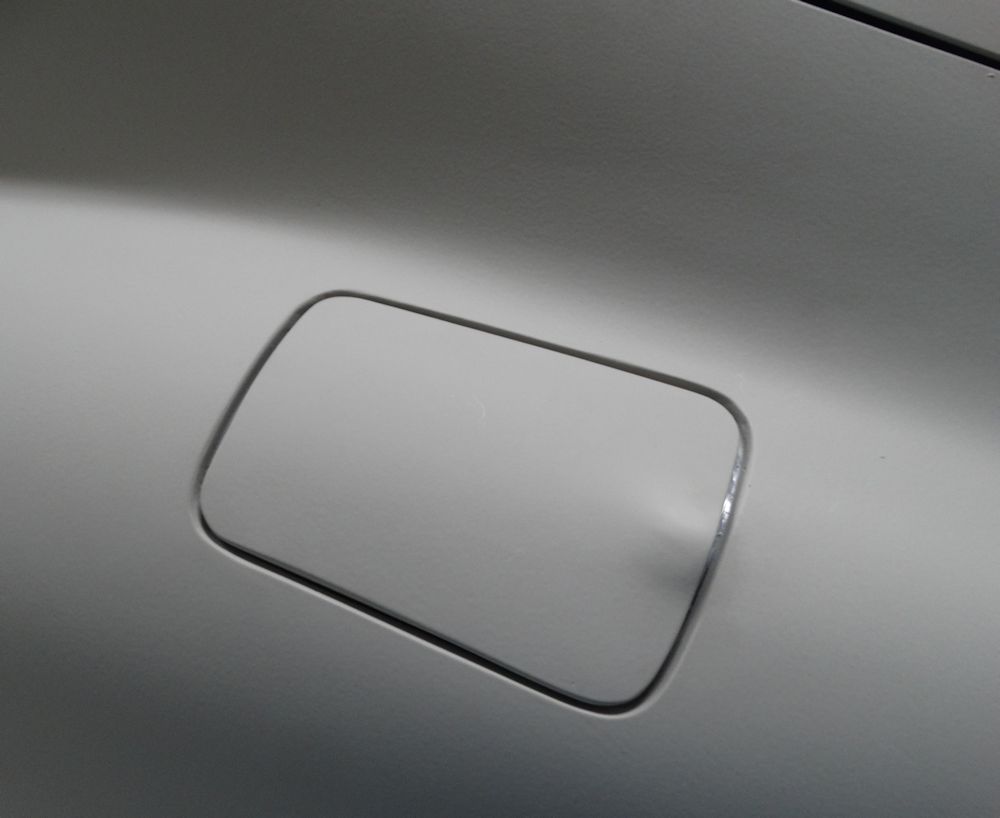
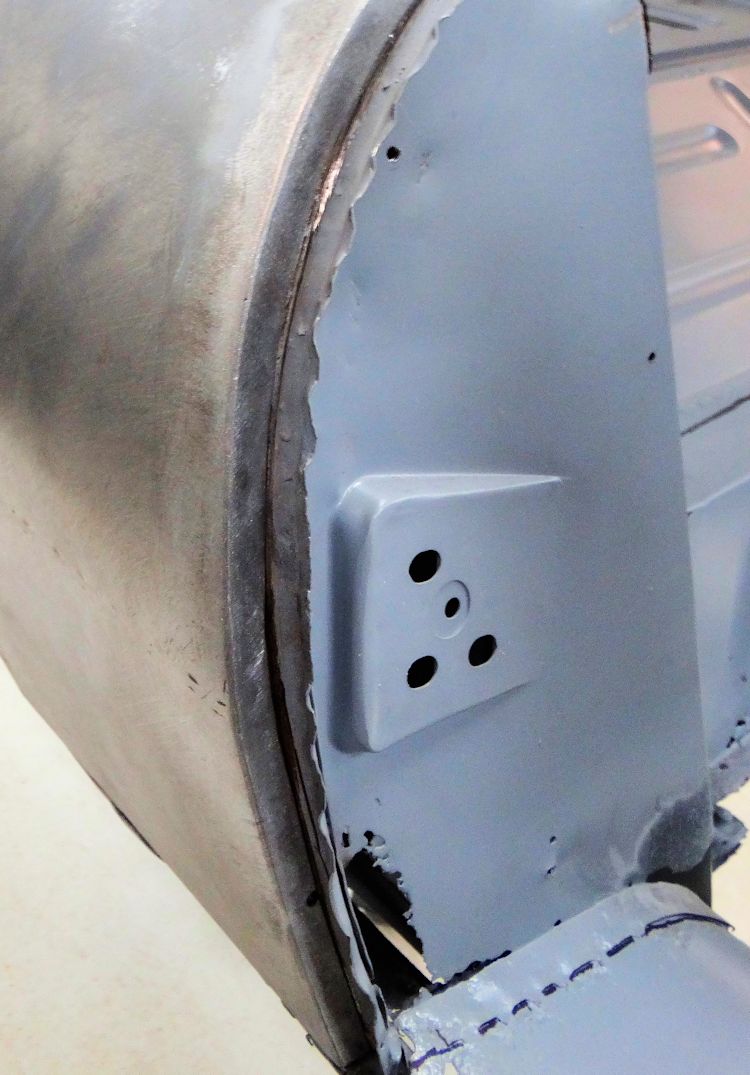
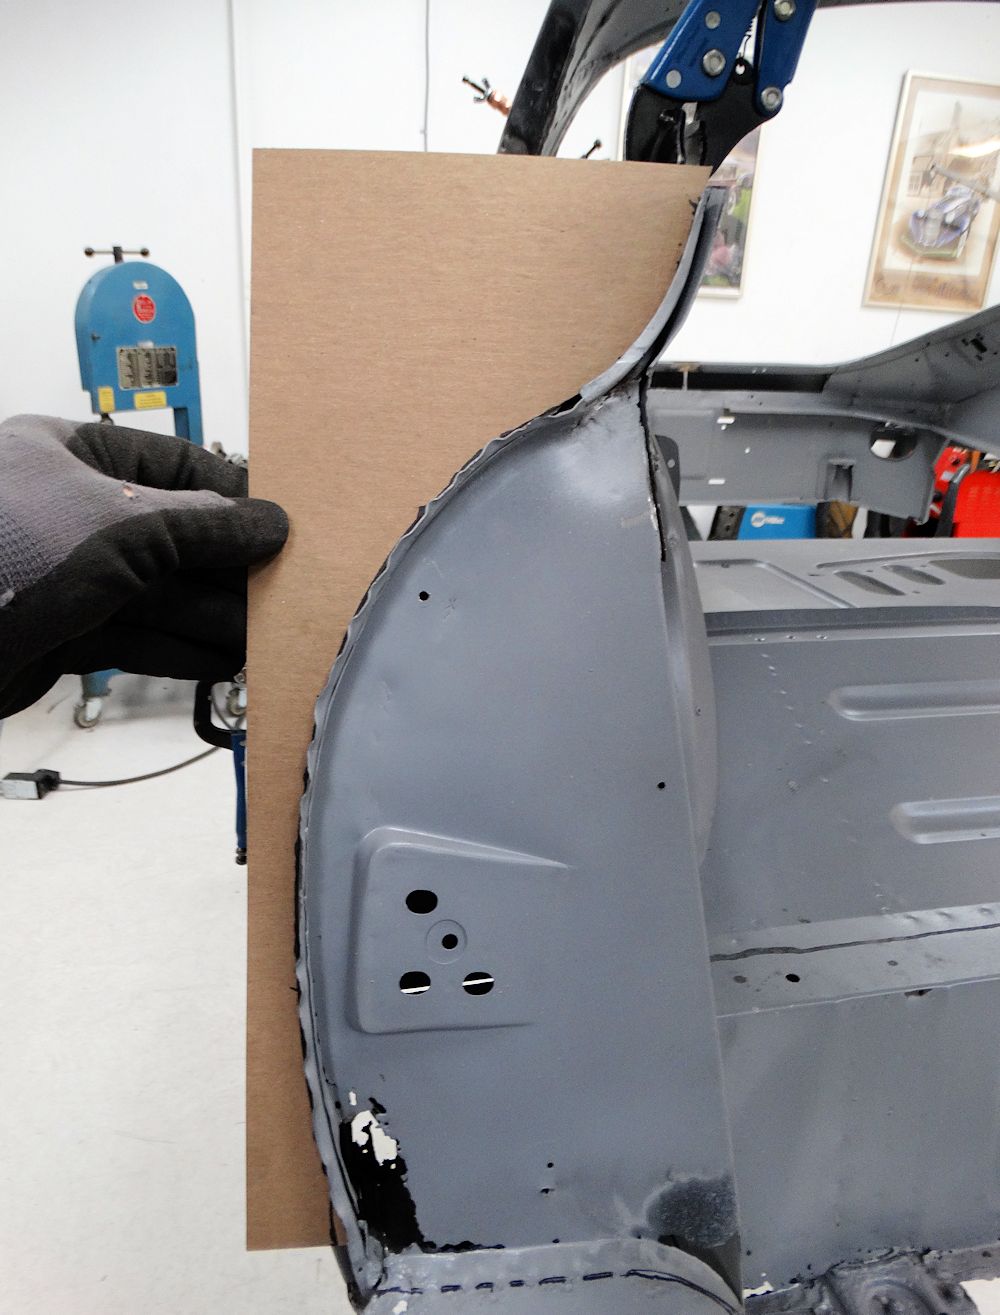
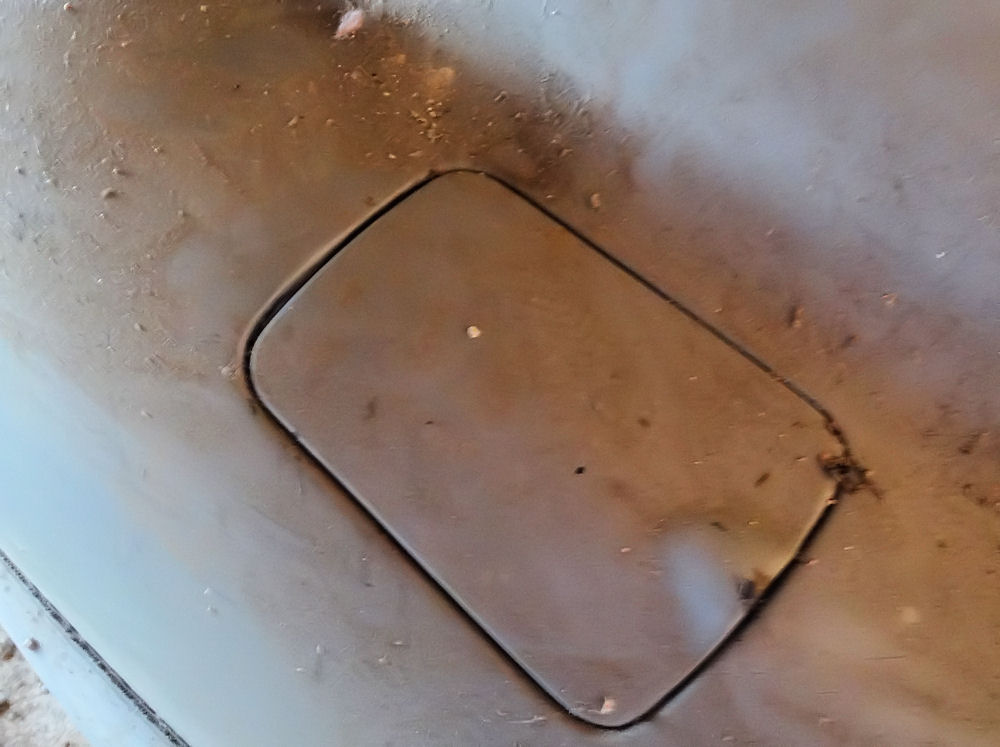
Note pronounced rectangular shape of gas flap which is a feature of the very early cars |
 |
 |
| Tailgate also fits beautifully |
|
 |
 |
| Another view showing how the bonnet follows
the contour of the cowl panel |
Front upper corner of the RH door |
 |
 |
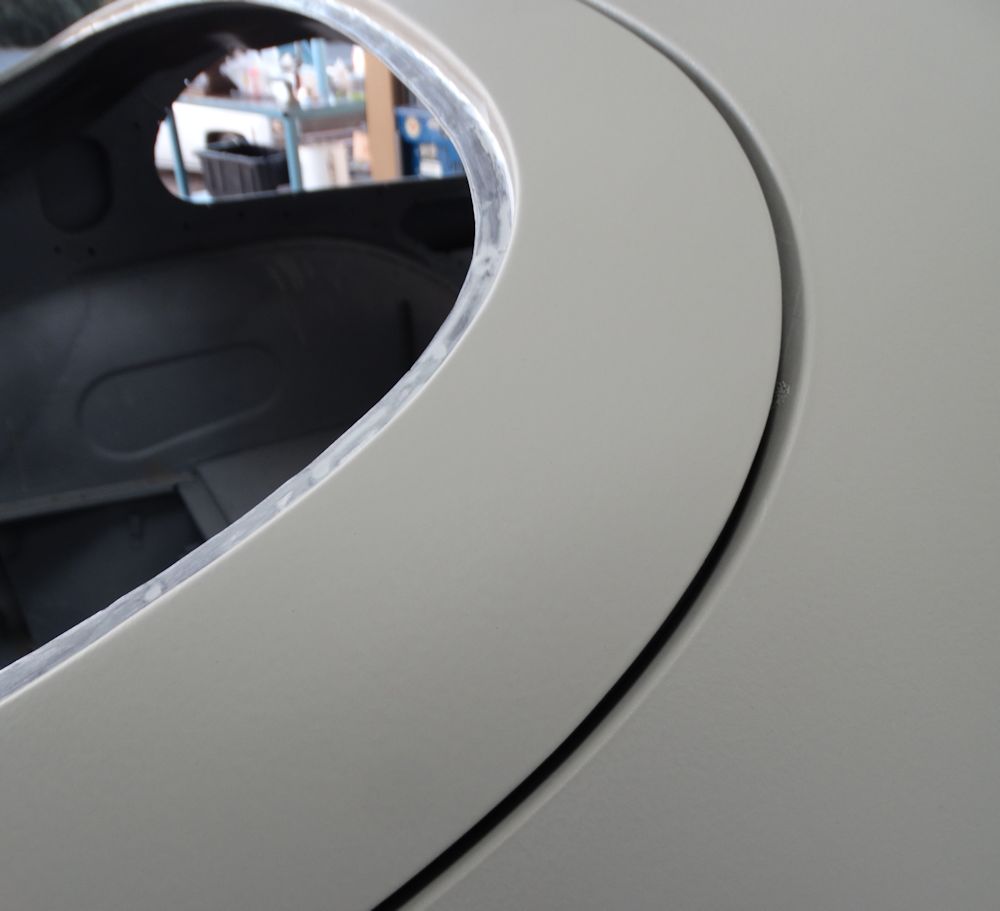
| Wheel arch lips were folded on very early cars
for additional tire clearance |
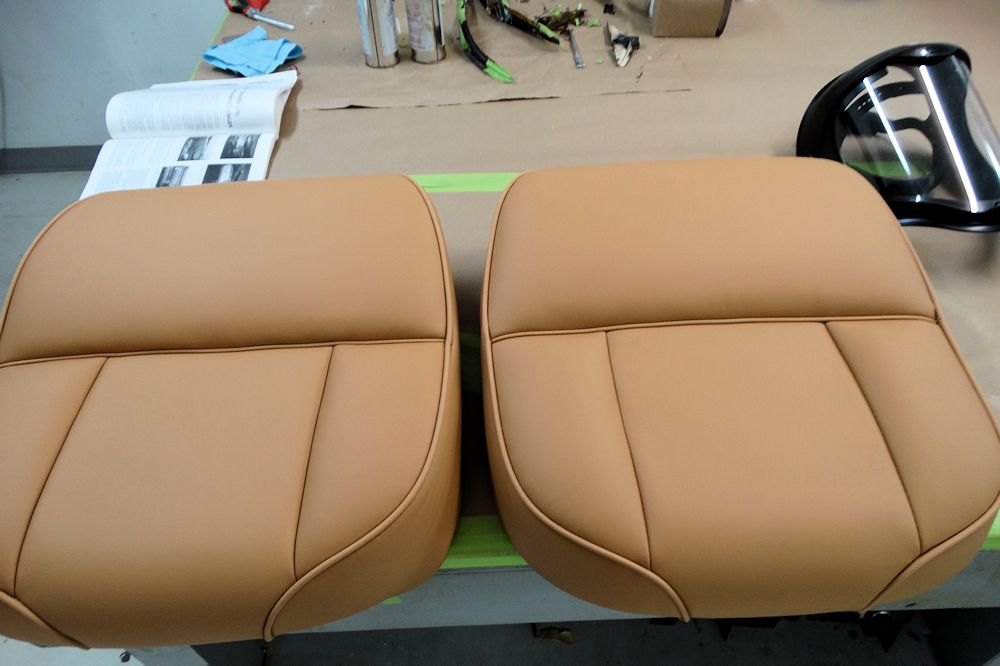
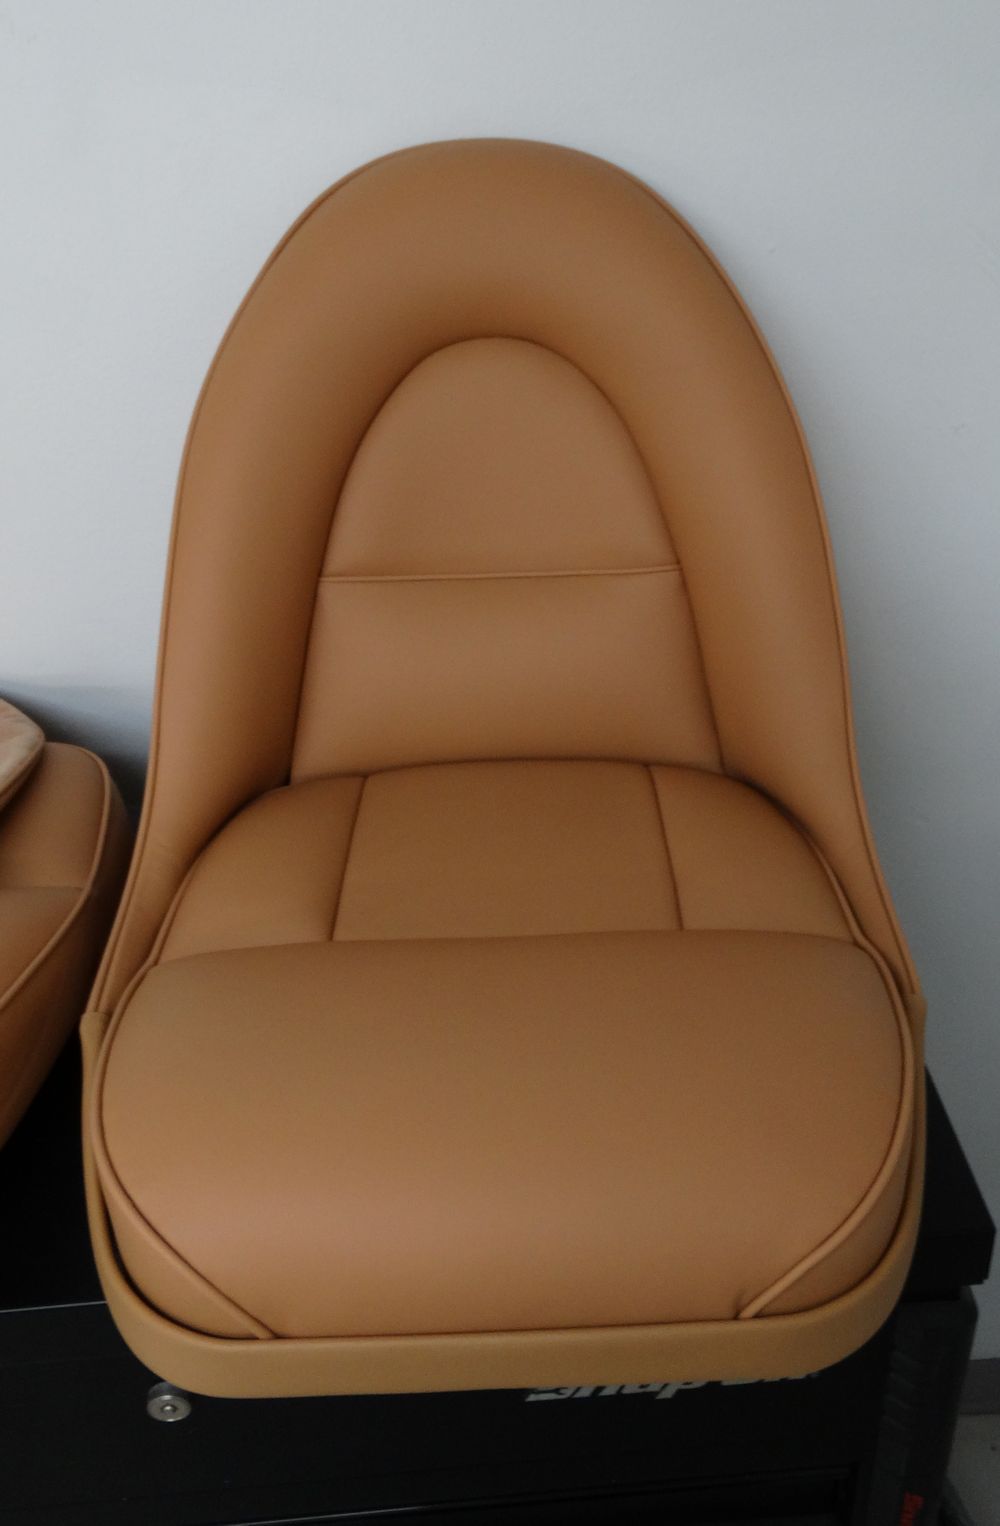
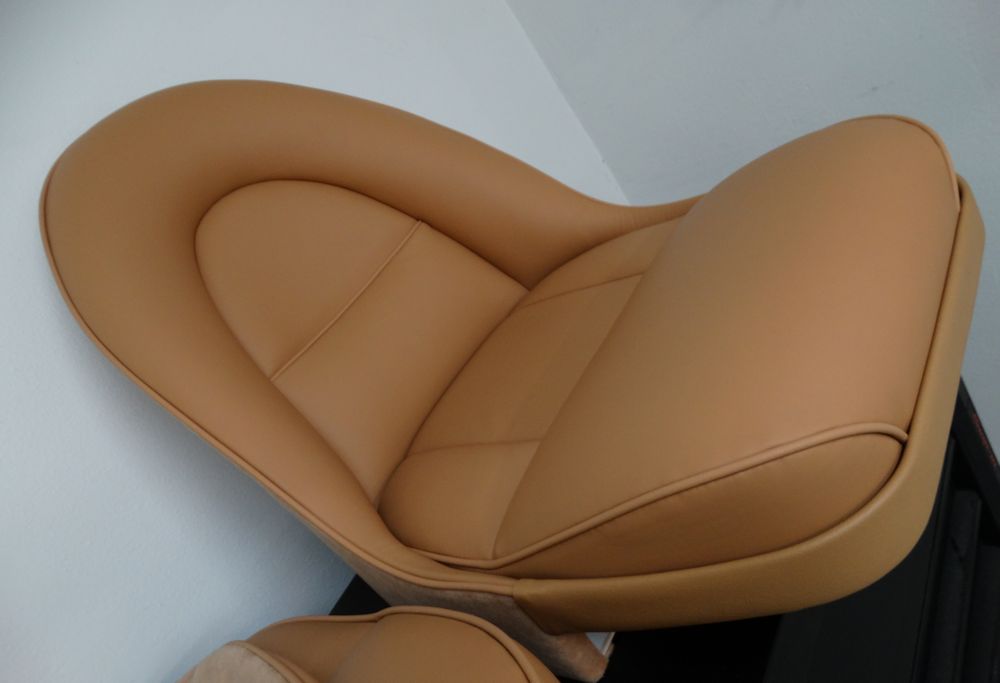
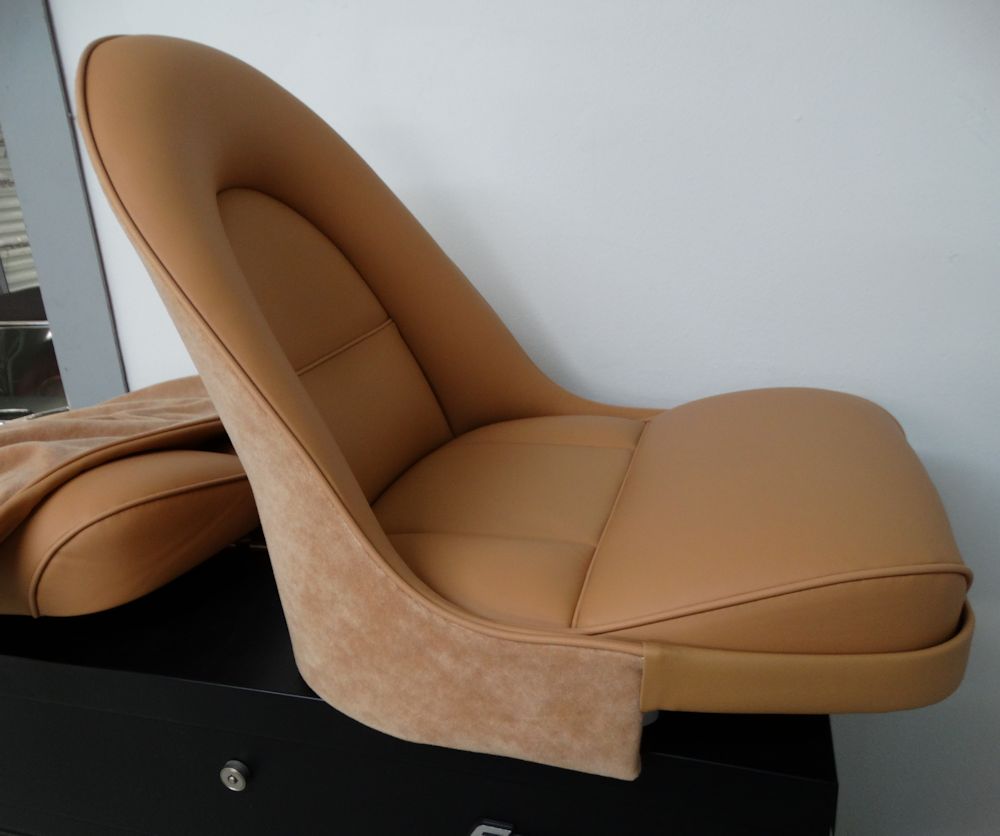
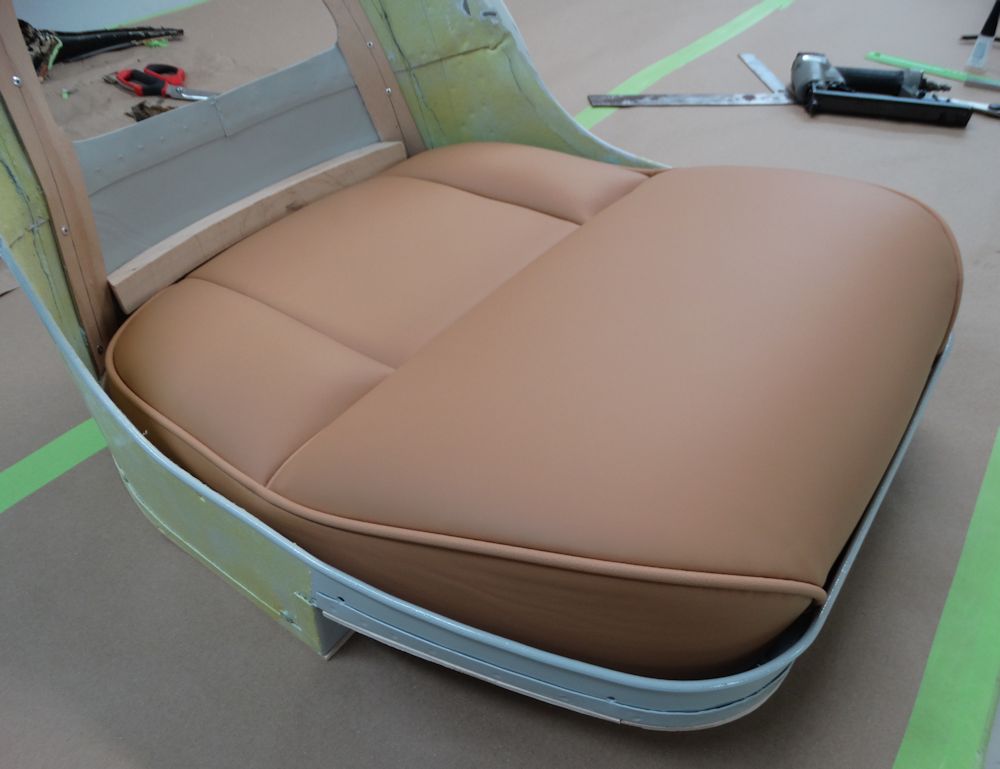
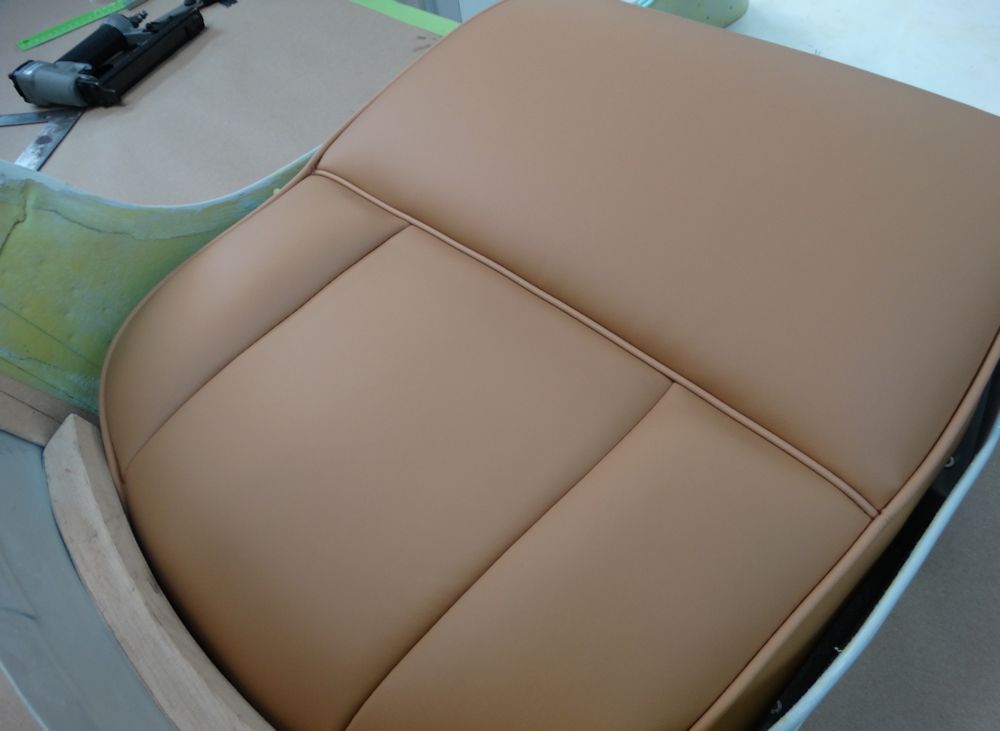
Carlos has now completed the re-trim of the first seat.
 |
 |
 |
 |
 |
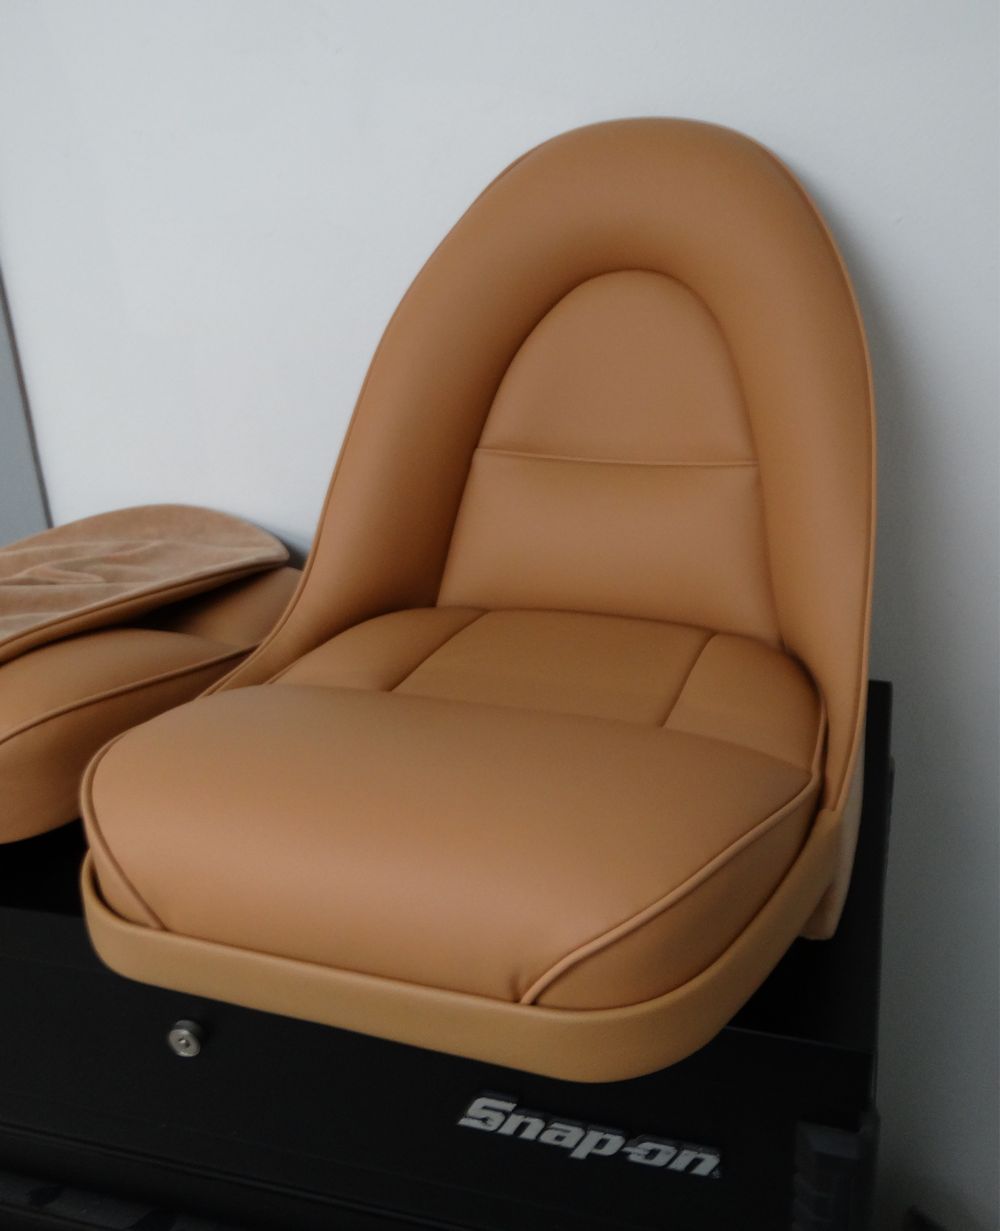 |
Carlos has been putting on something of a master class, trimming your seats.
 |
 |
| Restored seat base cushion frames |
|
 |
 |
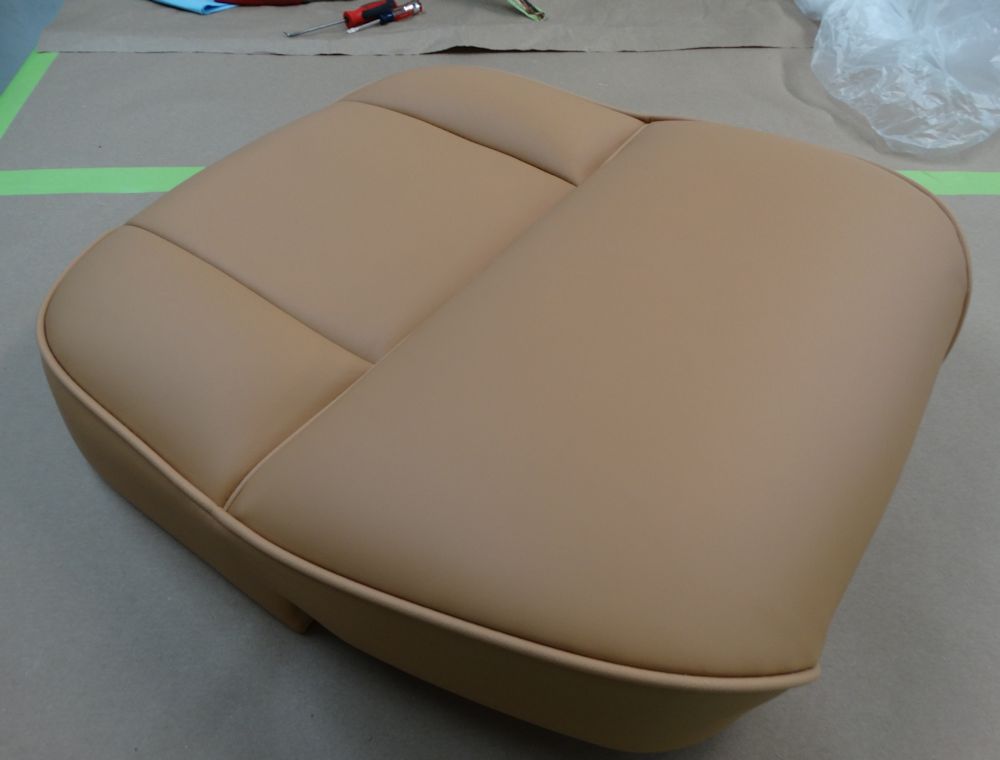
| First of the seat bases trimmed |
|
 |
 |
 |
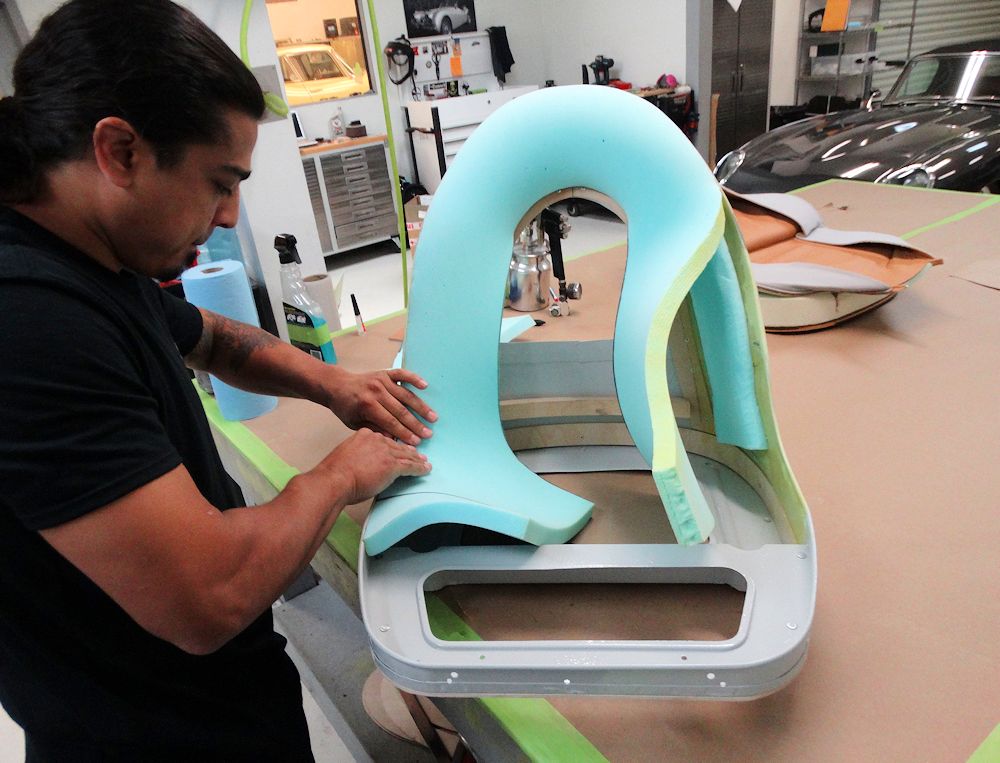 |
| Trimming and installing seat back foam |
|
 |
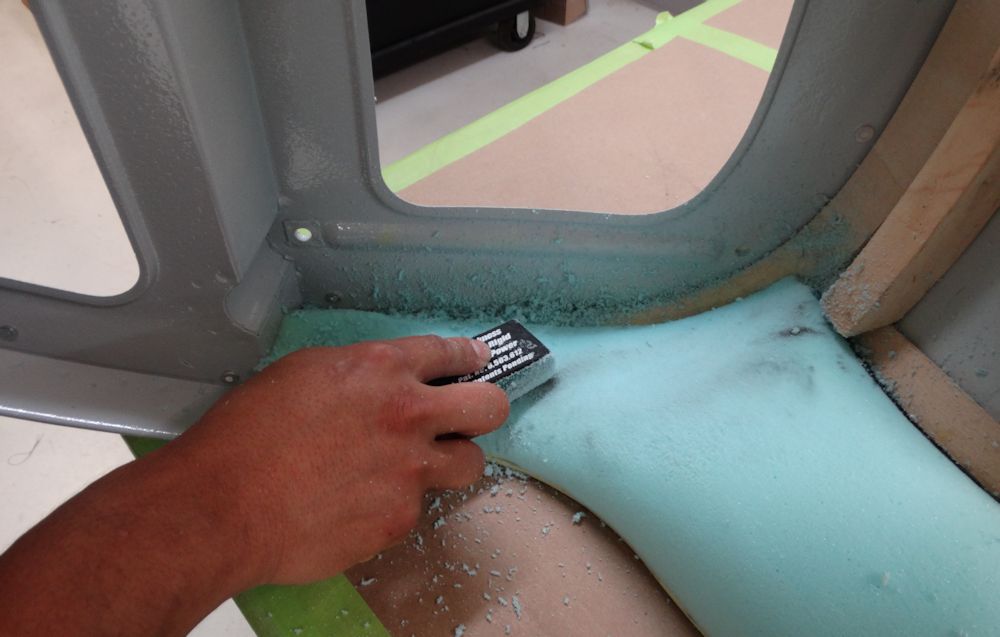 |
| Carving the foam to the desired shape using a sanding block |
|
 |
 |
| Trimming the second seat base |
|
|
|
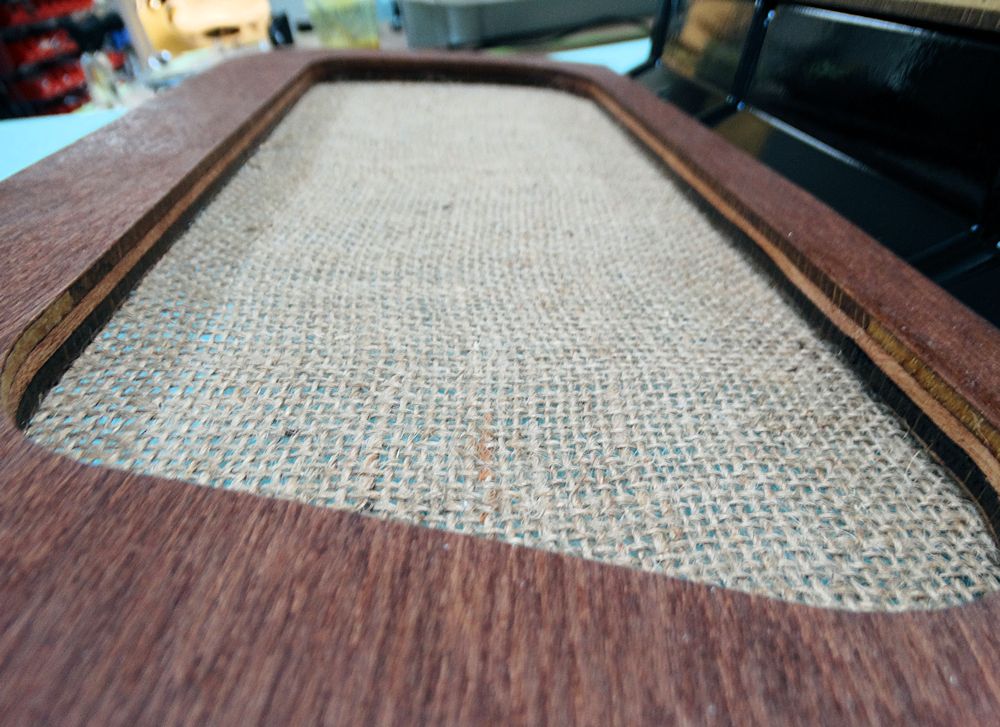
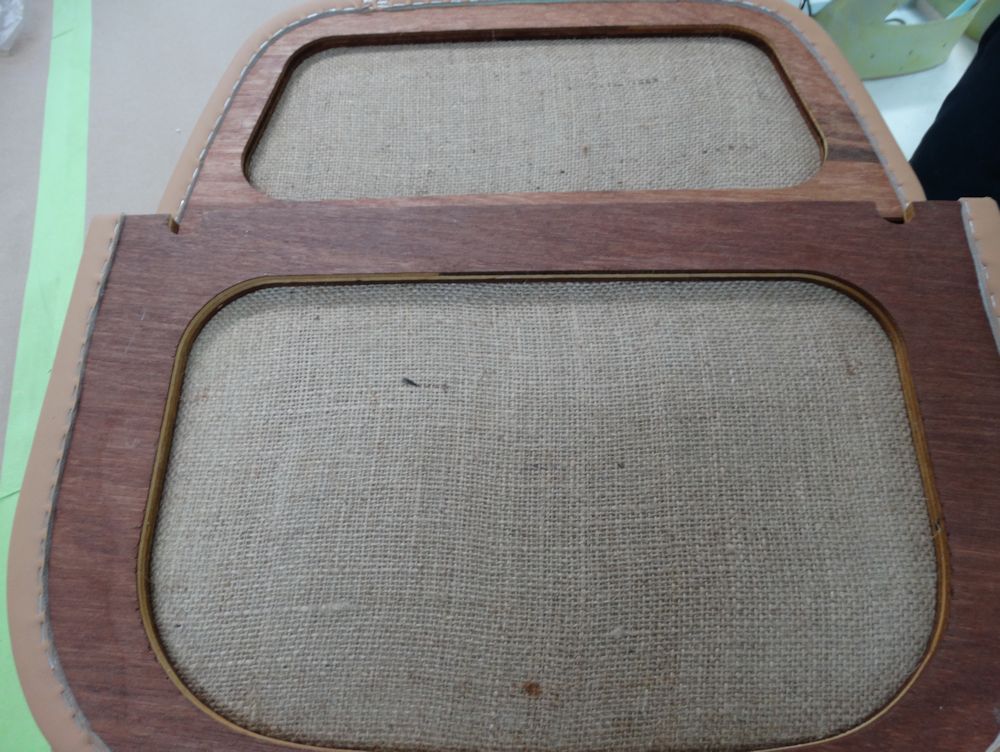
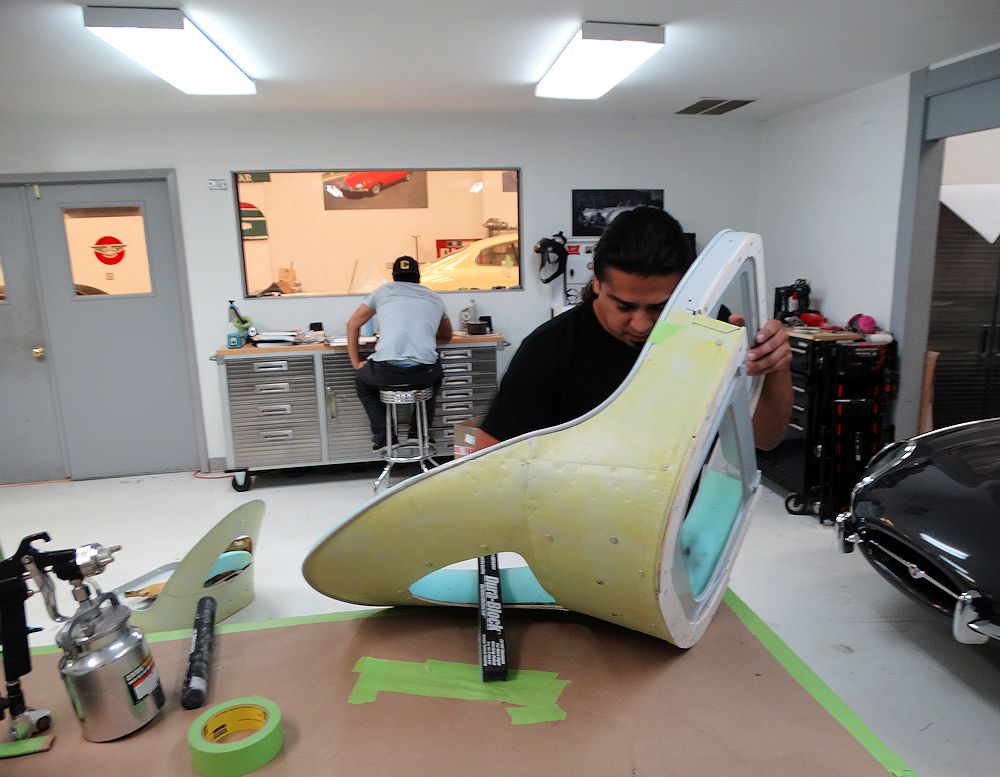
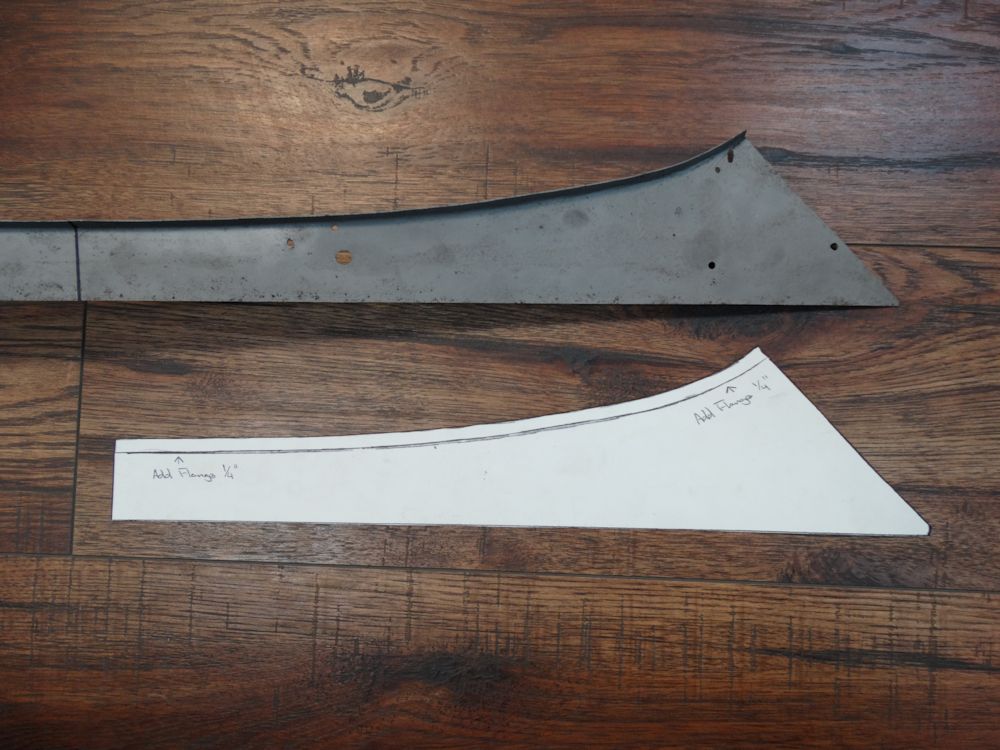
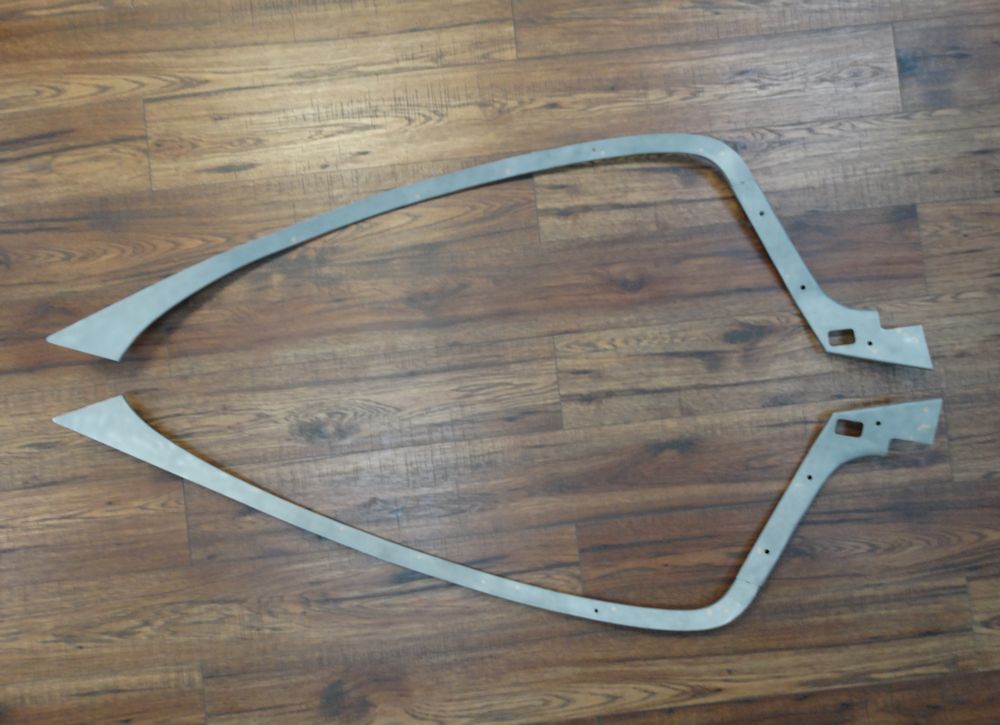
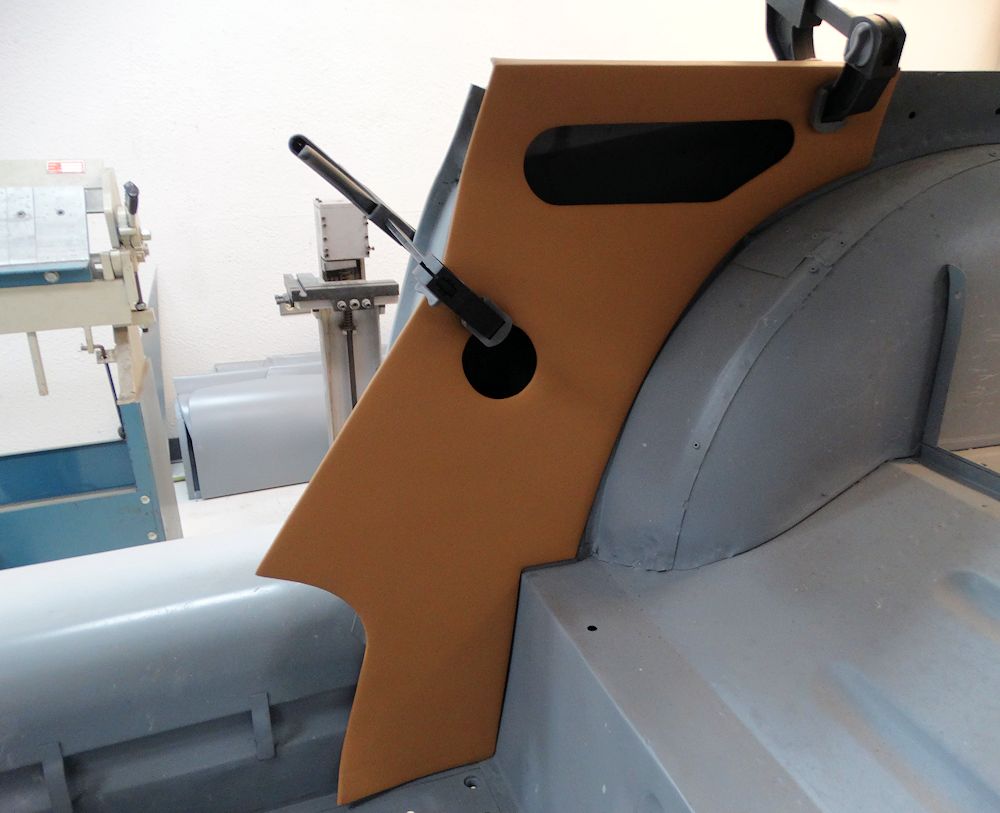
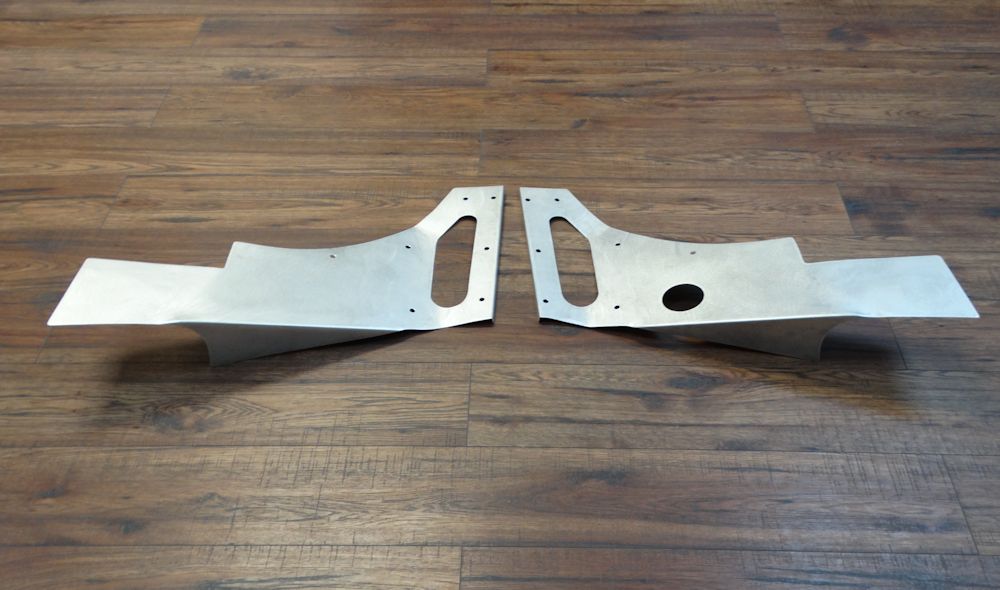
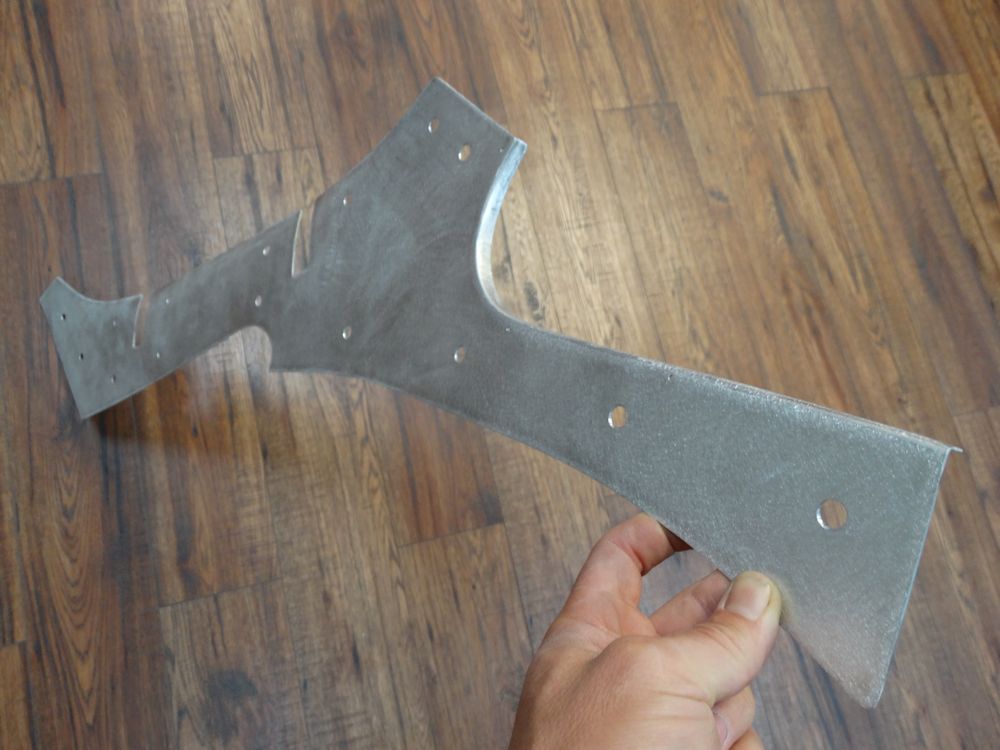
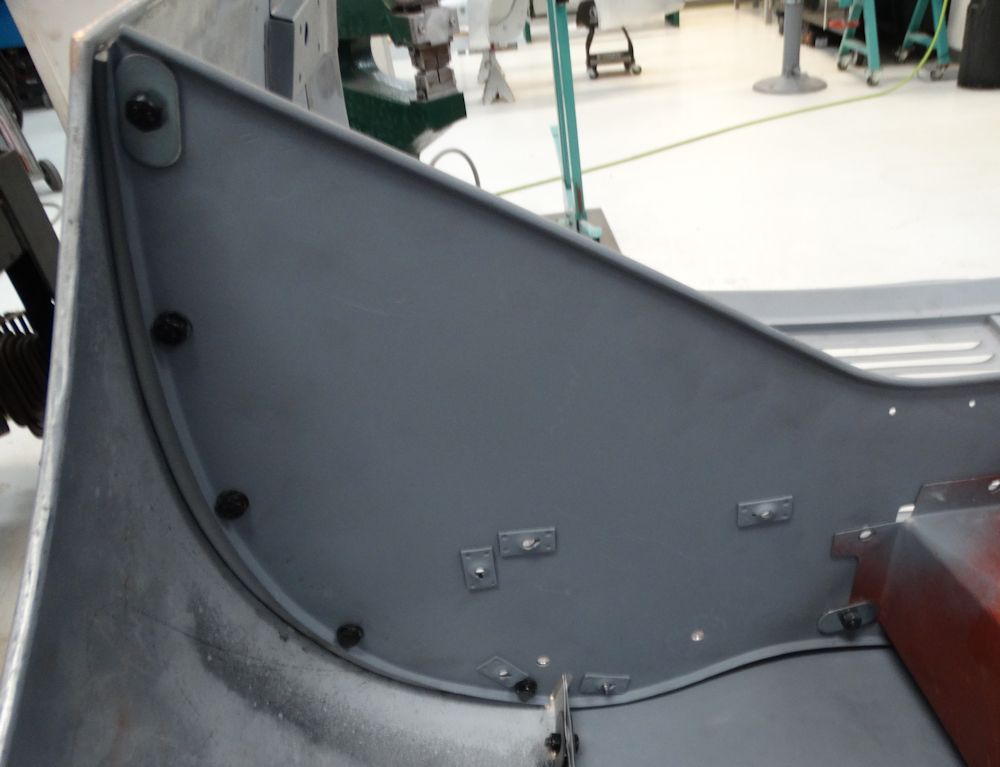
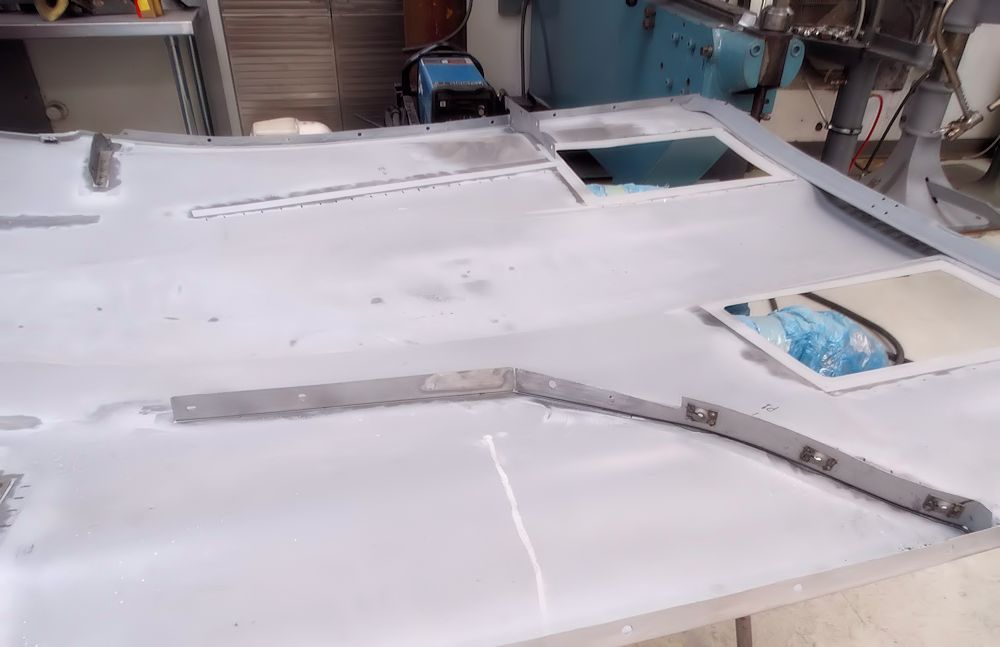
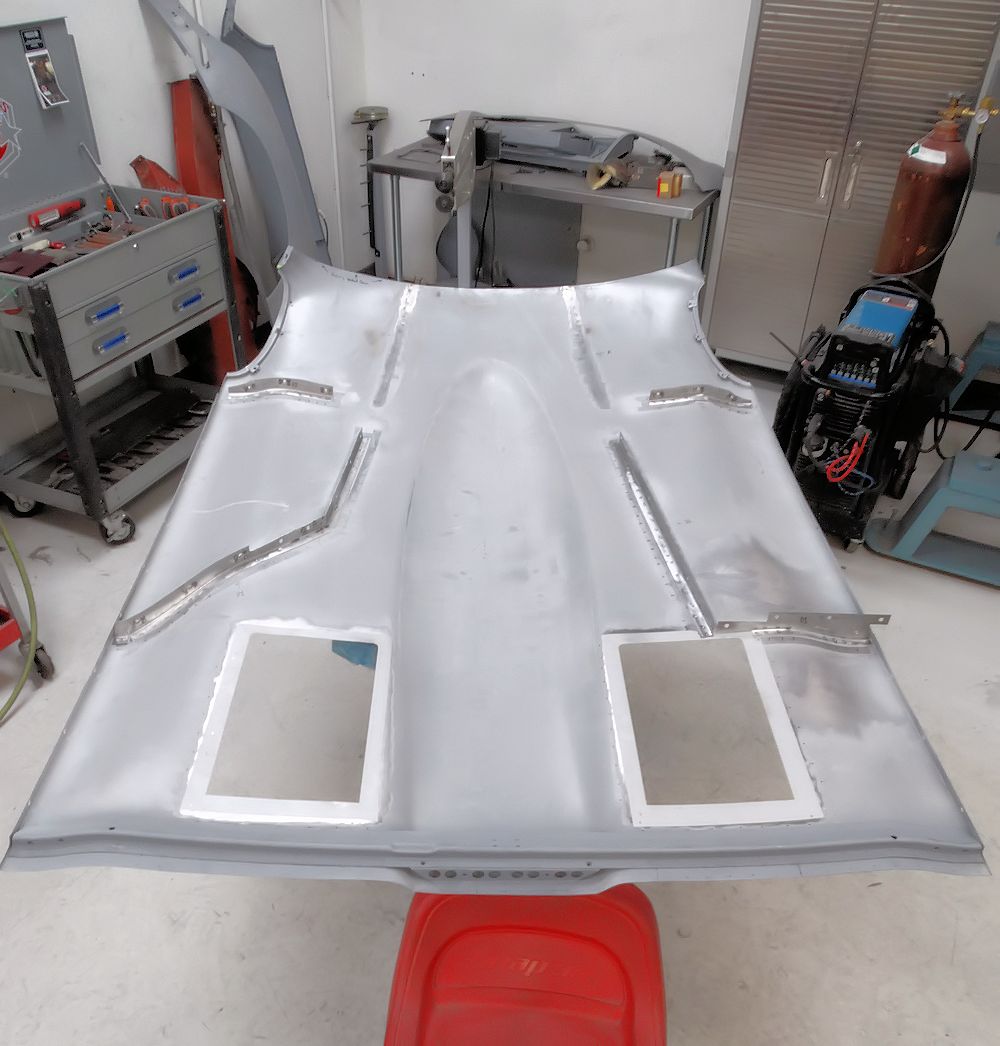
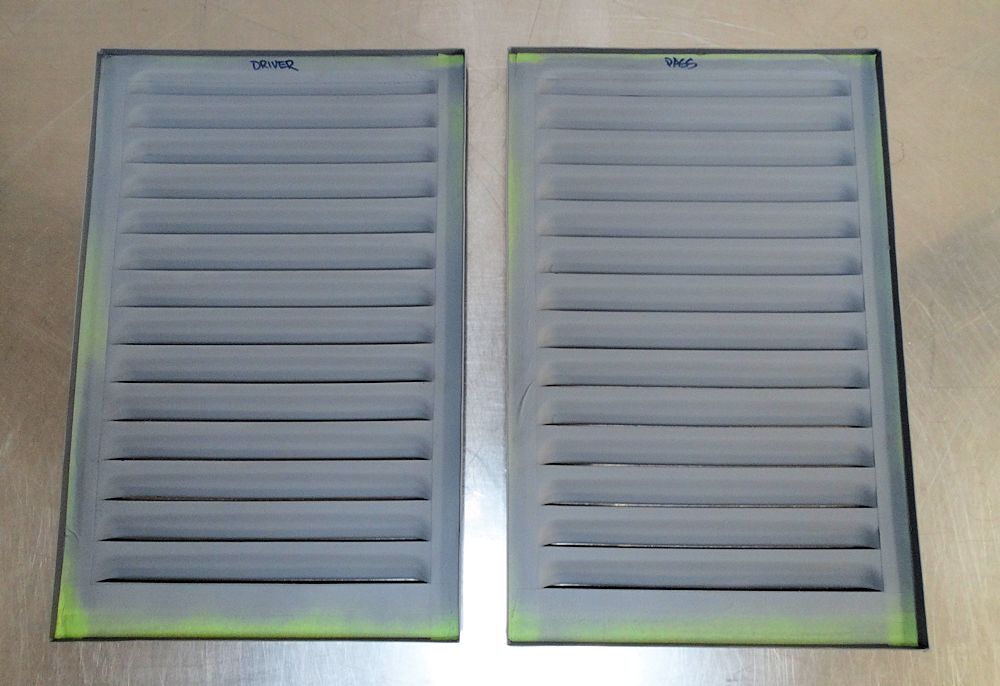
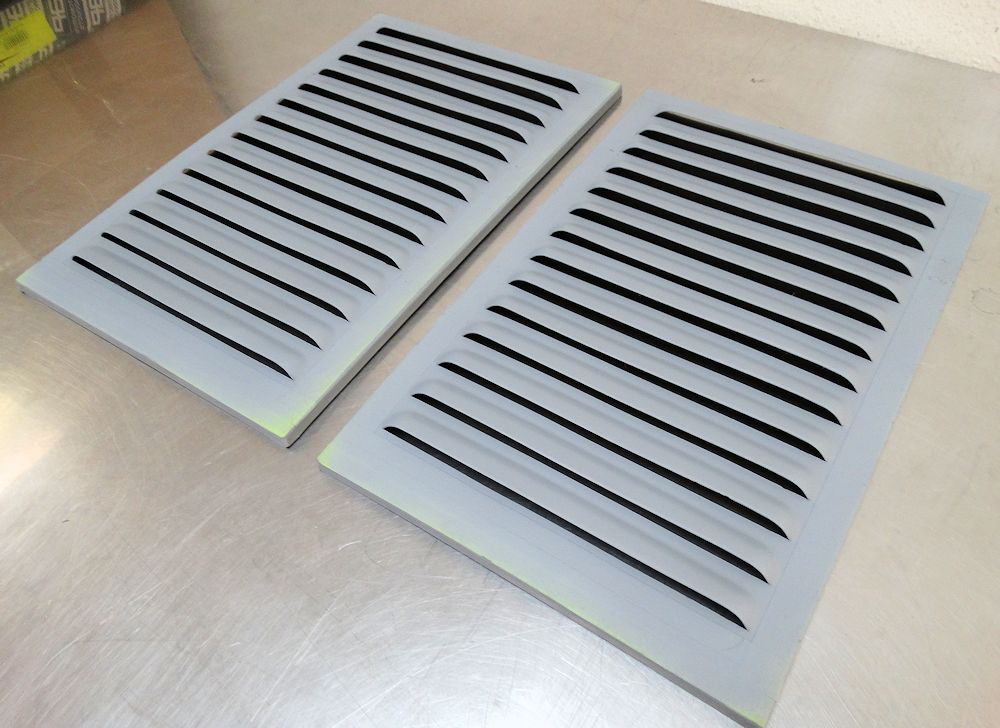
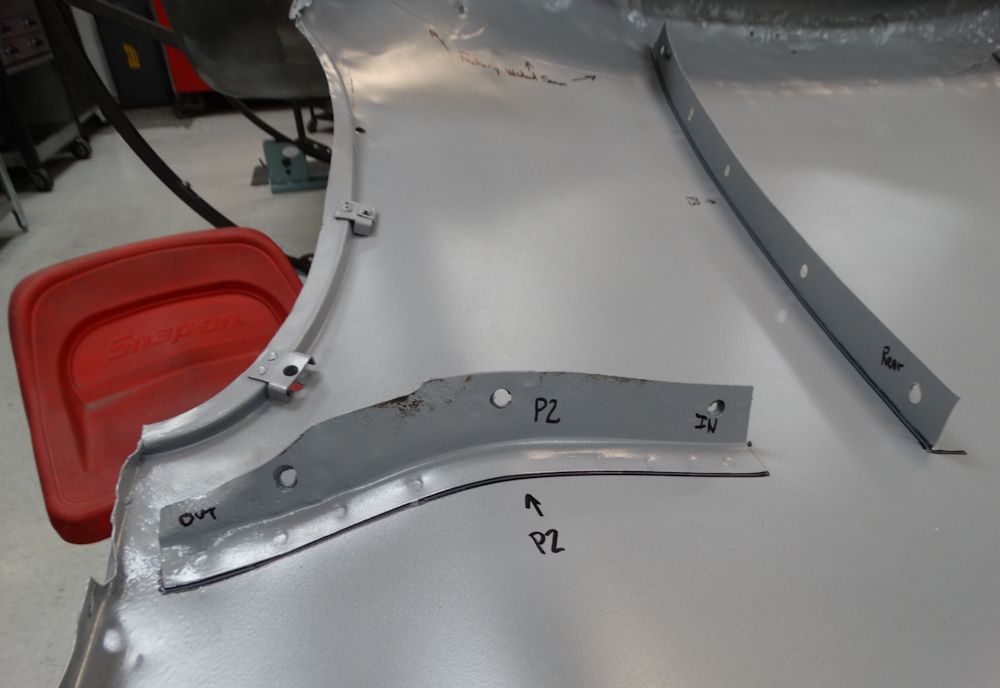
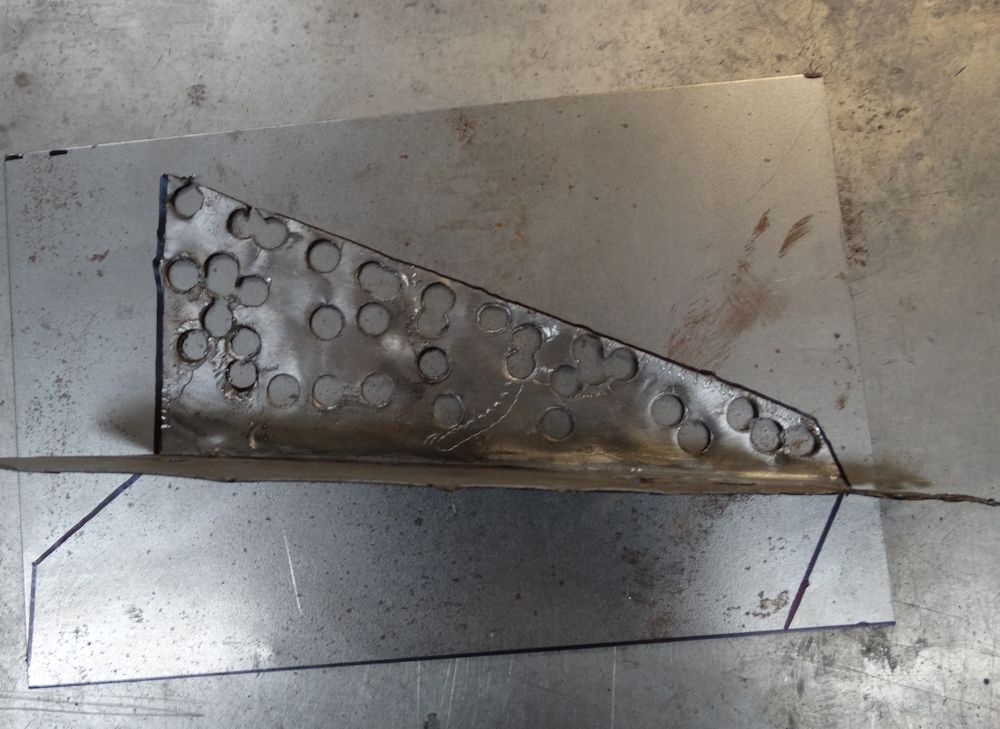
We have had to fabricate several interior trim panels as there are subtle differences between the very early cars and later production models. It isn't really possible to buy a 'kit' for the very early cars, because so many things were hand built, resulting in variations from one car to the next.
 |
 |
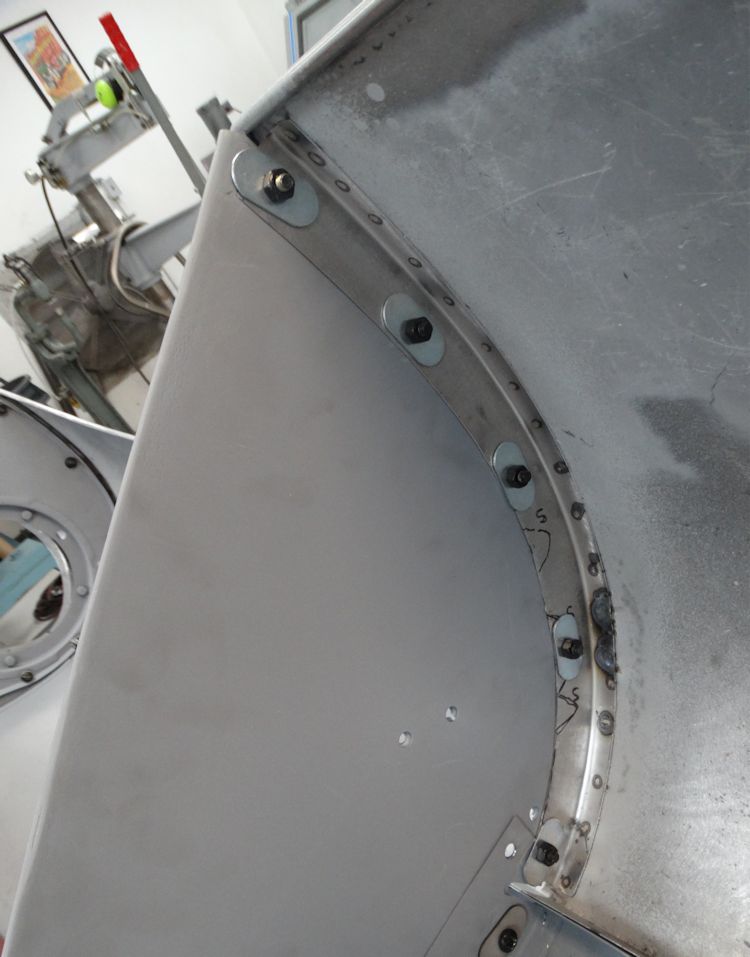
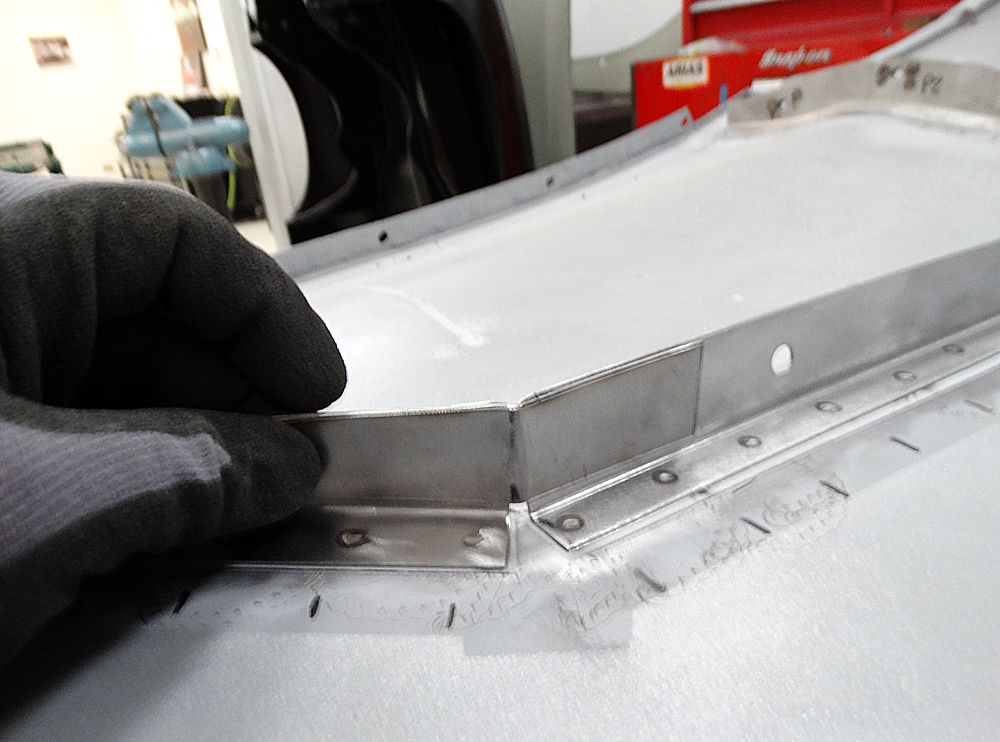
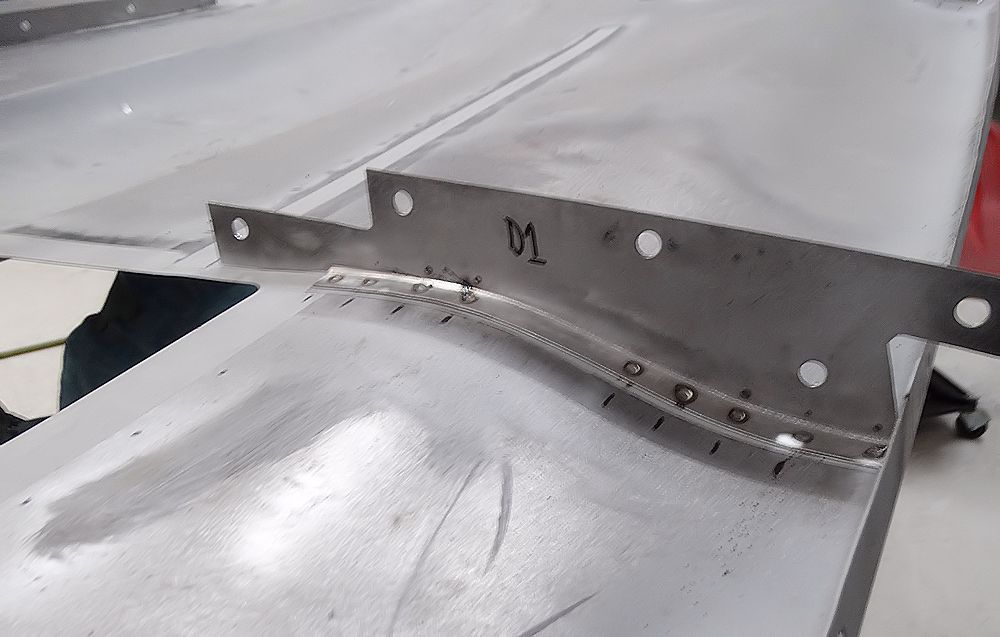
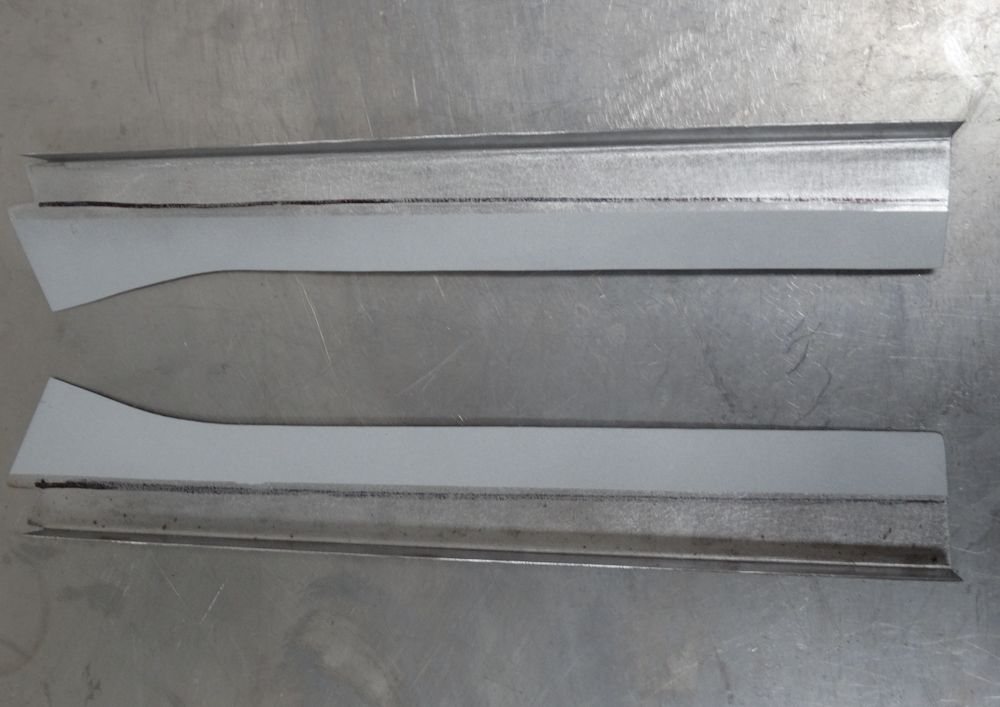
| A unique feature of the very early coupes are
the sabre-like cantrail panels |
Fabricating new cantrail ends |
 |
 |
 |
 |
| Corrected template in center, newly fabricated alloy panel to right |
|
 |
 |
| Note slight difference in position of holes
for cubby and hatch release |
Trial fitting hatch release in new panel |
 |
 |
| New panels will be trimmed in biscuit vinyl |
|
 |
 |
| Panels around hatch itself also had to be
fabricated |
|
 |
 |
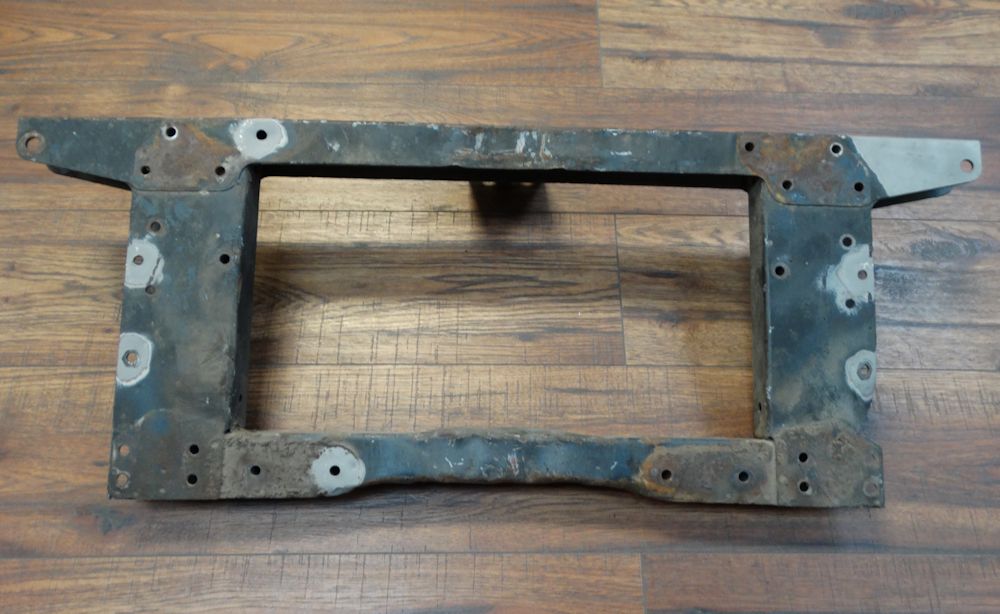
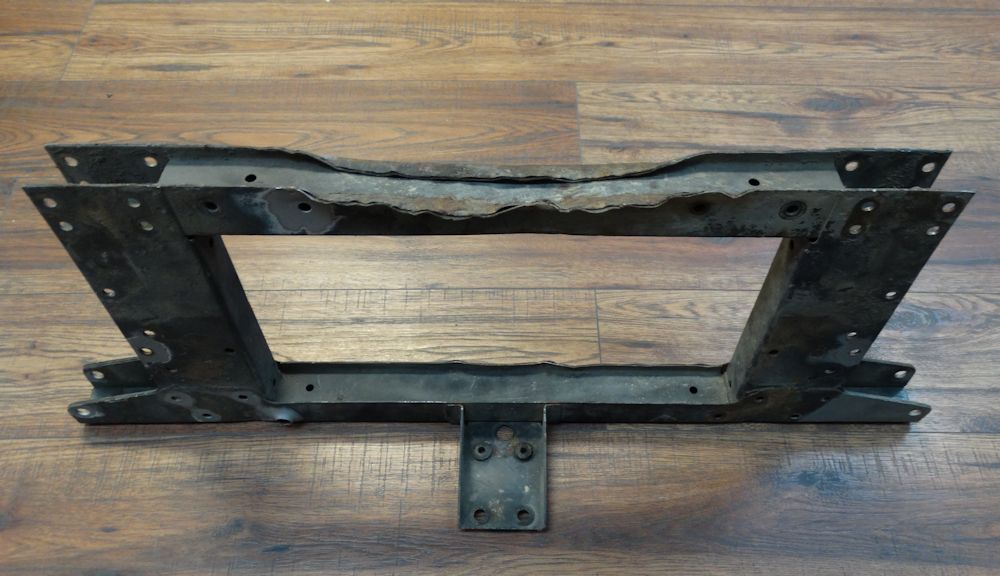
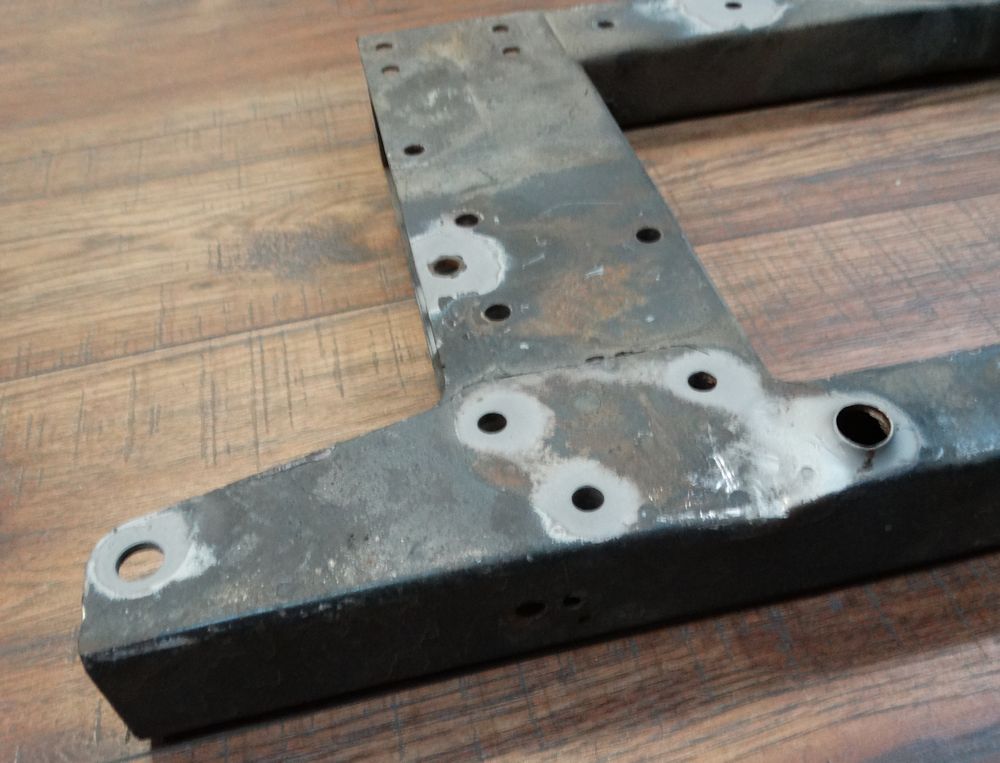
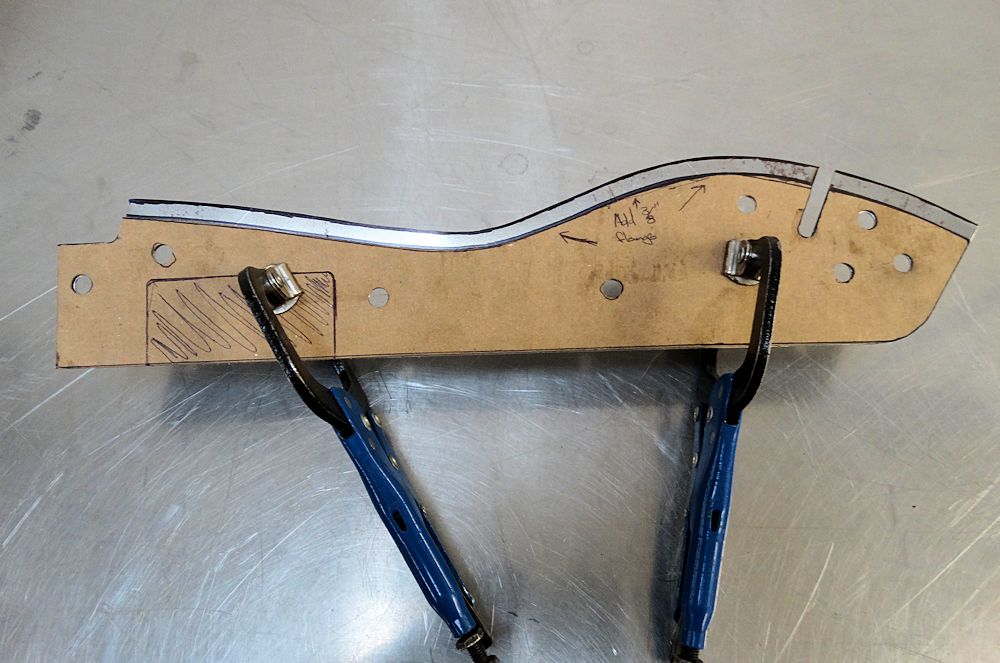
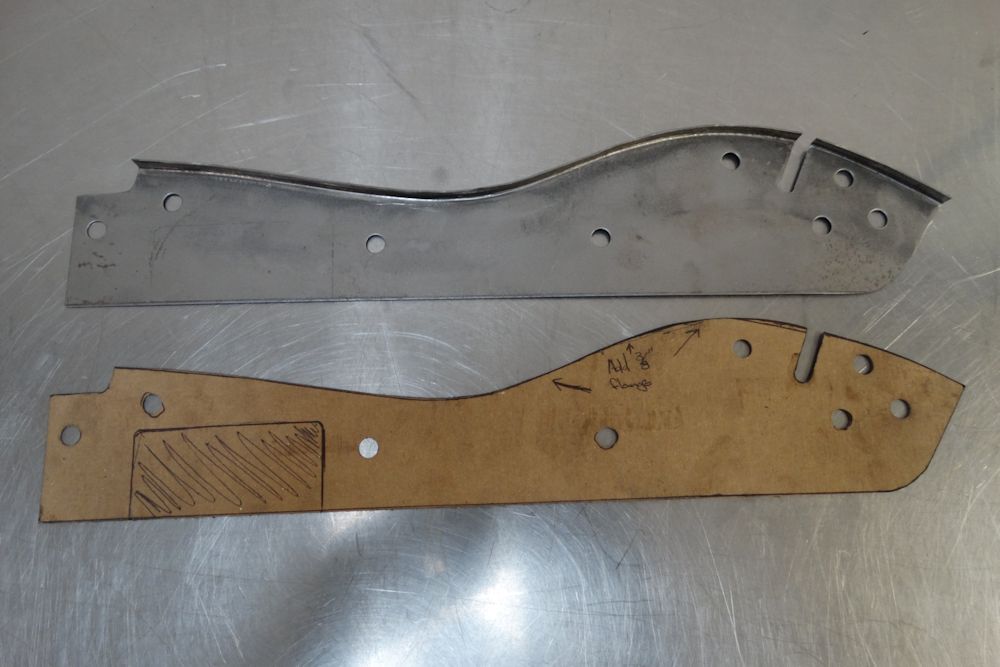
Your original bonnet hinge frame was unfortunately too badly damaged to restore. As there are several differences between the very early hinge frames and the later versions, Matt spent some time modifying a replacement frame to look exactly like the original. The following sequence of photographs show how we achieved this.
 |
 |
| The original frame was manged and rusty |
Radiator support plinth is fabricated on the
very early hinge frames |
 |
 |
| Lower mounting bracket of the early frame |
Lower mounting bracket of later frame, which is heavily reinforced |
 |
 |
| Later radiator support plinth is pressed |
|
 |
 |
| Cutting away the pressed plinth on the later
bracket |
Flat plinth welded in place |
 |
 |
| Brace spot welded on plinth, precisely as the original had been |
License plate bracket tab was not on the very
early frames |
 |
 |
| License plate tab removed |
|
 |
 |
| Finished frame is indistinguishable from the
original |
Your original outside latch bonnet has now been restored and assembled.
 |
 |
 |
 |
Your original picture frame was too badly damaged to save, although we felt it was important to retain the original factory chassis number stamping. To that end, Matt cut away the stamped portion of the original picture frame and transplanted it to a new frame.
 |
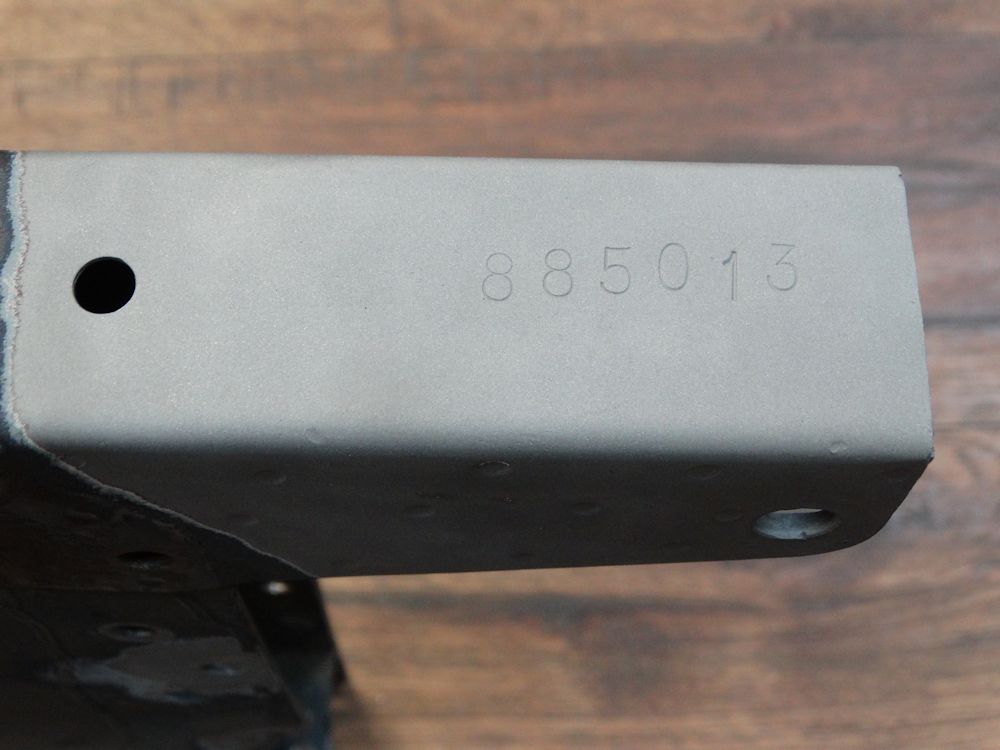 |
 |
 |
| The original picture frame was mangled! |
|
 |
 |
| Factory chassis number stamping cut out |
|
 |
 |
| Original chassis stamping clamped to the new
frame |
Job done! |
Your Team CJ restoration book is already at almost 200 pages - and the car has yet to be painted!
Matt has almost finished restoring your bonnet. All that remains to be done is to reconstruct the belly pan that forms the bottom half of the bonnet mouth.
 |
 |
 |
 |
 |
 |
 |
 |
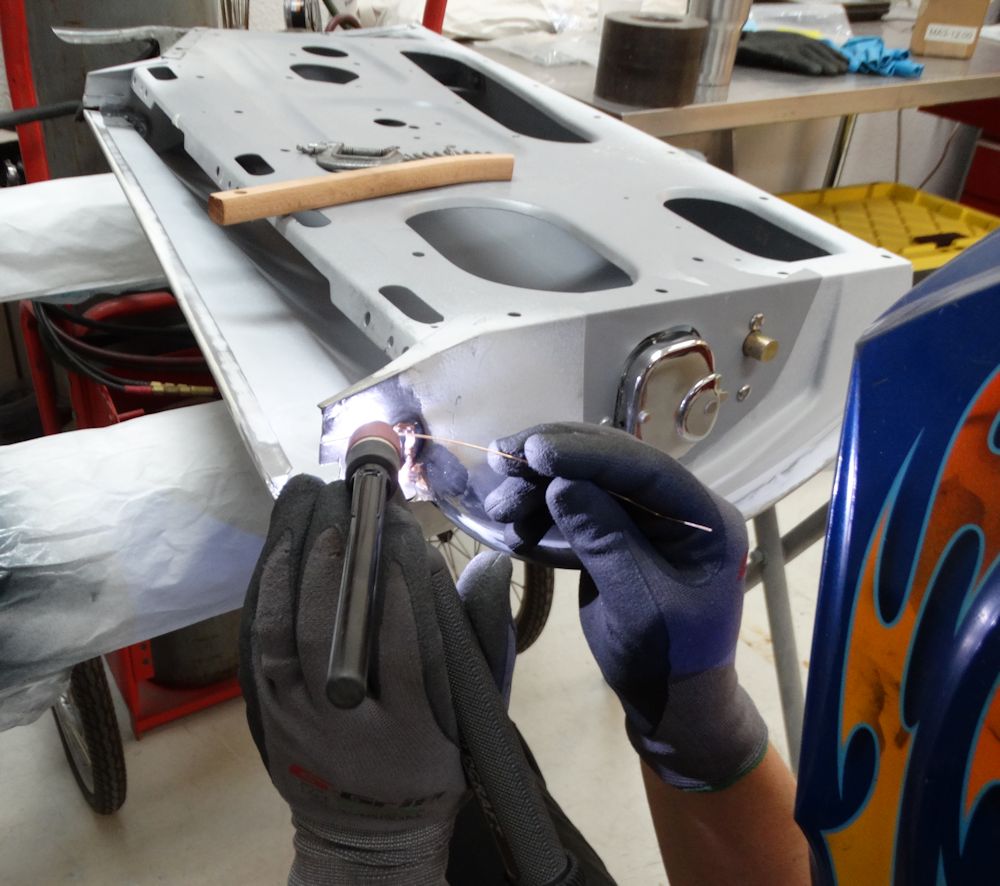
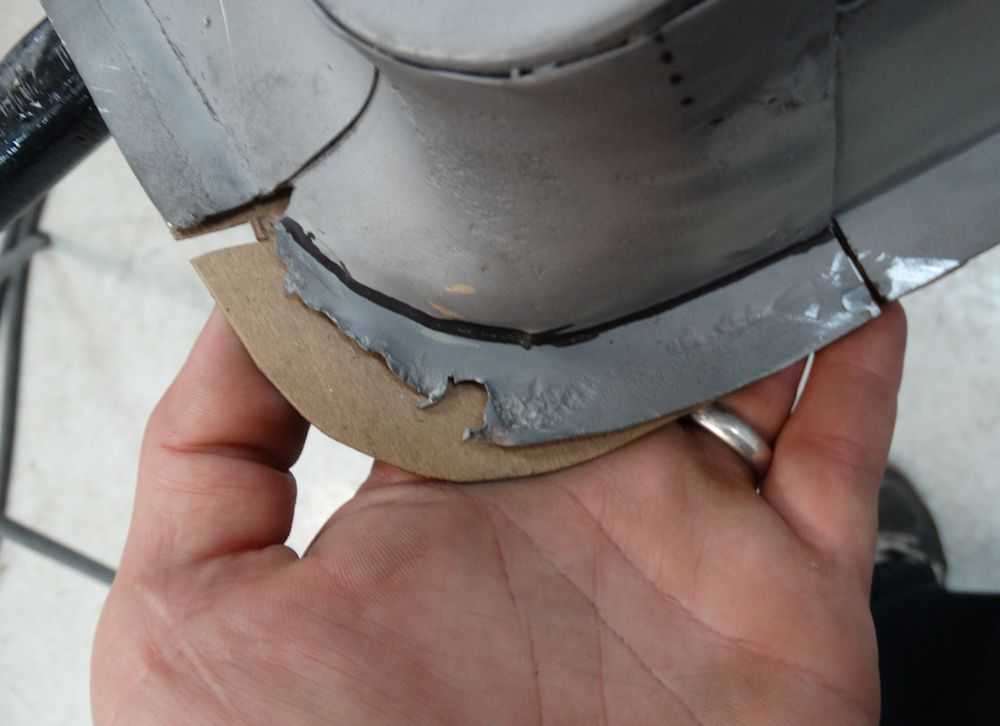
Continuing with the restoration of your original bonnet.
 |
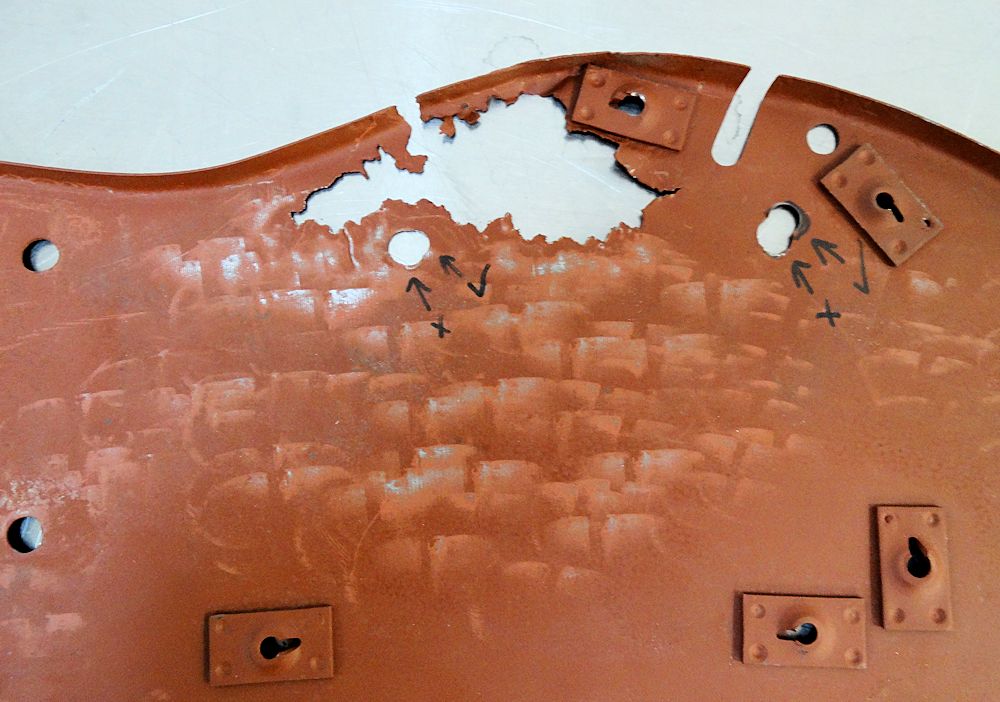 |
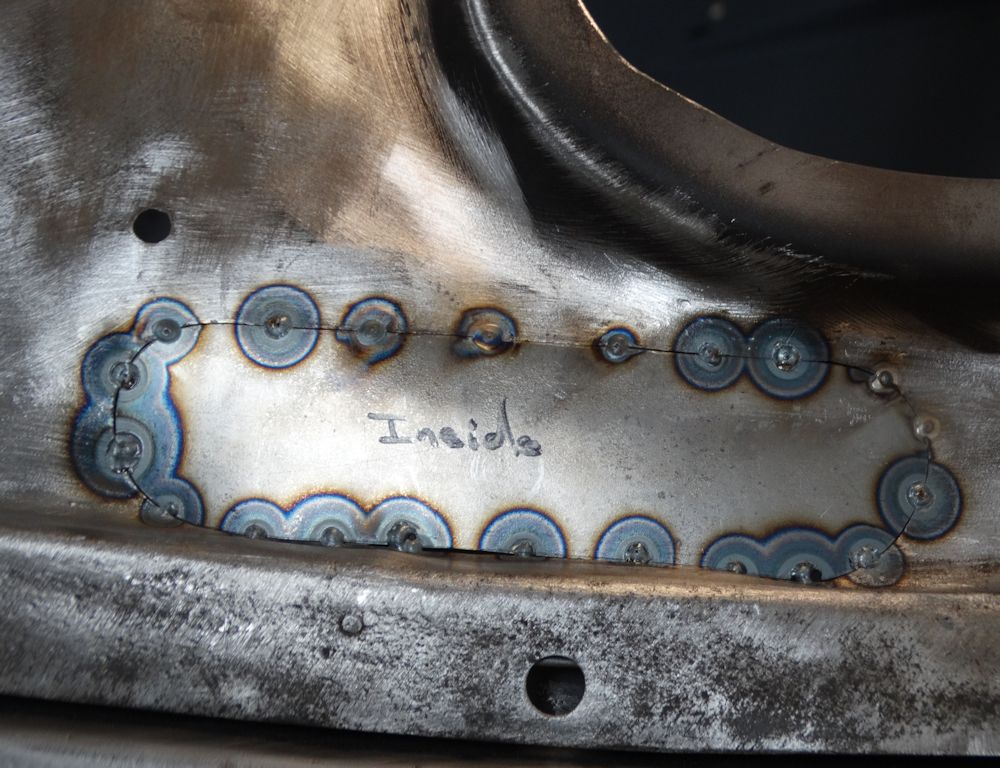
| Some nasty corrosion in the heater intake
panel |
|
 |
 |
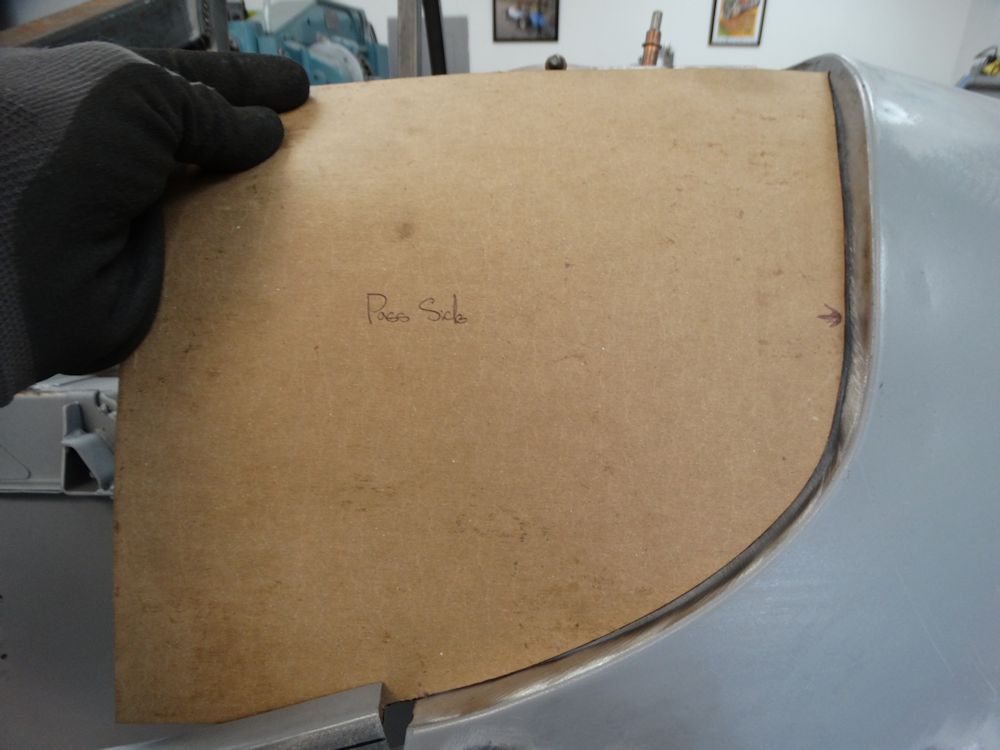
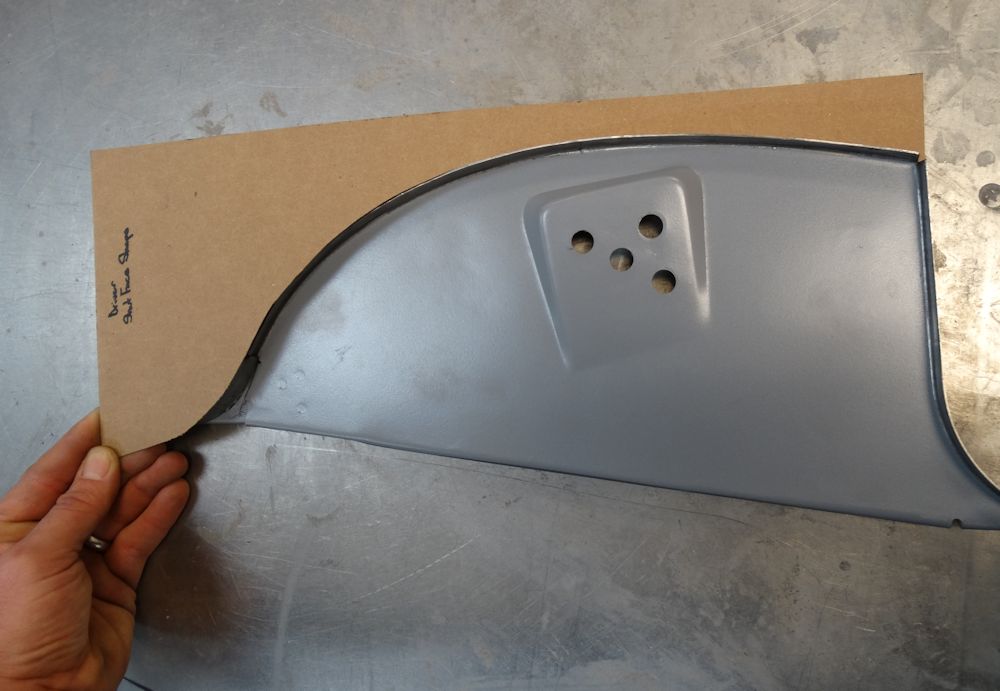
| Making a card template for the repair panel |
|
 |
 |
 |
 |
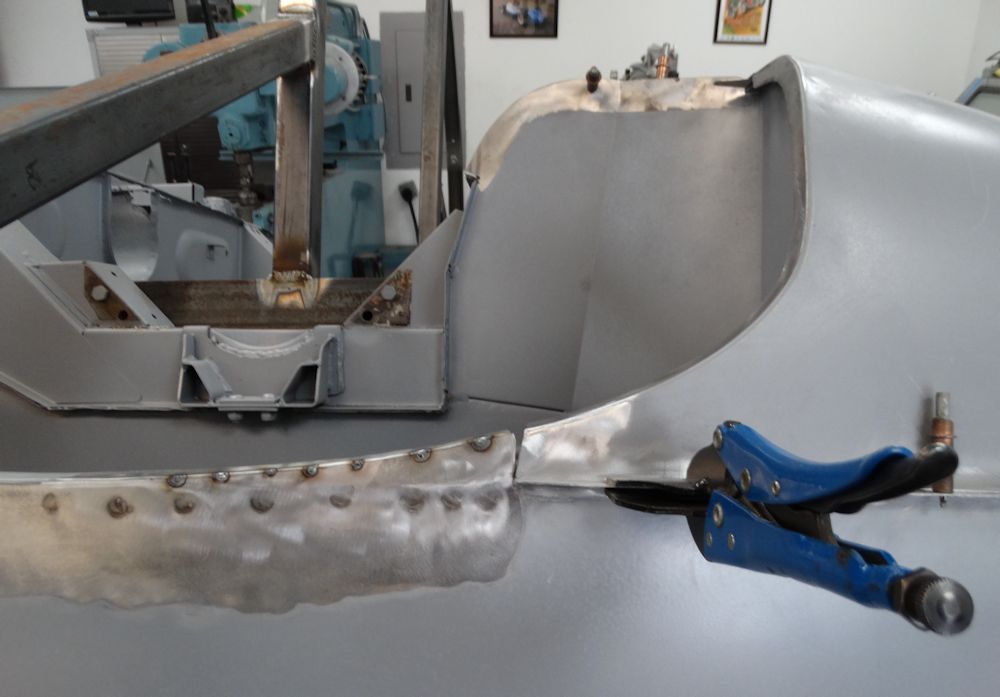
| Tack welding repair panel in place |
|
 |
 |
 |
 |
| Spot welding brackets to underside of the bonnet center section |
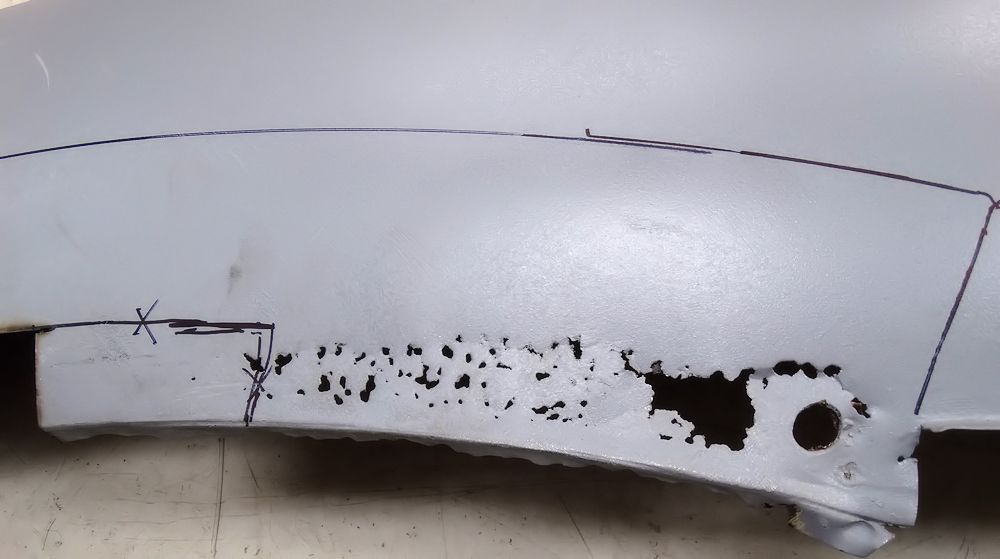
Marking a corroded area of the RH wing to be cut away and patched |
 |
 |
 |
 |
| Corroded sheet metal cut away |
|
 |
 |
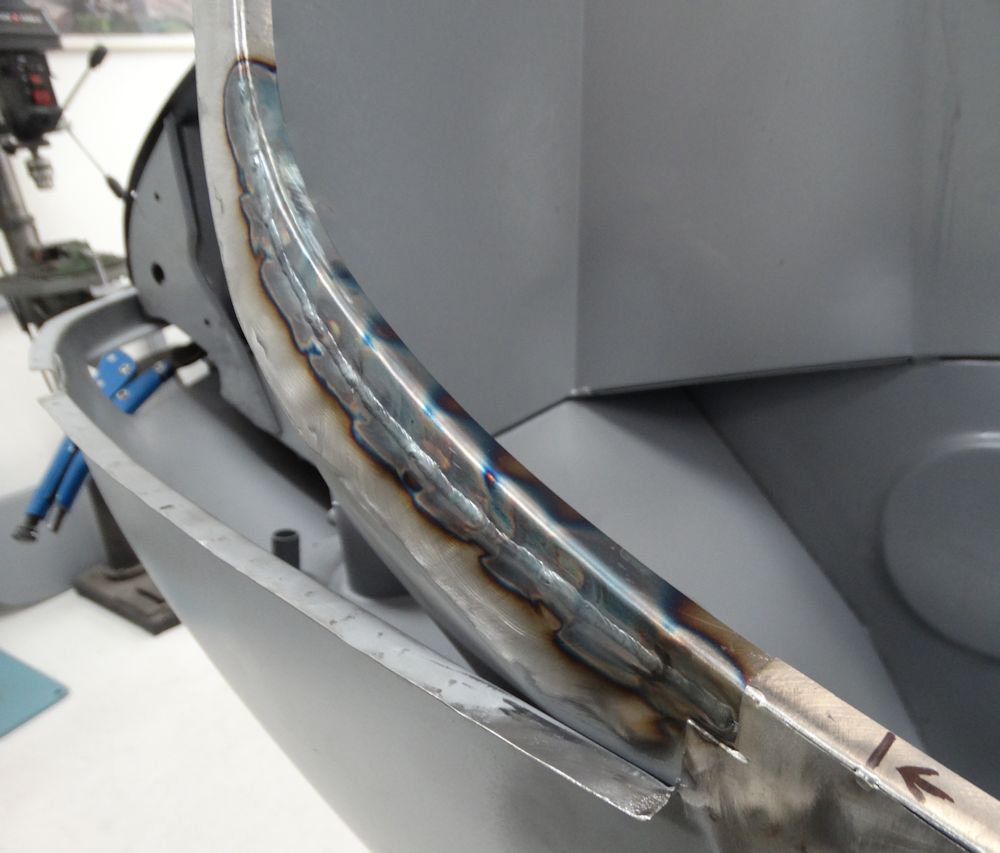
| Repair panel tack welded in place |
After TIG welding and metal finishing, the
repair is virtually invisible |
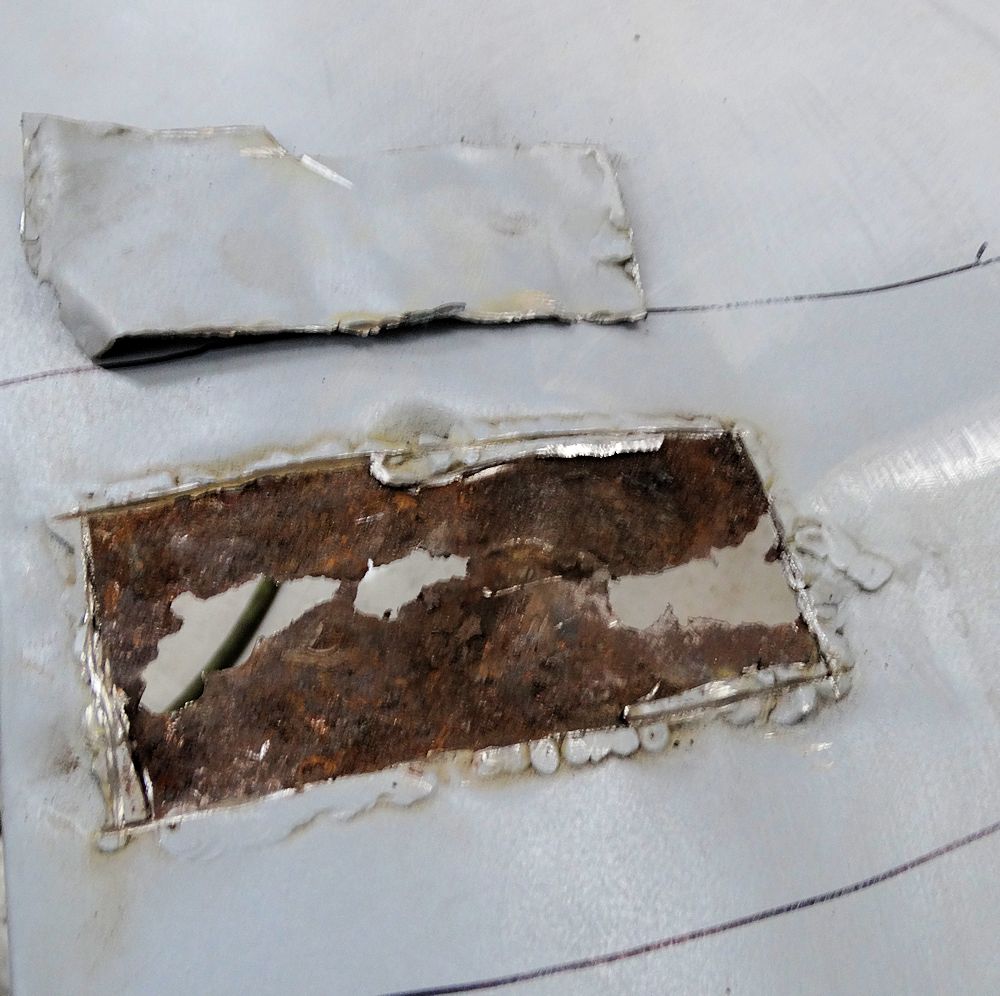
Repairing mangled 'tea tray' panel for bonnet mouth, tack welding repaired nose section to bonnet center section...
 |
 |
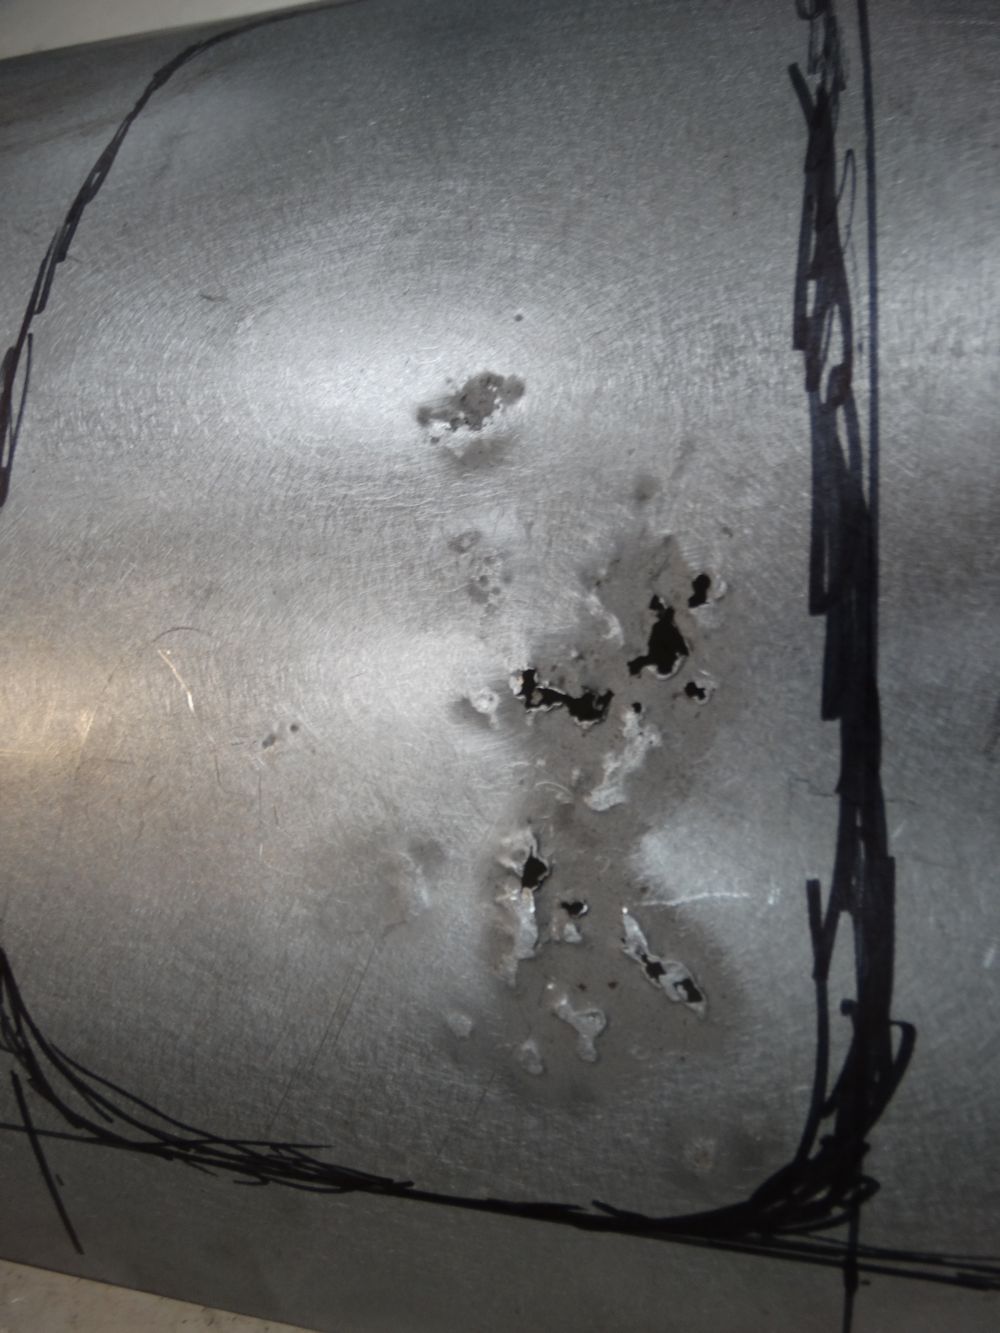
| Bonnet mouth 'tea tray' was badly damaged and also had an unwanted hole |
Front edge was particularly mangled |
 |
 |
| Matt reworked the panel on the English wheel with the planishing hammer |
|
 |
 |
| Trial fitting the repaired panel |
Tack welding repaired nose to original center
section |
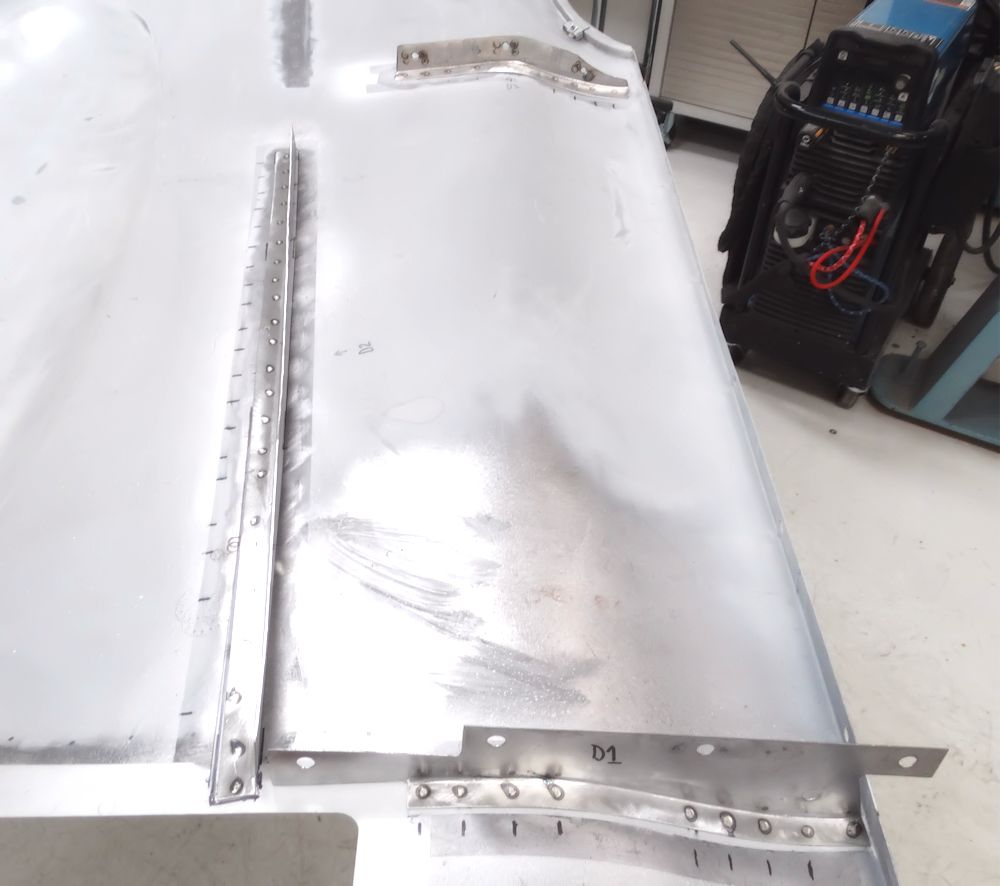
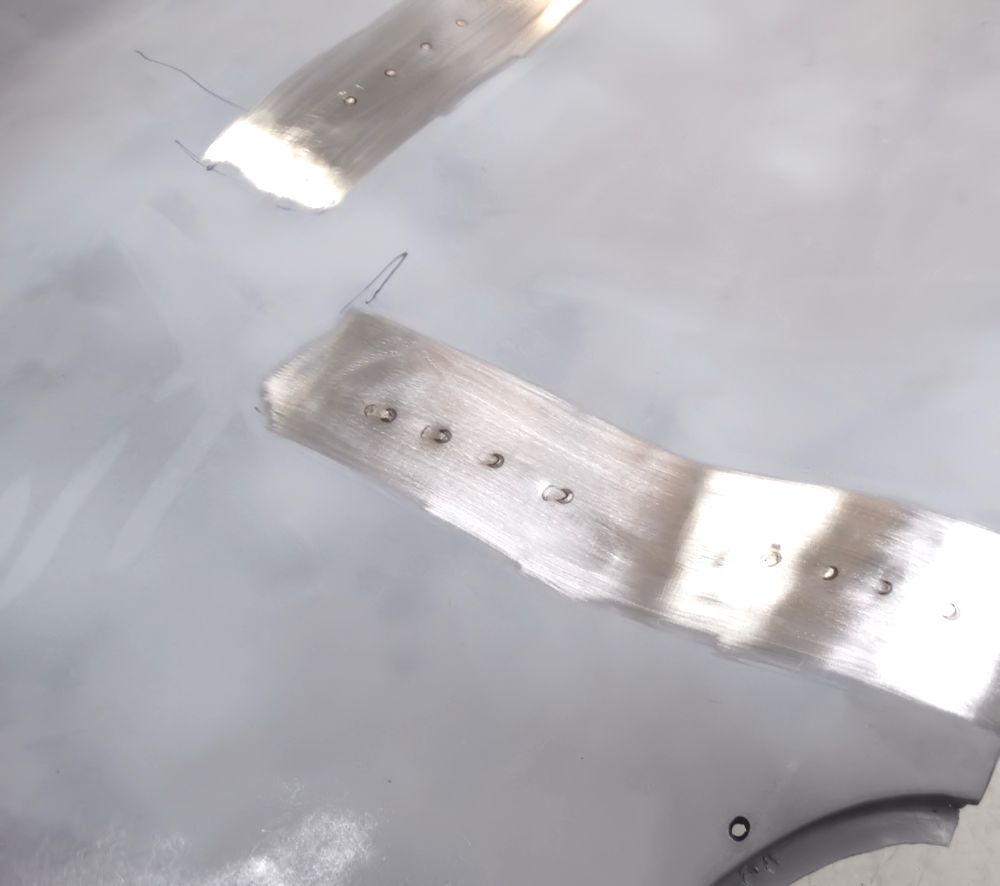
Matt has been pressing ahead with the restoration of your bonnet. Some of the brackets on the underside of the bonnet center section were a little too rough to be re-used, so we fabricated new replacements. On the very early bonnets, all of the support brackets beneath the bonnet center section and on the inner wall of the front wings were spot welded in place, rather than glued, as was the case on later production E Types. In restoring your bonnet, Matt has been taking great care to replicate the precise location of every last spot weld.
 |
 |
| Fabricating new support brackets |
|
 |
 |
| Spot welding support brackets in place |
|
 |
 |
| Every last spot weld is in precisely the same
postion |
|
 |
 |
 |
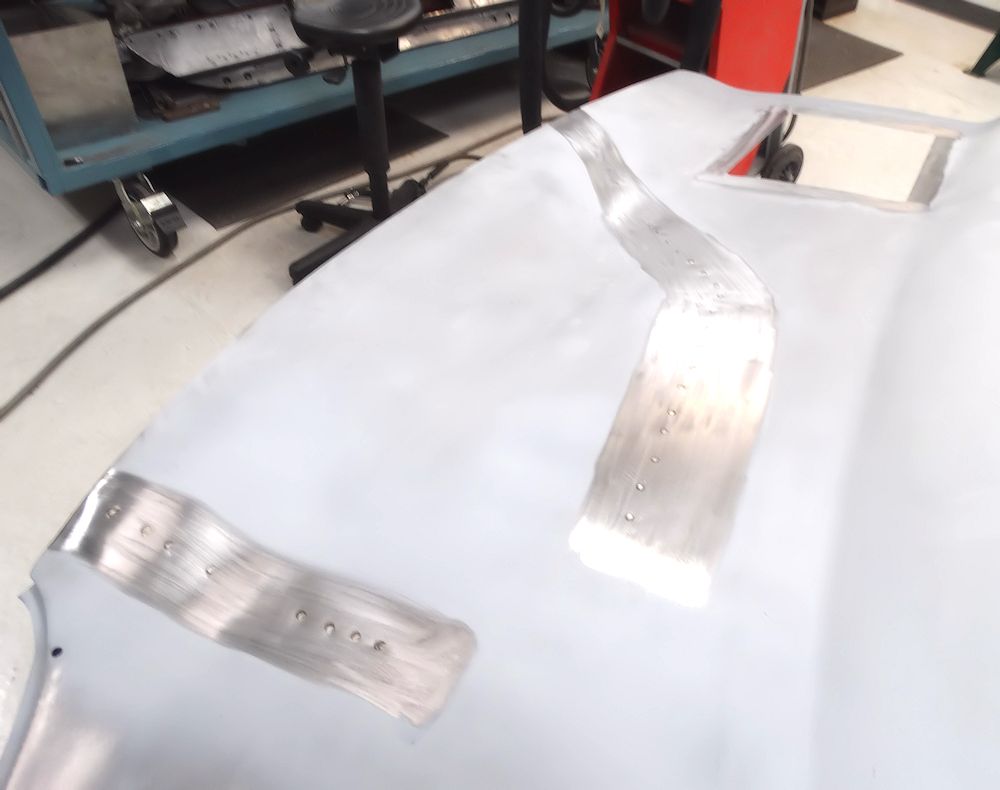 |
| Spot welds visible on top side of the bonnet center section |
|
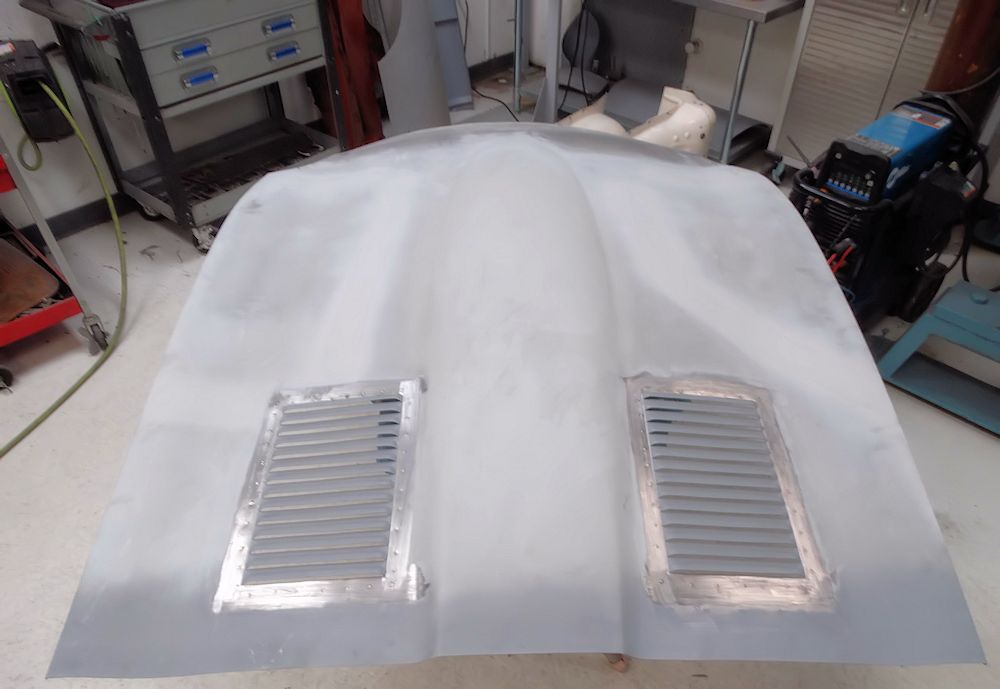 |
 |
| Spot welding the restored louvers back in
place |
|
 |
 |
| Spot welded panels and louvers viewed from beneath |
|
 |
 |
| Air intakes will need some repairs before they can be bolted to the center section |
Pulling dents from one of the air intake
panels |
 |
 |
| Trial fitting the repaired air intakes |
|
 |
 |
| To be continued... |
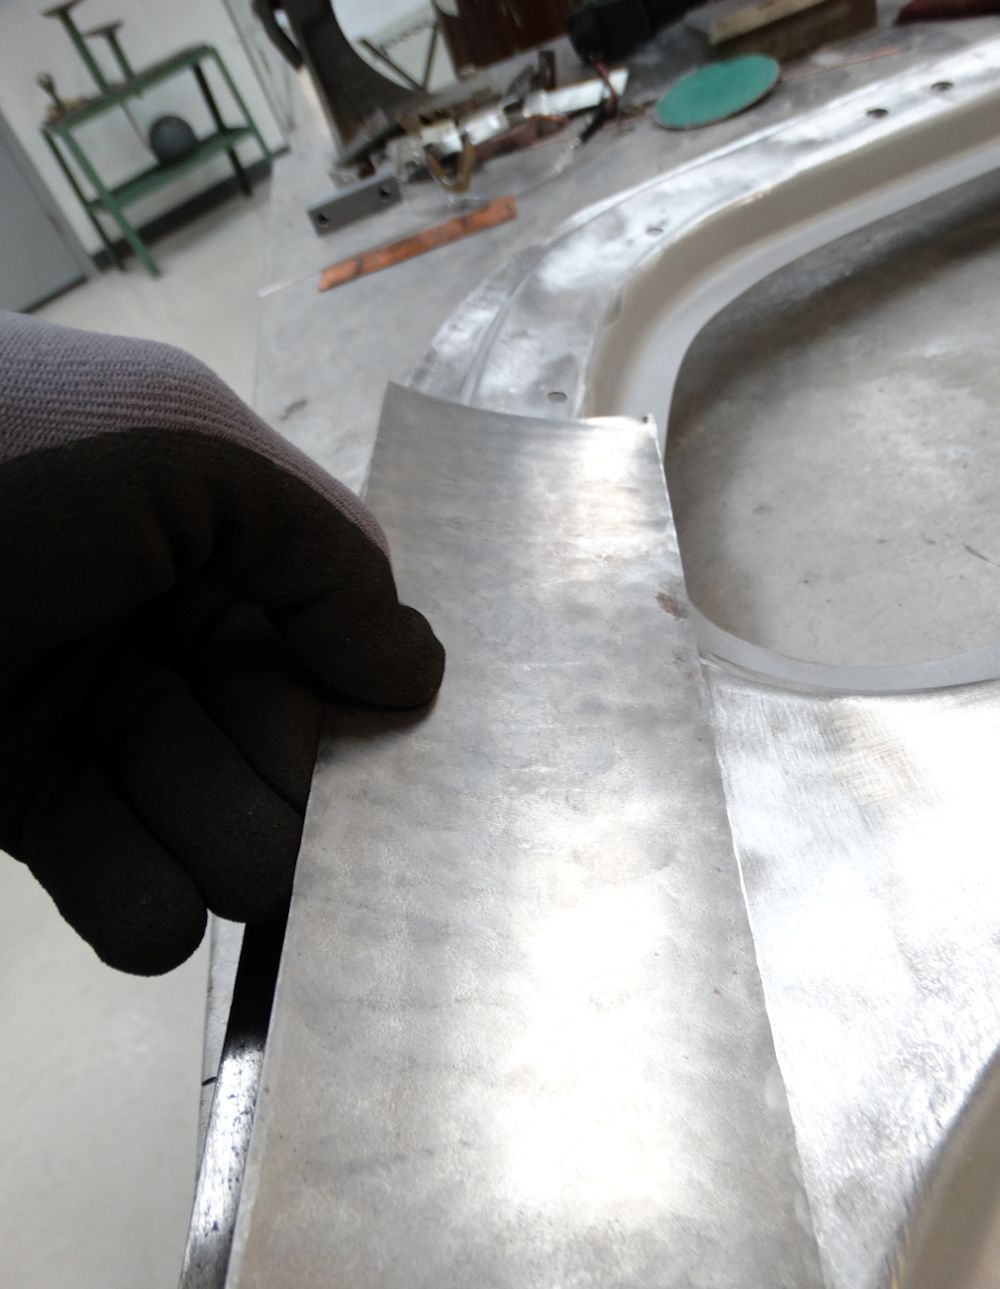
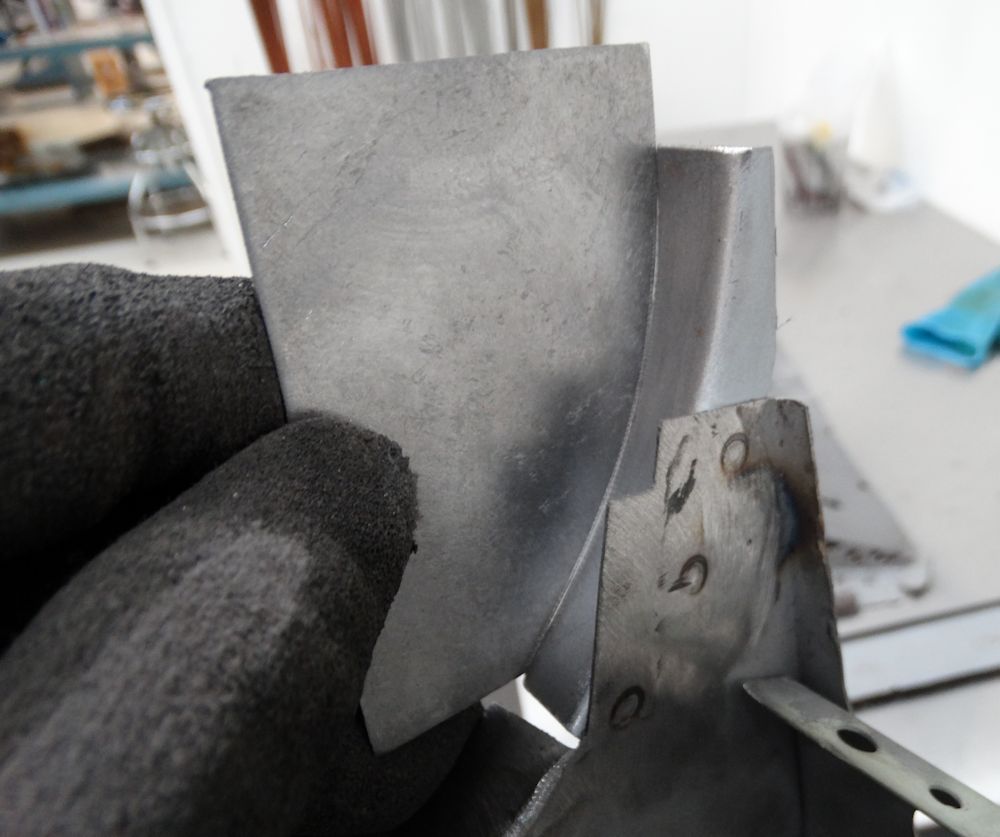
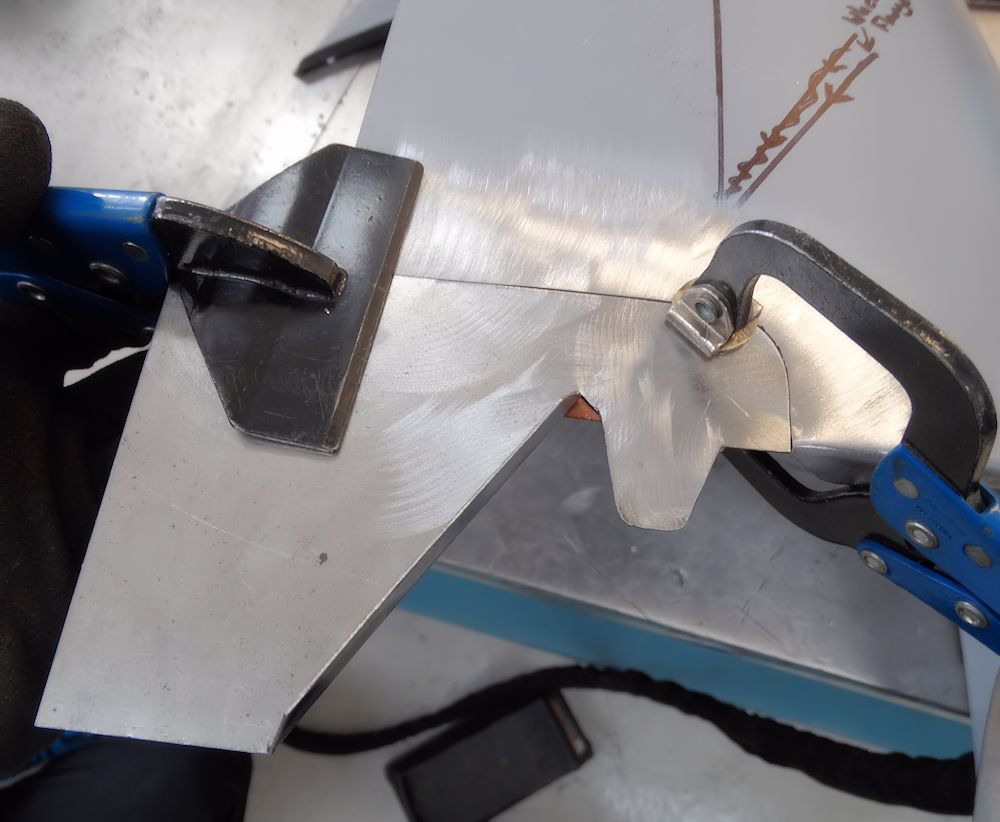
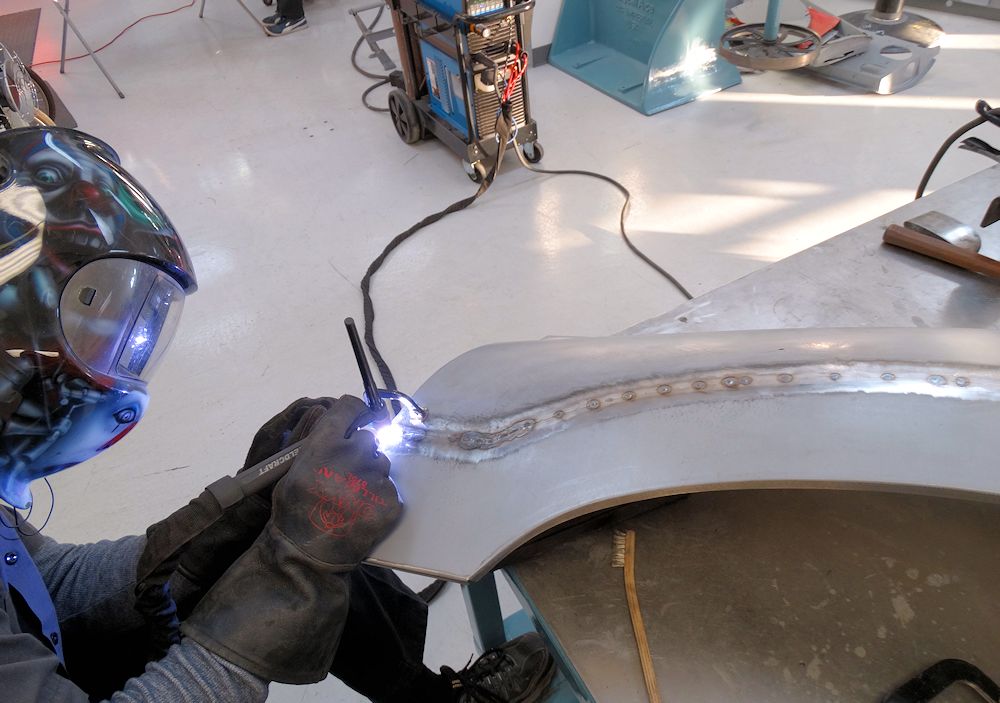
We were determined to save the original bonnet louvers, despite them being badly pitted and actually holed in some areas. It took some ingenuity on Matt's part, including fabricating a copper louver to use as a backing panel to the original louvers during the welding process. I thought you might be interested to have Matt explain his methods personally.
|
An
explanation of welded louver repair, by Matt Quinn The original bonnet from 885013, albeit creased and crunched from accident damage and dilapidated with rust, is obviously worth saving as it is one of only three original LHD outside latch coupe bonnets still with its original body. Our goal with this project is to preserve as much of the original sheet metal as possible. Without going into a rabbit hole of theory and textbook detail, I have compiled my thoughts and actions behind the 'copper louver' idea in the following paragraphs. After
removing both spot welded louver panels from the
bonnet center section, I found extensive rust and
pitting on the mating surfaces between the two panels. After media
blasting, wire wheeling and treating the surfaces with
Ospho (a rust sealer and inhibitor), I could see the
full extent of the dilapidation that had meandered
onto the visible (upper) sections of the louvers. Rust had eaten away
the metal, leaving behind extensive pitting, and even
some holes, all of which had been hidden beneath
multiple layers of paint and body filler.
I regularly
use 30 ounce copper sheet clamped to the back side of
sheet metal when welding in patch panels. The copper acts as
a heat sink and also keeps the back side of the weld
shielded from the atmosphere. This allows small
holes to be filled with weld by keeping the focus of
heat off the area, so the base metal will accept a
filler rod without disappearing. After making a
test panel with our louver cutter on the Pullmax
machine, I was able to repair the original louvers by
copper backing them during the welding process. The louver cutter
made a slightly less pronounced replica of the factory
louvers so it backed the stamping perfectly. I lightly clamped
the copper louver in place and used a silicon bronze
rod to TIG weld up the pitted areas.
|
 |
 |
 |
 |
| Original spot welds were cut out in order to
separate the louvers from the center section |
Punching out plugs to fill the holes left
cutting out the original spot welds |
 |
 |
| Welding the plugs |
|
 |
 |
| Copper 'backing' louver fabricated on the
Pullmax |
|
 |
 |
| Copper louver lightly clamped in place |
|
 |
 |
 |
 |
| Front louver actually holed |
|
 |
 |
| Note copper louver visible through the rust
hole |
|
 |
 |
| Pitting and hole now filled with silicon
bronze |
|
 |
 |
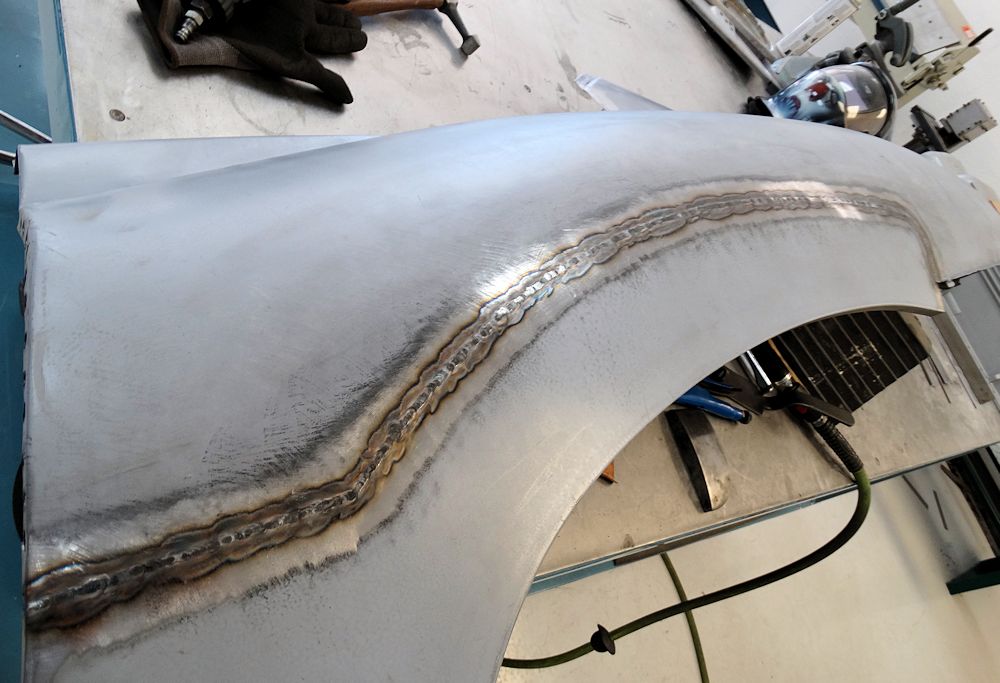
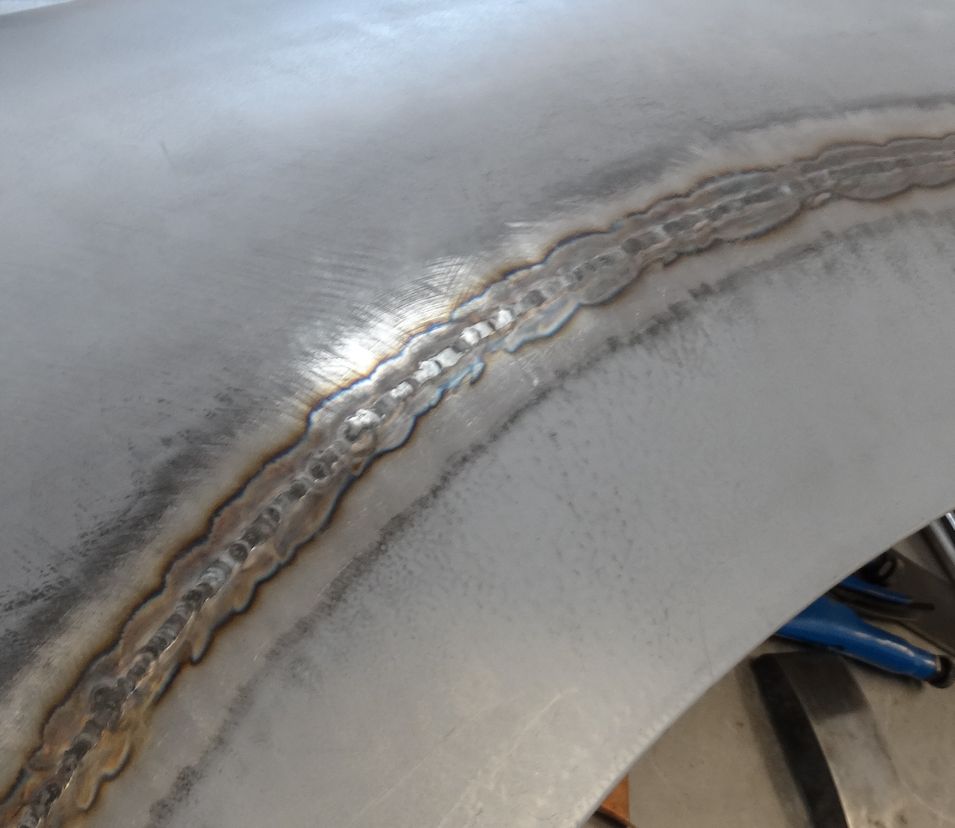
| Louvers now almost ready to be spot welded back onto the center section |
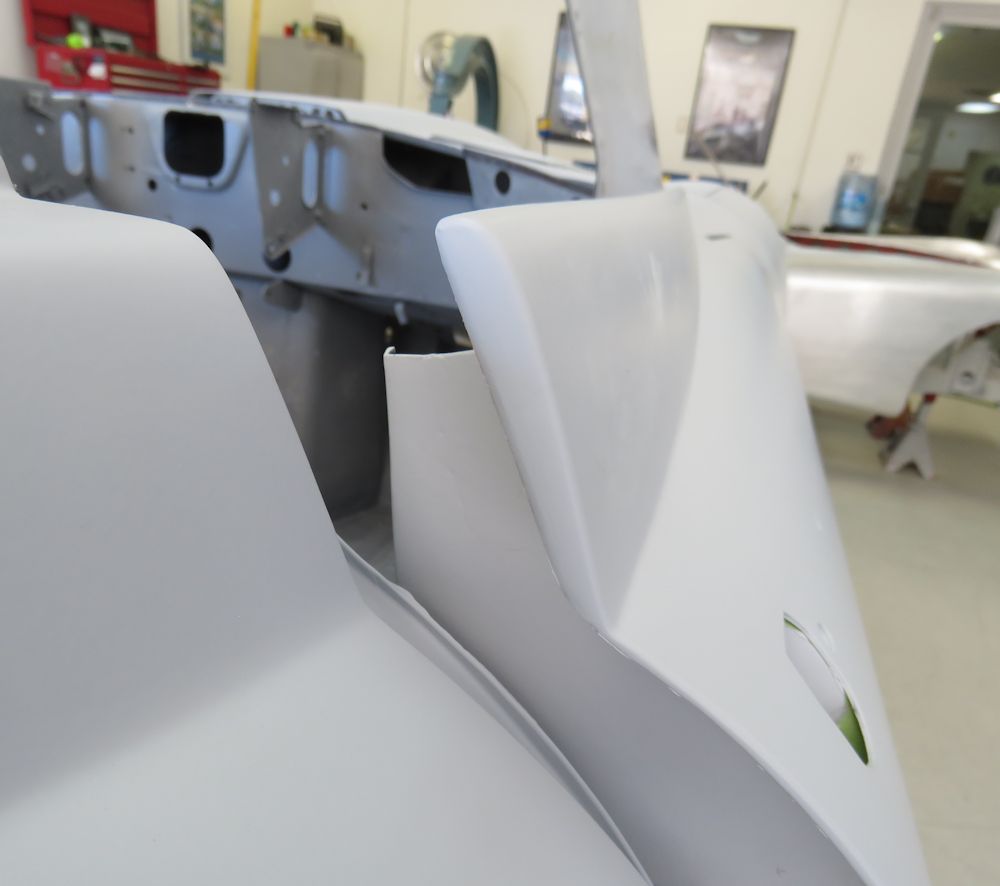
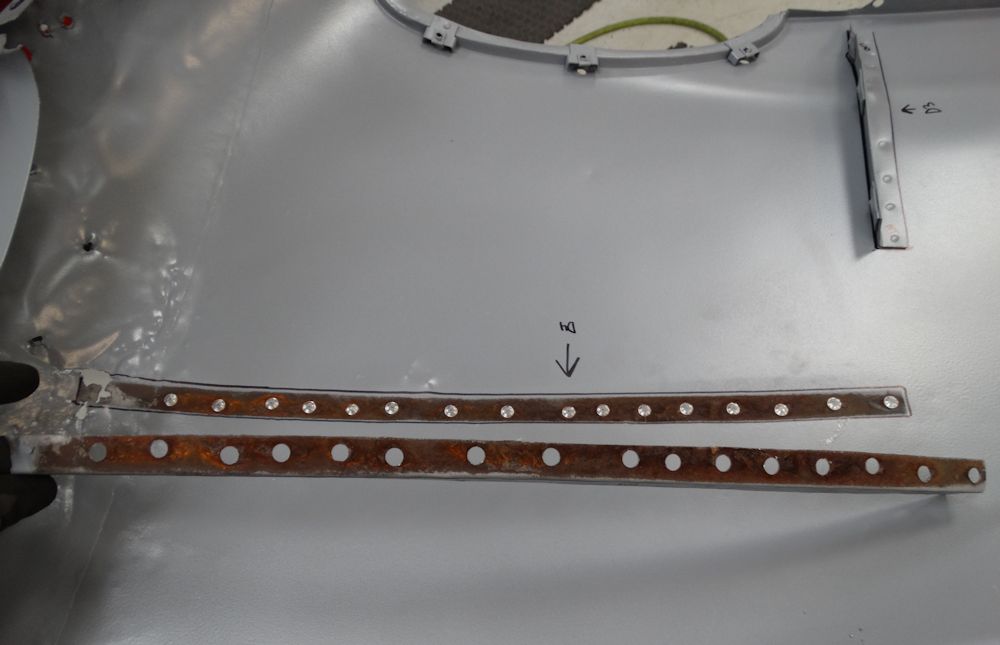
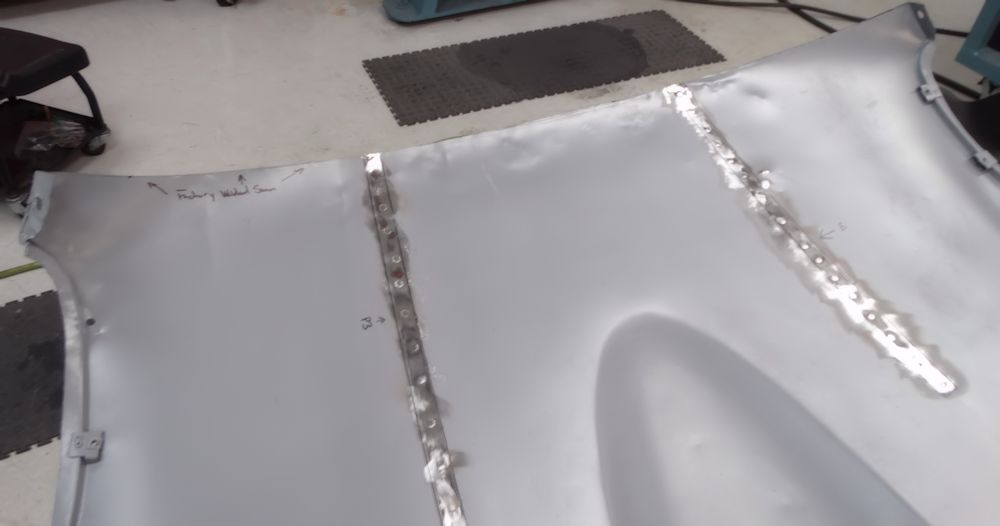
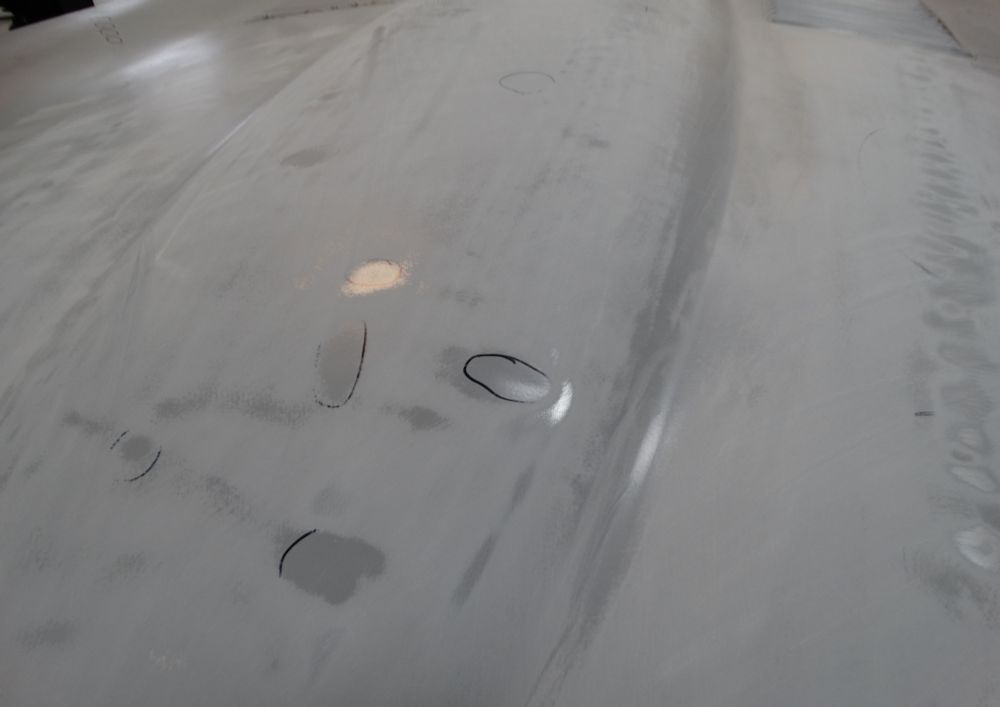
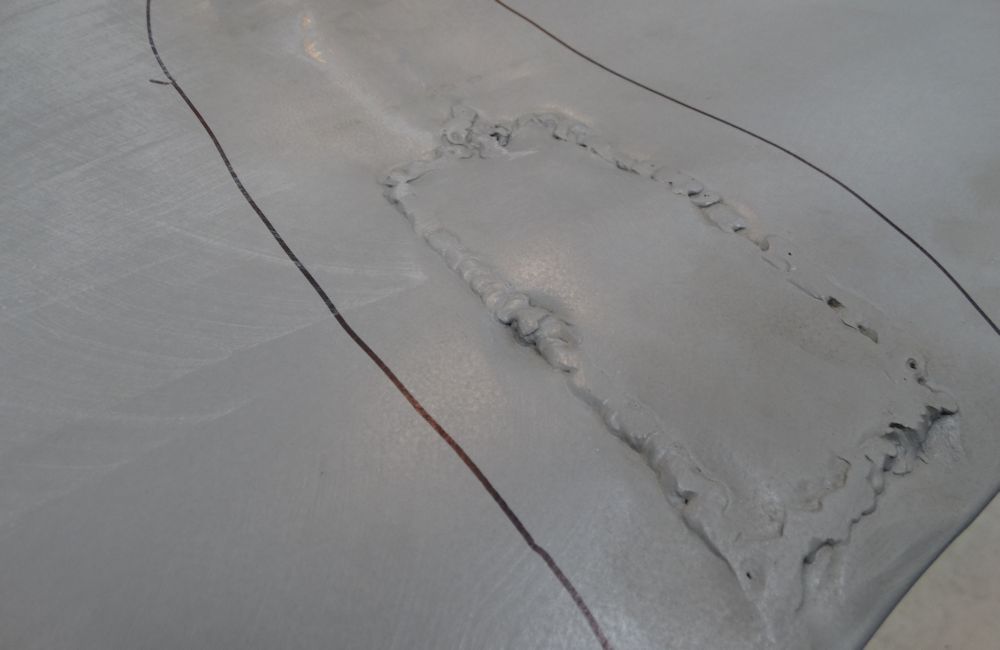
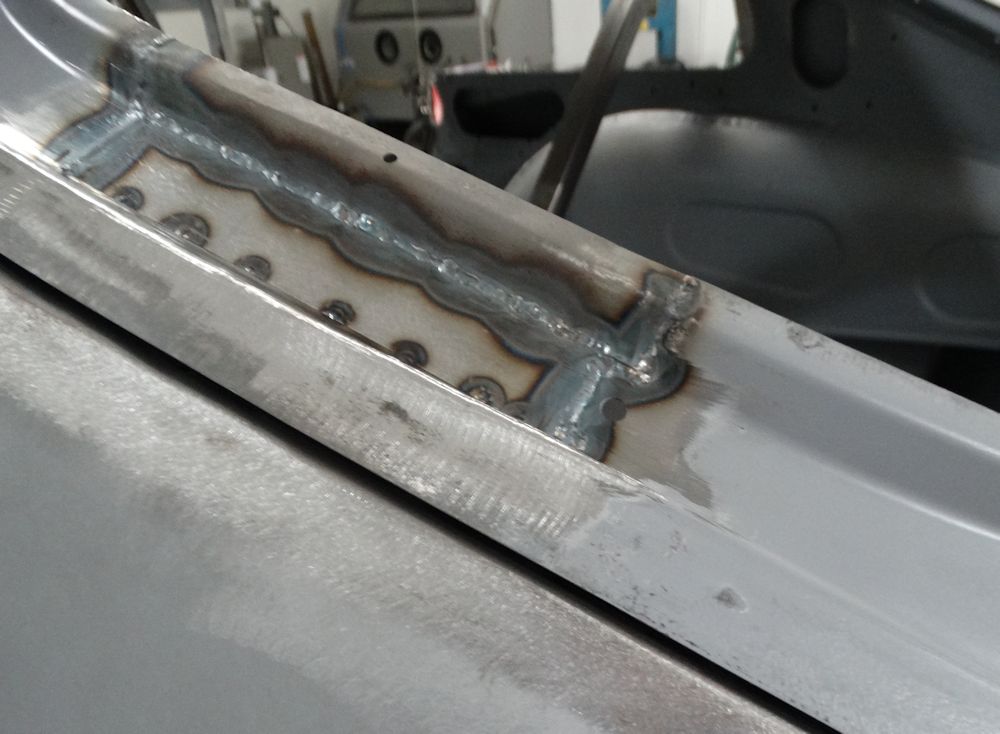
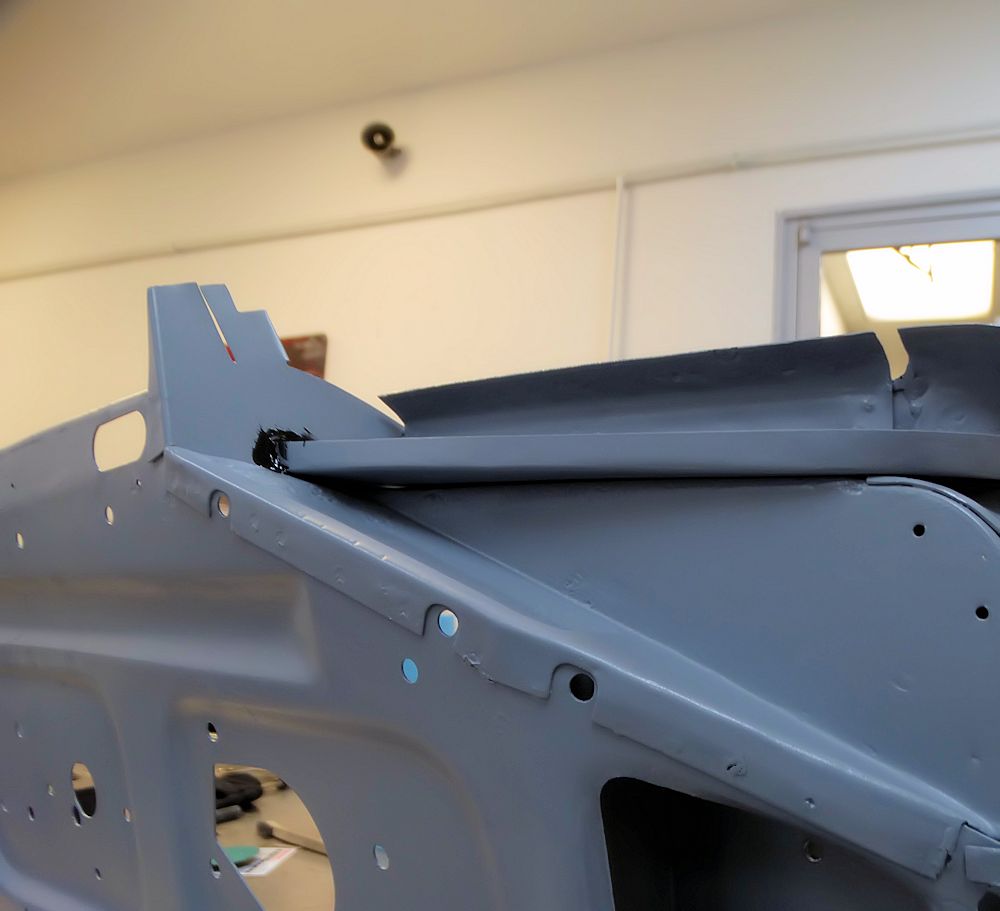
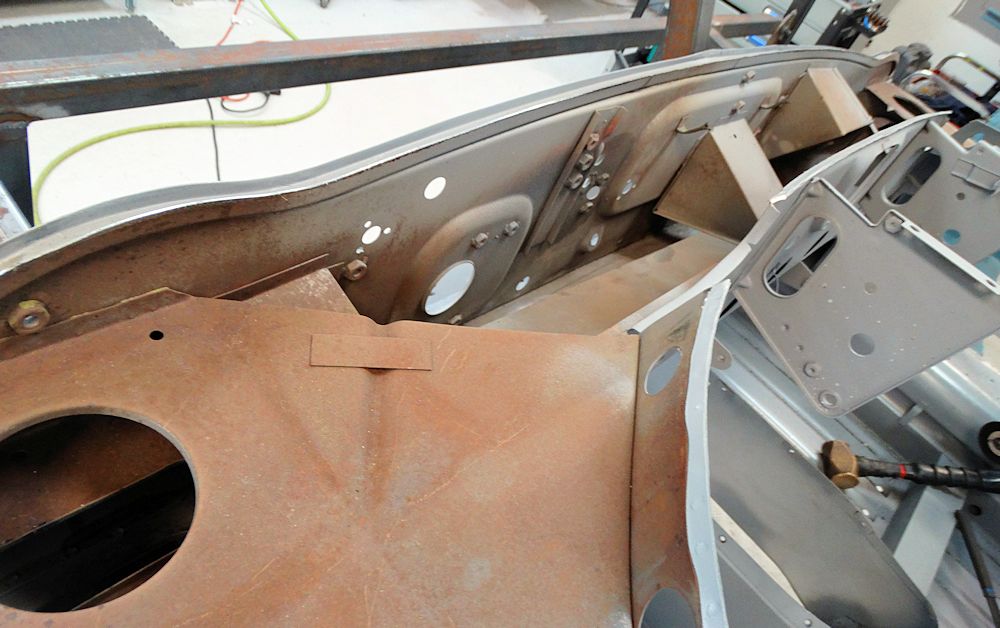
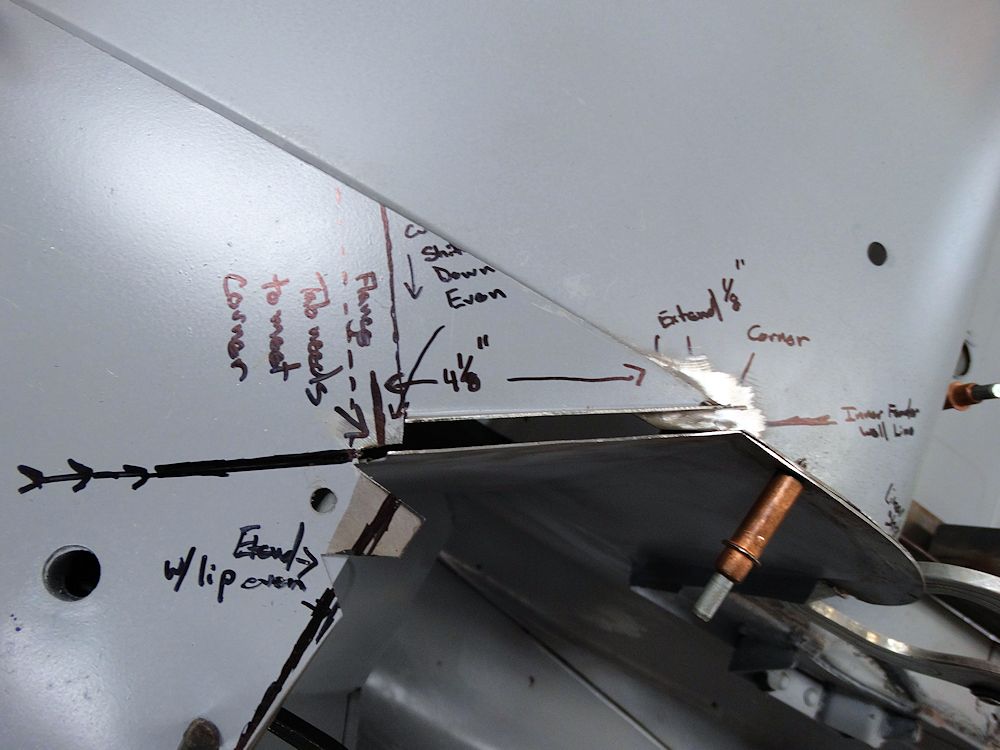
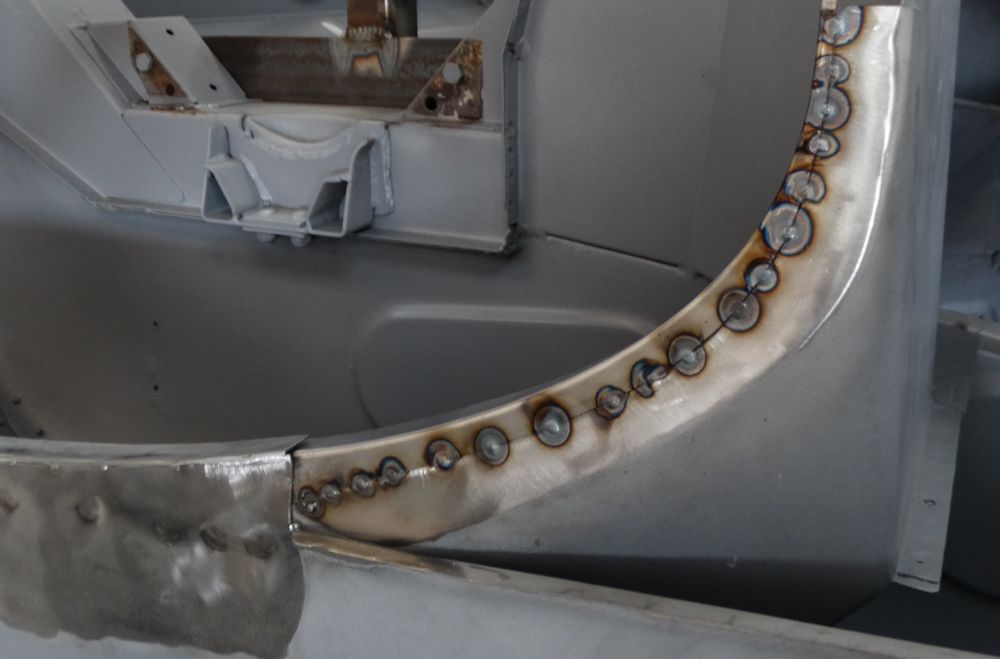
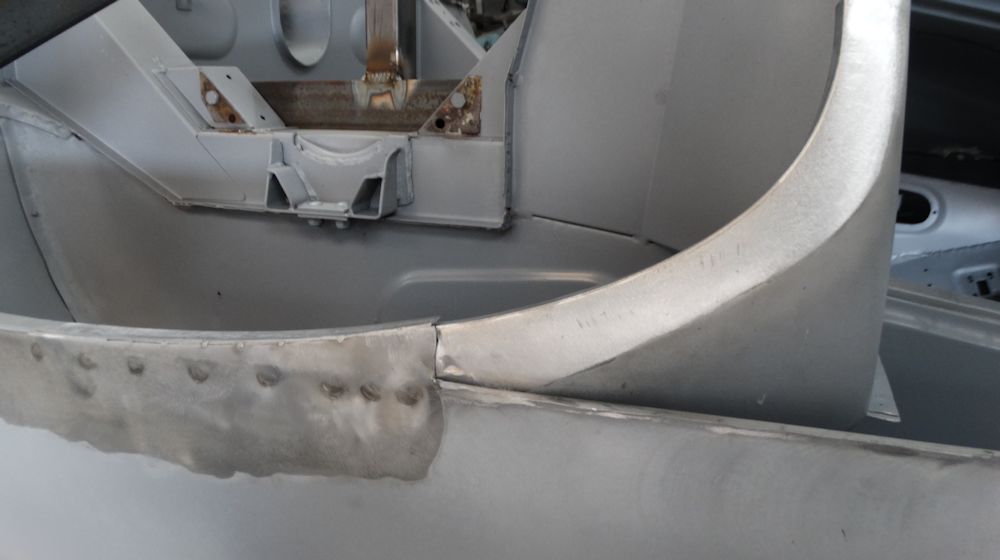
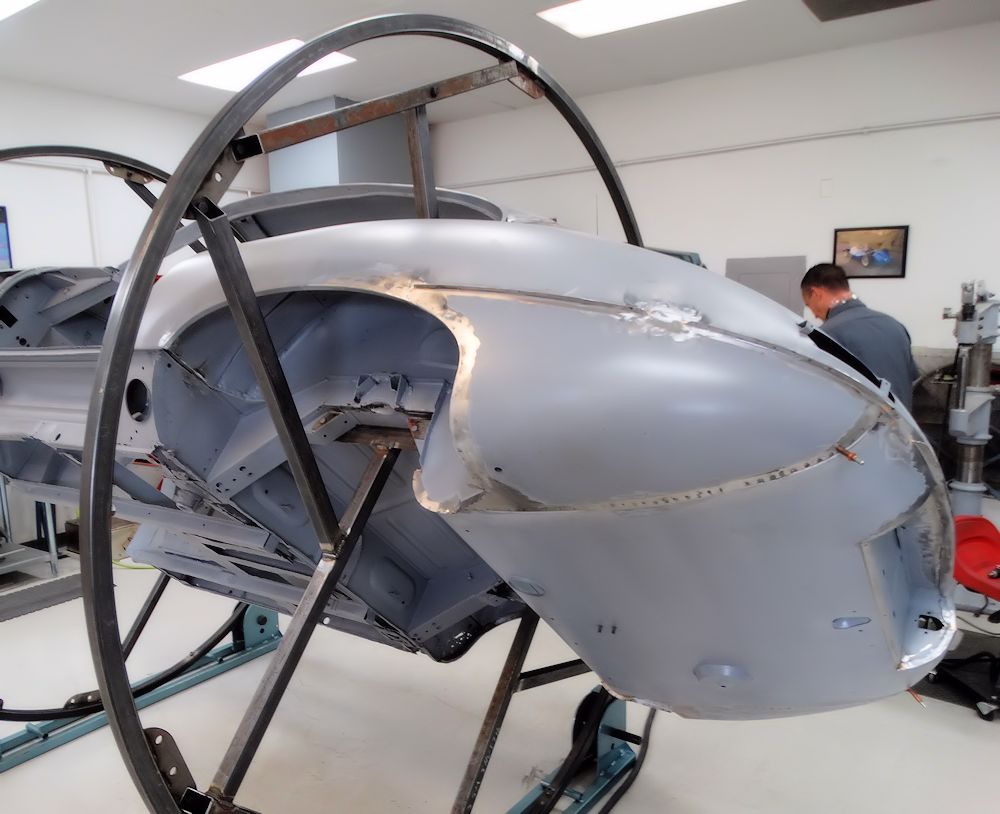
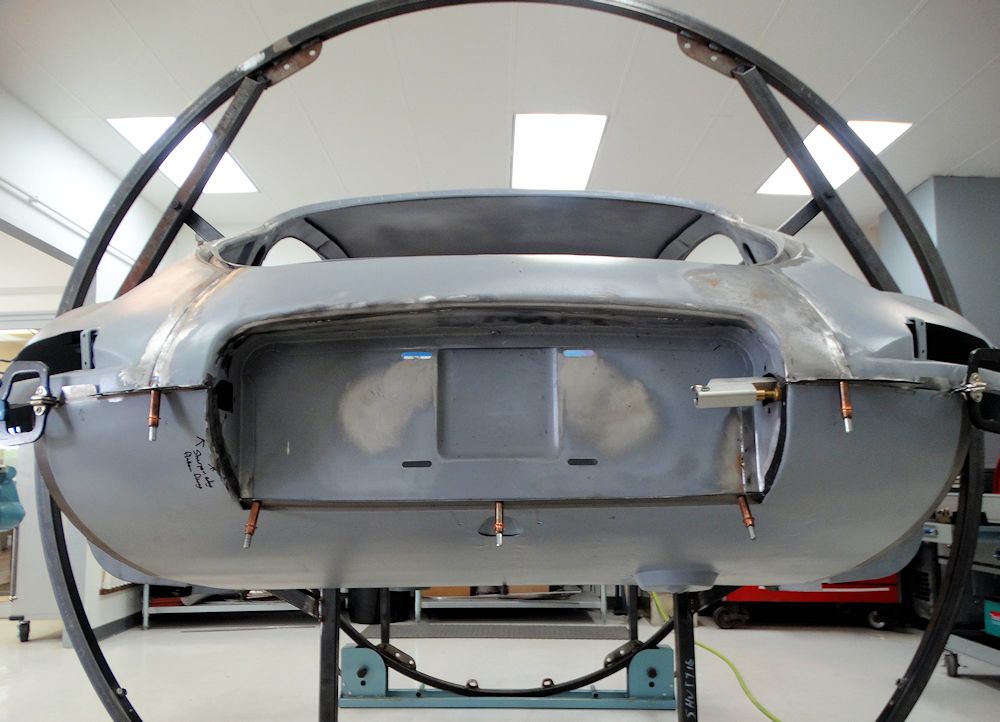
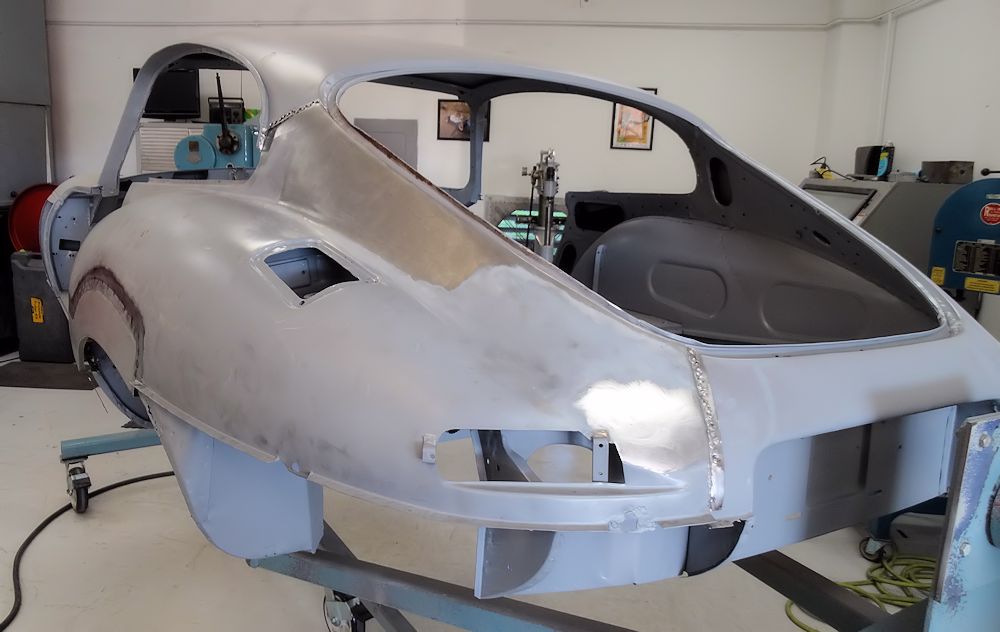
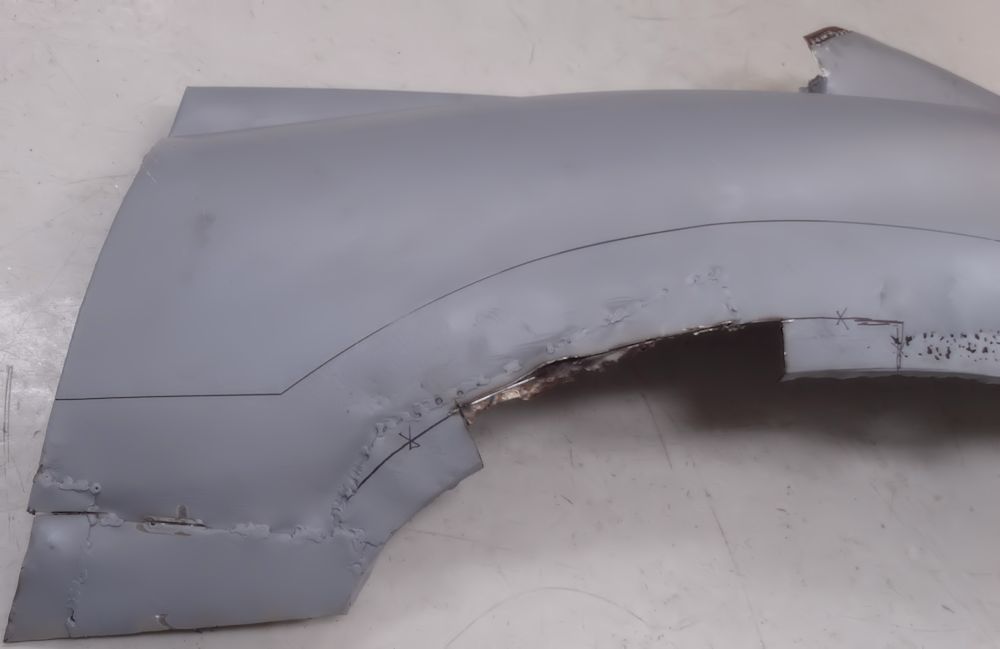
The follow sequence of photographs show some of the challenges we have restoring the original outside latch bonnet. For any other E Type, we would simply supply a new bonnet and modify it to look like an outside latch unit. However, as we believe 885013 may be one of only three LHD outside latch coupes that still has its original bonnet, we think it is worth the extra time and effort to save as much of the original sheet metal as possible.
 |
 |
| The center section nose is especially badly
damaged |
|
 |
 |
| Some of the support flanges are very rusty |
The rear edge brace is also damaged |
 |
 |
| There is some severe pitting in the louvers, with some areas actually rusted through |
The center section has been crudely patched in the distant past |
 |
 |
| Another shot of rust pitting in the louvers |
|
 |
 |
 |
 |
 |
 |
 |
 |
| When the factory assembled the early bonnets,
they welded bare metal to bare metal (no primer) |
|
 |
 |
| Bad corrosion beneath one of the flanges |
|
 |
 |
 |
 |
| Forward section of the bonnet nose cut away |
Early center sections were two piece, with the
nose welded in place across the entire width of the panel |
 |
 |
| Metal finishing the top surface of the center
section |
|
 |
 |
 |
 |
| Metal finishing the power bulge |
|
 |
 |
| No primer between the louver panel and the
center section, leading to inevitable corrosion |
|
 |
 |
 |
 |
 |
 |
| Corrosion between the rear edge brace and the center section |
|
 |
 |
| We are applying weld through primer to all weld zones |
|
 |
 |
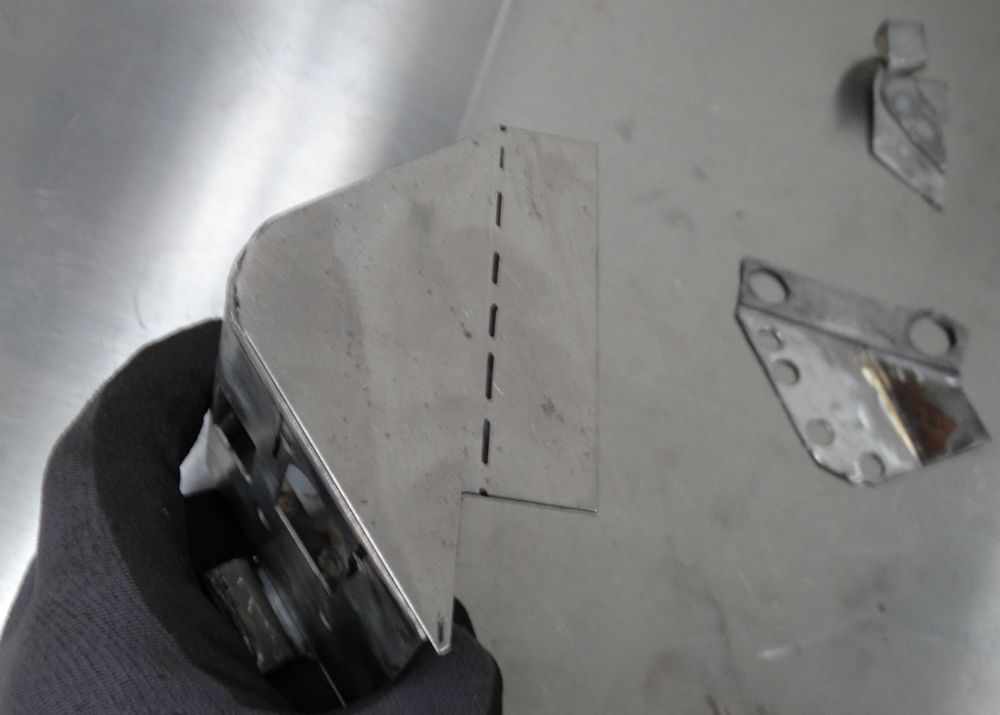
| Replacement panel cut from a rust free bonnet |
|
 |
 |
| Tack welding the replacement panel in place |
|
 |
 |
|
 |
 |
 |
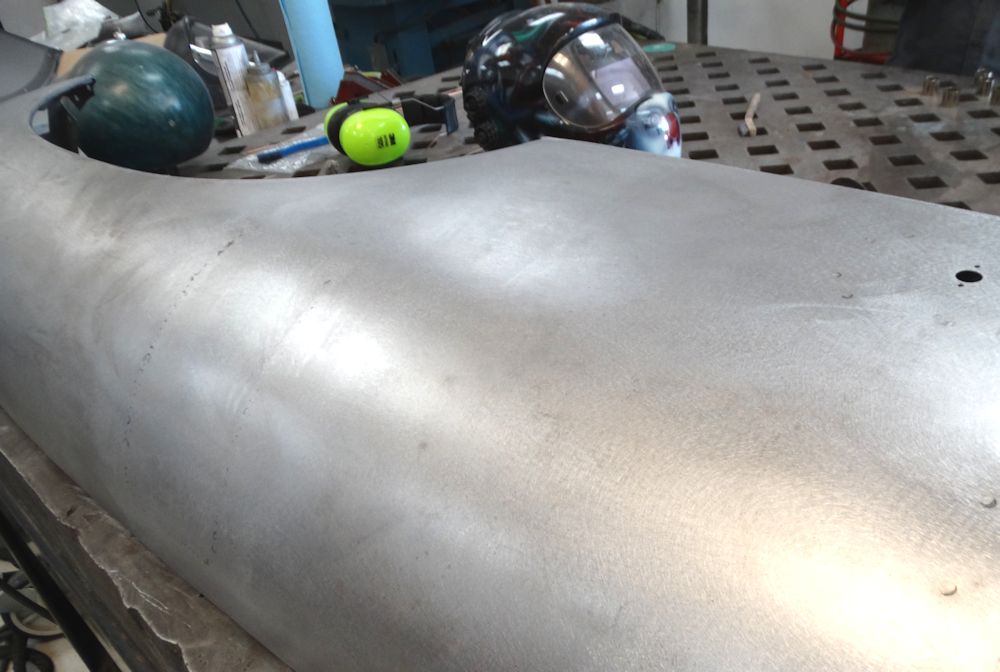
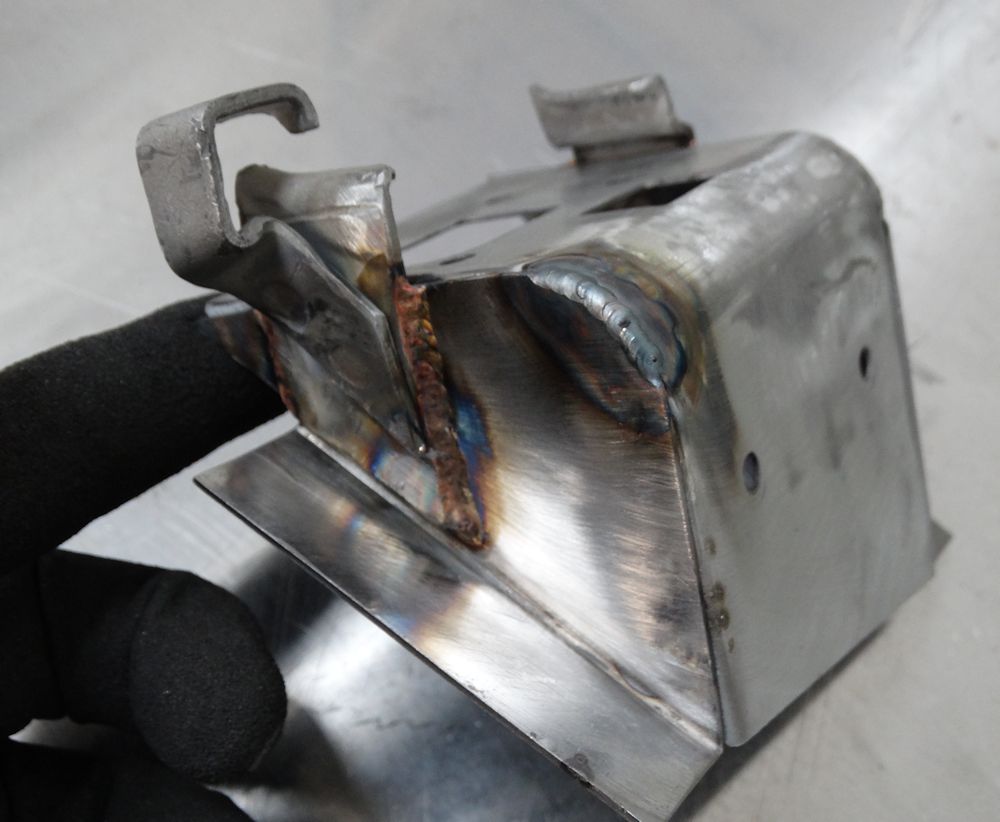
| Center section starting to look much better |
A new forward nose section will be fabricated using our wooden buck |
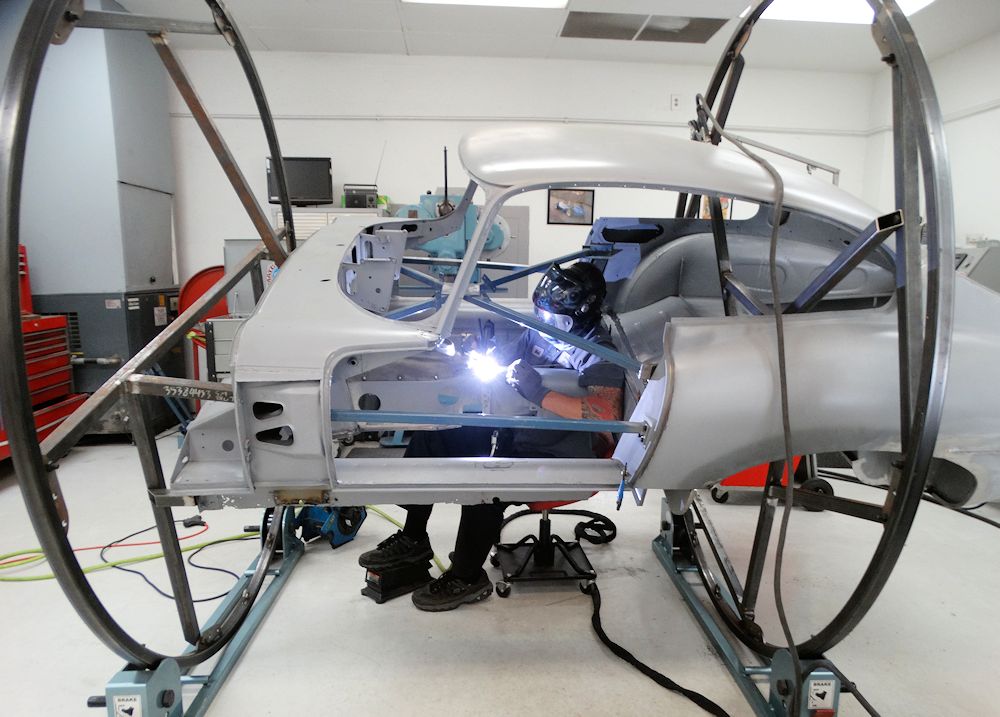
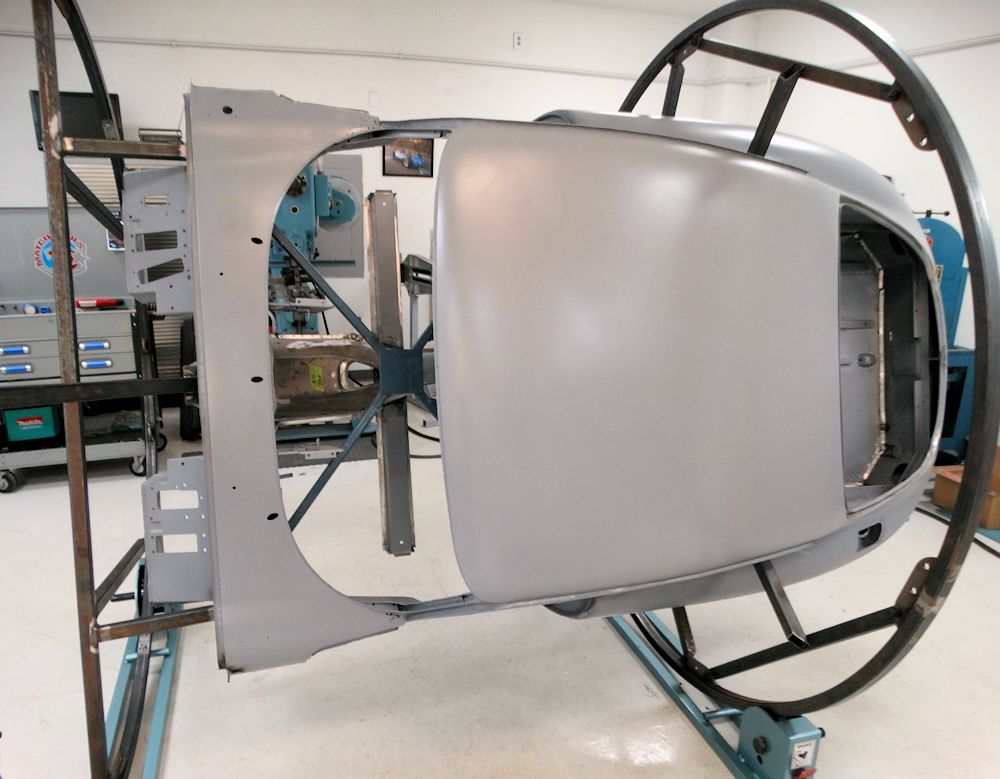
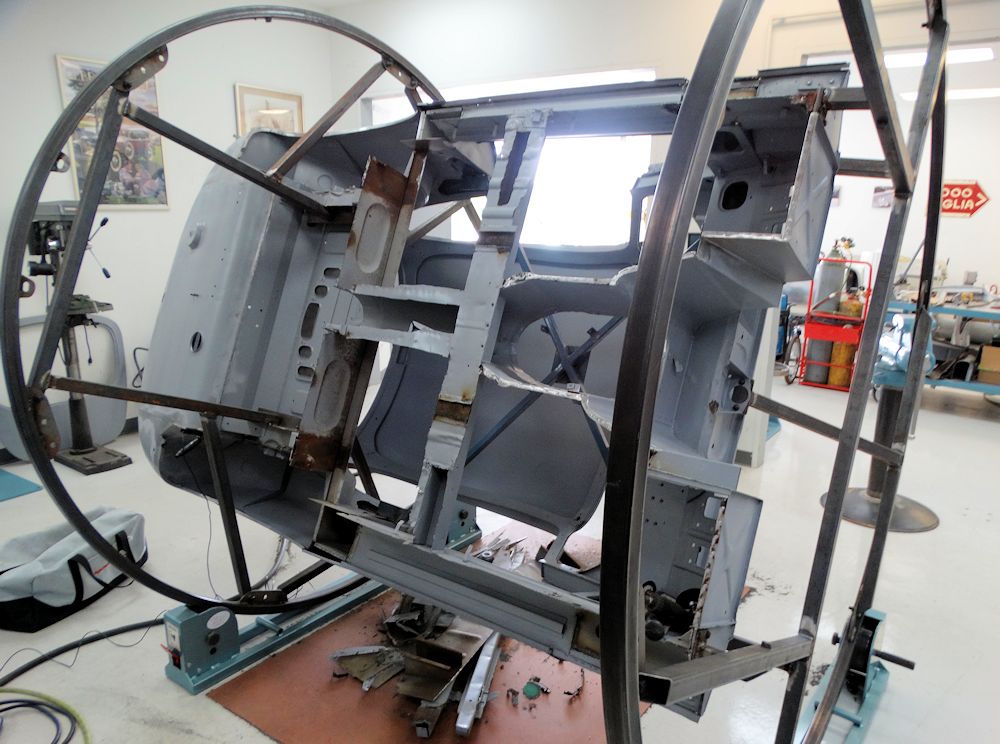
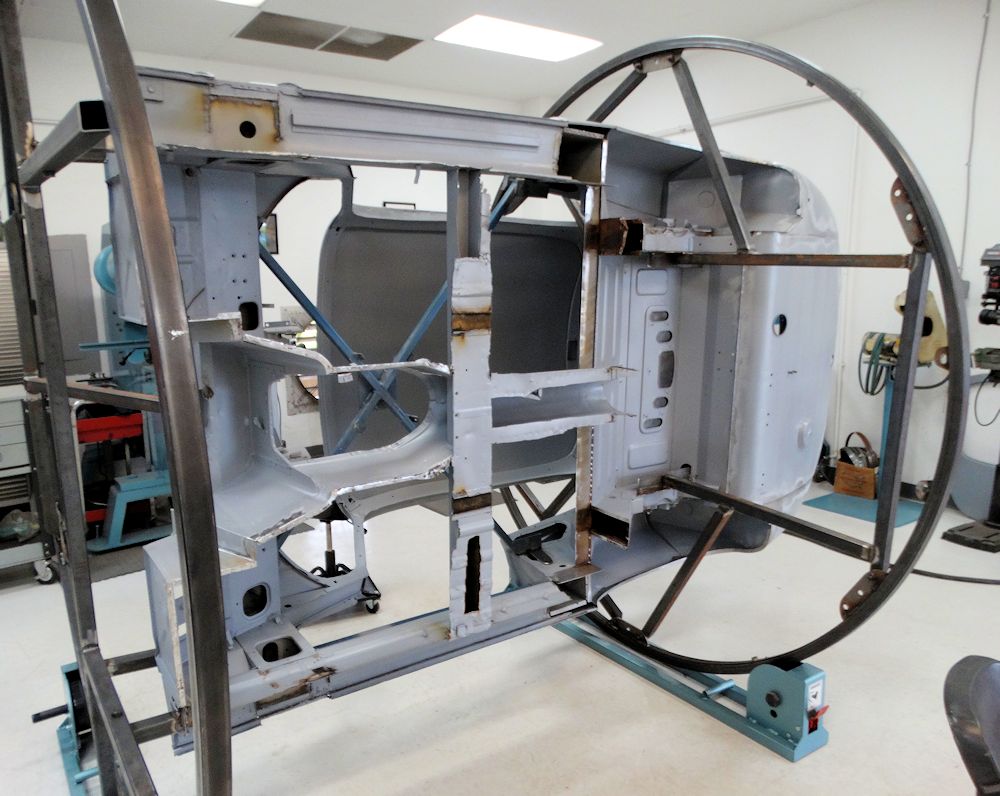
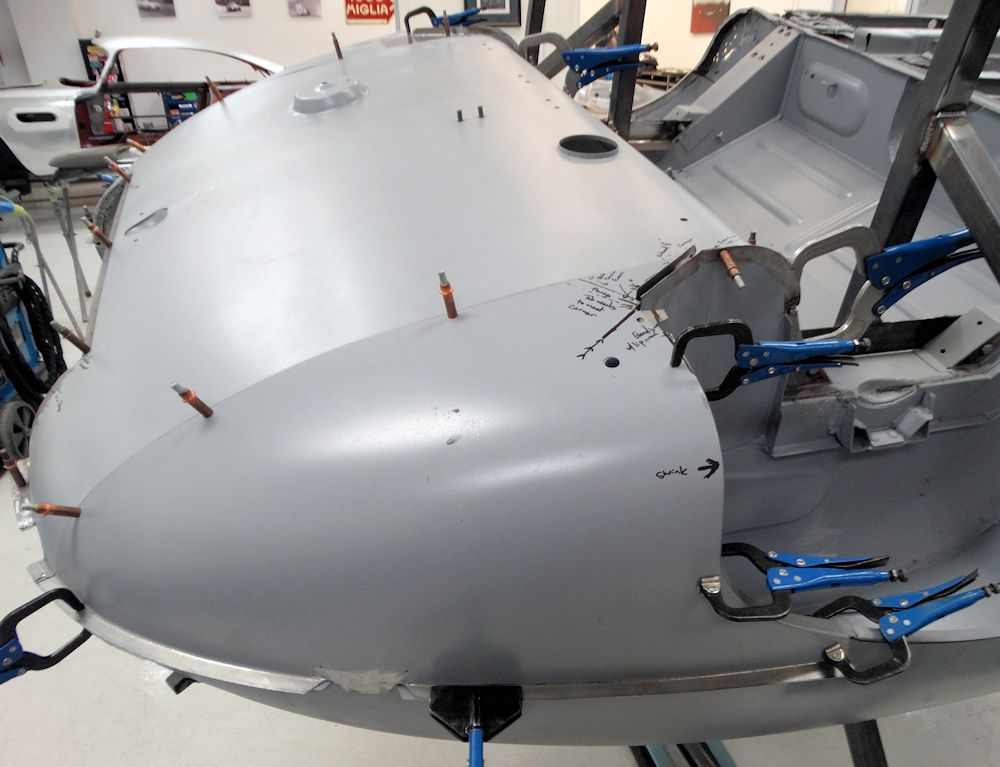
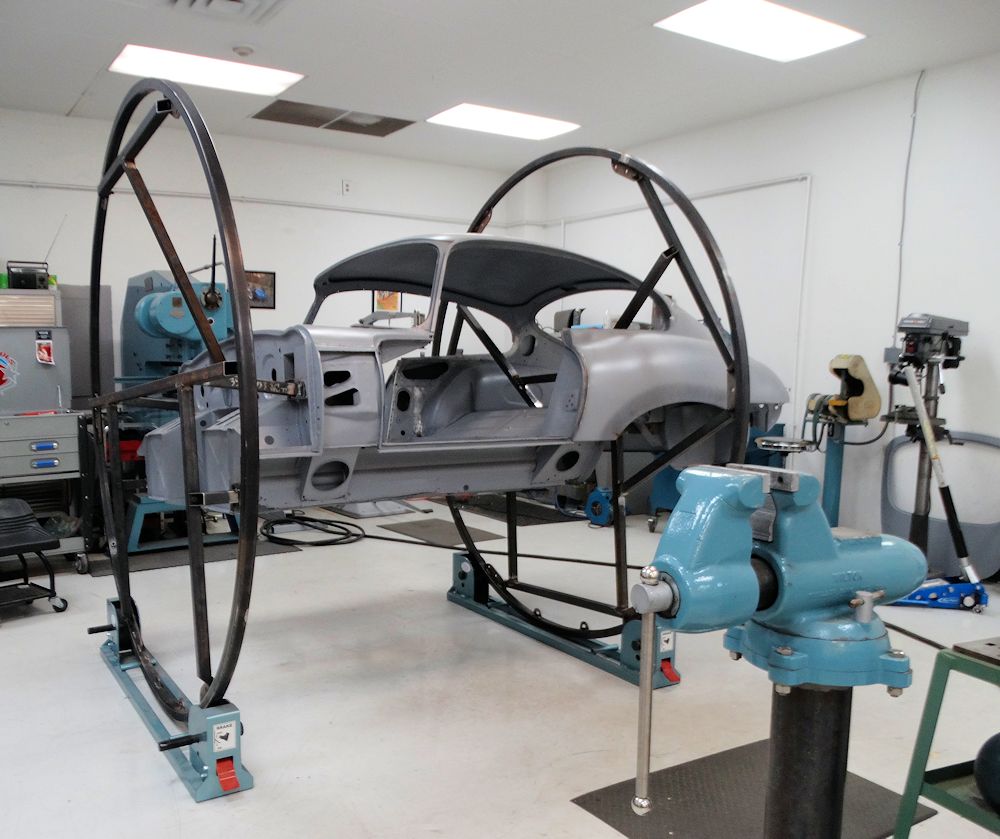
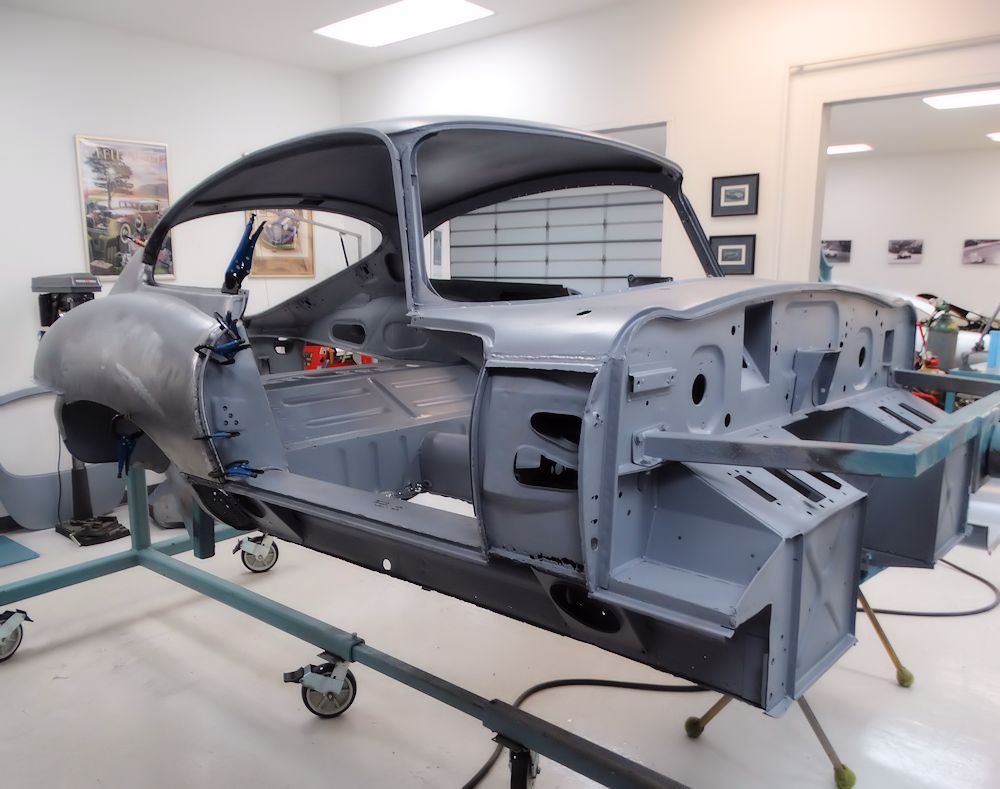
Matt has removed the main body from the roller-hoop jig for installation on a roll-around frame jig. The hoops conjure up thoughts of Stargate Atlantis and the E Type emerging on the other side of the gate in the year 1961..
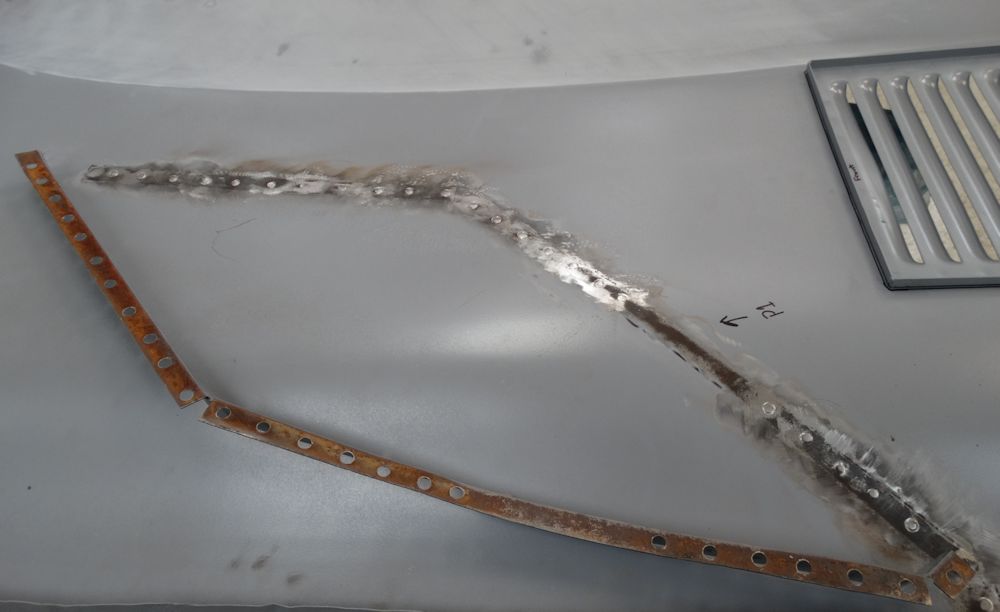
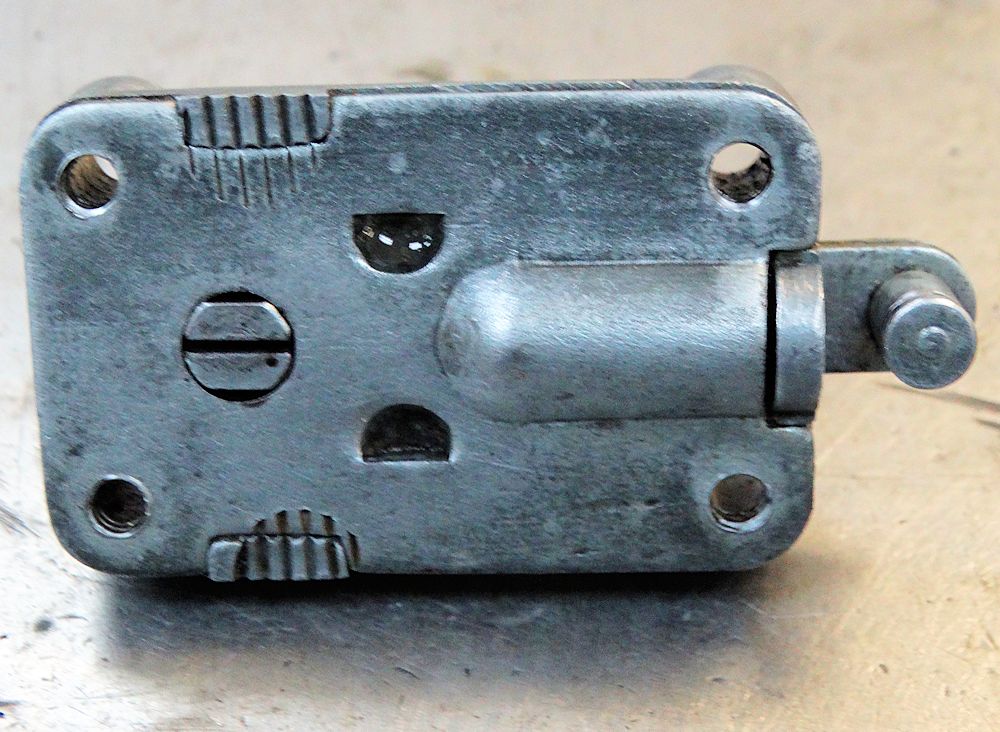
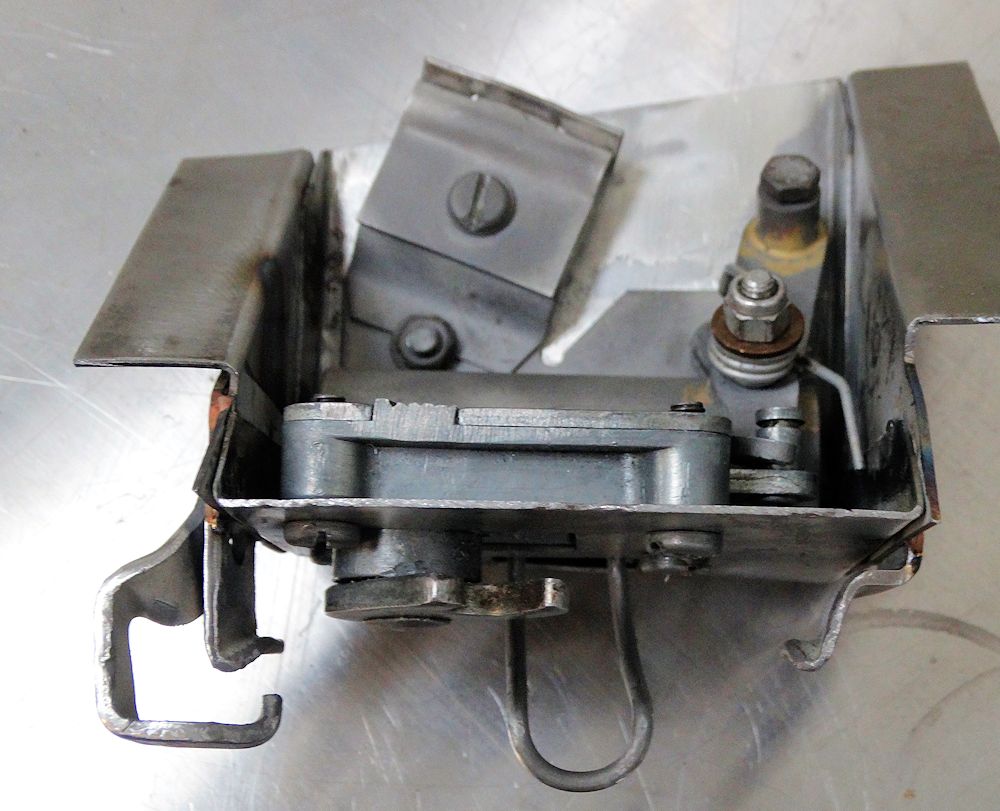
Interesting to note the many differences between the very early type of hatch door latch and one from just a year later in the E Type production cycle. In the photographs below, the later style latch is the freshly plated unit.
 |
 |
| Comparing early latch (on right) with later
version |
|
 |
 |
| There are several significant differences |
|
 |
 |
| Later latch had slotted, countersunk screws |
|
 |
 |
| Earlier latch had phillips button head screws |
Earlier latch had two 'hand cut' bolt holes,
versus 3 stamped/slotted bolt holes on later latch |
 |
 |
| Note differences in the construction of the
frame |
|
 |
 |
| Bolt holes were welded up prior to being
re-cut |
New bolt holes slotted for adjustment |
 |
 |
| Latch assembly trial fitted beneath tailgate |
|
 |
 |
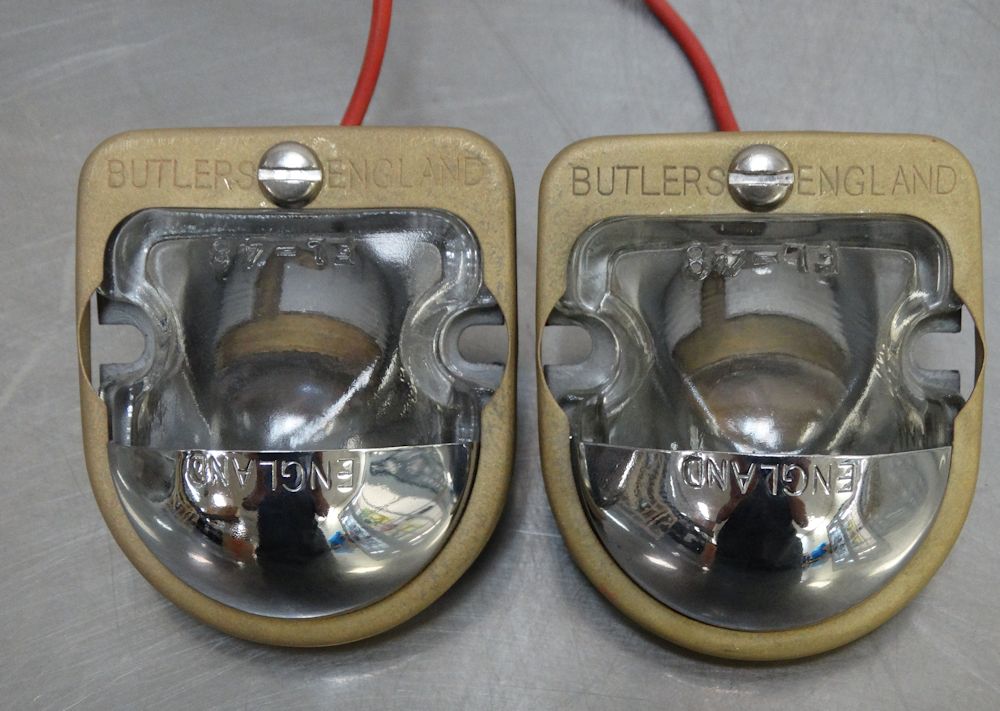
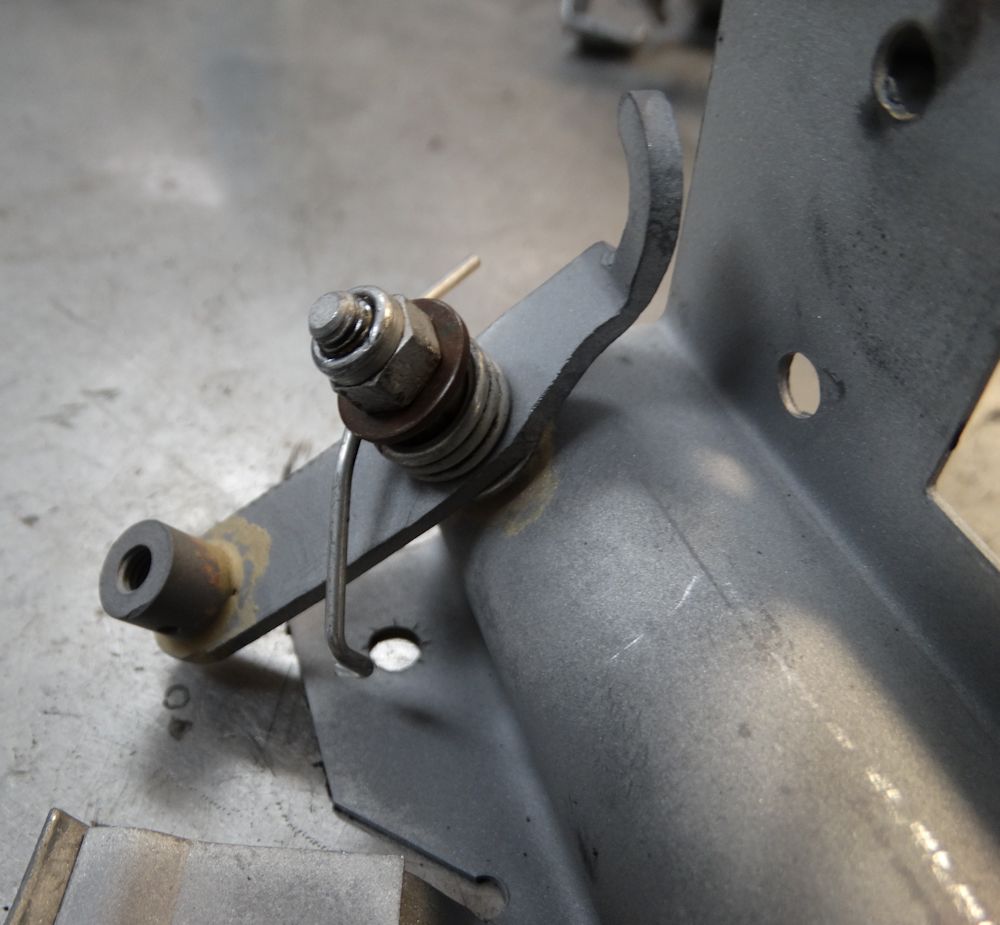
| Time to trial fit license plate lamps |
Note how poorly they fit before adjustment |
 |
 |
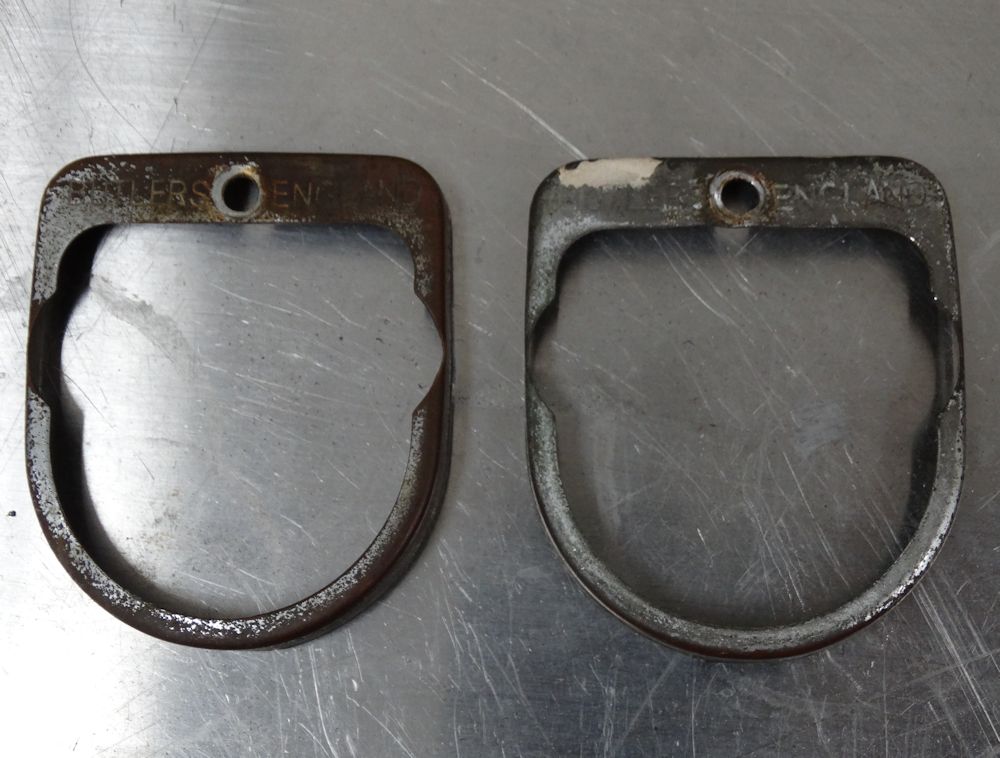
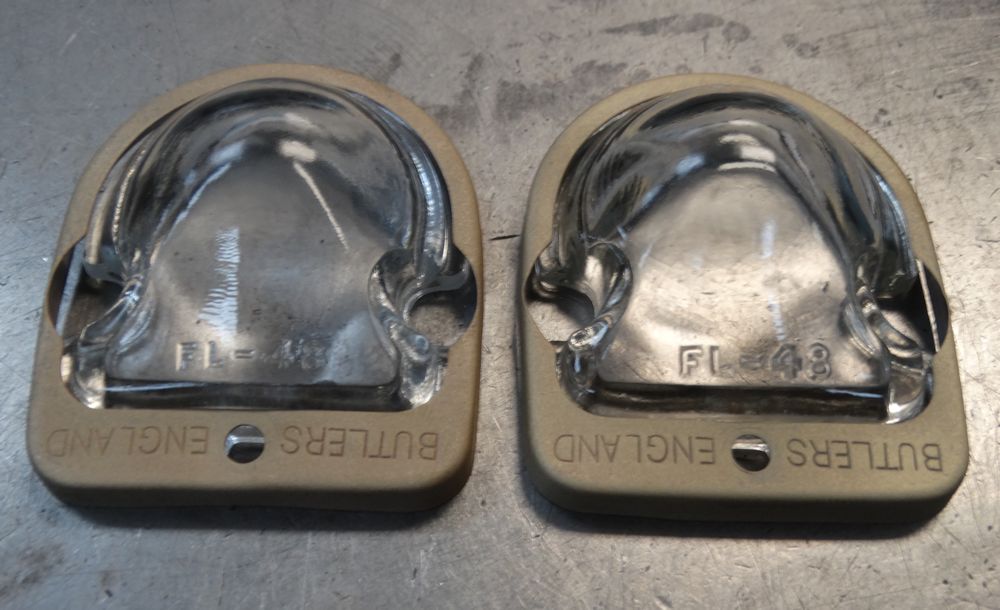
| Very early cars had "Butler" license plate
lights |
Chrome trim will be repaired prior to plating |
 |
 |
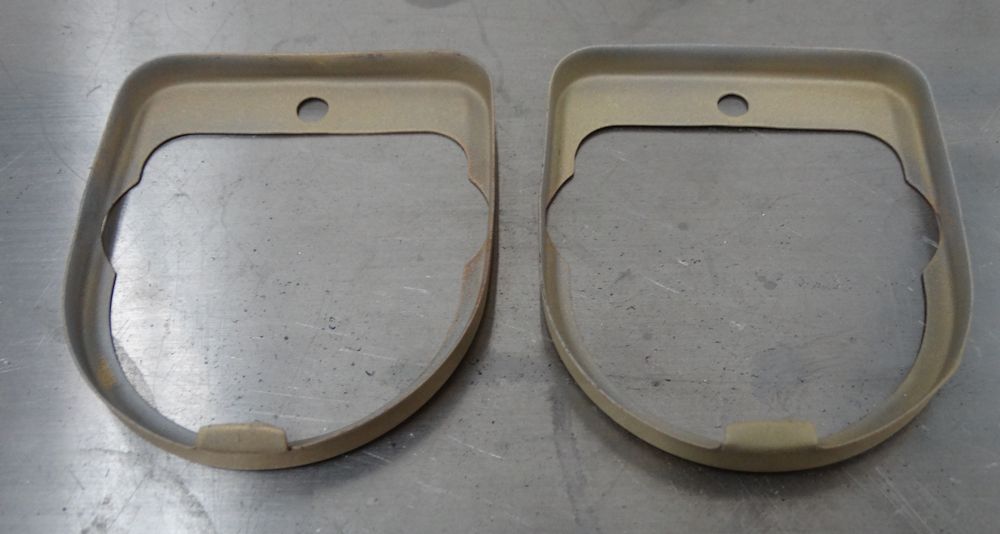
| Straightened and blasted, the brass trim is now ready to be re-plated |
|
 |
 |
 |
 |
| Trial fitting the lamp sockets |
Innards will be cad plated, outer trim chrome plated |
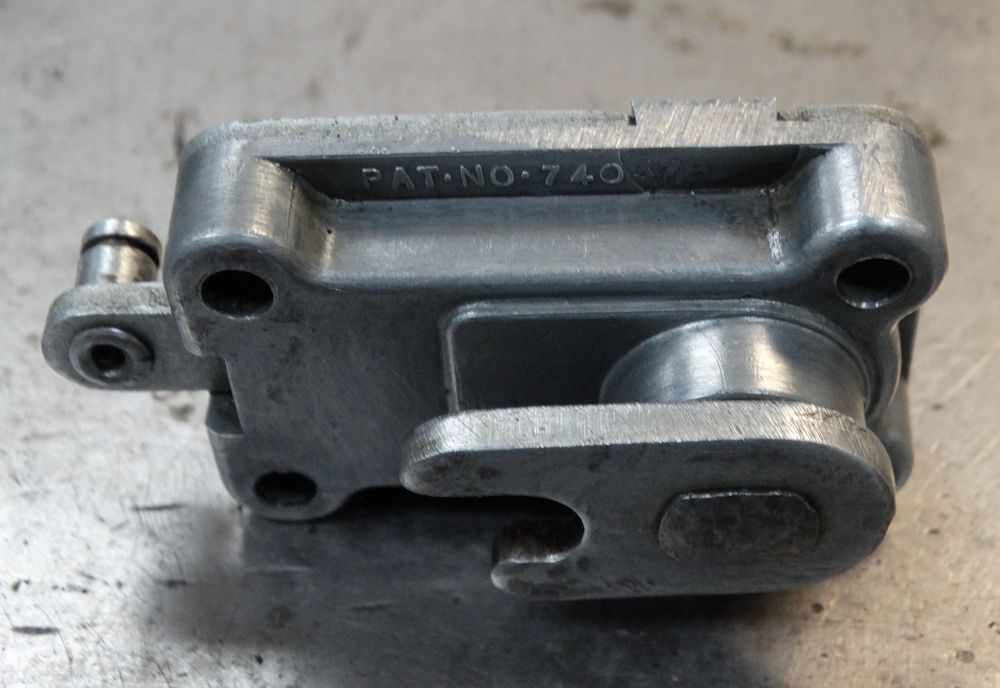
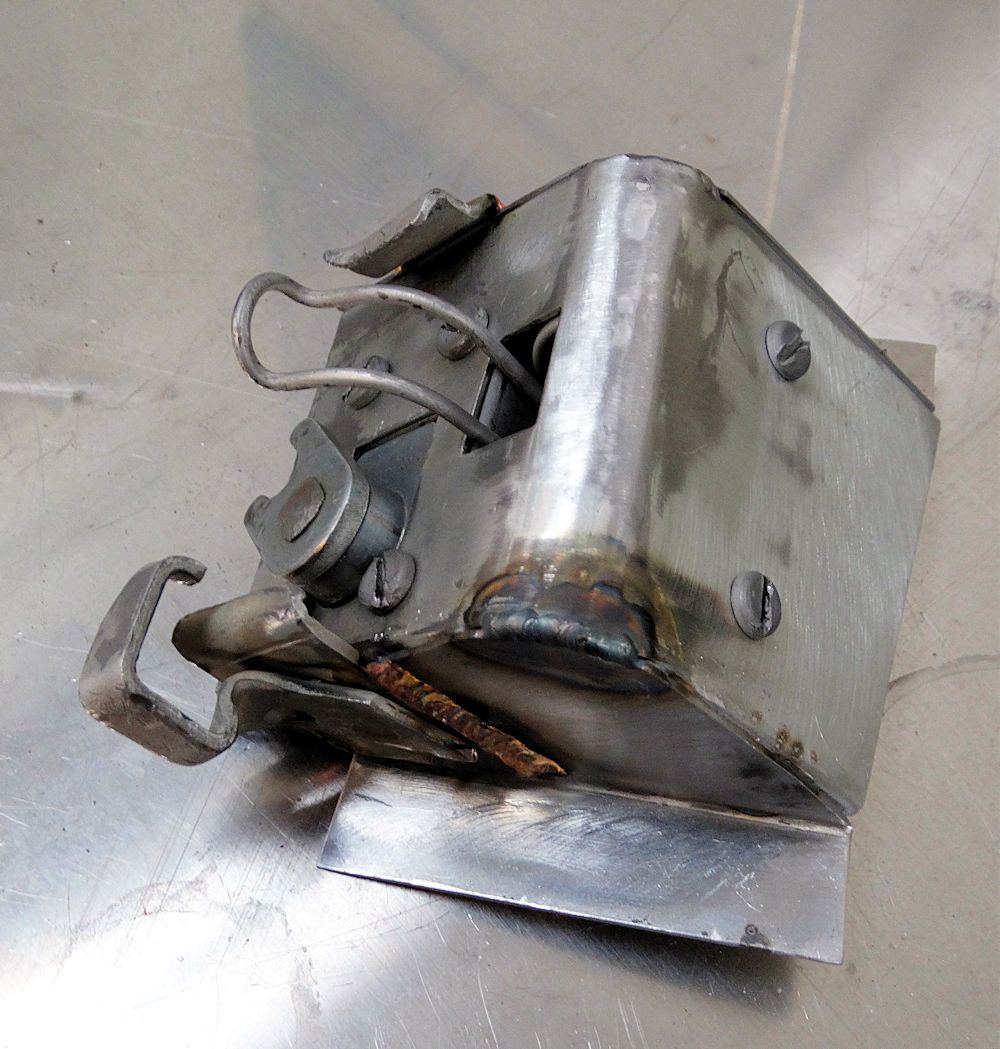
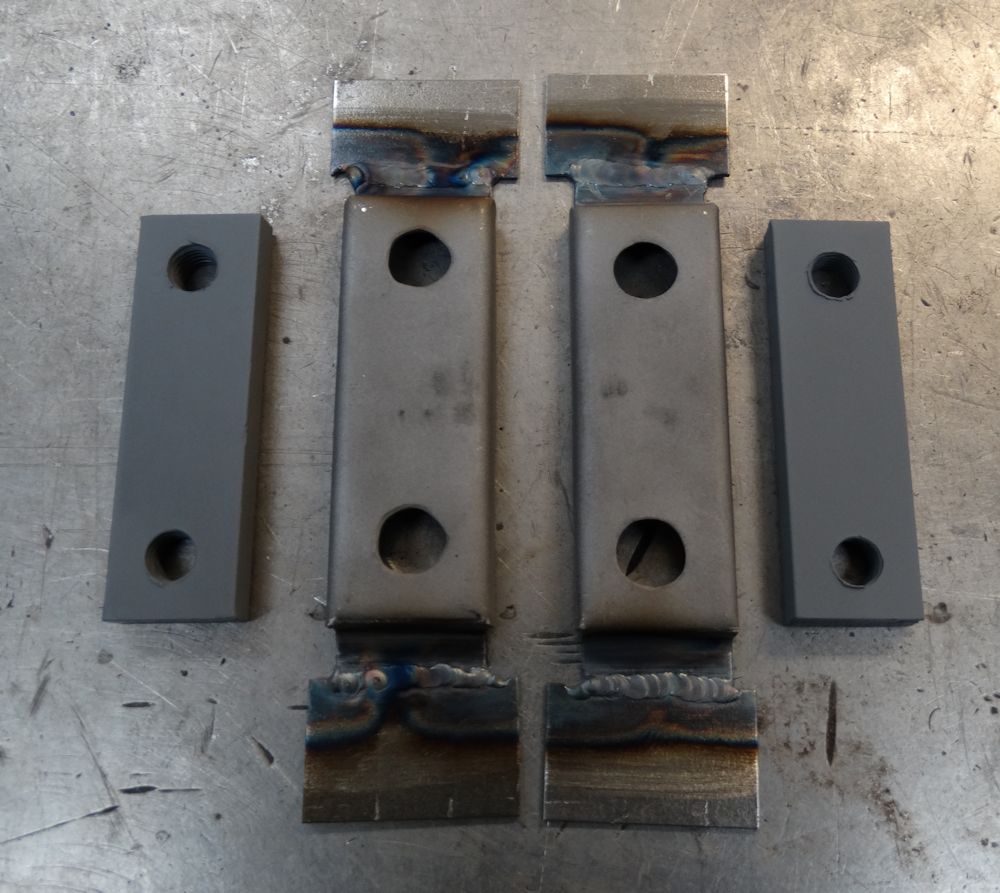
The following sequence of photos highlight some of the differences between the very early production, 'hand made' tailgate latch fitted to 885013, and the mass produced version used on virtually all regular production coupes.
 |
 |
| Comparing early coupe latch (left) with later production version (right) |
Later production latch frame is one piece |
 |
 |
| Early latch frame several pieces, welded
together |
Later latch has integral return spring |
 |
 |
| Early latch has no return spring |
|
 |
 |
| Latch frame requires extensive work |
|
 |
 |
 |
 |
 |
 |
 |
 |
 |
 |
| Both side panels will be replaced |
|
 |
 |
 |
 |
 |
 |
| Fabricating the second side panel |
|
 |
 |
 |
 |
| Reconstruction almost complete |
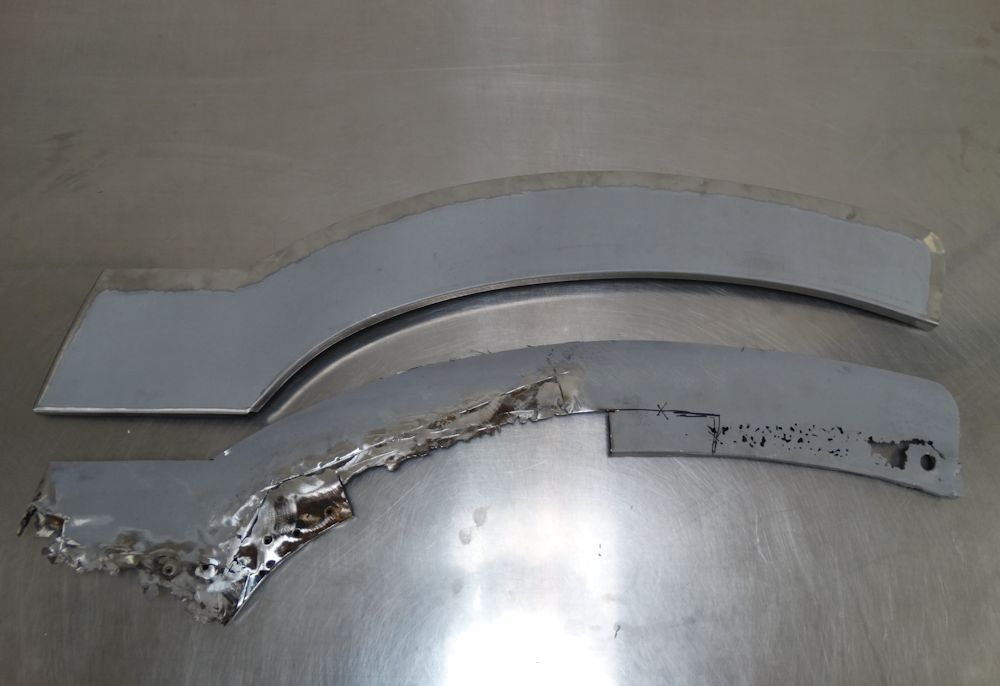
There are quite a few differences between the very early tailgates and later production items, so it was important that we repaired, rather than replaced, the hatch door for 885013.
 |
 |
| Tailgate has been repaired in the past |
Cutting out corroded sections |
 |
 |
 |
 |
| Fabricating new captive nut blocks |
|
 |
 |
| Fabricating repair panels |
|
 |
 |
 |
 |
| Trial fitting original hatch skin |
|
 |
 |
| Low spots identified down left side of panel, previously concealed by bondo |
Panel was reshaped on English wheel |
 |
 |
| Hinges were badly worn and required rebuilding |
Bronze bushings about to be pressed into
hinges |
 |
 |
| Note factory scribing denoting #13 (top and bottom hinges) |
|
 |
 |
| Hinges now rebuilt as new |
|
 |
 |
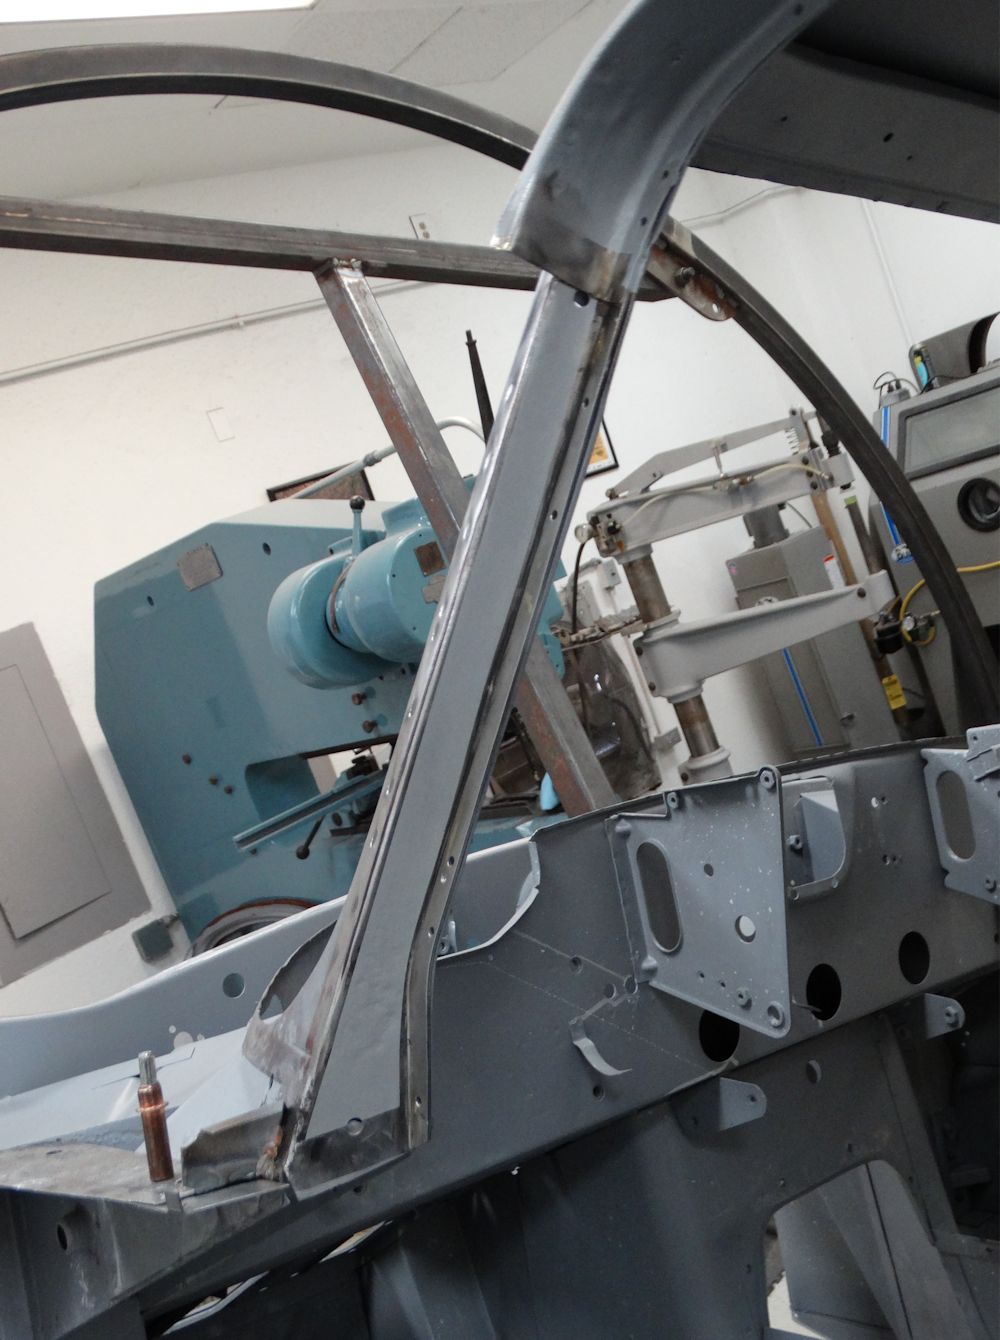
Huge progress in the CJ Coachworks over the last few weeks.
 |
 |
| Both A posts are rusty and require extensive
repair |
|
 |
 |
 |
 |
 |
 |
| Starting to fabricate repair panels |
|
 |
 |
| Trial fitting new panels |
|
 |
 |
 |
 |
| New sheet metal welded in place exactly as the original panels had been |
|
 |
 |
| Door shells both need rust repairs |
Many differences between very early doors and later production |
 |
 |
 |
 |
 |
 |
| Fabricating door top repair panels |
|
 |
 |
 |
 |
 |
 |
 |
 |
| Front edges of door frames are particularly
rough |
|
 |
 |
| Card templates made from the original panel |
|
 |
 |
 |
 |
 |
 |
| Trial fitting door frames |
|
 |
 |
| More door frame repairs |
|
 |
 |
 |
 |
 |
 |
| Both door frames now sound and ready to have new skins installed |
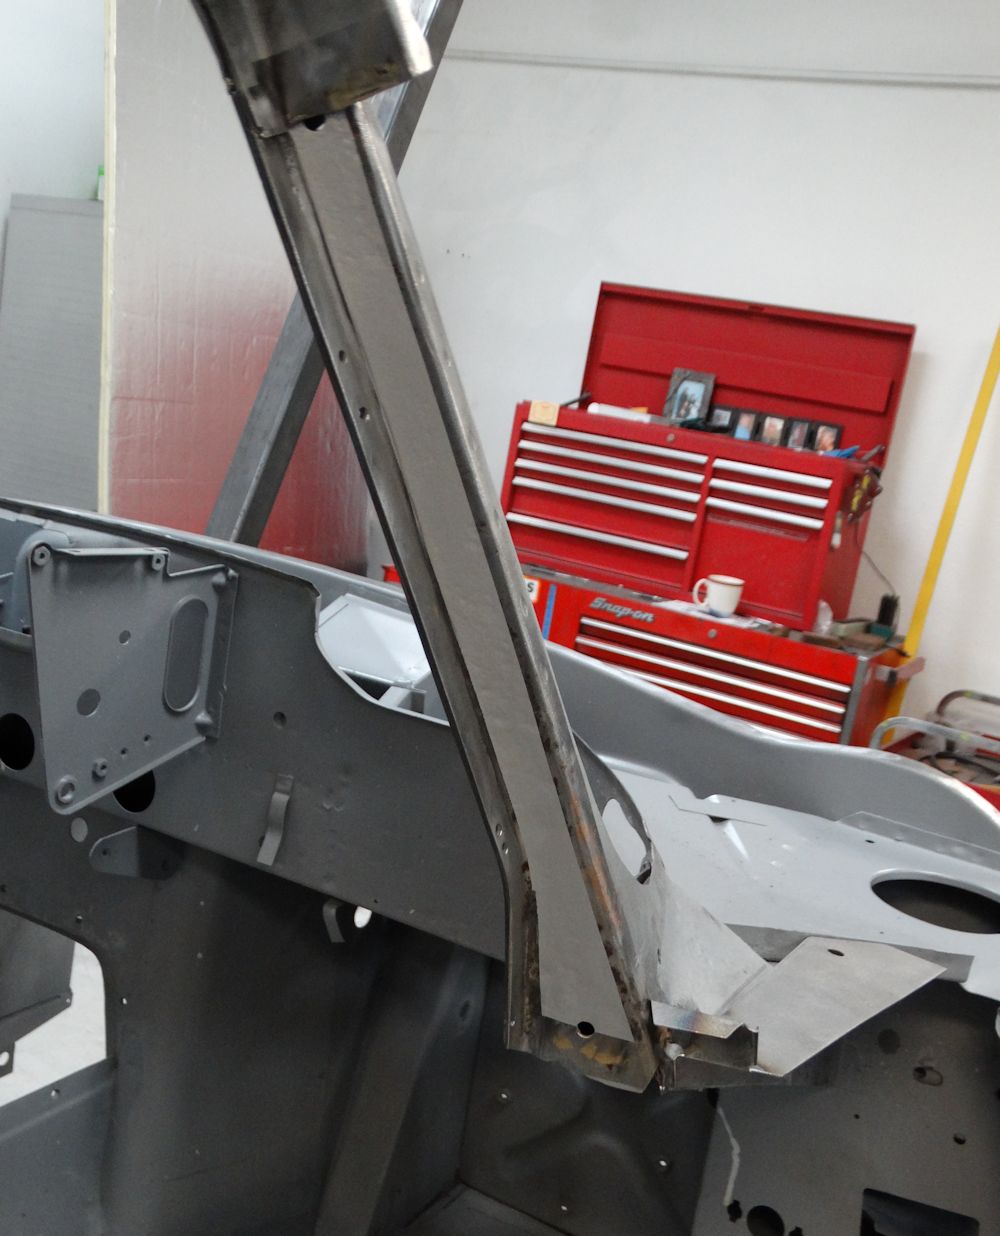
Time to turn our attention to the rusty cowl and screen pillars...
 |
 |
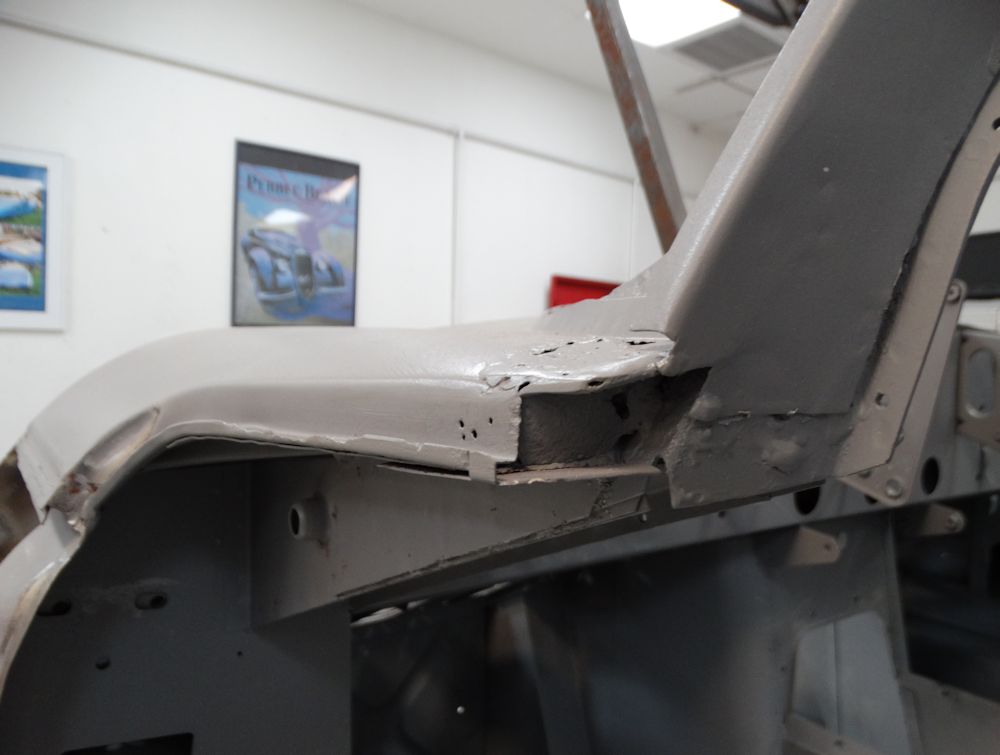
| Cowl panel is rusty and will have to be
replaced |
|
 |
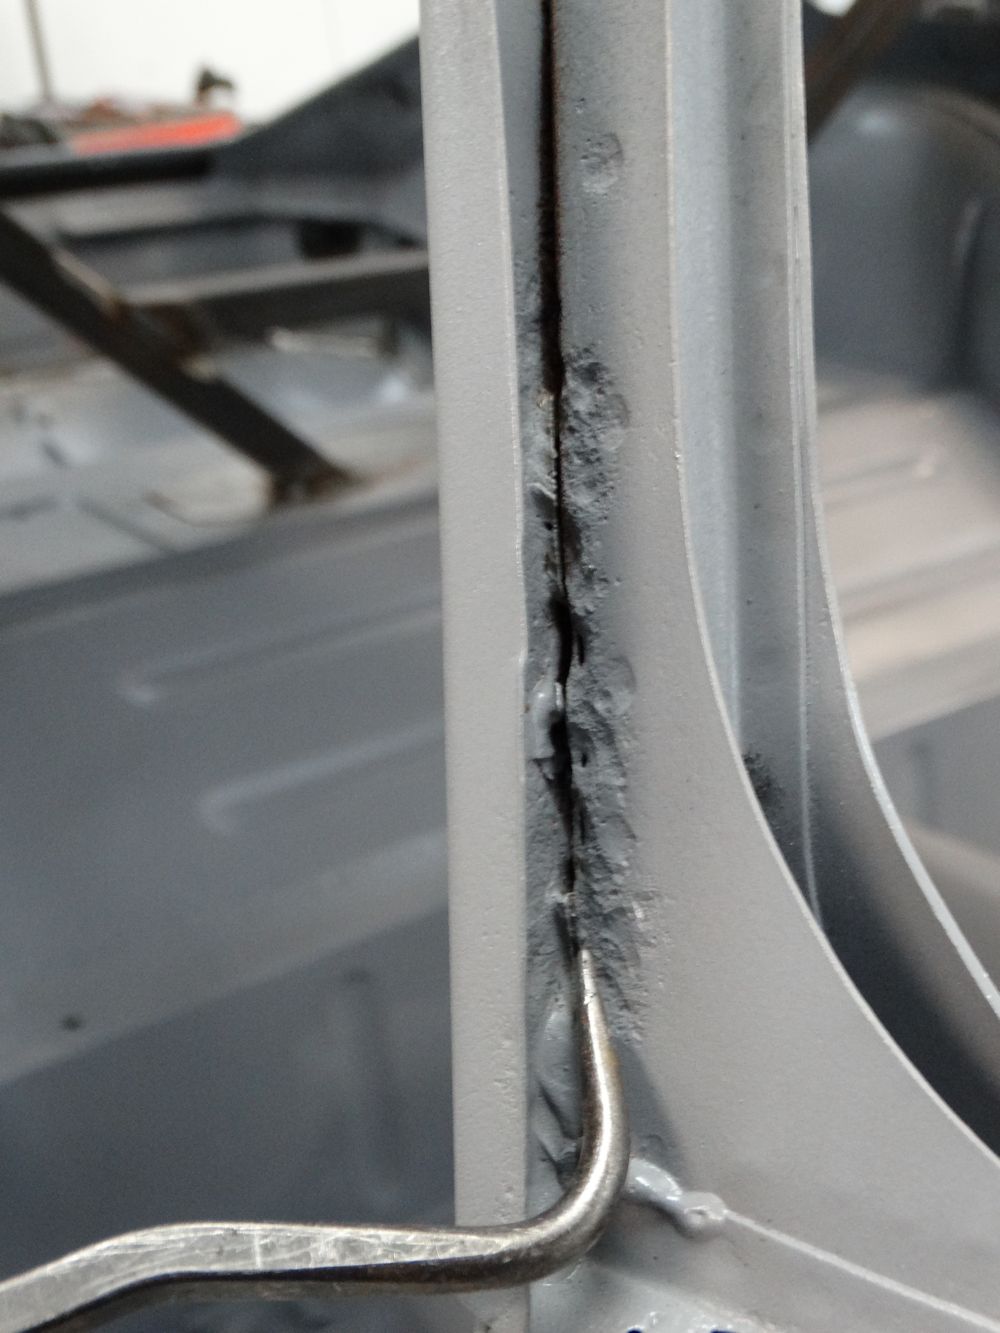 |
| Screen pillars are unusually rusty |
|
 |
 |
| The other side of the cowl is equally rusty |
|
 |
 |
 |
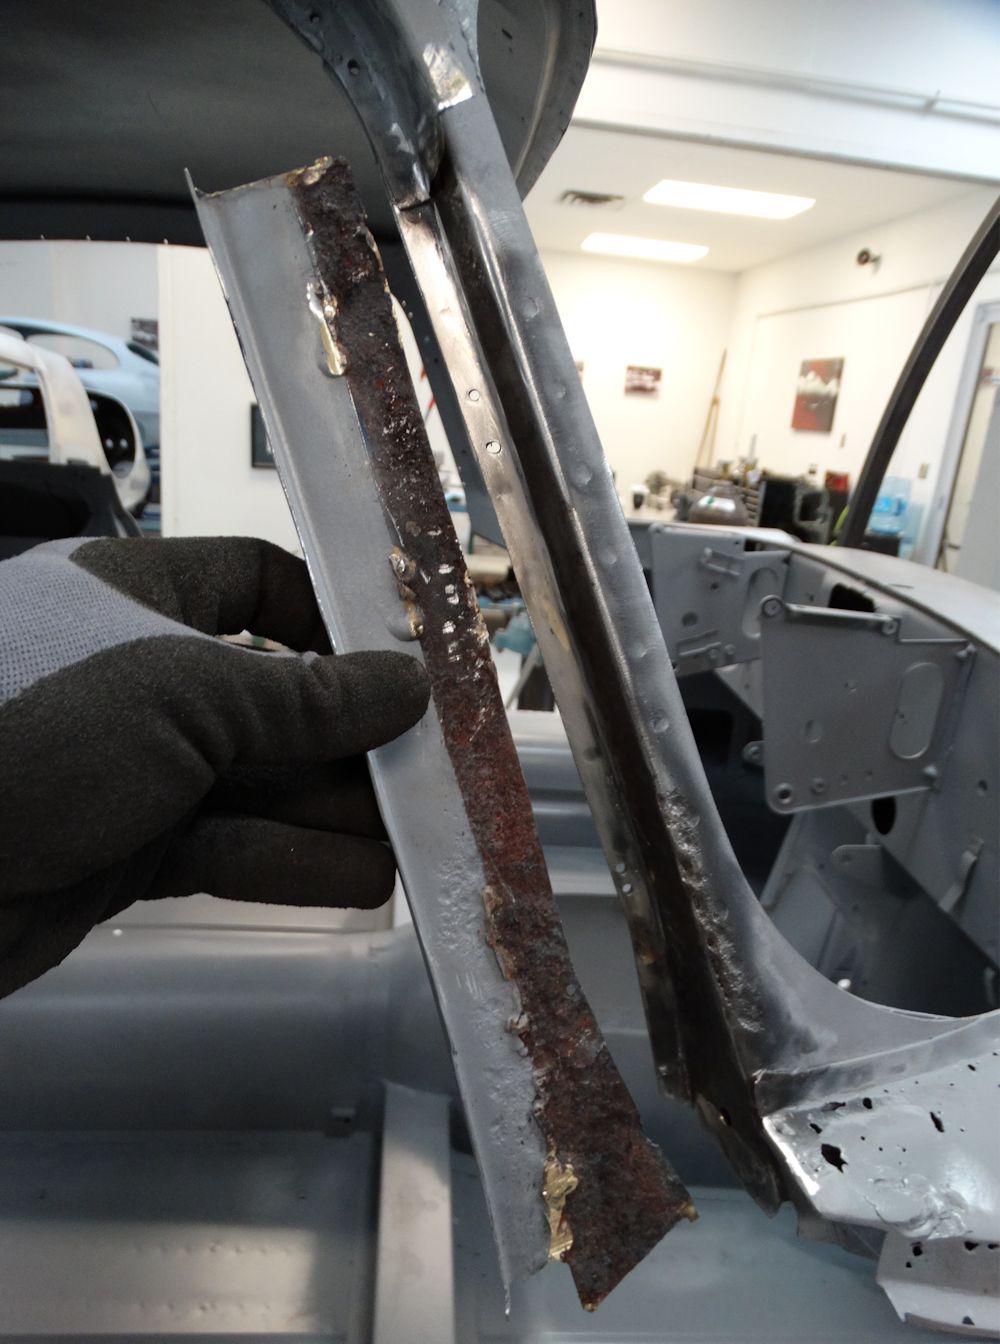 |
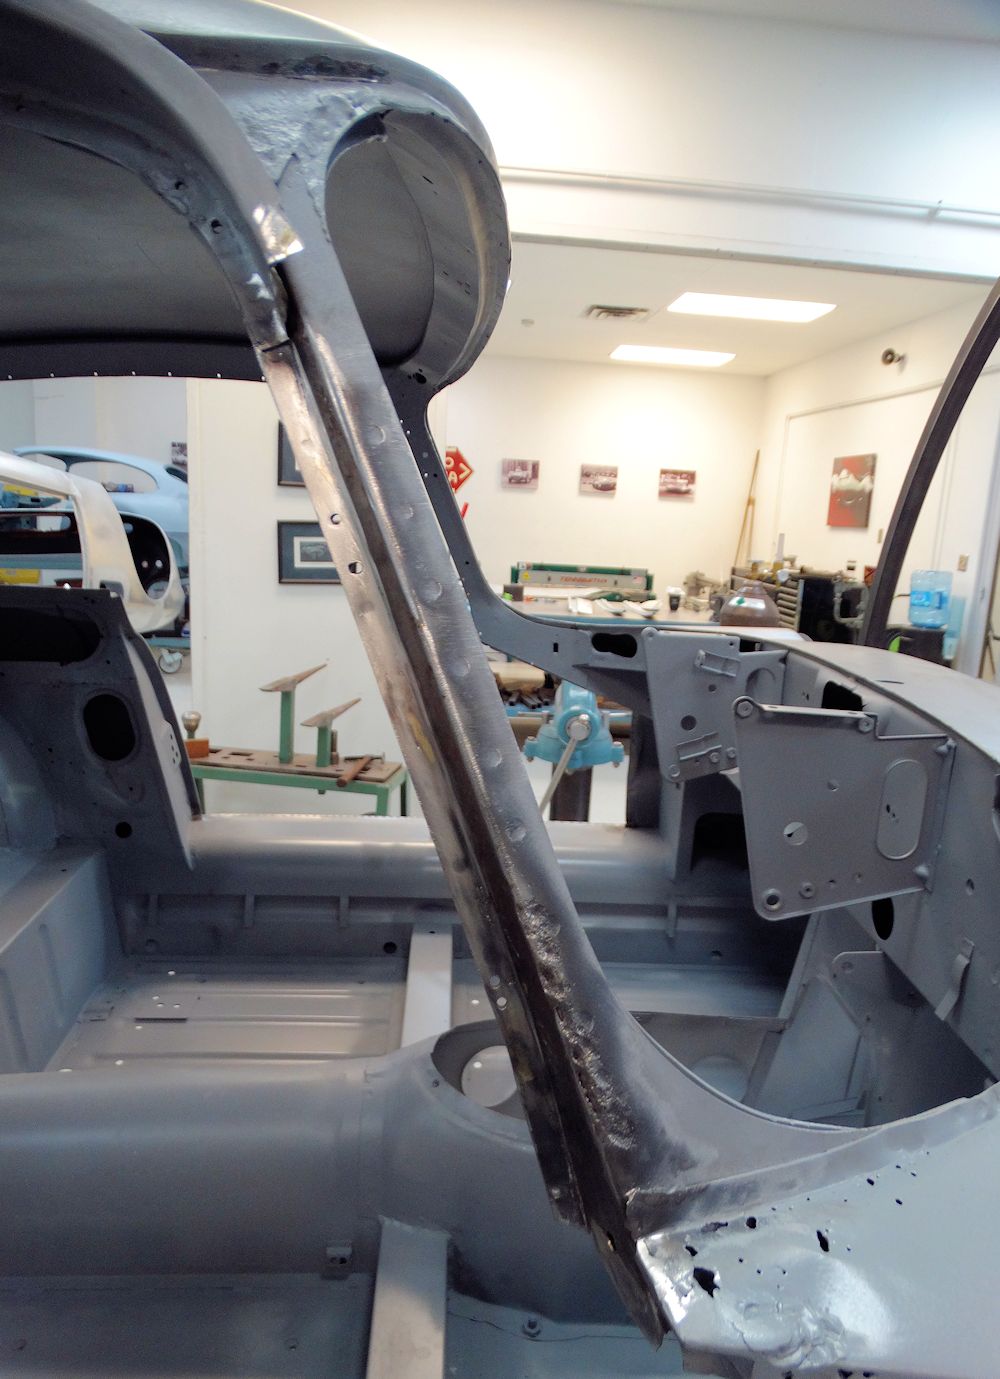
| Screen pillars will be reconstructed using new
sheet metal |
|
 |
 |
| Only minor surface rust found beneath the cowl
panel |
|
 |
 |
| Cleaning surface rust from inner dash |
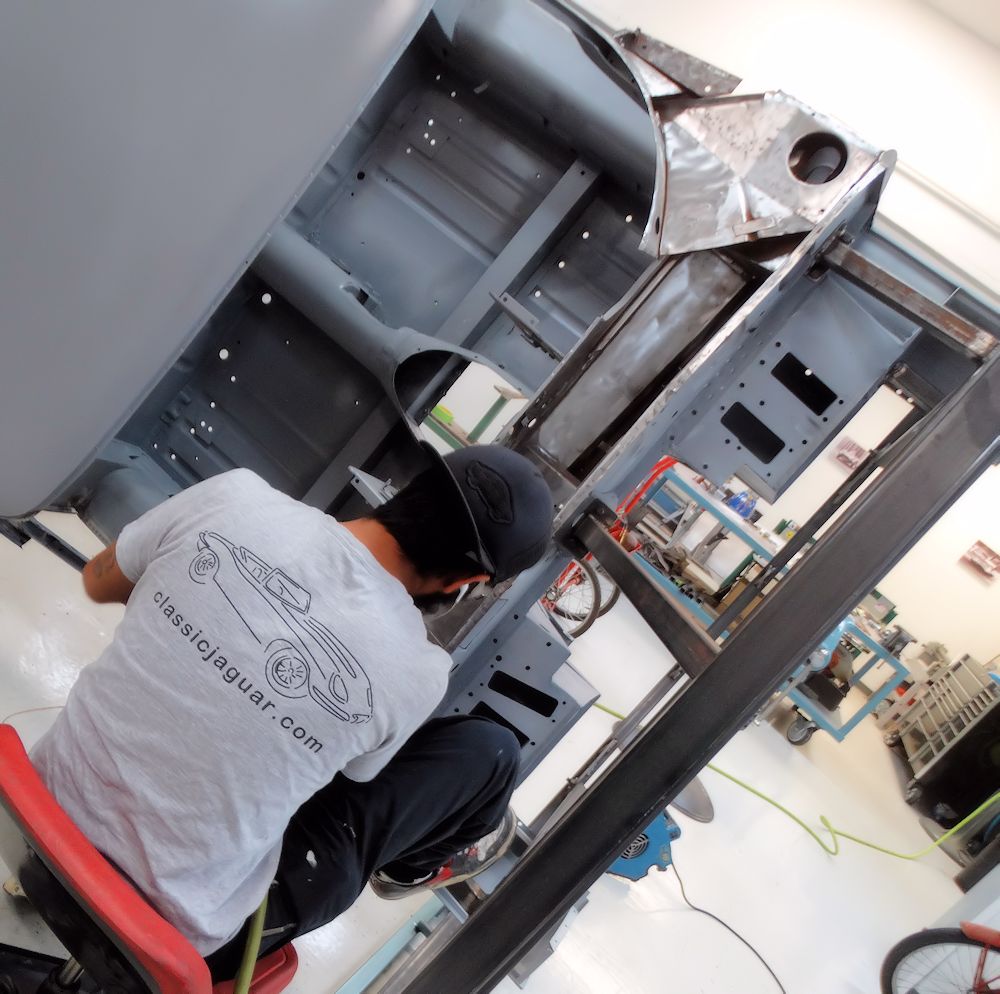
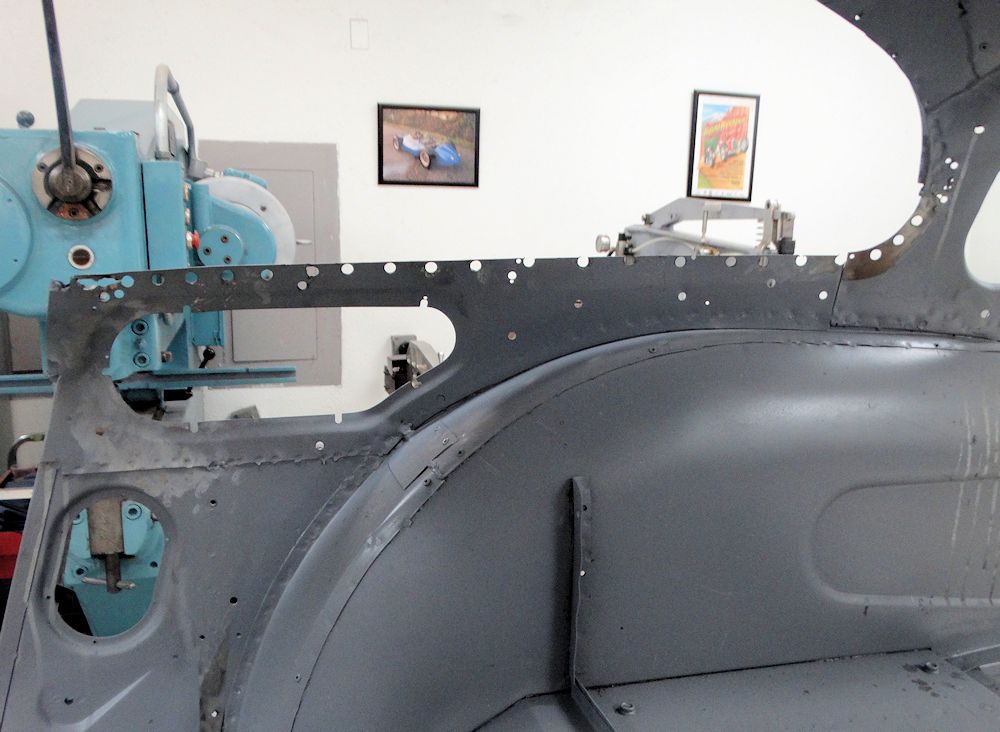
Rust proofing inner sill box sections and installing new outer sill panels.
 |
 |
| Wurth Body Wax applied to all enclosed section |
|
 |
 |
| Inner edge of outer sills also coated in wax |
Clamping new panels in position |
 |
 |
 |
 |
 |
 |
| Outer sills now welded in place |
|
 |
 |
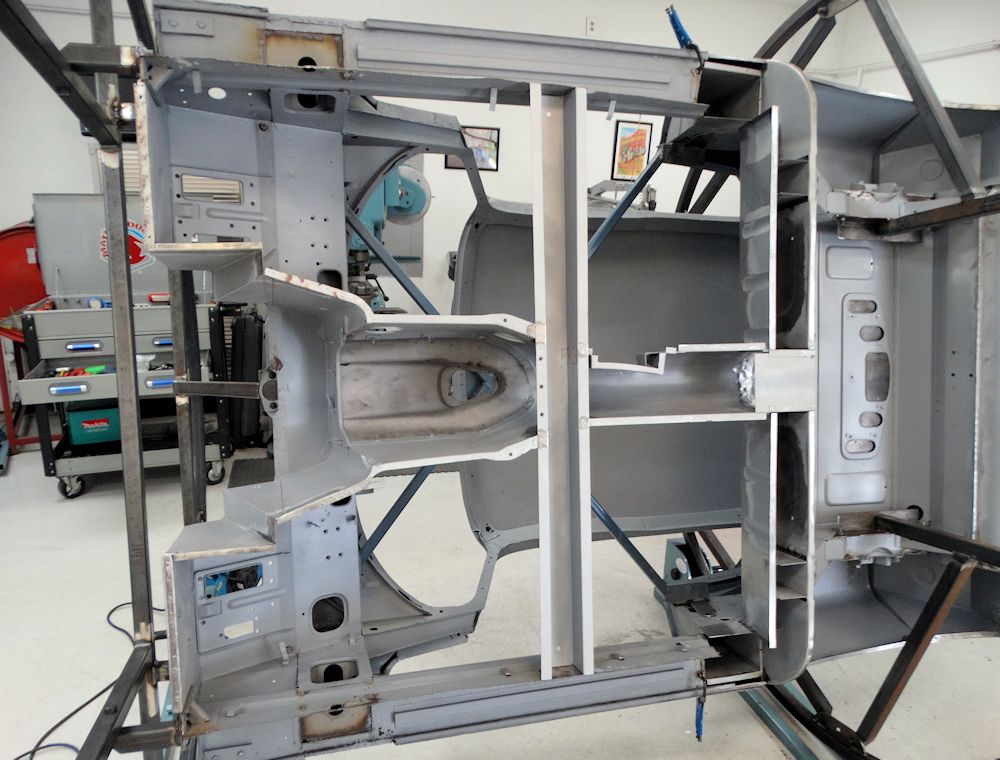
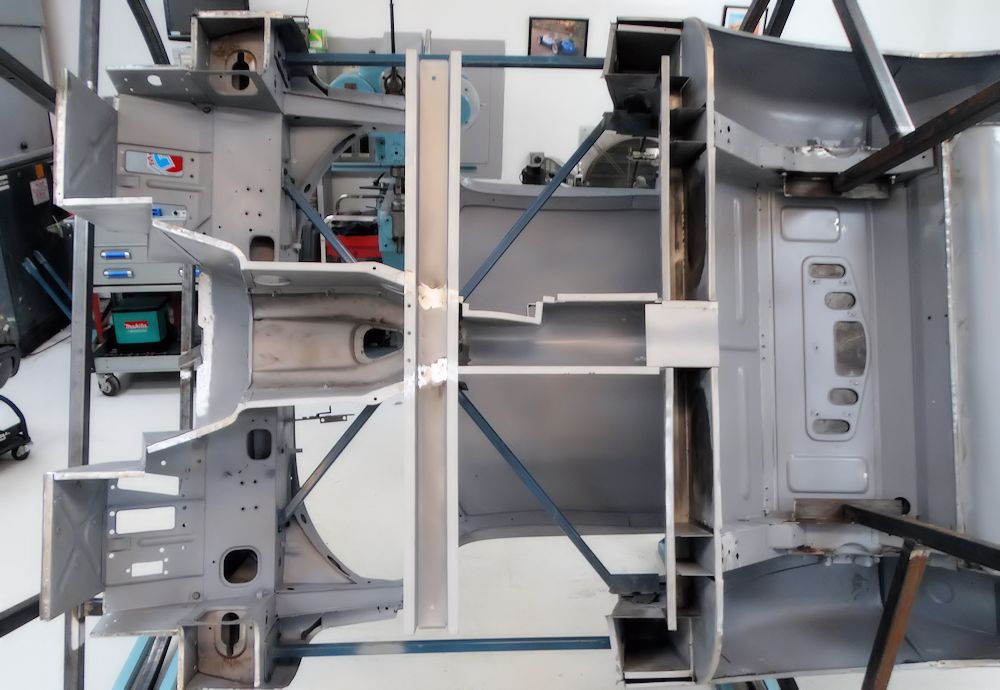
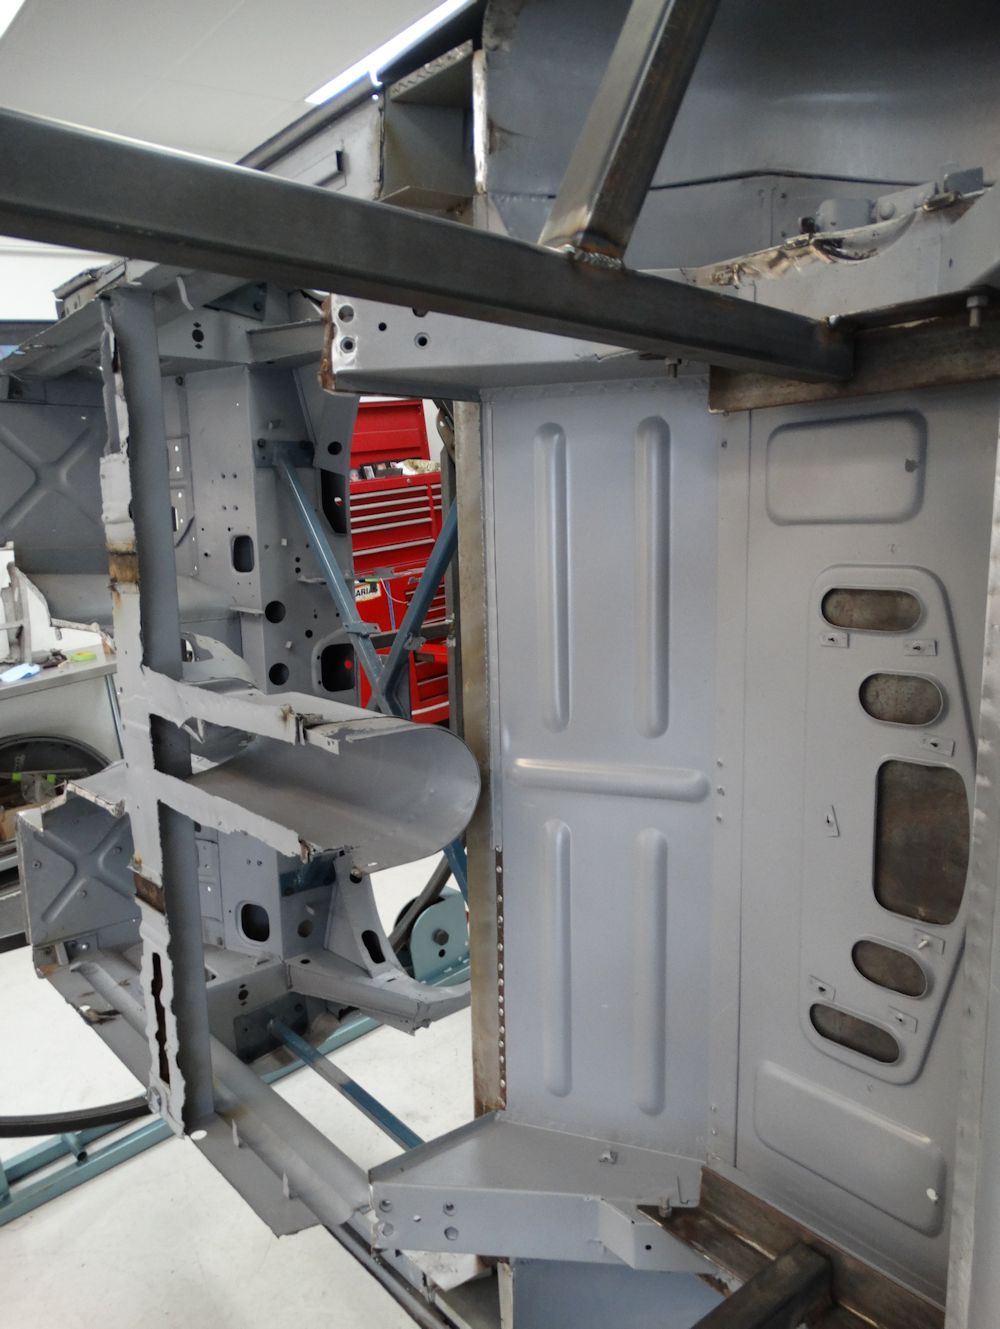
| Foundation of the monocoque now reconstructed |
 |
 |
| Floors now spot welded into place |
|
 |
 |
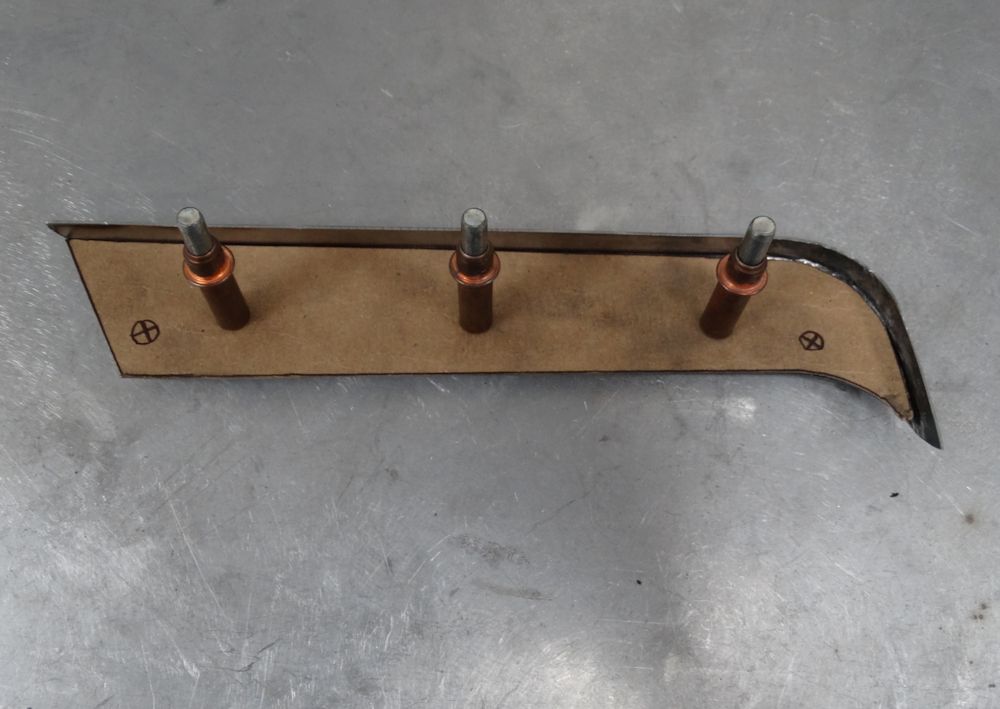
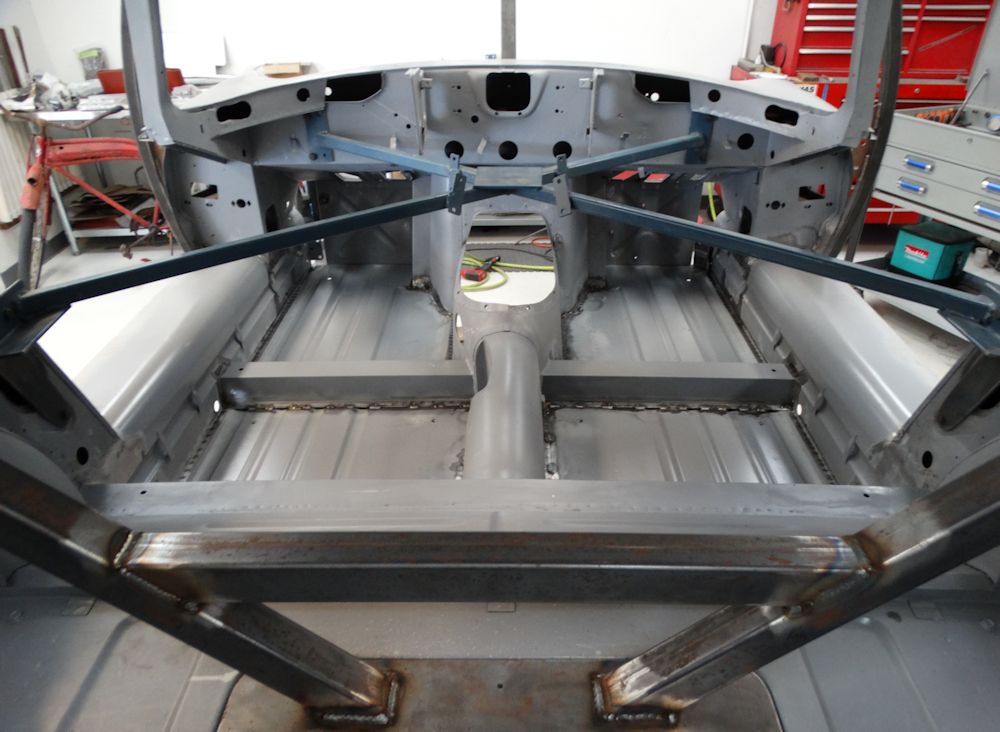
| Trial fitting engine frames |
Welding new engine frame anchor points into
place |
 |
 |
 |
 |
| Making sure front profile of outer sill
matches rear |
|
 |
 |
| Installing inner sill support gussets |
Installing the new outer sills and trial fitting new floors..
 |
 |
| New cross-member welded in place |
|
 |
 |
| Rear bulkhead repairs now completed |
Old inner sills now cut away |
 |
 |
 |
 |
 |
 |
| Laying new inner sills in place |
|
 |
 |
| Preparing to spot weld new inner sills in
position |
|
 |
 |
 |
 |
| Trial fitting new floors with reaction plate |
|
 |
 |
| New floors will be trimmed to match trans
cover |
Removing what is left of the old floors with a plasma cutter, repairing the transmission tunnel..
 |
 |
 |
 |
 |
 |
 |
 |
 |
 |
 |
 |
 |
 |
 |
 |
 |
 |
 |
 |
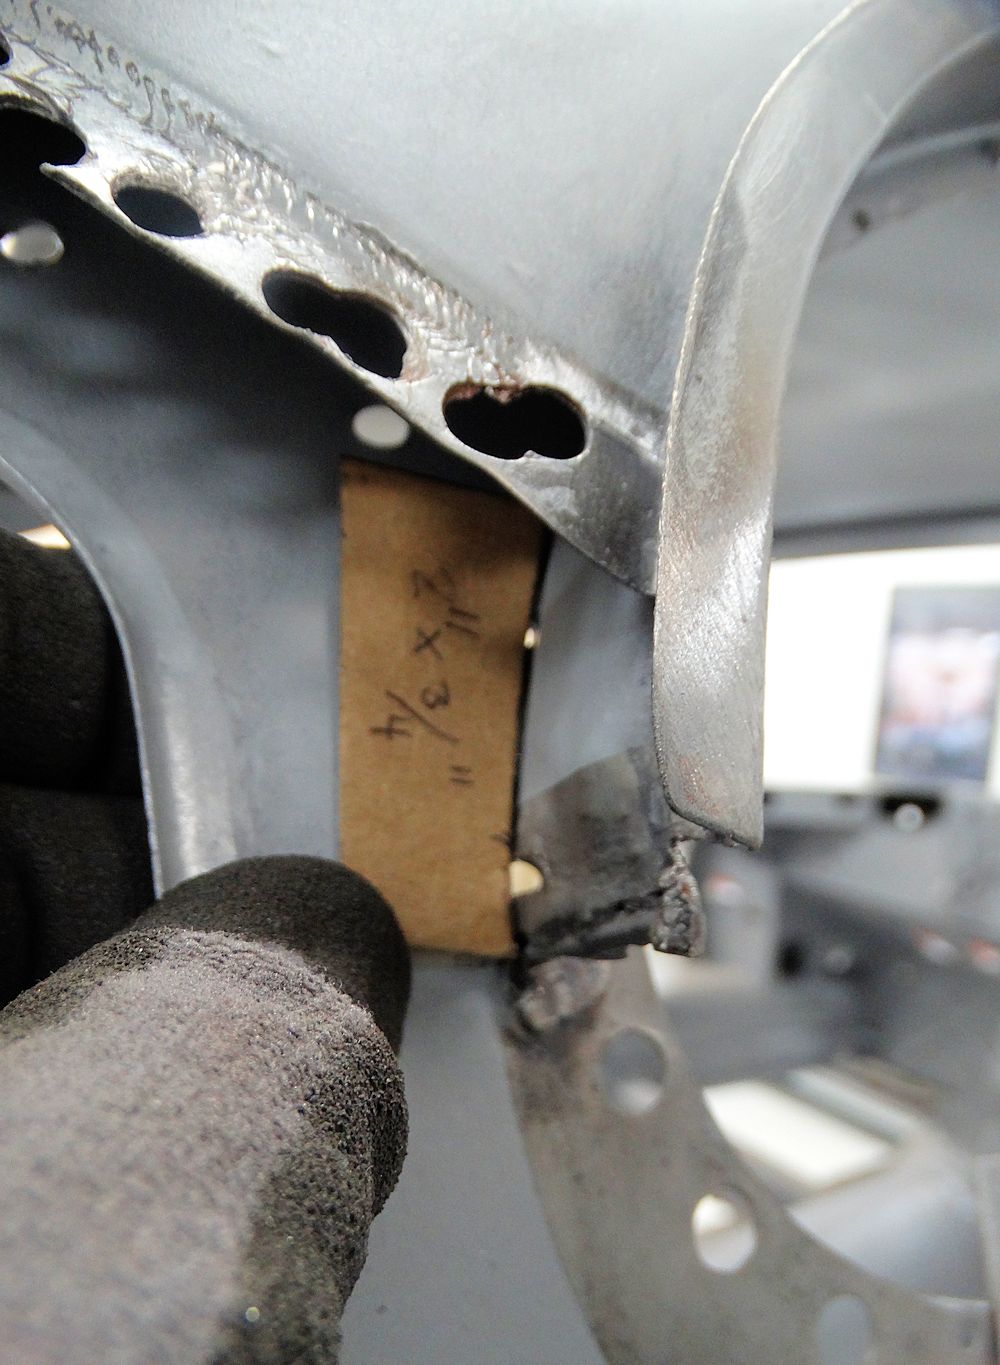
| Replacement drive shaft tunnel has facility
for seat belts which were not installed originally |
|
 |
 |
| Steel blanking plate cut to fill seat belt
anchor hole |
|
 |
 |
| Blanking plate welded in place |
After metal finishing, the repair is invisible |
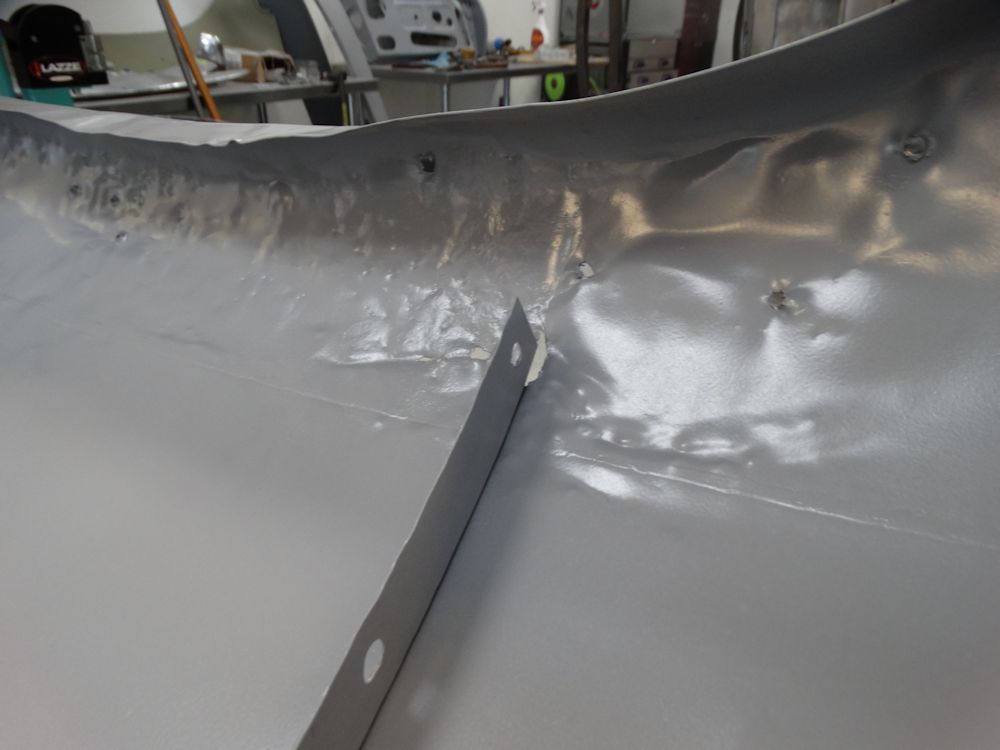
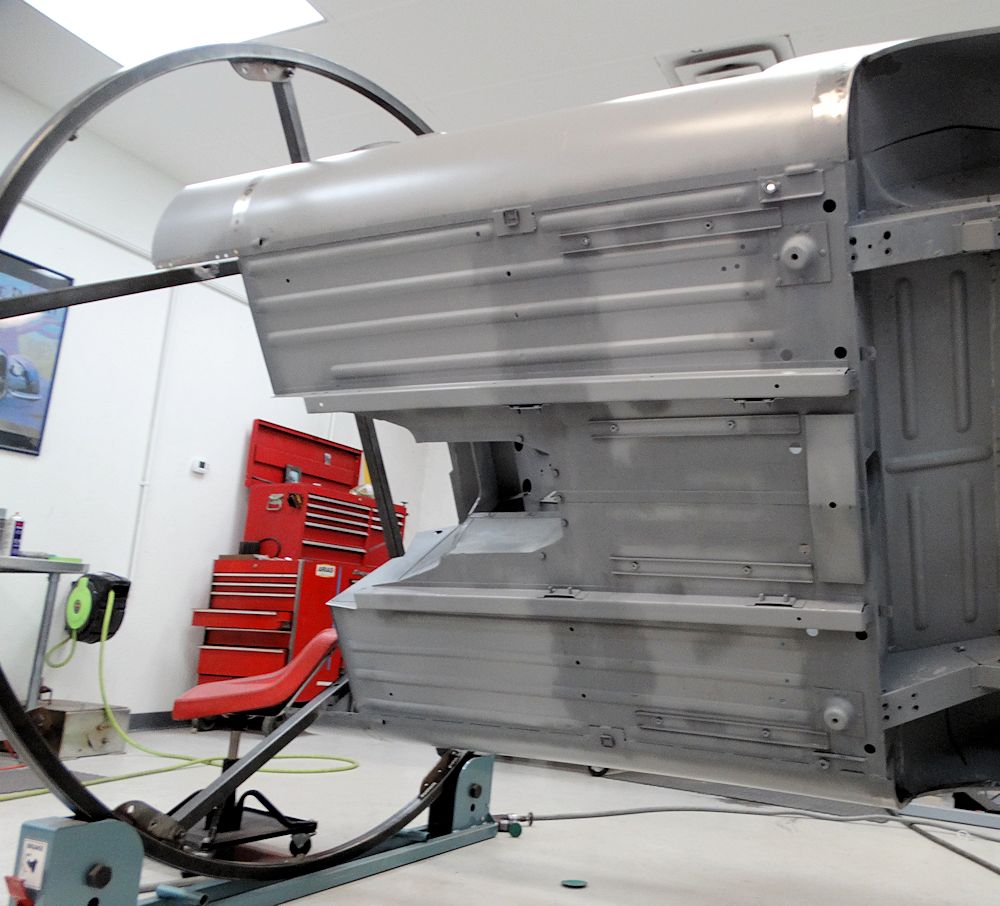
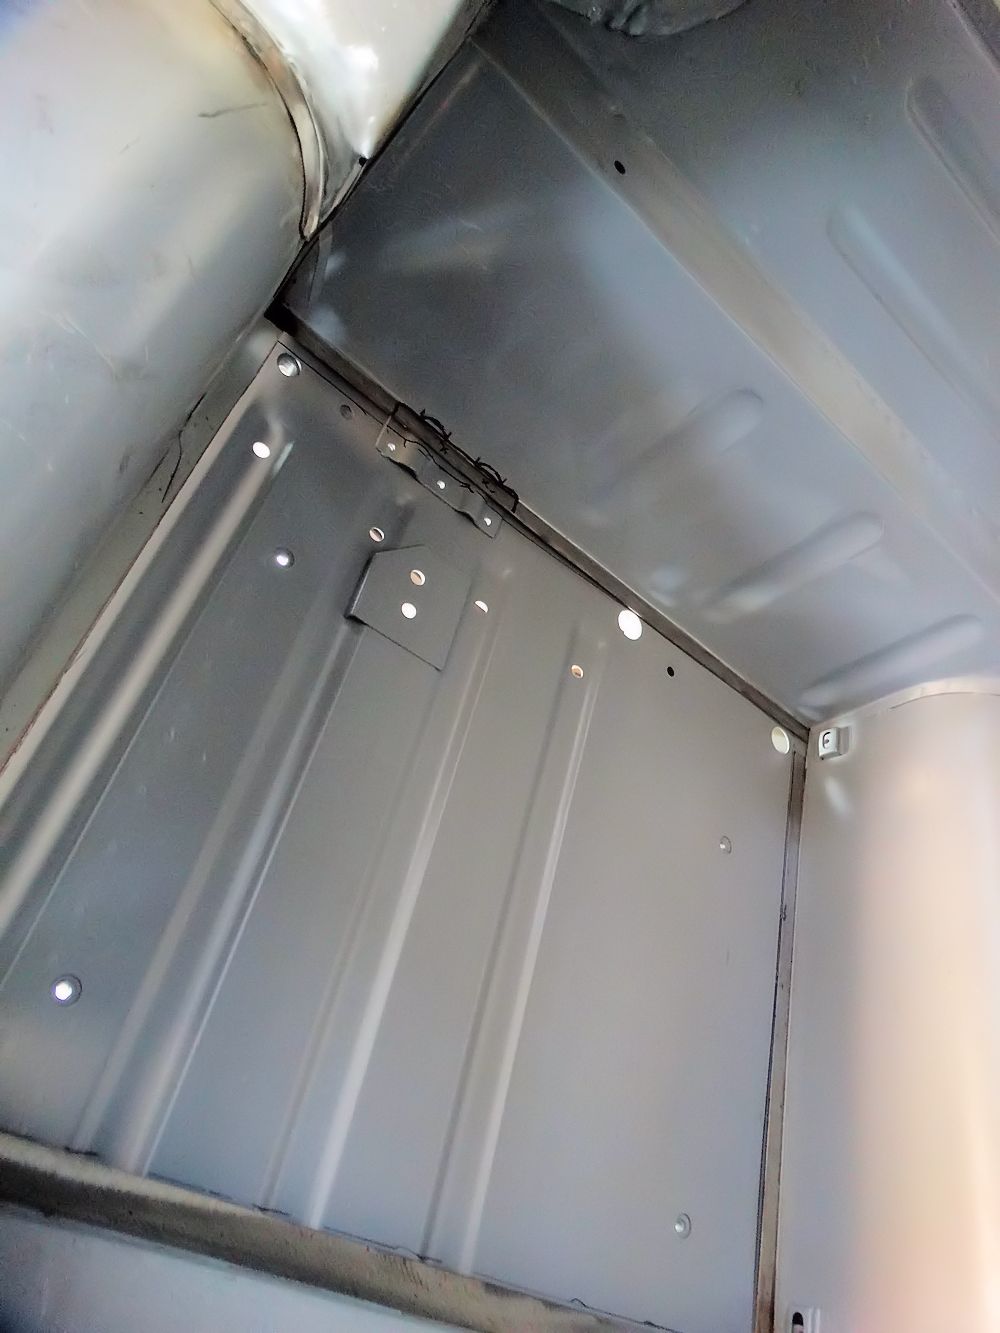
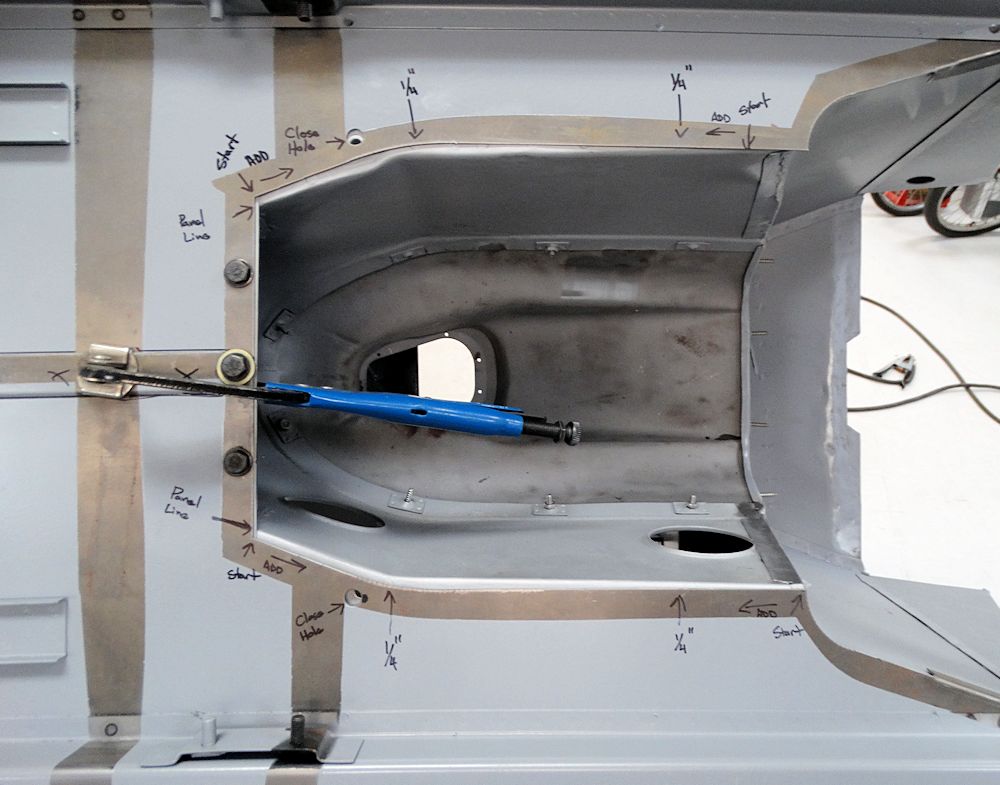
The new boot floor and lower quarters have now been welded in place, and Matt has also corrected the shape of the rear wheel arches.
 |
 |
 |
 |
 |
 |
 |
 |
 |
 |
 |
 |
 |
 |
Matt has been busy replacing the boot floor and lower quarter panels..
 |
 |
| Body shell has been placed on a special
rotisserie |
|
 |
 |
| Scraping away factory lead from license plate
area |
|
 |
 |
| Various modifications will be needed before
the new panels fit perfectly |
|
 |
 |
 |
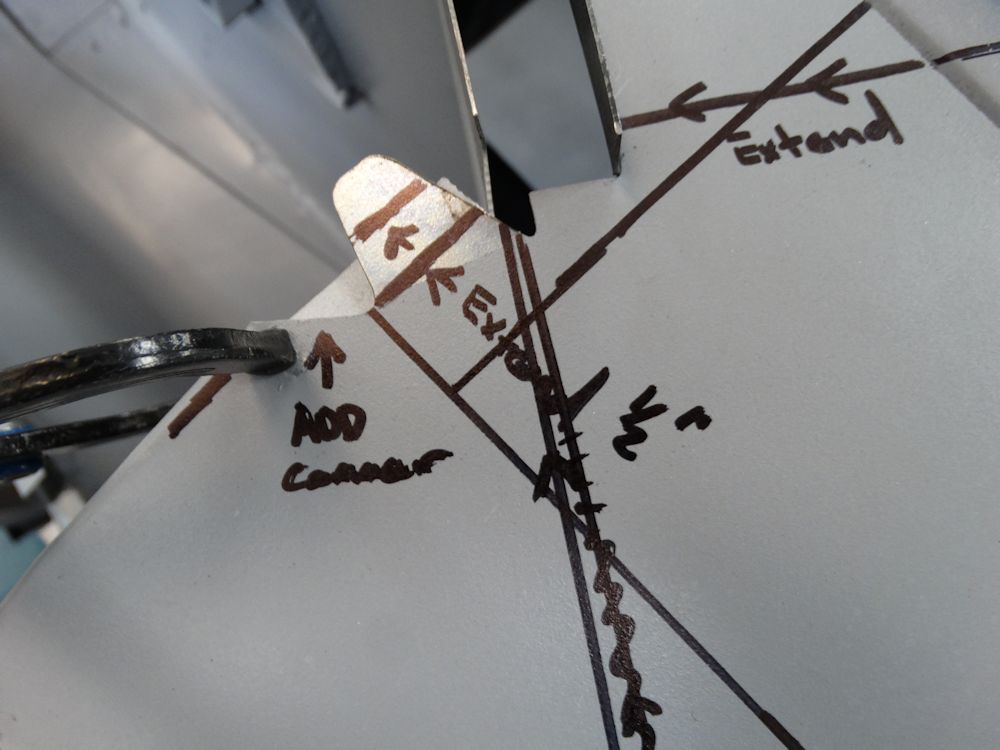 |
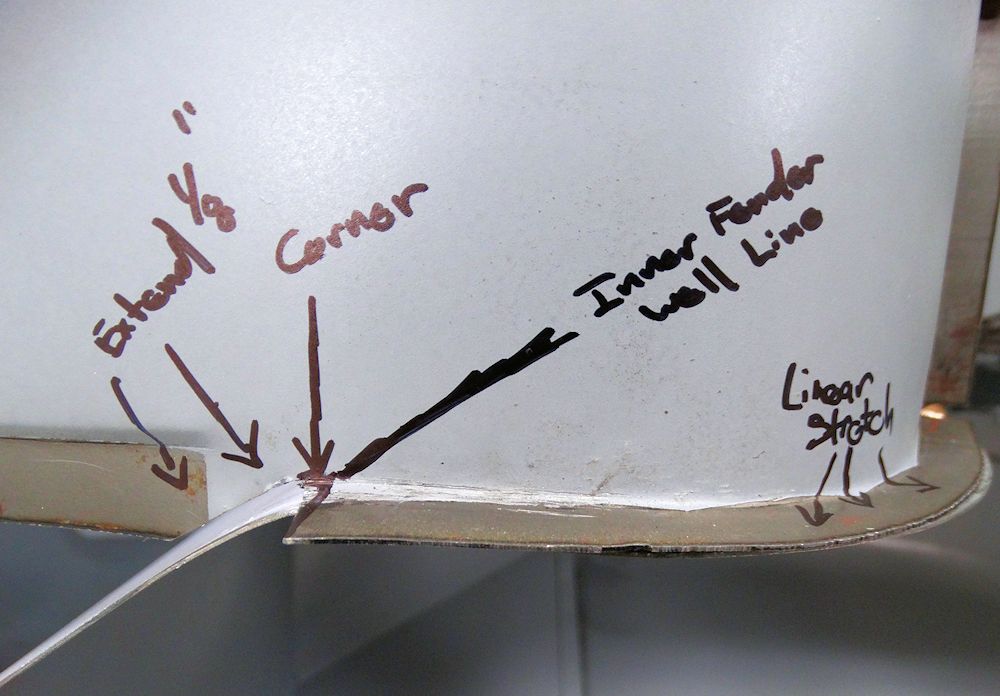
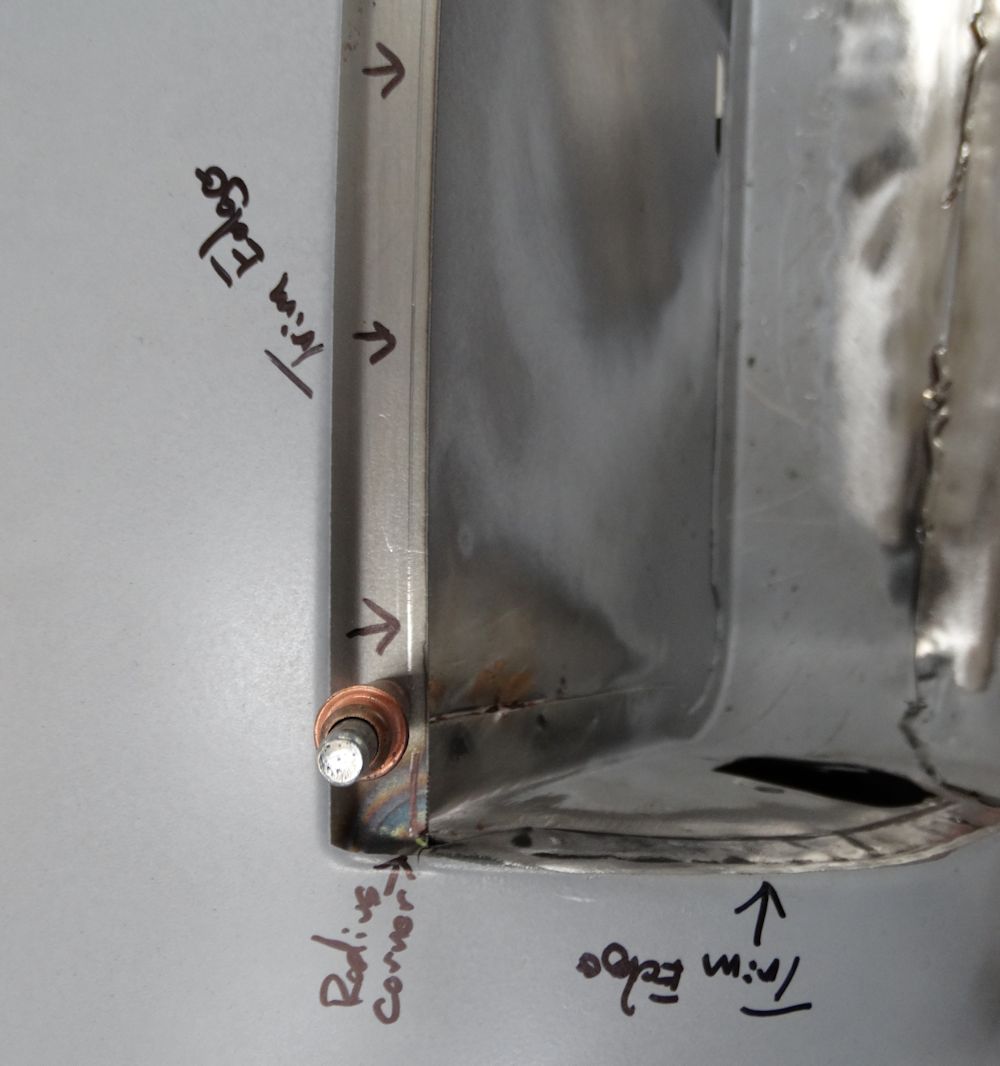
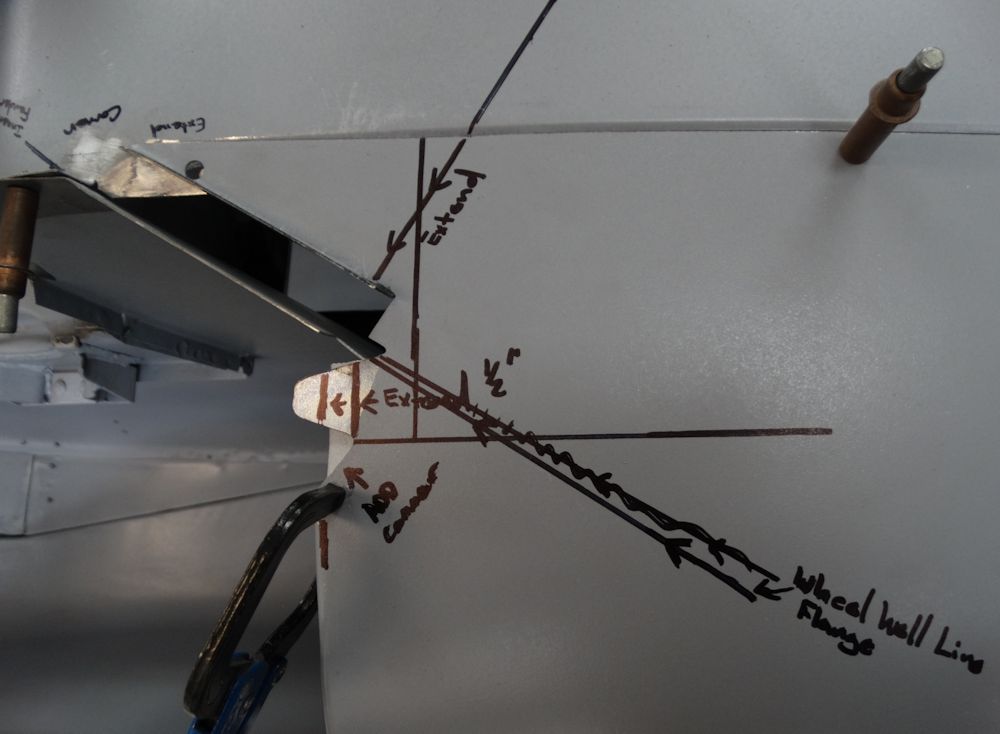
| Both panels will be extended to properly fit with edge of their respective wheel wells |
|
 |
 |
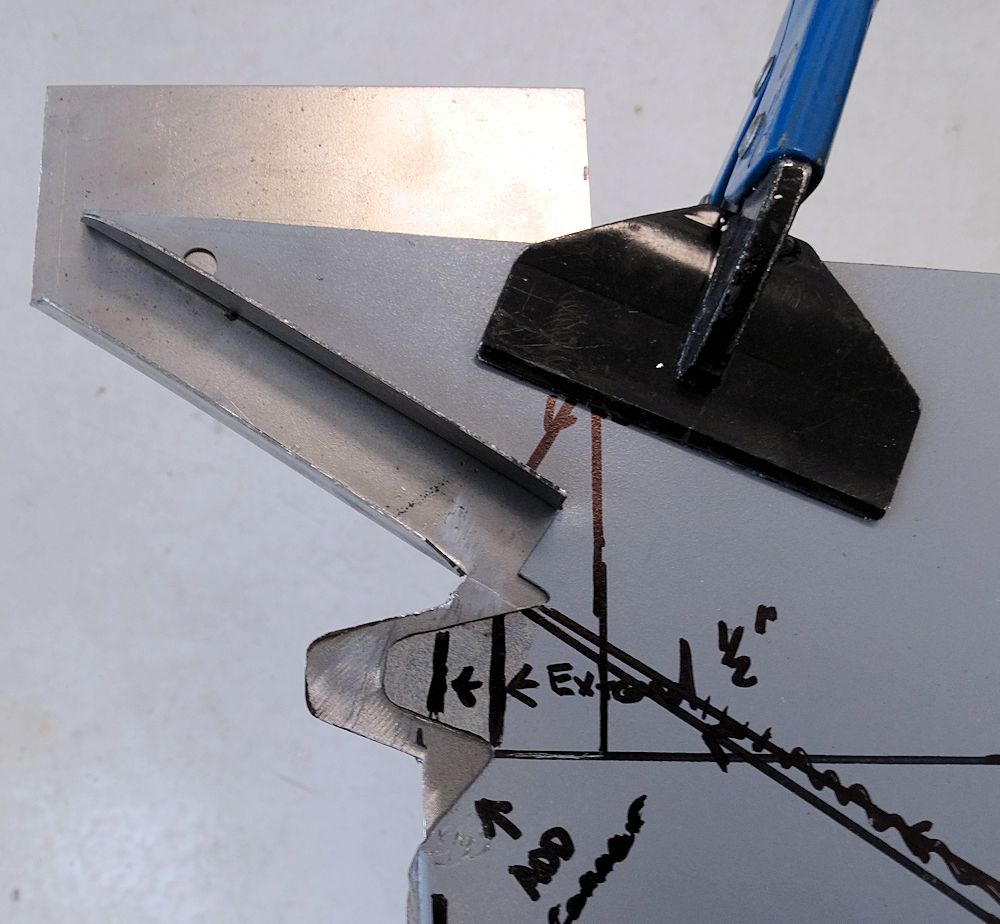 |
 |
| Preparing to weld extension panel to RH lower
quarter |
|
 |
 |
| Extended panel now fits perfectly |
Rear end starting to take shape |
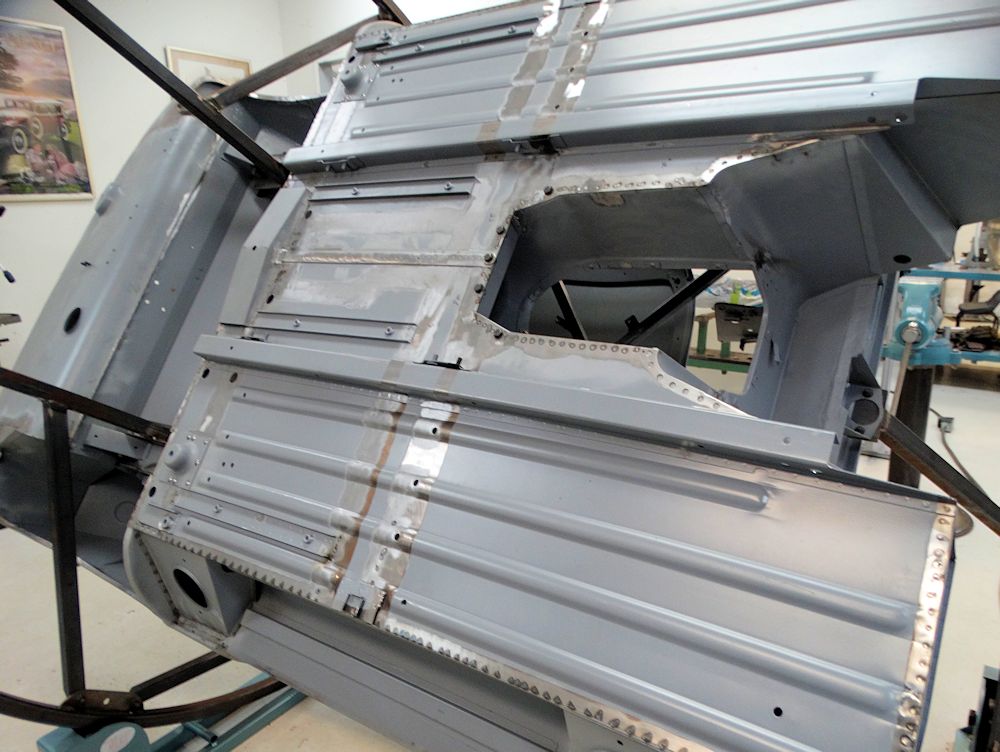
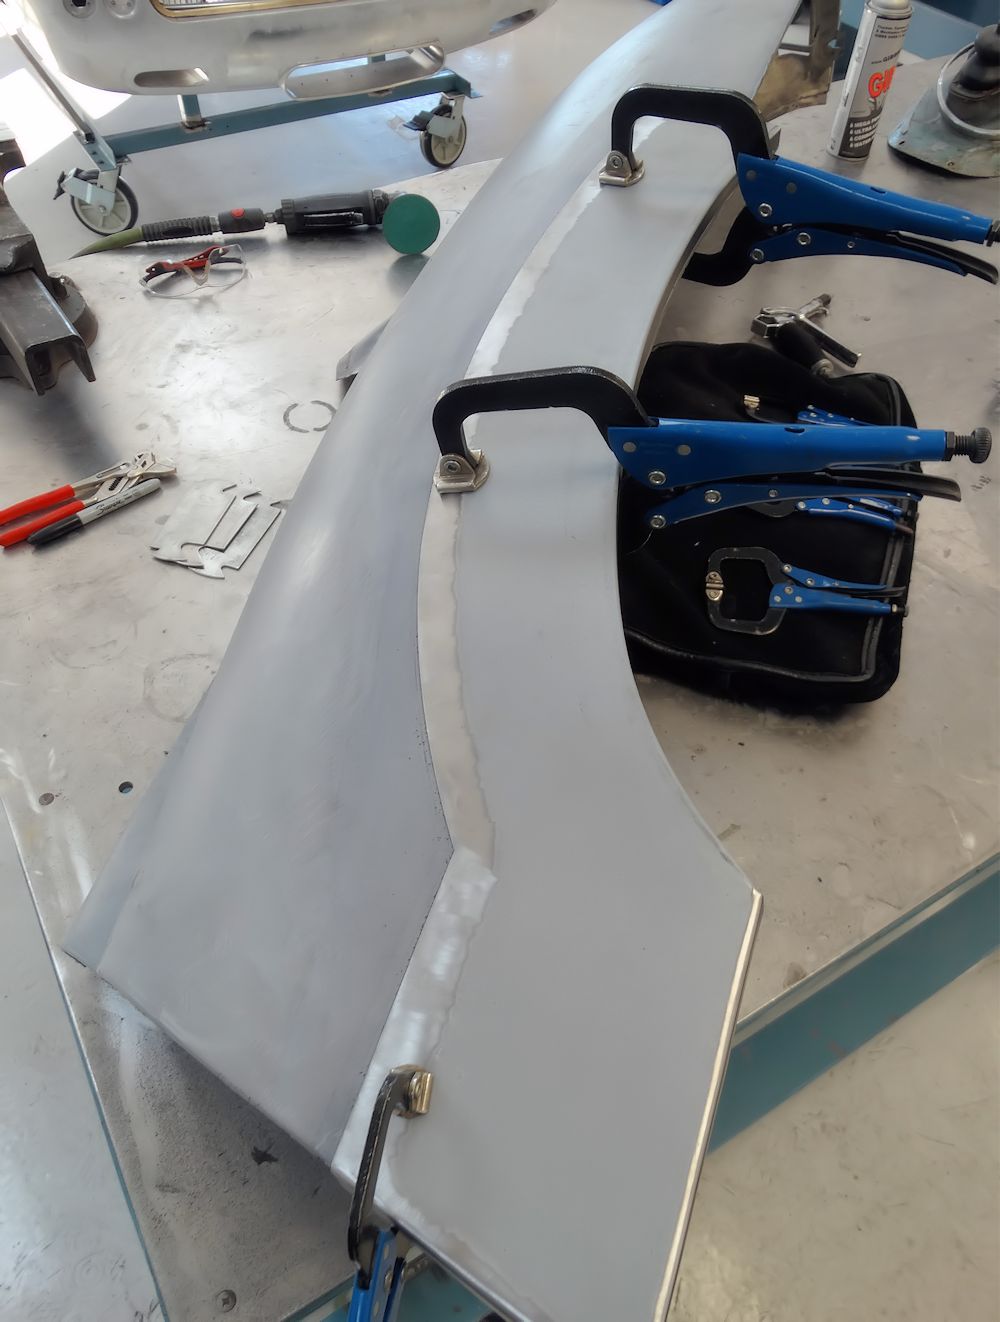
The right hand rear quarter panel has now been repaired and installed..
 |
 |
| Trial fitting quarter panel one last time |
|
 |
 |
 |
 |
| Repaired panel now sealed in epoxy primer |
Weld zones will be sealed with weld thru
primer |
 |
 |
| Quarter being welded in place (in back ground) |
|
 |
 |
| Matt will begin reworking the boot compartment
next |
Matt has been making great progress with the RH rear quarter and B pillar repairs. He is almost to a point where the second quarter panel can be permanently installed .
 |
 |
| Trial fitting RH quarter after significant
repairs |
Shut face panel is a mess, as is the rubber seal channel |
 |
 |
| Template for the new rubber seal channel |
Trial fitting new seal panel and new shut face panel together |
 |
 |
| View of the back side of the shut face panel |
|
 |
 |
 |
 |
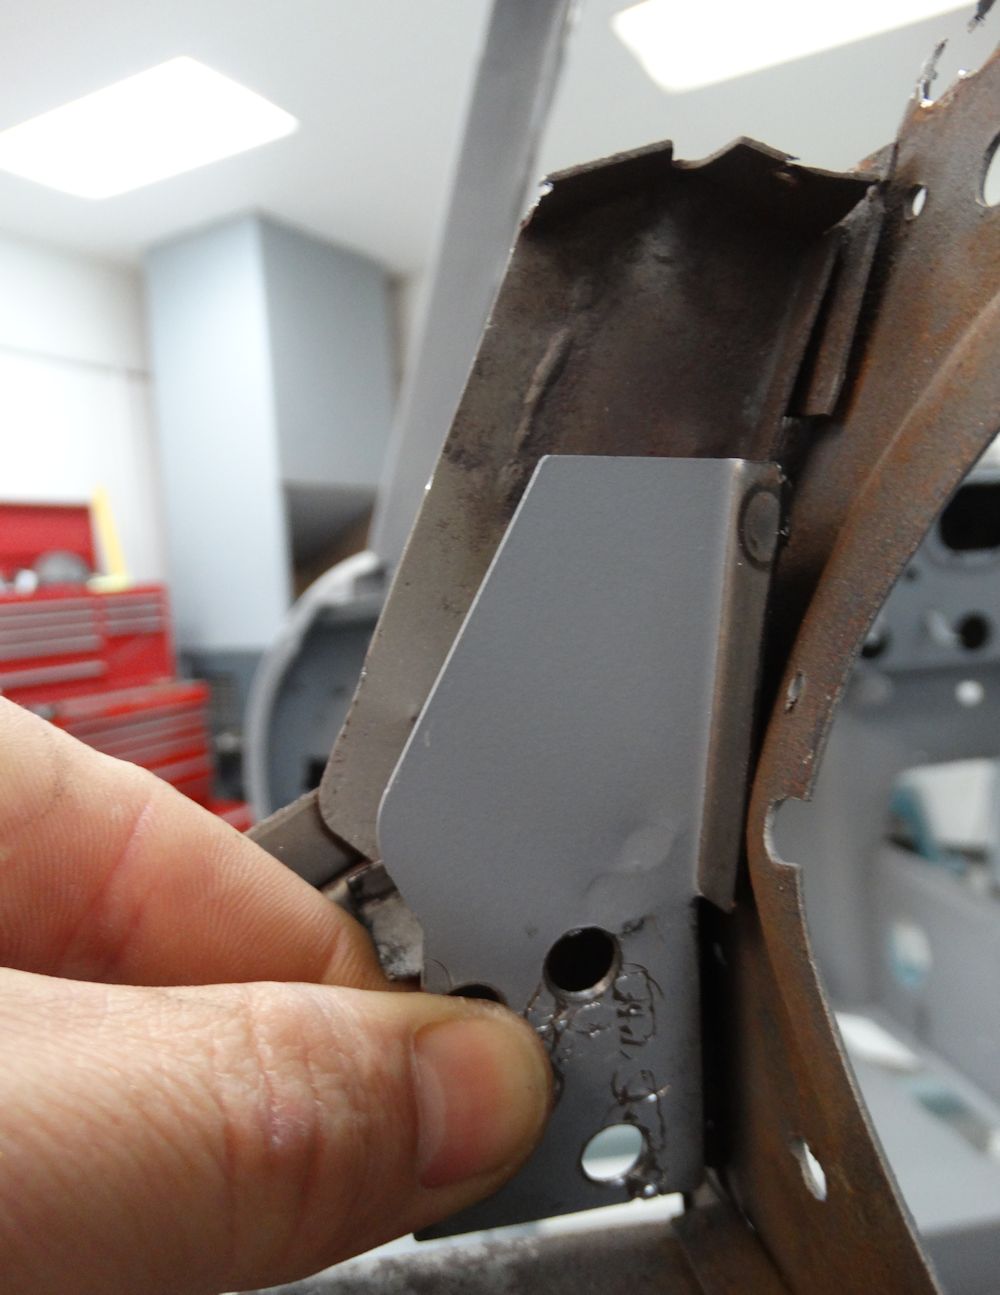
| Time to address the panel immediately beneath the RH quarter light window |
|
 |
 |
| Damaged portion cut away |
New sheet metal welded in place |
 |
 |
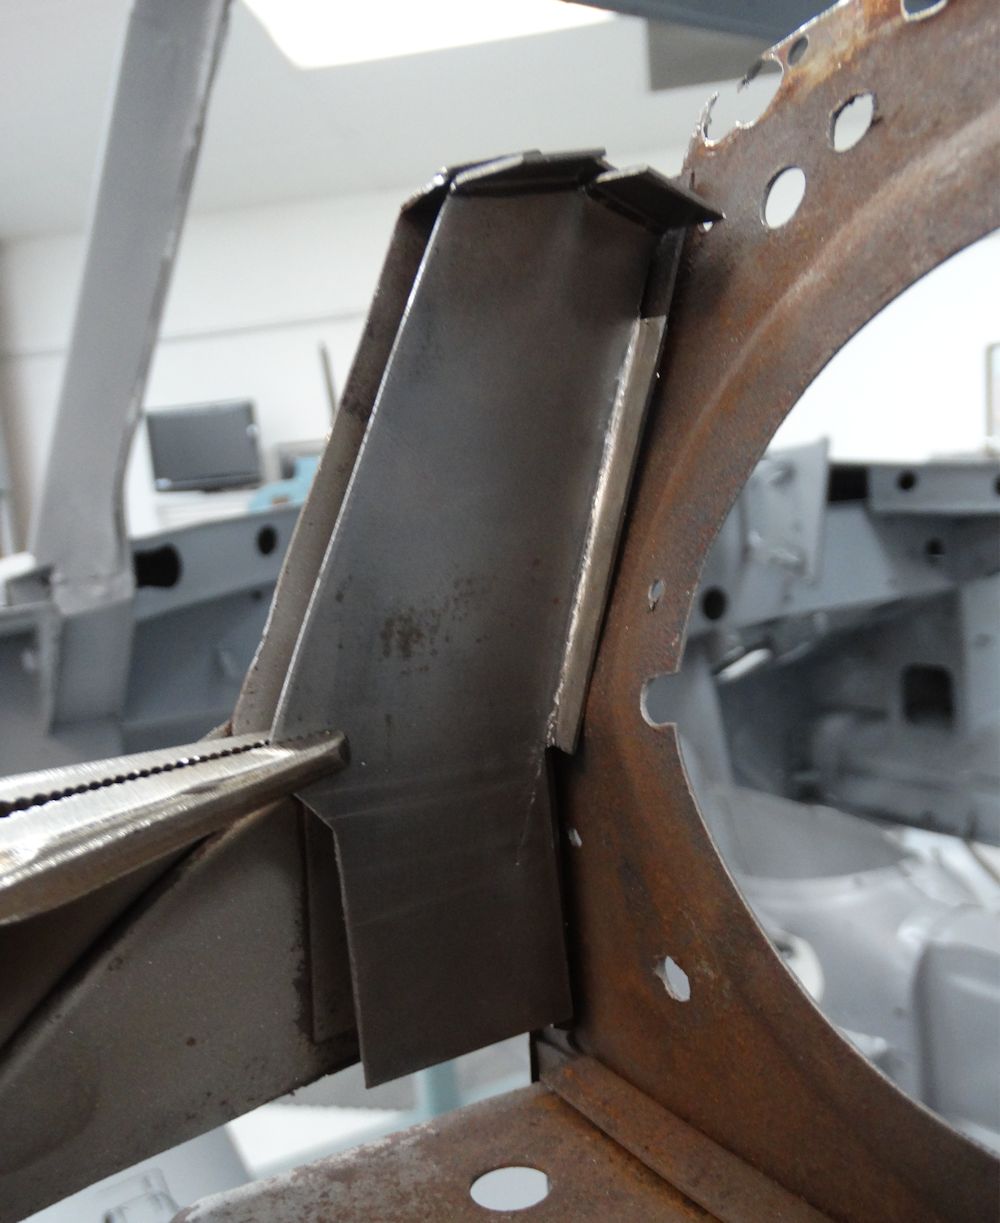
| Fabricating a support panel for the quarter light window latch |
|
 |
 |
 |
 |
 |
 |
| Preparing to weld the new shut face assembly to the quarter panel |
|
 |
 |
 |
|
| Note reconstructed B pillar support tower now welded to rear of shut face panel |
 |
 |
| Removing small dents from rear panel |
|
 |
 |
| Welding new seal retainer to quarter panel |
|
 |
 |
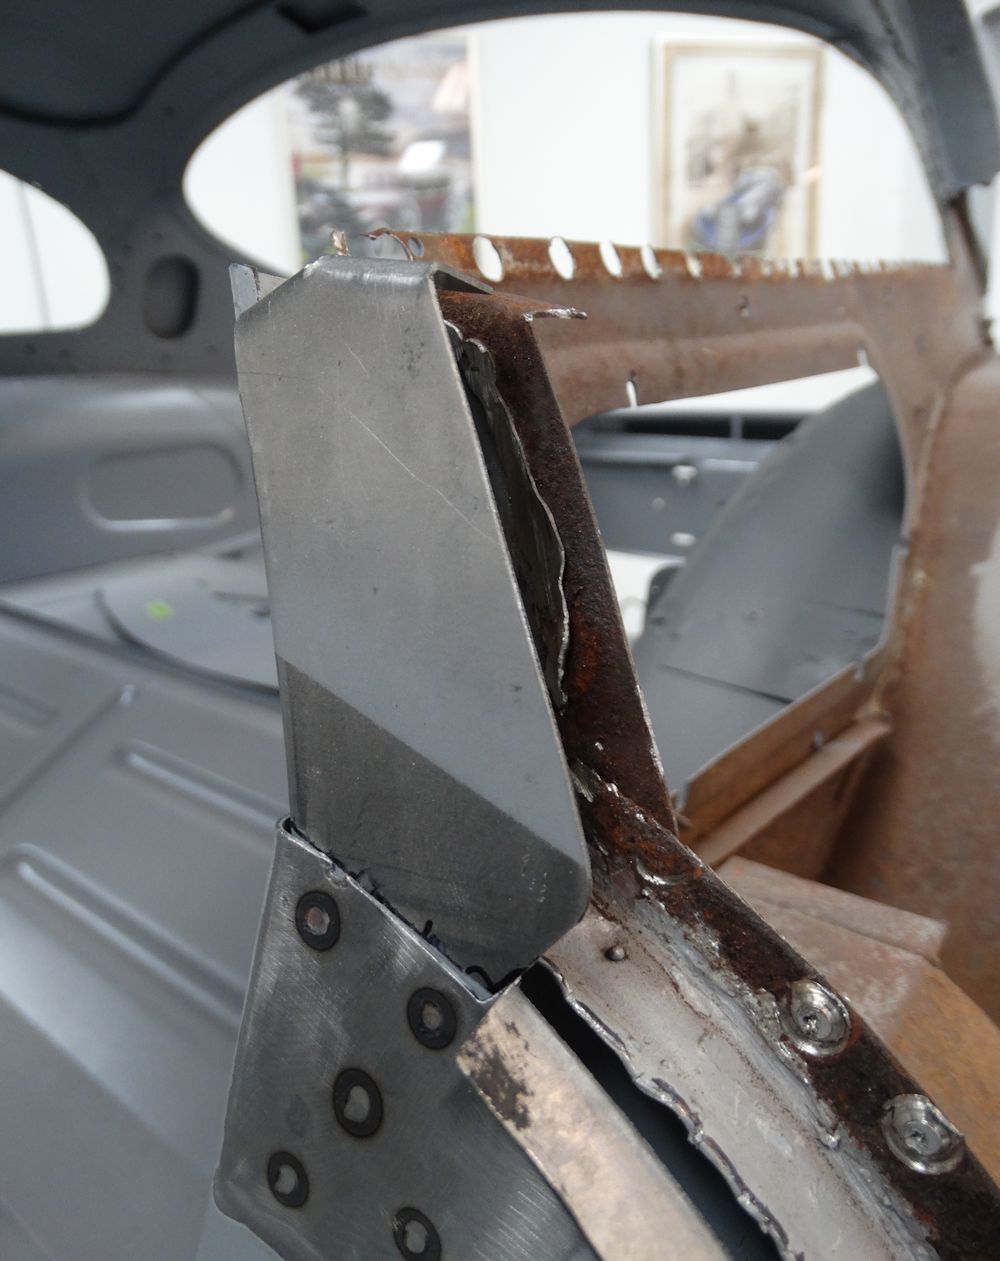
| Trial fitting the new shut face panel to
quarter |
Trial fitting new inner wheel well |
 |
 |
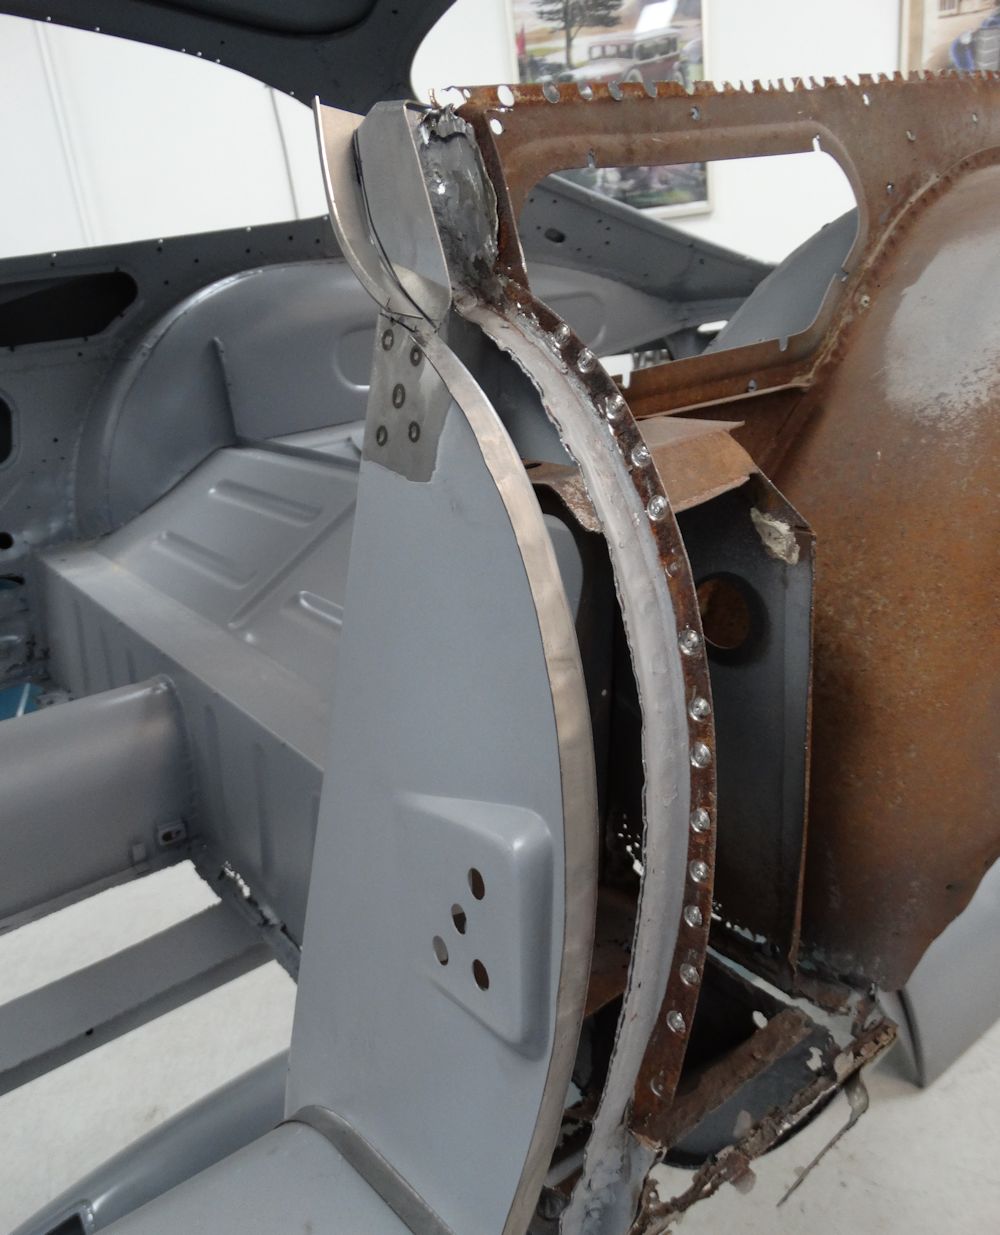
| Spot welding new inner wheel well in place |
Almost ready to install repaired quarter panel |
We have now completely disassembled the IRS and have the restoration and rebuild underway..
 |
 |
| Tag denotes 3:31 final drive |
|
 |
 |
 |
 |
| Cage and tie plate will be powder coated |
Very early version of IRS tie plate |
Continuing with the rear quarter panel repairs...
 |
 |
| Rusty panel cut out, compared side by side with the new replacement panel |
|
 |
 |
| Clamping the trimmed replacement panel in
place |
Panel first tack welded in place |
 |
 |
| Matt TIG welding the new seam |
|
 |
 |
| Repair panel now TIG welded in place |
As pretty a TIG bead as you will ever see |
 |
 |
| TIG bead then metal finished |
The result is a virtually invisible repair |
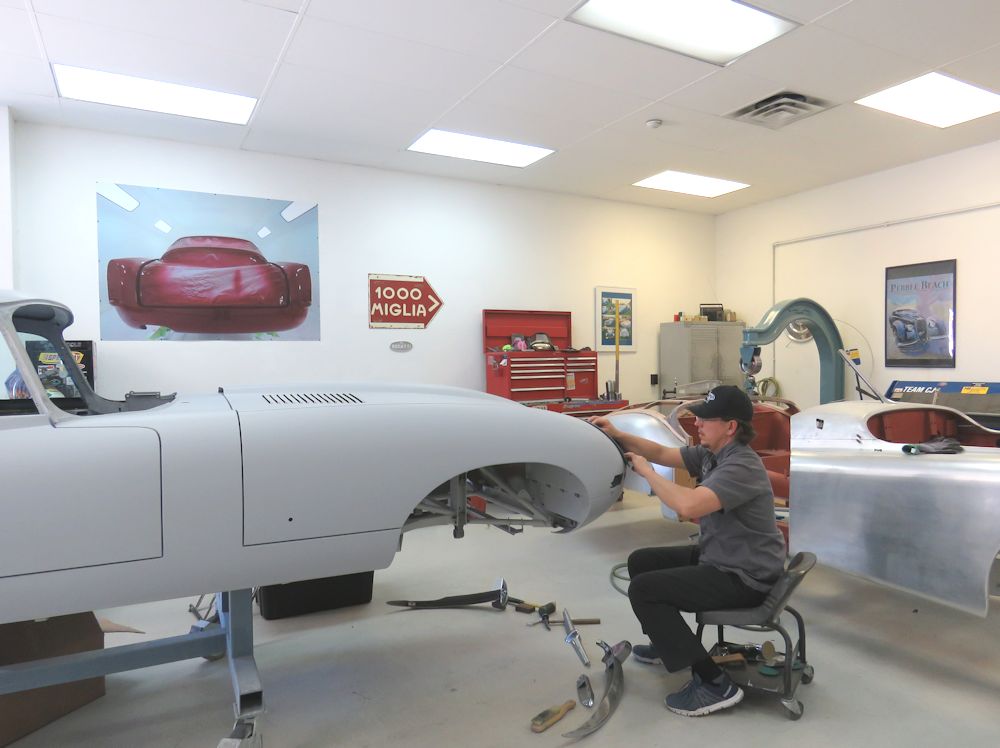
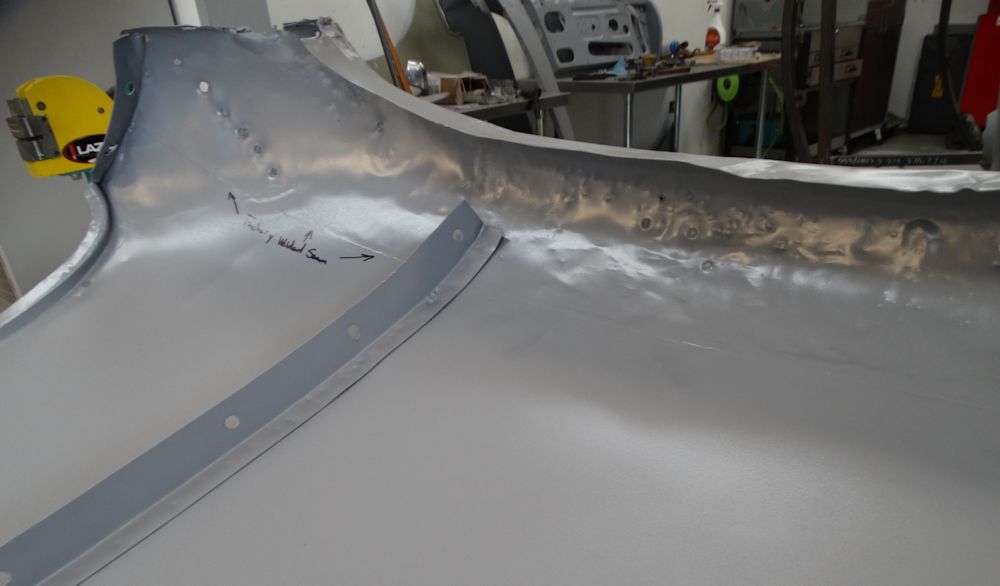
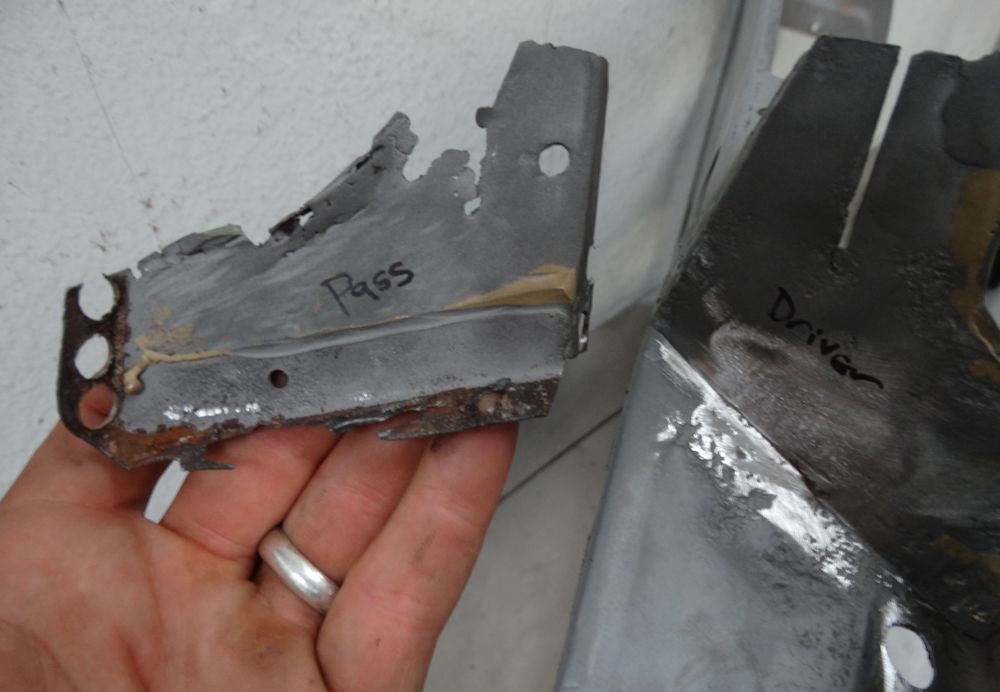
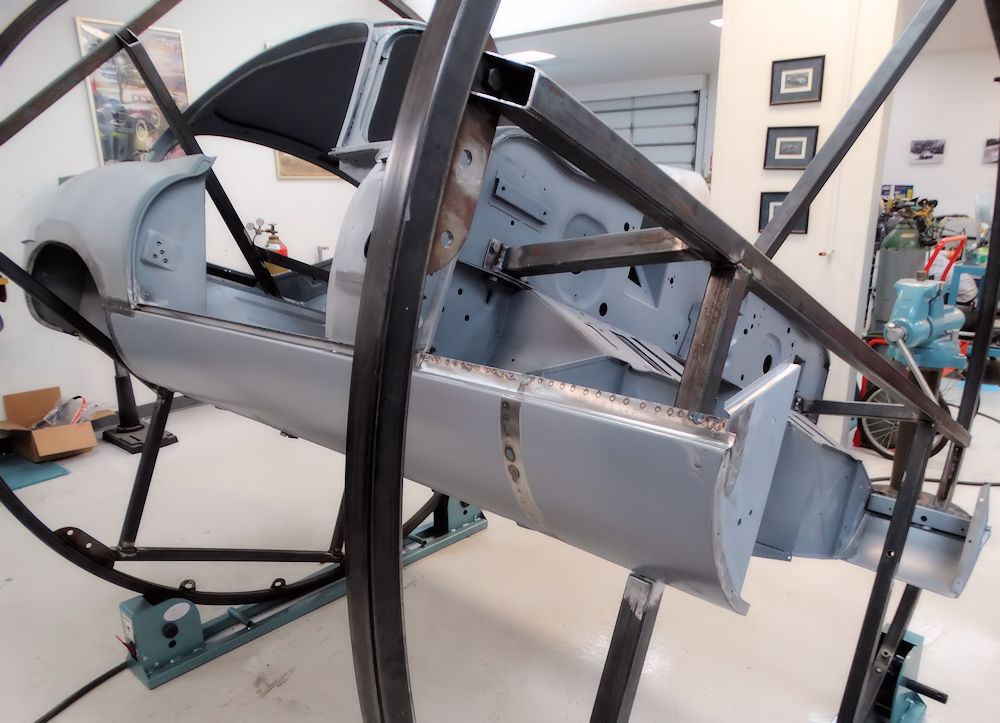
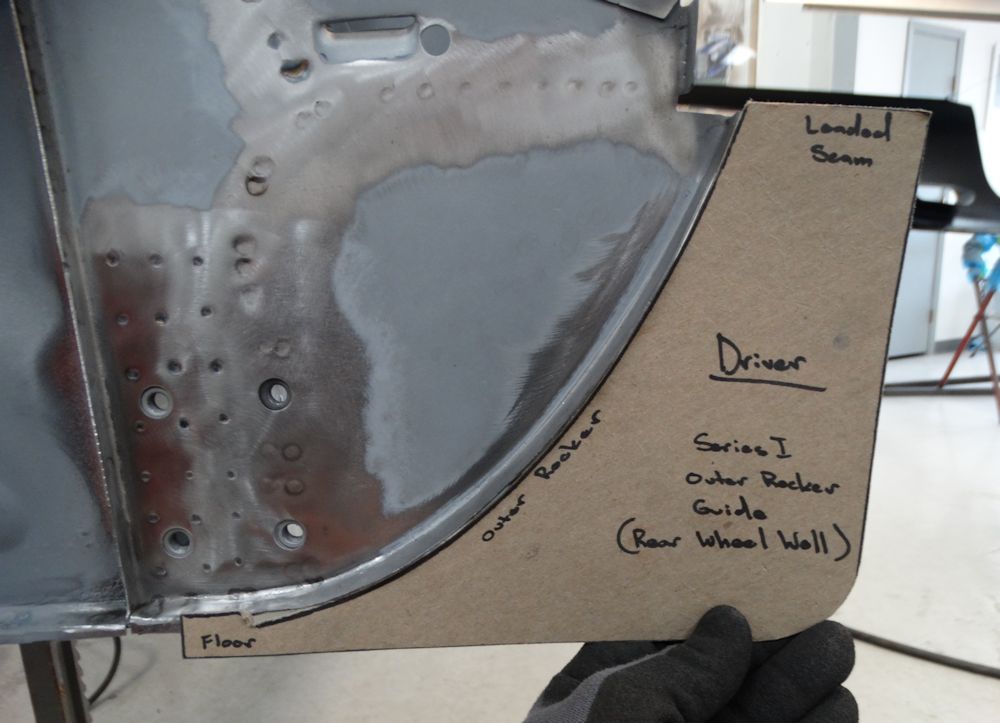
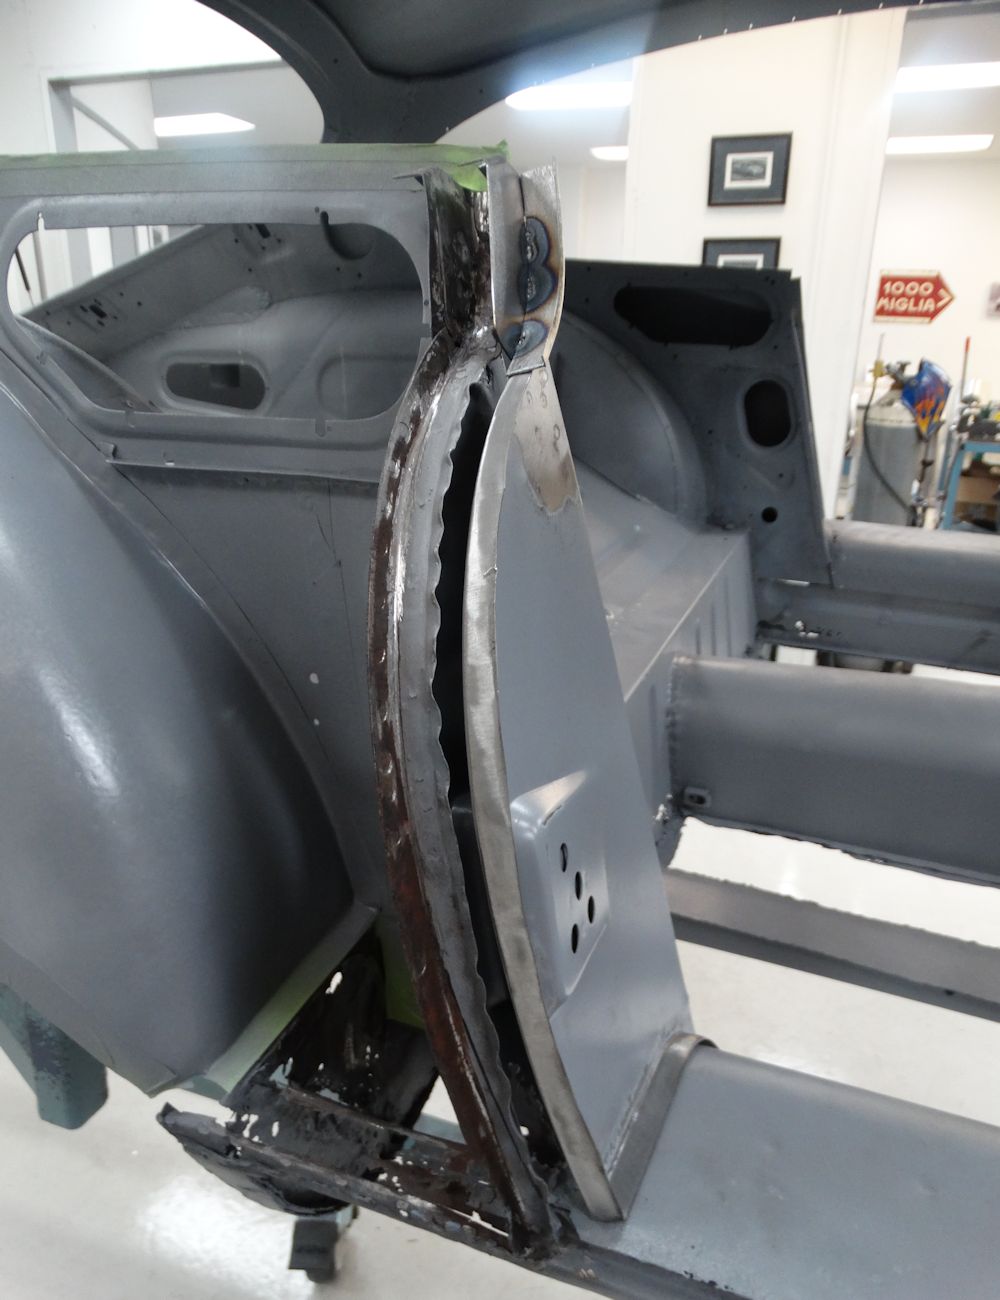
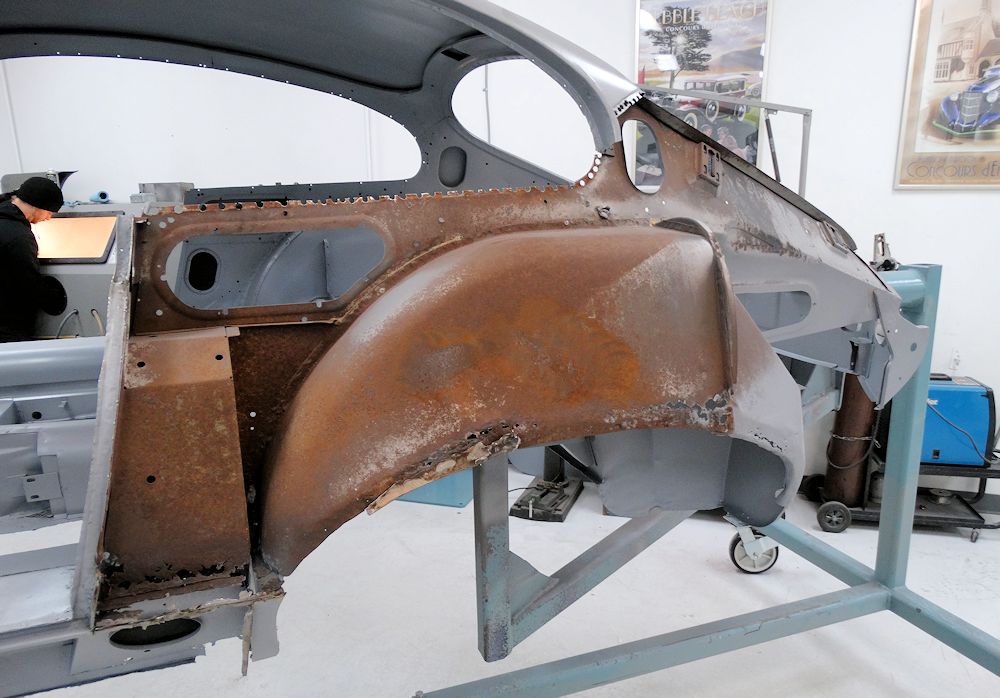
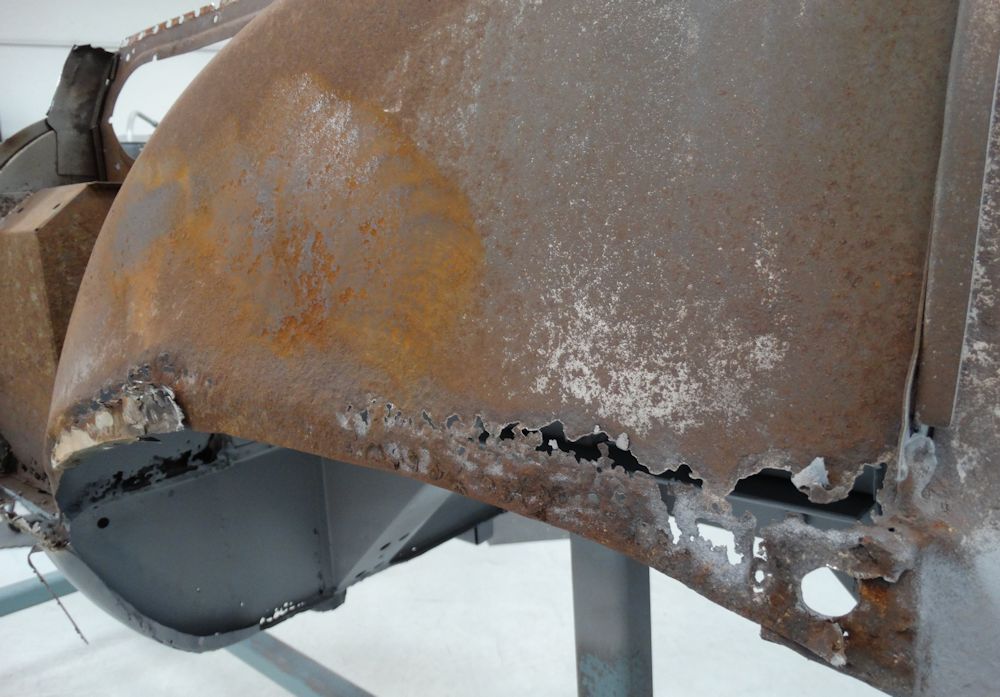
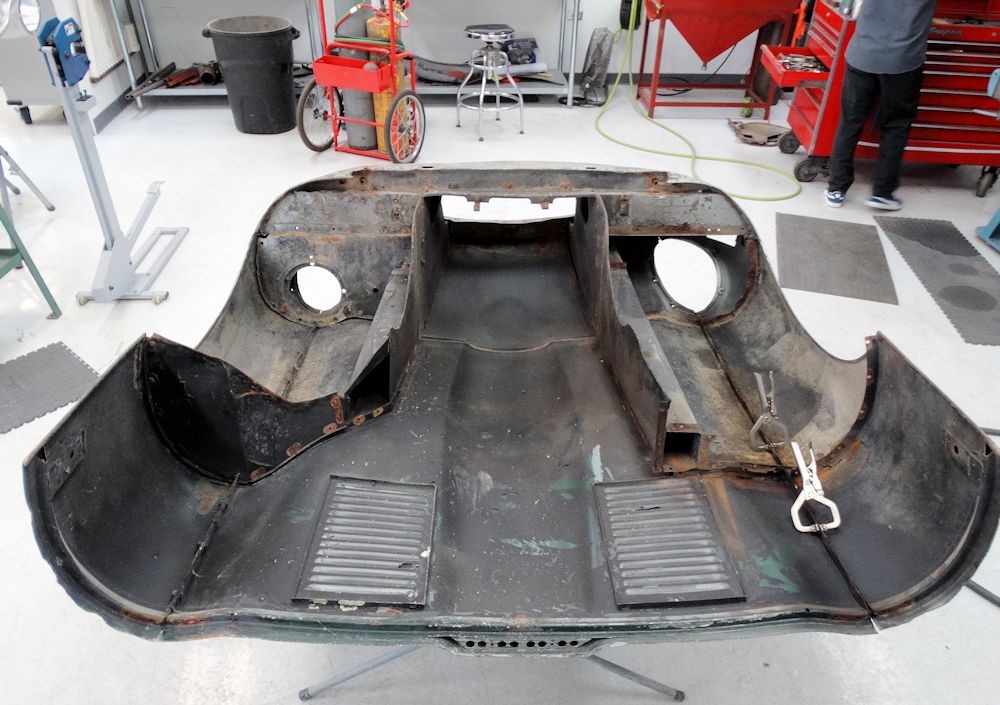
We are excited to get the body restoration of this very important E Type underway. Our first job is to remove and repair the driver's side quarter panel, as well as to fabricate and install a new seal rail for the door shut face panel.
 |
 |
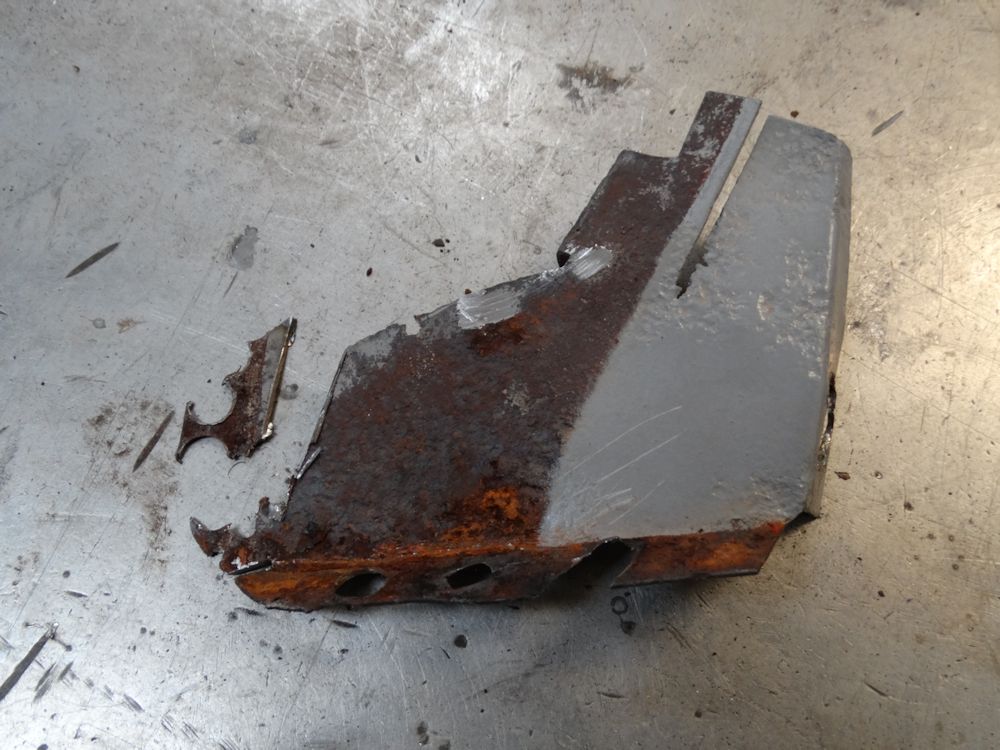
| Driver's quarter panel is in poor shape and needs extensive repair |
A rarely seen view beneath the rear quarter
panel |
 |
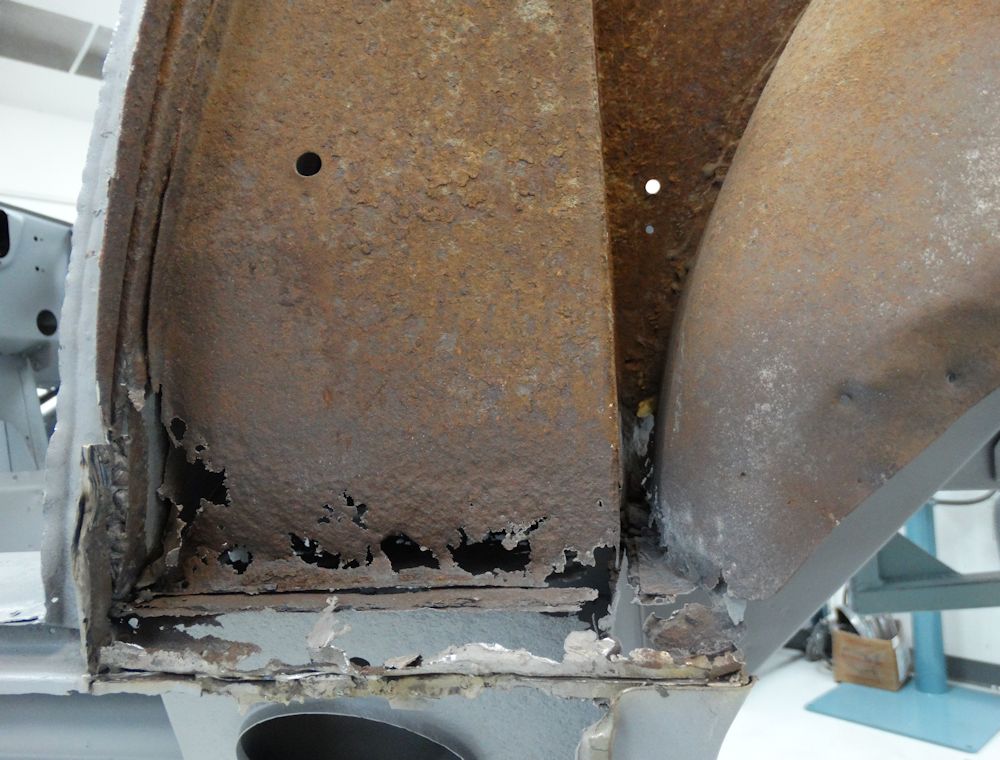 |
| B pillar in poor shape |
|
 |
 |
| Inner wheel arch will require attention |
Lower section of quarter panel is rtten |
 |
 |
 |
 |
| Interesting to see how these very earl panels
were made in two pieces, welded together |
A new shut face seal rail will have to be
fabricated |
 |
 |
 |
 |
 |
 |
 |
 |
 |
 |
 |
 |
| Ready to spot weld the new seal rail in place on the shut face panel |
|
 |
 |
| Holes previously drilled to pull the panel after an accident |
Holes now welded up and metal finished |
 |
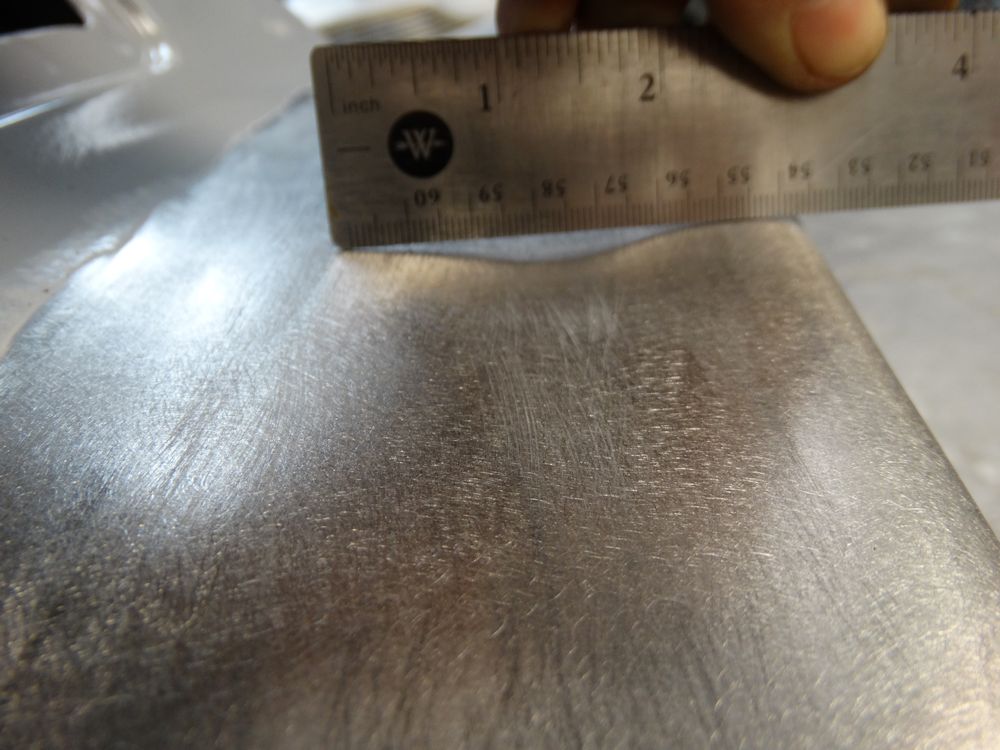 |
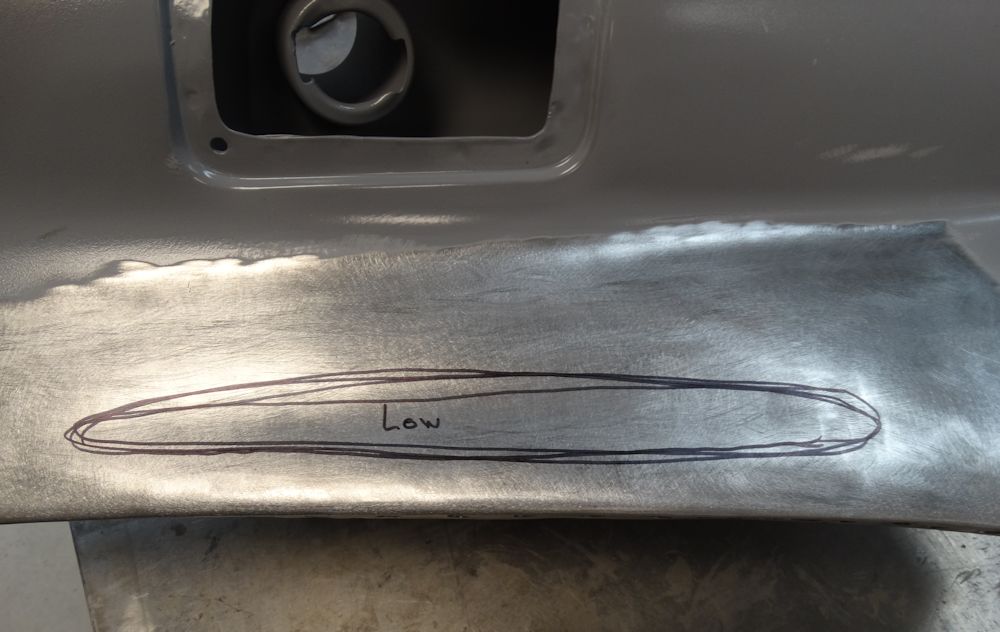
| Identifying a low spot on the quarter panel |
This shows the low spot very clearly |
 |
 |
| Matt planished and metal finished the low spot
to restore the correct contour and shape |
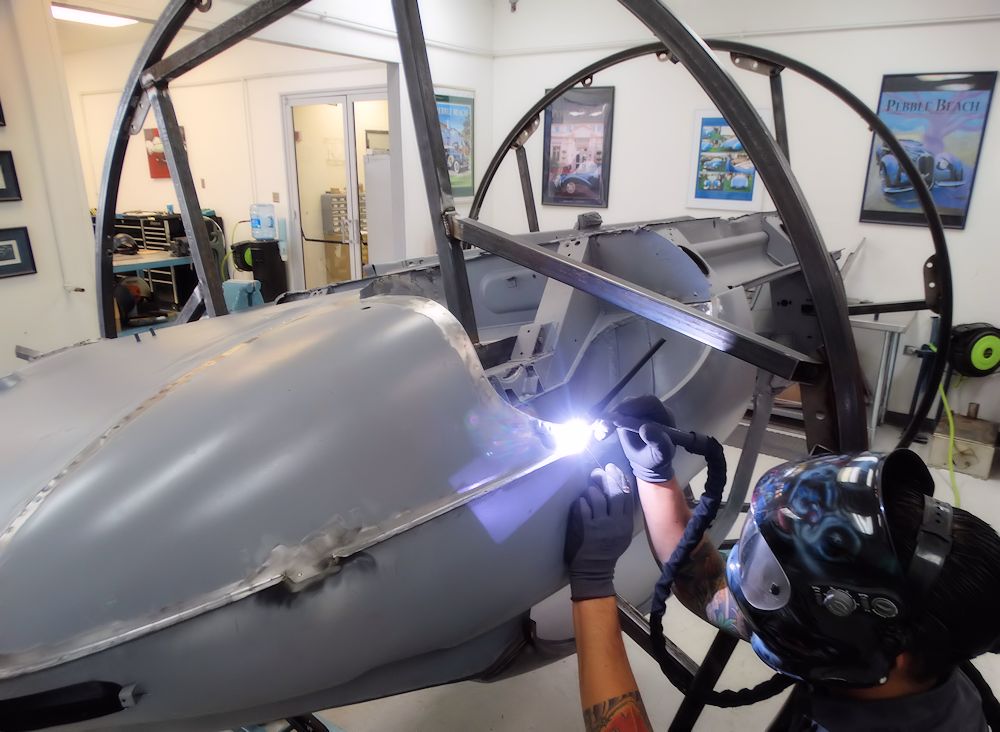
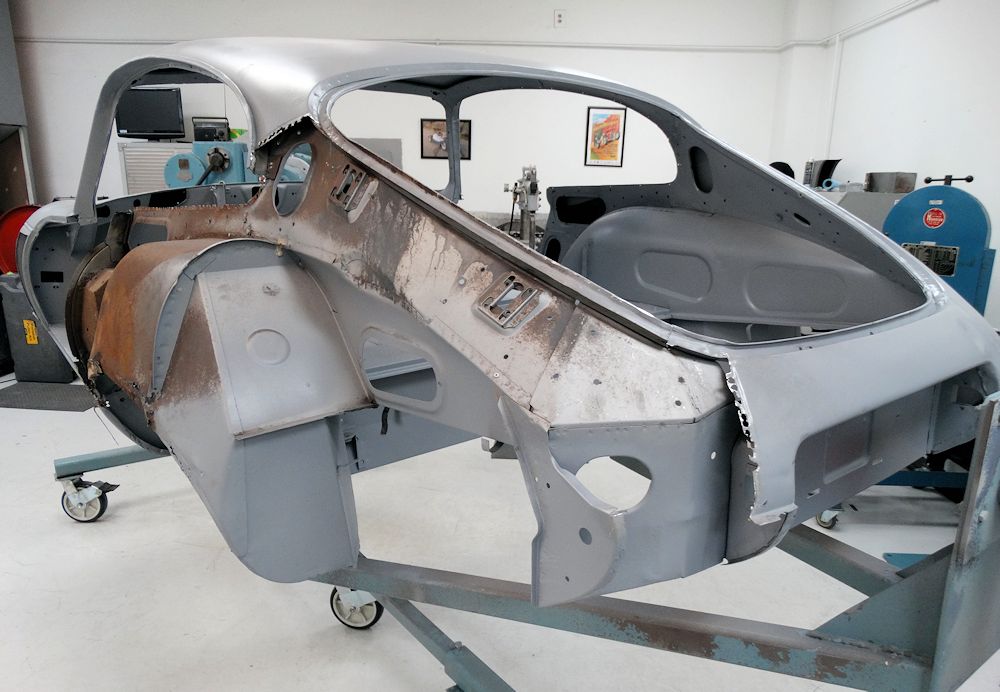
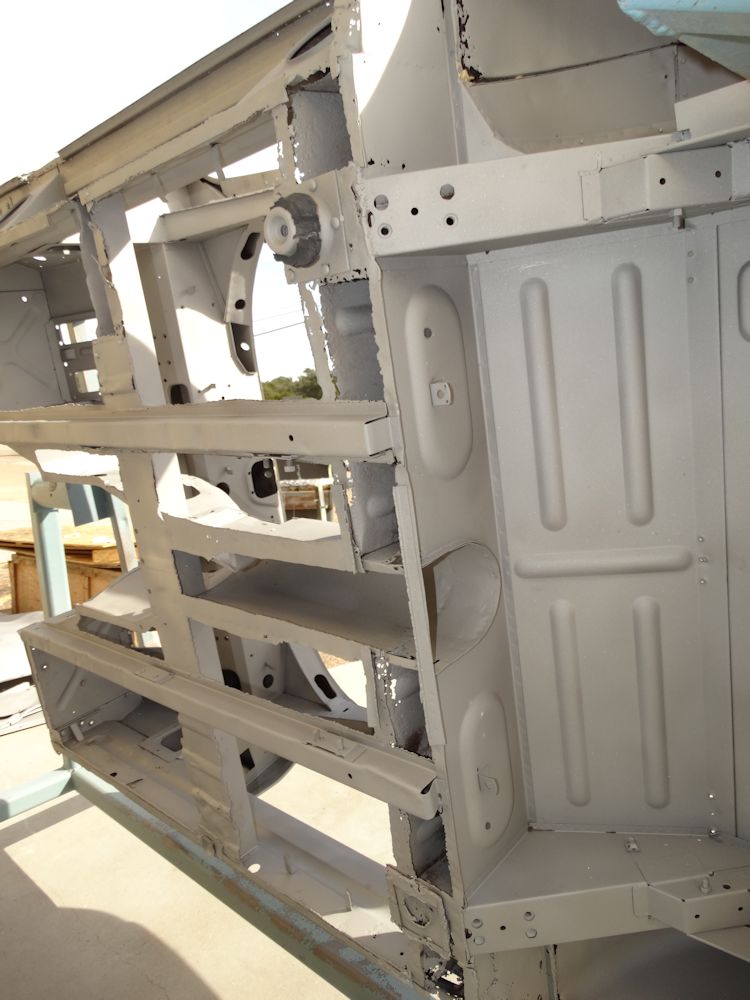
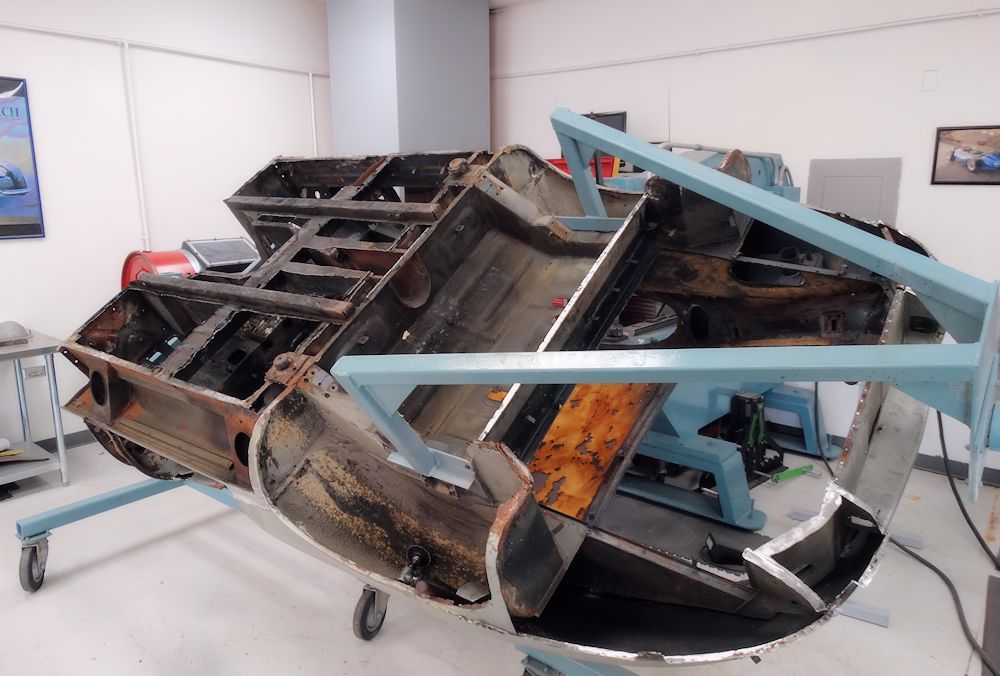
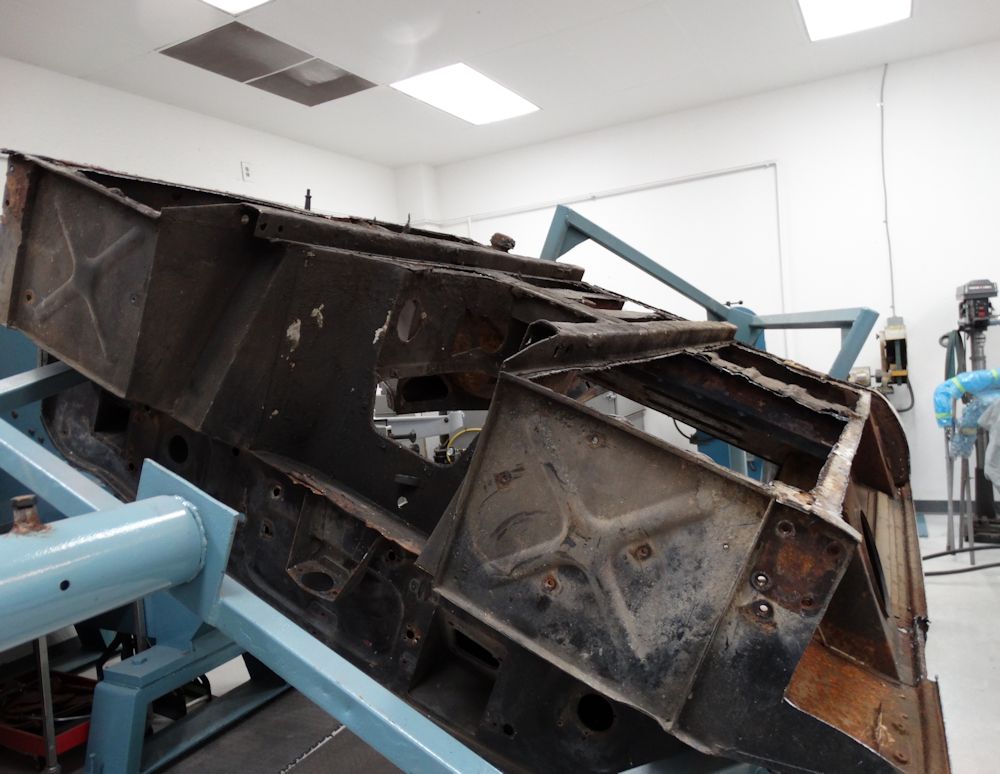
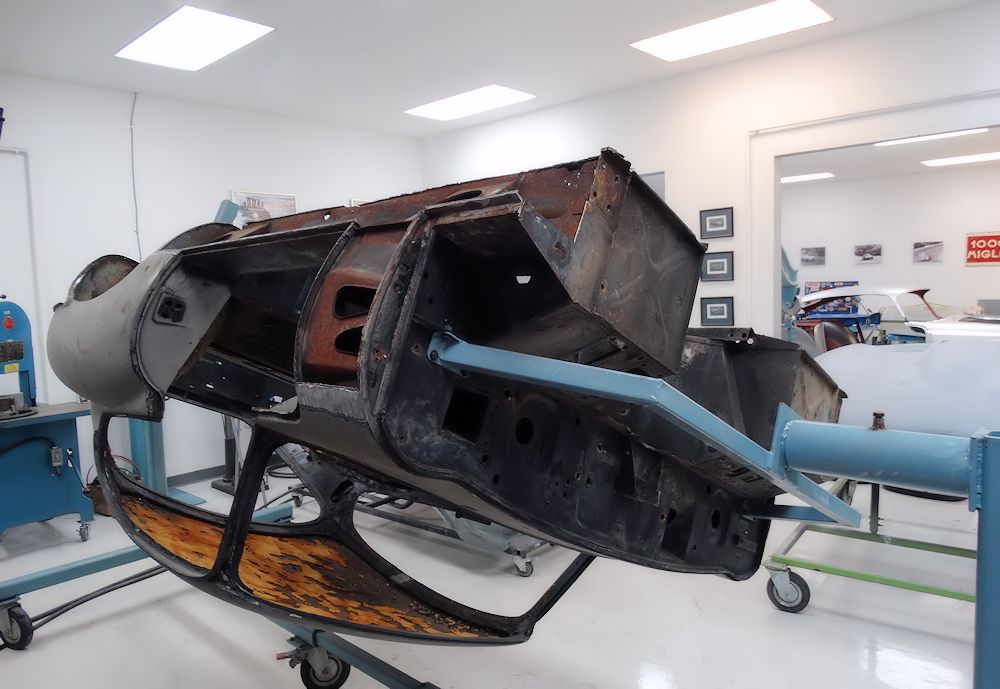
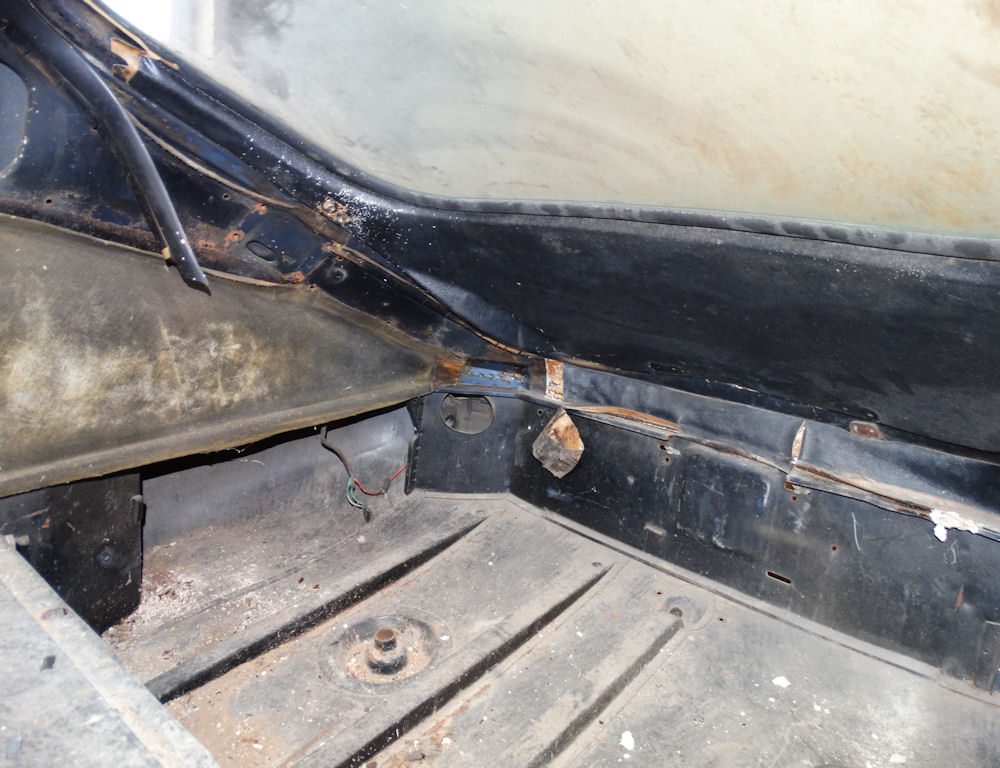
Back from the blasters, the main bodyshell is very much as expected, the bonnet a little rougher than we would have hoped. We will have the body restoration underway next week.
 |
 |
 |
 |
 |
 |
Preparing the body for media blasting back to bare metal...
 |
 |
 |
 |
 |
 |
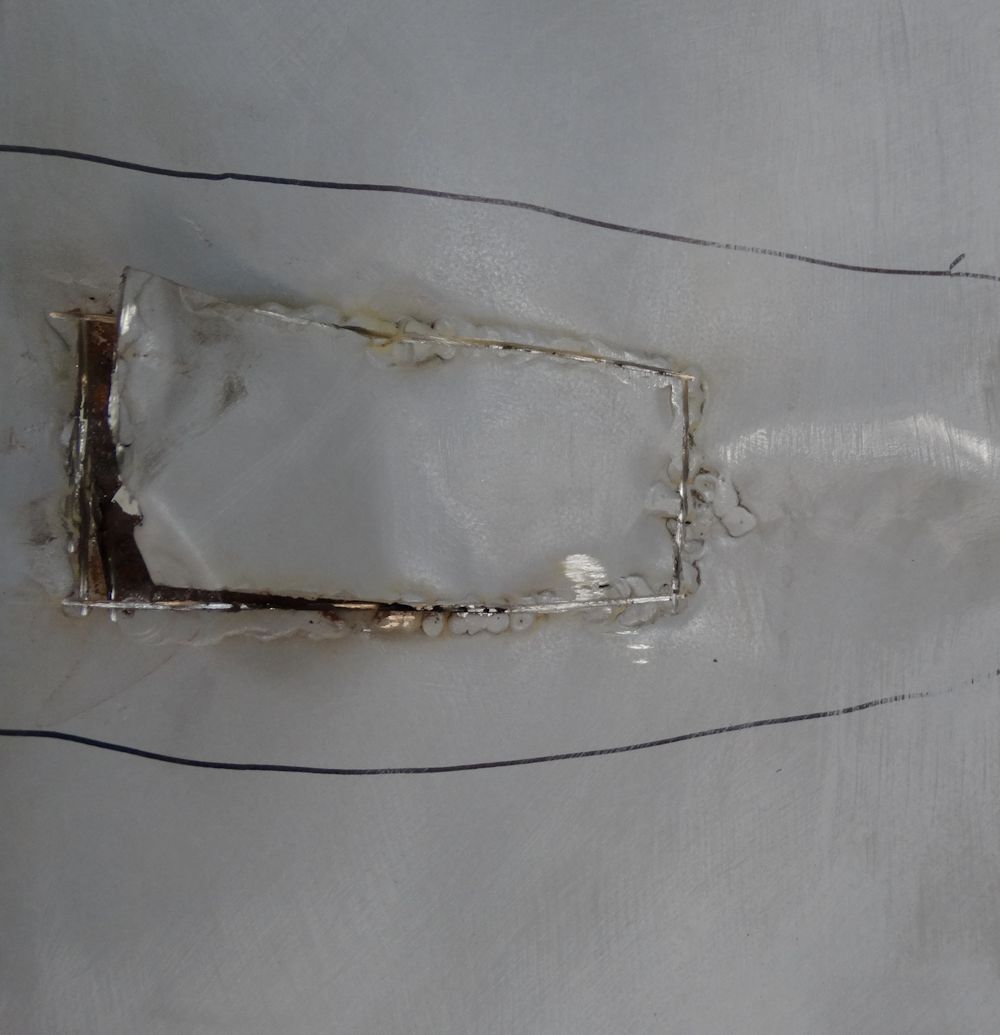
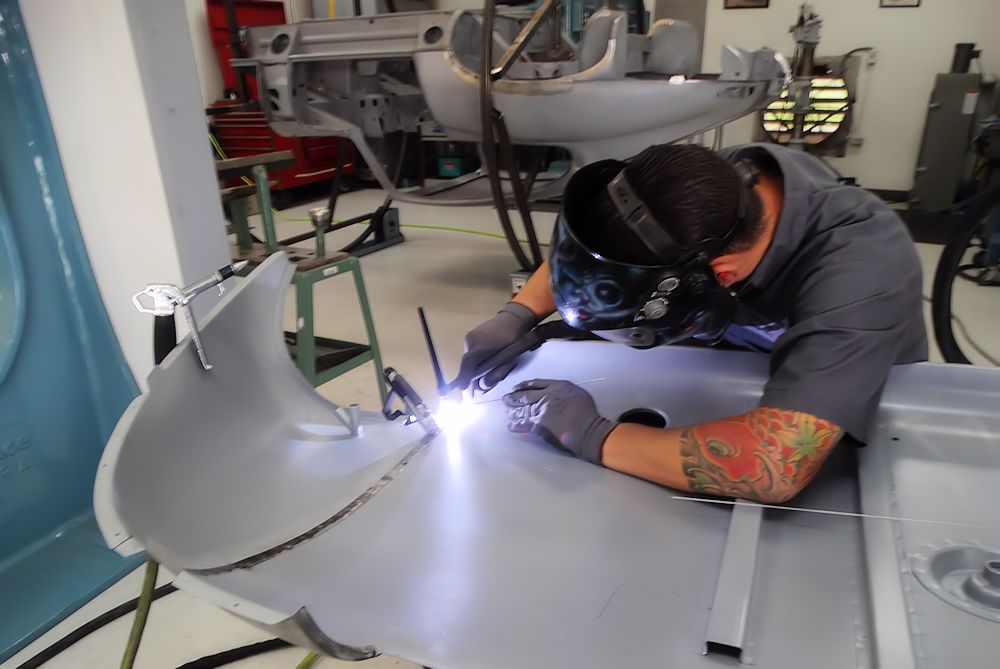
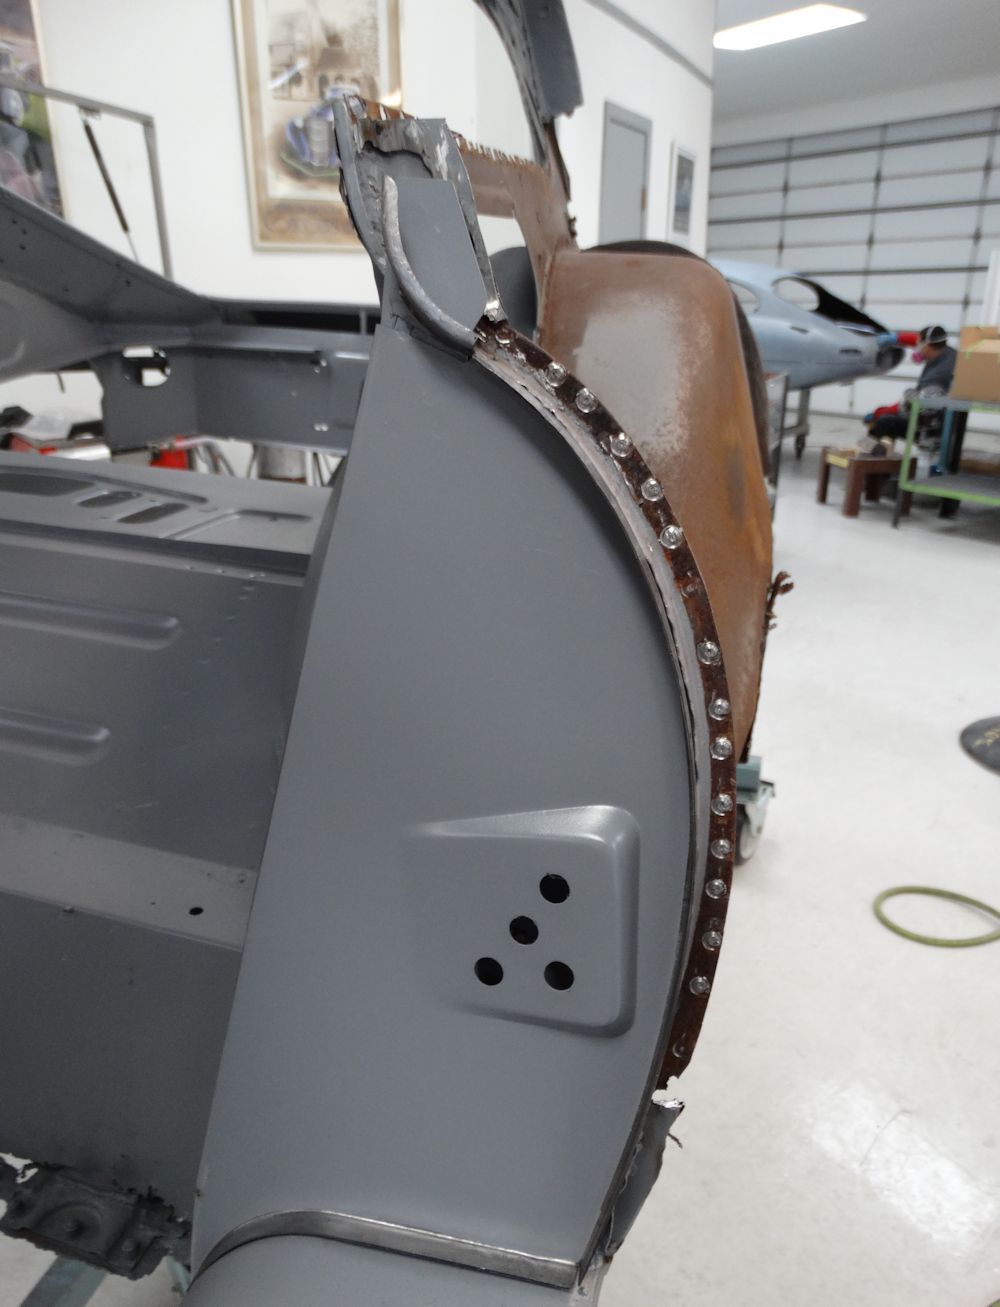
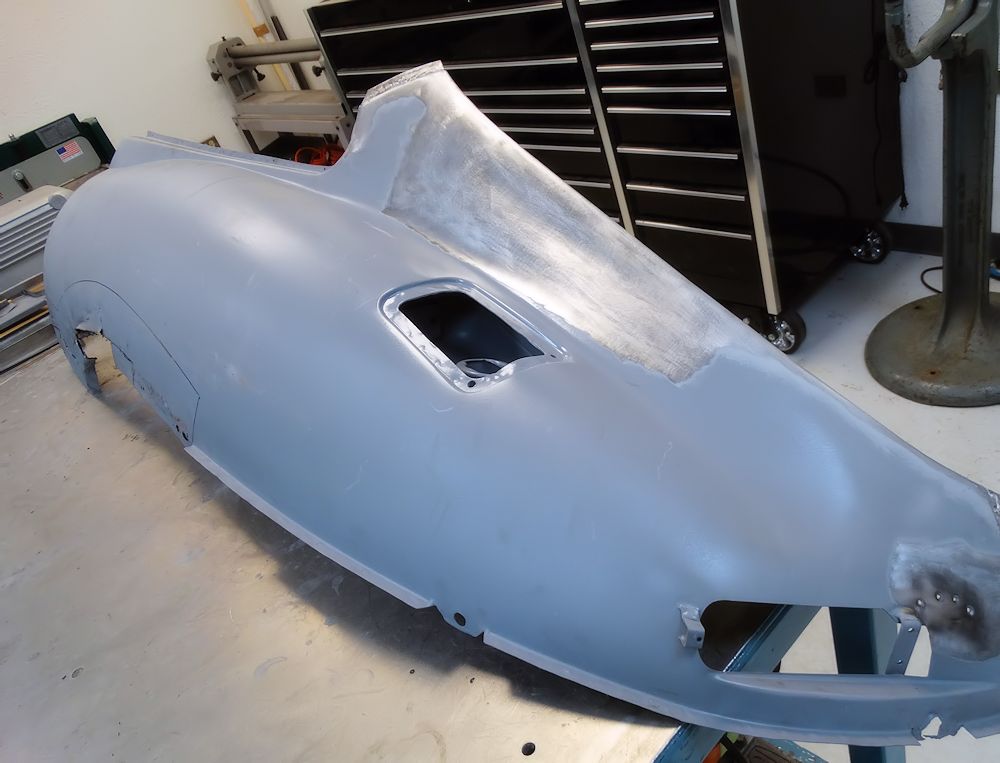
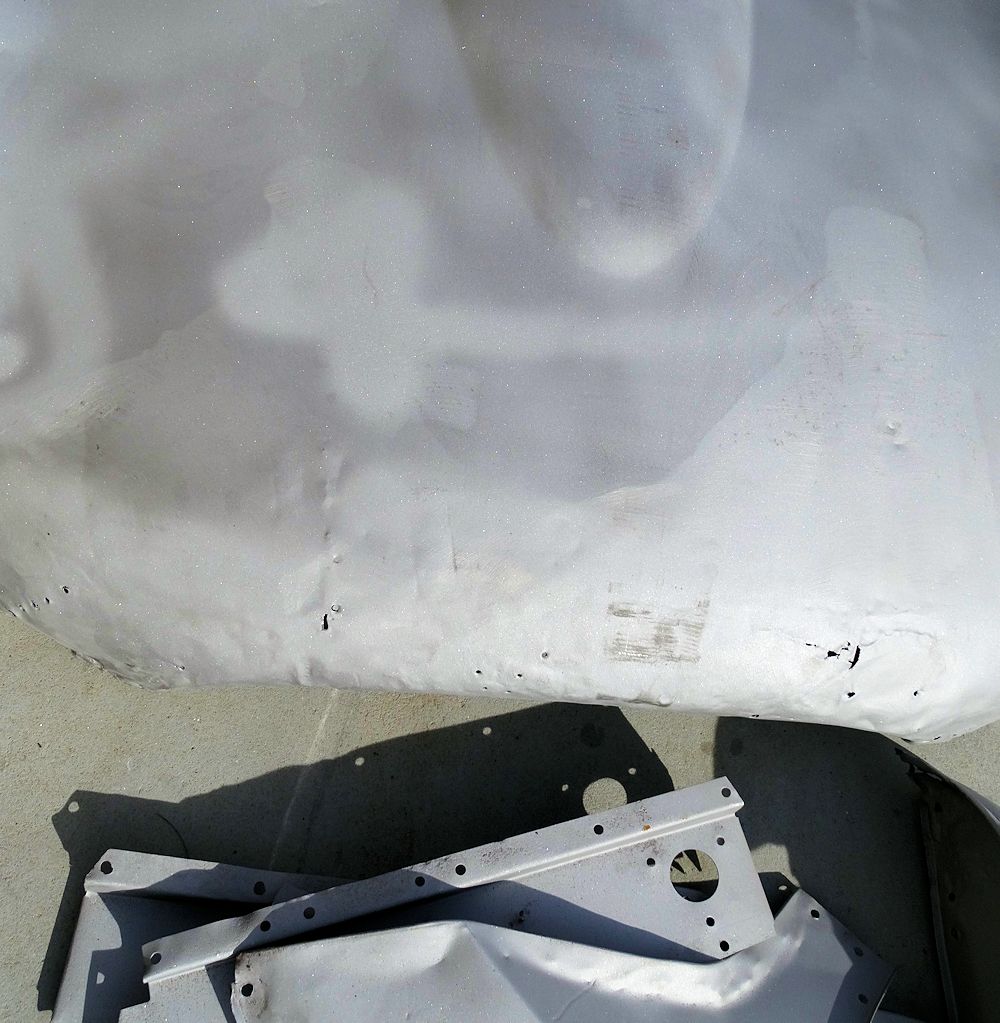
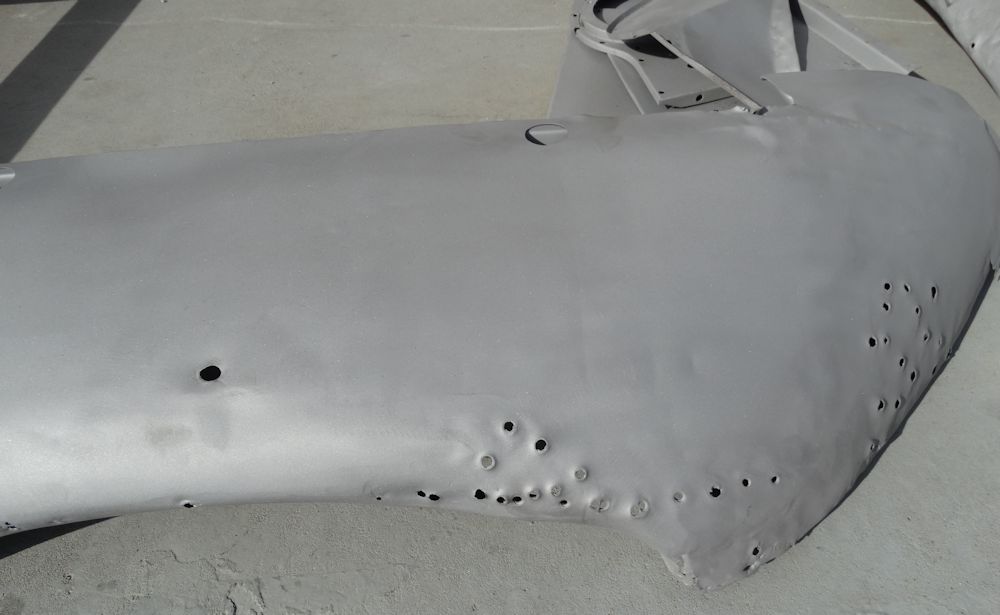
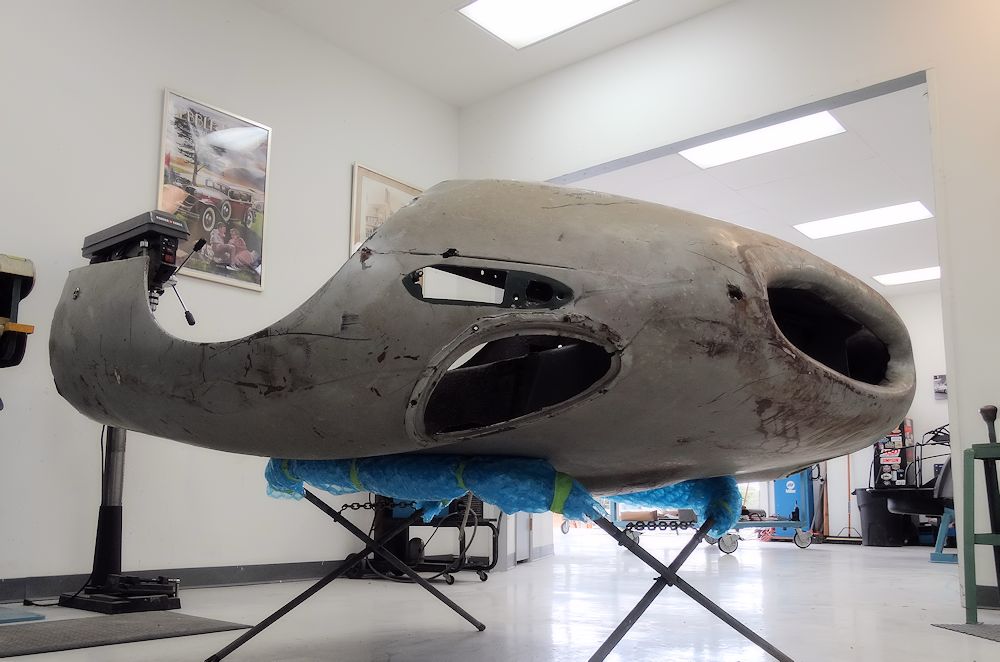
Time to get this important body restoration underway. Our first task will be to strip and disassemble the bonnet. We have decided to restore (rather than replace) the bonnet because we understand that 885013 is one of only 3 of the surviving outside latch coupes that still has its original factory bonnet.
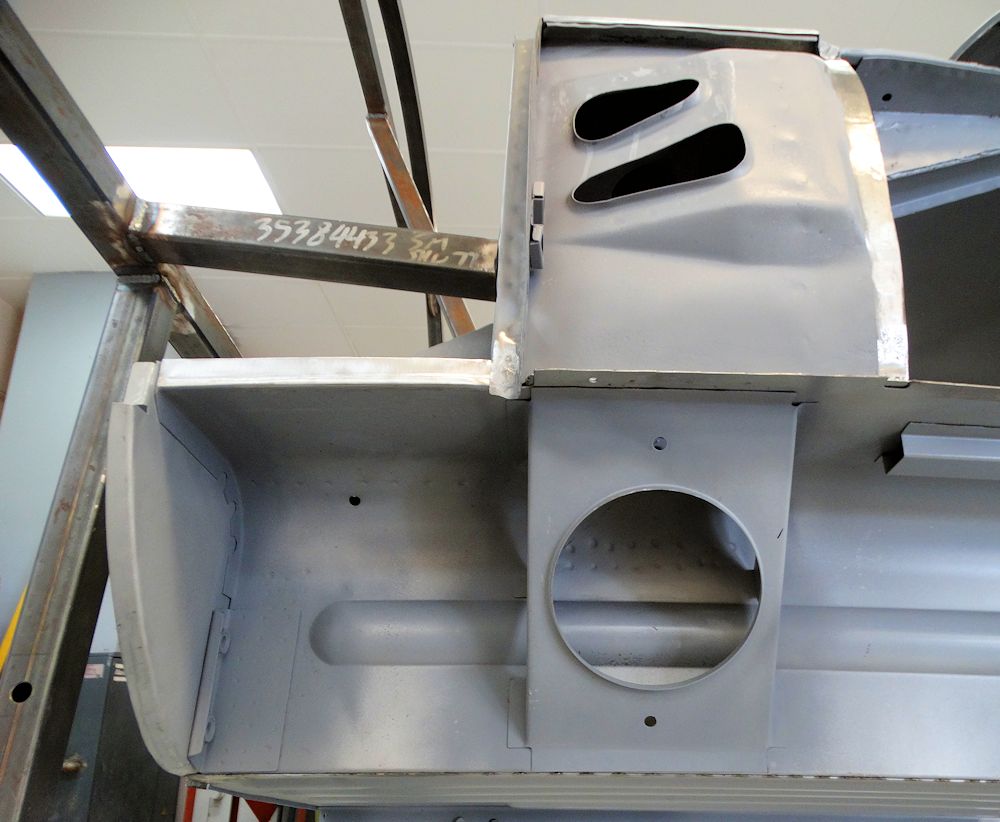
The last four photographs in the sequence below show the completed engine rebuild.
 |
 |
| Air intakes spot welded to underside of center section on early outside latch bonnets |
|
 |
 |
 |
 |
| We have to remove bondo from seams before we can take bonnet apart |
|
 |
 |
| Bondo almost 3/4" deep on the nose of this
bonnet |
|
 |
 |
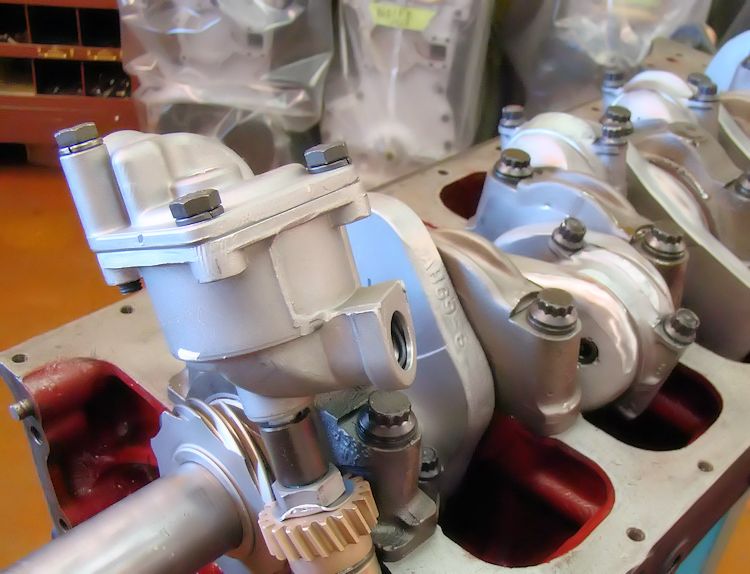
| Shot block rebuilt, time to install the head |
|
 |
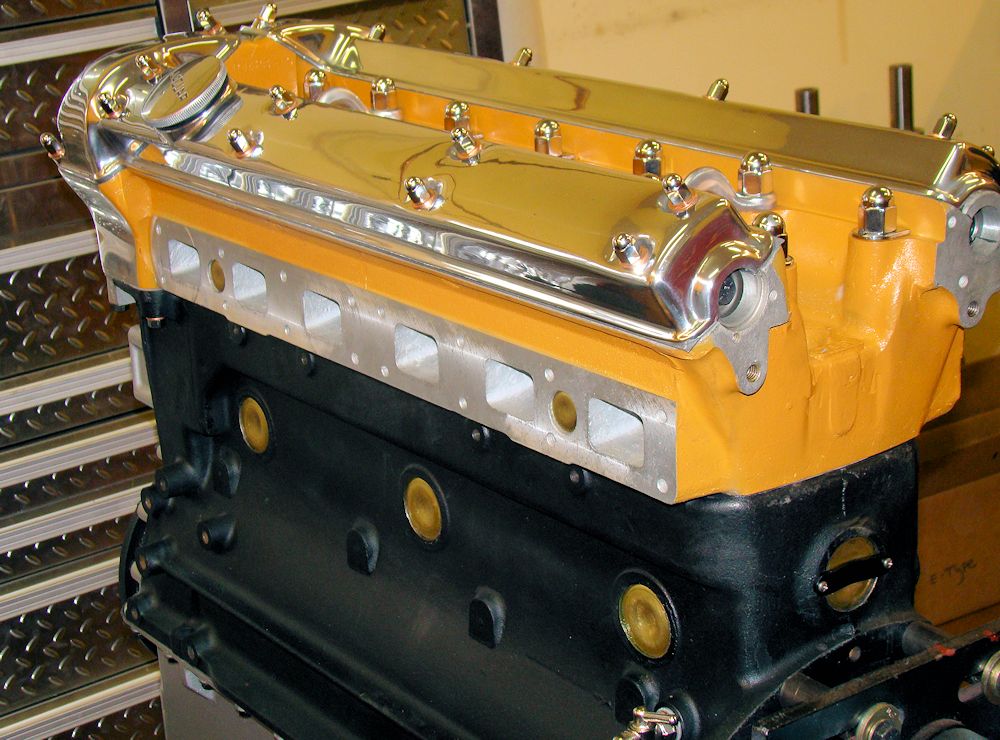 |
| Original bolts black zinc plated |
Polished valve covers add the finishing touch |
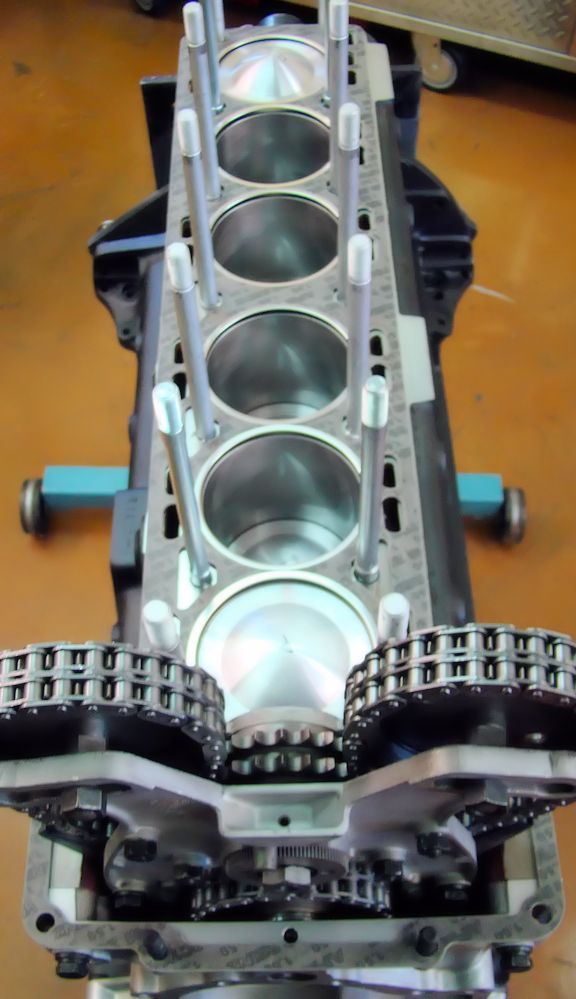
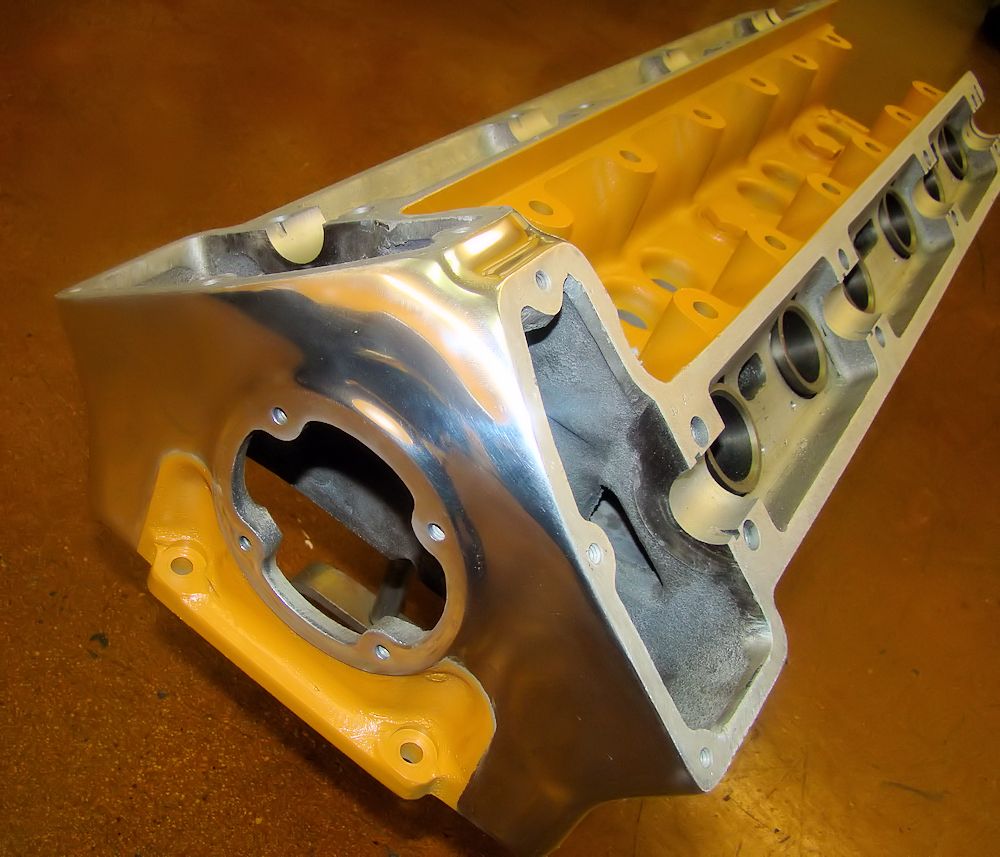
Assembling short block...
 |
 |
| Balancing crankshaft |
Uprated rear crank seal |
 |
 |
| ARP main and rod bolts |
|
 |
 |
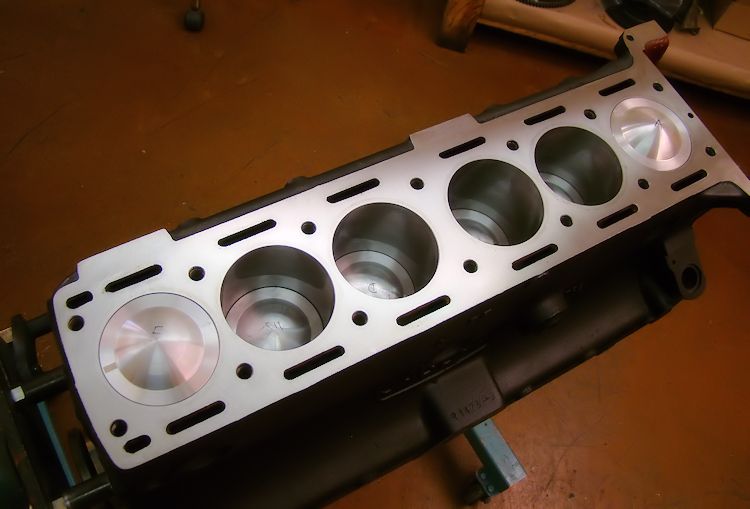
| Close up of cross hatch pattern on cylinder
wall |
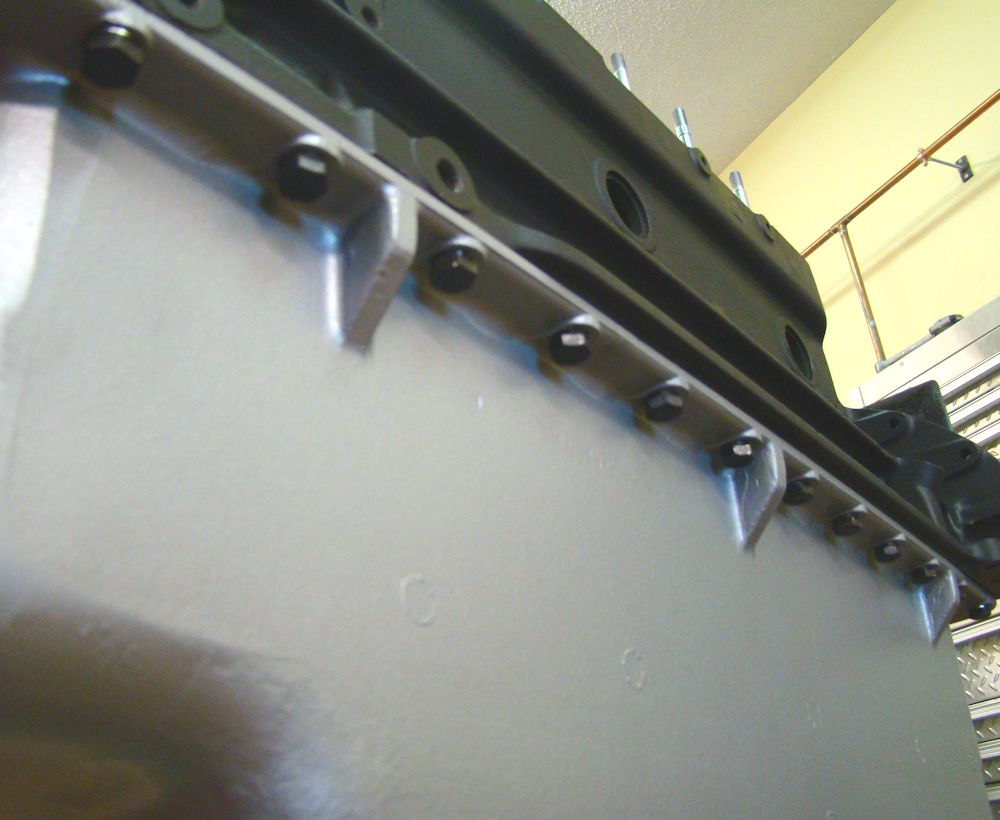
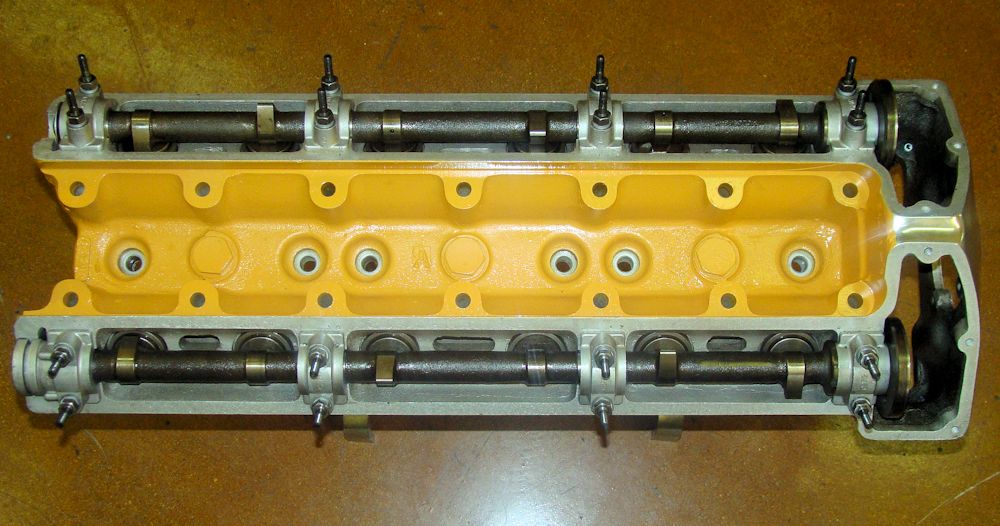
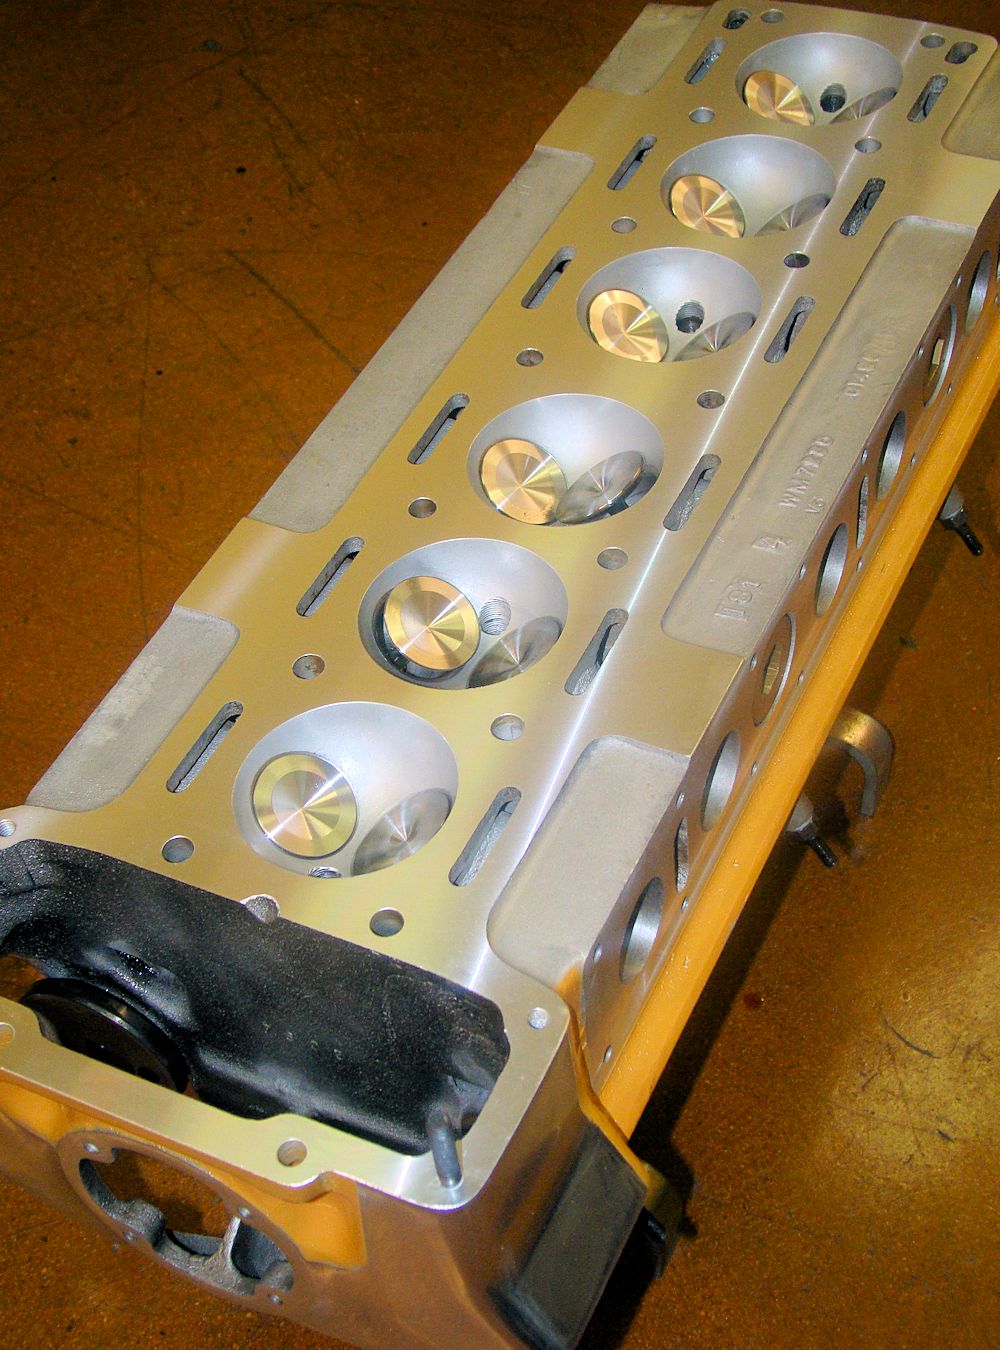
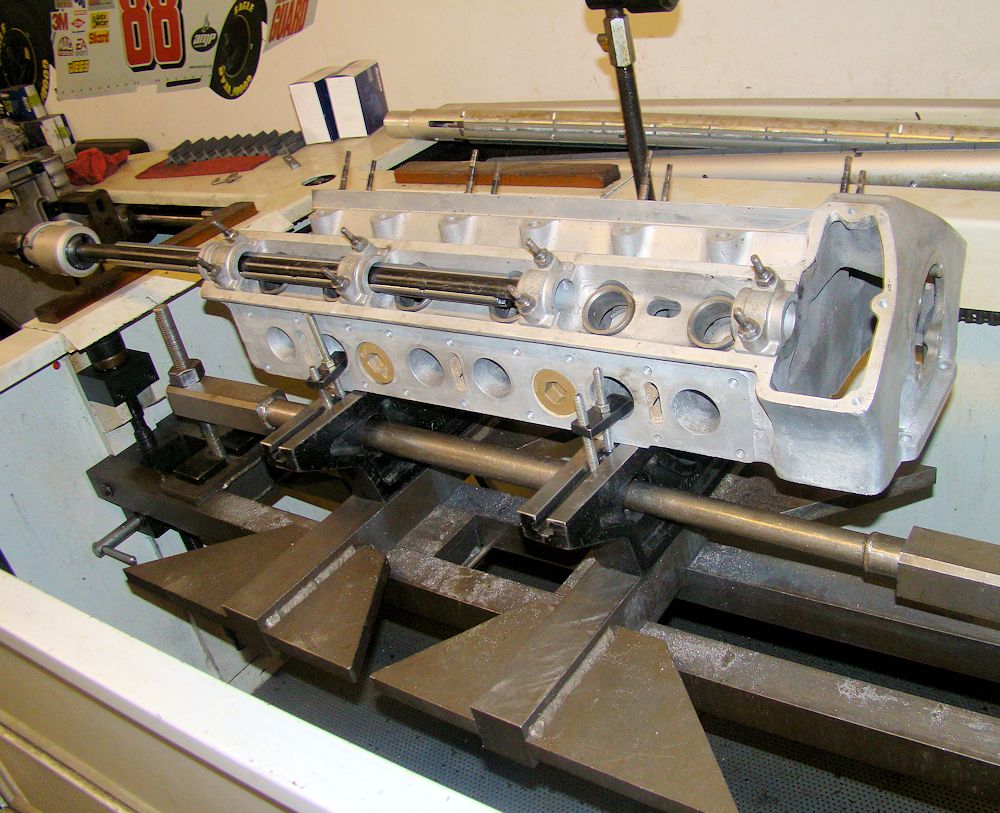
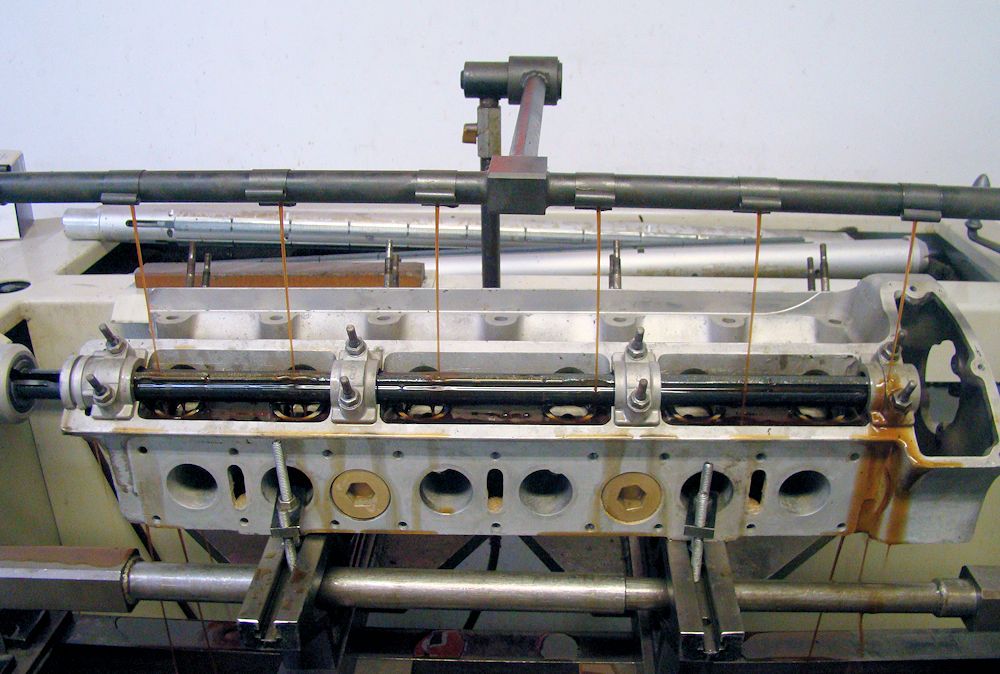
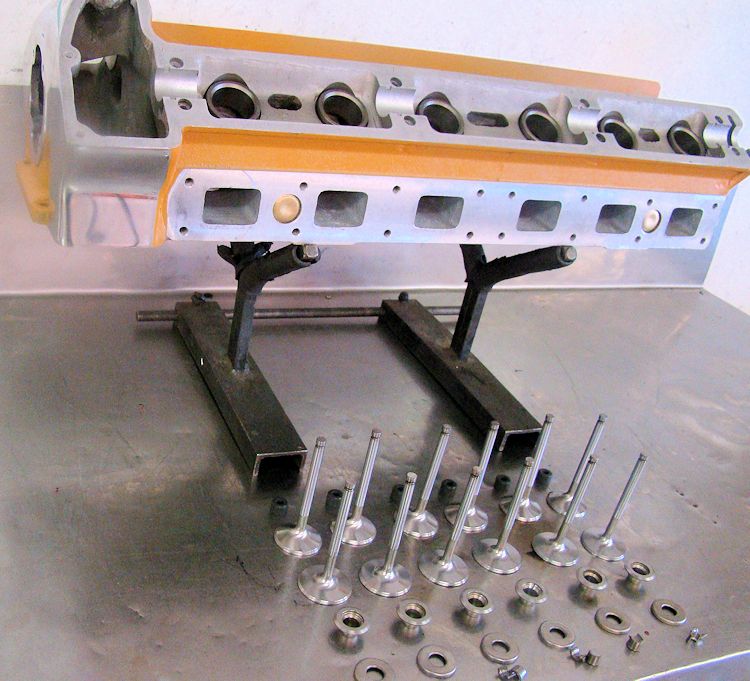
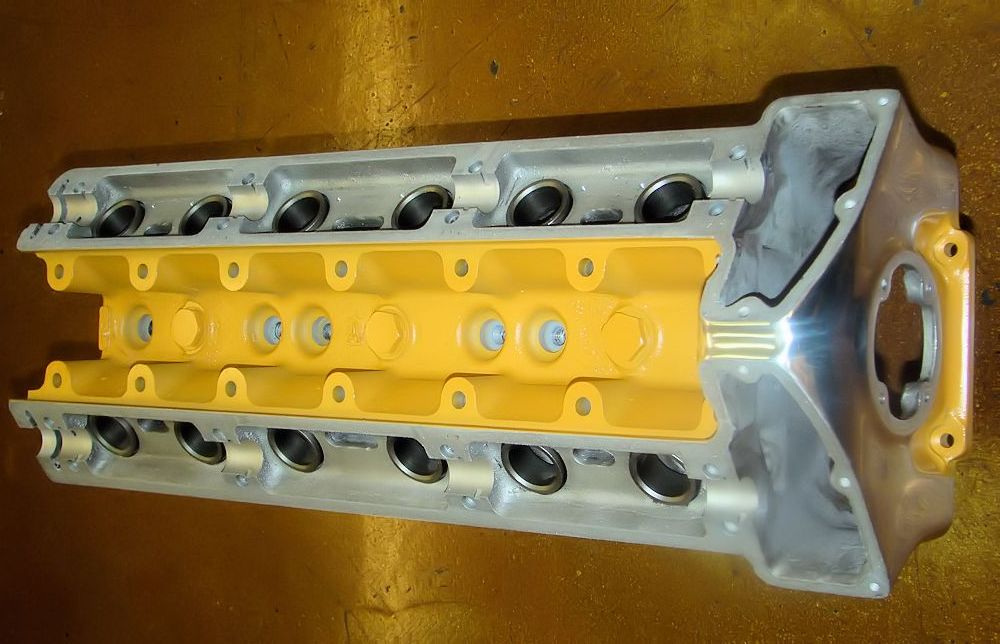
We have now fully assembled your cylinder head..
 |
 |
 |
 |
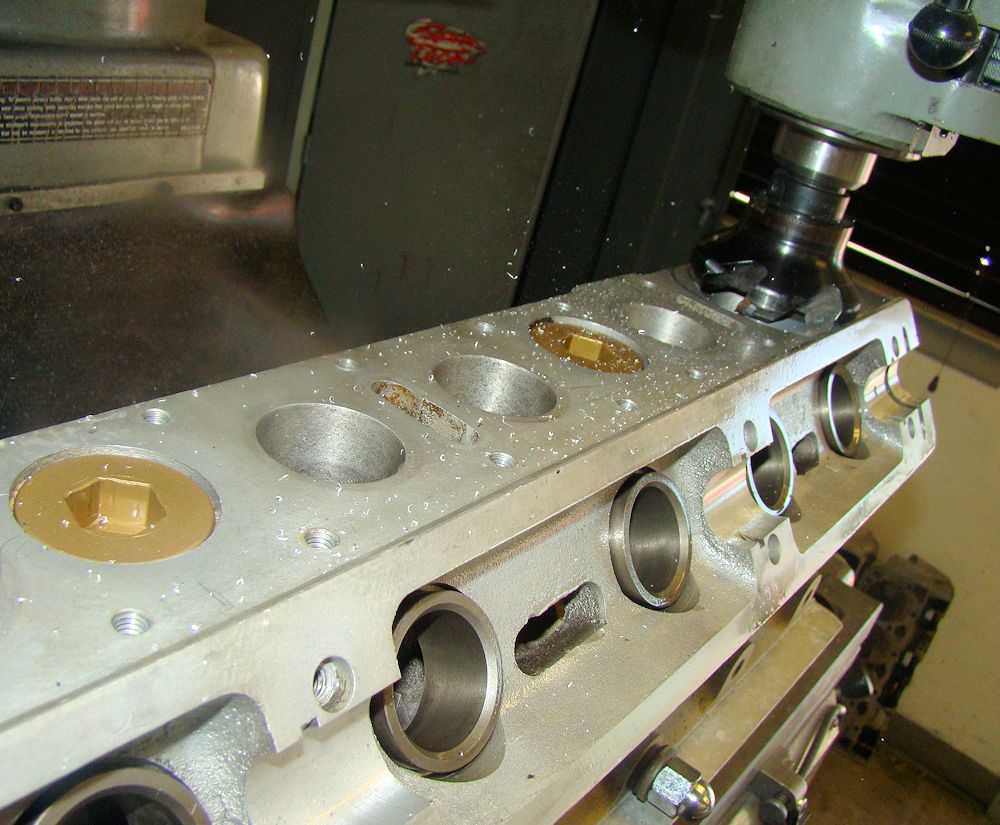
We have now completed the machine work to your cylinder head...
 |
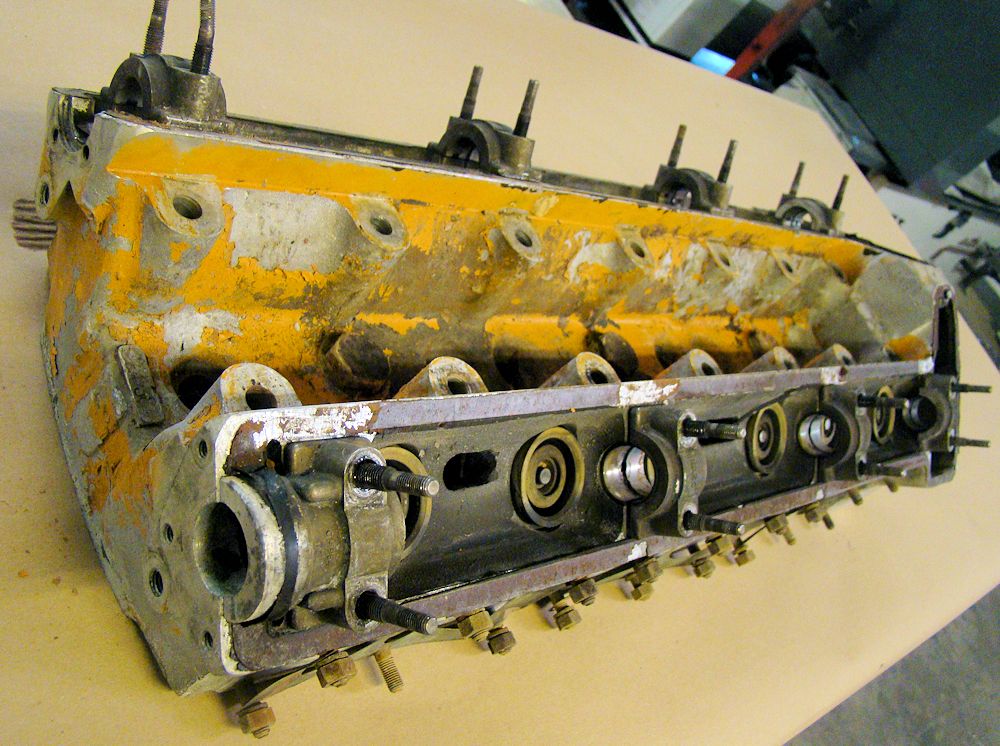 |
| Cylinder head was exceedingly grubby, but
actually in pretty good shape |
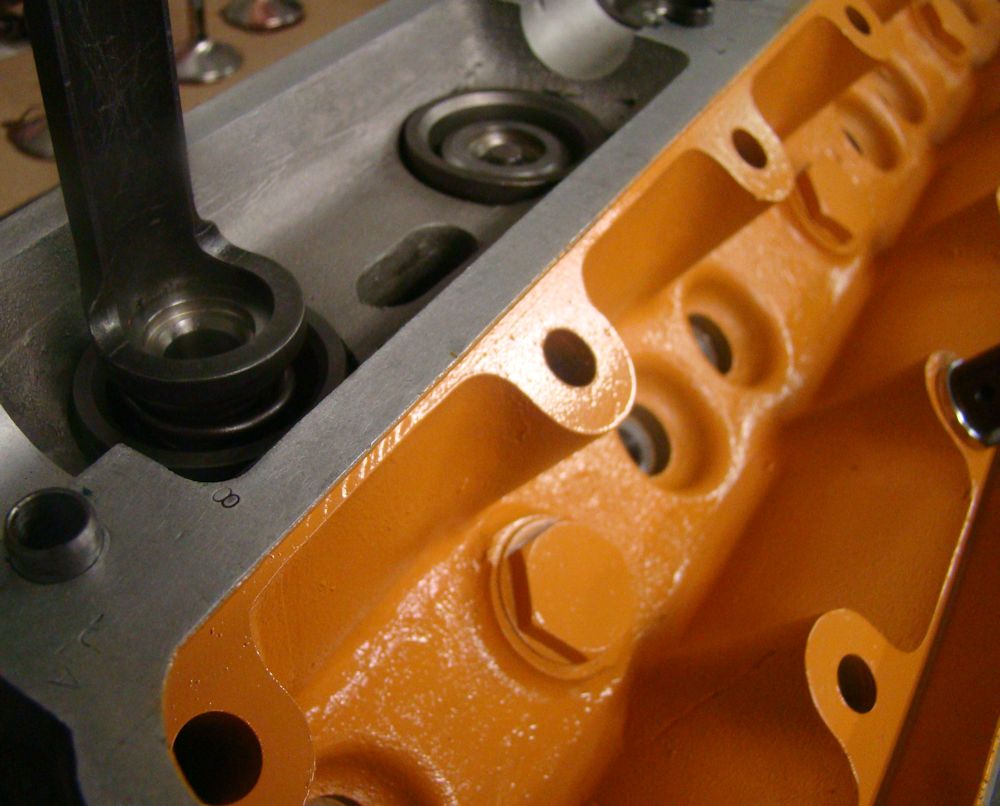
Pumpkin Gold a feature of very early E Type cylinder heads |
 |
 |
| Front chain cover will require extensive
cleaning and polishing |
Tear down underway |
 |
 |
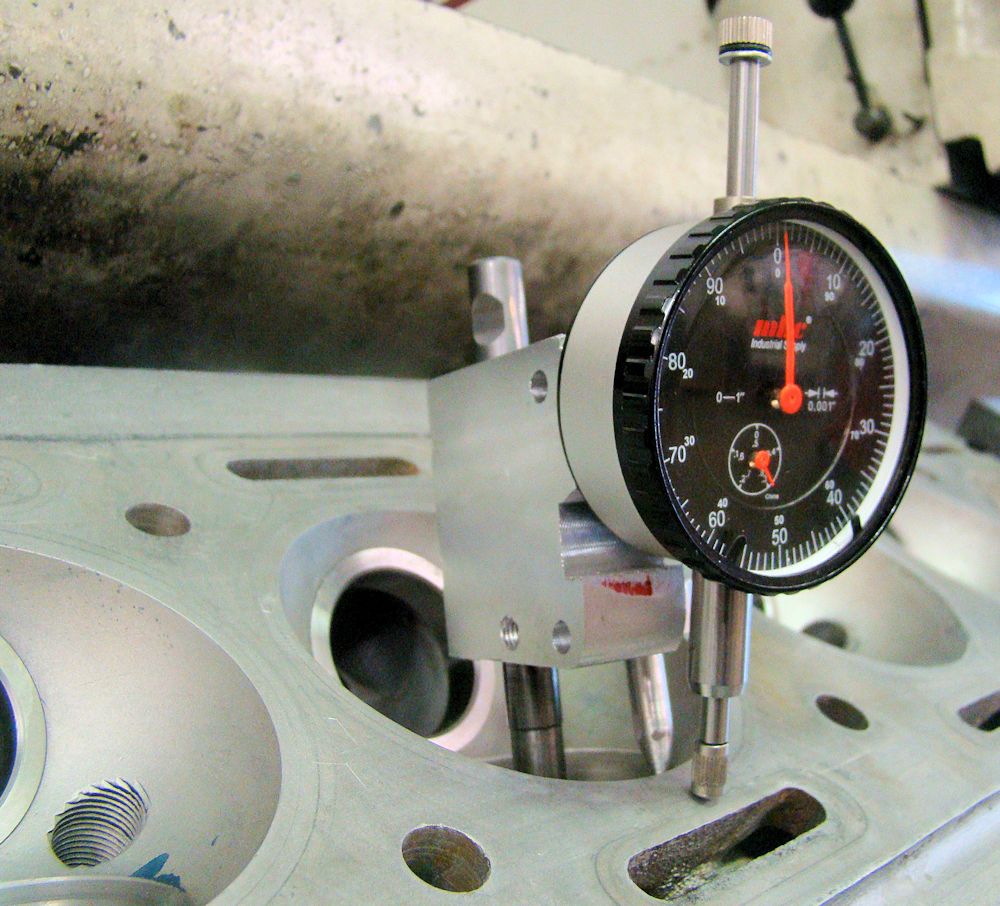
| Measuring camshaft saddles. An align hone will be needed |
Pressure testing head after media blasting |
 |
 |
| Align honing cam housings |
|
 |
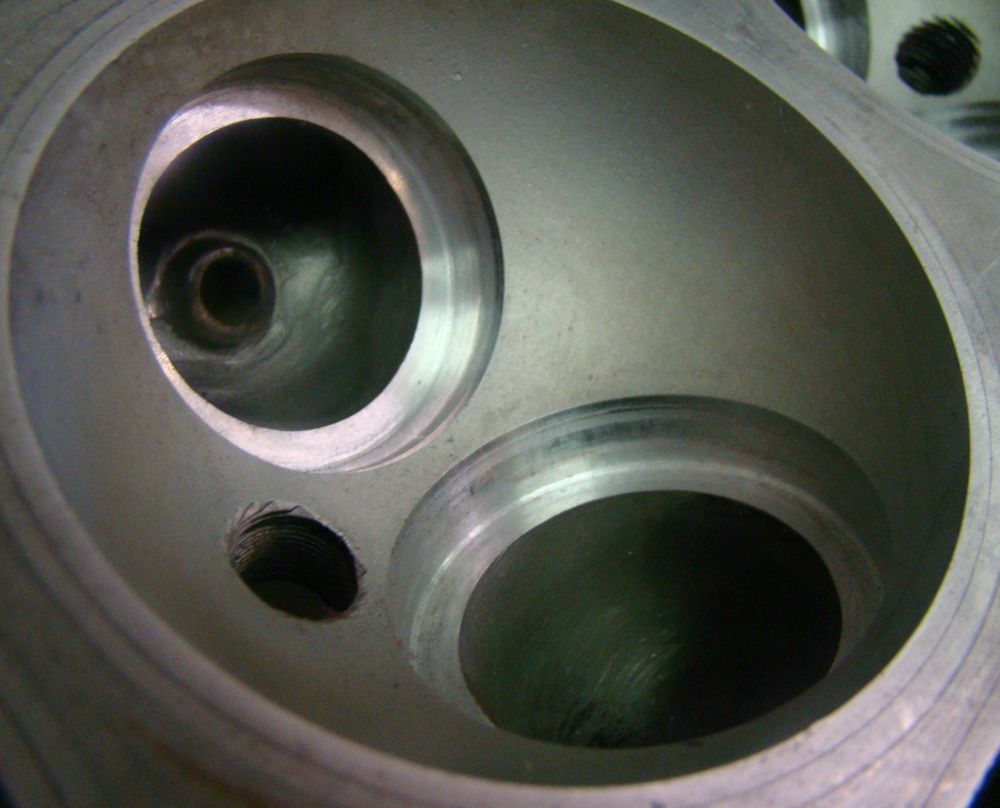 |
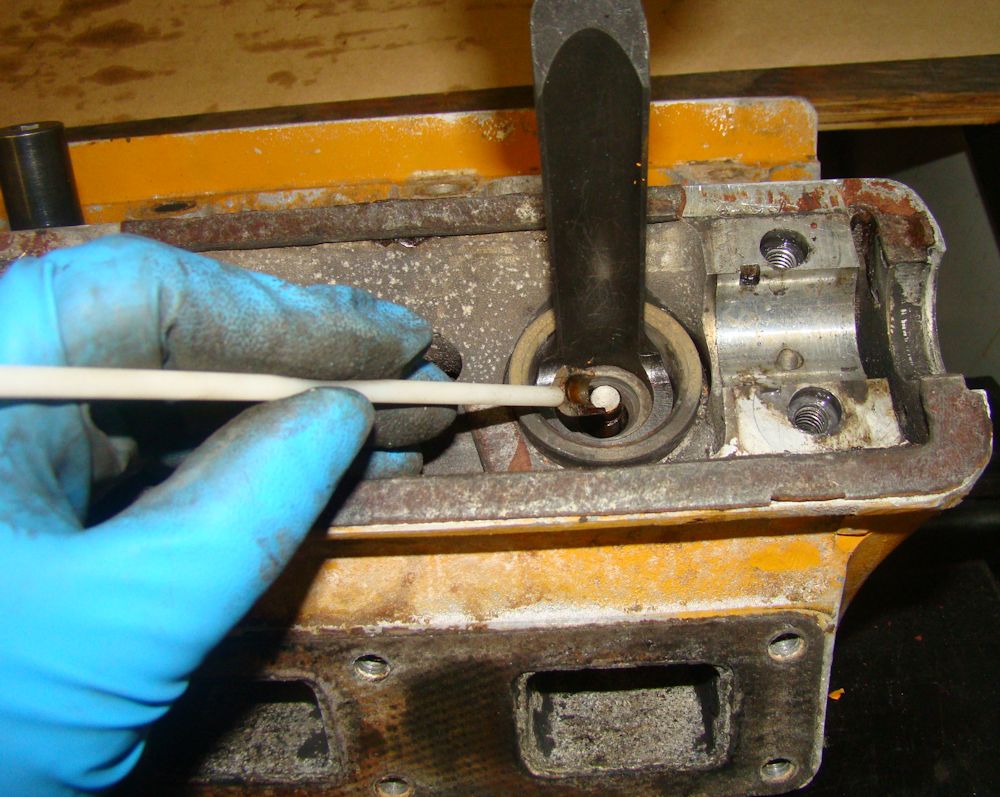
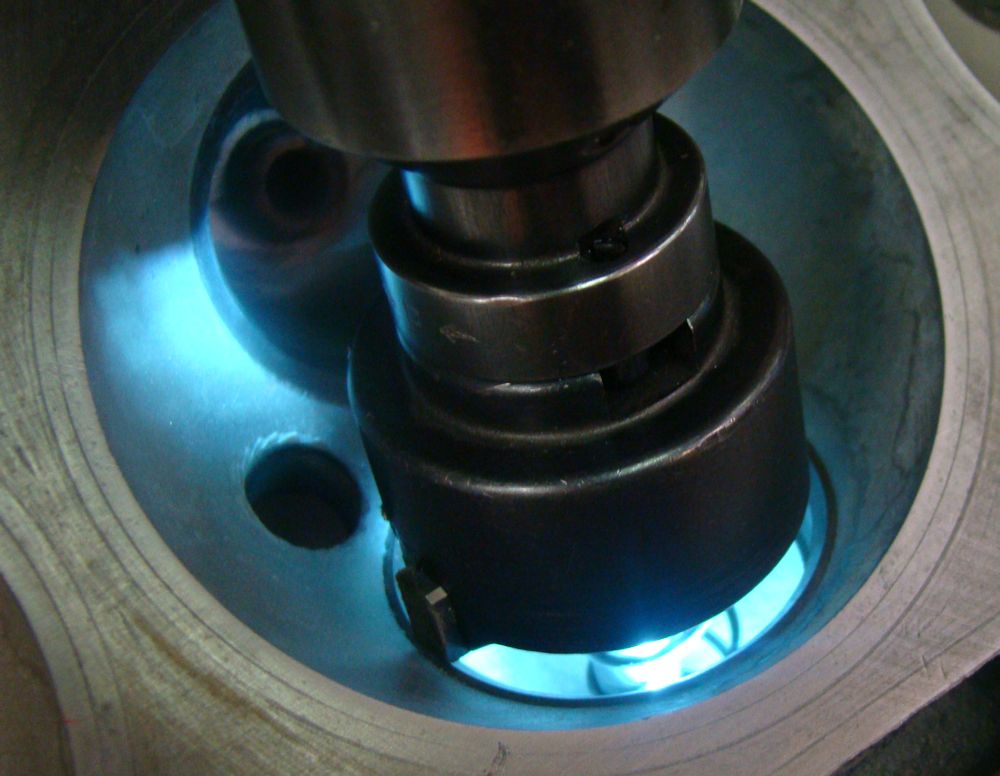
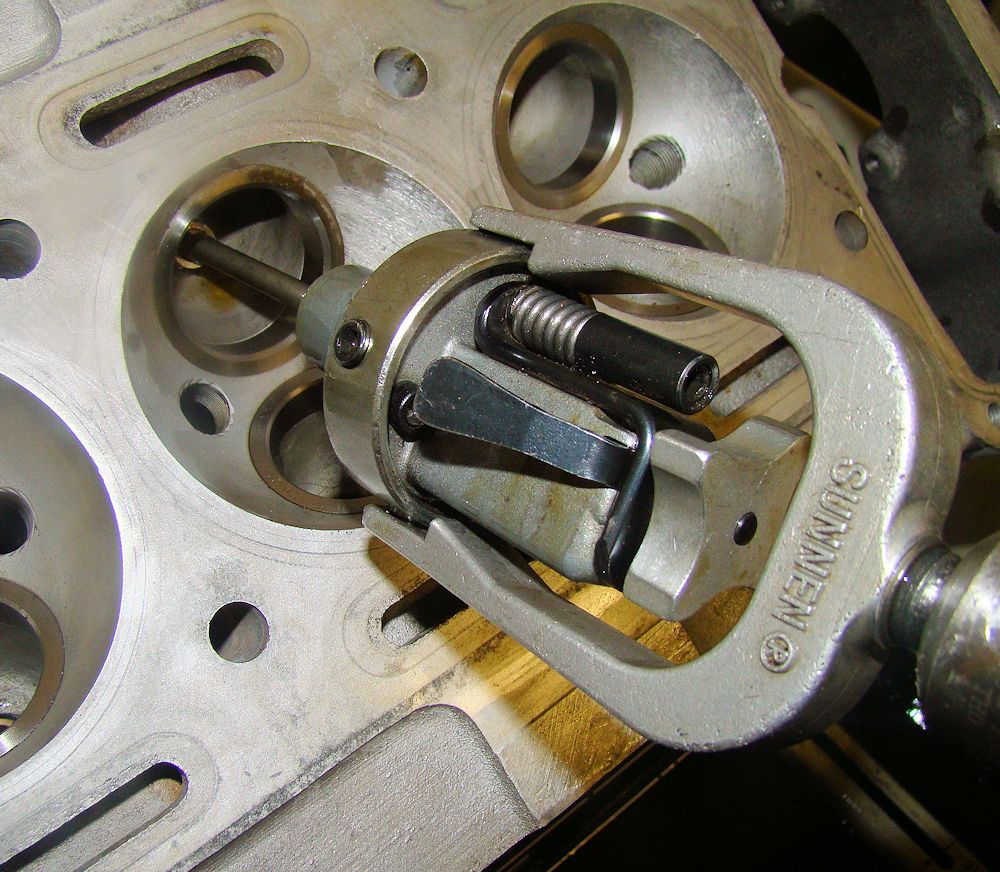
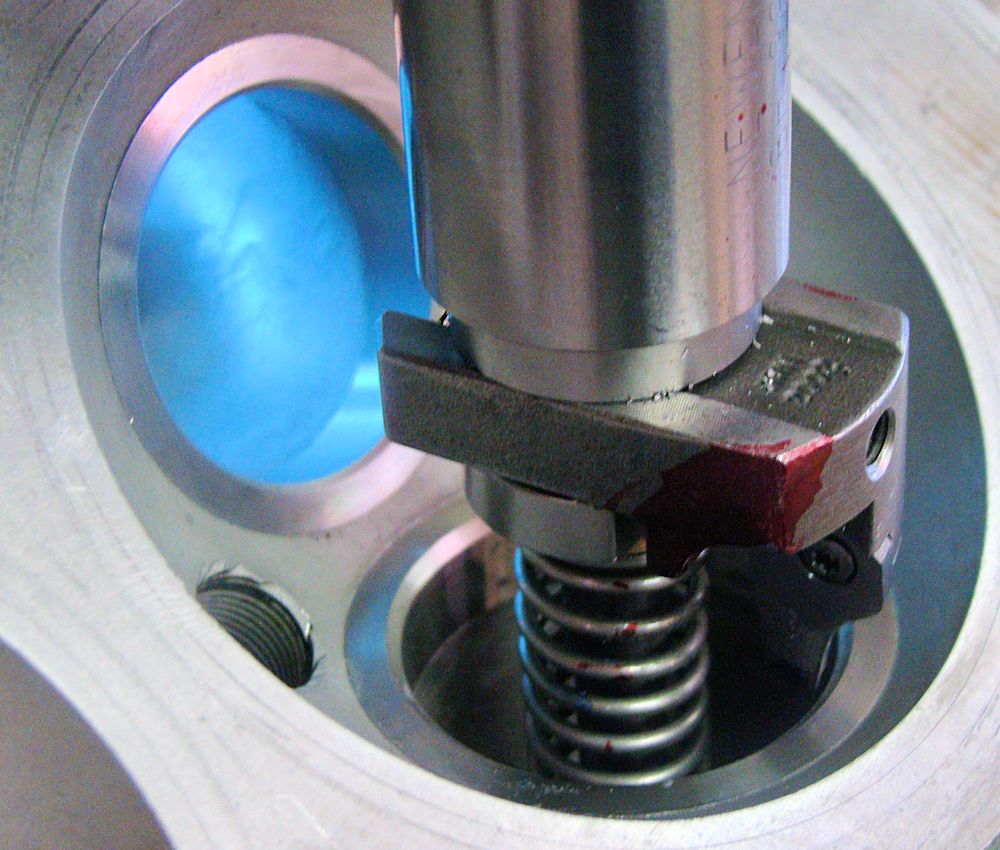
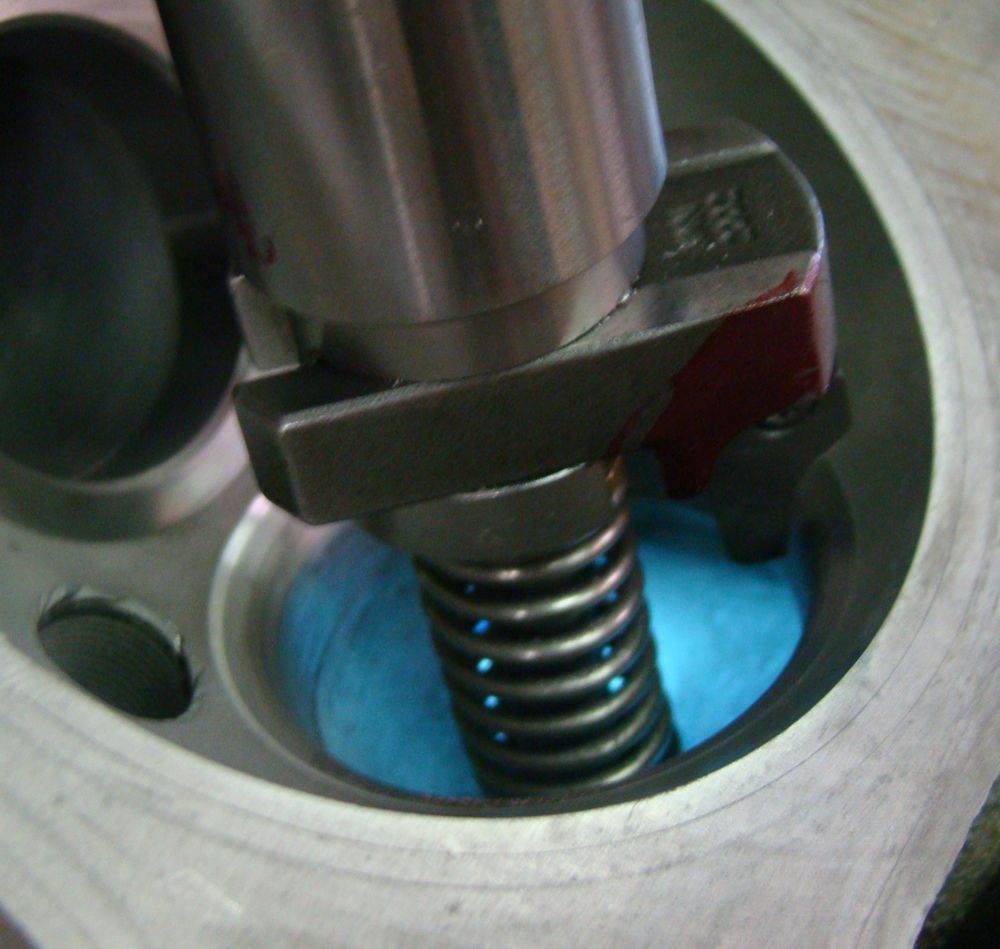
| Cutting out old valve seats |
Pockets now sized for custom CJ valve seats |
 |
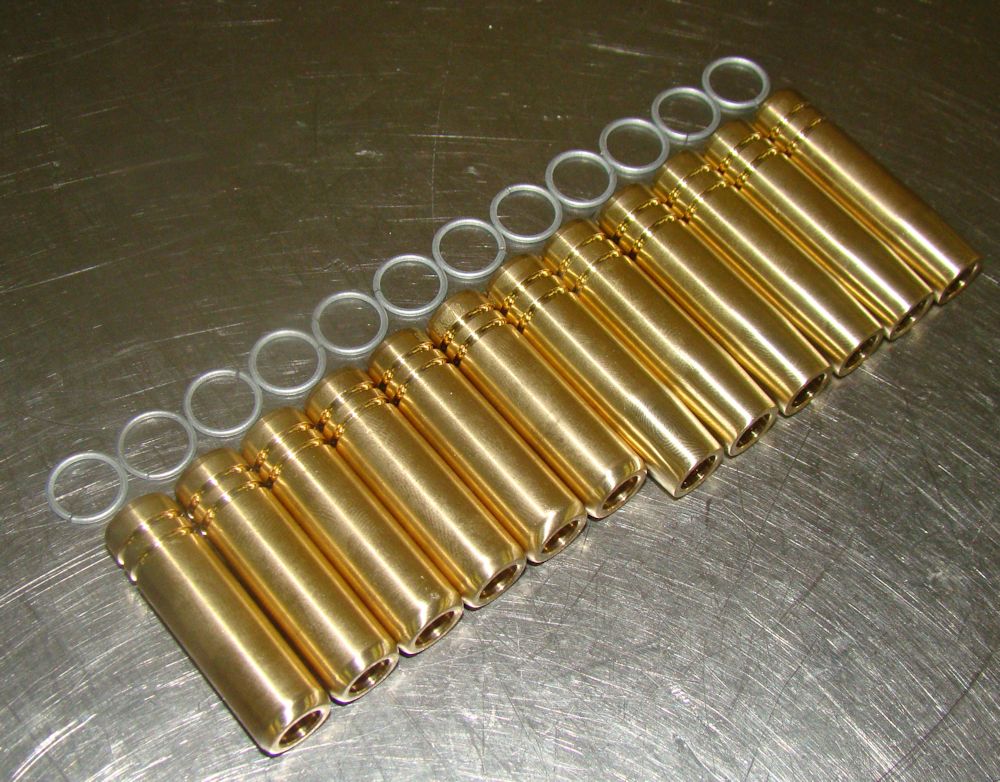 |
| New CJ seats pressed in place |
CJ magnesium bronze guides |
 |
 |
| Honing new guides for desired stem to guide clearance |
Setting up to machine the valve job |
 |
 |
| 5 angled valve job a CJ specialty |
|
 |
 |
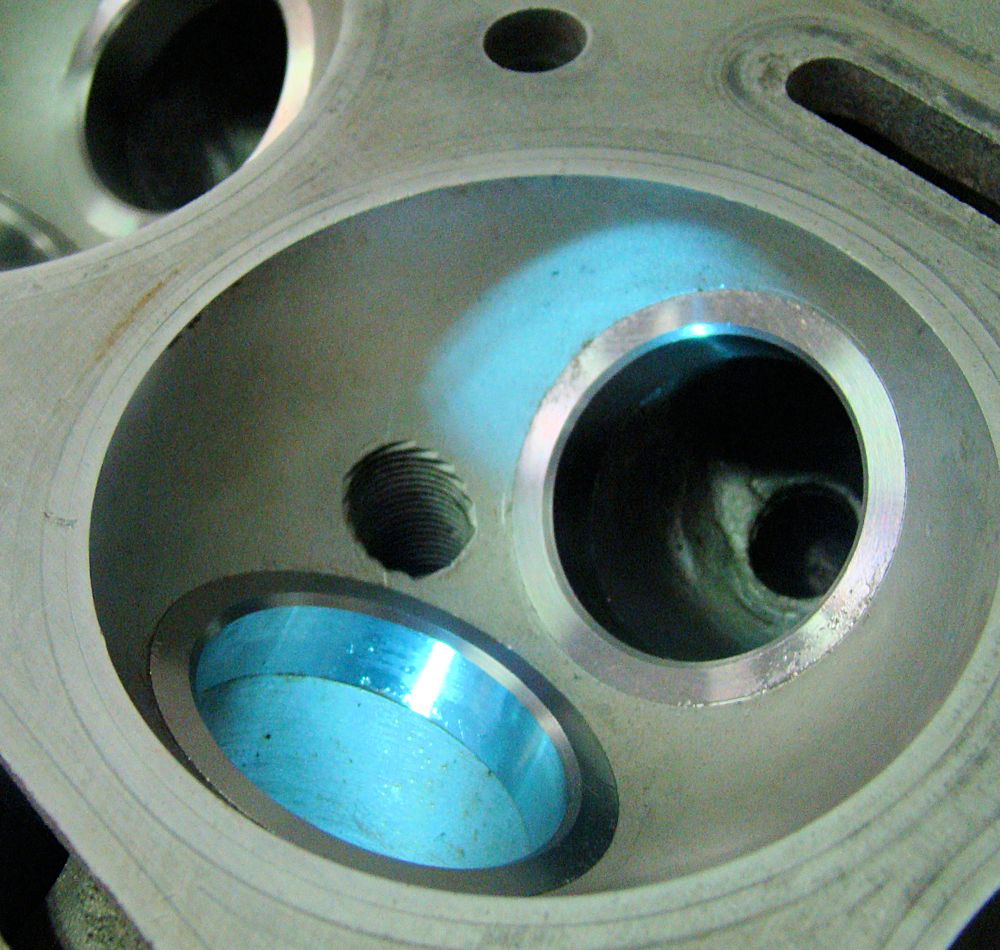
| Bowl requires blending to the new seat |
Blending creates a more efficient combustion chamber |
 |
 |
| Surfacing the intake and exhaust
flanges for perfect seal of intake and exhaust manifolds |
Surfacing the deck of the cylinder head |
 |
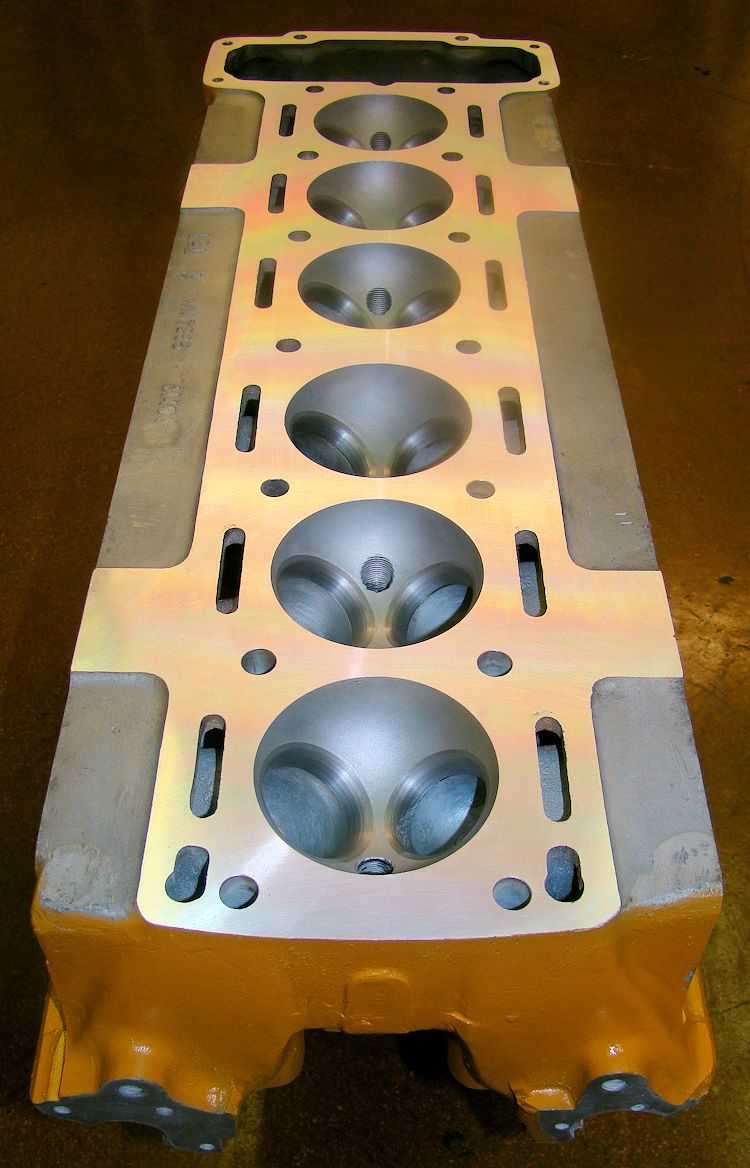 |
| Finished result is as good as new (or better) |
|
 |
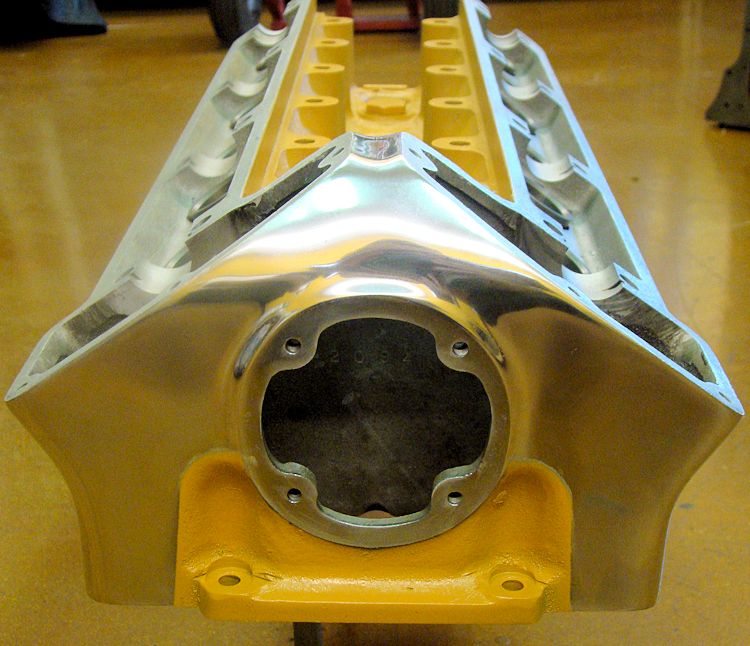 |
| Front chain cover received hours of sanding
and polishing |
|
 |
 |
| Ready for assembly |
Installing new valves and keepers on assembly
bench |
|
|
| Before... |
After... |
|
 |
| Before... |
After... |
Original Jaguar tool kit will be restored to new condition..
 |
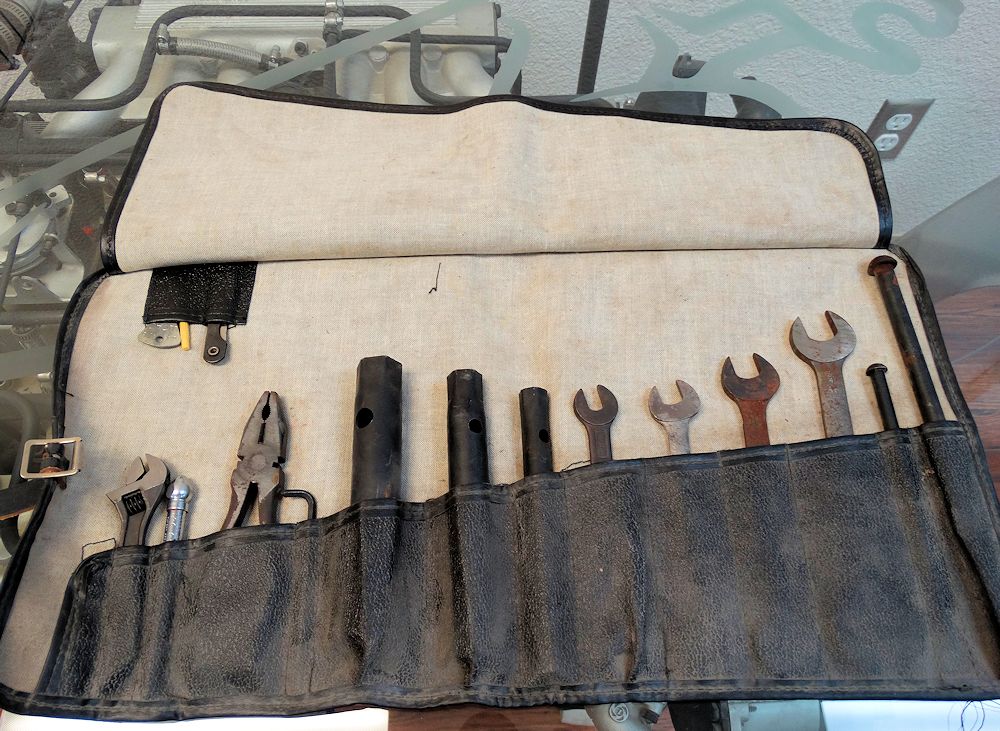 |
| Kit is almost complete, just missing the brake
bleed tube, cam timing tool and grease gun |
I am pleased to report that your car is now safely in the CJ workshops and we already have the restoration underway.
 |
 |
|
|
|
| |
|
 |
 |
|
have its original bonnet |
|
| |
|
 |
 |
|
|
|
We will have this exciting project underway in the next few days...
 |
 |
|
|
built |
|
|
|
|
|
 |
|
|
|
|
|
|
 |
 |
|
|
|
|
|
|
 |
 |
|
Biscuit trim |
|